Happy Holidays, Pirate Friends! We are excitedly back for another year and another round of holiday freebies to share with you! Over the years, we’ve compiled different tutorials and patterns that we think would make *perfect* gifts for your friends and family. Curious about what we’ve already released in the way of holiday freebies? Head right here to see all of them: Holiday Freebies Roundup.
Today, we are bringing you the: Scrunchie Crown!
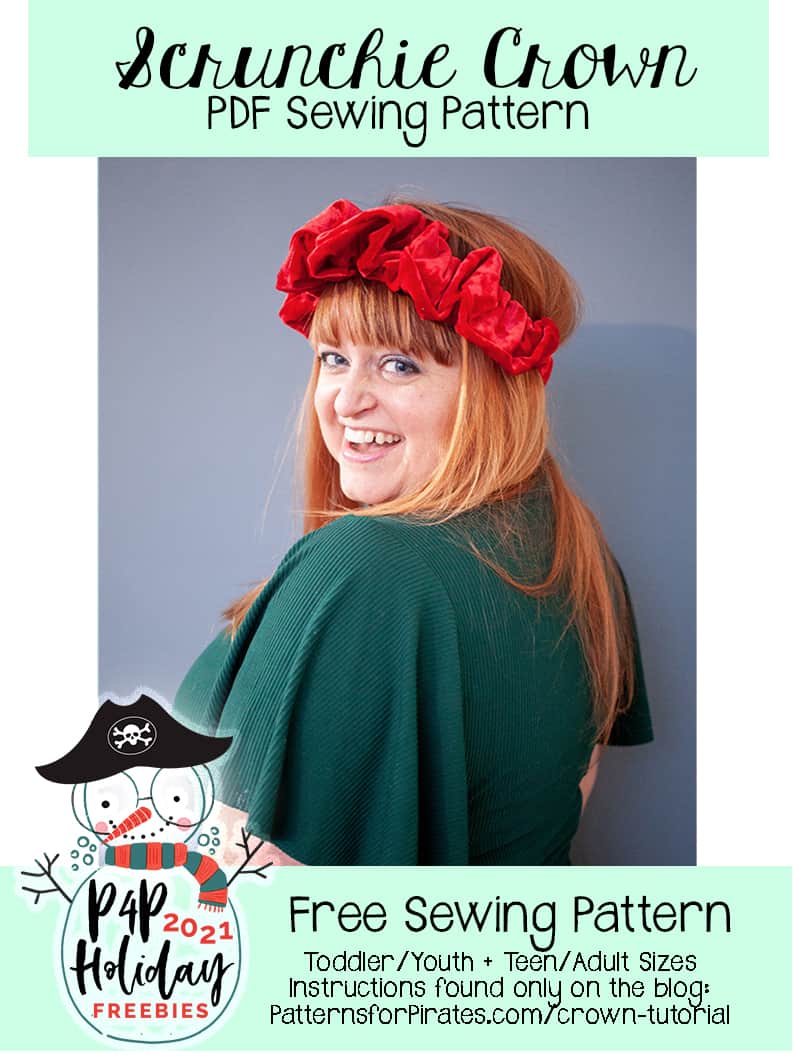
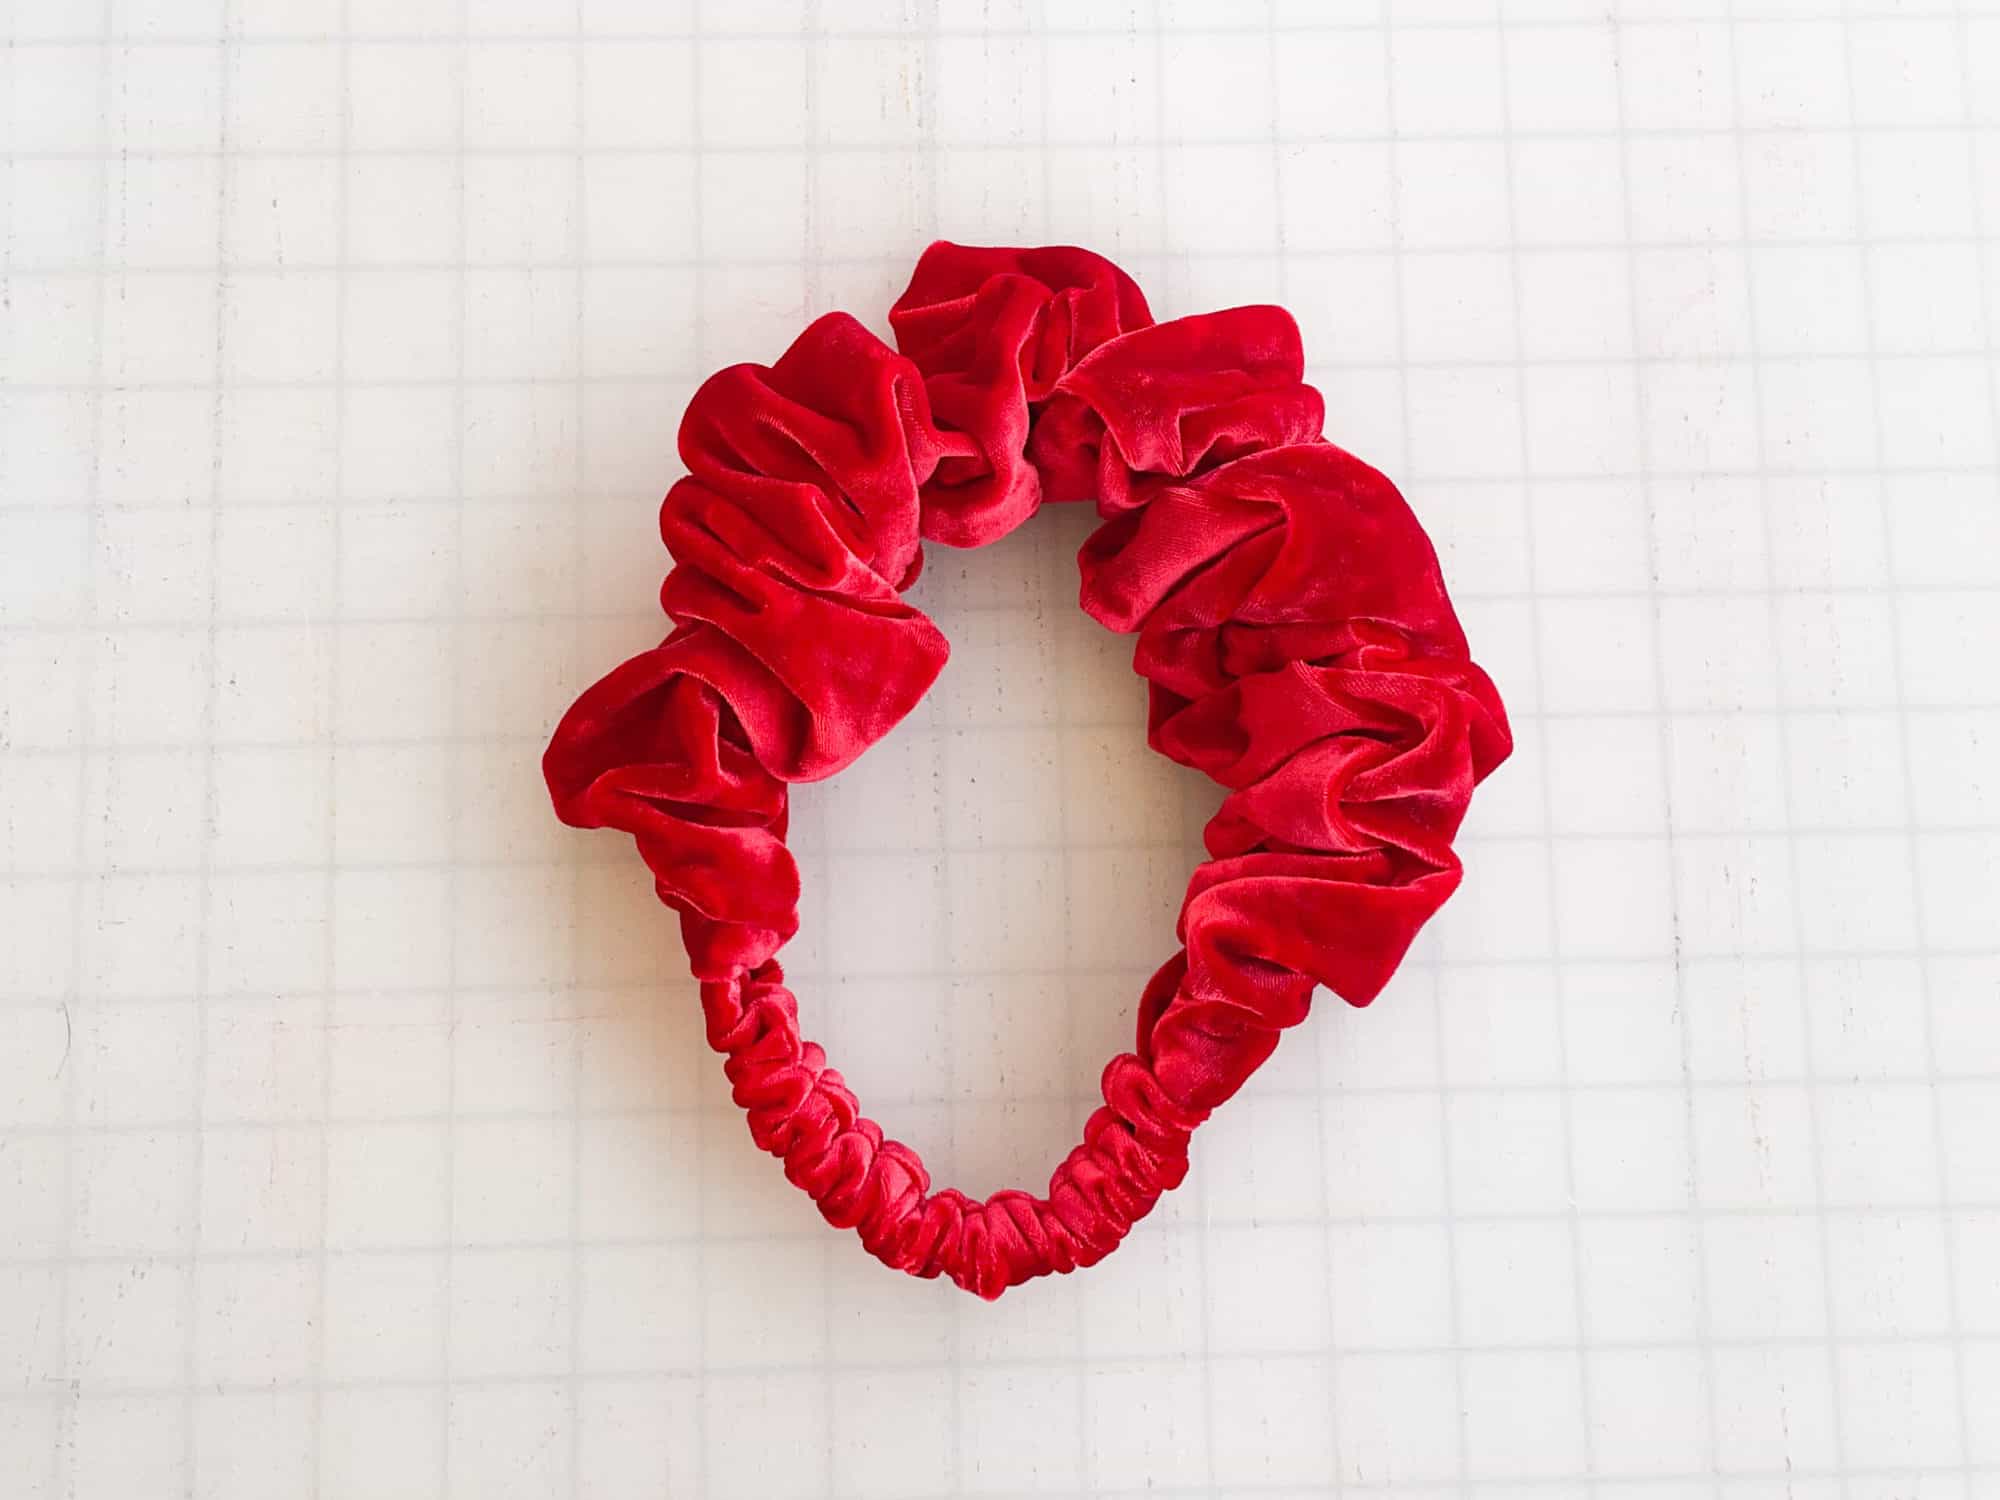
The Scrunchie Crown will having you feel like royalty in no time at all. At it’s most basic form, it’s a headband. At it’s Pirate form, it’s a gorgeous crown-like headband that is super fun to wear (and can also double as a standard oversized scrunchie for buns).
Supplies Needed:
- Scrunchie Crown pattern pieces
- Less than 1/4 yard knit or woven fabric
- 3/4″ elastic
TUTORIAL

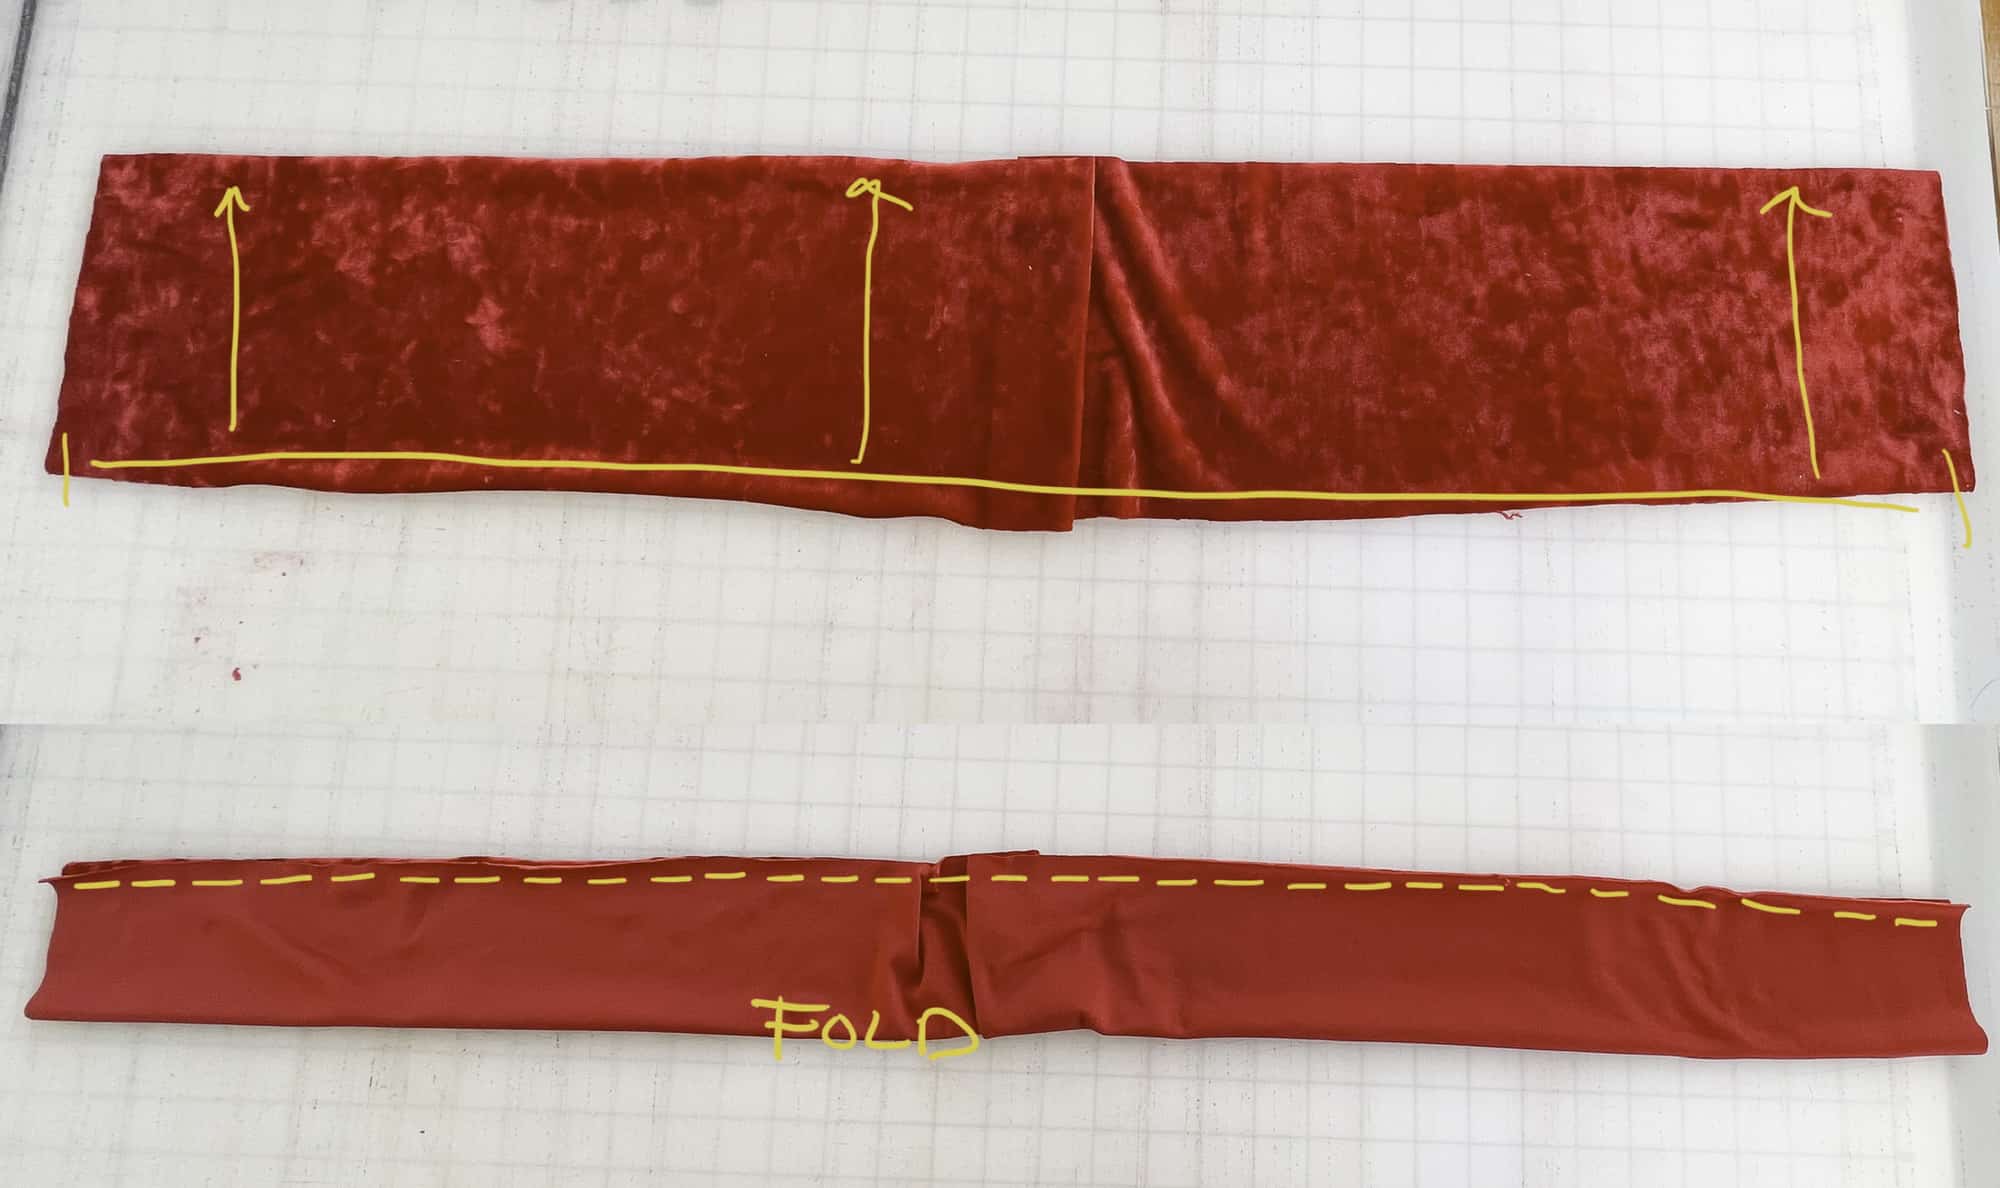
Step 1: Fold the top headband piece, with right sides together, meeting the long edge. Sew using 1/2″ seam allowance. 
Step 2: Repeat with the bottom headband piece, folding with right sides together, meeting the long edge. Sew using 1/2″ seam allowance. 
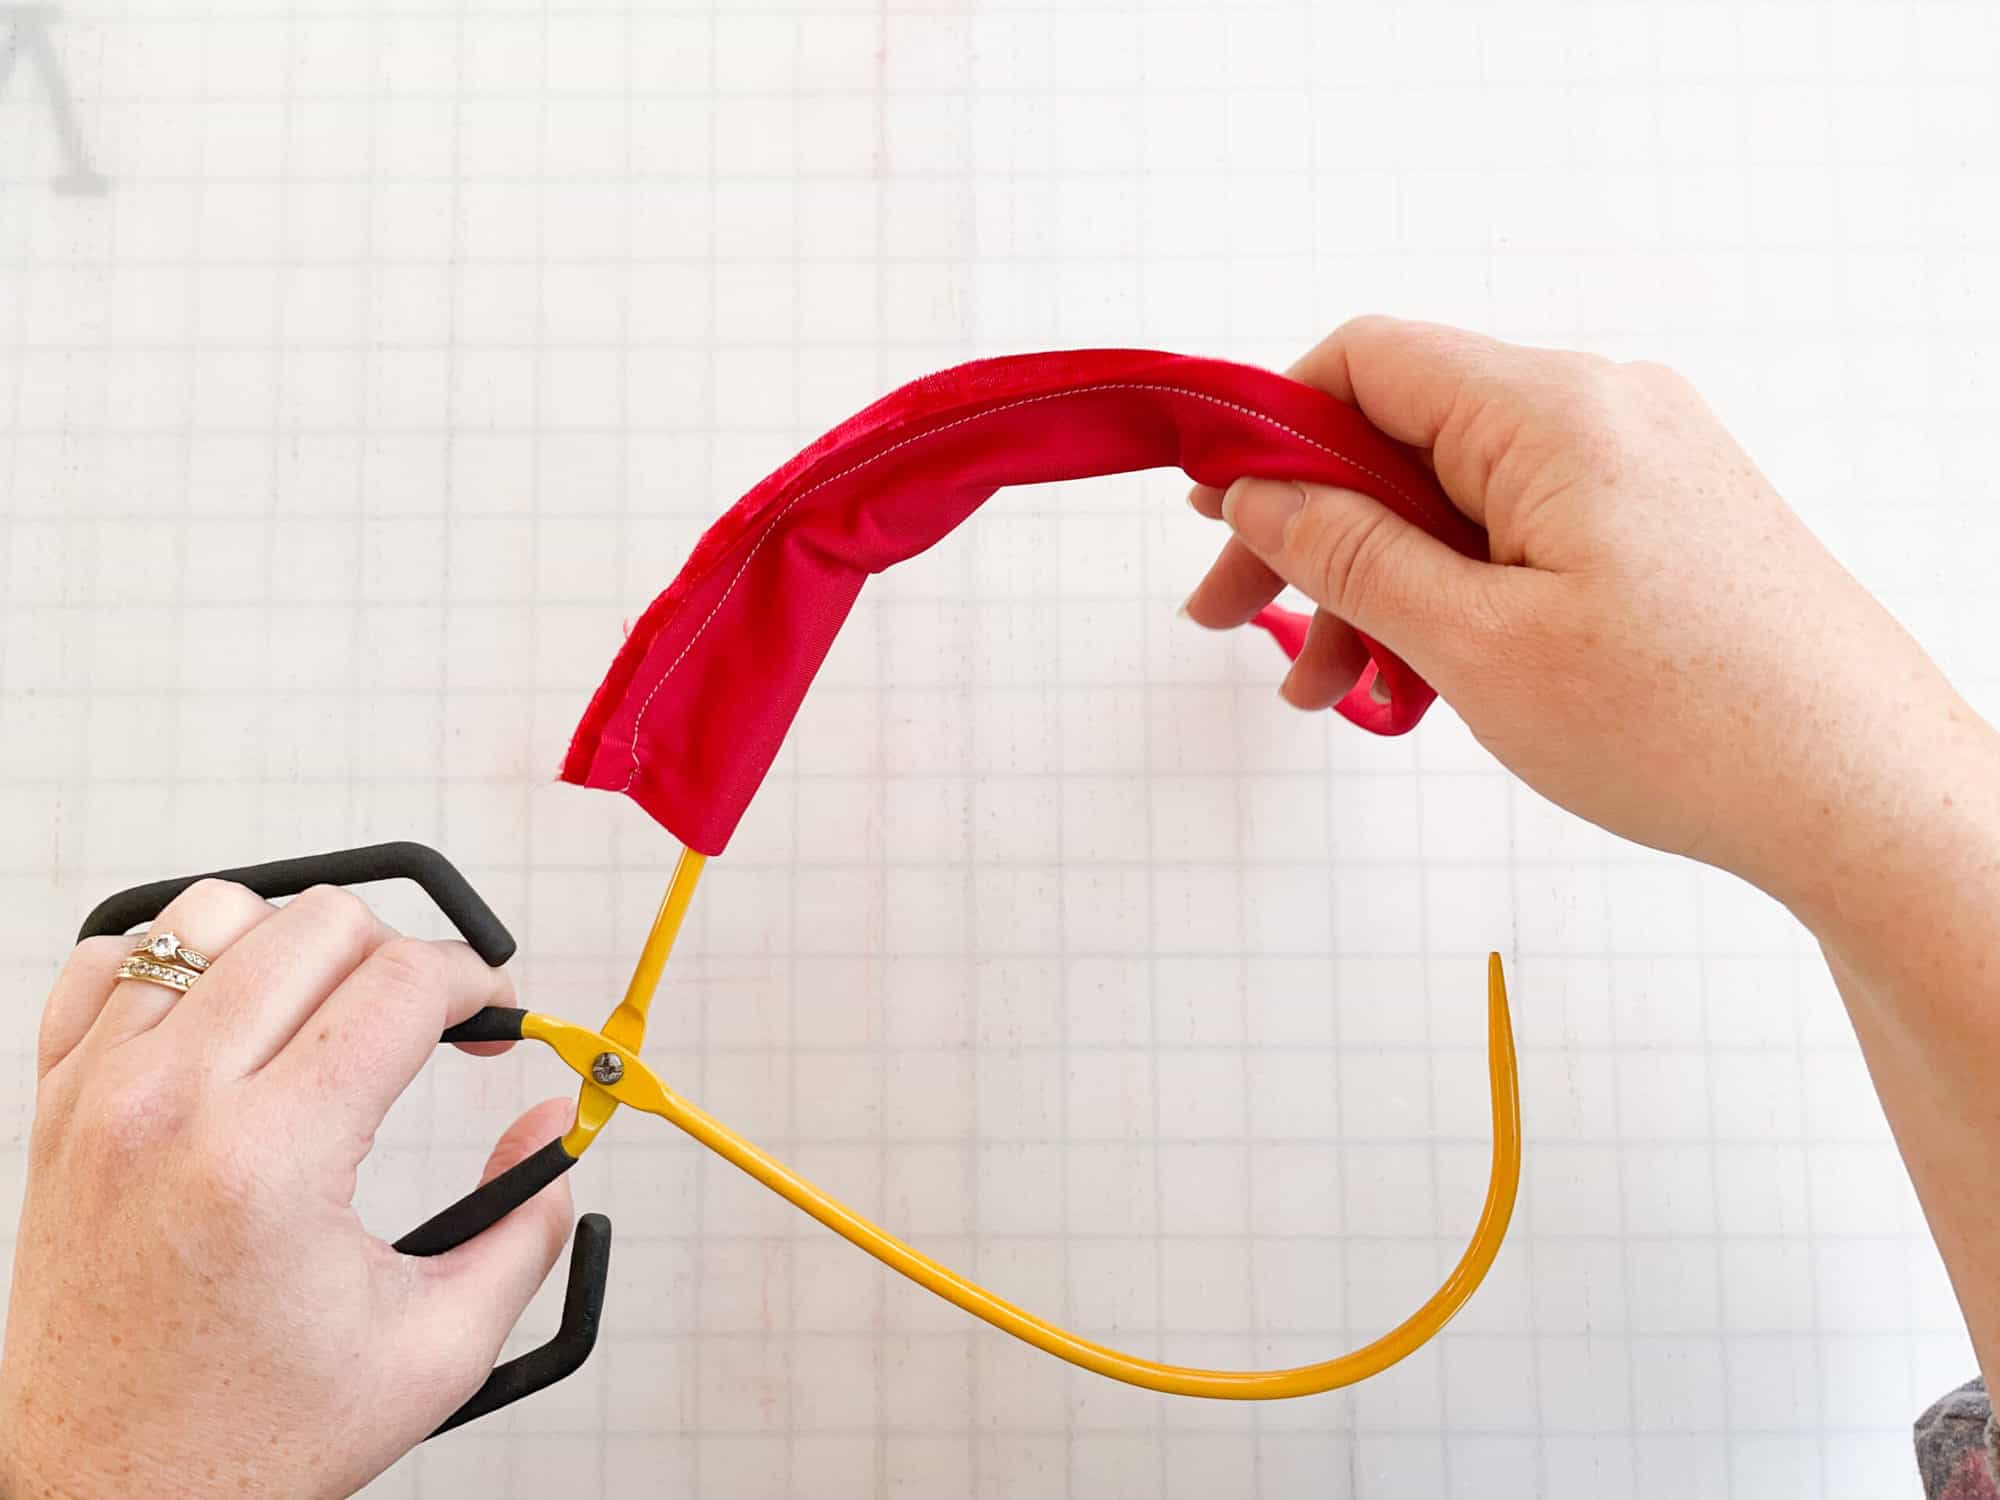
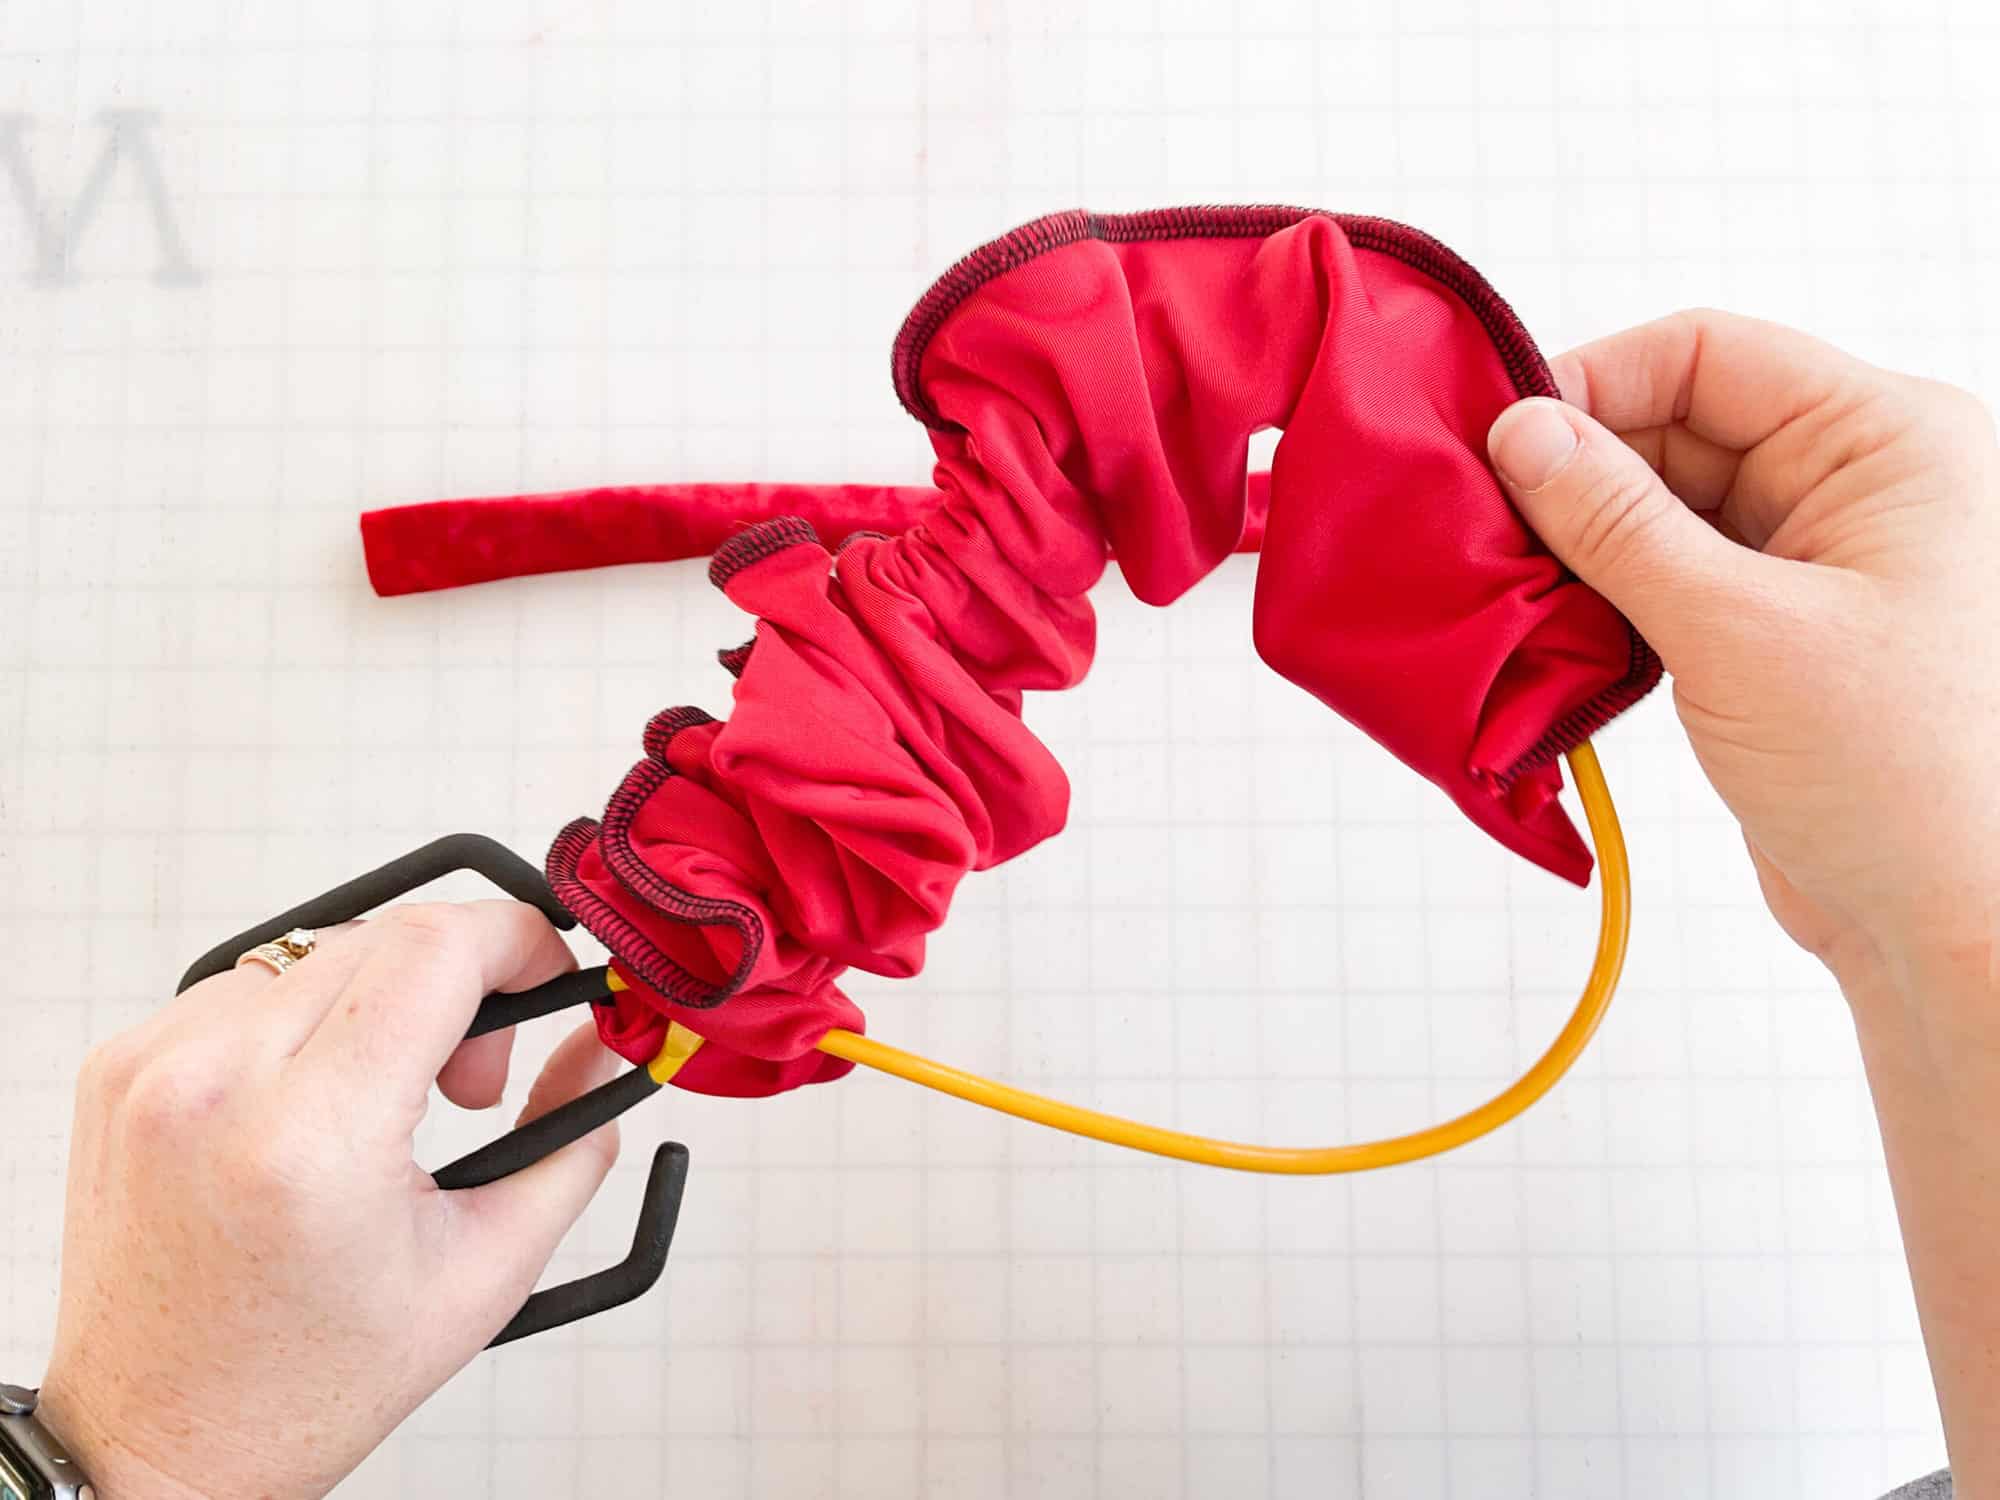
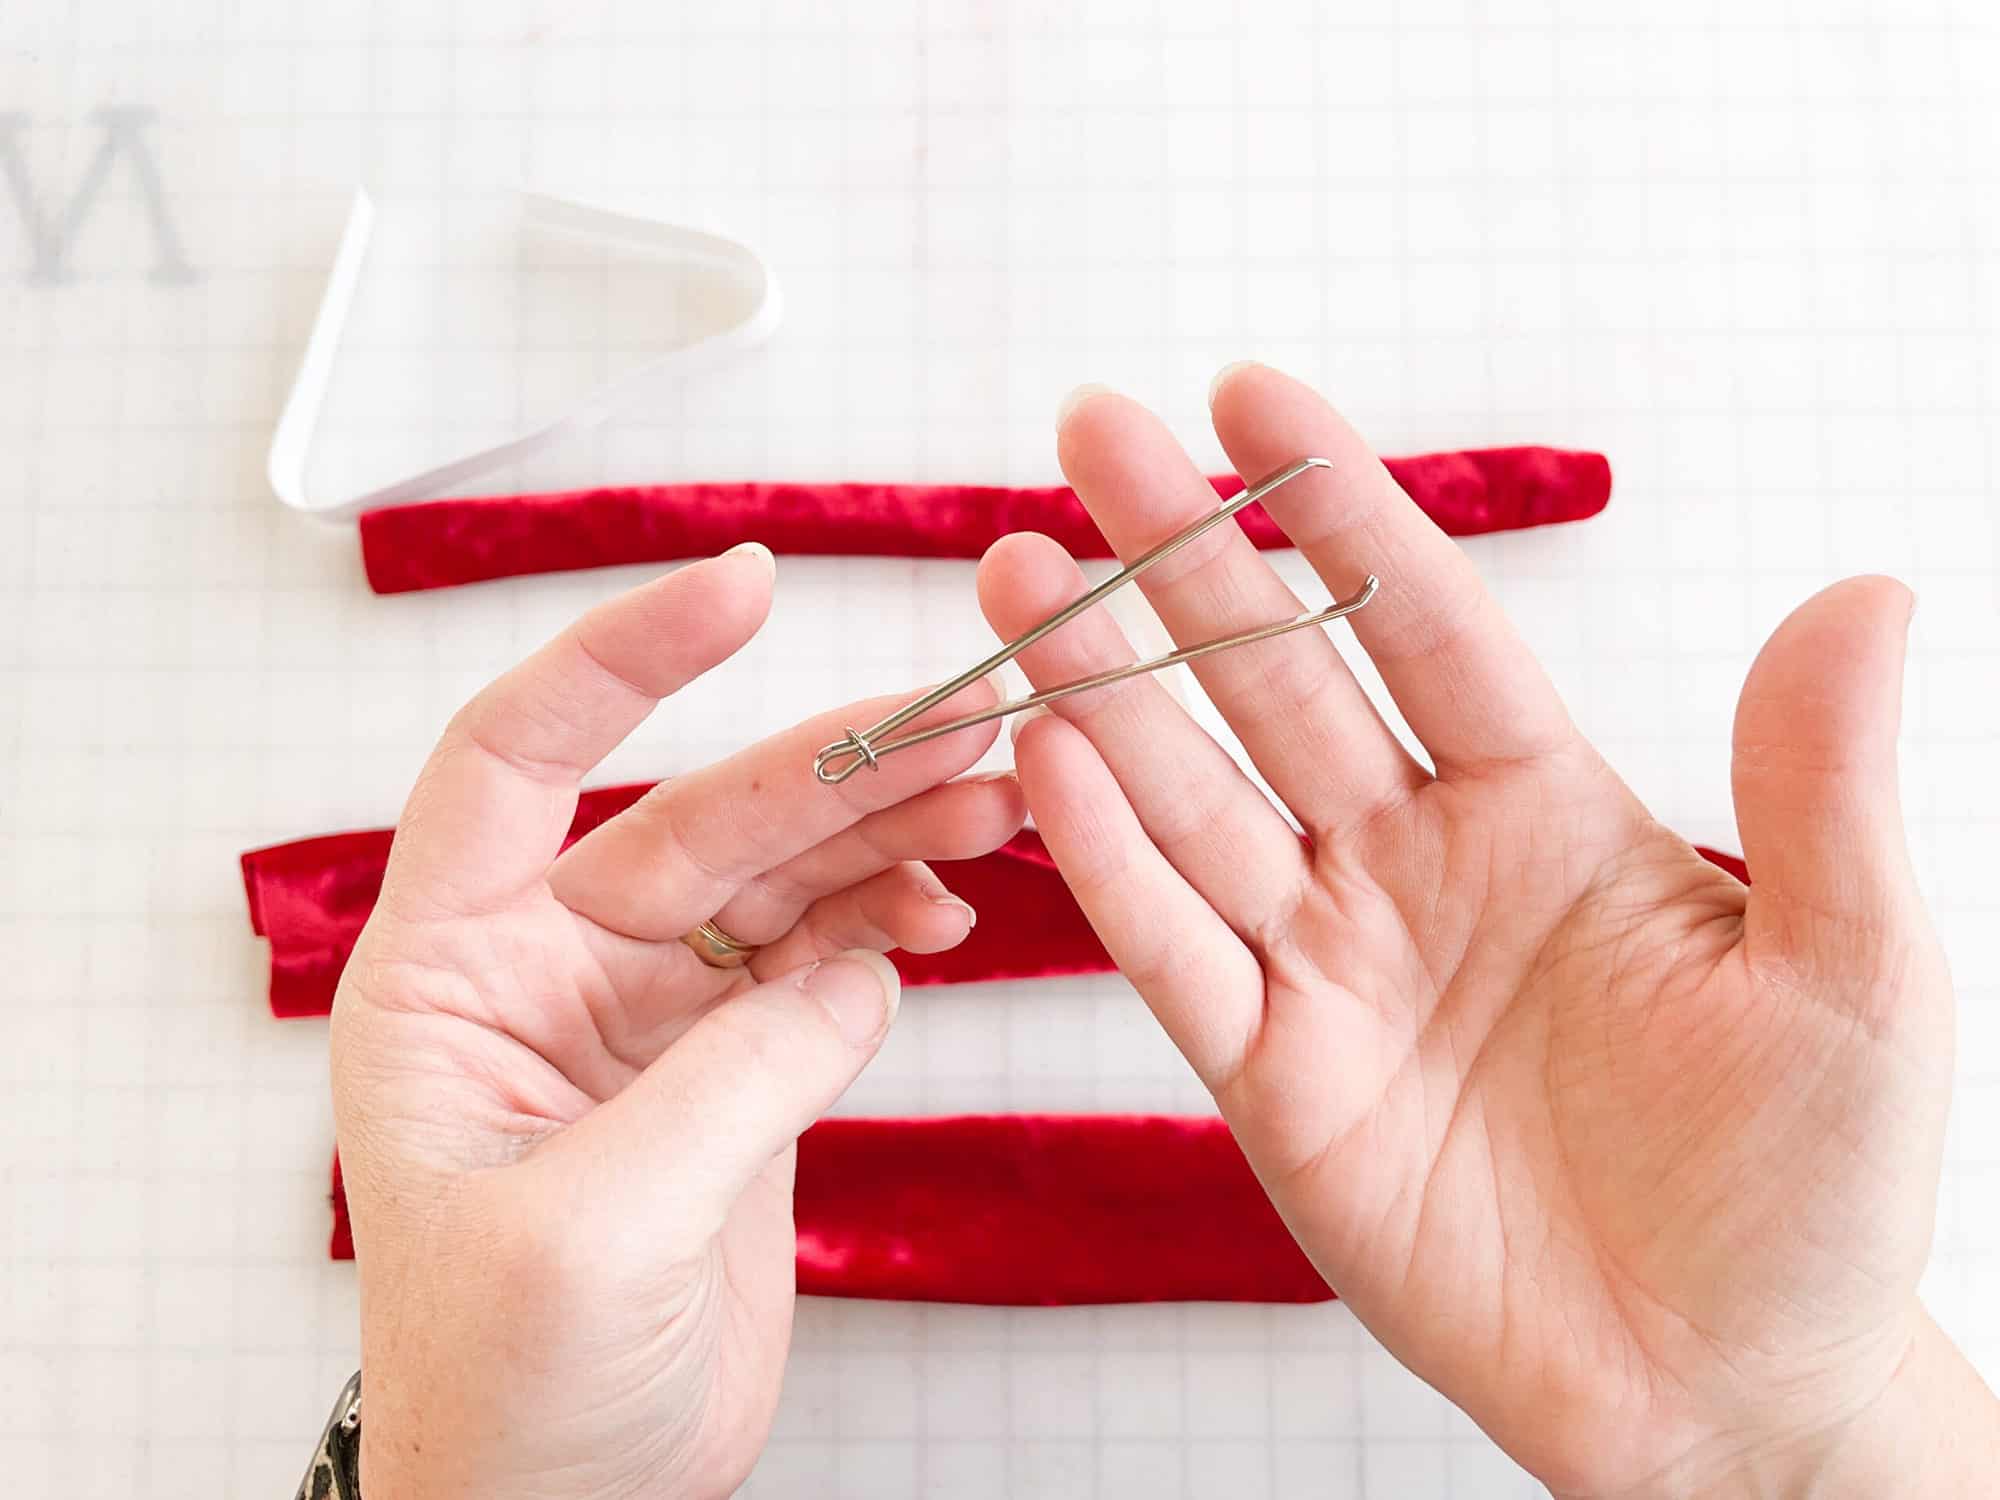
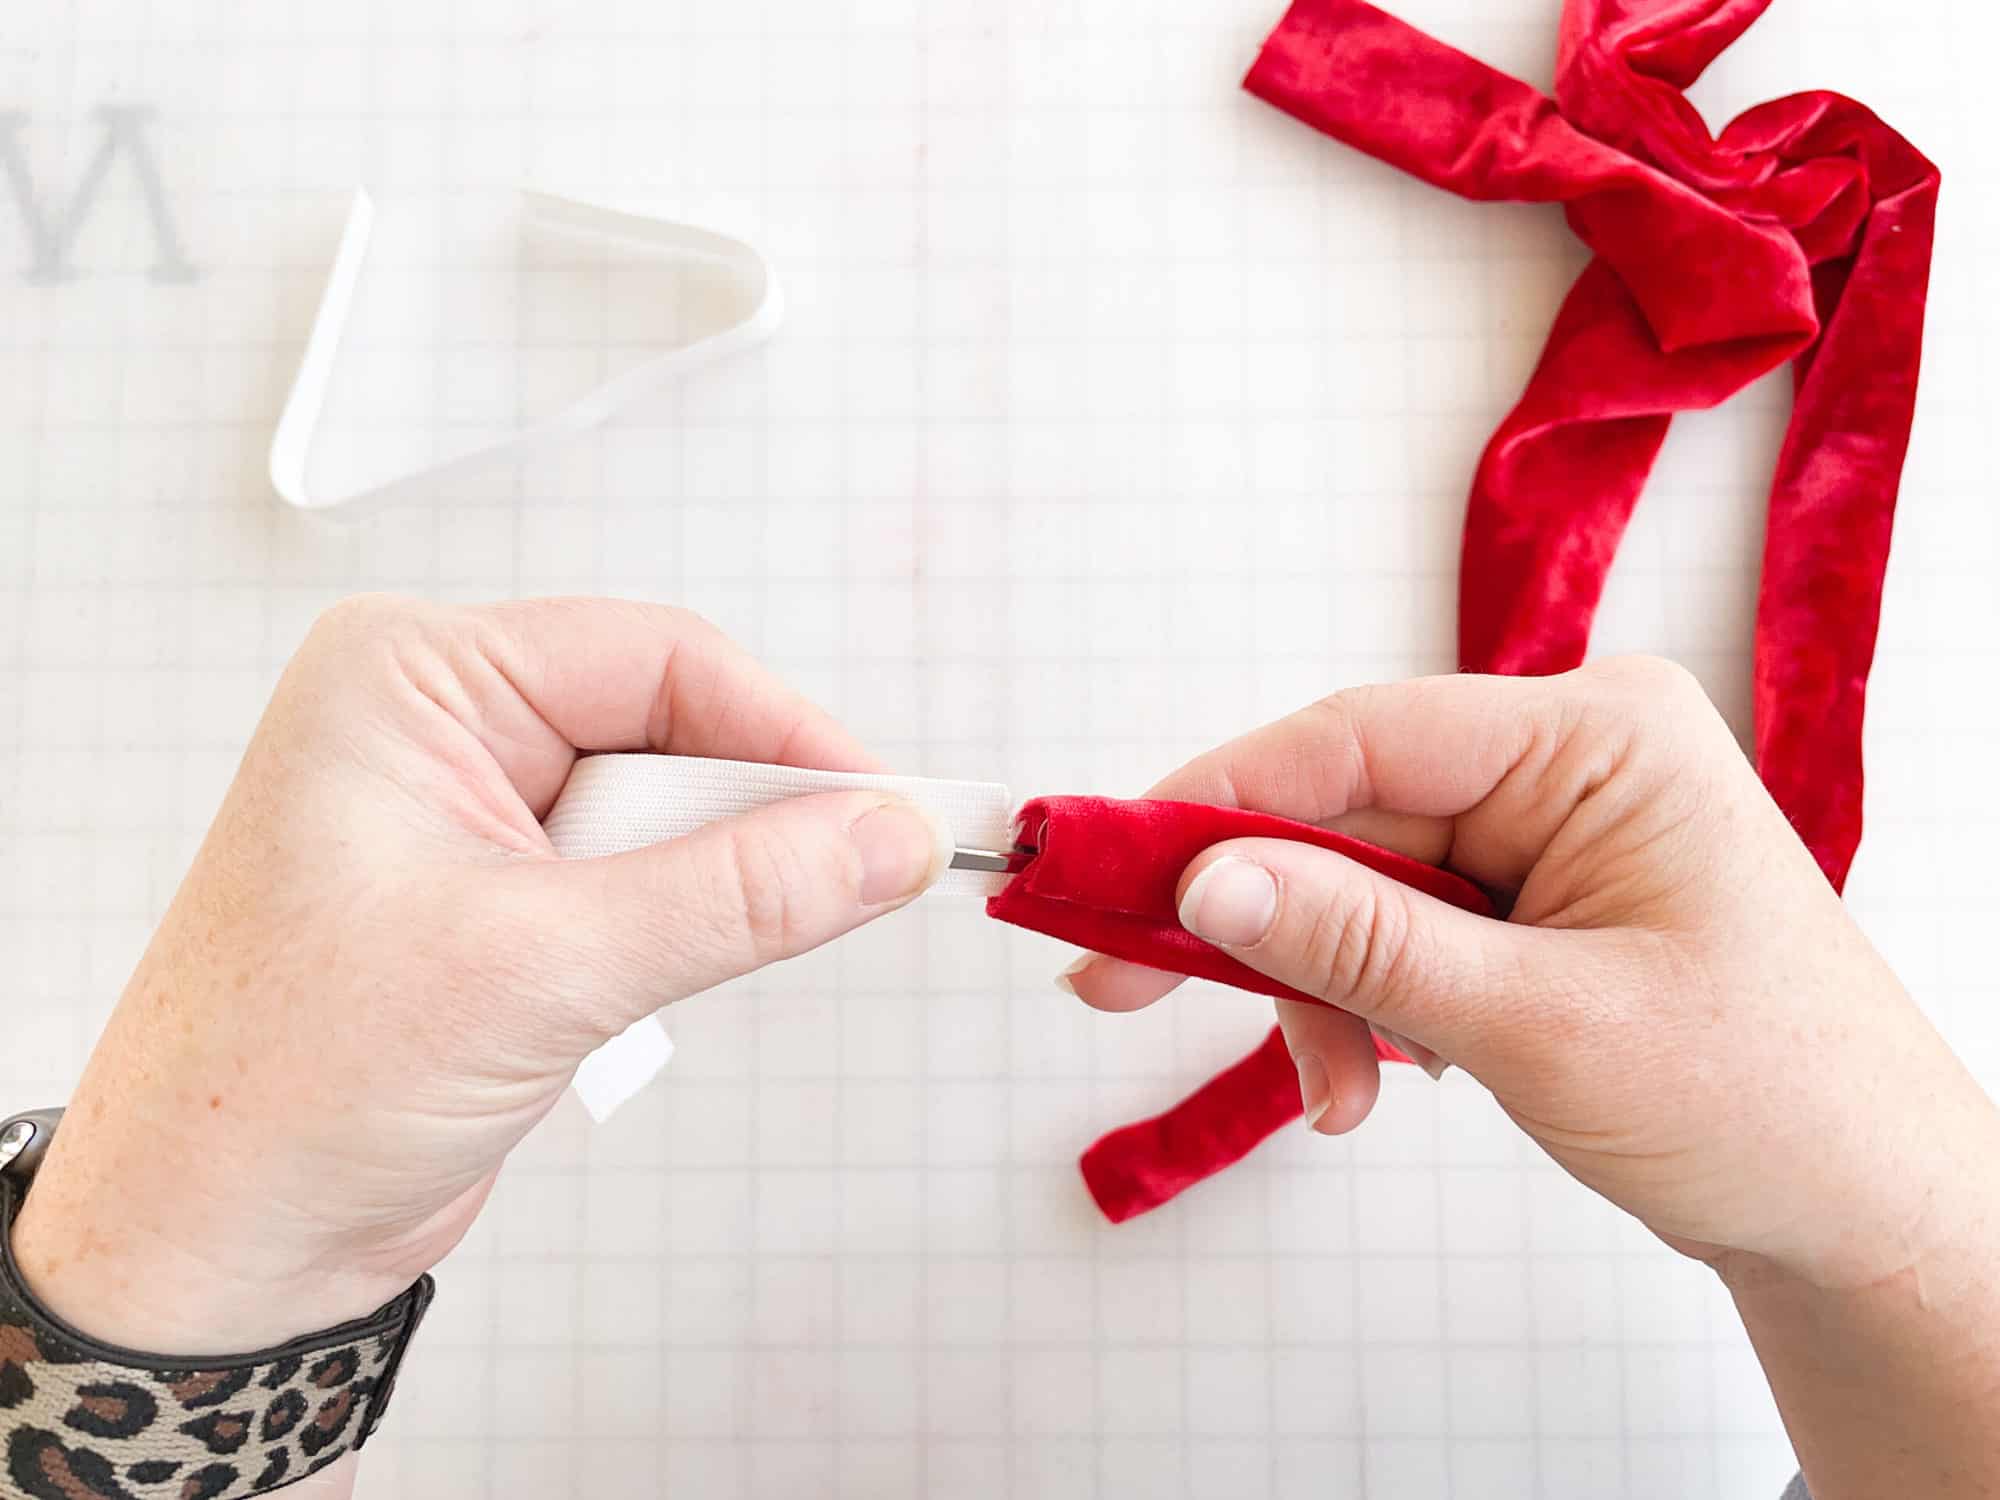
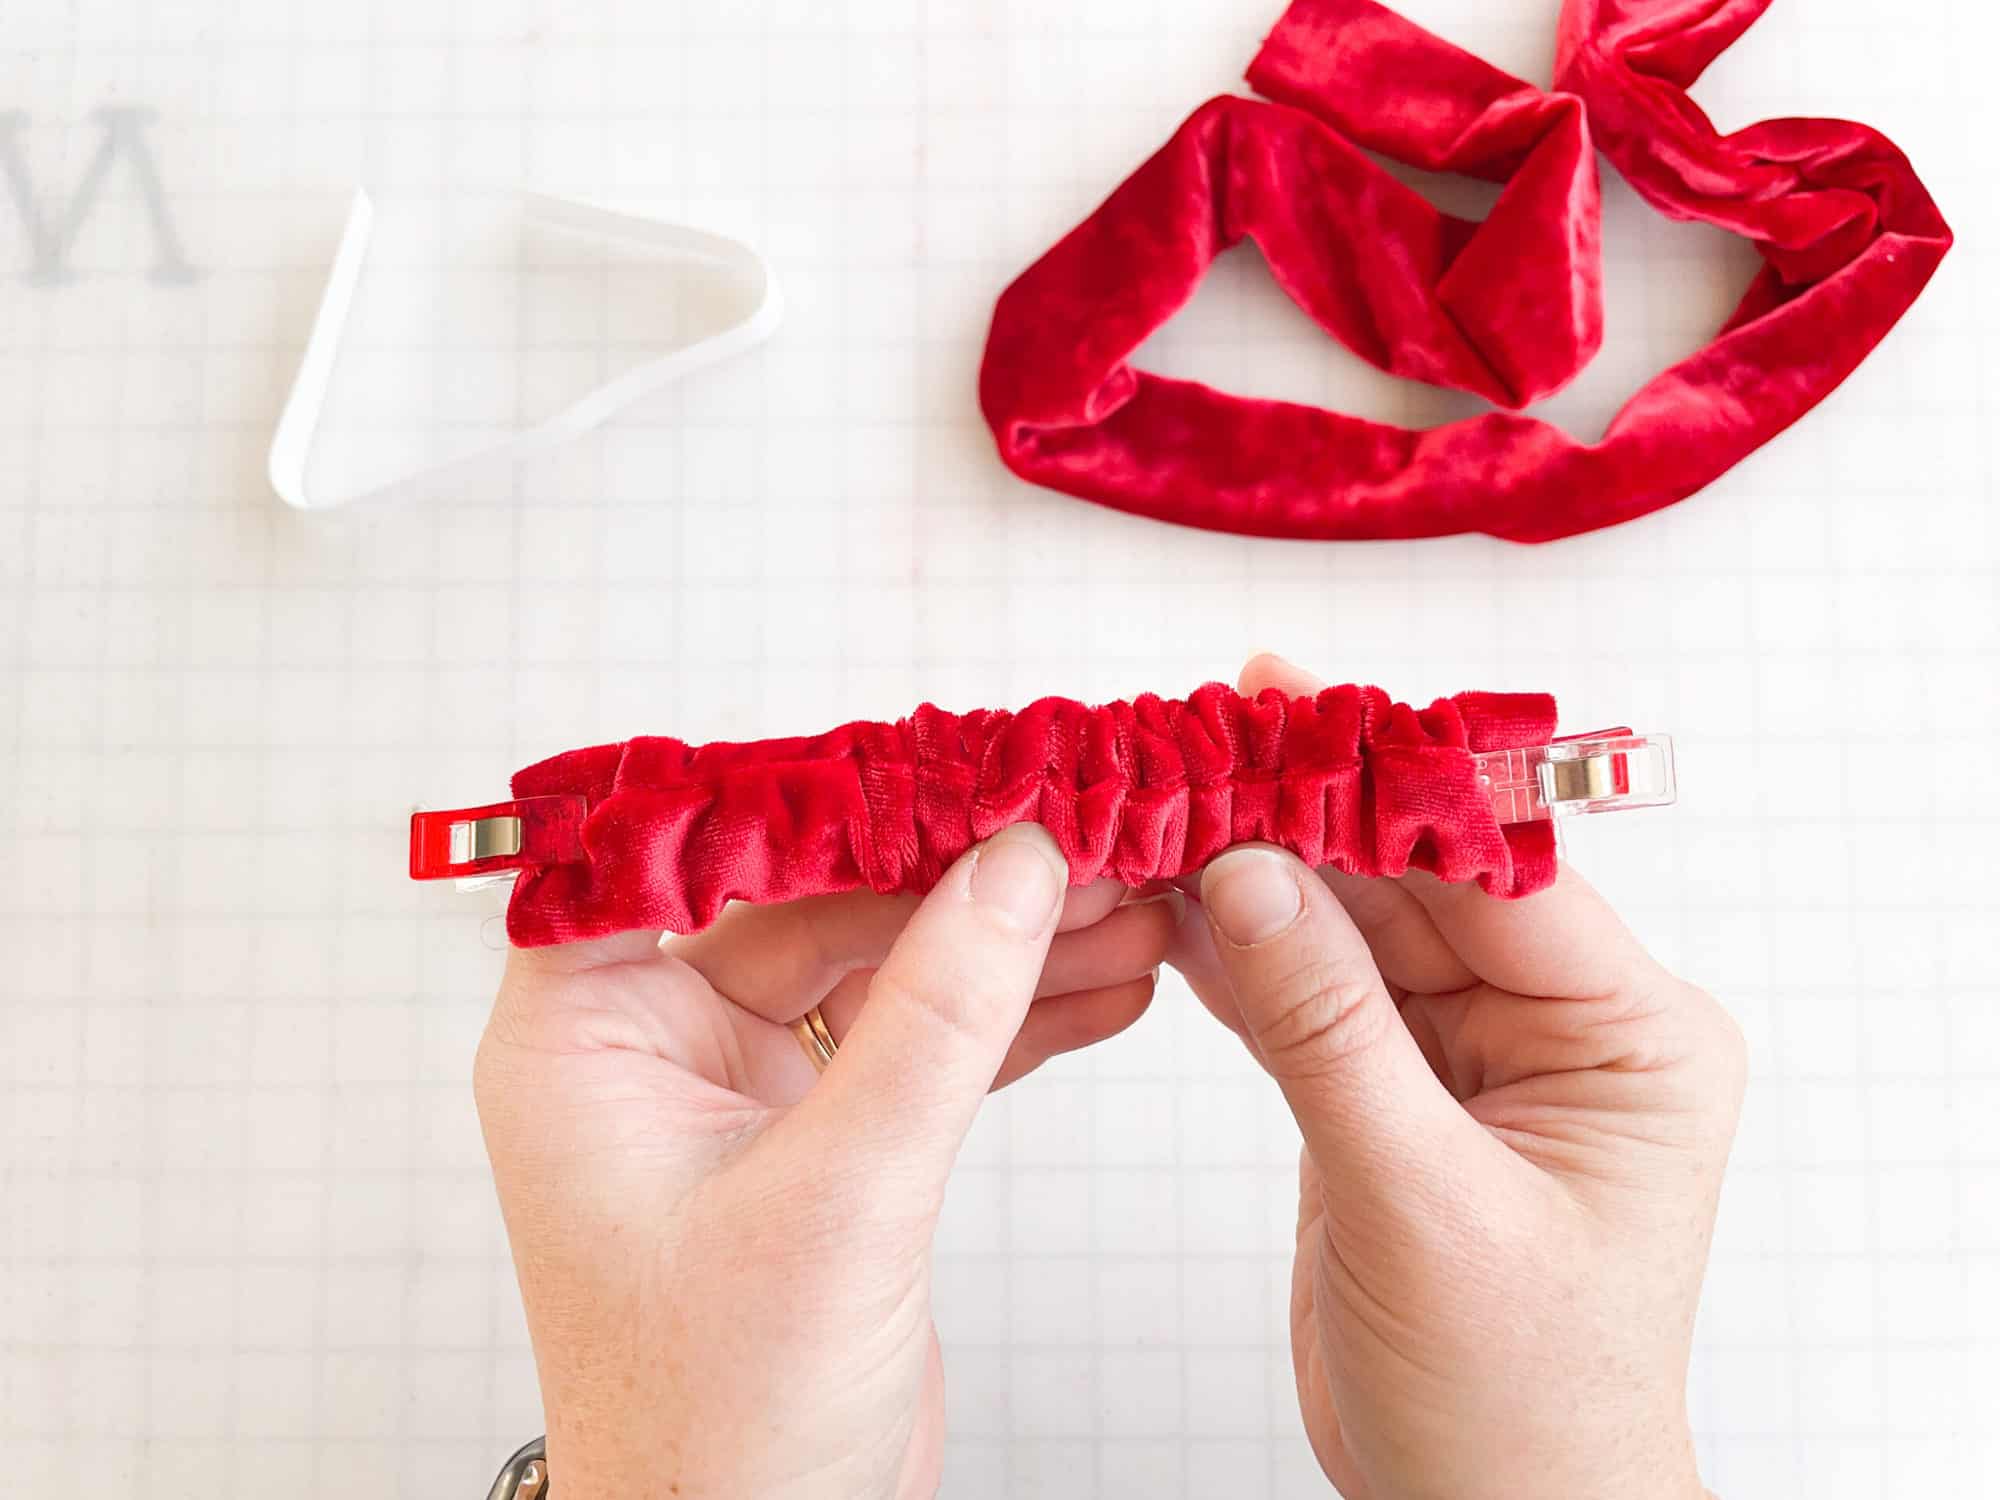
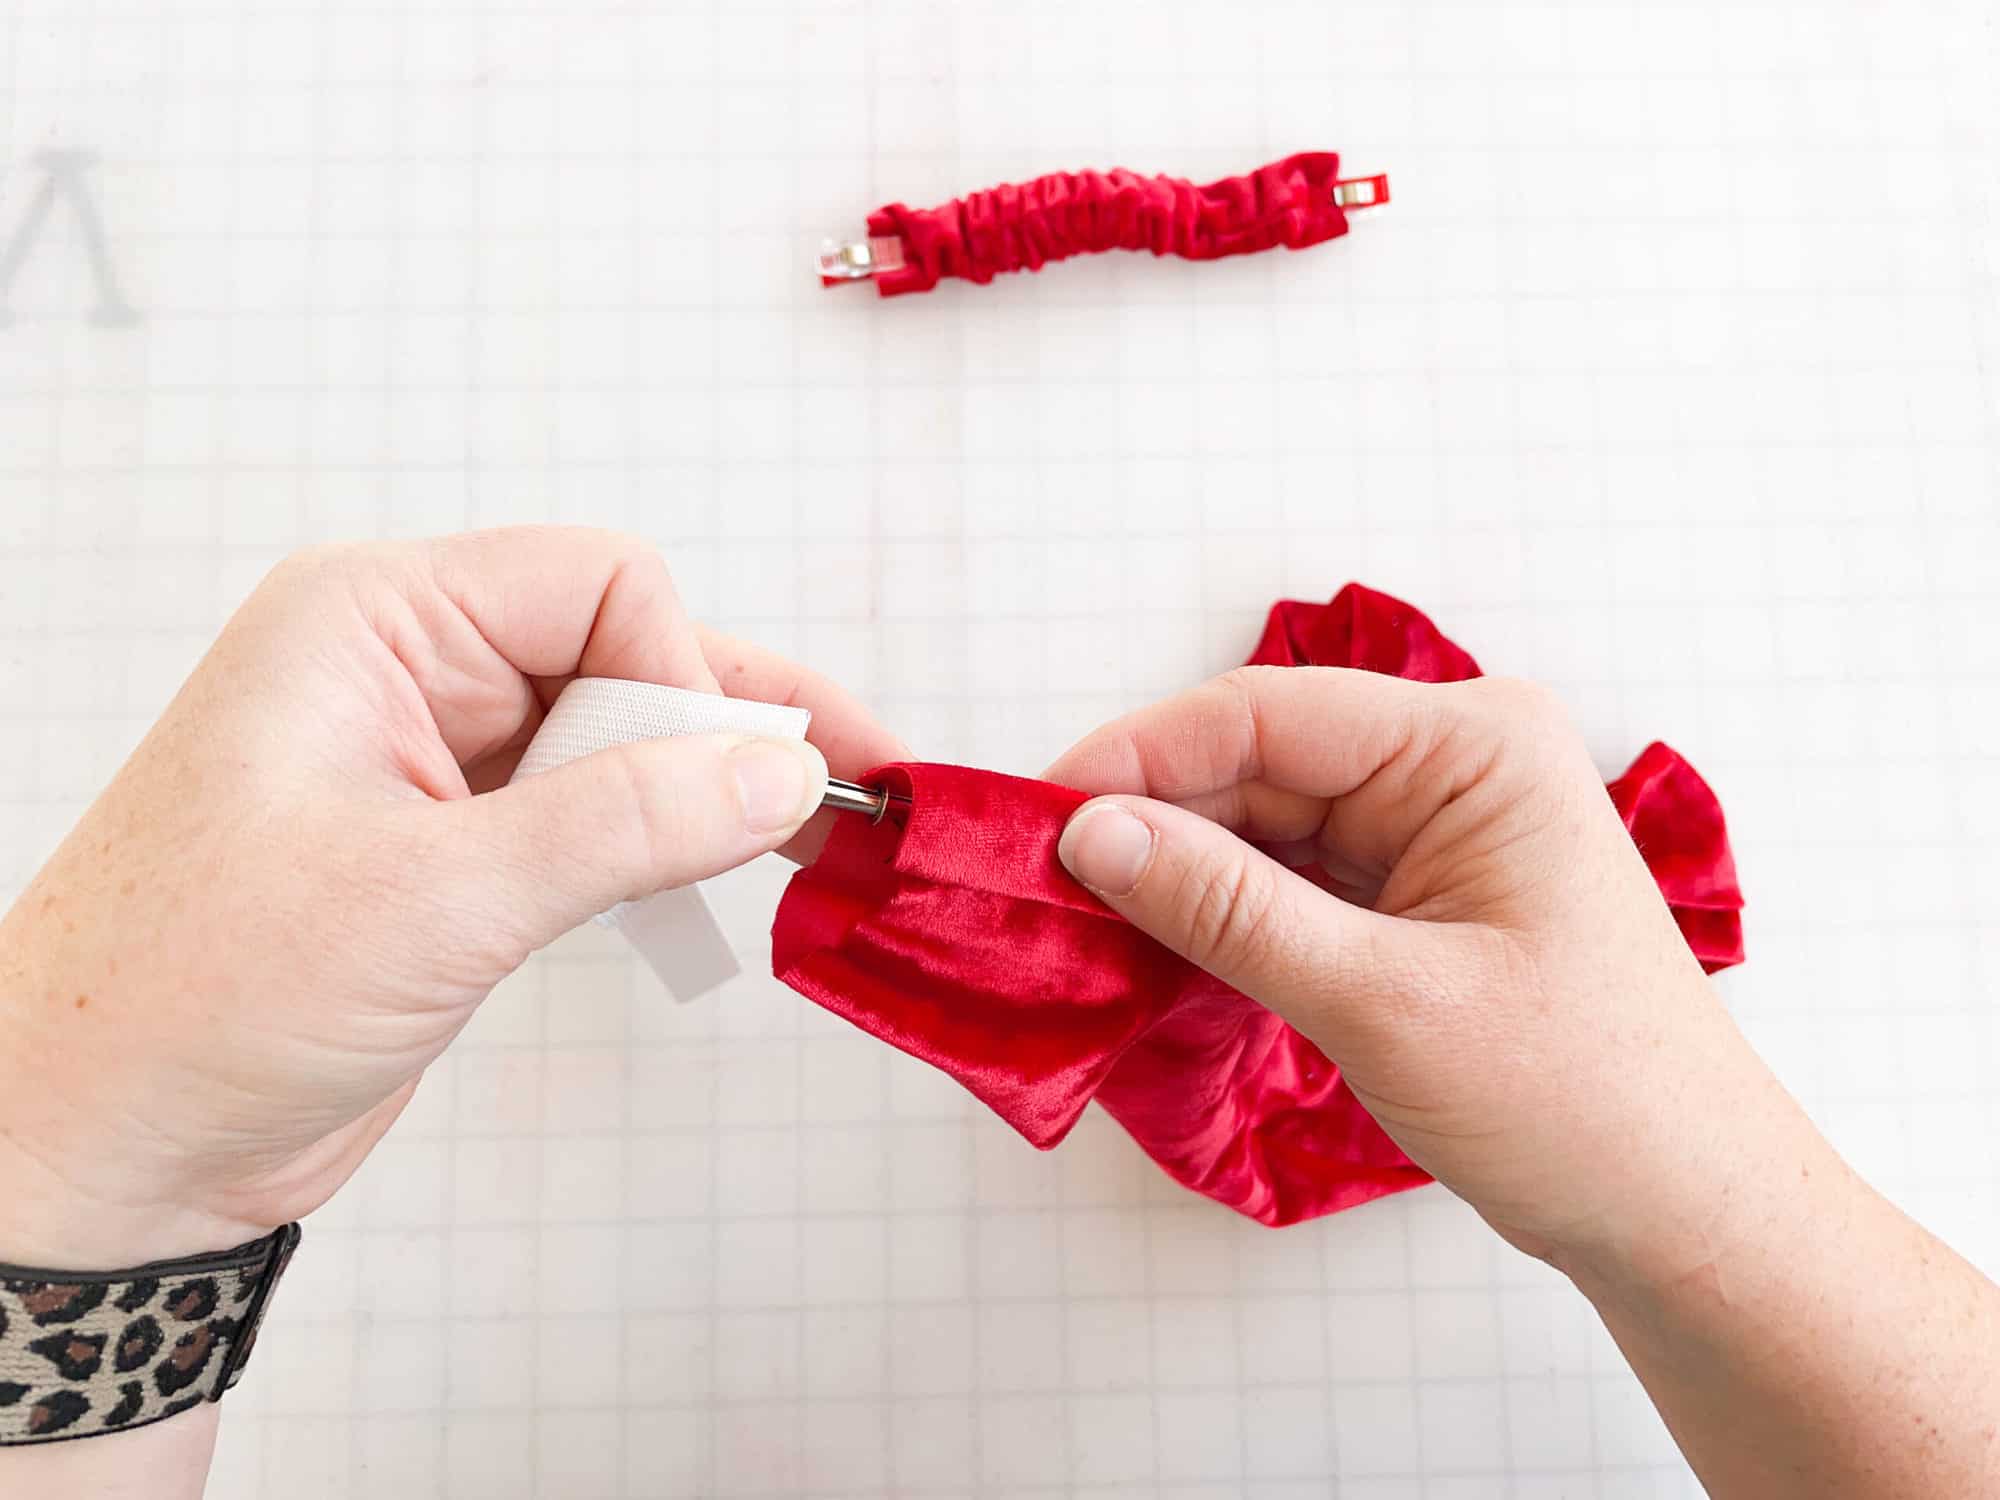
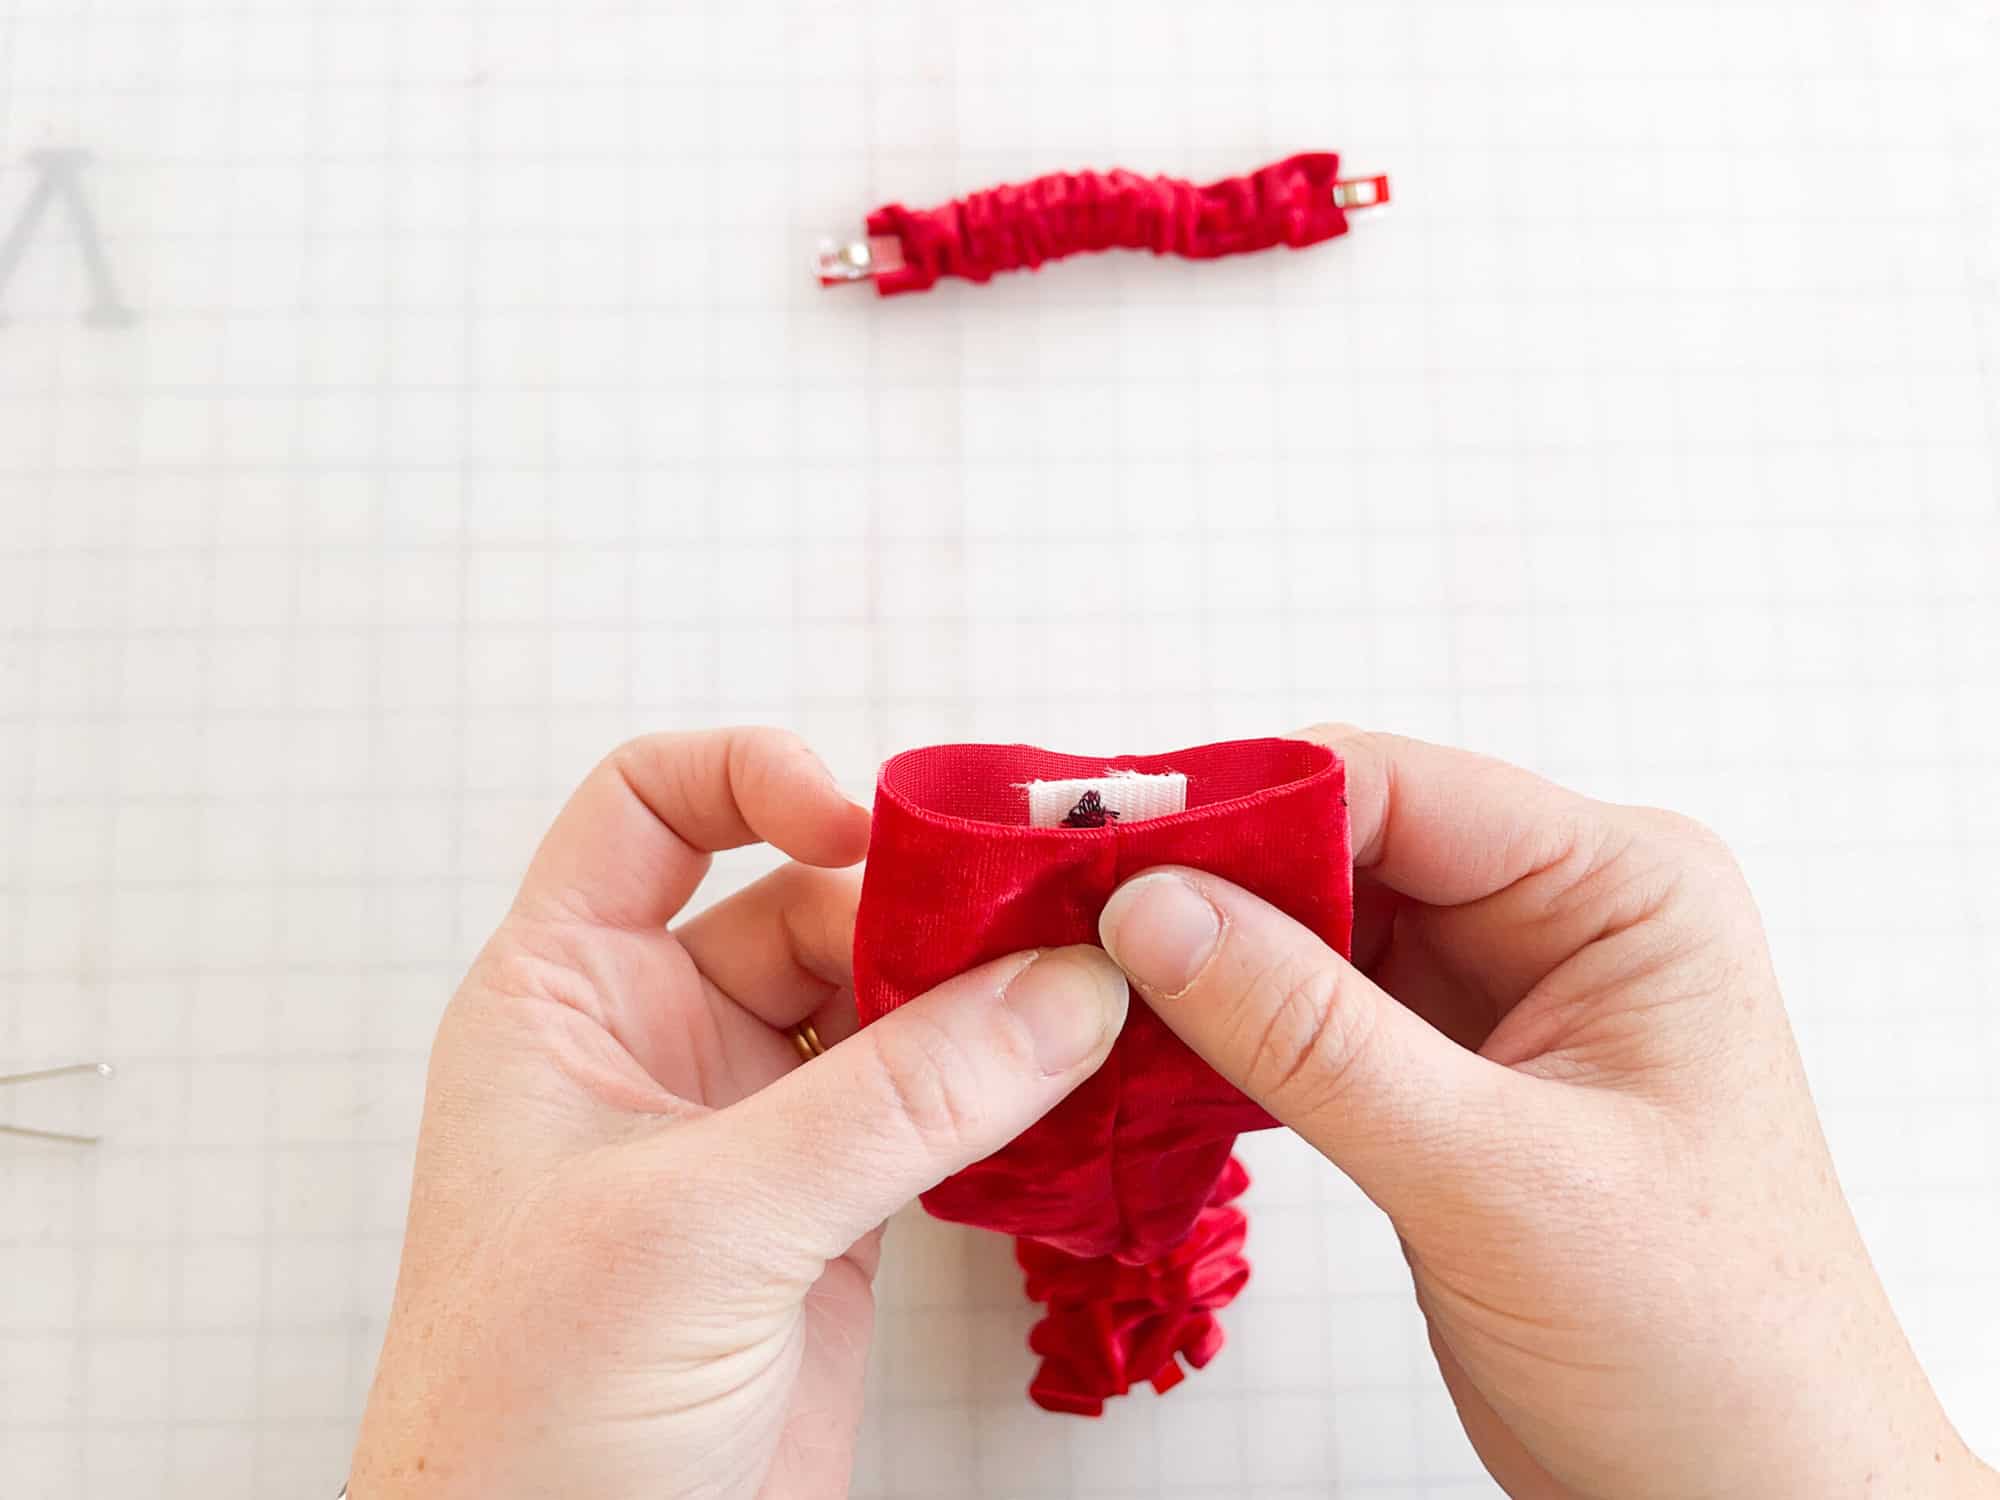
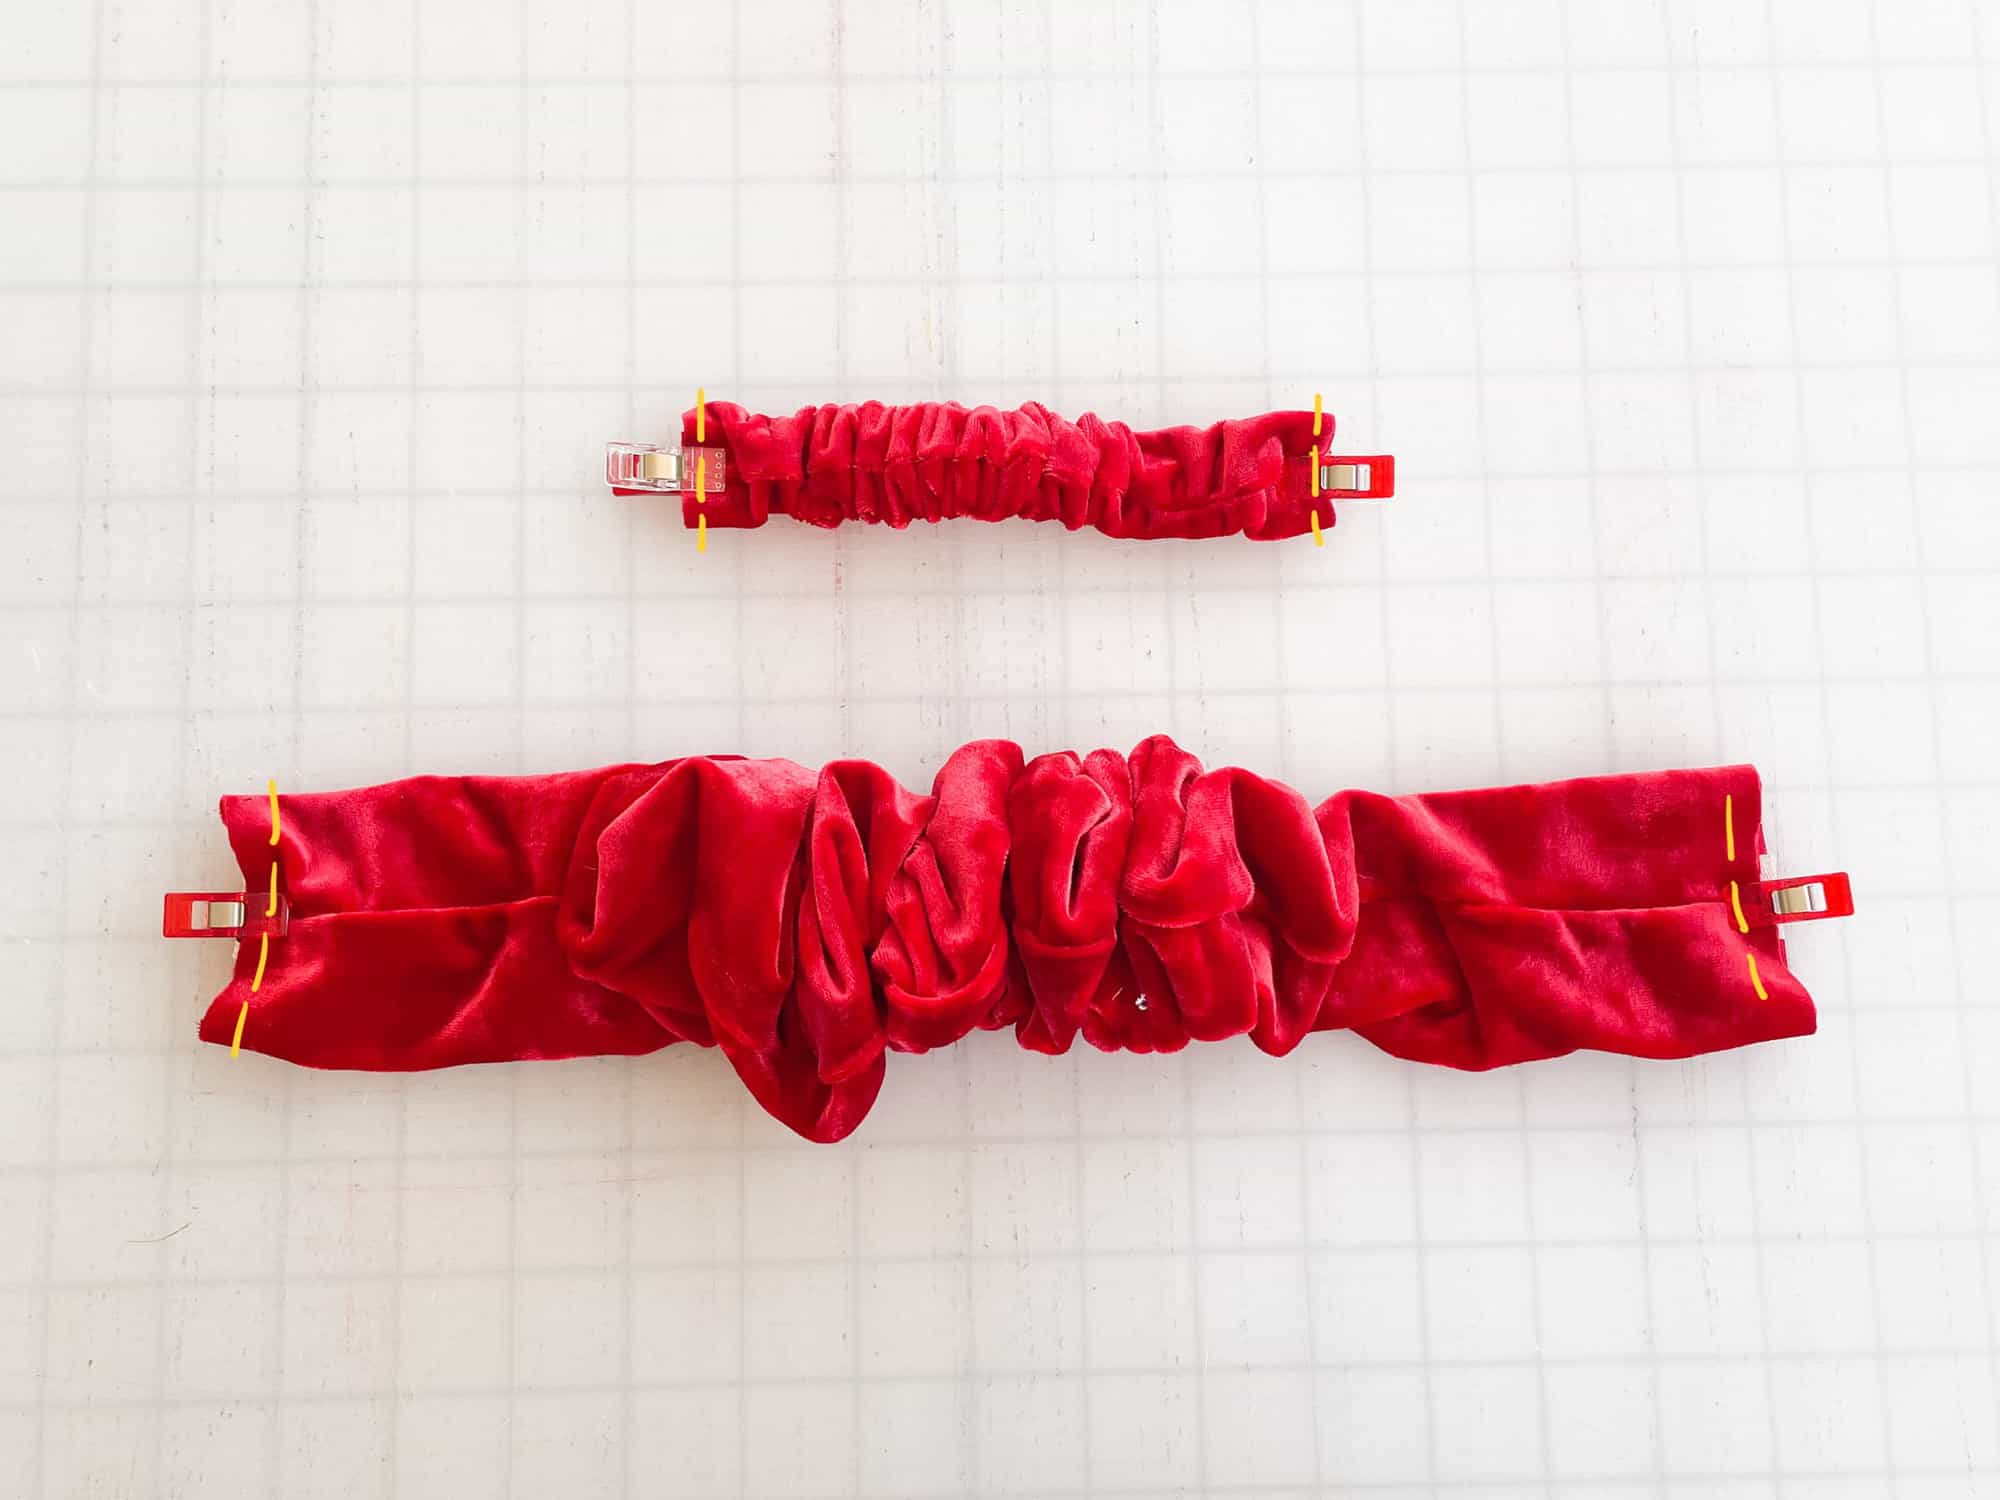
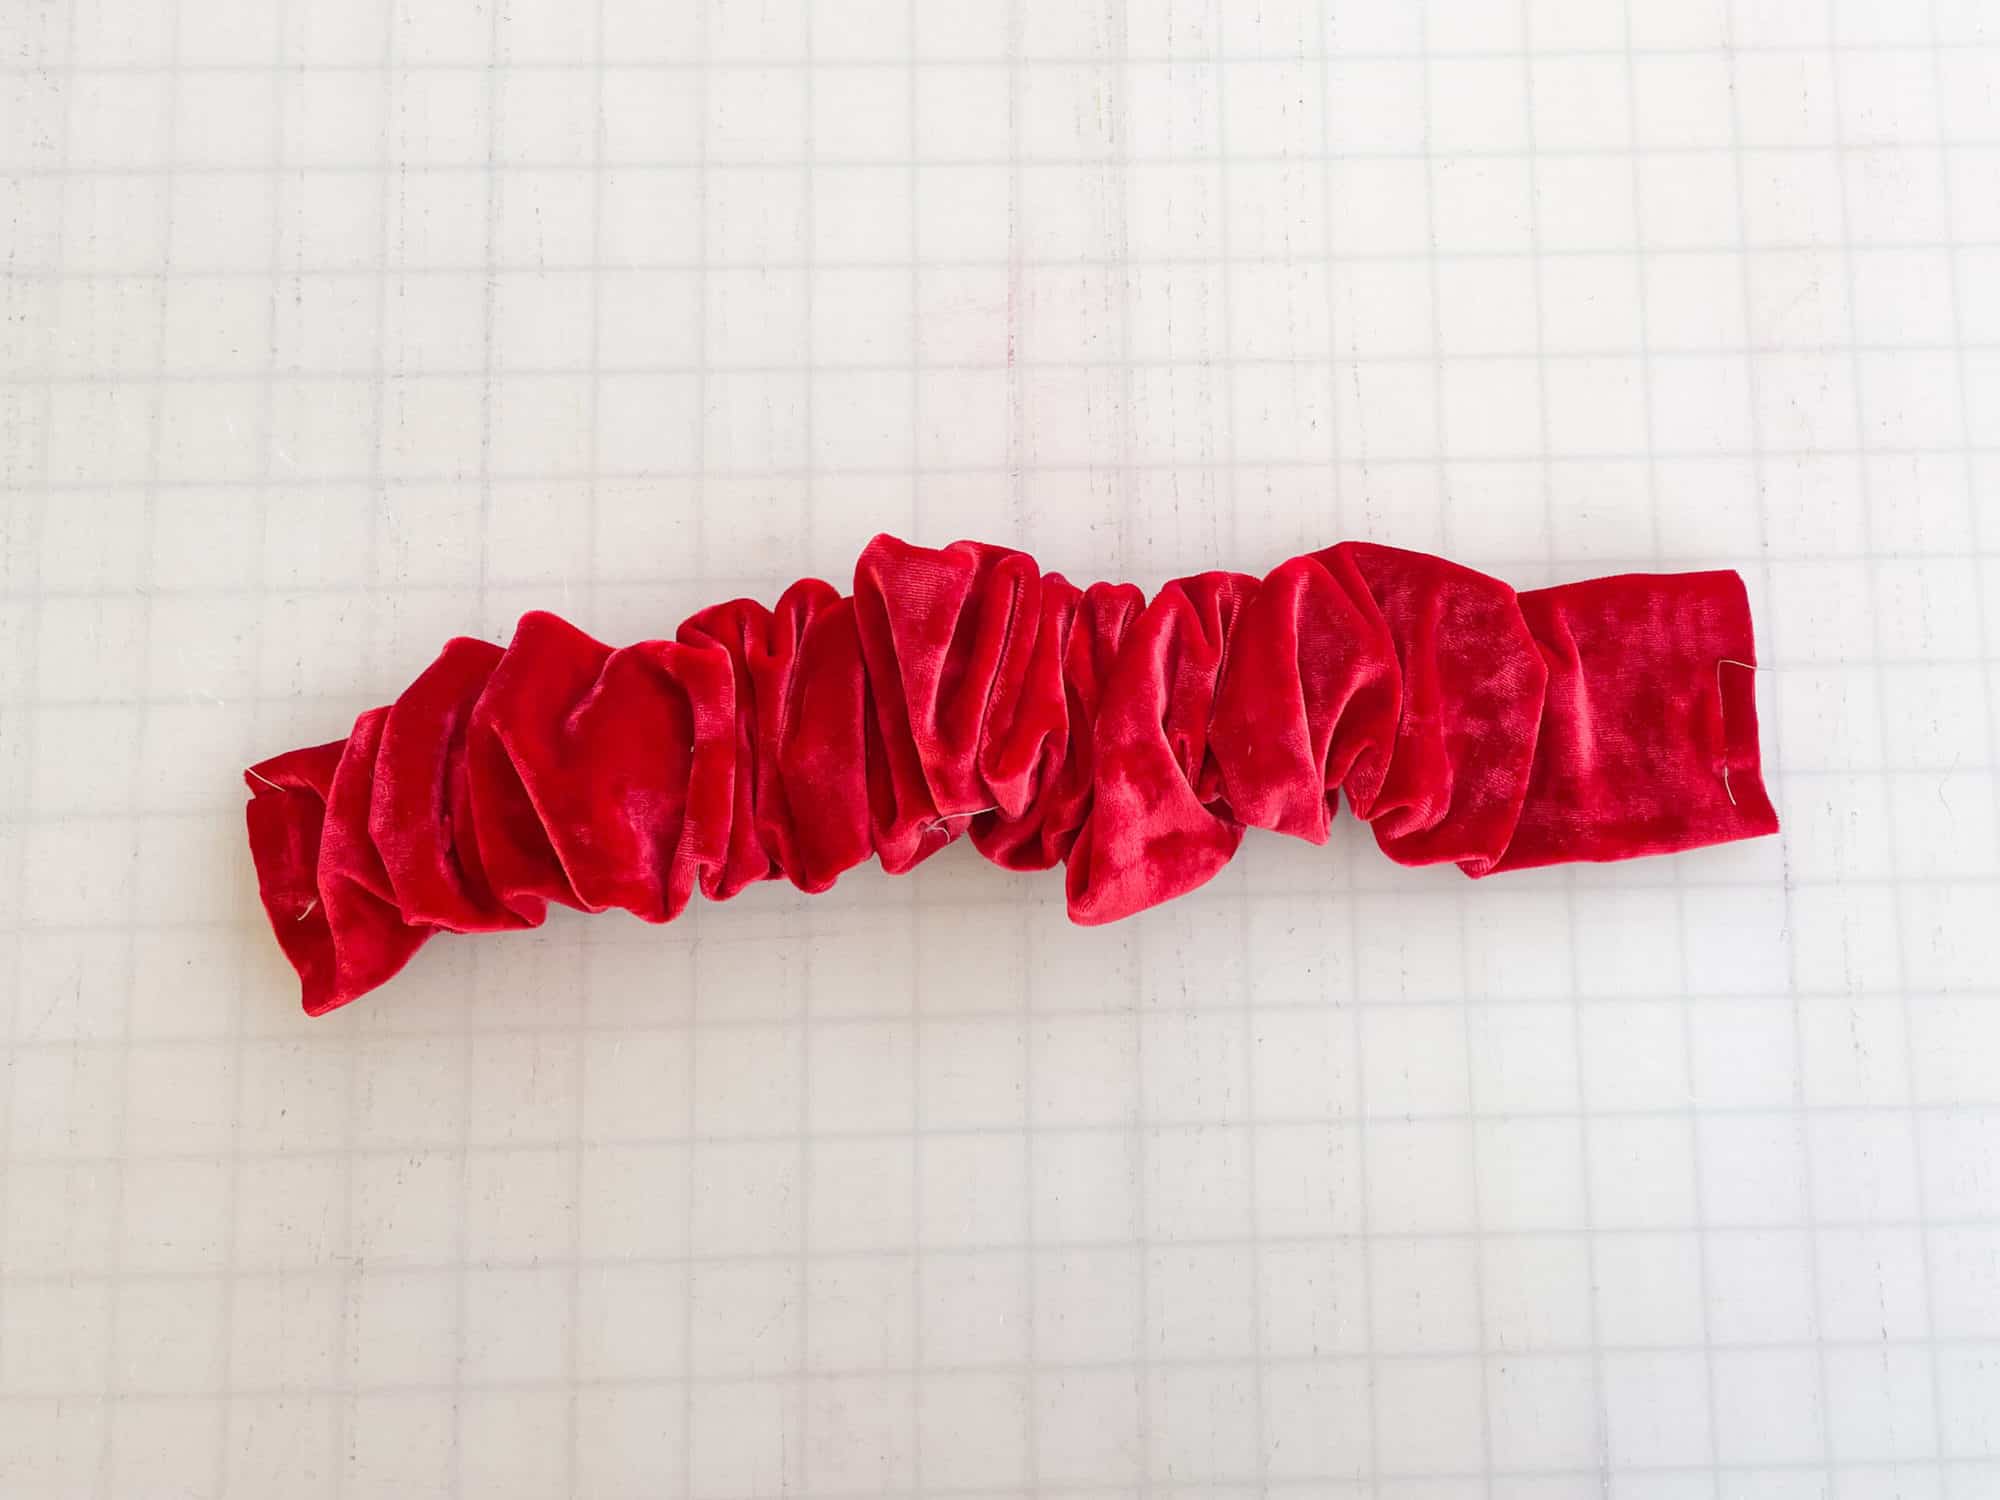
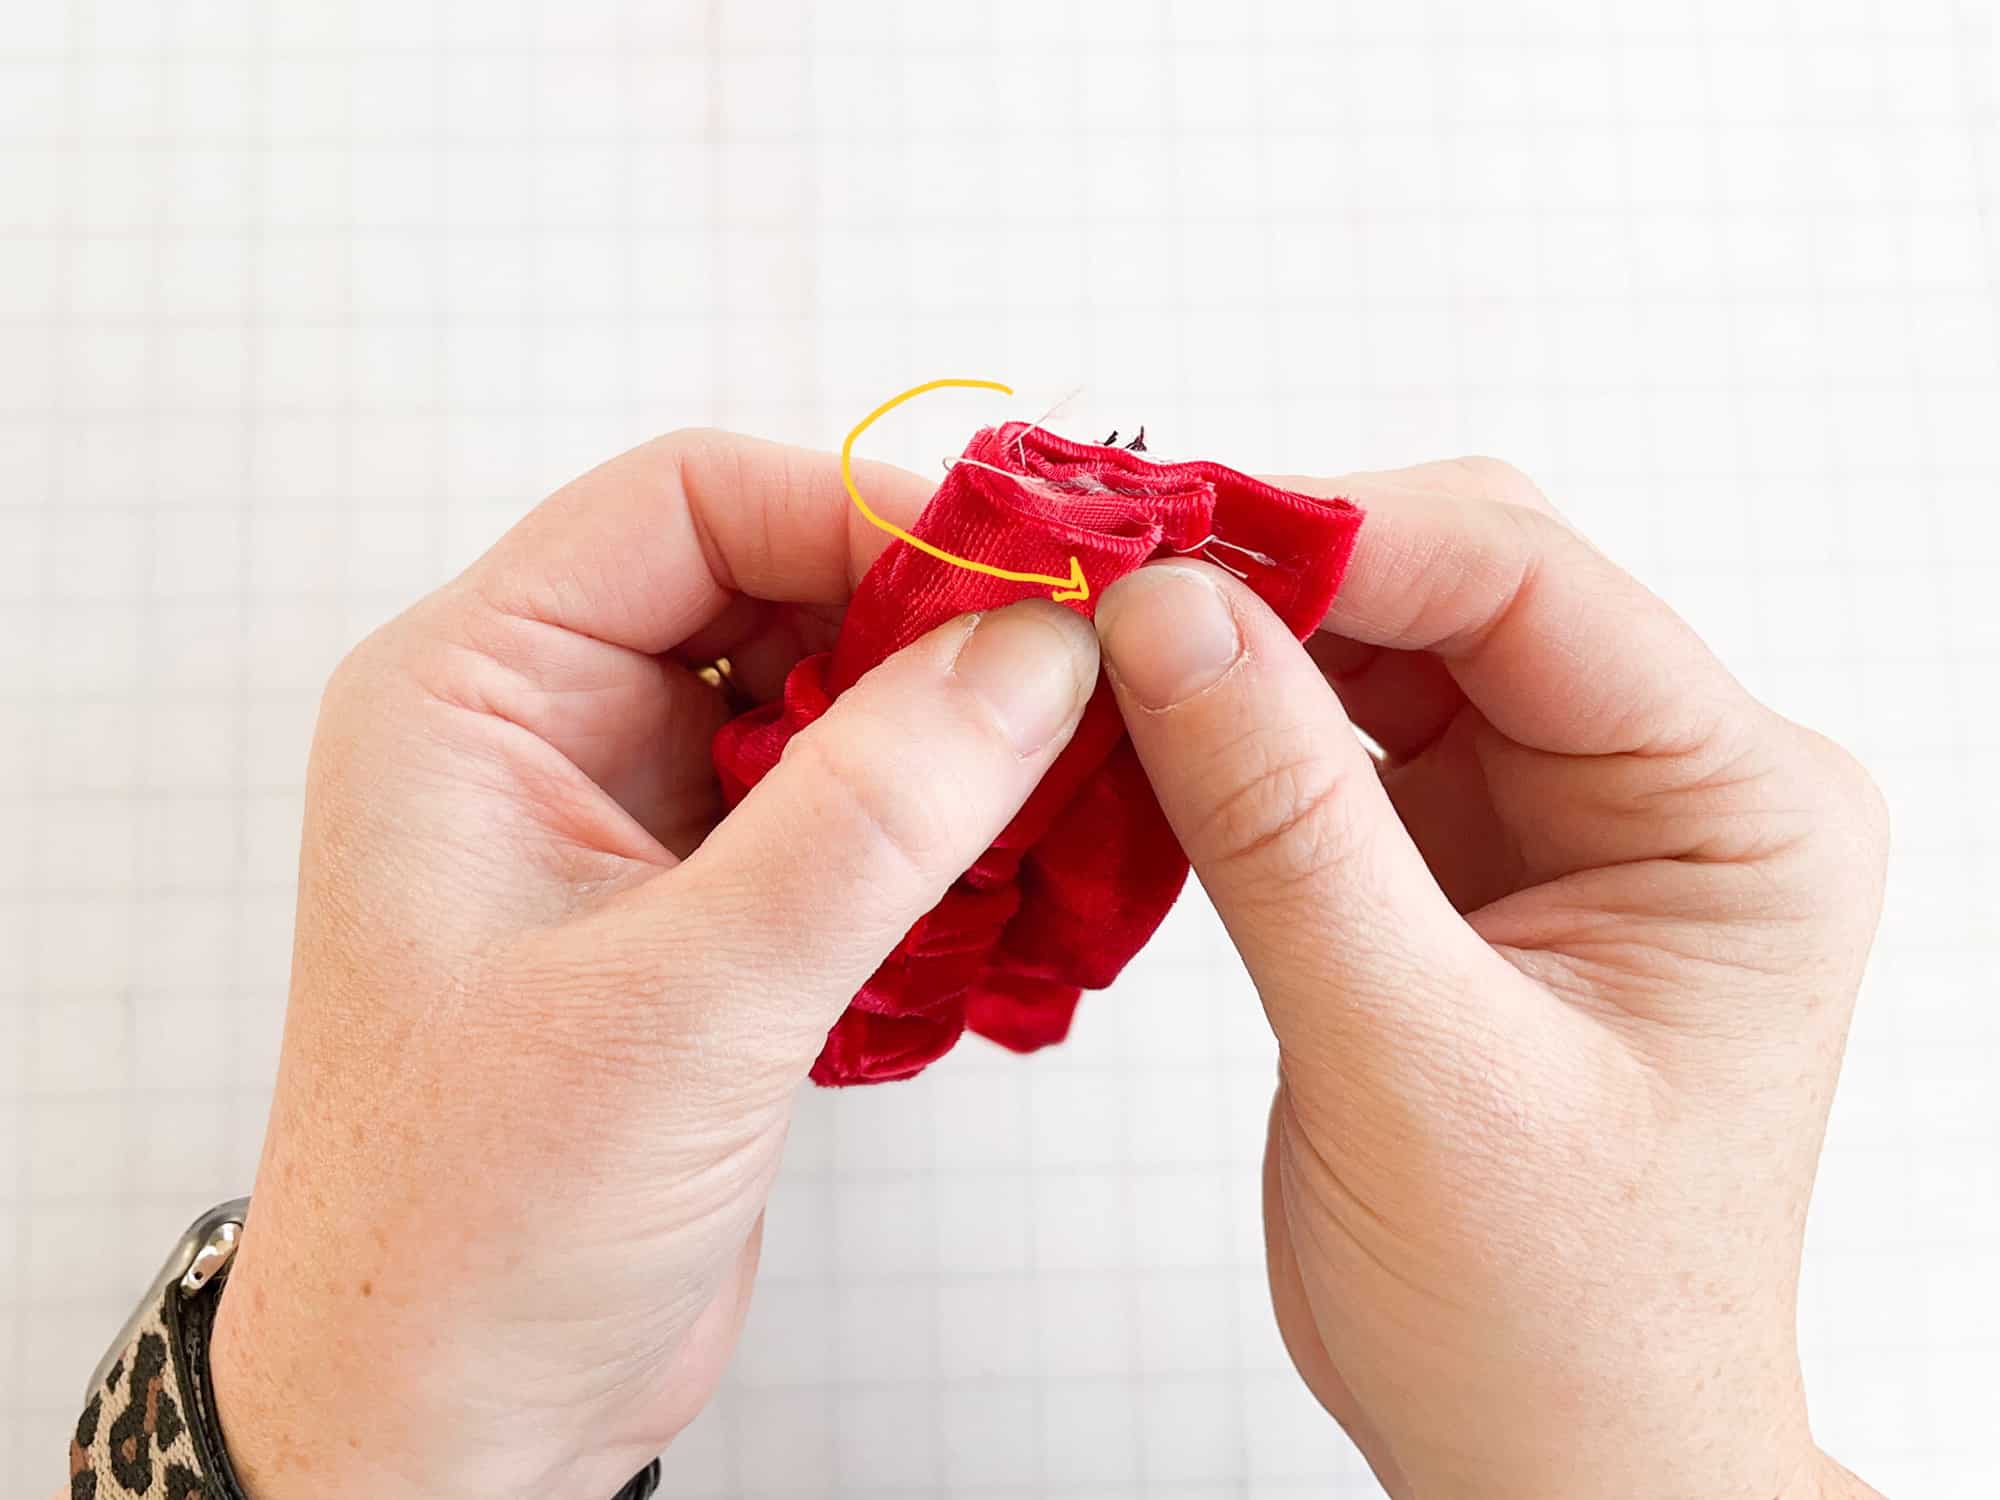
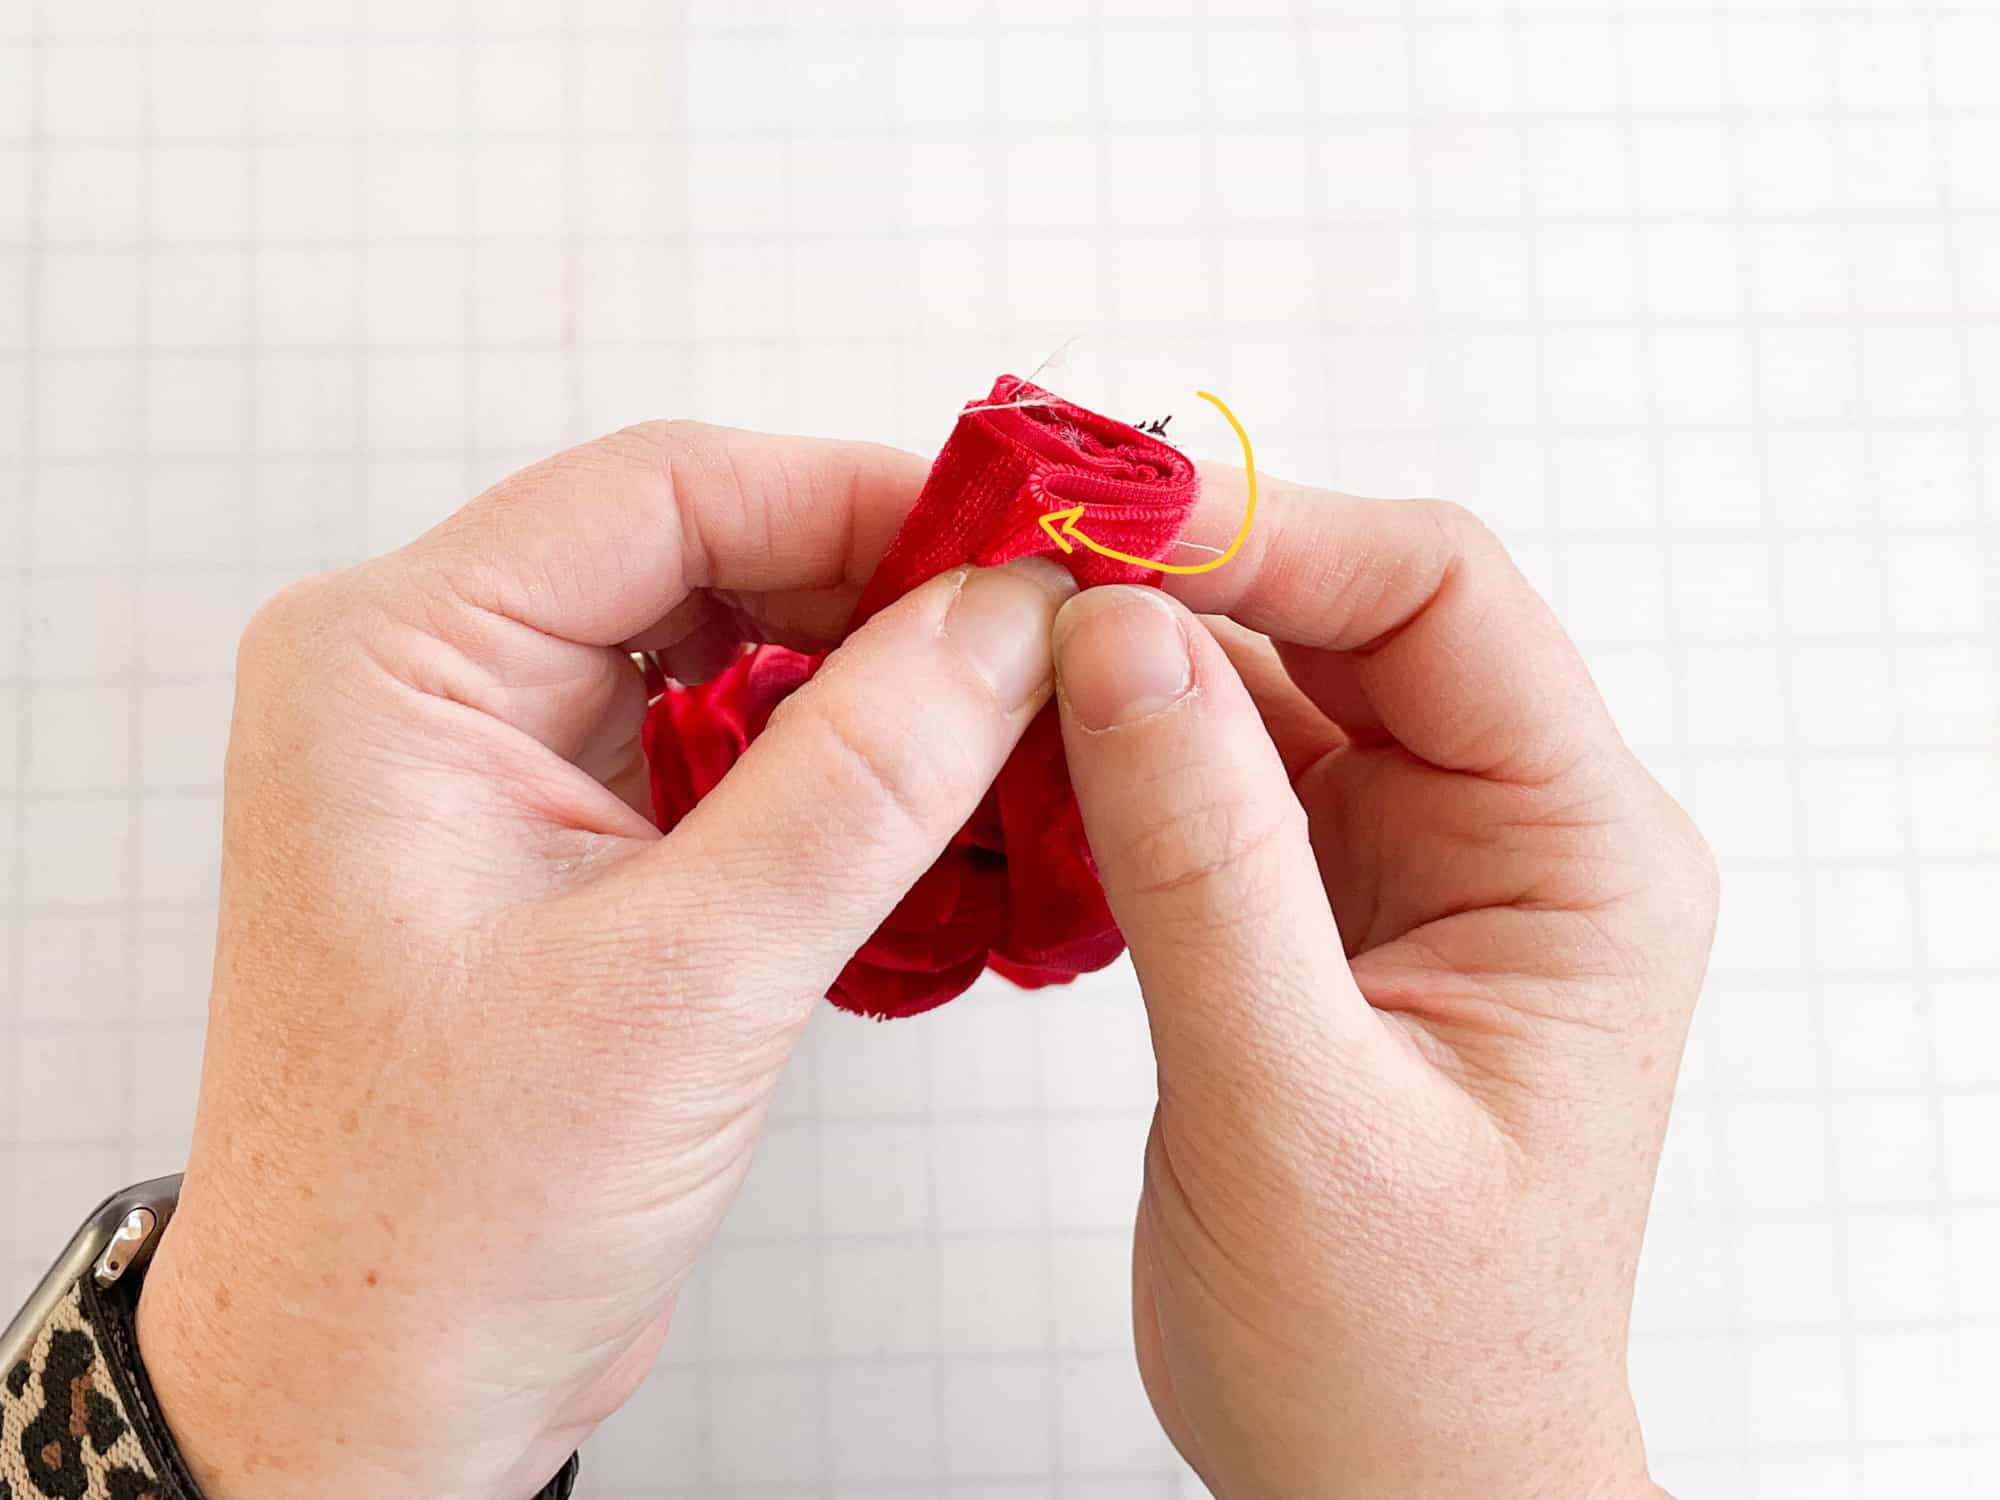
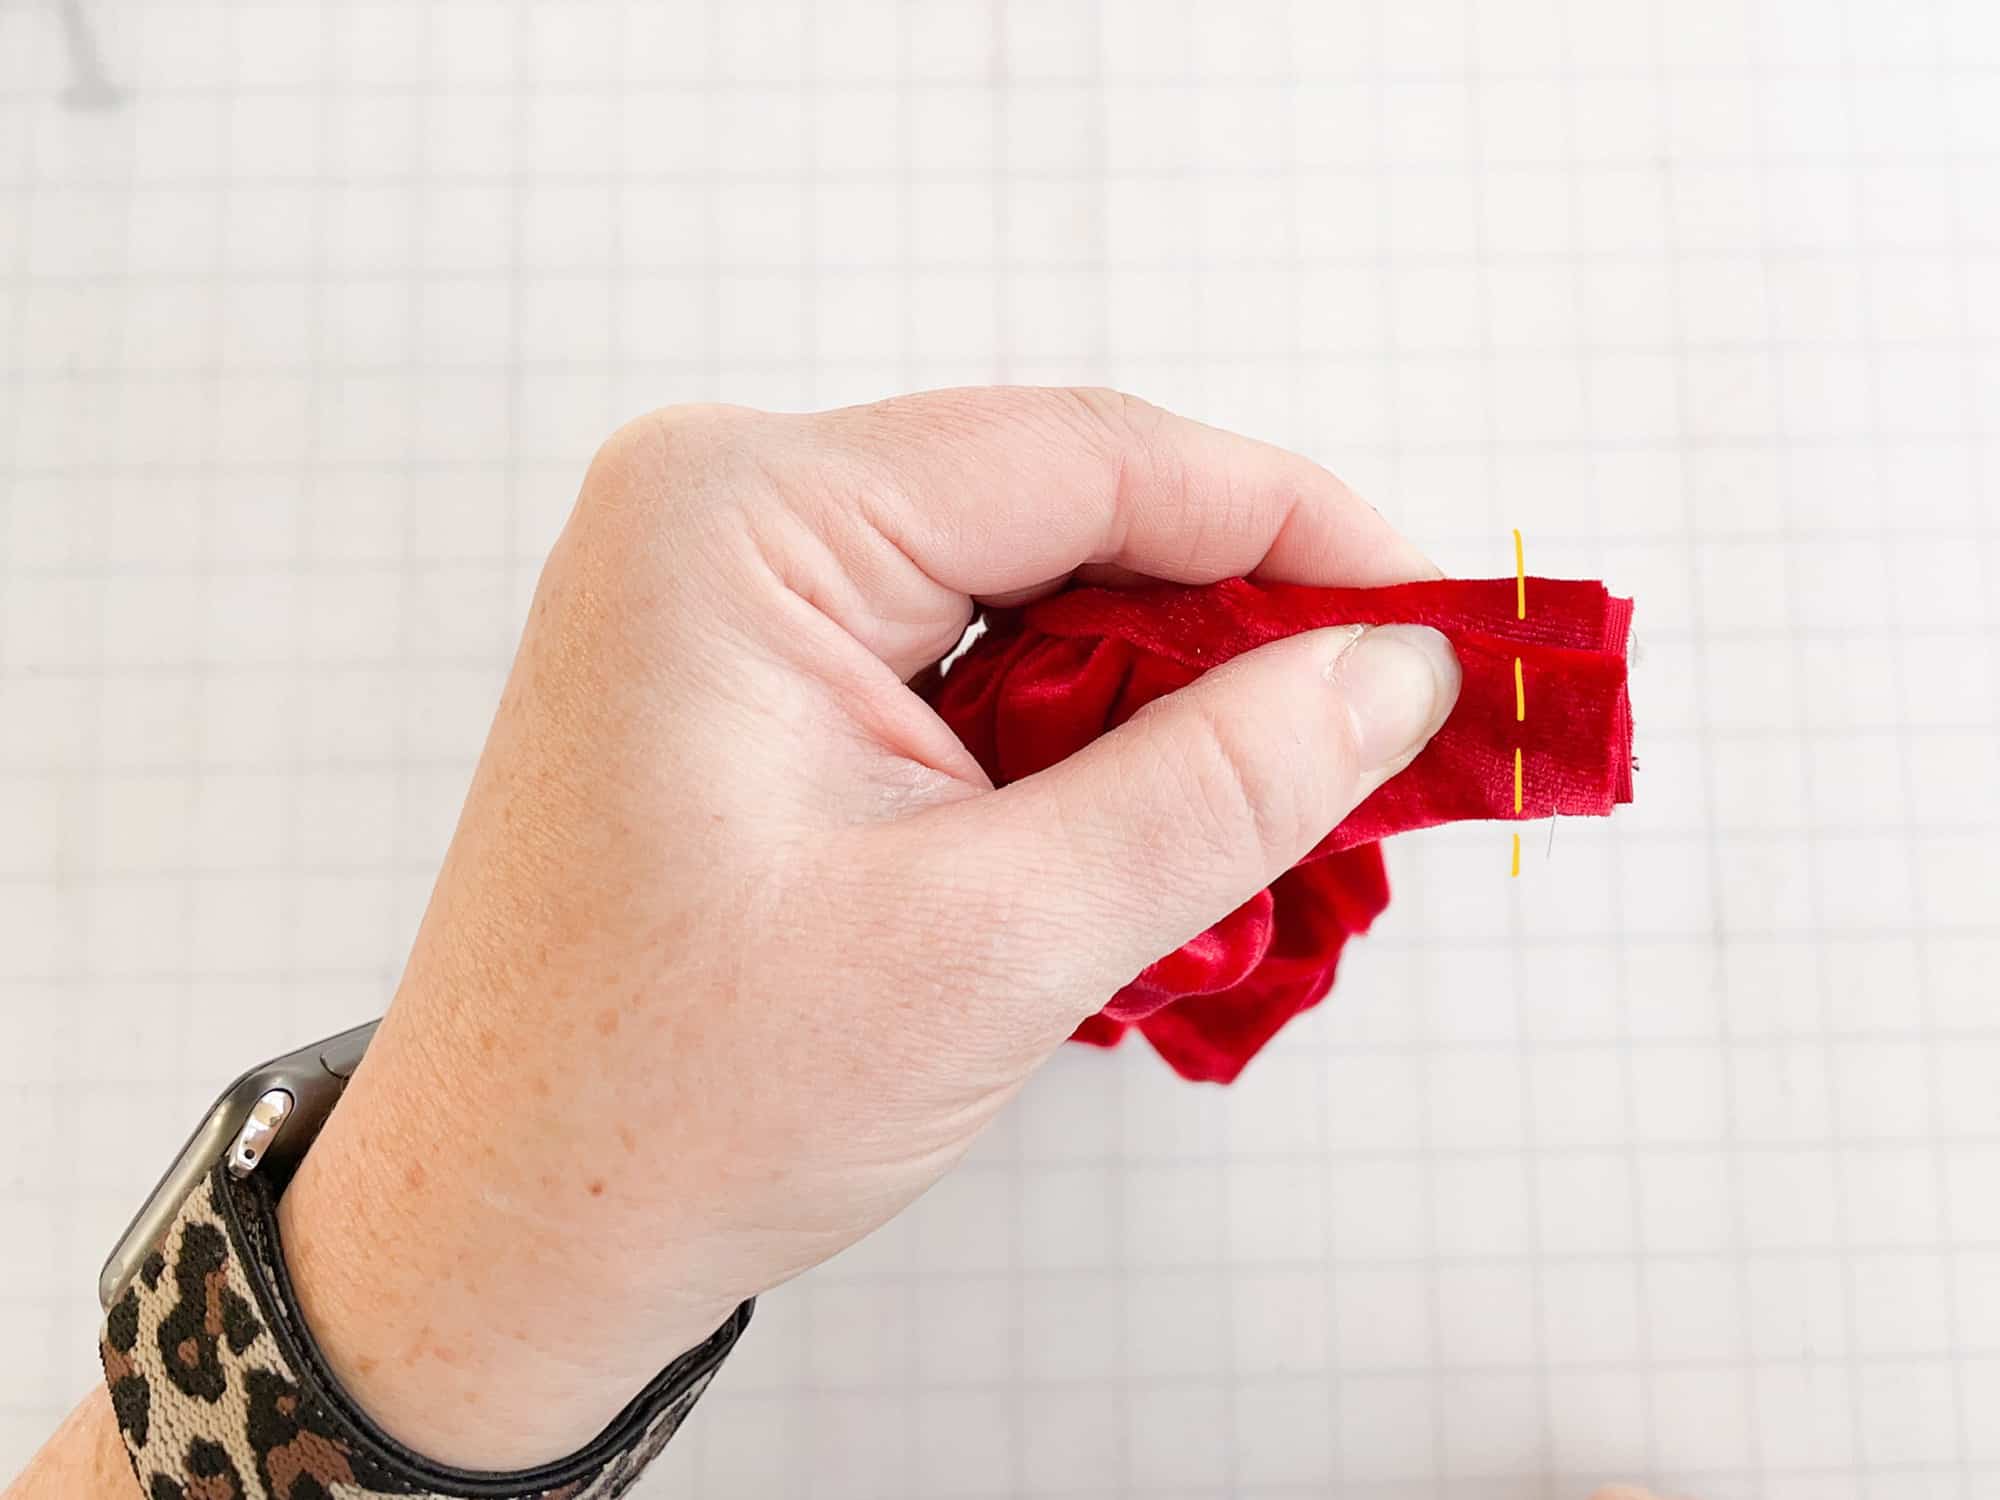
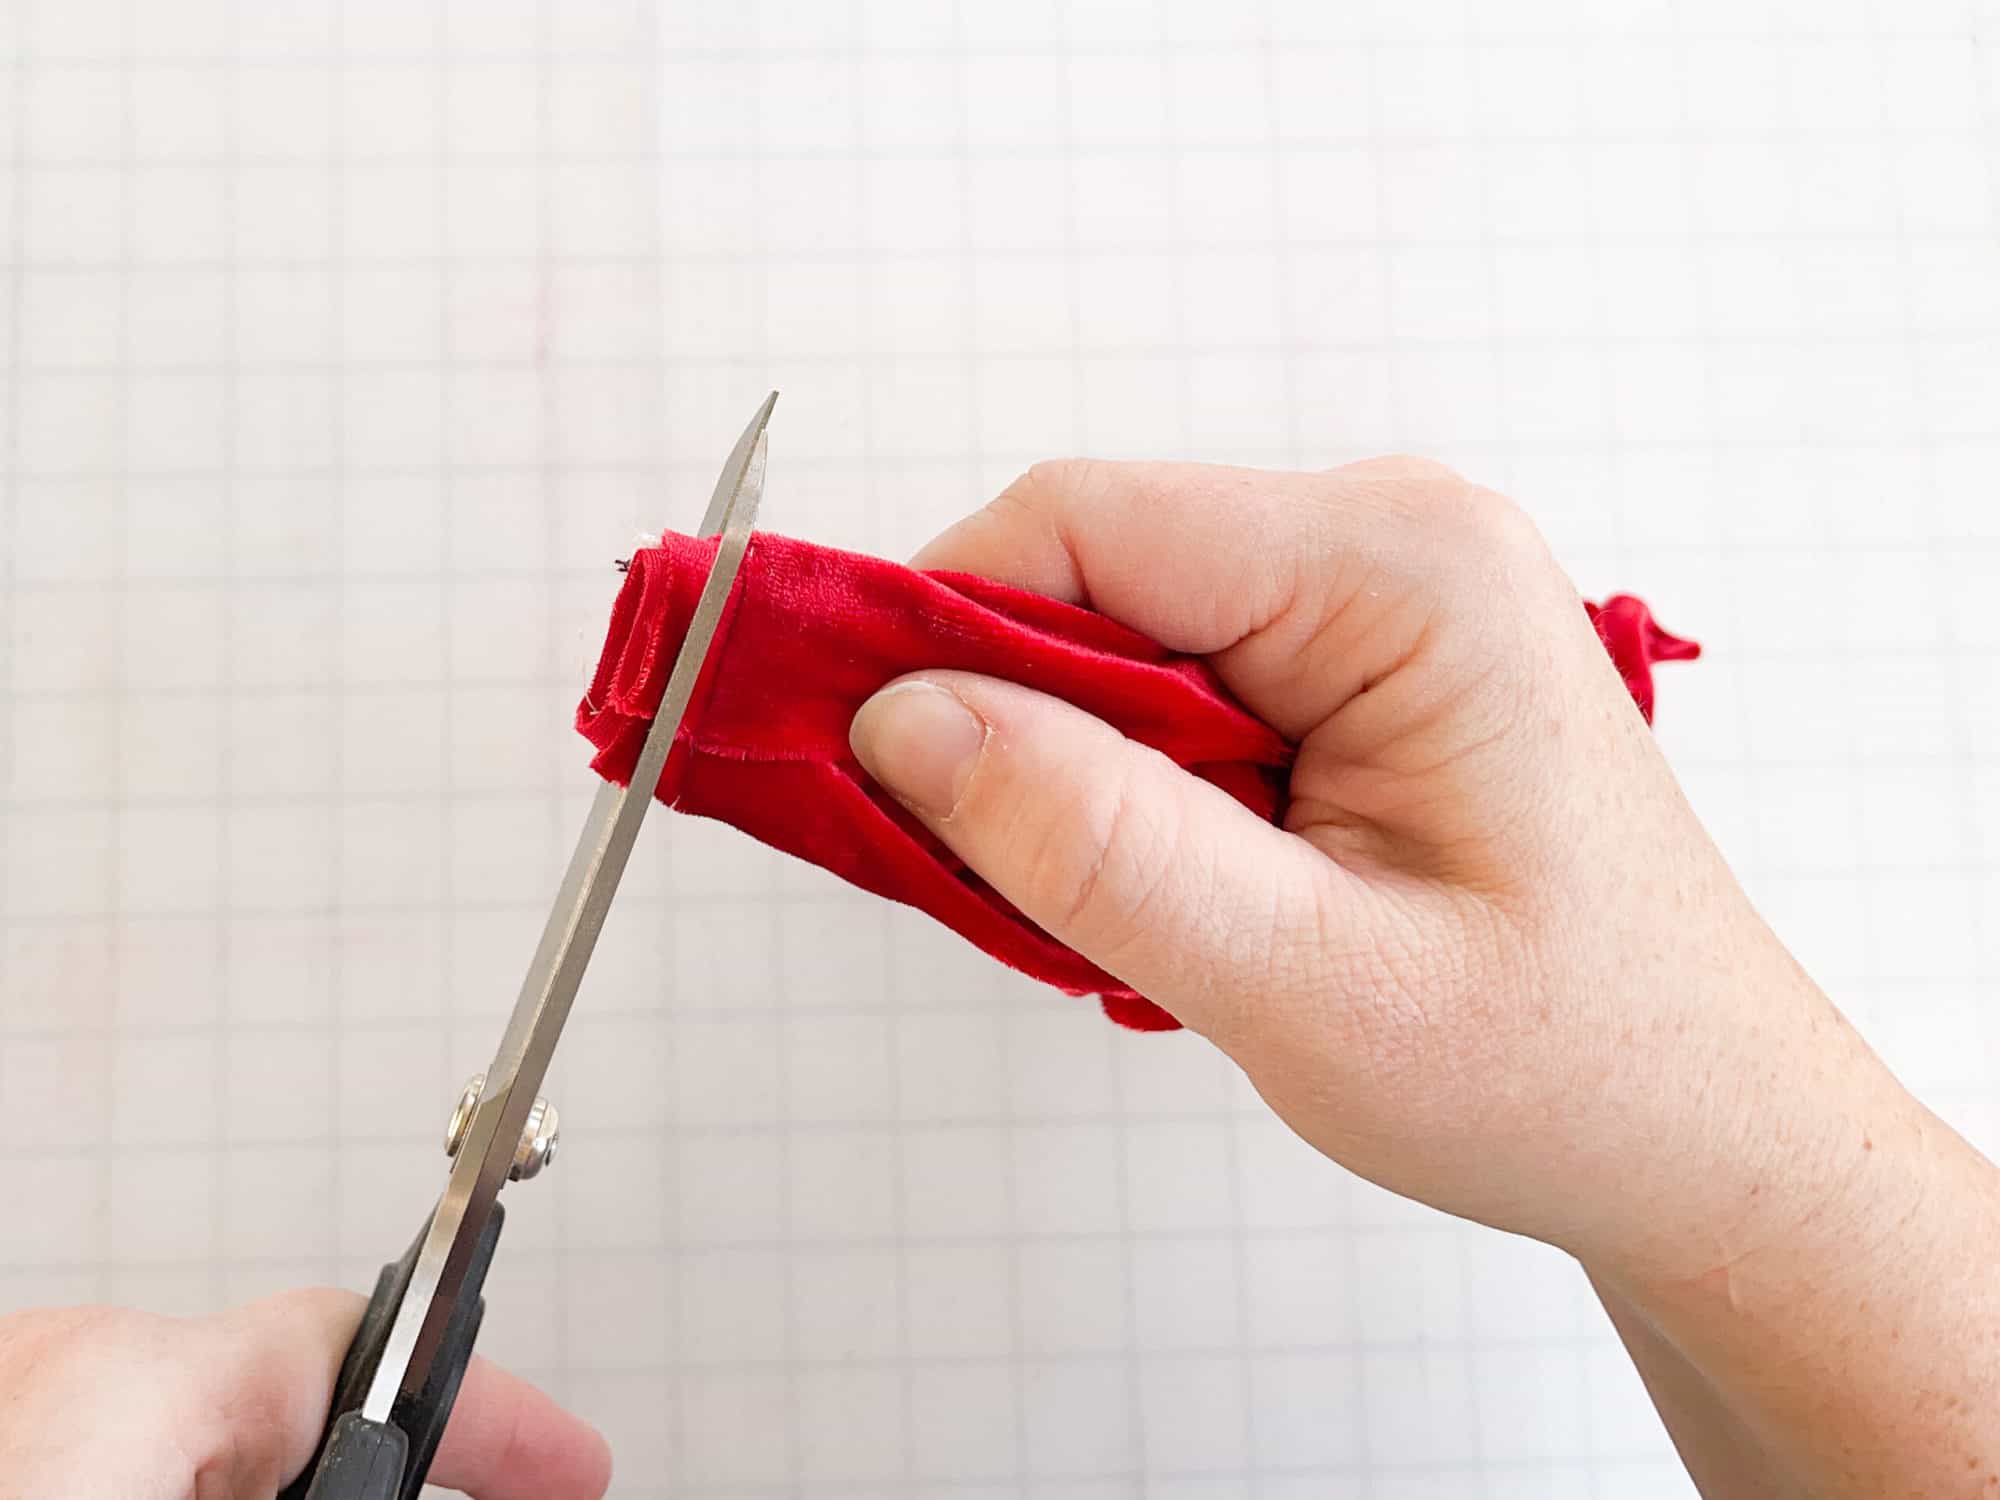
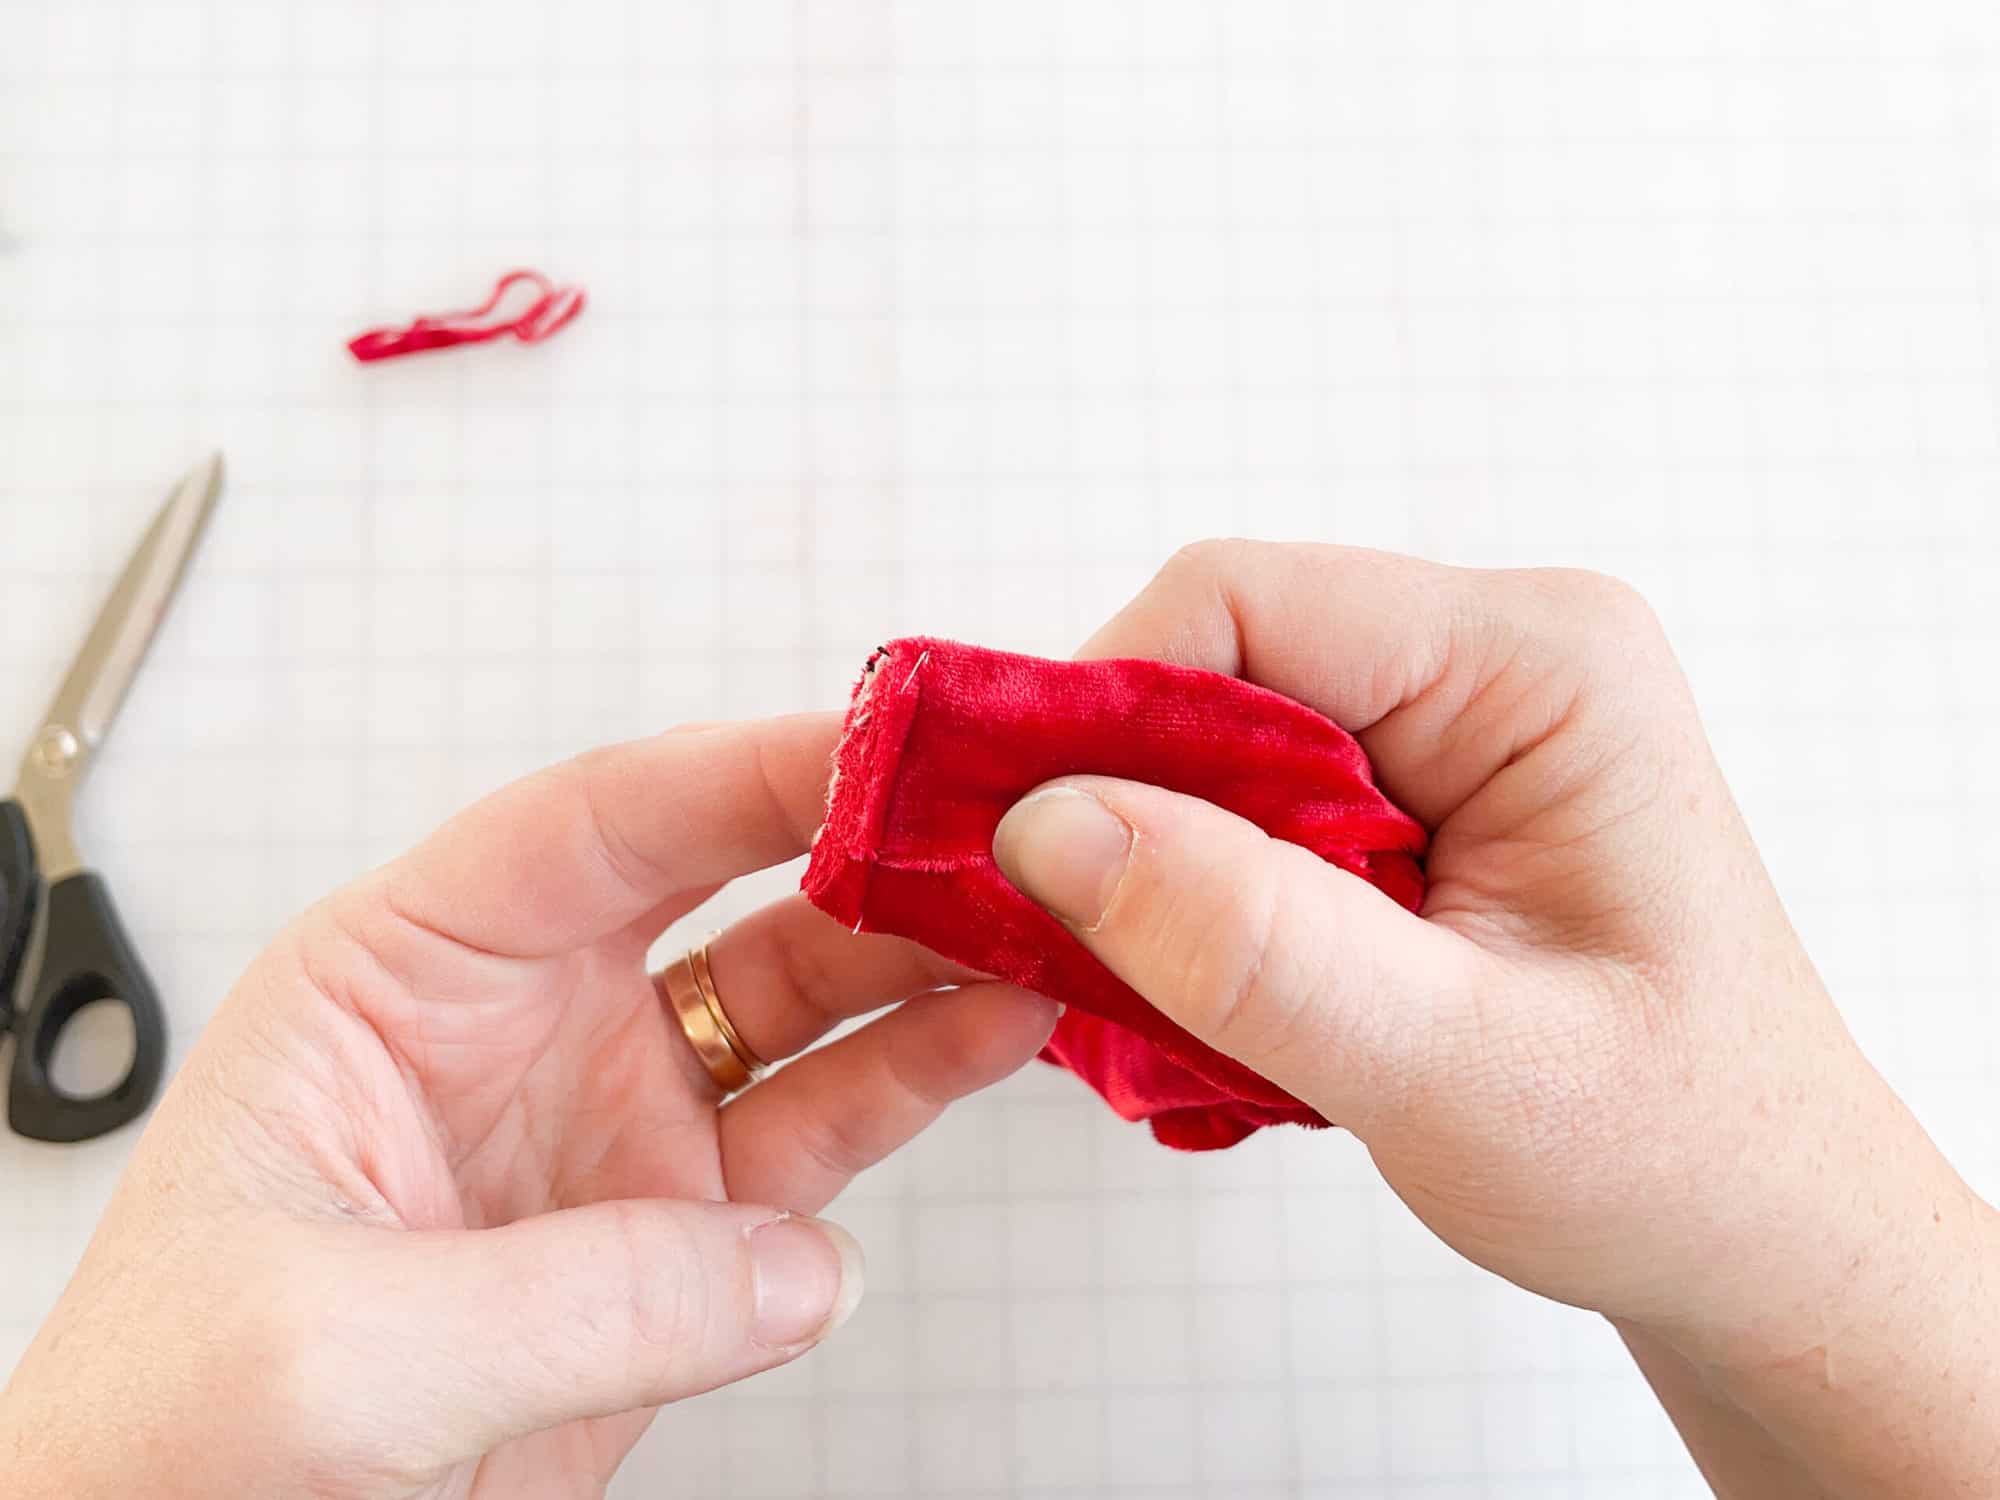
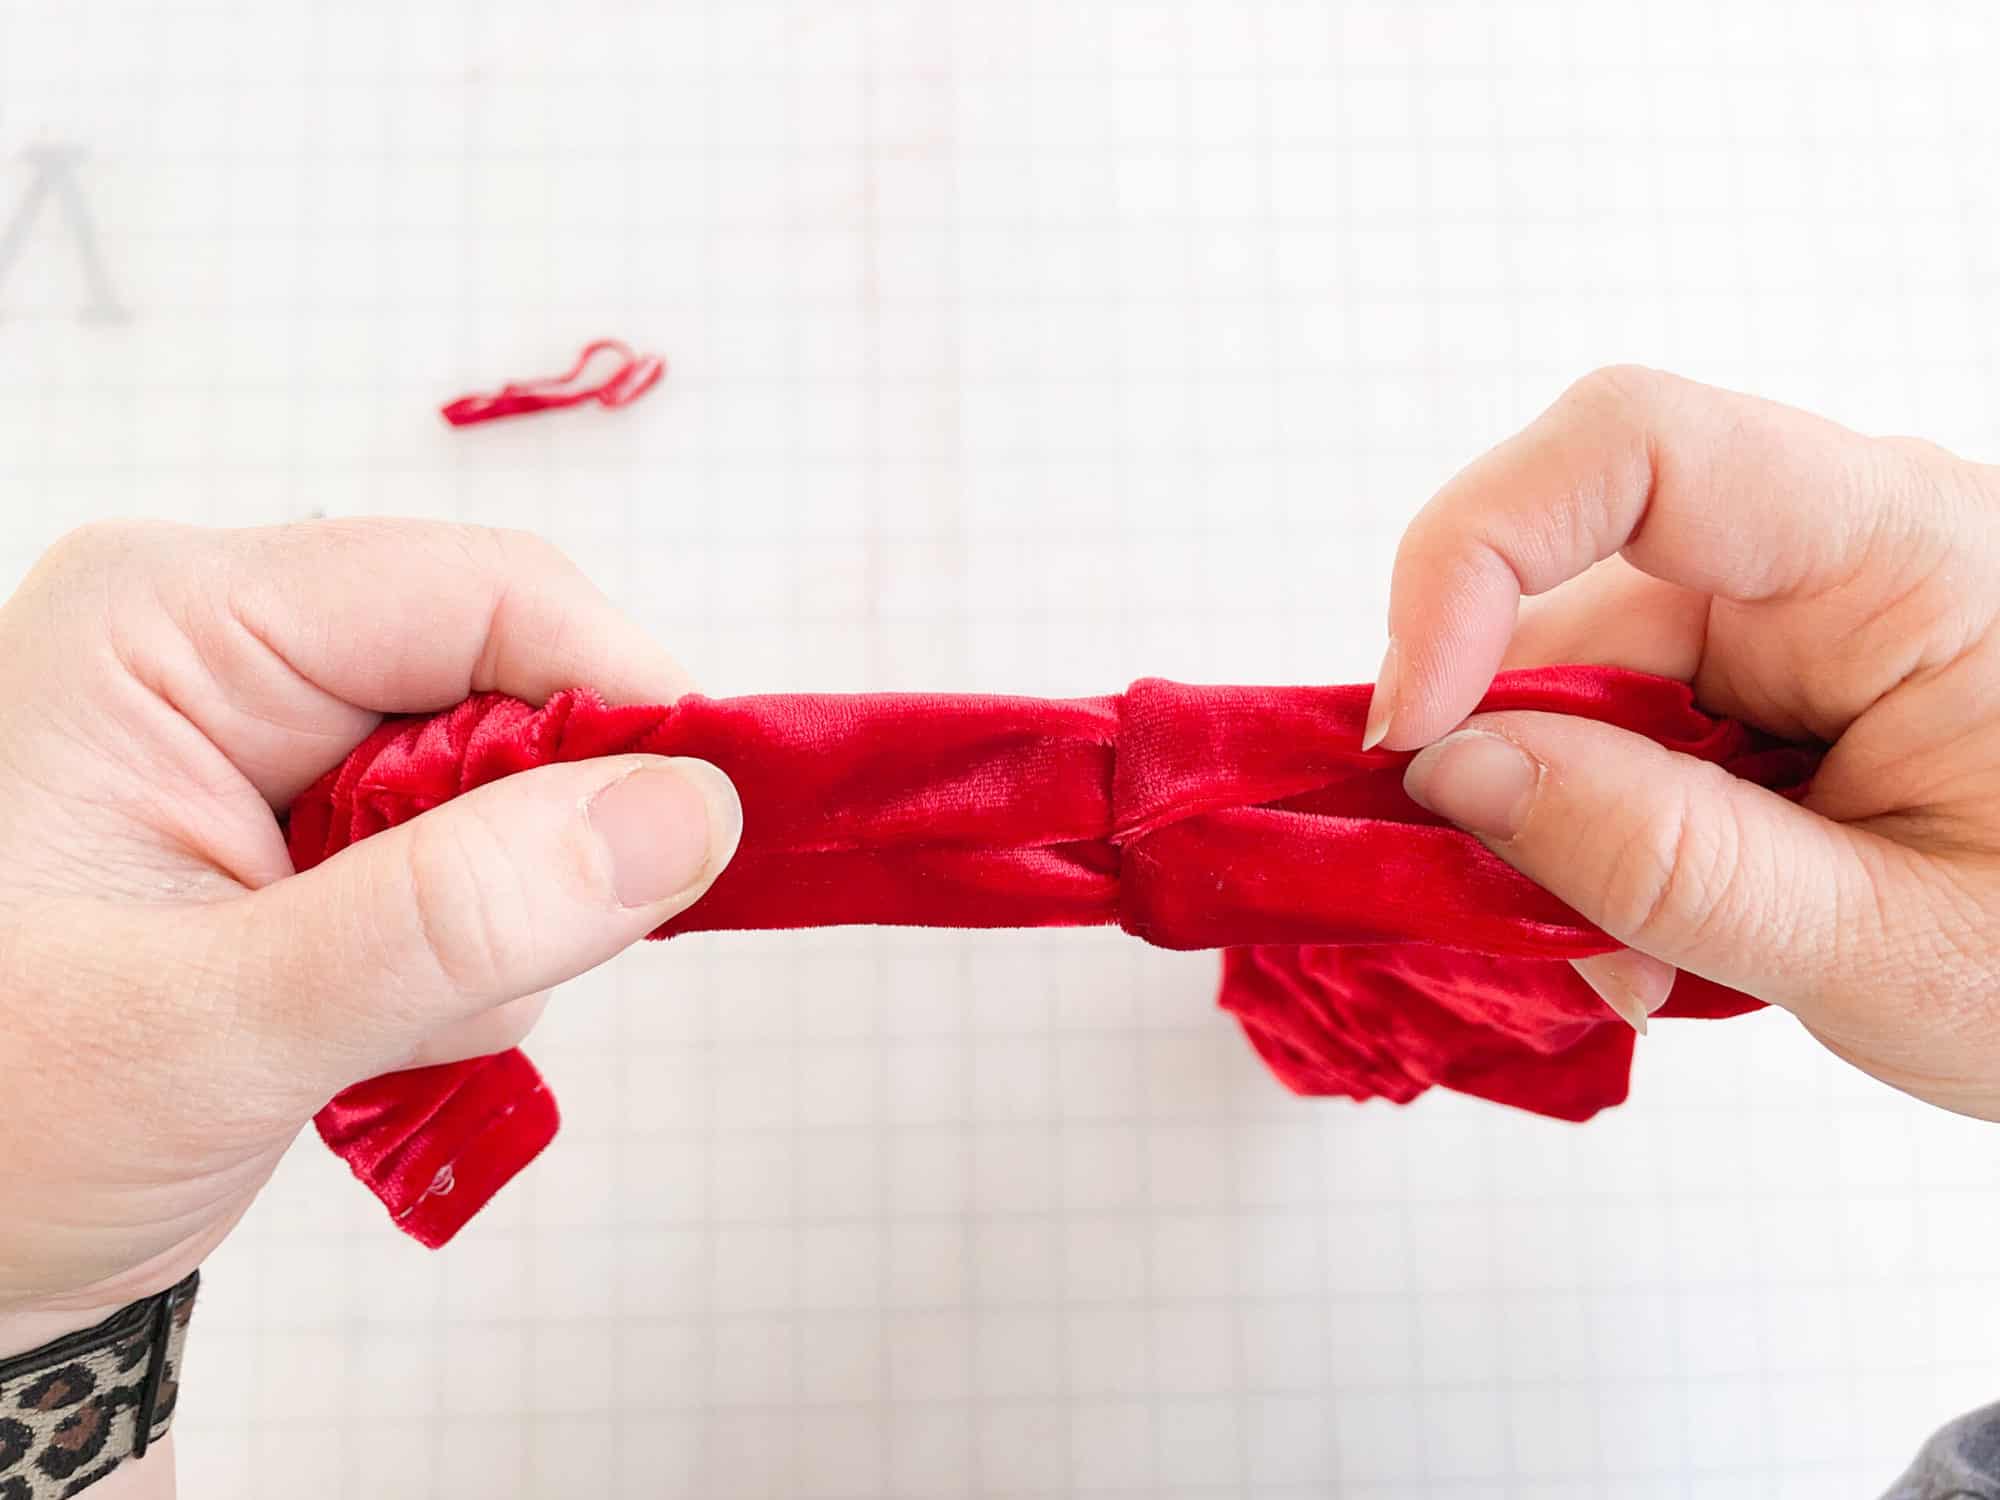
Step 3: Turn right sides out. Step 4: Using your favorite elastic threading tool, add your elastic in the top and bottom headband pieces. The fabric is a lot longer than the elastic. It’s easiest to first pin / clip the fabric to the elastic ends before basting. Be sure not to twist your fabric while adding the elastic in the tubes. For both pieces, you’ll want to align the elastic with the seam centered on it. Step 5: Baste the fabric to the elastic on both pieces. Step 6: Place your top headband piece on the table, with right sides facing you (aka, the seam should be on the table right now). Step 7: Aligning the raw edges, place the bottom headband piece on top, with wrong sides facing you. (This will allow for both right sides of the top + bottom to be facing one another.) Step 8: Fold the excess fabric from the top headband piece around the bottom headband. Your bottom headband will be completely encased by the top headband at this point. Step 9: Using 1/2″ seam allowance, sew along raw edge. Step 10: Without cutting through your stitches, clip off excess fabric and elastic ends. Step 11: Pull to flip fabric right sides out. The top headband piece will fold and hide your seams. Repeat Steps 6-11 on other side of headband pieces. You’re finished!!


——–
In case you consider yourself a more “visual learner” here’s a video tutorial that walks you through the entire tutorial, start-to-finish.
Check out what our fabulous testers were able to create with this very same tutorial!


I la-la-love when you share your photos with me! Head over to the Patterns for Pirates Facebook Group and show us what you’ve made!
Happy Holidays, Pirates!


Leave a Reply