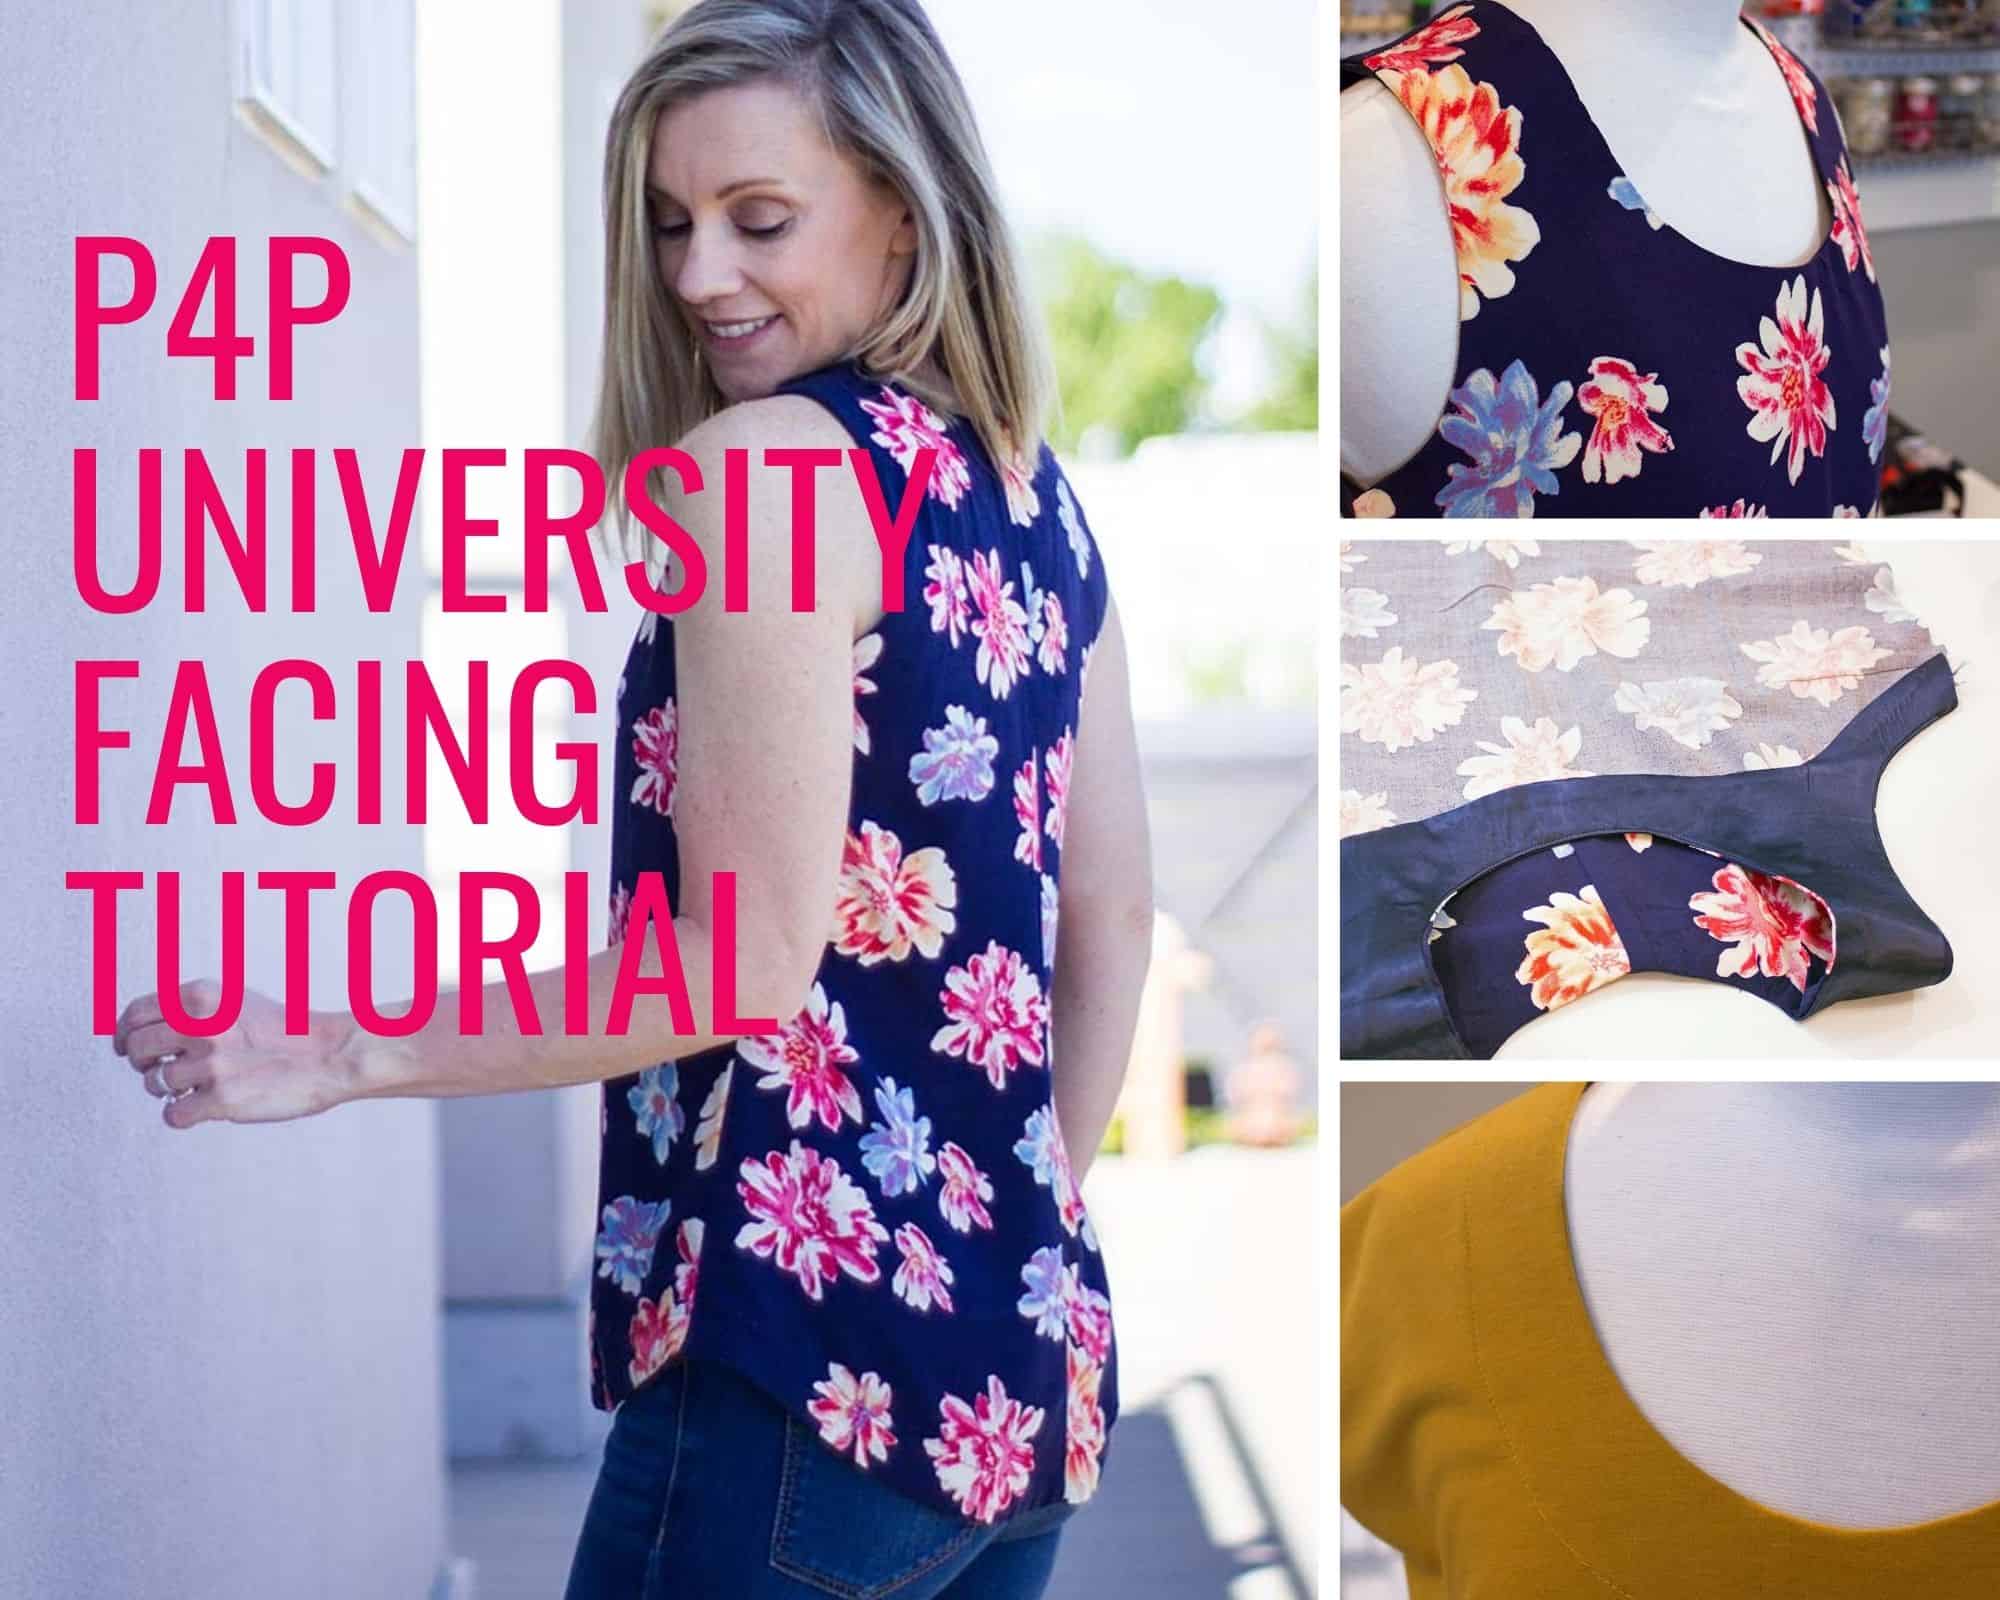
Today’s P4P University is all about facings. We will take a look at what facings are used for, how to draft your own, and where you can use them in your patterns. A facing is a way to finish the edge of a garment. Although you will often see tutorials for using a facing in necklines, they can be used in many other ways as well. Today we will look at both a simple neckline facing, an all-in-one facing, and how to use a hem facing.
**A video tutorial is available at the bottom of this blog post. **
WHEN TO USE A FACING
You can use a facing when sewing a pattern to finish any garment edges (necklines, sleeveless armholes, hems, and more). While they are more common in woven garments, you can also attach a simple facing to a knit garment if you are looking to replace the neckline binding or band. Let’s see how we can draft and use a simple neckline facing on the P4P Brunch Blouse Pattern.
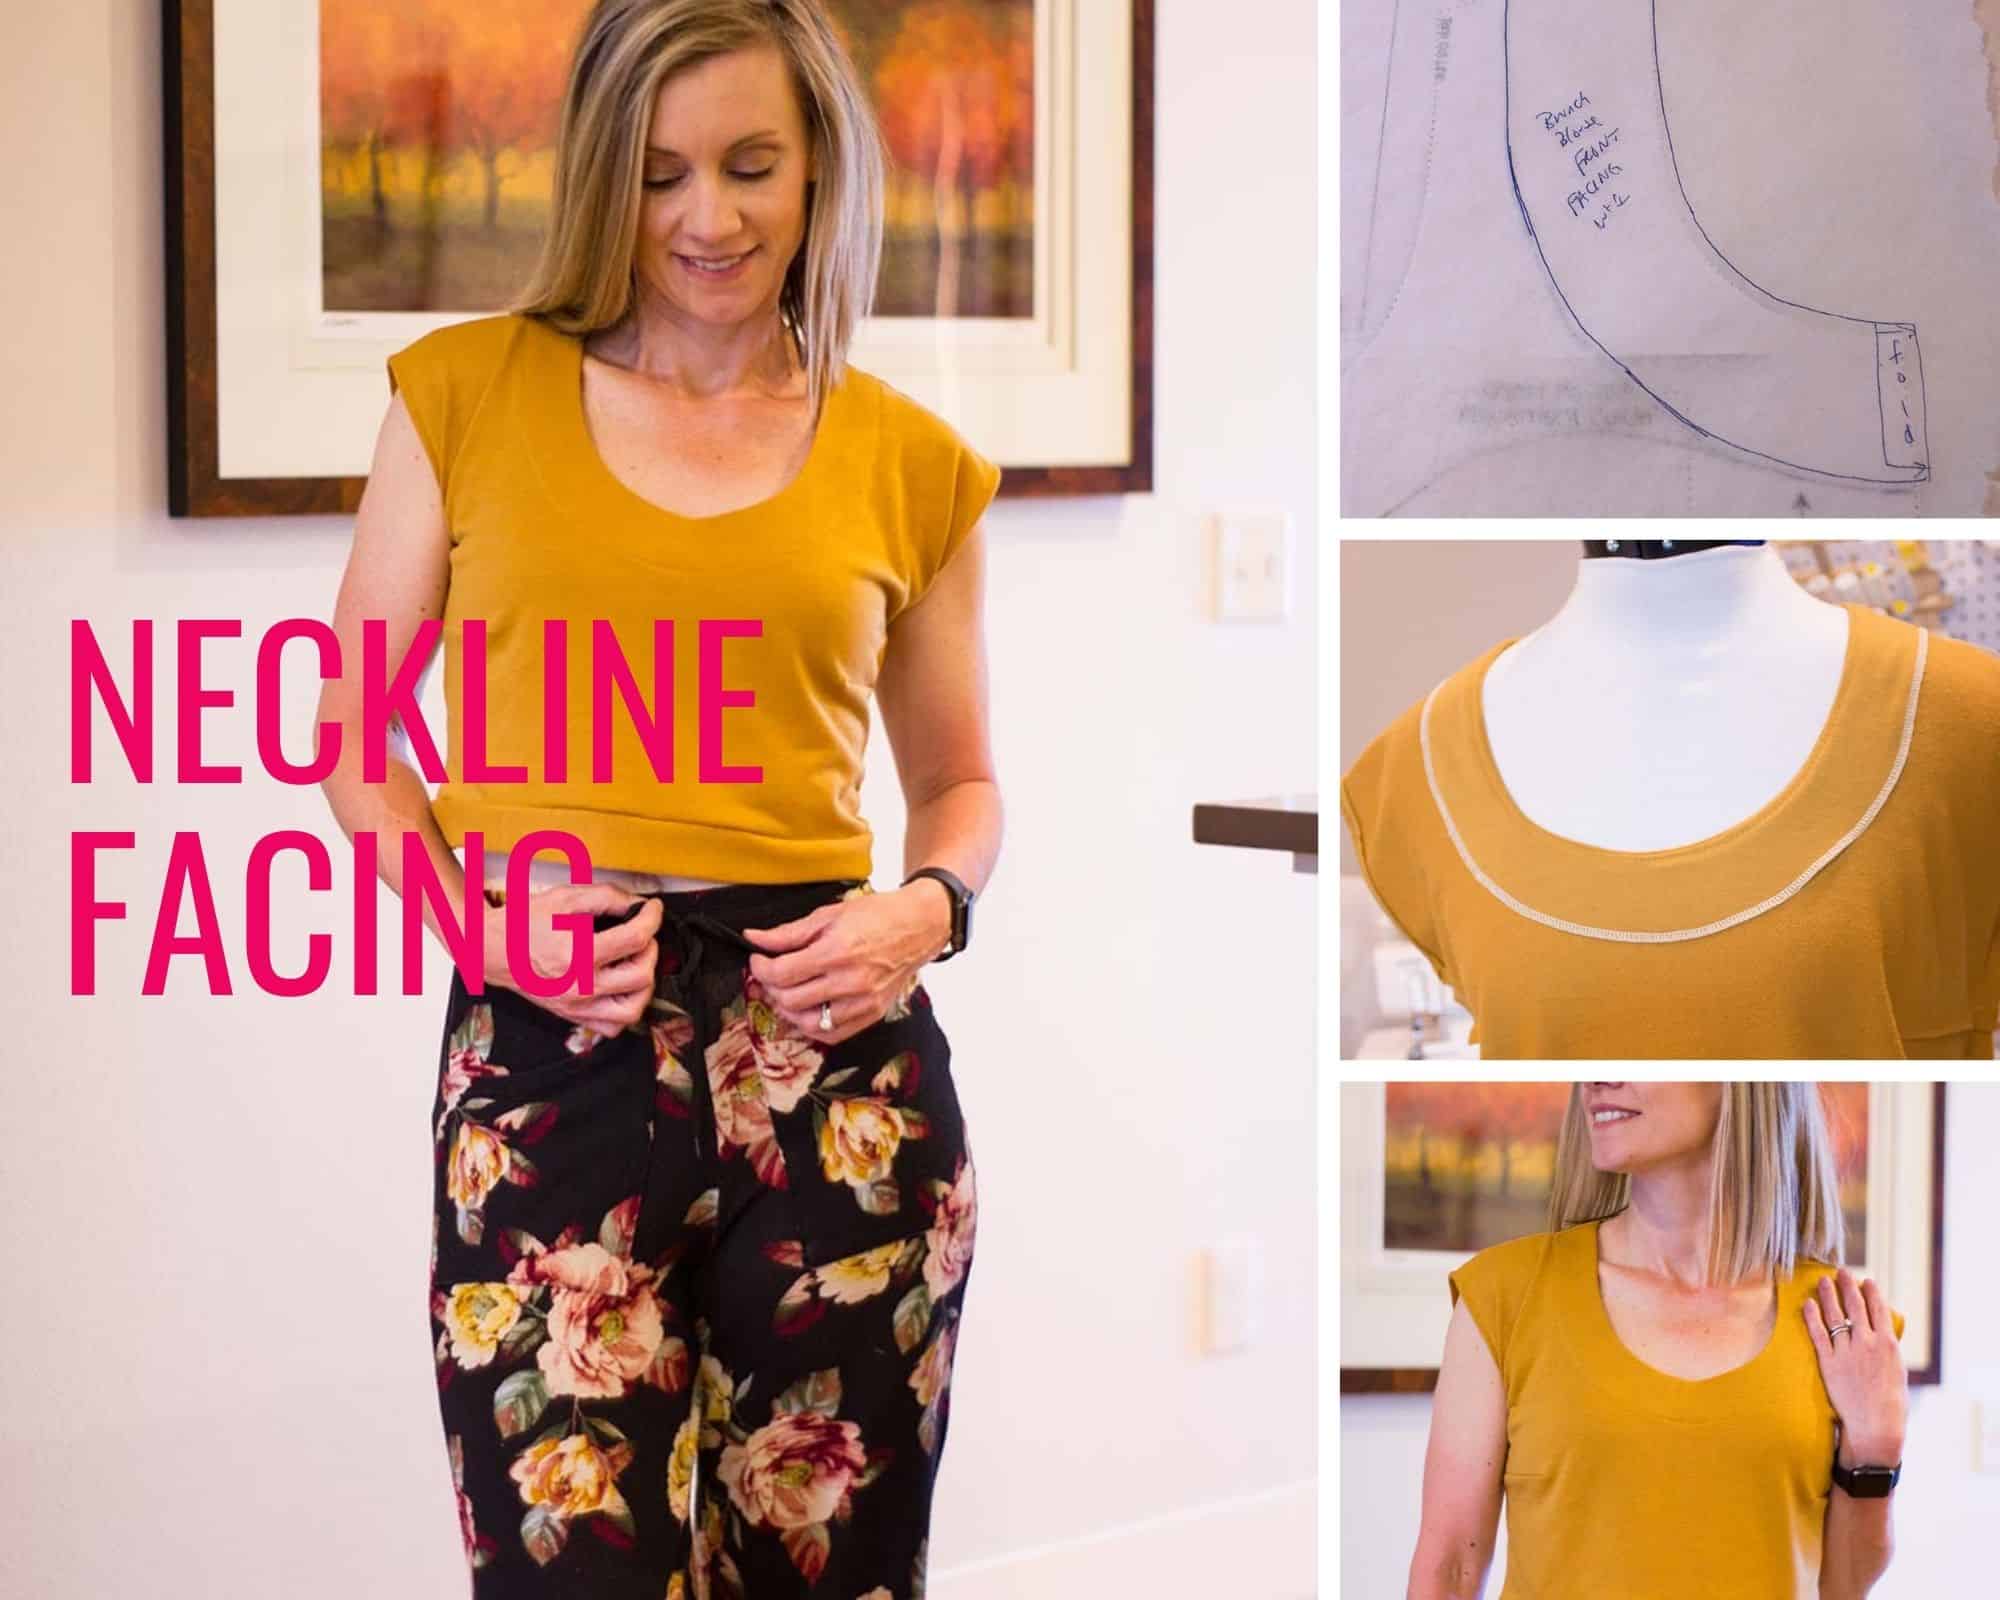
NECKLINE FACING
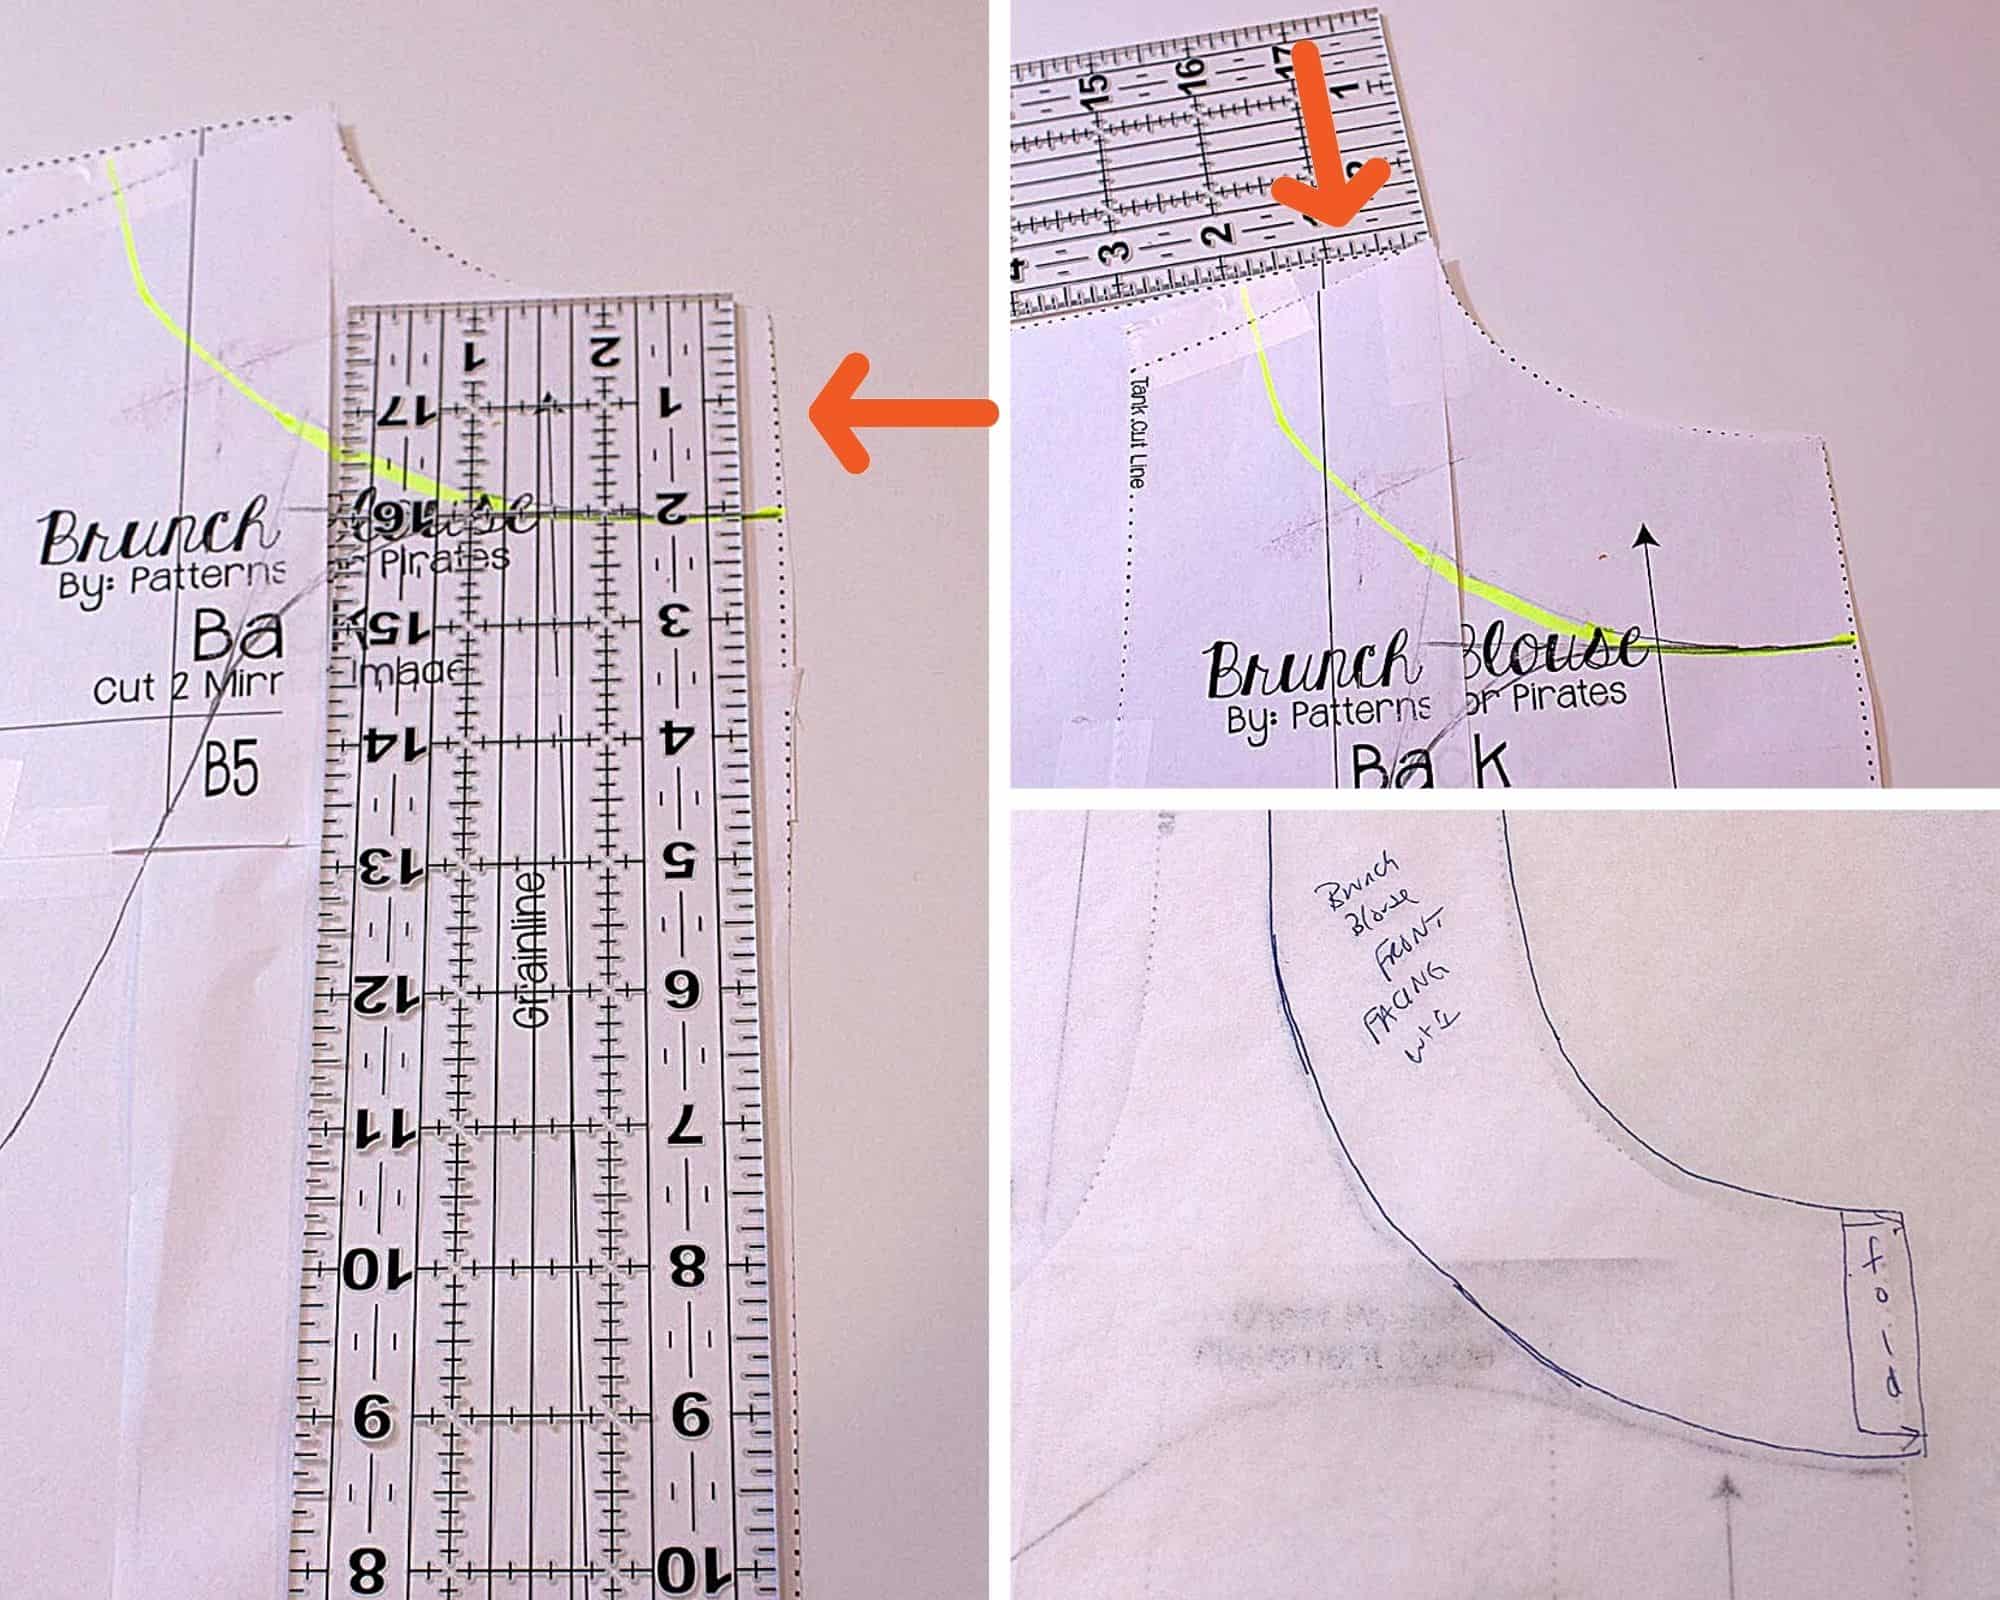
You will need the paper pattern, tracing paper, pencil, ruler
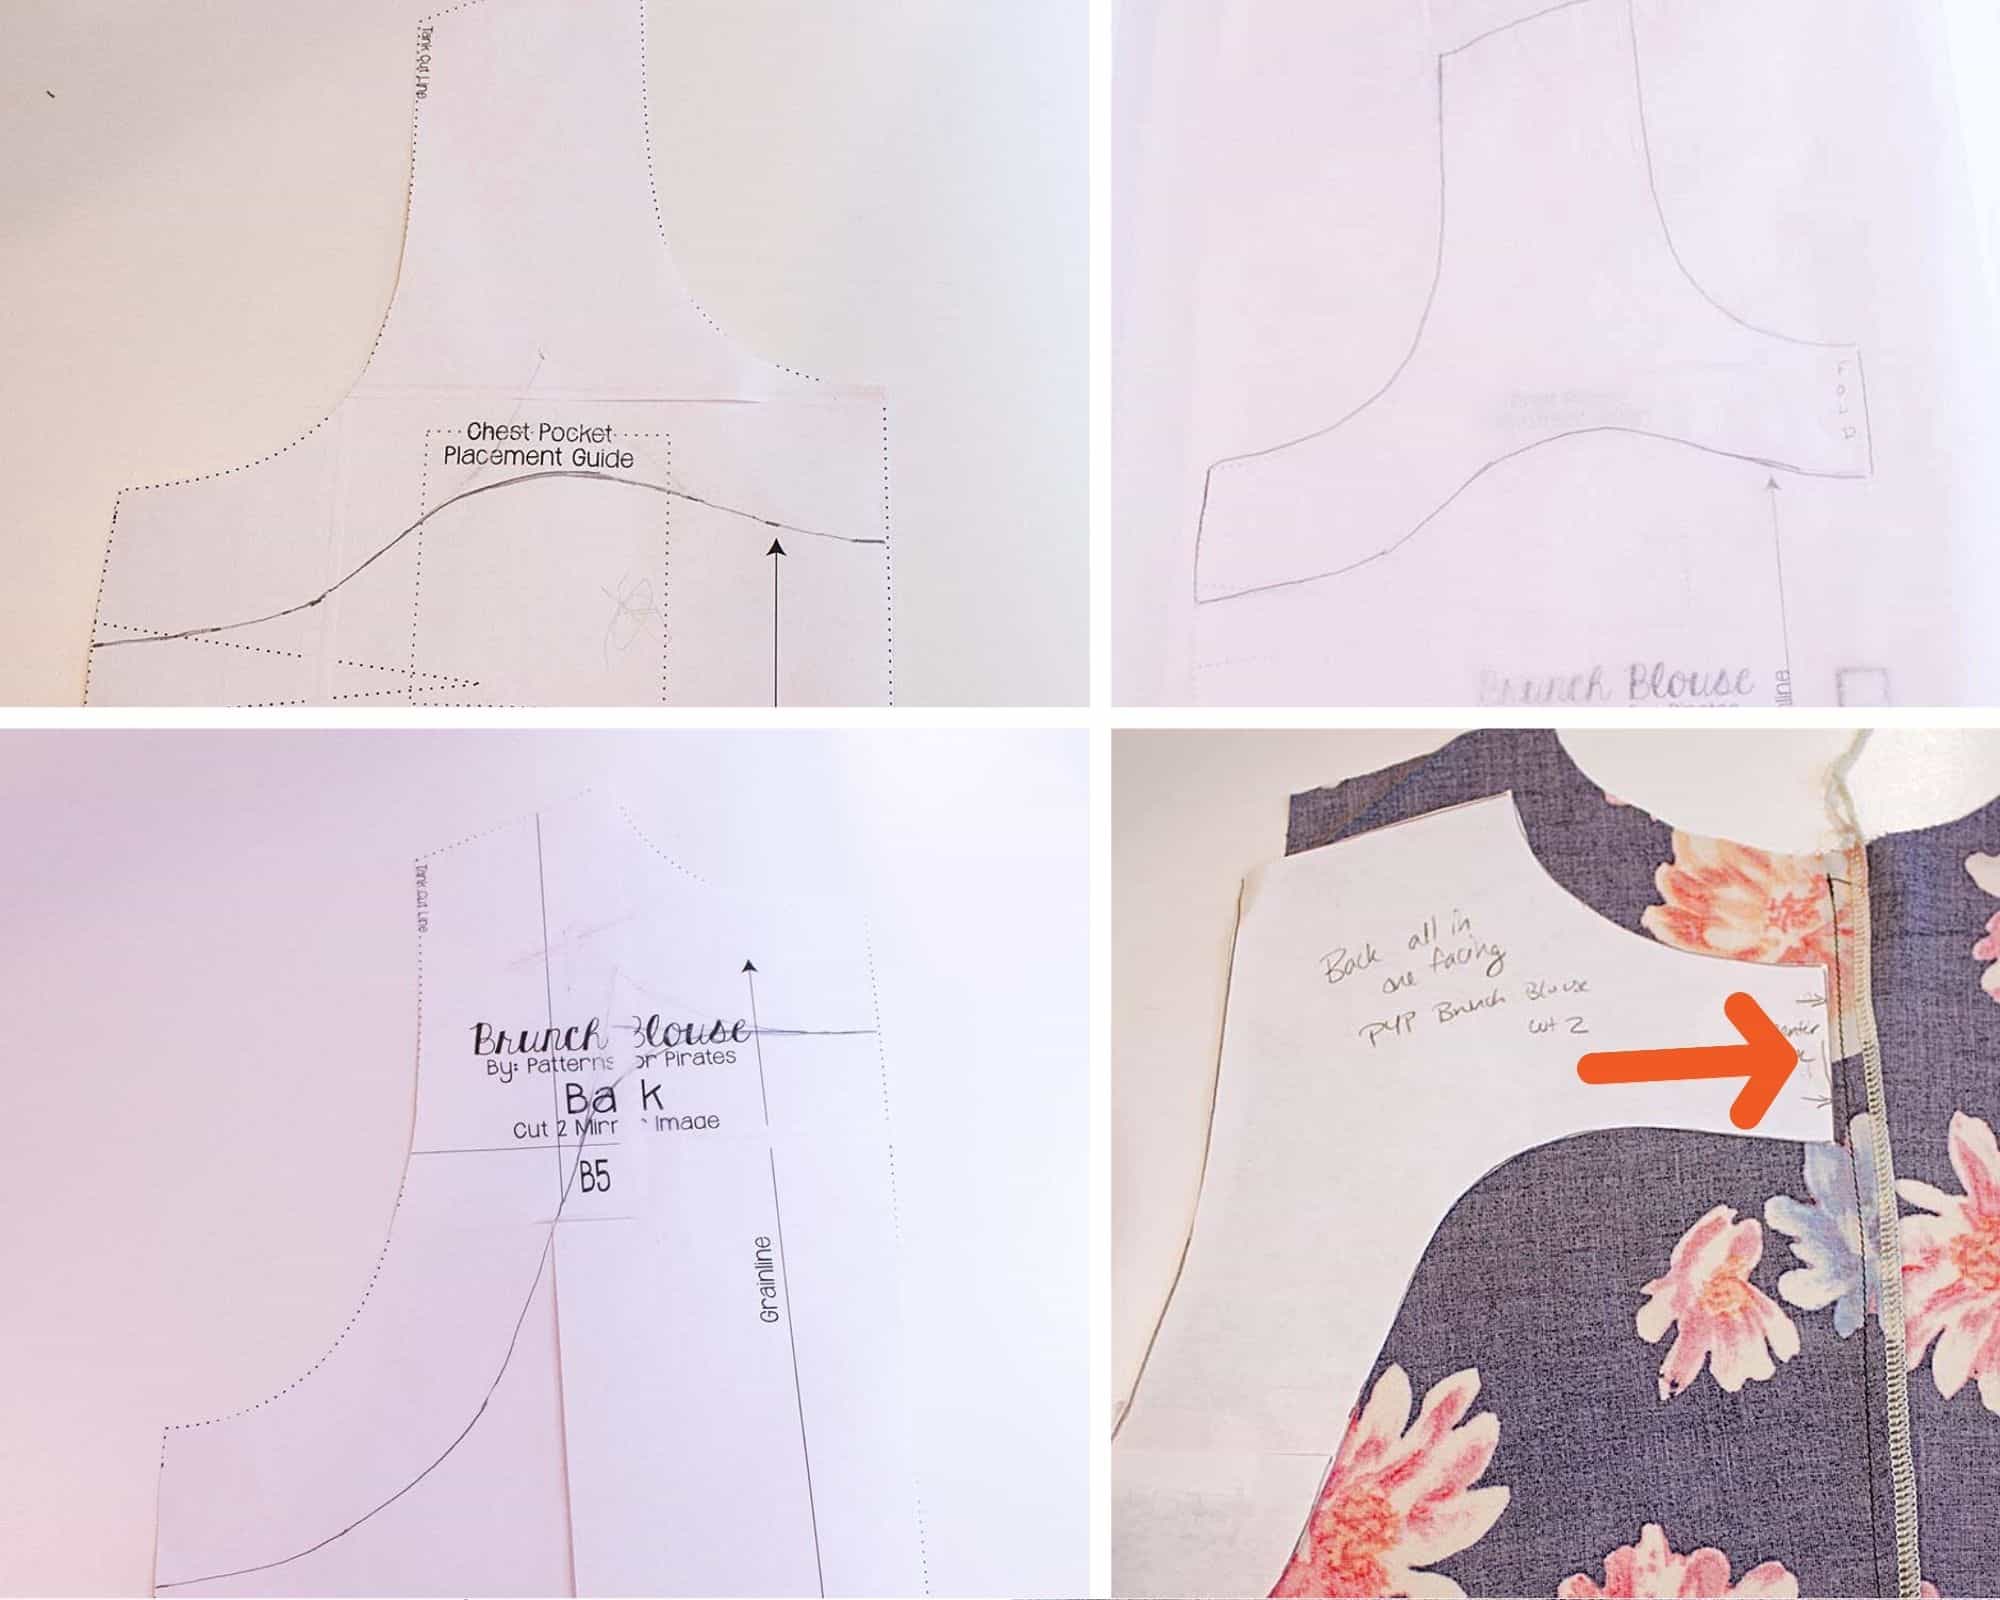
Begin by measuring 2 inches down all around the neckline of the paper pattern and placing marks. Draw a curved line to connect your markings. Trace this line, as well as the original neckline, onto your piece of tracing paper. This will now be your facing pattern piece. Repeat for the pattern back. **The Brunch Blouse uses a center back seam. To remove this in your facing, cut off 1/2 inch from the center back line on your pattern piece. Then cut the fabric on the fold at the new center back line.**
Cut your pattern pieces and facing pieces from your fabric. Make sure you are cutting your facing pieces on the fold as you would your front and back bodice pieces. Apply interfacing to the back of your facing pieces. You can leave off interfacing if you would prefer as I did in this knit pajama top. Make sure you use knit interfacing if applying to a knit garment.
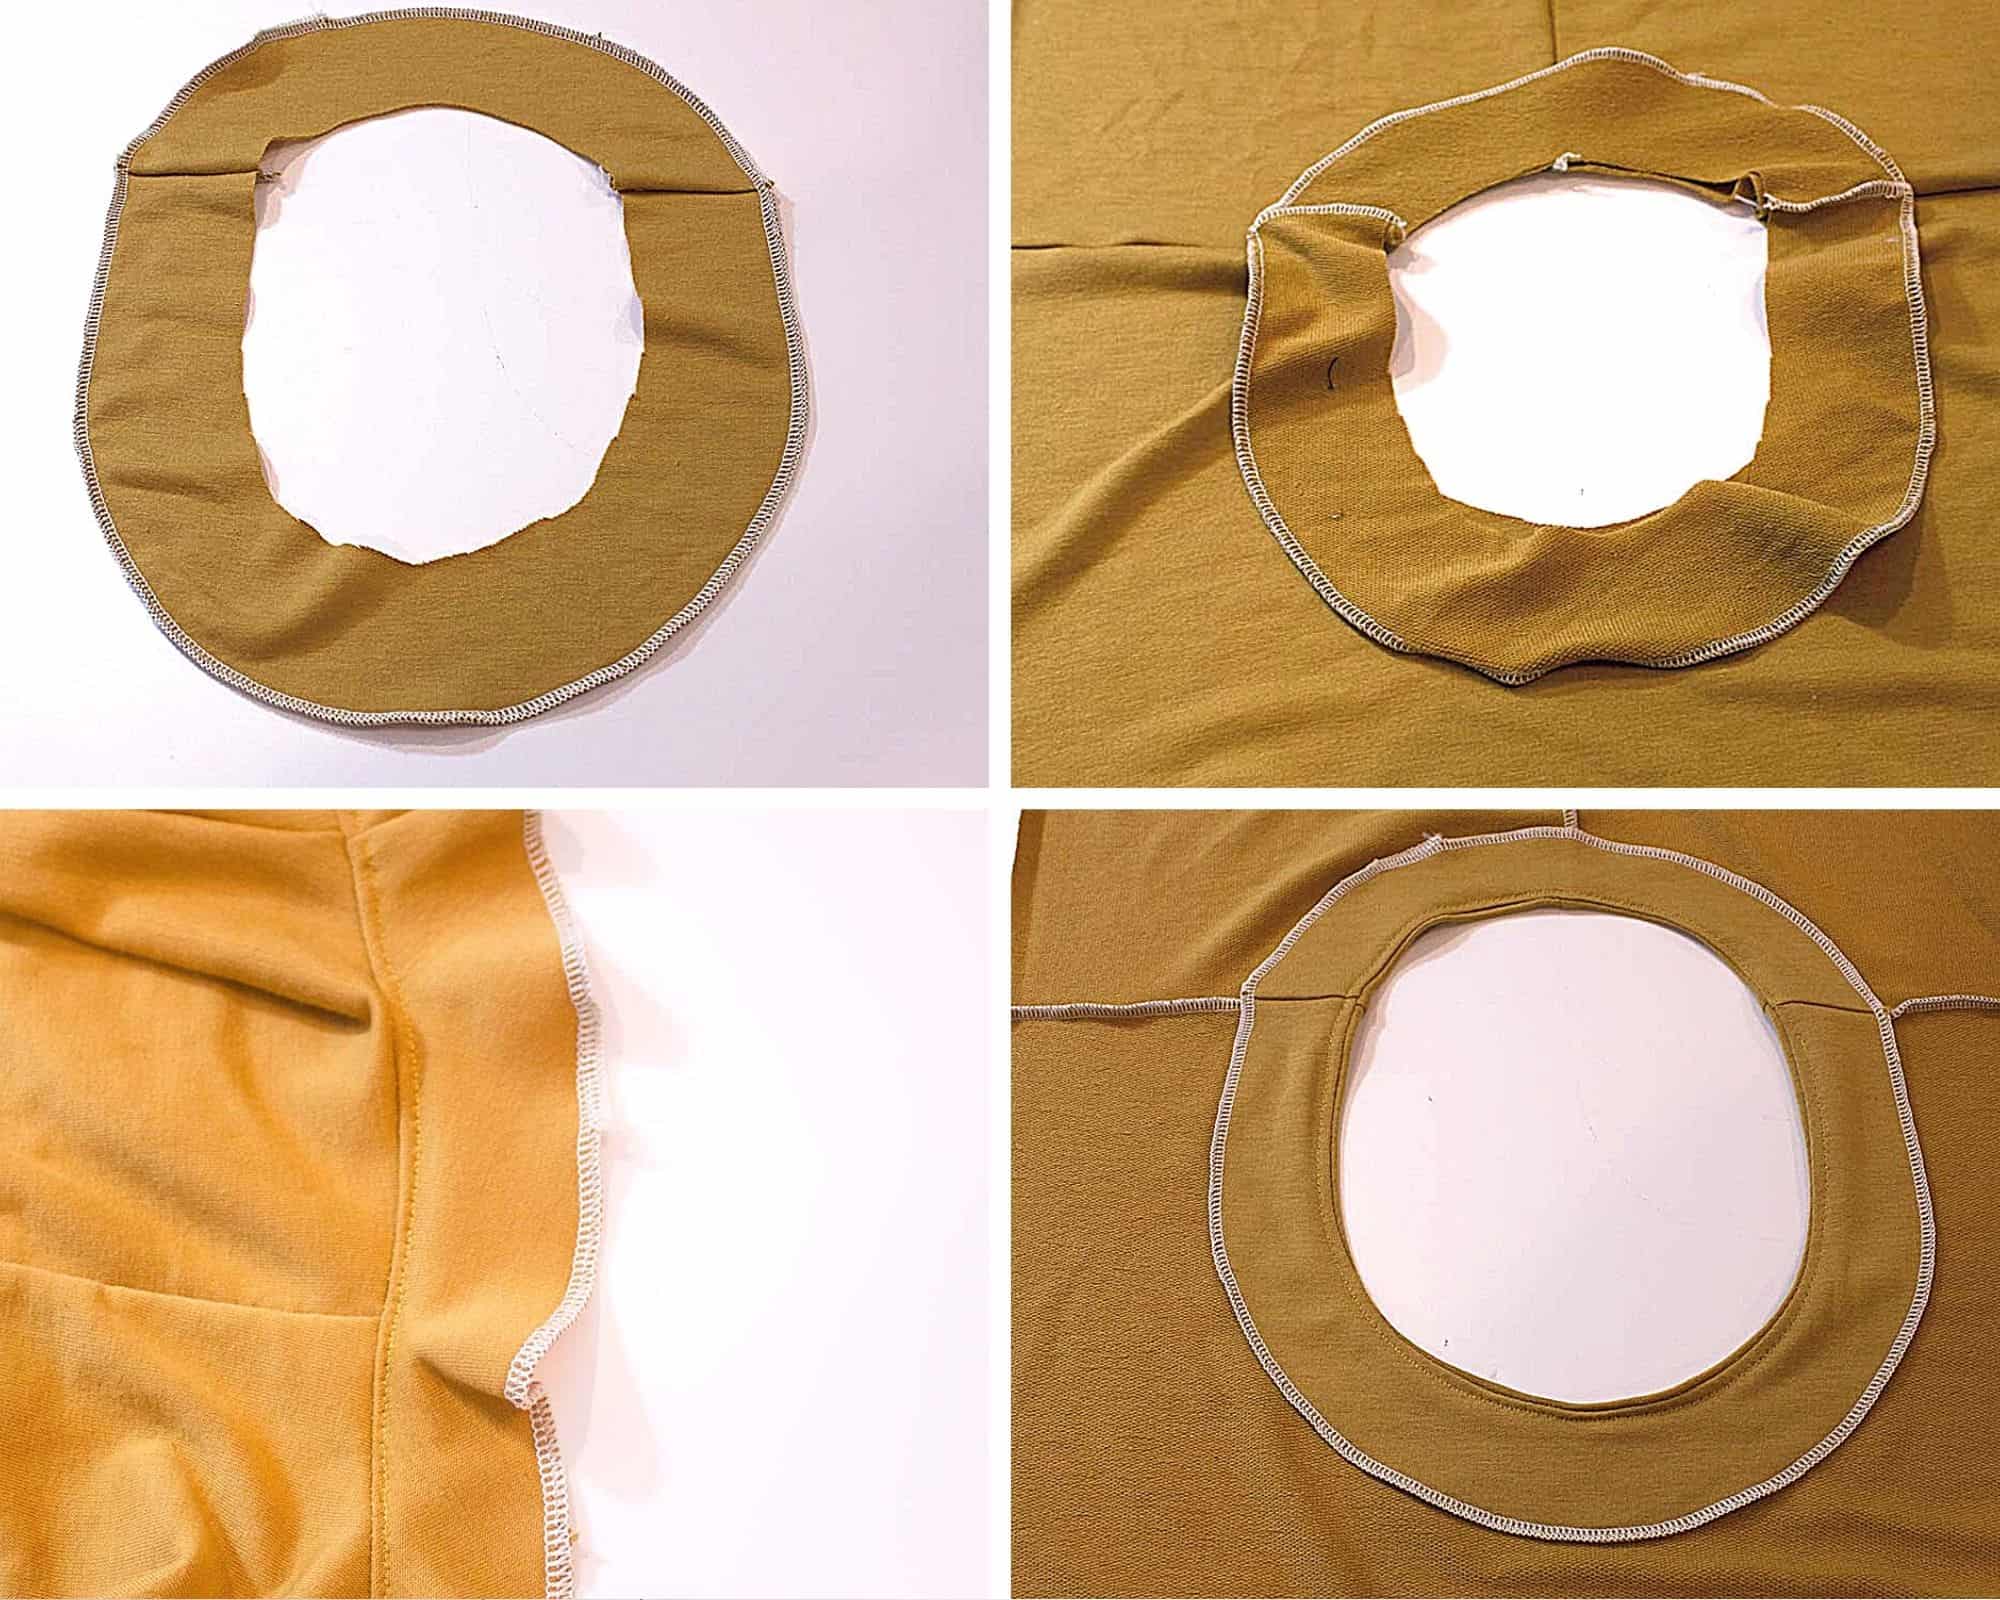
Sew the shoulder seams for your front and back bodice as well as the front and back facings. Press the seams open. Finish the outside edge of your facing with your serger, an overlock stitch on your machine, or your preferred finish. Place the bodice right sides out and mark the quarter points with pins. Repeat with your facing. Match your facing and bodice, right sides together at pins. Stitch together at 1/4 inch using a long stretch stitch for knit garments. **Note this will finish the neckline at 1/4 inch lower than if you were to use a band. If you do not want a deeper neckline, make sure you add the additional 1/4 inch to the neckline during the tracing stage**
Press the seam allowance towards the facing. Understitch. (See this tutorial for help with understitching) Fold the facing to the inside of the garment and press well. You can now topstitch along the facing edge or simply tack the facing down at the shoulder seams for a cleaner finish.
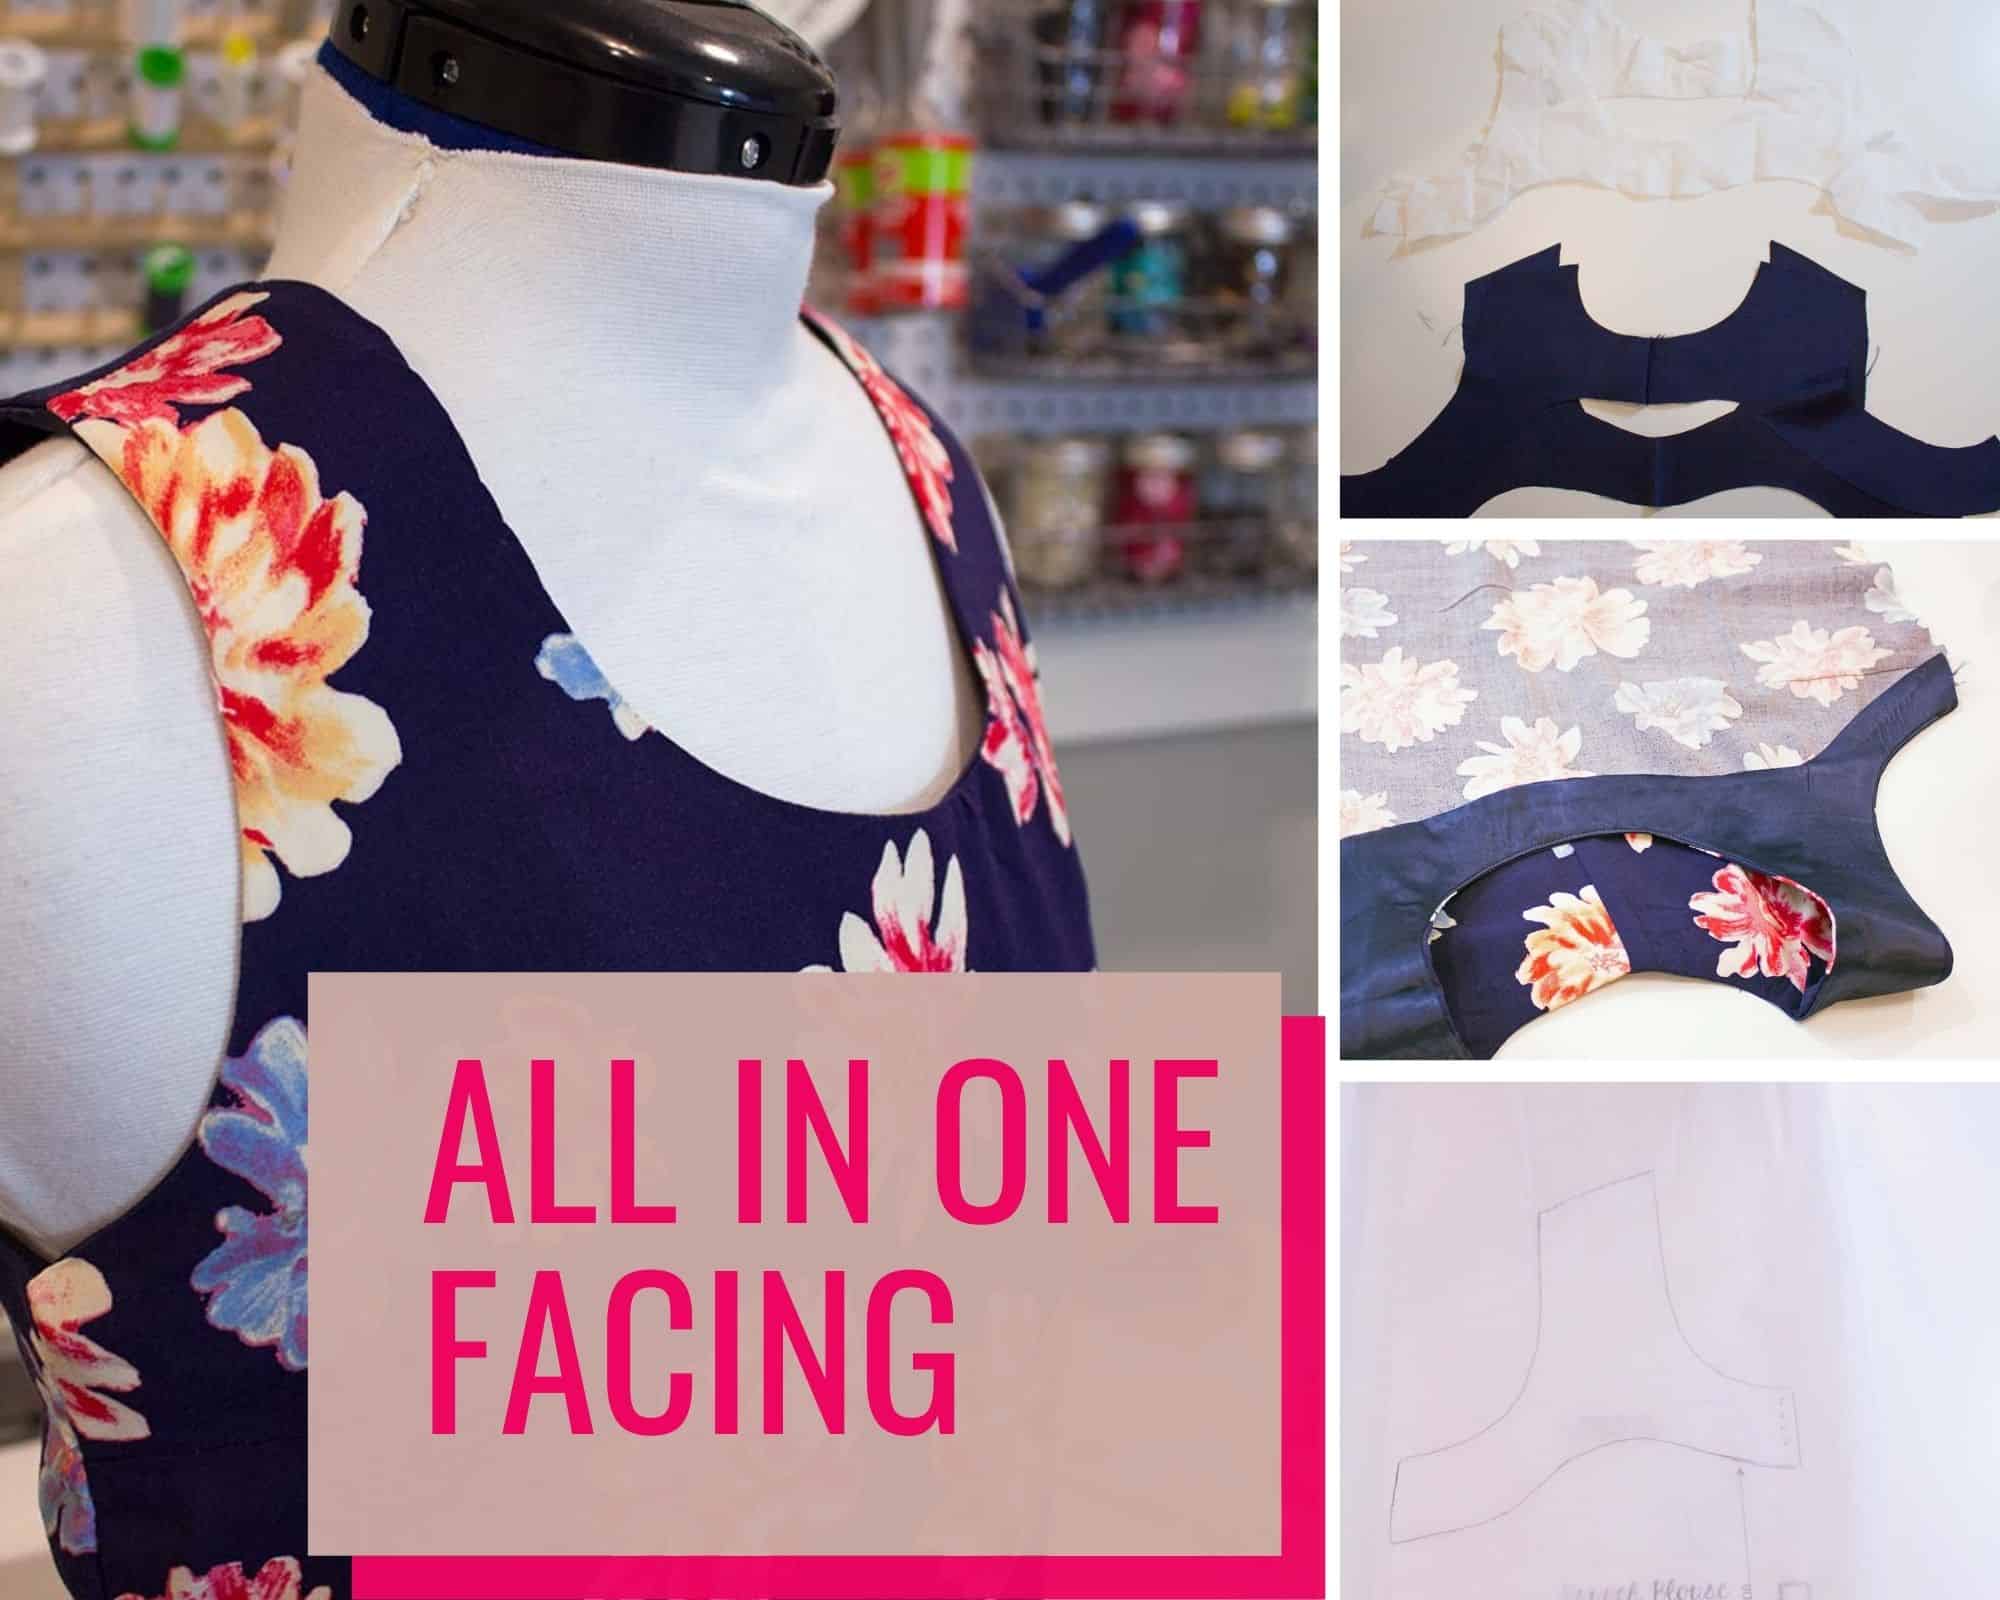
ALL IN ONE FACING
An all-in-one facing is a great way to create a clean finish on your sleeveless tops. This will create a finished edge on both the neckline and armholes using one piece. Here is how you can create this facing using the P4P Brunch Blouse.
Begin by marking two inches down from the underarm seam and make a mark on your pattern. Continue marking two inches down around the arm and neckline edges, creating a soft curve to bridge the two areas. See the pictures below for how I marked both the front and back bodices. Trace this new facing piece onto tracing paper using your marks and the original pattern lines at the shoulder, neck, and arms.
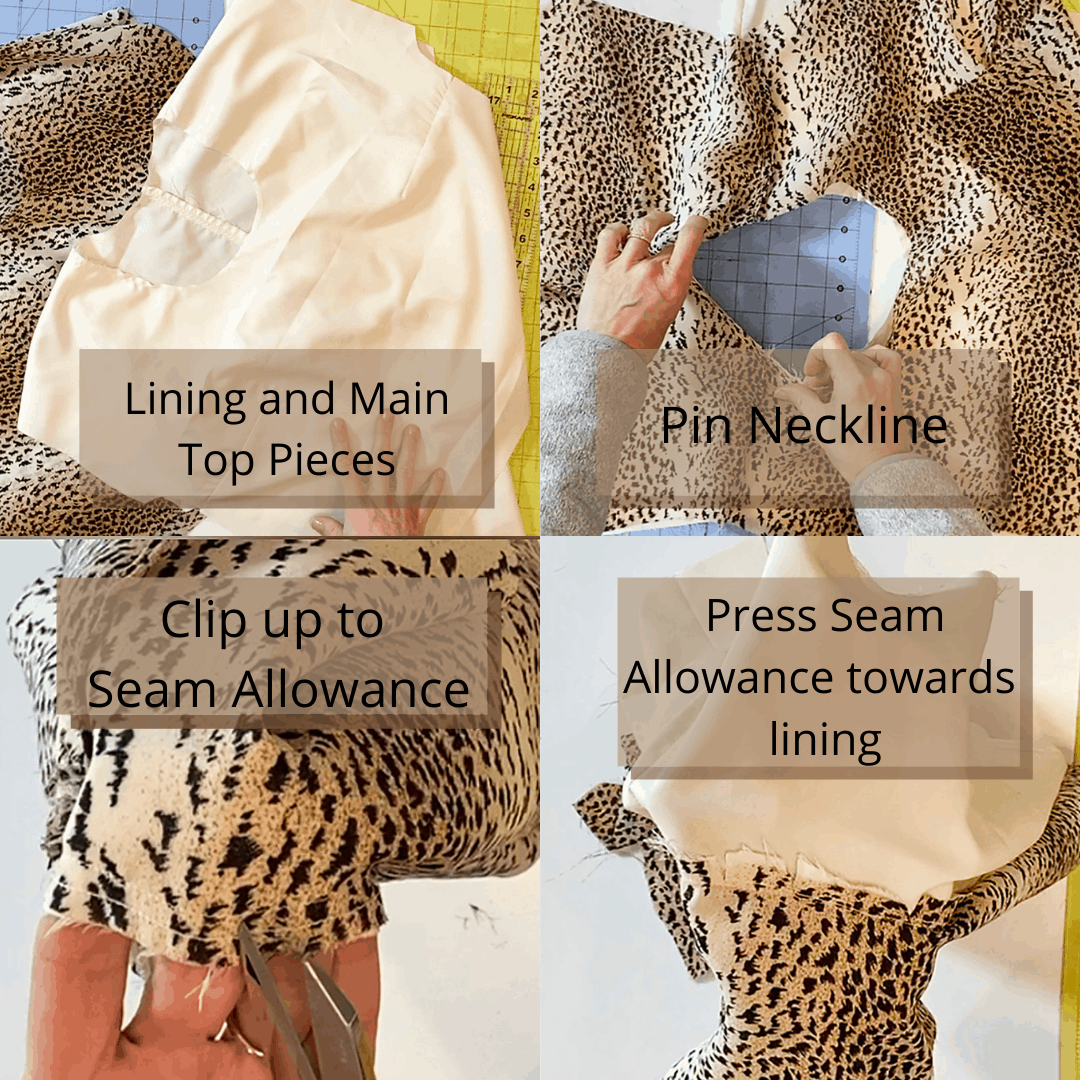
Cut your pattern pieces as well as facing pieces from your fabric. Cut your facing pieces from interfacing as well. Sew your bodice together at the shoulders only and center back if you are using the Brunch Blouse. For this facing technique, we will be using our interfacing to create the clean finished edge– the steps will look slightly different from the neckline facing tutorial above. Feel free to use either method on your facings.
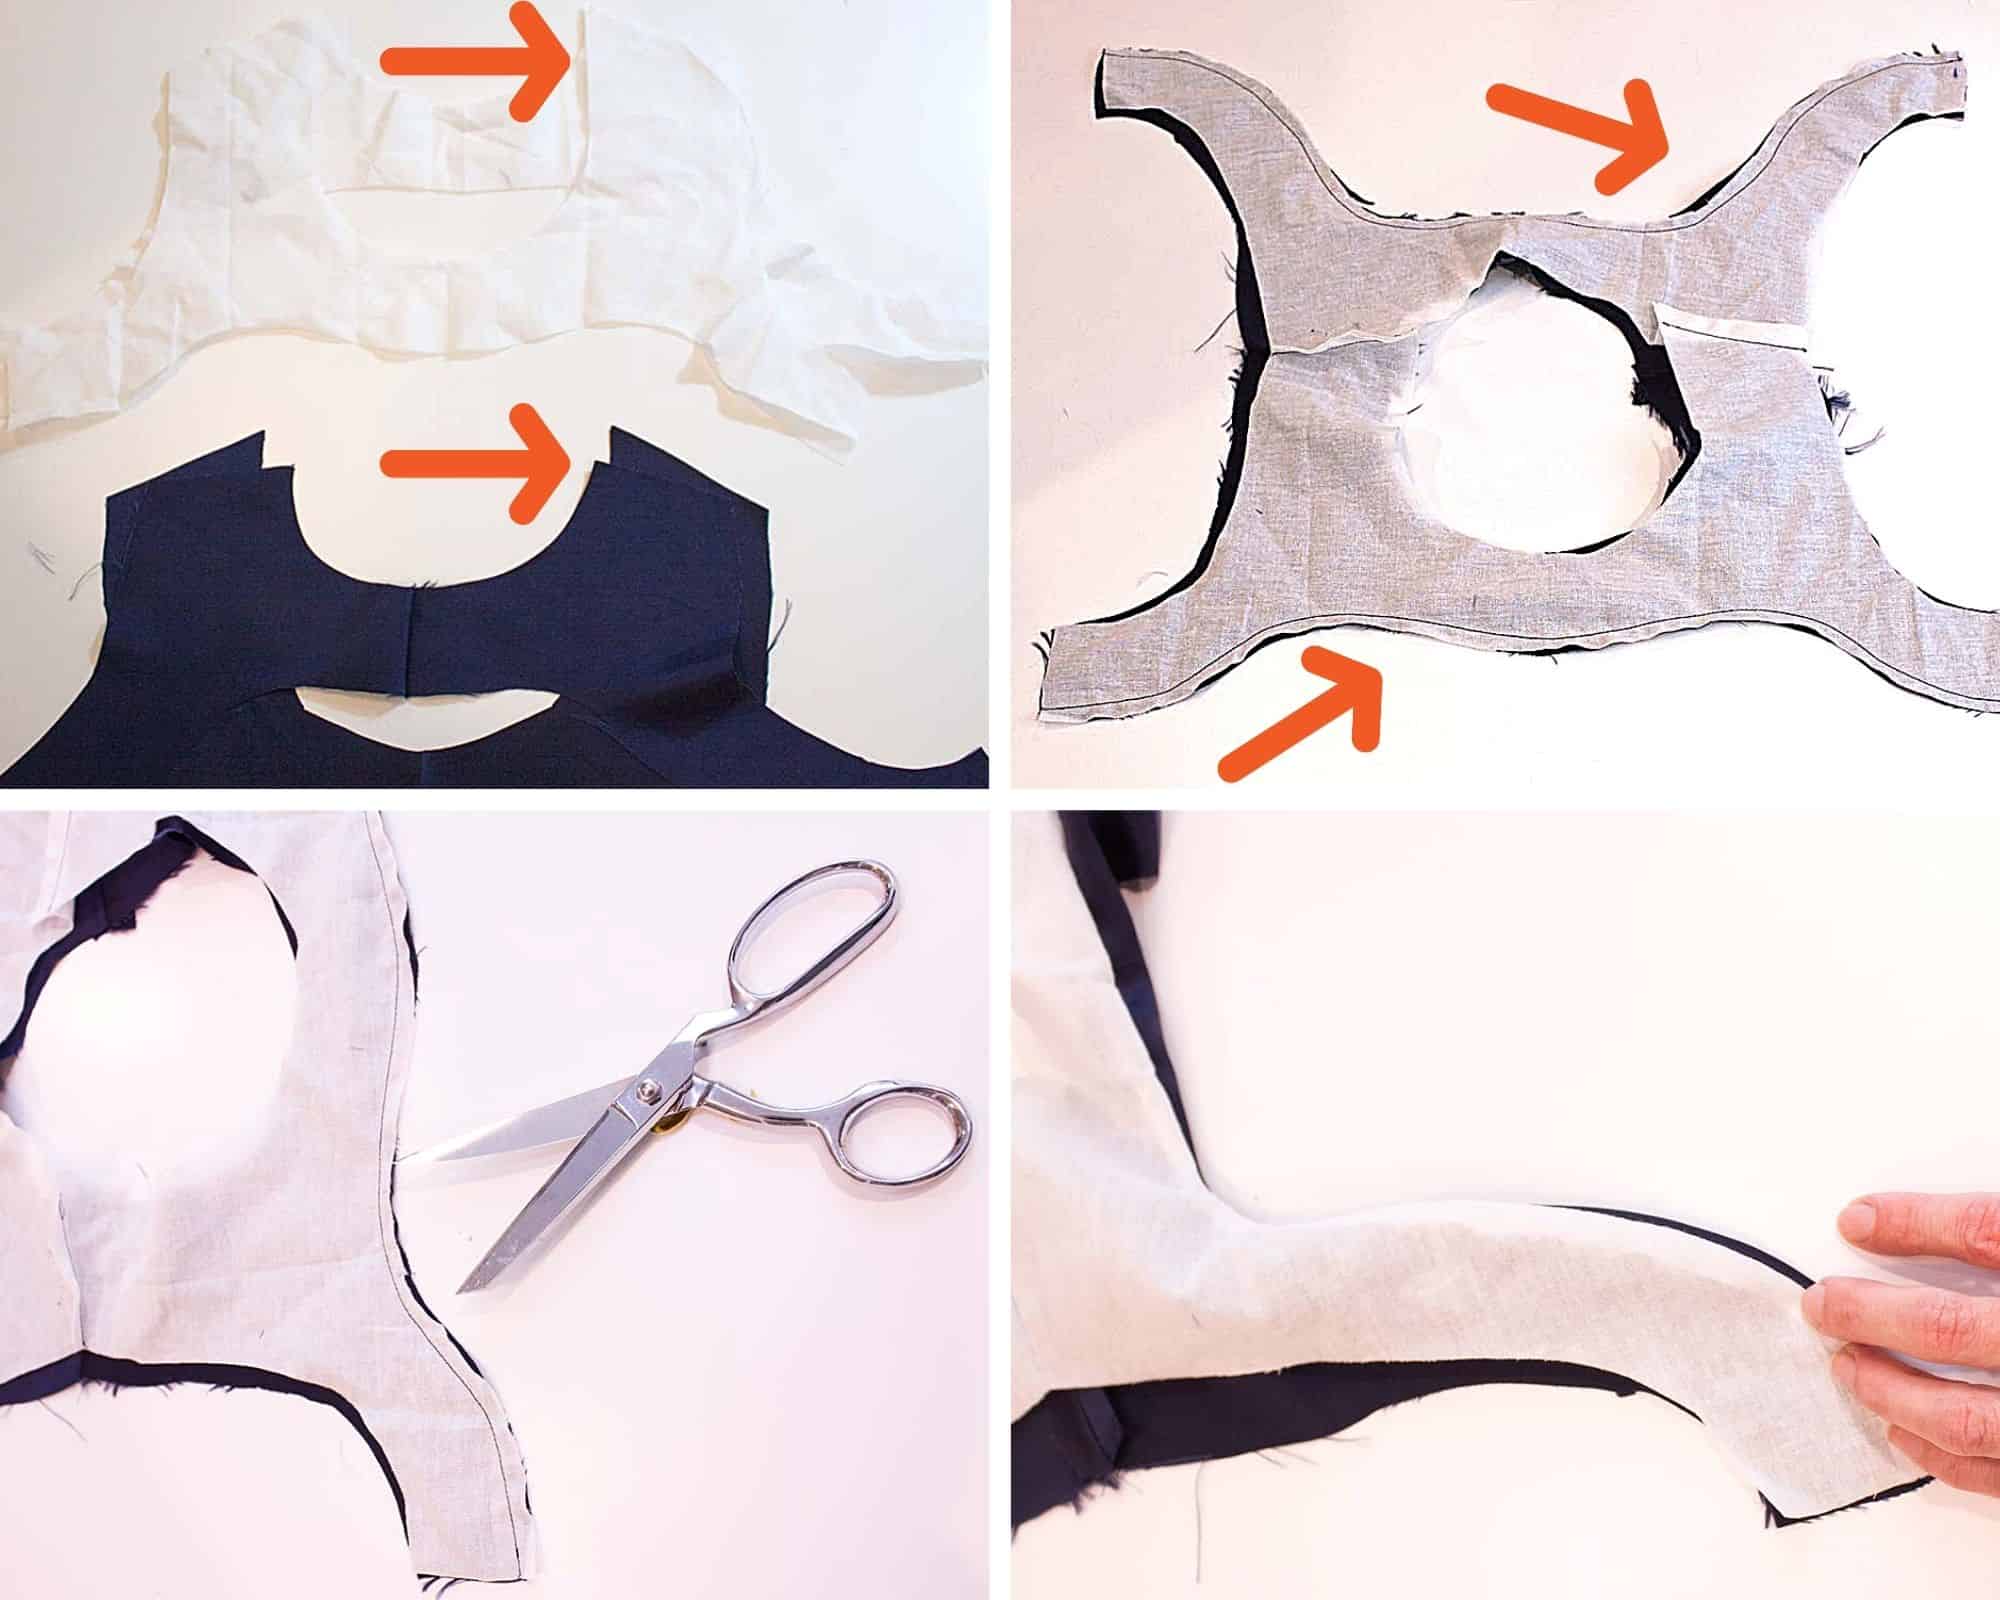
Sew only the shoulder seams on BOTH the facing pieces and the interfacing pieces- DO NOT FUSE the interfacing yet. Next, sew the interfacing to the facing, right sides together, along the outside curved edges using a 1/4 inch seam allowance. Clip the seam allowances around the curves. Finally, turn the interfacing and facing, right sides out. Your fusible side should now be facing the wrong side of the facing. Carefully align the pieces and press well. This will now give you a clean, finished edge along your facing without having to use your serger or machine.

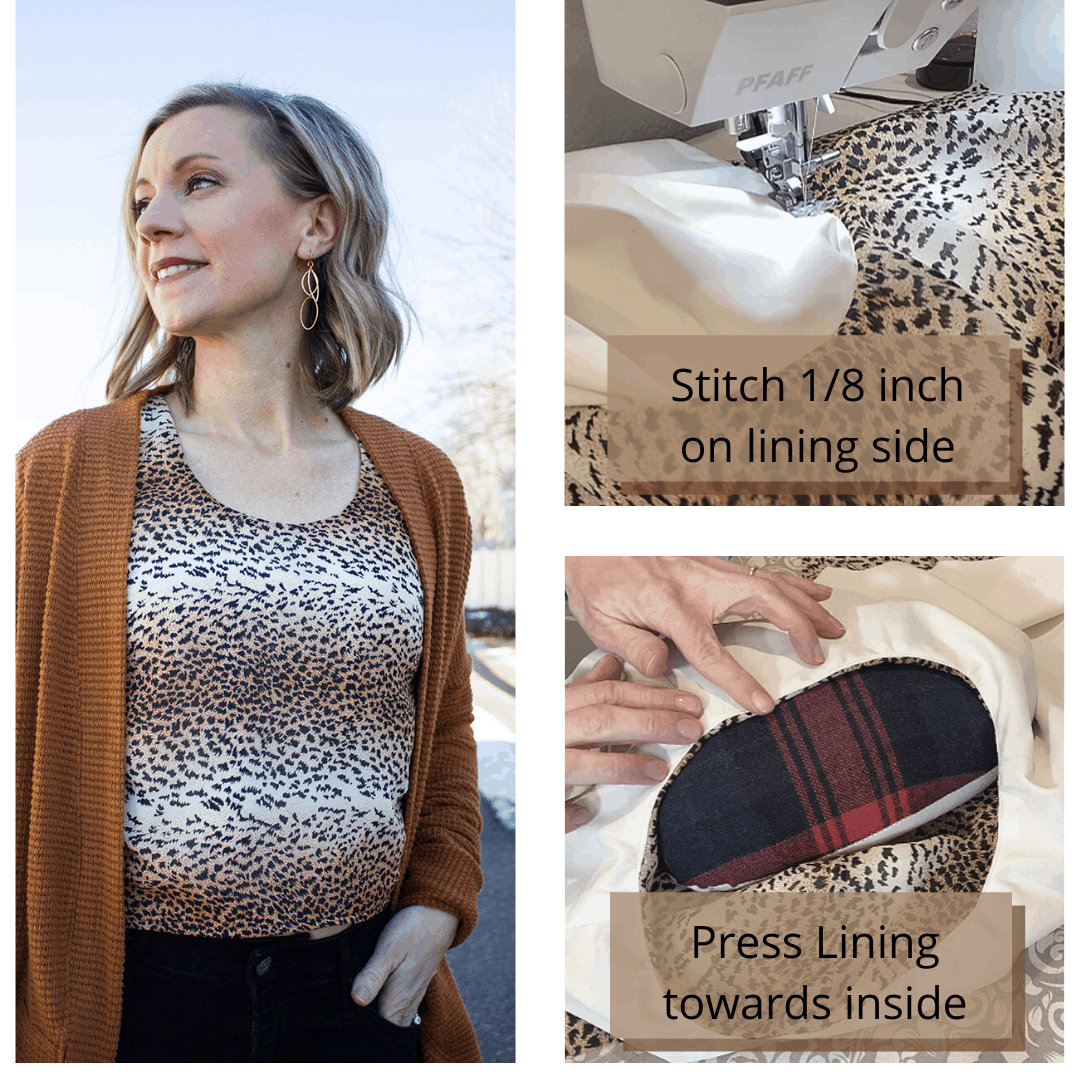
Next, lay the bodice right sides out, flat on the table. Lay the facing on top, right sides together. Match all seams and pin around the neckline. Stitch with 1/4 inch seam allowance, then clip and grade seam allowance. Press seam allowance towards facing and understitch at the neckline. Once the neckline is done, turn the garment right side out and lay flat. Roll one side of the bodice in a tight roll towards the opposite shoulder seam. Wrap shoulder seam fabric around the rolled fabric, pinning right sides together. Stitch with a 1/4 inch seam, being careful to not catch rolled fabric while stitching. Carefully pull the fabric through the opening and understitch as far as possible on each side of the armhole. Then repeat on the opposite side.
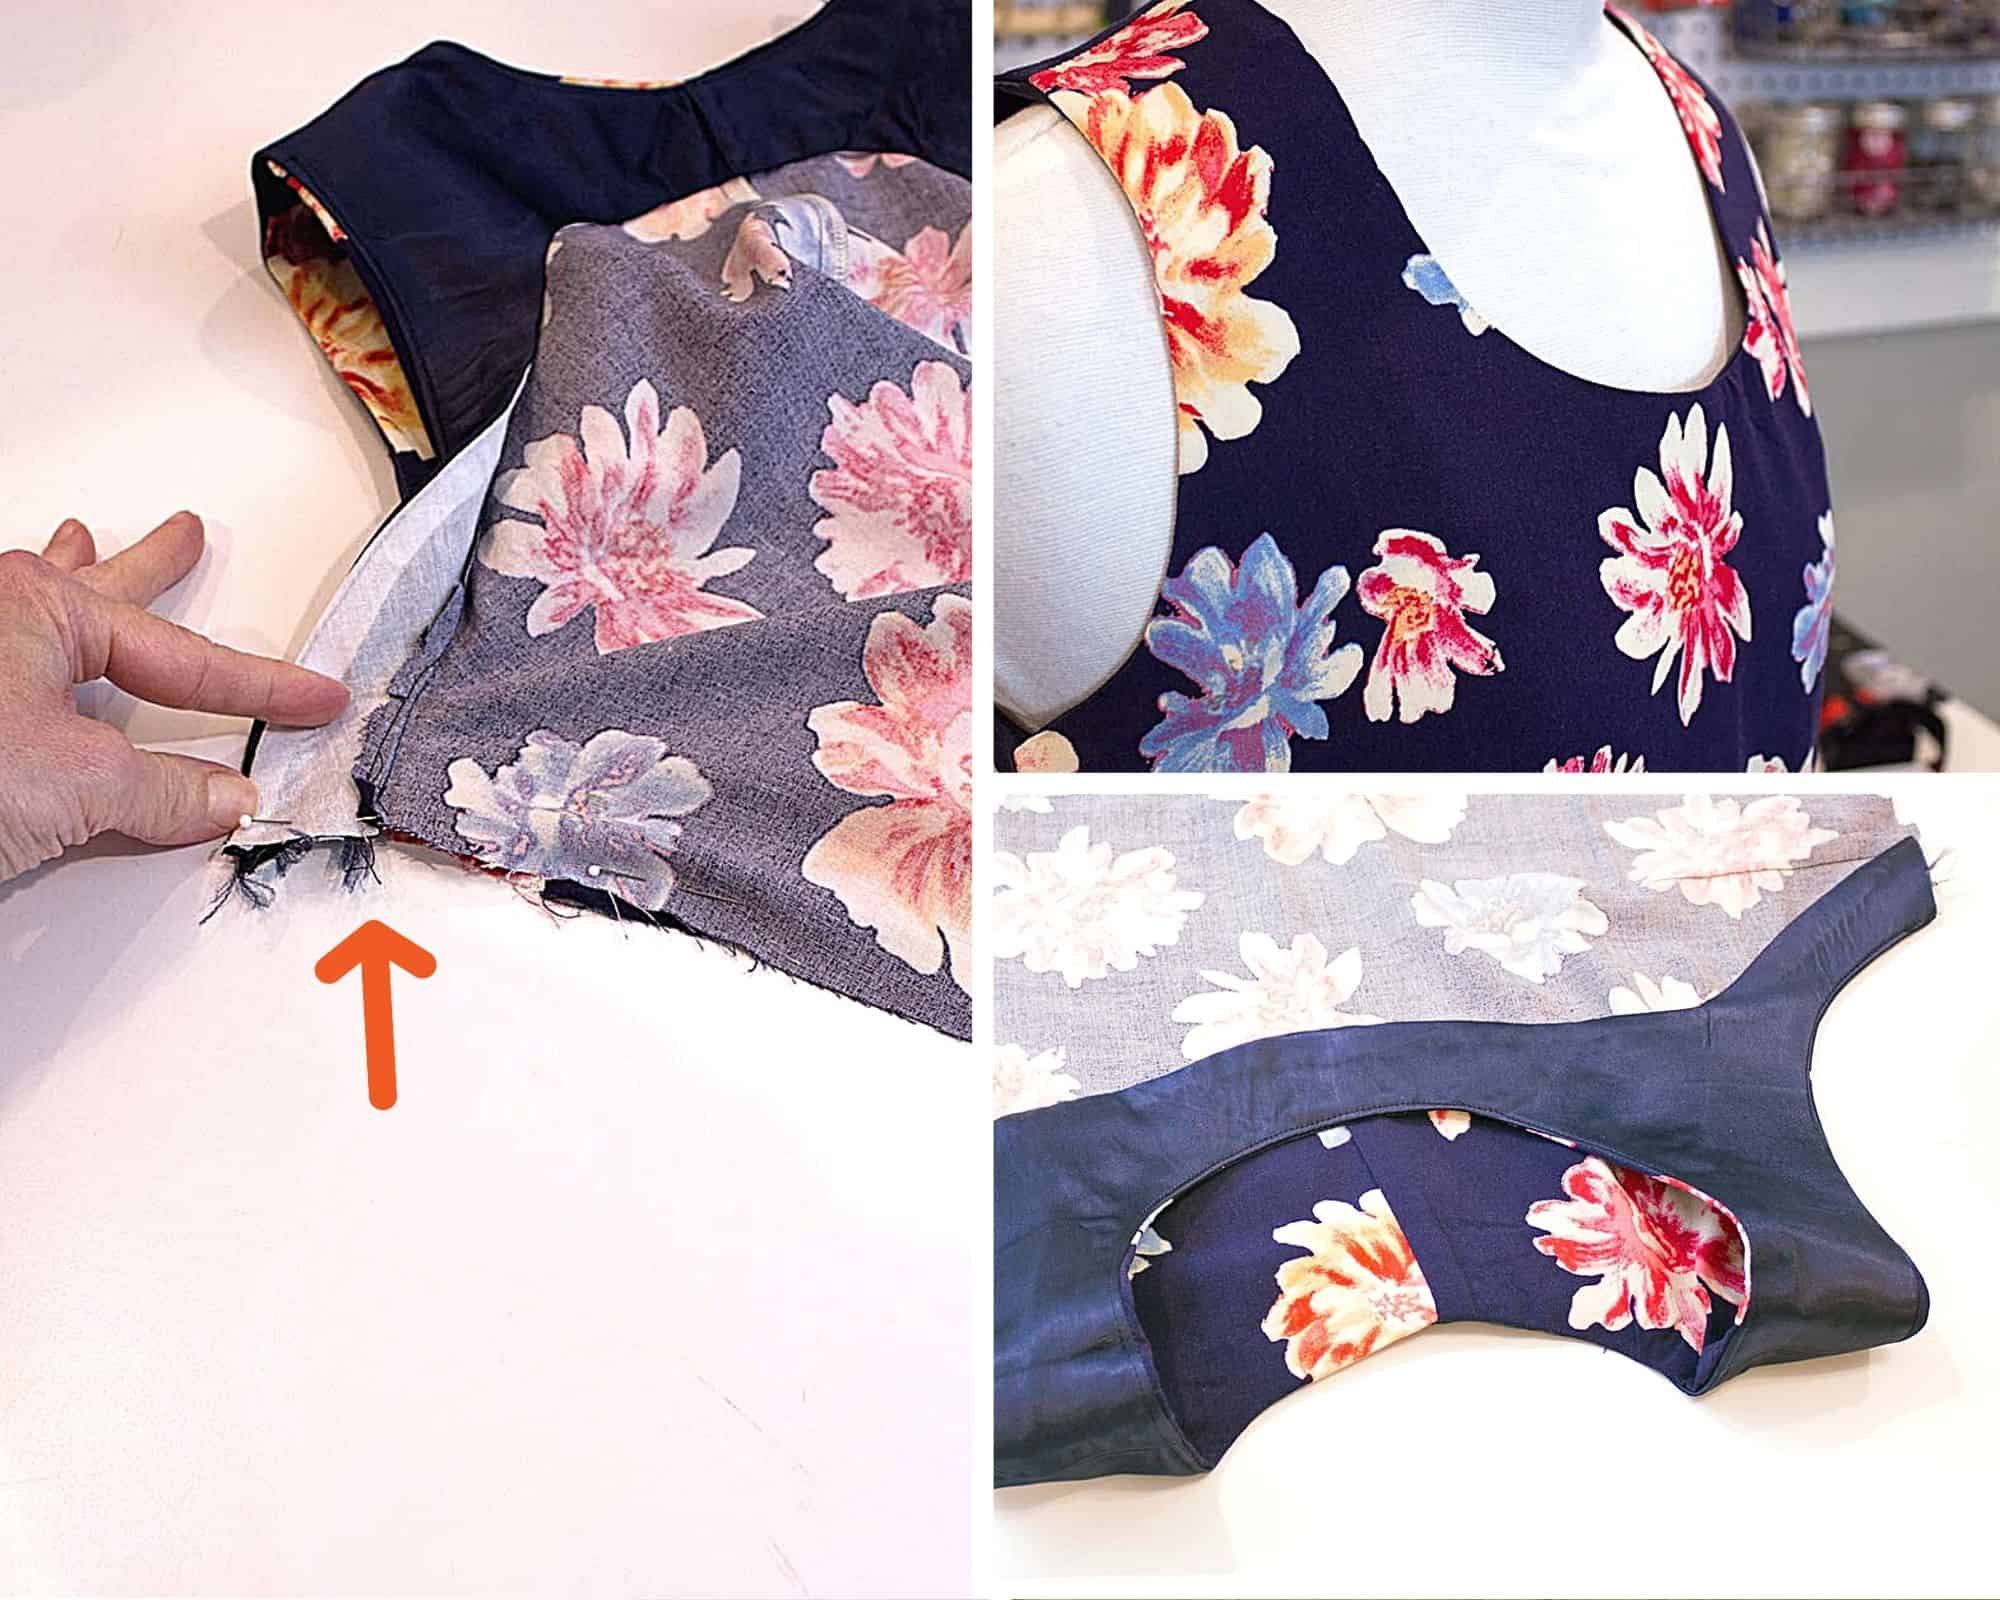
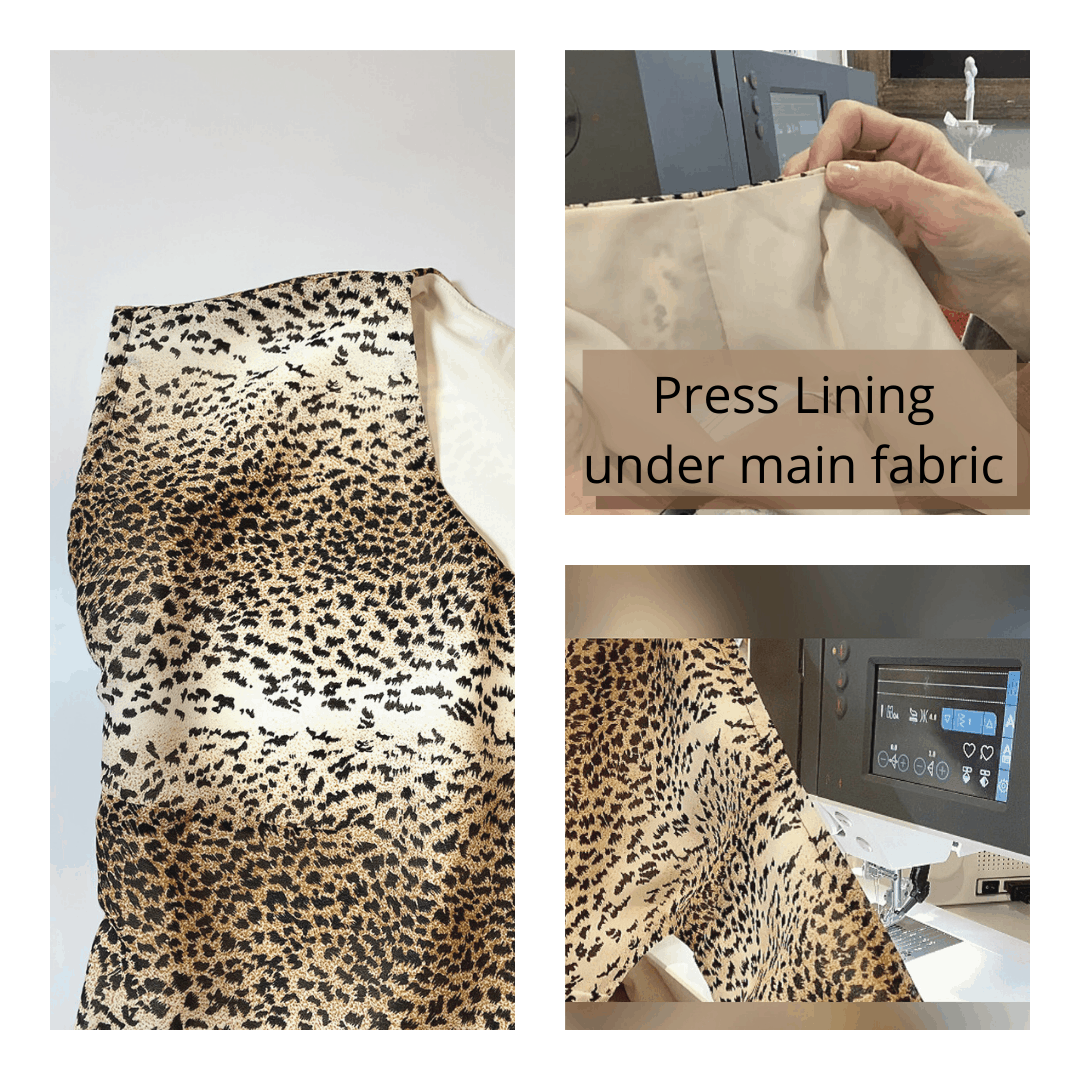
Fold facing up away from the underarm, match seams and stitch the side seams per the pattern. Trim away any bulk and fold seam allowance back down. Tack at underarm. Repeat on other side. The all-in-one facing is now complete. Finish the top per the pattern instructions.
HEM FACING
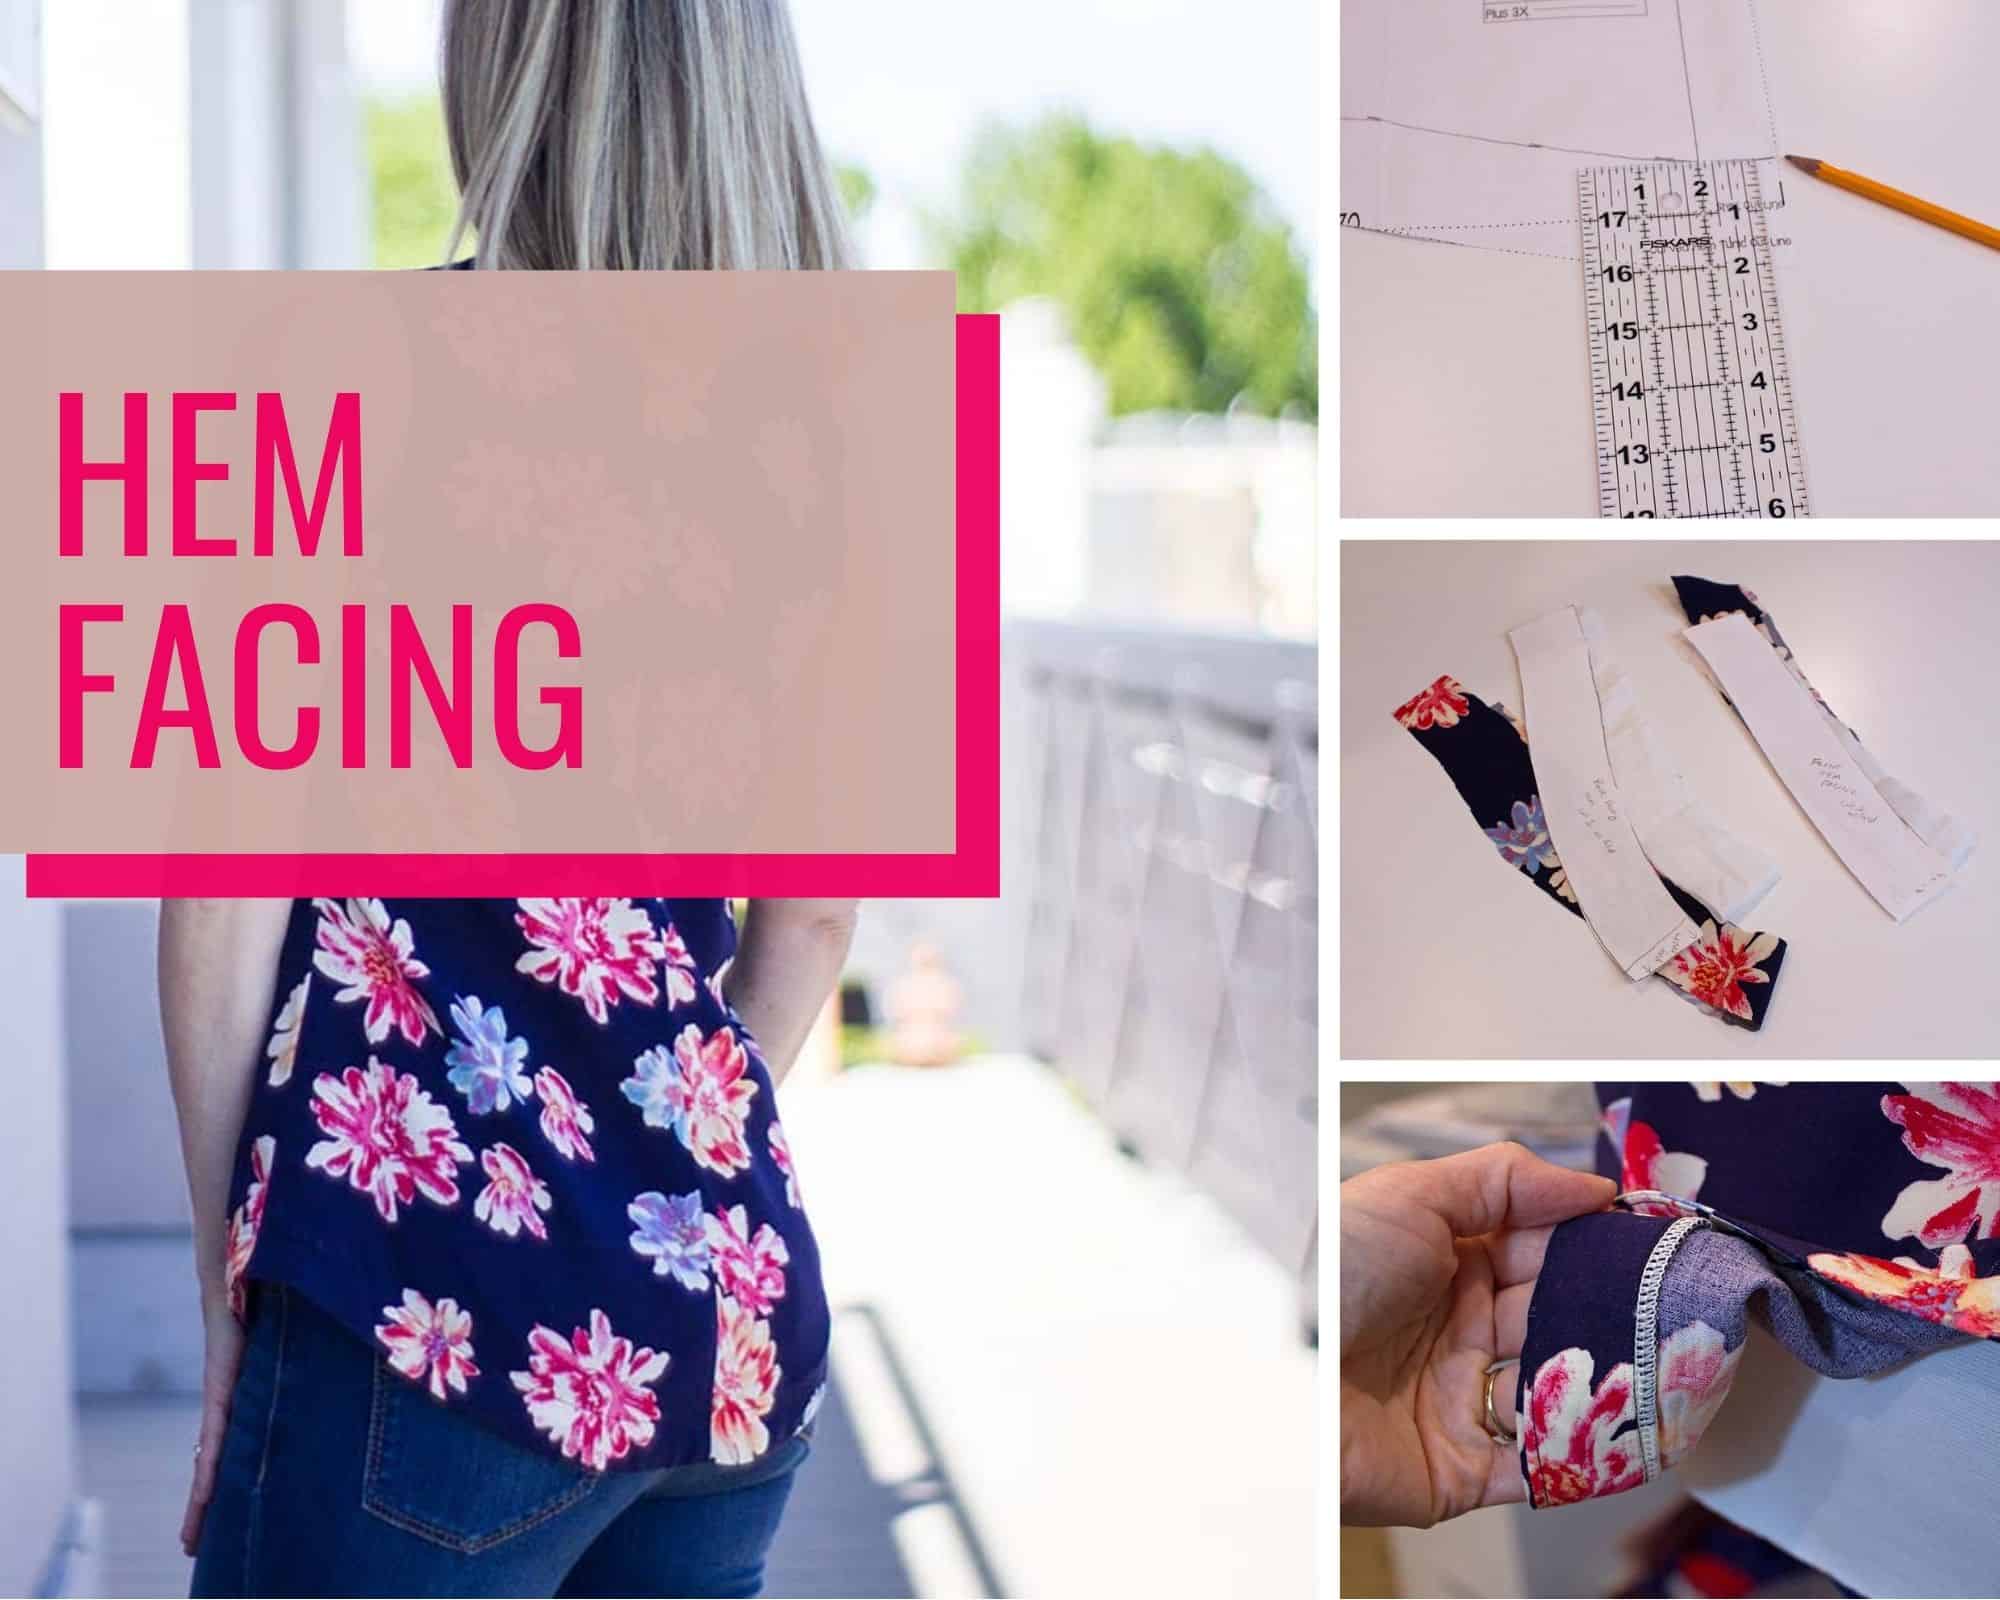
The final type of facing I will show today is the hem facing. This simple finish is helpful when creating a curved hem like the Brunch Blouse.
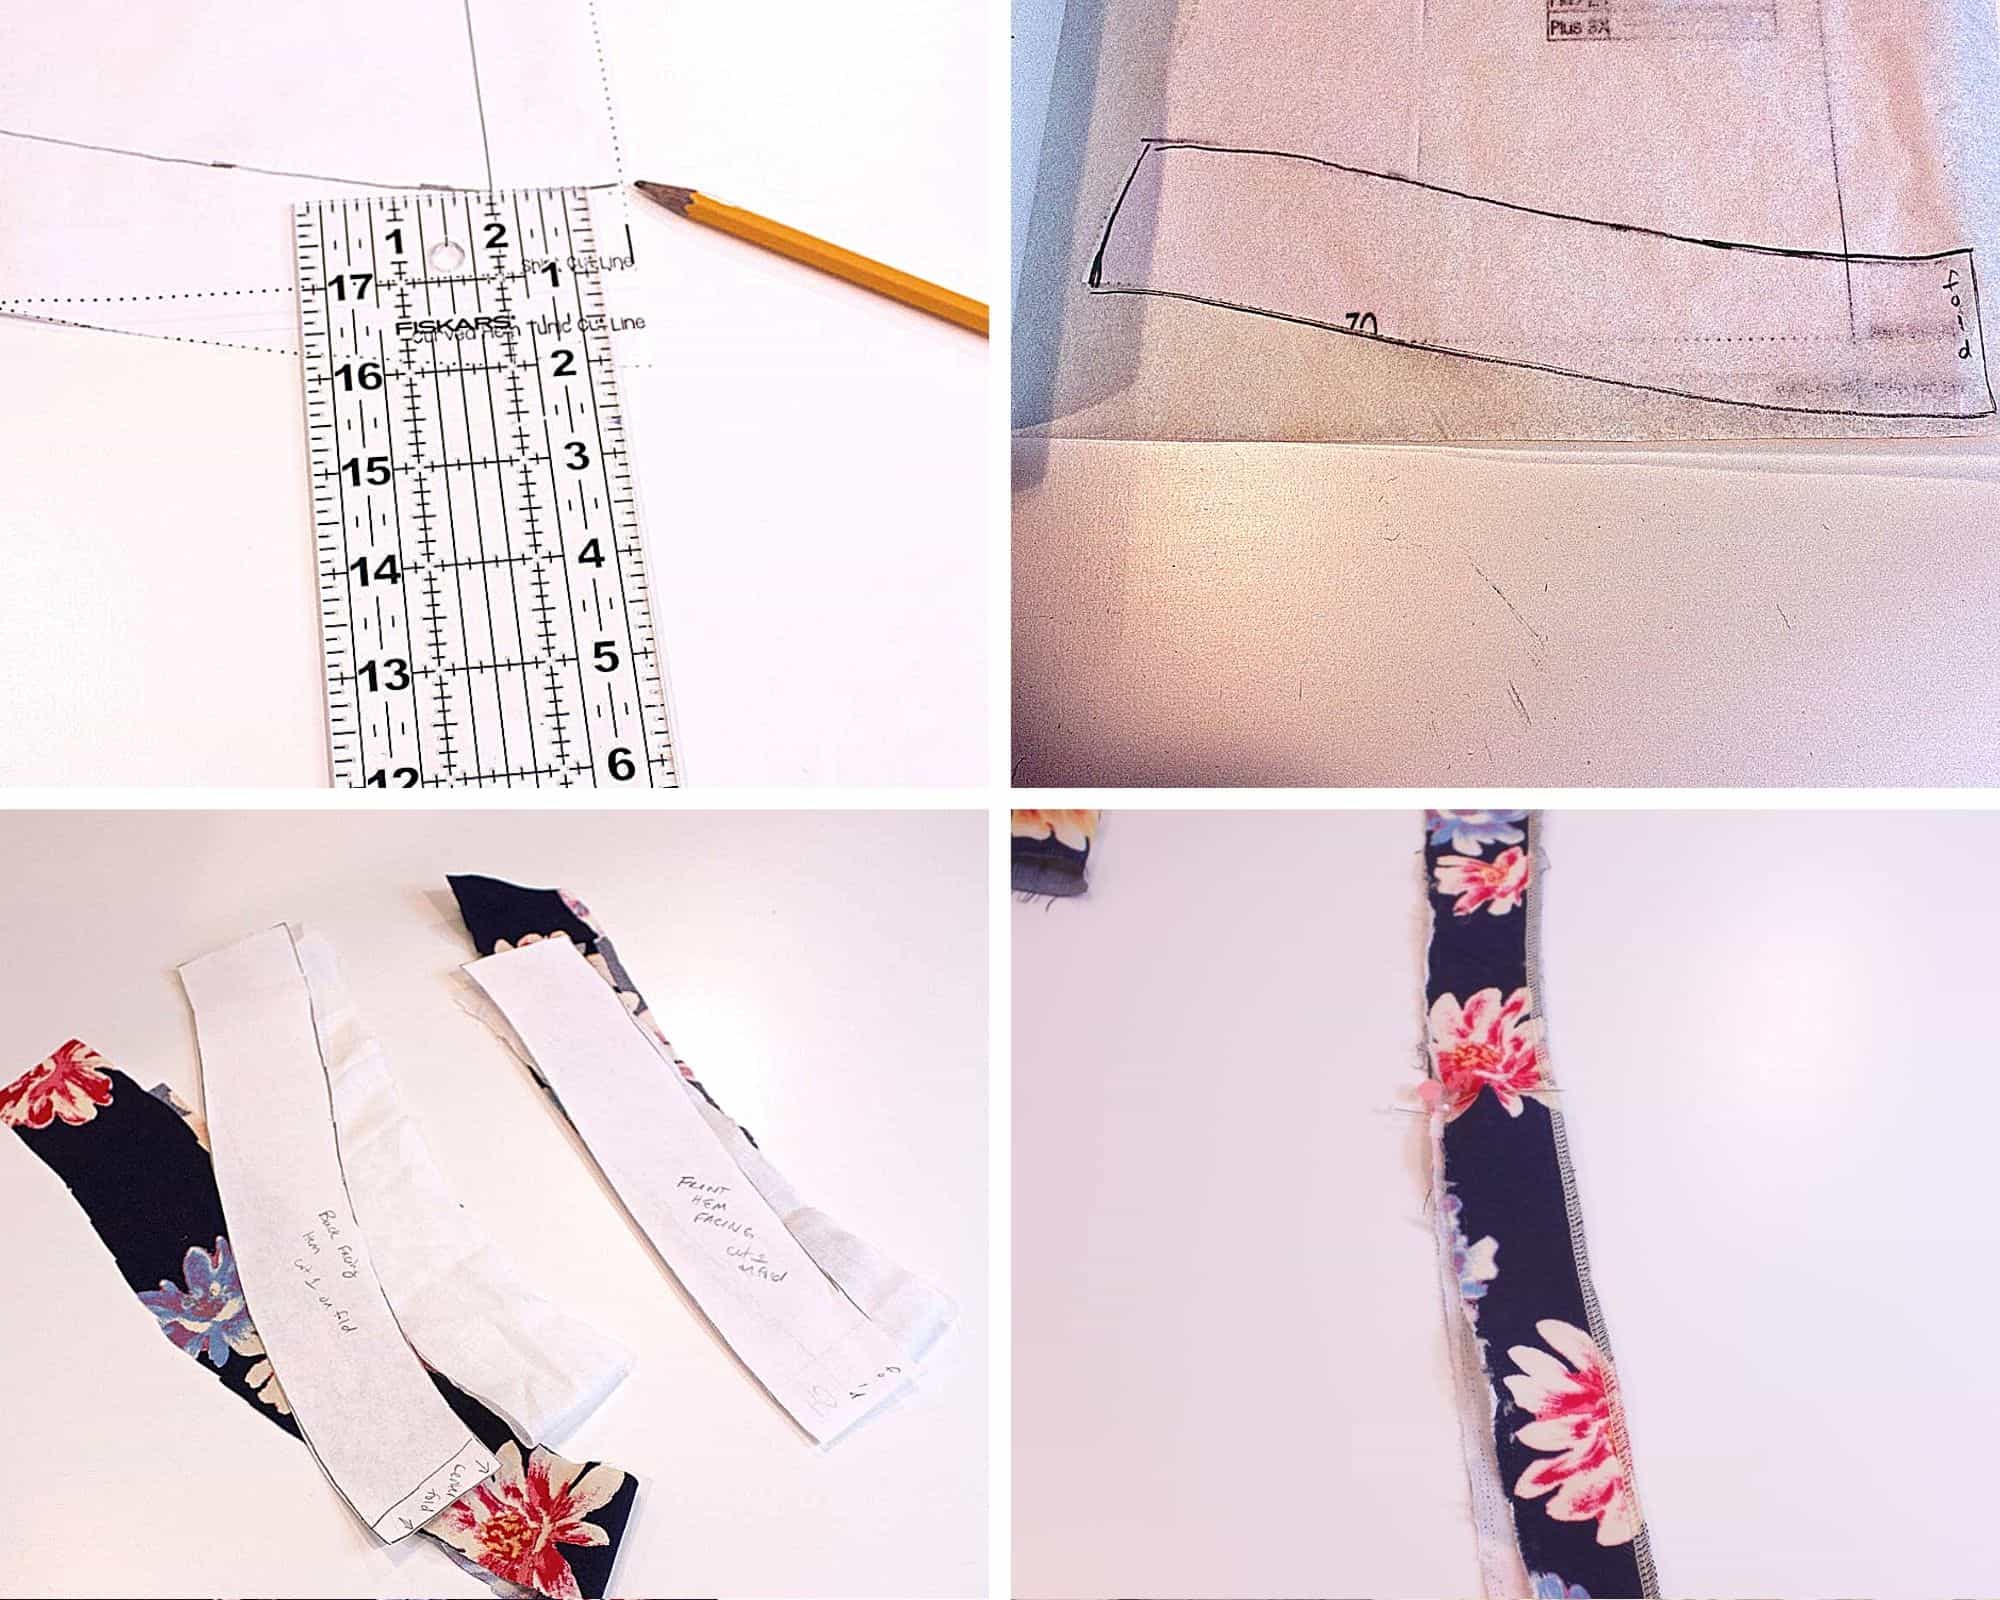
To create the hem facing pattern pieces, take your front and back bodice pieces and mark 2 inches from the bottom edge working from side seam to center. Make sure to mark your fold line and trace your facing piece onto paper. Cut one front and back facing from fabric and interfacing. Fuse the interfacing to the back of the facing pieces. Sew the side seams of your facing and finish the narrow side of the facing. (Make sure you are finishing the top of your pattern piece and not the bottom edge. Otherwise, your piece will not fit inside your garment without bunching.)
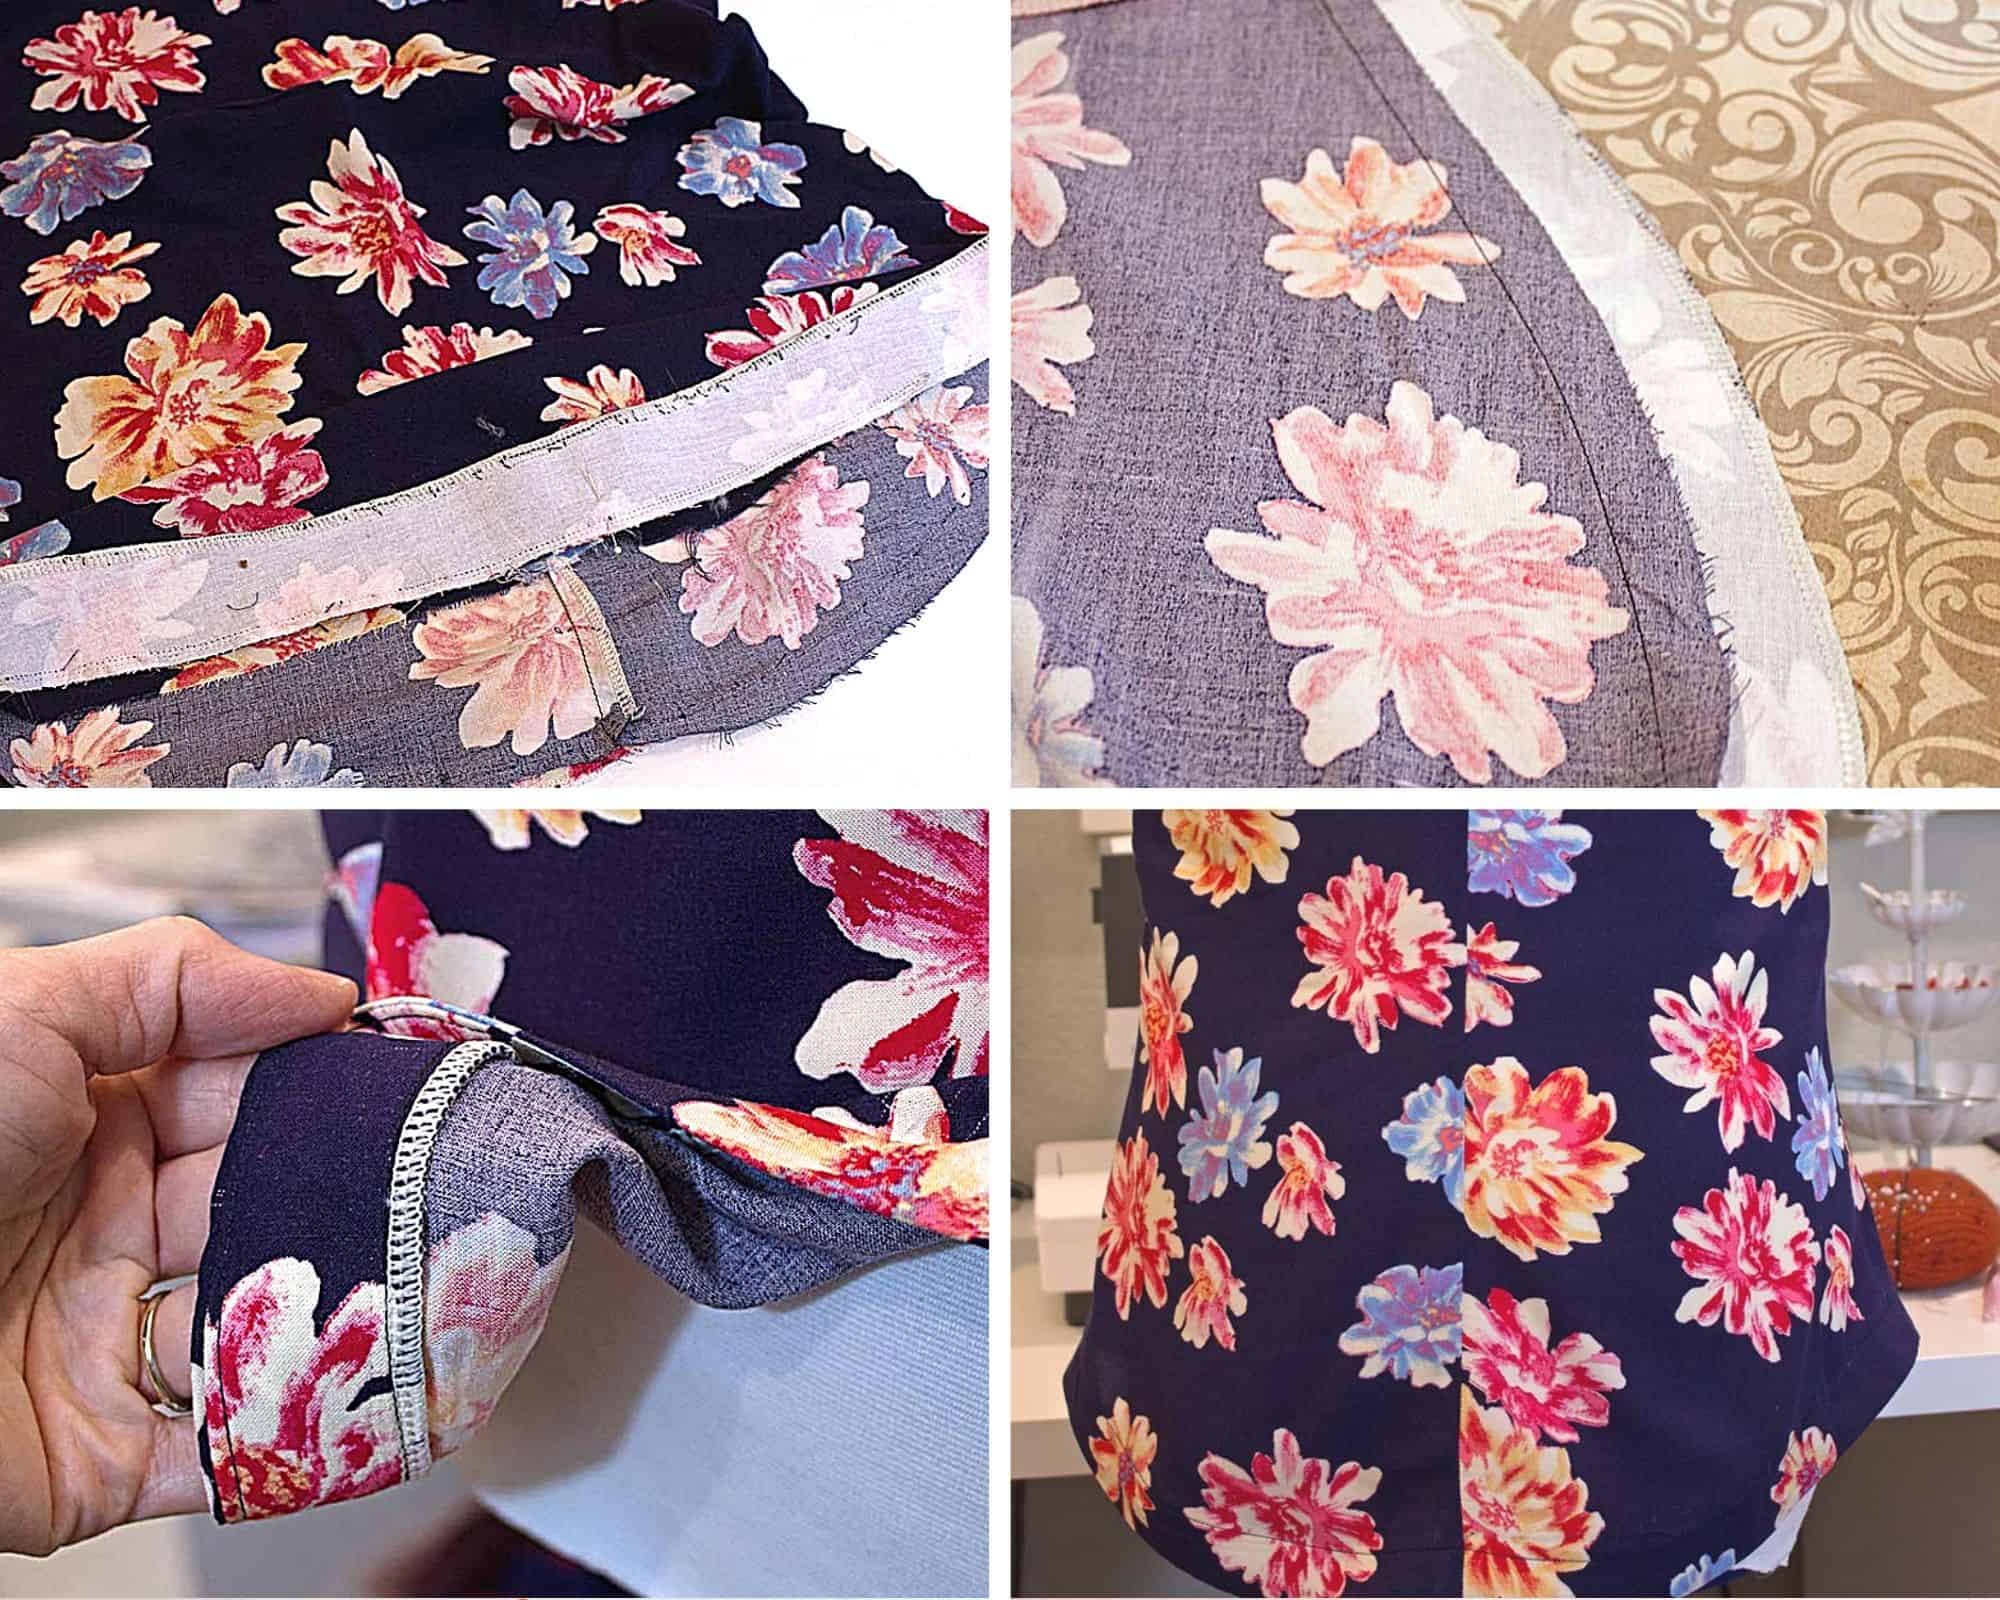
Complete your top per the instructions until the bottom hem. Lay your facing and top, right sides together and sew the raw edges together at 1/2 inch seam allowance. Press seam allowance towards facing. Understitch. Press the facing towards the wrong side of the top. Finish with your preferred stitching. You can edgestitch the facing or handstitch a blind hem.
This video will show you how to create the facings discussed in this blog post for those who prefer to learn that way.
Thank you for joining me today to learn all about facings. You can find more sewing tips and tricks on the P4P University blog posts.