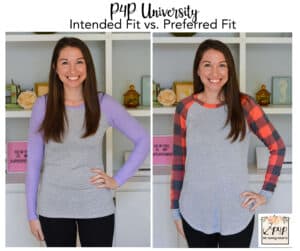
Intended Fit
First, let’s talk about what intended fit means. The intended fit is how the pattern is designed, by the pattern designer, to fit your body. It is based on sizing using your current measurements, the use of fabrics suggested in the pattern, and using the given seam allowances. These factors all play a role in obtaining the intended fit of a given pattern.
A great way to see the intended fit of a pattern across all sizes, would be to view the listing photos on the website as well as the album in the P4P Facebook Group. Both of these options show photos of the garments made by the pattern testers. All testers are required to make the patterns as designed, for their measurements, without any modifications.
Preferred Fit
When it comes to preferred fit, it is pretty much exactly how it sounds: how you like your clothes to fit. Maybe you like your sleeves extra long or for your shirts to always hit right at your hip bone. It could be that you don’t like high necklines or you would like the skirts of your dresses to be extra full. For me, I am more comfortable in clothing that fit a bit loose around my stomach.
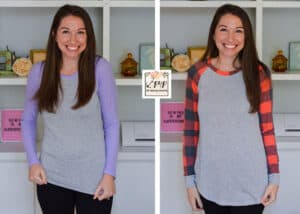
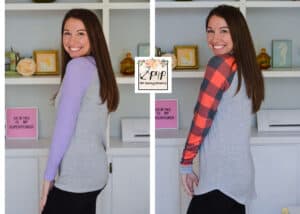
The Slim Fit Raglan is the perfect example for my intended fit vs. preferred fit comparison. The SFR is one of my most made patterns because I just adore the shape and style. It is intended to be semi-fitted and allows a wide range of fabric choices. You can see how the pattern is intended to fit me in the photo on the left (purple sleeves). I made the pattern based on my measurements, in my correct size, and followed the pattern exactly. It’s a super cute and comfy but is a little more fitted around my waist than I prefer.
If you are making a pattern for the first time, I always recommend making a muslin (or a practice version) before cutting into your favorite fabrics. If you make the pattern as intended, you are then able to decide if you would like to make adjustments and where. For my SFR, I decided to grade to the next size up from the bust down. This allowed me to keep all of my favorite things about the pattern but also provide a fit that I really felt good in.
Some things to remember when striving for that perfect fit:
- Am I measuring myself correctly? P4P University has a great post, if you need some help.
- Is my pattern printed correctly? Always double check that 2″ square.
- Am I using the right kind of fabric for this particular pattern? The patterns always list recommended fabrics and you can also check out the tester photos to see how those fabric types look with the pattern. If you are using fabrics types that are outside of the suggested ones, you may need to make other adjustments to get the intended fit.
- Lastly, am I using the proper seam allowance? You won’t believe what a difference, 1/4″ all around makes if you miss this one.
I hope this helps you determine how a pattern is intended to fit and encourages you to make them your own and feel great in everything you make!


