Patterns for Pirates

P4P stylish, modern, wearable patterns

  • Home
  • Blog
    • Frequently Asked Questions
    • Pattern Releases
      • Free Patterns
    • P4P University
      • Fitting
      • Sewing with Stretch, Knit Fabrics
      • Sewing with Woven Fabrics
      • Sewing Machines
    • Sew-A-Longs
    • Fabric for Pirates
    • Pattern Hacks
    • Announcement
      • Blog Tours
      • Contest/Giveaway
  • Shop
  • Bundle Discounts
  • Gift Cards
  • My Account
  • Cart

Fabric Storage Ideas – “Sew it, Win it, Build it” from P4P

October 21, 2016

We’re talking all about Sewing Rooms this week with our awesome “Sew it, Win it, Build it” giveaway!   Today we’re going to continue talking about sewing rooms and how you can store all those supplies you need/stock/hoard? 😉

slide1

We hear a lot of questions in the P4P Facebook Group asking how to store things in sewing spaces.  So, here is a little list to help you see the options you have out there.  Today we’ll just be doing fabric storage, but we will also cover pattern storage as well as other sewing supplies later this week! *(This post contains affiliate links)*

fabric-storage

The big one right? How in the world do you store all your fabric so that you can see and get to it easily when you’re trying to find that perfect coordinate, where it takes up minimal space, and where you can fit a lot?  Or is that just something I worry about?

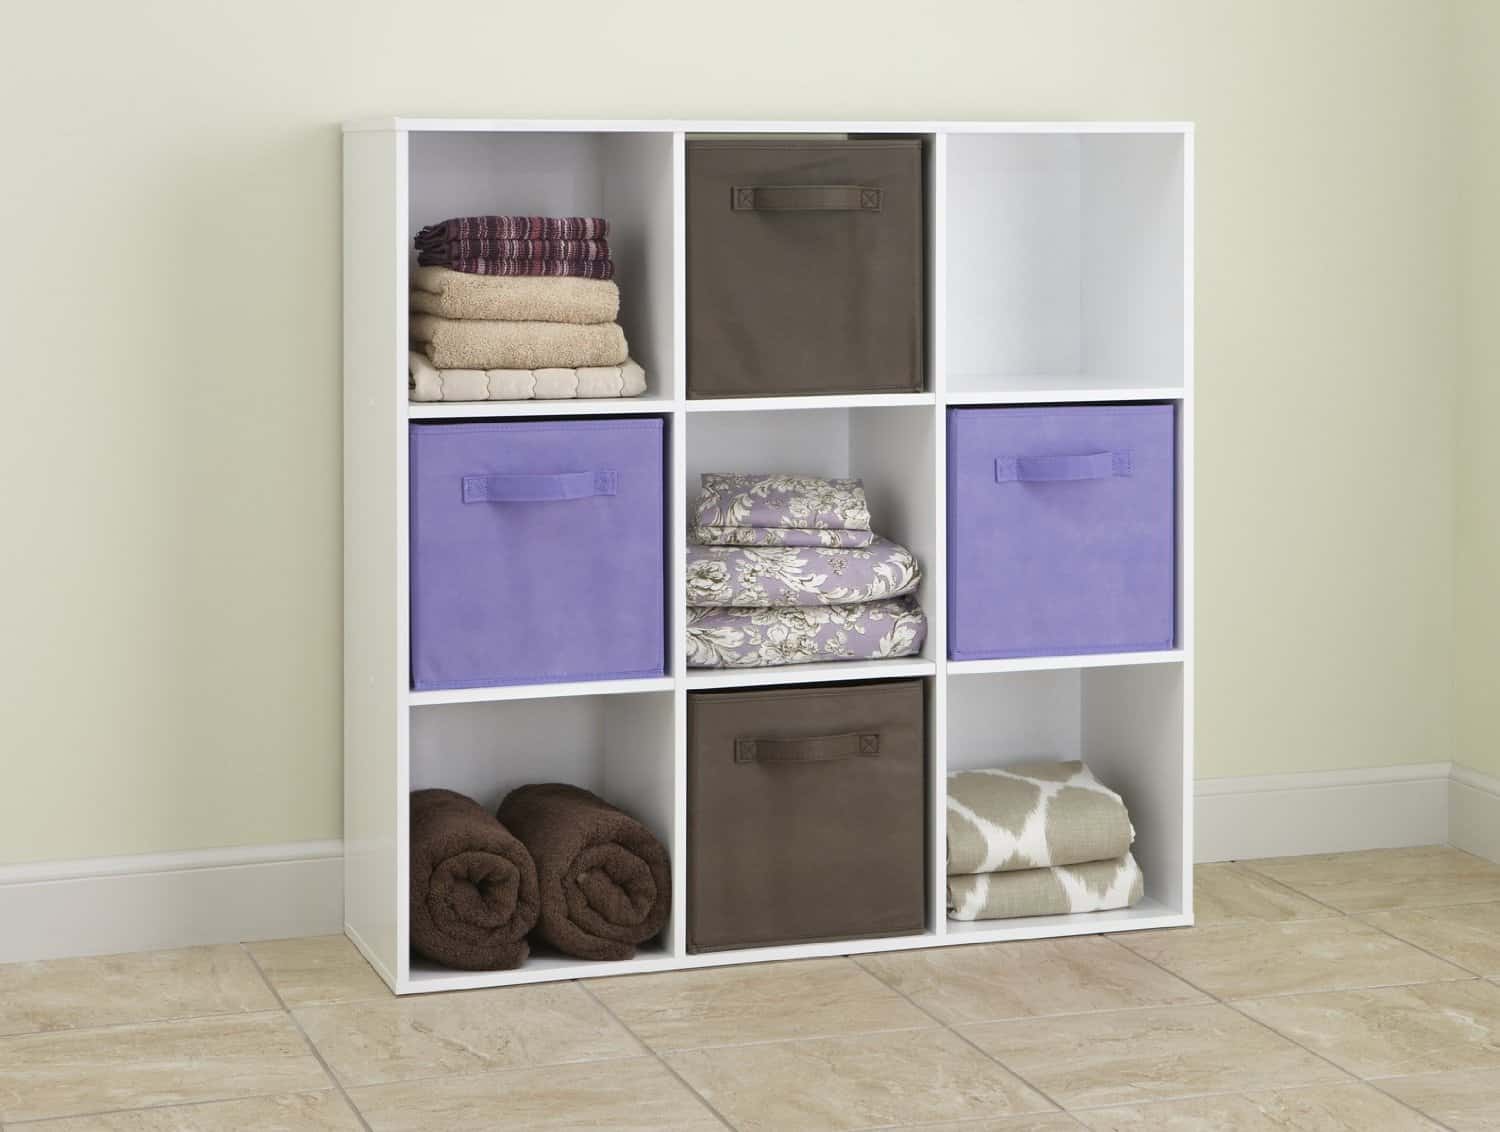
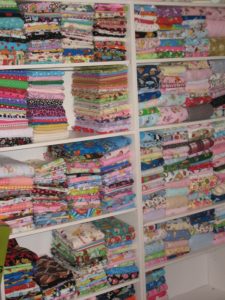
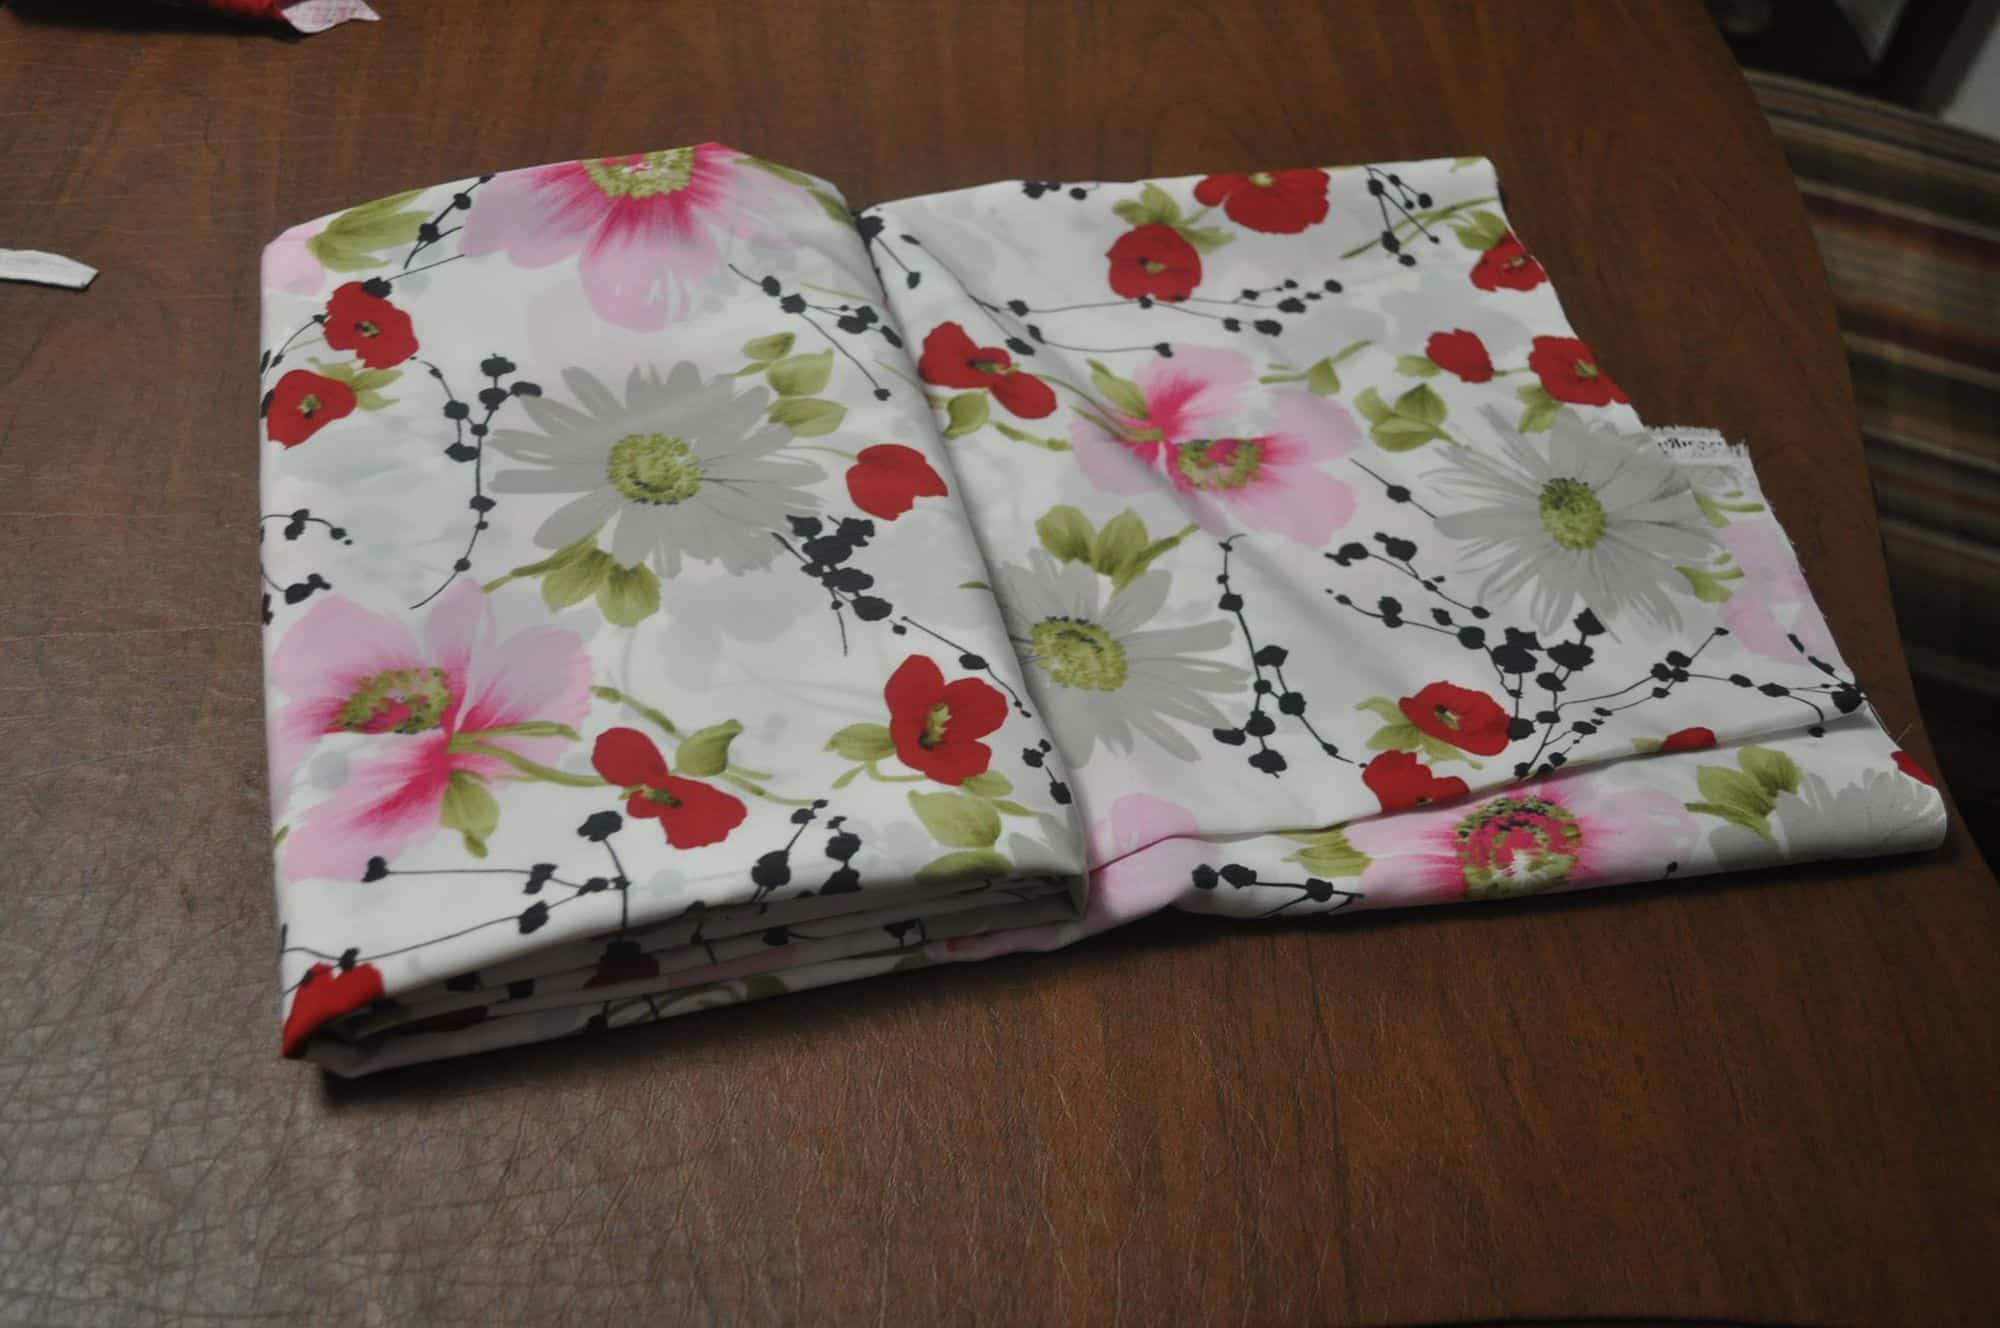
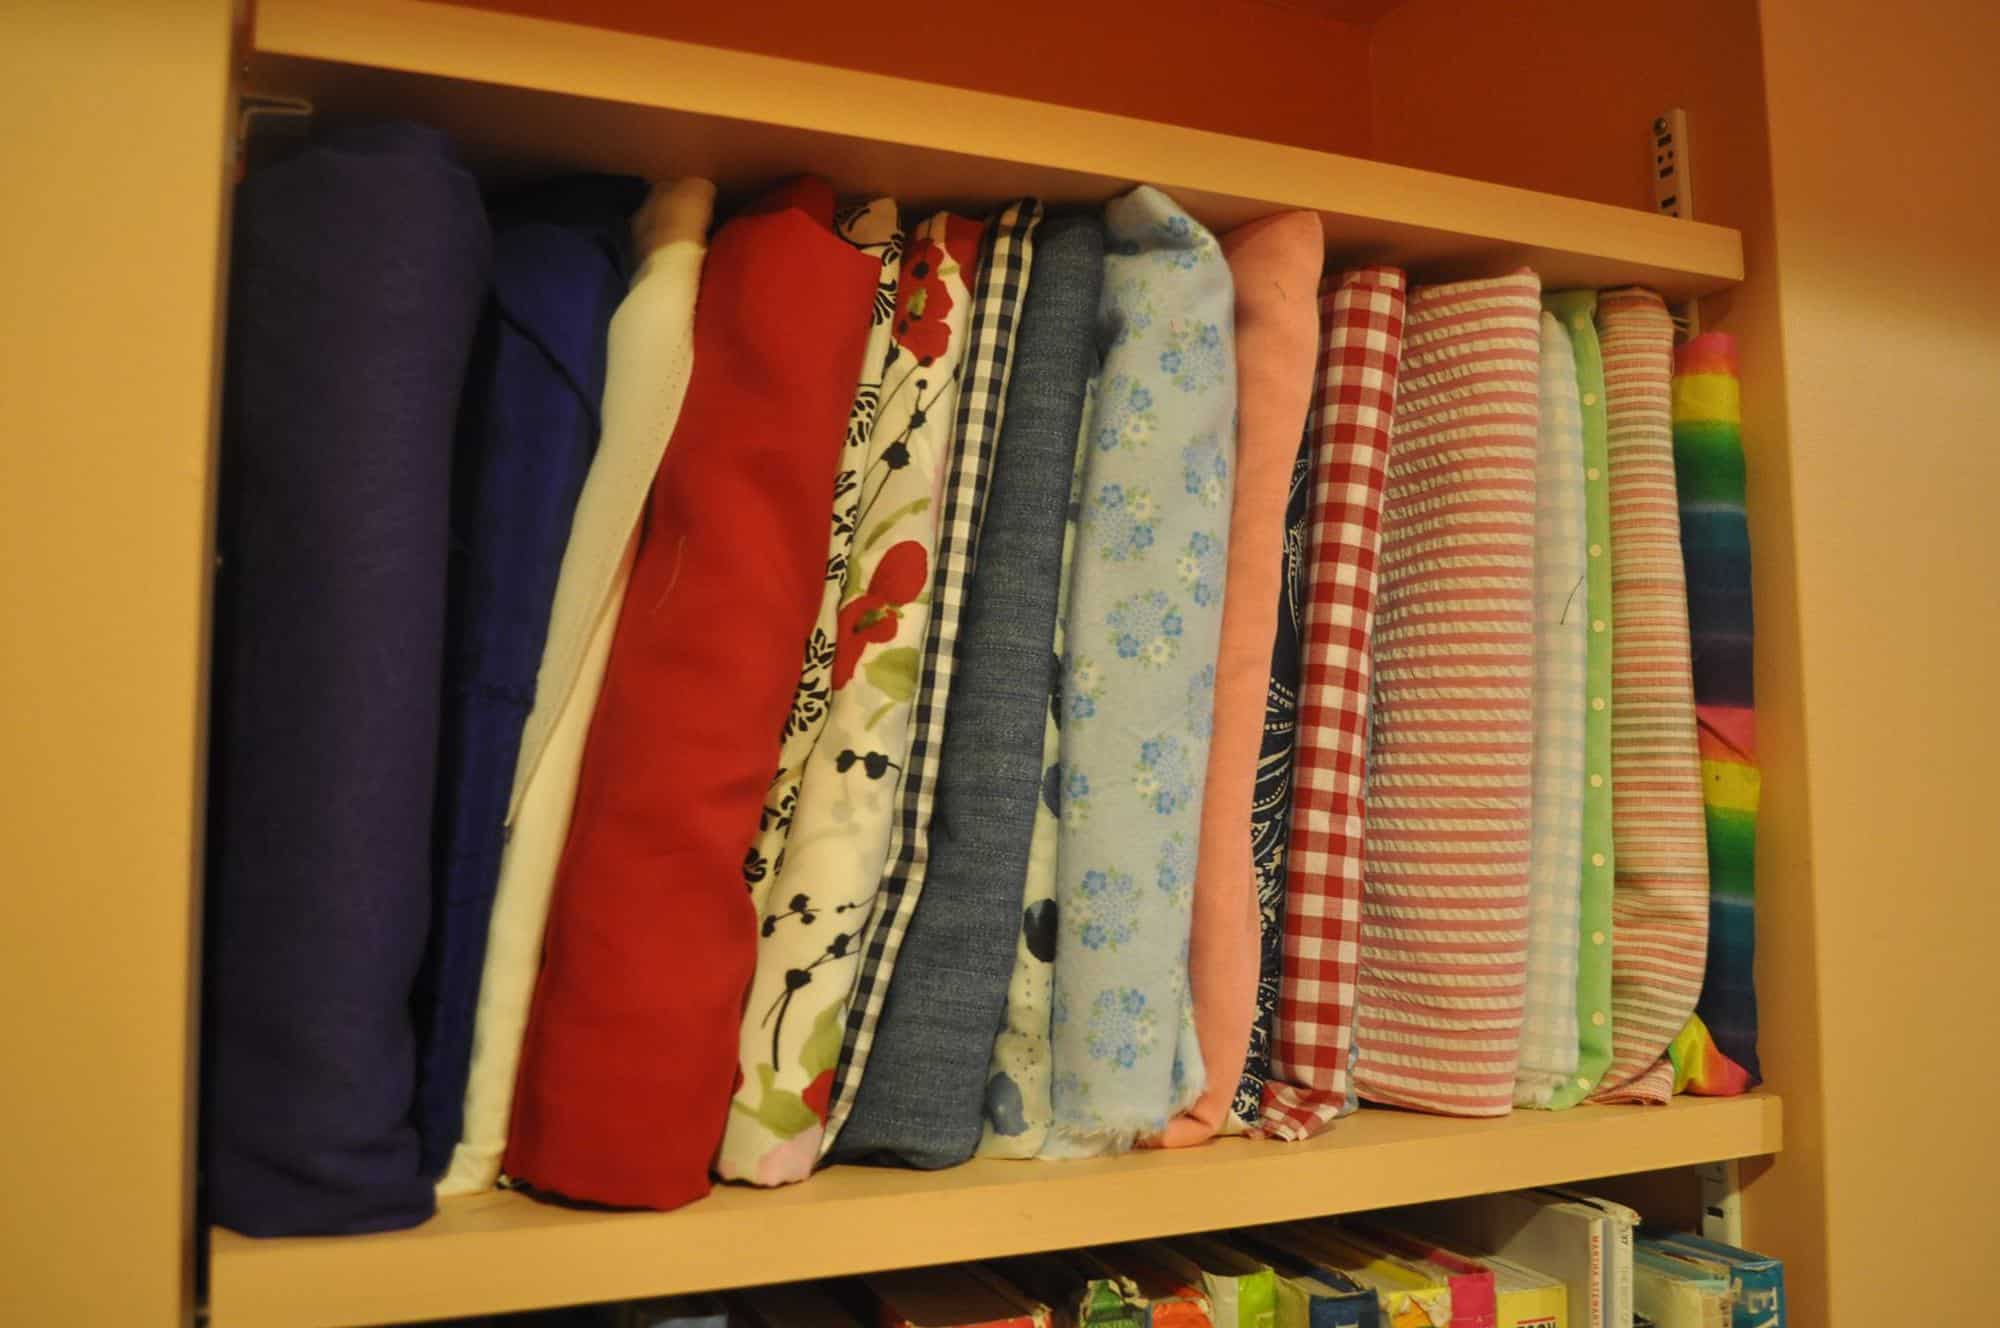
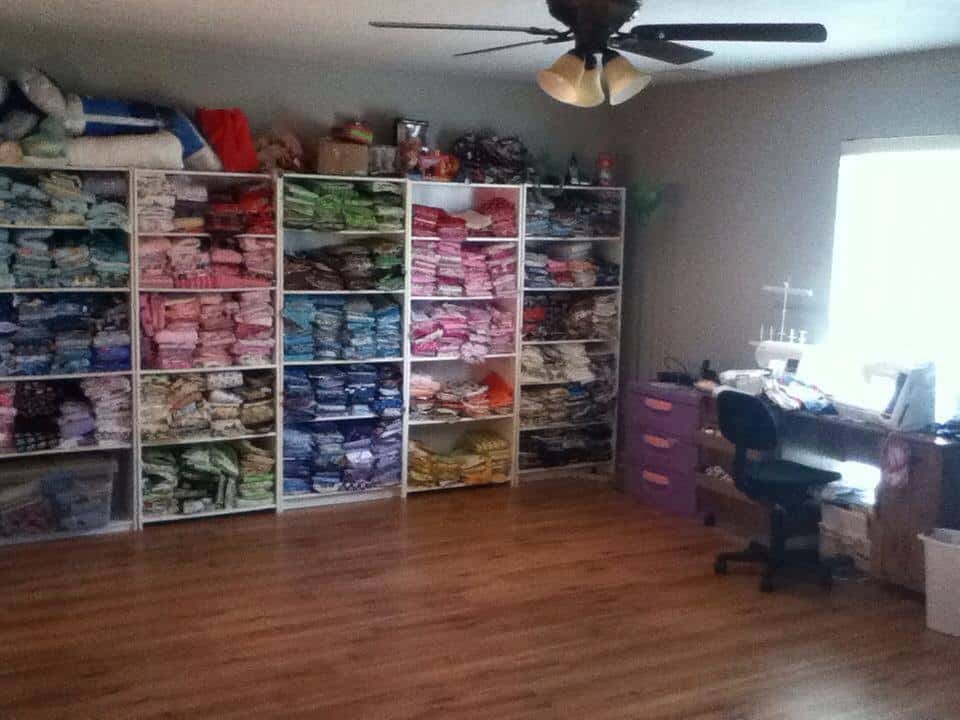
I store my fabric in open shelving.  I like to be able to see my fabrics really easily so that I don’t end up pulling them ALL out to color match or see my options. (Although sometimes I still do this a bit!)  I use cube shelving.  I like that each cube isn’t too wide that the fabric gets lost under others.  I’ve folded mine and rolled mine.  I like the idea of rolling better, I can see it more clearly when that shelf is getting really packed full, but I’ll be honest and say I didn’t have much success getting myself to keep up the rolling! When I would get it out to color match or decide between a few choices I would find myself not wanting to roll it back up! So, back to folding I went 😉   I also will use the little bins for scraps as well, I have one for knit and one for woven scraps. (Yes, one… I’m not a scrap hoarder!  When I get too full I go through it very quickly and give my nieces any that I take out for them to practice with.)

611pgl8p0sl-_sl1500_ 71dbwrb7q7l-_sl1500_
Maybe you happen to be a scrap lover…hoarder…like my dear sister Nicole 😉 She keeps everything! She sorts her scraps by color into bins:

14573036_10154036155823214_7449223298133569048_n


There is the “ruler folding method” for storing on bookshelves.  Which just helps you keep each cut folded at the same width so it fits nice and tidy on the shelves.  I’m just always in too much of a rush to be this neat and tidy! Maybe one day 🙂 The jist is to use your quilters ruler as a guide to fold your fabric cuts.  Here is a helpful blog post from my sister’s blog explaining how in detail.

m_foldfabric-008 m_foldfabric-001
Another way I’ve seen is to use comic book boards to fold your fabric around.  It’s like having tiny bolt of fabric on your shelves!  Roberta uses this method and it gives you such a nice and tidy look as well.  She has done it for a while and can count the number of layers around the board to get a good estimate on yardage without unwrapping and measuring! Great little trick!

14525245_10207496757918976_6692690070939439067_o 14608891_10207496756598943_7453680850056838816_o
You can also buy these fabric organizers made exactly for this use too.  They have little grips to slide/tuck your fabric into.

9c37a618f26aa3d4e5fee30187f18834

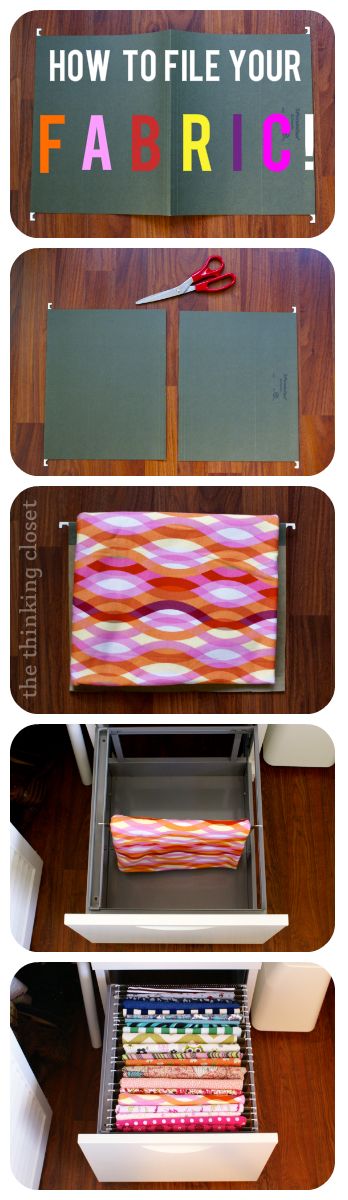
Another way I’ve seen around is to use filing cabinets. You can hang your fabrics on the file folders and sift through them.  Again, I think this really only works for smaller cuts of fabric.  You could fill up a cabinet way too quick with adult size cuts of french terry! I’ve never stored my fabric this way, but here is a blog post I found explaining how she does it.

e7105bf6885549a5d669de91daaac0a8

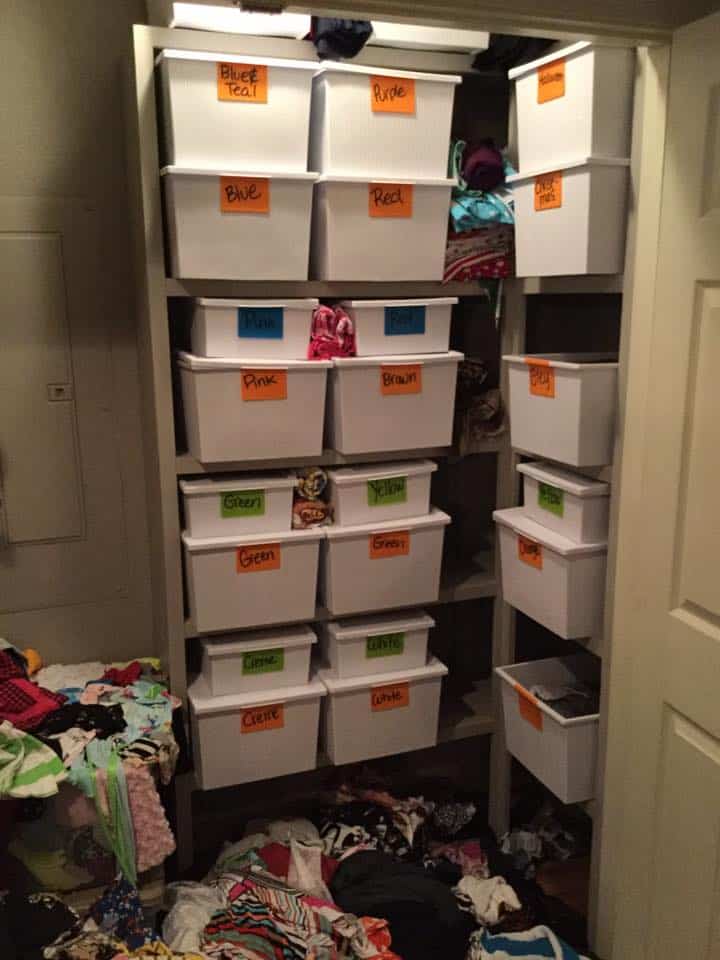
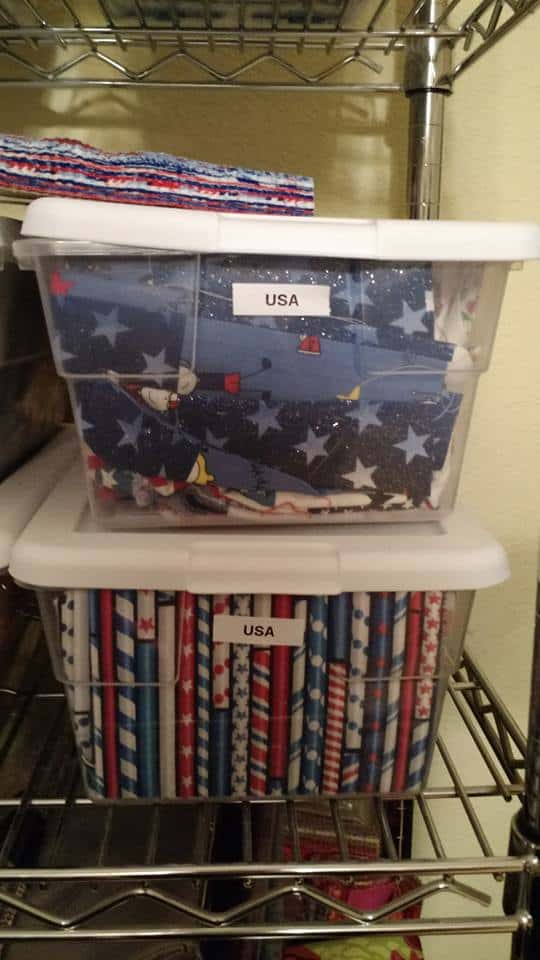
Another one I see often is in tubs.  I currently have all my fabric in tubs because we had to pack up my sewing room to show and sell our house.  But, I hate it!  Personally I sew way too often to have to dig out fabric from tubs every time.  I end up making a huge mess pulling it all out trying to find something! But, it would keep it out of eyesight if you don’t want your fabric on display.

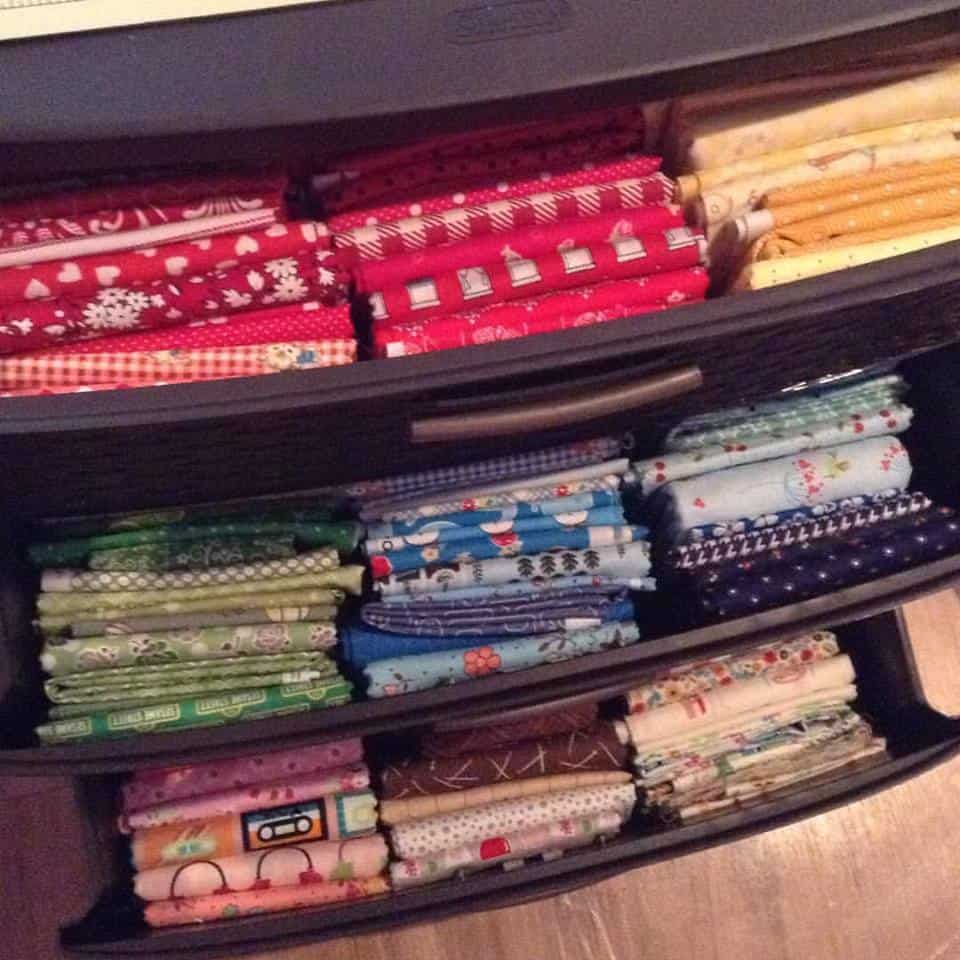
When we helped organize my mothers quilting fabric, which is so different than apparel fabrics since it’s a lot of smaller pieces rather than larger cuts.  We folded them and stored them into drawers and small bins vertically.  That way she could open the drawer or bin, and see all her fabric in that one at once.  she could easily pull pieces in and out without disrupting the others.  This is a view with drawers open and looking down into the drawers:

14570353_10154040633003214_3080425248963051391_n

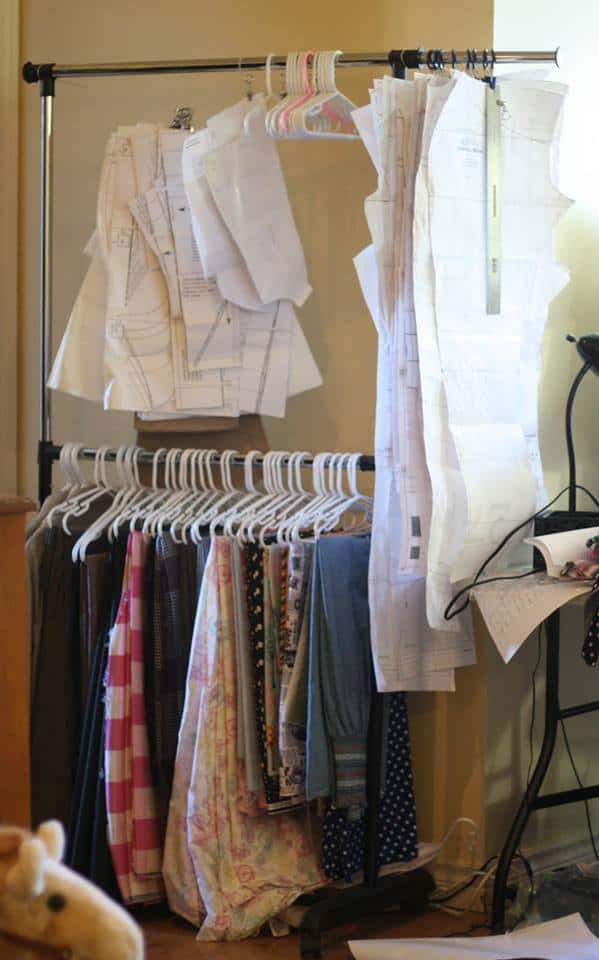
The last way I’ve seen is to hang.  On curtain rods, a wardrobe system, or if you happen to have a closet in your craft room. You can use a hanger and fold the fabric over the bottom like Patty does here:

14517387_10157644317920790_2152977761045174009_n

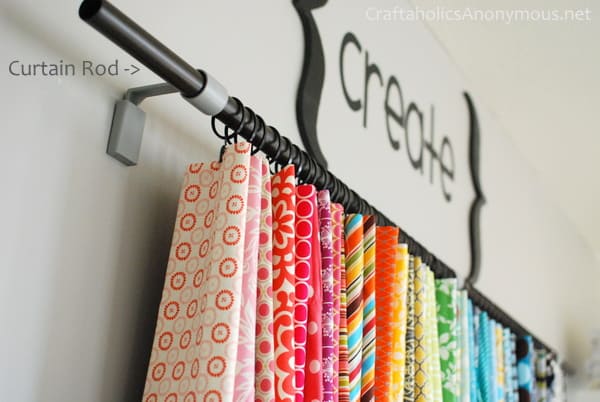
Or you can use curtain rings and clip them. Here is an example of this from Crafterholics blog:

candle-gift-tag-014-1

Now that you’ve decided what you’ll be storing your fabric with you can move on to thinking about how you organize it within that unit.  I like to keep my fabric organized by type.  Meaning I have all my french terry together, rayon spandex, sweater knits, ect.  Some of my very favorite types I split into more– solids, prints… I also keep most of my “t-shirt weight knits” together and sort my solids, stripes, prints.  So– it might looked haphazard to someone just looking at it.  But, when I go to look for a certain project it’s perfect for me! I can look for the weight/blend that I’m needing for that project and then move into what print/color/ect. from there.

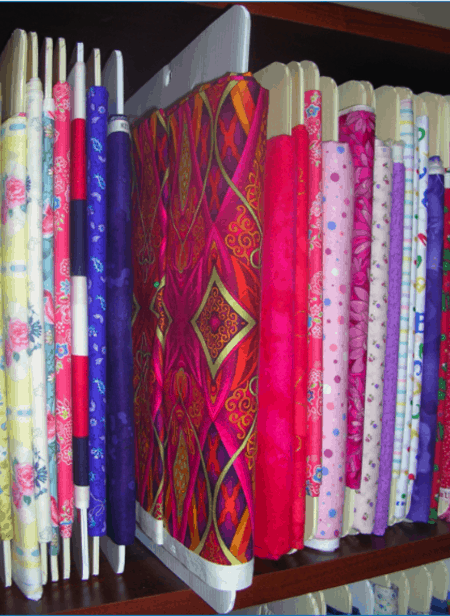
My mom also organizes her quilting stash in types.  But, obviously not fabric type since it’s all quilting cottons.  She uses the type of quilt it’s for… meaning- low volume goes together, a quilt set from a certain designer, brights, holiday prints, I spy quilt fabrics, ect.  So that when she’s ready to sew up a low volume quilt she can go to that drawer, pull it open and pick from there.  We also did her blenders all together in a rainbow sort.  So if she needs a blender in a certain color she can quickly get to it as well.

14570372_10209242052120414_5099504970576963411_n

My oldest sister Nicole organizes her fabrics in 2 big categories- she does both apparel and quilting sewing a lot. So, she has… a lot of fabric… a lot… lol… She has all her knits together and then sorted by rainbow colors.  Then her cotton wovens together sorted again by rainbow colors.  It does look pretty in there all rainbowed out!

14639575_10154040631643214_6321923127233648177_n

My sister Megan organizes by type like me- she also has a separate place for fabric for her son and then for her daughter.  It helps when they’re ready to pick something out!

Whew… Well, I hope that helps show you a few ways you can store your fabric!

Stay tuned for some more ways to organize your sewing/craft room this week including pattern storage and other supplies!

schedule


Filed Under: Contest/Giveaway 2 Comments

How to Plan the Perfect Craft/Sewing Room- Sew it, Win it, Build it- from P4P

October 18, 2016

When my husband was trying to sweet talk me into building a new house his biggest selling point was a bigger sewing space… eventually he won me over and I’ve been planning that sewing room since!! I’ve had a lot of fun researching and planning it, so much, that we’re giving away the chance for someone else to get a new sewing room!  If you haven’t read our “Sew it, Win it, Build it” Giveaway post make sure you stop by and read how to enter for your chance to win! 

slide6

Flooring-

I started with the basics first. I wanted NO carpet.  And ladies, this first decision was a biggie, because it’s an expensive choice! But, after years of killing vacuums I was getting some floors that weren’t carpet! It took me months of persuading my husband, but as you can see…. I got my way! 😉 I was so excited to see those floors going in that day!!!

14469697_10102930910234283_7101480442136359089_n

I looked into A LOT of flooring options (besides carpet).  There is laminate wood, vinyl, tile, and hardwoods to name the most popular.  I even looked into much crazier kinds, but none were very price effective that I found (like rubber, cork, ect.).

Furniture Arrangement-

I really love this little trick to plan a room!  I use Adobe Illustrator, but you could use any drawing program, or just a piece of grid paper would work perfectly as well to draw my room out with it all proportioned correctly on a smaller scale.  I prefer the digital program since you can easily change and move things around as you plan.

I drew the basic shape of my room using one inch as one foot.  Then, I added the furniture I was planning on putting in there all to scale.  This took time! But, I know the furniture I want will fit in nicely, what size cutting table I can fit in there with enough walking space around it (average is usually about 3 feet between furniture pieces), and where I needed my lighting! In the end it’s so much easier to take the time to create a template than to be measuring the actual room and furniture and trying to imagine if it will fit okay, if it will feel cramped, if you can make if even with this and that across the room, ect.  I highly recommend this little step to planning your craft room!

You also want to keep in mind what you use most, as well as what you use together.  Meaning, I use my sewing machines, iron/iron board together while I’m constructing.  So, I want those two “stations” close together in my room.  It’s almost like a kitchen where you typically have a triangle between sink, oven, fridge… but you have sewing machine, ironing board, cutting table!

screenshot-2016-10-06-21-09-22

Lighting-

I only had one window in my sewing space. I tried my best to add windows, but the way the house was set up it just wasn’t possible.  If you have the option to have more windows… the more the merrier in my eyes! I love a lot of light when I’m sewing!


I put pot lights all along the U shape desks where my machine are going so I could see well while sewing.  I also put a pot light above my computer desk because I read a lot there. Last I placed a hanging fixture above my cutting table in the center of the room.  And let me tell you, I had GRAND plans of doing a dramatic lighting fixture like a chandelier, but I”ll save you the heart-ache of planning that because in a craft room you really need good lighting and something fancy like that isn’t great.  They’re gorgeous and stunning and I wanted it so bad! But, in the end they gave off terrible light with rainbows and shadows everywhere 🙁 So… after realizing that I needed functional lighting I went with a pendant.  Since I had a single fixture in my mind and had it wired for that I choose this one that meant I didn’t need to have it re-wired for another fixture, but still got 2 pendants for better lighting along my big cutting table!

b2610b3297a44043506bc5605490c5ea

Outlets-

When we did our electrical walk I added quite a few electrical outlets to my sewing room.  Why not right? So now instead of having to have a bunch of giant cords running everywhere I’ll have an electrical outlet where I plan on having my machines.

I also added a floor outlet right where I plan on having my desk.  You really only need this if you don’t want your desk along a wall.  For whatever reason I was dead set on not looking at a wall while I work! I wanted to look towards the window!  So, I again used my drawing of my room to scale to plop in my computer desk where I wanted it and then told the builders exactly where so I wouldn’t have to run my computer cords to the wall.  (My husband thought this was great and used it in his office too!)

14183971_10102883630937373_5359873050865180300_n

Furniture-

I’m not going to get TOO much into furniture today, because we have a separate post with our favorite sewing storage coming up!  But, for my desks I plan on getting very simple desks with nothing under the table tops.  I want to be able to move my legs freely  and roll from machine to machine as easily and quickly as possible.  And even though you want a lot of storage in a craft room function has to be number one! So, I will find storage other placed besides under my machines!

I plan on getting an Ikea “system” so that I can mix and match open desks for under my machines with some desks with storage drawers or shelving under others.  So under my silhouette machine and heat press I will use that under storage space.  Here are 2 desks systems I’ve been eyeing at Ikea: the Micke and the Linnmon.

If you only have 1 or 2 machines a system isn’t that important.  I have enough machines that I really needed that corner unit! I use my sewing machine, serger and coverstitch together on a garment quite often.  So I wanted them close enough to swivel between, but not so close I couldn’t fit my arms/garments between while working.  I also wanted a little growing room 😉 just in case another machine finds it way into that room down the road… you know what I mean ladies!!

7c108480edf0dbd7200bdc1766fdea75 68399f12c144fec4842eefc7067ec188

Decor-

This is of course a huge personal preference.  But, I will say a sewing/craft room if it is JUST yours go all out!  Don’t worry about doing what’s on trend, what your partner likes, what is kid friendly… if it is just for you and your hobbies then making it your little slice of decorating heaven! I plan on going full on GIRLY! Pastels, gold, antiques, lace, florals, you name it! Anything I want that I usually get a, “no way”, “are you kidding me”, “too girly” reaction to… that’s what I”ll be putting in my room! So have fun and celebrate a space that’s just for you!

bdaa8c44c70a5d6786a0e7688cb5ddbf goldsequin 311621

Next up we’ll be talking about our favorite storage pieces in a craft/sewing room to finish planning it out! Don’t miss out on our other great posts all about sewing craft rooms!

schedule


Filed Under: Contest/Giveaway 5 Comments

Newest Patterns

  • Uptown Joggers - Youth $10.00
  • Uptown Joggers $12.00
  • Uptown Joggers - Bundle $20.00
  • Notch Top & Dress $12.00
  • Notch Top & Dress - Youth $10.00
  • Privacy Policy
  • Refund Policy
  • Affliliate Program
  • Contact Us
  • About

Copyright © 2023 Patterns for Pirates

Copyright © 2023 · Genesis Framework · WordPress · Log in