Patterns for Pirates

P4P stylish, modern, wearable patterns

  • Home
  • Blog
    • Frequently Asked Questions
    • Pattern Releases
      • Free Patterns
    • P4P University
      • Fitting
      • Sewing with Stretch, Knit Fabrics
      • Sewing with Woven Fabrics
      • Sewing Machines
    • Sew-A-Longs
    • Fabric for Pirates
    • Pattern Hacks
    • Announcement
      • Blog Tours
      • Contest/Giveaway
  • Shop
  • Bundle Discounts
  • Flash Friday
  • Gift Cards
  • My Account
  • Cart

2019 Holiday Freebies :: Festive Fabric Trees

December 2, 2019

Woohoo!  We are rolling into another day of our 2019 Holiday Freebies!  Get ready to make a million of these cuties…they’re really fun to make and are fabulous scrap busters.  Our testers just kept making more and more for their own homes, teacher gifts, and to fill their craft booths this holiday season.

Let’s get to making some happy little trees!

Grab your “FESTIVE FABRIC TREES” pattern pieces here!

Fabric Requirements (based upon 44″ quilting cottons):

  • 1/3 Yard Fabric
  • Fiber Fill, affiliate link

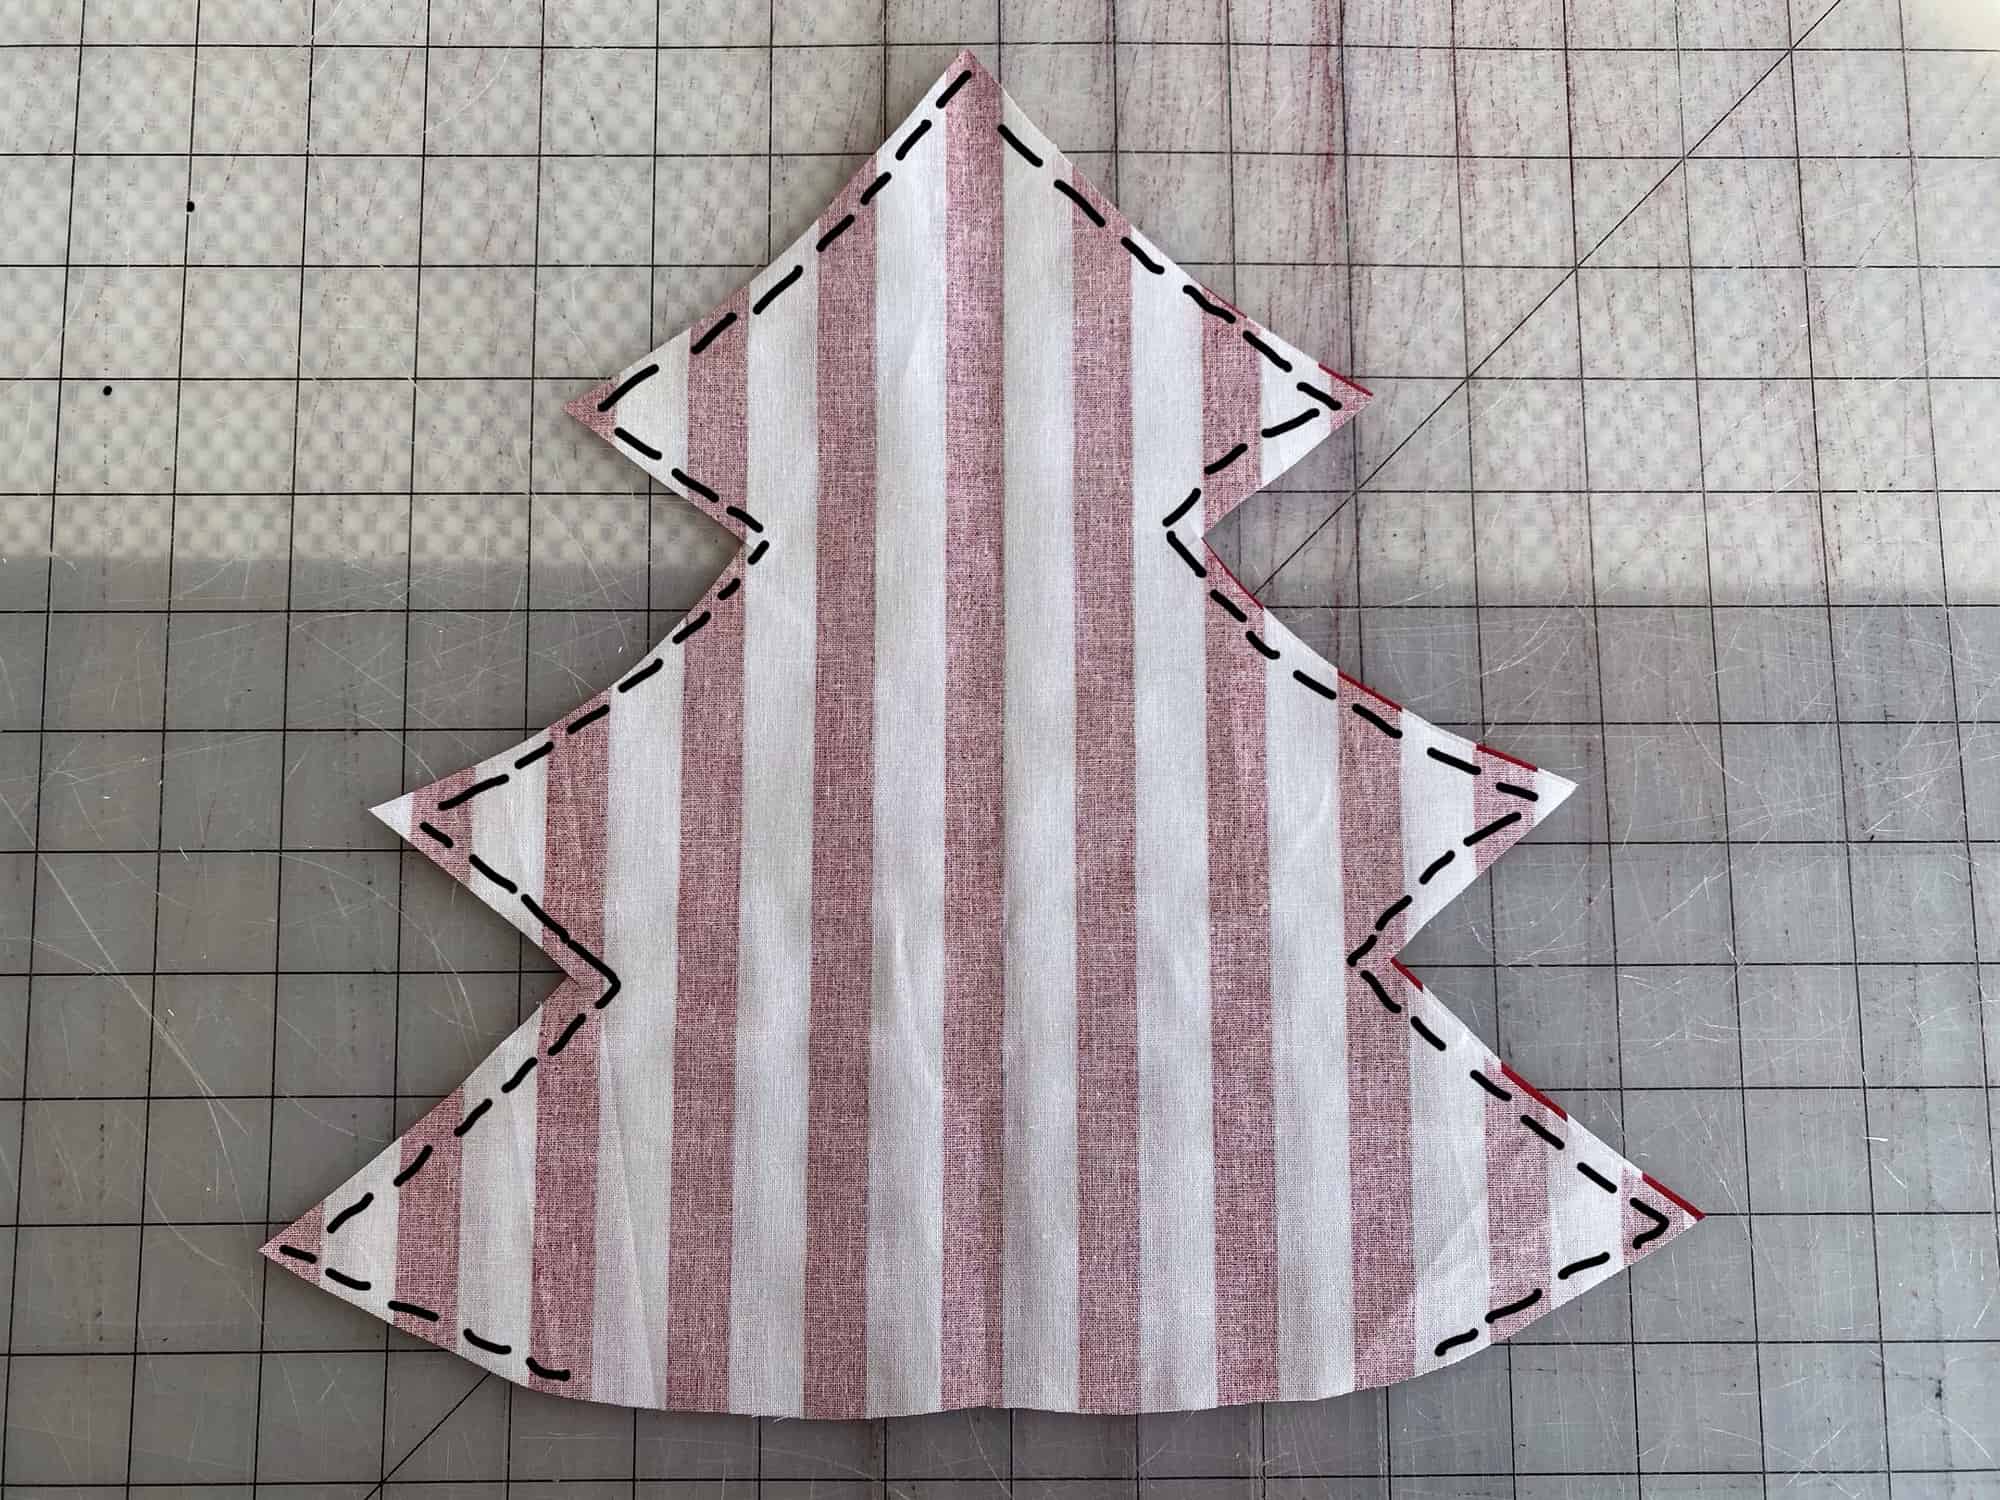
Prep your pieces.  You will need four total tree pieces for one tree.

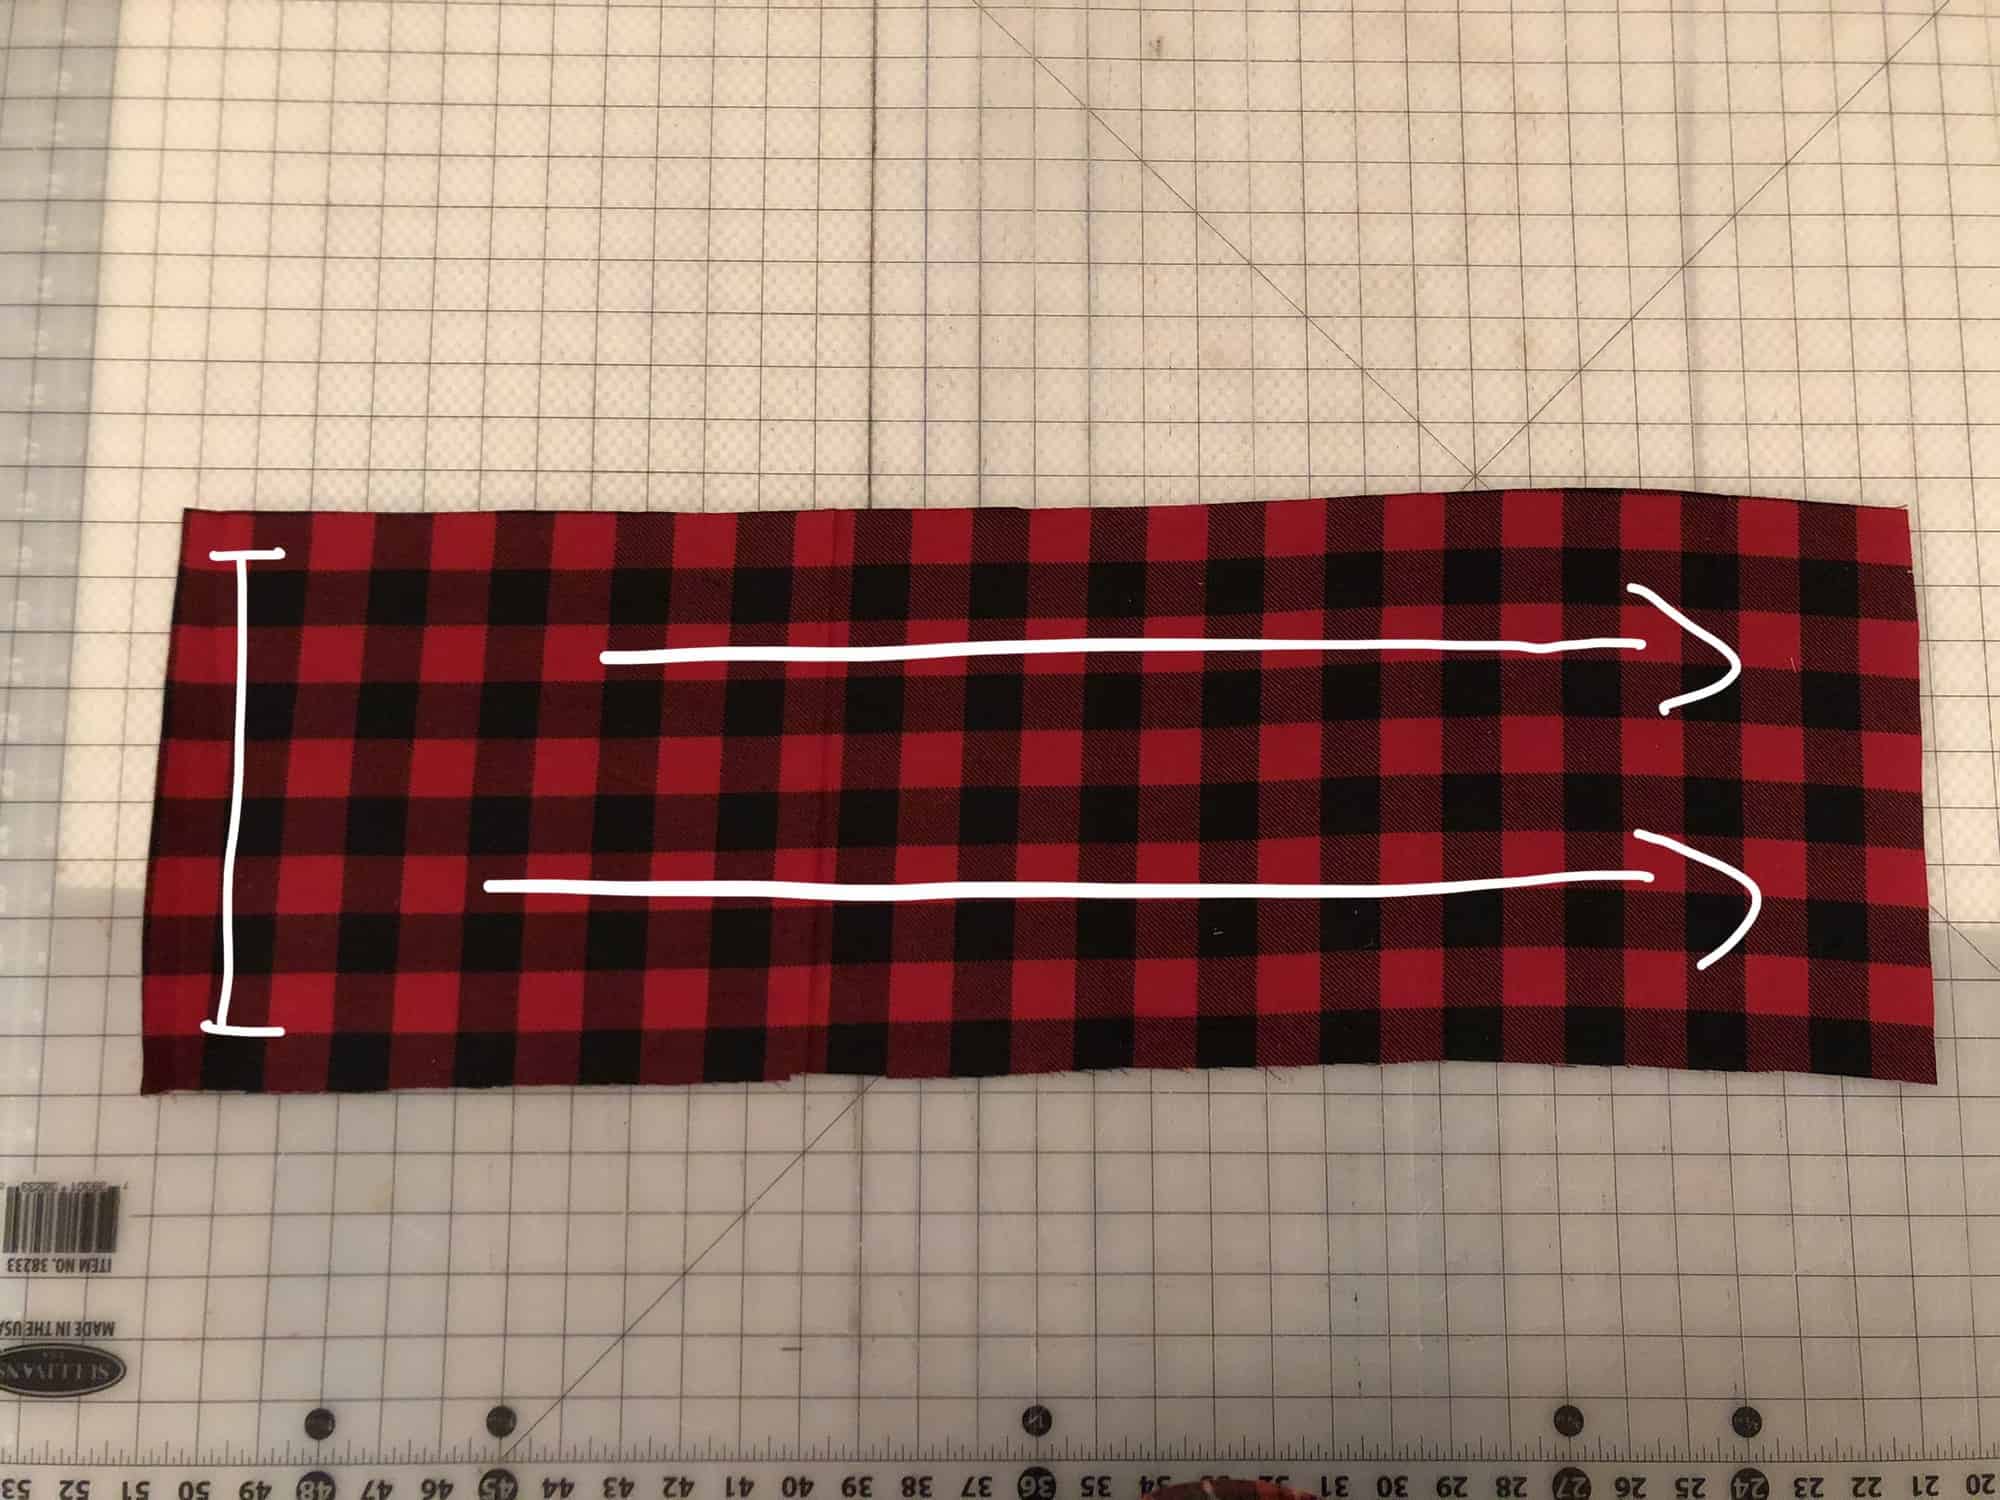
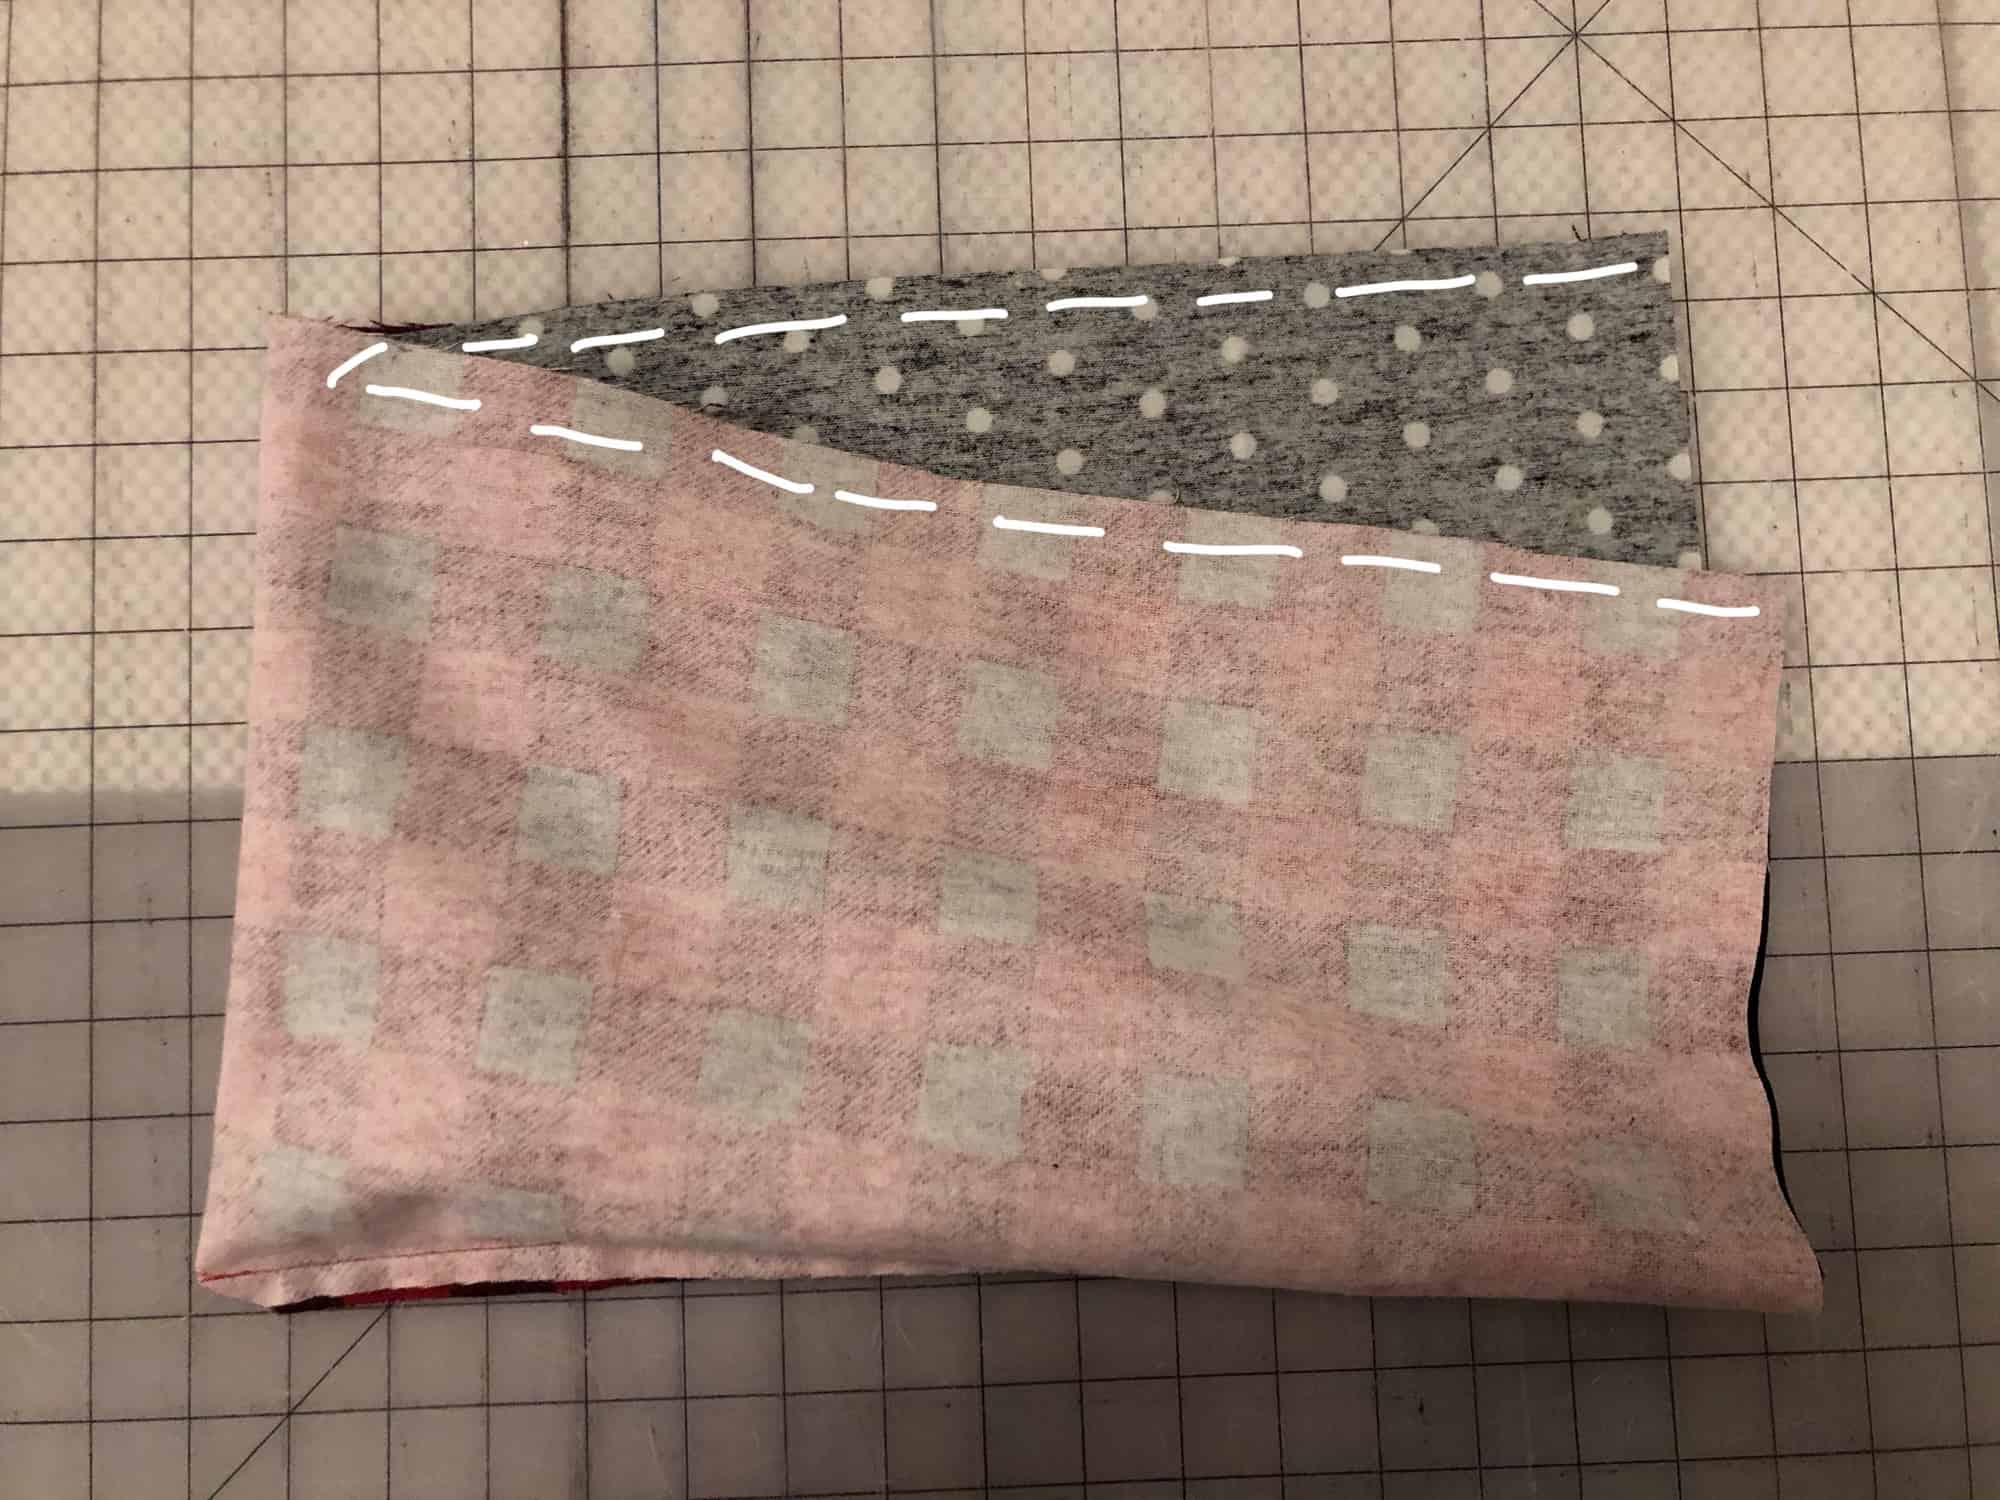
Place two of the pieces, right sides together.

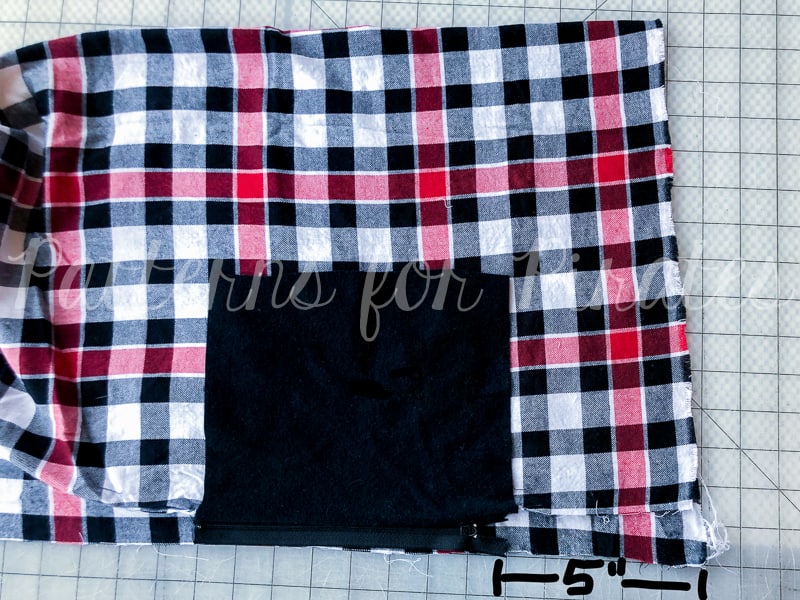
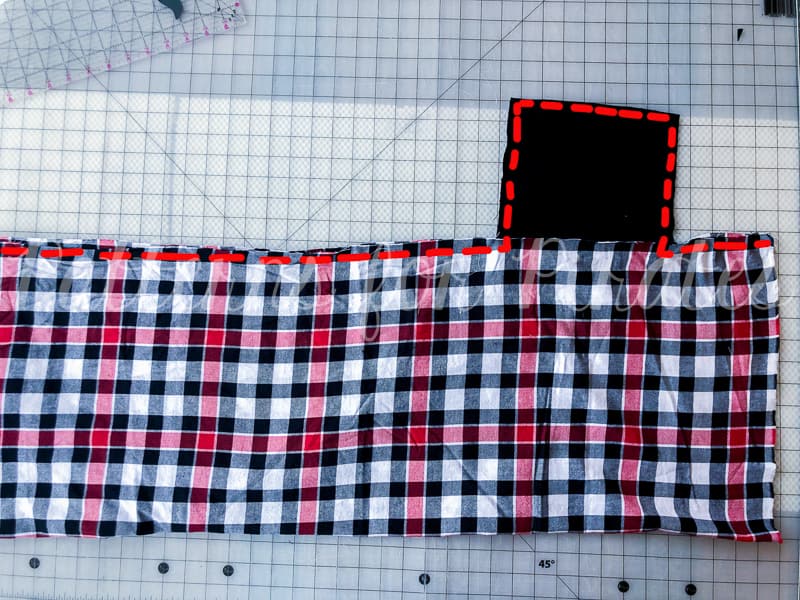
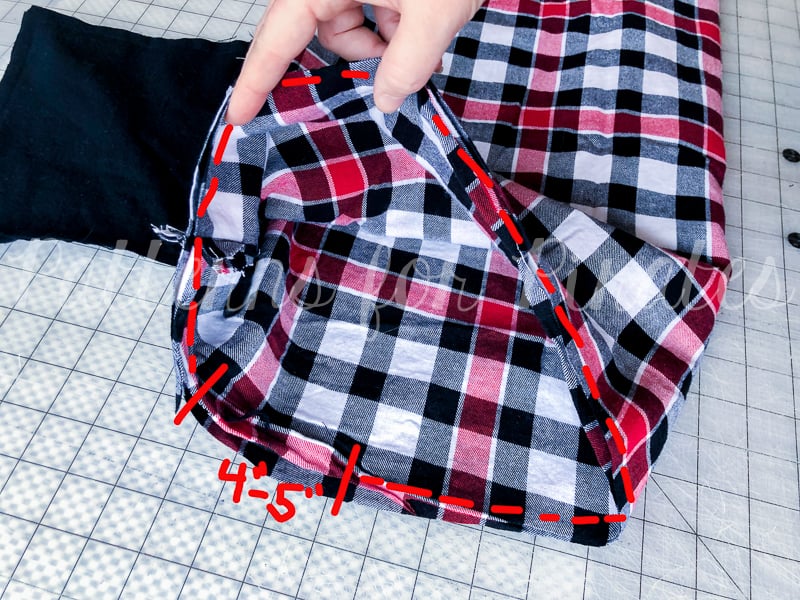
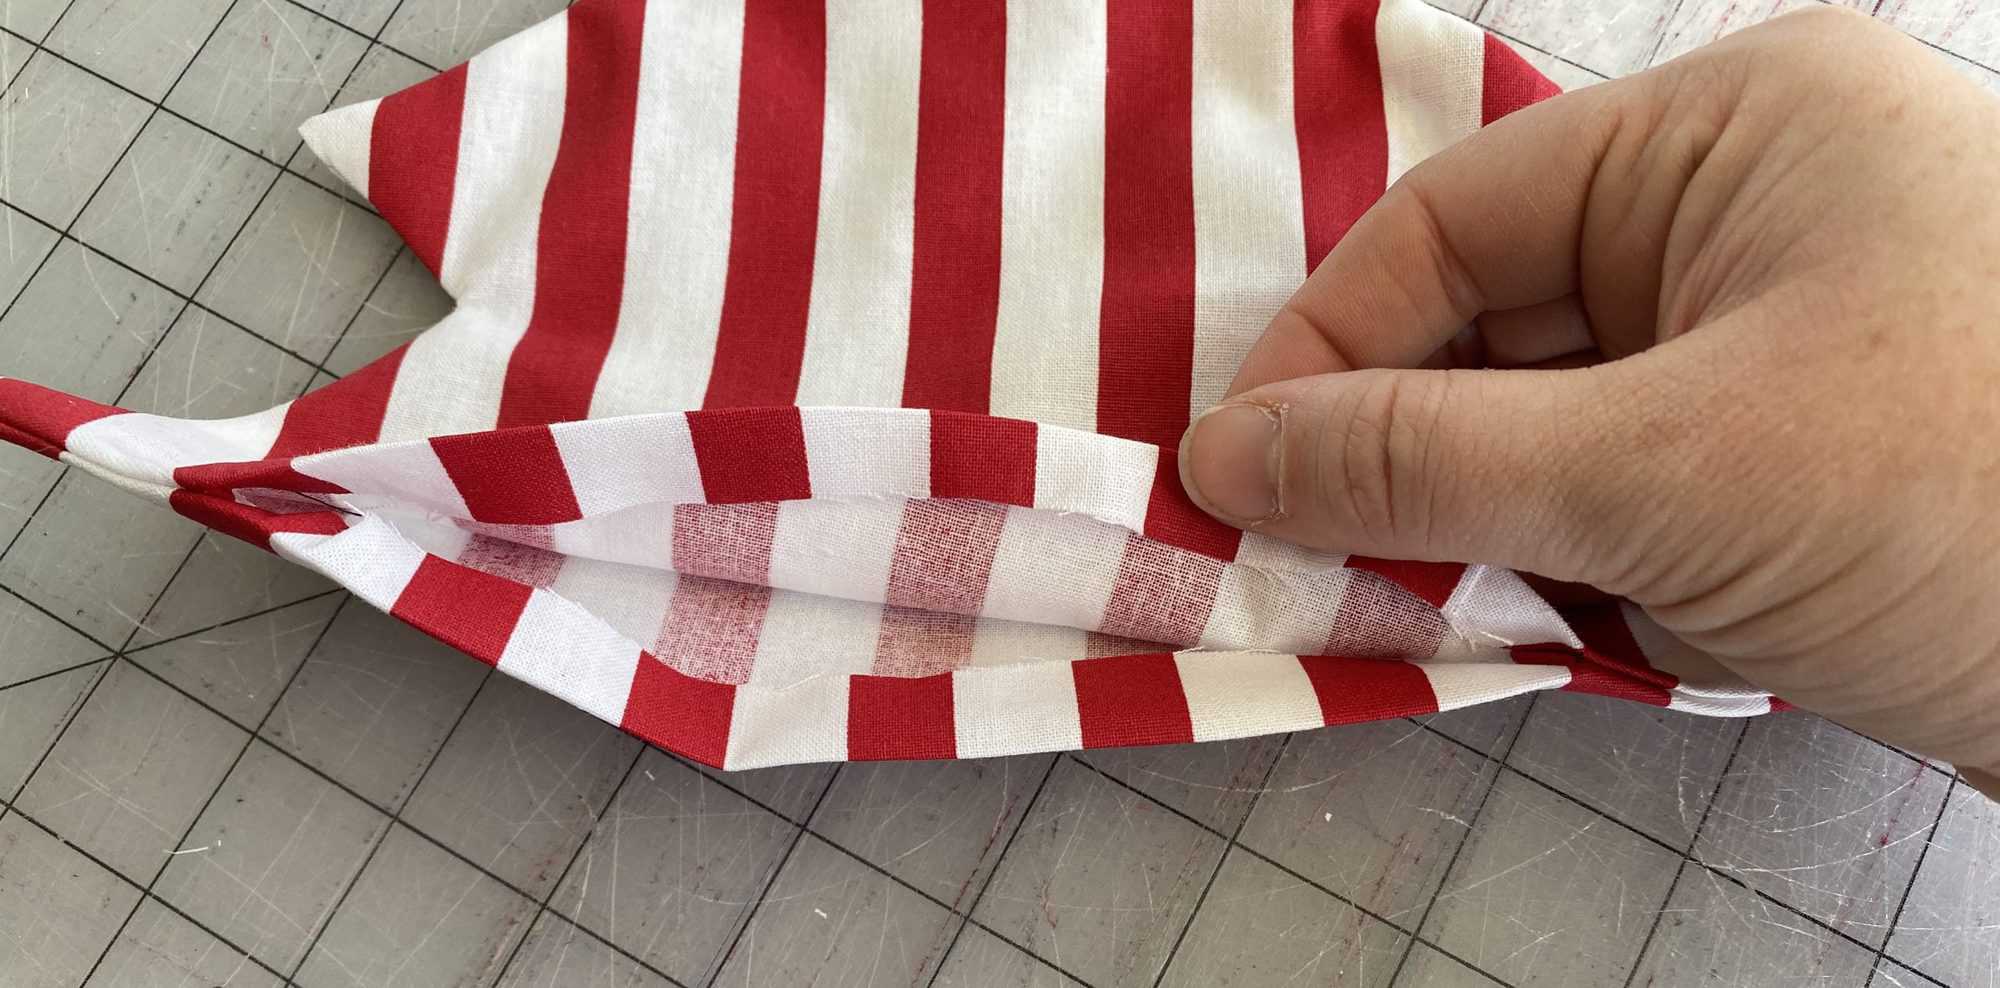
Sew around outer edge.  Only sew an inch or two along the bottom curve, on both sides, to leave space for turning and adding the fiber fill.

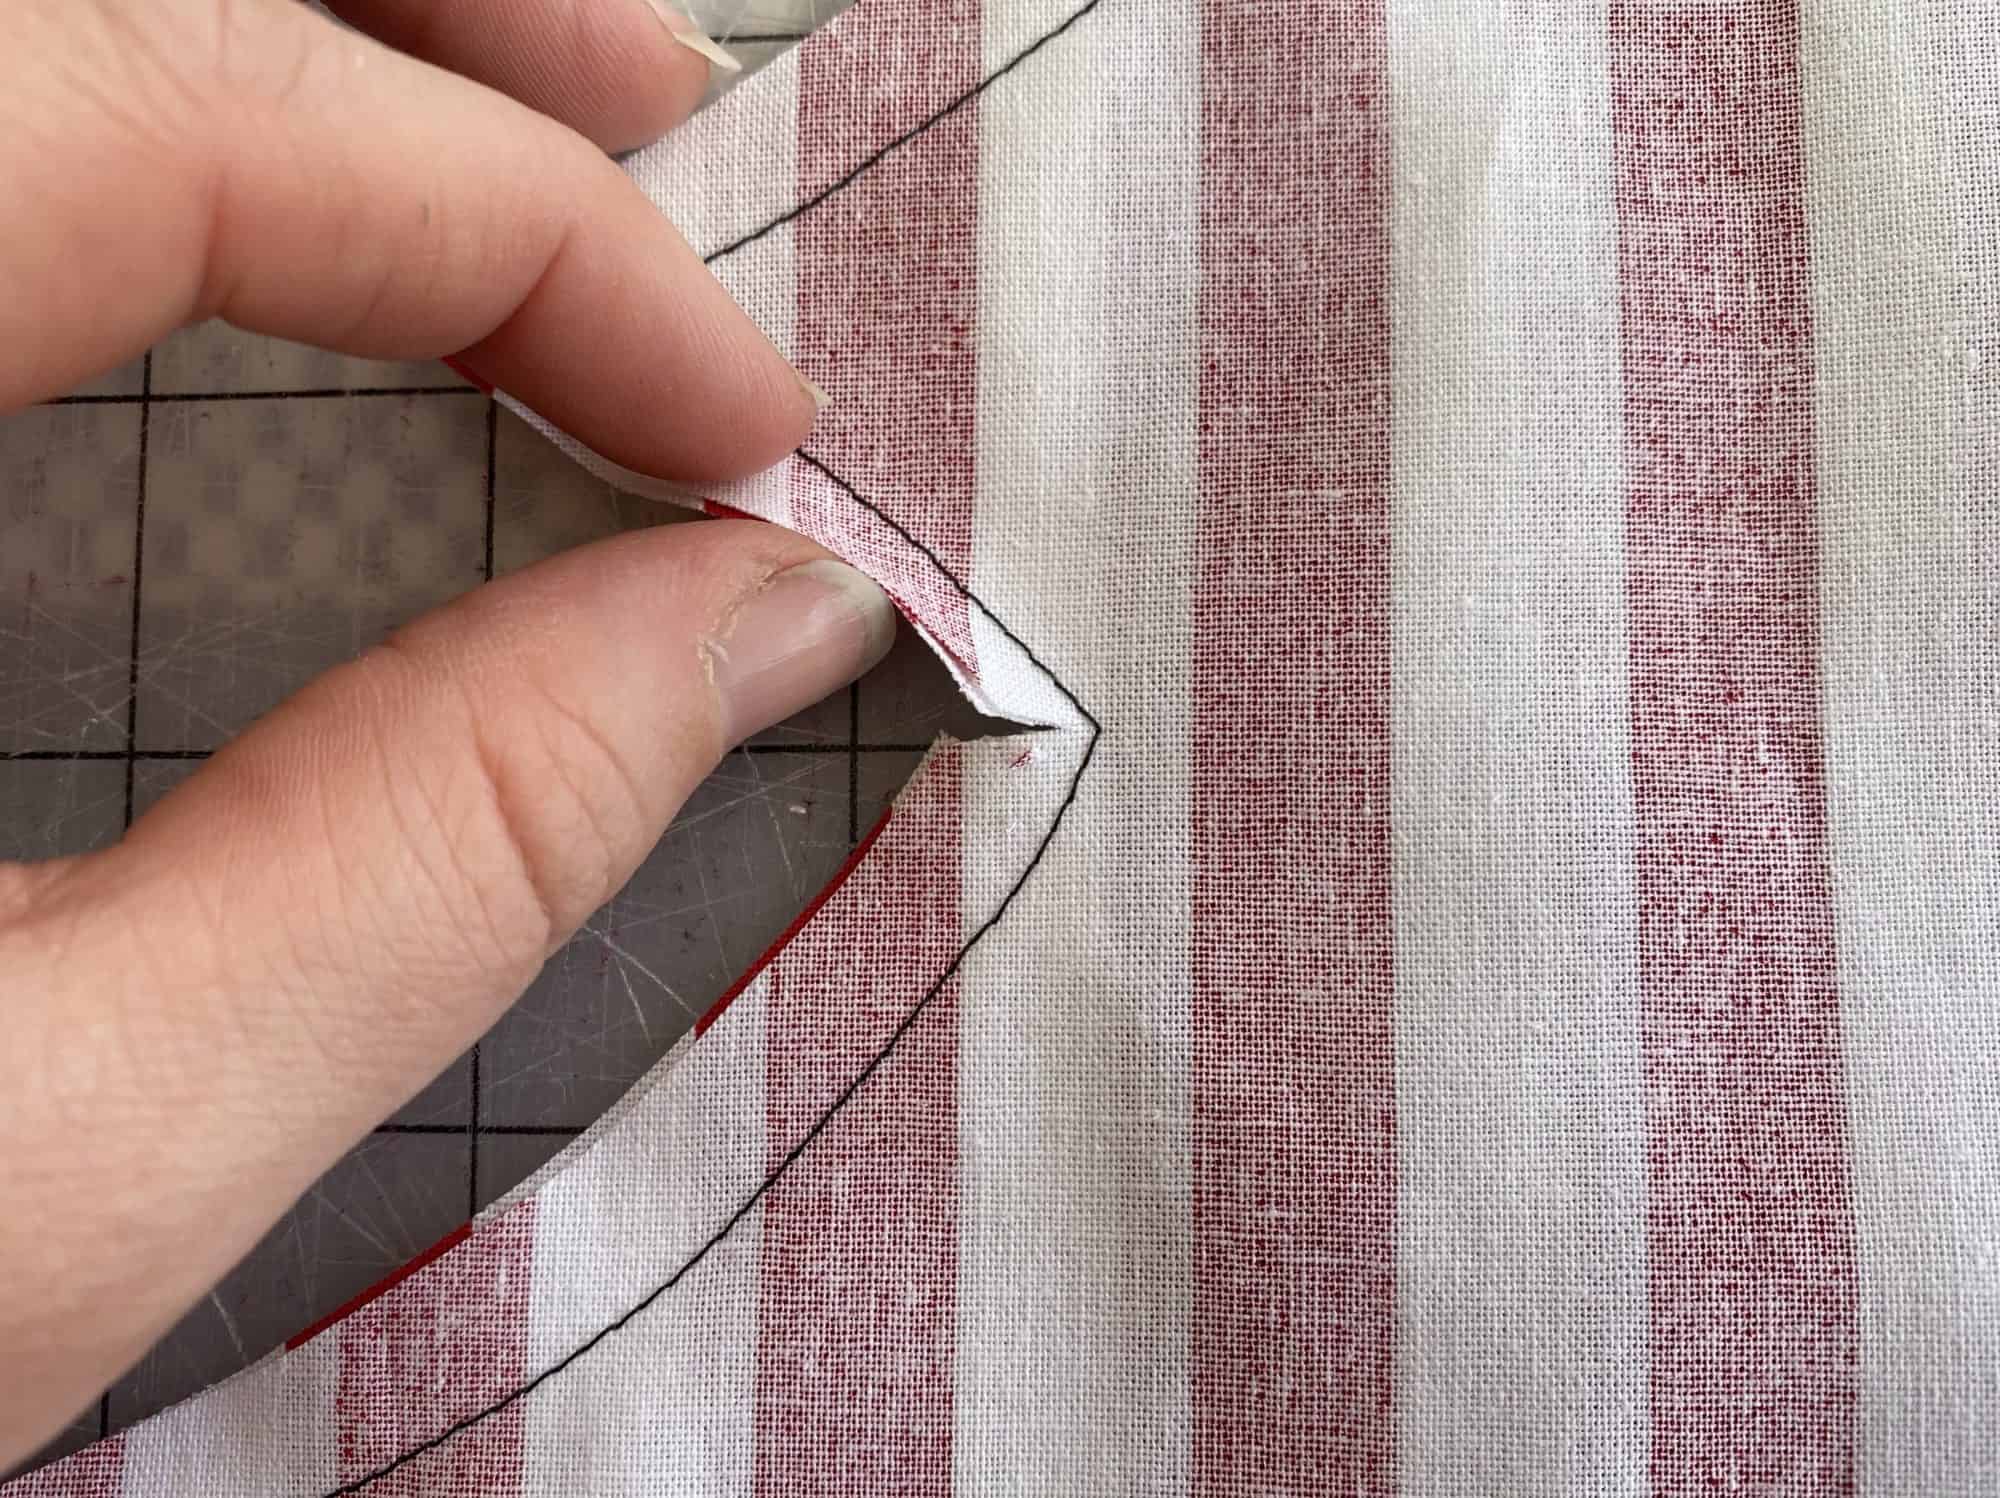
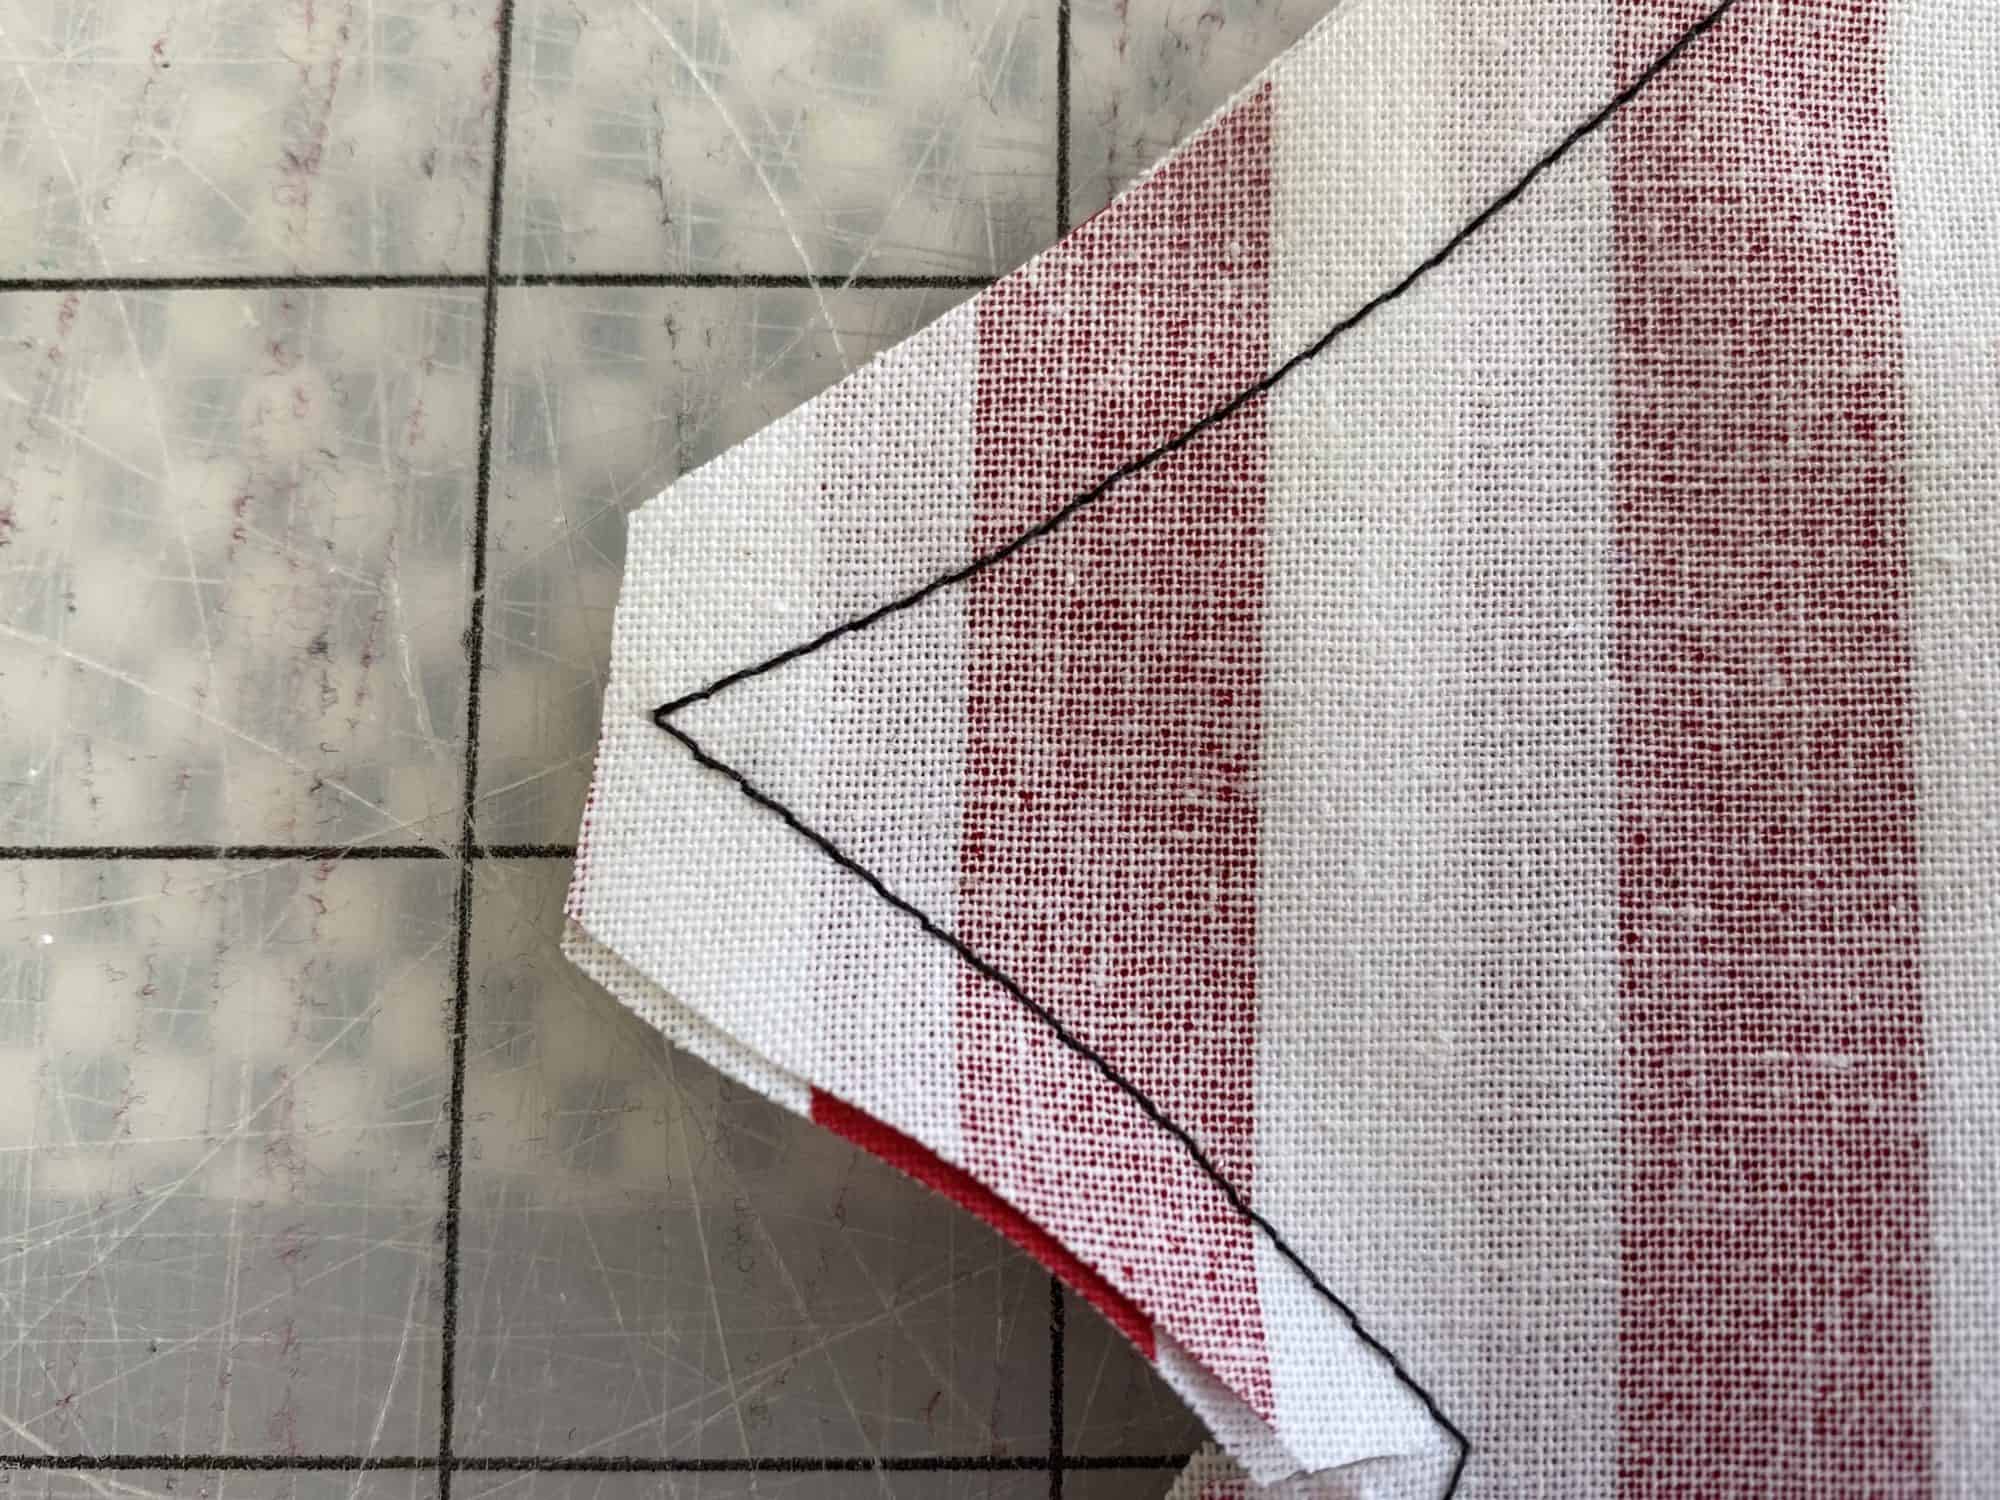
Clip as close as you can to the seam allowance without going through it, and trim points.  This will allow for sharper points.

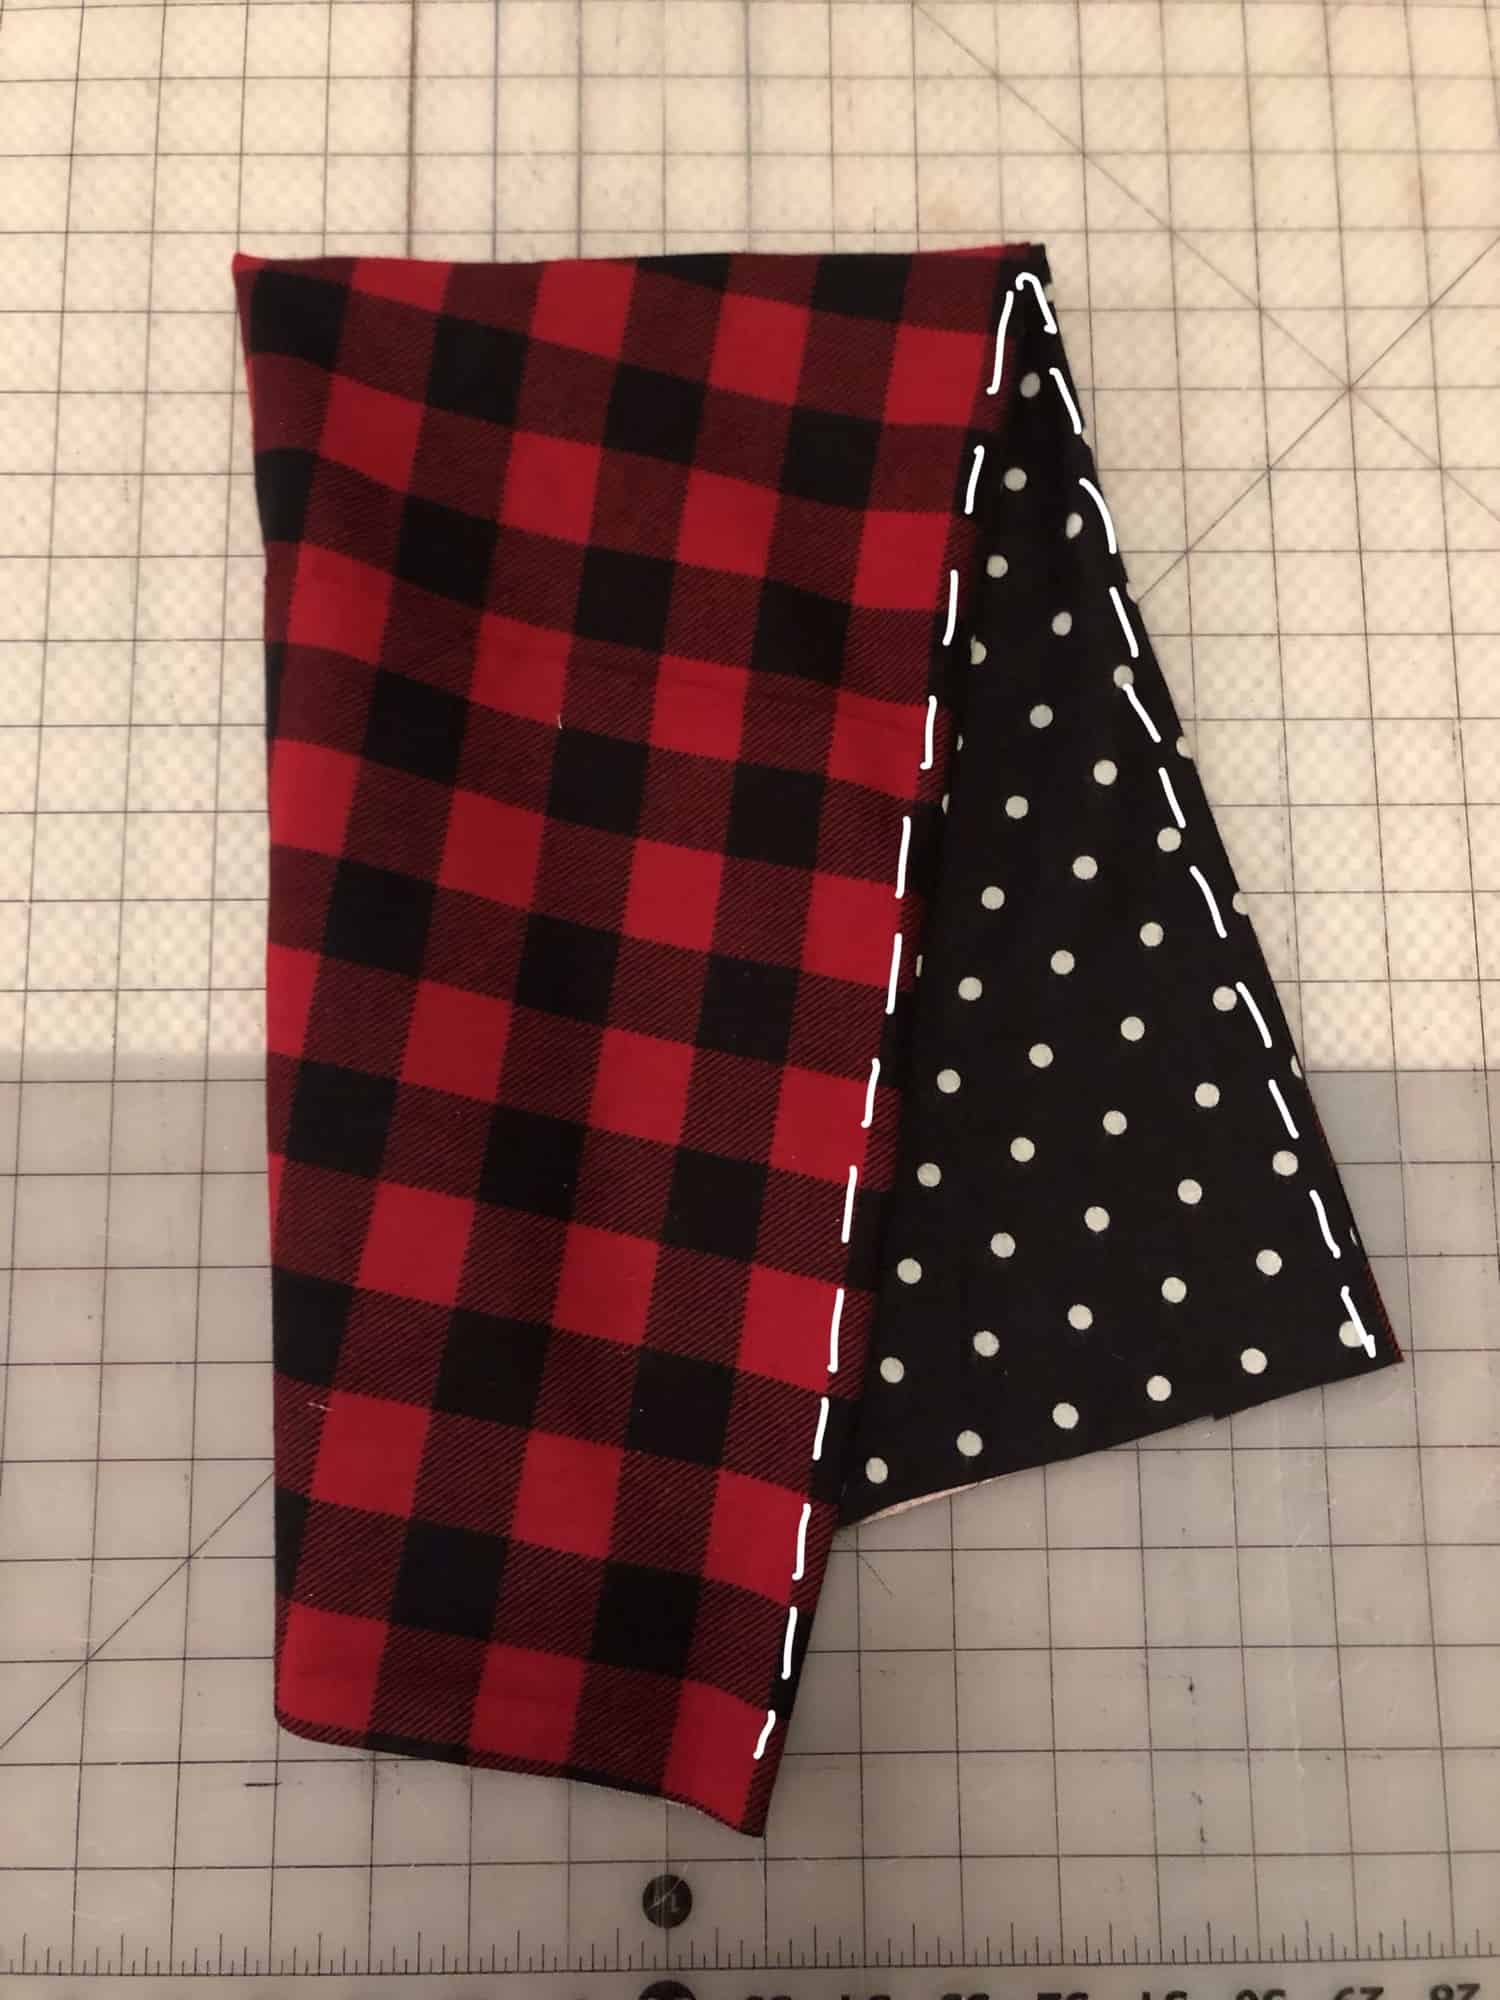
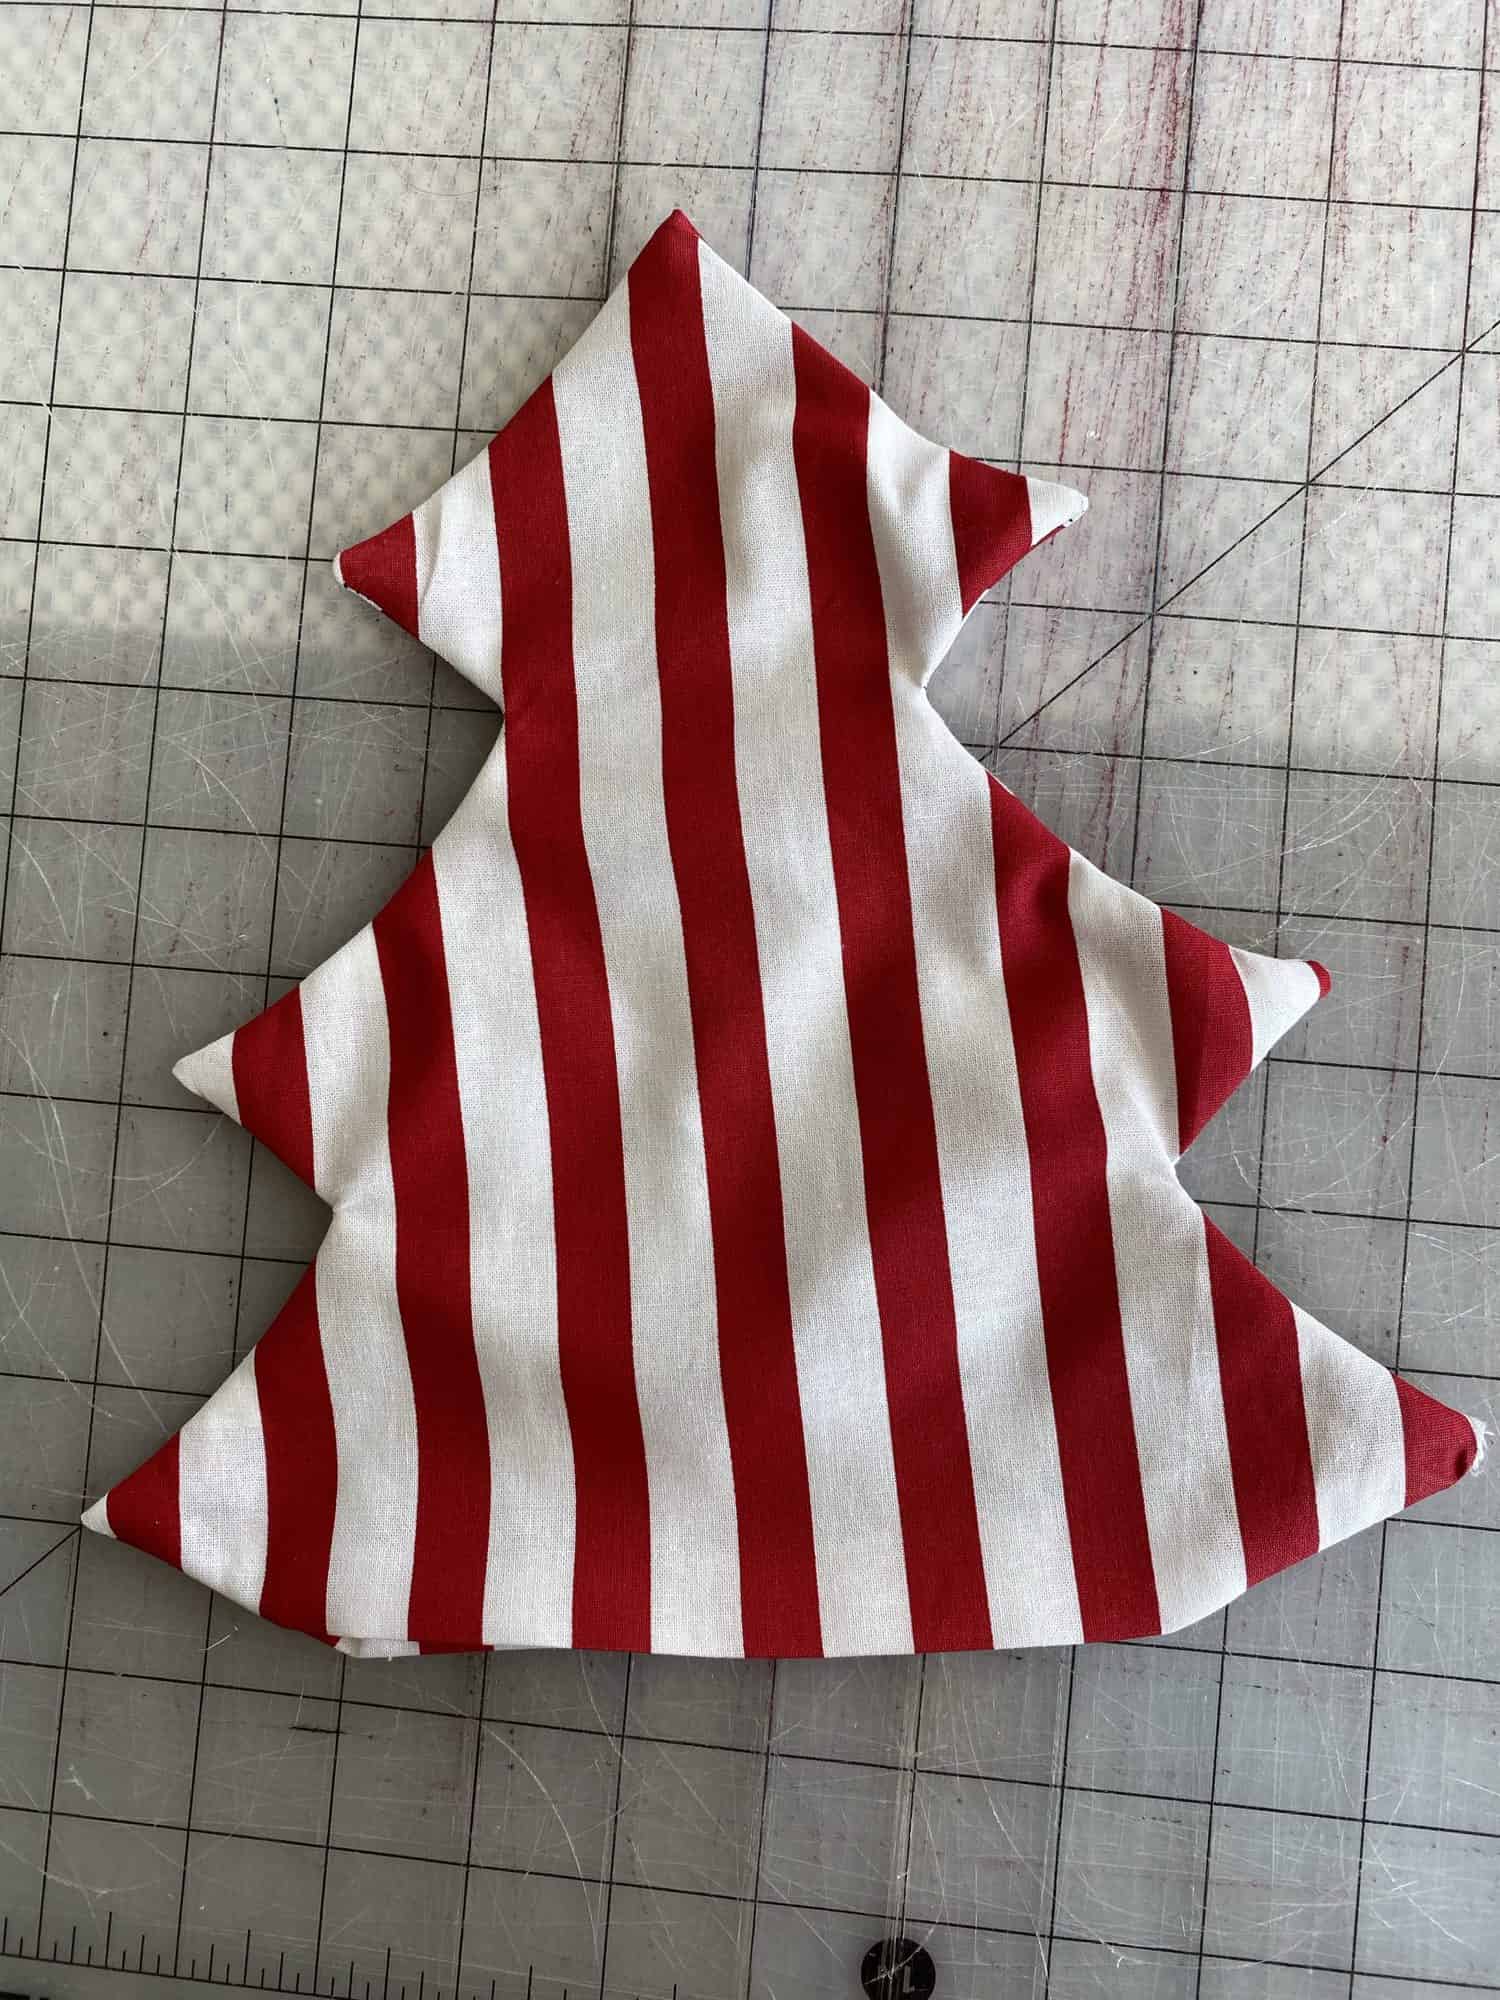
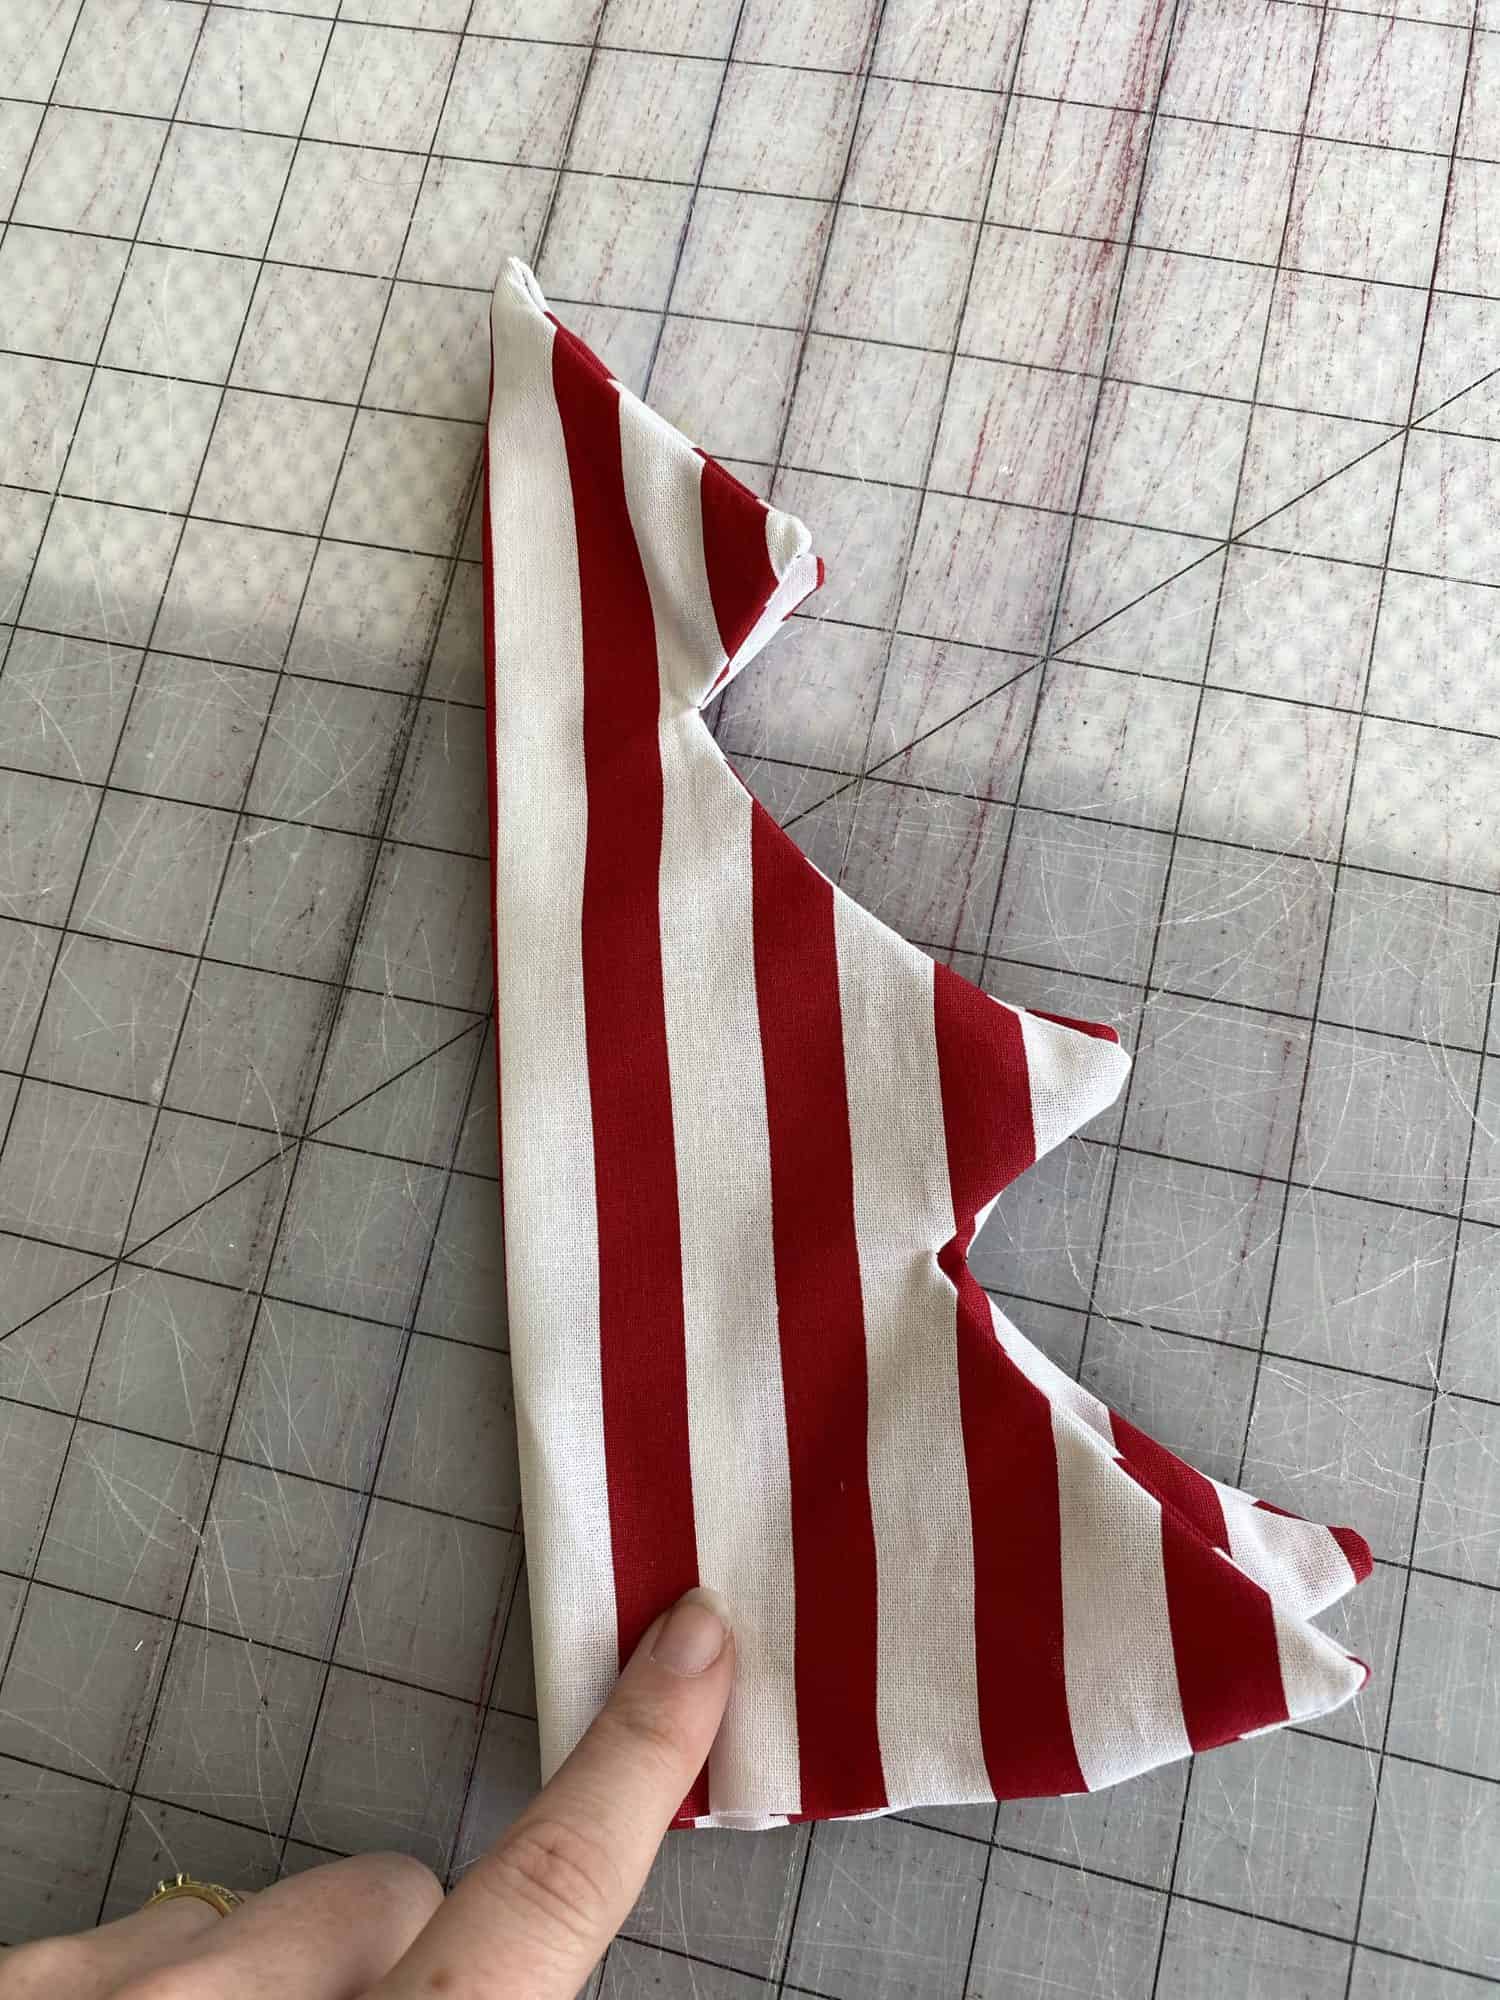
Turn right sides out and press, making sure to press under the seam allowance.  **Repeat with remaining pieces.

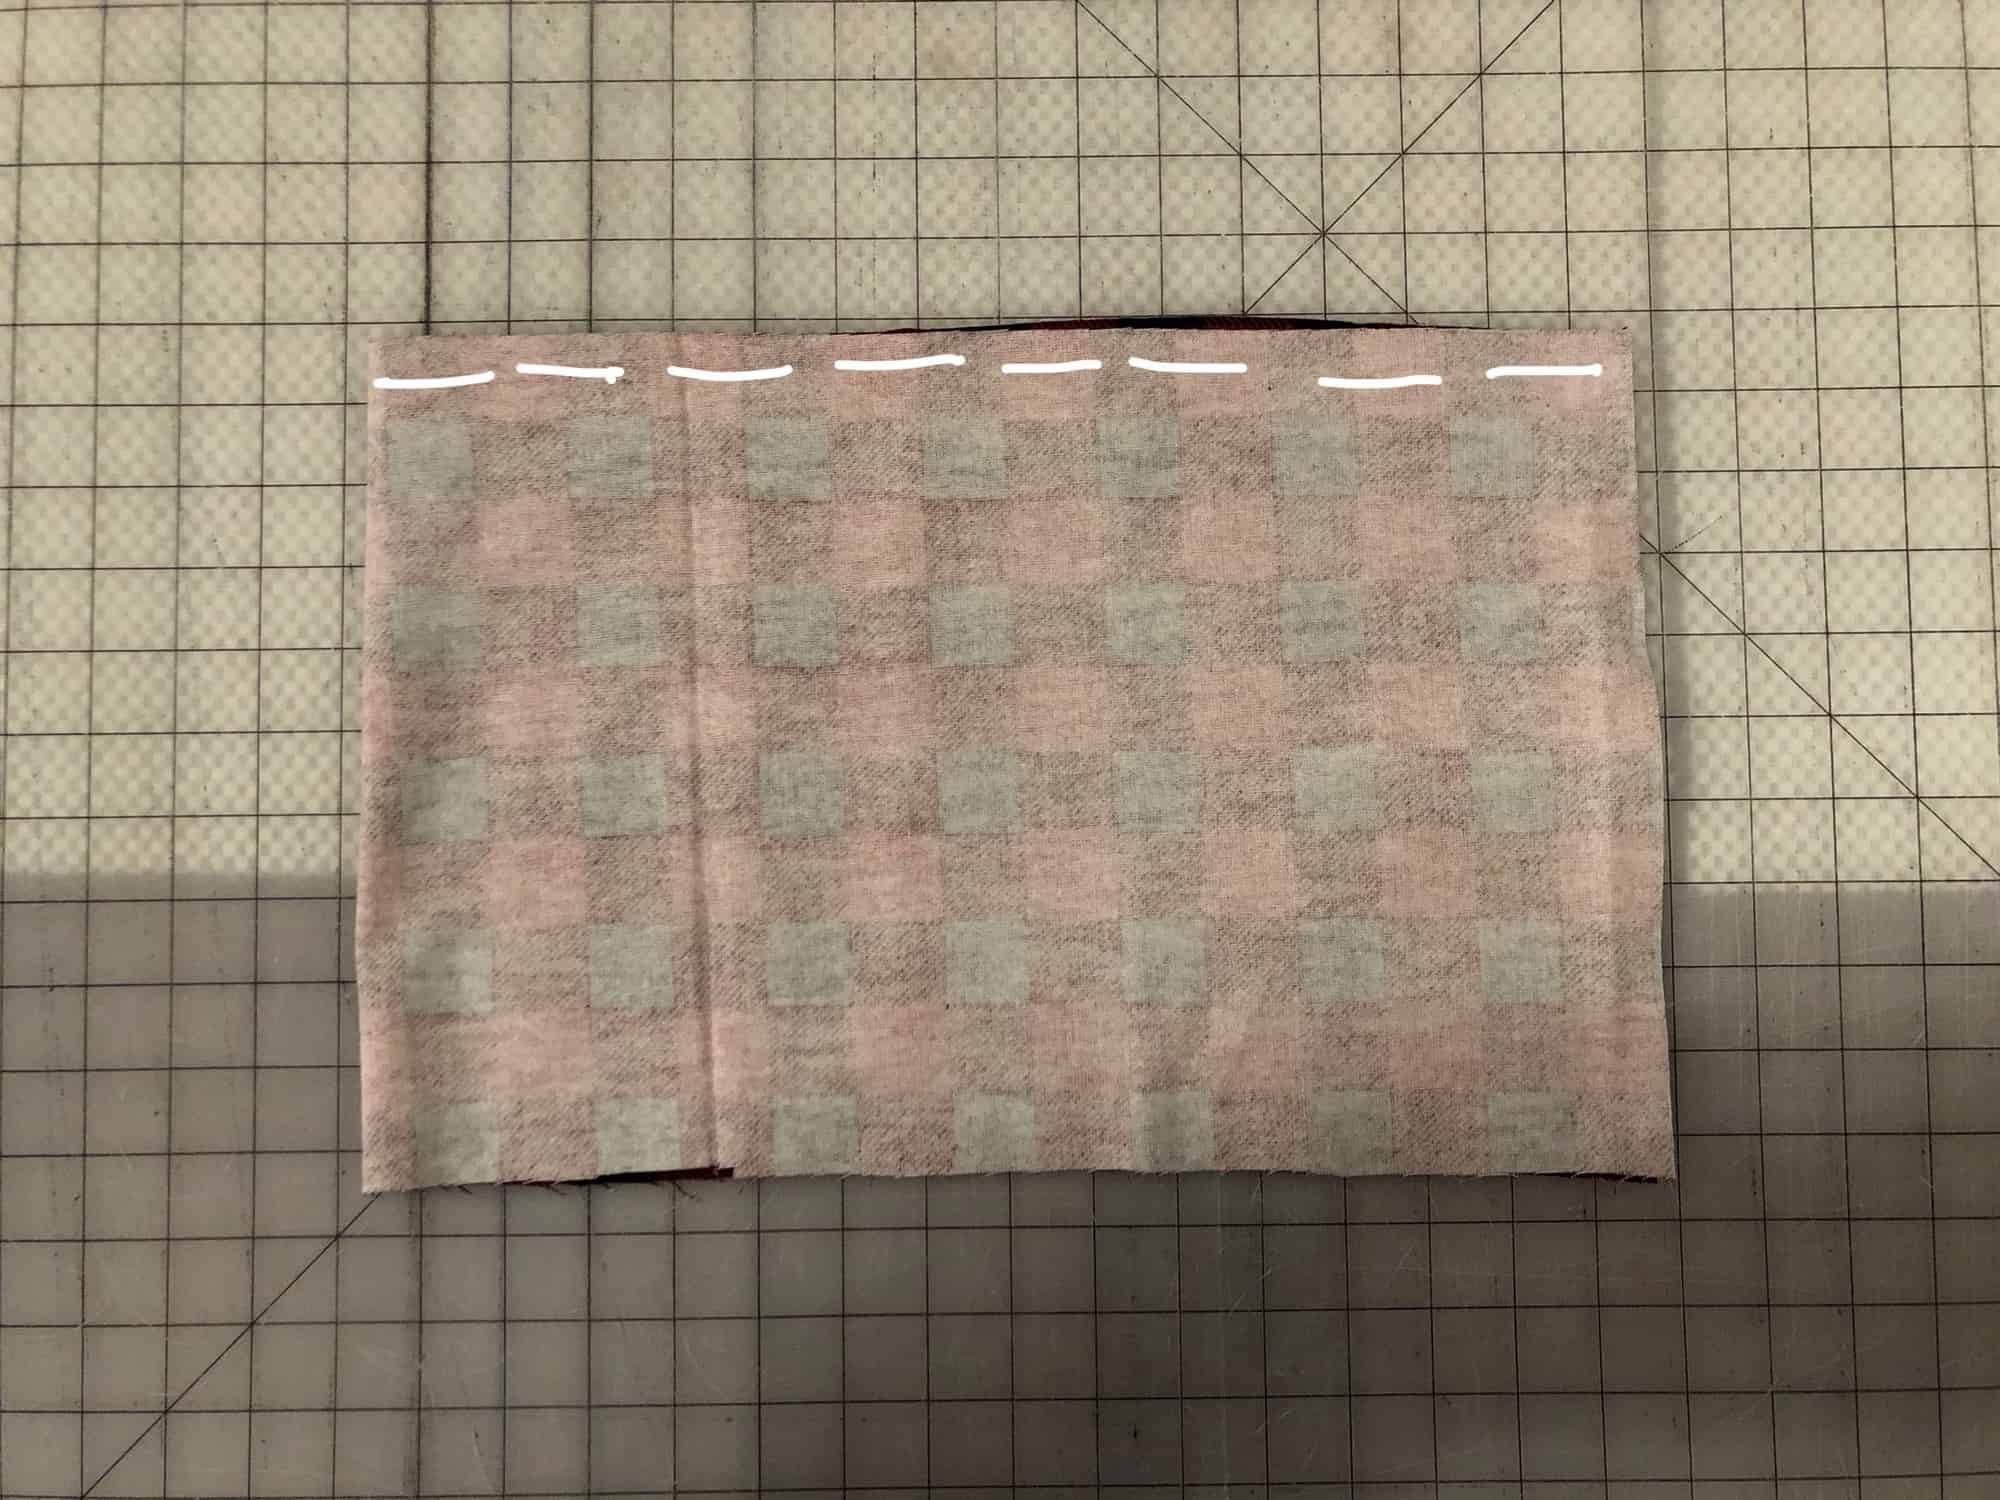
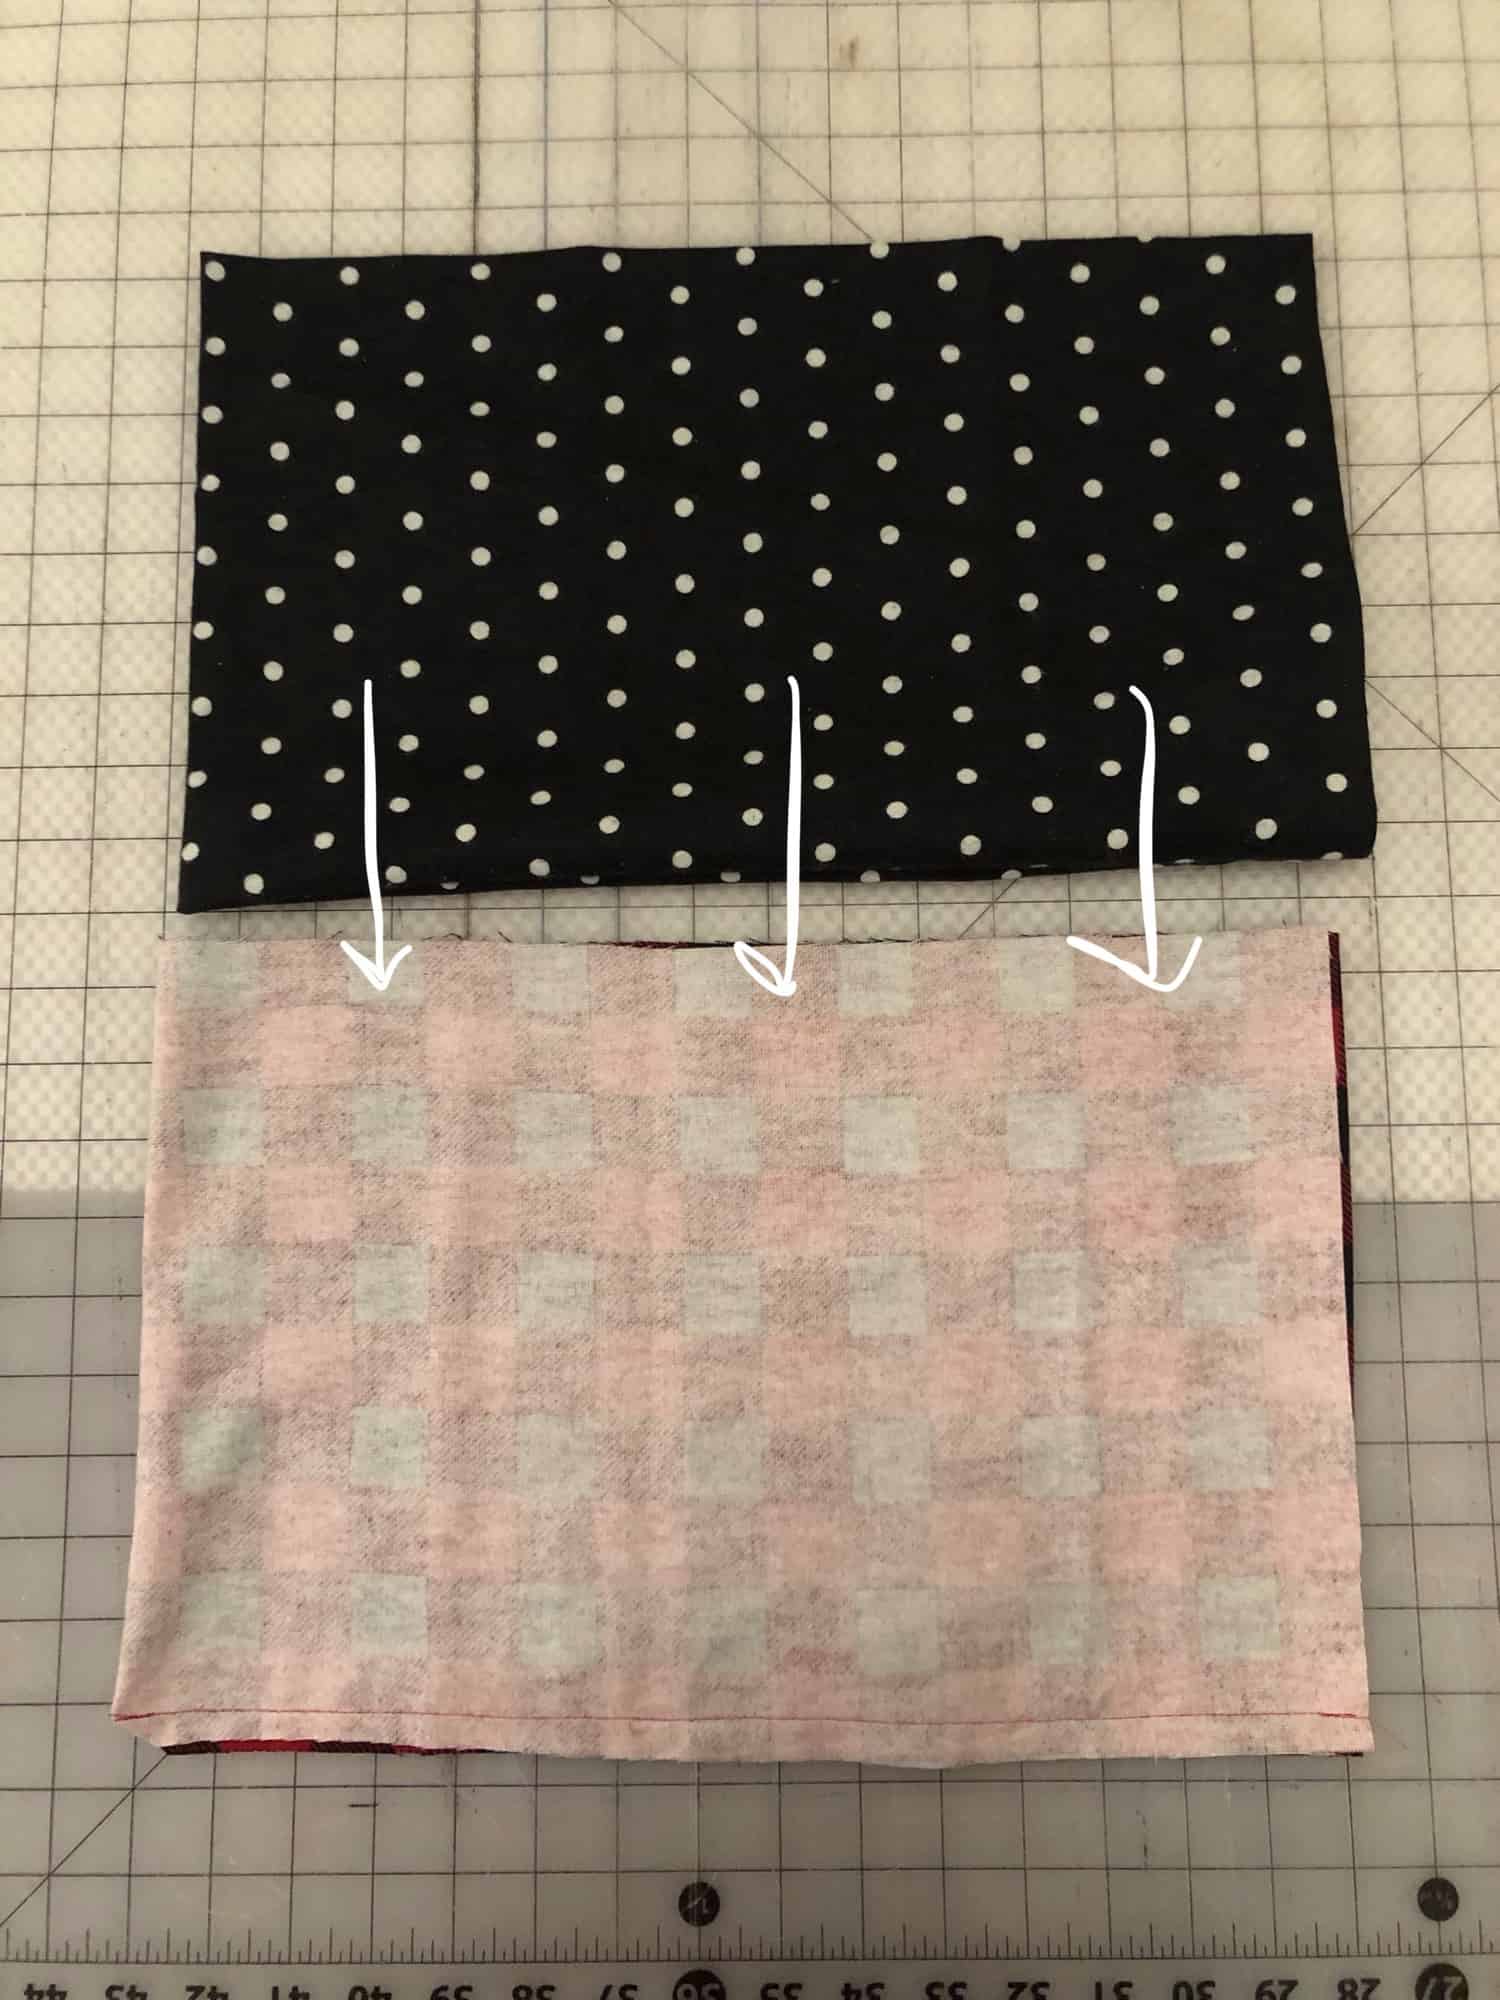
Press one of the sets in half, to create your guide line for sewing in the next step.

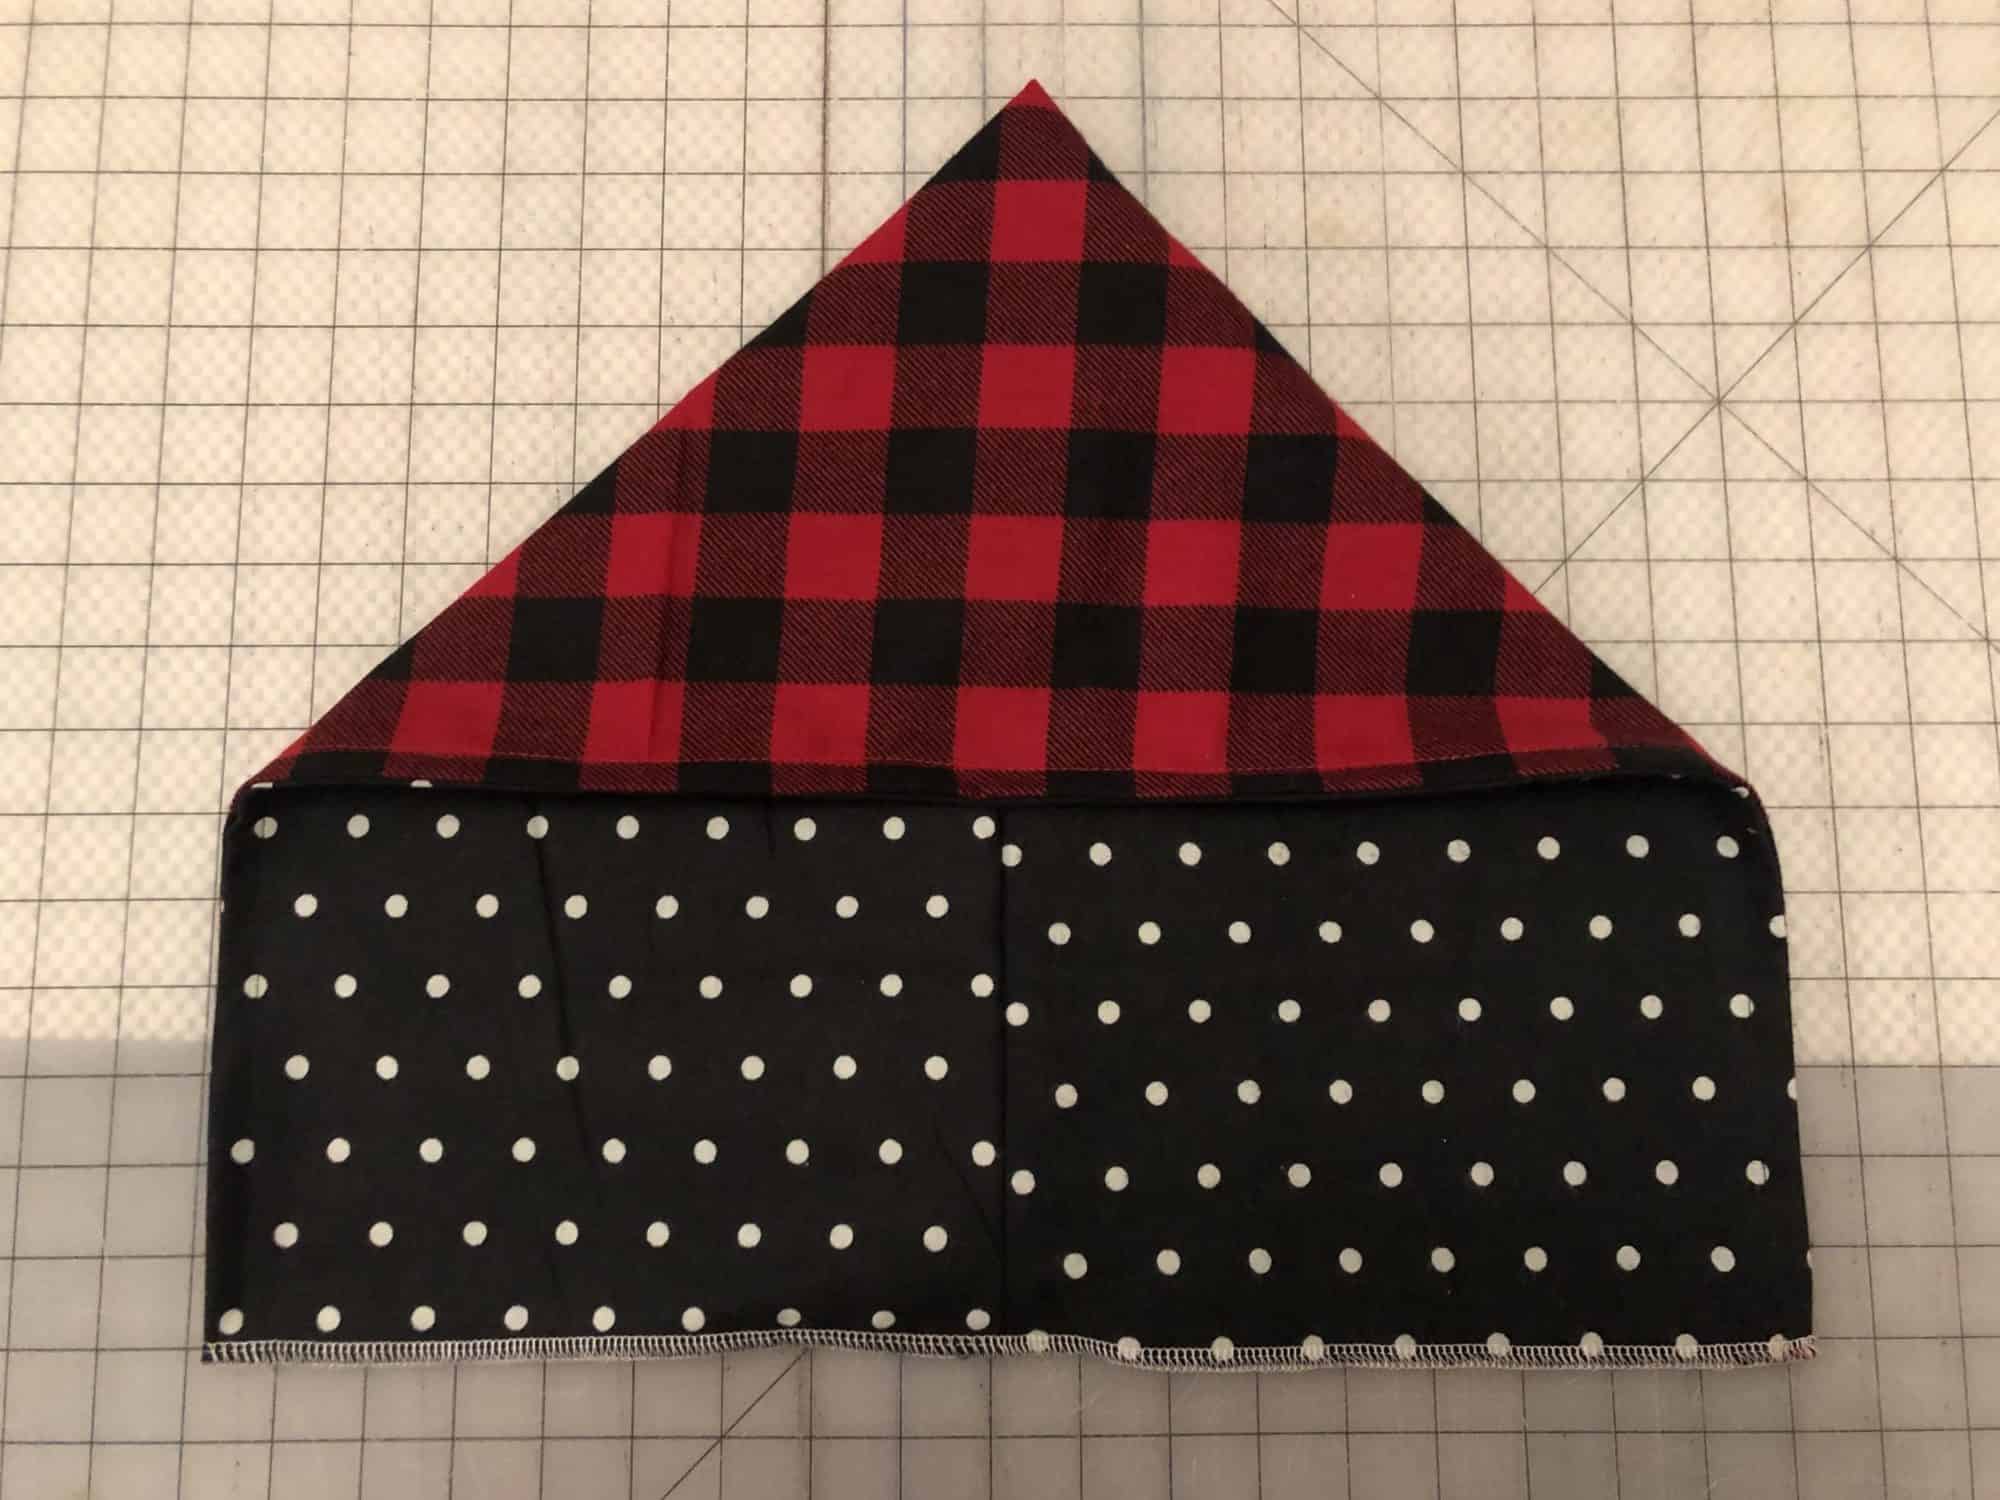
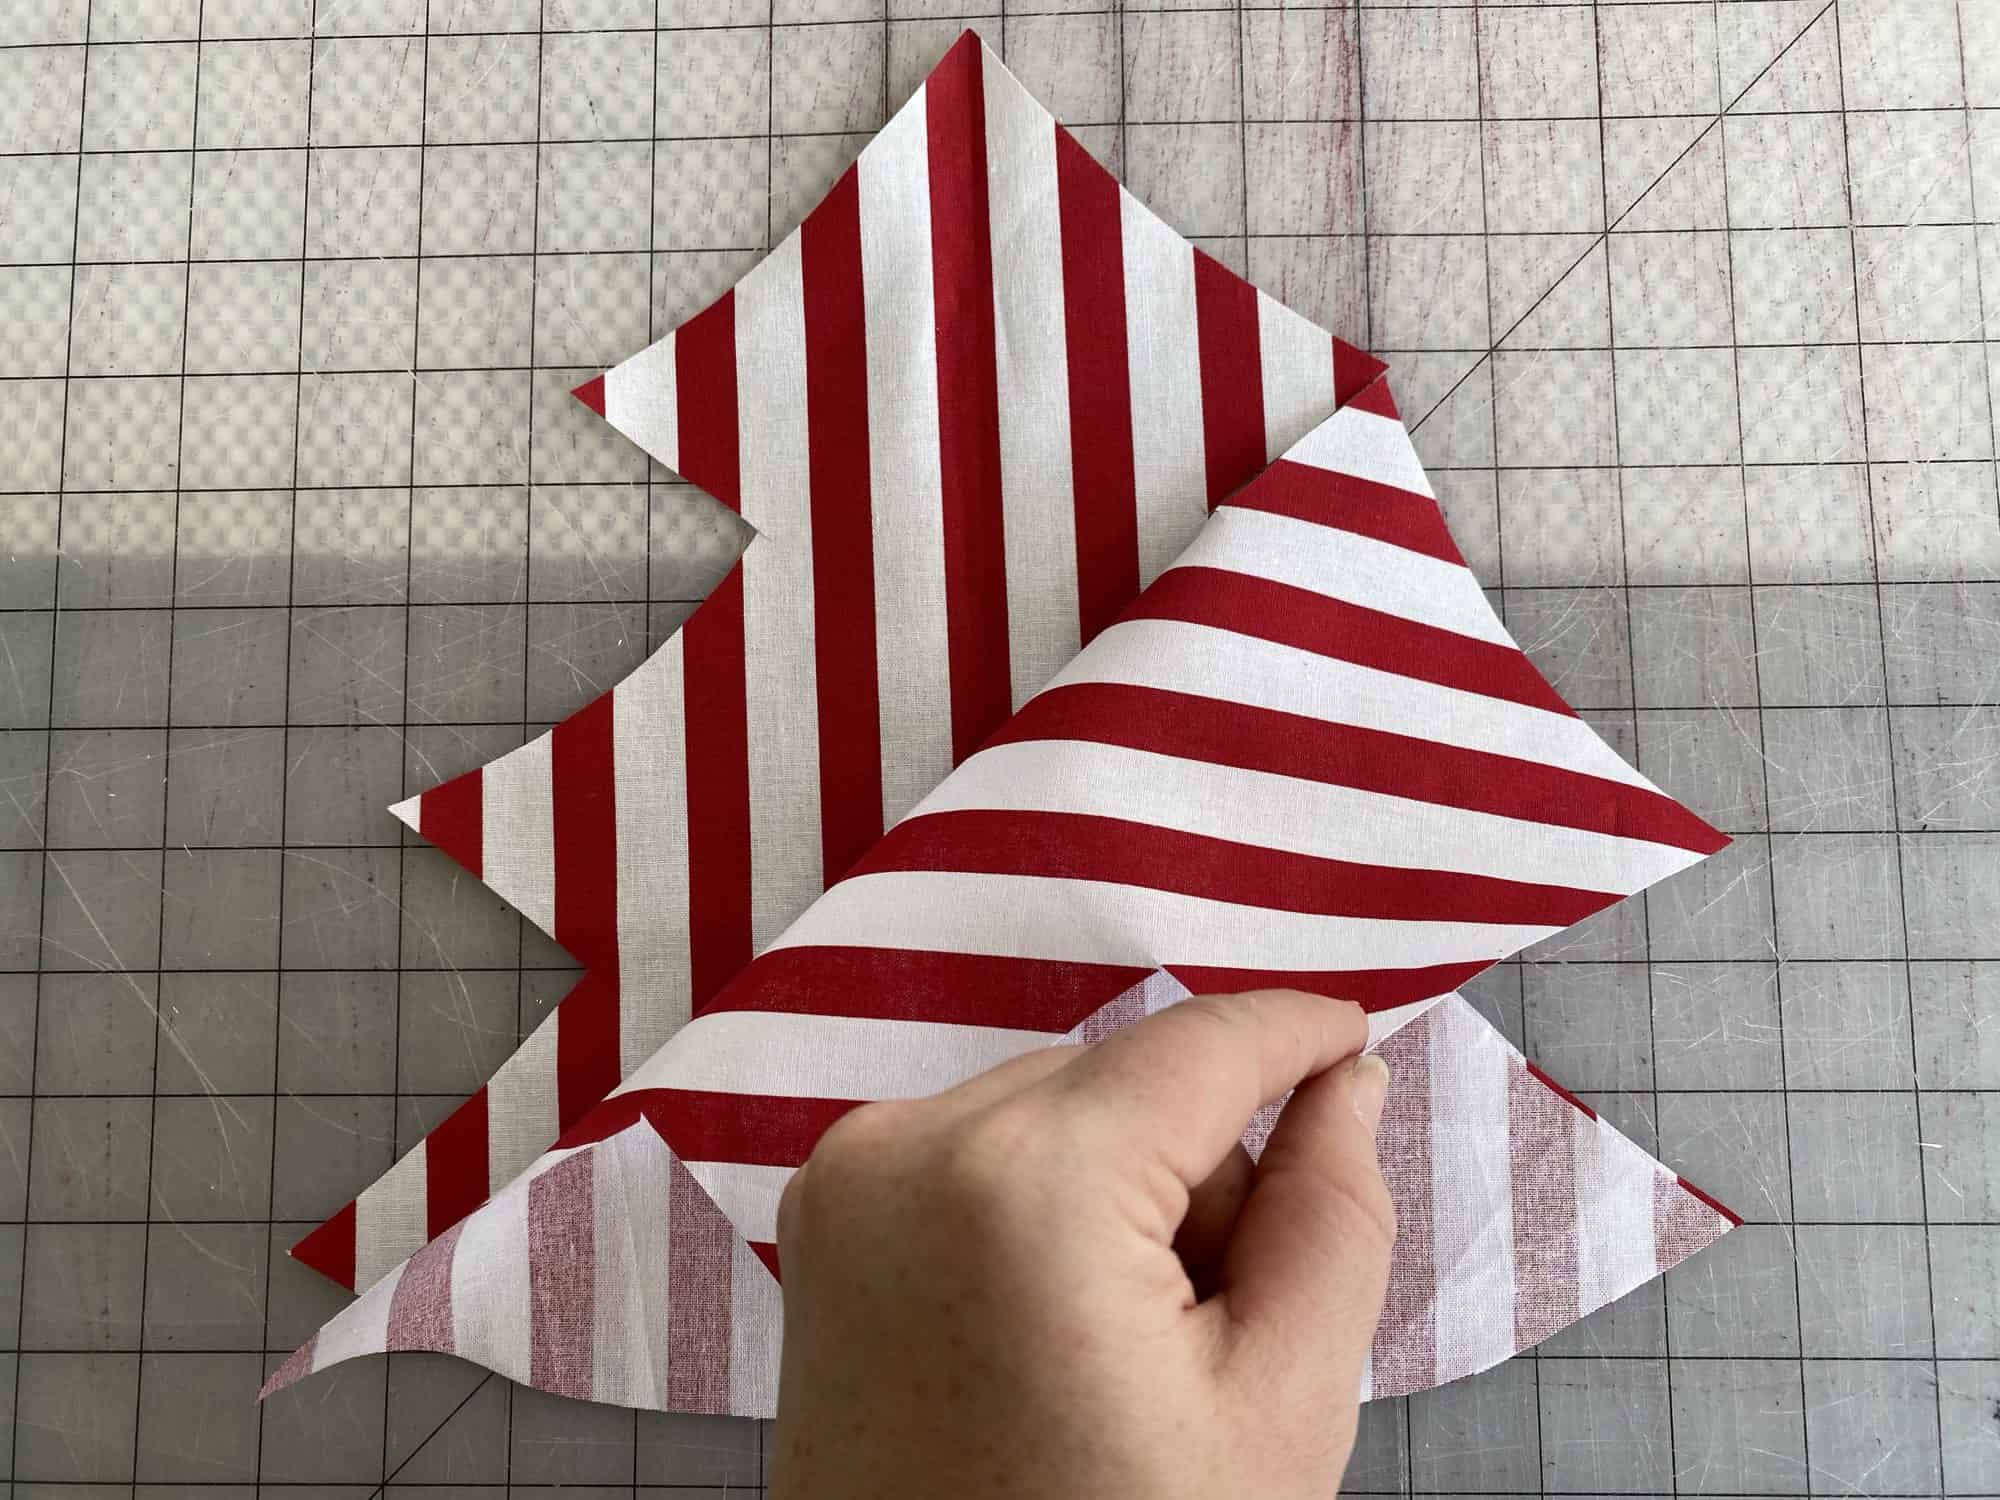
Align both sets on top of each other, keeping the one that you pressed on top.

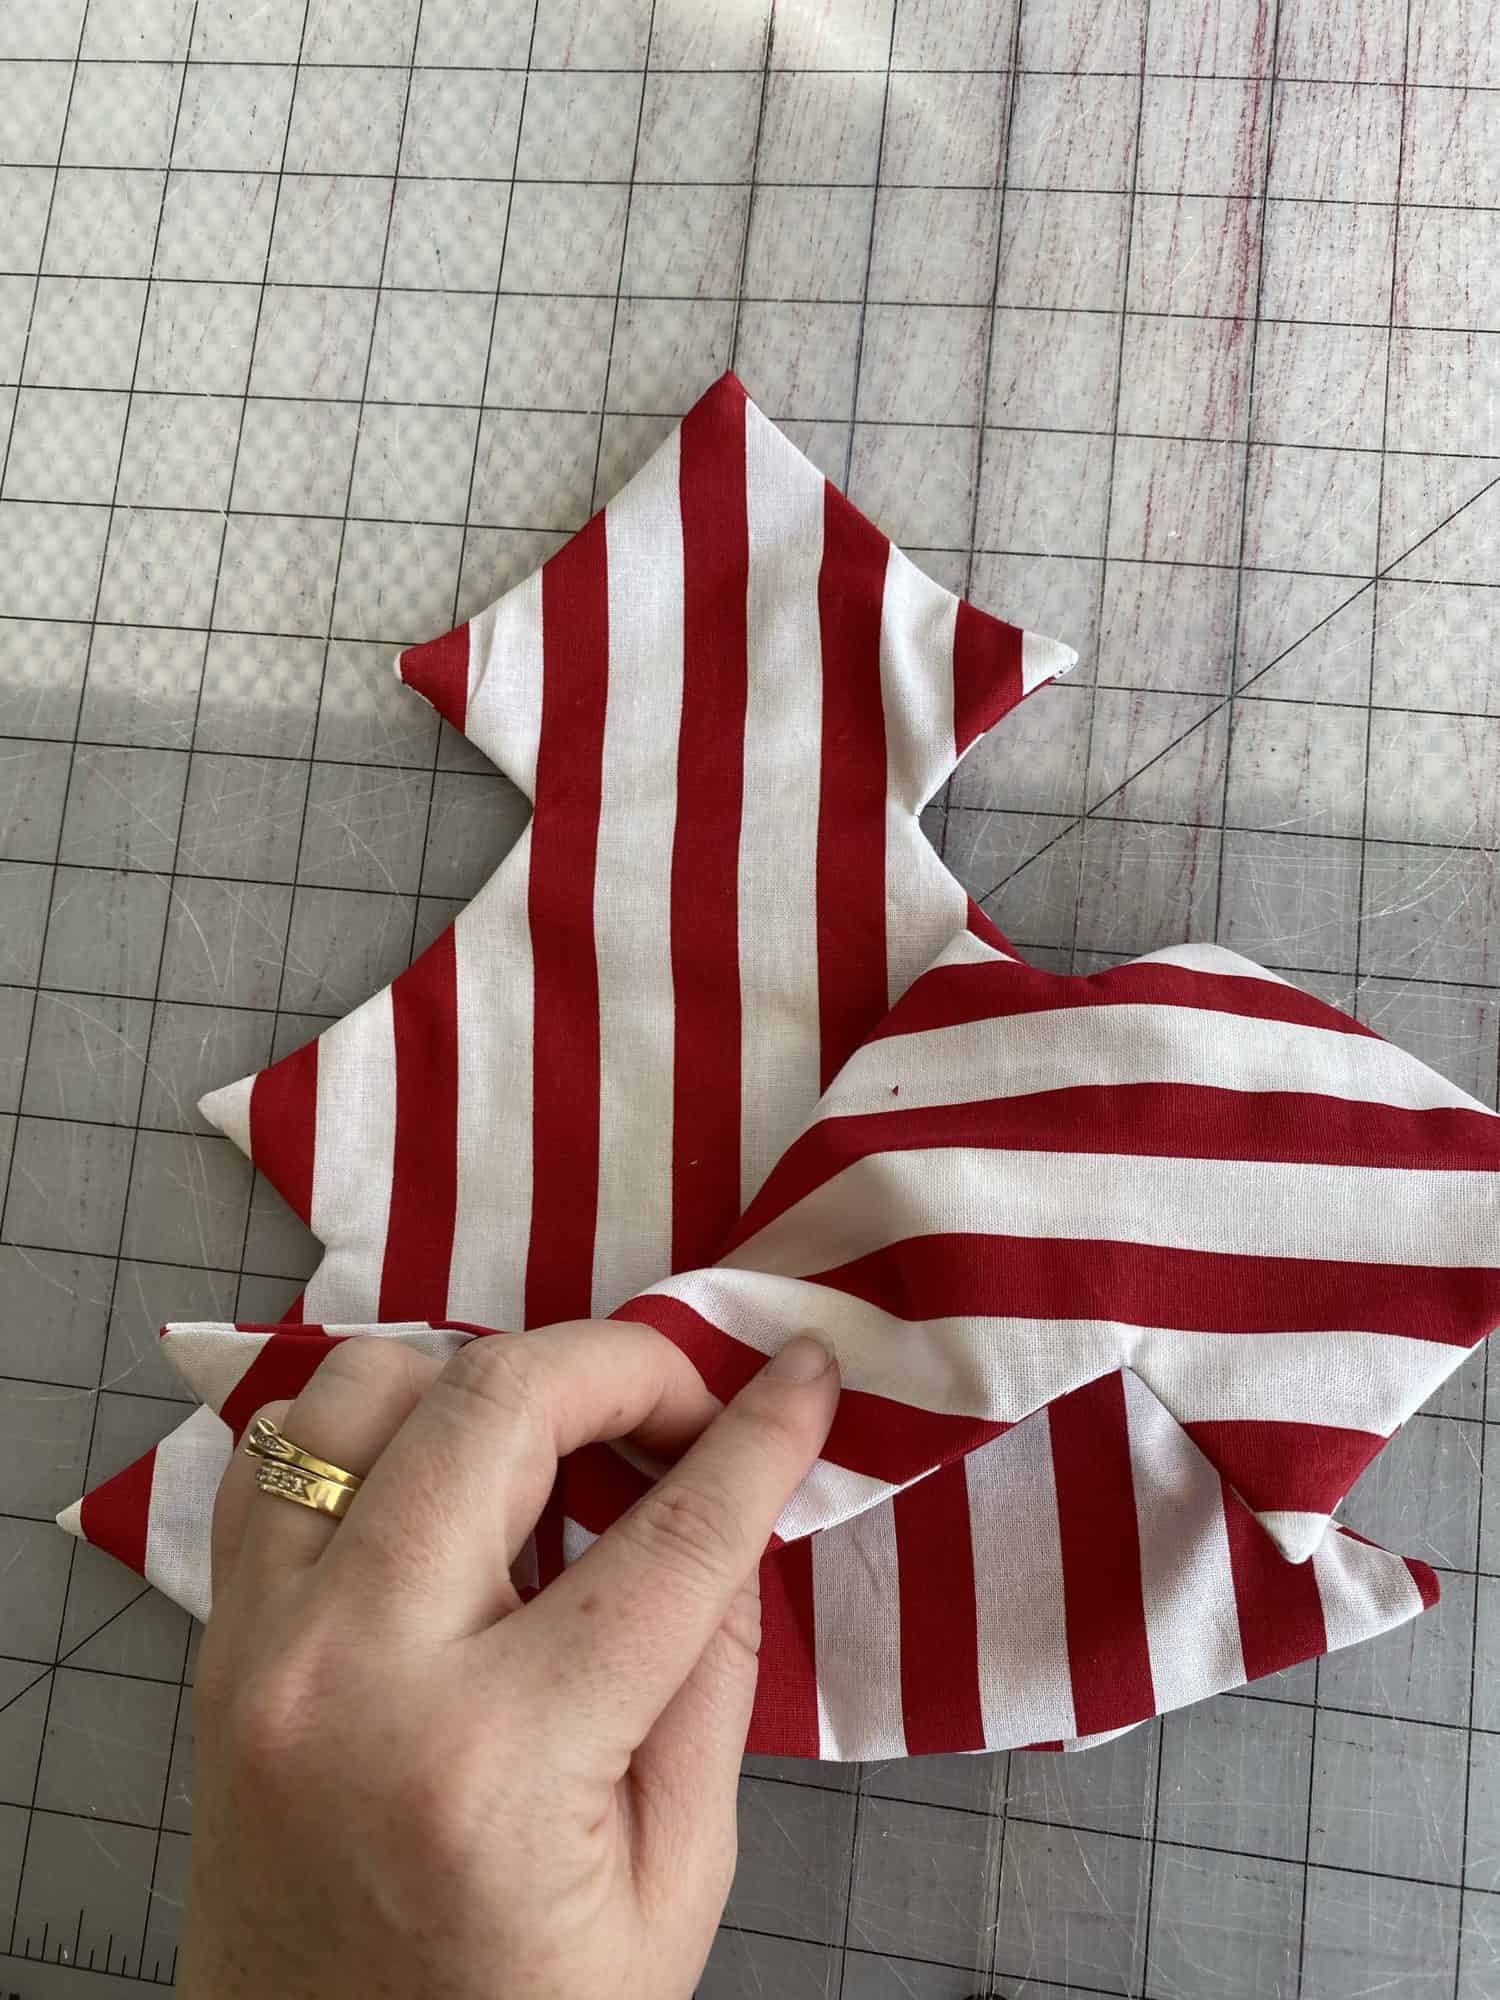
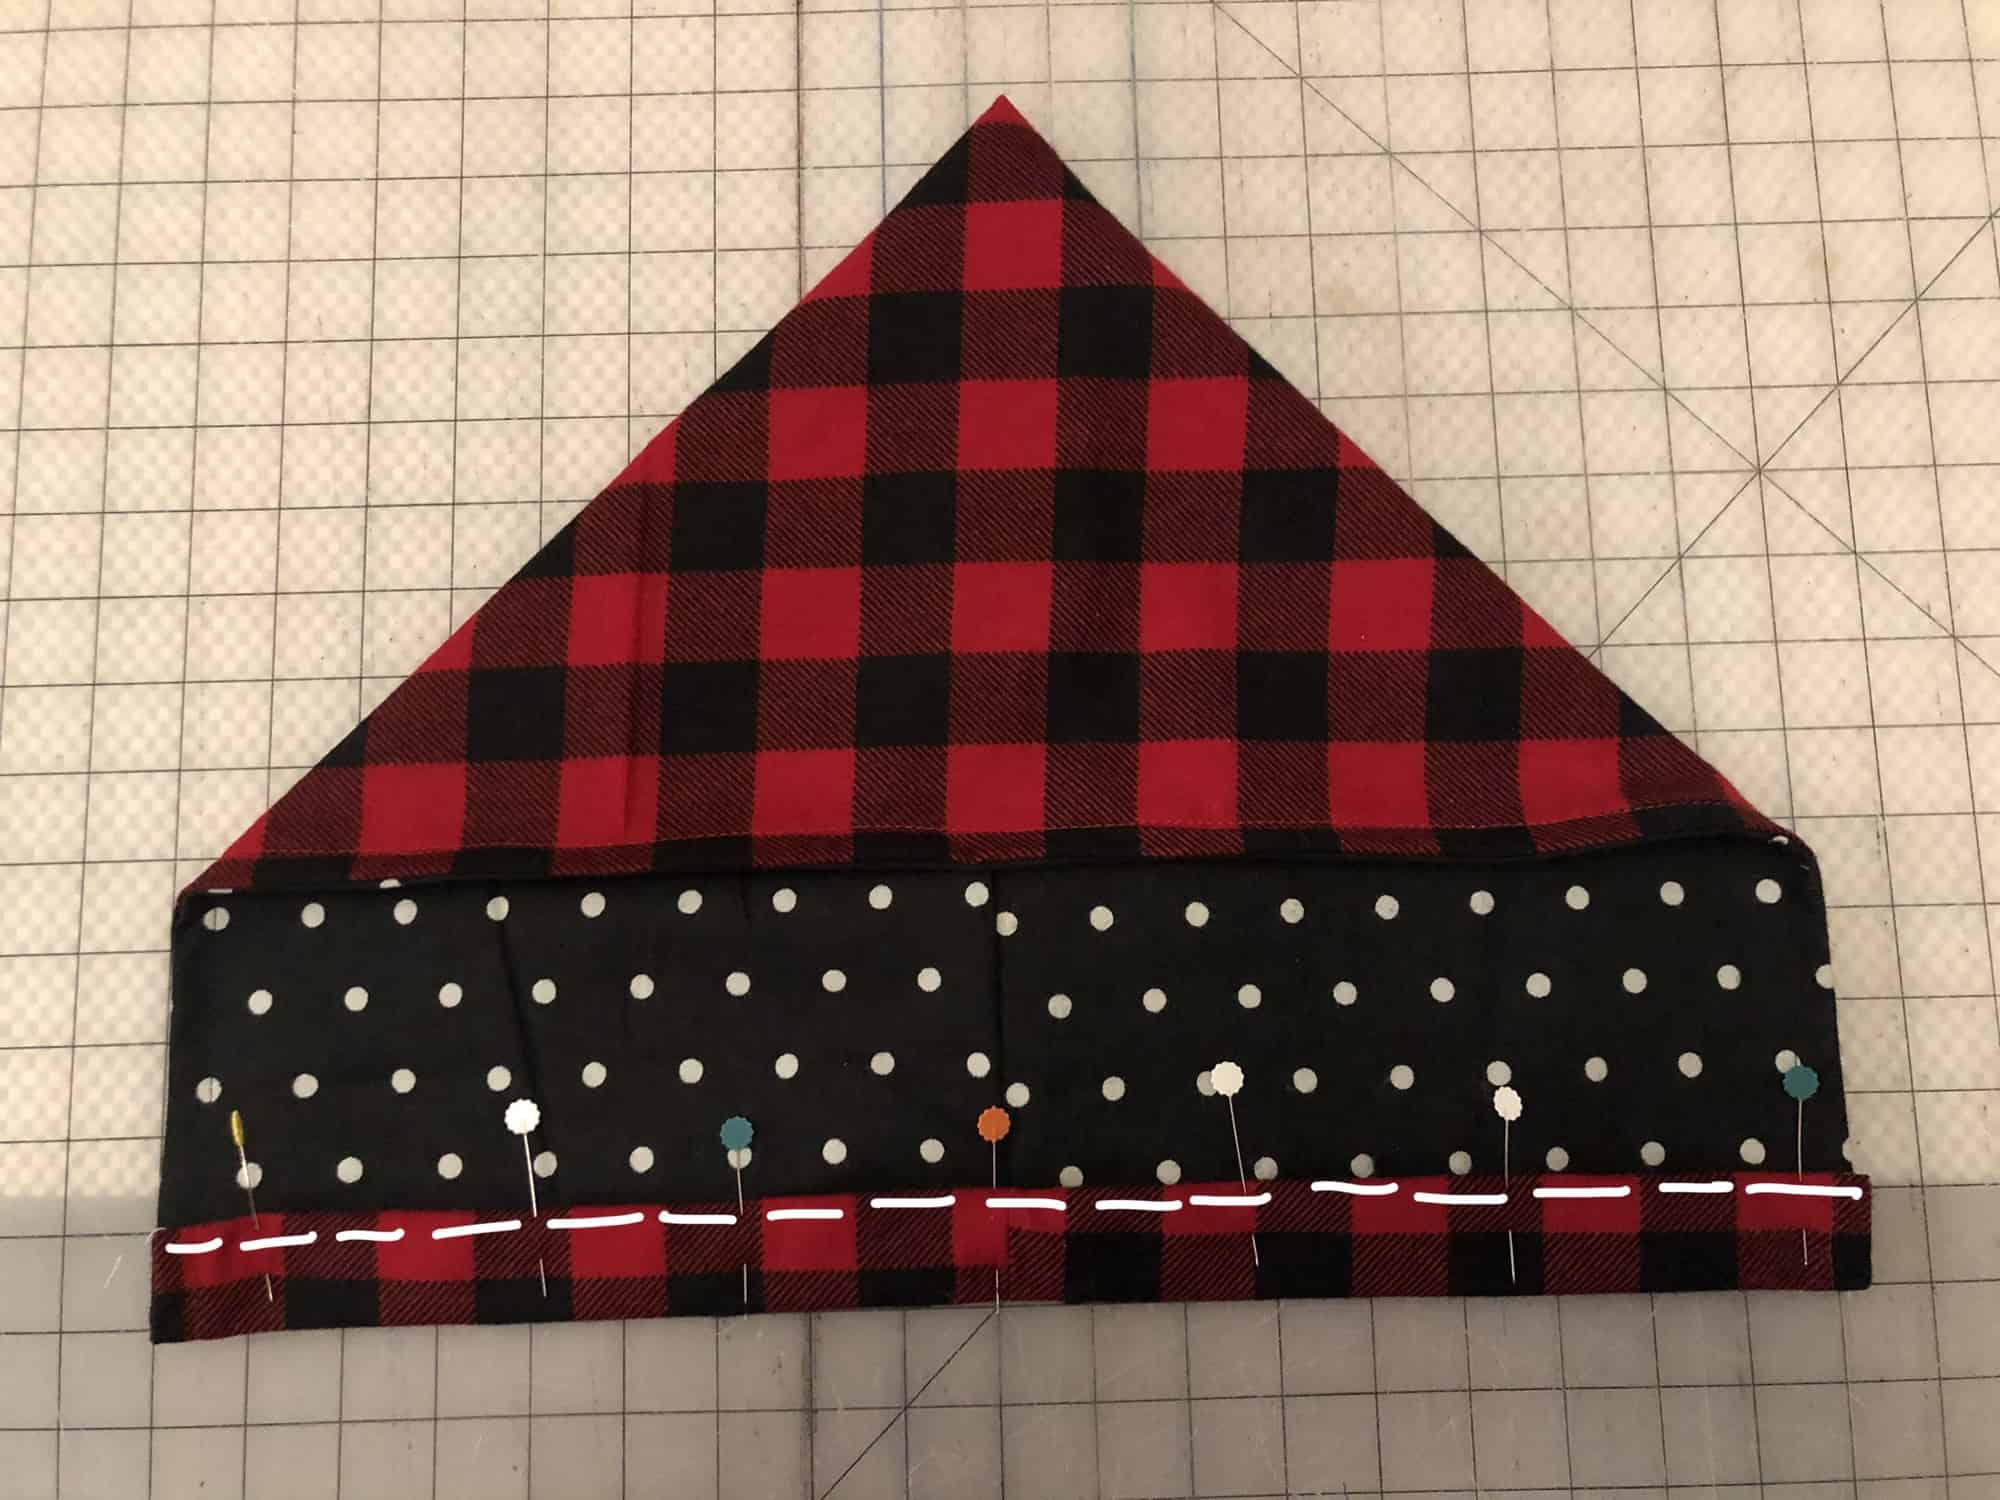
Sew a line straight down the middle of all layers.

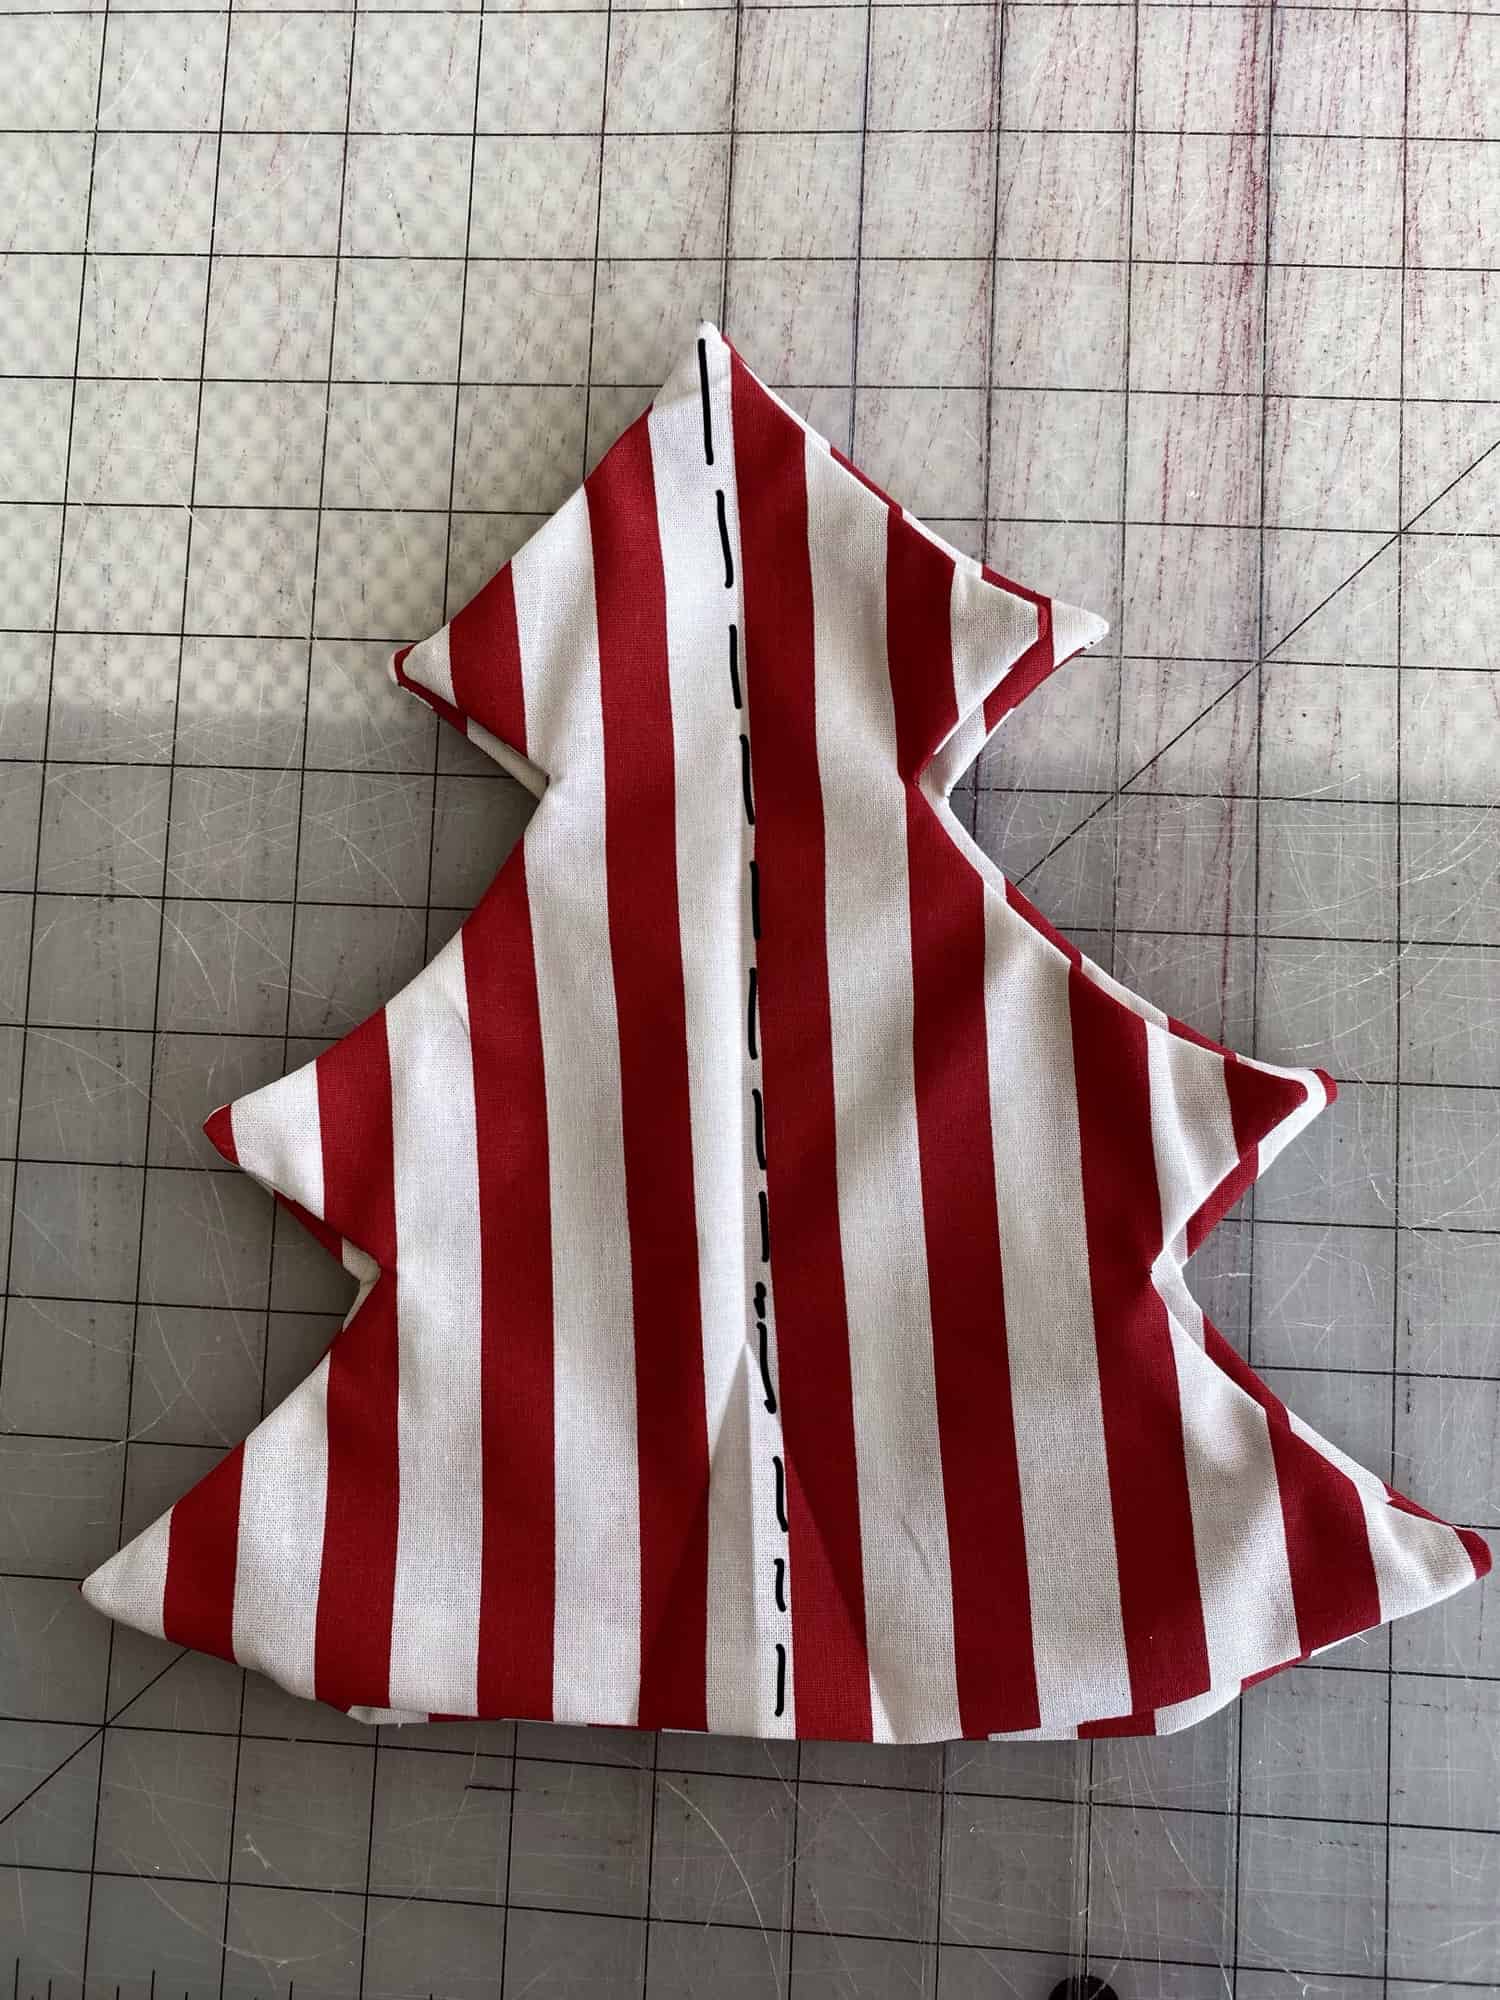
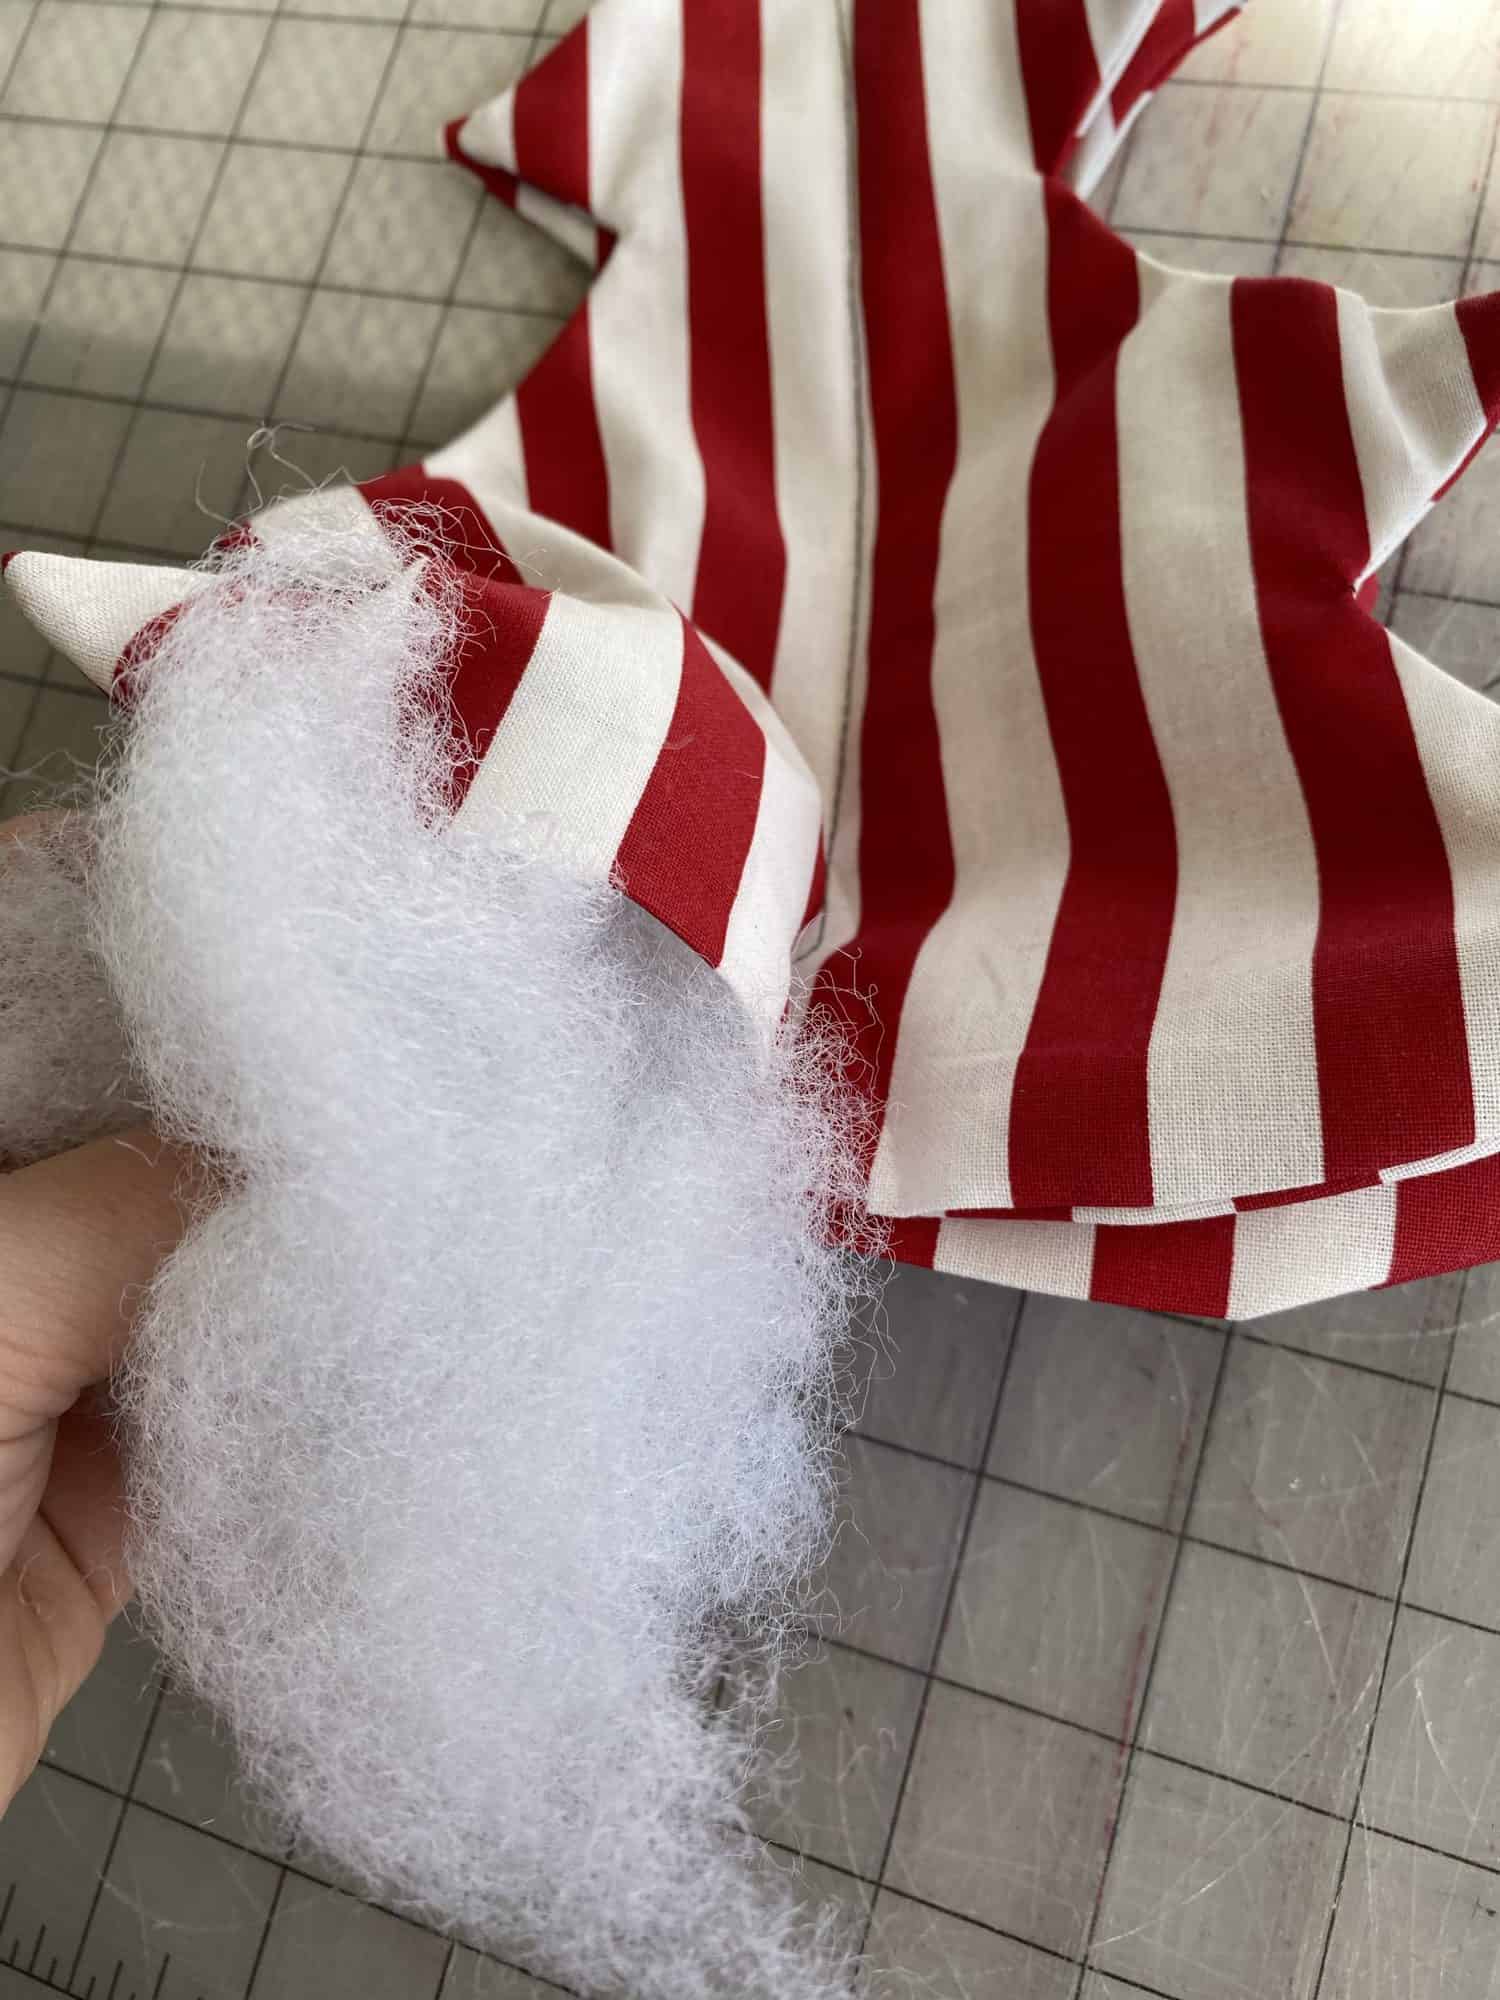
Fill all four openings with poly fill.

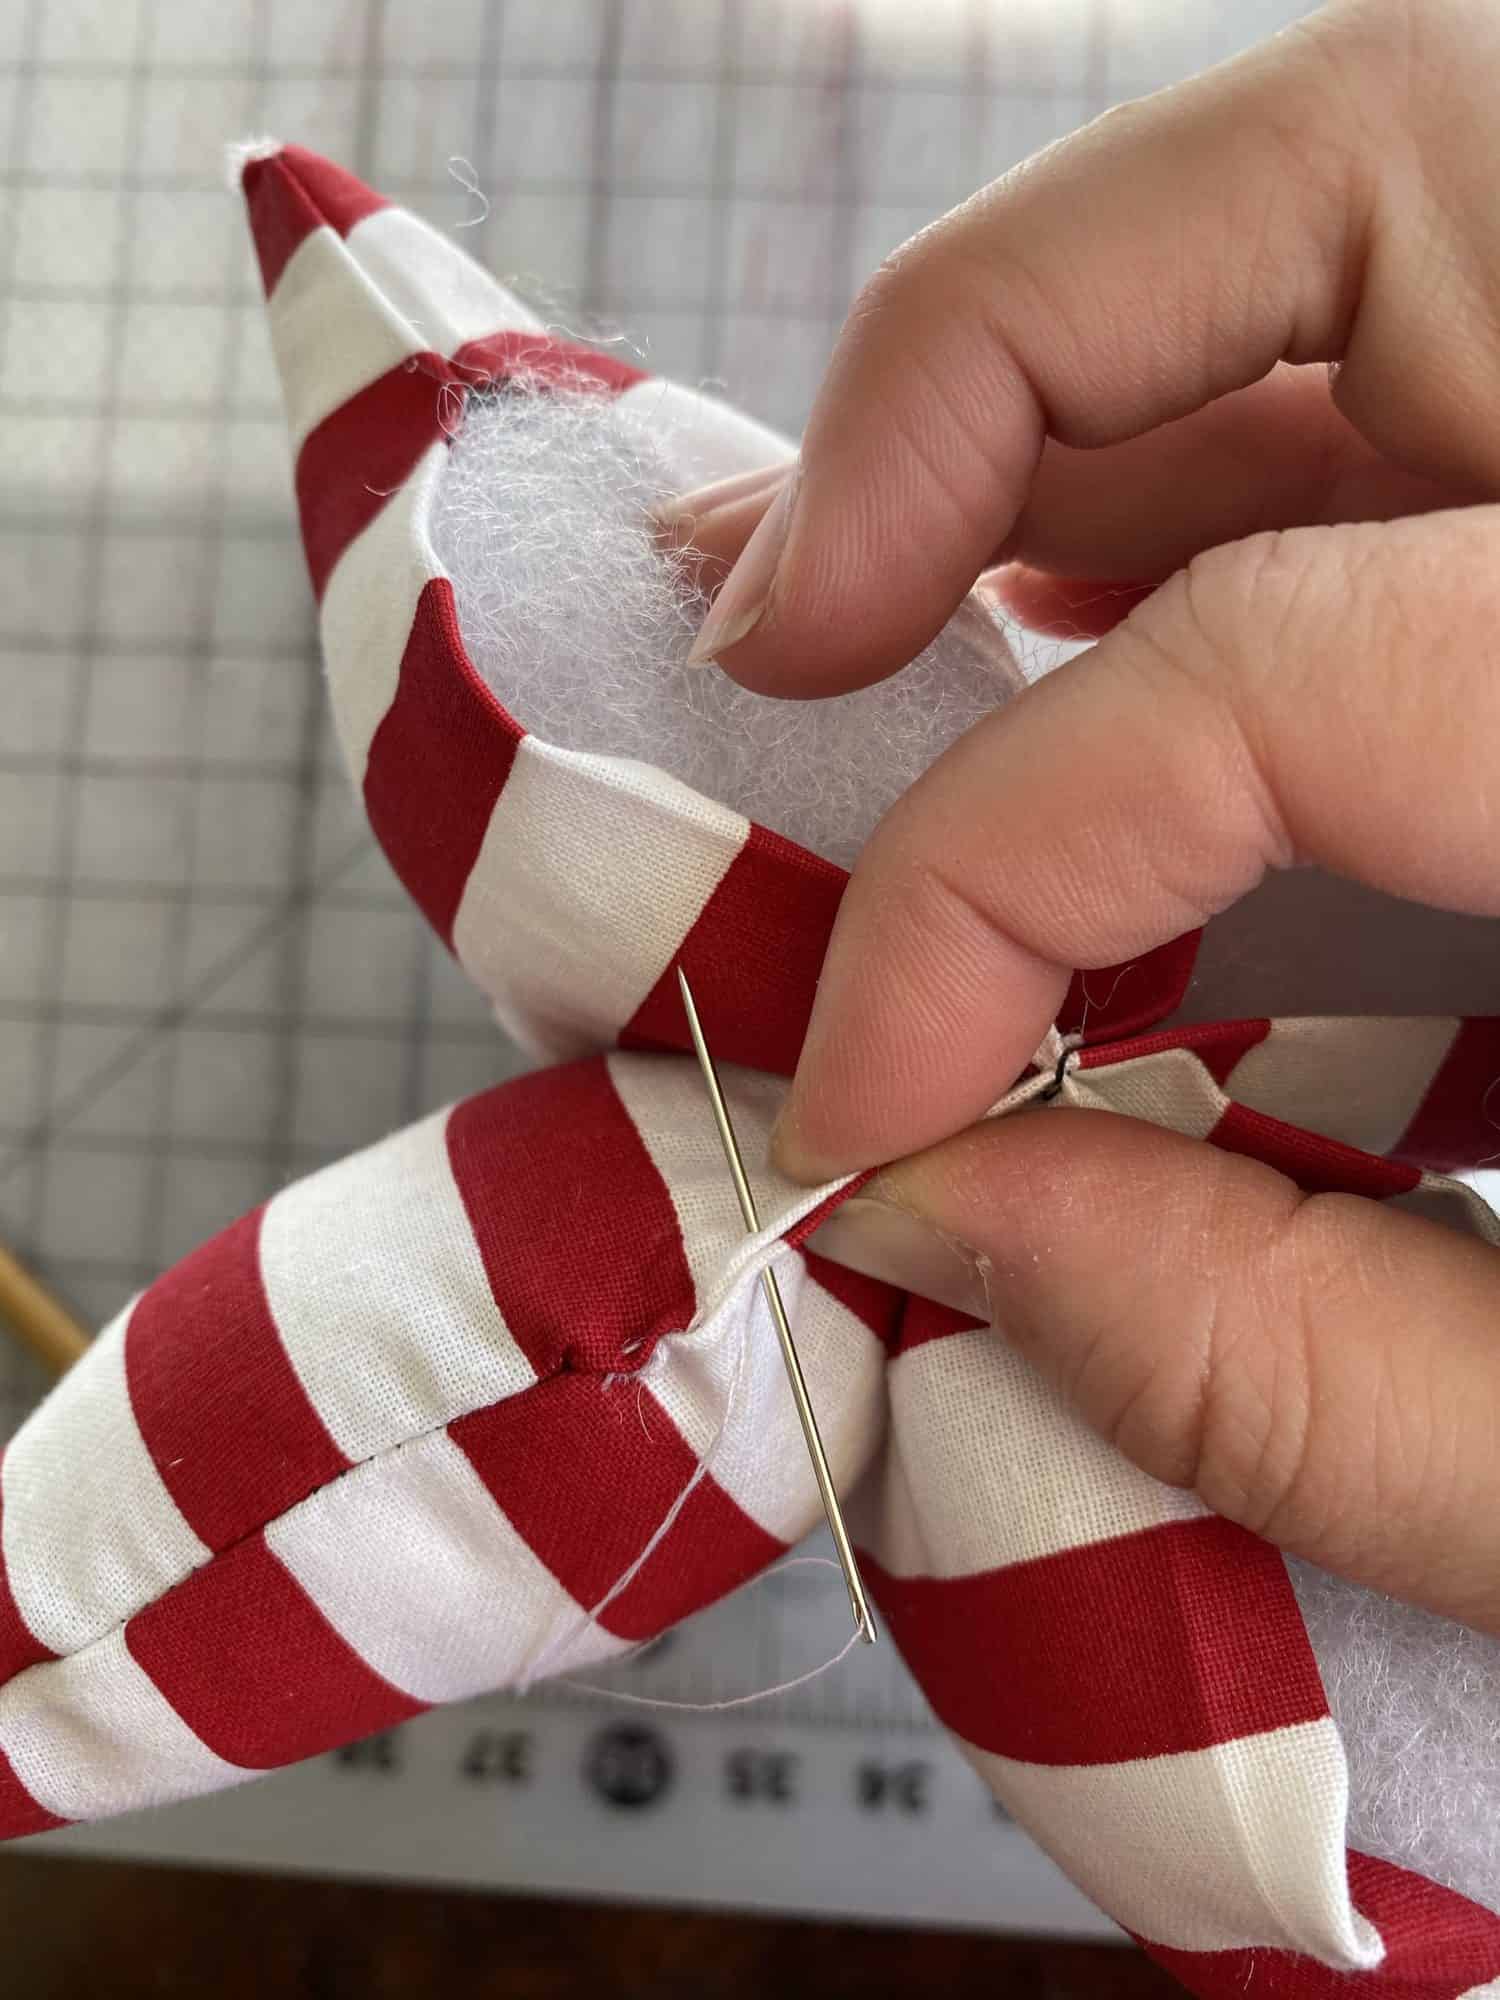
Hand stitch the openings shut on the bottom, using your favorite stitch.

You’re finished!  Sit back, enjoy your adorable new tree….and then go make a hundred more!  Here are a couple of cute ones from our testers!

As always, we love when you share what you’ve made with us.  Head over to the Patterns for Pirates Facebook group and show off the fabulous Festive Fabric Trees that you’ve managed to make from our freebie pattern!  Happy Holidays, friends!

Filed Under: Free Pattern, Pattern Release 6 Comments

2019 Holiday Freebies :: Pixie Hat

December 1, 2019

Are you ready for another super fun day of freebies for the 2019 Holiday Freebies with Patterns for Pirates?  Because I am!!

Today’s free pattern for you is a super, duper easy one.  And such a fun sew!  Let’s get to the Pixie Hat, shall we?

Grab your “PIXIE HAT” pattern pieces here!

Check the size chart before sewing to know which size you need to make!

Fabric Requirements (based upon 44″ quilting cottons):

  • – 3/4” or 7/8” ribbon (34″ for Toddler size, 35″ for Youth size, 36″ for Teen/Adult size)
    – 2/3 yard each lining + main. I like flannel for this!

Lay your piece with right side of the fabric up, facing you.

Meeting the short ends, fold the piece in half, with right sides together.
With 1/2” seam allowance, sew along one of the long edges.
Repeat with lining piece.


With the lining piece right sides out, and the main piece wrong sides out, put the lining piece inside of the main.

Align all edges and sew long, raw edge, using 1/2” seam allowance.

Turn right sides out. And top stitch along long edge, if desired.

If desired, baste/serge the bottom edge of the hat.

Press 1/4” and then 1” toward lining, to create ribbon casing. Top stitch along top edge of the fold.

Using a bodkin / safety pin, thread ribbon through casing.

**Quick reminder time!  To prevent fraying, you will want to seal the edges of your ribbon with heat.

Allow for only 12” of ribbon to be on either side of casing. Secure with stitches. It will gather to about 2/3 of the width of your hat bottom.
You’re done!

And just in case you’re in need of some inspirations, here are a few photos from our fabulous testers!

As always, our favorite thing is when you share what you’ve made from our patterns!  Head over to the Patterns for Pirates Facebook Group and let us “oooh” and “aaah” over what you’ve created!

Happy Holidays, Pirates!

Filed Under: Free Pattern, Pattern Release 1 Comment

Twist Back Top :: New Pattern Release!

September 24, 2019

Hey there Pirates!  Have we got something incredibly fun in store for you today or what??  It’s a pattern release day and we are bringing you TWO brand new patterns that you’re just going to love.  I promise.  Let’s meet the Twist Back Tops, in both adult and youth sizes!


This pattern is quick and simple sew that will impress! It has a dropped dolman sleeve style with a loose, slouchy fit throughout the sleeves and body. It is semi-fitted through high hip. The tank option makes for a great work out or summery top. The Twist Back Top also includes a short sleeve dolman sleeve you can add a bit more coverage, but still keep cool in those warmer months. You can add long sleeves and create a super fun sweater or pull over for the colder months. The extra long sleeve length will make you feel like curling up and snuggling! The adult sizing has a tank neckline that is a classic crew and a wider neckline for the dolman sleeve options. This pattern includes a back shoulder strap to keep the shoulders where they should be, or you can leave it off and have an off the shoulder style with wider neckline on the sleeved options. The open back is perfect to throw on top a leotard, sports bra, or tank.

The youth pattern covers a size range from 3M – 14.  As for the adult version of the pattern?  We just extended our sizes even more!  You’ll find it drafted for XXS – Plus 5x now!  Please check the size charts, as there were slight adjustments made to accommodate the new size range.

Imperial
Metric

Imperial- Youth
Metric- Youth

**Want to learn more about how to measure yourself for this pattern?  We’ve got you covered with an in-depth blog HERE.  And in case you’re new to Patterns for Pirates and PDF patterns in general, we have a great blog full of new-user tips HERE to help you get started!  As with all of our current releases and updates, the pdfs now include our layers feature and can be found in Letter, A4 and A0 sizes.  And for even more helpful fun, we have a *free* printable that you can use to help record your measurements as you take them.

Let’s take a quick look at the different options!

TANK TOP

SHORT SLEEVE

LONG SLEEVE

LONG SLEEVE W/CUFFS

OPTIONAL BACK STRAP

Should we talk about fabric choices for the Twist Back Tops?  We recommend a fabric with a good drape to it.  While fabric bases like french terry and sweatshirt fleece will work, they’ll end up a bit more “boxier”.  So if you’re looking for that perfect slouchy, twisty top…we recommend fabrics like: Rayon Spandex, Double Brushed Polyester, and Sweater Knits.

RAYON SPANDEX


DOUBLE BRUSHED POLY


SWEATER KNIT


Another change you might notice on these new patterns is a little surprise for our overseas pirates who use metric measurements! We now will include BOTH imperial and metric measurements to help everyone understand the charts as quick and easily as possible! Yay!


Ready to dive right in and make your new favorite top?  Go grab the patterns now!

TWIST BACK TOP | TWIST BACK TOP – YOUTH | TWIST BACK TOP BUNDLE

Hoping for a little inspiration before you get to sewing?  Just take a look at this pattern on all of the amazing shapes and sizes of our testers, and get a look at more examples of all the options in our albums in the P4P Facebook group!

Twist Back Top Album | Twist Back Top – Youth Album

And if our pattern alone doesn’t provide enough options for you, we’ve also included a blog post that will help take the Twist Back Tops to the next level!  Go check out our Easy Hacks Post to see how to make some slight alterations to the original pattern, to customize it even further!

The release sale (no code needed) will be through Monday September 30th (11:59PM US Central Time Zone).

Happy Sewing, Pirates!

Filed Under: Pattern Release 2 Comments

2018 Holiday Freebies :: Infinity Scarf with Hidden Zipper Pocket

December 2, 2018

Happy December, friends!!  It is my pleasure to be back again this year with an entire week of goodies for you.  AND THEY ARE ALL FREE!  That’s right, you are about to embark on a five day journey of free sewing patterns and tutorials.  I’m excited to get started!

Today’s freebie is a twist on a classic infinity scarf…we added a hidden, zippered pocket to it!  It’s a perfect little space to store your phone, keys, or anything that you’d like to carry with you but don’t want to need a purse or extra hand for. It’s a super quick sew and is at the top of my gift-giving list this holiday season.

Let’s get started!

Fabric Requirements: 2 yards of knit, flannel, or a light-weight woven.

You will need:
— Main Scarf Piece: 28″ W x 72″ L (can be woven or knit. If using a knit, you may need small strips of stabilizer where you’re attaching your zipper)
— 2 pocket pieces: 9″ W x 7″ L
— 9″ Zipper **You can make the pocket bigger / smaller by adjusting the size width of your pocket pieces to match the length of your zipper.

1.) With your main fabric laying RIGHT SIDE UP, lay your zipper FACING DOWNWARDS, 5″ from the edge of your fabric, along one of the long edges.

2.) Sandwich your zipper by laying a pocket piece on top, RIGHT SIDE DOWN.

3.) Pin/clip and sew along edge, using a zipper foot to get as close to zipper as you can.

4.) Flip your pocket piece up and away from the main fabric.

5.) Fold your pocket piece under the main fabric (their wrong sides should be touching now).

6.) Fold main fabric together, matching the long sides to each other.

7.) Making sure you’re still 5″ from the short edge, align the unsewn side of the zipper to the opposite long edge of your fabric. Once again, your zipper should be FACE DOWN.

8.) Sandwich your zipper by laying your other pocket piece on top, RIGHT SIDE DOWN.

9.) Pin/clip and sew along edge.

10.) For easier sewing on the next step, I like to unzip my zipper a bit, to get the pull out of the way.

11.) With fabric still RIGHT SIDES TOGETHER, sew with 1/2″ seam allowance along long edges, and outer edges of pocket.

12.) This step might feel a little tricky, but it’s really not! You’re going to want to keep your fabric inside out, while folding it in half to still have right sides together, and the short edges meeting each other. I find it easiest to stick my arm all the way inside, grabbing the opposite short end, and then pulling it toward me from the inside, being careful not to twist it. Align the short edges to each other.

13.) Stitch the raw edges together with 1/2″ seam allowance, leaving a 4-5″ opening for turning.

14.) Turn scarf right side out, pulling the entirety of the fabric through the opening you created in the last step.

15.) Pin and close up the opening with a blind stitch. You’re finished!

Here’s a little inspiration from our fabulous group of testers, in case you needed it.

As always, we love when you share what you’ve made with us.  Head over to the Patterns for Pirates Facebook group and show off the fabulous Infinity Scarf that you’ve managed to make from our freebie pattern!  Happy Holidays, friends!

**Since there was such a high amount of requests for a video tutorial, here you go!

Filed Under: Free Pattern, Pattern Release 49 Comments

Featured Patterns

  • Loosey Goosey Loosey Goosey $12.00 Original price was: $12.00.$10.50Current price is: $10.50.
  • Loosey Goosey- Youth Loosey Goosey- Youth $10.00 Original price was: $10.00.$8.50Current price is: $8.50.
  • Loosey Goosey - Bundle Loosey Goosey - Bundle $20.00 Original price was: $20.00.$18.00Current price is: $18.00.
  • Everyday Shirt Everyday Shirt $12.00
  • Everyday Shirt- Youth Everyday Shirt- Youth $10.00
  • Privacy Policy
  • Refund Policy
  • Affliliate Program
  • Contact Us
  • About

Copyright © 2025 Patterns for Pirates

Copyright © 2025 · Genesis Framework · WordPress · Log in