Patterns for Pirates

P4P stylish, modern, wearable patterns

  • Home
  • Blog
    • Frequently Asked Questions
    • Pattern Releases
      • Free Patterns
    • P4P University
      • Fitting
      • Sewing with Stretch, Knit Fabrics
      • Sewing with Woven Fabrics
      • Sewing Machines
    • Sew-A-Longs
    • Fabric for Pirates
    • Pattern Hacks
    • Announcement
      • Blog Tours
      • Contest/Giveaway
  • Shop
  • Bundle Discounts
  • Gift Cards
  • My Account
  • Cart

P4P Cardi Week :: Carefree Cardigan Fringe Hack

January 24, 2017

WEB COVER

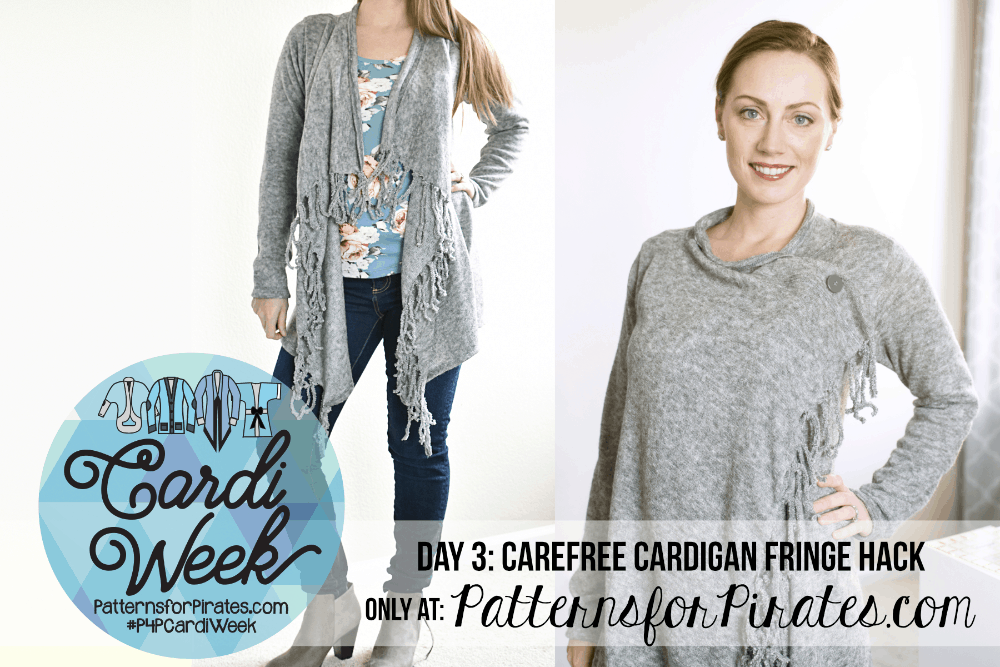
So you’ve been perusing Pinterest and you see all of those must have, trendy fringe cardigans. Now you’re looking at your library of sewing patterns and wondering which one can you easily hack into one of those gorgeous cardigans for yourself? Well here is a tutorial to show you how to easily transform the Patterns for Pirates Carefree Cardigan into a DIY fringe cardigan! Follow along to find out how easy this look is to achieve. At the end I have added the option to attach a button closure too!

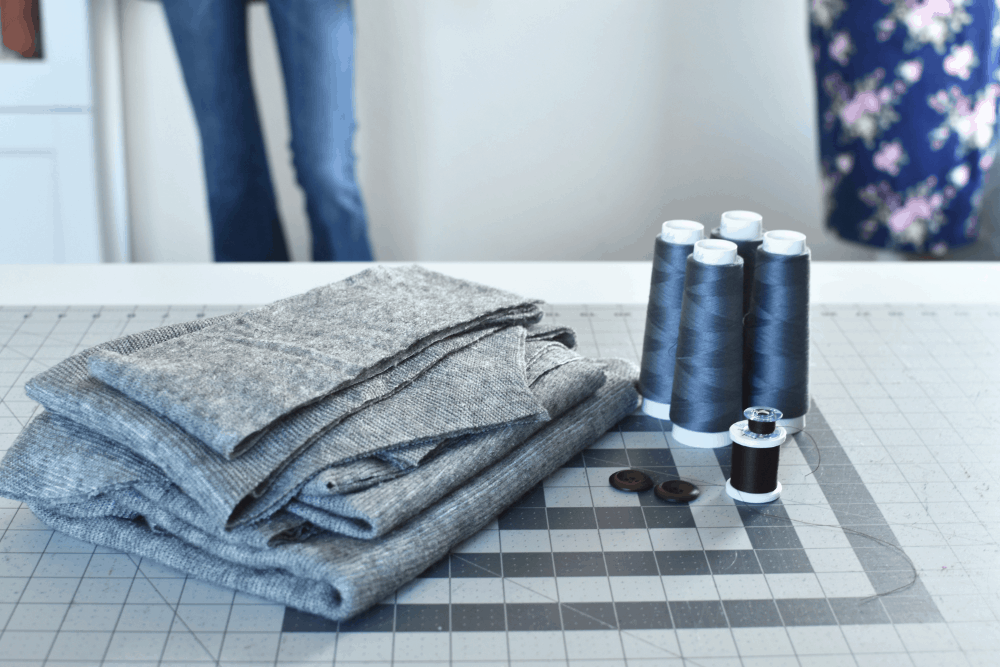
First things first, which fabric should you use? My favorite knit fabrics to use for this purpose are knit fleece, closed weave brushed hacci sweater knit or a light-medium weight poly rayon spandex french terry. That said, you could do this with pretty much any knit. Be careful of really loose weave sweater knits though (the ones you can see through). They may fall apart on you during the fringe creation.


MATERIALS

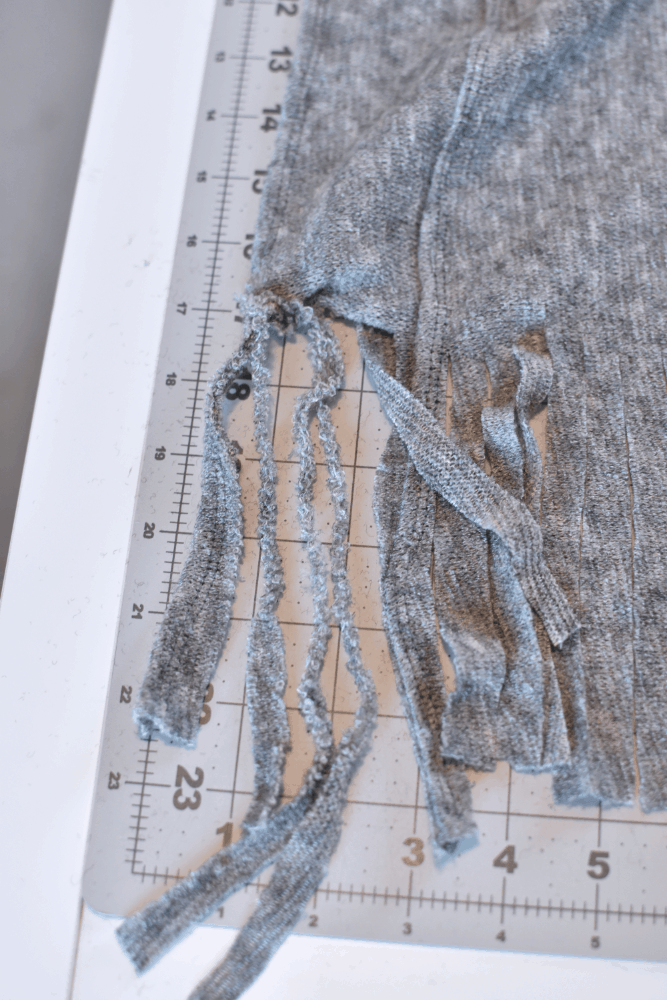
Step 1: Whatever you do, DON’T SKIP THIS. Before you make your fabric selection and begin cutting out your garment pieces, test out how the fabric is going to look once fringed. To do this make a few ½” wide by 6” deep cuts perpendicular to the selvedge edge. Tie a couple of these strips into a knot together just as it will be done on the finished cardigan. Some knits will stay structured; some will come close to falling apart. It is important to test the fabric to determine if your chosen fabric is going to give you a desired look.

IMAGE 1c

Step 2: Cut out all pieces of your Carefree Cardigan for a ‘neckband only’ version, except for the neckband. For the neckband you are going to cut out a band half the cut chart width plus a seam allowance of 1/2″ for hemming. 

IMAGE 3

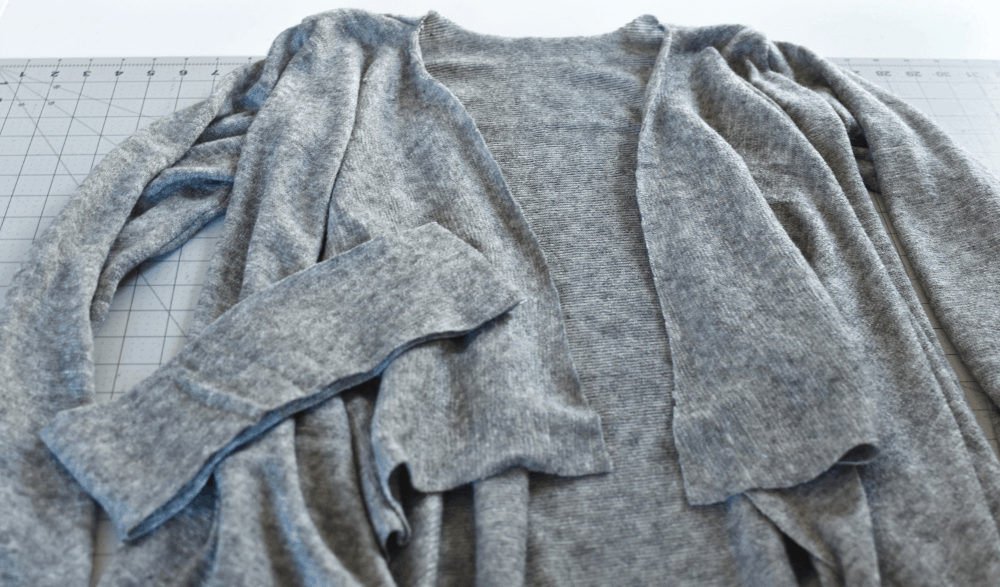
Step 3: Assemble your cardigan as directed by the Carefree Cardigan pattern tutorial with the exception of the neckband. You are attaching the neckband without folding it in half to form a closed band. You want an open raw edged band.

IMAGE 4

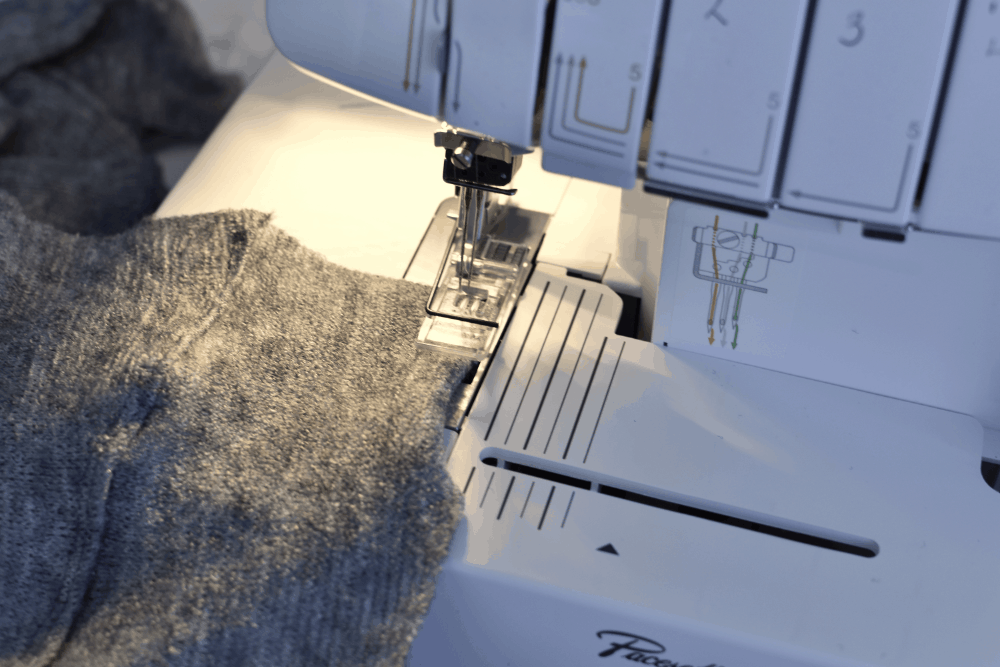
Step 4: Using your sewing or coverstitch machine, you will then hem the long exposed edge of the neckband and along the bottom hem. Use a 1/2”” hem width here. You want it thin so that it doesn’t become bulky when you create the fringe. Lastly, hem the sleeves as directed by the pattern.

IMAGE 5c

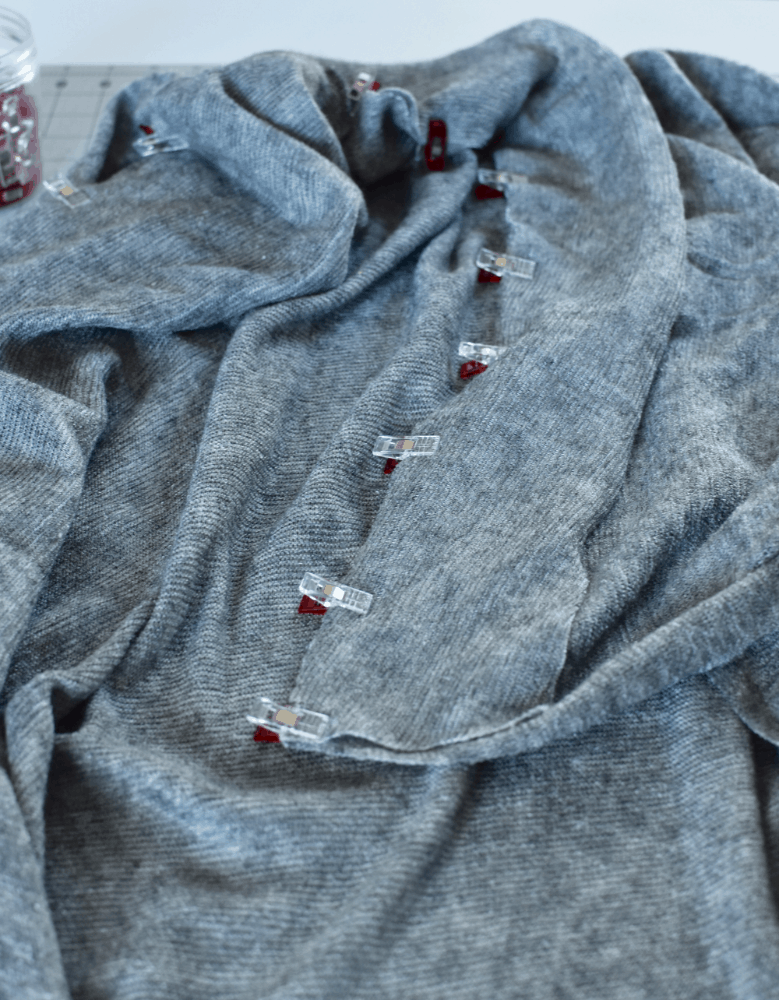
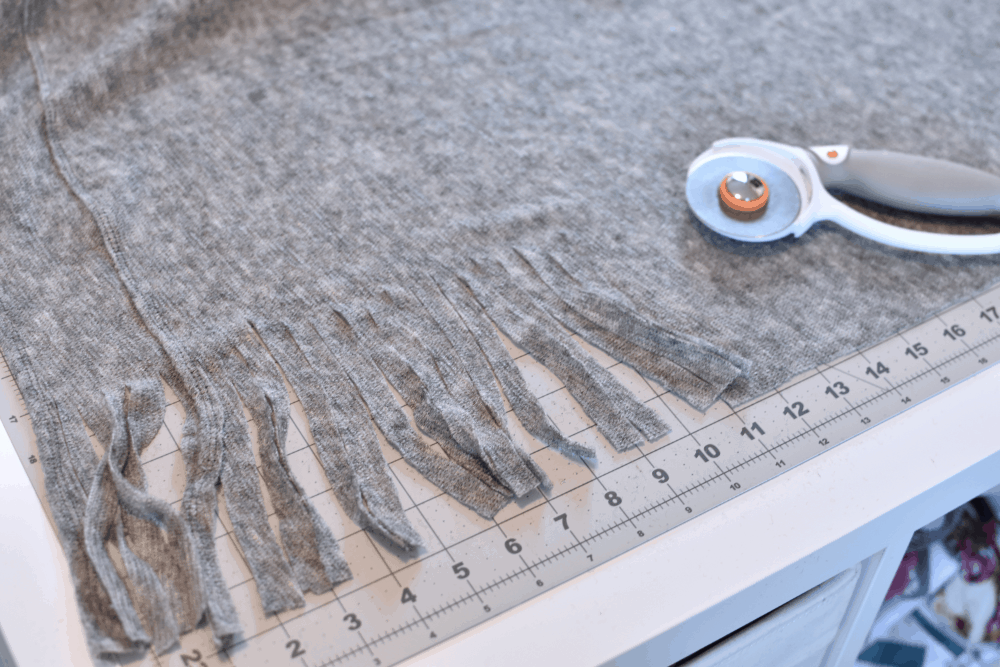
Step 5: Lay your cardigan out on your cutting mat, lining up the unfinished edge along a straight measurement line on your mat. Decide how wide you would like your fringe to be. Take your scissors and cut strips about 6” deep along the entire length of your cardigan front, every ½-1”. I chose to cut ½” strips. Go back and seam rip the hems on the bottom and top strips that you have now cut into fringe strips. You may want to add some reinforcement stiching to the hem stitches at the beginning and end just before it turns into fringe.

image 6c

Step 6: The last step is to finish the fringe edge. This is done by tying the base of the strips into knots all down the front. Decide how many strips you would like to be knotted together to create some separation. I chose to knot 2 strips together down the entire length of my cardigan.

If you choose not to add a button closure you are now all finished!

IMAGE 7B


OPTIONAL  Button Closure

IMAGE 12B

Step 7: Following Judy’s lead in her Carefree Cardigan Button blog tutorial, I chose to add a button to mine to finish off the look. To do this I put on my cardigan and played with different variations of button placement; to decide how I wanted the cardigan to be styled. I settled on adding a 1” shoulder button.

image 8b

[center button placement]

image 8c

[shoulder button placement]

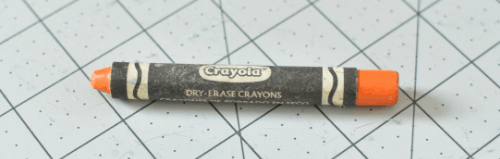
Step 8: Once you have decided on placement, mark it. A lot of the time I like to use dry erase crayons to mark placement. The mark is easily visible on any fabric and it stays put until you throw your garment in the wash. Mark the button location both on the overlapping bodice front and the under lapping bodice front.

image 9c

[dry erase crayon]

image 10c

Step 9: Use your sewing machine to create a buttonhole on the overlapping bodice front in the top corner. If you are using an oversized button or do not have an automatic buttonhole presser foot for your machine see Judy Hale’s post HERE. Carefully cut open the buttonhole with your seam ripper.

IMAGE 10B

[automatic buttonhole presser foot]

Step 10: Now attach your button with your sewing machine or by hand on the under lapping bodice shoulder where you have placed a marking. Try it on and adjust button placement if necessary.

IMAGE 11c

All done!

IMAGE 12c

Keep your eyes peeled for some other fun tutorials the ladies at Patterns for Pirates have prepared for you this week! Be sure to read all the way through the end of this post to find out about the contest we have running this week!

-Kelly Bailey

P4P Blog Contributor

Take a look at our jam-packed schedule of cardigan love!

Saturday, January 21: #P4PCardiWeek Announcement

Sunday, January 22: Cocoon Lace Hems and Butterfly Ruffle

Monday, January 23: Ribbon Tie Closure Hack

Tuesday, January 24: Carefree Cardigan Fringe Hack

Wednesday, January 25: Duster-Length Adjustment

Thursday, January 26: Kimono Ruffle Sleeves + Hem

Friday, January 27: Varsity Sweater Style Hack

Saturday, January 28: Carefree Cardigan Flannel + Vest Hack

Monday, January 30: #P4PCardiWeek Winner Announcement

You can follow along on the blog here, or in our Facebook group.  Search #P4PCardiWeek to be able to find our posts all over social media.  And please feel free to sew-along with us on one or all of the days.  The more the merrier!

But wait, there’s more!  We wanted to create a friendly pirate-y competition with our P4P Cardi Week!

Between tomorrow and Saturday, January 28, sew up a Patterns for Pirates cardigan using one of our hacks, or by keeping the pattern as-is.  Share your photo with us on Instagram or in our Facebook group and use the tag #P4PCardiWeek. We will pick our favorite and the winner will win a free P4P pattern of choice AND be featured on this blog.  Fun right?

To make it even better we have put all the cardigan patterns in the shop on sale all week (no code needed)!

Now get out there and sew some cardigans, matey!

Filed Under: Contest/Giveaway, Pattern Hacks 1 Comment

Siren and Hello Sailor Hacks

April 25, 2016

swim hacks

We couldn’t help ourselves to a few hacks to the new Siren Swim Top and Hello Sailor Swim Bottoms during testing!  We loved them so much we decided to share a few of our favorite quick and easy mods.

The Double Strap Hack: (My favorite! I couldn’t stop using this one 😉    )

IMG_1473IMG_1412 P4P PDF Patterns Siren Swim Top double crossover strap

This one is super simple and quick! You have 4 straps per cutting instructions.  Instead of sewing them right sides together to create 2 straps, we sewed each strap folded in half width-wise down the long edge.

IMG_6678

Turn right sides out.

IMG_6680

And place both side by side on the top pick ups.

IMG_6683

IMG_6684

The Double, Straight and Cross Strap Hack:

IMG_1126

Then we had even more fun doing one set of straight straps and one set of criss-cross straps… cute right?!?!? Just baste and double check you have them all placed correctly before finalizing the stitching! I slipped swim elastic inside this navy/white top straps for more support.  It also keeps the straps in place and hold their shape (not get folded or wrinkled up).

IMG_1089


Fringe Hack:

The only change during construction is that I did not sew the flounce into the side seam.

IMG_6761

Once the top was compete I began in the center and used my rotary blade and clear quiting ruler to cut 1/4″ strips up to the seam line.  I continued all across the top, keeping my slits straight. I wont lie though, it was REALLY late and I was tired… I threw the ruler aside and went at it all crazy!

IMG_6762 IMG_6763

I went back with scissors and clipped all the way up through the pick ups (I couldn’t get my roatary up that far without cutting through the main top pieces. IMG_6764 IMG_6767

It was crazy windy on our picture day with my cousin (isn’t she the cutest?!?!) so we only caught a few where the fringe wasn’t wildly blowing around! You could do the slits as small as your patience allows for and you could also tug them a bit to let the knit curl to hide some imperfections too! It’s a fun, flirty mod! I hope you don’t mind the other watermark on her pictures, my amazing sister took these photos and edited for me :).

IMG_1249 IMG_1315


Double Flounce Hack:

Creating the double flounce is as simple as cutting 2 of the front and back flounce pieces.  I just kind of eyeballed  how much shorter I wanted the top layer flounce but ended up cutting about 1.5″ off the front and 1″ off the back. Depending on your size, you could also use a smaller size length as a guide.   Be sure to keep the side seams the same length on both the front and back flounce of the layer you cut.  For construction, I basted the two layers together to help keep them together as it is a little trickier to stitch 5 layers of fabric.

P4P Siren Swim Top Double Flounce Hack


HELLO SAILOR BOTTOMS

Piping Detail Hack:

This adds a bit of visual interest to those paneled options! Just cut strips at least as long as your seam where your front center and front side panels meet. The width is a personal preference, but you will need double what you’d like your finished width, plus double the seam allowance (3/4″).  I choose 1/4″ finished width for mine, so I cut a strip 1 1/4″ wide.

IMG_6724

Fold strip width-wise and place right sides together matching raw edges along seam where front center and side panel meet.

IMG_6727

Then place side panel on top and stitch with normal 3/8″ seam allowance. (You will be stitching through 4 layers of fabric)

IMG_6728

I choose to top-stitch mine down along the folded edge.

IMG_6731

I love the little, simple detail!

IMG_1032


Separate Skirt Cover Up Hack:

I created a separate skirt for my cousin to use as a cover up! I just cut 1 extra waistband than the pattern calls for and sewed it to the skirt just like the waistband (folded with right sides together along the top raw edge.)

Now she can slip on the skirt when she’s walking around and take it off when she’s ready to really go swimming 🙂

IMG_1241

IMG_1309


One-Piece Hack:

For some, a two piece suit is not their style, so we hacked the Siren Swim Top and Hello Sailor to create an on trend one piece. You will construct your top and bottom as in the tutorial but will not attach your bottom band of the top or the waistband of the bottoms.  I chose to keep the bottom band of the top for extra support, but you can omit if you choose.  We will be connecting the top and bottom with a connector piece so you do not need the waistband of the bottoms.  Try on your top and bottom.  p4p pdf patterns siren swim top hello sailor one piece hack

To determine the length of the connector piece, measure the distance between the raw edge of your top and the top edge of your bottoms at center front and center back.  You may need to find someone to help you with the back ;). Add double the seam allowance (0.75″)  My gap was about 3″ so the length of my connector piece was 3.75″.  I used the waistband measurement for the width of the band as I wanted it to be held tight there.   Note: if your hip is much wider than your under-bust and waist, it will be difficult to pull up over your hips so you may need to shimmy it on!


Connecting the top and bottom is the same construction as the bottom band and waistband but you will be using the connector piece instead.  Stitch short ends of the connector piece and bottom band.  On the bottom band only, fold with wrong sides together.

p4p pdf patterns siren swim top hello sailor one piece hack


Matching raw edges and wrong side facing up, slip bottom band over connector piece.  You should have 3 layers of fabric.  Mark in 1/4s and with right sides together, match raw edges of the connector piece to the Siren Top.  Stitch.  Flip open and press seam down.


p4p PDF patterns Siren Top and Hello Sailor One Piece Hack


Turn your Hello Sailor bottoms inside out. Matching raw edges of the connector piece, with right sides together, slip your Siren Top inside the bottom. Be sure to match the front of your top with the front of your bottoms. Stitch.


P4P PDF patterns Siren Swim Top Hello Sailor One Piece Hack P4P PDF patterns Siren Swim Top Hello Sailor One Piece Hack


Filed Under: Pattern Hacks 12 Comments

Newest Patterns

  • Notch Top & Dress $12.00 $10.50
  • Notch Top & Dress - Youth $10.00 $8.50
  • Notch Top & Dress - Bundle $20.00 $18.00
  • Friendly City Sweater $12.00
  • Friendly City Sweater - Youth $10.00
  • Privacy Policy
  • Refund Policy
  • Affliliate Program
  • Contact Us
  • About

Copyright © 2023 Patterns for Pirates

Copyright © 2023 · Genesis Framework · WordPress · Log in