So… I’m tall… I mean… I’m TALLLLL 🙂
5’10” no shoes ha ha ha See me towering over my tiny mom?

It makes finding RTW clothes a CHALLENGE to say the least… yes, I can pay an arm and a leg for “talls” but I want young trendy clothes!! So making my wardrobe is so rewarding for me!
I’ve already posted tips for blending sizes for children’s clothing here but this method doesn’t work well for adult patterns because all of the sizes are made to fit an average height adult, rather than differing heights on the youth patterns.
Here are some tips for adding, or taking away length to a pattern for an adult.
Our patterns are drafted to two different size charts, as well as different heights for both charts.
- for our Hourglass Figure chart, patterns are drafted to a 5’5″ height.
- for our V-Figure Chart, patterns are drafted to a 5’6″ (short) / 5’10” (average) / 6’2″ (tall) height.
The “rule of thumb” is to add or remove 1/2″ for every 1″ that you differ from the height that the pattern is drafted for.
For example, at 5’10” there is a 5″ difference so I would need to add 2.5″ throughout the pattern. If I were 5’1″ then I would remove 2″ of length since there is a 4″ difference.
If you are shorter or taller you need to add/take away length throughout the whole pattern!
Just like children’s patterns I DO NOT recommend only adding to the bottom hemline. Knit patterns are much more forgiving in fit. And sure, adding only to the bottom hemline will make your garment longer. But using the method of lengthening at the bottom only will most likely not give you the desired fit.
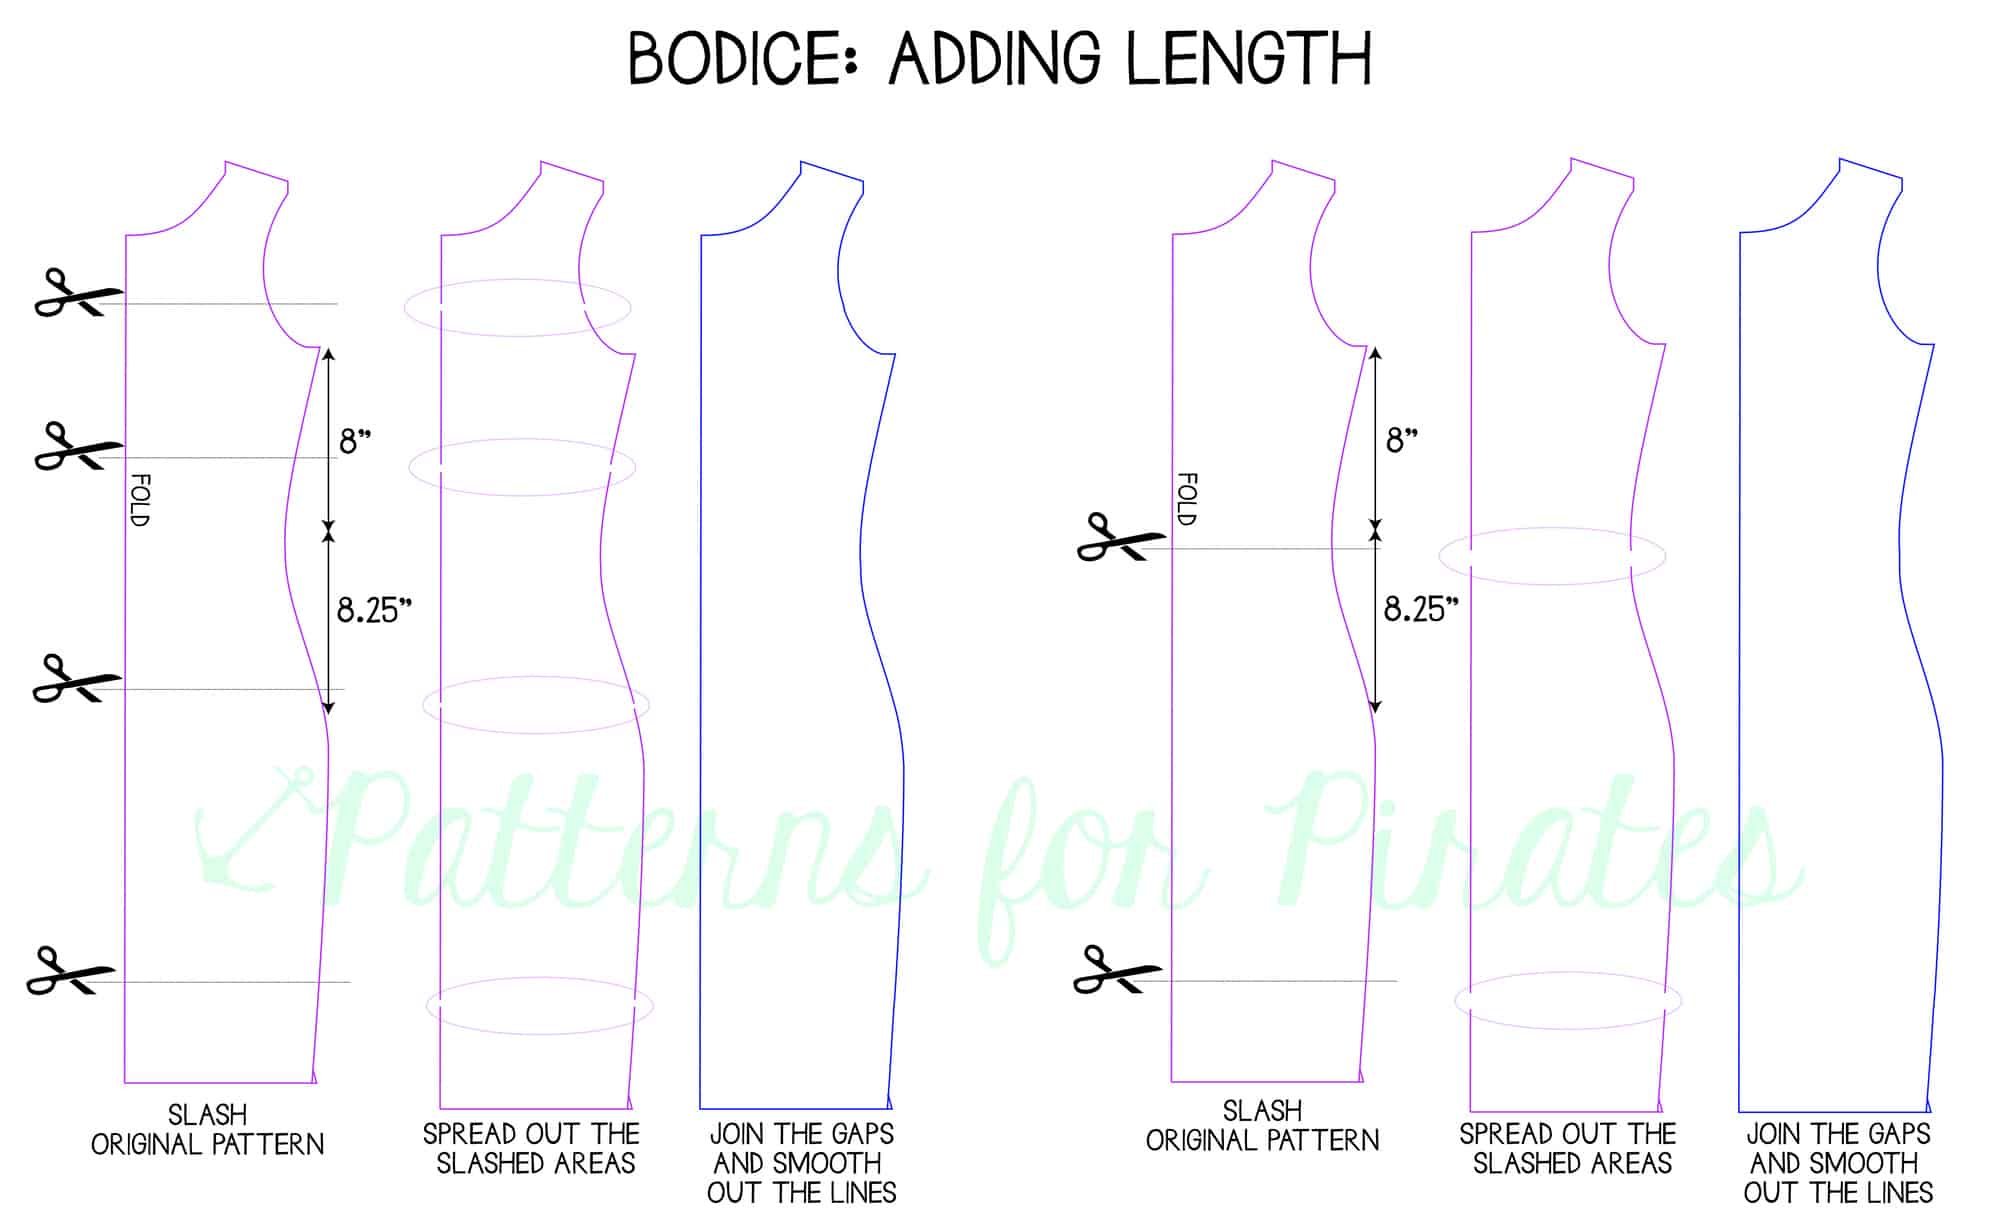
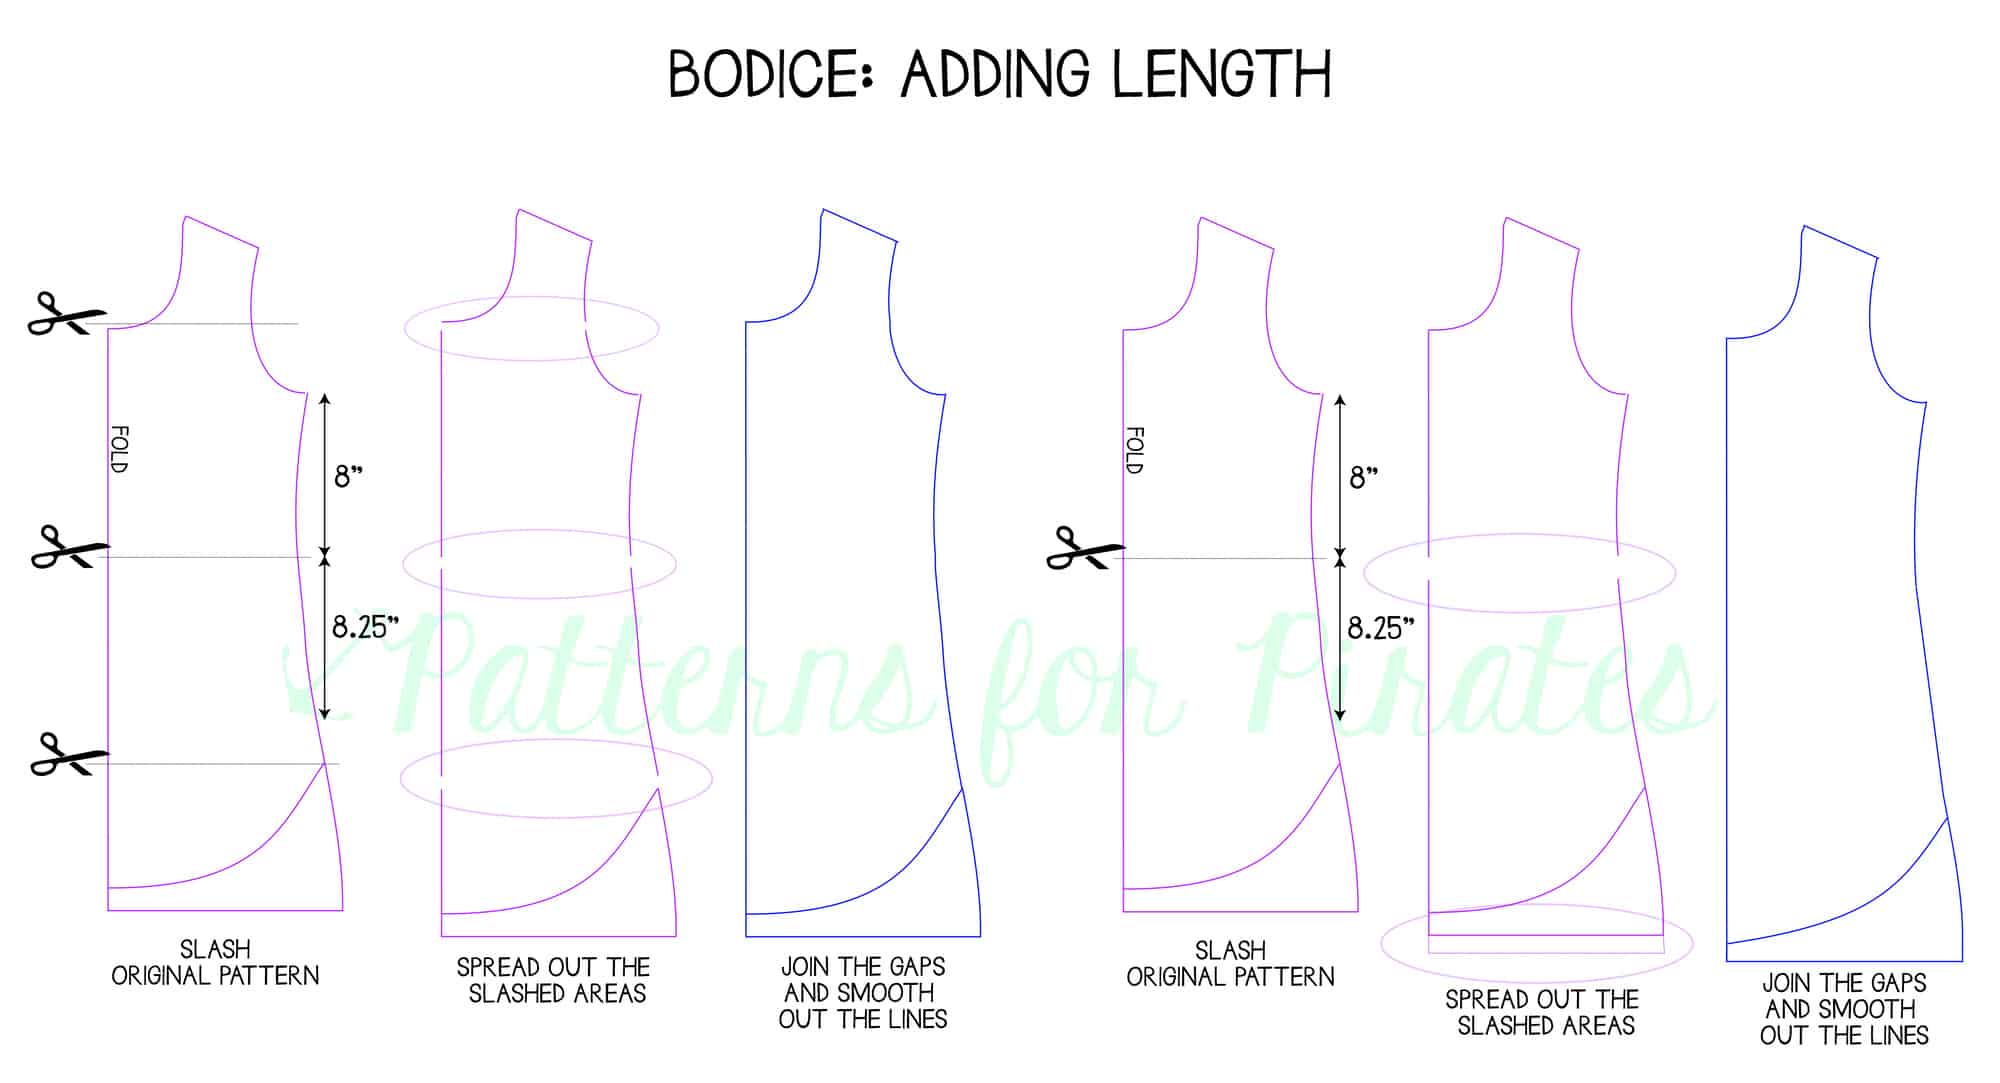
The four places I recommend adjusting for height are:
- at the shoulder/armscye
- just under the bust line
- just under the waistline
- at the bottom hemline.
Adding throughout the pattern helps keep the bust, waist, and hip where they actually hit you. P4P uses a standard side waist length of 8″ and a waist to hip length of 8.25″ so if you know your specific length measurements between those points, you will want to add/remove the exact amount in those areas.
(Not sure where to measure yourself for garment sewing? Check out our post here.)
I have made myself enough clothing to know how much I need to add to MOST patterns designed for average height.
– I add about 2 1/8″ to every shirt I make, or I add about 2 5/8″ to my tunic length tops
– I even know how much I like in each spot: at my shoulders I add a scant 1/8-1/4″, at the chest and waist area I add 3/4-1″, and my bottom hems get about 1/2-1″ added to them.
The shoulder/armscye adjustments can be tackled a couple of different ways. I personally like to take a smaller seam allowance there to add some length. But you can also splice your pattern straight across where the armsyce is and spread the pattern pieces to add length that way. I only add about 1/8-1/4″ to mine, but that tiny difference makes SUCH A HUGE difference in how a shirt fits me!
Because of how our no-trim patterns are assembled with the Letter and A4 formats, there are margins on each of the overlapped pages that make slash + spread adjustments easy as pie! For the chest and waist, I simply untape the pattern pieces, move them down (adding what I need for extra length), and then retape that section.
Or you can (with any pattern)… splice it straight across and measure what you’d like to add.
Shortening is the same method, you would just be overlapping instead of adding.
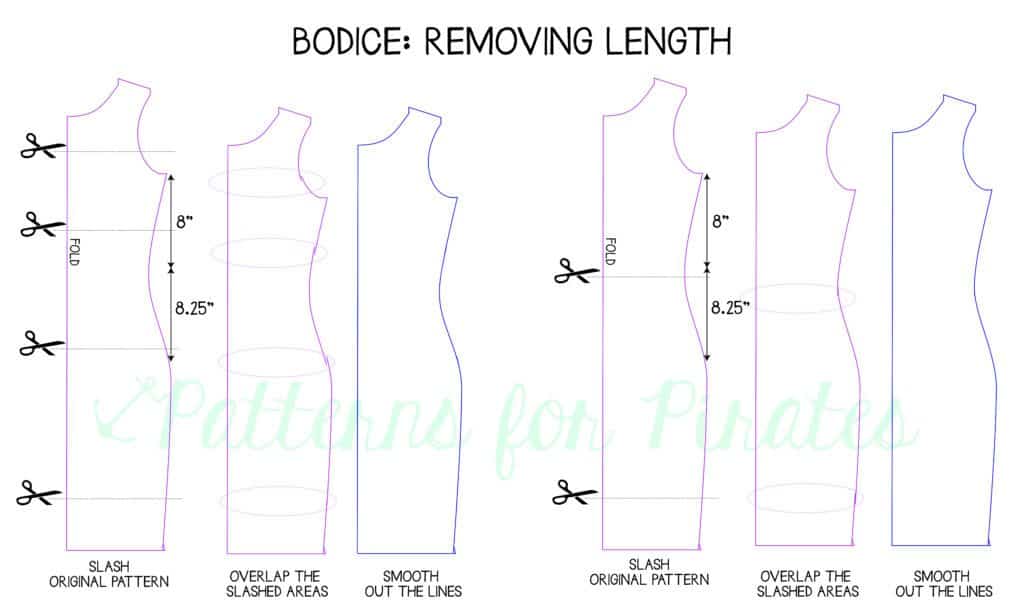
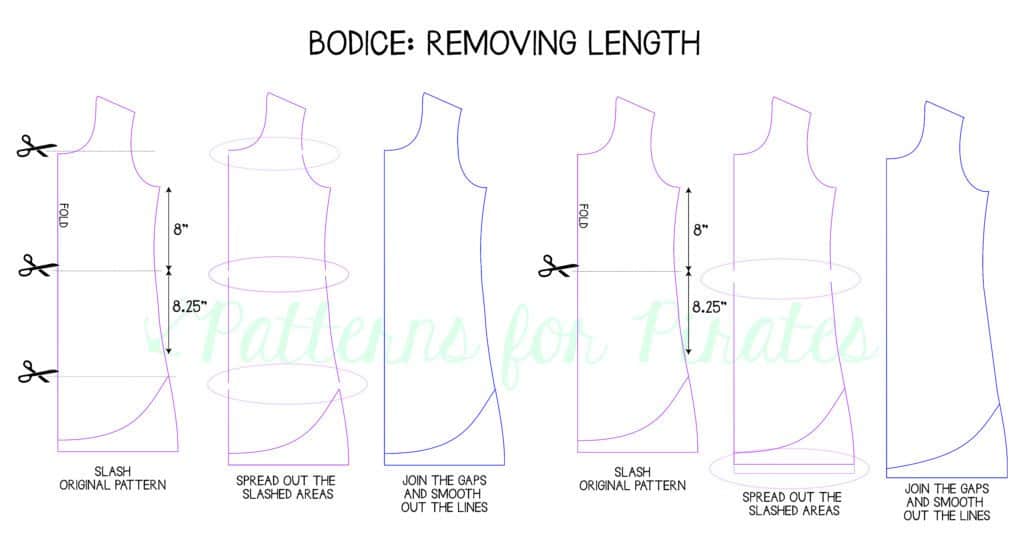
With the height adjustments you’re making, with adding or removing length, the pattern pieces won’t line up perfectly without a one extra step. All you need to do is cut out the pattern and “true up” the sides. Simply match the lines up and straighten them out the best you can to even out the adjustments made.
Repeat the process for the other pattern pieces as needed.
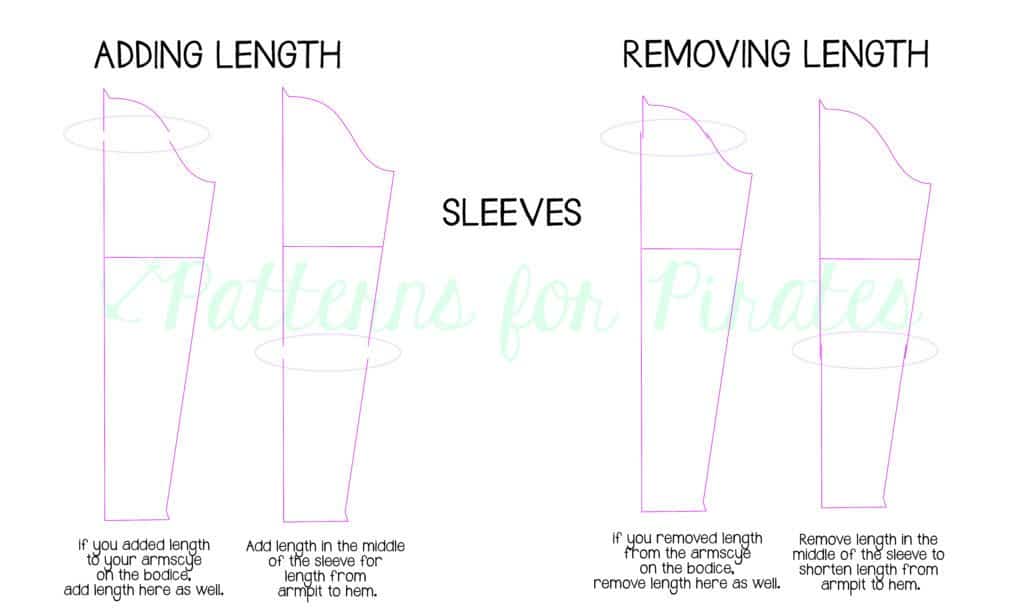
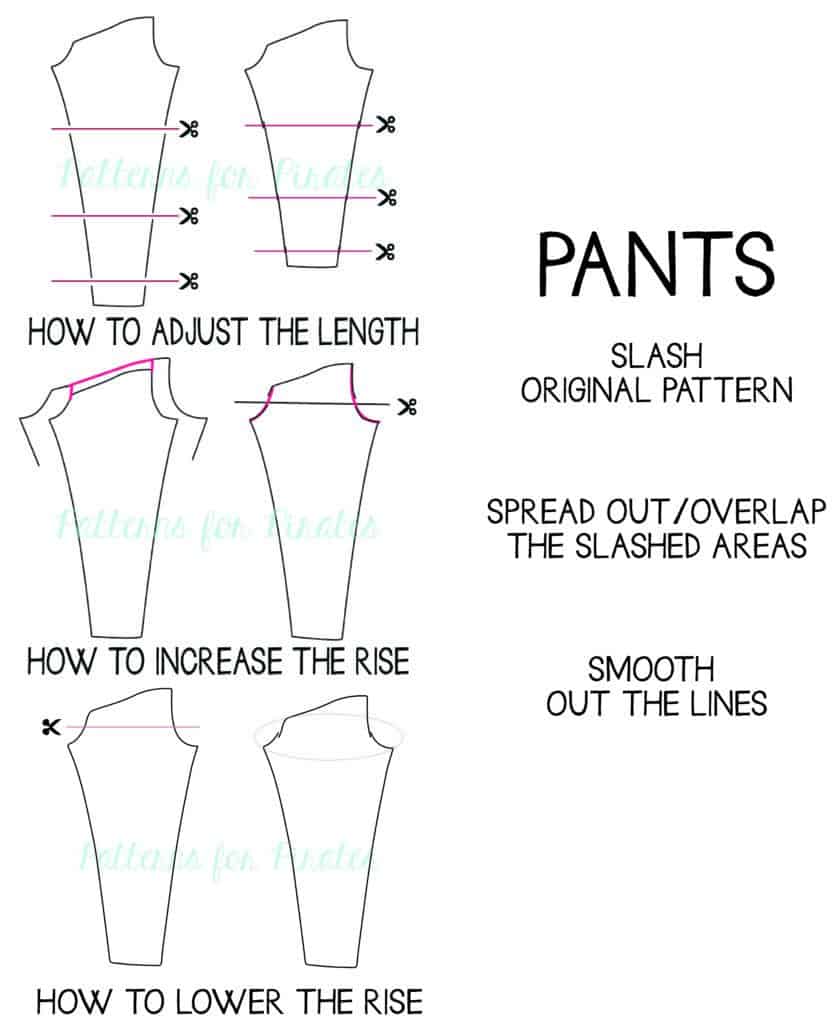
Remember: If you added length in the armscye on the bodice piece, you need to add length in the sleeve as well. Or if you changed the length of the rise on the back leg piece, you’ll need to do that same adjustment to the front leg piece.
Pants (like our Peg Legs, Vintage Jumper or Uptown Joggers) should also be shortened or lengthened throughout. Each of the patterns include a finished inseam length. Measure your inseam and compare to the pattern to make your length adjustments.
Ta-Da!!!! Now you have shirts and pants that will FIT you…ALL over! 🙂