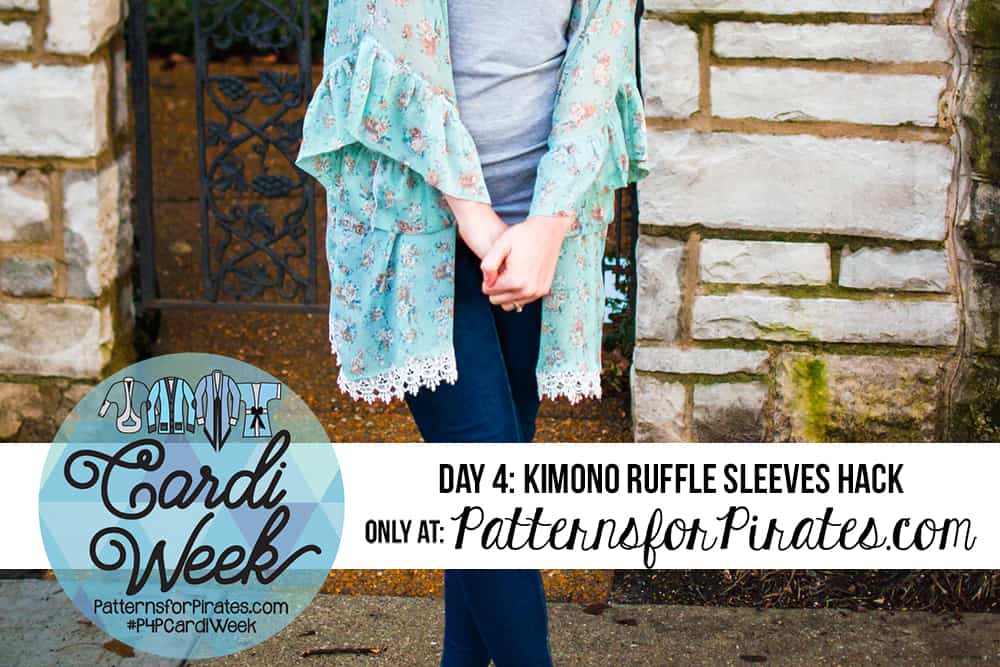
Cardi Week is well underway and I love seeing all of the inspiration in the Facebook group and here on the blog! Today I have a fun hack to bring up the delicate, vintage vibe of the Summer Kimono to the next level. Side note: if it’s not summer for you (yet), you can totally wear this kimono all year round like with flannel, here. Or look cute and freeze like me here, either way. 😉
First, you’ll want to think about fabric choices. For this one, I used a very flowy lightweight woven chiffon. Due to the ruffles here I would suggest using a decently lightweight fabric like this, since you don’t want the ruffles to be too bulky. If they are, then they won’t lay exactly right and be a little puffy.
Step 1. Once you’ve decided on your fabric, start by assembling the pattern. Cut out your bodice pieces. Assemble the front and back pieces as directed.
Step 2. The first thing you’ll need to do differently is cutting out the bands. Instead of cutting out two 5″x28″ bands, cut out two 10″x38″ bands. This is where you’ll do the ruffles.
Step 3. Now, fold the two bands in half, wrong sides together matching the long edges. Iron the fold and pin/clip along the raw edges.
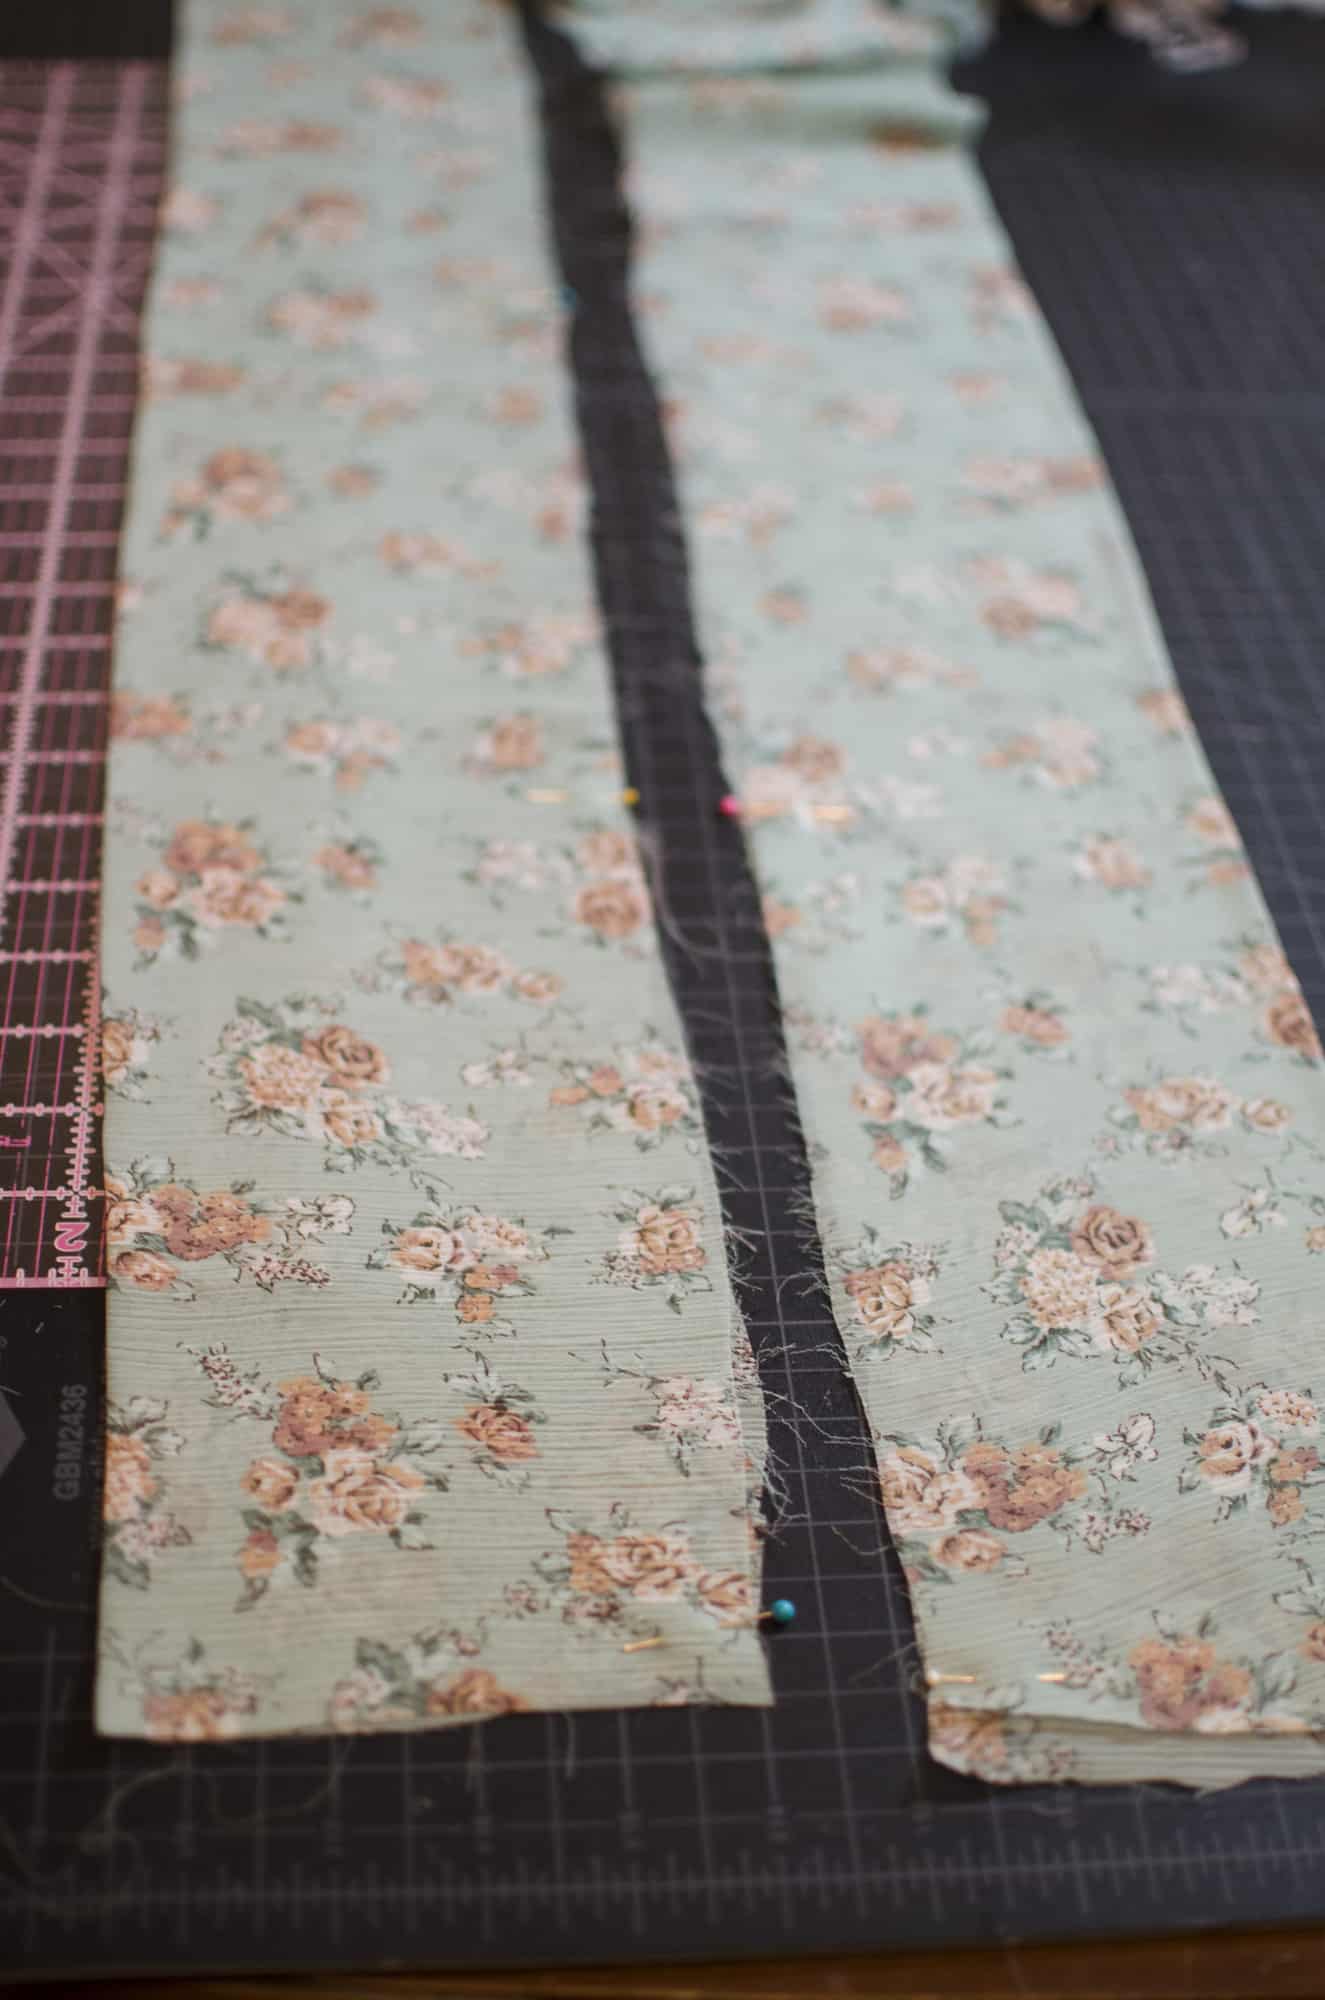
Step 4. If your fabric frays easily like mine, then you’ll want to do a zigzag (or other finishing stitch) right along the raw edges to stop it from fraying when you’re working with the fabric. Sew together both layers of fabric.
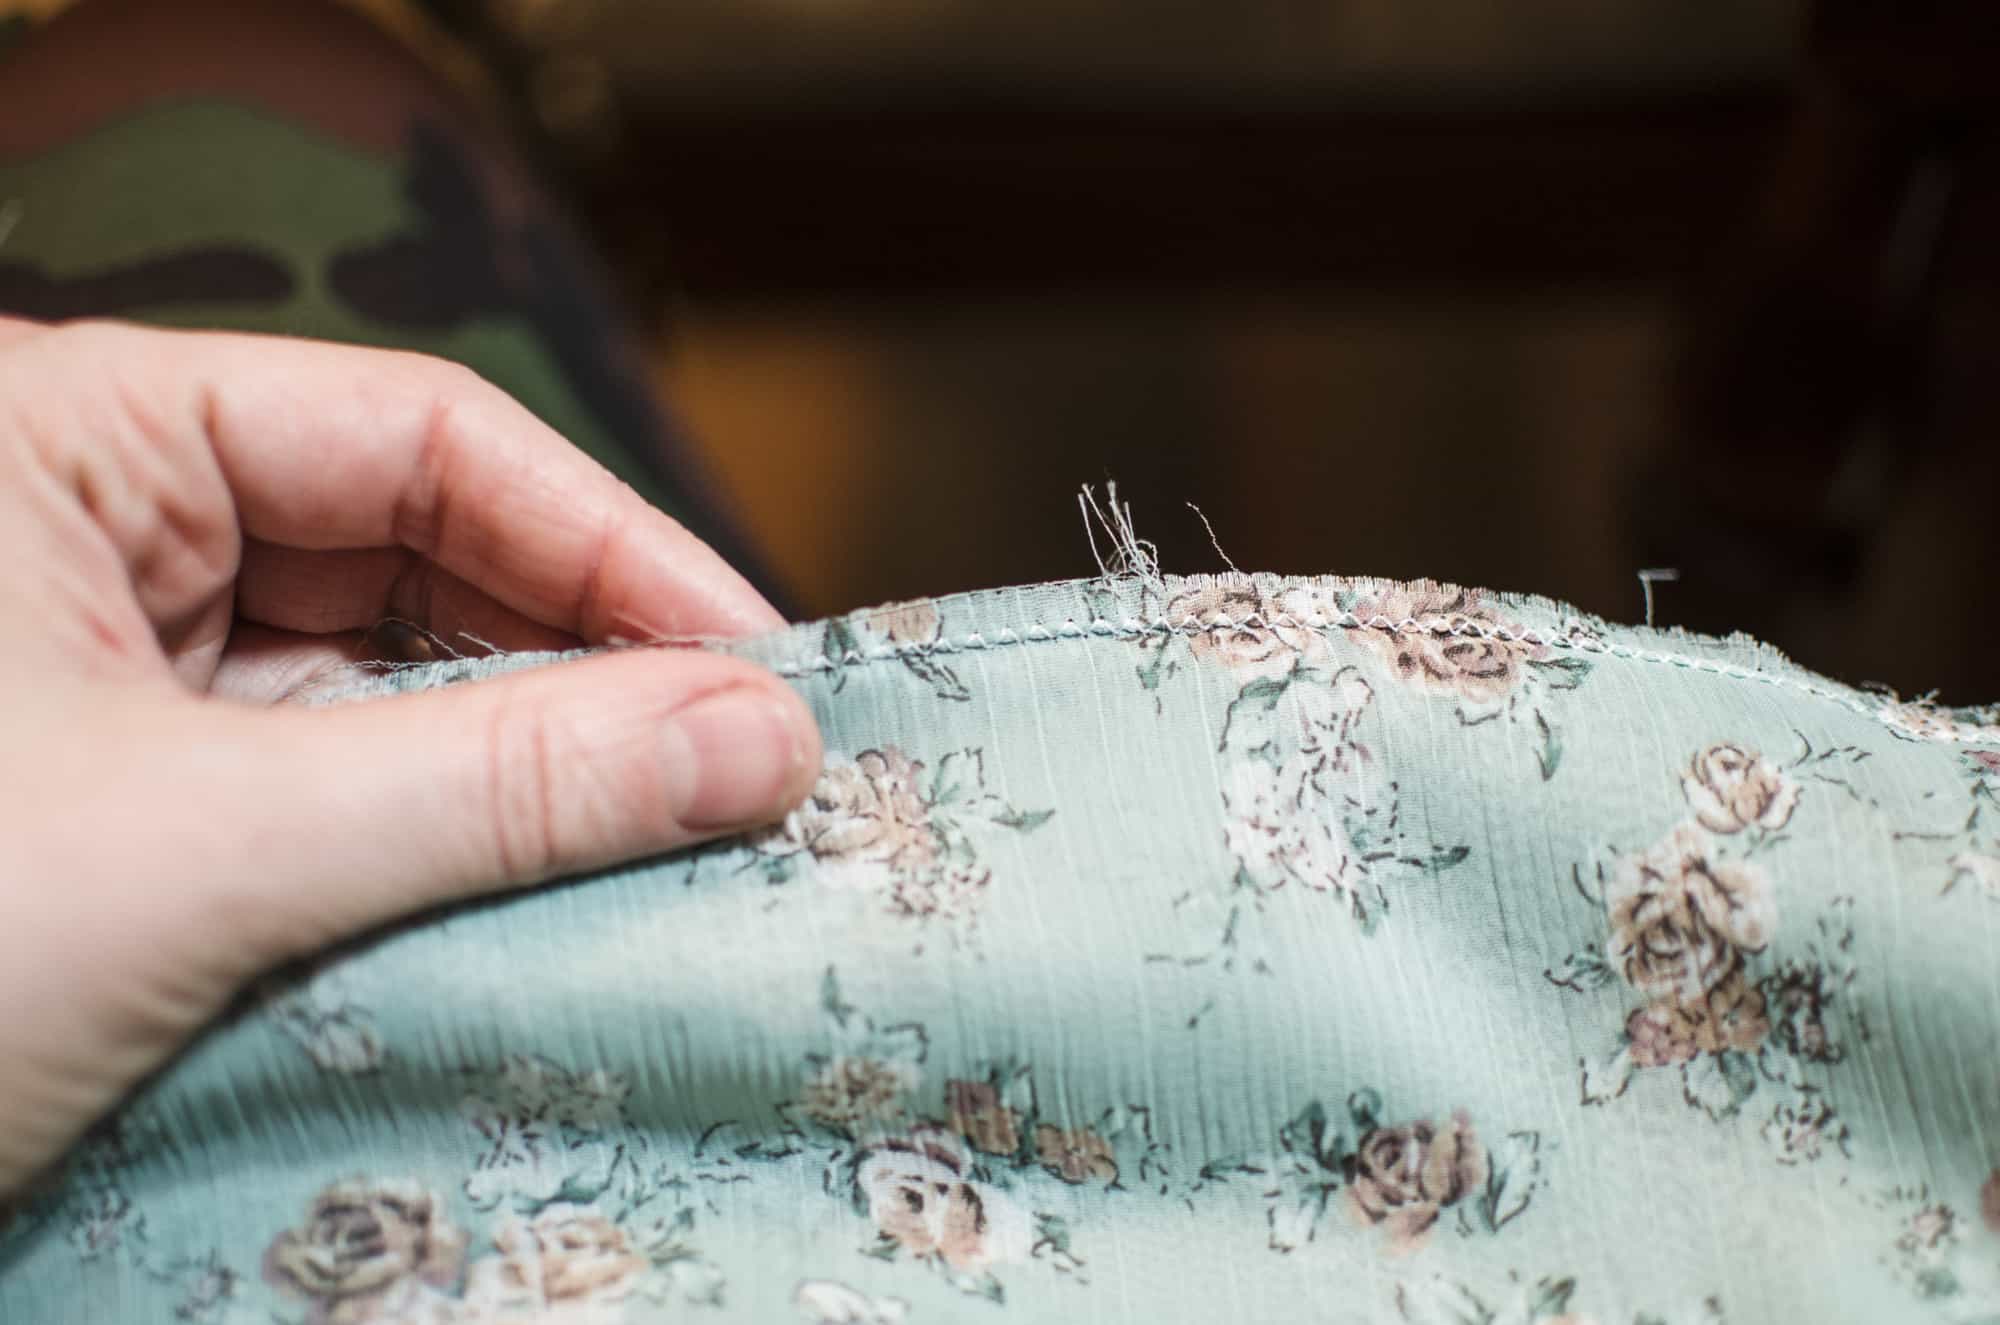
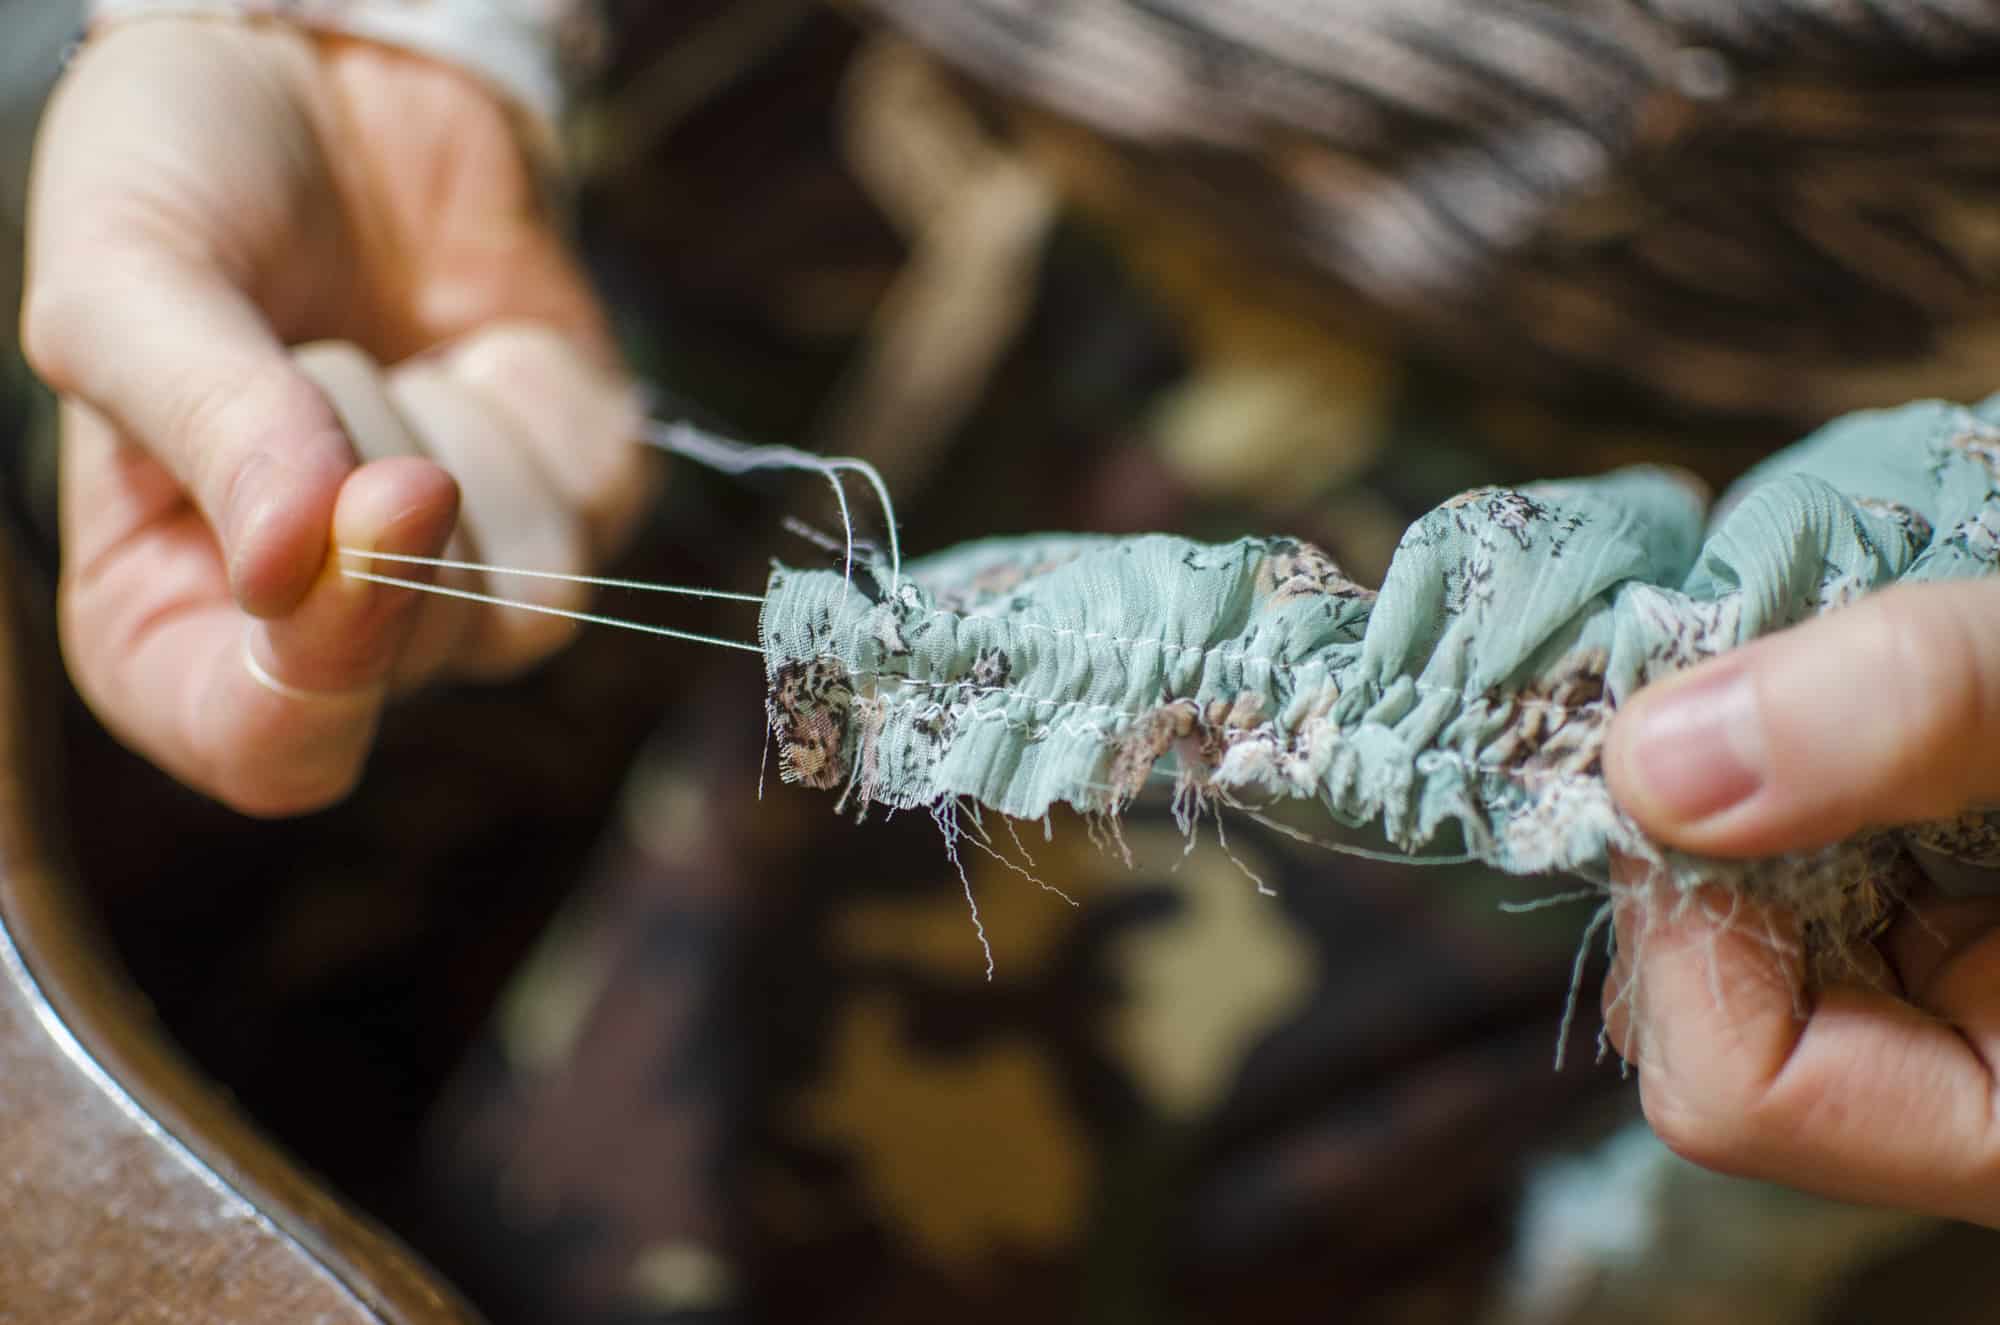
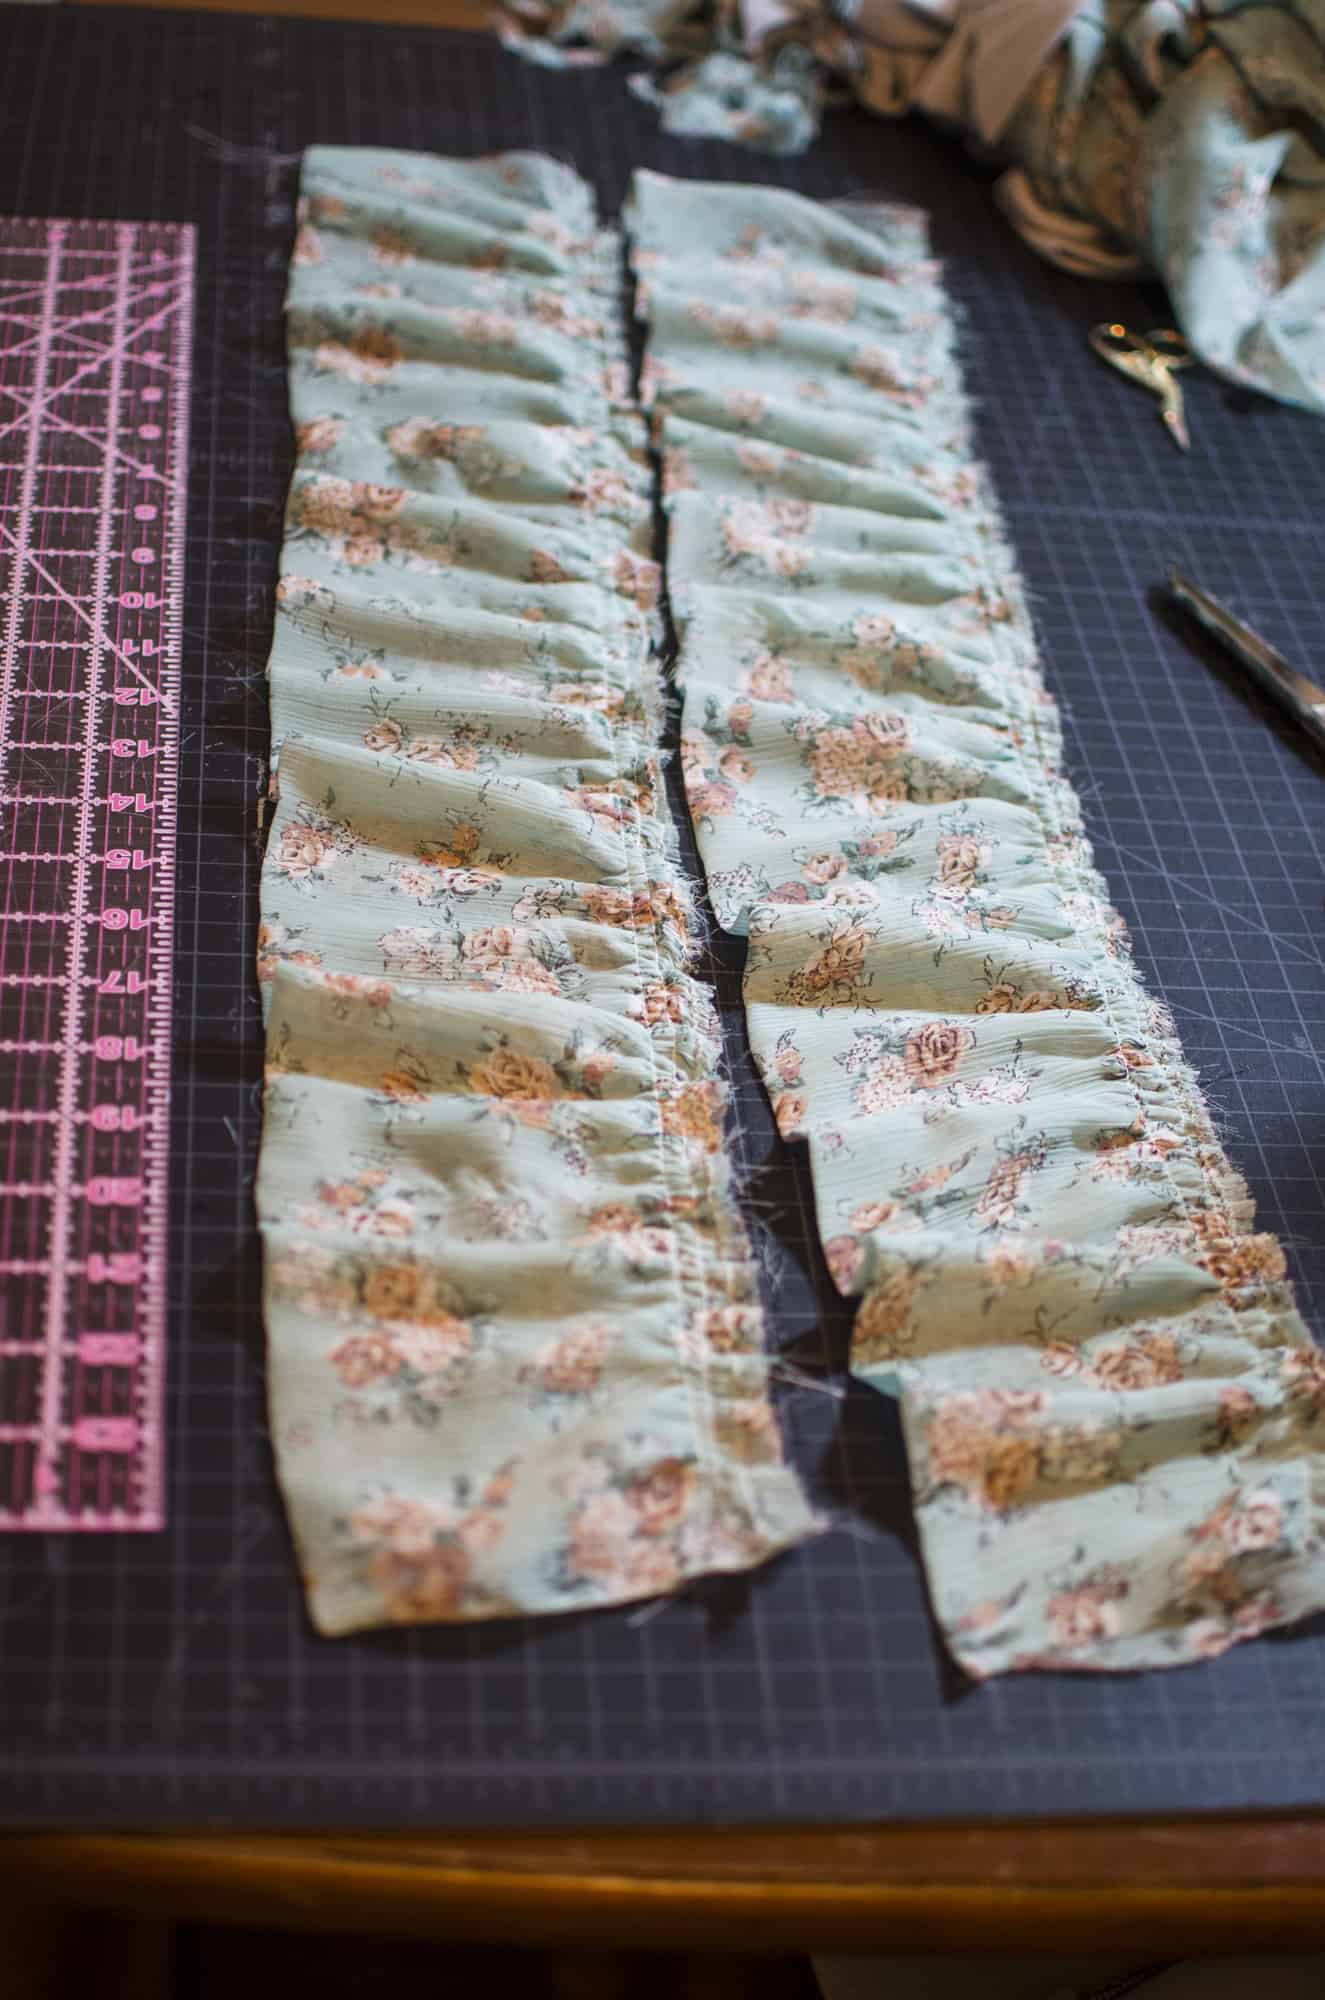
Step 5. Now, you’re going to need to gather the fabric. You can do this however you prefer, but for this project I recommend using basting stitches (straight stitch, loose tension, long stitch length). Sew down the raw edges twice, with the first line of stitching 3/8″ from the edge, the second line 5/8″ from the edge.
Step 6. Grab the bottom (bobbin) threads, and pull gently to gather. You’ll want to do this as evenly as you can, but you can adjust the ruffles as you go along or when you’re done too. Do this until the piece gathers shrinks down to the size of the edge of the sleeve, which will be around 28″.
Step 7. Make sure your ruffles are pretty evenly distributed, as much as possible. Don’t stress too much about this, since they will be hanging on the sleeve when done instead of laying flat on a table. 🙂
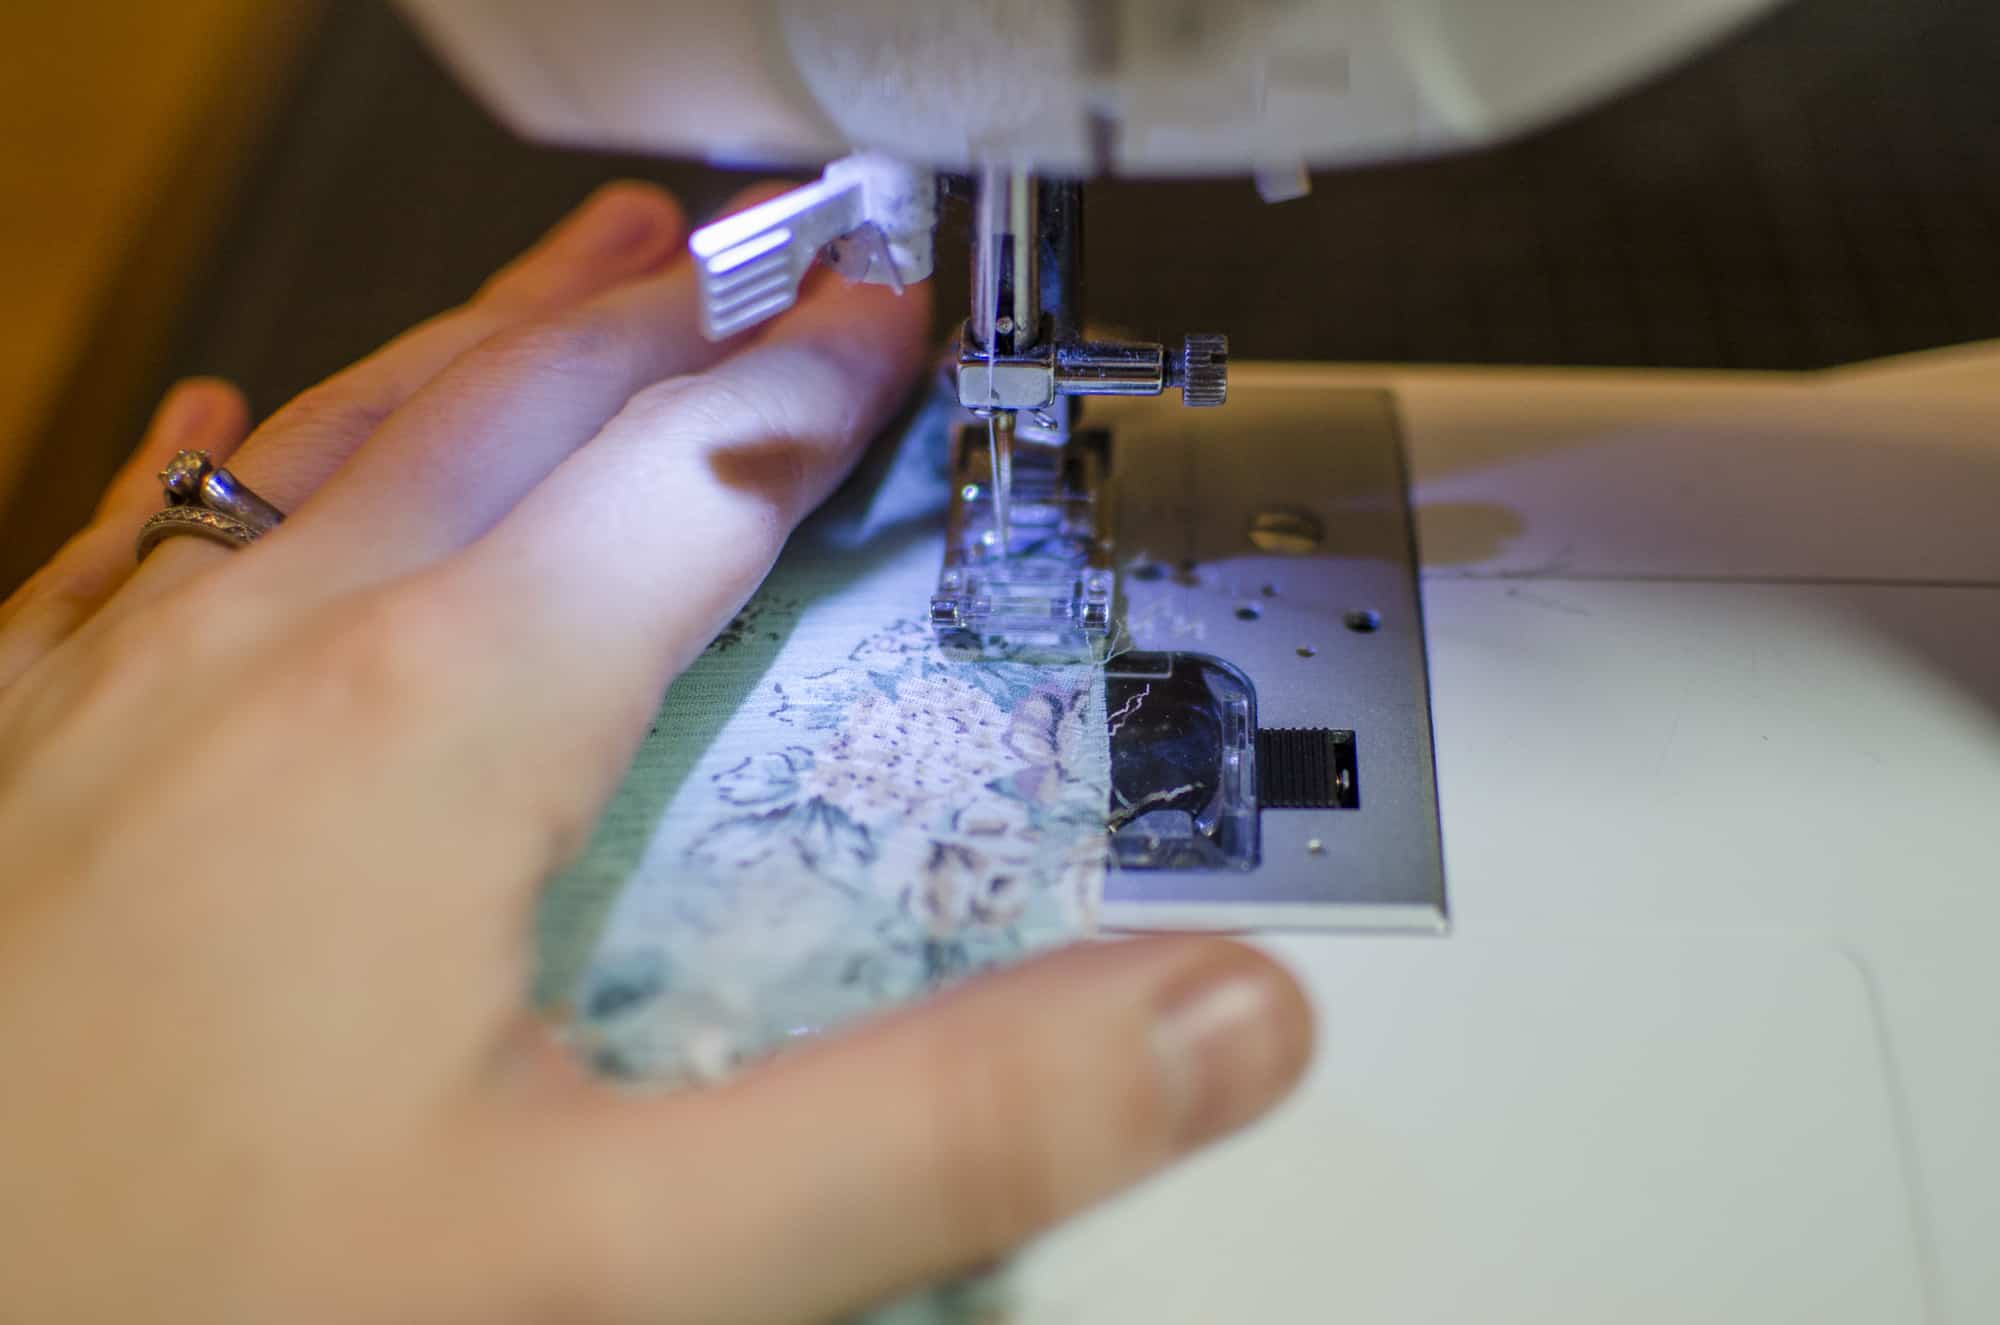
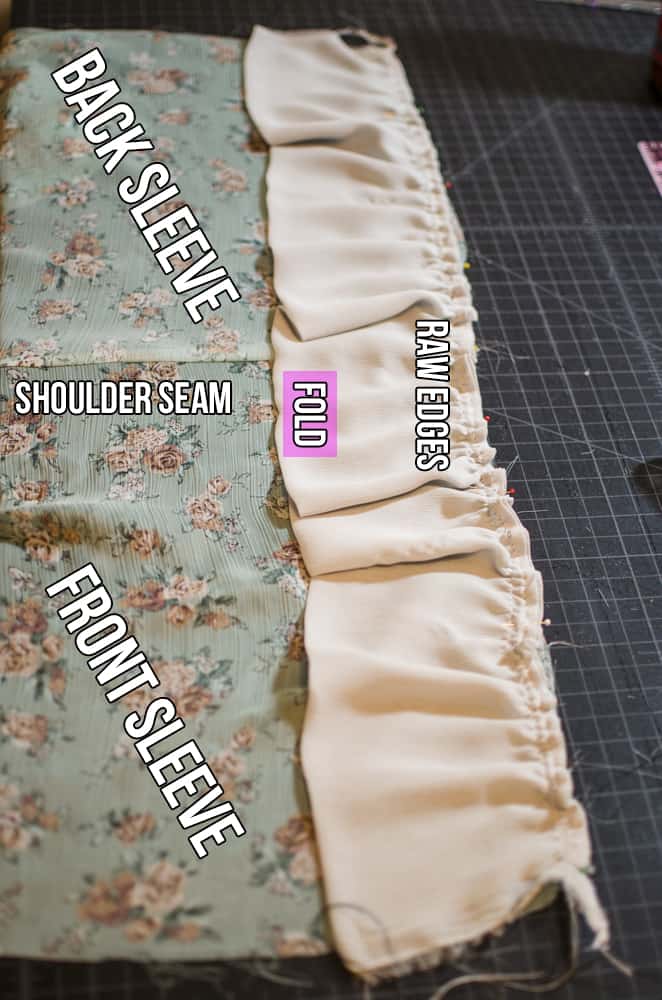
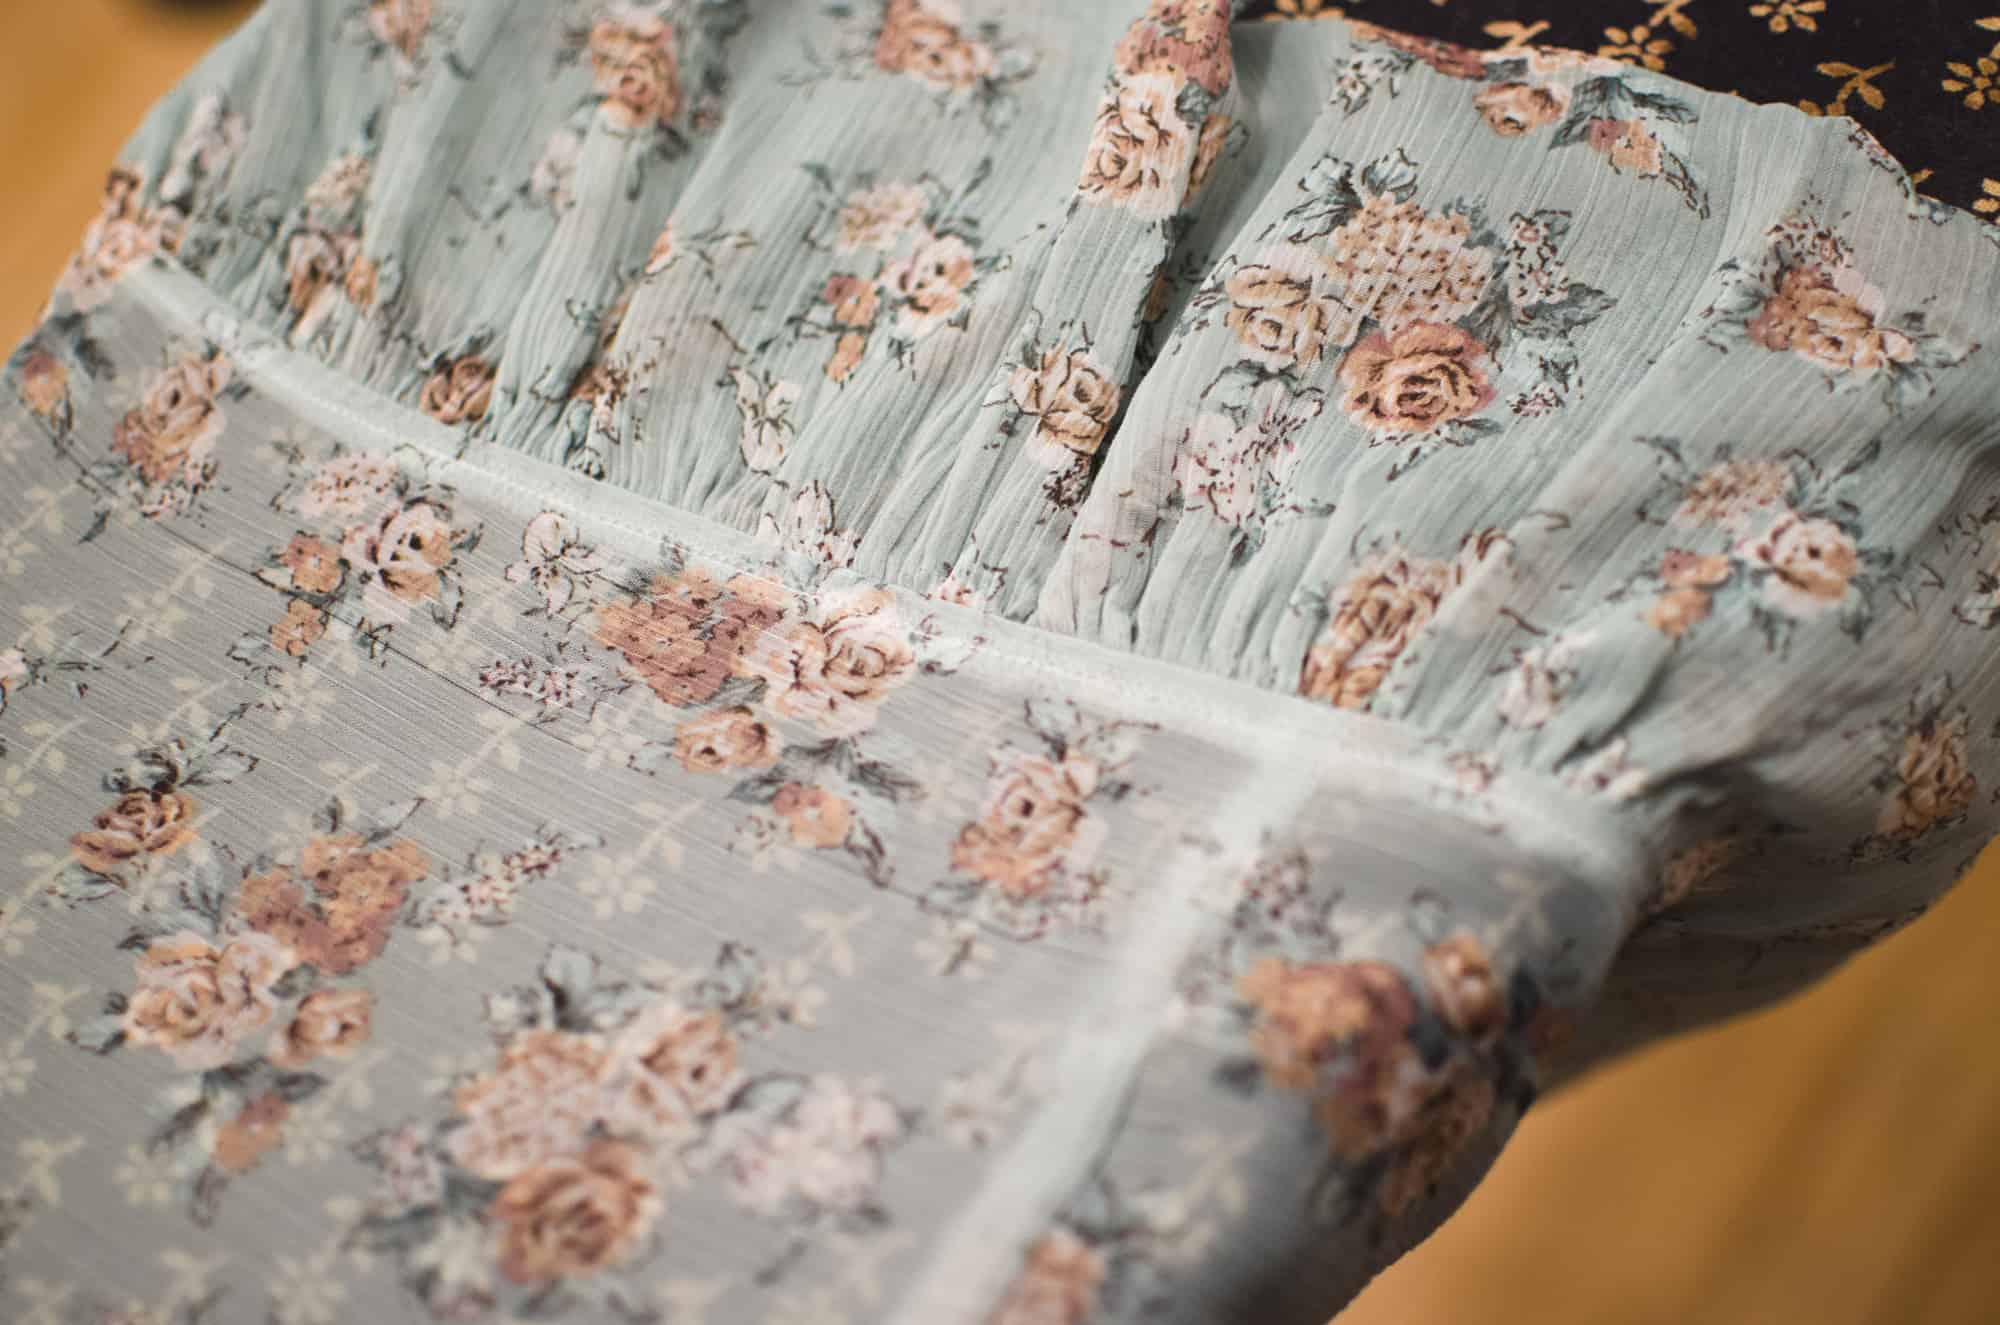
Step 8. Lay the ruffle pieces along the raw edges of each sleeve. Make sure the right side of the sleeve fabric is facing up towards you. Pin/clip generously. Trust me, you can’t really overdo it. (I used a different color of fabric for the ruffle in the picture, don’t get confused!)
Step 9. Now sew to attach the ruffles to the each sleeve. Take a 1/2″ seam allowance here; you should stitch right in between your basting stitches. Go slowly to make sure you don’t disrupt the ruffles too much, after you carefully arranged them. Once you’re done and you make sure that you like the way things look, remove the basting stitches.
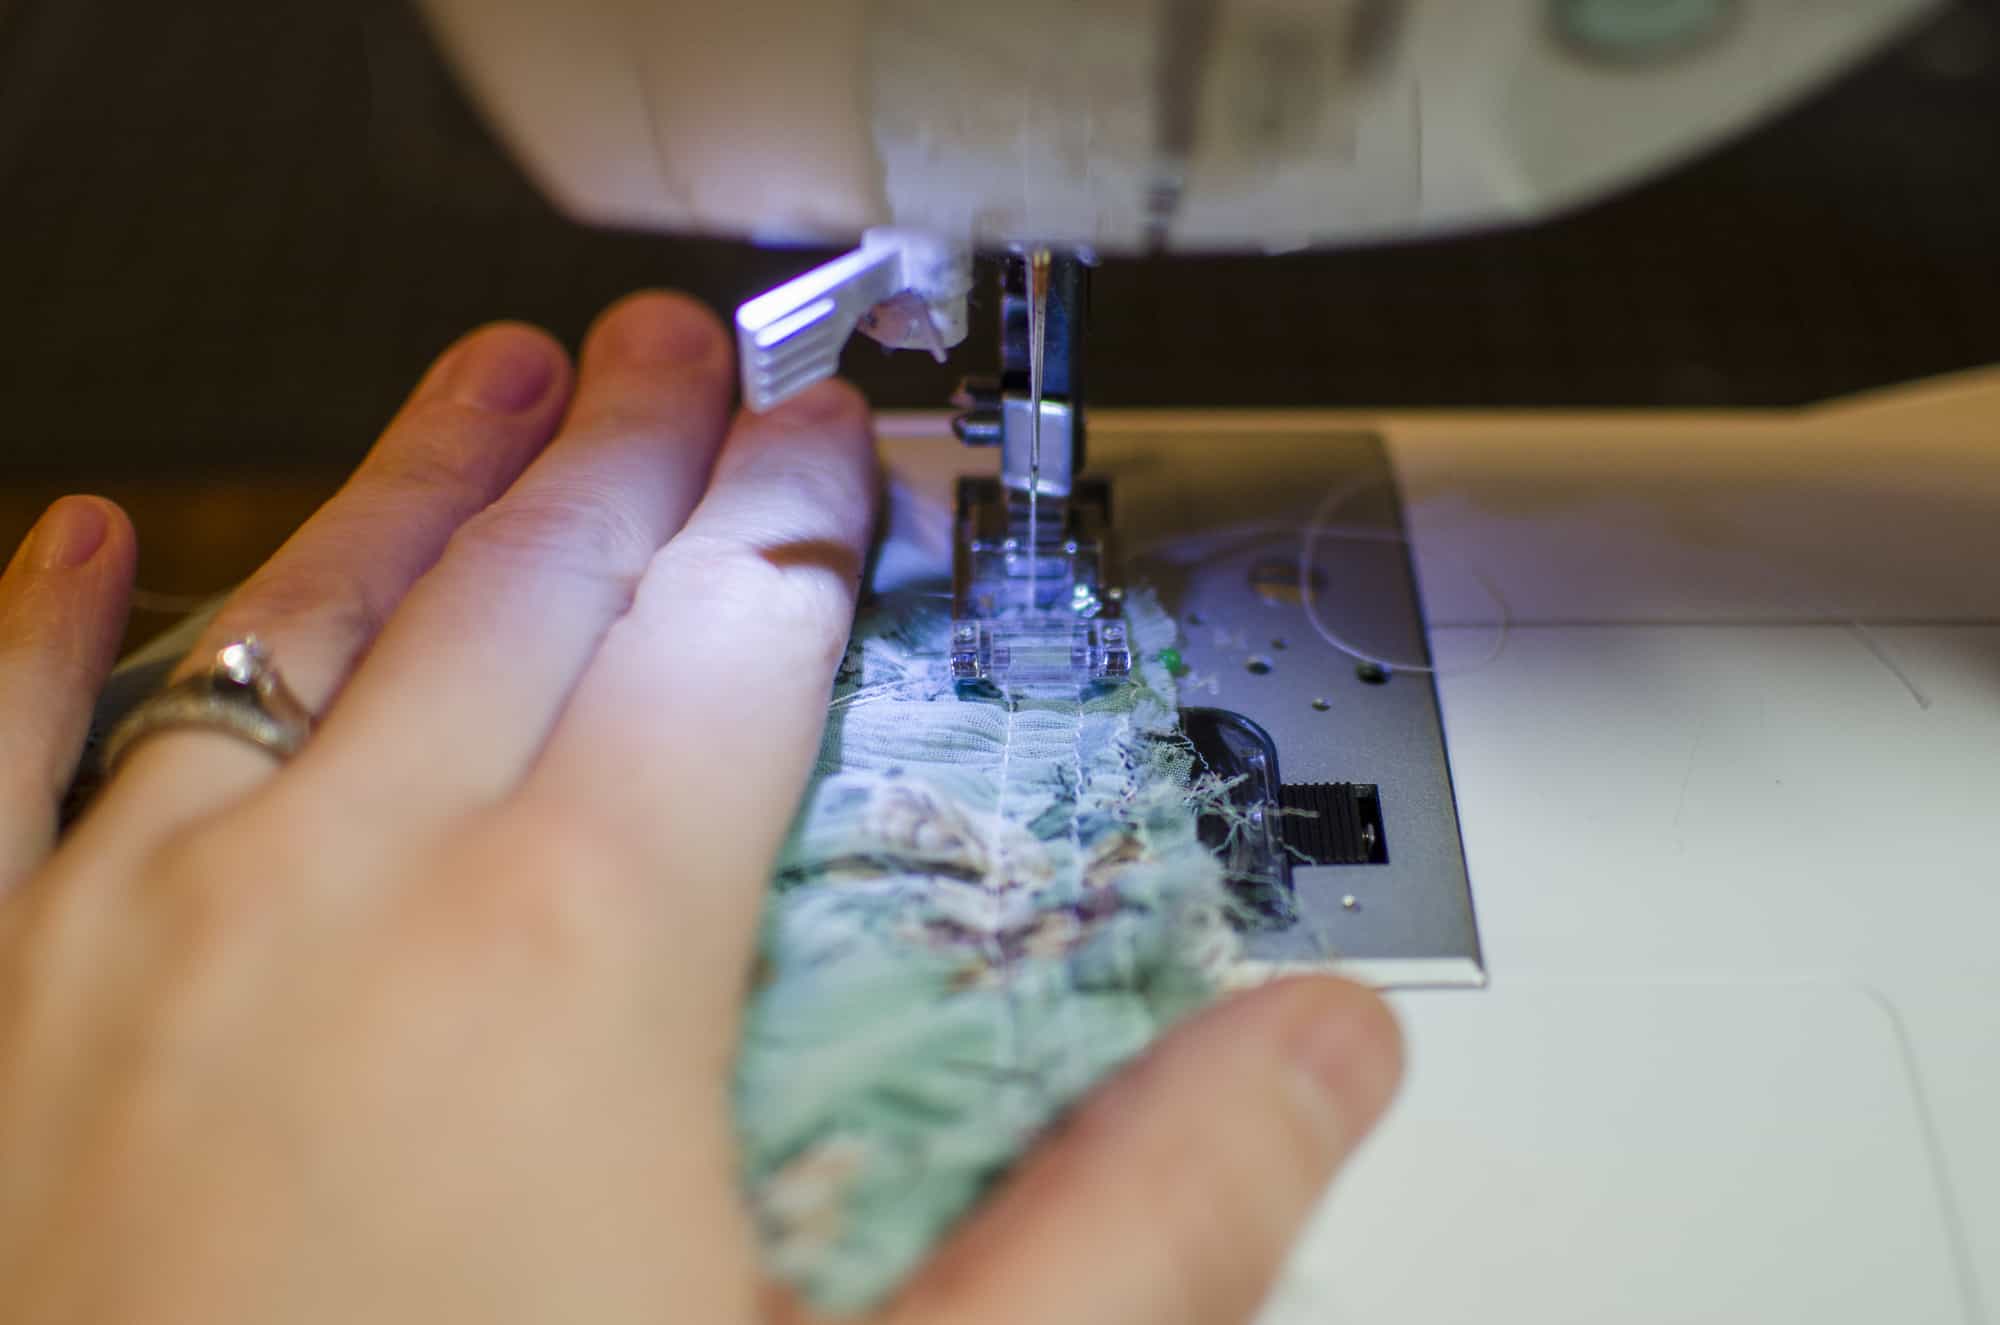
Step 10. Finish the edges of the ruffles and sleeves. With a sewing machine, sew another zigzag or similar stitch through all three layers of fabric. Or with a serger, just serge through all three layers cutting off 1/4″.
Step 11. Press the seam allowance up towards the sleeve and away from the ruffles. If you didn’t serge the edge, turn the seam allowance down 1/4″, tuck under, pin and iron so that the raw edge is enclosed.
Step 12. Topstitch so that the seam allowance stays flat and pressed up towards the sleeve. Since this is a woven, I just used a regular straight stitch, but you could also use a twin needle for a fancier stitch.
Optional: Lightly press/steam the ruffles down along the sleeve seam and folded edge. Don’t press enough to make creases, but this does help the ruffles lay pretty flat.
Step 13. Complete the rest of the kimono as the pattern instructions dictate. I finished my edges and hem with lace, but you can easily use this same technique to add a ruffle to the hem as well.
All done! I’m totally in love with this look – can you tell I’m ready for spring with this floral print and soft colors?! I also easily styled this ruffle kimono with a gray Layer Me Up tank and my fave stretch denim SOS Pants. Comfy and cute! It can be done, ladies.
![]()
![]()
![]()
Now go out and make your own! Be sure to use the hashtag #P4PCardiWeek when you post in the Facebook group or Instagram!
Pirate-ly Yours,
– Elisabeth
Take a look at our jam-packed schedule of cardigan love!
Saturday, January 21: #P4PCardiWeek Announcement
Sunday, January 22: Cocoon Lace Hems and Butterfly Ruffle
Monday, January 23: Ribbon Tie Closure Hack
Tuesday, January 24: Carefree Cardigan Fringe Hack
Wednesday, January 25: Duster-Length Adjustment
Thursday, January 26: Kimono Ruffle Sleeves
Friday, January 27: Varsity Sweater Style Hack
Saturday, January 28: Carefree Cardigan Flannel + Vest Hack
Monday, January 30: #P4PCardiWeek Winner Announcement
You can follow along on the blog here, or in our Facebook group. Search #P4PCardiWeek to be able to find our posts all over social media. And please feel free to sew-along with us on one or all of the days. The more the merrier!
But wait, there’s more! We wanted to create a friendly pirate-y competition with our P4P Cardi Week!
Between tomorrow and Saturday, January 28, sew up a Patterns for Pirates cardigan using one of our hacks, or by keeping the pattern as-is. Share your photo with us on Instagram or in our Facebook group and use the tag#P4PCardiWeek We will pick our favorite and the winner will win a free P4P pattern of choice AND be featured on this blog. Fun right?
To make it even better we have put all the cardigan patterns in the shop on sale all week (no code needed)!
Now get out there and sew some cardigans, matey!


Leave a Reply