Happy Holidays, Pirate Friends! We are excitedly back for another year and another round of holiday freebies to share with you! Over the years, we’ve compiled different tutorials and patterns that we think would make *perfect* gifts for your friends and family. Curious about what we’ve already released in the way of holiday freebies? Head right here to see all of them: Holiday Freebies Roundup.
Today, we are bringing you the: Earflap Hat!
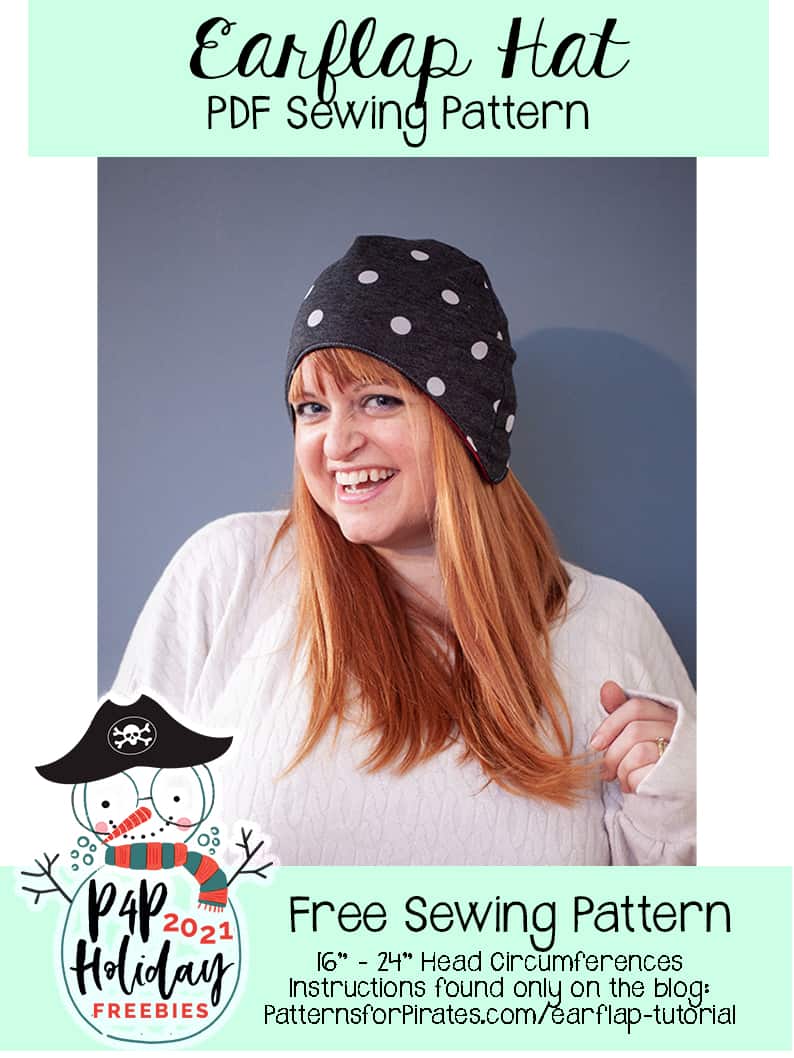
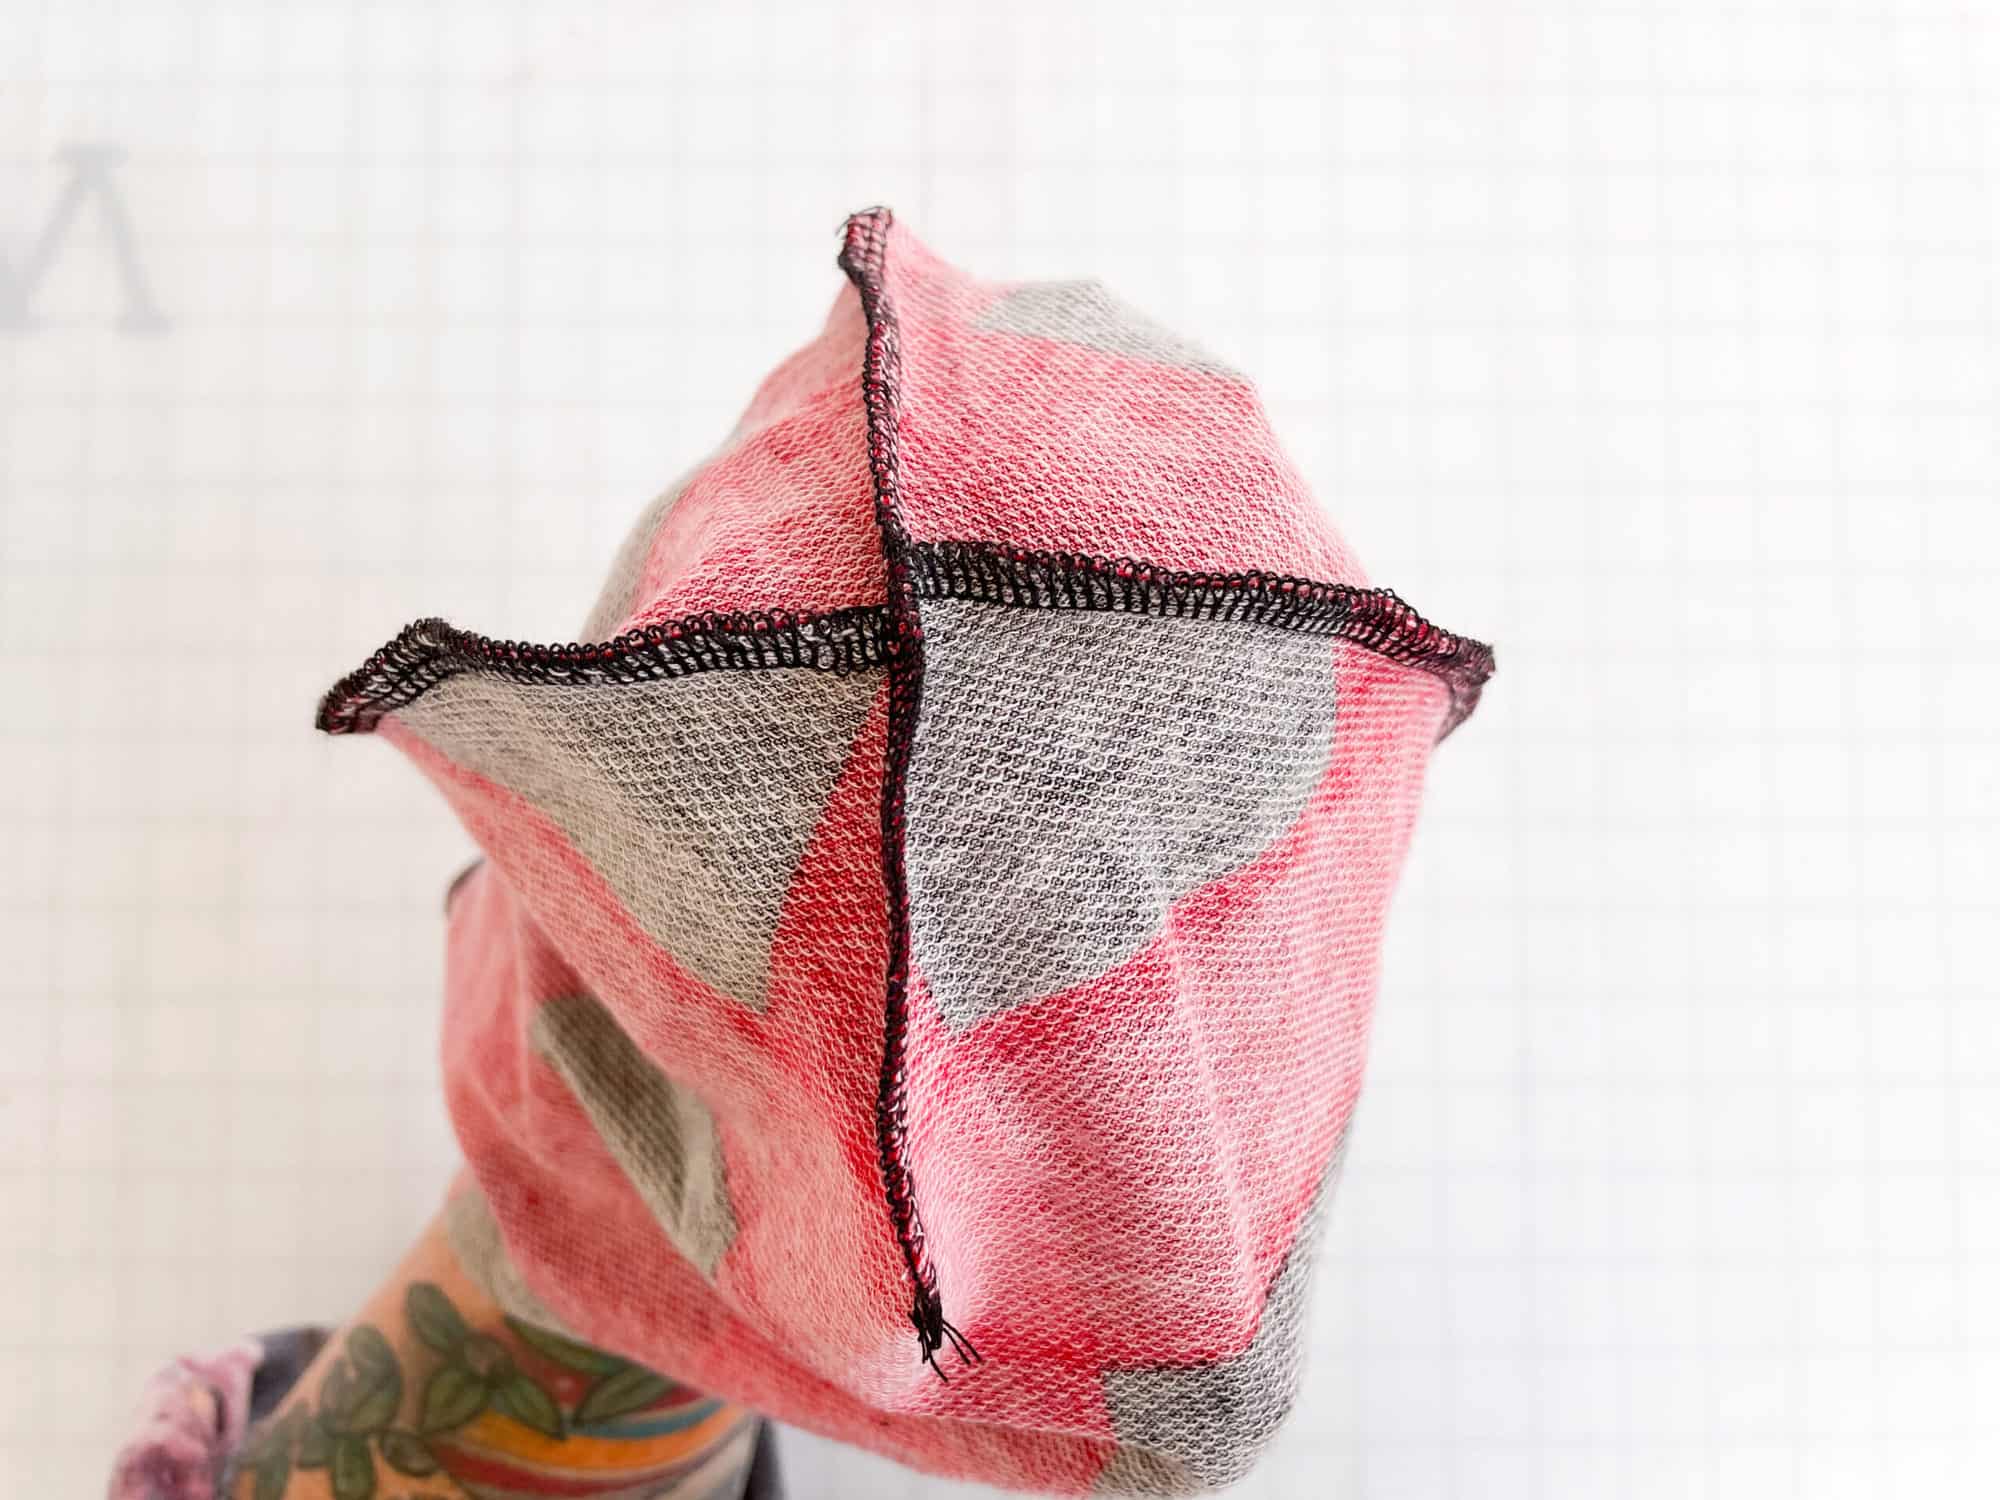
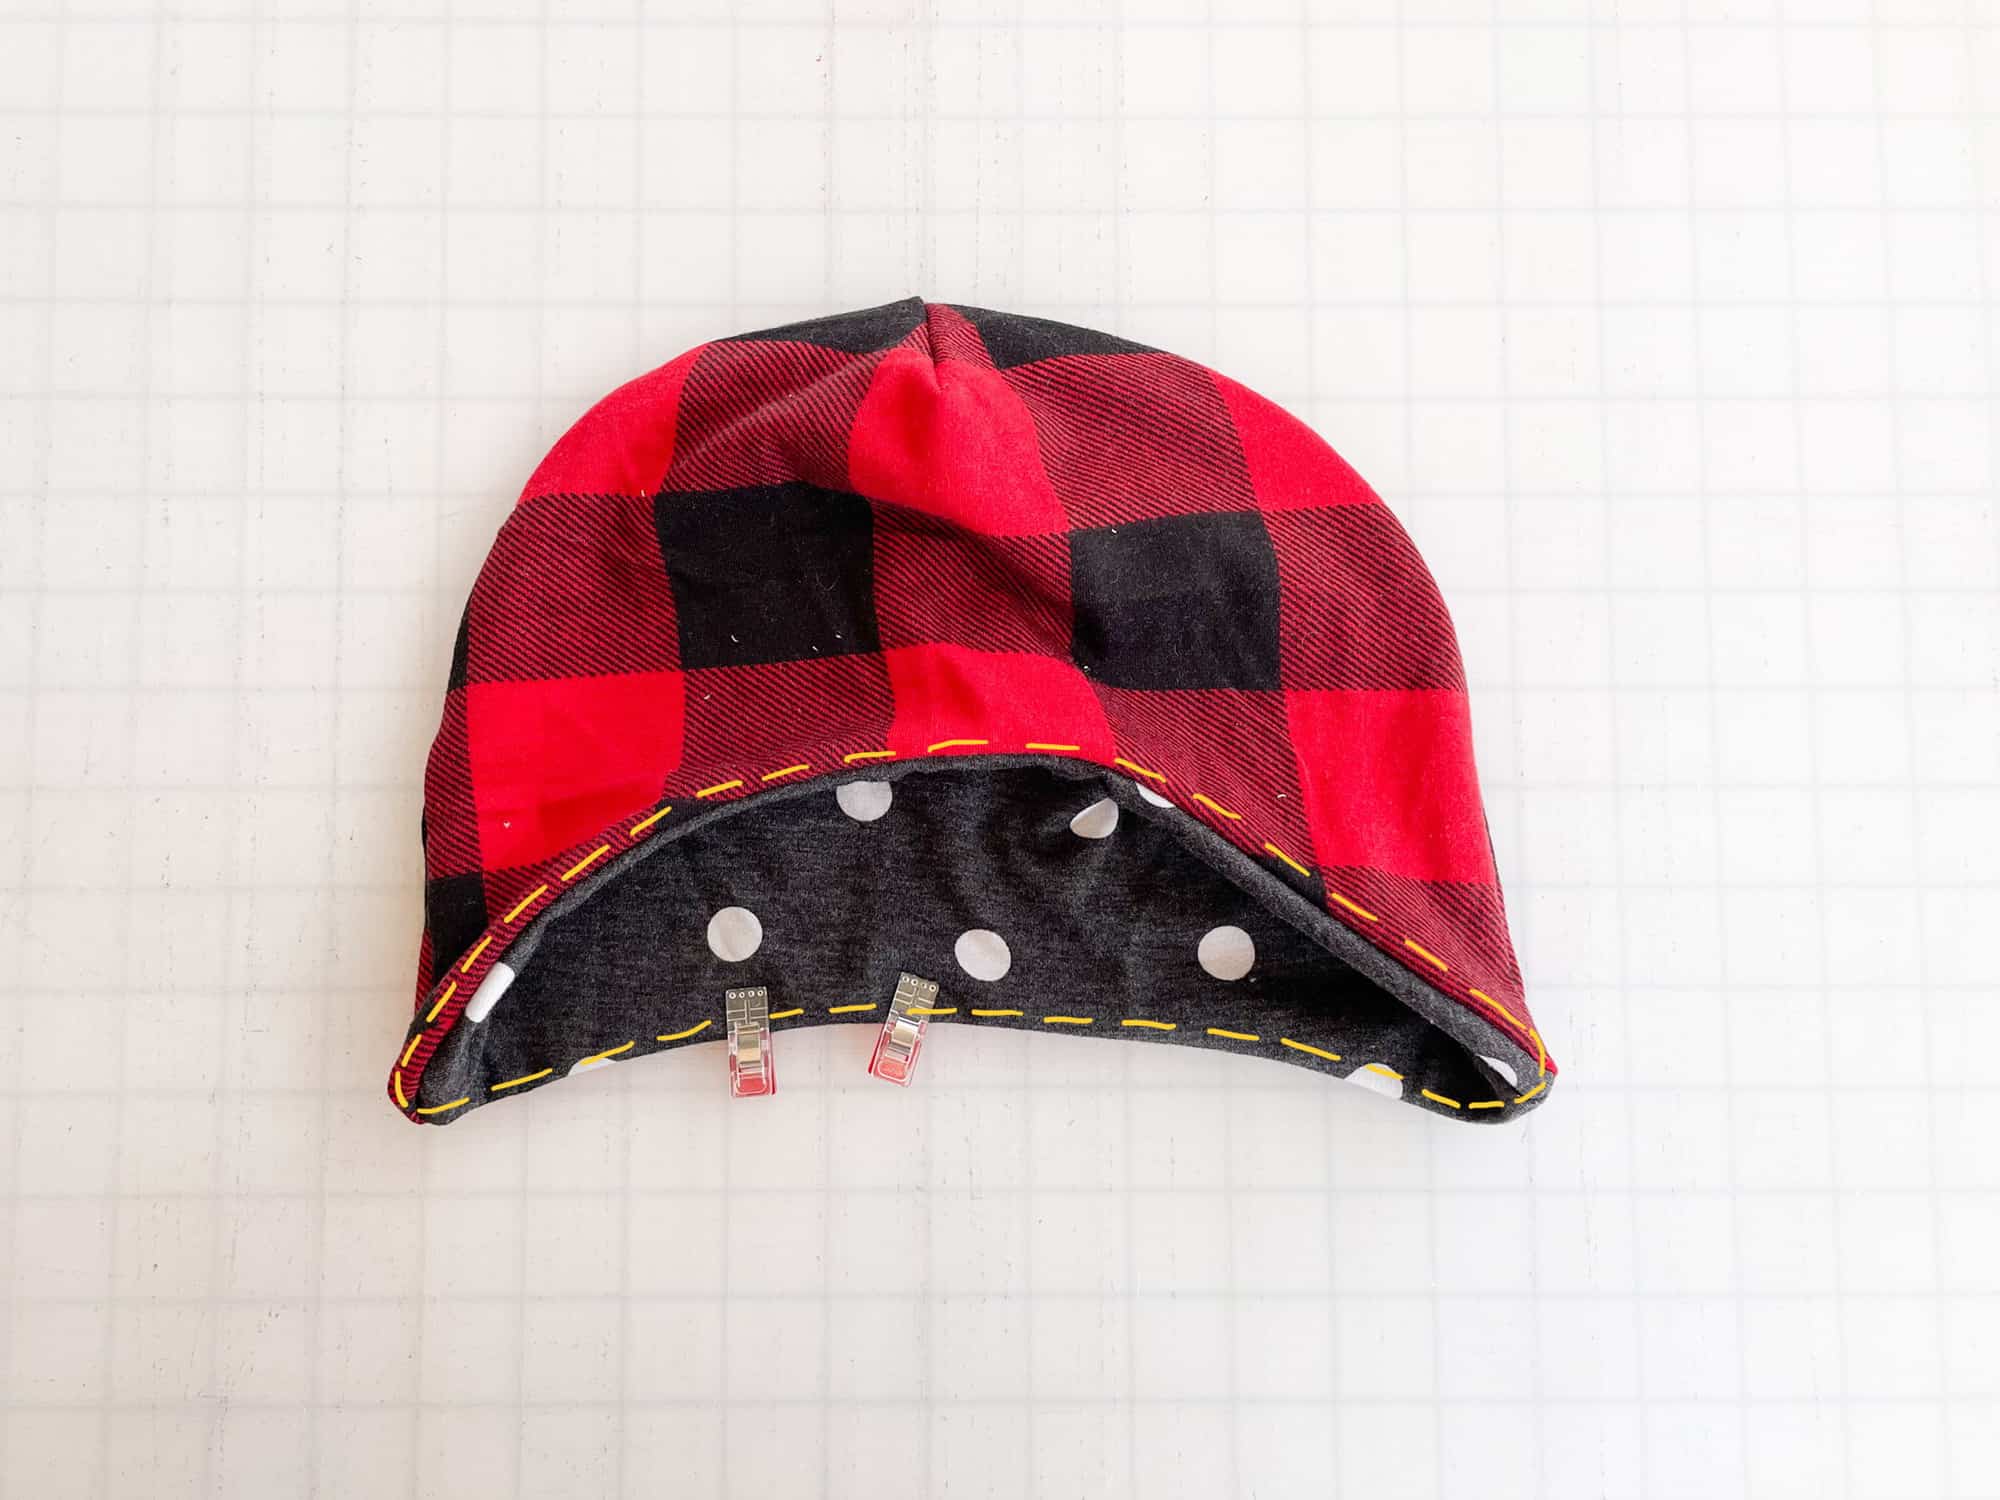
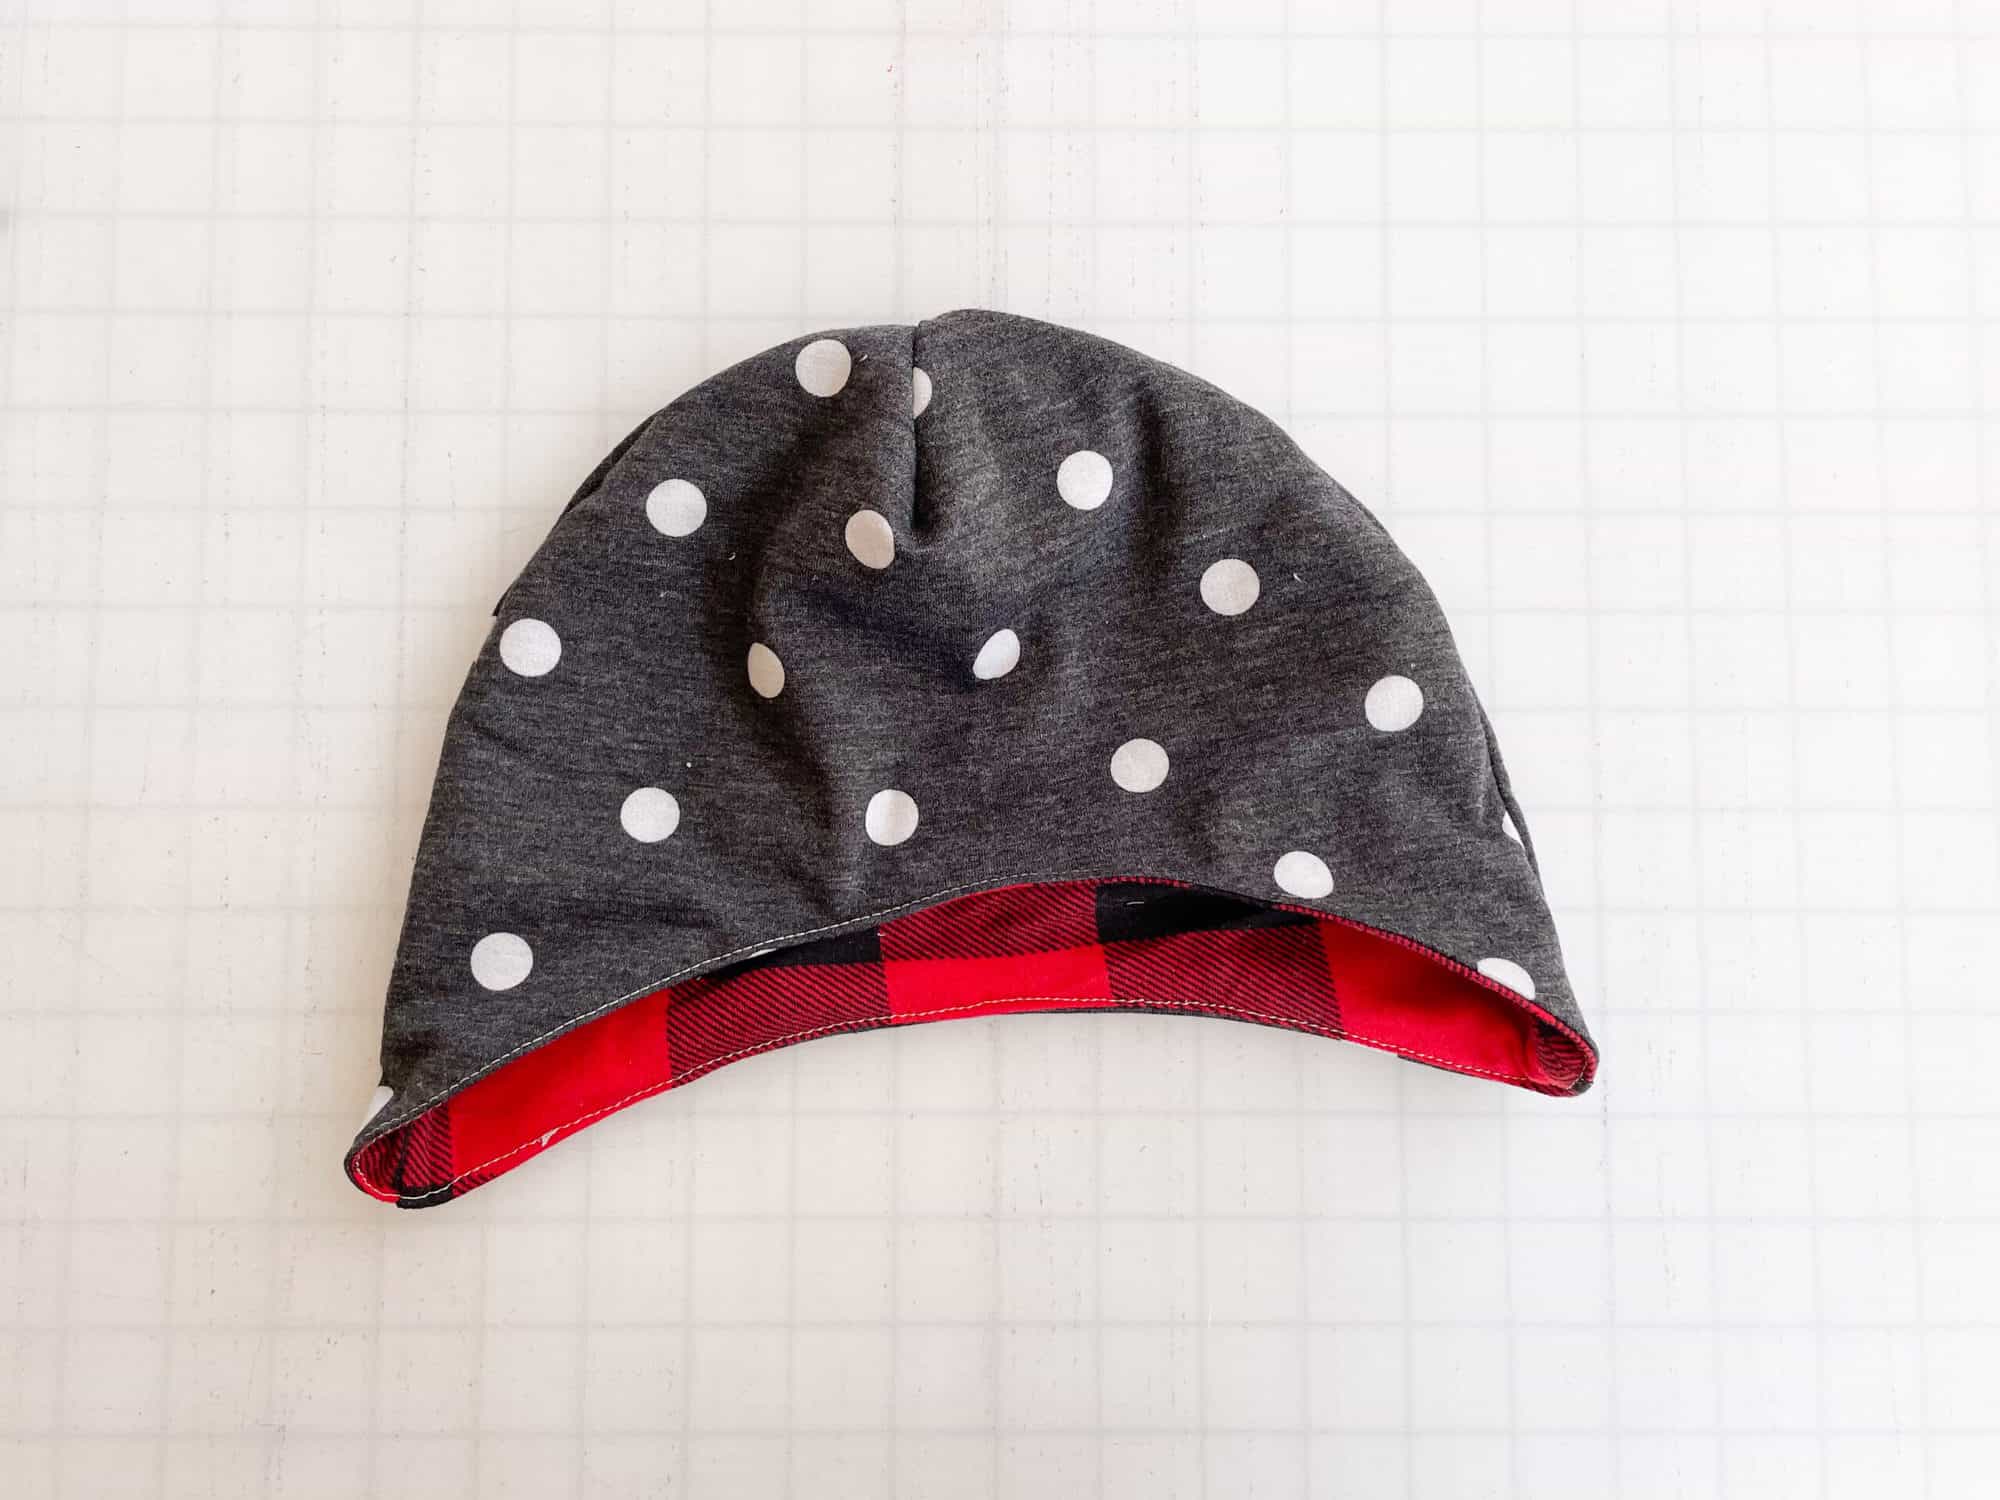
Who doesn’t love a quick and easy (and comfy) knit hat?? It’s a perfect go-to for the cooler months, and this hat is actually an incredible basic — I have so many ideas for how to dress it up! All seams end up fully enclosed, so it’s actually reversible too! Grab your favorite combo of fabrics and you’ll get 2-in-1 hats from this sweet little pattern!
Supplies Needed:
- Earflap Hat pattern pieces
- Less than 1/3 yard knit fabric
**if using a thicker fleece / fun fur for the lining, I’d recommend sizing up!
TUTORIAL

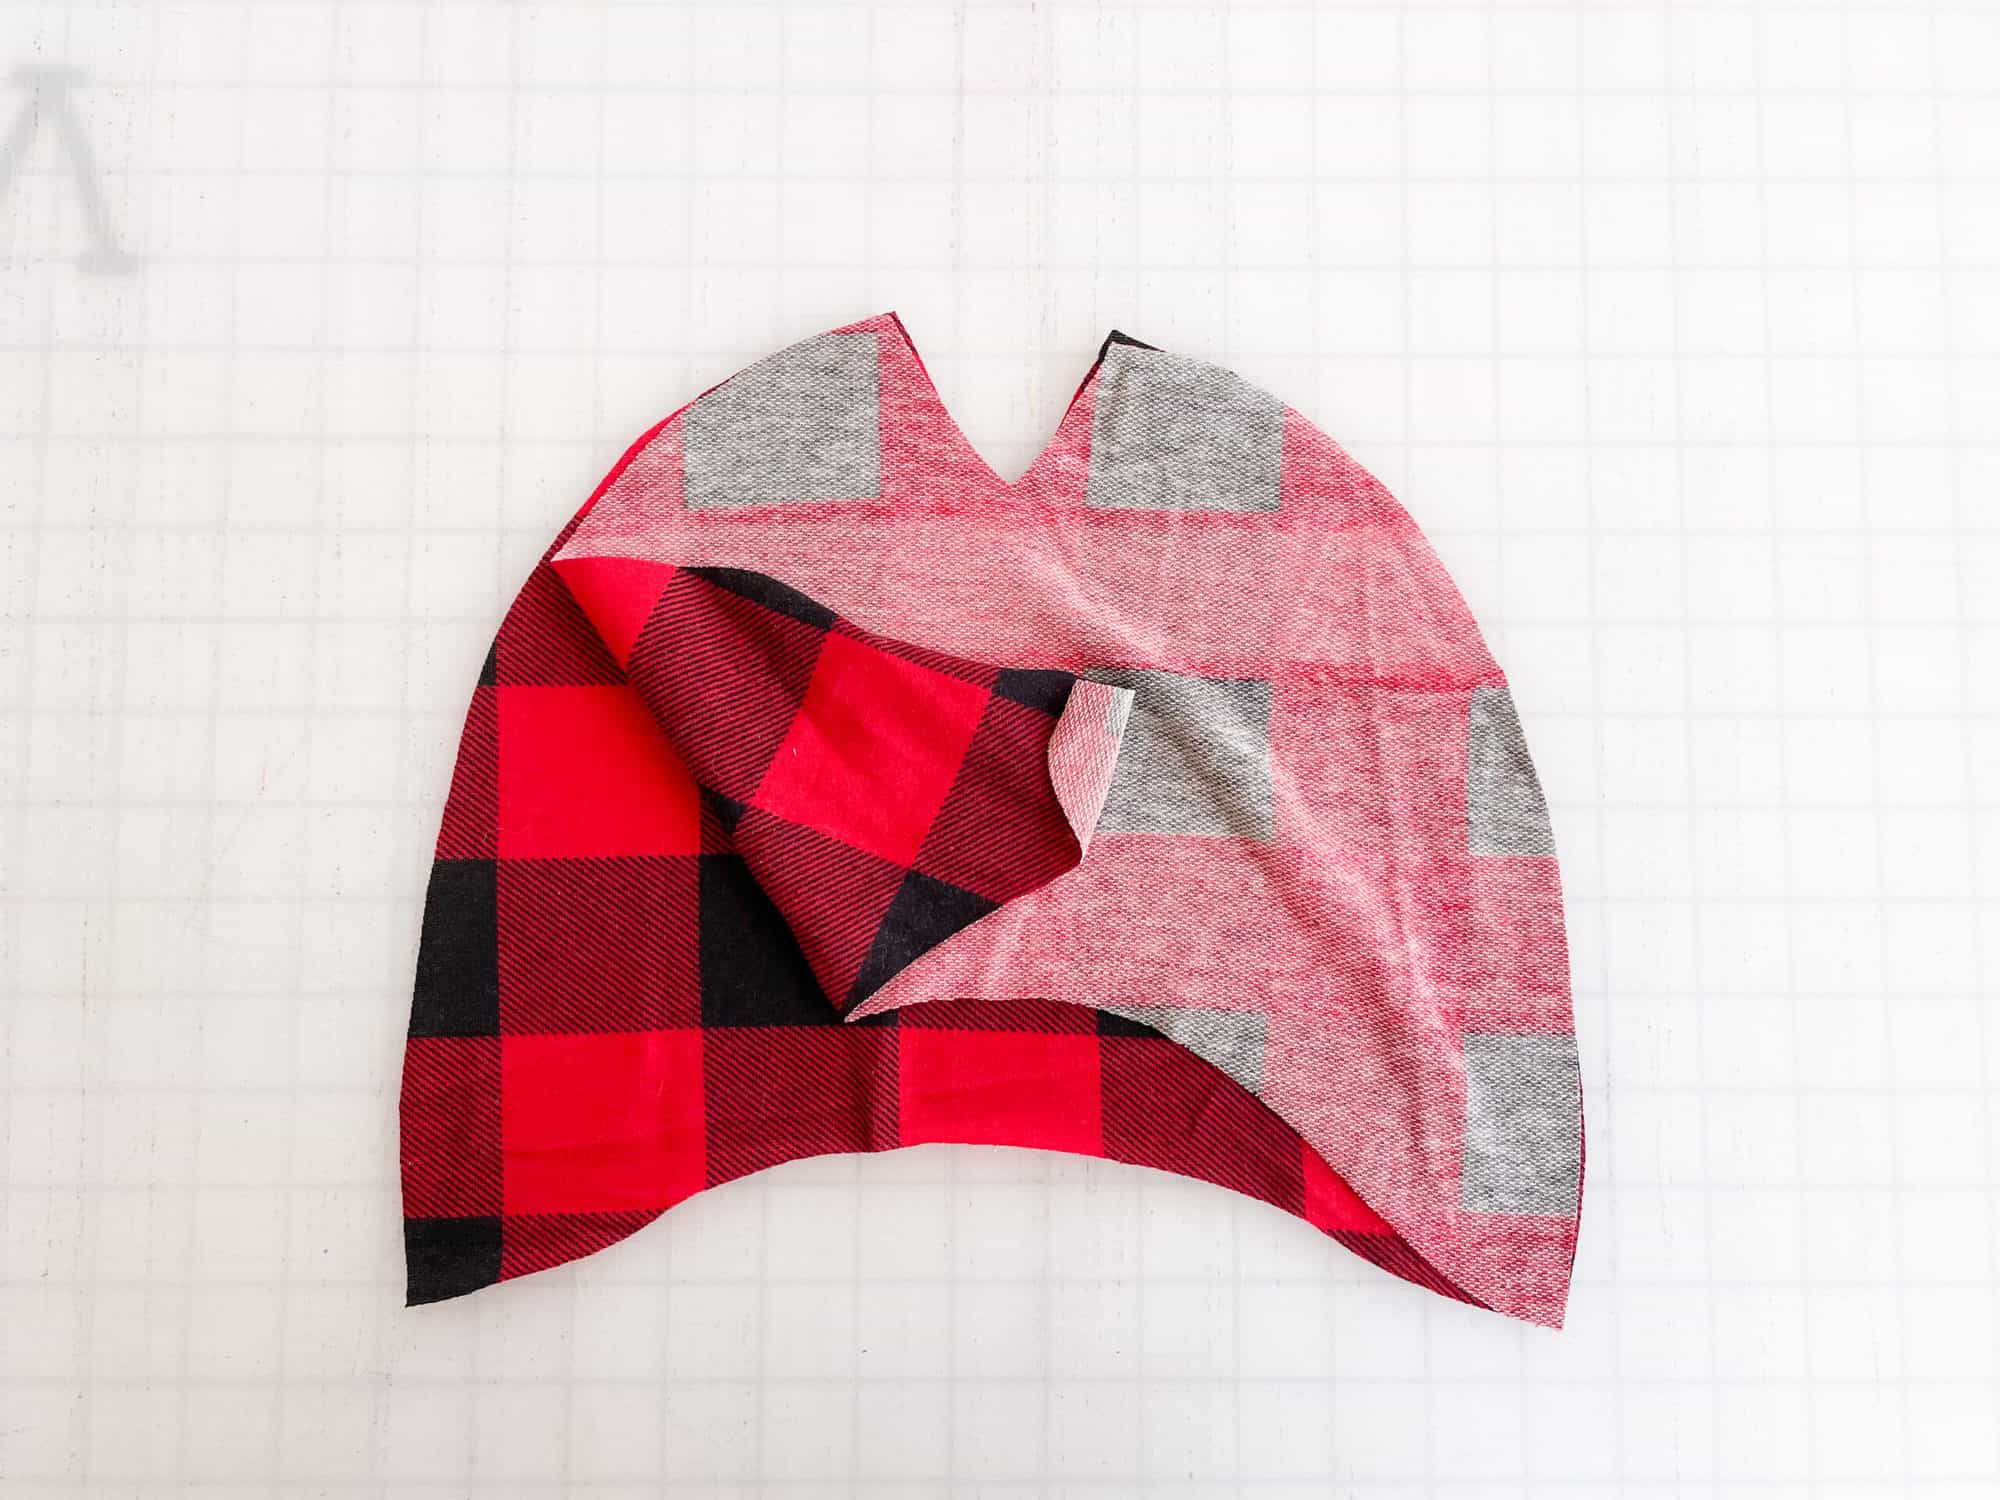
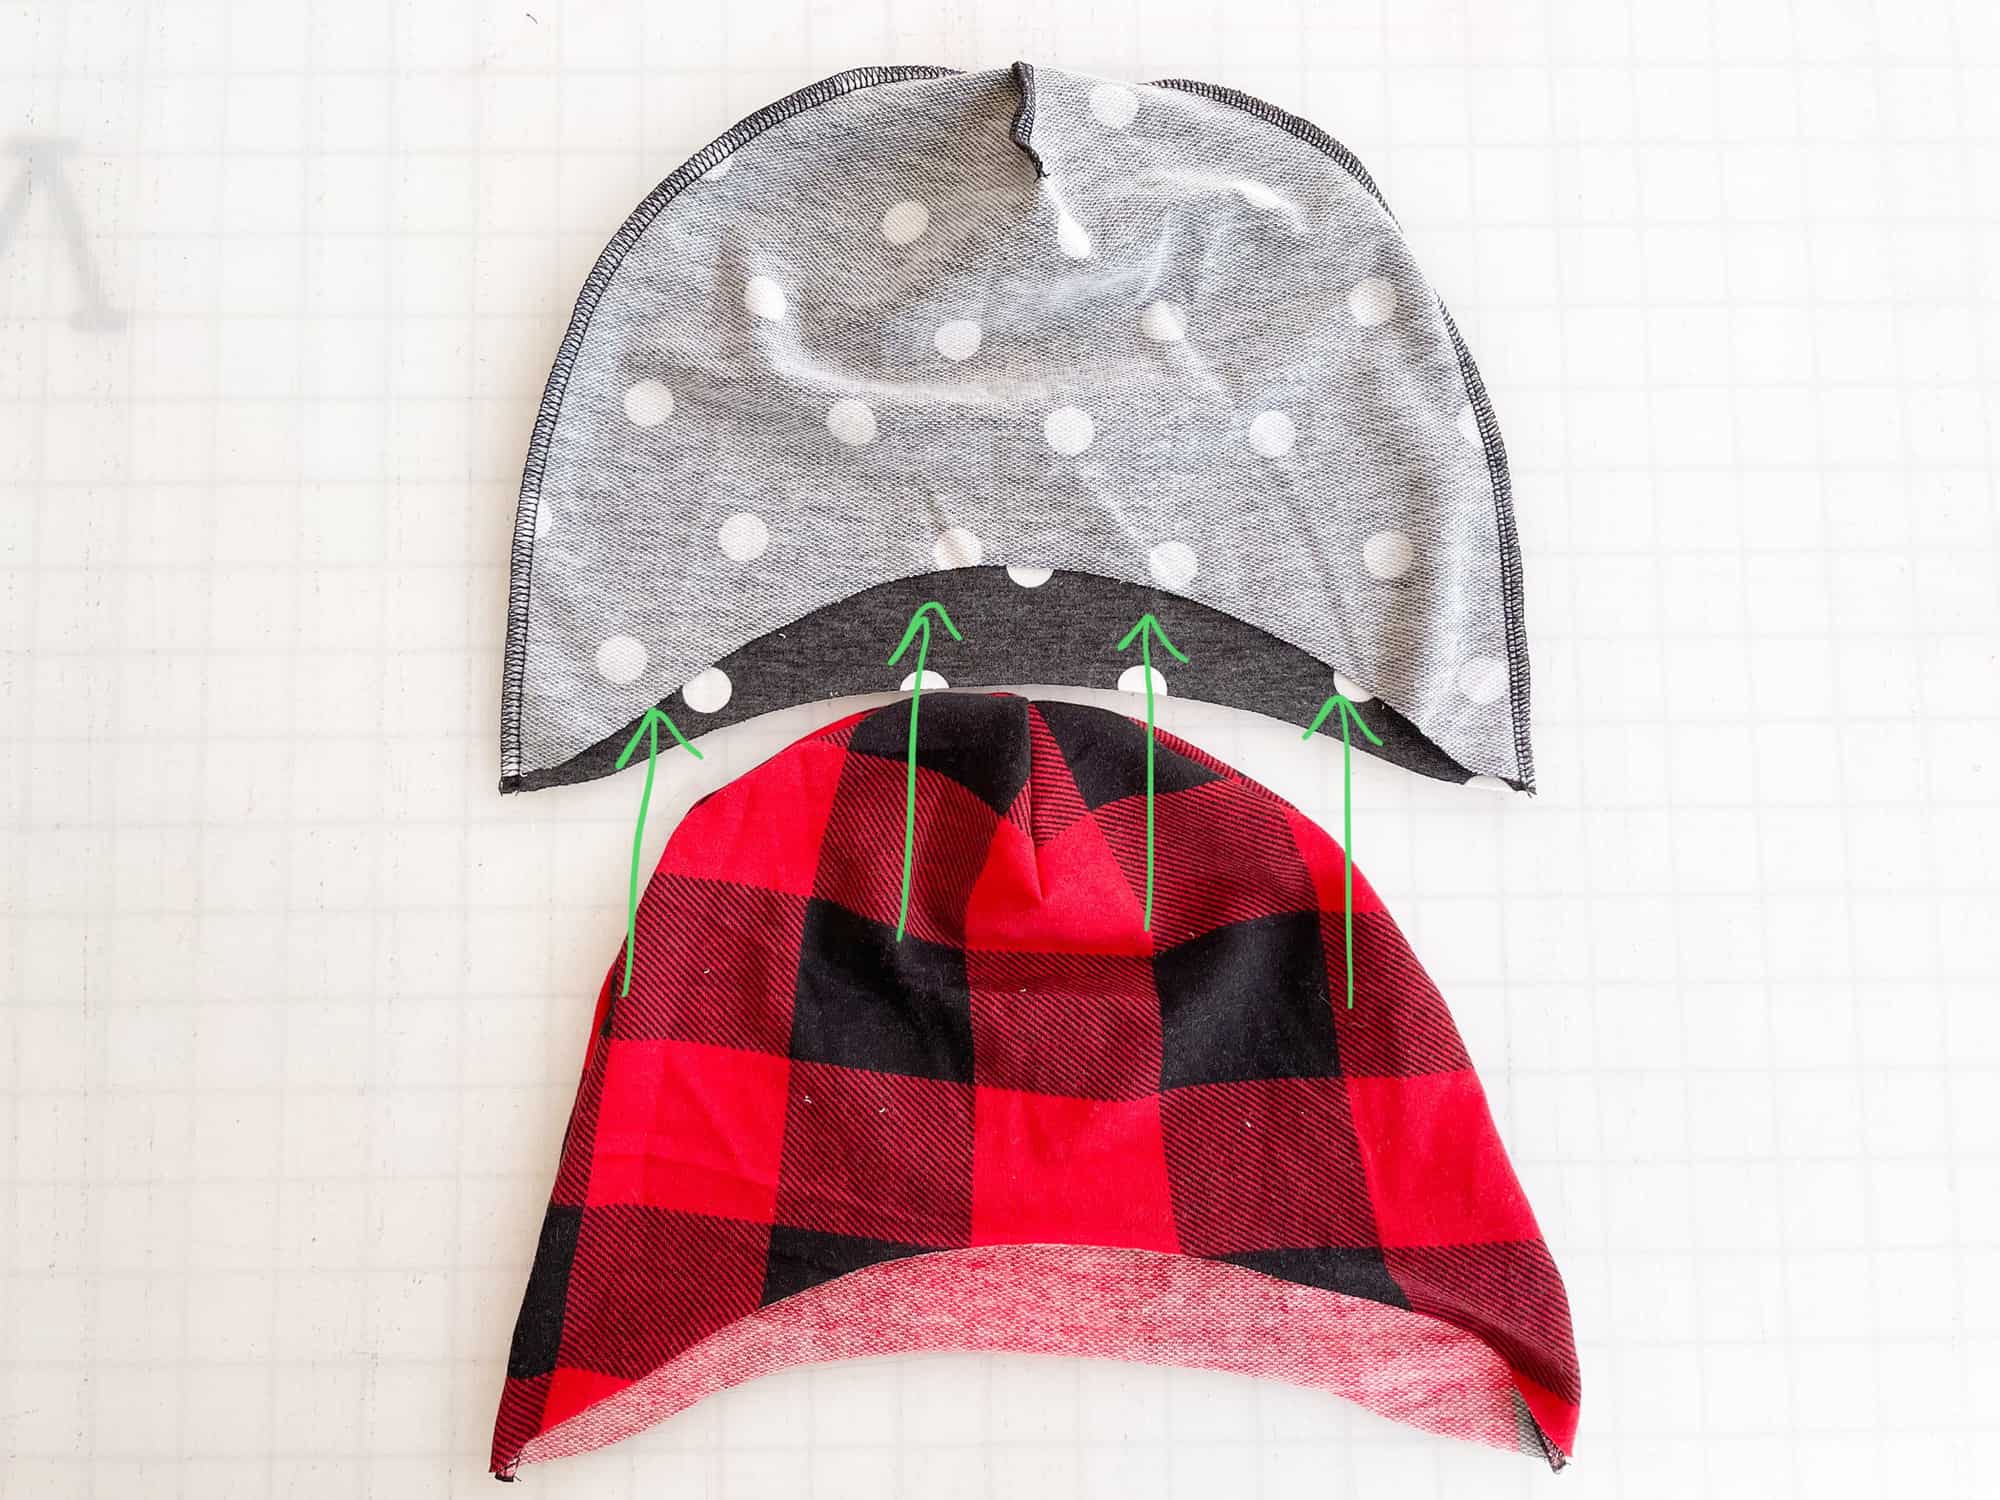
Step 1: Place back piece, right sides up. 
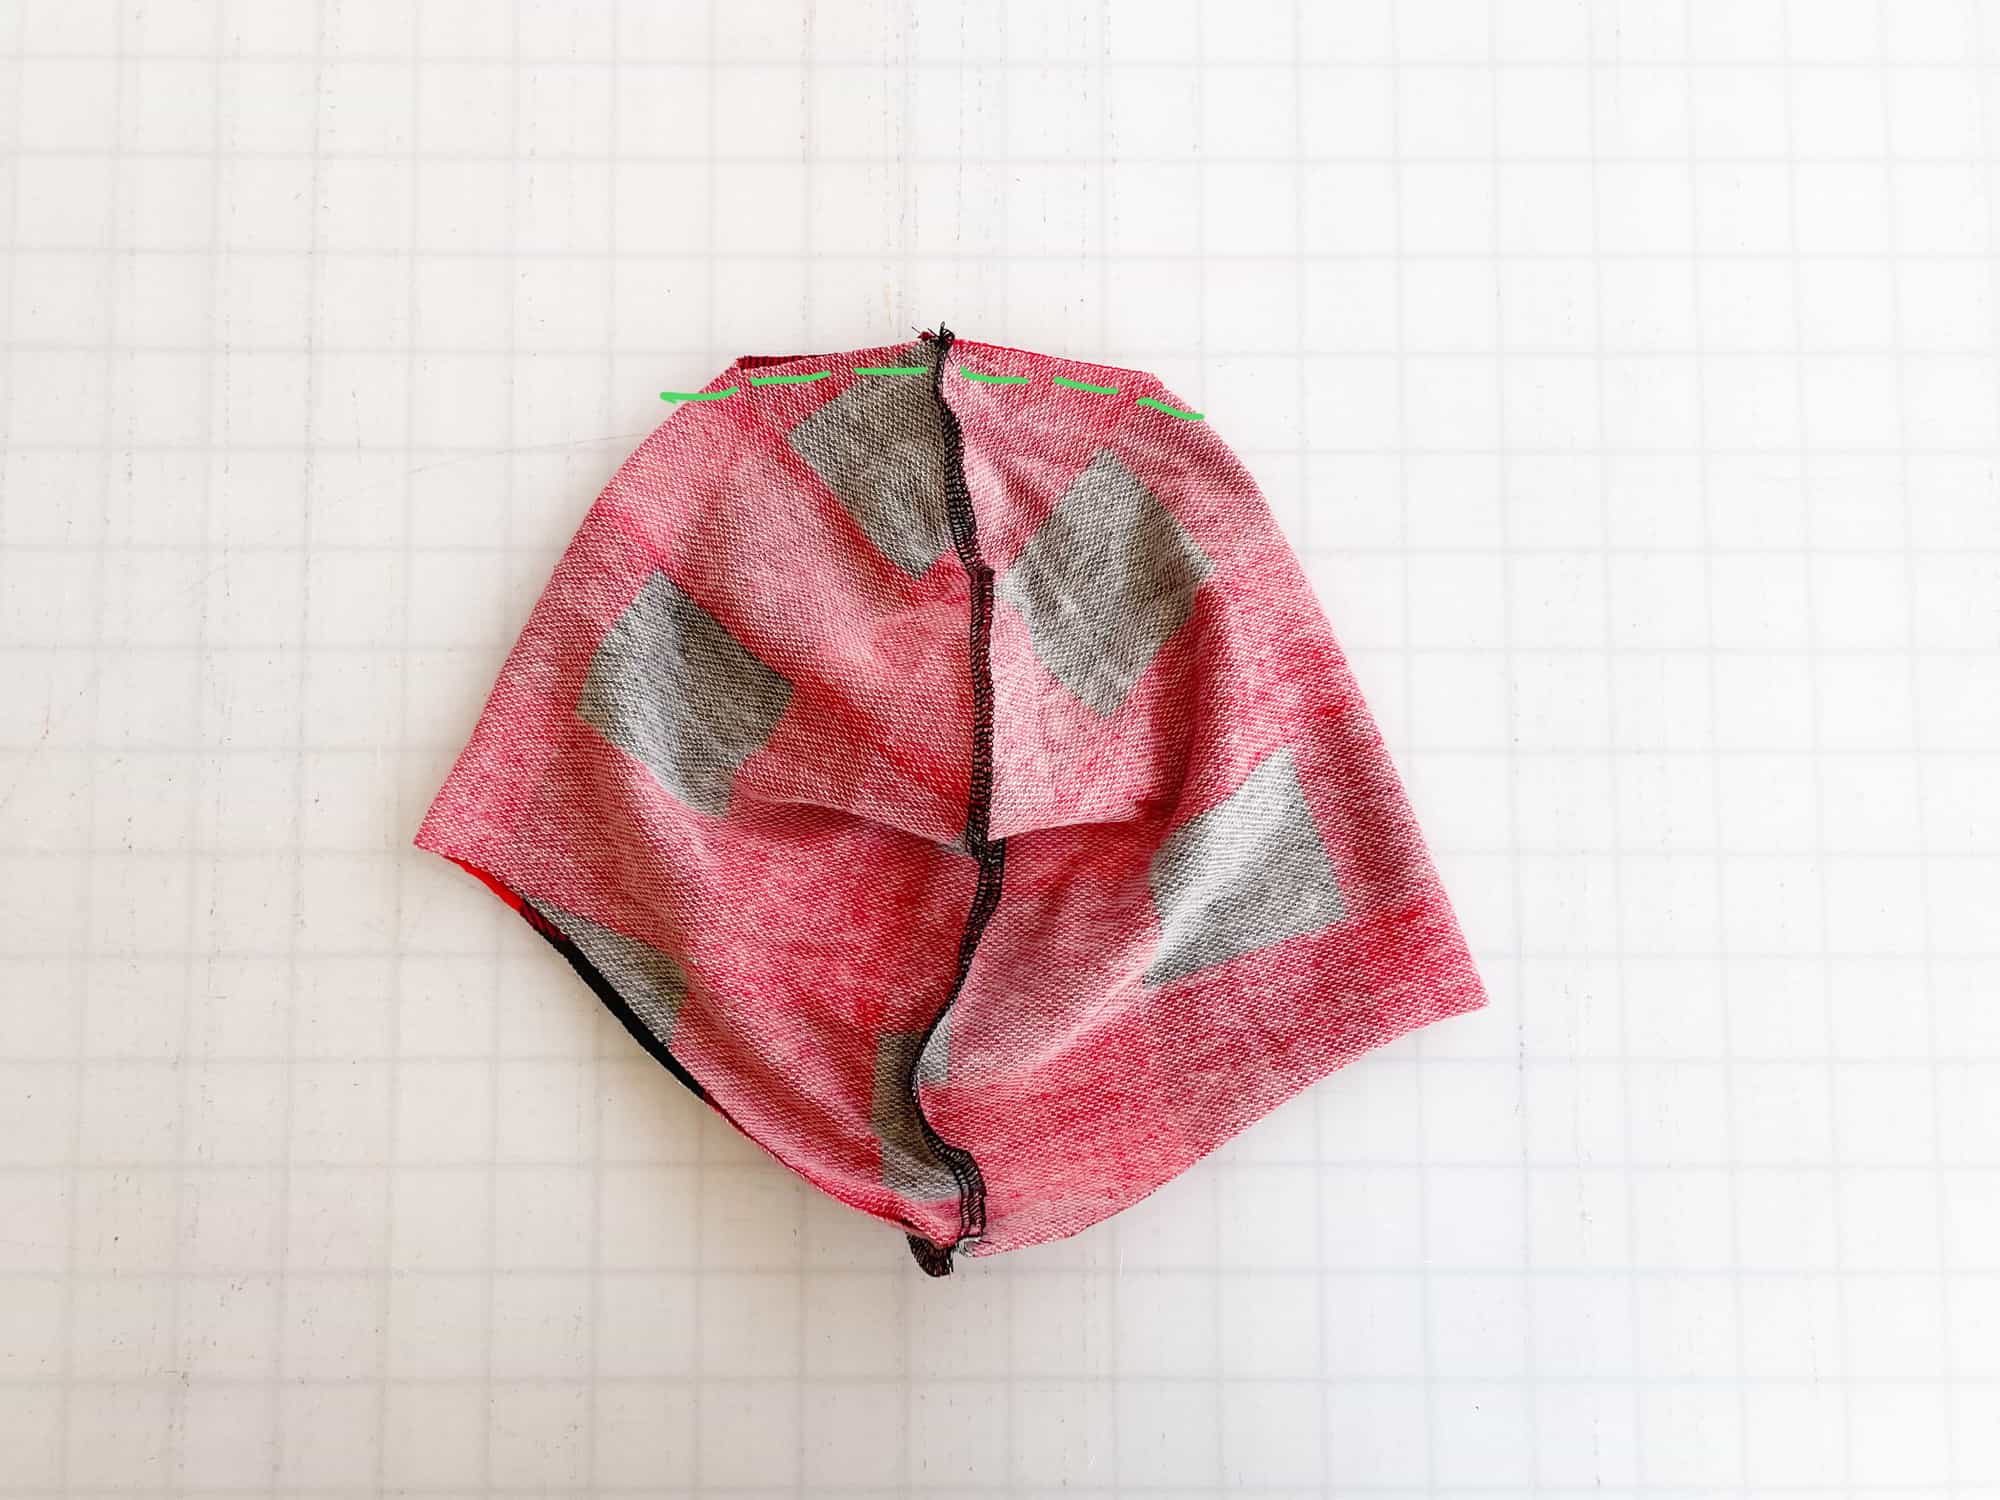
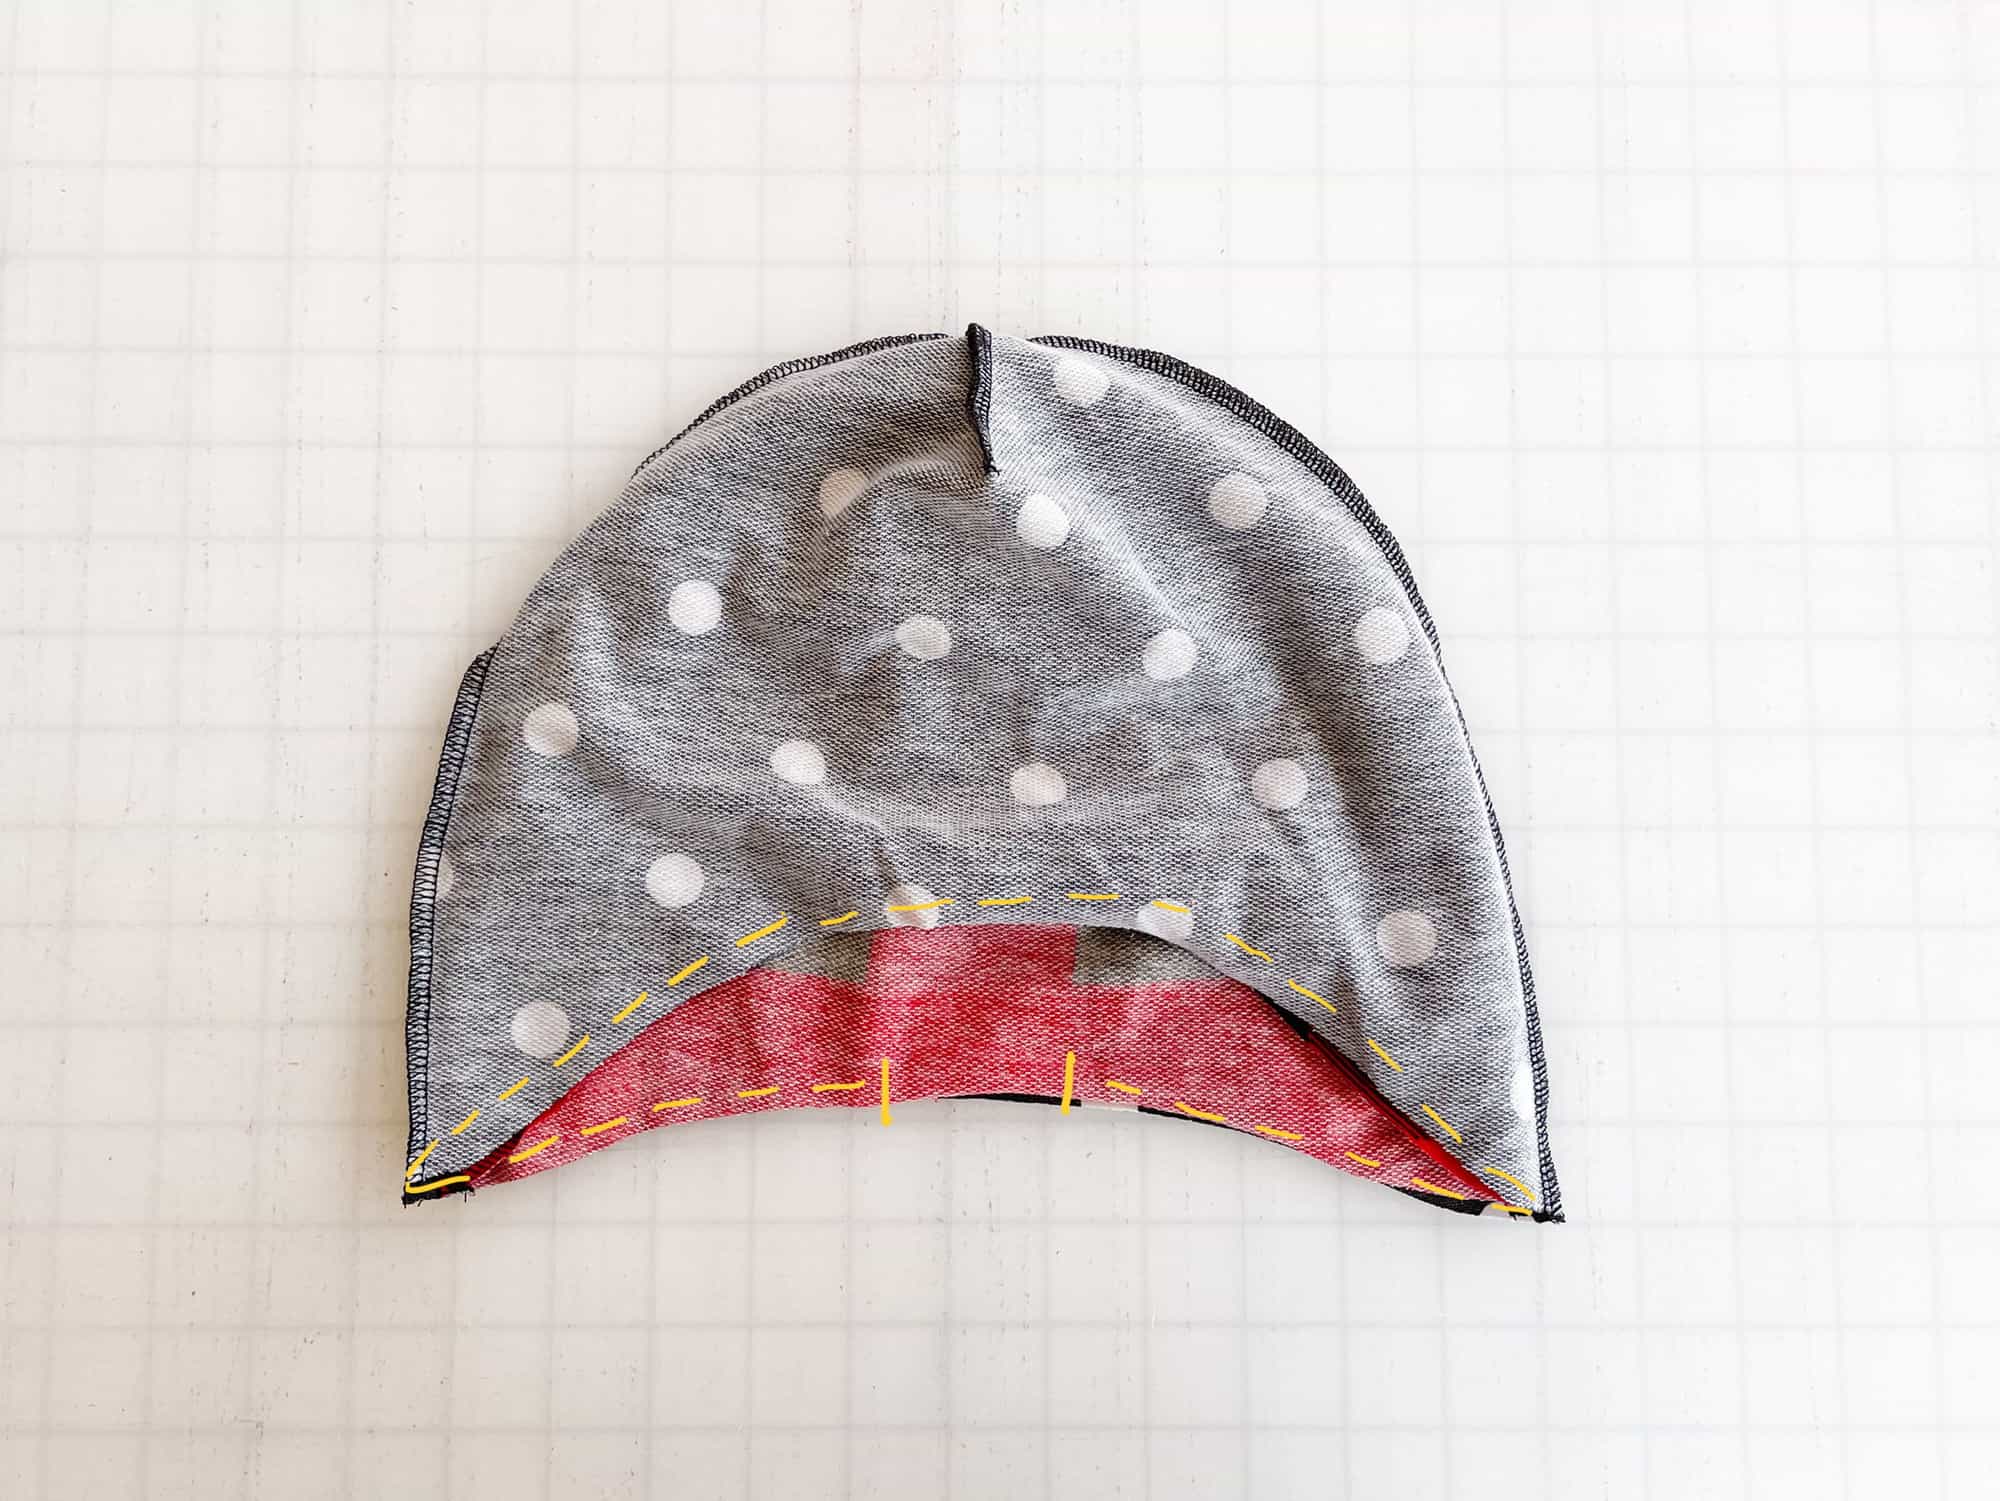
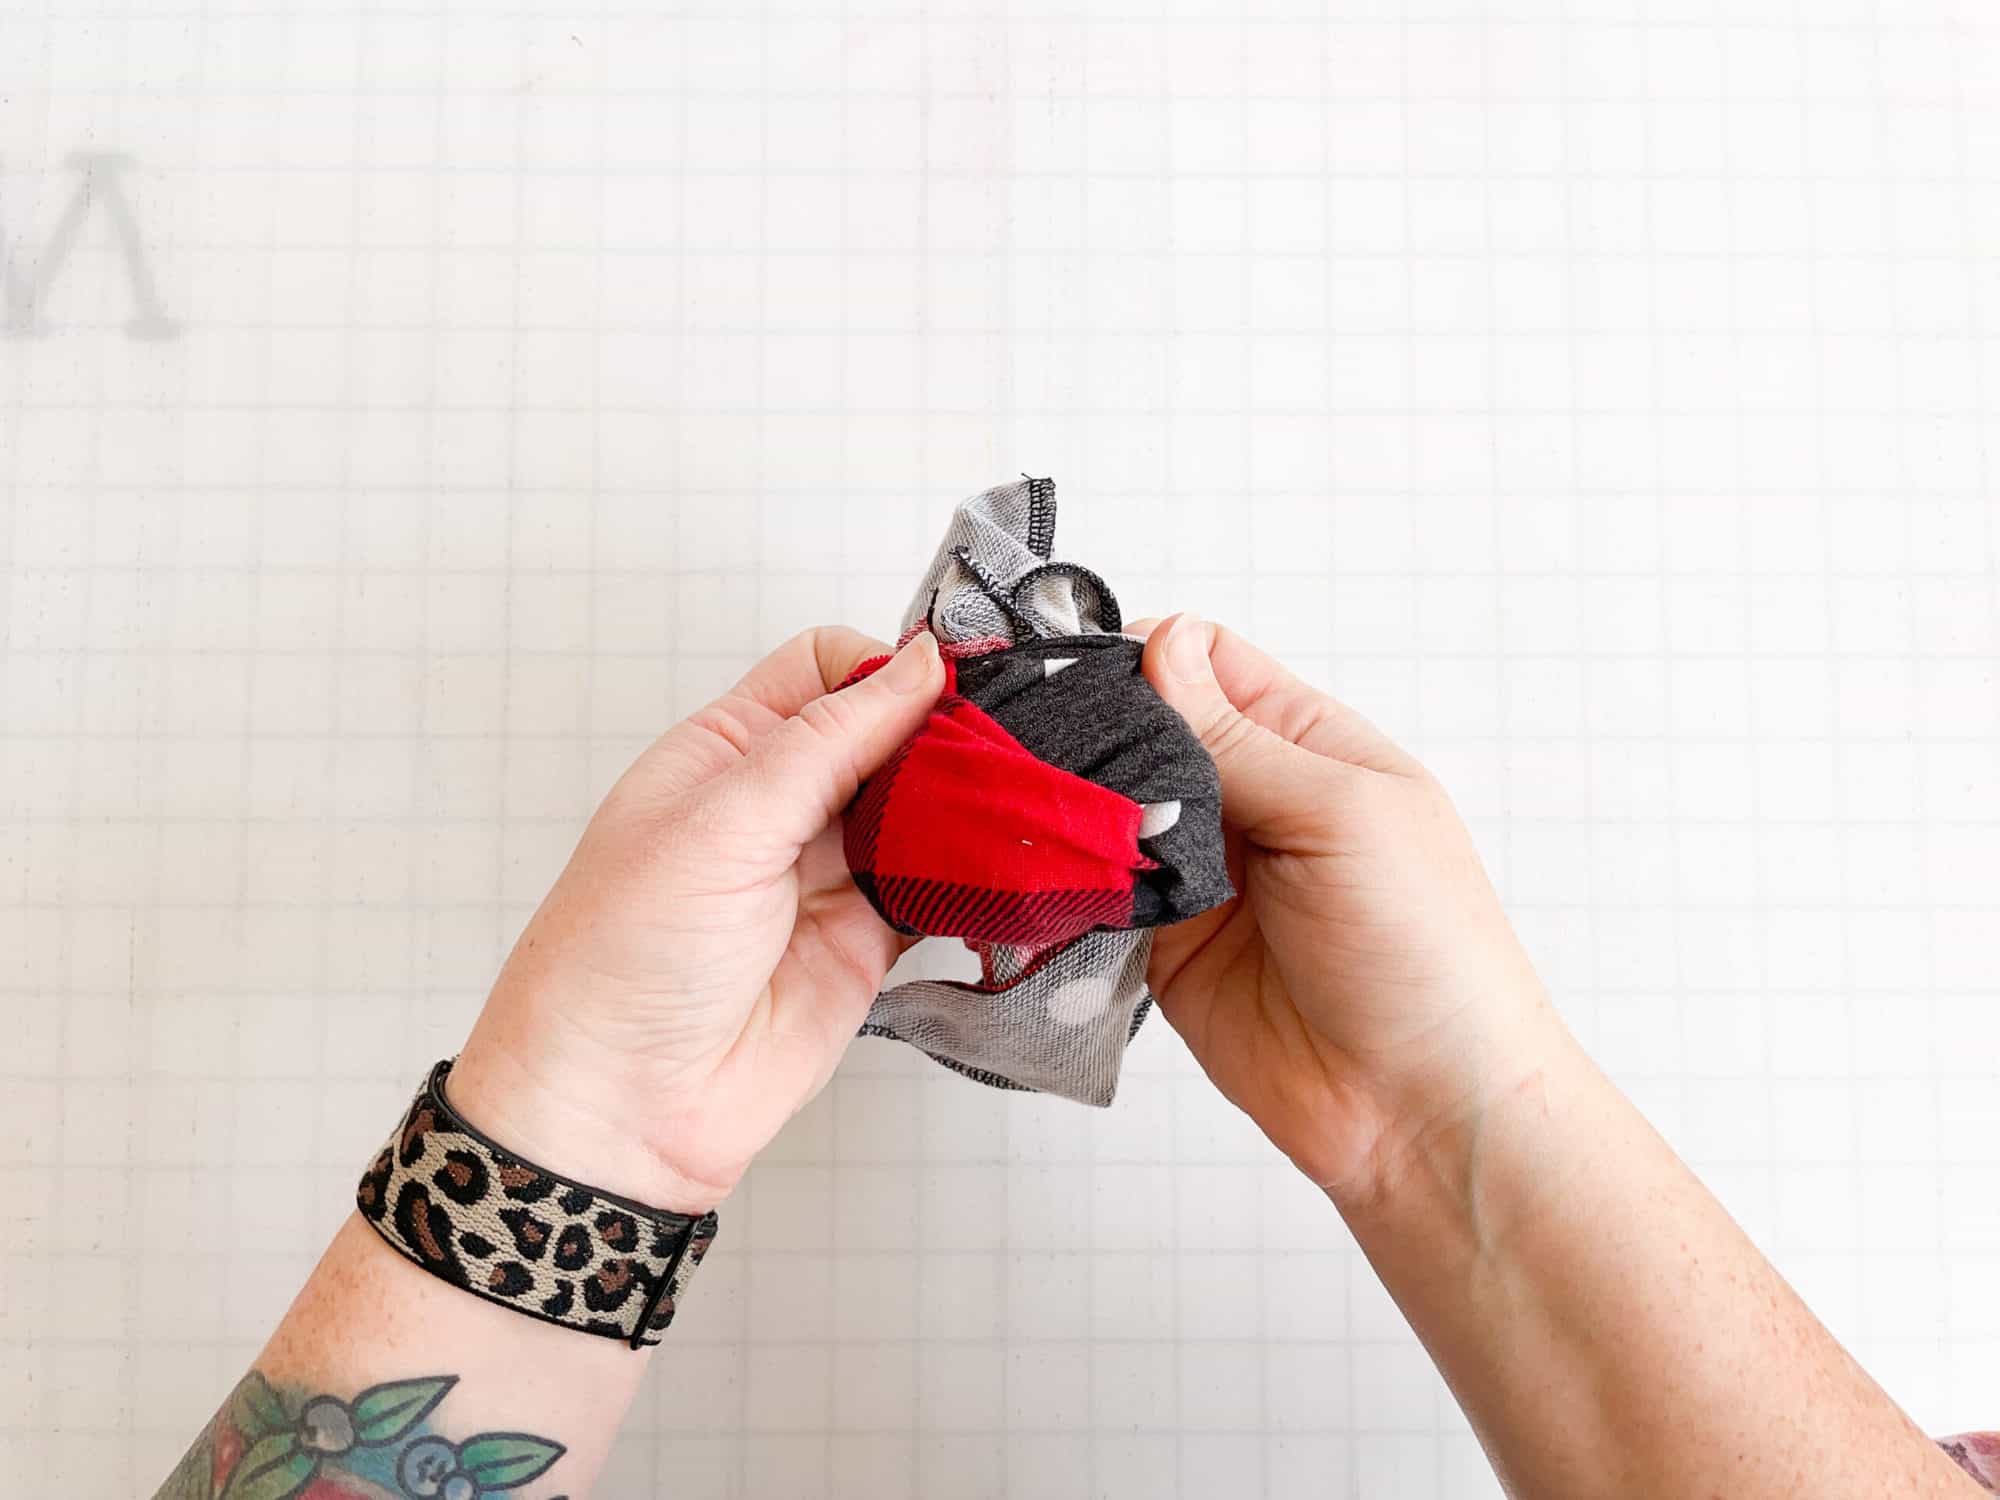
Step 2: With right sides facing each other, place the front piece on top, aligning long curved side edges. Step 3: Stitch, using 1/2″ seam allowance. Step 4: Open hat in opposite direction, matching the seams you just created at the top. Step 5: Sew the opening shut, using 1/2″ seam allowance. Repeat Steps 1-5 with lining fabric. Step 6: Place hat lining wrong sides out, and with main hat right sides out, slide the main hat inside of the lining. Step 7: Align all raw edges and sew using 1/2″ seam allowance. Leave 3-4″ opening for turning. Step 8: Turn hat right sides out. Step 9: Push lining fabric inside of main hat. Edge stitch along entire bottom of hat. You’re finished! And it’s reversible!


——–
In case you consider yourself a more “visual learner” here’s a video tutorial that walks you through the entire tutorial, start-to-finish.
Check out what our fabulous testers were able to create with this very same tutorial!


I la-la-love when you share your photos with me! Head over to the Patterns for Pirates Facebook Group and show us what you’ve made!
Happy Holidays, Pirates!

Very cute! How much stretch does the fabric need? Thank you
I used general CL for mine, worked perfectly. I think FT would work too.
I love these! I have made matching ones for me and my toddler, and several more already as Christmas presents! They are PERFECT for wearing under a cycle helmet!