Patterns for Pirates

P4P stylish, modern, wearable patterns

  • Home
  • Blog
    • Frequently Asked Questions
    • Pattern Releases
      • Free Patterns
    • P4P University
      • Fitting
      • Sewing with Stretch, Knit Fabrics
      • Sewing with Woven Fabrics
      • Sewing Machines
    • Sew-A-Longs
    • Fabric for Pirates
    • Pattern Hacks
    • Announcement
      • Blog Tours
      • Contest/Giveaway
  • Shop
  • Bundle Discounts
  • Flash Friday
  • Gift Cards
  • My Account
  • Cart

P4P University – Elastic

September 27, 2020

P4P University – Elastic 101


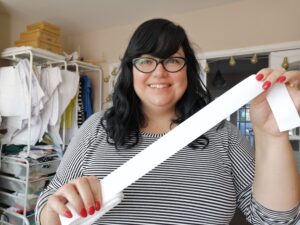
Hi,  I’m Dana one of the P4P team and I’m here today to talk all about elastic with you! We’ll be covering lots of different types of elastic that you may want to use in your sewing and showing your some examples of what they look like sewn up into finished garments, the times you may want to use them and the stitches I like to use to get the best finish.

To go alongside this blog post, I have filmed a video which you can find on the P4P You Tube channel here:

P4P University Elastics 101 Video

So, first things first, before you sew with any elastic there is one thing you will always want to do with it before you begin – exercise it!  Give it a good tug several times to make sure if it is going to stretch out it does it now and not after you have finished your garment.  There is nothing worse than something which fits great at first and then soon starts to get baggy.


Let’s introduce and cover off some types of elastic you are likely to encounter when home sewing:

Regular Knit Elastic

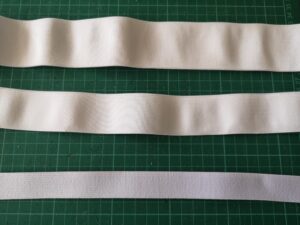
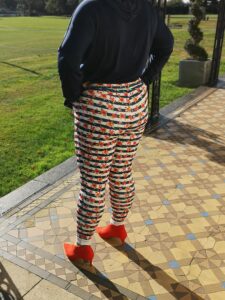
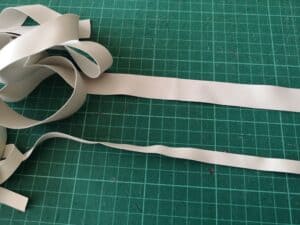
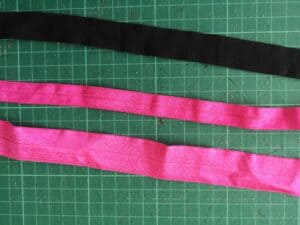
This comes in many different widths, depending on your need.  Pictured are 1″, 1.5″ and 2″ elastics.  Usually white or black in colour, I generally choose white because you can’t see it under lighter coloured fabrics.  This plain version is usually used for something like an enclosed elastic waistband, where the elastic is fed through a casing to form the waistband.  These SOS Pants have an enclosed elastic waistband.  It makes for a soft and comfortable to wear garment.

SOS Pants with enclosed elastic waistband

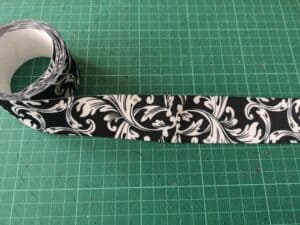
However, you can also find patterned elastics, like this:

Patterned Knit Elastic

and these can be used as a waistband in their own right, just by top stitching in place of a casing.  Super quick and easy way to finish a skirt or pair of shorts!  Just wrap around your waist and cut to size, then butt the short ends and zig zag stitch together to form a loop. Quarter the elastic, quarter the top of the garment and sew right on.

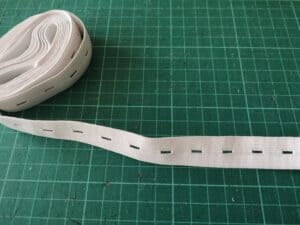
Buttonhole Elastic

This is great if you have small people that keep shooting up overnight, like me! You can use it in a waistband secured with a button, and then unbutton it as they grow.  Great for things with lots of ease drafted in, like the Walk The Planks.  Just remember to cut it a little longer than needed when you first sew it in so you have room to lengthen it.

Clear Elastic

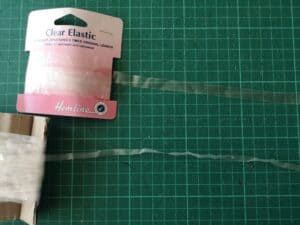
Clear Elastic is one of the things I had never heard of before I started sewing and now it’s the thing I use the most.  I use it for gathering skirts to fit bodices, like the Sweetheart Dress; for stabilizing shoulder seams on lightweight stretchy fabrics like rayon spandex, that have a tendency to grow otherwise; for adding ruching; and for adding extra strength to the seams of stretch fabrics under pressure, like in a sports bra, where it just serge it right on when sewing the seam itself.  Again this comes in different widths, pictures is 3/8″ and 1/4″.

Swim Elastic

As it’s name suggests Swim Elastic is used in swimwear.  Regular elastic can perish under the combined attack of both strong sunlight and chlorine, so it is best to use this type of elastic in swimwear to ensure it stands up to the test of time.  I often use clear elastic in swimwear too, both work fine, you just don’t want to use a regular knit elastic because when your pull your swimsuit out after a winter in storage you will probably find that the elastic has perished and lost all it stretch. If you’re going to take all that time to make a custom swim suit, you may aswell try and make sure it lasts.

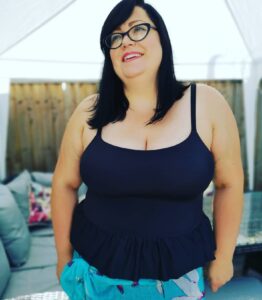
Sunflower Swim Top

I used several different widths of swim elastic in this Sunflower Swim Top to get the best fit for me, including 3/8″, 1/2″ and 1″.

Picot Elastic

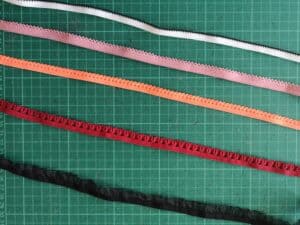
Picot Elastic is often thought of as a lingerie elastic, and it’s great for that but I think it’s also really pretty when used to finish the neckline and sleeves of a dress, where you just see the little picots popping out from the inside.

Me Hearties Dress

I used picot to finish the neckline and sleeves of this Trixie Lulamoon dress I made for my daughter’s birthday using the Me Hearties Dress pattern.  I just serged it on right sides together, flipped it down to the inside and then top stitched it with a triple zig zag stitch.  This is my favourite stitch for top stitching elastic because it is a really great stretchy stitch but it is also quite a wide stitch and that helps stop the elastic from flipping up.

Fold Over Elastic

You will often see Fold Over Elastic being abbreviated to FOE in sewing groups, but as you would imagine from its name you fold it over the raw edge of the fabric and top stitch in place. You can either use your coverstitch if you have one, or just sew with a triple zig zag stitch.

Fierce Bra and SOS Pants

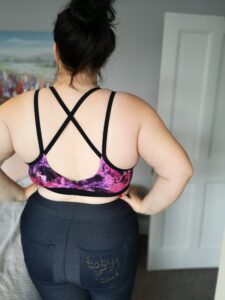
It is used in the Fierce Bra to finish the top raw edge of the bra and also form the straps.  It takes a bit of practise to get used to handling it at first but it a very useful tool to have in your arsenal!

Soft Waistband Elastic

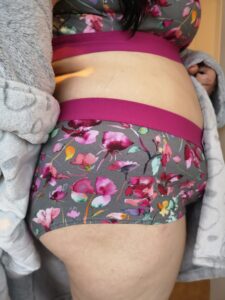
Lastly we’re going to talk about Soft Waistband Elastic.  You will probably recognise this as the type of elastic used on men’s boxers.  It is thick, soft, super stretchy and has great recovery and we use it both as the underbust band on the Fierce Bra and the waistband on the Fierce Undies.

Fierce Bra and Undies

You can either serge or sew the band on like a regular knit band, flip up and top stitch the seam down or you can just sew the band into a loop by butting the short ends together and then topstitch it right onto the top raw edge of the fabric, like in the picture above.  It makes sure your undies don’t shift all day whilst still being super comfortable to wear.  It comes in lots of different colours and some fun printed designs too and is designed to stay visible and not be sewn inside a casing.

Hopefully that has helped give you an idea of the types of elastic you might encounter whilst sewing and what yu may need them for.  Don’t forget to watch the video that accompanies this post for more examples to guide you and…

Happy Sewing!

Dana x
Filed Under: P4P University, Uncategorized Leave a Comment

Walk the Plank PJ Bottoms :: New Pattern Release!

September 27, 2017

Oh man.  Not only is today a release day, but it’s also a day that I get to make a fun announcement.  Or rather, TWO fun announcements!  Are you ready for this?

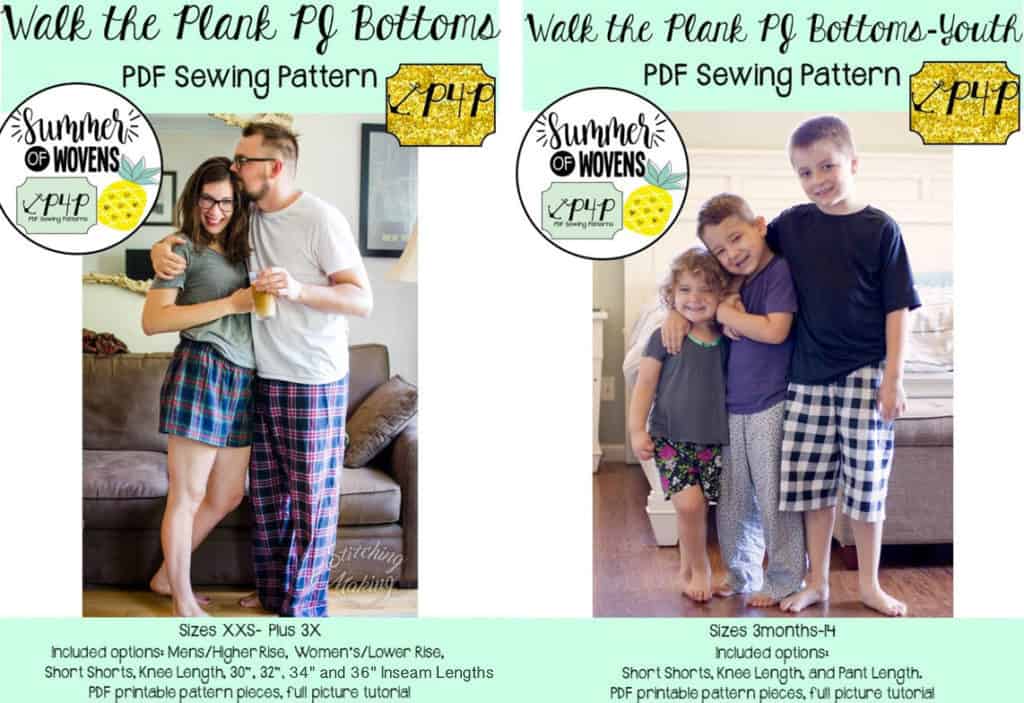
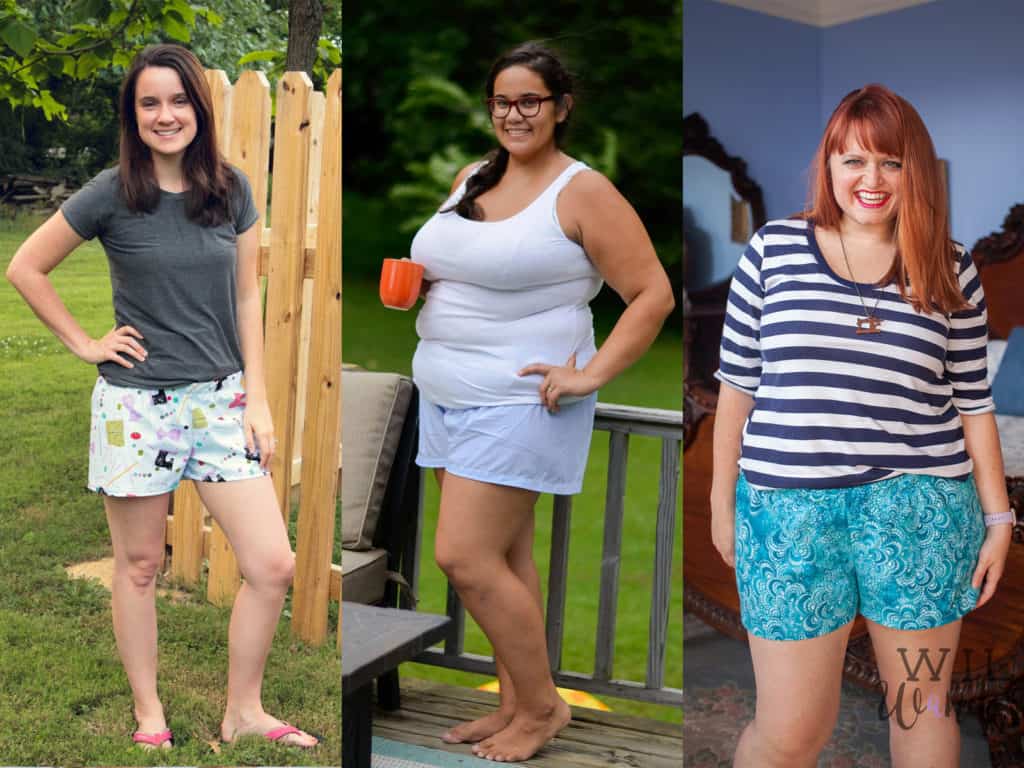
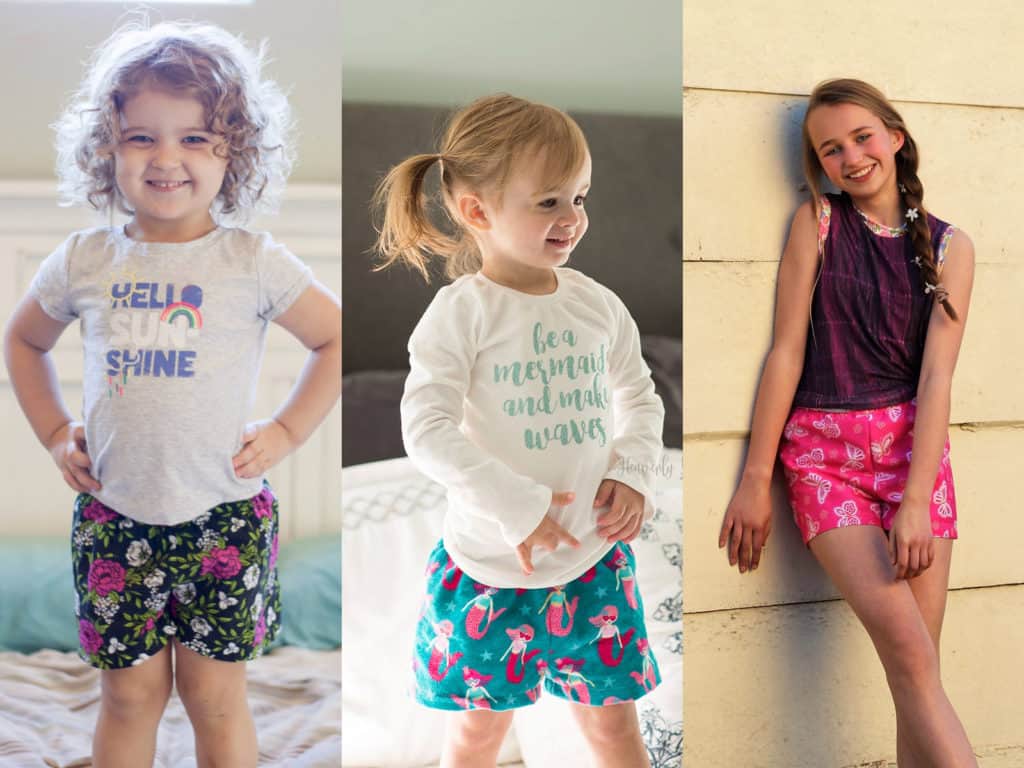
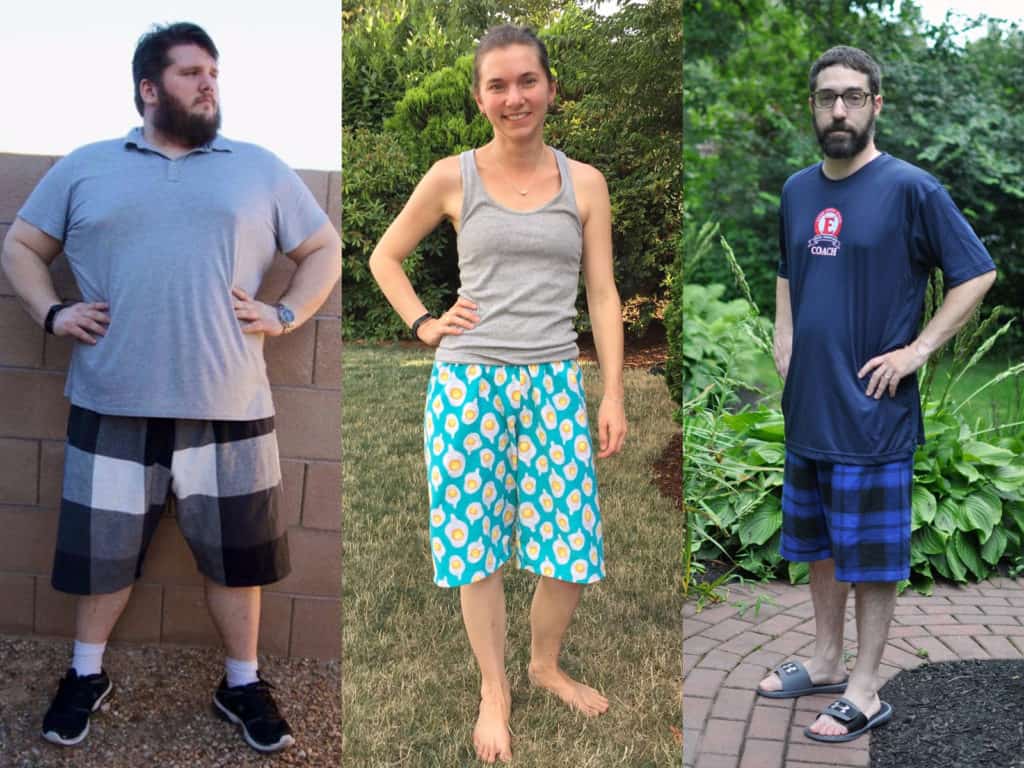
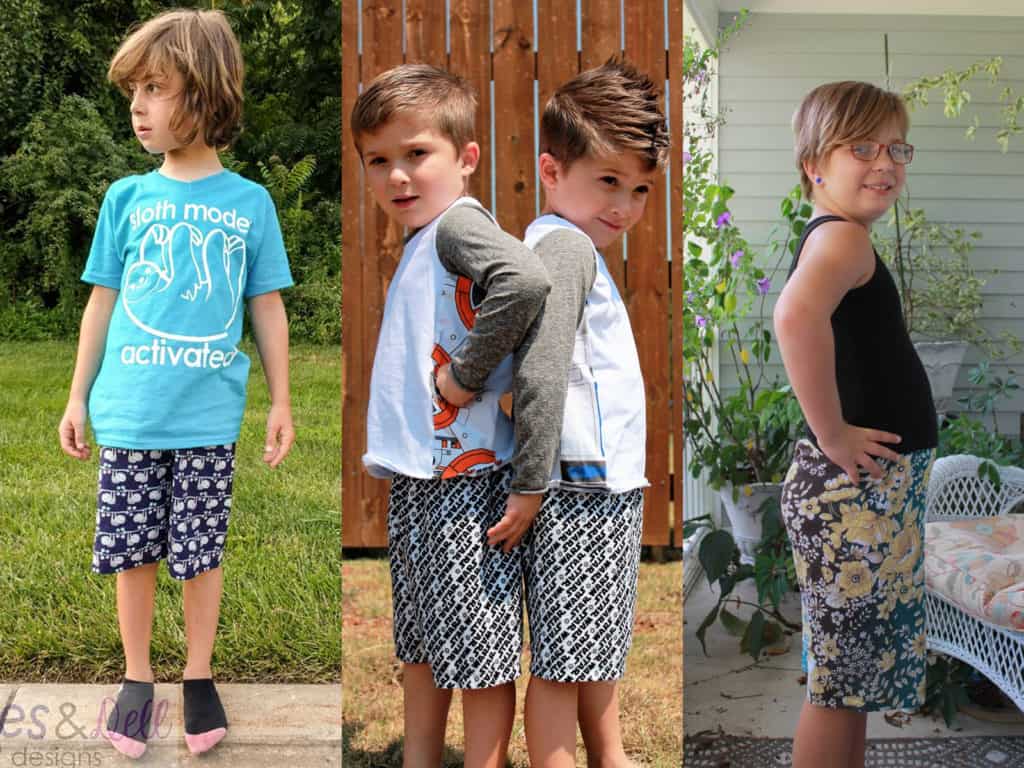
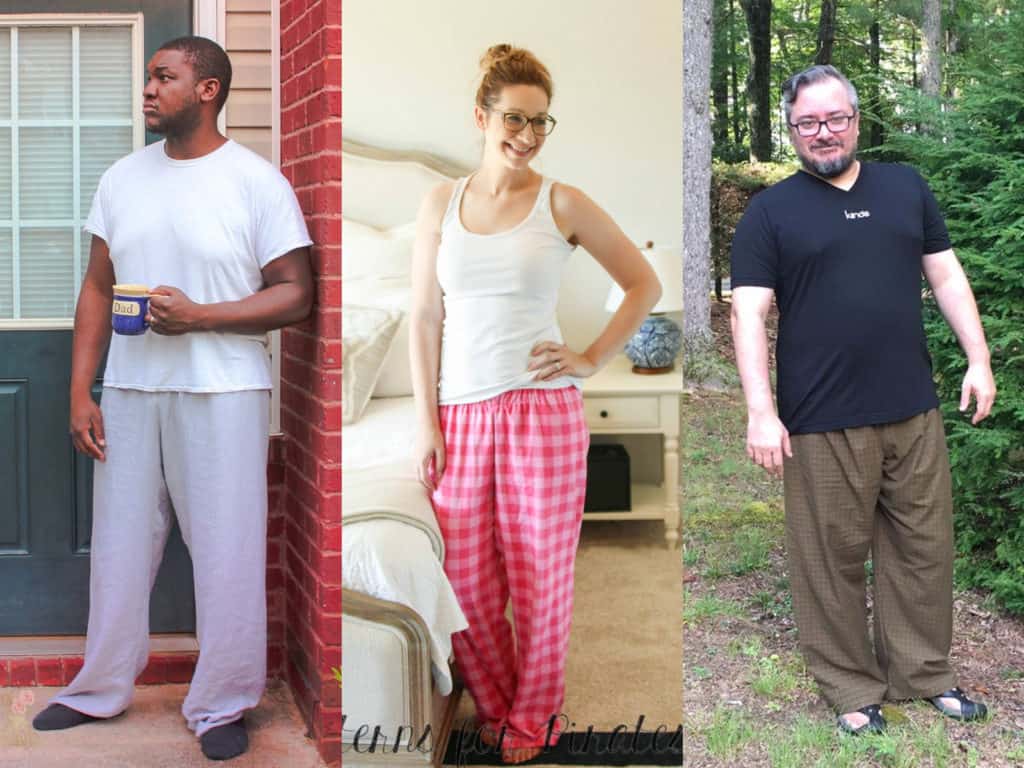
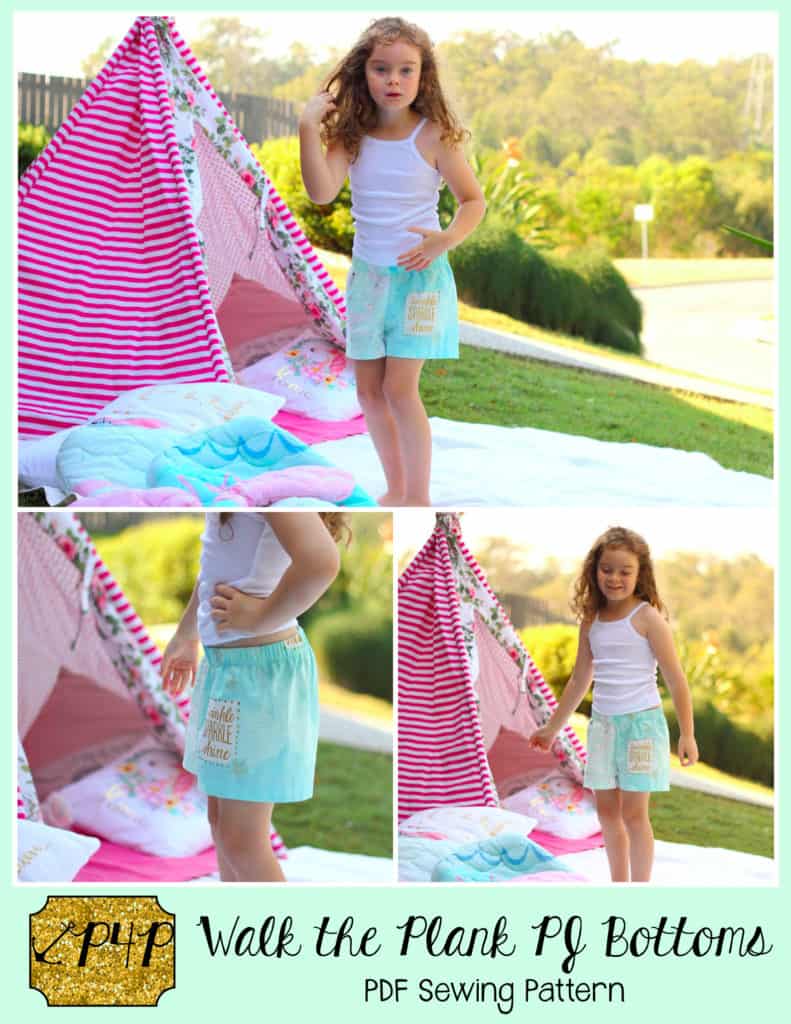
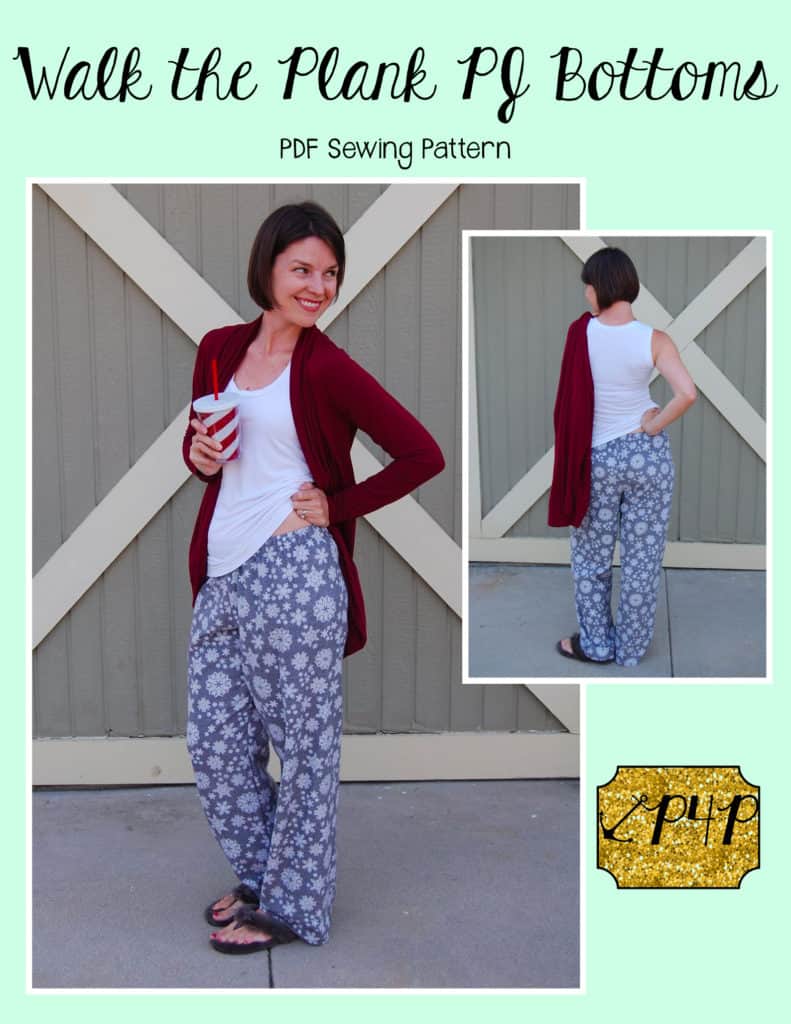
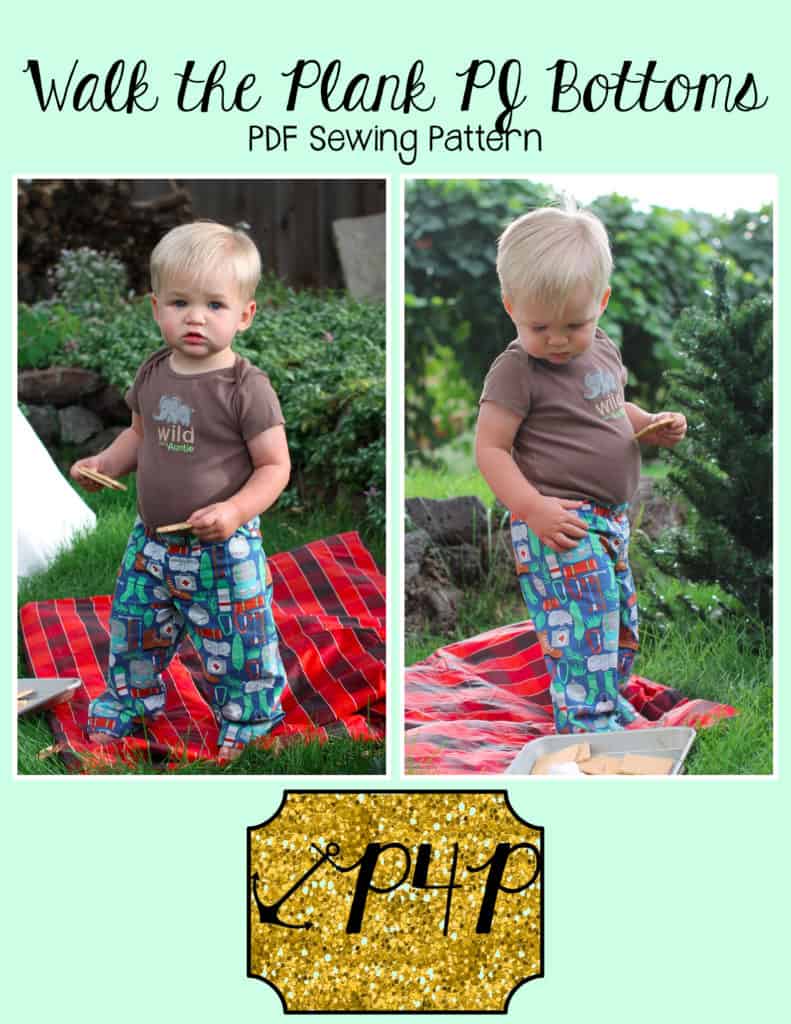
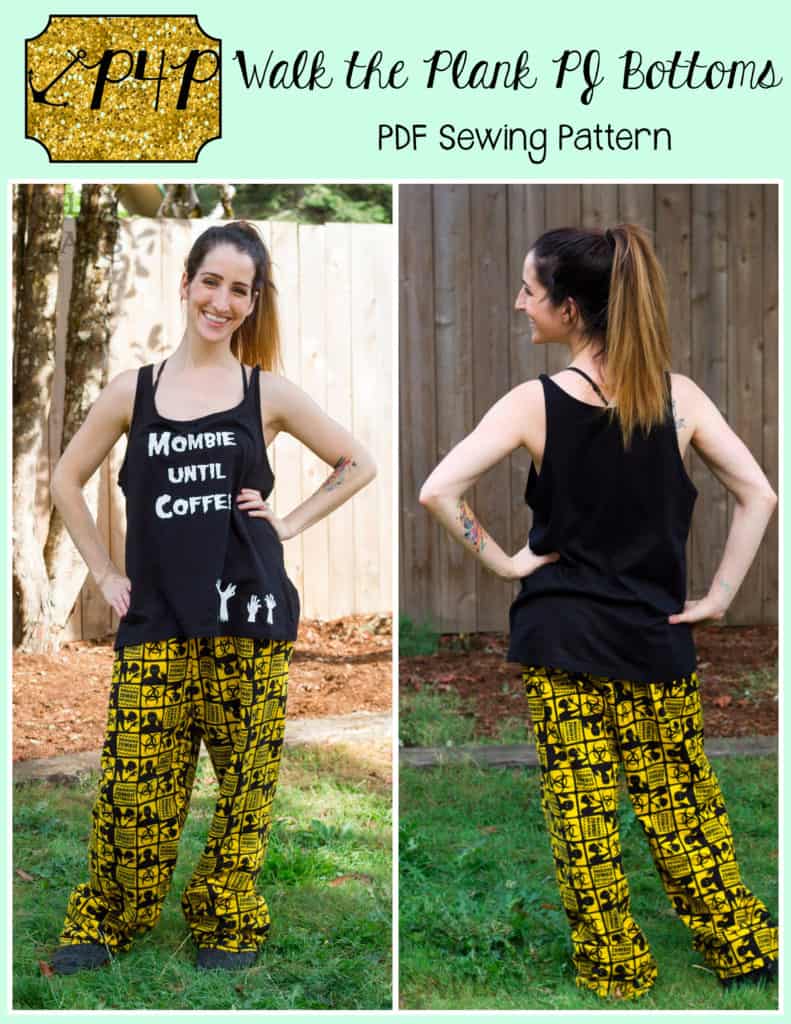
First, let’s talk about our newest pattern, and the final pattern in the P4P Summer of Wovens.  The Walk the Plank PJ bottoms are super easy to make, even easier to wear, pajama bottoms that are a unisex pattern and available in sizes 3M – adult Plus 3X.  Both the adult and youth patterns include three lengths (short shorts, knee length, and pant length).  The adult sizes have a differing mens and womens rise, as well as varying inseams (30″ / 32″ / 34″ / 36″ ).

The Walk the Plank pant truly is a quick sew!  All sizes were drafted to fit on a 44″ wide fabric, so you can easily use your favorite flannel or quilting cotton.  The patterns feature no side seam, and no waistband piece, as well as a quick elastic installation.  **Plus 3X were drafted with an extra side seam, so those sizes can use 44″ fabric as well.

Here’s a quick peek at the lengths:

SHORT SHORTS

KNEE LENGTH

PANT LENGTH

We have been running a contest over the last week.  You can read up on P4P’s Next Top Tester HERE if you’re interested in the process.  We had 650 (give or take) applicants that we invited into our Top Tester group.  These ladies went through some work for us!  They didn’t know what they were signing up for, but we had them all test the Walk the Plank PJ Bottoms for us!  Everyone did amazing, even amidst all of the chaos that testing in a group that size can bring.  And guess what?  We have a winner!

Well, we have four winners.  These testers did an incredible job, on all levels of testing.  It’s not just about taking pretty pictures.  It’s about providing feedback, supporting fellow testers, being around to ask/answer questions, and help with marketing.  We are so happy to have them on board with us!

Congratulations to our first ever Patterns for Pirates’ Next Top Tester: Amber Jones Zelenay 🎉🎉🎉
Our Second Place winner is: Karen Grimshaw
AND congratulations to the Runners Up: Bethany Tolman and Michelle Tobey


Want to know the best part about this pattern?  It’s FREE!!  We wanted to have a little end-of-summer celebration and thought this would be a fun way to party with you all.  Plus, it’s perfect timing with the holidays right around the corner.  Family Jammies Photo Op?  I think so!

Grab your copy of the Walk the Plank PJ Bottoms in UNISEX ADULT or UNISEX YOUTH today!

**Want to learn more about how to measure yourself for this pattern?  We’ve got you covered with an in-depth blog HERE.  And in case you’re new to Patterns for Pirates and PDF patterns in general, we have a great blog full of new user tips HERE to help you get started!  And, as with all of our current releases and updates, the pdfs now include our layers feature and can be found in Letter, A4 and A0 sizes.

If you’re still needing more inspiration, be sure to head over to the Patterns for Pirates Facebook Group Albums for the Walk the Plank PJ Bottoms to see what our amazing testers have sewn for themselves.  Don’t forget to tag us on Instagram (@patternsforpirates | #patternsforpirates) and to share your finished items over in our Facebook group!  We love to see what you make!

Happy sewing, friends!

Filed Under: Announcement, Contest/Giveaway, Free Pattern, Pattern Release 23 Comments

First Time User Tips

October 23, 2015

Are you using a P4P pattern for the very first time? I’m so excited for you to try out one of my pdf sewing patterns! Here are a few tips if you are brand new to sewing a P4P pattern, or to sewing from a pattern in general.

*Buying from the site- you will receive an email with a download link after payment is processed (check JUNK mail) and you can also log back into the site to download any purchased patterns anytime! Our freebie patterns downloads expire in 30 days once purchased, but fear not! You can add them to cart and “buy”  them as many times as you want.

Our patterns include various formats so be sure to open the correct one.

Letter – used mainly in the USA, must be printed on letter size paper (8.5″ by 11″)

A4 – used outside of USA, must be printed on A4 size paper (8.25″ by 11.75″)

A0 – used to print on 36″ wide paper, usually at copy shops.

Projector – this new style of paperless/printless way of cutting the fabric pieces requires a special set up. I would not recommend this for beginners. Only the newest P4P patterns include projector files.

#1: Read the tutorial thoroughly before beginning.  Before you start envisioning fabric selection and thinking about what size, you need to sit and read!  There is A LOT of info in the first few pages of a P4P pattern. Here are some highlights in those first few pages:

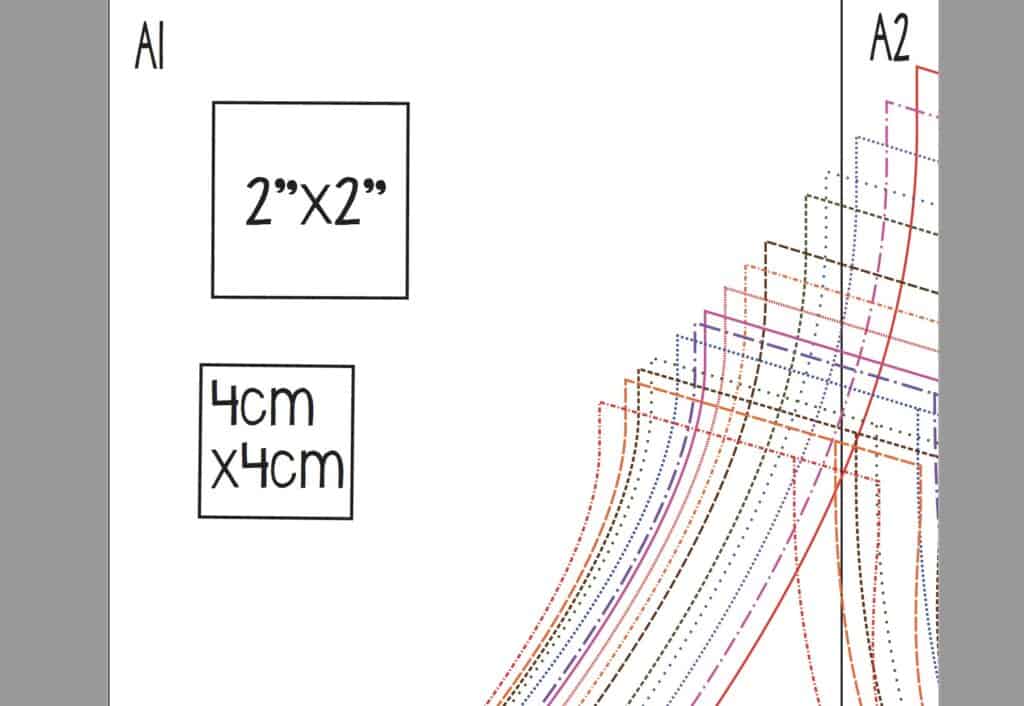
*Printing instructions-  You MUST open and print from ADOBE PDF viewer, not the app, not another PDF program! This will ensure the correct scaling!  I advise only printing the pattern pieces (these are listed on the first page in the tutorial) to save paper and ink-you can read the tutorial instructions on a computer, laptop, tablet, smart phone-whatever you have available! You will want to print with scaling set to “none” or custom “100%”. Carefully measure the 1×1 inch square to ensure that the pattern is printed in the correct scale (I always advise to only print the first page with the measuring inch first to test, then when you are sure it’s correct print the other pages). Our newer patterns include a 2″x2″ and a 4cm x 4cm square instead of the 1″ one.
Here is a shot of what your adobe printing settings should look like before you print: Custom scale: 100% and about the preview it should say 100%

Screenshot 2015-12-10 17.15.33


Here is a shot of the printed page with a correct 1×1 inch square:

SAMSUNG CAMERA PICTURES

One of the most common printing mistakes is to have the “fit to page” option clicked. Here is a shot of “fit to page” INCORRECT printing.  This will result in a pattern that is much smaller then intended!

If you look, you will see an outline around the entire page about 1/8″ that should not be there. The 1×1 inch square will also measure slightly smaller.

Screenshot 2015-12-10 17.16.02

SAMSUNG CAMERA PICTURES

SAMSUNG CAMERA PICTURES

*Piecing the pattern pieces together- I have a quick video putting the “no trim pages” together here: (you must be a member of the P4P FB group to view) Video Link

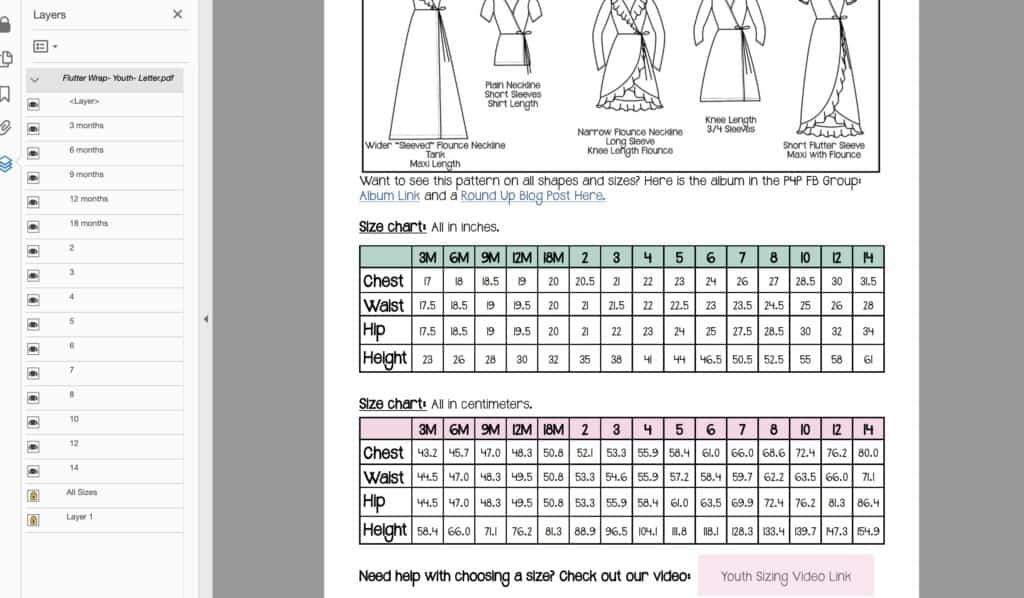
*Choosing your size- I have a size chart both in the listing pictures and in the first few pages of the tutorial.  Carefully measure yourself and find the size that your measurements correlate to.  Chest-fullest part around your bust, Waist-where you naturally bend to the side, High Hip-around your hip bones, Hip-around the fullest part of bottom/booty.  I only add the measurements that are important for that particular pattern.

Here is a blog post about measuring yourself.

  • If your measurements put you in several sizes then you can mash/blend sizes between your measurements to create the perfect fit (this is why sewing is so great! Custom fit and size for your particular body type). Our P4P University blog series includes a very helpful post about grading. You can read the Grading blog here.
  • Using the “Finished Measurements”- You can flat measure other garments that are well fitting and compare, or compare to your measurements. You should be able to know exactly how much you need to add or take off for the perfect length before sewing up!
  • LAYERS – once you chose your size(s) you can print just the needed one(s) by selecting it/them on the left side of the pdf file. Simply use the cursor to click/unclick the little “eye” located on the left of each size.
  • I also include the height my patterns are drafted for above the size chart (5’5″). If you are shorter or taller you will need to adjust for your height.  I include a link right below the size chart to this post explaining how I prefer to add/take length for petite and tall adjustments: Petite and Tall Adjustment Blog Post
  • Do not choose your size based on what you buy in ready to wear/store bought clothing.  Store sizing varies extremely from store to store.  Just choose based on your current measurements!
  • Read the description of fit carefully (located under the line drawing in the tutorial).
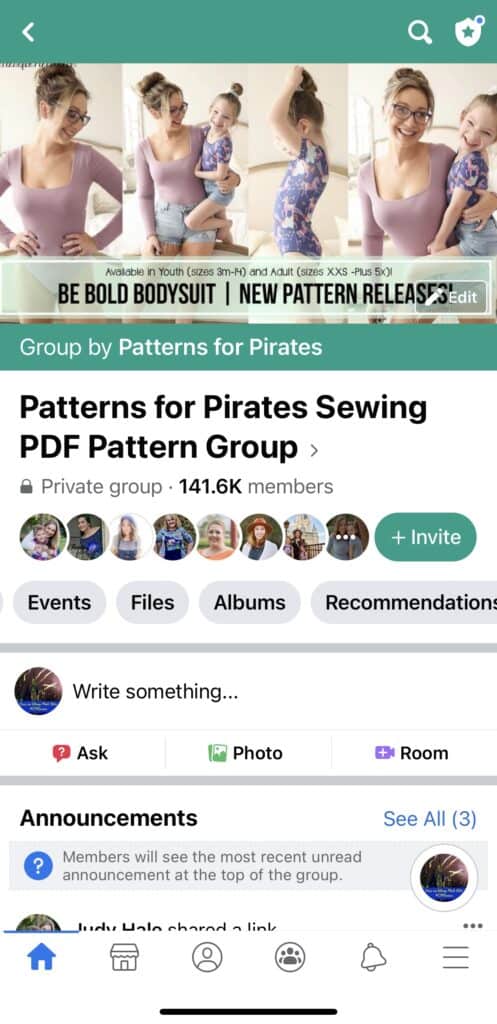
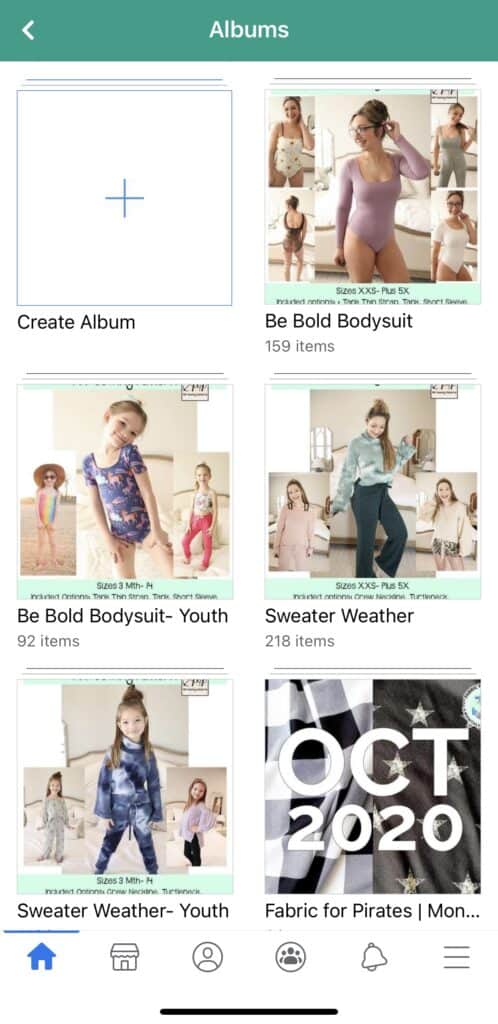
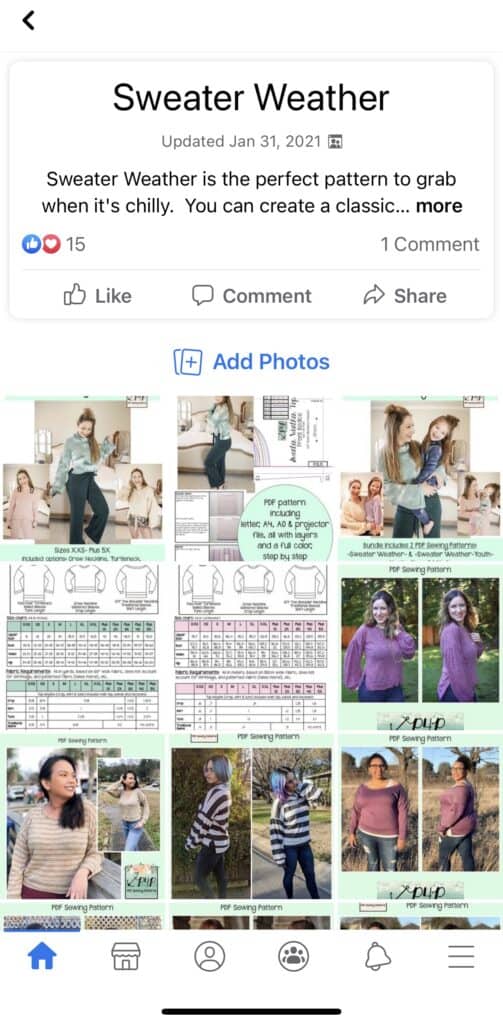
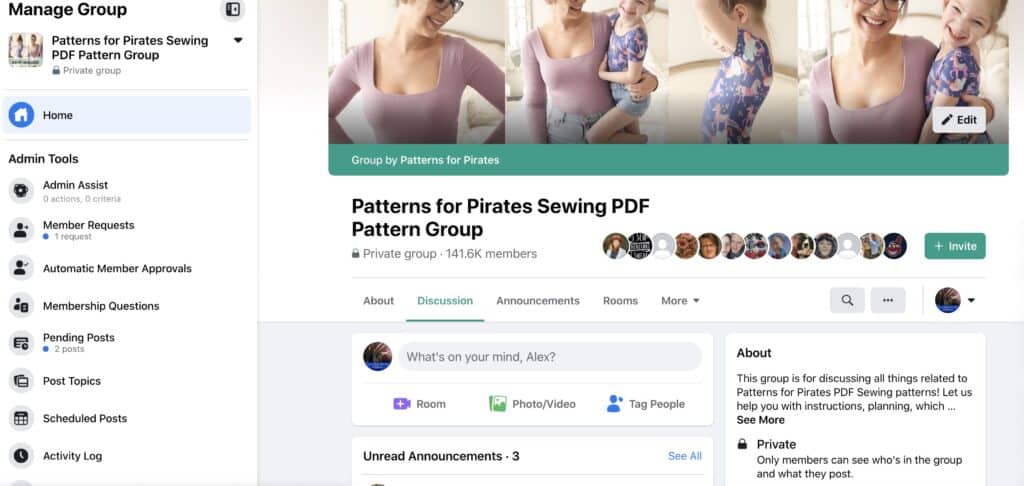
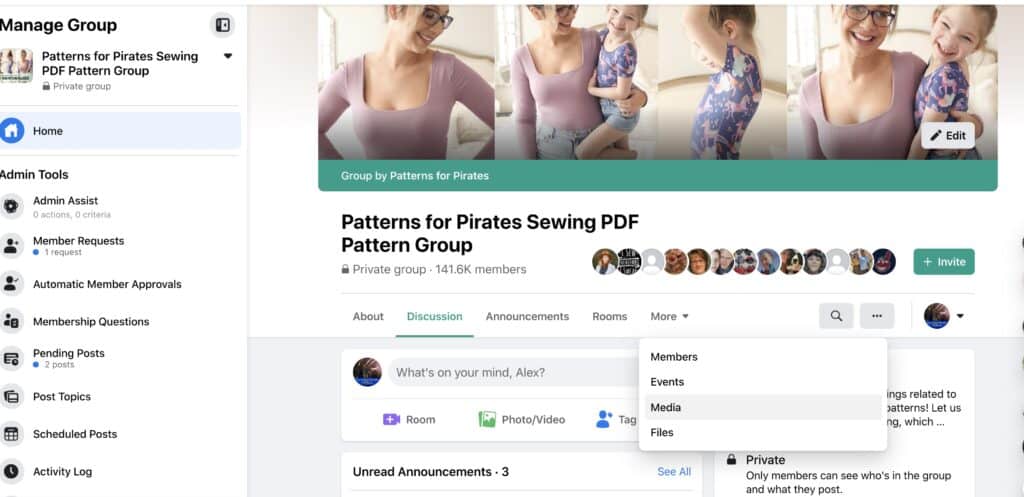
  • Look through the pattern album in the group! Yes, I have an album for almost every single pattern filled with A TON of pictures of every size and option for everyone to look through to see the intended fit of the pattern.  You can see where it is fitted, loose, and how it looks on a variety of sizes and body types.  Most pictures are also labeled with their size and their fabric choose to help even more! You can view the albums both mobile and on a desktop! Just go to the P4P FB Group and click “view group info”.  From there you can click “pictures” and go to “albums”.  Scroll through for the particular patterns you’re looking for! 🙂
  • Mobile View:


  • Desktop View:


*Choosing fabric- One of the most IMPORTANT parts of following a pattern is to use fabric that is suggested by the designer.  If you don’t you will not have the intended look that is shown on the cover and listing pictures.  The wrong fabric can mean a loose fit turns snug, a flowy fit turns tent-like, and so on.

  • Knit fabrics– I often give the percent of stretch knit fabrics should have for fitted patterns. Here is a quick link to my sister’s blog with a video on how to find the percentage of stretch: Megan’s Blog Post
  • Different fabric = Different look and fit— if you do not follow the suggested types of fabric you have to be prepared for the garment to not look and fit how it is intended and showed in the pattern listing pictures. I make sure that all my testers follow those suggestions, so all the tester pictures are going to show the intended fit and look. If you are unsure, read our Different Fabric, Different Fit before you decide.
  • Buying online- I love to buy online.  In fact, I pretty much get fabric from an online source or scramble to “borrow” some from my Mama’s large stash ;).  I hardly ever make it to a brick and mortar store! BUT, there seems to be an endless amount of fabric types to learn as a beginner seamstress and online shopping can be very difficult to navigate.  I always suggest buying from a smaller shop that you can message questions to!  Being able to ask how thick/thin, percentage of stretch and even if it would be good for a certain type of garment is such a nice bonus to supporting a smaller shop!
    • There are a lot of shops offering non custom fabric online as well as an abundance of custom knit designers/hosts FB that are smaller businesses (but be weary-sadly there are many that have been scammed by these groups, so look for well established custom groups).  I love destash fb pages where you can buy from other sewists, but often you’re buying from someone who doesn’t know the full description of the fabric, so I don’t recommend this for beginners.
    • Stick to searching the exact recommended fabrics until you are confident with all the different kinds of fabrics out there.
    • We also offer a monthly subscription where you can receive a 2 yard piece of fabric, hand selected by our team. Get all the details about Fabric for Pirates here.
  • Fabric Requirements- I list fabric requirements on the last listing picture under the size chart as well as the first few pages of the tutorial.  I often break up the fabric requirements into different options and different parts of the garment. Example: Relaxed Raglan I list main body 7/8yd and long sleeves 7/8 yd, this means you will need 7/8 for the main body and an ADDITIONAL 7/8 for the sleeves.
    • As described in the tutorial, the fabric requirements do not include extra for fabric being cut off grain, shrinkage after prewashing (I ALWAYS recommend pre-washing fabric before cutting!), or to match any kind of patterned fabric/directional fabrics.
    • I recommend buying a little more to account for these things 🙂

Screenshot 2015-10-23 13.24.34

*Looking for more inspiration- If you have looked through the listing pictures, album pictures in the FB group and still want to see more you can use the search bar in the Facebook group. with our hashtags to help! Some pictures are tagged with hashtag/pattern name… here are a few for examples: #peglegs  #carefreecardigan #cptmackcardigan… using the hashtag will help pull up pictures and not posts about the pattern 🙂


Now we’re finally ready to begin!

*Cutting fabric- It is important to cut your pieces along the grainline of the fabric.  Grainline is easily found parallel along the selvage of the fabric (the sides that are not cut by the store).  You want to match your selvage/grainline to the grainline arrow on the pattern piece.  Making sure this is straight is important! If it is cut off grain/not straight it will hang not straight! Have you ever had a pant leg/sleeve/shirt always twisting while you wear it? That is because it was cut off grain! It’s really annoying! So take your time matching the grainline on both woven and knit fabrics.

cutting layout

*Cut chart- I include a cut chart for any rectangle pieces.  The measurements for the cut chart are located in the first few pages of the tutorial and on the pattern pieces.  This way you can cut your rectangle pieces without having to look up the tutorial :). Our newer patterns include rectangle pattern piece as well. Some sewists prefer to have everything printed so now you can chose.

  • I prefer to use my cutting mat, quilters ruler and rotary cutter for cutting rectangle pieces.  If it has a longer measurement I prefer to fold in half and cut on the fold for ease as well.  Again, make sure you are keeping your grainline straight.

*Direction of Stretch- I also include a direction of stretch arrow on all pattern pieces for knit garments.  It is always perpendicular to the grainline.  Even with 4 way stretch fabric the greatest amount of stretch will run horizontally on your fabric.  If it is on the fold, fold  your fabric selvage (the part not cut by the store) towards the opposite selvage as wide as your piece and place on fold.

B1

*Using a Stretch Stitch for Knit Garments- Since most of my patterns are for knit/stretch fabric I thought I would add available stretch stitches you can use.  I use a serger in the tutorial, this is a great machine stitch for stretch fabrics if you own one.  Basic sewing machine stitches that also work are

a) triple stitch

b) lightening stitch

c)honeycomb stitch

d) overlock stitch

e) stretch overlock stitch-this is my personal favorite usually-

f) double overlock stitch

If you read your manual they will list the stretch stitches your machine have.  If you don’t have or can’t find your manual you can always google for your manual!  It is very valuable to have! 🙂

stretch stitches


I hope these tips are helpful for first time users! You can always post other questions to the P4P FB group and don’t forget to share your final garment!


Filed Under: Frequently Asked Questions, P4P University 66 Comments

Featured Patterns

  • Loosey Goosey Loosey Goosey $12.00
  • Loosey Goosey- Youth Loosey Goosey- Youth $10.00
  • Loosey Goosey - Bundle Loosey Goosey - Bundle $20.00
  • Everyday Shirt Everyday Shirt $12.00
  • Everyday Shirt- Youth Everyday Shirt- Youth $10.00
  • Privacy Policy
  • Refund Policy
  • Affliliate Program
  • Contact Us
  • About

Copyright © 2025 Patterns for Pirates

Copyright © 2025 · Genesis Framework · WordPress · Log in