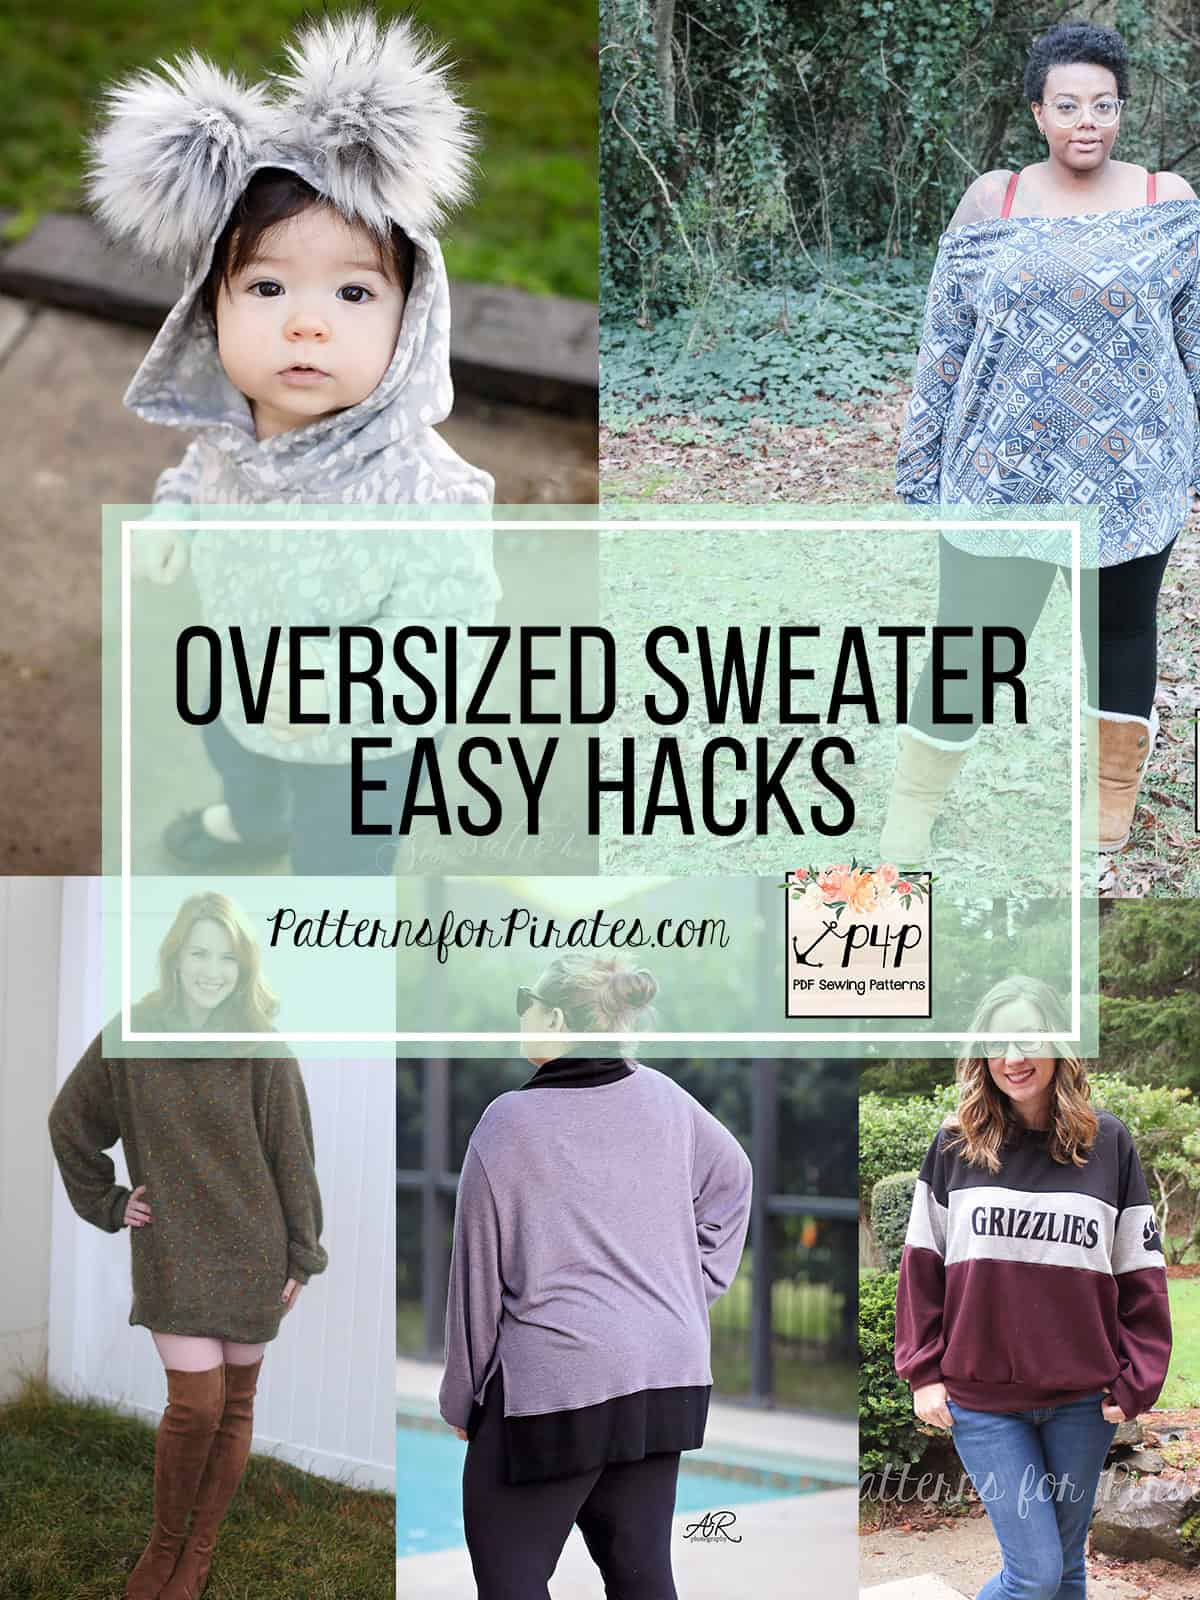
It’s here! It’s here! The comfiest, snuggliest, coziest sweater you will ever have. The Oversized Sweater includes so many options for both youth and adult but we couldn’t help ourselves…we wanted more! The P4P blog team is showing you how to make an Off the shoulder sweater, a mini dress, a color blocked one, the cutest pom poms hack ever and a higher side slit one. Enjoy!
…..
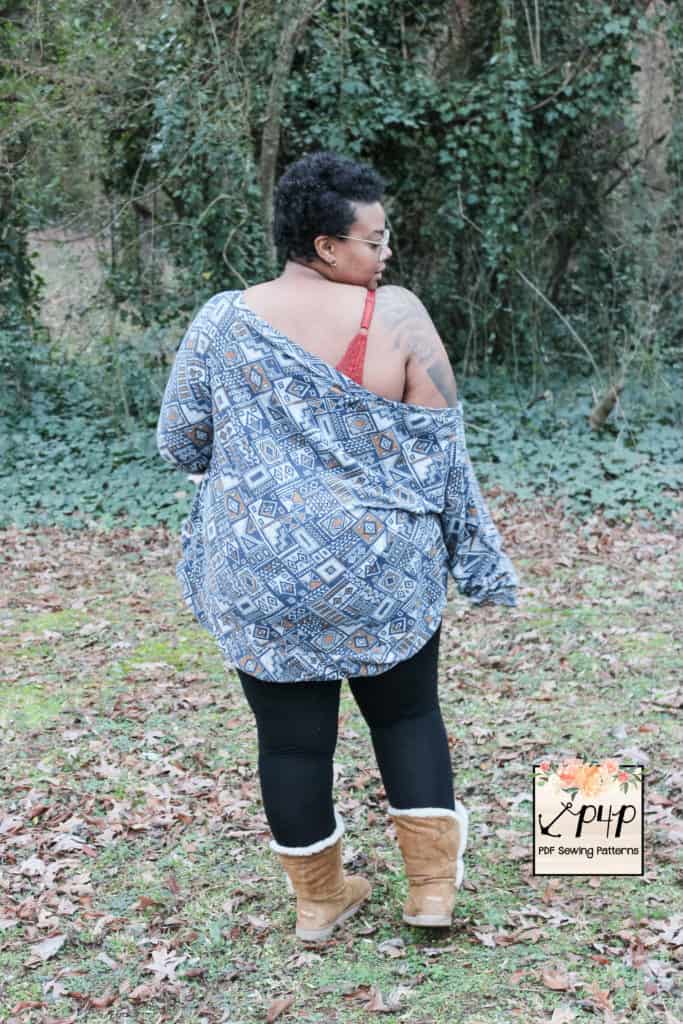
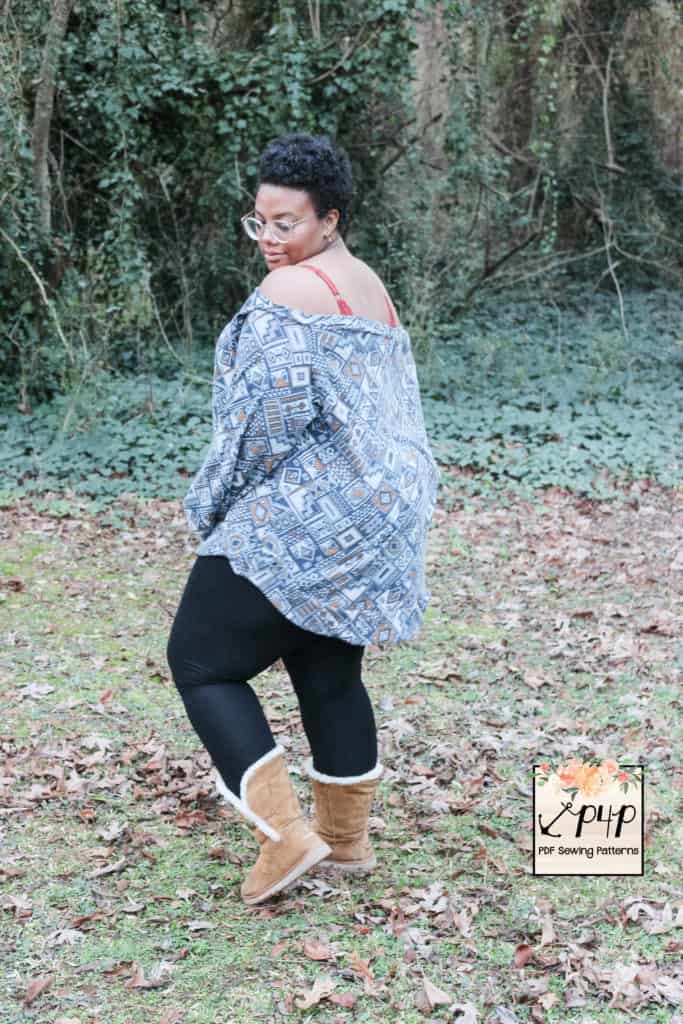
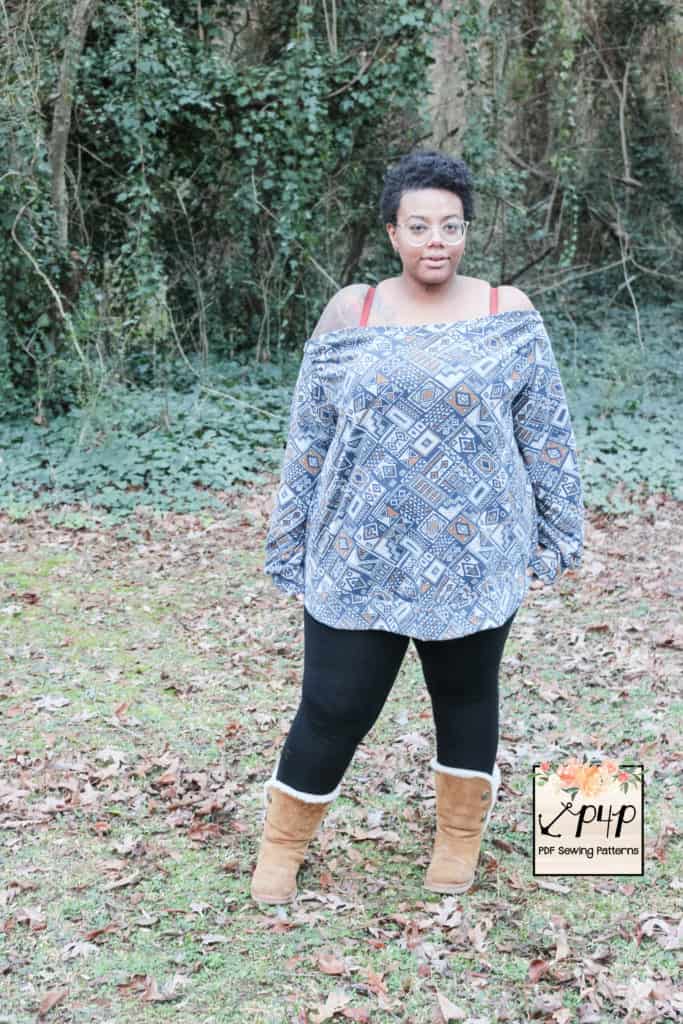
Off the shoulder
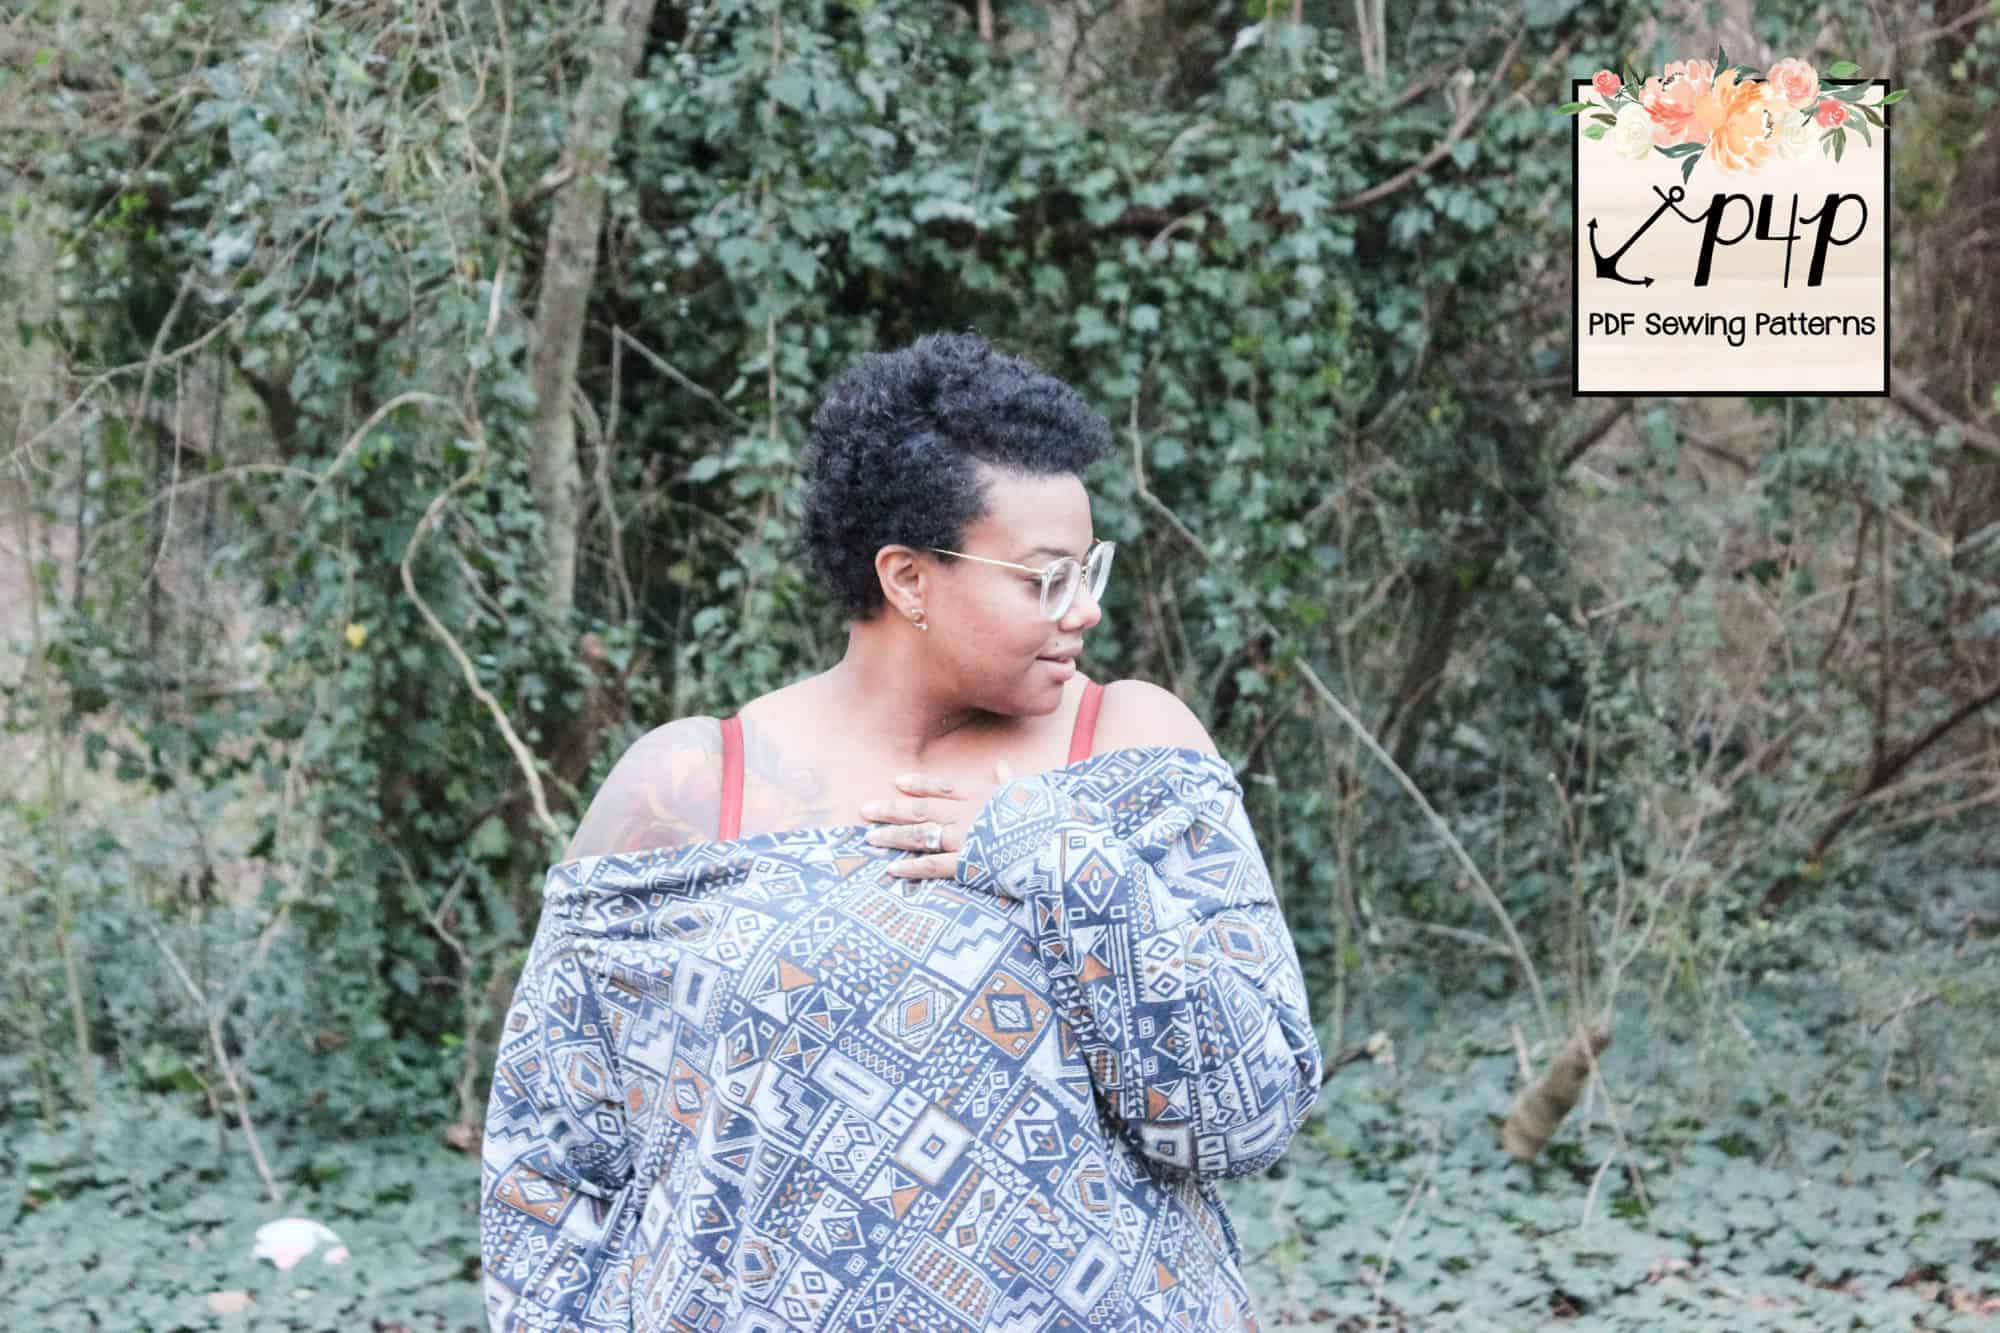
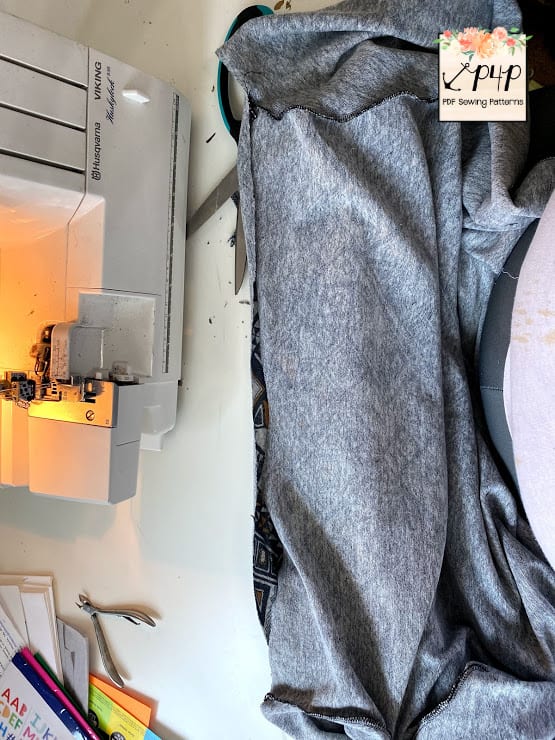
Off-the-shoulder shirts are my jam. I still remember falling all the way in love with the first one I saw Alex do for the Relaxed Raglan. This Oversized Sweater is the PERFECT top to hack into your favorite Pinteresty slouchy off-the-shoulder sweater. And it’s pretty easy! Grab your fabric and pattern pieces–let’s get started!
Layer your front, back and sleeve pieces on top of each other.

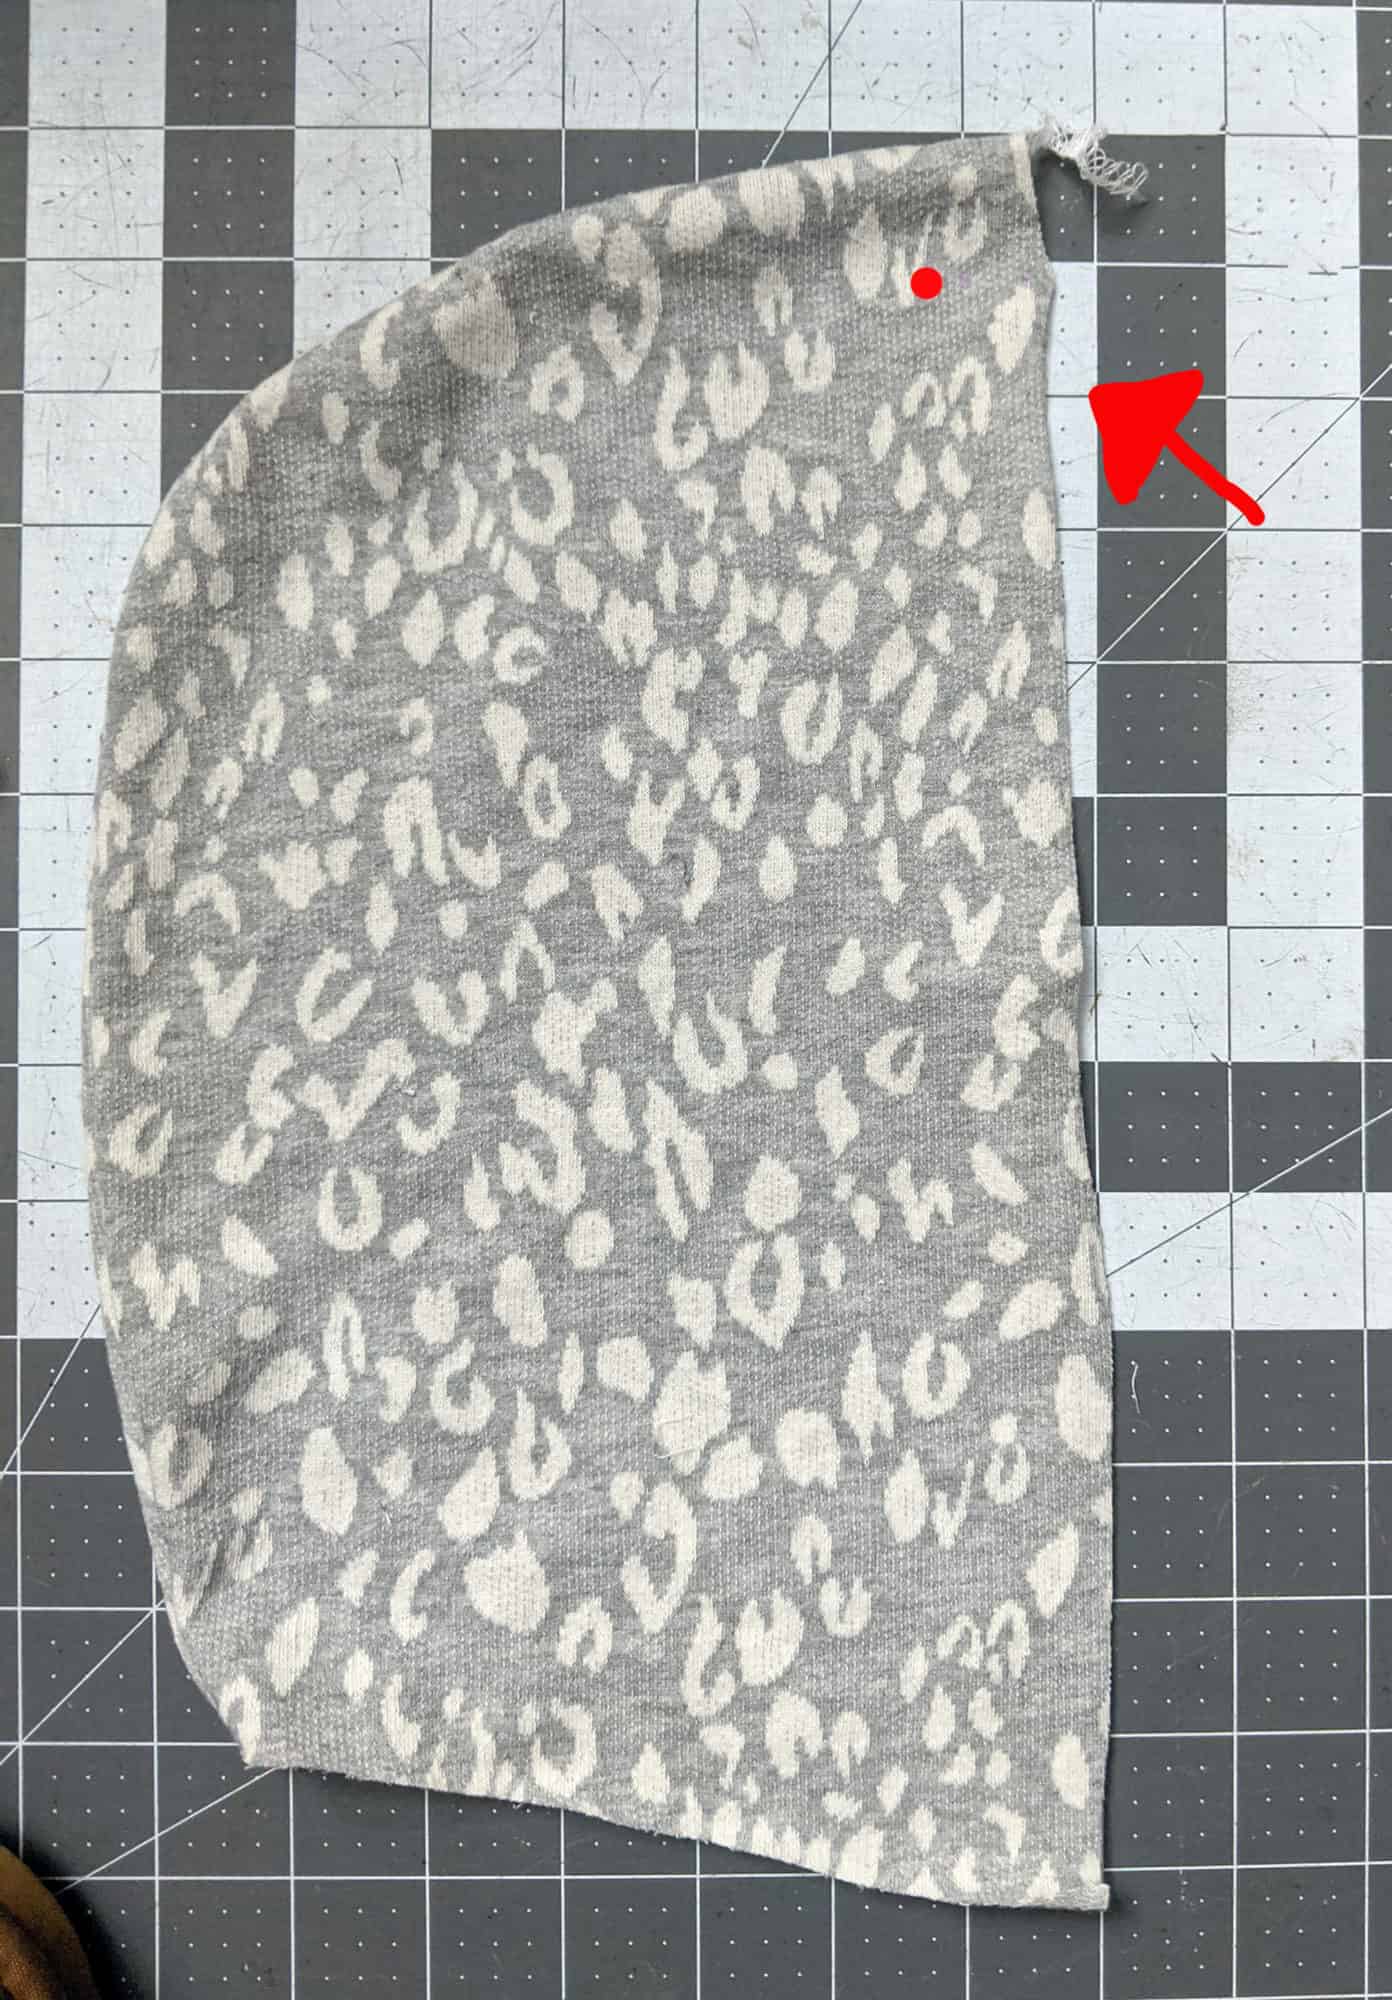
Measure down 1/2 inch.
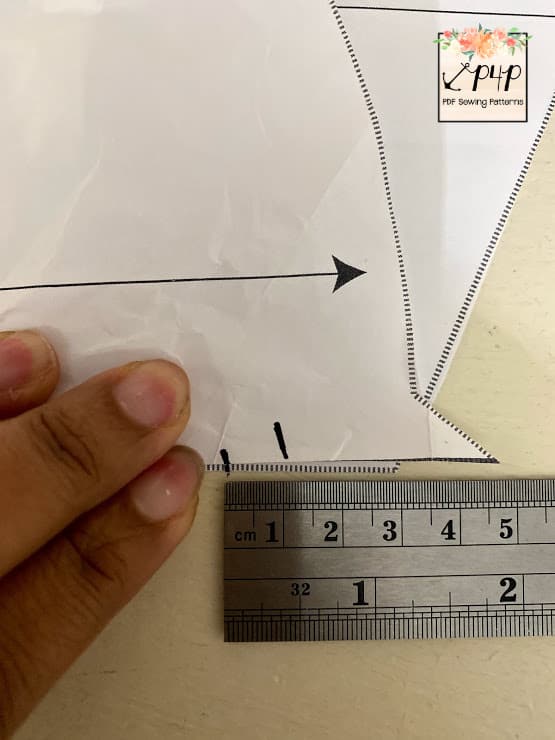
Draw a line. This is going to be your new cut line.
Cut out your pieces.
**Tip: Place a clip on the front of the sweater to differentiate your pieces.
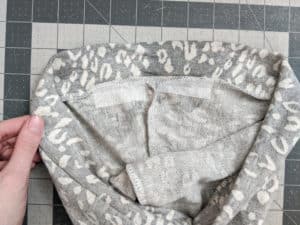
Sew your sleeves on first. They aren’t going to be sewn all the way up so remember that. You’re going to sew them on similarly to how raglan sleeves are done. They’ll look like this:
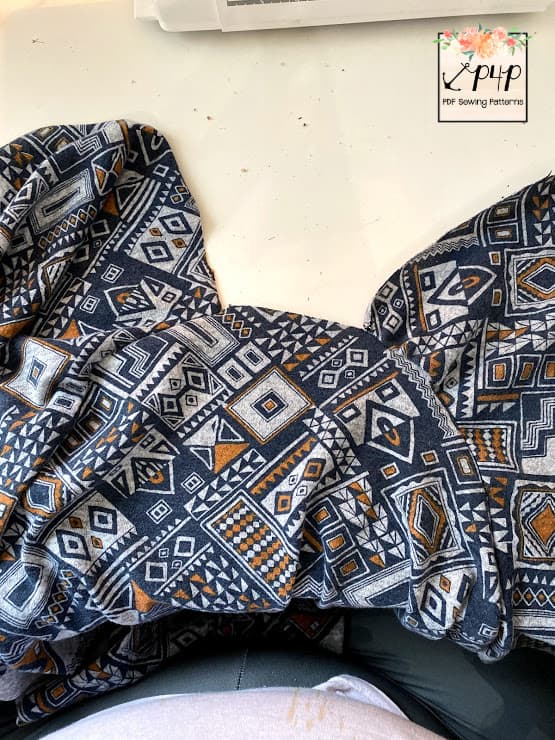
Once the sleeves have been attached to both the front and back pieces, it’ll look like this.
Cut a neckband 3 inches in width by 85% of your measurement of your shoulders (with shoulders down, measure around your body). Add the neckband.
Finish assembly as instructed in the tutorial and then rock the hell out of it!
I’m wearing a hachi sweater knit in a straight P1 with a curved hem.


…..
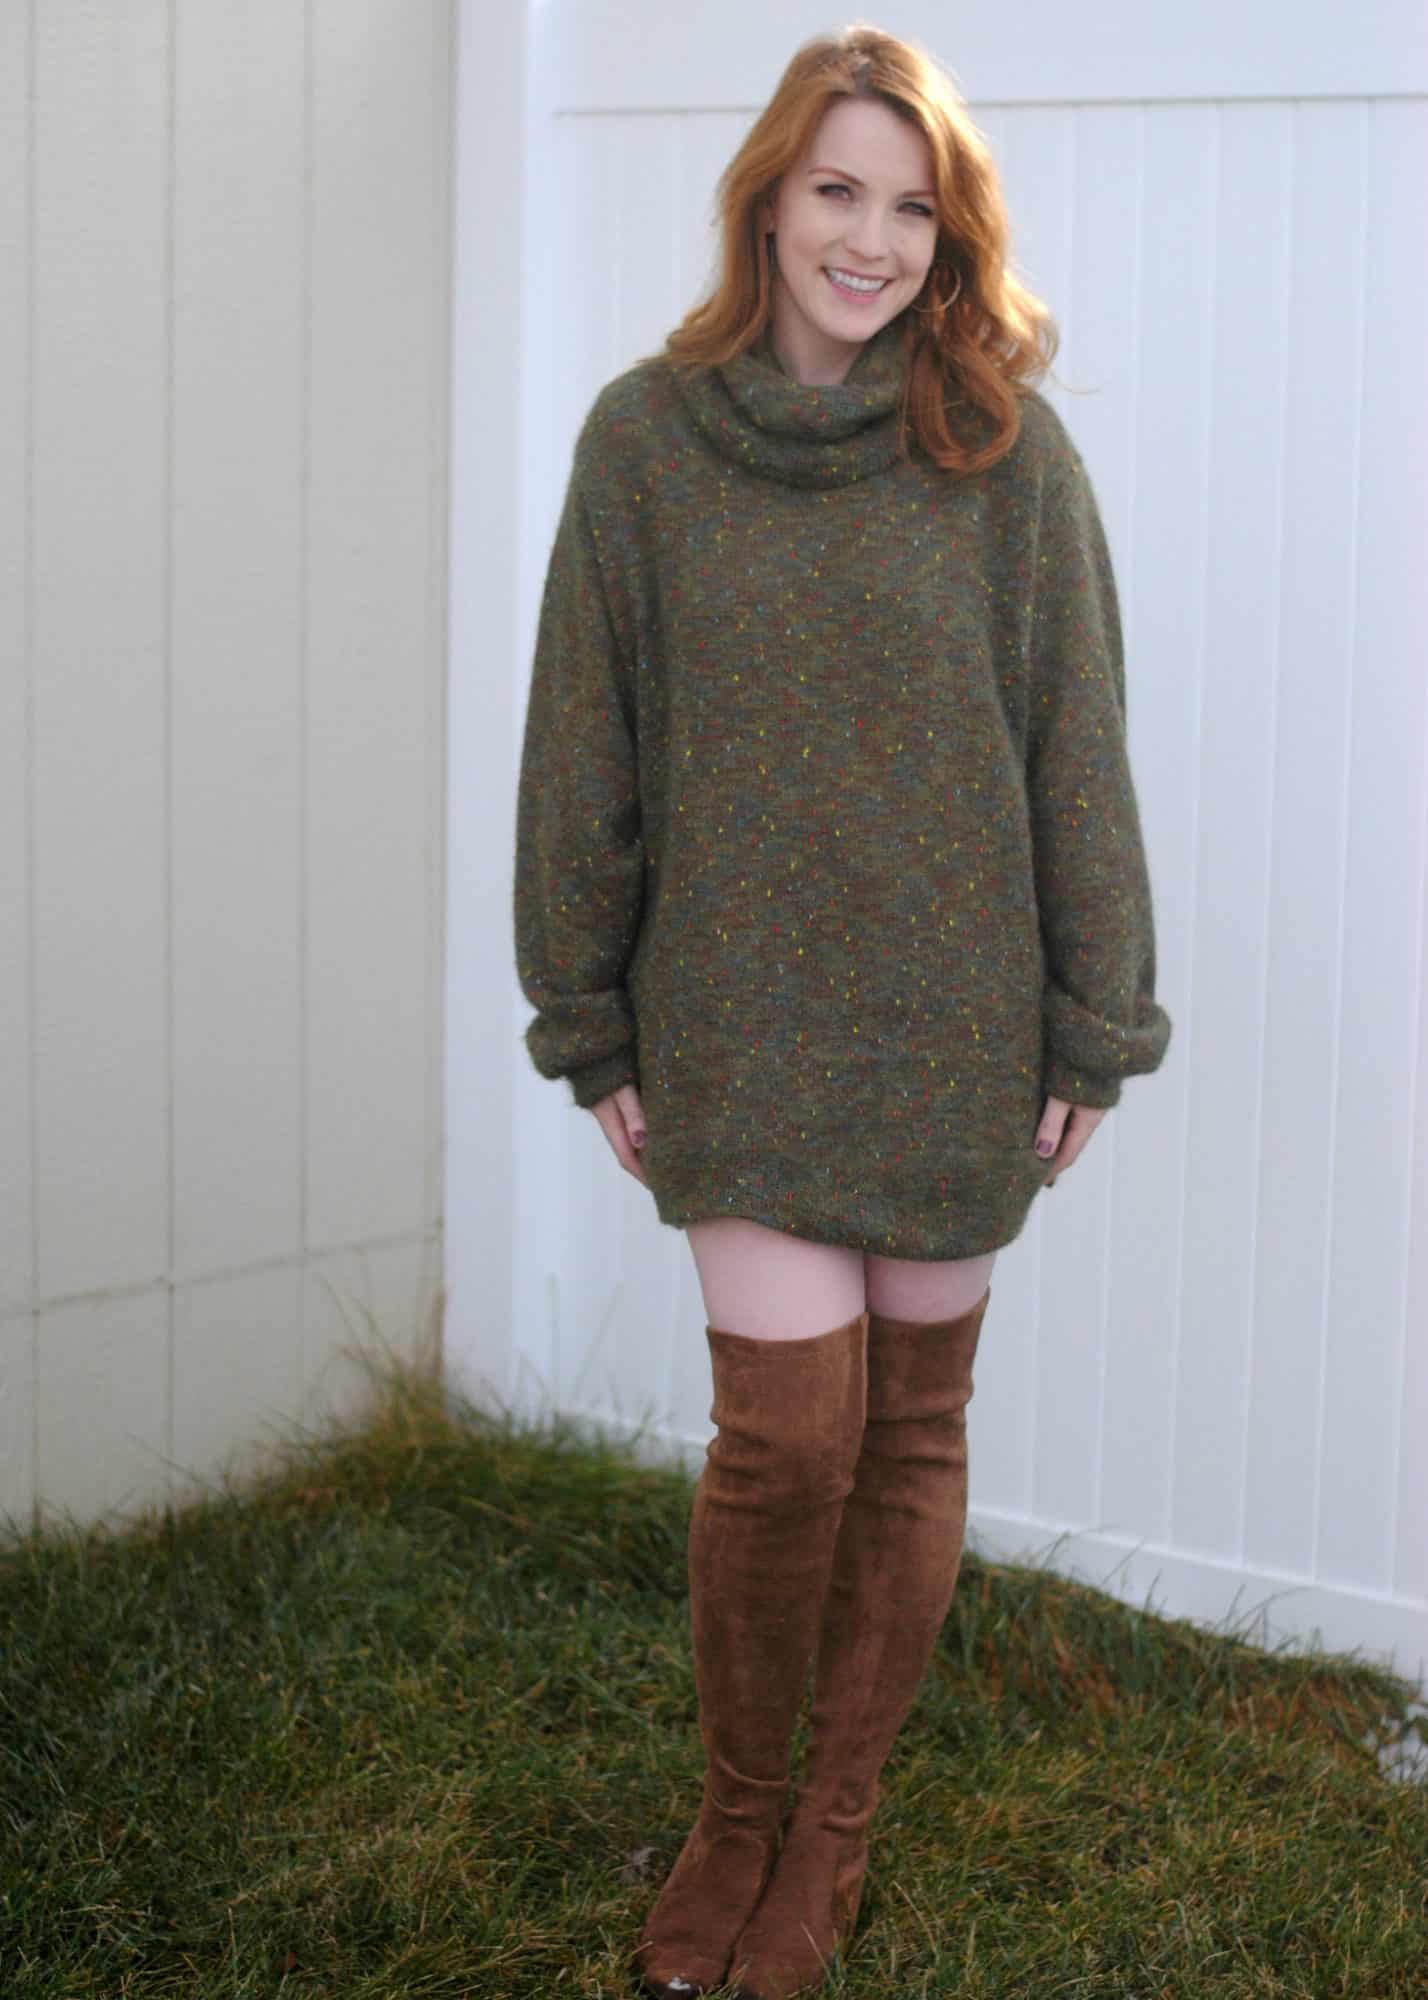
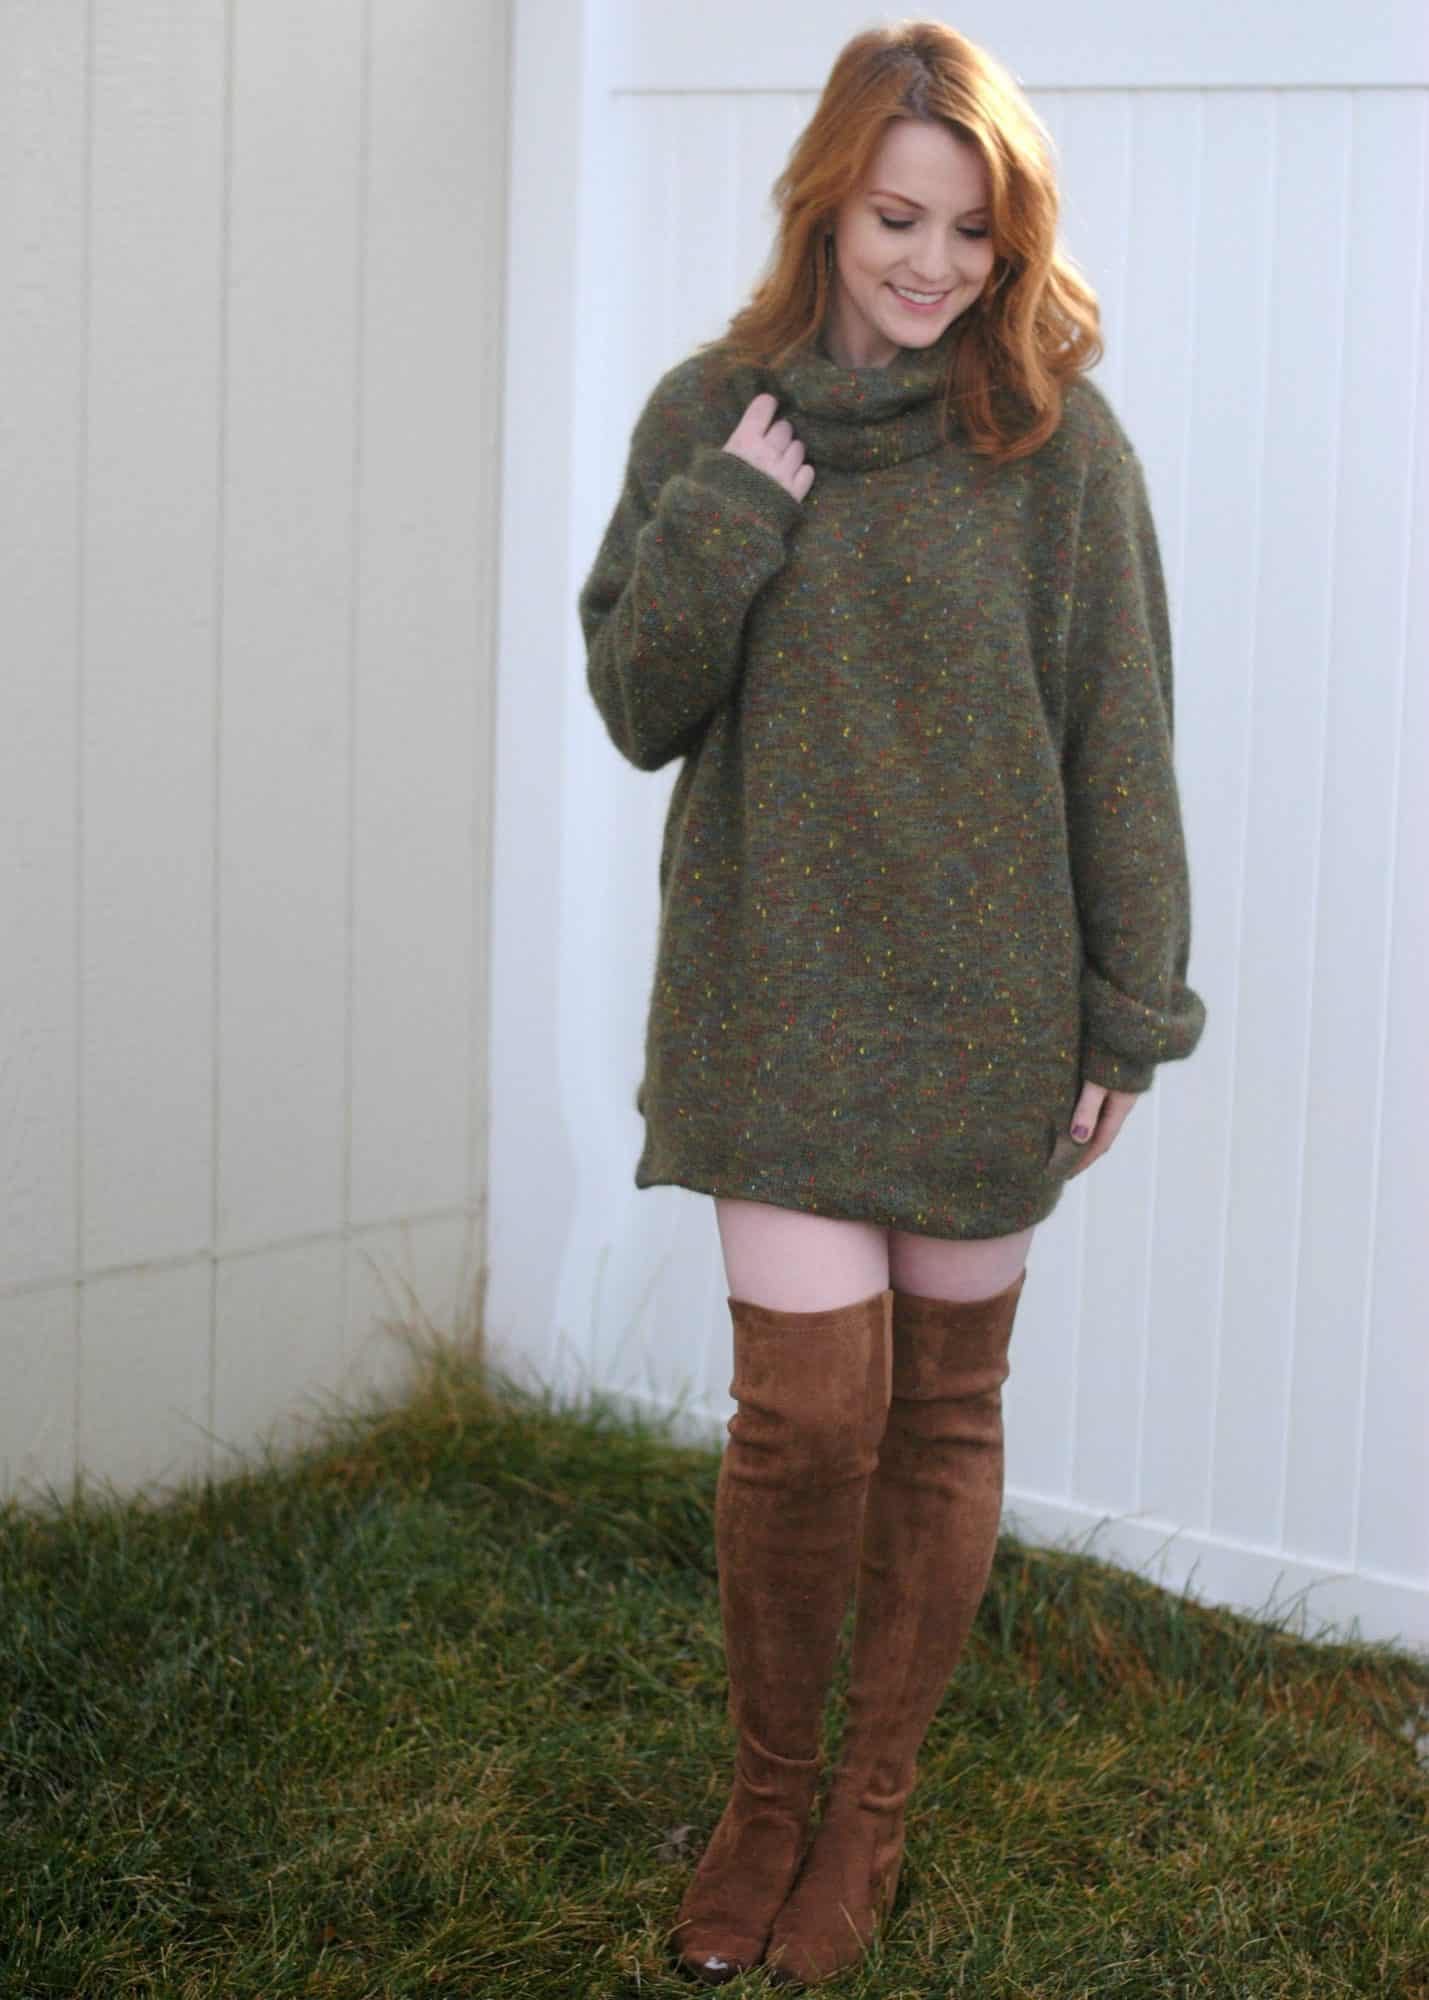
Mini dress
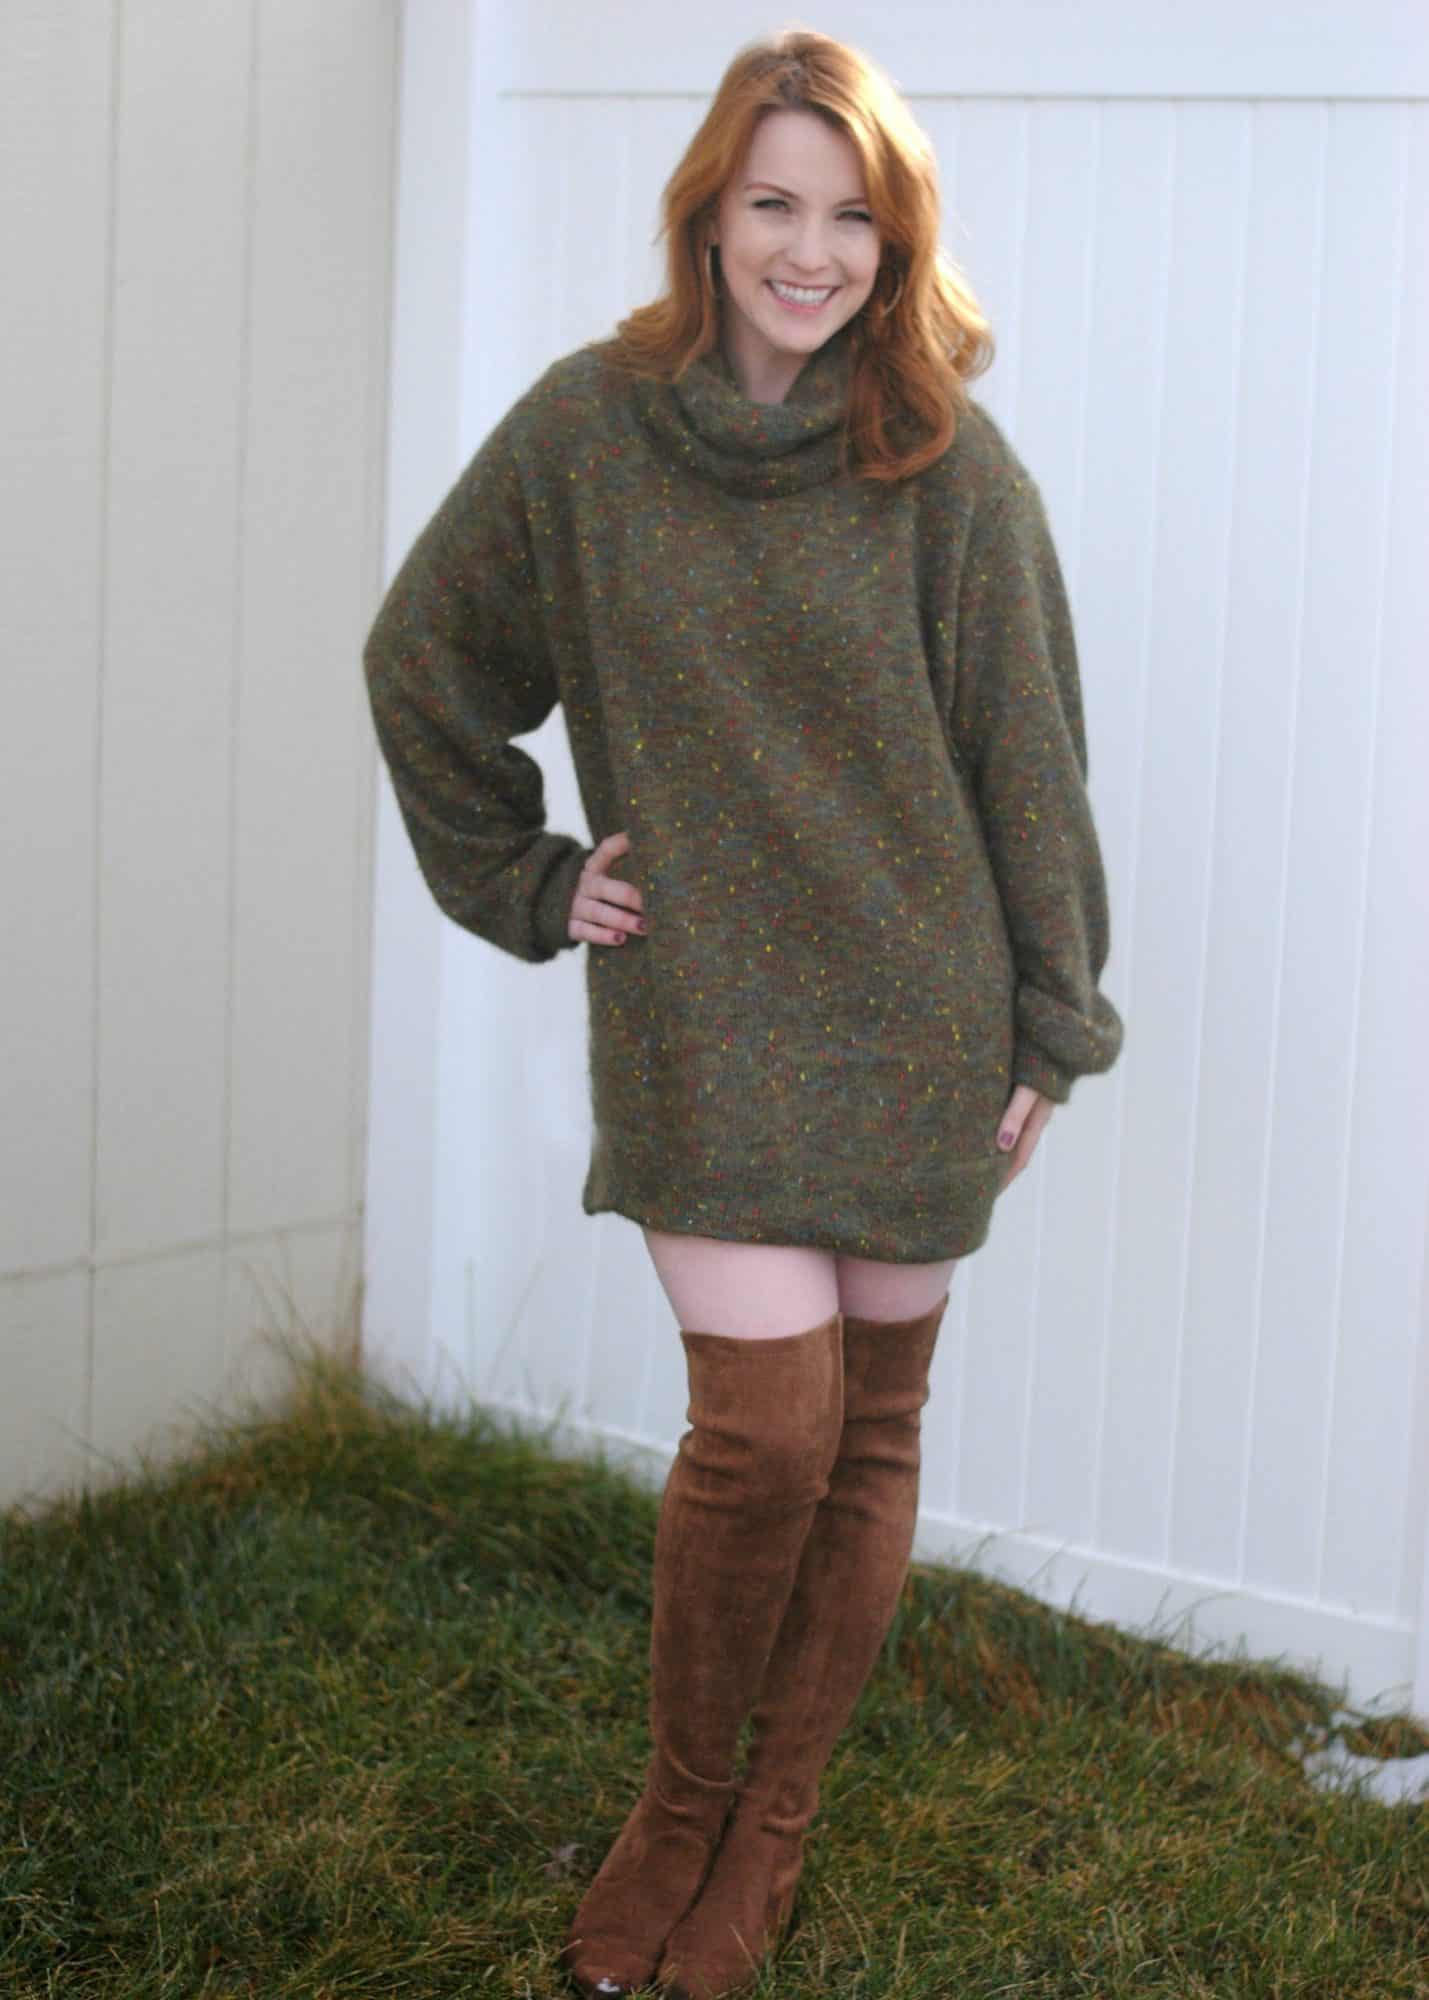
Next up, we have a mini dress hack. I love anything that I can wear that’s comfy, but that’s also really sexy, and this mini dress hack fits the bill perfectly.
For this version, we’ll be using the high-low hem option of the sweater. Because the bottom of both the front and back pieces of the bodice are straight, it’s very easy to simply add length to the bottom of these to lengthen your sweater into a dress. How much length you add to the bottom of your pattern pieces is completely up to you, but I found that 4 inches was perfect for the “mini” look I was going for.
When cutting out both the front and back pieces of your sweater, simply add 4 inches to the length at the bottom of each. Please note that the high-low bands were not changed at all for this hack; only the length of the main body pieces have been altered.
Cut and sew together the rest of the sweater as described in the tutorial, and voila! You now have a cute and very trendy mini dress, ready to go!
…..
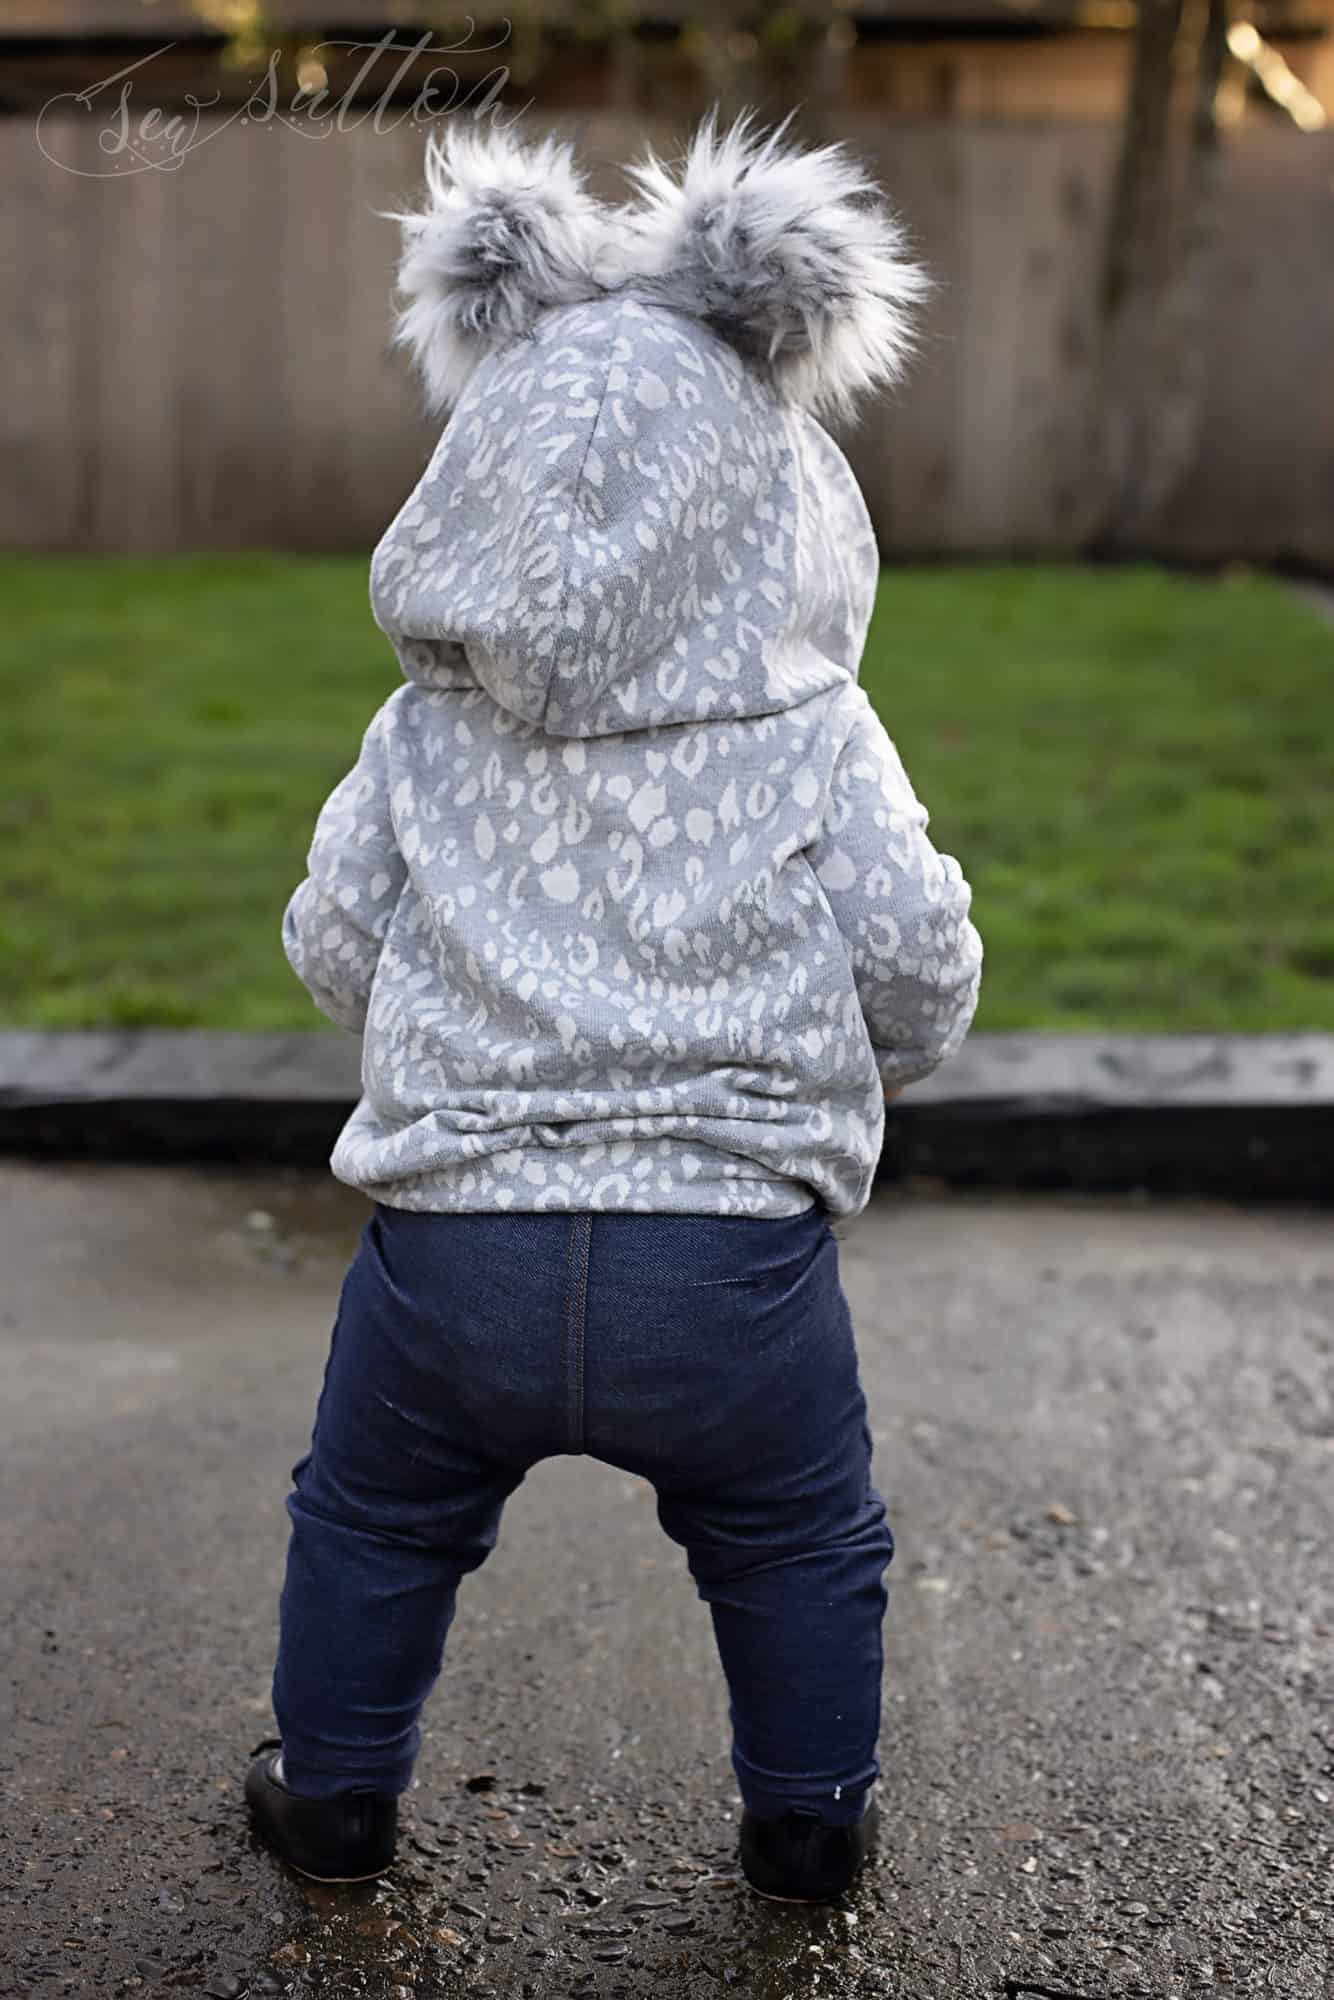
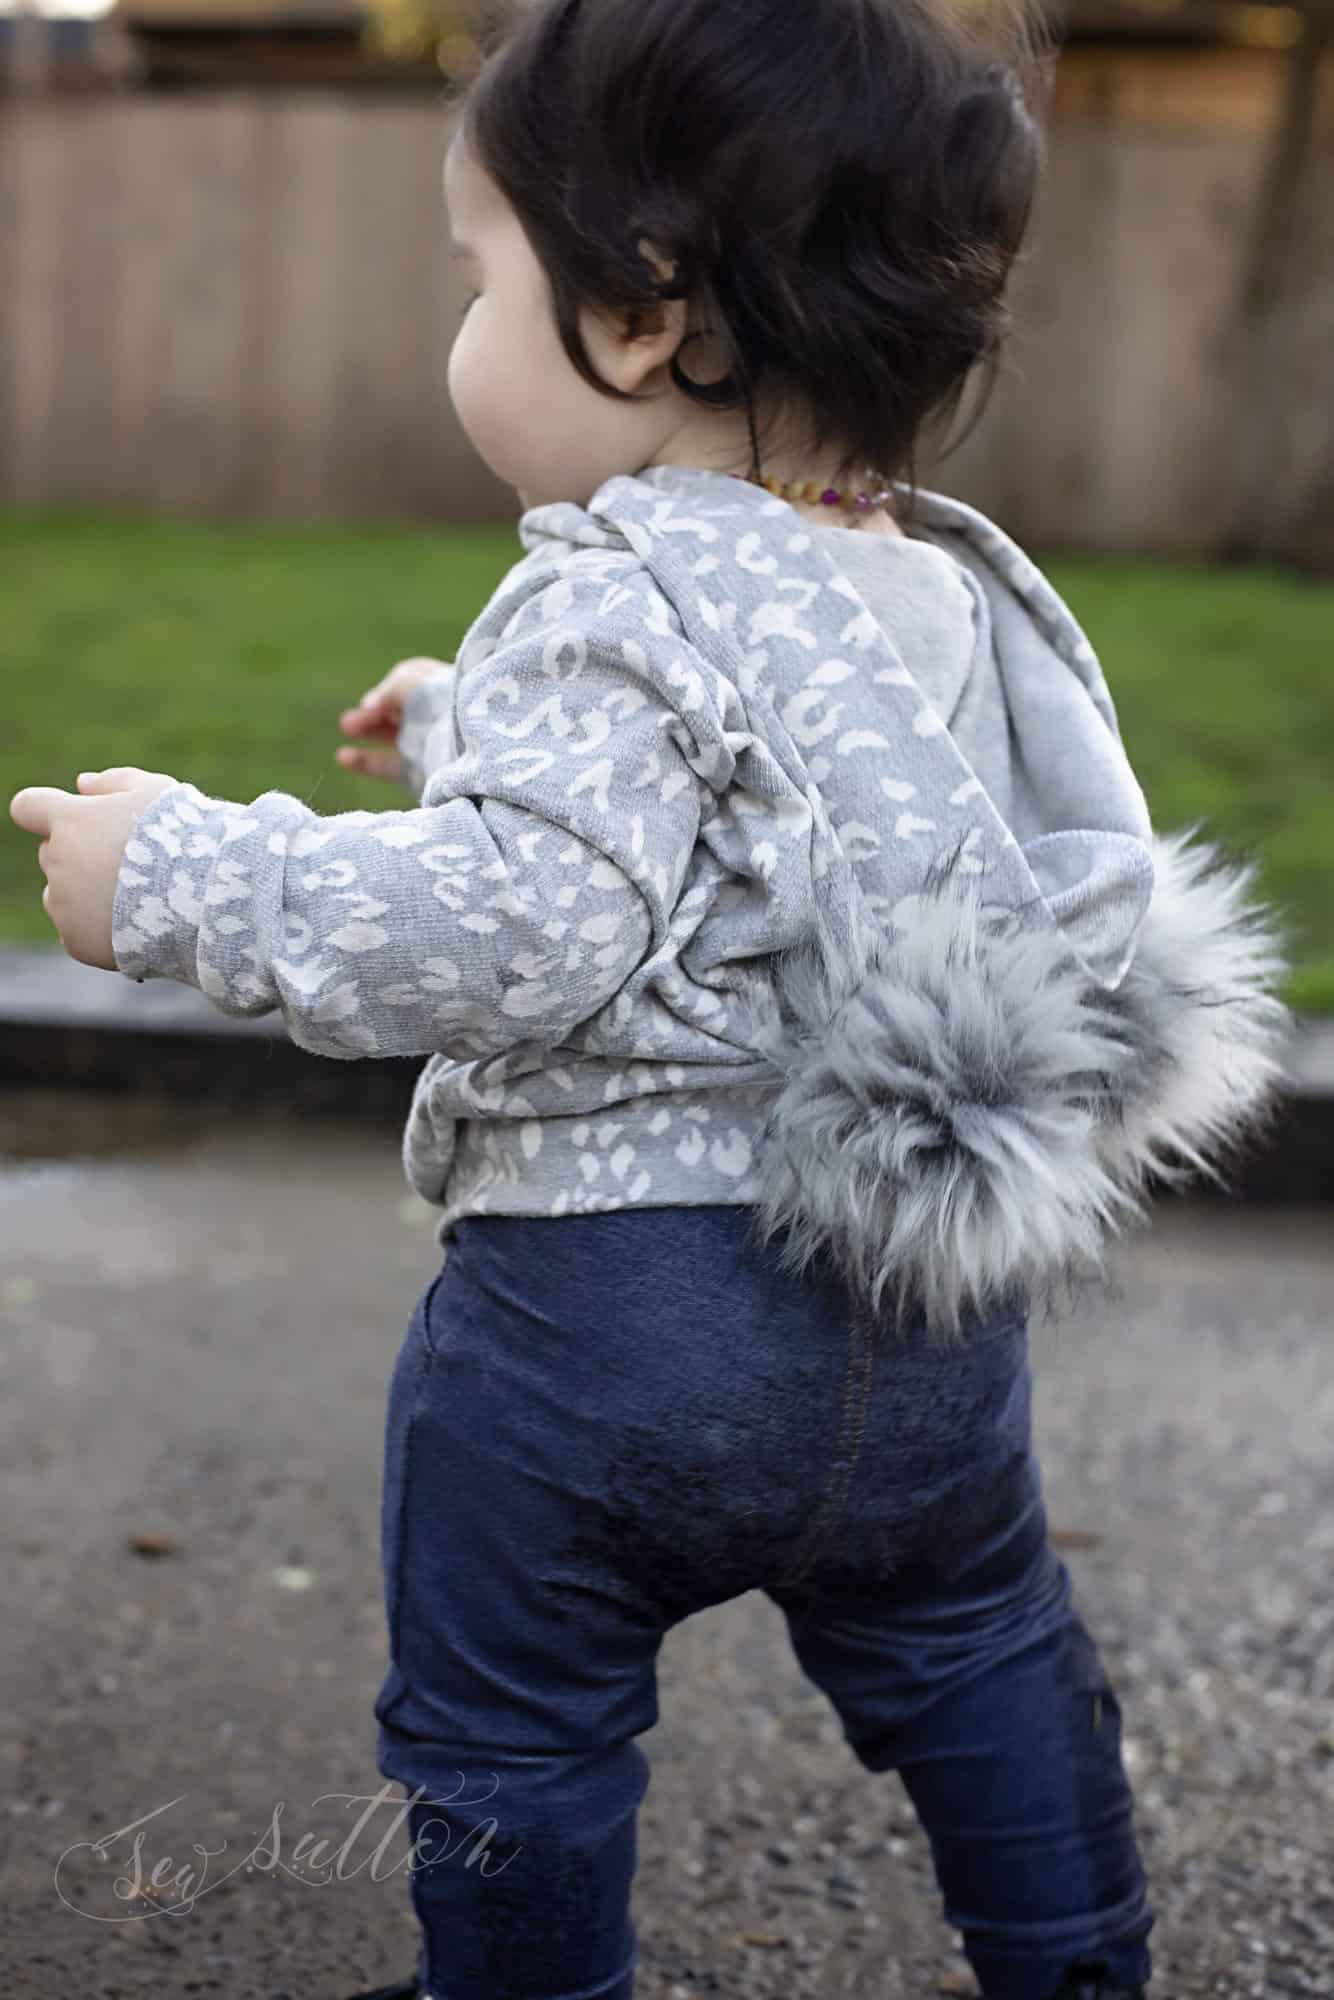
Poms


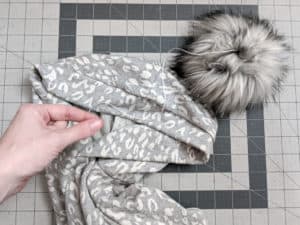
If you’re anything like me you might have an addiction to Faux Fur Poms especially on the littles! They are just so cute! I’m going to show you a quick and easy way to substitute the ears for Poms! You’ll sew your hood together exactly the same as all of the instructions but before sewing the hood I recommend marking your ear placements slightly past the seam allowance in a washable pen that way you know where to place your poms. Then I highly recommend adding interfacing where your poms will be for added durability especially if using a pom with snaps.
Now if you have a sew on pom you’ll sew it right along the markings you made for the ears. I recommend going directly through the seam allowance, once again for added durability.
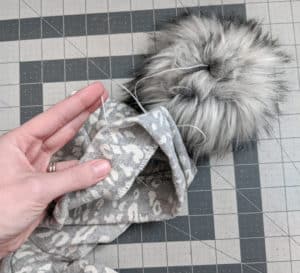
If you are using a pom with snaps (which I recommend for washing purposes as well as pom changing fun!), push your seam allowance toward the back of the hood and attach your snap through your interfacing and the seam allowance.
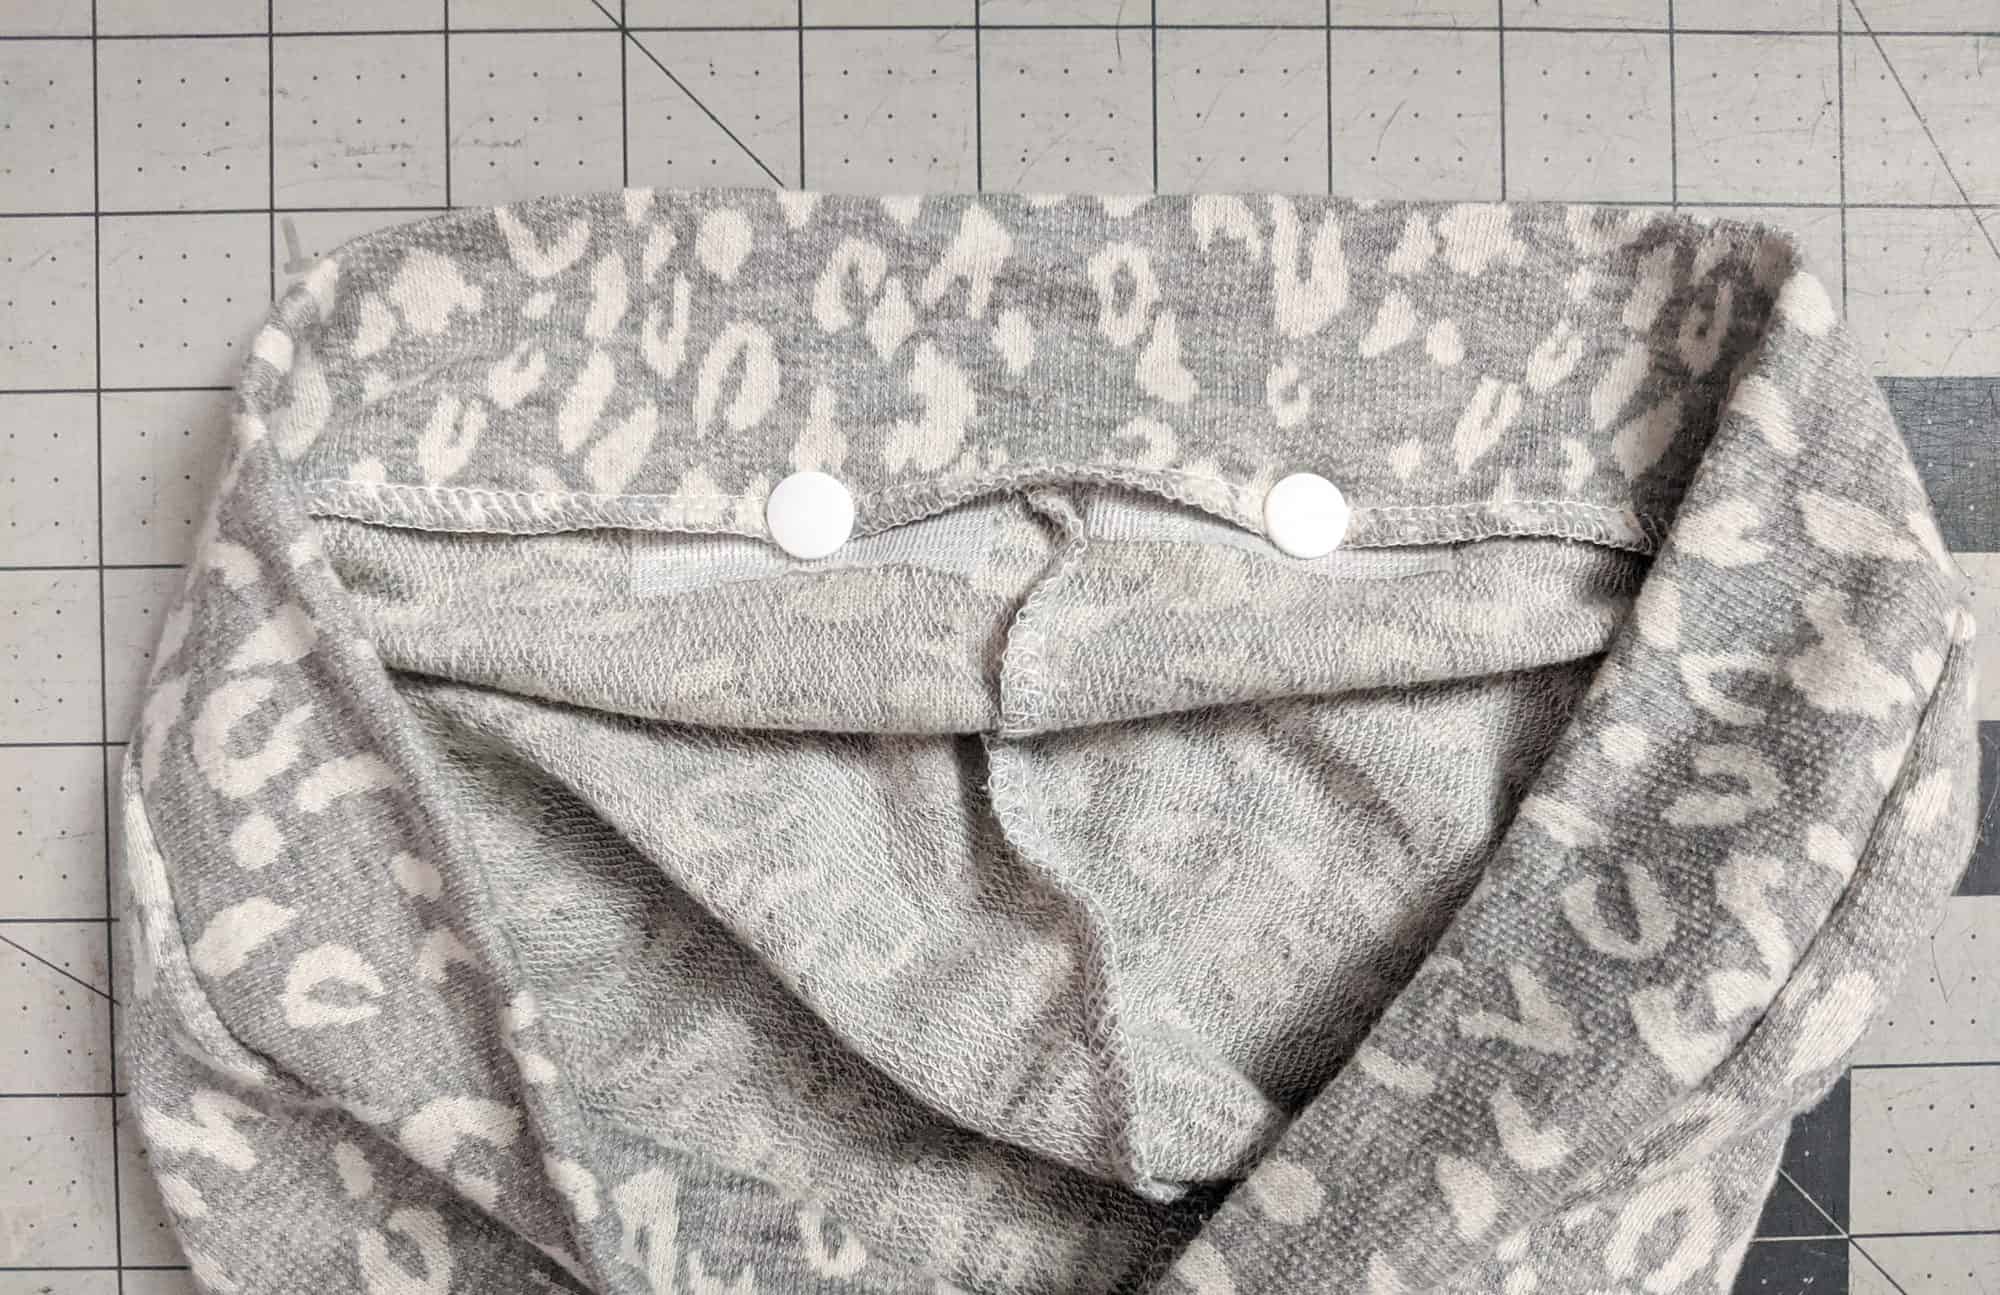
and wallah! You are done and now have super cute pom ears!


Happy Sewing,
Michelle
…..
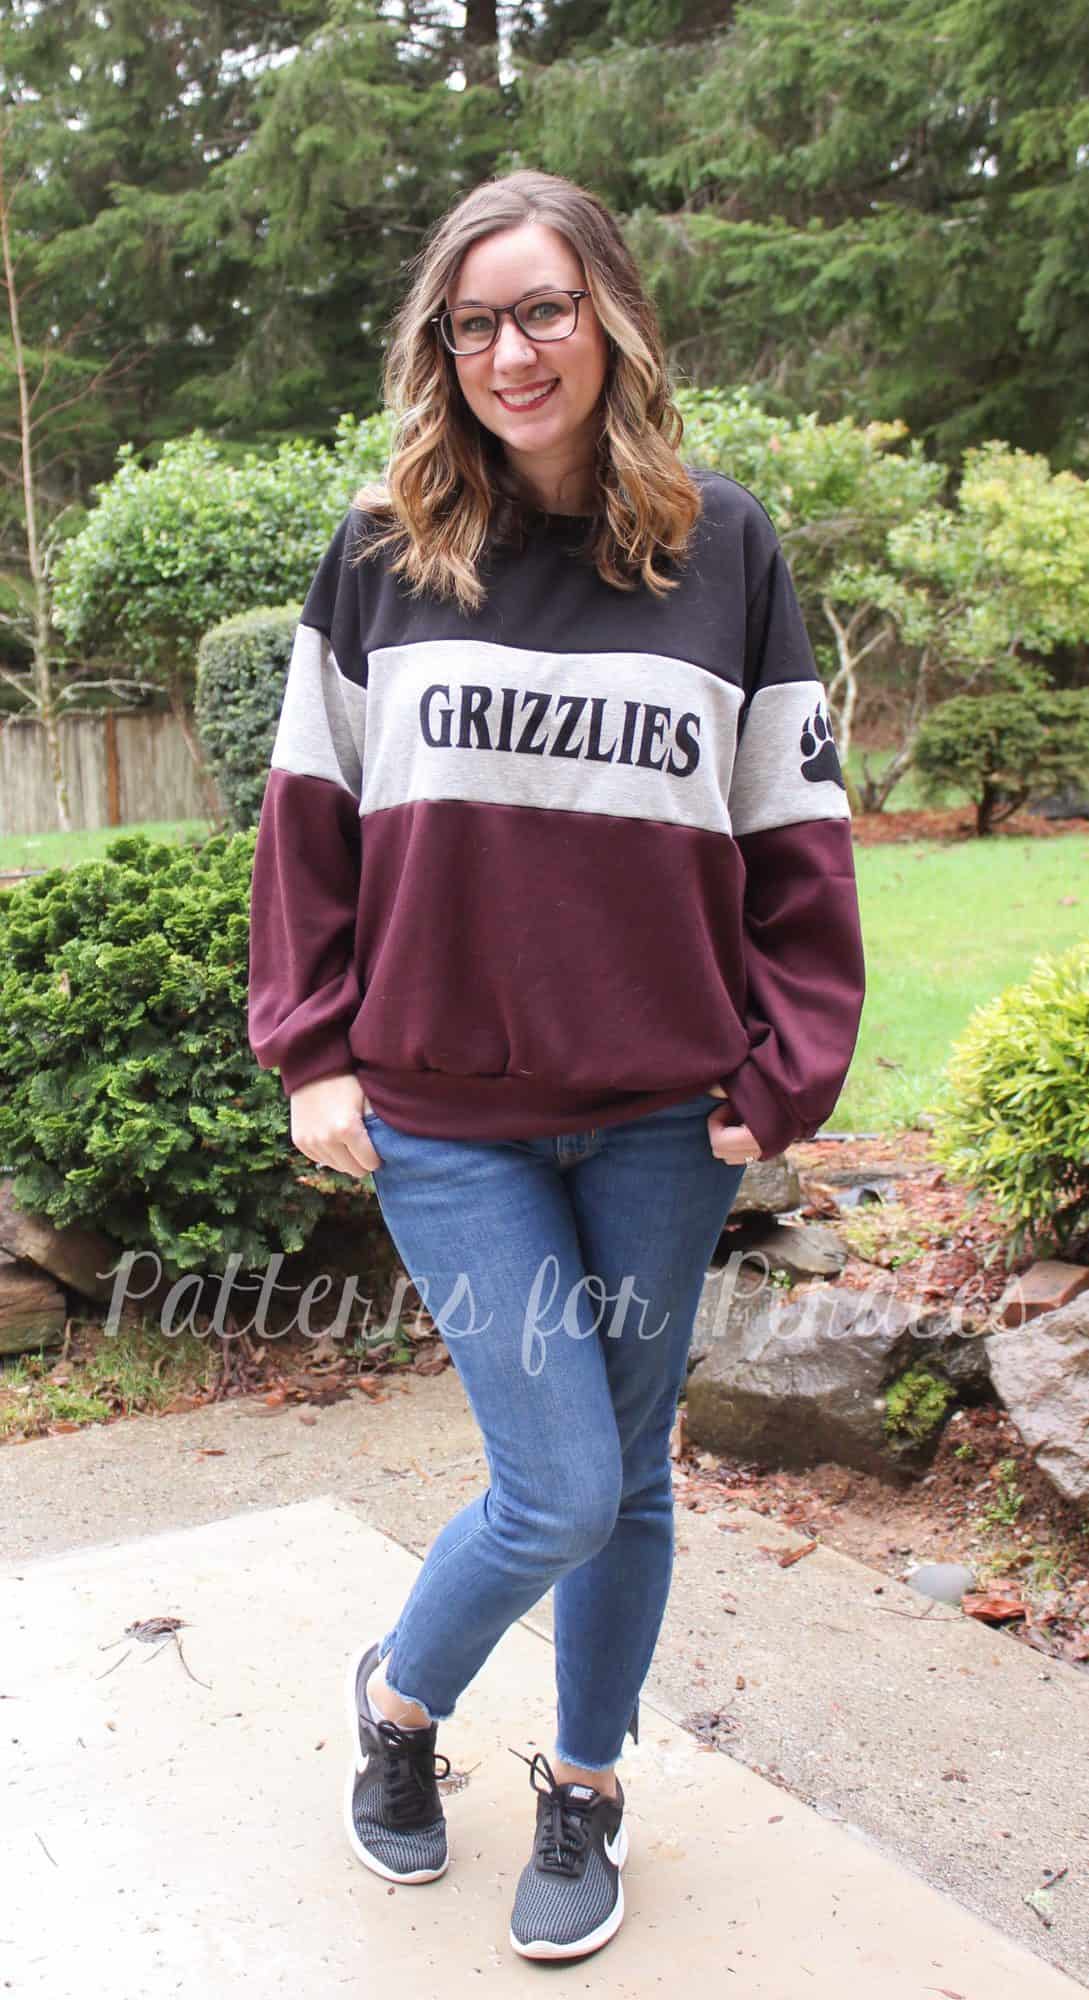
Colorblocked
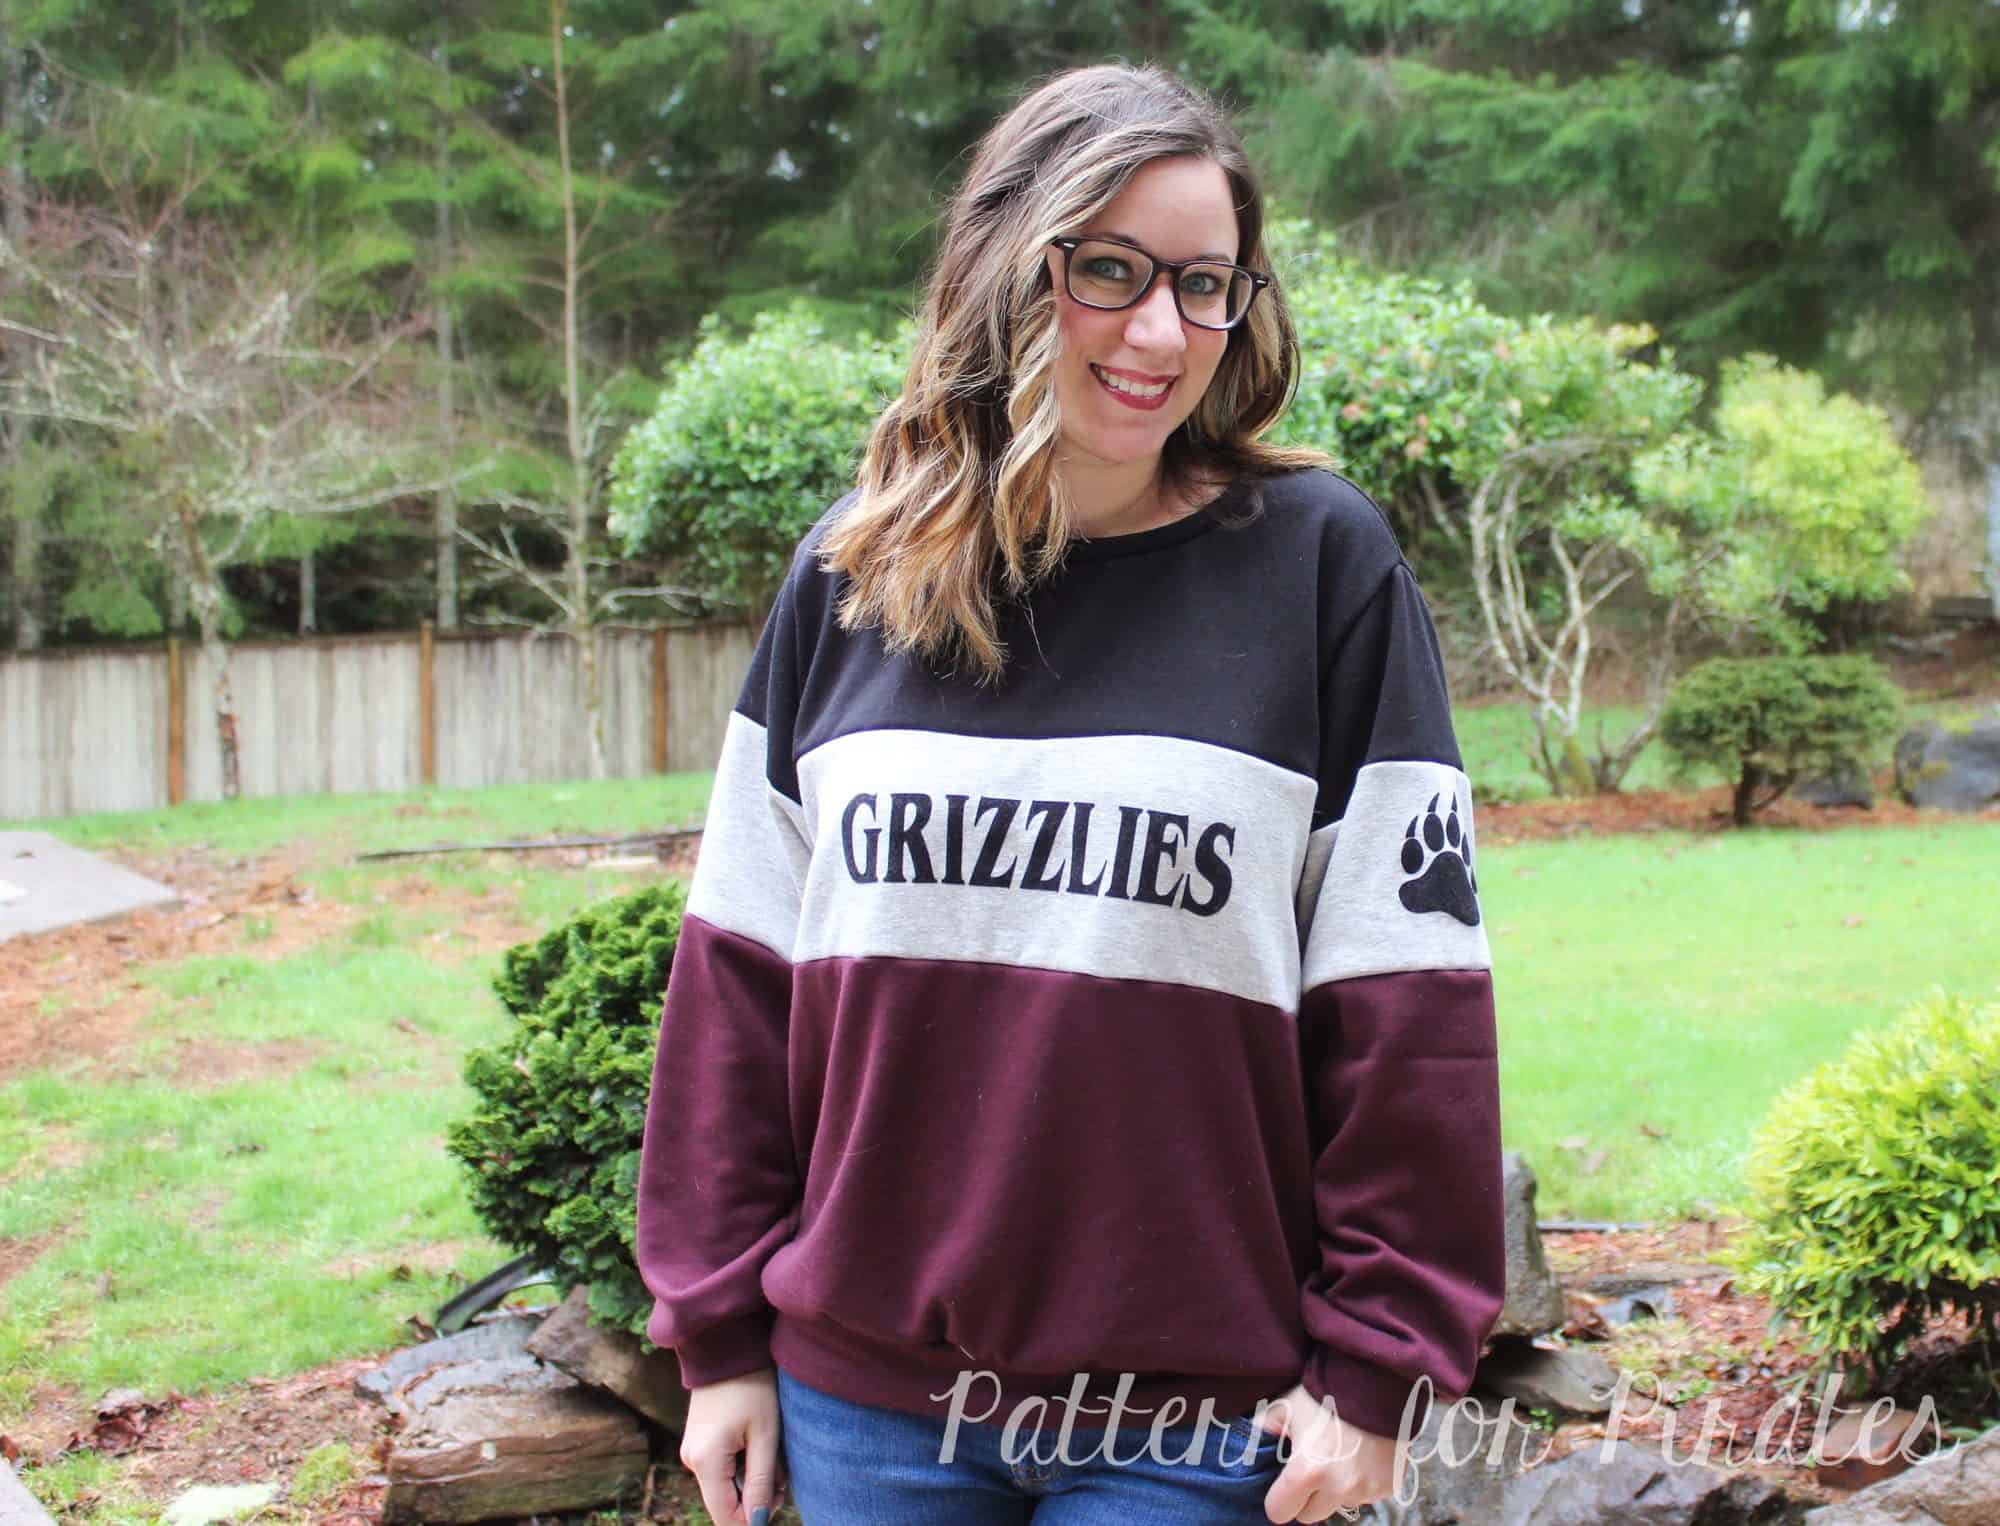
I am all in anytime that I have a chance to sport some spirit gear for our local team (Go Grizzlies!). Awhile ago, I was doing some aimless browsing and came across a colorblocked sweatshirt that was absolutely perfect. Of course they didn’t have our team colors, but the oversized sweater was the perfect starting point to recreating this sporty look.
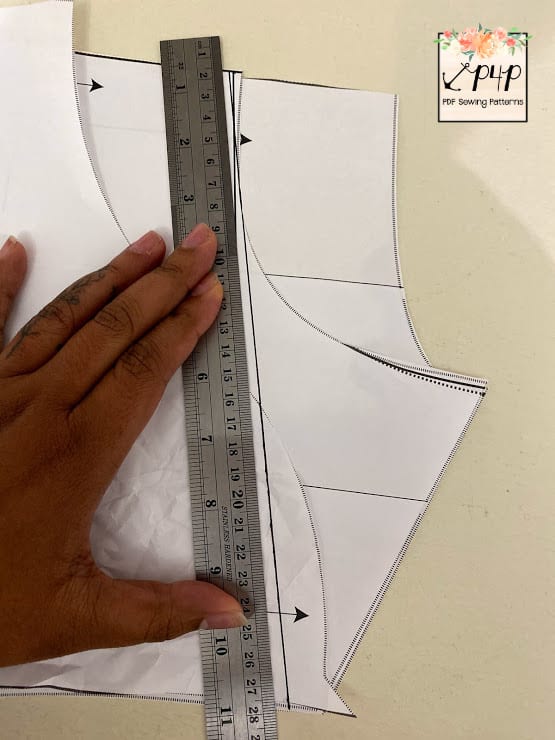
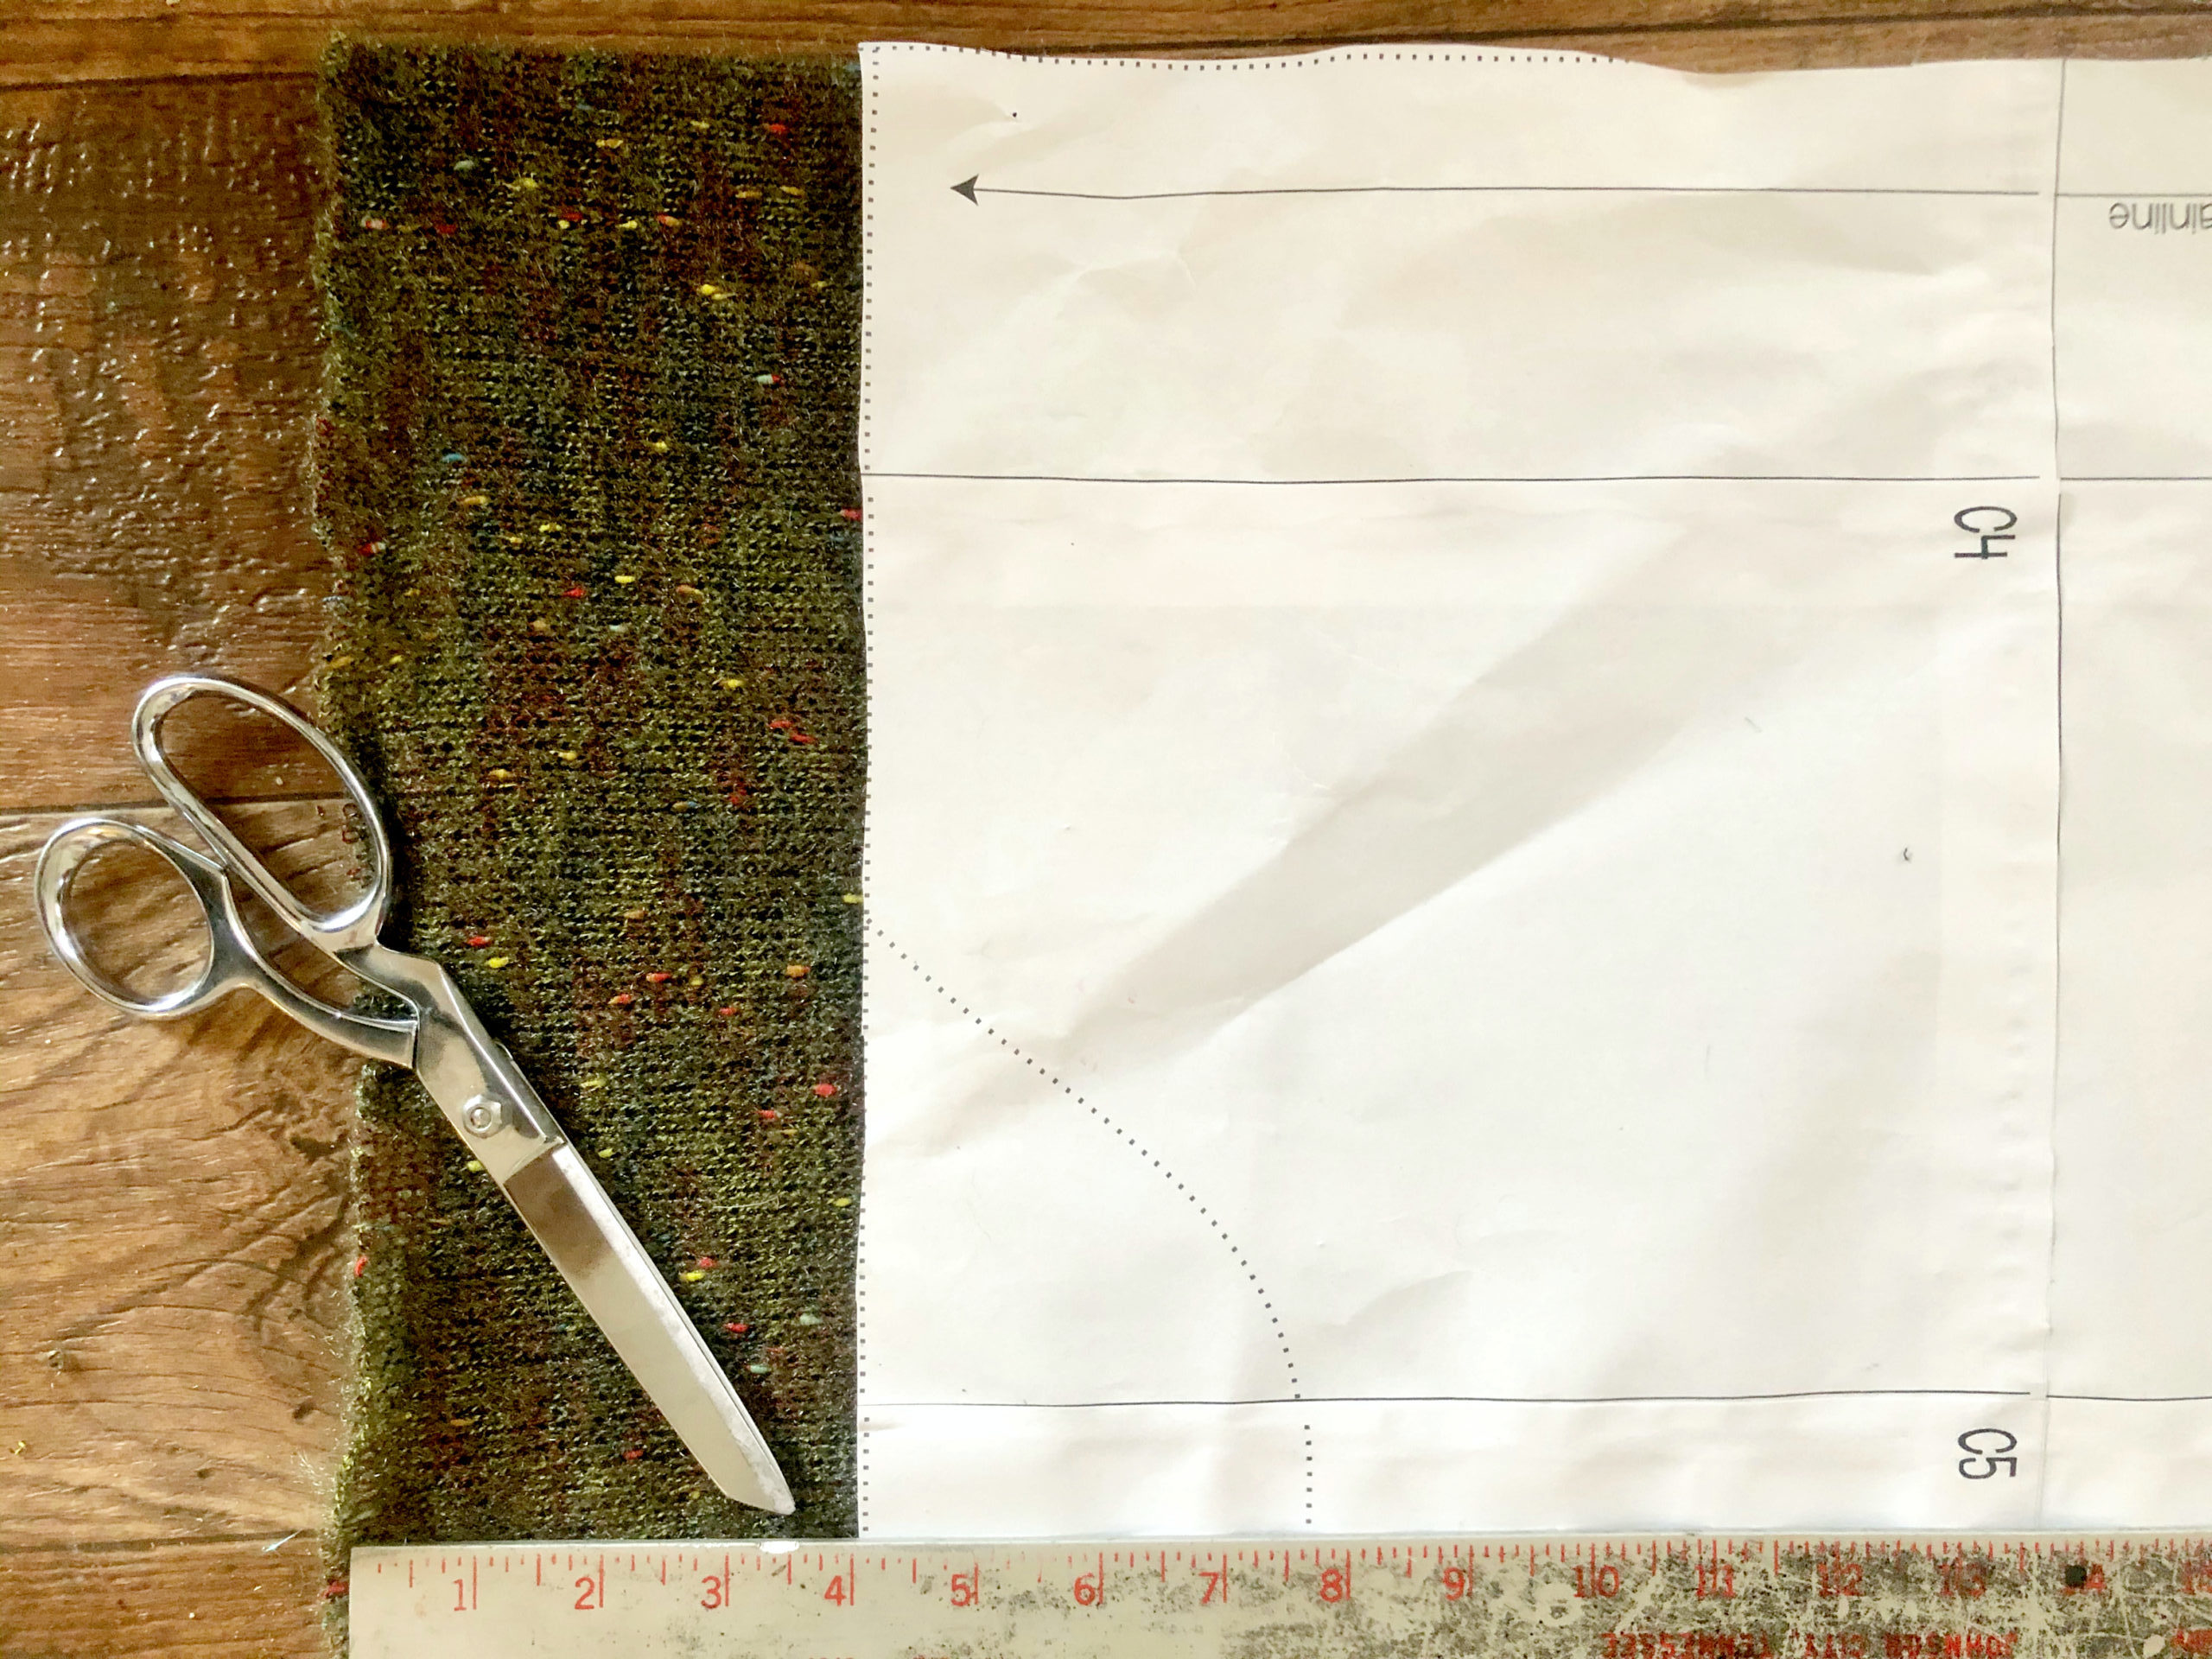
To begin, you will want to divide the front and back bodice pieces, as well as the sleeve, into the sections. For mine, I began with the front bodice piece. I measured 5″ down from the neckline and placed a vertical line. I then measured 6″ below that to create my second color block. The remaining section will be for my third color block. For the back bodice, I lined up the bottom hemline of both front and back piece, and transferred my lines to this piece as well. 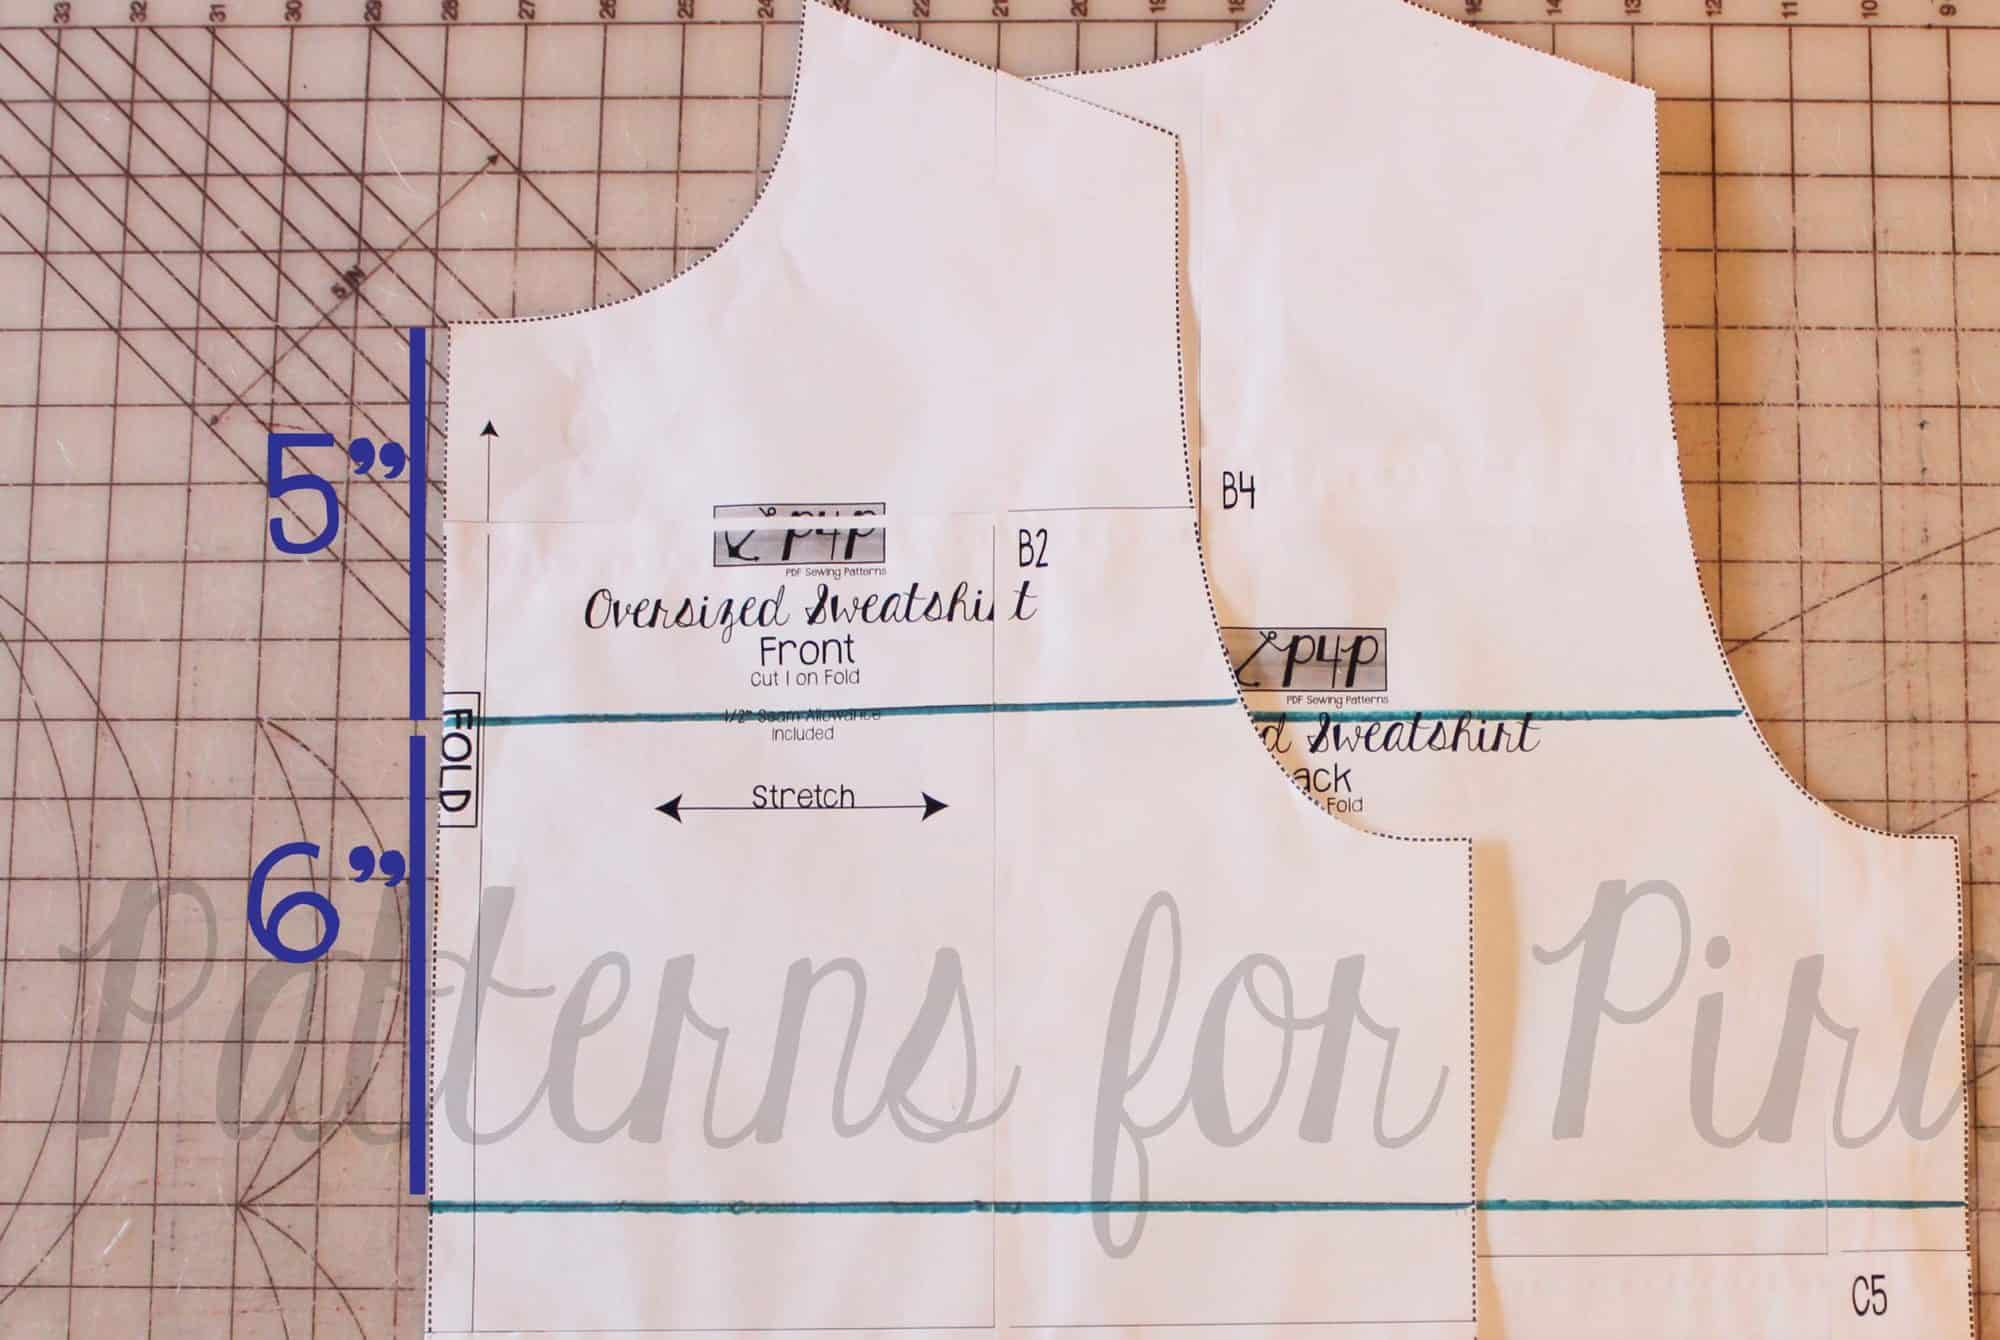
To create the colorblocked sleeve, I began by aligning to top of the sleeve with the front bodice neckline and again, transferring these lines. 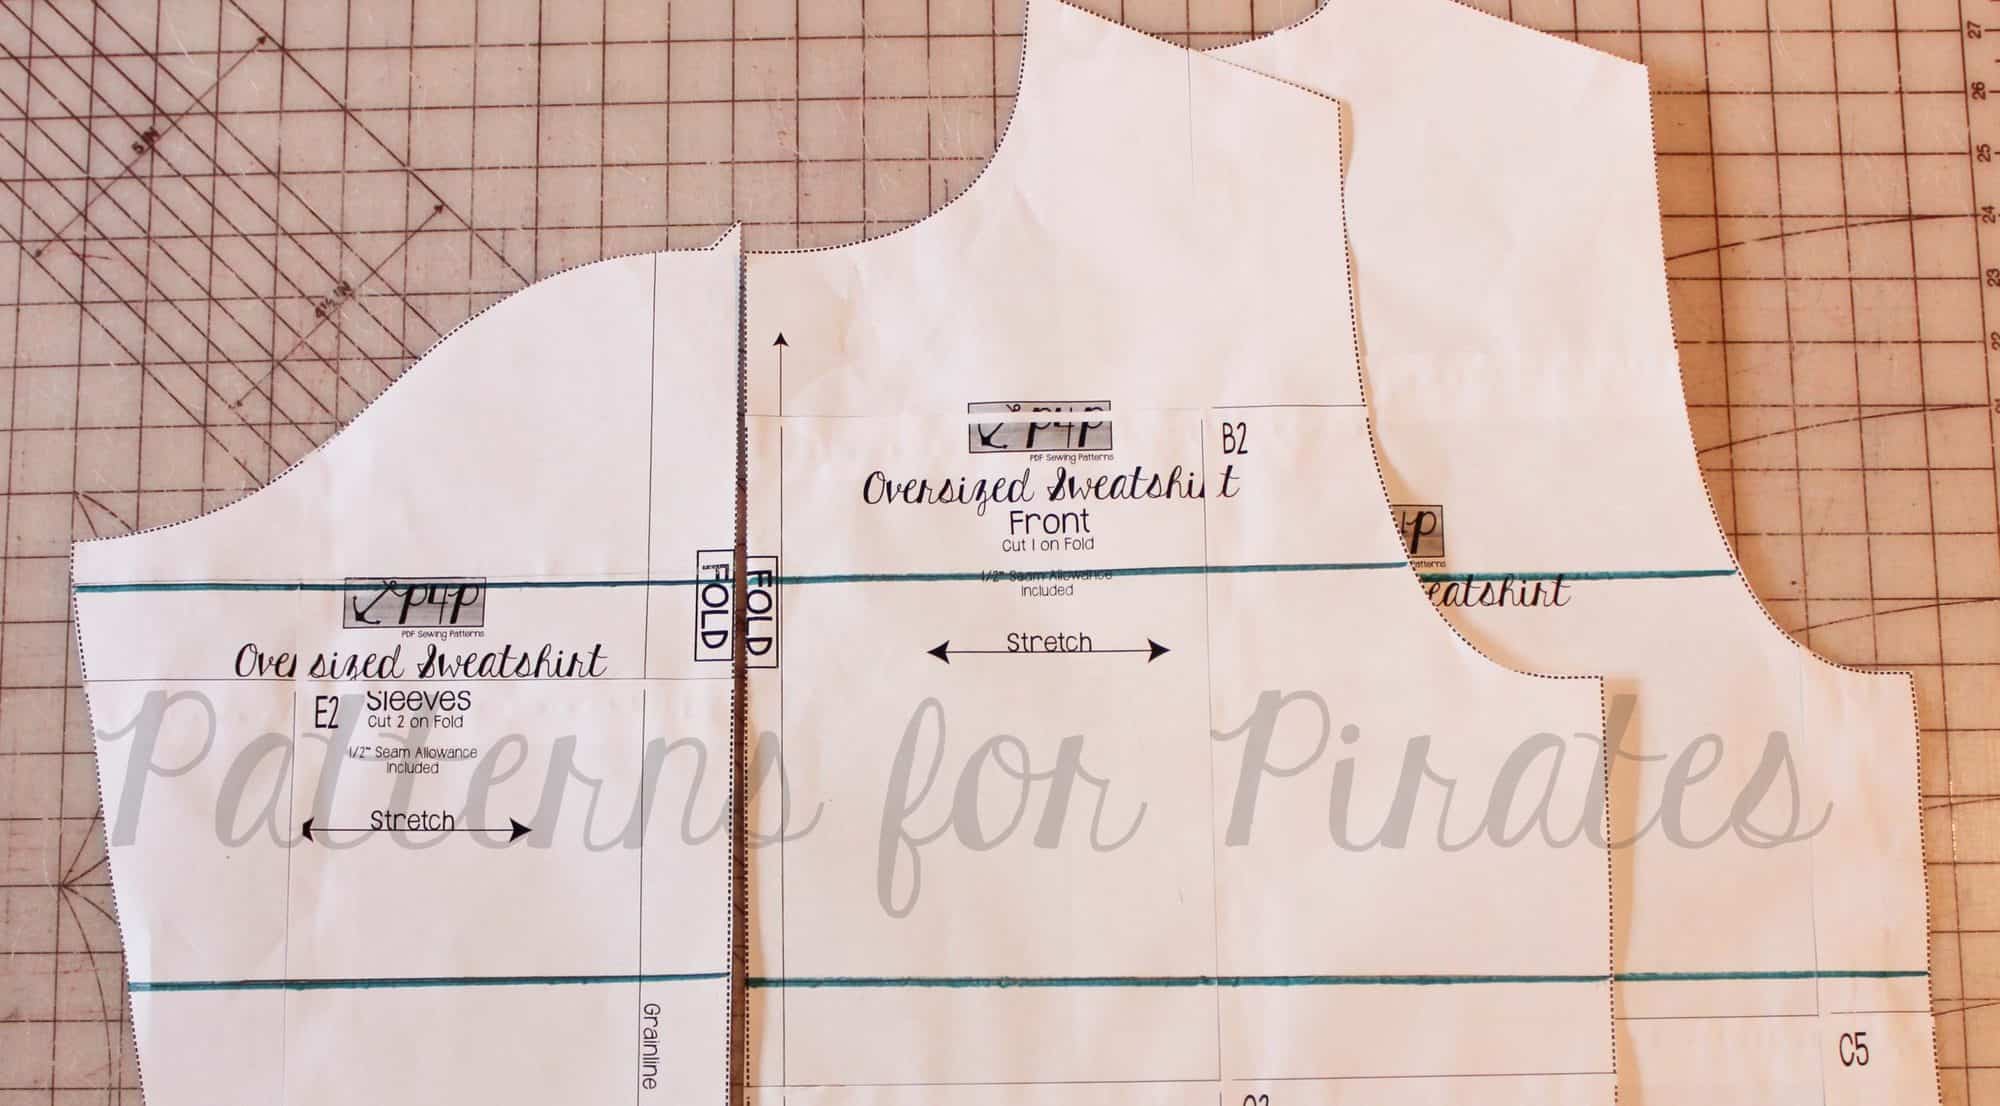
Once the lines are drawn, you will then need to cut your pieces on these lines (you can also fold your pattern on each of these lines if you’d rather not cut your original). To cut the fabric, you will need to add an additional 1/2″ to each line you drew, both to the top and bottom colorblocked sections of this line, to account for the seam allowance.
Now that you’ve cut out your pieces (phew, wasn’t that fun?! haha), you will begin to reassemble the bodices and sleeves. With right sides together, match up each colorblock section and sew using a 1/2″ SA.
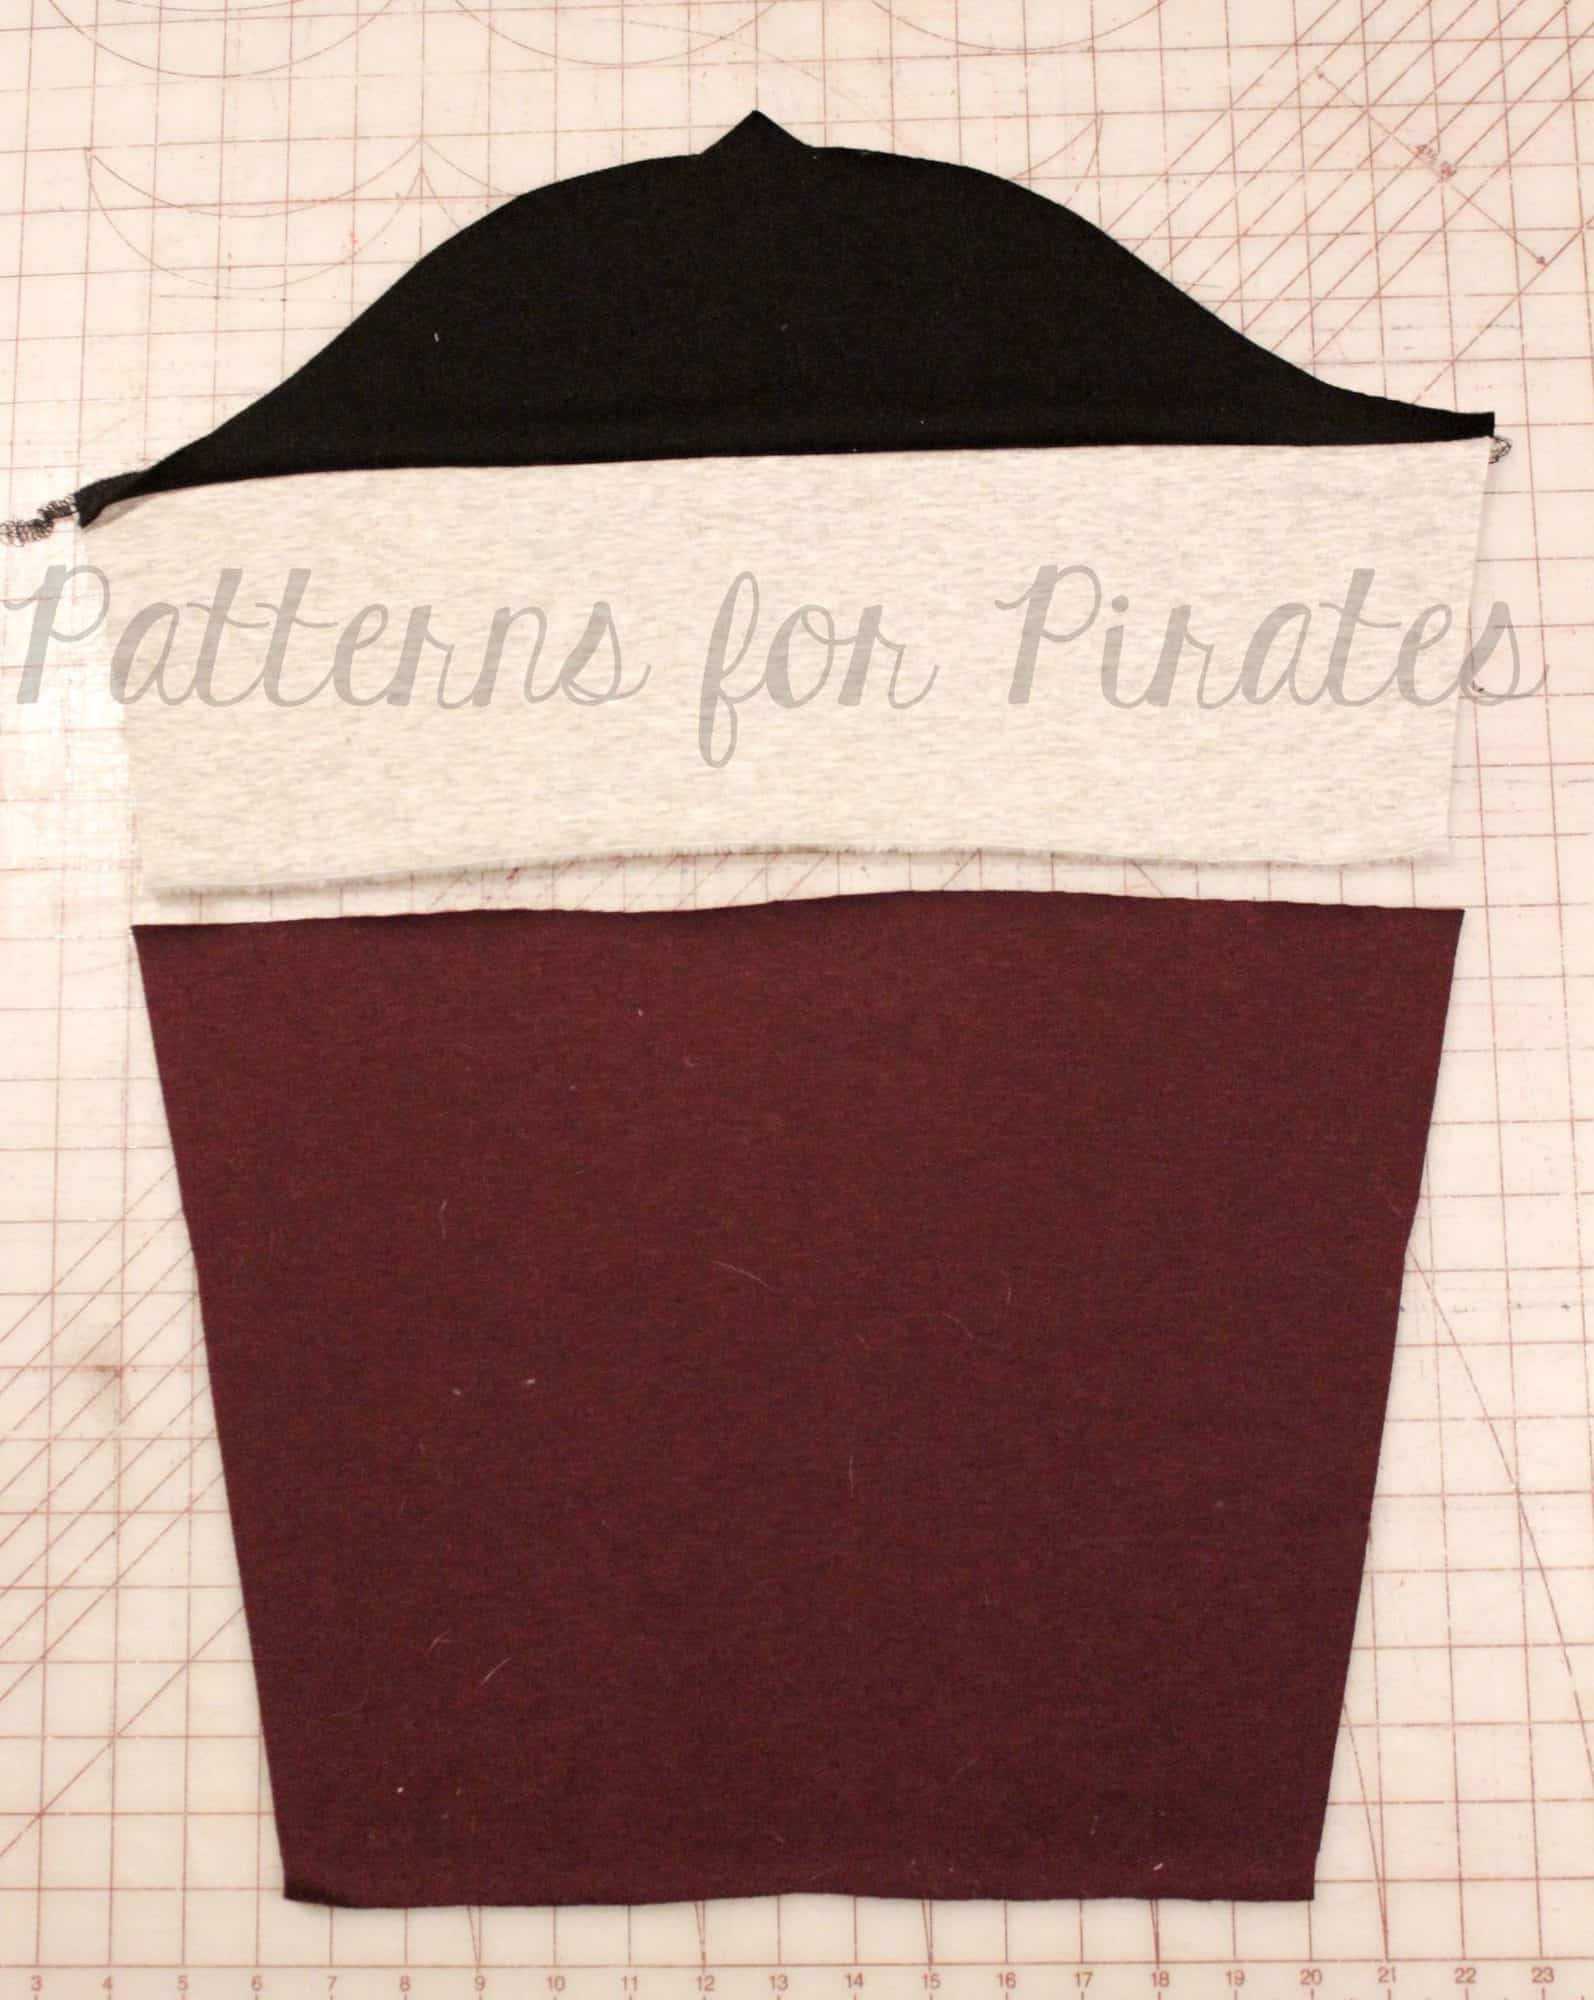
Once your pieces have been sewn together, you will then follow the original tutorial to construct your sweatshirt. And just like that, you’re now ready to show off your favorite colors, prints, or school spirit all in one fun, colorblocked sweater!
…..
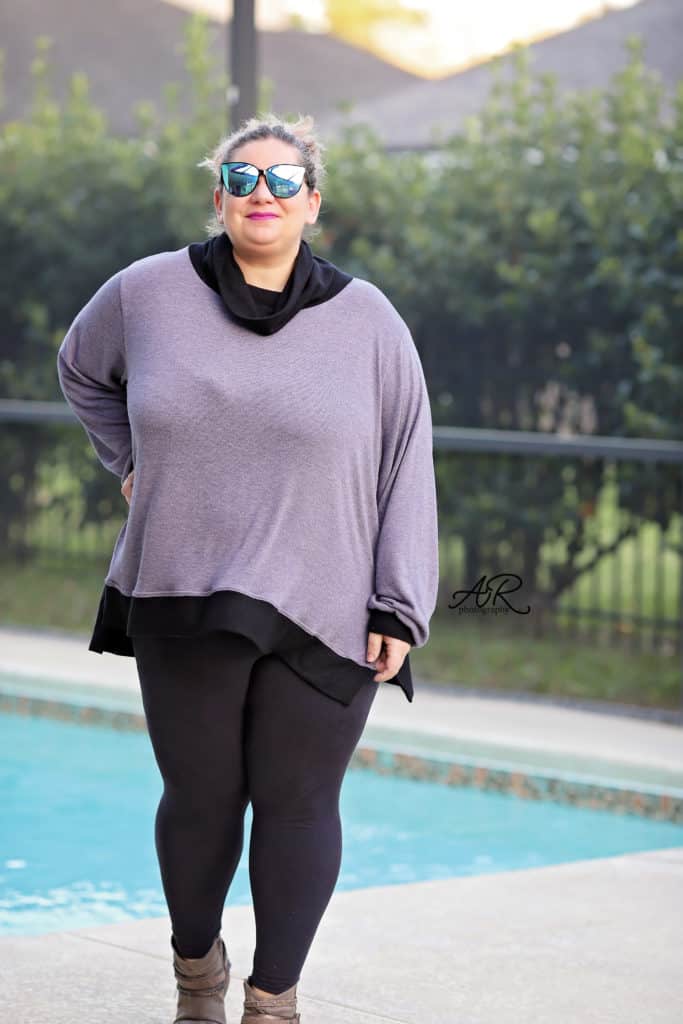
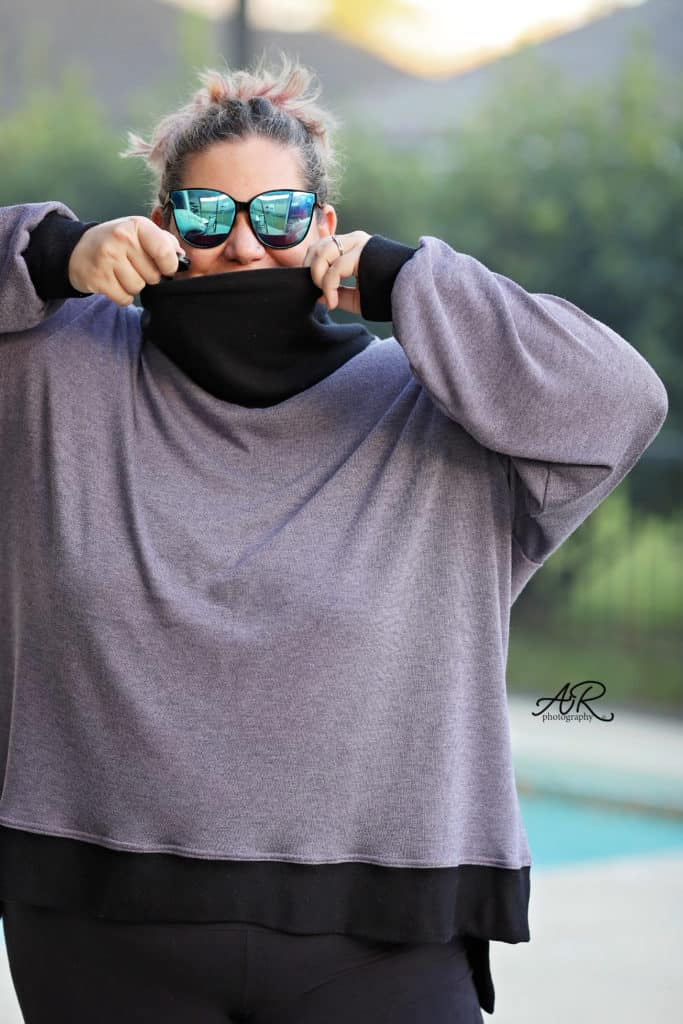
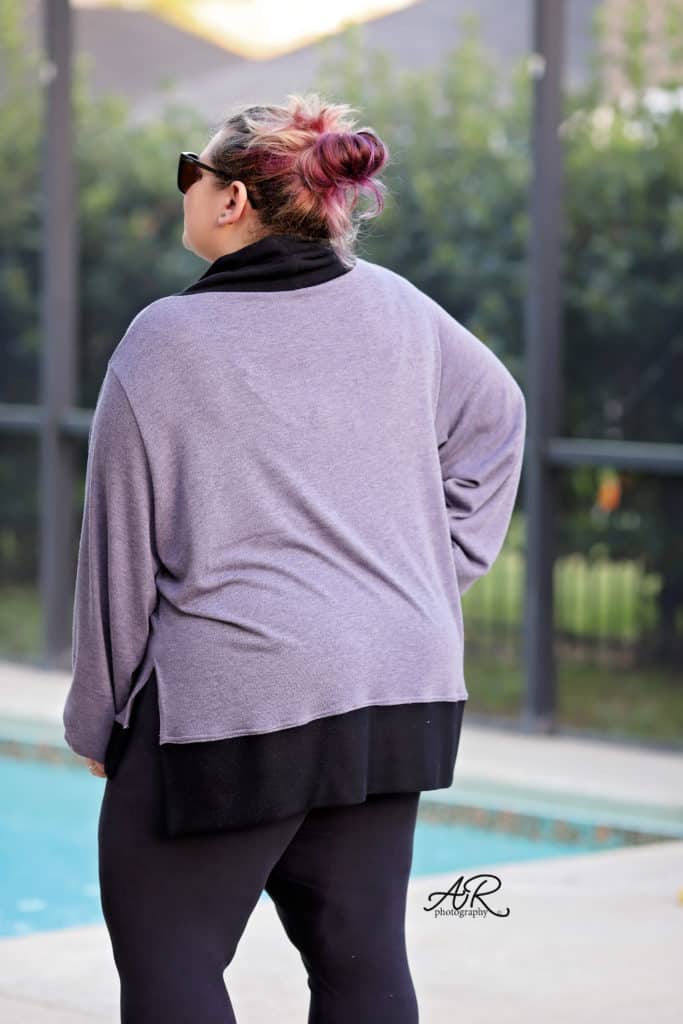
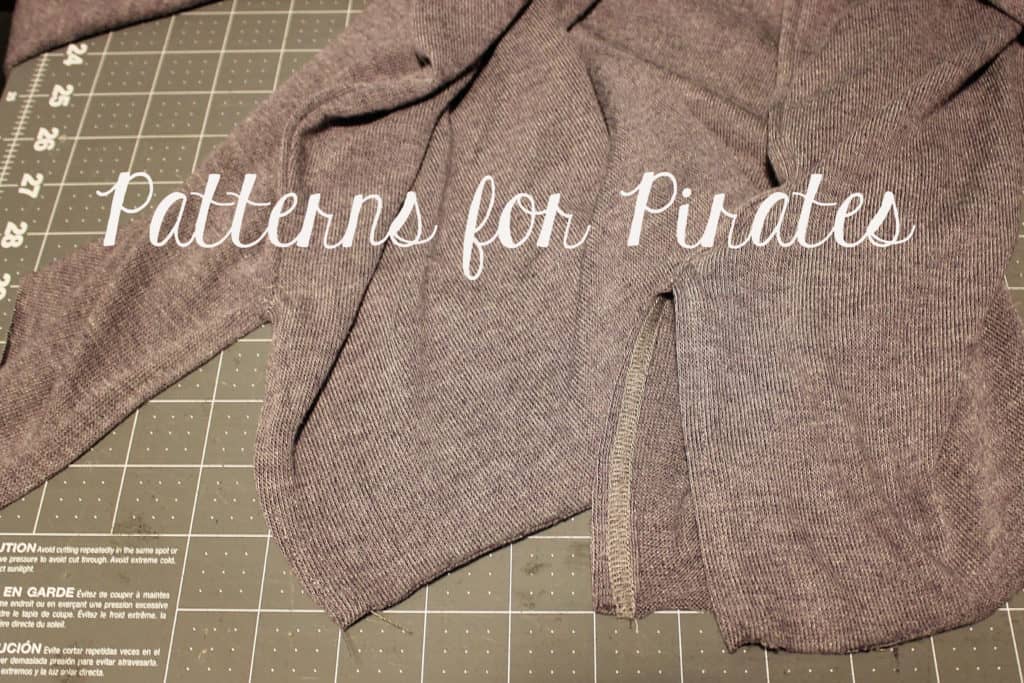
Higher side split
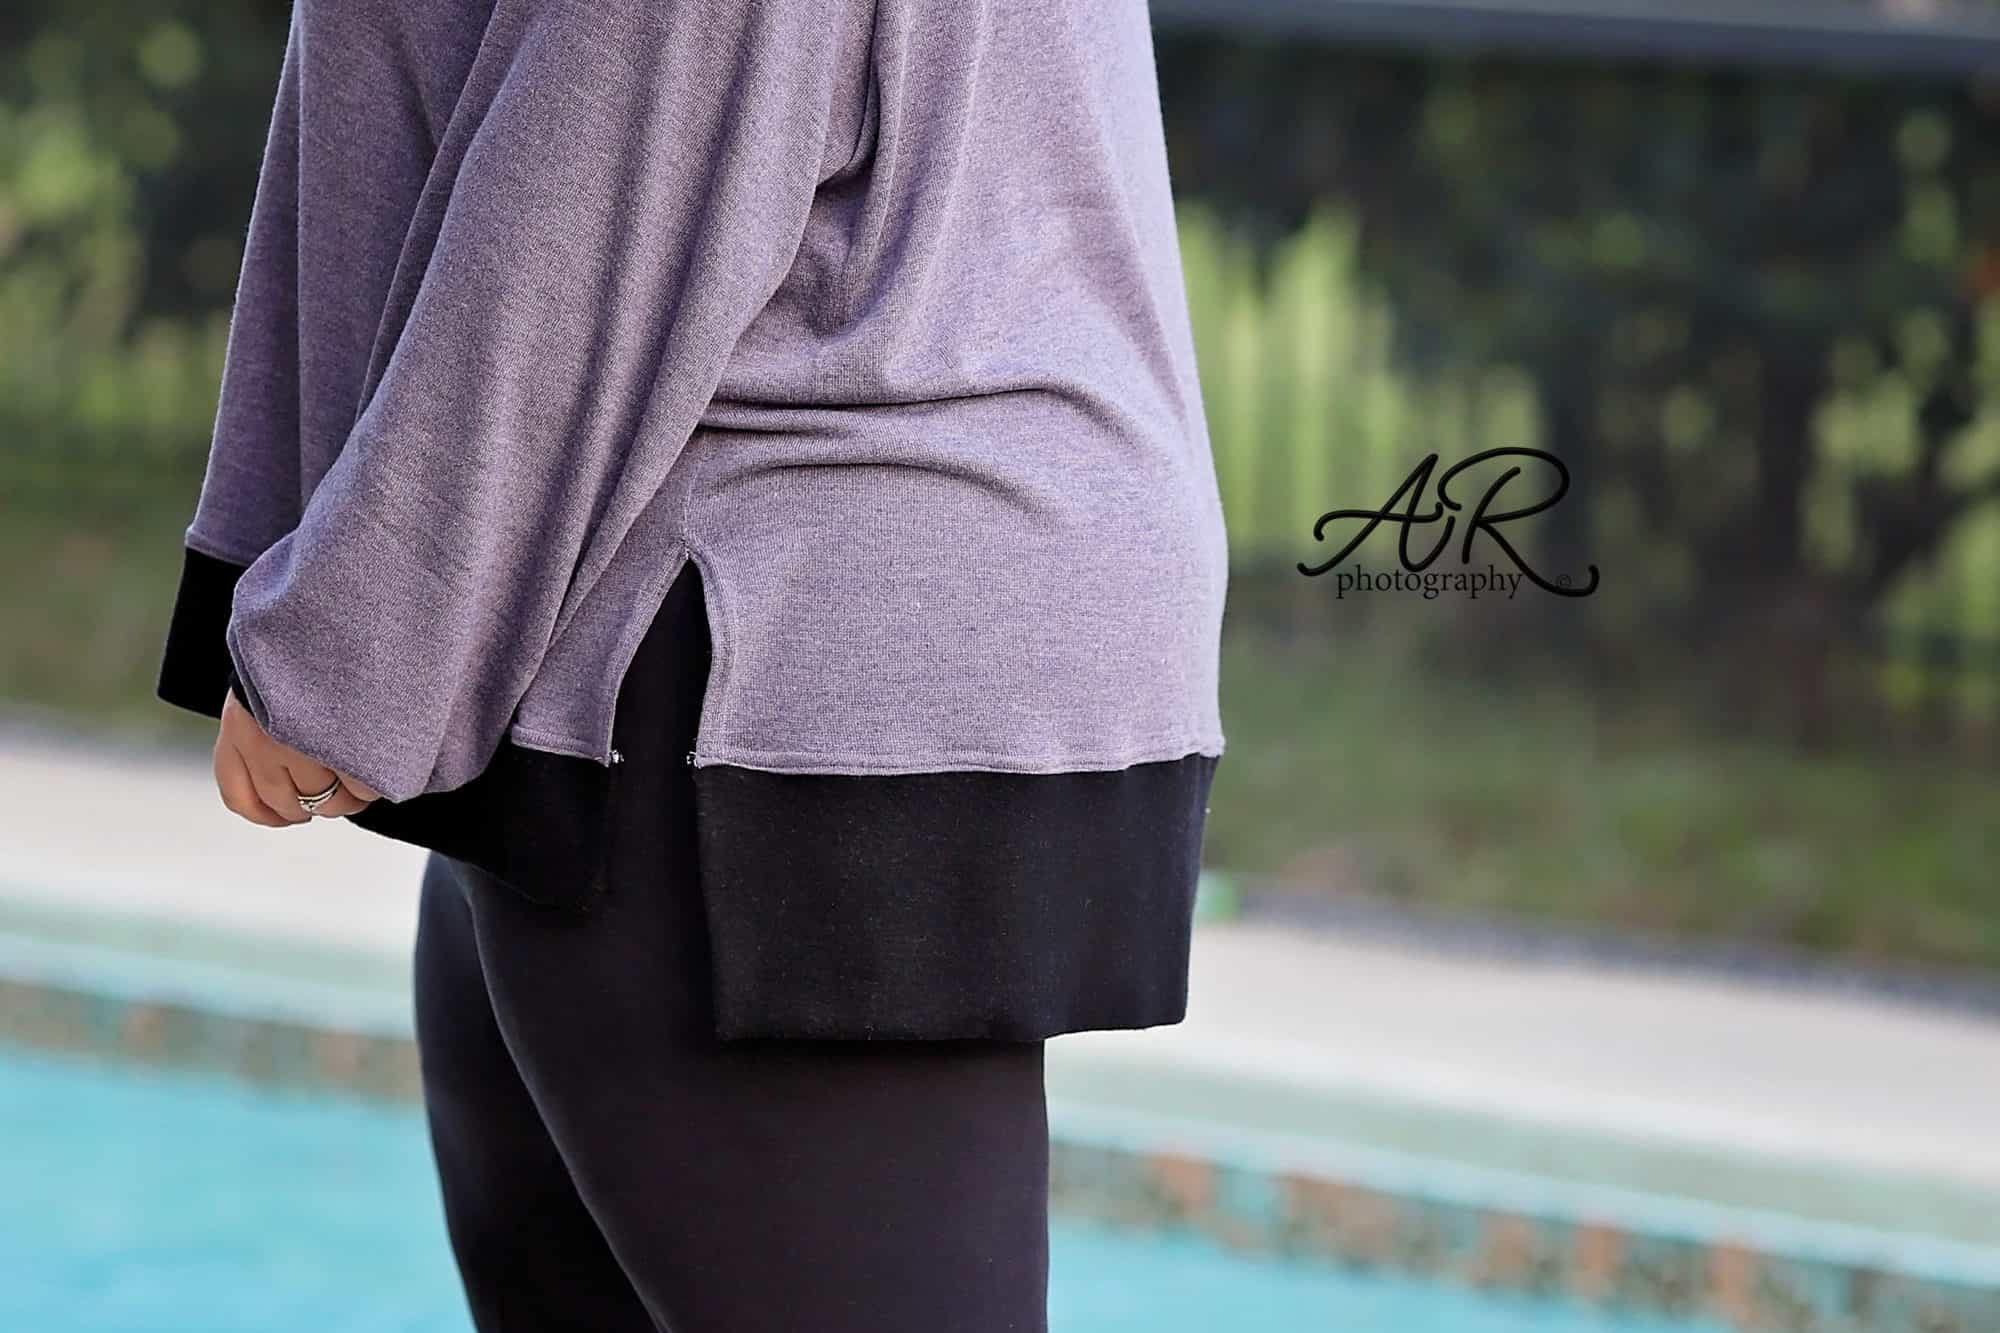
Let’s end this easy hacks series with a Pinterest inspired hack. One of the testers shared a picture of a high side slit oversized sweater and I knew I just have to have one. This is super easy look to achieve!
I chose to make the slit 5″ but that is just a mild suggestion. You can certainly make it bigger (or smaller) if you’d like. Mark 5″ up from the bottom raw edge on all 4 side seams. You can use pins, clips or a tailor chalk.
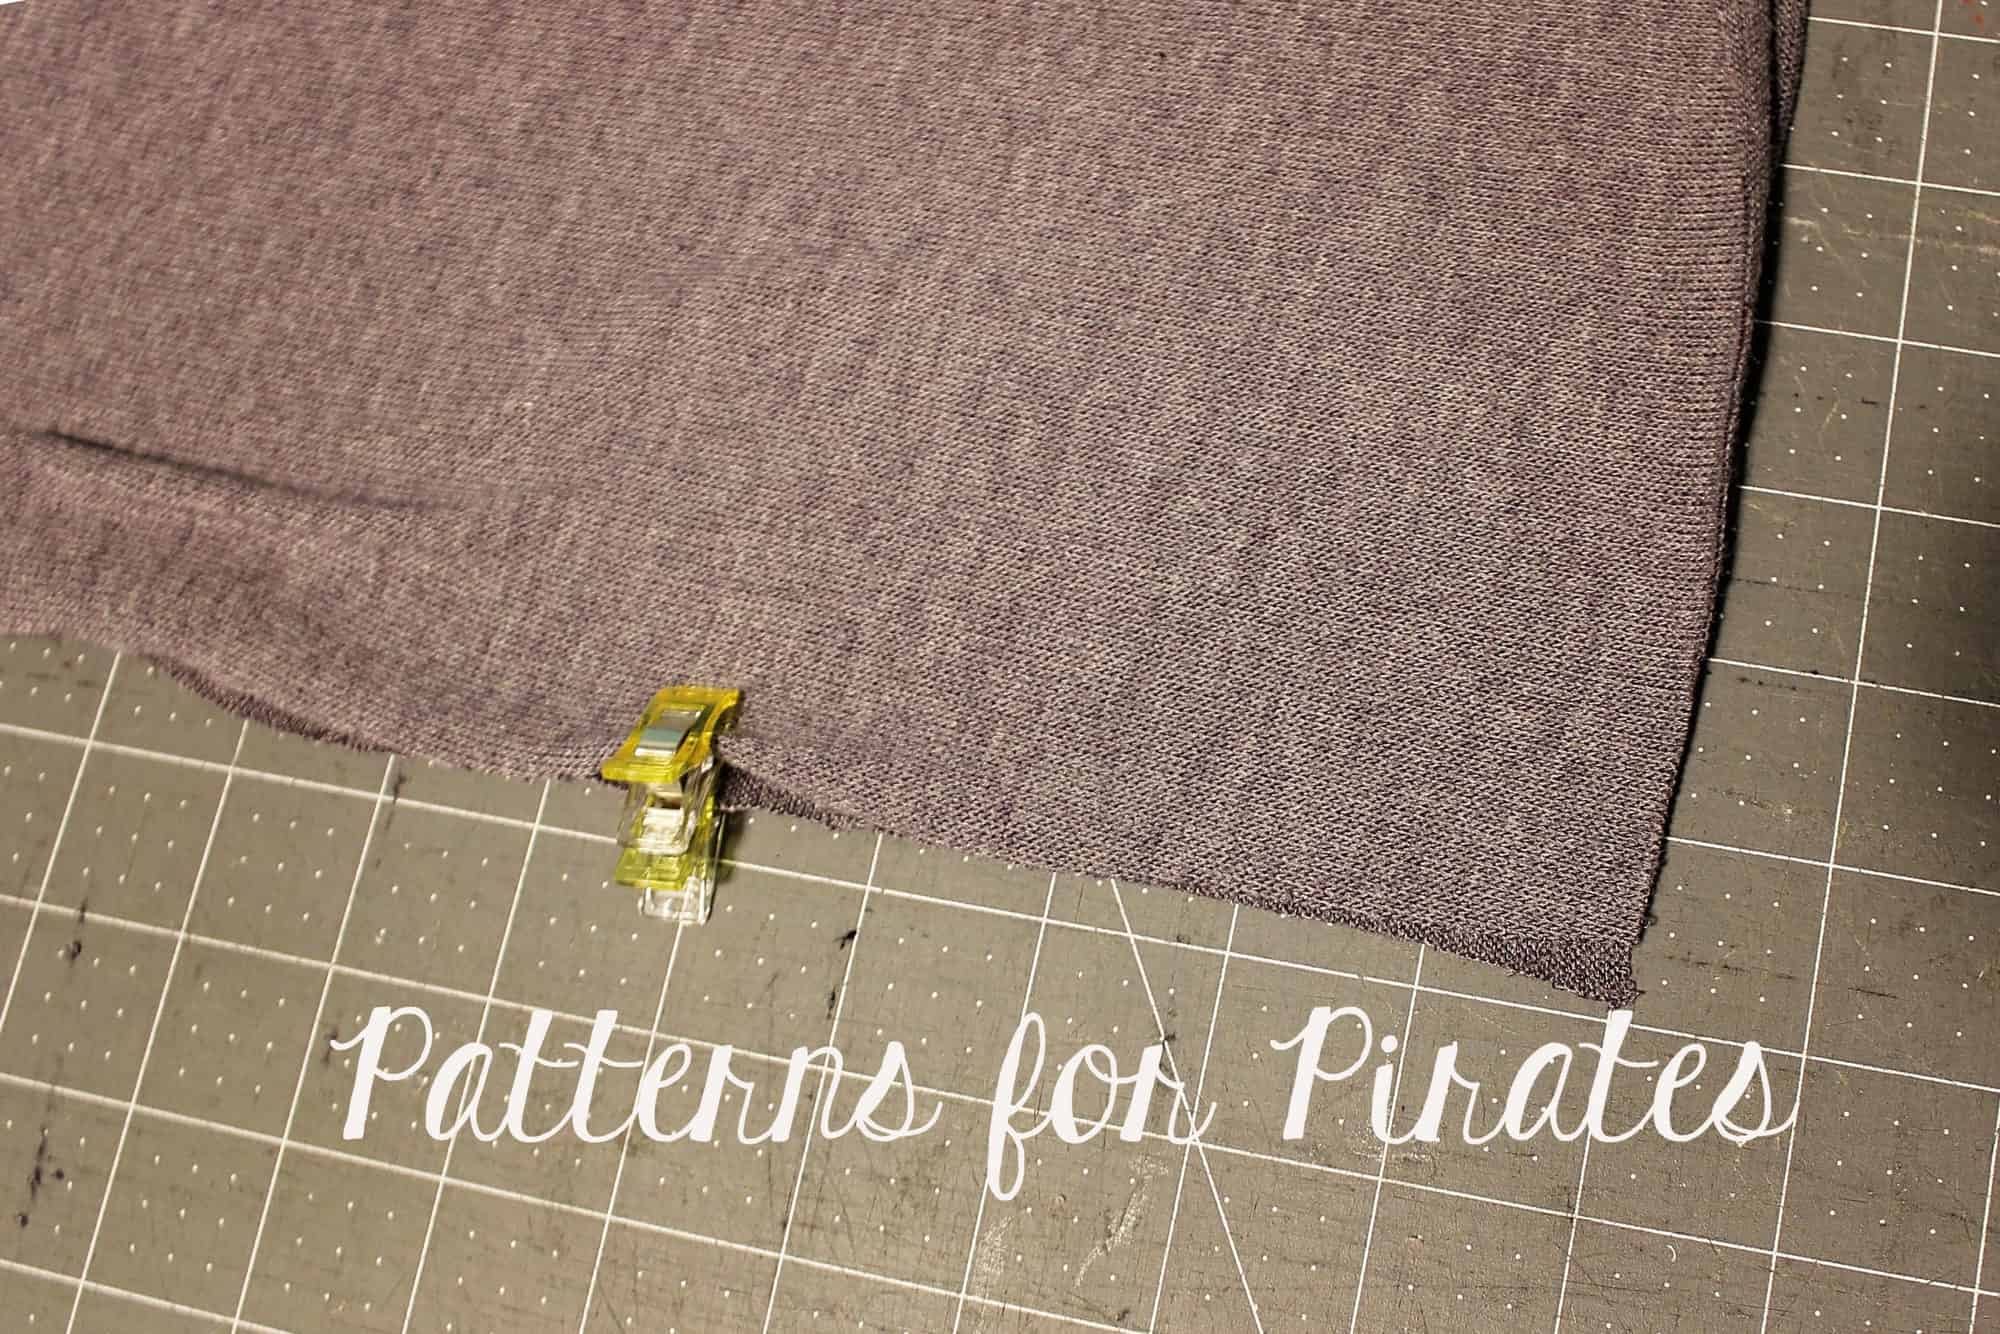
Sew the pattern as instructed in the tutorial but stop the at the 5″ mark. You may find this step easier to be done if you sew (at least the last few inches) with a sewing machine. Repeat the steps on the other side.
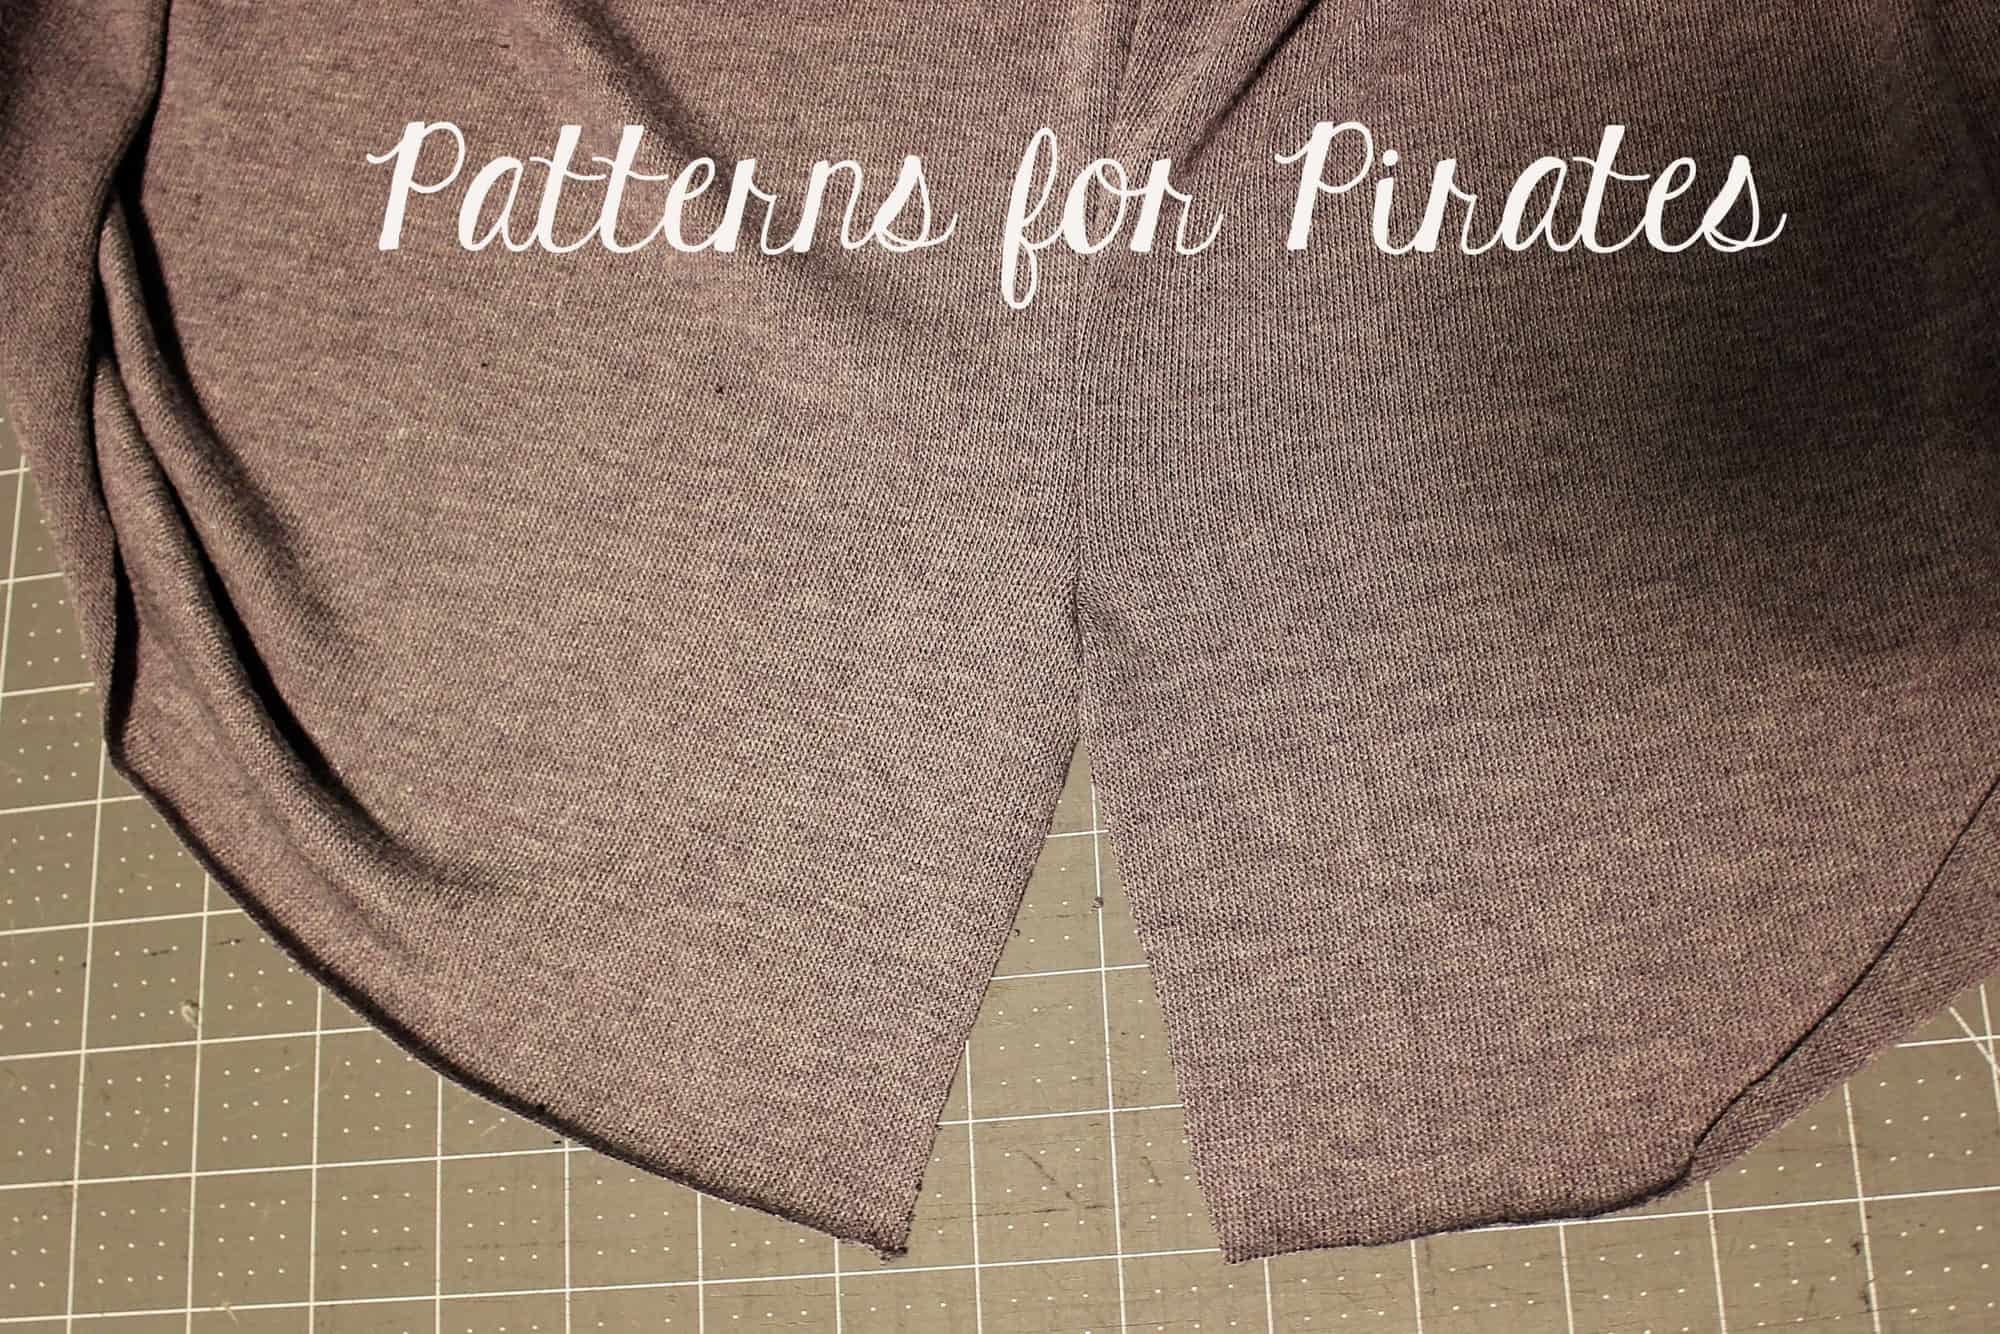
Press a 1/2″ hem on both sides of the side seam. Stitch the hem down with a zig zag stitch, twin needles or a coverstitch.
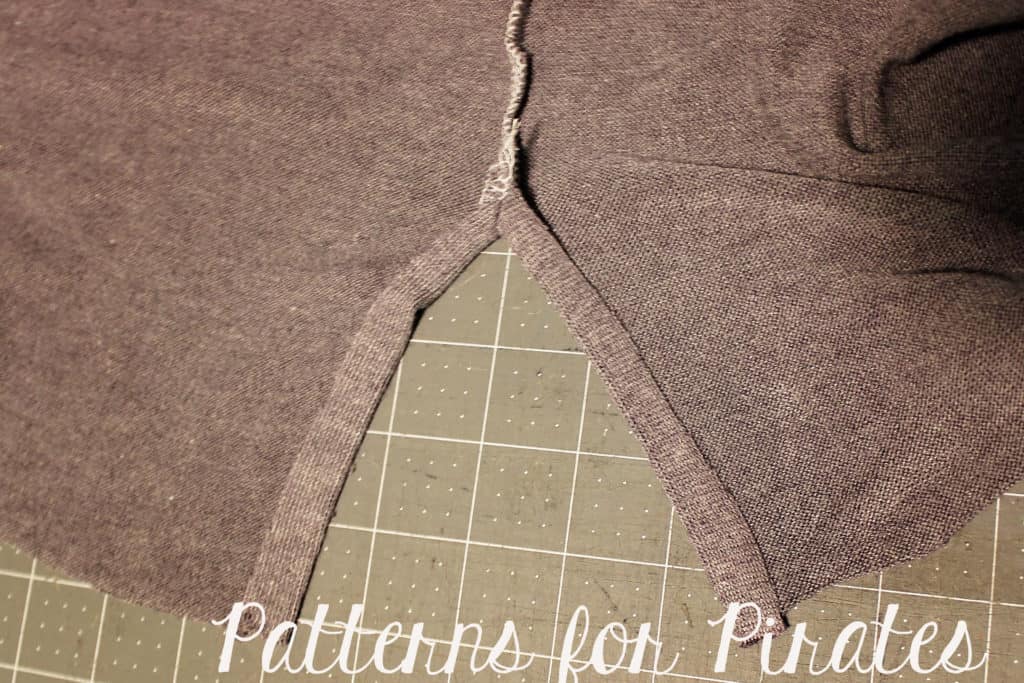
Continue adding the front and back bands ad in the tutorial. See that was super easy!
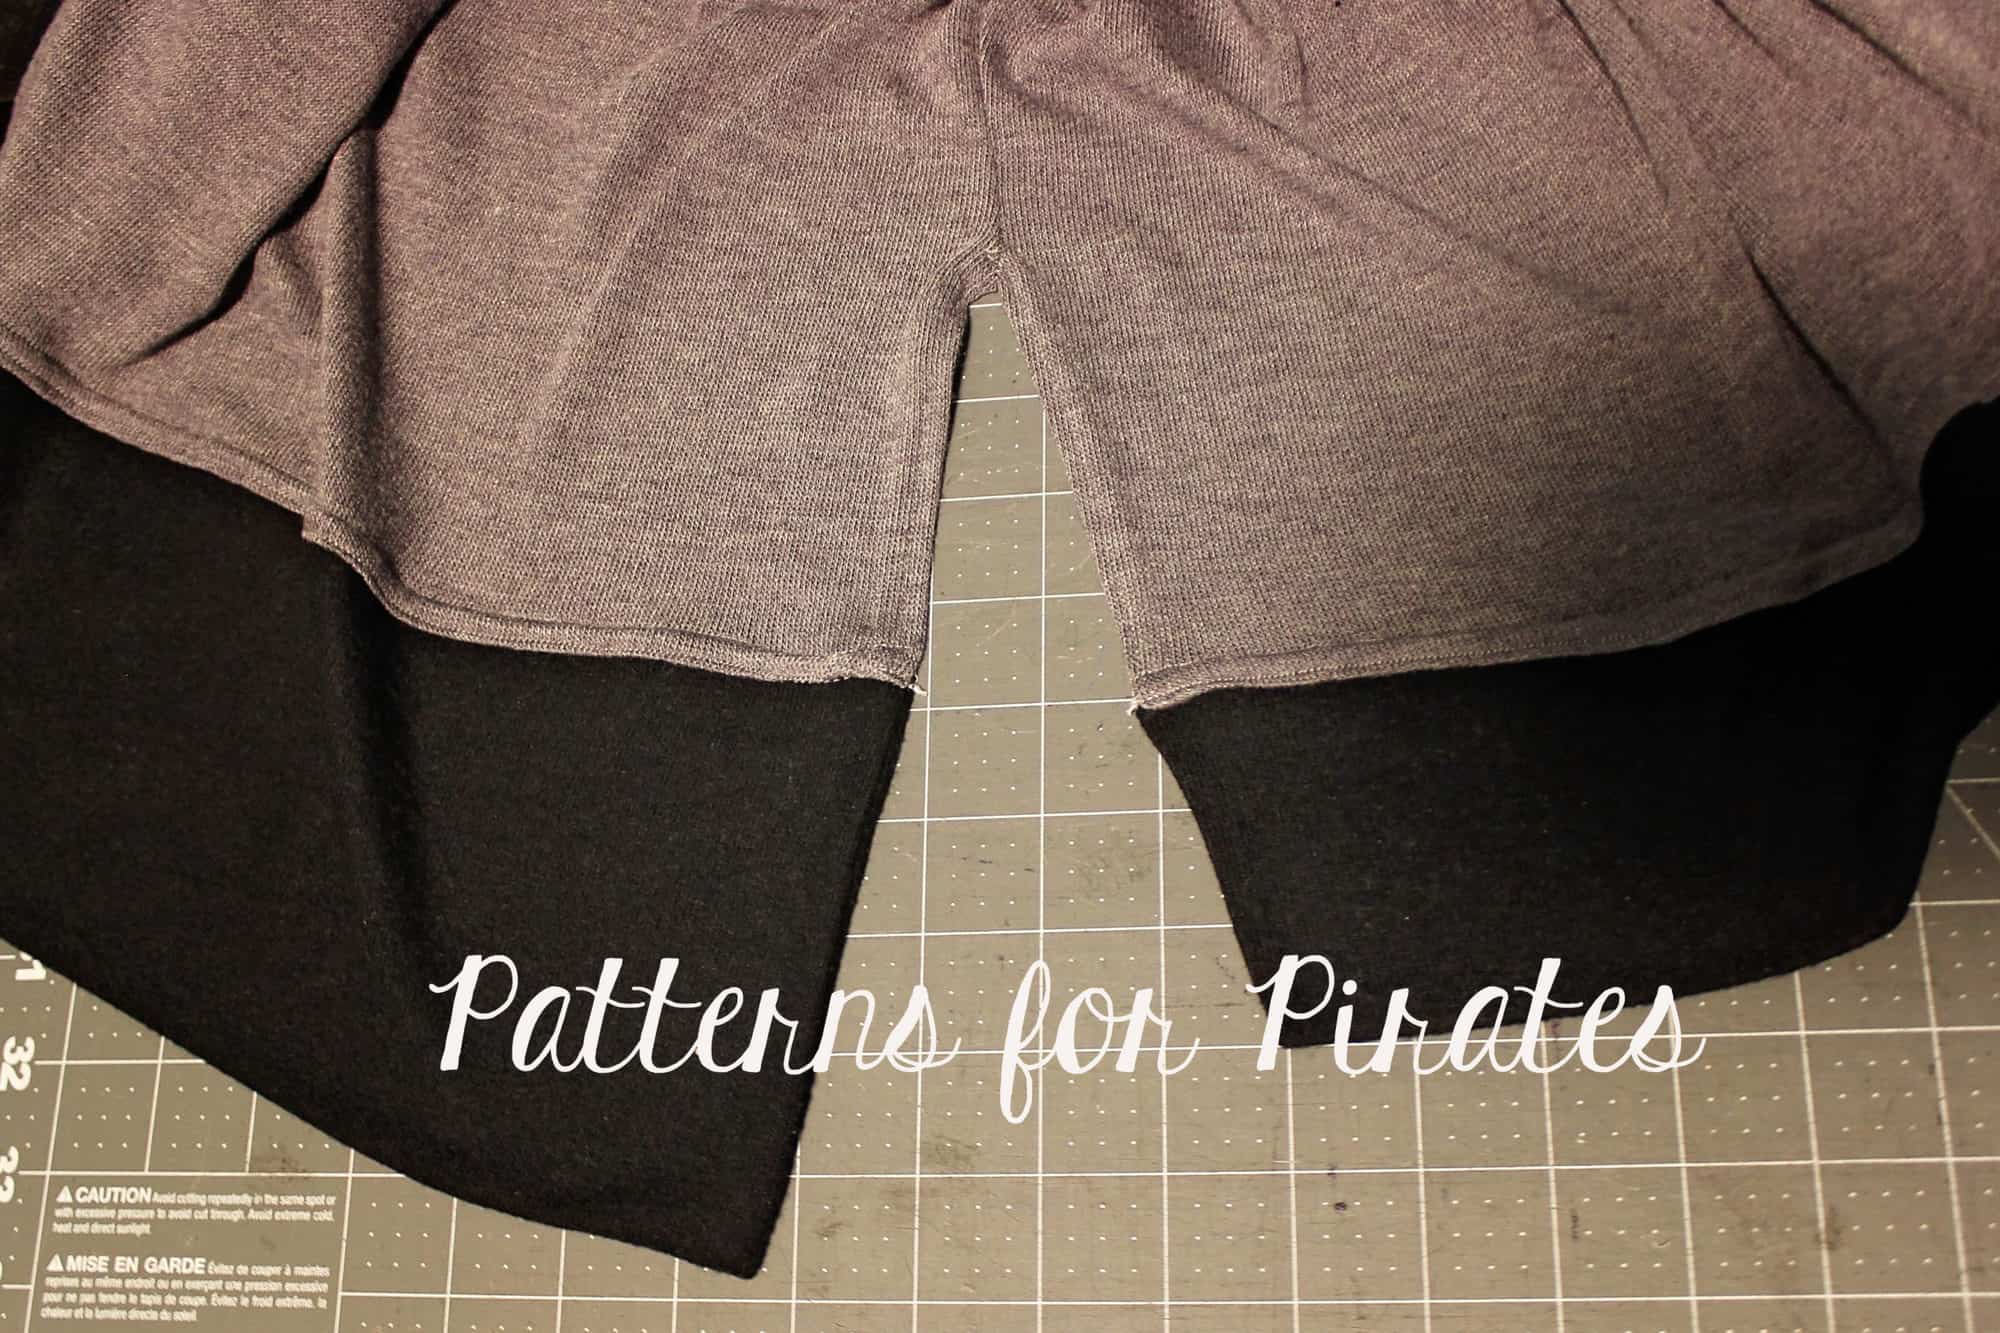
I did the hack on my turtleneck version but it would be super cute on all neckline.
Tip: If you would like to make the high side seam on the curved hem option you would have to sew the side seams the same way you do the high low option.