Patterns for Pirates

P4P stylish, modern, wearable patterns

  • Home
  • Blog
    • Frequently Asked Questions
    • Pattern Releases
      • Free Patterns
    • P4P University
      • Fitting
      • Sewing with Stretch, Knit Fabrics
      • Sewing with Woven Fabrics
      • Sewing Machines
    • Sew-A-Longs
    • Fabric for Pirates
    • Pattern Hacks
    • Announcement
      • Blog Tours
      • Contest/Giveaway
  • Shop
  • Bundle Discounts
  • Flash Friday
  • Gift Cards
  • My Account
  • Cart

Trick or Treat Bag :: Free Sewing Tutorial + Pattern!

October 28, 2018

Let’s get to it, my Pirate friends!  This my favorite time of the year: HALLOWEEN!!  It’s full of kitchy decorations, creative costumes, and lots of sewing (at least for me!) and is also the start of the holiday season.

We are all treats and no tricks this year, by giving you a quick and easy Trick or Treat Bag that you can whip up in no time for your littles — or yourself!  It doesn’t take much fabric and is a great way to finally use up all of that fun cotton woven that you keep buying while browsing the fabric store, without any actual plan of what you’re going to make with it.

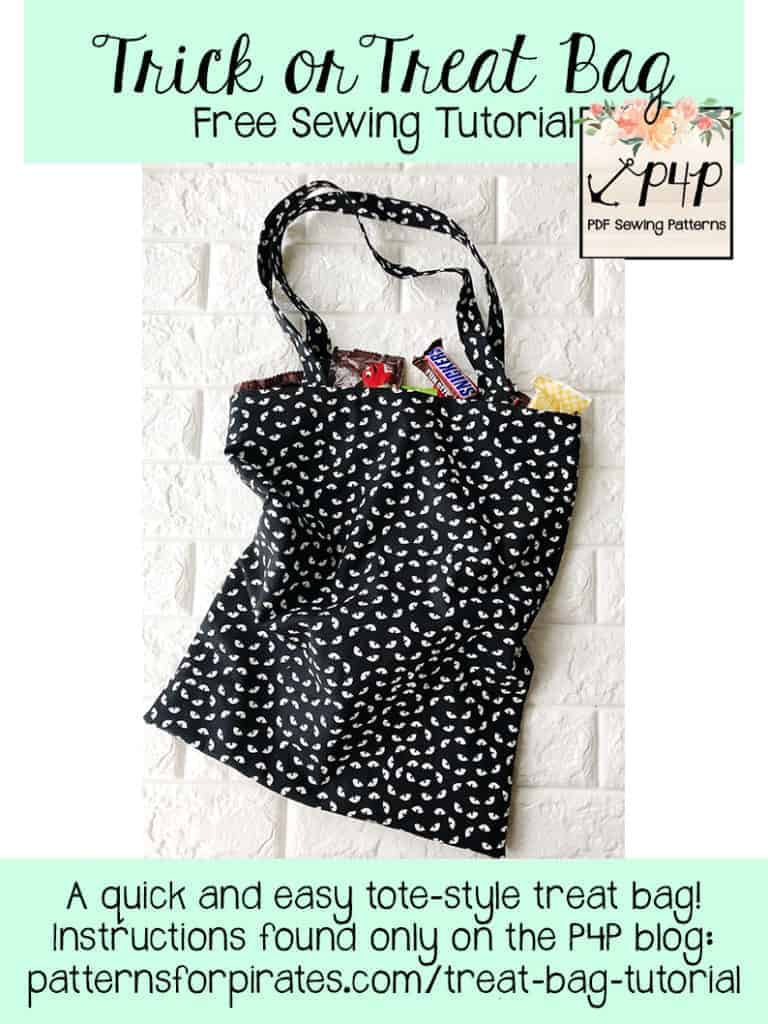
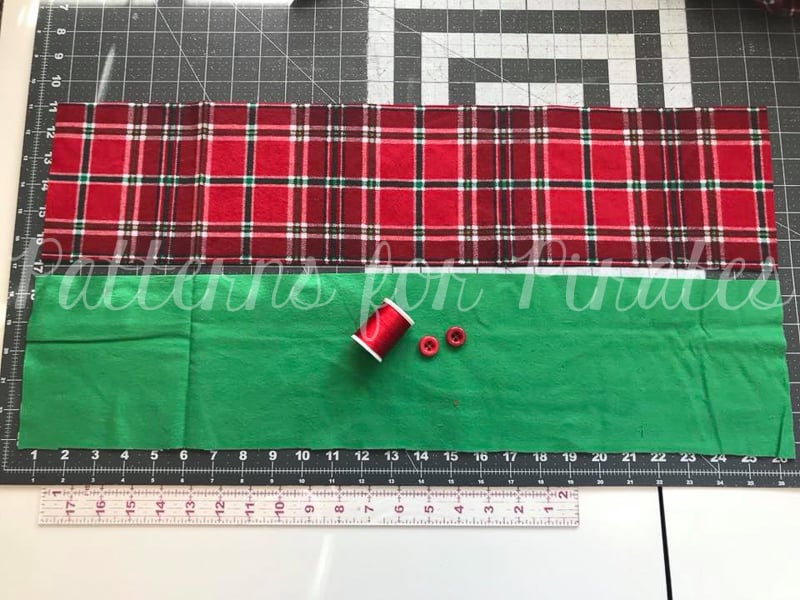
This tote is meant to be made with woven (non-stretch) fabrics.  You will need a little under 3/4 Yard of the main fabric, and 1/2 Yard of the lining fabric.  This bag ends up being reversible — so if you can’t decide between fabrics (which we couldn’t at all….the prints this time of year are SO CUTE!!), you can use it one way, and then turn it inside out and use it again.  It’s like two bags in one!

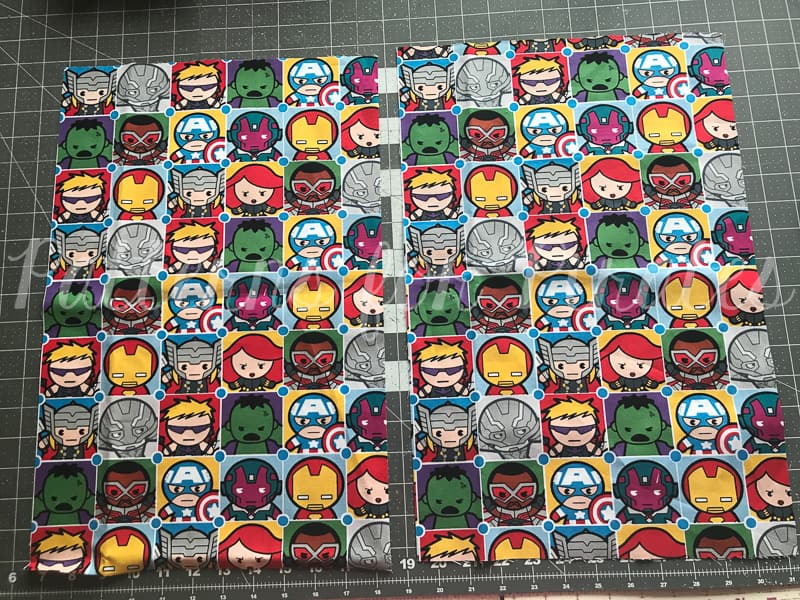
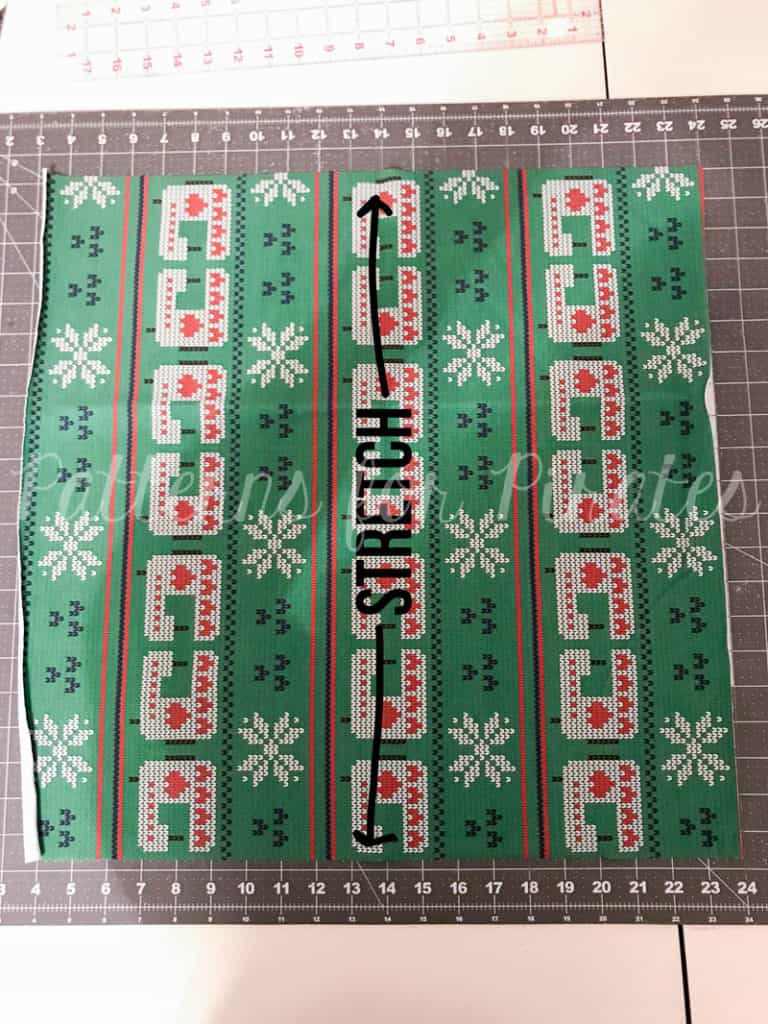
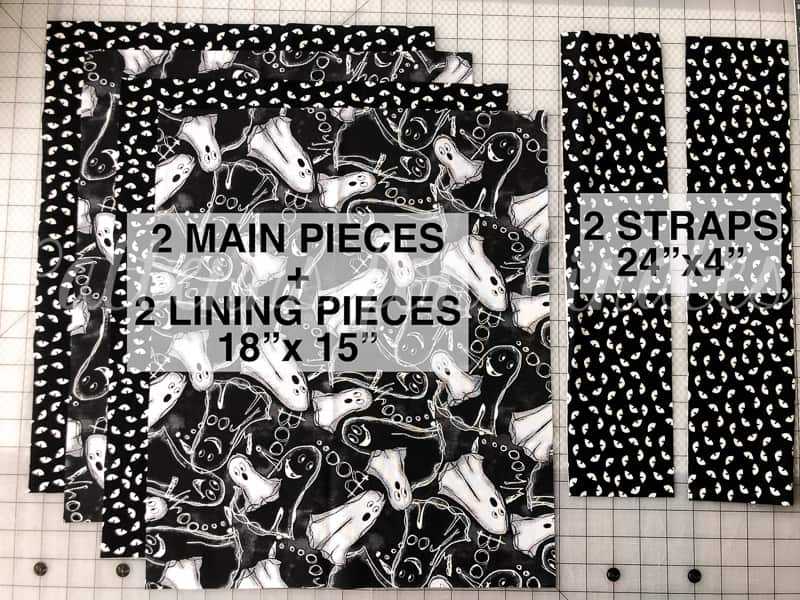
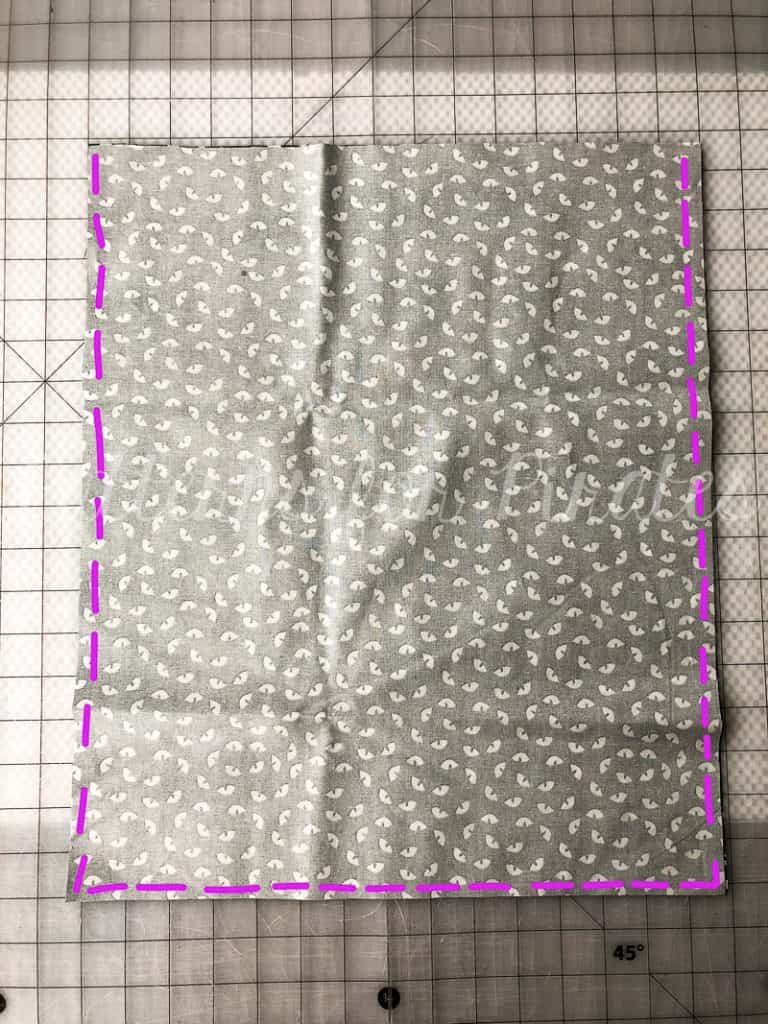
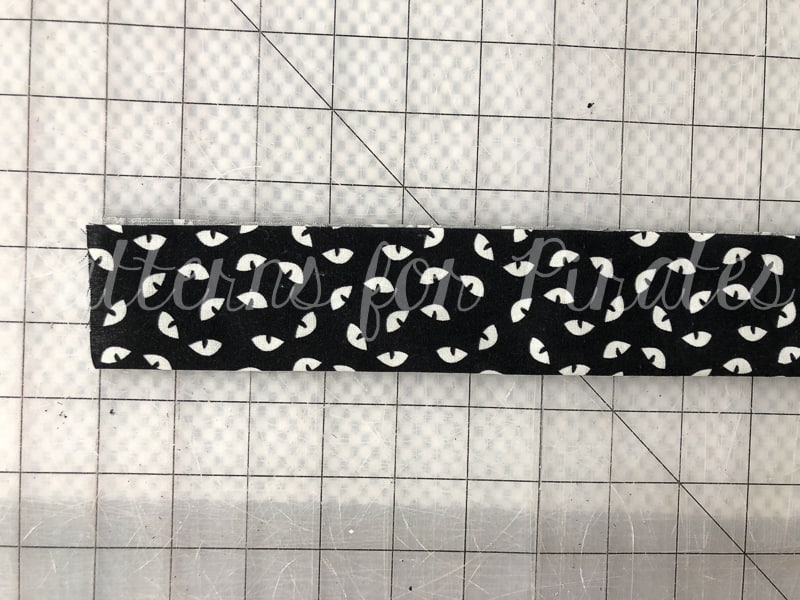
Step 1: Cut 2 Main Fabric pieces and 2 Lining Pieces 18″ long x 15″ wide.  Cut 2 Straps 24″ long x 4″ wide.

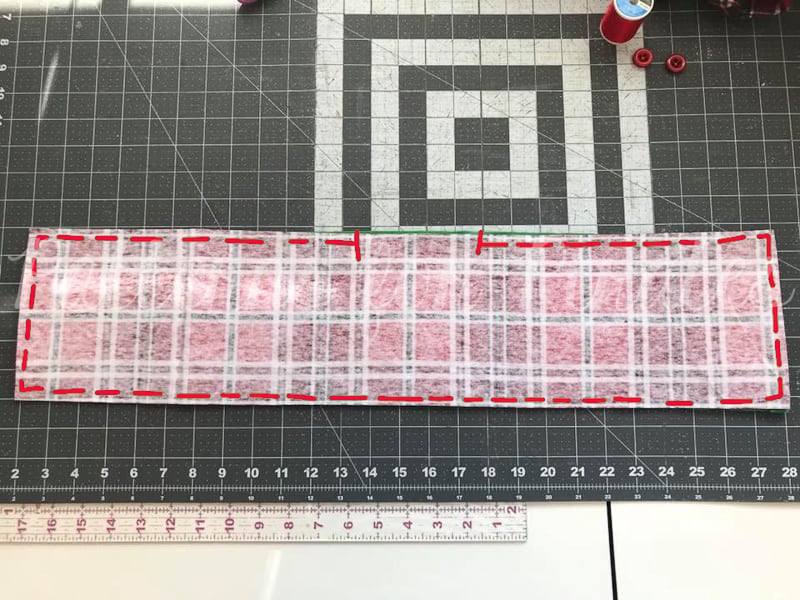
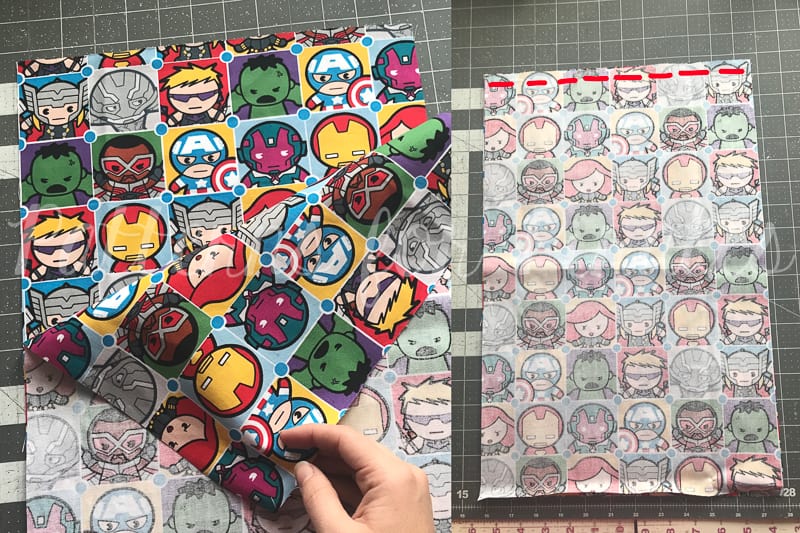
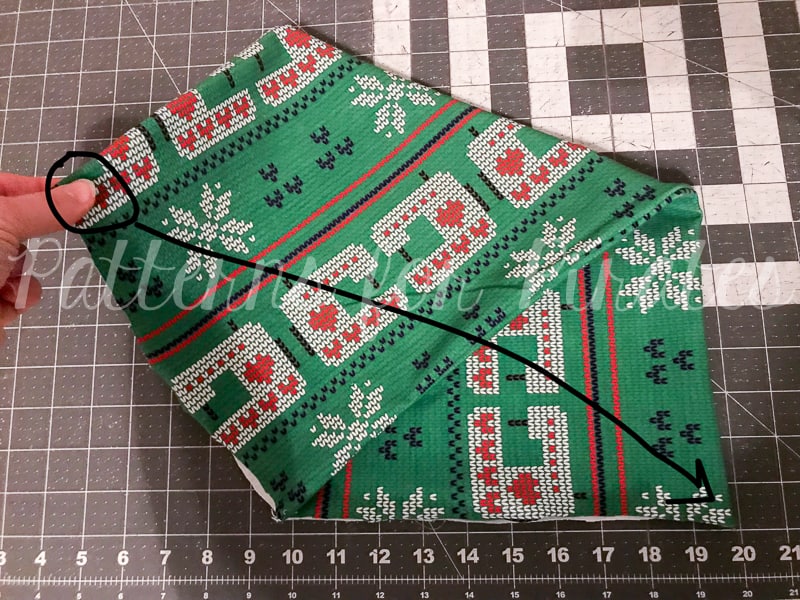
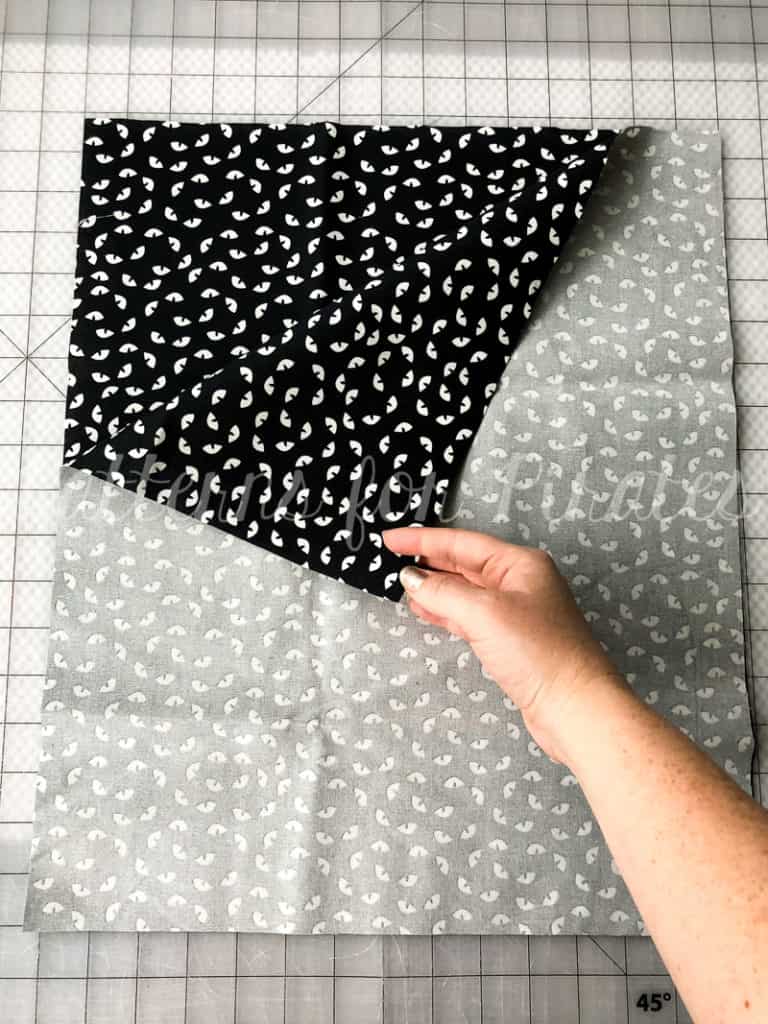
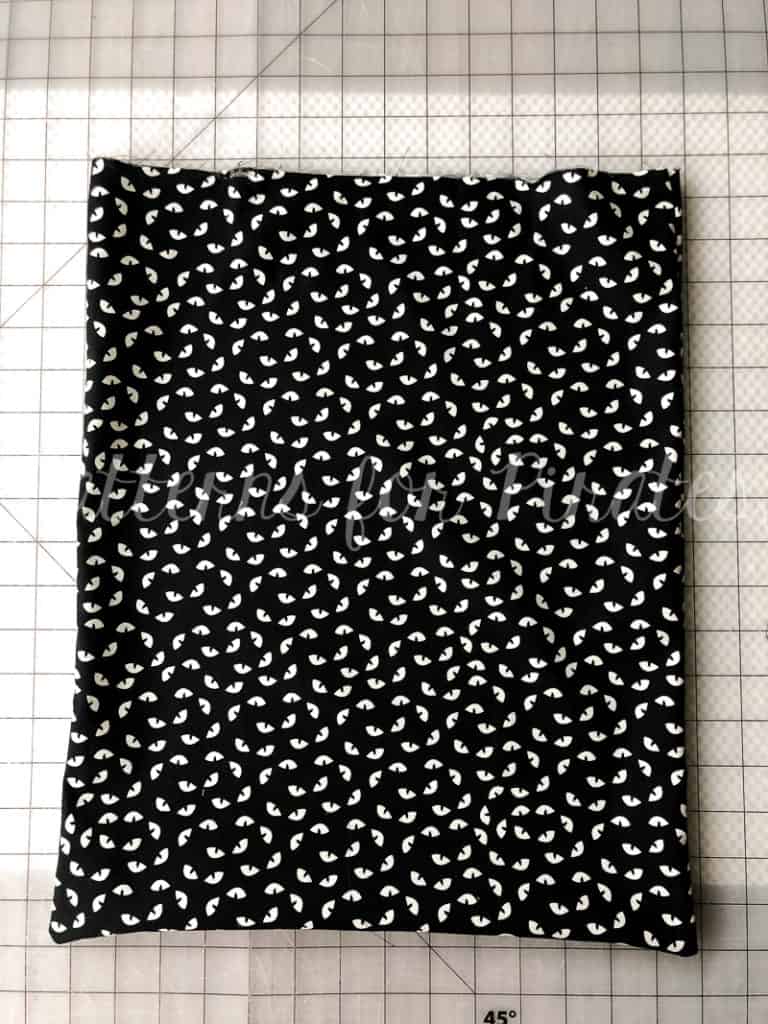
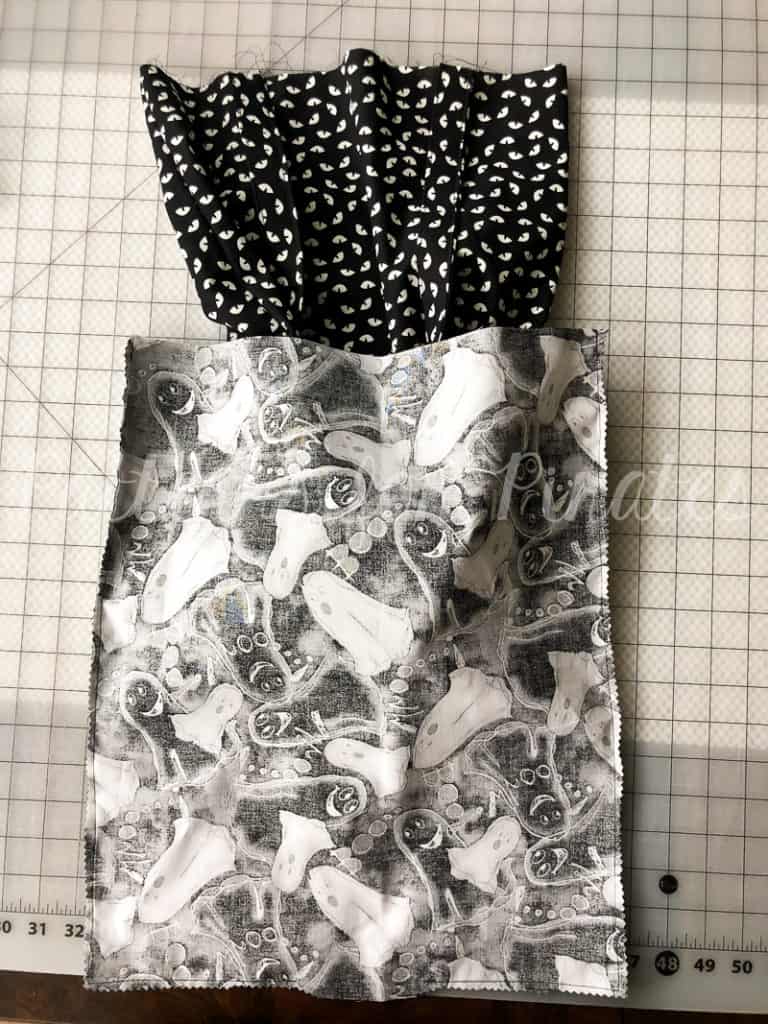
Step 2: Lay main bag pieces, right sides together.

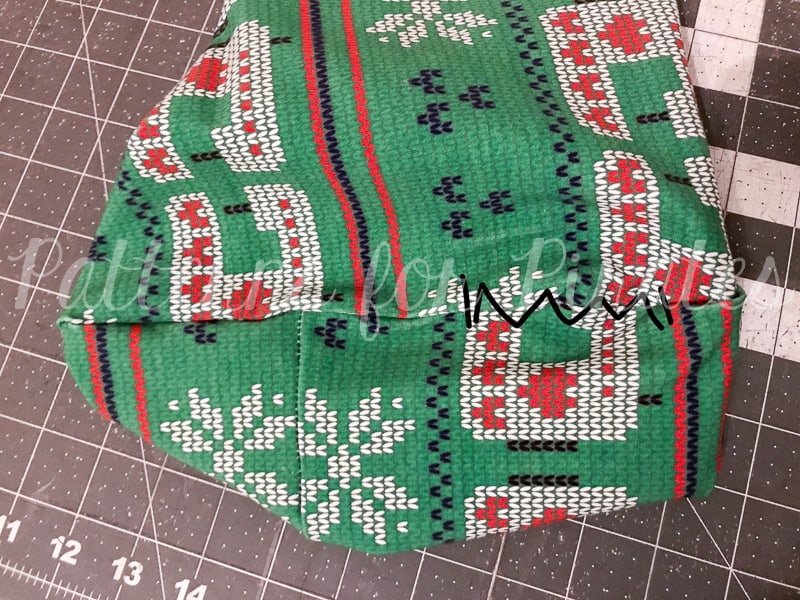
Step 3: Using 1/2″ seam allowance, sew along the side and bottom edges.

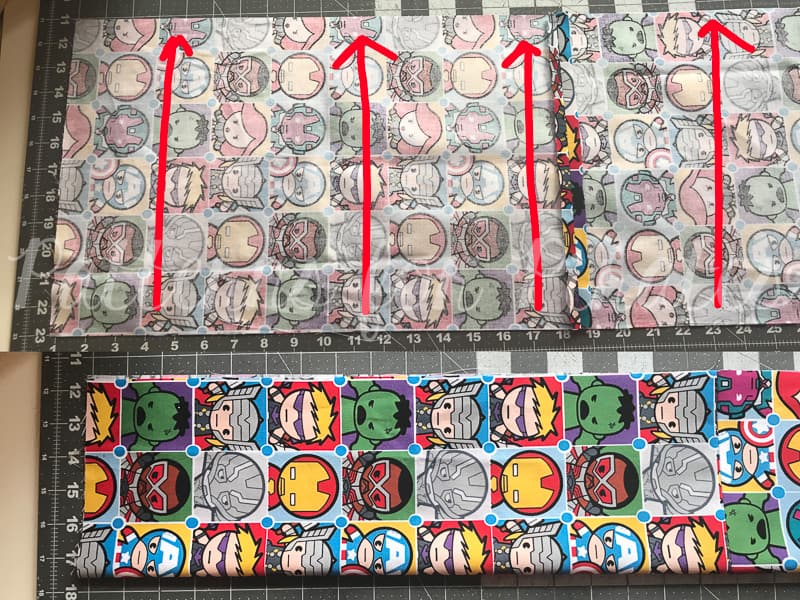
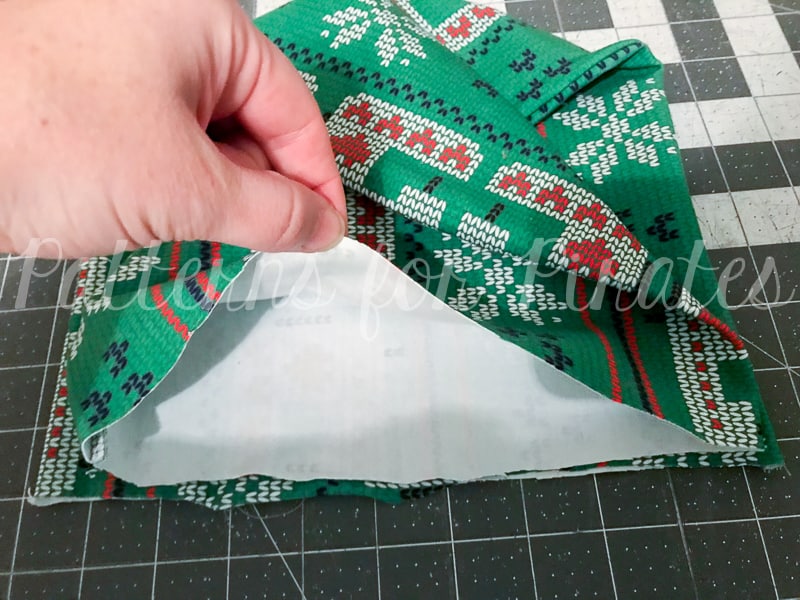
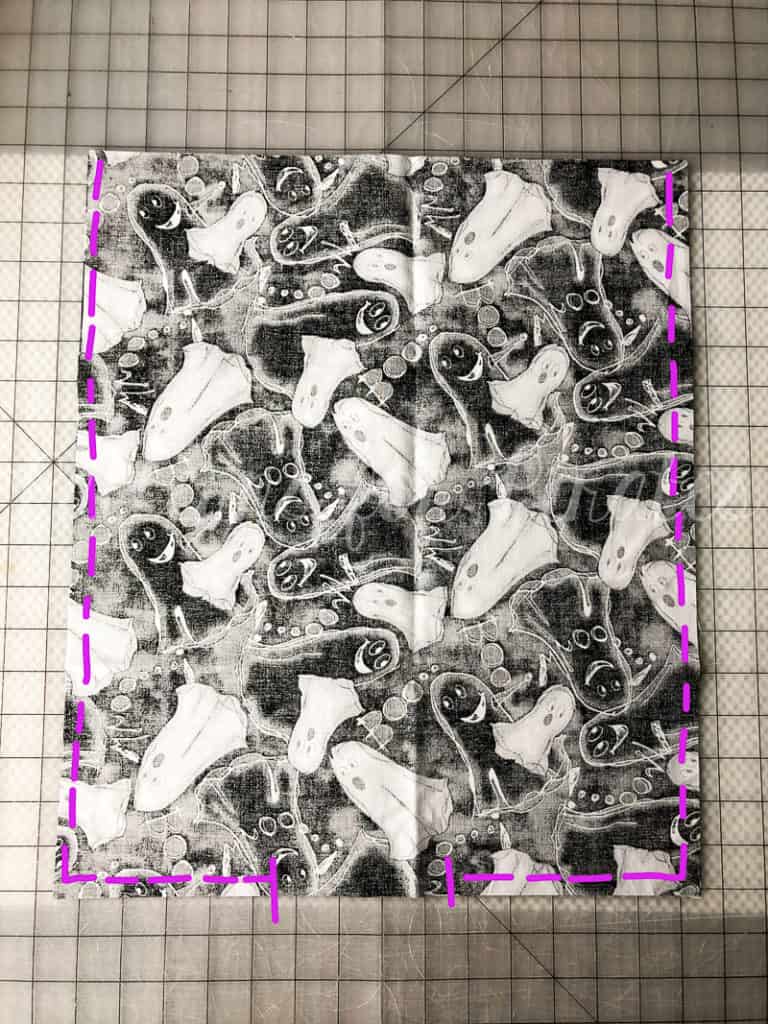
Step 4: Repeat Steps 2 + 3 with lining fabric, only this time leaving a 3-4″ opening in the middle bottom for turning.

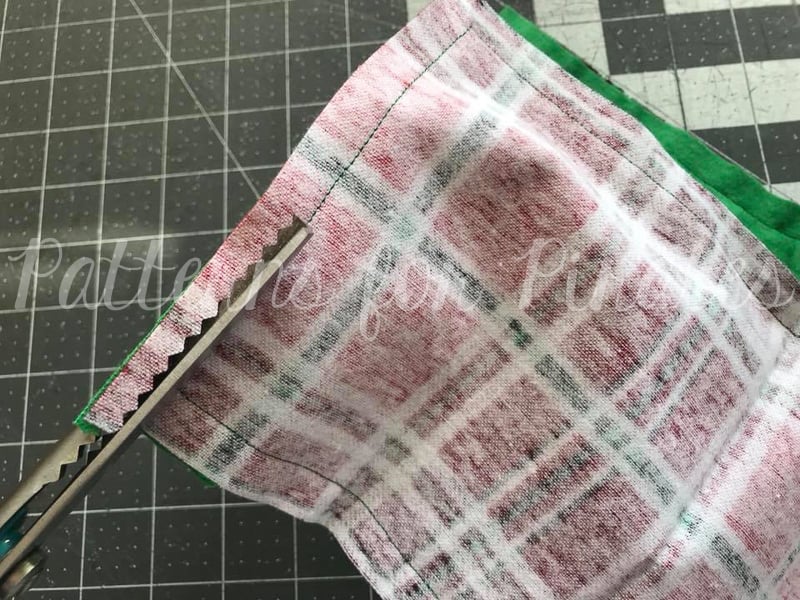
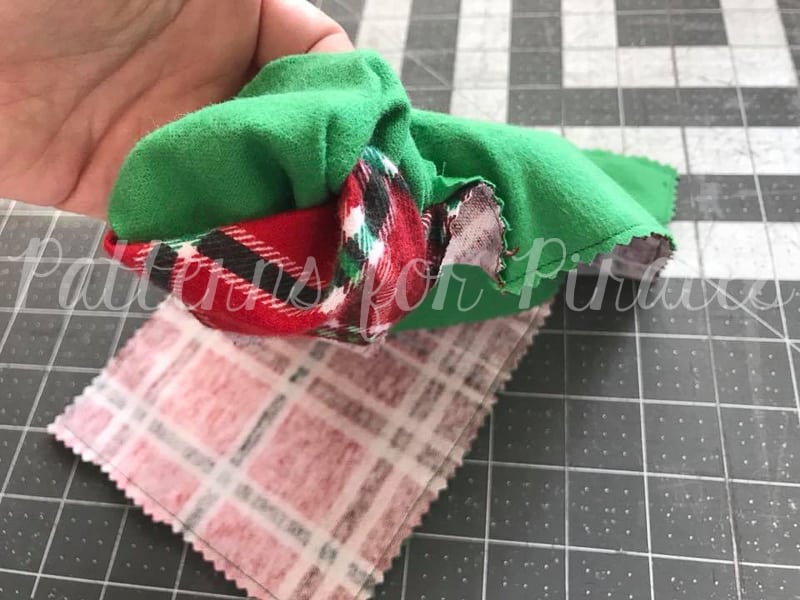
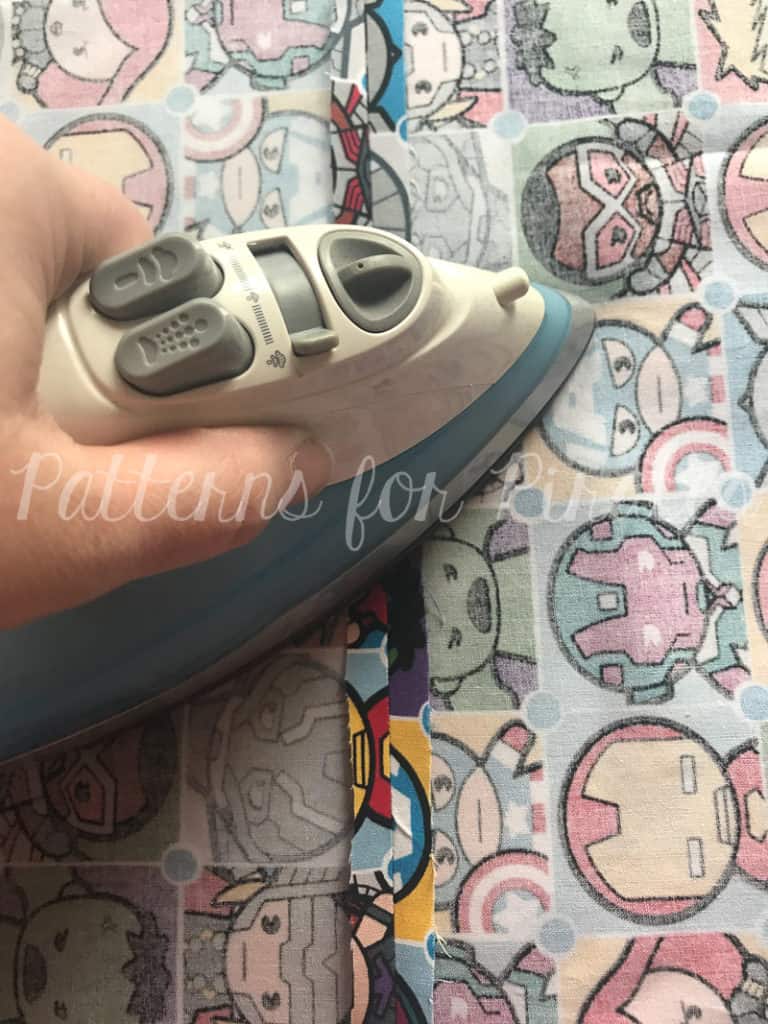
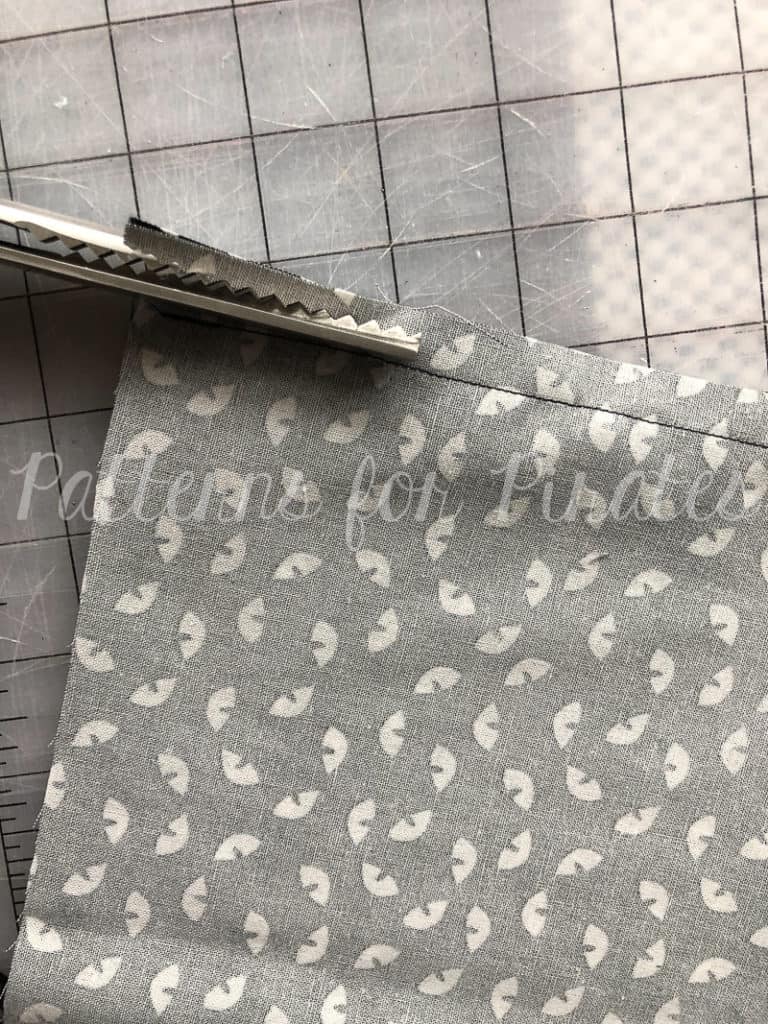
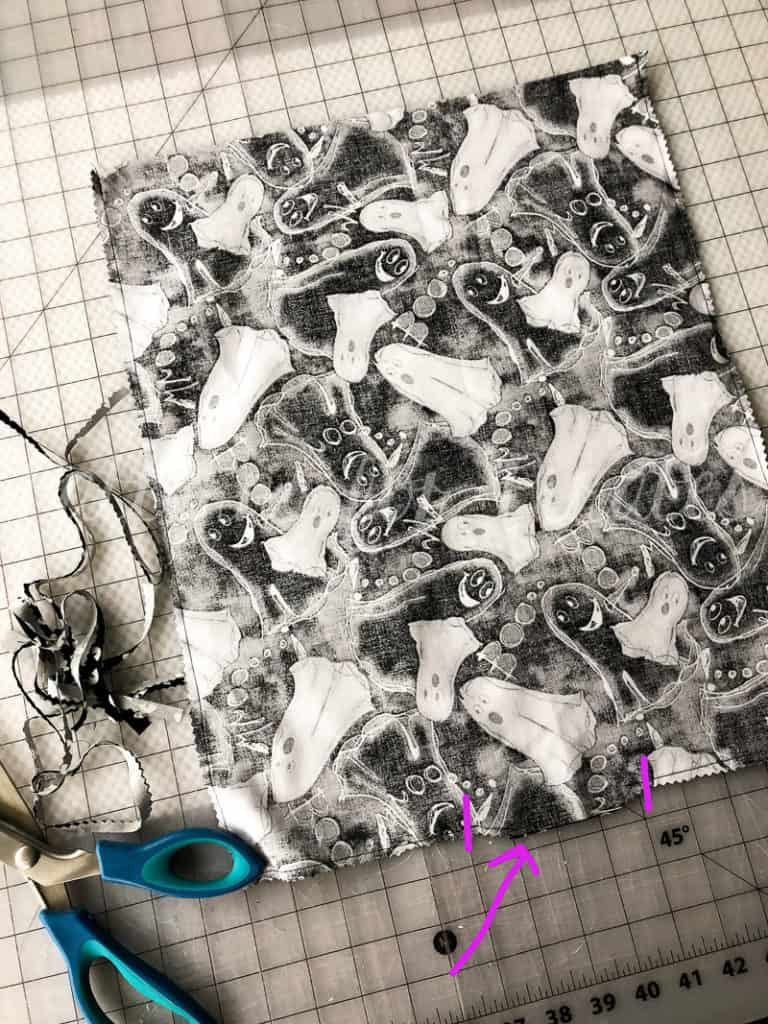
Step 5: Trim seam allowances and corners on both main and lining pieces.  Be careful not to clip through your seams, and leave the allowance on the opening of the lining piece.  Set aside main and lining bag pieces for now.

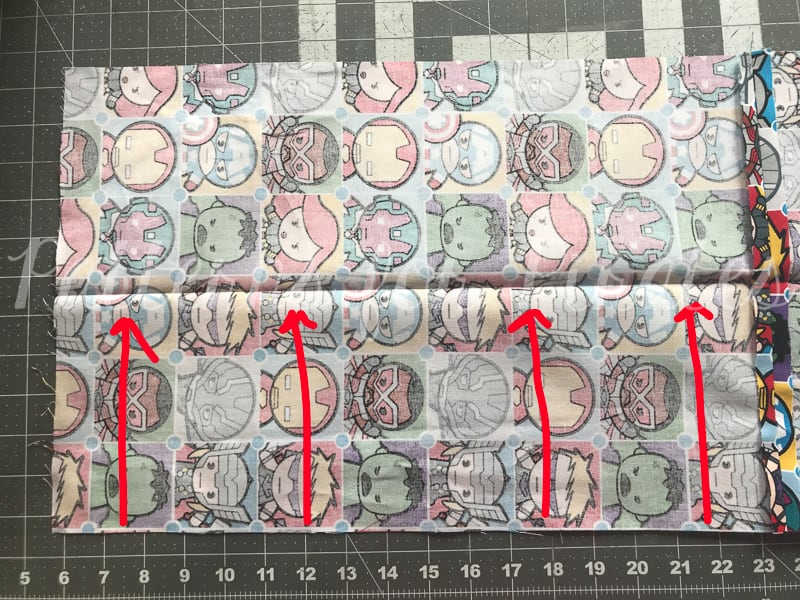
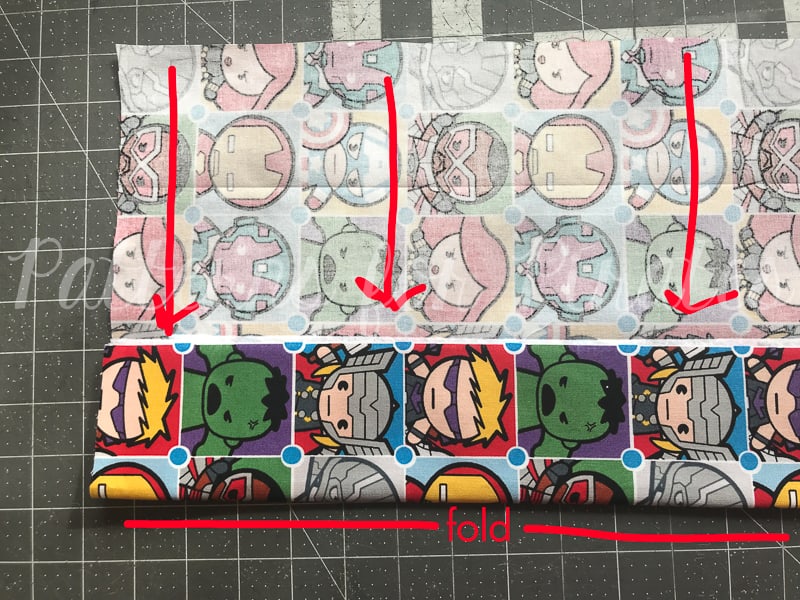
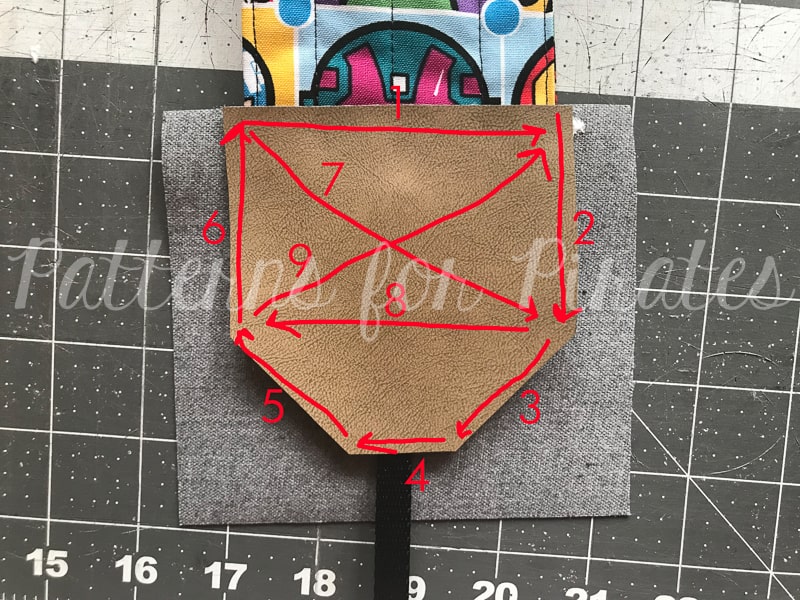
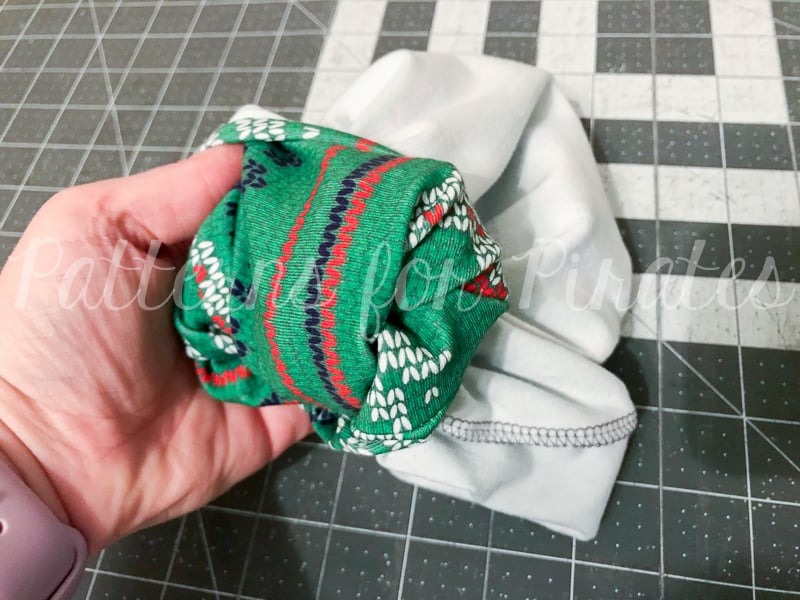
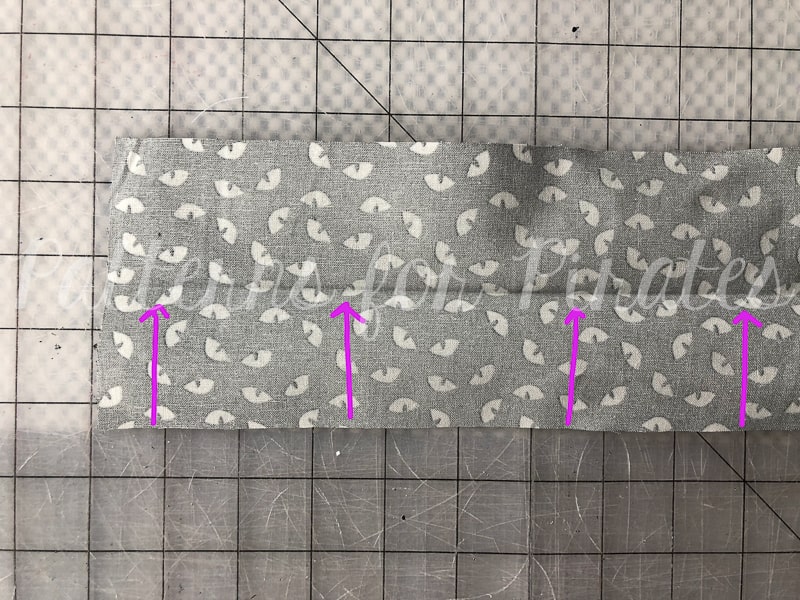
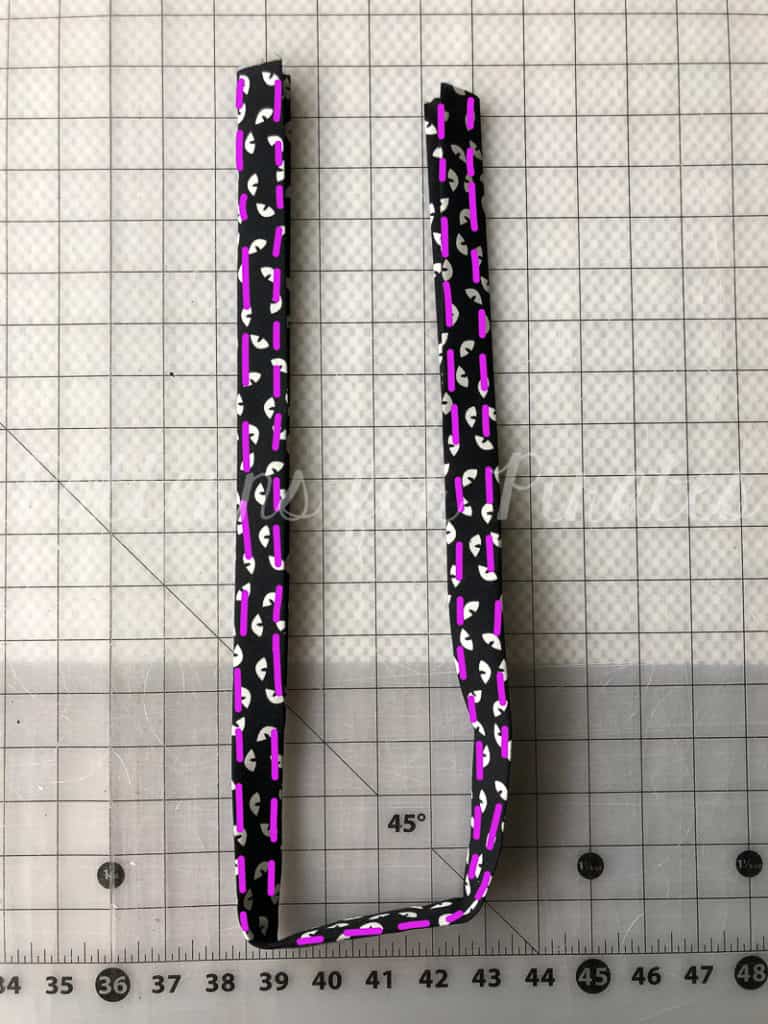
Step 6: With one of your strap pieces, lay with wrong side facing you.  Fold in half, meeting the long edges together.  Press.

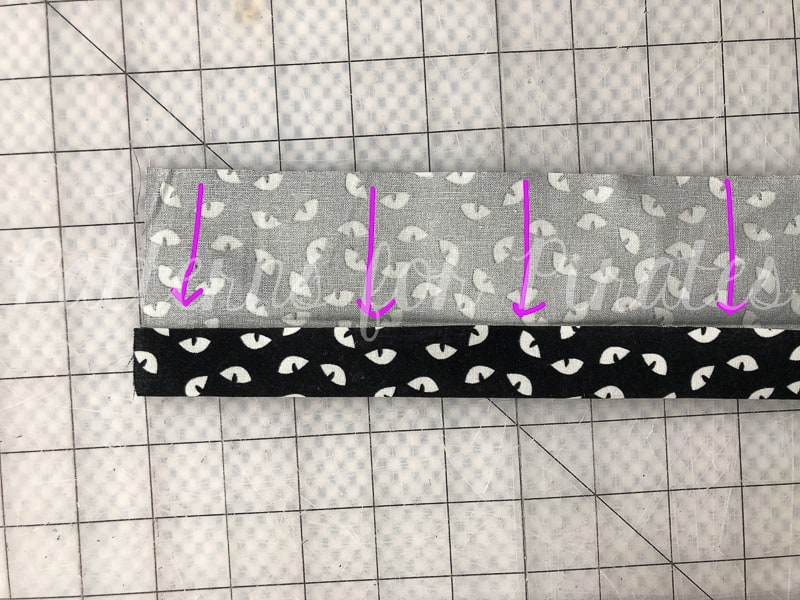
Step 7: Open up your piece and fold one of the raw edges toward the middle crease you just made.

Step 8: Repeat with the second raw edge. Press.

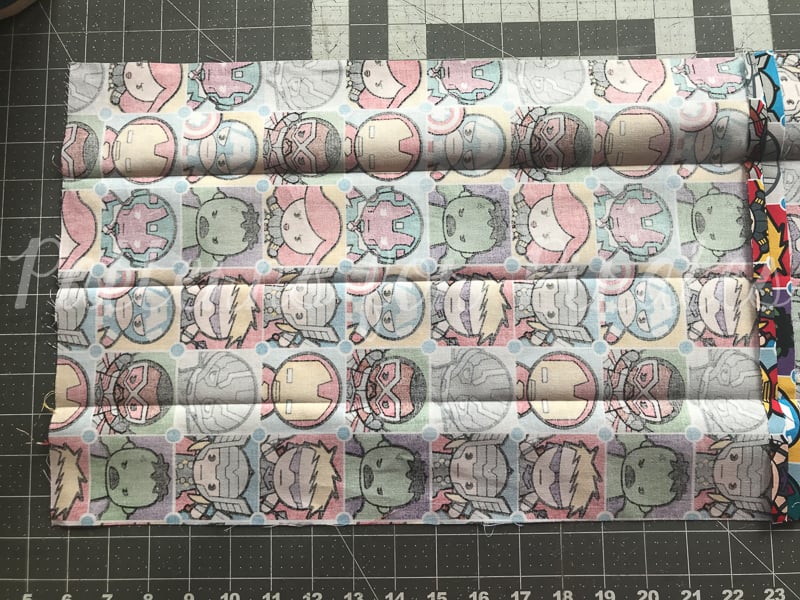
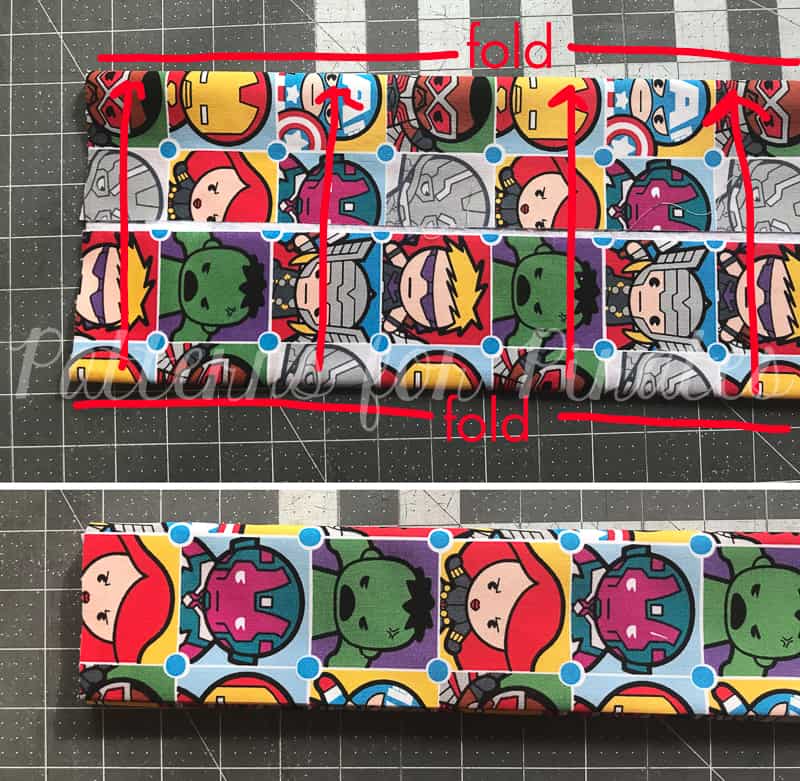
Step 9: Fold along middle crease, meeting both folded edges. All of your raw edges will be fully enclosed now.

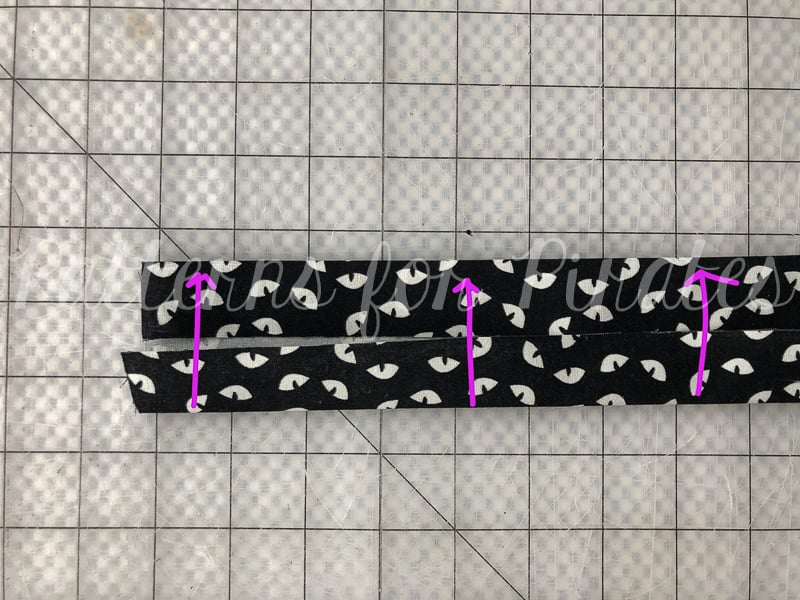
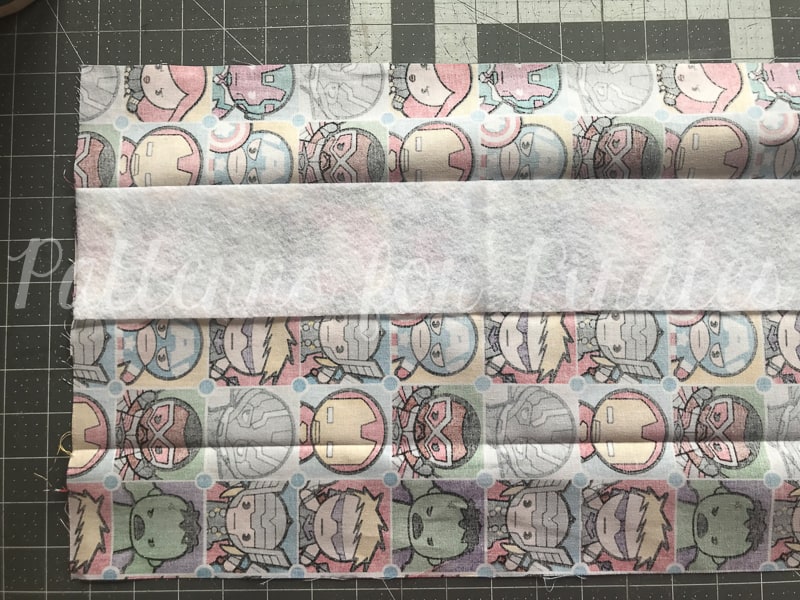
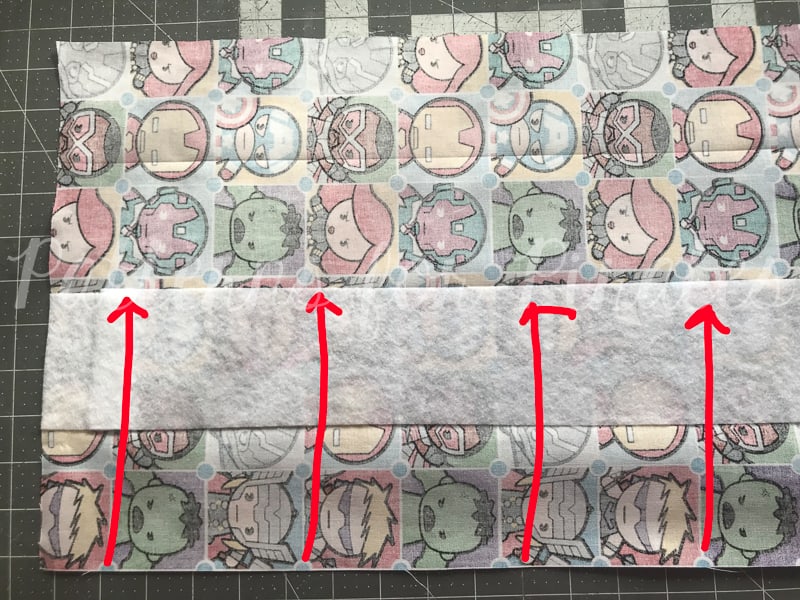
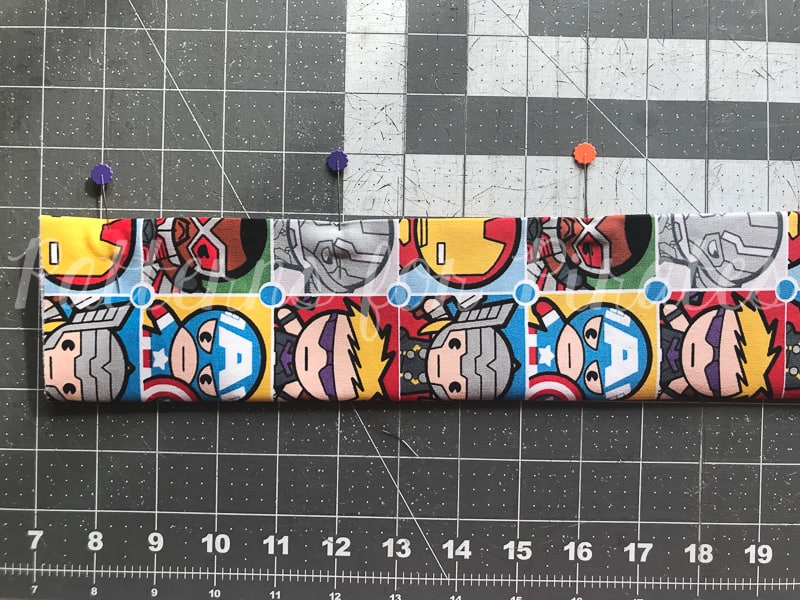
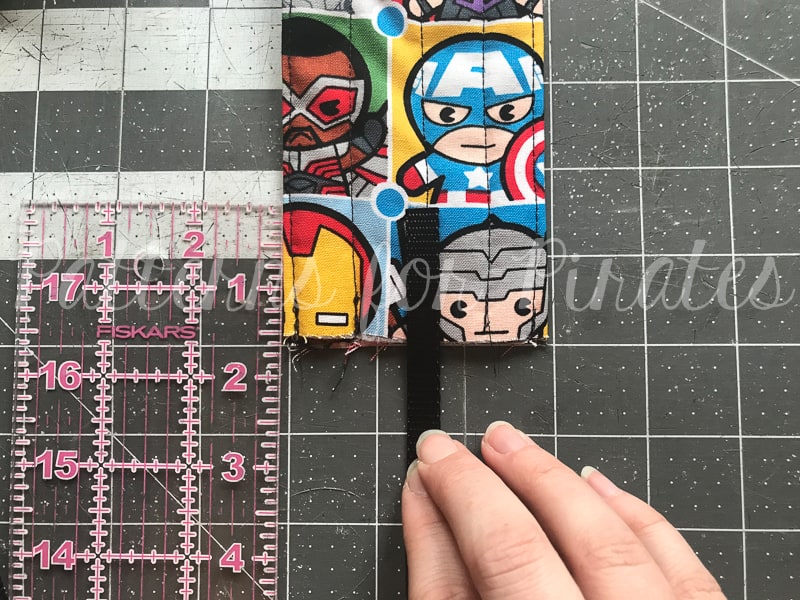
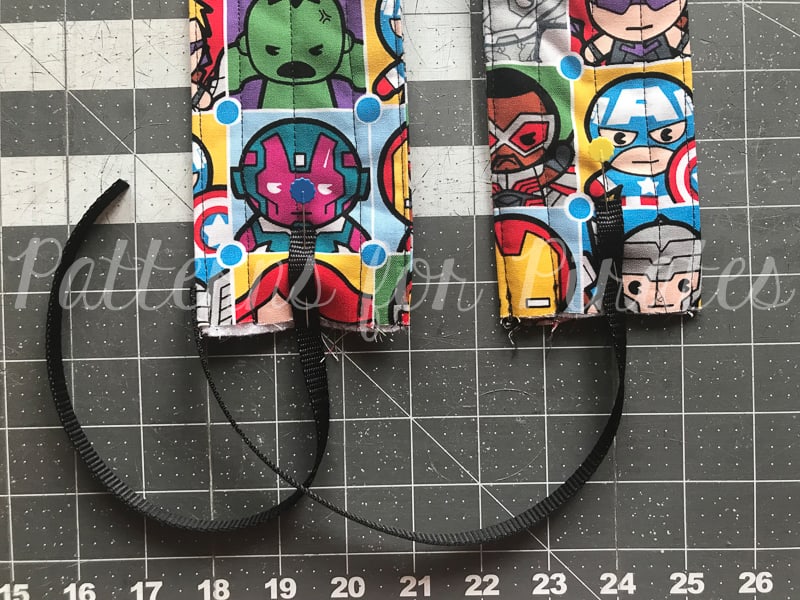
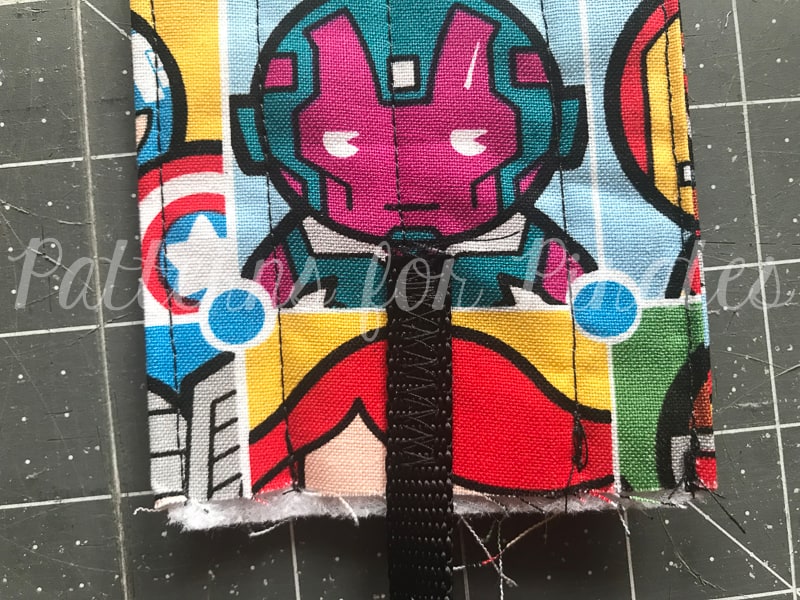
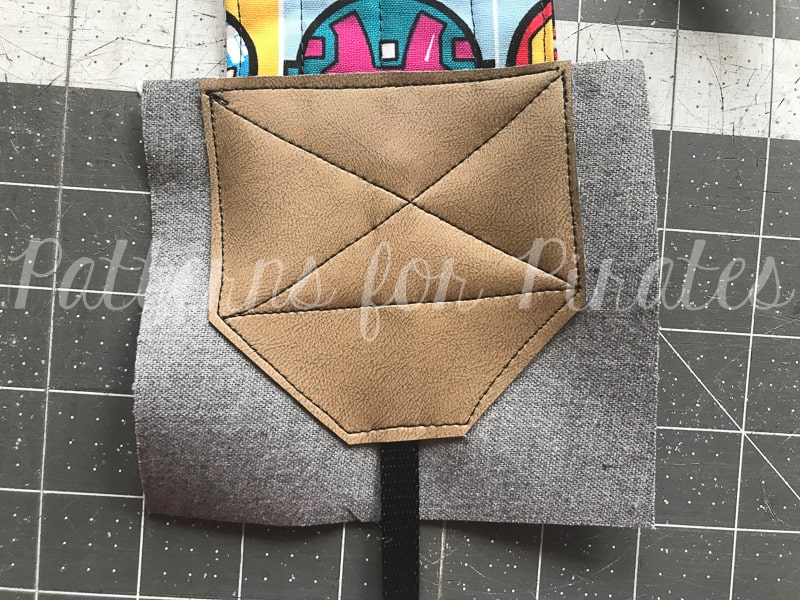
Step 10: Press you strap piece.  Then edge stitch along both long, outer edges.  Repeat with second strap.

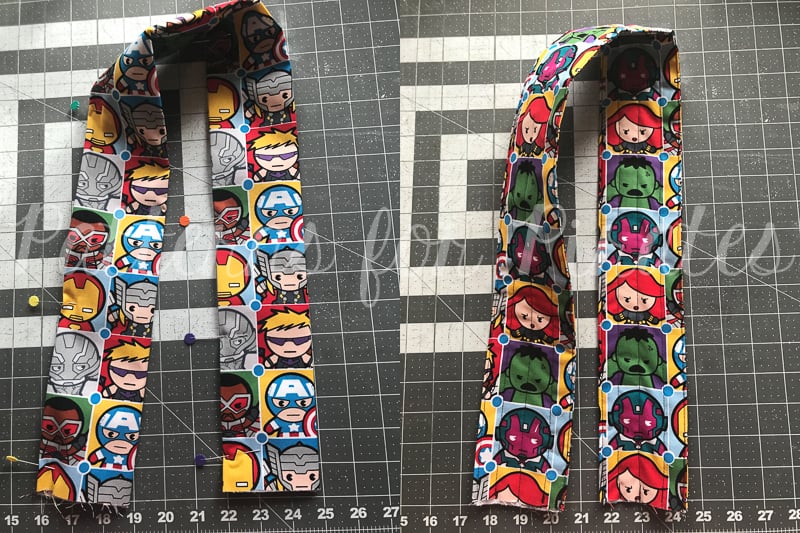
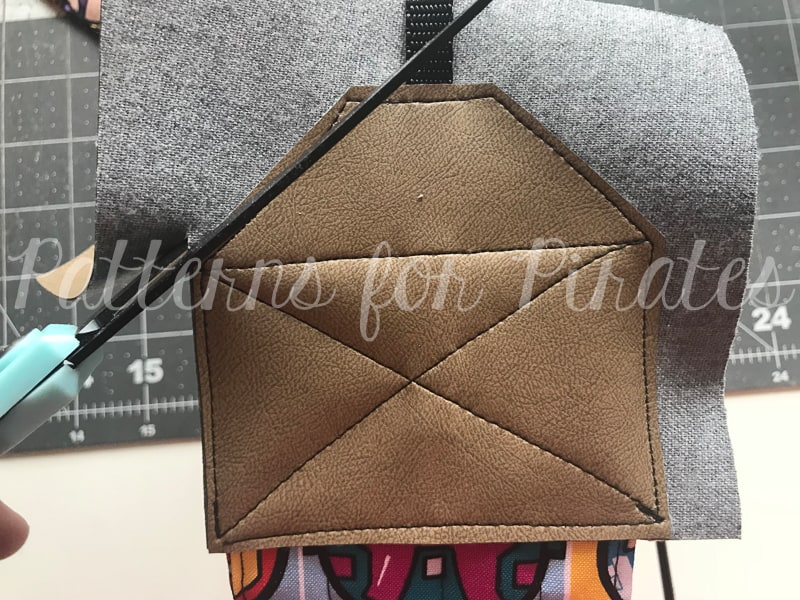
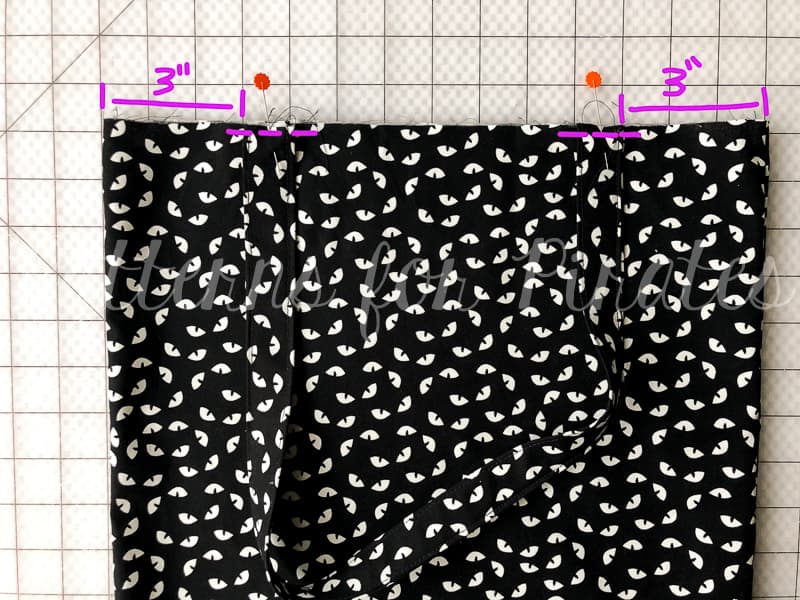
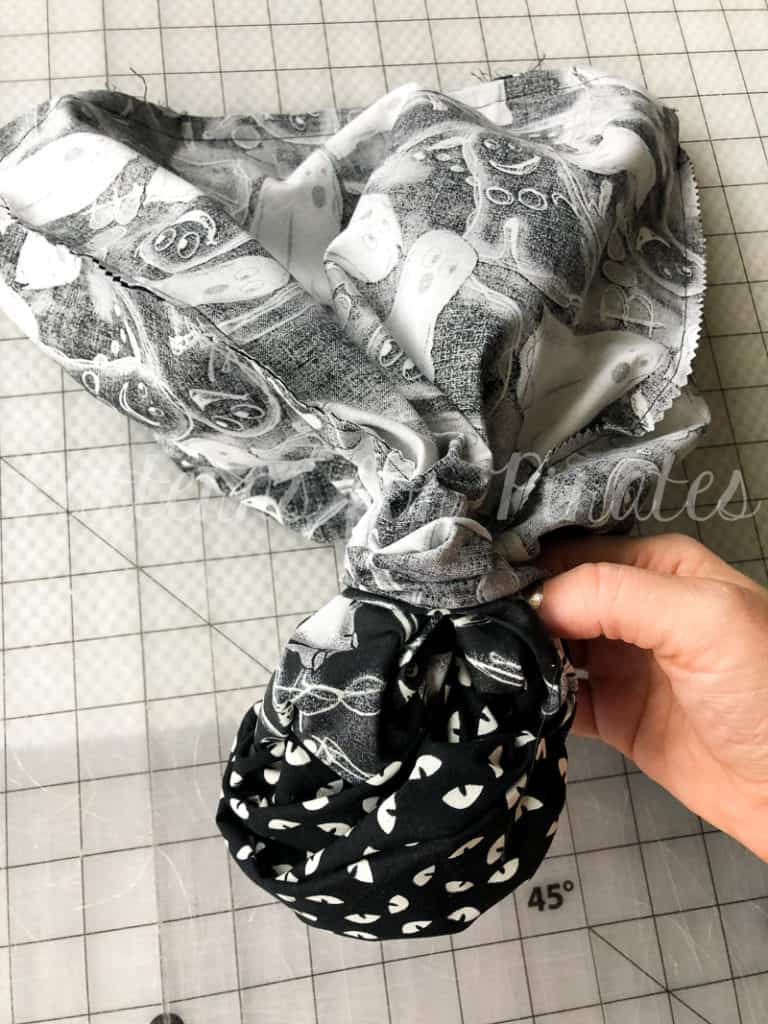
Step 11: Grab your main bag piece and turn right sides out.

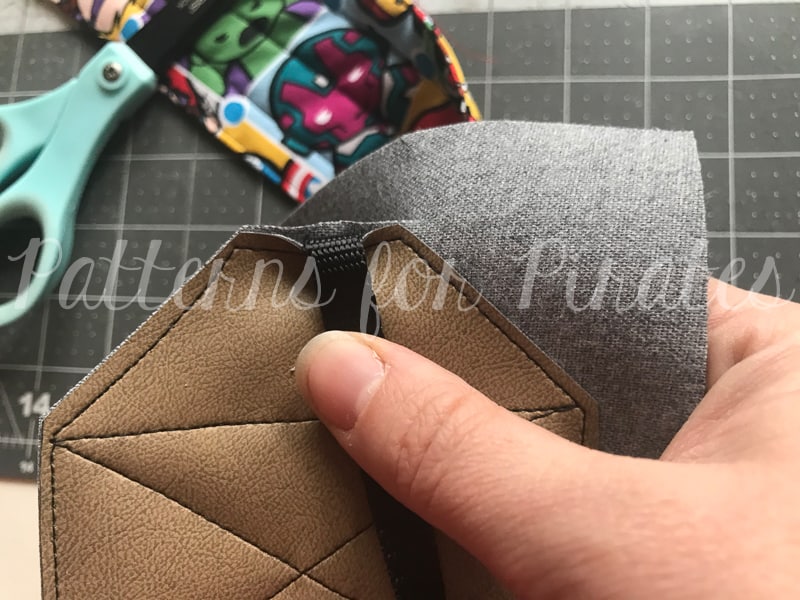
Step 12: Careful not to twist your strap, pin raw edges in place, measuring 3″ from the edge of your bag.  Baste, using 1/4″ allowance.  Repeat on other side of main bag piece, using the other strap.

Step 13: With your main bag piece (with straps now basted onto it) right sides out, and lining piece wrong sides out, slide the main bag inside of the lining.

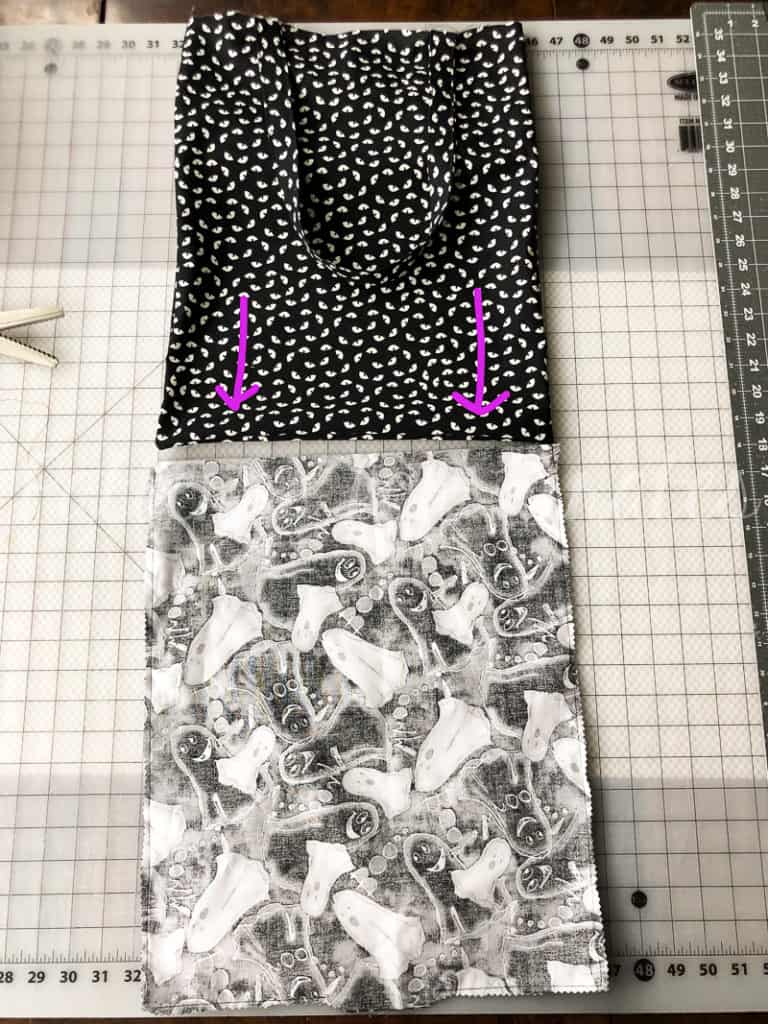
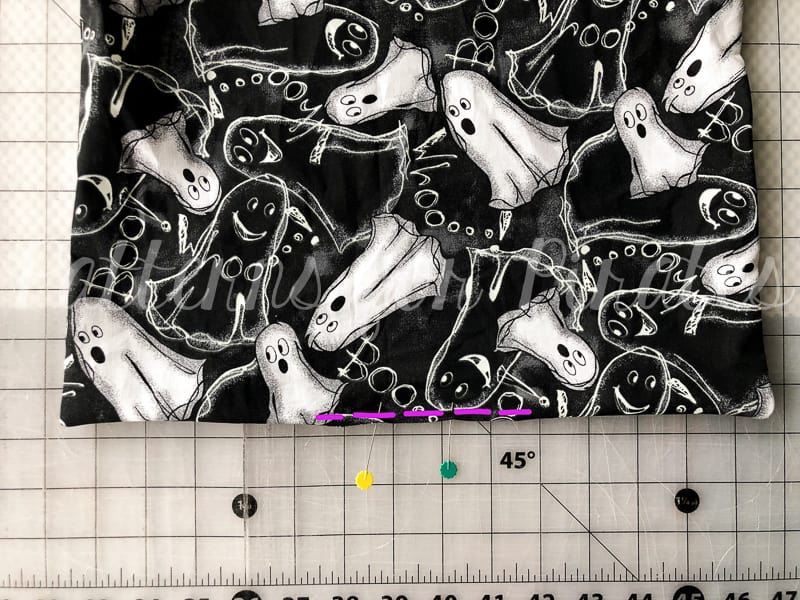
Step 14:  Align raw edges and seams, and pin in place.

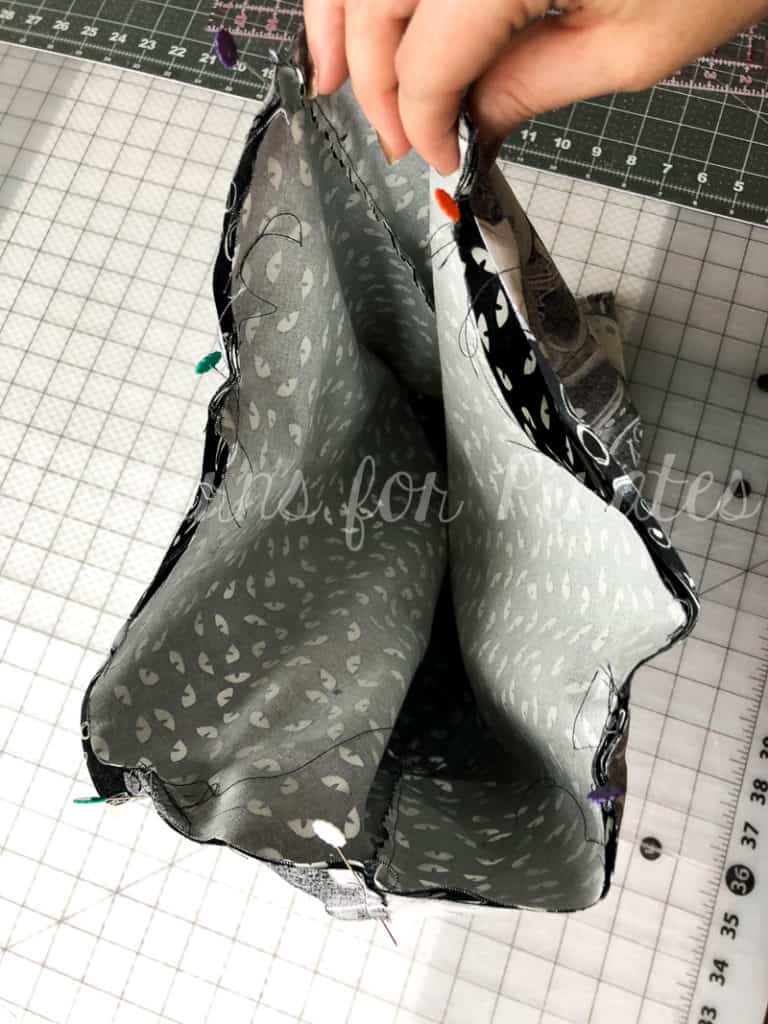
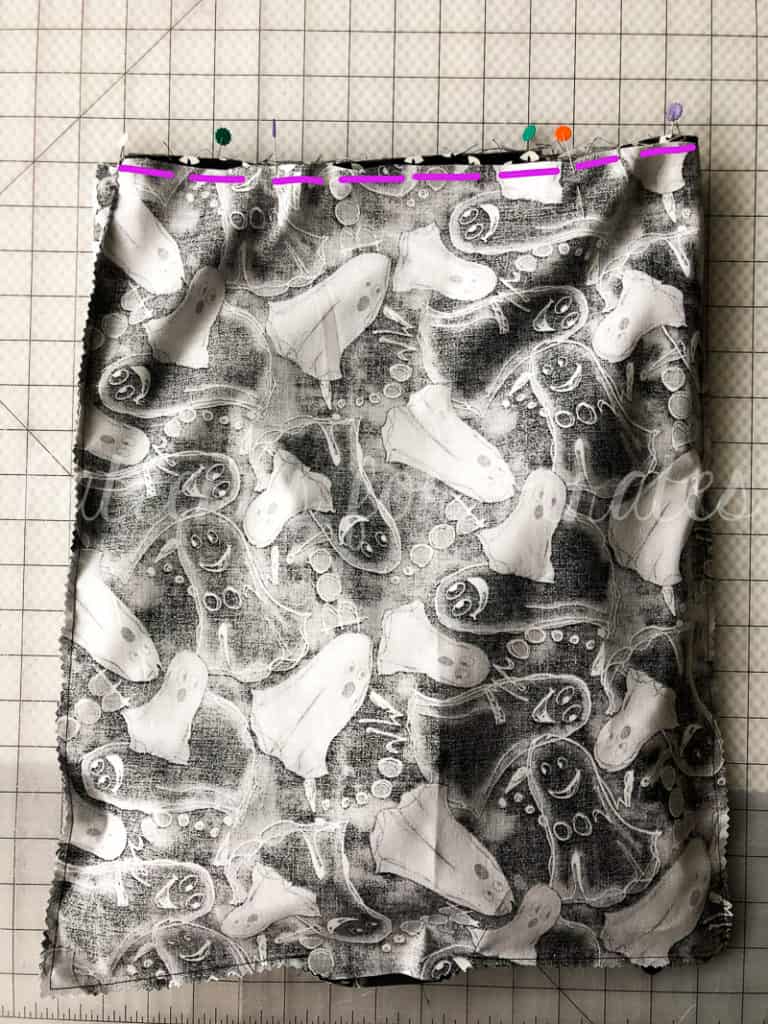
Step 15: Using 1/2″ seam allowance, stitch around entire top edge of bag.

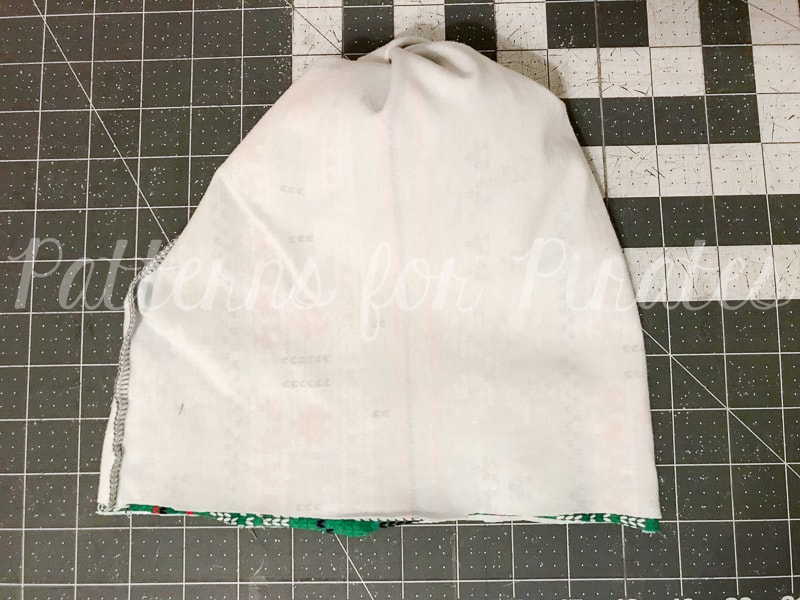
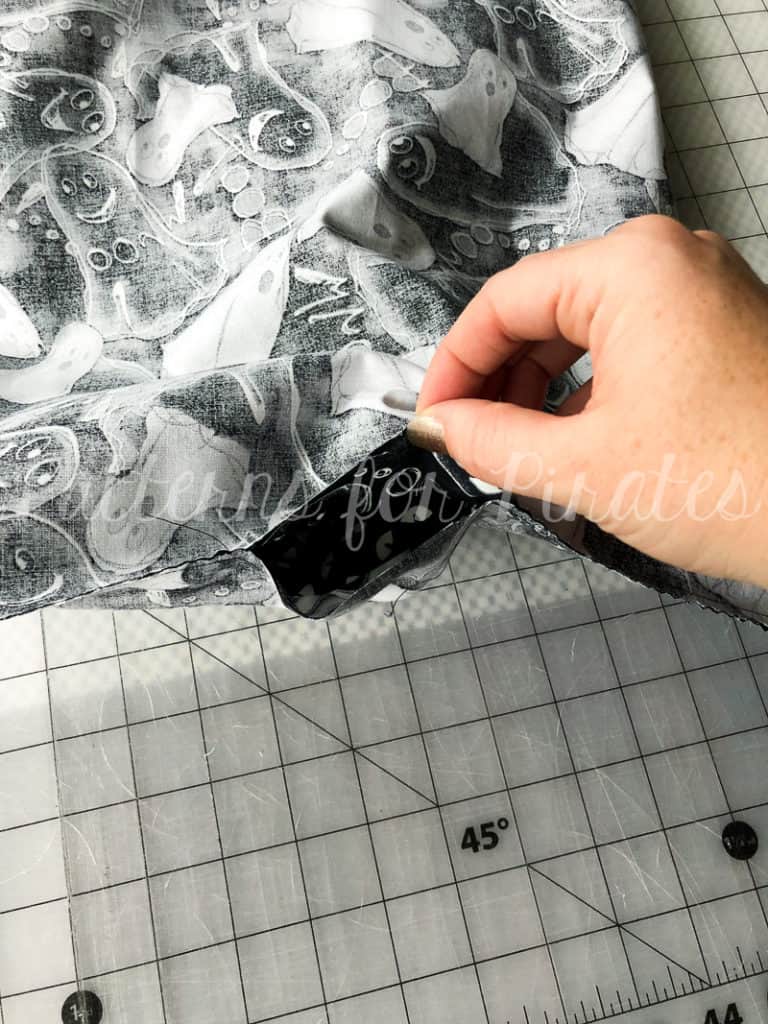
Step 16: Through the opening that we left in the bottom of the lining piece, turn your bag right sides out.

Step 17: Using your favorite stitch (I recommend doing a blind hand stitch), close the opening in the bottom of the lining piece.

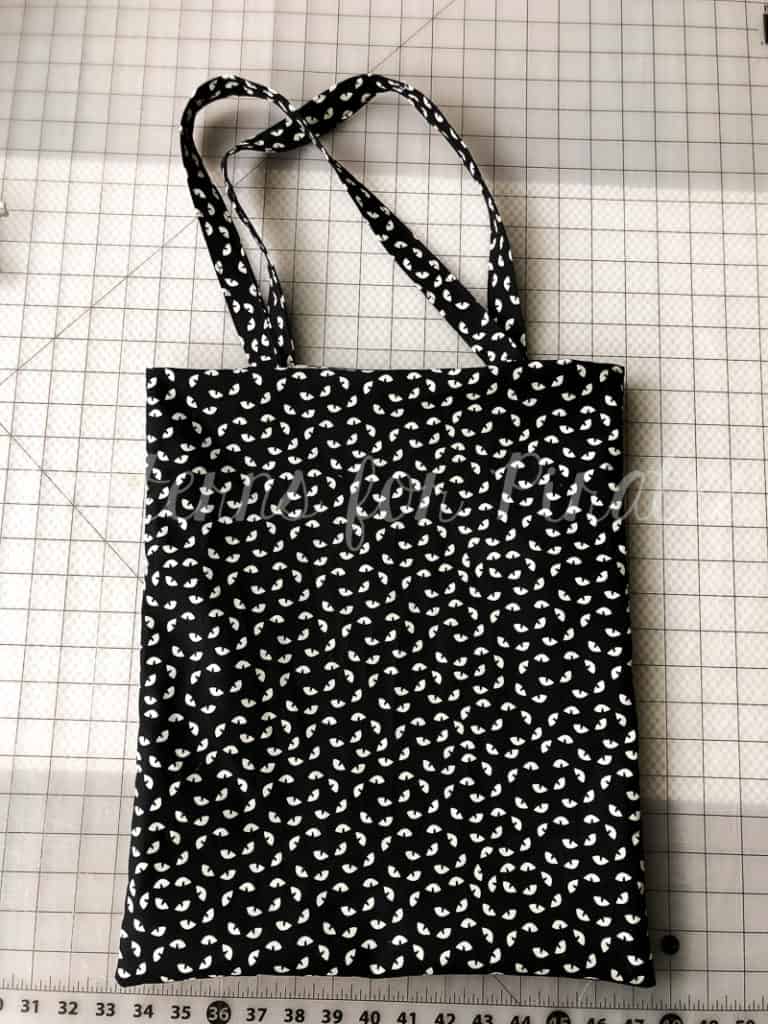
Step 18: Push lining inside of the main bag piece, press, and admire your new handiwork before your littles steal it and fill it with candy this Halloween!

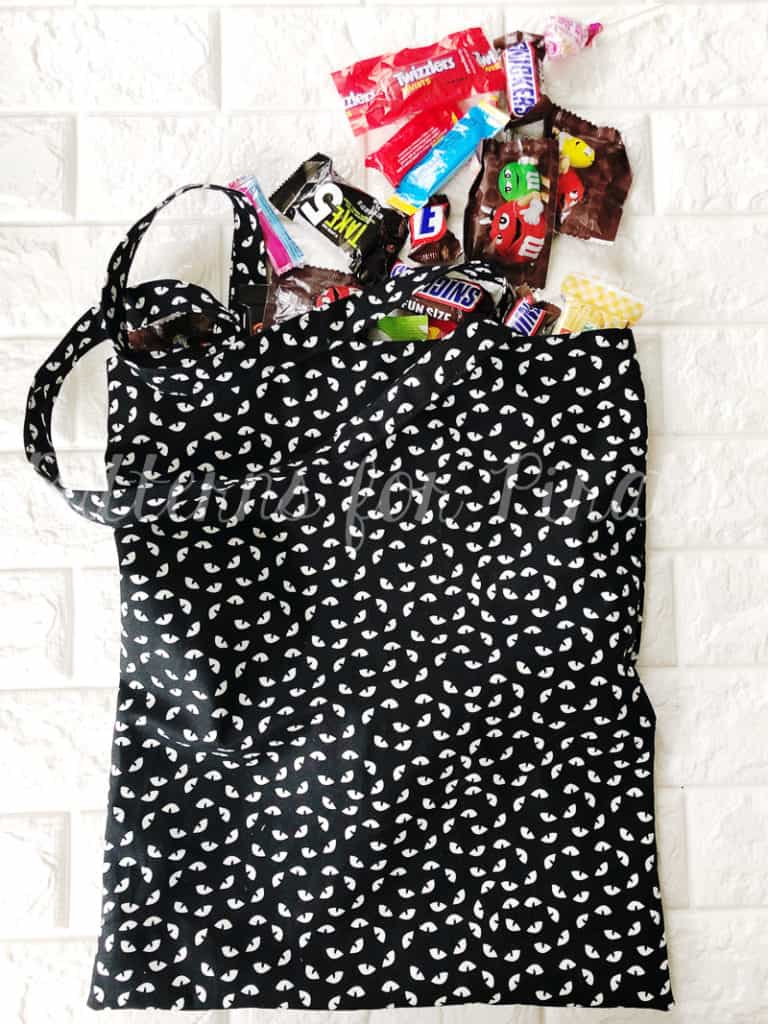
Happy Halloween, friends!  I’m loving all of the costume photos that have been rolling in so far.  Can’t wait to see the rest of them (hopefully with some new P4P Trick or Treat bags in tow!)

Filed Under: Free Pattern 4 Comments

FREE Convertible Cover Pattern + 100k Sale-A-Bration Day 2!

September 11, 2018

EEP!  Are you guys ready for the second day of our 100K Sale-A-Bration?!?!

If you missed what the party is all about, go read all about the giveaway, sale, and the pure appreciation/joy/excitement surrounding this big milestone HERE.

As we all know, the owner, designer and fearless leader behind Patterns for Pirates is Judy Hale.  P4P is such a big part of her life, and you can tell that she brings a lot of personal experiences and interests into her designs.  When we celebrated our 75K Milestone (which feels just like yesterday), our freebies were themed around the wee baby that was still growing inside of her belly.  Judy’s nesting for her third child ended with her designing and sharing the Wee Lap Tee, Petite Pegs, Teeny Beanie and Burp Cloth.

This time around, the baby boy is here and our freebies are a little more focused on the daily needs of the Momma!  It’s time to introduce you to the Convertible Cover Pattern!

The Convertible Cover is multifunctional, 4-in-1 cover that is so easy to make, and even easier to fit into your daily routine!  You can use it as a cover for infant car seats, nursing, high chairs, and shopping carts.

You must use a breathable, lightweight fabric with a high stretch.  The fabric content is vital.  Natural fabrics that breathe are needed to keep baby safe and at a safe temperature while in use (ie: rayon spandex, modal, bamboo spandex and lightweight cotton spandex.)

**We care about the safety of your child!  Always remove cover from your child’s infant car seat before placing it into a vehicle and never leave your child covered while unattended. It is important to monitor your baby to ensure they do not overheat in warm climates or during the hot summer months. Keep the cover away from any heat source.   Please use recommended breathable fabrics, and always remove cover before placing baby into vehicle. If gifting the cover please give safety guidelines to the recipient.

Let’s take a peek at all of the ways it can be used, shall we?

INFANT CAR SEAT COVER

NURSING COVER

HIGH CHAIR COVER

SHOPPING CART COVER

What are you waiting for?

Go grab your copy of the Convertible Cover now!

Also be sure to head over the Patterns for Pirates Facebook Group and enter yourself into today’s daily drawing for the 100K Sale-A-Bration

Happy Sewing, Pirates!

Filed Under: Contest/Giveaway, Free Pattern, Pattern Release 1 Comment

2017 Holiday Freebies: Easy Button Cowl

December 8, 2017

I’m back to gift you the final item for our 2017 Holiday Freebies!  Have you had fun with us so far this week?

In case you’ve missed the last four days, go take a look: Slouchy Headwarmer / Emoji Pillows / Clothing Size Tags / Camera Strap

On the last day of our freebies, we are sharing how to make this super cute, quick, and easy Button Cowl.  We’ve even got two ways for you to wear it.  Are you ready?  Let’s get to it!


Materials needed:

  • 2 – 26″ wide x 6″ long pieces of fabric (can be flannel, fleece, sweatshirt fabric, etc. Really anything will work, but obviously the cozier the better.)
  • 2 buttons / snaps
  • Coordinating thread

With fabrics right sides together, stitch around entire outside using 1/2″ seam allowance. Leave 3″ opening for turning.

Trim away bulk, making sure not to snip through seams.

Turn right-sides-out, through the opening.

Tuck in your seam allowance, press.

Top stitch along entire outer edge, making sure to catch your opening in there.

There are two ways you can add buttons/snaps to the cowl to create different ways to wear them.  I created an easy diagram to help you with placement for your buttons and button holes, depending on the style you’re wanting for your cowl.

Here’s a quick peek at what some of our testers made for themselves with this pattern:

As always, we would love if you shared your creations with us!  Head over to the Patterns for Pirates Facebook Group and show us what you made!  Happy Holidays, friends!

Filed Under: Free Pattern 5 Comments

2017 Holiday Freebies: DIY Camera Strap

December 7, 2017

What?  We are on day four of the 2017 Holiday Freebies already?  I hope you’re having as much fun as I am!  If you need to back and review the past three days, I can wait!

Here are some links: Slouchy Headwarmer / Emoji Pillows / Clothing Size Tags

Now that we’ve covered that, let’s get to today’s free pattern!  Sewing and photography seem to go hand-in-hand more often, because we want to share what we’ve made with our sewing community!  Why not sew yourself a sweet little strap to wear while you’re using that camera of yours?  It’s super easy to do and way more fun than using what came with your camera originally.  Let’s get to it!

Prep your pieces, you will need:

  • Pattern Piece for Vinyl Ends
  • 36″ L x 12″ W Quilting Cotton
  • 2 – 12″ cuts of nylon webbing (1/2″ or 3/8″ both work) — I used THIS
  • 2 – 1/2″ or 3/8″ sliding adjusters — I used THESE black versions as well as THESE fun colored ones!
  • 36 L x 3″ W Fusible Fleece Interfacing
  • Small scraps of Vinyl/Pleather

**If you can’t find the nylon webbing / sliding adjusters in your local fabric store, a quick trick is to buy a small dog collar from the dollar store.  They tend to have the right width strap, and usually include the adjuster on it as well.

Important: The ends of nylon wedding need to be heat sealed to prevent fraying.  Make sure to do this before sewing it to your strap pieces!

**If your fabric is directional, you will want to cut two pieces for your strap and then stitch them together. Cut two 18.5″ x 12″ pieces from your quilting cotton.

For directional fabric, place your pieces right sides together, and sew along the short edge, using 1/2″ seam allowance.

Press open your seam.

For all straps: Fold your main fabric wrong sides together, meeting the long edges to one another. Press.

Open up your piece and fold one of the raw edges toward the middle crease you just made.

Repeat with the second raw edge. Press.

If you open your piece, you’ll now have 3 creases, spread evenly across four total sections.

On one of the middle sections, following the directions provided by the manufacturer, iron your fusible fleece to your strap piece.

We will be refolding the strap in the same method as before. Take one of the raw edges and fold it toward the middle crease.

Repeat with other raw edge.

Fold along middle crease, meeting both folded edges. All of your raw edges will be fully enclosed now.

Press, press, press.

I like to clip/pin my outer edges together, to make sure they’ll align properly when I go to stitch them. Straight stitch along the entire edge you just pinned, getting as close to the edge as you can.

This part is up to you, and how fancy you want to get with your quilting. I like to run an edge stitch along the other long edge. And then three even lines across the rest of the strap. You can stitch as much or as little as you’d like!

Take your nylon strap and overlap it 1.5″ from the edge of your strap, aligning it directly in the center of the strap.

Pin and repeat for the opposite end.

Using a wide zig zag stitch, secure your nylon strap to the end.

For the vinyl pieces, I recommend to only cut one actual piece — and to have an oversized rectangle for the other. It’s easier than trying to get them to line up perfectly. Especially since vinyl can be fussy to topstitch.

I like to run a line of fabric glue at the top of the vinyl backside. It helps keep it in place when sewing.

Two inches up from the bottom of your strap piece, lay out one of the vinyl pieces. The vinyl should be slightly wider than your strap.

Flip over your strap.

Throw another line of glue on the edge of your vinyl square.

Place it 2″ up from the bottom of your strap.

Flip your piece back over and stitch your vinyl on. This is the path I take and it allows for a continuous stitch. You can take whatever path you want. 😉

I HIGHLY recommend using a teflon foot for this. Vinyl can be a huge brat. I know they carry them at JoAnn Fabrics, or you can snag one on Amazon.

Finished stitches.

Trim the vinyl to match your other pieces.

Be careful not to cut off your nylon strap. Just tuck it out of the way when you’re trimming.

Take your slider.

Slide it onto your strap.

Put the cord in from the bottom-up on your camera.

Give yourself a little slack.

Run the cord back through the bottom and secure the strap to your camera. Easy peasy!


I am SO EXCITED to see your new, stylin’ camera straps!  I’ve been using my me-made strap for years now (so has my hubby) and we get compliments on it all the time.  I’m betting you will too!  Please, if you do make one for yourself, share it with us in the Patterns for Pirates Facebook Group!

**Also, as a quick note, there are some affiliate links scattered within this post.  I make a small commission for purchases made through those links, but I only link products that I’ve used and actually recommend myself.

Filed Under: Free Pattern 2 Comments

2017 Holiday Freebies :: Size Tags

December 6, 2017

We are back for more fun with day three of our 2017 Holiday Freebies!  (In case you missed the last two…check out our Slouchy Headwarmer + Emoji Pillows and then come right back!)

One of the only complaints I get in my household about the handmade clothes I make for my husband and son are that there aren’t tags.  Apparently it’s not as easy for everyone as it is for us to find the back of your shirt!  We are helping to change that with these cute clothing size tags, so now the only complaint should be that they don’t have enough of your handiwork hanging in their closets!

I made the “THIS IS THE BACK” tags for my own family’s use a while back and thought I might share it with my P4P friends!  And then we couldn’t leave you with just one (kinda snarky) design, so I whipped up two more styles to go along with it.  I think a favorite with our holiday help were the “Size: Unique” set.  Now you can label your clothing properly with things like: beautiful, sassy, strong, healthy, etc.  Kinda fun, right?

You can go pick up your copy of these designs right HERE.

Don’t own a die cutting machine like a Silhouette or Cricut?  No sweat!  We have included an extra file type (PNG) that will allow you to work with the designs however you’d like.  We even had someone print on fabric using their at-home printer and sewed the labels in that way.  Pretty clever, huh?

Here are some other ideas:

— Go old school and use an iron on transfer paper and your at-home printer.
— Use Heat Transfer Vinyl and your die cutter.
— Try your hand at Freezer Paper Stenciling.  (Dana from Made Everyday has a great tutorial HERE.)

And just as a handy little tip from someone who has been using tags like these for a while now, I like to cut a bunch of tags on my Silhouette, weed them, lay them on a piece of parchment paper and then cut them out. That way, they’re ready to go when I need them. No fuss!

As always, we love to see what you make from our goodies!  Please feel free to share with us over in the Patterns for Pirates Facebook Group!  And make sure to come back tomorrow to see what else we’ve cooked up this week for you!  Happy Holidays, Friends!

Filed Under: Free Pattern 14 Comments

2017 Holiday Freebies :: Slouchy Headwarmer

December 4, 2017

I. Am. So. Excited.

We are kicking off another year of P4P Holiday Freebies and today is the first of FIVE days of freebies.  I hope you love each and every one of them as much as I do.  We brainstormed pretty hard to find things that were unique, quick to make, and totally giftable for people on your holiday lists.  (And if you’re on your own holiday list, we don’t judge at all!)  Today’s freebie is like four-in-one!  It’s a slouchy headwarmer that can convert into a headband, hat, cowl, and messy bun hat!

Suggested fabrics: Brushed Poly, Rayon/Spandex, (some) Sweater Knits, Cotton Lycras, etc.  The fabric has to have a really good stretch and recovery factor.

Cut square: 20” wide x 20” long.
**The average woman’s head size is 21″ in circumference.  If your head measures smaller/larger than this, it’s easy to adjust accordingly.  I also recommend to add an inch or two if you’re using a thicker cotton/lycra blend or something with a high spandex percentage, as it can be extra tight and end up a little uncomfortable if it’s too tight.

Fold in half, right sides together. Stitch with 1/2” allowance.  Turn right side out.

Fold top right corner to meet bottom left corner.

Grab the outer corner (which was top left corner before we folded in the last step) and have it meet the right bottom corner.

Shown folded with the twist.

Grab the top layer of the four raw edges.

Flip it around the entire headband, so you have a pocket with right sides together.

Stitch around open edge closed, leaving a 2-3” opening for turning.

Pull your headband back through opening, turning it right-sides out.

Blind stitch opening shut.

And now comes the fun part!  This headwarmer can be worn FOUR different ways.  Four!  Amazing, right?  Especially for such a simple sew!  You can…..

…rock it as a headband/earwarmer.

…wear it like a hat.

…throw it on over a messy bun.

…or keep your neck warm, while wearing it like a cowl.

As always, we love when you share what you’ve made with us.  Head over to the Patterns for Pirates Facebook group and show off the fabulous Slouchy Headwarmer that you’ve managed to make from our freebie pattern!  Happy Holidays, friends!

Filed Under: Free Pattern 36 Comments

#SewLikeAPirate :: Freebies and a Contest!

May 23, 2016

Who doesn’t love a good graphic tee?  We sure do!
P4P girl Katy has created four FREE designs to help transition you into a full blown pirate sewist.  Are you ready?

noevil 13268127_10102683251304763_664552423215925727_osewlikeawind in sails

You can go pick up your copy of these designs right HERE.

Don’t own a die cutting machine like a Silhouette or Cricut?  No sweat!  We have included two extra file types (PNG and PDF) that will allow you to work with the designs however you’d like.

— Go old school and use an iron on transfer paper and your at-home printer.
— Use Heat Transfer Vinyl and your die cutter.
— Try your hand at Freezer Paper Stenciling.  (Dana from Made Everyday has a great tutorial HERE.)

But wait, there’s more!  We wanted to create a friendly pirate-y competition with this new release.

Between today and Saturday, June 4, sew up a Patterns for Pirates shirt and apply one of these fab new designs.  Share your photo with us on Instagram or in our Facebook group and use the tag #SewLikeAPirate We will pick our favorite and the winner will win a free P4P pattern of choice AND be featured on this blog.

What are you waiting for?  Get to sewing!

Filed Under: Contest/Giveaway, Free Pattern 6 Comments

  • « Previous Page
  • 1
  • 2

Featured Patterns

  • Mae Top - Bundle Mae Top - Bundle $20.00
  • Mae Bottom - Bundle Mae Bottom - Bundle $20.00
  • Loosey Goosey - Bundle Loosey Goosey - Bundle $20.00
  • Bacall Bodysuit Bacall Bodysuit $12.00
  • Privacy Policy
  • Refund Policy
  • Affliliate Program
  • Contact Us
  • About

Copyright © 2025 Patterns for Pirates

Copyright © 2025 · Genesis Framework · WordPress · Log in