Patterns for Pirates

P4P stylish, modern, wearable patterns

  • Home
  • Blog
    • Frequently Asked Questions
    • Pattern Releases
      • Free Patterns
    • P4P University
      • Fitting
      • Sewing with Stretch, Knit Fabrics
      • Sewing with Woven Fabrics
      • Sewing Machines
    • Sew-A-Longs
    • Fabric for Pirates
    • Pattern Hacks
    • Announcement
      • Blog Tours
      • Contest/Giveaway
  • Shop
  • Bundle Discounts
  • Flash Friday
  • Gift Cards
  • My Account
  • Cart

Choker Neckline Hack

August 21, 2017


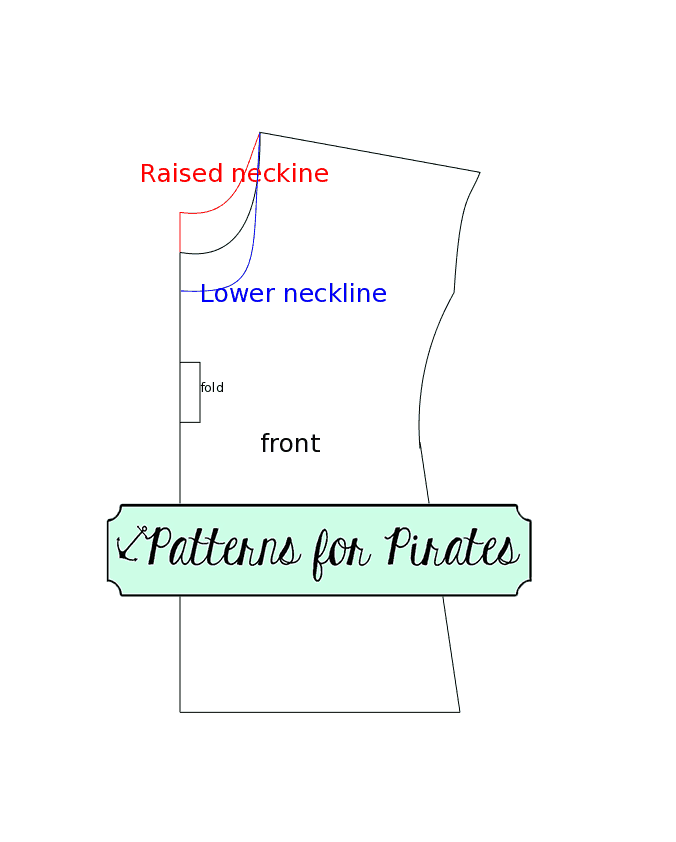
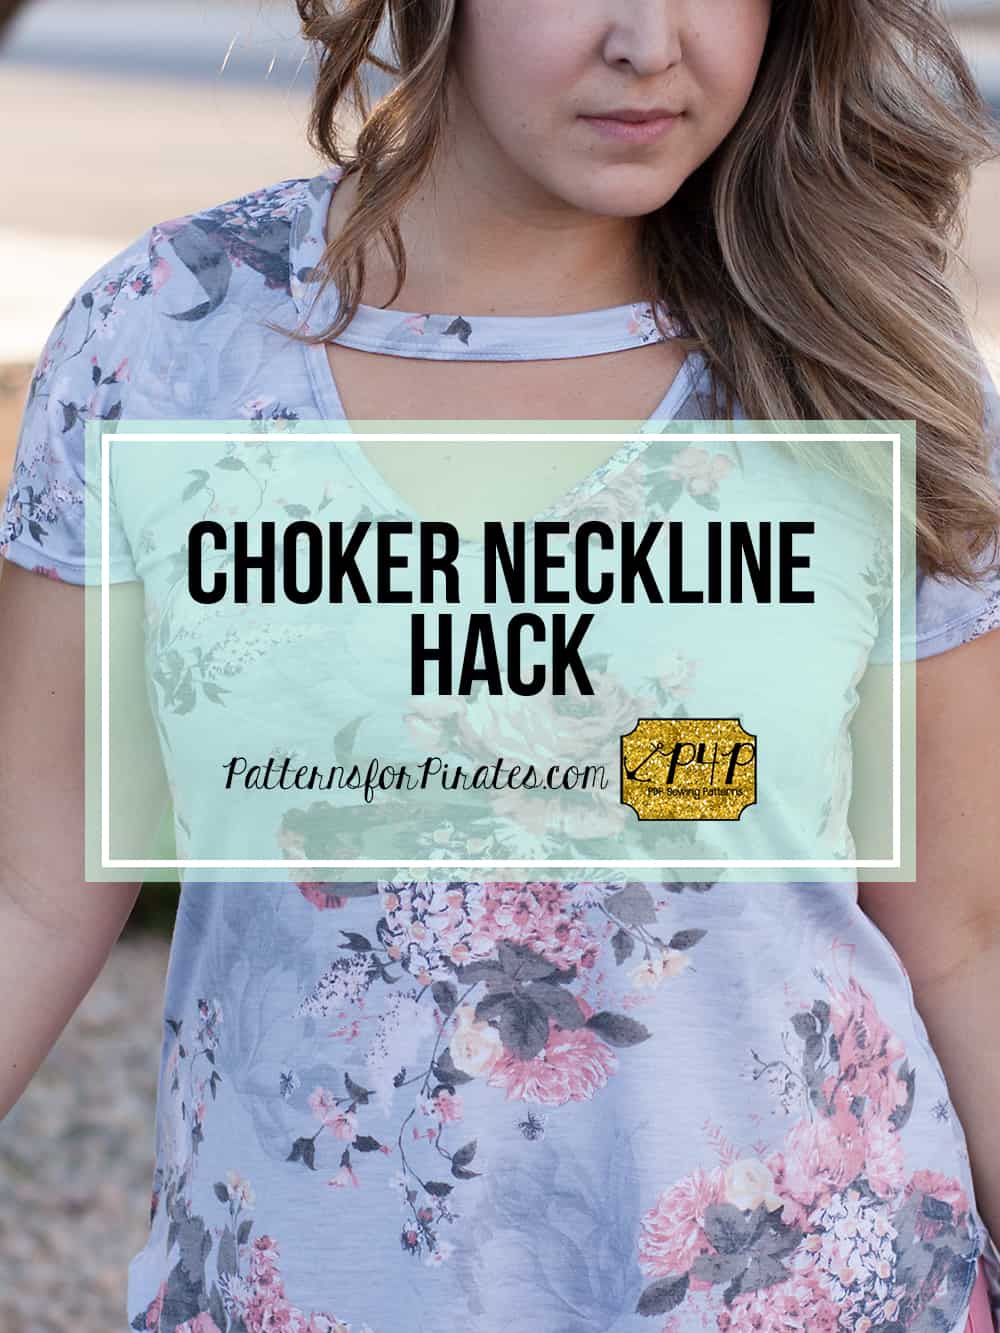
Choker necklines are all the rage right now, so we thought we’d give you the “how-to” so you can add it to your most loved top.  I used the Favorite Tee since it already has a V-neck option but you can really use any of our t-shirt patterns and add a lower scoop neck or v-neck to it.

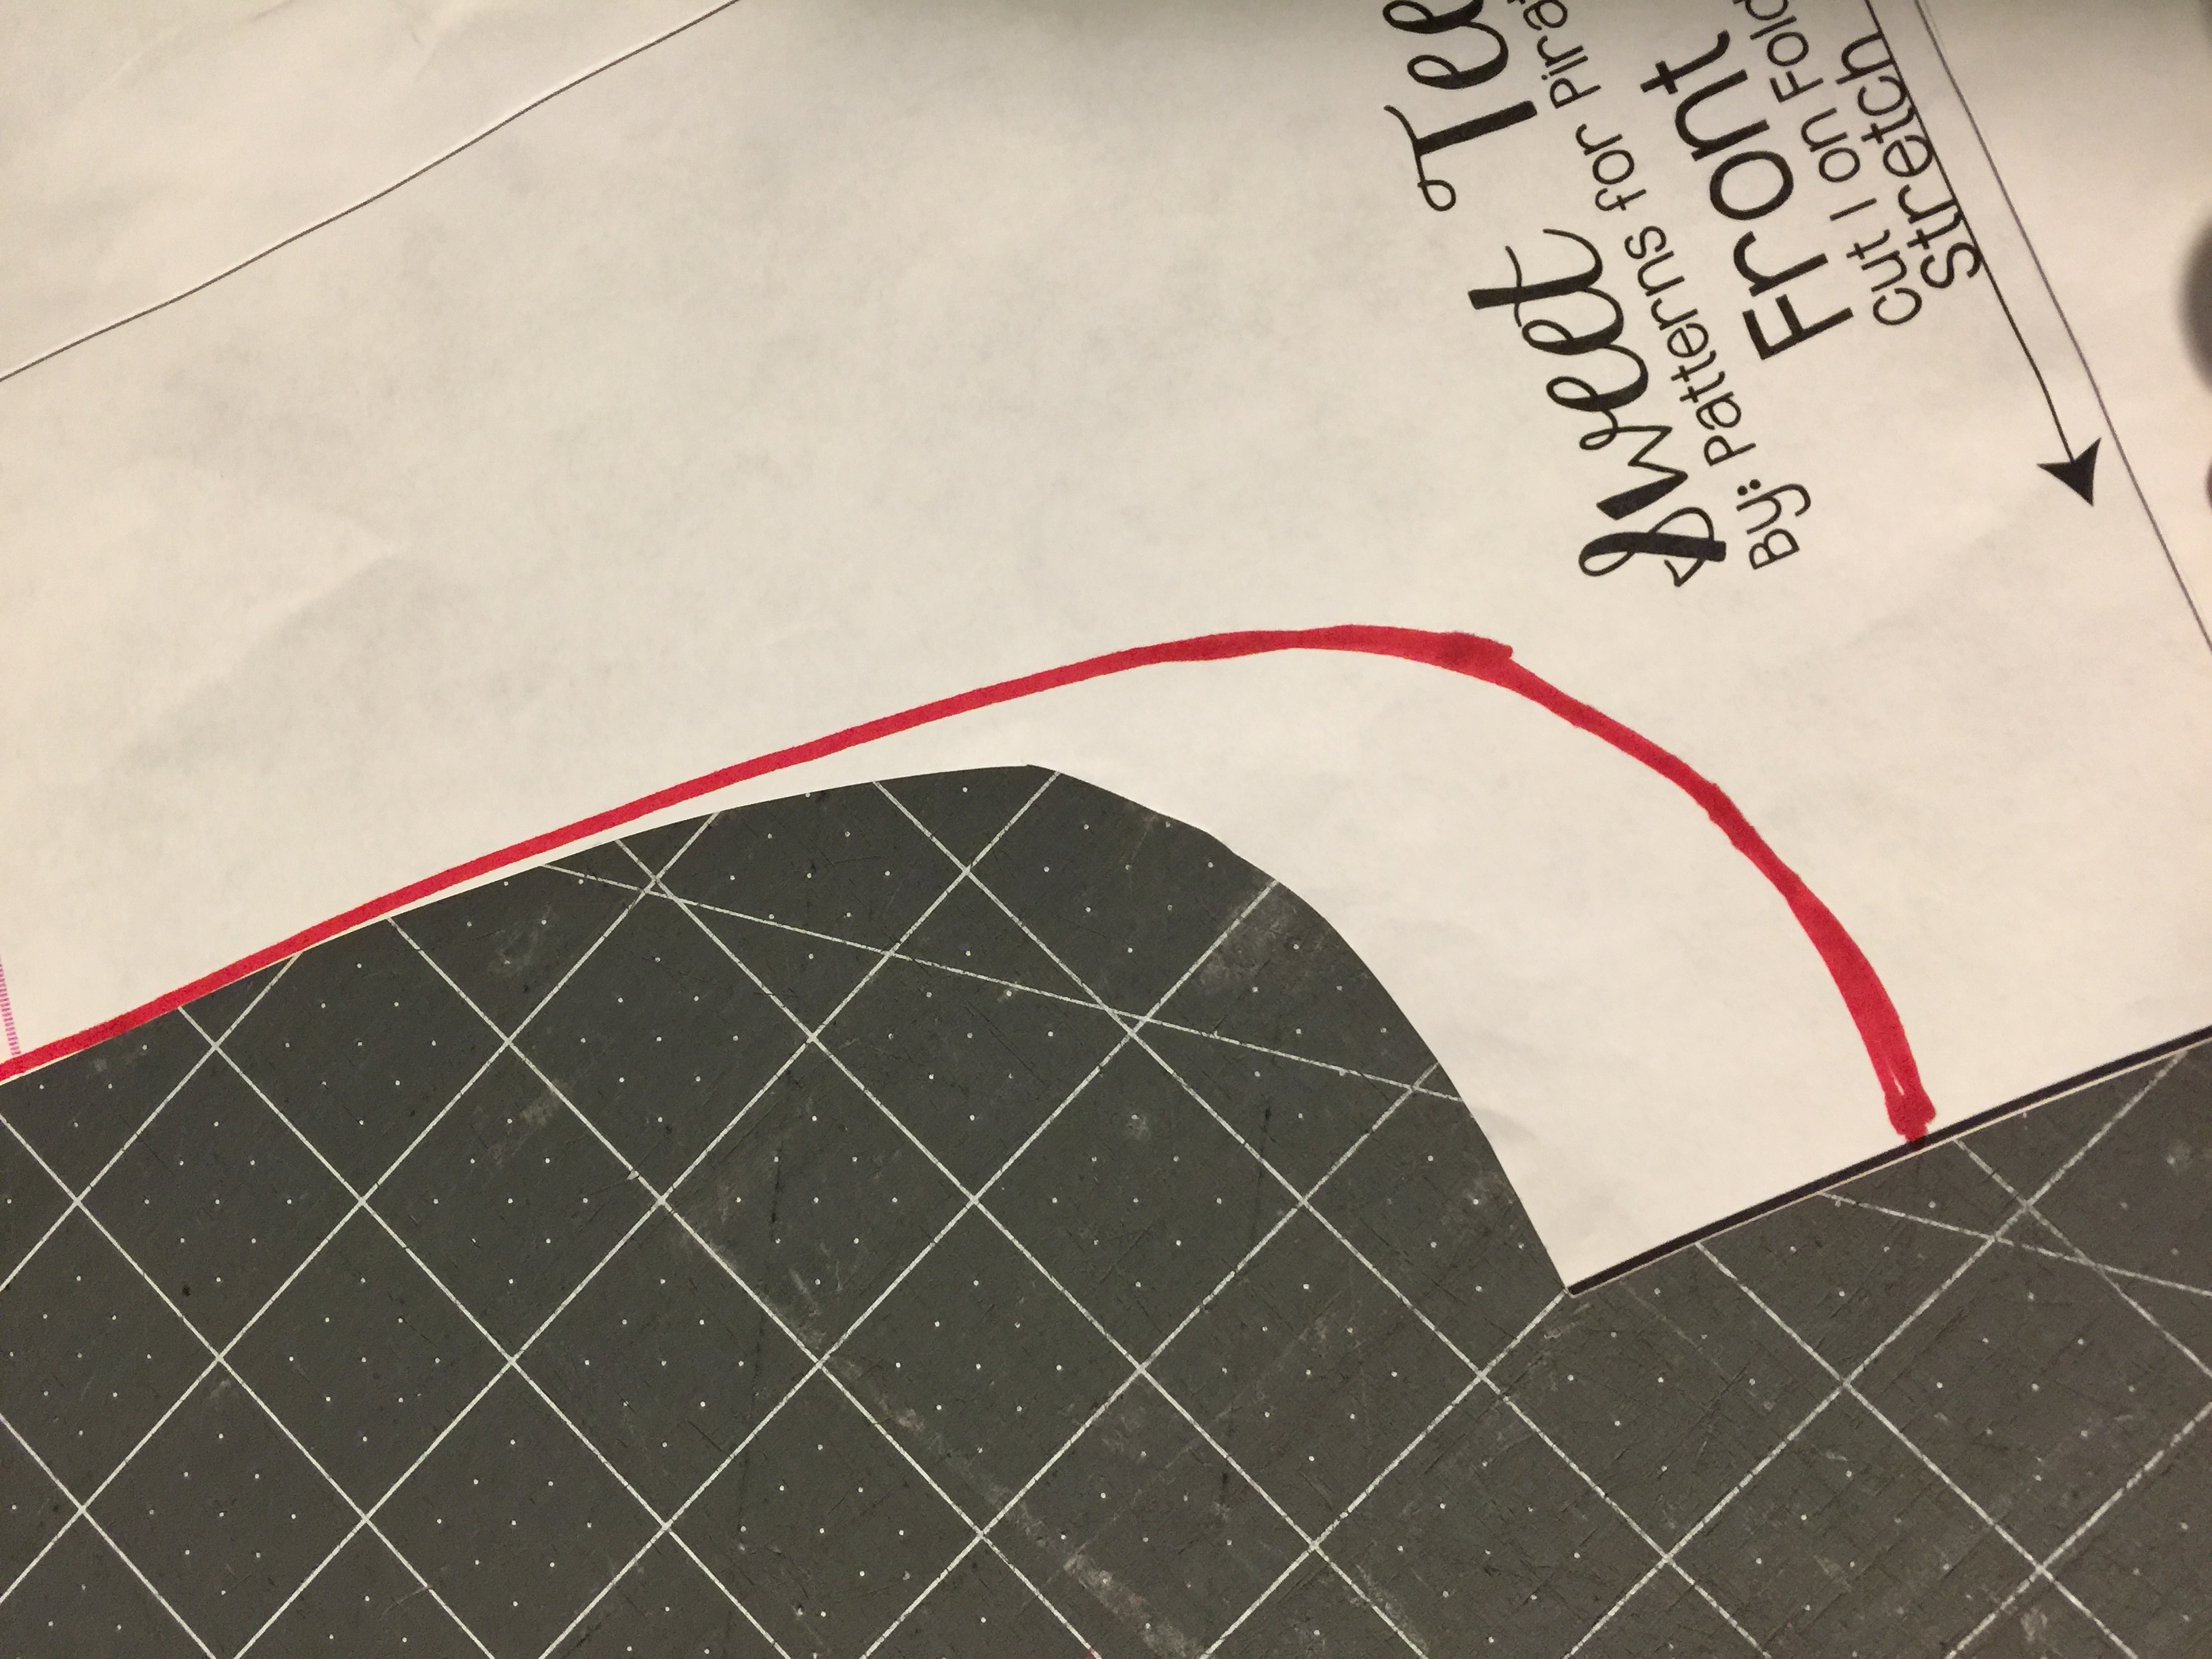
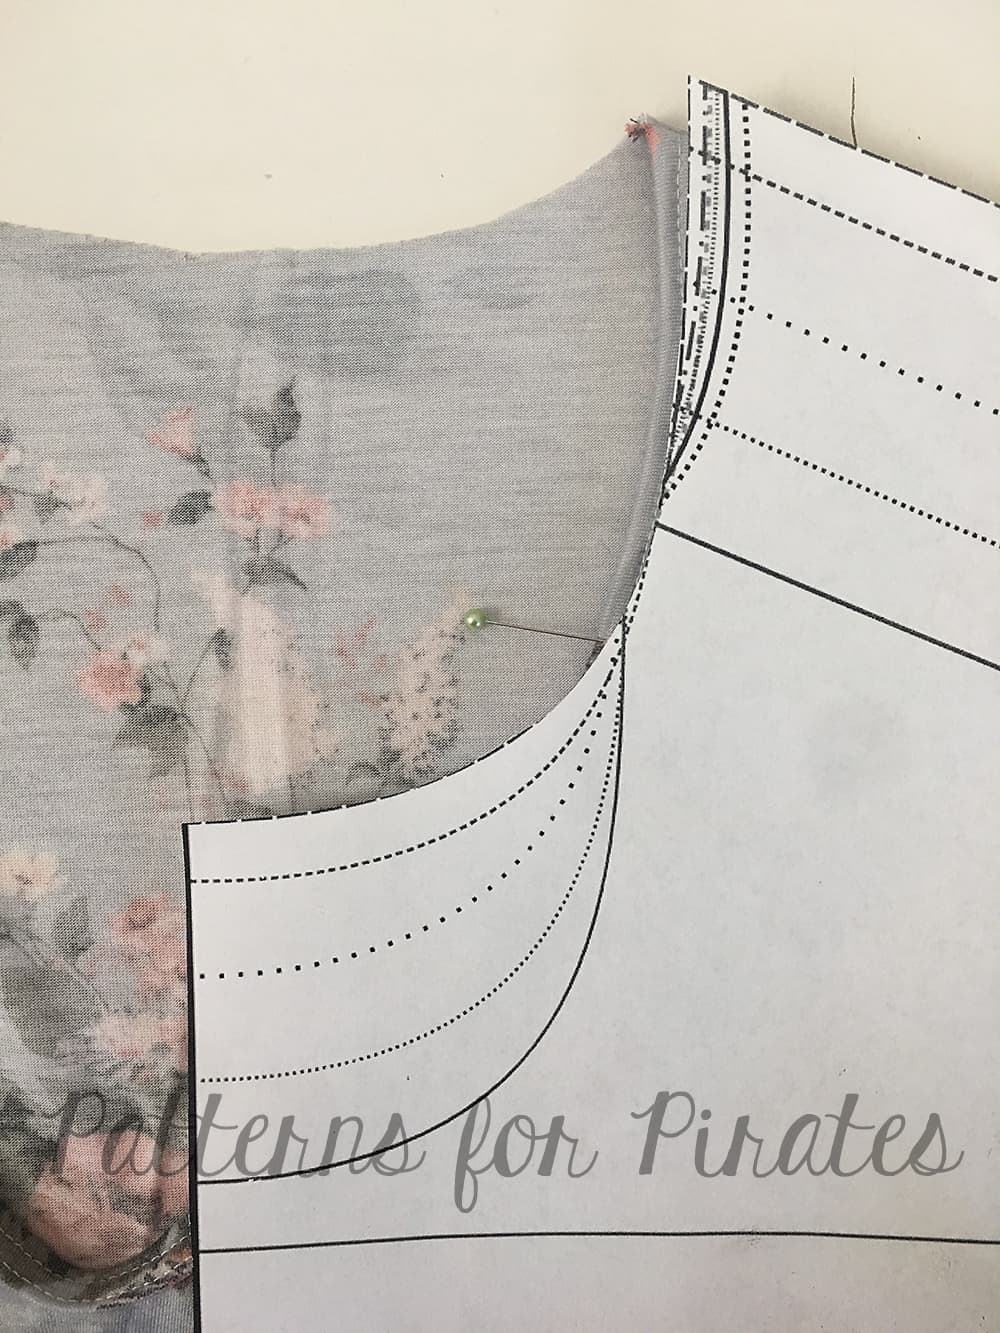
Once you have decided your pattern and cut your pieces, do not assemble your shirt!  We need to finish the V-neckline first and is easier to do prior to construction.  I chose to bind the V-neck, but you could also use a traditional neckband if you wish.  (Need more help with knit binding? Check out our tips HERE)

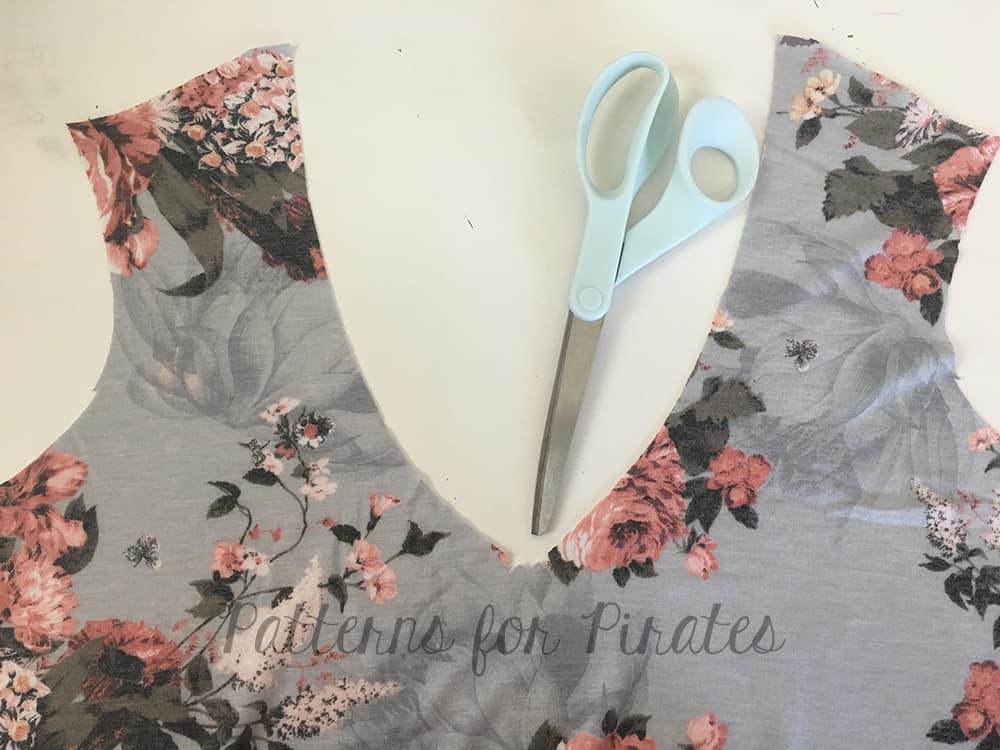
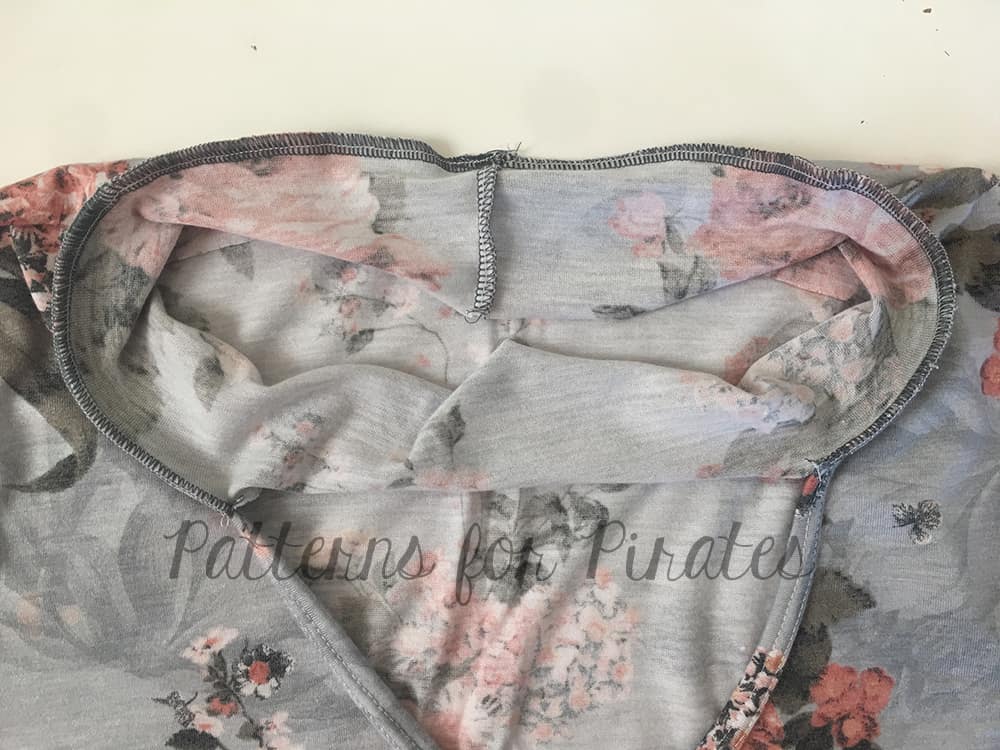
Snip a small “v” 3/8″ inward, on either side of the center of the v-neckline.
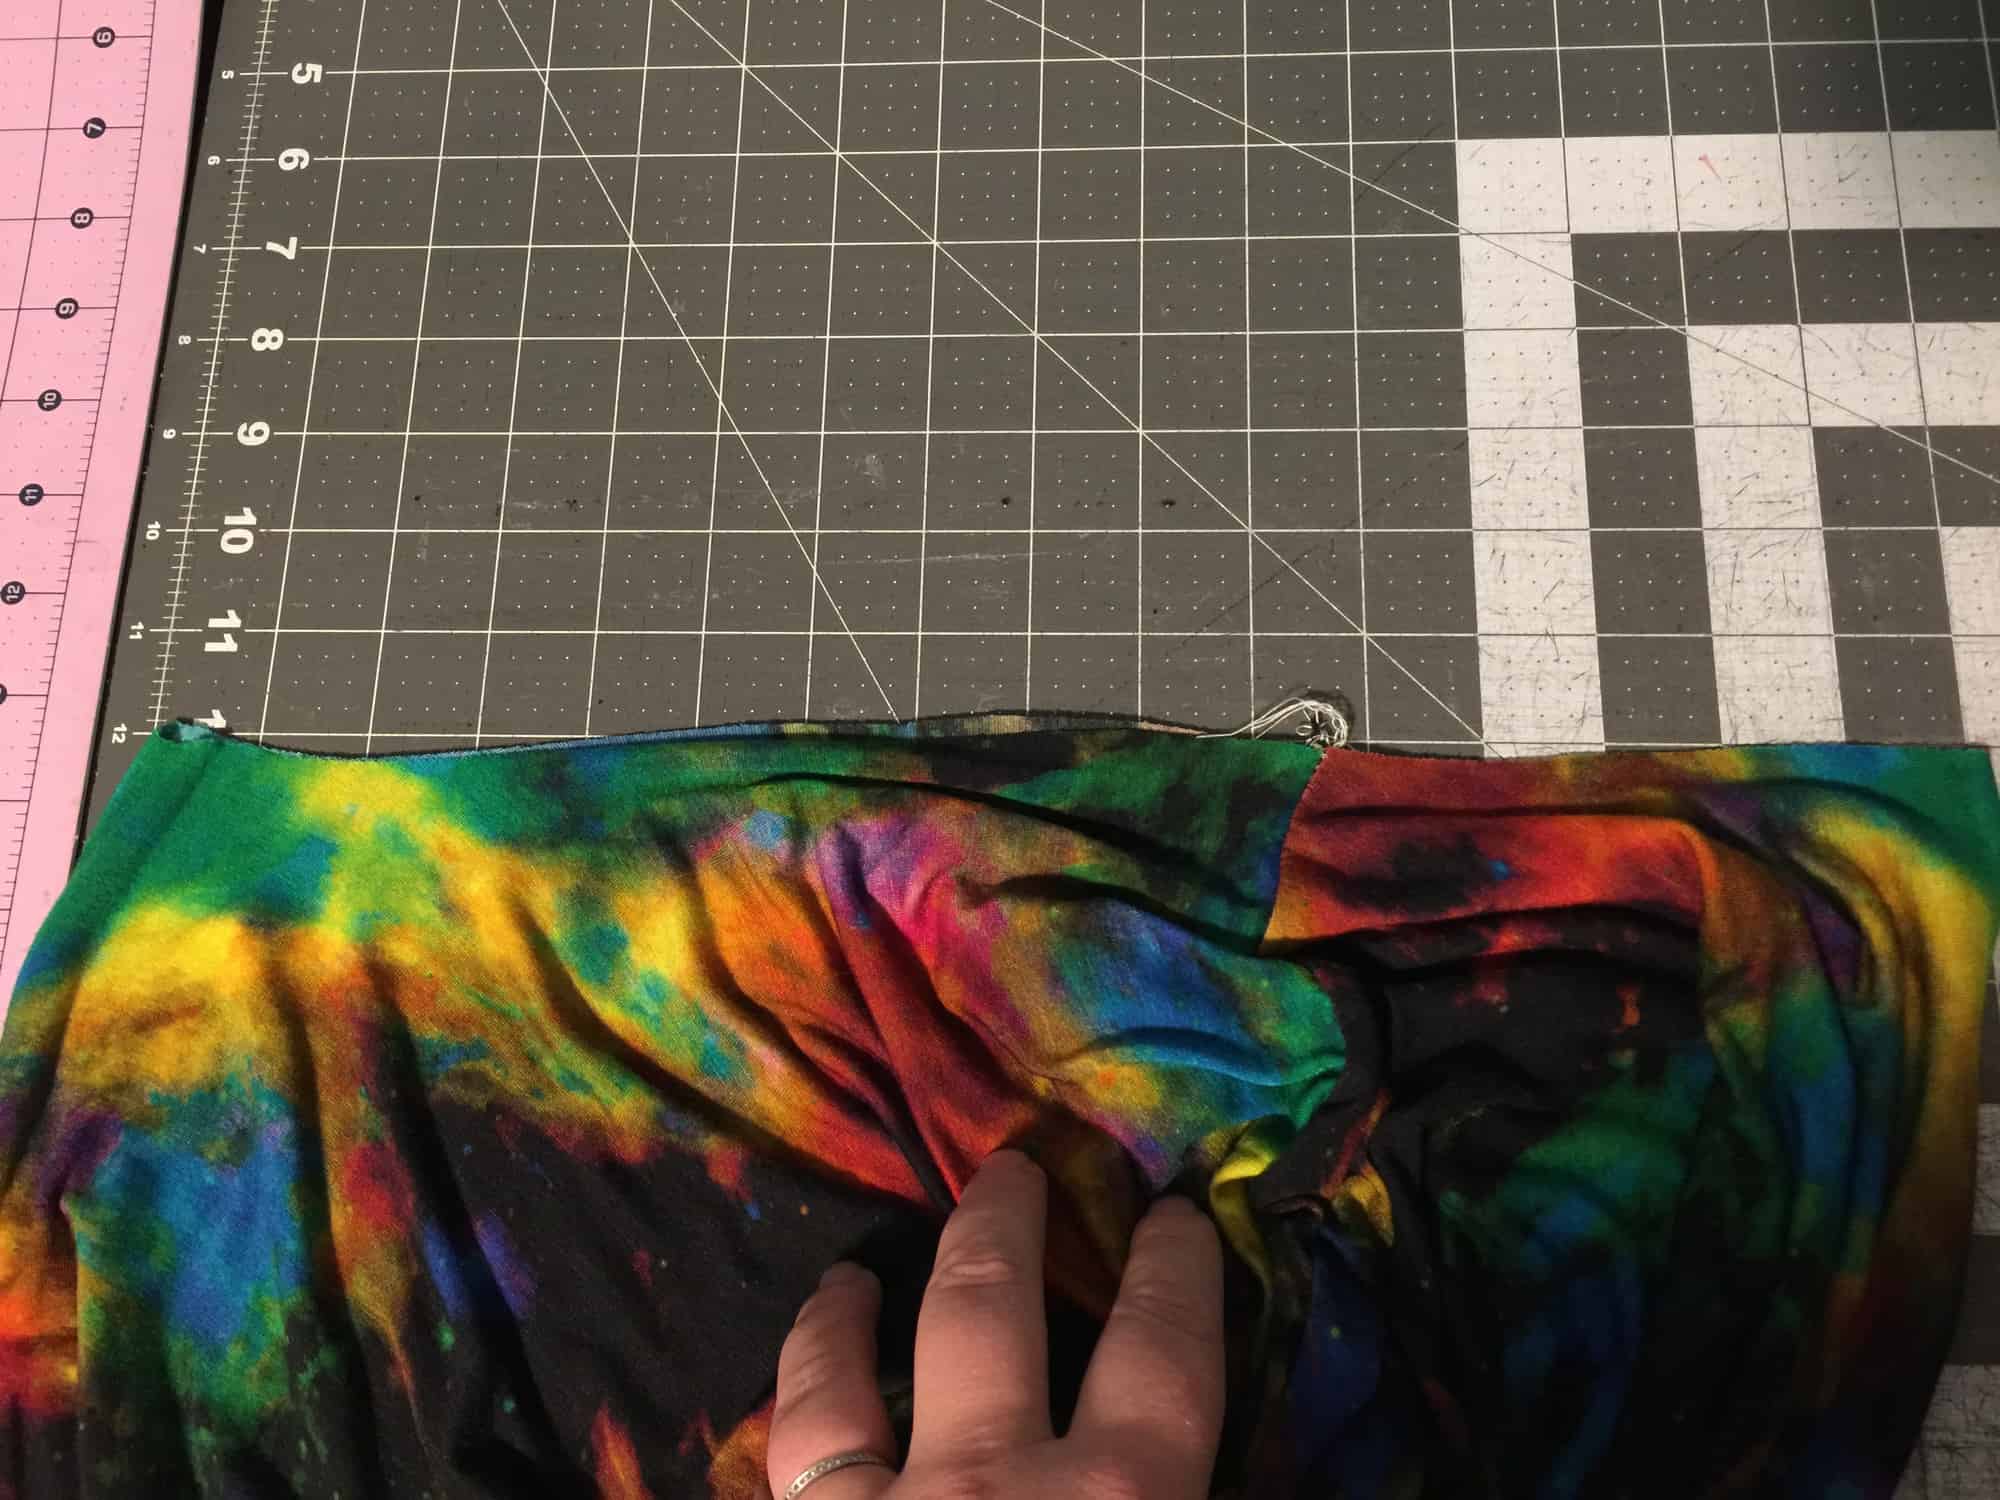
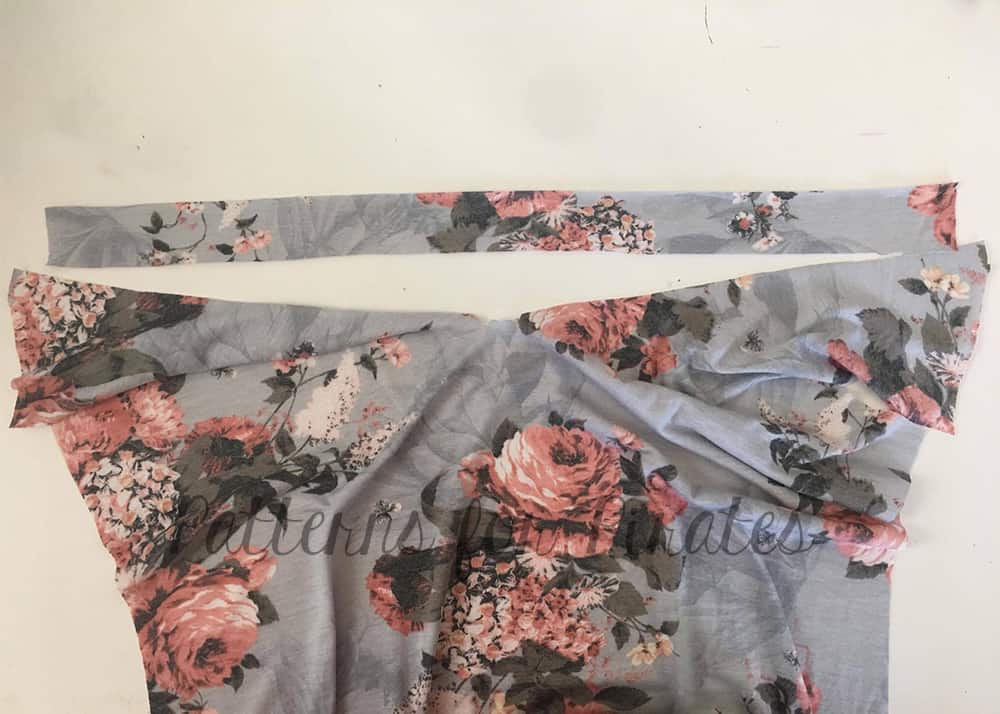
Cut a binding strip 1.5″ x 90% of the neckline.

With right side of the binding to the wrong side of the neckline, pin in place.
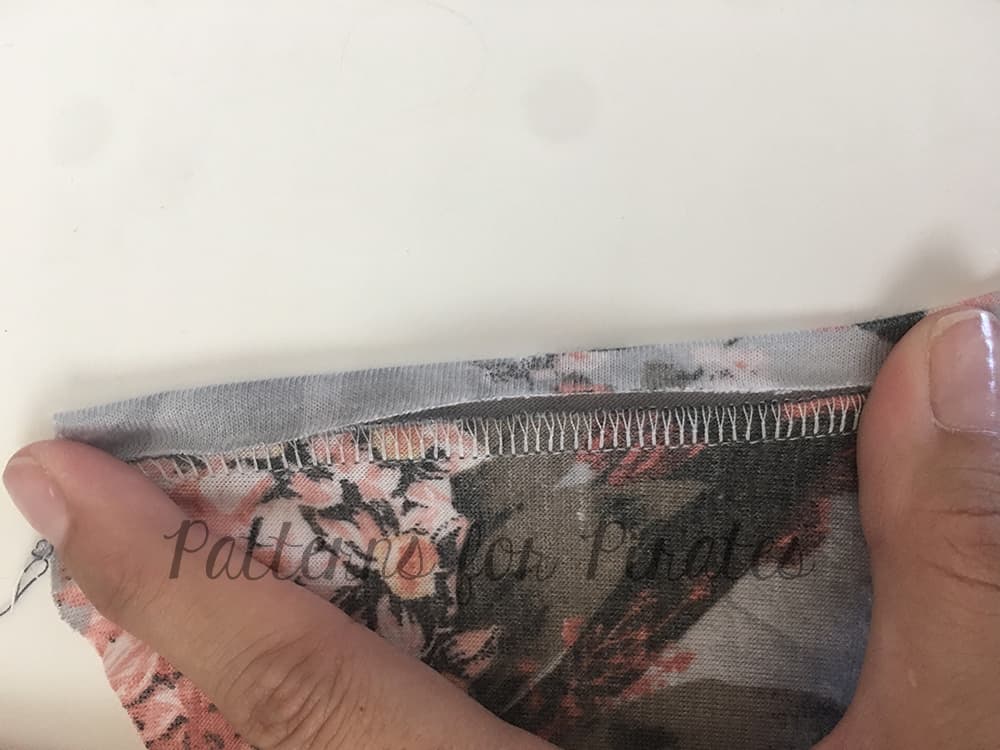
Stitch with a 1/4″ seam allowance. Note: the binding will need to stretch slightly to fit the neckline.

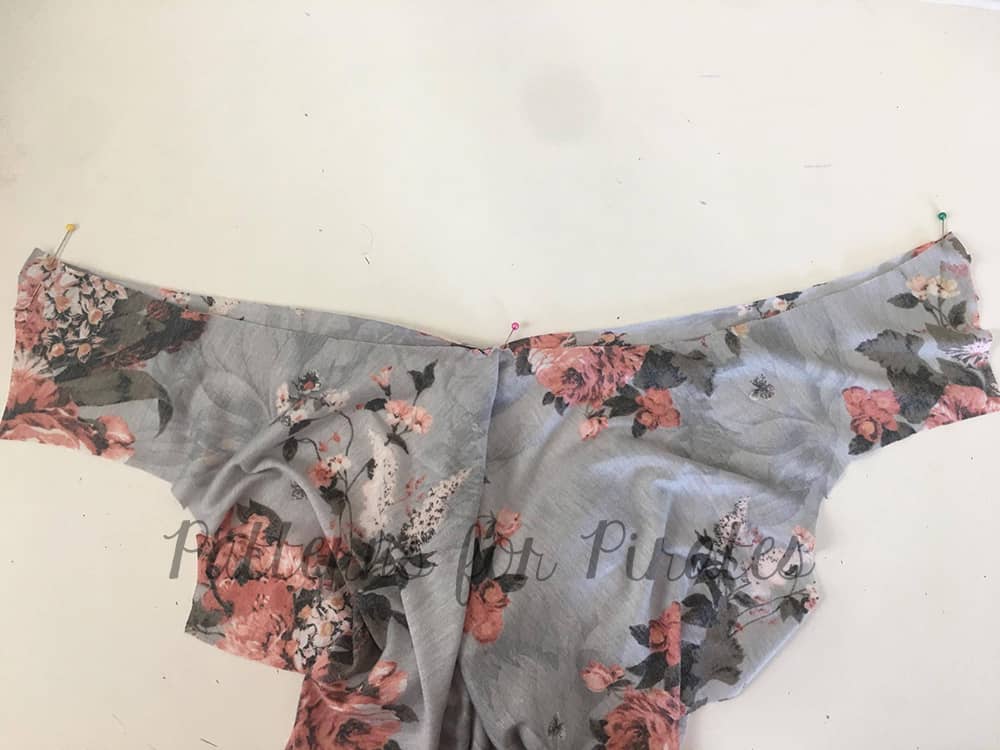
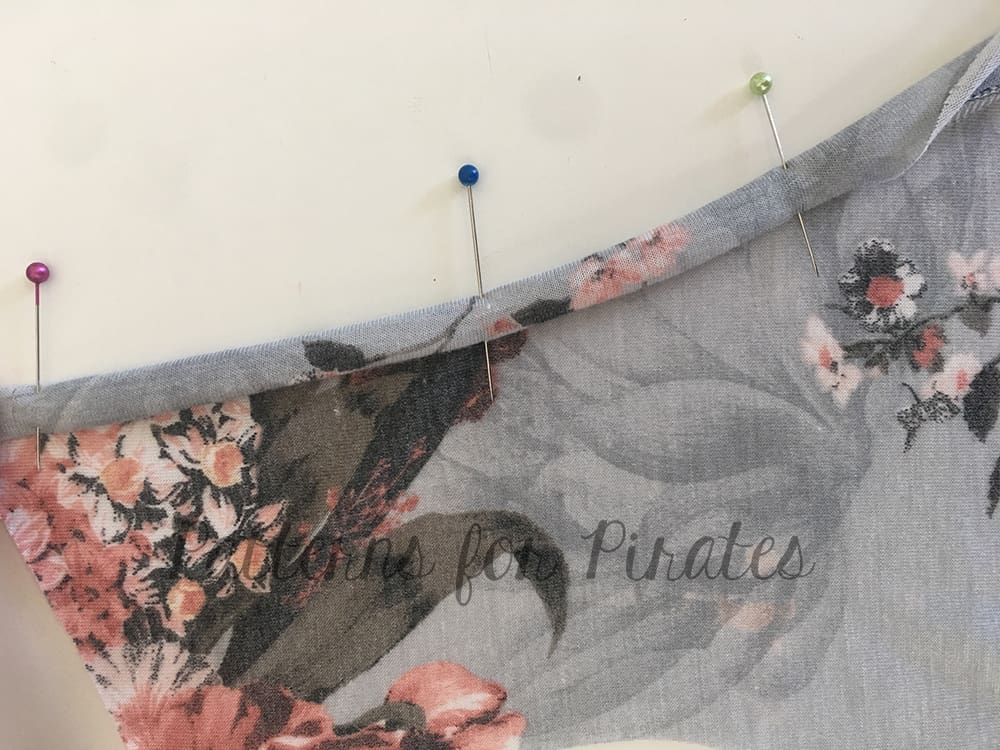
Press seam allowance up and fold raw edge to meet center. Press.
Fold over again, covering seam allowance and press.
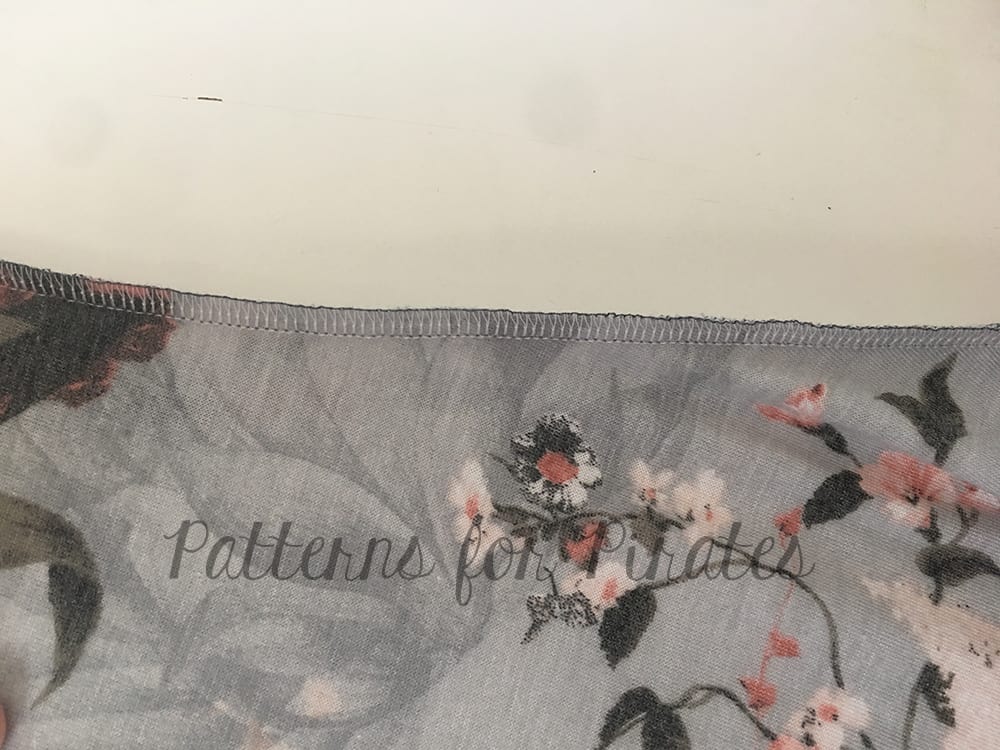
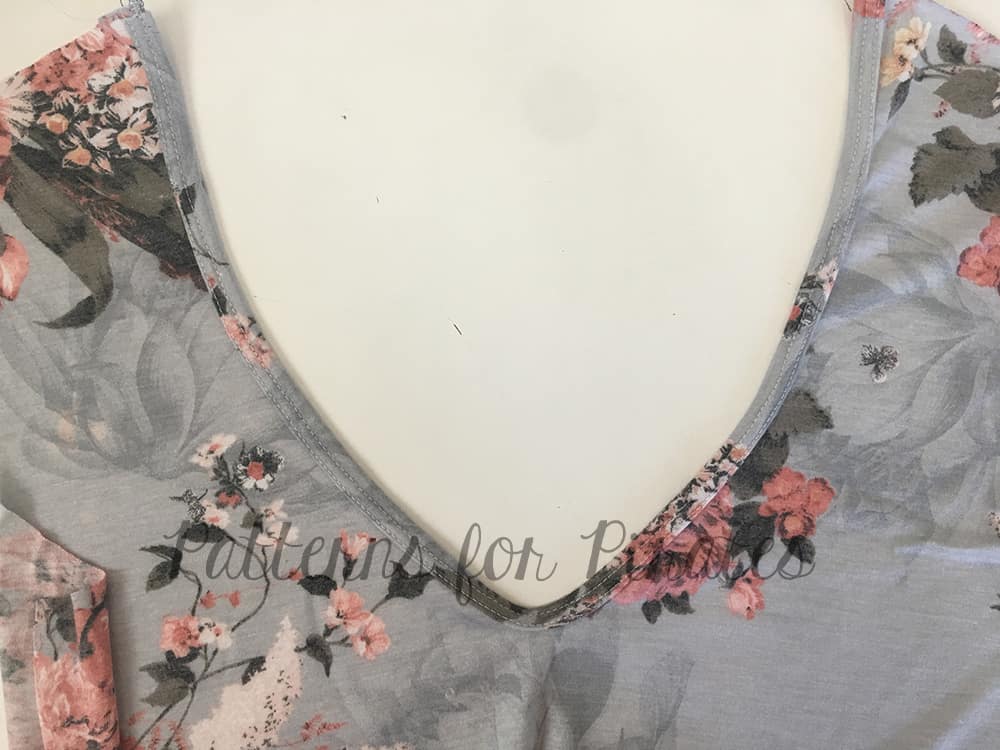
Top-stitch.
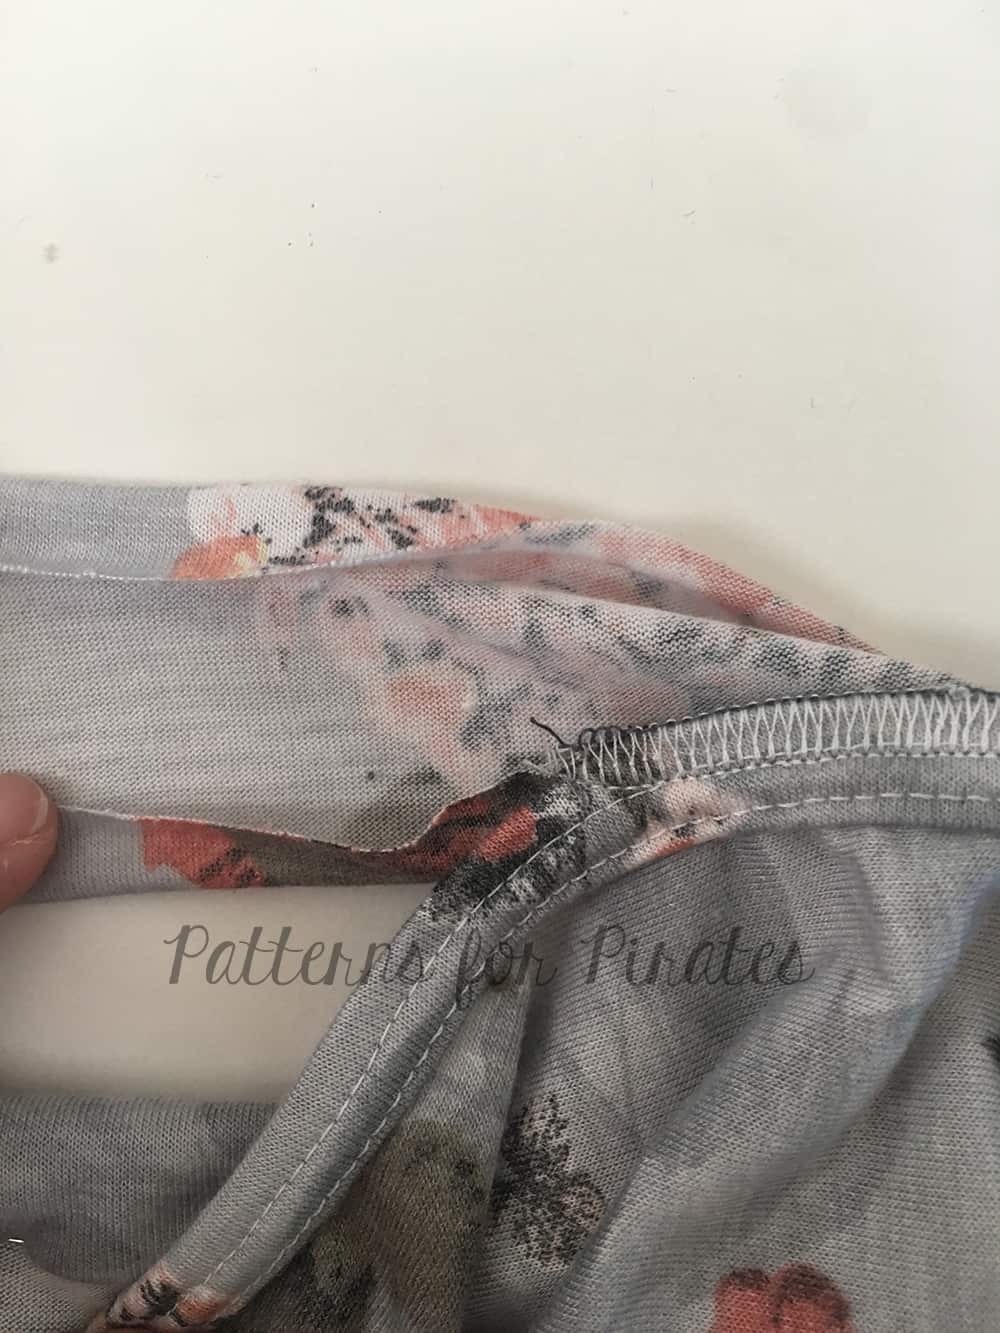
Fold V-neck in half width-wise and stitch down the center of the V.


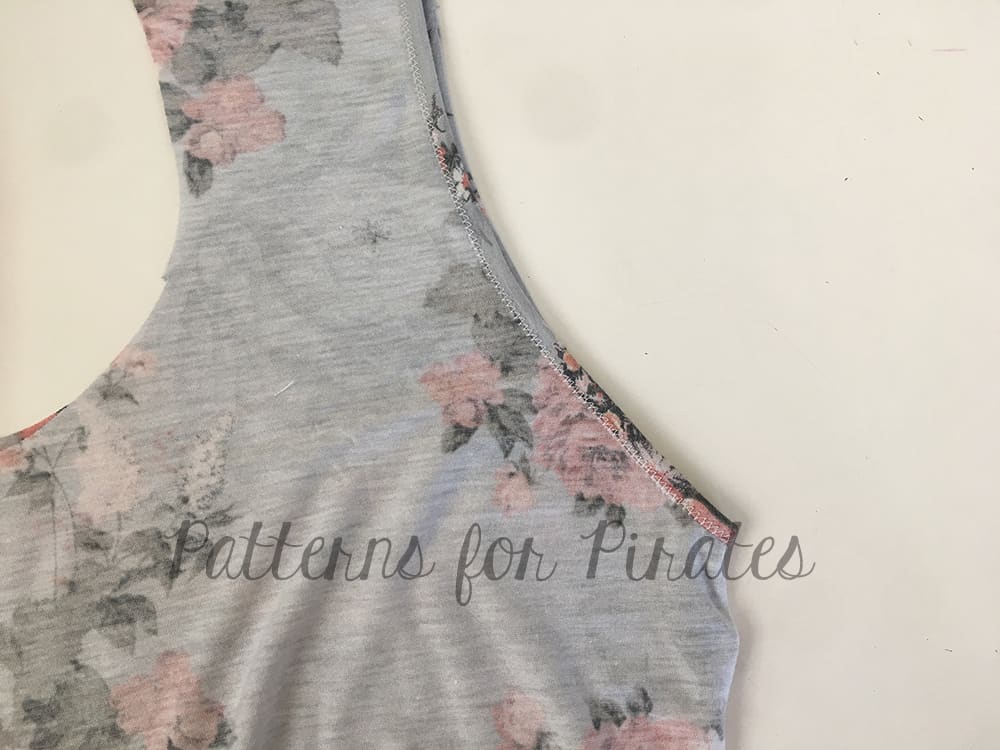
Next, construct and finish your shirt as indicated in the tutorial, but do not use the existing neckband instructions.  We will now finish the choker portion of the neckline.

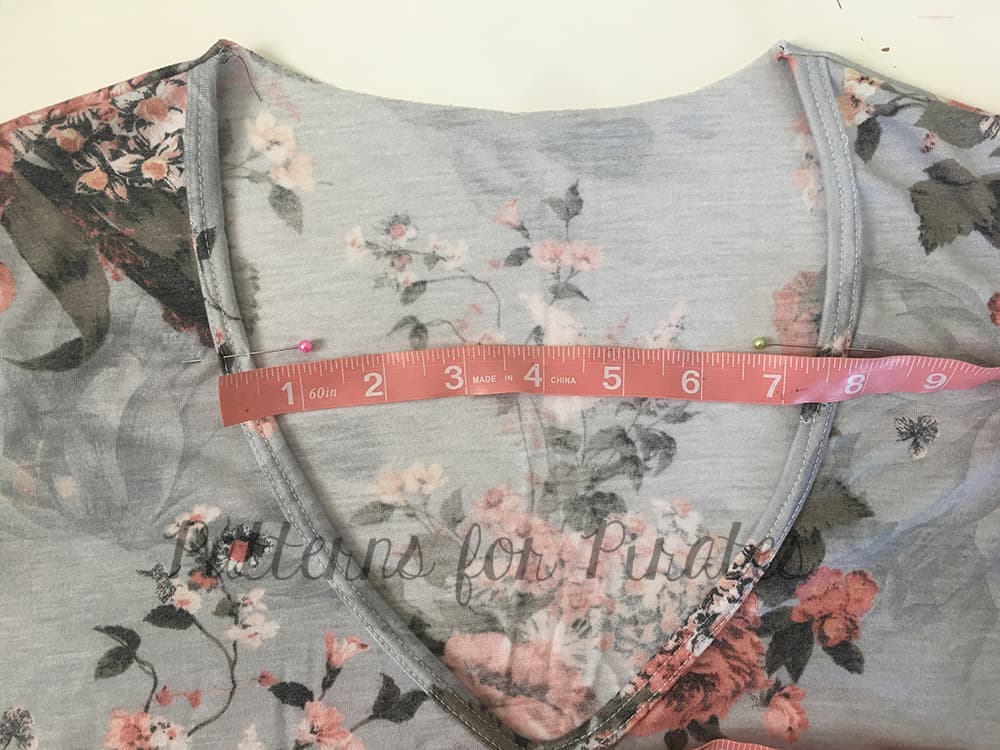
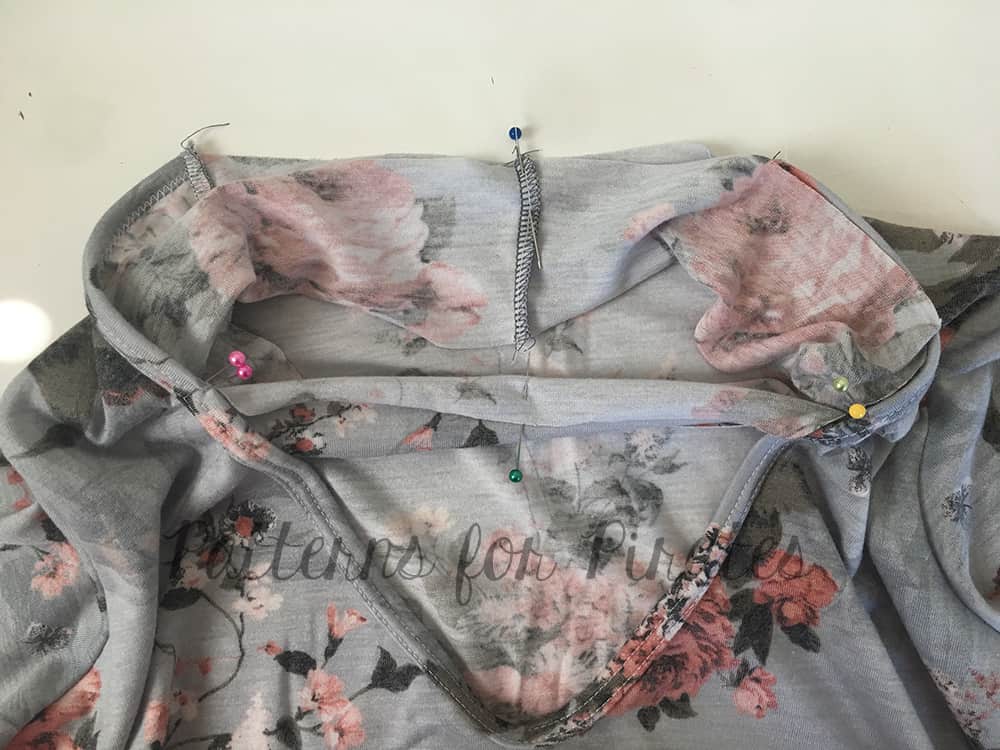
I did not want the choker neckband piece to be too high on my neck, so used the Women’s Henley as a guide for placement. You can make your own adjustments if you prefer to have it higher or lower. Place a pin or mark on the neckline where you wish to have the choker band.


We are going to use the same binding method as we did the v-neck to finish the choker band.  My binding strip is 2.5″ and finishes about 1″.  Again, this is customizable and if you wish to have a thicker or thinner choker piece, adjust the height of your band accordingly.  (just be sure to add 1/2″ to the height as we will be folding and enclosing the raw edges).

Lay your shirt flat and measure the distance between either side of the neckline where you wish the choker band to attach at the neckline. This is measurement “A”.
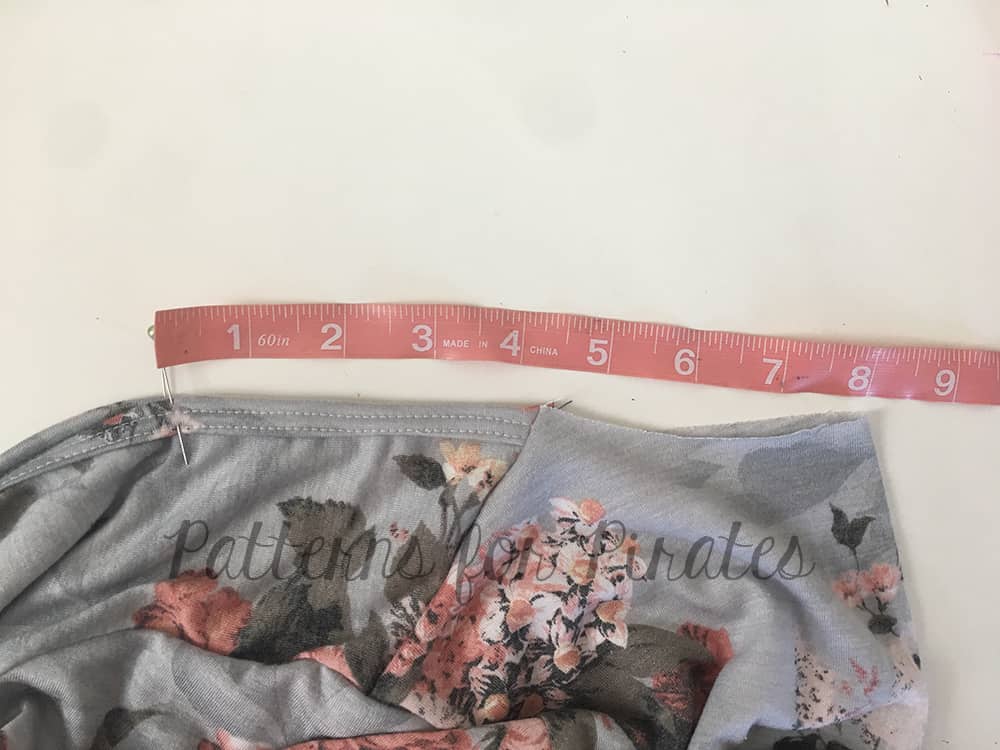
Measure the neckline from your marked point to center back. This is measurement “B”.

To determine the width of your choker binding:  A + ((B x 2) x 90%)).  For example, my measurement A is 8″. Measurement B is 8″. So my choker band is 8″ + 14.4 (or 8 x 2 then x 90%) = 22.4″ .  To make it a nice even number I just rounded it out to 22.5″.

Mark 1/2″ of measurement “A” from the fold.
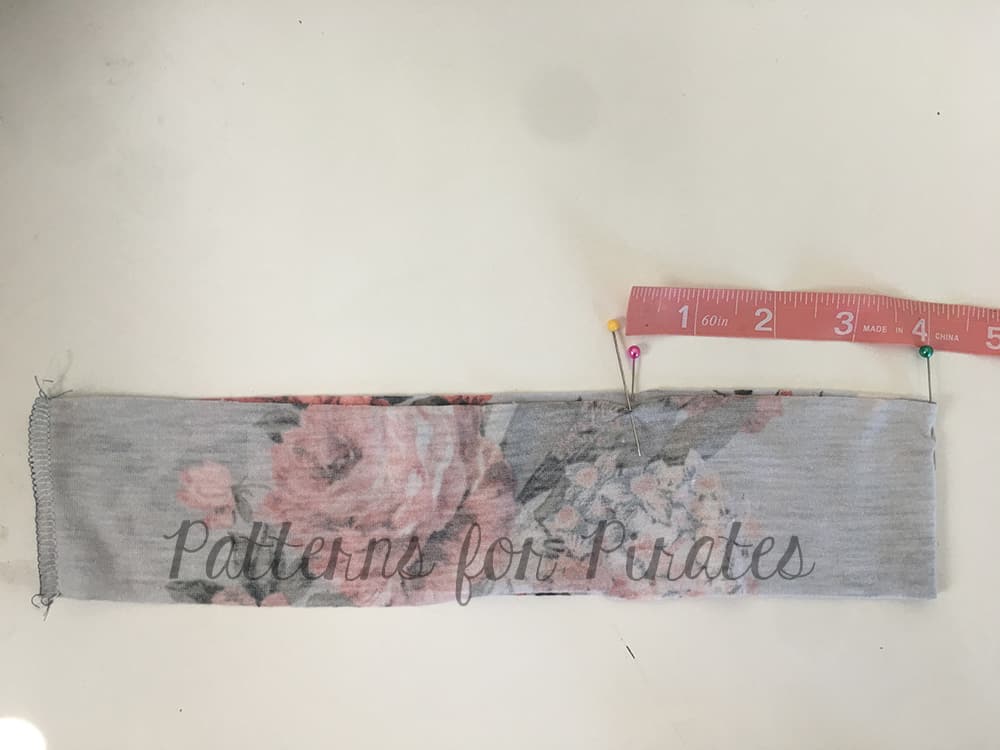
Fold binding in half width-wise and stitch short ends together, creating a circle.
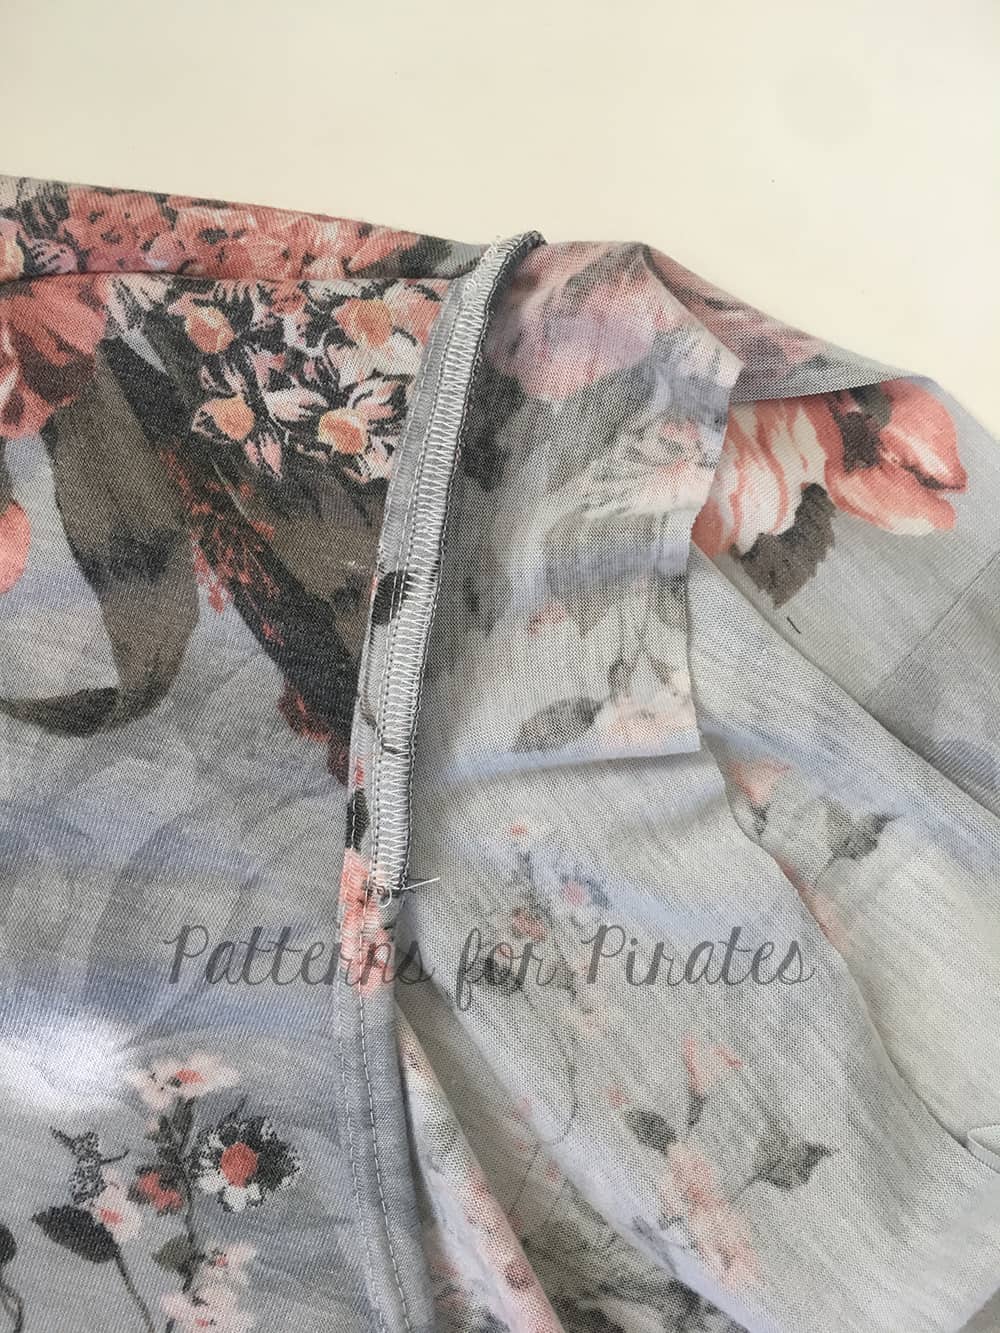
 

With right side of binding to wrong side of shirt, match center back and two front points of neckline and choker binding.
Stitch using a 1/4″ seam allowance.

Press seam allowance up.
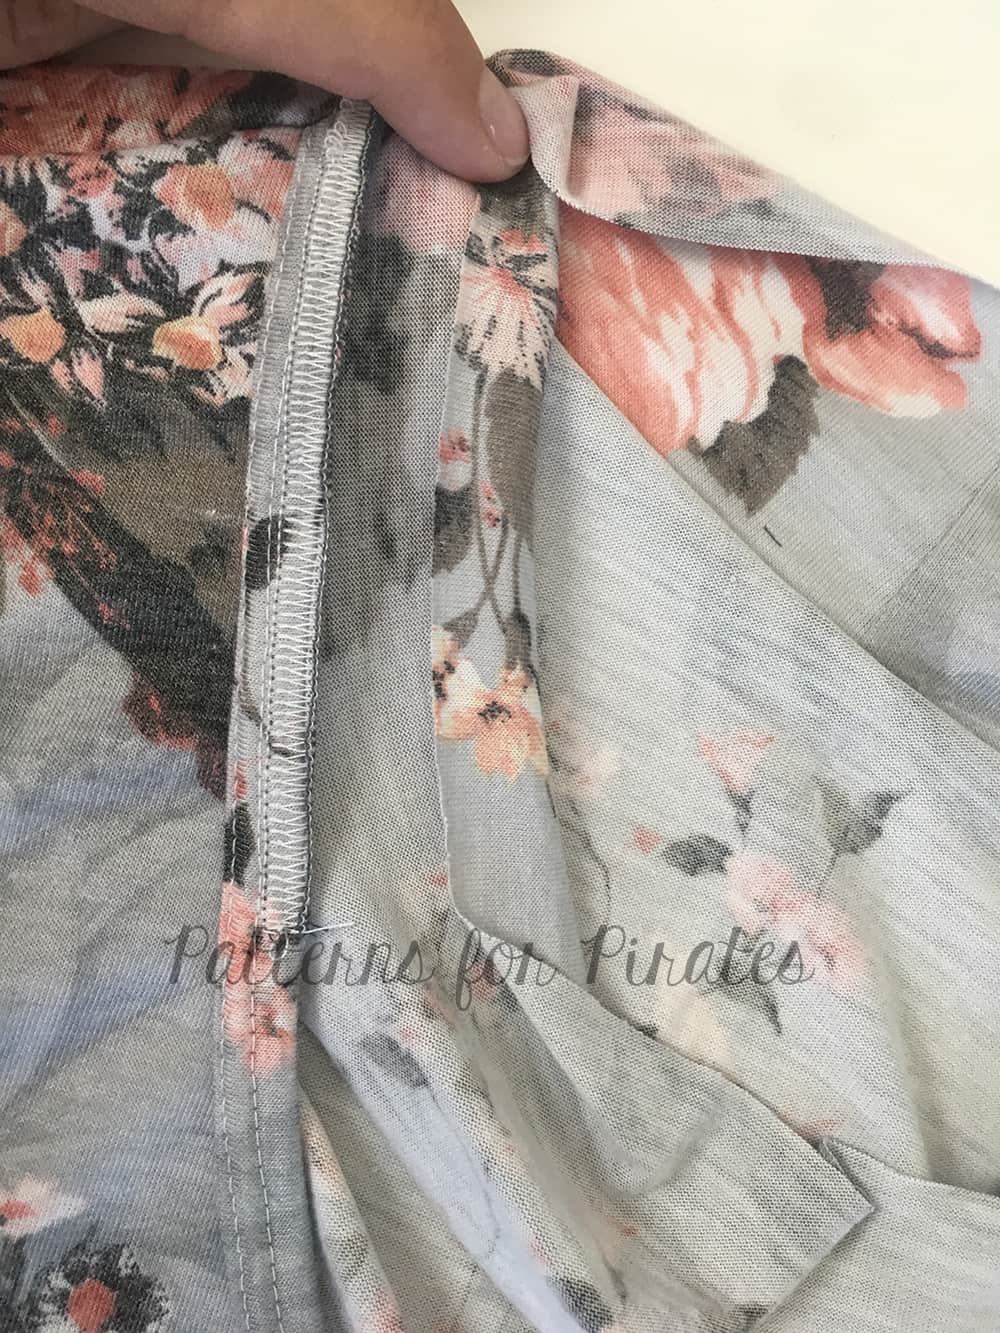
Fold binding raw edge down 1/4″ towards center. Press.

Fold and press the bottom raw edge 1/4″ between your V-neck.
Fold in half again, just covering your previously stitched line.

Continue folding and pressing the binding all the way around neckline.
Top-stitch near the bottom fold.

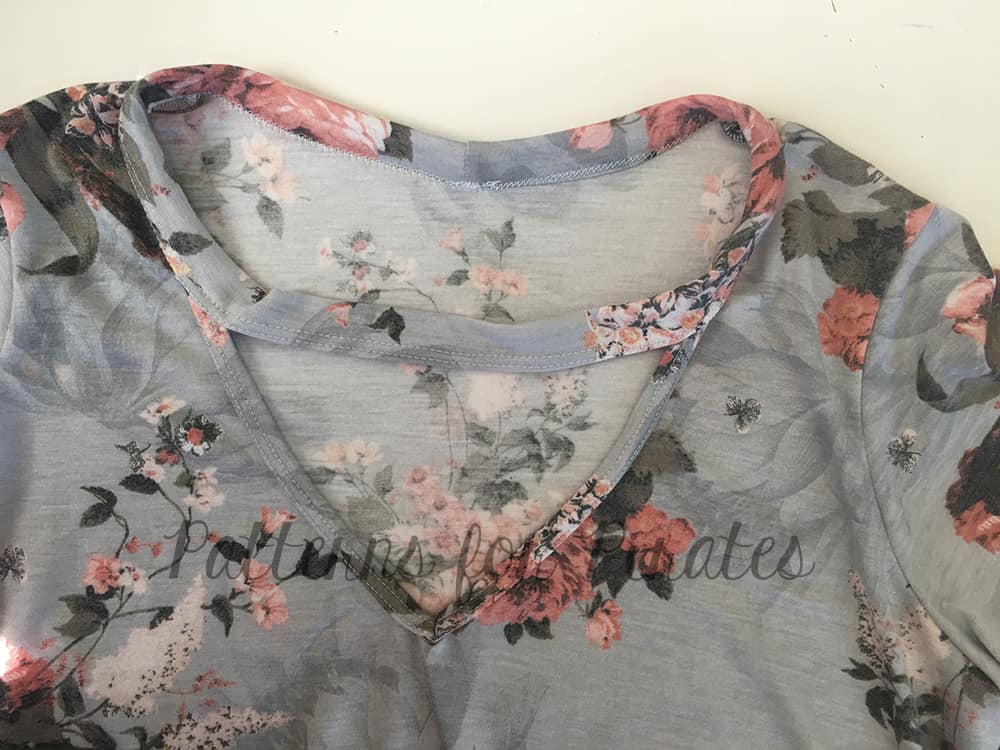
Voila!  You’re all finished.   🙂


Filed Under: Pattern Hacks, Uncategorized 1 Comment

How to lower or raise a neckline

January 6, 2017

img_4108

We have seen a lot questions about raising or lowering the neckline of various P4P shirts or dresses. On the blog today I show you how easy it is to alter the neckline to achieve the look you want. For this tutorial I will use the Sweet Tee pattern in a beautiful viscose rayon (dress option lengthen 3.5″) but you can apply this technique to either one of the shirt patterns.

img_4118

Start by printing and cutting your pattern in the size needed. The only piece we will be altering will be the front of the shirt (or bodice).

For lowering the neckline you will need to mark on the center fold where you would like the new neckline to be. I usually lower my Sweet Tee neckline 1.5 inches. Using a French Curve (or going slowly) draw a curve similar to the original one from your mark to the inner shoulder point.

raiselowerneckline

img_4502

Cut your fabric using the new front pattern piece. The rest of the pattern pieces will remain the same. The only other change you will need to make is the length of the neckband or binding.

To raise the neckline you will need to grab your front bodice piece and a blank piece of paper. Align the center fold of the front pattern piece  with the side of your paper and glue them together.

Mark a point 1-2 inches above the original top center depending on how high you’d like the neckline. Using the French Curve draw a curve from the center point to the inner shoulder point. Cut the new front using this modified pattern piece and the rest of the pieces as in the original pattern.

img_4503

The only additional modification you will need  to make is to adjust the neckband or binding length. You will need to make it longer or shorter depending on the new neckline. I like to calculate the new neckband length after I sew the front and back pieces together at the shoulder. To find out the new neckline circumference lay the neck opening along a ruler and multiple it by 2.

img_4505

Your new neckband length will be 85% of this circumference plus 1 inch to accommodate the seam allowance. (C * 0.85 +1 ). Cut the new neckband/binding using the new length but keeping the width suggests in the pattern. All you have left to do now is sew the shirt or dress according to the tutorial and you have just made yourself a custom outfit. Easy peasy…right? 🙂

I can’t wait to see your creations in the Pattern for Pirates group.

img_4115

img_4113

Happy sewing, pirates!

Filed Under: Frequently Asked Questions, Pattern Hacks, Uncategorized 6 Comments

Featured Patterns

  • Loosey Goosey Loosey Goosey $12.00 Original price was: $12.00.$10.50Current price is: $10.50.
  • Loosey Goosey- Youth Loosey Goosey- Youth $10.00 Original price was: $10.00.$8.50Current price is: $8.50.
  • Loosey Goosey - Bundle Loosey Goosey - Bundle $20.00 Original price was: $20.00.$18.00Current price is: $18.00.
  • Everyday Shirt Everyday Shirt $12.00
  • Everyday Shirt- Youth Everyday Shirt- Youth $10.00
  • Privacy Policy
  • Refund Policy
  • Affliliate Program
  • Contact Us
  • About

Copyright © 2025 Patterns for Pirates

Copyright © 2025 · Genesis Framework · WordPress · Log in