In true P4P fashion, we have a few easy, fun hacks for the Brunch Blouse. Grab the pattern here and get creating!
. . . . .
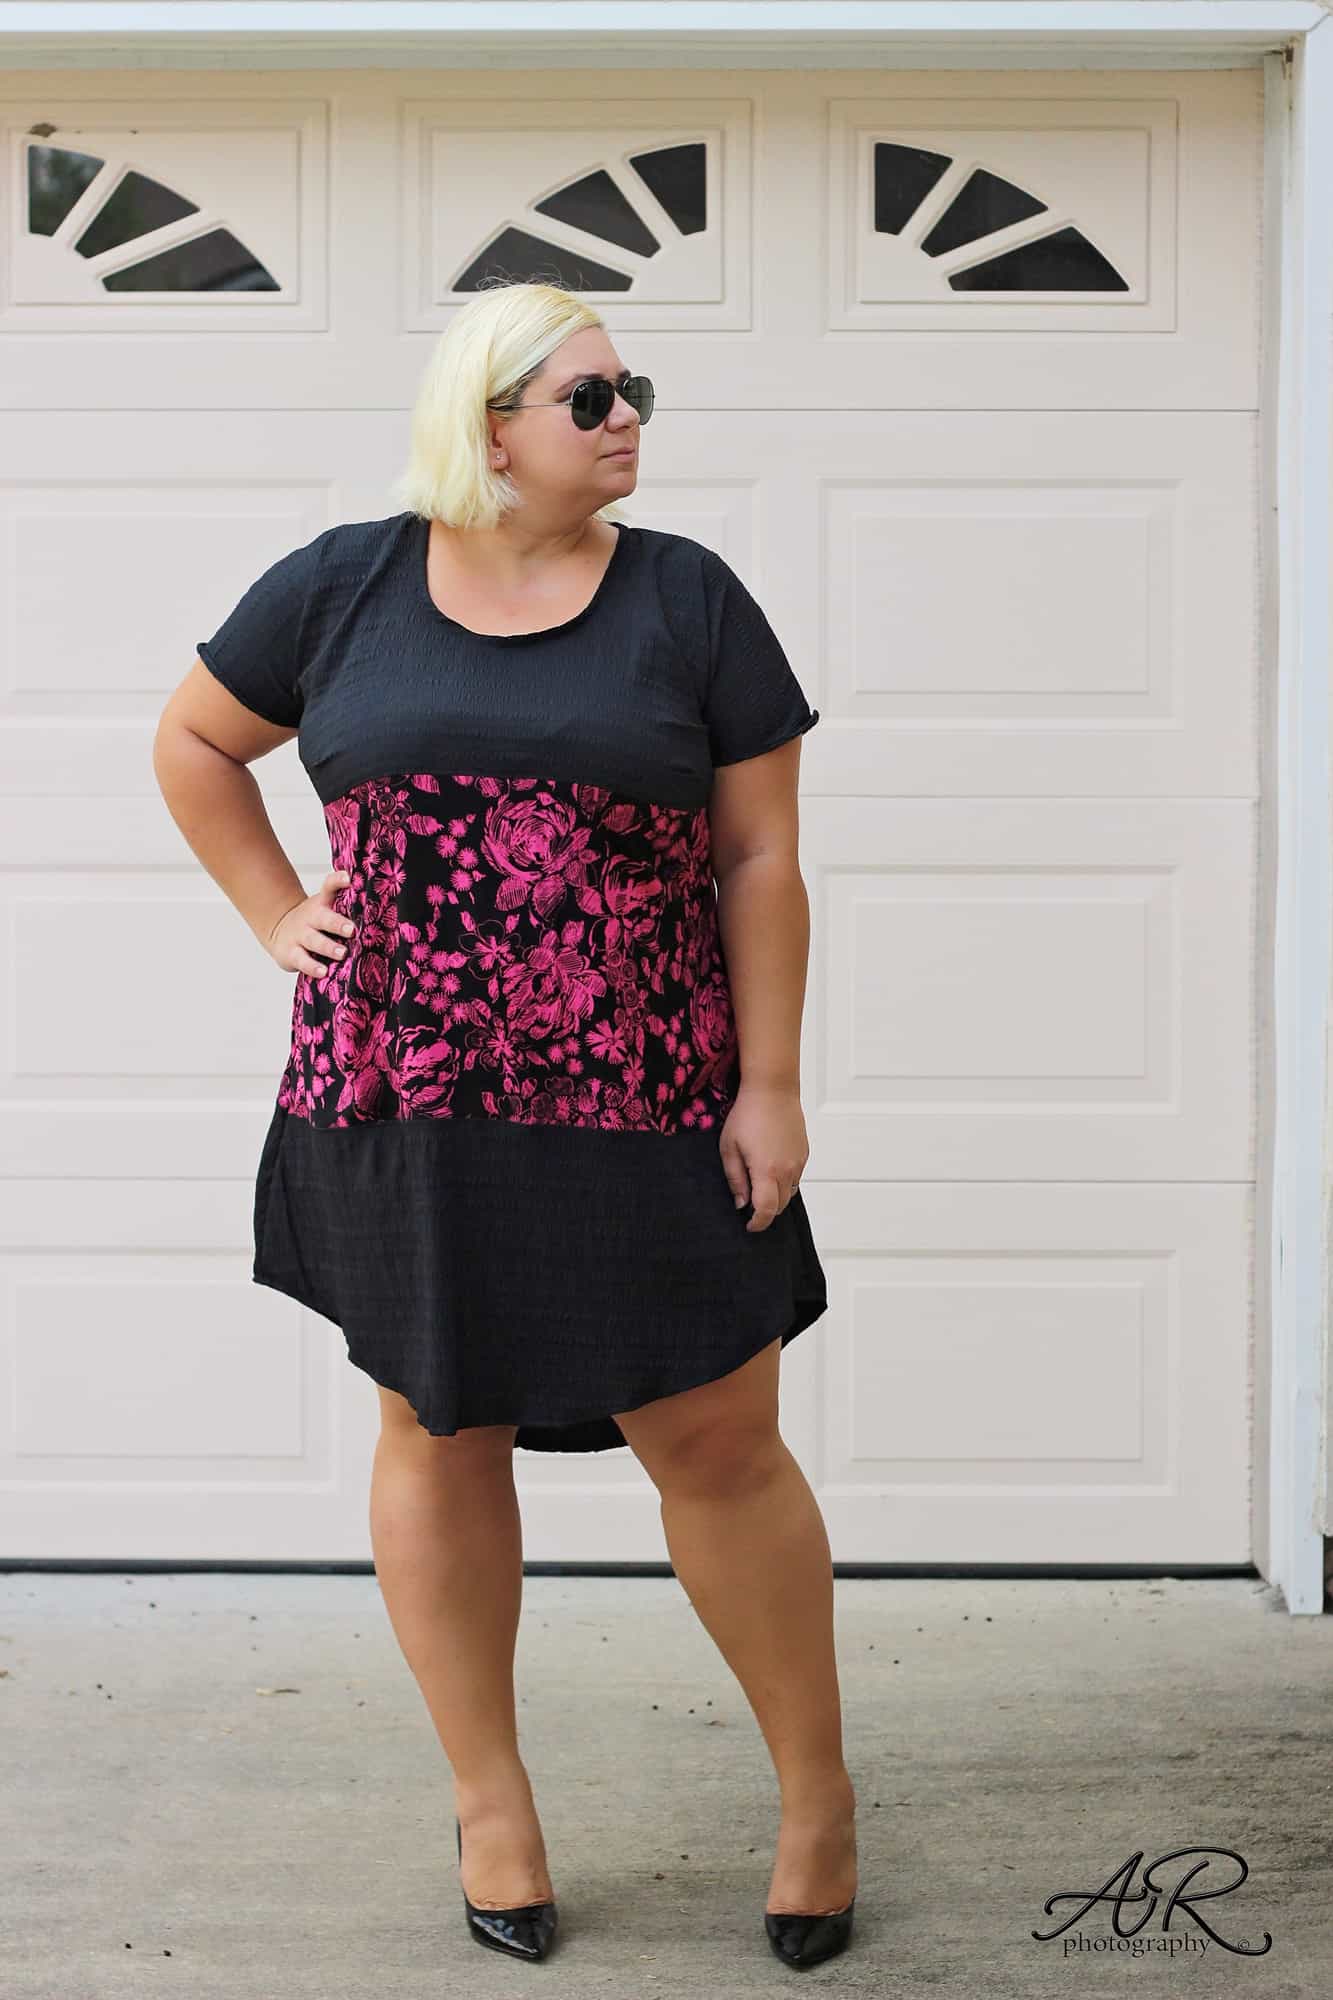
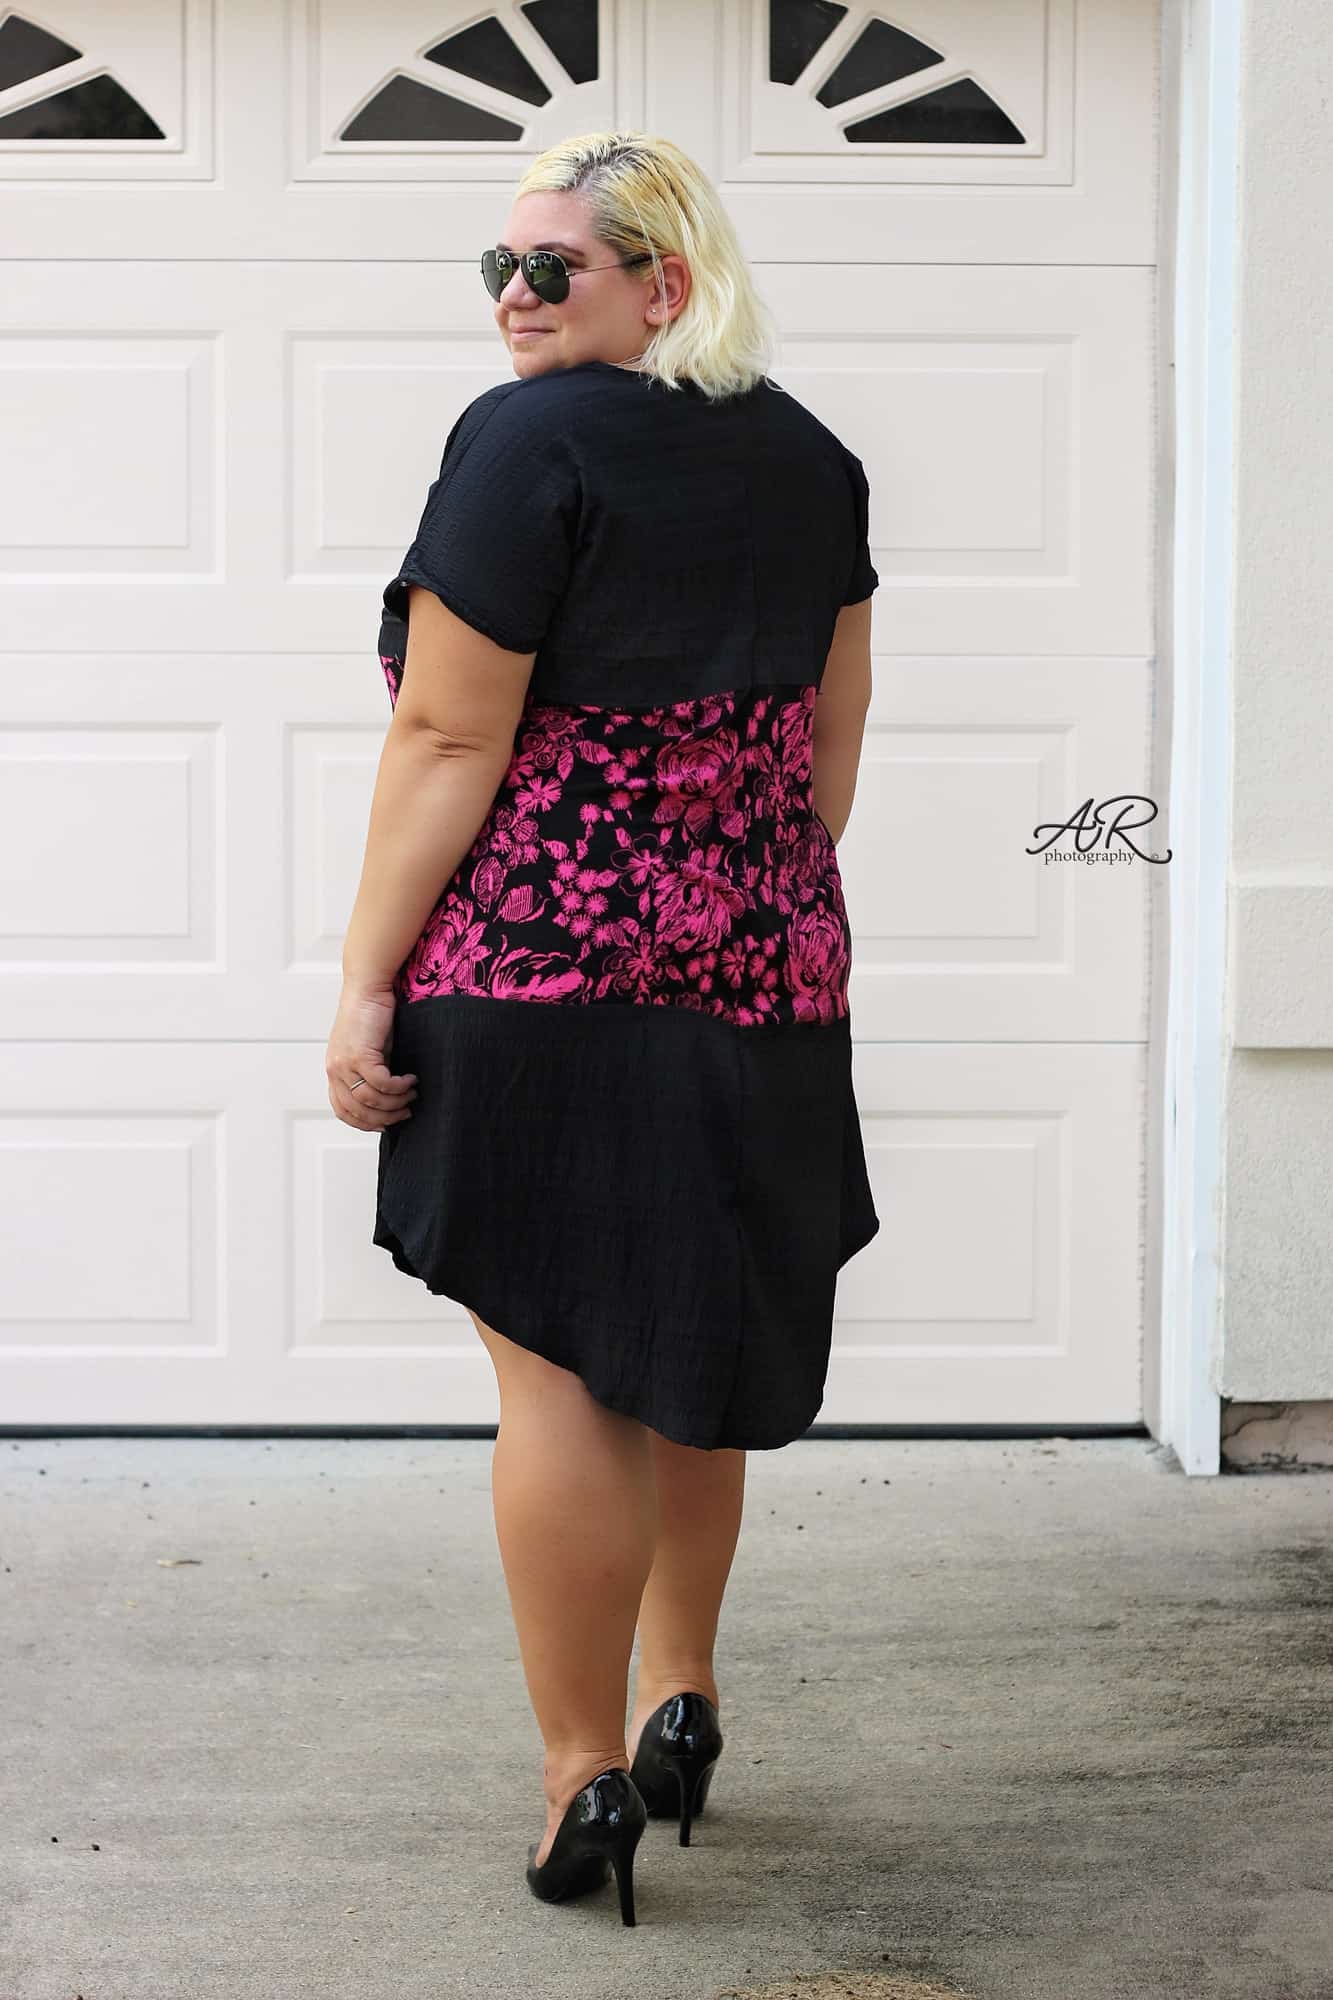
Color Block Dress
First off I will show you how to achieve a color block look with the dress option of the Brunch Blouse. You can use the same principles for the top option, you will just need to adjust some measurements. Start by printing the pattern in the size you need. Now grab a ruler and some scissors or a rotary cutter (for paper only 😉 ) because we’ll do some cutting.
Take the front pattern piece and mark 1.5″ down from where the dart mark is. Now draw a horizontal line (perpendicular to the center fold). Measure the distance between this line and the bottom of the dress.
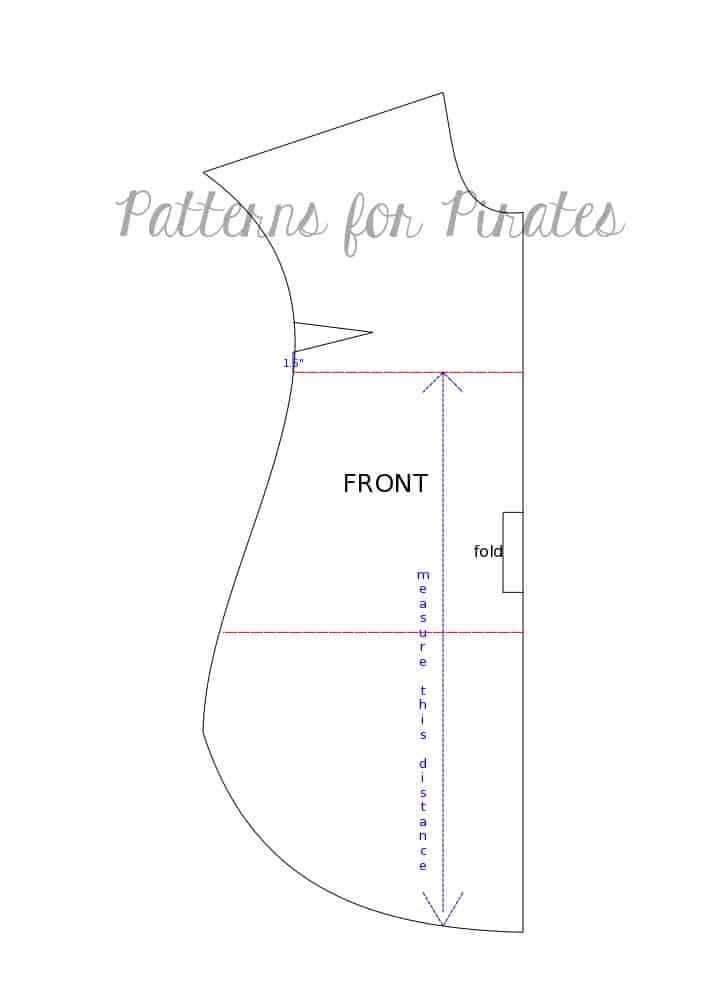
Divide the length in half and draw a horizontal line at the half way mark. You have now split the front in 3 separate pieces.
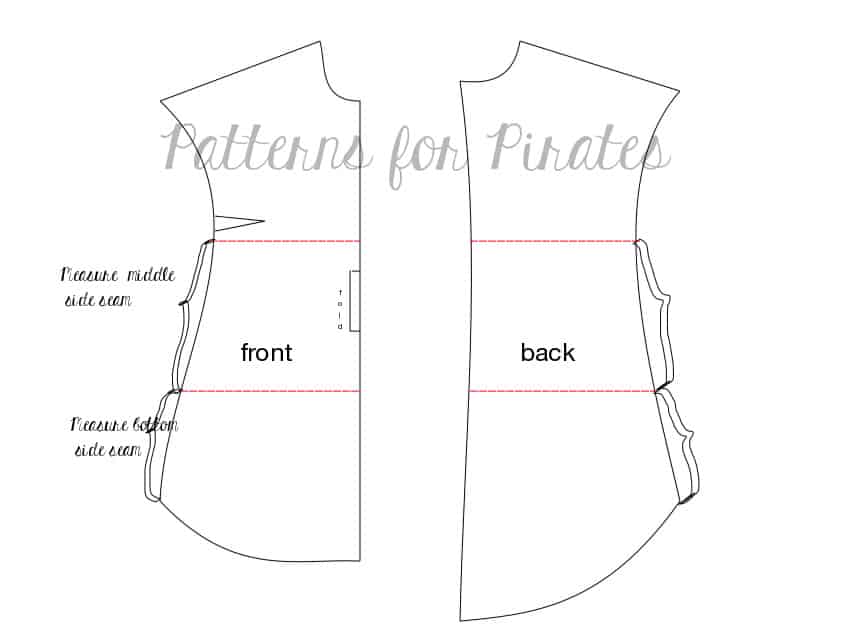
Measure the side seam from the bottom to the bottom colorblock line. Take your back piece and measure up on the side seam the same amount and mark it. Now draw a horizontal line on the back piece. We will be measuring the front middle part side seam now. Mark the point on the back piece from the bottom colorblock line to whatever the measurement was for the middle front side piece. Draw a horizontal line front that marking point. You have now color blocked your back pattern pieces too, making sure that they will line up beautifully with the front color block pieces. Great job!
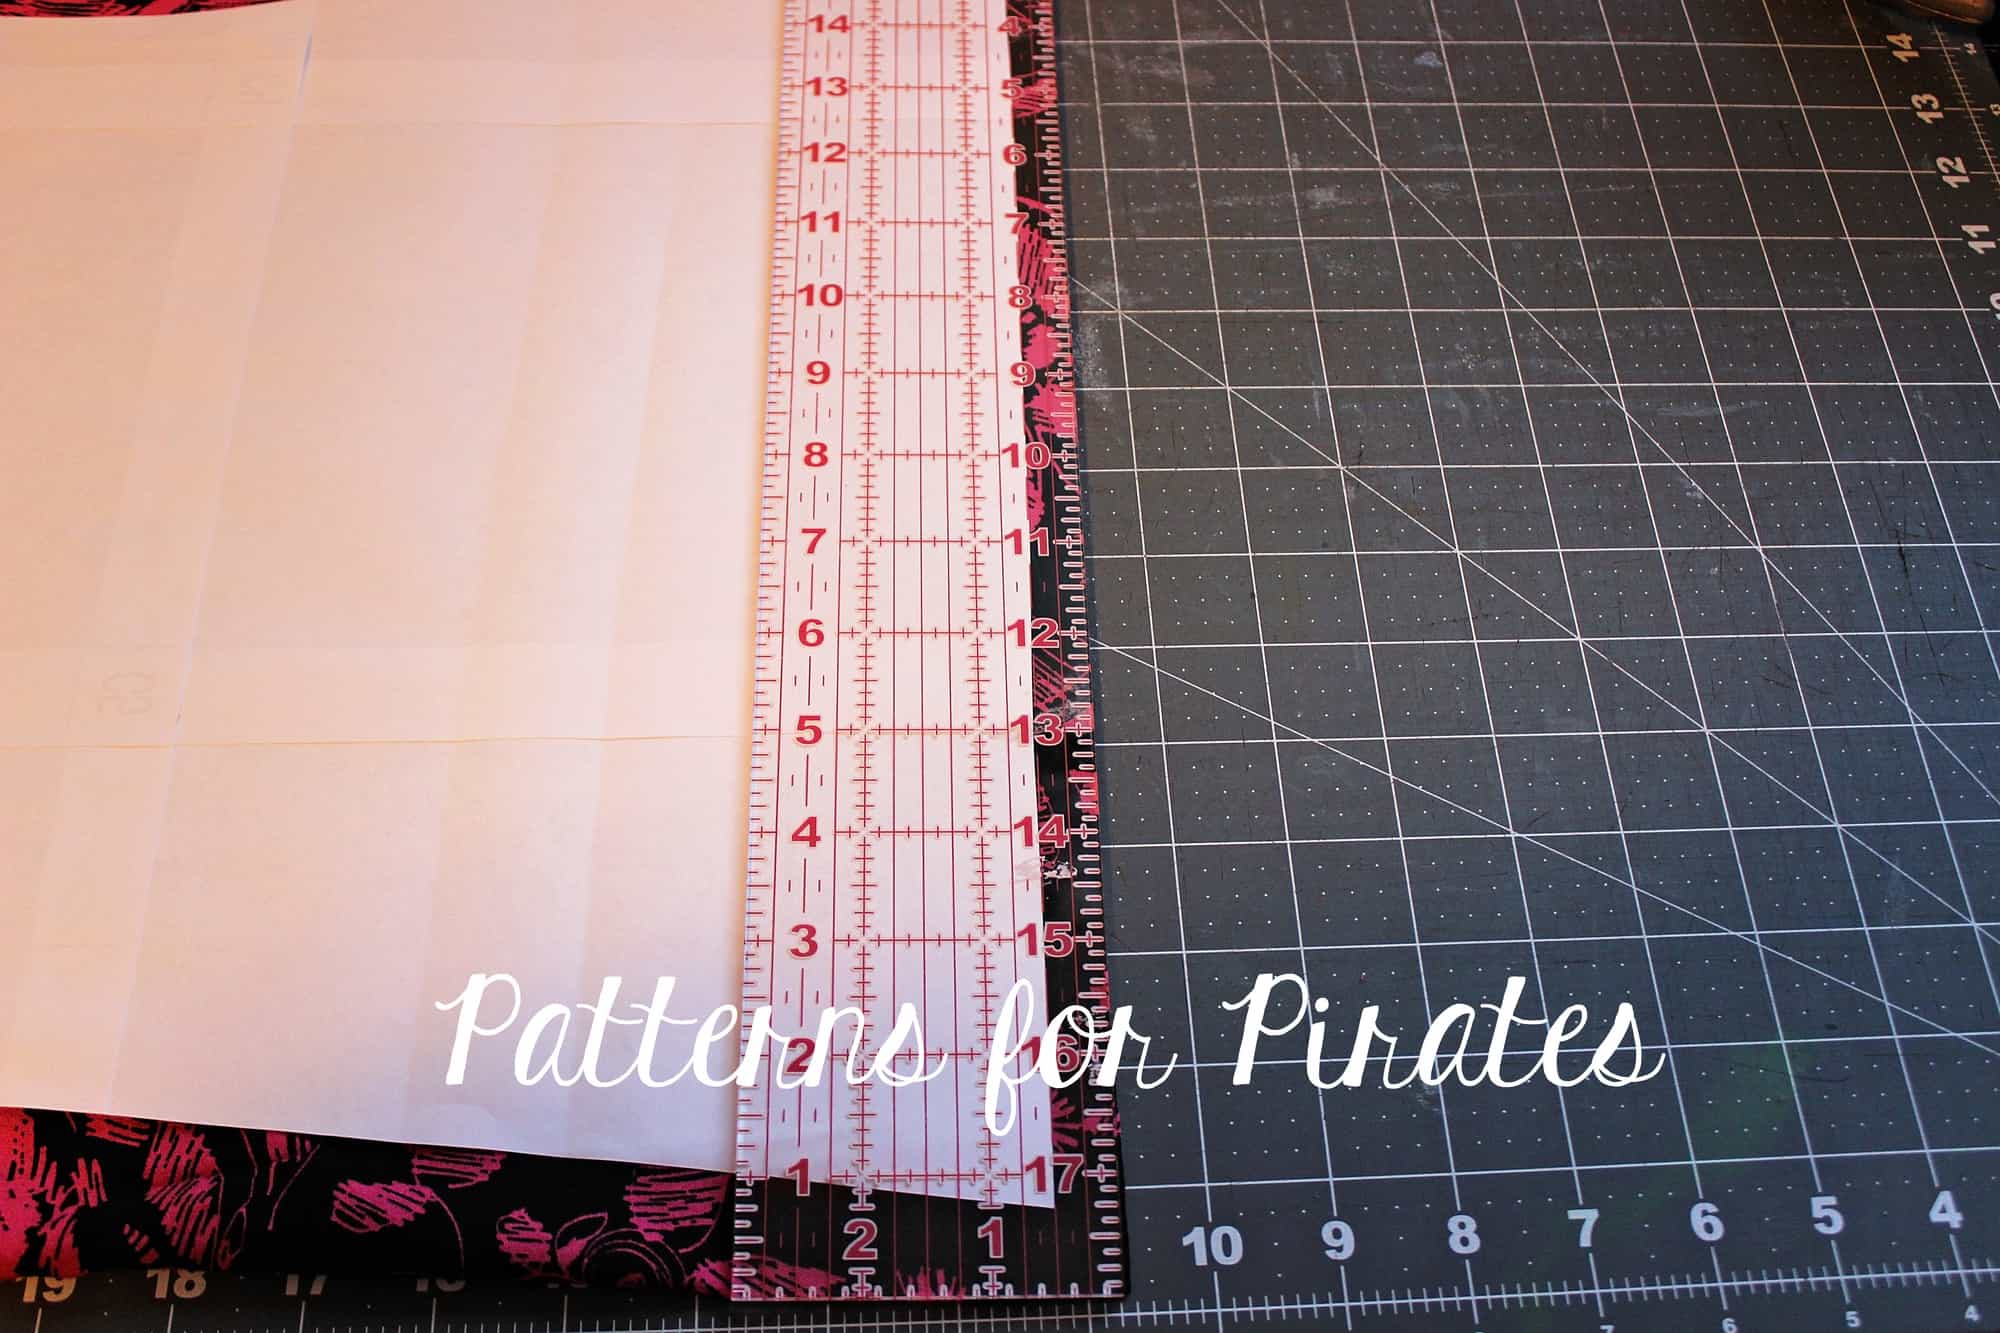
We will now cut the fabric. DO NOT FORGET THE SEAM ALLOWANCE! Since we are only dealing with straight color blocking lines, I will show you the easiest way to add SA. Simply use a quilter’s ruler and cut away 1/2 from the newly designed pattern pieces. Remember you need to add seam allowance only to the colorblock parts, NOT the center fold or side and middle back seam. Those seam allowances are already included in the pattern.
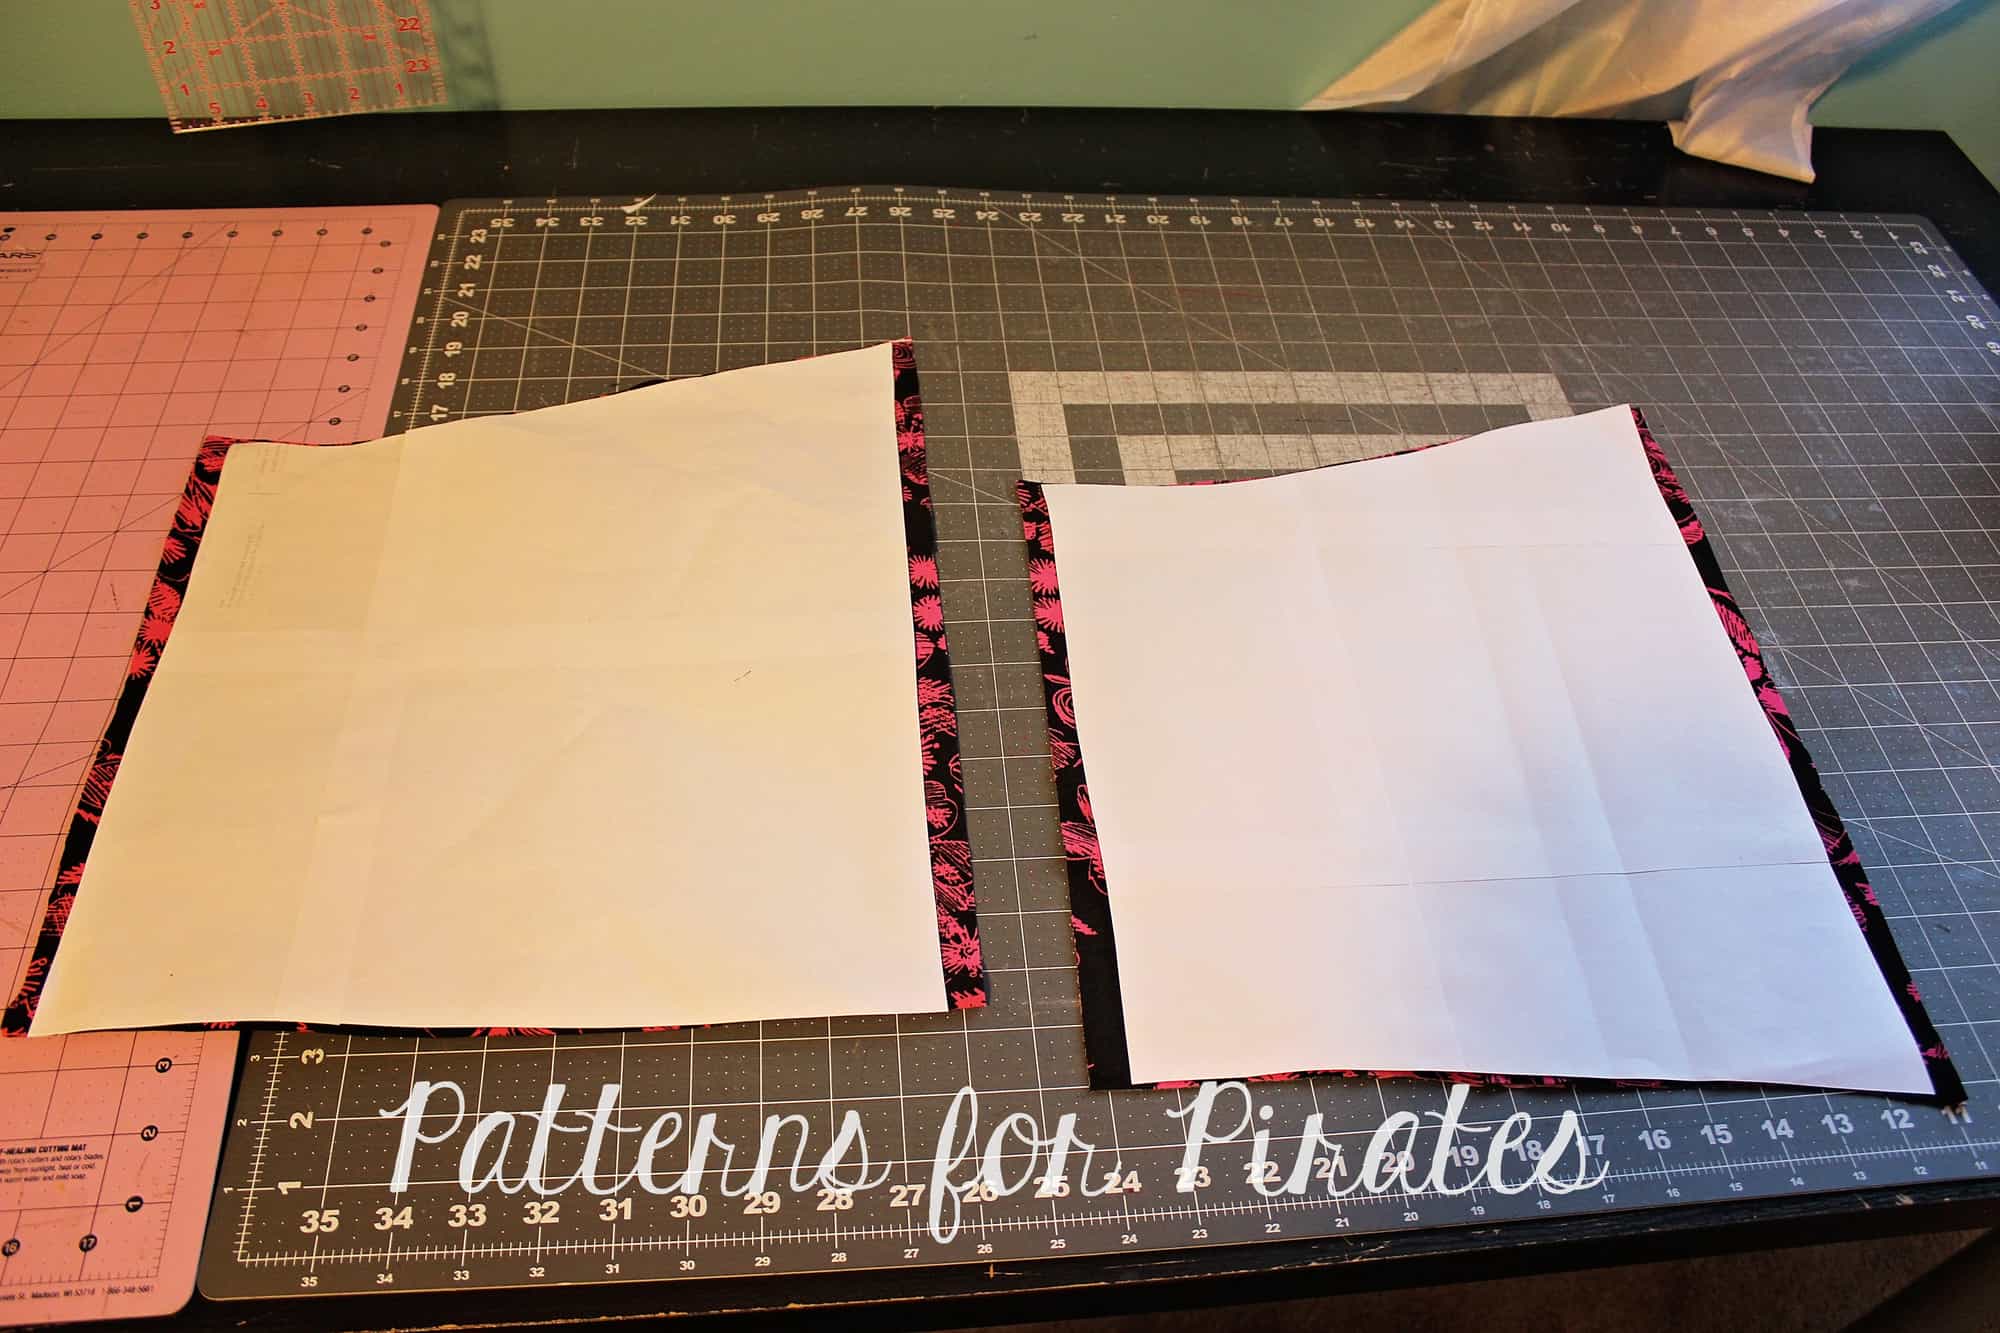
Once you have all your pieces cut (3 for the front, 6 for the back) you will start sewing them together. First sew the front top to the front middle (RST) with 1/2″ seam allowance, serger your raw edges and optionally top stitch. You will now sew the front bottom to the front middle, right sides together. You now have your front piece ready. Repeat the process for the back pieces. Remember that the back of the Brunch Blouse is not cut on fold so you will end up with two mirrored back cuts.
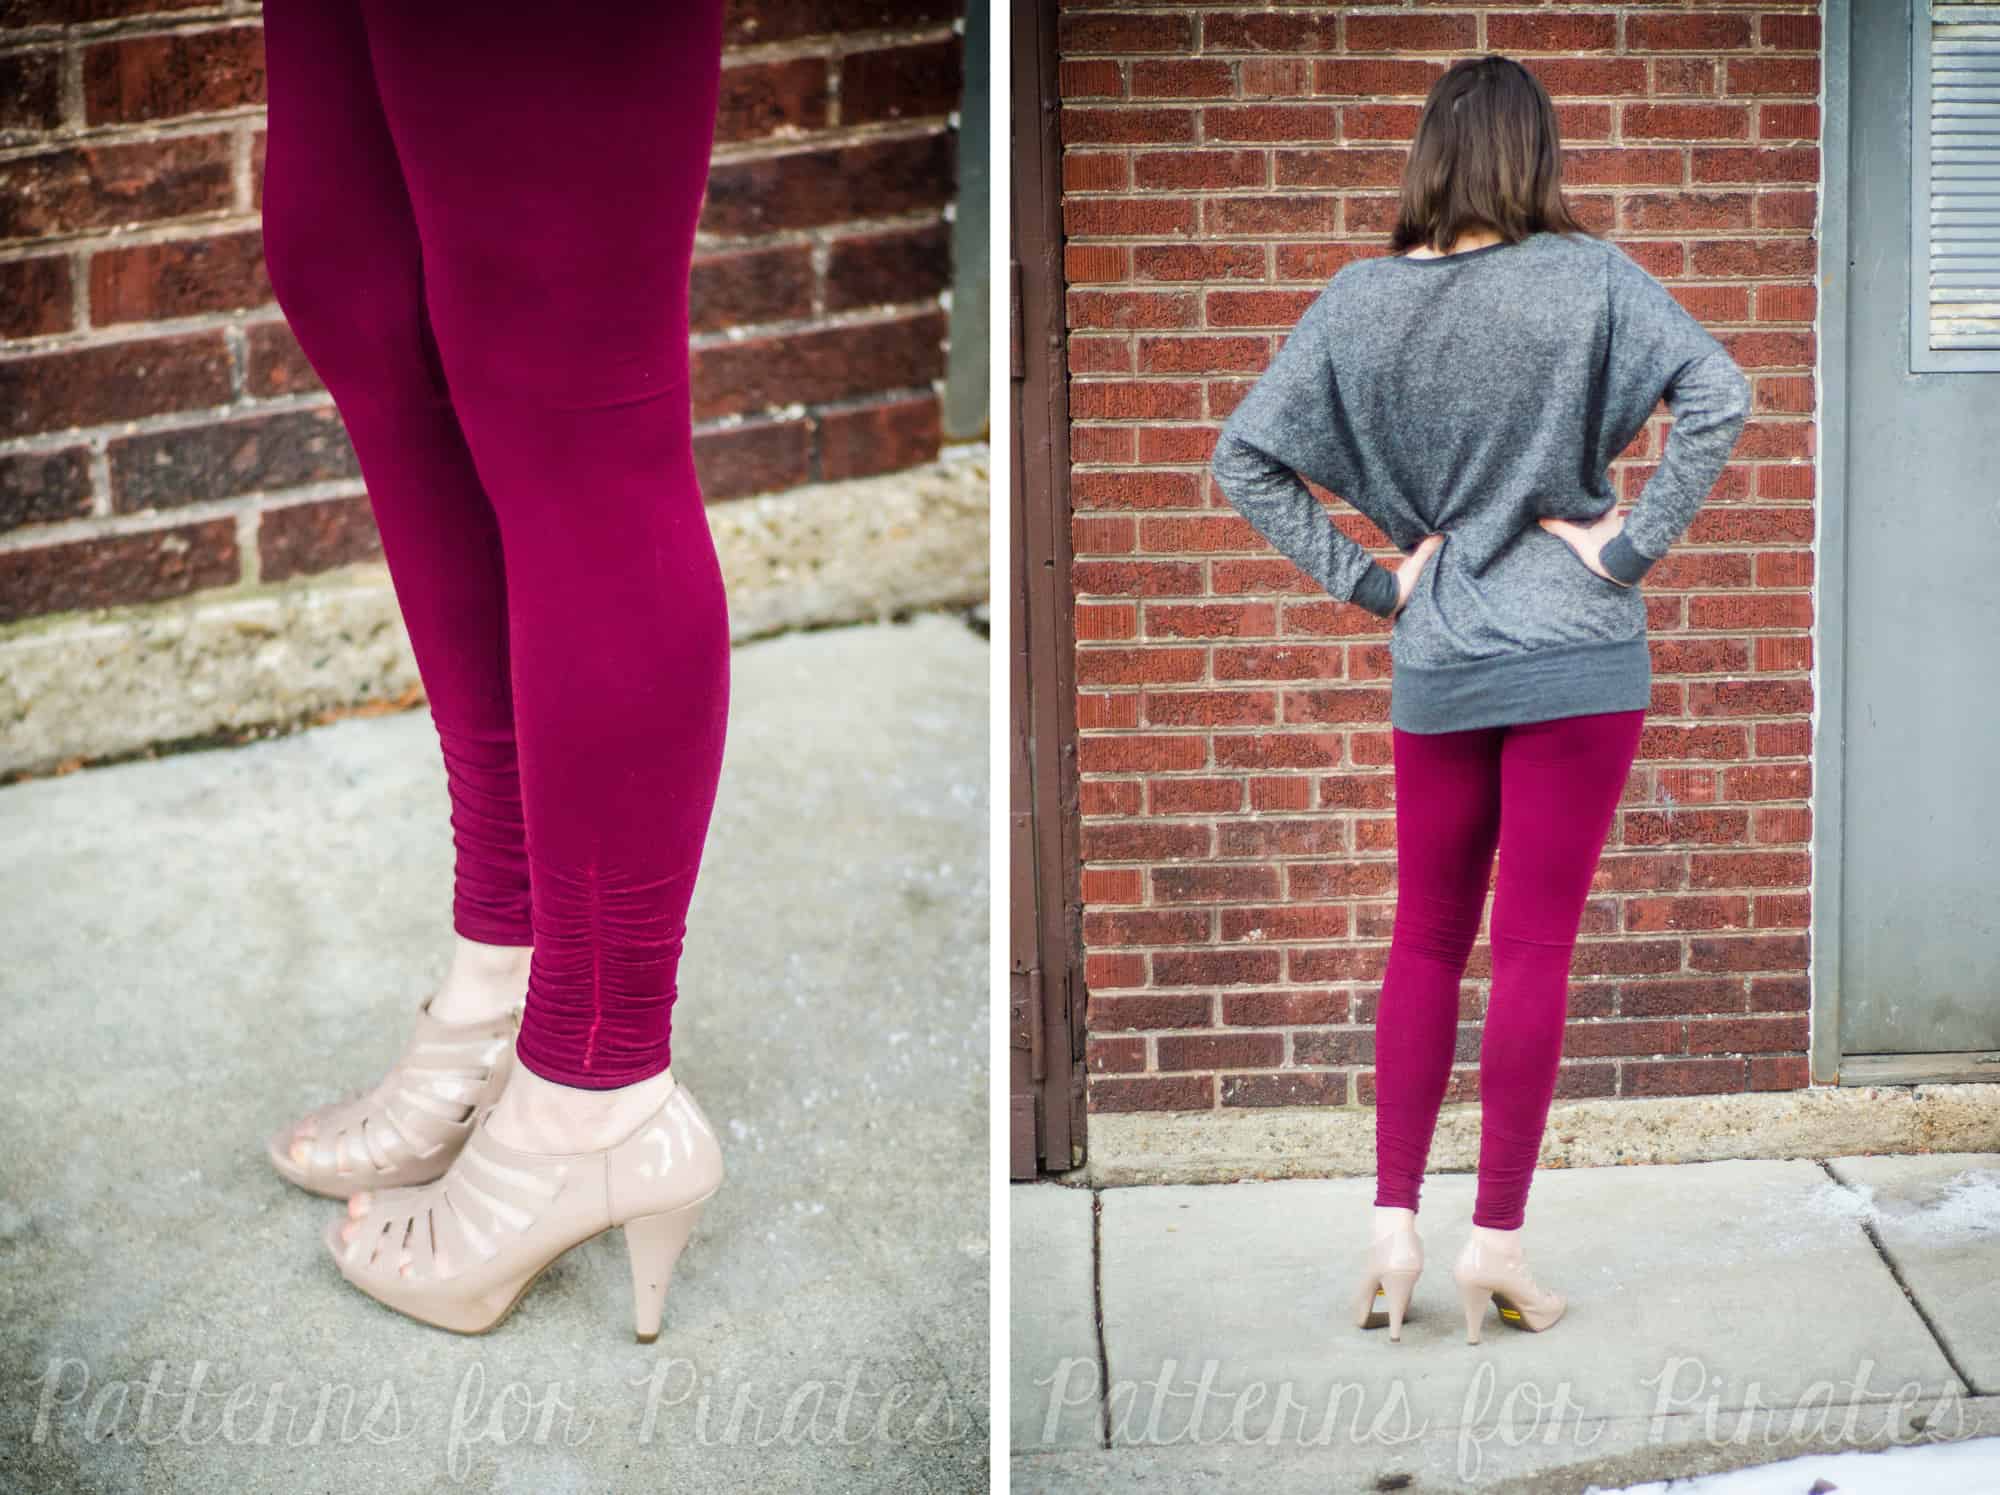
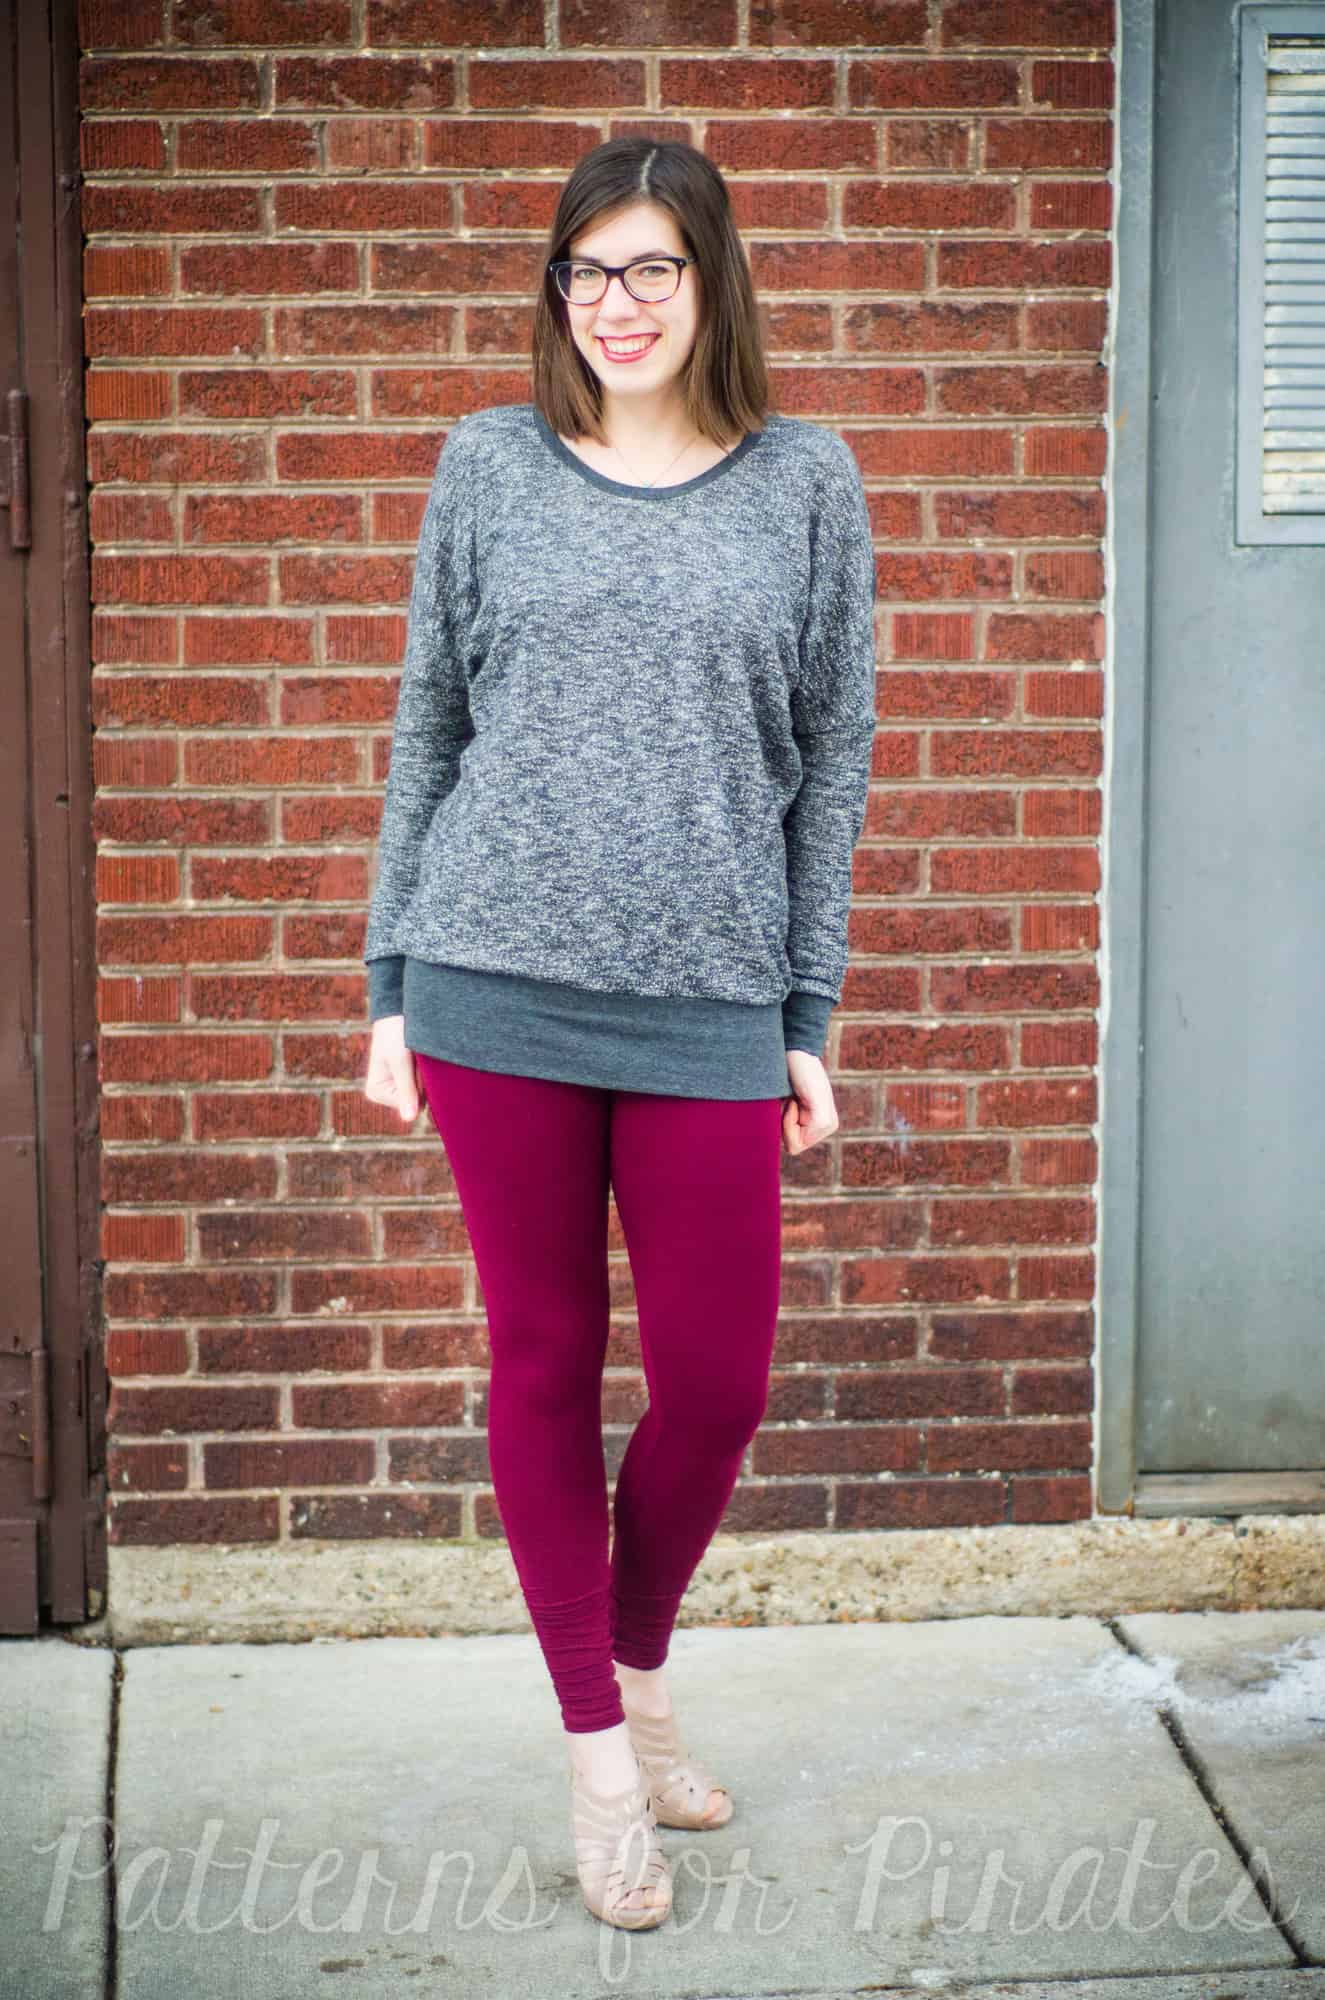
Finish sewing your BB dress as per the tutorial instruction. How easy and fun was that? You can get creative with your color blocking…just imagine a beautiful ombre blouse, or a blouse with lace overlay for the top colorblock. The possibilities are endless.

. . . . .
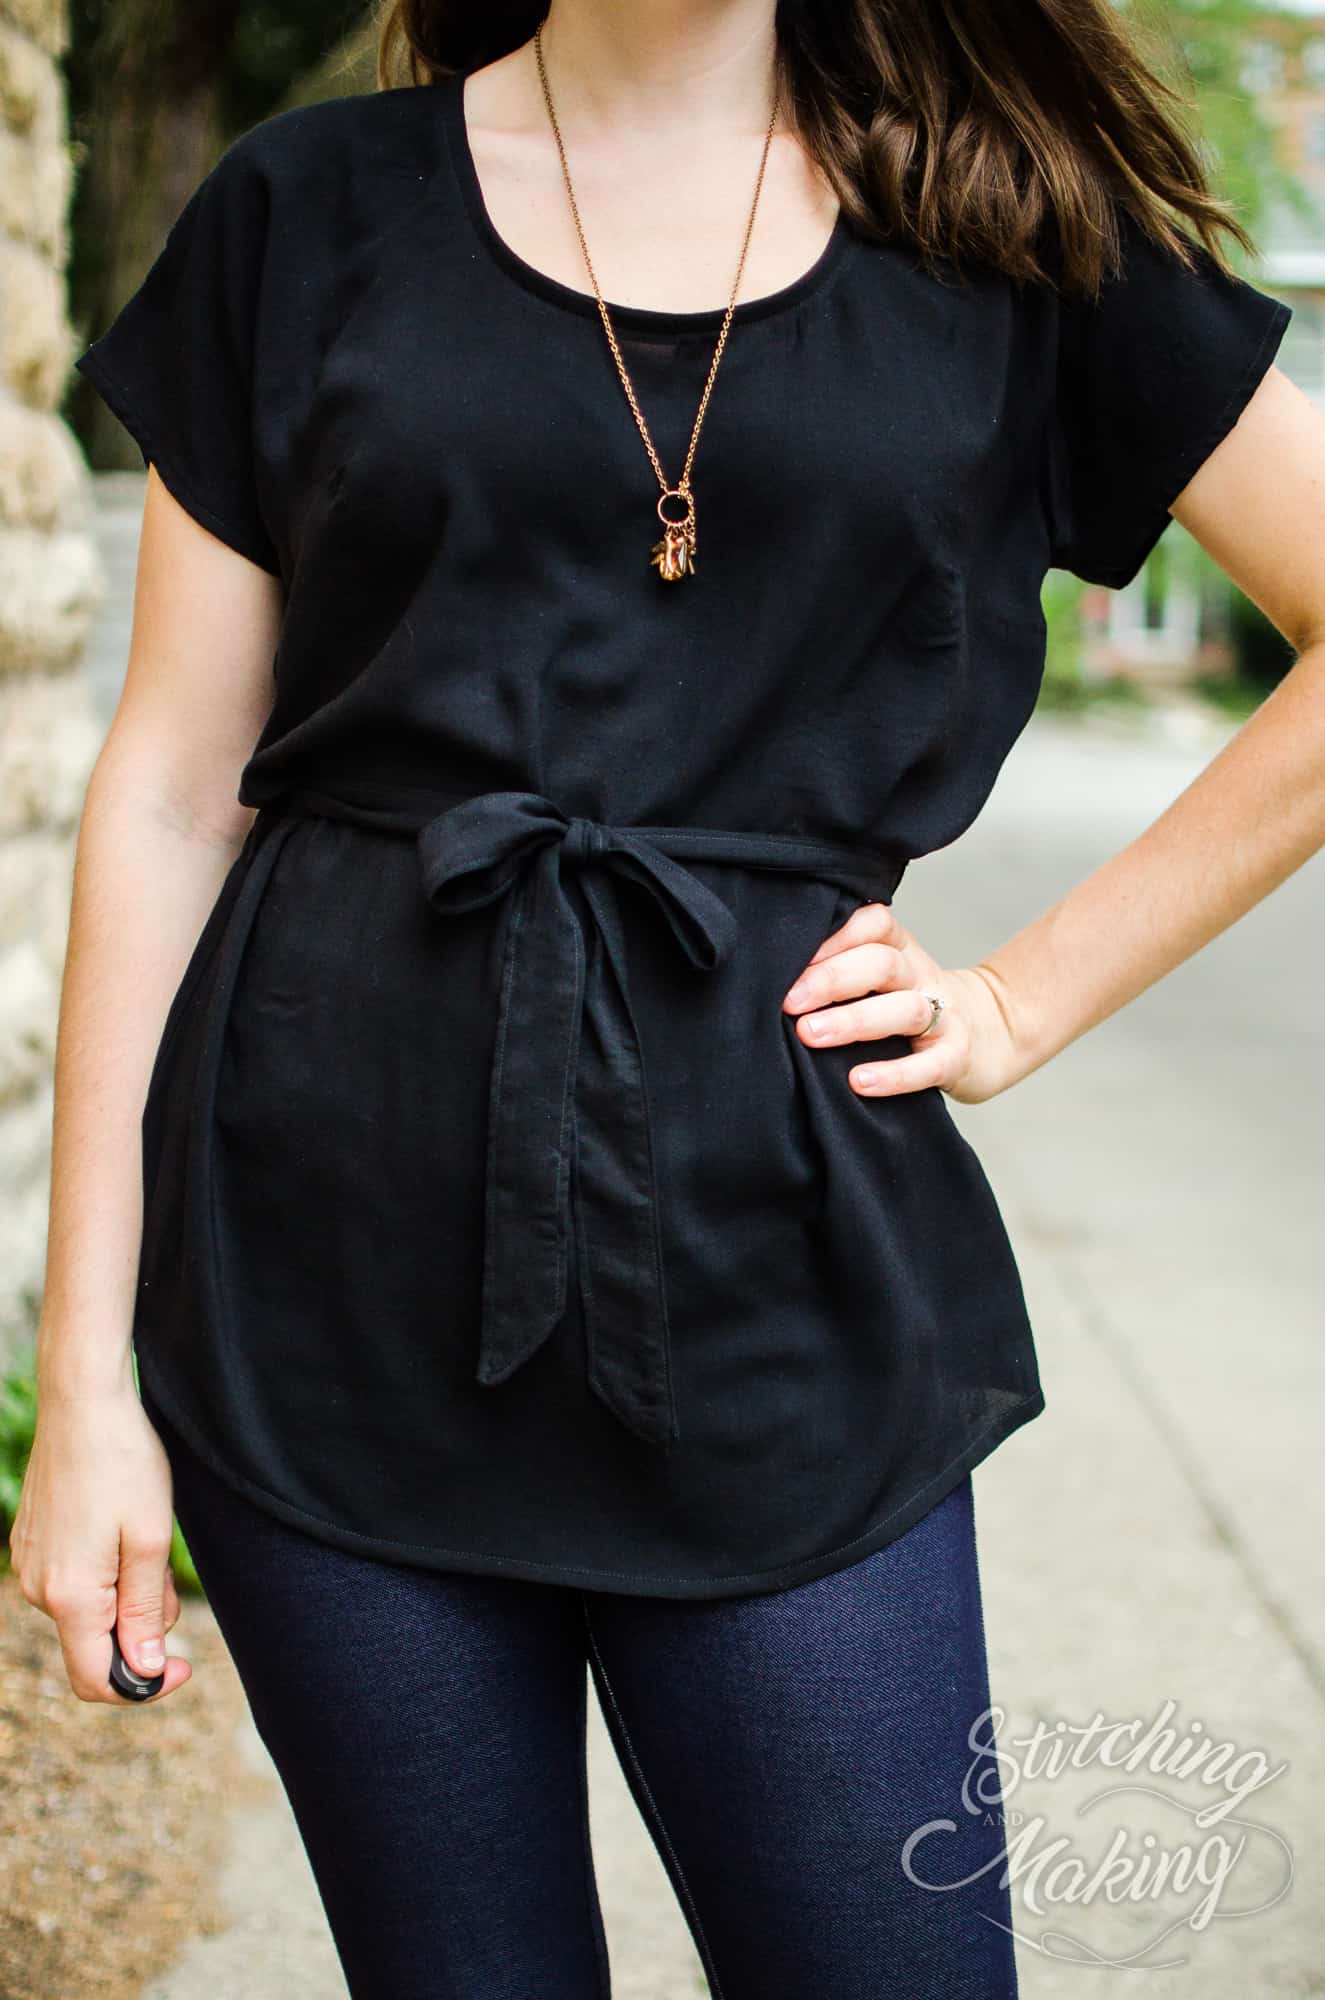
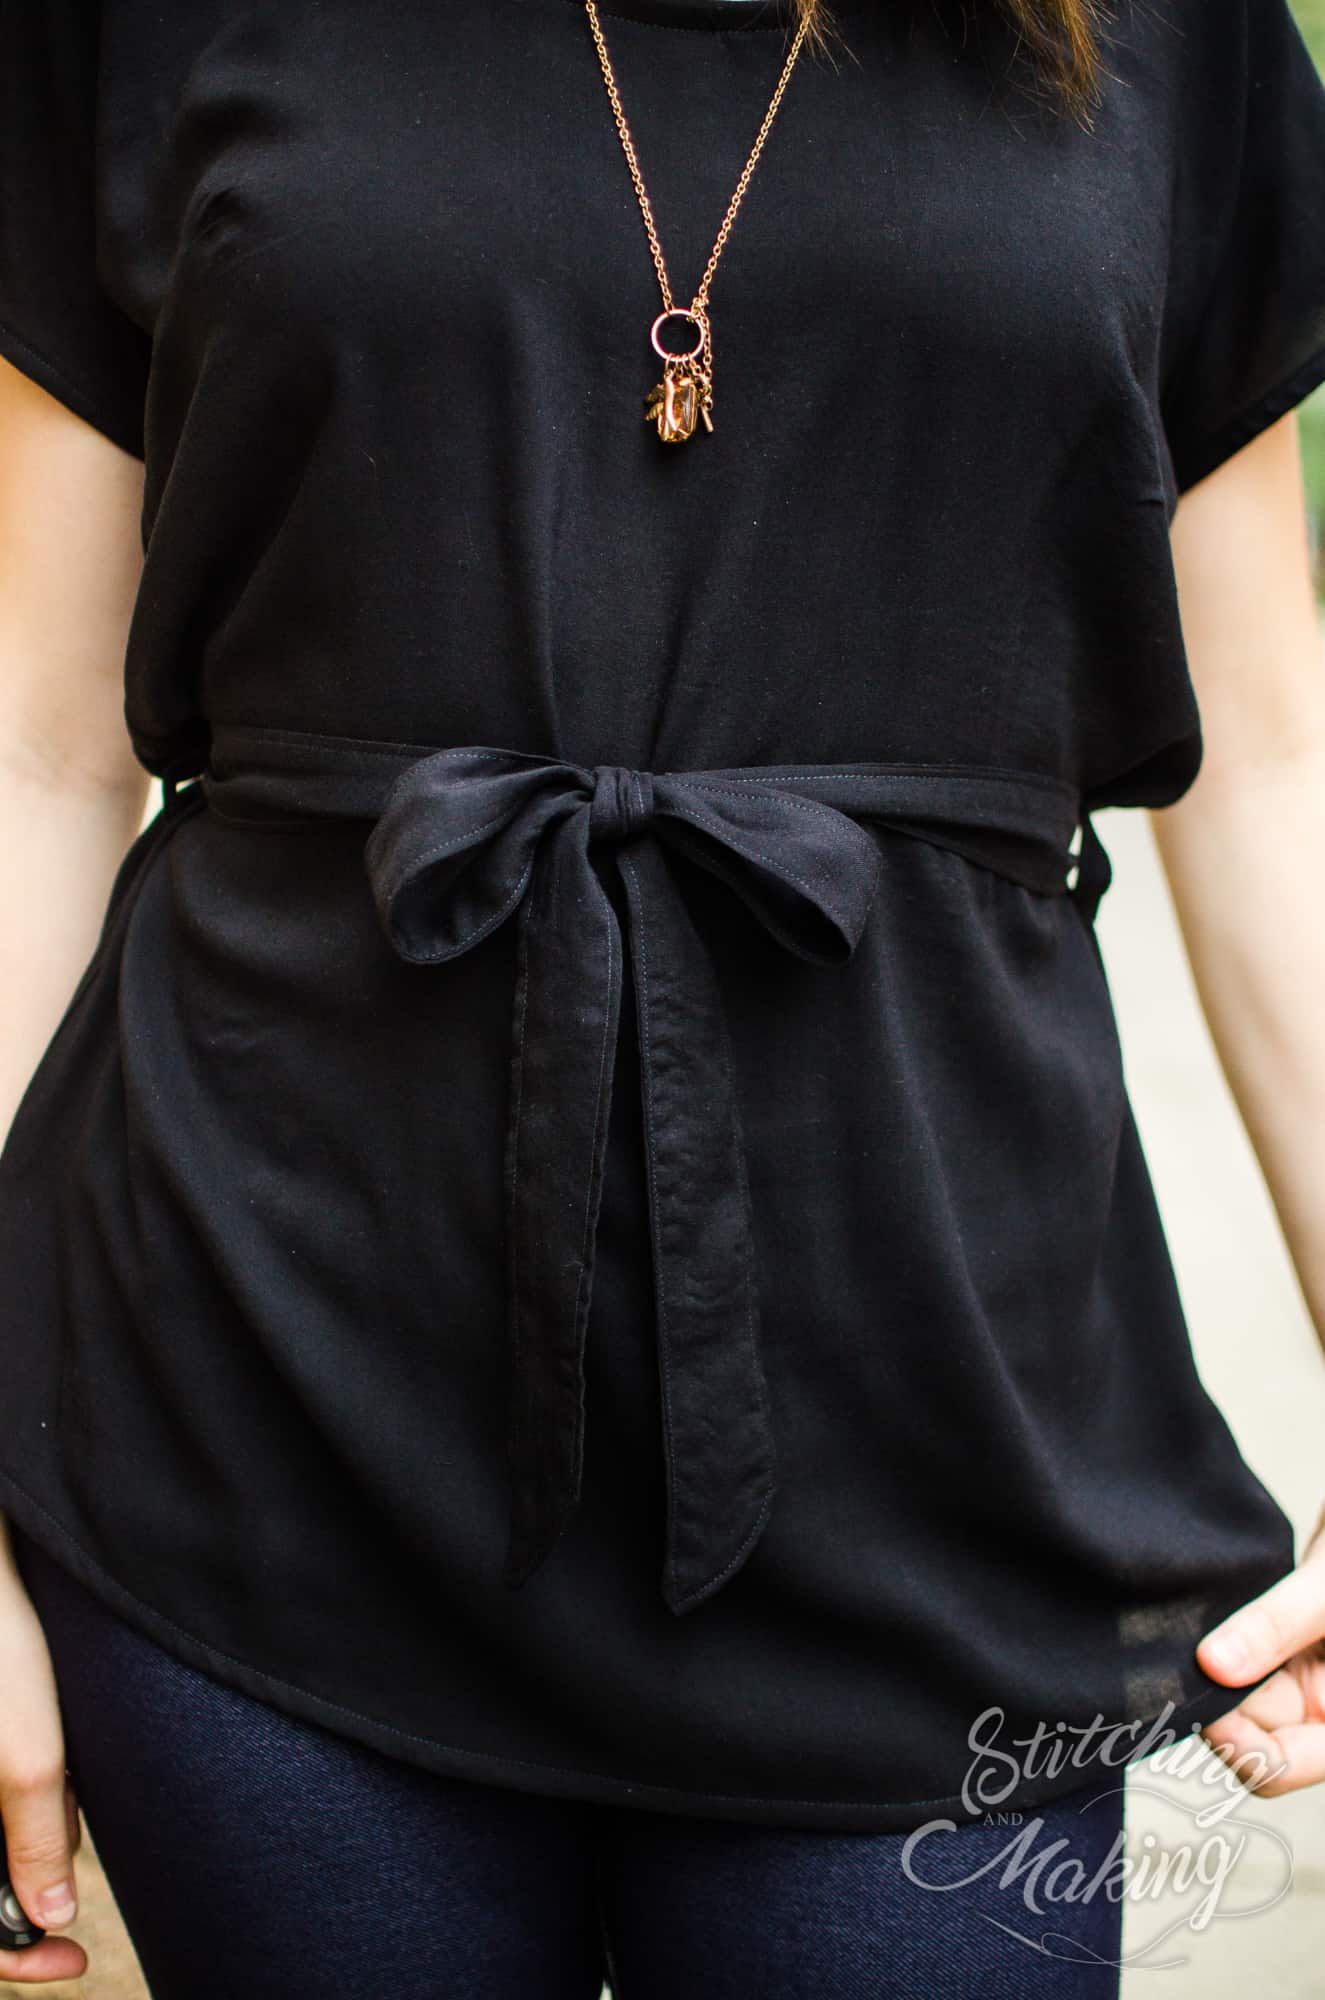
Belt Loops and Sash Hack
This hack is super easy but a fun option for a different look than the normal Brunch Blouse! You can do this hack with any option except the one that already includes the waist tie.

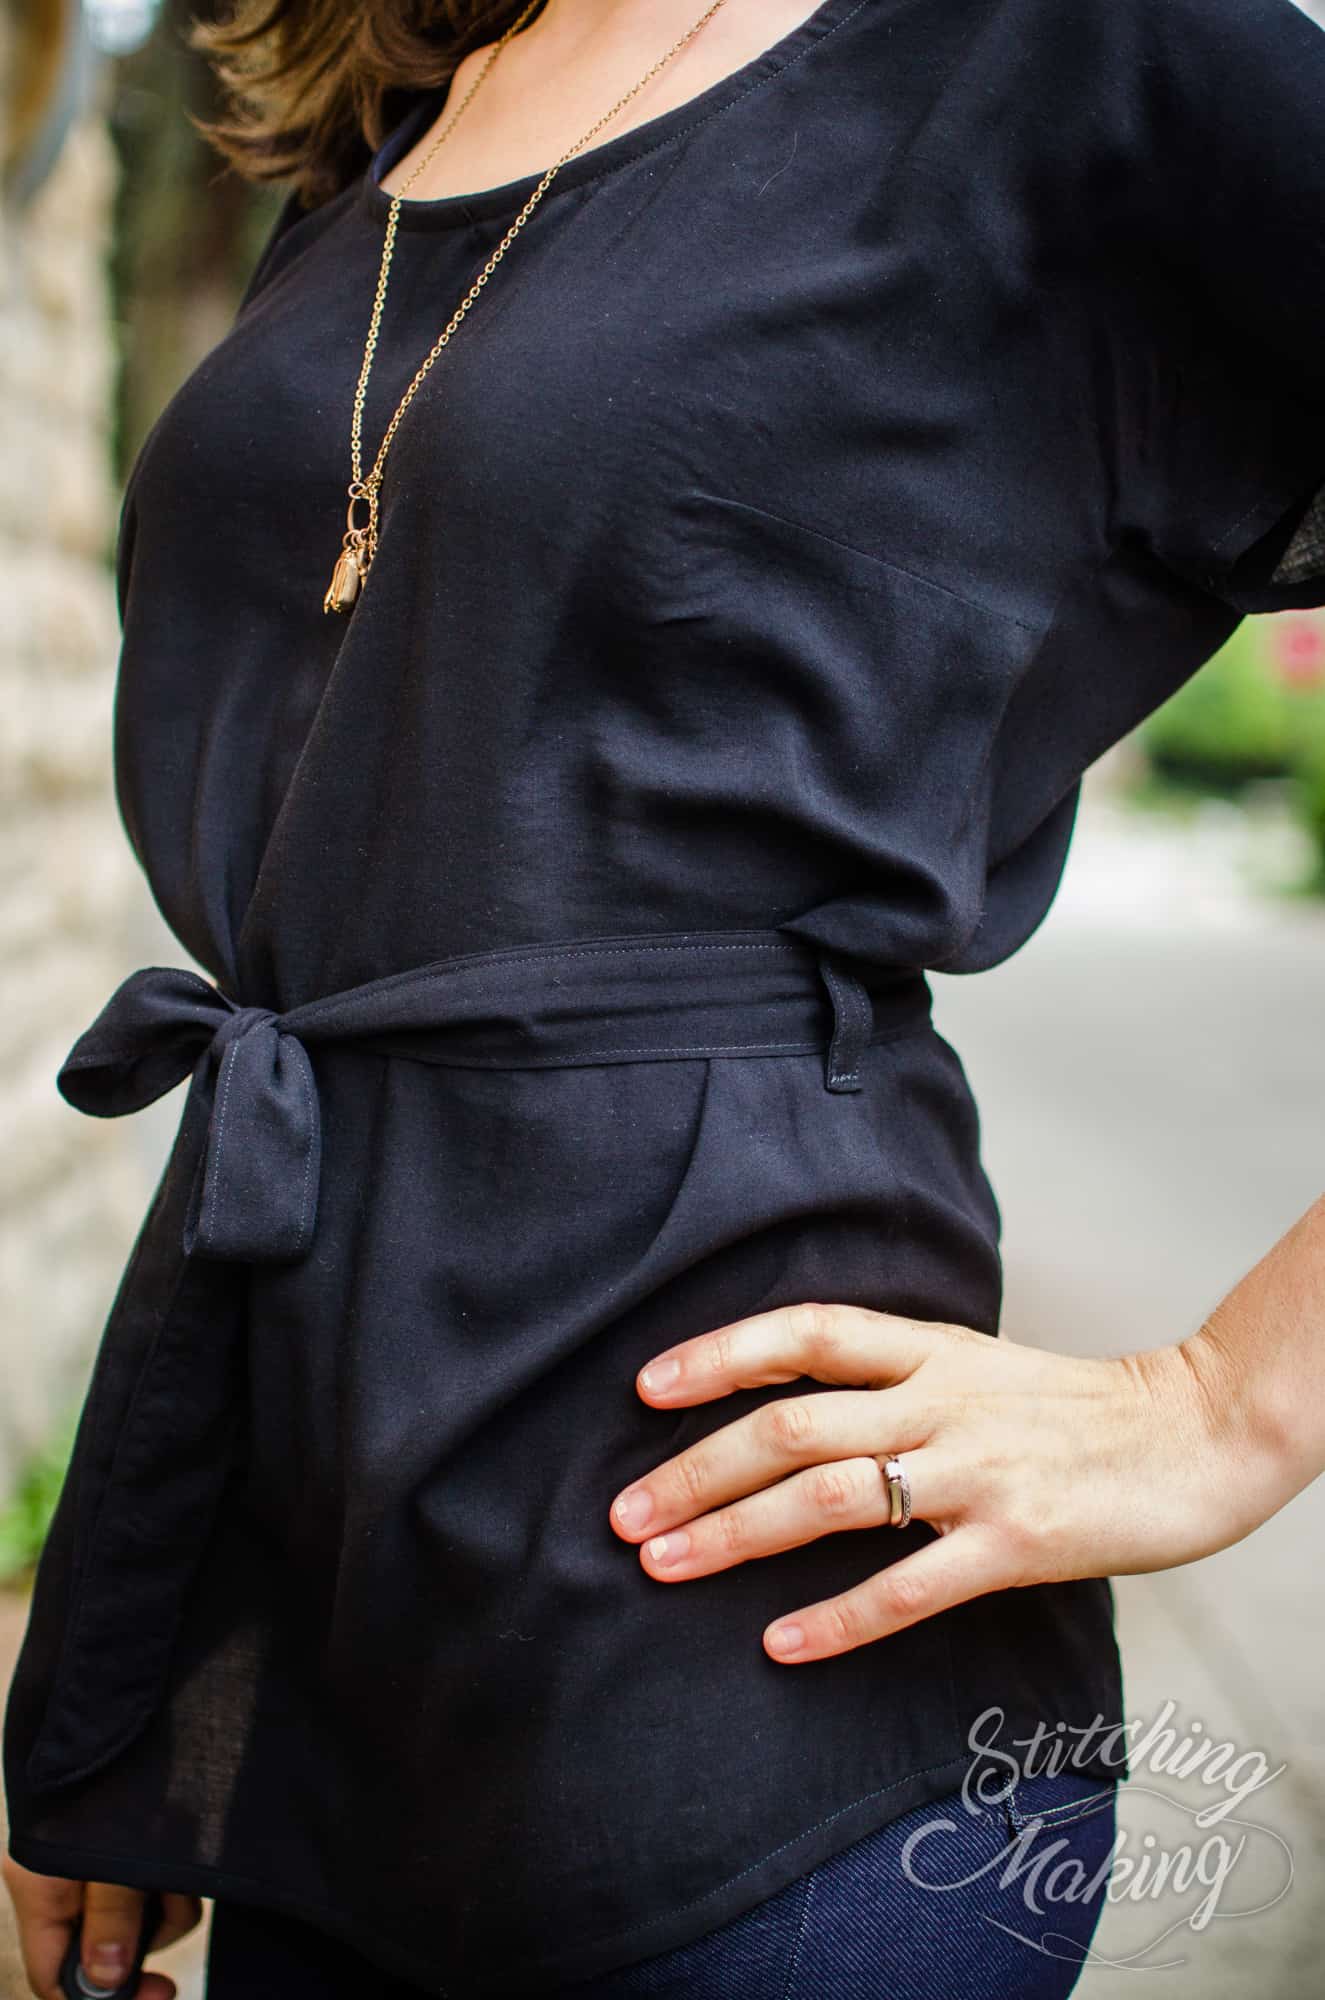
1. First, sew up your blouse/dress as usual. Make sure to mark the notches on the side seams, add a pin as well after you’ve sewn the side seams so that you can still see where the notch is.
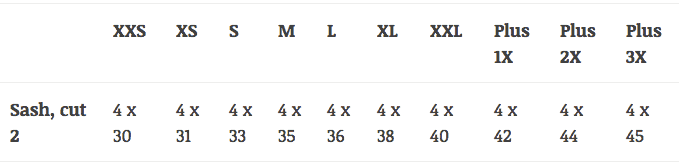
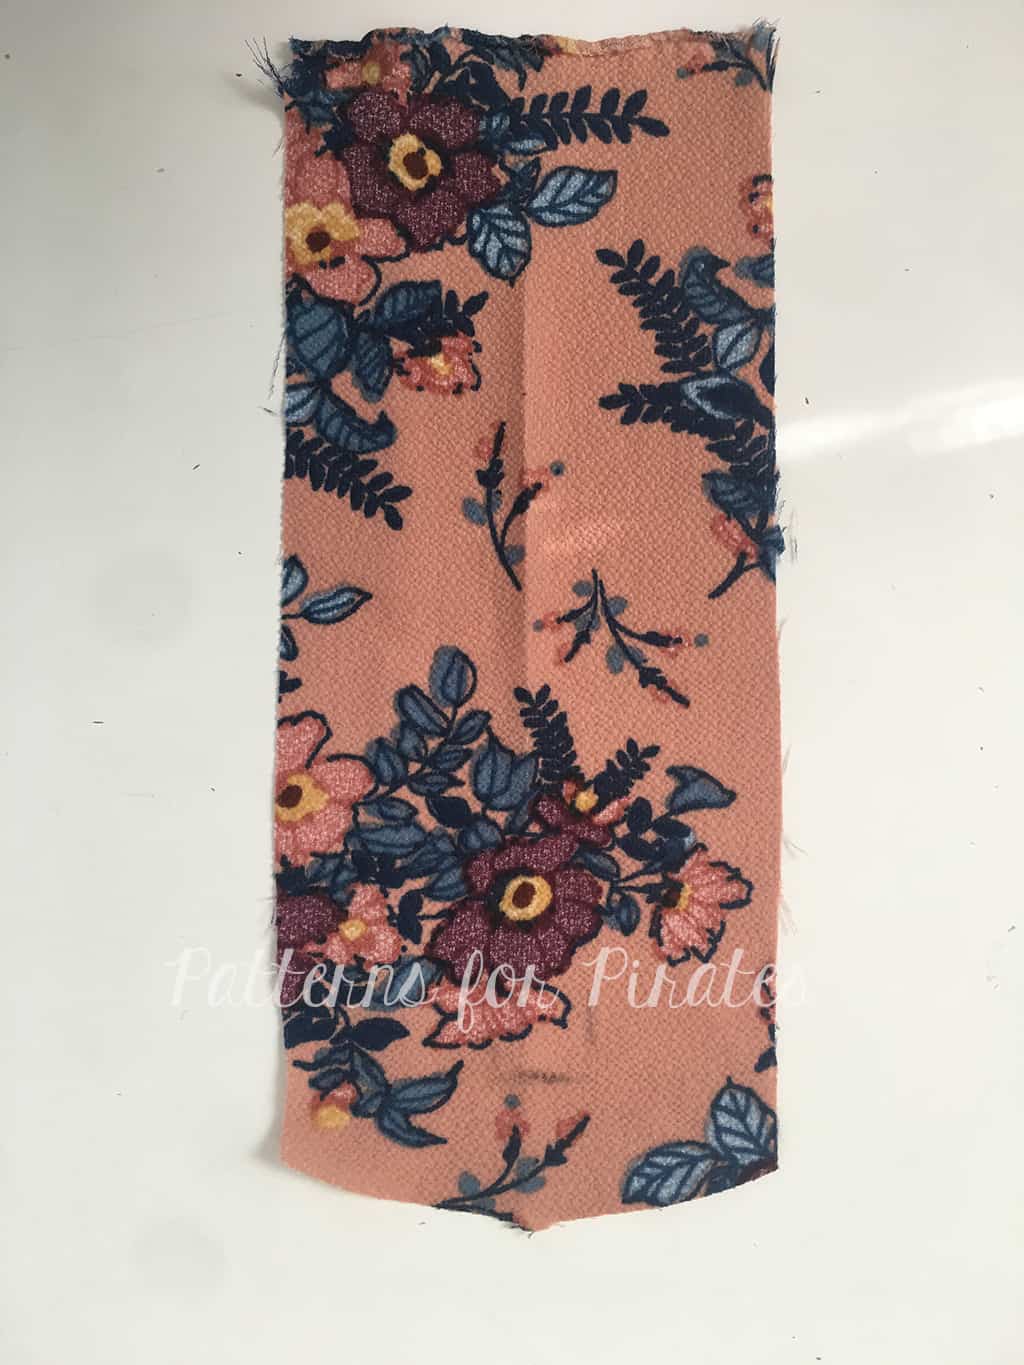
2. To make the sash, refer to this cut chart based on your size. Cut two.
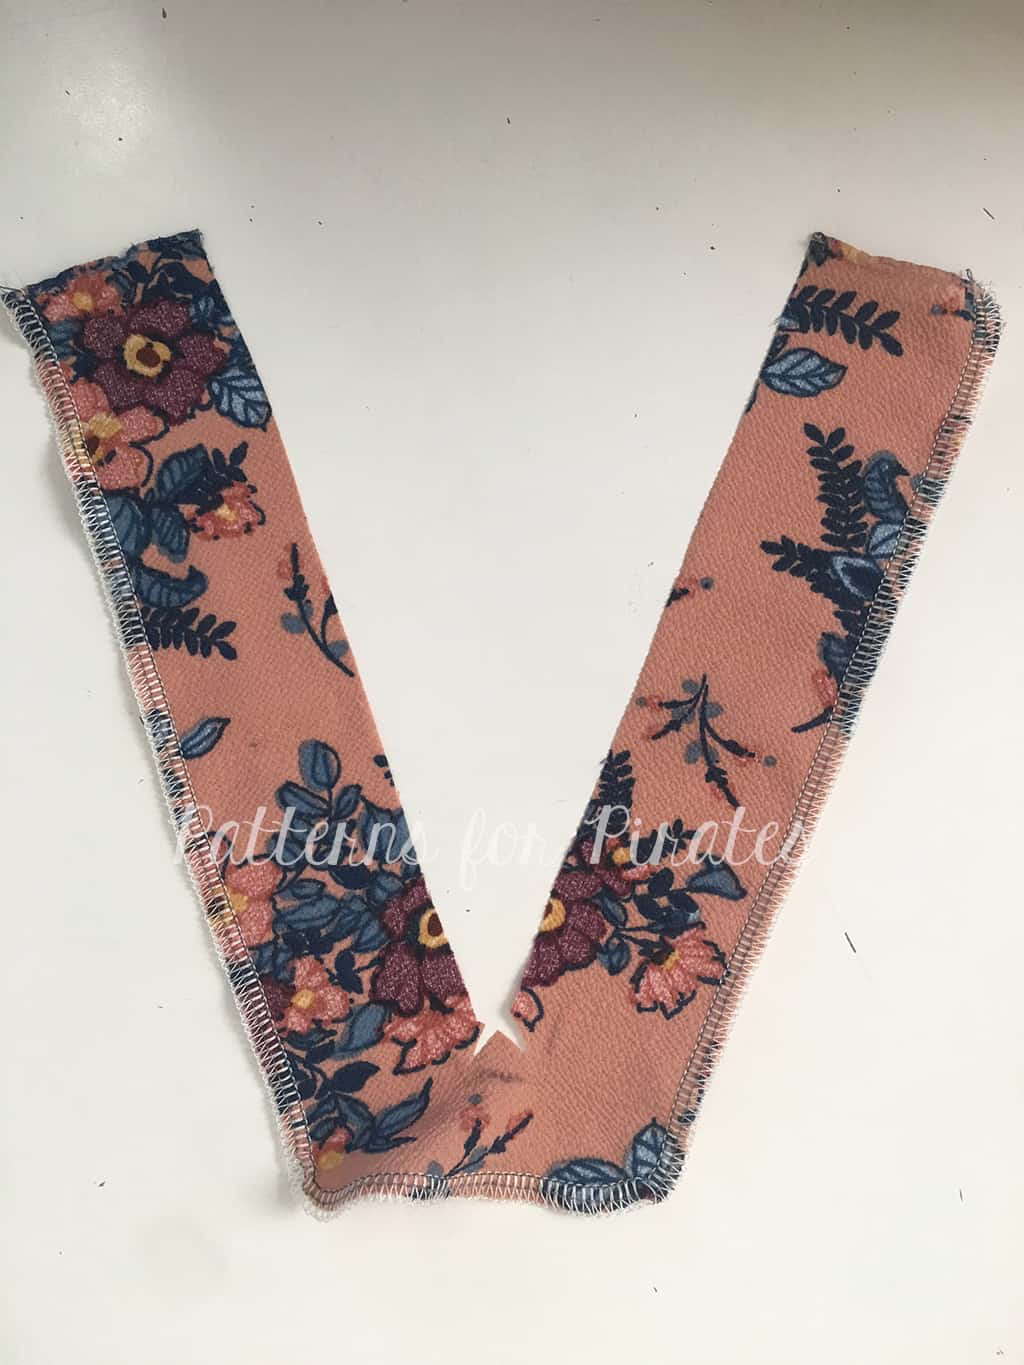
3. Right sides together, sew the short ends together. Press open and finish edges.

4. Right sides together, sew the long edges now, but leave 2″ unsewn in the middle. This is how you’ll turn it right side out when you’re done.

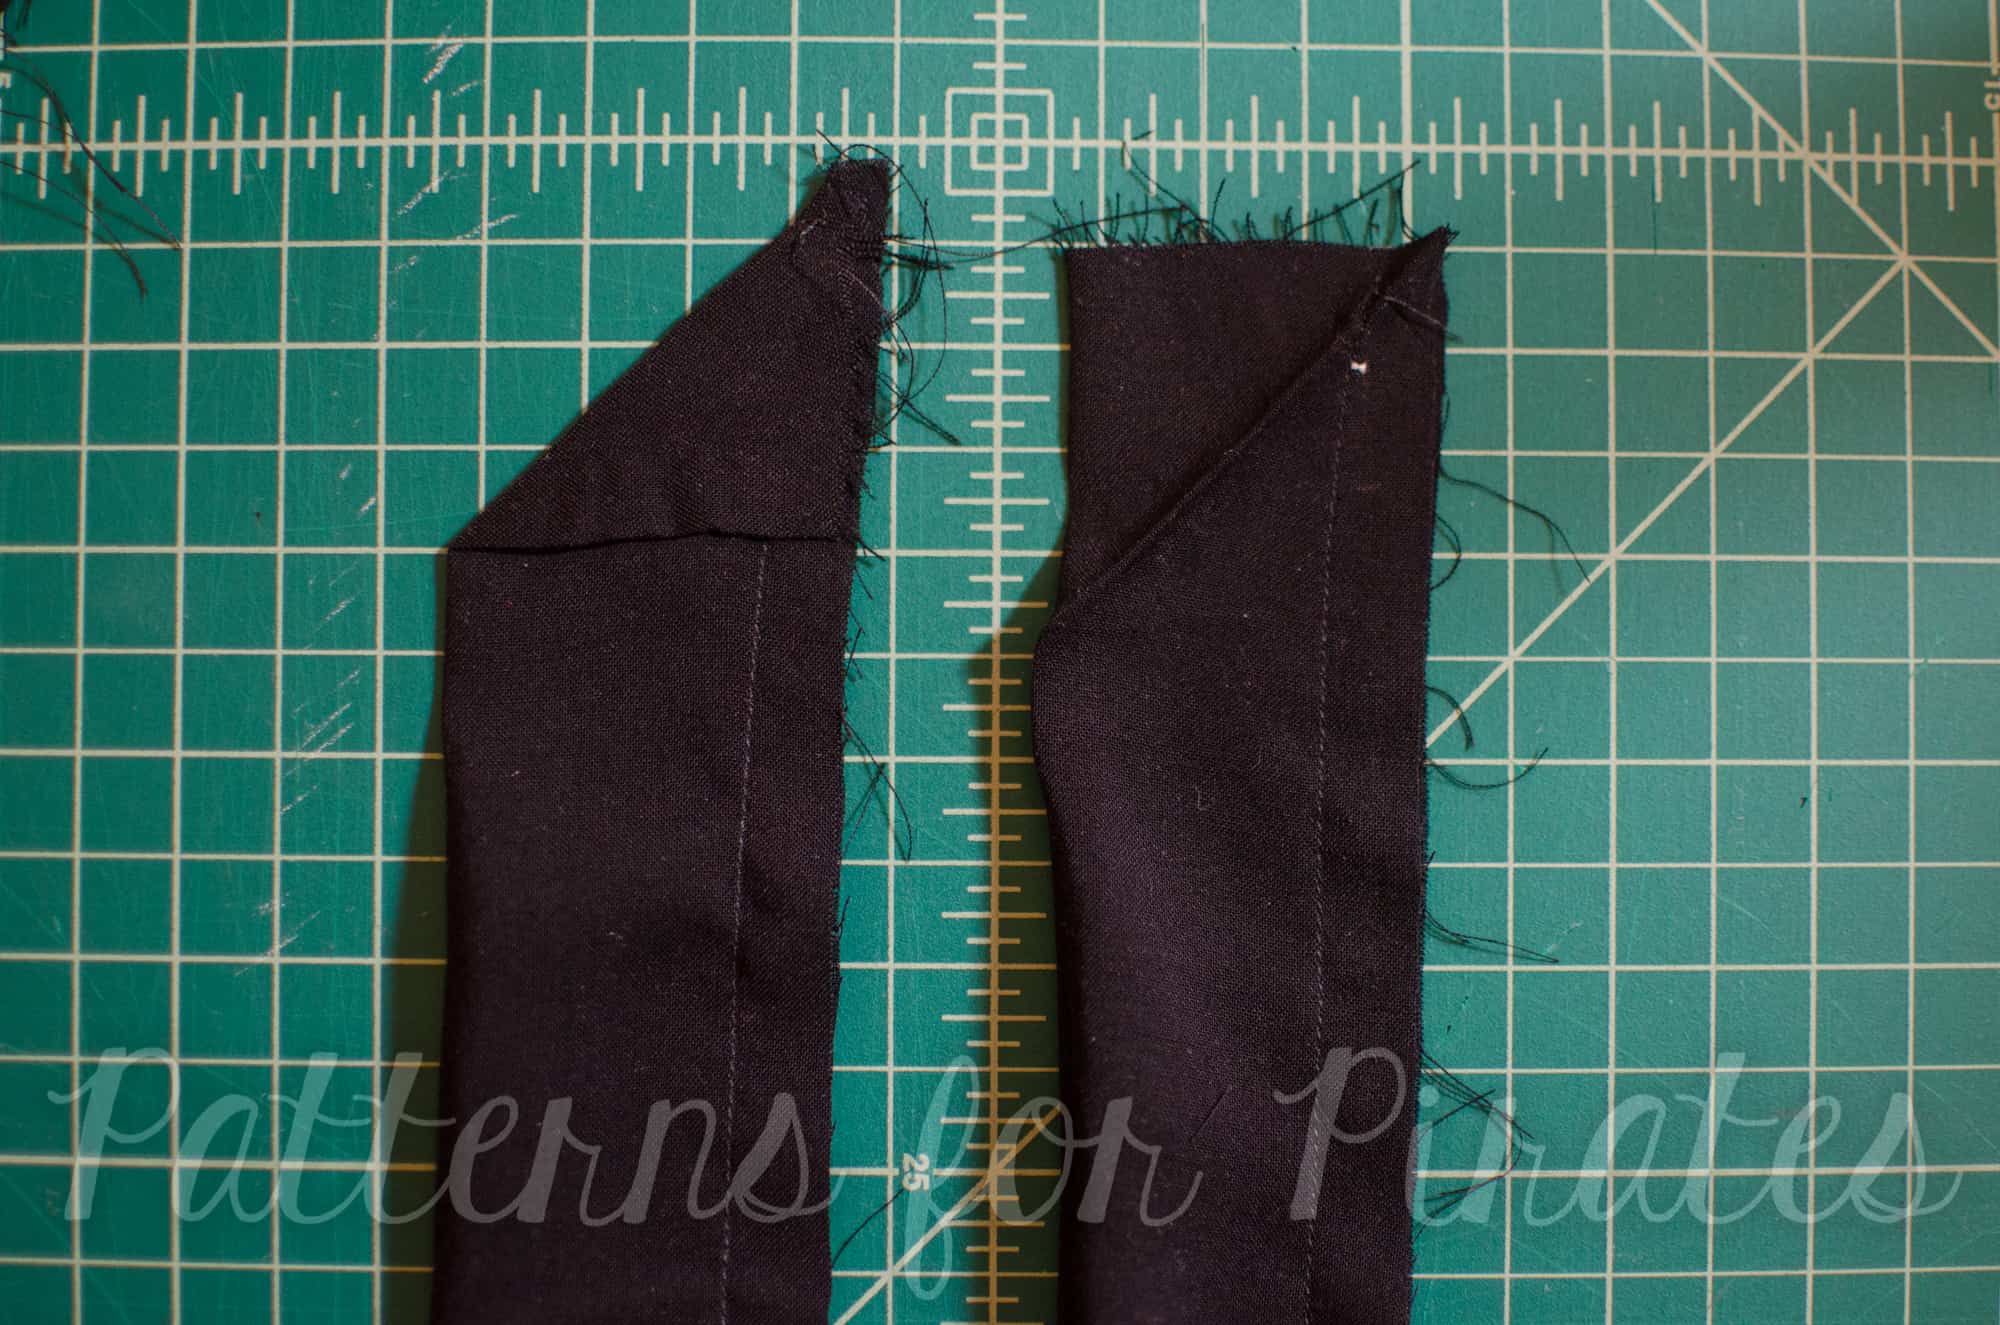
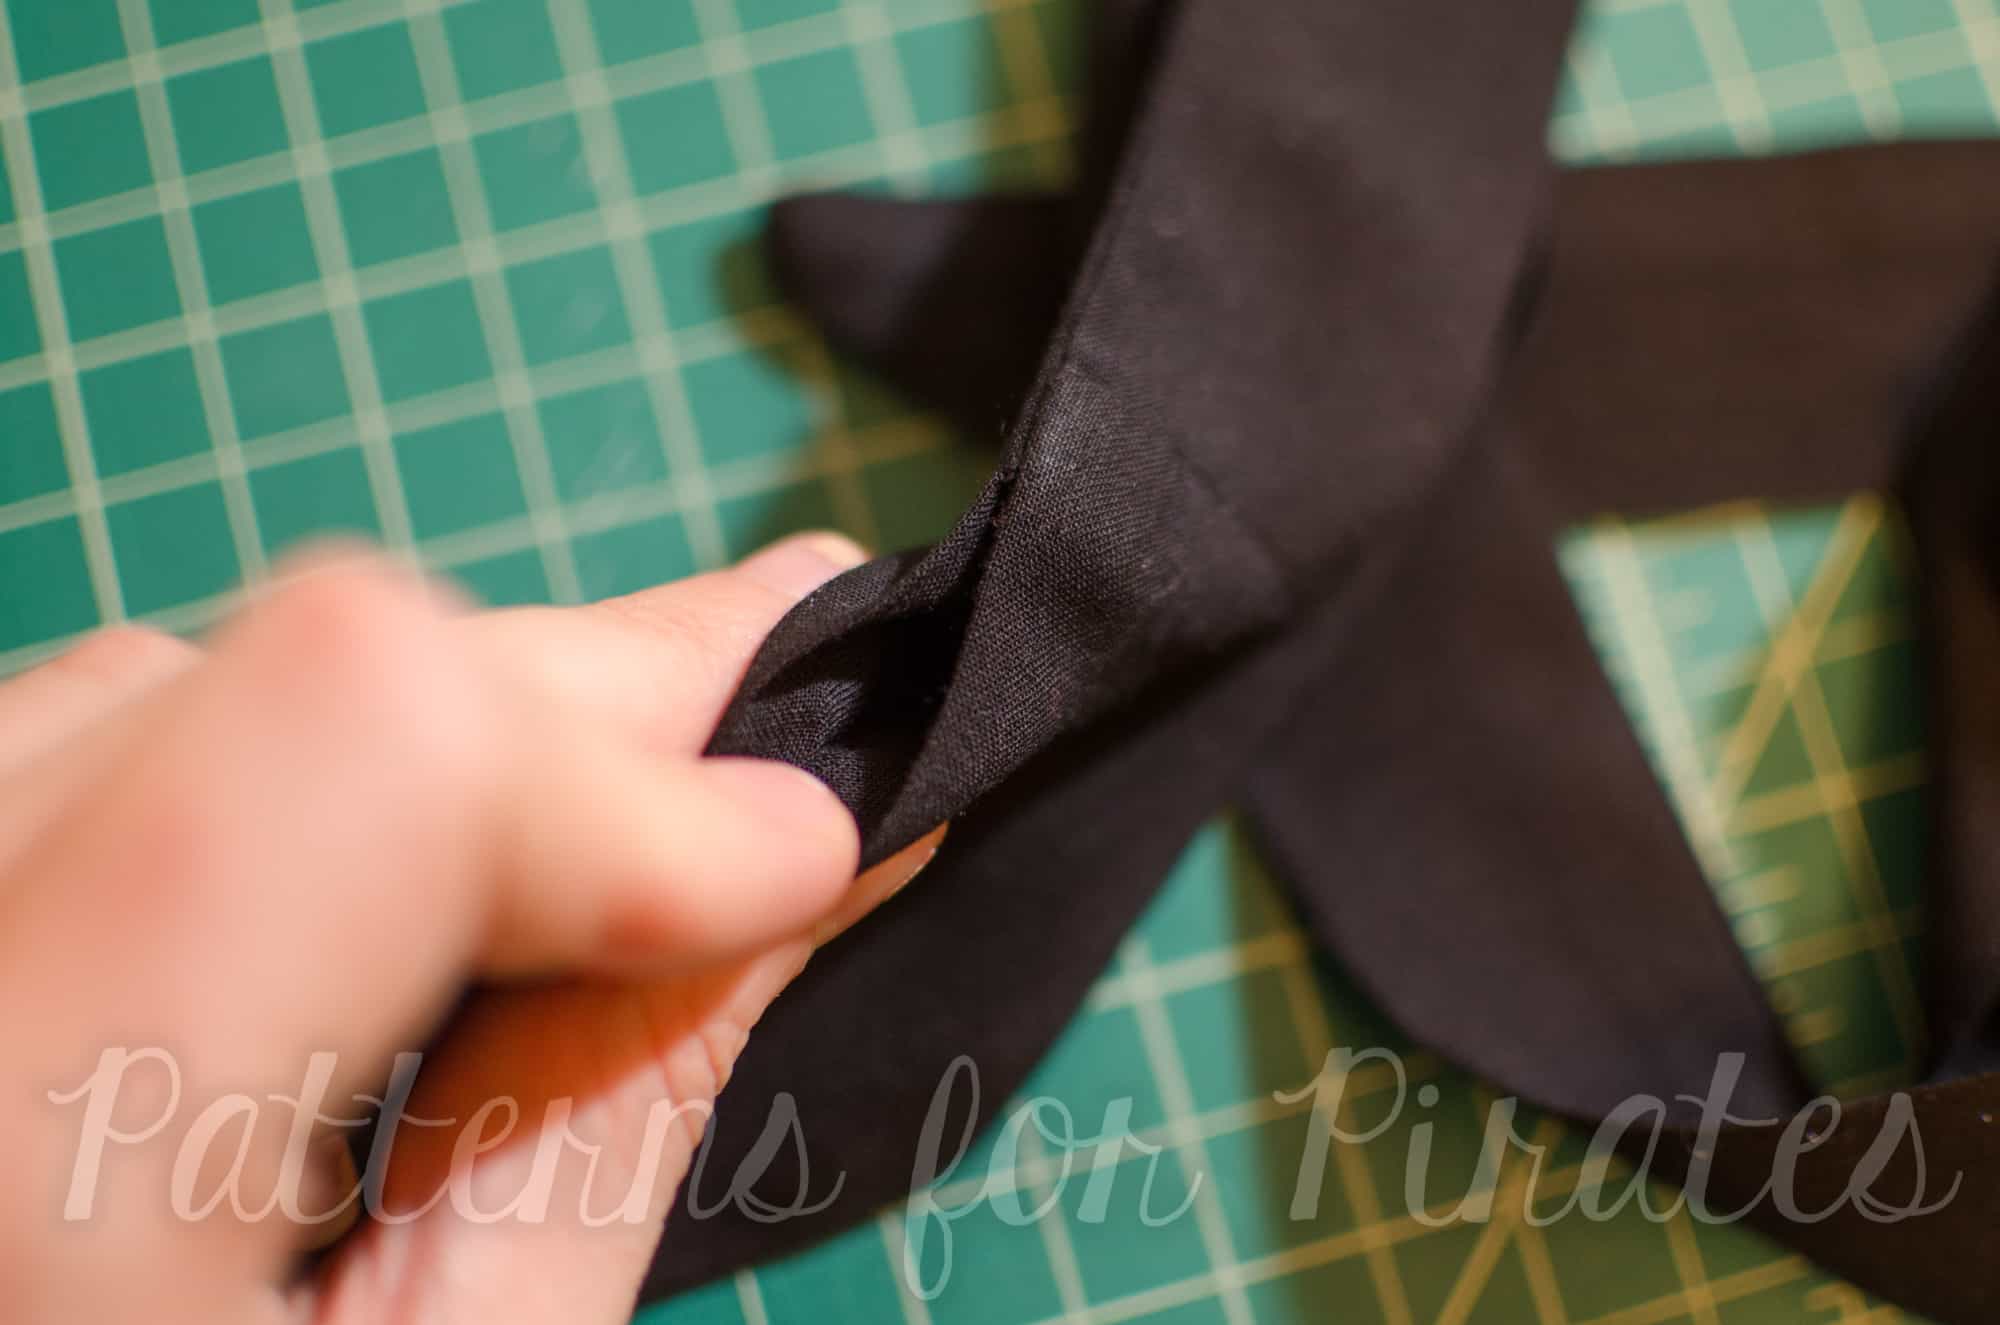
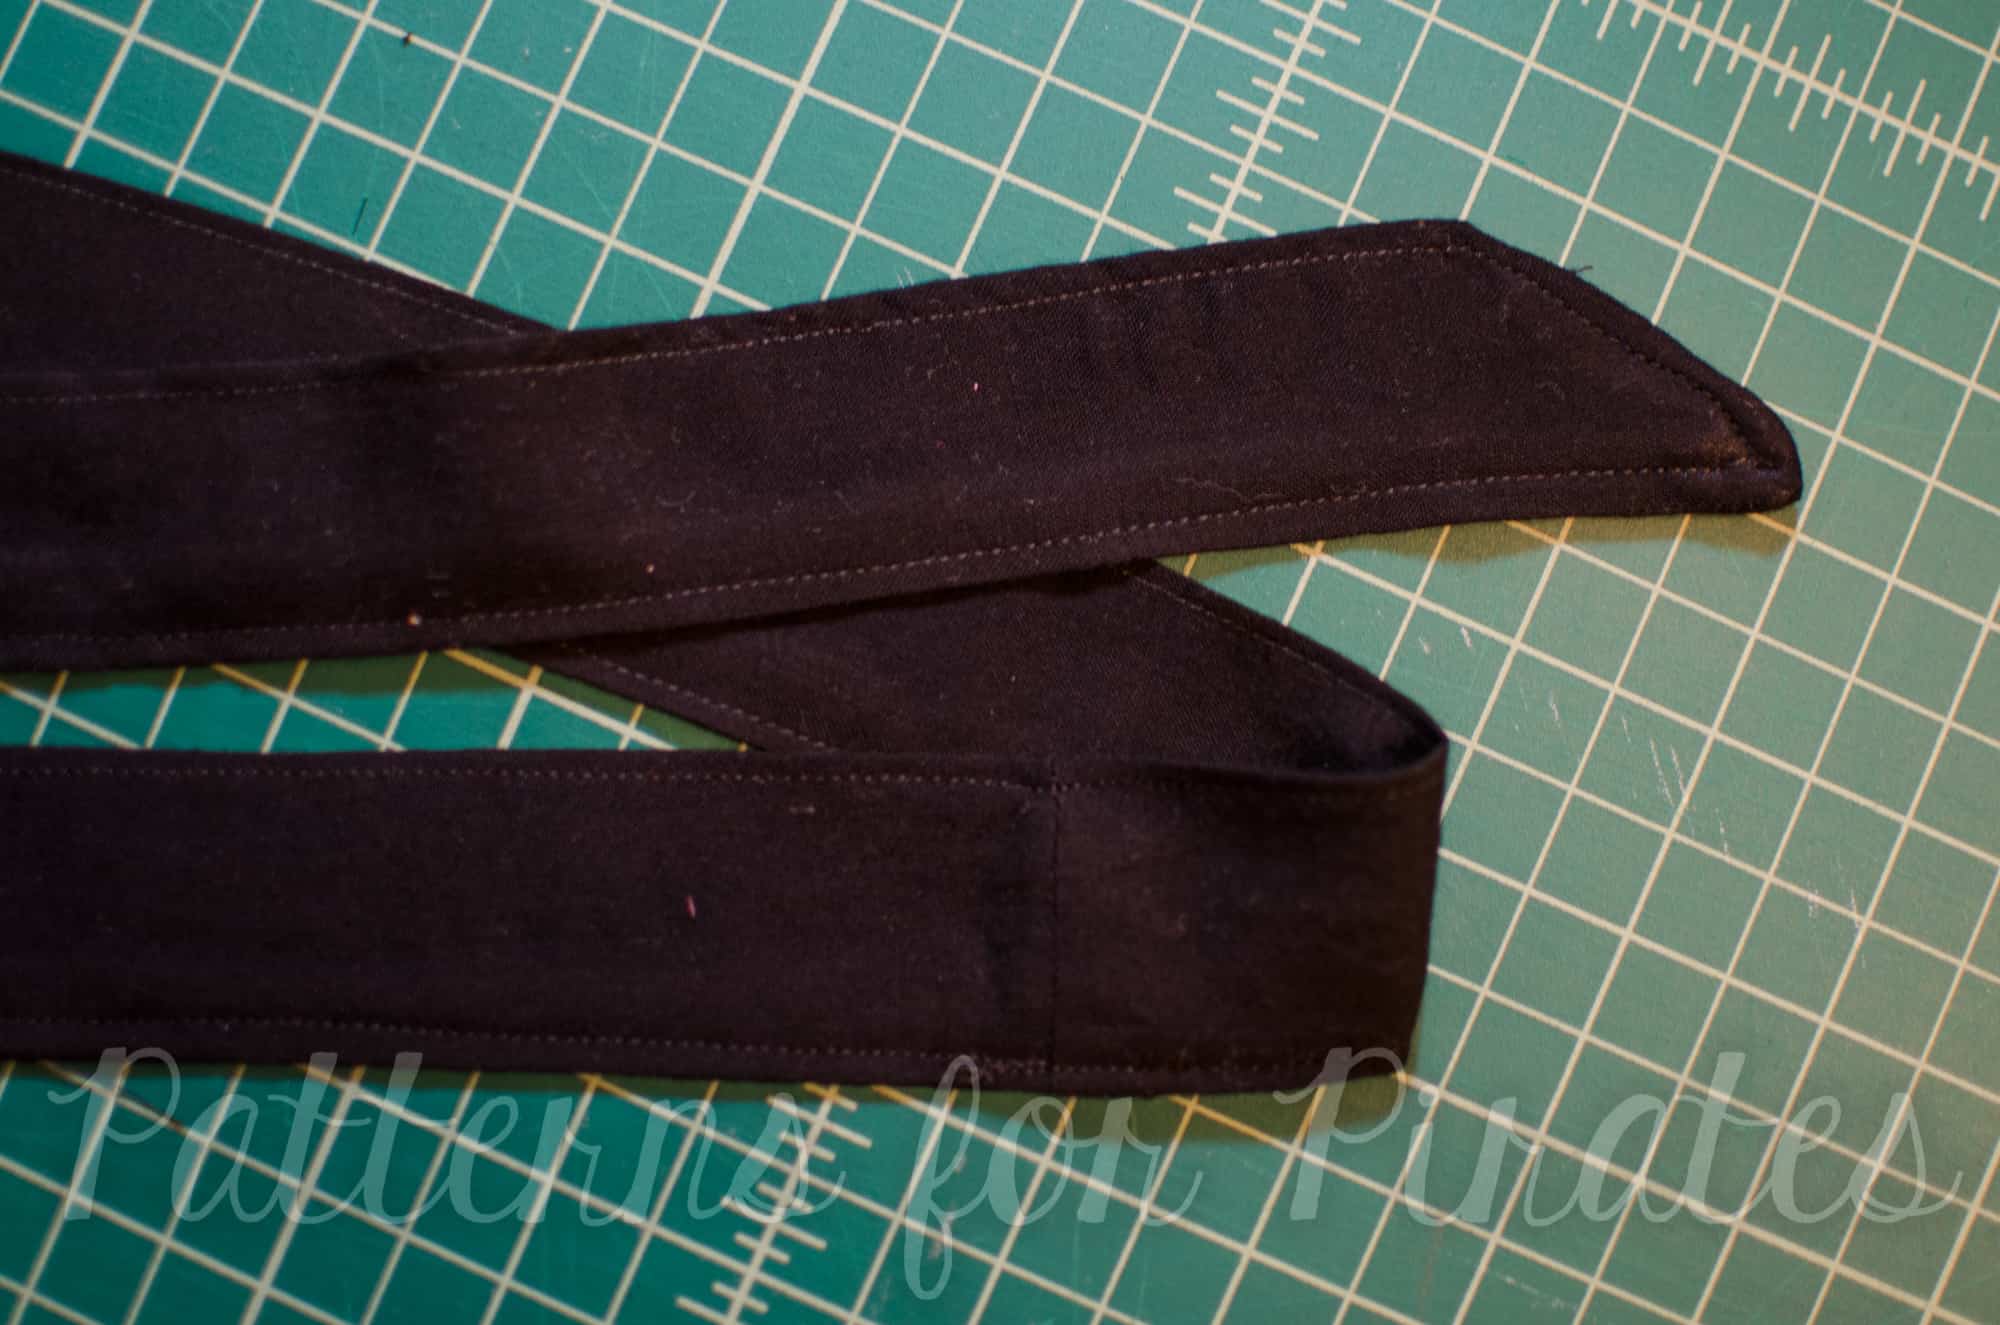
5. Iron the short edge over to form a triangle. Now sew here to make the pointed edge, and trim the seam allowance down to 1/2″.
6. Turn right side out, press, and topstitch as close to the edge as you feel comfortable. When you get to the 2″ you left open, align the seam allowance inside and and stitch shut while topstitching.
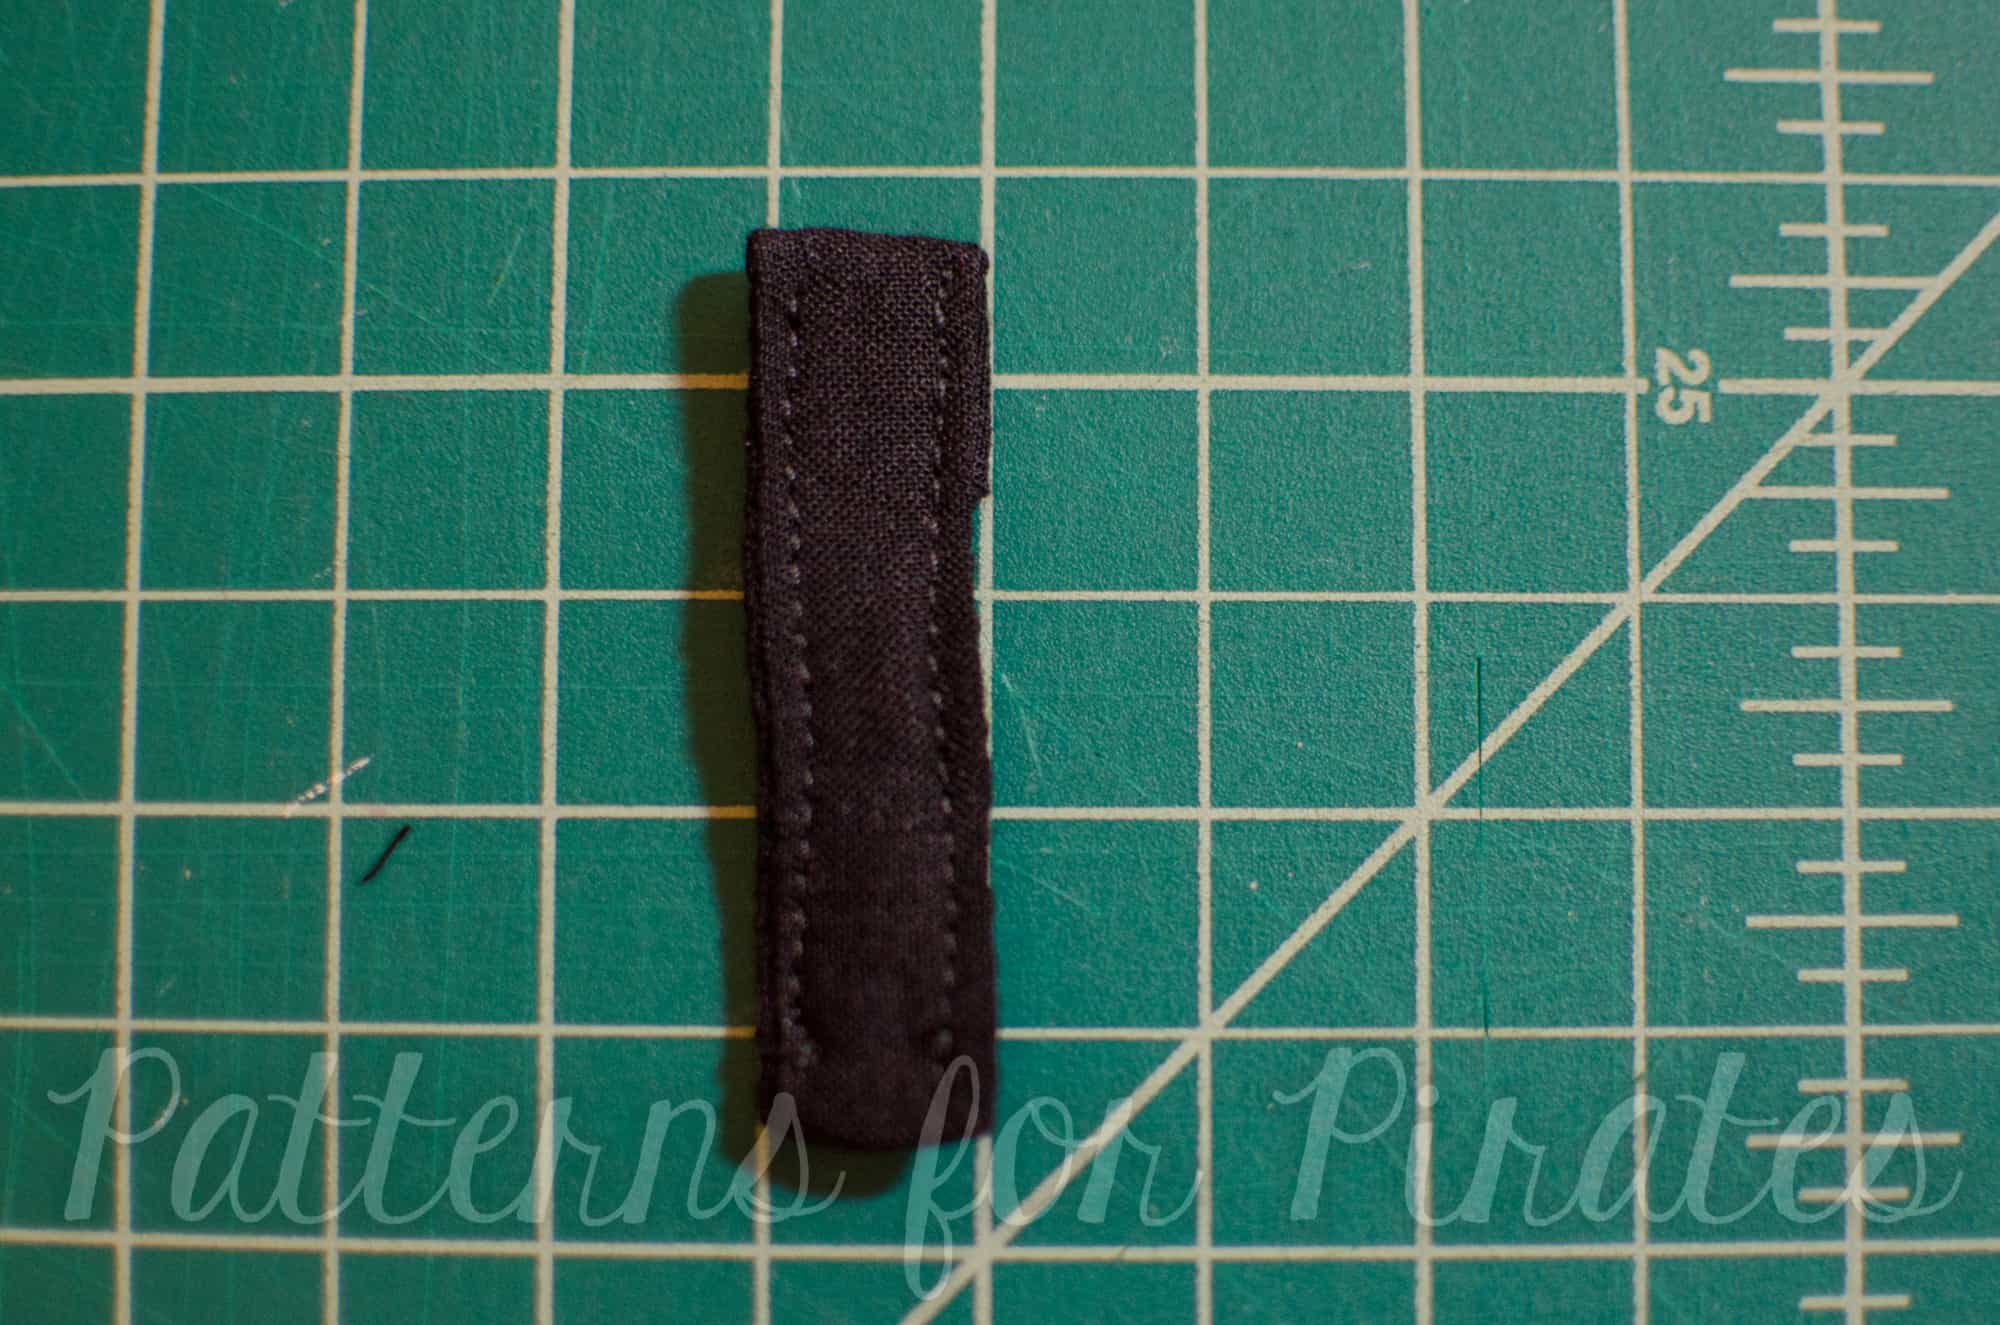
7. For the belt loops, first decide if you want two or three. I opted for two because I didn’t want one on the back (I just don’t like the feeling).
8. Cut rectangles 3″ x 1.5″ – four for two belt loops or six for three belt loops.
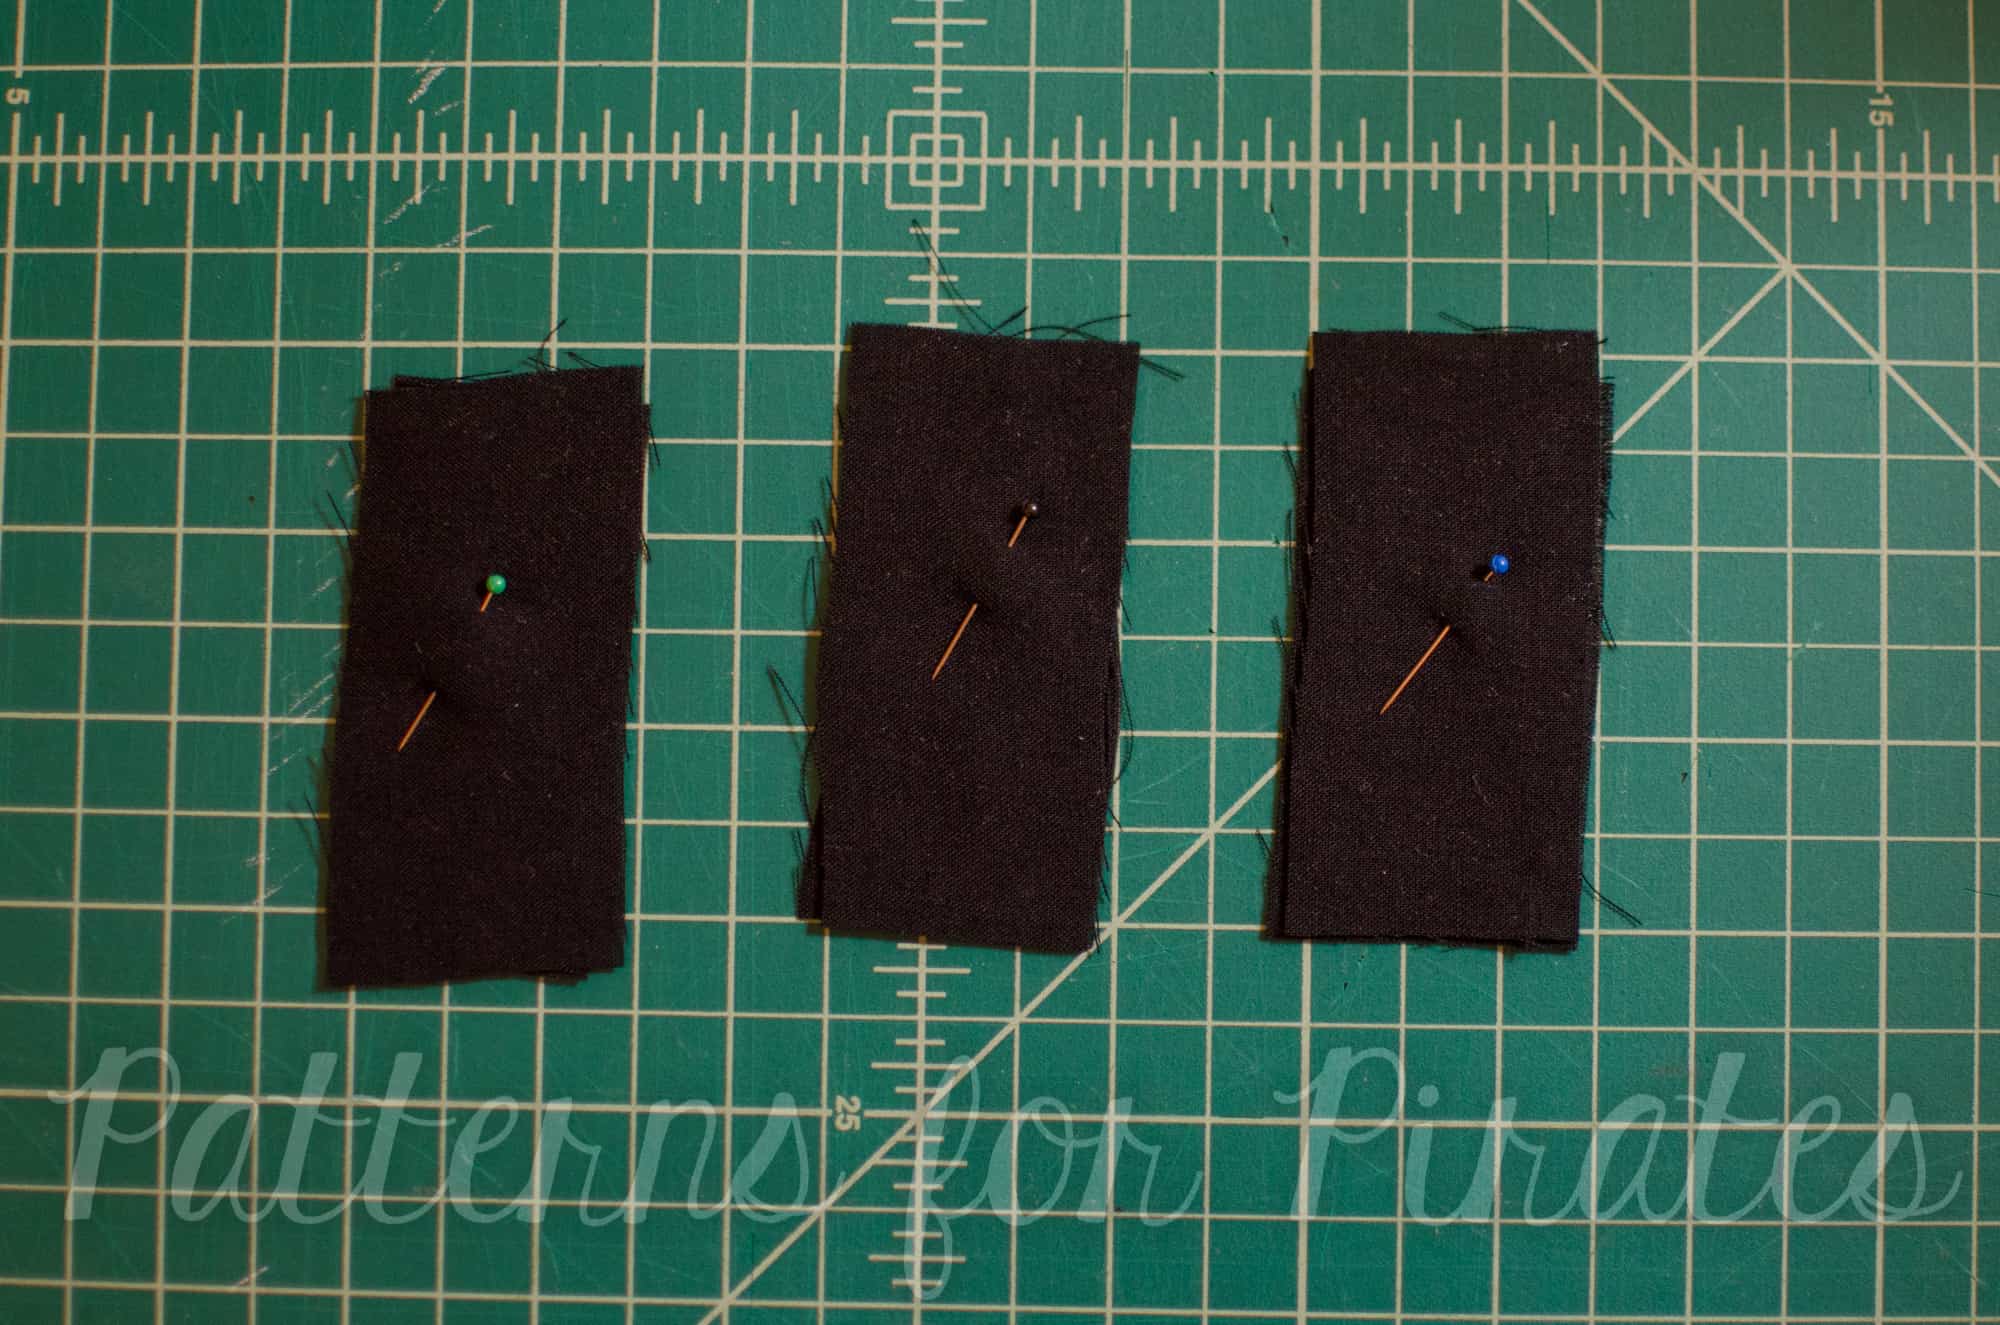
9. Stitch along the long edges, right sides together. Then trim seam allowance to 1/4″.
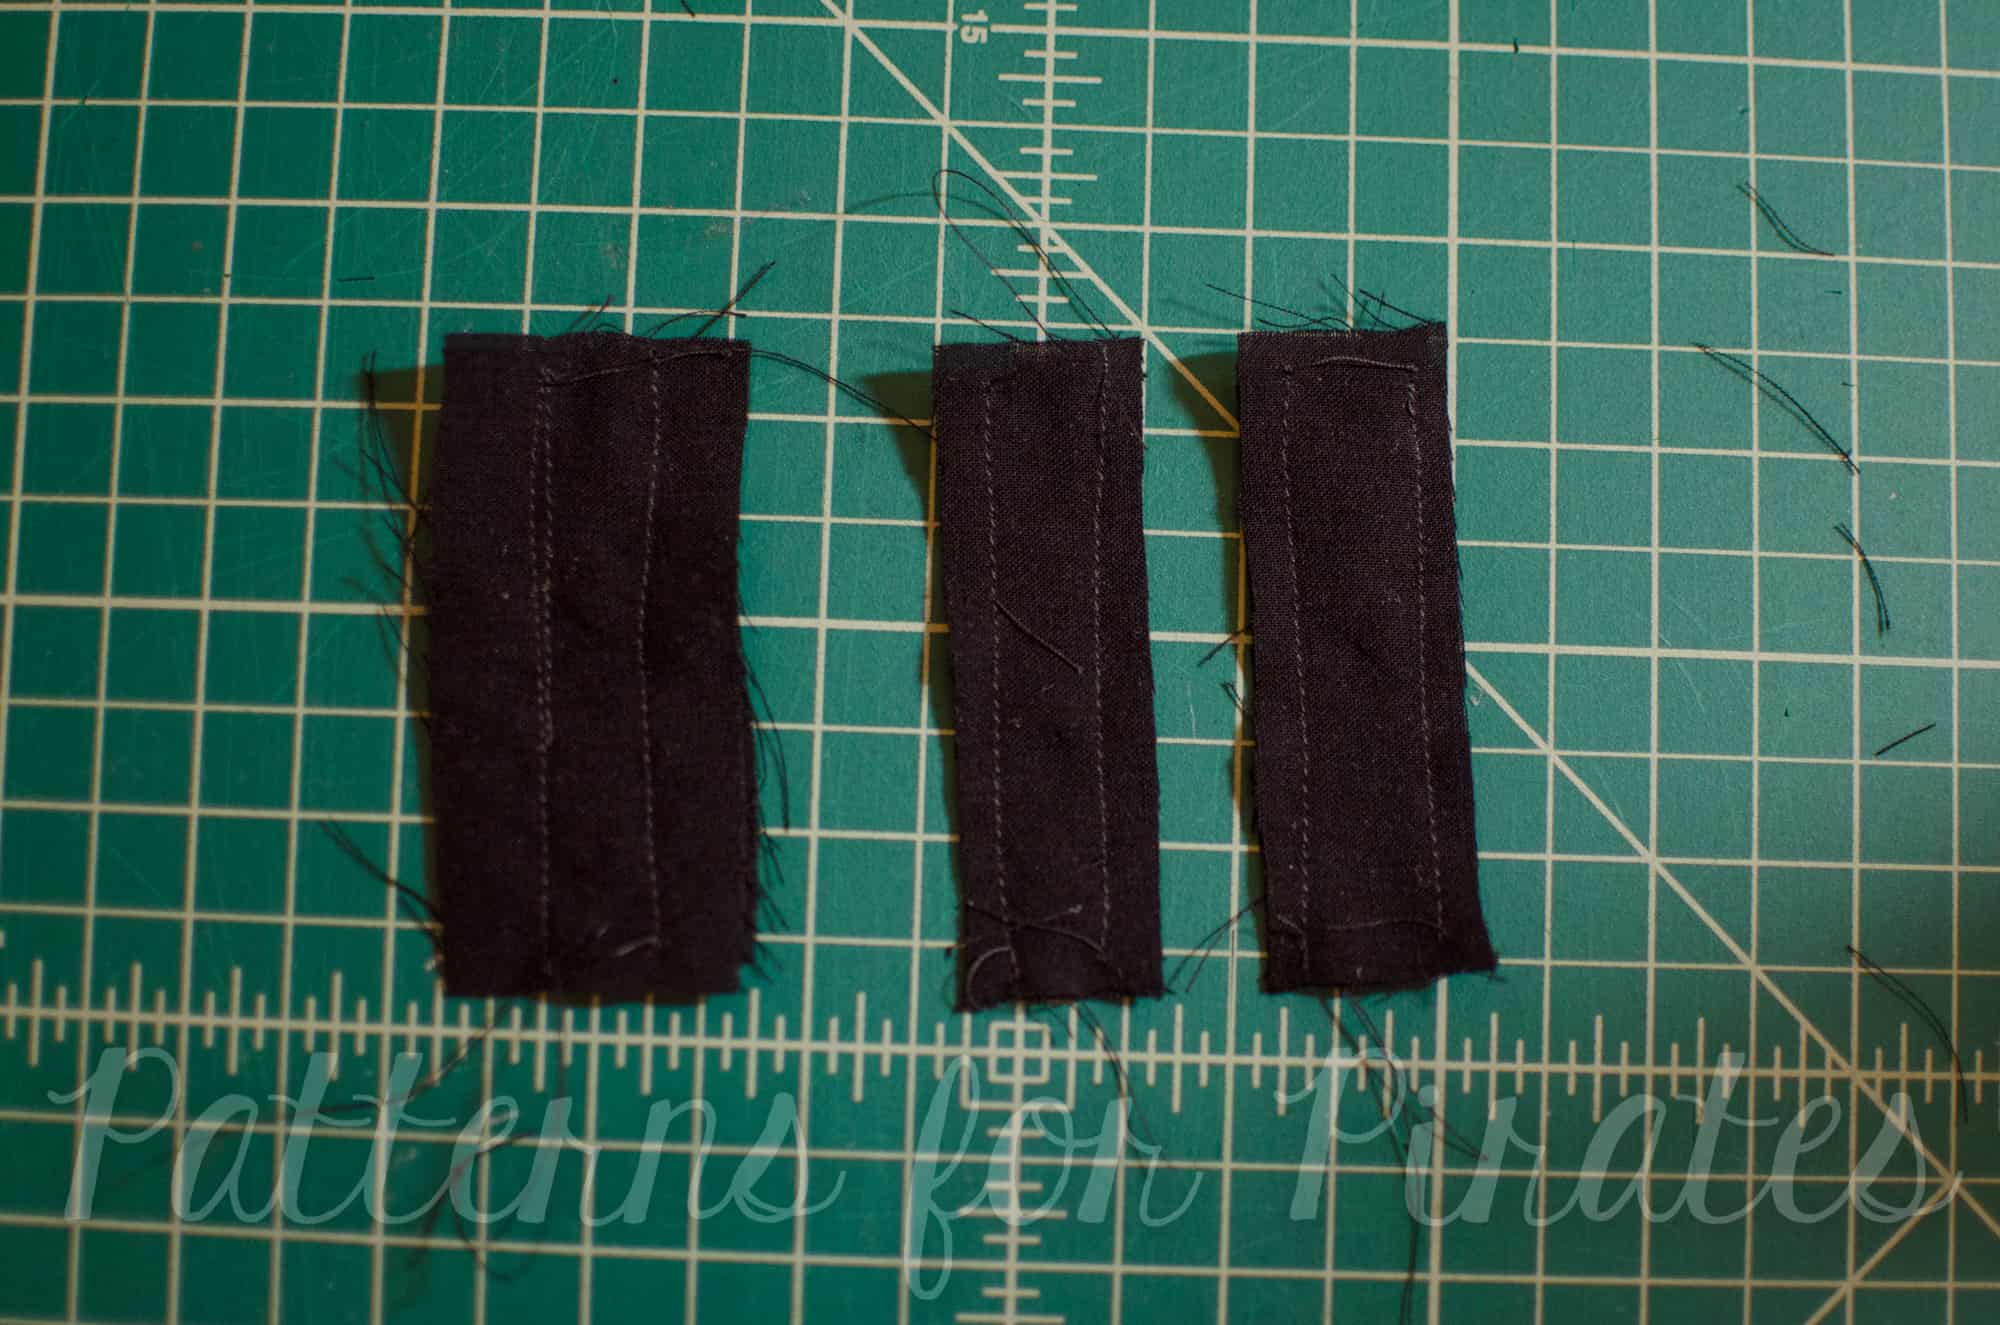
10. Turn right side out, press short raw edges to the back 1/2″. then topstitch down the long edges as close to the edge as you feel comfortable.
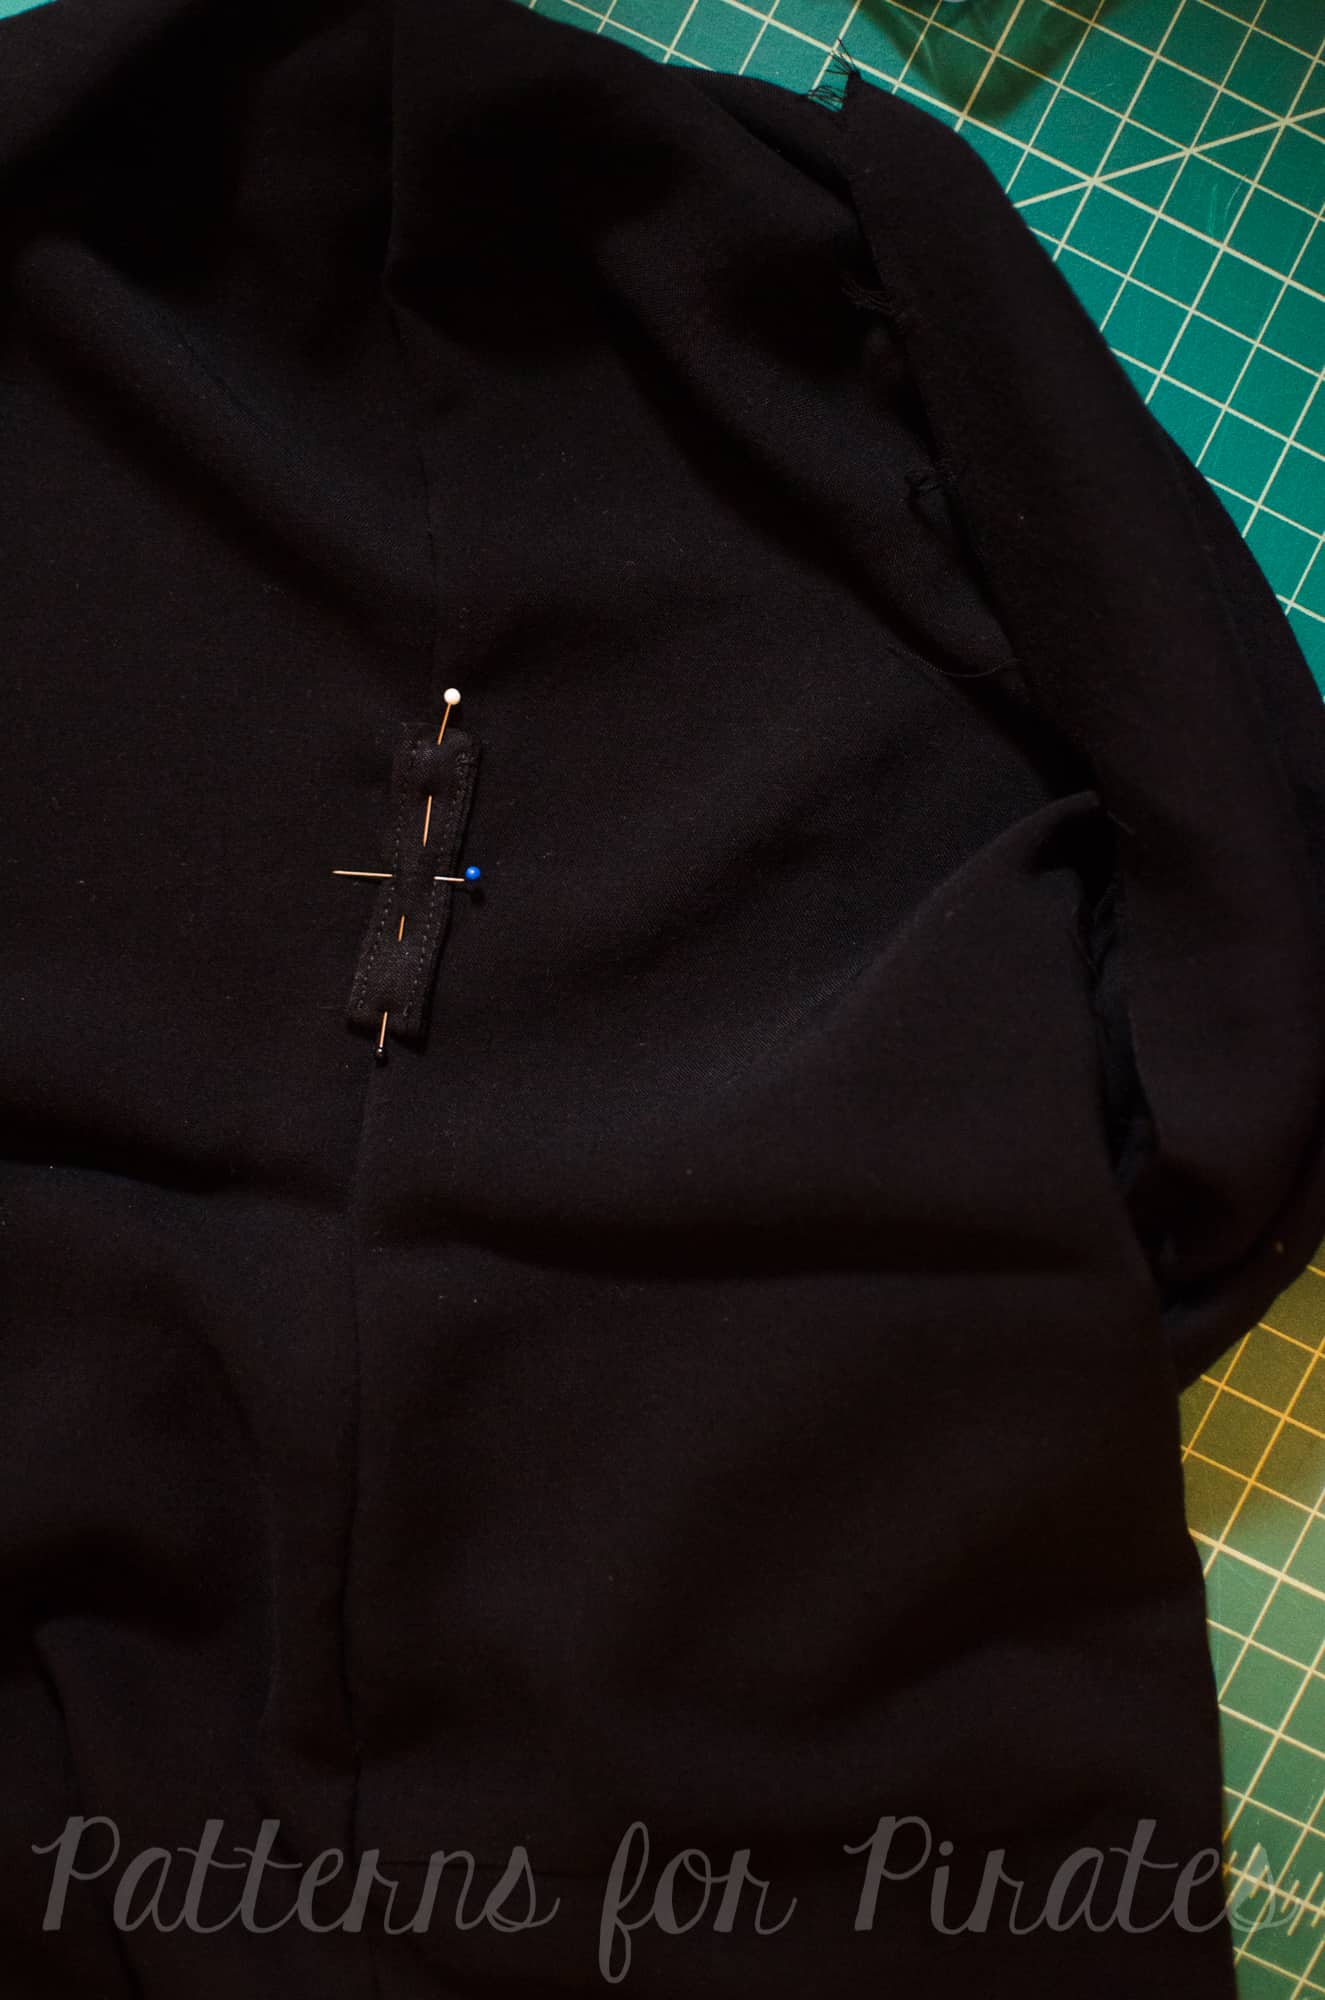
11. Find the notch on the blouse side seams you marked earlier. Sew the loops on to the side seams, over the notch, by topstitching the short side 1/4″ from the edge. If you’d like a loop on the back too, find the middle of the back neckline and use a ruler to find the center back of the blouse from there and attach.

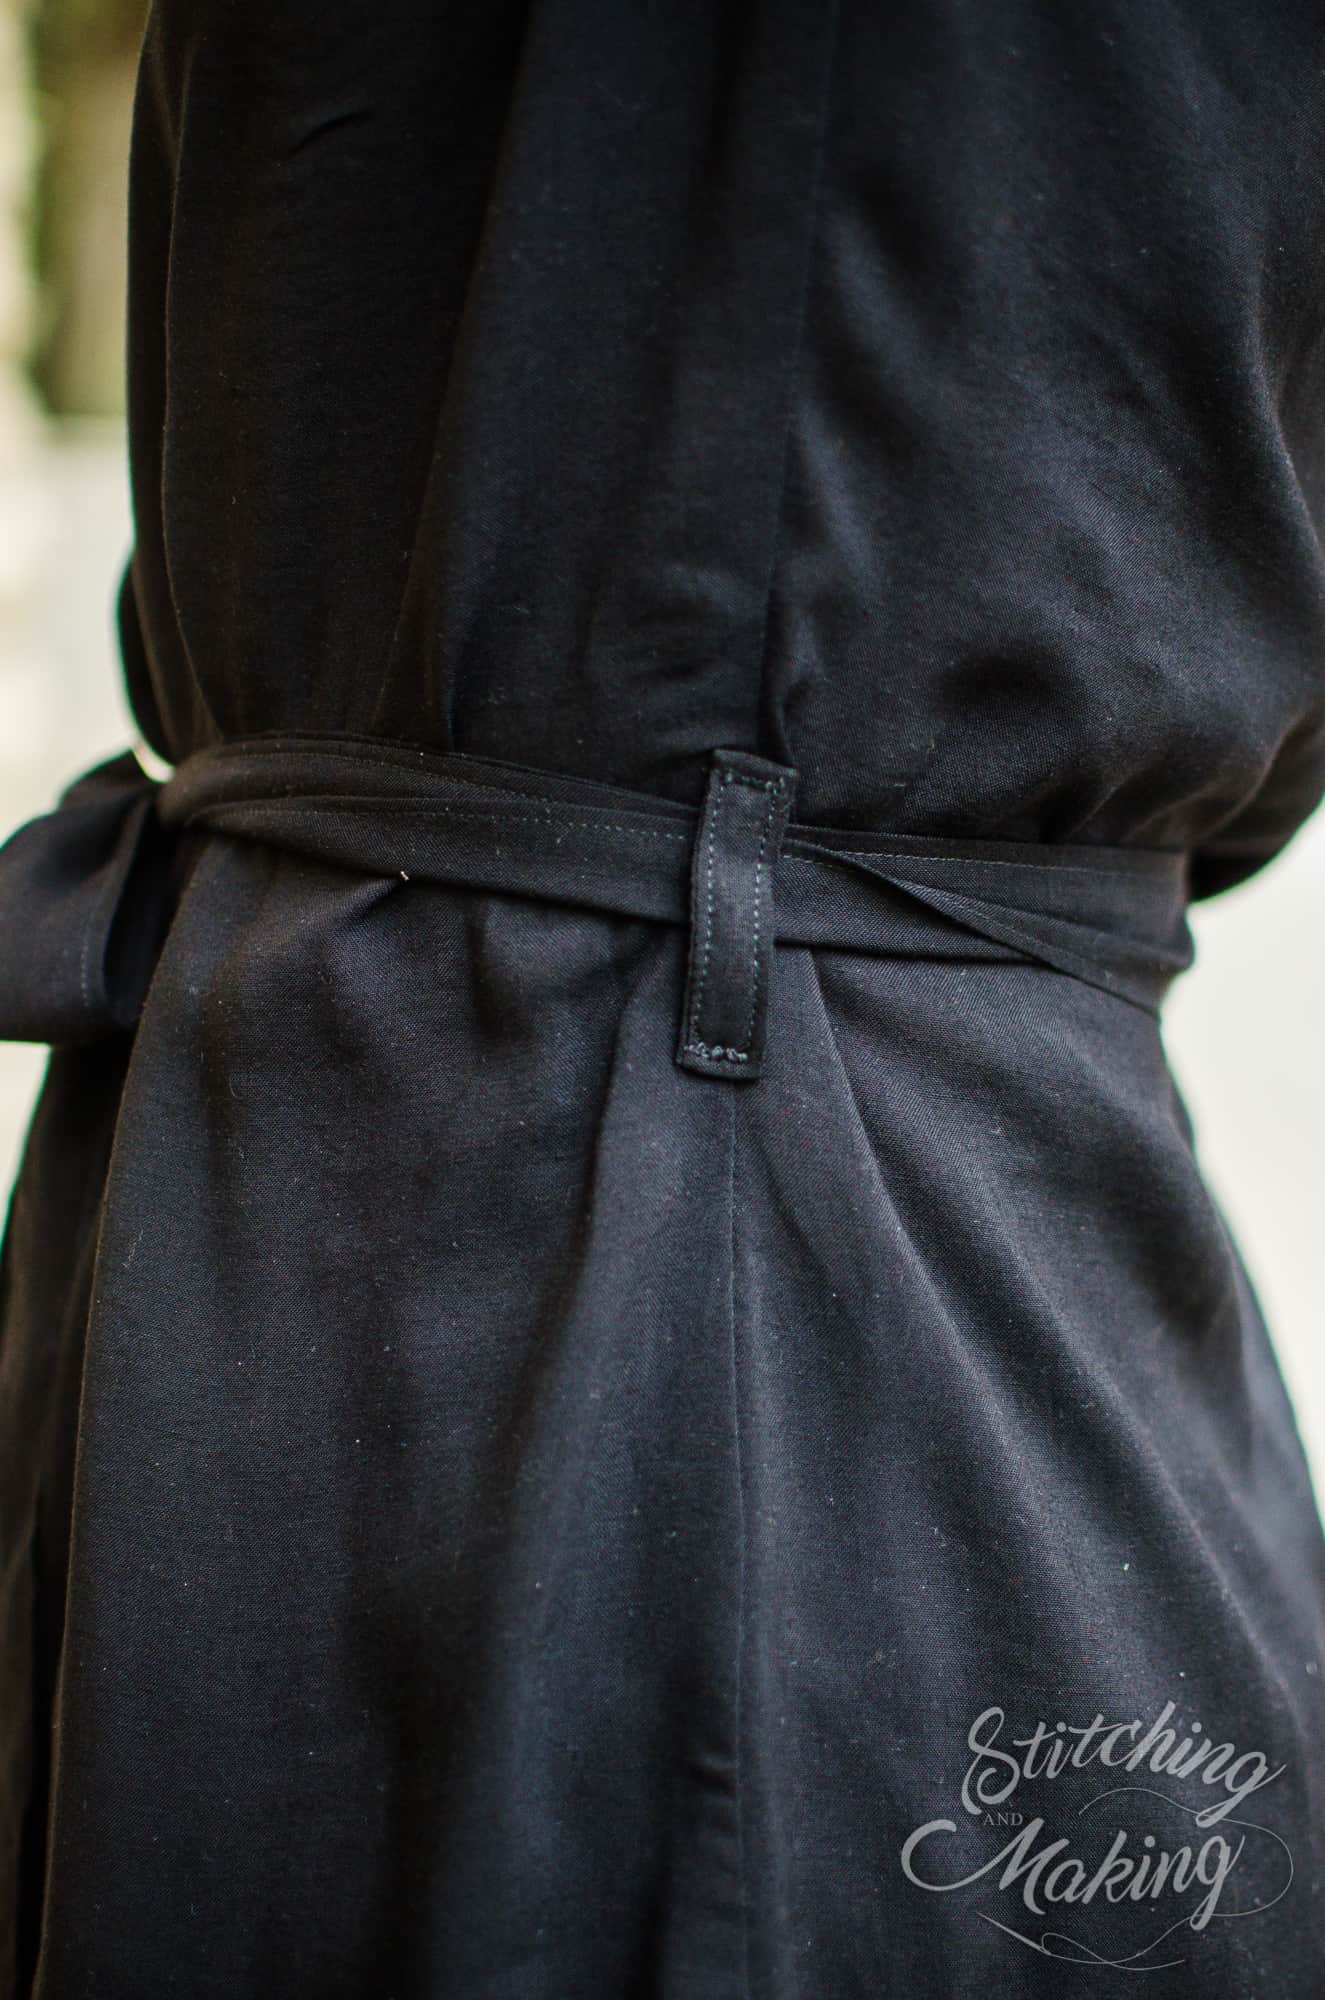
12. Press everything one last time. Slip in your sash into the loops and wear your new blouse!
~Elisabeth
. . . . .
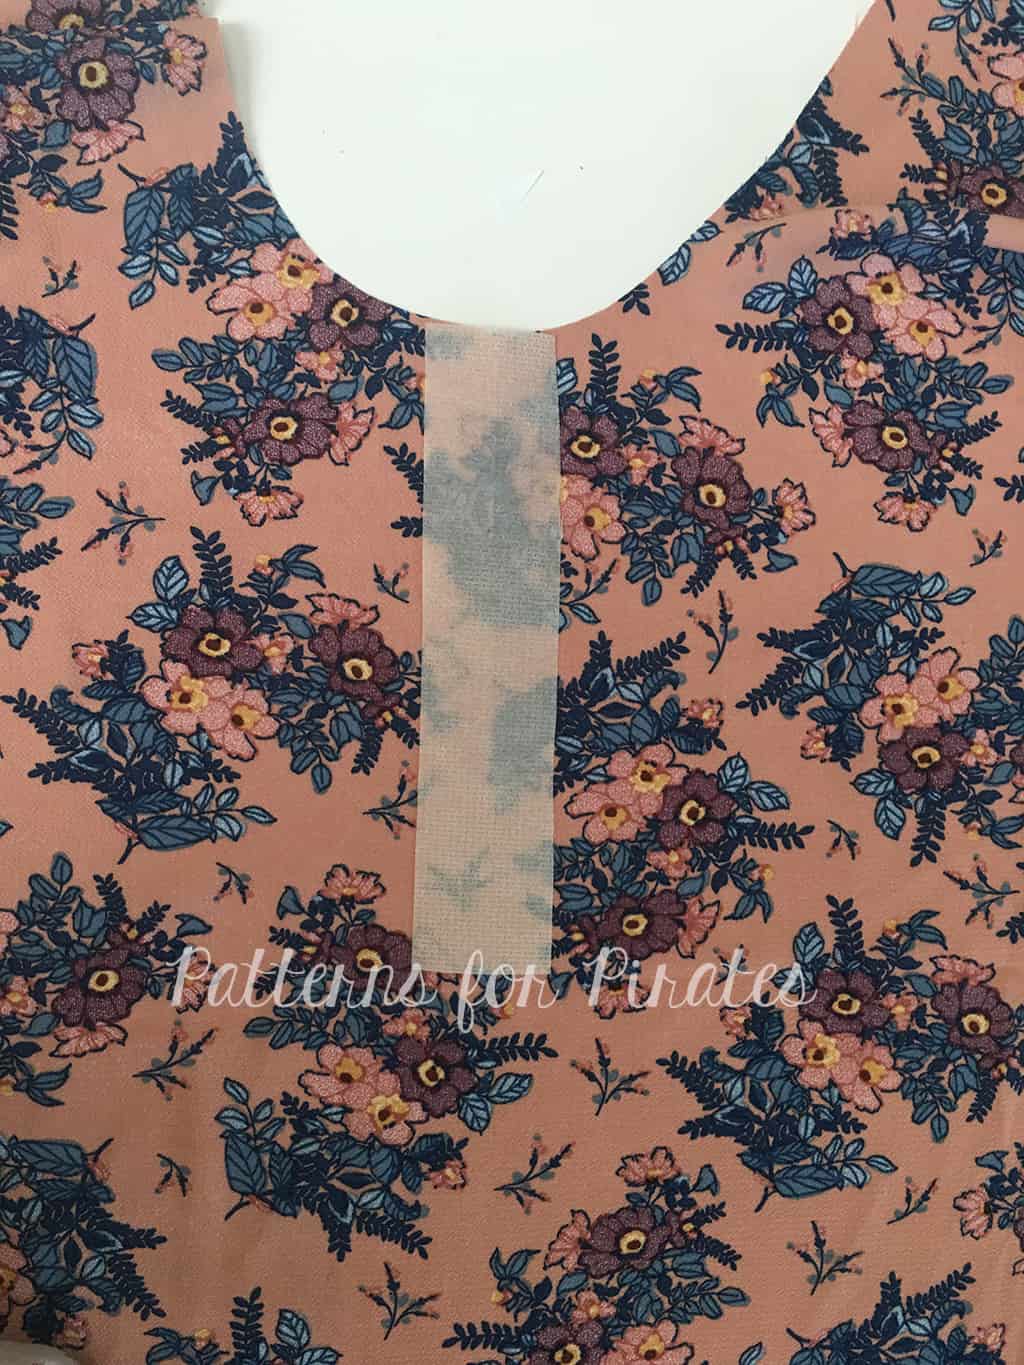
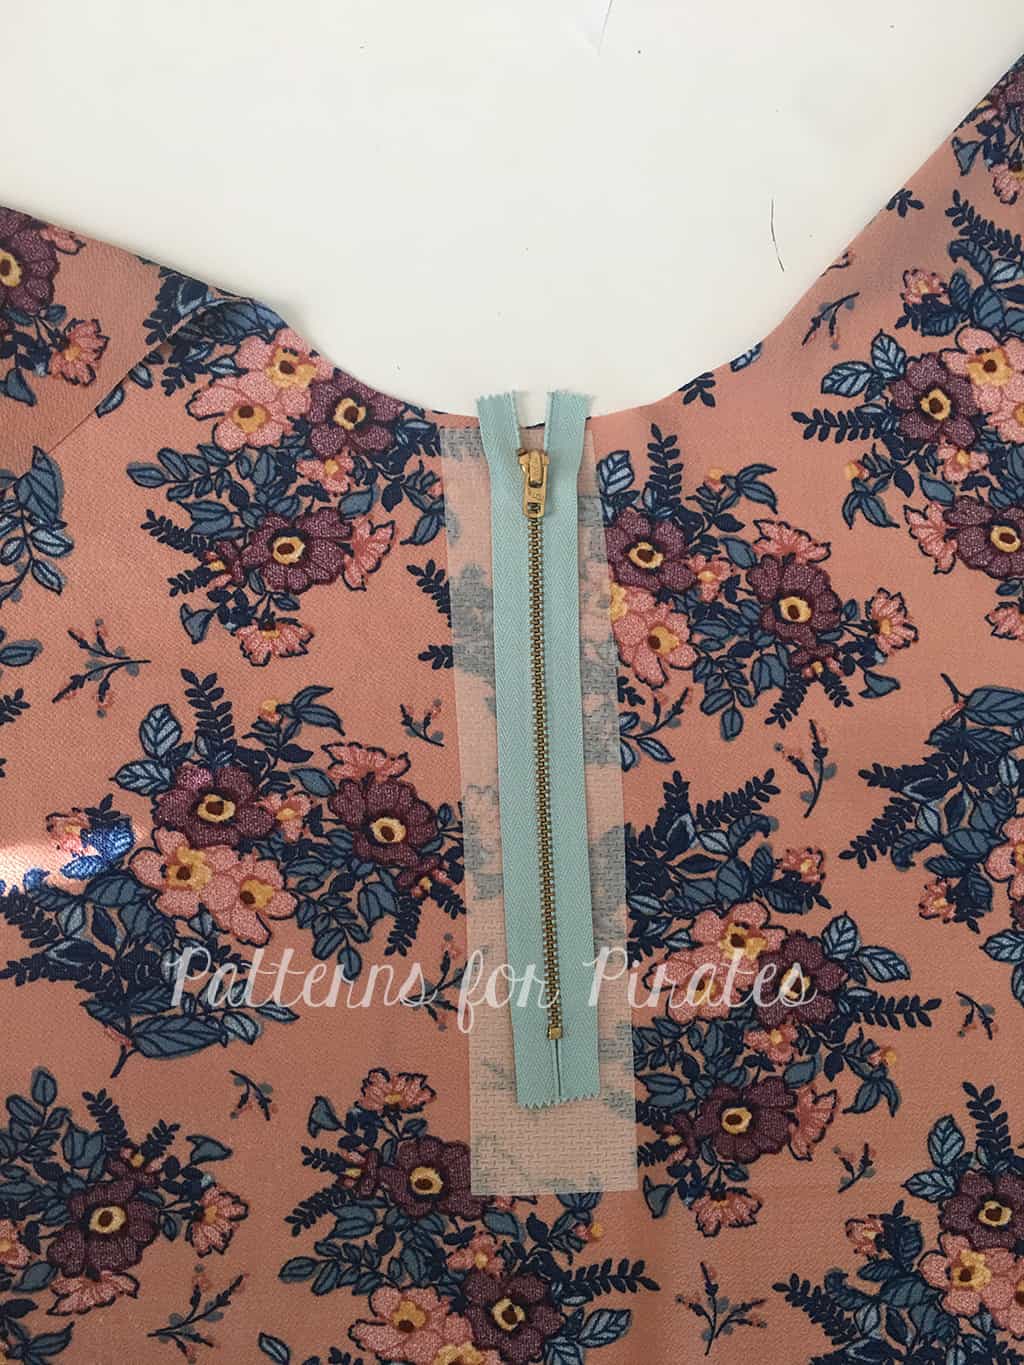
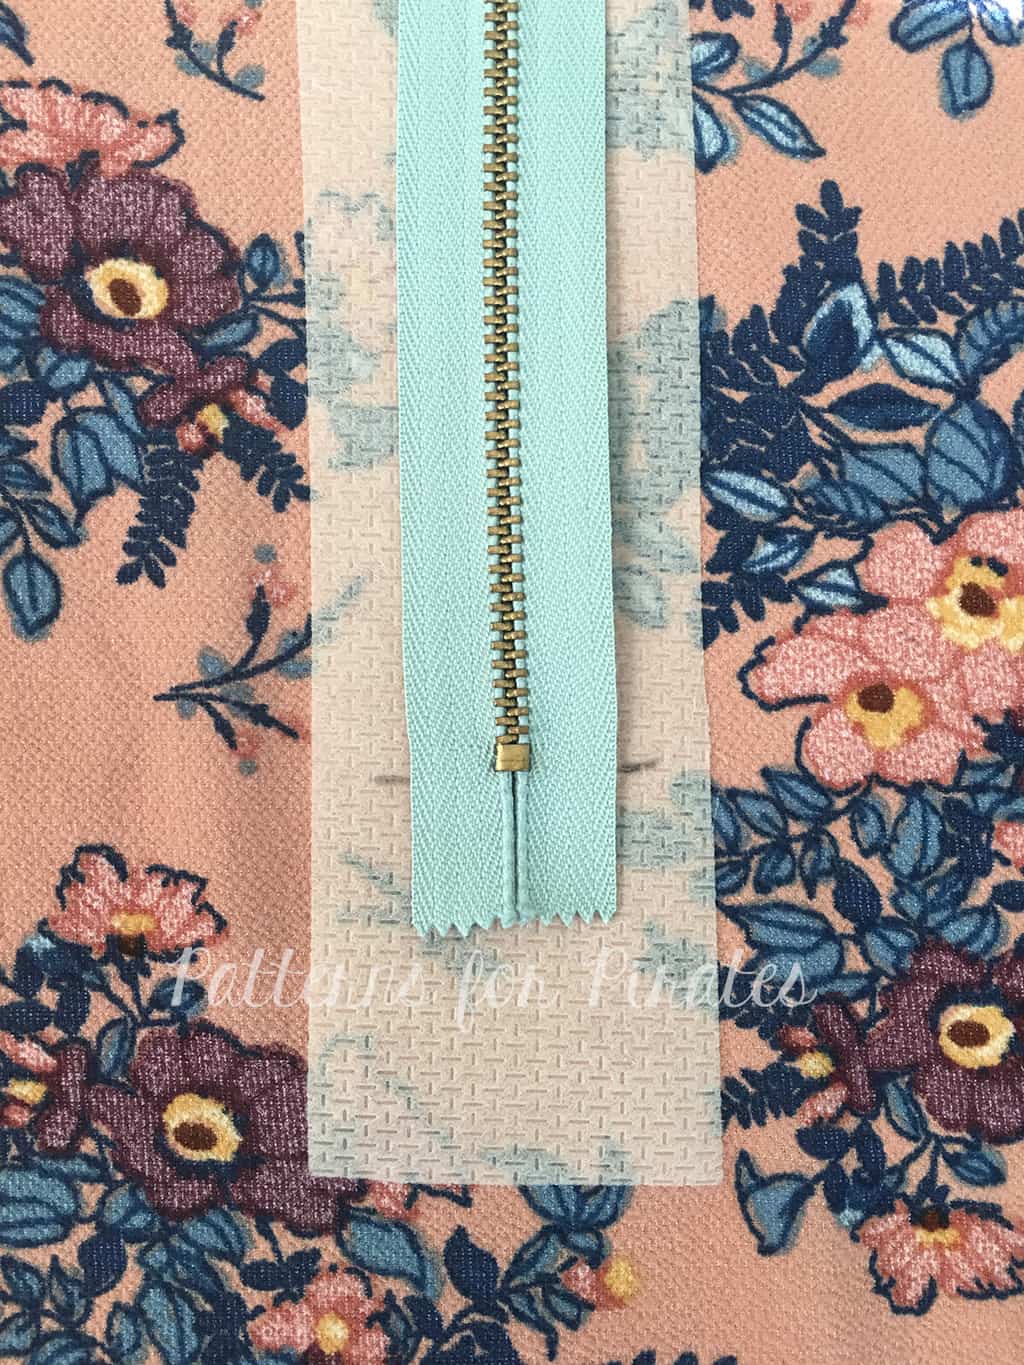
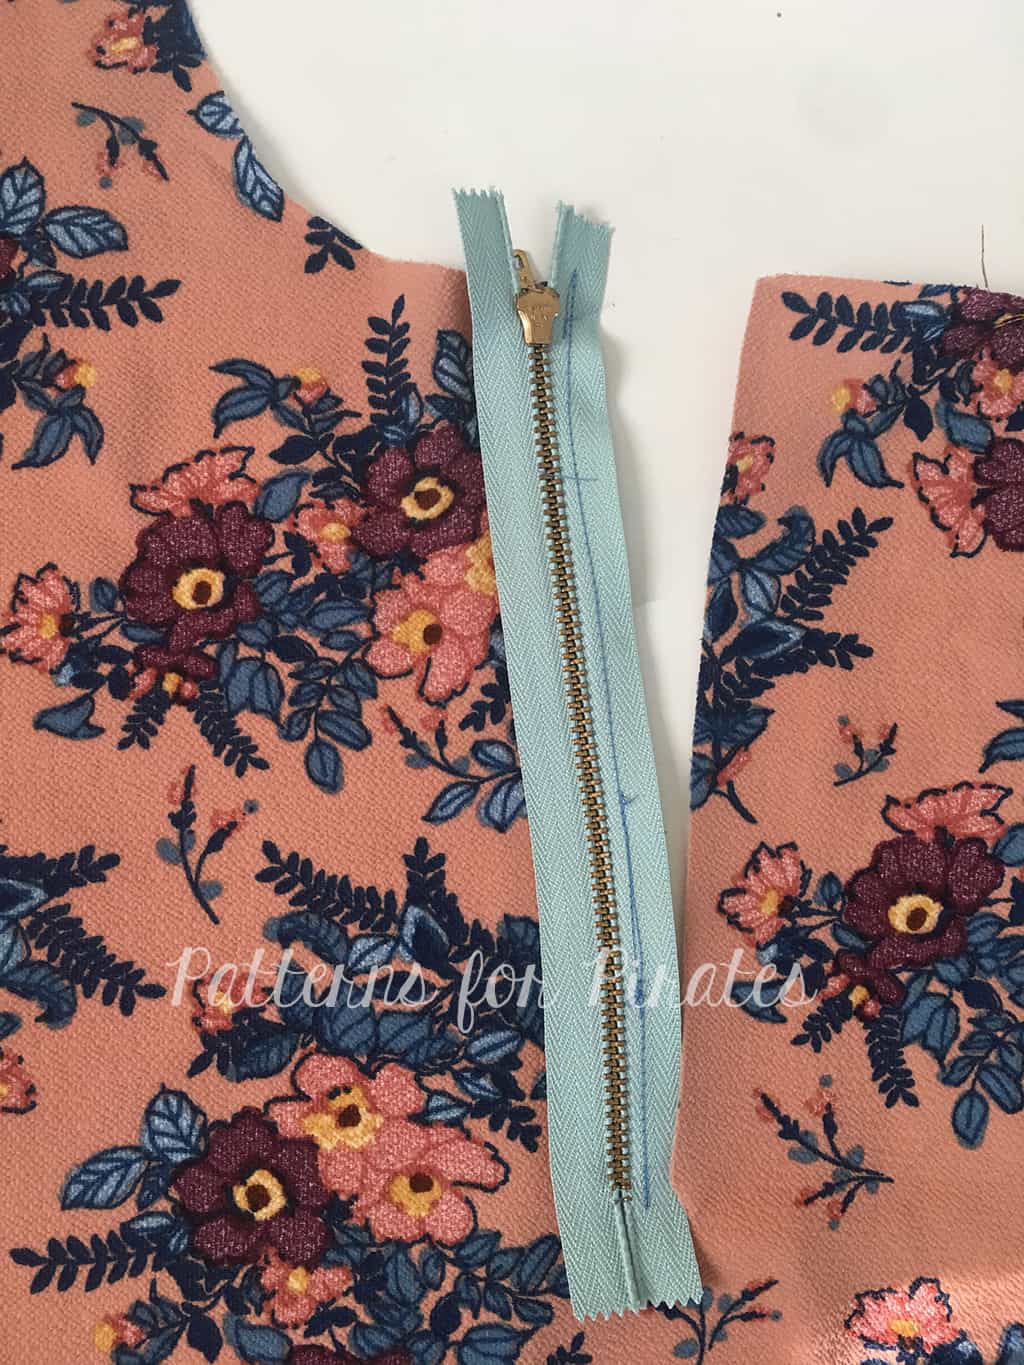
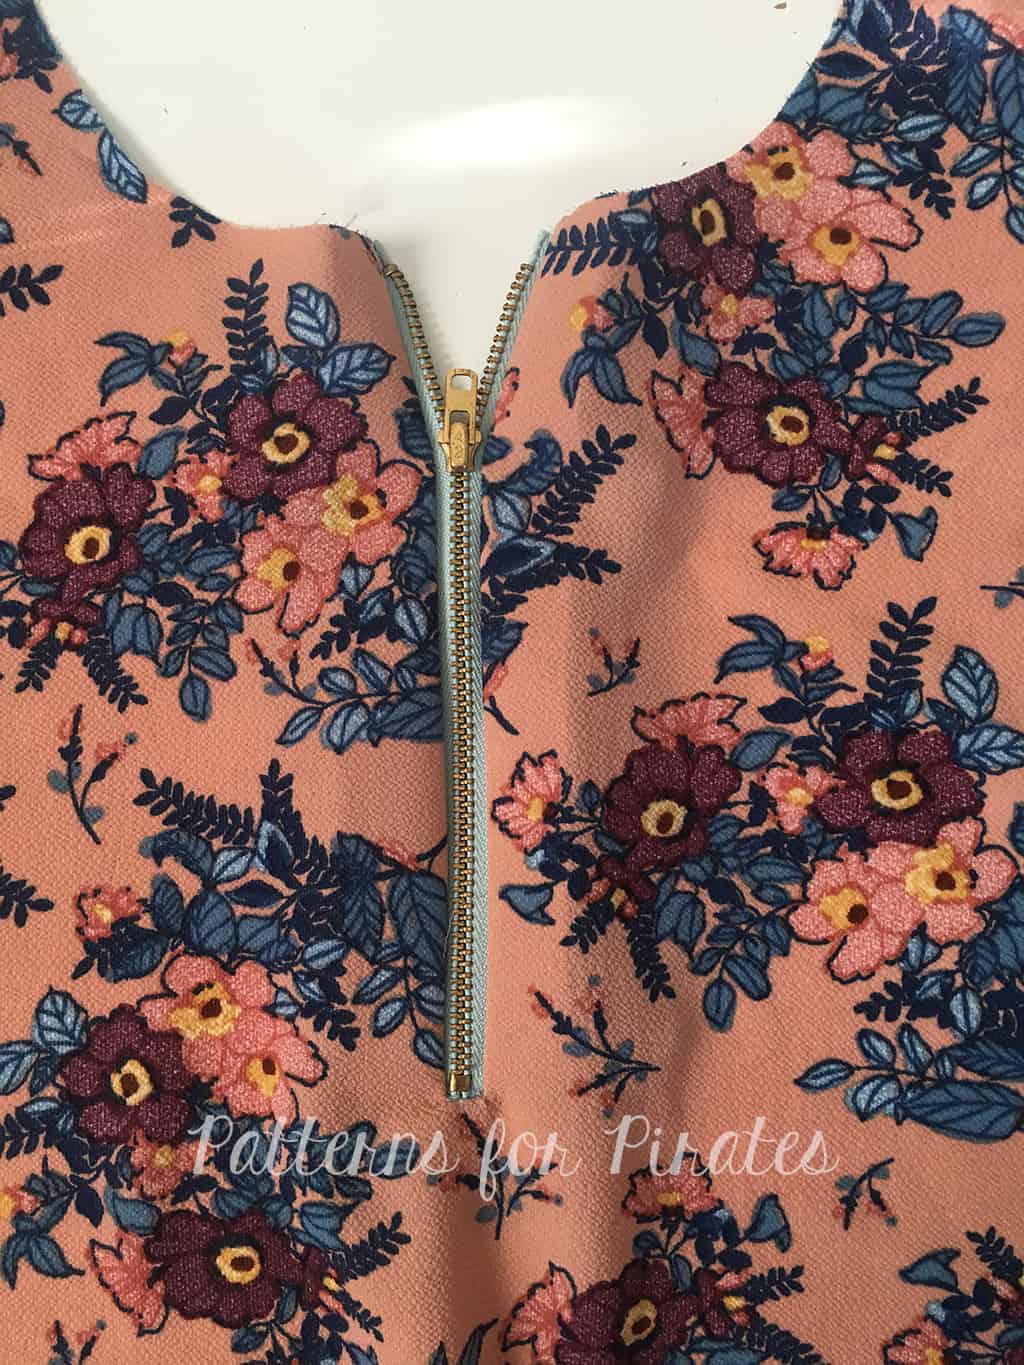
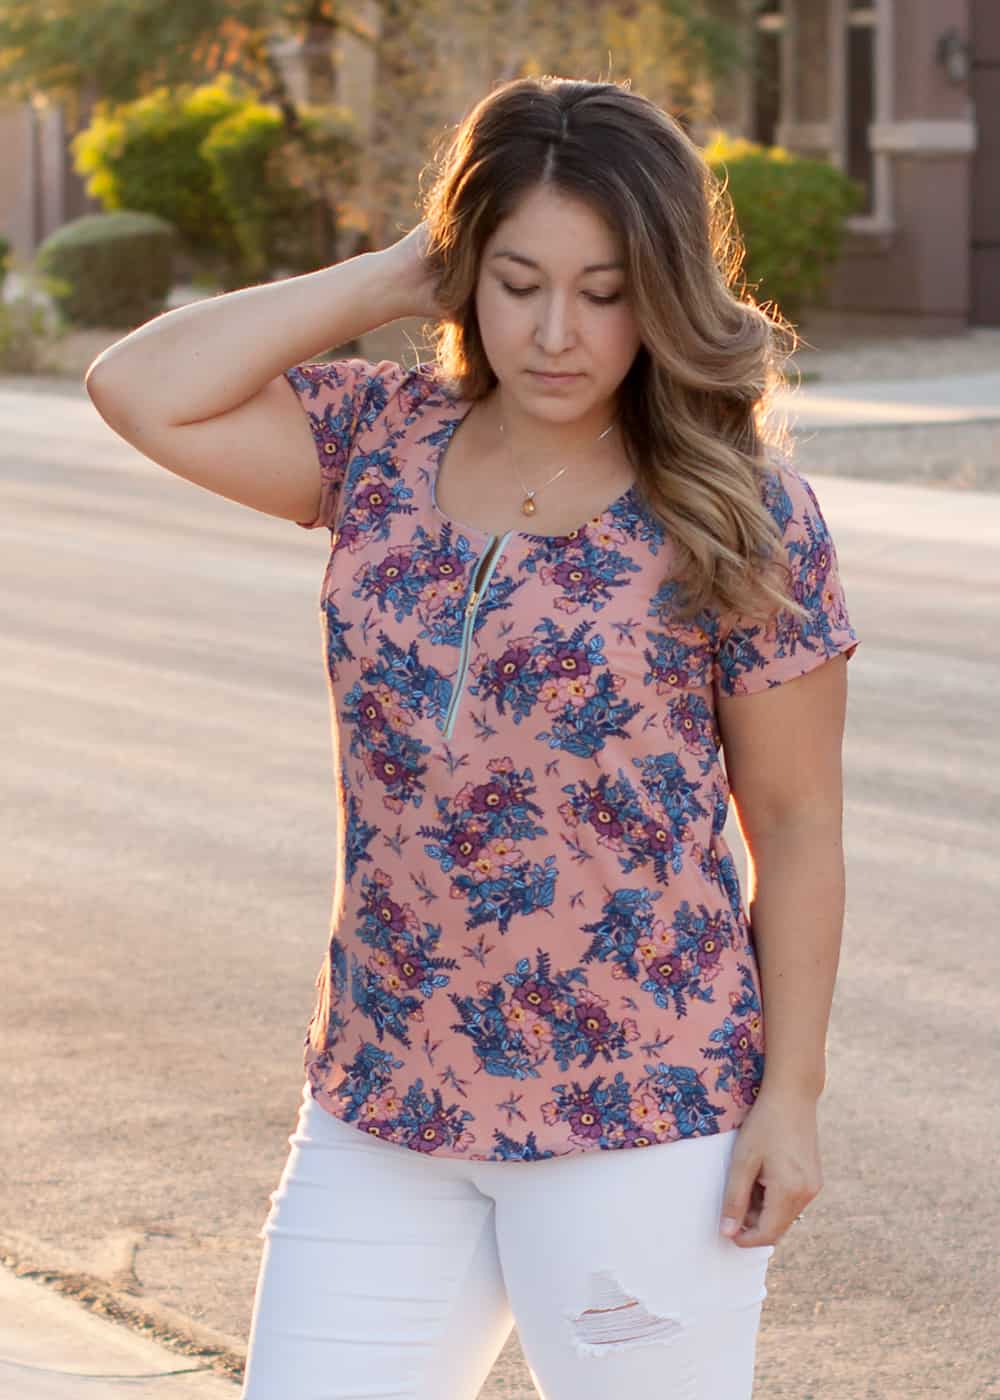
Front Zipper Hack

This is a little more intense and involves one of those scary things… you know, a zipper! Now, if you’ve never installed a zipper this may be a little daunting, but I promise, take it slow, you can do this!
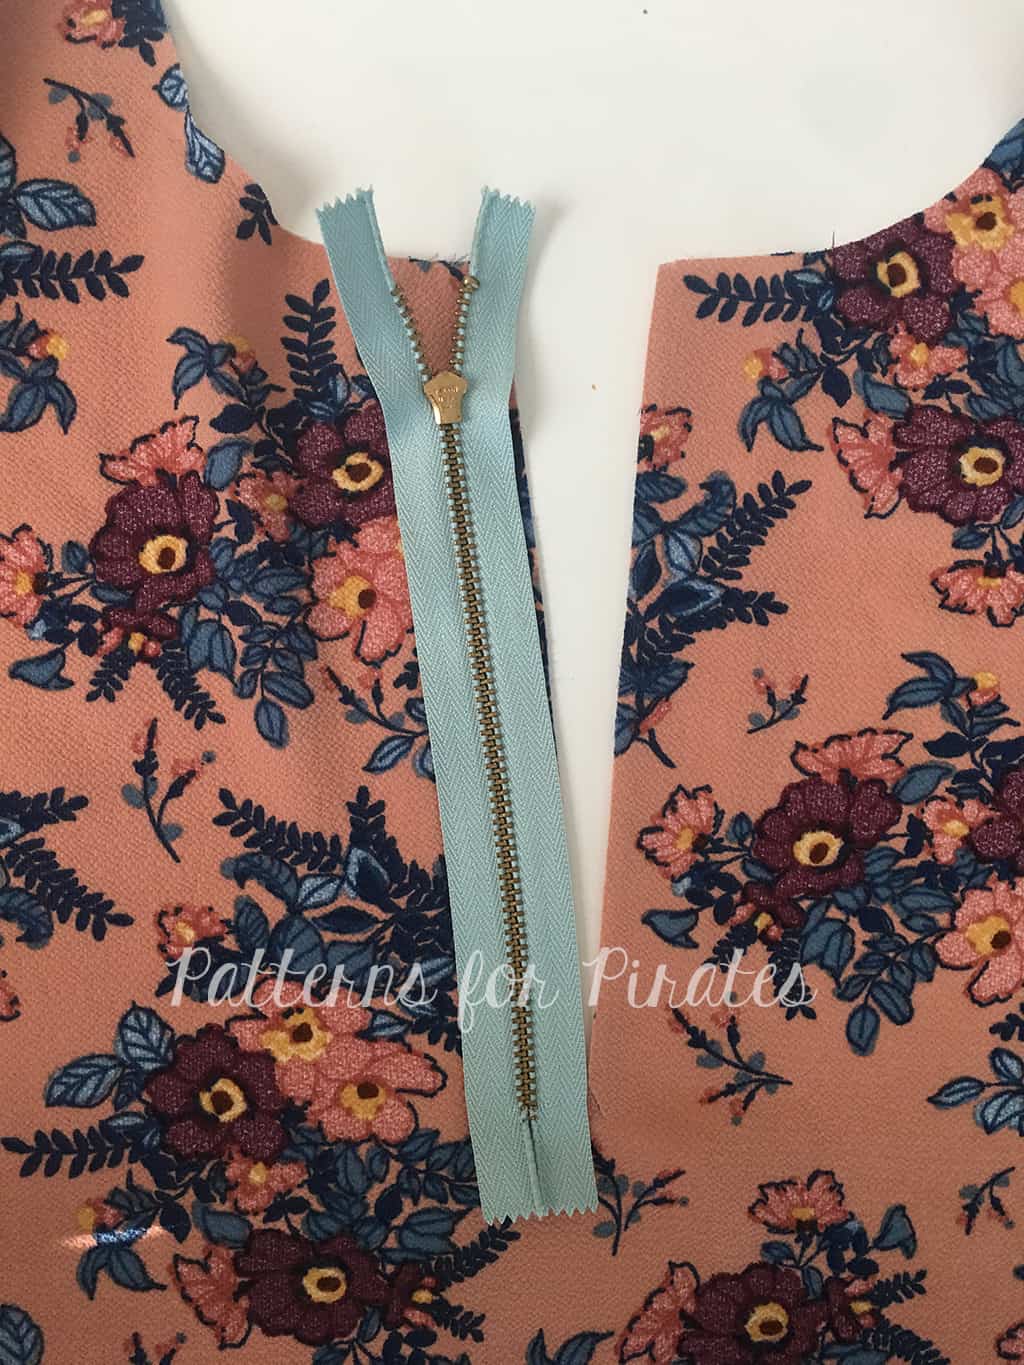
I am using a 7″ (I think?) exposed metal zipper but you can choose your preferred length if you want it shorter or longer. If you’re choosing this option, do this prior to any other step in completing your top. So now, let’s get started.
-

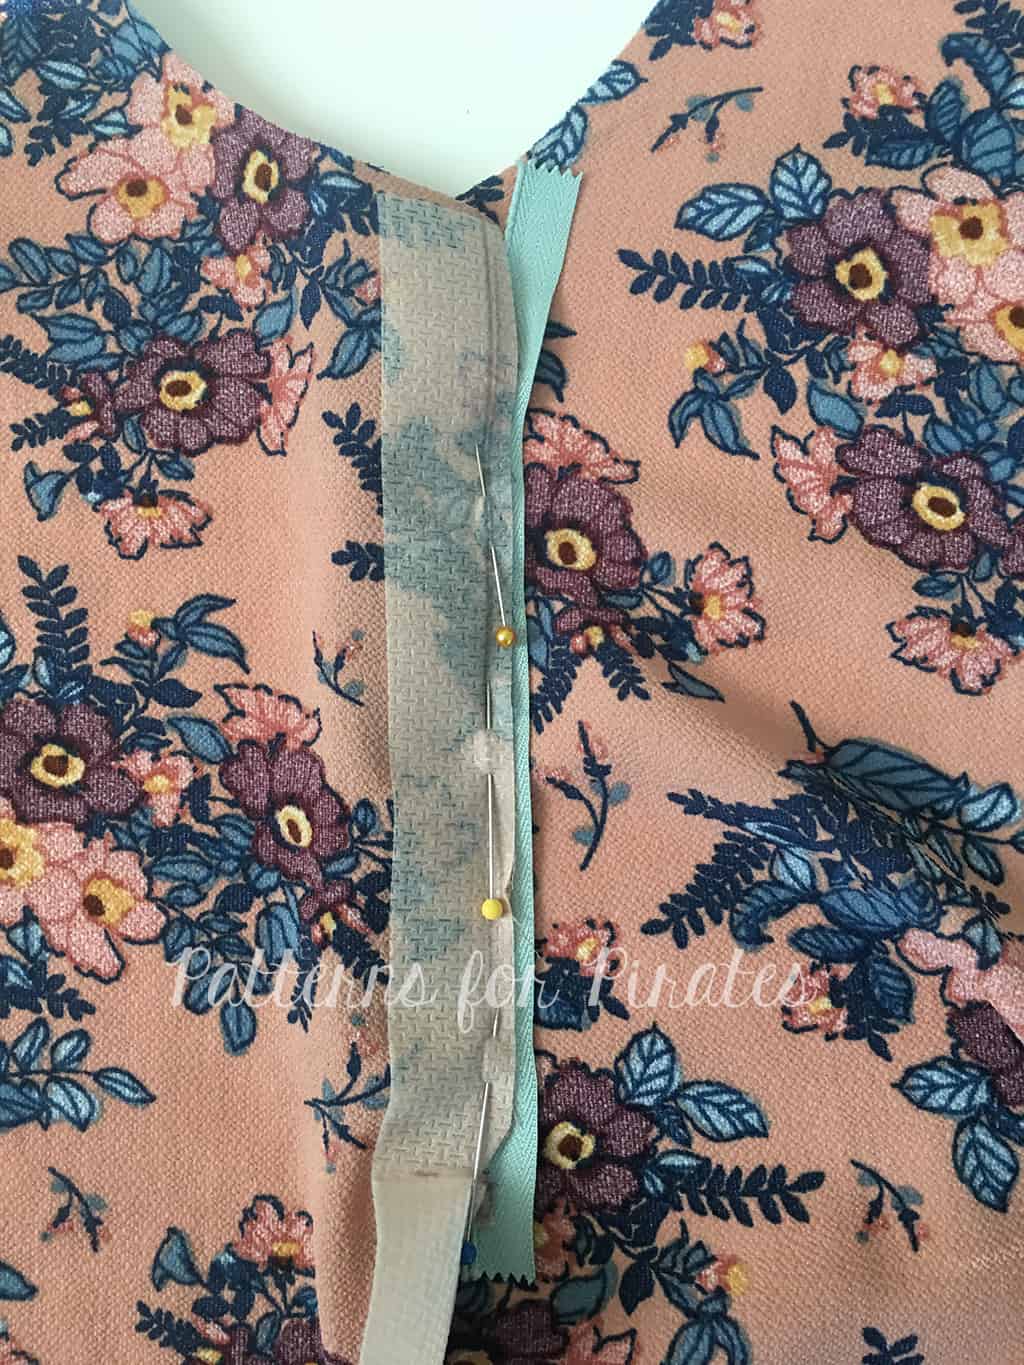
- Find center front of neckline and iron on interfacing to wrong side of fabric.
-
- Place top of zipper 1/4″ below raw edge of neckline. If your tails are longer, you can trim them later.
-
- Mark the zipper stop placement on your interfacing.
-
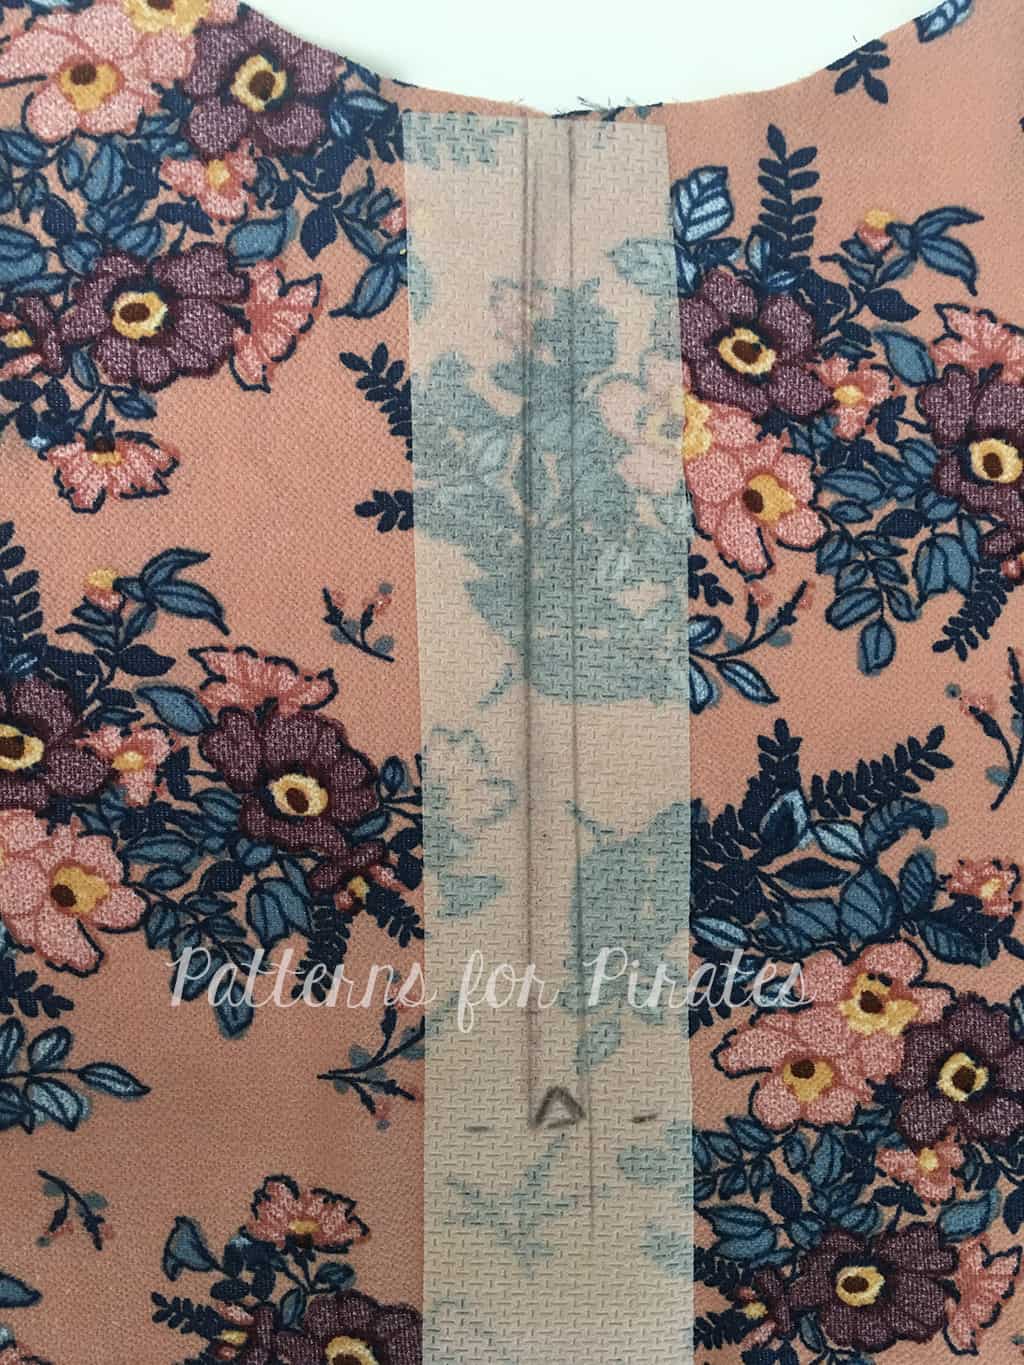
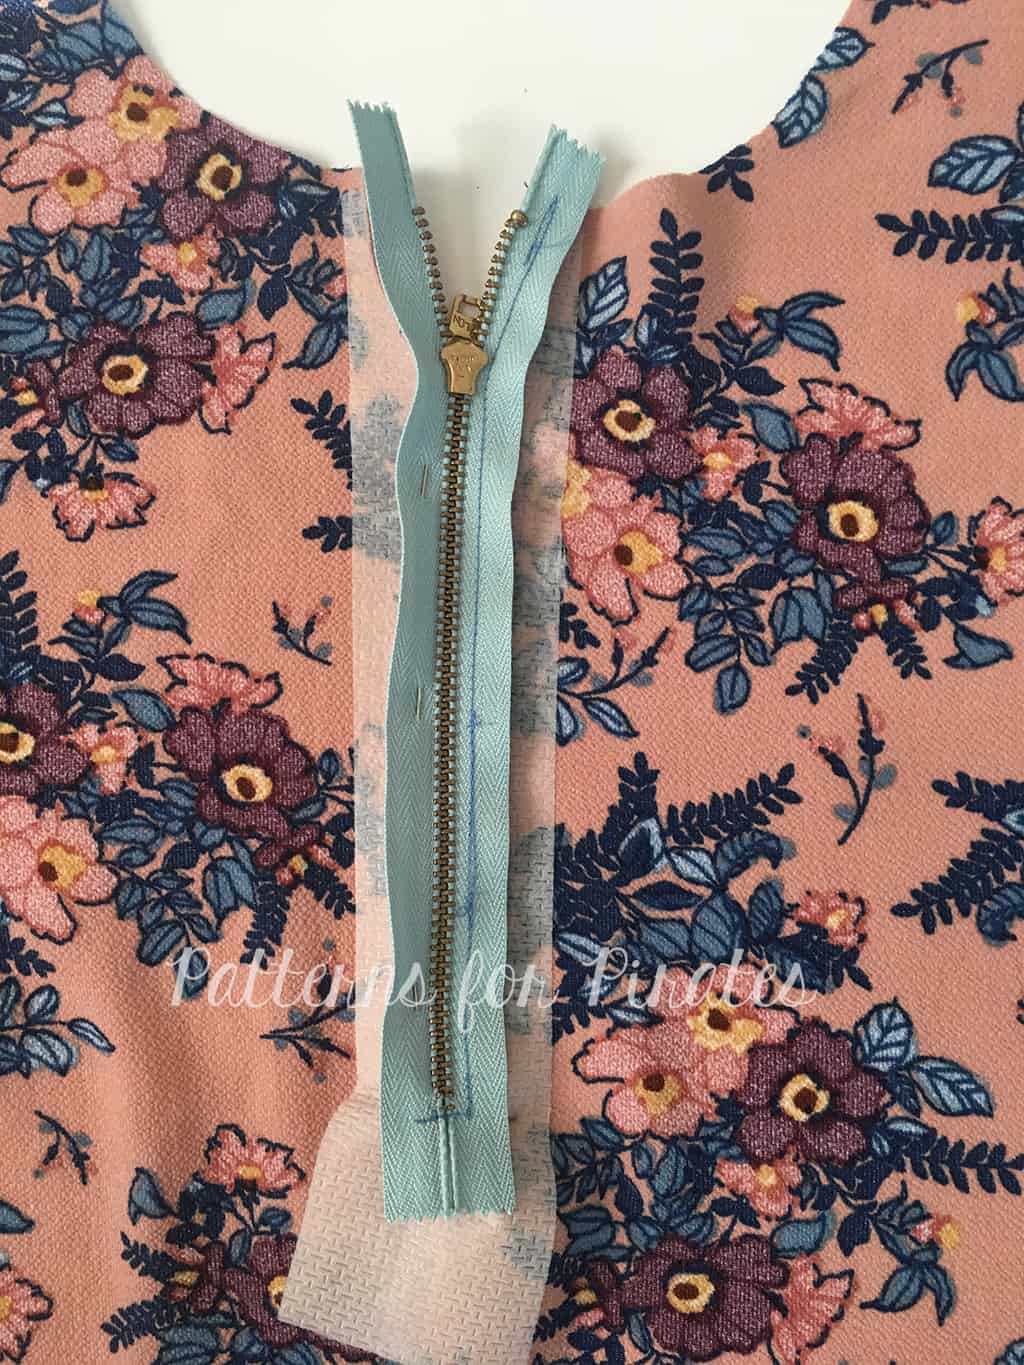
- Draw a 1/2″ rectangle down the center of the front bodice. (this will be your stitch guide)
-
- Cut down the center of the rectangle. Stopping just above the bottom, snip at a 45 degree angle to the corners.

-
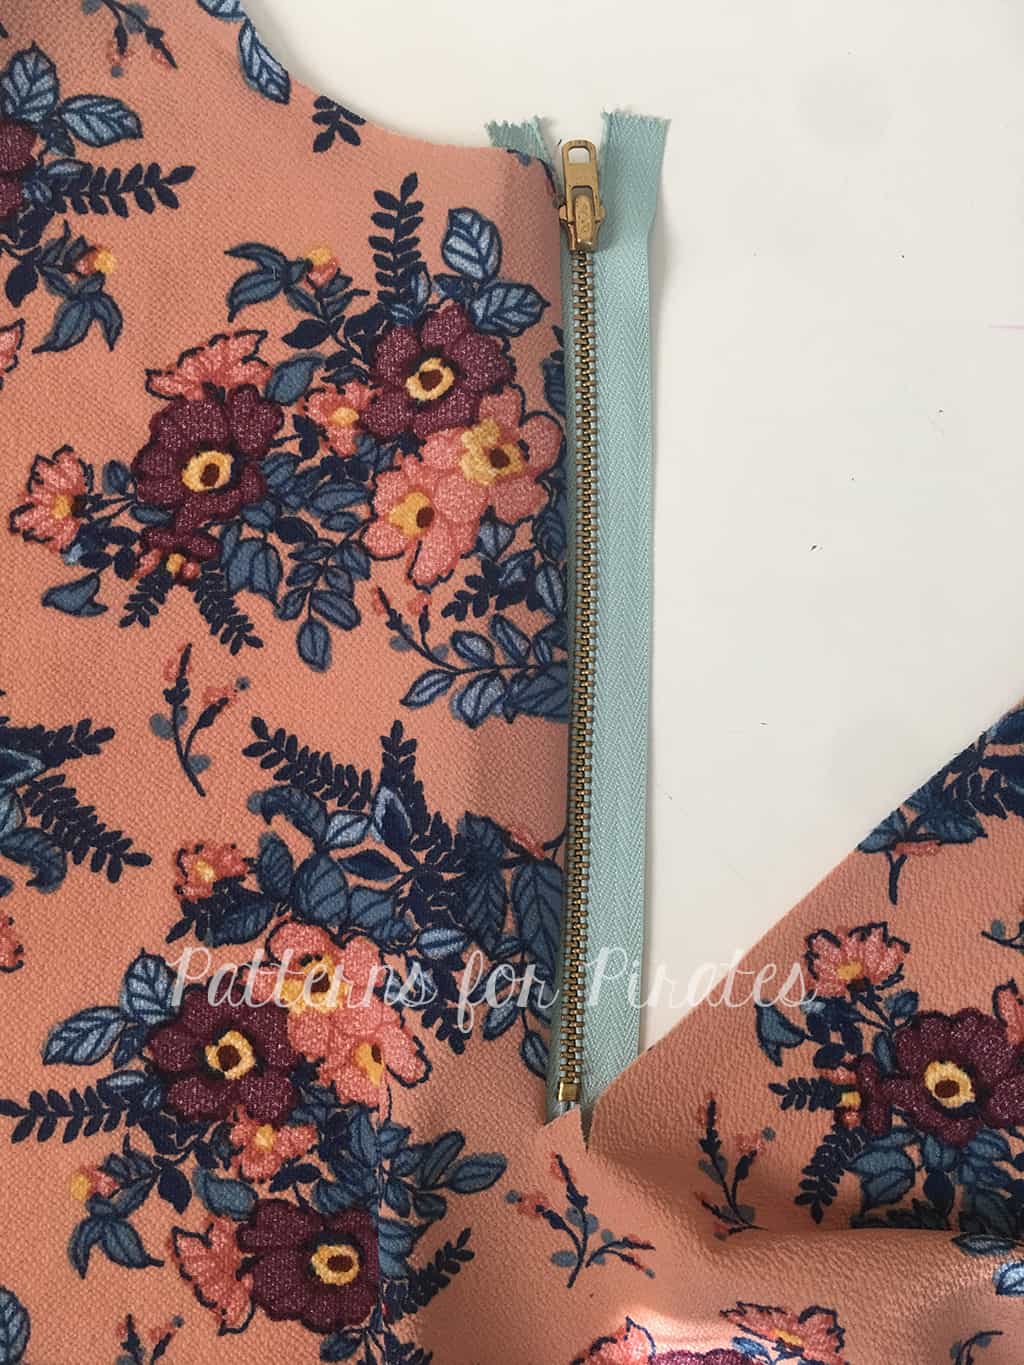
- With right sides together, pin zipper in place.
-
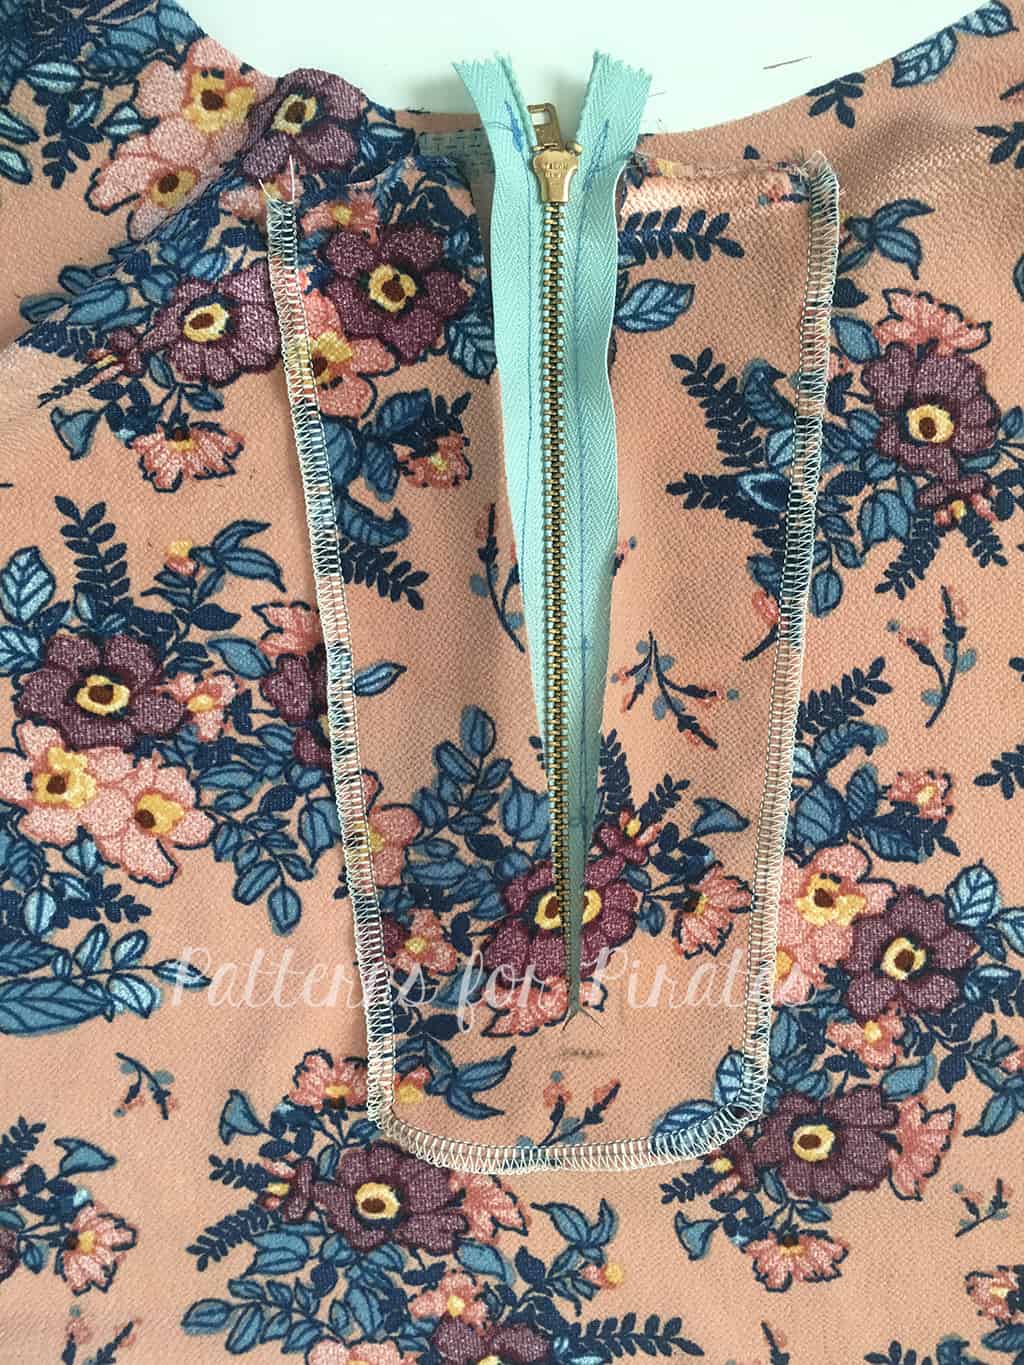
- The raw edge of your fabric should line up toward the center of the zipper tape.
-
- Be sure that your zipper stop is aligned with the bottom edge of your rectangle.
-
- Stitch.
-
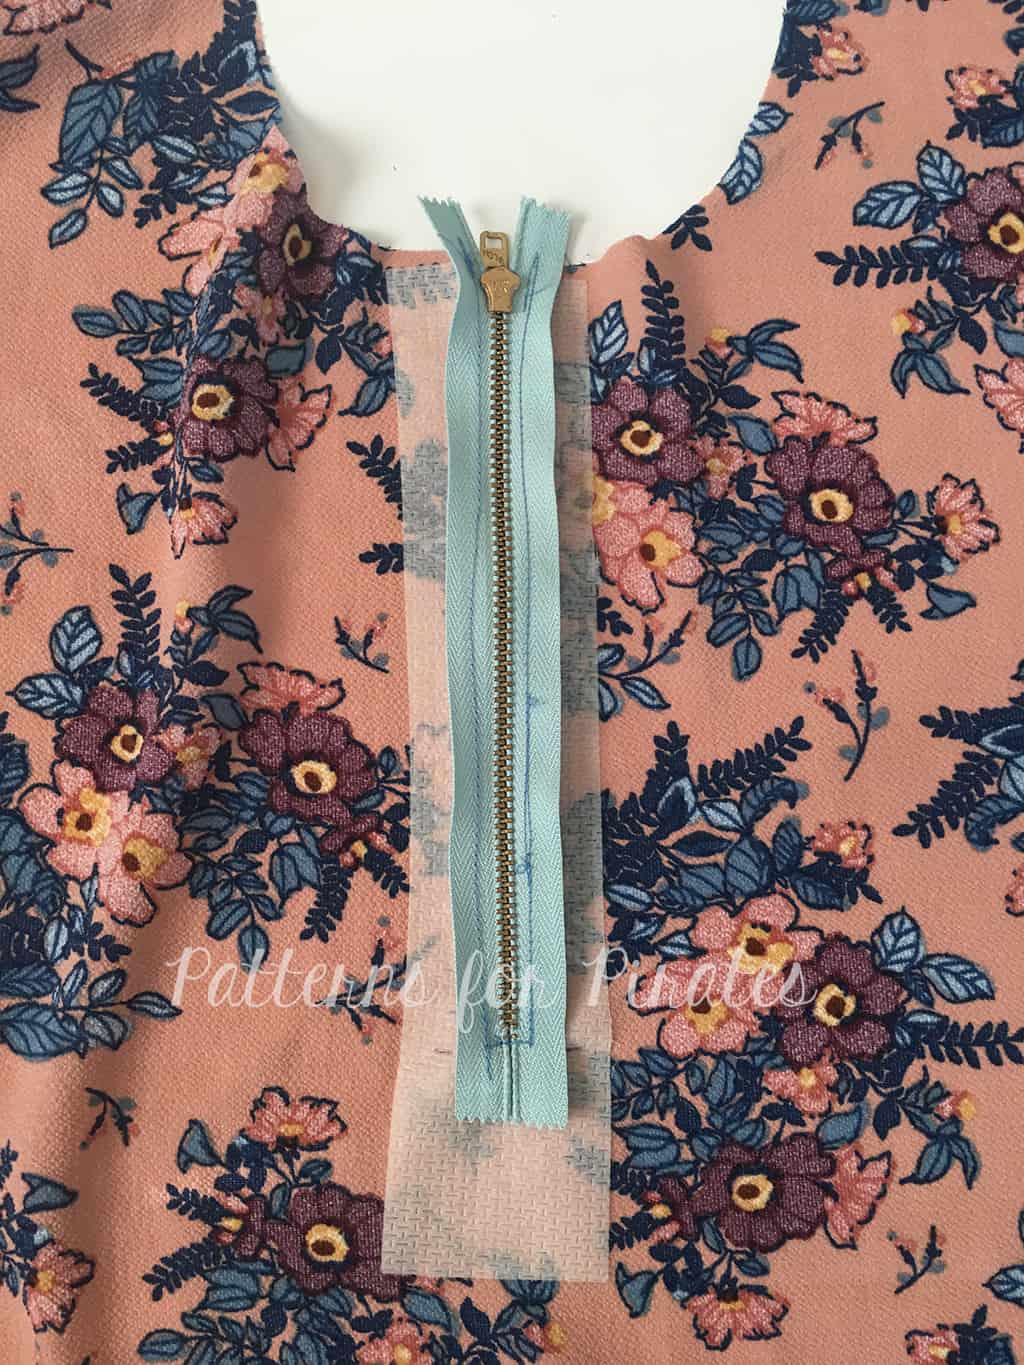
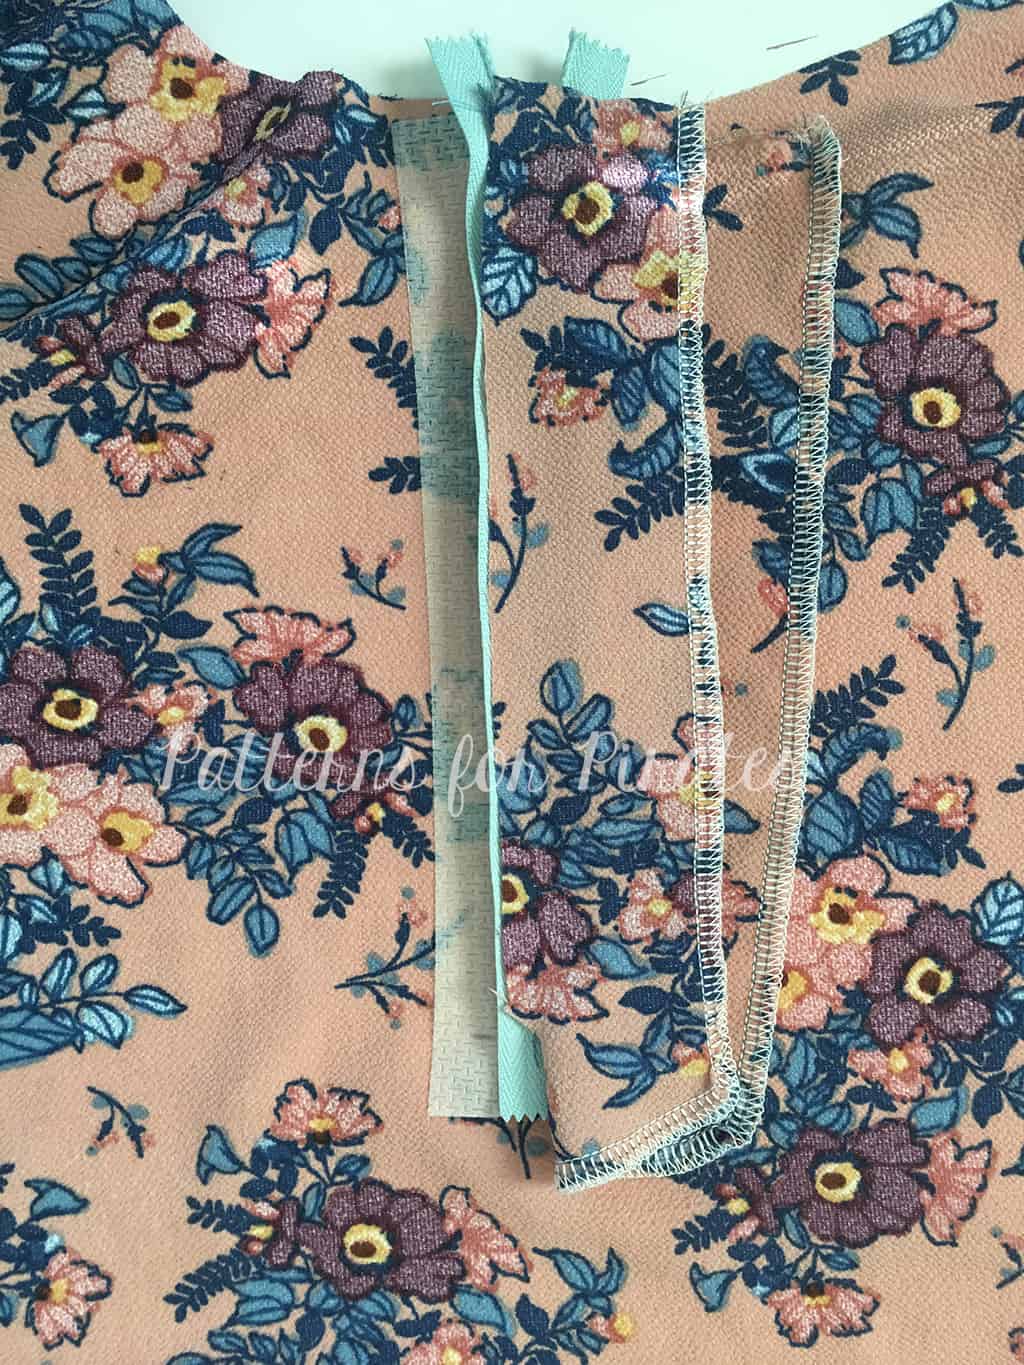
- View from the front
-
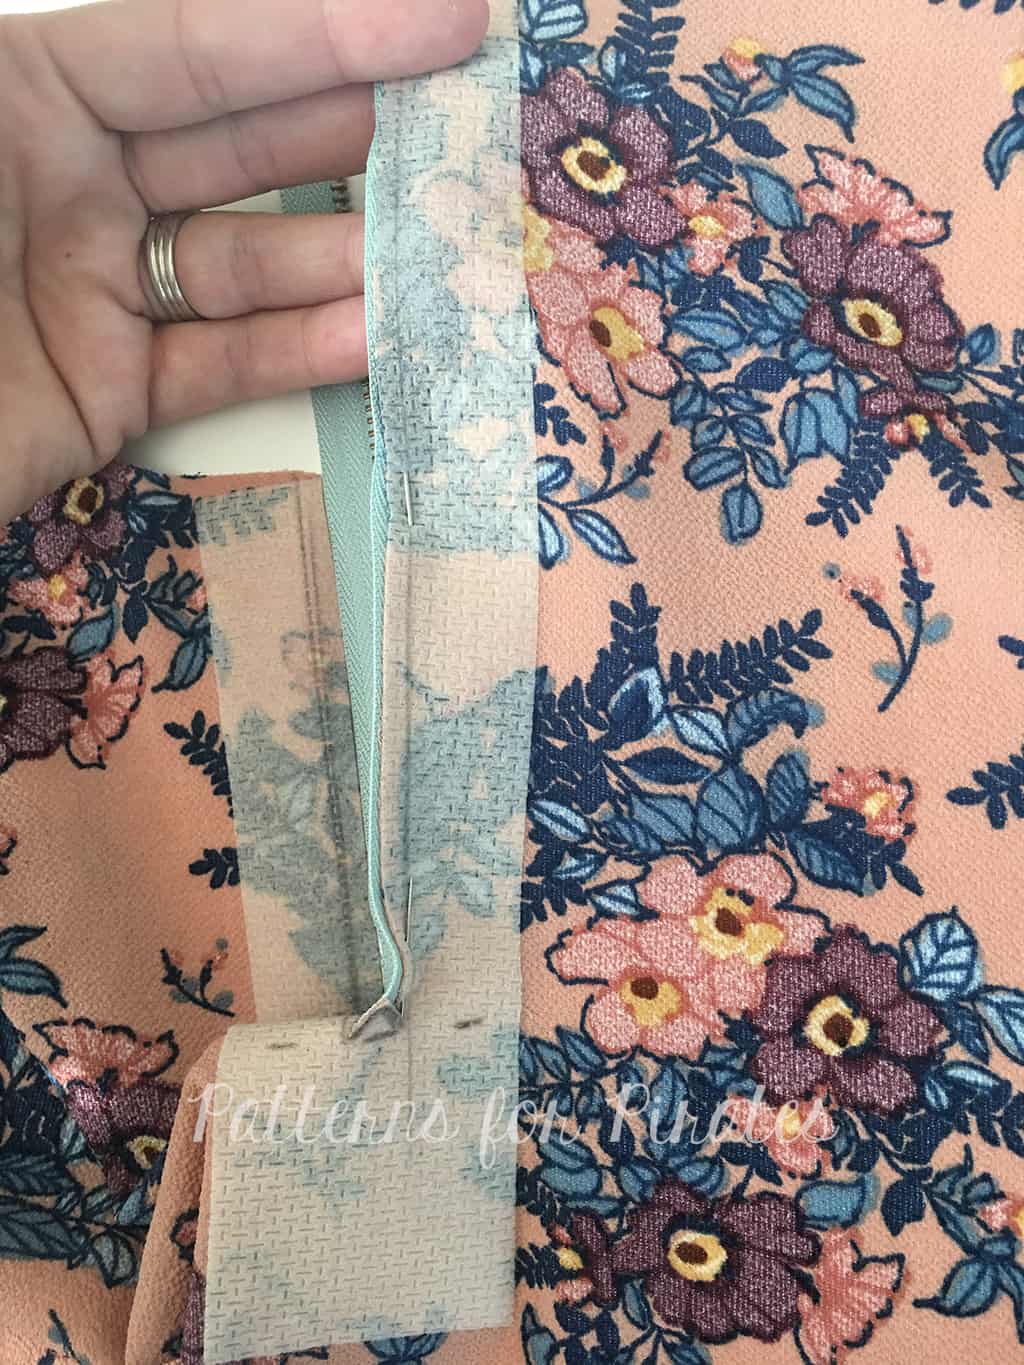
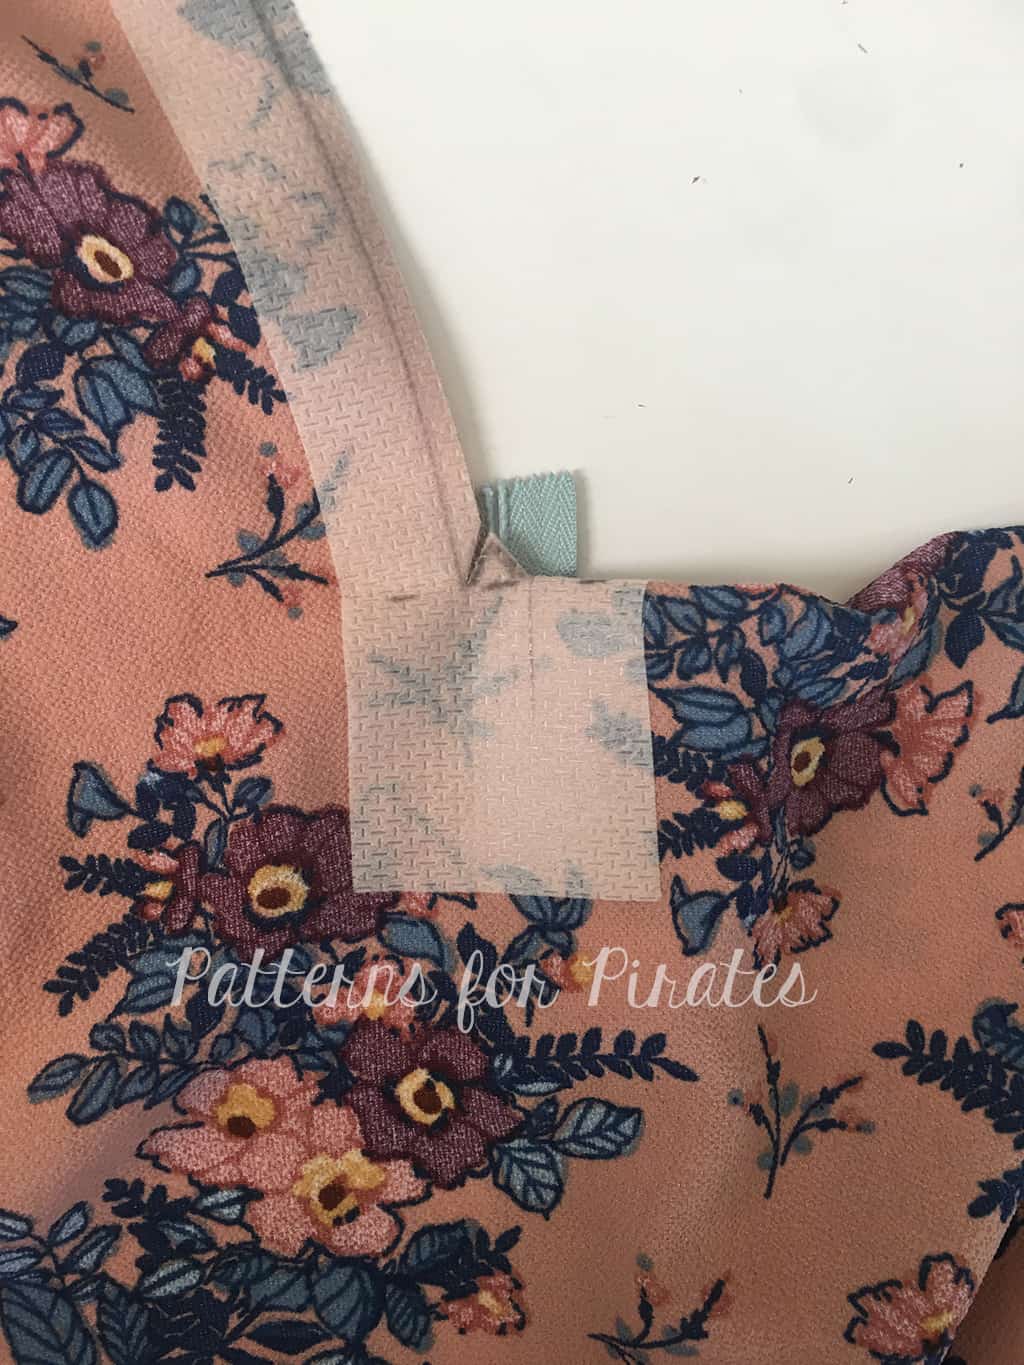
- Flip notch upward and stitch.
-
- View from back of zipper.
-
- Repeat with opposite side. With right sides together, pin zipper to front bodice.
-
- Stitch.
-
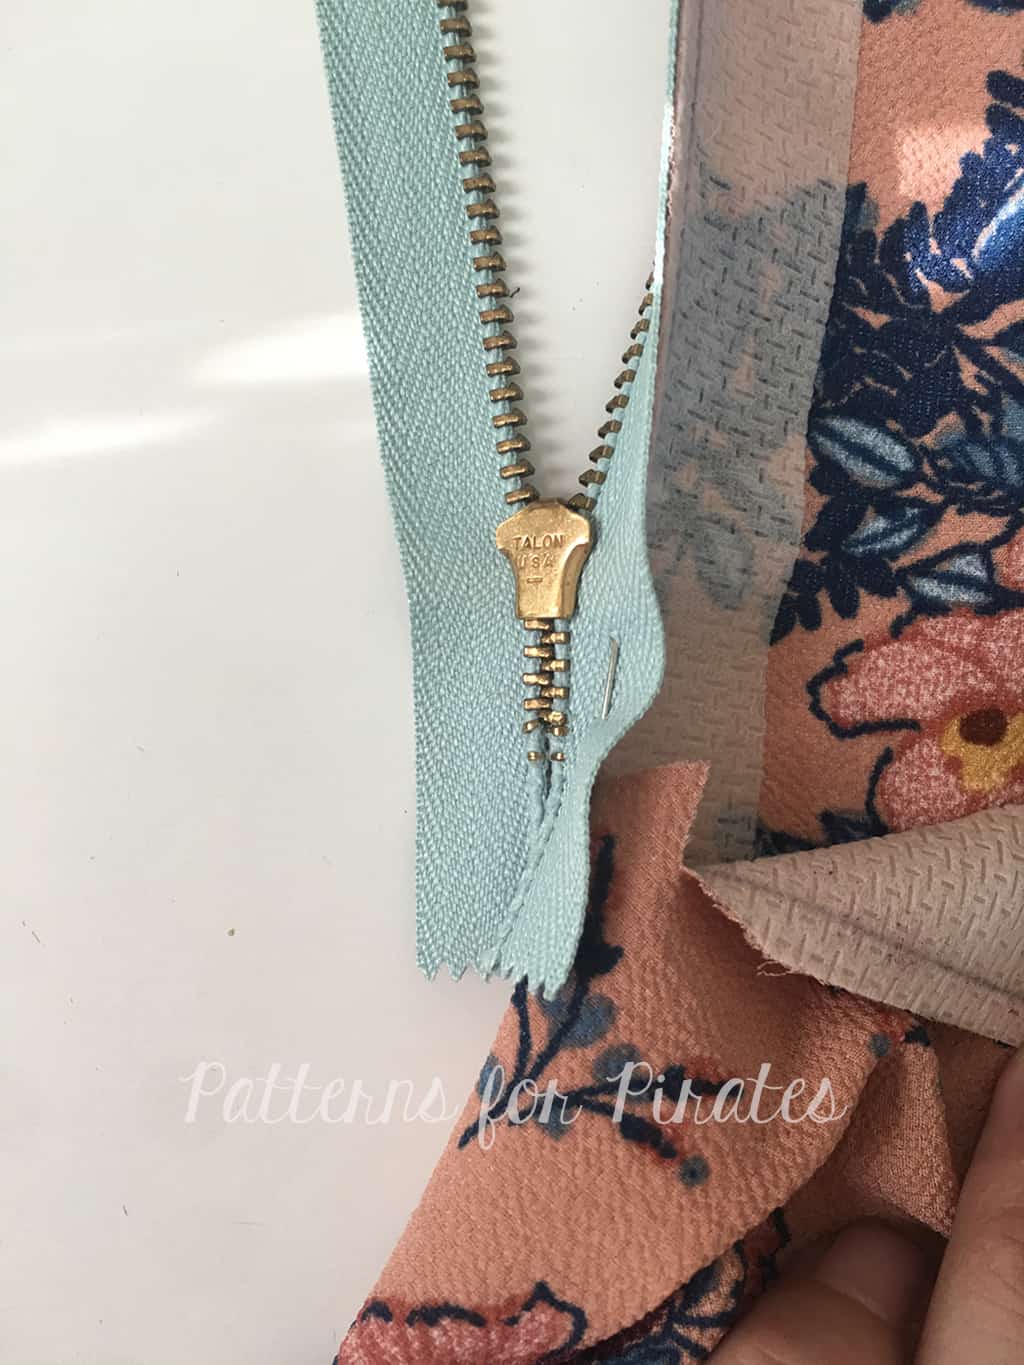
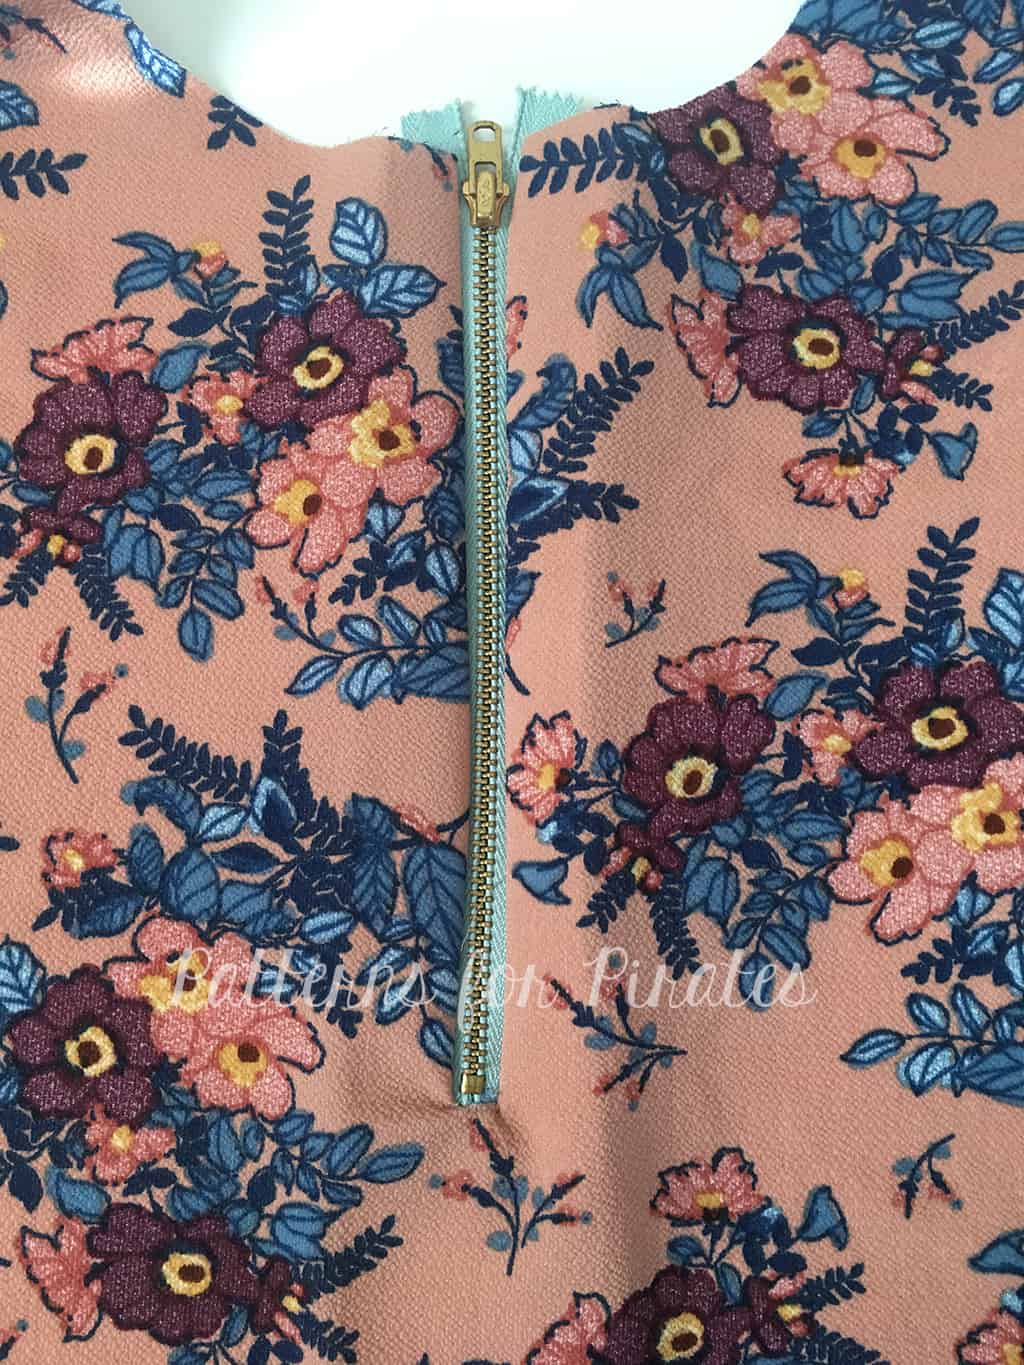
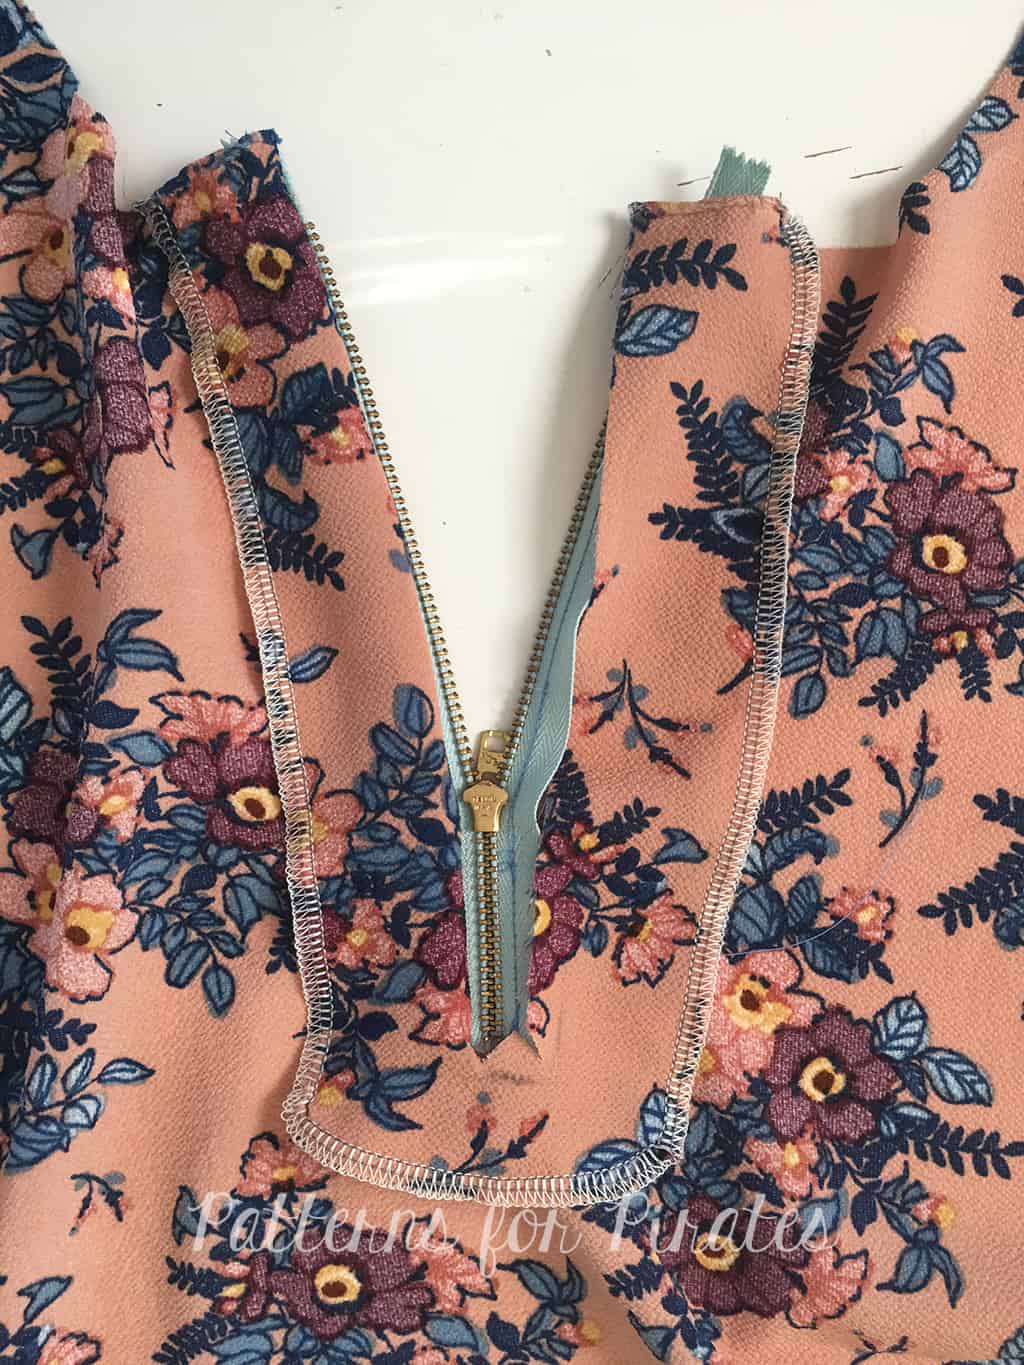
- View from back of completed zipper.
-
- View from front. You can stop here and top-stitch if you do not mind the zipper showing inside your item. Proceed to next step if you want to enclose it.
-
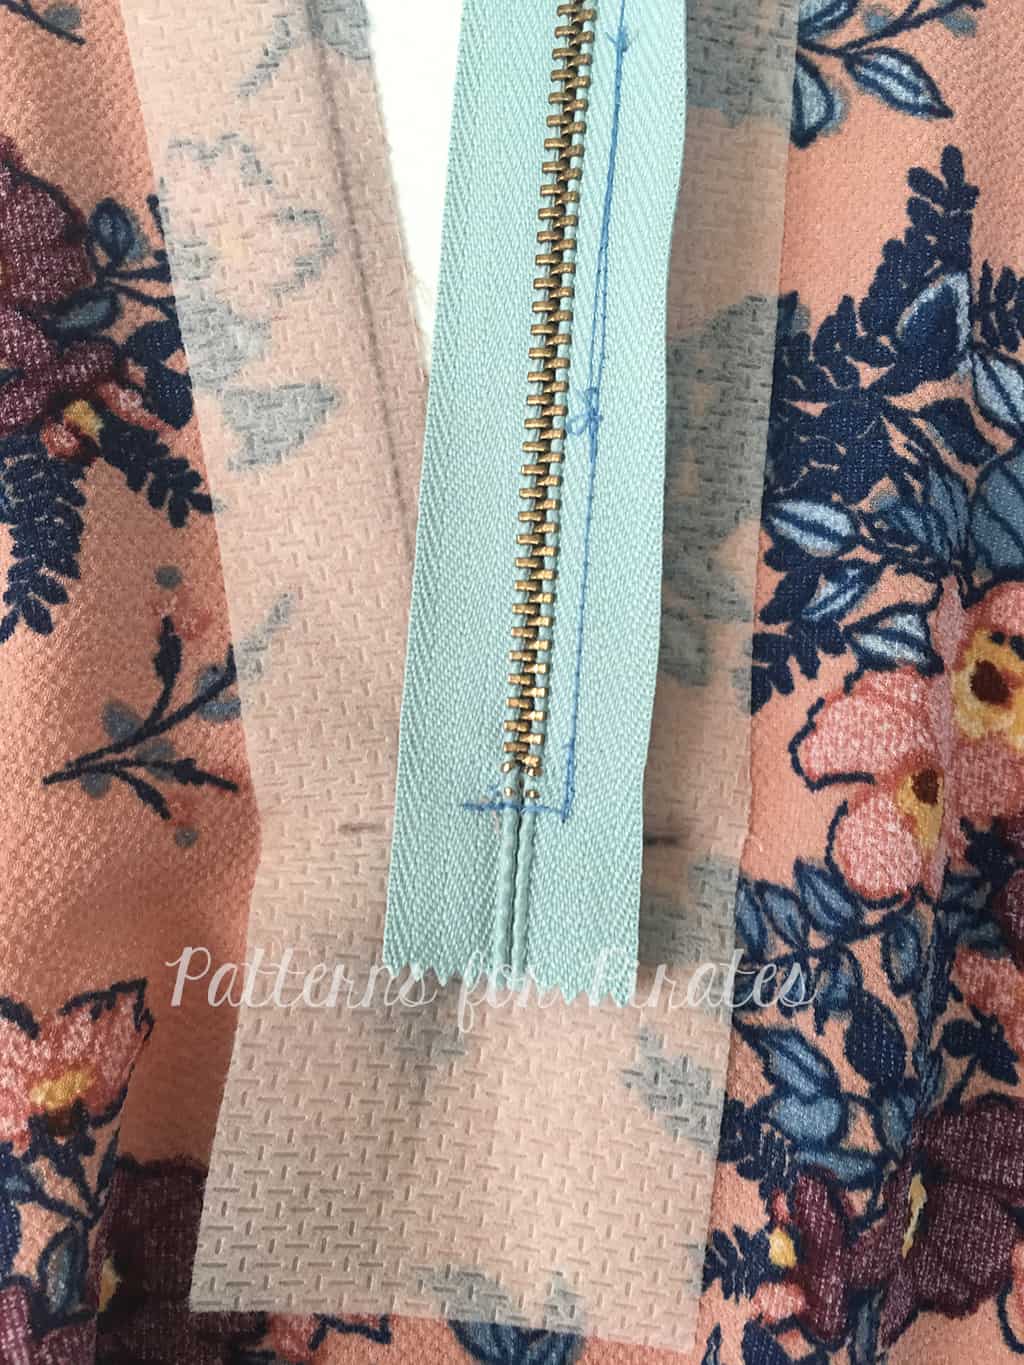
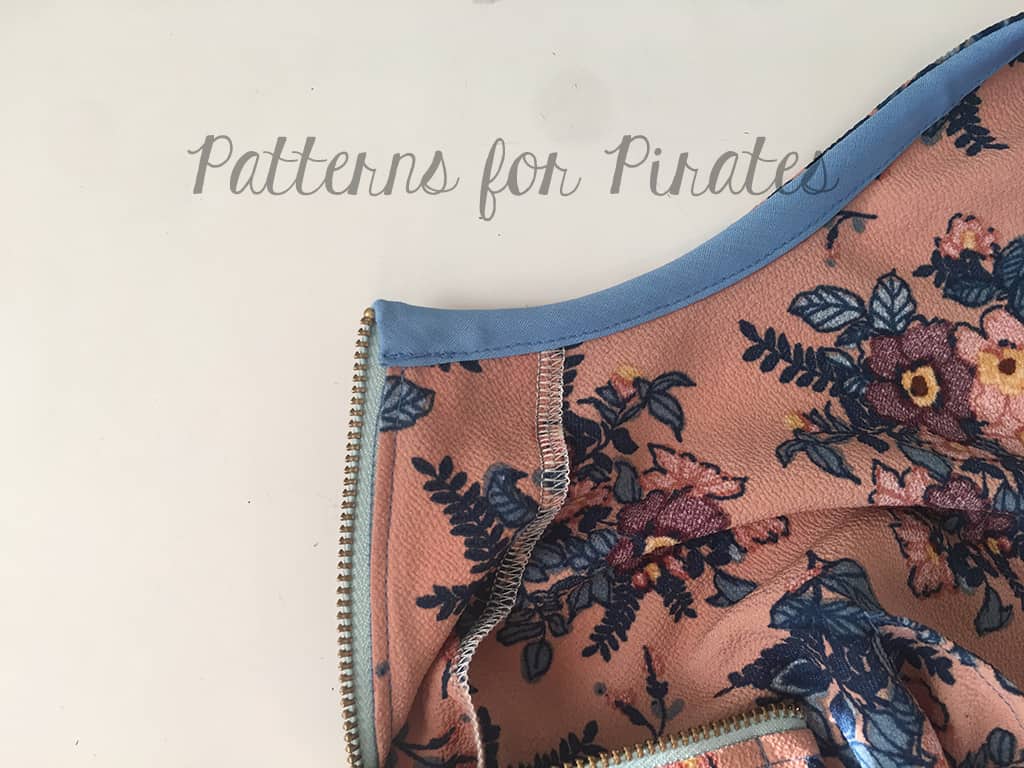
- Cut a facing and transfer the markings as previously done in the first few steps.
-
- Finish raw edges. Cut down the center of the facing and snip towards the corner at a 45 degree angle.
-
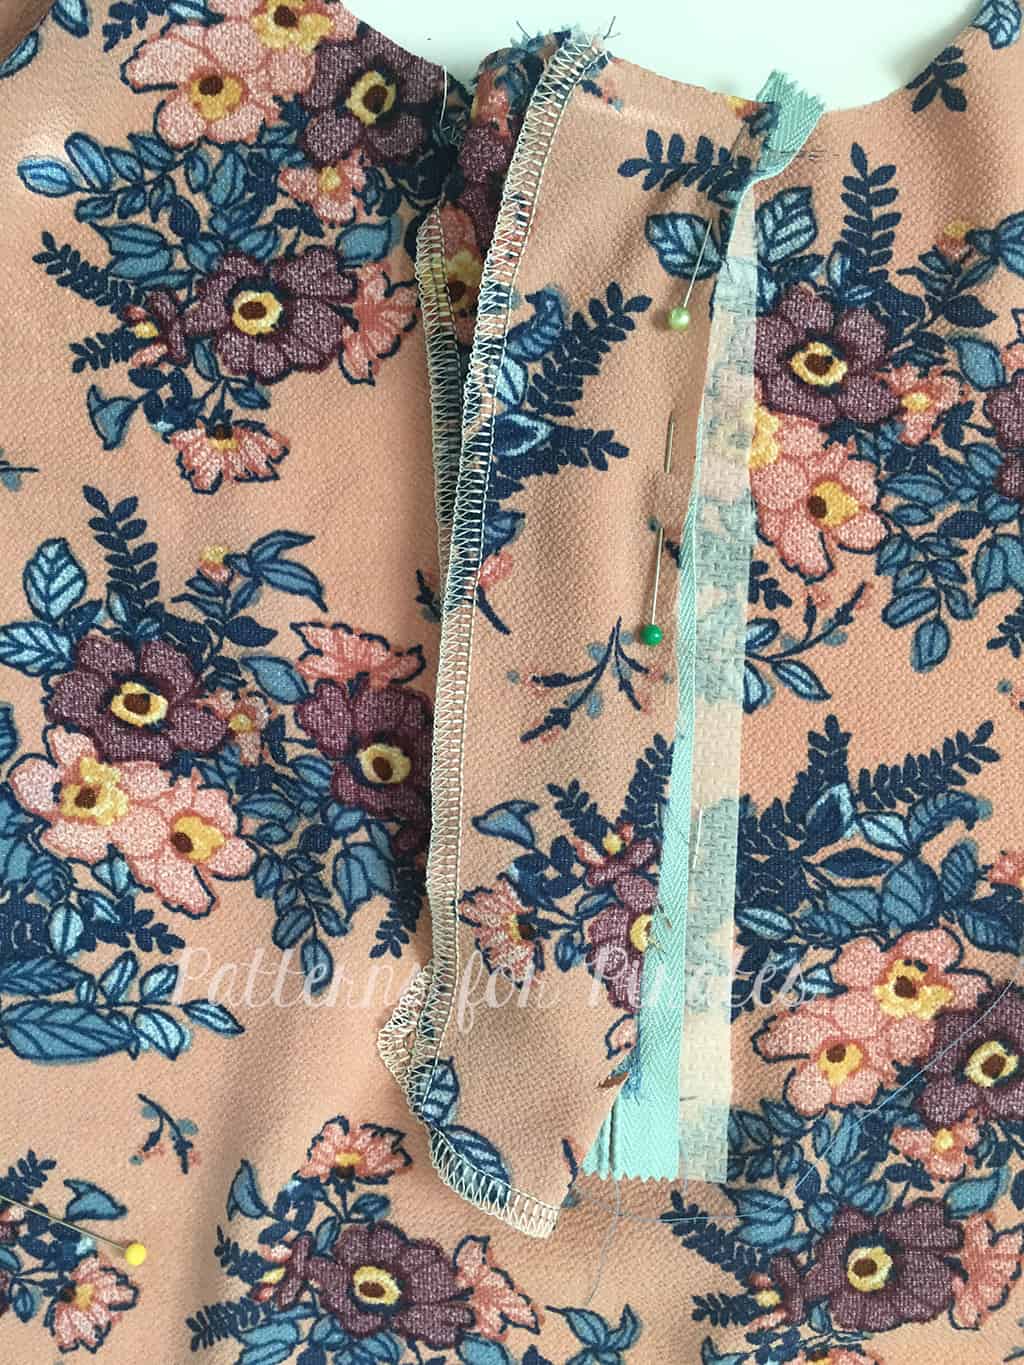
- Lay the facing right side up on top of the wrong side of your zipper and front bodice.
-
- Flip the facing toward the center so that the right side is now lined up with the wrong side of the zipper. Stitch.
-
- View of left side of facing stitched.
-
- Repeat on opposite side. Stitch.
-
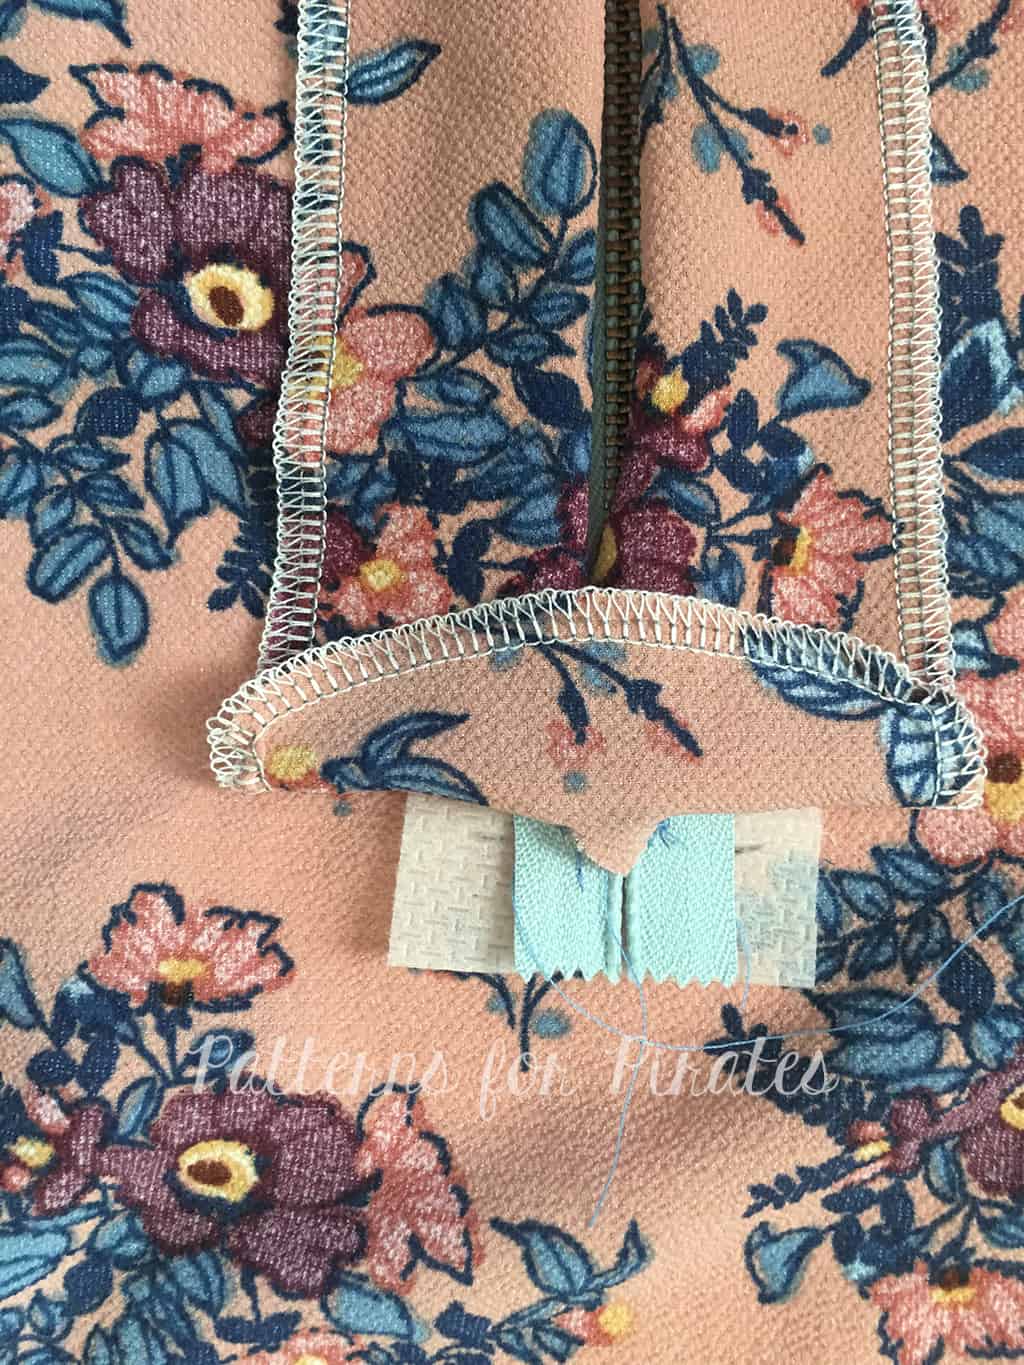
- Pull notch down and stitch in place. (same as you previously did on your main front body).
-
- View from back.
-
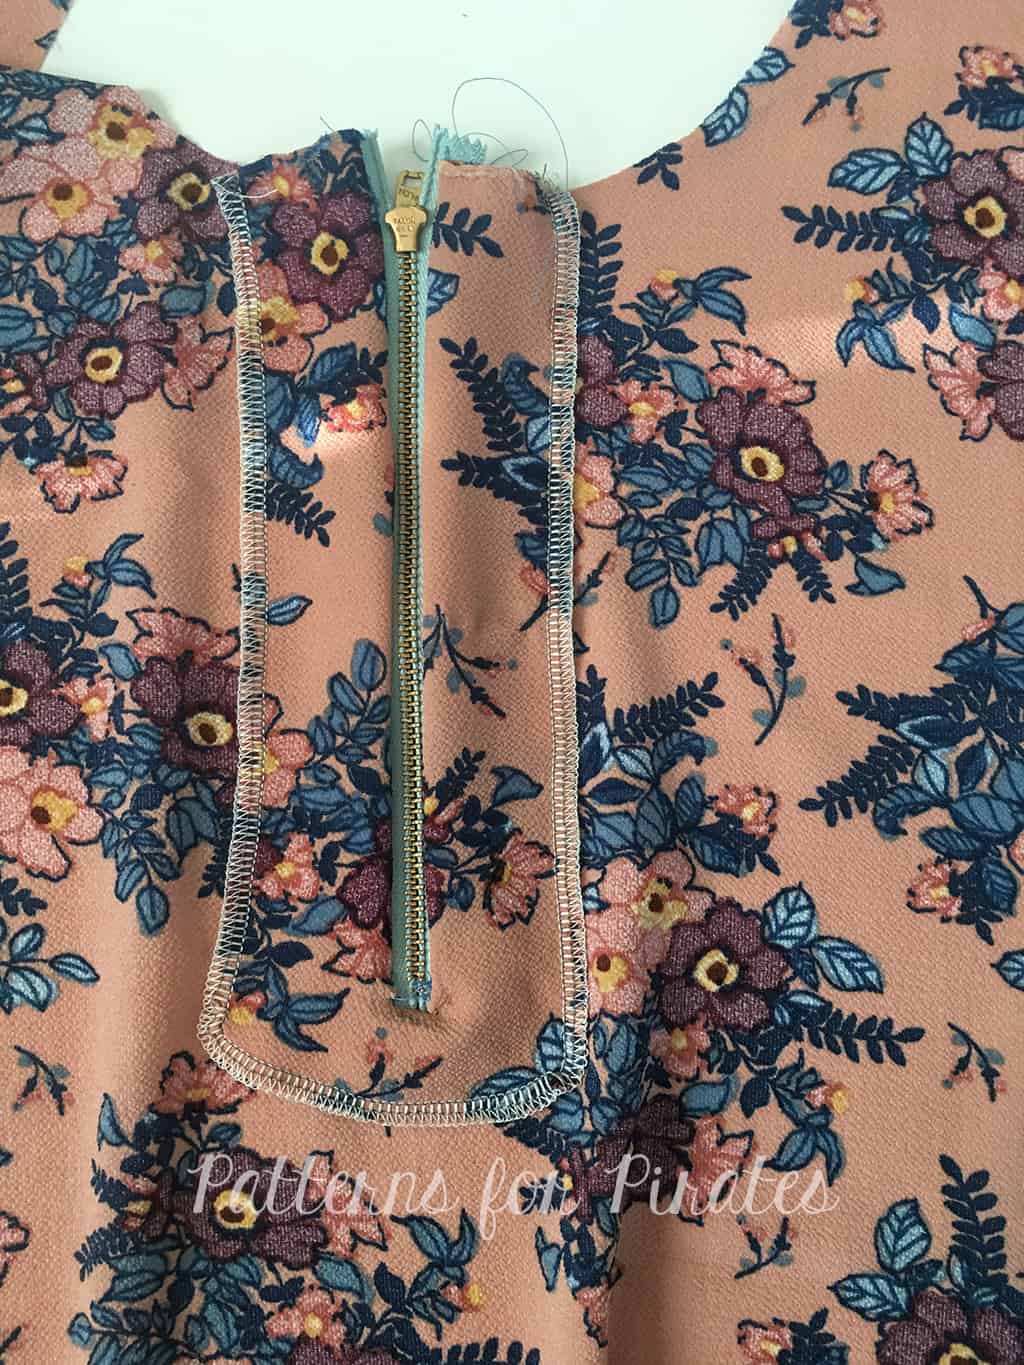
- Top-stitch around zipper.
-

- Finish neckline using single fold bias tape as shown in the tutorial.
There you have it! I hope that wasn’t as difficult as it appears. If you’re not sure you’re ready to tackle the zipper on your top, try it on a few scrap pieces first. Practice makes perfect right?


We hope you enjoyed the hacks as much as we did. Don’t forget to share your makes in the Facebook Group, we’d love to see them! Happy Sewing!