Patterns for Pirates

P4P stylish, modern, wearable patterns

  • Home
  • Blog
    • Frequently Asked Questions
    • Pattern Releases
      • Free Patterns
    • P4P University
      • Fitting
      • Sewing with Stretch, Knit Fabrics
      • Sewing with Woven Fabrics
      • Sewing Machines
    • Sew-A-Longs
    • Fabric for Pirates
    • Pattern Hacks
    • Announcement
      • Blog Tours
      • Contest/Giveaway
  • Shop
  • Bundle Discounts
  • Flash Friday
  • Gift Cards
  • My Account
  • Cart

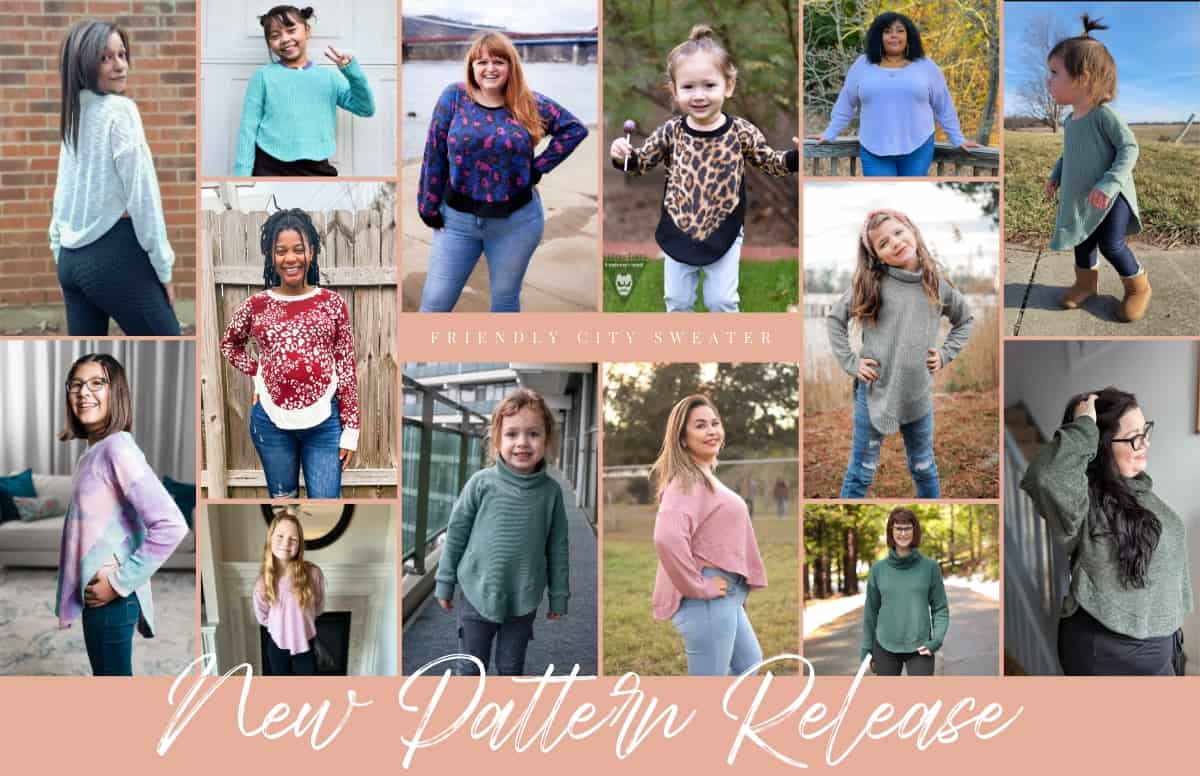
New Pattern Release :: Friendly City Sweater

January 17, 2023

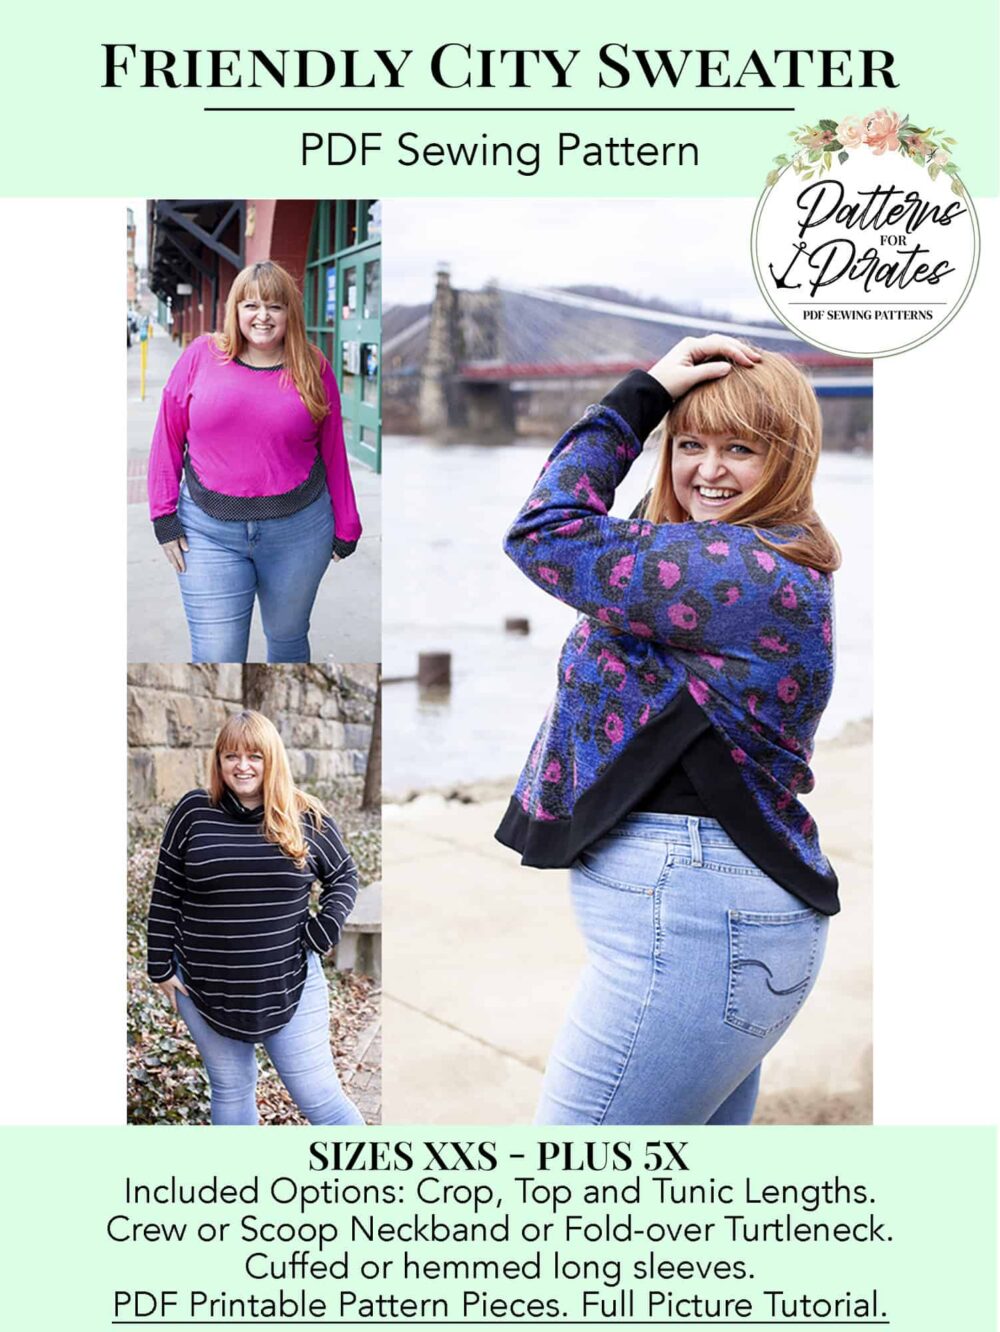
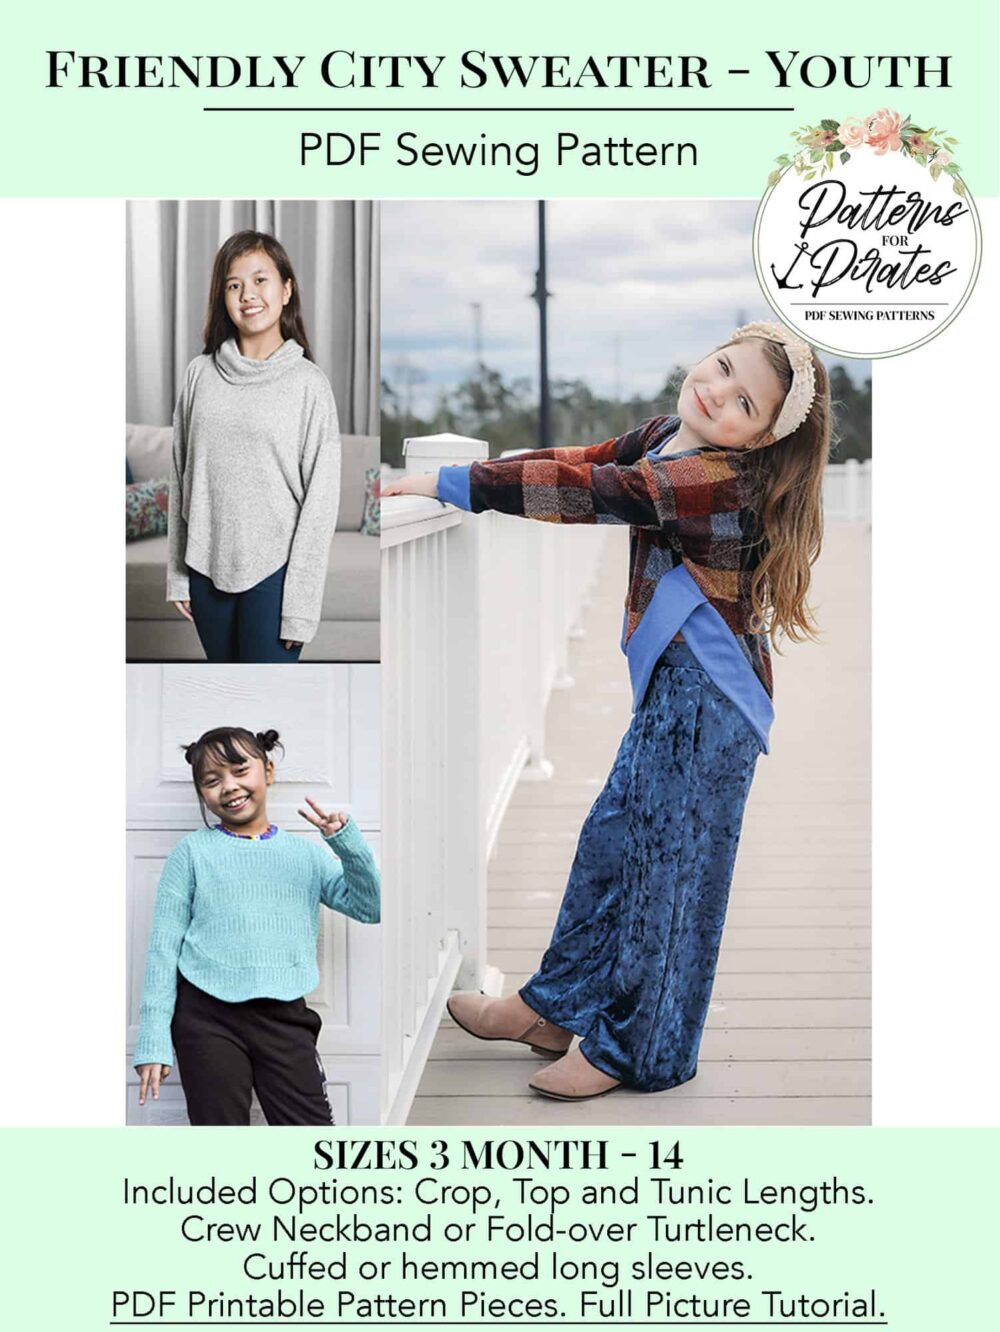
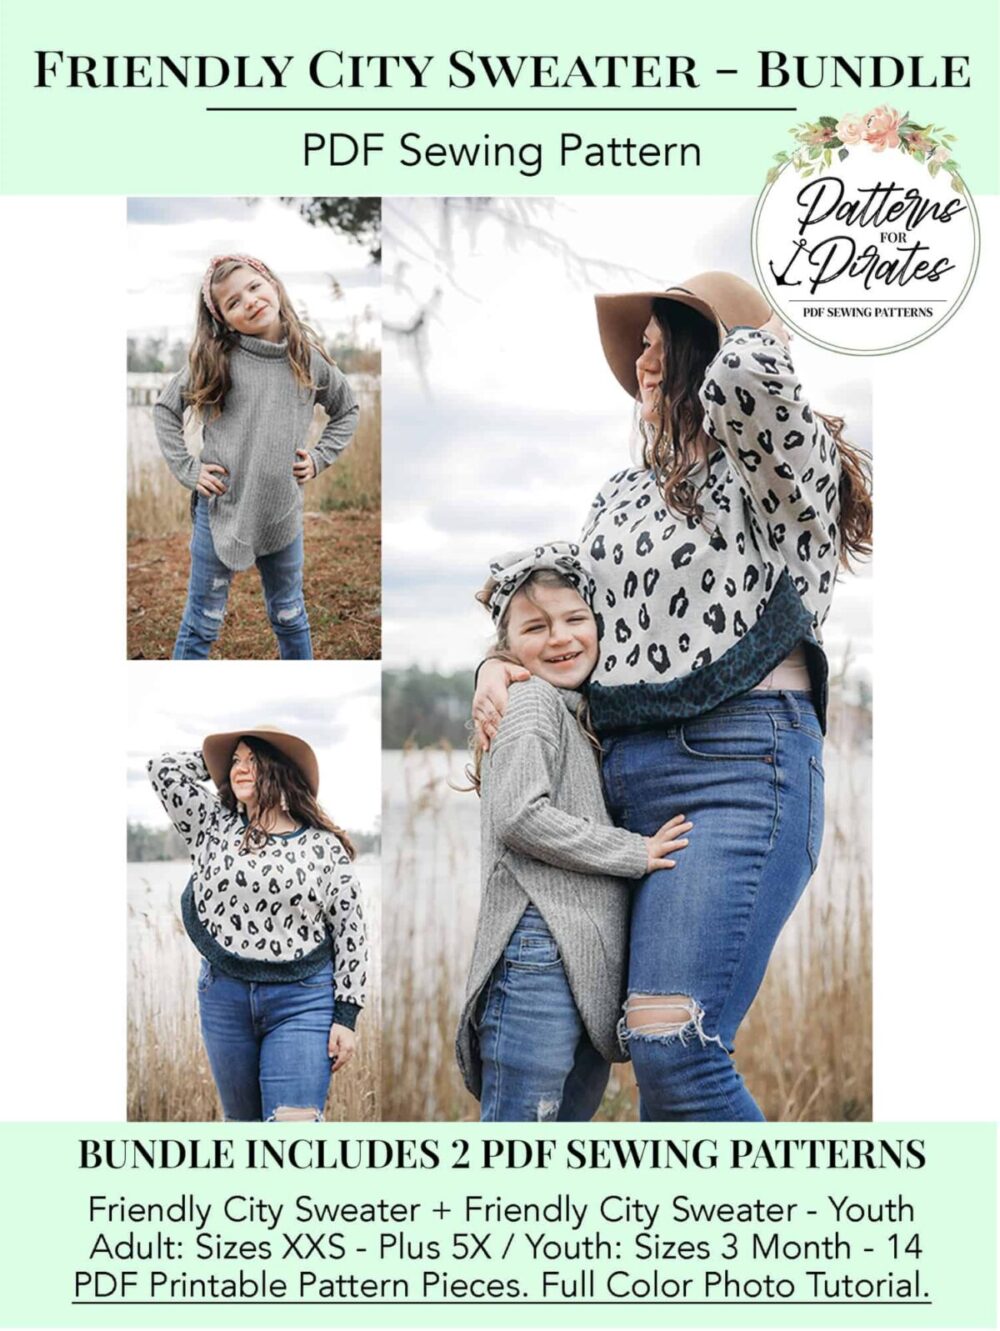
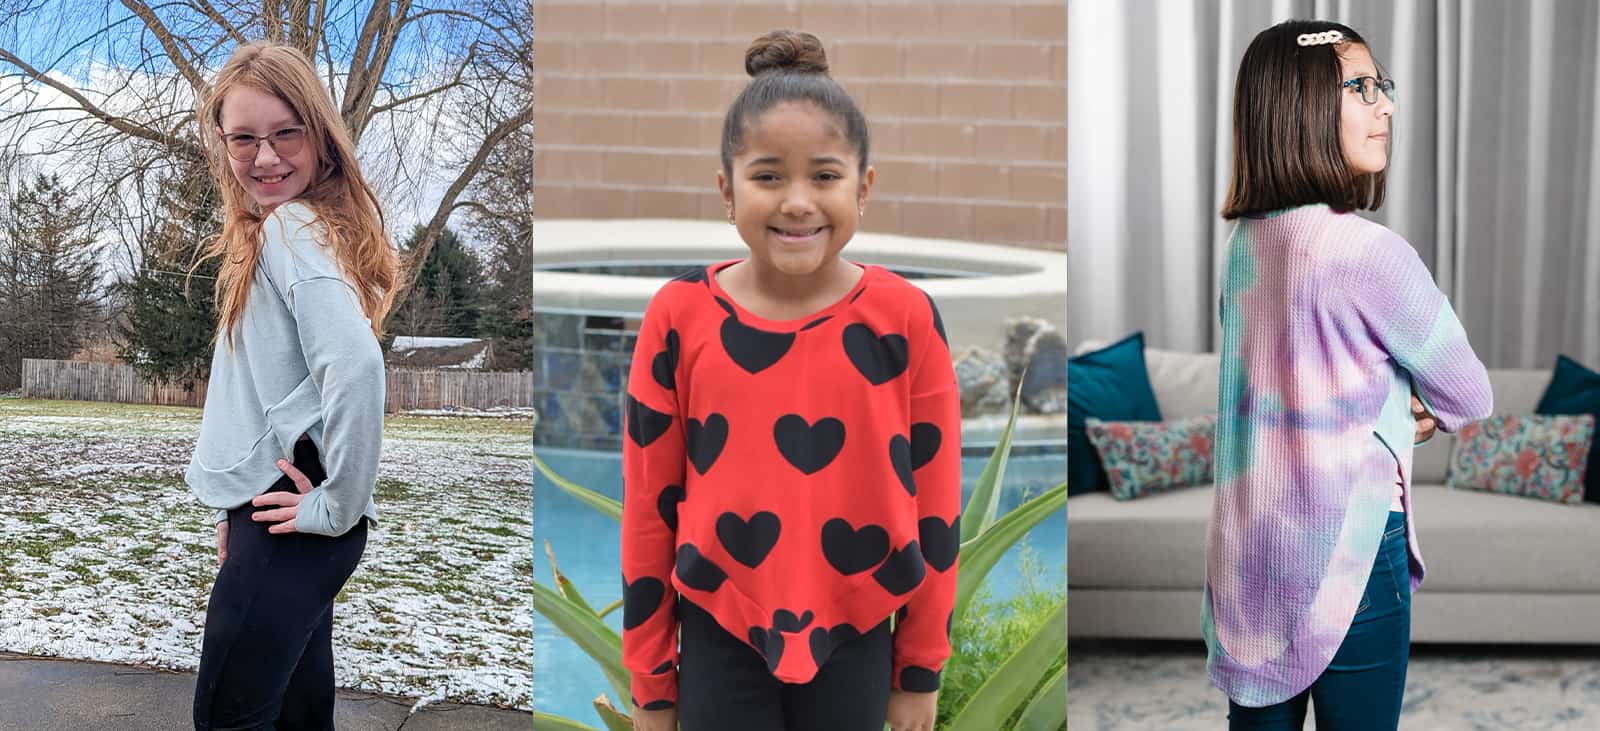
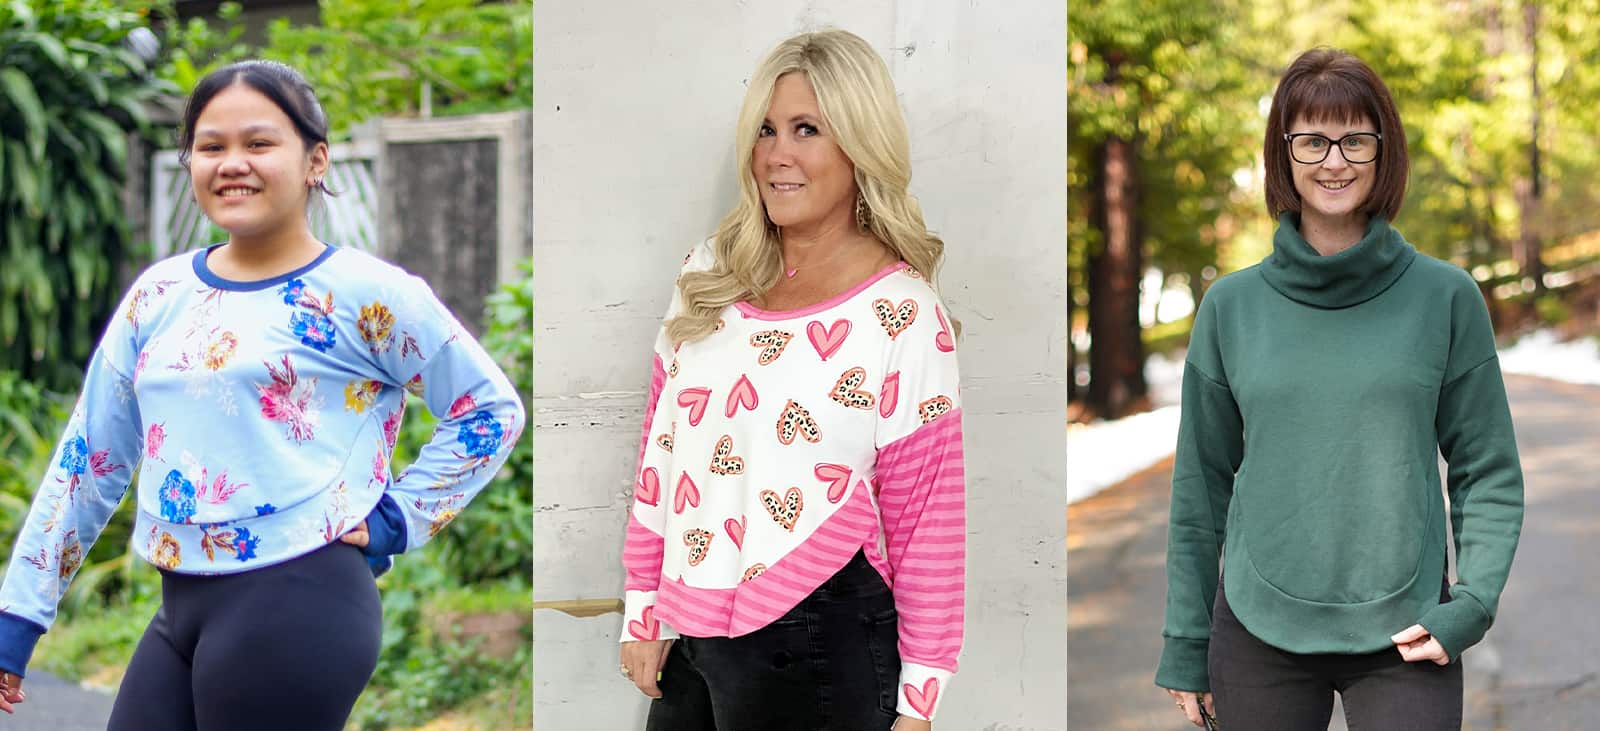
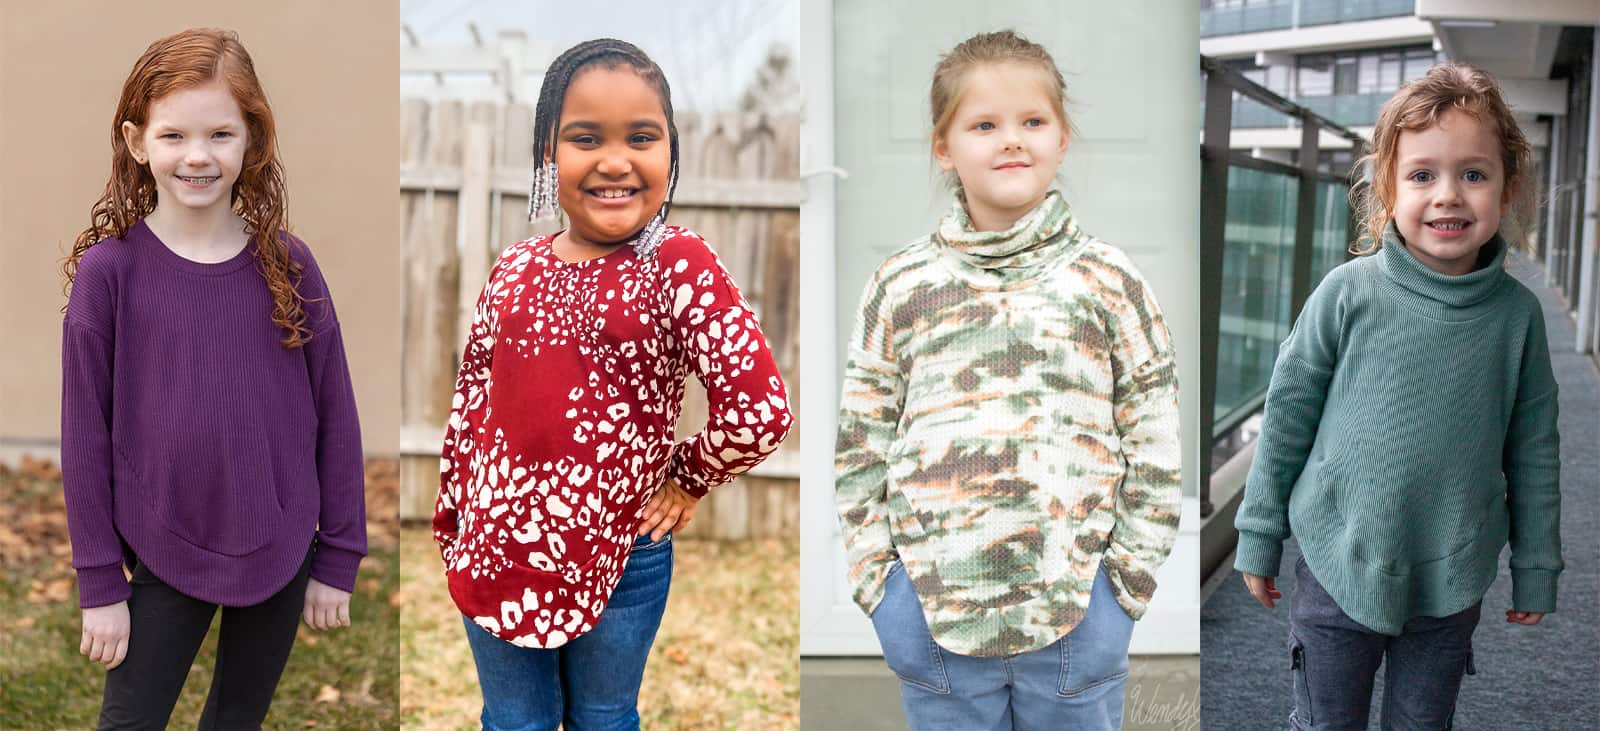
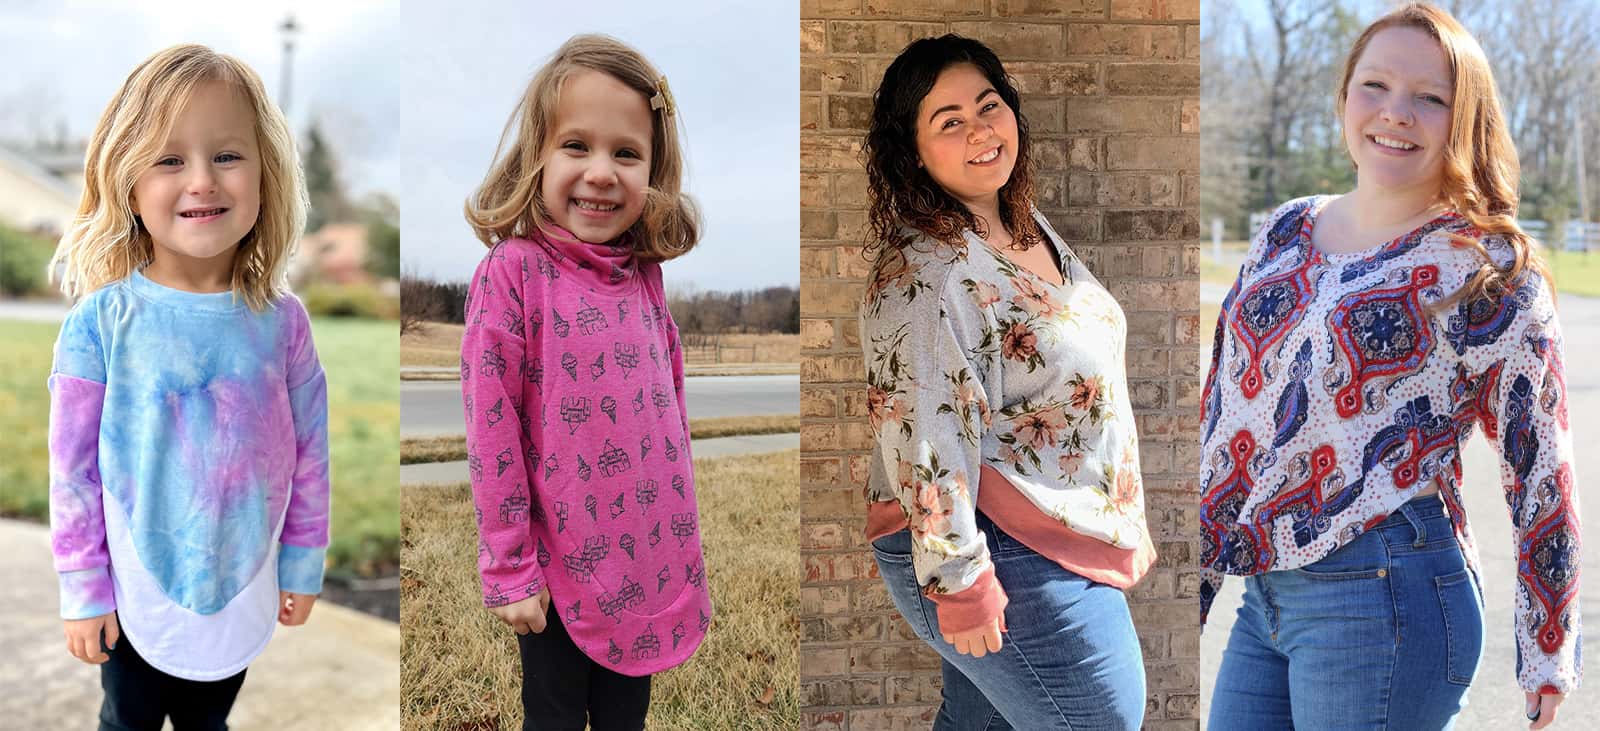
We are super excited to share that we are releasing our first pattern of the new year! Well — not just pattern (singular) but patterns…plural! The Friendly City Sweater + Friendly City Sweater – Youth are the newest designs to be added to the Patterns for Pirates catalogue and you’re going to want to hear all about it!

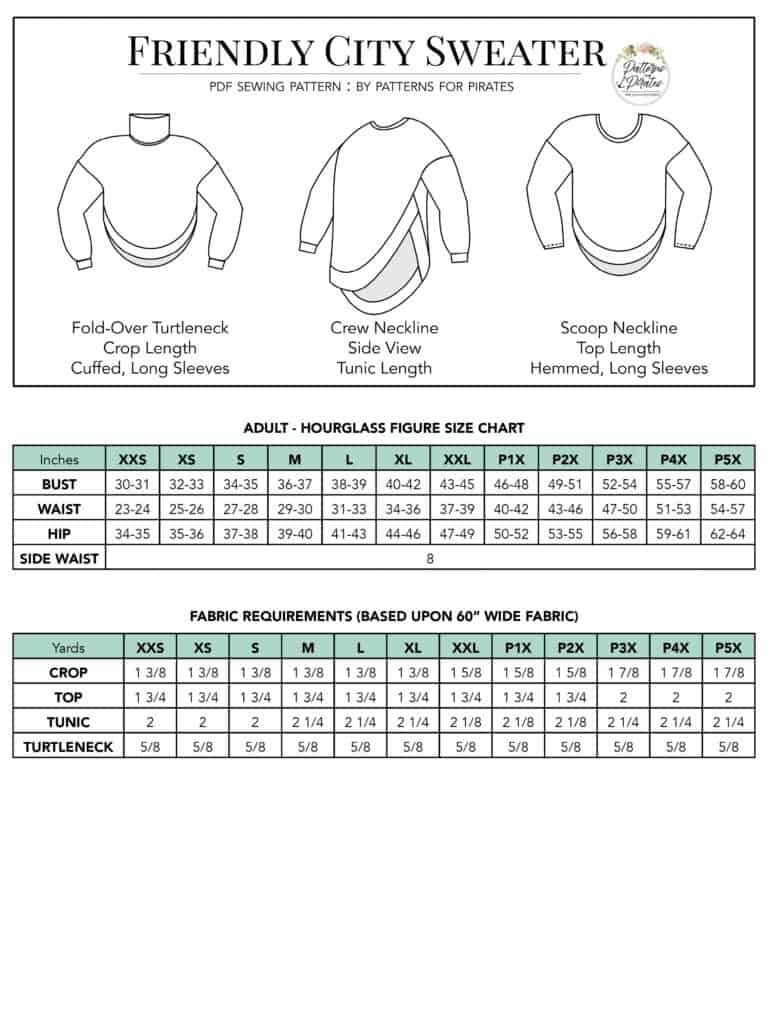
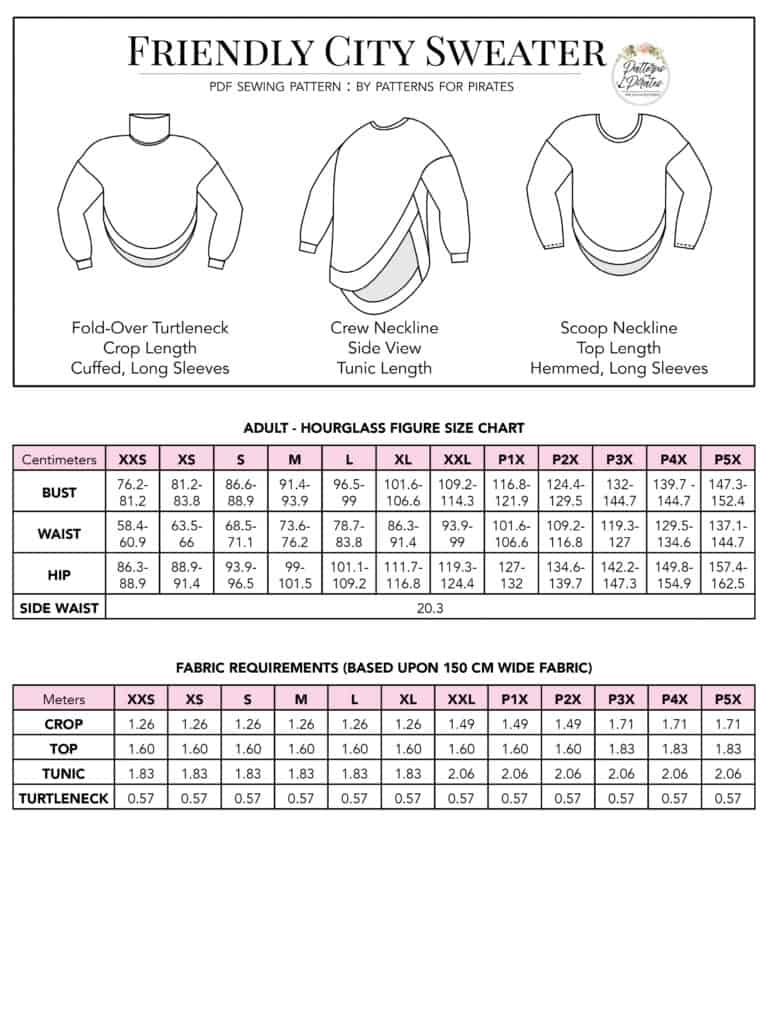
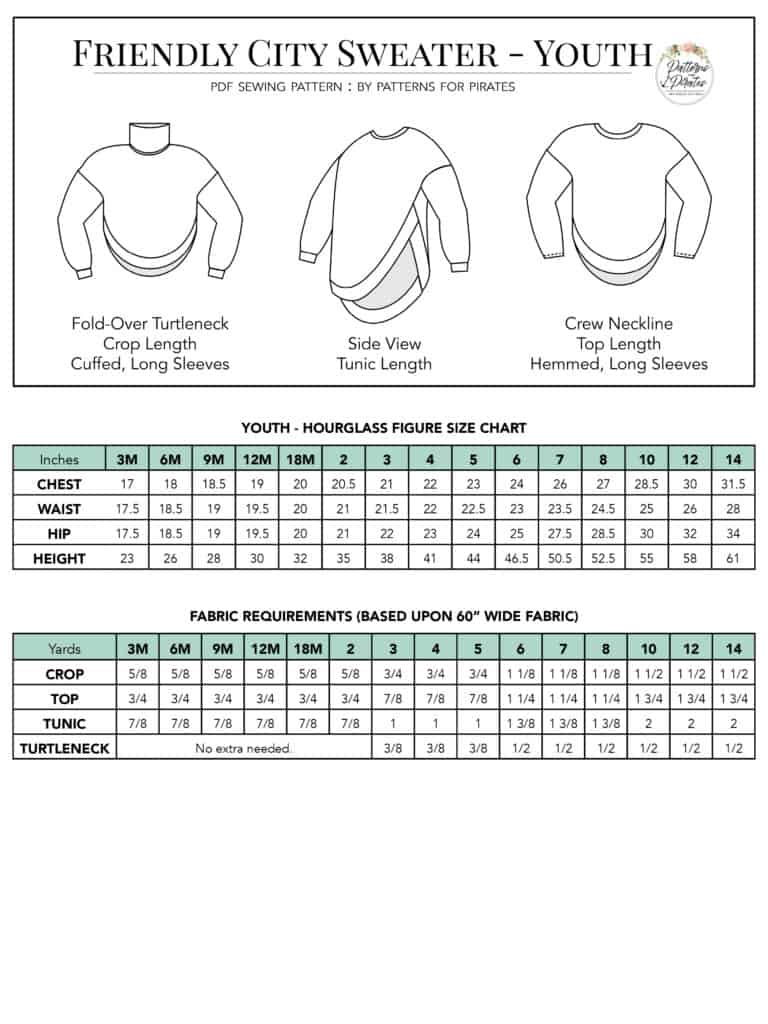
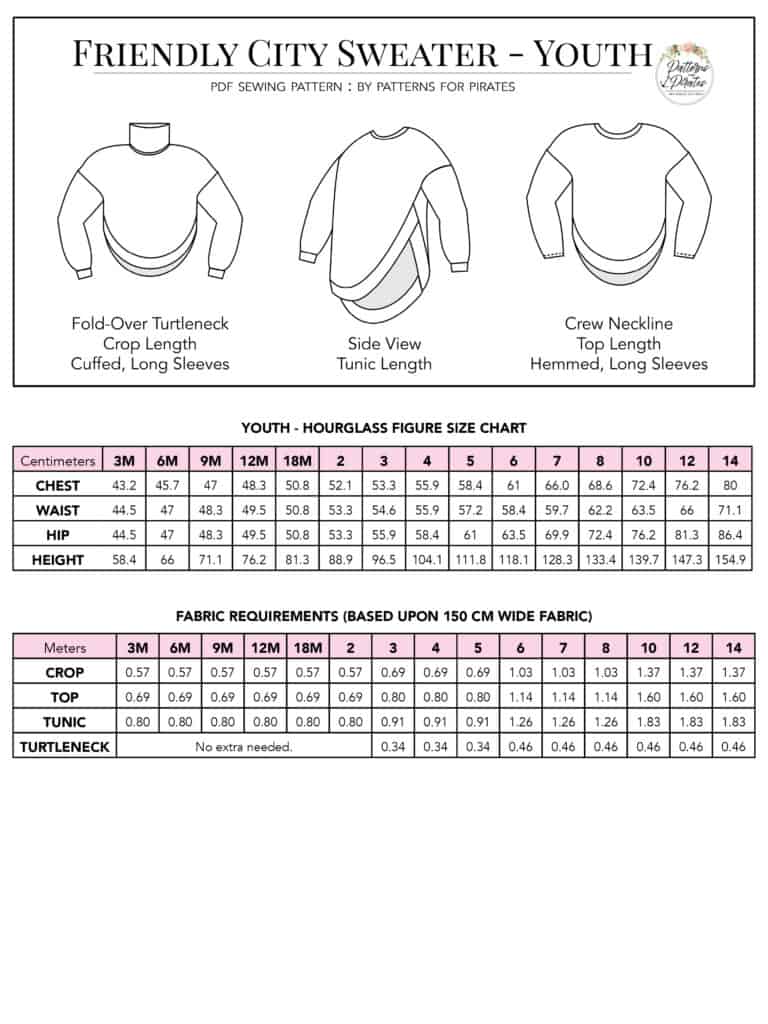
The youth sizes range from 3m – 14 and the adult sizes are for the full, newer size chart, extending from XXS – Plus 5X for the Adult Hourglass Figure.

  • *Want to learn more about how to measure yourself for these pattern?  We’ve got you covered with an in-depth blog HERE.  And for even more helpful fun, we have a free* printable that you can use to help record your measurements as you take them.
  • And in case you’re new to Patterns for Pirates and PDF patterns in general, we have a great blog full of new-user tips HERE to help you get started!
  • As with all of our current releases and updates, the pdfs now include our layers feature and can be found in Letter, A4, A0 and projector sizes.
  • We’ve also got an excellent planning tool for you with our Coloring Pages. It’s a resource that is updated with every new pattern addition, this pattern included!

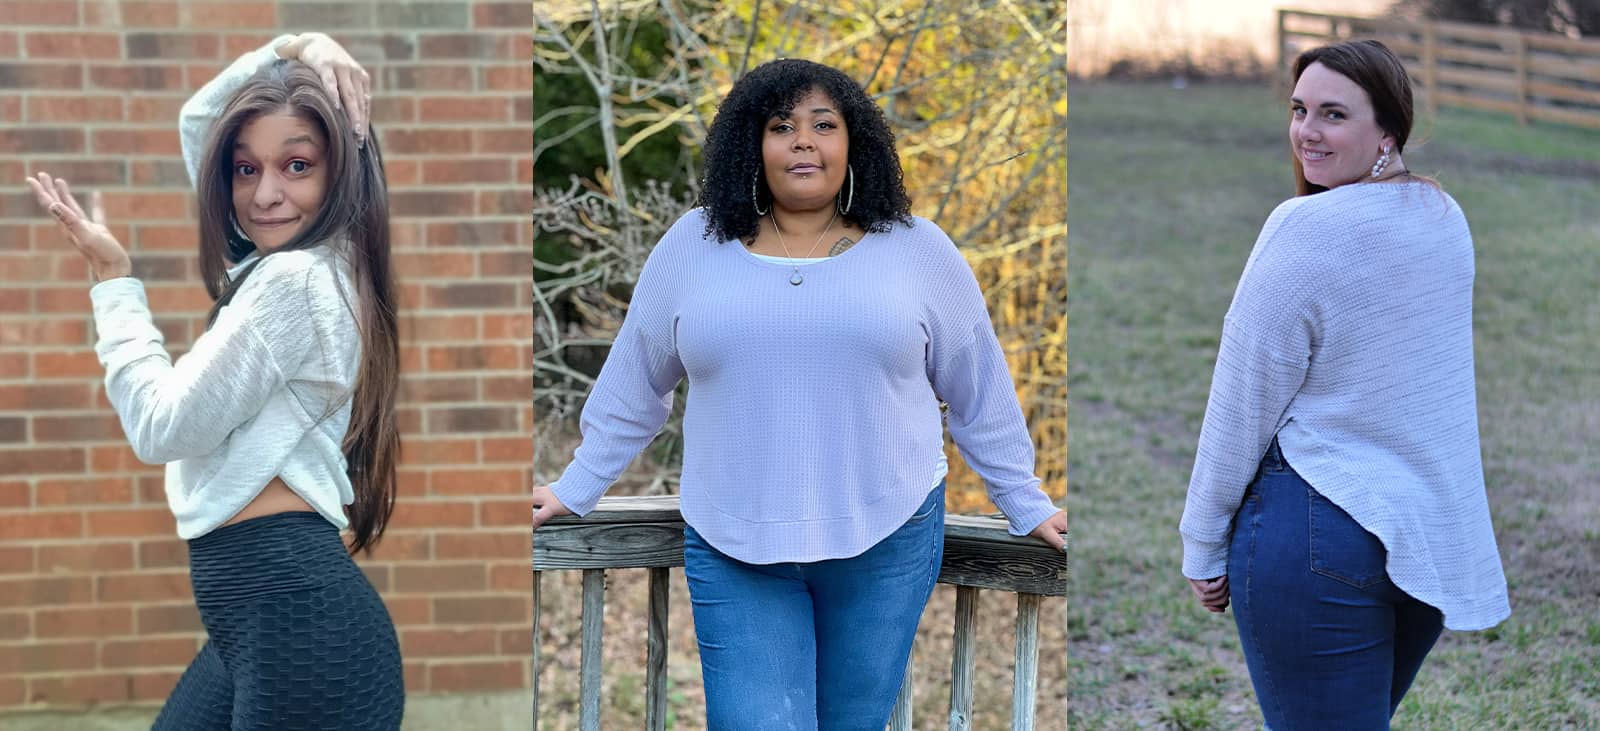
The Friendly City Sweaters are open-sided tops with a relaxed and easy-to-wear silhouette. The pattern features a dramatic, curved hemline in three lengths, all of which are finished with curved bands that nest neatly into the side seams. Designed with cozy fabrics in mind, this pattern is a fun twist on a basic sweater.

You’ll want to grab a Friendly City Sweater out of your closet on those chilly days, when you need something to help keep you warm and cozy. We included only long sleeves in the pattern, with the option of a hemmed or cuffed sleeve, and both sleeve versions fitting loosely at wrist. While there are three different hem lengths to choose from, the nested bands all meet at the same spot at your natural waist before opening up to a flattering curved bodice bottom. The crew neckline sits at a just-right height, the scooped neckline (available only on the adult pattern) gives you a slightly more open option, and the fold-over turtleneck is designed for that perfect level of coverage without being restrictive, even in thicker fabrics.

Pattern options for the Friendly City Sweaters include:

  • Necklines: Crew Neckline / Scoop Neckline (adult only) / Fold-Over Turtleneck
  • Hemlines: Crop / Top / Tunic Lengths
  • Sleeves: Cuffed / Hemmed Long Sleeves

The Friendly City Sweater Pattern is drafted for light-to-medium weight knit fabrics. Due to the design with open sides and oversized fit…the more drape the fabric has, the better. Stiffer fabrics will most likely “tent” off of your body, whereas fabrics with a softer drape will provide for the intended silhouette.

Specific Fabric Suggestions: Brushed Ribbed Knits, Ribbed Knits, Modal Knit Blends, DBP (Double Brushed Polyester Knit), Sweater Knits, Spandex French Terry Blends, Waffle/ Brushed Waffle Knits, etc.


The nested bands are the biggest feature of the Friendly City Sweater patterns — and also might be considered the trickiest part because the construction goes outside of your typical steps when sewing a top. Not to worry! We’ve got a video walking you through the ::entire:: sewing process, including how to wrap your brain around those amazing banded bottoms!

https://youtu.be/Y1h29SHzflkhttp://

Let’s take a look at some of the different options:

Hemlines (Crop / Top / Tunic)

Necklines (Crew / Scoop (Adult Only) / Turtleneck)

Sleeves (Cuffed / Hemmed)

We are so excited to see what you sew up with the new Friendly City Sweater patterns!  Head on over to the shop, grab yourself a copy, and get to sewing!  They are available on sale (no code needed) through 11:59pm CST, January 22, 2023.

Friendly City Sweater | Friendly City Sweater – Youth | Friendly City Sweater – Bundle

Hoping for a little inspiration before diving into some Friendly City Sweater sewing?  Journey over to our Facebook group where you can see tester albums full of amazing images!

Friendly City Sweater Album | Friendly City Sweater – Youth Album
 

Filed Under: Pattern Release Leave a Comment

New Pattern Releases :: Be Bold Bodysuit!

March 10, 2021

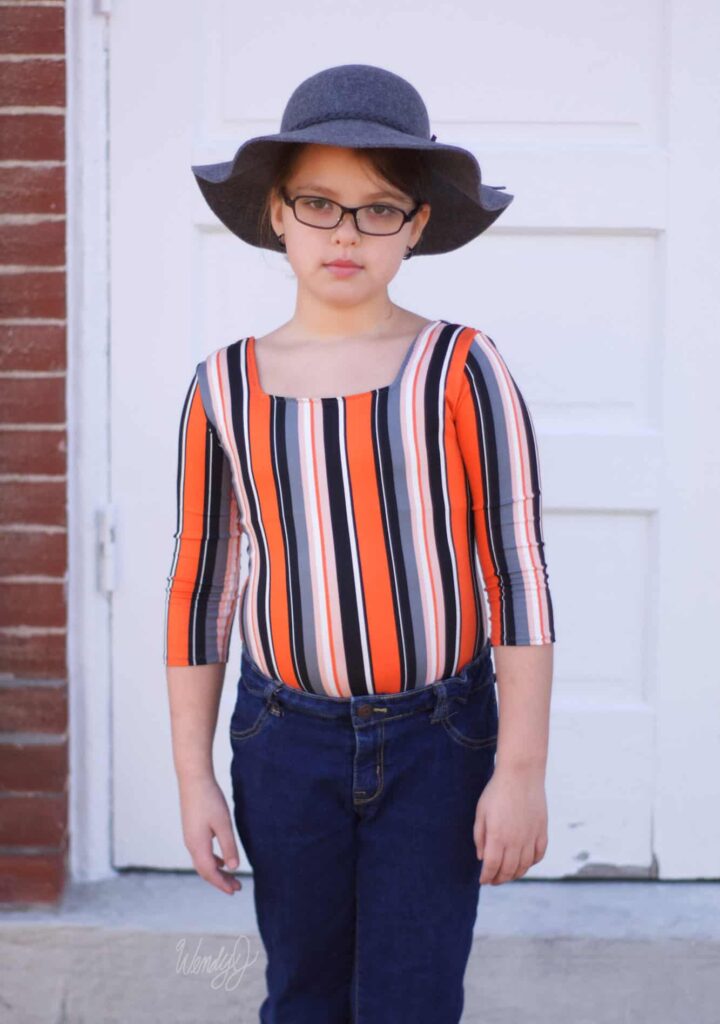
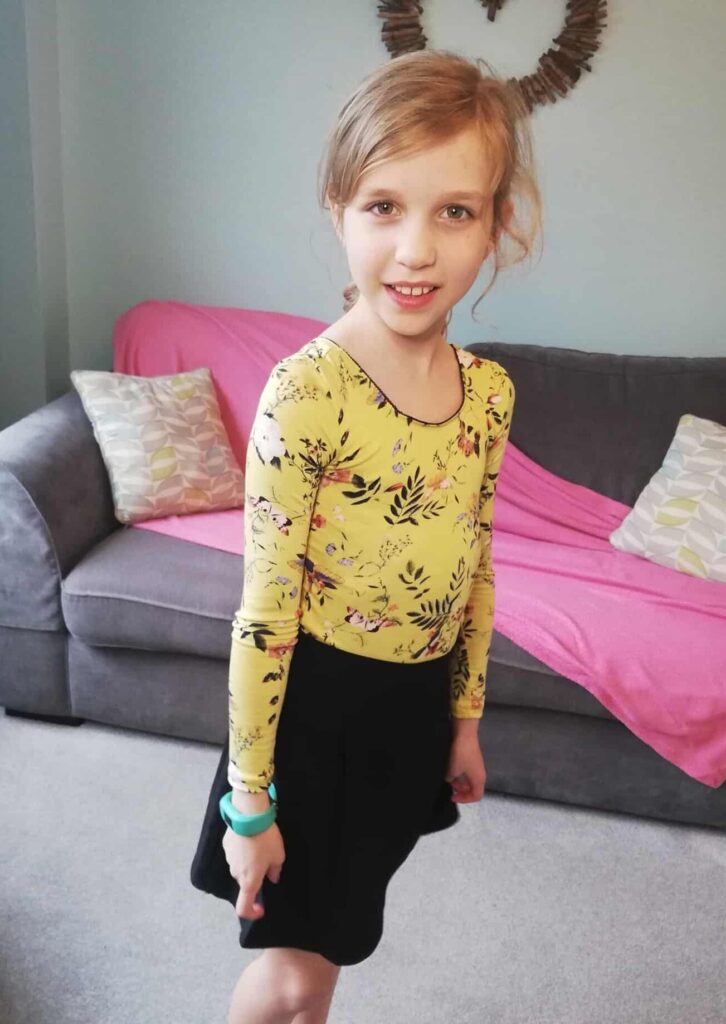
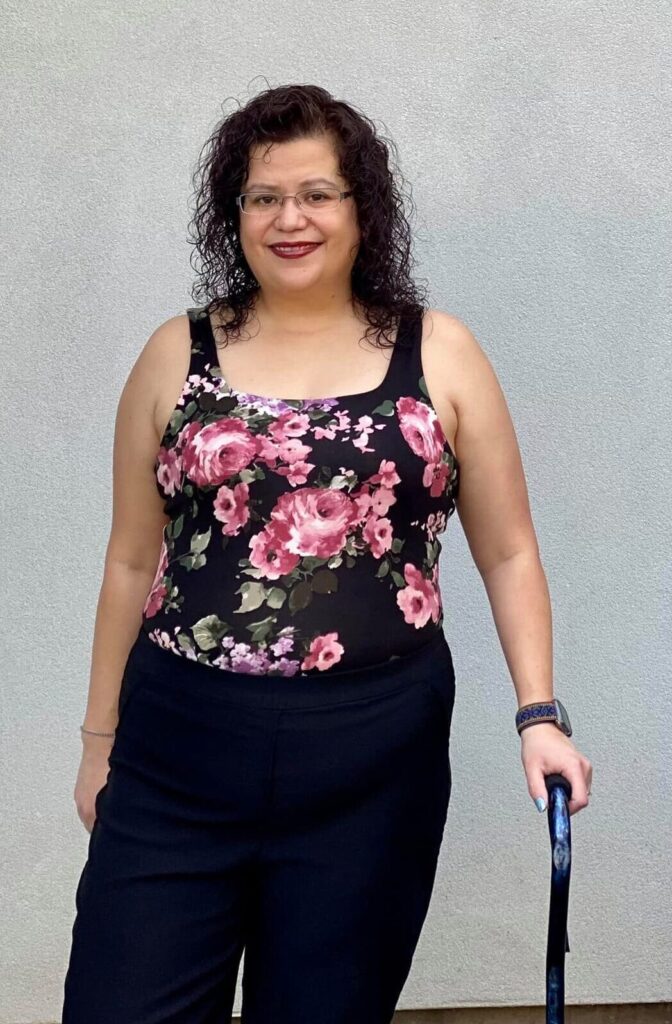
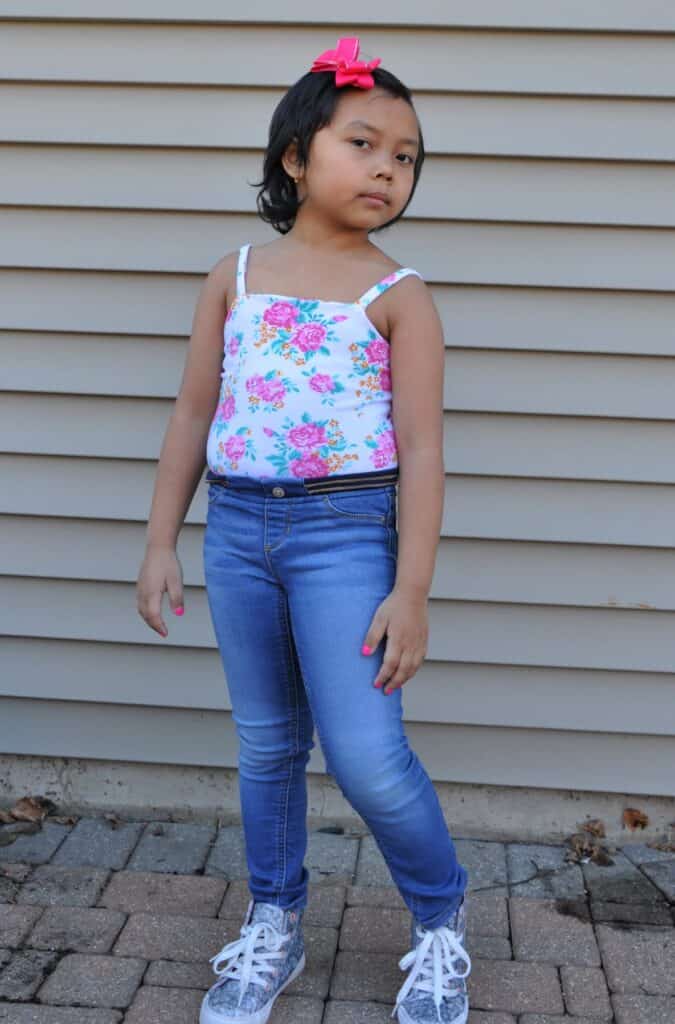
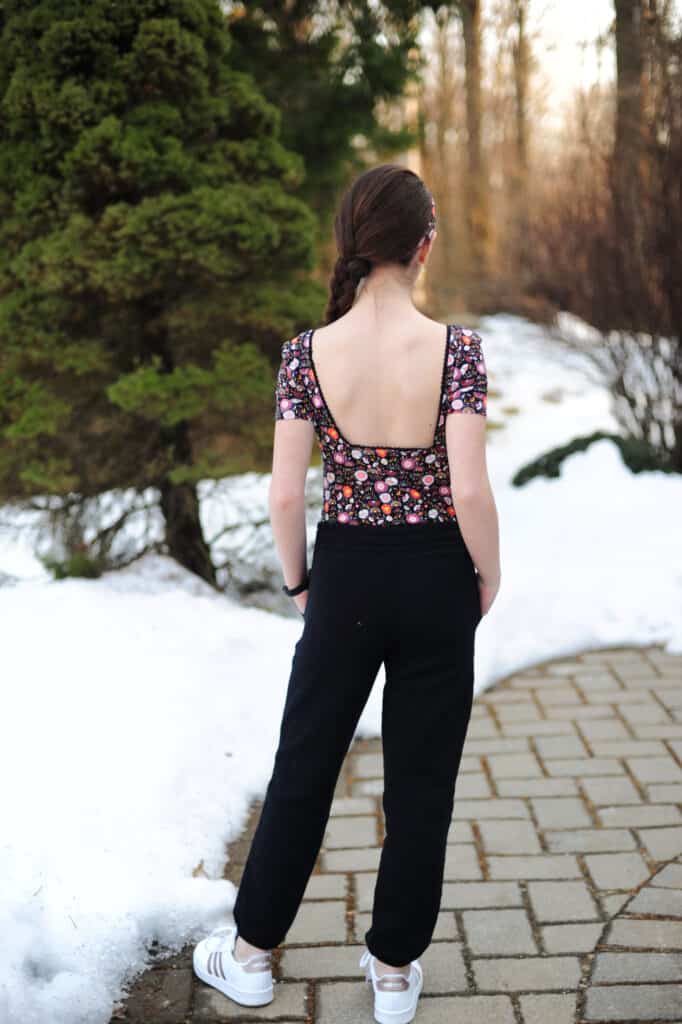
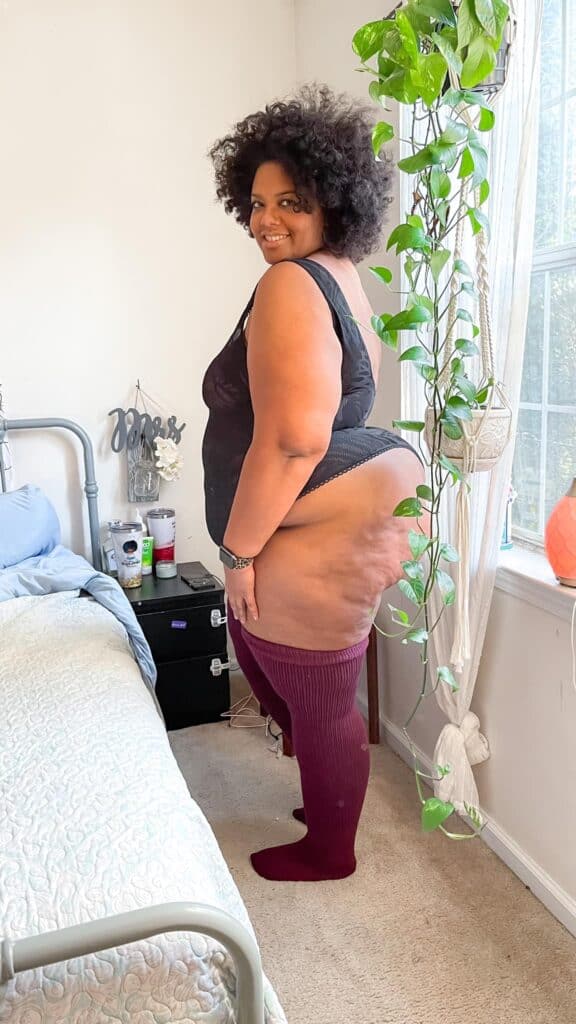
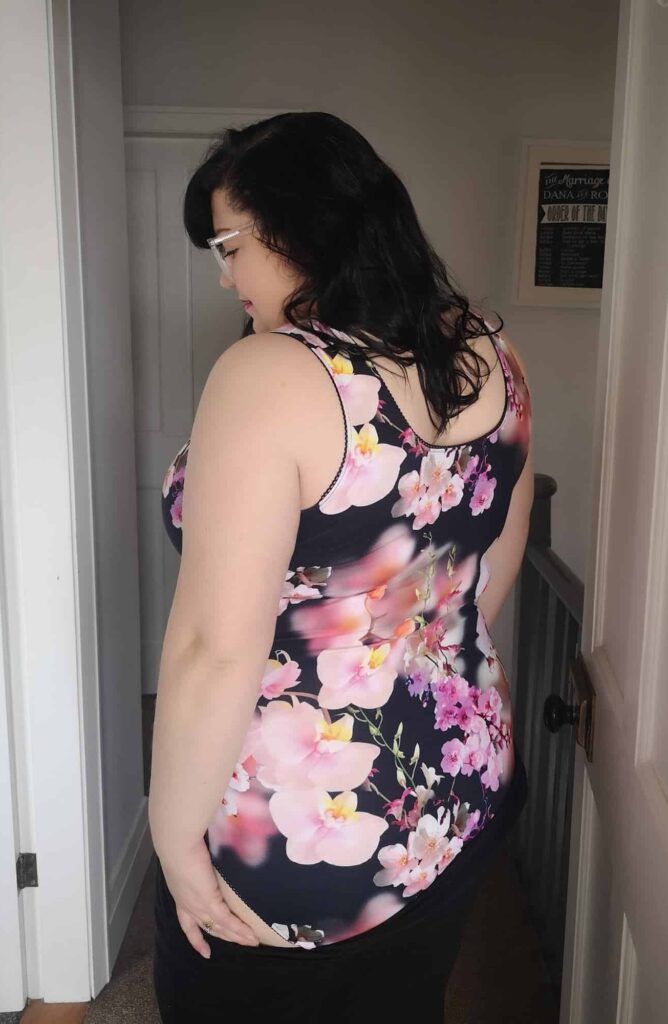
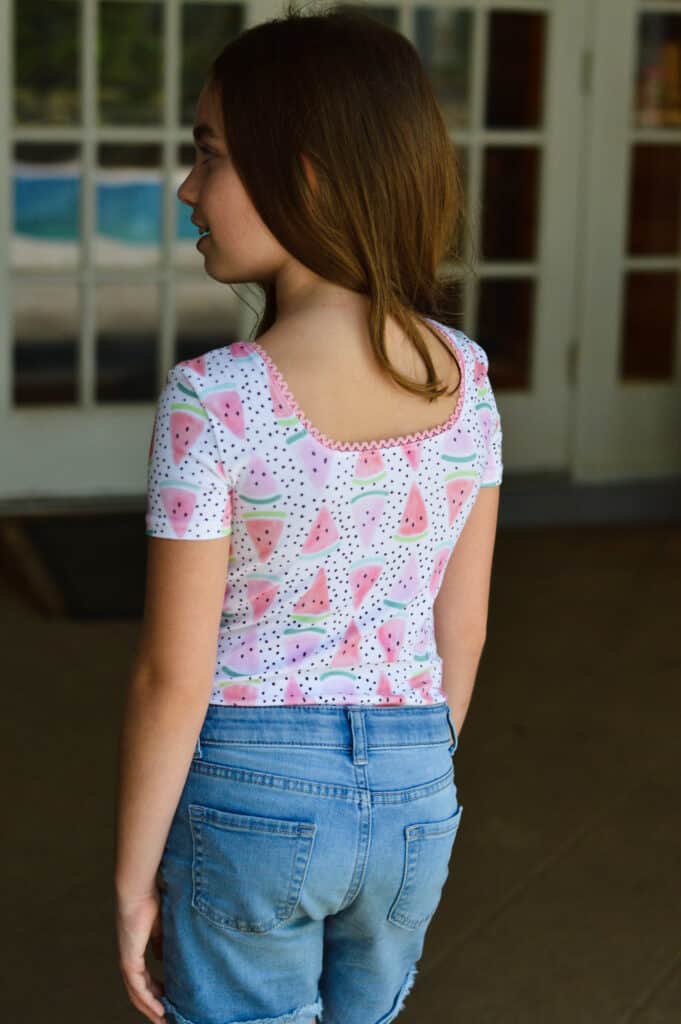
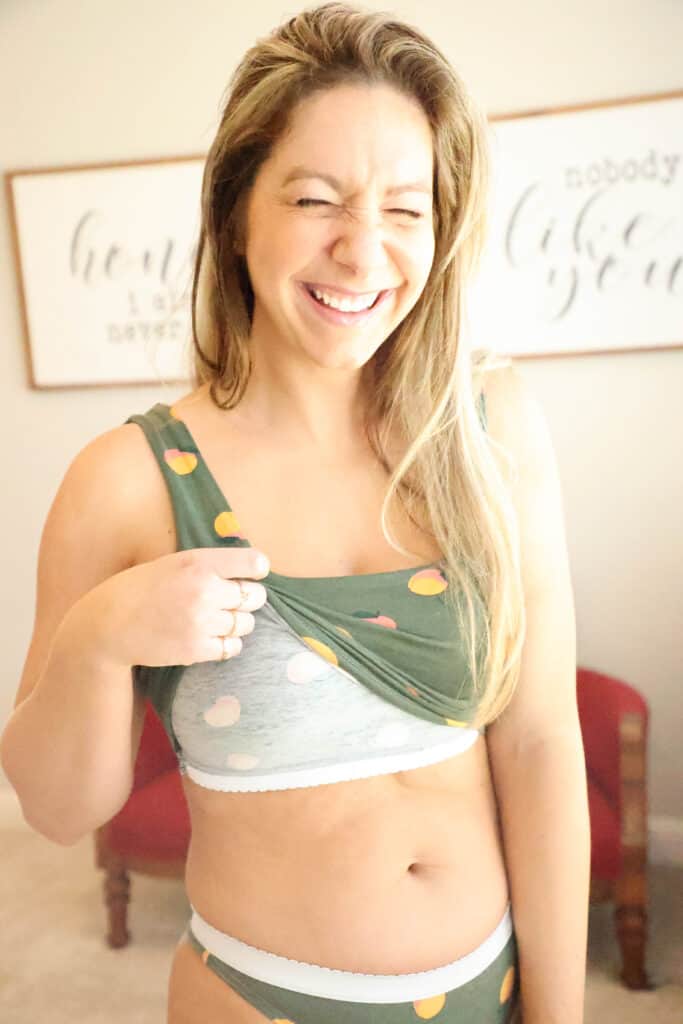
We are so excited to be celebrating another release day with our favorite Pirate Crew!  We’ve been wanting to put out a bodysuit for forever now, and the day is finally here.  Let’s learn all about the Be Bold Bodysuits, available in both Adult and Youth sizes!


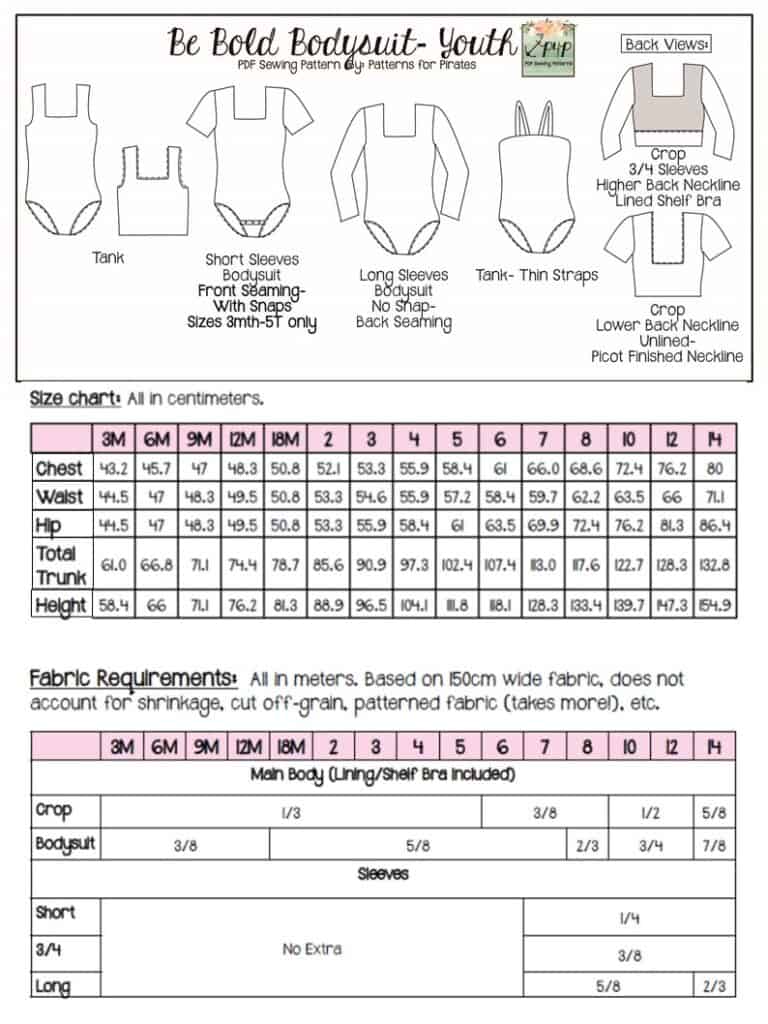
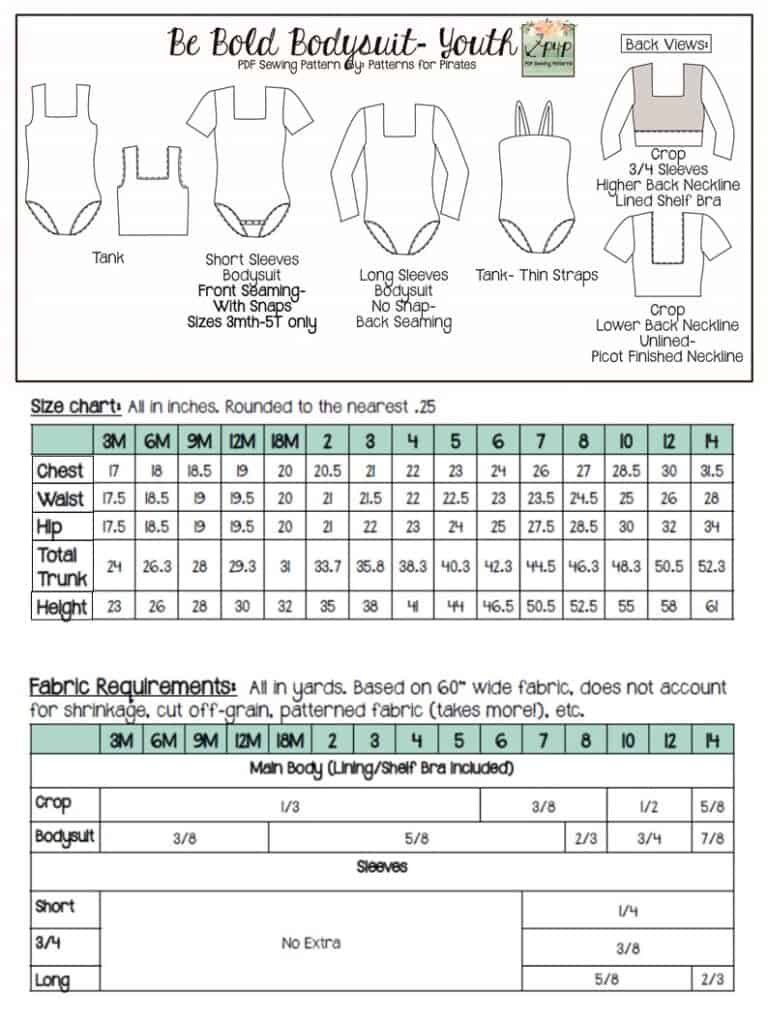
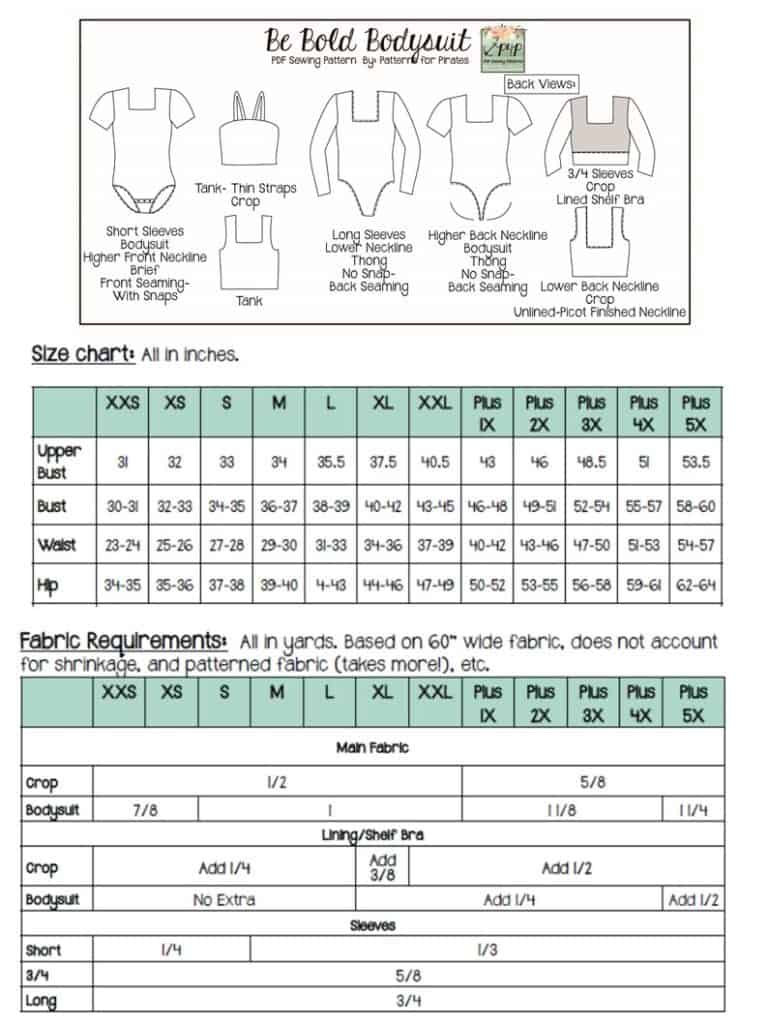
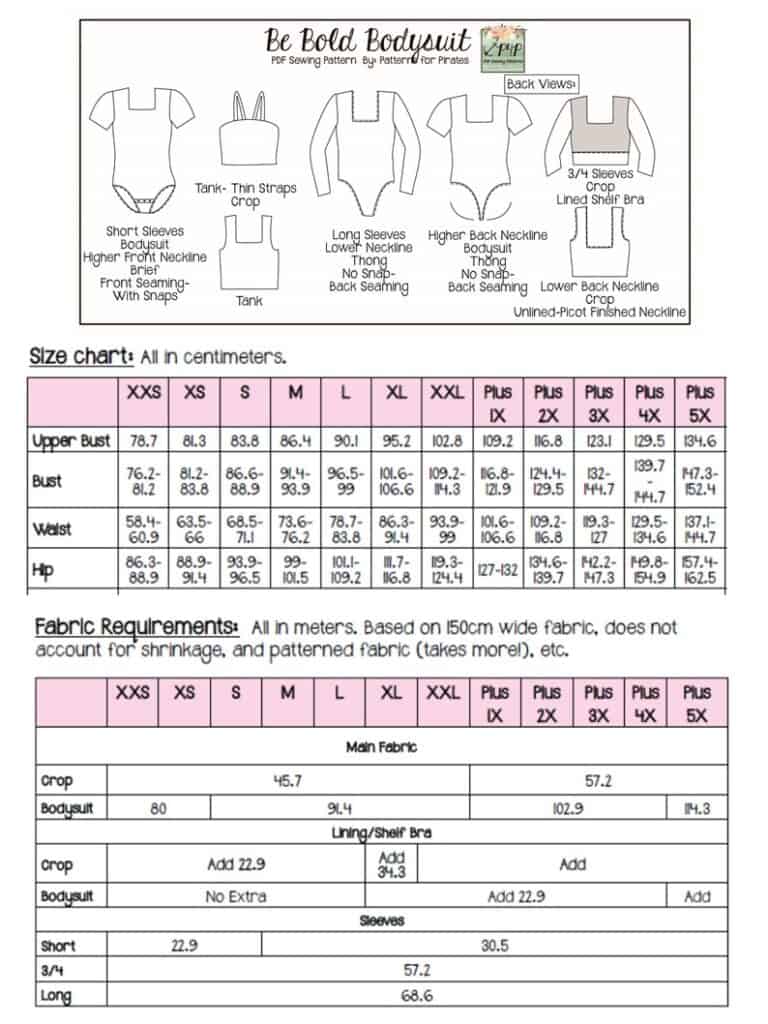
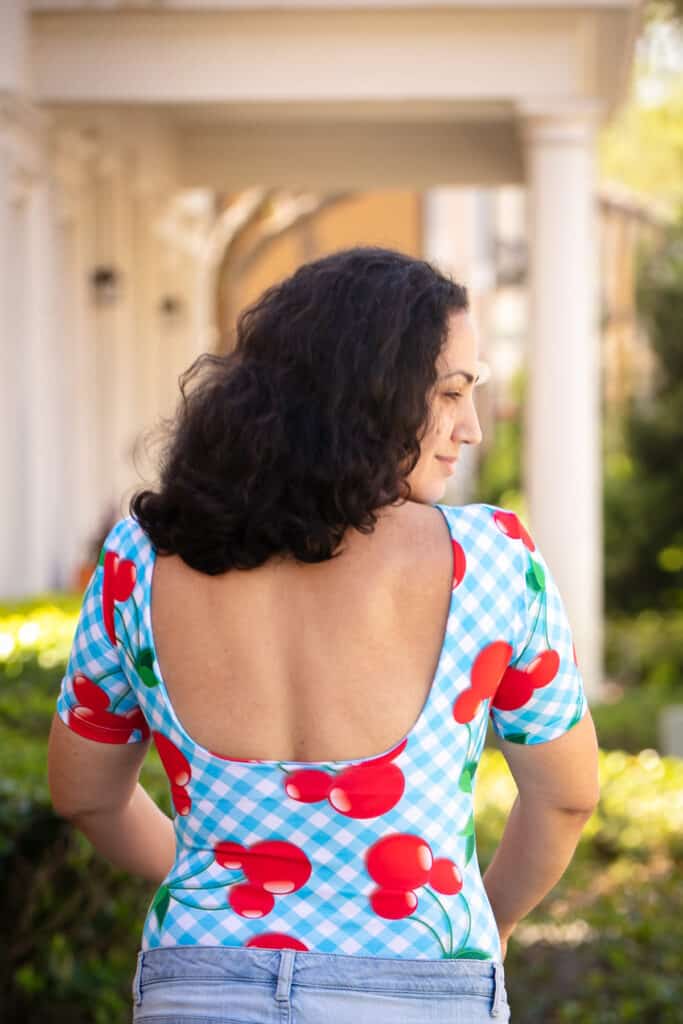
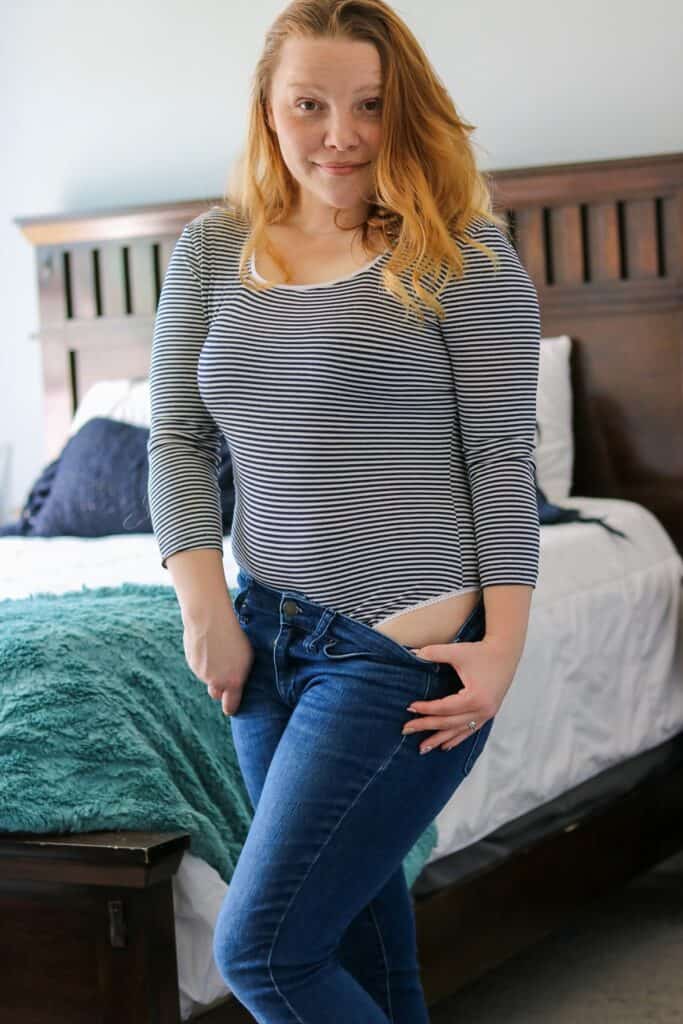
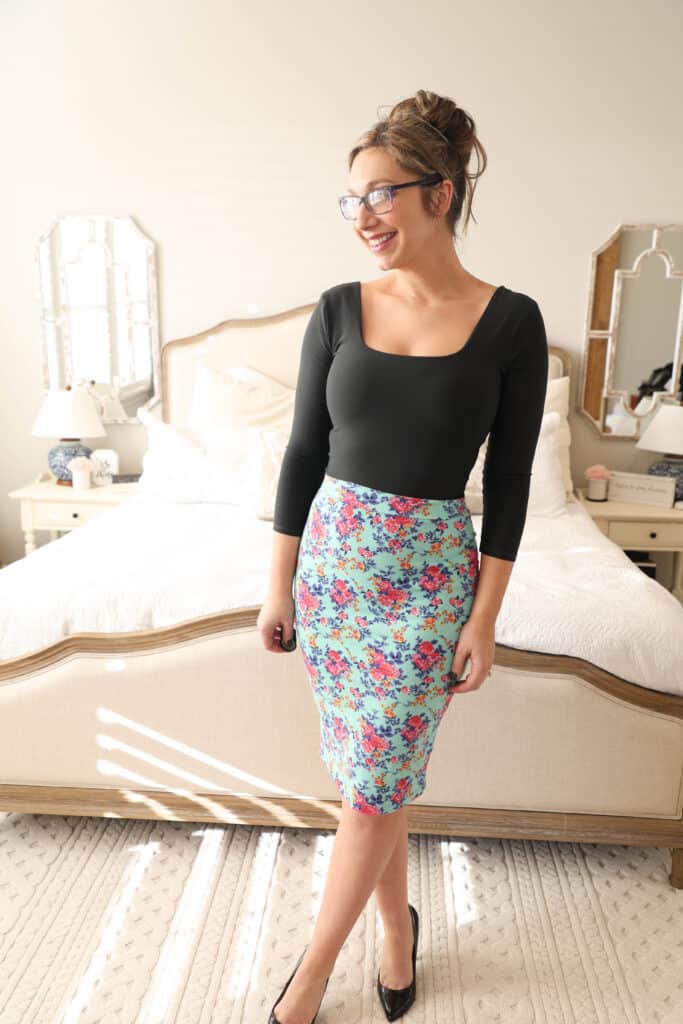
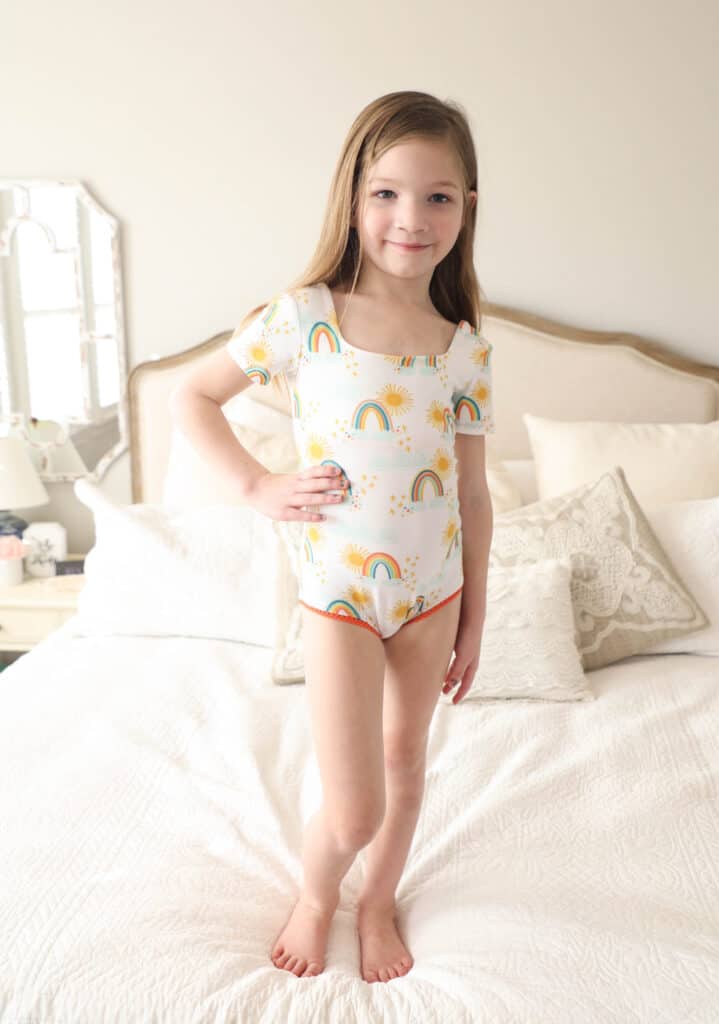
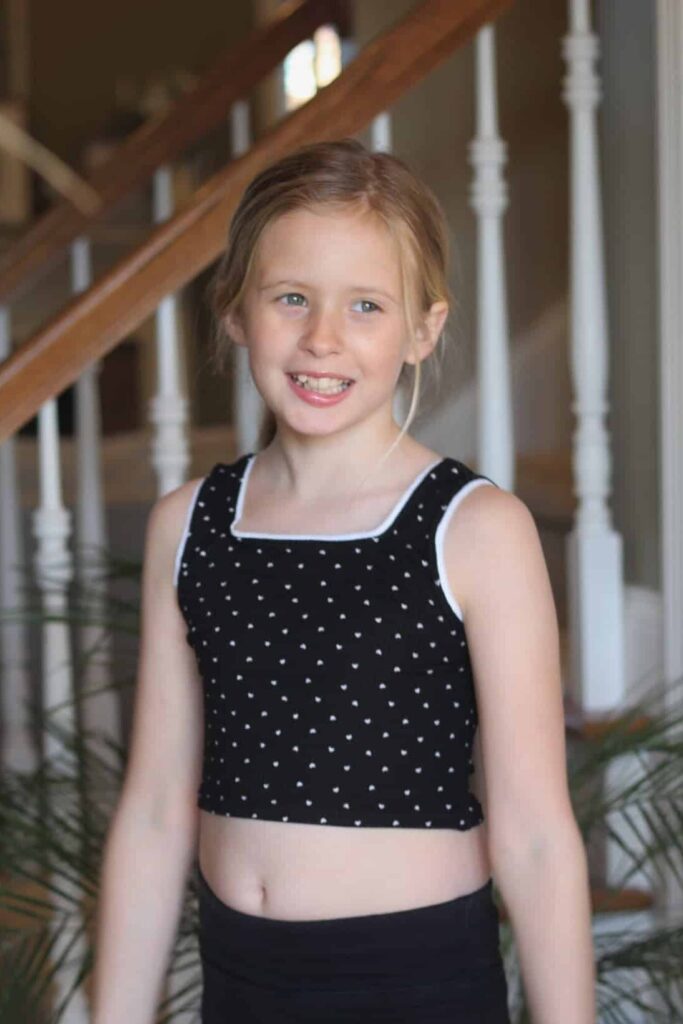
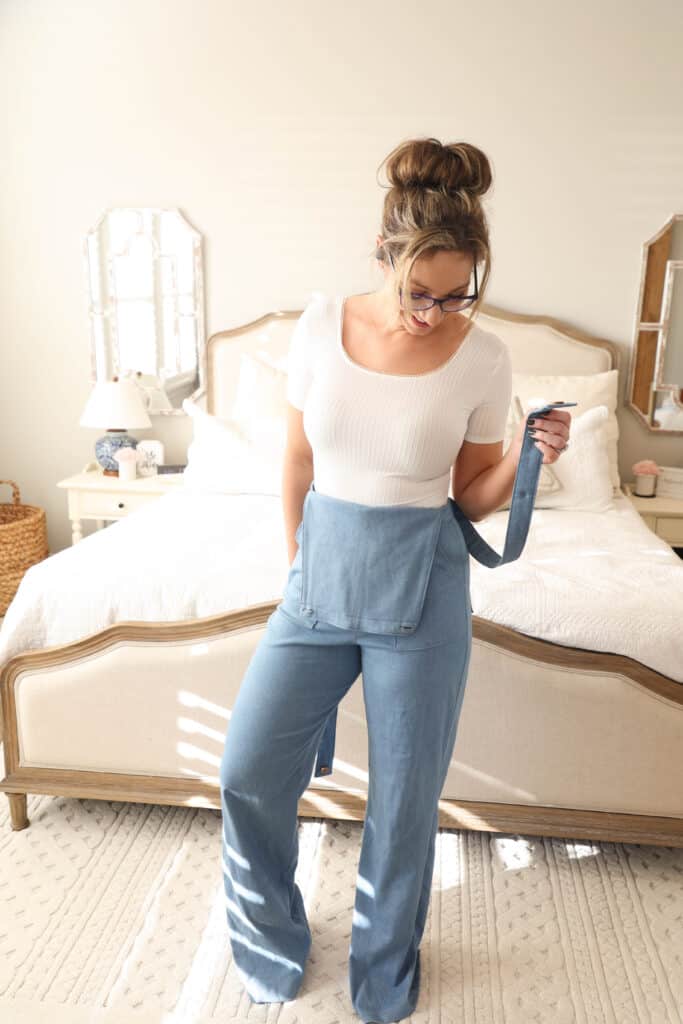
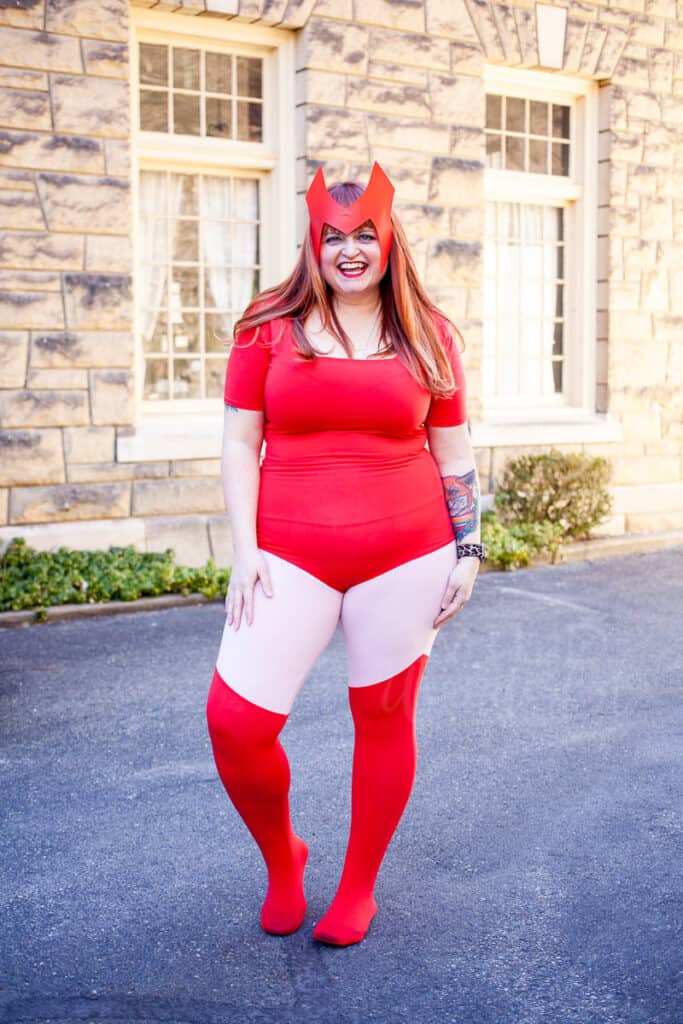
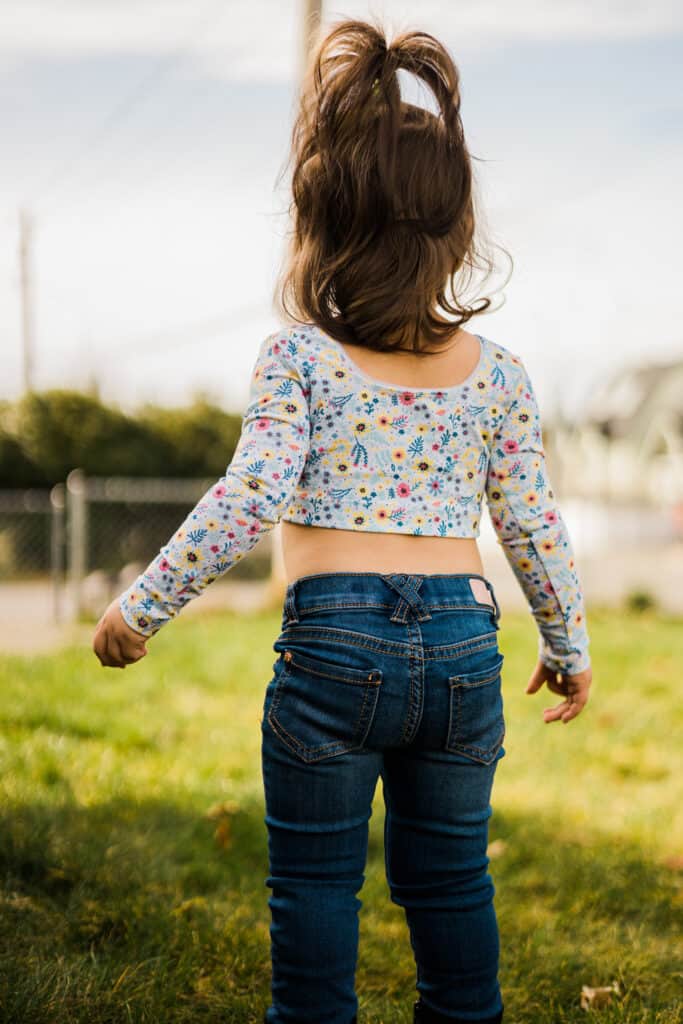
The Be Bold Bodysuit will have you feeling fierce in any option. This classic tight fit bodysuit is meant to feel snug and act as the perfect tucked in top without worrying about anything coming un-tucked. With all the options we’ve packed into this single pattern, you’ll be able to make a perfect bodysuit or crop to pair with any bottoms – skirts, pants, overalls, casual or dressy. You can pick from a higher or lower neckline on both the back and front for the adult pattern, and a higher or lower back neckline for the youth version.  You can also take this pattern from the hot summer with the multiple tank options to the cooler weather with longer sleeve options. You can finish the neckline with a simple picot elastic or with a lining and shelf bra.
Moving down for the adult pattern, you can have multiple bottom options as well!  You can do a thong or brief plus pick if you’d like the seam in the traditional back spot or add snaps with a front seam for ease of snapping. The bodysuit is partially lined so you can use the bodysuit as your undergarment.
Drafted for high stretch (4 way stretch) knit fabrics like cotton spandex, double brushed poly, ribbed knits, athletic knits, or swim knits.  Options include: crop length, bodysuit with thong (snaps or back seam), bodysuit with brief (snaps or back seam), lined neckline with shelf bra, unlined with picot finished neckline, thin strap tank, tank, short sleeve, 3/4 sleeve or long sleeve.
Enjoy several videos throughout the tutorial like fabric suggestions, options and cutlines video, how to add/remove length to pieces, sewing the picot on the shelf bra, neckline and leg lines, and lining the tank option.

The youth sizes range from 3m – 14 and the adult sizes are for the full, newer size chart, extending from XXS – Plus 5X!  If you haven’t sewn with us in a while, please make sure to check the size charts, as there were slight adjustments made to accommodate the new size range for adults.


*Want to learn more about how to measure yourself for these pattern?  We’ve got you covered with an in-depth blog HERE.  And in case you’re new to Patterns for Pirates and PDF patterns in general, we have a great blog full of new-user tips HERE to help you get started!  As with all of our current releases and updates, the pdfs now include our layers feature and can be found in Letter, A4, A0 and projector sizes.  And for even more helpful fun, we have a free* printable that you can use to help record your measurements as you take them.

Let’s take a quick look at all of the options!

There are three options available for the sleeves- short, 3/4, and long. If sleeves are quite the look you’re going for, check out the sleeveless options, including a classic tank strap as well as a thin strap tank. For the necklines, not only is it a fun squared design, there are several options that can be mixed and matched. If you’re feeling a bit daring, there is a low option available for both front and back bodices. If you’d like a little more coverage, there are also higher cutlines. You can use these options together to create your perfect look. To help finish the necklines, use either a simple picot elastic or finish with a lining and shelf bra. To round out the Be Bold Bodysuit, you have multiple leg options (available on the adult version).  This includes either a thong or brief plus you can choose if you’d like the seam in the traditional back spot or add snaps with a front seam for ease of snapping.  The bodysuit is partially lined so you can use the bodysuit as  your undergarment.

SLEEVED OPTIONS


SLEEVELESS OPTIONS


NECKLINES


ADULT LEGLINE OPTIONS


PICOT FINISHING


LINED w/SHELF BRA


What are you waiting for?  Head on over and grab yourself a copy of the perfect Be Bold patterns!  They are available on sale (no code needed) through 11:59pm CST, March 19, 2021.

BE BOLD BODYSUIT | BE BOLD BODYSUIT – YOUTH | BE BOLD BODYSUIT – BUNDLE

Maybe hoping for a little more inspiration before you make the purchase?  Head over to our Facebook group where you can see tester albums full of amazing images!

Be Bold Bodysuit | Be Bold Bodysuit – Youth

If you’re looking for even more options, we show you a few more ways you can use this pattern in our Be Bold Easy Hacks post.


Filed Under: Pattern Release Leave a Comment

Plushie Pals :: Free Sewing Pattern + Tutorial!

February 3, 2020

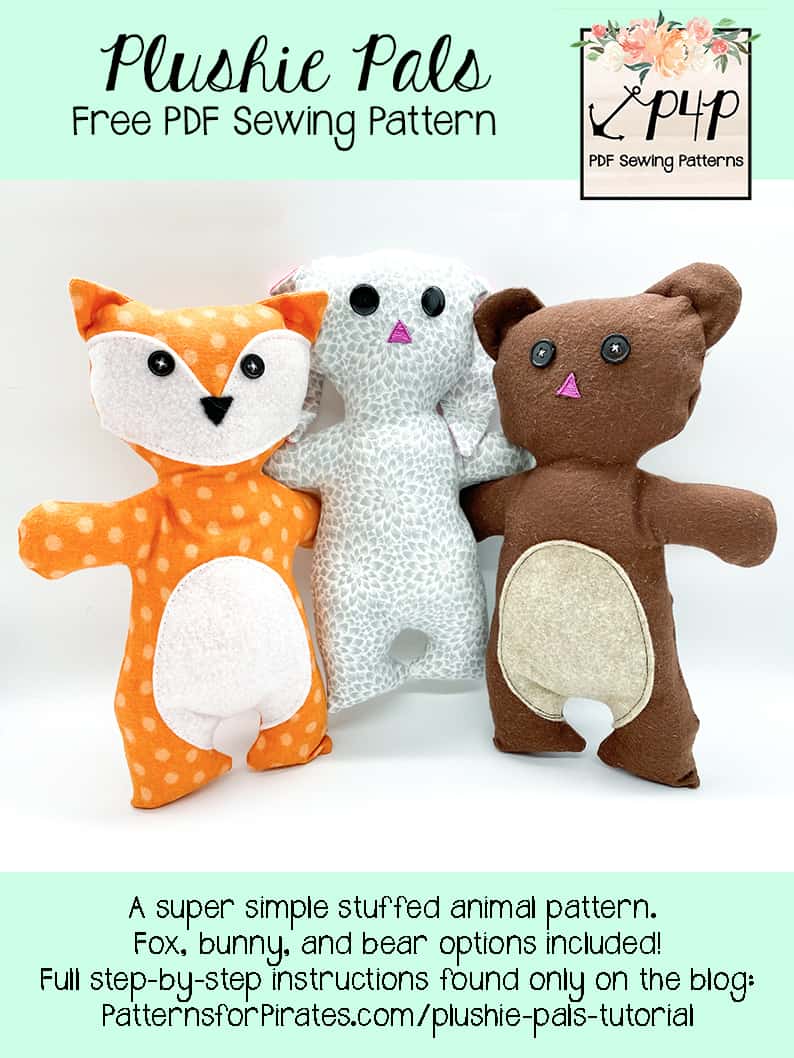
It’s February, which means I’m already brainstorming cute gift ideas for Valentine’s Day for the kiddos in my life.  I love sending little packages of things to my niece and nephew up north, and including something handmade is always at the top of my list.  And that’s exactly why these Plushie Pals were born!

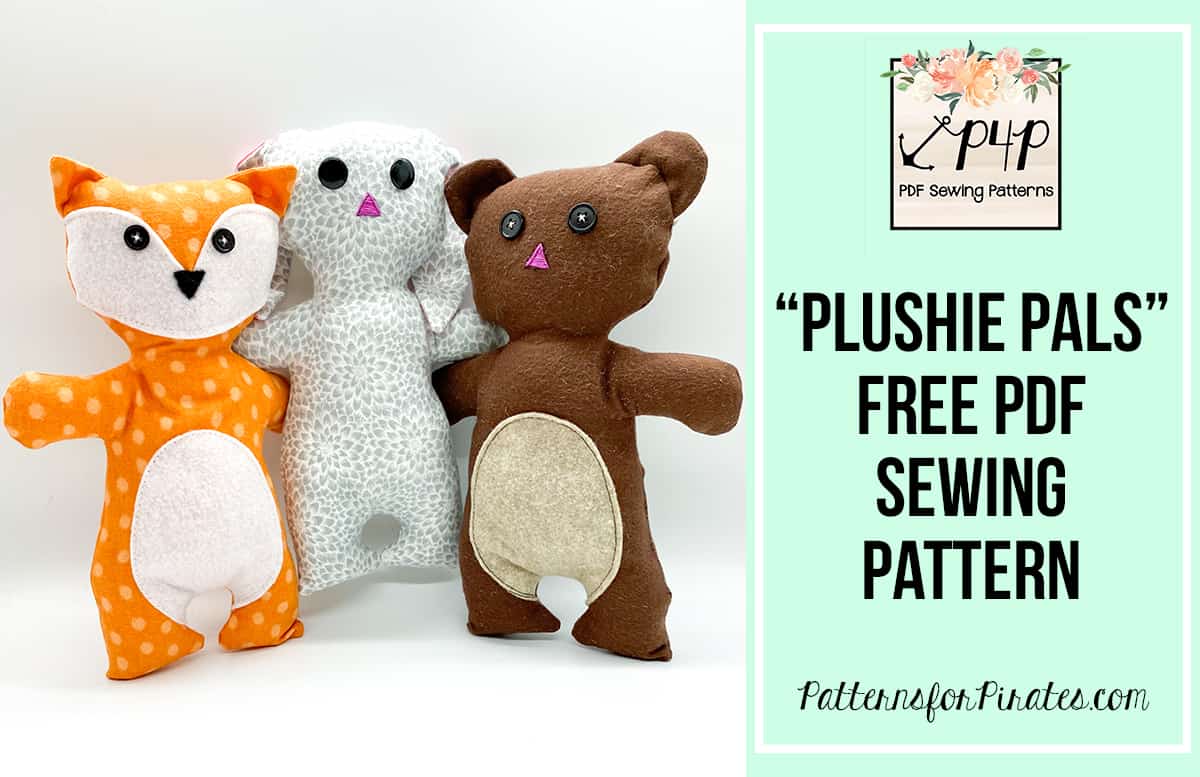
We are bringing our newest pattern to you today, keeping in mind that you’re probably short on time like the rest of us.  The Plushie Pals are super duper fast to sew, and end with the cutest results!  The fox, bunny and bear pattern pieces are all included, but the pattern itself would be incredibly easy to adjust into just about any animal or character that you could think of!  Let’s get to sewing, shall we?


Grab your “PLUSHIE PALS” pattern pieces here!

Oh! This time around, I loaded the pieces onto Cricut Design Space so you could cut them with your Maker.  Find them here: Plushie Pals for Cricut Maker

Fabric Requirements (based upon 44″ wide fabrics): 

– 1/3 yard main body fabric.  Directional prints will require more.  (I like to use flannel, but quilting cottons / kona cottons / felt will all work for this!)
– Felt for fox face and bear/fox bellies.  The edges are left raw on these pieces, so you’ll want to use something that won’t fray.
– Scrap sizes of fabrics for ear accent colors.
– Buttons, embroidery thread for facial features.
– Fiberfill.

1/4″ seam allowance used throughout pattern, unless otherwise indicated.

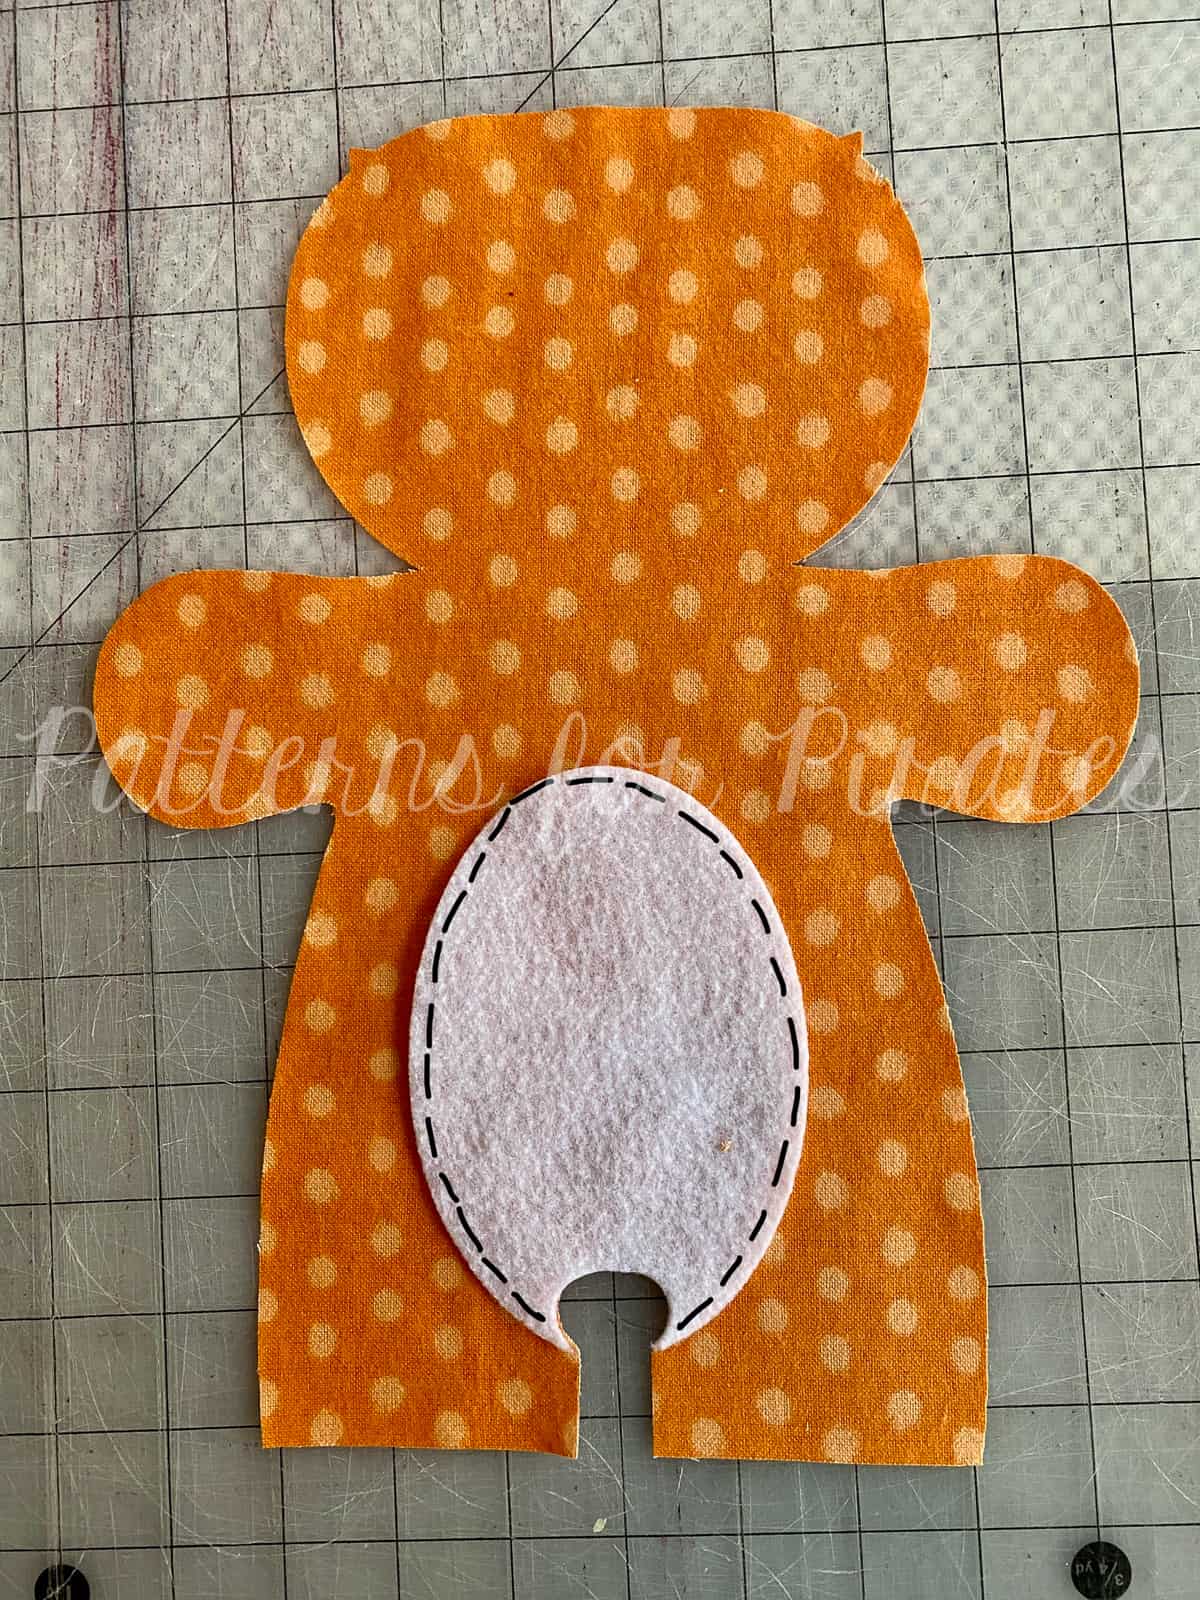
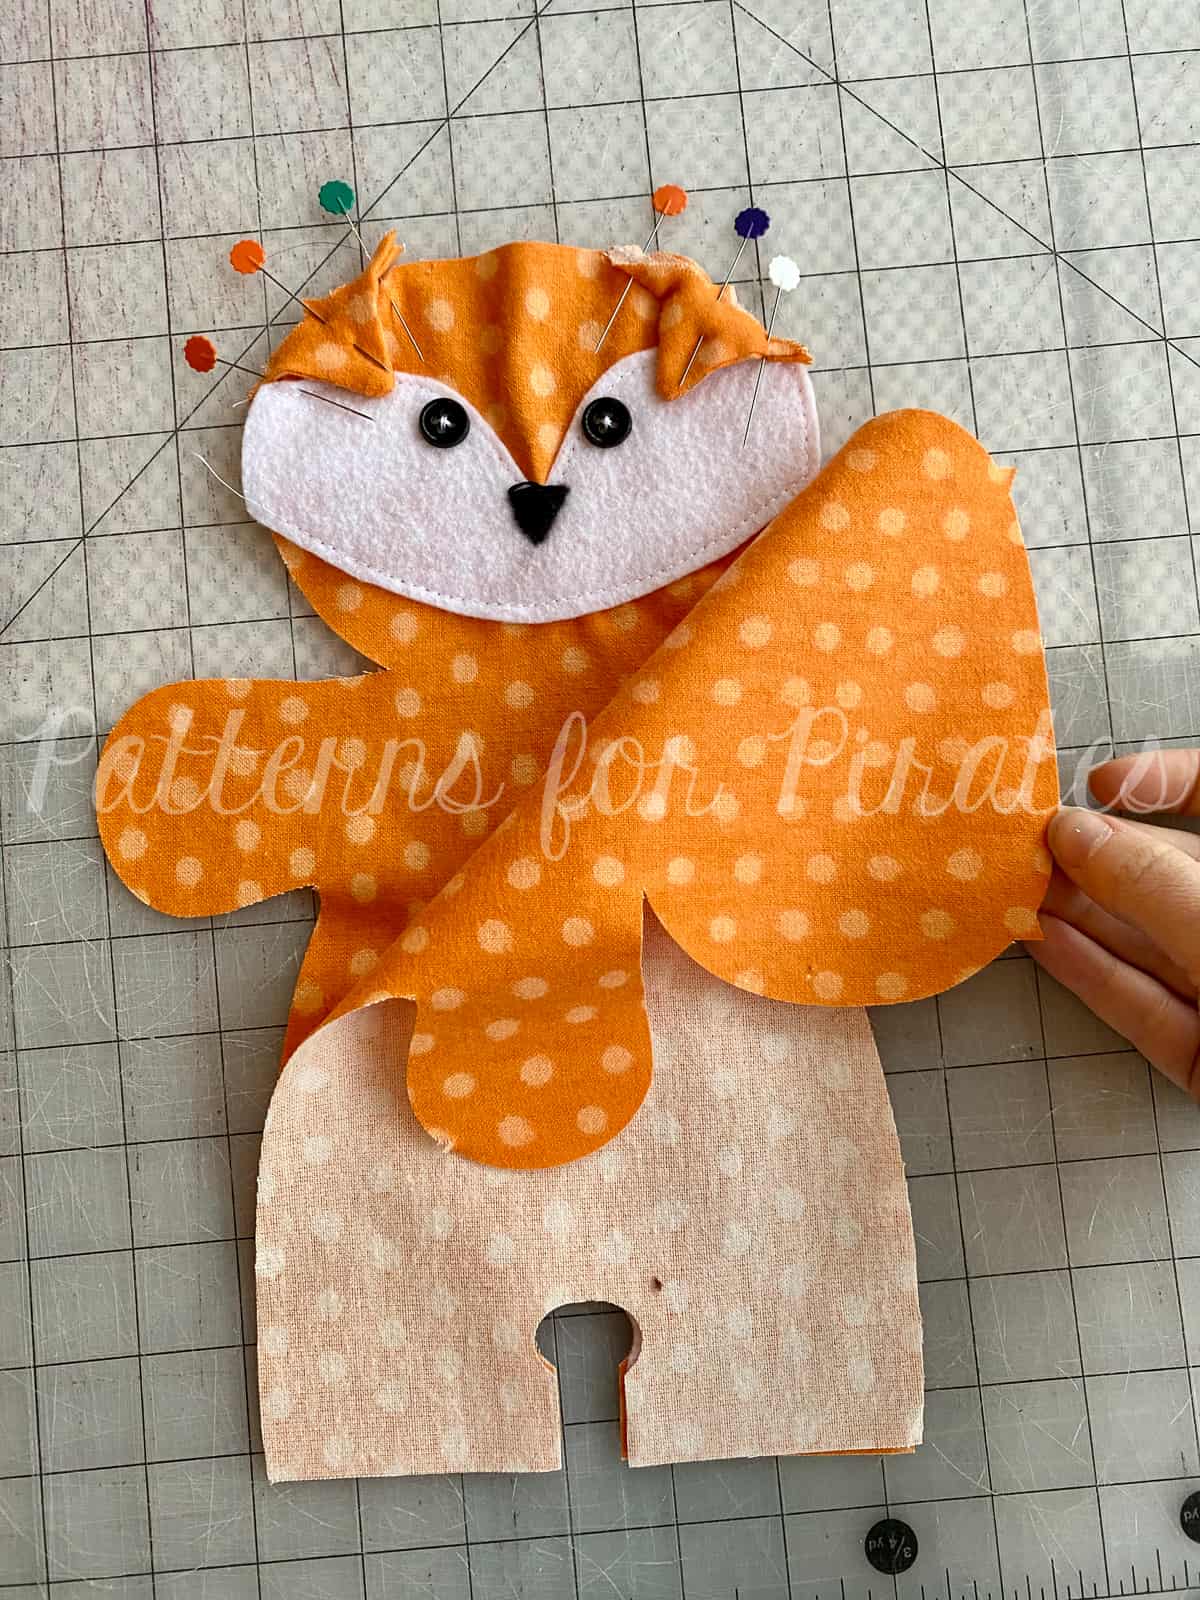
  • For Fox/Bear options: With both fabrics facing up, align the belly piece to one of the main body pieces and stitch along long, outer curve, at around 1/8″ inch.

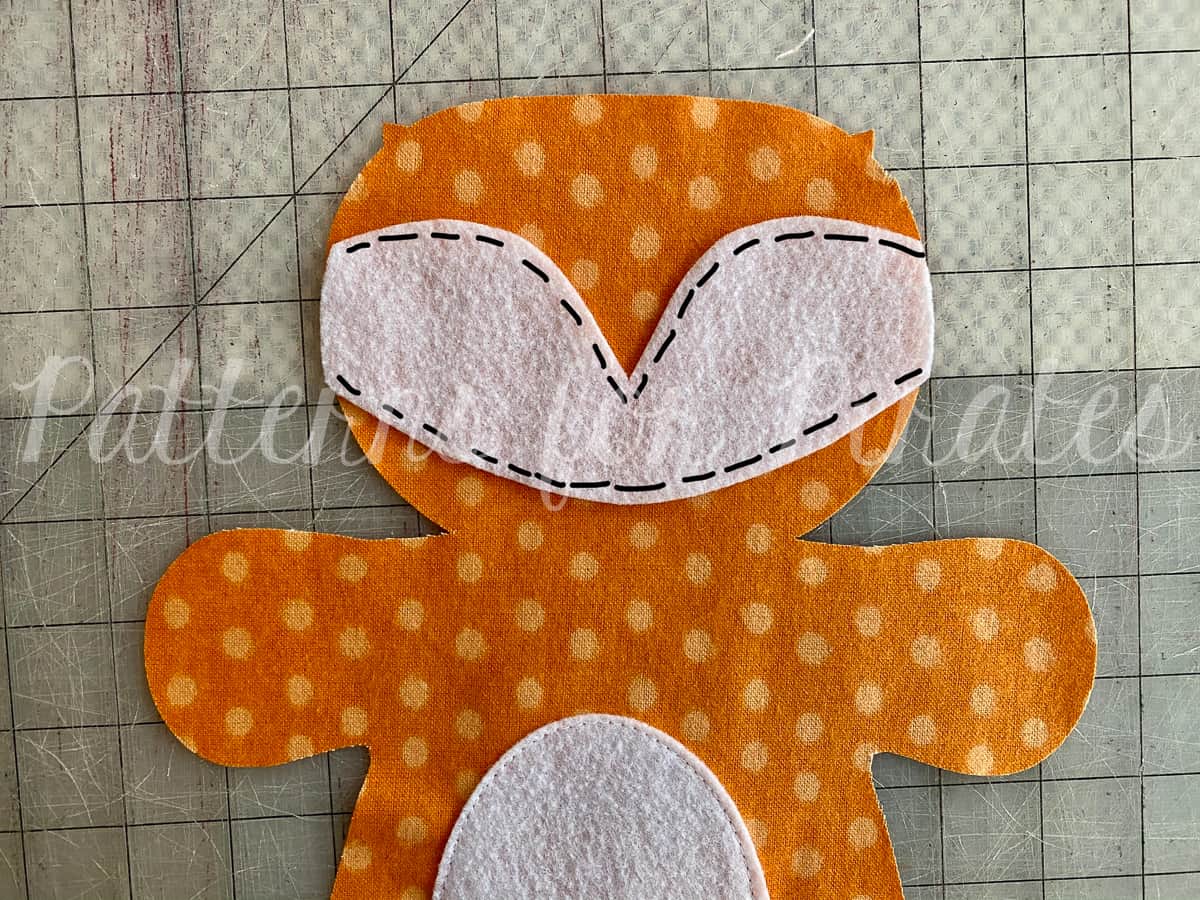
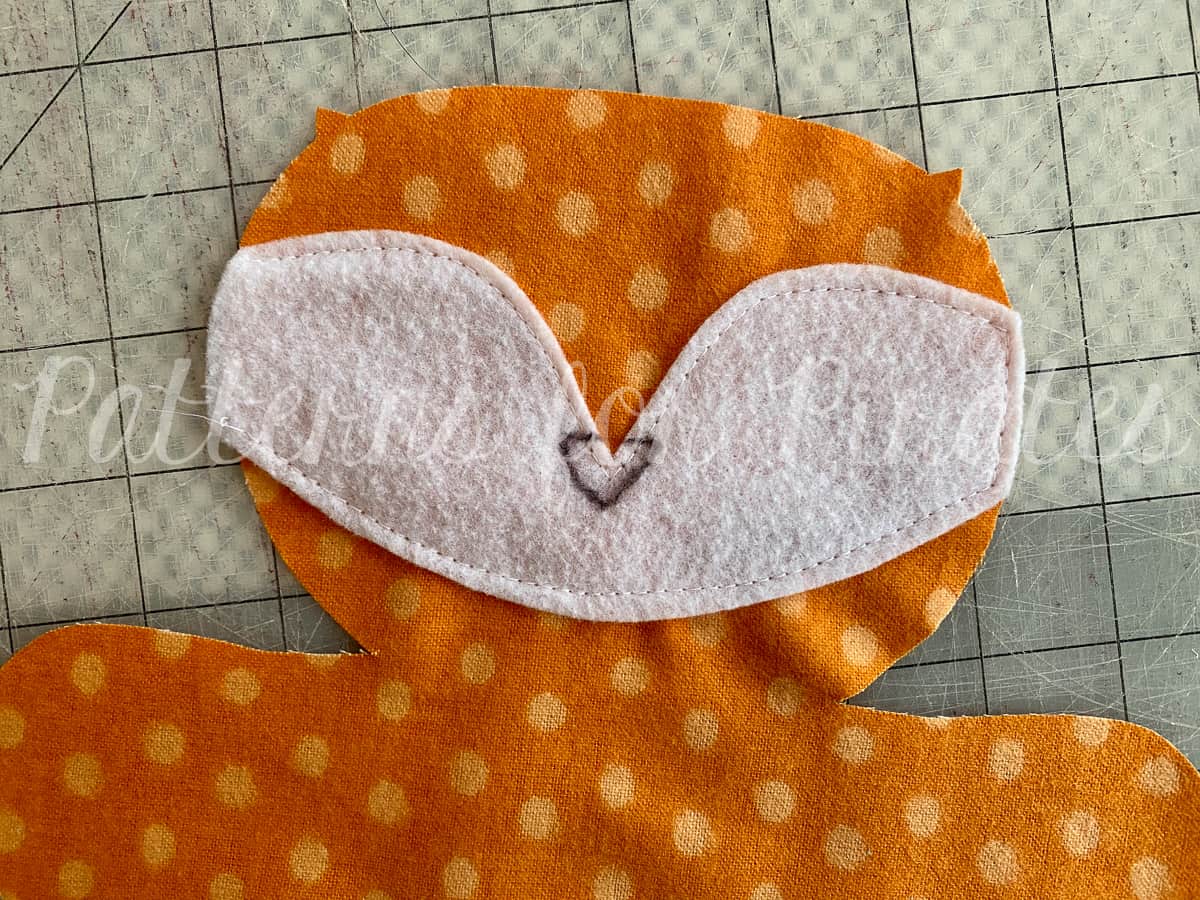
  • For Fox option only: With both fabrics facing up, align the face piece to main body piece and stitch along top and bottom edges, at around 1/8″ inch.

  • For all options: This is the best time to add facial features to your Plushie Pal.  Using a fabric marker (I used a permanent one so it would show easier in photos), draw a triangular nose shape to help guide your stitches, if choosing to embroider the details.  Details could also be applied and look adorable in fabric paints or using HTV.  We didn’t include any specific facial details in the pattern because there are so many different ways to make a face. 🙂

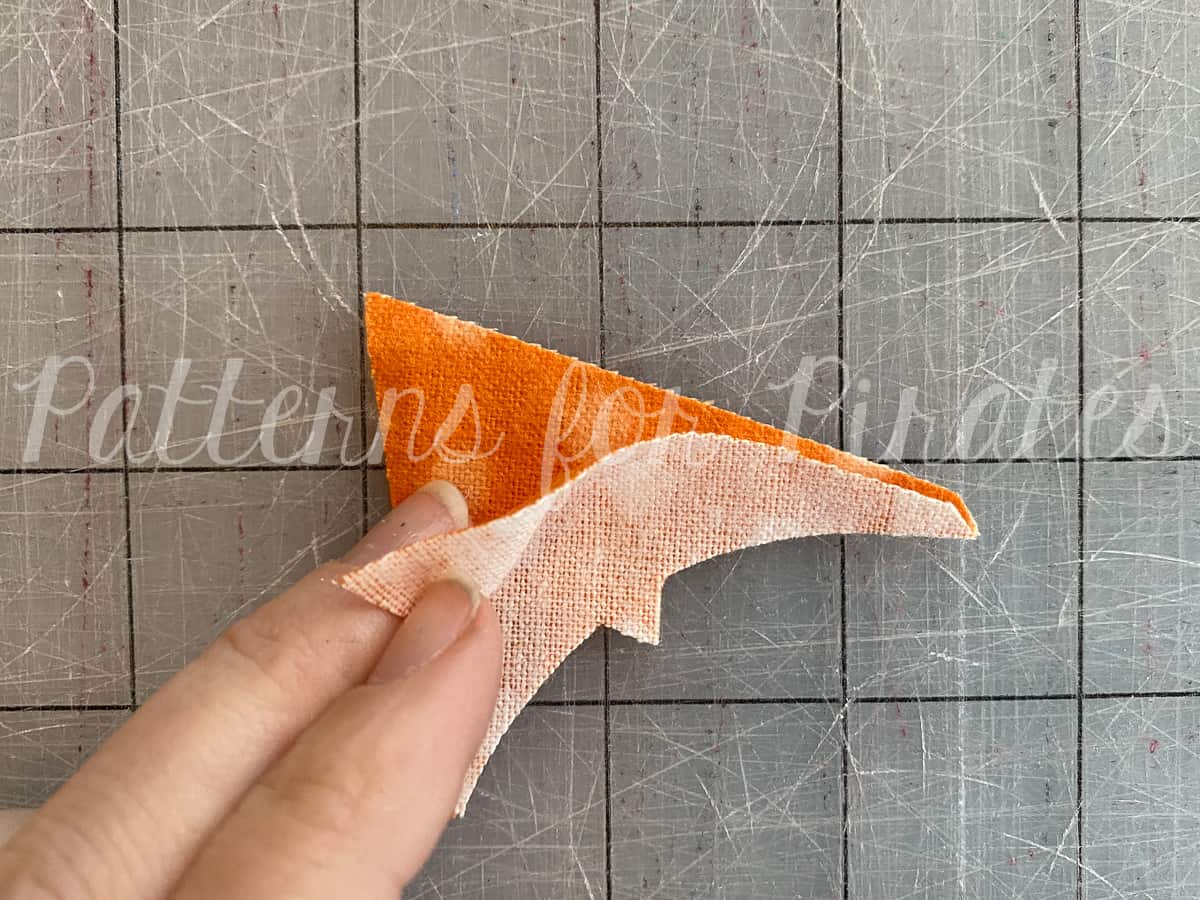
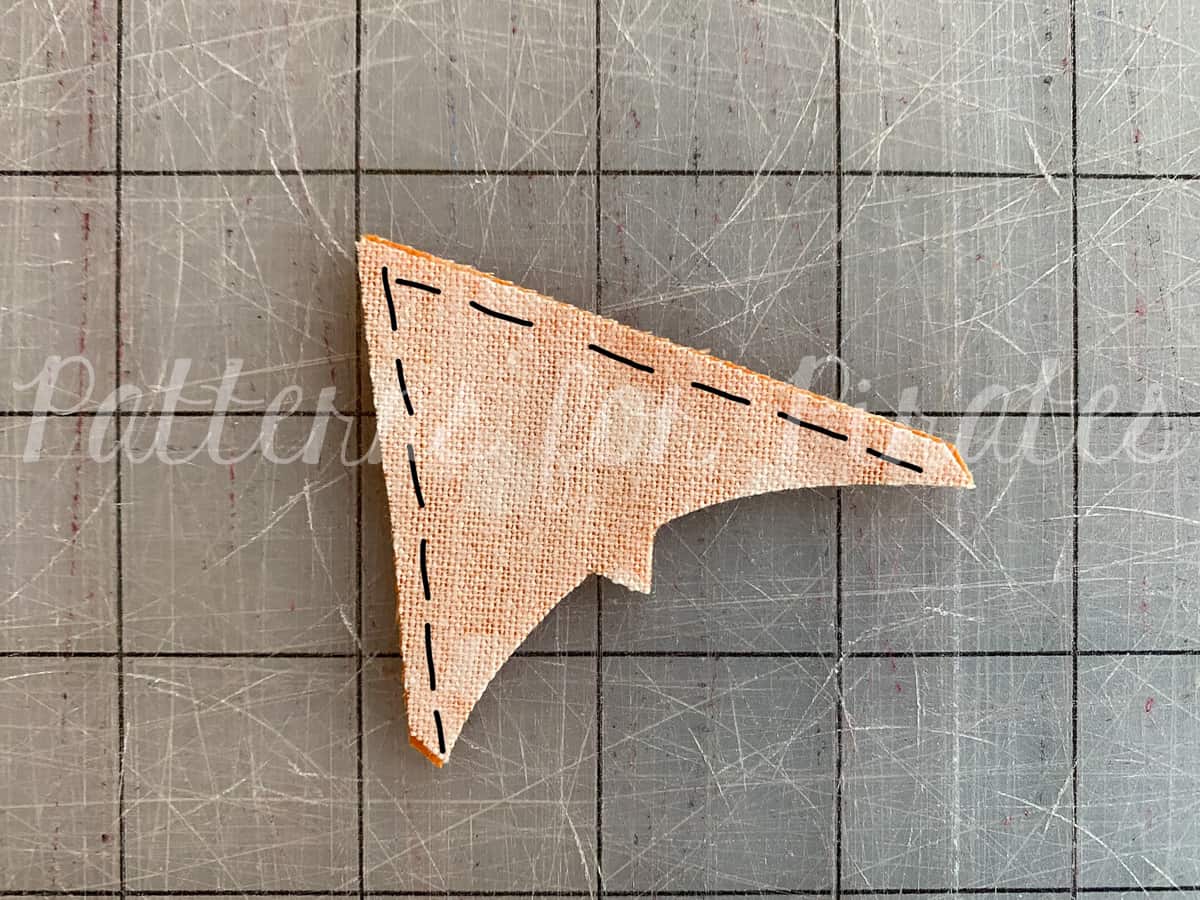
  • For Fox/Bear options: Place two ear pieces, right sides together.

  • Sew along outer edge(s).

  • Clip seam allowances and turn ears right sides out.  Press.  Topstitch if desired.  *repeat with second ear.

  • For Bunny option: Place two ear pieces, right sides together.

  • Sew along outer curved edges.

  • Clip seam allowances and turn ears right sides out.  Press.  Topstitch if desired.

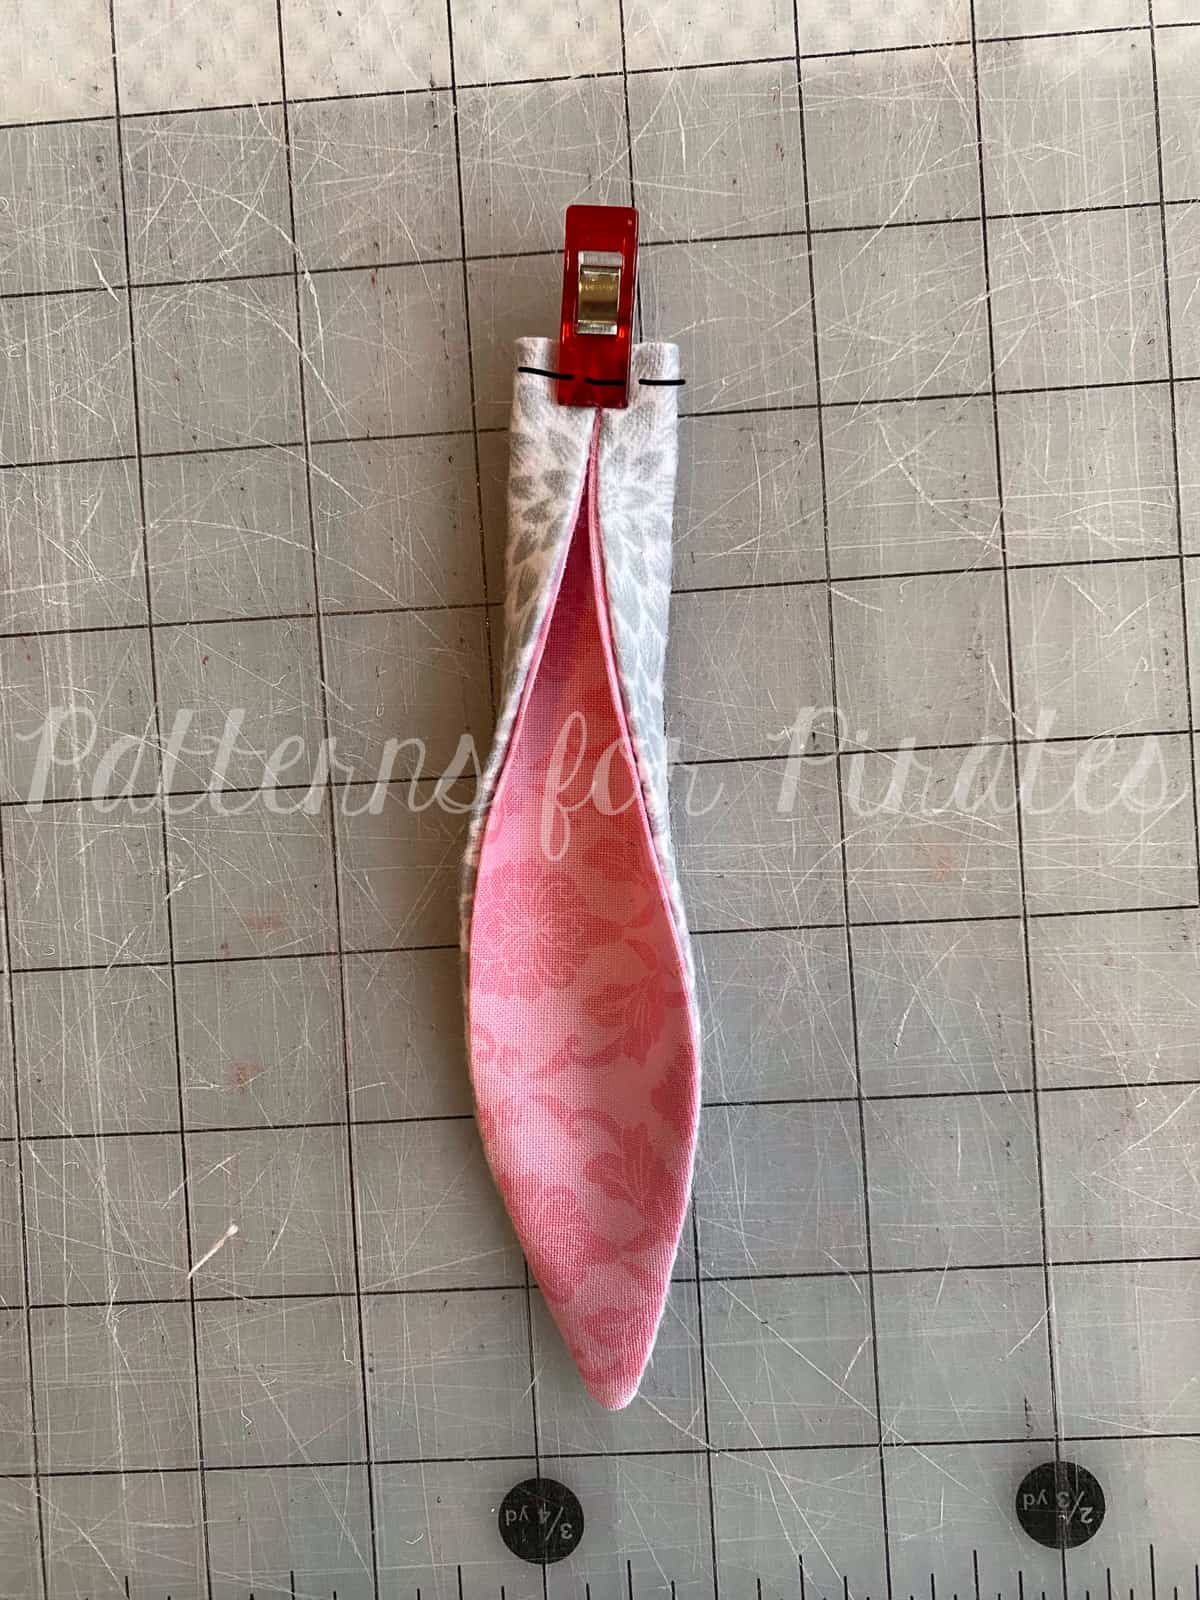
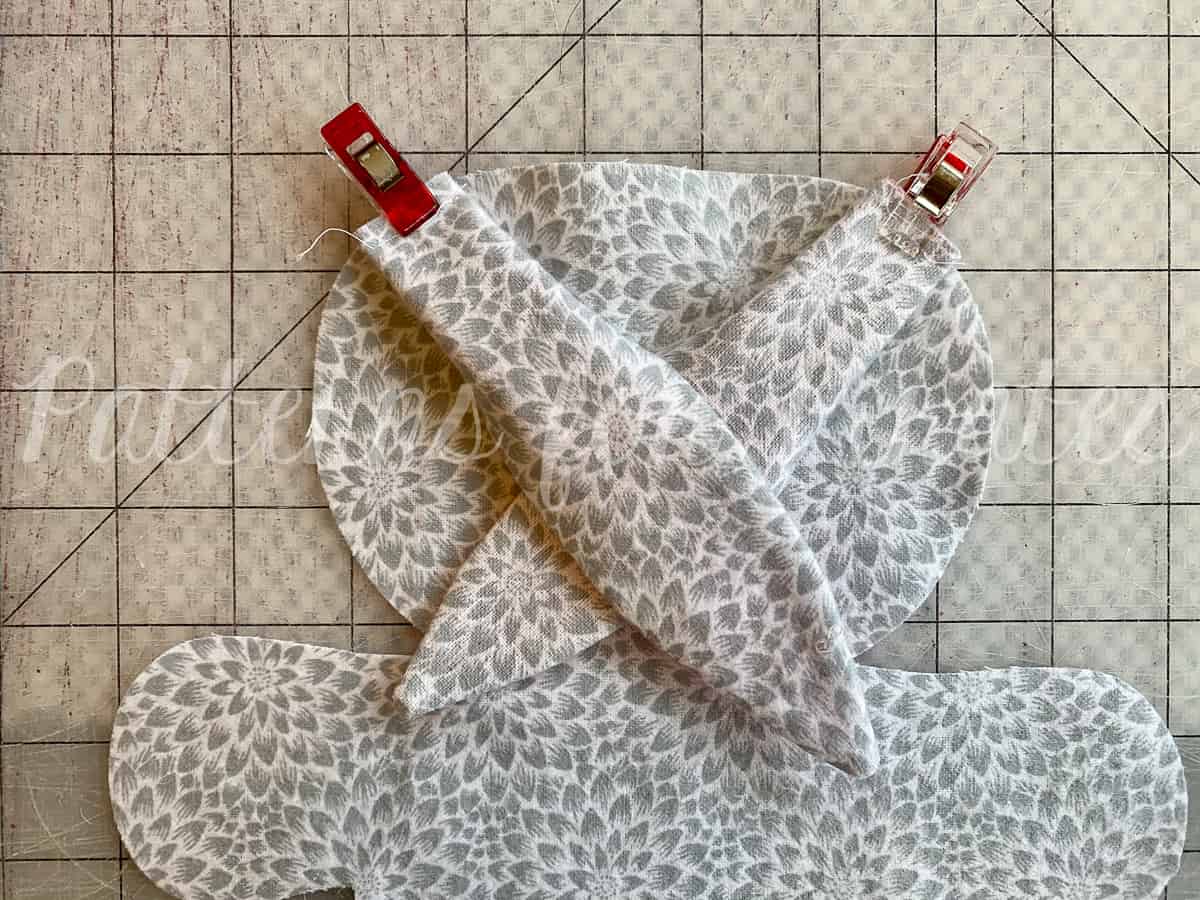
  • Fold along the top, raw edge, meeting the corners together.  Clip or baste top edge in place.  Repeat with other ear.

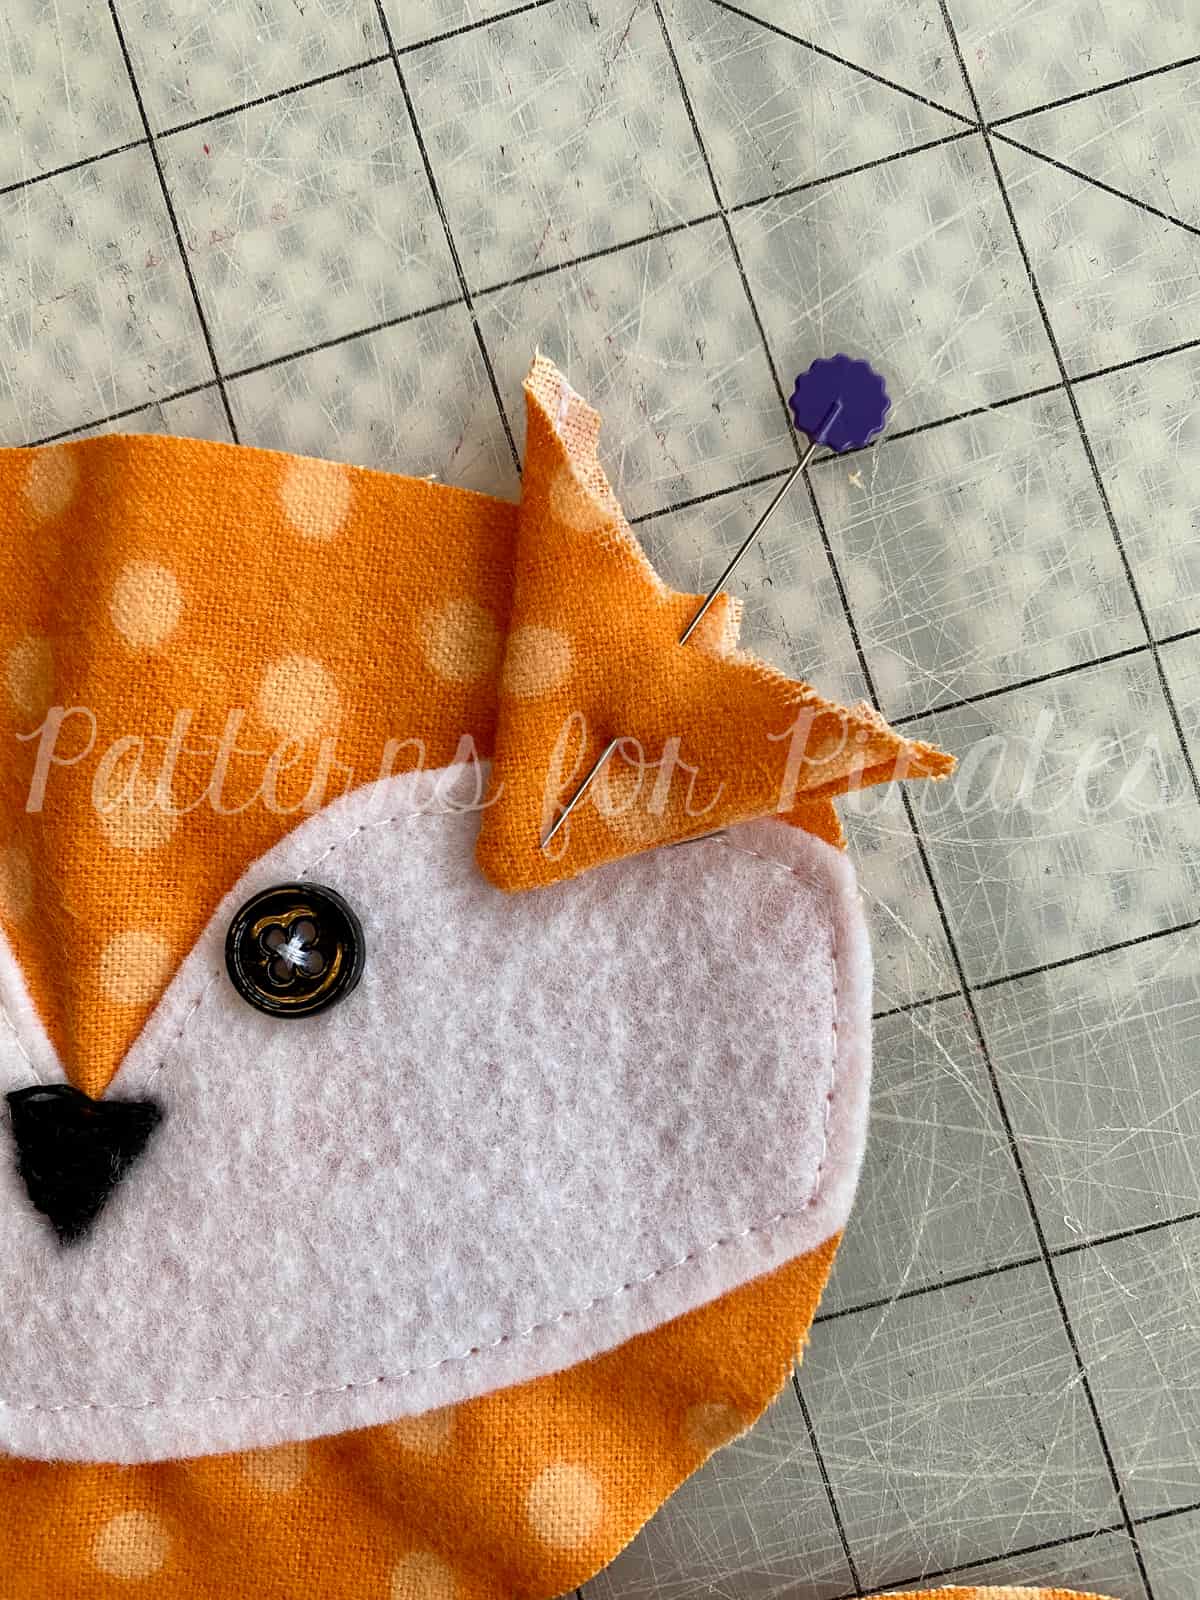
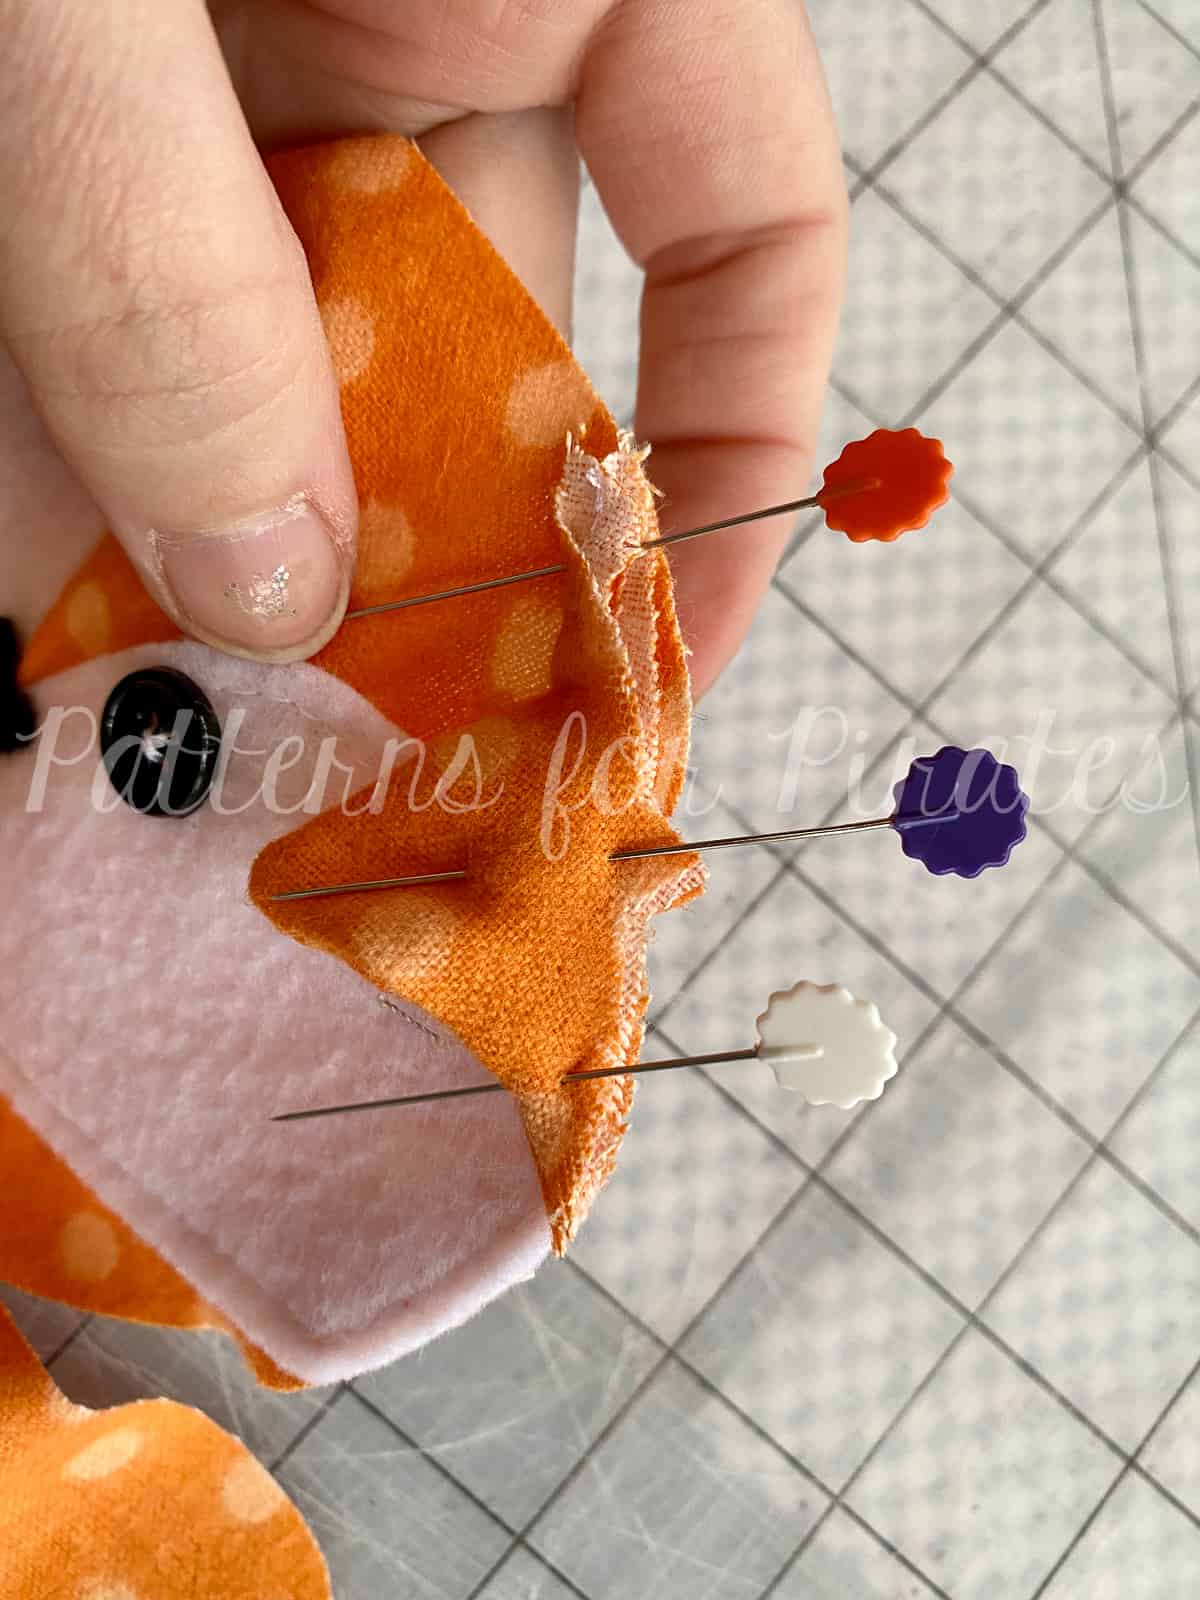
  • For all options: With right sides together, align ears using the markings on the pattern pieces.

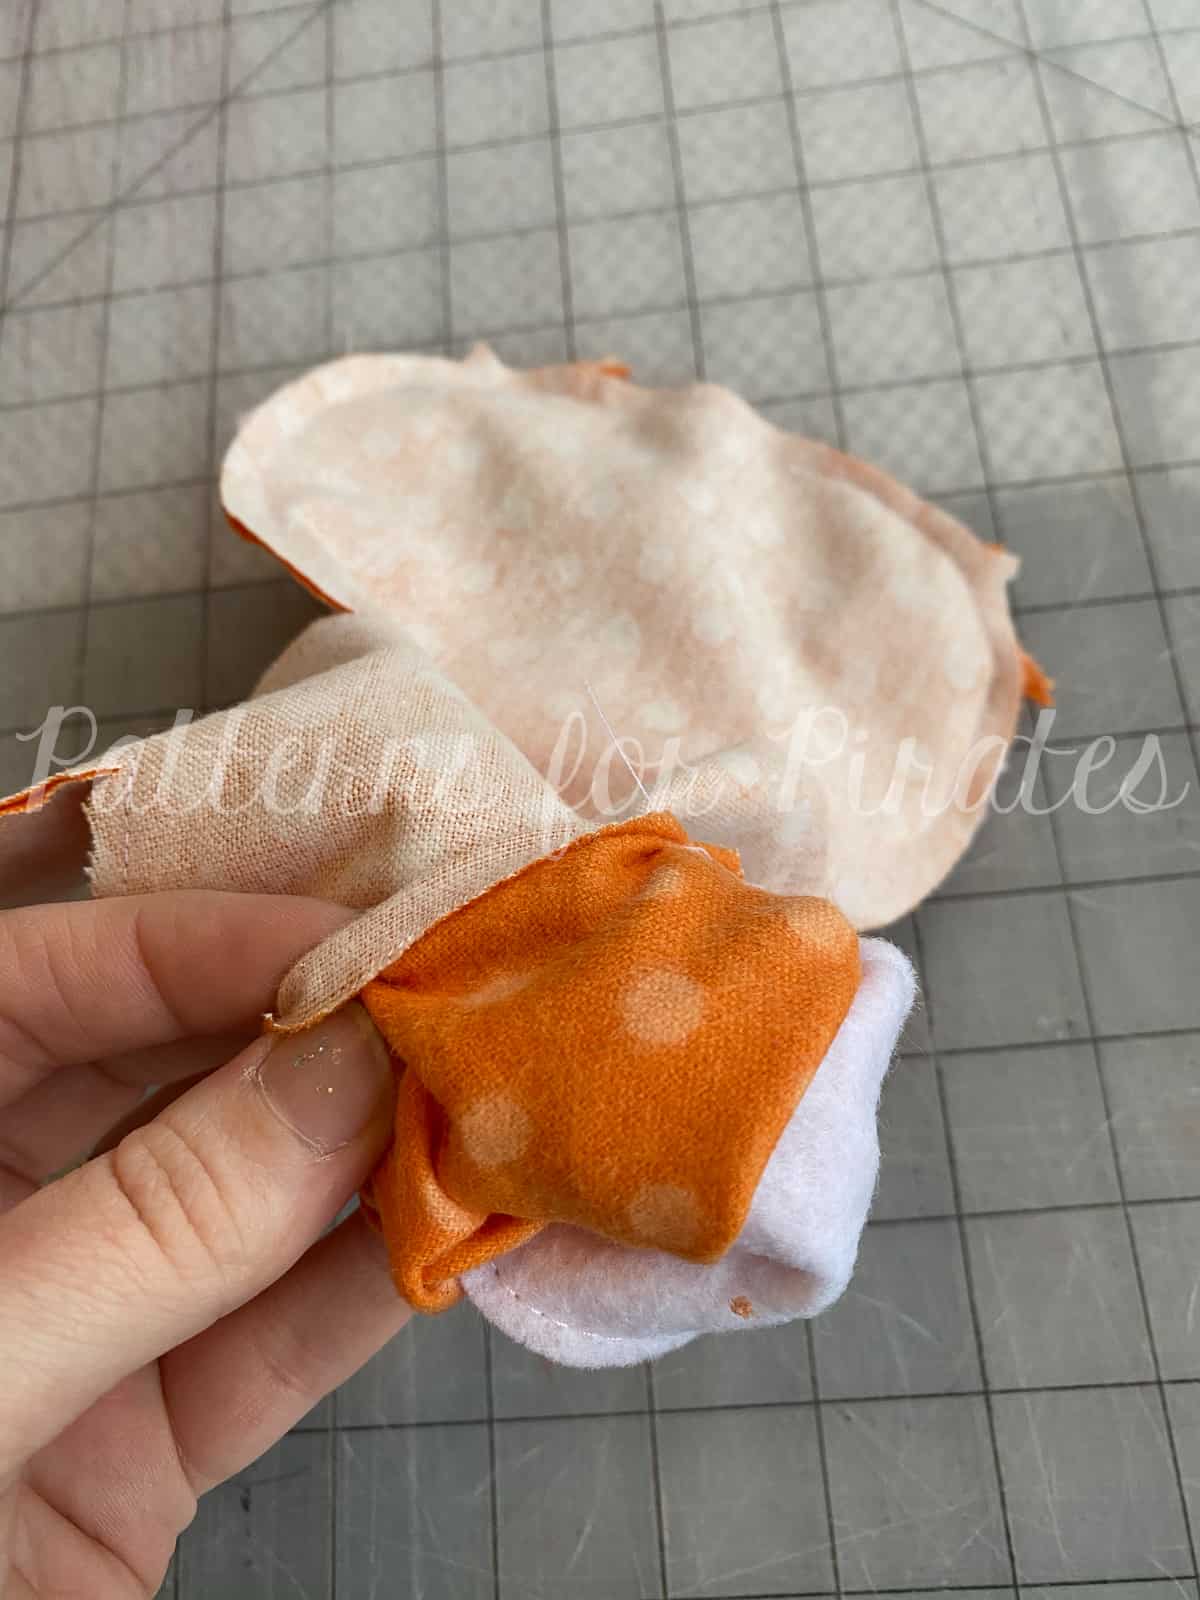
**Note: The bear and fox ears will need to be eased in along the curved edges.  While the bunny ears will simply be centered against the marking on the body piece, be sure to tuck them out of the way while sewing so you don’t catch them in the next steps.

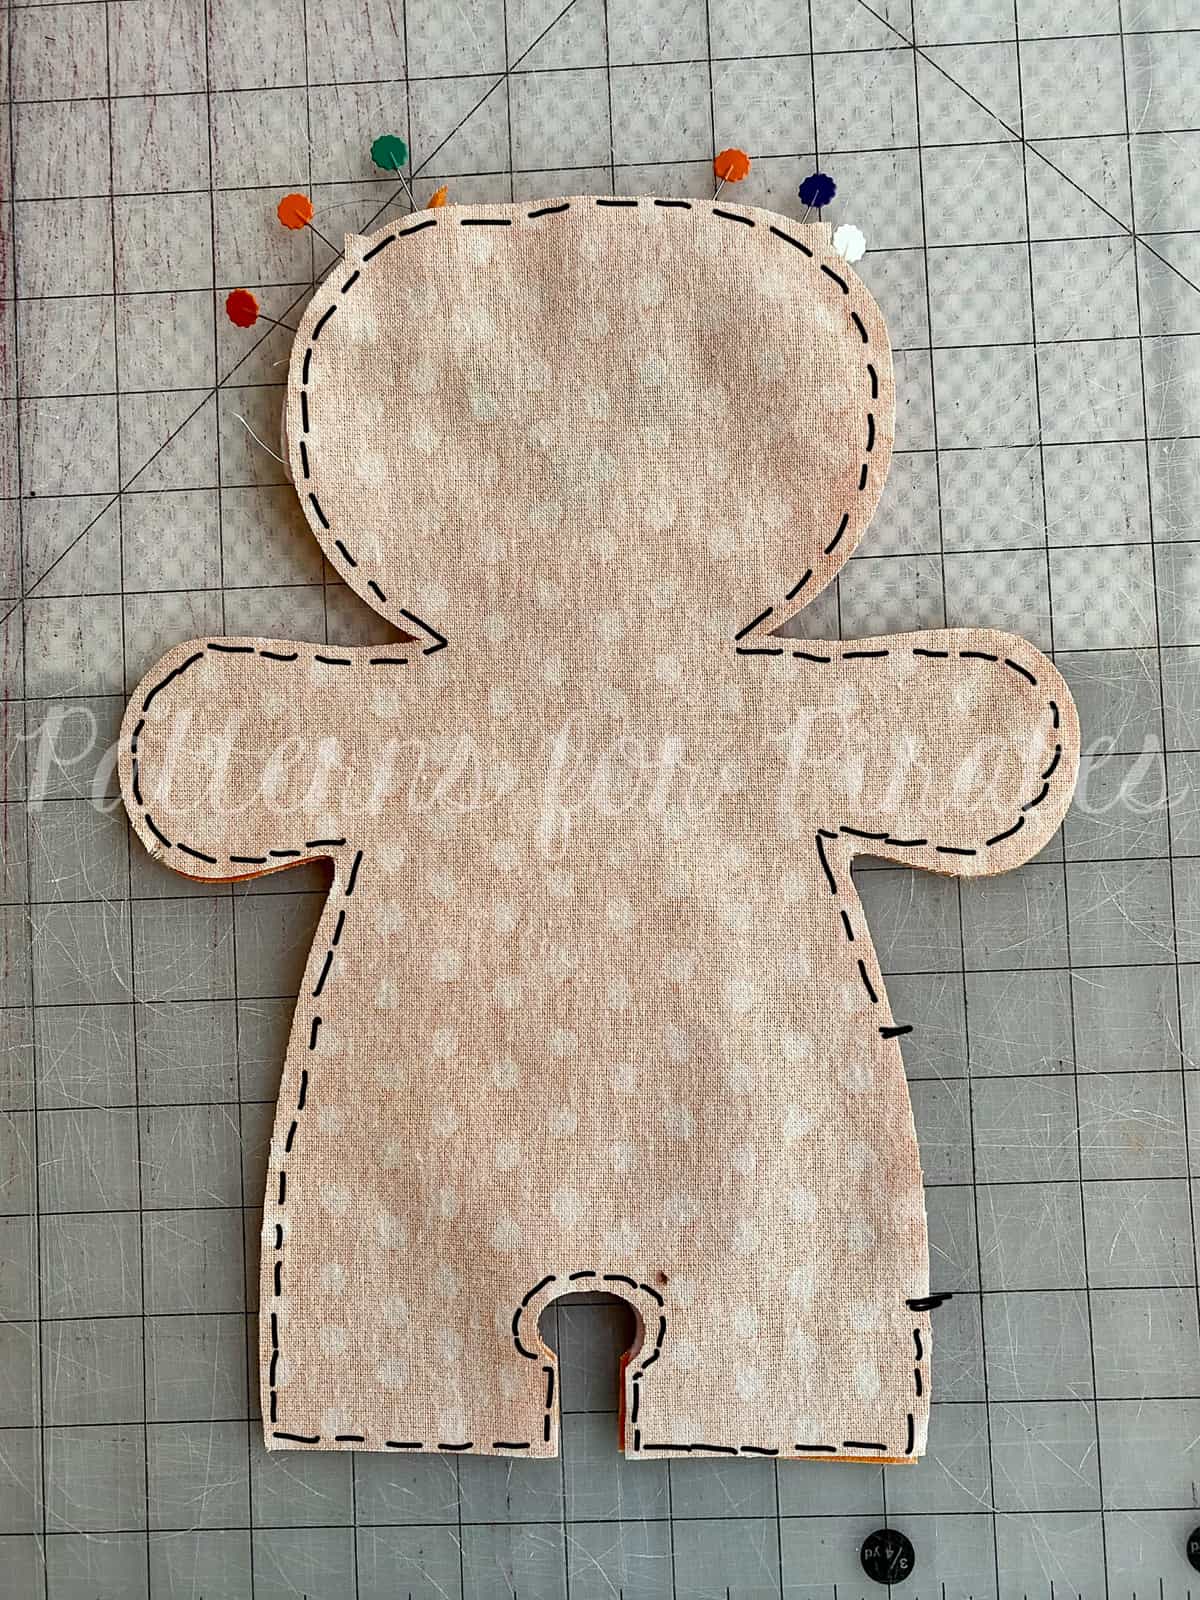
  • With the front body piece facing upwards, place the back body piece on top (right sides together).

  • Sew along entire outer edge, leaving only about a 3″ opening along one of the sides for turning.

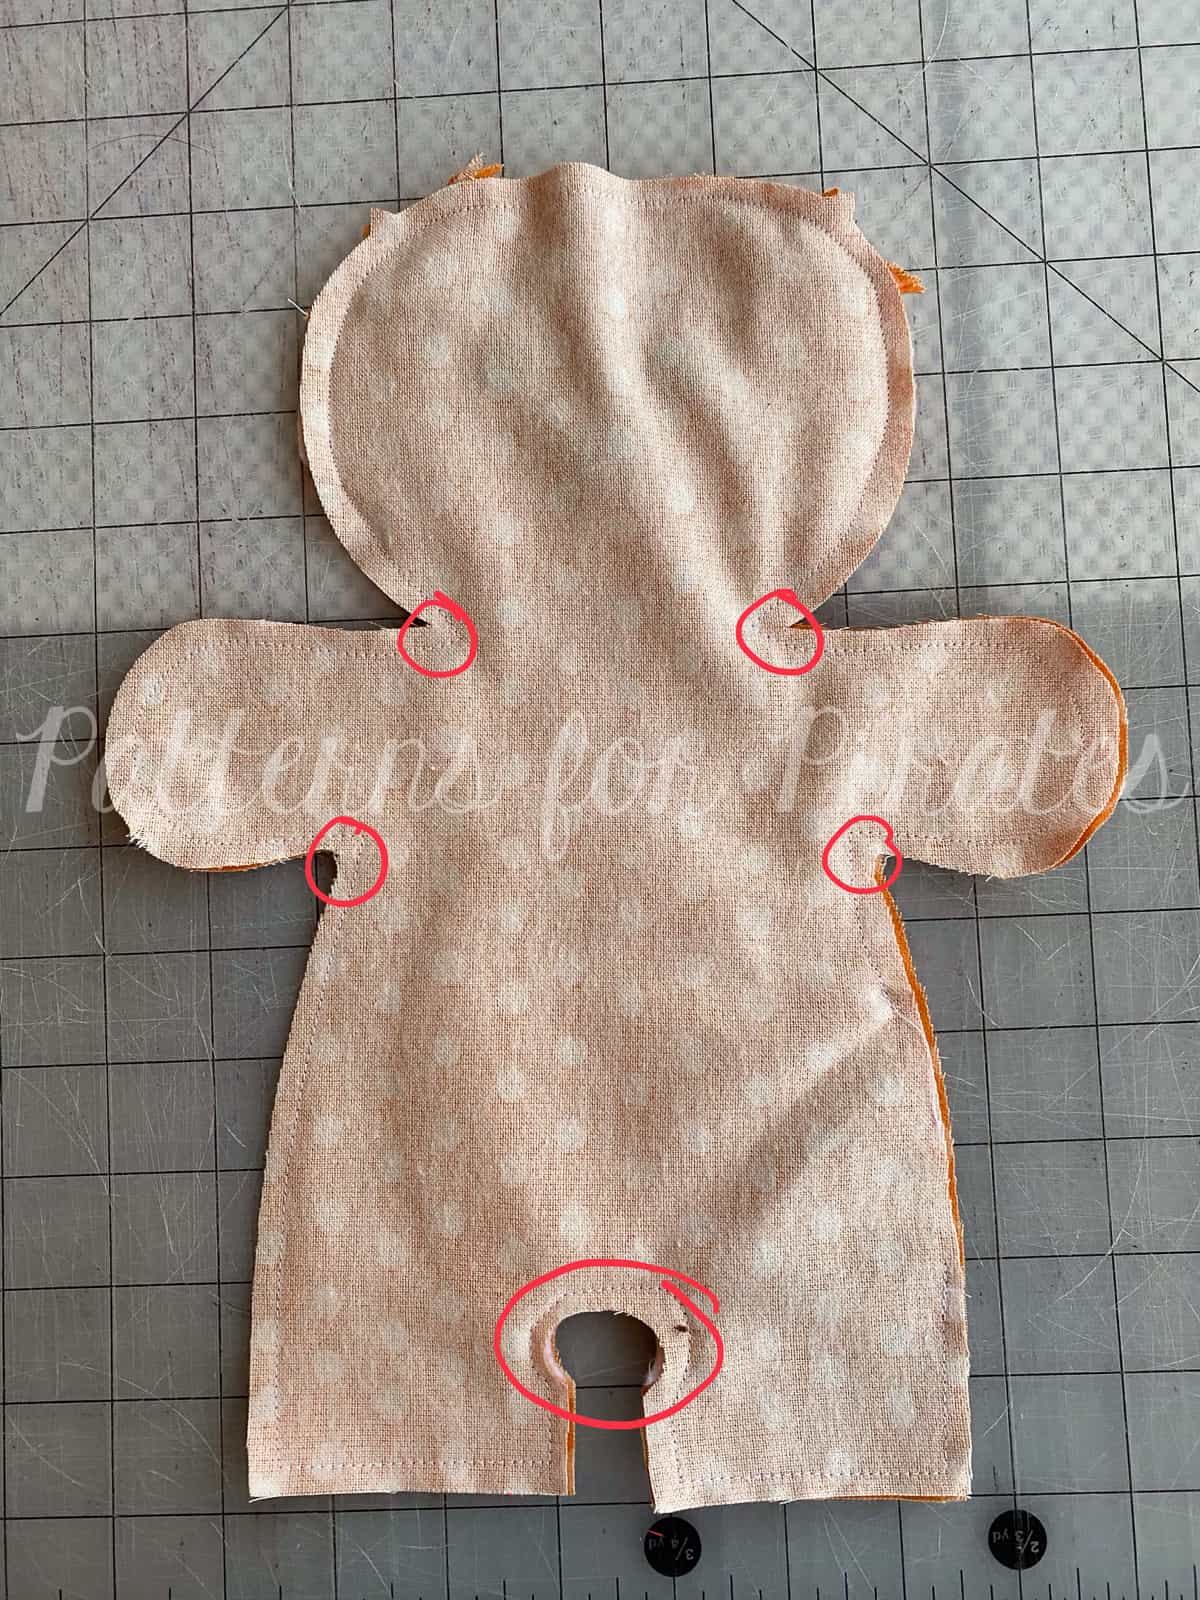
  • Clip corners and seam allowances before turning.  It is recommended to use pinking shears around all of the curved edges for a cleaner look once turned and stuffed.  I circled the most important parts to make sure to clip, in order to avoid wrinkles or pulling at the “joints” of the arms and legs.

  • Turn your Plushie Pal right sides out, through the opening you left in the previous step.

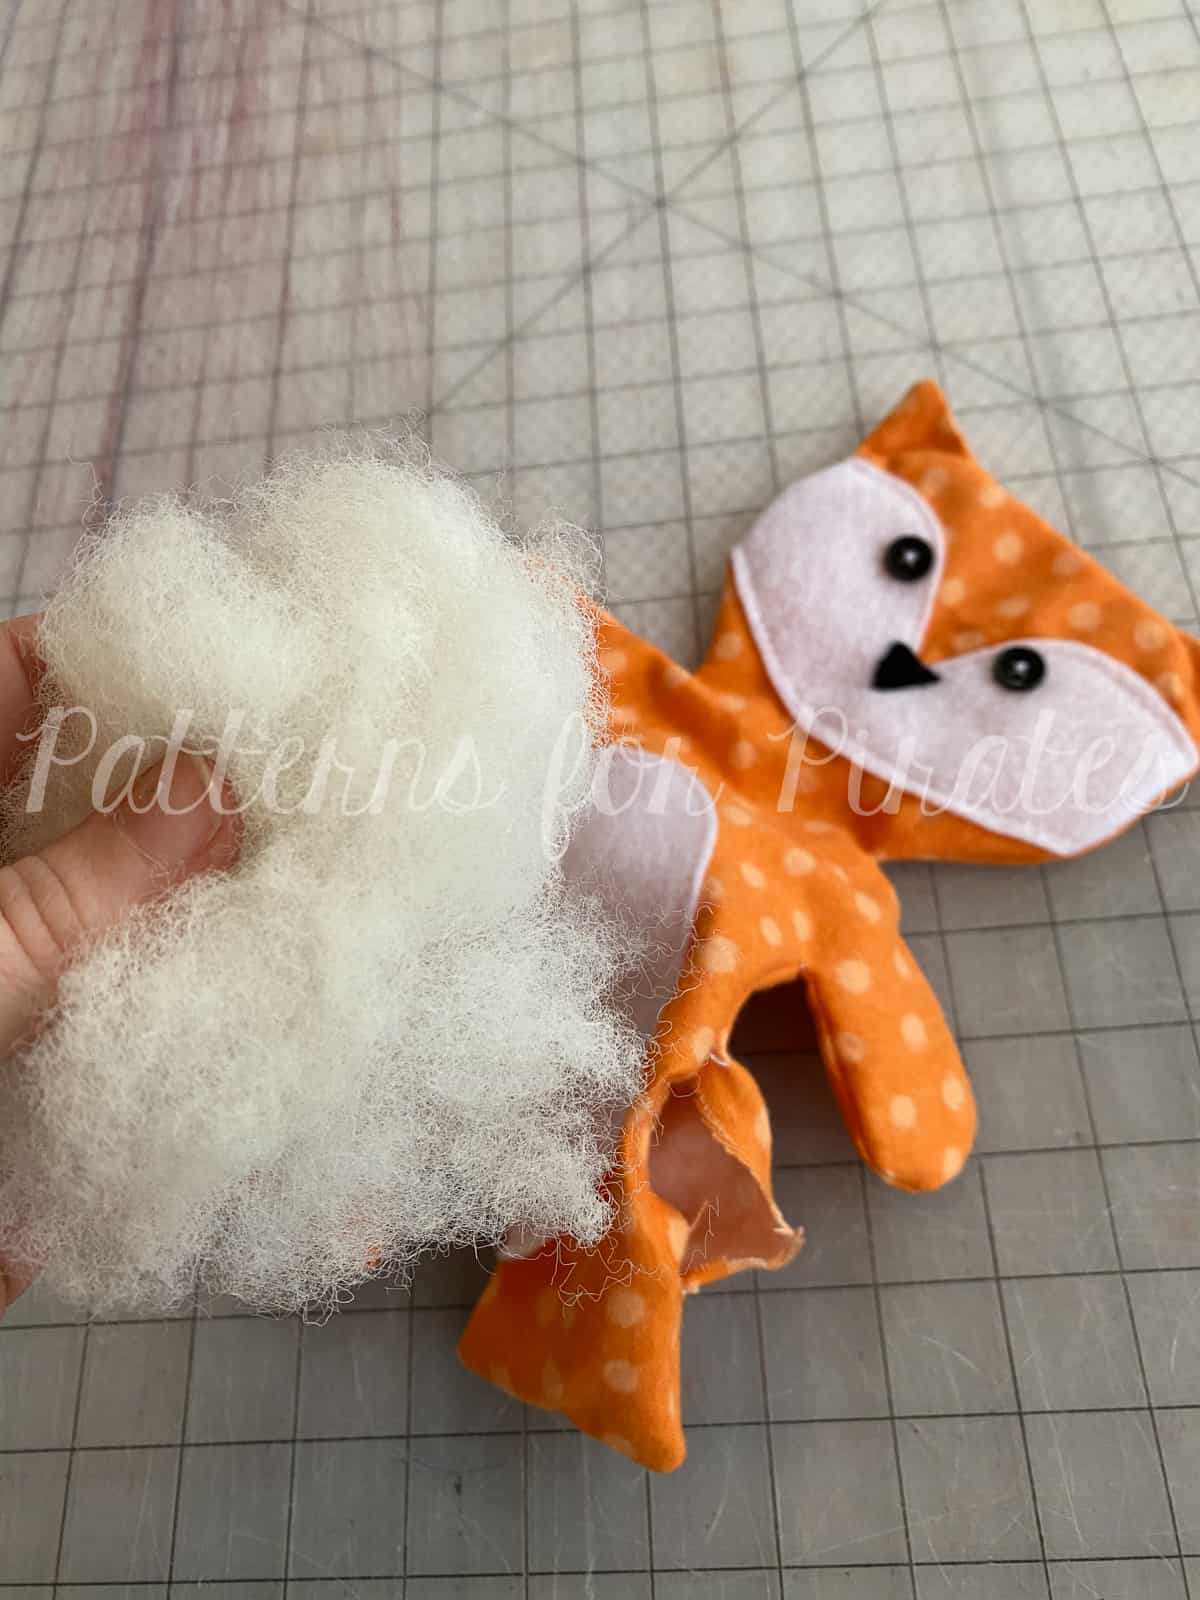
  • Using fiberfil, stuff your Pal to your liking.  Be careful not to overstuff.  And using a tool like a chopstick / bodkin is incredibly helpful for filling the arms and legs and getting the stuffing into the corners easily.

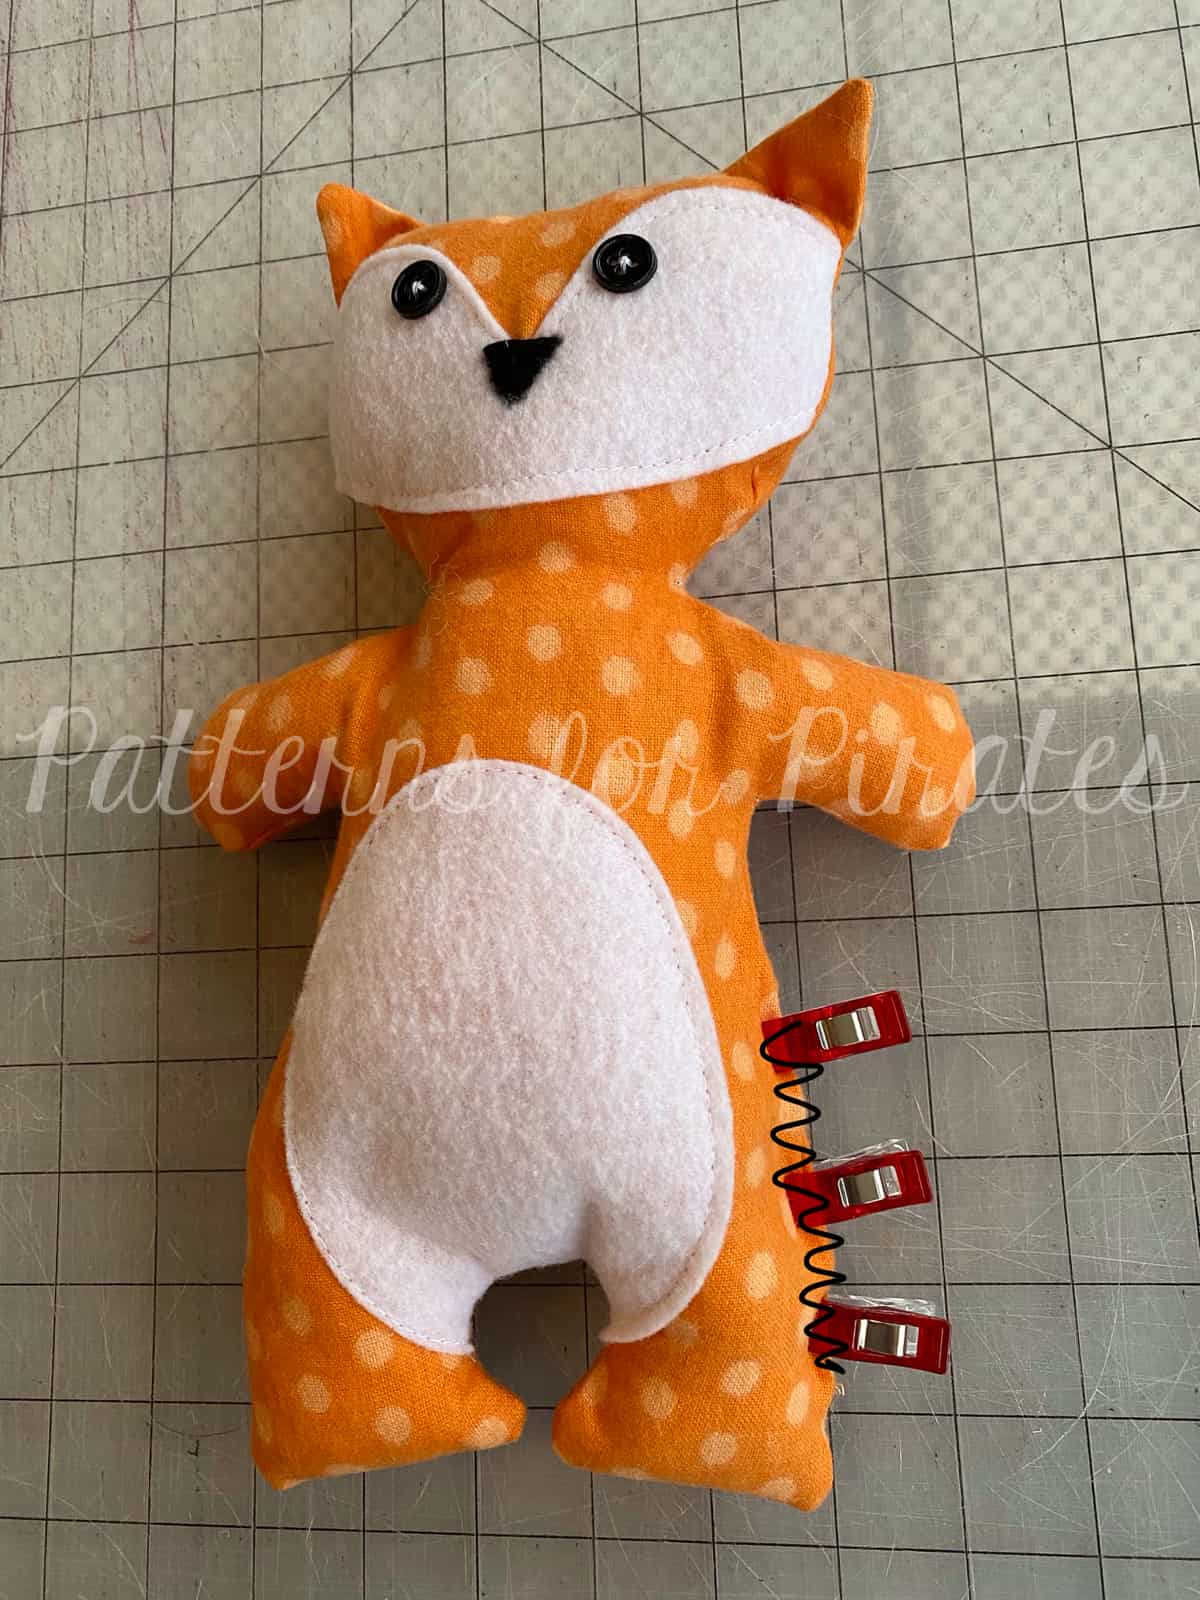
  • Tuck your seam allowance back into the opening.  Pin or clip.  And using your favorite method, stitch it shut.

You’re all done!  Be careful — once you make one, you’re going to want to make ten more!  (Ask me how I know…..)  They’re just so darn cute!

As always, we love when you share what you’ve made with us.  Head over to the Patterns for Pirates Facebook group and show off the fabulous Plushie Pals that you’ve managed to make from our freebie pattern!  Happy Valentine’s Day, friends!

Filed Under: Free Pattern, Pattern Release 6 Comments

2019 Holiday Freebies :: Hooded Blanket

December 4, 2019

Alas, we have arrived to the final day of the 2019 Holiday Freebies.  But do not fret, my friends.  Because what we’ve got in store for you today is super fun!

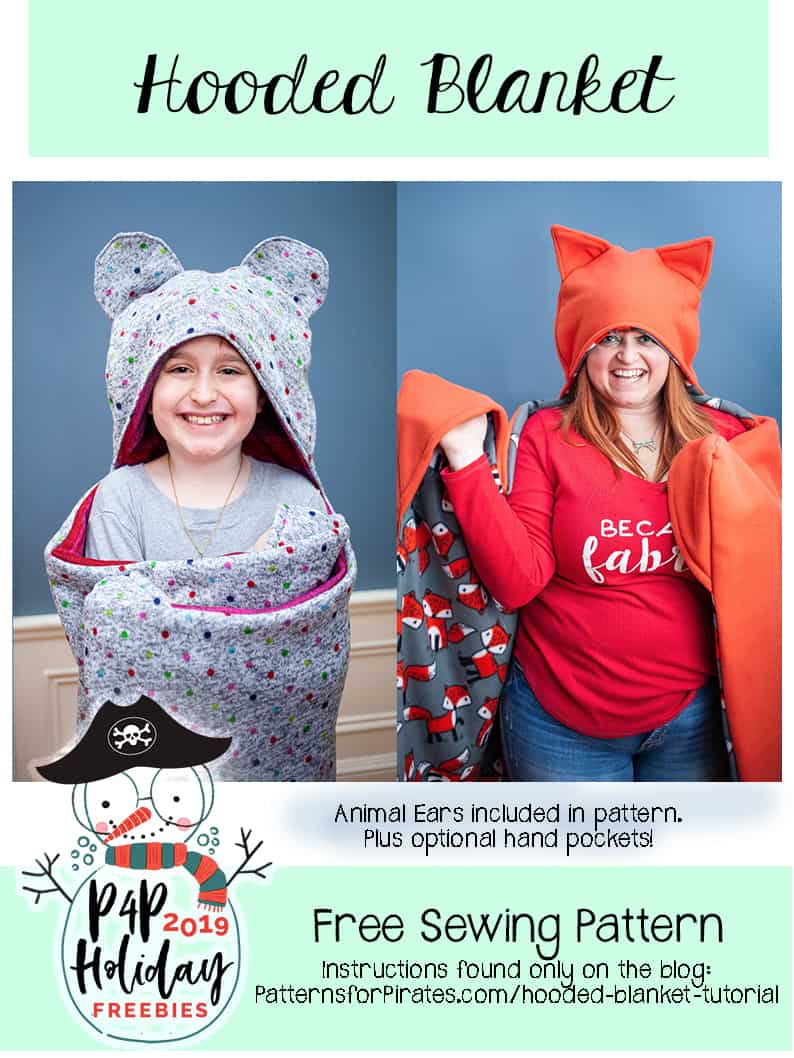
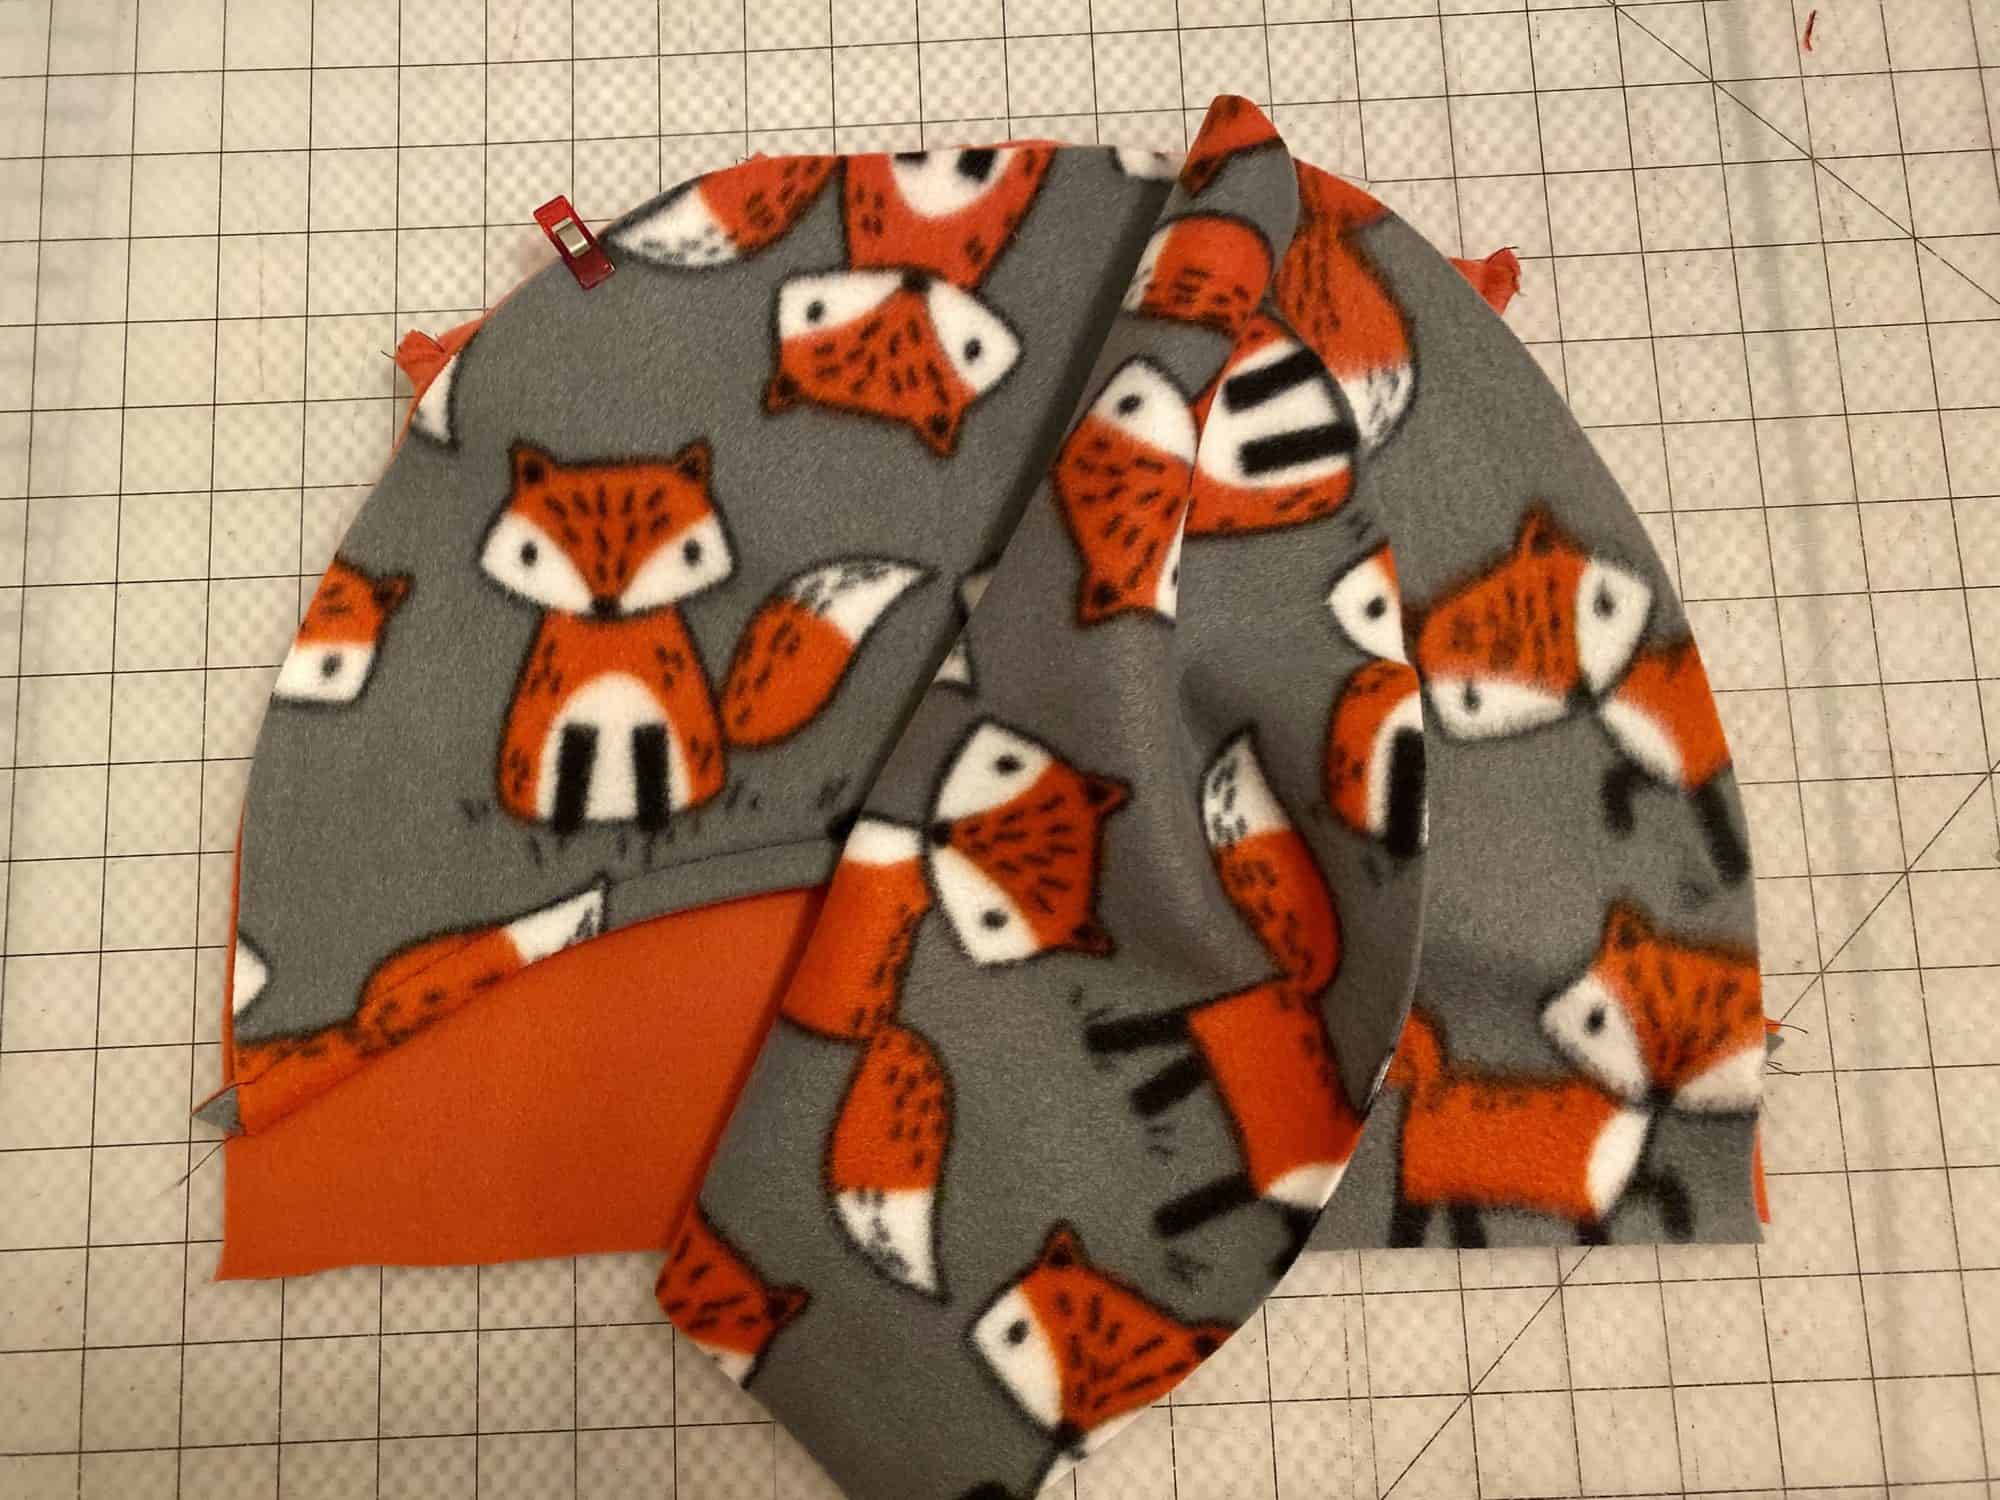
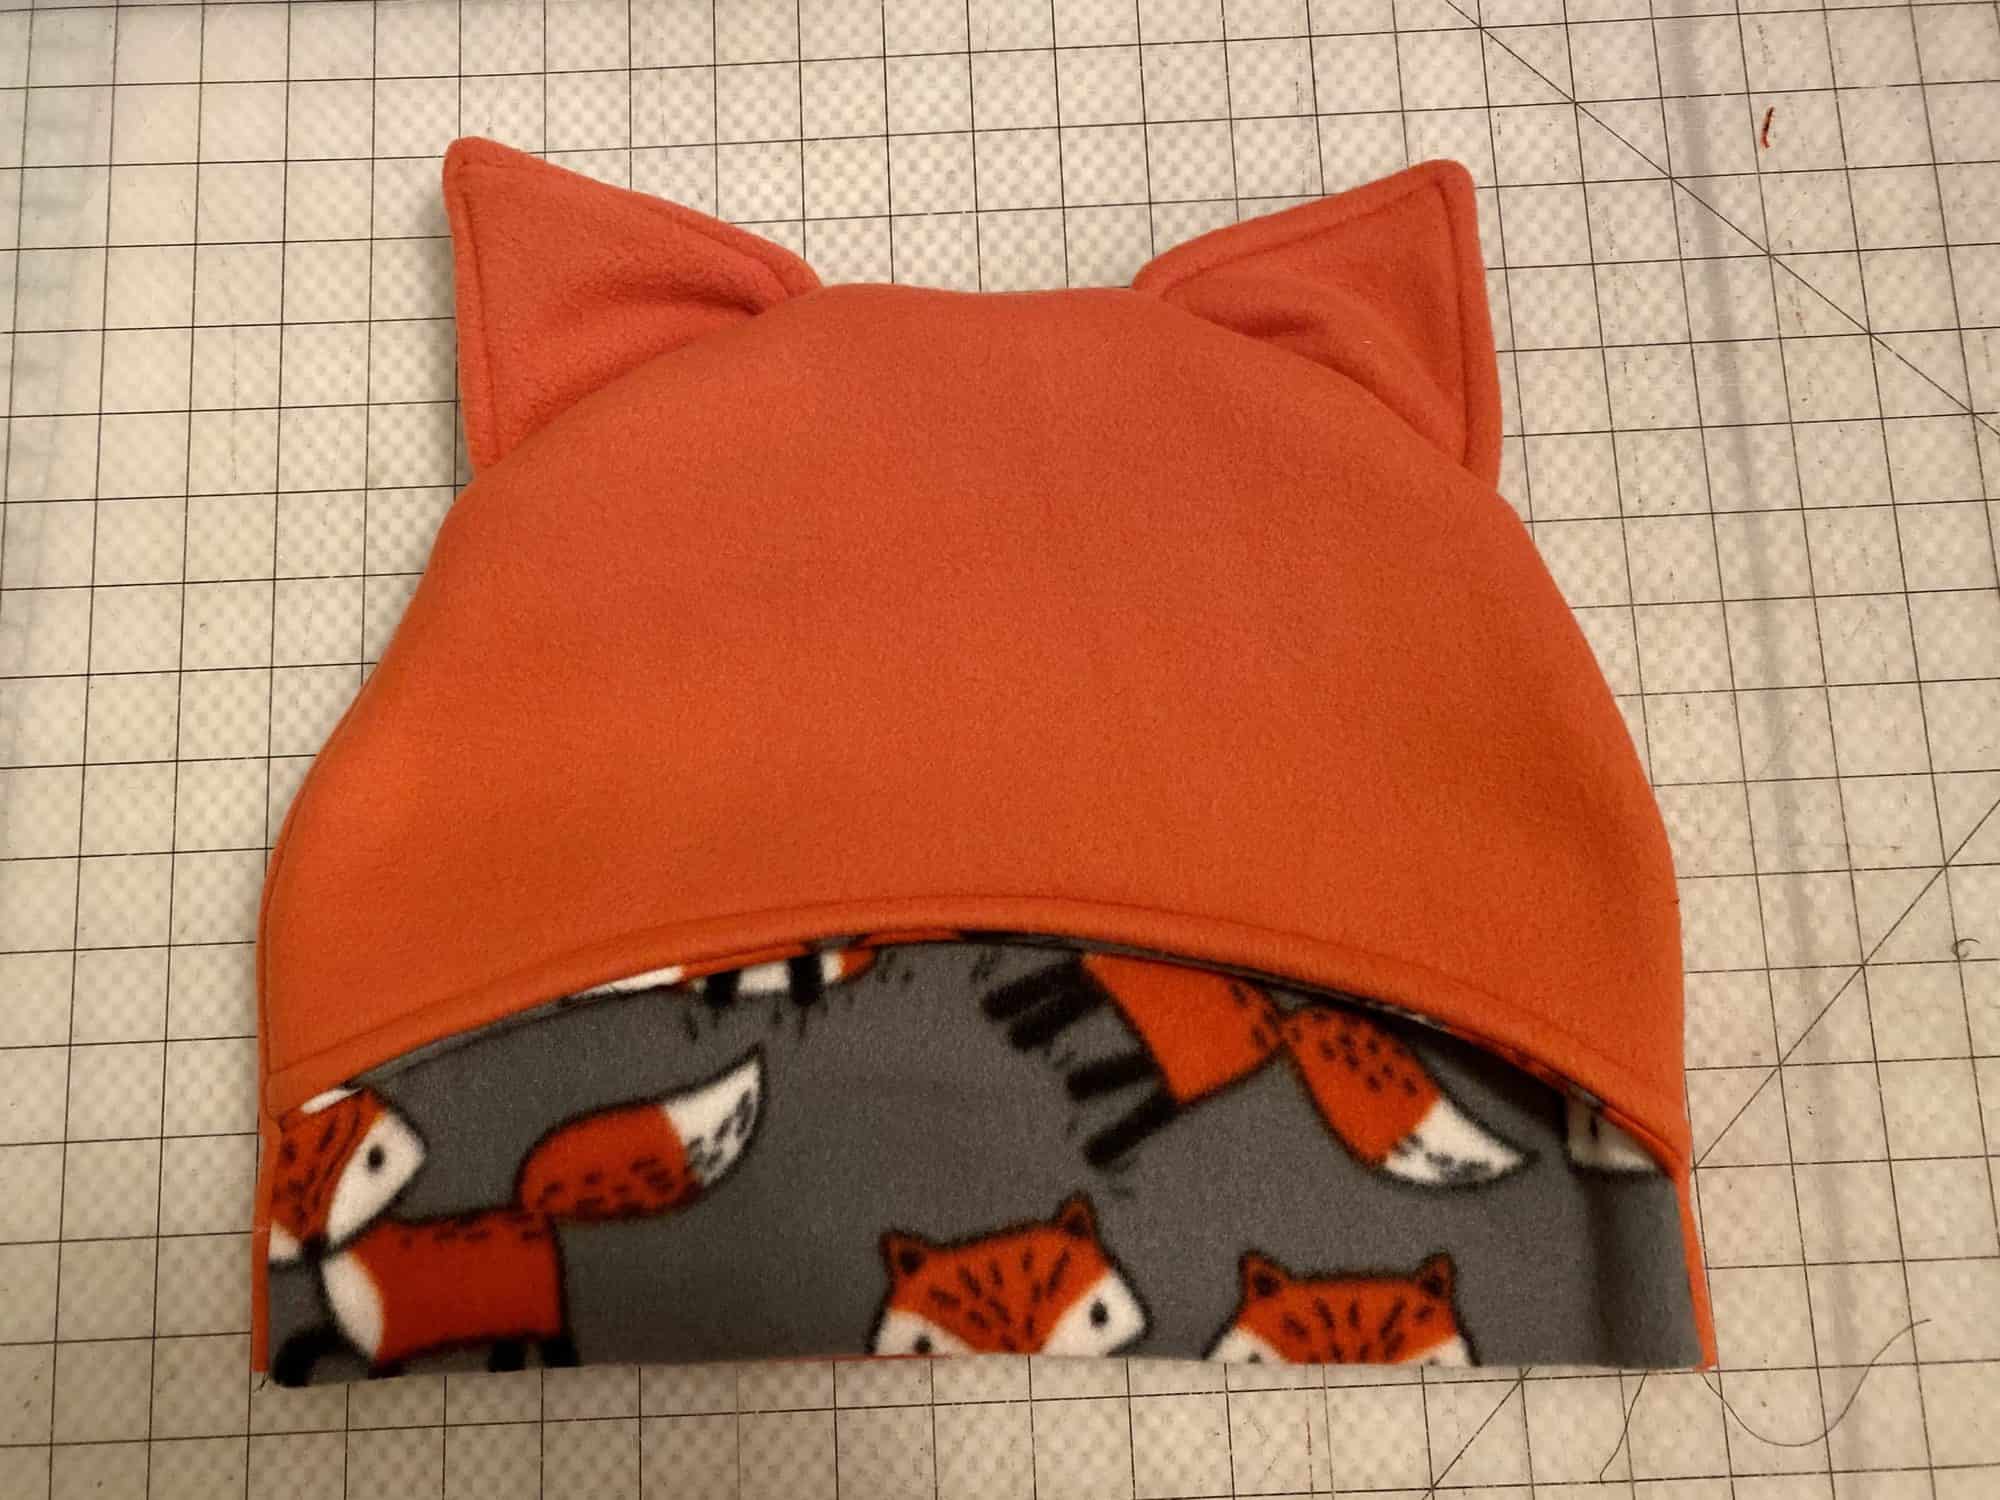
Blankets are a hot commodity in our household.  At least between my son and I.  We love to snuggle on the couch under all the cozy blankets that we can, while catching up on our favorite Netflix movie or series.  I mean, who doesn’t?  We upped the blanket coziness a little by adding a hood.  And some hand pockets.  And then gave them some ears so we could be cute and cuddly at the same time.  It’s really the best thing ever!

Grab your “HOODED BLANKET” pattern pieces here!

Fabric Requirements (Most fabrics work great for this! My favorites are fleece and minky.):

  • 1.5 yards of lining
  • 1.5 yards main fabric

For blanket pieces, you will need 1 main + 1 lining fabric 54″w x 40″t
The great thing about this pattern is that you can adjust the height and width of your blanket to your own liking!  If you want it larger or smaller….go for it!  Just remember that you may need additional yardage if you do.

1. Hem long, angled edge of hand pockets by folding under 1/2″ (toward wrong side) and edge stitching.

2. Align at top two corners of blanket lining piece and baste in place. Both lining and hand pocket fabrics will be right sides facing up.

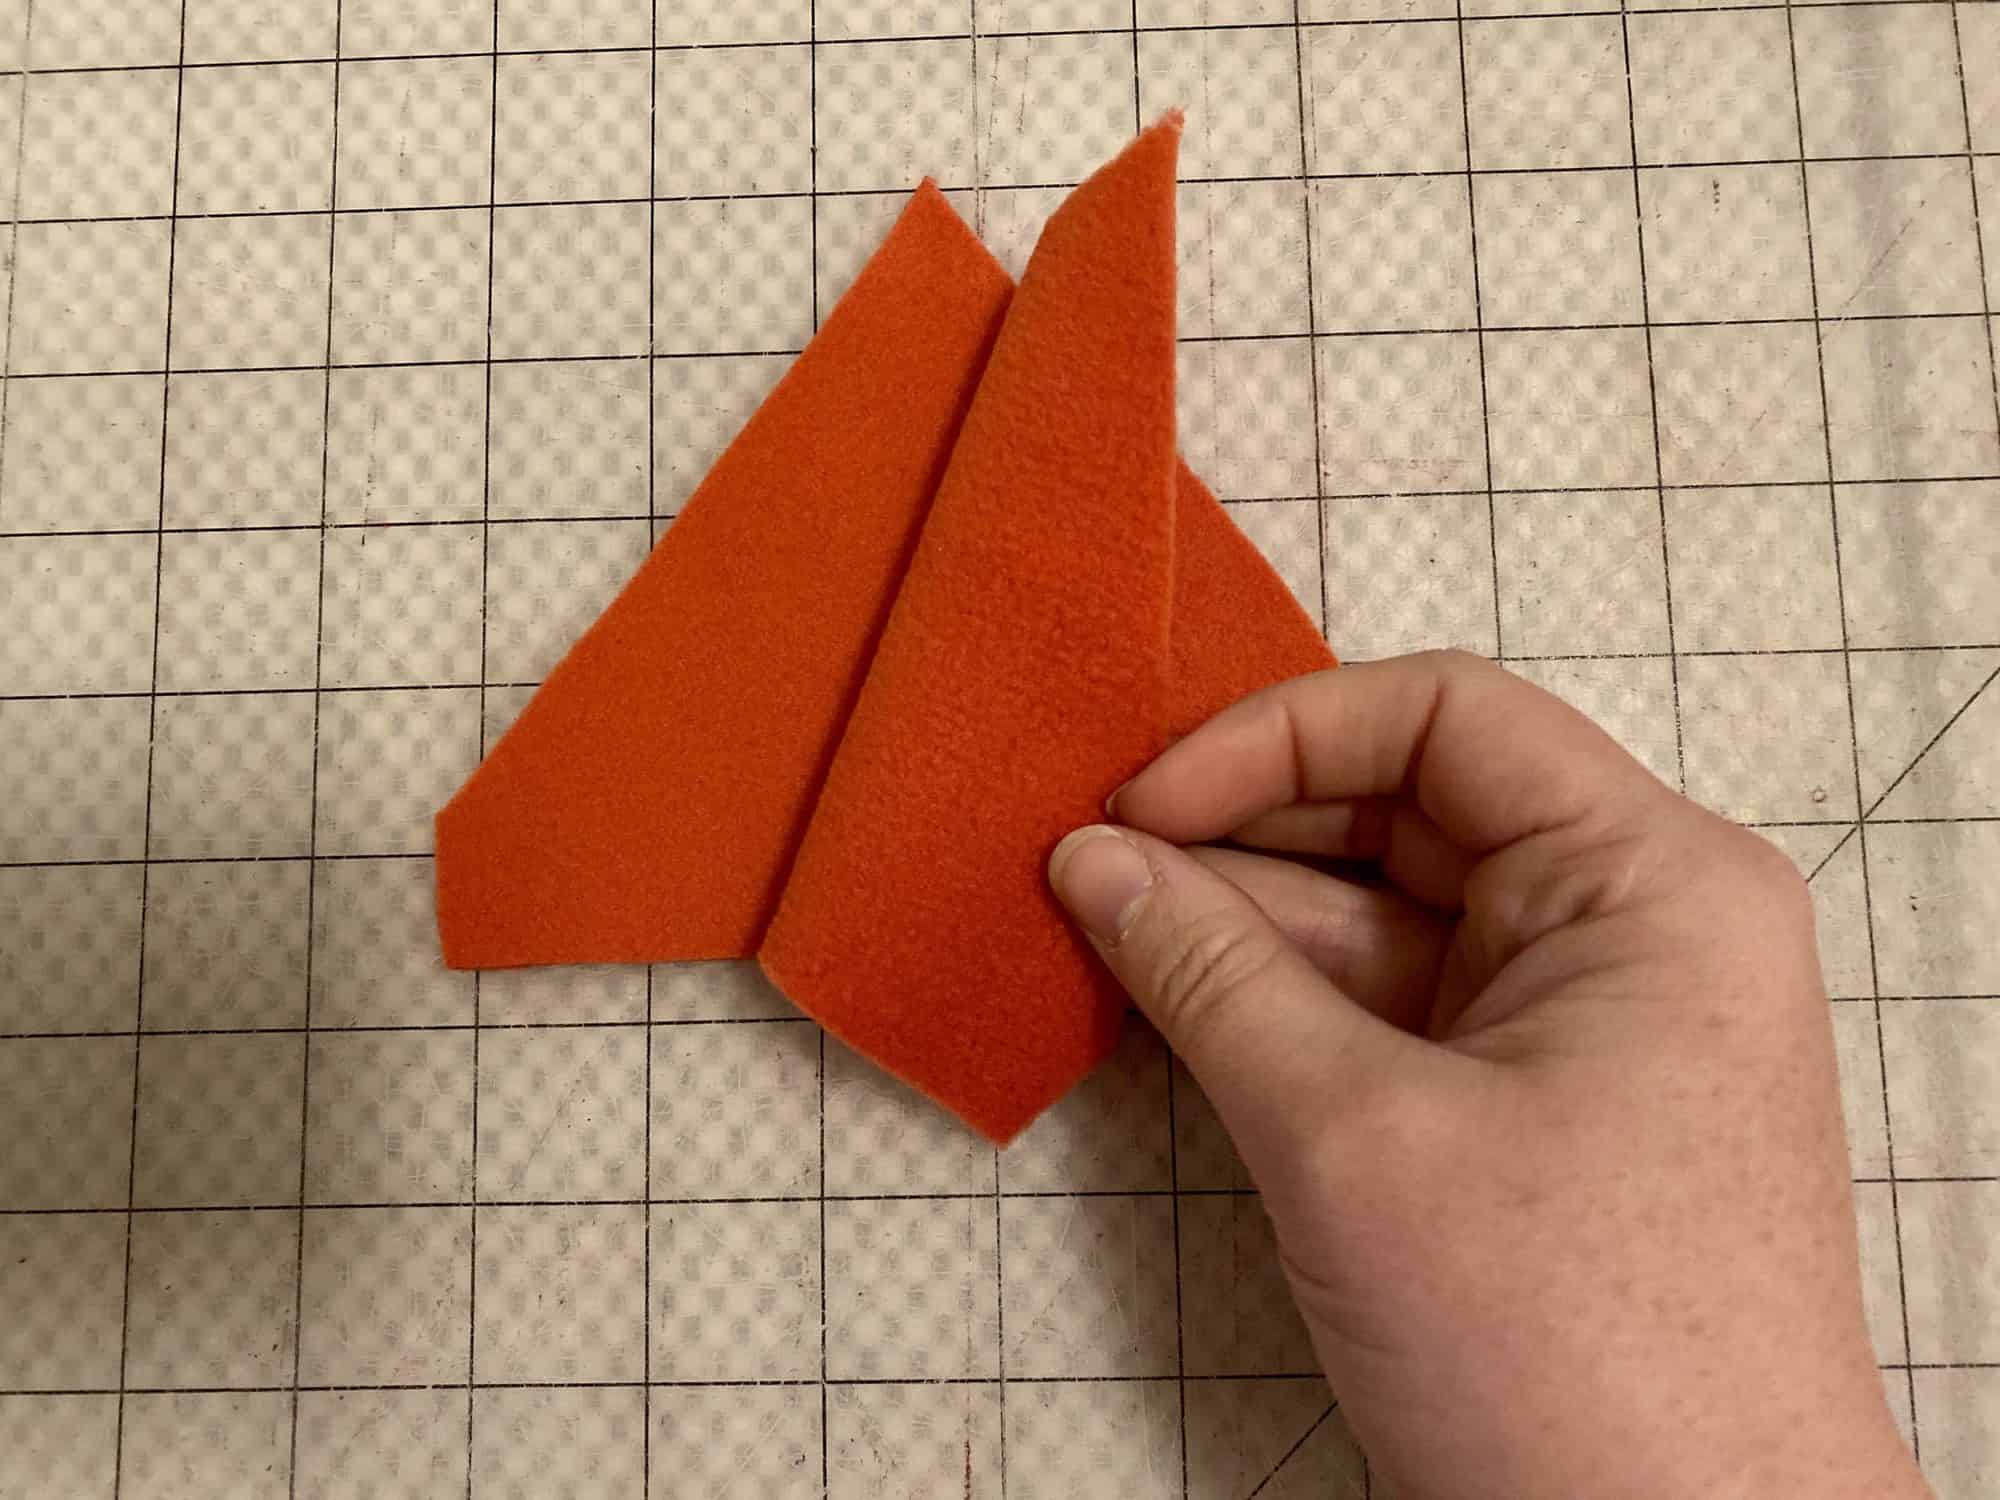
3. Optional ears: Sew ear pieces, right sides together, leaving bottom edge open. Repeat with other ear.  Turn right-sides-out and top stitch if desired.

4. Place front hood pieces, right sides together.  Stitch along bottom curve.

5.  Turn right side out.  Top stitch if desired.

6. Align ear notch to marked point on the hood front. Baste place. Repeat with second ear.

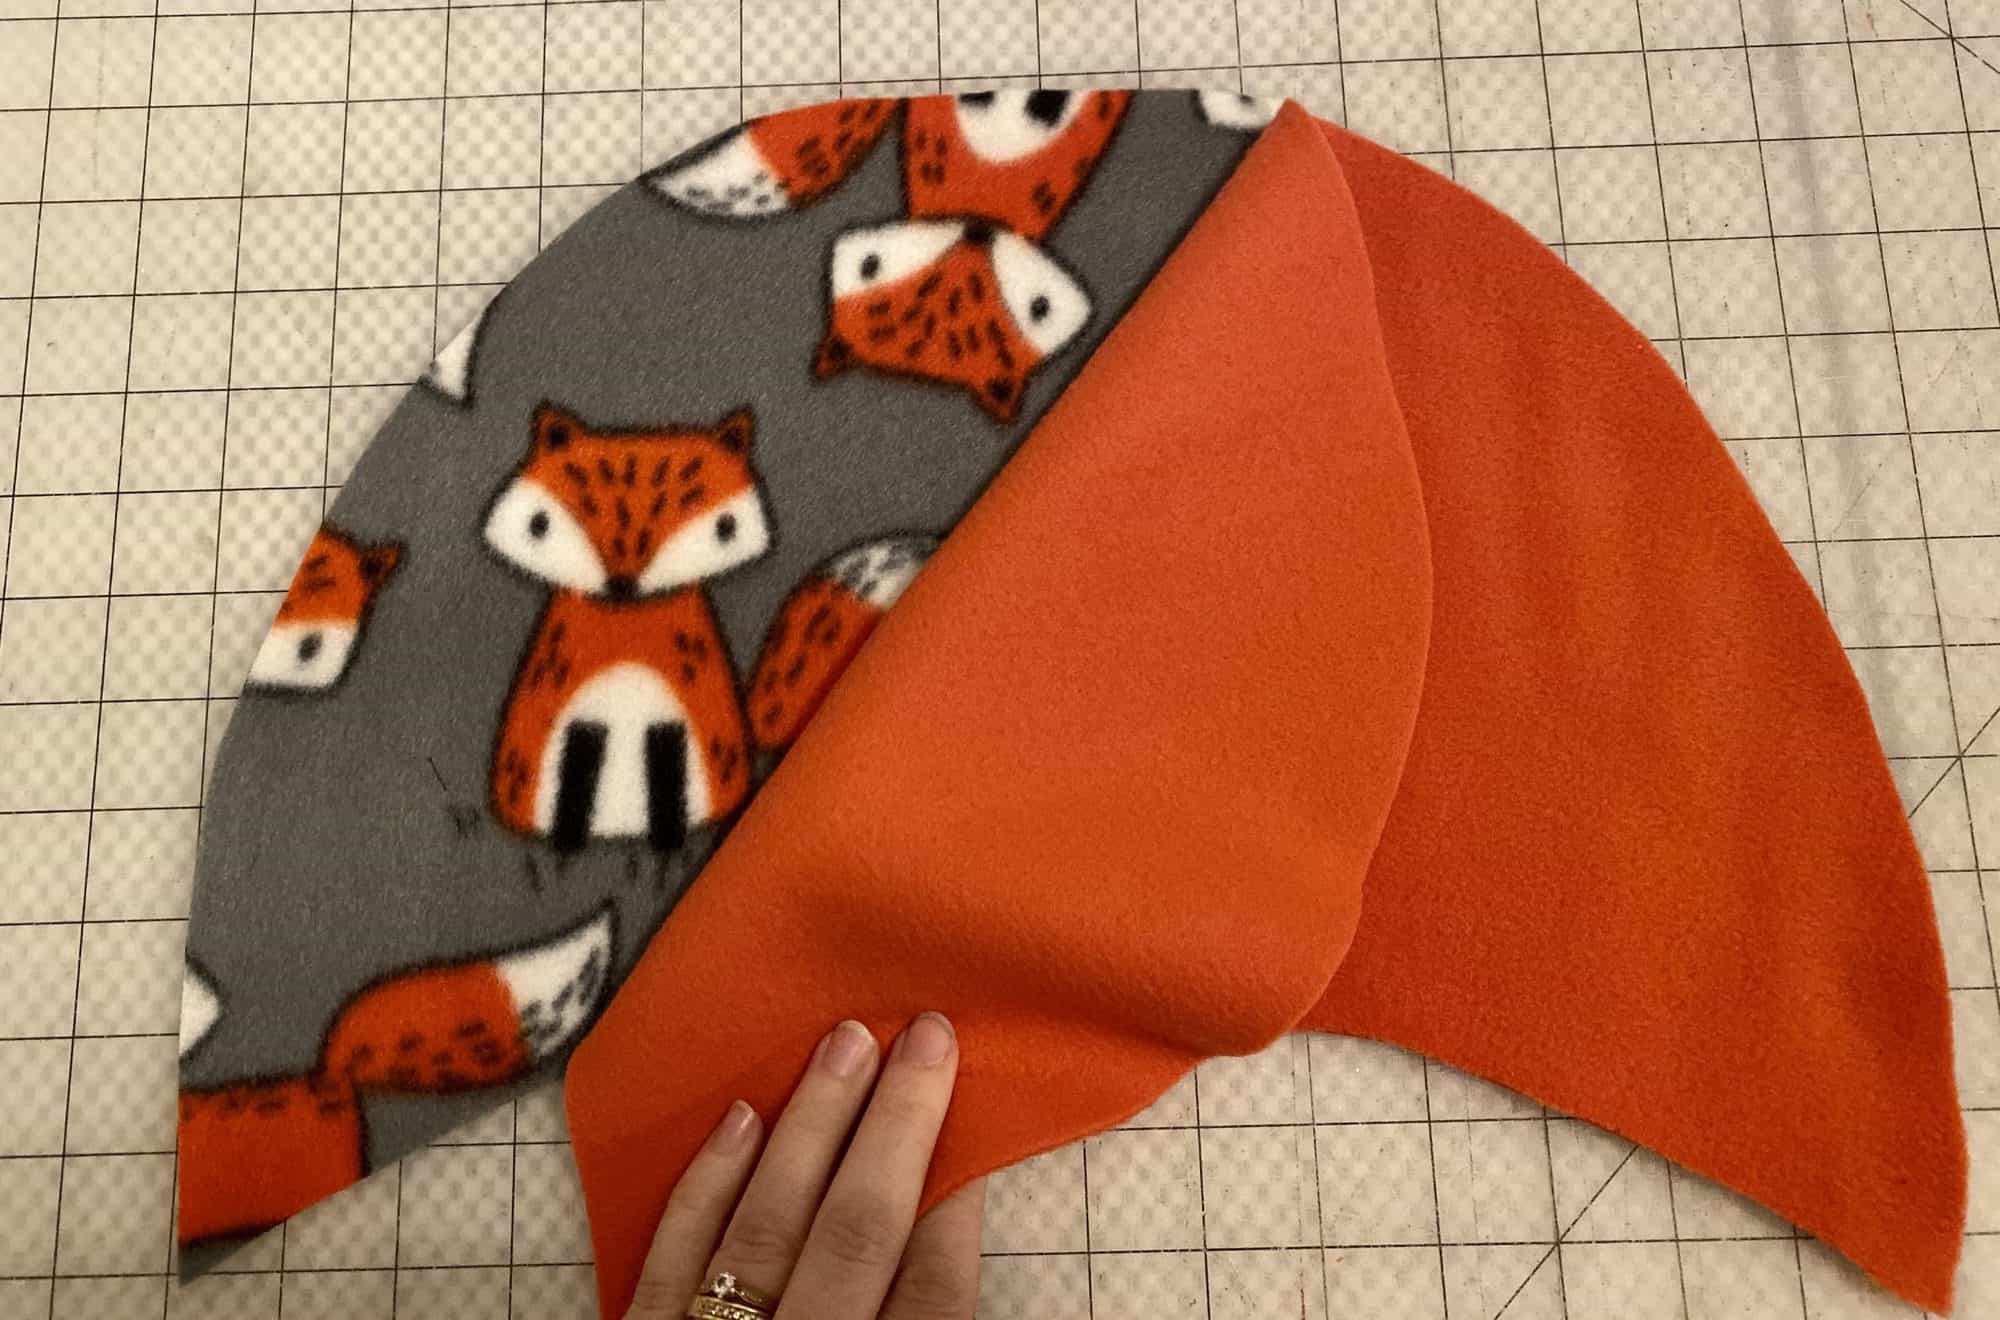
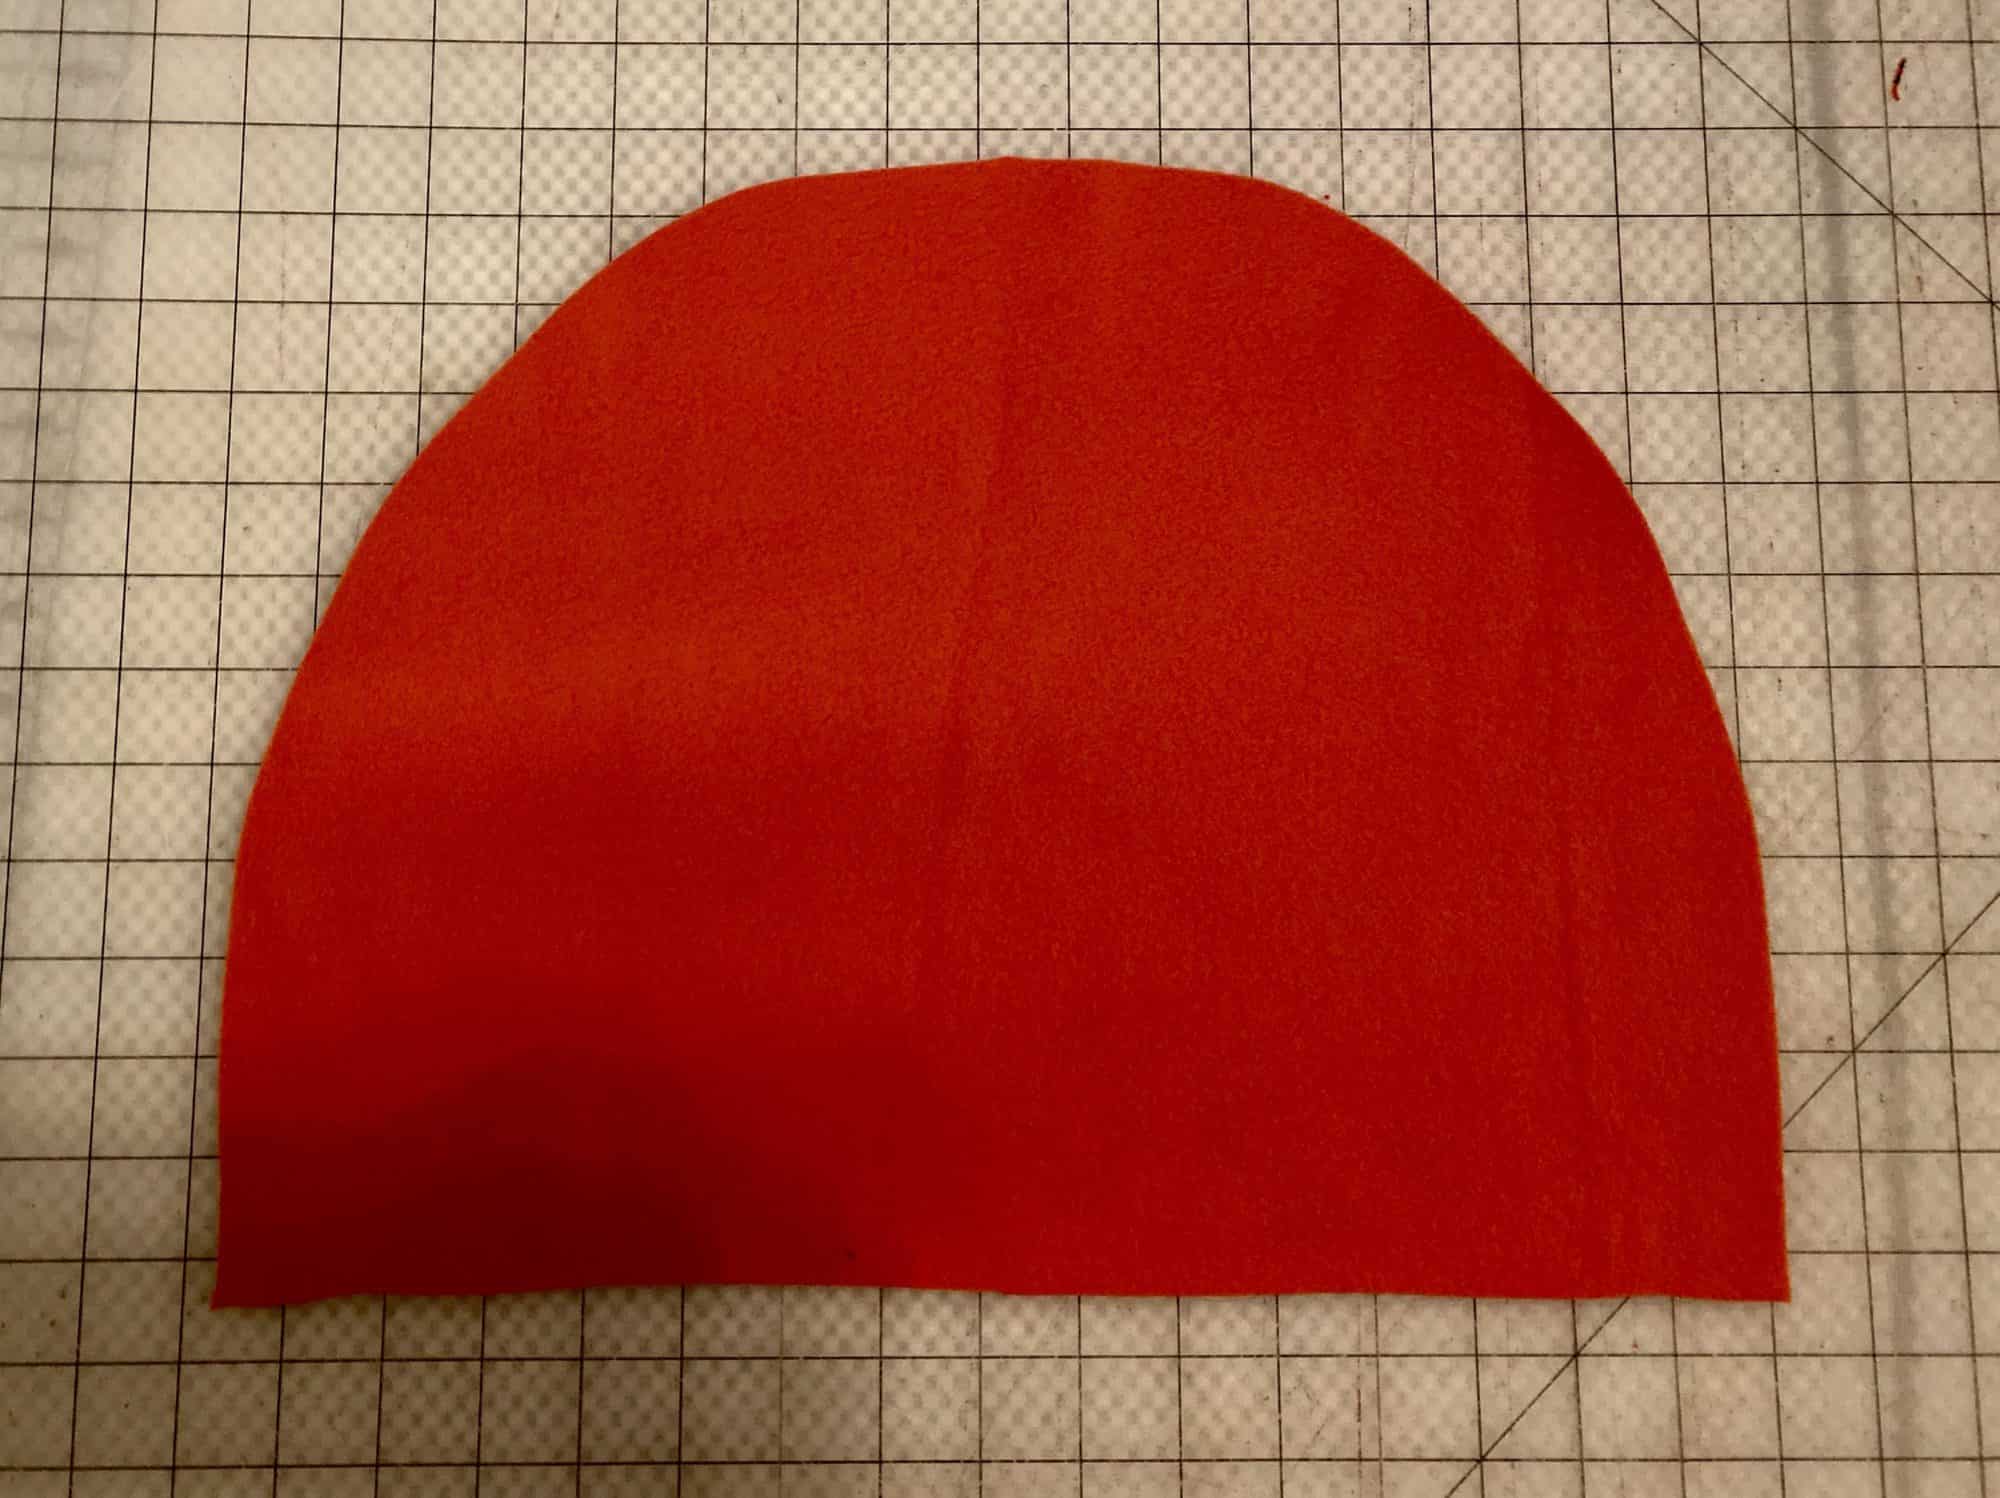
7. Place the main back hood piece, right sides up.

8. Place the front piece sections on top, main fabrics together.

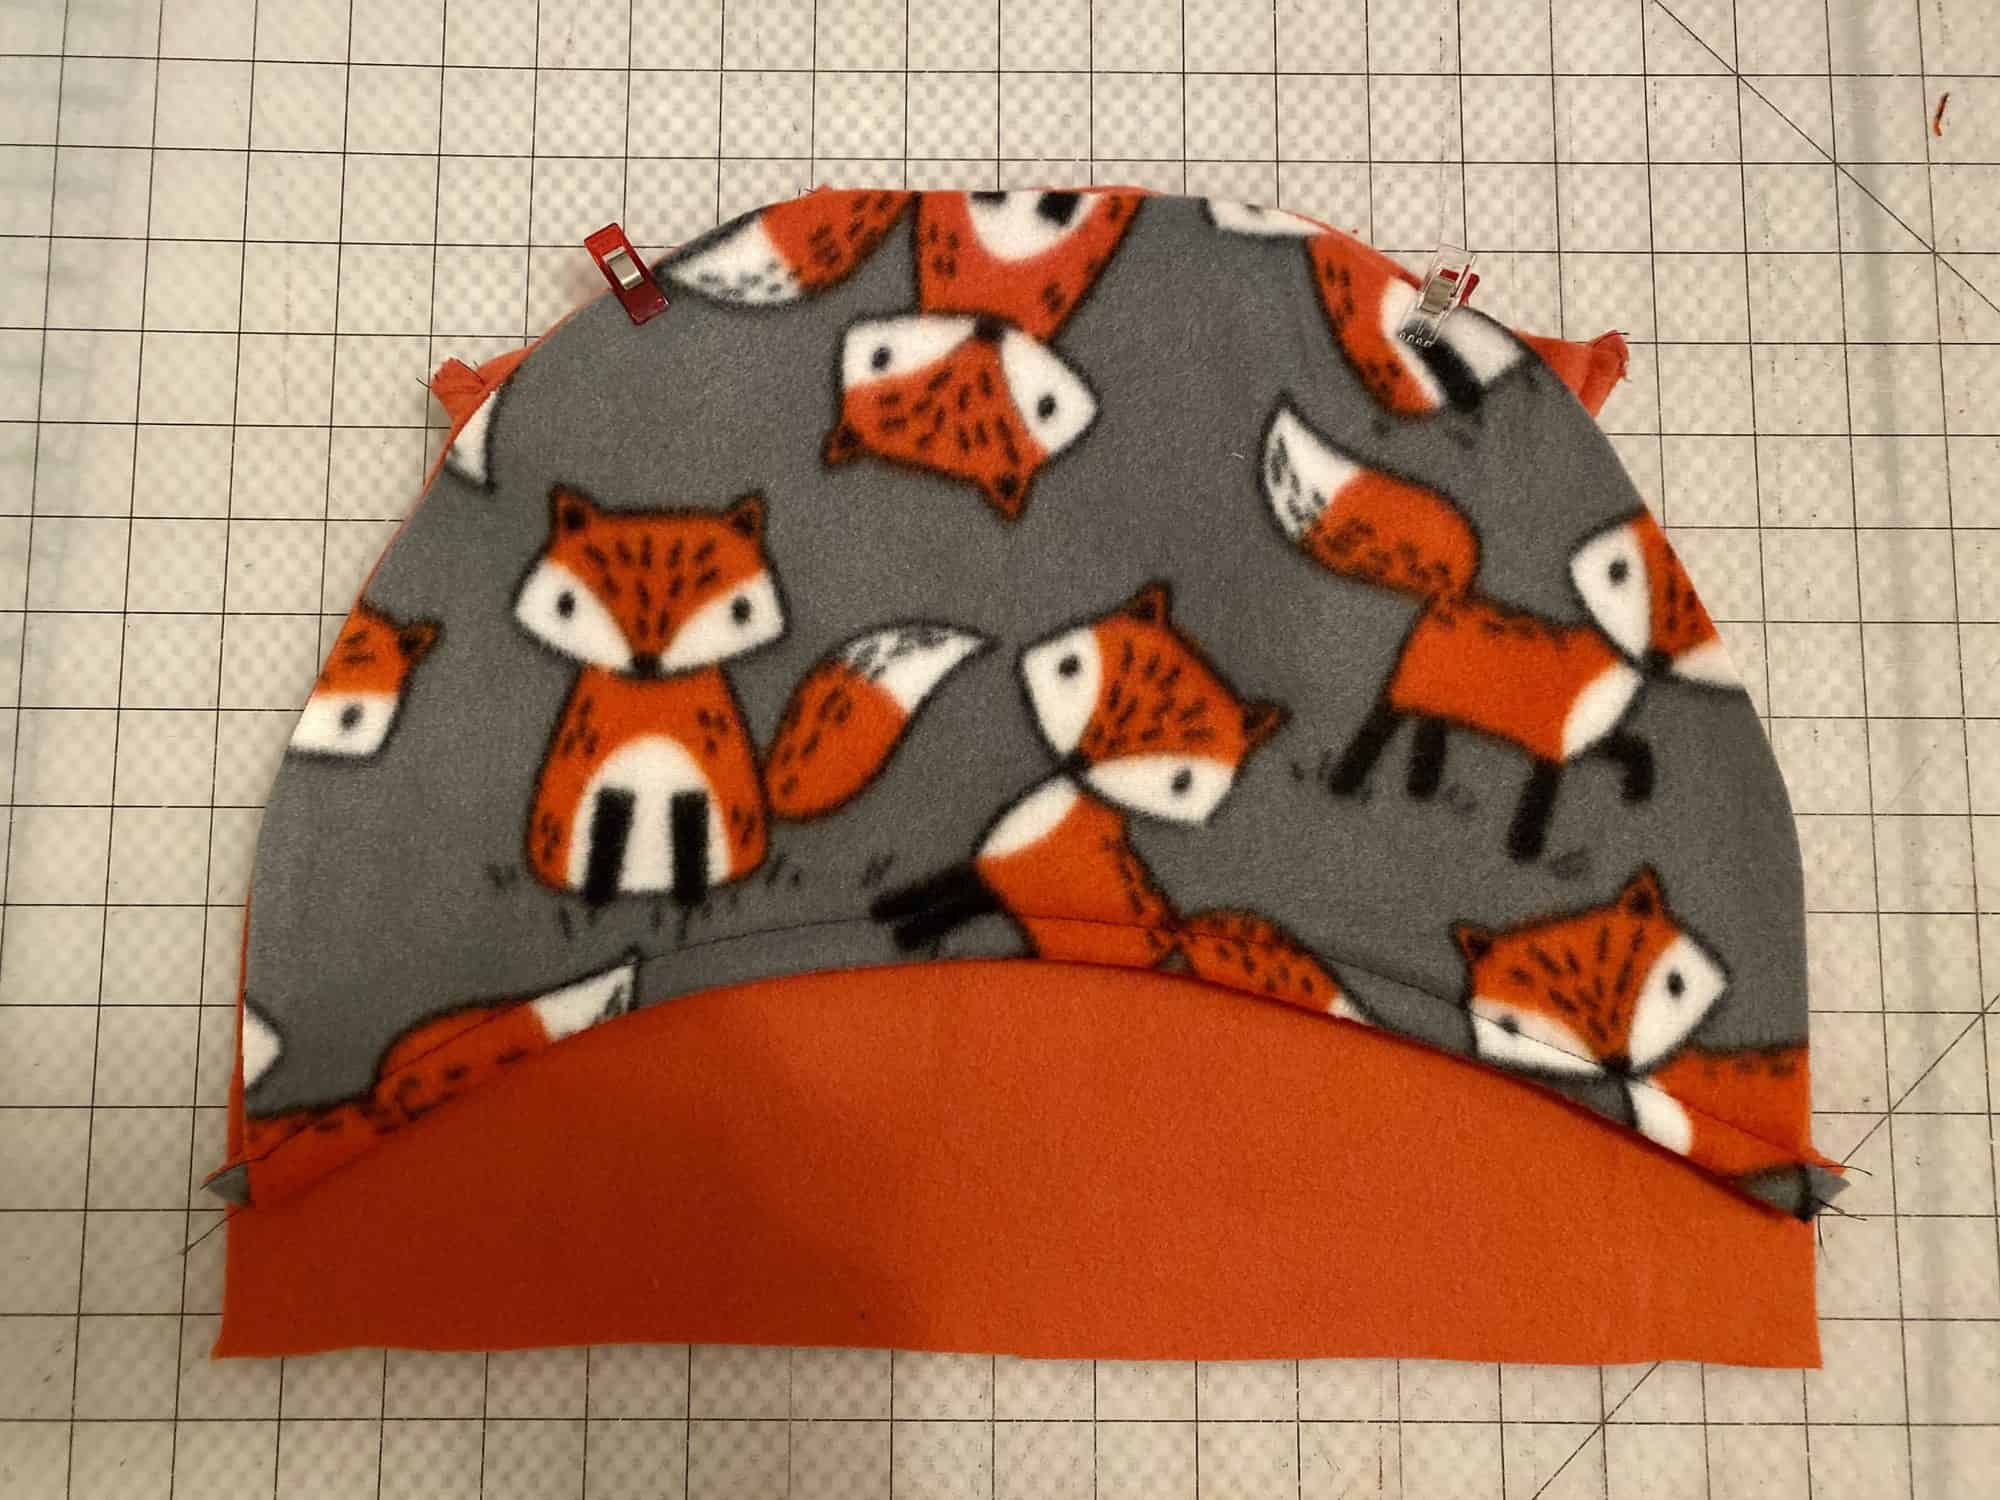
9. Place lining back hood on top, right sides down.  Sew along entire top curve.

10. Turn right sides out.

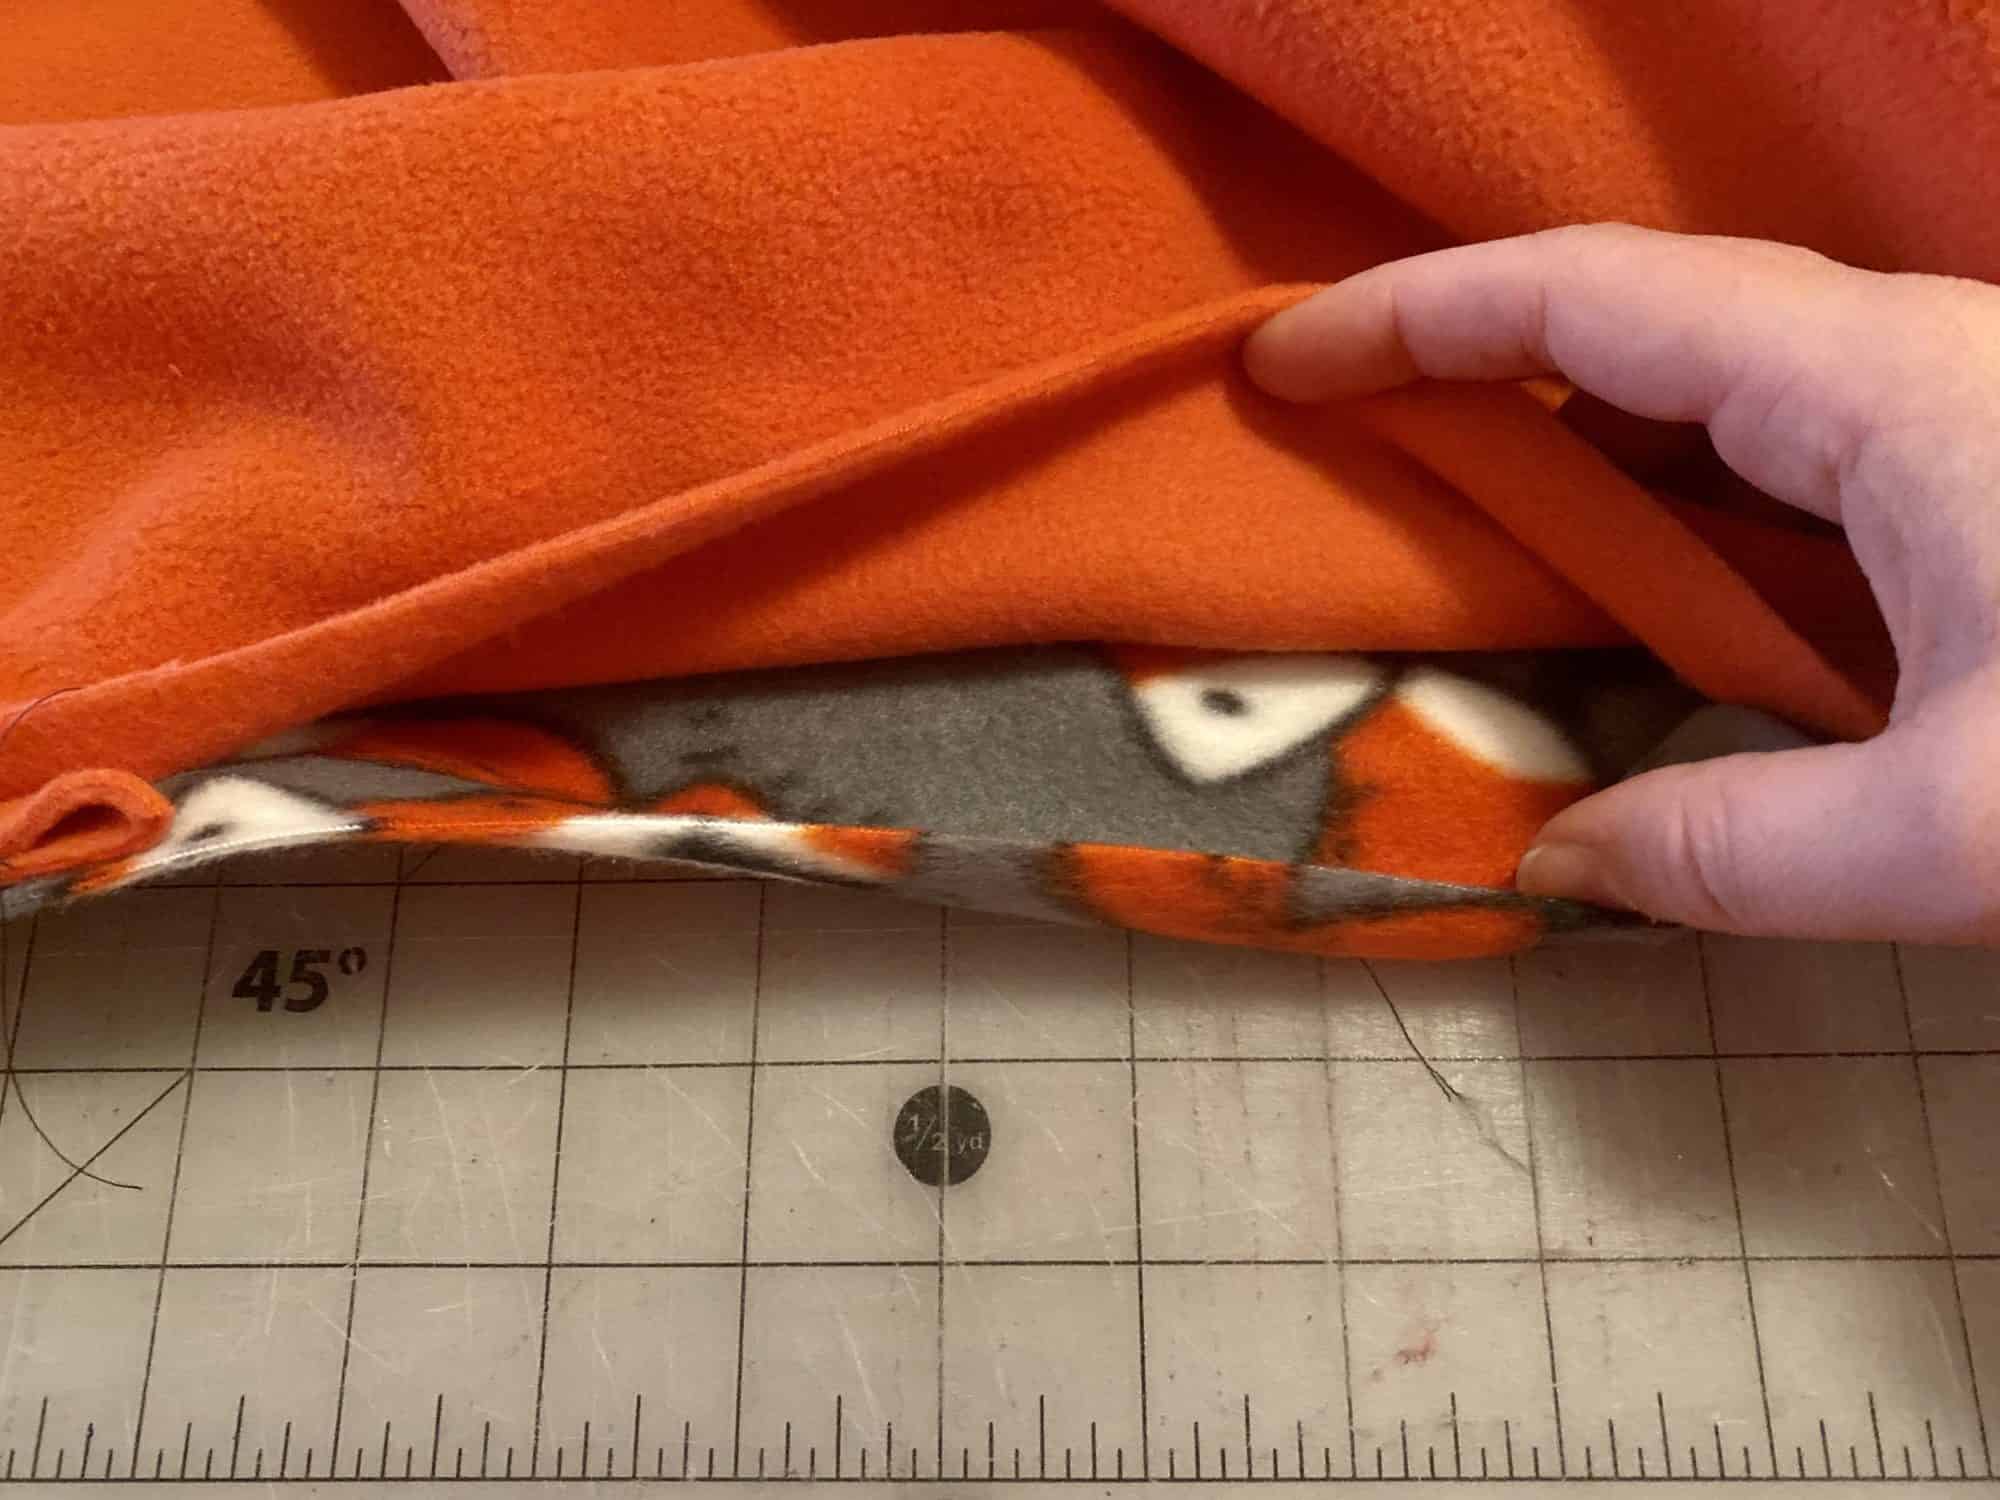
11.  Mark middle points of hood and blanket lining piece.  Baste hood in place, with hood opening facing down towards lining piece.

12. Place main blanket piece on top, right sides facing down.  Sew along all four outer edges, leaving 6-8″ opening for turning.

13. Turn right sides out. Press. Sew the opening closed, using your favorite method.
Optional: Top stitch along entire outer edge.

Need some inspiration for your very own Hooded Blanket?  Check out what our testers sewed up for themselves:


I la-la-love when you share your photos with me!  Head over to the Patterns for Pirates Facebook Group and show us what you’ve made!

Happy Holidays, Pirates!

Filed Under: Free Pattern, Pattern Release 6 Comments

P4P Maternity Wear :: Hack & Tips

August 16, 2018

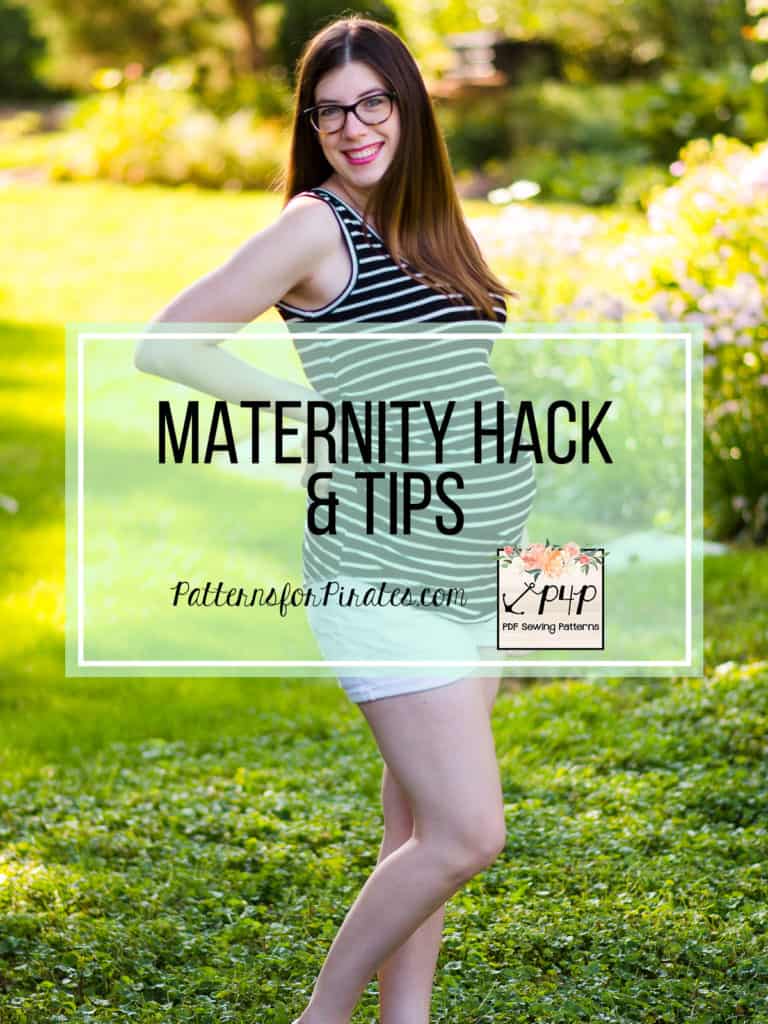
Today I’ll be talking about P4P patterns and maternity!  We got lots of questions in the Facebook group about what kinds of patterns can be used for maternity as-is and what kind of modifications or hacks can be done in order to make patterns maternity friendly.  I’ll go over a categorization for P4P patterns and which ones can be worn both pre, during, and post maternity and how to do a simple hack to make most other knit top/dress/swim patterns accommodate a bump.

For links to all patterns, check out the women’s section of the shop.

Pattern Breakdown

No Modifications Needed

These patterns should work for most women for a majority of pregnancy, if not the whole way.  Some women may prefer more ease than others.

  • Cocoon Cardigan
  • Free Spirit Tank
  • Grandpa Cardi
  • Pumpkin Spice Dolman
  • Relaxed Raglan
  • Summer Kimono
  • Carefree Cardigan
  • Boho Babydoll
  • RagDoll Raglan
  • Boundless Knit Dress
  • Peg Legs with Maternity Add-On
  • Siren Swim Top
  • Favorite Tee (earlier pregnancy)
  • Everyday Elegance Top (earlier pregnancy)
  • Go To Jacket (earlier pregnancy)
  • Pirate Pencil Skirt (earlier pregnancy)

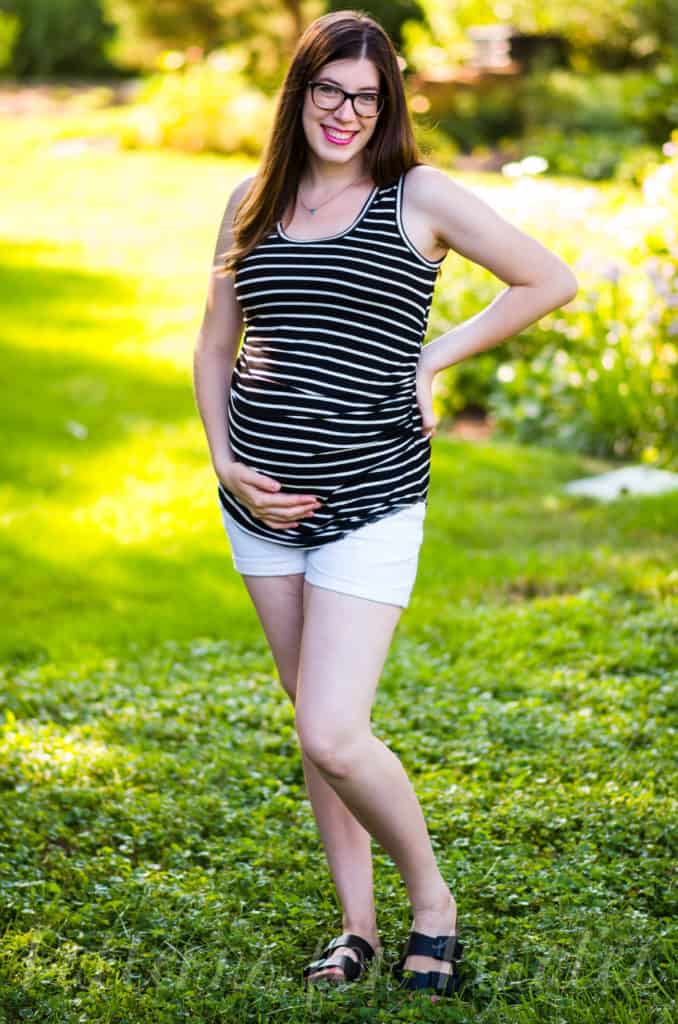
Here’s examples of how these some of these patterns fit with no mods on a 22 week bump!

Boho Babydoll
Free Spirit Tank
Favorite Tee
Relaxed Raglan

Pumpkin Spice Dolman
RagDoll Raglan
Cocoon Cardigan

Simple Hack Suggested

For most women, a simple hack I’ll show you below should make these patterns pregnancy-friendly.  Disclaimer: Some women have had success wearing some of these patterns without any mods during pregnancy, or towards the beginning of pregnancy.  Personal body shape, fabric choice and fit preference will play a large role in this.  I would suggest using the hack in general because they will likely fit better this way.

  • Essential Tank
  • Slim Fit Raglan
  • Sweet Tee
  • Layer Me Up Shirt
  • Favorite Tee
  • Wiggle Dress
  • Cross My Heart Cami
  • Women’s Henley
  • Boyfriend V-Neck

Not Suggested for Maternity Wear

  • Timeless Tunic
  • Brunch Blouse
  • Sweetheart Dress
  • Sunshine Dress
    • Could possibly work very early pregnancy.
  • Hello Sailor Swim Bottoms

Simple Maternity Hack

Before you cut into your fabric, you will want to double check your measurements because they will definitely be in flux during pregnancy.  To ensure the best fit, choose the size that you currently measure, not just your pre-pregnancy size.

Here’s what you will need:

  • Desired pattern to hack
  • Any required notions for pattern chosen
  • Layer Me Up Maternity Add-On
  • 1/4″ elastic

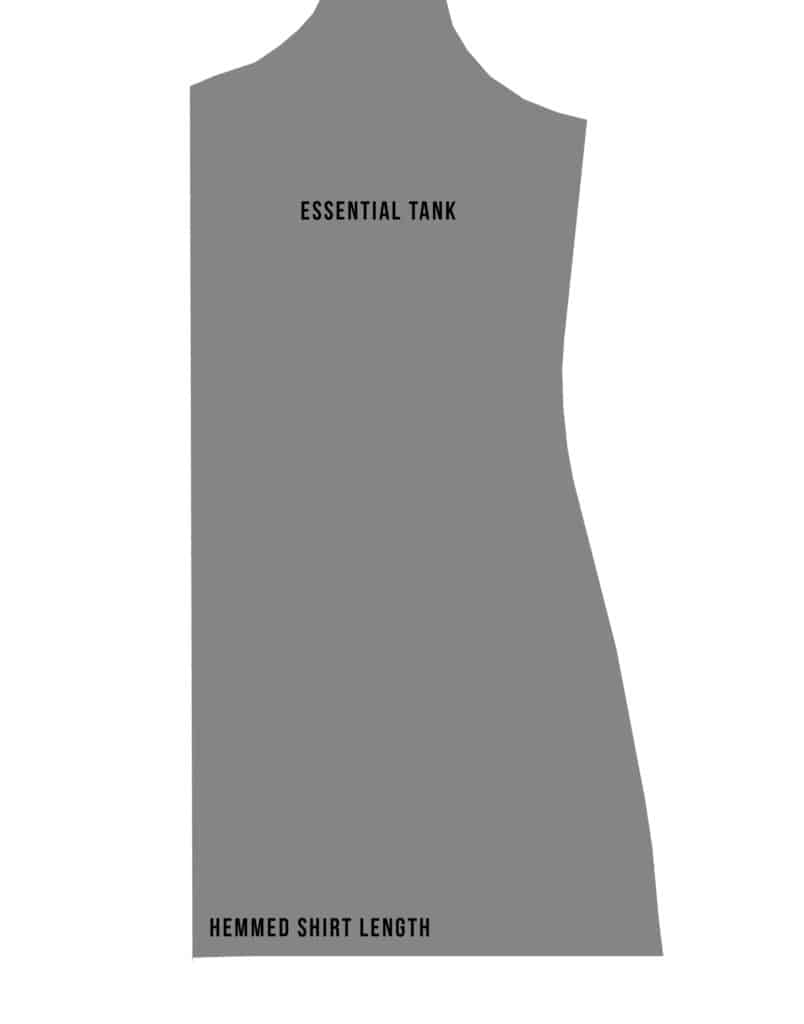
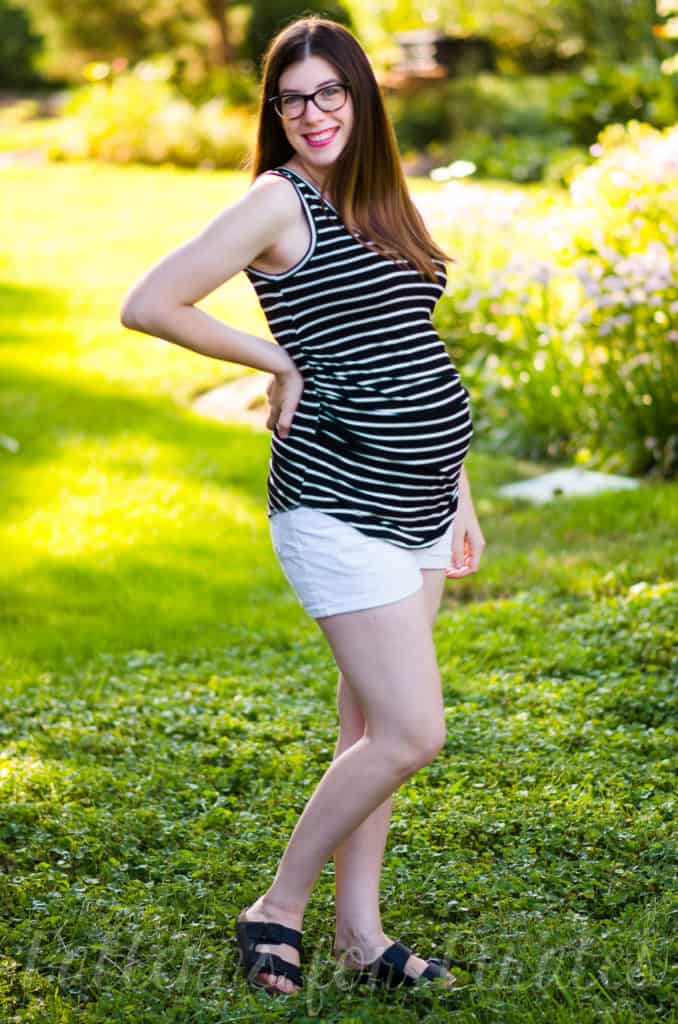
For this tutorial, I chose to show how to use the Layer Me Up Maternity Add-On with the Essential Tank.

1. Assemble your desired pattern. You will only need to alter the front piece.
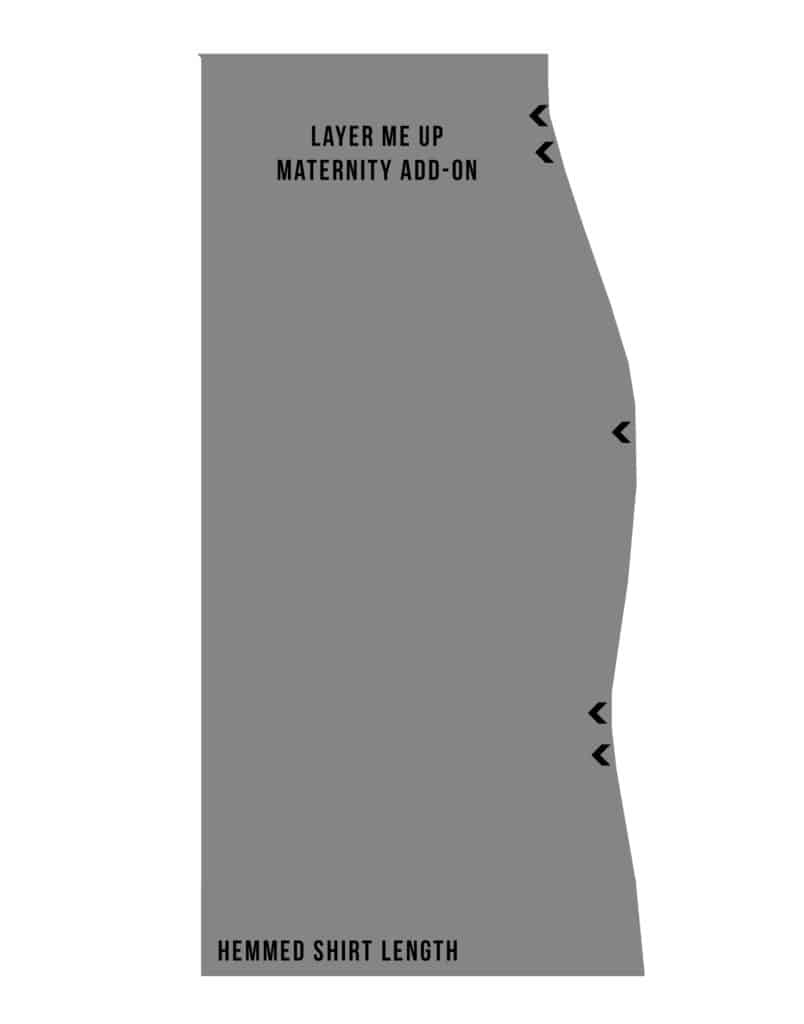
2. Assemble the Layer Me Up Maternity Add-On

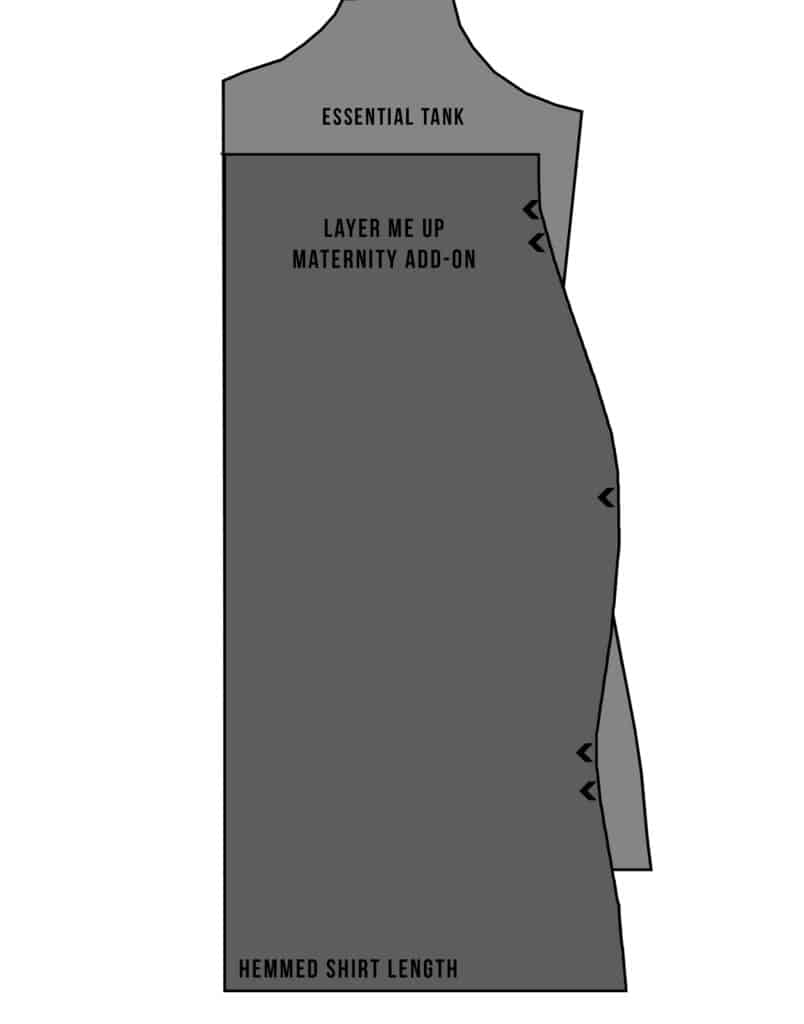
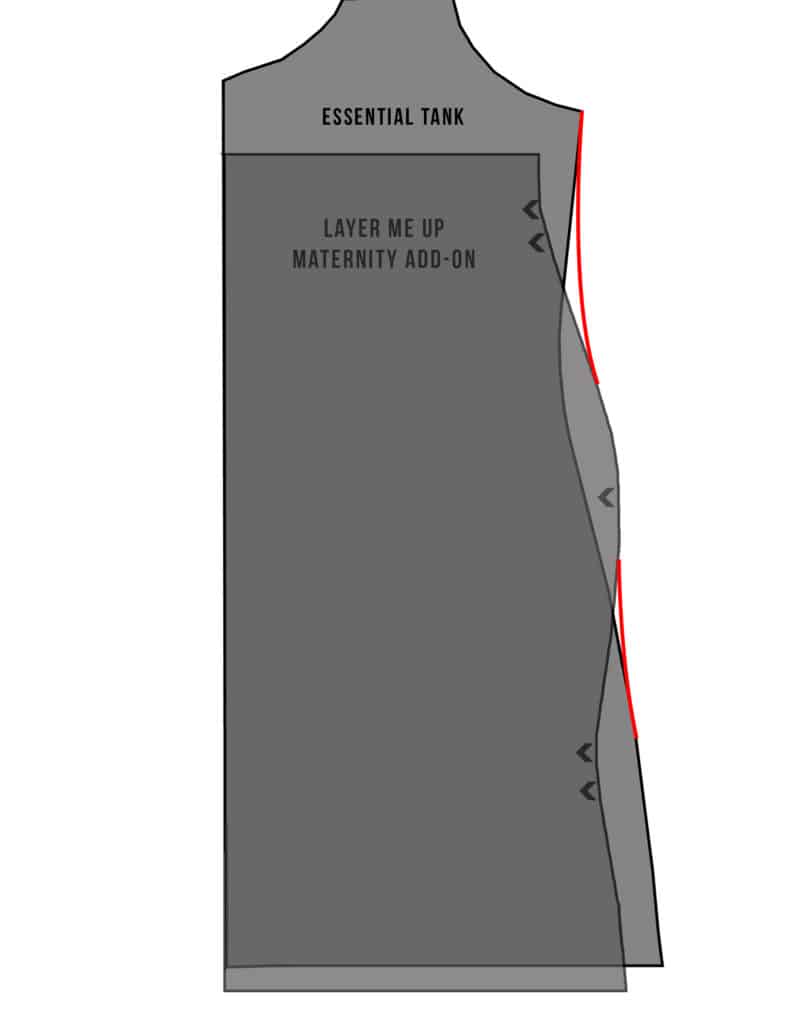
3. Lay the add-on on top of your pattern piece, roughly 1″-2″ below the armpit curve.
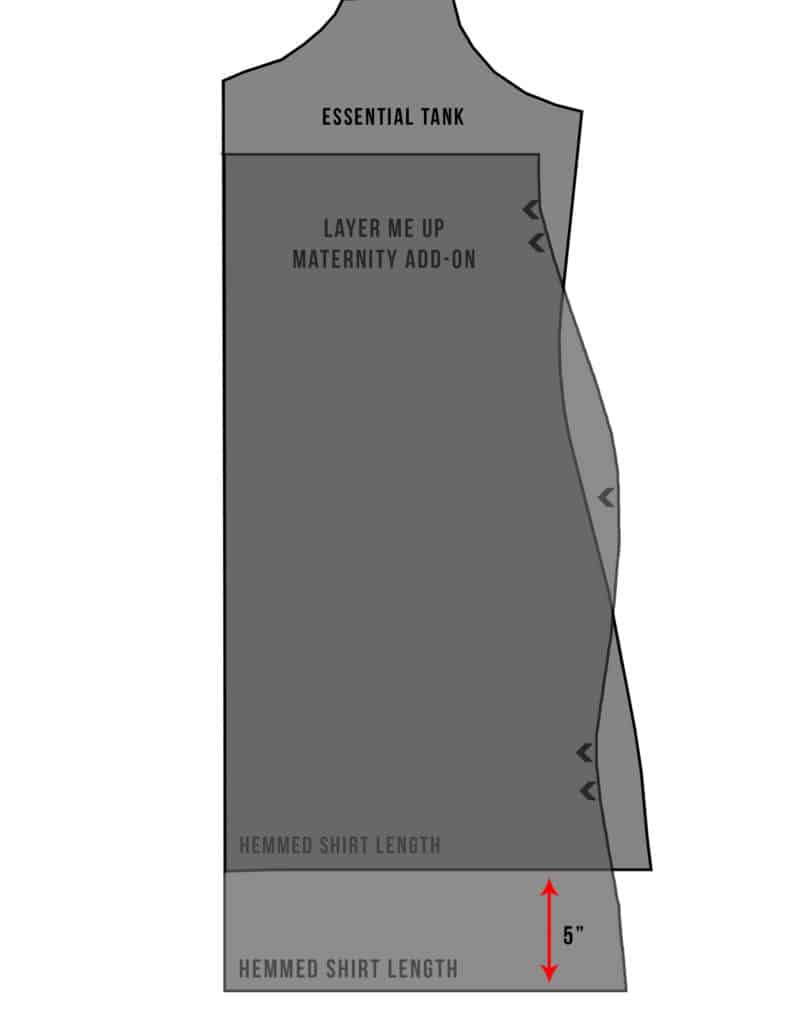
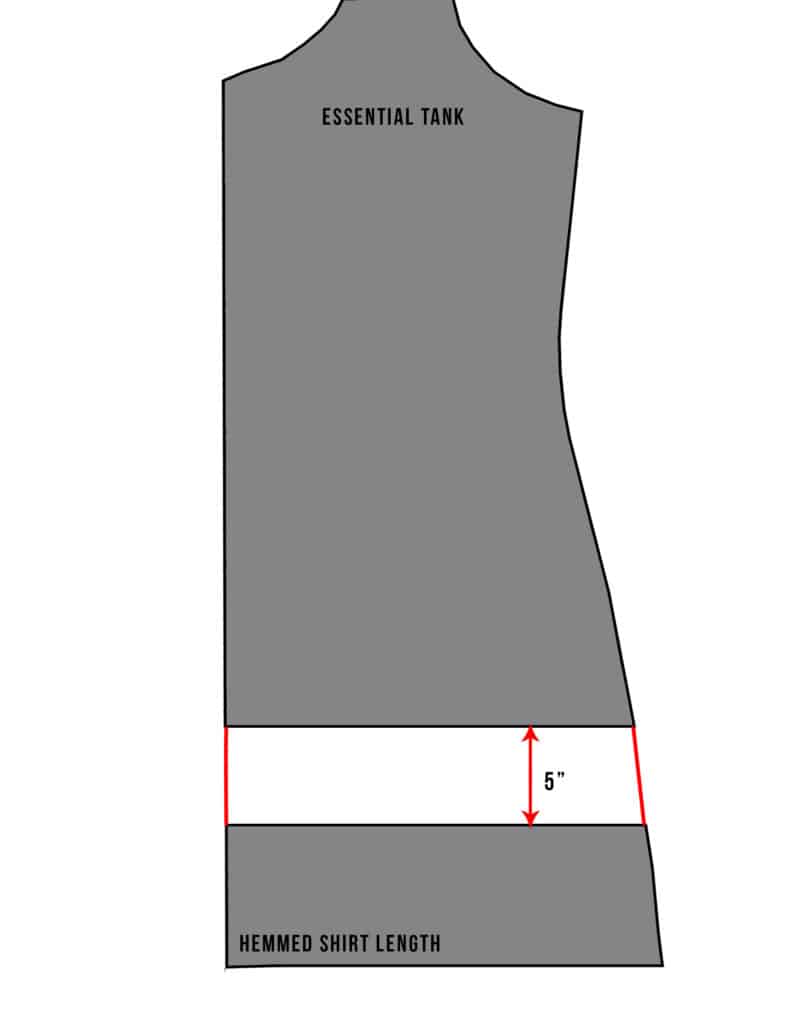
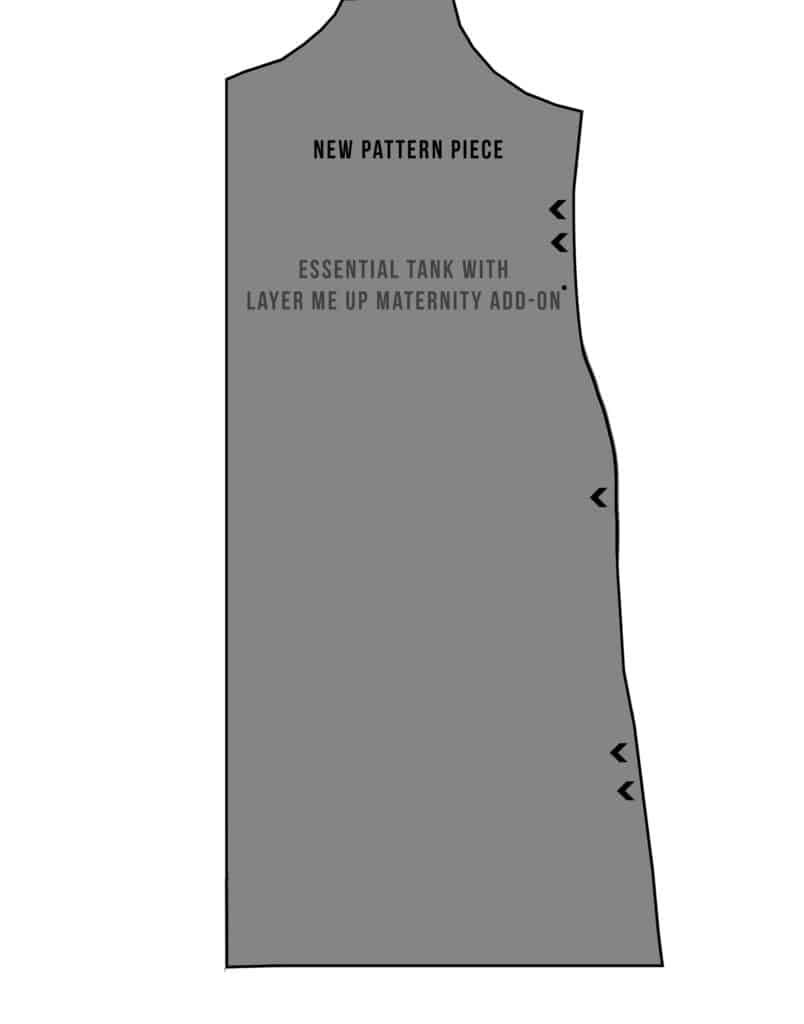
4. Note the difference between two of the same hem lengths on your pattern and the add-on. In this case, the difference was 5″ between hemmed shirt lengths.

5. Add this difference in length to your pattern piece, just above the hem.
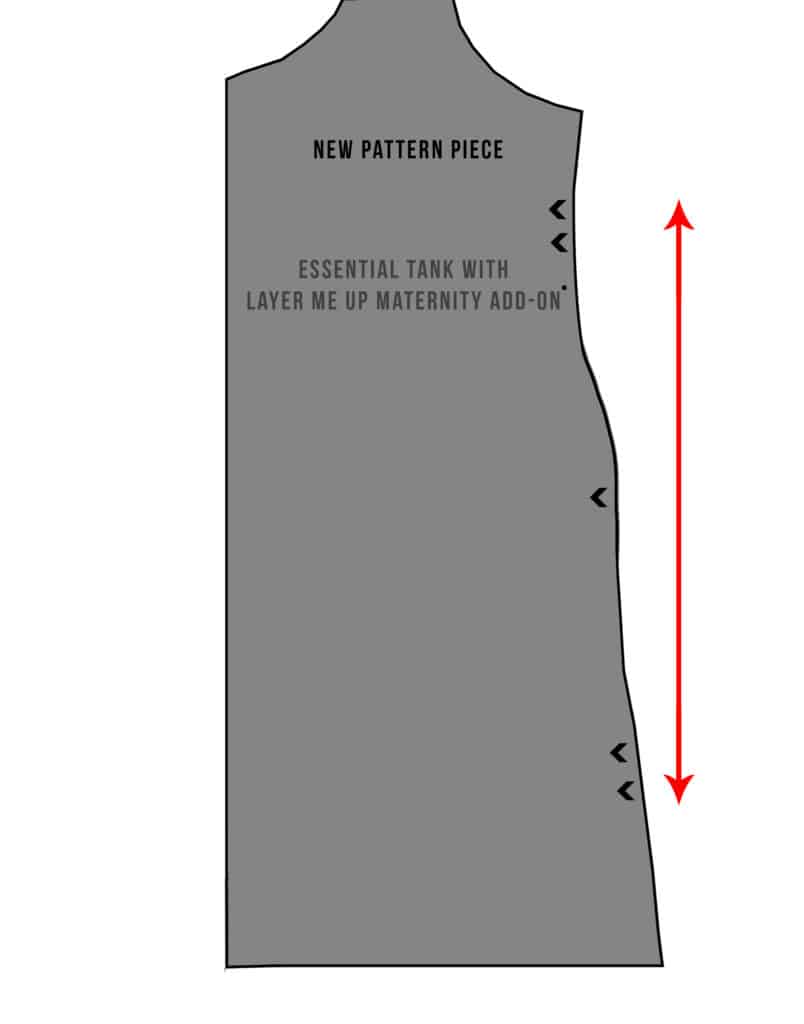
5. Grade between your piece and the add-on in the stomach area, making sure to keep your lines smooth.

6. Trace your new pattern piece on to a new sheet of paper, to make things easier.
7. Make sure to transfer the notches from the add-on. Your elastic will be stretched here.

After you’re done making the changes to your pattern, add the elastic as shown in the Layer Me Up Add-On instructions.  Then, finish sewing up your desired pattern as per those instructions.  That’s it!  Use these same guidelines to combine the add-on with any of the patterns shown on the Simple Hack Suggested list above.


As a bonus, I’ll also point out that knit pants with an elastic waist can be easily adjusted for under-belly maternity wear by slightly decreasing the rise.  (See this post for more info on adjusting the rise.)  I lowered the rise about 1.5″ on the front of the Mama Bear Joggers to make these shorts maternity-friendly.

Feel free to try this out with any knit P4P shorts or pants.  You could try it with woven pants as well, if you are more adventurous as this may require more adjusting.  Don’t forget the Peg Legs have the Maternity Add-On as well, which works perfectly!

With just a little hacking, a lot of patterns can easily be made maternity friendly.  Happy sewing!


Filed Under: Pattern Hacks 3 Comments

So Classic Sundress Round Up

August 3, 2018

It feels like it’s been forever since I’ve been able to say this….but IT’S RELEASE DAY!  And we’ve got some ah-dorable dresses for you today, my pirate friends.  Get ready to meet the So Classic Sundress patterns!


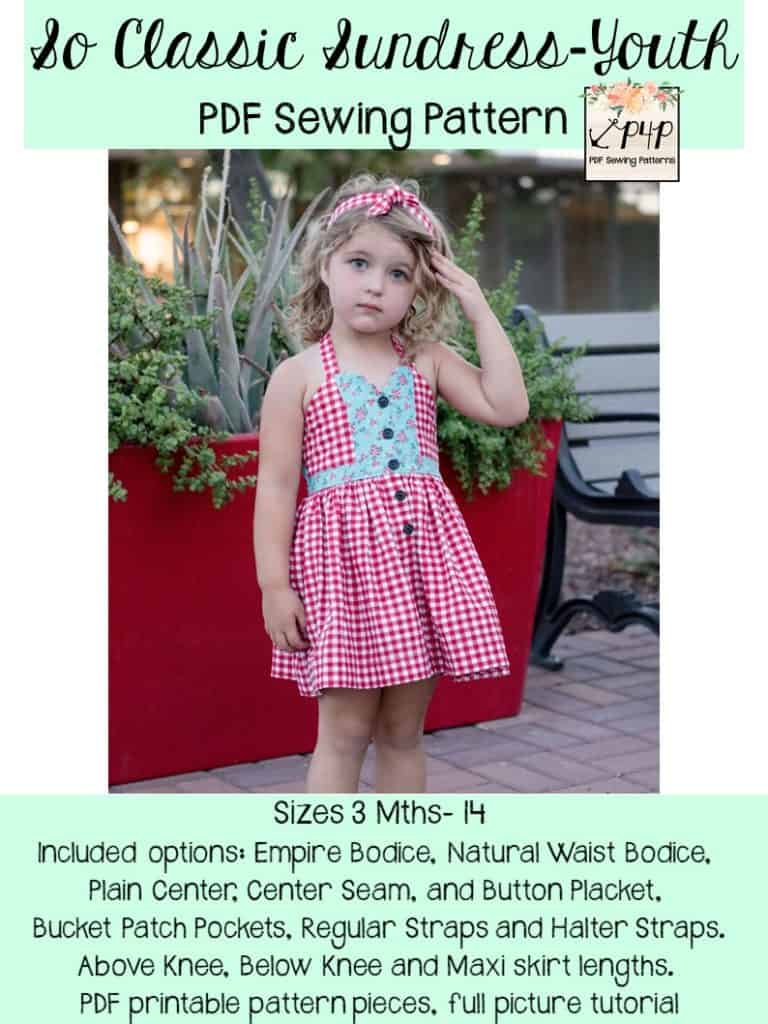
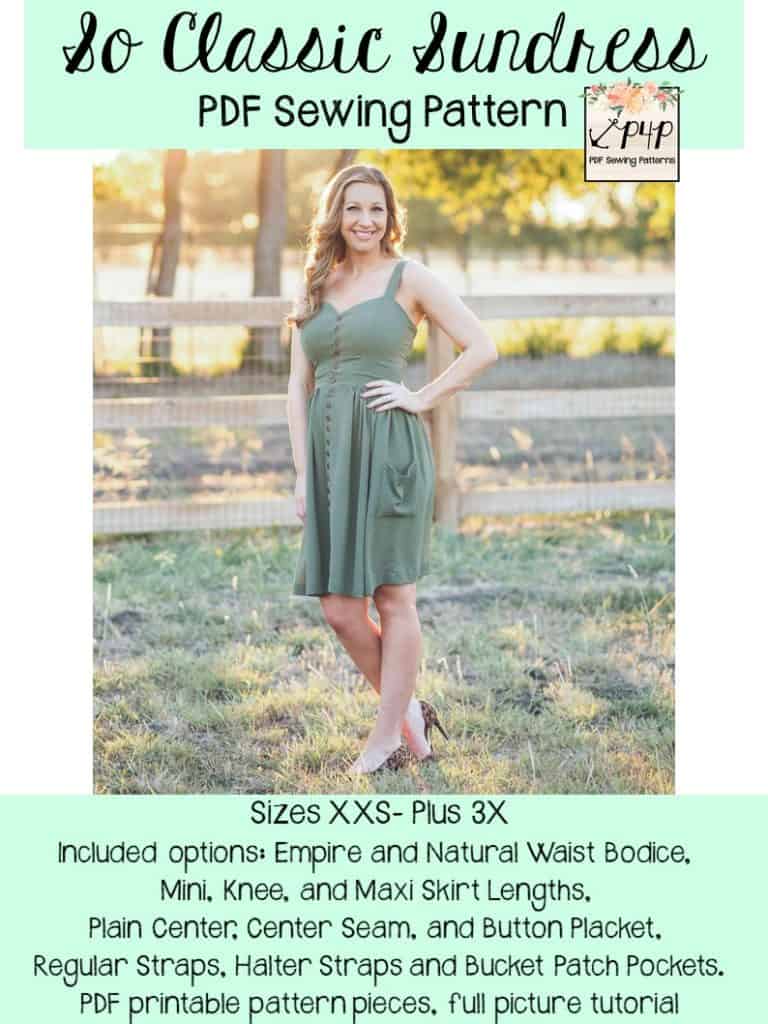
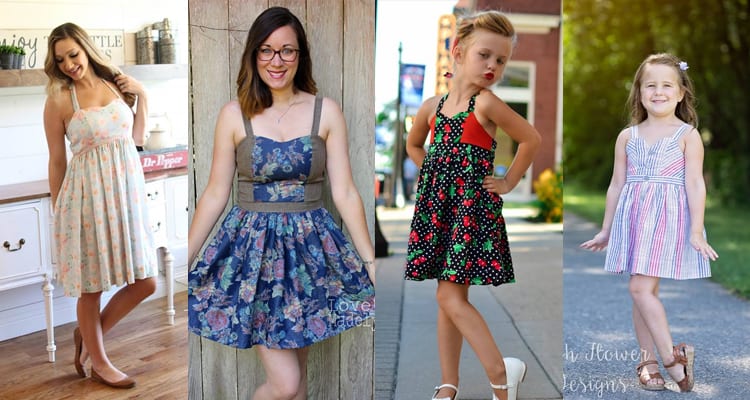
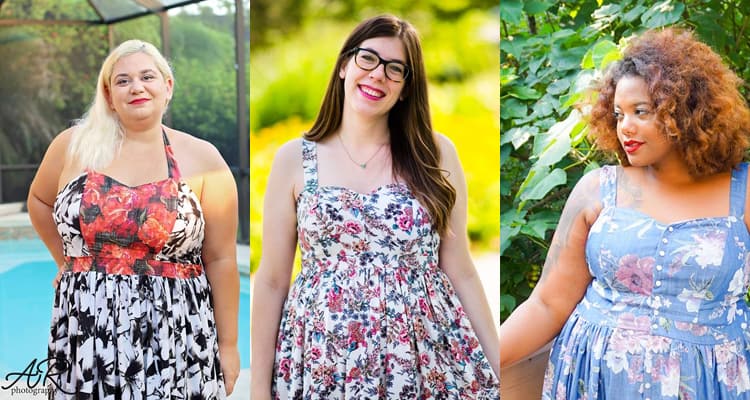
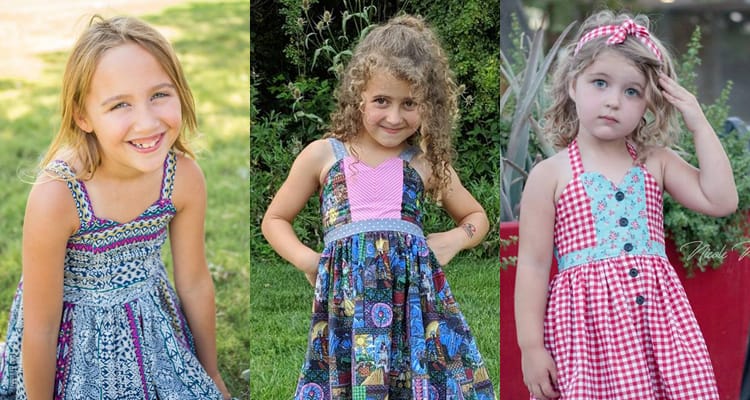
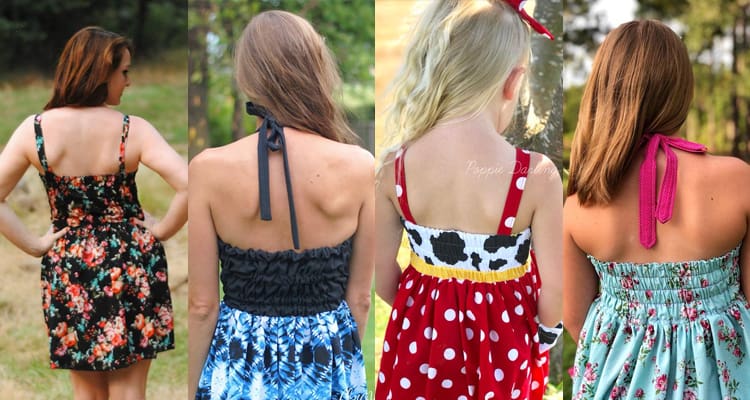
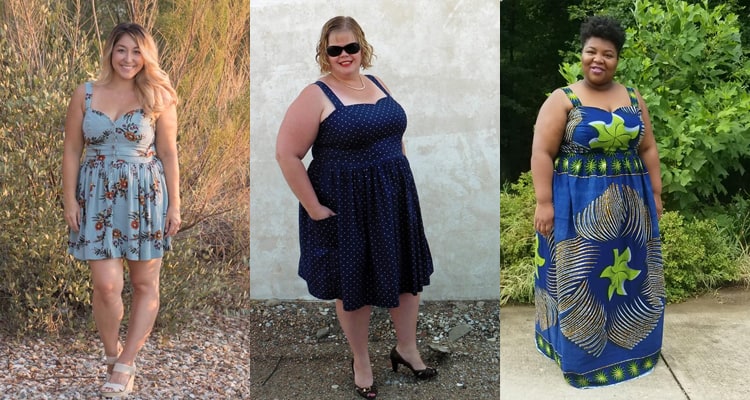
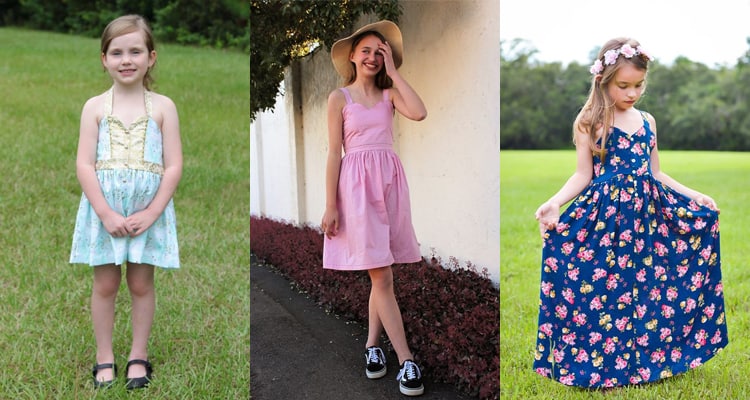
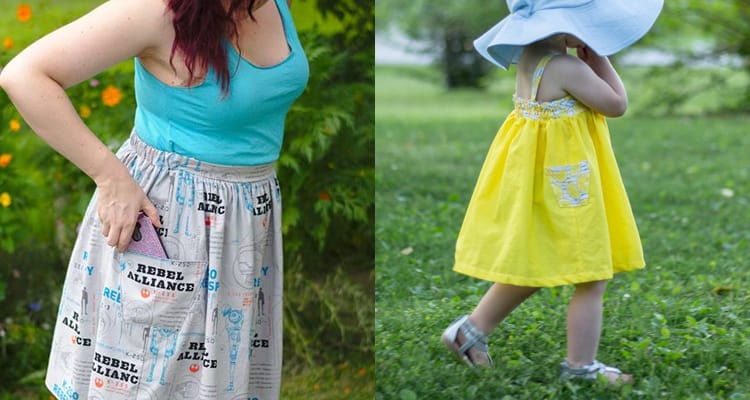
The Sew Classic Sundresses are just that: so classic!  Drafted for use with woven fabrics, these dresses have such a retro flair and can be paired with so many different fabric types to create the perfect look.  Both patterns feature as many options as we could pack into them.  Two bodice lengths (empire and natural waist), three bodice styles (plain, center seam, and button placket), three skirt lengths (mini, knee and maxi), two strap styles (halter and straight), bucket patch pockets, princess seams, and an elastic casing back bodice.  It is drafted for women (sizes XXS – Plus 3X), and youth (3M – 14).

**Want to learn more about how to measure yourself for this pattern?  We’ve got you covered with an in-depth blog HERE.  And in case you’re new to Patterns for Pirates and PDF patterns in general, we have a great blog full of new user tips HERE to help you get started!  And, as with all of our current releases and updates, the pdfs now include our layers feature and can be found in Letter, A4 and A0 sizes.

Are you ready to see all of the options in action?  Me too!

Empire + Natural Waist Bodices

Plain, Center Seam + Button Placket (Princess Seam) Bodices

Regular + Halter Straps (with Elastic Casing Back Bodices)

Mini, Knee + Maxi Lengths

Optional Patch Pockets

It’s time to get So Classic with us!

SO CLASSIC DRESS – YOUTH | SO CLASSIC DRESS – WOMEN’S | SO CLASSIC DRESS – BUNDLE

Need more inspiration before you commit?  Head over to our Facebook group and take a look at the amazing dresses that our gorgeous testers created.  Youth Album / Women’s Album
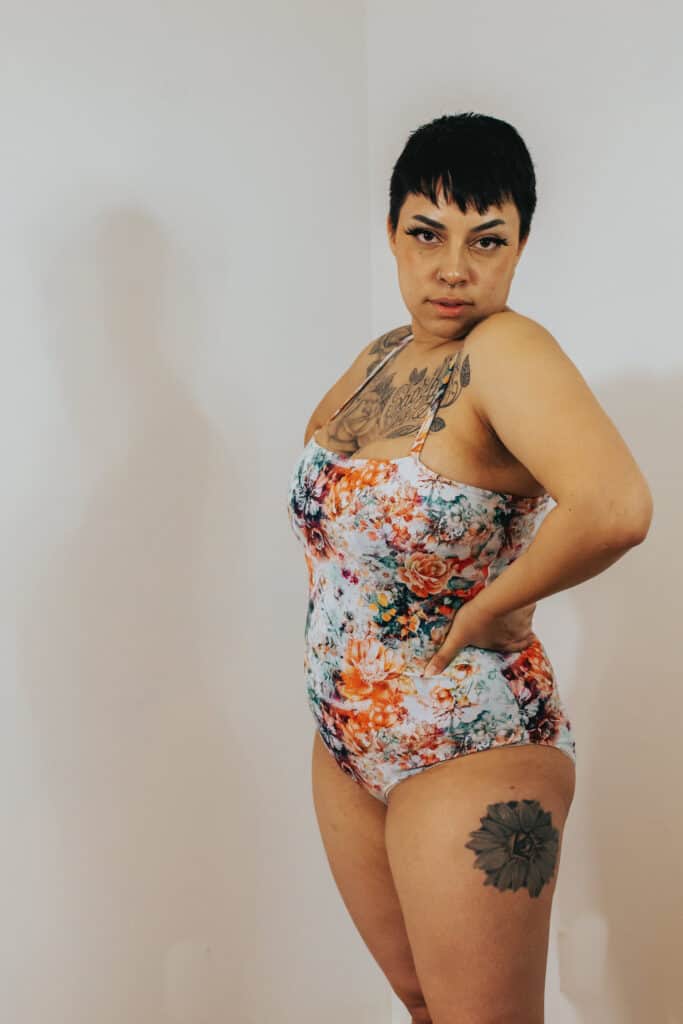
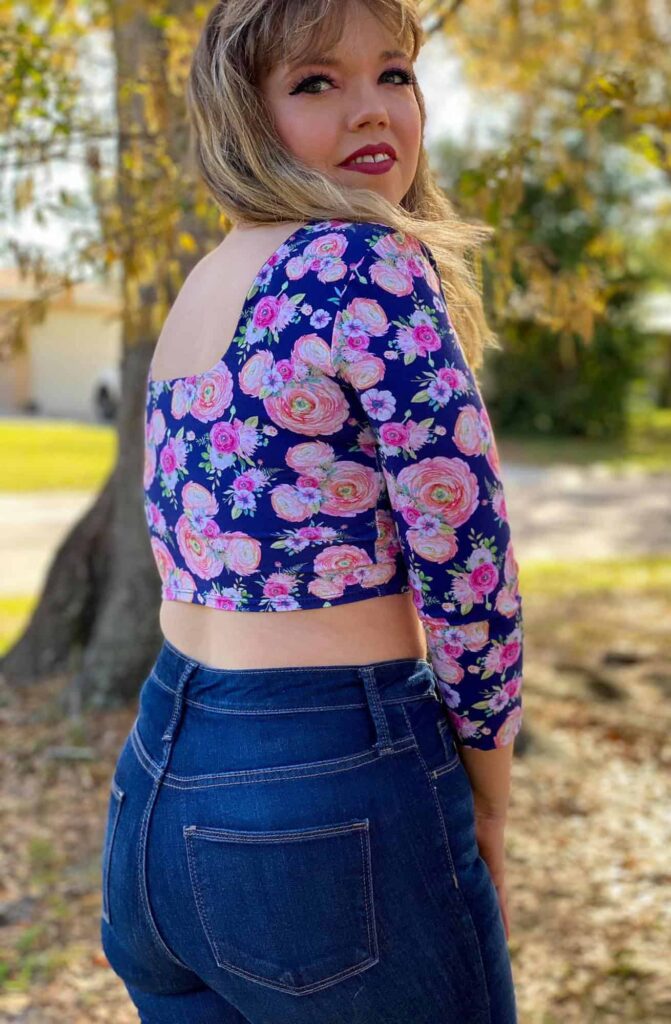
But wait.  There’s more!  Take a look at our So Classic Dress Easy Hacks post to take your patterns even further!

The release sale (no code needed) will be through Friday August 10, 2018 (11:59PM US Central Time Zone).

Happy sewing, my pirate friends!

Filed Under: Pattern Release Leave a Comment

Sweet Bow :: Pattern Release/Update!

September 7, 2017

Summer might be coming to an end, but we’ve still got some “Summer of Wovens” patterns up our sleeves!

Before we get to the fun: If you already own a copy of the original Sweet Bow, you will NOT need to re-purchase to get the updates.  If you bought here (PatternsforPirates.com) or on the Craftsy store, you will simply need to sign into your account and re-download the file.  If your purchase was via Etsy, email help@patternsforpirates.com (WITH PROOF OF PURCHASE) and you will get an updated file.  It’s as easy as that, we promise!

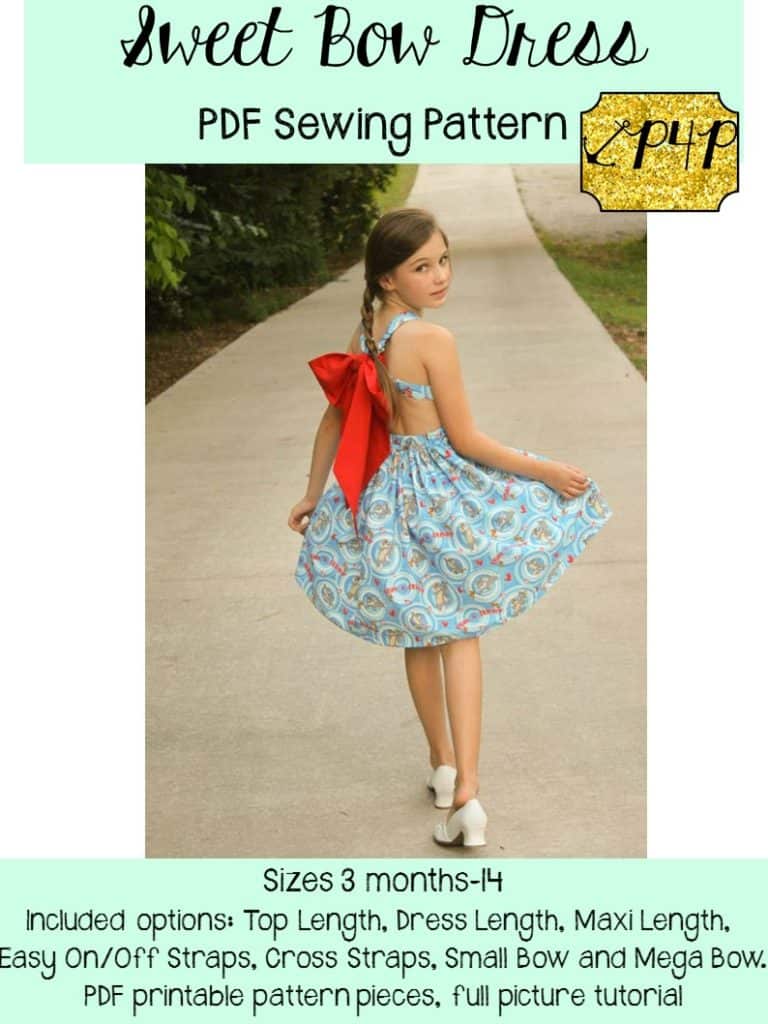
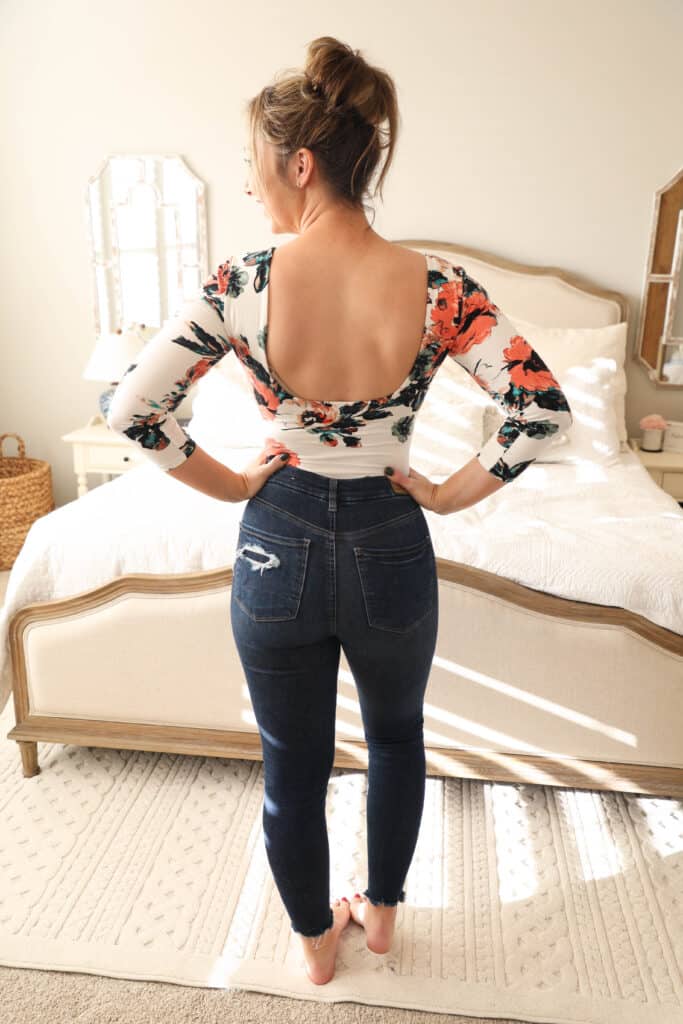
The Sweet Bow is a stylish pattern with a sweetheart neckline, a bodice that hits at the natural waistline, and features a very full and twirly skirt.

This was one of the earlier Patterns for Pirates patterns and we wanted to make sure to update it to the current P4P standards.  The pdfs now include our layers feature and can be found in letter and A4 (no A0- it is only 2-3 pages to print!).  We also tweaked the fit for the smallest sizes and added maxi length option for some extra glamour.

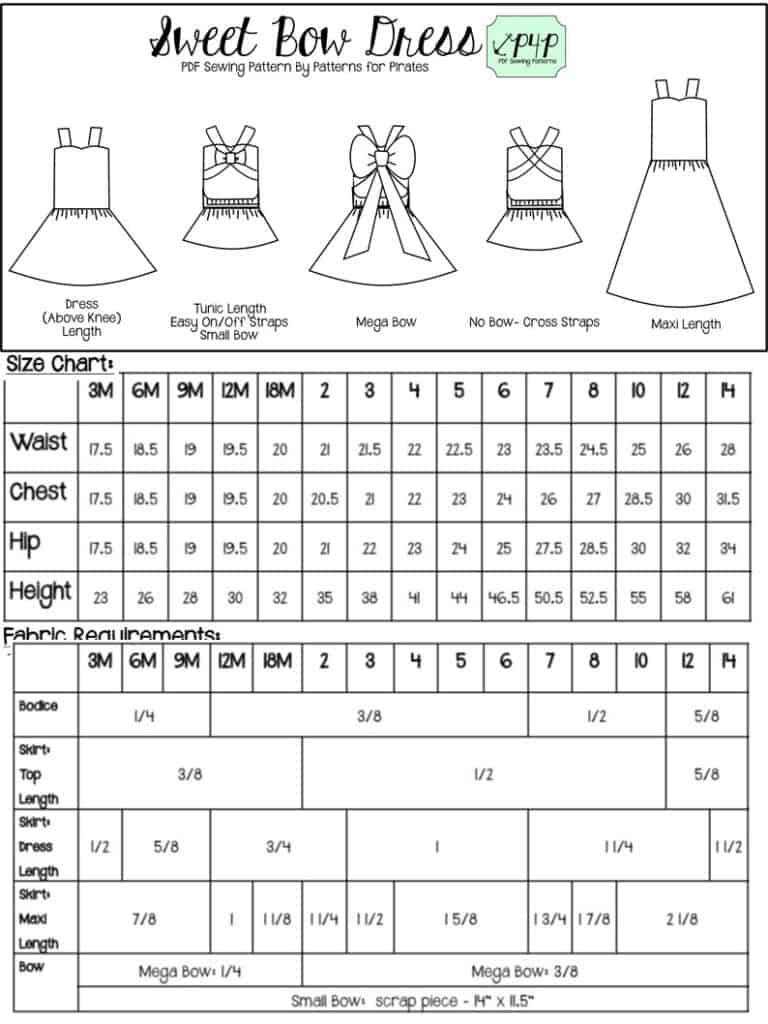
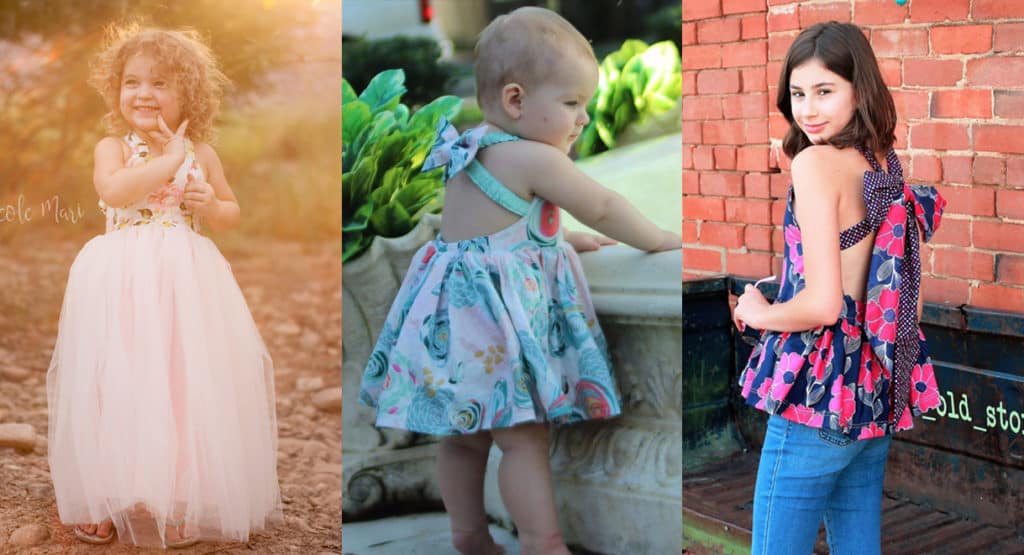
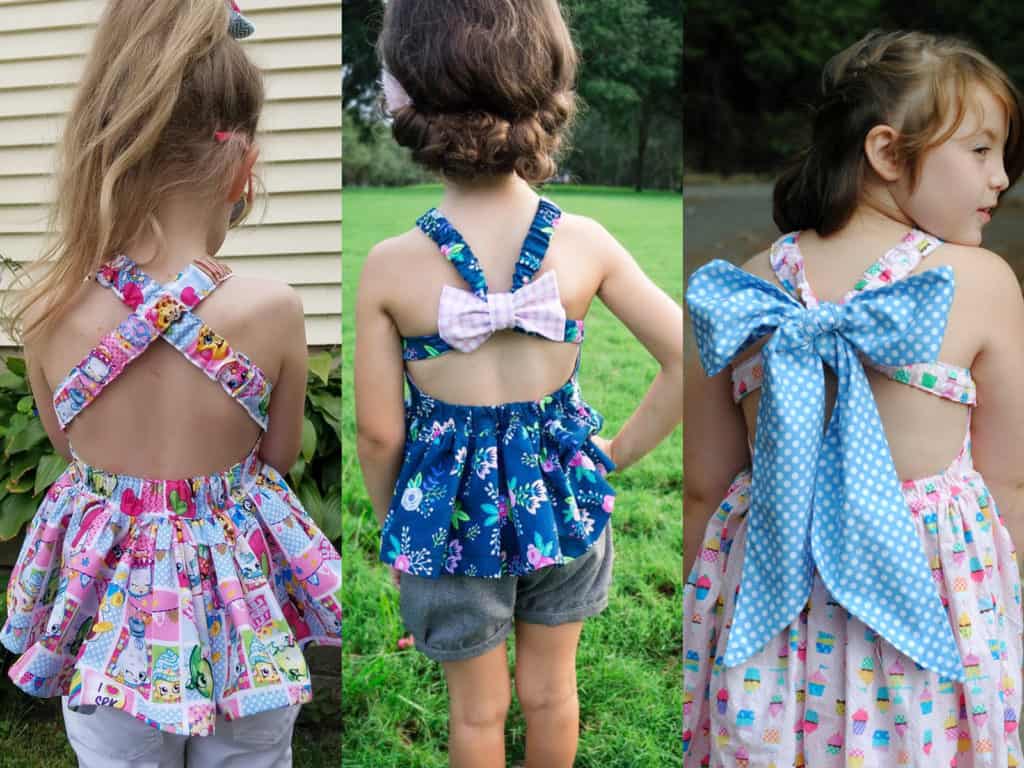
The Sweet Bow now features three hemlines (top, dress and maxi), two strap options (cross and easy on-off), and optional bow embellishments (small and mega bow).

**Want to learn more about how to measure for this pattern?  We’ve got you covered with an in-depth blog HERE.  In case you’re new to Patterns for Pirates and PDF patterns in general, we have a great blog full of new user tips HERE to help you get started!  And don’t miss out on the Measurement Chart printables, to help keep all of those crazy numbers in one easy-to-reference spot.

Here’s a quick rundown of the options:

Three Hem Lengths

Cross Straps, Small Bow + Mega Bow


Ready to purchase the Sweet Bow and get to sewing yourself?  Go grab your copy HERE!!  The pattern is on a re-release sale through Sunday, September 10, 2017.

If you’re still needing more inspiration, be sure to head over to the Patterns for Pirates Facebook Group Album to see everything our beautiful testers have sewn for their littles.  Don’t forget to tag us on Instagram (@patternsforpirates | #patternsforpirates) and to share your finished items over in our Facebook group!  We love to see what you make!
Happy sewing, friends!

Filed Under: Pattern Release 2 Comments

P4P University :: Twin Needle Tips

March 16, 2017

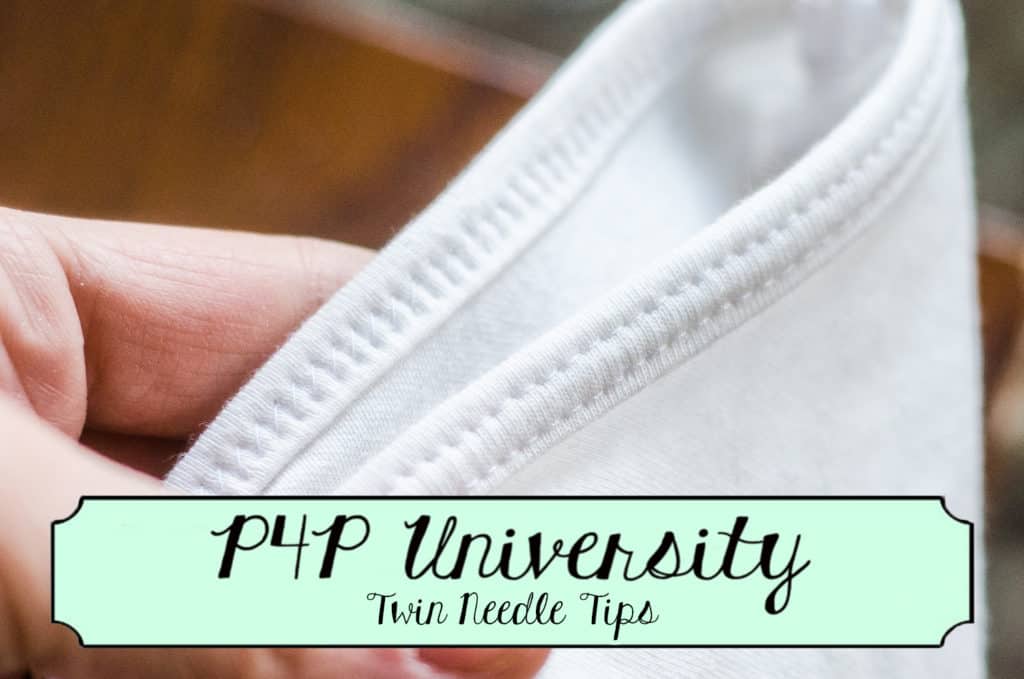
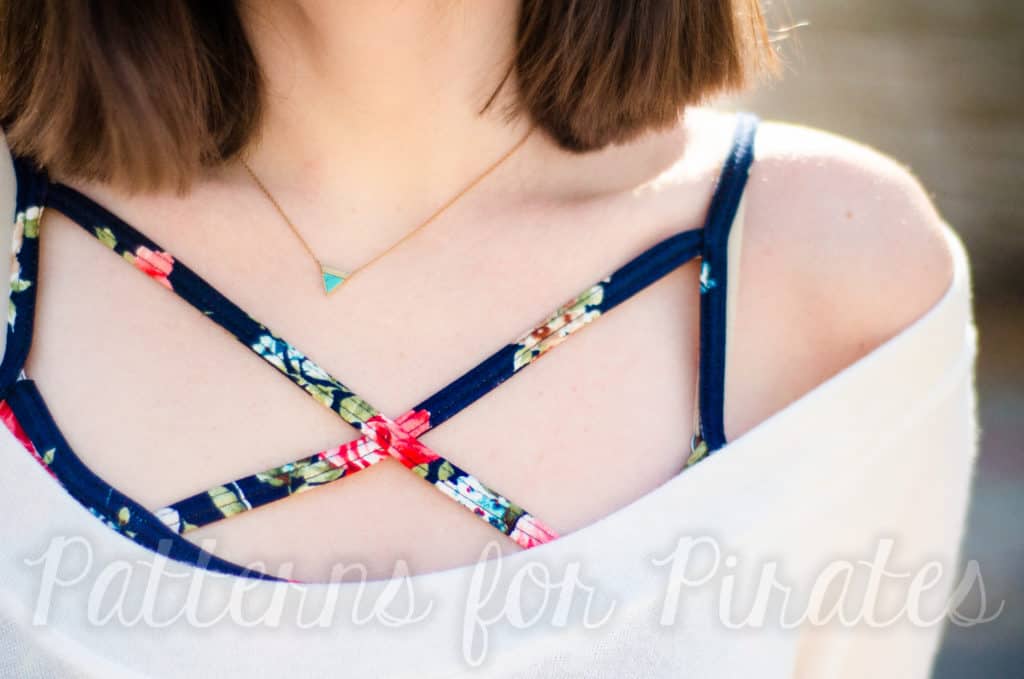
Hello Pirates!  Today I’ll be walking through some tips on using a twin needle for topstitching as an alternative to a coverstitch machine.  The end goal (of either twin needles or a coverstitch) is two lines of parallel stitching on the right side of the fabric, with the ability to stretch and not break threads when pulled.  This is usually used when hemming, but these tricks will especially come in handy when topstitching binding on our new cami pattern!


1. Stretch Needles

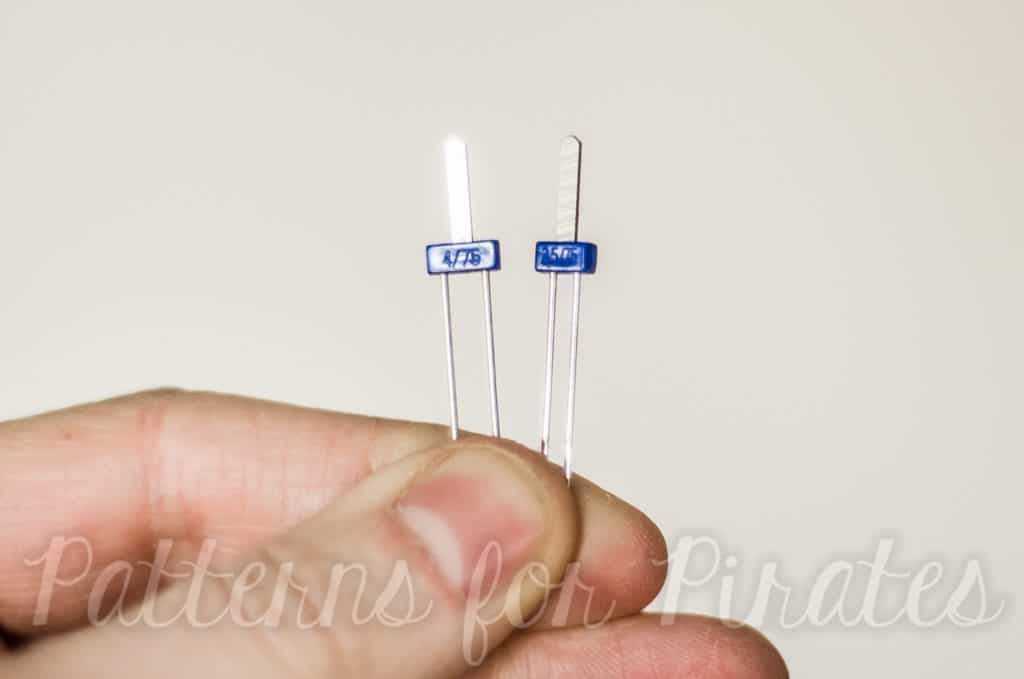
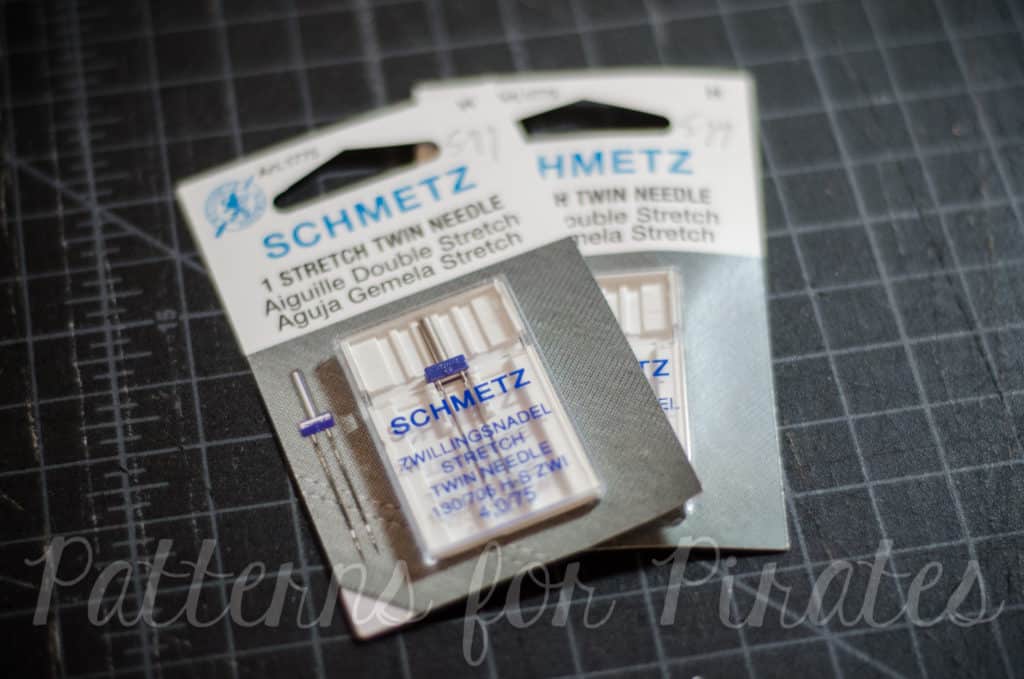
The most important point is to make sure you buy stretch needles.  Schmetz is the most common brand that people tend to use, they are available on Amazon.  I prefer the wider 4.0 width the best because it works better for me; it also comes in a 2.5 width.  These are both 75/11 needle size.


2. Threading

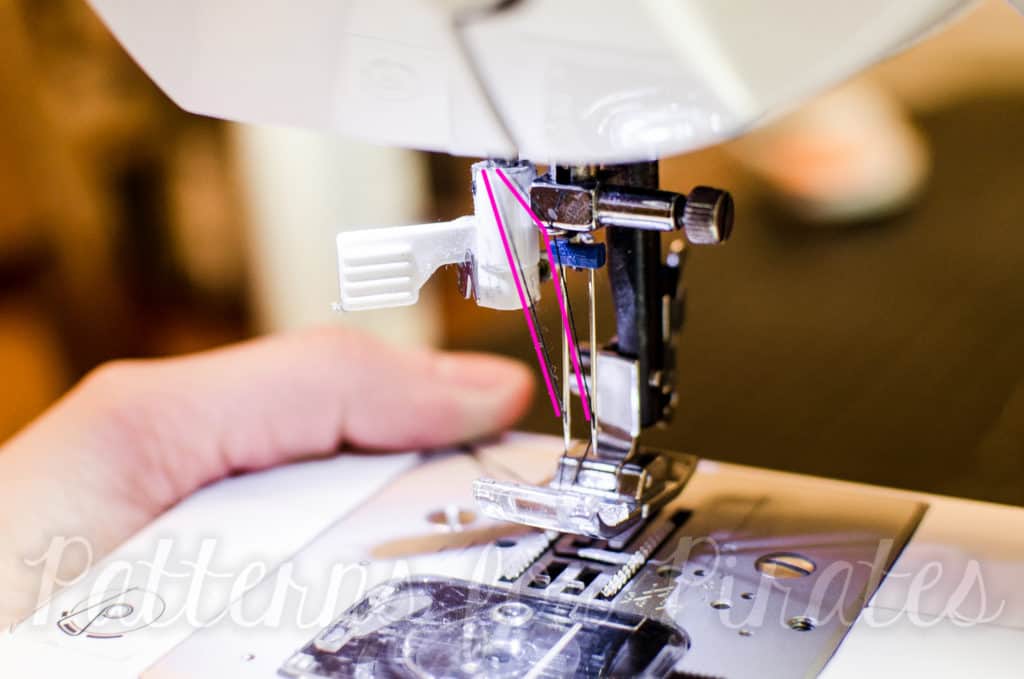
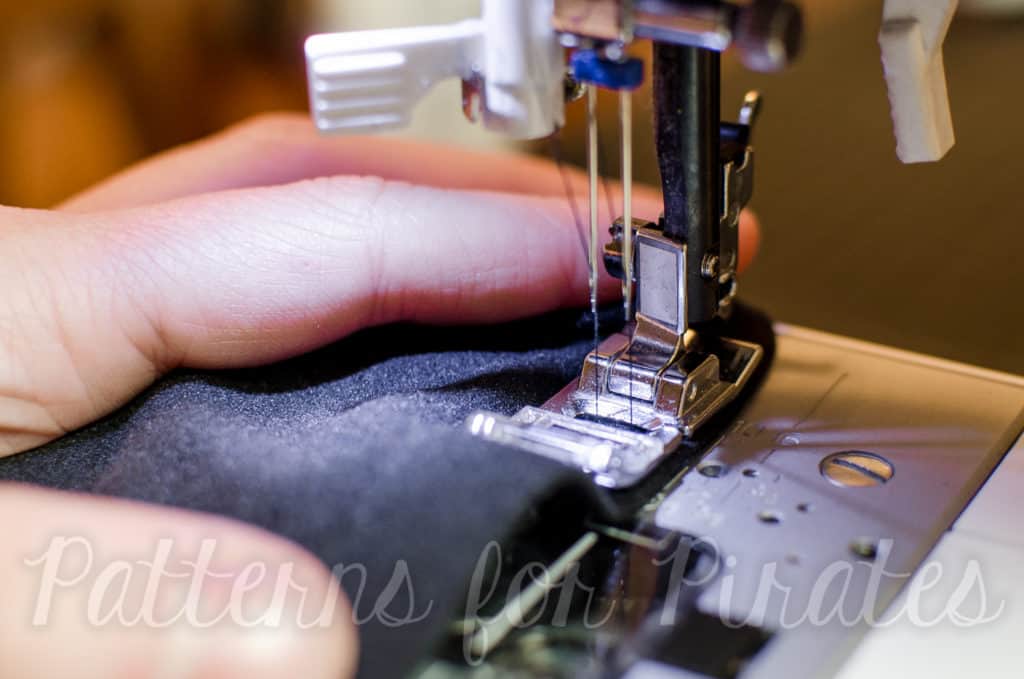
When threading, it helps to thread as shown in the below picture.  This helps stop the threads from twisting when sewing.  Also, make sure your threads are not caught on anything (or each other) at the top of your machine.
 

5. Stitch Type

Use a regular straight stitch for this; no need to use a triple stretch stitch (|||) or any other stretch stitch like that.


4. Tension

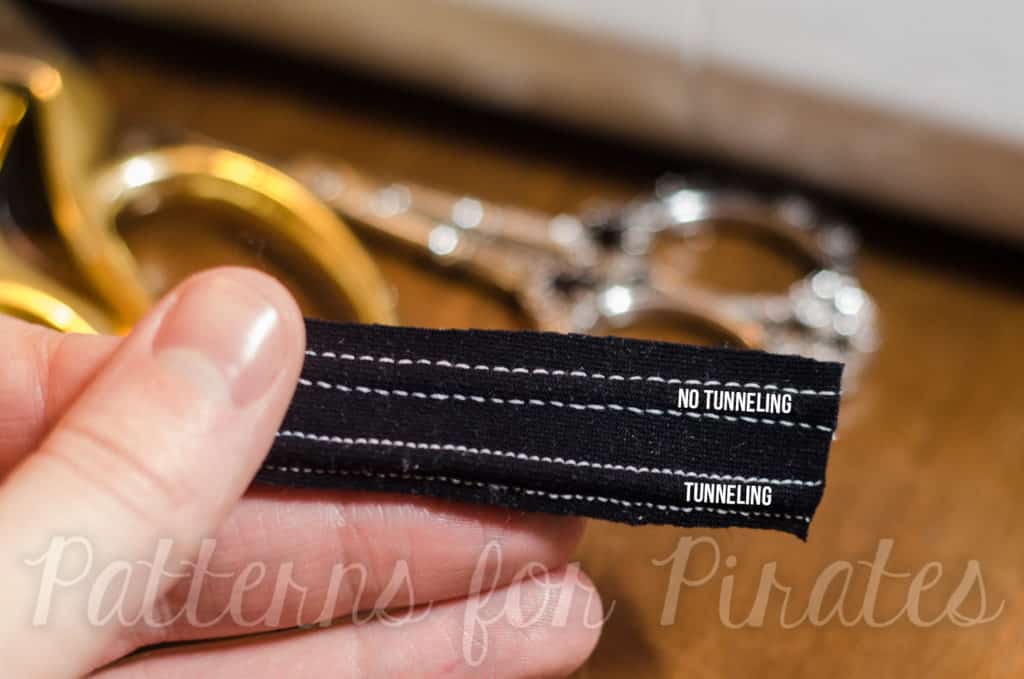
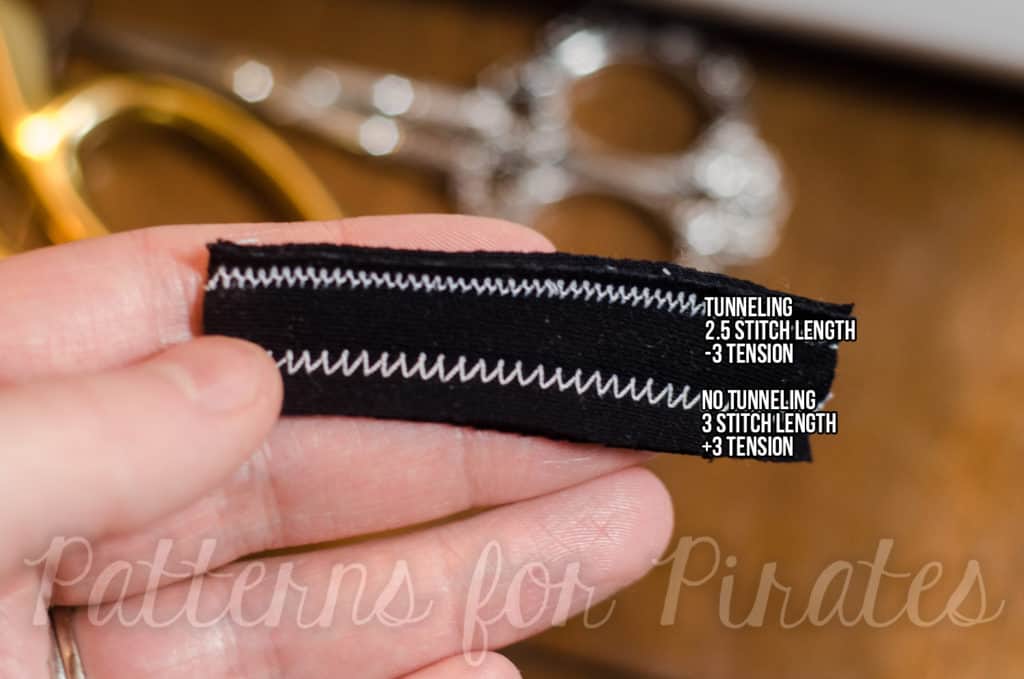
Tunneling is what happens when there is a large bump in between your two rows of stitching.  To avoid this, I’ve found it helps to increase your top thread tension.  Your machine may vary, but I usually set my tension to 3.  If possible, you should also decrease your bobbin tension as well.


5. Stitch Length

Increasing stitching length usually also helps with tunneling, especially on trickier, slipperier fabrics.  Your machine may also vary on this too, but I set mine between 3.0 – 4.0, depending on fabric.  The lower number will help things stretch more though, so you may need to find a happy medium.


6. Go Slowly!

This is a huge one.  It’s so tempting to go full steam ahead, especially if you using a twin needle to hem.  You’re almost done with your project, but don’t ruin it with a sloppy hemming job!  Going slowly can make all the difference between a wavy hem and a perfectly flat one.  If you encounter any thicker areas of fabric, it may also be a good idea to use the hand crank on your machine, turning it slowly to ensure no mistakes as you pass over the thicker area.


7. Don’t Stretch as You Sew

This applies to all knit fabric projects, but especially when using a twin needle.  Don’t pull or stretch the fabric as you feed it into the needle area.  I’ve found that even creating a little extra negative tension as you guide the fabric can help to avoid any pulling as you sew.


8. Top vs. Bottom

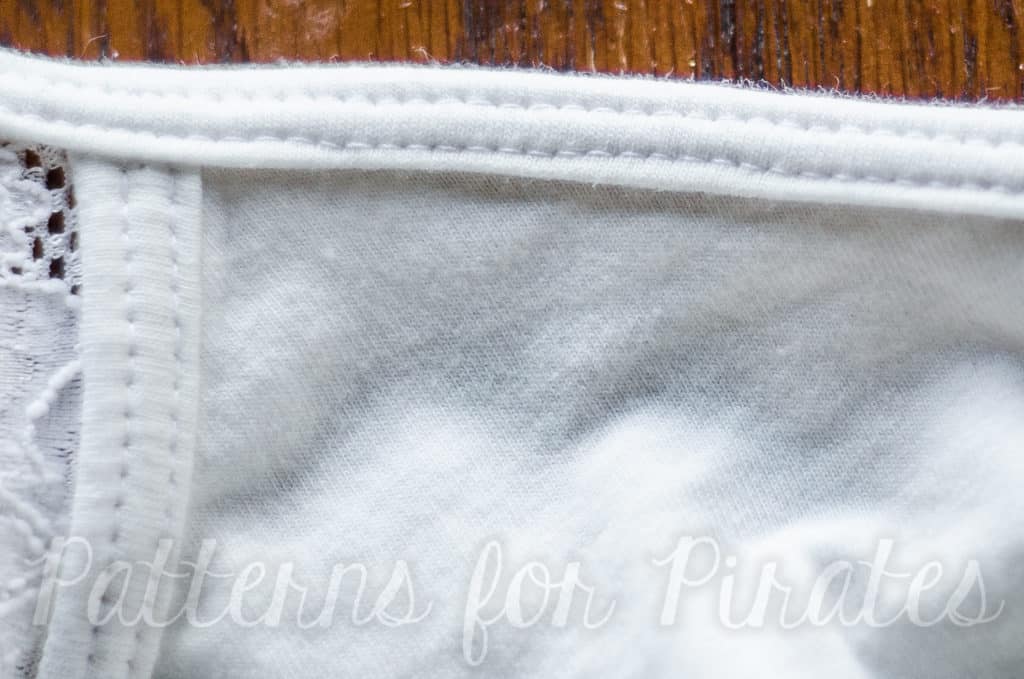
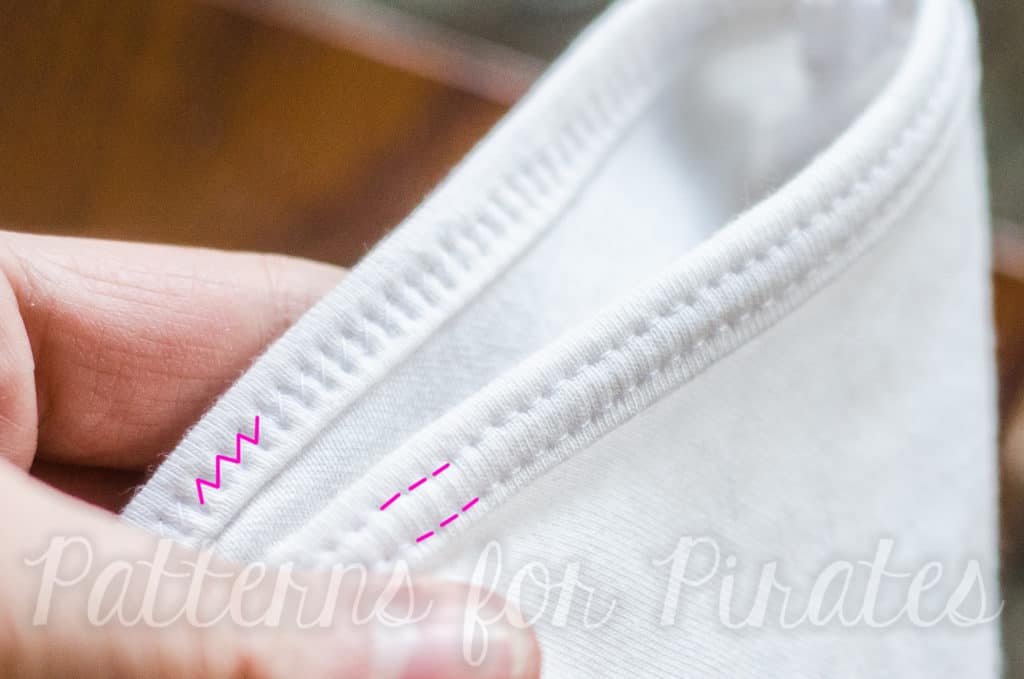
When everything is done correctly, you should have two parallel lines on the top of your fabric, and a perfect zigzag on the back.  The zigzag is what allows your fabric to stretch after it’s sewn, so if you have super tight or non-existent zigzags, then you likely need to adjust (likely increase – confusing, I know) your top thread tension.  Here’s how it should look, the underside of the fabric is at the top of the picture and the right side is on the bottom.  Note the zigzags!


I hope these tips help you as you prepare to topstitch lots of fun binding or finish up a fancy new garment with a twin needle hem!  Let us know in our Facebook group or here in the comments if you have any questions about twin needles!

Elisabeth

Filed Under: Frequently Asked Questions 15 Comments

Featured Patterns

  • Mae Top - Bundle Mae Top - Bundle $20.00 Original price was: $20.00.$18.00Current price is: $18.00.
  • Mae Bottom - Bundle Mae Bottom - Bundle $20.00 Original price was: $20.00.$18.00Current price is: $18.00.
  • Loosey Goosey - Bundle Loosey Goosey - Bundle $20.00
  • Bacall Bodysuit Bacall Bodysuit $12.00
  • Privacy Policy
  • Refund Policy
  • Affliliate Program
  • Contact Us
  • About

Copyright © 2025 Patterns for Pirates

Copyright © 2025 · Genesis Framework · WordPress · Log in