Patterns for Pirates

P4P stylish, modern, wearable patterns

  • Home
  • Blog
    • Frequently Asked Questions
    • Pattern Releases
      • Free Patterns
    • P4P University
      • Fitting
      • Sewing with Stretch, Knit Fabrics
      • Sewing with Woven Fabrics
      • Sewing Machines
    • Sew-A-Longs
    • Fabric for Pirates
    • Pattern Hacks
    • Announcement
      • Blog Tours
      • Contest/Giveaway
  • Shop
  • Bundle Discounts
  • Flash Friday
  • Gift Cards
  • My Account
  • Cart

Gala Gown :: Easy Hacks

November 29, 2019

It’s a Gala Hacks party! In true P4P fashion, our amazing blog team has some fun, easy hacks and mash ups ready for you.

…..

Gala – Sweetheart mash up

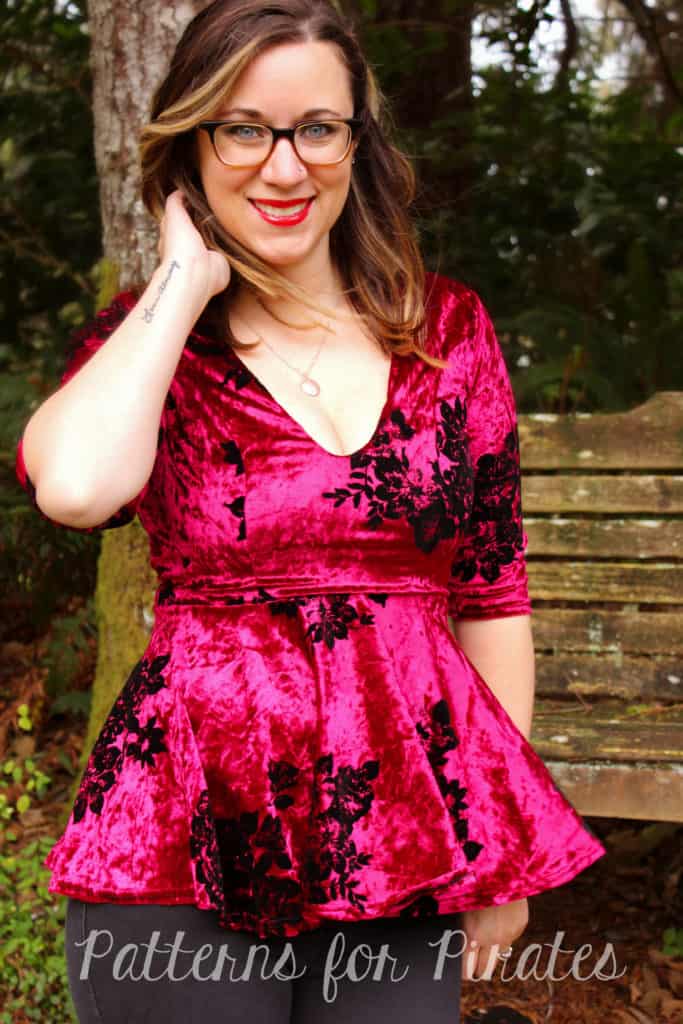
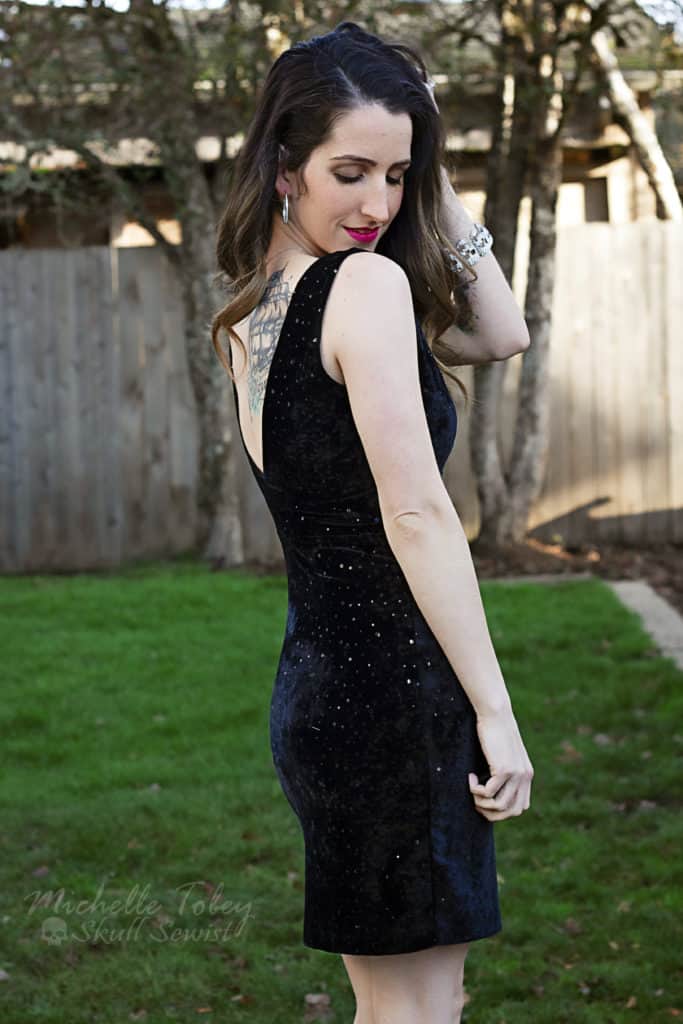
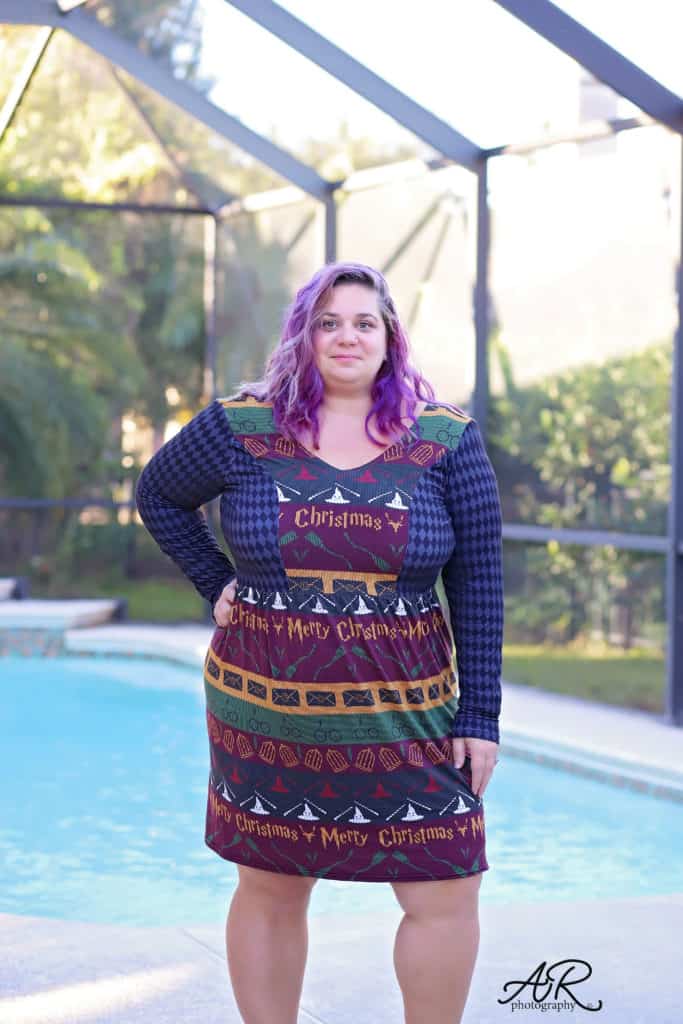
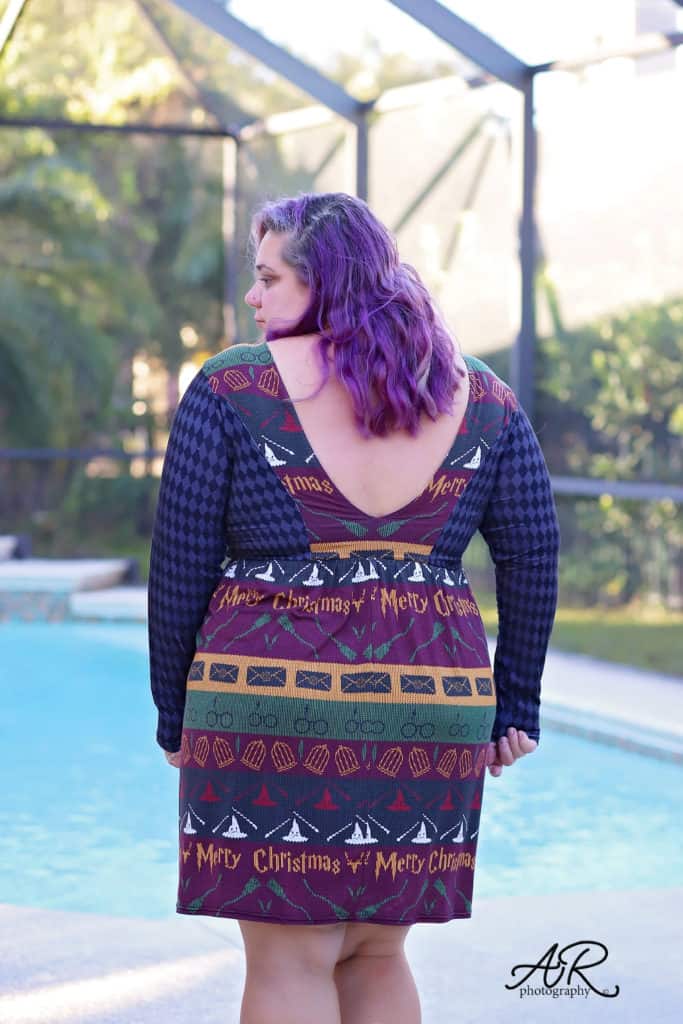
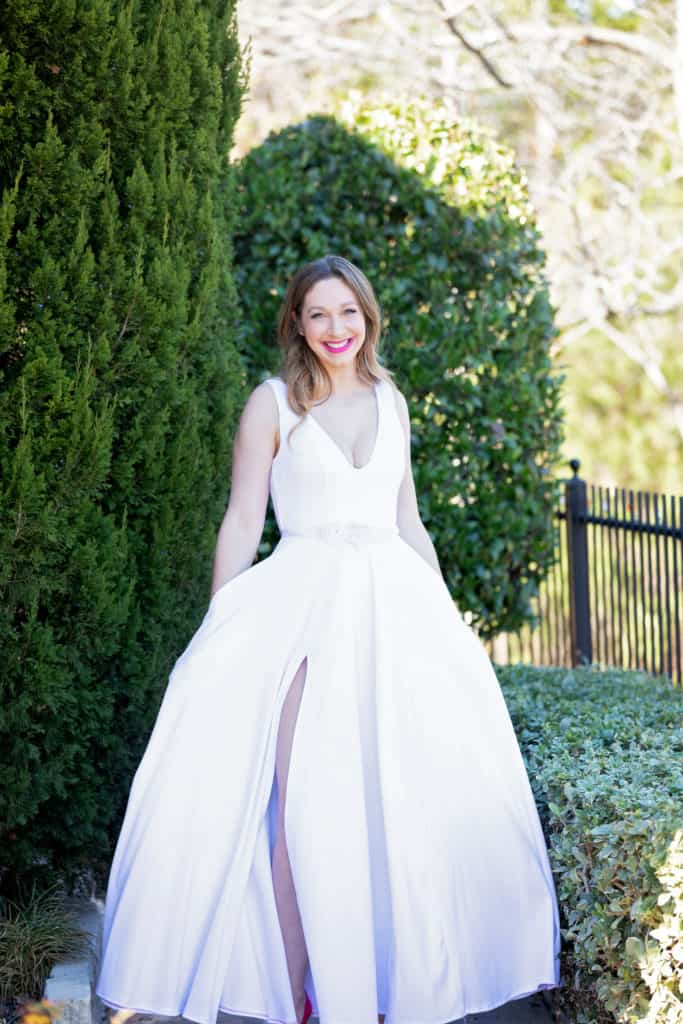
There’s no denying that the Gala Gown has all of the drama and beauty needed for all of those amazing times in our life. However, it can also be transformed into a fun little top with very little effort! I used the bodice of the Gala Gown for this look, however I paired it with the peplum skirt option from the Sweetheart Dress. 

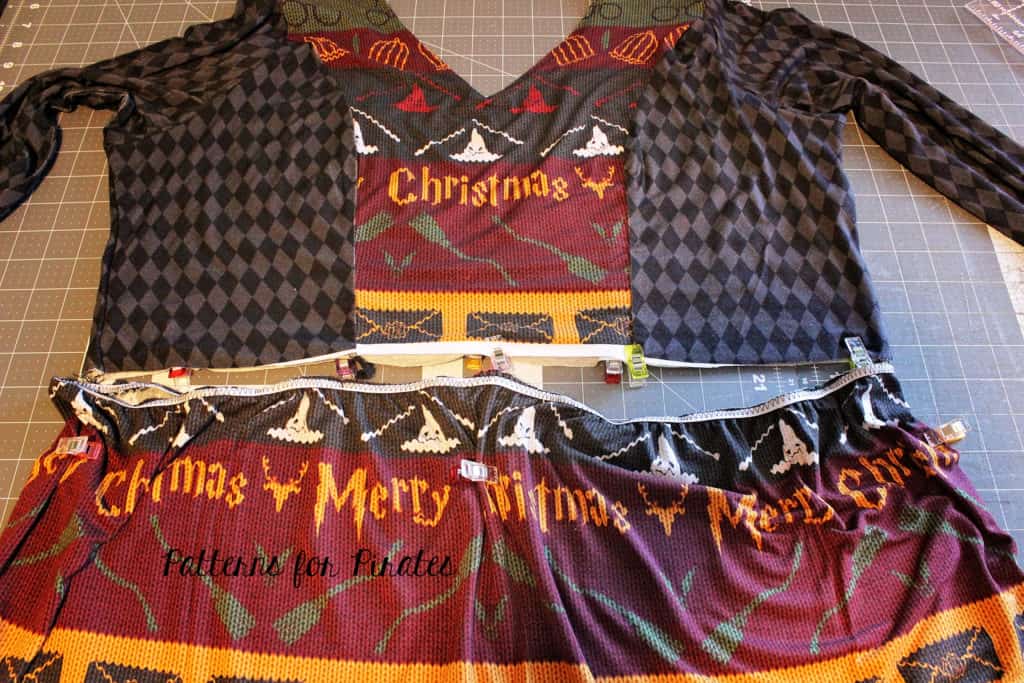
To create this look, cut and assemble your bodice from the Gala Gown as directed in the tutorial. You will then want to use the peplum skirt option from the Sweetheart Dress. Mark the quarter points on both the bodice and the skirt. Slip the skirt over the bodice, right sides together, and match quarter points. Attach using a ½” SA. Finish your peplum by hemming and you’re all done!
~ Erinn

…..

Gala – Pencil Skirt mash up

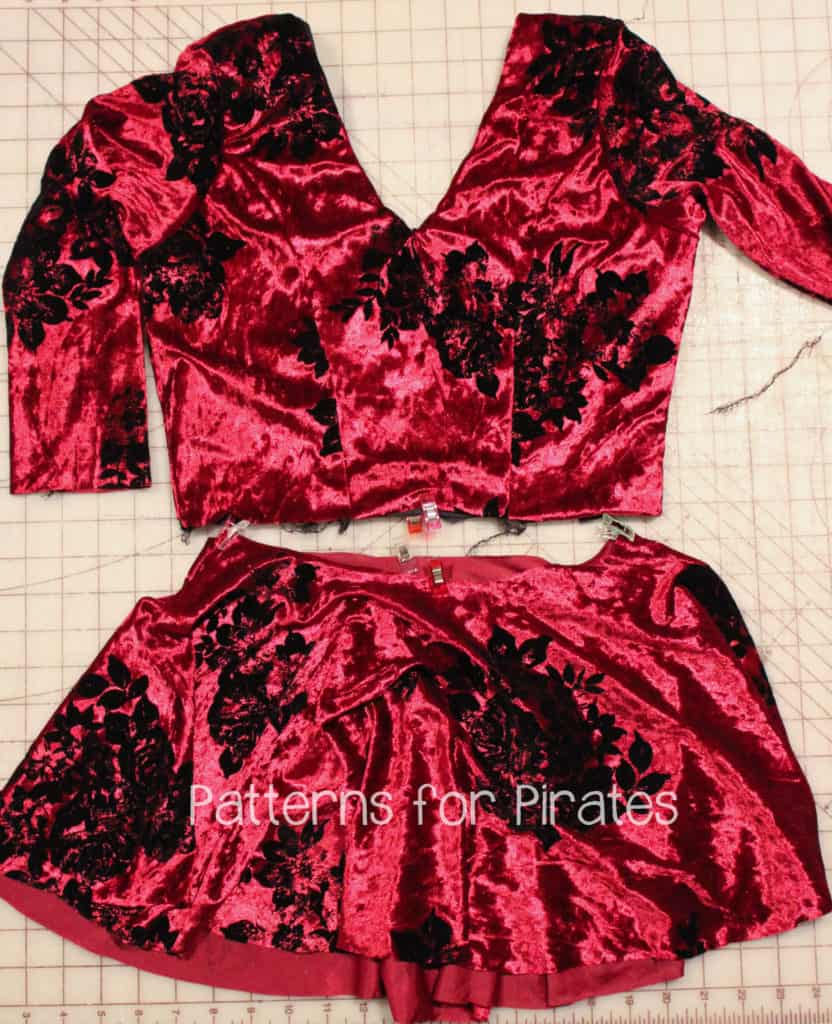
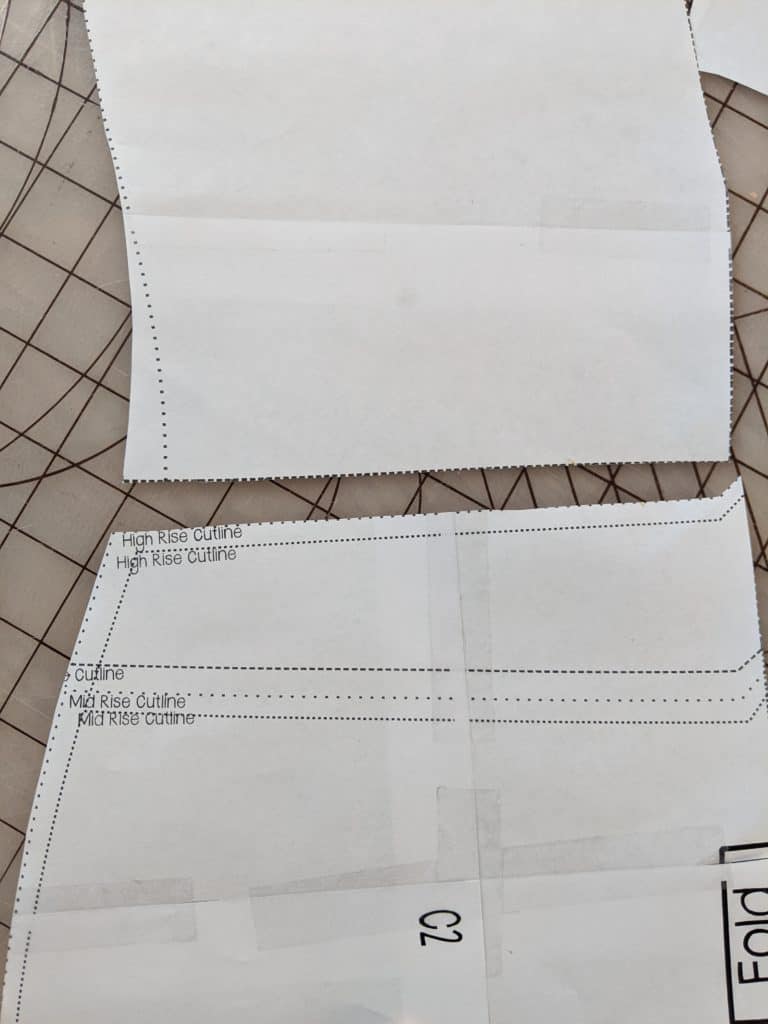
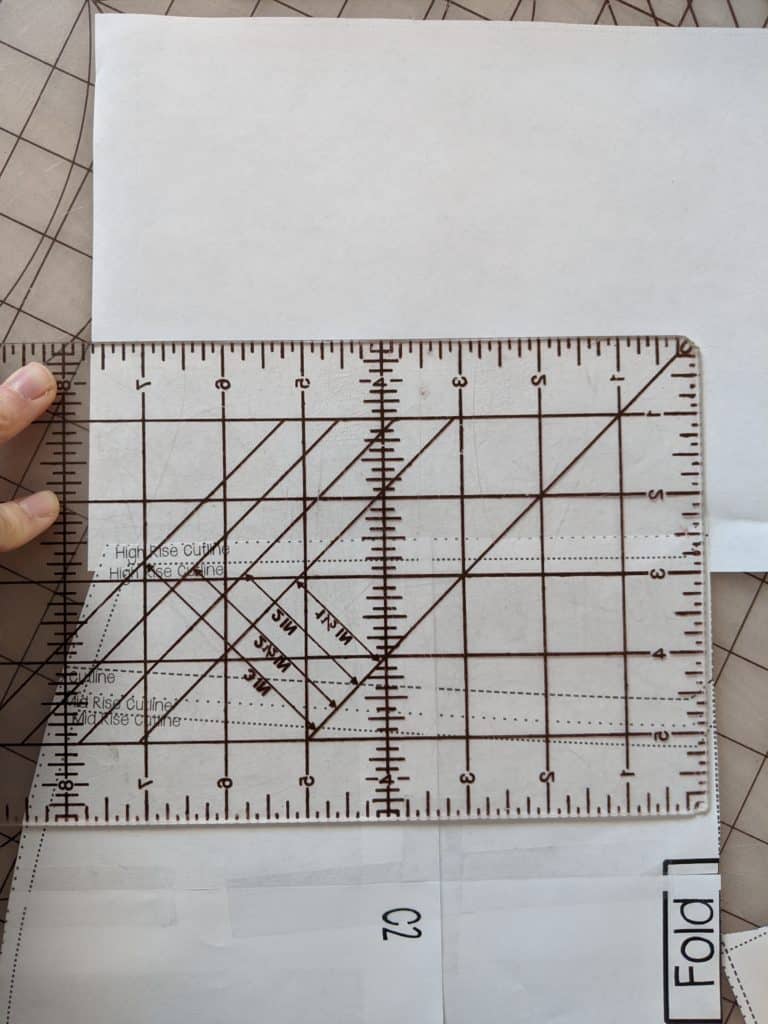
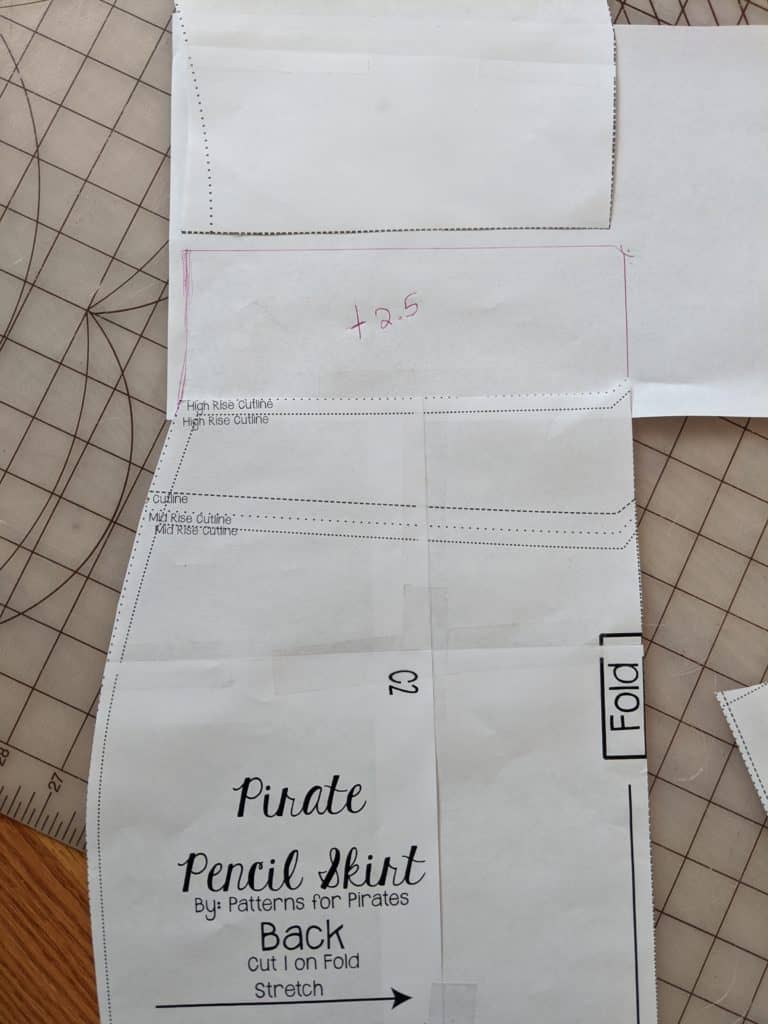
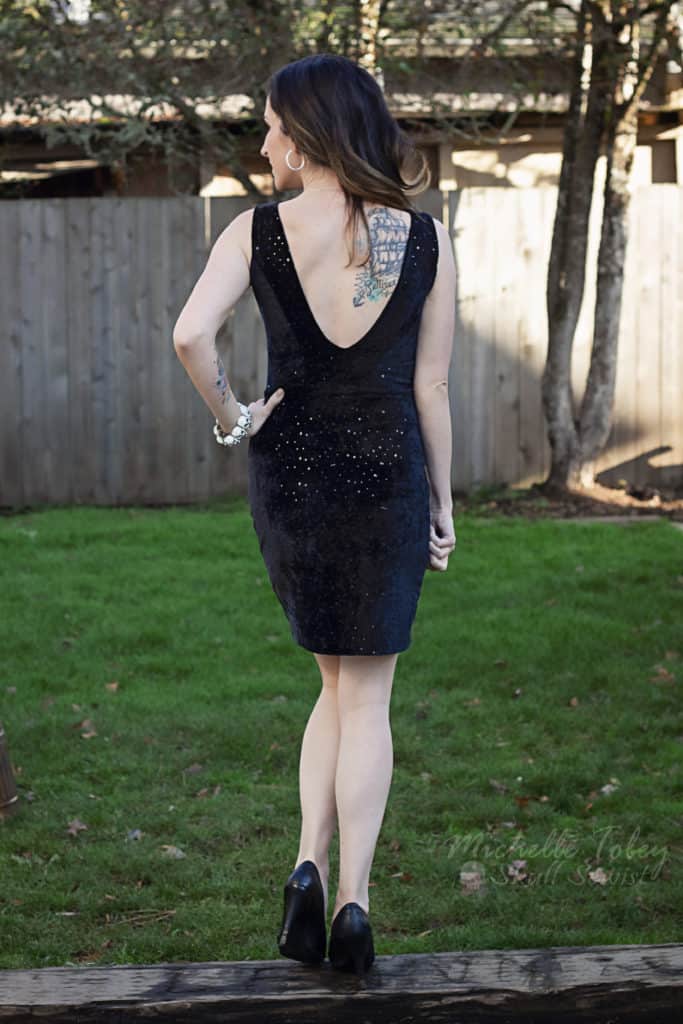
Loving the new Gala top but looking for something a little more form-fitted through the hips?  I’m going to take you through a super quick and easy mash with the Freebie Pirate Pencil Skirt that’ll give you a totally different look. Go ahead and grab your Gala Bodice Lining and your Pencil Skirt Pattern (high rise height) pieces.  You’ll want to make sure the bodice bottom is close to the same width as your pencil skirt top for mashing (based on your sizing it should be).  You may have to grade your pencil skirt pieces slightly to match the Gala Bodice.  I did this through the added waistband height.

Next, you’ll need need to add the Pencil Skirt band height to your pencil skirt pattern.  You’ll take the given band height and divide it by 2 and then add that to the top of your pattern pieces.  For example- the band height on mine called for 5 inches so I added 2.5 to my pattern piece ( since the band is folded in half for the actual skirt height).  This is what you’ll cut for the bottom of your dress.


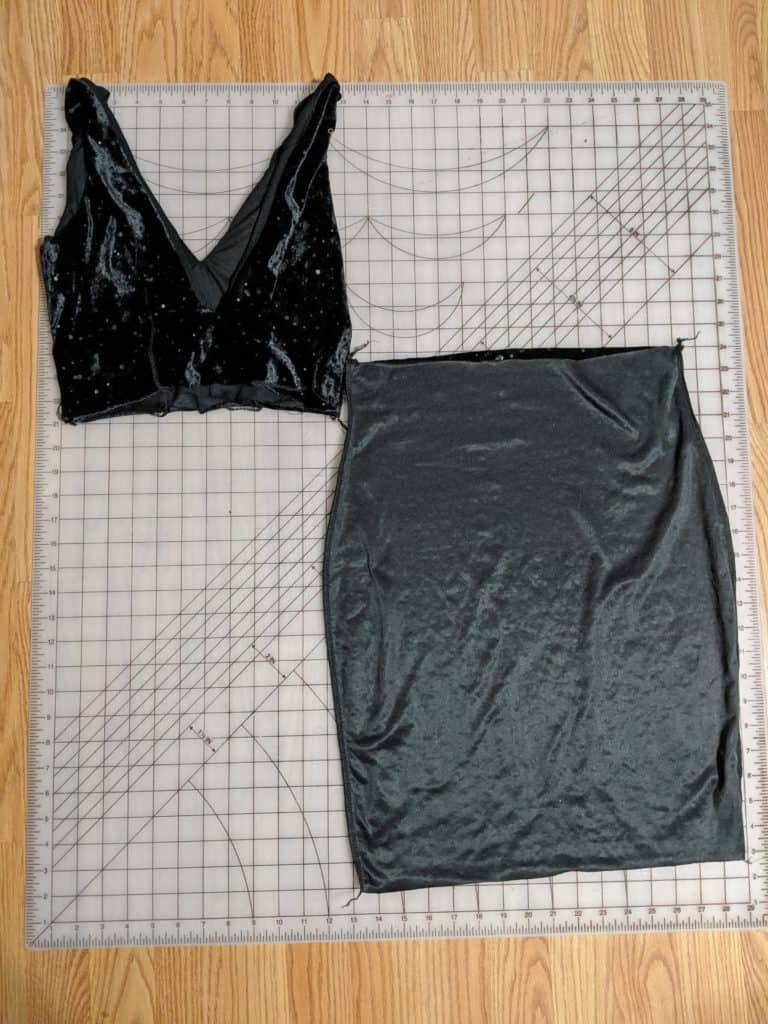
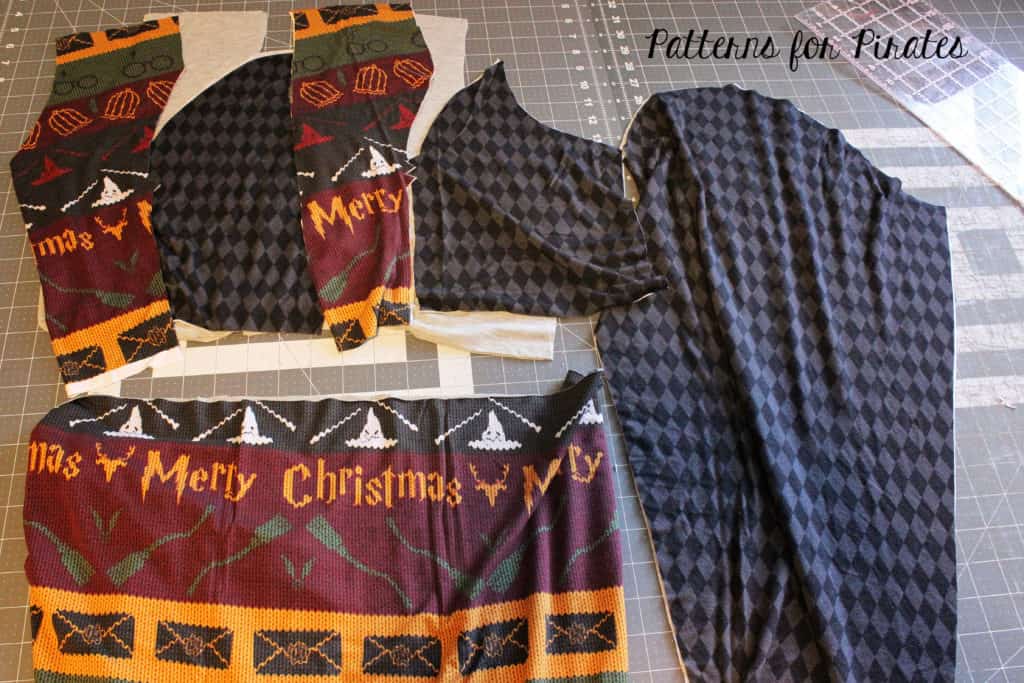
Now, sew your bodice as directed in the pattern and the side seams of your pencil skirt.   You’ll end up with two separate pieces that look like the photo below.

Finish your dress by sewing your bodice to your skirt piece just like you would if you were sewing the standard Gala skirt and you’re done!  Totally new look- perfect for New Years’ Eve fun!


Happy Sewing and Cheers,

Michelle


…..

Gala – Boundless mash up

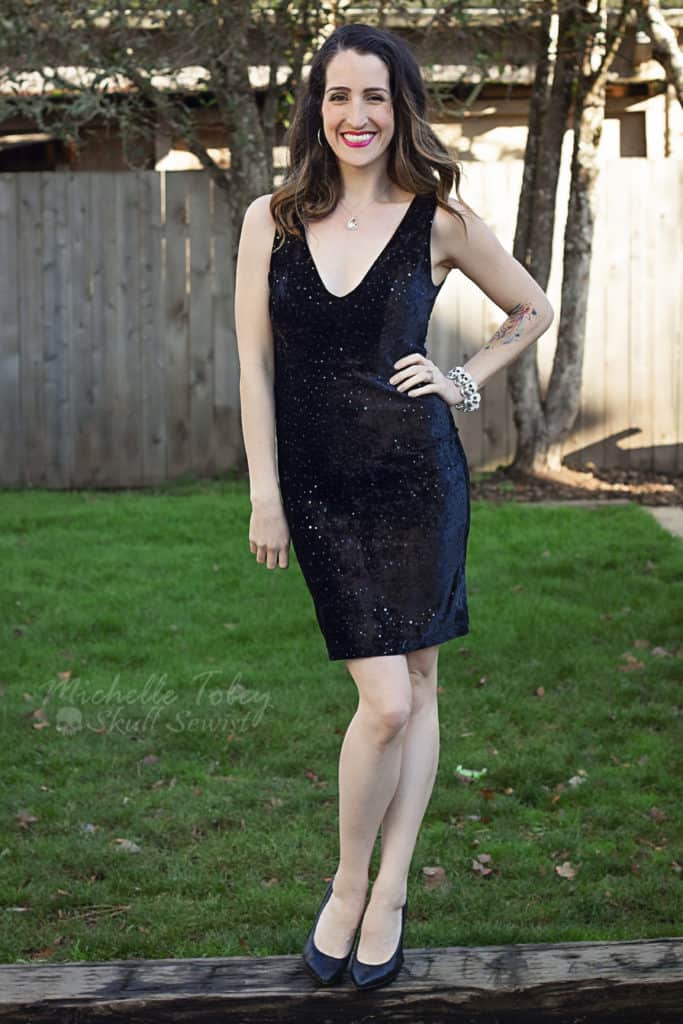
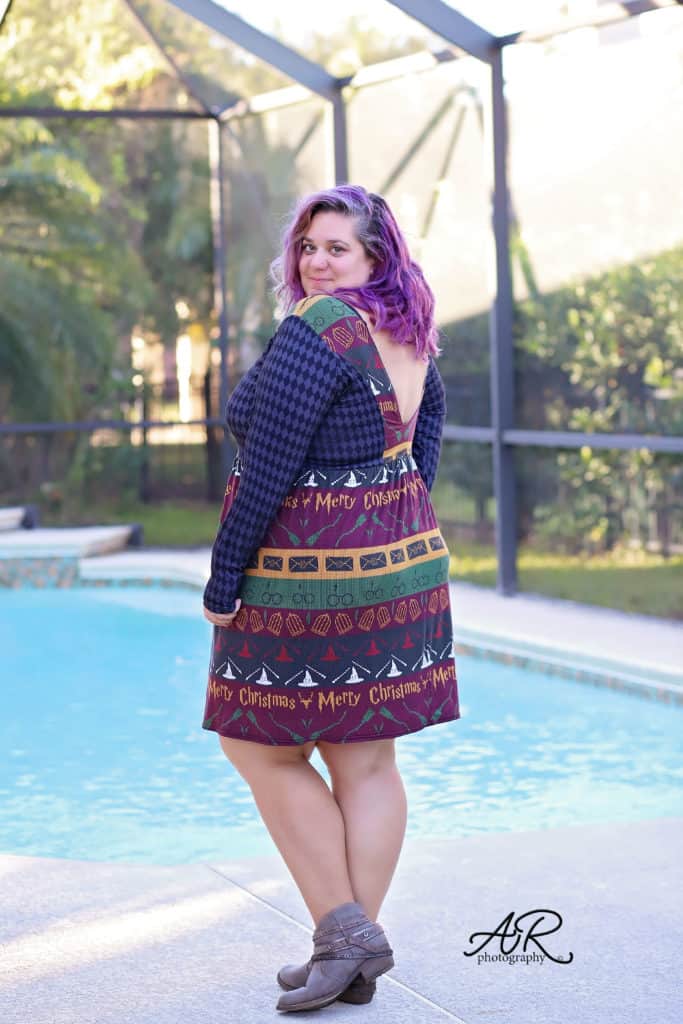
It’s no secret that the Boundless dress is one of my favorite P4P dresses so it was only natural that I would mash the Gala Gown bodice with the Boundless skirt. This is a super easy hack.

All you have to do is cut the Gala Gown bodice and sleeves and the Boundless skirt. I used bamboo knit for my whole dress but if you used stable knits for the top, I encourage you to use fabric with great drape for the skirt.

Sew the top and the skirt as instructed in the patterns. You will be adding the skirt as in the Boundless tutorial, using elastic to stabilize the waist.

Hack: I used the width of the fabric and stitched the skirt in a loop. I marked the sides and front of my skirt and attached it to the bodice with the seam in the back. 


…

Ribbon Belt

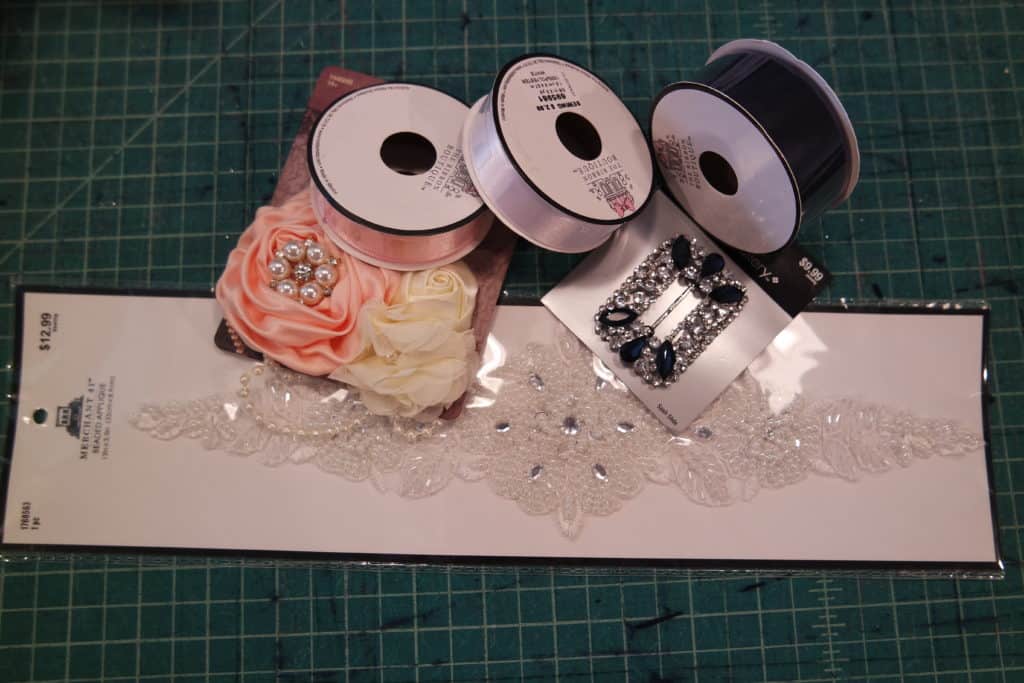
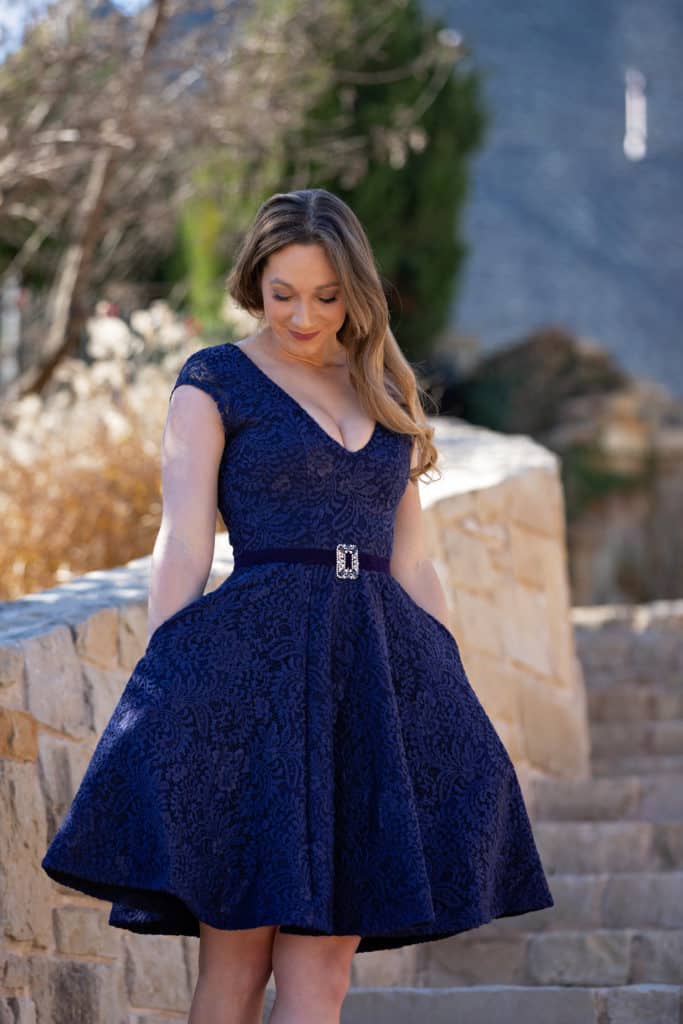
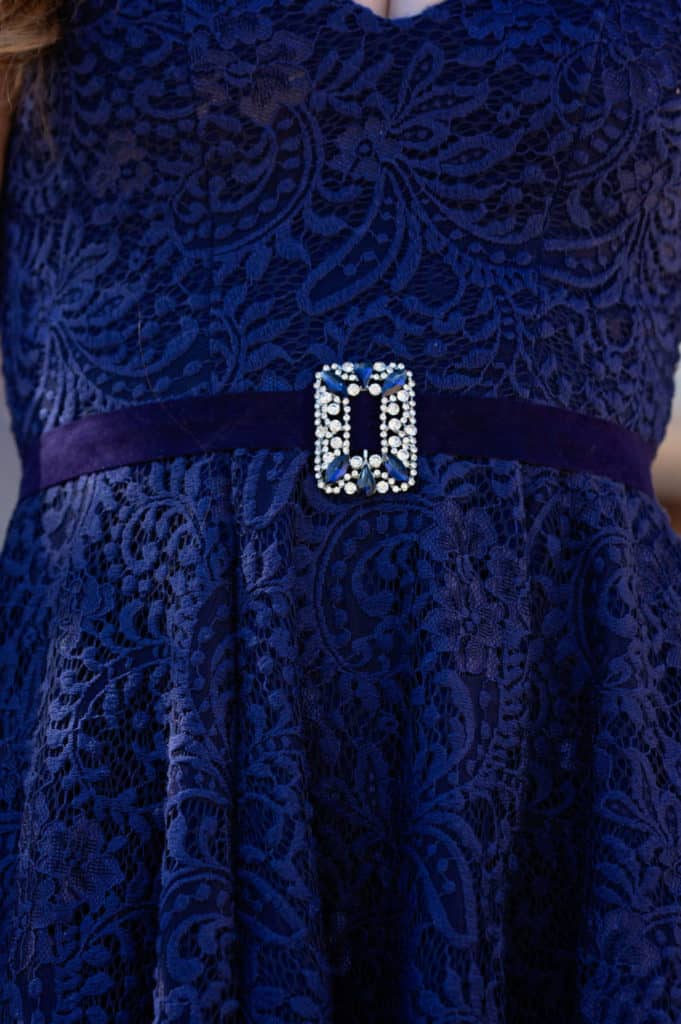
I see a lot of posts wanting something to really highlight the waist when wearing a dress, but if you’re wearing a more formal dress you might not have a belt that goes! A ribbon belt can be very elegant and simple to create to give yourself a little more definition or attention to your waistline.  You can grab any ribbon style you’re drawn to that coordinates with your dress and attach whatever embellishment you find that makes your heart sing!

Some ideas would be appliques, belt buckles, brooches, fabric flowers, hair-clips, bows, etc.  I picked up satin ribbon and some great velvet ribbon as well.

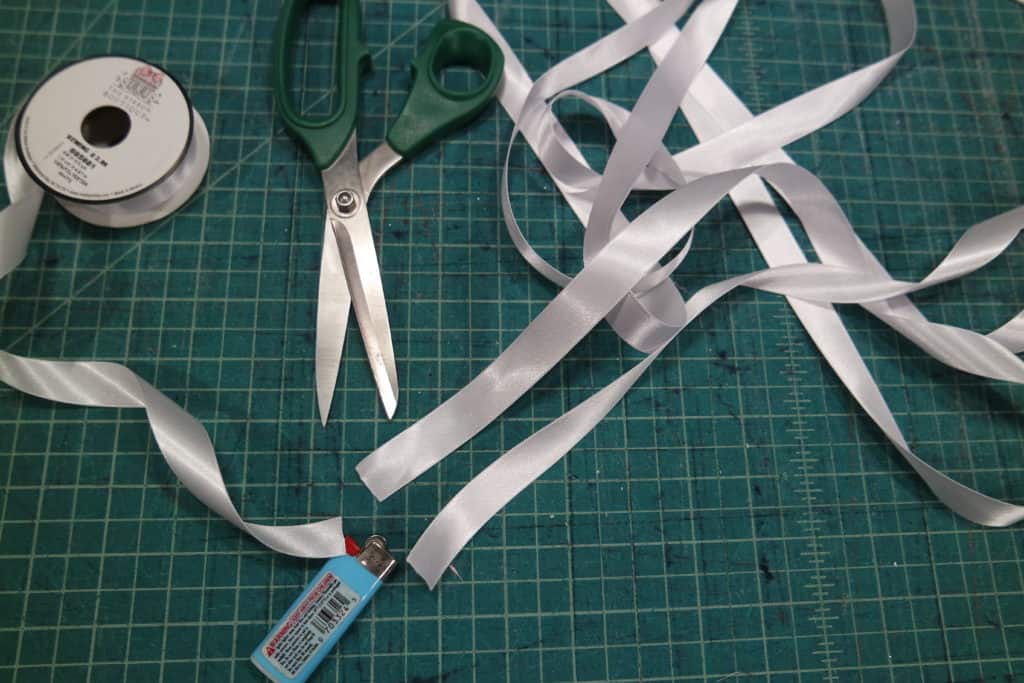
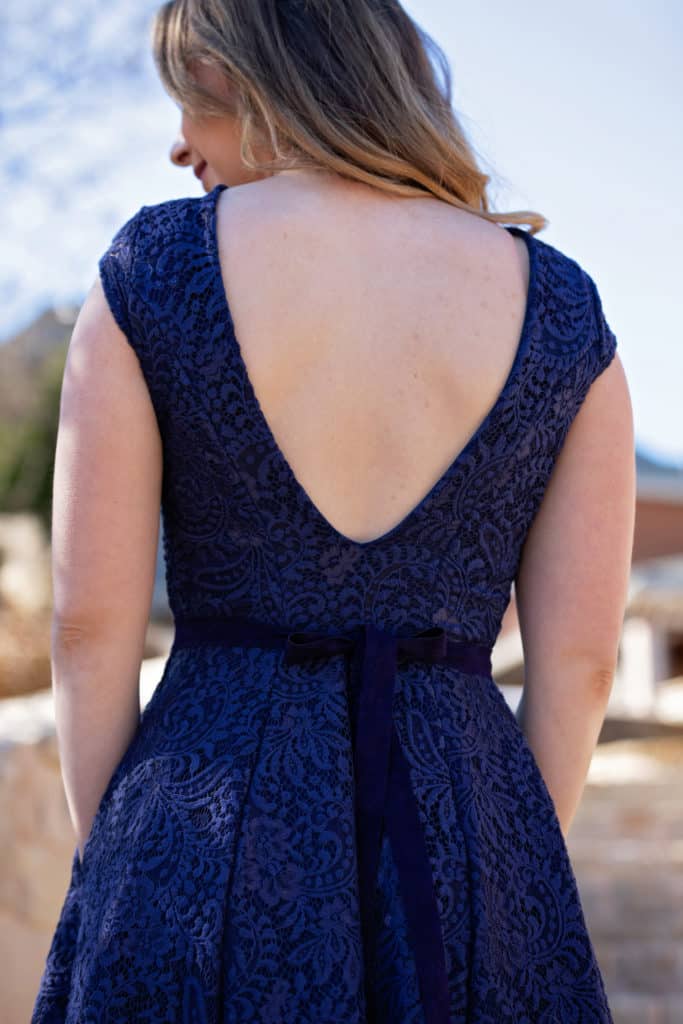
To create it you just need to cut your ribbon as long as you’d like- so the waist measurement plus enough to tie a bow and however long you want  your tails.  I like to have my tails go to almost the very bottom of my hem personally, but that’s just personal preference.  Make sure you finish the edges if you pick a ribbon that frays.  Satin ribbon I prefer to heat seal with a flame.

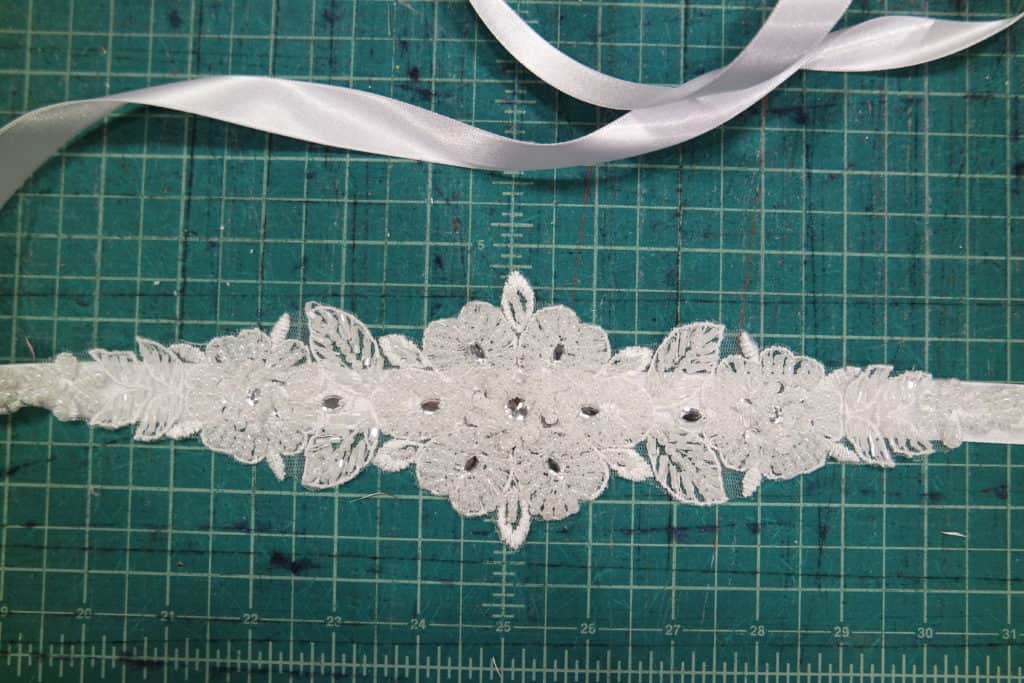
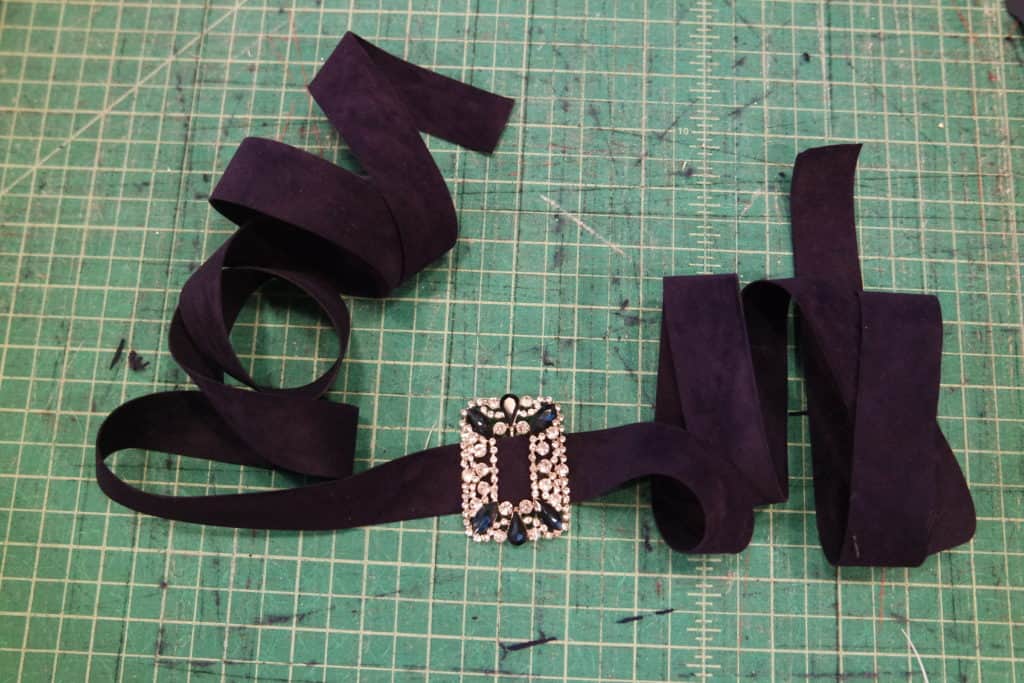
Find the center of your cut ribbon and attach your embellishment with hand stitching.

There! You now have a beautiful belt that will look stunning on your more formal dresses! It’s quick and simple for such a fabulous add on and the possibilities are endless!


Here a a few modeled with the Gala Gown.


Judy

Which hack will you make first? Don’t forget to share your creations in the P4P Facebook group so we can all admire them too.

Filed Under: Pattern Hacks, Pattern Release 1 Comment

Just Write Skirt :: FREE Sewing Pattern + Tutorial!

July 31, 2019

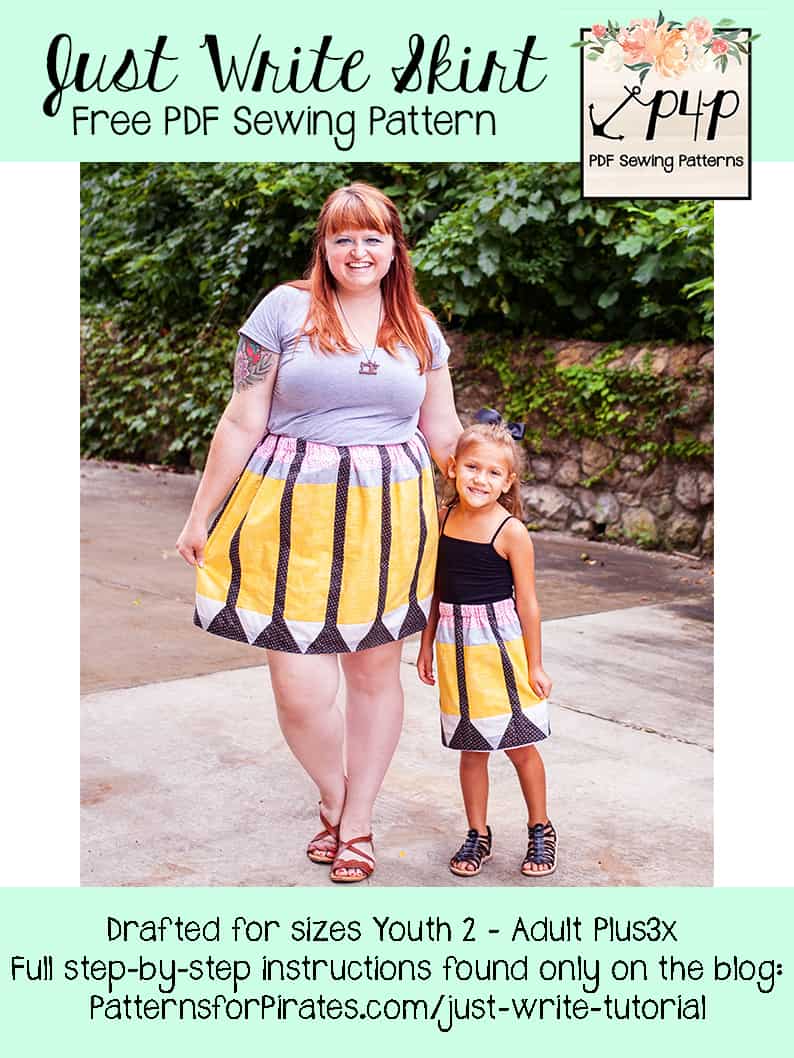
Unbelievably so, it’s time to start thinking about Back-to-School season.  Which means that stores are filled to the brim with tempting school supplies.  Is anyone else a pen / notebook / planner nerd like me?  I could spend hours in those aisles.  Life just got a little better for me because now I can really let people know about my undying love for school supplies by wearing it on my sleeve….er skirt!!  Pirate friends, meet the Just Write Skirt!

Before we get started, here are some things you’ll need:

  • Just Write Skirt free Pattern Pieces (found in the store HERE)
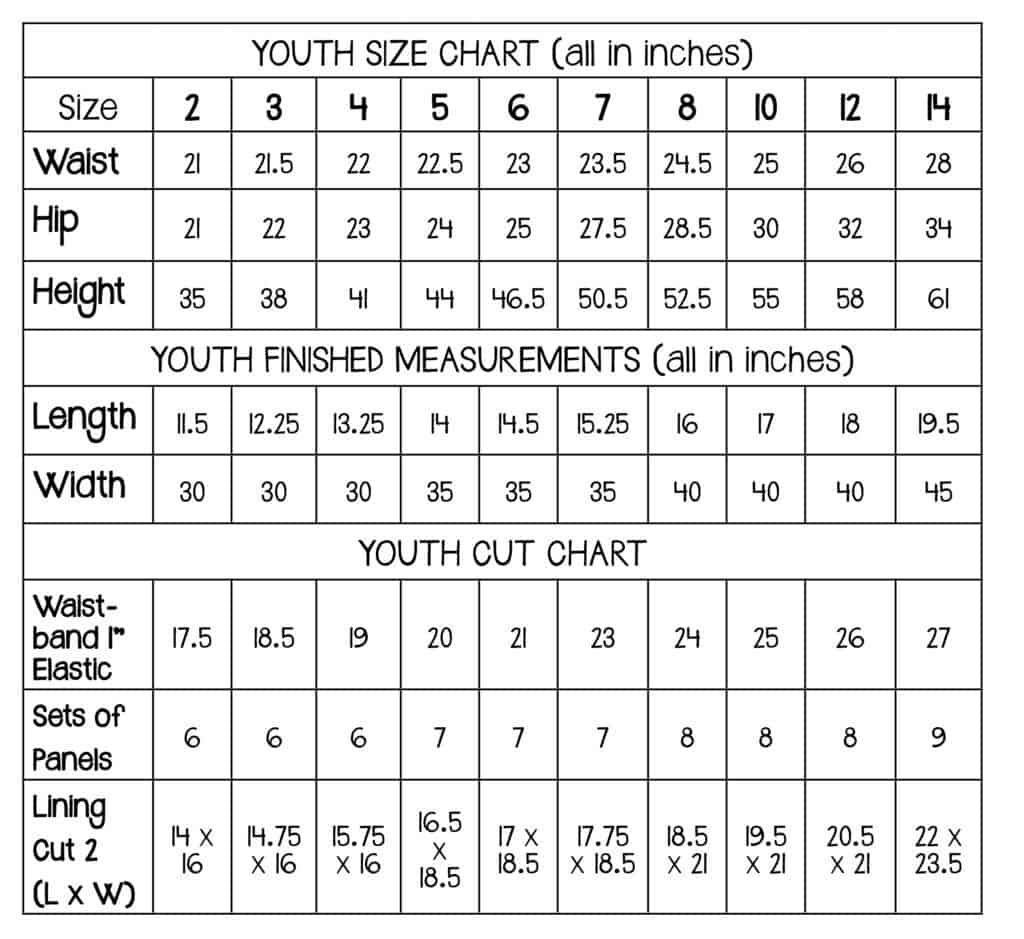
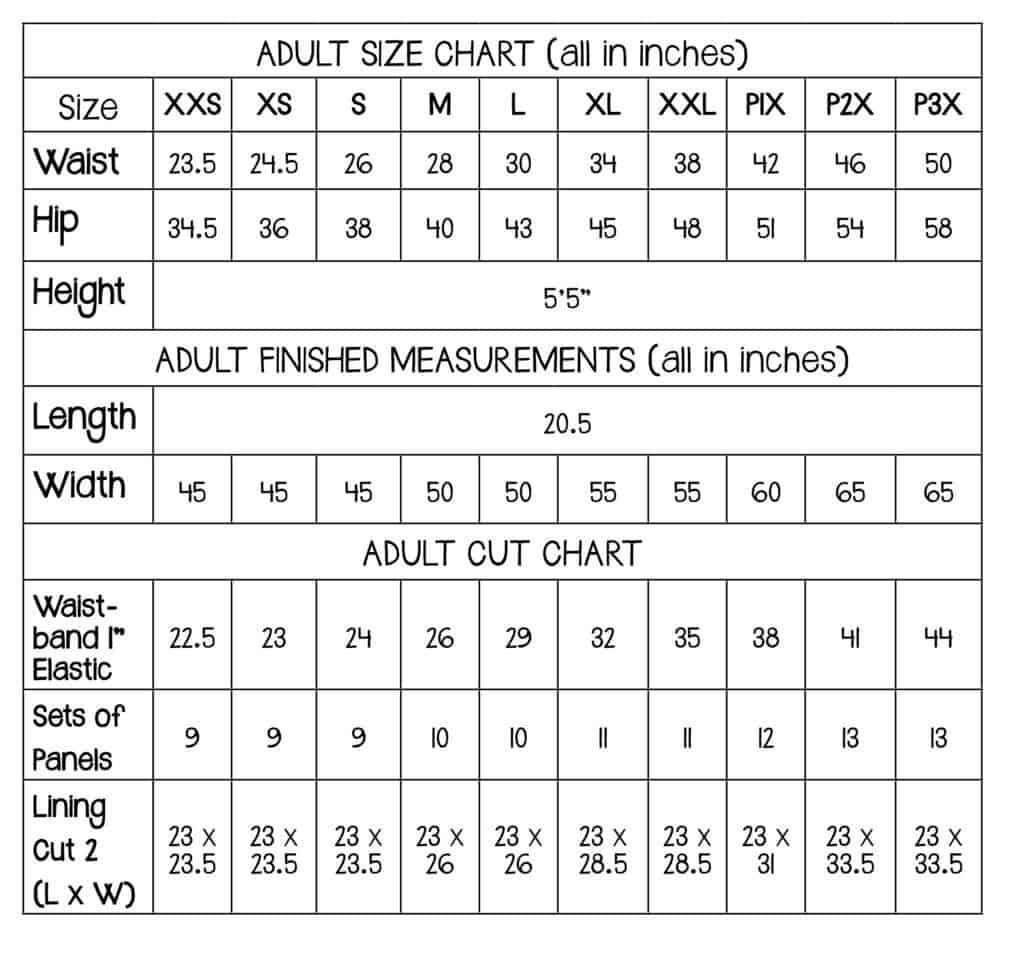
  • 1″ Waistband Elastic.  See cut chart for length needed.
  • YouTube Video Tutorial for assembling a pencil panel set (also found at the bottom of this tutorial)
Fabric Requirements (in Yards, rounded to nearest 1/8)
Sizes 2-7 8-12 14 XXS-P1X P2X-P3X
Lining 1/2 5/8 1-1/4 1-1/3 1-1/3
Pencil (yellow) 1/4 1/3 3/4 7/8 7/8
Accent Panel (black) 1/2 5/8 5/8 2/3 2/3
Point Accent (black) 1/4 1/4 1/4 1/4 1/3
Lead (grey) 1/8 1/8 1/8 1/8 1/4
Ferrule (grey) 1/8 1/8 1/4 1/4 1/4
Eraser (pink) 1/4 1/4 1/3 1/3 1/3
Pencil Wood (off-white) 1/8 1/4 1/4 1/4 1/4

**While the skirt is meant to sit at your natural waist, you will want to choose your size based upon your hip measurement.  Wanting a fuller skirt?  The more pencil panel sets you add, the fuller your skirt becomes.  Just keep in mind that each panel finishes at 5″, and you will need to adjust your lining fabric to account for any extra panels in your awesome skirt!

Sewing for a child who is a blend of sizes?  No sweat!  Just sew up the number of panel sets that is required for their waist/hip measurement, and use the pattern pieces for their height.

And now, onto the tutorial!
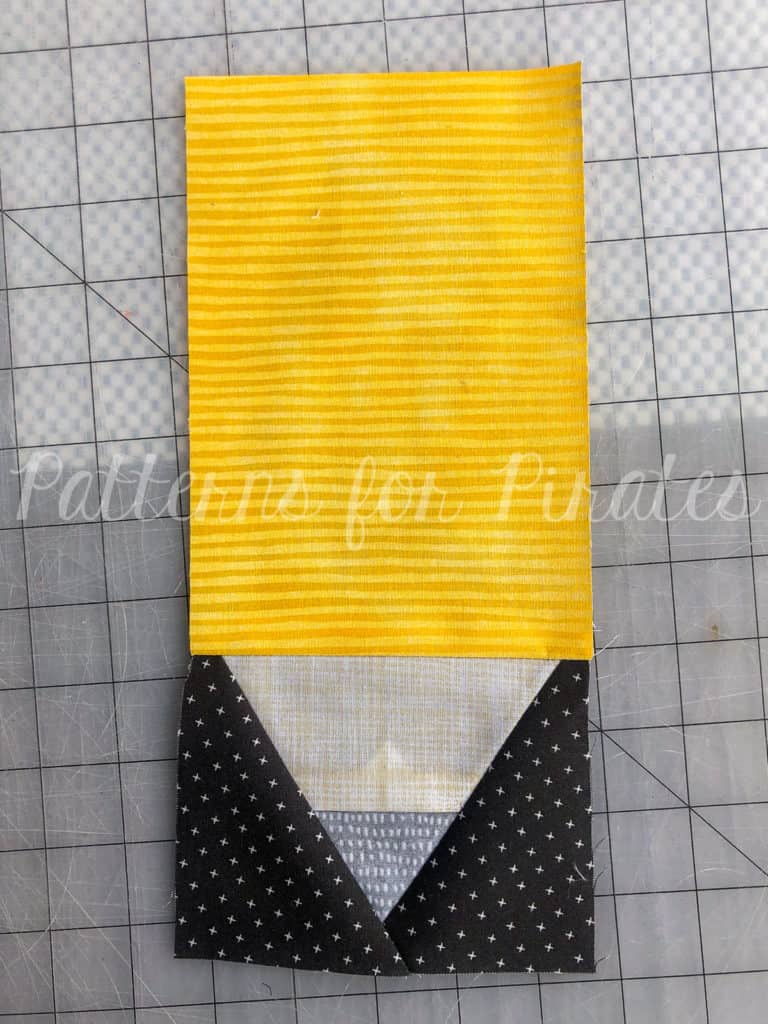
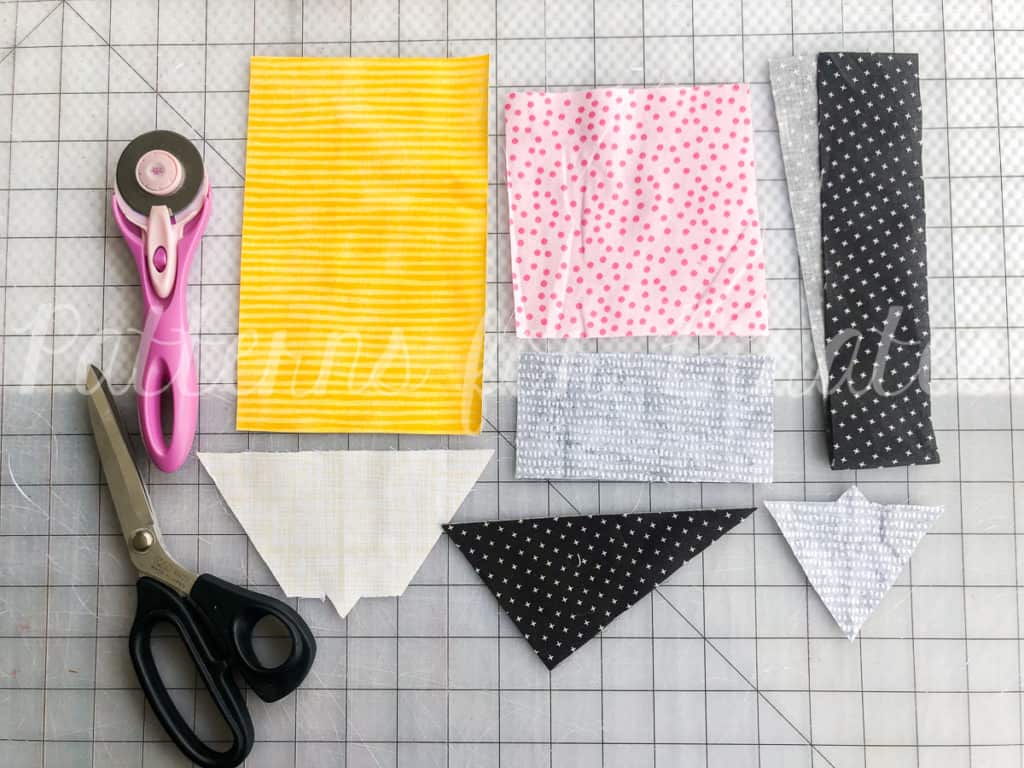
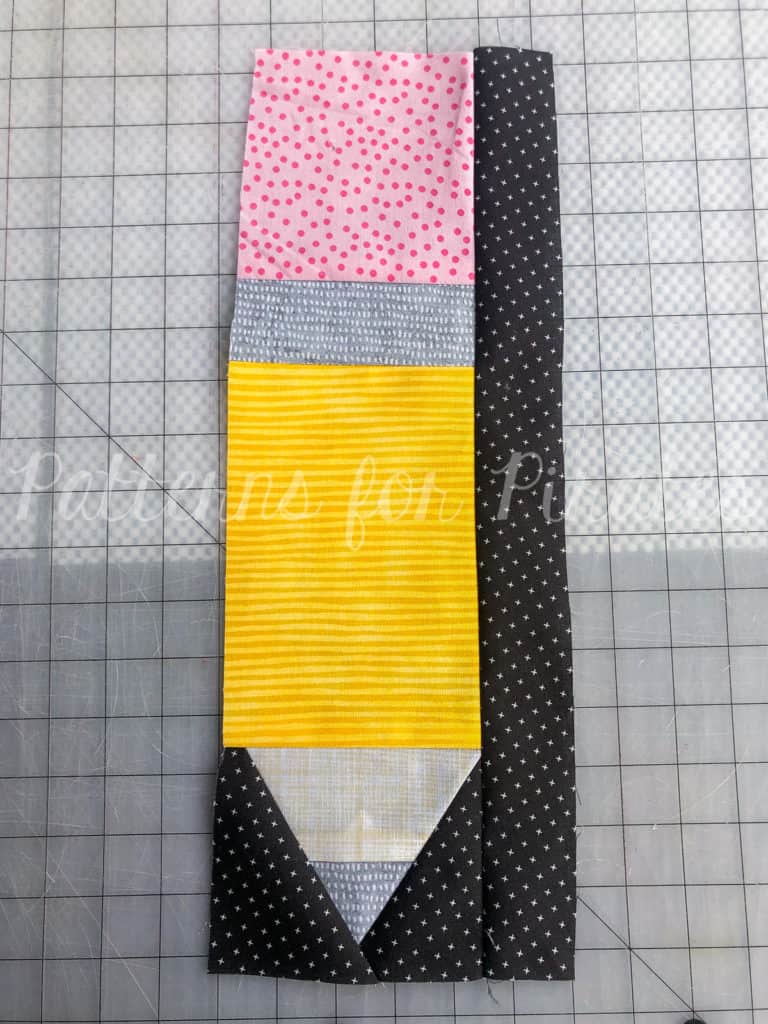
Step 1: For each pencil panel, you will need:
– 1 Ferrule piece (grey)
– 1 Eraser piece (pink)
– 1 Pencil body (yellow)
– 1 Pencil wood (off white)
– 1 Pencil lead (grey)
– 2 mirrored Point accents (black)
– 1 Accent panel (black)

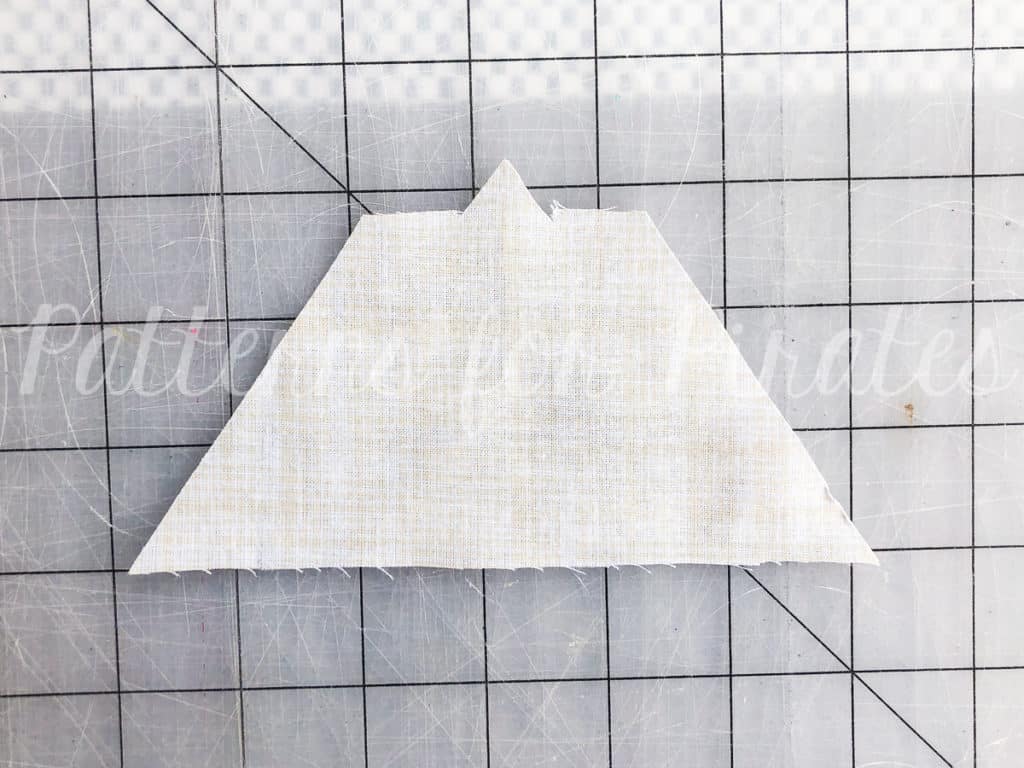
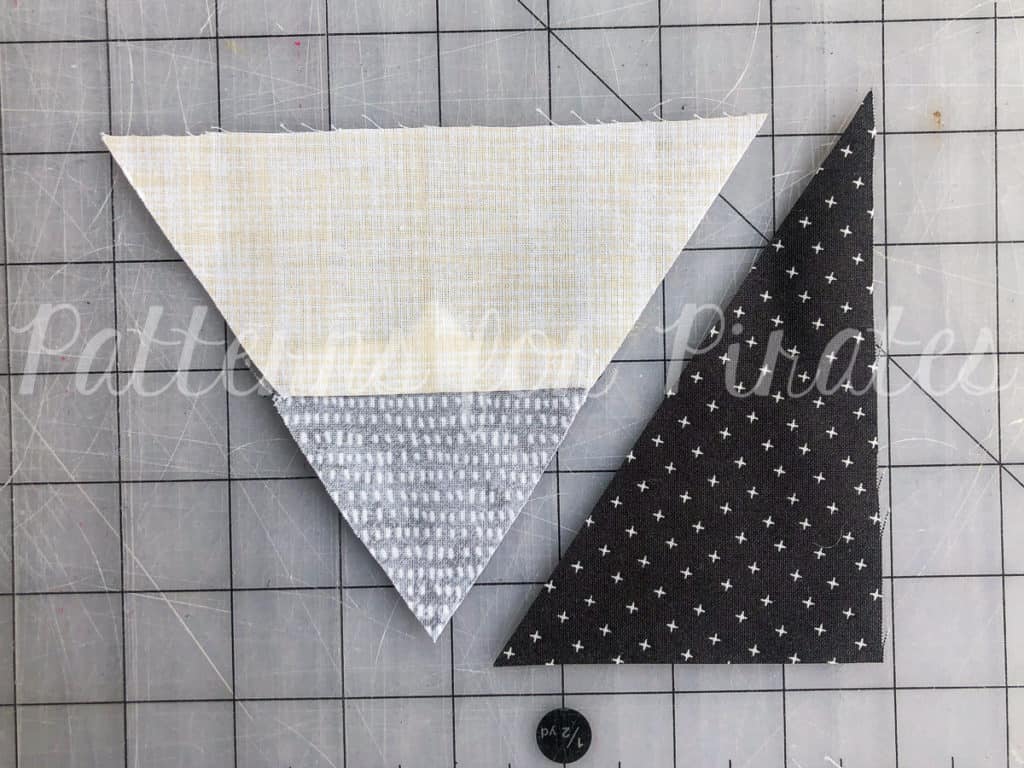
Step 2: Lay your “pencil wood” piece, right side up.

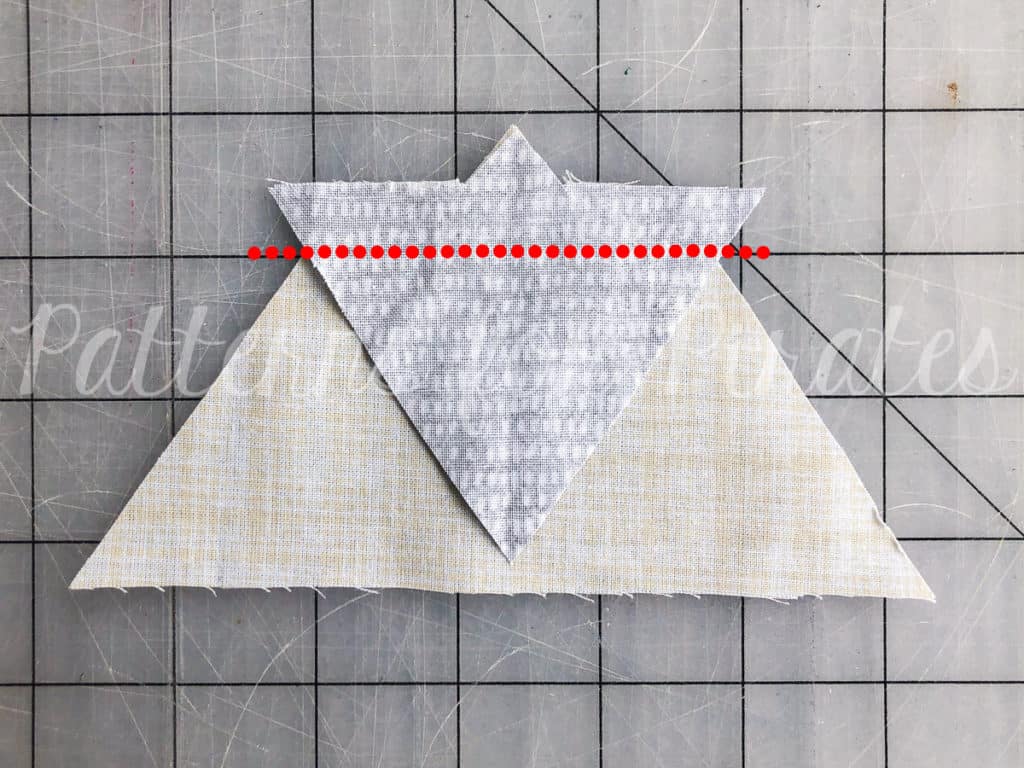
Step 3: Lay your “pencil lead” piece on top of your wood piece with right sides together, matching the notches. Sew with 1/2″ seam allowance.

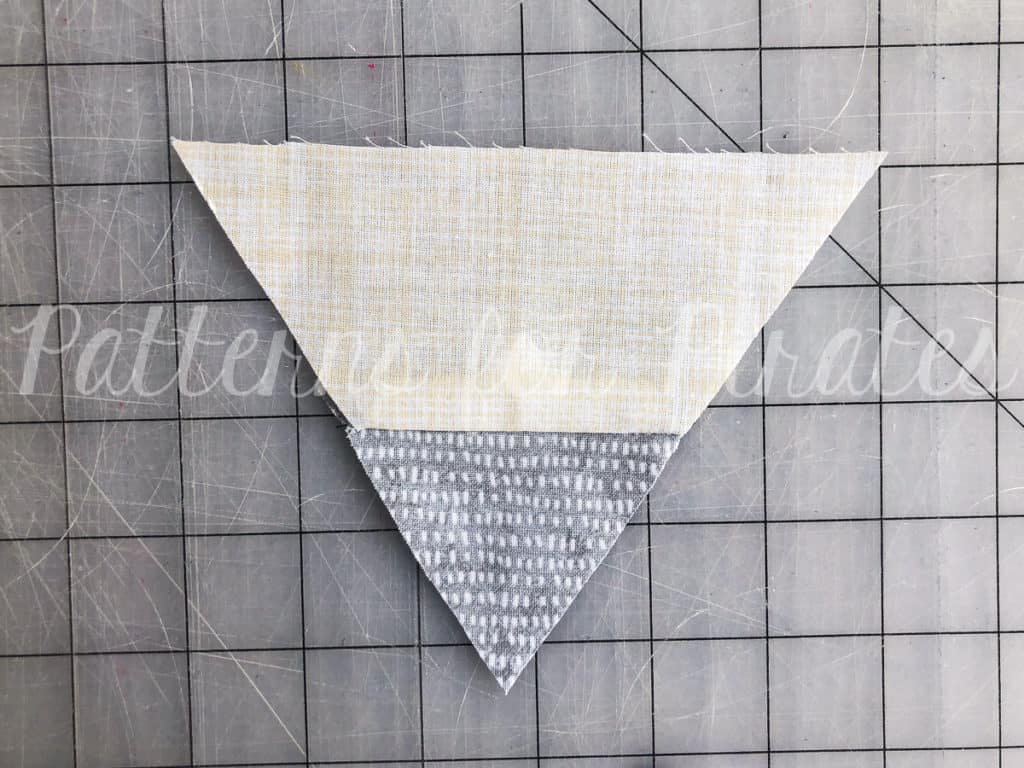
Step 4: Open up the pieces and press.

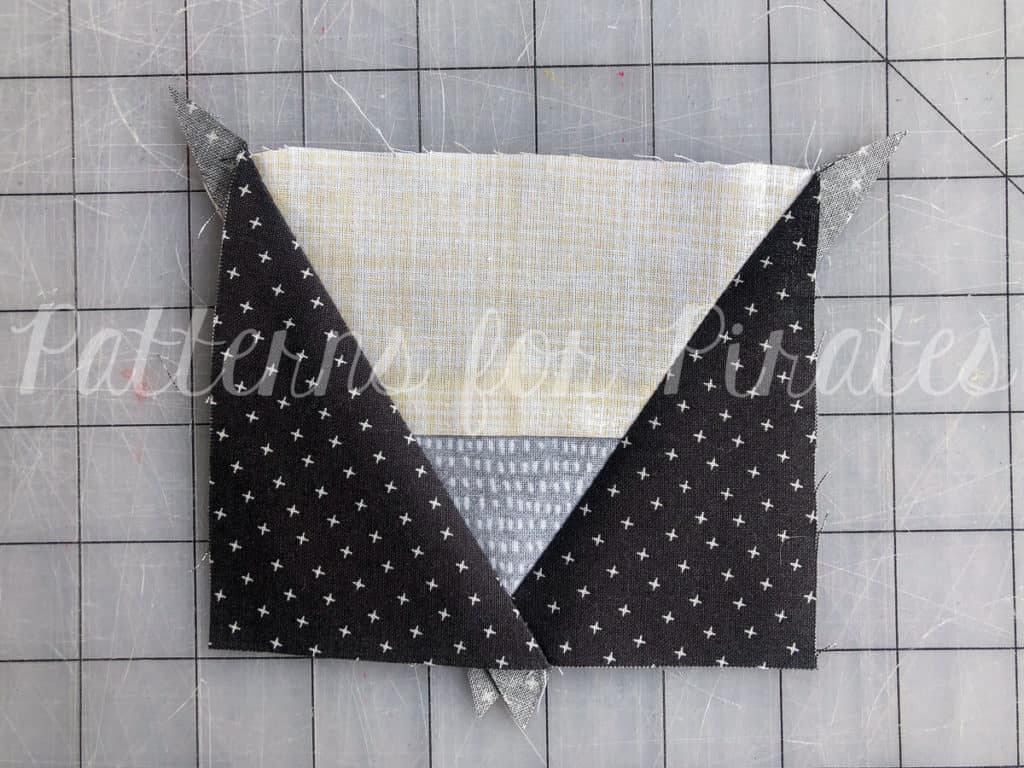
Step 5: Lay out your new pencil point, with one of “point accents” next to it.

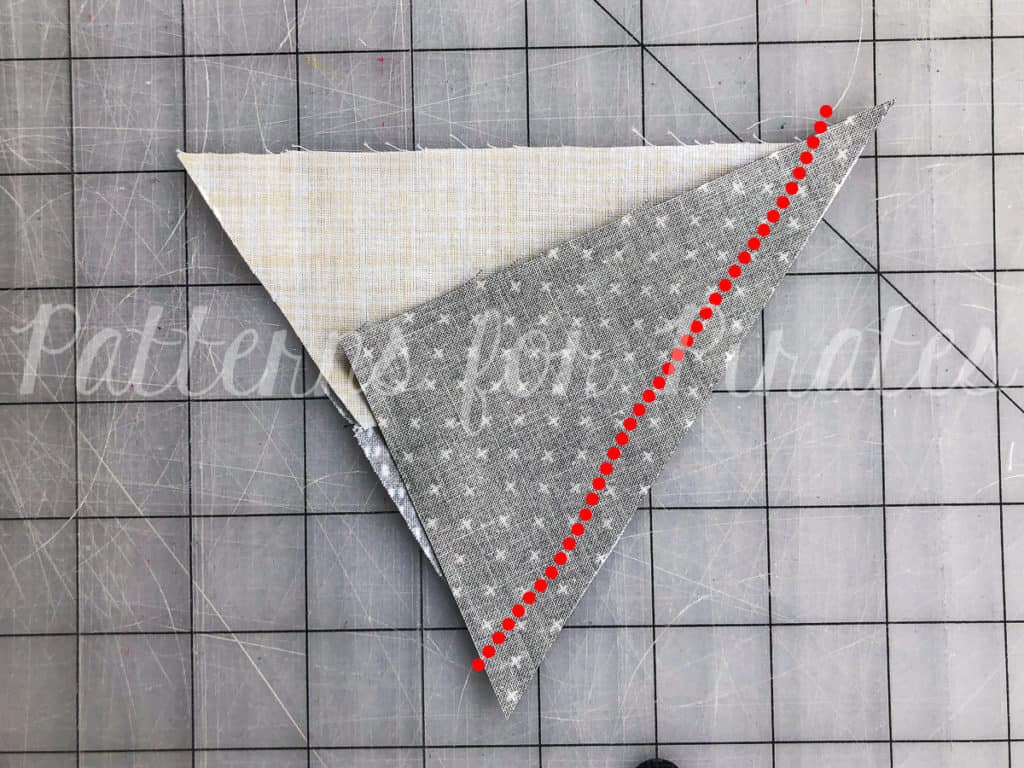
Step 6: With right sides together, align the “point accent” along the long angled edge. Sew with 1/2″ seam allowance.

**Note, there will be around 1/2″ of overhang on the top and bottom of the “point accent” piece.

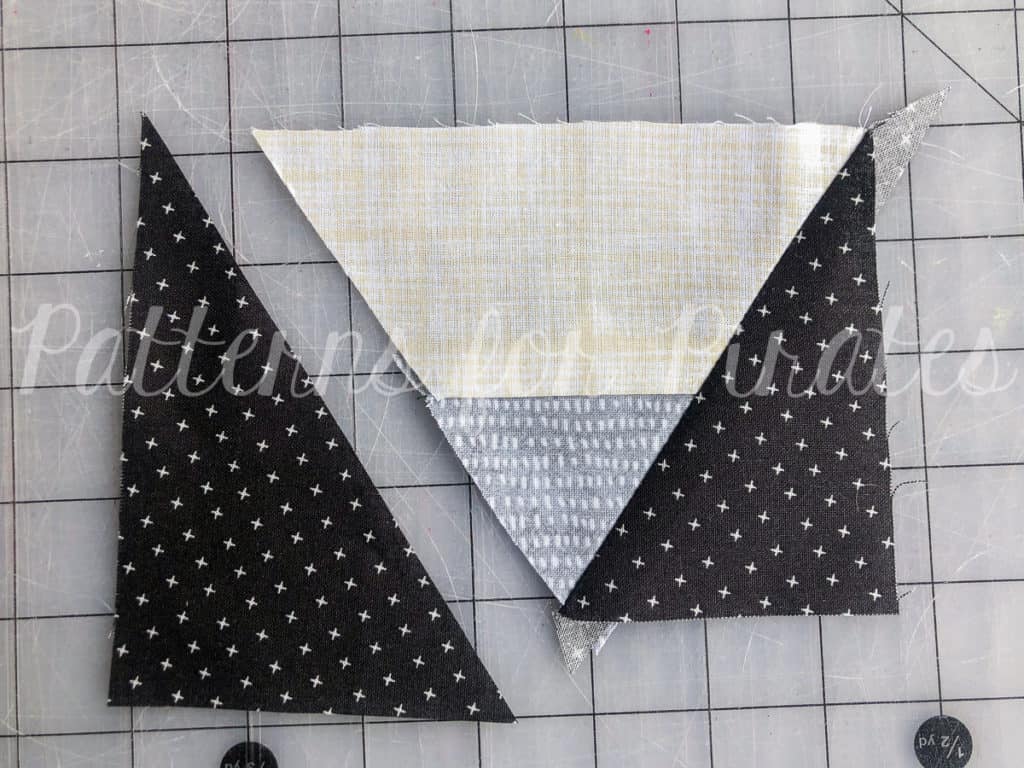
Step 7: Open up the pieces and press.

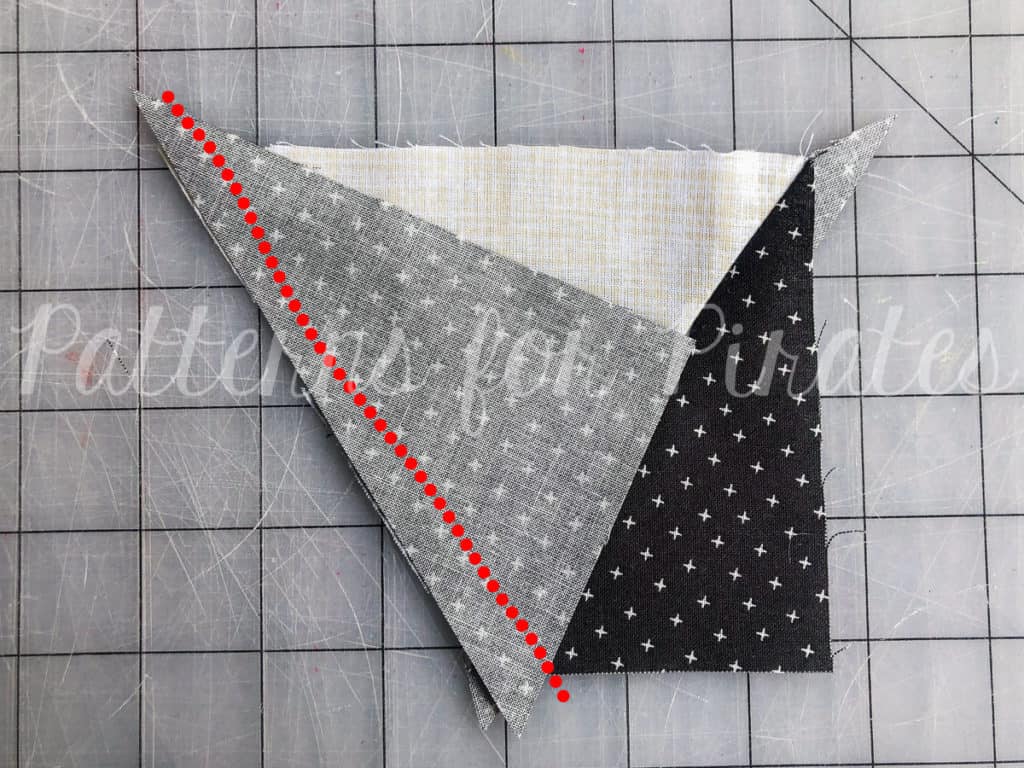
Step 8: Repeat with the other “point accent”.

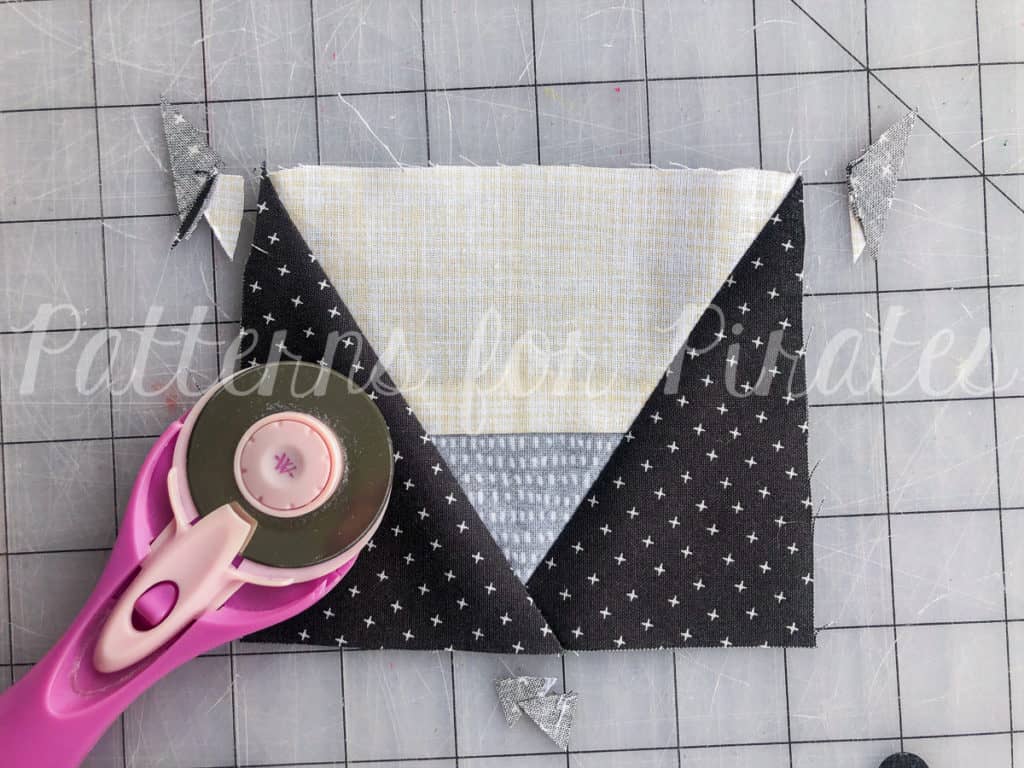
Step 9: Open up the pieces and press.

Step 10: Trim off the excess fabric.

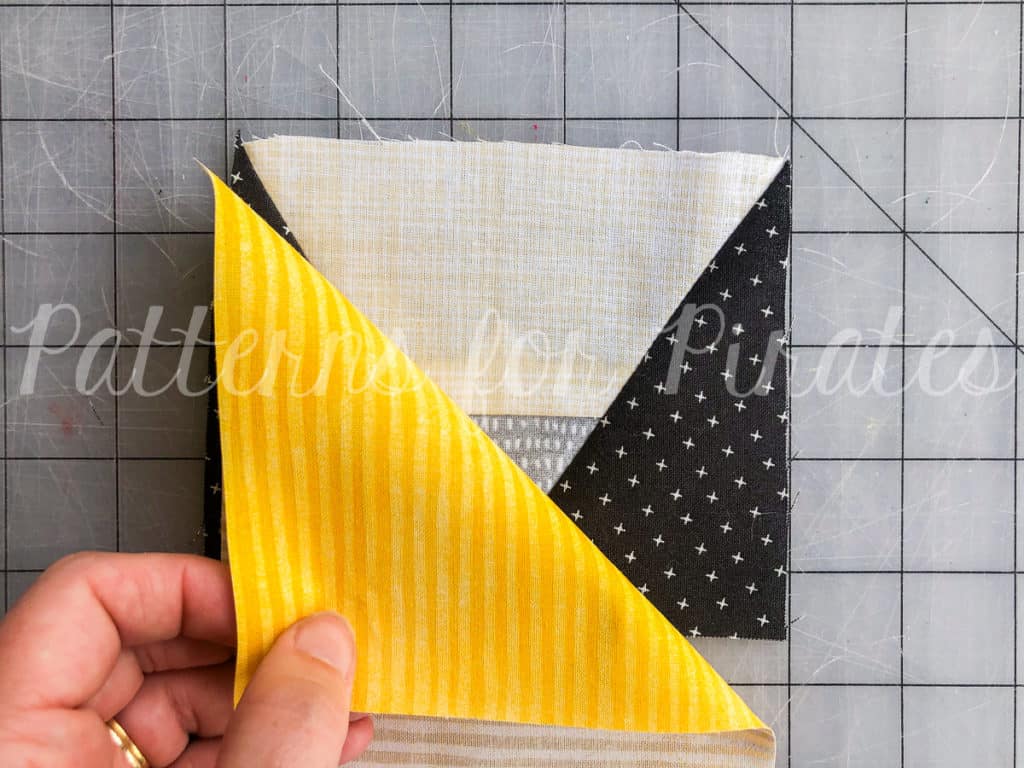
Step 11: Lay the piece right side up, and place the “pencil body” right sides together. Align the short edges.

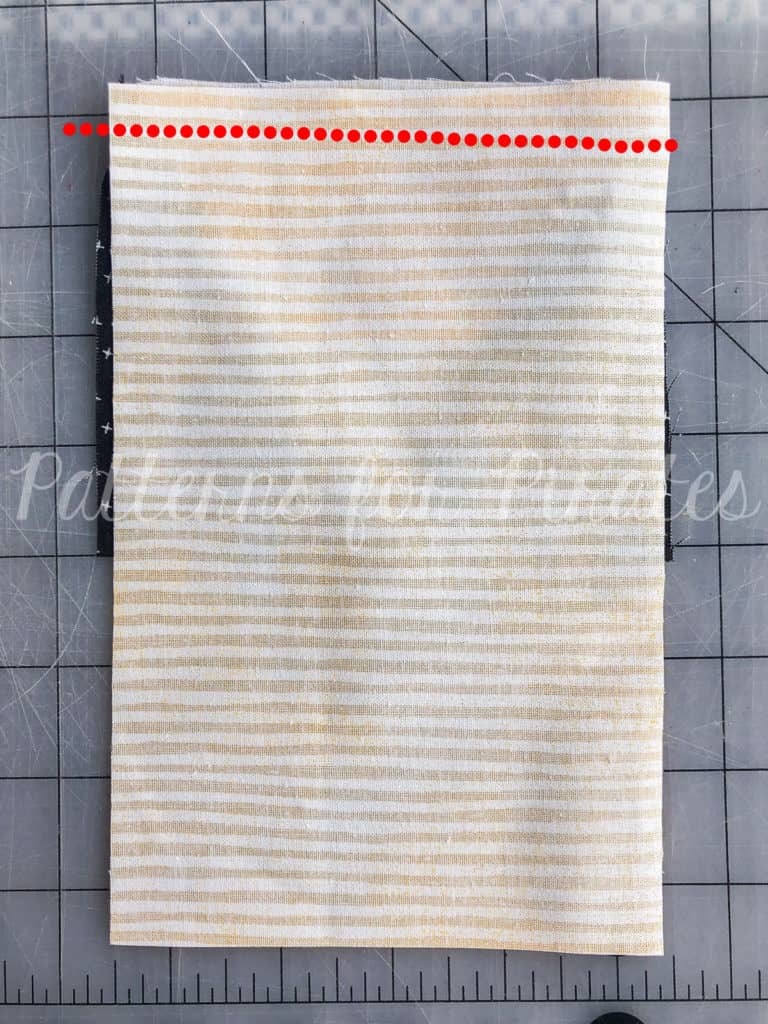
Step 12: Stitch, using 1/2″ seam allowance.

Step 13: Open up pieces and press.

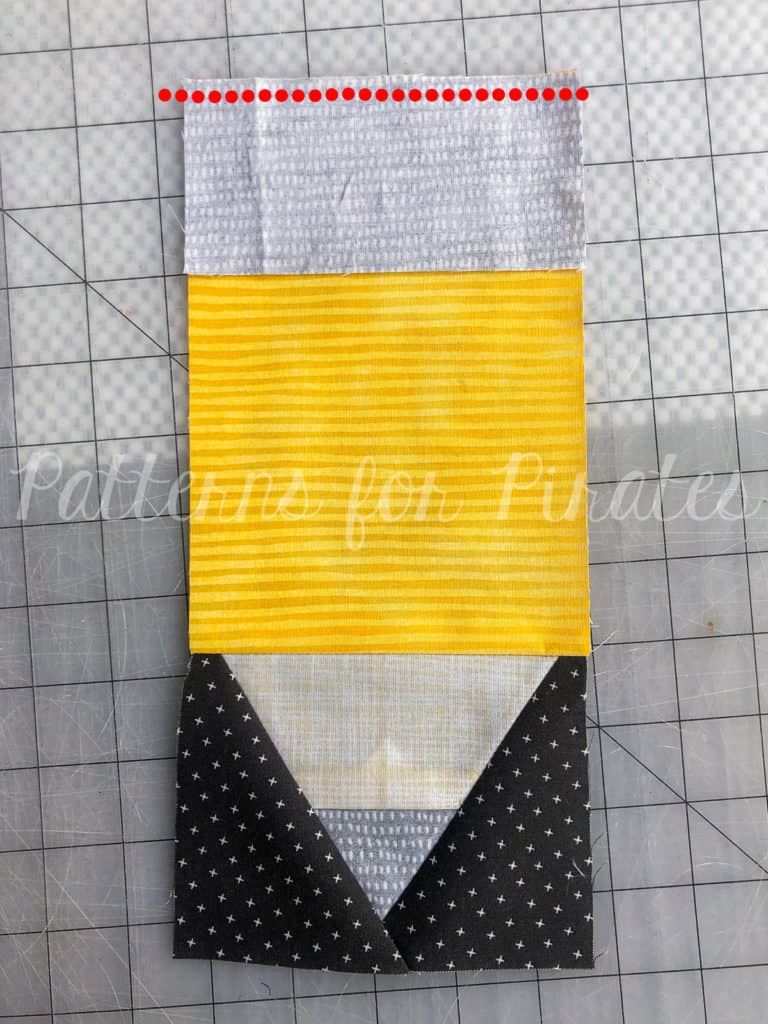
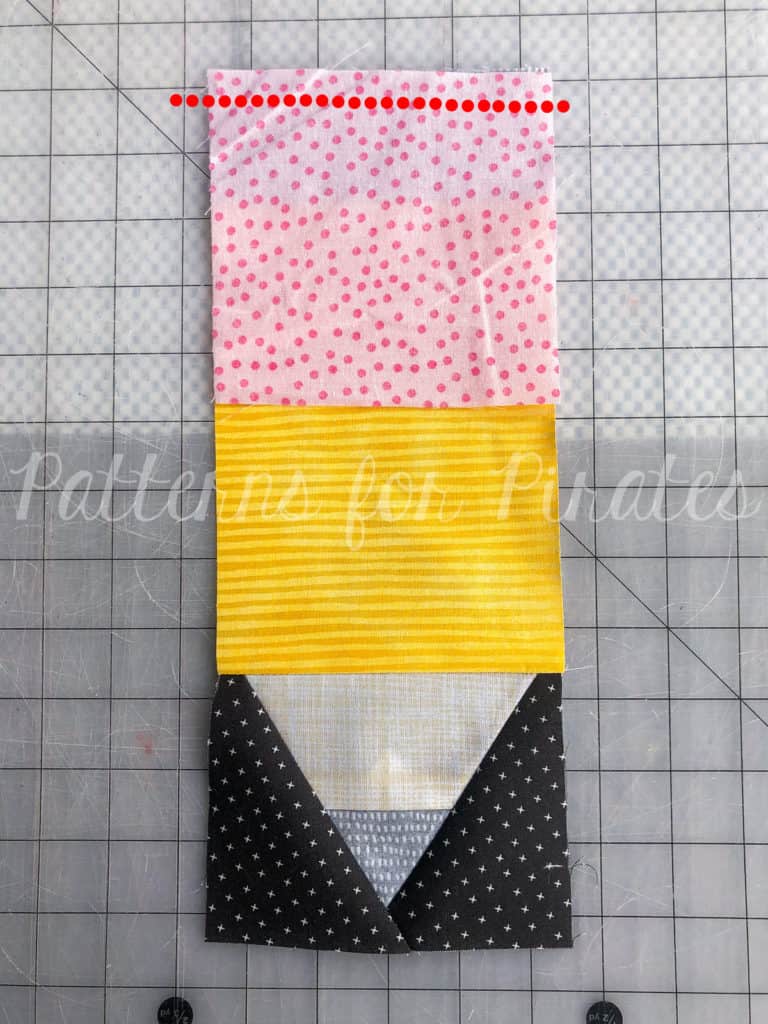
Step 14: Align the “ferrule” piece along the top, shorter edge, right sides together, and sew with 1/2″ seam allowance. Open up the pieces and press.

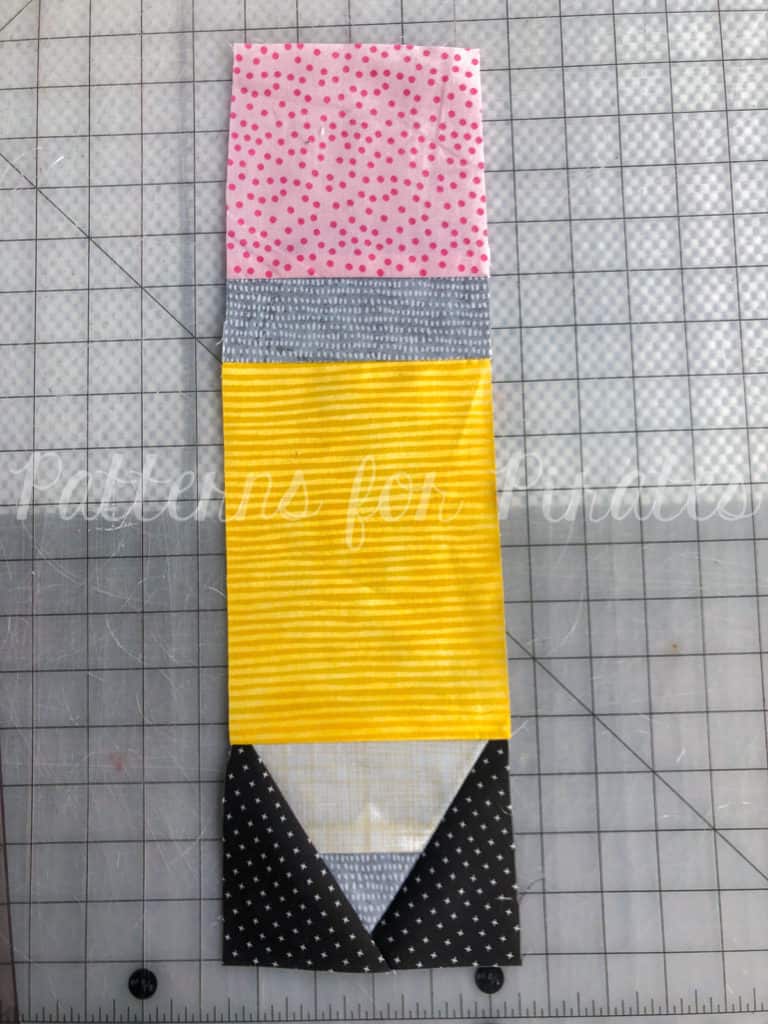
Step 15: Align the “eraser” piece along the top, shorter edge, right sides together, and sew with 1/2″ seam allowance.

Step 16: Open up the pieces and press.

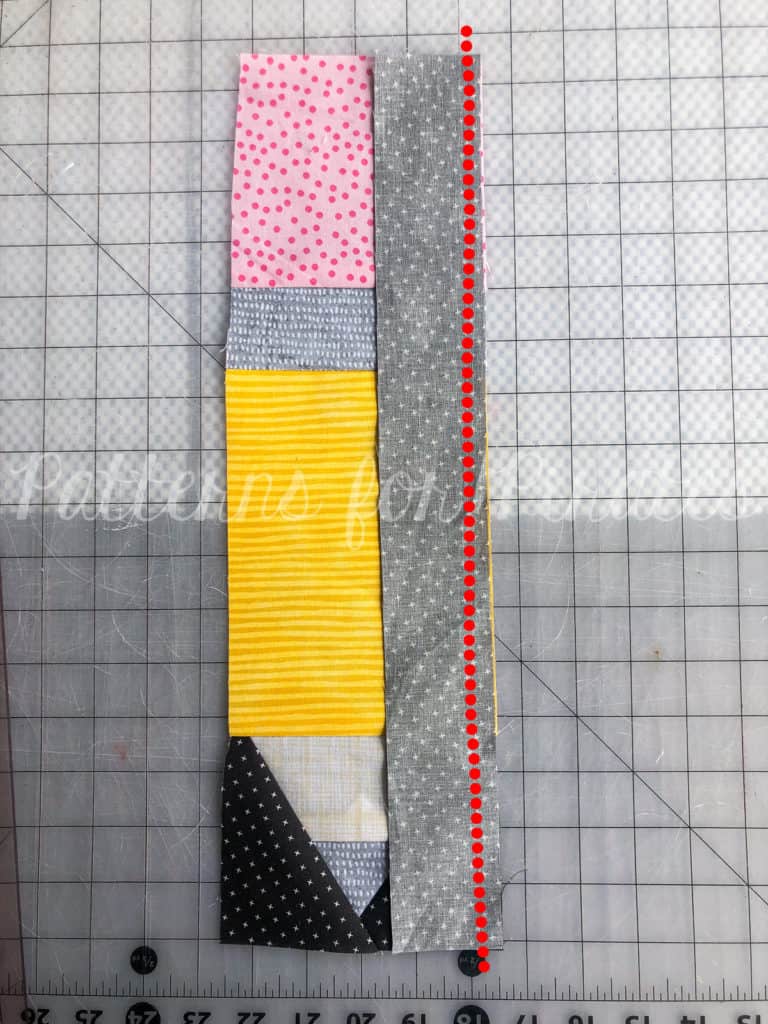
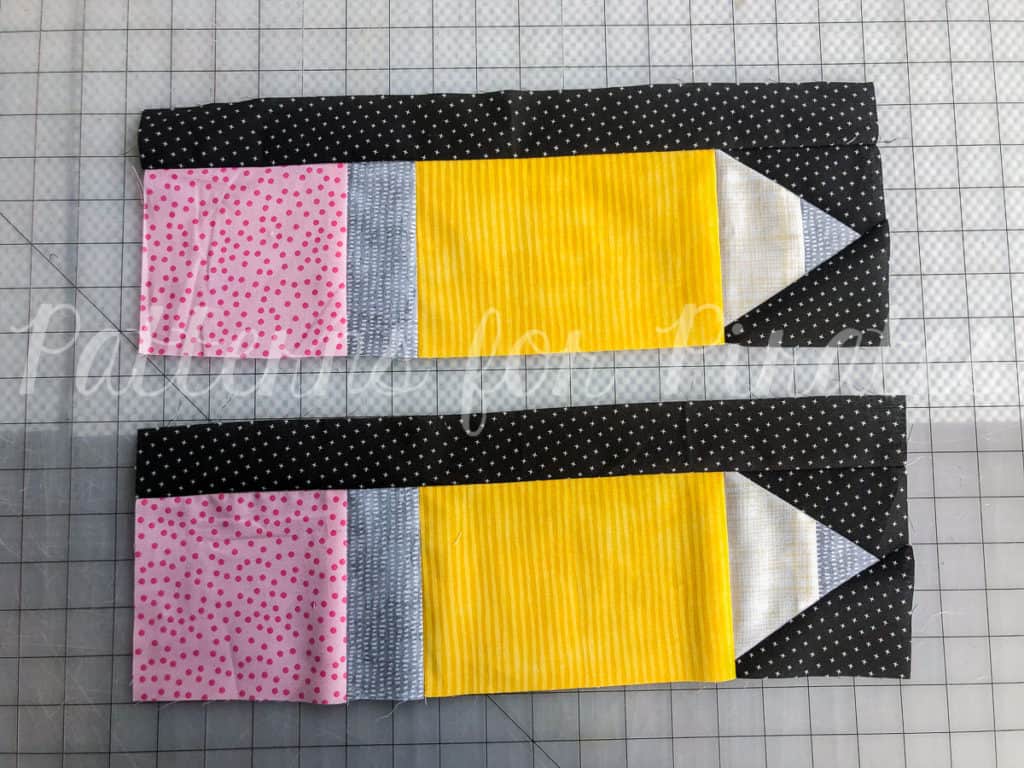
Step 17: Align the “accent panel” along the long edge of both pieces, right sides together. Sew using 1/2″ seam allowance.

Step 18: Open up pieces and press.

Repeat according to the number of “sets of panels” required for the size skirt being sewn.

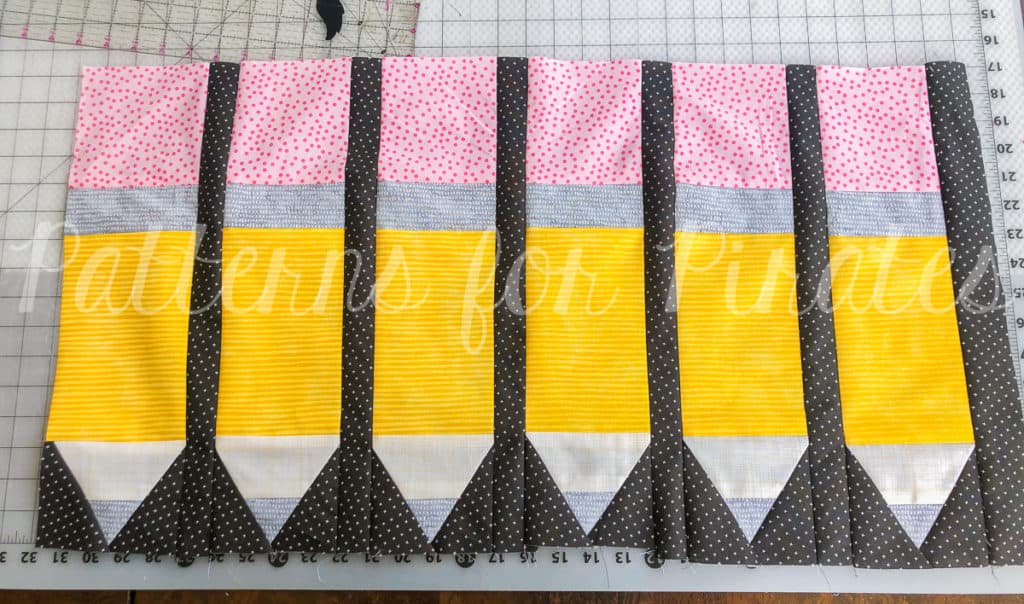
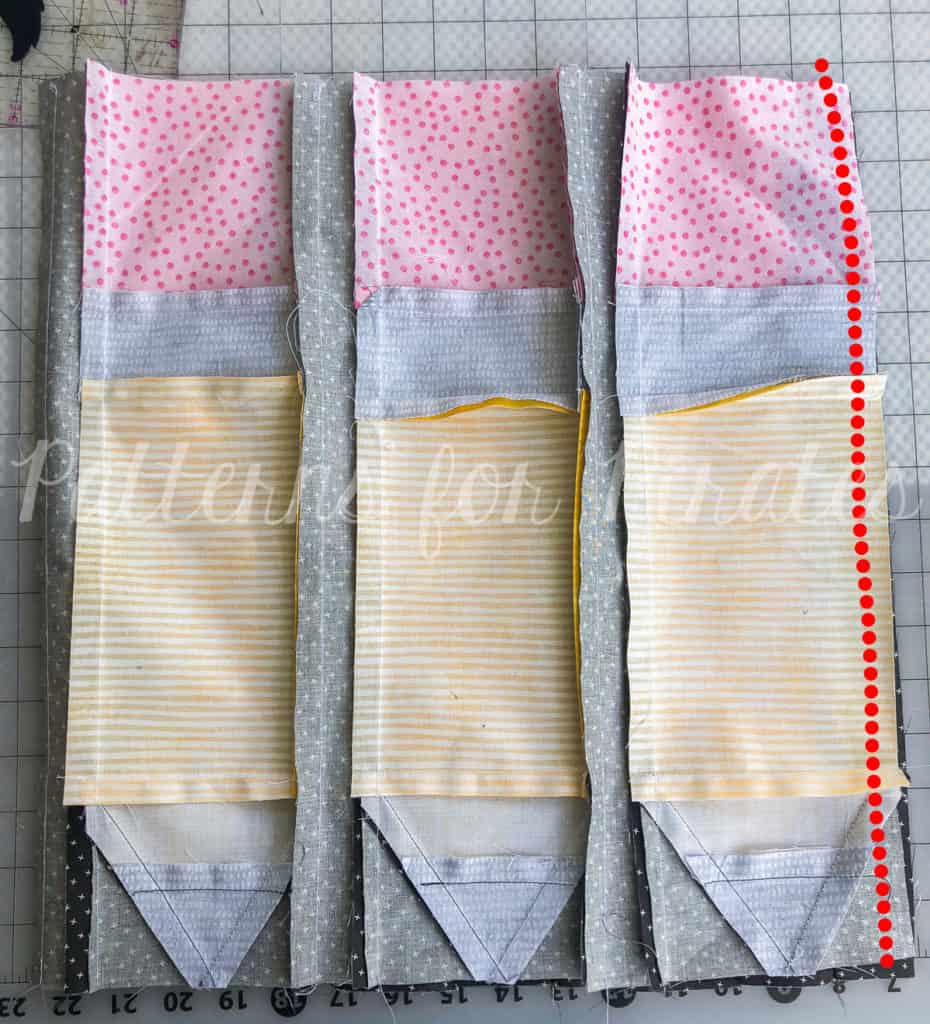
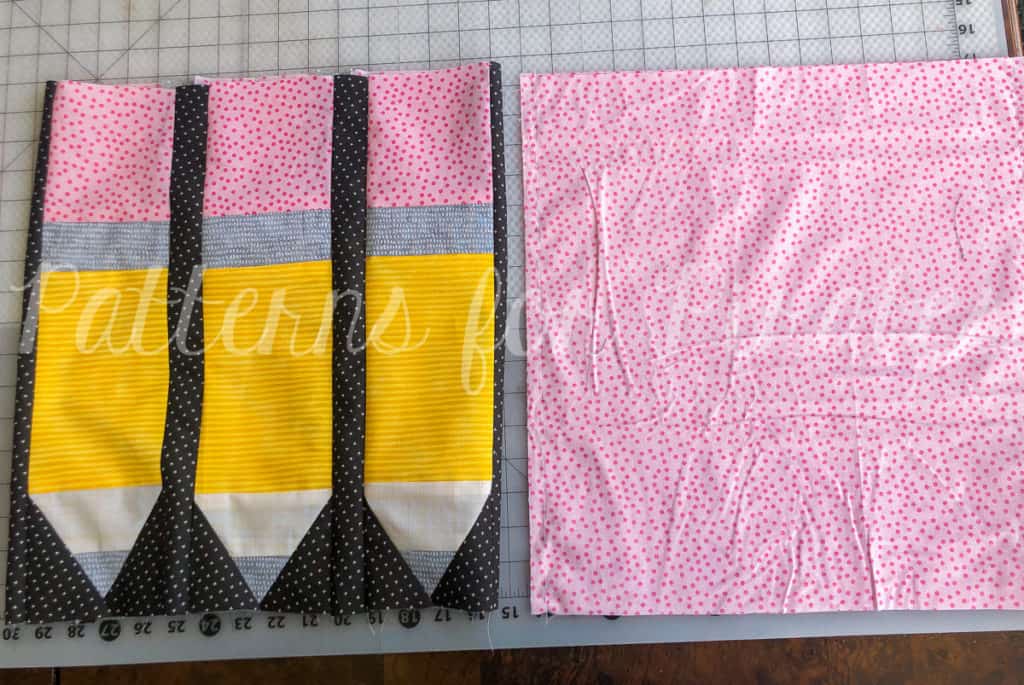
Step 19: Begin to join the panels to form a skirt.

Step 20: With right sides together, align each panel along the long edge and sew using 1/2″ seam allowance.

Step 21: Continue until all of the panels are sewn together.

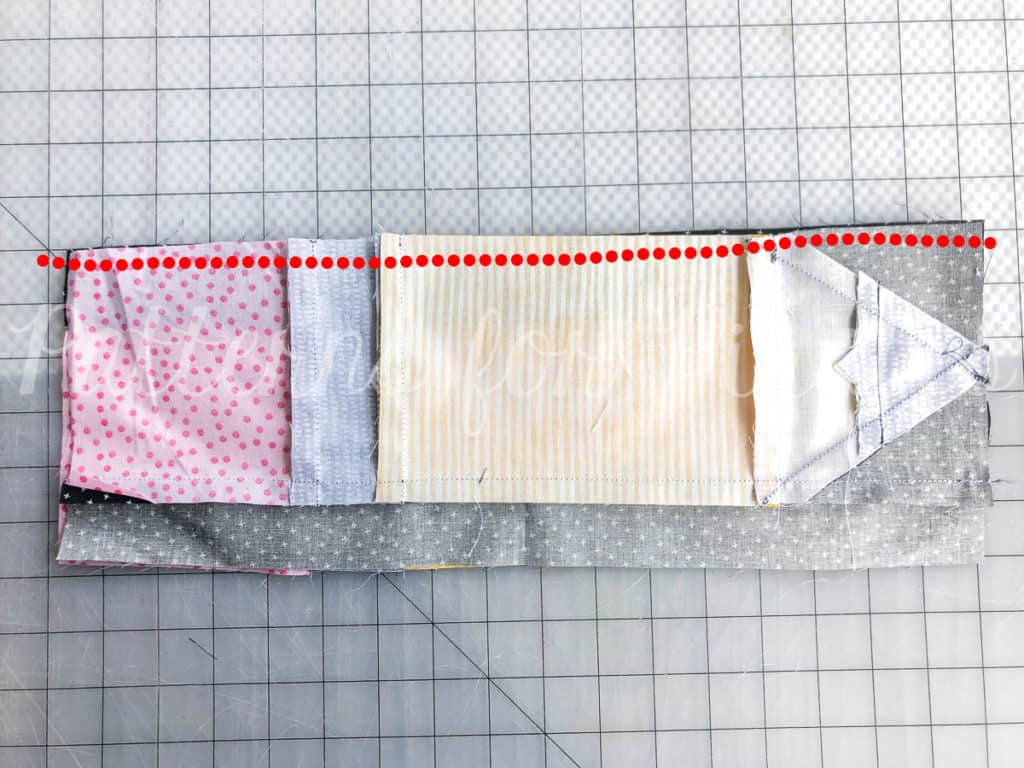
Step 22: Fold your set in half, right sides together, and sew to create a tube.

Step 23: You should now have a circle of pencils.

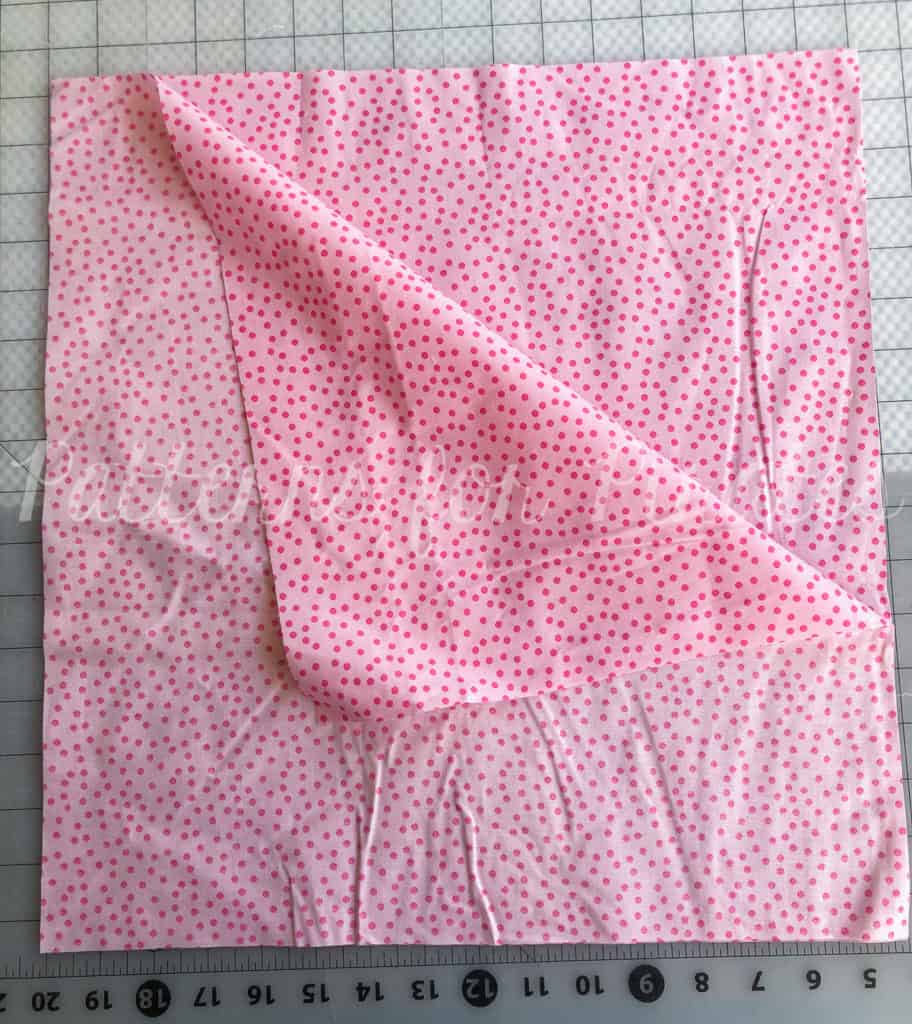
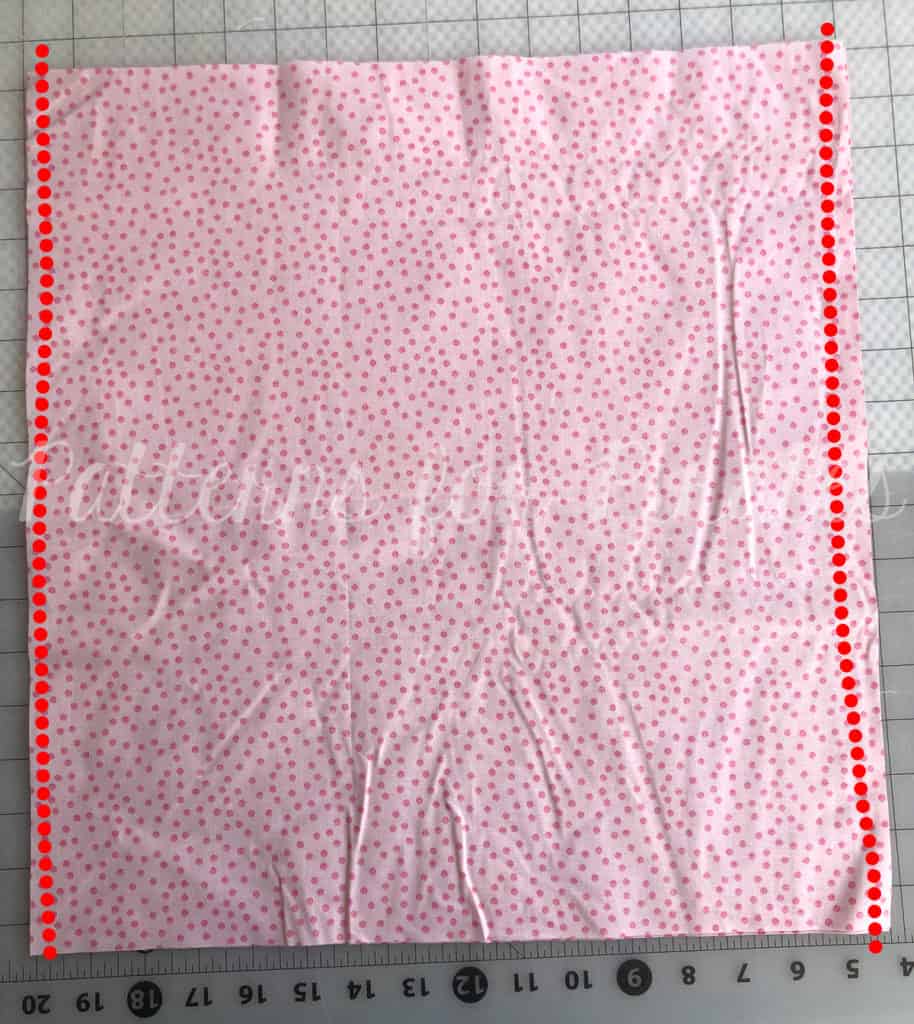
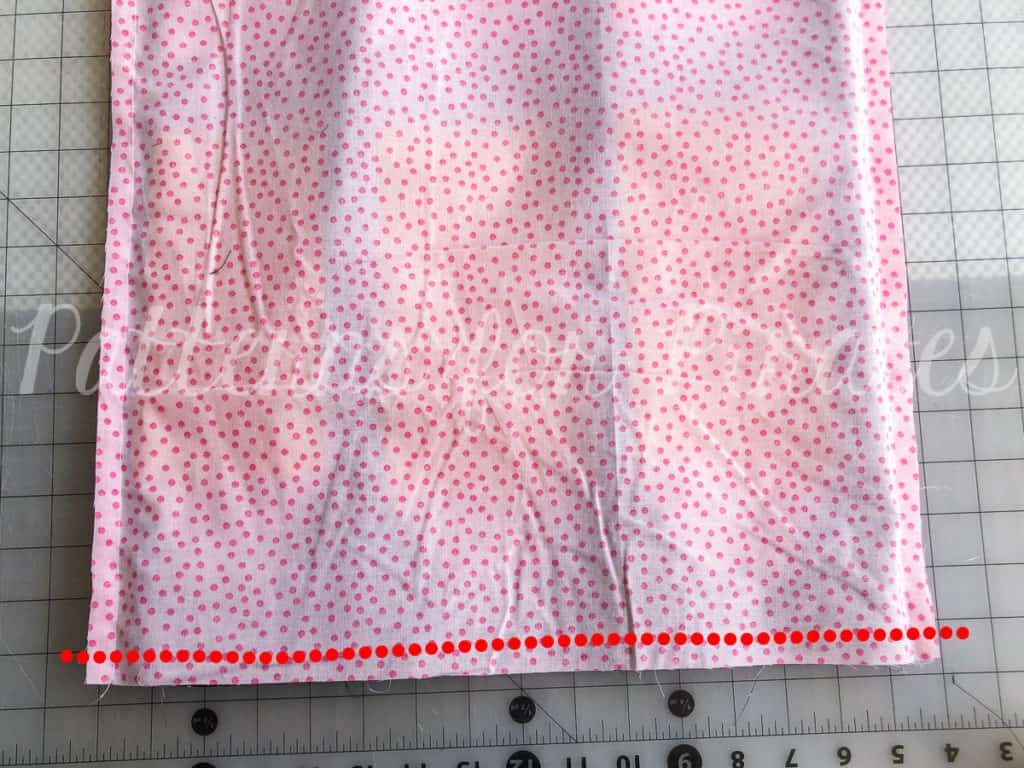
Step 24: Align your lining fabric with right sides together.

Step 25: Sew along both sides, using 1/2″ seam allowance.

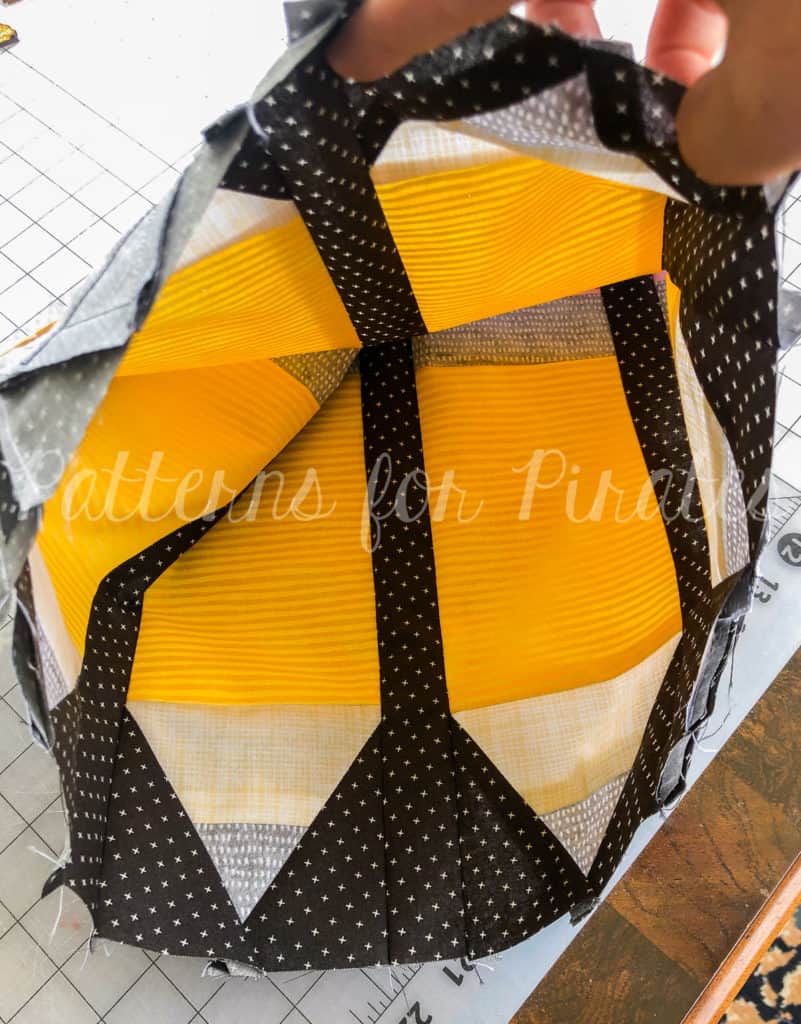
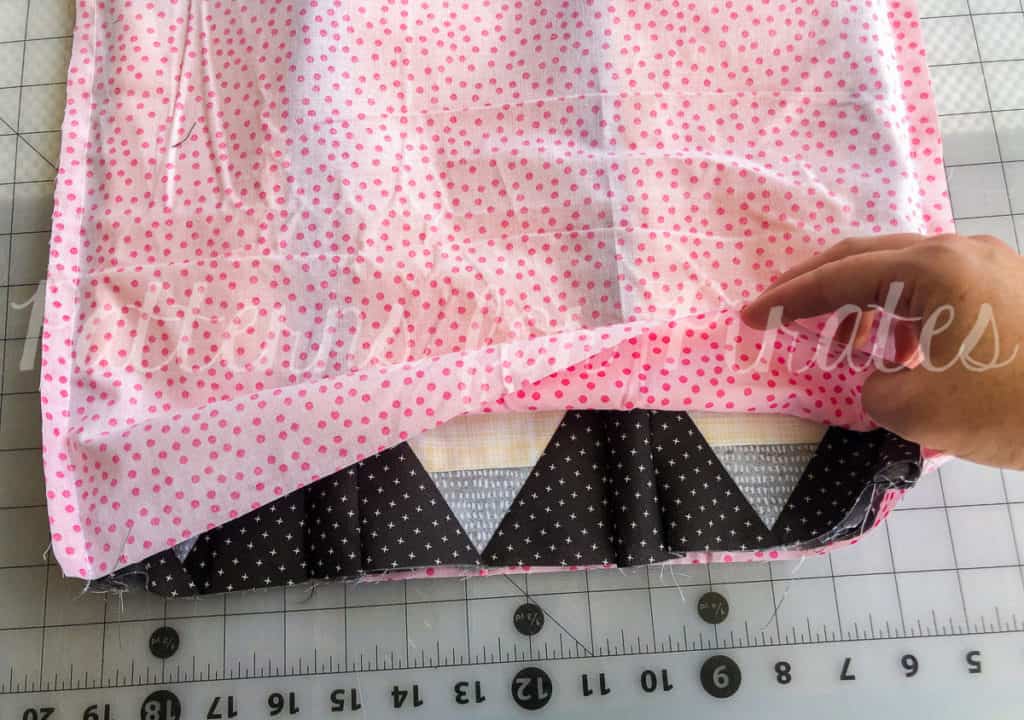
Step 26: Turn your main skirt right sides facing outwards, and keep your lining fabric with the right sides facing in.

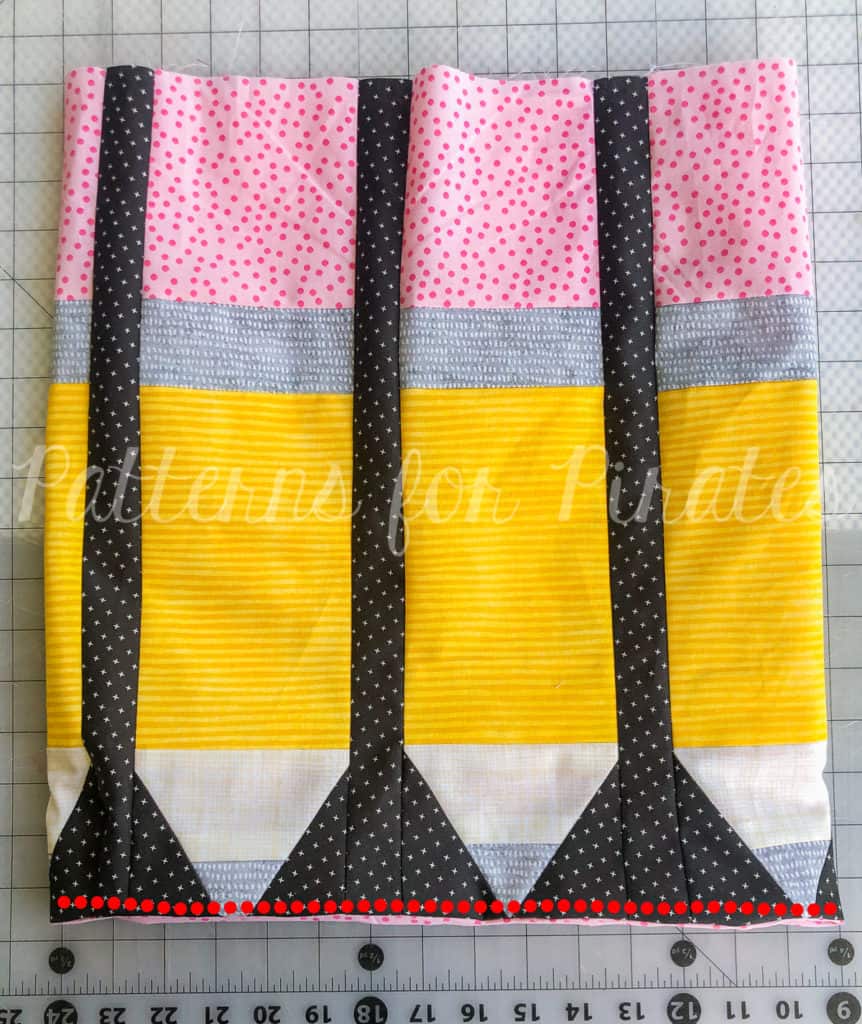
Step 27: Slide your main skirt inside of the lining, with the right sides together.

Step 28: Sew along the bottom edge opening, careful to sew only one layer of lining to one layer of the main skirt.

Step 29: Open up the pieces, so they are right sides out.

Step 30: Slide the lining inside of the main skirt, wrong sides together, completely enclosing all of your seams.

If desired, edge stitch along the bottom of the skirt.

Step 31: Treating your main and lining fabrics as one, press 1/2″ along the entire top, raw edge, toward the lining side.

**Quick tip: You might find it easier to manage the double layers if you serge / zig-zag stitch around the top raw edge before folding and pressing.

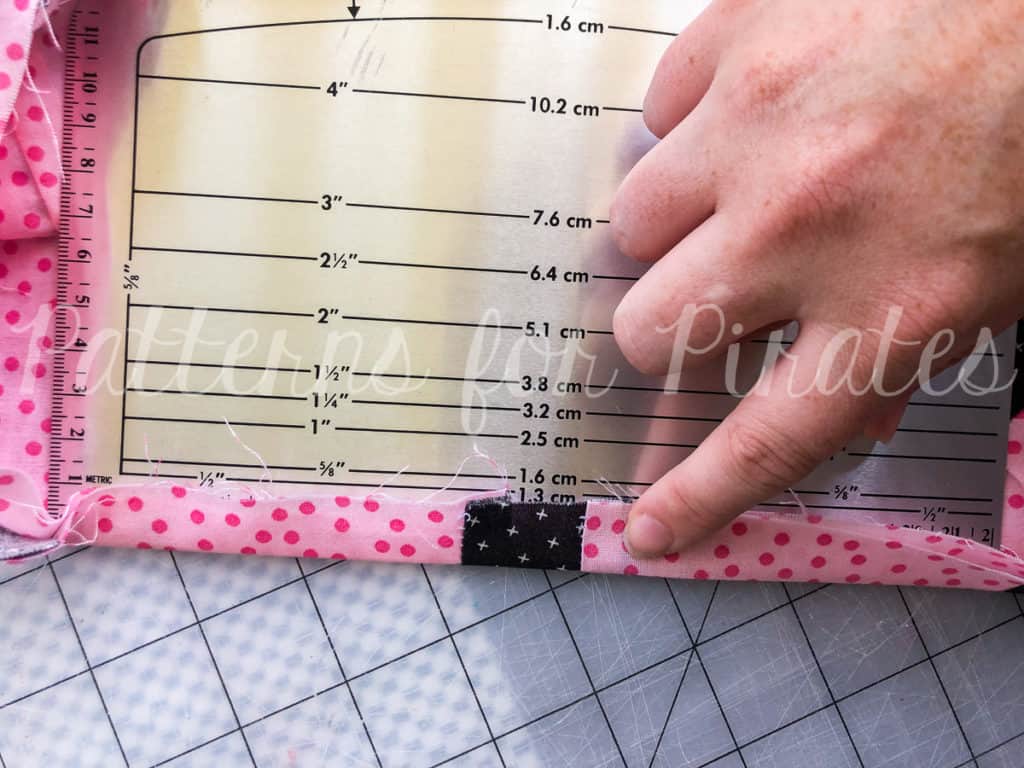
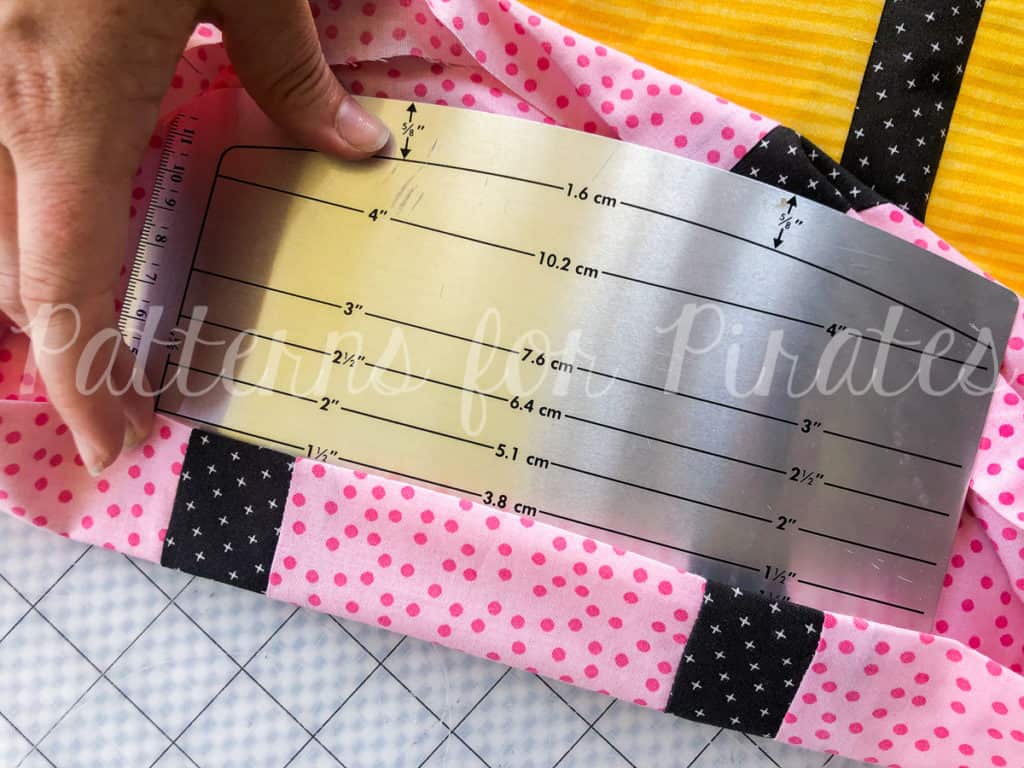
Step 32: Press an additional 1-1/2″, creating a casing.

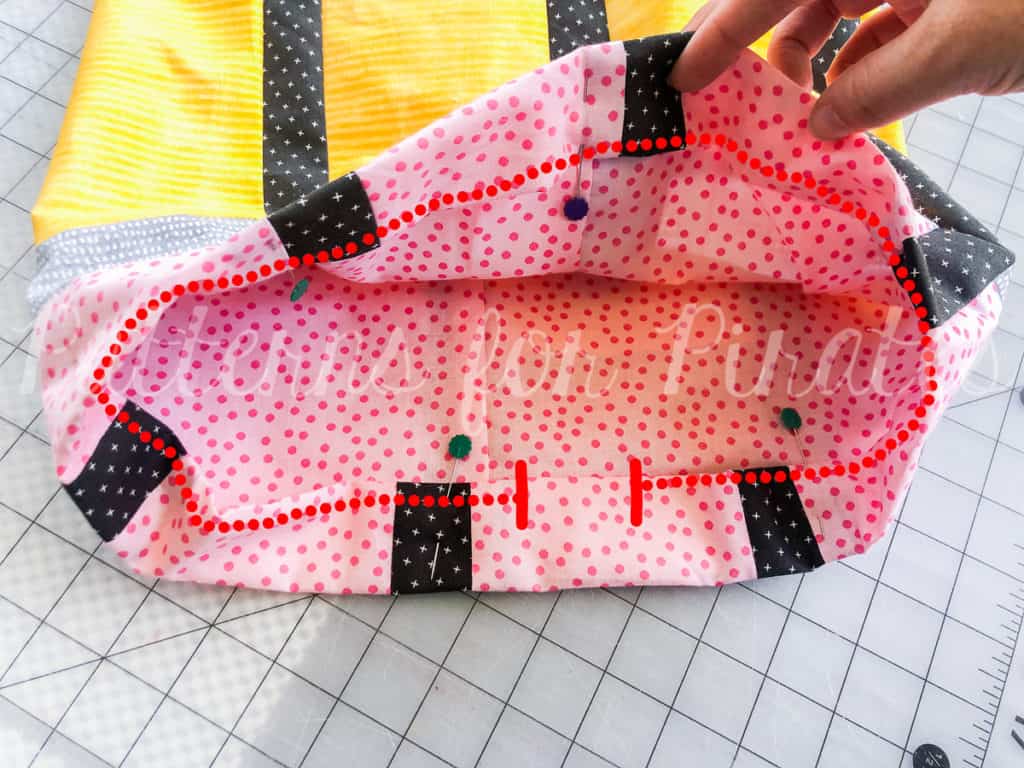
Step 33: Pin and sew along the entire skirt, edge stitching close to the fold in the casing. Leave a 2-3″ opening for elastic.

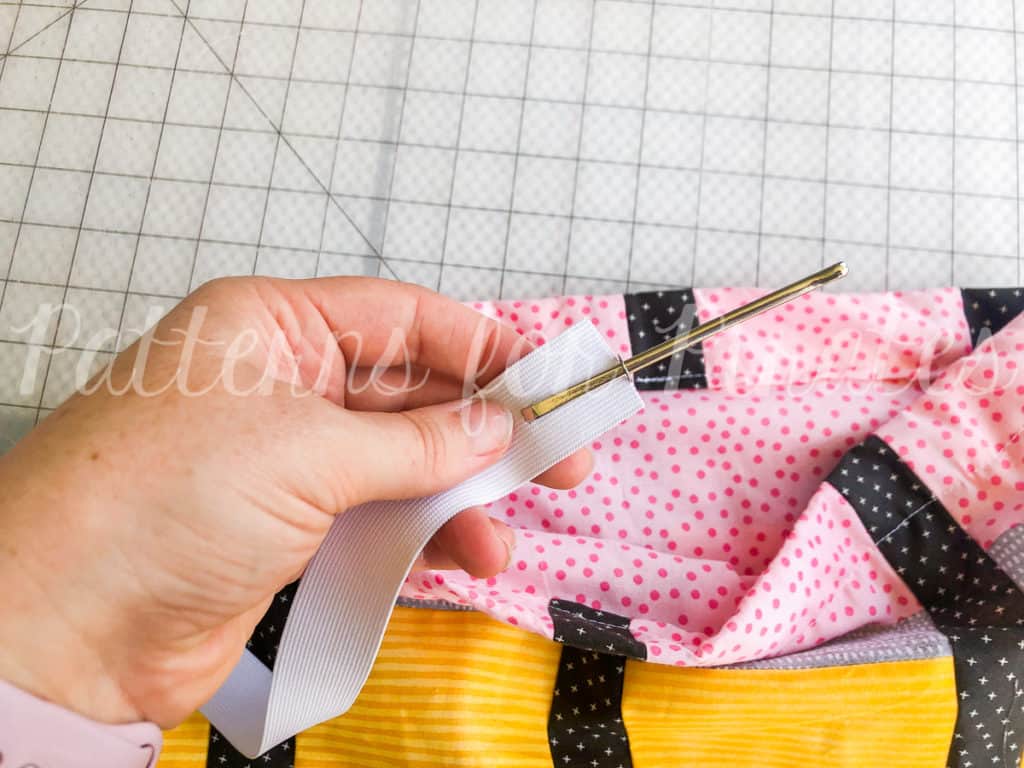
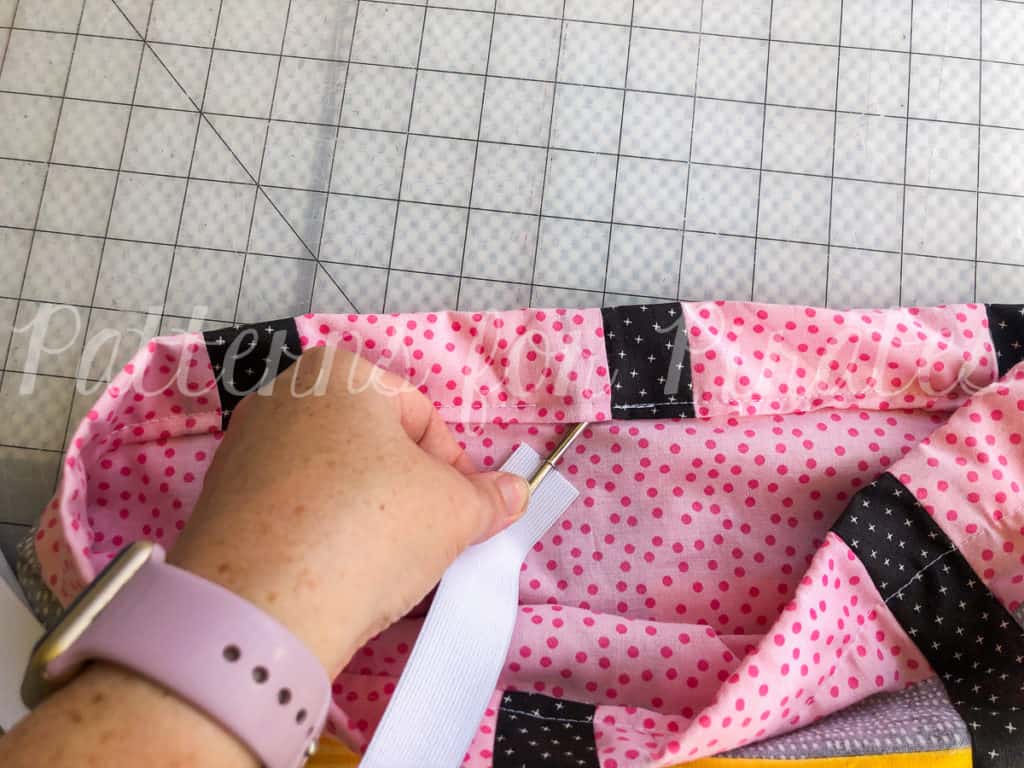
Step 34: Using a pin or bodkin, thread your elastic through the opening you left in the casing.

Be careful not to twist your elastic.

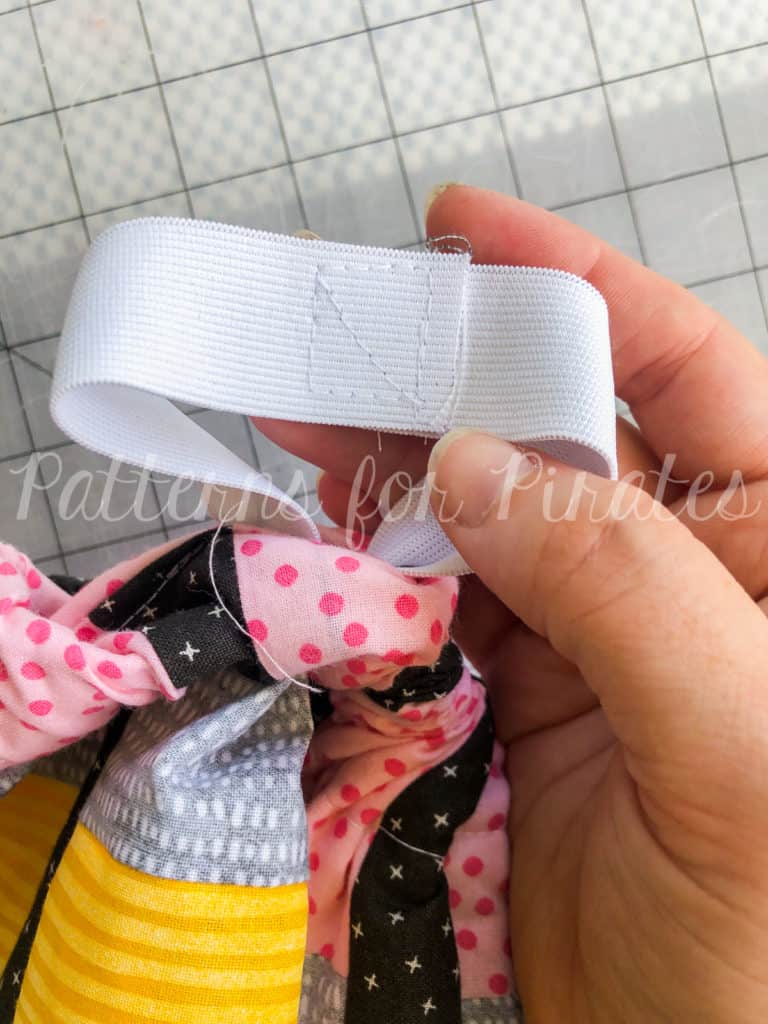
Step 35: Pull the elastic out the other side of your casing, overlap at 1″ and secure the ends together.

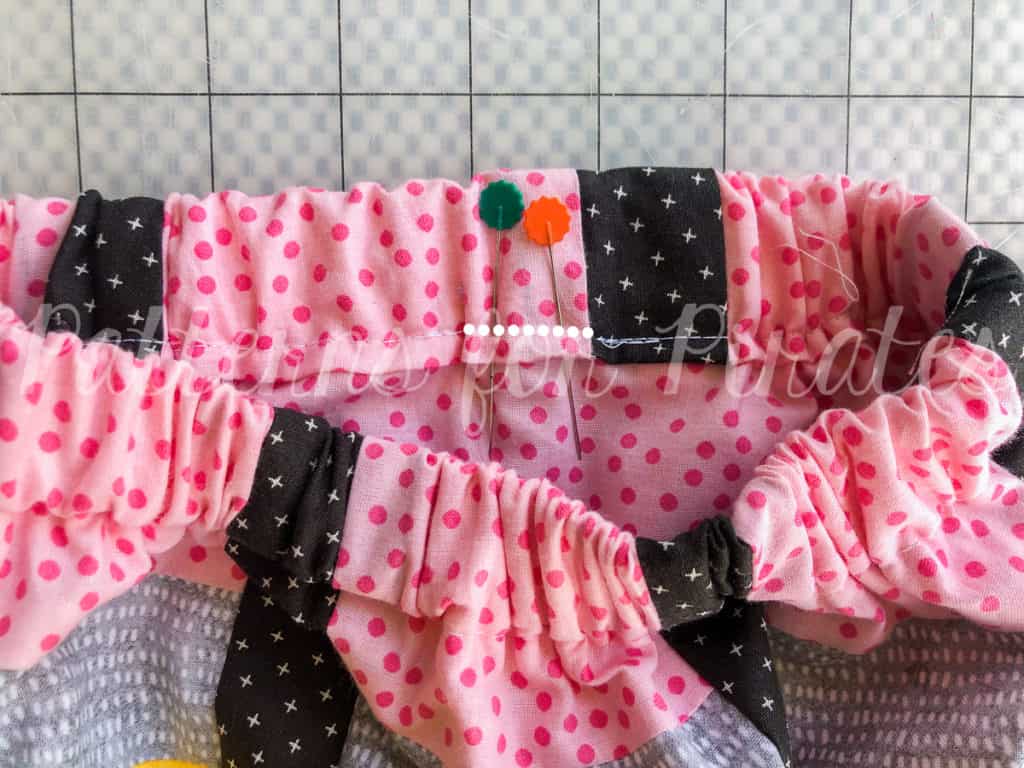
Step 36: Pin and stitch closed the opening in your casing.

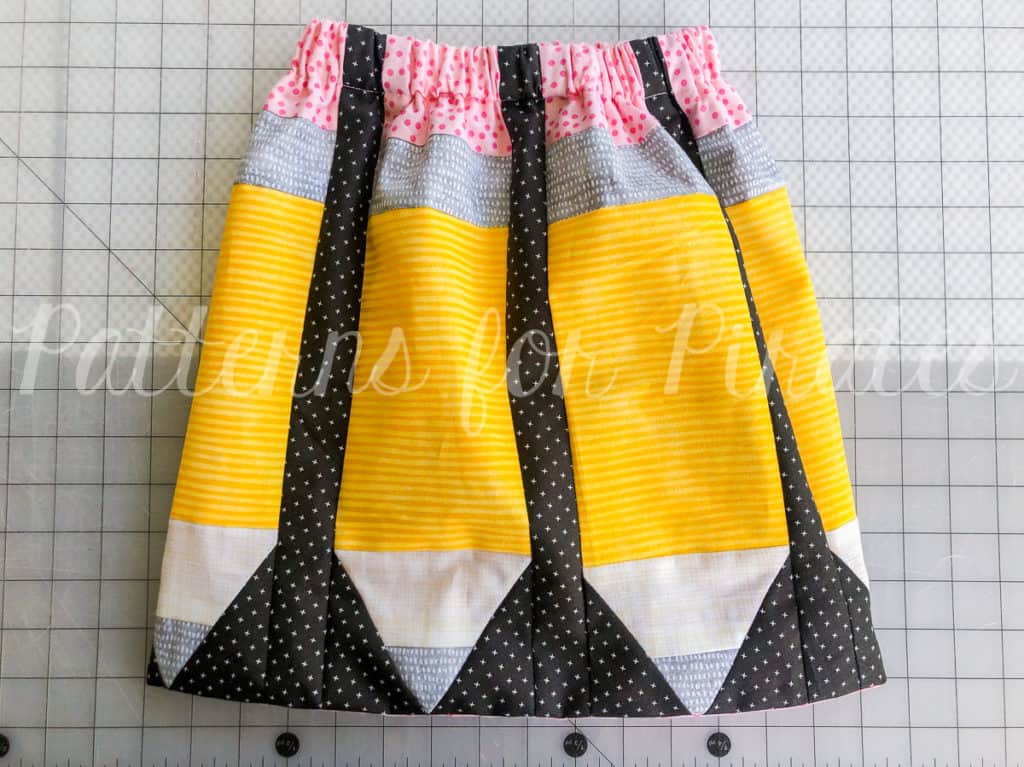
Step 37: Press and admire your new “Just Write” skirt!
Are more of a “learn by watching” type?  If so, here’s a video to walk you through the steps of creating the pencil panels:

As always, we love when you share what you’ve made with us.  Head over to the Patterns for Pirates Facebook group and show off super awesome Just Write things that you’ve managed to make from our freebie pattern!

In case you were looking for a little inspiration on your own Just Write Skirt, check out our tester album and take a look at all of the gorgeous items our creative friends have made!

Happy Back-to-School season, Pirate Friends!

Filed Under: Free Pattern, Pattern Release 3 Comments

Sew what do I wear…Professional Edition

October 27, 2017

It’s that time of the year again…time for the Sew What do I wear blog tour hosted by Made for Mermaids and P4P. This season a group of very talented women are bringing you inspiration for business wear outfits so make sure to check them all out.

As busy professionals on the go one of the most important thing to keep in mind when sewing your office outfits is time! How much spare time to you have? How many outfits can you treat yourself to in the allotted sewing time? Easy and fast patterns will help you get many looks in a short amount of time.

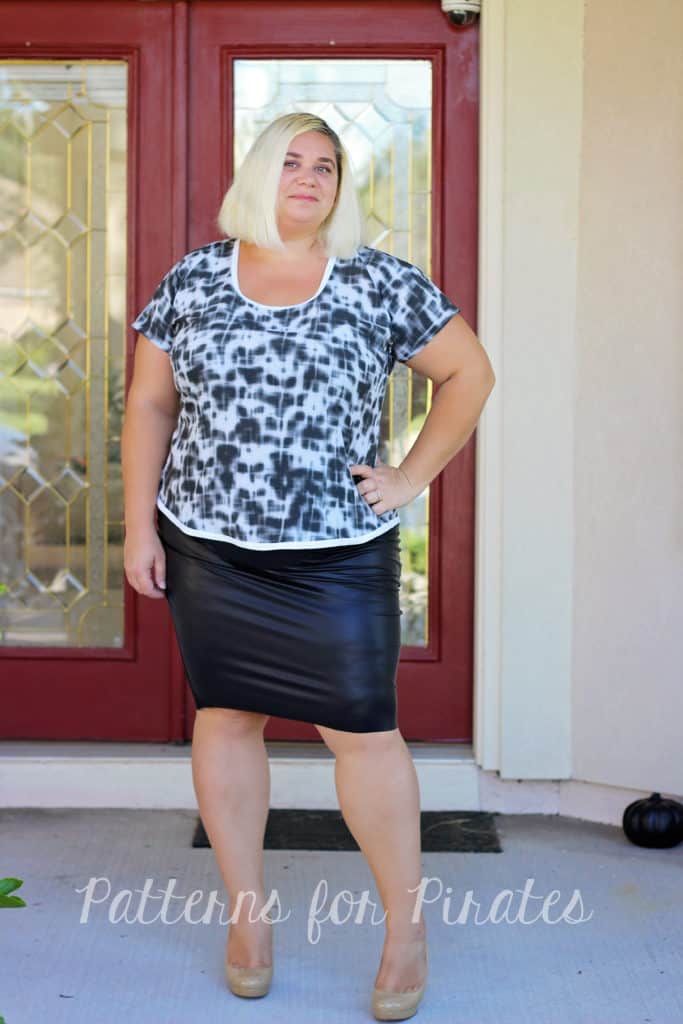
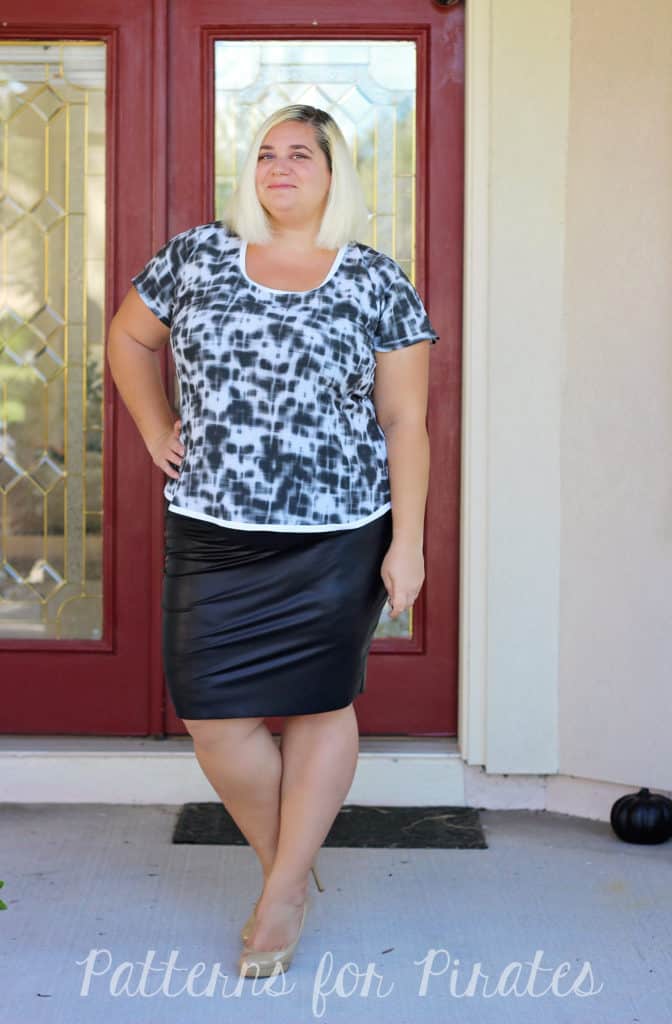
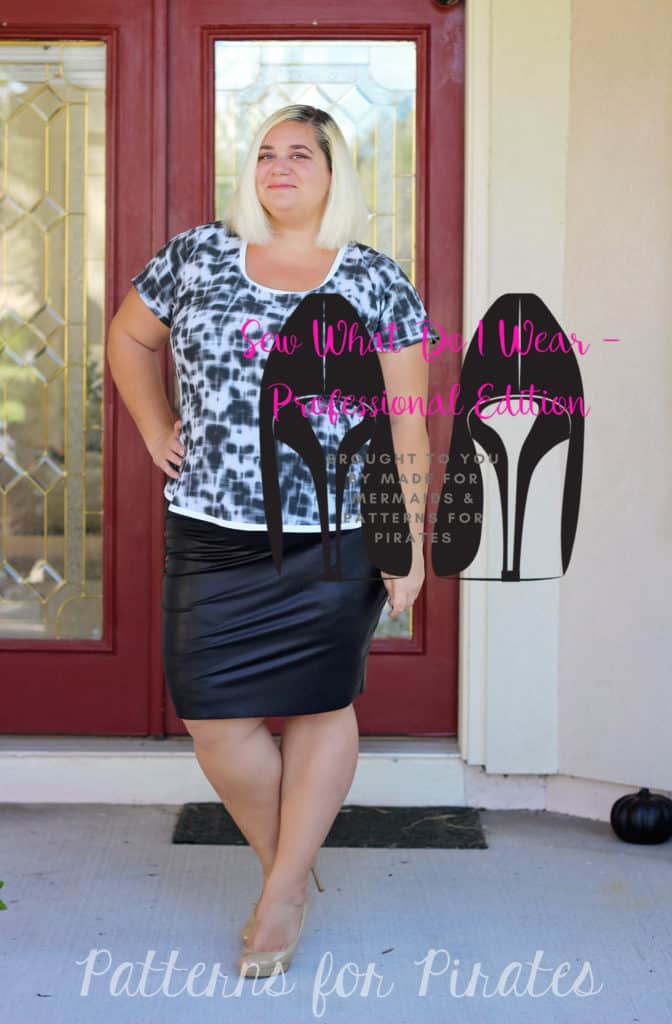
Keeping that in mind, for today’s blog I chose two of the fastest to sew P4P patterns, the Brunch Blouse and the Pirate Pencil skirt. Both patterns have a minimal number of pattern pieces and are super fast to put together.

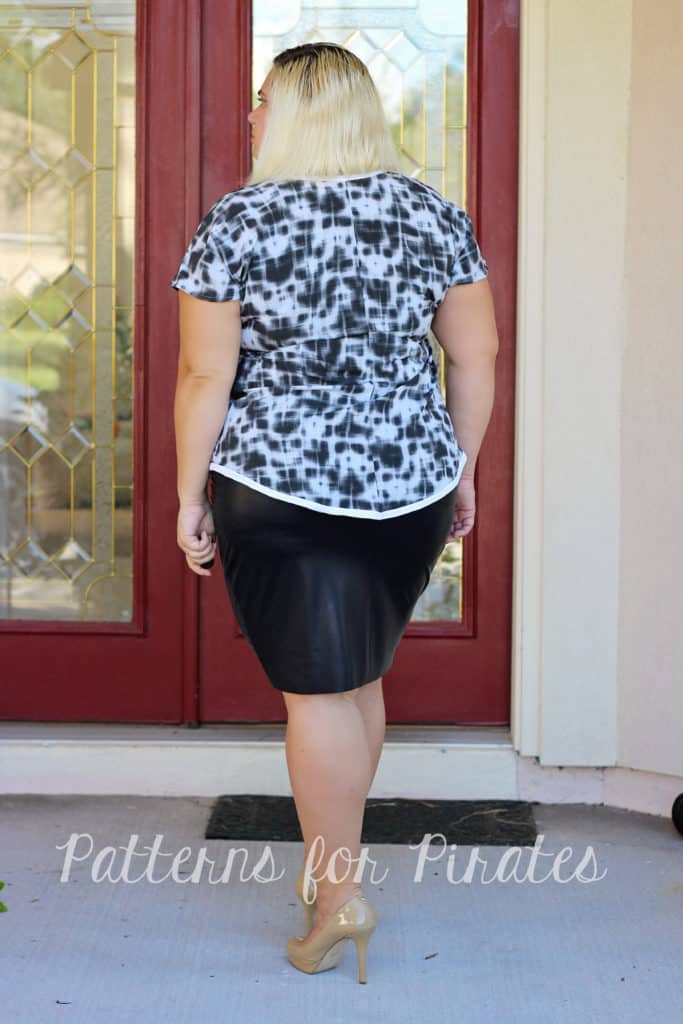
For a more edgy look I use some vegan stretch leather when I made the Pirate Pencil Skirt . I loved the look of the skirt un-hemmed so I just skipped this step all together…boom! Even a faster sew now!

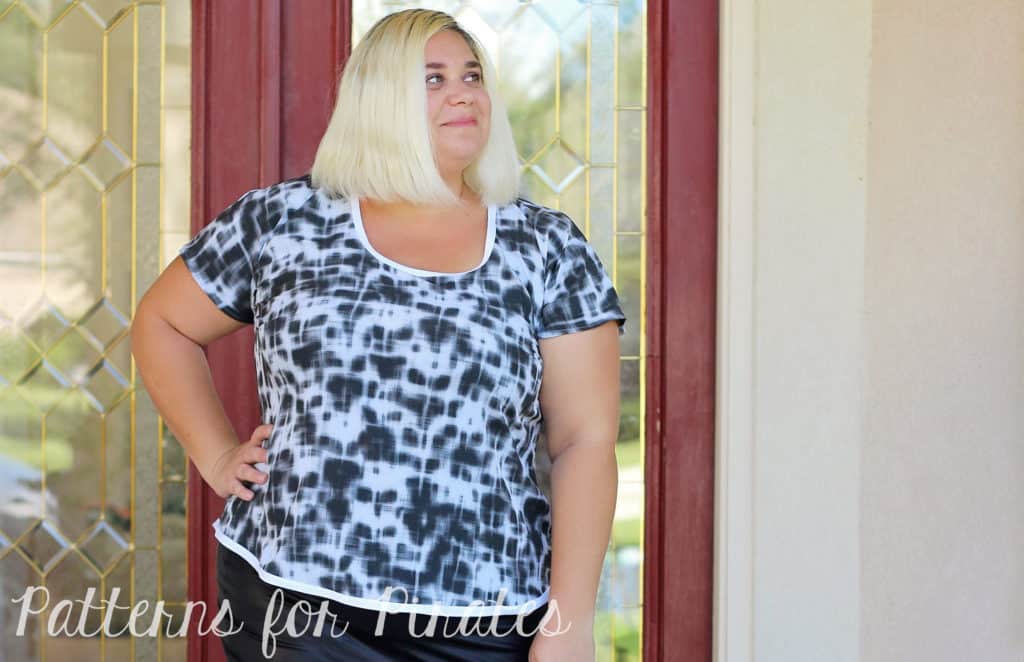
As I was sewing the top length Brunch Blouse I realized I wanted to add some extra details to it but without much work 😉 Store bought single fold bias tape to the rescue! Instead of finishing the neckline with the bias tape on the inside (as per the pattern tutorial), I did a switcharoo and put the bias tape on the outside of the neckline. I finished the bottom of the shirt using the same technique. The bias tape hem add a little extra to the shirt, doesn’t it?

There you have it! Two easy to sew patterns and a pair of of stilettos and you made yourself a edgy office attire. If you live in a colder weather are, throw a Cocoon Cardigan over and you’re ready for a stylish day at work.

Make sure you check out all the amazing blogs that joined us for this tour!

Filed Under: Blog Tours, Frequently Asked Questions, Uncategorized 2 Comments

Featured Patterns

  • Loosey Goosey Loosey Goosey $12.00 Original price was: $12.00.$10.50Current price is: $10.50.
  • Loosey Goosey- Youth Loosey Goosey- Youth $10.00 Original price was: $10.00.$8.50Current price is: $8.50.
  • Loosey Goosey - Bundle Loosey Goosey - Bundle $20.00 Original price was: $20.00.$18.00Current price is: $18.00.
  • Everyday Shirt Everyday Shirt $12.00
  • Everyday Shirt- Youth Everyday Shirt- Youth $10.00
  • Privacy Policy
  • Refund Policy
  • Affliliate Program
  • Contact Us
  • About

Copyright © 2025 Patterns for Pirates

Copyright © 2025 · Genesis Framework · WordPress · Log in