Patterns for Pirates

P4P stylish, modern, wearable patterns

  • Home
  • Blog
    • Frequently Asked Questions
    • Pattern Releases
      • Free Patterns
    • P4P University
      • Fitting
      • Sewing with Stretch, Knit Fabrics
      • Sewing with Woven Fabrics
      • Sewing Machines
    • Sew-A-Longs
    • Fabric for Pirates
    • Pattern Hacks
    • Announcement
      • Blog Tours
      • Contest/Giveaway
  • Shop
  • Bundle Discounts
  • Flash Friday
  • Gift Cards
  • My Account
  • Cart

Lumberjack Sew Along – day 1

January 24, 2022

Welcome to the Lumberjack SEW ALONG! 

Let’s get the Lumberjack party started! If you have not purchased the Lumberjack pattern(s) you can grab them here:

Lumberjack Youth

Lumberjack Hourglass 

Lumberjack V figure

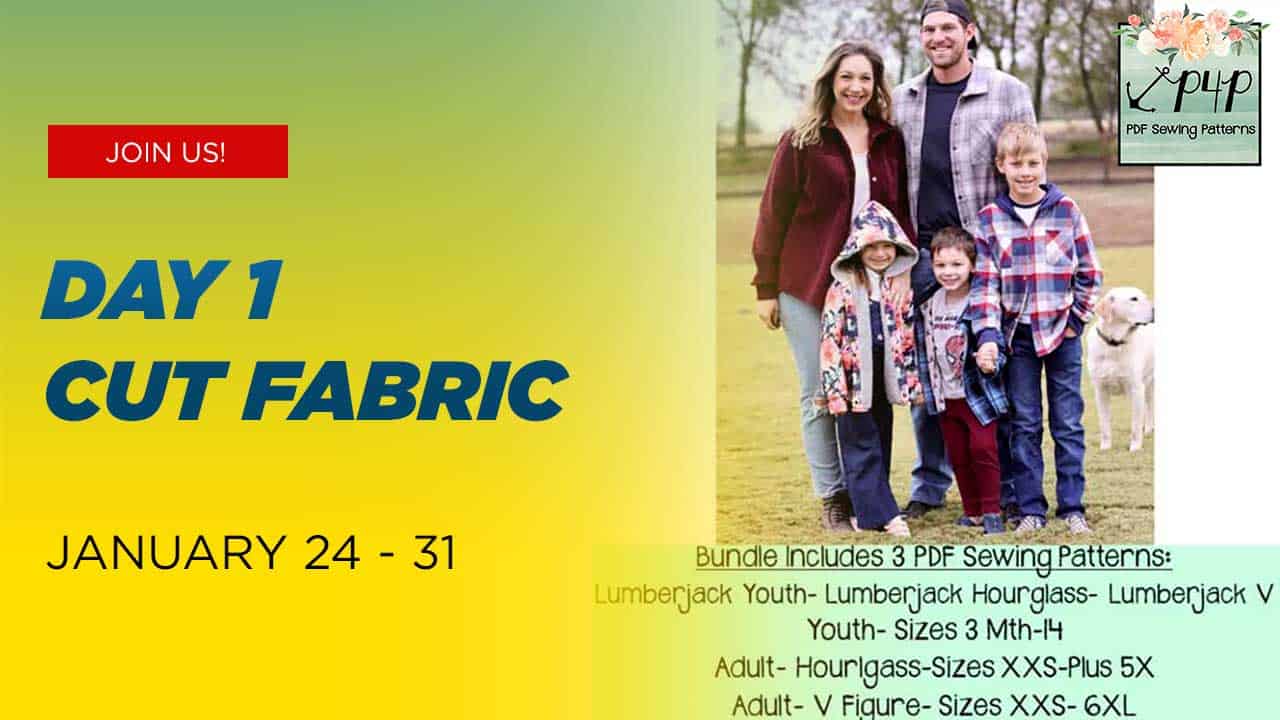
And of course, our bundle for the whole family

Before you select which style you are sewing along, take a look at the Round Up Blog where we show you all options available.

Now that you have the patterns it’s time to select which file format you would like to use. Both the Youth and the Adult come in A4 and Letter format to print at home, A0 format to print with a plotter or at a copy shop AND a projector file. If you use the projector file you will not have to print anything!! That’s definitely my favorite way! You can see in today’s video how I use the file to cut the fabric. 

Note: The tutorial is now a separate file from the pattern pieces. 

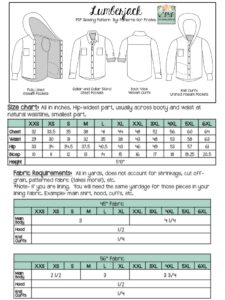
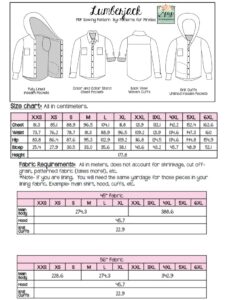
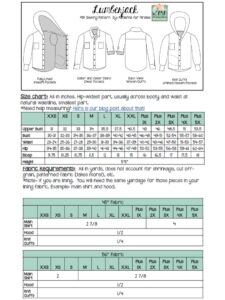
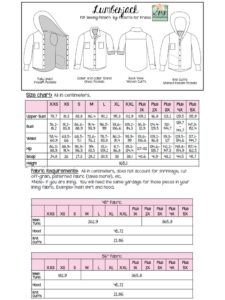
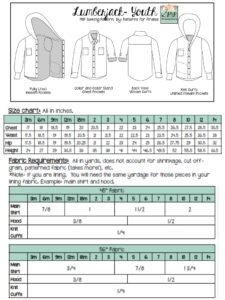
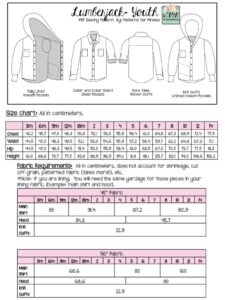
Let’s start by taking the measurements needed for the best fit. P4P has an amazing blog that gives you tips for accurately taking your measurements. You can read all about it here. If your measurements put you in a different size for chest/waist/hips be sure to check out our P4P University blog and grade to achieve the perfect fit. All 3 Lumberjack shirt patterns have straight side seams and relaxed fit so it is a little more giving when it comes to grading for the waist. 

Let’s talk fabric! The Lumberjack pattern is drafted for woven fabrics like flannel, light weight denim, light weight wool or medium weight cotton woven. For the lining you can use minky, fleece, flannel, french terry, sherpa…pretty much your preferred soft, cuddly fabric. For this sew along I am using a brushed flannel that I got from Joann fabrics. For the closures I am going to add spring snaps. Buttons are an option too 😉


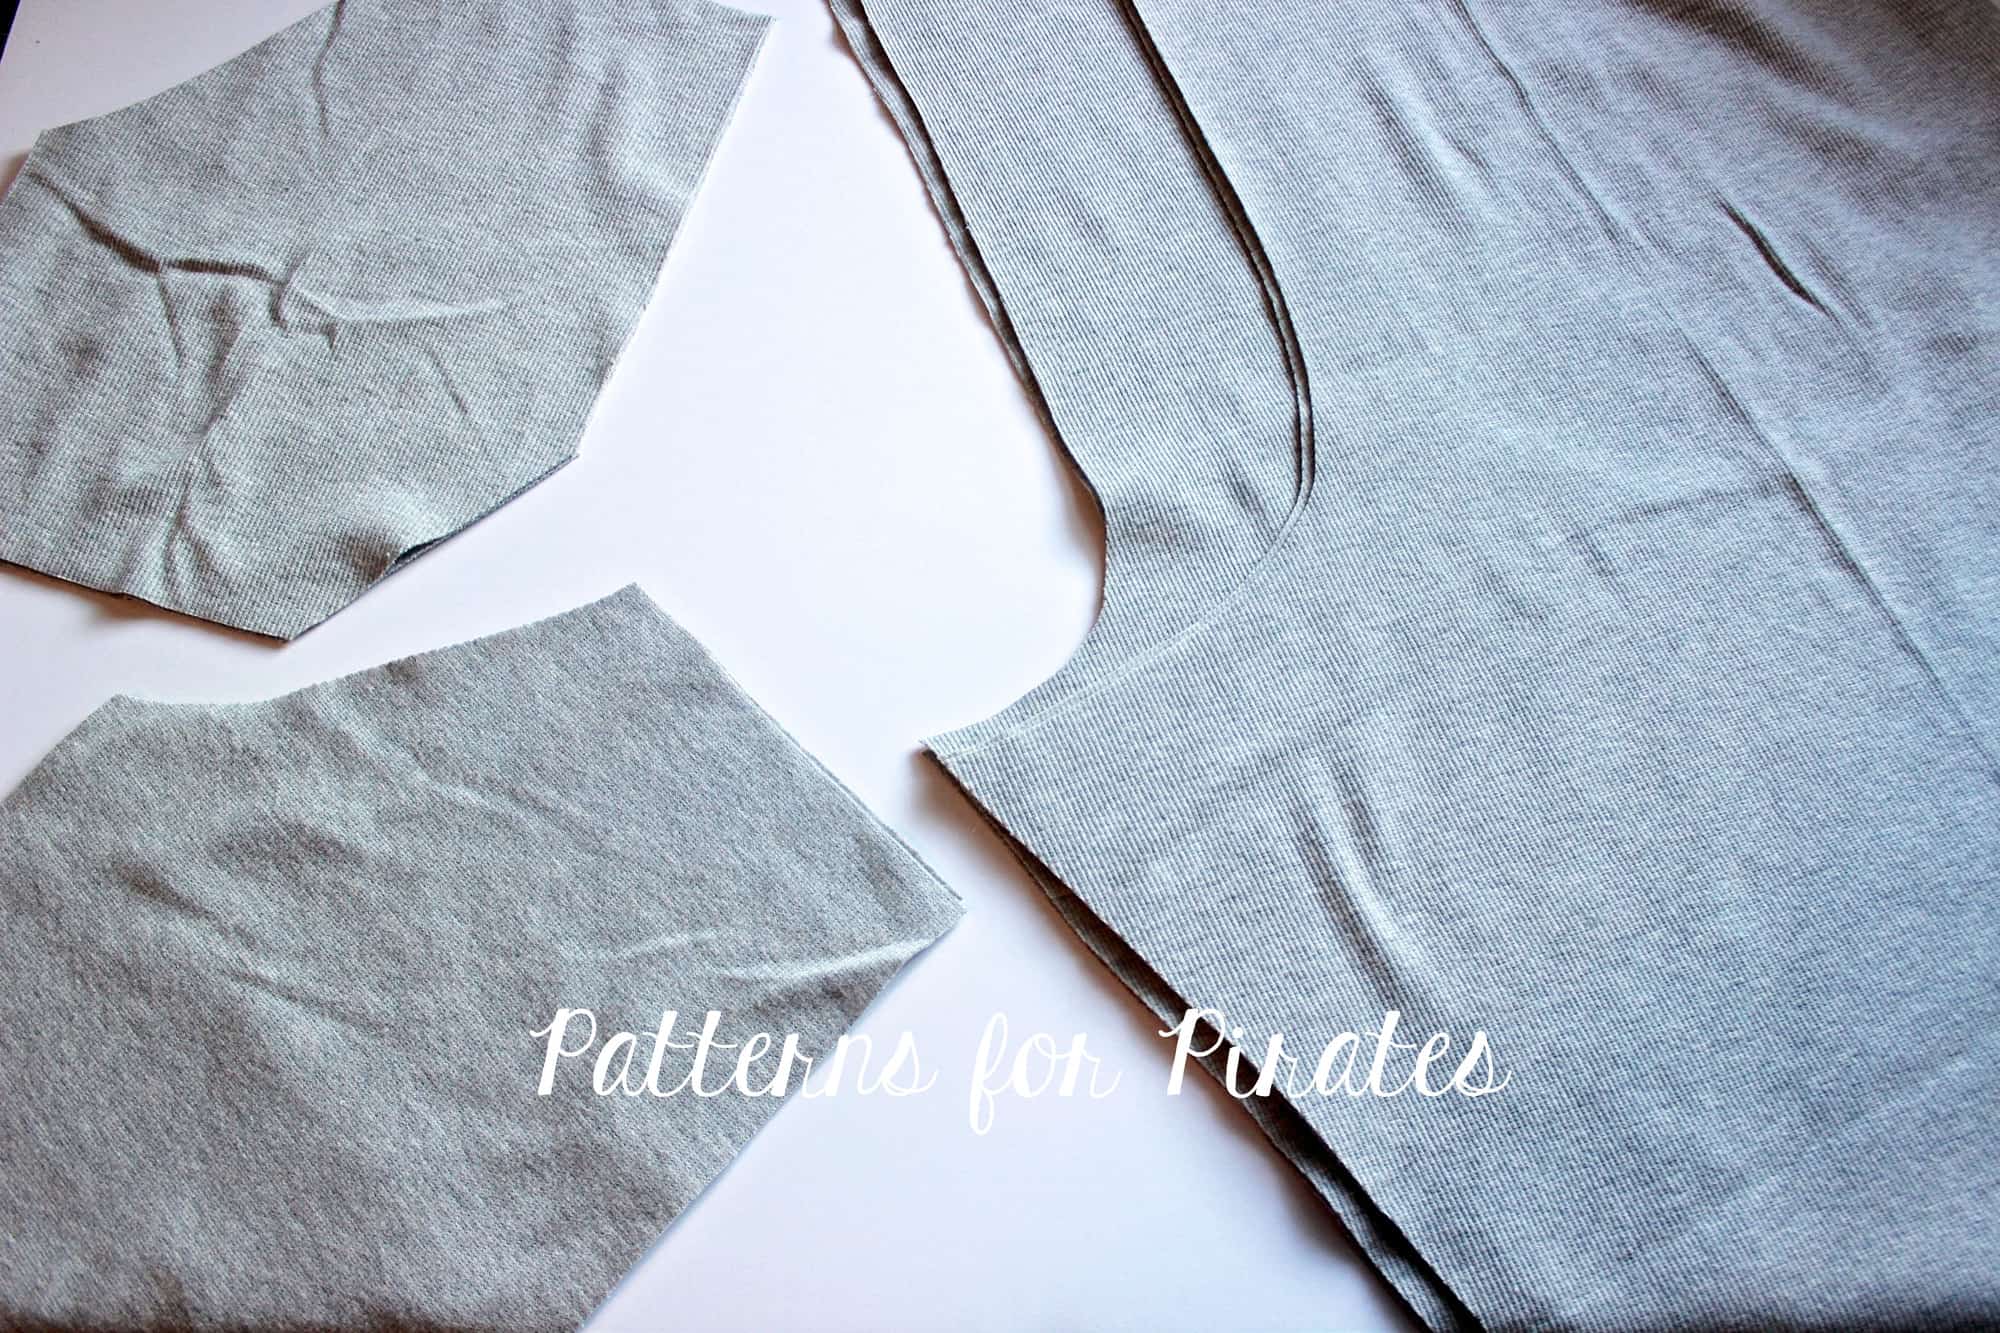
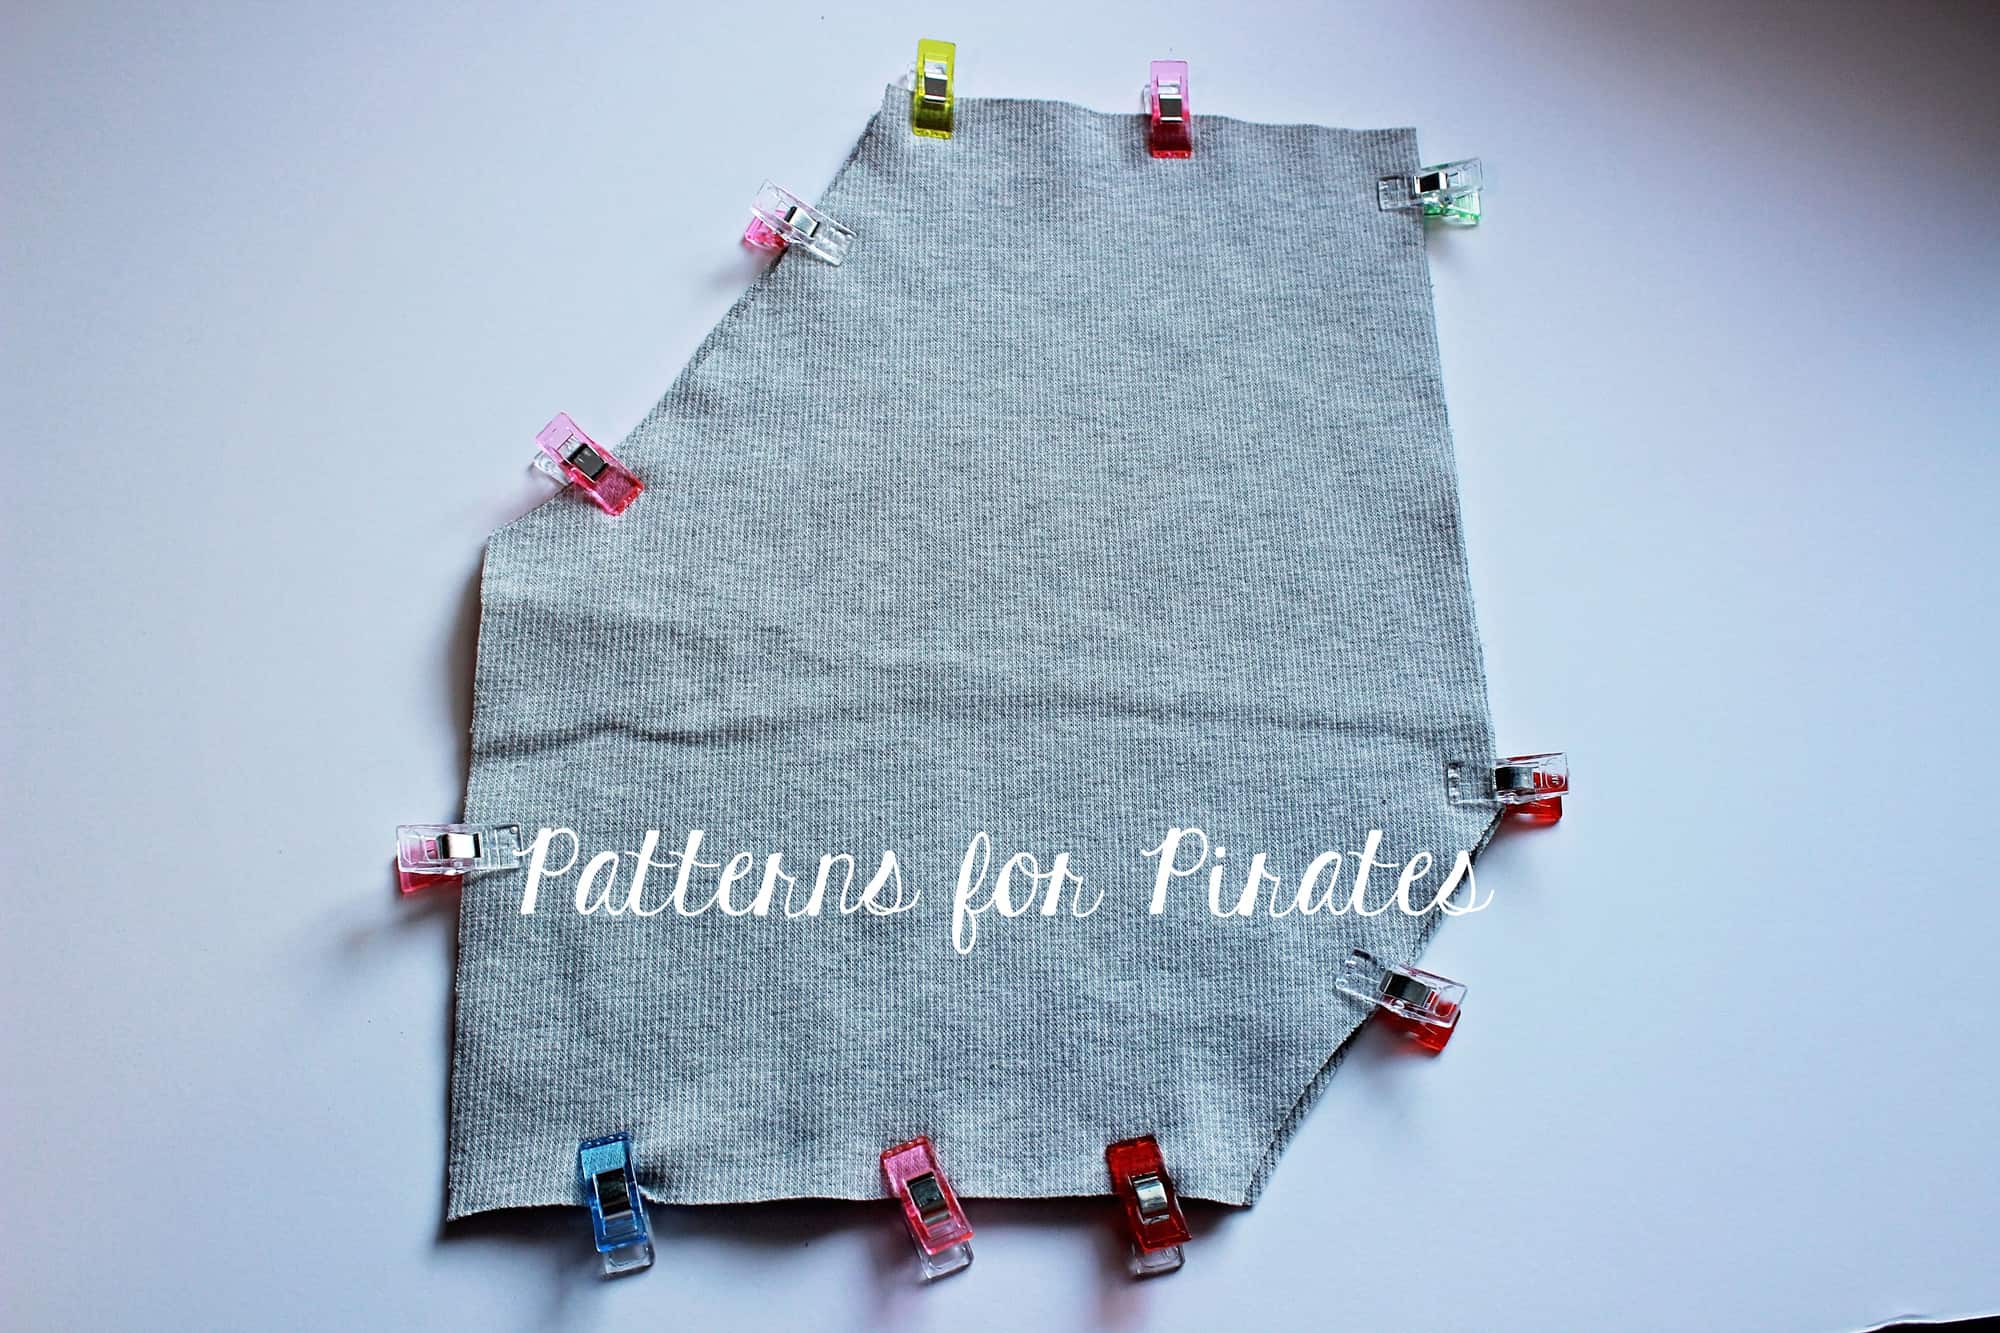
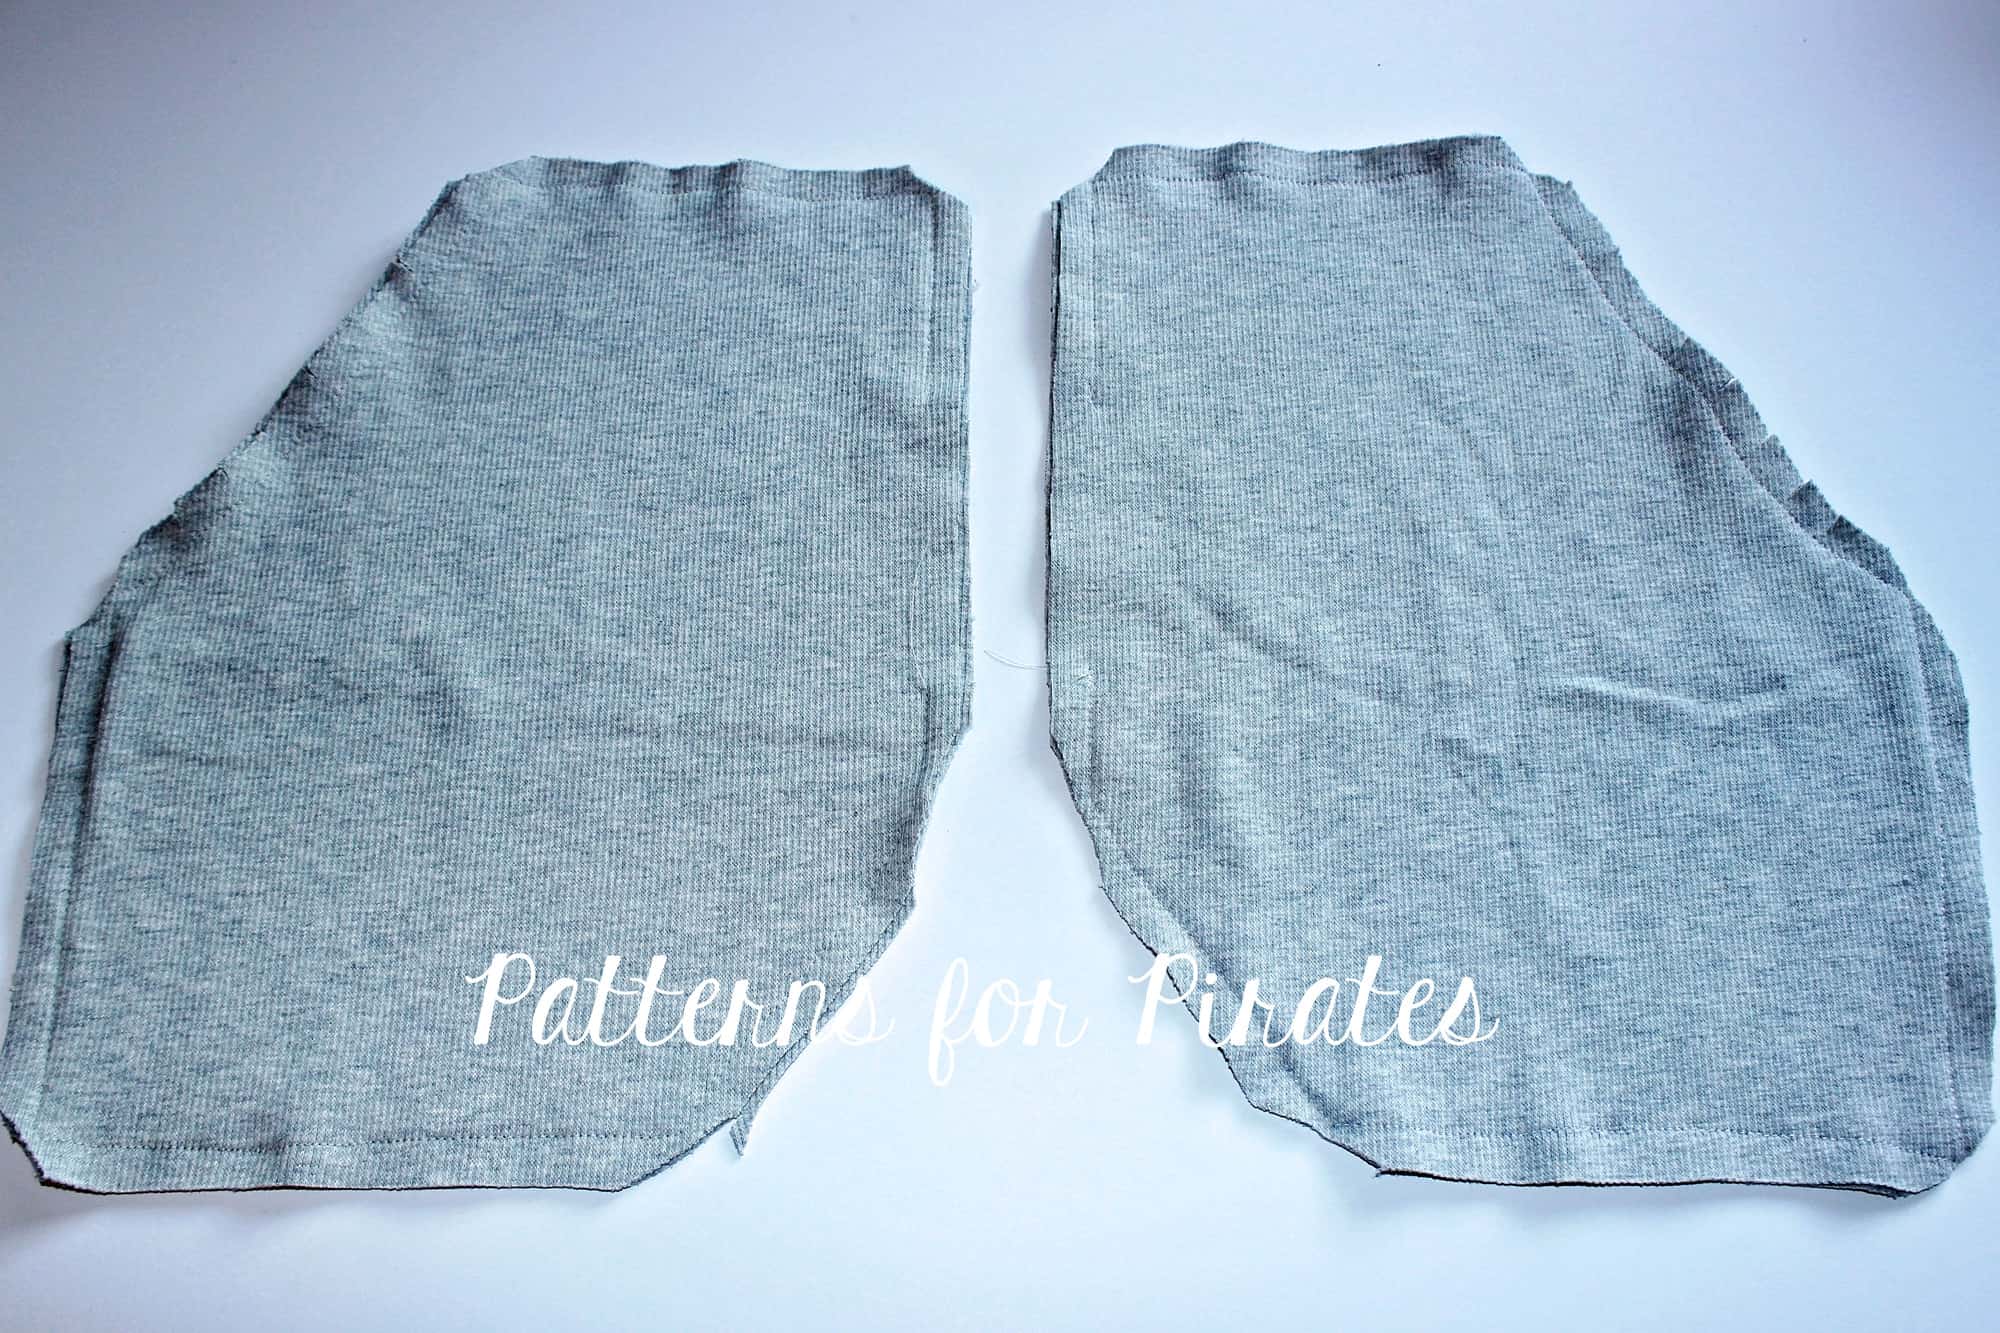
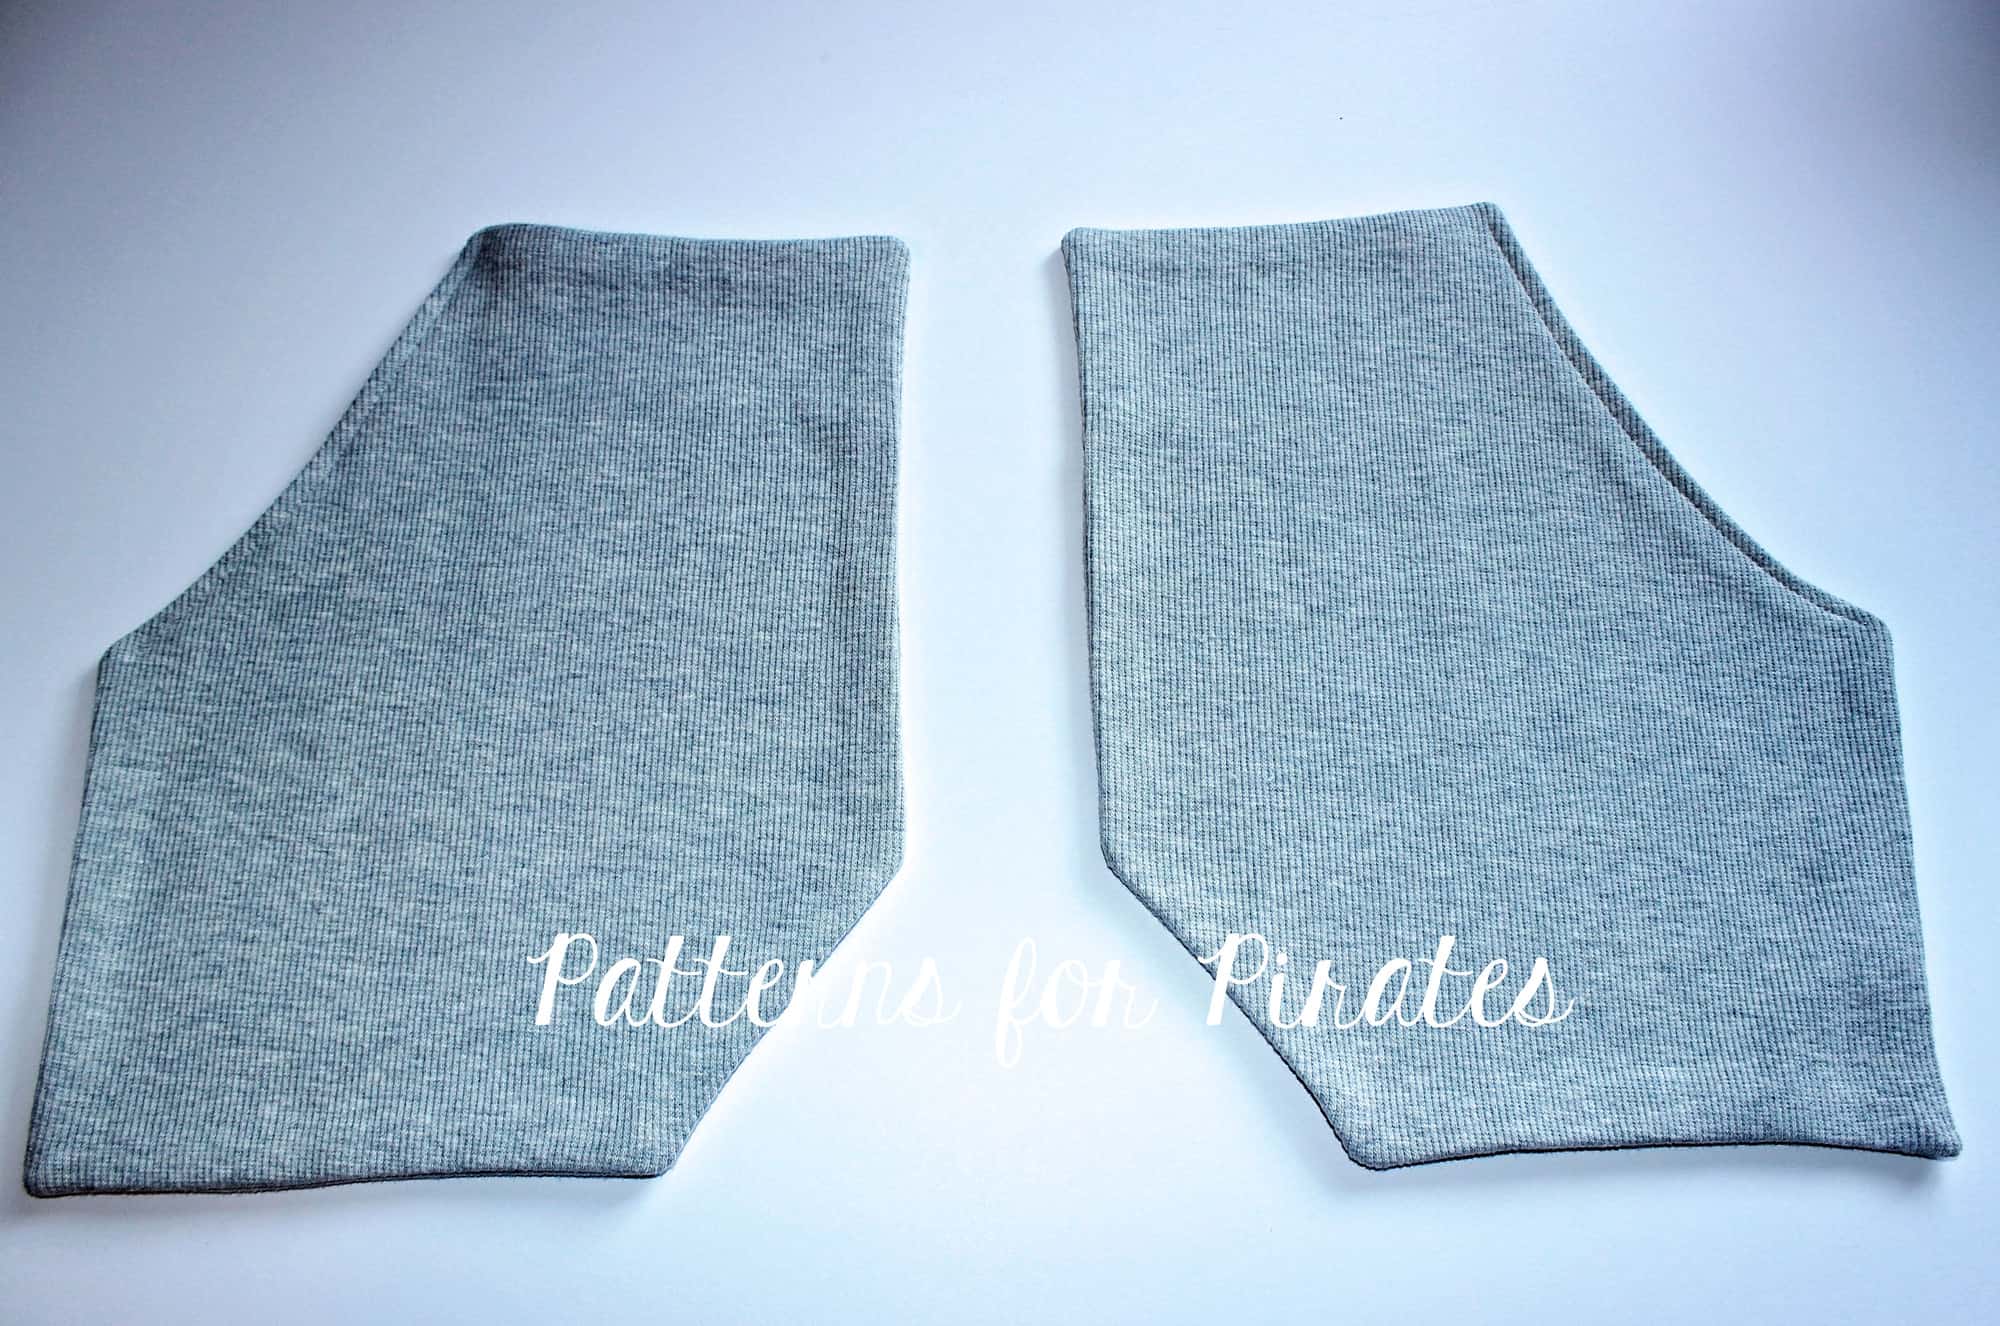
Day 1 video is posted below. Check it out and once you are done cutting your fabric post a picture of it in the comments of the Day 1 photo of the Lumberjack SAL album in the M4M & P4P Sew Along group. If you sew more than one,  post each one in a separate pic!

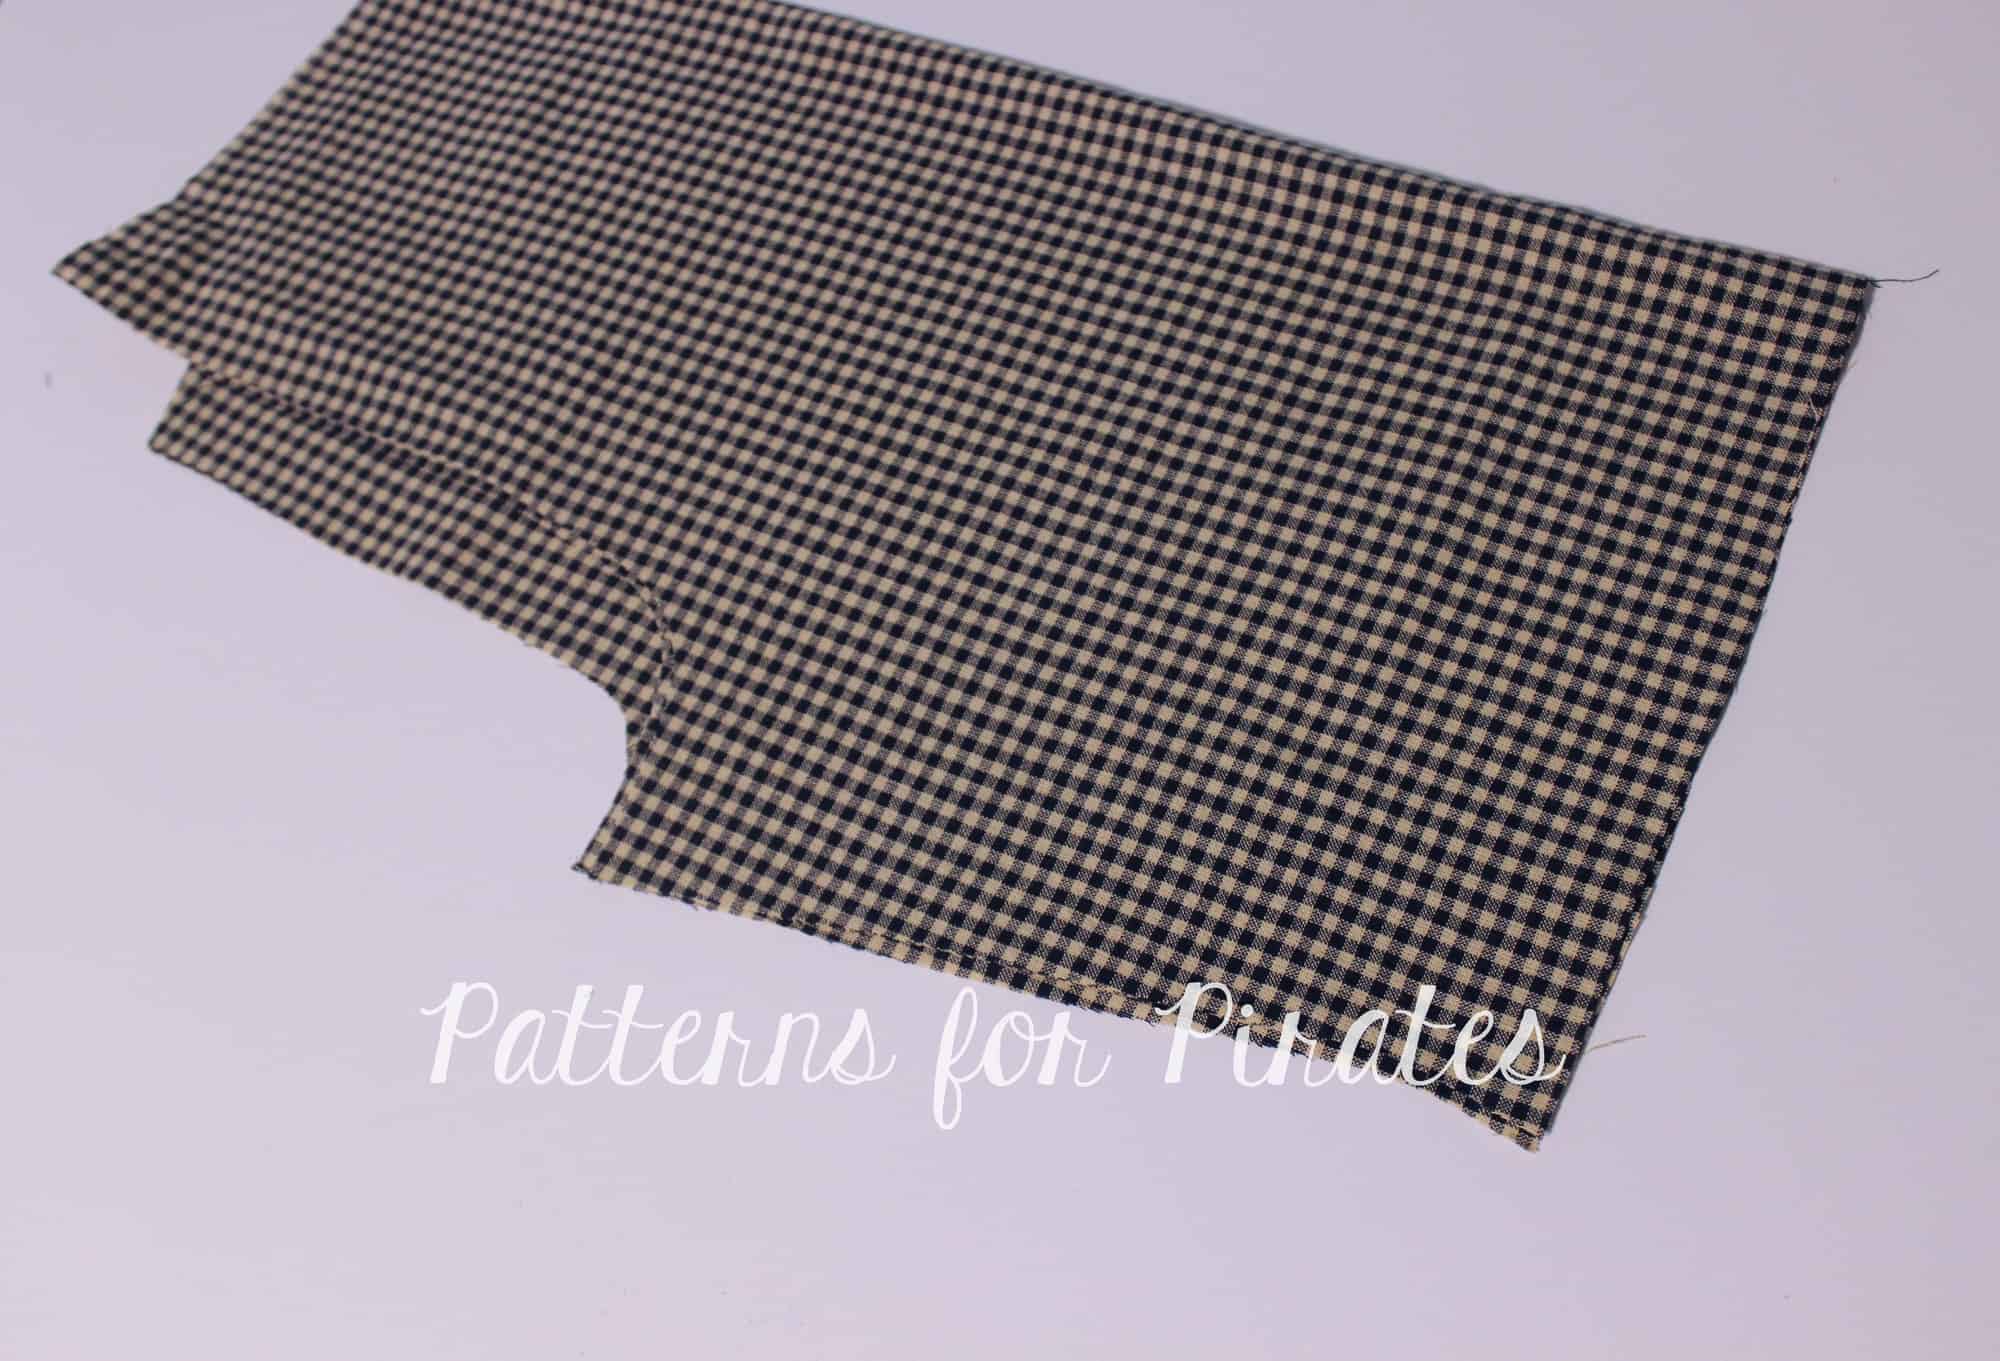
Lumberjack Sew along – day 1 | cut fabric

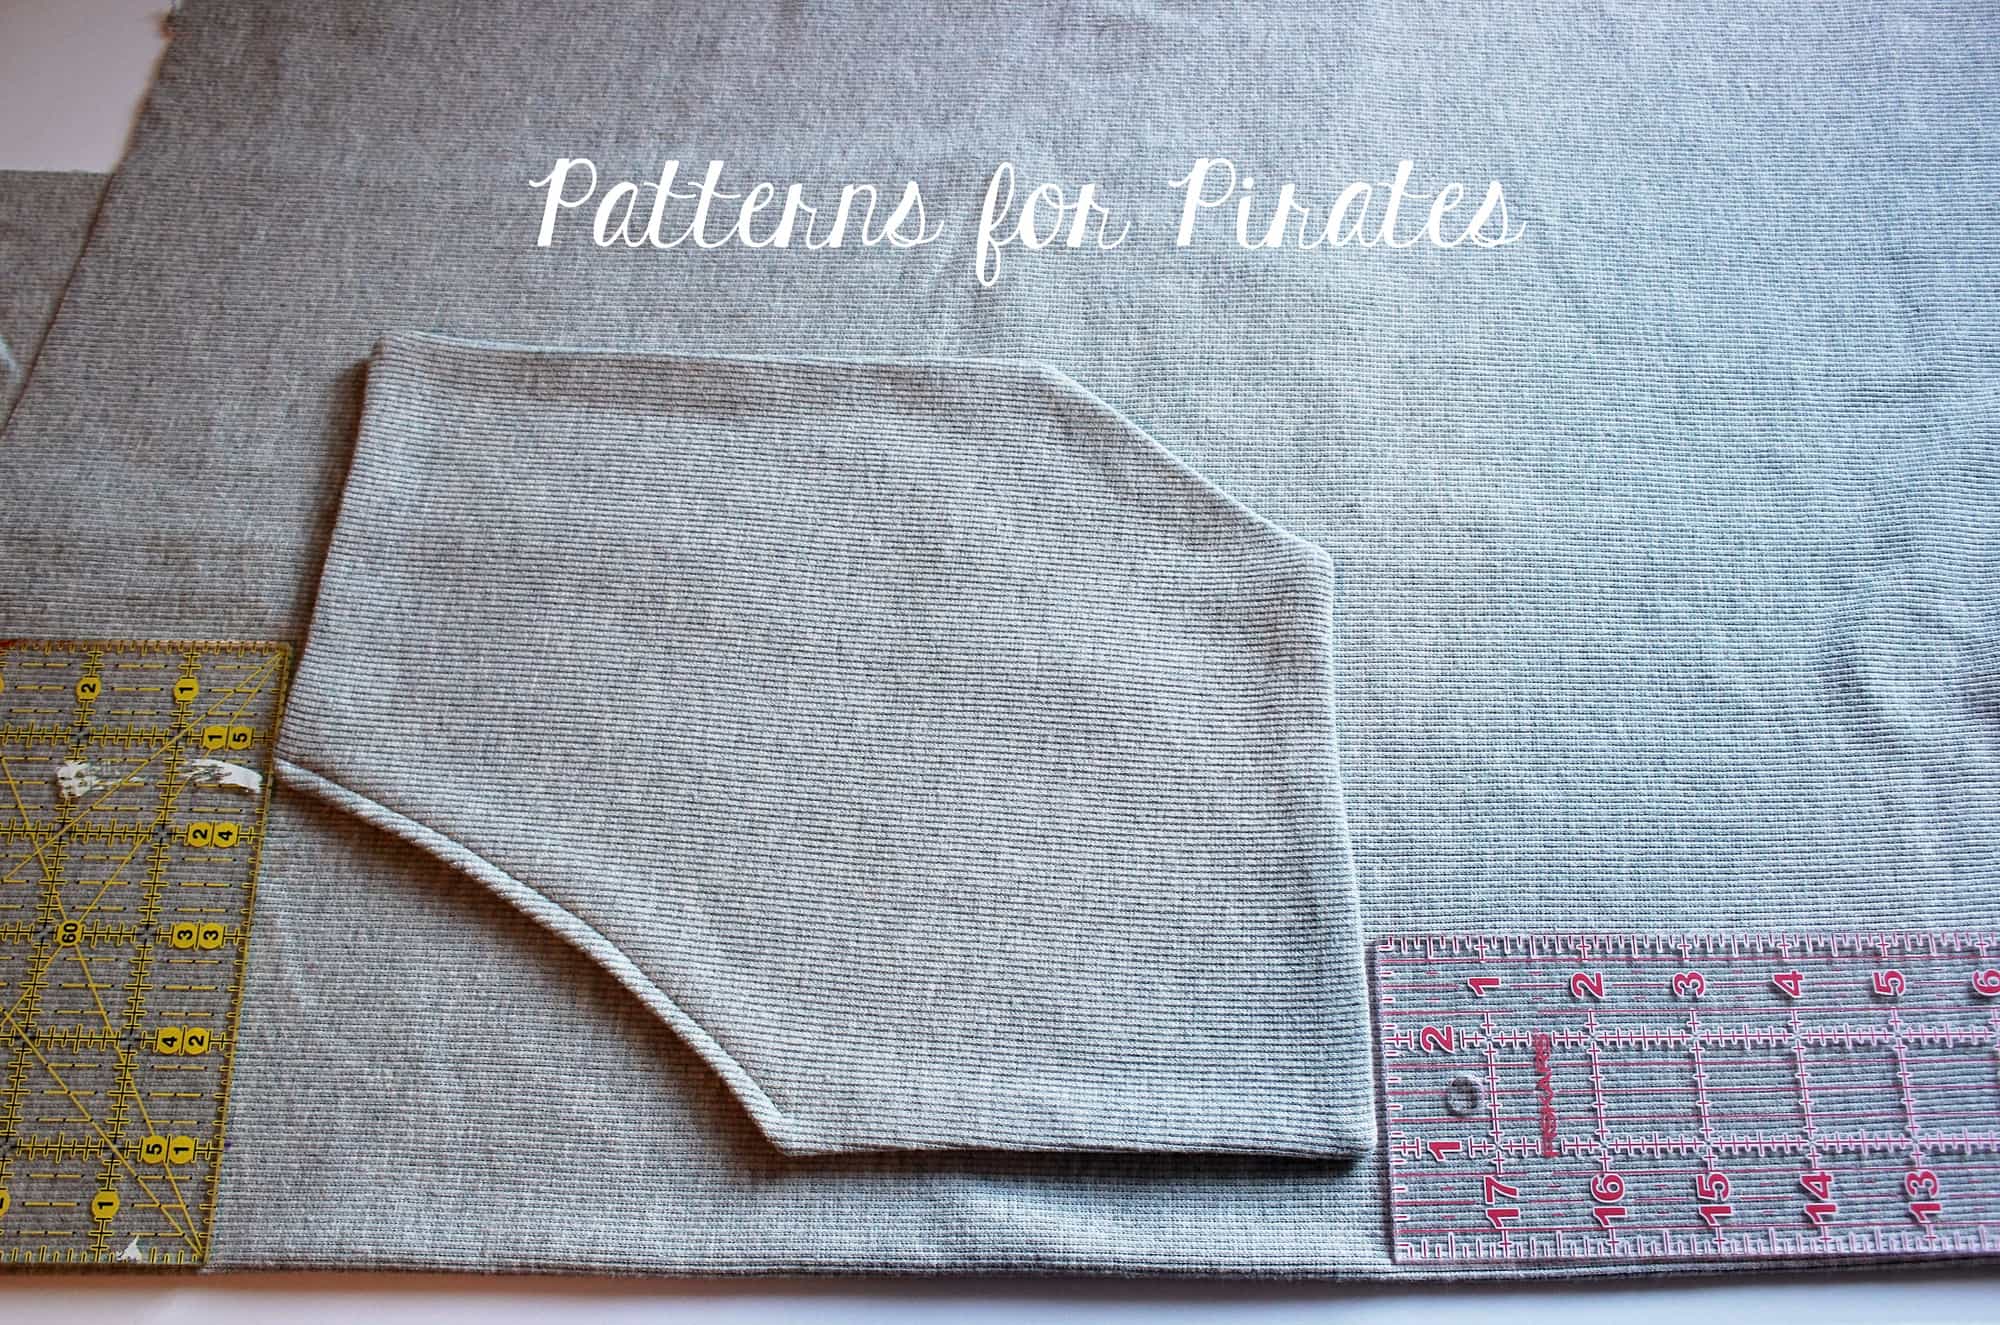
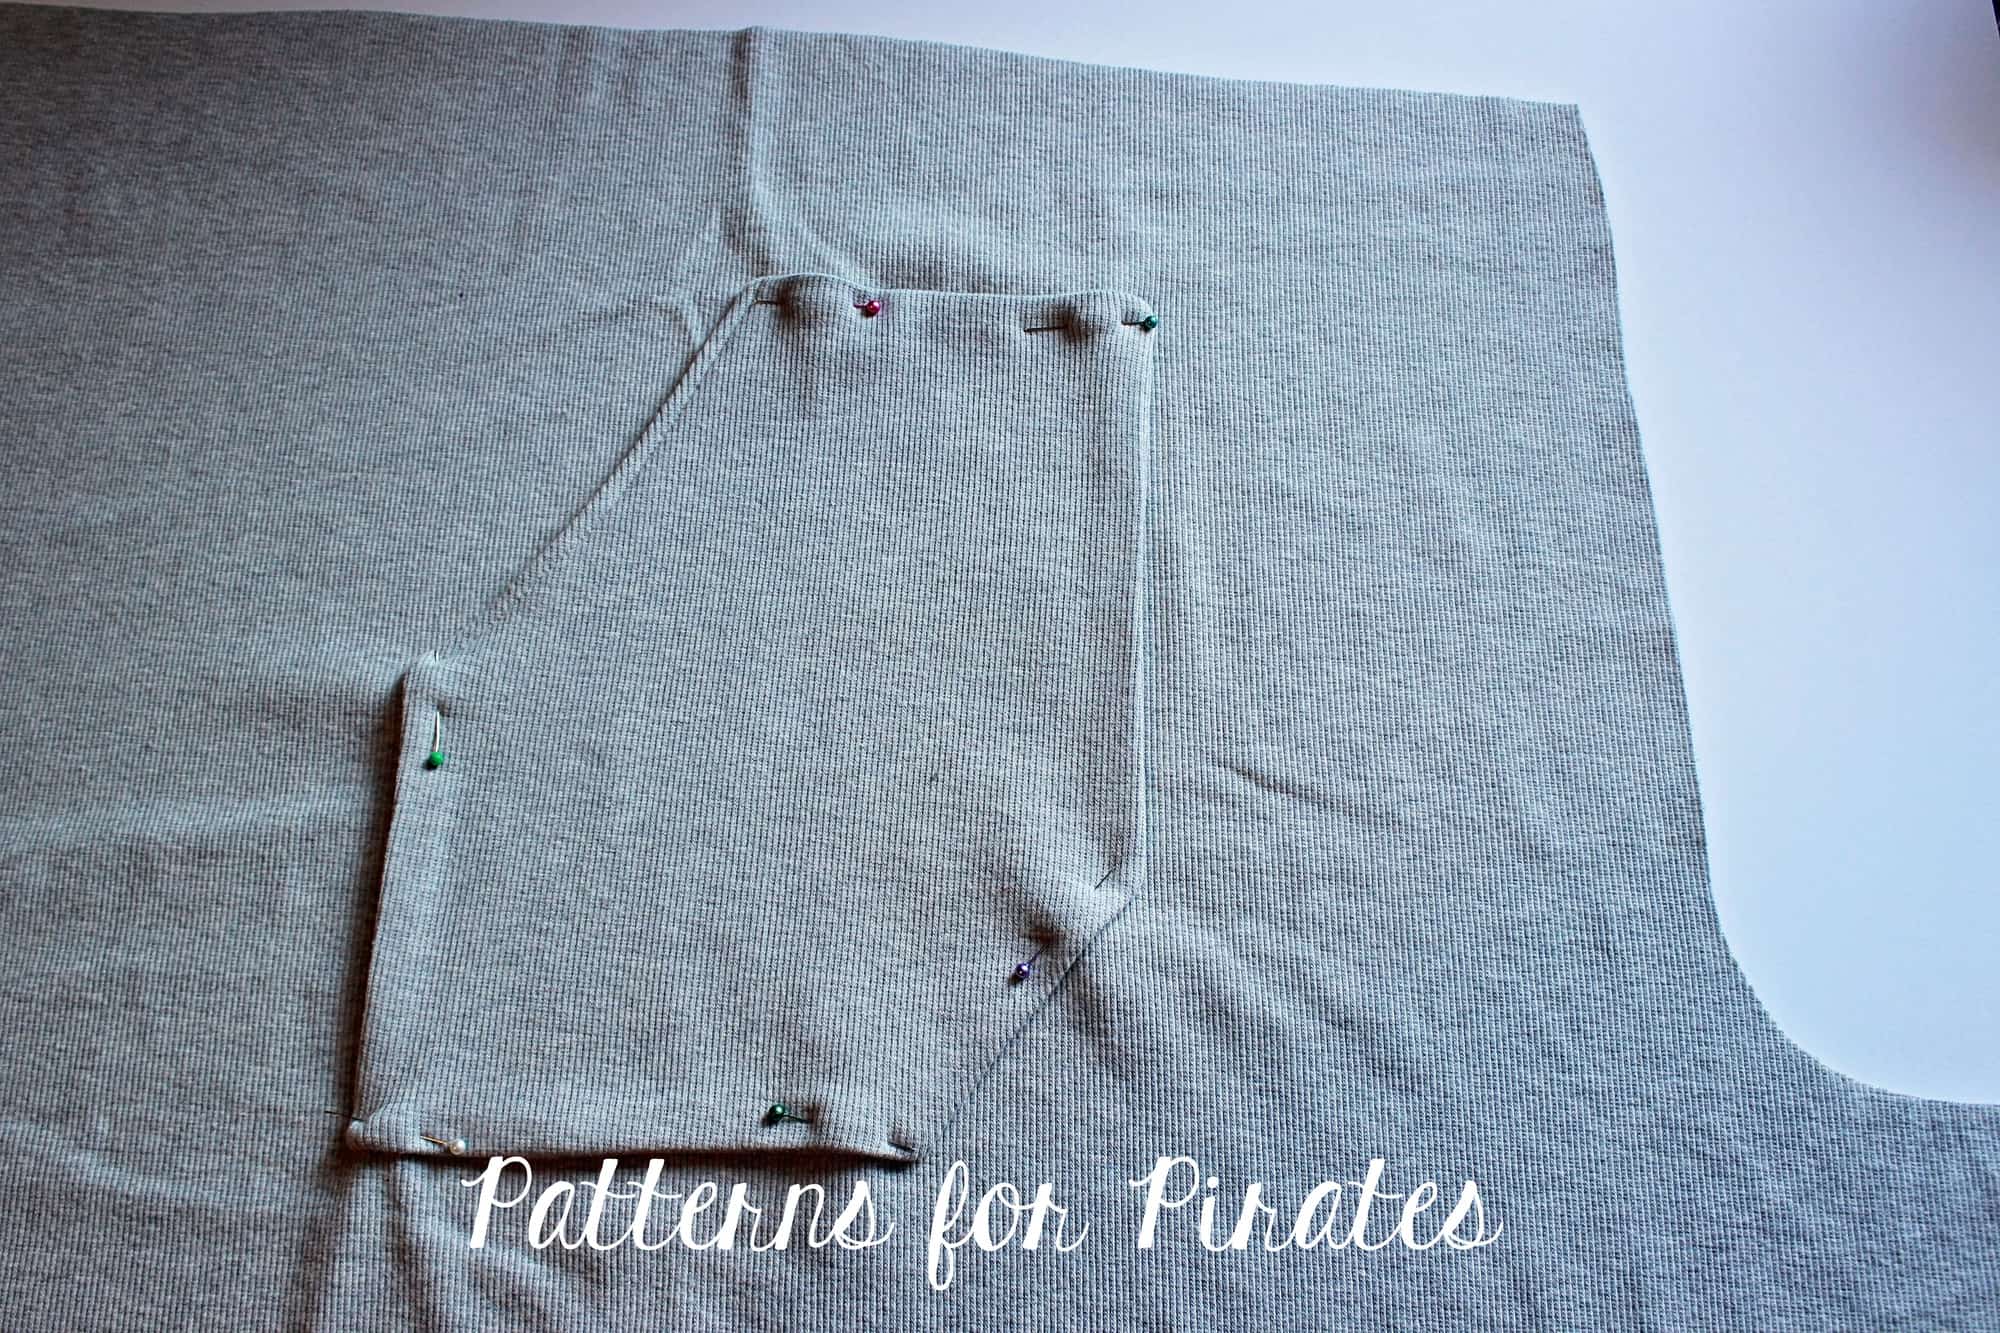
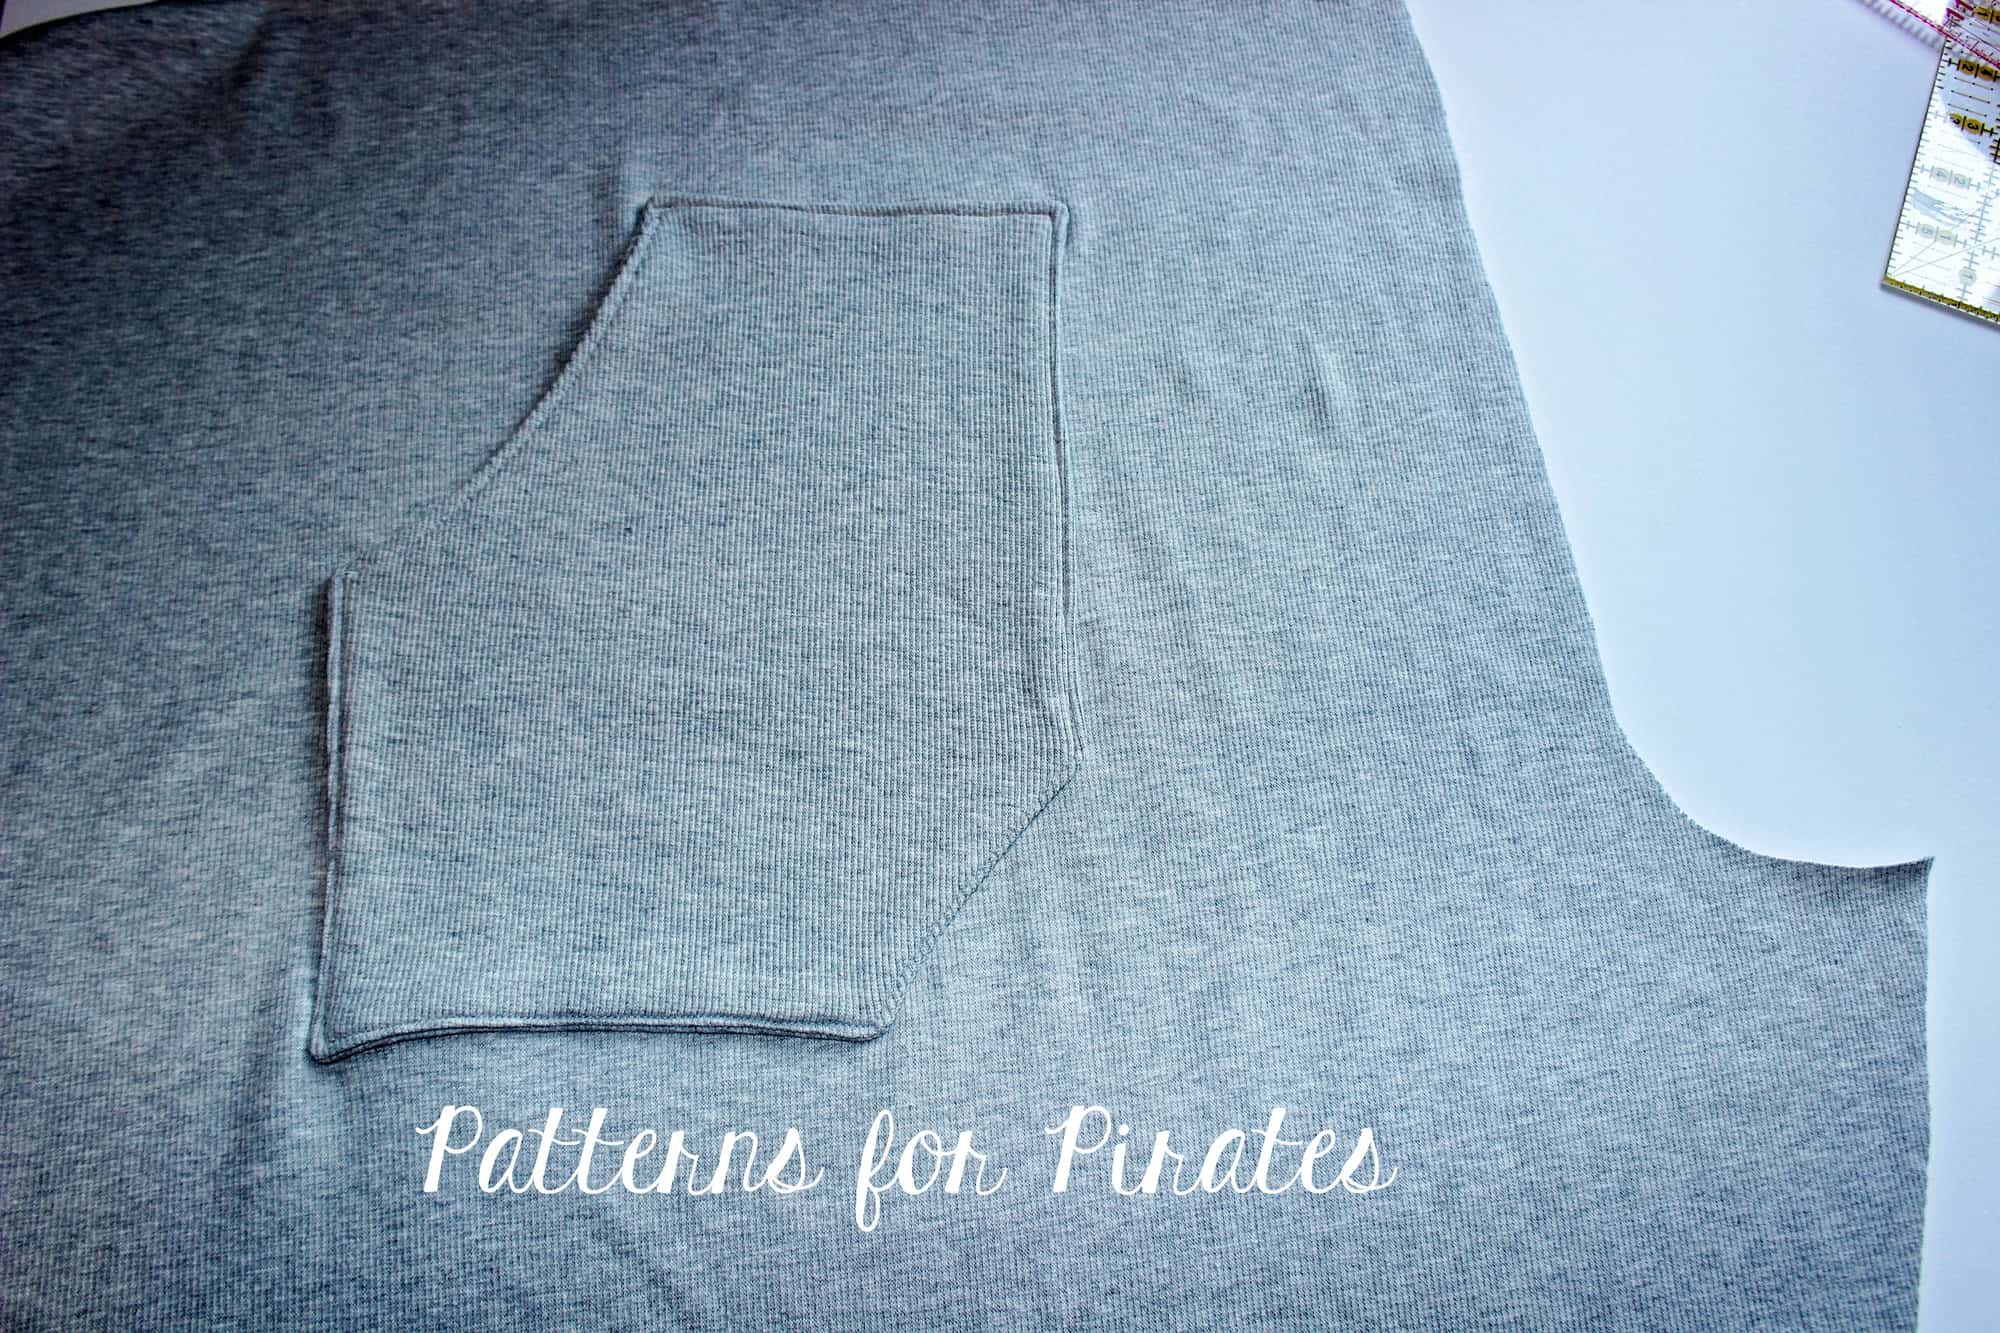
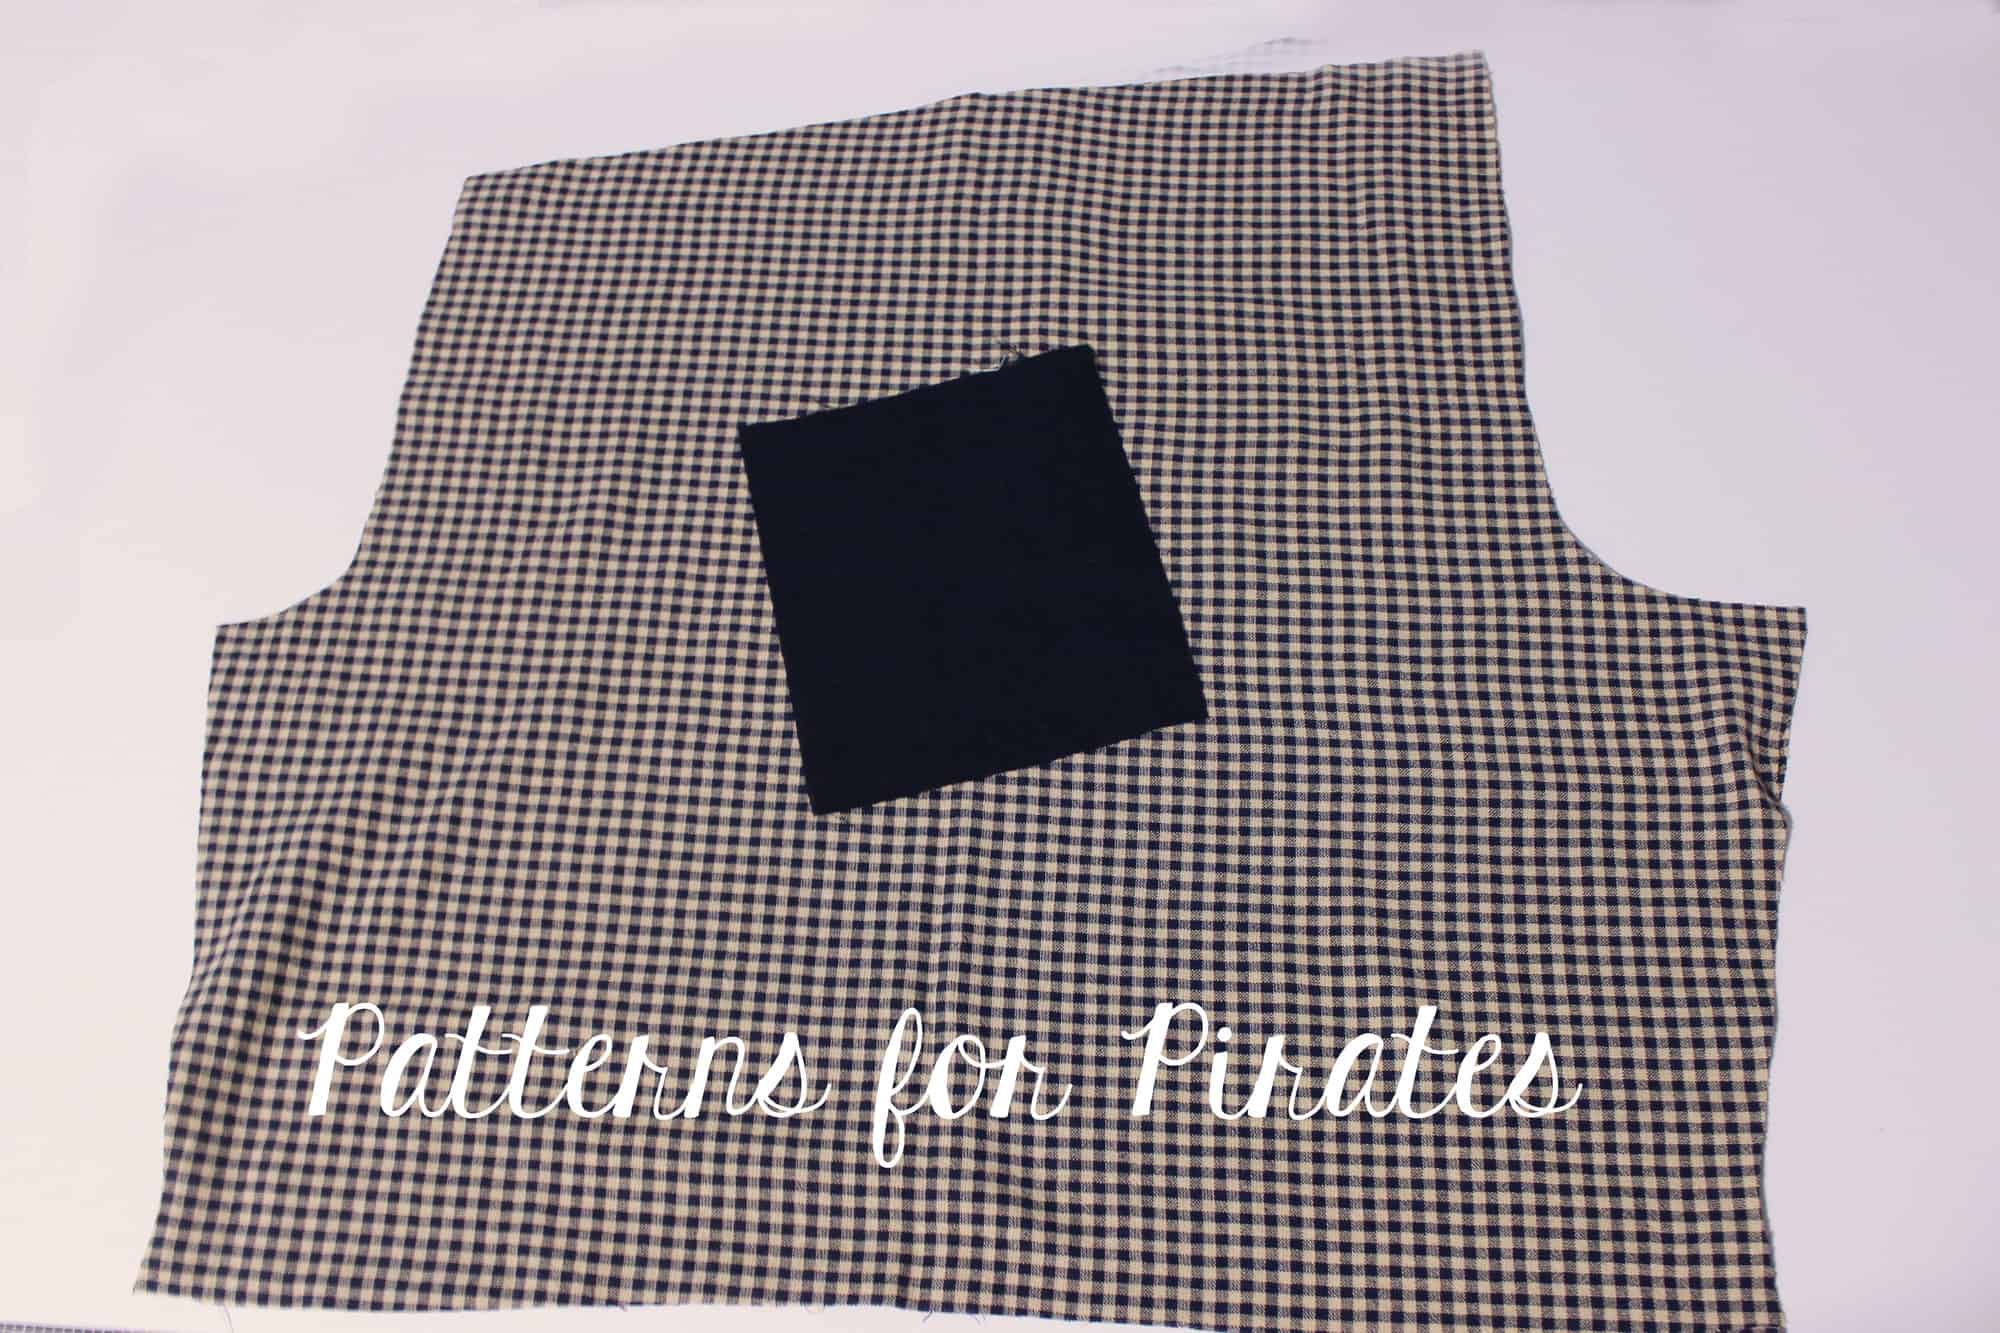
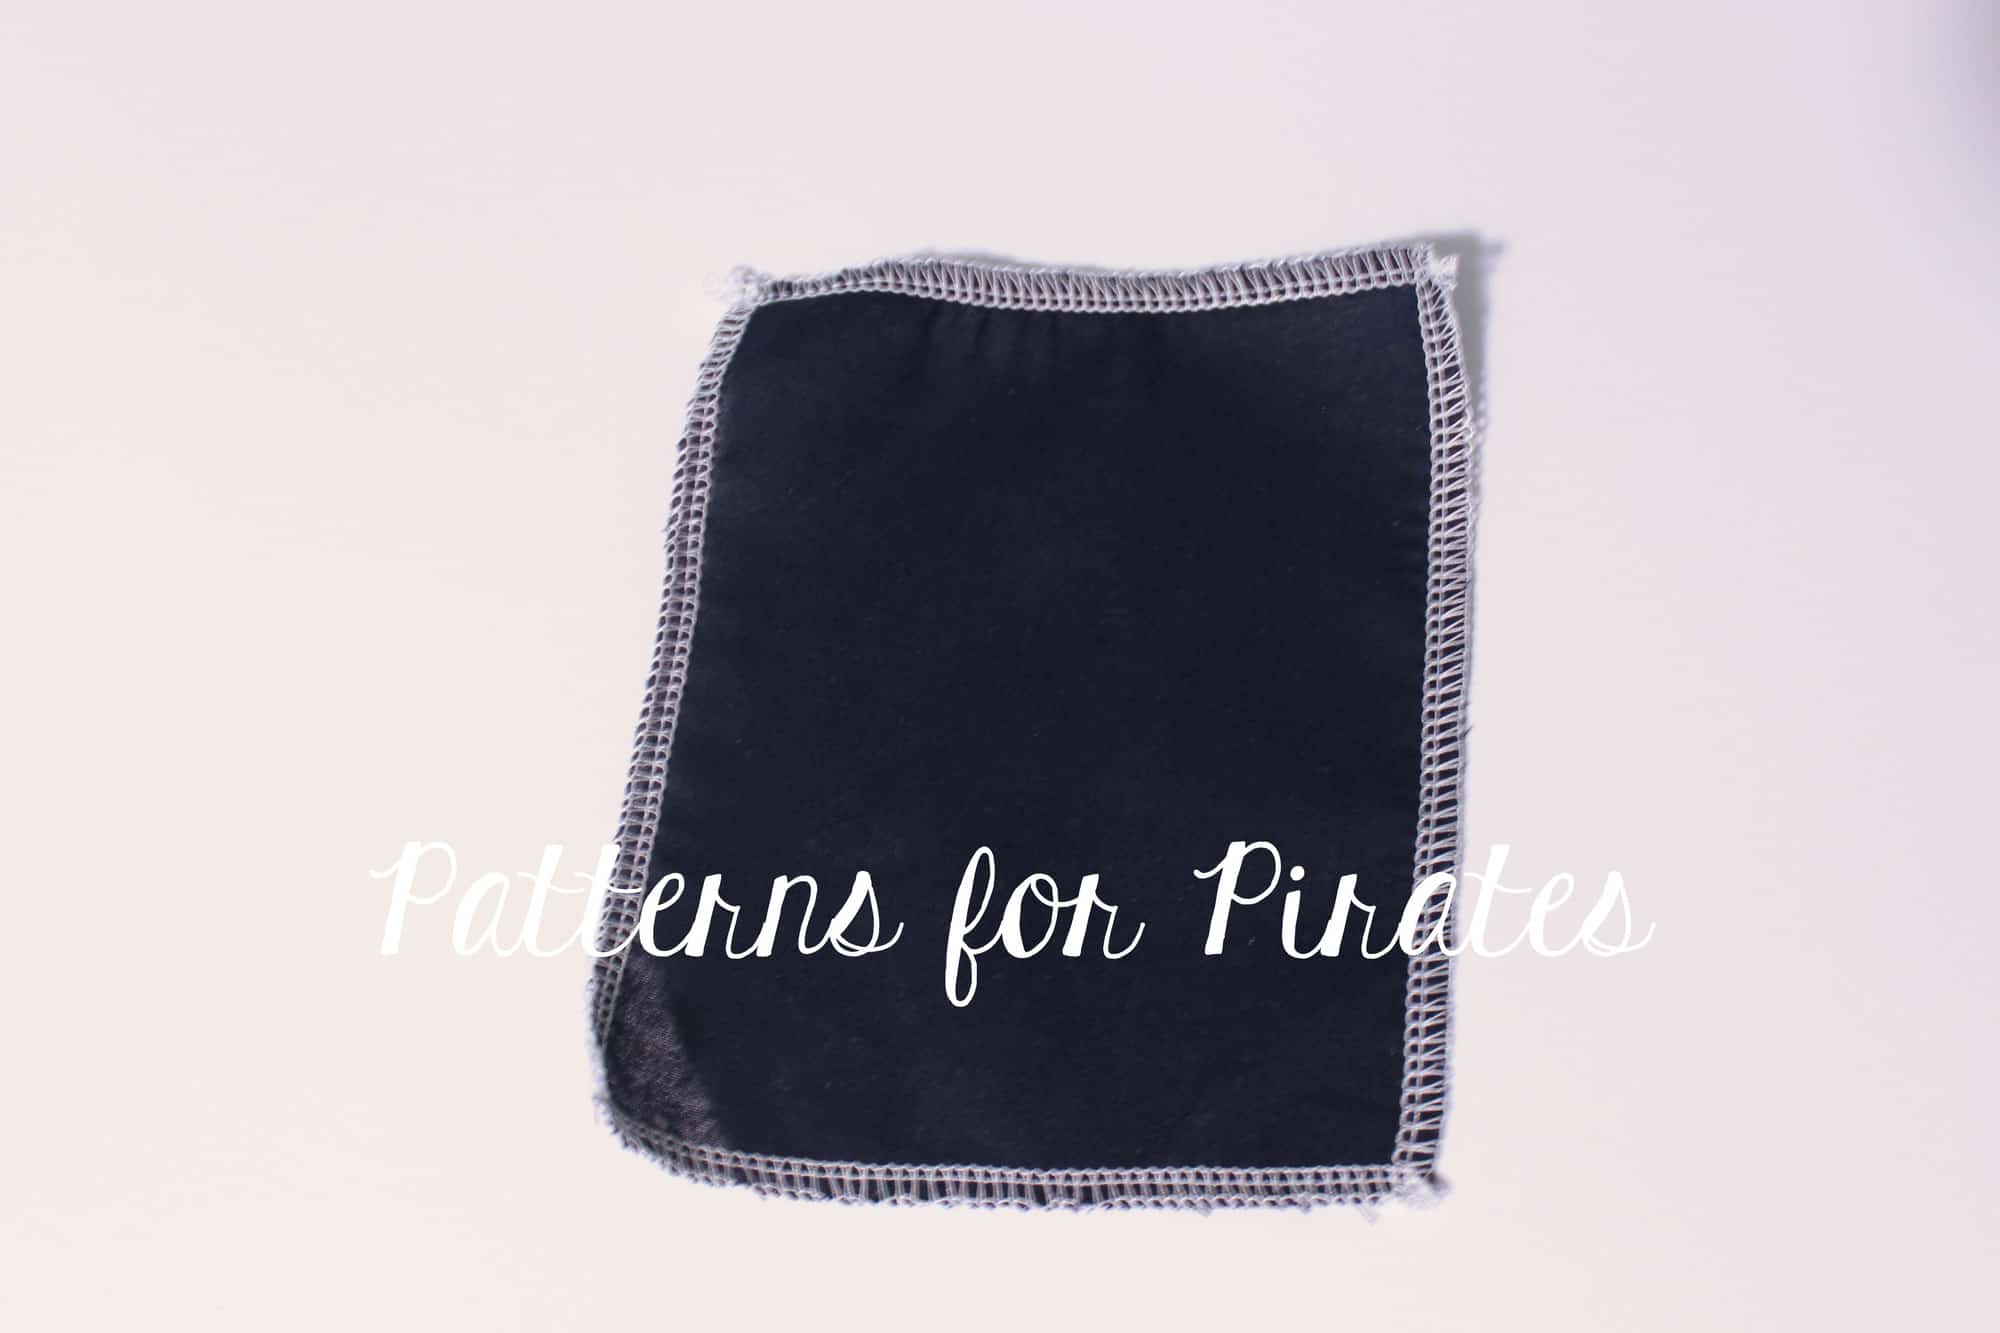
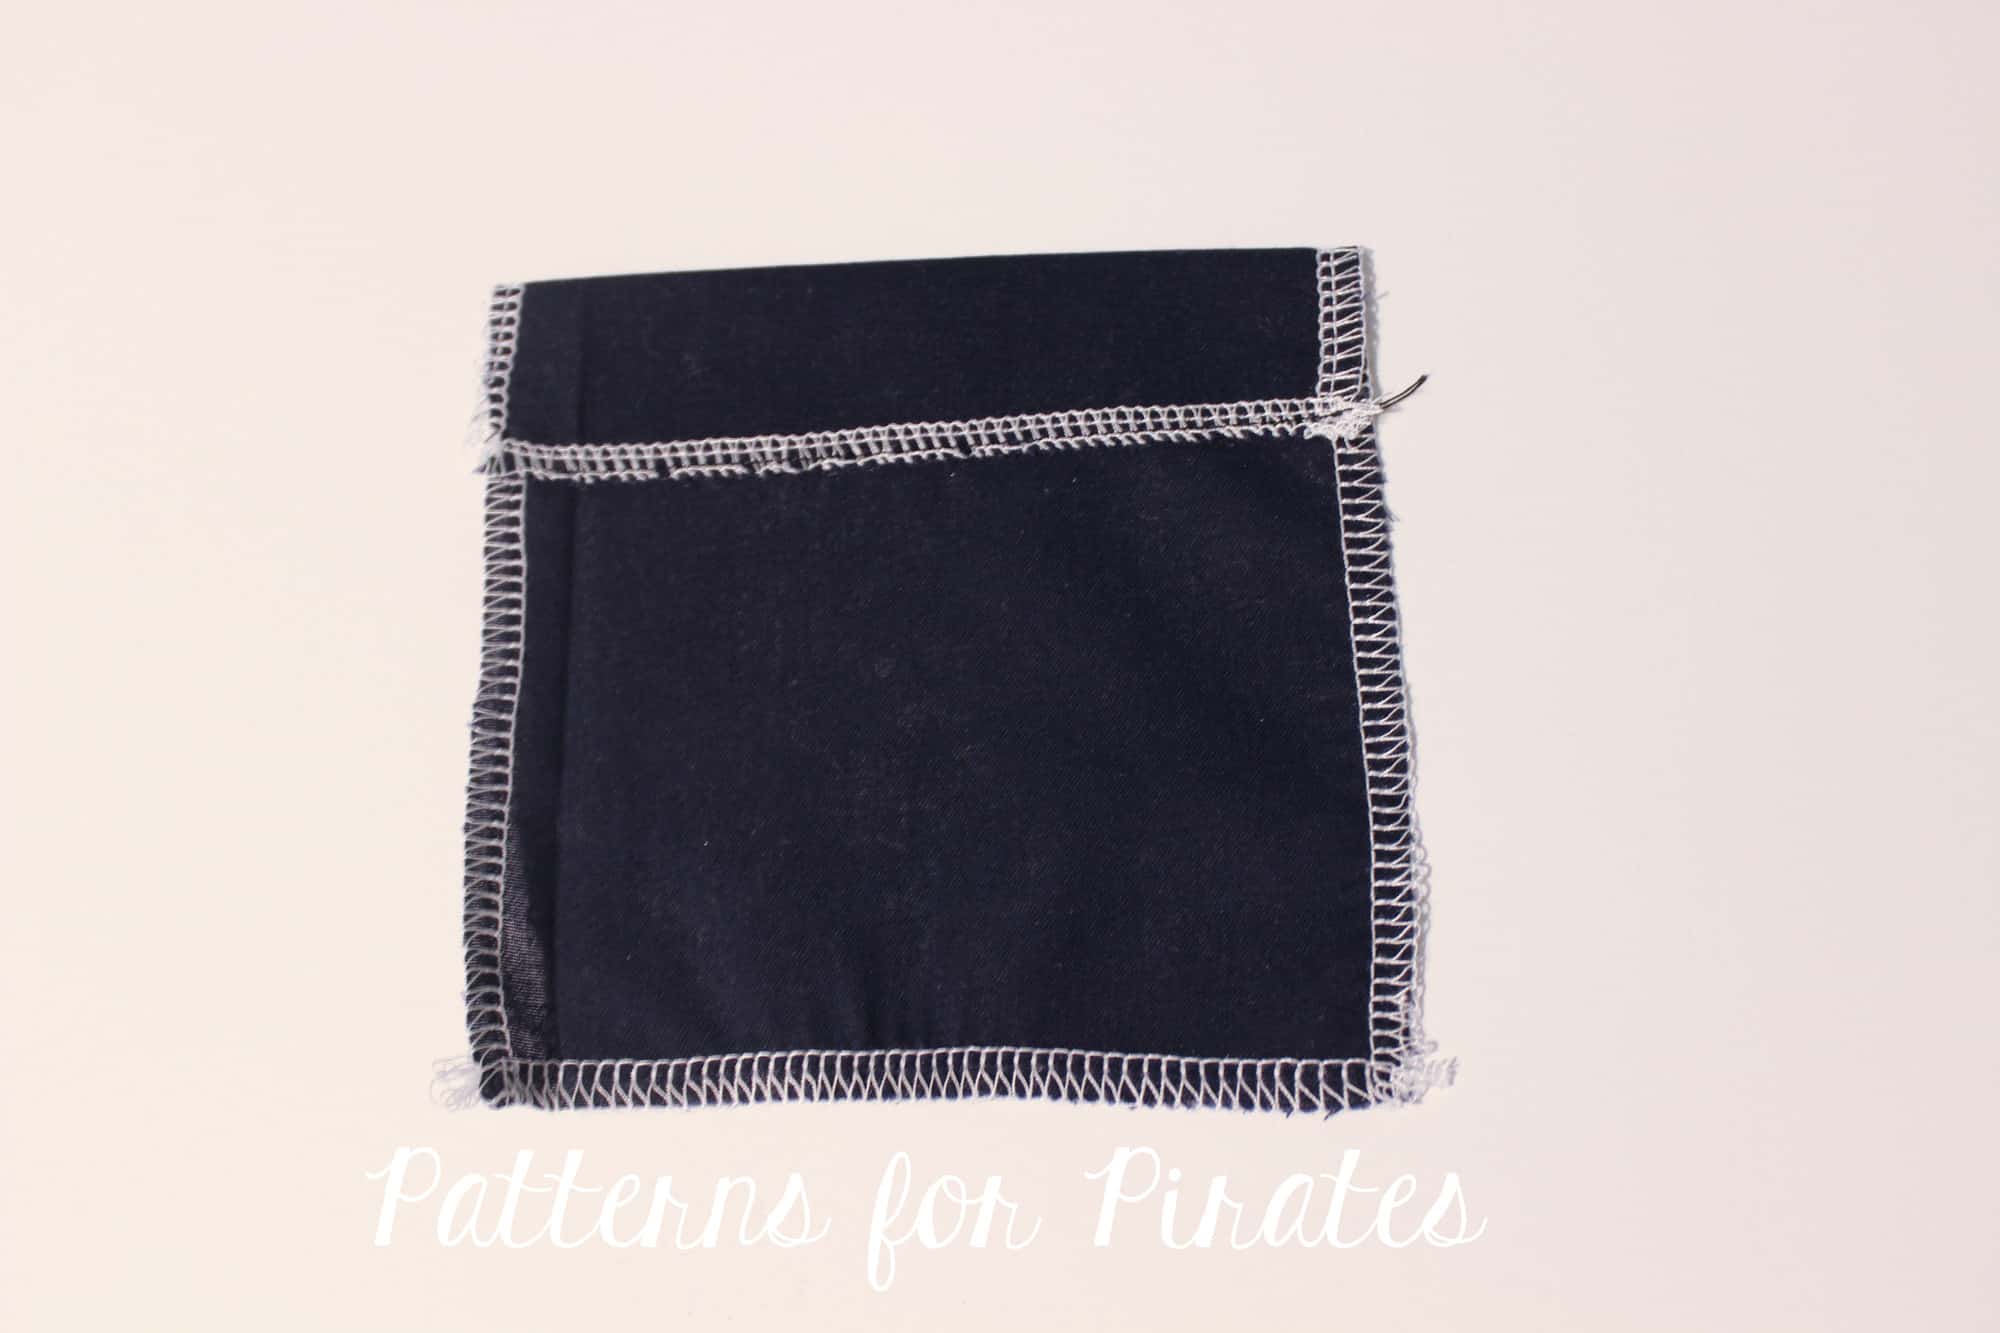
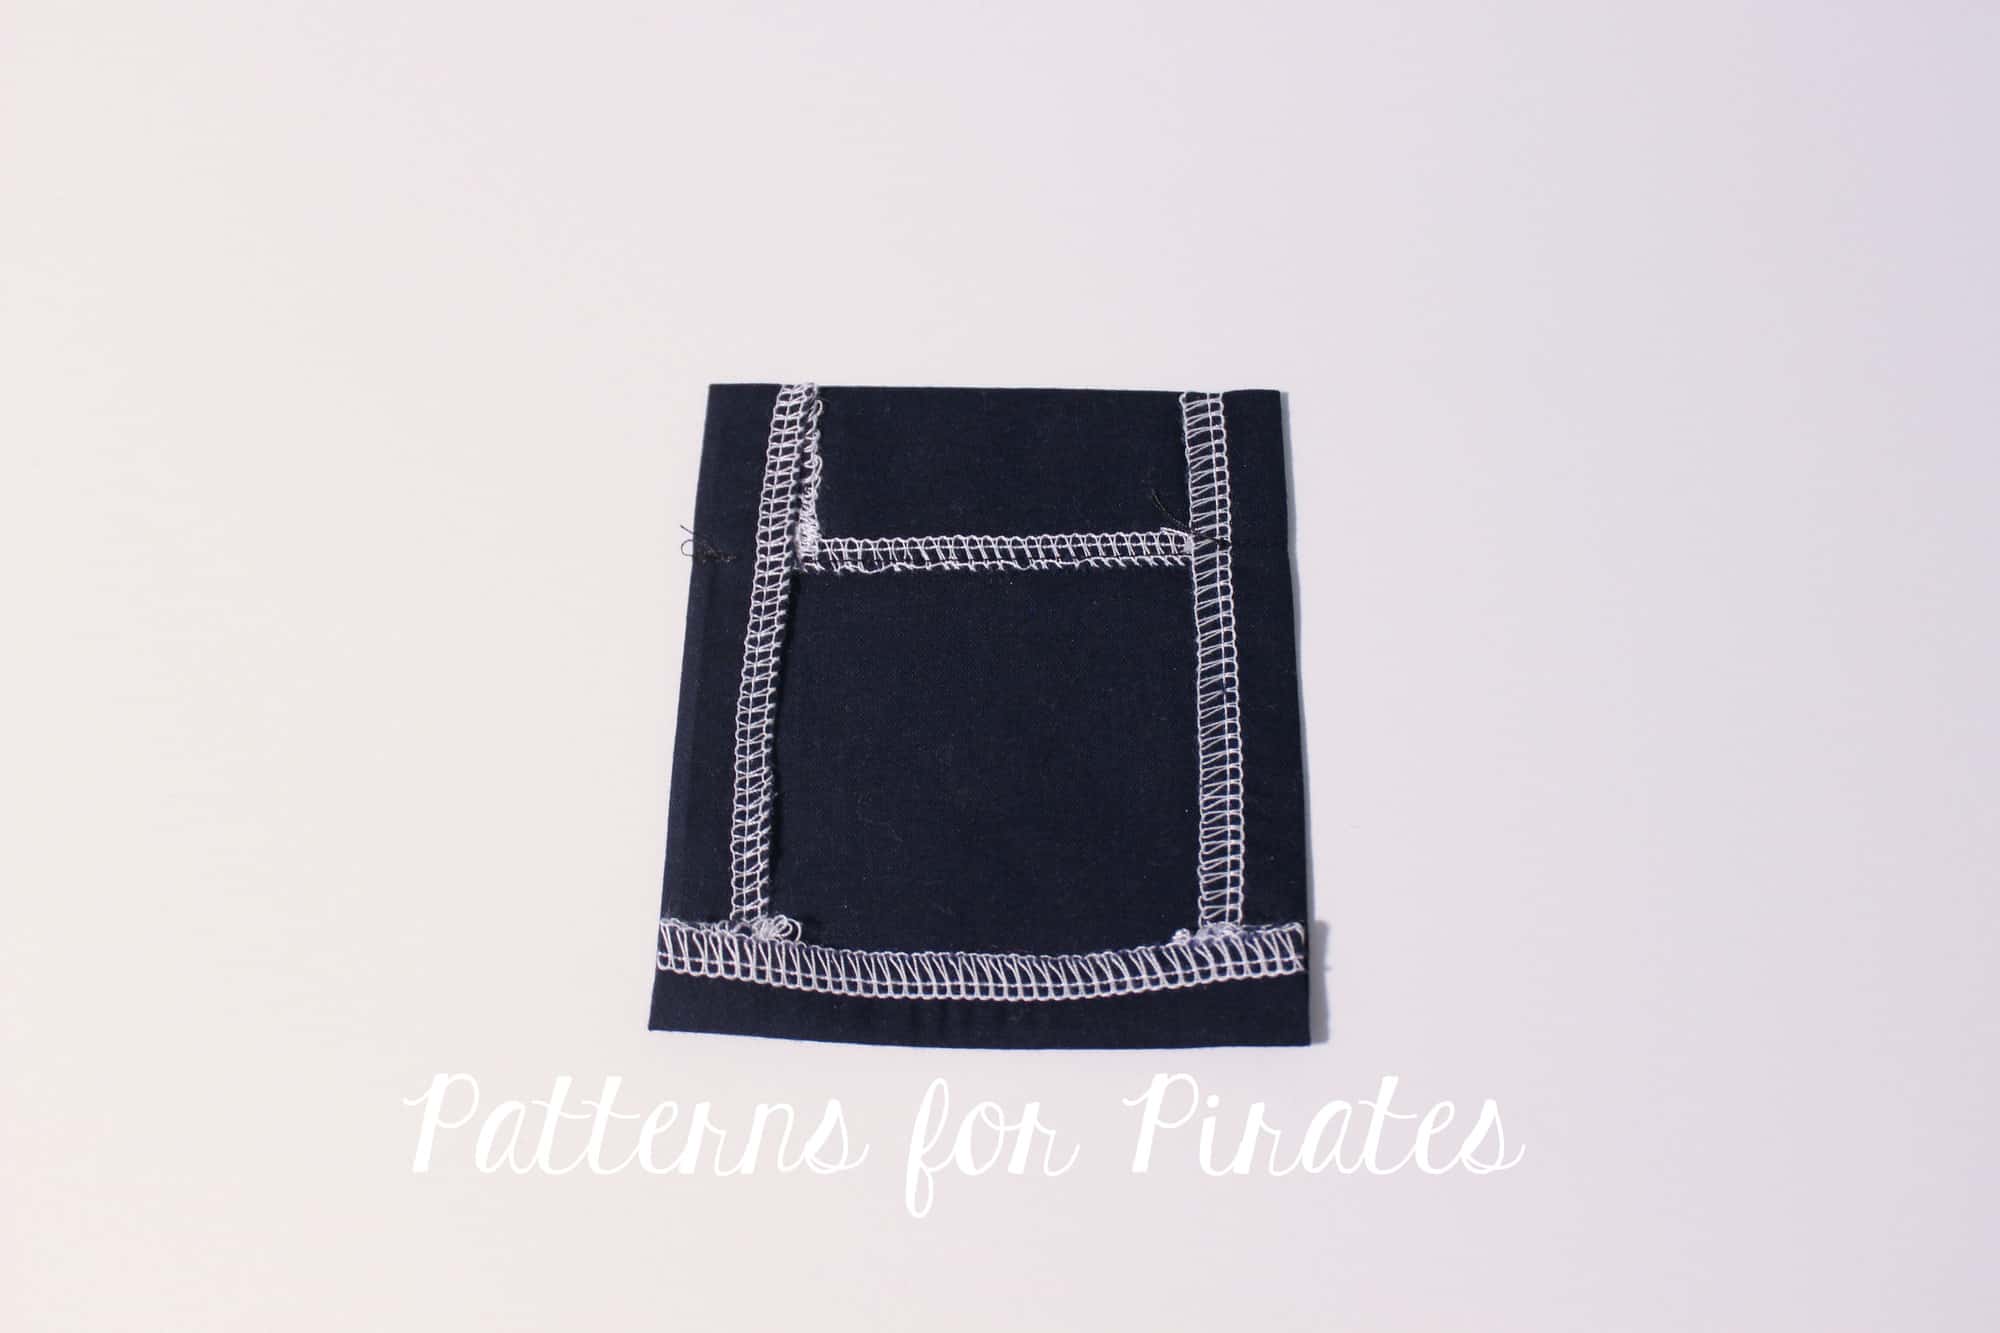
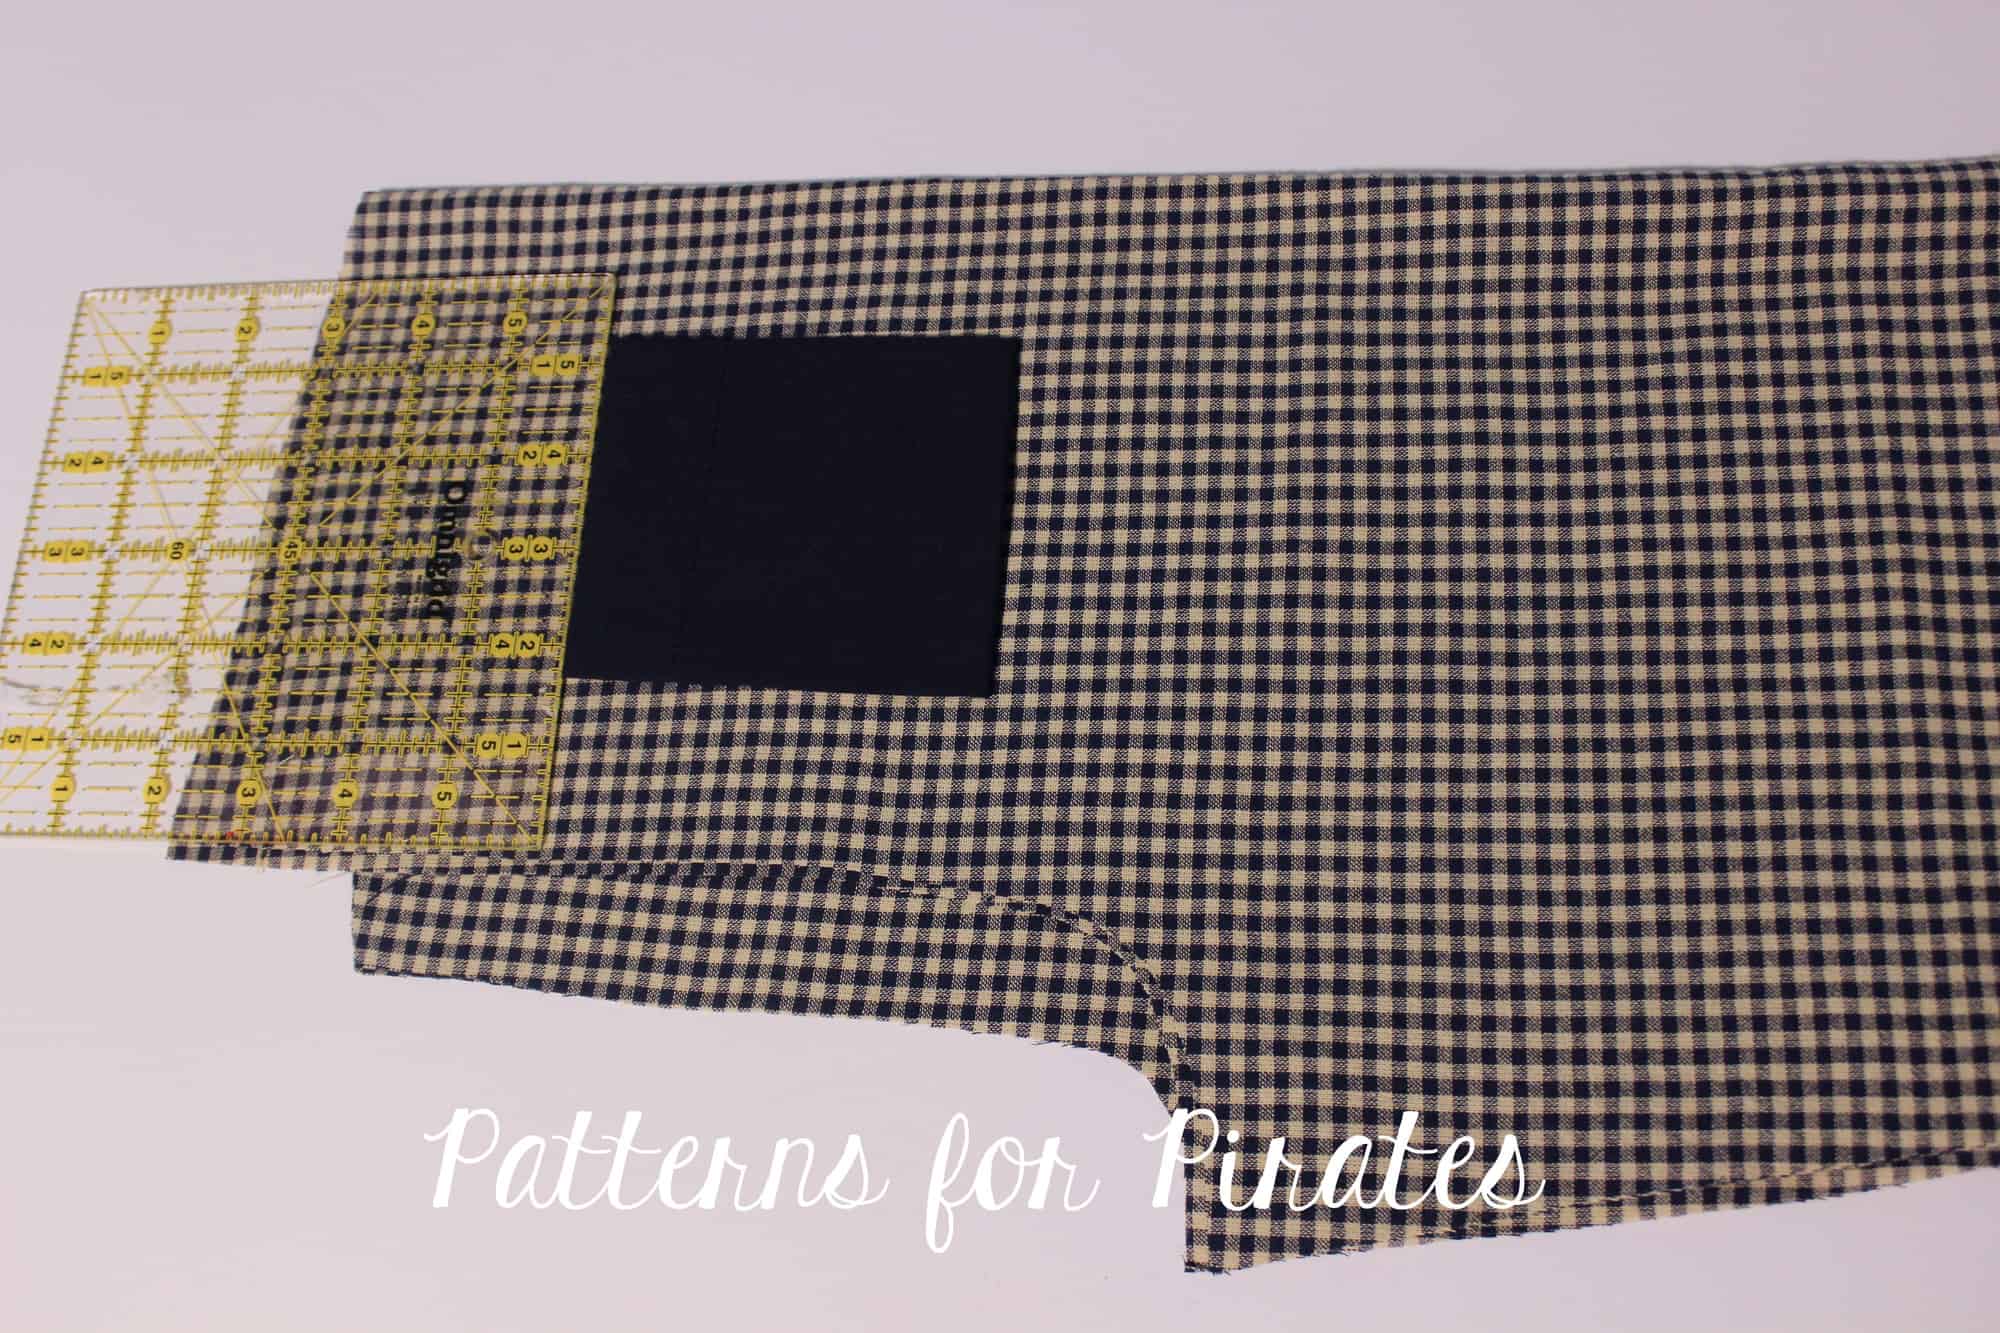
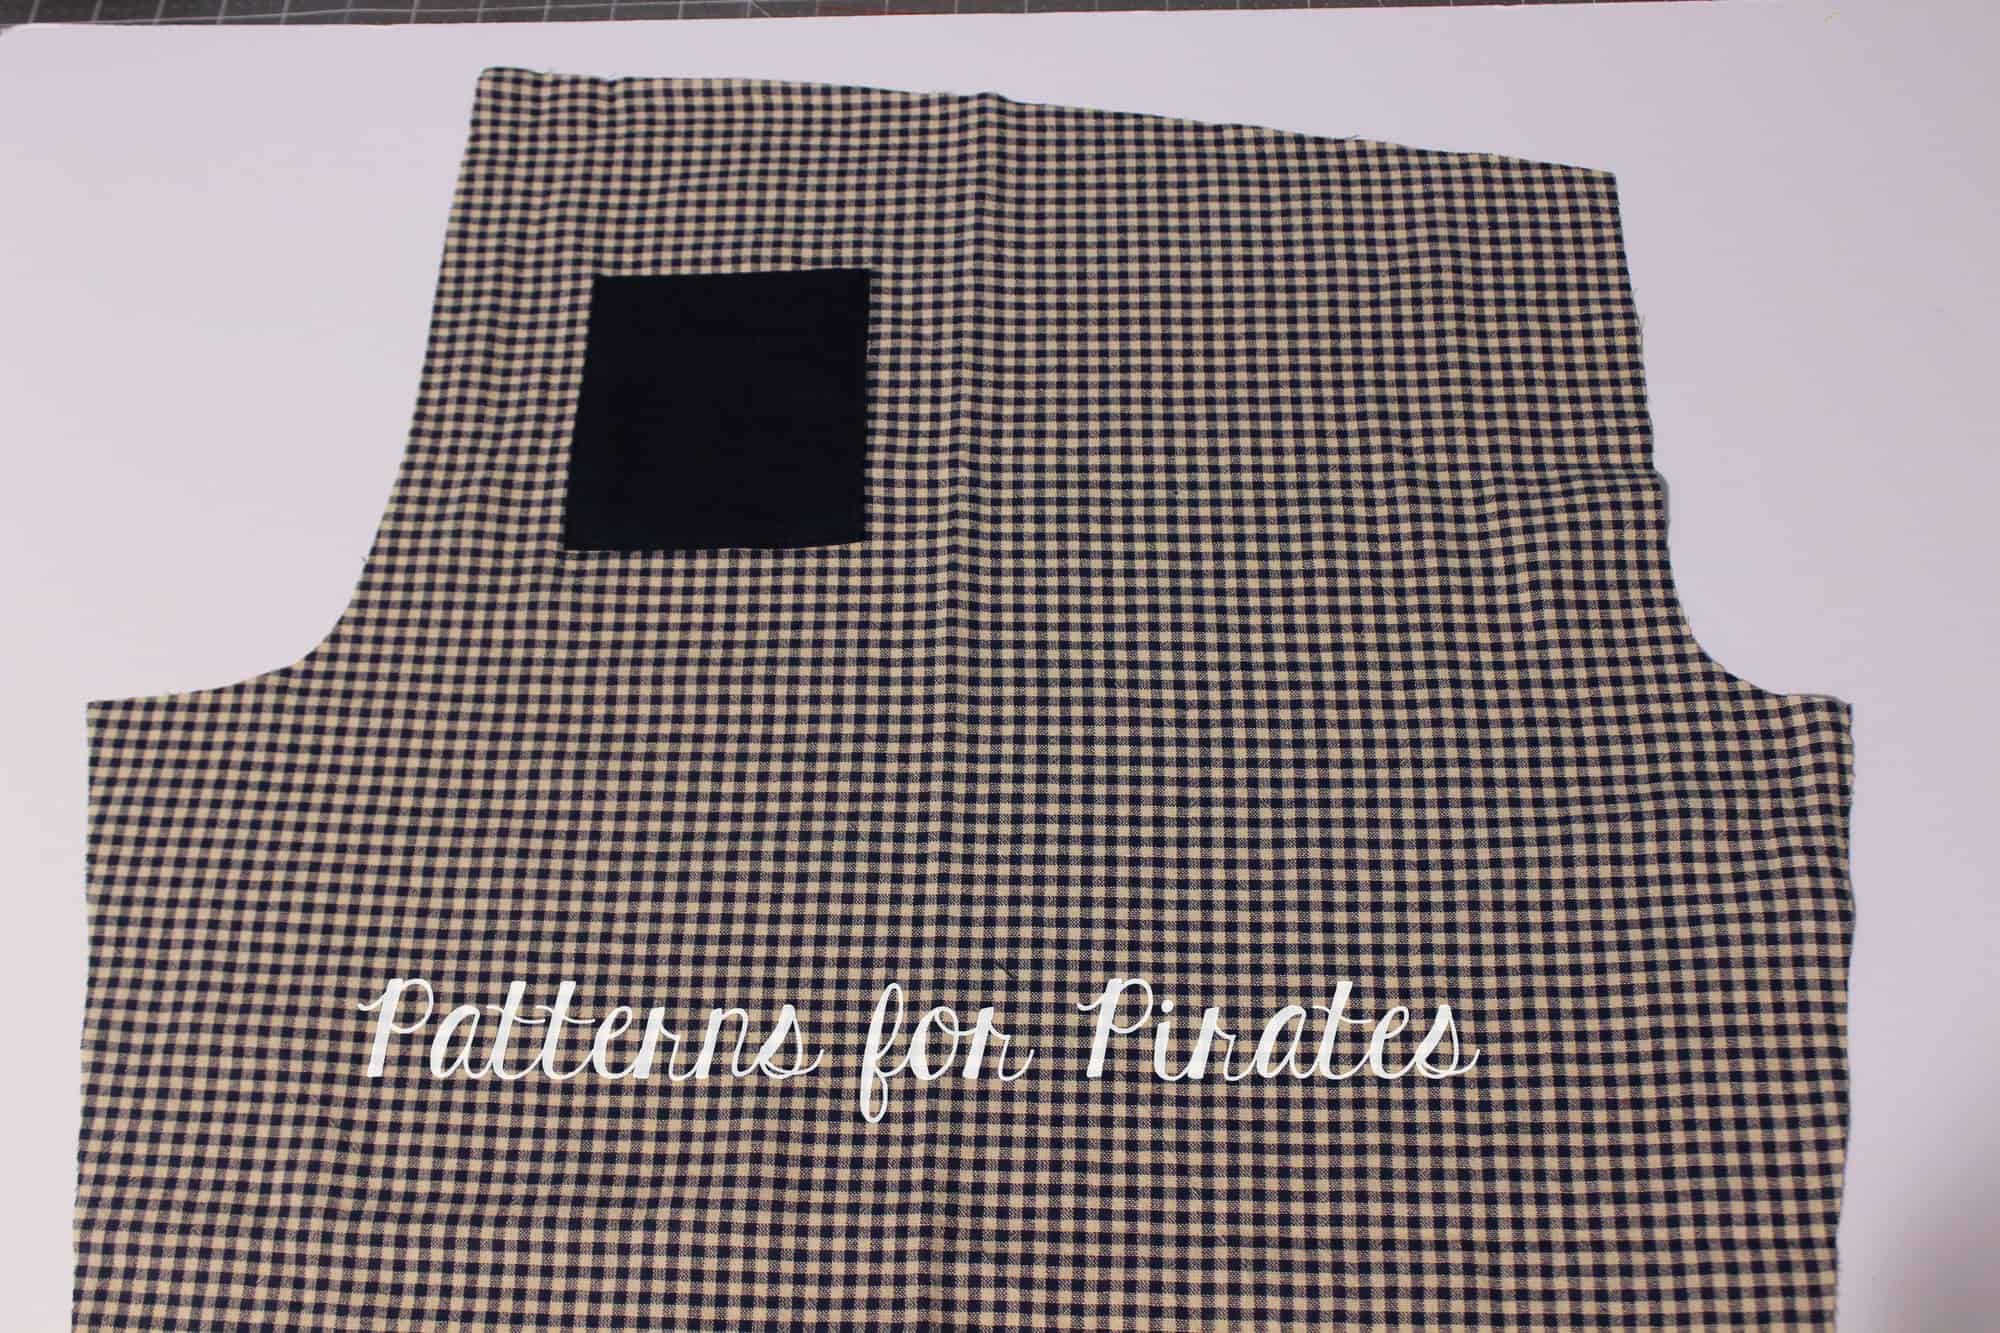
Lumberjack Sew along – day 2 | chest pocket, shoulder seams

Lumberjack Sew along – day 3 | sleeves, side seams

Lumberjack Sew along – day 4 | cuffs

Lumberjack Sew along – day 5 | hood/collar

Lumberjack Sew along – day 6 | hemming, closures

Lumberjack Sew along – day 7 | winners announcement

Filed Under: Frequently Asked Questions, Sew-A-Long, Uncategorized 1 Comment

Rainbow Dress :: New Pattern Release!!

August 13, 2021

Happy pattern release day, y’all!!

We are SO SUPER DUPER EXCITED to share all about the newest pattern releases we have over at Patterns for Pirates today! The Rainbow Dress is drafted for both adult and youth sizes and you are about to be as smitten with the pattern as we are!

The Rainbow Dress is such a fun and unique pattern that can be used to create a classic and simple dress or top or add all the fun details and create something extrodary! No matter what the dress option will have you feeling twirly and beautiful! The sleeve options will take you all year round.

Rainbows aren’t really your thing? That’s okay too, we included a plain skirt option as well.  And to make sure you weren’t left with no fun details we also added a fun gathered sleeve option, pockets, and an adorable peter pan style front collar.

The Rainbow Dress is drafted for high stretch knits like cotton spandex, double brushed poly, spandex rib knits, medium weight sweater knits, ITY, DTY, and the like.  The peter pan collar however can be made in a woven, so you can use that non-stretch lace that looks so classic and cute.

This dress was designed by my very own Rainbow Baby who happens to love rainbows.  I couldn’t imagine doing a rainbow dress without also supporting our friends in the LGBTQAI+community with the pattern, so a small proceeds of all sales will go to the Trevor Project and Share Pregnancy and Infant Loss Support (10% calculated at the end of each year).  So, if you purchase this pattern you can not only enjoy the fun, twirly, unique design, but also feel great that you’re helping support communities in need.

*Want to learn more about how to measure yourself for these pattern?  We’ve got you covered with an in-depth blog HERE.  And in case you’re new to Patterns for Pirates and PDF patterns in general, we have a great blog full of new-user tips HERE to help you get started!  As with all of our current releases and updates, the pdfs now include our layers feature and can be found in Letter, A4, A0 and projector sizes.  And for even more helpful fun, we have a free* printable that you can use to help record your measurements as you take them.

The options include:

  • Gathered Sleeves w/cuffs (in short, 3/4 and long lengths)
  • Fitted sleeves (in short, 3/4 and long lengths)
  • Full circle skirt (plain or rainbow colorblocked)
  • Crop and Top length shirt bodices
  • Two necklines + optional Peter Pan collar for the higher version
  • Optional pockets

Let’s take a look at the different ways we can sew up these patterns!

GATHERED SLEEVES

FITTED SLEEVES

PLAIN / RAINBOW COLORBLOCKED CIRCLE SKIRTS

CROP + TOP LENGTH SHIRTS

HIGH / LOW** NECKLINE / PETER PAN COLLAR

**Low Neckline option for adult pattern only.

OPTIONAL POCKETS

What are you waiting for?  Head on over and grab yourself a copy of the Rainbow Dress patterns!  They are available on sale (no code needed) through 11:59pm CST, August 20, 2021.

RAINBOW DRESS | RAINBOW DRESS – YOUTH | RAINBOW DRESS – BUNDLE

Maybe hoping for a little more inspiration before you make the purchase?  Head over to our Facebook group where you can see tester albums full of amazing images!

Rainbow Dress Album | Rainbow Dress – Youth Album


Filed Under: Pattern Release Leave a Comment

Walk the Plank – easy hacks

September 27, 2017

Ahoy, pirates! Hope you grabbed your FREE Walk the Plank pajama pants patterns by now. If not you can get them here. Today I wanted to show you how easy it is to add patch pockets to the pattern so all those husbands, boyfriends and sons of ours will be even happier with their new PJ pants. I’ll also show you how to enclose the the elastic in the seam.

. . . . .

Front patch pockets

Start by printing the WTP pattern piece in the size needed. Now grab your Papa Bear Joggers (Mama Bear or Baby Bear) pants pattern and print only the page(s) that include the Patch Pocket. You now have two pattern pieces, the pants and the pocket. Cut the leg fabric (two mirrored images) and 4 pocket pieces (2 mirrored images for the main and 2 for the lining). The PJ pants pattern is drafted for woven fabric. I did use knit instead…you can do that too if you want!

Take your pockets and place them right side together. Sew around the edge with a 1/2″ seam allowance, leaving 2-3″ opening so we can turn the pocket.

Clip the corners and snip the curve of the pocket as close to the seam as possible (without clipping the stitch). Turn your pocket inside out a press very well. Repeat with the other pocket.

Top stitch only the pocket curve opening.

Take the pants pattern piece and place it right side up. Fold the pants so the inseam matches making sure the front is on top. Measure 4″ down from the waist edge and 1 inch away from the side fold. Place the pocket as in the picture below and pin in place.

Note: you will need to adjust these measurements if you are making the kids Walk the Plank pj pants.

Sew the pocket to the pants making sure you leave the pocket curve open. You will only be sewing around the 5 straight edges. Repeat for the other leg.

That’s it! You added patch pockets to the pajama pants. Simply continue to construct the pattern as per the tutorial and enjoy a new pair of PJs WITH POCKETS!


. . . . .

Back patch pocket

Next I want to show you how to add a back pocket to your Walk the Plank PJ pants. This hack is even easier and it does not require any additional P4P patterns. Simply cut one rectangular piece of the same fabric or a coordinating one. The size of the rectangle will vary depending on how big you would like the pocket. I cut my piece 5″ wide by 6″ tall and I am making a size 6 PJ pants.

Optionally, you can serge around the edges to prevent fraying in the wash.

Fold the top of the pocket 1″ down, press and sew in place.

Now fold the other three sides 1/2″ and give it a good press. Do not sew them just yet.

Take your pants pattern piece and with the right side out, match the inseam. Place it on the table with the back facing up. The back part of the pants is the one with the higher rise.

Place the pocket approximately 3″ down from the rise. Note that this placement will vary from size to size so I encourage you to baste in place insead of sewing in place if you are not sure if you’ll like where the pocket sits.

Edge sew the pocket to the pants (or baste) making sure you do not sew the top but only the bottom and the sides of the pocket.

Continue sewing the PJ pants as per the pattern tutorial and enjoy you new pair of back pocket Walk the Plank pants. 🙂

NOTE: If you basted the pocket, try the pants on! If you like where the pocket sits, stitch it in place. IF you don’t, you can easily remove the pasting stitches and relocate the pocket before you sew it in place.

. . . . .

Enclosed elastic waistband

Next up I would like to show you how to enclose the elastic in the waist so you do not have any visible serged edges. Sew your PJ pants as indicated in the tutorial. Press the top of the pants 1/4″ down in order to create a memory hem.

NOTE: this method will yield a rise that will be 1/4″ lower than the original pattern.

Sew the elastic in a loop (as per the pattern) and mark the quarters with pins or clips. Find the quarters of the waist opening and match the elastic quarter points to them, placing the top of the elastic 1/4″ of an inch down from the top of the pants. Use the memory crease mark as a guide.

Sew the elastic with a a zig zag stitch.

Fold the top top of pants down. This may be a tricky process since you will have to stretch the elastic as you go. Take it slowly and press!

Fold the elastic down and pin in place. You will again need to stretch the elastic so you might find it easier to skip pinning and just use your hand to hold it in place when you sew.

Sew as close to the edge as you can, stretching the elastic  to make sure the fabric lays flat when you stitch it.

There you have it…. an enclosed elastic for your new PJ pants!

Hope you found these easy hacks helpful. Don’t forget to show your creations in the P4P group! We love to see what you make for you and your loved one.

Filed Under: Free Pattern, Pattern Hacks, Pattern Release, Uncategorized 12 Comments

Flannel Kimono with pockets

October 28, 2016

img_2004

It is officially fall! The crisp morning air should make its appearance soon and what better way to embrace it than by treating ourselves with a cozy flannel top. For my blog today I’ll show you how you can take the Summer Kimono into fall and I’ll also give you some tips for working with flannel.

img_2008

You will need your printed and cut kimono pattern pieces. You can chose any of the styles, I went with the curved hem because it’s my favorite. 🙂 Now grab your Grandpa Cardi pattern and print just the pocket piece. It’s on page 22-23. img_1918

Sew your pockets according to the instructions. I opted for the band pocket but you can certainly use the non banded option too. Remember to press the bottom of the pocket too! You’ll now stitch them on to your two front pieces. Placement it’s a matter of personal preference so I’ll show you where I stitched mine on but you can certainly move them higher or lower. I placed the pocket about 4 inches from the center and about 2 inches from the bottom (remember the bottom is not hemmed yet). Sew the pockets on the front pieces.

img_1927You will now start assembling your kimono according to the instructions. Something very important to keep in mind, especially if you are sewing sizes L and up is that most flannel fabrics are 42-44 inches wide. Your fabric may not be wide enough to cut the entire length of the sleeve so in this case you have a few options. You can either do what I did and just shortened the sleeves length by 2.5 inches or so and either add the sleeve band (as per the pattern) or just hem it. The other option would be to attach additional fabric to the selvage and cut the pattern pieces as they are. You could use the same fabric as the main one or even coordinating/contrasting fabric for a colorblock look. Get creative!

TIP: When sewing a curved hem on woven fabrics I like to first serge the raw edge, making sure I don’t cut any of it with my serger knife.  This will basically give me the 1/4 inch mark and make the fabric more stable. Press the 1/4 inch hem, and then press again another 1/4 inches and sew in place. Wasn’t that easy? That’s the magic of serging the raw edge first.

img_1931

I know a lot of you have asked in the Facebook group is the Summer Kimono can be made with flannel fabric so now you know it can…and it’s pretty cozy on top of that! As always, don’t forget to show off your creations and tag me if you have any questions!

Alex

img_1988-1

img_1991 img_2013-1

Filed Under: Frequently Asked Questions, Pattern Hacks, Uncategorized 2 Comments

P4P Raglan Week: Contrast Bands Hack

September 22, 2016

Say you bought this really pretty cotton interlock with zero stretch recovery and you just had to use it for a raglan with a kangaroo pocket.  The things is, you know your darling little rock collector isn’t going to understand that she can’t actually use her pocket or the openings will get stretched out.  The solution?  Stretchy bands on the pocket openings.

img_6282

If you haven’t bought your Jolly Roger Raglan and Add-ons, go do it now.

I’ll wait while you buy, print and glue.

Perfect.  Now, cut out your kangaroo pocket, mark and cut off a half inch from each pocket curve.  I marked on the back with the ruler and a fine tip washable kids’ marker.

img_6265

Next, you want to measure your curve by carefully, without stretching, pulling the curve straight along the ruler.  Make sure you measure the curve after you’ve trimmed off the extra half inch.

img_6266

Subtract half an inch and cut out bands that length by 2 inches wide.  If you don’t have a rotary cutter and mat, you need one.  Trust me, it makes a whole world of difference cutting out bands.

I’ll wait while you go buy one.

There, wasn’t that easier??

Press bands in half lengthwise.

img_6269

Pin band to the right side of the curve by pinning each end first and then stretching to fit.

img_6270

Serge or sew on, stretching to fit the pocket curve.  Do not stretch the pocket fabric.

Press the bands back.

Now continue with the pattern tutorial to complete your shirt.

img_6276

Now put it on your adorable child and snap pictures to share with us on Facebook!

– Patty Hamm

img_6292

img_6300

If you’ve hacked a kangaroo pocket of a raglan during P4P Raglan week, we would love for you to share it with us!  Head over to the Facebook Group or share on Instagram.  And be sure to use the tag #P4PRaglanWeek so we can find you!

Curious about what else has been happening during our raglan-loving week of fun?

Just take a look at our schedule!

Monday, September 19: Jolly Roger Raglan Pattern Update + Jolly Roger Add-On Pack Pattern Release

Tuesday, September 20: JRR Woven Fabric Hack

Wednesday, September 21: JRR Animal Faces Add-On

Thursday, September 22: Contrast Band Hack for Kangaroo Pockets

Friday, September 23: Women’s Keyhole / Scoopback Raglan Hack

Saturday, September 24: Off-The-Shoulder Raglan Hack

Sunday, September 25: Adding Stripes to Your Raglan Sleeves

Filed Under: Blog Tours, Frequently Asked Questions, Pattern Hacks, Sew-A-Long 1 Comment

Featured Patterns

  • Loosey Goosey Loosey Goosey $12.00 Original price was: $12.00.$10.50Current price is: $10.50.
  • Loosey Goosey- Youth Loosey Goosey- Youth $10.00 Original price was: $10.00.$8.50Current price is: $8.50.
  • Loosey Goosey - Bundle Loosey Goosey - Bundle $20.00 Original price was: $20.00.$18.00Current price is: $18.00.
  • Everyday Shirt Everyday Shirt $12.00
  • Everyday Shirt- Youth Everyday Shirt- Youth $10.00
  • Privacy Policy
  • Refund Policy
  • Affliliate Program
  • Contact Us
  • About

Copyright © 2025 Patterns for Pirates

Copyright © 2025 · Genesis Framework · WordPress · Log in