Patterns for Pirates

P4P stylish, modern, wearable patterns

  • Home
  • Blog
    • Frequently Asked Questions
    • Pattern Releases
      • Free Patterns
    • P4P University
      • Fitting
      • Sewing with Stretch, Knit Fabrics
      • Sewing with Woven Fabrics
      • Sewing Machines
    • Sew-A-Longs
    • Fabric for Pirates
    • Pattern Hacks
    • Announcement
      • Blog Tours
      • Contest/Giveaway
  • Shop
  • Bundle Discounts
  • Flash Friday
  • Gift Cards
  • My Account
  • Cart

X Factor Sew Along – day 6

August 29, 2020

Last sewing day is here…and it’s probably the most rewarding one. Today we will get to see the project come to life. For the crop option you will be attaching the band to the bodice matching the side seams. Keep in mind that it is much easier to sew a couple of inches on each side of the center seam with your sewing machine (using a stretch stitch!) than it is to sew all around the waist with only the serger. If you are sewing the dress option, you would need to make sure that the waistband is sandwiched between the skirt and the bodice, right sides together. 

Last steps of this sew along are hemming the sleeves and skirt. If you did the crop tank, you are already done. The sleeves are hemmed 1/2″. Did you make your memory hem a few days ago? Well now it comes in handy. The skirt is hemmed 1″ while the sleeves are hemmed 1/2″. In the video below you can see how I finish the dress option including the 1″ hem.


Thank you so much for joining us this week. We loved watching your creations come to life! Don’t forget to post your final photo in the comments of day 6 check in picture of the sew along album. We will pick two winners and announce them here on the blog Monday evening or Tuesday. 

X Factor SAL | day 1

X Factor SAL | day 2

X Factor SAL | day 3

X Factor SAL | day 4

X Factor SAL | day 5

X Factor SAL | day 6

X Factor SAL | day 7

Filed Under: Frequently Asked Questions, Sew-A-Long, Uncategorized Leave a Comment

X Factor Sew Along – day 5

August 28, 2020

Welcome to day 5 of our X Factor sew along! Today we create the skirt by adding the optional pockets and sewing the side seams. If you are making the crop top style, today is a rest or catch up day. No need for any check in pictures.
You might have noticed in the first video of this sew along that I added the pockets to my pattern piece (removing the seam allowance) so I will not have to stitch them. One less step 😉 In the video below I show you how I use my serger to sew the side seams instead of a combination of sewing machine and serger. Both methods work great so chose the one you are more comfortable.

Reminder: the patten includes two links to complete sew ups of the X Factor so you can also follow Judy’s method of sewing the side seams when the skirt has pockets. And why would you even consider skipping the pockets? 😊

If you are doing the dress option, check in for day 5 in the comment of today’s photo of the sew along album. See you back here tomorrow for the final steps!  


X Factor SAL | day 1

X Factor SAL | day 2

X Factor SAL | day 3

X Factor SAL | day 4

X Factor SAL | day 5

X Factor SAL | day 6

X Factor SAL | day 7

Filed Under: Frequently Asked Questions, Sew-A-Long, Uncategorized Leave a Comment

X Factor Sew Along – day 4

August 27, 2020

Day 4 is here! Today we add the neckband and the back band.  If you are new to sewing with knits or simply would like a refresher, take a look over our P4P University Neckbands 101 blog post. This blog shows you how to create the crew neck.  The most important thing to keep in ming when creating and adding the crew neckband is to press, press, press! 

In the Day 4 video below I walk you through creating and adding the V neckband. This is a slightly different way of creating the neckband than I showed in the P4P University V neckband blog. This time we will overlap the ends creating the V point that way. I highly encourage you to add the V part of the neckline with the sewing machine, instead of a serger. It will make for a more precise stitch and a neater look.
Last step is to stitch the back band to the front one. Keep in mind that the front band is attached to the bodice. Overlap the parts that will become the waistband one time (doesn’t matter if you overlap left on top of right or vice versa).  With the right sides together sew the side seams of the band following the 1/2″ seam allowance. 

Don’t forget to add your check in photo to the comments of Day 4 in the X Factor sew along album. See you back here tomorrow! 


X Factor SAL | day 1

X Factor SAL | day 2

X Factor SAL | day 3

X Factor SAL | day 4

X Factor SAL | day 5

X Factor SAL | day 6

X Factor SAL | day 7

Filed Under: Frequently Asked Questions, Sew-A-Long, Uncategorized Leave a Comment

X Factor Sew Along – day 3

August 26, 2020

Ahoy, pirates! Today’s steps include adding the sleeves or armbands (for the tank option) and sewing the side seams. I have decided to make a long sleeve dress to wear on chillier Florida days. 

  • For the short, 3/4 and long sleeves start by pressing a memory a 1/2 hem. If you are doing the cuffed long sleeves style, you will not be needing the memory hem. 
  • If you opted for the tank style, start by pressing the bands lengthwise, wrong sides together. Open them up and sew the short ends to create a loop. 

Tip: when pinning the sleeved to the arm opening start with the shoulder seam, then pin the two outer corners. This will make easing the sleeves into the opening very easy. There shouldn’t be any stretch, but you will ease the concave curve into the convex one. 

When adding the arm bands to the tank option, you want to avoid stretching the band too much on the front and back. The most stretch should be at the armpit and shoulder. This will help ensure that the bands lay nicely when worn. 

Day 3 video is below. As always, don’t forget to add your progress photo to the comments of today’s check in photo in the sew along album. 


X Factor SAL | day 1

X Factor SAL | day 2

X Factor SAL | day 3

X Factor SAL | day 4

X Factor SAL | day 5

X Factor SAL | day 6

X Factor SAL | day 7

Filed Under: Frequently Asked Questions, Sew-A-Long, Uncategorized Leave a Comment

X Factor Sew Along – day 2

August 25, 2020

Welcome to day 2 of our X Factor Sew along. Today is a pretty easy and quick day. We sew the front seam of the bodice and the shoulder seams. Place the two mirror front bodice pieces right sides together, matching the center seam. Using your sewing machine, stitch a couple of inches at the bottom with a 1/2 seam allowance. You can sew the rest of the front seam with the serger if you prefer. 

Once this step is completed you will sew the shoulder seams right sides together, following a 1/2″ seam allowance. 

Tip: Add clear elastic to the shoulder seams to strengthen them and make sure the shoulders don’t stretch throughout the day. 

We have included two FULL pattern sew ups in the tutorial (see page 7). Judy has covered all options in the two videos so you can always refer to them throughout the week. 

Upon completion of today’s steps snap a picture of your progress and add it to the day 2 check in photo comments in the X factor SAL album located in the P4P & M4M sew along group.


X Factor SAL | day 1

X Factor SAL | day 2

X Factor SAL | day 3

X Factor SAL | day 4

X Factor SAL | day 5

X Factor SAL | day 6

X Factor SAL | day 7

Filed Under: Frequently Asked Questions, Pattern Release, Sew-A-Long, Uncategorized Leave a Comment

X Factor Sew Along – day 1

August 24, 2020


Welcome to the X Factor Crop and Dress sew along! 

In the next 6 days we will be sewing together the newest P4P pattern. Join us for a chance to win some fabric and pattern money and have fun alongside our community! If you have not purchased your copy yet, you can buy the adult X Factor here, the youth one here, or you can get the bundle and save. If you are still undecided which style to make, our Round Up blog will give you a glance at all options included, from sleeve lengths to necklines. You can also use the Easy Hacks blog for added options.

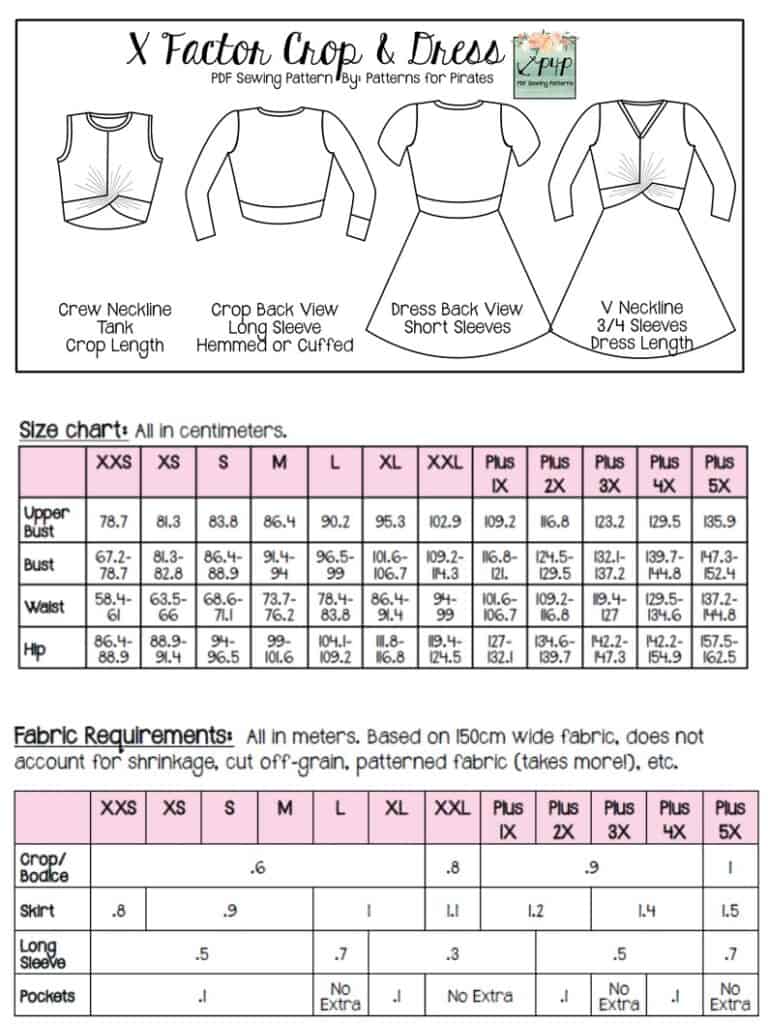
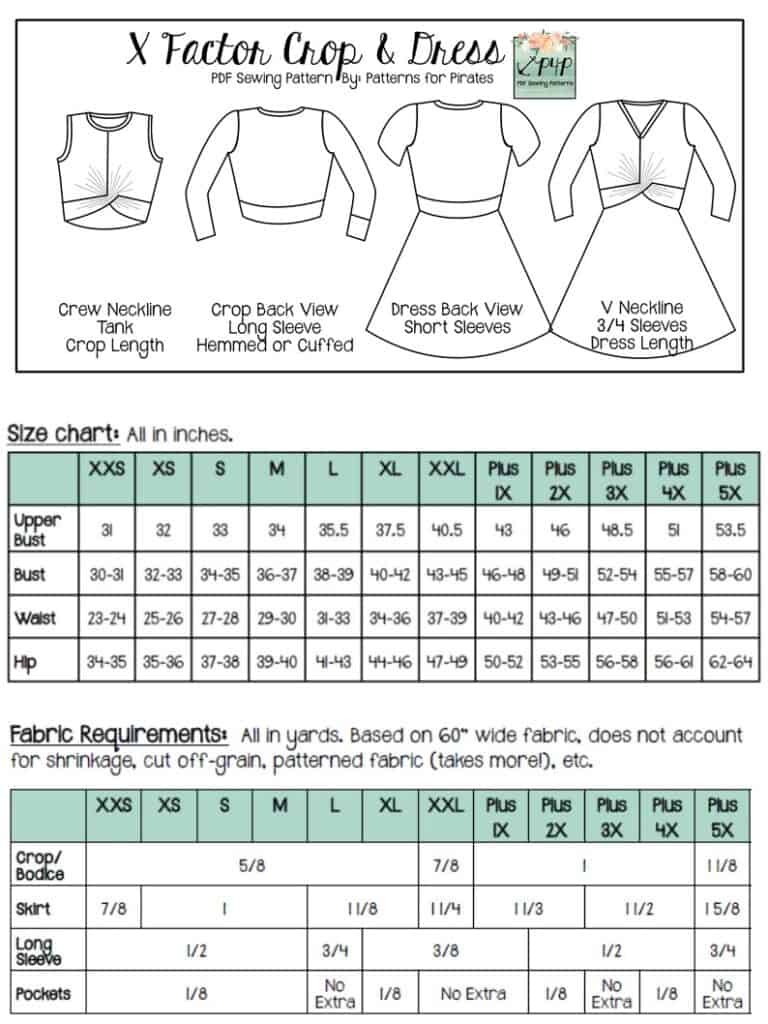
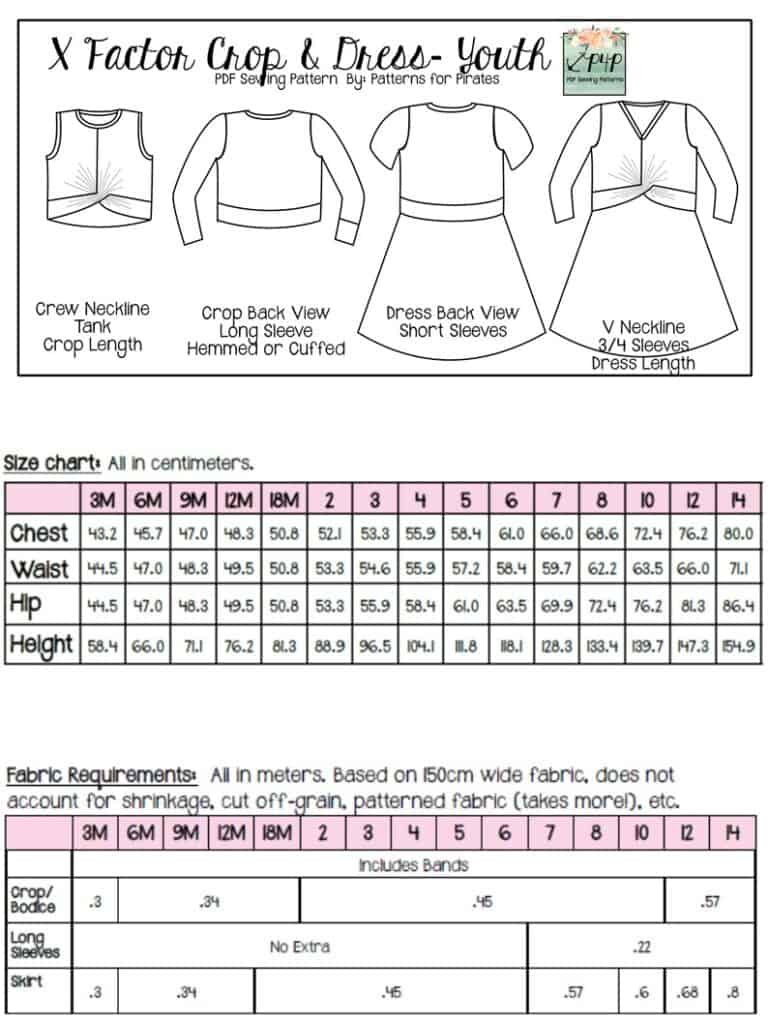
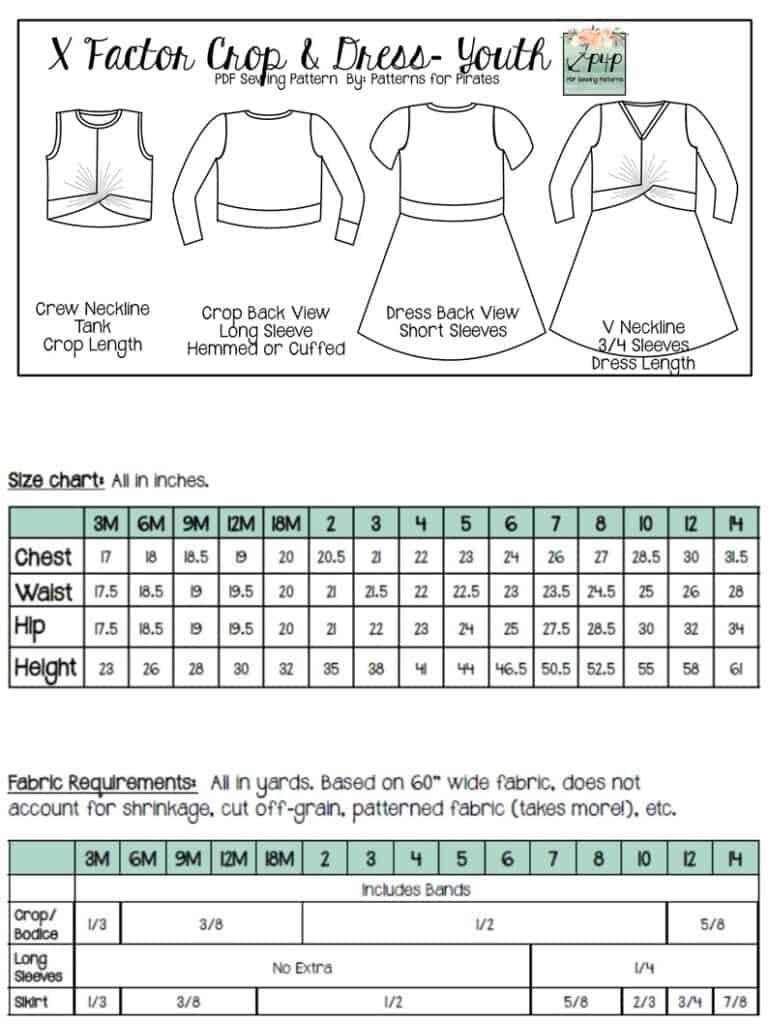
Let’s start by taking the measurements needed for the best fit. P4P has an amazing blog that gives you tips for accurately taking your measurements. You can read all about it here. If your measurements put you in a different size for chest/waist/hips be sure to check out our P4P University blog and grade to achieve the perfect fit. The X Factor patterns include videos as well. On page 3 you will notice an active button that will take you to the video about adding or removing length. Please refer to it if you are taller or shorter than 5’5″. 


Unsure about which knit type will work best for your desired look? Take a look over our P4P University Knit Types blog. We also included a cheat sheet that you can print. If you are like me and sometime are just keen on using a specific print for a specific pattern, read our Different fabric, different fit blog post before you cut your fabric. 

The P4P team has started adding Projector Files to our new patterns. If you are looking to skip printing, buying rims of paper and ink, this new innovative way of cutting your patterns may be the option for you. I am using a mix of printed and projected pattern pieces for my dress. 

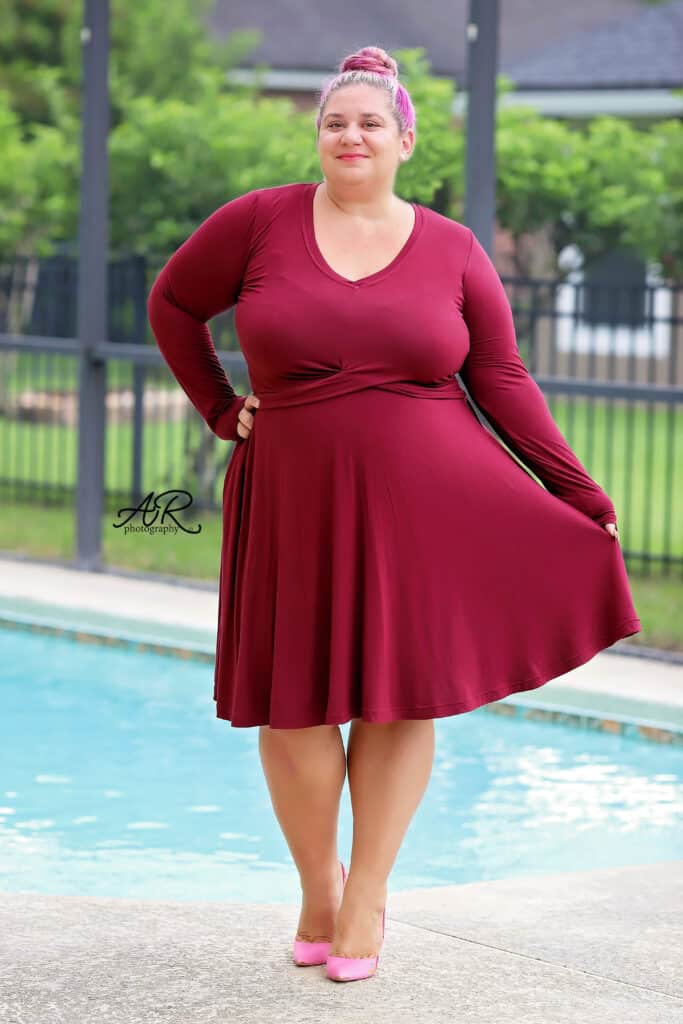
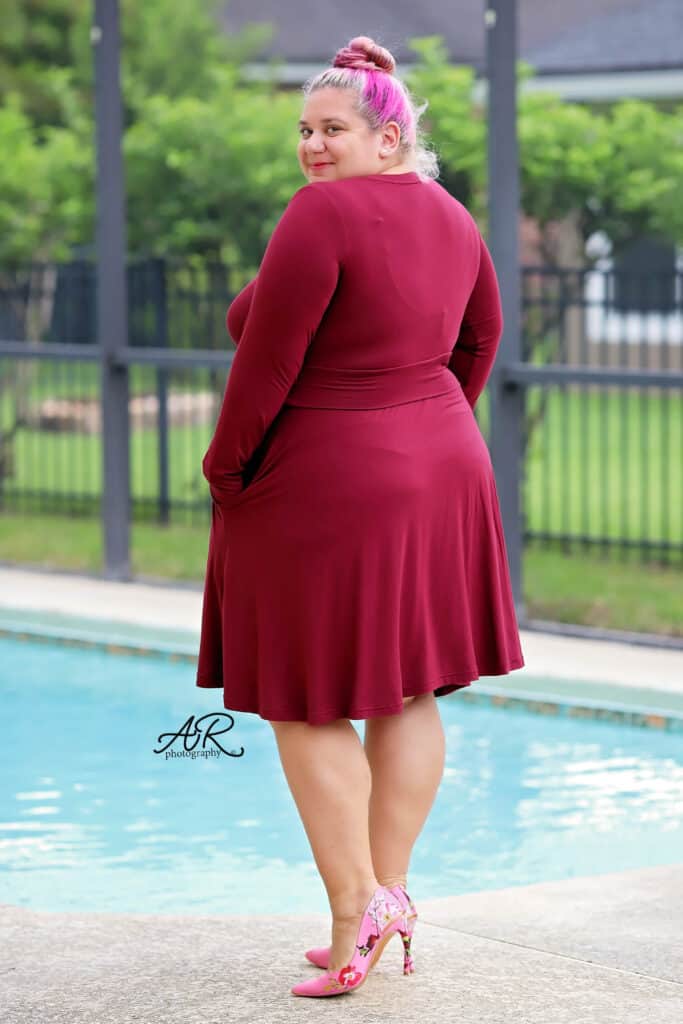
The X Factor is drafted for high and 4 way stretch knit fabric. My personal recommendations are rayon spandex, bamboo lycra, ITY, Cupro and double brushed poly. You can also use athletic knit and certain sweater knits. During this sew along I will be making the V neck dress style using a stunning Mily Mae Fabrics burgundy bamboo spandex. MMF is also this sew along’s sponsor so two lucky winners will receive gift certificates to their shopping website. 


You can see the first video below, including how I use my projector file for the bodice. Once you cut the fabric, post a picture of your pretty pile in the comments of DAY 1 photo of the X Factor album in the M4M & P4P Sew Along Group. 


X Factor SAL | day 1

X Factor SAL | day 2

X Factor SAL | day 3

X Factor SAL | day 4

X Factor SAL | day 5

X Factor SAL | day 6

X Factor SAL | day 7

Filed Under: Frequently Asked Questions, Sew-A-Long, Uncategorized Leave a Comment

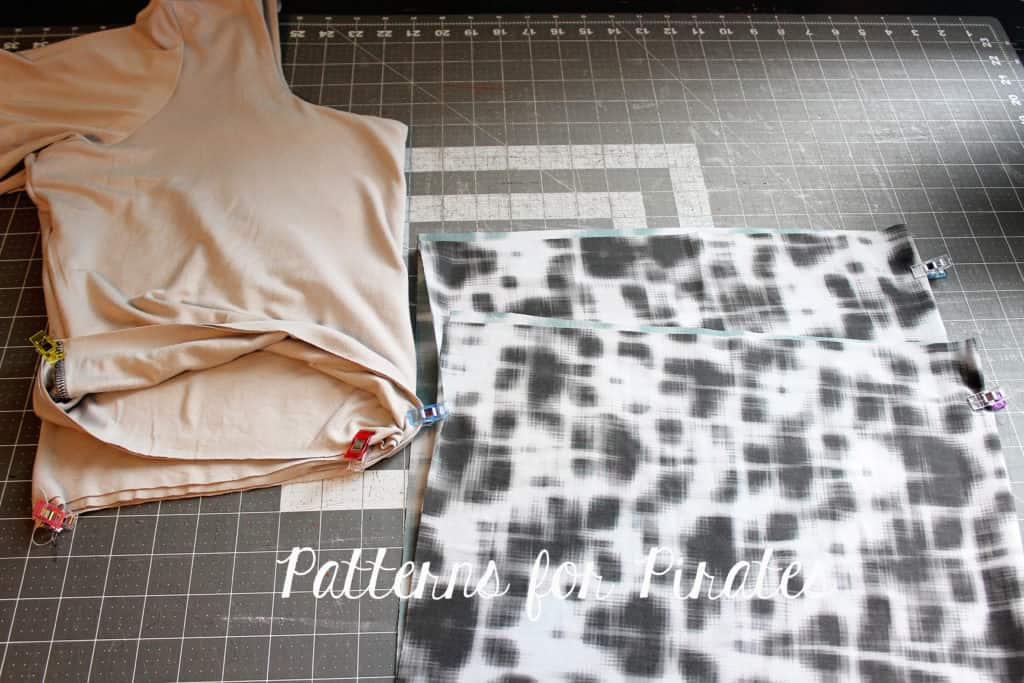
Tips for adding a woven skirt to a knit bodice

August 17, 2017

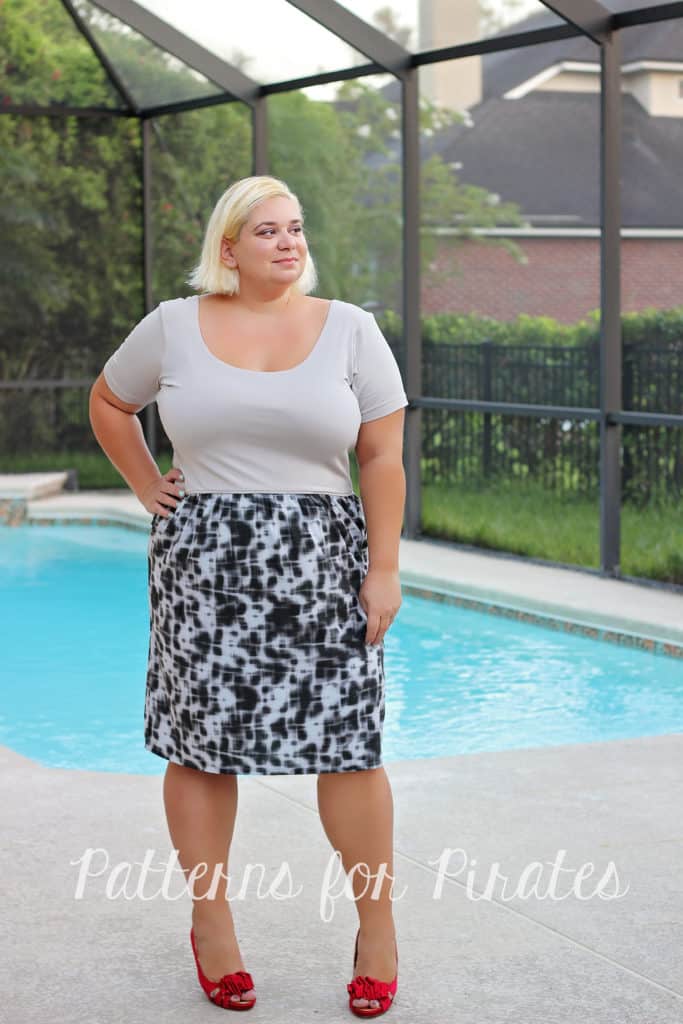
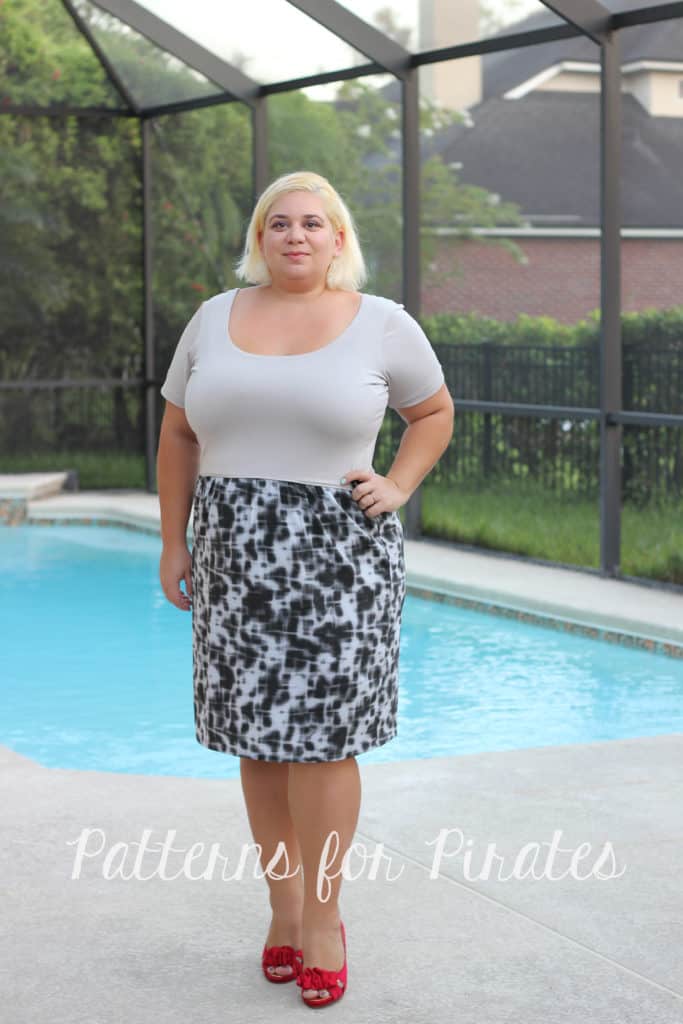
Ahoy, pirates! The Summer of Wovens is in full swing so I wanted to show you how easy it is to add a gathered woven skirt to a knit bodice. You can use this technique to the Boundless dress, like I have, or the Sunshine dress. If you love the bodice of the Sweetheart dress as much as I do you can use it and hack it with a woven gathered skirt too.

The most important thing to keep in mind when adding a woven skirt is CHOOSING THE RIGHT WOVEN fabric. Make sure to use a light weight fabric with great drape. I used a Nicole Miller chiffon and it worked beautifully. You can also use rayon, rayon challis  or crepe georgette. Avoid quilters cotton, it will look stiff and add visual width which we don’t want. Am I right, ladies? 😉

Cut the pieces as per the pattern. You do not need to size up or down, just be sure to measure yourself and choose the size based on that. I do recommend adding some width to the skirt for more comfortable wear. I did not add it to mine but you can certainly increase width by a couple of inches. You can see how to take your measurements here.

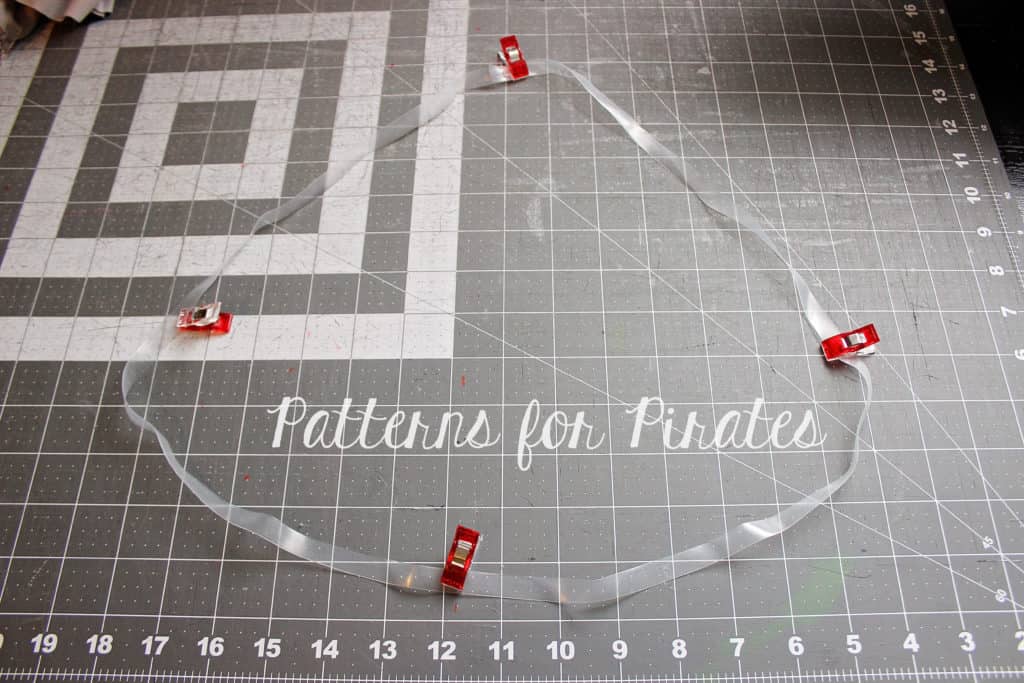
Sew the bodice as per the pattern tutorial. I marked the center of the front skirt piece and the back. I like to use clear elastic when I attach the skirt to the bodice. I do that for two reasons, the clear elastic will add stability to the seam and it will help you gather your skirt evenly. Simply cut a piece of elastic that matches the bodice bottom. Don’t forget to add seam allowance! I prefer to cut just one piece and match the elastic seam to the center back but if you prefer to cut two pieces and match the seams to the sides you’re welcome to do that as well.

Mark the quarters of the clear elastic. Mark the side seams and center back and front of the skirt. Remember to mark the to of the skirt if you’re using a fabric with a directional print 🙂

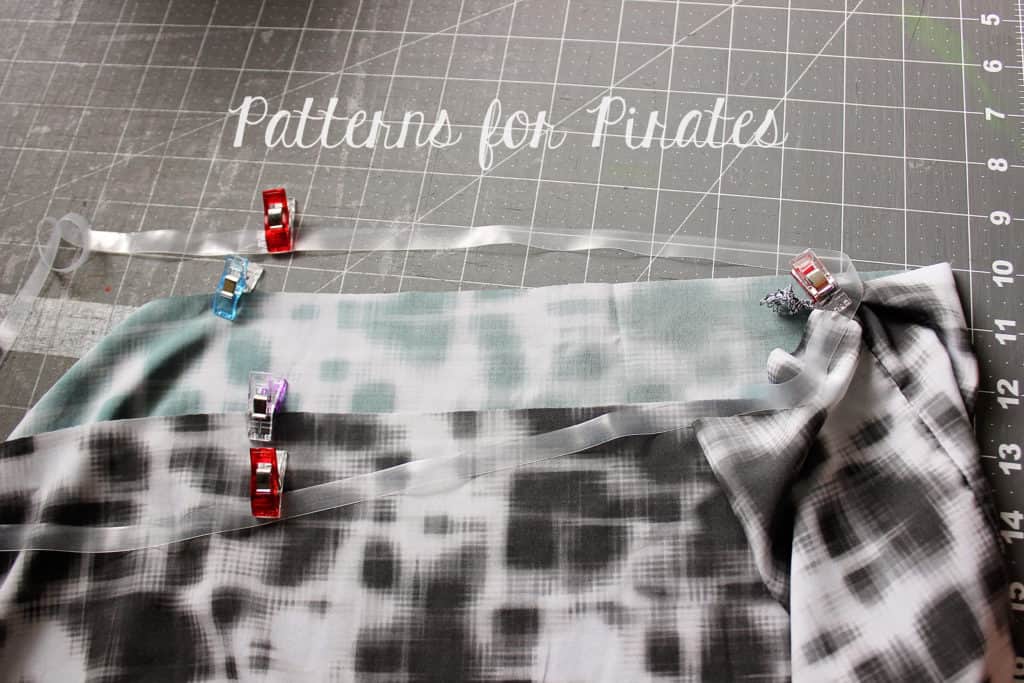
Match the quarters of the skirt to the quarters of the elastic.

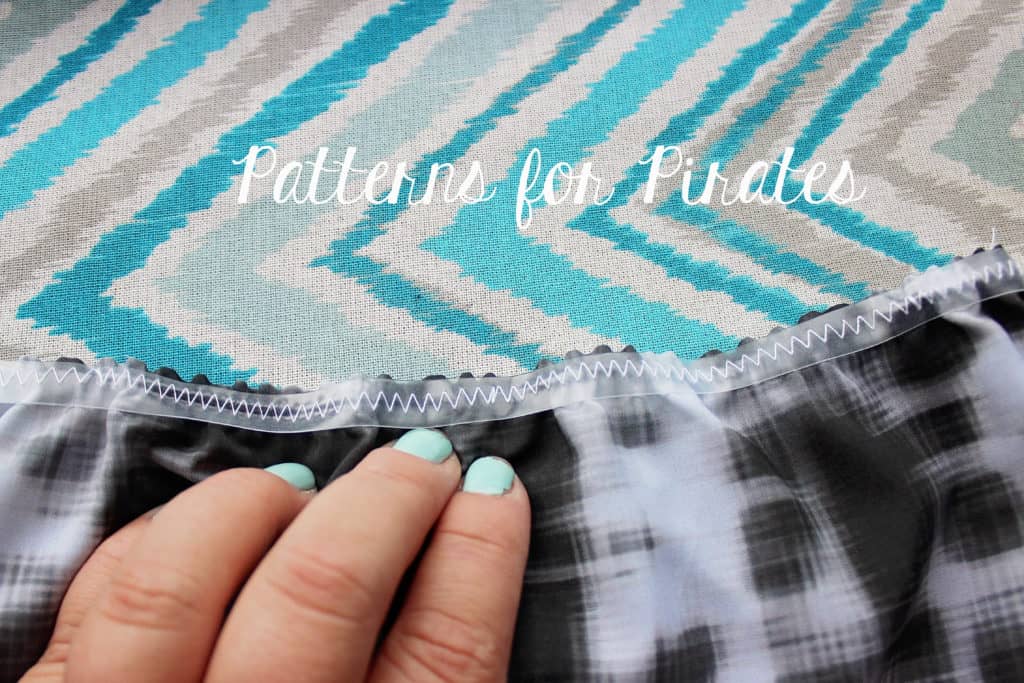
Sew the clear elastic to the top of the skirt. Use a zig zag stitch and adjust the tension and width to better fit the type of fabric you are using. Stretch the elastic as you sew. If you use a 1/2″ clear elastic simply align the edge of the elastic to the edge of the skirt. I use 3/8″ clear elastic so I put it a little lower than the edge to accommodate the 1/2″ seam allowance that is followed in this pattern.

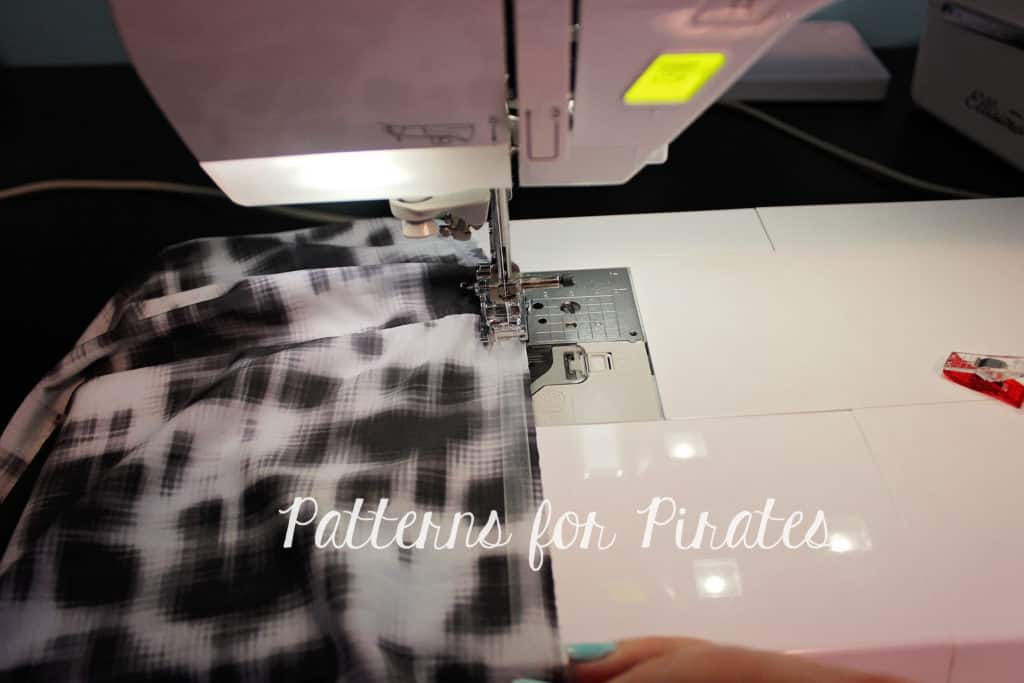
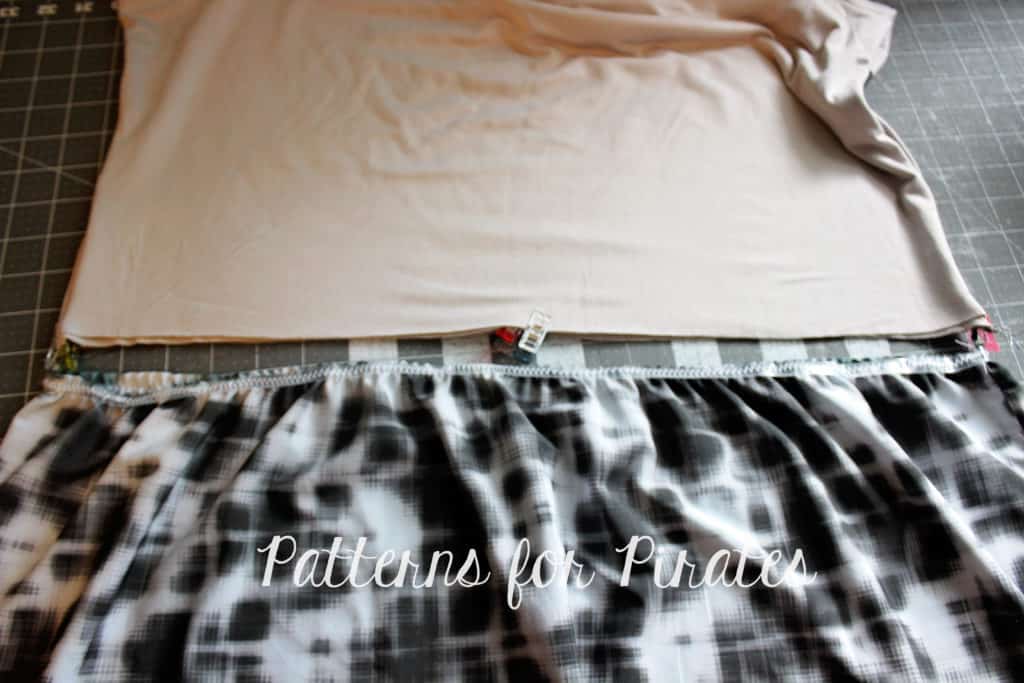
All you have to do now is attach the skirt to the bodice. The bottom of the bodice and the top of the skirt will be the same circumference. Match the side seams and the center backs and fronts, pin right sides together and sew.

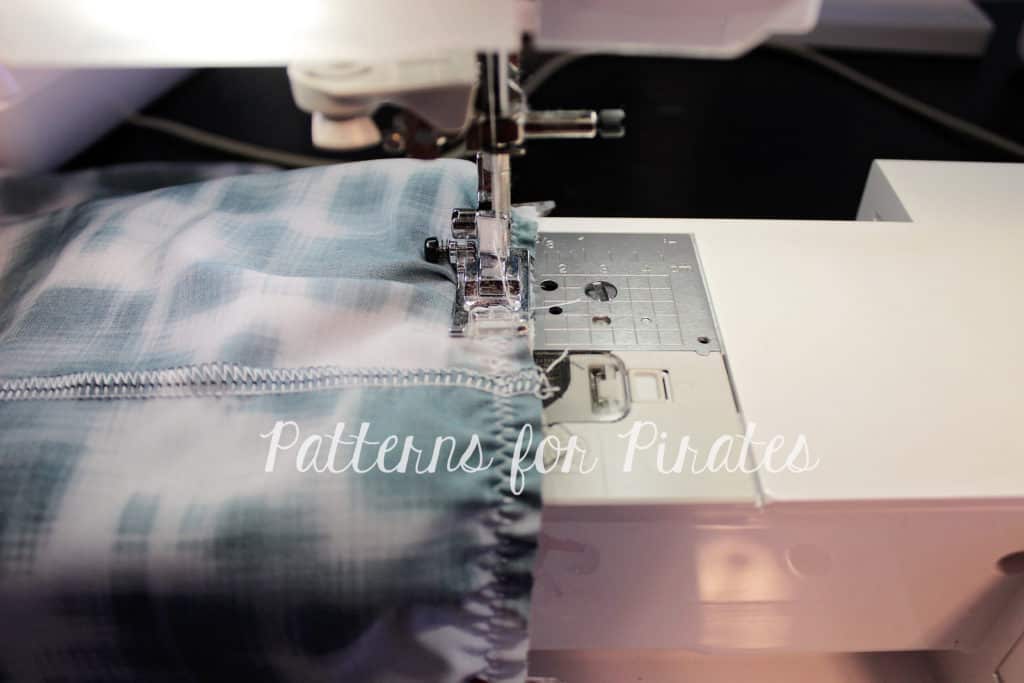
I like to attach the skirt to the bodice using a zig zag stitch but you can also use a triple stretch stitch.

Optional: top stitch the seam allowance up towards the bodice.

Tadah! You’re all set to rock your new woven skirt Boundless (or Sunshine) dress! I can’t wait to see your take on this easy hack so be sure to post it in the P4P group too!

Filed Under: Frequently Asked Questions, Pattern Hacks, Uncategorized 6 Comments

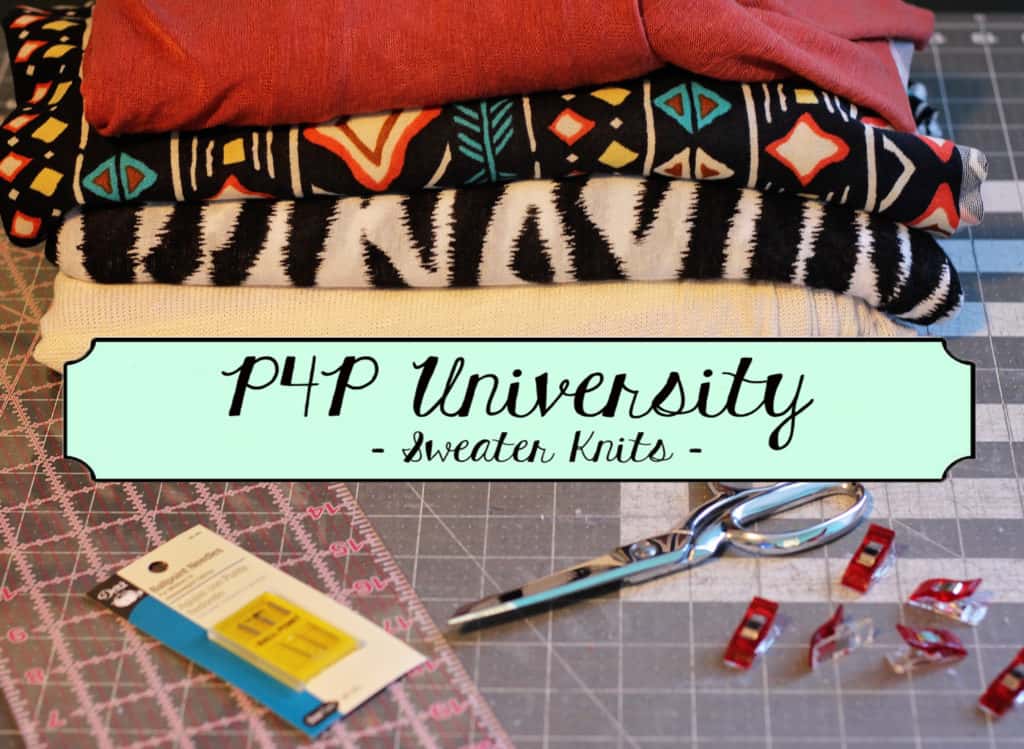
Tips for working with sweater knits

November 25, 2016

img_3505

Have you seen the sneak peek Judy posted on Instagram? Check it out if you haven’t already. If you did you might have noticed that soon you will be sewing those pretty sweater knits you’ve been saving. In the blog today I will give you some of my tips and tricks to work with this kind of fabric.

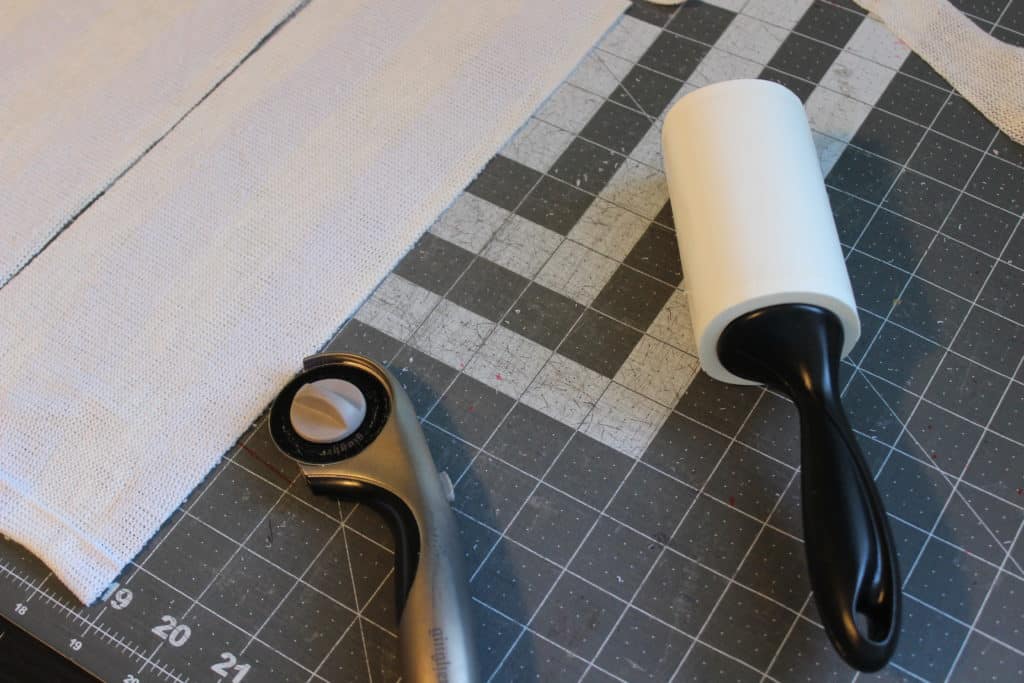
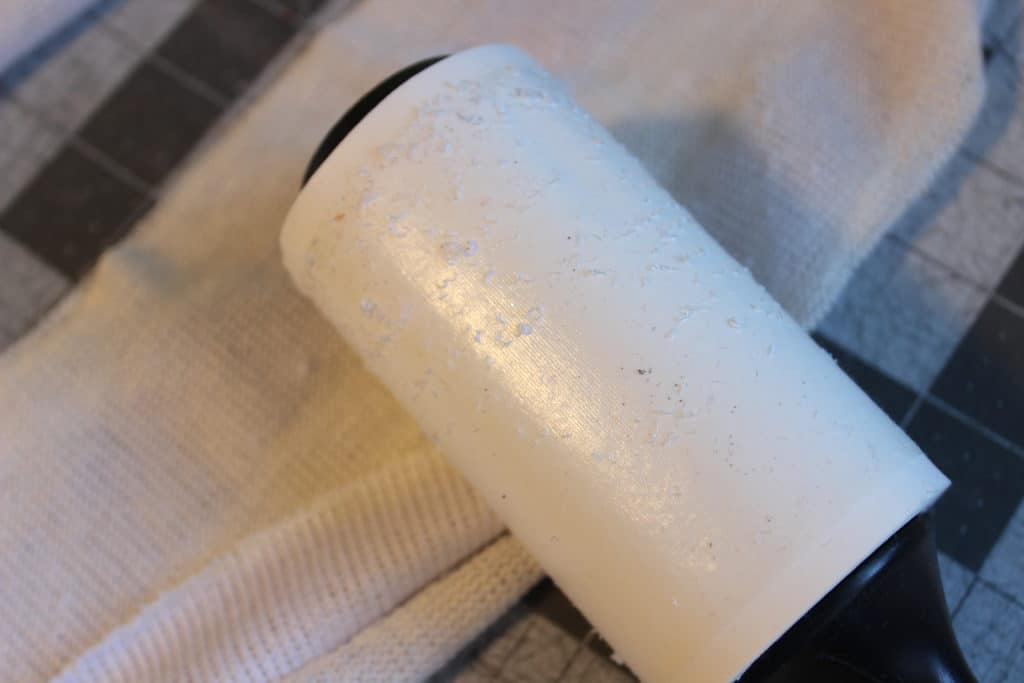
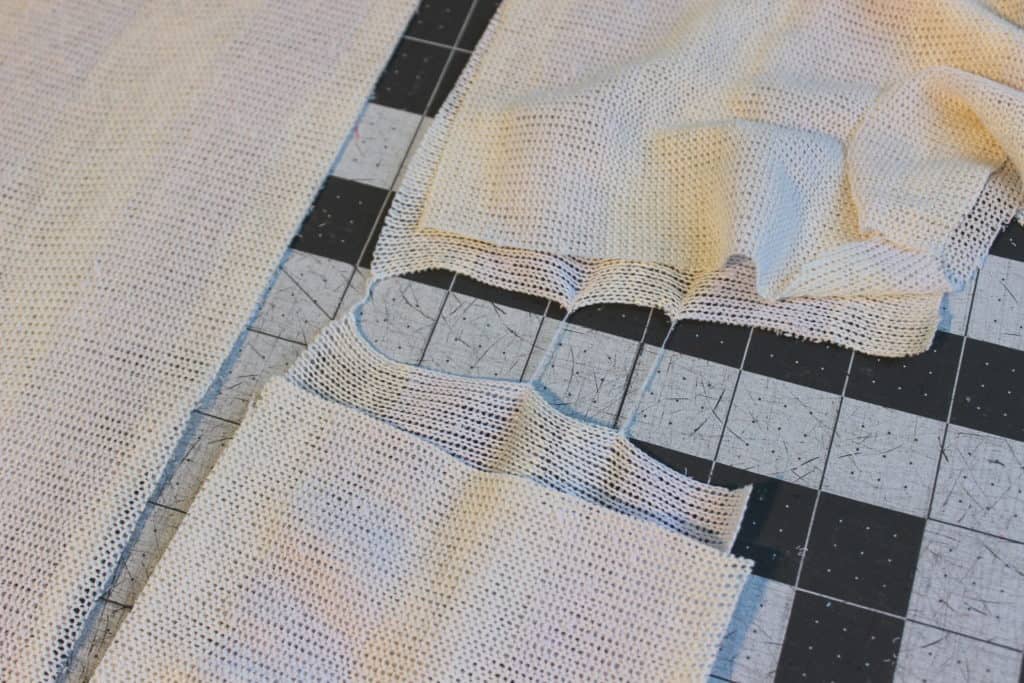
1.Grab the lint roller! No, I have not lost my mind…believe me, you will want the lint roller close by when you cut sweater knit. Whether it’s a open weave or a dense one, sweater knits tend to leave a lot of residue when being cut.

img_3488

TIP: Use the lint roller to not only clean your cutting mat but also the edges of the fabric pieces you just cut. That will help keep your sewing machine cleaner.

img_3491

2. If cutting with a rotary cutter, use a new or very sharp blade. I find sweater knits to be more prone to getting a run in the fabric if  the cutter or scissors is not very sharp.

img_3489

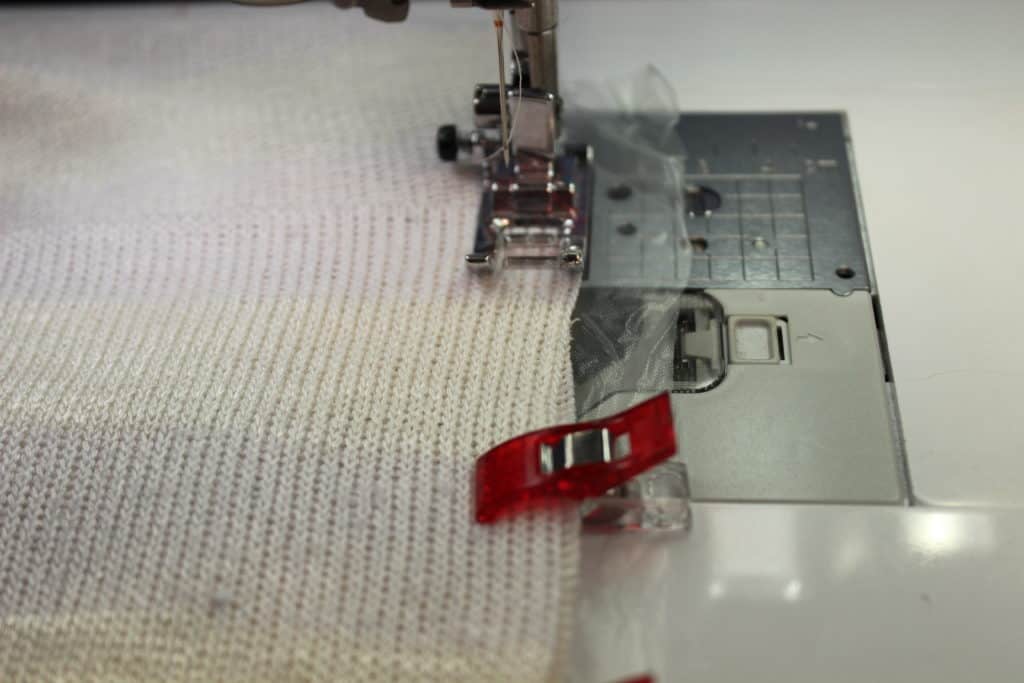
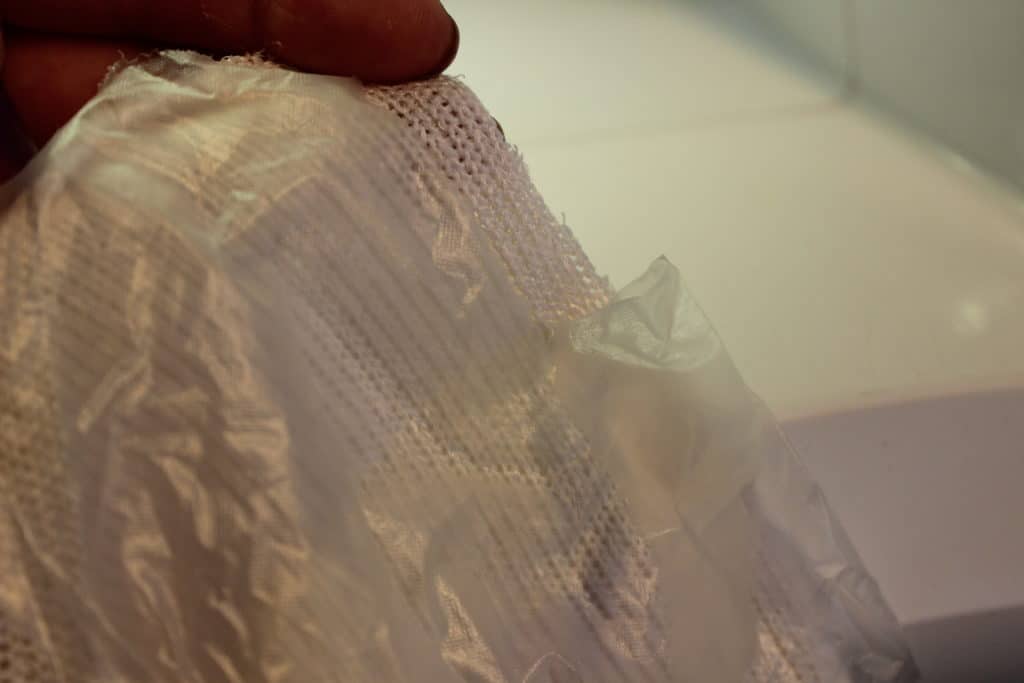
3. Water soluble stabilizer is not just for embroidery! When working with sweater knits on your sewing machine I highly recommend placing a piece of WSS under your fabric. This will not only make sewing it easier but it will also prevent puckering and even more important it will stop your machine from “eating” your fabric. Sweater knits, especially open weave ones have a lot of “holes” so your machine is basically sewing through air.

img_3493

Tear away the excess, the remaining water soluble stabilizer will disappear when you first wash the garment. I prefer transparent WSS but opaque ones work just as well.

img_3494

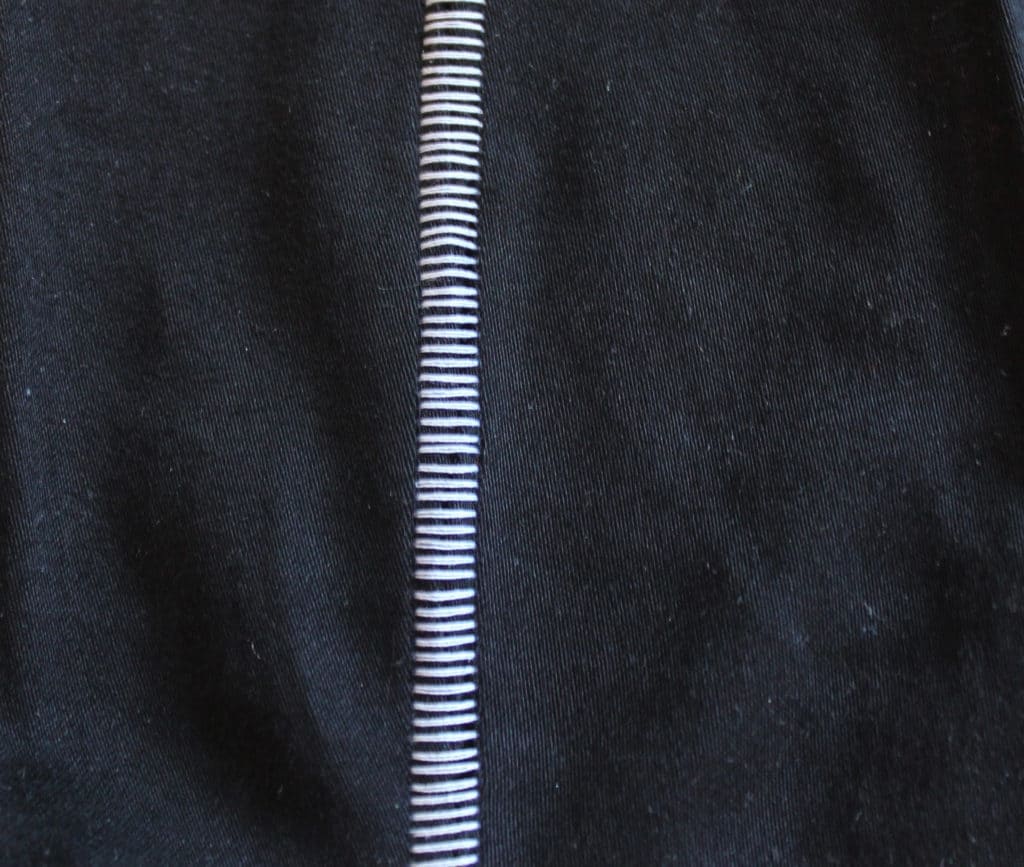
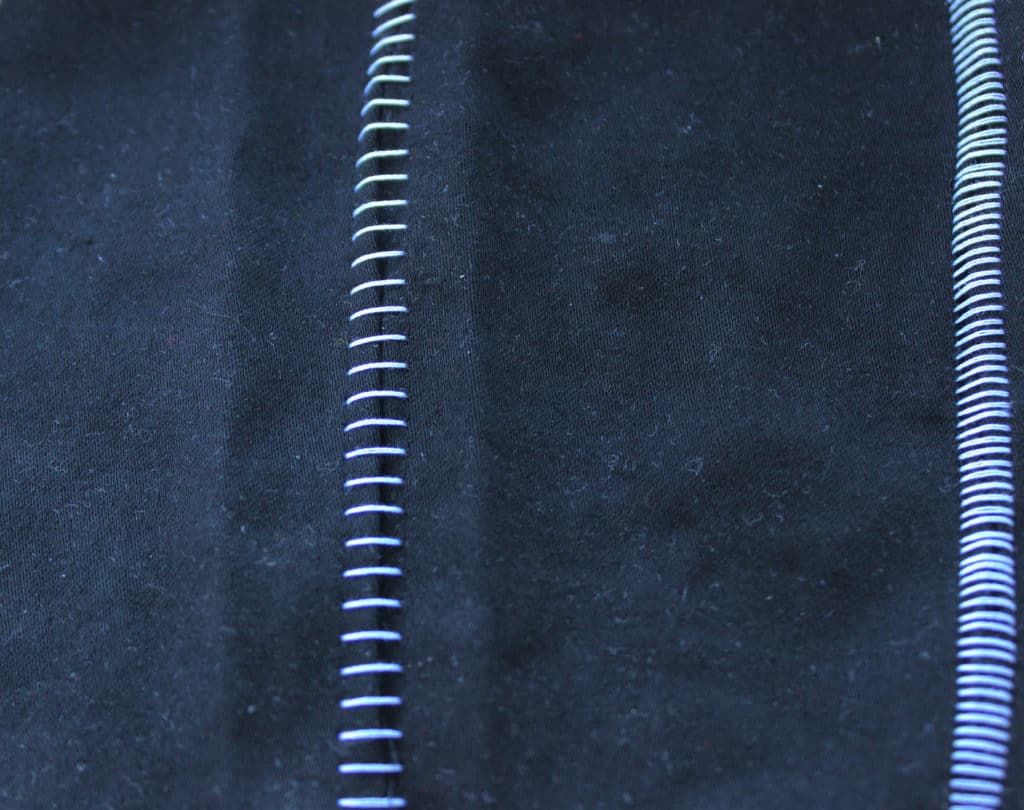
4. You can sew sweater knit entirely with your sewing machine however a serger will make the process faster and easier. You might need to adjust your settings a bit to accommodate this type of fabric. My favorite serger stitch when sewing sweater knits is the FLATLOCK stitch. Check your serger user manual to make the proper settings for a flatlock stitch, they will vary from model to model. Here is an example of how a white thread flatlock stitch looks like on a black piece of fabric.

img_3498

A narrower flat lock stitch

img_3501

A wider flat lock stitch

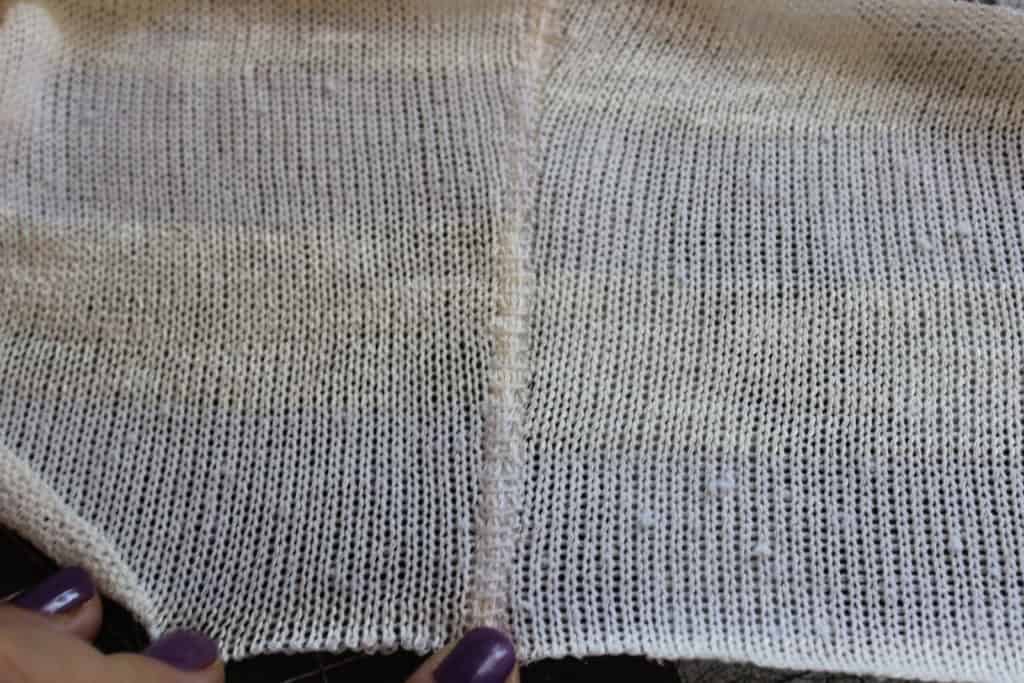
I use this type of serger stitch when I make sweater knit bands and hems. Use a matching thread so the stitch will blend in with the fabric.

img_3504

5. Just as with all knits, always use a ball point needle in your sewing machine and serger. You’ll also need to lower the pressure foot tension of your sewing machine.

6. The markings on open weave sweater knits will need to be added with chalk/ a tailor pen or by adding tailor tacks. Notches are impossible to see on sweater knits.

I hope you find these tips helpful when you will be sewing the new Cocoon pattern releases soon. I will leave you with another sneak peek of this amazing cardigan. Now get the sweater knits stash out and as always post your creations in the group so we can all ohh and ahhh over them.

img_3638img_3518

Alex


Filed Under: P4P University, Sewing with Stretch, Knit Fabrics, Uncategorized 1 Comment

Basics of Sewing Swim

April 25, 2016

As I’m approaching my very first swimsuit pattern release, I realize there will be a lot of questions about sewing swim!

So here are some bullet points you’ll need to know before you jump into your first suit! 🙂

swim

Common Questions:

  • What type of fabric do you need? 
    • Nylon Spandex is the traditional swim knit. There are also some polyester spandex blends that are capable of with standing the chlorine and can hold up to the activity.
    • My favorite suit I made was out of supplex, a nylon spandex.  I almost always use a nylon spandex rather than the poly blends, it’s just my personal preference.
    • Just like all fabric types you will have a wide range of quality.  Great swim knit can be a breeze to work with, while cheaper/thinner/slinkier swim knit can really test your patience ;). If you’re sewing swimwear for the first time, I’d recommend buying a good quality swim knit even if you’re nervous.  It is much easier to work with!
    • How can you tell if it will be easy or more difficult to work with online? Watch the weight- steer clear of lightweight, drapey descriptions and try to stick with medium weight knits.
    • Lining- You can use a swim lining or just self line with more swim knit.  The self lined suit will most likely fit and feel a bit tighter because usually your swim knit is a bit more stable than the swim lining.
  • Do I need special thread?
    • Nope 🙂 You can use standard poly thread like always.
    • You can use a stretch thread in your loopers or bobbin for more stretch. I’ve done both and haven’t ever had issues with threads popping, but I recommend it if you’re planning on getting tons of wear and being very athletic in it.  (I highly recommend it for youth- they wear them more often, are more active and they often get passed down to other kids throughout the years.)
  • What is the best stitch?
    • You can use your serger or your favorite stretch stitch.
    • When using my machine I usually use the lightening stitch or regular zigzag stitch. I use my coverstitch as well for finishing hems.
    • I baste with a stretch stitch as well, you can technically baste with a traditional long straight stitch, but if you don’t pull  your basting stitches you will hear those threads pop when you try on/wear…which can be scary ;).
    • stretch stitches
  • What kind of needle should I use?
    • You need to use a stretch needle. These are best when sewing fabric with high spandex content.
  • What other notions will I need?
    • You will need a SWIM elastic.  Even if you are using the top as a sports bra, I still recommend using the swim elastic.  It has more stretch then regular elastic and will withstand the wear and tear much better.
    • I highly prefer the cotton swim elastic to the clear plastic kind. It is so much easier to work with and softer.
    • IMG_0010
    • Don’t let the elastic scare  you!
    • And don’t skip it! I know a lot of ladies will use bands on swim in place of elastic, but I don’t recommend it.  Elastic keeps it shape always- wet or dry.  Swim fabric on the other hand gets heavier and stretches out when wet (and depending on quality can stretch enough that it is loose while swimming.) So, if you don’t ever want to loose your bottoms or have to constantly tug back in place don’t skip the elastic!!
    • Here is a little video of me putting in some swim elastic to help!

  • How can I make sure the top is supportive enough to hold me up?
    • Follow the tutorial and use all the suggestions to add more support.  If you skip any, you might regret it if you’re looking to be very active or have a larger bust to hold up.
    • Power mesh- this is an inner lining mesh spandex that you can use to add more support to a suit. It stretches less than swim knits, so it will hold in your body better on that section you place it. I only recommend using it in some of the suit and for adults only.  I like to use it on the front of both the top and bottoms.  If you have a smaller bust, you most likely will not want it in the top.  It is something that will “smoosh” you like a minimizer.  There are varying degrees/quality of power mesh as well. You can get looser and stronger depending on how much activity and “smoosh” you’d prefer in your suit.  There is also “power net” which is an even tighter mesh.  Use this one with caution as you might need to go up a size to accommodate the amount of stretch.
    • Swim cups- I used a sew in swim cup in almost all of my suits and sports bras too.  I like the tighter feel (the cups don’t stretch like swim knit- so it will feel and be tighter across the chest if you sew them in.) and the thicker layer of coverage for my bust.  I HIGHLY prefer the soft cups.  I find the molded cups to be really unforgiving in perfect fit (lets just say the D/DD was no where NEAR fitting my D cup bust… I was really channeling the Madonna cone look :/ ) and are much more difficult to get placed perfectly and to sew in nicely and neatly.  For larger then a D/DD cup you’re really only getting some coverage for the “important part”.  You will need to slip your lining on  (I recommend wearing a bra/sports bra) to get a good placement and make sure it’s covering that important part, pin in place, and sew in.
    • Remember you’re looking for your sewing cup size- which is the difference between your upper and full bust (NOT under and full bust).  You don’t want your cups oversized.  They will take up too much of your top and you will loose too much stretch that you need for a good fit.
    • IMG_0081
    • I also have an option for adding boning to the side seams, my other sister Megan loves this one! You’ll just need lightweight boning:
    • IMG_6694
  • Where can you get these supplies?
    • Here is a Note on my sister’s (the swim suit sewing queeen ;)) FB page with tons of suppliers:
      • https://www.facebook.com/notes/coles-creations/buying-swimsuit-fabric/10150740266823620
  • How tight should it be?
    • Traditional swimsuit fit has negative ease, meaning the finished measurement of the suit will be smaller then your body.  It will have to stretch to get on.  Suits are generally 20-25% negative ease.  Some athletic ones (think Speedo, Nike, etc) have 30% for more intense work out/swimming needs.  Don’t size up if you plan on swimming at all in it, you will need that negative ease to keep the suit in place when wet.  If you are at the lower end of your size range you might even need to take a bigger seam allowance to make it snug enough (this will depend on quality of swim knit as well, the super stretchy thinner fabric will mean you will need it tighter).
    • The elastic around the edges of the suit are there to help keep everything in place as well.  It might “squeeze” you a bit when not wet, but again you will want that very snug to make sure your suit isn’t shifting while you’re swimming.

Have FUN sewing and swimming!  

IMG_1335 IMG_092913040907_10103939304773709_3823376724495832161_o IMG_099613041099_10154119162434666_7968371201553453968_o (1)

Filed Under: P4P University, Pattern Release, Sewing with Stretch, Knit Fabrics, Uncategorized 15 Comments

Featured Patterns

  • Loosey Goosey Loosey Goosey $12.00 Original price was: $12.00.$10.50Current price is: $10.50.
  • Loosey Goosey- Youth Loosey Goosey- Youth $10.00 Original price was: $10.00.$8.50Current price is: $8.50.
  • Loosey Goosey - Bundle Loosey Goosey - Bundle $20.00 Original price was: $20.00.$18.00Current price is: $18.00.
  • Everyday Shirt Everyday Shirt $12.00
  • Everyday Shirt- Youth Everyday Shirt- Youth $10.00
  • Privacy Policy
  • Refund Policy
  • Affliliate Program
  • Contact Us
  • About

Copyright © 2025 Patterns for Pirates

Copyright © 2025 · Genesis Framework · WordPress · Log in