Patterns for Pirates

P4P stylish, modern, wearable patterns

  • Home
  • Blog
    • Frequently Asked Questions
    • Pattern Releases
      • Free Patterns
    • P4P University
      • Fitting
      • Sewing with Stretch, Knit Fabrics
      • Sewing with Woven Fabrics
      • Sewing Machines
    • Sew-A-Longs
    • Fabric for Pirates
    • Pattern Hacks
    • Announcement
      • Blog Tours
      • Contest/Giveaway
  • Shop
  • Bundle Discounts
  • Flash Friday
  • Gift Cards
  • My Account
  • Cart

P4P University- Waistbands

September 21, 2020

Ahoy Pirates! Today, we’re talking waistbands. We’ll cover some of the different types of waistbands that you’ll generally see in P4P patterns, the best fabrics and materials for constructing them, and some helpful tricks and tips to getting the very best results.

Types of Waistbands

There are many different types of waistbands out there in the wide world, but today I’ll cover some of the most common ones you’ll see in apparel sewing and in many P4P patterns.

First off, let’s talk about knit waistbands. These waistbands can be normal or high-rise, and are stretched to fit a garment’s waist.  Knit waistbands will need to be made with knits with excellent stretch and good recovery. You’ll want to look for fabrics like brushed polyester, cotton lycra, or cotton ribbing to make these. This type of waistband is easy to sew, with no casings, elastic or fancy stitching required. Hurray!

Generally with this type of waistband, you’ll line up the short ends of the waistband piece, right sides together, and stitch. Next, flip the waistband so the right side is up, then fold in half lengthwise, wrong sides together, and press. From there, you will quarter the band with pins and attach (more on quartering waistbands and other tips later)!


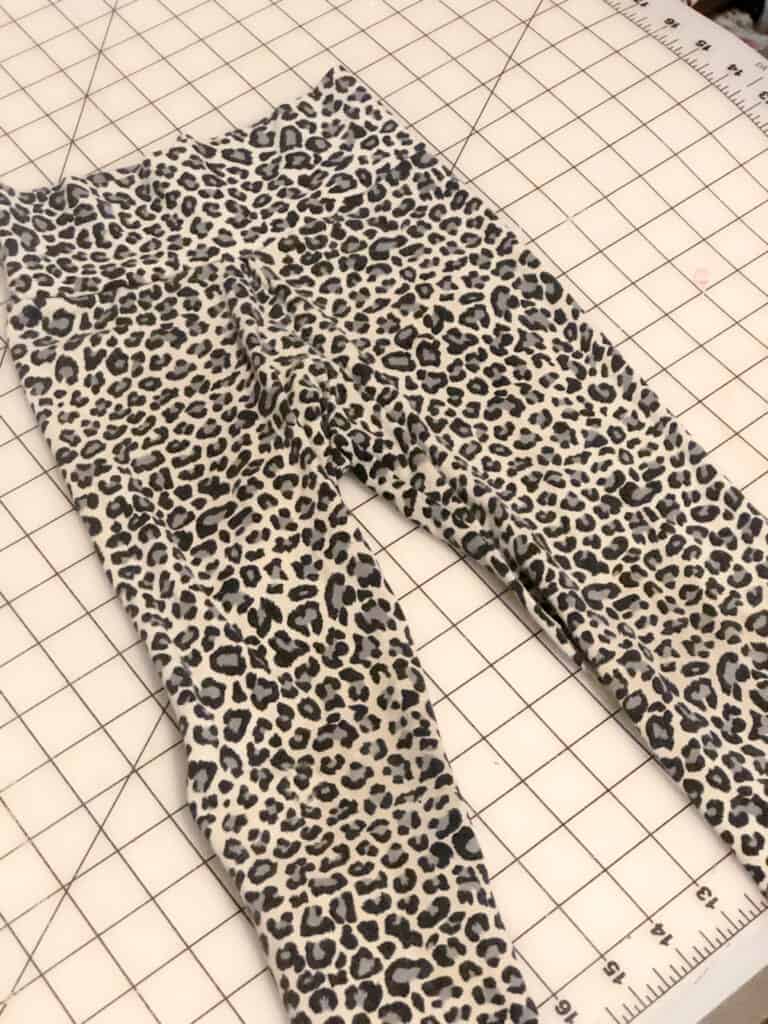
Here, I’ve used double brushed poly to sew a knit waistband onto a pair of Peg Legs. I’ve simply attached it by stretching it evenly, and sewing it to the garment with my serger, although a sewing machine will work just as well. Make sure to use a stretch stitch, like the lightening bolt, at the longest length setting!


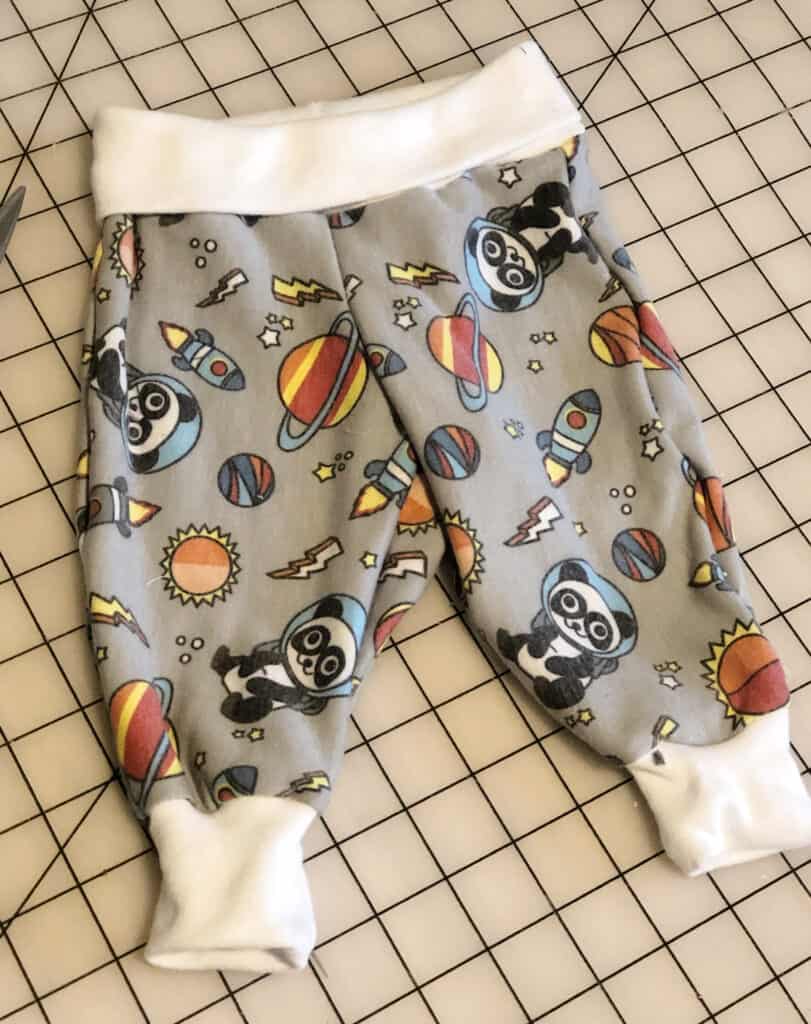
Next up, we have  tall/yoga waistbands. Yoga waistbands are made and constructed similarly to regular knit waistbands, but are simply “taller” and meant to be folded over for a even more comfortable fit. I especially like using yoga waistbands on clothing for children, as they are super comfy to wear! Brushed polyester and cotton lycra are excellent choices for these. I’ve used a yoga waistband here on a pair of Baby Bear Joggers, using brushed polyester.


Next,  we have enclosed elastic waistbands. Generally, this type of waistband is used for knit garments that have a little less vertical stretch or recovery and need a little “help” holding the garment up around the wearer’s waist.

To construct, you will sew together the short ends of the waistband casing, right sides together. Next fold lengthwise, wrong sides together, and press. Set aside. Take your elastic piece, and sew short ends together, using instructions for the specific pattern being used. Generally, you will be instructed to either overlap the two short ends and sew, or “butt up” the ends- pushing them together and sewing with a wide zig-zag stitch, but not overlapping. Next you will slip the elastic loop into your knit waistband casing, and sew together as one piece onto your garment. You may topstitch this seam afterwards, if desired.

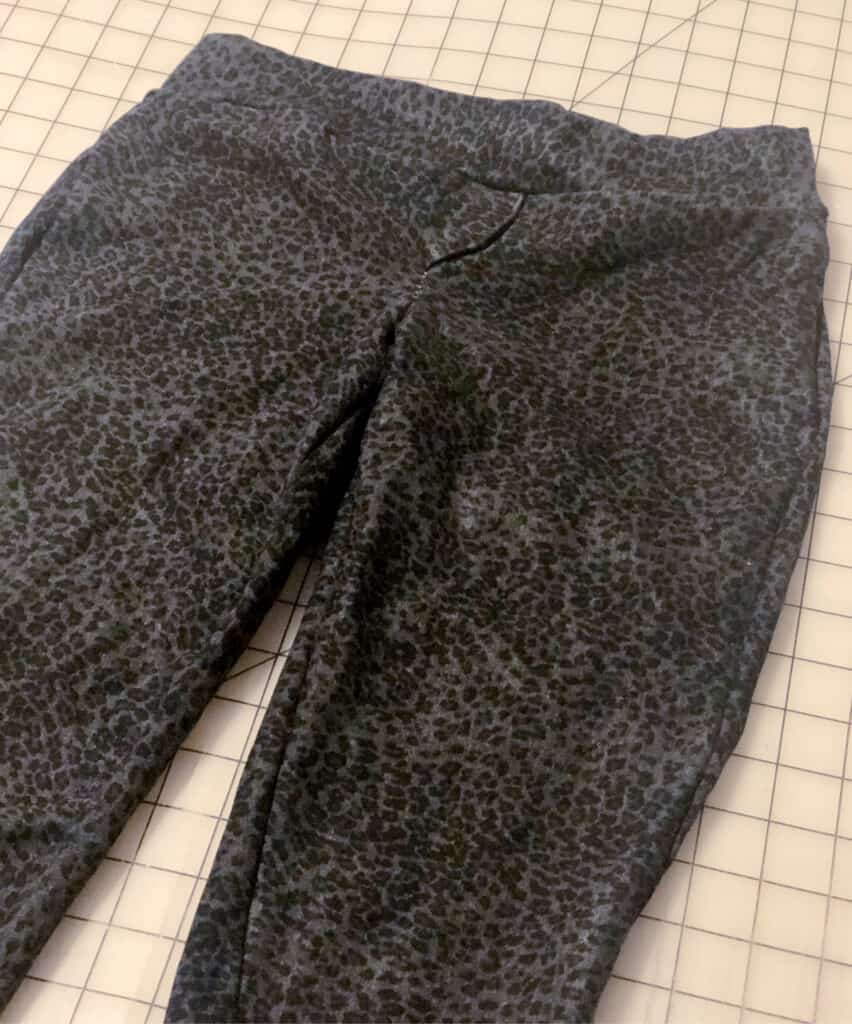
Here, I’ve made a pair of SOS Knit Pants with an enclosed elastic waistband. Although the fabric I used was a jegging material with little vertical stretch, the added elastic I used helps give the little bit of extra “oomph” needed to keep the pants up around my waist and snug-fitting.


Another style of waistband you’ll see often in apparel sewing is exposed elastic waistbands. These are waistbands that you’ll see in many applications, such as athletic shorts or undergarments. These will be generally created using plush back, underwear, or soft waistband elastics. It’s important to use these types of elastic, especially for undergarments, as they are much more comfortable and soft, and elastic will be up directly against the wearer’s skin.

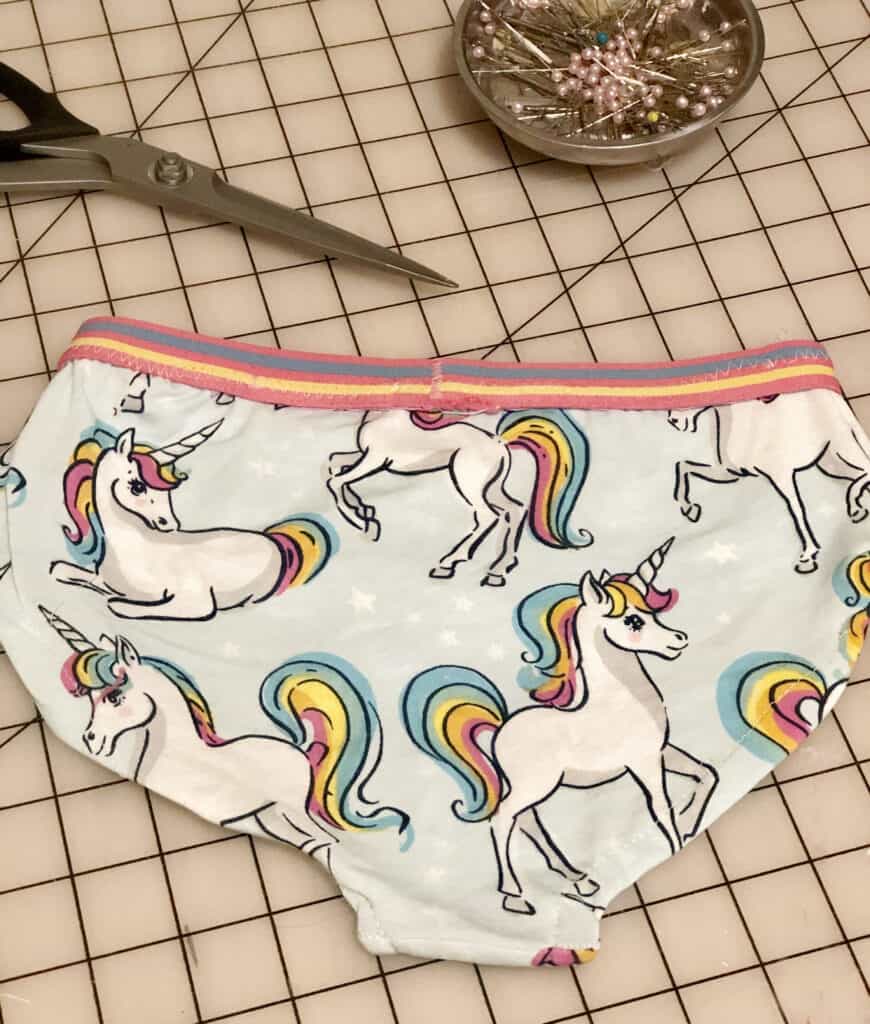
On patterns such as the Fierce Undies pictured here, the elastic used will be “butted” together before being sewn, not overlapped. This is because overlapping will make the exposed elastic waistband too bulky.


Tips and Tricks

Just as there are many different types of waistbands out there in the sewing world, there are just as many tips to make sewing them easier! Here are just a few to help you along the way:

1. With knit, yoga, and enclosed elastic waistbands, serge or baste the raw edges together once you’ve folded lengthwise, wrong sides together, and before attaching to the garment. This will essentially take those two layers of fabric of the folded waistband and turn them into one, making it easier to attach them to the garment in a clean and professional-looking way. Remember, if you serge the raw edges of your waistband before attaching it to your garment, DO NOT CUT ANY OFF!

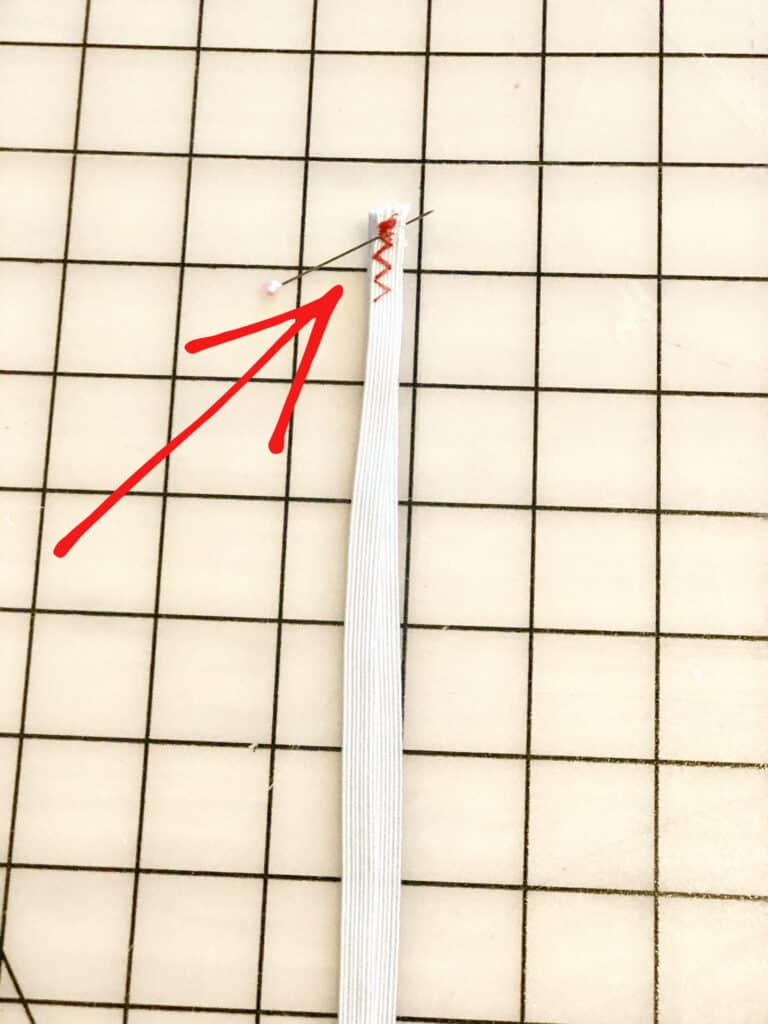
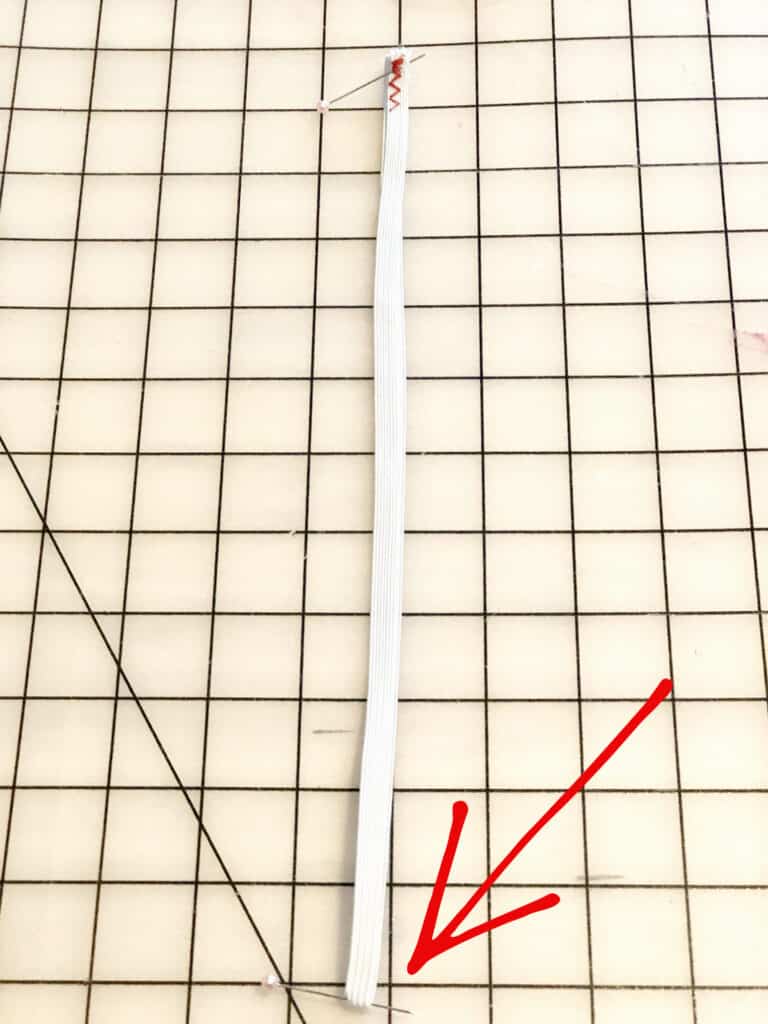
2. ALWAYS quarter your waistbands before attaching them to a garment! What is quartering? It’s equally dividing the waistband into fourths, so you can better ensure that the waistband will be evenly stretched across the garment’s waist.  It’s easy to do:

 First, sew the waistband or elastic together at the short ends, as directed by the pattern. Pin or mark the point of the seam.

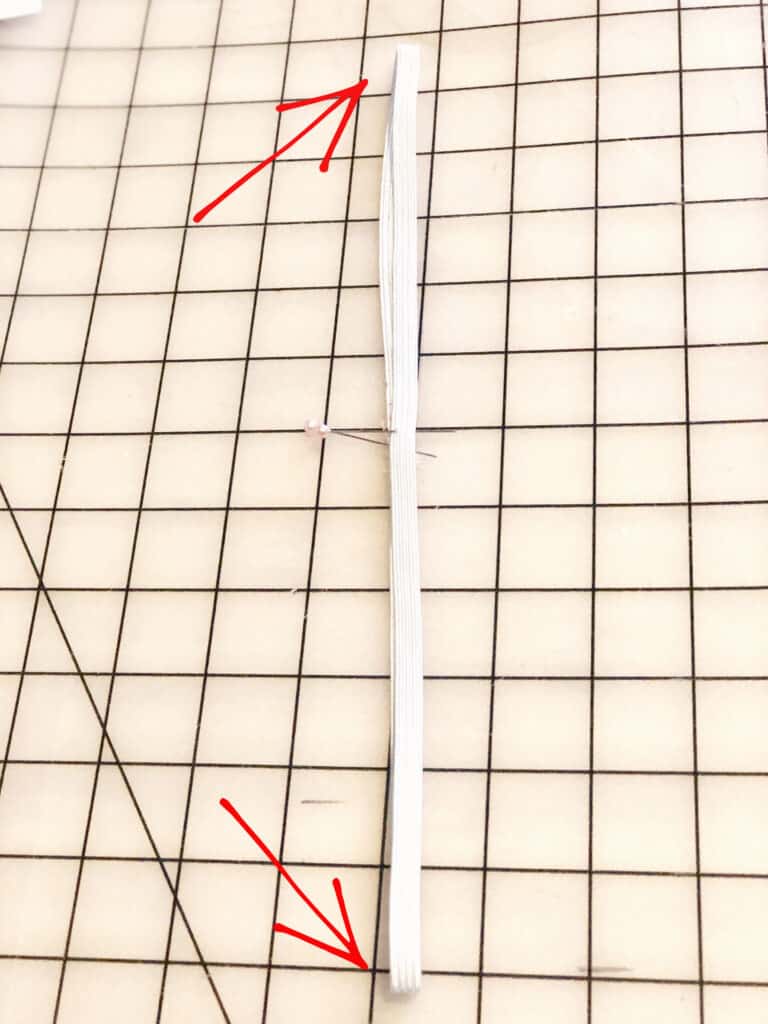
Next,  fold in half to find the half point. Pin or mark the half point.

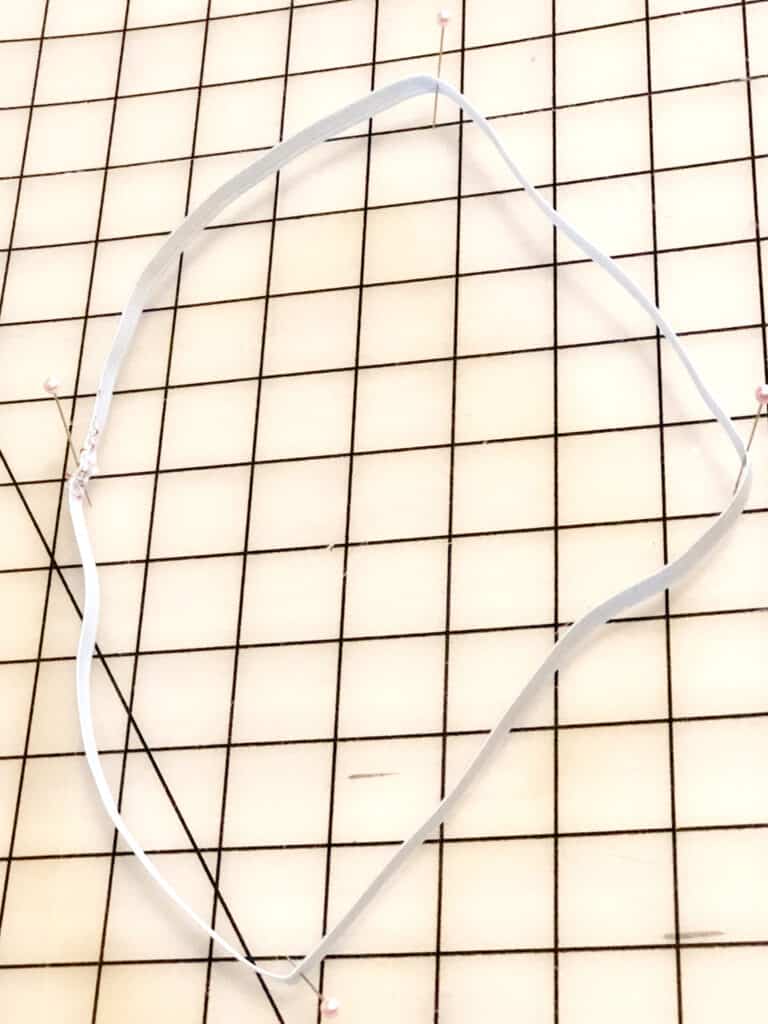
Now, take the two marked points (the seam and half point) and fold the waistband or elastic so that they meet in the center. Pin or mark the folded edges on either side to find the quarter points.

And there you have an evenly quartered waistband! This might sound like an extra step, but trust me, it’s one that will save you time by                          ensuring that you don’t have an unevenly stretched waistband (hello, seam ripper!) and will give you the most professional- looking finish.


3. SAVE your scraps! Especially with youth apparel, waistbands usually take very little fabric, and can be excellent scrap-busters. So next time you make something with a stretchy fabric with great recovery, make sure to stash those extras away for a rainy day!


That’s it for now! Just a few examples of some of the waistbands you’ll encounter while sewing some gorgeous, handmade apparel. No matter which waistband is required for your pattern, always make sure to quarter those bands, have fun, and share your beautiful makes with us over at Patterns for Pirates’ Facebook page!

Caitlin

Filed Under: Frequently Asked Questions, P4P University, Uncategorized Leave a Comment

Twist Back Top :: New Pattern Release!

September 24, 2019

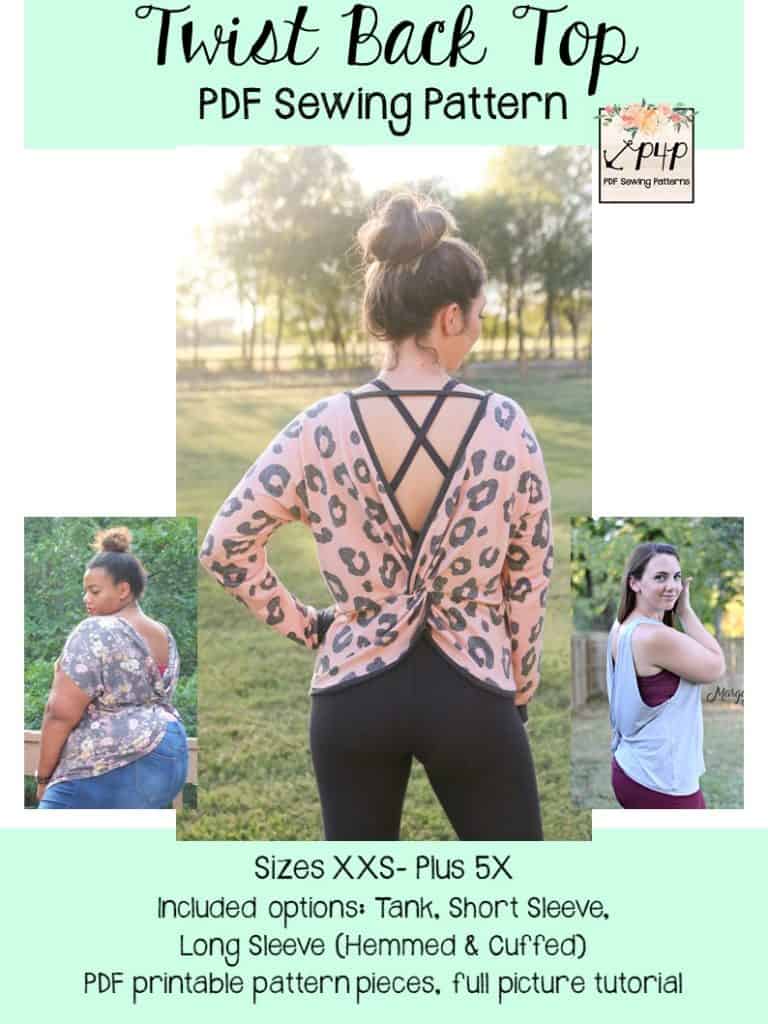
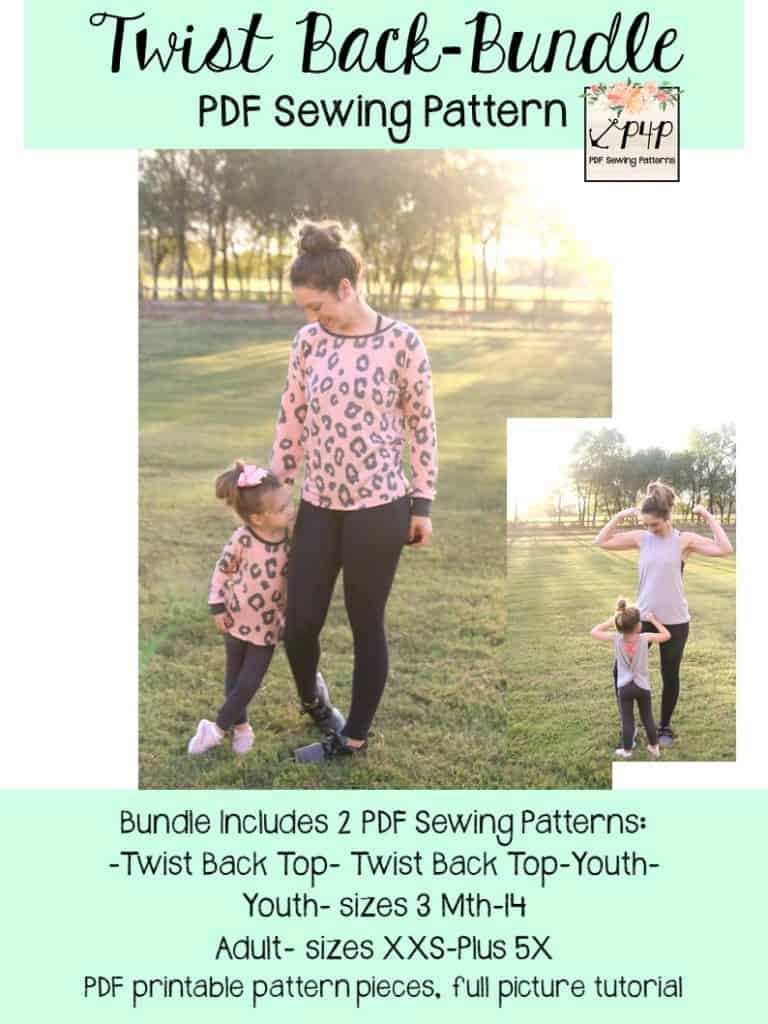
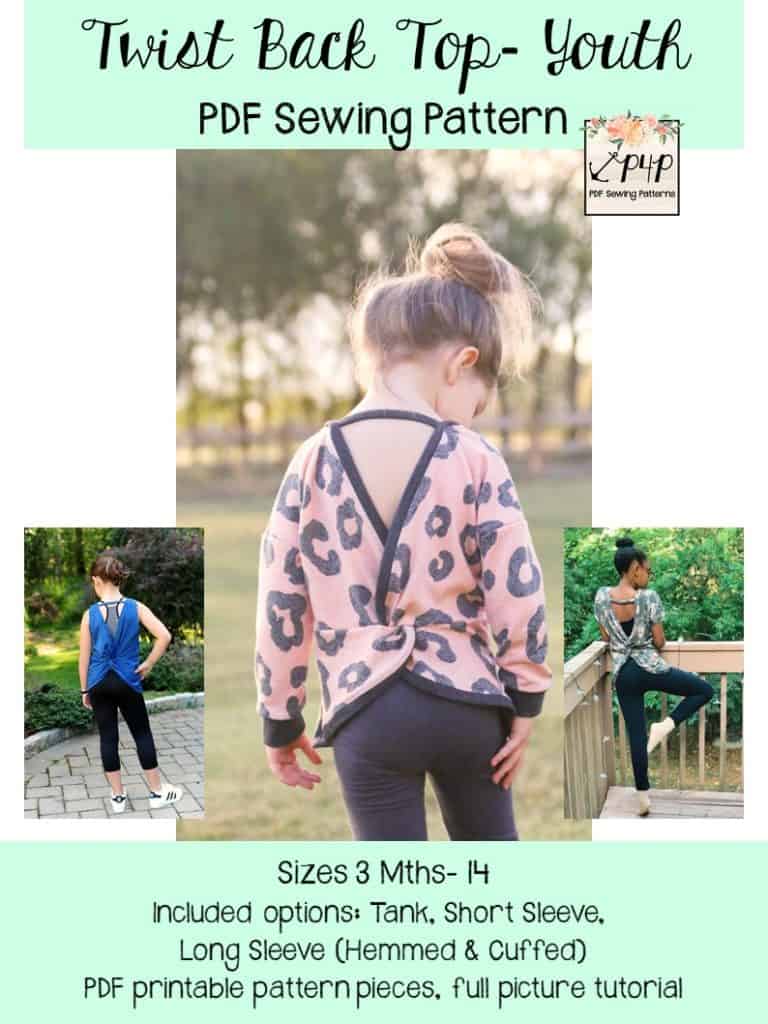
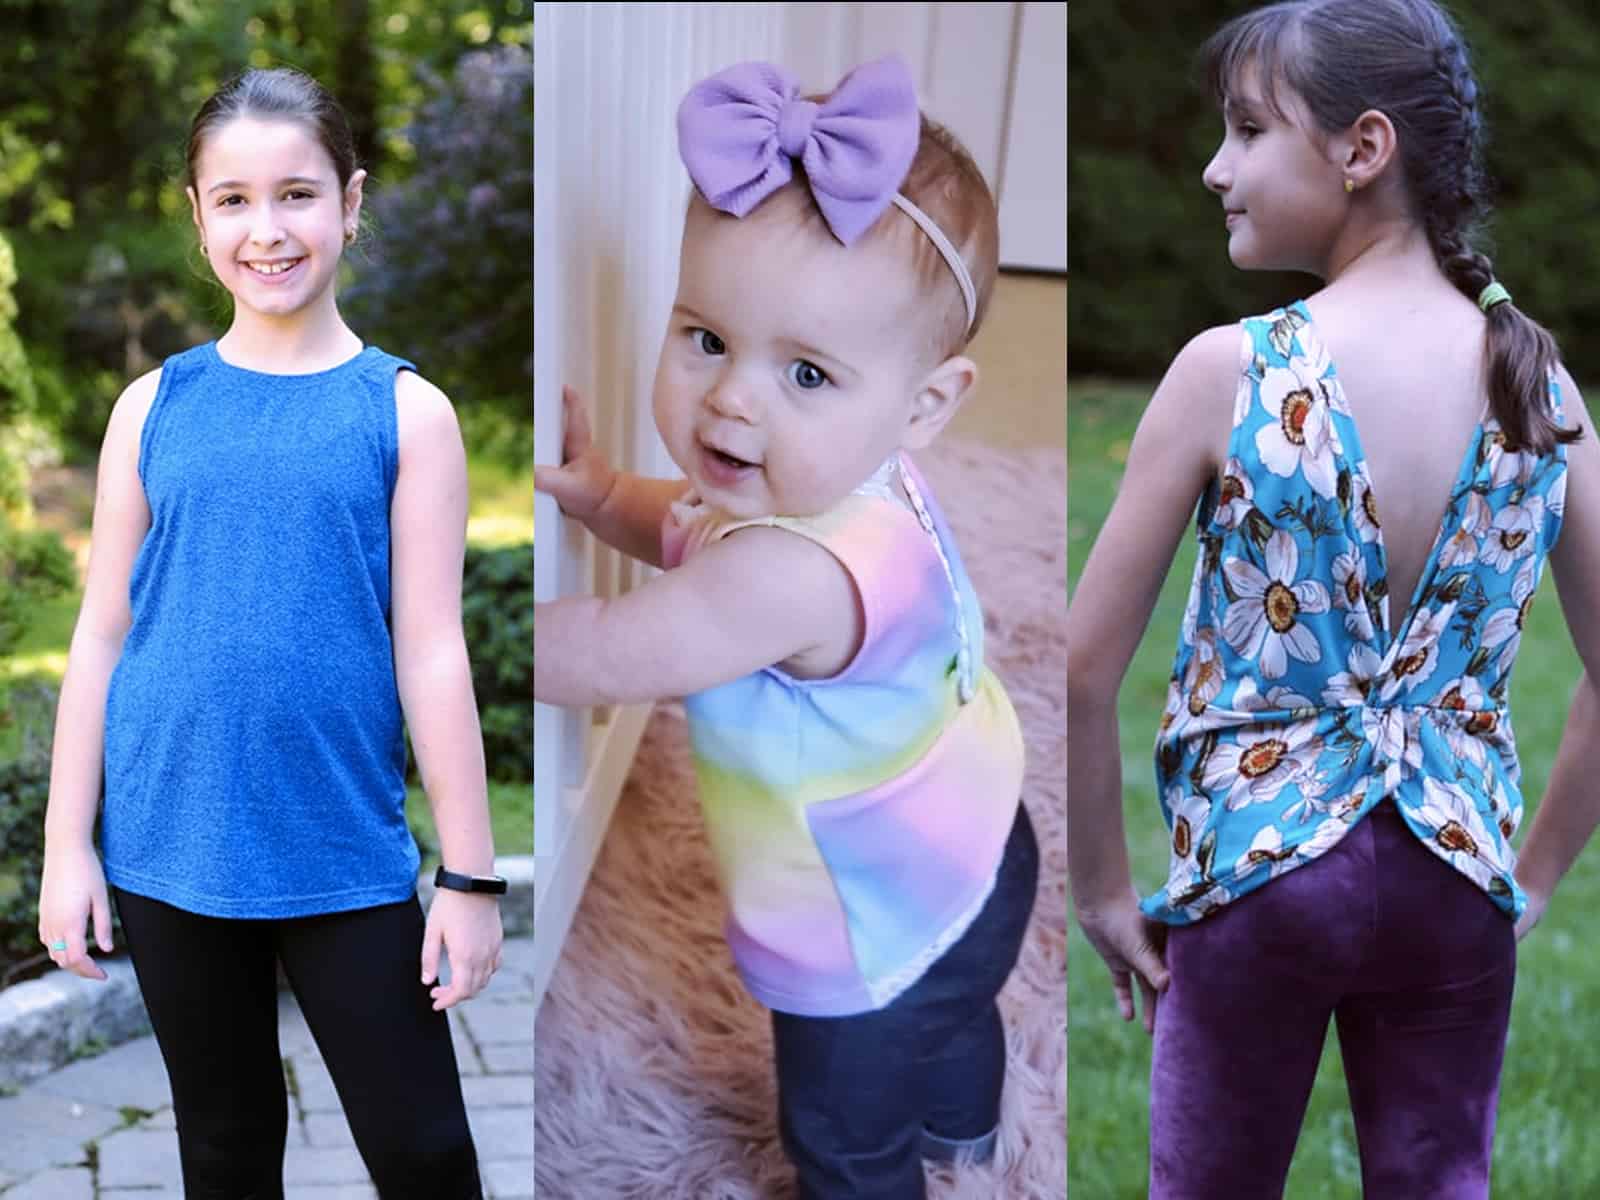
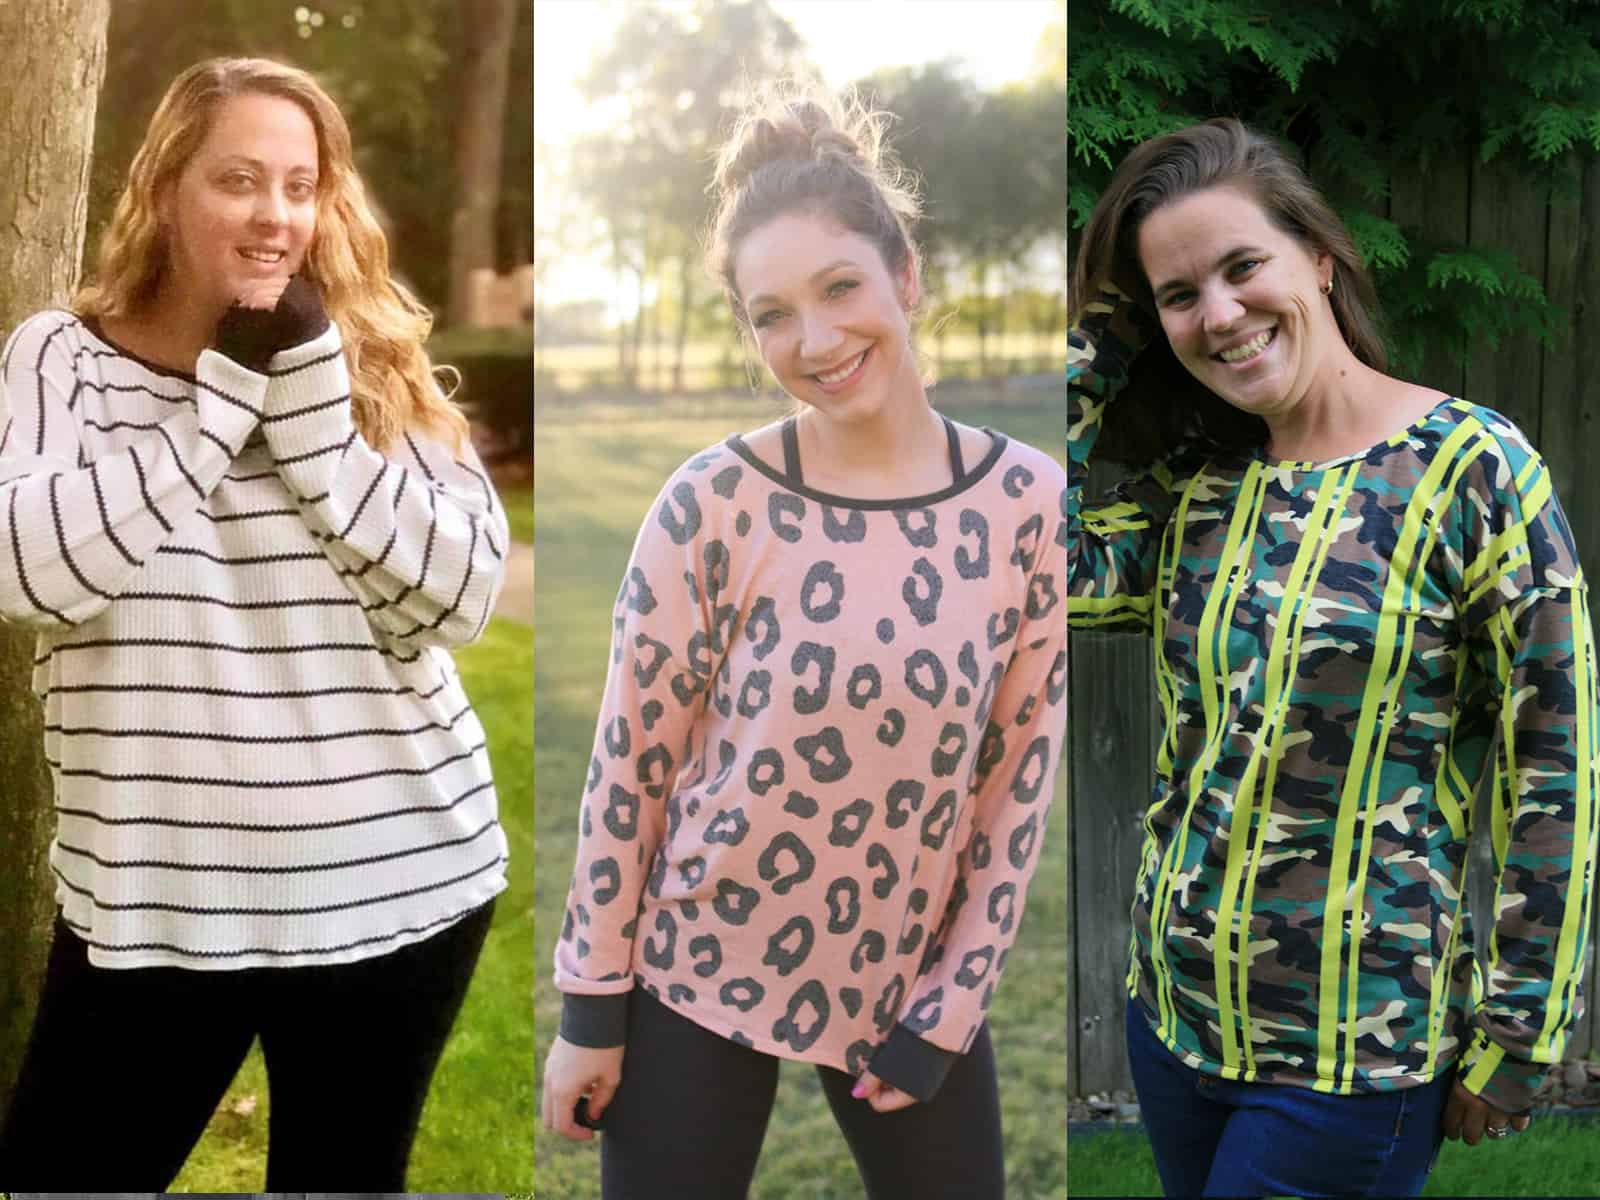
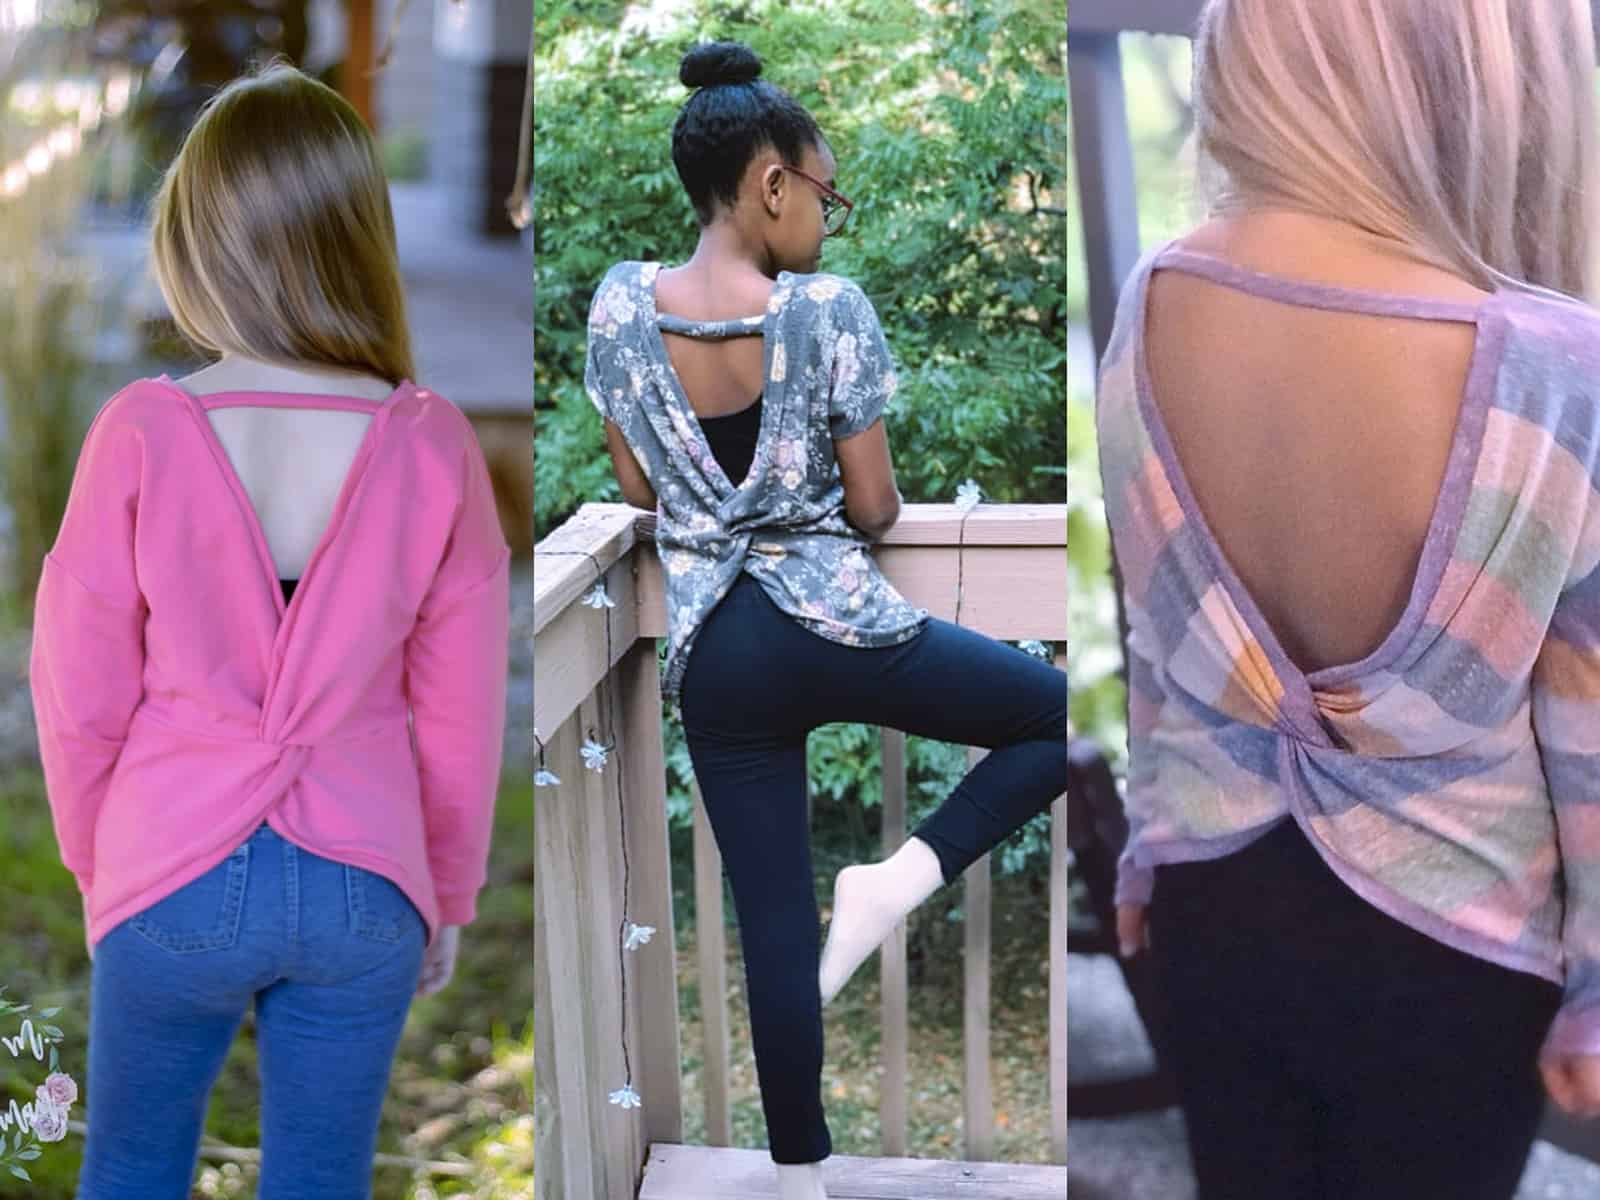
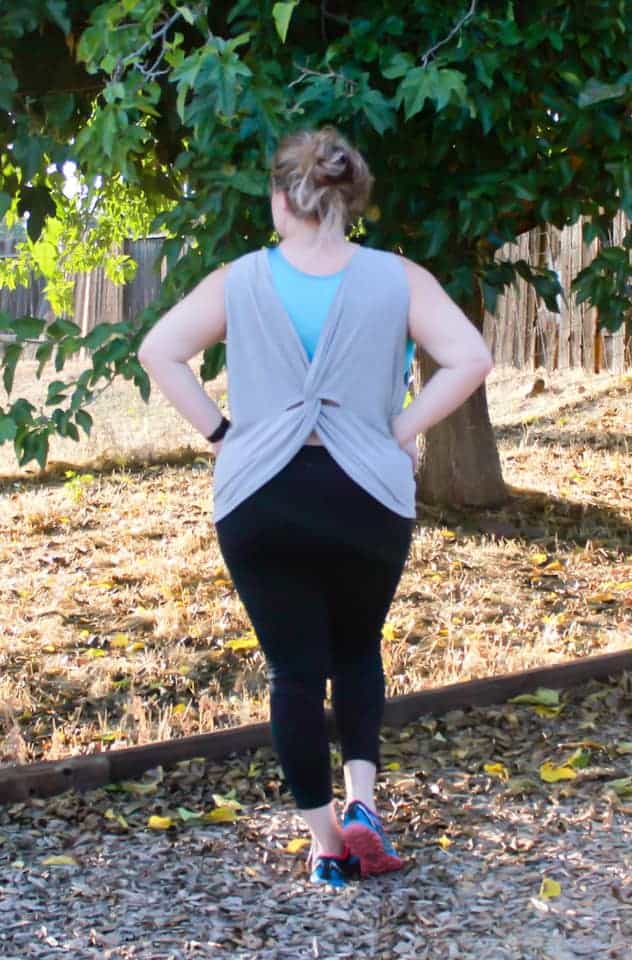
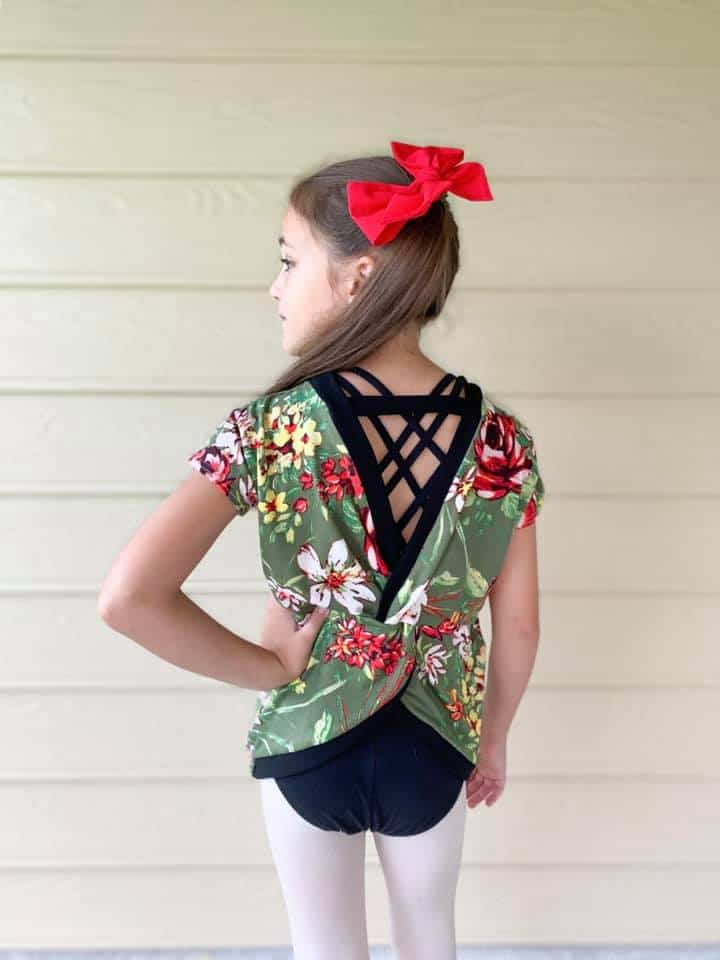
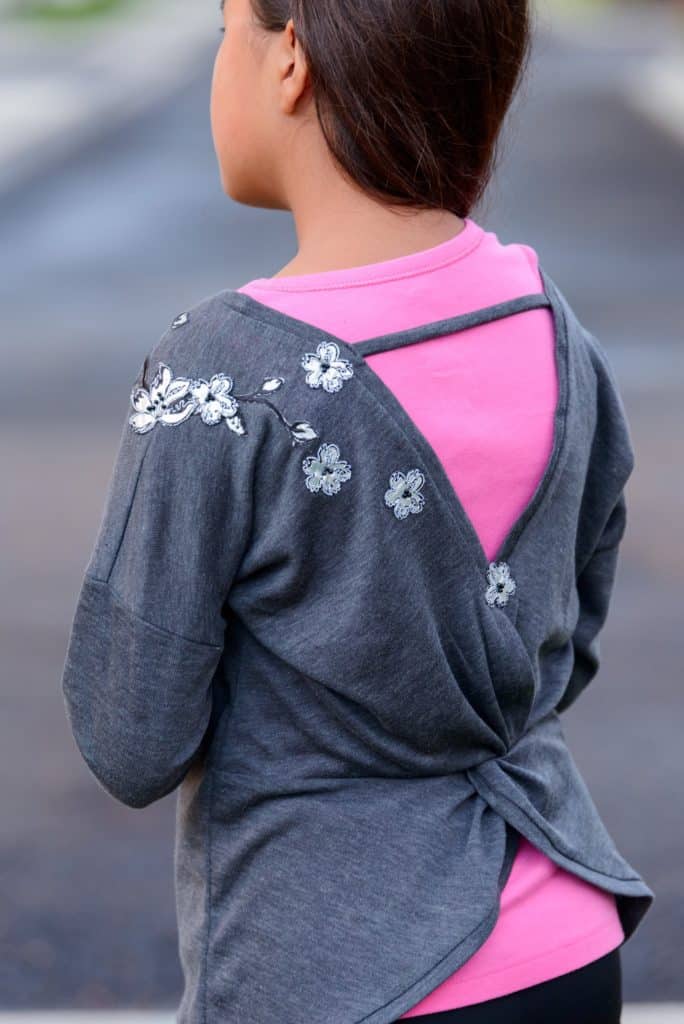
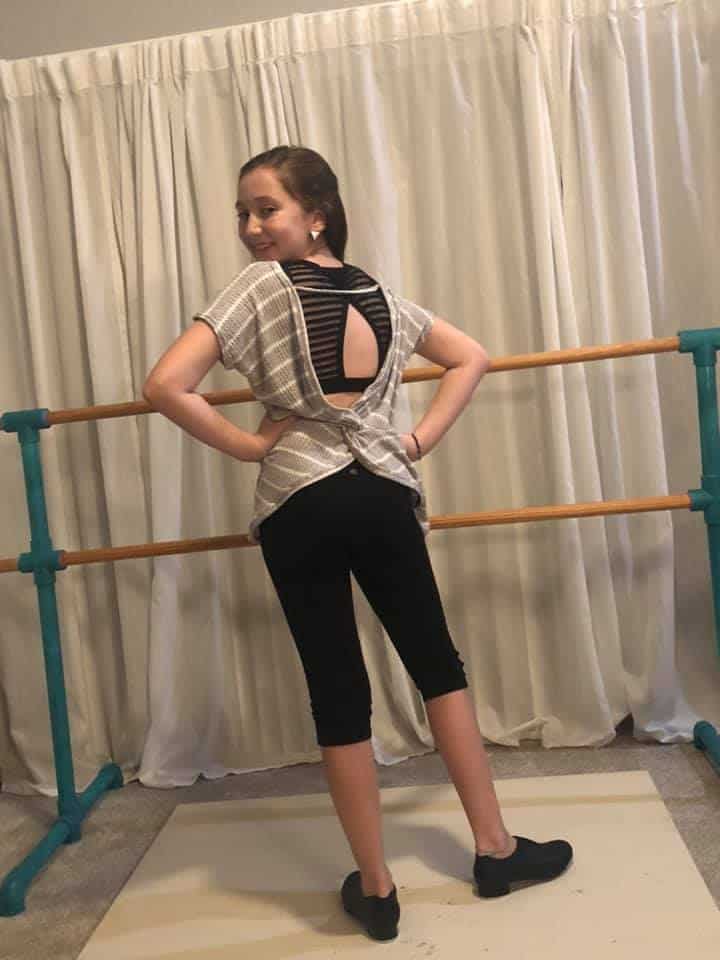
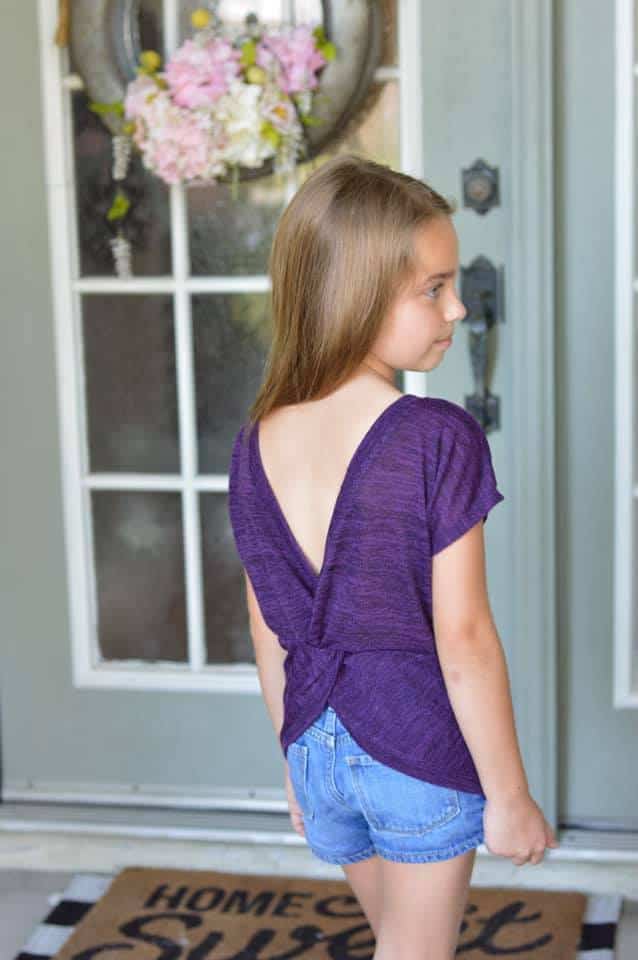
Hey there Pirates!  Have we got something incredibly fun in store for you today or what??  It’s a pattern release day and we are bringing you TWO brand new patterns that you’re just going to love.  I promise.  Let’s meet the Twist Back Tops, in both adult and youth sizes!
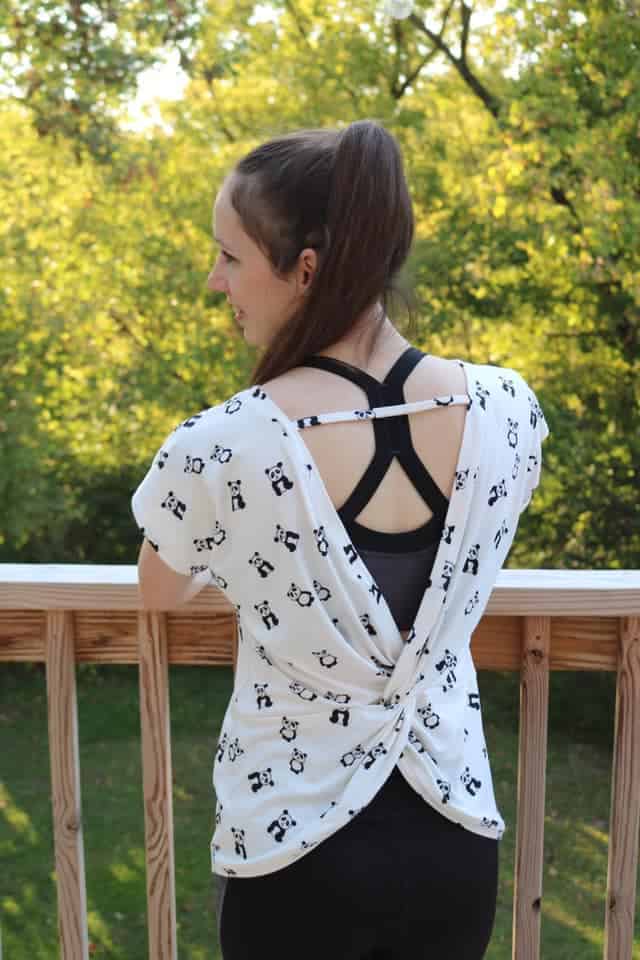

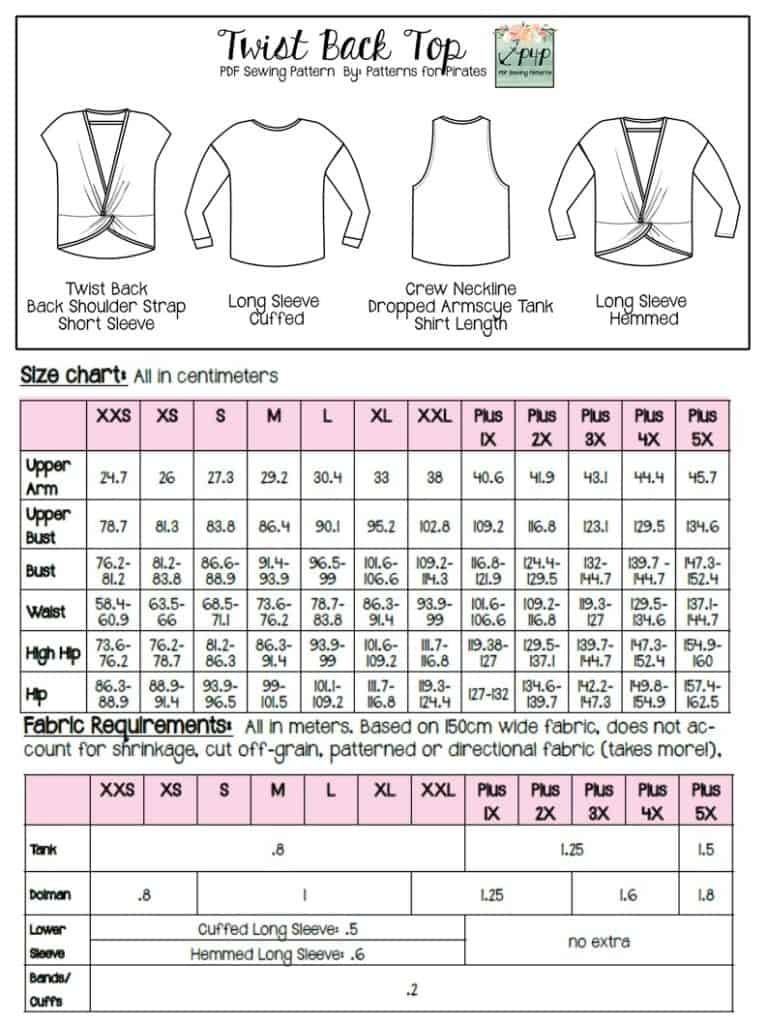
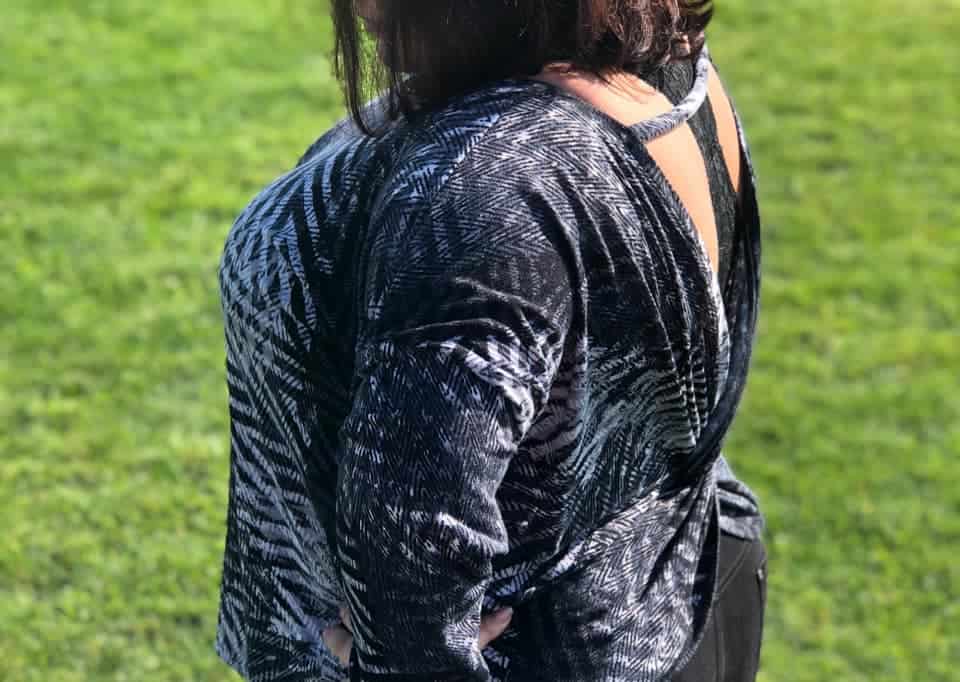
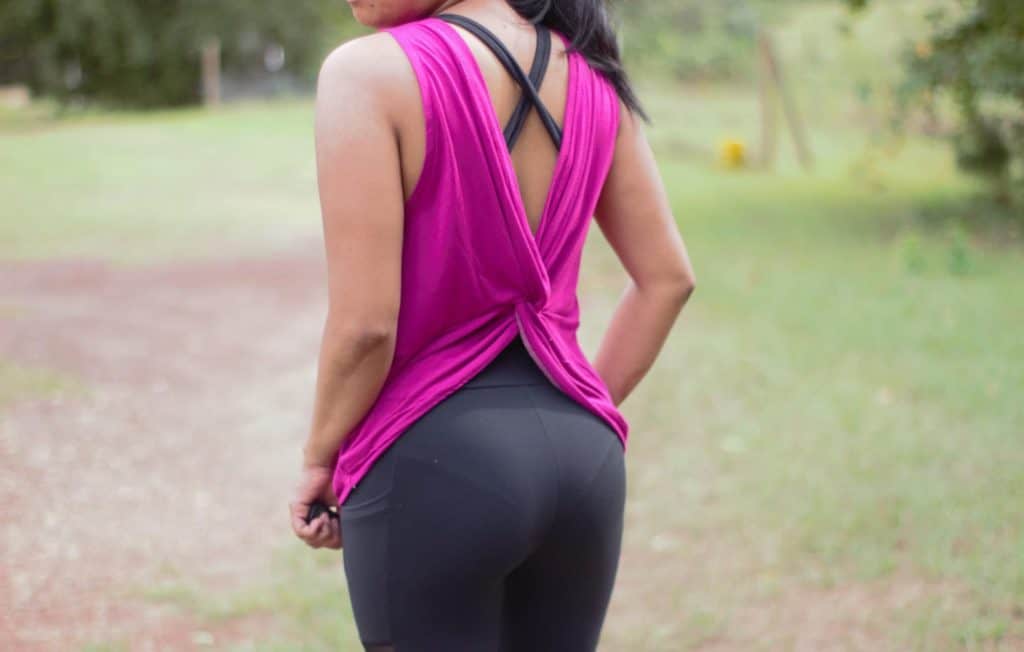
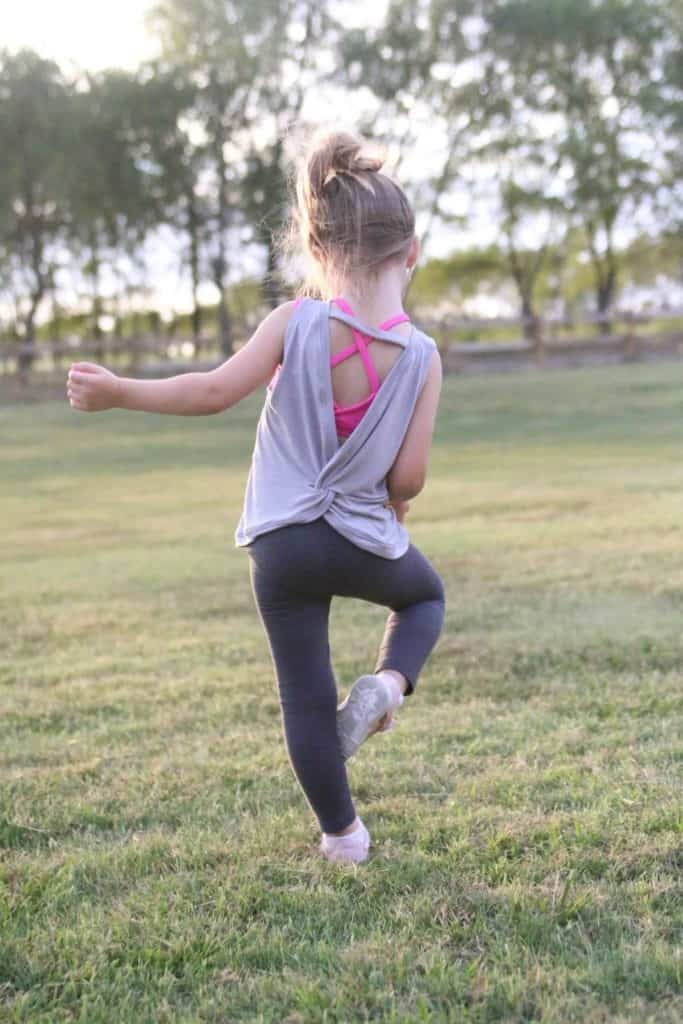
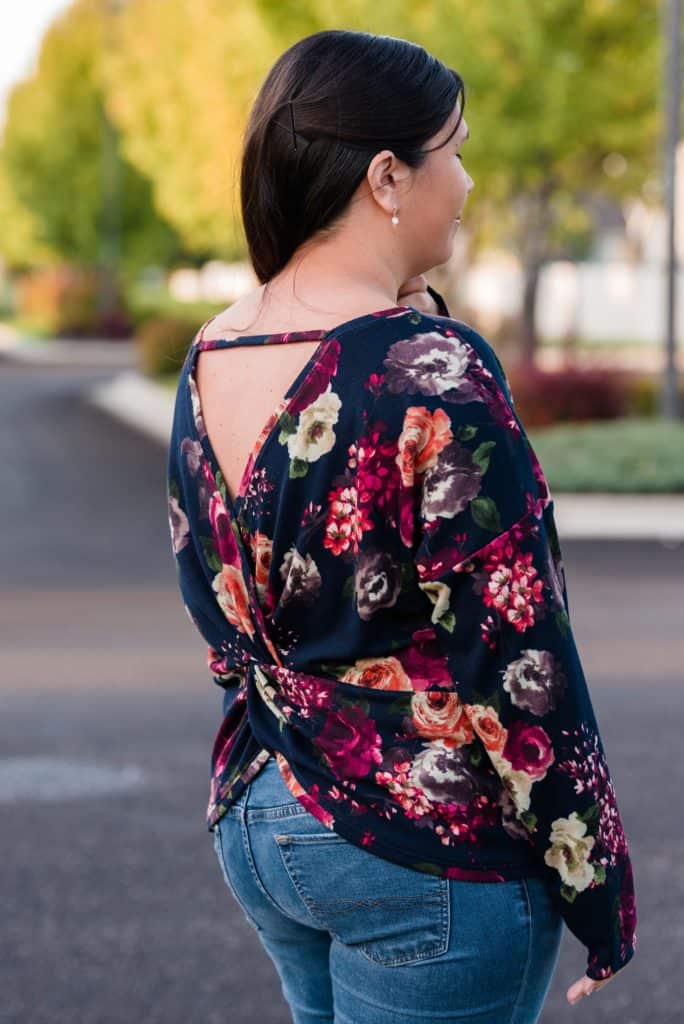
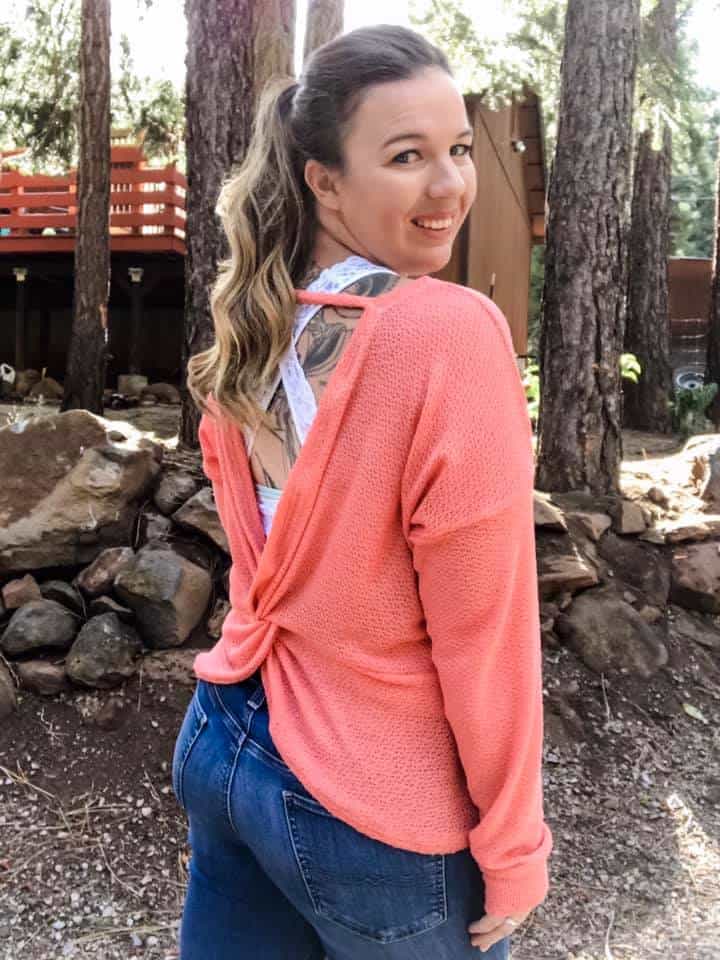
This pattern is quick and simple sew that will impress! It has a dropped dolman sleeve style with a loose, slouchy fit throughout the sleeves and body. It is semi-fitted through high hip. The tank option makes for a great work out or summery top. The Twist Back Top also includes a short sleeve dolman sleeve you can add a bit more coverage, but still keep cool in those warmer months. You can add long sleeves and create a super fun sweater or pull over for the colder months. The extra long sleeve length will make you feel like curling up and snuggling! The adult sizing has a tank neckline that is a classic crew and a wider neckline for the dolman sleeve options. This pattern includes a back shoulder strap to keep the shoulders where they should be, or you can leave it off and have an off the shoulder style with wider neckline on the sleeved options. The open back is perfect to throw on top a leotard, sports bra, or tank.

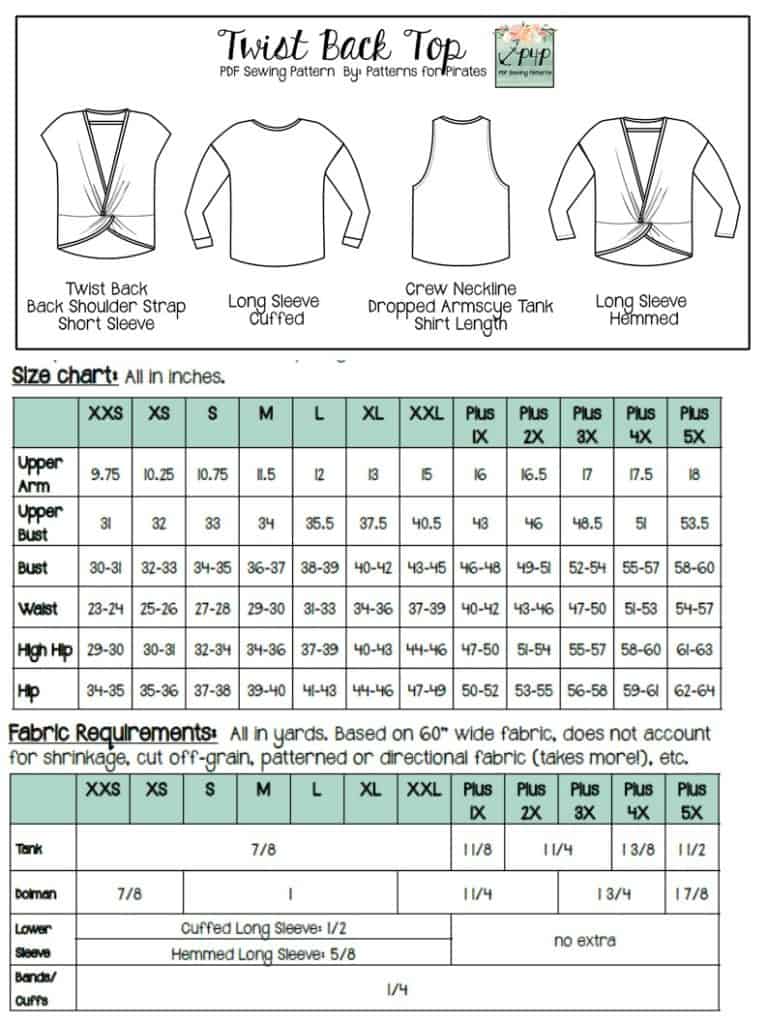
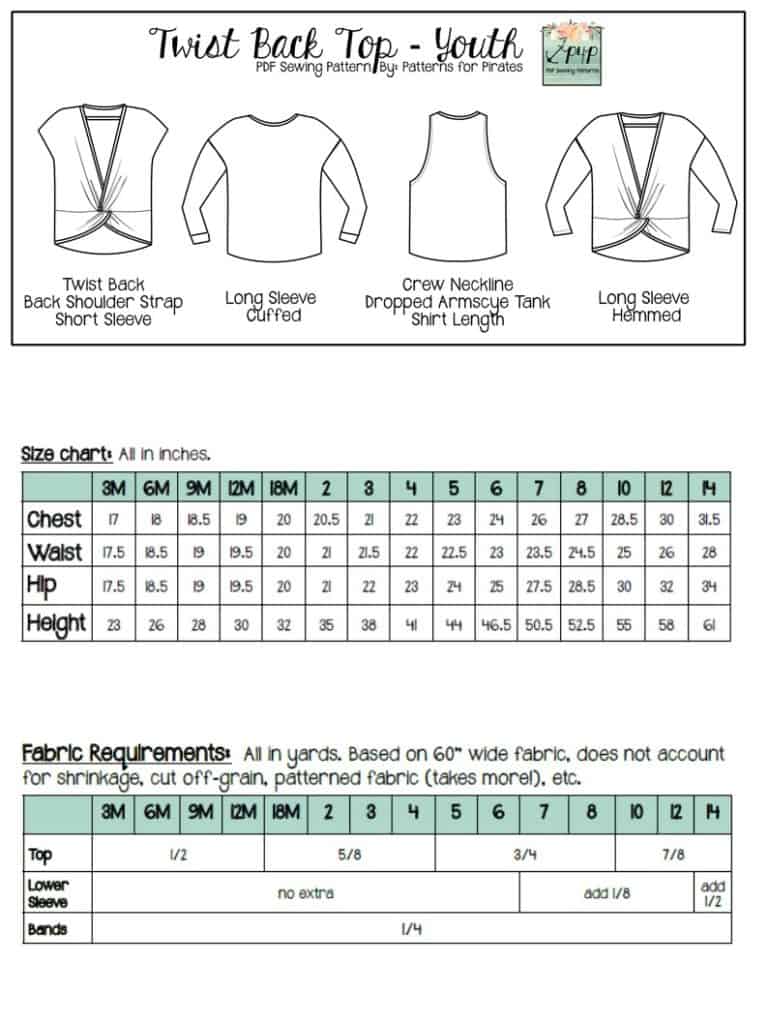
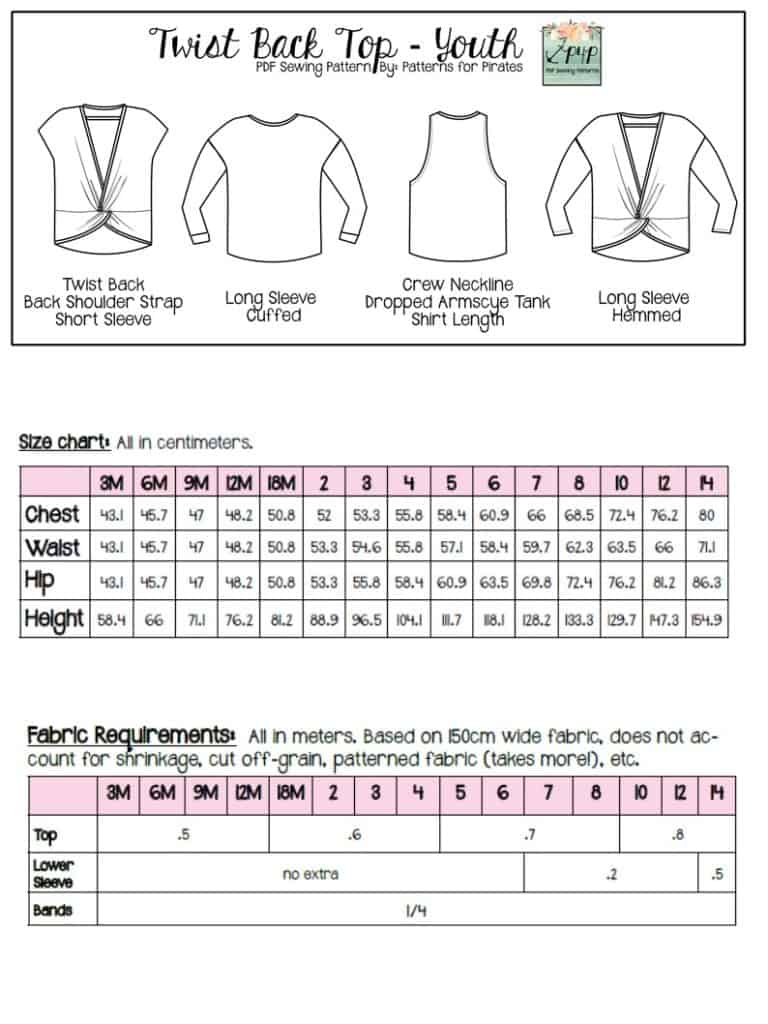
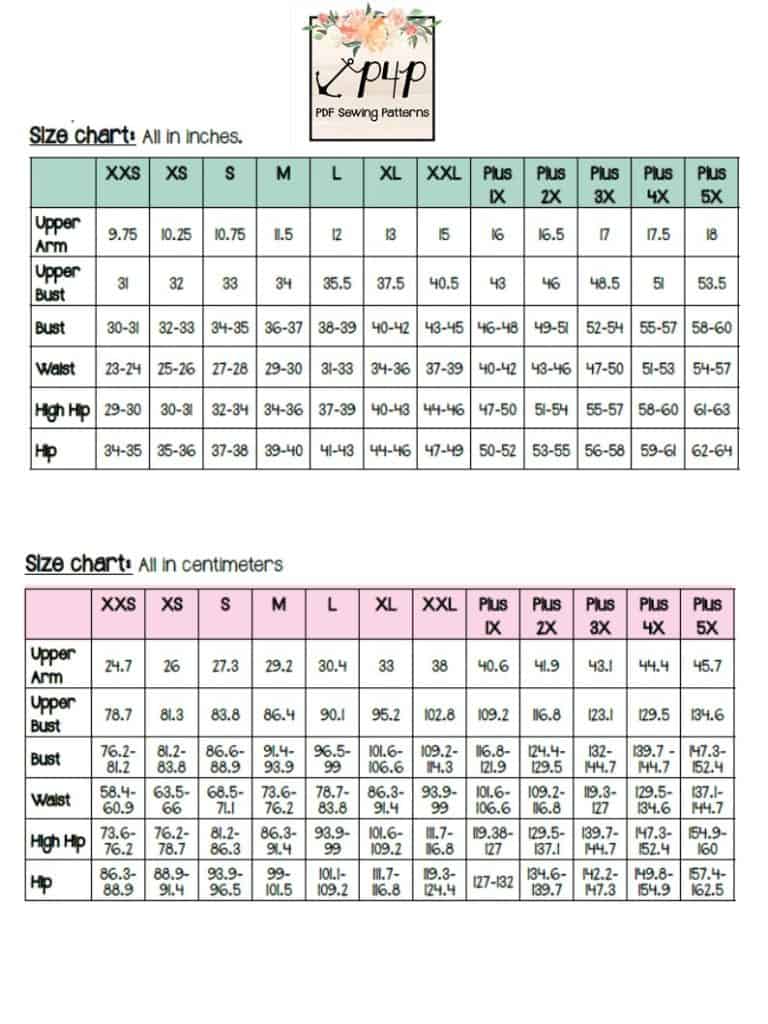
The youth pattern covers a size range from 3M – 14.  As for the adult version of the pattern?  We just extended our sizes even more!  You’ll find it drafted for XXS – Plus 5x now!  Please check the size charts, as there were slight adjustments made to accommodate the new size range.

Imperial
Metric

Imperial- Youth
Metric- Youth

**Want to learn more about how to measure yourself for this pattern?  We’ve got you covered with an in-depth blog HERE.  And in case you’re new to Patterns for Pirates and PDF patterns in general, we have a great blog full of new-user tips HERE to help you get started!  As with all of our current releases and updates, the pdfs now include our layers feature and can be found in Letter, A4 and A0 sizes.  And for even more helpful fun, we have a *free* printable that you can use to help record your measurements as you take them.

Let’s take a quick look at the different options!

TANK TOP

SHORT SLEEVE

LONG SLEEVE

LONG SLEEVE W/CUFFS

OPTIONAL BACK STRAP

Should we talk about fabric choices for the Twist Back Tops?  We recommend a fabric with a good drape to it.  While fabric bases like french terry and sweatshirt fleece will work, they’ll end up a bit more “boxier”.  So if you’re looking for that perfect slouchy, twisty top…we recommend fabrics like: Rayon Spandex, Double Brushed Polyester, and Sweater Knits.

RAYON SPANDEX


DOUBLE BRUSHED POLY


SWEATER KNIT


Another change you might notice on these new patterns is a little surprise for our overseas pirates who use metric measurements! We now will include BOTH imperial and metric measurements to help everyone understand the charts as quick and easily as possible! Yay!


Ready to dive right in and make your new favorite top?  Go grab the patterns now!

TWIST BACK TOP | TWIST BACK TOP – YOUTH | TWIST BACK TOP BUNDLE

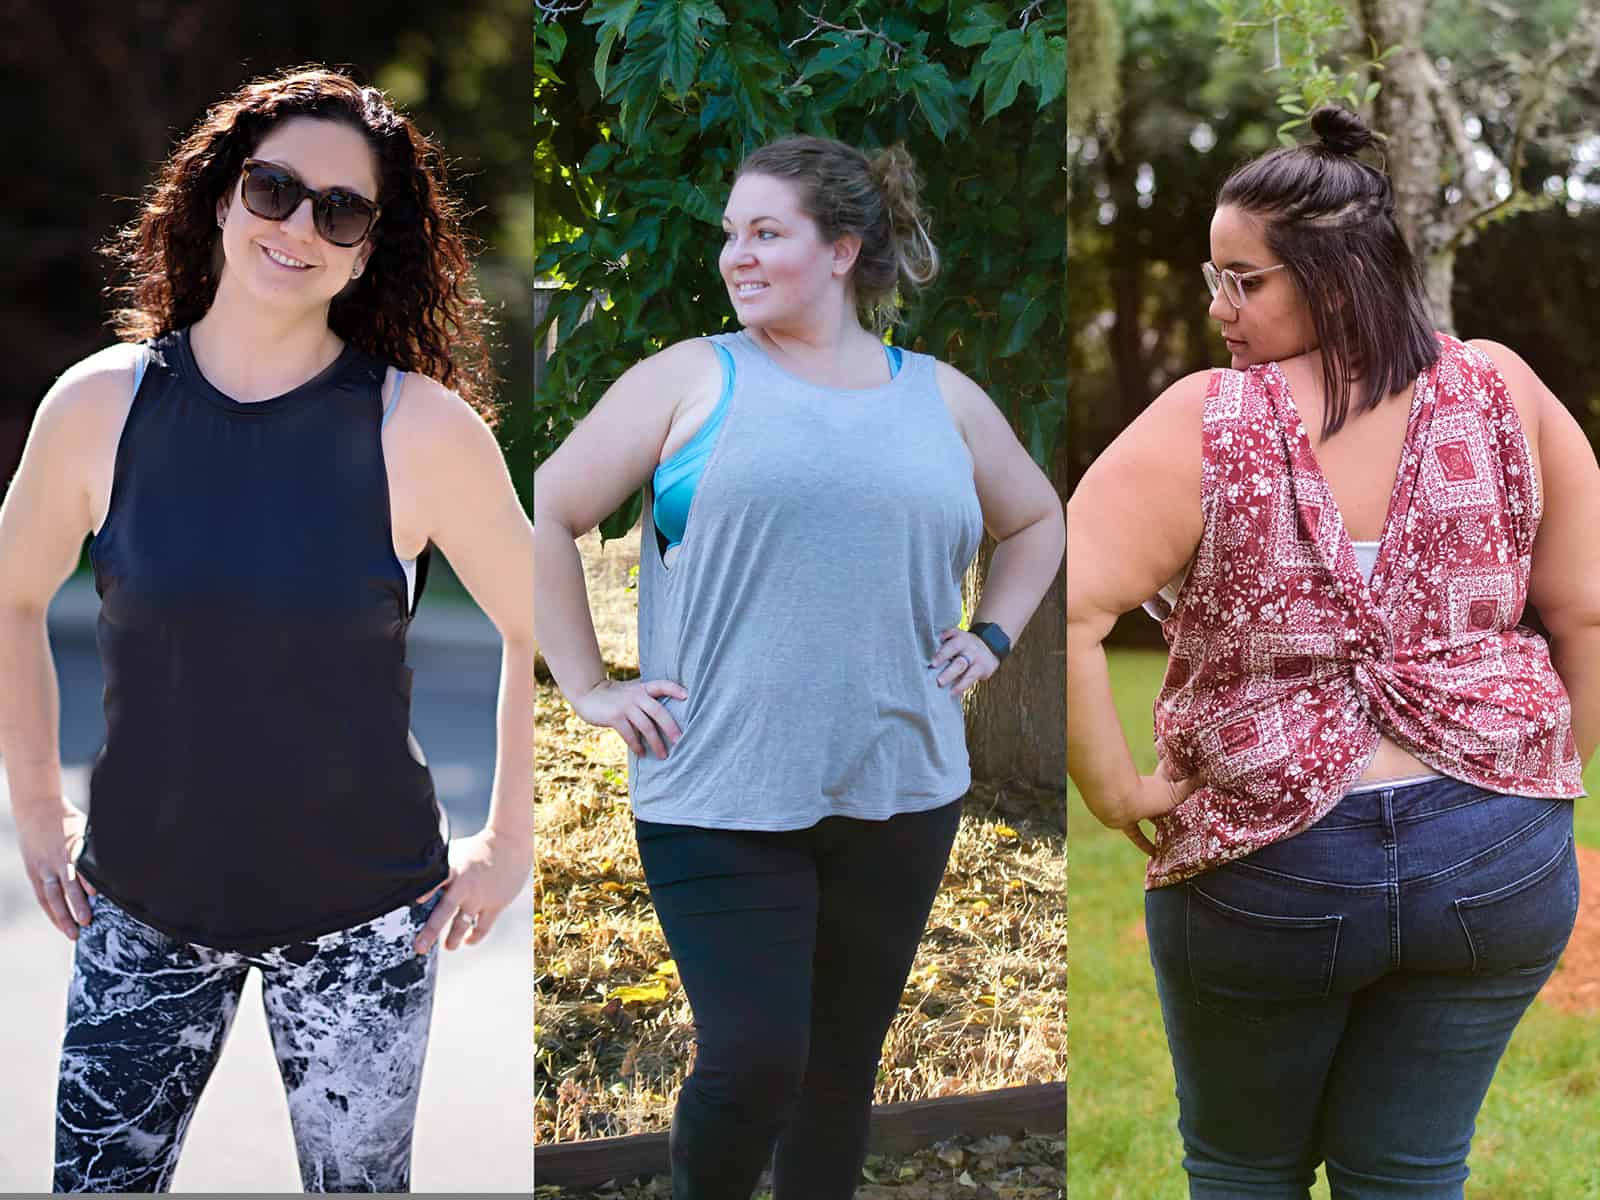
Hoping for a little inspiration before you get to sewing?  Just take a look at this pattern on all of the amazing shapes and sizes of our testers, and get a look at more examples of all the options in our albums in the P4P Facebook group!

Twist Back Top Album | Twist Back Top – Youth Album

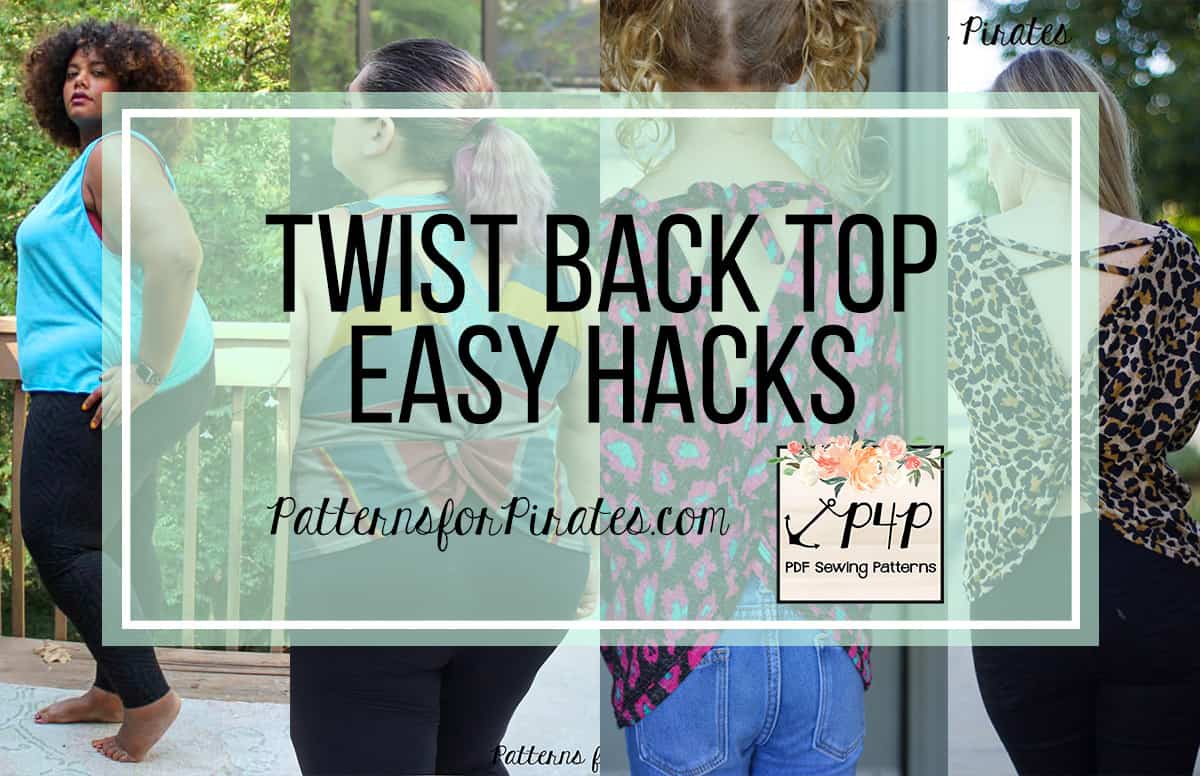
And if our pattern alone doesn’t provide enough options for you, we’ve also included a blog post that will help take the Twist Back Tops to the next level!  Go check out our Easy Hacks Post to see how to make some slight alterations to the original pattern, to customize it even further!

The release sale (no code needed) will be through Monday September 30th (11:59PM US Central Time Zone).

Happy Sewing, Pirates!

Filed Under: Pattern Release 2 Comments

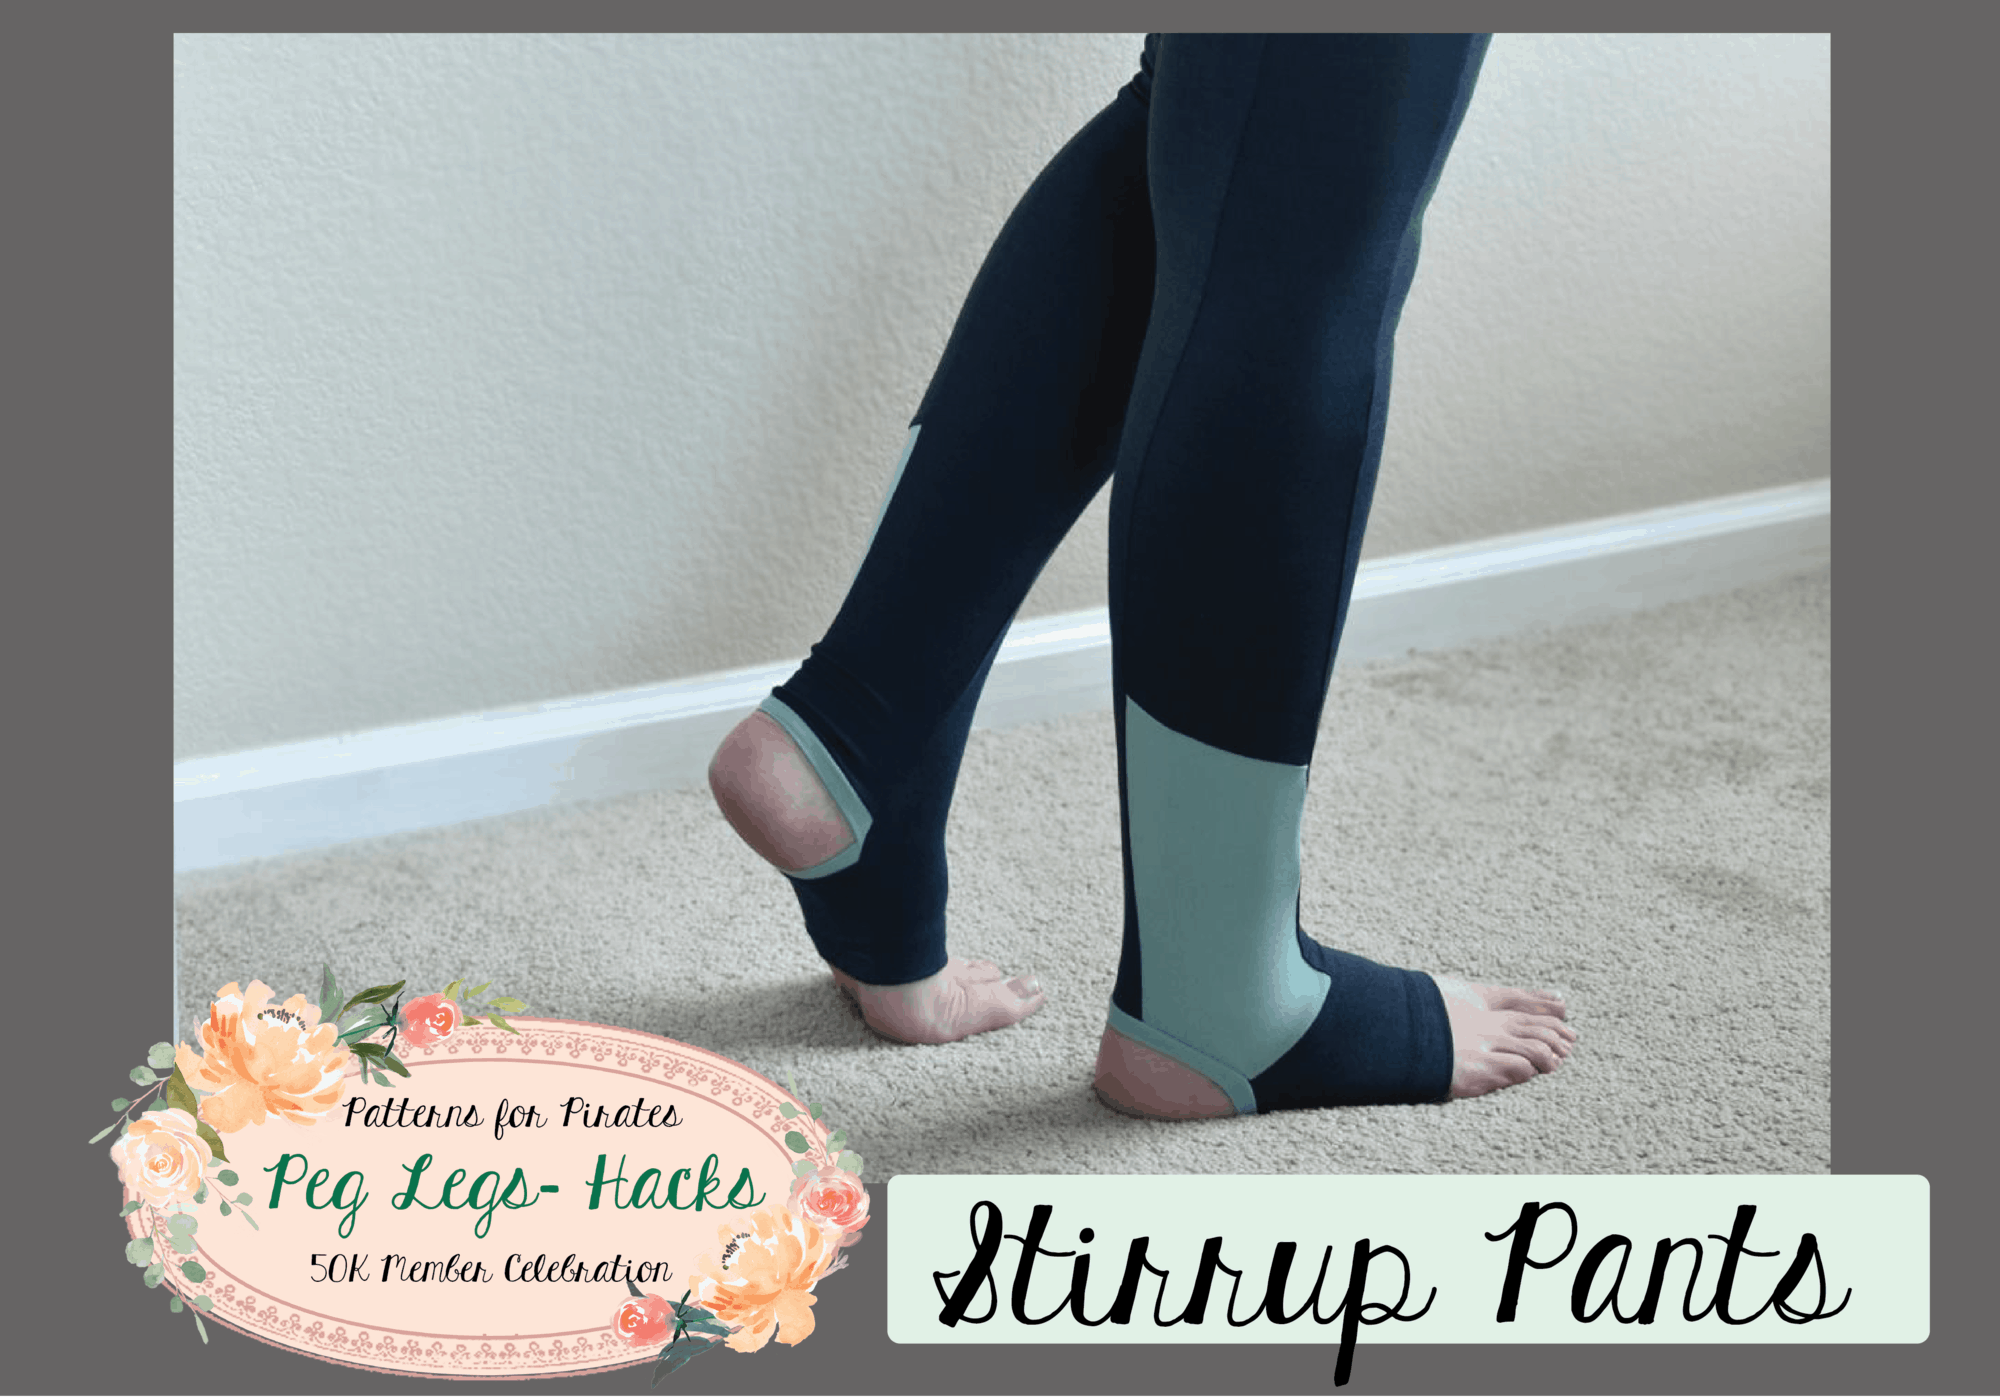
50K Fan Celebration :: Stirrup Pant PegLegs Hack

April 22, 2017


Written by Kelly Bailey (P4P Blog Contributor)

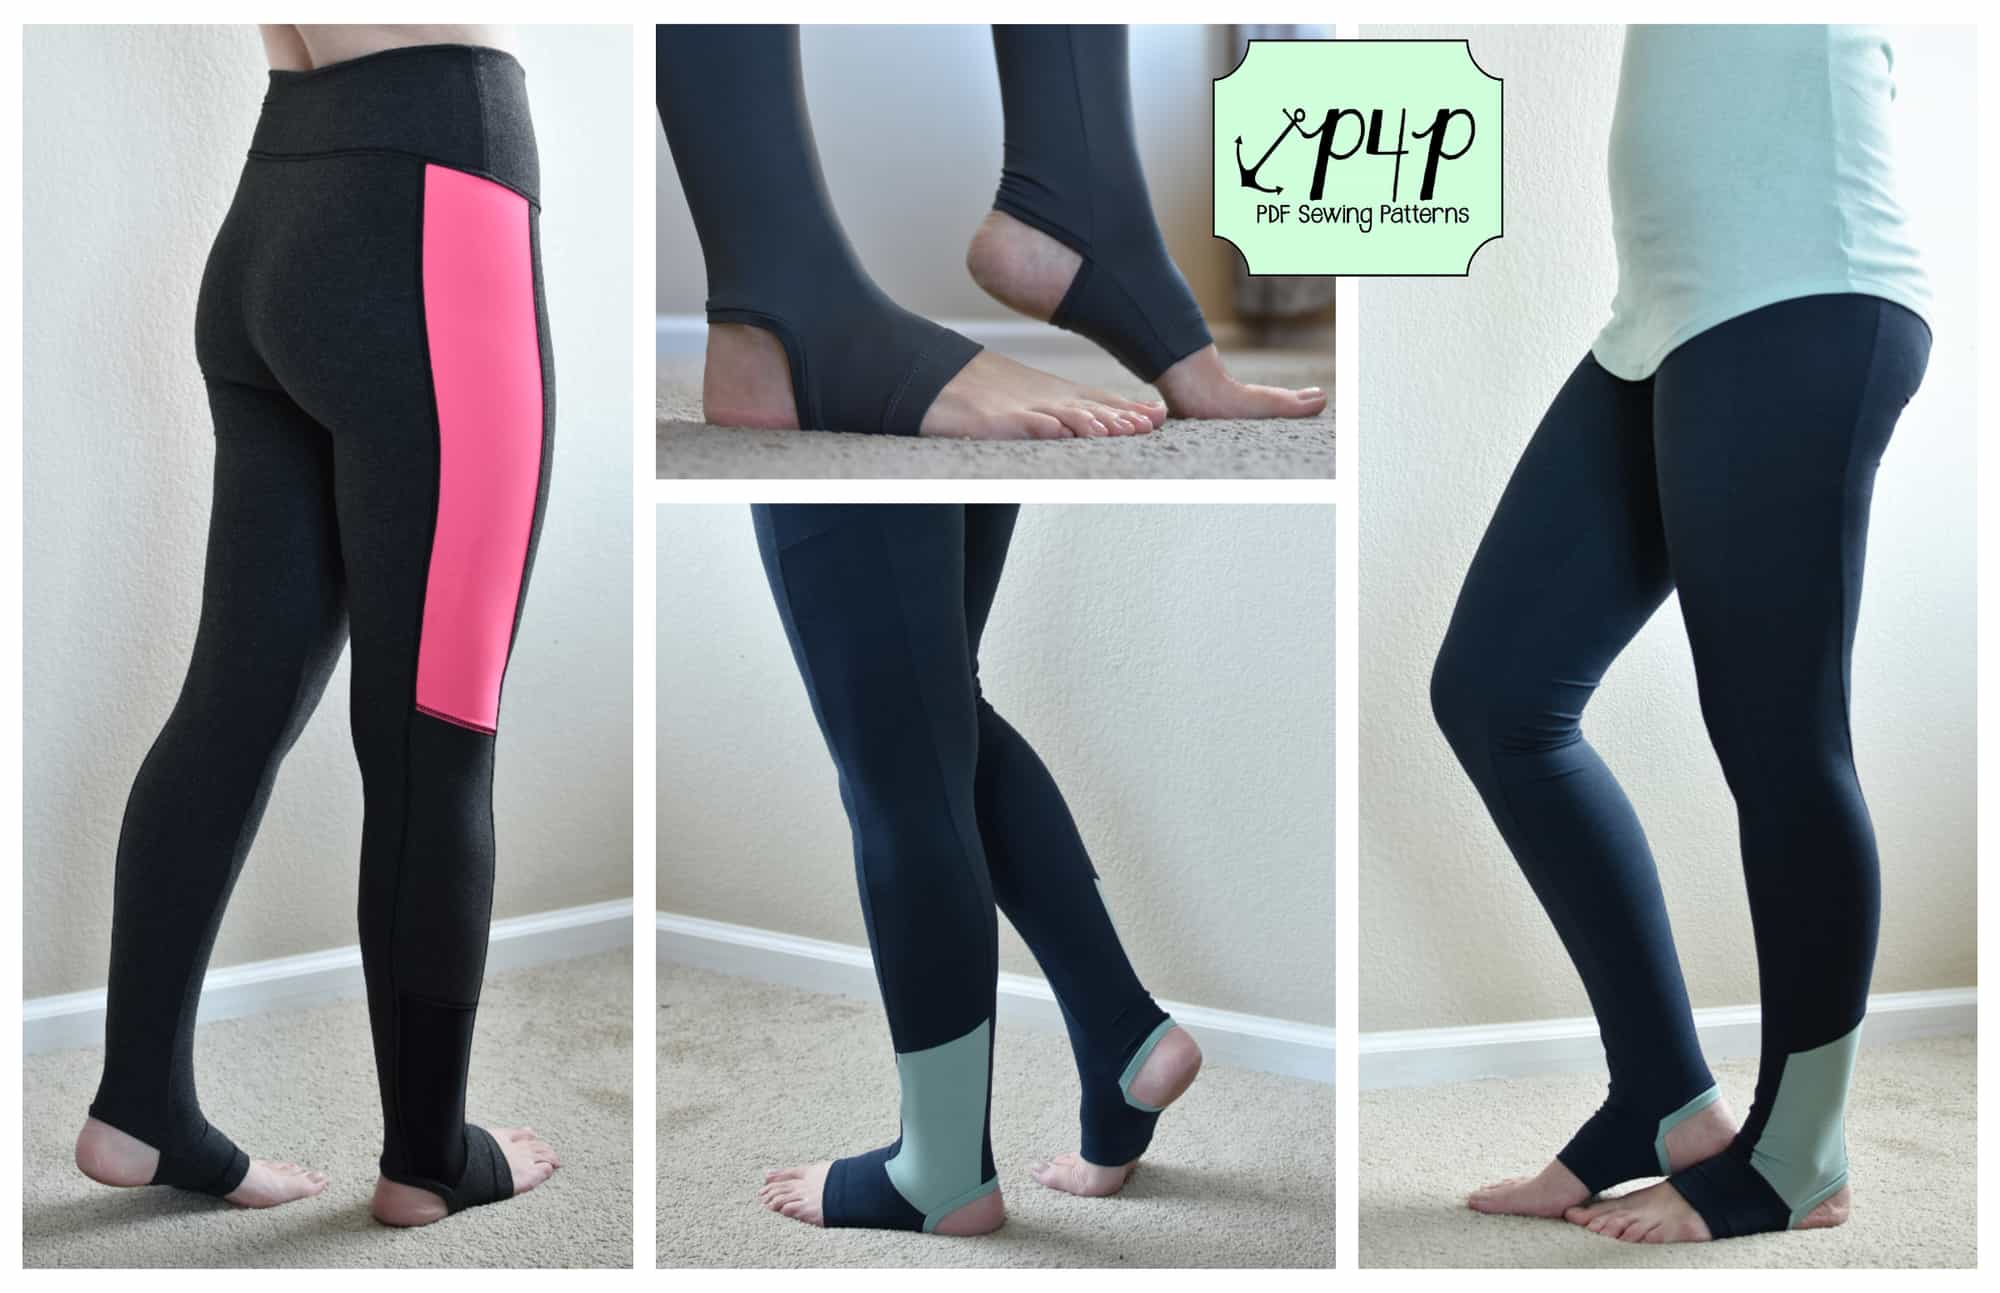
For this tutorial I will be showing you how to take the updated Patterns for Pirates Peg Leg pattern and hack it into a pair of leggings featuring the stylish yoga stirrups! Have you seen these store purchased versions in your gym classes, or maybe on Pinterest, or maybe you’ve been looking for a comfortable pattern for stirrup leggings to compliment a casual outfit? This simple hack is both comfortable and durable. Follow along with this tutorial and please share your results in the P4P sewing group!

Step One: Fabric

My first, and most important, advice is to choose your fabric wisely. This pattern is intended for 4-way stretch knit with at least 50% stretch. See Peg Leg 101 to review the way the fabric contents and stretch will affect your results. Not all knits are meant for leggings due to the degree of stretch this pattern requires. For all 3 of my versions I have used a brushed polyester spandex knit with varying weights. Athletic knits, such as supplex or heavy weight brushed poly, are the best option if you intent to vigorously work out in your finished garment.


Step Two: Stirrup Pattern Piece

Print out and assemble your Peg Leg pattern as normal, being sure to add or take away height as necessary for you. See Peg Leg 101 for more information on how, where and when this is necessary. The Peg Leg pattern is drafted for an average height of 5’5” and an inseam of 28”. This hack can be applied to both the “plain” version and the “color-blocked” versions. Beware that once you’ve sewn this up you will not be able to simply trim off length at the very end of construction as you would with the standard pattern. So be sure to make a traditional pair and know these height adjustments before attempting this hack.

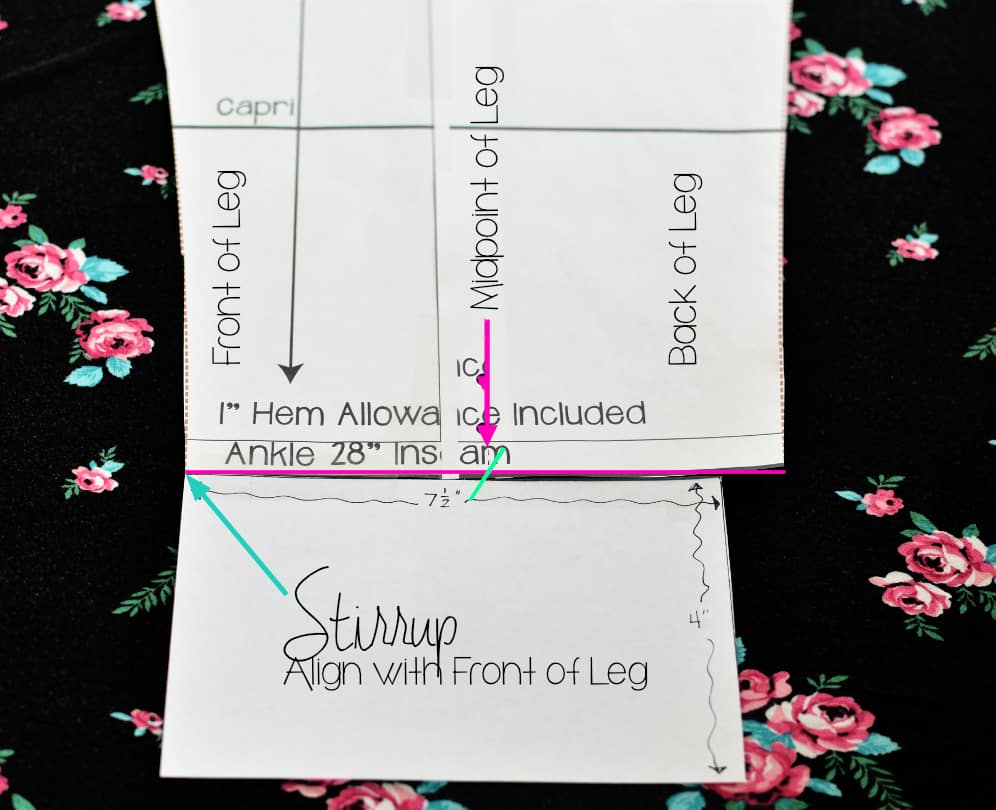
Next cut out a paper rectangle measuring 7.5” x 4”. The 4” height fits my size 9 foot perfectly but you may need to add or remove a little bit to that measurement depending on your shoe size.

Step Three: Modifying the Peg Leg Pattern

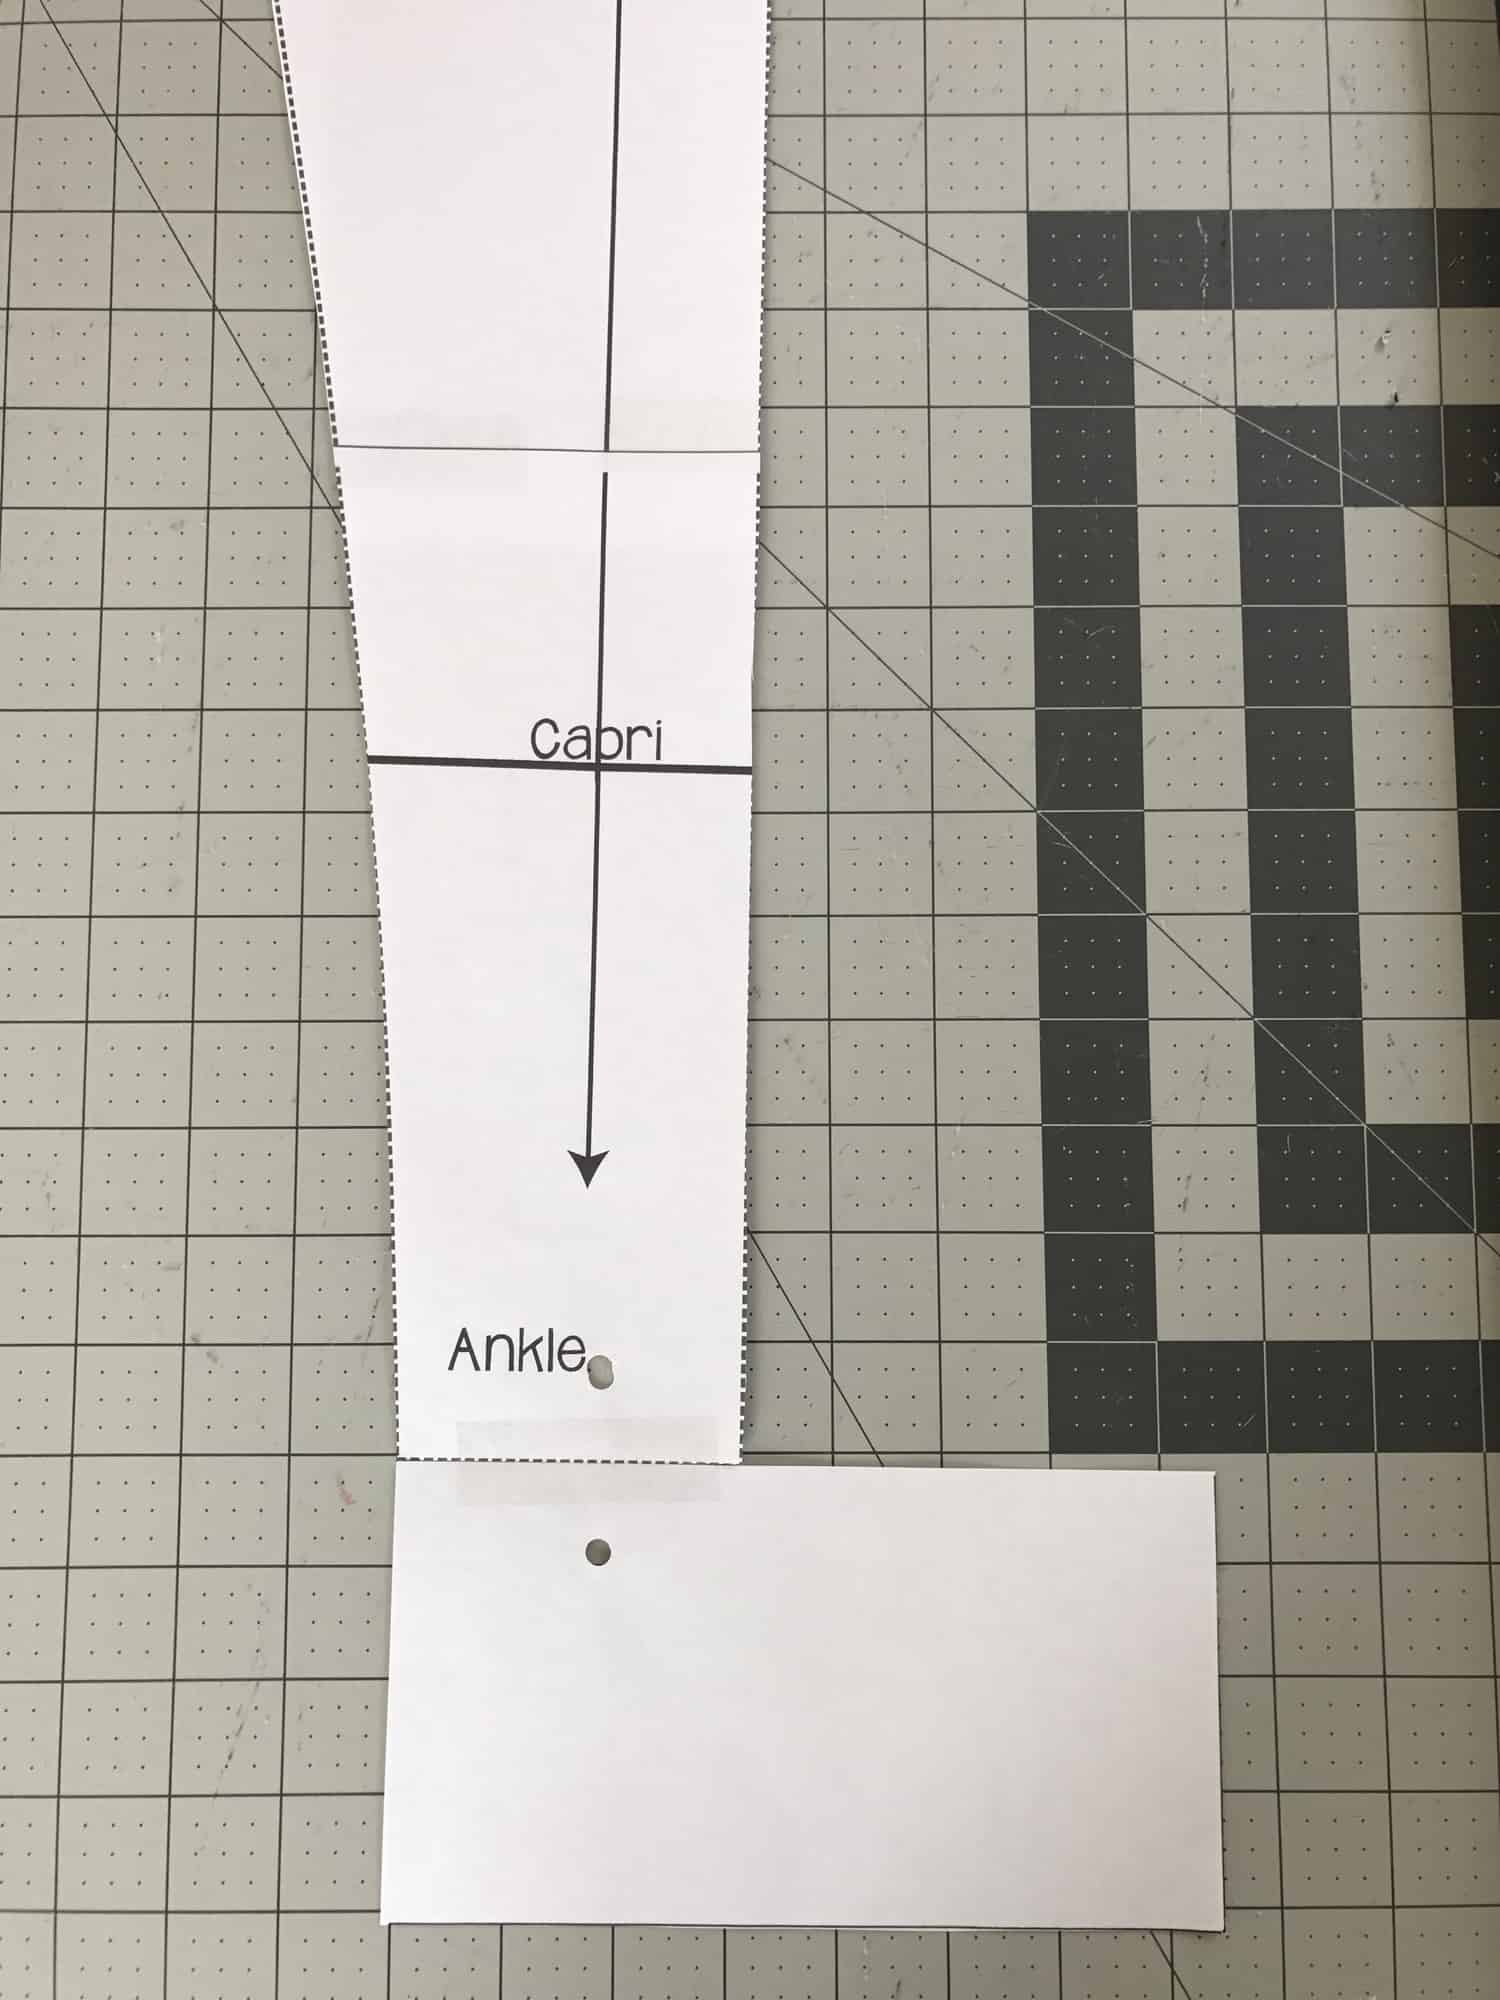
If you’re modifying the “plain” version tape your rectangle to the ankle of your peg pattern as shown. Be sure to pay attention to the side you’re attaching the rectangle to. You want to line the edge of the stirrup rectangle with the FRONT side of the leg piece.

If your modifying one of the “color-blocked” versions line up and attach your stirrup rectangle with the edge of the FRONT pattern piece as pictured.

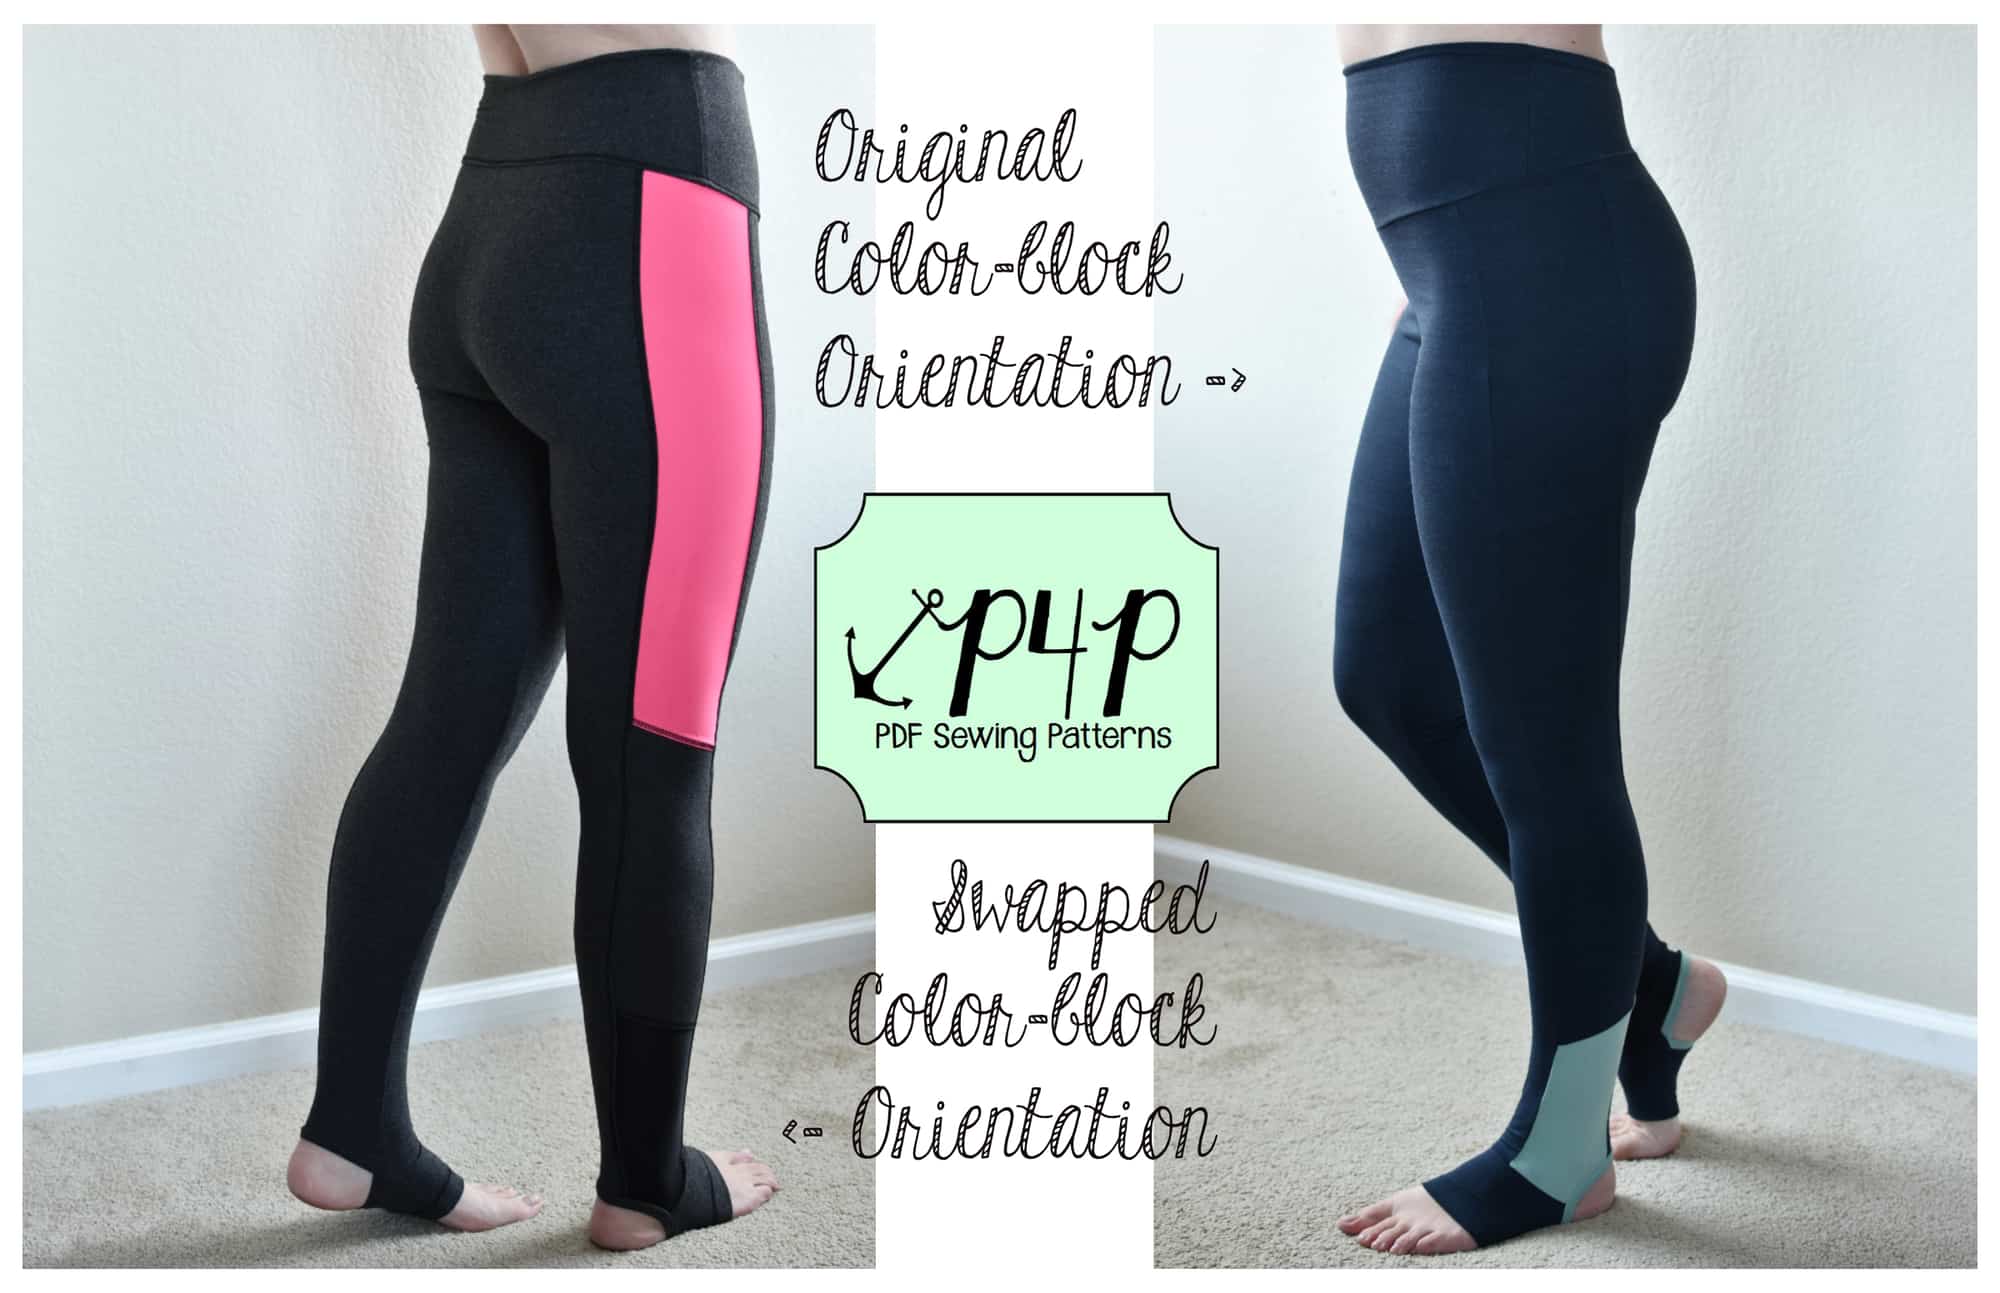
NOTE: You can switch up the top and middle color-block panel pieces and the pattern will still go together without issue if you are not attaching the pocket. If you do attach the pocket still, it would just sit lower on your leg. My charcoal and hot pink pair show what this swap looks like. My navy and seaglass version show the color-block panel assembly as instructed in the original pattern. I also chose to give a faux flatlock look to my pink version. Follow Alex’s decorative top stitching blog to get this look yourself!

Step Four: Cut Out Your Pieces & Assemble Color-block

Use your modified pattern to cut from your fabric all legging pieces. Add to this the addition of two 1.25” x width of ankle strips with the greatest stretch going with the longer length. Theses will be the bands that stretch around the heel of your foot. The width measurement will leave extra that will get trimmed off after attachment. For a size small I cut a 8″x 1.25″ sized heel band.

For the “plain version” make a cut in each leg piece, as shown in the image below, just to the center width of the leg. This is where you will attach the heel band.

For the “color-blocked” version you are going to sew together all color-block pieces as normal, creating two full leg pieces. You will need to pivot the seam 90 degrees to attach the stirrup to the ankle at the front of the leg. Be sure to only sew the stirrup to the halfway mark along the ankle (mid color-block). Leave the rest unattached so that you can sew the heel band in place.

Step Five: Sew Crotch Seams

Lay your fully assembled leg pieces right sides together on top of one another. Sew your crotch curves together.

Step Six: Attach Heel Bands

Press your heel bands wrong sides together lengthwise and then pin along the unfinished slit along ankle edge. Sew in place being sure to use a stretch stitch but not to stretch either the band or the leg piece.


Step Seven: Pin Inseam in Place

Start by pinning your crotch seams right sides together then go to the stirrup piece and start lining up inseams there. Work your way up the leg making sure to overlap the bands as shown in the photo below. Sew inseam together using stretch stitch. Trim off excess heel band.


Step Eight: Finishes

At this point you can attach your waistband using the directions in the patterns tutorial and then hem the bottom of the stirrups using a stretch stitch and your preferred hem width. Press.

All Done!

Try them on and enjoy. Keep your feet cozy whether in yoga class or sewing your next garment at home!


We are celebrating reaching 50K fans in our Facebook group!  To make it a party, our beloved PegLegs pattern just got an update AND some new add-ons.  Before you go running to your machine to sew up your own leggings, make sure to read our PegLegs 101 blog post.  This way, you’ll have all the the information you’ll need to make the perfect pair before you even cut into your gorgeous fabric.

But wait, there’s more!  After any good party is an after-party.  We are taking it one step further and sharing some easy hacks that’ll bring even more flavor to your favorite leggings pattern!  We hope you check them out, make your new favorite pair of leggings, and know that we appreciate every single one of you amazing sewing guys and gals!

Here are our hacks / tutorials / latest tricks:

Lace Waistband Alternative | Drawstring Waistband Tutorial
Exposed Elastic Waistband | Stirrup Pant Hack
Ruched Ankles Adjustment | Decorative Topstitching Tutorial
Ruched Side Panel Hack

Filed Under: Blog Tours, Pattern Hacks, Pattern Release, Uncategorized 2 Comments

Featured Patterns

  • Loosey Goosey Loosey Goosey $12.00 Original price was: $12.00.$10.50Current price is: $10.50.
  • Loosey Goosey- Youth Loosey Goosey- Youth $10.00 Original price was: $10.00.$8.50Current price is: $8.50.
  • Loosey Goosey - Bundle Loosey Goosey - Bundle $20.00 Original price was: $20.00.$18.00Current price is: $18.00.
  • Everyday Shirt Everyday Shirt $12.00
  • Everyday Shirt- Youth Everyday Shirt- Youth $10.00
  • Privacy Policy
  • Refund Policy
  • Affliliate Program
  • Contact Us
  • About

Copyright © 2025 Patterns for Pirates

Copyright © 2025 · Genesis Framework · WordPress · Log in