Patterns for Pirates

P4P stylish, modern, wearable patterns

  • Home
  • Blog
    • Frequently Asked Questions
    • Pattern Releases
      • Free Patterns
    • P4P University
      • Fitting
      • Sewing with Stretch, Knit Fabrics
      • Sewing with Woven Fabrics
      • Sewing Machines
    • Sew-A-Longs
    • Fabric for Pirates
    • Pattern Hacks
    • Announcement
      • Blog Tours
      • Contest/Giveaway
  • Shop
  • Bundle Discounts
  • Flash Friday
  • Gift Cards
  • My Account
  • Cart

Harvey Relief Thank You!

September 3, 2017

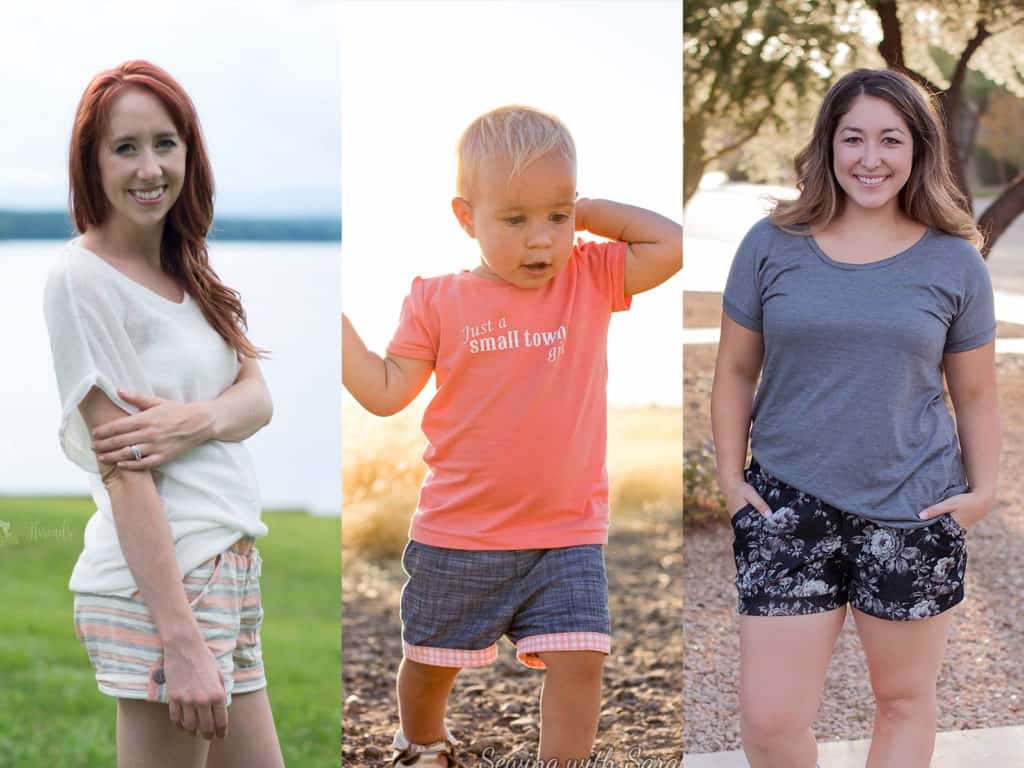
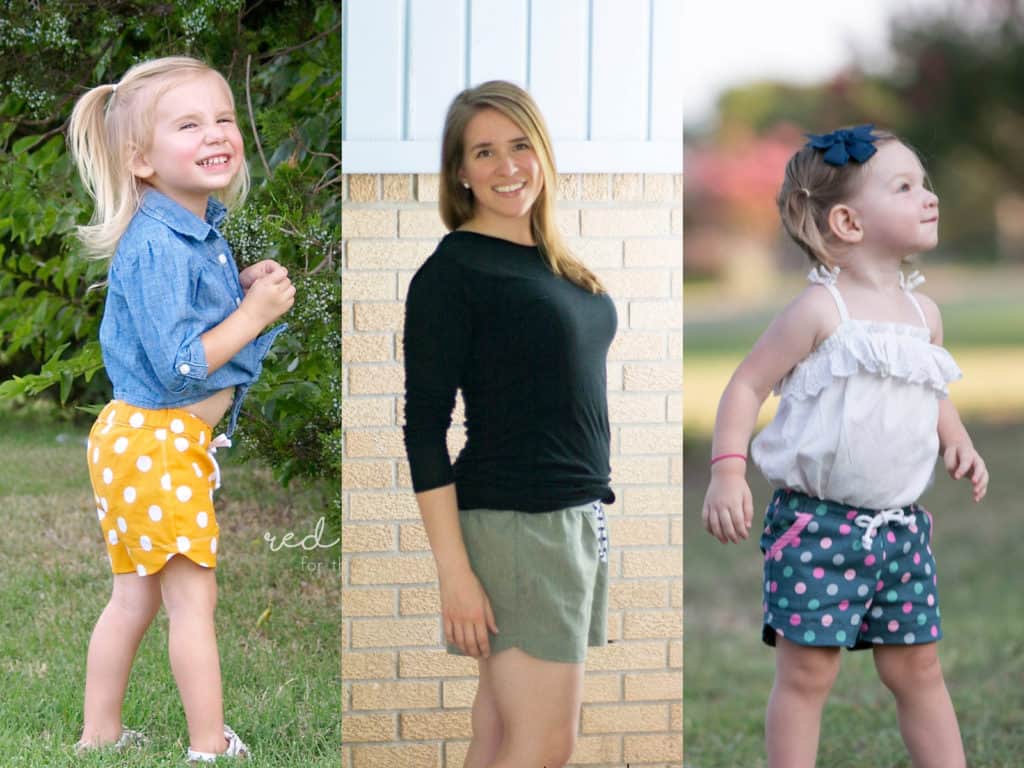
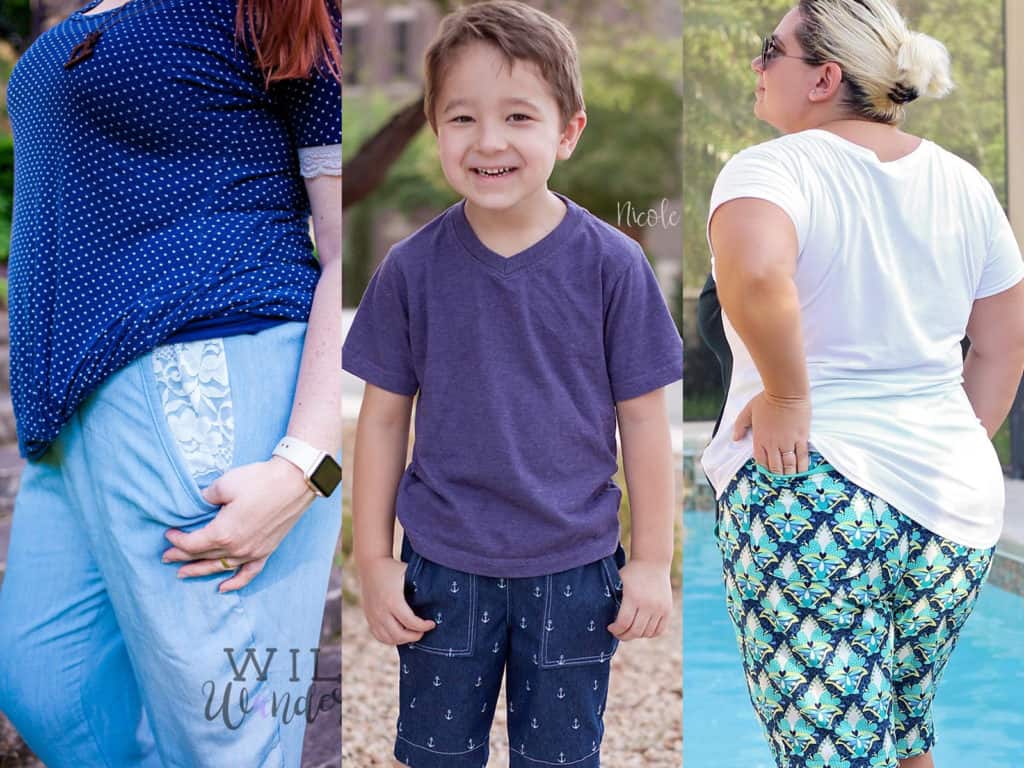
I wanted to say THANK YOU each and everyone of you that purchased a pattern during my one day only flash sale where I promised to give 100% of profits to Harvey Relief charities.  Blog Post Here.

To say the least I WAS BLOWN AWAY with the response.  We raised an incredible amount to give to the southern coast of Texas, that is in such a huge need right now.

I am so proud to be able to give this donation with your help. Helping those victims of Harvey, who are still without their homes and struggling to find the necessities makes my heart sing. Now when I scroll through my Facebook feed and see my friends and family in those flood areas trying to recover from their losses, I can feel a little better knowing that the P4P community was able to help provide some relief. I can’t imagine how scary of a time this is for them, as they’re still not able to get to their homes, and they have such a long, rough road ahead of them.


Together we are able to help so many families in need with over $15k donated.  I split the amount between a few local relief efforts including the Houston Diaper Bank, Houston Food Bank,, the JJ Watt Houston Flood Relief Fund  , and  Texas Association of Fire Fighters (designated directly to Harvey victims).

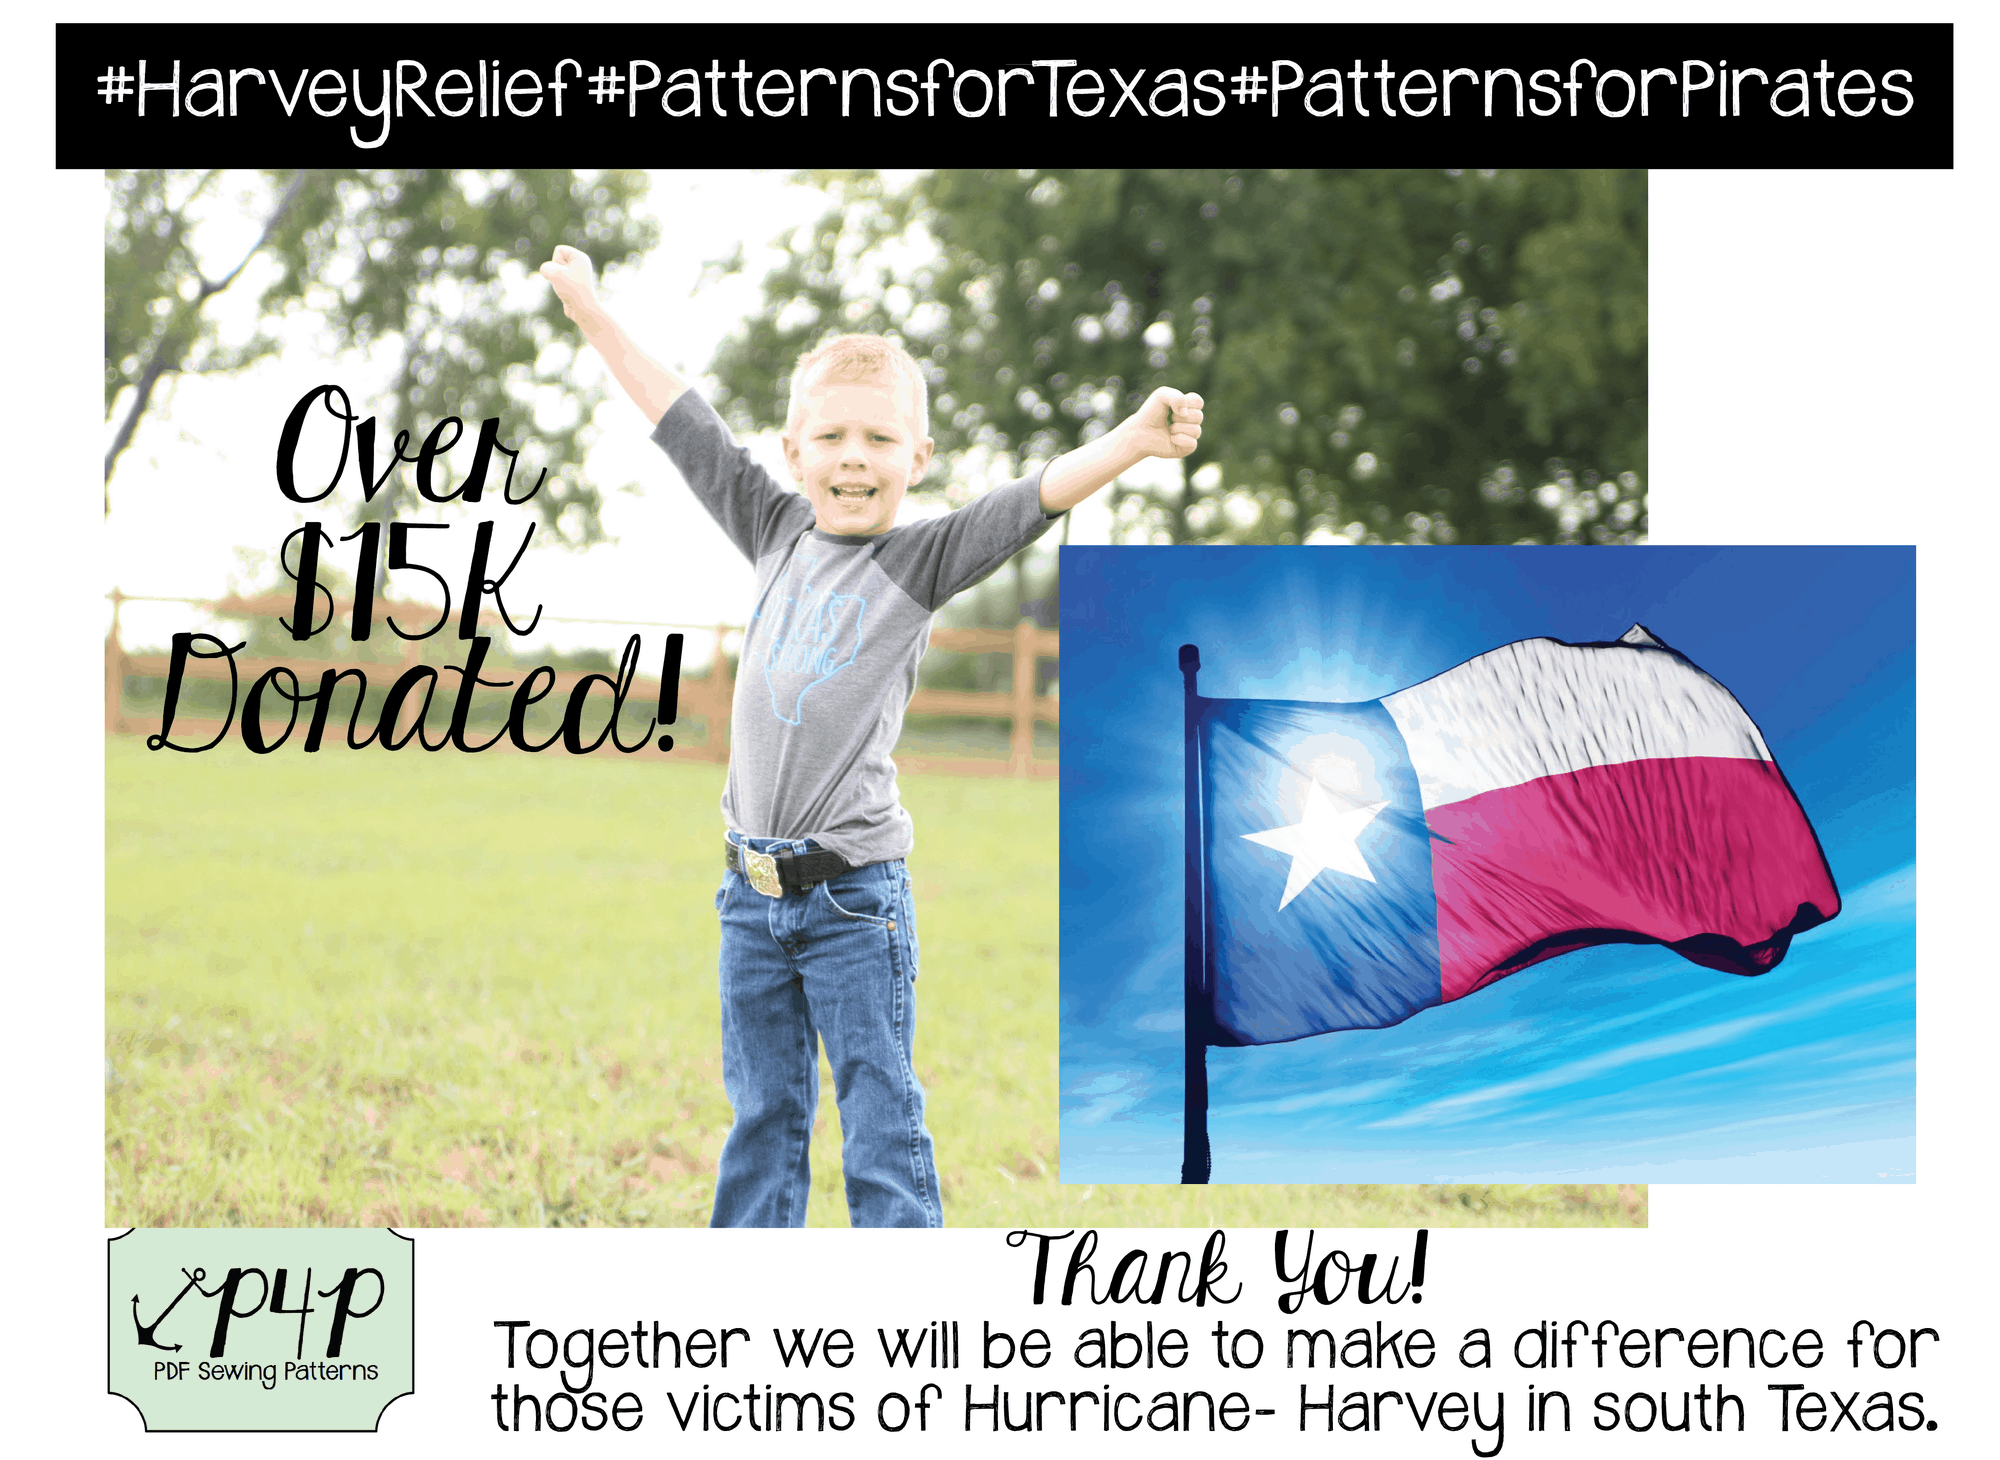
Each charity has it’s own main focus of relief- which is why I choose to split.  The Food Bank to help get meals to those in the area.  The Diaper Bank to get diapers and other toiletries to those in need in that area- and is one of the things I’ve heard most from local disaster relief efforts that is needed so badly.  The JJ Watt Houston Flood Relief is a very specific fundraiser with goals to help with all immediate needs- clean water being a focus currently as well as future planning to help relieve the re-build and aftermath this storm will leave the areas with.  He has an incredible foundation where there are no fees incurred and is working hard to put the money into the very best action for his city.  Lastly, I gave a small amount to the Texas Association of Fire Fighter- designated specifically to Harvey Relief where some of the fire fighters who are working tirelessly as first responders have also lost everything.  Fire families sacrifice so much to be the first in action and help their community.

I waivored sharing the amount raised for a few days, but I hope if you purchased from the P4P site 8/31/2017 that you share the pride in being able to give to these great charities that will absolutely be making a difference in the victims lives both immediately and down the road when the media has moved on to other headlines.  THANK YOU! If you missed the sale and are disappointed, you can always donate to one of the local charities I choose or another you like.

-Judy

Filed Under: Announcement 5 Comments

Harvey Relief

August 31, 2017

As most of you know, I’m a Texan.  The tragedy of Hurricane Harvey came so quick and devastated so many, it’s completely overwhelming.  We know so many friends and family who evacuated, are without their home, had to leave in the shortest notice with nothing but their children in tow, and so on.  There are so many heart-wrenching stories and those that were lucky are doing everything they can to help their neighbors, it’s inspiring.  I was at a loss of what I could do with P4P to help, but I’m hoping together we can raise some funds to send down to my fellow Texans in need.


I will be donating 100% profit of all sales made TODAY (August 31, 2017) on the P4P site.  And to try to boost that number I will be doing a site wide sale code (we usually only do site wide sales 2-3 times per year!) Use code: TEXASSTRONG for 20% off your total purchase today only- August 31st, 2017.  To help give the most we can, I’m asking kindly to share without affiliate links today- this will help get every penny to those who are is desperate need.

Turns out I’m not the only PDF Sewing pattern designer thinking of those on the Texas coast either.  My sister, who has huge ties to the southern coast, immediately set down and designed some wonderful Texas Pride cut files and is giving 100% profit of all sold to the Harvey Relief.  You can get them bundled all together here or buy few individually as well.

I loved them so much- I purchased them and made one for each member of my family.  Even my husband asked for one, although I haven’t grabbed his pictures just yet.  My son isn’t quite old enough to understand the situation, but he knew the shirts meant people in Texas needed help and we were going to try to help so he was ready to pose for me unlike he usually does.

I think Megan might have made this saying just for my Baby Girl 😉 She’s always Rarin’ to GO! So many parents with younger kids are now without diapers, formula, bottles, let alone their pacifiers, blankies, lovies…any comfort we can provide those little babies will make my heart lift up.  So many found themselves carrying their small children above the flood waters.

We’re not the only ones that have joined in trying to send funds for the Harvey Relief. A ton of PDF Sewing pattern designers are looking to help and many have set up their own sale codes in their groups! I’m so grateful to be in an industry that is so kind and willing to work together to help others.  I urge you to go take a look at each designer here and make any purchases today while they are giving some proceeds to a Harvey Relief charity.

The Harvey Relief sale codes are only valid TODAY- August 31st, 2017 so please let everyone know that might be interested in PDF Sewing patterns! We will be posting in the P4P Facebook Group where you can tag any friends/members.  Again, if you are an affiliate with P4P or these other designers please remember not to use affiliate links when sharing today so we can give everything we can to the charities.

Thank you, together we can help!

-Judy

Filed Under: Announcement 5 Comments

Choker Neckline Hack

August 21, 2017


Choker necklines are all the rage right now, so we thought we’d give you the “how-to” so you can add it to your most loved top.  I used the Favorite Tee since it already has a V-neck option but you can really use any of our t-shirt patterns and add a lower scoop neck or v-neck to it.

Once you have decided your pattern and cut your pieces, do not assemble your shirt!  We need to finish the V-neckline first and is easier to do prior to construction.  I chose to bind the V-neck, but you could also use a traditional neckband if you wish.  (Need more help with knit binding? Check out our tips HERE)

Snip a small “v” 3/8″ inward, on either side of the center of the v-neckline.
Cut a binding strip 1.5″ x 90% of the neckline.

With right side of the binding to the wrong side of the neckline, pin in place.
Stitch with a 1/4″ seam allowance. Note: the binding will need to stretch slightly to fit the neckline.

Press seam allowance up and fold raw edge to meet center. Press.
Fold over again, covering seam allowance and press.

Top-stitch.
Fold V-neck in half width-wise and stitch down the center of the V.


Next, construct and finish your shirt as indicated in the tutorial, but do not use the existing neckband instructions.  We will now finish the choker portion of the neckline.

I did not want the choker neckband piece to be too high on my neck, so used the Women’s Henley as a guide for placement. You can make your own adjustments if you prefer to have it higher or lower. Place a pin or mark on the neckline where you wish to have the choker band.


We are going to use the same binding method as we did the v-neck to finish the choker band.  My binding strip is 2.5″ and finishes about 1″.  Again, this is customizable and if you wish to have a thicker or thinner choker piece, adjust the height of your band accordingly.  (just be sure to add 1/2″ to the height as we will be folding and enclosing the raw edges).

Lay your shirt flat and measure the distance between either side of the neckline where you wish the choker band to attach at the neckline. This is measurement “A”.
Measure the neckline from your marked point to center back. This is measurement “B”.

To determine the width of your choker binding:  A + ((B x 2) x 90%)).  For example, my measurement A is 8″. Measurement B is 8″. So my choker band is 8″ + 14.4 (or 8 x 2 then x 90%) = 22.4″ .  To make it a nice even number I just rounded it out to 22.5″.

Fold binding in half width-wise and stitch short ends together, creating a circle.
Mark 1/2″ of measurement “A” from the fold.


With right side of binding to wrong side of shirt, match center back and two front points of neckline and choker binding.
Stitch using a 1/4″ seam allowance.

Press seam allowance up.
Fold binding raw edge down 1/4″ towards center. Press.

Fold and press the bottom raw edge 1/4″ between your V-neck.
Fold in half again, just covering your previously stitched line.

Continue folding and pressing the binding all the way around neckline.
Top-stitch near the bottom fold.

Voila!  You’re all finished.   🙂


Filed Under: Pattern Hacks, Uncategorized 1 Comment

Tips for adding a woven skirt to a knit bodice

August 17, 2017

Ahoy, pirates! The Summer of Wovens is in full swing so I wanted to show you how easy it is to add a gathered woven skirt to a knit bodice. You can use this technique to the Boundless dress, like I have, or the Sunshine dress. If you love the bodice of the Sweetheart dress as much as I do you can use it and hack it with a woven gathered skirt too.

The most important thing to keep in mind when adding a woven skirt is CHOOSING THE RIGHT WOVEN fabric. Make sure to use a light weight fabric with great drape. I used a Nicole Miller chiffon and it worked beautifully. You can also use rayon, rayon challis  or crepe georgette. Avoid quilters cotton, it will look stiff and add visual width which we don’t want. Am I right, ladies? 😉

Cut the pieces as per the pattern. You do not need to size up or down, just be sure to measure yourself and choose the size based on that. I do recommend adding some width to the skirt for more comfortable wear. I did not add it to mine but you can certainly increase width by a couple of inches. You can see how to take your measurements here.

Sew the bodice as per the pattern tutorial. I marked the center of the front skirt piece and the back. I like to use clear elastic when I attach the skirt to the bodice. I do that for two reasons, the clear elastic will add stability to the seam and it will help you gather your skirt evenly. Simply cut a piece of elastic that matches the bodice bottom. Don’t forget to add seam allowance! I prefer to cut just one piece and match the elastic seam to the center back but if you prefer to cut two pieces and match the seams to the sides you’re welcome to do that as well.

Mark the quarters of the clear elastic. Mark the side seams and center back and front of the skirt. Remember to mark the to of the skirt if you’re using a fabric with a directional print 🙂

Match the quarters of the skirt to the quarters of the elastic.

Sew the clear elastic to the top of the skirt. Use a zig zag stitch and adjust the tension and width to better fit the type of fabric you are using. Stretch the elastic as you sew. If you use a 1/2″ clear elastic simply align the edge of the elastic to the edge of the skirt. I use 3/8″ clear elastic so I put it a little lower than the edge to accommodate the 1/2″ seam allowance that is followed in this pattern.

All you have to do now is attach the skirt to the bodice. The bottom of the bodice and the top of the skirt will be the same circumference. Match the side seams and the center backs and fronts, pin right sides together and sew.

I like to attach the skirt to the bodice using a zig zag stitch but you can also use a triple stretch stitch.

Optional: top stitch the seam allowance up towards the bodice.

Tadah! You’re all set to rock your new woven skirt Boundless (or Sunshine) dress! I can’t wait to see your take on this easy hack so be sure to post it in the P4P group too!

Filed Under: Frequently Asked Questions, Pattern Hacks, Uncategorized 7 Comments

FREE Printable Measurement Charts

August 14, 2017


I am excited to be sharing this new FREEBIE with you today!  The biggest/best part of sewing for yourself or your family is being able to create custom clothing for exactly the unique size and shape that you are.  But that’s a lot of numbers to remember.  So we are here to make it a little easier on you by sharing these measurement charts.

There is a fill-in chart for each member of your family.  Simply print, measure, write it down, and get to sewing!

Need help figuring out some of these measurements?  We’ve already got you covered!  Head over to Judy’s post about “How To Measure Yourself” to see where to place the measuring tape and how to get the most accurate numbers.

What are you waiting for?  Go grab a copy of these PDFs and make life a little easier on yourself!
FREE PRINTABLE MEASUREMENT CHARTS

Happy sewing, friends!

Filed Under: Free Pattern 7 Comments

How to Print P4P A0 Copy Shop File with Blue Prints Printing

August 8, 2017

We now offer the A0 Copy Shop File with all our newer patterns for an added convenience.  The A0 Copy Shop File is meant to be printed on a large printer on larger size paper (A0 size paper that is ;)).  It is about the size of an engineer’s print.

Most of our patterns fit on one to two of the A0 size papers.  This means you don’t need to tape together the smaller paper to tile together your larger pieces.  Very few pieces cannot fit onto that size and still need to be pieced (very long pieces usually- like Essential Tank Maxi which spans from shoulder to floor), but that’s 2 pieces rather than 50!  Here is an example of a pattern printed on an A0 size sheet:

We get asked a lot about where to print them!  And now we have a great suggestion for you.  We had  Blue Prints Printing reach out to us wanting to help make the process smooth and easy for everyone trying to print PDF sewing patterns! Most PDF plotting companies are based around printing engineer blueprints/plans.  So the process can seem confusing to upload and understand what you need for a PDF sewing pattern instead.  Not only did they ask all about the sewing patterns and what P4P seamstresses are looking for, they actually created a page and a great tool on their site for merging all the patterns into an order for a great experience JUST FOR US! <3  *They also set up an affiliate program for the P4P blog- accounts made through the P4P blog links will be affiliate links. *

They worked hard to make the process simple.  They have clickable step by step instructions on how to upload your patterns and order with suggestions on paper size, paper type, etc. to make the ordering process easy for a PDF sewing pattern. They also gave us an exclusive P4P discount code for the kick off: p4p-intro15 which will give you 15% off on print orders of $40.00 or more.  This comes out to $1.12 per page, which is the lowest we’ve found online anywhere.  They have incredibly fast shipping too!

But just to make sure, I’ve made a quick video all about how to get your A0 Copy Shop File from your account here on the P4P site, uploaded to their site and receive that big box of patterns all ready for you to create without taping or gluing sheets together.

They package very nicely so that your patterns come very smooth and protected as well!   You do pay shipping for this box, so it makes most sense to order as many together as possible in a “bundle” to save on shipping 🙂

They are welcoming the Pirates over with huge open arms and if you have any trouble they will be more than happy to help with your question or concern 24/7 at: service@blueprintsprinting.com or you can call from 9am-5pm, M-F Mountain Time/ leave voicemail other times at:  888-507-1002.

I hope this helps all you seamstresses out there that love PDF patterns, but don’t love taping them together!

Judy

Filed Under: Announcement, Frequently Asked Questions 19 Comments

Fall Capsule

August 1, 2017

Once again Patterns for Pirates teamed up with Made for Mermaids and Cole’s Corner and Creations to bring you some Fall Capsule inspiration. As before we will be giving you some ideas how to create Women, Boys and Girls mini capsules.

Today I will show you how to create a perfect mini fall/back to school capsule for your little men. As some of you know, I live in Florida so my kids’ capsules will reflect the warm climate. For the rare days when it’s chilly (and by chilly I mean 70s 🙂 ) I love to have some layering pieces ready. I find Cpt Mack’s Cardigan to be the perfect layering piece for short or long sleeves tshirts. Those elbow patches are so fun!

When you built your boy’s fall capsule be sure to add a button up shirt like the Lumberjack Shirt. They can be worn as stand alone tops but also make great layering tops. You can make the collar option or go for a fun, cool look and add a hood.

Every boy needs a cool jacket! Am I right? Well…look no further than the Spirit jacket from Cole’s Corner and Creations. The raglan style sleeves make it such an easy sew that you’ll be whipping those in no time.

Between the 3 sisters pattern companies you have so many tops options. For Noah’s fall capsule I went with my 3 favorite choices…the P4P Jolly Roger Raglan, the M4M Dylan Tee and the P4P Yo Ho Henley. All patterns feature a long sleeve and short sleeve option so you can pick whatever style works best for your area.


When choosing the bottoms for the mini fall capsule I kept in mind one thing: COMFORT! My little man lives in shorts all year long so I went with the Pirate Playground shorts and a modified knee length Baby Bear Joggers. I like the loose fit of the Playground Pants for PE days and the slimmer fit of the Baby Bear Joggers for everyday wear.

For the occasional colder day I had to add a pair of the new Little Loungers pants. This pair is made with a striped linen blend and it’s such a classic look. It pairs beautifully with the Yo Ho Henley, the JRR and the Dylan Tee.


We can’t wait to see your little one’s capsules this fall! You can read the contest details on the M4M blog here. Regardless of which top, layering piece or bottoms you choose remember to: Keep it fun! Keep it simple! Keep it comfortable!

Filed Under: Blog Tours, Uncategorized Leave a Comment

P4P University :: Bias Binding

July 22, 2017


We recently covered the tips and tricks to using a knit binding (HERE) but what about woven fabrics?  One of the many finishing options for necklines, sleeve hems and armcyes for woven fabrics is bias binding.  Unlike knit, woven binding should be cut on the bias (45 degrees from the grain-line) so that it bends and curves and allows it to lay flat.  Some patterns will include a pattern piece, which makes it easy to line up and cut the strip on the bias, however, it can eat up quite a bit of fabric and we all know how much we hate to waste pretty fabric, right?  You can also use pre-made bias binding, but many of times it’s nice to use the same fabric as the your garment, so we’re going to show you how make a continuous bias strip from a small square of your fabric.  This is also perfect to use up your scraps.

For this example, I used a 15″ x 15″ square which makes about 100″ of 2″ bias binding.  A 12″ square makes about 60″ which is plenty for the bias binding neckline option of the Everyday Elegance.

Cut and prep the square. Mark opposite sides with A/B and draw a diagonal line from one corner to the other.
Cut the square across diagonally.

With right sides together, match the ‘A’ side and stitch together using a 1/4″ seam seam allowance.
Press seam allowance open.

Starting at the bottom, draw 2″ lines parallel to the bottom edge. If there is any excess that does not complete a full 2″ row, just trim it off.
With right sides together, fold the ‘B’ side toward one another. Your fabric should be a square, with your drawn lines still parallel with one another.

Pull the pointed corners in opposite directions and match up the next row of lines.
With right sides together, pin and stitch using a 1/4″ seam allowance.

Press seam allowance open.
Starting at one end, cut along your previously drawn lines.

Continue cutting around the circle and voila! You now have a continuous bias strip.

At this point, you can set your binding aside or you can continue to pre-press to finish preparing it to be sewn to your garment.  A 2″ binding strip will create 1″ single fold or 1/2″ double fold bias tape.  The above method also works for various widths and single or double fold bias tape.

Fold bias strip in half toward the wrong side. Press.
Unfold and re-fold the raw edges toward center.
Fold again and press.

There you have it!  Creating your own bias tape from woven fabric is as simple as a couple of seams and cuts.

Check out the video below as Judy walks you through a quick demonstration on sewing with bias binding.

We’ve added another quick video with SINGLE FOLD BIAS BINDING 🙂 Enjoy!

As promised in the video here are a couple pictures to entice you to PRESS and stay stitch to help get a great finish.

Finished single fold bias:


Happy Sewing!!

Filed Under: P4P University, Sewing Techniques, Sewing with Stretch, Knit Fabrics, Uncategorized 4 Comments

Linen Loungers :: New Pattern Release!

July 20, 2017

Wahoo!  It’s pattern release day!  And we are coming to you with our first ::new:: pattern for the “Summer of Wovens”!!  (Too many exclamation points?  Can you tell I’m excited?)

We are bringing you the Linen Loungers and the Little Loungers, which are both a woven pant full of options!

The women’s Linen Loungers are in our full size range, from XXS – Plus3X.  They are available in five lengths (shorts with cuffed hem, shorts with curved hem, bermuda, capri and pant), three pocket options (patch, slat and a back patch pocket), two waistbands (woven and yoga) and also offer optional button tabs and a drawstring.  The unisex youth Little Loungers are available in sizes 3Month – 14 and cover all of the same options as their women’s counterpart!

What are your fabric options for these pants?
For the shorts length, the sky is pretty much the limit.  You can use a more structured woven or something with drape and have your new favorite pair of shorts to wear while taking on your everyday life.  For the other lengths, we highly recommend using a woven apparel fabric that has some drape to it like linen, linen blends, rayon, crepe, ect.  These Loungers are all a pull-on pant style and drafted looser in the hips for easy on/off, and then taper in at the knee with a slight bootcut flair.

**Want to learn more about how to measure yourself for this pattern?  We’ve got you covered with an in-depth blog HERE.  And in case you’re new to Patterns for Pirates and PDF patterns in general, we have a great blog full of new user tips HERE to help you get started!  And, as with all of our current releases and updates, the pdfs now include our layers feature and can be found in Letter, A4 and A0 sizes.

Let’s break down the options a little!

Cuffed Hem Shorts (with optional Button Tab)


Curved Hem Shorts


Bermuda/Capri/Pant Length

Slat/Patch/Back Patch Pockets

Woven/Yoga Waistband

Ready to purchase a copy of the Loungers and get to sewing yourself?
Grab a copy of the Little Loungers, Linen Loungers, or even a Loungers Bundle so you can sew for practically the whole family.

Please don’t think we’d leave you with just the pattern and no extras!!  Head over to our “Loungers Hacks” post to see how you can take these patterns another step further.

If you’re still needing more inspiration, be sure to head over to the Patterns for Pirates Facebook Group Albums for the Linen Loungers and Little Loungers to see what our amazing testers have sewn for themselves.  Don’t forget to tag us on Instagram (@patternsforpirates | #patternsforpirates) and to share your finished items over in our Facebook group!  We love to see what you make!

Happy sewing, friends!

Filed Under: Pattern Release Leave a Comment

LL – easy hacks

July 20, 2017

In true Pirate fashion we could not have let this double release go by without showing you some easy but fun hacks for the Little Loungers and Linen Loungers. Erinn will start you off with an adorable bias binding hack for the curved hem shorts.

…..

Bias Binding curved hem

Adding bias bindings to the hemline of the curved shorts is a quick and easy way to create an entirely different look. One of the things that I love most about this look is that it’s a great way to add a pop of contrasting or coordinating fabrics.

To create this look, cut out your pattern pieces as you would per the pattern. The only additional thing you will need are your bindings. For mine, I cut them 2″ wide by a length that was longer than the hemline. As you can see below, I used the curved pattern pieces and marked the top edge. I will connect my bias binding pieces up to this marking.

If you are attaching pockets, you can complete everything through these steps. Before sewing up the inseam and sides, you will want to complete your bindings along the curves. Place your shorts facing down and bias binding pieces face down and then gently ease them along the curves. You will want to pin/clip this in place. As you can see, my pieces are longer than the edges, but these will be trimmed later. Attach with a 1/2″ seam allowance, then clip into seam allowance along curve.

Once you’ve attached your binding, press binding piece and seam up. Press bias binding piece to align with top edge, then press again as you fold binding over (these are the same steps as were completed on pockets).  Edge stitch along folded edge and repeat on the other three hemlines.

Once you’ve attached all bias bindings, you will assembly your pattern as directed. When reaching the curved seam and inseam, you will want to make sure to use a straight stitch for the last few inches to create a cleaner finish (With wovens, it is advised to use a straight stitch first and then go back over with a serger if desired. If doing so, end your serged section a few inches before your straight stitch to help create that cleaner look). Trim any bias binding pieces that might be longer than your seam allowance.


…..

Cuffed capri pants

Next I will show you how easy it is to add  cuffs to the capri pants. The patterns include a cuff option for the short so we will use the same tutorial techniques. Start by printing the pattern in your desired size. I made a size 6 Little Loungers with patch pocket and elastic waistband.

There are two changes you will need to do to the original pattern. You must cut the capri length 1 inch shorter than the cut line for both the front and back pieces. We do that because we won’t be hemming anymore, we will be adding the cuffs. That brings me to the second change you’ll need to make. The cuffs in the pattern are drafted to fit 1:1 ratio to the shorts leg opening. The capri leg opening is smaller so we will need to shorten the width of the cuff. How much you shorten the width will vary for each size. The length of the cuff will remain the same.

Don’t forget to cut and attach the button tabs too! They add such a cute touch to the capris!

Sew the pants as per the tutorial. Easy peasy! Don’t be afraid to add some detail stitching to the button tabs or the pockets! I used my coverstitch to add a touch of blue but you can certainly use a twin needle or your preferred decorative stitches.

If you love the look of the cuff but prefer the bermuda length you can certainly apply the same principals and created a cuffed bermuda linen lounger or little lounger…the sky’s the limit! 🙂


…..

 Hemmed and lined shorts

We always like to mix up our finishing options to give you a wide variety that you can apply to any pattern so we went with a cuffed or curved hem facing for the shorts this time.  If you’ve been following P4P for awhile, you’ll notice Judy loves some short shorts 😉 but that may not be your  preference.  I’m going to show you how to lengthen your inseam and do a simple hemmed edge.  I also wanted to use this gorgeous embroidered lace so will give some insight on how to line them.

First, decide what you would like  your finished inseam length to be.  The current inseam finishes at 2.5″.  For my finished length I went with 3.5″.  Decide the length of your preferred hem (I did 1/2″) and add this to your desired inseam length.  Measure and transfer to your pattern.  Don’t forget all seam allowances are 1/2″ so your total inseam on the pattern should be 1/2″ longer.  Example for my 3.5″ finished inseam: 1/2″ seam allowance at the crotch curve + 3.5″ inseam length + .5″ hem allowance = 4.5″ total inseam.

Now that you have adjusted your inseam length we will make our hem gauge for the hem.  You’ll notice these outward notches on other cutlines (bermuda) as well as on sleeves hems.  It may look a little funny, but it actually serves a purpose.  Cutting the outward notch will allow the hem to lay flat once folded.  The angle of the gauge should be a mirror image of the seam just above it so that when its turned under it will lay flush.  Again, my hem allowance is 1/2″, if you choose to do a wider hem, you will want to extend your hem gauge to match the same length of your hem allowance.


Proceed to cut your pattern and construct as instructed in the tutorial.  To make a lined pair, cut every piece from both your main and lining fabric.  Lay your main fabric on top of your lining piece (right sides up) and construct as usual, treating them as one piece.

To hem, I serged both the main and lining fabric together to finish the edge . Then turned and top-stitched.  Easy right?


You can also line the shorts by treating your lining and main fabric as separate items.  So construct a main short and lining short then slip them inside one another and attach your waistband to both the lining and the main.  I chose to it the other way since I would be hemming them together anyway.


…..

Fully Enclosed Seams on Cuffed Shorts

When it comes to seams on my pants, I tend to gravitate toward wanting to enclose all of them.  It gives a nicer, neater look to your pant, and just feels more “handmade” than “homemade” to me.  The Loungers tutorial already tells you how to enclose the waistband on your pants, but what if you wanted to enclose the cuff hems too?

Here’s a quick rundown of how to make that happen:

  1. Prepare your cuff as the pattern states.  Right sides together, fold piece in half and stitch along unfolded edge.
  2. Working from the wrong side of the fabric, fold and press 1/2″ on one of the long edges of entire cuff piece.
  3. With right sides together, fold and press your cuff piece, leaving 1/2″ seam allowance at the top edge.
  4. Press, press, press.

5. With your pant leg piece right side up, place your cuff piece on top (pinning carefully and aligning all of your seams.  Stitch at a 1/2″ seam allowance.

6. Flip your fabric over so you’re looking at the wrong side of your pant leg.  Open up your cuff piece and press the raw edges away from the pant leg, toward your cuff.
7. Using those beautifully pressed lines that you created for yourself back in steps 2-4, fold your cuff piece so it encloses all of your raw edges.
8. Press and edge stitch.

You now have a beautifully enclosed hem on your pant leg!  Do a small happy dance, pat yourself on the back, and then repeat the steps for your other cuff.

(I didn’t have a chance to grab photos in my new shorts made from the tutorial yet, but I used that same method on the short pictured below and I LOVE them!  You will too!)


Use one of these hacks?  Be sure to hop on over to the Facebook Group and share your Linen and Little Loungers love. 🙂

Filed Under: Pattern Hacks, Uncategorized 1 Comment

  • « Previous Page
  • 1
  • …
  • 50
  • 51
  • 52
  • 53
  • 54
  • …
  • 68
  • Next Page »

connect with me

  • Email
  • Facebook
  • Instagram
  • Pinterest
  • YouTube
Privacy & Cookies: This site uses cookies. By continuing to use this website, you agree to their use.

To find out more, including how to control cookies, see here: Cookie Policy
  • Privacy Policy
  • Refund Policy
  • Contact Us
  • About

Copyright © 2026 Patterns for Pirates

Copyright © 2026 · Genesis Framework · WordPress · Log in