Patterns for Pirates

P4P stylish, modern, wearable patterns

  • Home
  • Blog
    • Frequently Asked Questions
    • Pattern Releases
      • Free Patterns
    • P4P University
      • Fitting
      • Sewing with Stretch, Knit Fabrics
      • Sewing with Woven Fabrics
      • Sewing Machines
    • Sew-A-Longs
    • Fabric for Pirates
    • Pattern Hacks
    • Announcement
      • Blog Tours
      • Contest/Giveaway
  • Shop
  • Bundle Discounts
  • Flash Friday
  • Gift Cards
  • My Account
  • Cart

Sew, what do I wear? Holiday Edition

November 19, 2016

swdiwlogo

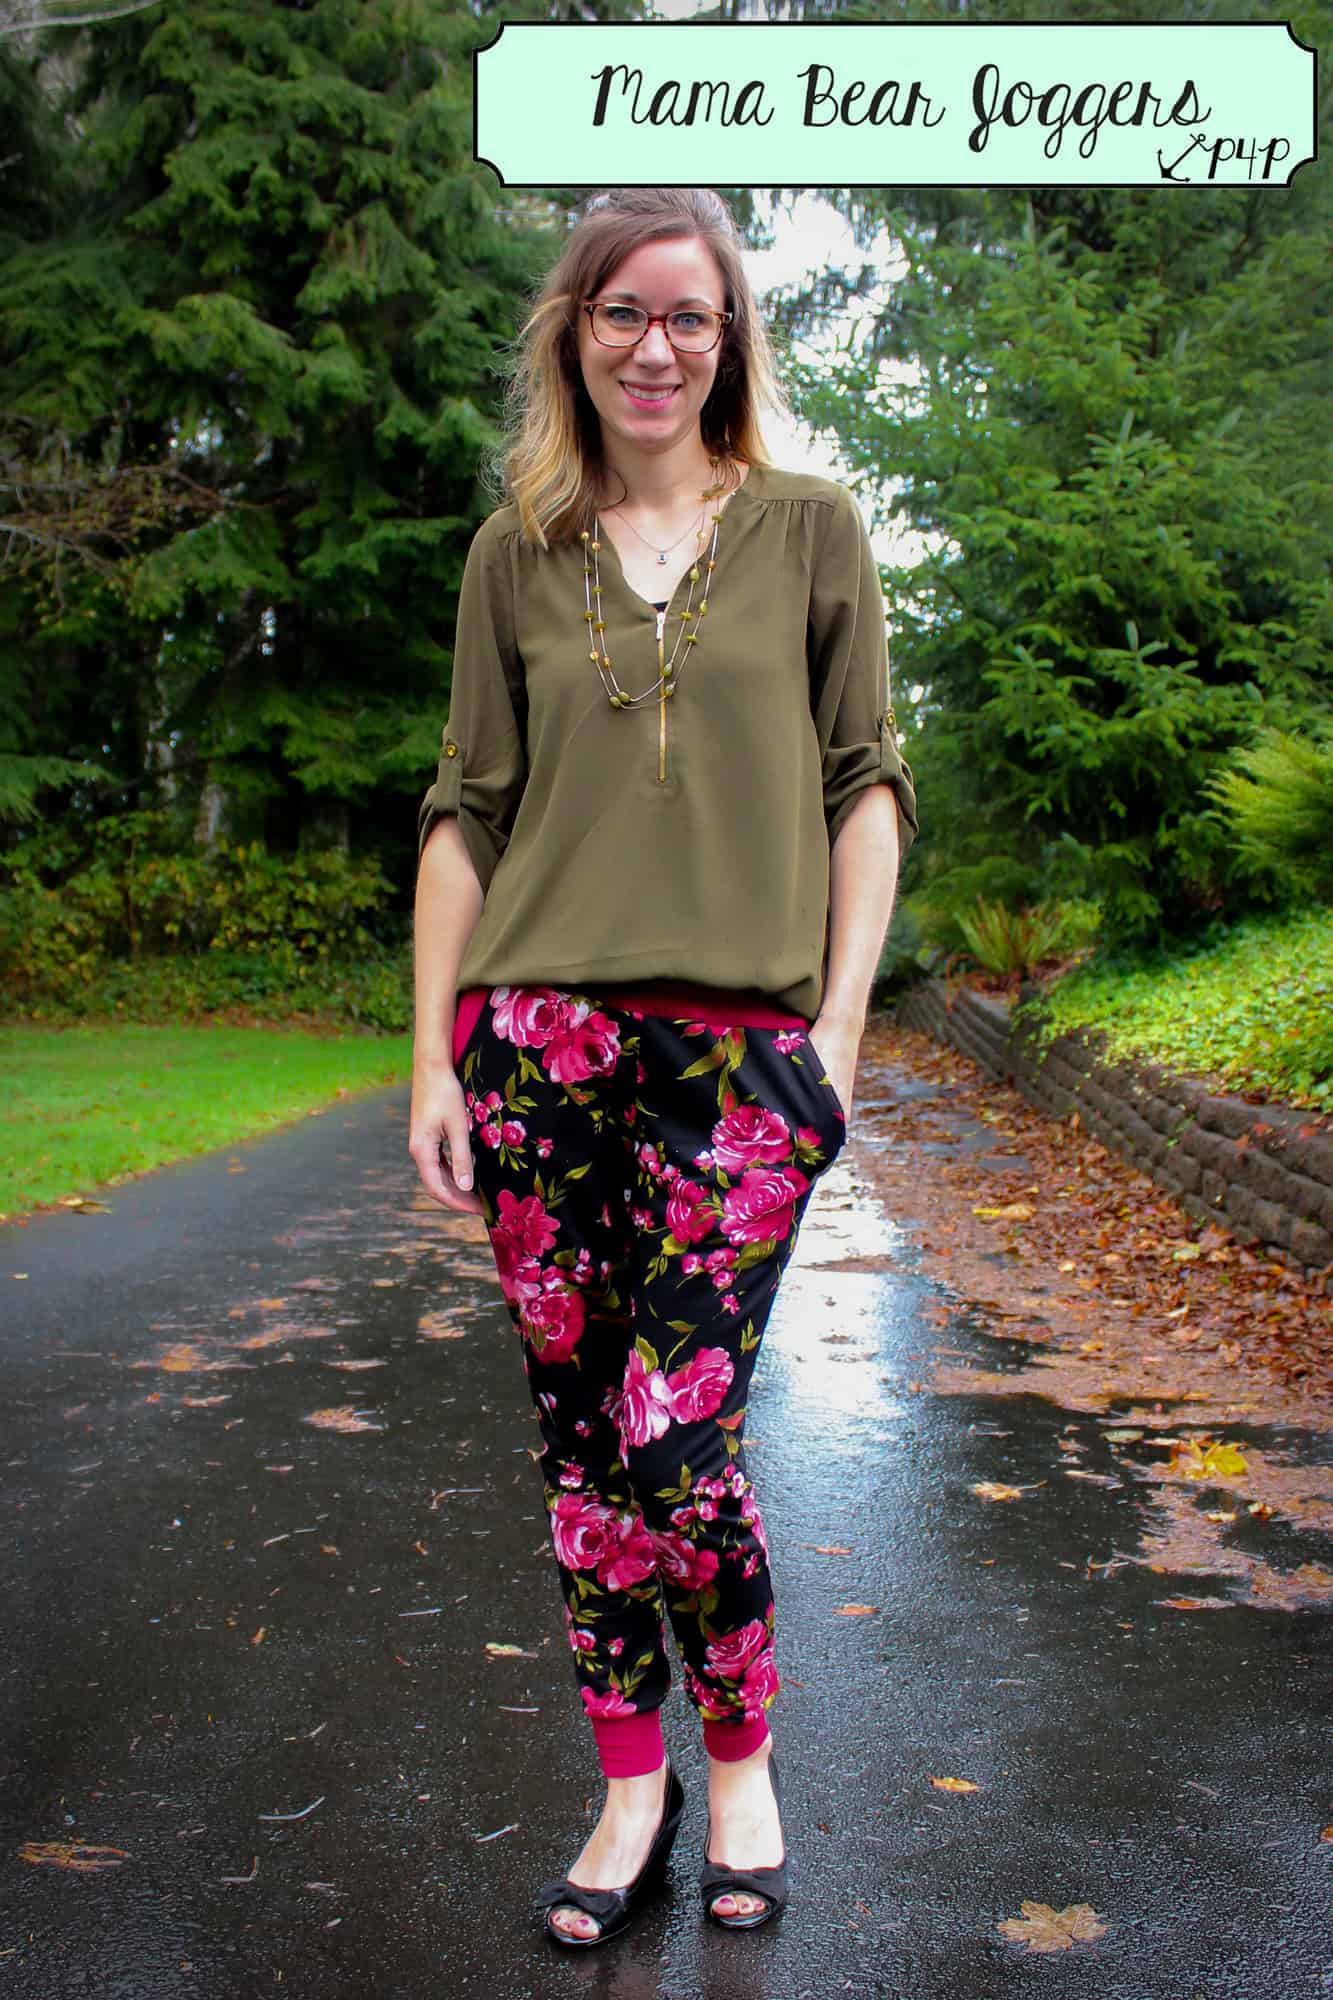
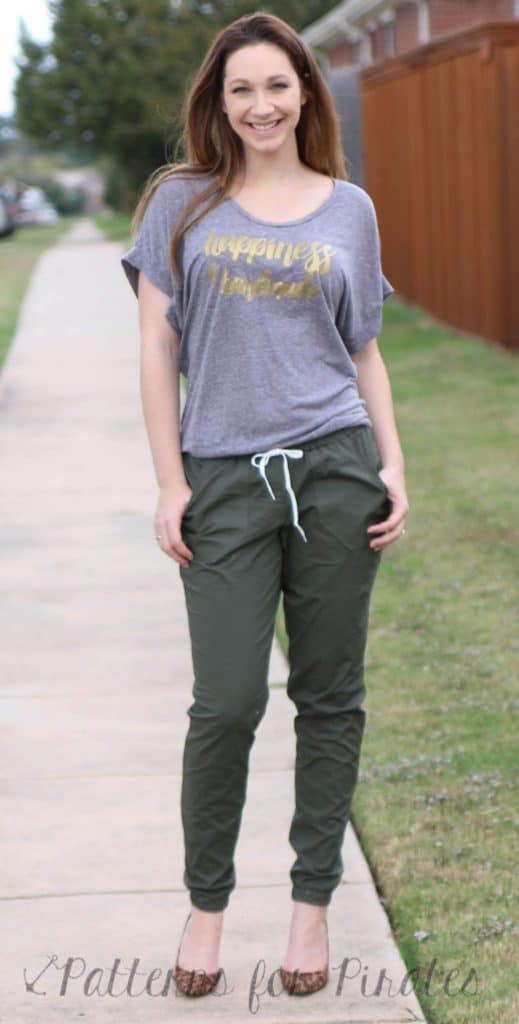
We teamed up with the Made for Mermaids ladies and have been sharing some great inspiration pieces to add to your holiday wardrobe; whether it be for family photos, dinners, or parties.   You can usually find me in some SOS Pants and a Sweet Tee or Mama Bear Joggers and a Boyfriend Tee but we have some fun holiday parties and a trip to Las Vegas coming up so decided to go all out and use some sparkly and luxurious fabrics.  My three little ones keep me pretty busy and if you’re anything like me, I tend to wait until the very last minute to sew up my items and am left running out the door, trimming my last thread.  So, with that, here’s my take on our ever famous Peg Legs  and Pumpkin Spice Dolman, two of the quickest and most beginner friendly patterns, to make them party worthy.

img_7674-2

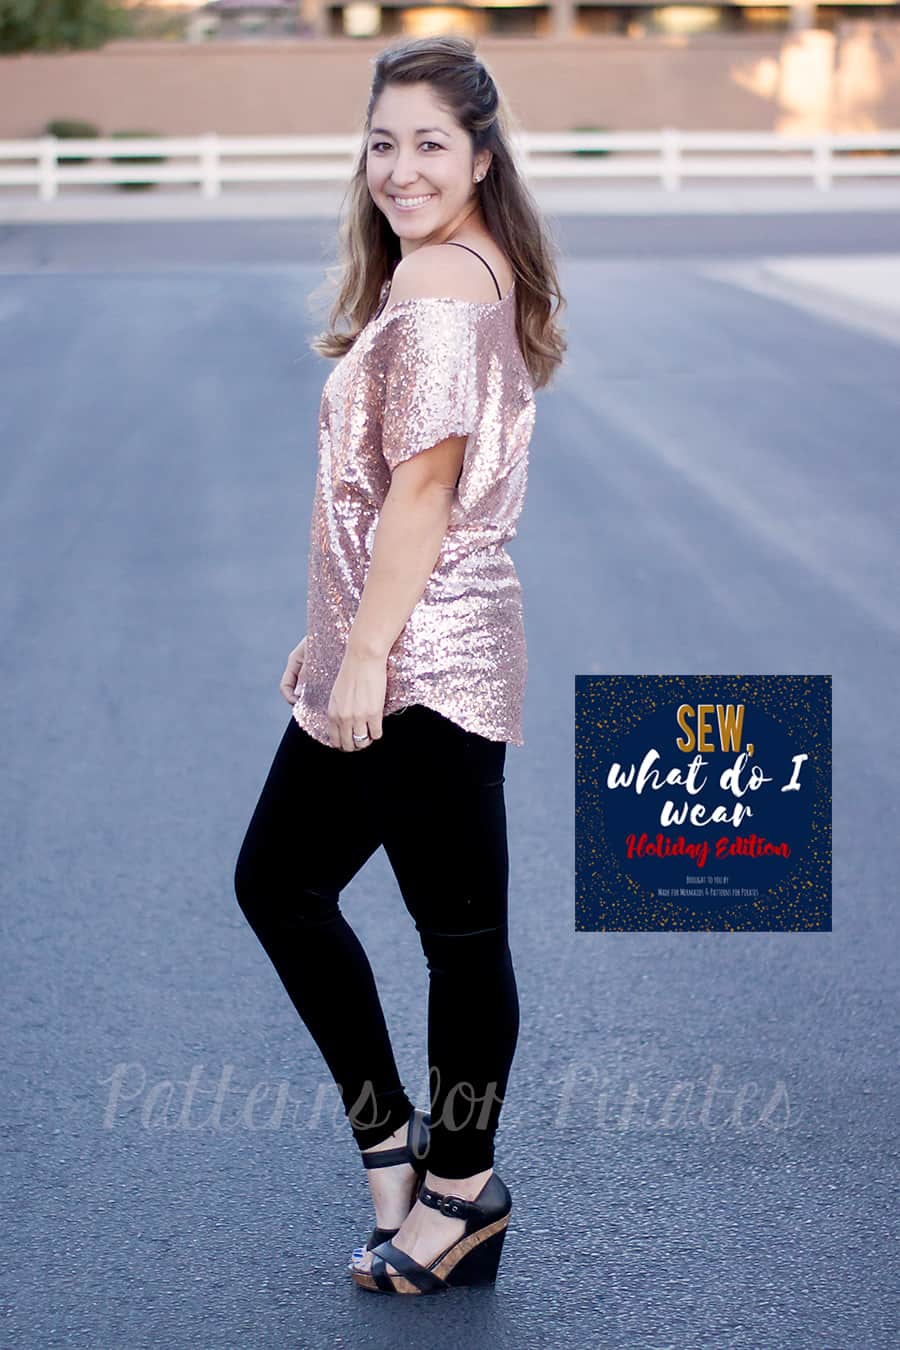
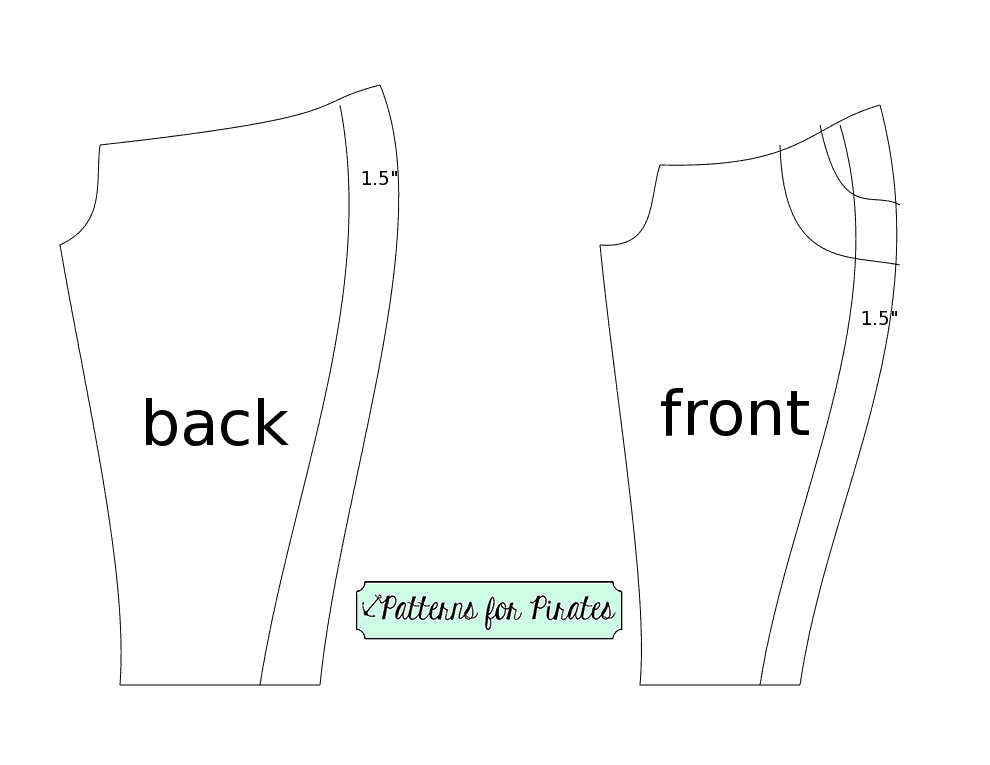
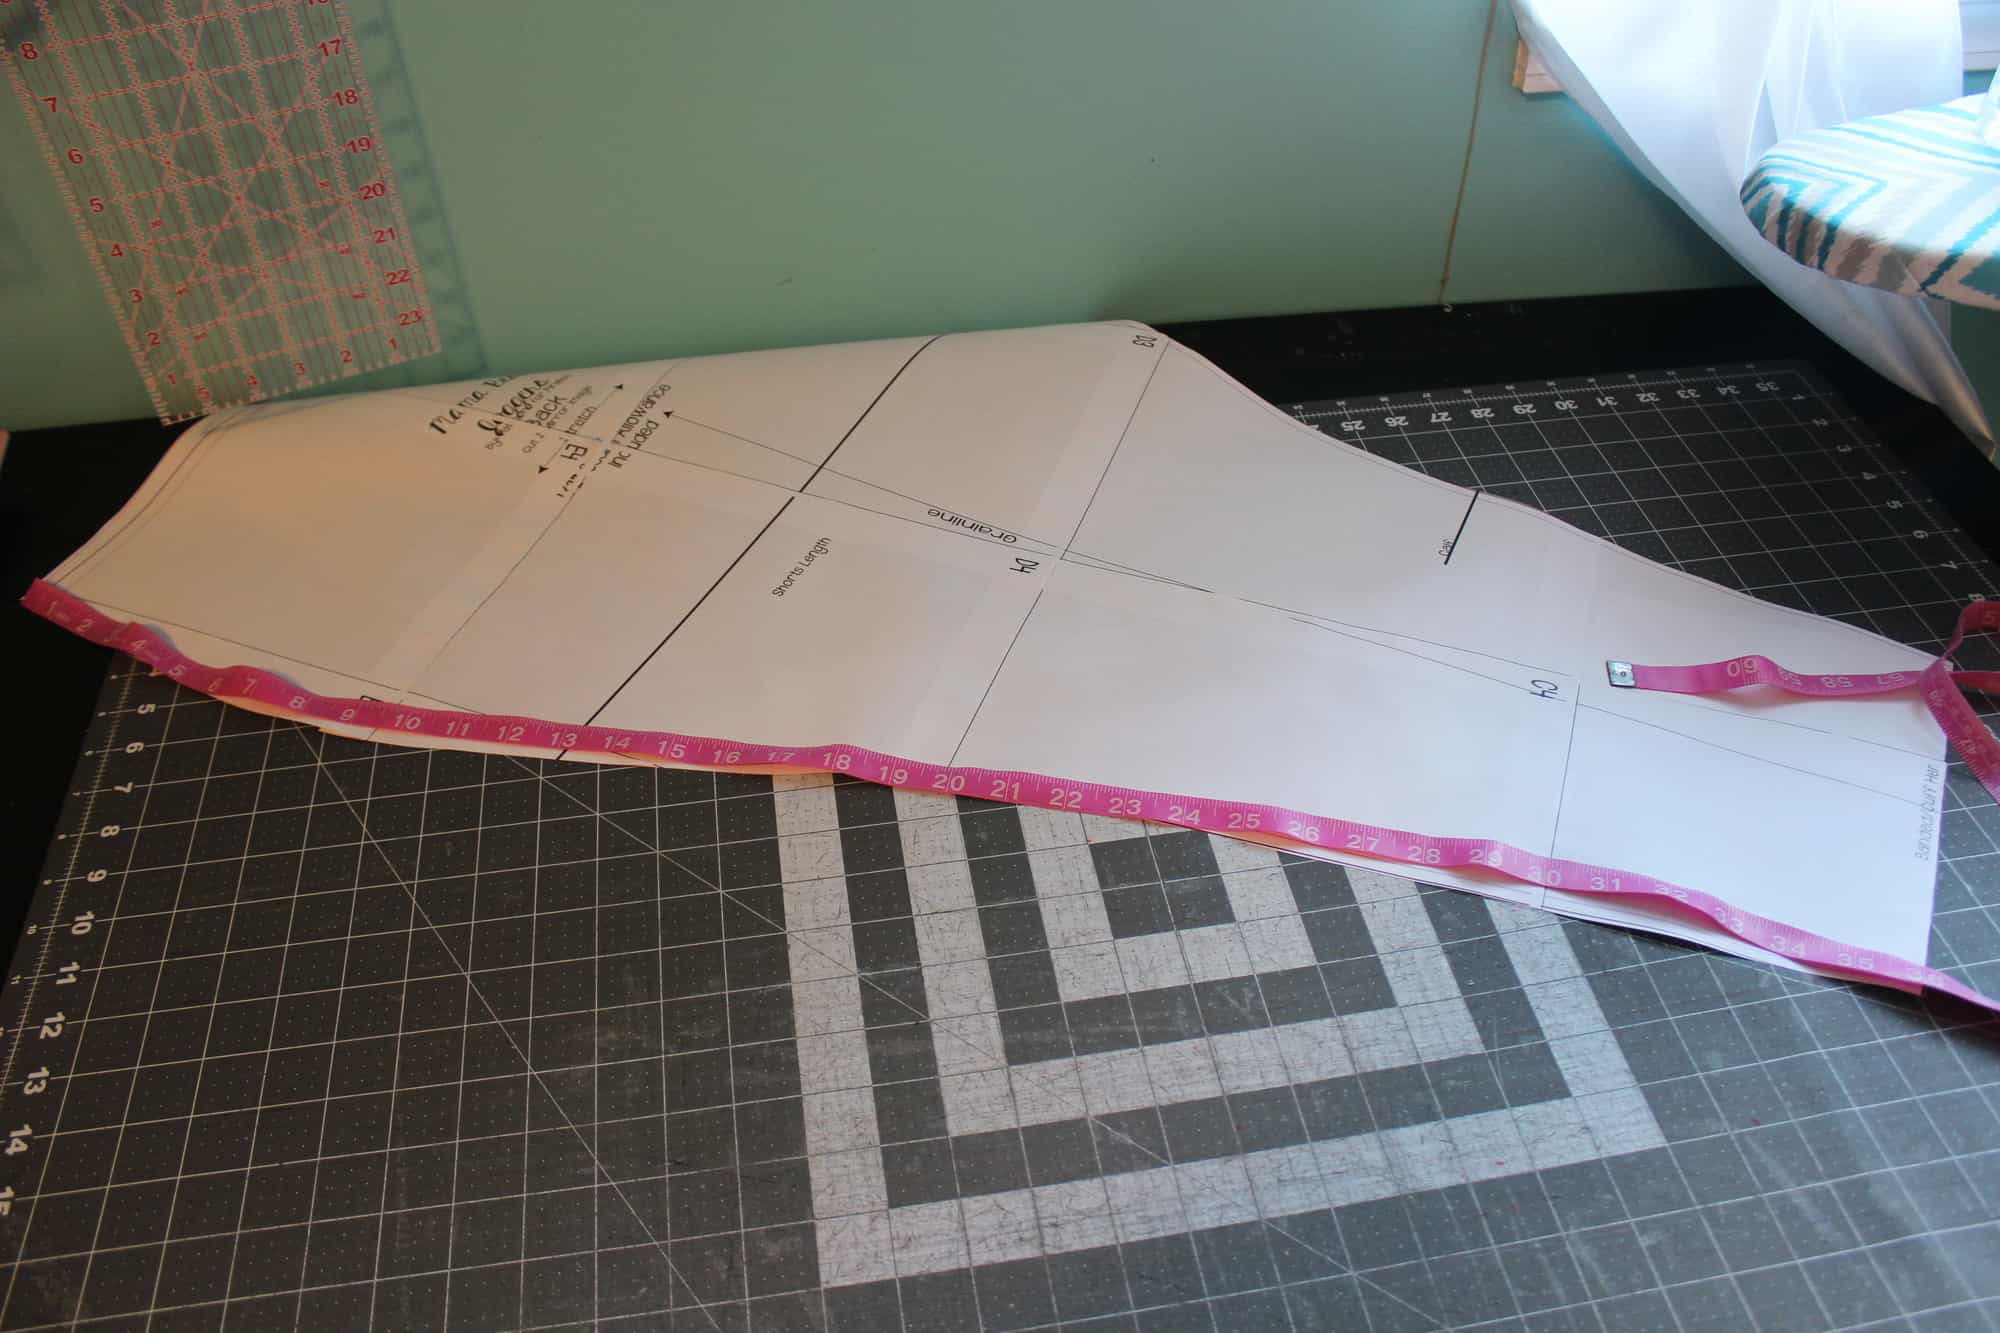
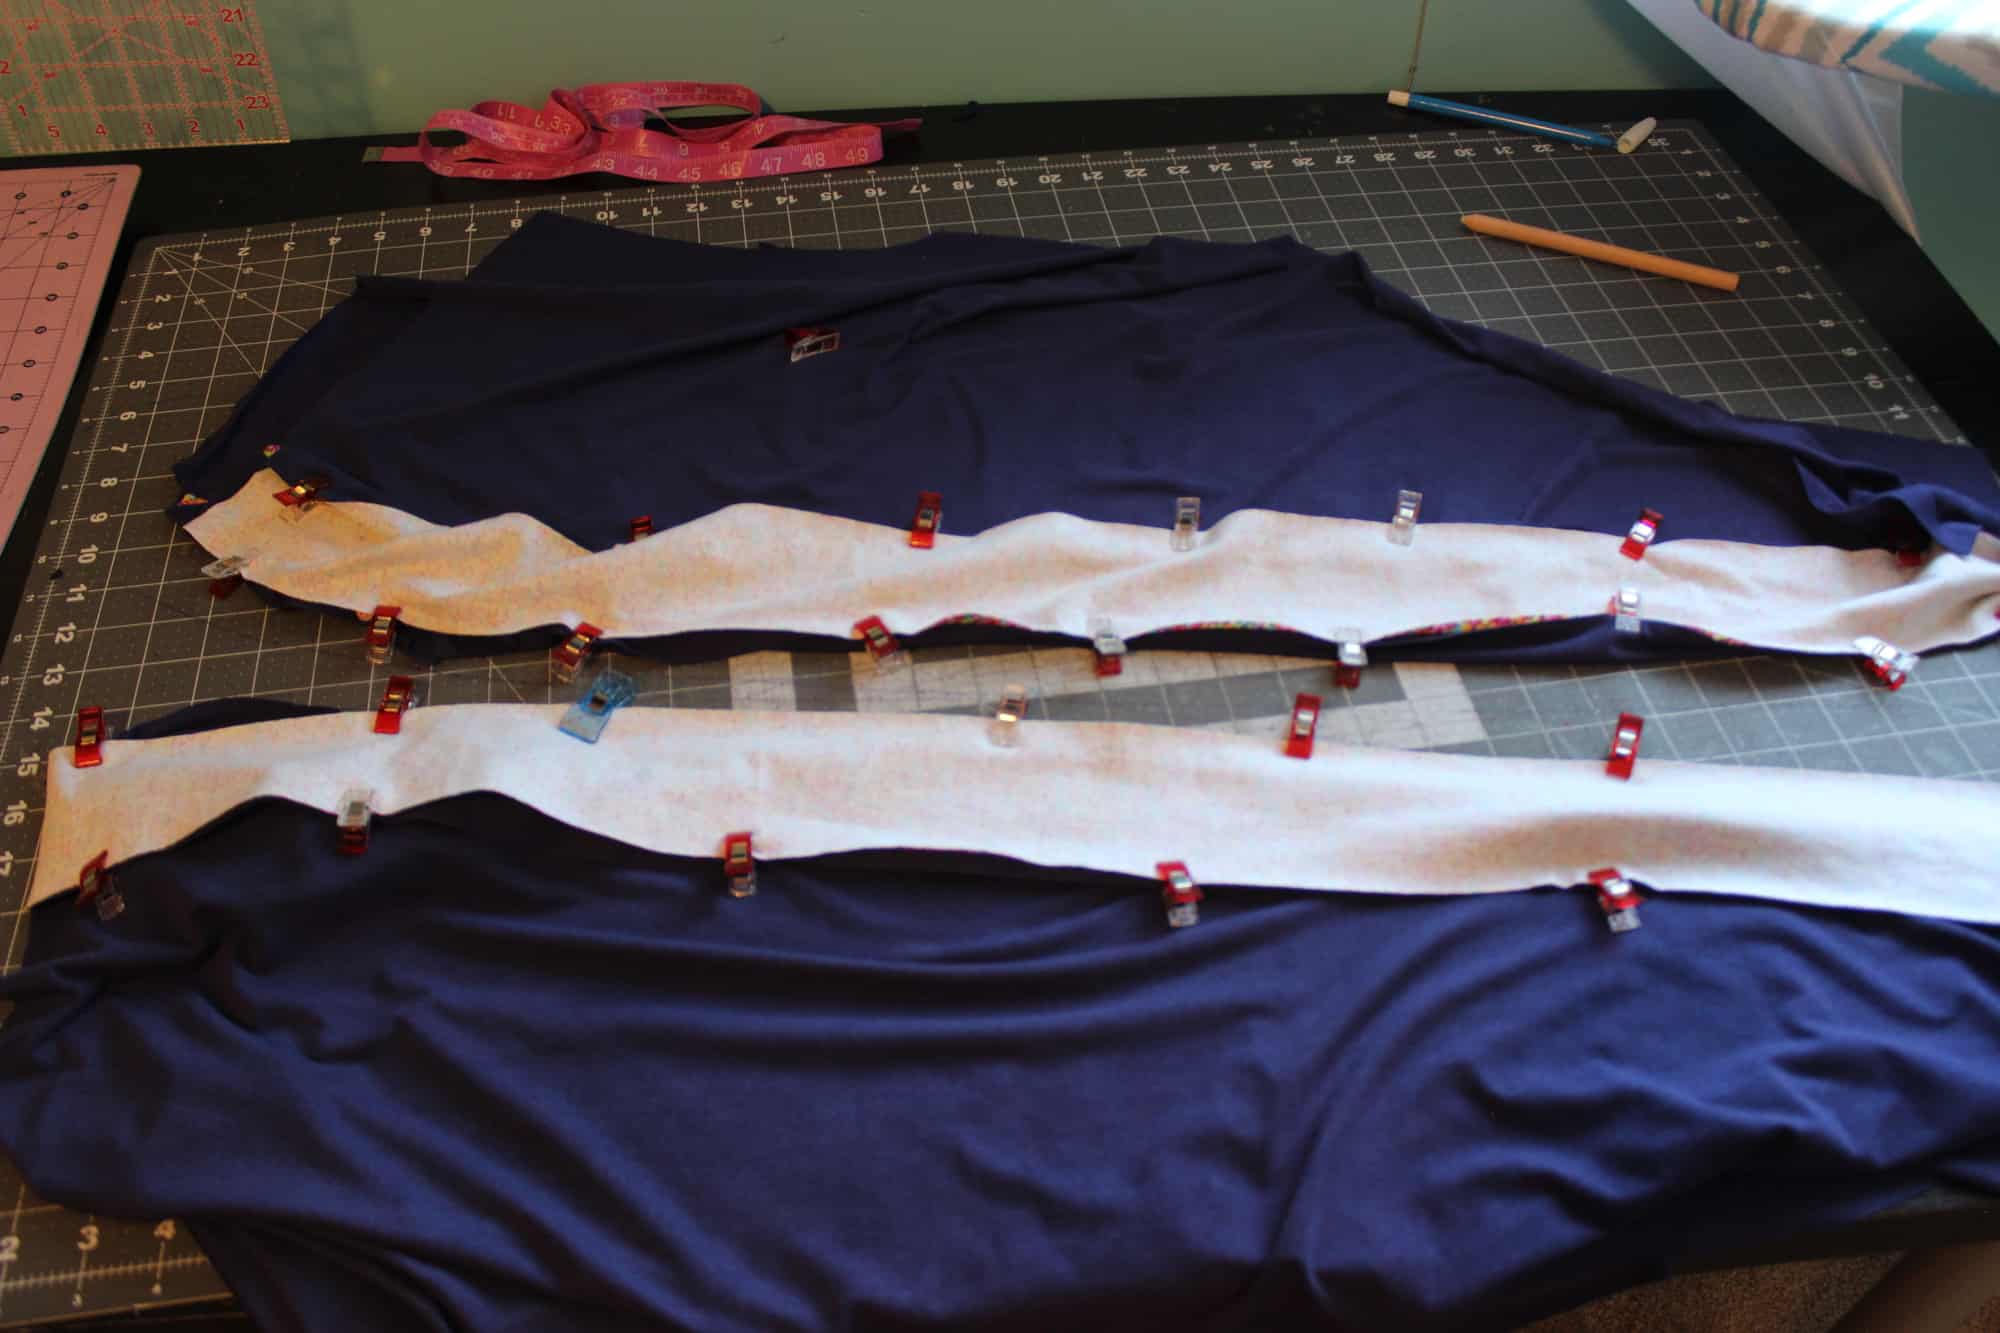
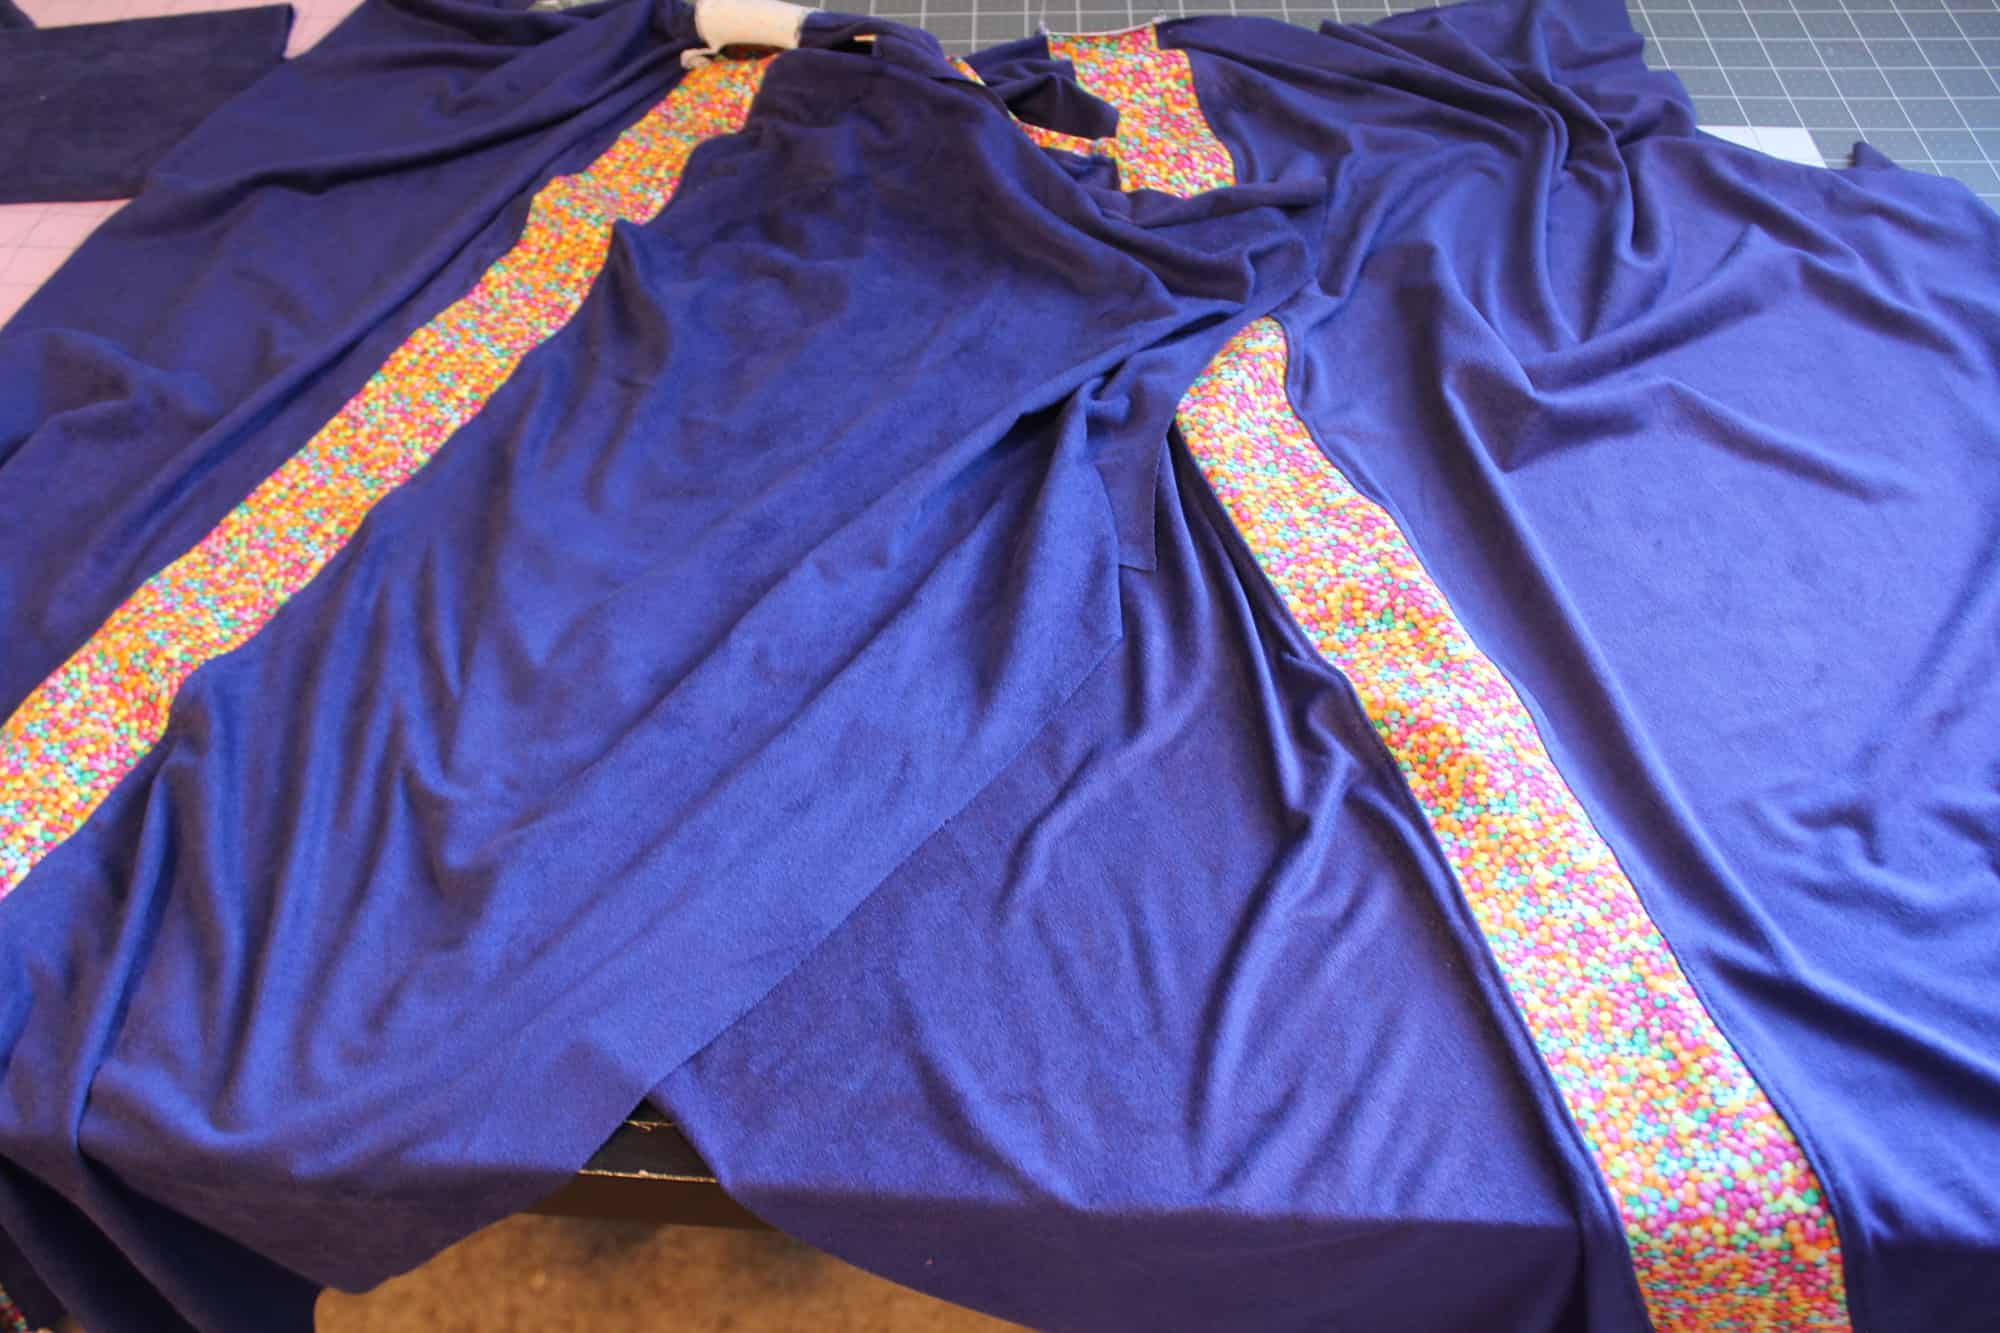
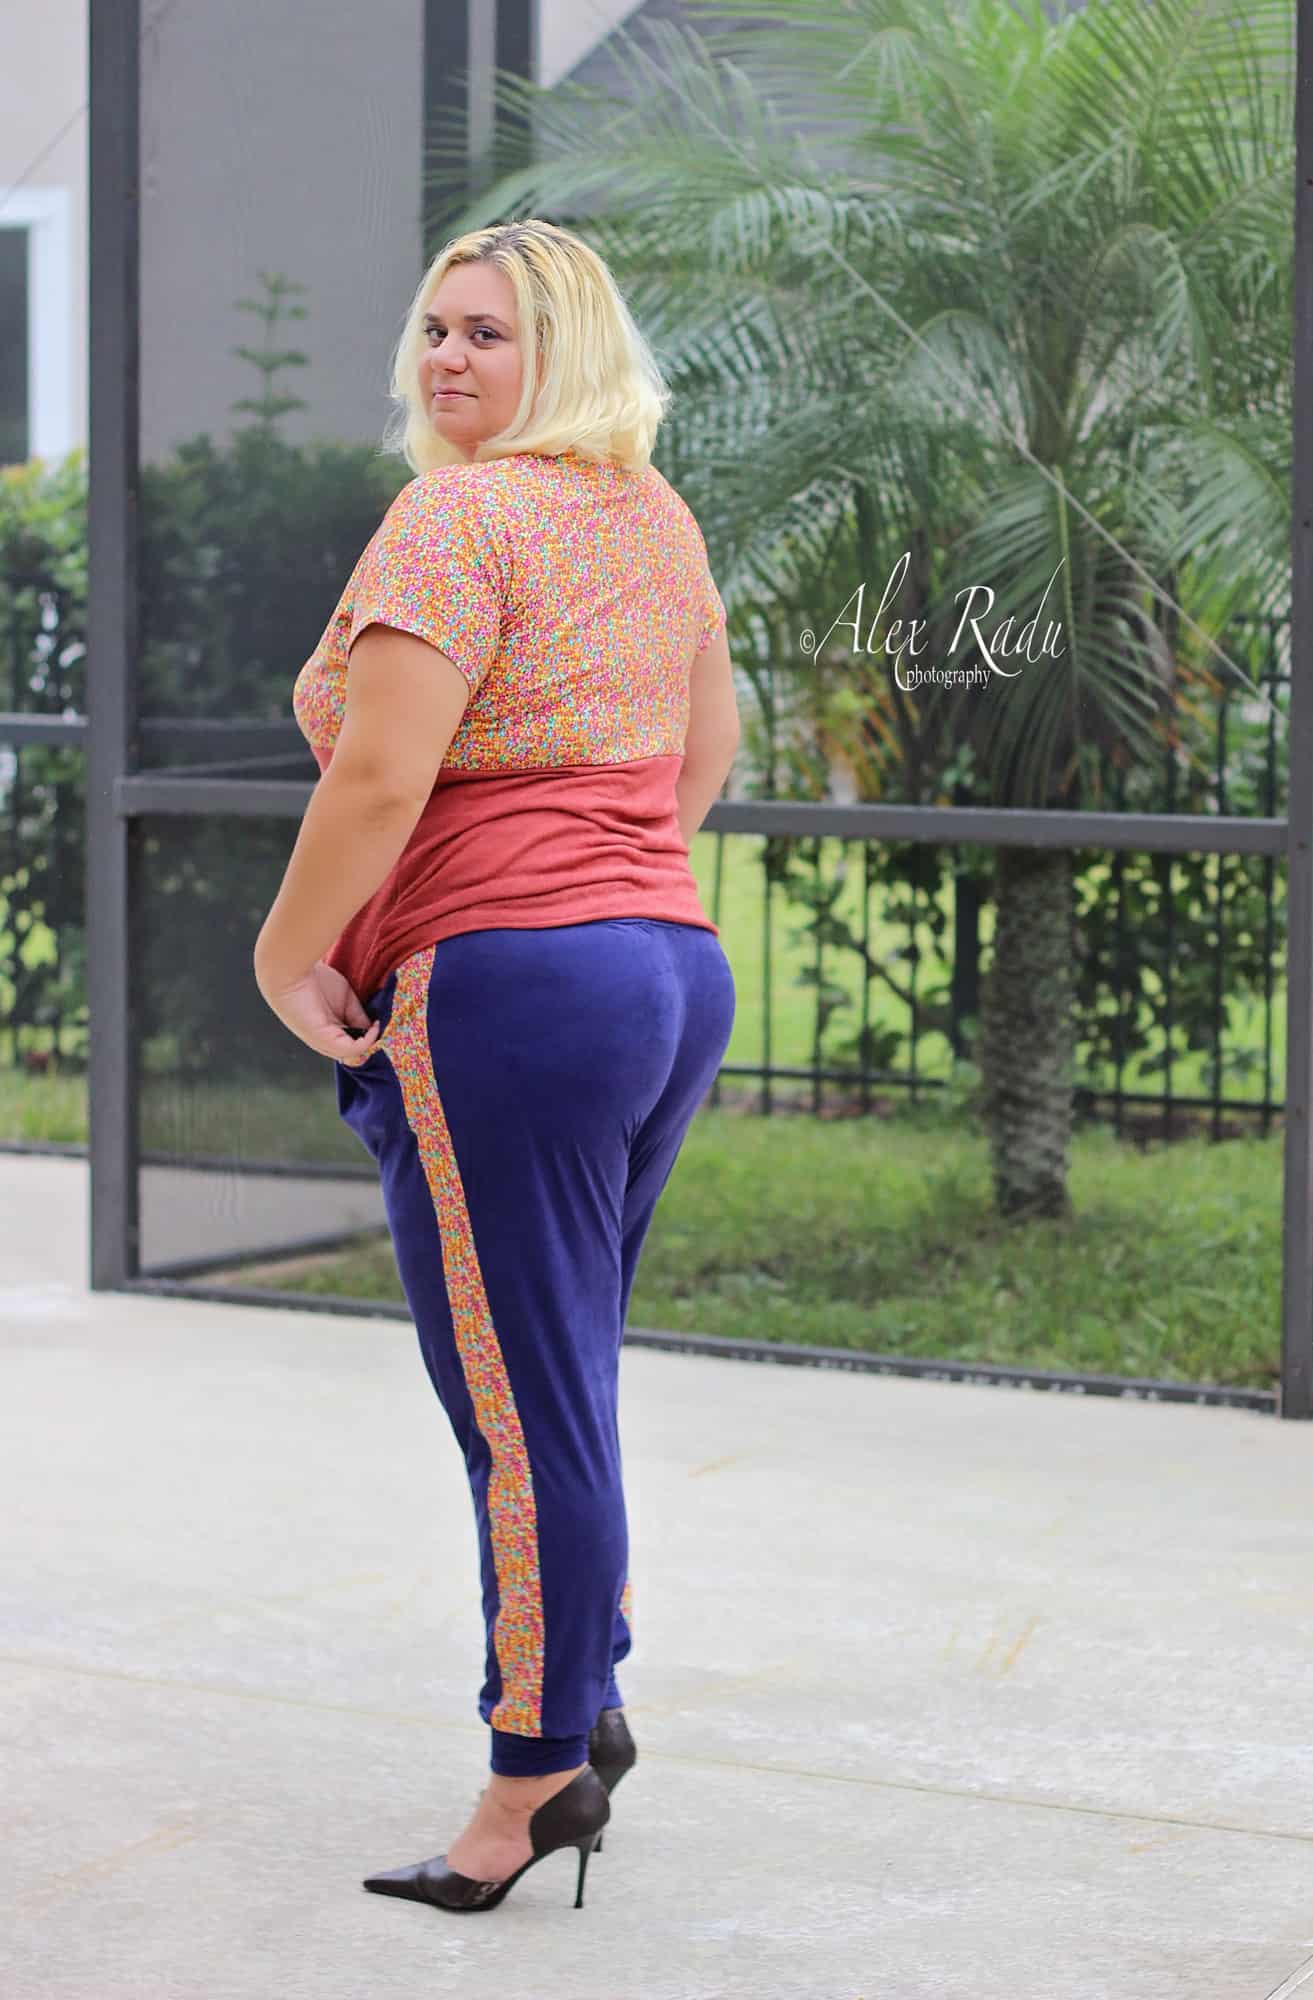
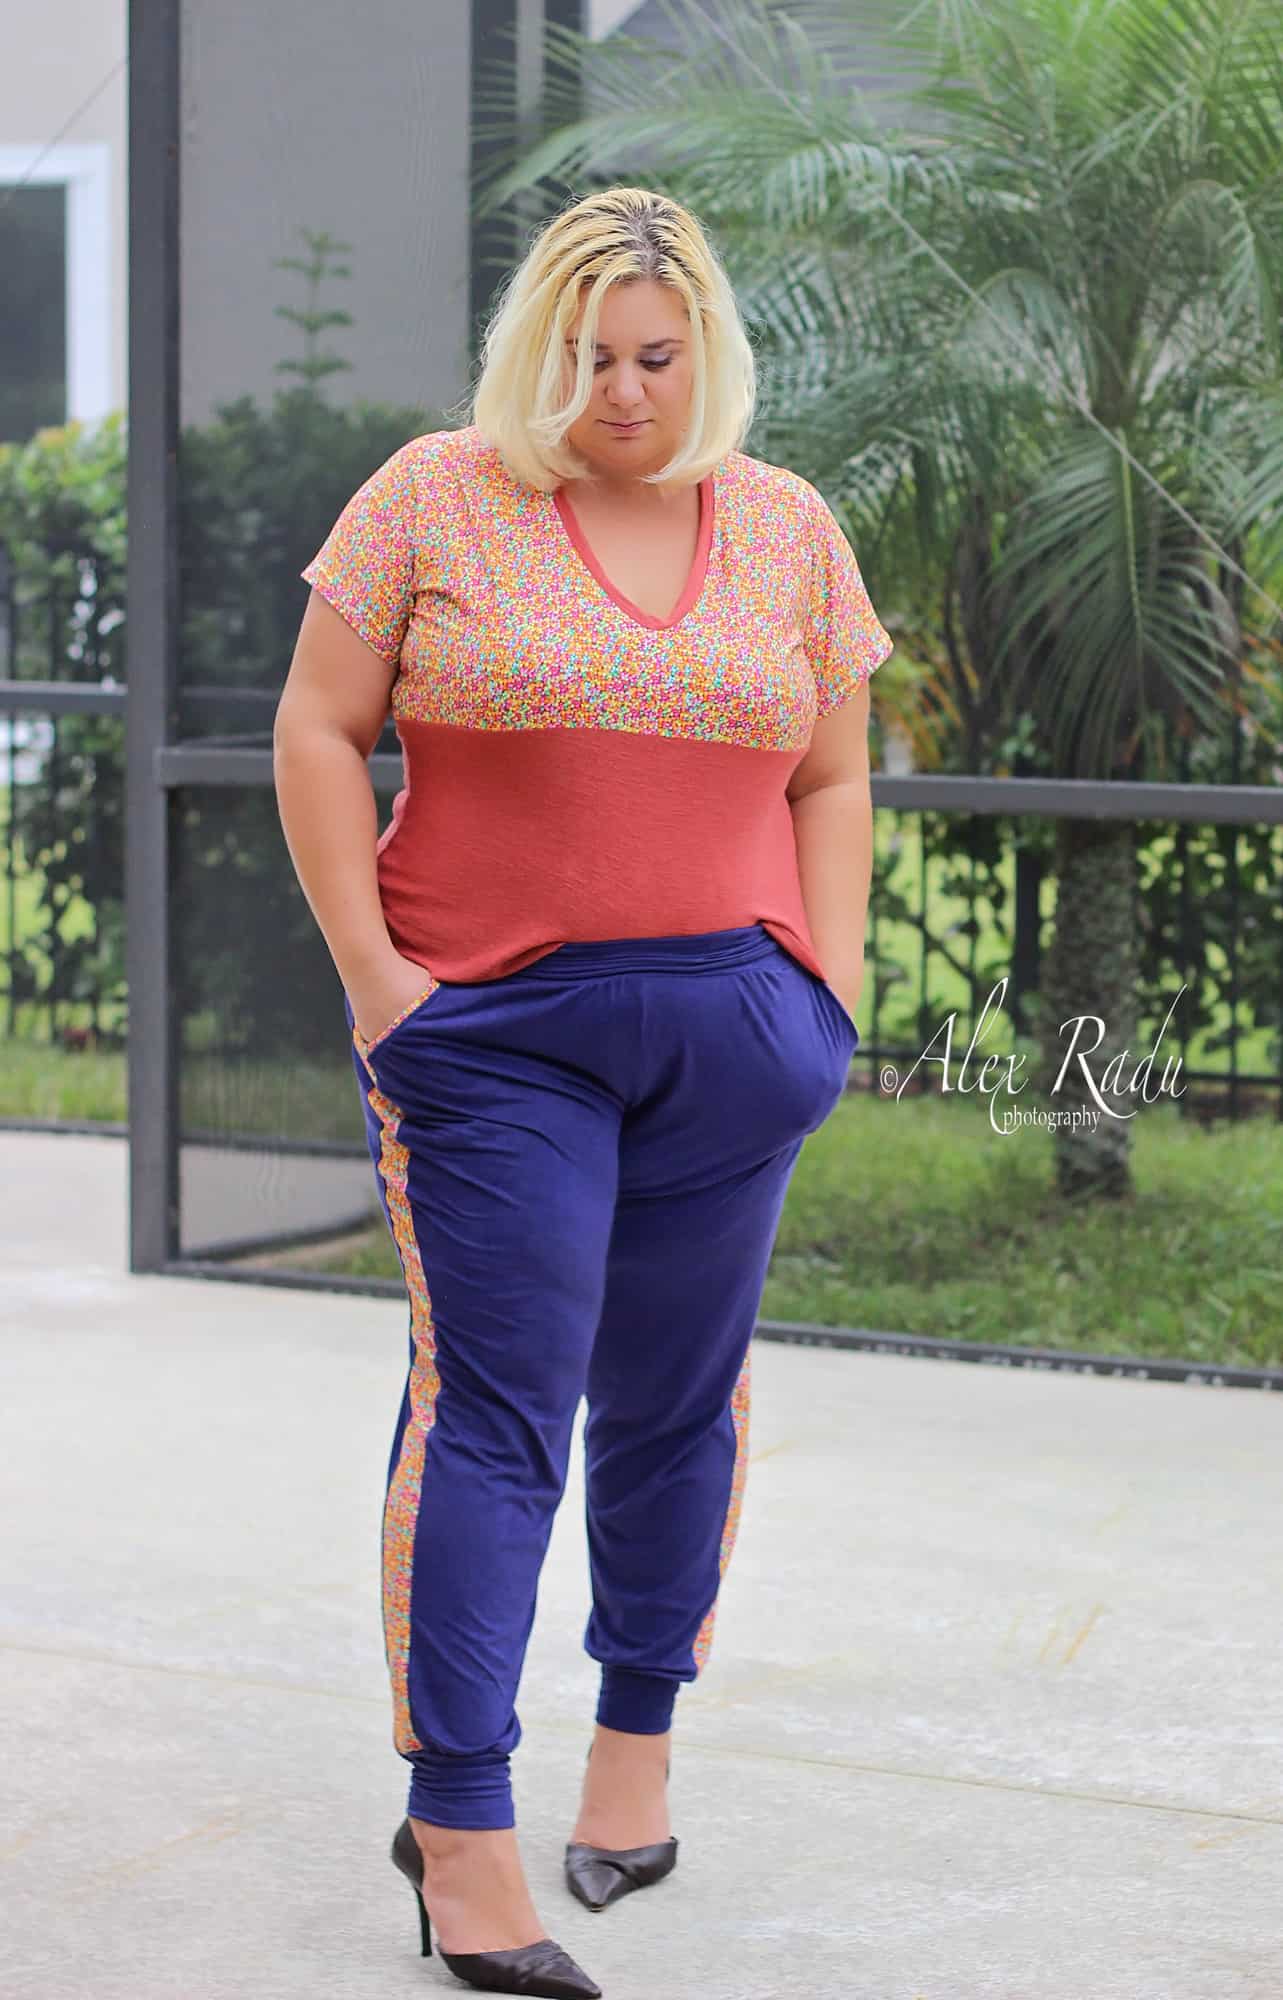
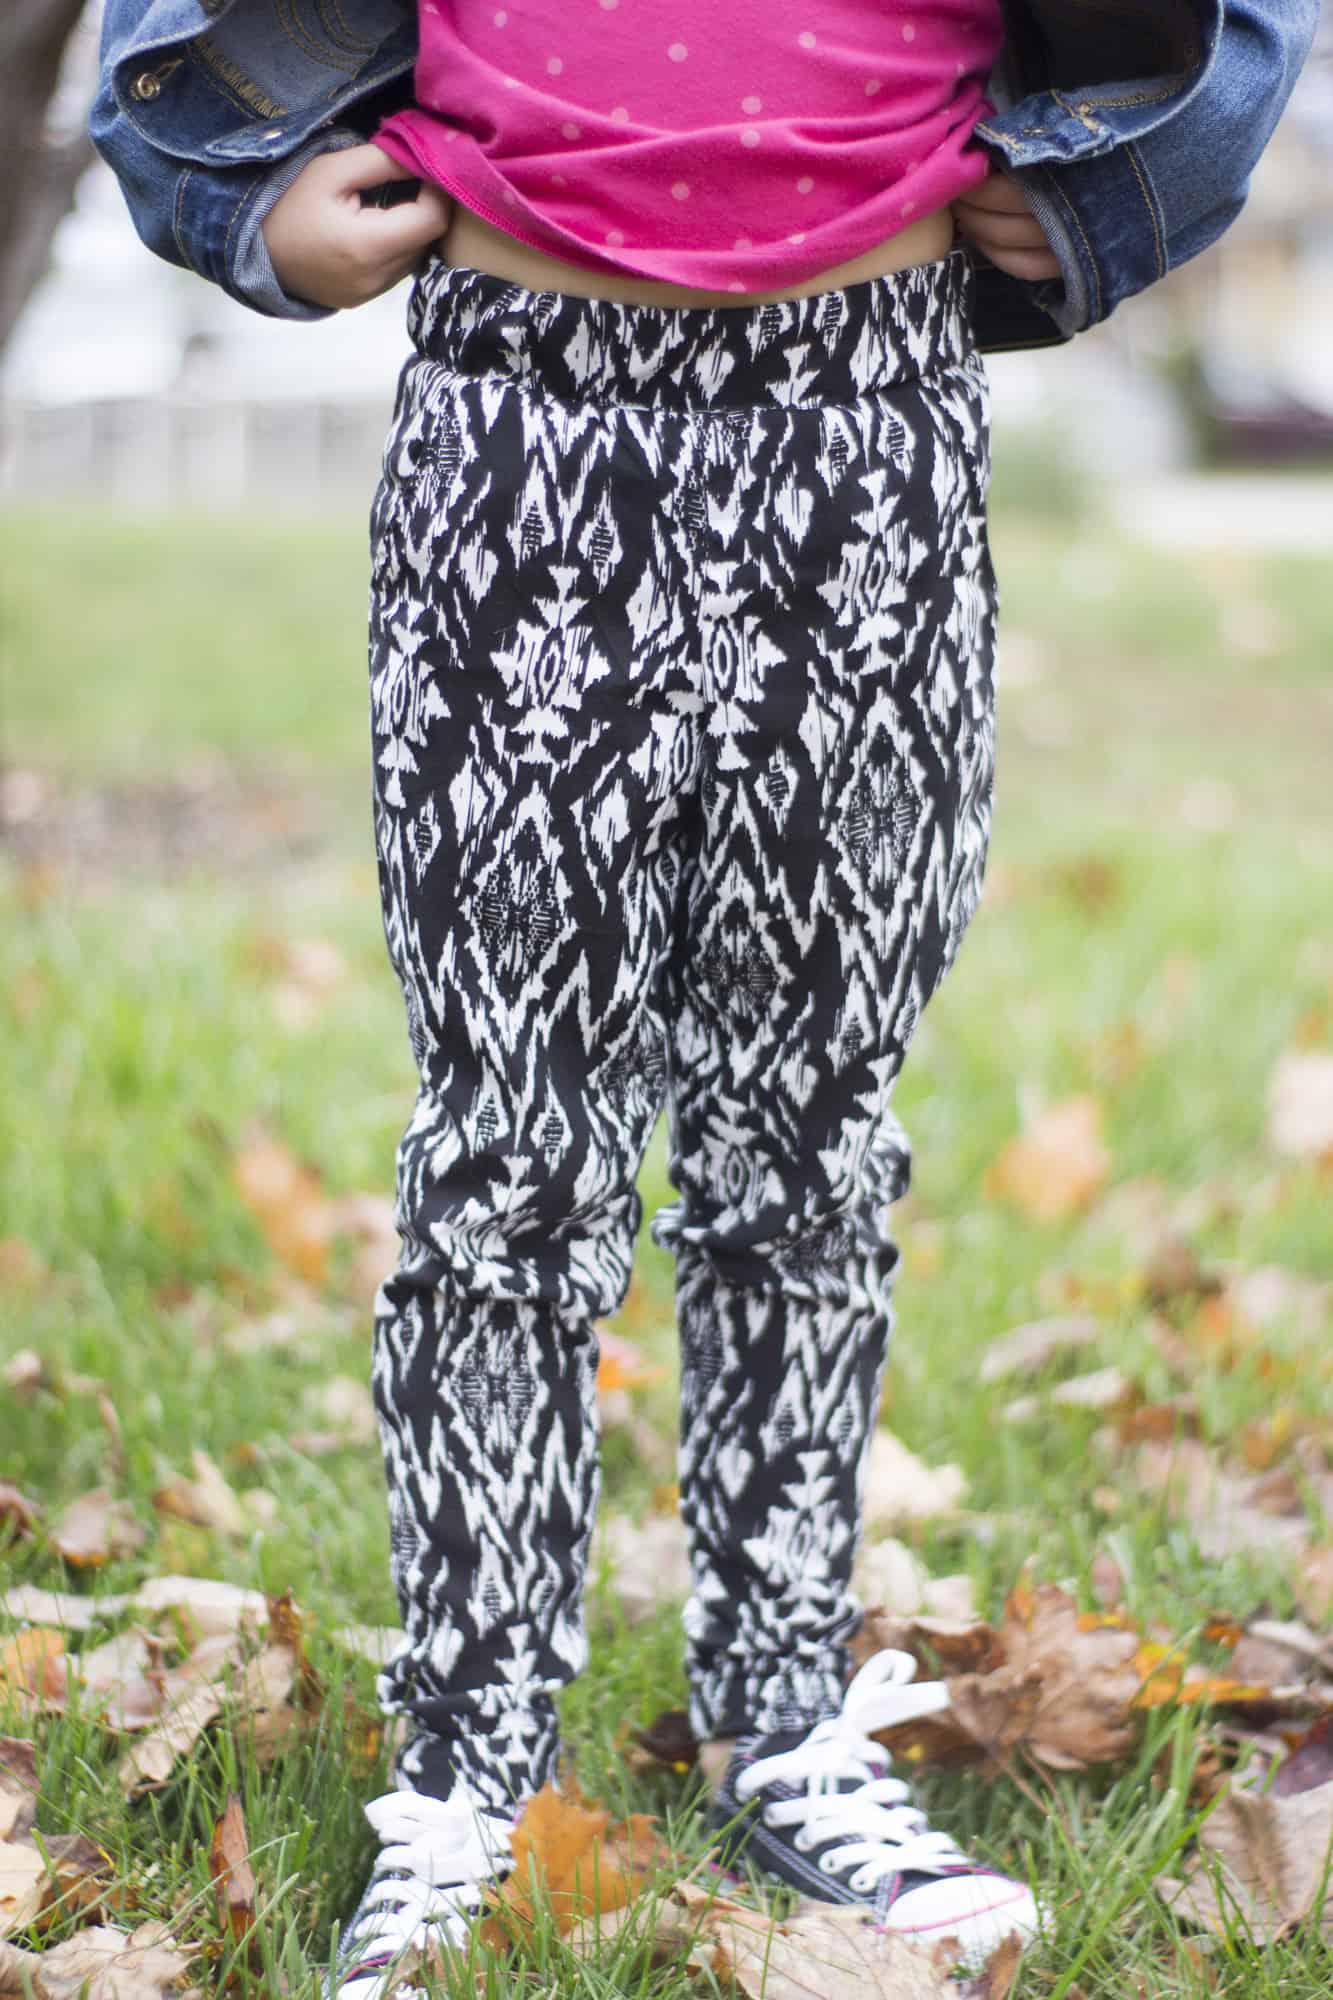
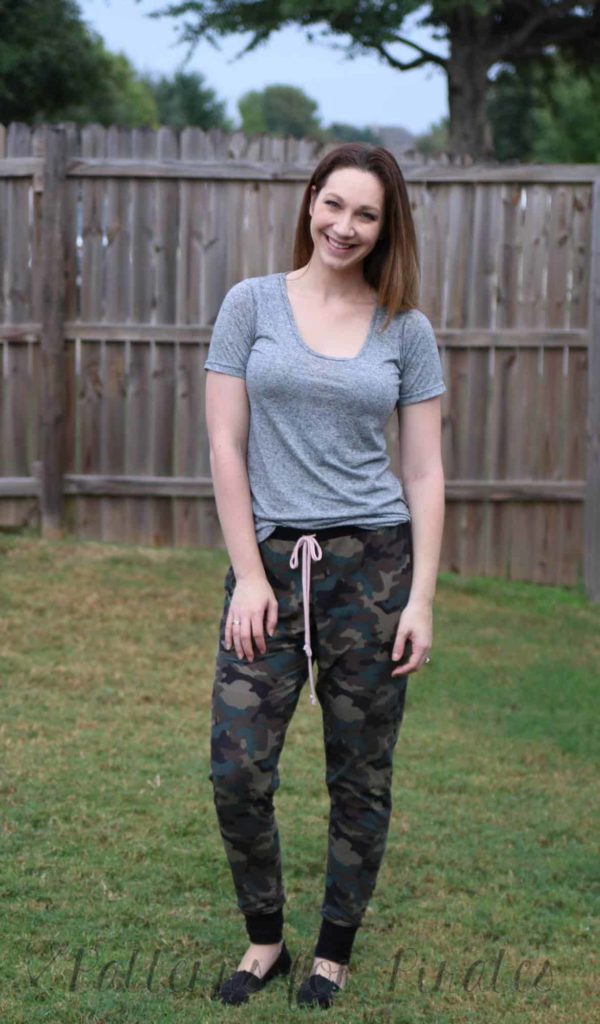
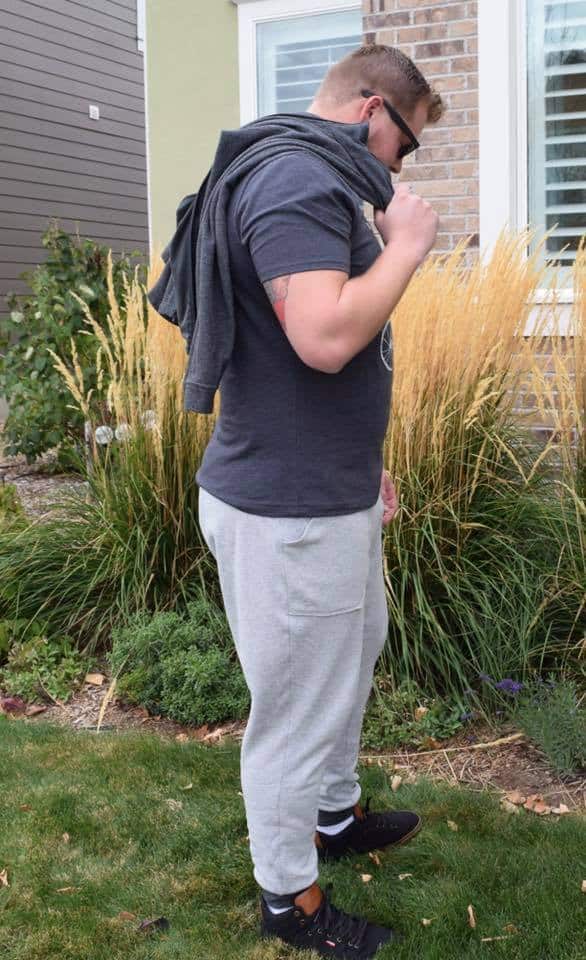
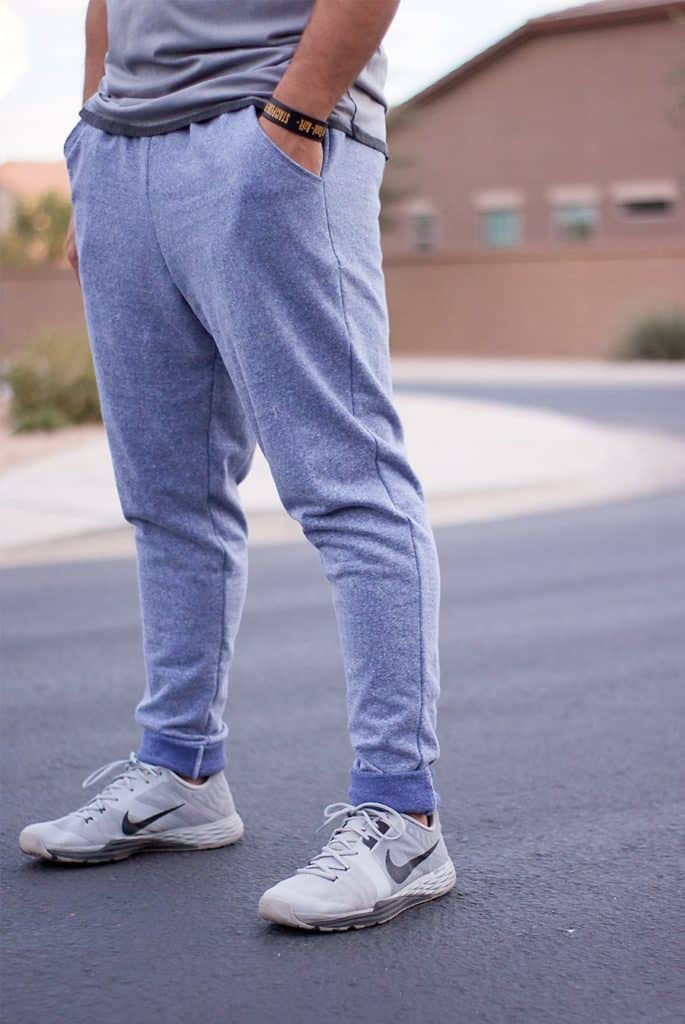
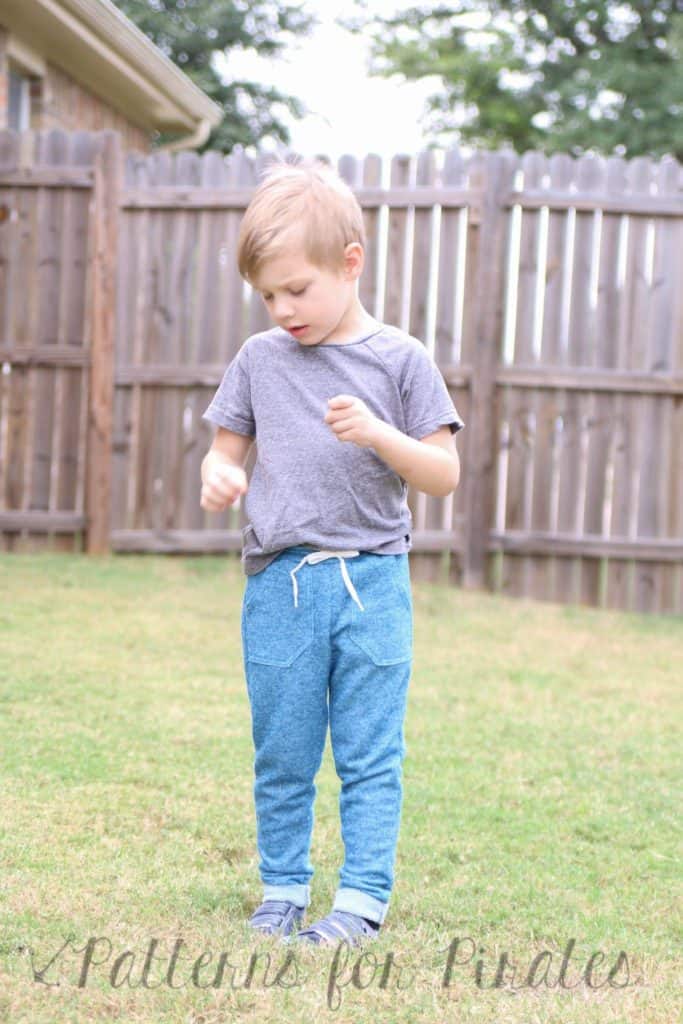
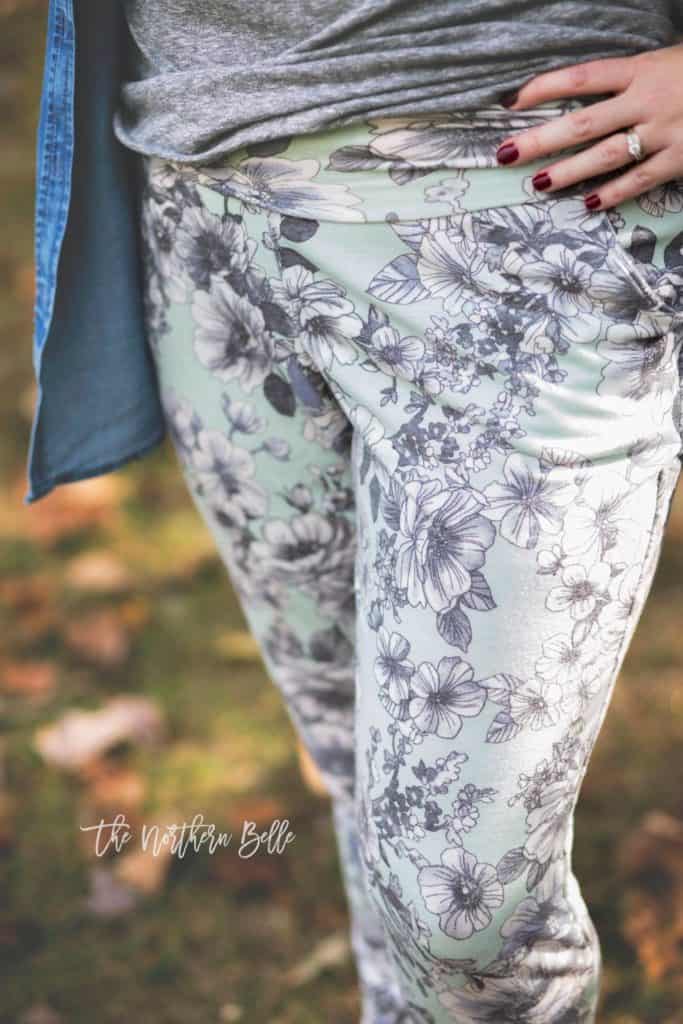
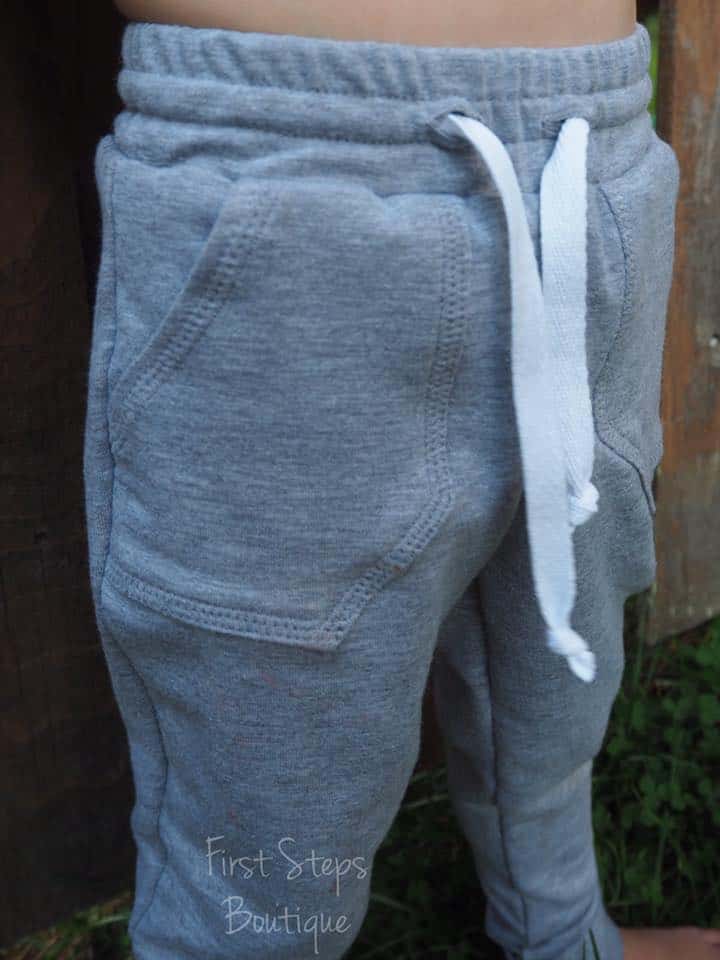
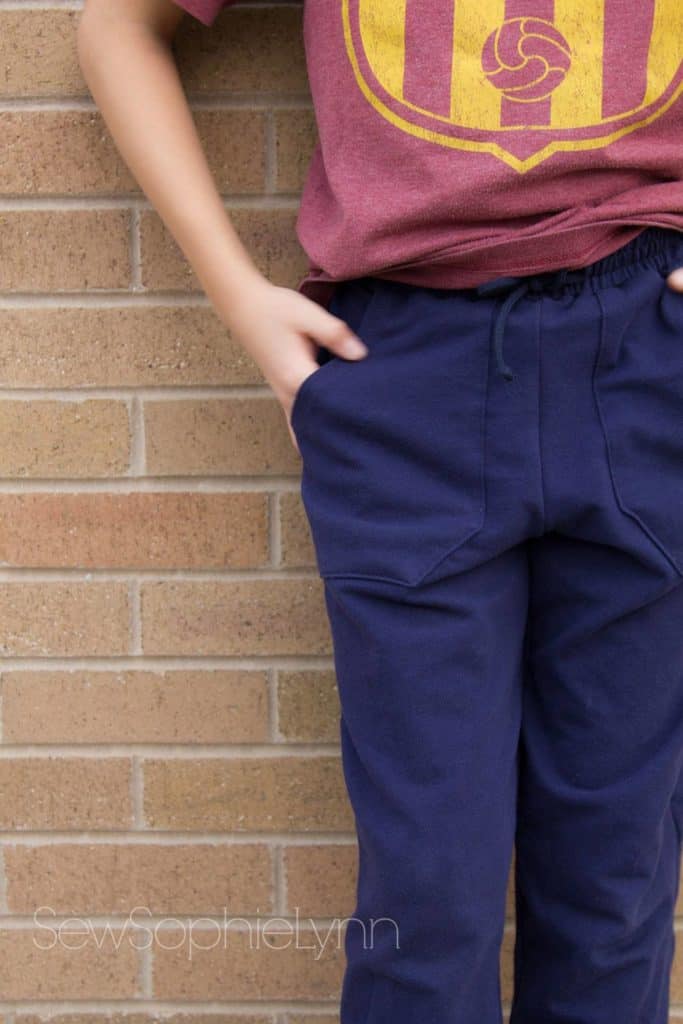
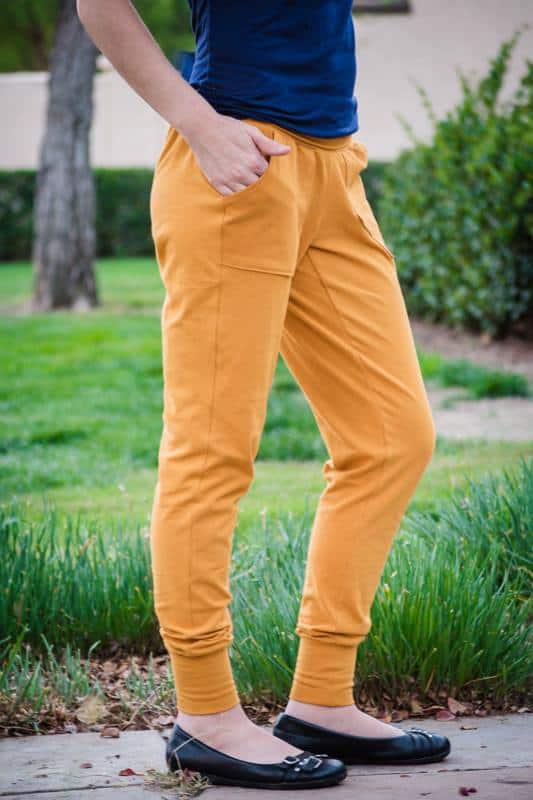
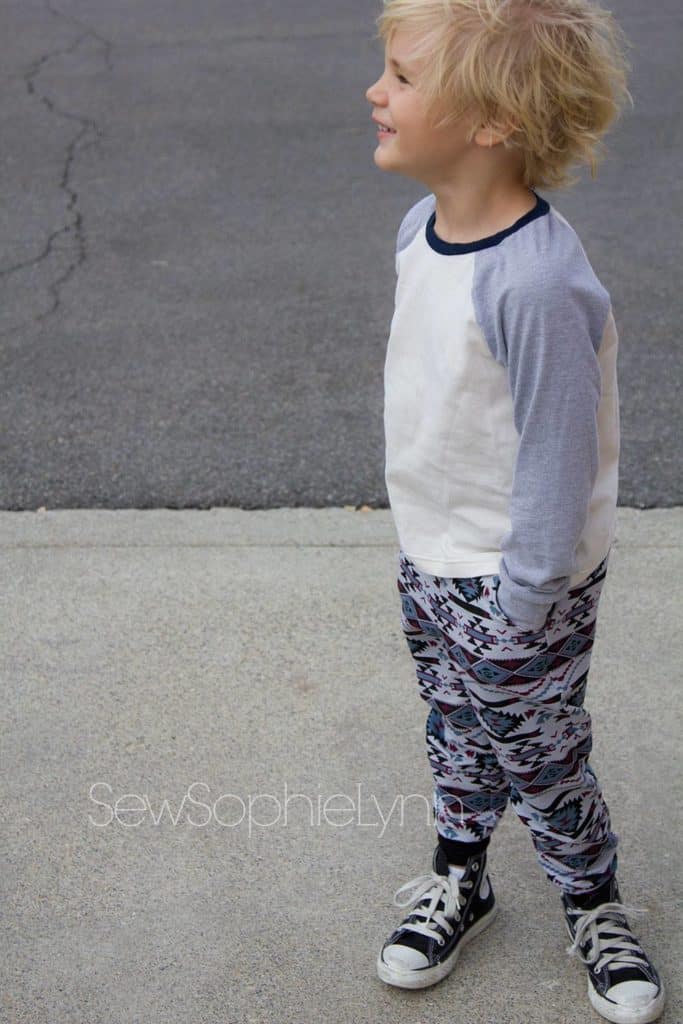
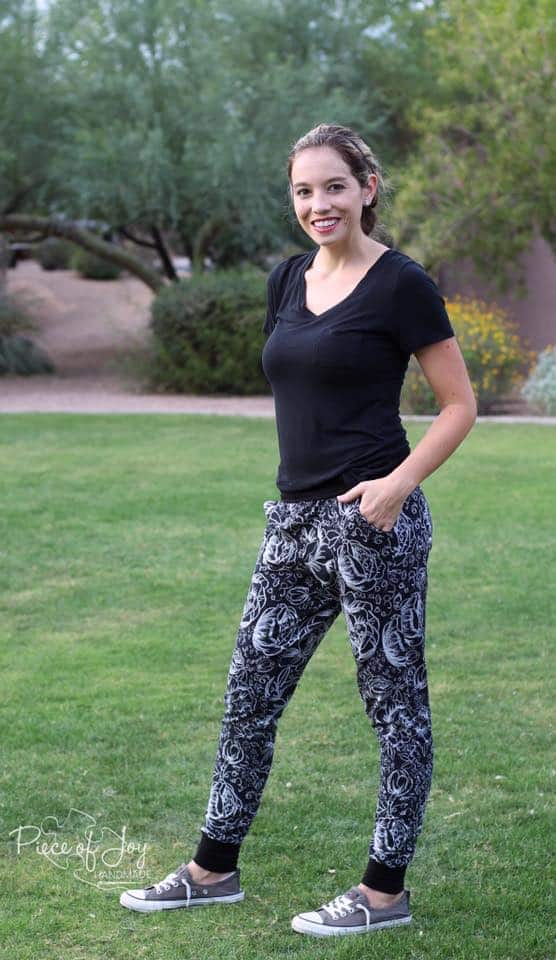
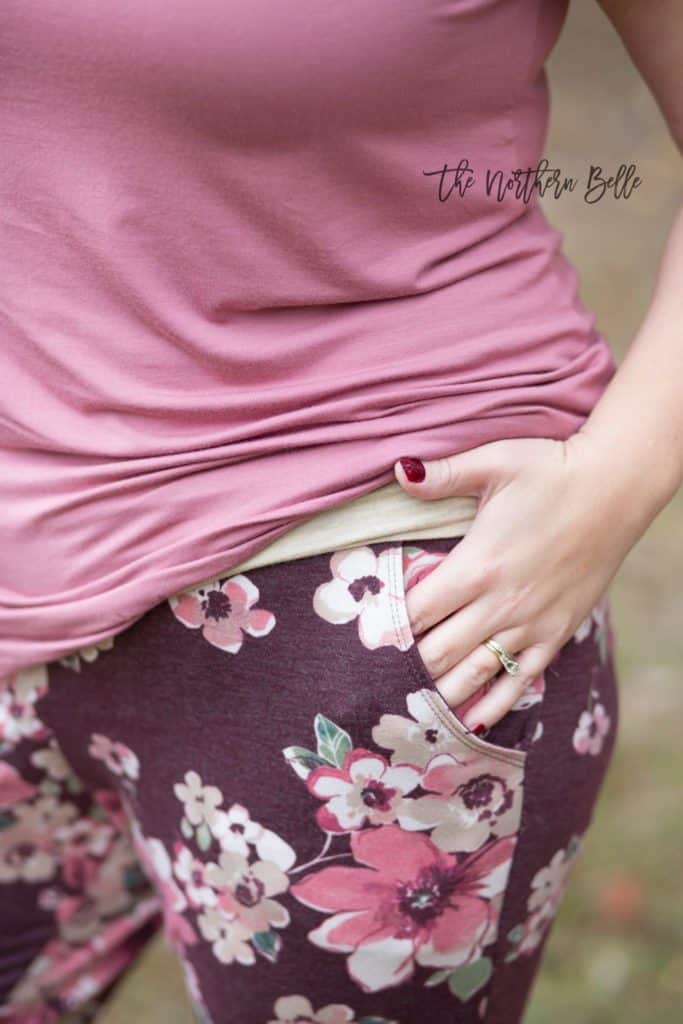
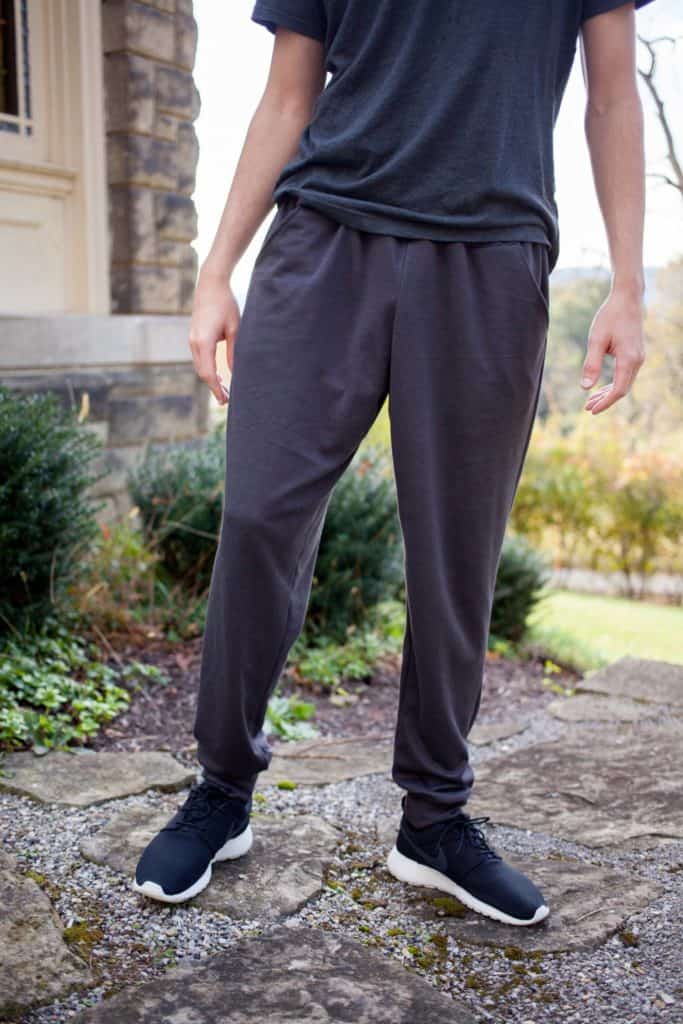
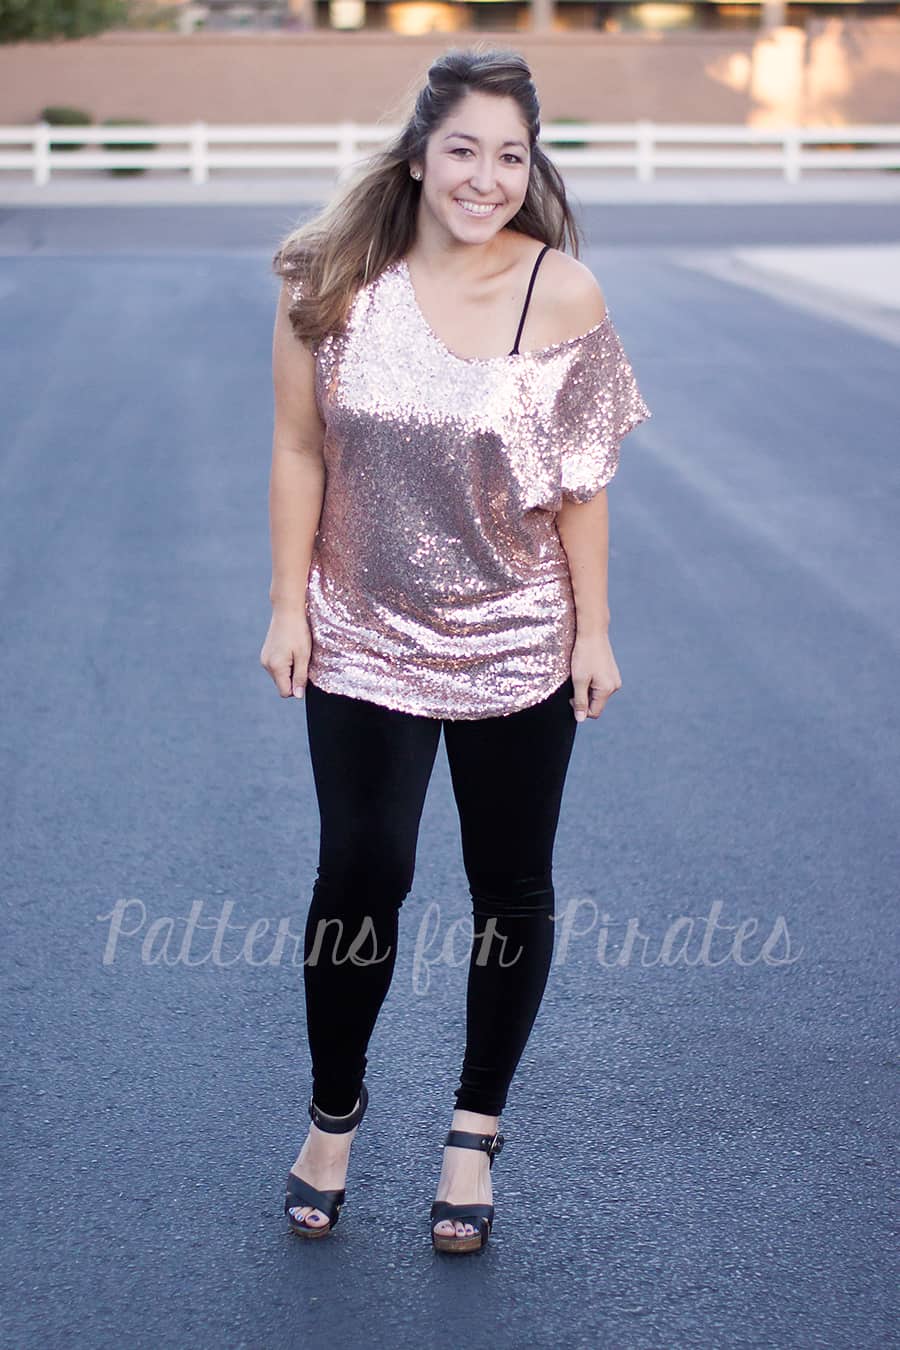
First, let’s talk about Peg Legs.  If you haven’t heard what Pegs legs are…Check out this blog post: Peg Leg 101.   My drawer is full of basic pegs, but I didn’t want just any old pair so I decided to use stretch velvet.  While the fabric does meet the minimum stretch requirements, I opted to take a slightly smaller seam allowance just to ensure that they wouldn’t end up a little sheer at the booty and looking more like tights. I also used supplex for my waistband since I wasn’t sure if the velvet would cause the waistband to slip too much.   Changing the type and texture of the fabric took my “mom-iform” pants to luxurious!

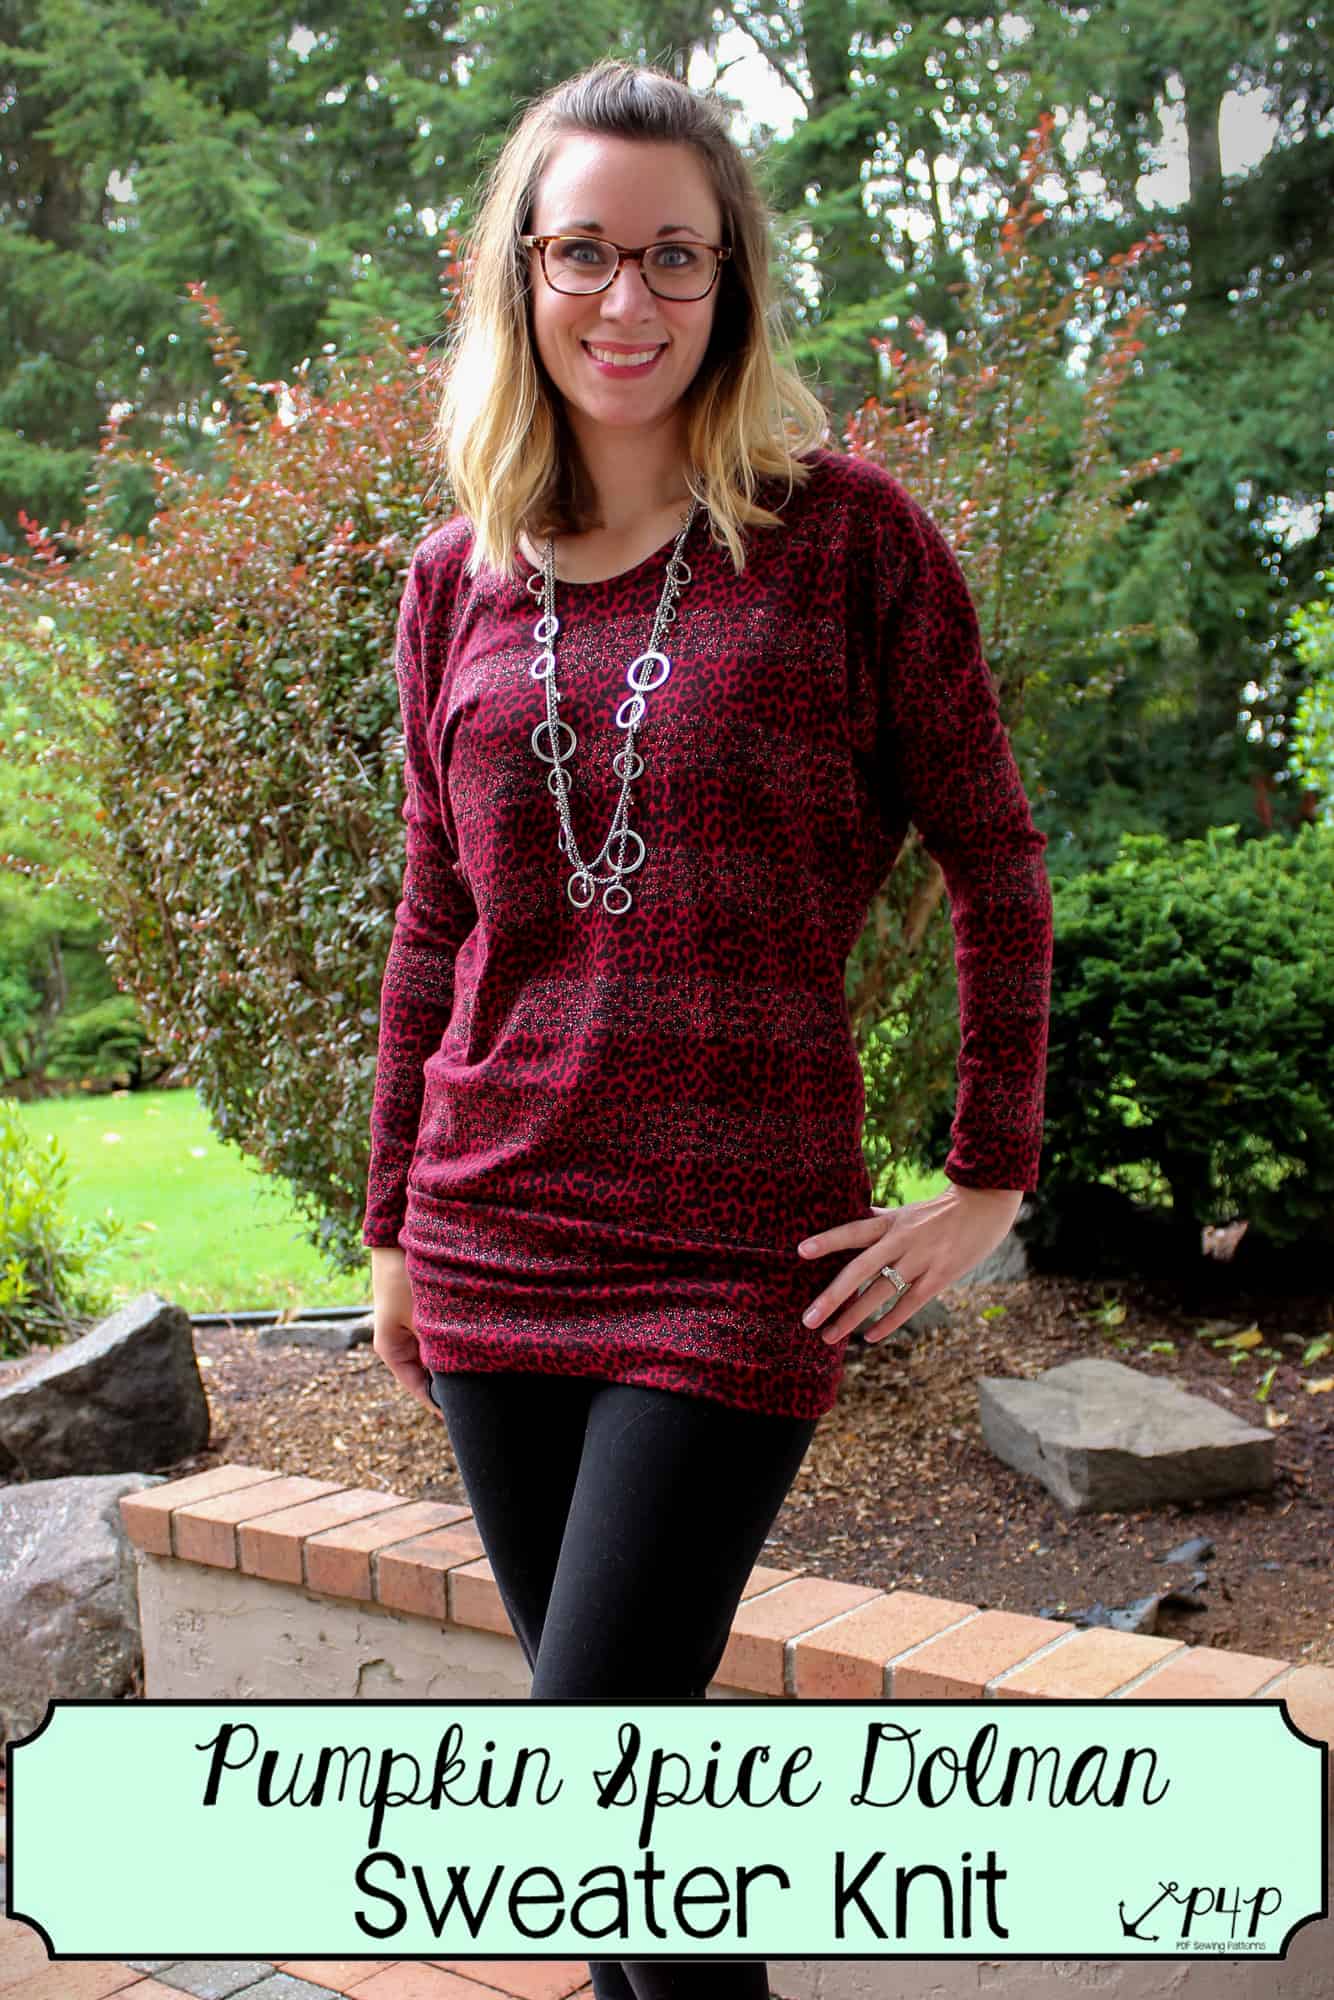
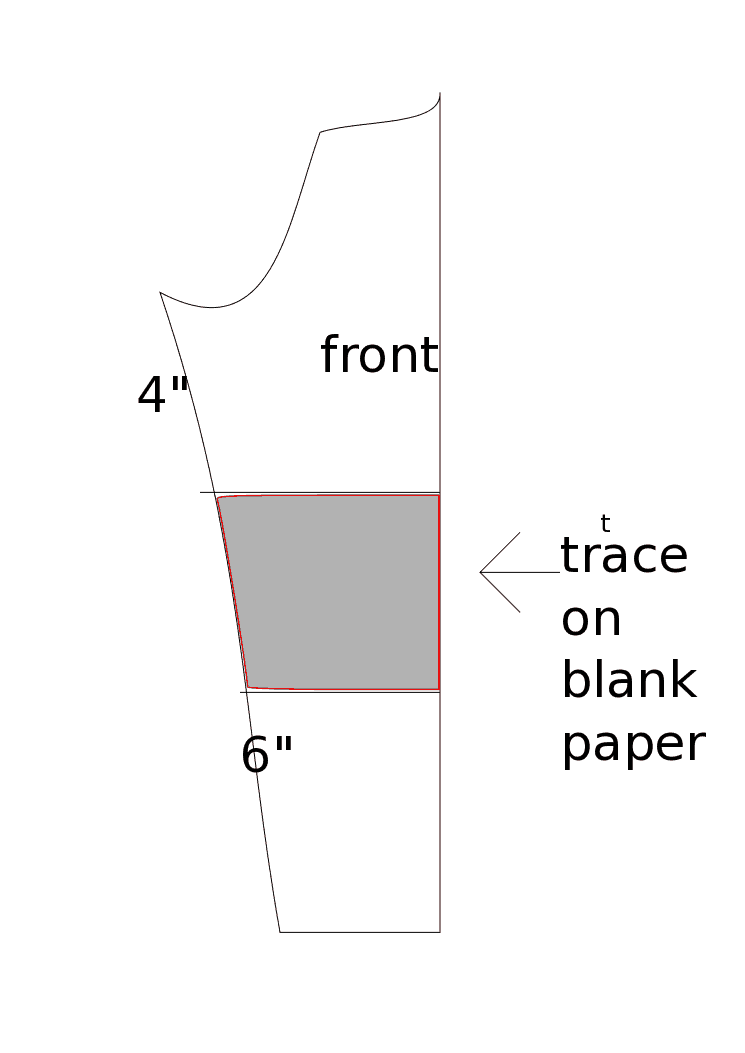
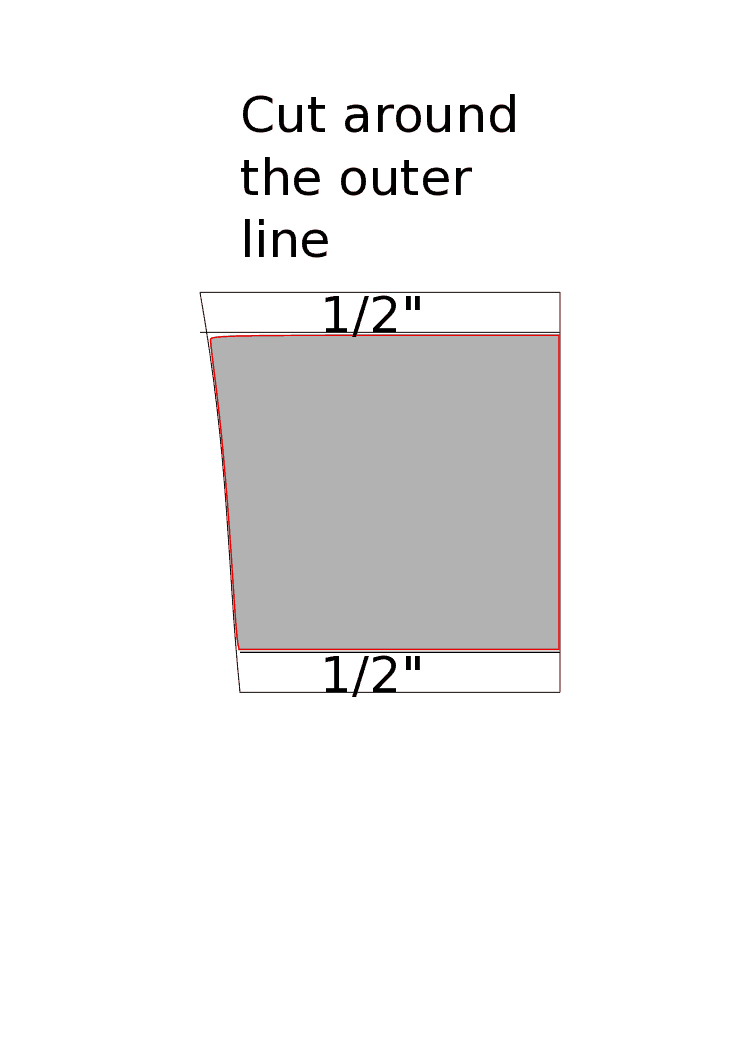
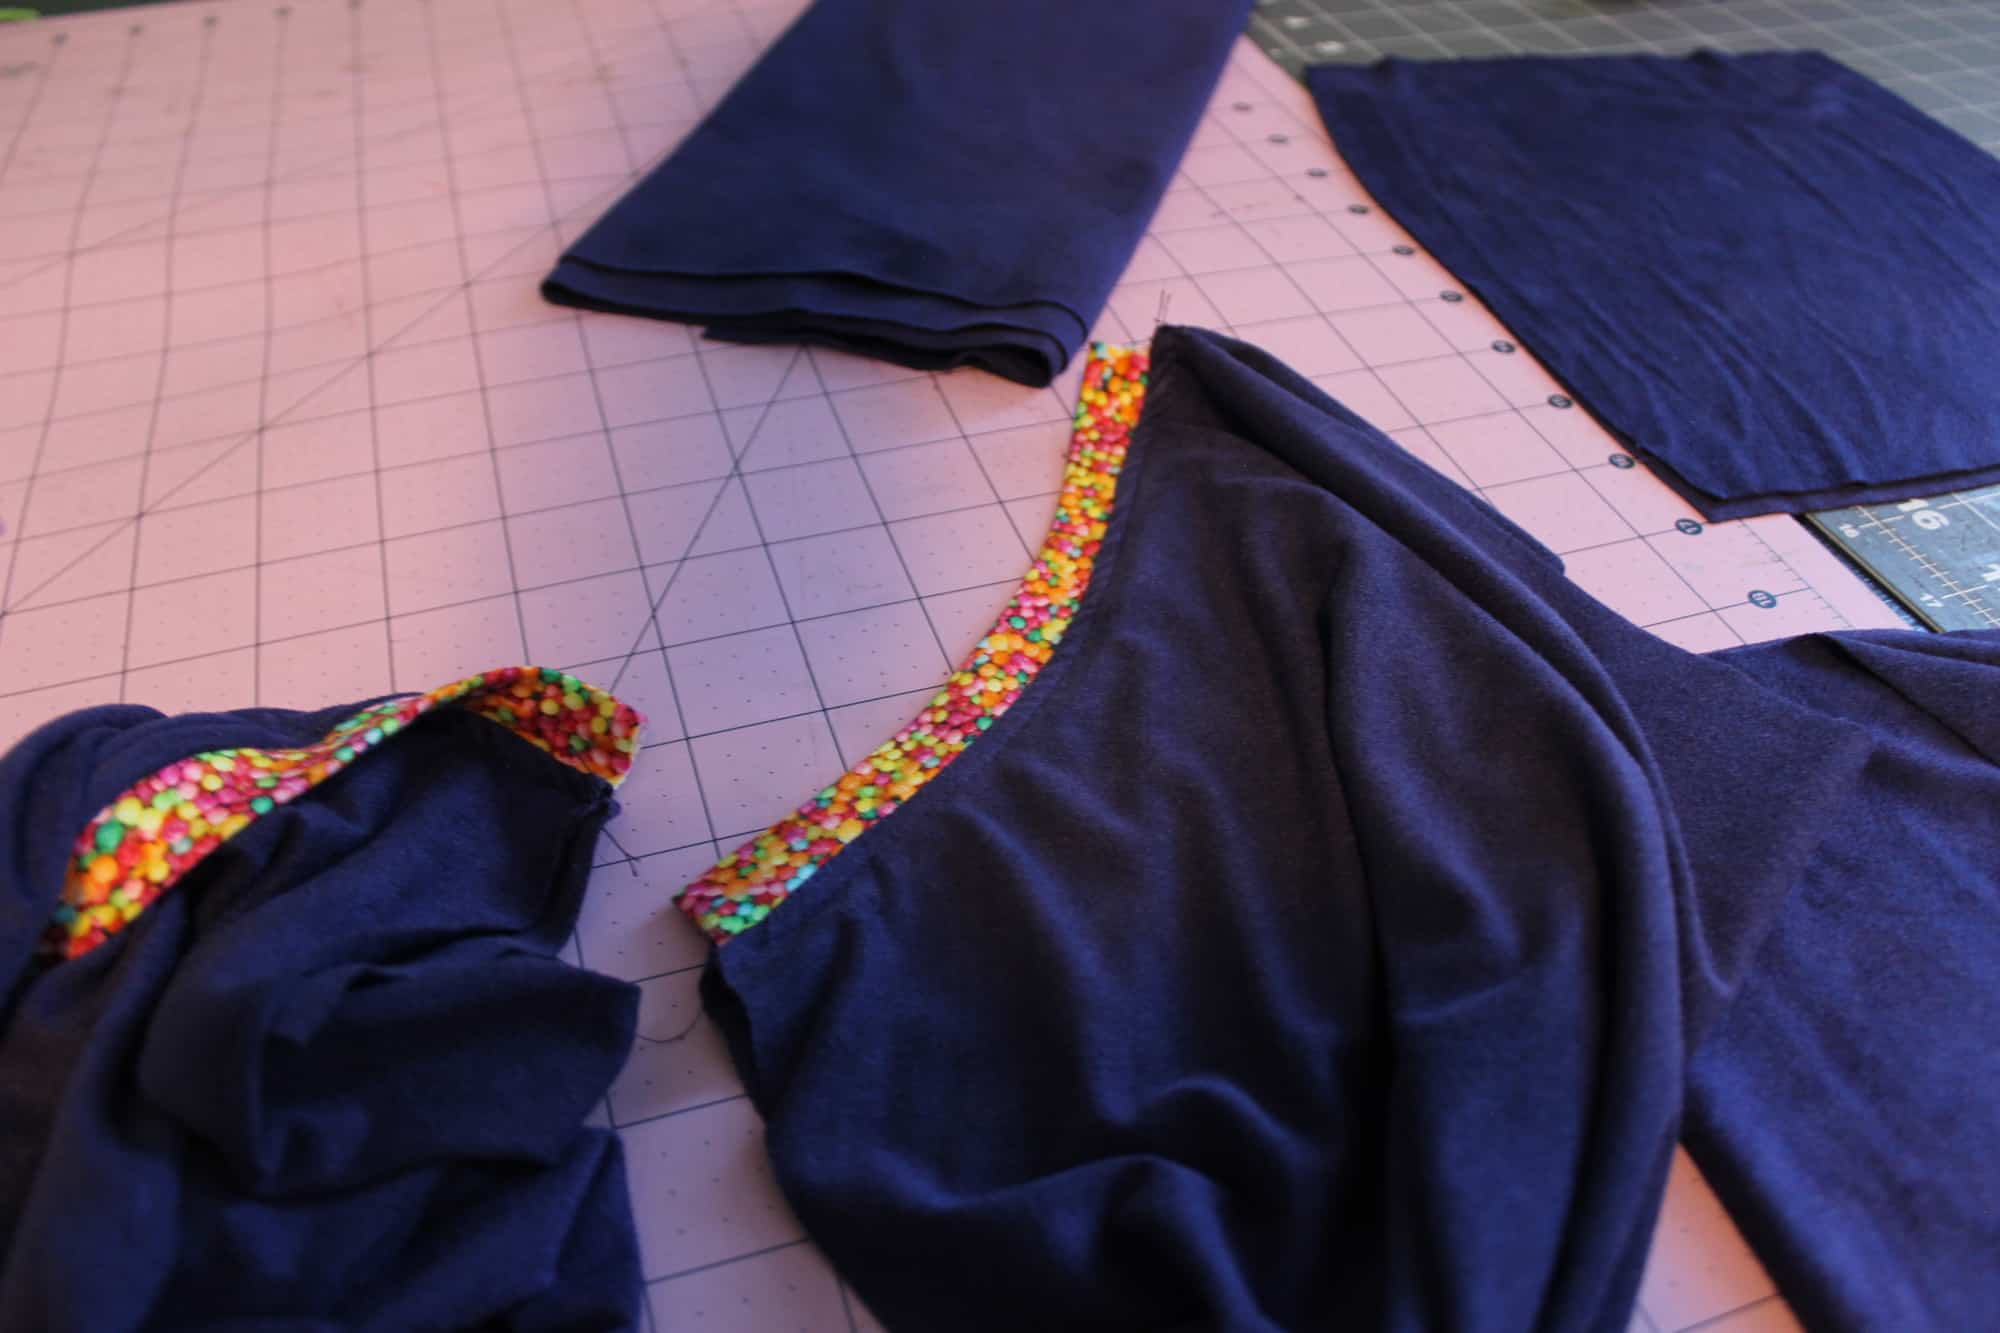
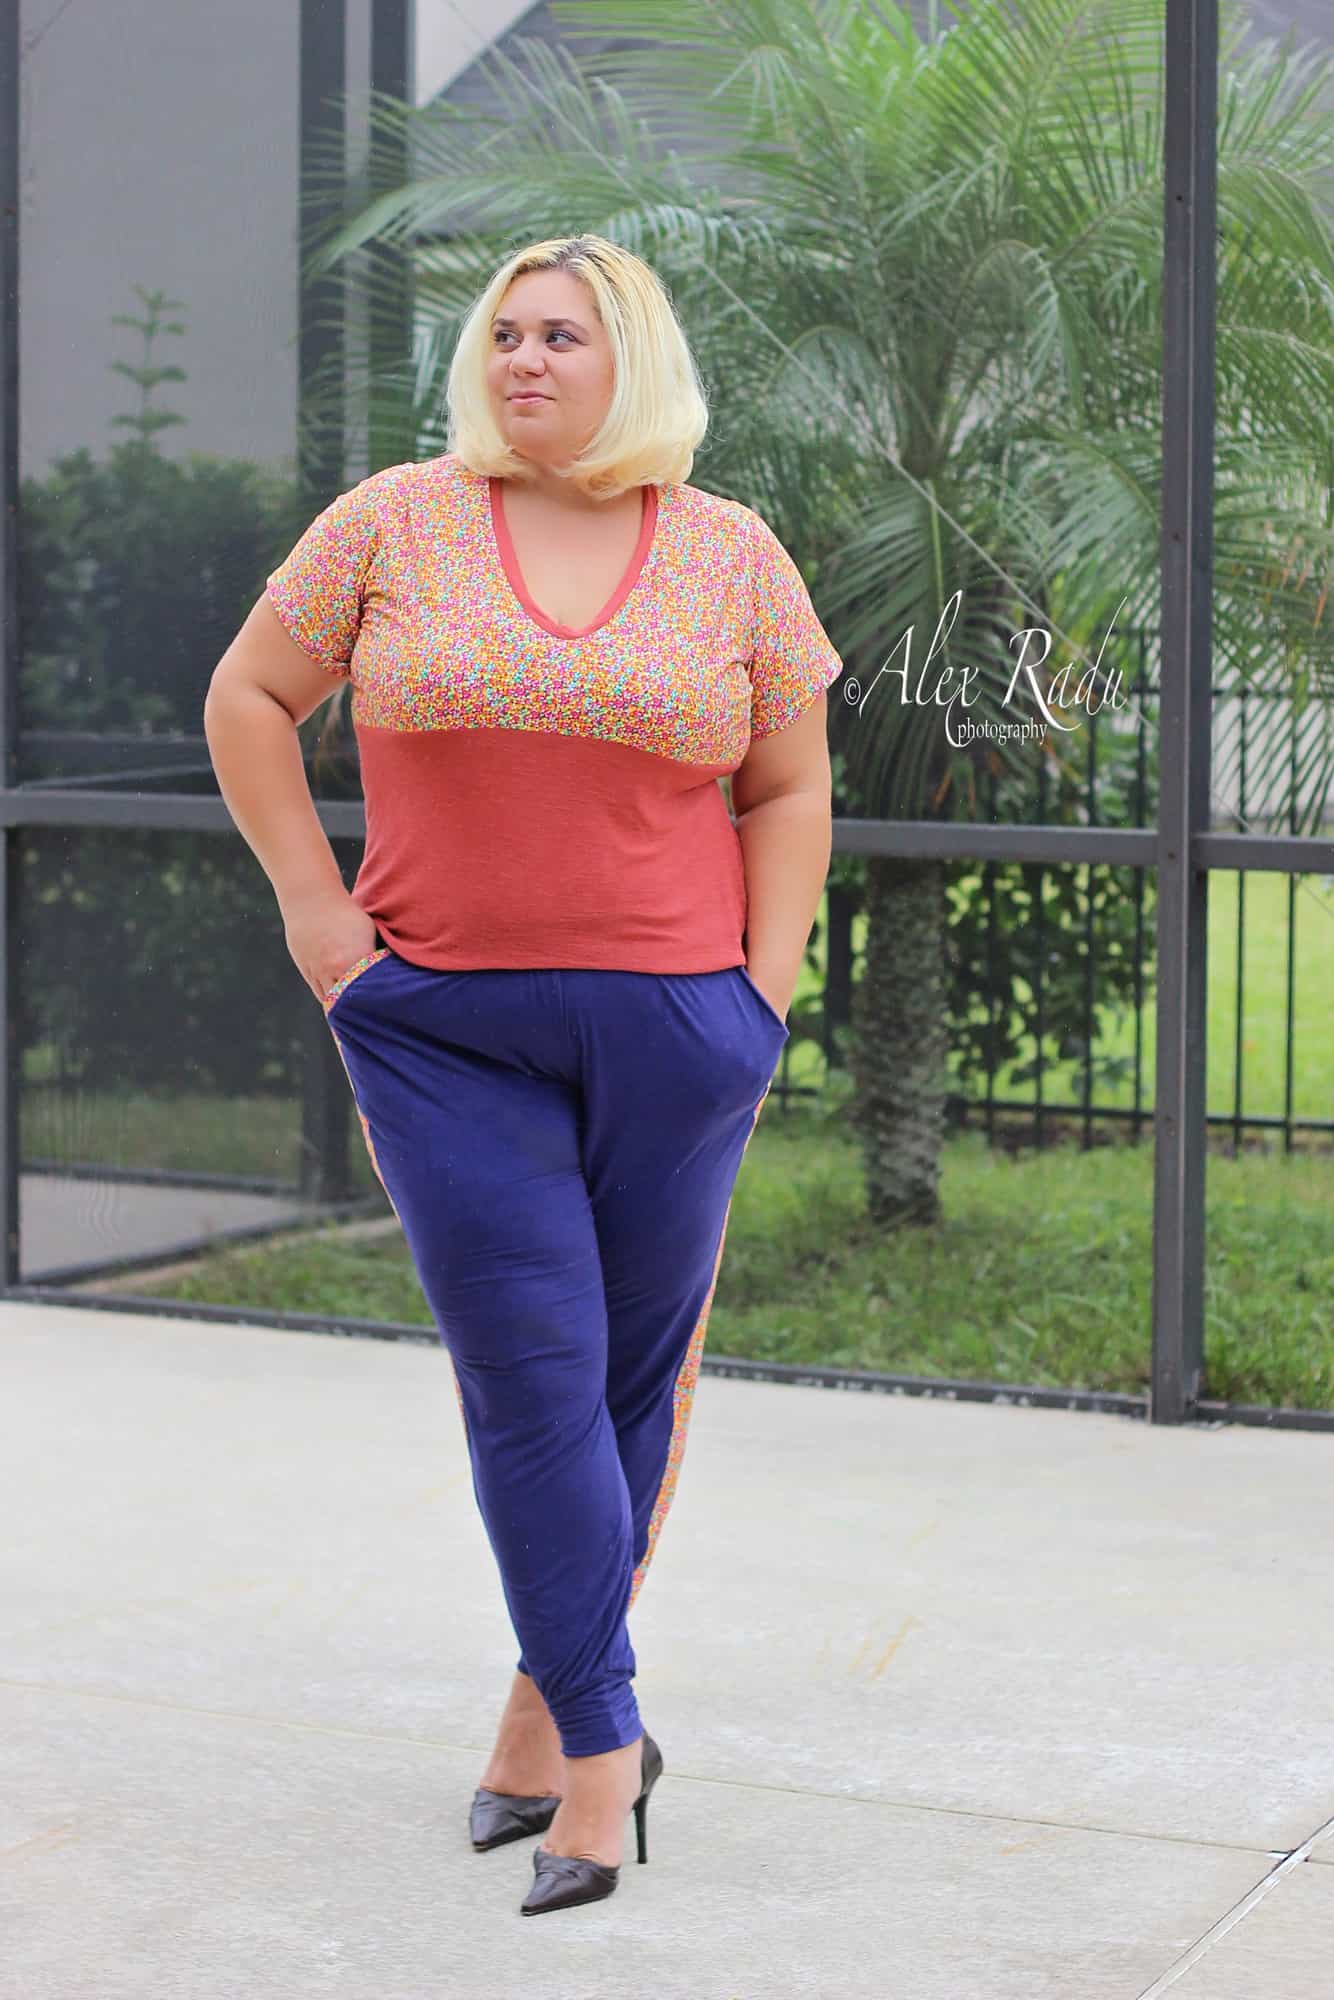
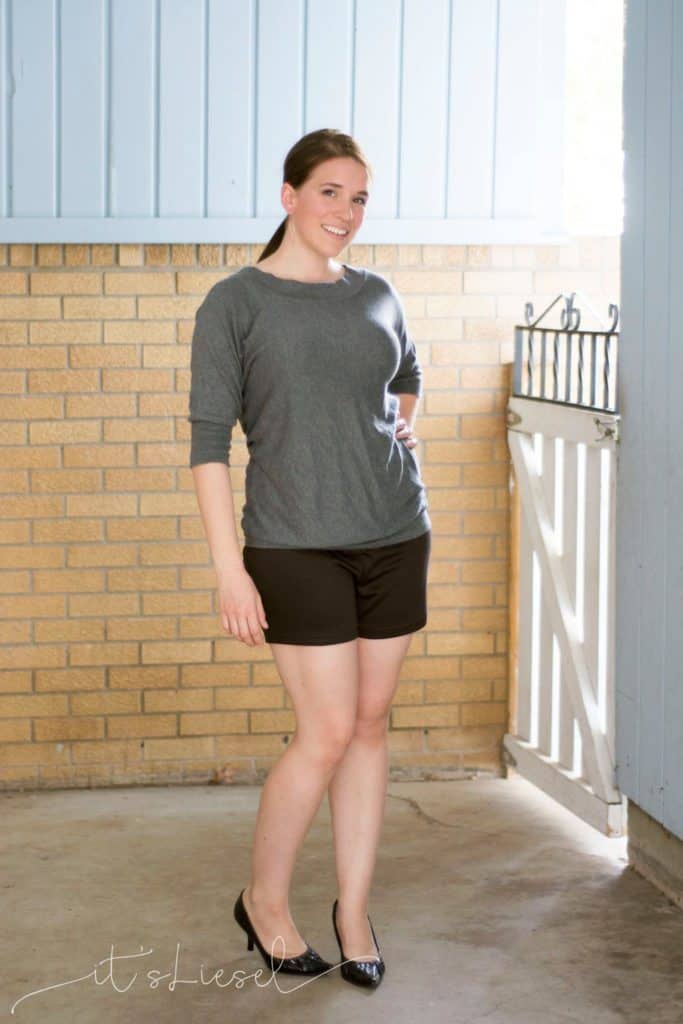
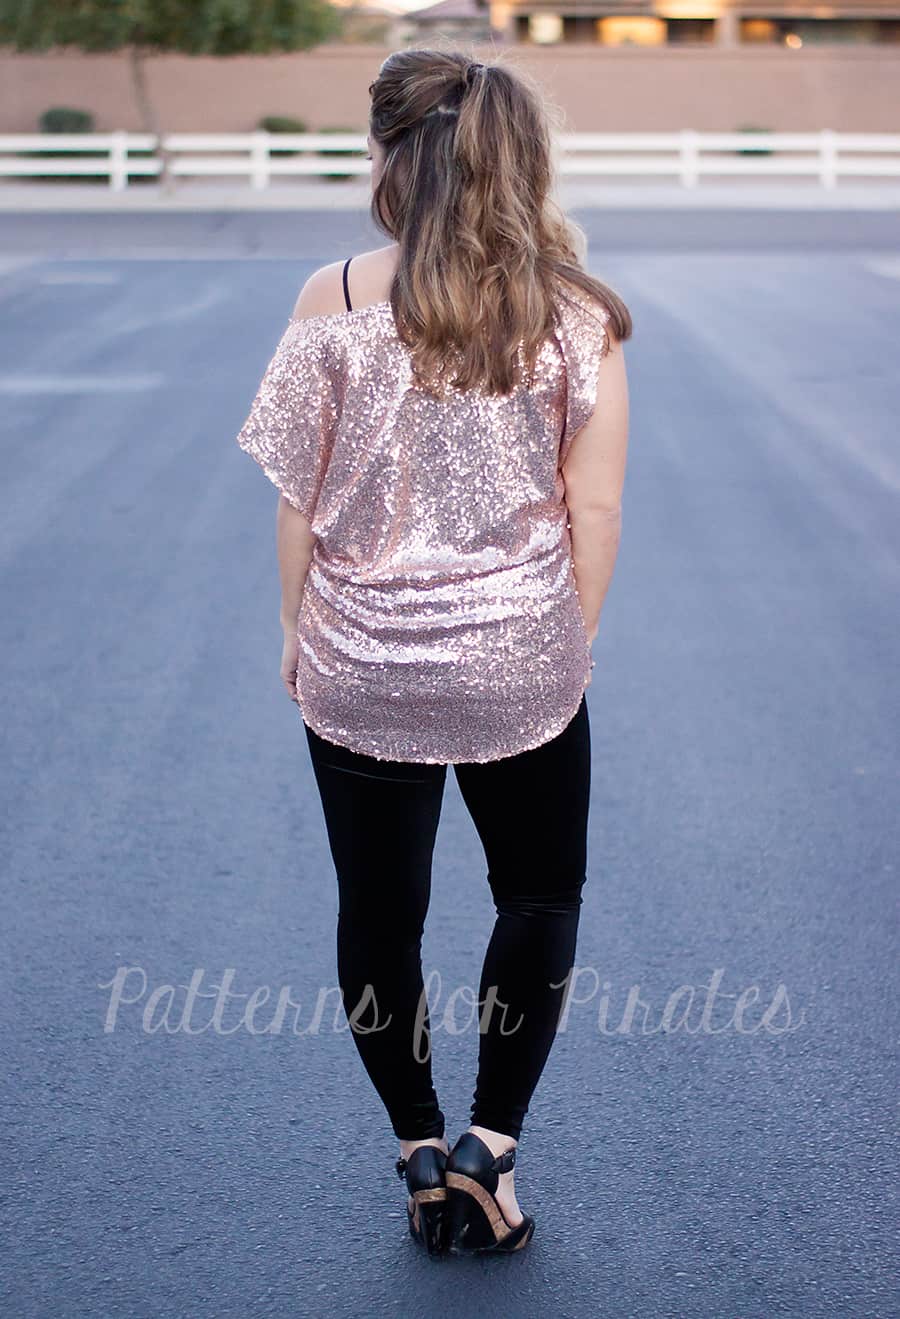
Now on to my top.  I’ve recently made a few Off -the-Shoulder Raglans using our raglan hack from a few weeks ago and am really liking the look so I thought it would be a perfect addition to the Pumpkin Spice Dolman to take it up a notch. I was also limited on my fabric and ended up using two front pattern pieces so I could use it for both the front and back.  The back pattern piece of the PSD is wider since naturally our curves (our booty and shoulders) need the extra ease but I was ok with slightly slimmer fit through the hip that I would end up with by using the same pattern piece for the front and back.

Peg Legs & Pumpkin Spice Dolman Holiday

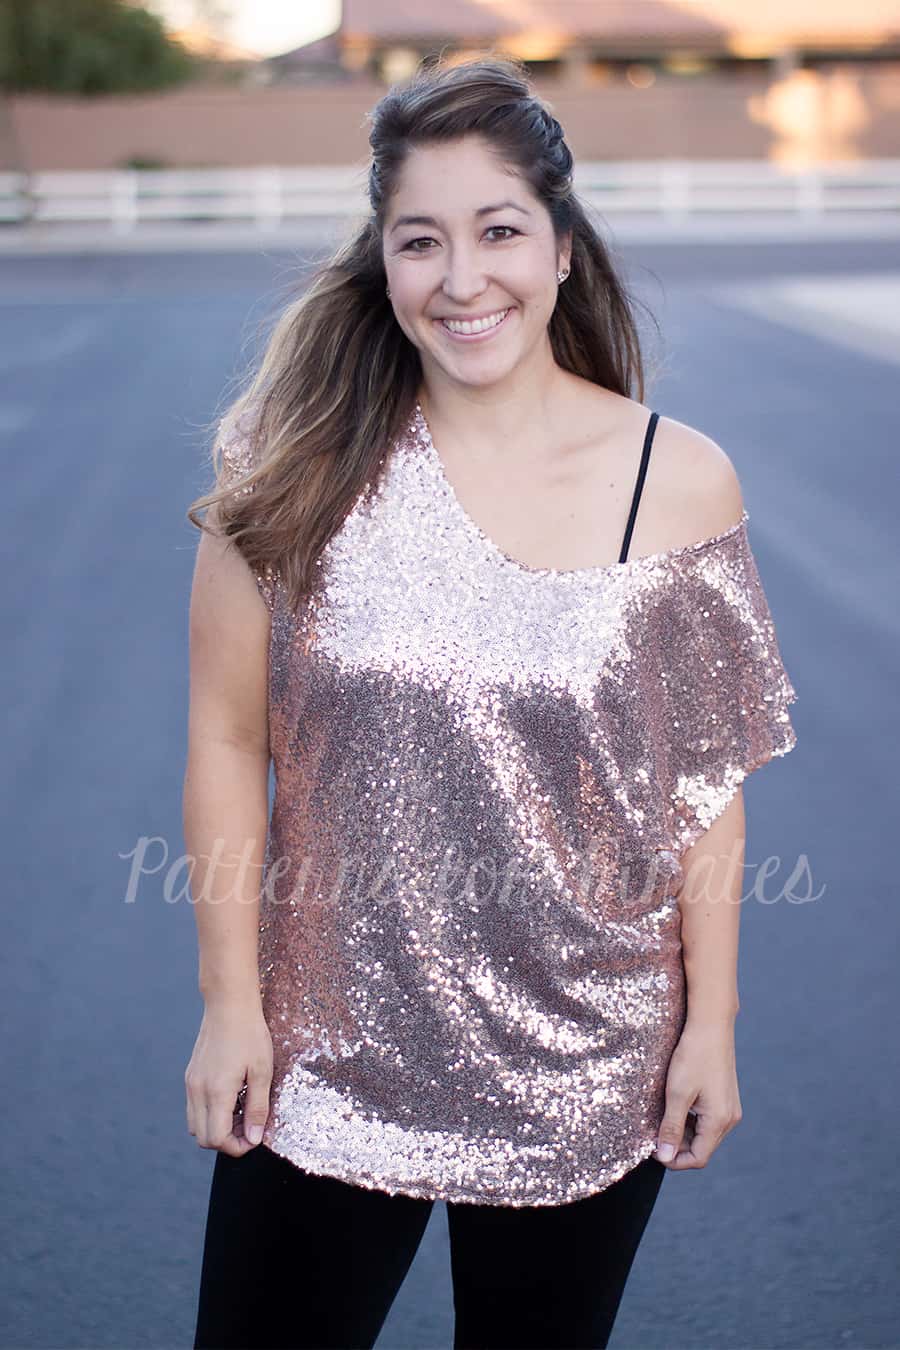
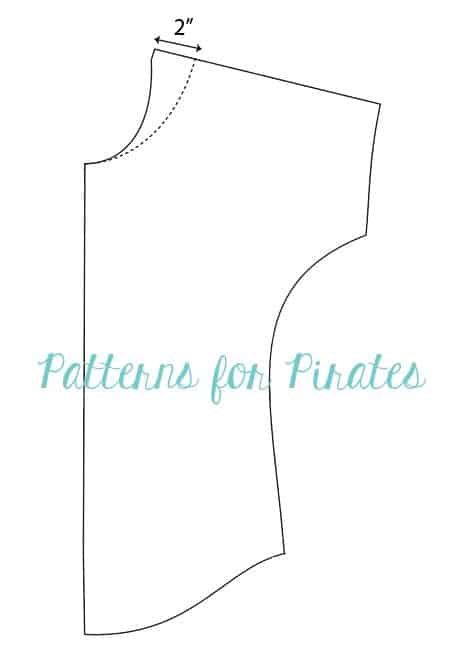
To create the off the shoulder look, I widened the neckline at the shoulder seam by removing 2″.  I also turned the edge 1/4″ and hemmed it rather than adding a neckband.

off-the-shoulder-psd

I hemmed the bottom and sleeves as well.   To be honest, my serger hated the sequins and I ended up having to do most of the construction on my sewing machine. The blade was able to handle them, but with the combination of the speed, my needles kept breaking.  So just as a cautionary tale, if you decide to use sequins, go slow!  Even with my serger issues though, I was still able to complete my entire outfit in just over an hour…yes, you read that right; an hour! Now, run and grab all the sparkly fabric you can find and shine straight into the New Year!

Peg Legs & Pumpkin Spice Dolman Holiday  Peg Legs & Pumpkin Spice Dolman Holiday

Don’t forget to check out all the amazing ladies and their makes, if you haven’t already!  There is sure to be something that inspires  you!  Have you joined in on the fun and made a P4P or M4M holiday outfit?  Join the Facebook Group and share away.  We’d love to your creations.

Nov 14 – Wild & Wanderful/ What Does She Do All Day?/ My Creative Room
Nov 15 – Sew A Piece of Joy / Red Stitch Blue Stitch/ Sewn Of A Stitch
Nov 16 – MaMoose / Rebel & Malice / On Wednesdays We Sew
Nov 17 – It’s Liesel / Stitching and Making / The Kisses Co
Nov 18 – SewSophieLynn/ I’m Just Like Mommy/ Lady and the Gents / The Crunchy Mommy


Filed Under: Blog Tours, Pattern Hacks 2 Comments

Sew, what do I wear? Planning and Sewing for Family Pictures

November 19, 2016

swdiwlogo

I, along with a lot of apparel seamstresses LOVE to sew up something special for family pictures! We get our family pictures done every fall.  And each year I like to think I get a little bit better at my part, which is coordinating/sewing the outfits.  Or most of them!

1185182_10101089986360483_1574504116_n 10660348_10101707723280743_4188534425432925783_n

_dsc4951

2047

I think the most important “rule” is to have solid back ups.  I like to pick out a true back-up plan with clothes we already have.  I’m a last minute kind of girl, but nothing is worse than really being under pressure to finish something right before you need to look happy in front of a camera! And, you never know when a project decides to be a “doomed project”… you know it happens from time to time that it just isn’t meant to be… everything that could go wrong goes wrong! So… have a REAL back-up… something you will genuinely be happy with and have picked out and ready just in case.  It will take off pressure, stress and be there in case you need it 🙂 This year we slipped into someone’s “spot” after they cancelled… so I only had about 24 hours to get ready. I made Little Guy a Deep Sea VNeck and he wore a pair of Cpt Comfort Jeans I had already made him.  Hubs and I both wore all store bought.  And I still love the pictures 🙂 and I’m glad we could slip in with this photographer that I love!  This year we did navy, green and cream/khaki and my undershirt had a little tiny bit of pink.

10653650_10101707723320663_7624800562902864647_n

On to the next… I don’t ever try to sew every single piece of clothing in the picture.  That’s a lot to take on, especially if your family is growing and has lots of bodies to clothe! I like to pick the most important to me and make those extra special.  That way I have time and energy to make those “show stoppers” and leave the rest to store bought or something that was made a few months ago! My poor husband pretty much never gets anything made for him…maybe next year 😉  Last year when I was at the end of my pregnancy I only made my shirt (a Layer Me Up )! I wore some SOS skinny pants I had and my Little Guy wore a Yo Ho Henley I had also made previously.  I paired a sweater that was my Granny’s (so still a special to me piece) and the rest was store bought we had on hand.  I had set out to make a cardigan and pants for Little Guy, but those back ups came in handy when I couldn’t muster up the energy!

_dsc4958

When picking colors I love to pick colors that I think compliment both our skin tones and my house! I print the pictures and have them in our living room every year… so I don’t want some crazy colors that aren’t going to go well with all my other decor.  We happen to all be very fair skined, so it’s easy to compliment all our skin tones with the same cooler tones.  If your family has different skin tones, no biggie! You can mix in cooler and warmer tones with different shades and colors. When I’m deciding I love to search Pinterest for family photo in the colors I’m deciding between.  I can’t pull off brighter warmer tones like yellow and orange, so we usually do cooler greens and blues.  I did do a bold lip color this year, but I don’t think I’ll be repeating that 🙂

2011

I like to pick only a couple colors to use in our pictures and just add neutrals to fill it in.  I almost always go for navy as a base.  It’s super easy to use because you can find it so easily in male and female clothes, jeans and chambray are great and easy neutrals to work with navy/blue as well.  I also always add in white/cream as another neutral.  It helps balance the picture having a dark, mid and lighter tone color.  Then I pick a midtone color or two to work in.  This year we did navy, cream and darker khaki/caramel for the neutrals and teal for the color and I added in a tiny pop of pink since it was our first family pictures with Baby Girl and thought it needed that pop of pink to celebrate! Don’t worry about making everything the same exact shade either, adding different shades of the same color help give some dimension.

2000

Next is finding a good mix of texture, solids, prints in your outfits.  This can be tricky and honestly a bit time consuming.  But, I really cherish these pictures forever and I don’t mind sitting and staring at a mix of fabric and clothes for a day for them! I like to use jean, knit, plaid, stripes, prints, sweater, ect to make us have some depth.  I like a lot of solids or near solids as well though, because in the end I really want our faces to be the highlight of the picture not our clothes (as hard as that is for a seamstress ;)).  Adding things like buttons and trim to a solid can be the best of both worlds!  A little trim can really make your solid apparel look extra special without being distracting at all like a loud print can become. I usually like to do the kids in the bolder prints or colors but I have mixed it up where I wear a floral, like when I was a million months pregnant last year…. everyone was looking at the belly, so I thought I’d go ahead and highlight it!  And I put Little Guy with a pop of a brighter mustard color to bring some attention to him too.  Here we did navy, cream and olive with his pop of mustard and my floral brought in a bit of pink.

_dsc4917

Layering is a great way to add some more depth and texture.  But, if you’re finding it hard to pair that many items together don’t worry.  It doesn’t make or break your photos if you’re not layered! We did our first year in the summer months in Texas— no one was going to layer anything!  Again we’re in navy, white as neutrals and added that pop of red.  I put Little Guy in the boldest and we’re both in a more subtle print.

1175421_10101089987912373_2084890075_n

But, you know… if your personality is loud print, then go for it! It’s all about outfitting your family to show them off… put them in something that reflects who you guys are!

I do think it’s important to be comfortable enough that you and your kiddos can sit, stand, walk, and move around without having to adjust your clothes every time.  Otherwise you will spend more time in your session fixing clothing than taking pictures and no one wants that! Or even worse you get them back and  you look uncomfortable! You don’t want to wear something you feel like you need to stand a certain way to be flattering…so suck in the whole time! (This is also wear layers can help mamas cover areas they might be more self conscious of!)

Even though I was super pregnant and merely standing was pretty uncomfortable, I just had on stretchy SOS pants, a super soft rayon spandex Layer Me Up and sweater. So I could sit, squat without worrying about my clothes at all!  (A little secret though, I pulled my hamstring muscle squatting down for this picture, lol!)

_dsc5025

I almost always let my Little Guy wear some kind of t-shirt.  It’s what he always wears day to day and I want him to look like him! I want him to look and feel comfortable while we take the pictures as well.  This Deep Sea V Neck is in a sweater knit.  So the fabric choice dressed it up a bit while he was still very comfy!

10354875_10101707723774753_441210257010283846_n

For this year I used the Timeless Tunic for myself.  I did a solid teal rayon jersey in the dress length.  I did size down to a small since I used a very stretchy and drapey knit rather than a woven it’s drafted for.  I also drafted out the bust darts since it was knit.  I used the sleeve split hack that Angela had shared when it released and used a little crochet trim along the split.  I thought it gave the solid a little more umph! I also love to put us in trendy clothes, which is sometimes a “no-no” for family photos.  But, since we do them every year I love the idea and I can’t wait to look back through the fashion!  I paired it with a long necklace and wedge booties.  I was comfortable in the knit and the skirt wasn’t so tight that I felt like I needed spanx or to “suck in” the whole time.  The split sleeve was something I had to be aware of while taking pictures though and how they were laying.

2053

For Little Guy I made him a plain grey Jolly Roger Raglan in a heathered cotton jersey.  The heathering gave it a tiny bit of texture/interest even though it was a solid.  I also made him a Lumberjack out of a flannel (the poor baby was so hot! It was in the higher 90’s when we took these!).  I did the hood option and added quick knit bands in place of the cuffs.  I also didn’t have time to actually make the button holes if you look closely! But, I bet no one else will ever notice…I hope! He wore some store bought jeans with it.

2078

Baby Girl wore a High Low Tide Top in a french terry.  She was the only one is what I’d consider a more bold print.  Since she’s so little I thought it was a great way to drawl your eyes to her. She also had the pop of pink within the color scheme in the floral.  A nice soft knit for her too so she would be comfortable and I wouldn’t have to worry about it getting all wrinkled everything I held her or she plopped down walking a few steps.   I added a little of the crochet trim and the buttons on Little Guys’s Lumberjack to her leggings (I used the Bonny Leggings by M4M).  Just a tiny detail that no one else will probably notice coordinates and matches but me.

2024

Husband wore all store bought–sorry honey! Darker khakis, a button up and a sweater (he was also VERY hot— but he looks great right? 😉 Gotta love a man who will wear layers on a hot TX day for you!)

2094

I love seeing the family pictures pop up in the Patterns for Pirates Facebook Group!  And I see the questions for help from time to time too! So I hope this helps you get your family pictures planned and sewn  up for next time!

2002

Blue and Red- Photos by Crystal Ingle Photography, Green, Navy and Blue, Floral- Photos by Colleen Hauth Photography, and this years teal- Photos by Contemporary Portaits.

tourdates

Nov 14 – Wild & Wanderful/ What Does She Do All Day?/ My Creative Room
Nov 15 – Sew A Piece of Joy / Red Stitch Blue Stitch/ Sewn Of A Stitch
Nov 16 – MaMoose / Rebel & Malice / On Wednesdays We Sew
Nov 17 – It’s Liesel / Stitching and Making / The Kisses Co
Nov 18 – SewSophieLynn/ I’m Just Like Mommy/ Lady and the Gents / The Crunchy Mommy

Filed Under: Blog Tours, Frequently Asked Questions Leave a Comment

P4P Professional Looks

November 18, 2016

“How can I make this look more professional?” “Is this okay to wear for an interview?” These are just a few of the questions that we see asked all the time about P4P patterns. Well, Angela and I are here to help give you some ways of how you can make and wear Patterns for Pirates a part of your professional wardrobe- and trust us, it’s possible.  Angela works in the insurance world and I am a teacher and both of us admit to wearing P4P almost everyday! So here are a few tips and tricks from to help make you the envy of your office!

Fabric Content Choice
Every pattern will have a different look depending on which type of fabric you use. Some of our favorite contents for workwear are liverpool, ity, sweater knit, ponte de roma and brushed poly. It is important to be aware of the pattern you are using, as each fabric has a different drape and some are more suitable for different patterns. Liverpool is a more structured, textured fabric with great stretch. It is wonderful for patterns such as the Sweetheart, Sweet Tee, and SOS Knit Pants. Ity fabric is a very soft fabric with amazing drape and a smooth, soft texture. It comes in a variety of patterns and is great for making tops look more “dressy” and its a great choice for dresses like the Boundless Dress. Sweater knit is a very easy way to make patterns such as the Pumpkin Spice Dolman and the Grandpa Cardigan look professional for work. It can be found in a variety of weaves (loose to tight), textures, and weight. Another great option is ponte de roma, it is a nice weight and again is more structured so works well for the Pirate Pencil Skirt and bottoms like the SOS Knit Pants, Palazzo Pants and it really dresses up the Mama Bear Jogger shown below with a sweater knit Slim Fit Raglan with the cowl from the Add on Pack.  Another great fabric that seems to be popping up everywhere is brushed poly and it can be used for so much more than peglegs!  Brushed poly comes in various weights and can be single or double brushed and it has a great drape to it so it works well for tops and dresses.  Rayon spandex and bamboo spandex blends are another great choice for tops and dresses.

img_4825_edited-2img_57861img_60961


Fabric Pattern Choice
In the professional world, it is very easy to play it safe with neutral colors. Neutral colors can be a great base for any outfit- as you can see with most of ours. We both tend to have a solid color somewhere in an outfit and then will pair this with something more bold. For example, I used the Sweetheart skirt hack to create a circle skirt in a solid gray. I then paired this with a polka dot Essential Tank and a cardi. I have also paired the Mama Bear Joggers in a floral french terry with a solid top. And Angela has paired a solid black ponte de roma Pirate Pencil Skirt with a patterned brush poly Sweetheart Peplum.


img_5158_edited-1img_4816_edited-1img_61002

Adding Details
Adding details such as lace, trims, even a belt can help elevate a pattern to the next level. Lace is one of my favorite things to add to make an outfit look more professional. As you can see below, I used the Sweet Tee in the dress length, however added a lace trim to the hem. Angela added a belt to the Everyday Elegance to dress it up a bit. Or even just adding some jewelry like a necklace on a Pumpkin Spice Dolman. What shoes or boots your wear also can make such a difference on making your outfit look casual or office appropriate.

img_5273ee12105747_10153206085671033_1156641344939810881_n

Every office is going to be a bit different in what they allow and don’t allow. Some office will allow Peg Legs where as other office won’t allow any type of leggings, some won’t allow a skinny pant where as others will.  Patterns for Pirates have all your bases covered. Both Erinn and I get away with peg legs at the office but you will notice in pictures you see of us in our work attire we stick to solids for leggings. A lot of these looks would also pair nicely with a blazer for a more corporate look or try adding a Grandpa or Carefree Cardigan if your office is cold.  I know both of us have plans to sew a lot of the new Cocoon Cardigans for work as well.

And now that you’ve read some of the basics for becoming a “Professional Pirate”, here are a few more pictures for some inspiration!  And you know getting photo’s of your office attire isn’t easy so I’ve included some bathroom selfies cause I know that you all love seeing bathroom selfies 😉 Happy sewing and make sure to share your professional looks in the P4P Facebook group! ~ Erinn and Angela

img_46072img_4821_edited-1img_3606 14939622_10154070693911033_1112729001056391089_o10353639_10153256696556033_8649728710252151176_nimg_55351flatlay-sweetheartpepluem

Filed Under: Blog Tours, Uncategorized Leave a Comment

a cool way to add reinforced knees to the Captain Comfort Jeans

November 15, 2016


img_3369

As a mom of young kids I am always looking to make them cool clothes that are not only on trend but can withstand their active lifestyle. In today’s blog I will show you how to take the already cool Captain Comfort Jeans to the next level and reinforce the knees in a modern new way.  If you’re looking at the Cpt. Comfort and need some tips on sewing jeans we’ve done a blog post all about it here!

img_3979

img_3319

img_3321

Start by printing the pattern and cutting your fabric. I used an old pair of jeans I had saved for upcyling. (Here is a blog post about using an old pair of jeans for this pattern!) I find denim fabric by the yard to be pretty costly so I save all usable jeans pairs that my husband and I don’t wear anymore. You can make any style Comfort jeans with this hack, including the lined version.

Take your front piece pattern and measure 4 inches down from the top of the inseam, mark it on the pattern. Now measure and mark 6 inches from the bottom of the hemmed option cut line. I made a size 5 but I think these measurements would work well for sized 4-6. You will need to mark higher or lower depending on the size you need and how big you want the knee patch.

img_3936

img_3937

front-cpt-comfort

Draw a horizontal line from the two markings. Using a blank paper trace the knee patch between the two lines you just drew. Now you will draw another line parallel to these two 1/2 inch above the top line and 1/2″ bellow the bottom one. You just made the patch pattern piece.

patch

Cut two jeans patches using the pattern piece you just created. Don’t forget to mirror the pieces!! Measure the inner and outer leg part of the patch and divide it by 3. Grab your fabric marker or chalk  and draw a one inch line perpendicular to the sides of the patch at the markings.


img_3940

Using a your sewing machine and denim needles sew a small dart that starts 1/4 inch away from the marking. Repeat the process for the remaining 7 small darts on the two patches .

img_3942

Press the top dart up and the bottom darts down. Top stitch them in place. I love jeans thread for topstitching, It adds a nice touch to the finished look. Take your patches to the ironing board and press the top and bottom edges 1/2″ wrong sides together. Stitch in place 3/8 inch from the fold.

Place the patched on the front pieces (wrong side of the patch to the right side of the leg piece) making sure to match the right leg patch to the right patch and the left leg patch to the left leg.  Sew the patches on about 1/8 inch away from the folded edge.

img_3952


img_3953

There you go! You just added cool knee patches to the Cpt Comfort Jeans. Continue sewing the pants according to the pattern and don’t forget to show them off in our group.

img_3349

img_3353

img_3339

Happy sewing, pirates!

Alex

Filed Under: Frequently Asked Questions, Pattern Hacks, Uncategorized 1 Comment

Easy Bear Jogger Hacks

November 11, 2016

img_3221

The Mama Bear Joggers were just released and are packed with options. I have already made myself a few pairs so I was browsing Pinterest for styling ideas (don’t we all?). I came across a cute pair of joggers that had a tuxedo stripe on the side so I just had to make myself a pair like that. In today’s blog I’ll show you how I did the tuxedo stripe and an accent slat pocket band.

Start by printing and cutting the pattern in your size. (I grade mine in for the waist that’s why you’ll see two lines instead of one). Don’t cut the fabric just yet. If you’d like to do just the accent pocket band you’ll nee to place the pocket lining over your front piece and remove 1 inch from the curve. That can be done easily if using a French Curve.

img_3040

Now take your measuring tape and measure the new pocket opening. You will be cutting your accent band to be 2″ by 95% of the opening.

img_3043

Fold the band wrong sides together and give it a good press. Sandwich the  folded band between the right side of the front of the pants and the right side of the pocket lining. You will be stretching JUST the band slightly. Sew the 4 layers together.

img_3050

Turn the pocket over so its wrong side is on the wrong side of the front leg. You can now top stitch along the curve. Tadah! You’ve added a decorative band to the slat pocket. If you do not add the side strip proceed with sewing the joggers according to the pattern tutorial.

img_3052

If you add the stripe, we will be making some pattern alteration prior to cutting the fabric. Place your pocket lining and back on top of the front of the pants matching the top and  side lines. We will be removing 1.5 inches from the side of the front of the pants. Following the side curve draw a line parallel to the side, 1.5″ away.joggersstripe

Cut along the new line. Now grab the back of your pants and repeat the process on the side. You now have 4 new pattern pieces, front and back, pocket and pocket lining. We will measure the new side length with a measuring tape because it’s flexible. The tuxedo stripe will be 3″ by the new measured side. See? That wasn’t so bad.

img_3038

Add the pocket according to the tutorial. We will now sew RST the front piece with one side of the strip. Then attach the other side of the strip to the back of the leg, right sides together. Repeat with the the other leg.

img_3055

img_3056

That’s it! Those are the only changes we made to the pattern. You can now finish your joggers according to the tutorial. You can add the strip to either one of the leg options, cuffs, elastic or rolled.

img_3200img_3223

Get creative with all these joggers hacks and as always post your pretties in the group.

Alex

img_3225


Let’s face it- everyone loves a jogger and the Patterns for Pirates Joggers are perfect! One of the things that I love about joggers is that there are so many different ways to style them. One of my favorite looks is the addition of a moto patch. This simple detail can add an extra bit of edge and flair to your joggers and help take an already awesome look to the next level! So let’s get started…

img_52302

Creating Patch Piece

To start with, you will need to determine how far down to attach the patch. You will want to measure from your inseam to the top of where you want to attach the patch. As you can see in the picture below, mine measured 9.5″. Draw a line across your pattern piece at this measurement. Next, you will draw the bottom line for your patch- your next line should be 7″ down from this line (your finished patch will be at total of 6″). Using tracing paper, copy this section of your pattern to create your moto-patch.

img_5240

Quilting the Patch
You will need to cut out two mirror image pieces. Next, you will trace your quilting lines on each piece (make sure to do mirror images!). Begin by marking both the horizontal and vertical centers of your piece (if you don’t have a quilters ruler- this mod is a GREAT excuse to go purchase one!!). After marking centers, draw lines every 2 inches in both directions. The final markings will be on the diagonals- connecting your squares. Repeat on the other patch.

picmonkey-collage

After completing your markings, stitch across all of the diagonal marks only. Then, take a few minutes and admire all of the hard work you just did— Ok! Moment over, because now you get to repeat all of that beautiful stitching on the other patch! img_5214

Finishing and Attaching Patch
Press both the top and bottom of your patch, using a 0.5″ allowance to create a finished edge. Taking your front leg piece, place patch piece 0.5″ lower than original line (to account for your pressed seam… ex. Mine was at 9.5″ and I placed the patch at 10″ down) and pin in place.  img_5219
Using a 0.25″ seam allowance, stitch the top and bottom into place. Then stitch over the horizontal lines only to finish creating your quilted look. img_5222You can now complete your Joggers by following the pattern directions.

And if you needed a few other ideas for you patches, you could also…

  • Cut your patches at angles
  • Place patches on thighs
  • Mix and match fabric patterns
  • Use fabrics that are already quilted (Yes- They exist and would be a huge time saver for this!)

img_52363

I can’t wait to see how your patches (and joggers!) turn out. Make sure to share all of your creations on the P4P Facebook page!

~Erinn


img_60741I have been eying up all the adorable woven joggers that seem to be everywear this season and as soon as I saw the new P4P joggers I thought hmm, I wonder if then could be done in woven and guess what, they work great in woven for the baby bear joggers! I sewed up this pair for my daughter in a rayon challis remenant that I found and they are just too cute on her and super trendy right now! I didn’t alter anything while sewing but if your child has thicker calfs or ankles you may want to grade out one size to give a bit more room or take a smaller seam allowance from the calf down. These have the elastic waistband but as I had some 1 1/4 elastic in my stash Idecided to use it instead of doing the 3 rows of elastic. I inserted my elastic into the waistband and then basted the seam allowance before attaching the waistband to the pants. I did the elastic casing cuff which worked great the rolled cuff may be a touch to tight thou for wovens. No other changes to these and my girl has adorable woven joggers! I can’t wait till spring to make her a pile more!

img_60771

img_60751


I love the little shorties or bloomers look for my Baby Girl.  Show off those rolls on her legs that I love so much!  It’s very simple to use the new Baby Bear Joggers to create this cute, trendy look!

I determined the inseam by estimating how wide I would need it to cover her diaper.  I made hers about 1″ before bands…they could’ve used another 1/2″ really though.  I marked this on the inseam of back and front pieces.  The side seam length I determined by thinking about how long I needed it to cover the diaper.  I curved the bottom hem up towards the outer leg seam by about 2″ on both the back and front pieces.

I sewed the pattern up per the directions.  To finish the bottom hem I added thick bands.  I made them finish 1.5″ matching the waistband thickness.  So, I cut 4″ by slightly shorter than my leg opening.  You want to stretch the bands to fit the leg openings so that your bands are snug to their thighs.

Fold the bands in half width wise with right sides together (I wanted the “wrong side” to show on my bands.

img_0985

Fold the band in half lengthwise with wrong sides together.

img_0986

Align raw edges with raw edges of shorts and stitch, stretching band only as you sew all three layers together. Then flip band down with seam inside shorts.

img_0987

I think they’re so precious! My Baby Girl has been sick and wasn’t really up for pictures, but we snapped just a couple to show them a bit.     img_0990 img_0630  img_0659  img_0692 img_0693

Filed Under: Pattern Hacks 2 Comments

Papa, Mama + Baby Bear Joggers! :: New Pattern Release

November 10, 2016

We are officially announcing the release of, not just one, but THREE patterns: Papa, Mama and Baby Bear Joggers!!  (I’ll wait while you do a little happy dance.)

Maybe you feel like you’ve been waiting forever since Judy first teased with you with jogger images, and maybe it took a little longer to get it “just right”, but that means you’ll be more than happy with what we’ve got for you guys.  You can clothe the entire family in joggers this fall, winter and beyond.  And you’ll want to, because they’re just that comfy and perfectly in style.

We’d like to thank Raspberry Creek for being our fabulous sponsors on this set.

bundle6

As usual, you will not be shorted on options.

The Papa Bear Joggers have two lengths (shorts and pants), three hem types (cuffed, rolled and elastic), two waistbands (elastic only or drawstring), and two pocket types (slat and patch).
The Mama Bear Joggers and Baby Bear Joggers have all the same options as the men’s pants, with a yoga waistband option included…however the Baby Bear sizes do not have a shorts length.

joggers-line-drawing

For all sizes of joggers, we recommend only using stable knits with a 20% stretch.  Think: cotton lycra, liverpool, french terry, ponte de roma, etc.  You can mix up your fabric picks by adding waistbands and cuffs that have a little more stretch, coming in with a minimum of 50% stretch horizontally.

Cuffed Bottoms:


Rolled Hem Bottoms:


Elastic Hemmed Bottoms:

img_0344 img_060014882140_10157765142130599_6859717849300847514_o

Shorts Length (Mens and Womens Sizes only):


Yoga Waistband (Women and Youth sizes only):


Elastic / Drawstring Waistband:


Patch Front Pockets:


Slat Front Pockets:


You can find the Joggers patterns bundle HERE.
Or snag them as individuals: Papa Bear Joggers | Mama Bear Joggers | Baby Bear Joggers

They will be on sale through Monday 11/14/2016 with no code needed.

Be sure to head over to the Patterns for Pirates Facebook Group to see more tester images and pull inspiration from the amazing creations they  made during our multiple rounds of testing!

Filed Under: Pattern Release Leave a Comment

P4P Halloween Costume Contest: The Winners!

November 3, 2016

Halloween costume sewing is basically my (Katy) favorite type of sewing.  It’s allowed to be over-the-top, silly, and super creative.  And I feel like it pushes sewists out of their usual comfort zones.  We held a costume contest in a thread on the Patterns for Pirates Facebook group!  If you were curious about all of the costumes shared, head HERE to find all of the amazing sews.

costume-contest

I have a hard time choosing just one winner.  So I decided to let my husband and son pick their favorites too this time around!  Here are our picks!

Louis’ Favorite (in the least surprising choice…from my Pokemon obsessed 6-year old): Jennifer Rowe with her Pikachu, made from the P4P Jolly Roger Raglan + Add-Ons, and the Pirate Playground Pants!

14695579_10211083149336893_9114943008414542237_n

Bennett’s Favorite (another non-surprise from my Star Wars nerdy husband): Jennifer Richardson with her Darth Vader / Rebel Pilot dresses using the Me Hearties Peplum/Dress pattern.

14902904_1120397181411499_9071670995202499178_o

Katy’s Favorite (I couldn’t help but die a little bit over this unicorn.  I think the hooves sold me.): Jamie Grey with her Unicorn made from the Sweet Tee and Peg Legs.

14900463_10209583853211881_6198337319903692706_n

Congratulations to the winners!  I’ll be contacting you about your winnings!

And thank you so much to everyone who shared their amazing creations.  I’ve now got a lot of new ideas for next year’s costume sewing extravaganza!

Filed Under: Contest/Giveaway Leave a Comment

Flannel Kimono with pockets

October 28, 2016

img_2004

It is officially fall! The crisp morning air should make its appearance soon and what better way to embrace it than by treating ourselves with a cozy flannel top. For my blog today I’ll show you how you can take the Summer Kimono into fall and I’ll also give you some tips for working with flannel.

img_2008

You will need your printed and cut kimono pattern pieces. You can chose any of the styles, I went with the curved hem because it’s my favorite. 🙂 Now grab your Grandpa Cardi pattern and print just the pocket piece. It’s on page 22-23. img_1918

Sew your pockets according to the instructions. I opted for the band pocket but you can certainly use the non banded option too. Remember to press the bottom of the pocket too! You’ll now stitch them on to your two front pieces. Placement it’s a matter of personal preference so I’ll show you where I stitched mine on but you can certainly move them higher or lower. I placed the pocket about 4 inches from the center and about 2 inches from the bottom (remember the bottom is not hemmed yet). Sew the pockets on the front pieces.

img_1927You will now start assembling your kimono according to the instructions. Something very important to keep in mind, especially if you are sewing sizes L and up is that most flannel fabrics are 42-44 inches wide. Your fabric may not be wide enough to cut the entire length of the sleeve so in this case you have a few options. You can either do what I did and just shortened the sleeves length by 2.5 inches or so and either add the sleeve band (as per the pattern) or just hem it. The other option would be to attach additional fabric to the selvage and cut the pattern pieces as they are. You could use the same fabric as the main one or even coordinating/contrasting fabric for a colorblock look. Get creative!

TIP: When sewing a curved hem on woven fabrics I like to first serge the raw edge, making sure I don’t cut any of it with my serger knife.  This will basically give me the 1/4 inch mark and make the fabric more stable. Press the 1/4 inch hem, and then press again another 1/4 inches and sew in place. Wasn’t that easy? That’s the magic of serging the raw edge first.

img_1931

I know a lot of you have asked in the Facebook group is the Summer Kimono can be made with flannel fabric so now you know it can…and it’s pretty cozy on top of that! As always, don’t forget to show off your creations and tag me if you have any questions!

Alex

img_1988-1

img_1991 img_2013-1

Filed Under: Frequently Asked Questions, Pattern Hacks, Uncategorized 2 Comments

And the Winner is…. P4P Sew it, Win it, Build it Giveaway!

October 24, 2016

I truly enjoyed this past couple weeks with my newsfeed on the P4P Facebook Group, Pinterest and Instagram all filled with the P4P Sew it, Win it, Build it Giveaway entries! I loved seeing your sewing spaces big and small, messy and tidy, and sparse or packed full! It’s so fun to see how everyone sews! But, lets get to it, because I know everyone is ready to see who won the biggest giveaway we’ve ever done!

slide1

Who will get this amazing grand prize???

slide4

slide4

Okay okay…without anymore suspense… the random lottery winner from ALL the entries (there were a lot ladies!!)

slide7

screenshot_20161024-091521

From our Instagram feed!  I will be sending you, livingyoungfitness a private message on Instagram!


Thank you all for participated and cheering each other on! I love to see the friendship and camaraderie the P4P Facebook Group is filled with! <3 We’re all just a bunch of ladies and gentlemen who have a love for sewing!

Thank you so much for letting me share the love of sewing with such a lovely group and I hope livingyoungfitness can build the sewing space she’s been dreaming of since the start of the giveaway!  If you weren’t the lucky winner I hope you got some great sewing done with the motivation and have some ideas for your holiday wishlist for your sewing space too! 😉 I know I do!!

Filed Under: Announcement, Contest/Giveaway 4 Comments

Last Call for Entries- Sew it, Win it, Build it Giveaway by P4P

October 23, 2016

I hope you’ve read and entered into our biggest giveaway ever!

The Sew it, Win it, Build it Giveaway- the chance to win a sewing room make-over!

slide1 slide4

We wrote a week full of posts all about planning, filling, organizing a great sewing space- rather you’re in the dining room, bedroom, or lucky enough to have a sewing shack we hope they helped you find the perfect storage solution, find the best tools, and plan a great layout that works for you!

slide7

We are also having our LAST sale of the year with a huge 30% site wide sale through tonight, use this code below for the discount at check out:30kcouponcode

Today is the LAST day to enter or grab patterns with the sale code!

Contest  and sale will end tonight at midnight. So last entries can be posted until 11:59PM Sunday October 23rd US Central Time Zone. (So you have about 8 hours to get somethings sewn up and post from now!)

Good Luck! Winner will be a random lottery winner- so everyone has a chance!

We will announce the winner tomorrow 🙂

Make sure to read through those entry rules here!

One last THANK YOU for all your support and giving me the pleasure of helping 30k members of our Facebook Group sewing up P4P patterns!

slide3

Filed Under: Announcement, Contest/Giveaway Leave a Comment

  • « Previous Page
  • 1
  • …
  • 57
  • 58
  • 59
  • 60
  • 61
  • …
  • 68
  • Next Page »

connect with me

  • Email
  • Facebook
  • Instagram
  • Pinterest
  • YouTube
Privacy & Cookies: This site uses cookies. By continuing to use this website, you agree to their use.

To find out more, including how to control cookies, see here: Cookie Policy
  • Privacy Policy
  • Refund Policy
  • Contact Us
  • About

Copyright © 2026 Patterns for Pirates

Copyright © 2026 · Genesis Framework · WordPress · Log in