Patterns for Pirates

P4P stylish, modern, wearable patterns

  • Home
  • Blog
    • Frequently Asked Questions
    • Pattern Releases
      • Free Patterns
    • P4P University
      • Fitting
      • Sewing with Stretch, Knit Fabrics
      • Sewing with Woven Fabrics
      • Sewing Machines
    • Sew-A-Longs
    • Fabric for Pirates
    • Pattern Hacks
    • Announcement
      • Blog Tours
      • Contest/Giveaway
  • Shop
  • Bundle Discounts
  • Flash Friday
  • Gift Cards
  • My Account
  • Cart

P4P Raglan Week: Off-The-Shoulder Raglan Hack

September 24, 2016

raglan-week-day6

IMG_0881 Did you start your fall sewing, pirates? Even though it doesn’t look like fall outside I like to tell myself cooler weather is coming. One of the staples in my fall/winter wardrobe is the raglan tunic. It is perfect for wearing it with Peg Legs (and we all know peg legs are practically fall uniform) and SOS pants. For my blog today I’ll show you how to get an “off the shoulder” look using the Relaxed Raglan. You can certainly use the Slim Fit Raglan if you prefer. I just am going for a looser, more casual look so I used the Relaxed Raglan pattern.

Screen Shot 2016-08-30 at 9.13.22 AM

First off, select your size, print and cut the pattern pieces according to the instructions. Don’t cut the fabric just yet! We’ll now make some small hacks to the pattern to get a wider neckline. Take the front pattern piece and measure 3 inches down on the center fold and mark that spot. Then measure 3 inches down on the sleeve part and mark that point too. Using a french curve (or just going slowly) and following the original pattern, draw a curve line between the two points. Repeat with the back and the sleeve pattern pieces.

testraglan

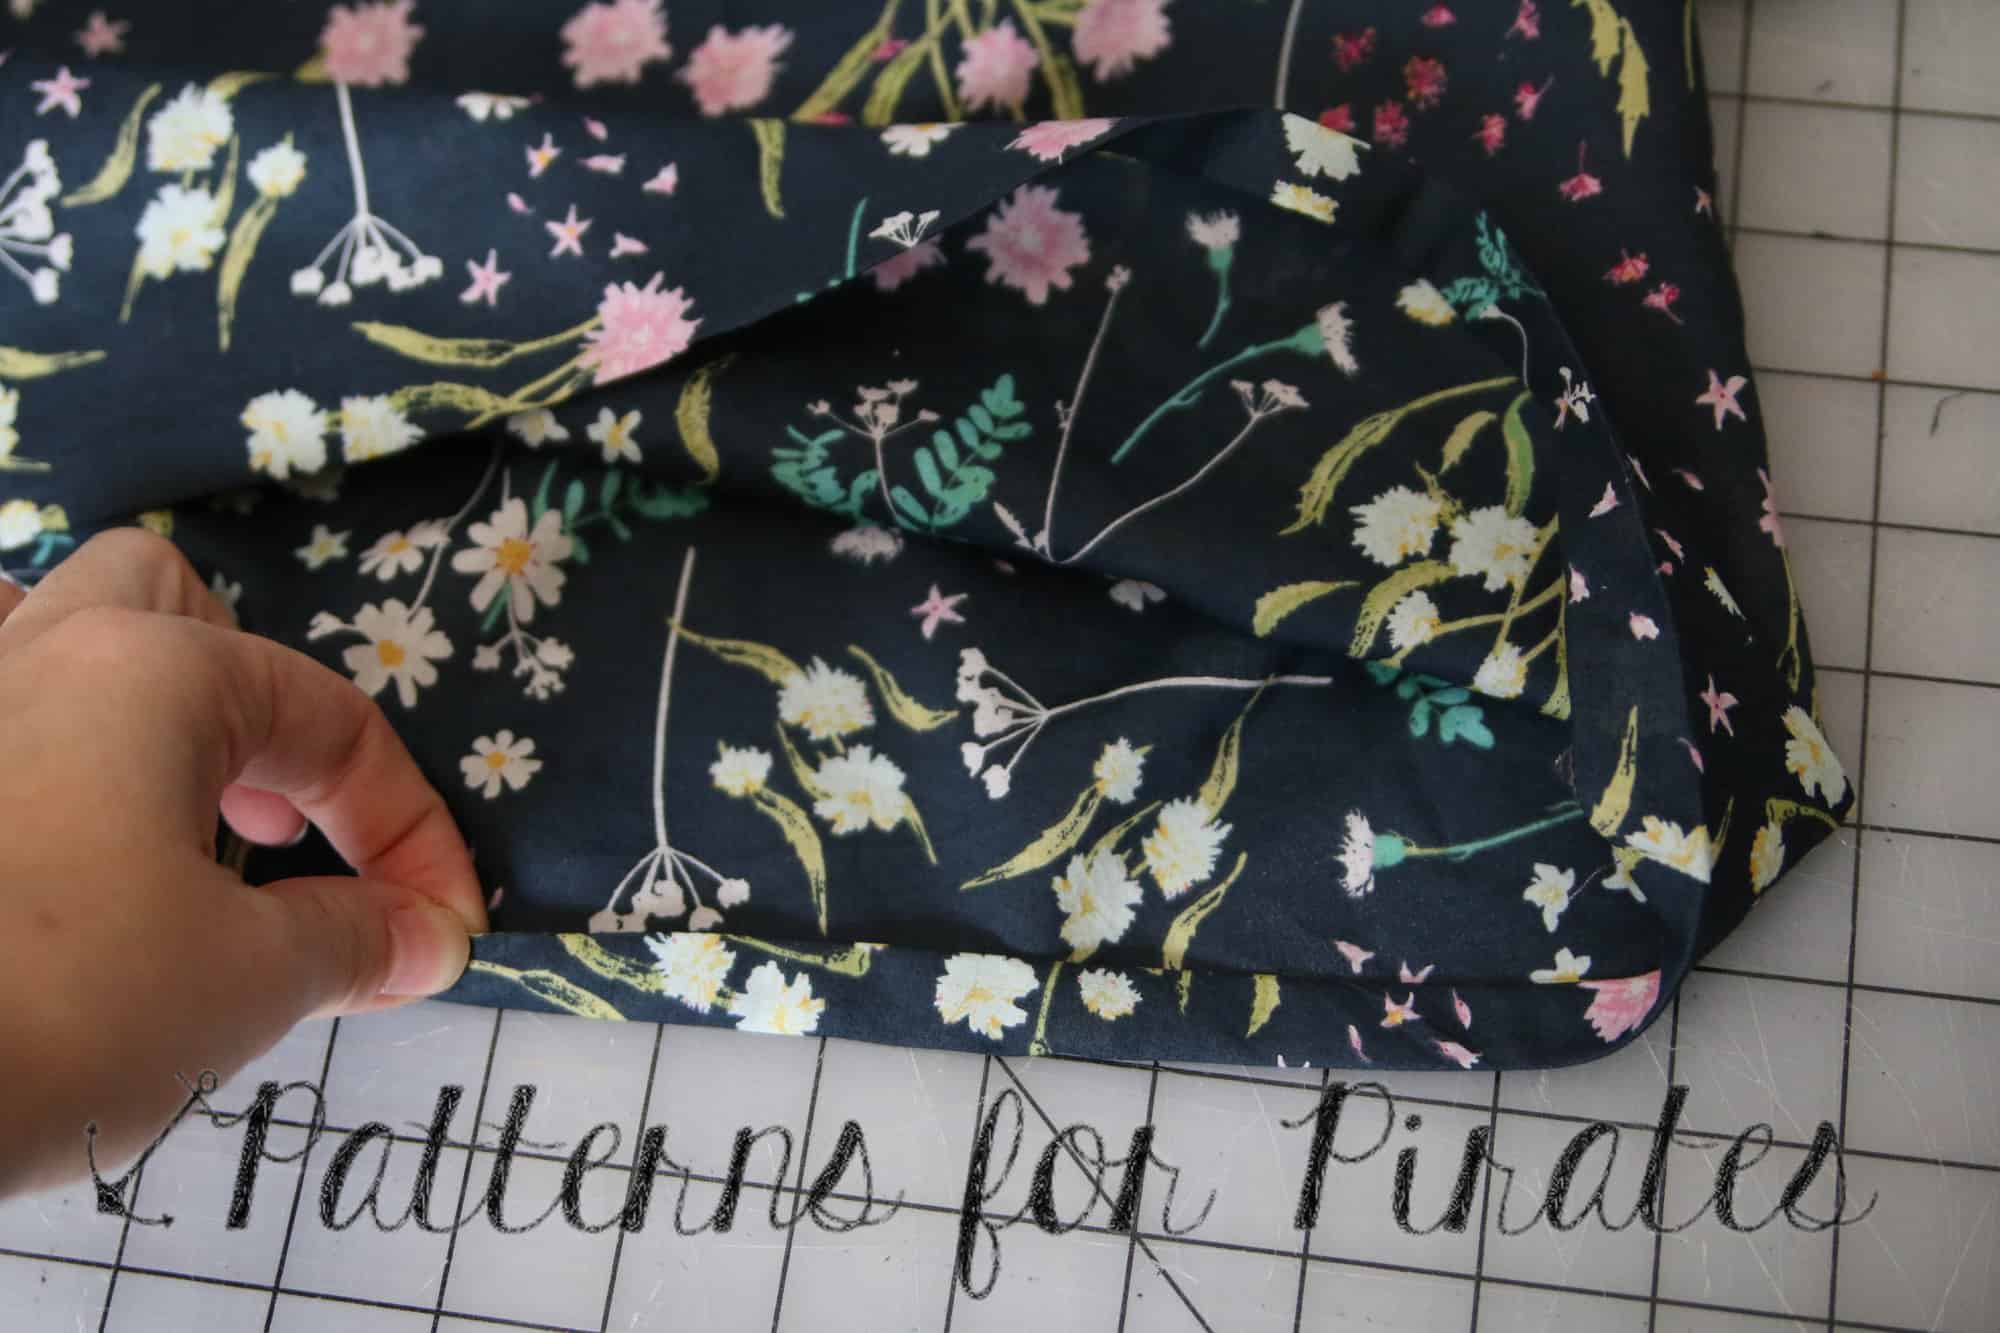
Once you drew the new cut line, remove the top part and cut the fabric following the new pattern pieces. At this point you will have a front, back and two sleeve pieces plus and additional cuffs or waistband you may need depending on the style raglan you chose. Do not cut the neckline as per the original pattern suggestion. If you do, the neckband will be too small for the new neckline.

Sew the raglan according to the instruction, leaving the neckline as is. Once sewn, take the shirt/tunic, lay it flat on a table and measure the neckline opening circumference. You will calculate the new neckband based on this measure. The new neckband will be 85% of the opening plus seam allowance. So you will do Opening X 0.85 + 1 (for SA). You now have the new length of the neckband. The width stays the same as the pattern.

You’re almost there. All you have to do now is cut the neckband and attach it to the shirt. Tadah! All done, you have a cool new off the shoulder raglan.

IMG_0903 IMG_0882 IMG_0888

I can’t wait to see what you create.  Don’t forget to show off your raglan in the group and keep an eye out for all the surprises during this Raglan Week.

IMG_0905

If you’ve hacked a sexy off-the-shoulder look of a raglan during P4P Raglan week, we would love for you to share it with us!  Head over to the Facebook Group or share on Instagram.  And be sure to use the tag#P4PRaglanWeek so we can find you!

Curious about what else has been happening during our raglan-loving week of fun?

Just take a look at our schedule!

Monday, September 19: Jolly Roger Raglan Pattern Update + Jolly Roger Add-On Pack Pattern Release

Tuesday, September 20: JRR Woven Fabric Hack

Wednesday, September 21: JRR Animal Faces Add-On

Thursday, September 22: Contrast Band Hack for Kangaroo Pockets

Friday, September 23: Women’s Keyhole / Scoopback Raglan Hack

Saturday, September 24: Off-The-Shoulder Raglan Hack

Sunday, September 25: Adding Stripes to Your Raglan Sleeves

Filed Under: Pattern Hacks, Uncategorized 4 Comments

P4P Raglan Week: Keyhole/Scoopback Raglan Hack

September 23, 2016

raglan-week-day5

The classic basic silhouette of a raglan makes for a great base to play with fabric pairings and adding extra details to  change them up a bit.  I often look at boutique style for inspiration and the keyhole, scoop back has been a popular request among members in the P4P Facebook Group so we thought we’d share the how-to.  I used the Slim Fit Raglan for my example, but this could easily be applied to any of the raglan patterns.

  • Print and assemble your pattern as usual.
  • Decide how low you would like your key hole and measure from the nape of your neck to desired length.  I wanted the keyhole to sit just above my bra-line so went with 8″.
  • Draw your keyhole curve, starting 1″ inside the edge where you would attach your sleeve down to the length you desire.  I didn’t have a french curve handy, so actually used the curve from the armscye of the sleeve pattern piece as a guide.  Cut out keyhole.

P4P Raglan Week Keyhole


\


  • Construct your raglan as usual.
  • We are going to bind the keyhole with the traditional knit binding method but you could also do a t-shirt band (like the neckband in the pattern) as another option.  Measure the keyhole length then multiply by 90% (this is your width measurement)  You will stretch the binding just ever so slightly to fit the opening.  This will help keep the keyhole from gaping and lie flat.  Binding = 2″ x  width. 

P4P Raglan Week Keyhole


  • With right sides together, pin binding to keyhole, matching raw edges. Stitch with 3/8″ seam allowances.

P4P Raglan Week Keyhole

  • Press seam allowance up and fold binding down towards raw edge. Fold again, enclosing seam allowance.

P4P Raglan Week Keyhole P4P Raglan Week Keyhole

Alternatively, if using a thicker fabric for your binding, you can skip the first fold and just fold the binding over enclosing the raw edge.

P4P Raglan Week Keyhole

  • Top-stitch with your favorite stretch stitch.


For the neckline, we will use the same binding method as shown above for the keyhole but need to take a few measurements to determine the length of binding you will use for the neckline only.

  • Measure your neckline.  Pictured: shirt on the fold so my neckline is 2 times the length.

P4P Raglan Week Keyhole

Neckbands are typically smaller than the neckline to bring it in and prevent gaping.  To determine the amount of the binding for the neckline, multiply the length by 85%.  Neckline = 24″ (it looks like 23″ but actually measures 12″ on the fold) so my binding length for the neckline is about 20.5″.   Total Binding = 2″ x 58″.

  • Fold your binding in 1/2 to find the center point.  My neck binding length is 20.5″ so we will measure out 1/2 to each side of center point.  (or 10.25″ for my example). Mark end points.

P4P Raglan Week Keyhole

  • With right sides together and aligning raw edges, match center point and end points of neckline and binding. Stitch with 3/8″ seam allowance from endpoint to endpoint to endpoint (neckline only).

P4P Raglan Week Keyhole

  • Press seam allowance up and press binding down towards raw edge. Fold again, enclosing seam allowance.

P4P Raglan Week KeyholeP4P Raglan Week KeyholeP4P Raglan Week Keyhole

  • Continue folding towards the end of the tails.

P4P Raglan Week Keyhole

  • Top-stitch with your favorite stretch stitch.
  • Tie a bow and your done!

P4P Raglan Week Keyhole


P4P Raglan Week Keyhole P4P Raglan Week Keyhole

If you’ve created your very own version of a Keyhole, Scoopback Raglan during P4P Raglan week, we would love for you to share it with us!  Head over to the Facebook Group or share on Instagram.  And be sure to use the tag #P4PRaglanWeek so we can find you!


Curious about what else has been happening during our raglan-loving week of fun?

Just take a look at our schedule!

Monday, September 19: Jolly Roger Raglan Pattern Update + Jolly Roger Add-On Pack Pattern Release

Tuesday, September 20: JRR Woven Fabric Hack

Wednesday, September 21: JRR Animal Faces Add-On

Thursday, September 22: Contrast Band Hack for Kangaroo Pockets

Friday, September 23: Women’s Keyhole / Scoopback Raglan Hack

Saturday, September 24: Off-The-Shoulder Raglan Hack

Sunday, September 25: Adding Stripes to Your Raglan Sleeves

Filed Under: Blog Tours, Contest/Giveaway, Pattern Hacks, Uncategorized 1 Comment

P4P Raglan Week: Contrast Bands Hack

September 22, 2016

Say you bought this really pretty cotton interlock with zero stretch recovery and you just had to use it for a raglan with a kangaroo pocket.  The things is, you know your darling little rock collector isn’t going to understand that she can’t actually use her pocket or the openings will get stretched out.  The solution?  Stretchy bands on the pocket openings.

img_6282

If you haven’t bought your Jolly Roger Raglan and Add-ons, go do it now.

I’ll wait while you buy, print and glue.

Perfect.  Now, cut out your kangaroo pocket, mark and cut off a half inch from each pocket curve.  I marked on the back with the ruler and a fine tip washable kids’ marker.

img_6265

Next, you want to measure your curve by carefully, without stretching, pulling the curve straight along the ruler.  Make sure you measure the curve after you’ve trimmed off the extra half inch.

img_6266

Subtract half an inch and cut out bands that length by 2 inches wide.  If you don’t have a rotary cutter and mat, you need one.  Trust me, it makes a whole world of difference cutting out bands.

I’ll wait while you go buy one.

There, wasn’t that easier??

Press bands in half lengthwise.

img_6269

Pin band to the right side of the curve by pinning each end first and then stretching to fit.

img_6270

Serge or sew on, stretching to fit the pocket curve.  Do not stretch the pocket fabric.

Press the bands back.

Now continue with the pattern tutorial to complete your shirt.

img_6276

Now put it on your adorable child and snap pictures to share with us on Facebook!

– Patty Hamm

img_6292

img_6300

If you’ve hacked a kangaroo pocket of a raglan during P4P Raglan week, we would love for you to share it with us!  Head over to the Facebook Group or share on Instagram.  And be sure to use the tag #P4PRaglanWeek so we can find you!

Curious about what else has been happening during our raglan-loving week of fun?

Just take a look at our schedule!

Monday, September 19: Jolly Roger Raglan Pattern Update + Jolly Roger Add-On Pack Pattern Release

Tuesday, September 20: JRR Woven Fabric Hack

Wednesday, September 21: JRR Animal Faces Add-On

Thursday, September 22: Contrast Band Hack for Kangaroo Pockets

Friday, September 23: Women’s Keyhole / Scoopback Raglan Hack

Saturday, September 24: Off-The-Shoulder Raglan Hack

Sunday, September 25: Adding Stripes to Your Raglan Sleeves

Filed Under: Blog Tours, Frequently Asked Questions, Pattern Hacks, Sew-A-Long 1 Comment

P4P Raglan Week: Animal Faces

September 21, 2016

raglan-week-day3

I don’t know about anyone else, but my daughter is completely obsessed with animals. Lucky for me, she also loves the Jolly Roger Raglan- so it was a natural choice to put an animal face on a raglan for her. Raglans are an essential piece of her fall wardrobe and such a great style on girls or boys and now with the Add-on pack you have so many more options but it’s still fun to add some character to the front. The shape of the raglan sleeve are perfect for fun details like animal ears so we have created 2 different ear options and 5 animal faces for you- a kitty, panda, fox or deer, and pirate puppy! You can find the face file and ear pieces here.

Here is a quick tutorial on what to do!

First we are going to cut 4 of whatever ear option you are choosing (2 pieces for each ear). You can mix and match as you choose, we had quite the discussion on what ear belongs to which animal and we are still undecided on if a raccoon has rounded or pointed ears so we are going to leave it to you to decide!  I used a fairly heavy weight cotton lycra on my ears but if you are using a thinner knit you may want also want to use interfacing on your ears (if so, cut your interfacing and iron it on now).  Next we are going to take our ears and place right sides together, then sew with a 1/4 inch seam allowance around our ear leaving the bottom straight edge open.  I like to trim my seam allowance down with my pinking shears but you can also make tiny clips around your curve.  Turn your ears right side out and press them well.  You can top stitch your ears if you would like, I chose not to top stitch mine.

img_55721img_55731

img_55741

Next we are going to take our front piece and line up our ears.  I placed the edge of the kitty ear 1.5 inches down from the top of the shoulder on a size 5.  With the rounded ear I would move it farther down just a tad, I placed my panda ear at 1.75.  You may want to move your ear up a bit on the smaller sizes or down a bit on the larger sizes, do whatever you like but be mindful of the 0.5 inch seam allowance on the neckband as you don’t want to place your ear too close to the top and sew it into your neckband.  Once you have your ear placed on your front add your sleeve pin or clip in place and repeat on the other side.  Sew your sleeves into your front piece and continue construction as normal.  TIP: before your attach your neck band iron all your seams, you want your seams where your ears are placed to point towards the shirt and not the sleeve, it makes a huge difference on keeping your ears standing up!  Once you’ve finished your shirt, if your ears are wanting to fall forward just tack them in place on the top of each ear.  I just pinned them in place and did a couple stitches on my machine. Or you could stitch them all the way around onto your sleeve, completely up to you.

img_55761img_55771

Now you just need to iron on your vinyl!  This again, is a personal choice. I like my face fairly high on the shirt but others like it lower. Don’t have a way to cut vinyl, that’s OK! You can cut the pieces out of fabric and applique them on, add buttons for eyes, rick rack for whiskers… just have fun with it!

Go sew a bunch of animal faced raglans and let your inner animal out! Happy sewing and as always post your creations in the Patterns for Pirates Group- we are excited to see what your create! Don’t forget to tag your posts #p4praglanweek

P.S. Another quick tip, the kitty face raglan below is more of a tunic length, but you will see that is not an included option in the pattern.  A quick way to achieve a tunic length for girls is by adding the band to the hemmed length! Quick, easy and gives you one more cute option.

img_56541

img_56491img_55811img_5579114424768_10210631319370302_8079611700312509247_o

14317592_10210631319450304_566160835777953597_n

14124316_10153844301153317_1921540397317453212_o

If you’ve created your very own adorable animal version of the  Jolly Roger during P4P Raglan week, we would love for you to share it with us!  Head over to the Facebook Group or share on Instagram.  And be sure to use the tag #P4PRaglanWeek so we can find you!

Curious about what else has been happening during our raglan-loving week of fun?

Just take a look at our schedule!

Monday, September 19: Jolly Roger Raglan Pattern Update + Jolly Roger Add-On Pack Pattern Release

Tuesday, September 20: JRR Woven Fabric Hack

Wednesday, September 21: JRR Animal Faces Add-On

Thursday, September 22: Contrast Band Hack for Kangaroo Pockets

Friday, September 23: Women’s Keyhole / Scoopback Raglan Hack

Saturday, September 24: Off-The-Shoulder Raglan Hack

Sunday, September 25: Adding Stripes to Your Raglan Sleeves

Filed Under: Free Pattern, Pattern Hacks, Uncategorized 2 Comments

P4P Raglan Week: Woven Front Hack

September 20, 2016

Welcome back for Day 2 of P4P Raglan Week!  Now that you’ve all grabbed your copies of the Jolly Roger Raglan and the Add-On pack for it, I’m here to share an easy “hack”!

raglan-week-day2

I love being able to make fun shirts for my son.  However, I don’t always love having to spend the money for fancy knit prints, or having to search high and low for something that is geared toward the interest of my 6-year old.  How to do I get around it?  With fun, WOVEN cotton prints, from my local fabric stores!  They are money savers and tend to have a million fun prints that are loved by my little guy.  Want to know how I manage to mix a woven fabric into a knit pattern?  It’s so simple!

jolly-roger-hack-002

No adjustments are needed for the pattern pieces itself.  Out of your knit fabrics cut your neckband, sleeves and back panel as the pattern calls for.  And for the front, simply opt in your woven print instead of a knit!  It’s as easy as that!  Because of the way raglan sleeves are attached, they still provide enough ease, stretch, and room for the shirt to fit over your little’s heads.  And the Jolly Roger Raglan has enough of a relaxed fit that there isn’t any need to add extra space in the body.  Easiest hack ever, am I right?

jolly-roger-hack-004

Create your raglan as the pattern calls for.  I always use a serger to finish the bottom hem of my woven-front raglans, but you don’t have to.  I just like having that serged piece for a sturdier grip when I’m turning the edge under 1/4″ and then another 1/4″ before I edge stitch the hem.  You are welcome to finish the bottom edge however it suits you the best.

jolly-roger-hack-006 jolly-roger-hack-007

Be sure to press your fabric and then have your child wear it (to distract them while you make a million more).

jolly-roger-hack-008jolly-roger-hack-020

If you’ve created your very own woven-front Jolly Roger during P4P Raglan week, we would love for you to share it with us!  Head over to the Facebook Group or share on Instagram.  And be sure to use the tag #P4PRaglanWeek so we can find you!

Curious about what else has been happening during our raglan-loving week of fun?

Just take a look at our schedule!

Monday, September 19: Jolly Roger Raglan Pattern Update + Jolly Roger Add-On Pack Pattern Release

Tuesday, September 20: JRR Woven Fabric Hack

Wednesday, September 21: JRR Animal Faces Add-On

Thursday, September 22: Contrast Band Hack for Kangaroo Pockets

Friday, September 23: Women’s Keyhole / Scoopback Raglan Hack

Saturday, September 24: Off-The-Shoulder Raglan Hack

Sunday, September 25: Adding Stripes to Your Raglan Sleeves

Filed Under: Pattern Hacks, Uncategorized 4 Comments

P4P Raglan Week: Jolly Roger Raglan Update + Add-Ons Release!

September 19, 2016

Welcome to the first day of the P4P Raglan Week!  It’s looking like you are just as excited as we are!  Let’s get the party started with Day 1: the Jolly Roger Raglan update + Jolly Roger Raglan Add-On pattern release!

raglan-week-day1

Let’s talk the Jolly Roger Raglan update first!  It’s one of the most tried and true patterns for kids in the Pattern for Pirates family, and we did a little tweaking to make it even better.  First, we added the layers feature!  We also gave the entire tutorial and pattern an overall facelift to make sure everything was perfect from neckband to hem and everything in between.

14425408_10102913036683023_4848683499498318168_o

img_7894

We have also adjusted the angle of the raglan-sleeve to better match the style of our two women’s raglans (the Relaxed Raglan and the Slim Fit Raglan).  Our testers went through several rounds of the sleeve being adjusted before we all agreed on the fit.  I think you will all love it too!

**If you already own the Jolly Roger Raglan, you will not need to re-purchase to get the updates.  If you bought here (PatternsforPirates.com) or on the Craftsy store, you will simply need to sign into your account and re-download the file.  If your purchase was via Etsy, email help@patternsforpirates.com (WITH PROOF OF PURCHASE) and you will get an updated file.


Now let’s talk the highly requested Add-On Pack for the Jolly Roger Raglan!  You are going to love it so much!  **You must own the Patterns for Pirates Jolly Roger Raglan as well, since this is an add-on and not a stand-alone pattern.

14311484_10102912545716923_6741414687456728065_o

The Add-On Pack is full of super fun options:

  • Two hood types (traditional and cross-over funnel hoods)

14424963_10104358521989049_3747064700530049573_o 14289941_10210944418675163_8315798585323290006_o

  • Kangaroo Pocket

14311306_10207007364604832_362004355791744599_o 14305368_10153988962242877_9154033479605197205_o

  • Cowl Neck

img_9684 14242208_10210516508814415_2927786901913388326_o

  • Inseam Pockets

img_9693 14289893_10154511902671972_2765528919065172778_o

  • Funnel Collar

14324360_10153919372931033_8759815284094426481_o14289782_10154456917283433_4894254594844709762_o

  • Thumbhole Cuffs

14289845_10101035850150252_4649496919678406481_o 14352397_10104358521954119_8025388624738965920_o

  • Ruffle Hem

14324251_10210565851973658_6020903452005956770_o 14242252_10101029350026552_5253696604094059063_o

You can mix-match these options a million times over and still want to make more!  (Just ask our fabulous testers!)

The Jolly Roger Raglan is available for purchase HERE.
Find the Jolly Roger Add-On Pack for purchase HERE.
Or, you can bundle the Jolly Roger + Add-On Packs together HERE.

Be sure to head over to our Facebook Group and check out all of the amazing tester creations for the Jolly Roger Raglan and the Jolly Roger Add-On Pack!  They will provide for endless amounts of inspiration if you’re ever needing it!

listing-pictures-updated-1 listing-pictures

Are you joining us for P4P Raglan Week?  Be sure to share your creations on Instagram or in our Facebook group and use the tag: #P4PRaglanWeek !!  One lucky person will be featured on the blog and win a P4P pattern of their choice!

Here’s the rest of the schedule for the week:

Monday, September 19: Jolly Roger Raglan Pattern Update + Jolly Roger Add-On Pack Pattern Release

Tuesday, September 20: JRR Woven Fabric Hack

Wednesday, September 21: JRR Animal Faces Add-On

Thursday, September 22: Contrast Band Hack for Kangaroo Pockets

Friday, September 23: Women’s Keyhole / Scoopback Raglan Hack

Saturday, September 24: Off-The-Shoulder Raglan Hack

Sunday, September 25: Adding Stripes to Your Raglan Sleeves

Filed Under: Announcement, Blog Tours, Pattern Release, Sew-A-Long 3 Comments

P4P Raglan Week! It’s Coming!

September 18, 2016

Arrrrrrrre you ready for some raglan-sewing tips, tricks and add-ons?  We sure are!

In case you missed Nicole’s sneaky announcement yesterday, here’s another teaser to get you excited about the week ahead.  Patterns for Pirates is dedicating an ENTIRE week to all things Raglan!  And boy do we have the best week planned out for you!

14242253_10104318744847759_6014705790794734426_o

We are constantly being asked what the best patterns are for beginners.  Raglan-style shirts are excellent because of the sleeve type.  They’re super fast to sew, fun to mix/match fabrics and prints with, and leave an unlimited amount of style possibilities.  In fact, the Relaxed Raglan was the first ever P4P pattern that I (Katy) made for myself and I haven’t stopped making them since.  I do hope you join us for all of the fun we are about to have!

Just take a look at our schedule!

Monday, September 19: Jolly Roger Raglan Pattern Update + Jolly Roger Add-On Pack Pattern Release

Tuesday, September 20: JRR Woven Fabric Hack

Wednesday, September 21: JRR Animal Faces Add-On

Thursday, September 22: Contrast Band Hack for Kangaroo Pockets

Friday, September 23: Women’s Keyhole / Scoopback Raglan Hack

Saturday, September 24: Off-The-Shoulder Raglan Hack

Sunday, September 25: Adding Stripes to Your Raglan Sleeves

You can follow along on the blog here, or in our Facebook group.  Search #P4PRaglanWeek to be able to find our posts all over social media.  And please feel free to sew-along with us on one or all of the days.  The more the merrier!

But wait, there’s more!  We wanted to create a friendly pirate-y competition with our P4P Raglan Week!

Between tomorrow and Wednesday, September 28, sew up a Patterns for Pirates raglan shirt shirt using one of our add-ons, hacks, or keep the pattern as-is.  Share your photo with us on Instagram or in our Facebook group and use the tag#P4PRaglanWeek We will pick our favorite and the winner will win a free P4P pattern of choice AND be featured on this blog.  Fun right?

To make it even better we have put all the raglan patterns in the shop on sale all week (no code needed)!

Now get out there and sew some raglans, matey!

Filed Under: Announcement, Blog Tours, Sew-A-Long 6 Comments

Timeless Hacks

September 13, 2016


We are so excited to share the Timeless Tunic with you guys that we couldn’t help but share just a few easy mods you can do to have even more fun with this new woven pattern!

timeless-tunic-pattern-hacks


First up is the Crop Length: This is a super easy mod that is great for pairing with high-waisted bottoms.


img_3002img_2943

img_2987


Cut bodice pieces and skip the 2 skirt pieces.  Sew up the bodice following the tutorial like normal.  When you’re at the point of attaching the skirt you will instead create a casing with just the bottom edge of the bodice (just like the 3/4 and long sleeve options).

img_9407

Fold up the bottom raw edge 1/2″ to wrong side, and again another 1/2″ hiding raw edge.

img_9409

Edge stitch along top fold, leaving about 1.5″ un-stitched.  Feed your waist elastic in, around and out of the casing using a safety pin or other tool.

img_9410

Stitch elastic ends together using a wide zigzag (Make sure not to flip or twist your elastic as you’re guiding it through and stitching into a circle).

img_9414

Pull elastic all the way into the casing.  Stitch remaining 1.5″ closed.

img_9416

Wah-Lah!

img_9418

Now you have an adorable crop length that you can pair with your favorite high-waisted bottoms and not have to worry about tucking i in and getting any lumps and bumps from the bottom. I paired mine with the Pirate Pencil Skirt in the high waist and midi length option.

img_2948

img_2980


Split Sleeve and Curved Dress Hemline by Angela.

cover2

A big fashion trend that I’ve been seeing recently is a pretty split sleeve and the new Timeless Tunic and dress is the perfect pattern to easily add a split sleeve.  I’m also a big fan of a curved hem, so I’m also going to show you how to add the curved hem to the dress length.  Let’s get started!

First thing we are going to do is draw a line from the shoulder seam directly down the middle all the way down to the bottom of our sleeve piece.  This is going to be our extra cut line to create 4 pieces.  Now, if you’re lazy like me, you can just cut your sleeve out as normal and then cut down the center line that you created right thru your pattern and fabric. Make sure you don’t forget your notches!! It’s really easy to make a mistake without those notches as you will now have 4 sleeve pieces.  Next you’re are going to need to create your binding strips. To do this, I just measured that line we created on the pattern to determine how long the binding needs to be and I added a inch extra just to be safe.  As we are binding a straight piece you don’t have to worry about cutting your binding on the bias.  I just cut mine the length of my piece by 1.5 inches wide.

img_54241

Next you’re going to press your binding just like you would any other binding or bias tape. Fold in half lengthwise and press and then press the edges into the center.

img_54341

You’re going to pin the right side of the binding to the wrong side of your sleeve and sew in the first pressed line which is a 3/8″ seam.

img_54381

Once you have sewn the seam, press the seam allowance up towards the binding and then fold your binding down and repin so that the fold on your binding meets the seam line.  I like to pull mine just slightly over the seam so that when you edge stitch you don’t see the seam underneath.  You will then edge stitch your binding down.  You are going to do this on all 4 of your sleeve pieces.

img_54391img_54401


Time to sew the sleeves on! Easy peesy- you just match the top of your binding to the top center of your sleeve and make sure that your sleeve binding are right against each other.  Make double sure that your notches match here too, ask me how I know!  Now you will continue constructing as shown.  When you get to your sleeve casings you can sew your casing flat and insert your elastic.  I then sewed the elastic together to form your circle and then pull your casing over the elastic so you can’t see it.

img_54471img_54481 img_54501


On to the curved hem! This is super simple too.  I started by tracing off the tunic curve on the front skirt and then lined up the curve to the side seam so that the bottom of the curve was at the bottom of of the dress length and traced it on. You will need to extend your line just a tad at the center as the dress is aline so it doesn’t match on both edges. (This is going to make your dress length a bit shorter on the sides so if you are worried about that add a little length) I then cut my new curved hem.  For the back you want to also trace off your tunic curved hem but as it is a different curve then the front you want to make sure that your side seams are going to match.  The back hem will dip a bit lower then the dress length so you will need to tape some paper onto the bottom of your back piece so that you can trace your curve easily.  I found the easiest way to get your hems to match was to take your front piece and place it on your back piece, matching the side seams and mark where your front curve starts on the back piece and then place you back curve on that mark and trace.  Cut your new hem line and continue constructing as normal.

img_54201img_54211img_54231img_54311

img_55401

img_55361

Hope you enjoyed these easy hacks and please share your creations in the Patterns for Pirates Facebook group, we love seeing what you make!


V Neck Modification by Alex.

IMG_1214

The much anticipated woven tunic and dress is finally here! The Timeless Tunic includes 3 sleeve lengths, a sleeveless option and two hem lengths. So why not add a V-neckline to the mix? 😉 I am a very big fan of V-necklines, I find them flattering on all sizes and shapes so today I will show you how I hacked the Timeless Tunic to get a V-neck look.

First of all print your pattern in the size needed, grab a ruler, a marker and some paper because we’ll do some light drafting. Ready?

IMG_1180

Tape your pattern as per the instructions and set aside the front facing. We will  draft another front facing shortly. Grab the front bodice piece and mark 3 inches. You can do less or more depending on how deep you’d like the cleavage. For my example I lowered the neckline about 3 inches. Once you mark that point on the center fold line, draw a straight line from where the neckline begins to curve to your marked point. Cut along the line and discard the little pieces.

TIP: If you prefer to save the original front bodice piece, then just fold along the marked line and tuck the little piece under the pattern. This way you can re-use this pattern for the regular curved neckline again simply by unfolding it.

IMG_1181-1

Now that you have your front bodice piece ready, all we have to do is draft the front bodice facing. My V-neck Timeless dress is the sleeve option so you’ll see the sleeve facing throughout this tutorial. You can use the same suggestions and draft the sleeveless front facing option, too. Grab the original front facing, lay it over the front bodice and mark the shoulder width on it.

IMG_1184

Now lay a piece of paper (preferably  tracing paper but good ole printer paper will do, too, as you can see) over the V-neck front bodice. Trace the shoulder and the V-neckline on the paper. Mark about 2.75 inches down where the fold line will be. Using a French Curve (or drawing very slowly), draw a curve from the outer shoulder point to the bottom point of the center fold. That’s it! You’ve now drafted a new V-neck front facing.

IMG_1185 IMG_1187-1

Cut the fabric (and interfacing) using the V-neck bodice and the new V-neck front facing you just created. The rest of the pattern pieces and elastic will remain the same as the original pattern.

IMG_1189

Sew your dress or tunic following the pattern’s directions. When sewing the bodice to the facing around the neckline, I prefer to start from the V point, sew around the neckline and end at the V point where I started. If you start at the shoulder seam, make sure to pivot when you get to the V point of the neckline.

IMG_1194-1

TIP: When you snip the seam allowance around the neckline, don’t forget to cut a little V piece at the pointed spot. It will make your neckline lay nice and flat once you press it.

IMG_1195

Finish sewing the tunic or dress as per the pattern tutorial. Now you have your very own Timeless Tunic with a V-neckline. As always, I can’t wait to see your creations in the group . Sew like a pirate!


Sheer Overlay by Nicole

img_6704

There are some gorgeous woven fabrics available but some may be a little too sheer to wear sans under-layer or finish the neck and armholes with the facings method found in the pattern.  With a couple of easy changes, you can use fabrics like chiffon or lace.  I chose to use a chiffon and left my sleeves sheer but needed the extra coverage in the bodice and skirt.

Once you decide on your fabrics (that’s the hard part, right? 😉 ) you will cut the following:

(1) Main fabric bodice – front and back, (1) Main fabric skirt – front and back, (1) lining – front and back, (1) lining skirt – front and back ( I shortened the hem by 1″ as I used a rolled hem on the edges and did not want it to peek out the bottom edge)  (1) front and back facing (2) main fabric sleeve mirror image.  Note: Lightweight woven fabrics like chiffon are delicate.  When ironing the fusible interfacing, proceed with caution and use a pressing cloth.

img_6603 img_6606

For assembly of the bodice, you will treat your front and back as one piece.  Place main fabric and lining right sides up (wrong side of main fabric touching right side of lining) and baste along the edges or using a washable basting spray to keep the two layers together.  Construct main bodice as shown in pattern.

img_6608

For the skirt, I did not want them attached at the side seam so I stitched the side seams of both the main fabric and lining separately, creating two skirts.  Slip your lining skirt inside your main fabric with right sides out (wrong side of main fabric touching right side of lining).  I serged my two skirt together at the top edge to make attaching them to the bodice a little easier.  Continue construction as shown in the pattern.

img_6612  P4P Timeless Tunic PDF Pattern Sheer Overlay


Easy enough….right?! The constructions doesn’t change any and should not be any more difficult to put together.  Working with slinky fabrics is the hard part but with a little patience you’ll get through it in no time.

P4P Timeless Tunic PDF Pattern Sheer Overlay P4P Timeless Tunic PDF Pattern Sheer Overlay


Make it in knit!

We all love the quick and ease of sewing up a knit, right?! You can sew this pattern in a knit with no modifying! Here is Alex’s in a rayon spandex with no modifications other than about 1.5″ added to skirt length for a personal preference on skirt length.  She kept the dart and facings as is in the pattern exactly and sewed her size on the measurement chart.  With knits you can have less wearing ease and be comfortable, so you could size down if you wanted a more fitted look compared to the woven option.  She looks fabulous and she didn’t have to iron it 😉 lol!

14310375_10153881465478317_8390996610783788831_o 14231855_10153881465828317_6125367821420674475_o

Filed Under: Pattern Hacks 2 Comments

Timeless Tunic and Tiny Timeless-Pattern Release!!

September 13, 2016

I’m asked for more patterns drafted for non-stretch woven fabrics all the time! And although my heart will always sing for those quick knits 😉 I do love a nice woven top or dress too!

So without further ado, let me introduce the Timeless Tunic and the youth version the Tiny Timeless (because Baby Girl needs to match Mama sometimes)!  We also have them bundled together for a discount in the Timeless Bundle!   All will be on sale through Sunday 9/18/2016 US Central Time Zone.

new-release

listing-pictures-bundle

I love a softer drape for my own tops.  I feel like the drape gives a more flattering silhouette.  Personal favorites are rayon challis, crepe, peachskin, poly chiffon and voile.  But, I drafted it so that you can get away with using a stiffer woven like a chambray or flannel without loosing too much of the glamour!  Now you will have a great, timeless pattern that allows you to use up that gorgeous woven fabric you’ve been hoarding for that “perfect pattern”!  (ah ah ahhhhhhhhhh…)

14324626_10157531259405599_1898415430425264769_o

Both include the same options:

Tank– Perfect for warmer weather or for a nice layering piece. I loved to wear a nice silky tank under a cardigan!

14242301_10210716022718957_378574312330514505_o14241659_10100199813559177_5606052251135658841_o14125490_10207570896533783_6302897511345138404_o

Short Sleeve– A bit more coverage, but still great for warmer weather and layering!

14184470_10206952209069922_8833346384594323059_n14241581_10102547913260398_7254487766094641562_o14242208_10210571073896937_805838614165298697_o

3/4 Sleeve– A great transition length that you can wear year round.

14249950_10154503698239666_7646869345079131584_o14352546_10210567848103560_4851958667013892215_o14206059_10157281958945562_7297118569733716242_o

Long Sleeve- Take this length into the colder months no problem! A lot of our testers loved the longer sleeve paired with a cozy flannel!

14242334_10104325619441019_6908037680625653308_o14125531_10157496754100599_3483788795218596629_oimg_3072

Top/Shirt Length- Cute, comfy, and easy to wear!

14324611_10153780722145841_3662509677212397532_o14238084_10153700243027016_1014006267670653907_n

Curved Tunic Length- My personal favorite 🙂 It’s flattering and has some coverage but still looks trendy and put together. Younger girls love that curved tunic for pairing with skinnies or leggings!

img_279114231138_10153769419810841_3613078633363806887_o14290074_10153768368870841_553585620824454842_o

Dress Length- Meant to hit about 2″ above knee (a super flattering length on all shapes) you can make it casual everyday or sew it up in a nicer fabric and pair with heels to dress it up!

14258341_10207132892821807_6136906350317382751_o14207652_10157496740100599_2033111073842957631_oimg_2624

So, just how versatile is this pattern? It can really be styled up or down so many ways you could wear this anywhere!

This is such a classic look you can make it a casual, everyday/play look:

14249963_10154503755929666_9129185631609573782_o14231413_10207876129193547_6674605127882798680_o14205954_10210512674724260_4397482894494798683_o

Maybe a casual date, girls meet up, or shopping day:

14207814_10154300057696539_8237162624284821183_o14203258_10208929354683616_2720049744373384192_n14207750_10210551066636768_7037204826372407243_o

Use something a bit nicer and you have a great office or work wear attire staple. Send your littles in it for school ceremonies or picture day:

14231234_10153612253591735_8839325507524326519_o14232033_10208995061987559_5269068041149513619_o14188314_721772925249_1691406524578386645_o

It’s the perfect style for a shower or party! Perfect for those adorable border prints as well!

14196081_10153869020893317_5082474374666622486_o14291746_10100703800196229_1962536080284580740_n14249724_1066496020113465_6724777699018234887_o

You can even do a great silky fabric and make a more formal version:

14222301_10154394234975185_4863718361316041852_n14206175_10103253572656169_8892717186004317338_o14207838_10154332104716539_4627475586566883372_o

Warning though, doing this dress in a fabulous silky leopard print can really make you feel glamourous!! This little one had some great modeling poses in her fancy dress!! Don’t we all love to feel beautiful! <3 <3 <3

14311451_10154332105296539_2865024478159272751_o

I hope you enjoy this new pattern as much as we all do!

The Timeless Tunic and Tiny Timeless will be a great weapon to pull out when you or your little one find that perfect woven fabric!

img_9056

Filed Under: Pattern Release, Uncategorized 2 Comments

How to Sew a Faux Layered Look using Just One Pattern

September 9, 2016

IMG_0856- p4p

The other day I was browsing Pinterest for some fall inspiration outfits but since I am now a resident of the sunshine state many of the fall looks I liked were not weather friendly. So what better way than to add “faux” layering to my shirts to pretend fall is in the air? 🙂

IMG_0869

Today I’ll show you how I used the Women’s Henley shirt to make myself a “layered” shirt. I chose the simple crew neckline and the rolled sleeves option but this style would look amazing with the Henley style neckline or the hooded style.

listing pictures

Start by cutting the pattern based on your measurements. Ohh, by the way…did you see that the Henley got an updated? It now has layers so you can just print your desired size. Cut the hemmed shirt option and grab a piece of paper so you can draft the faux layers part. It’s easy-peasy, don’t be scared! Simply trace the curved hem option of the front pattern piece, measure 1.25 inches on the side seam and draw a straight line from that point to the center seam. Repeat the procedure with the back piece of the pattern. Now you will have two extra pattern pieces (front and back) that you need to cut on fold at the center.

fauxlayeredpieces

IMG_0786

Sew your shirt according to the pattern instruction, iron the 1 inch memory hem and set it aside before stitching it. We will now prepare the “faux” layer. With the right sides together sew the side seams with 1/2 inch seam allowance.

IMG_0789

Once you have a loop-like piece you can go ahead and stitch the curved hem with your coverstitch or sewing machine. Press it! You are almost done. All you have left to do now is attach the layered part to your main shirt. Lay the main shirt on a flat surface and insert the faux layer piece matching the side seams. You can match the raw edges inside the shirt and pin all around the hem.

IMG_0798


If you prefer your faux layer to be just “peeking” from under your shirt you can certainly place the layer a little higher inside the main shirt and pin in place. Stitch the bottom hem of the shirt and the faux layer together at about 1 inch above the fold.


IMG_0799

You just made yourself a beautiful shirt that takes you from summer to fall. This style shirt pairs beautifully with the SOS pants and the Pirate Pencil skirt. As always, don’t forget to show off your layered creations in the group. Happy sewing, pirates!

Alex

IMG_0845-1IMG_0857

Filed Under: Pattern Hacks 9 Comments

  • « Previous Page
  • 1
  • …
  • 59
  • 60
  • 61
  • 62
  • 63
  • …
  • 68
  • Next Page »

connect with me

  • Email
  • Facebook
  • Instagram
  • Pinterest
  • YouTube
Privacy & Cookies: This site uses cookies. By continuing to use this website, you agree to their use.

To find out more, including how to control cookies, see here: Cookie Policy
  • Privacy Policy
  • Refund Policy
  • Contact Us
  • About

Copyright © 2026 Patterns for Pirates

Copyright © 2026 · Genesis Framework · WordPress · Log in