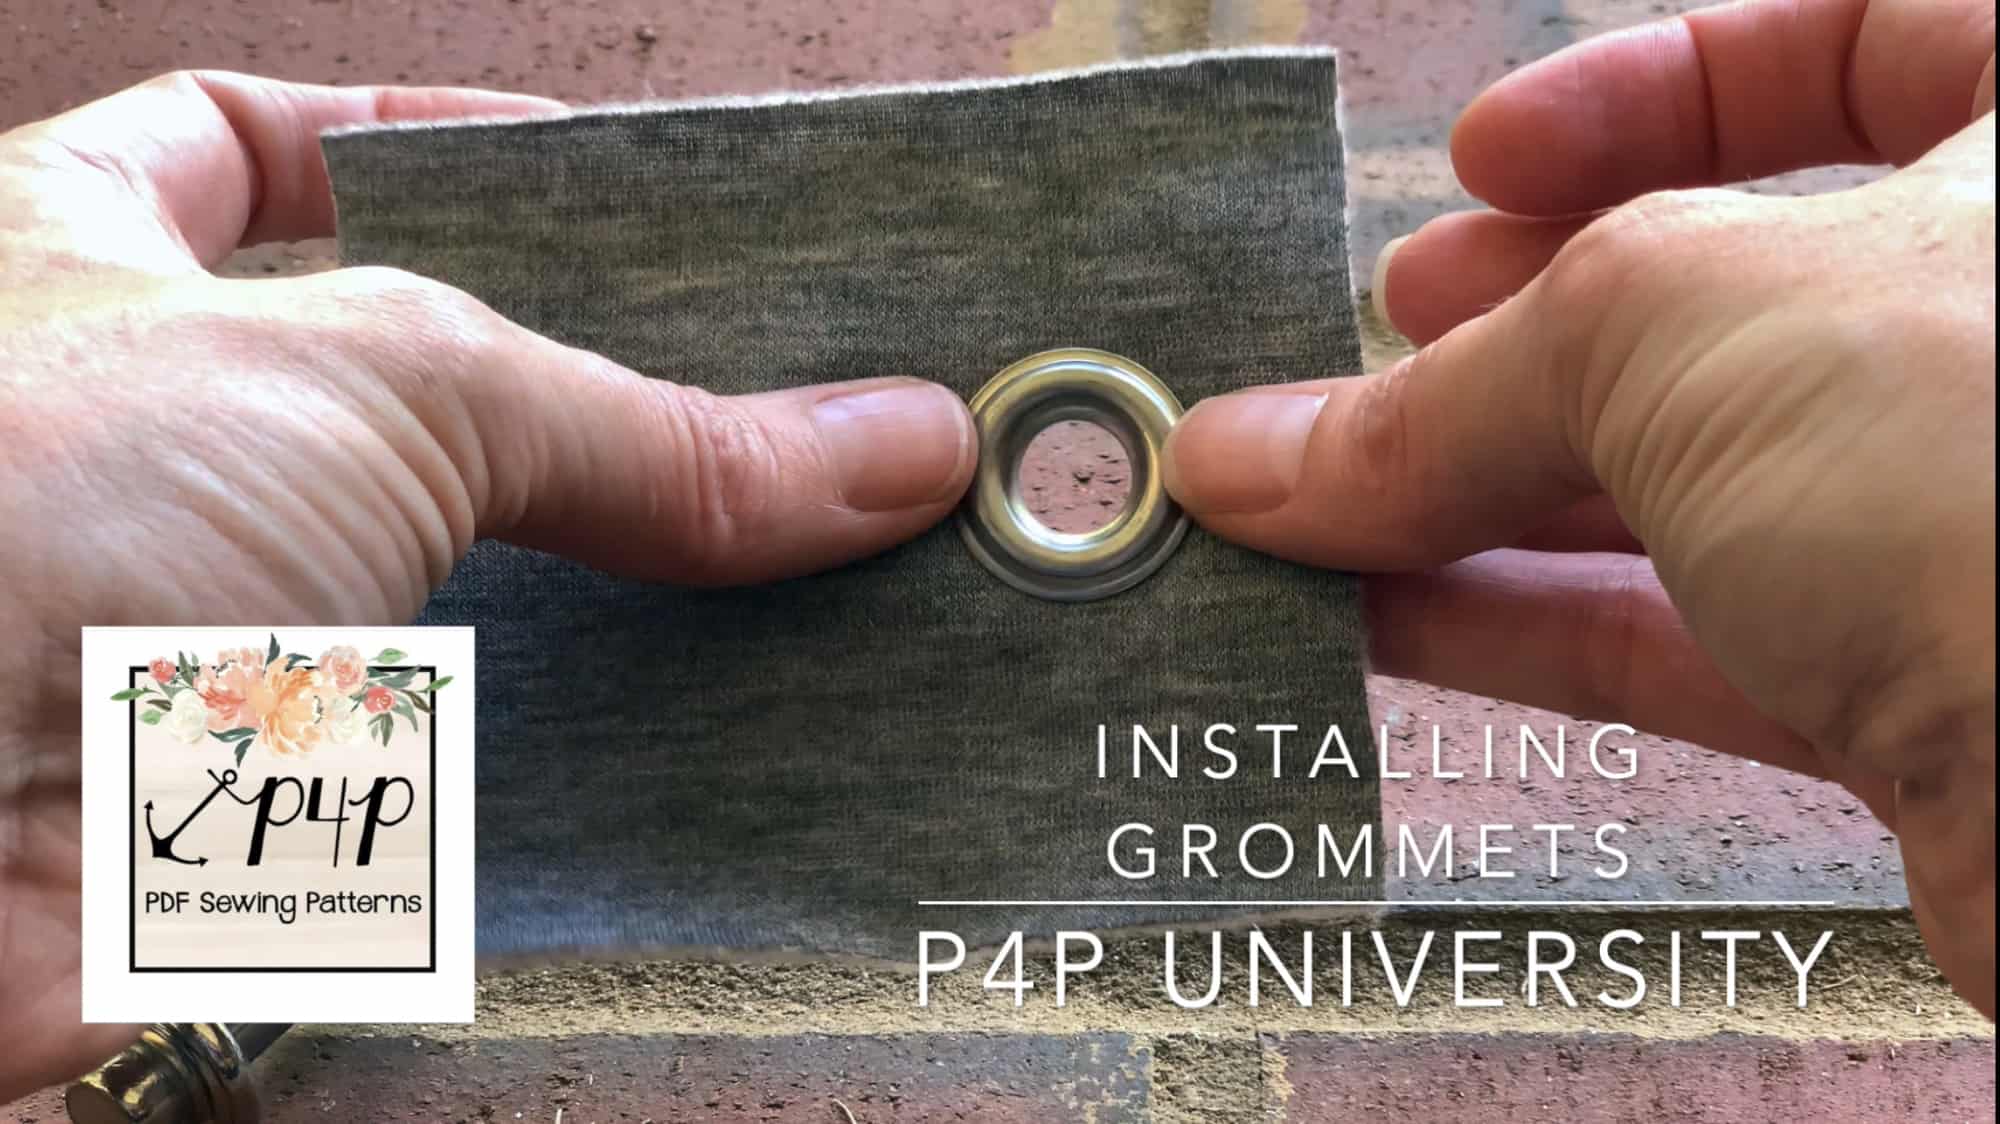
Raise your hand if grommets scare you? Have you done everything possible, including skipping that cute drawstring, just to avoid installing eyelets?
I did for years! I even made buttonholes to avoid installing those little metal devils. Buttonholes!
But, I’m here now to show you how truly easy it is to install grommets in your makes. Within the next few minutes, you’ll wonder why you were ever intimidated.
For those who prefer a video tutorial, I’ve got you covered!
If you prefer a written tutorial, read on.
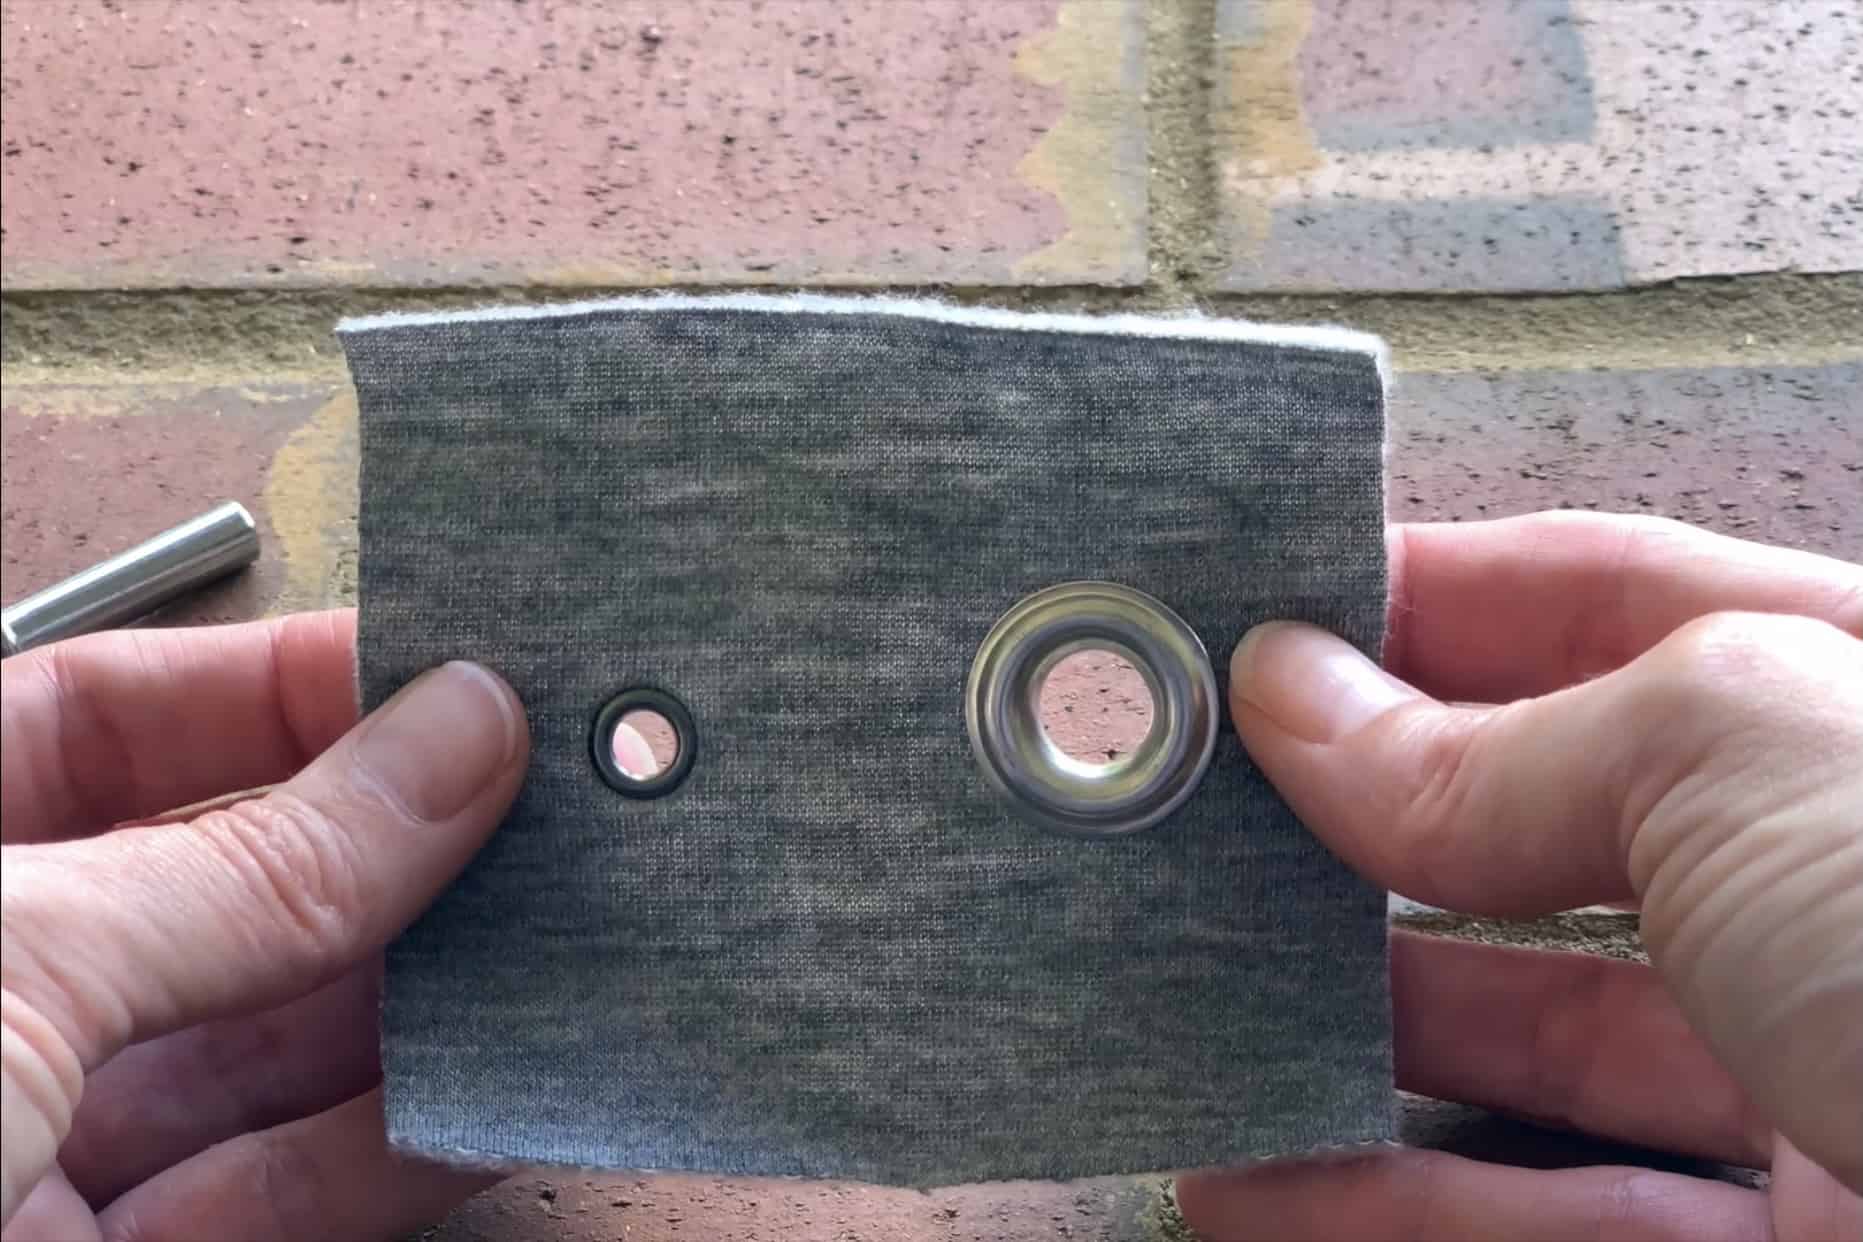
First, the anatomy of a grommet…
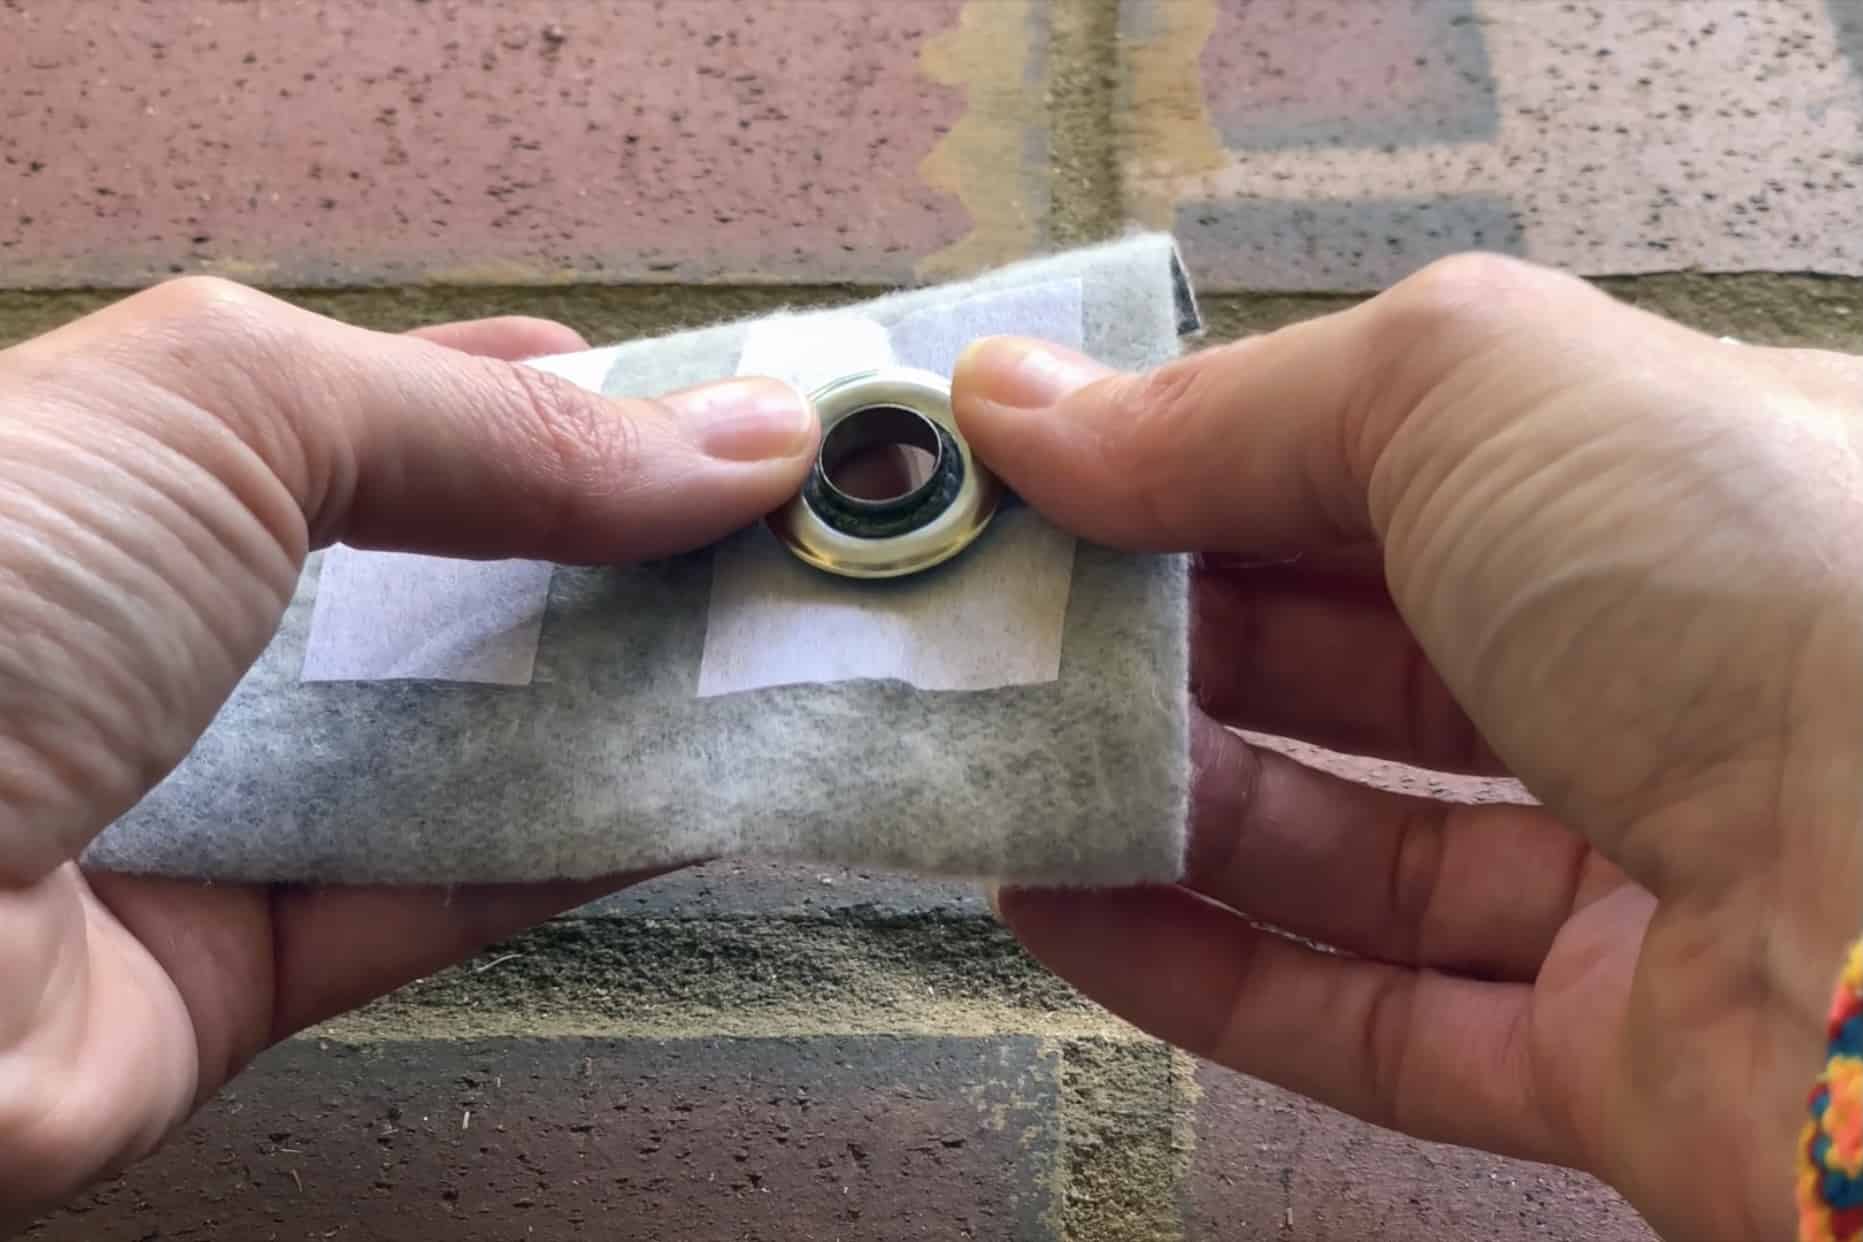
You will have your eyelet – that’s the piece that has a post. It will always be on the right side of your fabric. The backside is called the washer. The larger sizes typically have sharp teeth that help to better secure the grommet in place. The smaller sizes often have a plastic ring that sits between the back of your fabric and the metal washer.
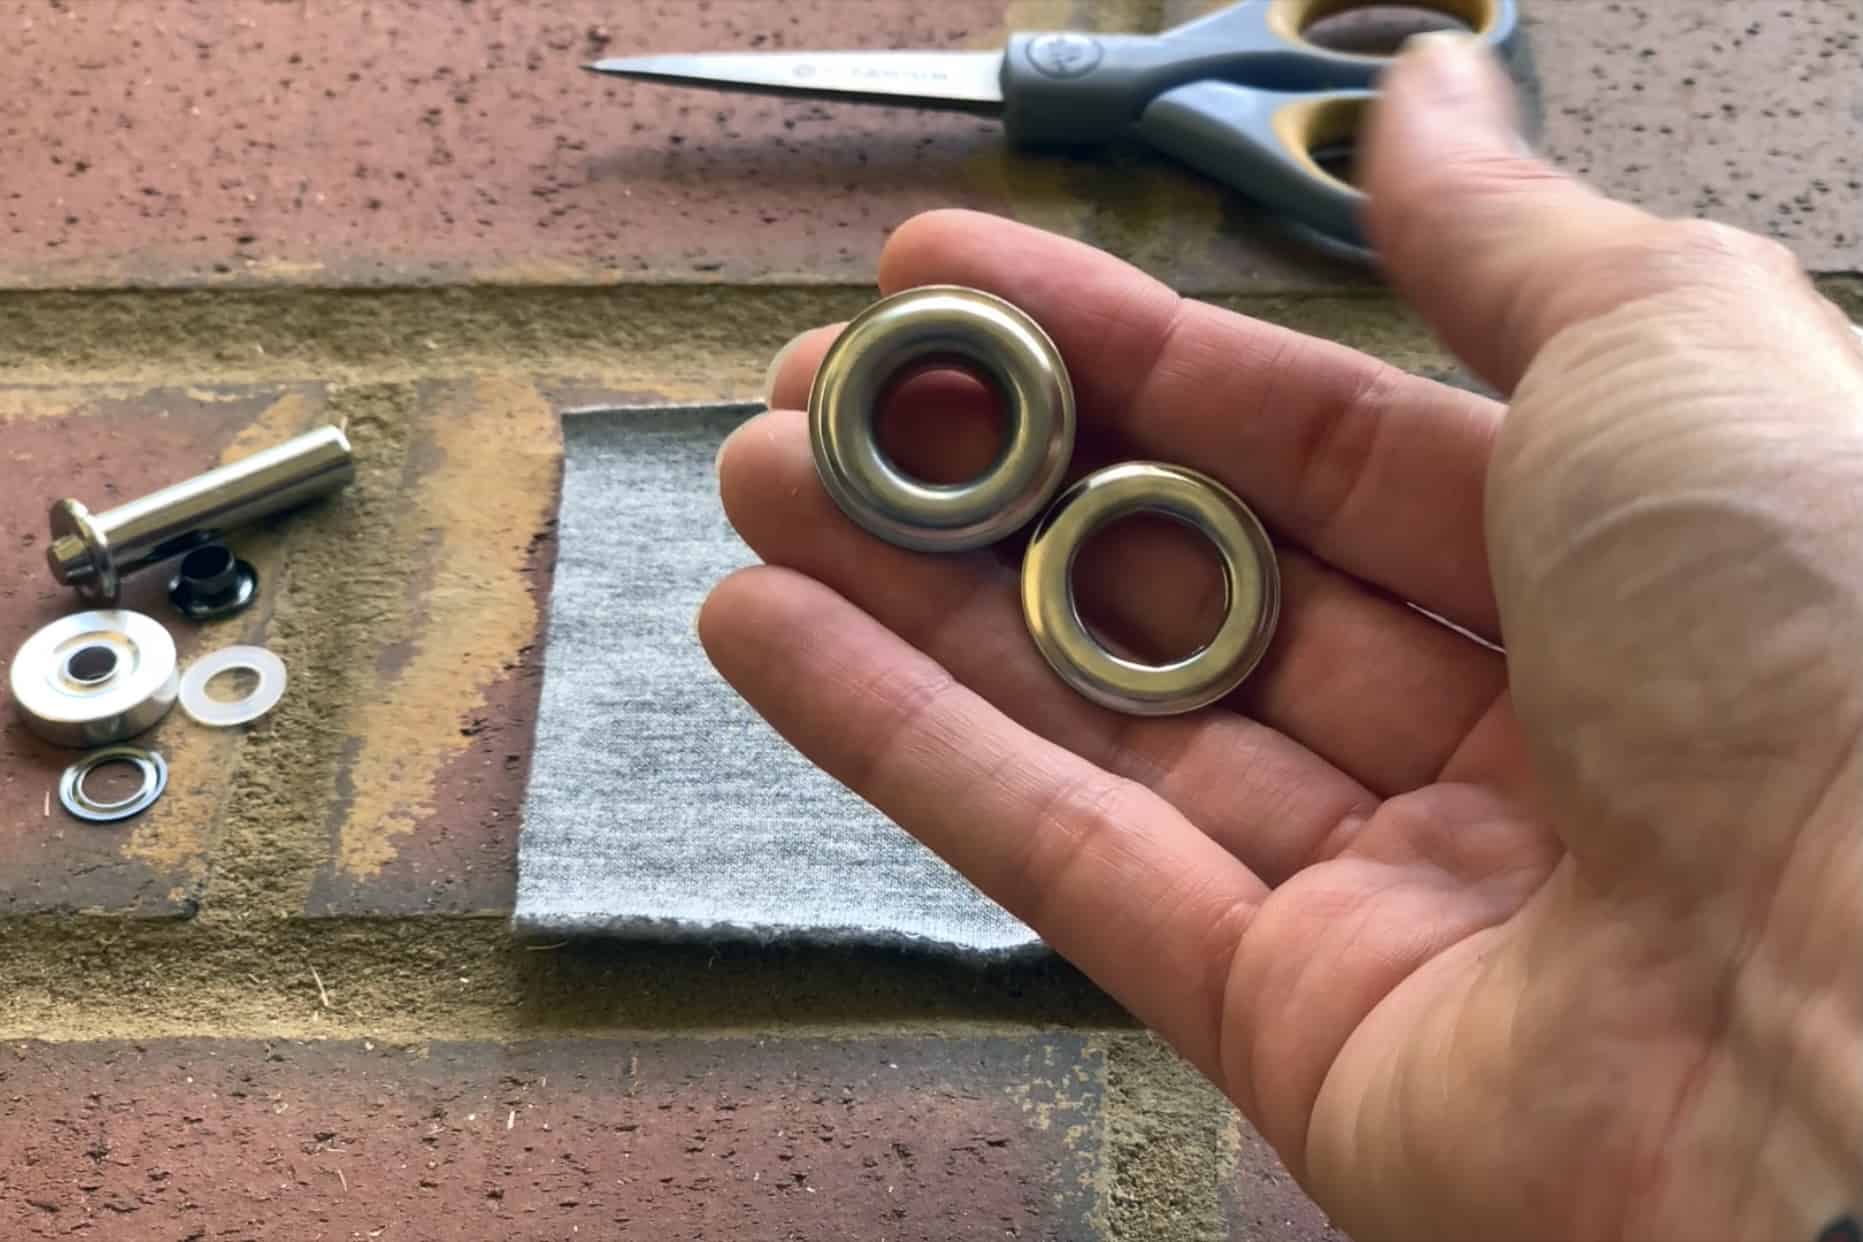

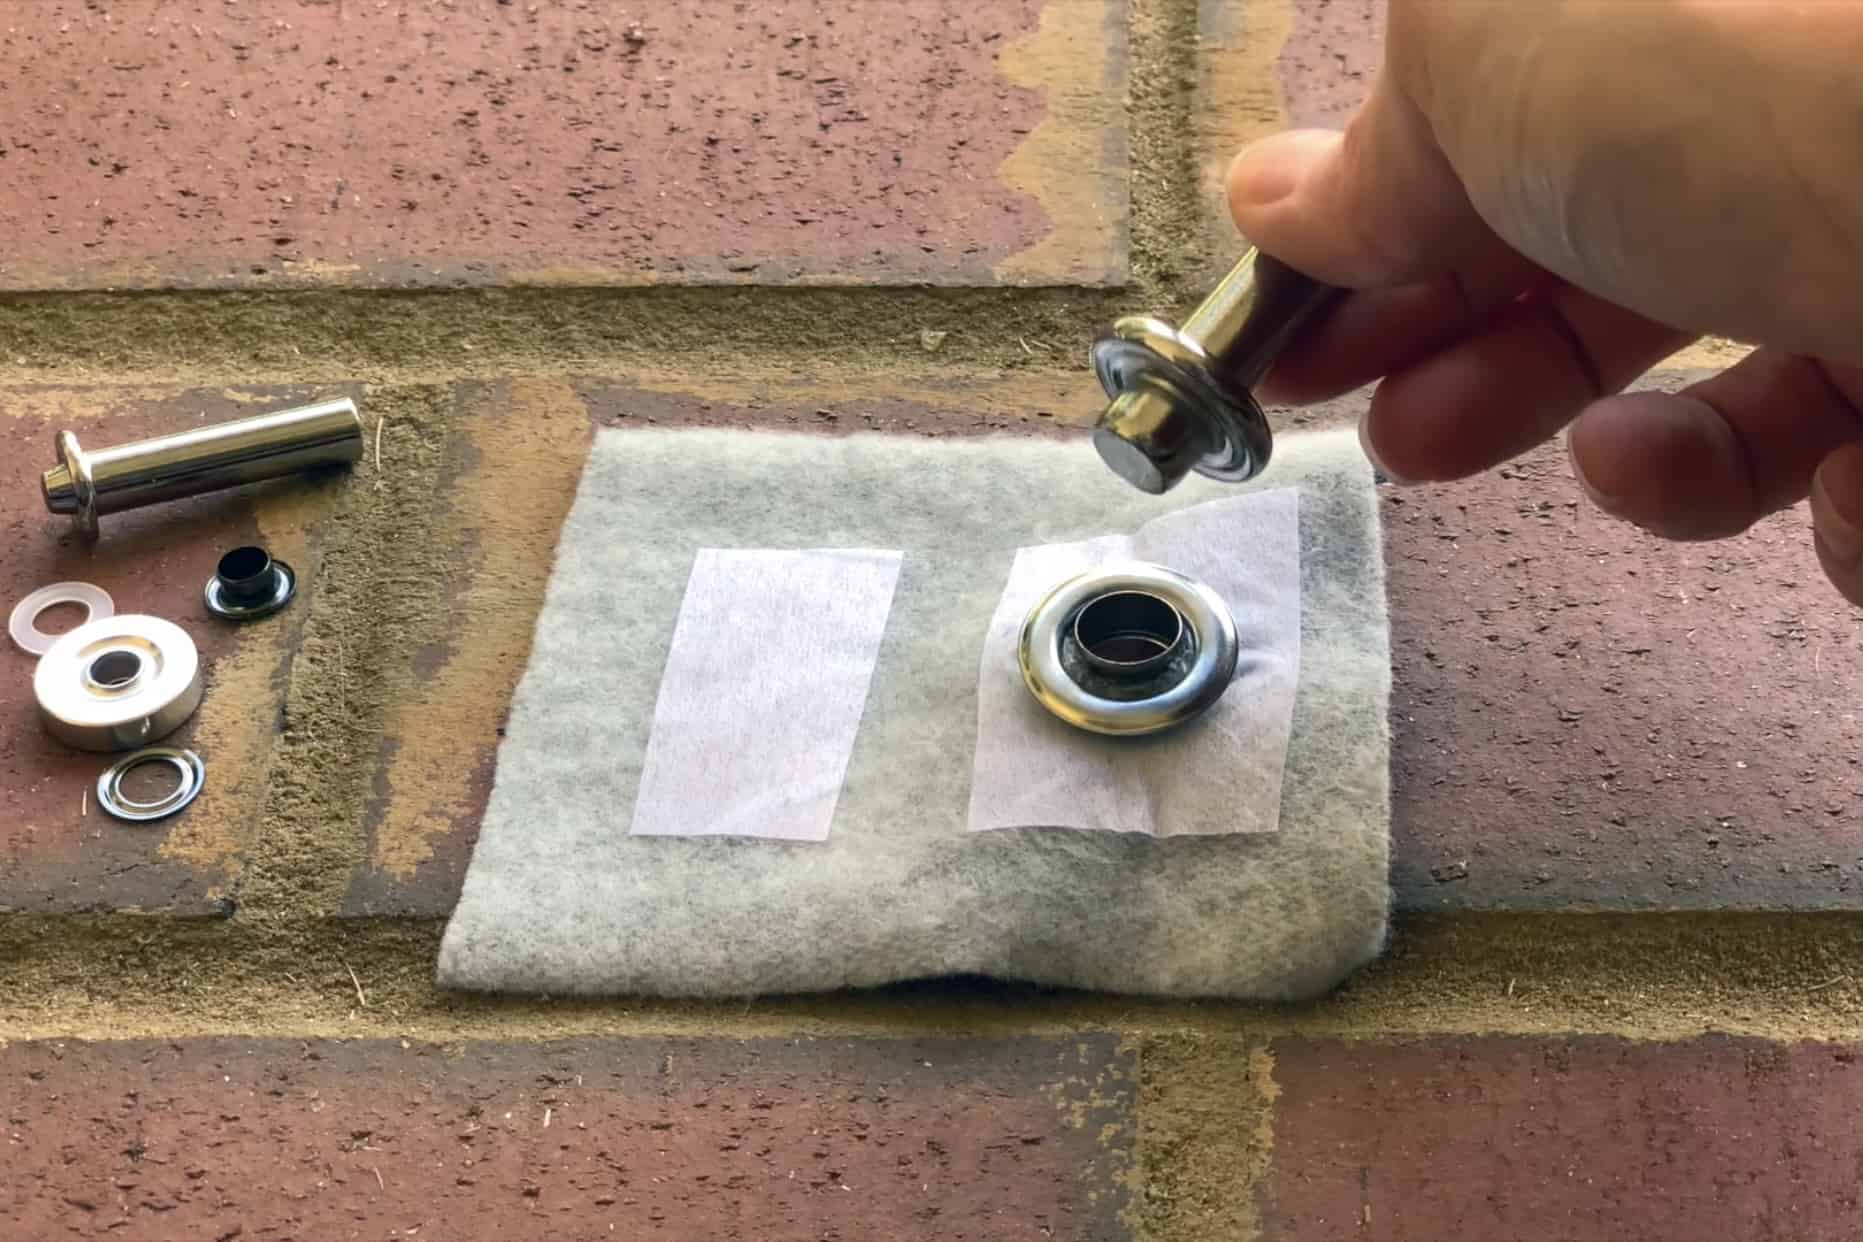
Most grommet kits will also come with an anvil (remember the Coyote and Roadrunner from Looney Tunes?!) and a setting tool. It’s important to use the right anvil for the size of grommet that you are setting.
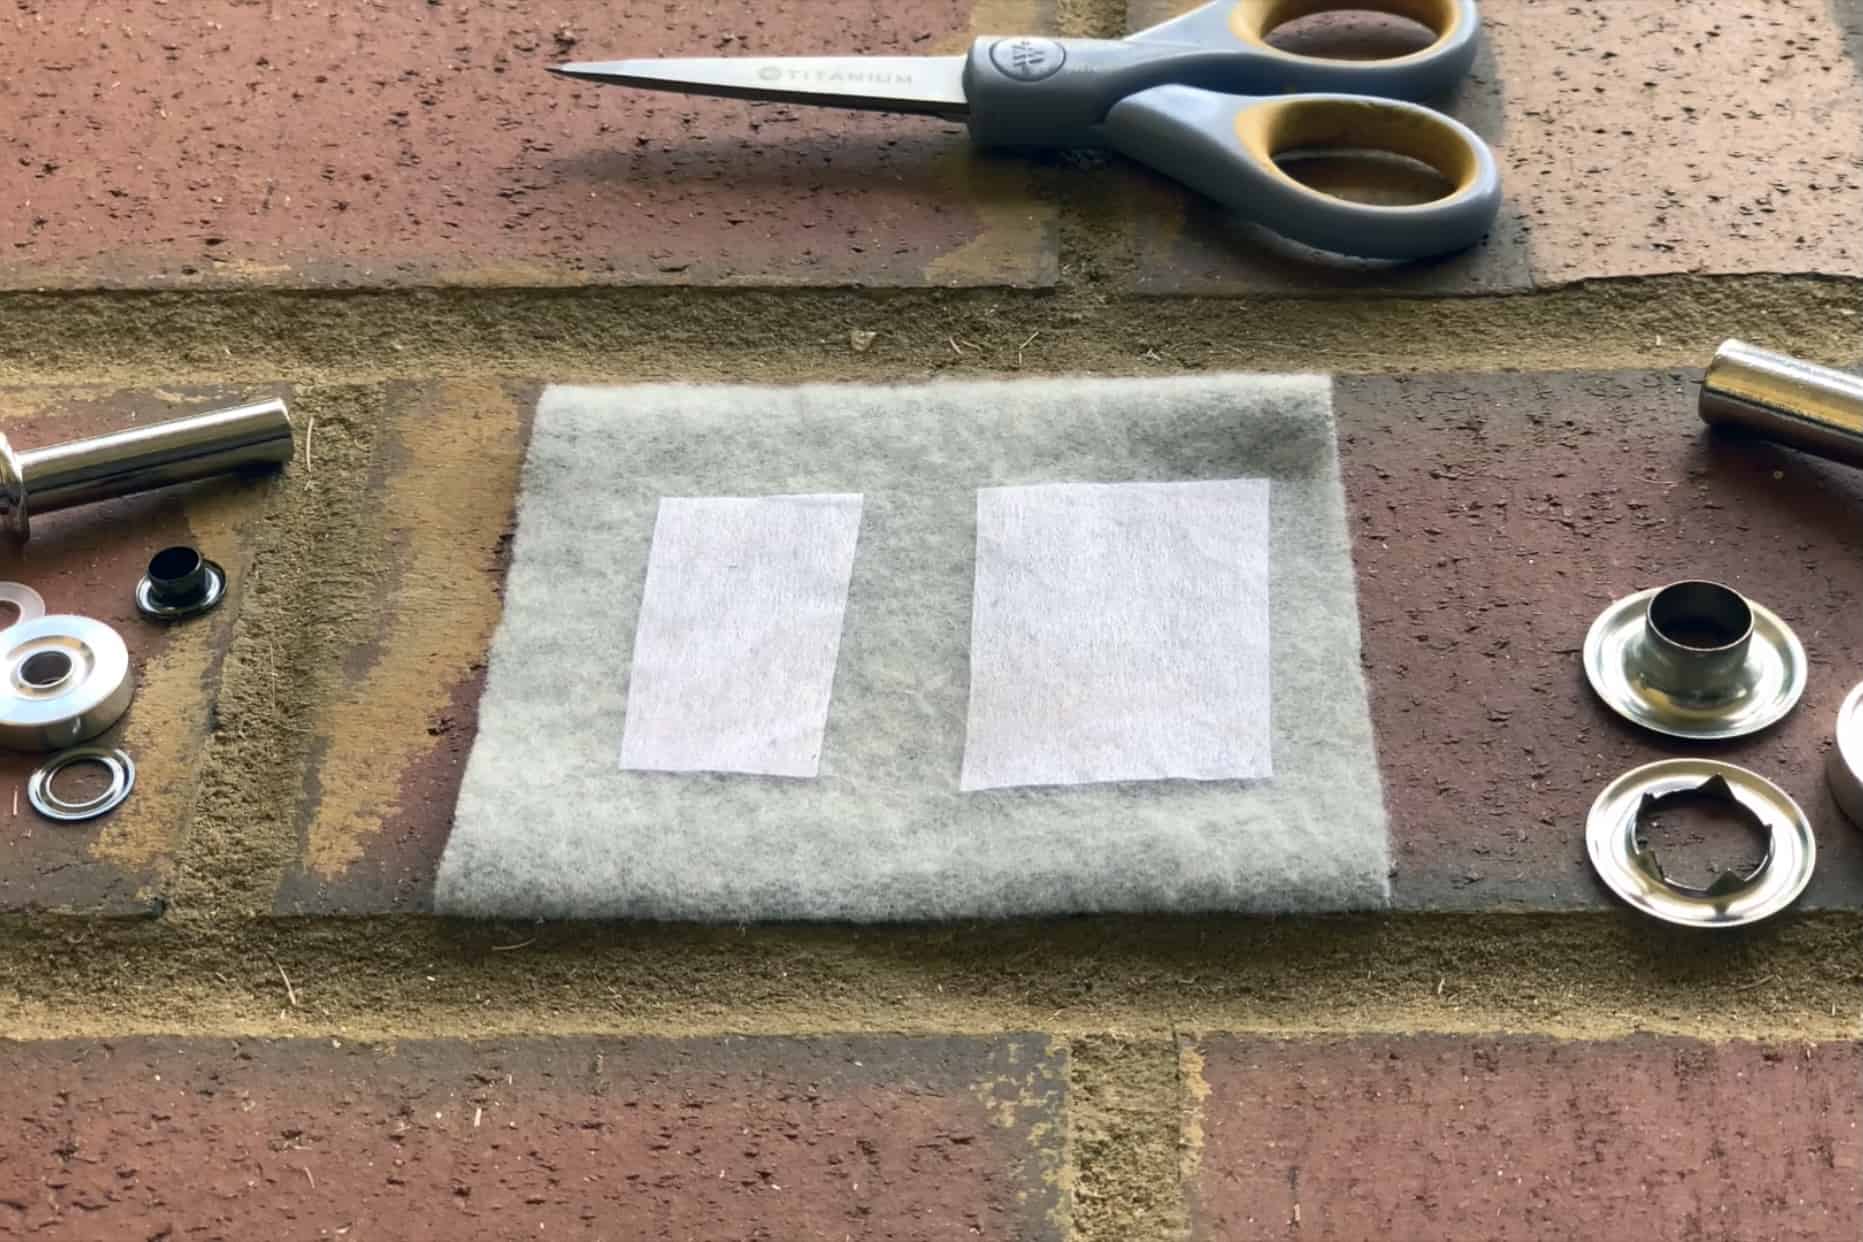
I always iron a bit of interfacing on the backside of where my grommets will be installed. That extra security means that you won’t be replacing a grommet due to your fabric stretching out.
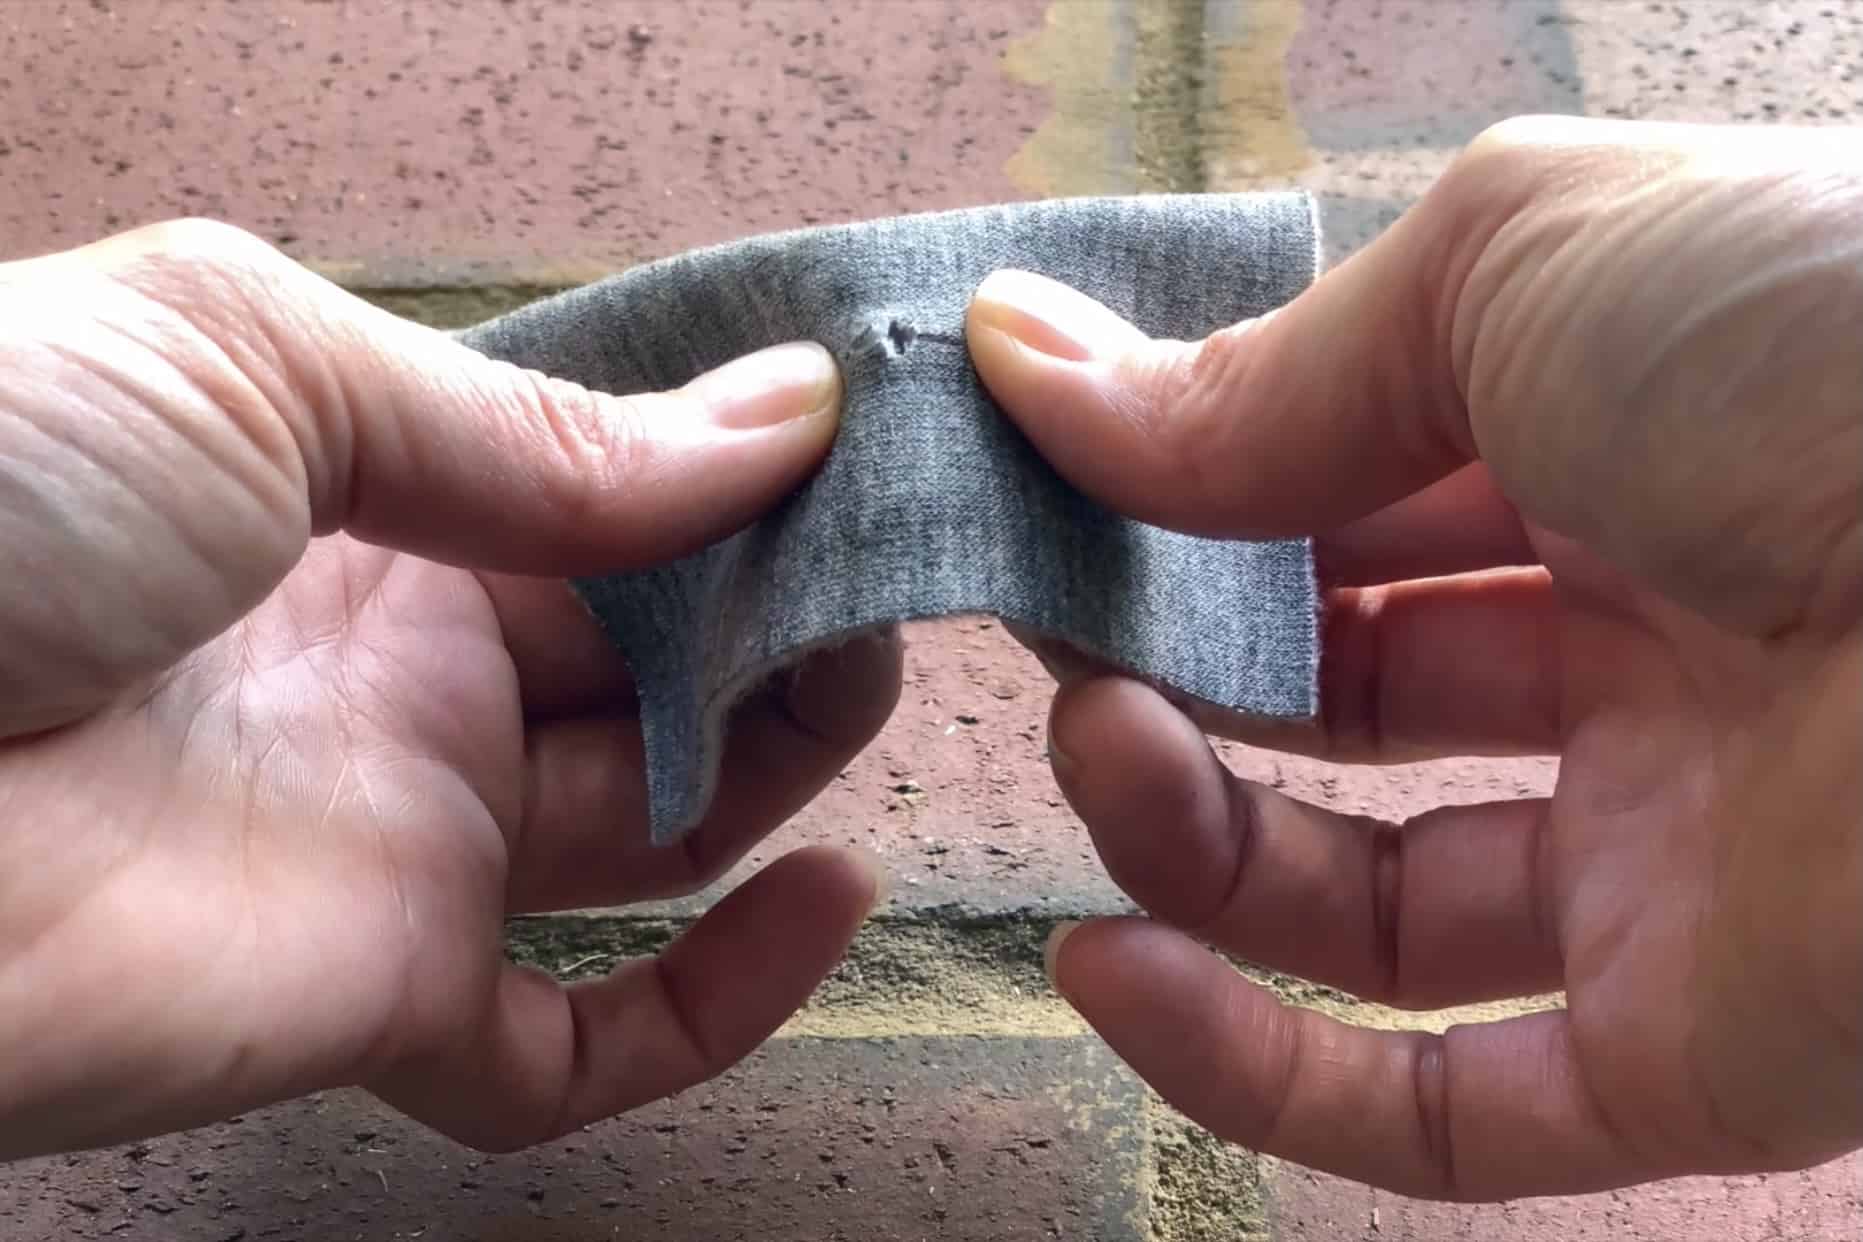
Snip a small “X” where you want to place your grommet, taking care not to make the opening too large. You want it just big enough to push your eyelet post through.
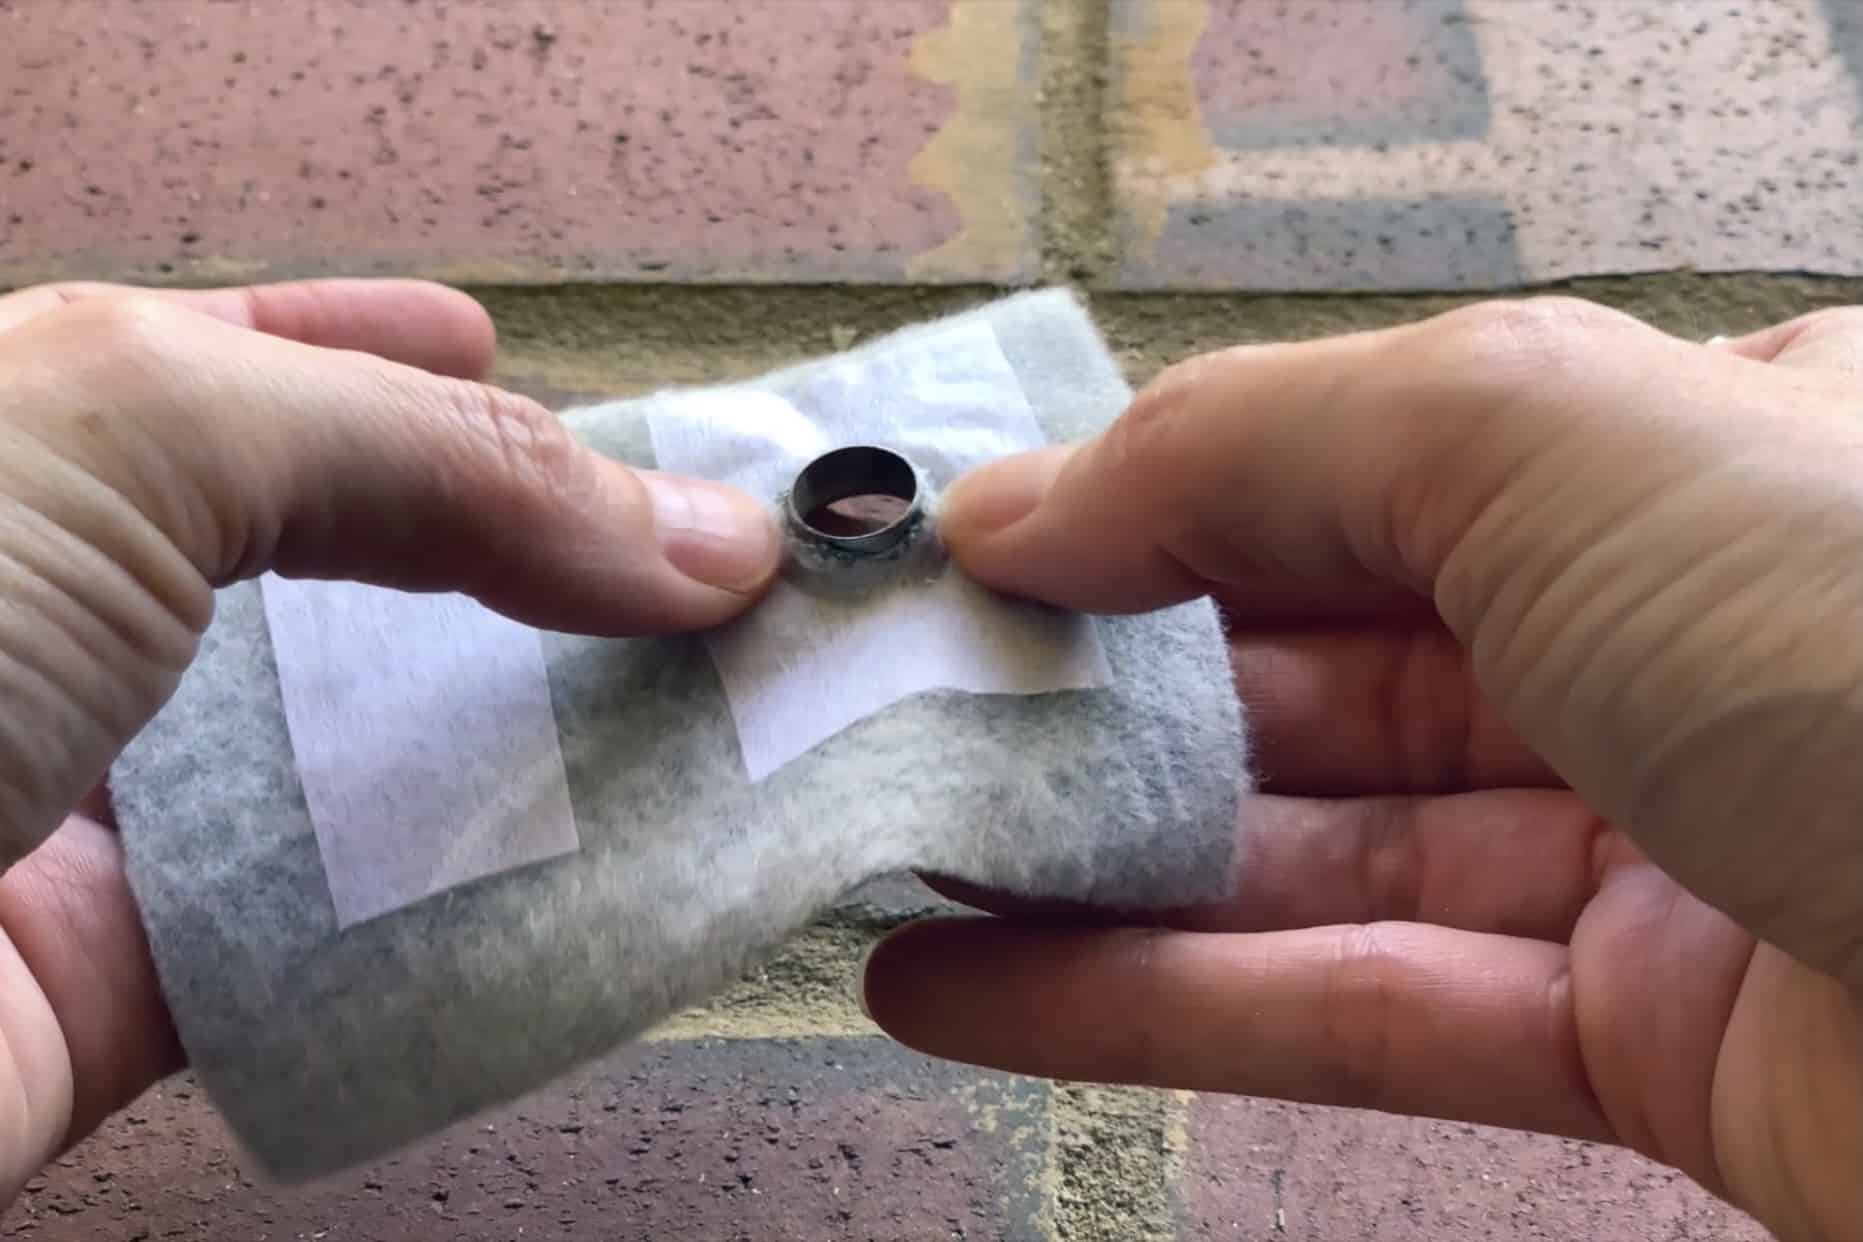
Place your washer around the post of the eyelet. If you are using a smaller eyelet, place the plastic ring under the metal washer.
Set your grommet, face down, on top of the anvil and insert your setting tool in the post with the short end.
Give it a few good whacks with your hammer – four or five should do. As you are hammering, the post is actually folding down over the washer and securing it in place.
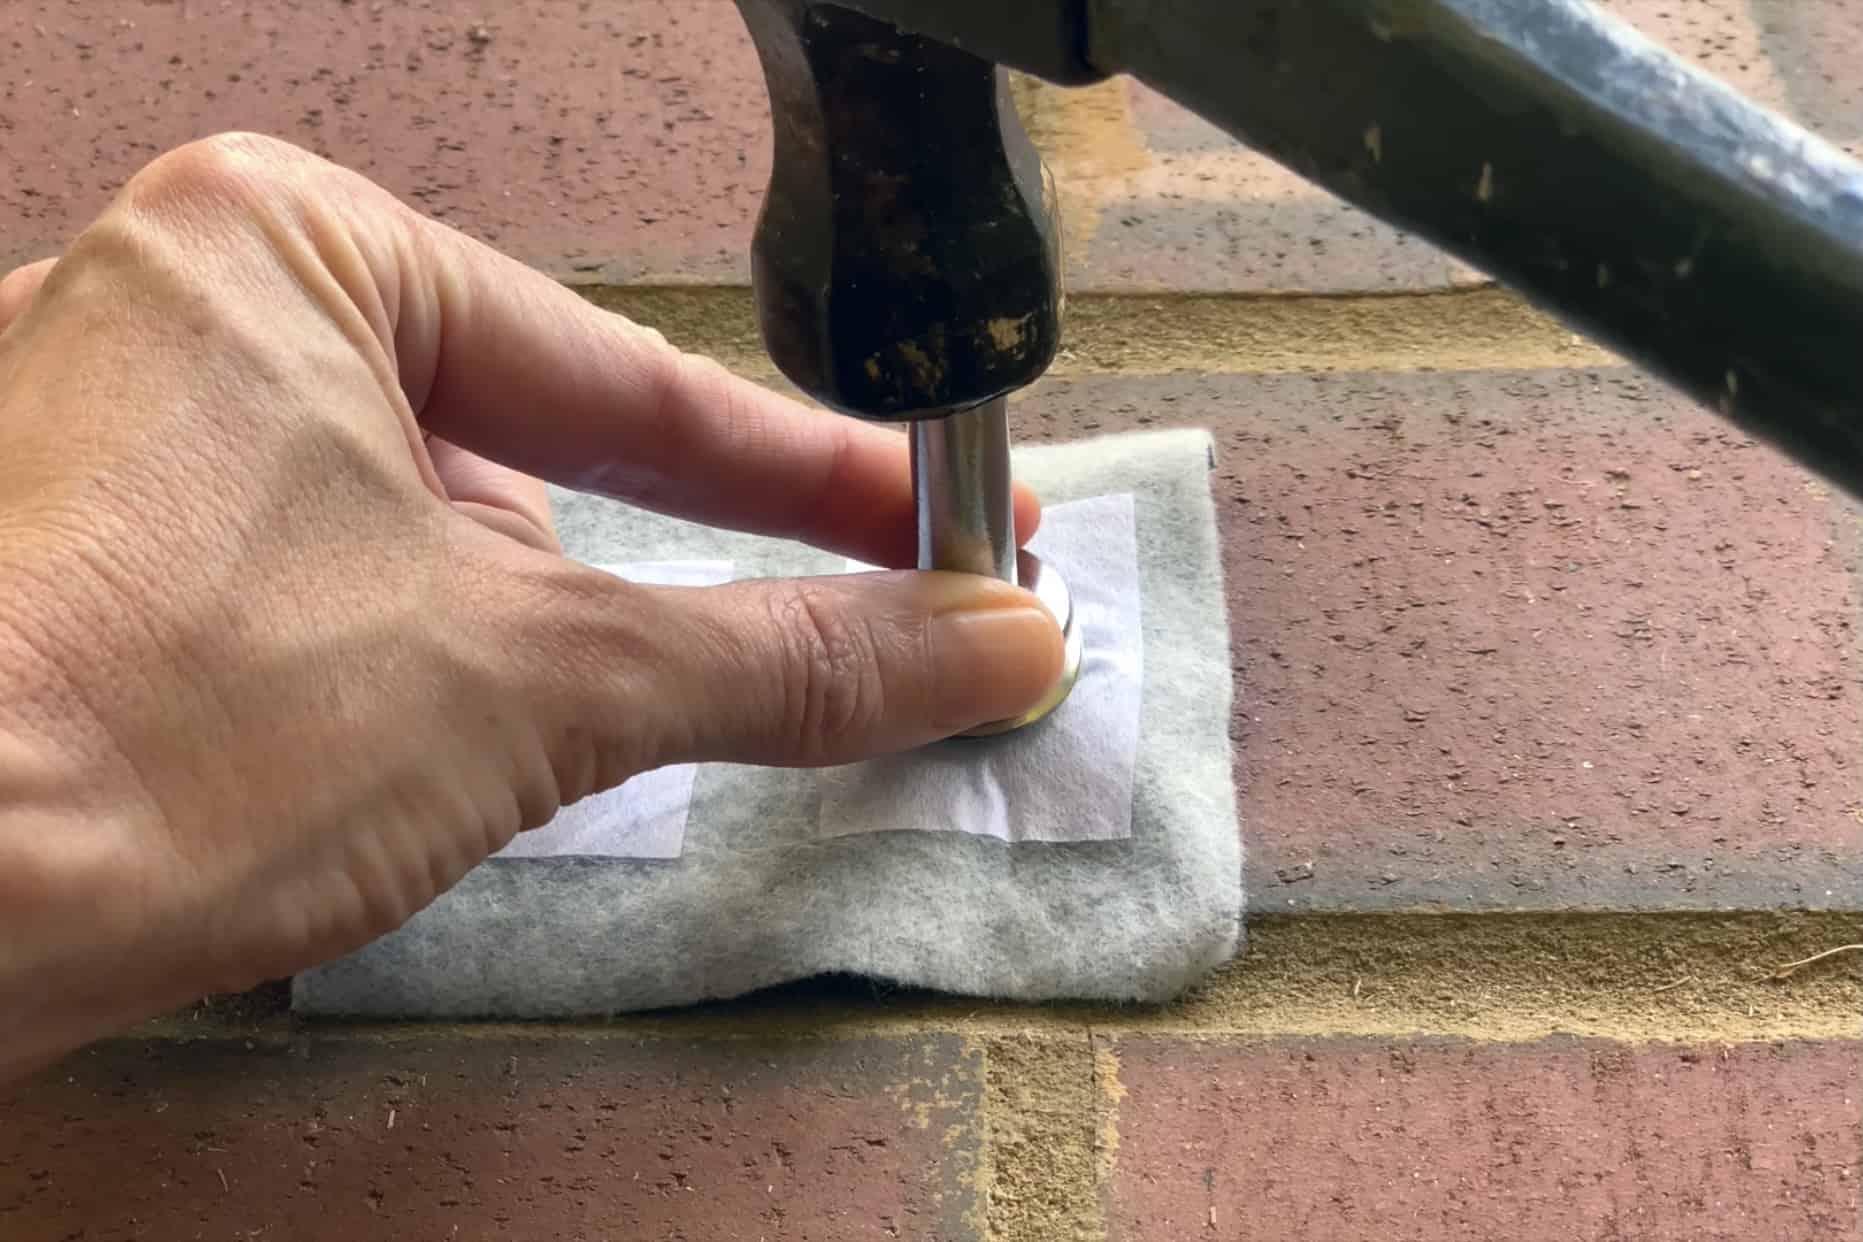

And that’s it! You’re ready to install your second grommet. You can feel how tight the fit is around your fabric. If it feels too loose, replace your setting tool and strike it with the hammer a couple more times.
Setting grommets is a wonderful garment-making skill to know and it will unleash even more creative possibilities in your future projects.
If there is any detail that I’ve left out of the written instructions, please do watch the video above. Feel free to reach out to me through the P4P Facebook Group, too. I’m happy to answer any questions you may have.
Until next time, happy sewing!
Rachel
Oh my goodness! What?? That looks so easy and now I am inspired to get going on grommets!! Thank you for the video!
Did you know that the anvil and setting tool usually can make a perfect size hole. There is a somewhat sharp edge on the anvil.
Just leave out the grommet pieces and stamp you’re fabric first.
Always test the hole making step on a piece of scrap fabric, it might not work for you’re specific fabric.