Patterns for Pirates

P4P stylish, modern, wearable patterns

  • Home
  • Blog
    • Frequently Asked Questions
    • Pattern Releases
      • Free Patterns
    • P4P University
      • Fitting
      • Sewing with Stretch, Knit Fabrics
      • Sewing with Woven Fabrics
      • Sewing Machines
    • Sew-A-Longs
    • Fabric for Pirates
    • Pattern Hacks
    • Announcement
      • Blog Tours
      • Contest/Giveaway
  • Shop
  • Bundle Discounts
  • Flash Friday
  • Gift Cards
  • My Account
  • Cart

Heart Pouch :: Free Valentine Sewing Pattern!

February 10, 2019

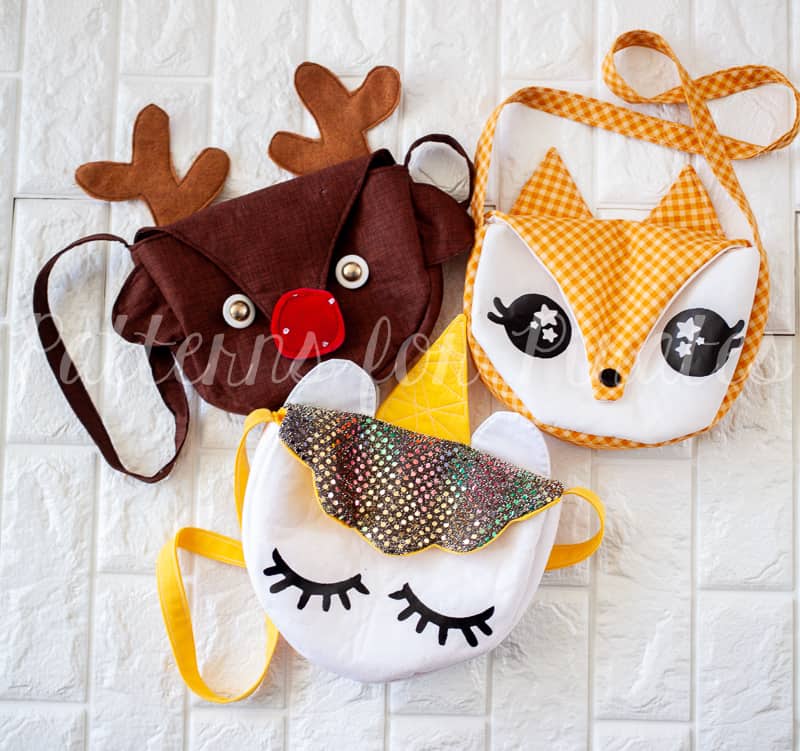
Have we told you (our Pirate family) lately that we love you?  We love you so much, that we are giving our hearts to you this Valentine’s Day.

Well, maybe not our actual hearts…but a Heart Pouch sewing pattern.  And it’s free!!  This zipper style pouch is super easy, quick, and fun to make, and takes very little fabric.  (Plus maybe you have some 9″ zippers laying around from the scarfs that you never got around to making this past holiday season??  It’s a perfect way to use up that stash!)

**Stick around all the way to the bottom of this post for a video tutorial of the assembly of these sweet little pouches as well!

— Heart Pouch PDF free pattern pieces (found HERE)
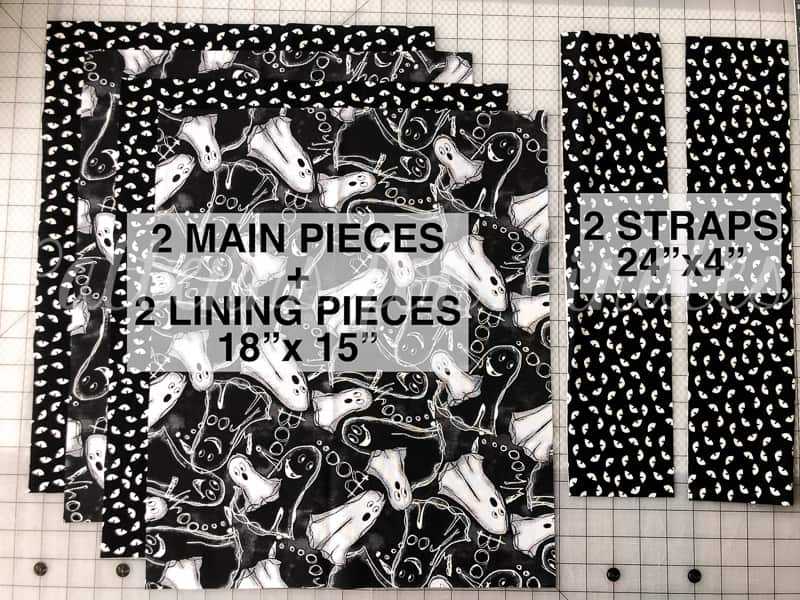
— 2 – 8″x8″ pieces cotton woven for main + lining fabrics
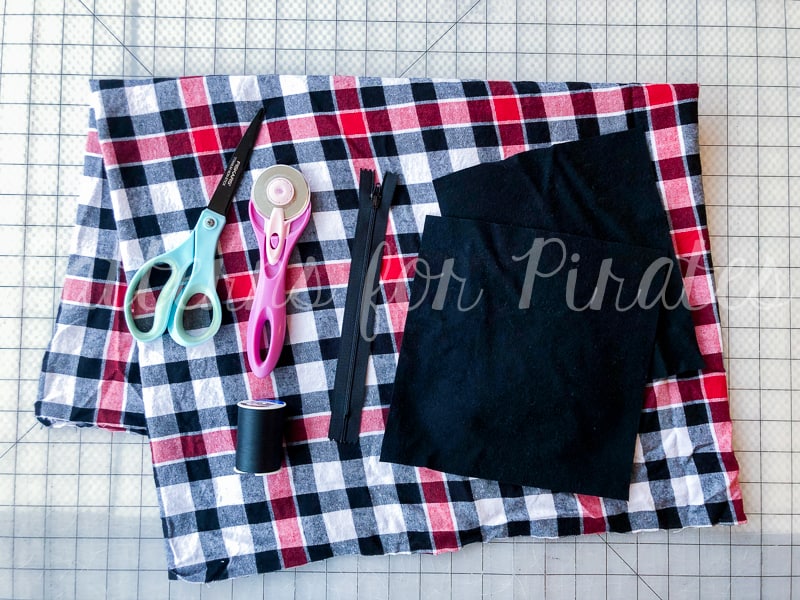
— Lightweight Fusible Interfacing: I like Pellon SF101, or Heat & Bond 3336 (aff links)
— 1 – 9″ zipper

Recommended fabrics: quilting cotton, kona cotton, etc.

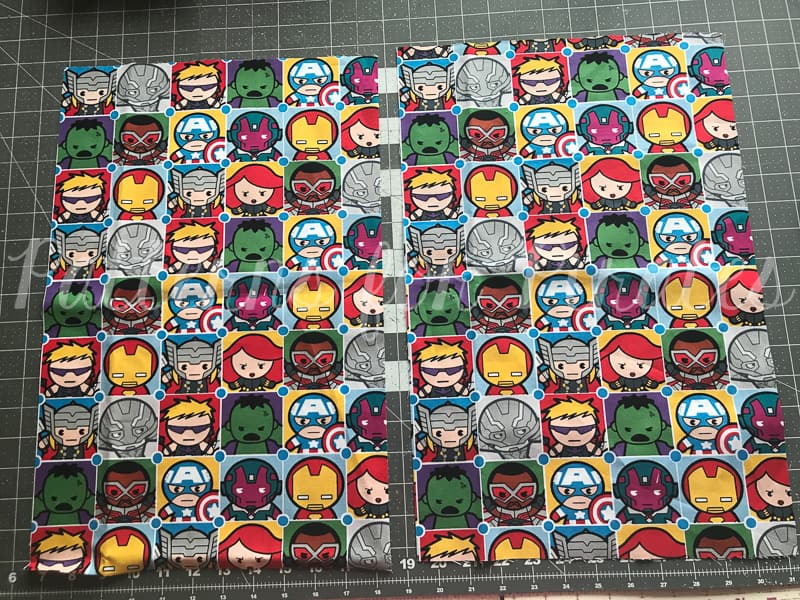
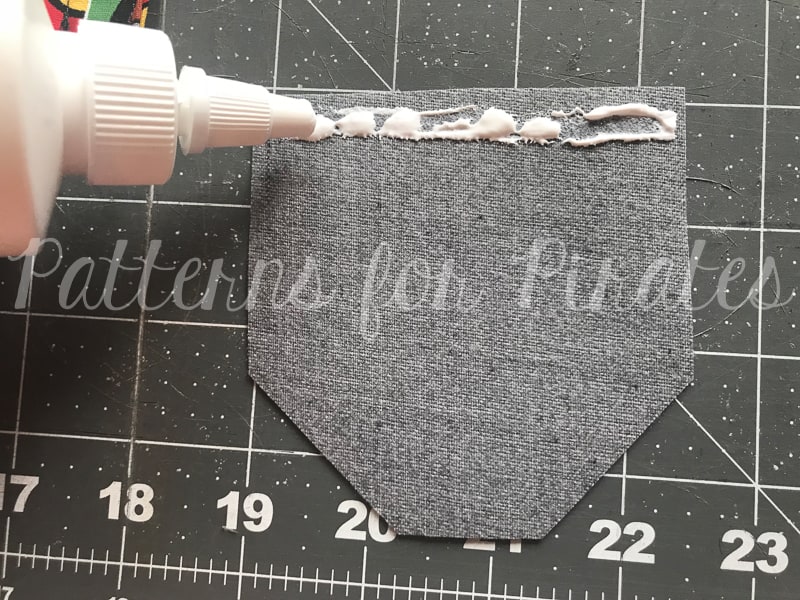
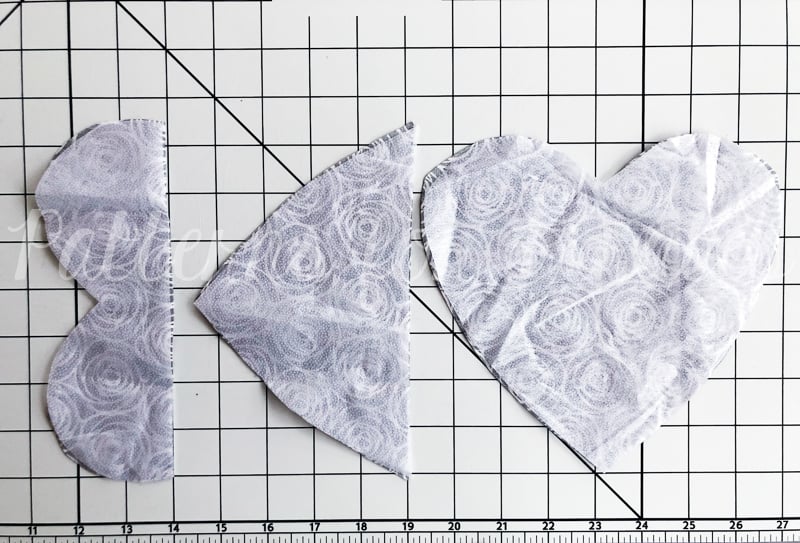
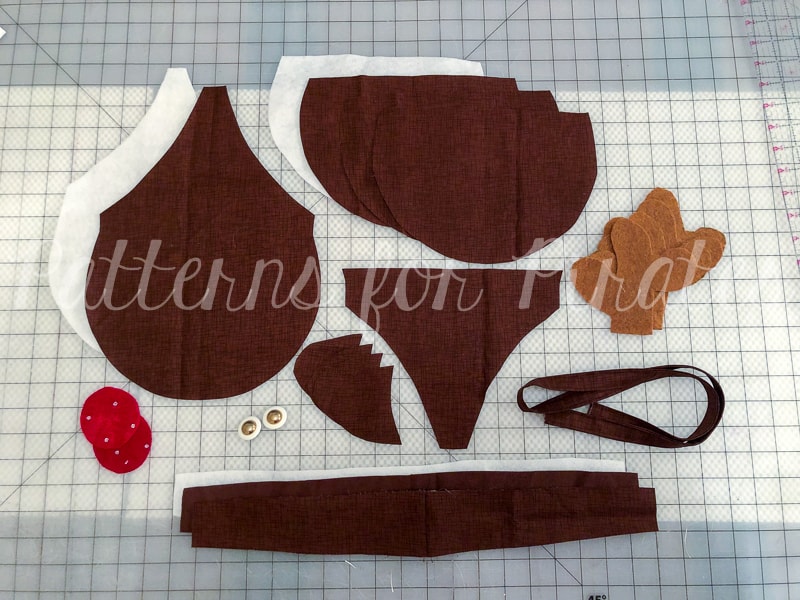
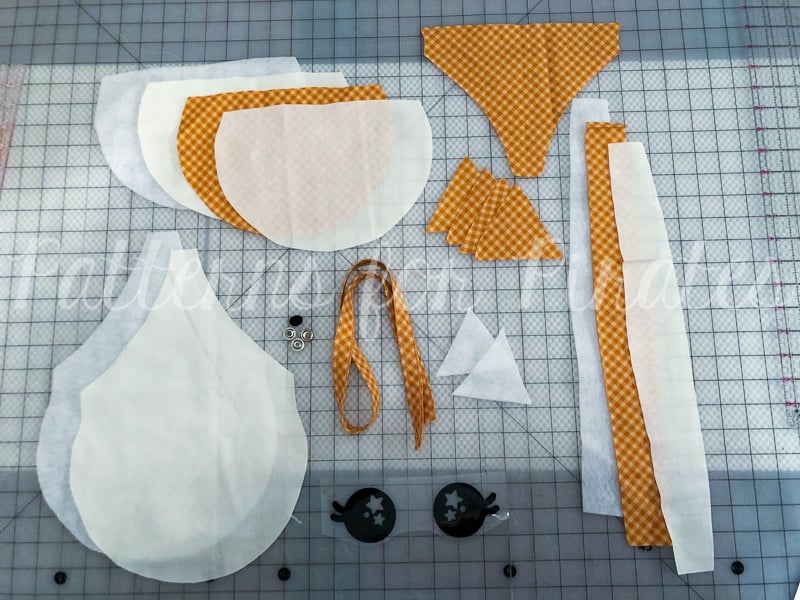
Step 1: Prepare your pieces.  You will need one each of the pouch back, pouch upper front, and pouch lower front; in your main, lining and interfacing fabrics.

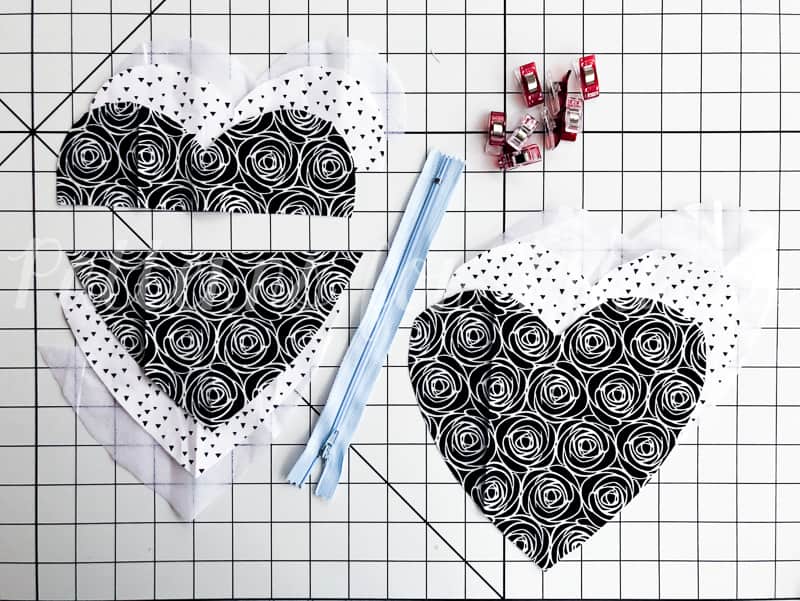
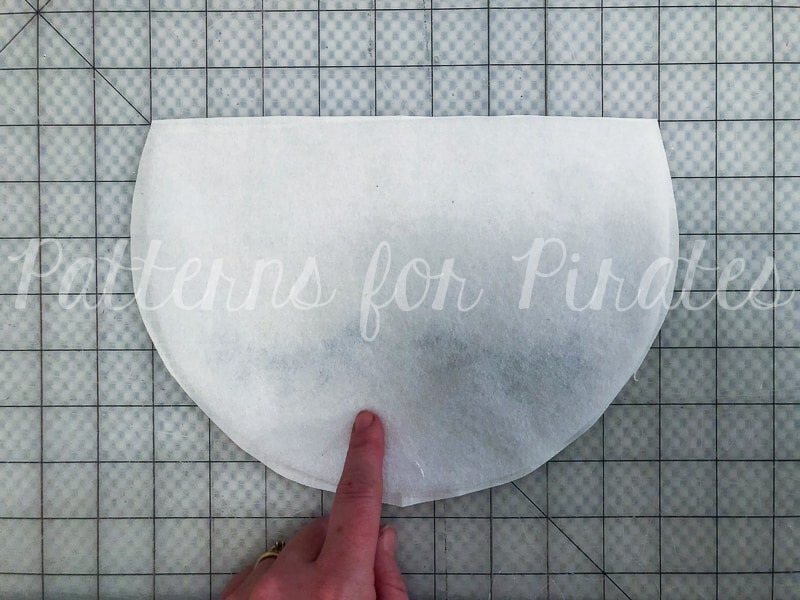
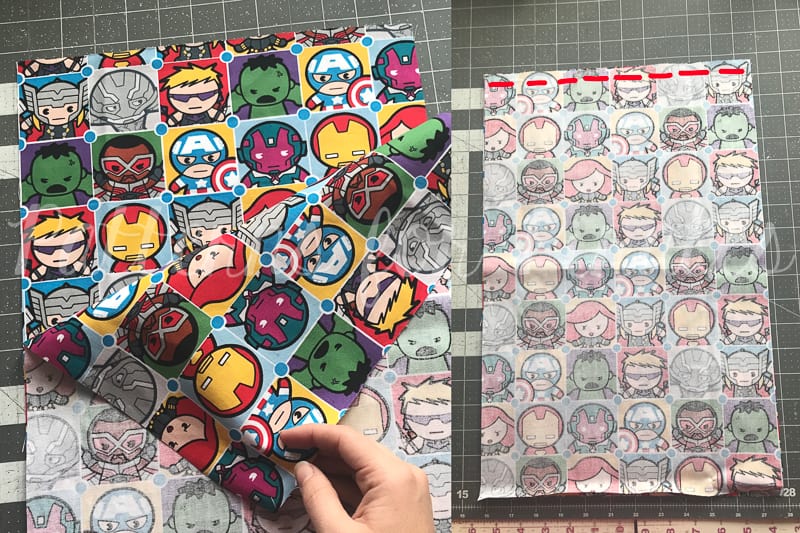
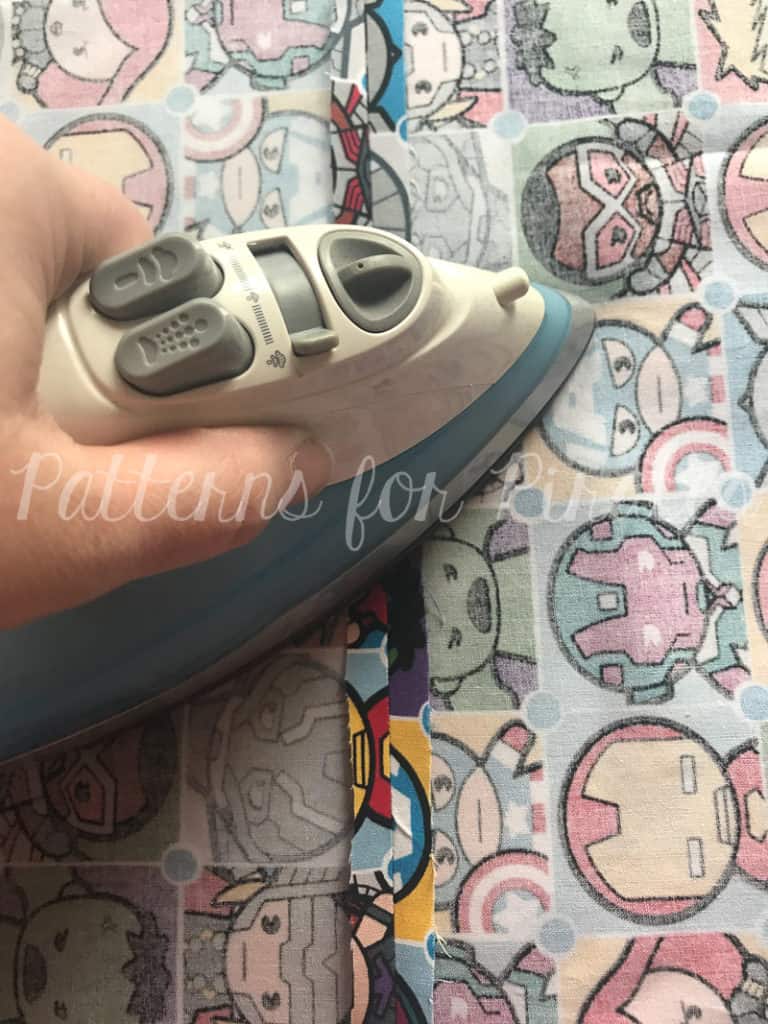
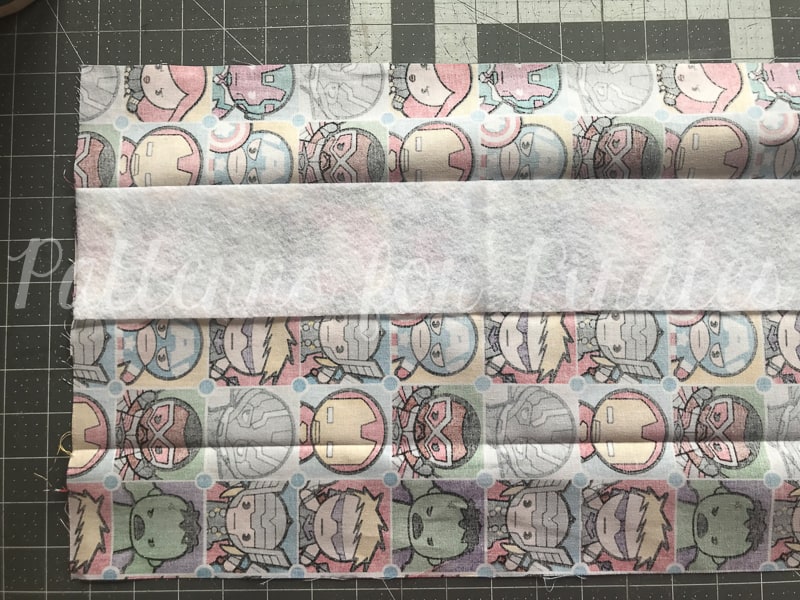
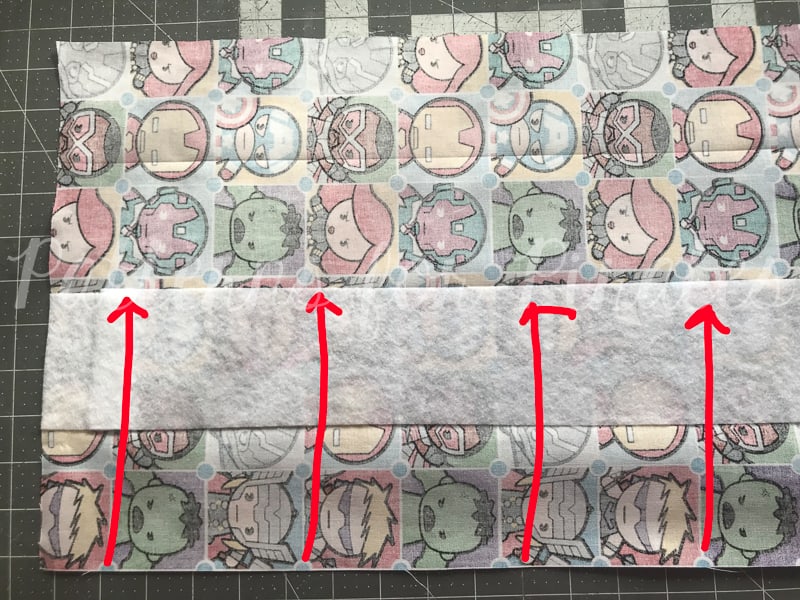
Step 2: Following the instructions from the manufacturer, iron the interfacing to your main fabric pieces.

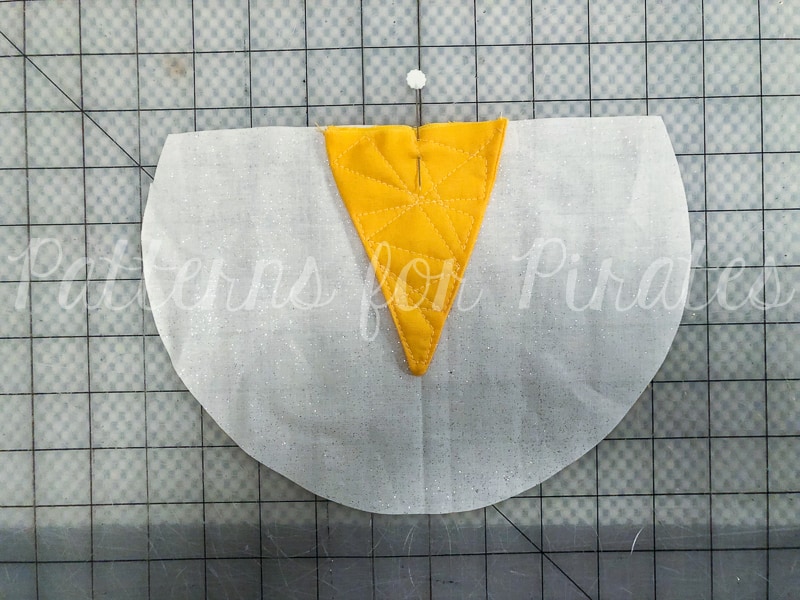
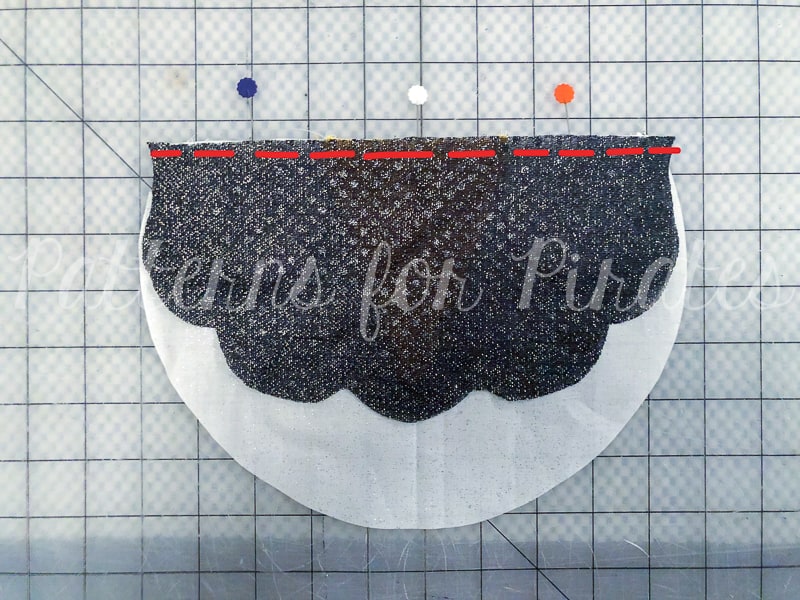
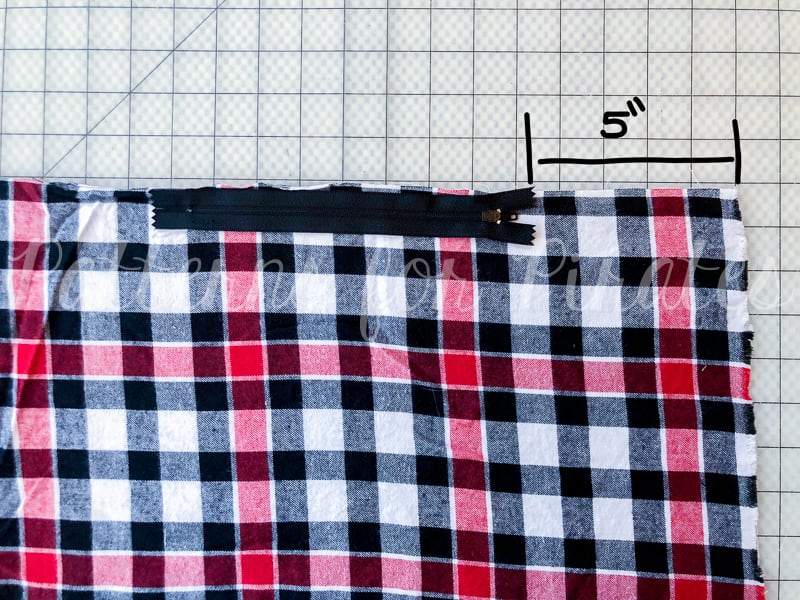
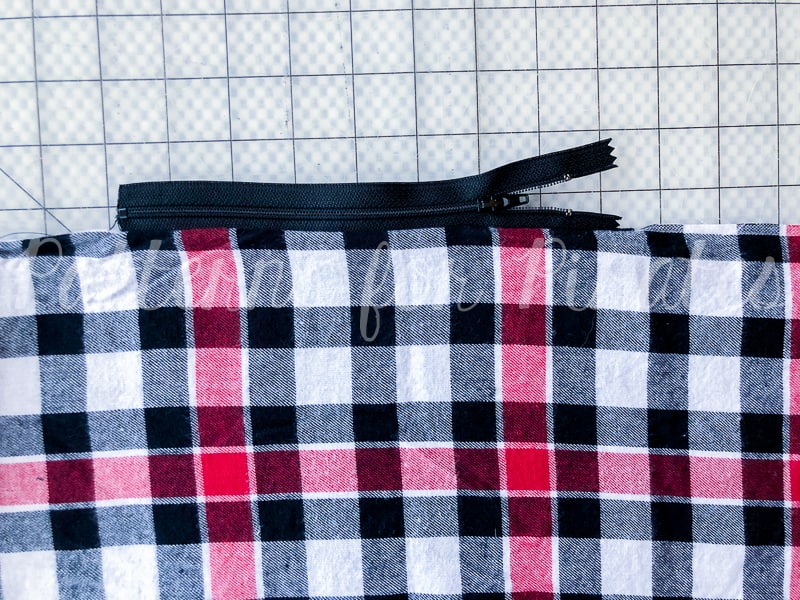
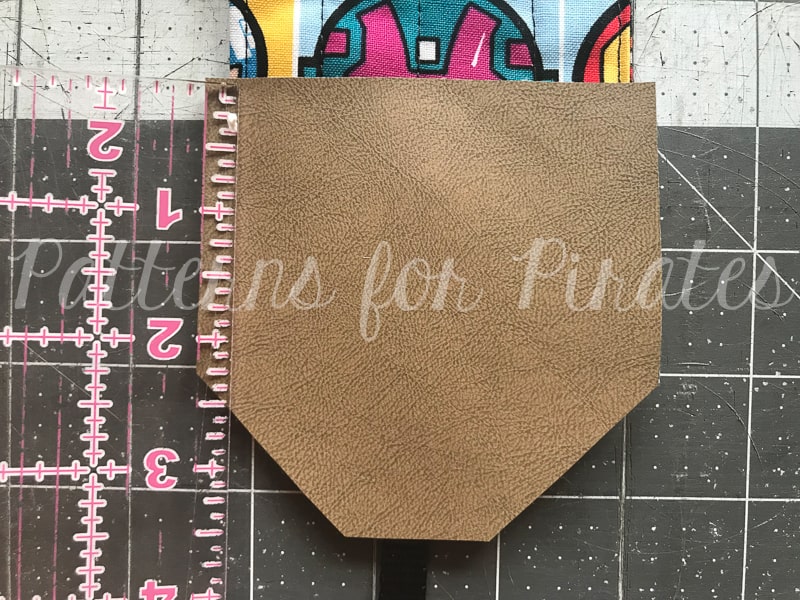
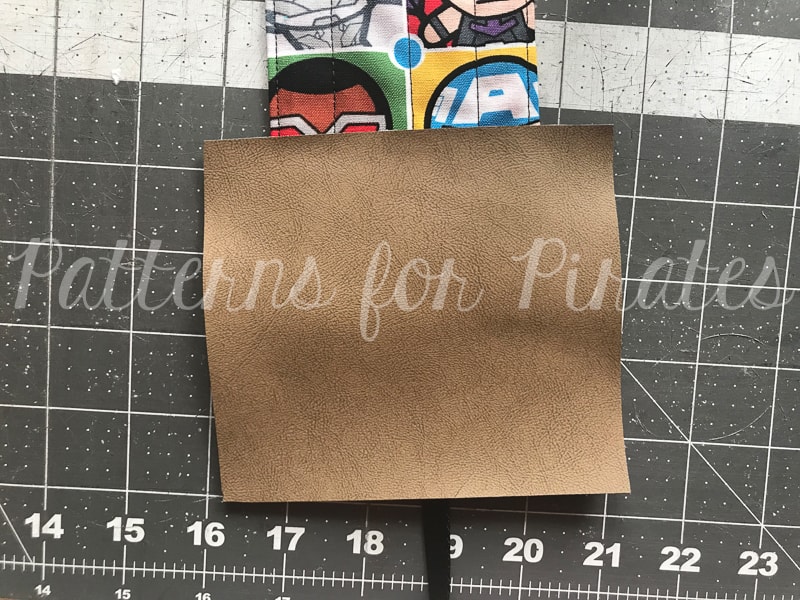
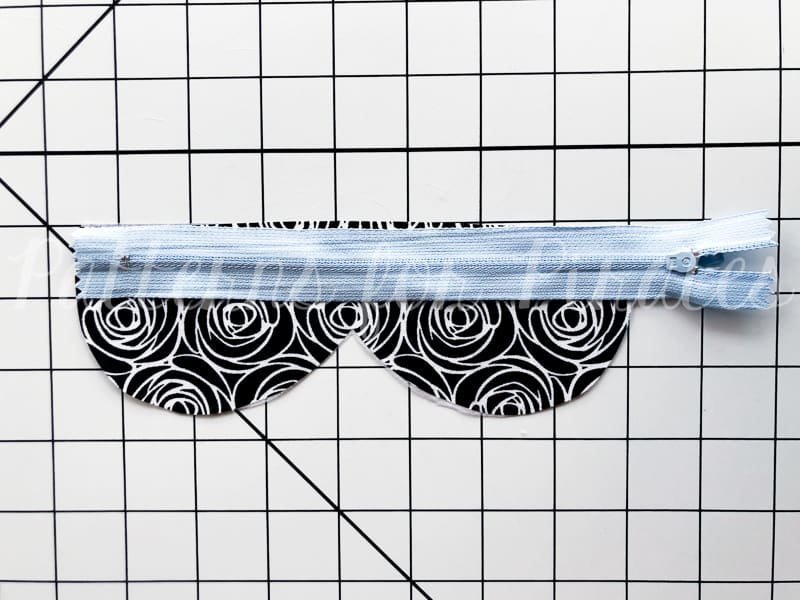
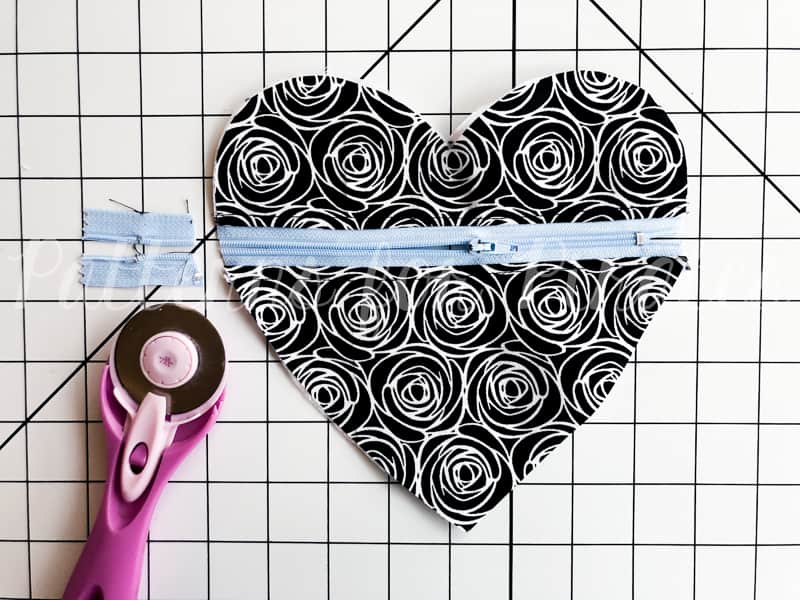
Step 3: Locate the upper front piece in your main fabric, and lay it with the fabric face up.

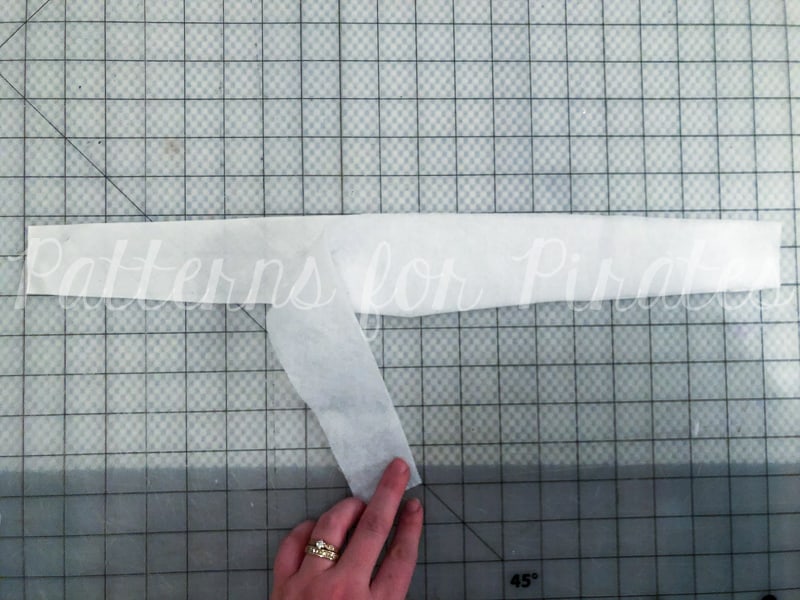
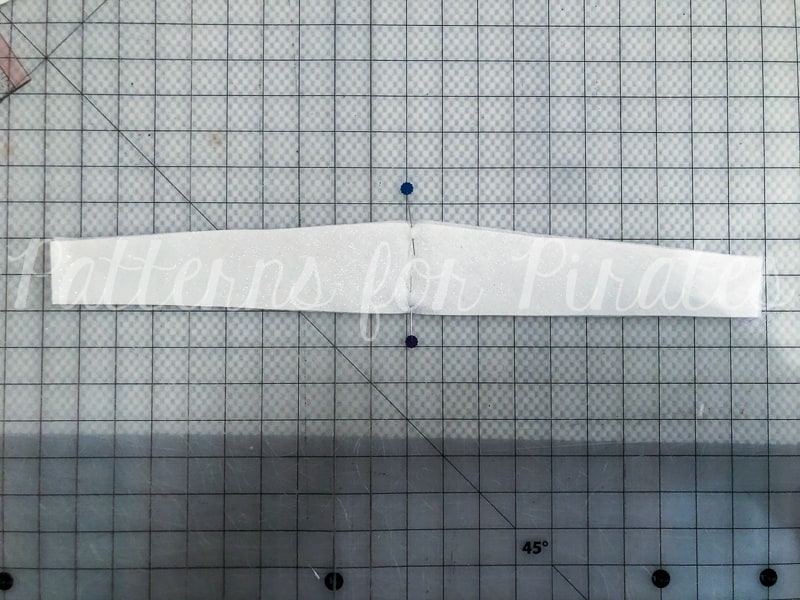
Step 4: With the zipper face down, align it against the straight, raw edge of your pattern piece.

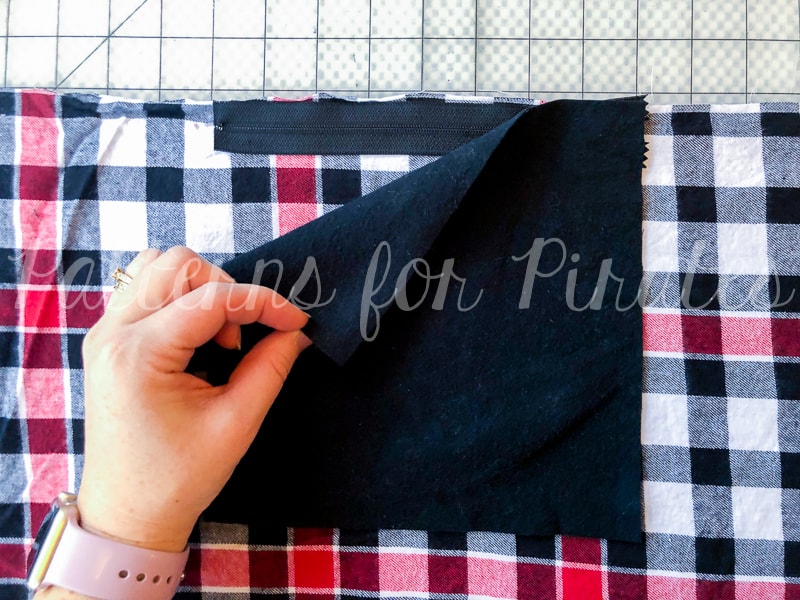
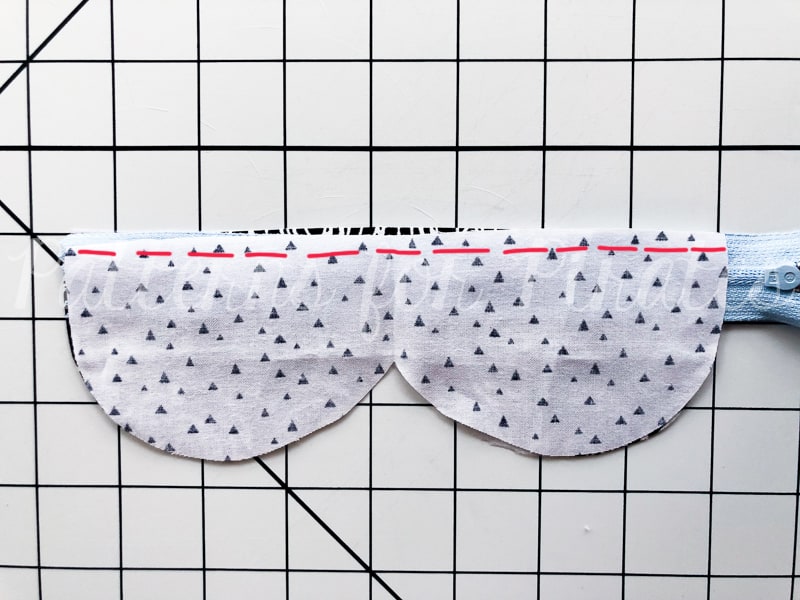
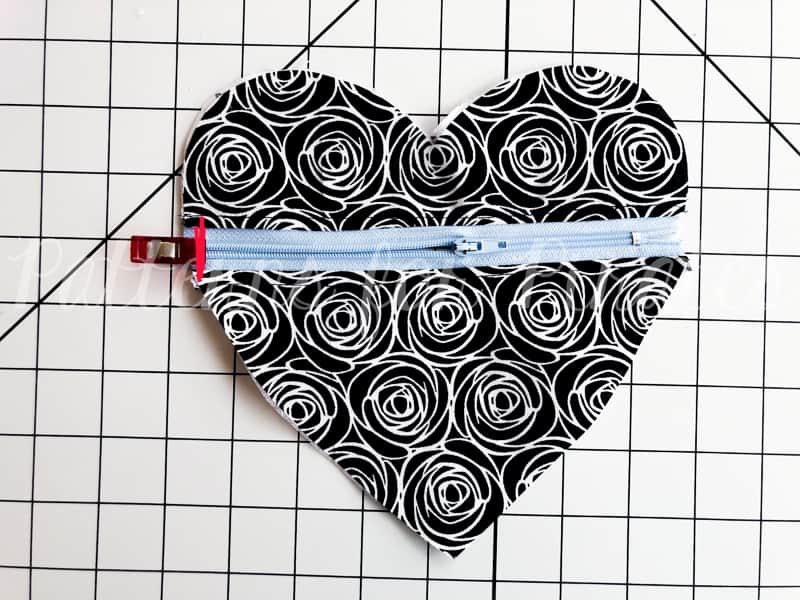
Step 5: With your upper front lining piece face down, align it along the straight edge, sandwiching the zipper between the two pieces of fabric.  Sew with 1/4″ seam allowance.

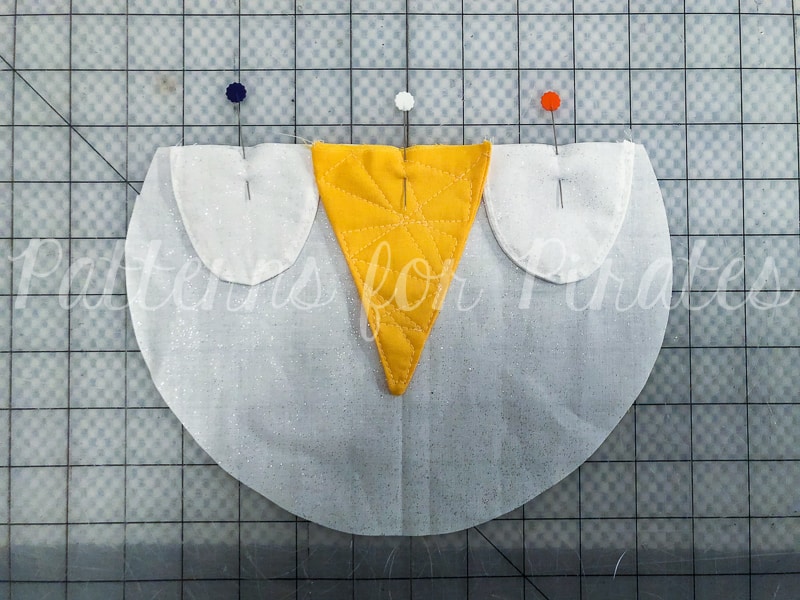
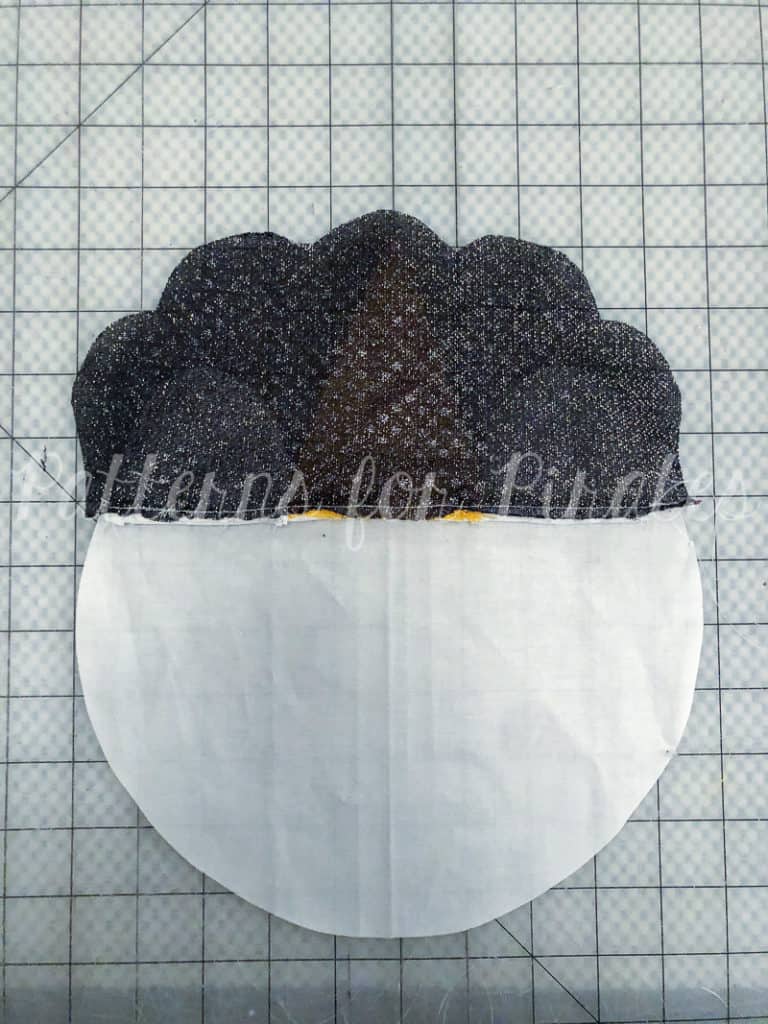
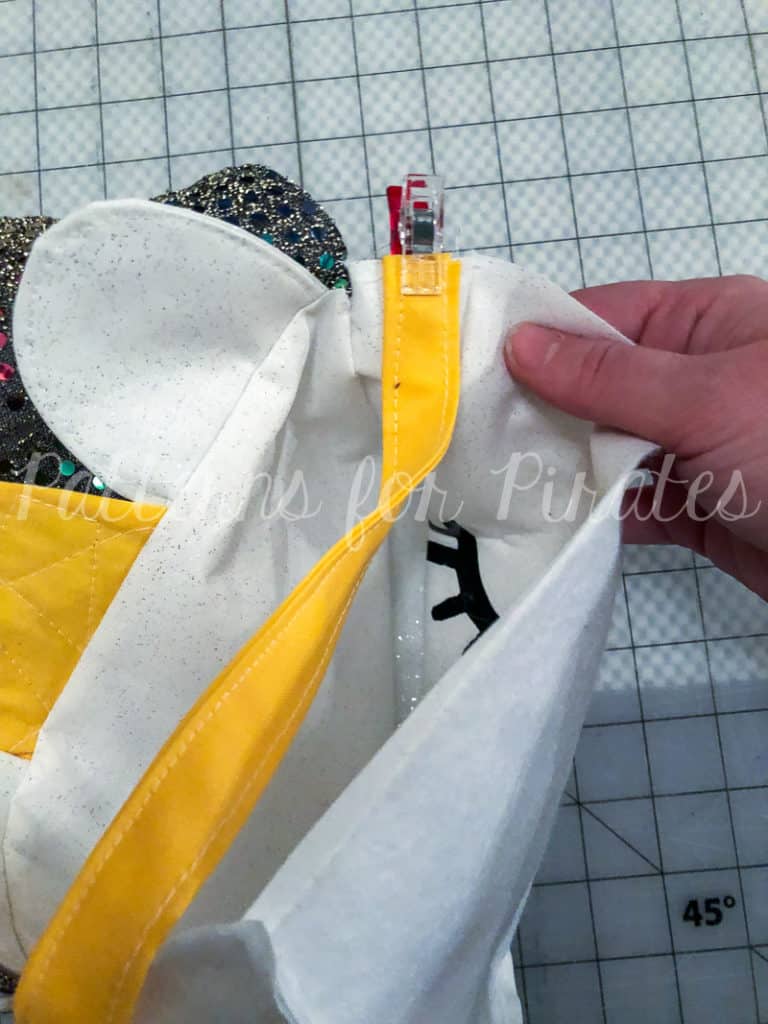
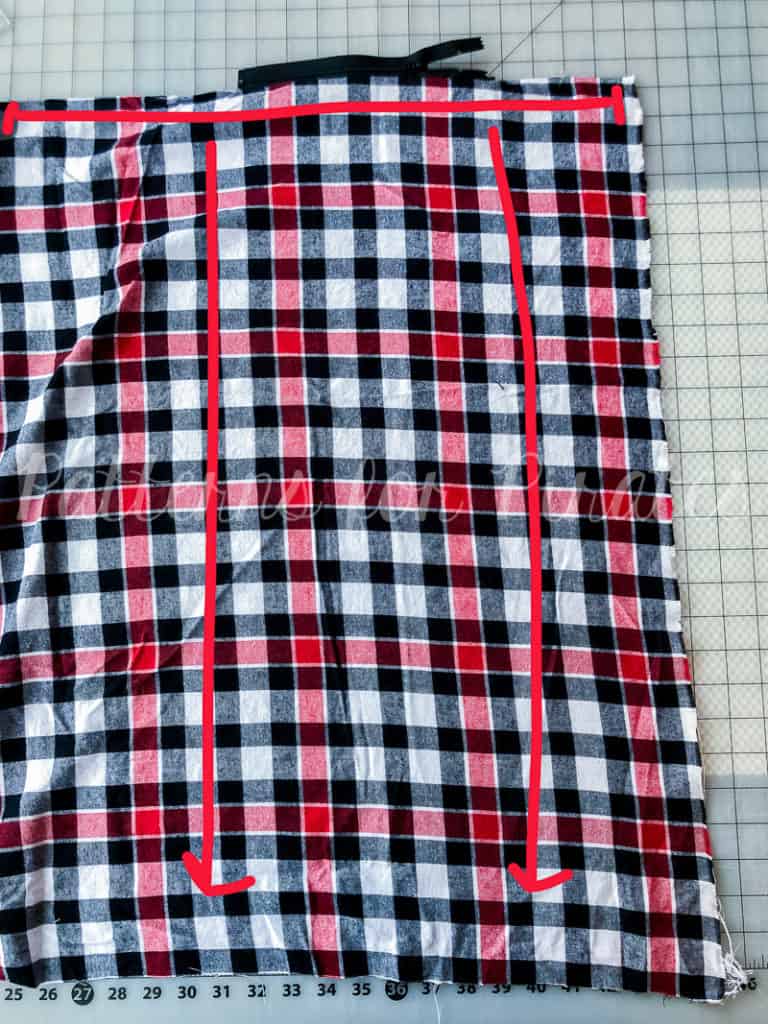
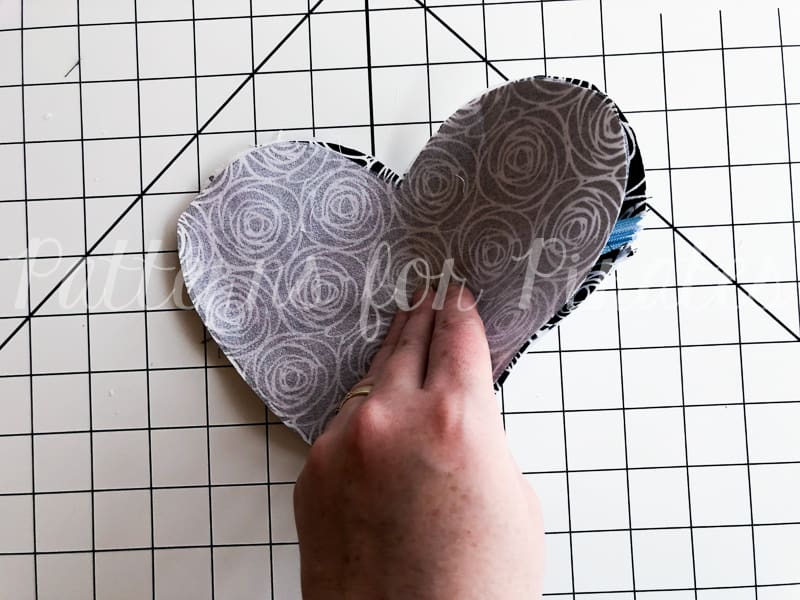
Step 6: Flip open the upper front pieces, so they are now touching with wrong sides together, and your zipper is exposed.  Press and topstitch, if desired.

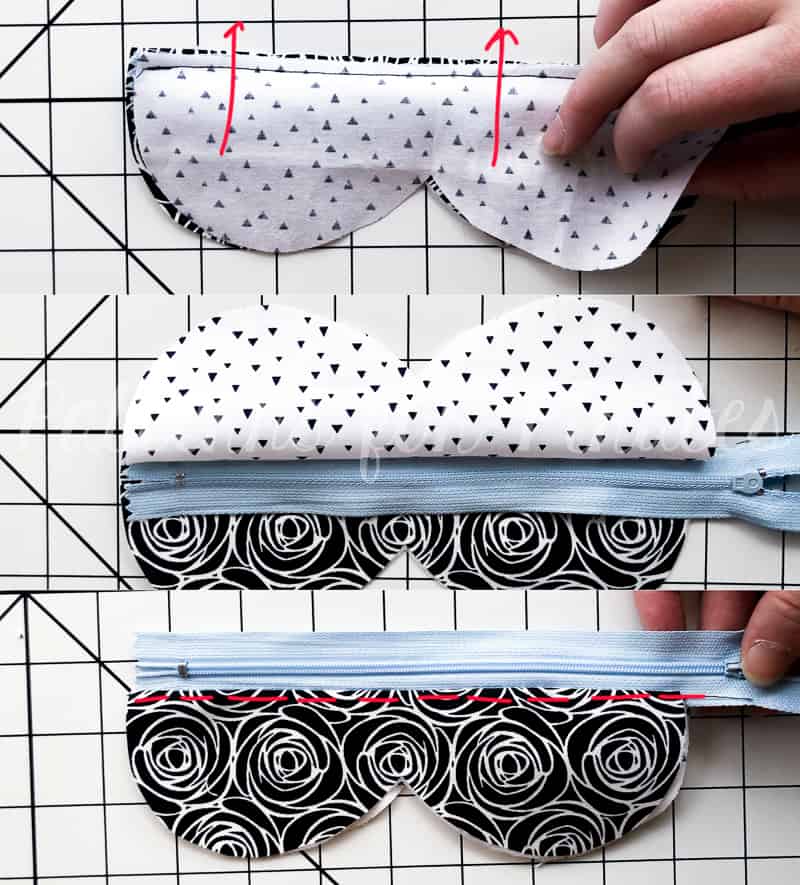
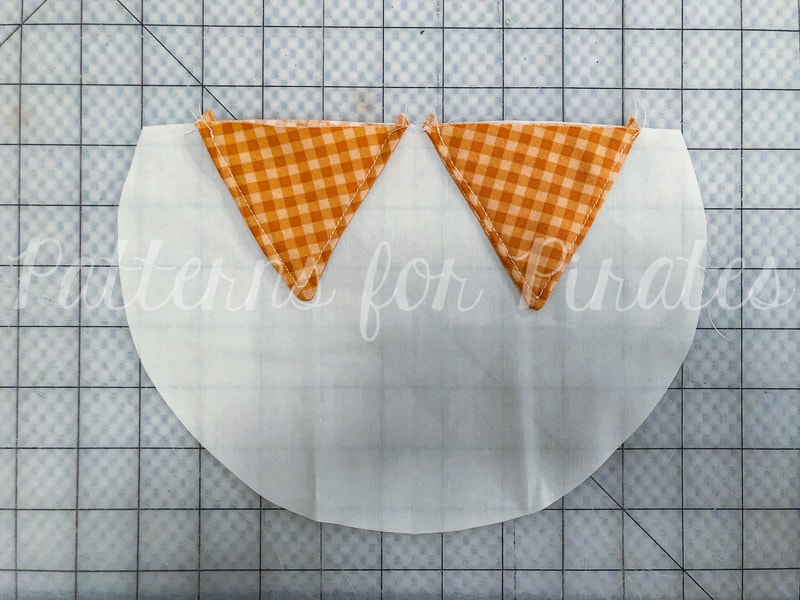
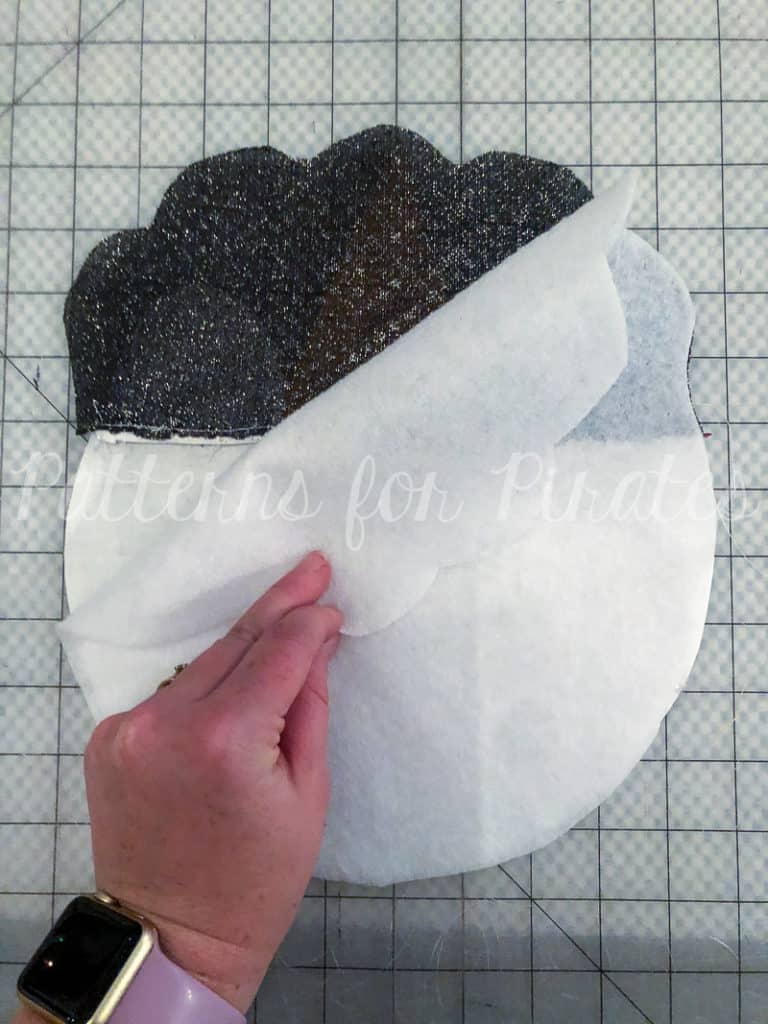
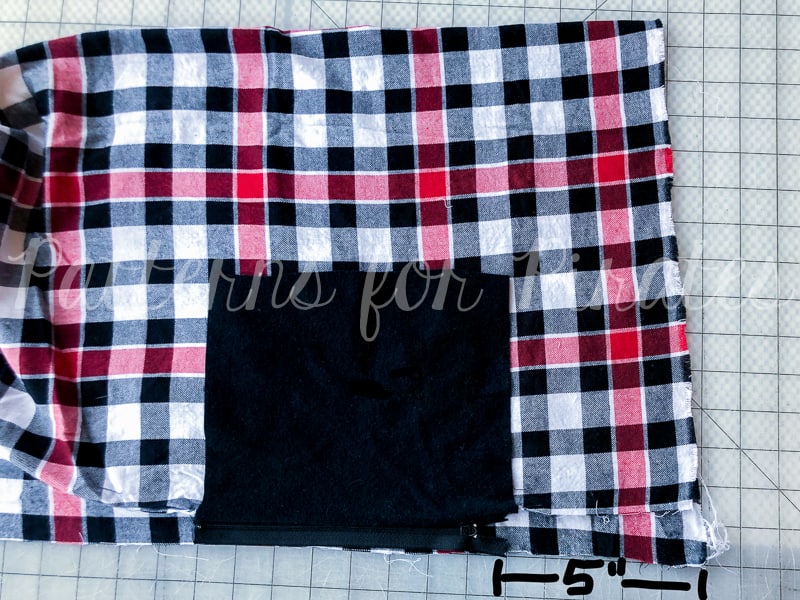
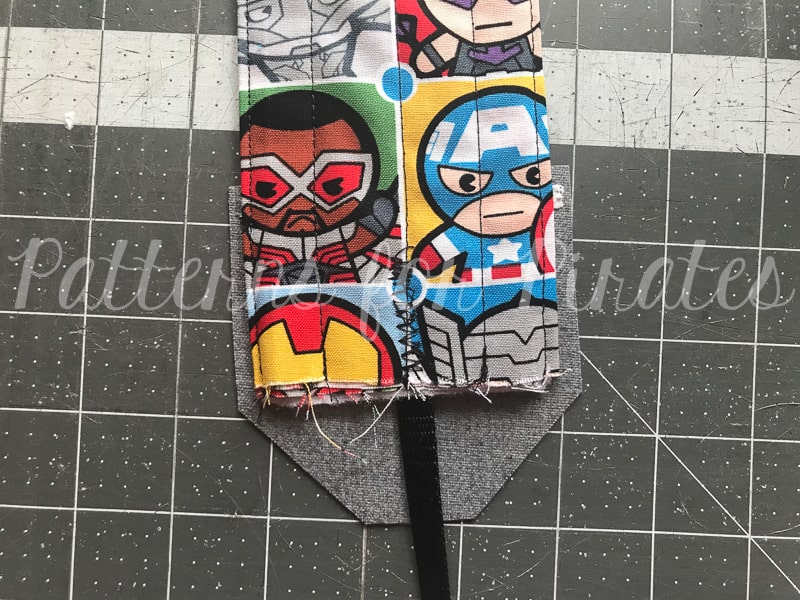
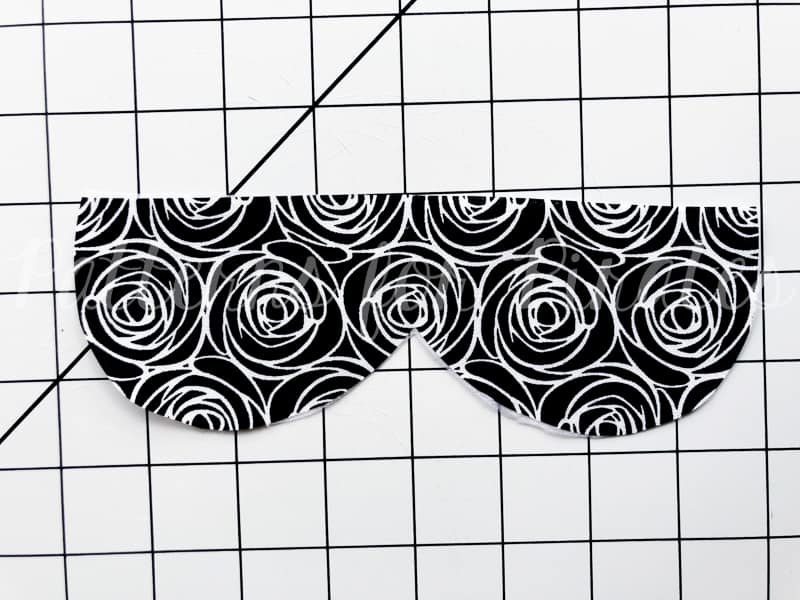
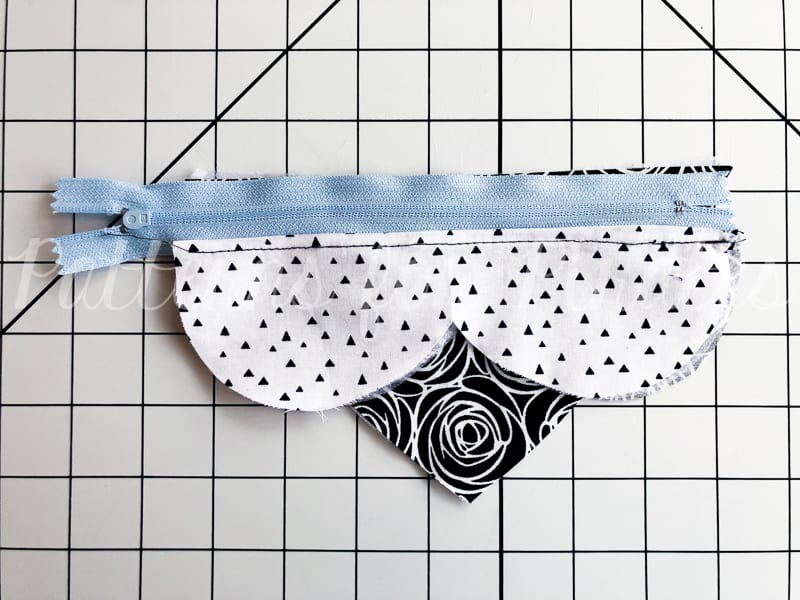
Step 7: Locate your lower front piece in your main fabric, and lay it with the fabric face up.

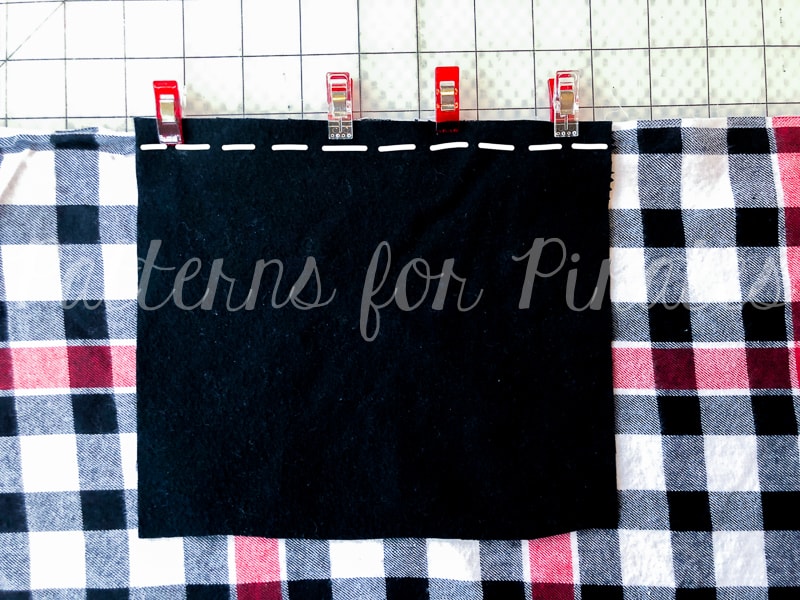
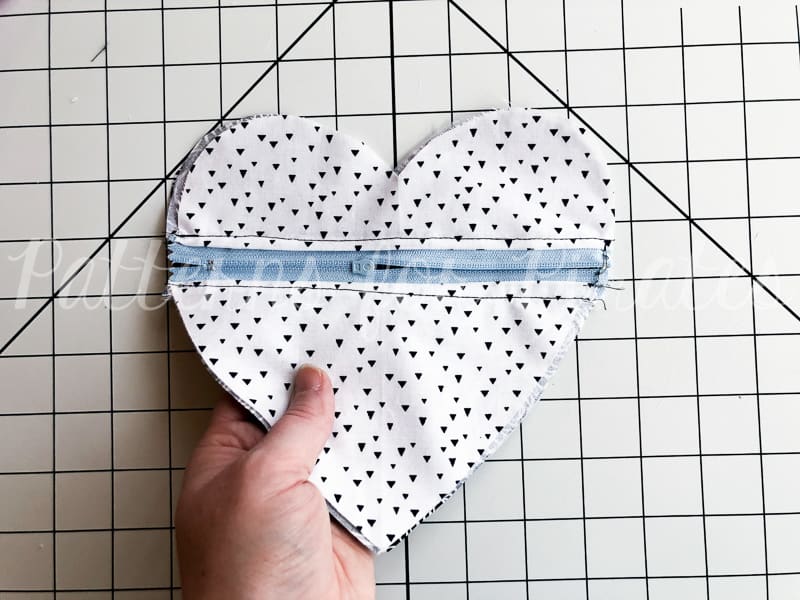
Step 8: Lay your upper front pieces with the main fabric face down, aligning the zipper to the long straight edge of the lower piece.

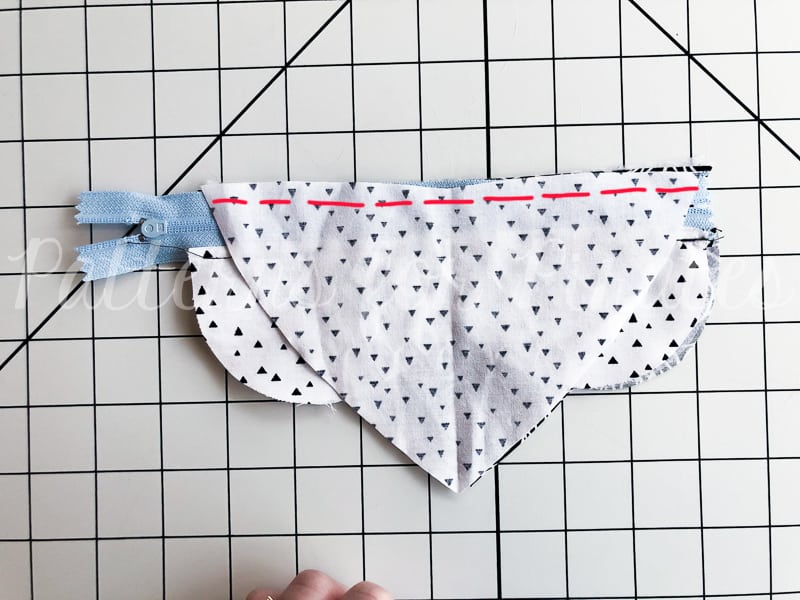
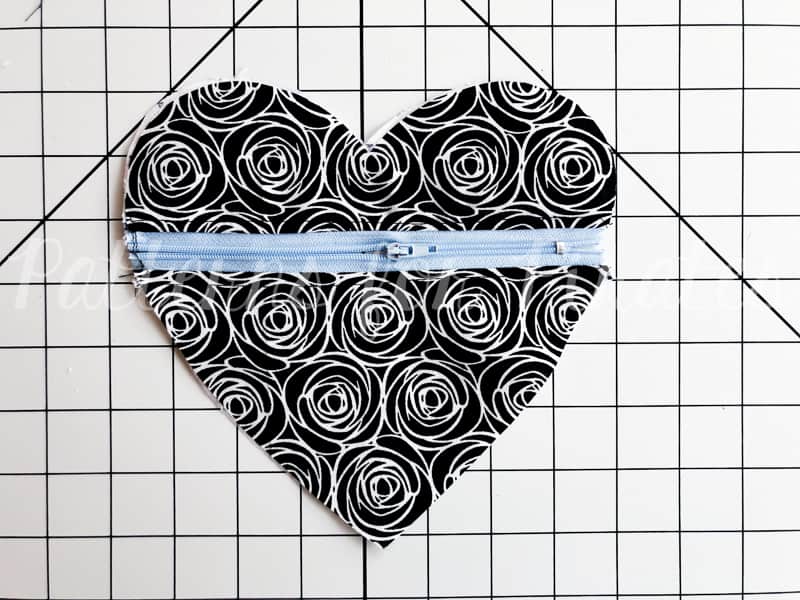
Step 9: Similar to step 5, align the lower front lining pieces along the straight edge, sandwiching the zipper between the two pieces of fabric.  Sew with 1/4″ seam allowance.

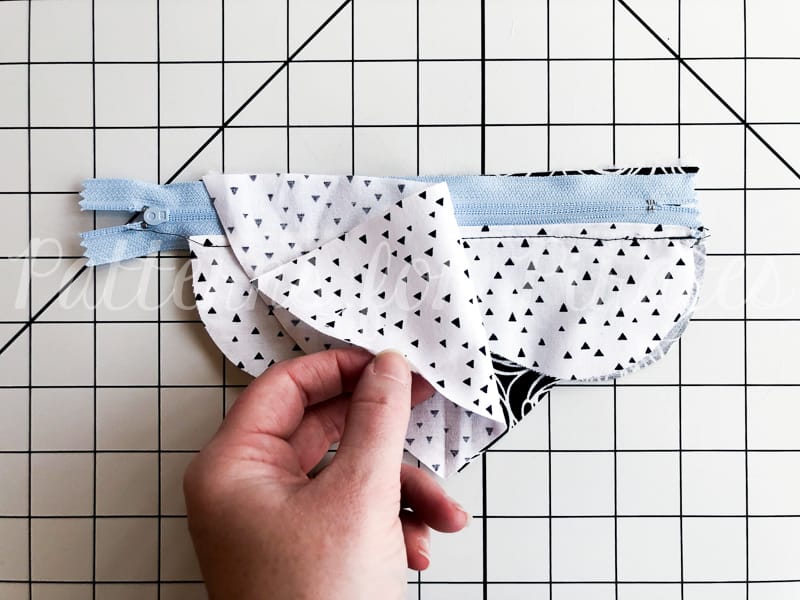
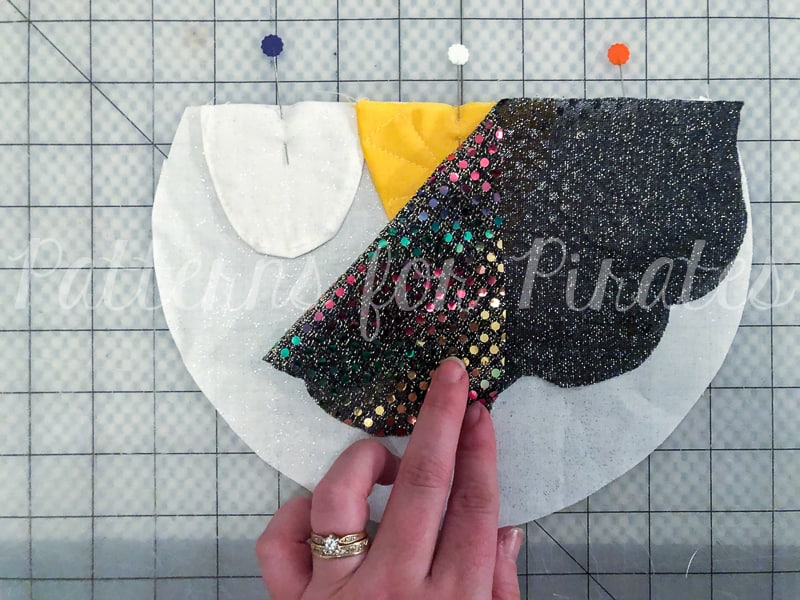
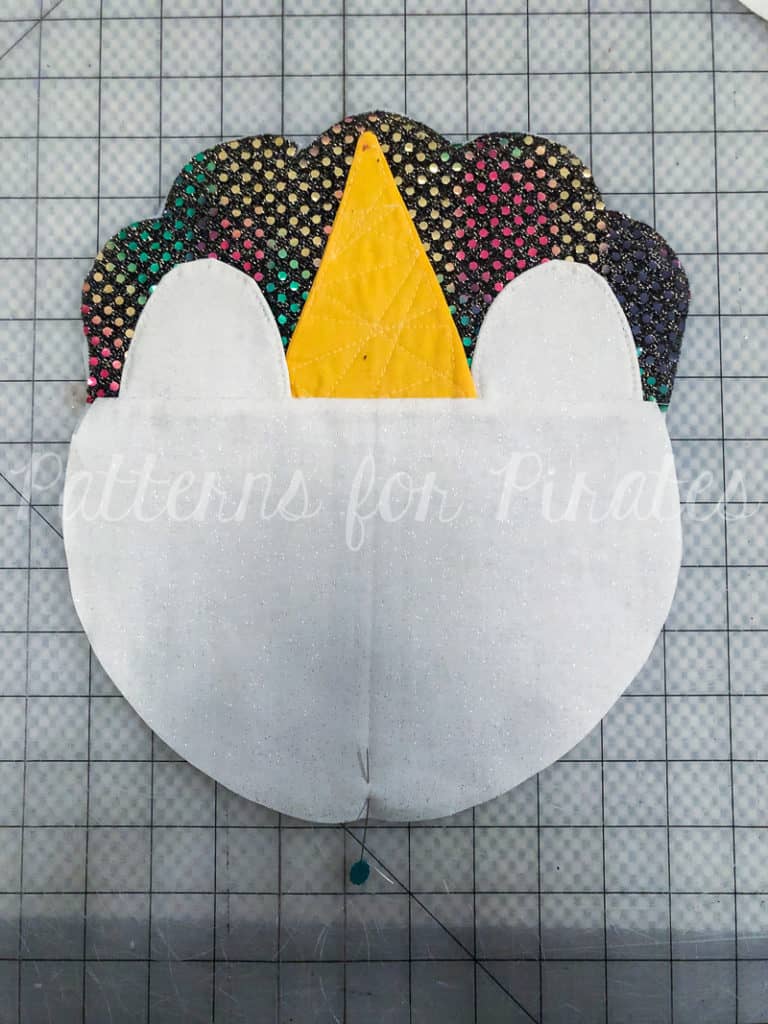
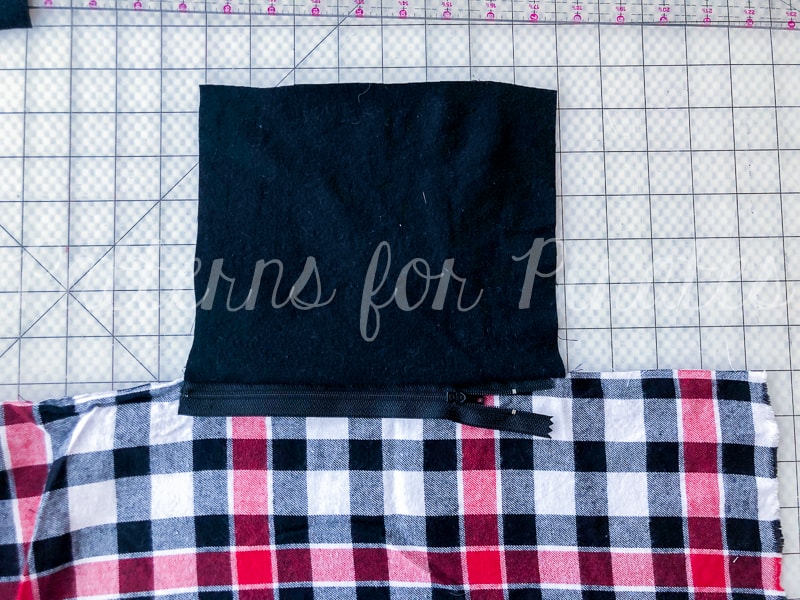
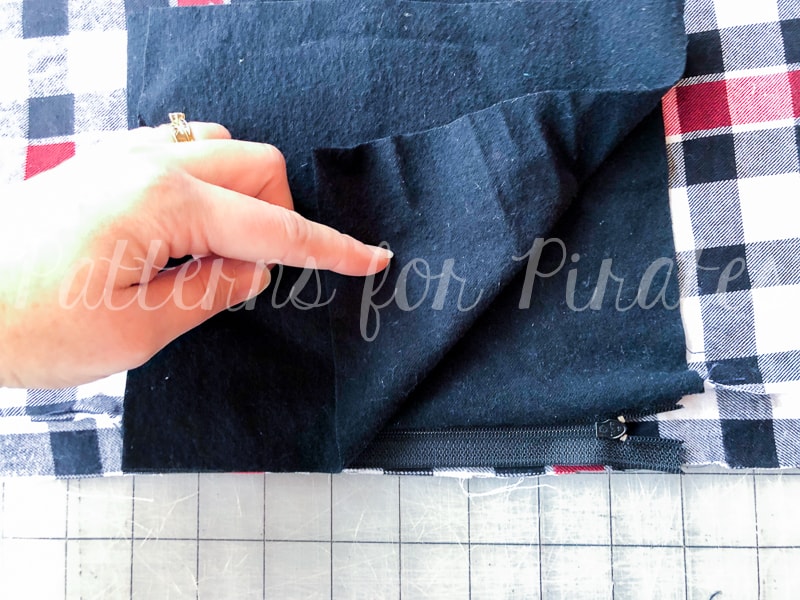
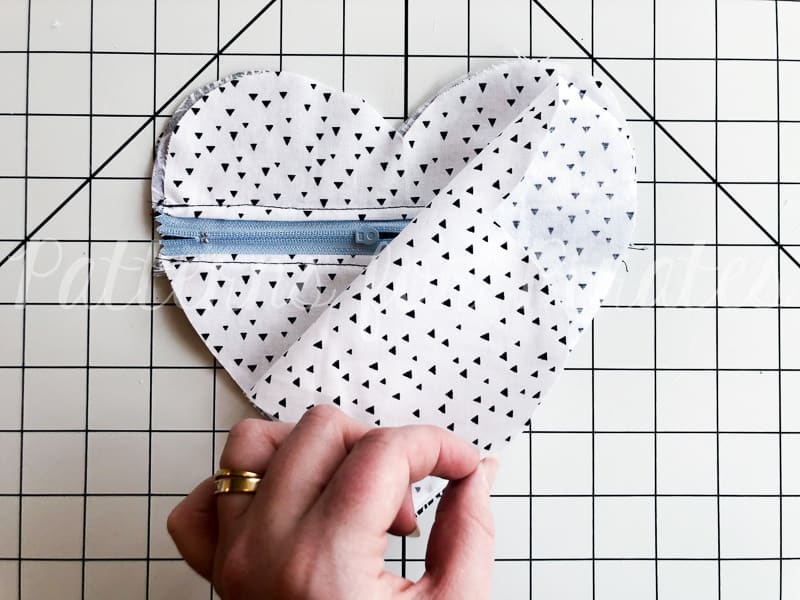
Step 10: Flip open the lower front pieces, so they are now touching with wrong sides together, and your zipper is exposed.  Press and topstitch, if desired.

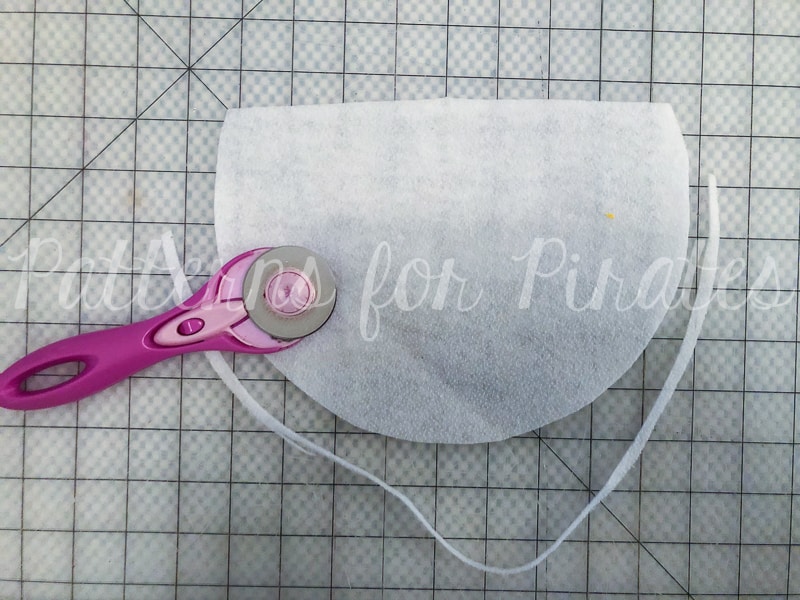
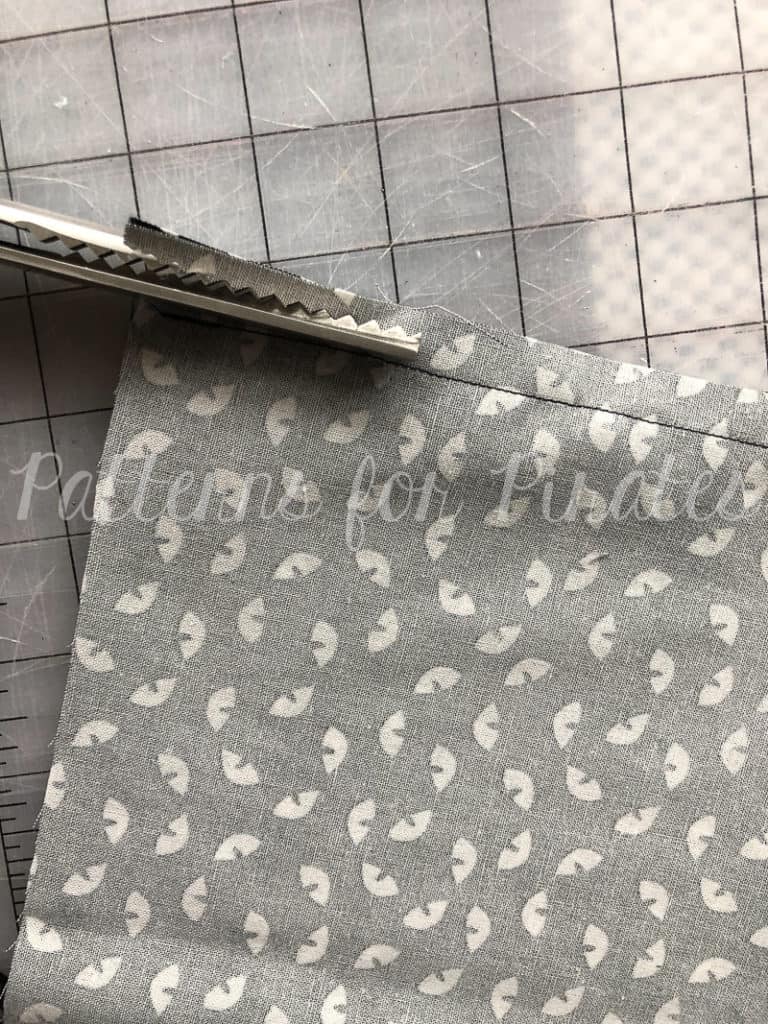
Step 11: Open up your zipper, and trim any excess length if needed.

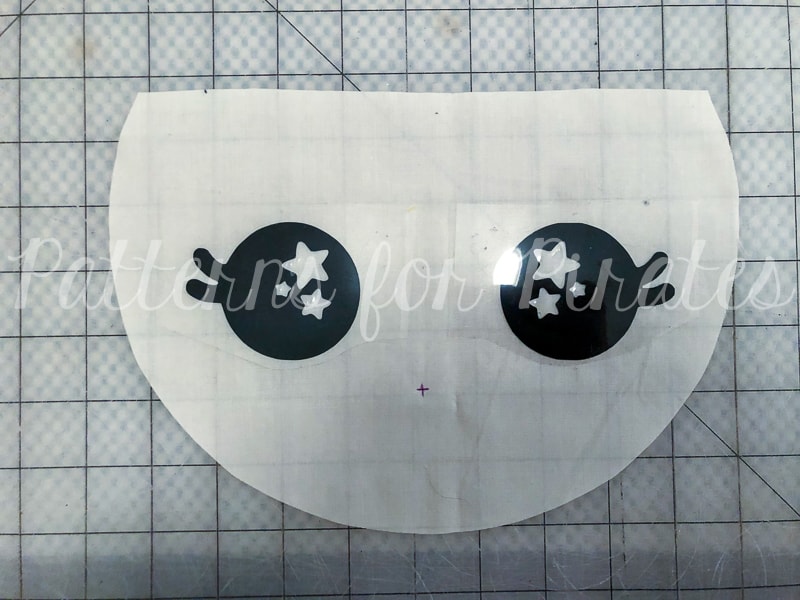
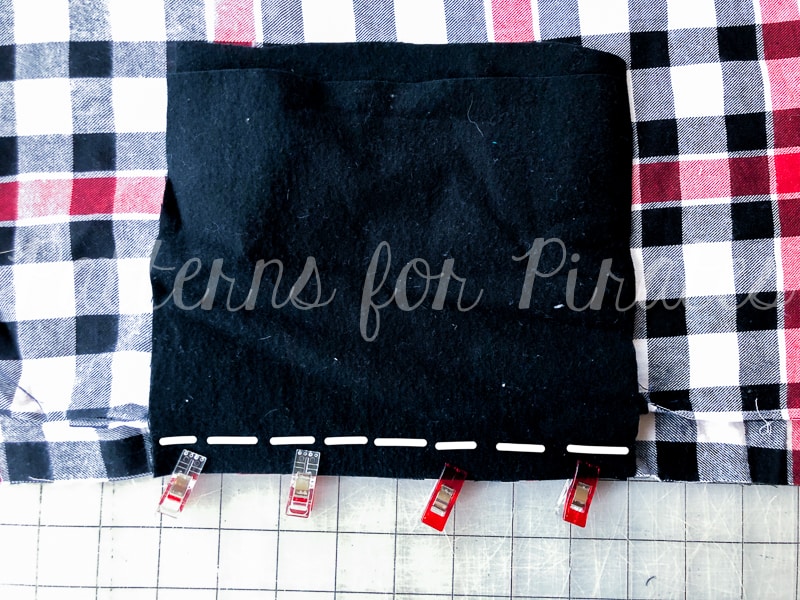
Step 12: Clip your zipper opening together and zigzag stitch to baste the edge shut.

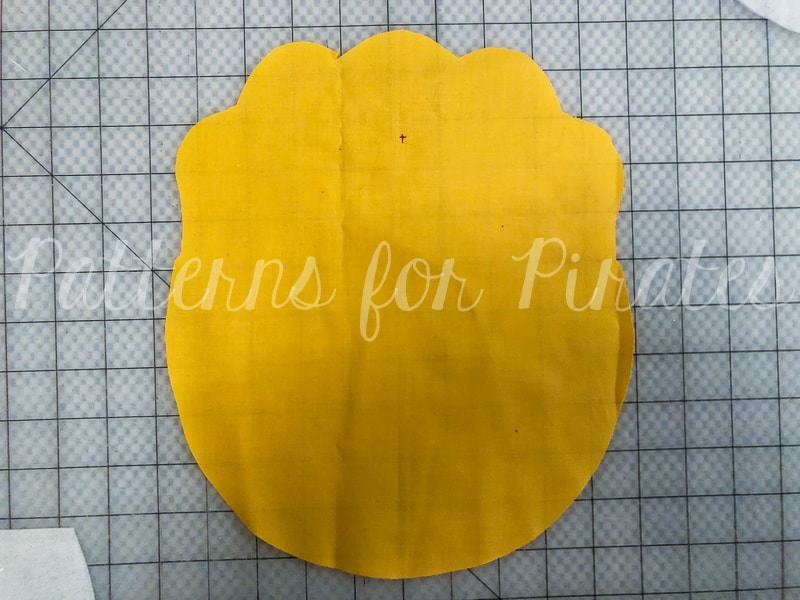
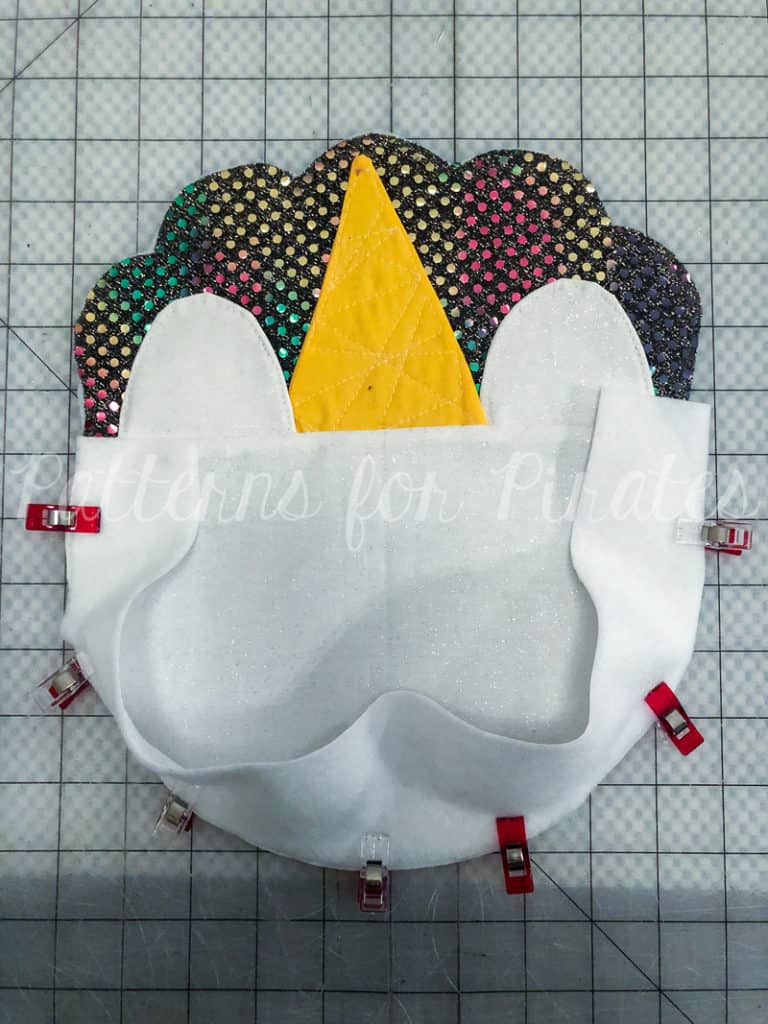
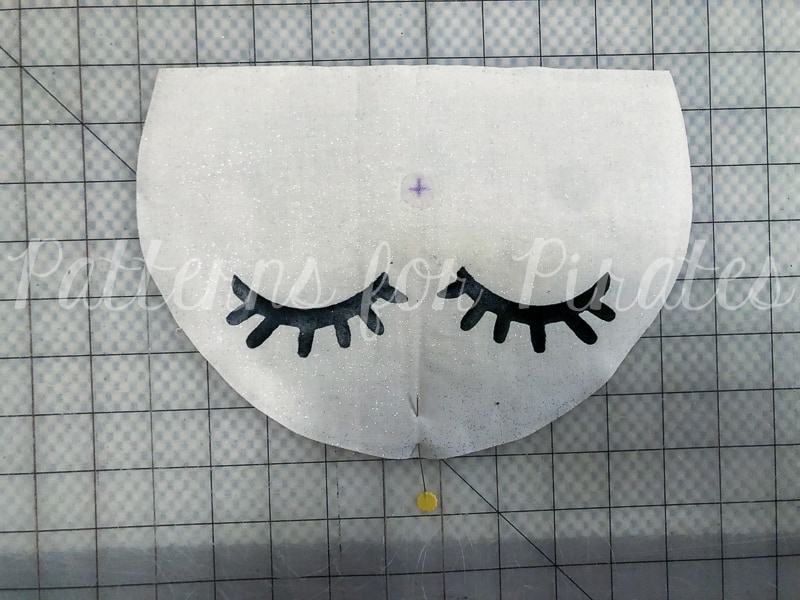
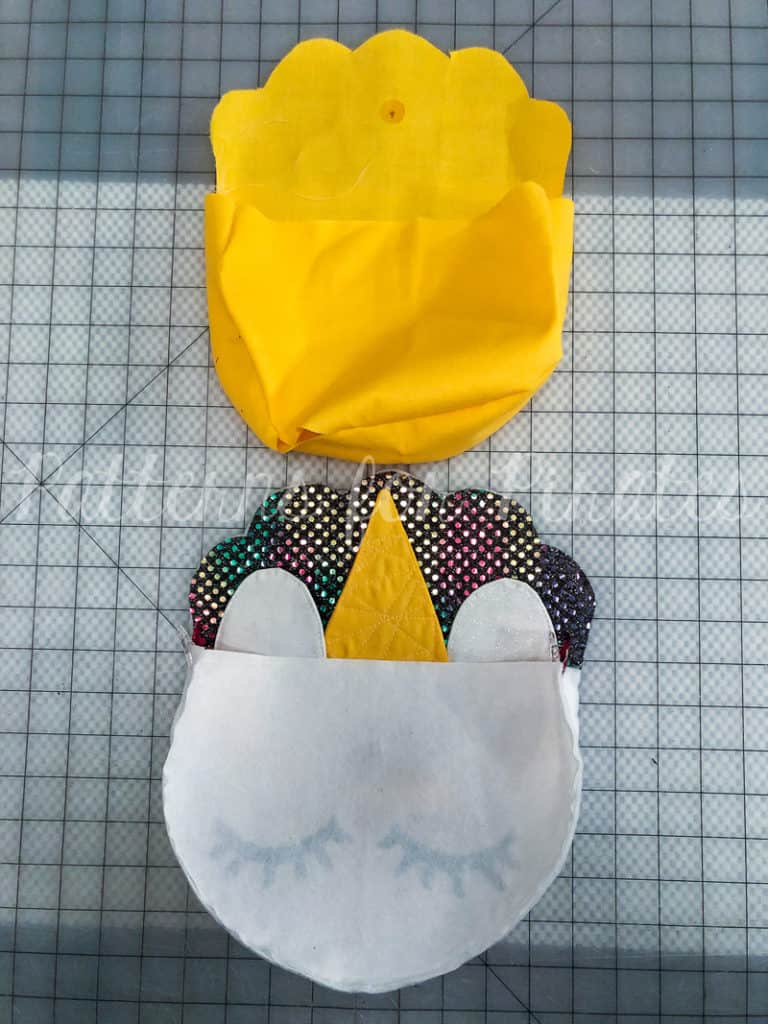
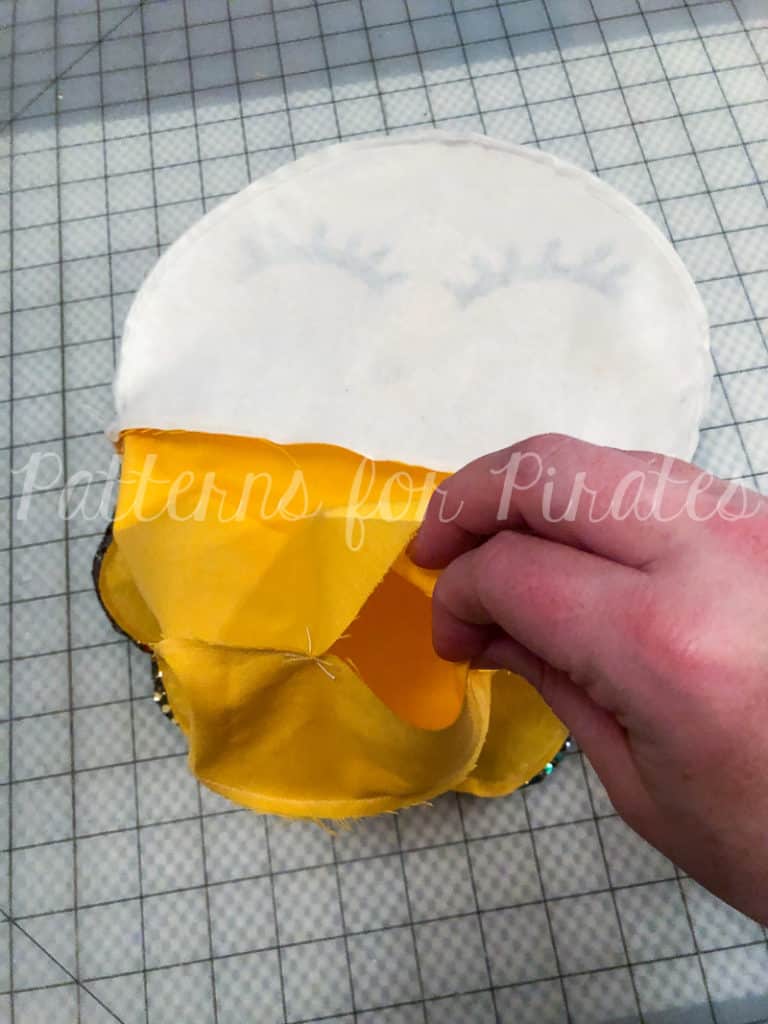
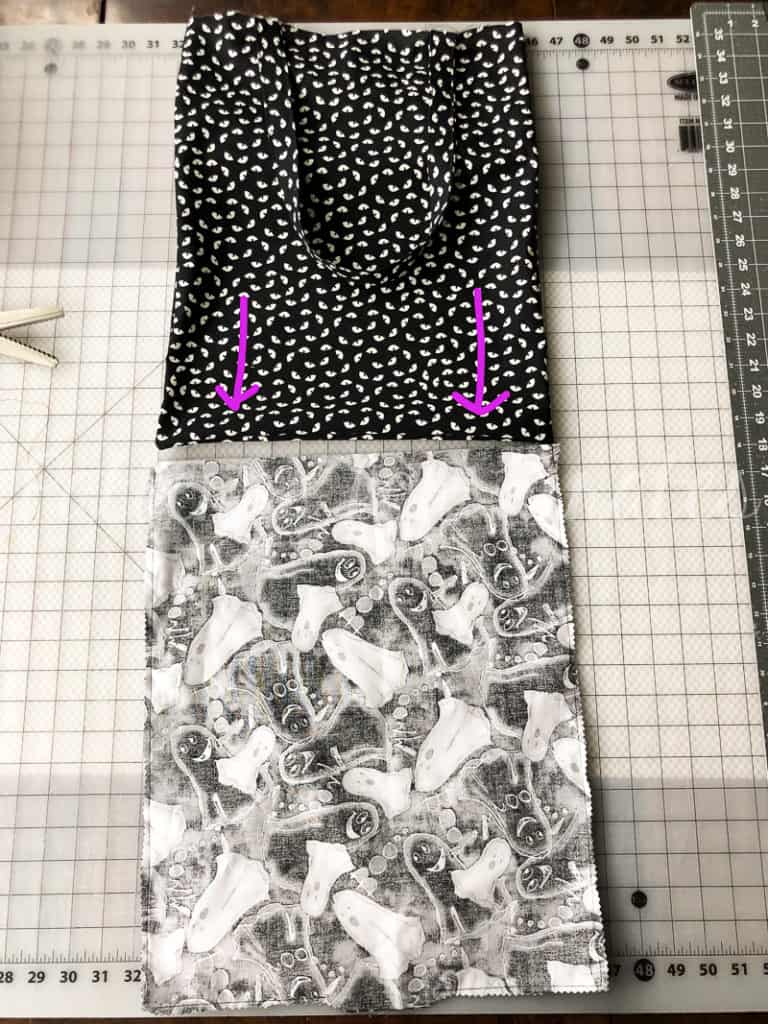
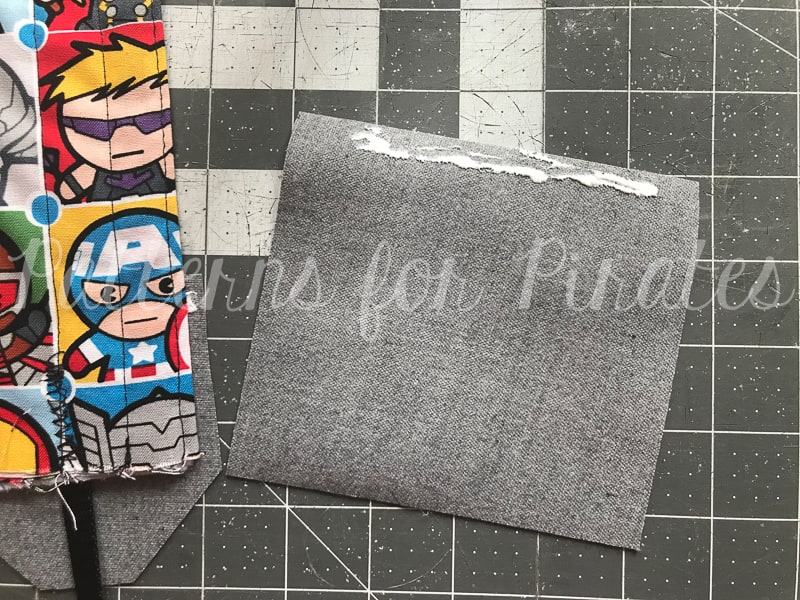
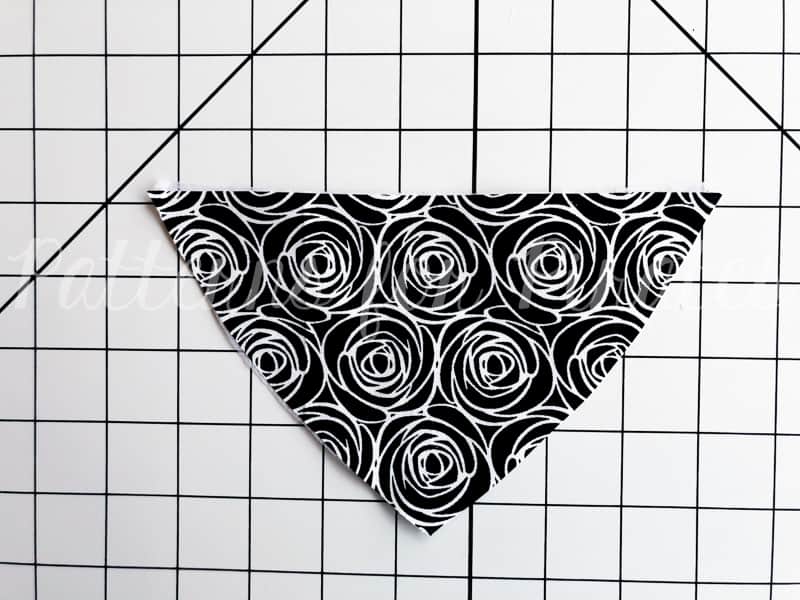
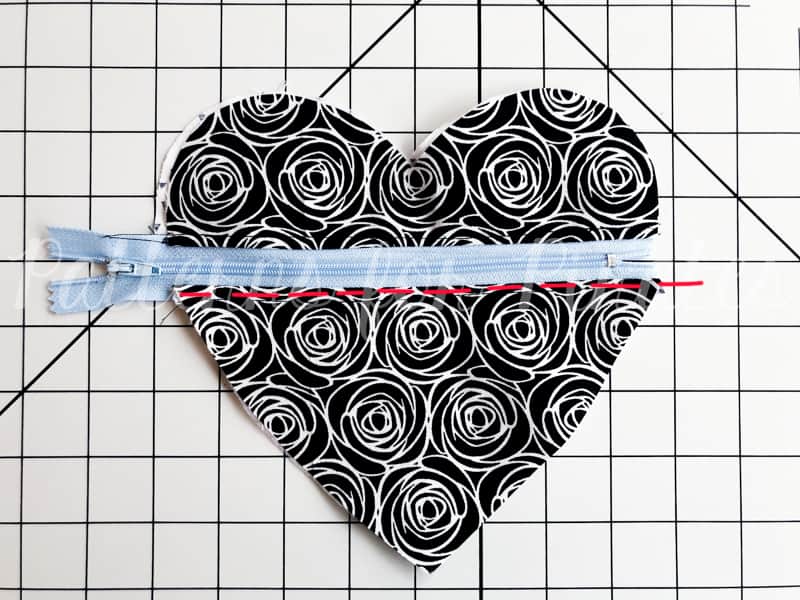
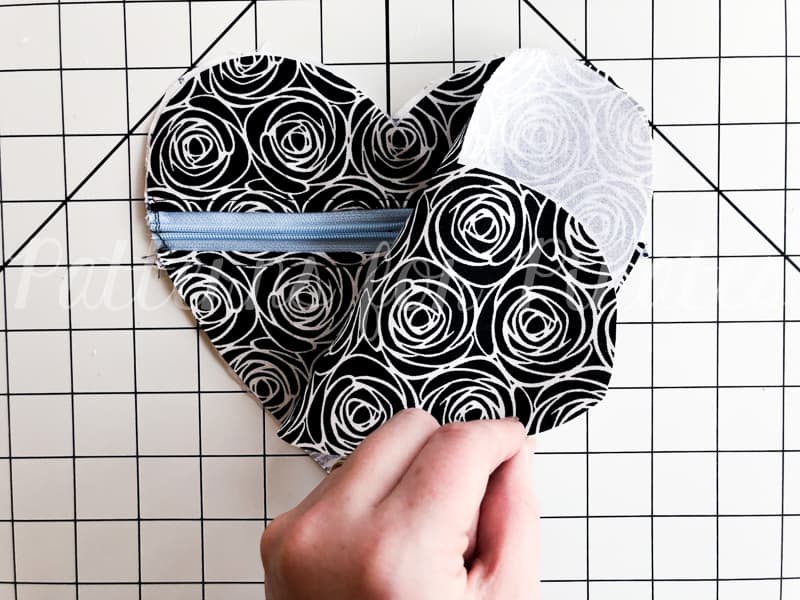
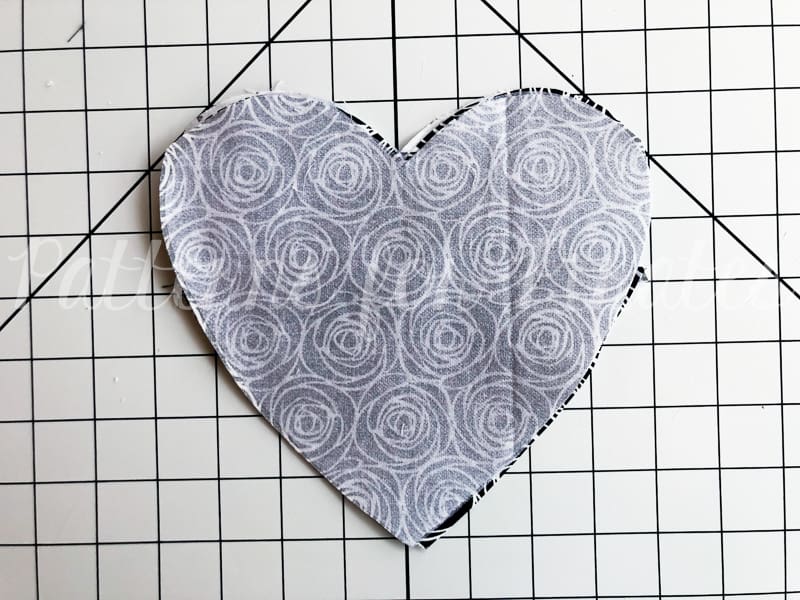
Step 13: Lay your completed front piece with the main fabric face up.

Step 14: Place your main back piece on top, with right sides together.

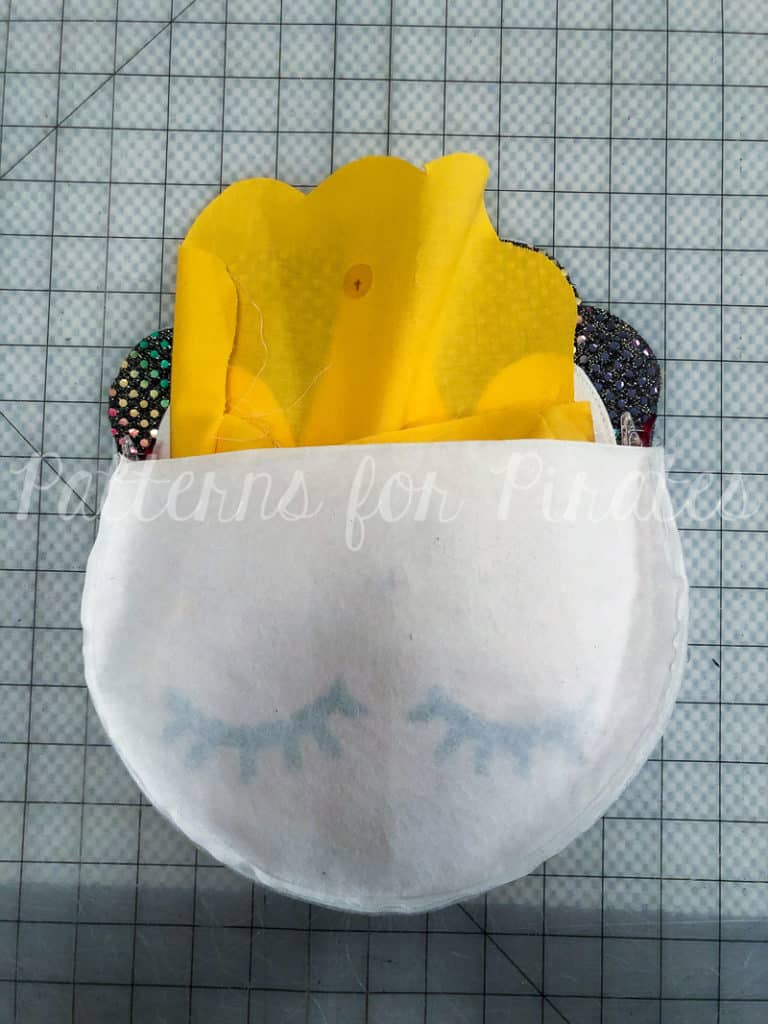
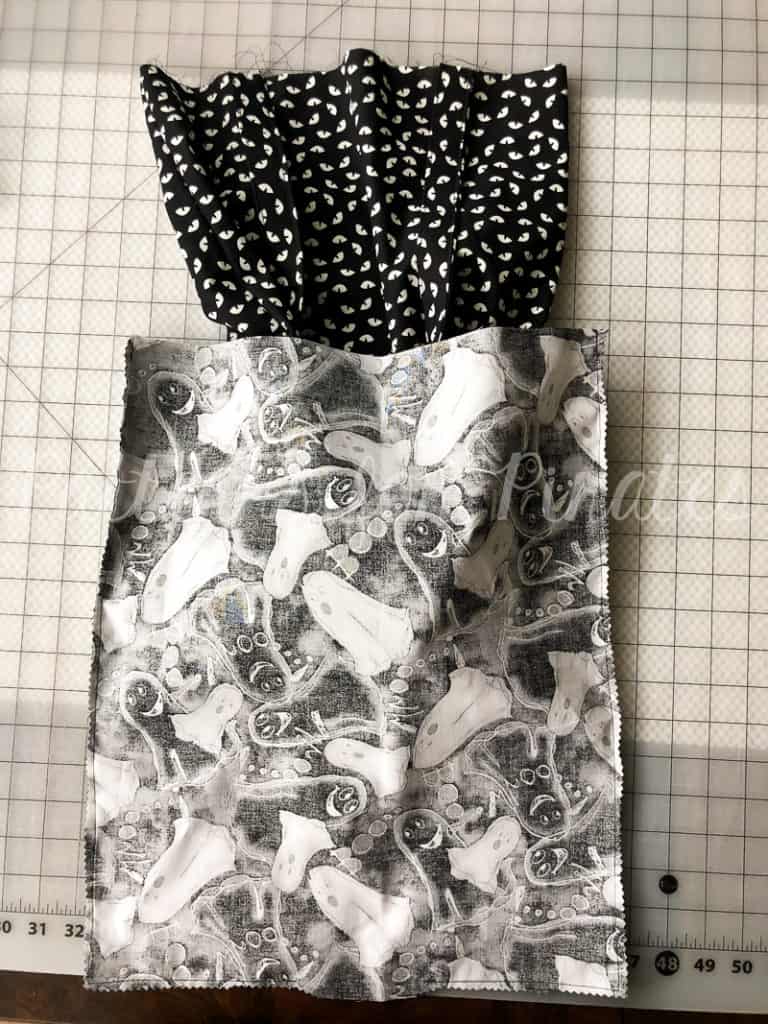
Step 15: Flip the entire group over, so that now the lining side is face up.

Step 16: Place your lining back piece on top, with right sides together.

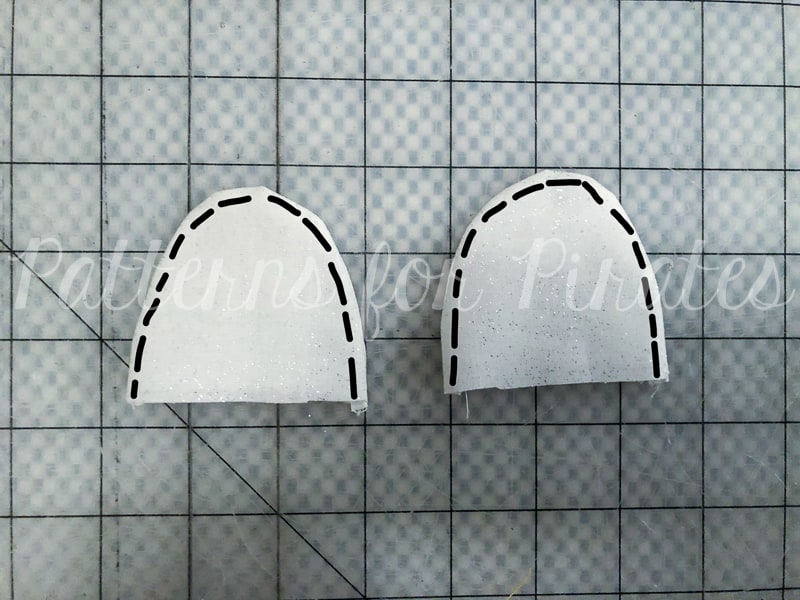
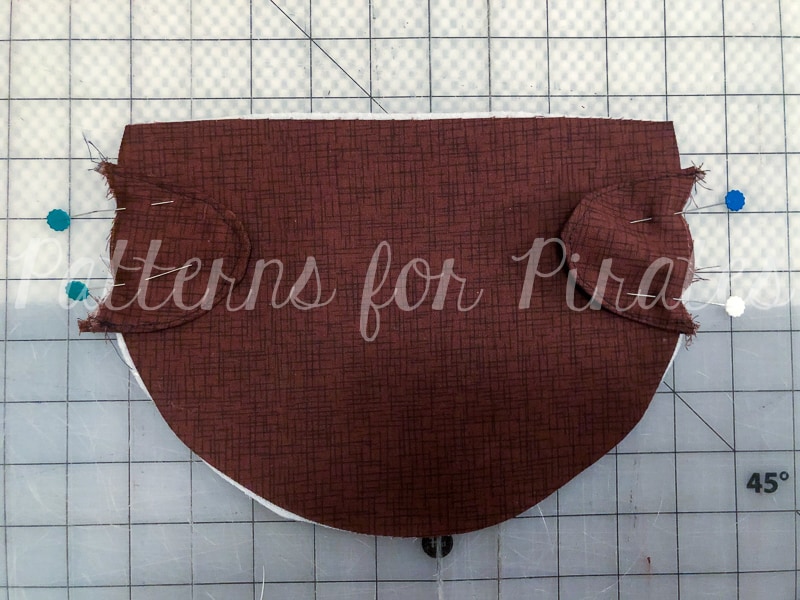
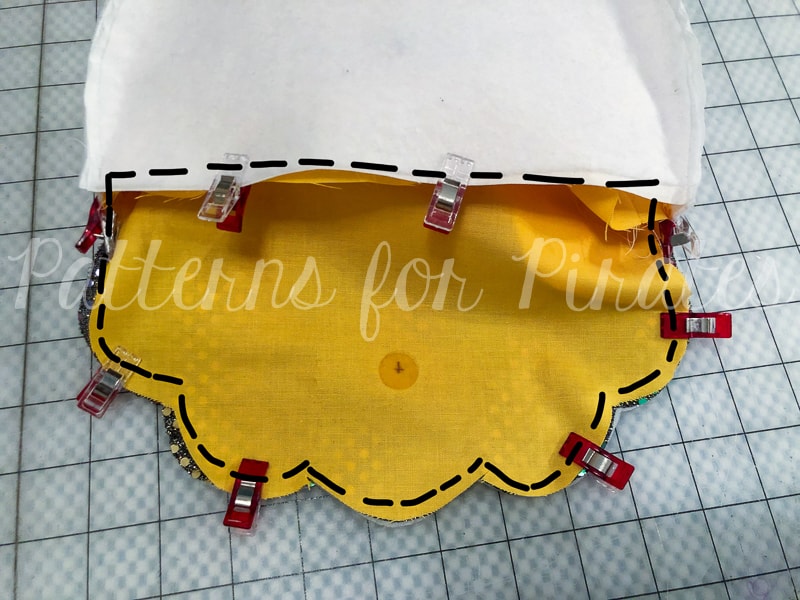
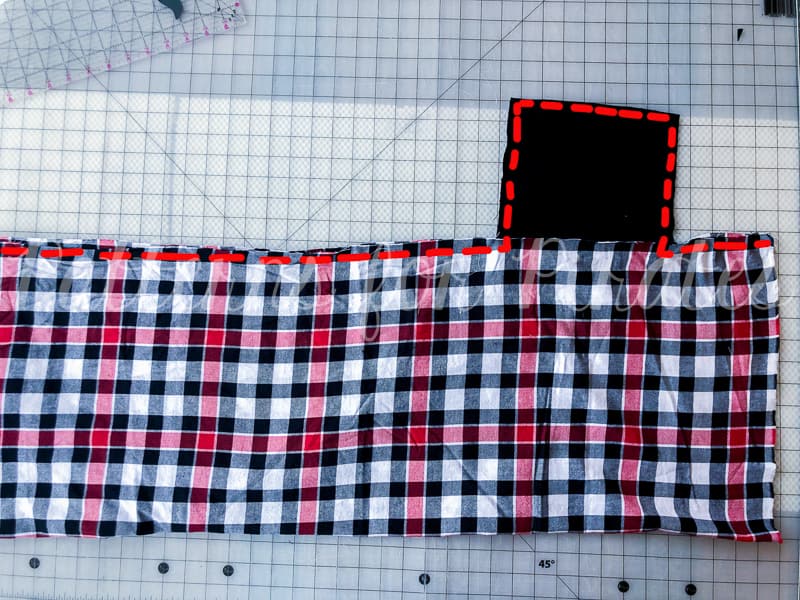
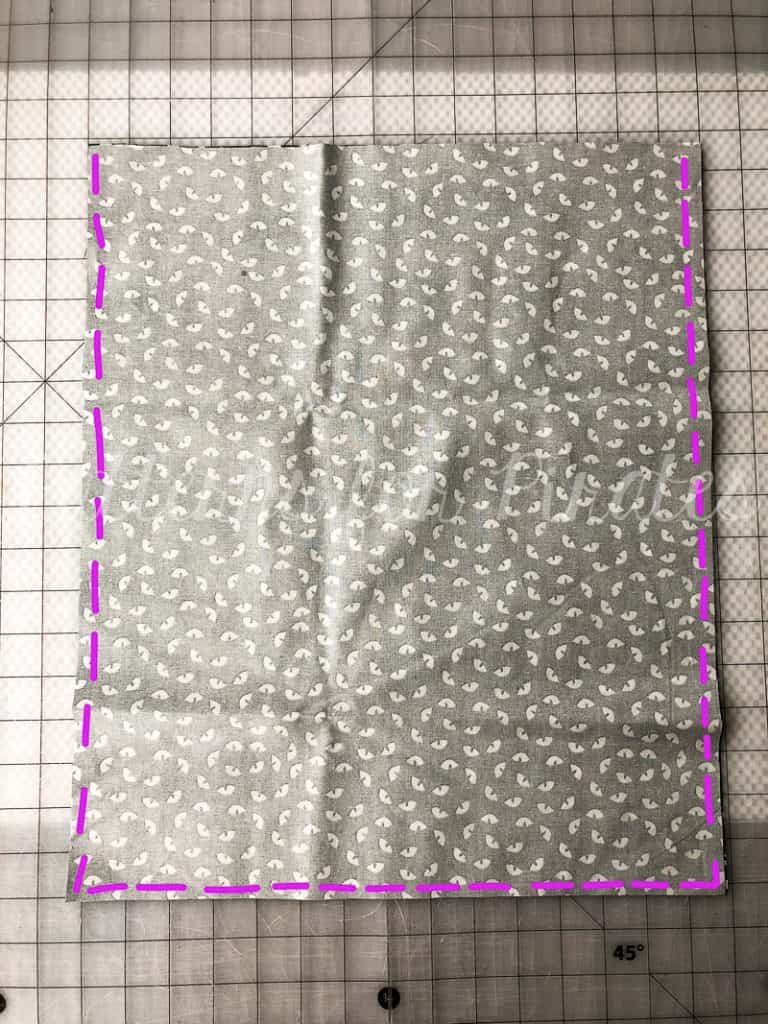
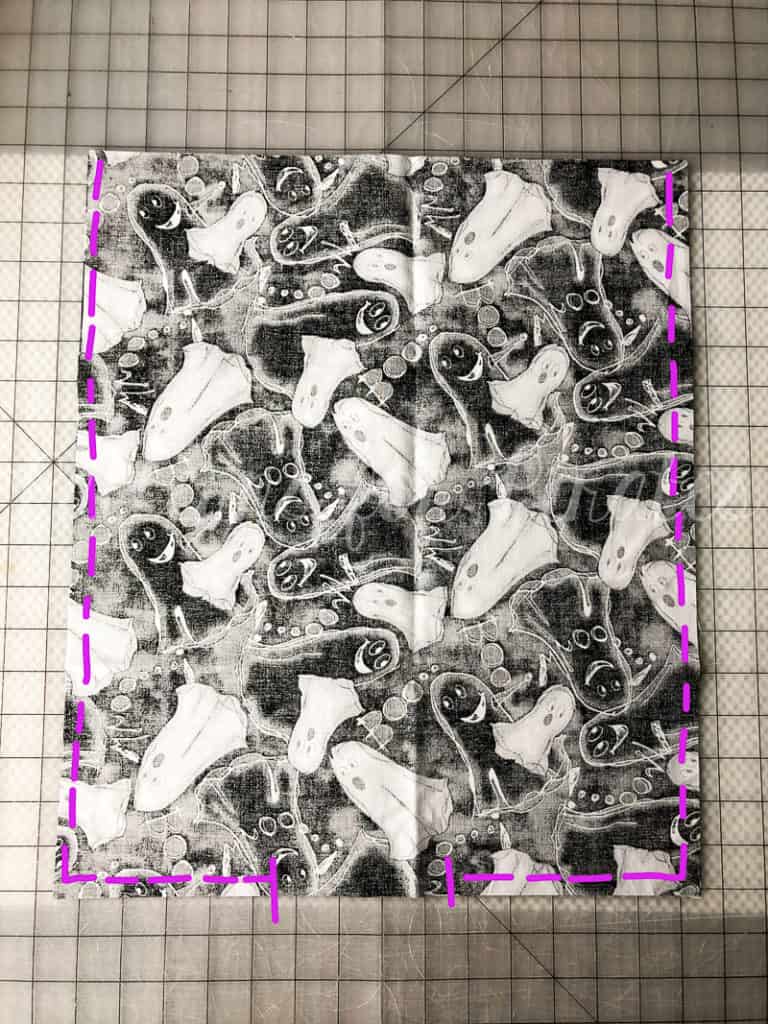
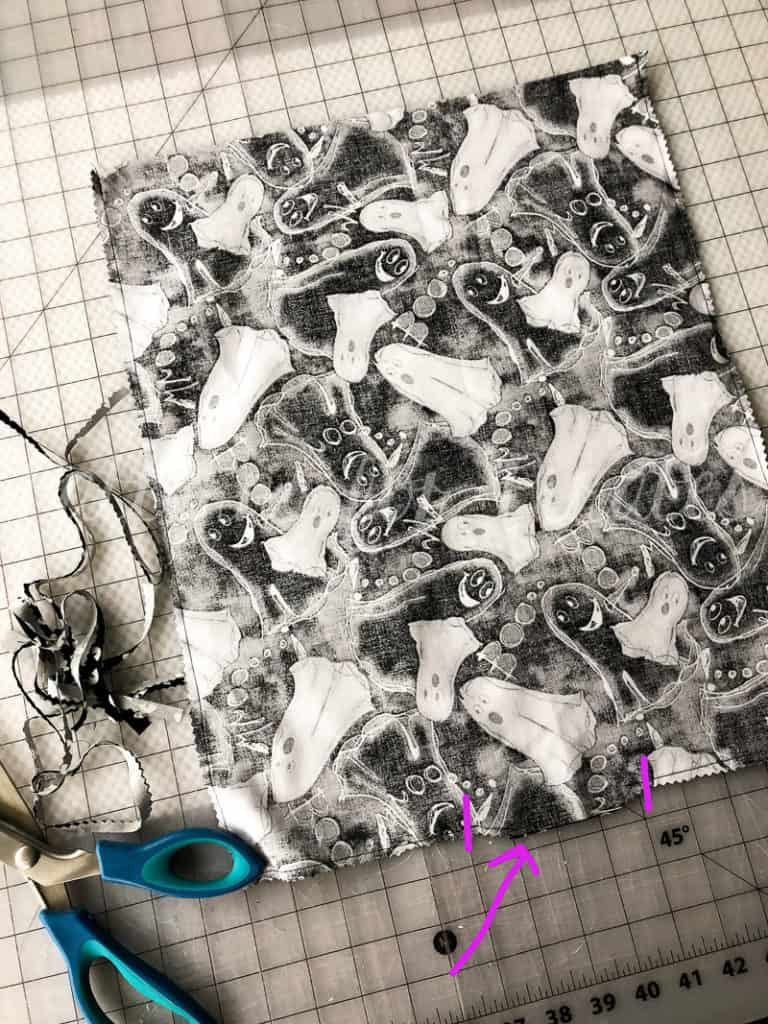
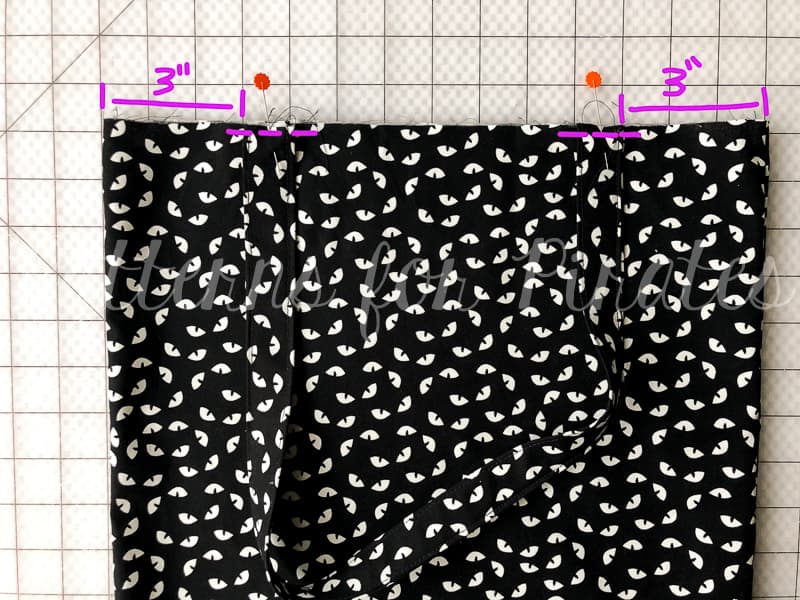
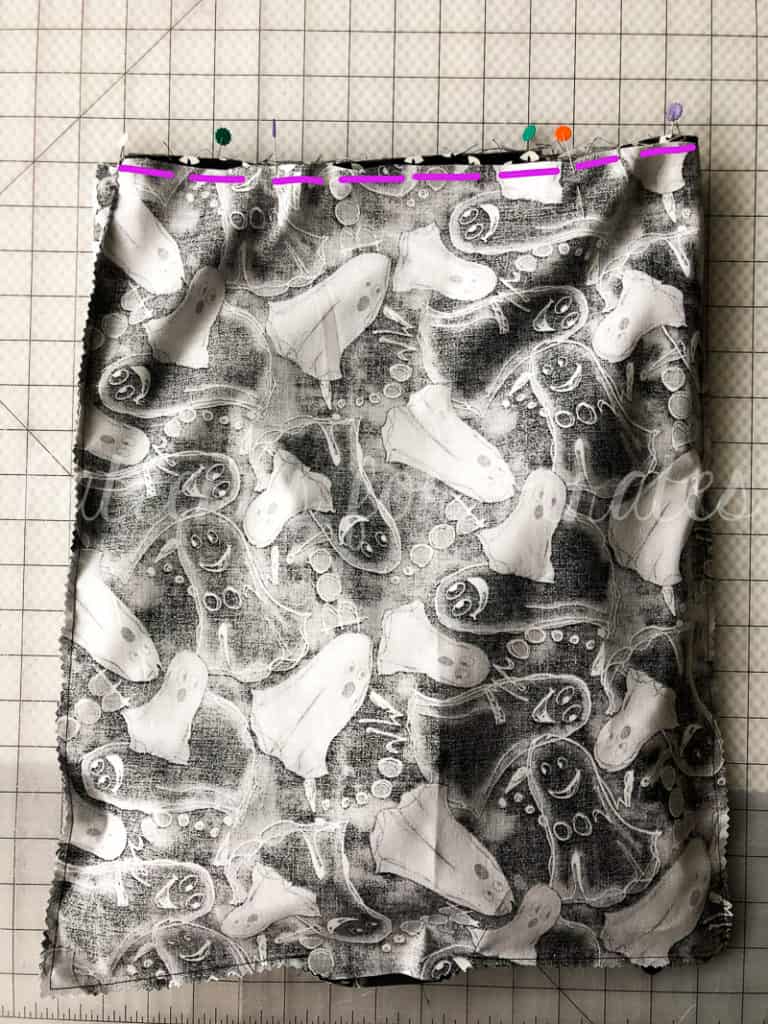
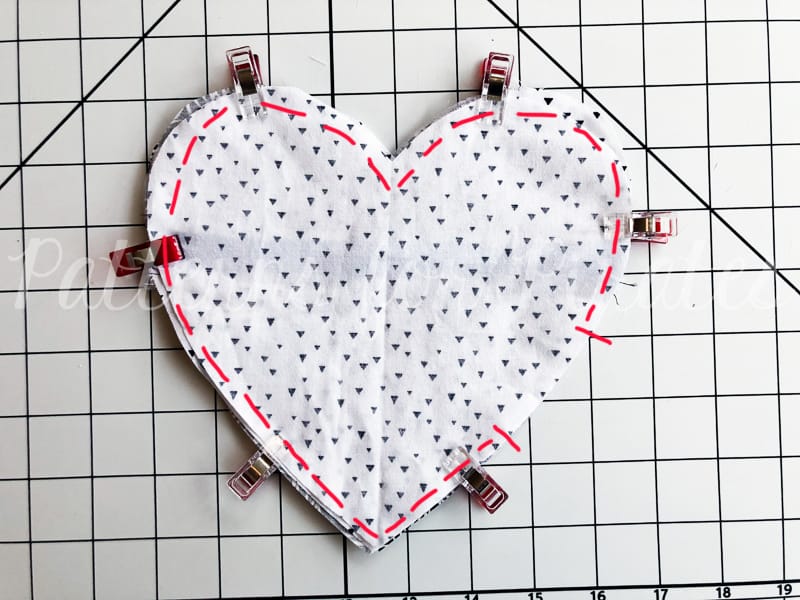
Step 17: Pin/clip and sew entire outer edge with 1/2″ seam allowance, leaving a 2″ – 3″ opening along one of the straighter sides.

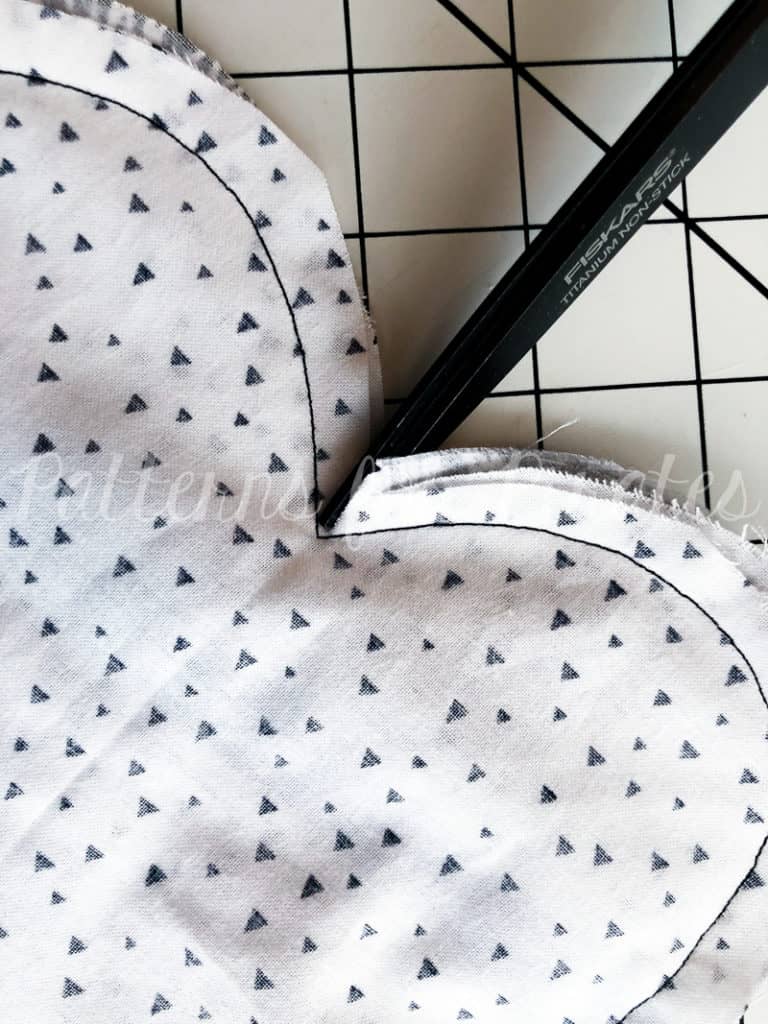
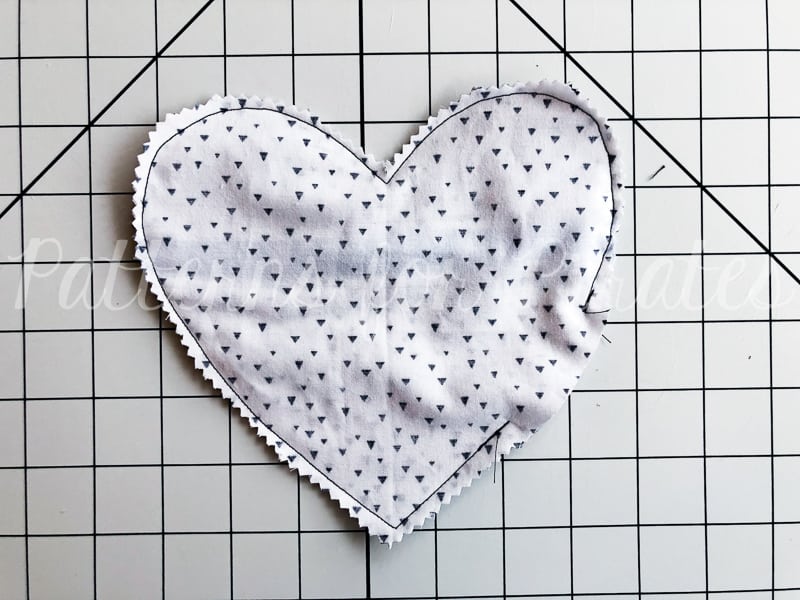
Step 18: Clip into the top point seam allowance as closely as you can, without clipping through your stitches.  Trim around entire outer edge, for easy and cleaner turning.

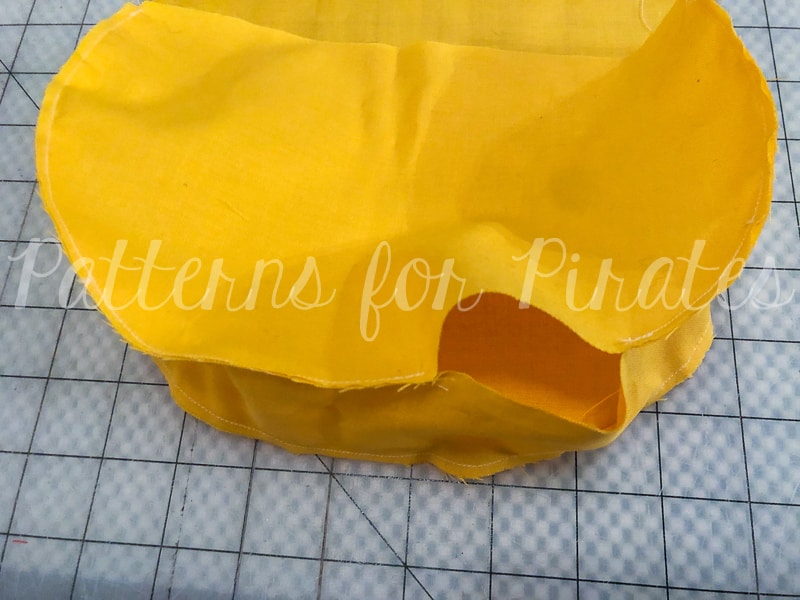
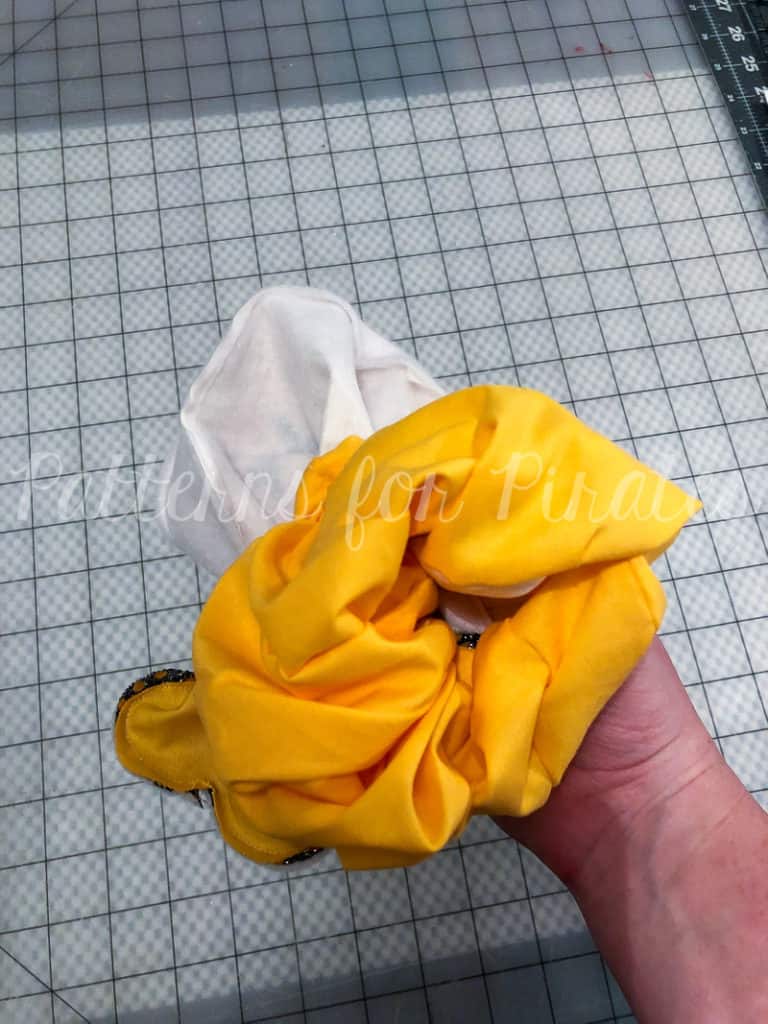
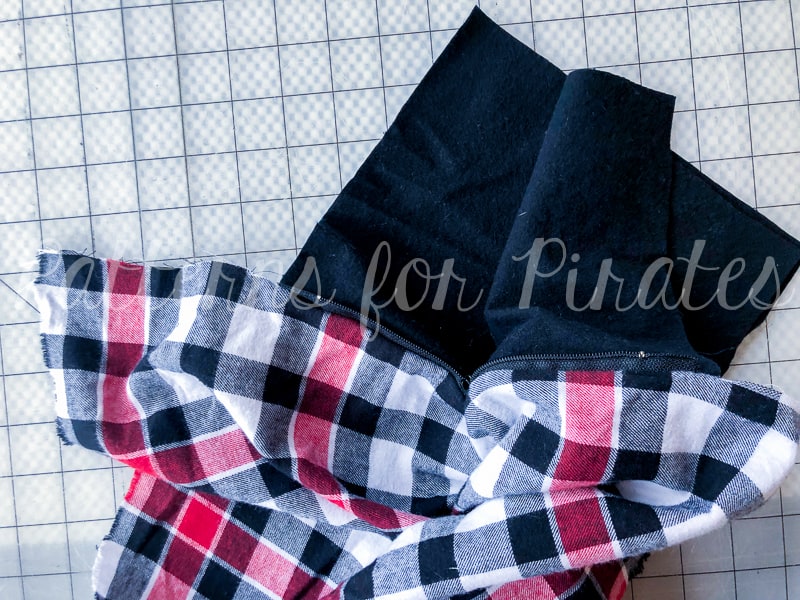
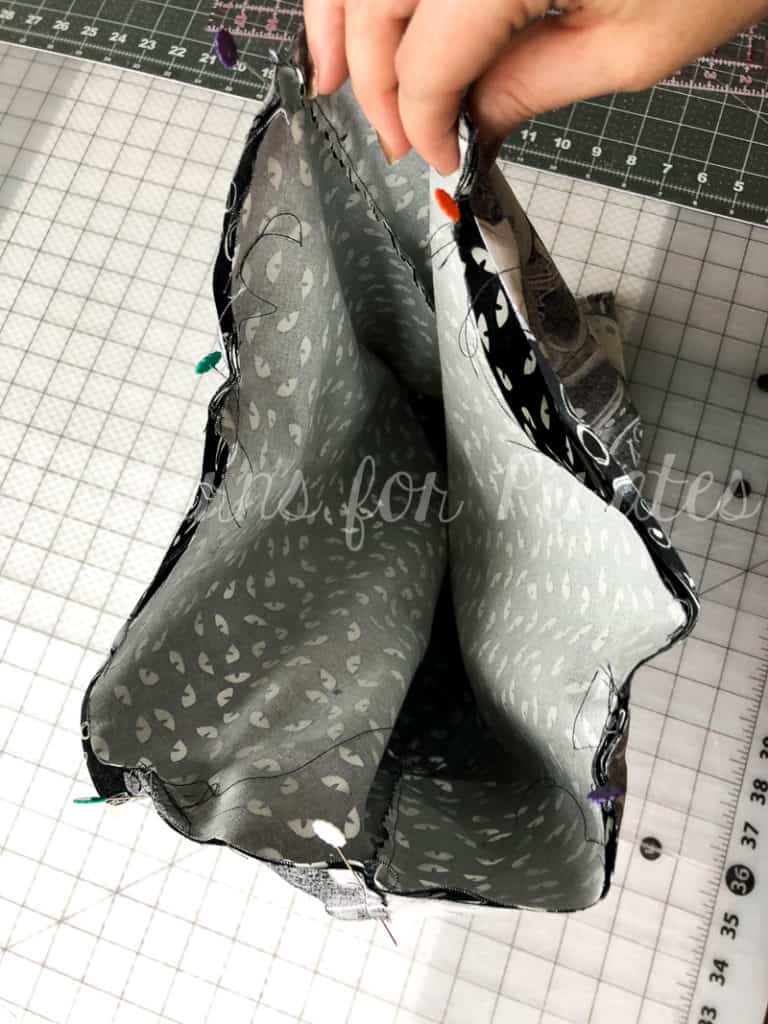
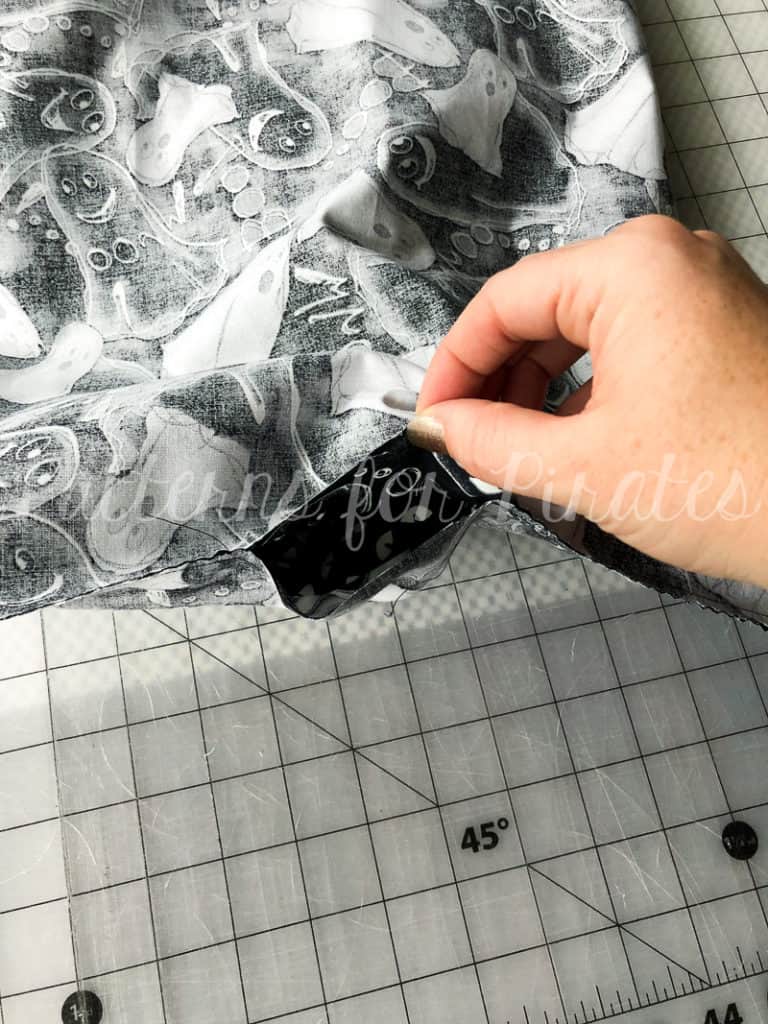
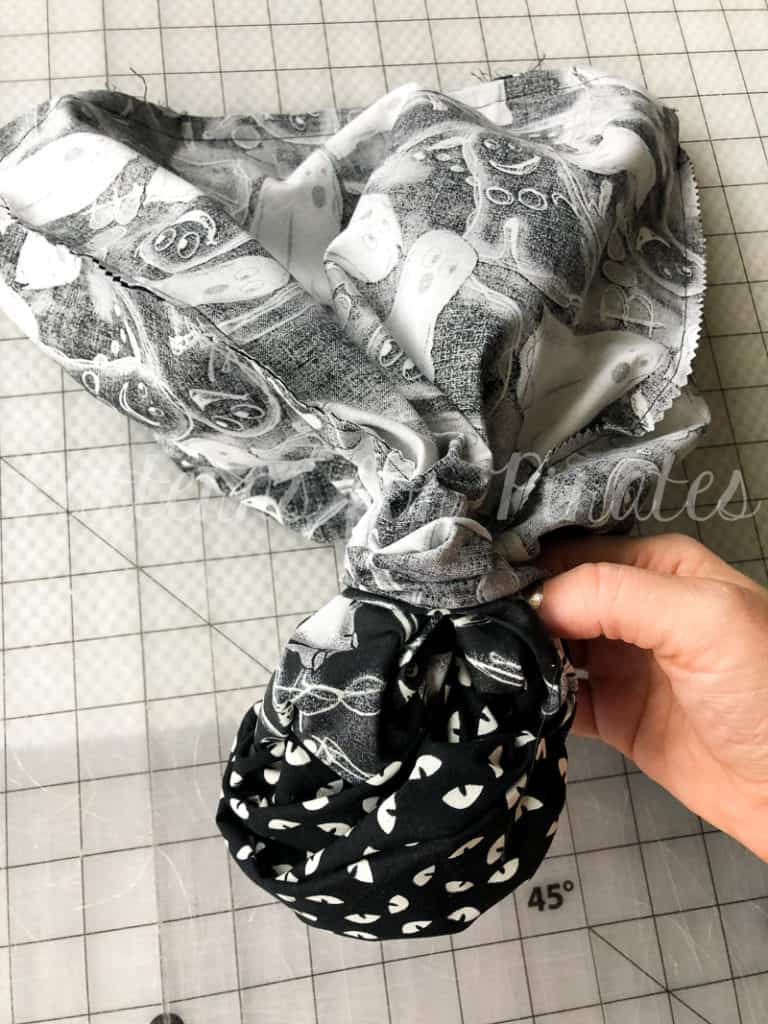
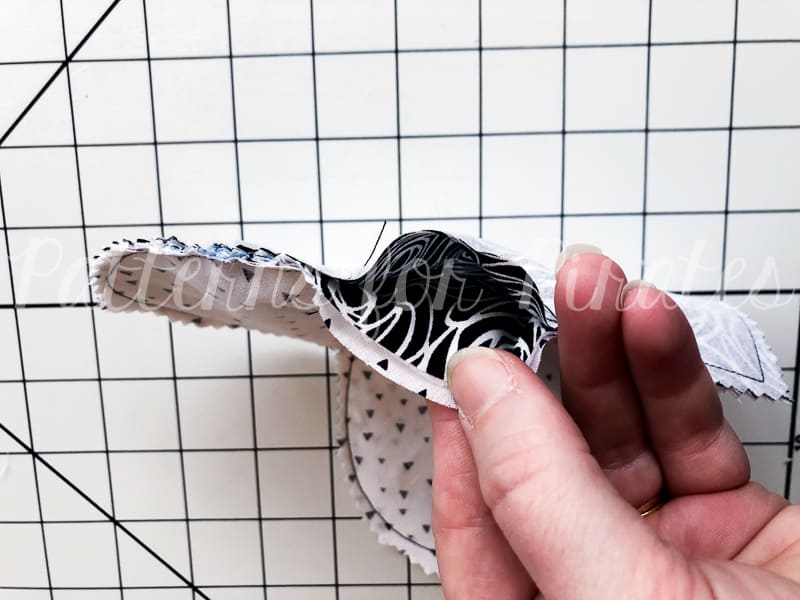
Step 19: Turn your pouch right sides out, through the opening of the main fabric pieces.

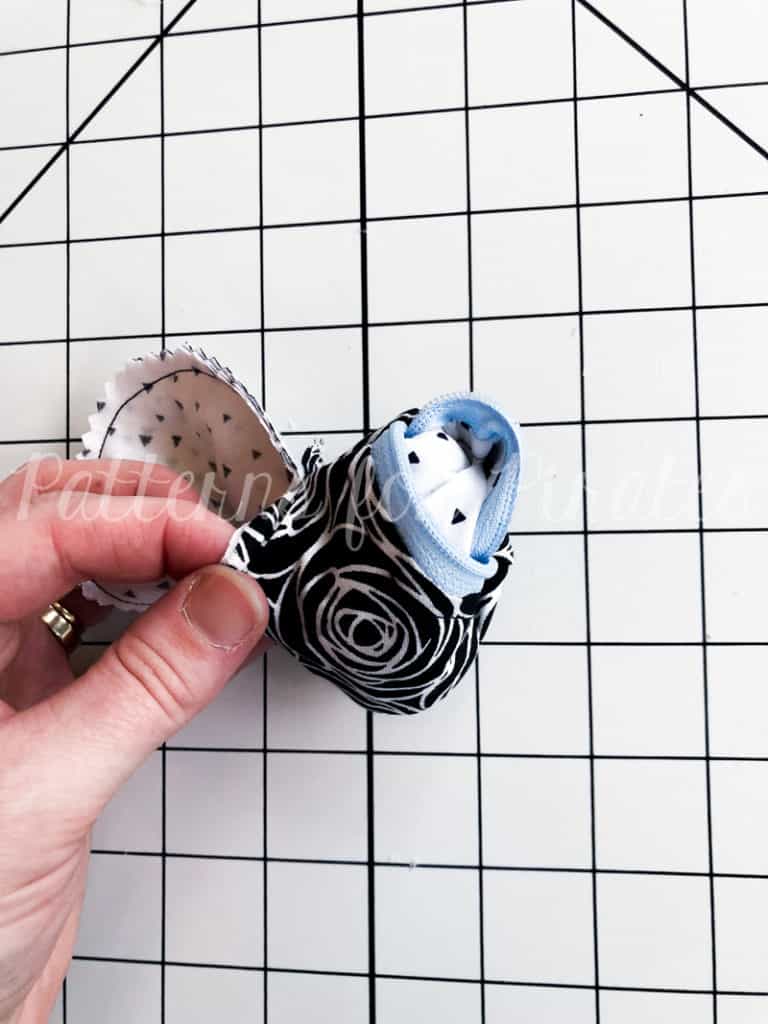
Step 20: Press and smooth out all corners, round edges and bottom point.

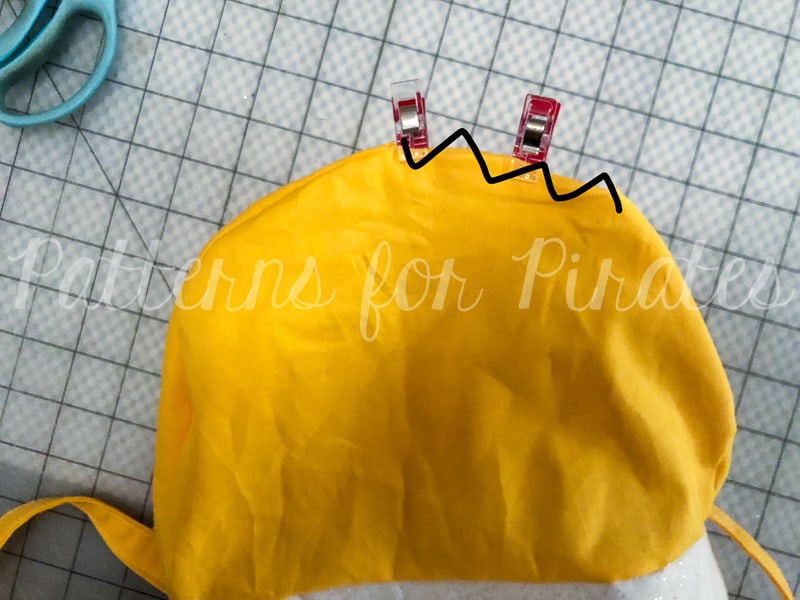
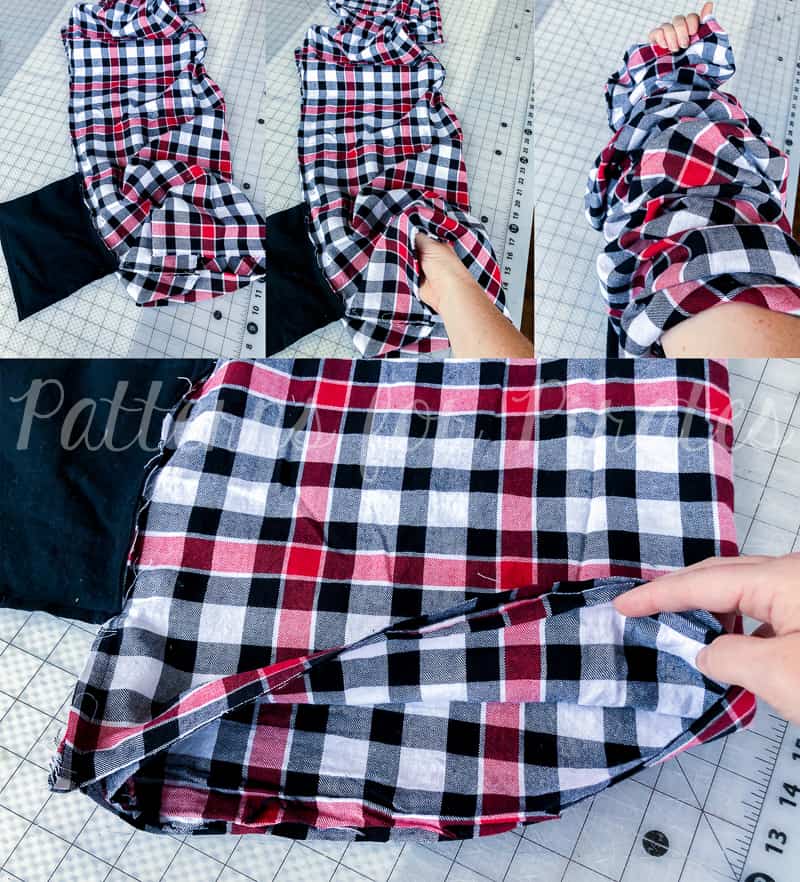
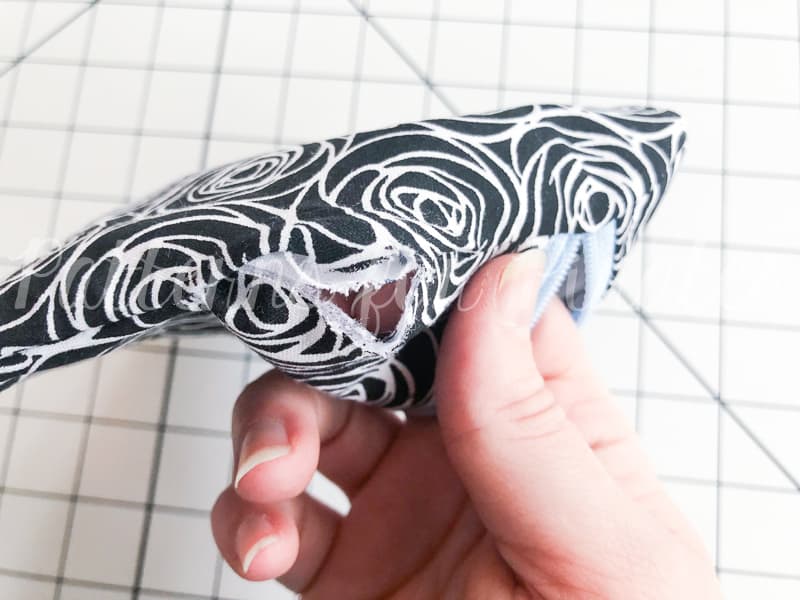
Step 21: To close up your opening with no raw edges showing, pinch three of the raw edges together…treating them as one.  And the fourth raw edge as it’s own.

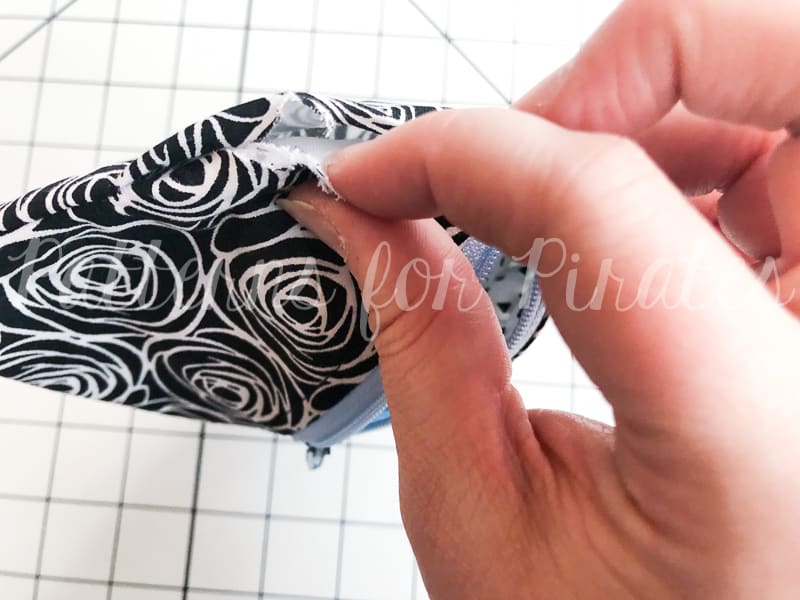
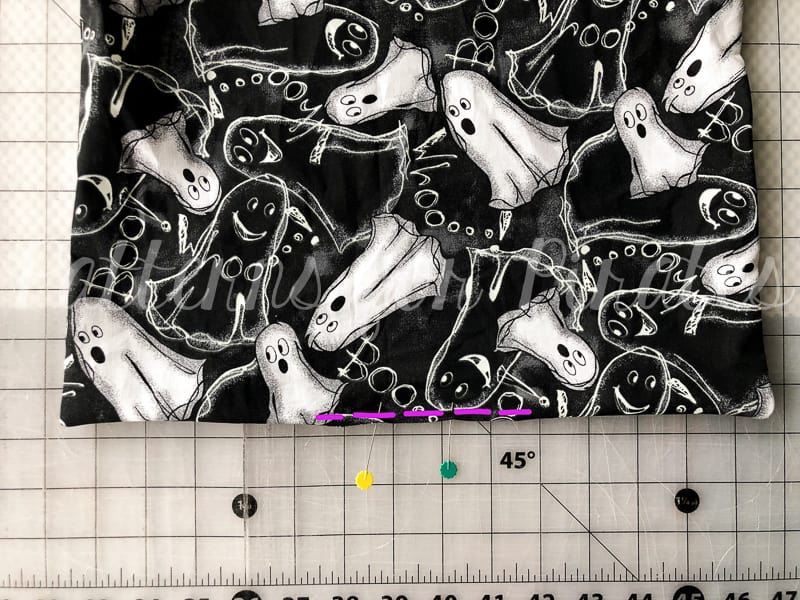
Step 22: Tuck raw edges in and pin/clip.

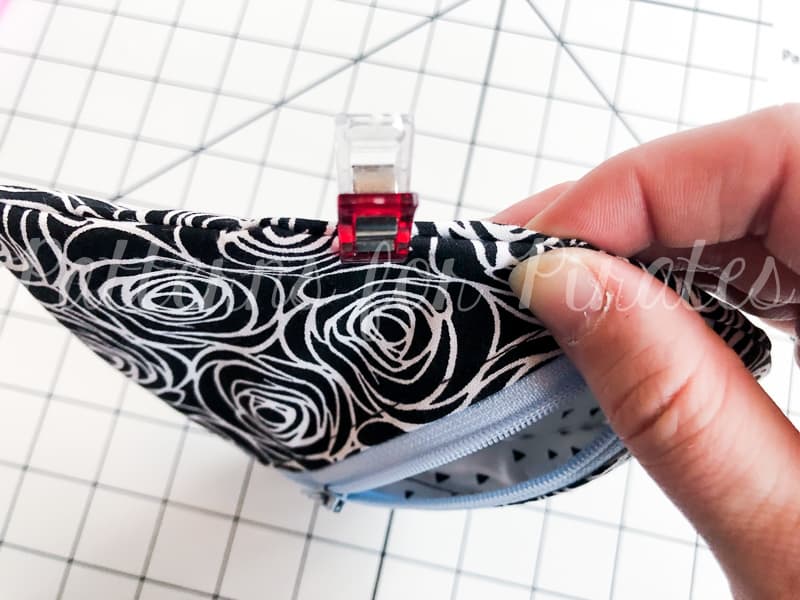
Step 23: Using your favorite blind stitch, close up the opening.

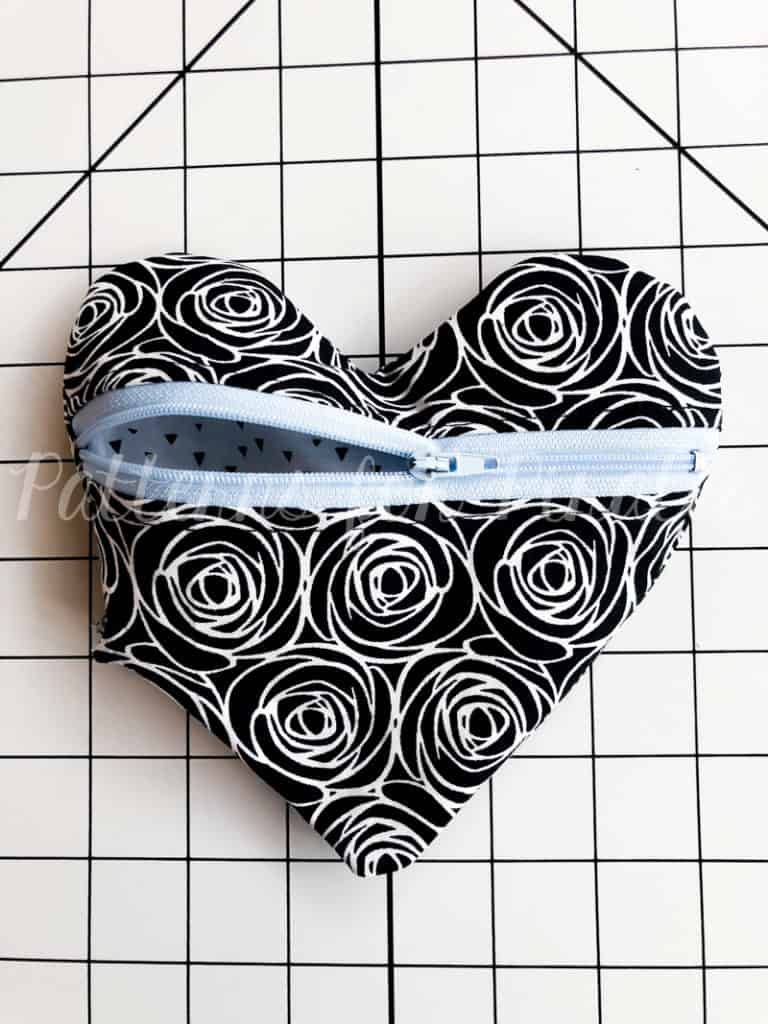
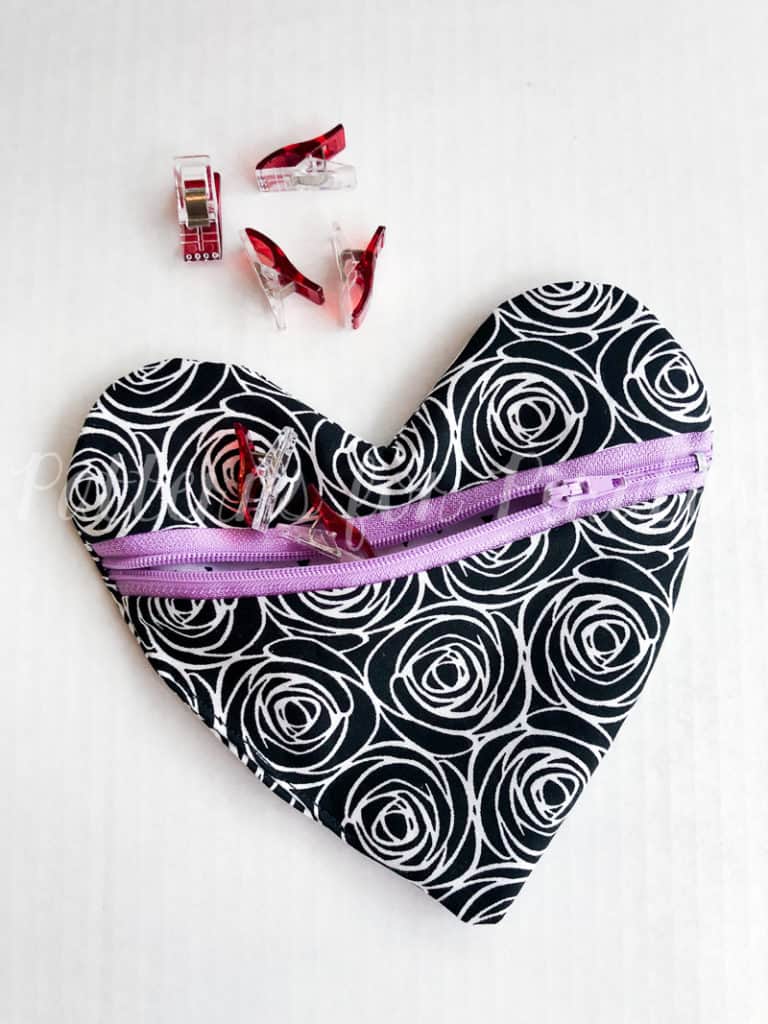
Step 24: You’re finished!  Go fill your new heart pouch with whatever goodies will fit in it, or gift it to someone who will do the same.

Are you someone who considers themselves to be more of a visual learner?  Here’s a video that walks you through all of the same steps above.  Hopefully it helps!

As always, we love when you share what you’ve made with us.  Head over to the Patterns for Pirates Facebook group and show off the fabulous Heart Pouch that you’ve managed to make from our freebie pattern!  Happy Valentine’s Day, friends!

Filed Under: Free Pattern, Pattern Release 20 Comments

2018 Holiday Freebies :: Critter Clutch

December 3, 2018

Welcome back to the second day of our P4P Holiday Freebies 2018!  I’m not sure I can even handle the excitement I have over today’s free pattern.  I am so happy to have this idea out of my head and finally in pattern form, to share with all of you.  AND FOR FREE!

These Critter Clutches are simply adorable!  They take minimal amounts of fabric, with not too much time involved in it.  The hardest part is deciding which version to do first: Unicorn, Reindeer or Fox??!!

You will need:
— Critter Clutch pattern pieces + Eye Digital Designs for HTV (found HERE)
— 1/2 yard main fabric, 1/2 yard lining fabric
— Fusible Fleece: I like Pellon 987F (aff link)
— Buttons / Snaps / Velcro for eyes and closures

Recommended fabrics: quilting cotton, kona cotton, flannel, etc.

Cut out all pieces needed for your corresponding bag.

Prepping the Strap:

Cut 3″ long x 34″ wide strip of fabric.
**Note: Depending if you or the recipient will be wearing it cross body or straight down from one shoulder, you may want to adjust the width of this piece to your liking.

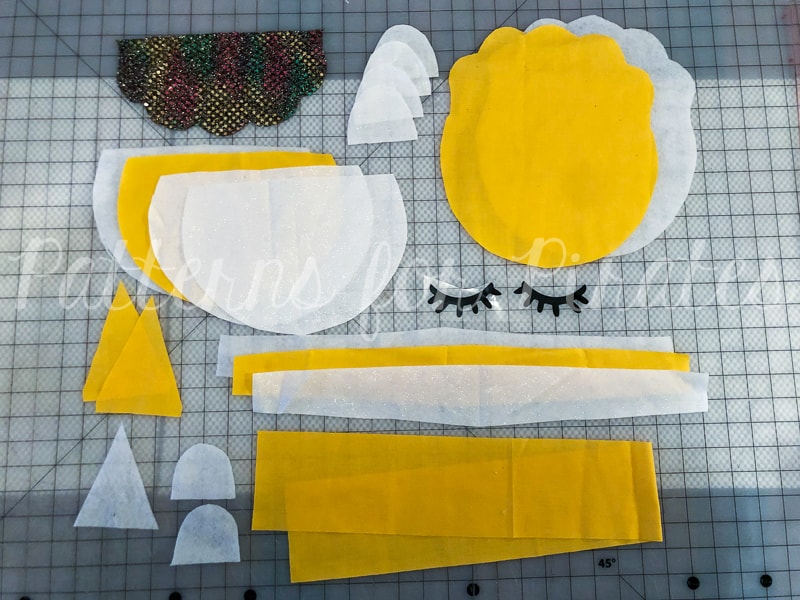
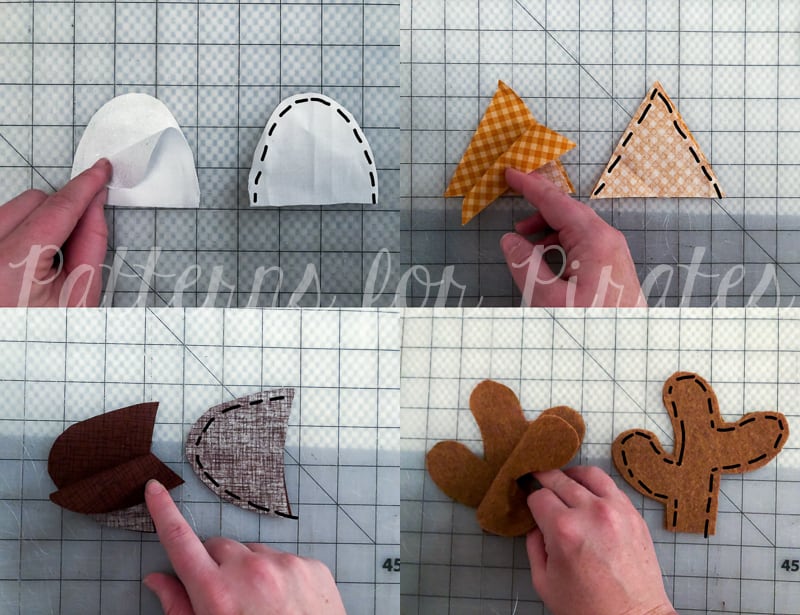
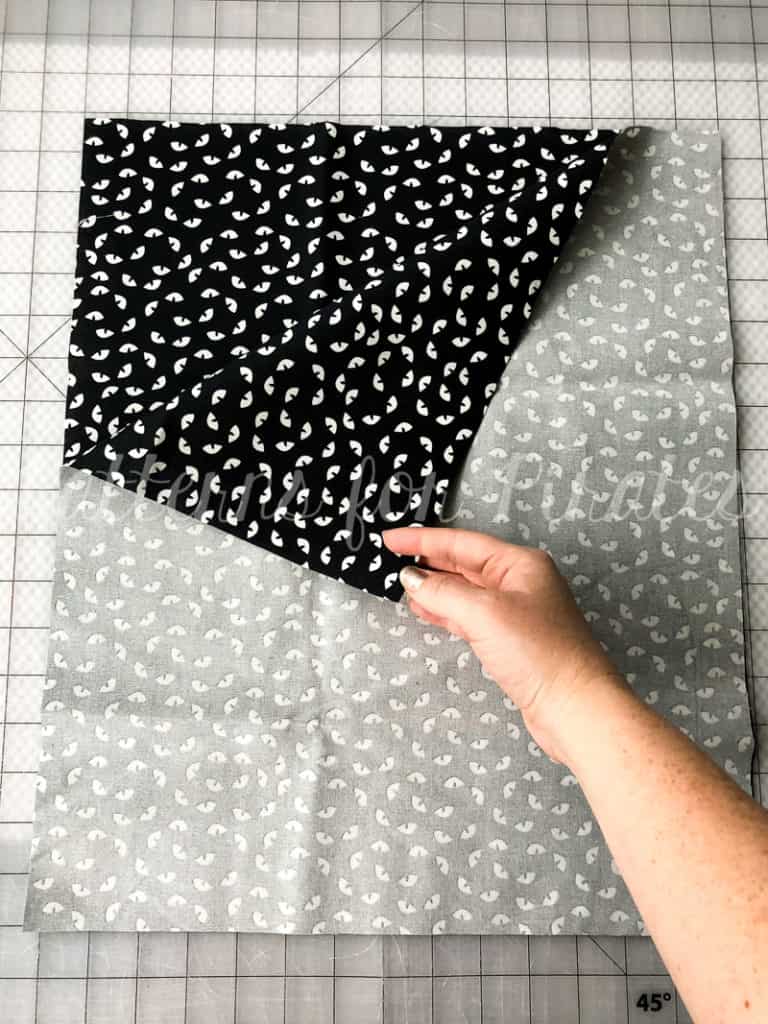
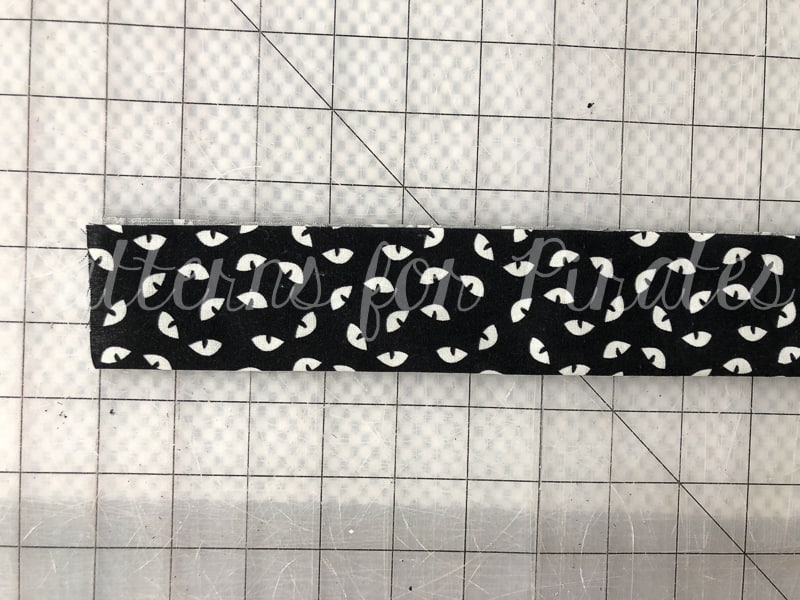
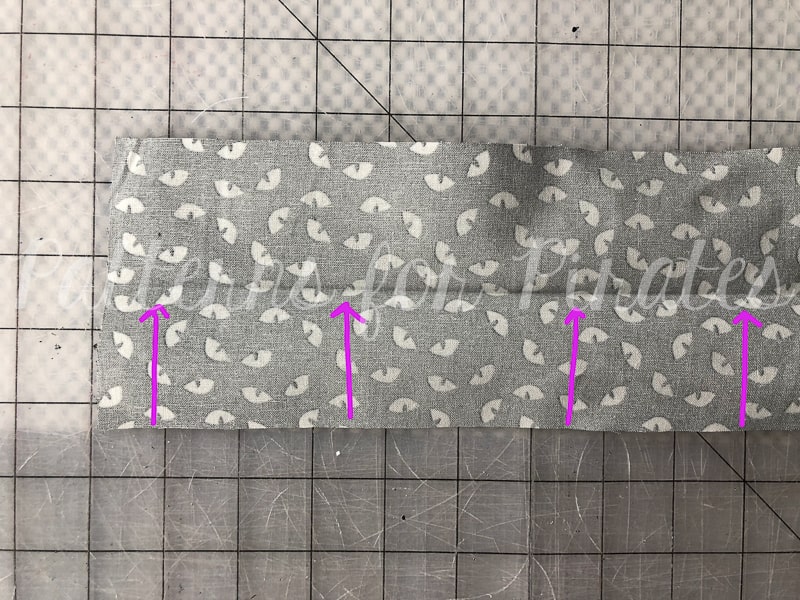
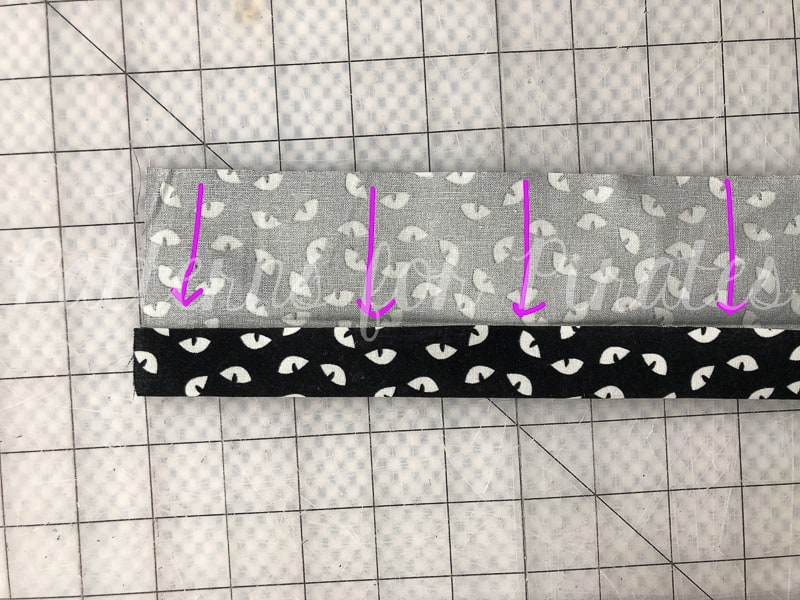
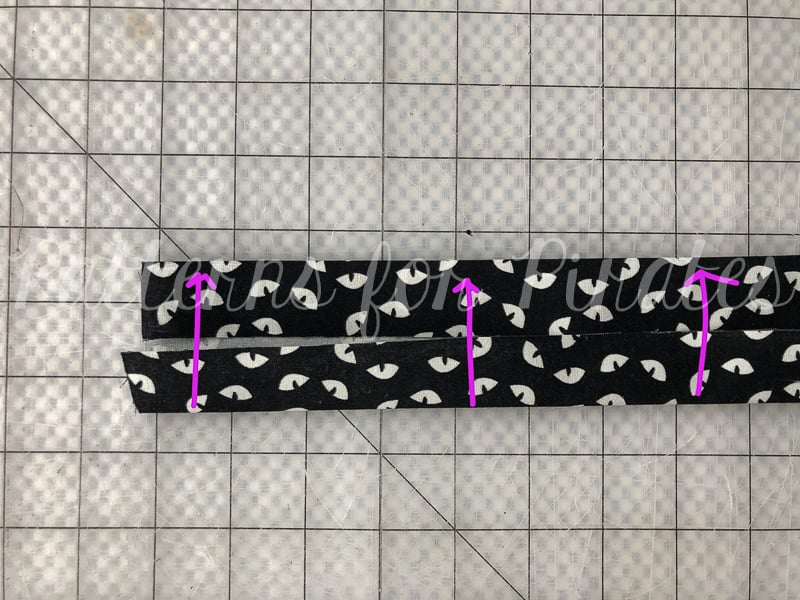
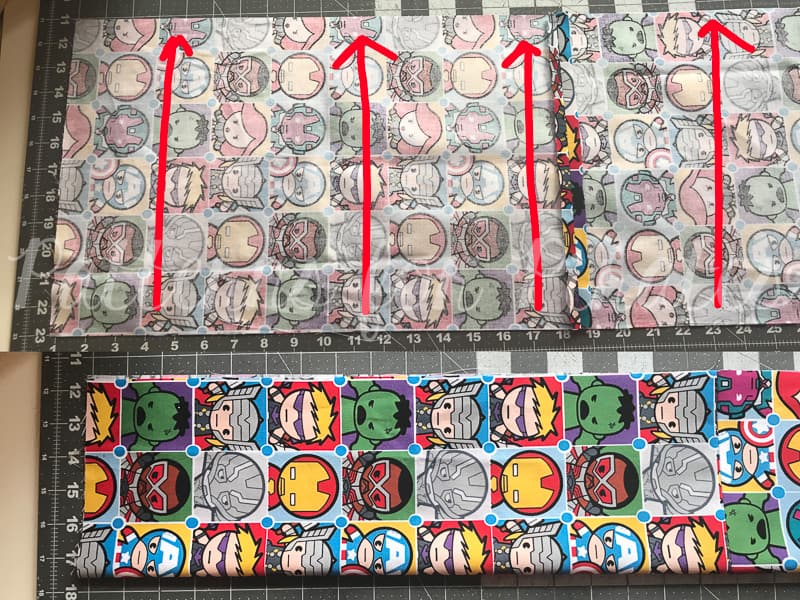
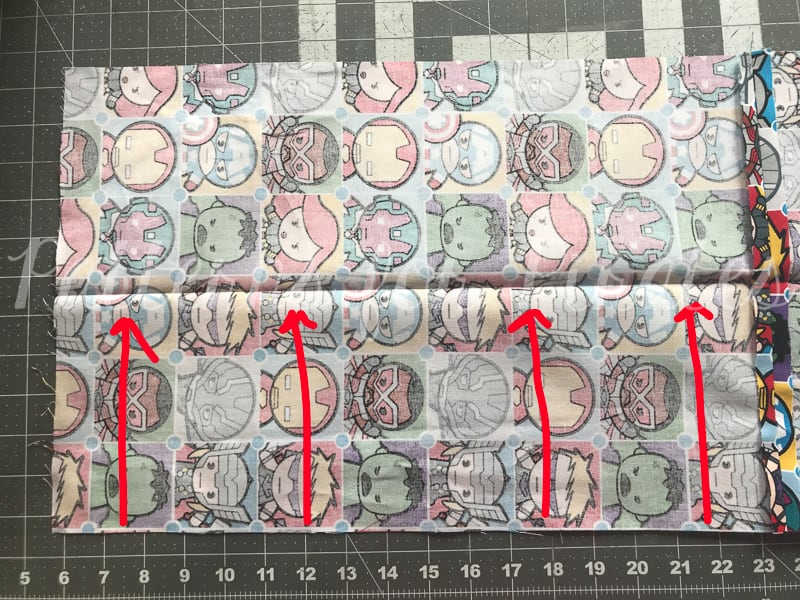
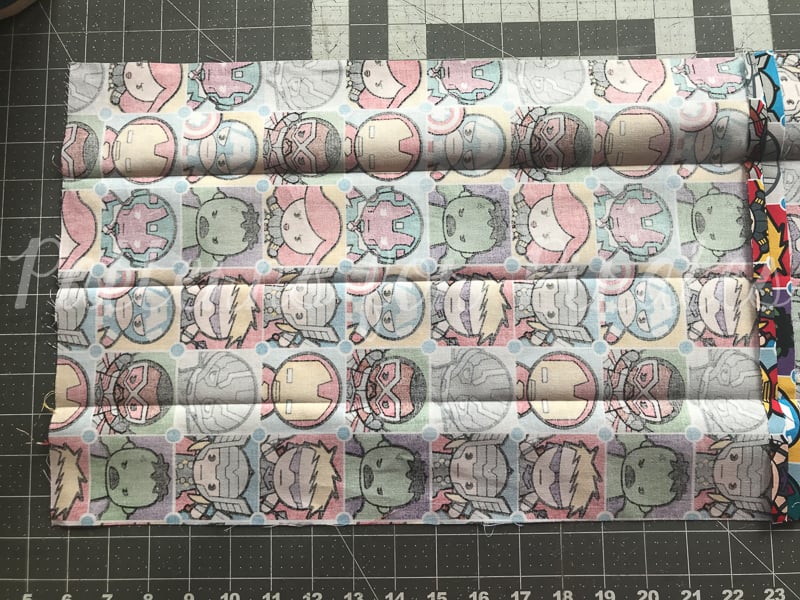
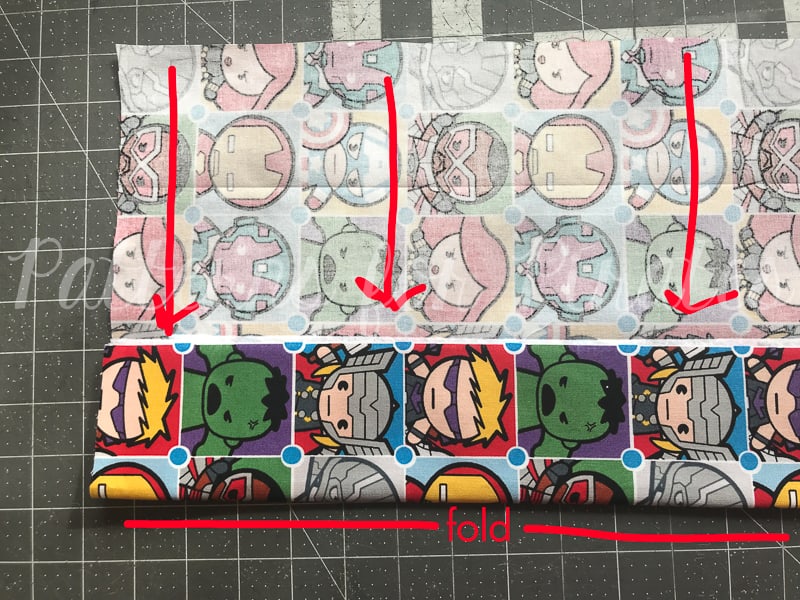
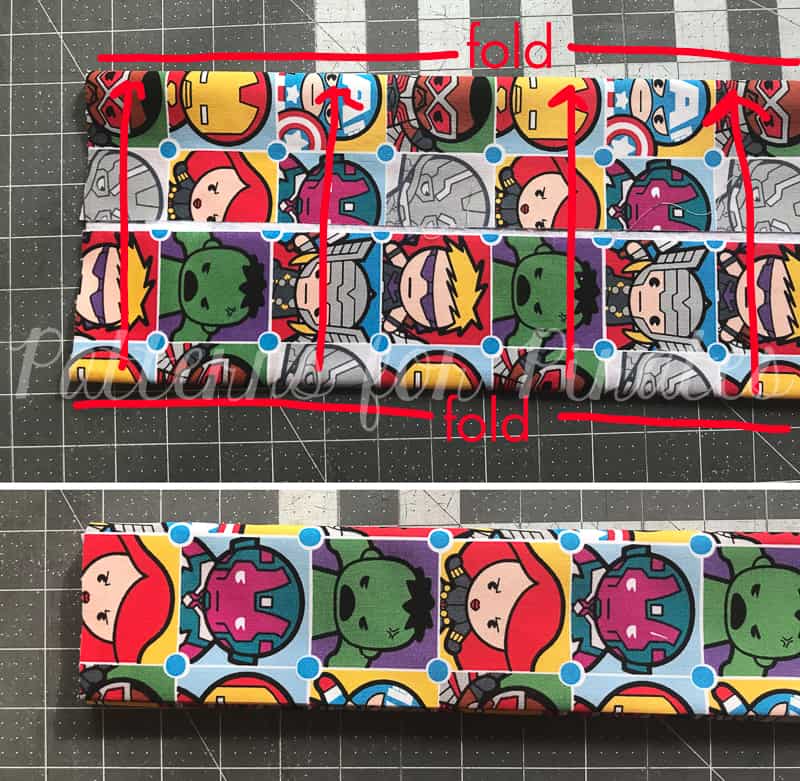
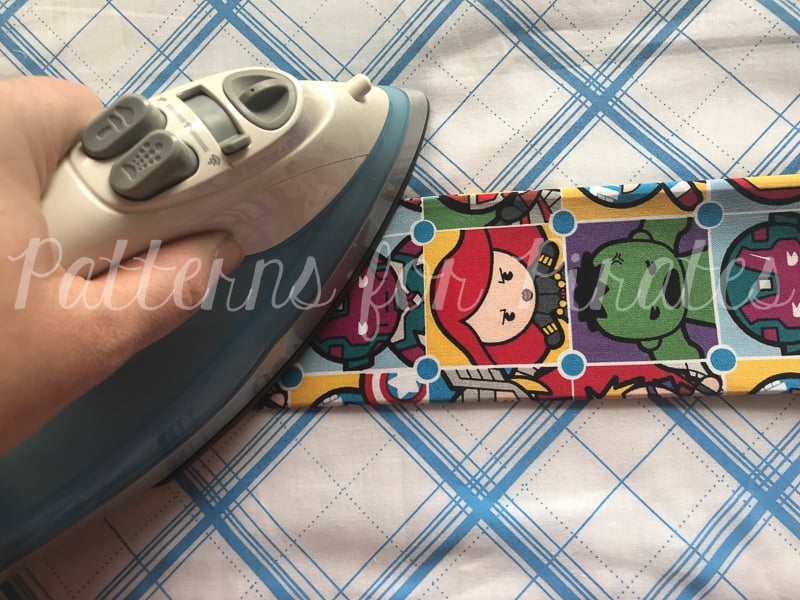
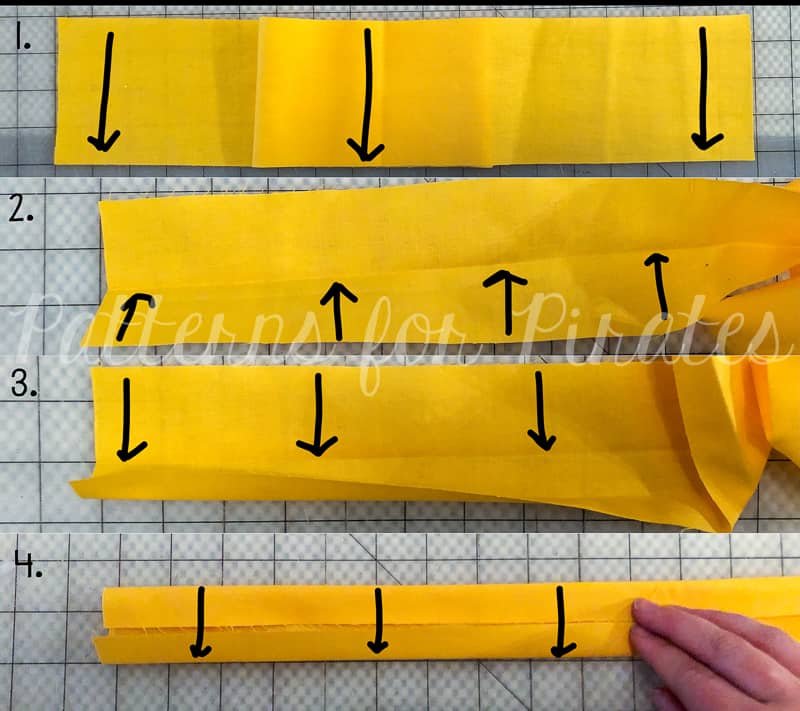
1. Fold in half, with long edges touching, wrong sides together. Press.
2. + 3. Open up, and fold each long edge into the crease you just created.
4. Fold, completely enclosing the raw edges.

Edge stitch along both long edges. Set aside.  Finished width: 3/4″.

Horn / Ear / Antler / Nose Pieces: 

*Tip: I added fusible fleece to these pieces to help them stand up better.  Some of our testers opted to fill them with a small amount of fiberfil.  Either way works!


Right sides together, sew along the outer edges using 1/4″ seam allowance. Leave the bottom open for turning.

Clip corners and allowance before turning to get a crisper edge.  Topstitch if desired.

I like to get a little funky with the unicorn horn and add some decorative stitches to it.  This also helps the horn’s stiffness.

Apply Interfacing:

Carefully trim away 1/4″ from each interfacing piece, to allow for easier turning.

Following the instructions from the manufacturer, apply interfacing to these pieces:

  • Front Main Piece
  • Main Gussett

Eyes + Closures:

I personally like to add the eyes and velcro / snaps to the front main piece before we assemble the bag.  It allows for all of the stitching or snaps to be enclosed inside of the bags, and it’s a lot easier to apply HTV to a flat surface.  You can wait until the end if you’d like!

The Fox and Reindeer’s eyes need to be a little more wide set.  And the Unicorn’s eyes work best if you apply them closer to the bottom of the bag front.

Velcro / button placement on front main piece:

  • Unicorn / Plain Bag: 2″ from the top, centered (4.5″ from either side)
  • Fox / Reindeer: 2″ from the bottom, centered

Velcro / button placement on Back Lining piece:

  • Unicorn / Plain Bag: 2″ from the top, centered (4.5″ from either side)
  • Fox / Reindeer: 1.5″ from the bottom, centered

REINDEER ONLY:

1″ from the top edge, pin and baste ears in place using 1/8″ seam allowance.

Back Main Assembly:

UNICORN ONLY: Take back main piece and mark the center along the top, straight edge.  Mark center of horn piece.

Right sides together, align and pin/clip horn in place.

Place ears on either side of horn.  **Be sure not to go outside of your seam allowance on the outer edges, or you’ll have trouble turning your bag because the ears will be stuck in the outer edges.

FOX and REINDEER ONLY:

Right sides together, place ears and antlers (not pictured) 1″ from the outer edge.

ALL ANIMAL BAGS:

Place top piece, right sides together. Stitch with 1/4″ seam allowance.

Press open, with horn, antlers and/or ears pressed toward top and seam allowance pressed down.

Follow the manufacturer directions and iron your fusible interfacing onto the back side of the back main piece.

Attaching the Gusset:

Mark middle bottom of back piece and middle of both long edges of outer gusset piece.

Right sides together, ease gusset around bottom edge of back piece.  Sew using 1/4″ seam allowance.

Repeat for front main piece, attaching right sides together to other edge of gusset.

Repeat for lining pieces. Only this time, leave 4-5″ gap in one of the lining curves, to allow for turning.

Using 1/4″ allowance, baste straps, centered, on side gusset pieces. 

Final Assembly:

With the lining piece right sides out and the main, outer bag piece wrong sides out, slide the lining inside and align entire top edge.

Sew with 1/4″ seam allowance. Clip all edges and curves for cleaner turning.

Locate the opening you’d left in the lining.

Turn bag right-side-out through opening.

Pin and sew the opening in the lining closed, using your favorite blind or ladder stitch.

Press bag.  Topstitch around top edge if desired.

Reindeer Nose:

Align the nose at the very bottom of the front flap piece.  Top stitch the entire circle, catching the flap in your stitches and affixing the nose to the flap piece.

YOU’RE FINISHED!  DO A HAPPY DANCE!

In case you needed it, here is some inspiration for the different designs sewn up by our amazing testers!

UNICORN:

REINDEER

FOX

PLAIN

I hope you love these little cuties as much as I do.  Don’t forget to share your finished projects in the Patterns for Pirates Facebook Group!  Happy Holidays, friends!

Filed Under: Free Pattern, Pattern Release 5 Comments

2018 Holiday Freebies :: Infinity Scarf with Hidden Zipper Pocket

December 2, 2018

Happy December, friends!!  It is my pleasure to be back again this year with an entire week of goodies for you.  AND THEY ARE ALL FREE!  That’s right, you are about to embark on a five day journey of free sewing patterns and tutorials.  I’m excited to get started!

Today’s freebie is a twist on a classic infinity scarf…we added a hidden, zippered pocket to it!  It’s a perfect little space to store your phone, keys, or anything that you’d like to carry with you but don’t want to need a purse or extra hand for. It’s a super quick sew and is at the top of my gift-giving list this holiday season.

Let’s get started!

Fabric Requirements: 2 yards of knit, flannel, or a light-weight woven.

You will need:
— Main Scarf Piece: 28″ W x 72″ L (can be woven or knit. If using a knit, you may need small strips of stabilizer where you’re attaching your zipper)
— 2 pocket pieces: 9″ W x 7″ L
— 9″ Zipper **You can make the pocket bigger / smaller by adjusting the size width of your pocket pieces to match the length of your zipper.

1.) With your main fabric laying RIGHT SIDE UP, lay your zipper FACING DOWNWARDS, 5″ from the edge of your fabric, along one of the long edges.

2.) Sandwich your zipper by laying a pocket piece on top, RIGHT SIDE DOWN.

3.) Pin/clip and sew along edge, using a zipper foot to get as close to zipper as you can.

4.) Flip your pocket piece up and away from the main fabric.

5.) Fold your pocket piece under the main fabric (their wrong sides should be touching now).

6.) Fold main fabric together, matching the long sides to each other.

7.) Making sure you’re still 5″ from the short edge, align the unsewn side of the zipper to the opposite long edge of your fabric. Once again, your zipper should be FACE DOWN.

8.) Sandwich your zipper by laying your other pocket piece on top, RIGHT SIDE DOWN.

9.) Pin/clip and sew along edge.

10.) For easier sewing on the next step, I like to unzip my zipper a bit, to get the pull out of the way.

11.) With fabric still RIGHT SIDES TOGETHER, sew with 1/2″ seam allowance along long edges, and outer edges of pocket.

12.) This step might feel a little tricky, but it’s really not! You’re going to want to keep your fabric inside out, while folding it in half to still have right sides together, and the short edges meeting each other. I find it easiest to stick my arm all the way inside, grabbing the opposite short end, and then pulling it toward me from the inside, being careful not to twist it. Align the short edges to each other.

13.) Stitch the raw edges together with 1/2″ seam allowance, leaving a 4-5″ opening for turning.

14.) Turn scarf right side out, pulling the entirety of the fabric through the opening you created in the last step.

15.) Pin and close up the opening with a blind stitch. You’re finished!

Here’s a little inspiration from our fabulous group of testers, in case you needed it.

As always, we love when you share what you’ve made with us.  Head over to the Patterns for Pirates Facebook group and show off the fabulous Infinity Scarf that you’ve managed to make from our freebie pattern!  Happy Holidays, friends!

**Since there was such a high amount of requests for a video tutorial, here you go!

Filed Under: Free Pattern, Pattern Release 49 Comments

Trick or Treat Bag :: Free Sewing Tutorial + Pattern!

October 28, 2018

Let’s get to it, my Pirate friends!  This my favorite time of the year: HALLOWEEN!!  It’s full of kitchy decorations, creative costumes, and lots of sewing (at least for me!) and is also the start of the holiday season.

We are all treats and no tricks this year, by giving you a quick and easy Trick or Treat Bag that you can whip up in no time for your littles — or yourself!  It doesn’t take much fabric and is a great way to finally use up all of that fun cotton woven that you keep buying while browsing the fabric store, without any actual plan of what you’re going to make with it.

This tote is meant to be made with woven (non-stretch) fabrics.  You will need a little under 3/4 Yard of the main fabric, and 1/2 Yard of the lining fabric.  This bag ends up being reversible — so if you can’t decide between fabrics (which we couldn’t at all….the prints this time of year are SO CUTE!!), you can use it one way, and then turn it inside out and use it again.  It’s like two bags in one!

Step 1: Cut 2 Main Fabric pieces and 2 Lining Pieces 18″ long x 15″ wide.  Cut 2 Straps 24″ long x 4″ wide.

Step 2: Lay main bag pieces, right sides together.

Step 3: Using 1/2″ seam allowance, sew along the side and bottom edges.

Step 4: Repeat Steps 2 + 3 with lining fabric, only this time leaving a 3-4″ opening in the middle bottom for turning.

Step 5: Trim seam allowances and corners on both main and lining pieces.  Be careful not to clip through your seams, and leave the allowance on the opening of the lining piece.  Set aside main and lining bag pieces for now.

Step 6: With one of your strap pieces, lay with wrong side facing you.  Fold in half, meeting the long edges together.  Press.

Step 7: Open up your piece and fold one of the raw edges toward the middle crease you just made.

Step 8: Repeat with the second raw edge. Press.

Step 9: Fold along middle crease, meeting both folded edges. All of your raw edges will be fully enclosed now.

Step 10: Press you strap piece.  Then edge stitch along both long, outer edges.  Repeat with second strap.

Step 11: Grab your main bag piece and turn right sides out.

Step 12: Careful not to twist your strap, pin raw edges in place, measuring 3″ from the edge of your bag.  Baste, using 1/4″ allowance.  Repeat on other side of main bag piece, using the other strap.

Step 13: With your main bag piece (with straps now basted onto it) right sides out, and lining piece wrong sides out, slide the main bag inside of the lining.

Step 14:  Align raw edges and seams, and pin in place.

Step 15: Using 1/2″ seam allowance, stitch around entire top edge of bag.

Step 16: Through the opening that we left in the bottom of the lining piece, turn your bag right sides out.

Step 17: Using your favorite stitch (I recommend doing a blind hand stitch), close the opening in the bottom of the lining piece.

Step 18: Push lining inside of the main bag piece, press, and admire your new handiwork before your littles steal it and fill it with candy this Halloween!

Happy Halloween, friends!  I’m loving all of the costume photos that have been rolling in so far.  Can’t wait to see the rest of them (hopefully with some new P4P Trick or Treat bags in tow!)

Filed Under: Free Pattern 4 Comments

2017 Holiday Freebies: DIY Camera Strap

December 7, 2017

What?  We are on day four of the 2017 Holiday Freebies already?  I hope you’re having as much fun as I am!  If you need to back and review the past three days, I can wait!

Here are some links: Slouchy Headwarmer / Emoji Pillows / Clothing Size Tags

Now that we’ve covered that, let’s get to today’s free pattern!  Sewing and photography seem to go hand-in-hand more often, because we want to share what we’ve made with our sewing community!  Why not sew yourself a sweet little strap to wear while you’re using that camera of yours?  It’s super easy to do and way more fun than using what came with your camera originally.  Let’s get to it!

Prep your pieces, you will need:

  • Pattern Piece for Vinyl Ends
  • 36″ L x 12″ W Quilting Cotton
  • 2 – 12″ cuts of nylon webbing (1/2″ or 3/8″ both work) — I used THIS
  • 2 – 1/2″ or 3/8″ sliding adjusters — I used THESE black versions as well as THESE fun colored ones!
  • 36 L x 3″ W Fusible Fleece Interfacing
  • Small scraps of Vinyl/Pleather

**If you can’t find the nylon webbing / sliding adjusters in your local fabric store, a quick trick is to buy a small dog collar from the dollar store.  They tend to have the right width strap, and usually include the adjuster on it as well.

Important: The ends of nylon wedding need to be heat sealed to prevent fraying.  Make sure to do this before sewing it to your strap pieces!

**If your fabric is directional, you will want to cut two pieces for your strap and then stitch them together. Cut two 18.5″ x 12″ pieces from your quilting cotton.

For directional fabric, place your pieces right sides together, and sew along the short edge, using 1/2″ seam allowance.

Press open your seam.

For all straps: Fold your main fabric wrong sides together, meeting the long edges to one another. Press.

Open up your piece and fold one of the raw edges toward the middle crease you just made.

Repeat with the second raw edge. Press.

If you open your piece, you’ll now have 3 creases, spread evenly across four total sections.

On one of the middle sections, following the directions provided by the manufacturer, iron your fusible fleece to your strap piece.

We will be refolding the strap in the same method as before. Take one of the raw edges and fold it toward the middle crease.

Repeat with other raw edge.

Fold along middle crease, meeting both folded edges. All of your raw edges will be fully enclosed now.

Press, press, press.

I like to clip/pin my outer edges together, to make sure they’ll align properly when I go to stitch them. Straight stitch along the entire edge you just pinned, getting as close to the edge as you can.

This part is up to you, and how fancy you want to get with your quilting. I like to run an edge stitch along the other long edge. And then three even lines across the rest of the strap. You can stitch as much or as little as you’d like!

Take your nylon strap and overlap it 1.5″ from the edge of your strap, aligning it directly in the center of the strap.

Pin and repeat for the opposite end.

Using a wide zig zag stitch, secure your nylon strap to the end.

For the vinyl pieces, I recommend to only cut one actual piece — and to have an oversized rectangle for the other. It’s easier than trying to get them to line up perfectly. Especially since vinyl can be fussy to topstitch.

I like to run a line of fabric glue at the top of the vinyl backside. It helps keep it in place when sewing.

Two inches up from the bottom of your strap piece, lay out one of the vinyl pieces. The vinyl should be slightly wider than your strap.

Flip over your strap.

Throw another line of glue on the edge of your vinyl square.

Place it 2″ up from the bottom of your strap.

Flip your piece back over and stitch your vinyl on. This is the path I take and it allows for a continuous stitch. You can take whatever path you want. 😉

I HIGHLY recommend using a teflon foot for this. Vinyl can be a huge brat. I know they carry them at JoAnn Fabrics, or you can snag one on Amazon.

Finished stitches.

Trim the vinyl to match your other pieces.

Be careful not to cut off your nylon strap. Just tuck it out of the way when you’re trimming.

Take your slider.

Slide it onto your strap.

Put the cord in from the bottom-up on your camera.

Give yourself a little slack.

Run the cord back through the bottom and secure the strap to your camera. Easy peasy!


I am SO EXCITED to see your new, stylin’ camera straps!  I’ve been using my me-made strap for years now (so has my hubby) and we get compliments on it all the time.  I’m betting you will too!  Please, if you do make one for yourself, share it with us in the Patterns for Pirates Facebook Group!

**Also, as a quick note, there are some affiliate links scattered within this post.  I make a small commission for purchases made through those links, but I only link products that I’ve used and actually recommend myself.

Filed Under: Free Pattern 2 Comments

50K Fan Celebration :: PegLegs Update + Re-Release!

April 17, 2017


We are celebrating reaching 50K fans in our Facebook group!  To say the least, it is unbelievable that I have added so many ladies into the tiny group it started from.  I’m so honored to help each and every member learn a little more about sewing.  It makes my heart so happy to see posts about first time sews and the community answering questions with nothing but a kind heart.  I love the P4P group so much! So, we tried to think of something AMAZING to say thank you for supporting us!  To make it a party, our beloved PegLegs pattern just got an update AND some new add-ons.

The Peg Legs original pattern has  gotten more reviews and feedback than any other P4P pattern hands down!  So, naturally we took that feedback and tweaked them slightly.  We also updated them to include the newest features P4P offers: layers feature, as well as A0 and International print options.  Just like before, we have four different length options (ankle, capri, bike and shortie).  *If you already have the Peg Legs in your account you will simple need to redownload them to have the new updated files.

We’ve also added a different rise option, for those of you who like a little higher waist.  You can choose from high AND low/mid rises for your perfect leggings fit. The low/mid rise is the same as the original peg legs.

Now to really bring the celebration up a notch– the Add Ons! But what do the add-ons include?  So many things!
We are giving you color blocking options, pockets (in the waistband AND along the side panel), a contoured high waistband, and a gusset.  All extra options that you can mix-match to your heart’s content.

And, for all of you gorgeous pregnant mommas: a maternity add-on!  You can take the basic Peg Legs pattern and add an under belly, under belly v, or an over belly waistband for your new favorite maternity wear.

We also updated all the Freebies to NO CODES NEEDED.  We loved having everyone join the FB group and amazing community it has built, but we want them to be easy for everyone to get their hands on too! So, we hope everyone will still join the support group as well as enjoy the ease of grabbing the freebies with no codes 🙂

Before you go running to your machine to sew up your own leggings, make sure to read our PegLegs 101 blog post.  This way, you’ll have all the the information you’ll need to make the perfect pair before you even cut into your gorgeous fabric.

But wait, there’s more!  After any good party is an after-party.  We are taking it one step further and sharing some easy hacks that’ll bring even more flavor to your favorite leggings pattern!

We hope you check them out, make your new favorite pair of leggings, and know that we appreciate every single one of you amazing sewing guys and gals!

Here are our hacks / tutorials / latest tricks:

*****These will be made live as we post them throughout the next week! *****

Lace Waistband Alternative | Drawstring Waistband Tutorial
Exposed Elastic Waistband | Stirrup Pant Hack
Ruched Ankles Adjustment | Decorative Topstitching Tutorial
Ruched Side Panel Hack

Still want more?!?! Join us for our Peg Legs Sew-A-Long!

And of course one LAST thing to celebrate reaching 50.000 FB members is a SITE WIDE SALE! Enjoy 30%off your total purchase with coupon code: “50ksale” now through April 25th (ends 11:59PM the night of the 25th US Central Time Zone). *Bundle Discounts will not work with site wide sale code.

Thank you for giving this little work from home mama the chance to do what she loves! I hope each and everyone of you enjoys the updated pattern, the add ons, the hacks, the sew-a-long and the site wide sale 🙂

<3 Judy

Filed Under: Announcement, Free Pattern, Pattern Release, Sew-A-Long 18 Comments

  • « Previous Page
  • 1
  • 2

Featured Patterns

  • Mae Top - Bundle Mae Top - Bundle $20.00 Original price was: $20.00.$18.00Current price is: $18.00.
  • Mae Bottom - Bundle Mae Bottom - Bundle $20.00 Original price was: $20.00.$18.00Current price is: $18.00.
  • Loosey Goosey - Bundle Loosey Goosey - Bundle $20.00
  • Bacall Bodysuit Bacall Bodysuit $12.00
  • Privacy Policy
  • Refund Policy
  • Affliliate Program
  • Contact Us
  • About

Copyright © 2025 Patterns for Pirates

Copyright © 2025 · Genesis Framework · WordPress · Log in