Patterns for Pirates

P4P stylish, modern, wearable patterns

  • Home
  • Blog
    • Frequently Asked Questions
    • Pattern Releases
      • Free Patterns
    • P4P University
      • Fitting
      • Sewing with Stretch, Knit Fabrics
      • Sewing with Woven Fabrics
      • Sewing Machines
    • Sew-A-Longs
    • Fabric for Pirates
    • Pattern Hacks
    • Announcement
      • Blog Tours
      • Contest/Giveaway
  • Shop
  • Bundle Discounts
  • Gift Cards
  • My Account
  • Cart

LL – easy hacks

July 20, 2017

In true Pirate fashion we could not have let this double release go by without showing you some easy but fun hacks for the Little Loungers and Linen Loungers. Erinn will start you off with an adorable bias binding hack for the curved hem shorts.

…..

Bias Binding curved hem

Adding bias bindings to the hemline of the curved shorts is a quick and easy way to create an entirely different look. One of the things that I love most about this look is that it’s a great way to add a pop of contrasting or coordinating fabrics.

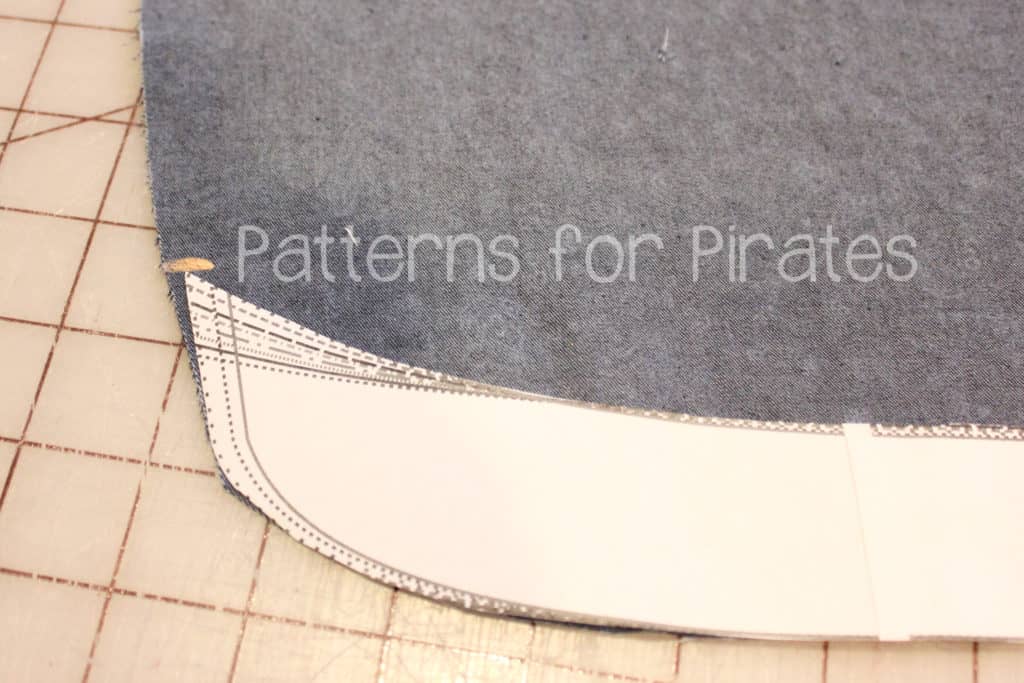
To create this look, cut out your pattern pieces as you would per the pattern. The only additional thing you will need are your bindings. For mine, I cut them 2″ wide by a length that was longer than the hemline. As you can see below, I used the curved pattern pieces and marked the top edge. I will connect my bias binding pieces up to this marking.

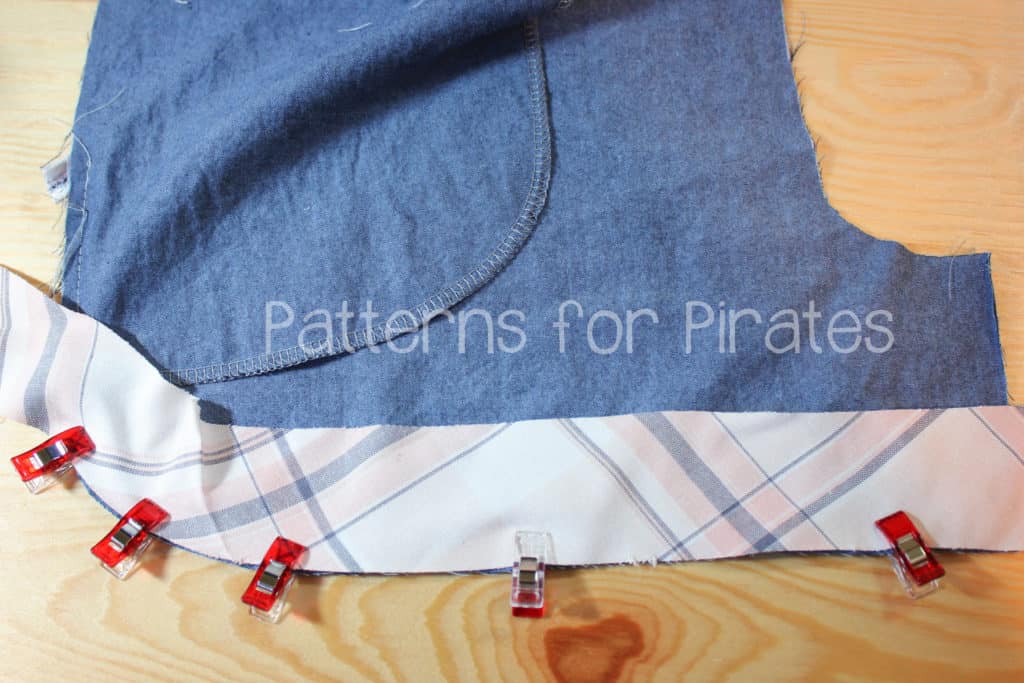
If you are attaching pockets, you can complete everything through these steps. Before sewing up the inseam and sides, you will want to complete your bindings along the curves. Place your shorts facing down and bias binding pieces face down and then gently ease them along the curves. You will want to pin/clip this in place. As you can see, my pieces are longer than the edges, but these will be trimmed later. Attach with a 1/2″ seam allowance, then clip into seam allowance along curve.

Once you’ve attached your binding, press binding piece and seam up. Press bias binding piece to align with top edge, then press again as you fold binding over (these are the same steps as were completed on pockets).  Edge stitch along folded edge and repeat on the other three hemlines.
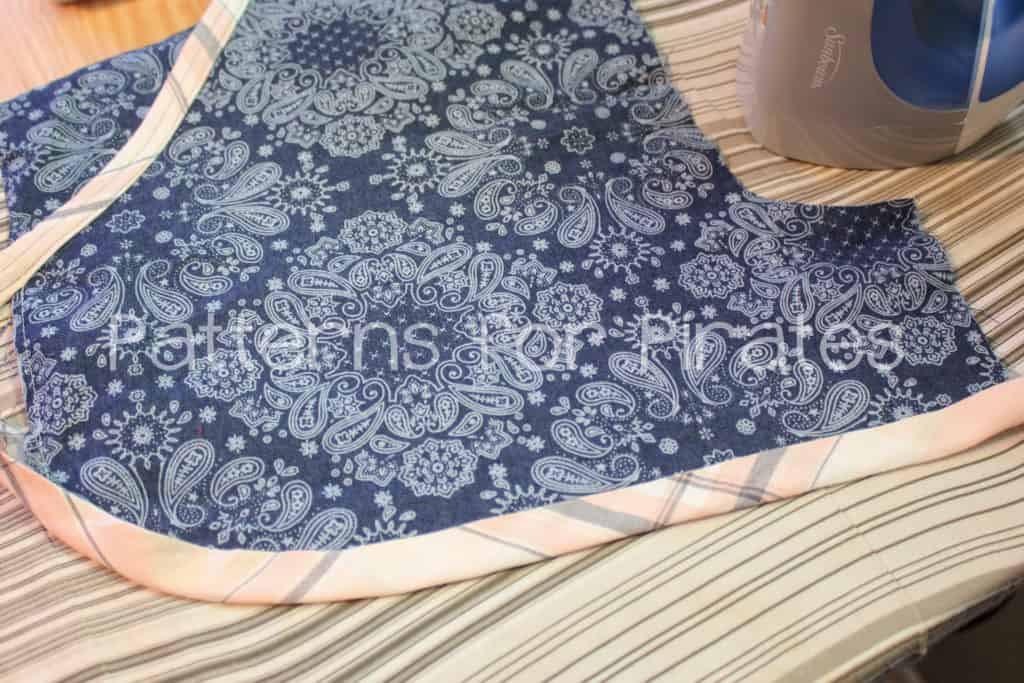
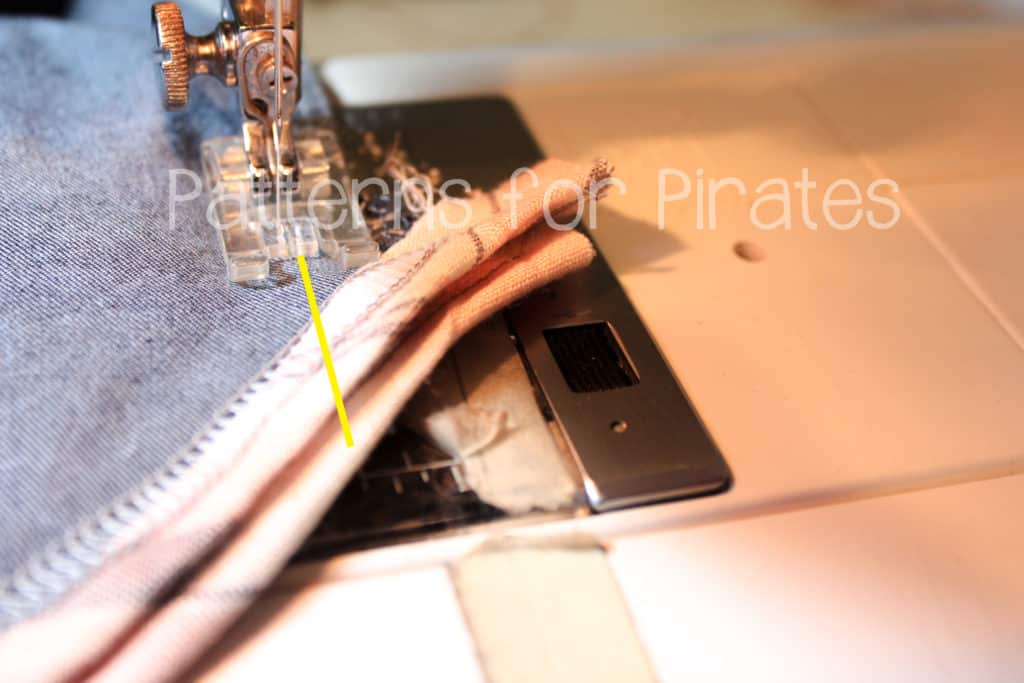
Once you’ve attached all bias bindings, you will assembly your pattern as directed. When reaching the curved seam and inseam, you will want to make sure to use a straight stitch for the last few inches to create a cleaner finish (With wovens, it is advised to use a straight stitch first and then go back over with a serger if desired. If doing so, end your serged section a few inches before your straight stitch to help create that cleaner look). Trim any bias binding pieces that might be longer than your seam allowance.


…..

Cuffed capri pants

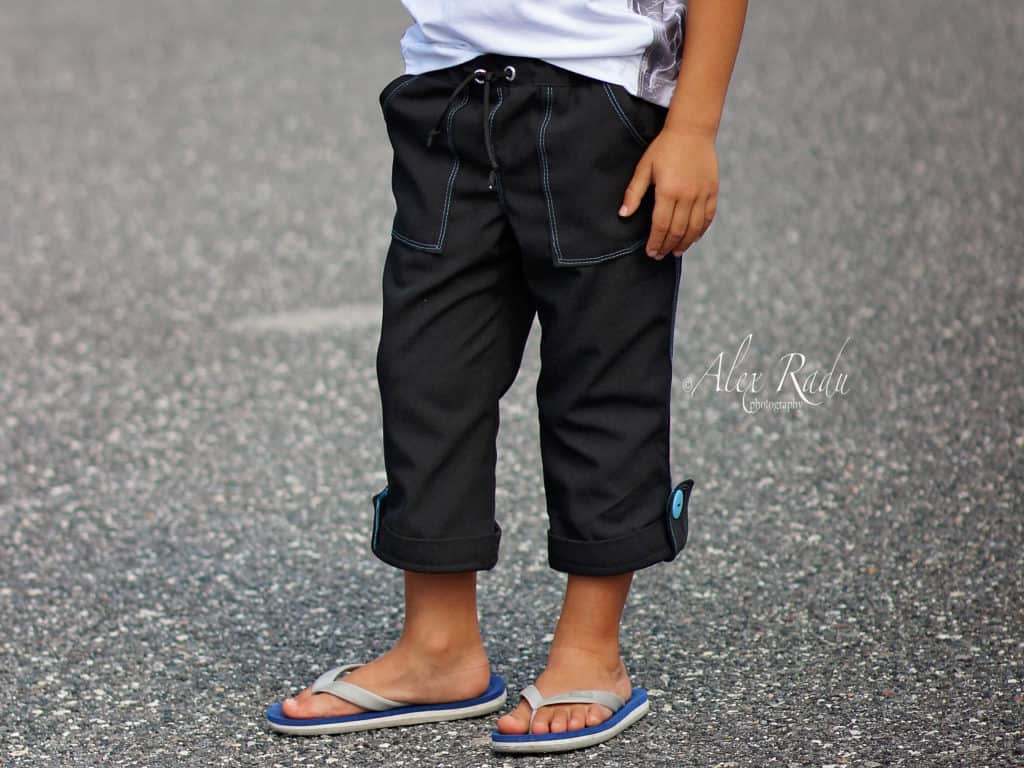
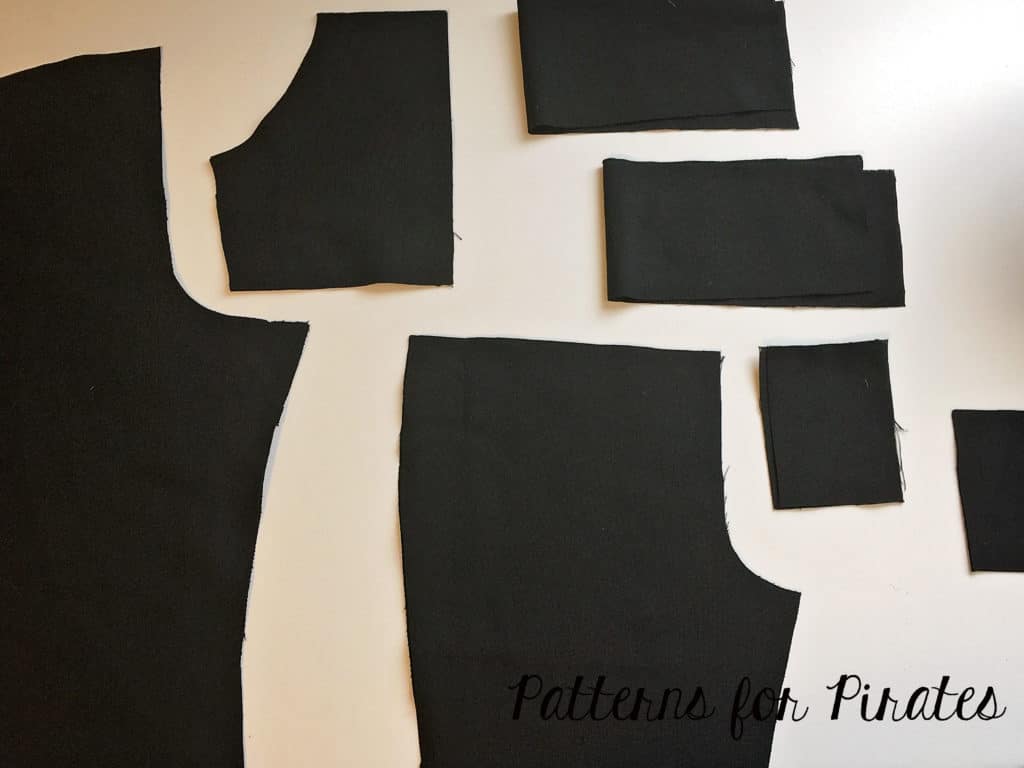
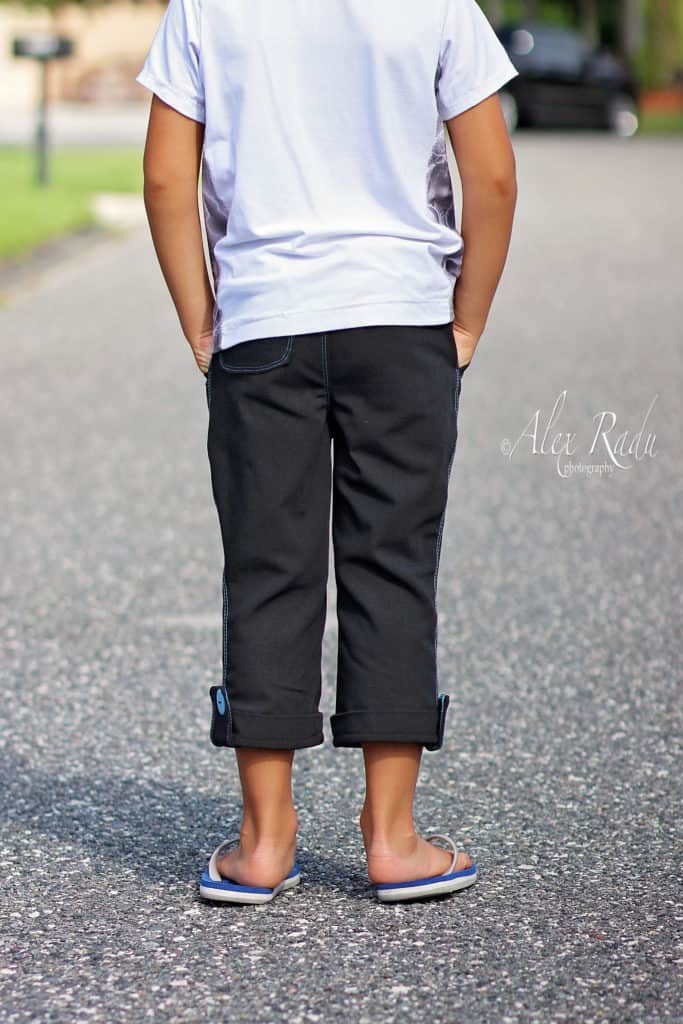
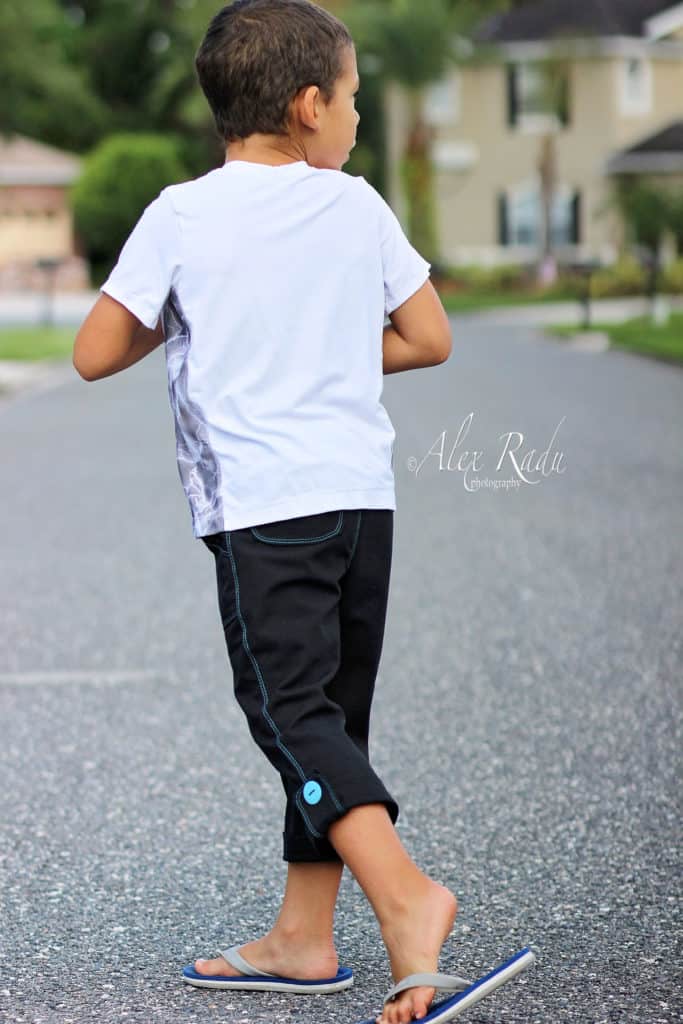
Next I will show you how easy it is to add  cuffs to the capri pants. The patterns include a cuff option for the short so we will use the same tutorial techniques. Start by printing the pattern in your desired size. I made a size 6 Little Loungers with patch pocket and elastic waistband.

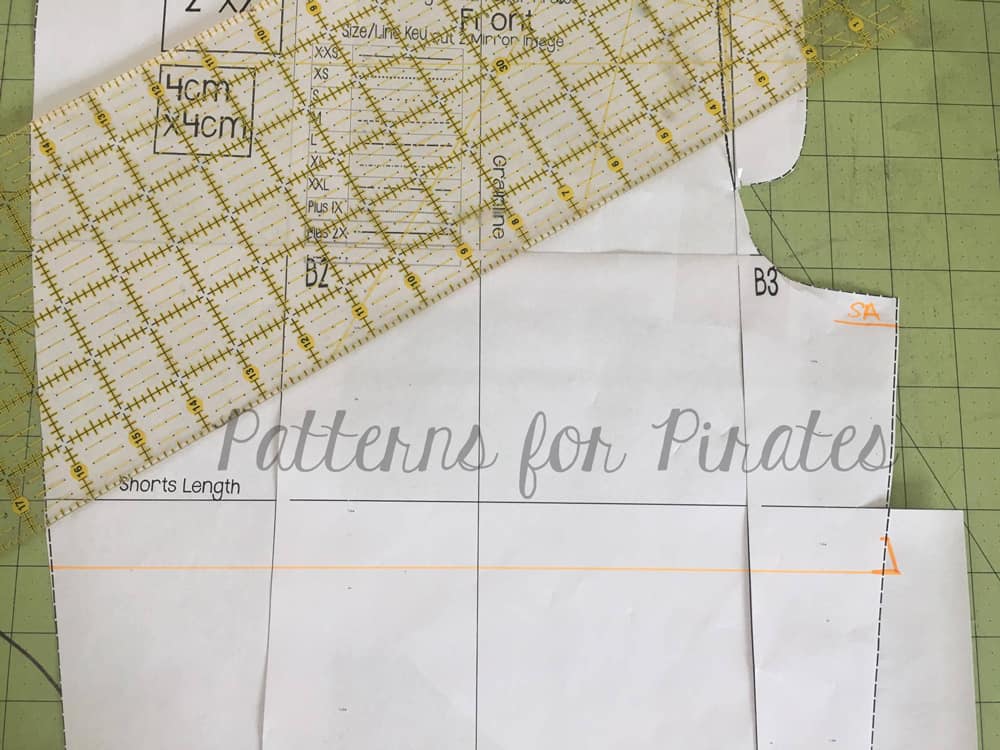
There are two changes you will need to do to the original pattern. You must cut the capri length 1 inch shorter than the cut line for both the front and back pieces. We do that because we won’t be hemming anymore, we will be adding the cuffs. That brings me to the second change you’ll need to make. The cuffs in the pattern are drafted to fit 1:1 ratio to the shorts leg opening. The capri leg opening is smaller so we will need to shorten the width of the cuff. How much you shorten the width will vary for each size. The length of the cuff will remain the same.

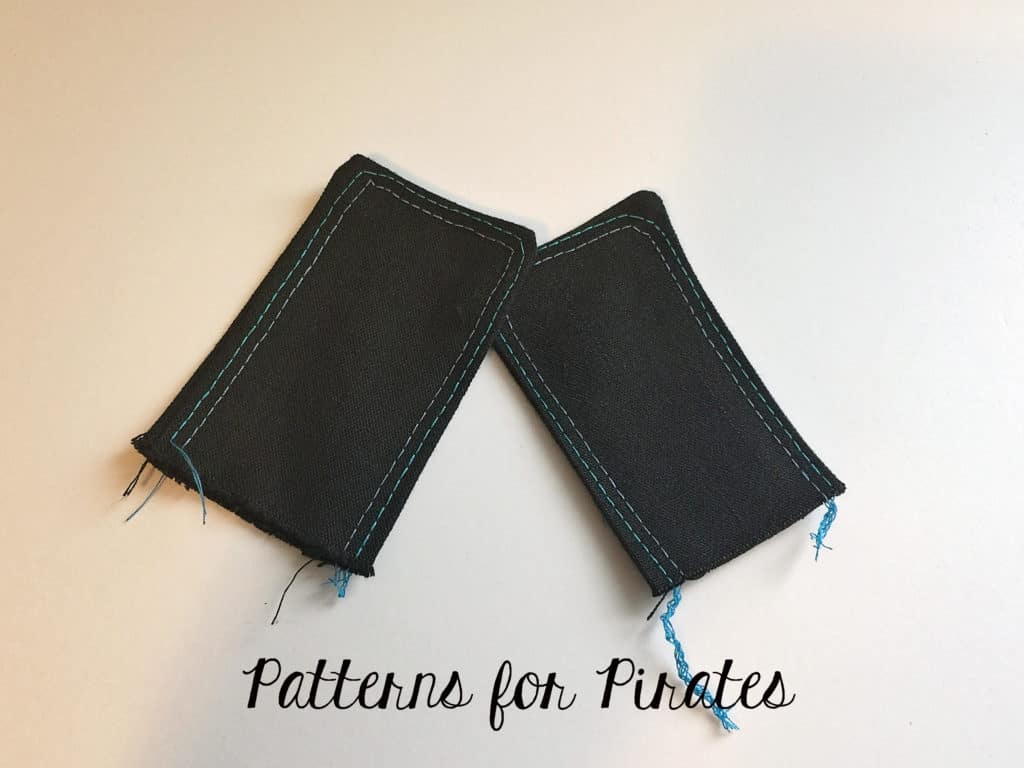
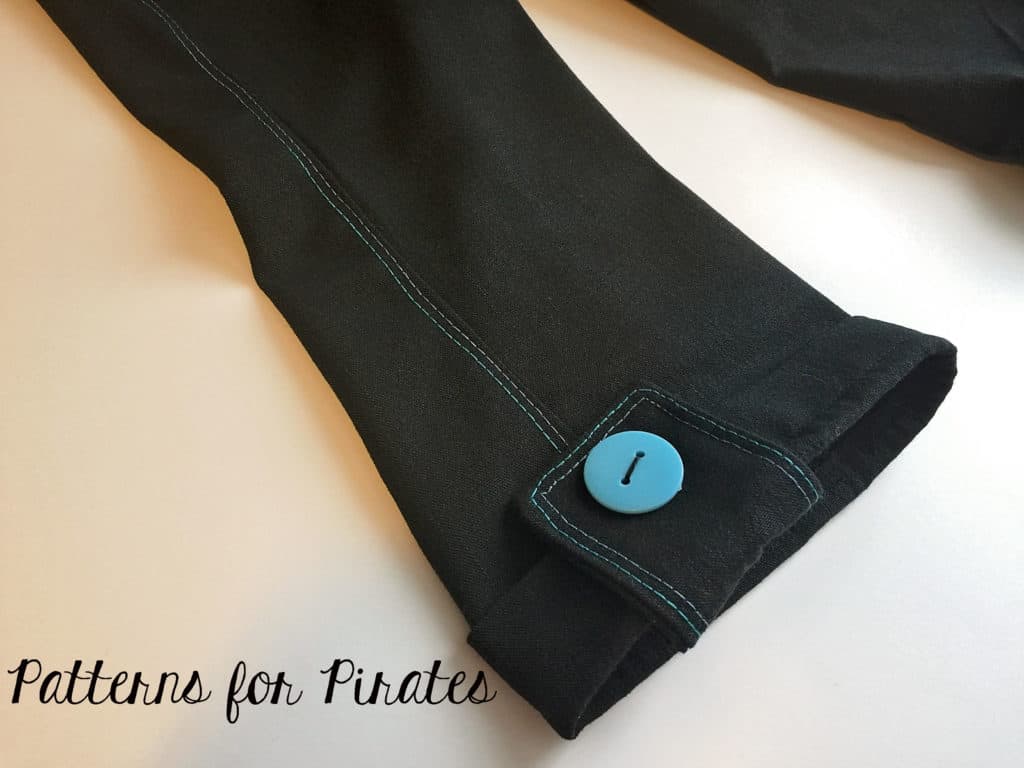
Don’t forget to cut and attach the button tabs too! They add such a cute touch to the capris!

Sew the pants as per the tutorial. Easy peasy! Don’t be afraid to add some detail stitching to the button tabs or the pockets! I used my coverstitch to add a touch of blue but you can certainly use a twin needle or your preferred decorative stitches.

If you love the look of the cuff but prefer the bermuda length you can certainly apply the same principals and created a cuffed bermuda linen lounger or little lounger…the sky’s the limit! 🙂


…..

 Hemmed and lined shorts

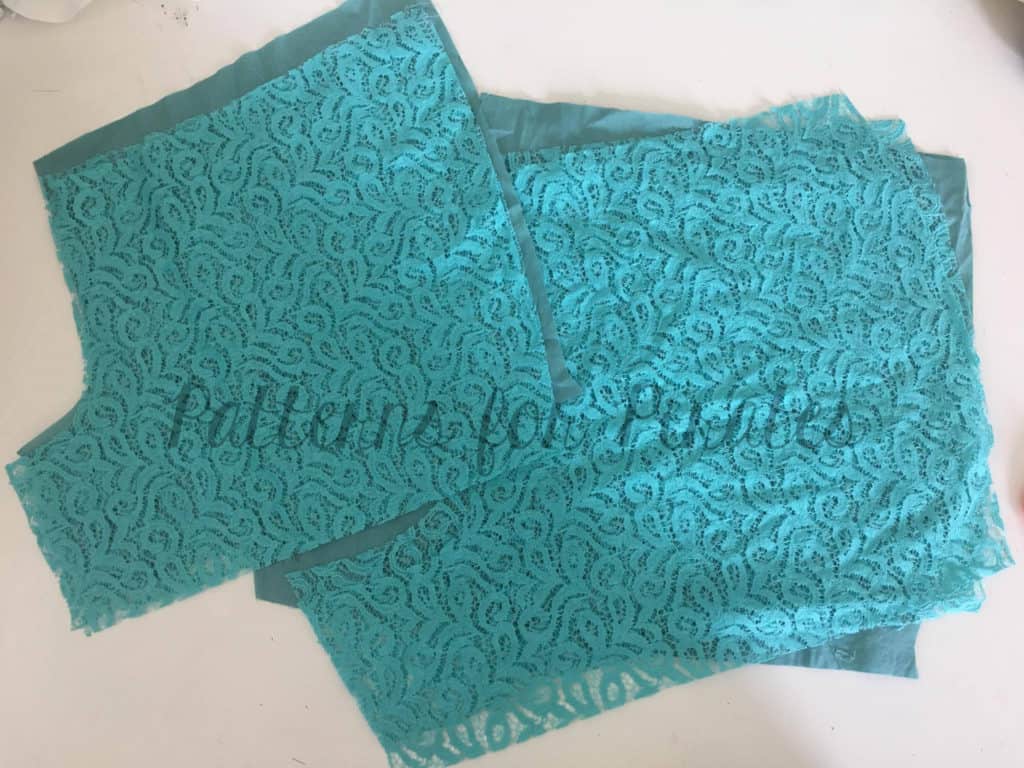
We always like to mix up our finishing options to give you a wide variety that you can apply to any pattern so we went with a cuffed or curved hem facing for the shorts this time.  If you’ve been following P4P for awhile, you’ll notice Judy loves some short shorts 😉 but that may not be your  preference.  I’m going to show you how to lengthen your inseam and do a simple hemmed edge.  I also wanted to use this gorgeous embroidered lace so will give some insight on how to line them.

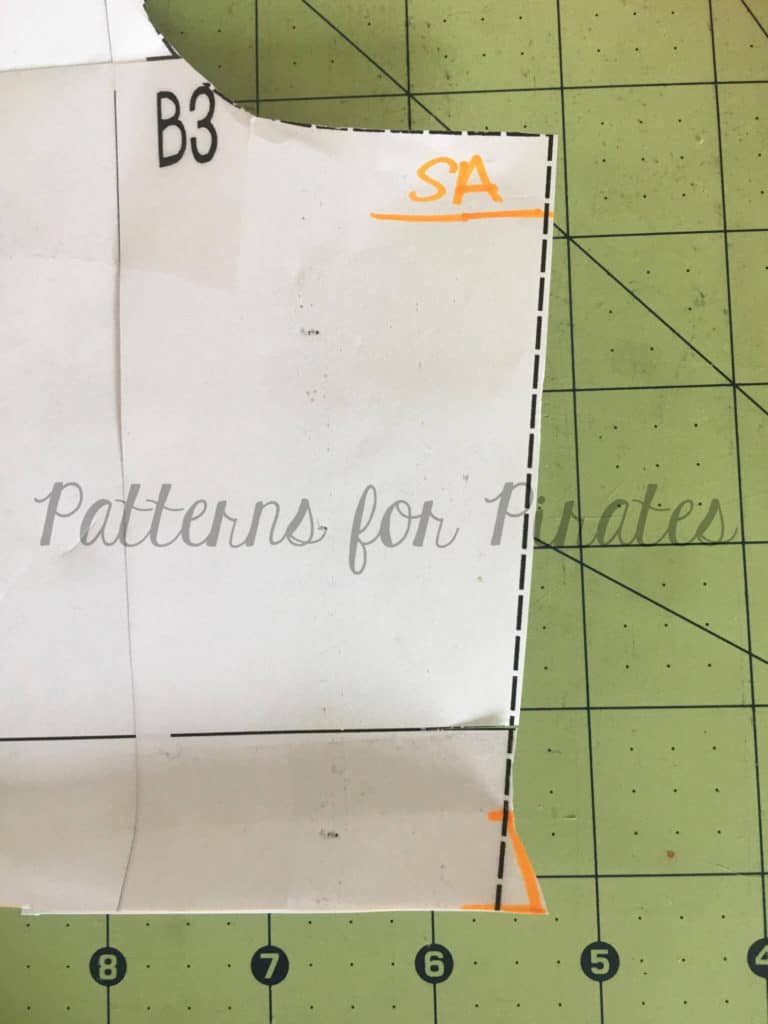
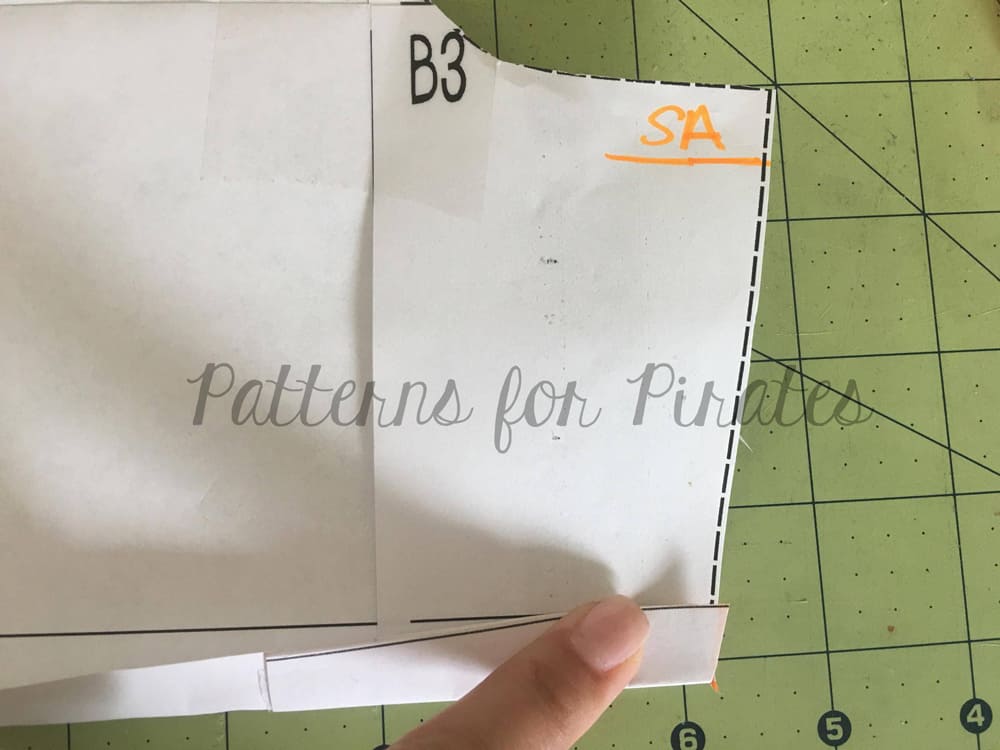
First, decide what you would like  your finished inseam length to be.  The current inseam finishes at 2.5″.  For my finished length I went with 3.5″.  Decide the length of your preferred hem (I did 1/2″) and add this to your desired inseam length.  Measure and transfer to your pattern.  Don’t forget all seam allowances are 1/2″ so your total inseam on the pattern should be 1/2″ longer.  Example for my 3.5″ finished inseam: 1/2″ seam allowance at the crotch curve + 3.5″ inseam length + .5″ hem allowance = 4.5″ total inseam.

Now that you have adjusted your inseam length we will make our hem gauge for the hem.  You’ll notice these outward notches on other cutlines (bermuda) as well as on sleeves hems.  It may look a little funny, but it actually serves a purpose.  Cutting the outward notch will allow the hem to lay flat once folded.  The angle of the gauge should be a mirror image of the seam just above it so that when its turned under it will lay flush.  Again, my hem allowance is 1/2″, if you choose to do a wider hem, you will want to extend your hem gauge to match the same length of your hem allowance.


Proceed to cut your pattern and construct as instructed in the tutorial.  To make a lined pair, cut every piece from both your main and lining fabric.  Lay your main fabric on top of your lining piece (right sides up) and construct as usual, treating them as one piece.

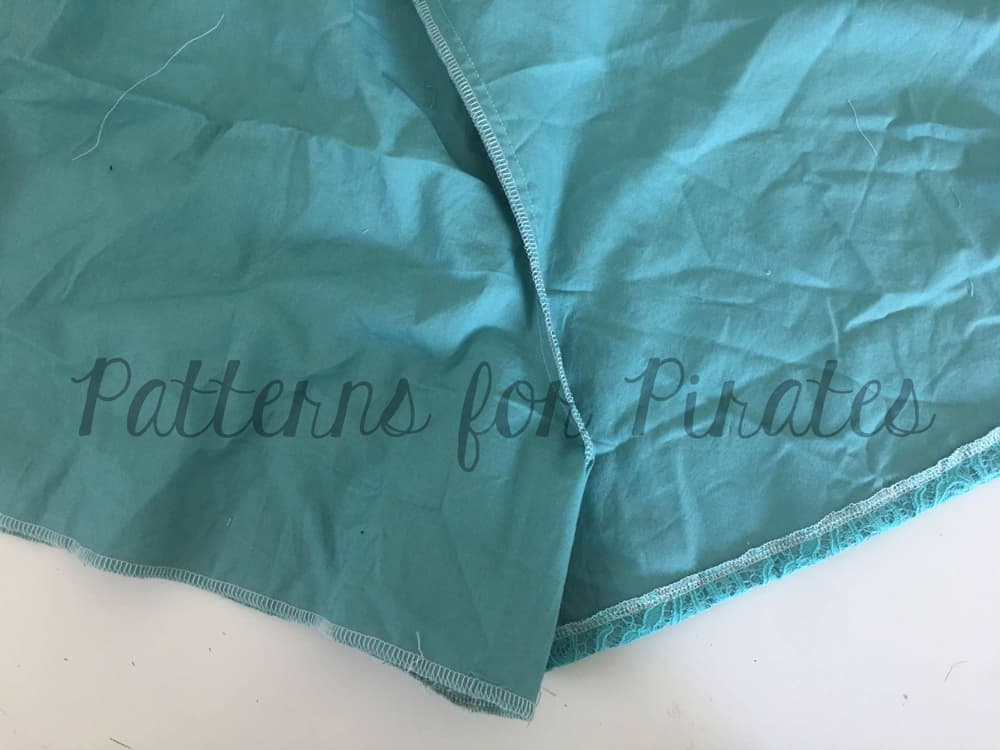
To hem, I serged both the main and lining fabric together to finish the edge . Then turned and top-stitched.  Easy right?


You can also line the shorts by treating your lining and main fabric as separate items.  So construct a main short and lining short then slip them inside one another and attach your waistband to both the lining and the main.  I chose to it the other way since I would be hemming them together anyway.


…..

Fully Enclosed Seams on Cuffed Shorts

When it comes to seams on my pants, I tend to gravitate toward wanting to enclose all of them.  It gives a nicer, neater look to your pant, and just feels more “handmade” than “homemade” to me.  The Loungers tutorial already tells you how to enclose the waistband on your pants, but what if you wanted to enclose the cuff hems too?

Here’s a quick rundown of how to make that happen:

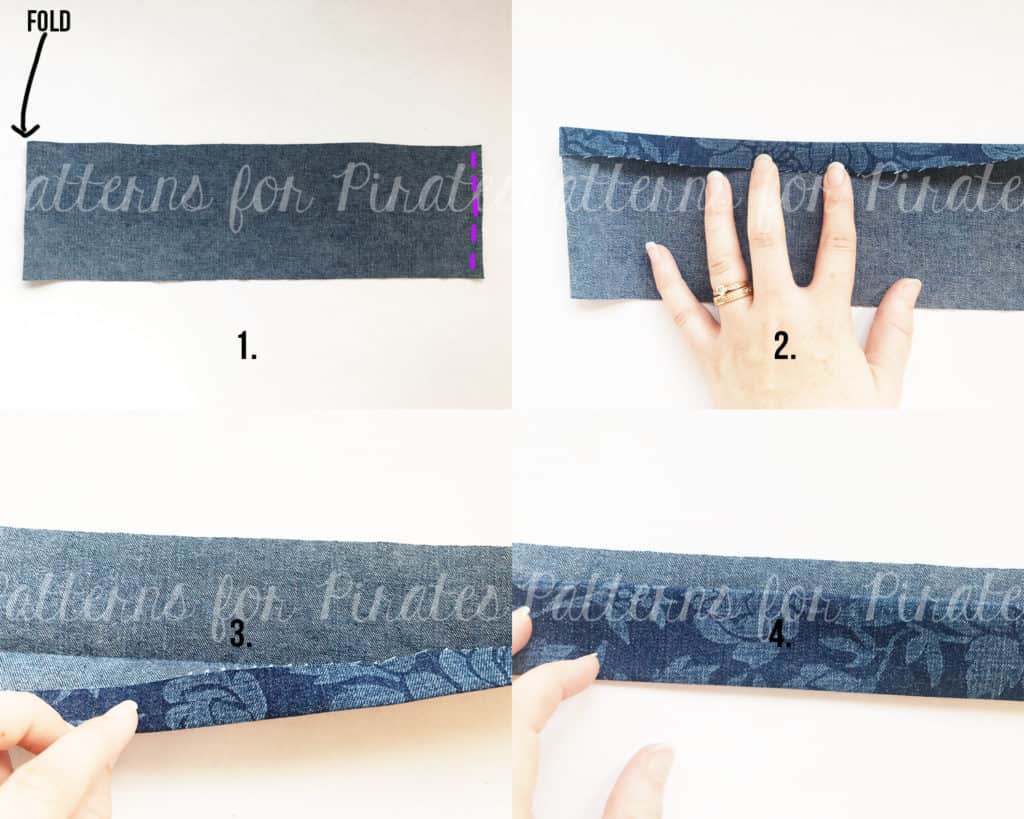
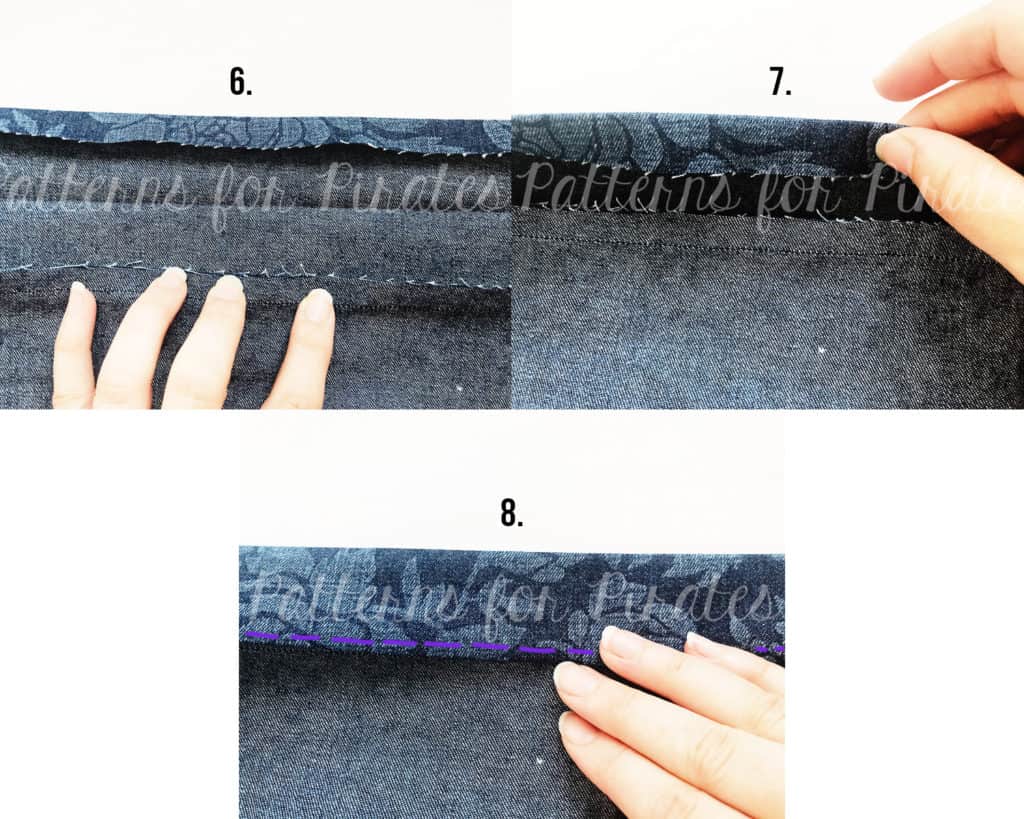
  1. Prepare your cuff as the pattern states.  Right sides together, fold piece in half and stitch along unfolded edge.
  2. Working from the wrong side of the fabric, fold and press 1/2″ on one of the long edges of entire cuff piece.
  3. With right sides together, fold and press your cuff piece, leaving 1/2″ seam allowance at the top edge.
  4. Press, press, press.

5. With your pant leg piece right side up, place your cuff piece on top (pinning carefully and aligning all of your seams.  Stitch at a 1/2″ seam allowance.

6. Flip your fabric over so you’re looking at the wrong side of your pant leg.  Open up your cuff piece and press the raw edges away from the pant leg, toward your cuff.
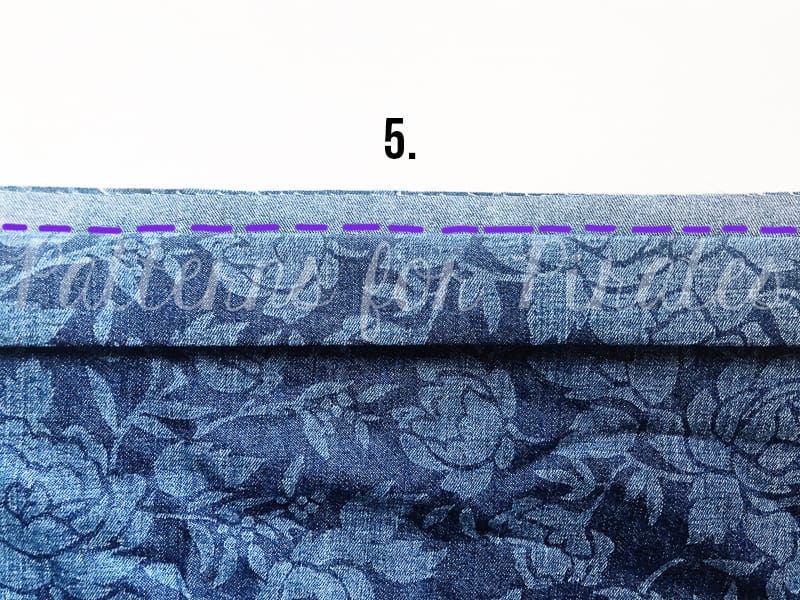
7. Using those beautifully pressed lines that you created for yourself back in steps 2-4, fold your cuff piece so it encloses all of your raw edges.
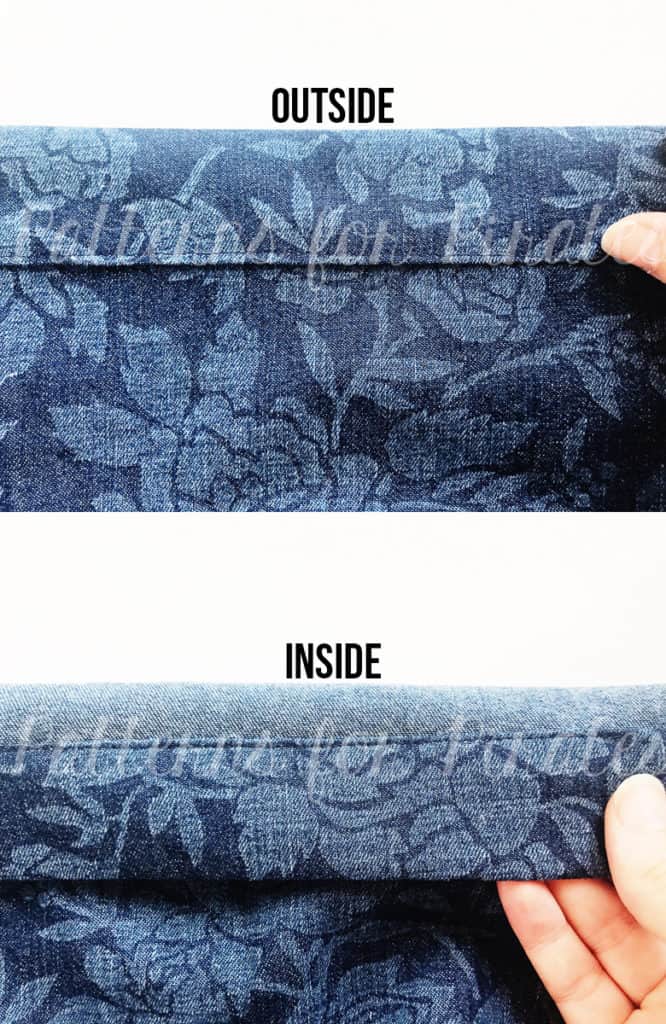
8. Press and edge stitch.

You now have a beautifully enclosed hem on your pant leg!  Do a small happy dance, pat yourself on the back, and then repeat the steps for your other cuff.

(I didn’t have a chance to grab photos in my new shorts made from the tutorial yet, but I used that same method on the short pictured below and I LOVE them!  You will too!)


Use one of these hacks?  Be sure to hop on over to the Facebook Group and share your Linen and Little Loungers love. 🙂

Filed Under: Pattern Hacks, Uncategorized 1 Comment

Favorite Tee | Easy Pattern Hacks

April 11, 2017


Lace Up V-Neck:

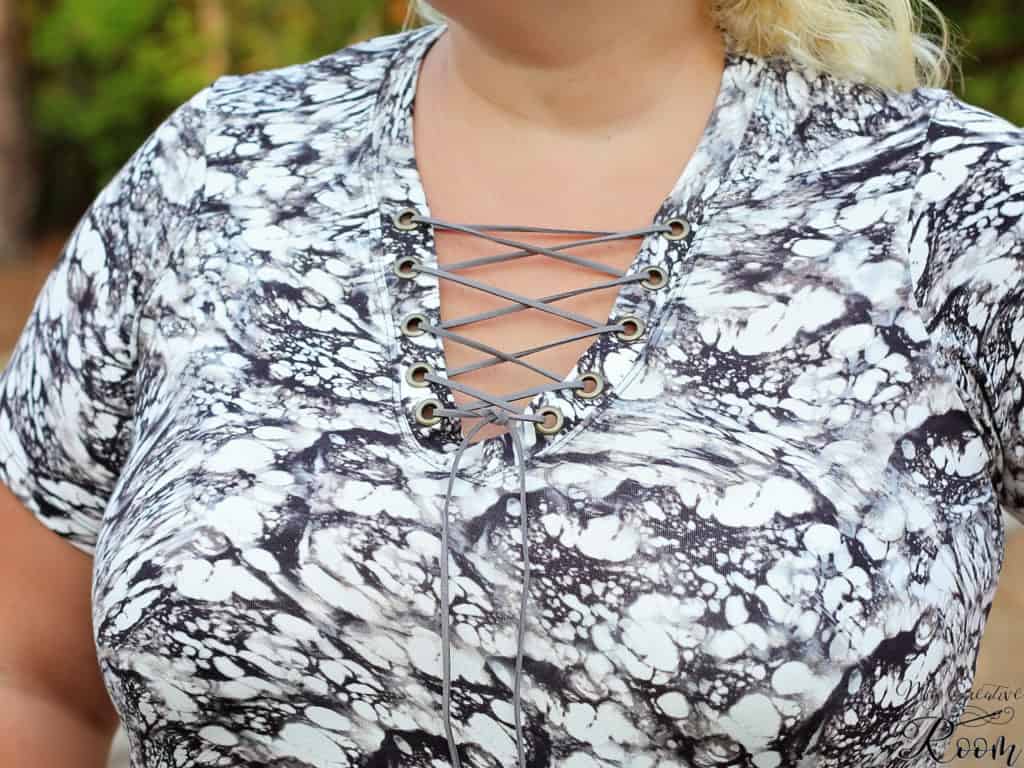
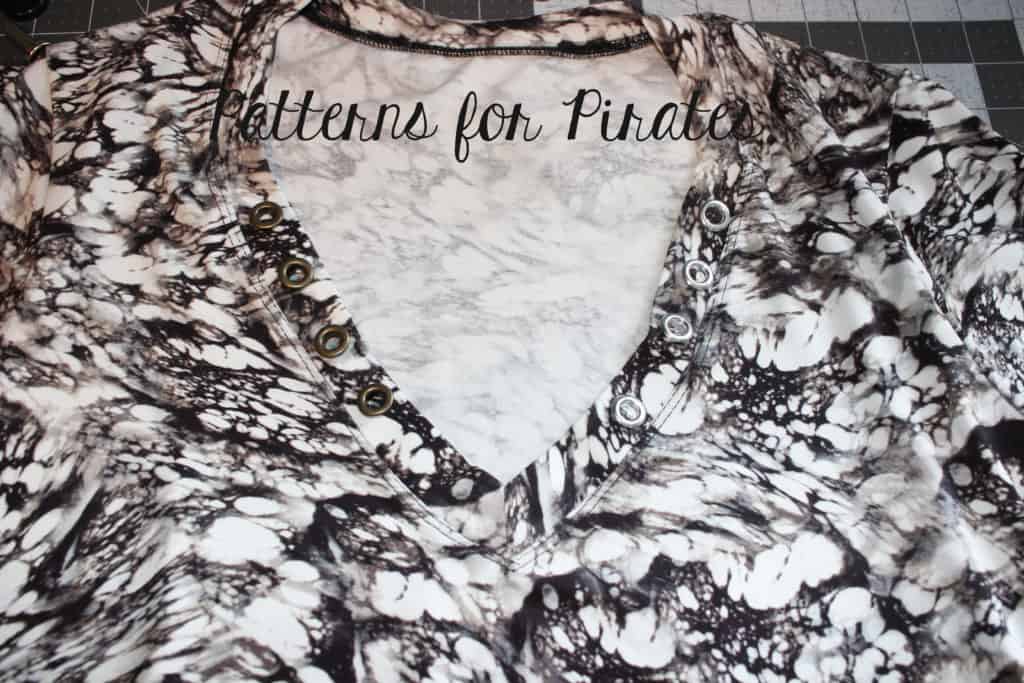
As if  the Favorite Tee was not amazing enough, we have a few easy hacks for it that will make you want to sew even more of them. The first time I saw a lace up V-neck shirt on Pinterest I knew I had to make myself one so I will show you how easy it is to get the look by using the Favorite Tee pattern. You will need the pattern printed and cut in your size (use the V neck option), a little bit of interfacing, 10 grommets and some cord.

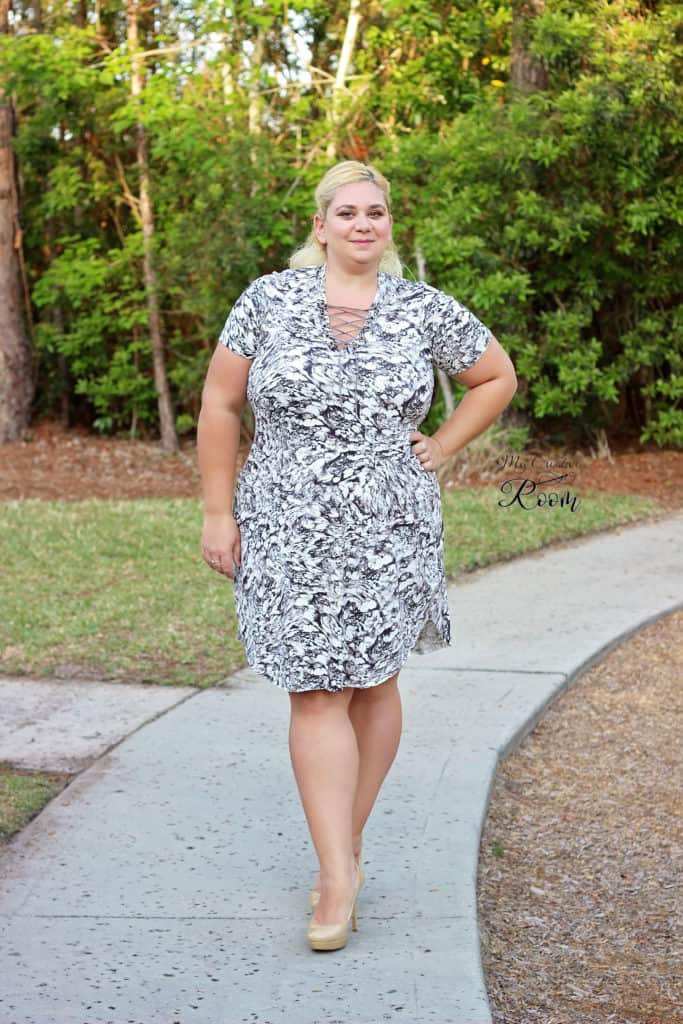
Favorite Tee dress option (lengthen 1.5″ in the front and unhemmed)

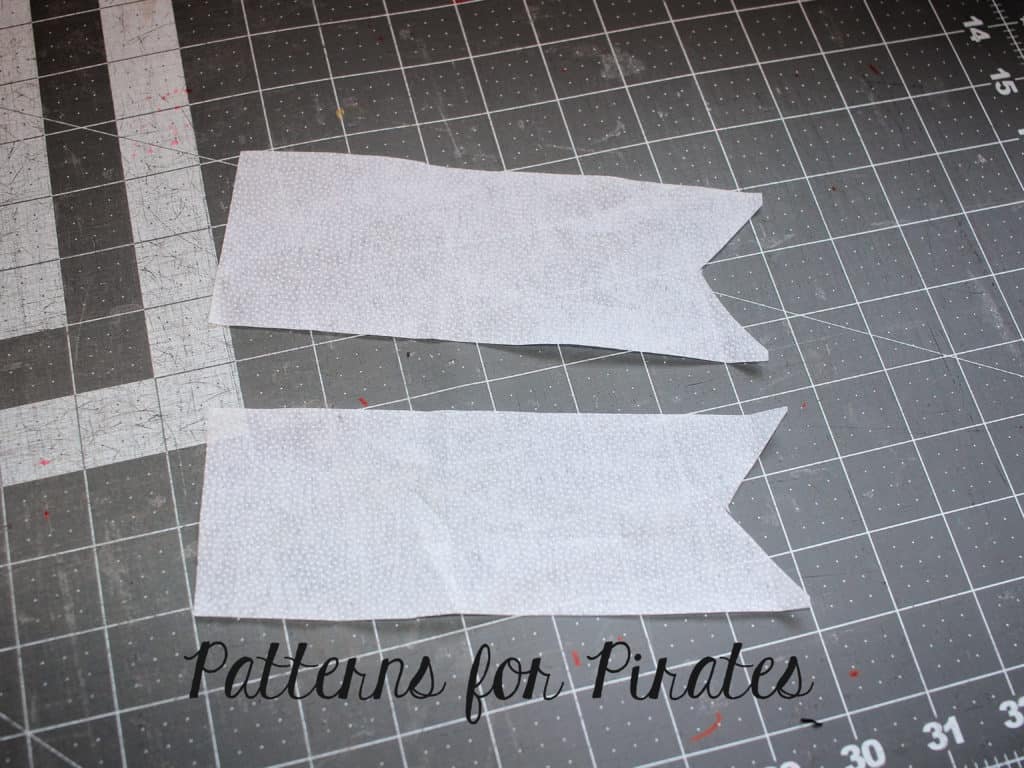
Start by adding some tricot or light weight interfacing to the V neck band. Cut 2 strips of interfacing about 7 inches long by the width of the band. Cut out the V at one end and iron the interfacing to the neckband.

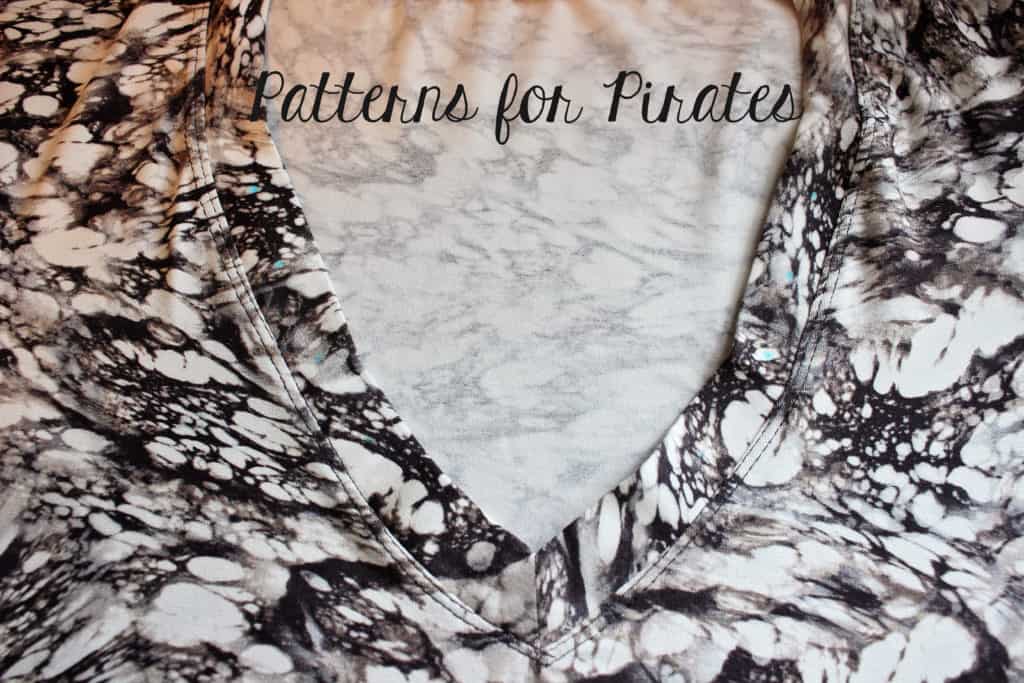
Sew the shirt or dress as per the pattern tutorial. I chose the dress because you know…one can never have too many dresses. You can certainly do this neckline with either one of the shirt length too. You will now need to mark the grommets location.

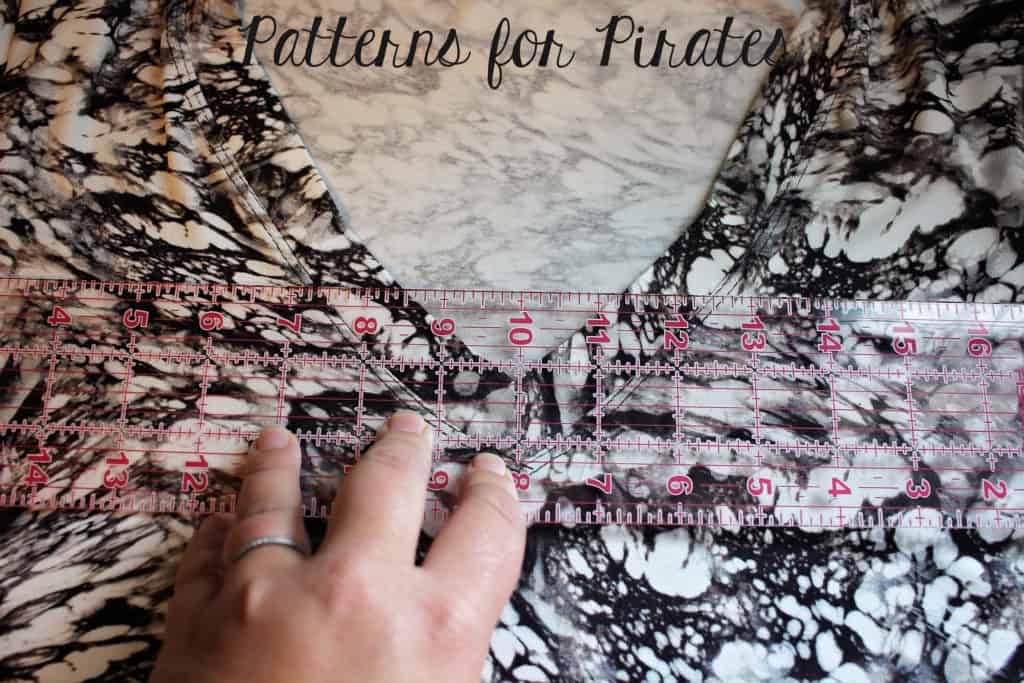
You can measure about one inch up on each side of the V band starting with the front center seam. Mark that spot. Keep adding a mark every one inch up on each side. I used 5 grommets on each side.

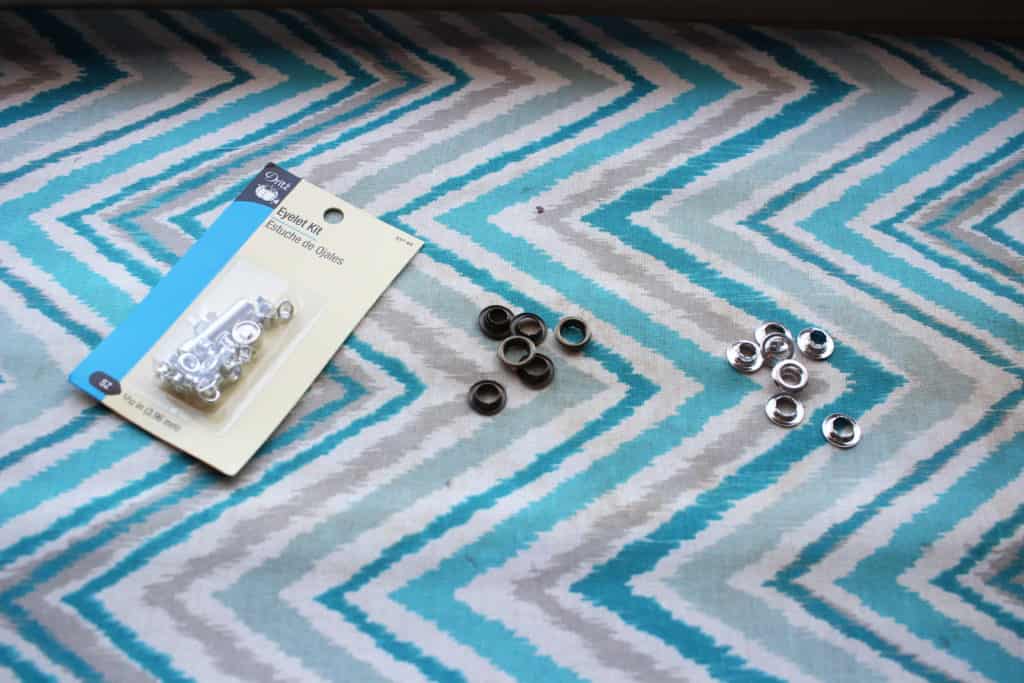
There are different size and color eyelets that you can use. I went with a brown/copper-ish finish for mine because I liked how it looked against the marble fabric.

ohhh the choices 🙂

Follow the manufacture instructions for adding the eyelets. I know there are more expensive devices out there but I am very pleased with my $1.50 Dritz eyelet tool so that’s what I used.

For a more edgy look you can make a faux leather binding and thread it through the eyelets.
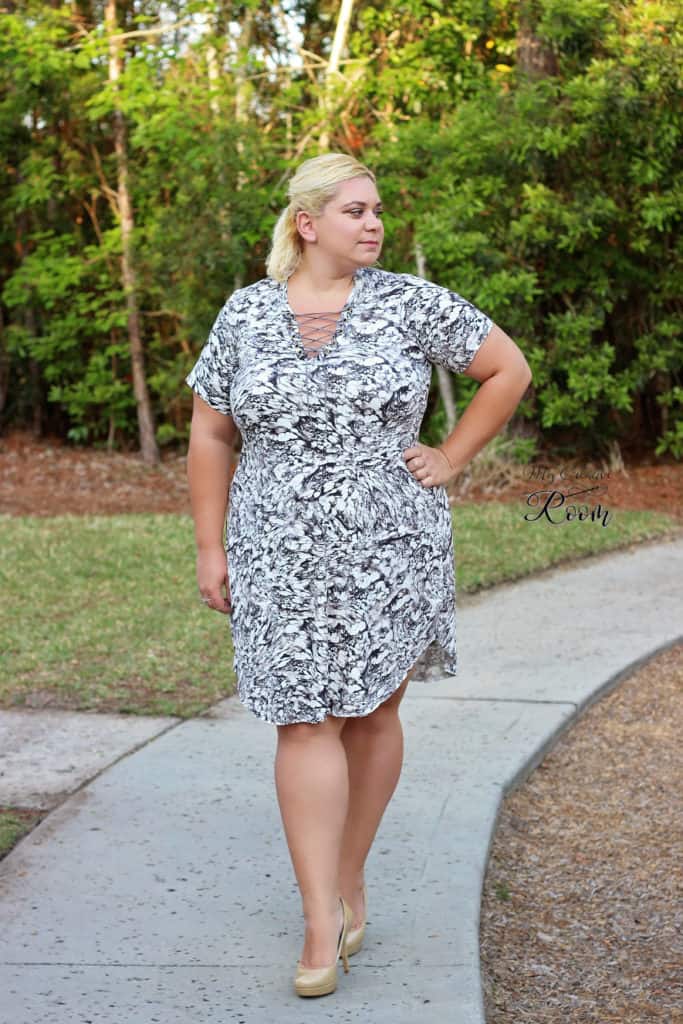
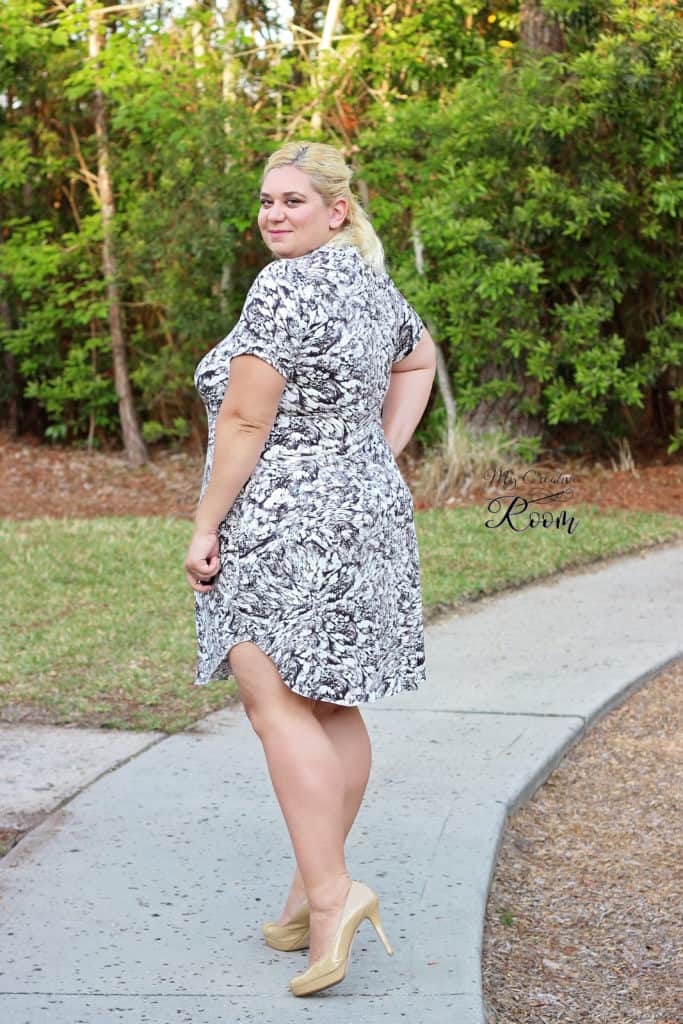
You are almost done. All you have to do now is lace up the neckband with a cord. You can use parachute cord, or faux suede cord like I used for my final pics or you can make your own. Tadah! You have just created your very own Pinterest worthy lace up Vneck shirt or dress.

Favorite Tee dress length (1.5″ longer in the front than the pattern and not hemmed)

Favorite Tee dress length (1.5″ longer in the front than the pattern and not hemmed)

Curved Hem Lace Insert:

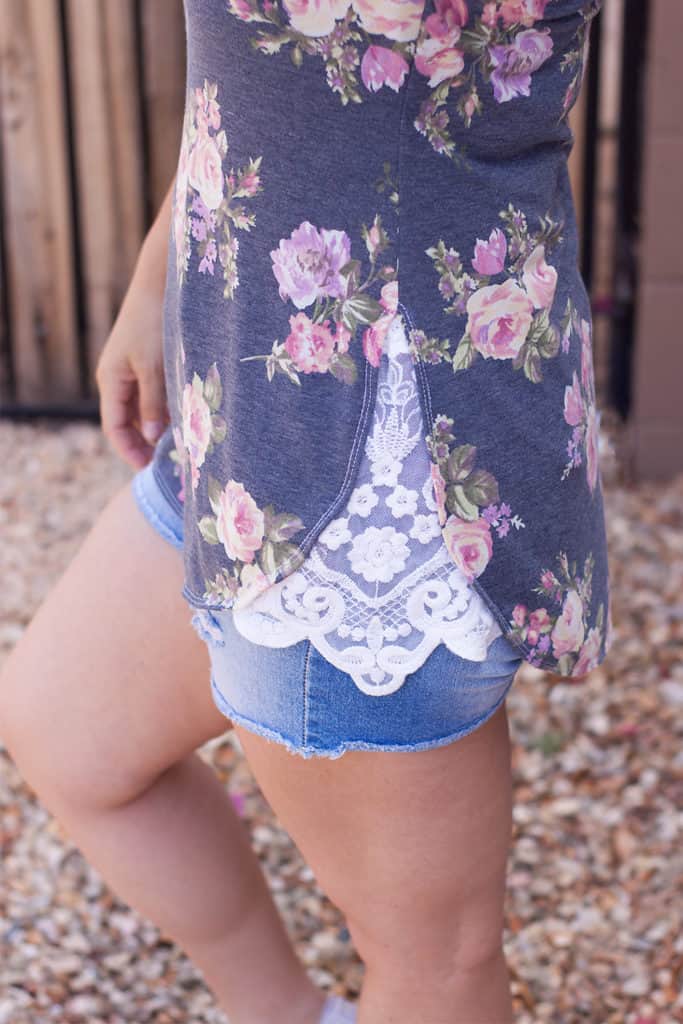
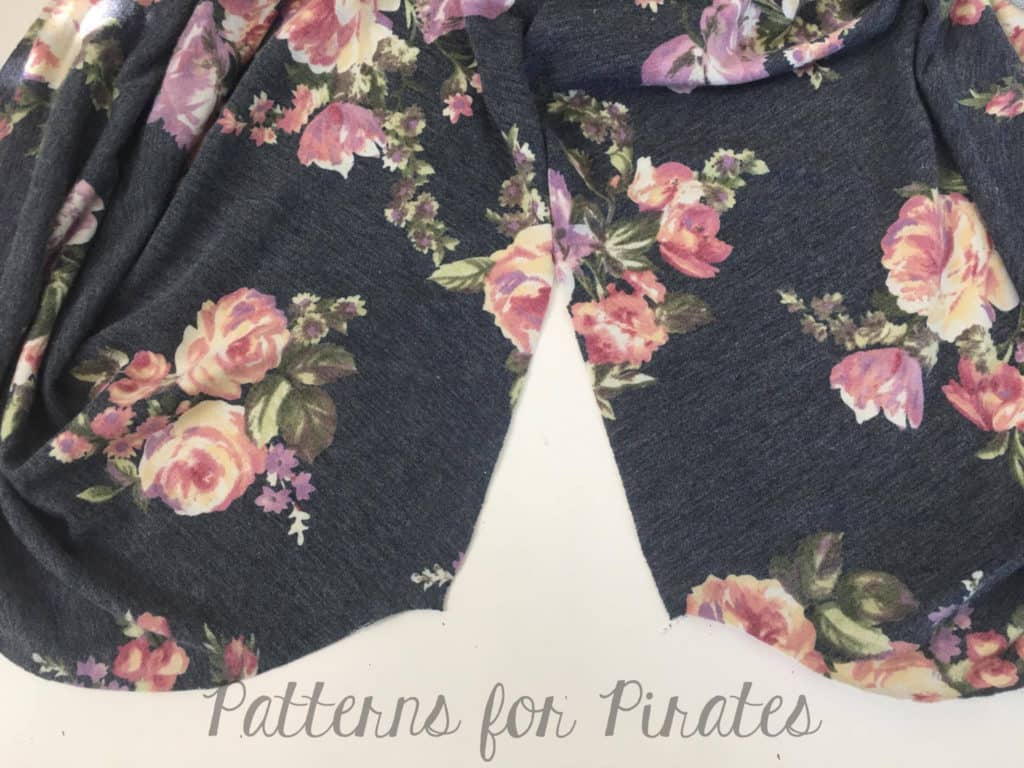
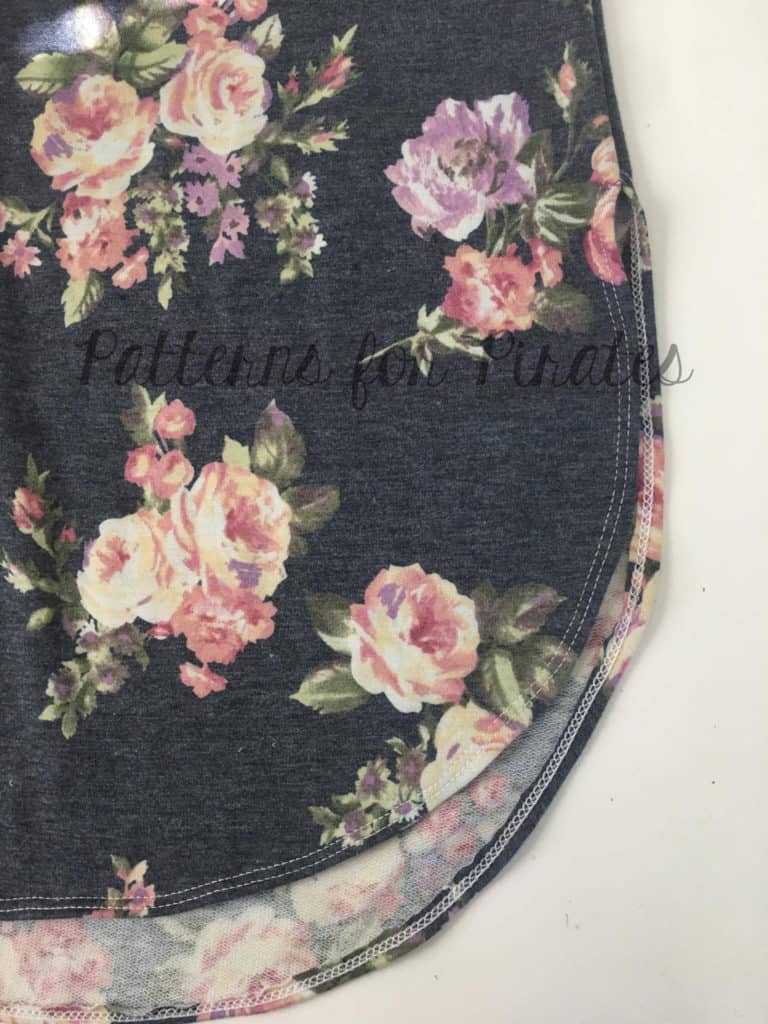
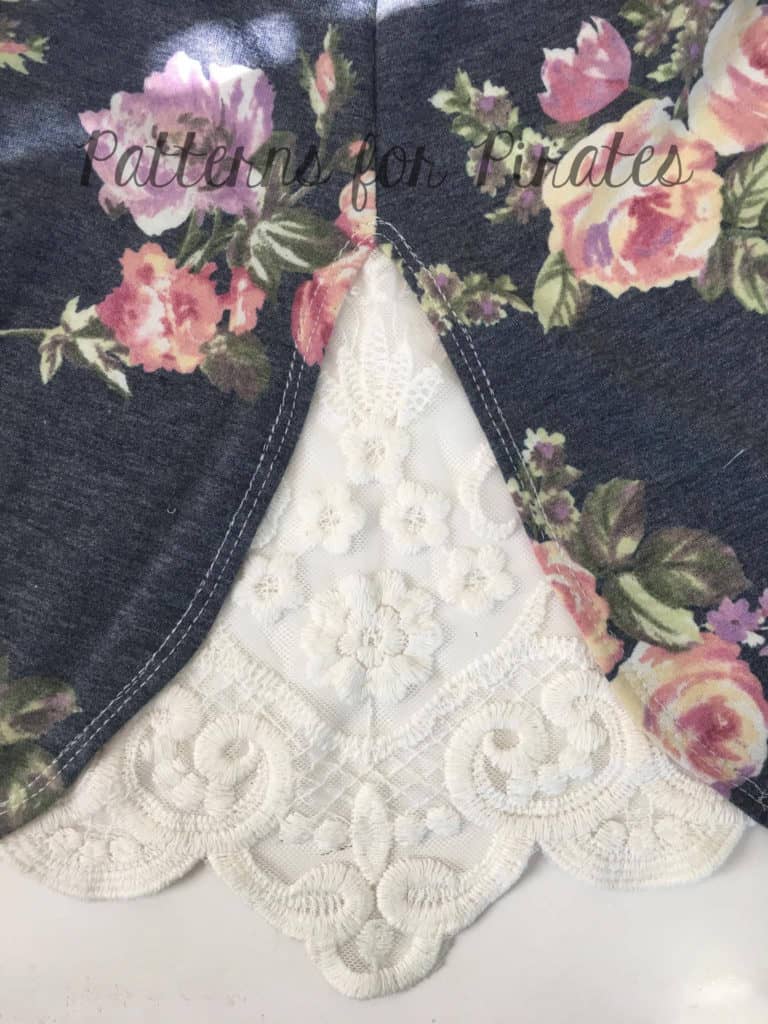
Adding lace to your finished garments is a fun way to add some extra sweet details.  You can use a lace applique, or in this instance, I used a scalloped edge mesh lace.  I chose the curved hem but you could use the other side split hem options if you’d prefer.  Print, cut and assemble your pattern as usual.  I wanted the curved hem to start a little higher on my hip so adjusted the length of the side seam. I stopped about 6″ from the bottom of the side seam.

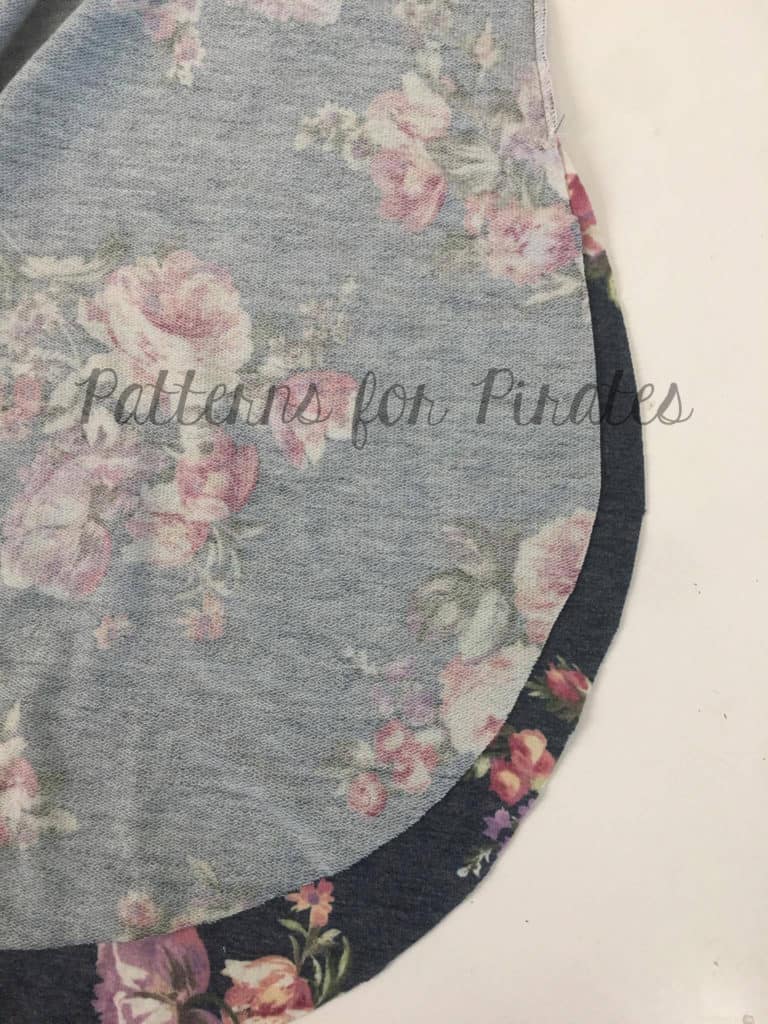
Since I stopped higher than the original side seam, my curve ended up looking a little funky, so I trimmed the edges to make a nice clean curve.

Hem using your fabric stretch stitch.  (Need some tips on hemming a curved hem?  Check out Alex’s post HERE)

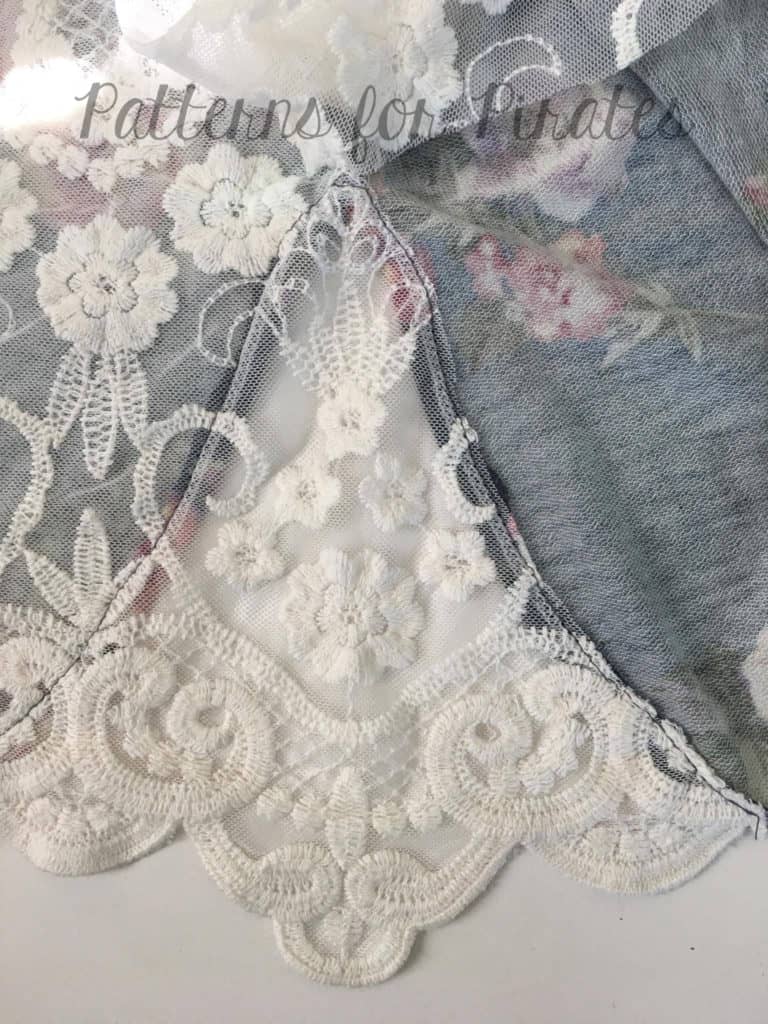
Next, open up your side seam and place your applique right side up to the wrong side of your main fabric.  Position as you wish and top-stitch in place.  *Note – be sure to measure your pattern piece from the curved hem line to side seam and make the applique at it’s widest point a similar measurement (near the bottom hem). Otherwise, you may loose some ease at the hip.

 Trim the applique or fabric if needed.

High Side Split Hem:  

The side split hem for both shirt and tunic lengths is a fun detail on it’s own, but we thought we’d take it up a notch (no pun intended 😉 ) and make those slits sky high.  Ok,  so maybe not that high but we did take them up quite a bit.  Using the average 8″ side waist measurement (based on a 5’5″ frame), construct your pattern as instructed but stop your side seam stitch at 8″ below the armpit.  Finish the side split as noted in the pattern.  Easy Peasy and no added steps or items needed!

This pairs perfectly with our Cross my Heart Cami to show off those layers.

Or, leave it un-layered and open with a high waist Pirate Pencil Skirt or some skinnies. Either way, you’re sure to be on trend.

Convinced you need the pattern yet?  The Favorite Tee is loaded with options and these simple hacks/mods give you that little extra to start filling up your closet without the worry of having too many duplicates.  I know they’re our new Favorite Tee 😉

Filed Under: Pattern Hacks 3 Comments

P4P Cardi Week :: Cocoon Lace Hems

January 22, 2017

cocoon-lace

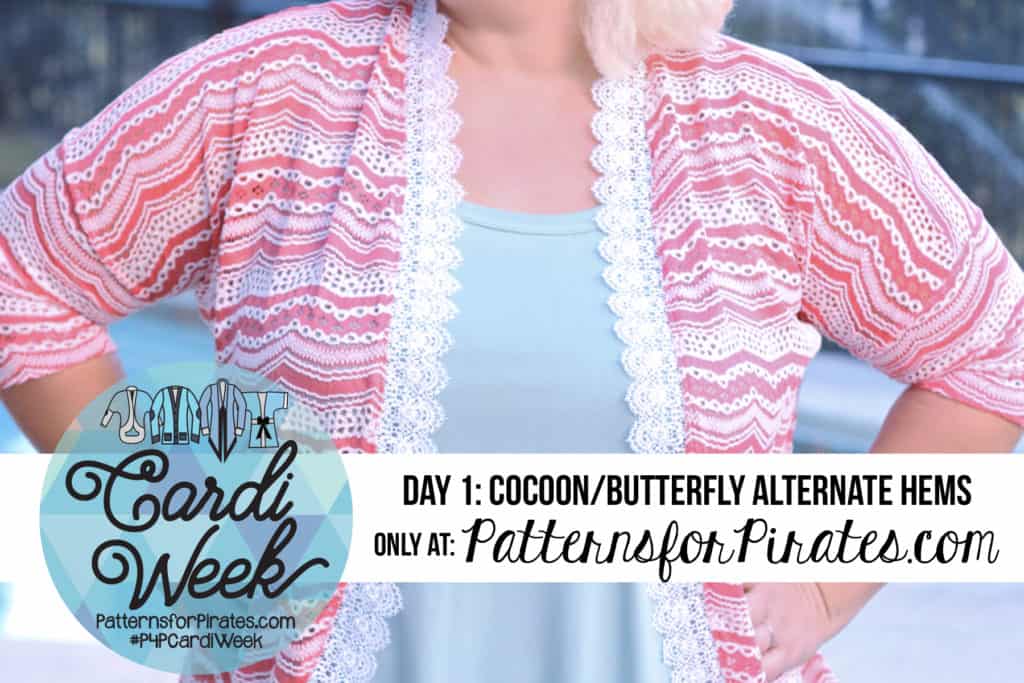
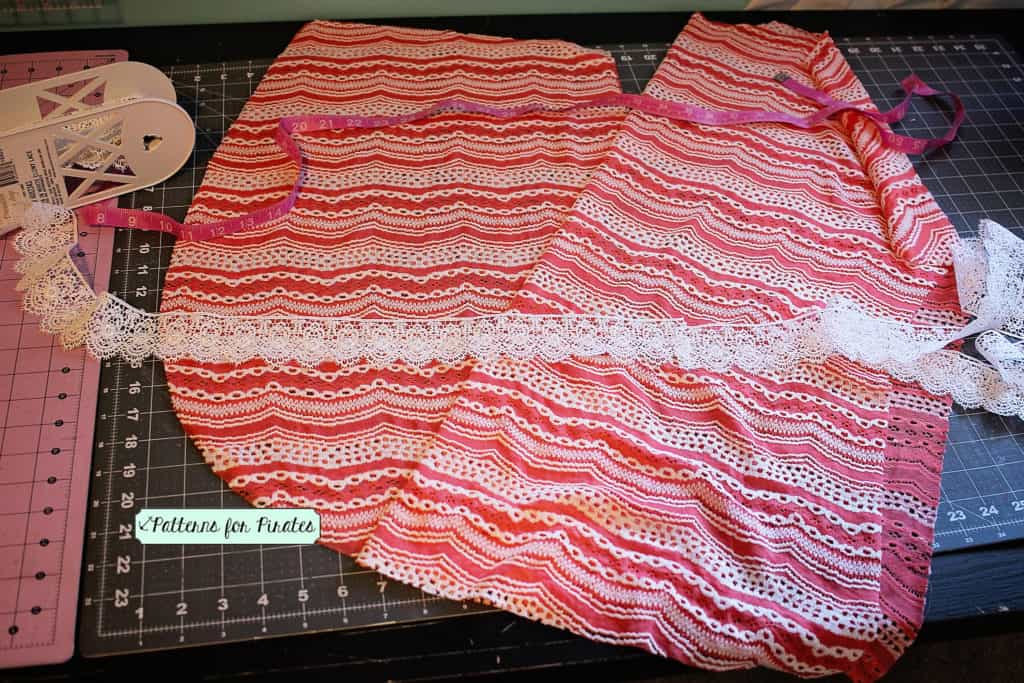
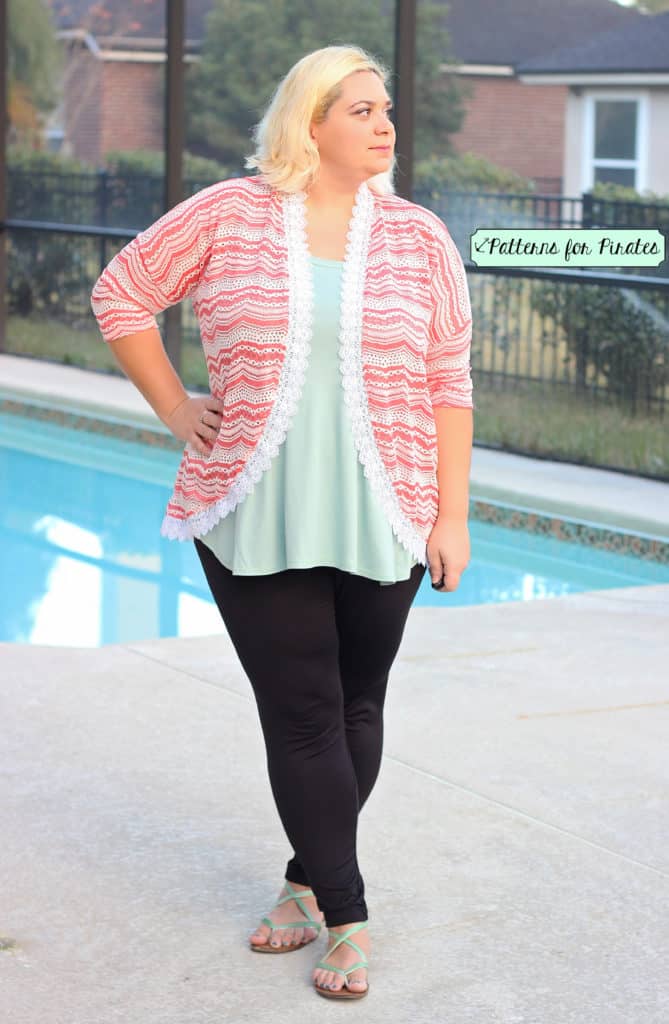
I’m sure by now you’ve all browsed Pinterest for cardigan inspiration, I know I have. When I saw a dolman style cardigan with lace trim I knew right away I needed to make myself one so in today’s blog I’ll show you how easy it is to get the look and I’ll also give you some tip for working with lace.

IMG_5383

Start by cutting the Cocoon Cardigan pattern pieces. You will not need to cut the the band, we will be replacing it with trim. I made a tunic length, 3/4 hemmed sleeves with no pockets but you can apply this technique to either one of the styles. The fabric and lace I used are both from Hobby Lobby.

IMG_5282

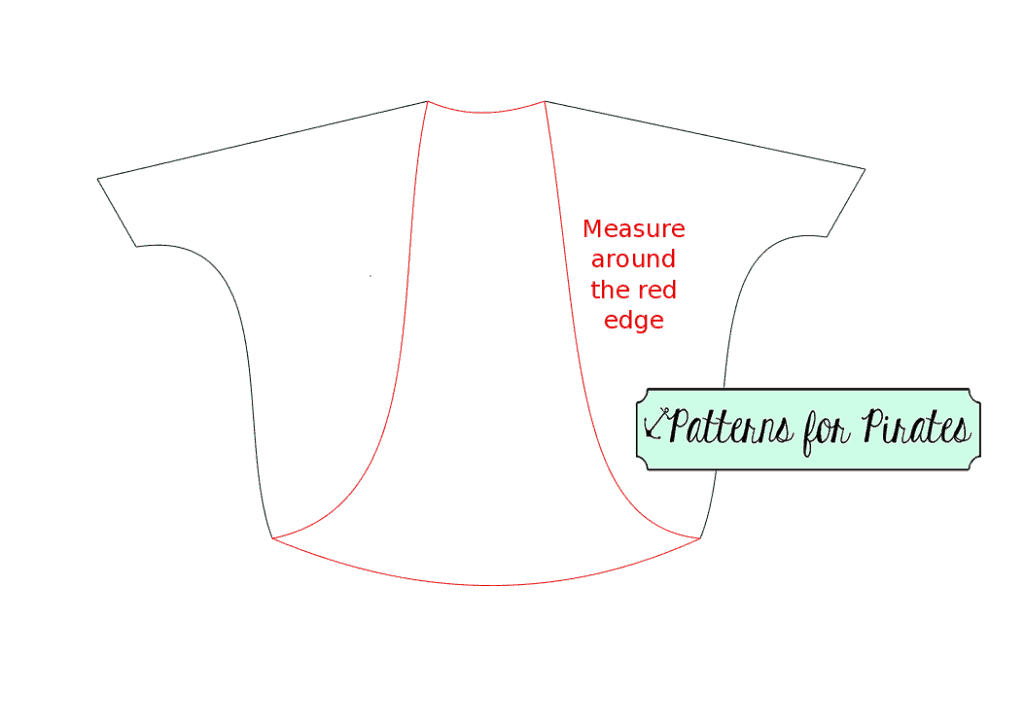
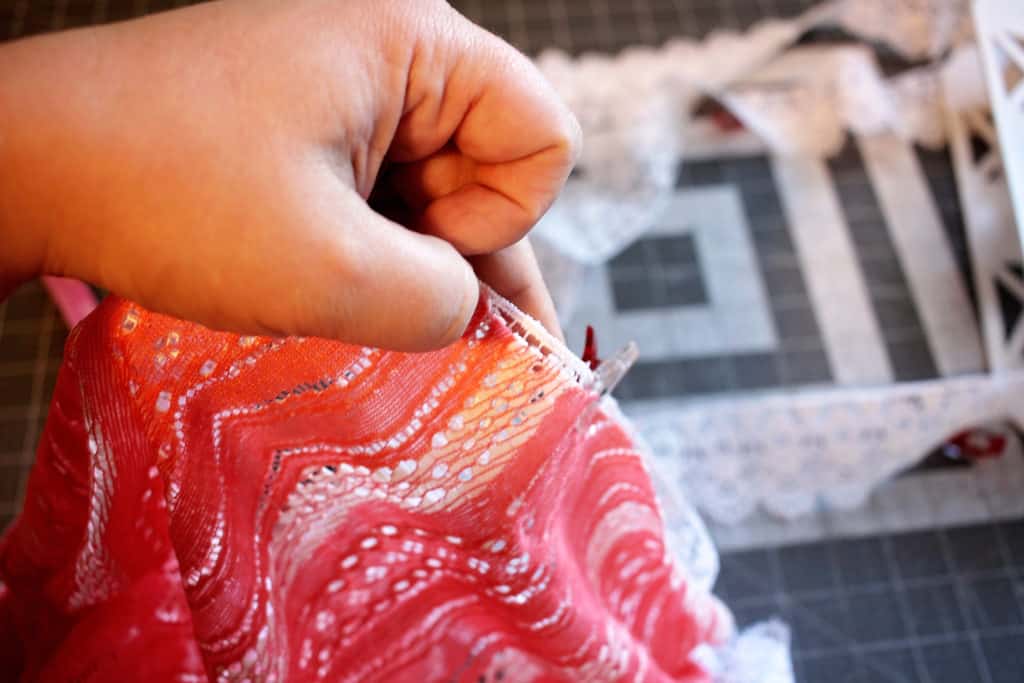
Assemble your pattern pieces as per the instruction. I like to leave the band for the end so you now have your cardigan ready to add the lace trim. The pattern band is shorter than the edge circumference and since most lace trims have no stretch we will have to measure the opening. The trim you will need will be equal to this length.

cocoondrawing1

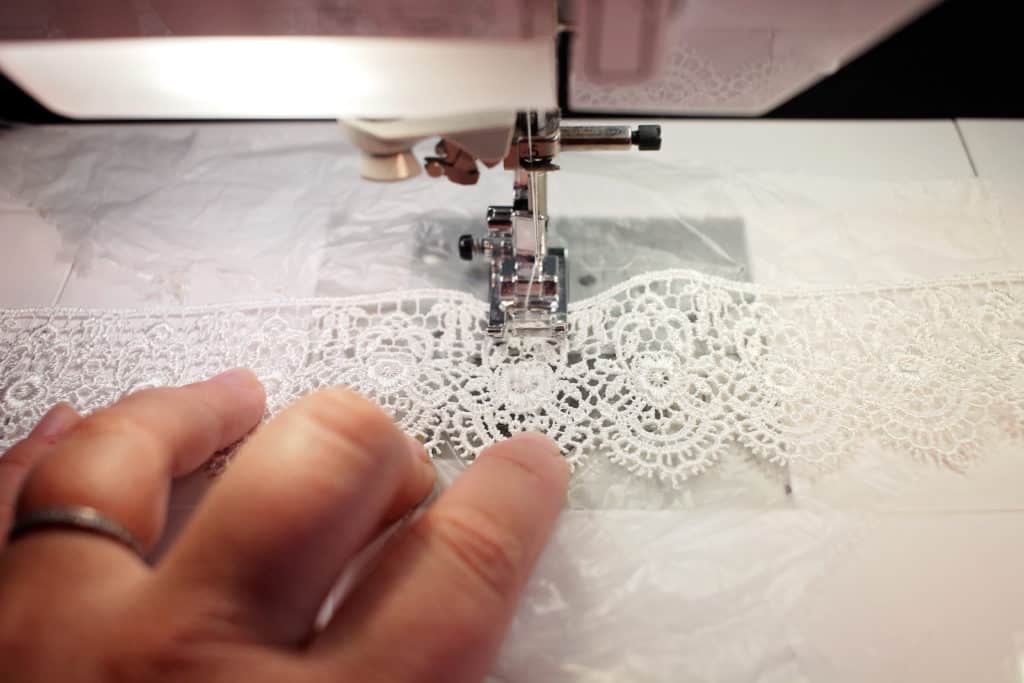
TIP: If your trim comes in 2 yards or less increments you will need to  attach two pieces together. To do that I like to use a zig zag stitch and just slightly overlap the ends. Stitch them together with a narrow zig zag stitch. Don’t forget to place a little piece of water soluble stabilizer under your lace when you stitch it.

IMG_5284

IMG_5285

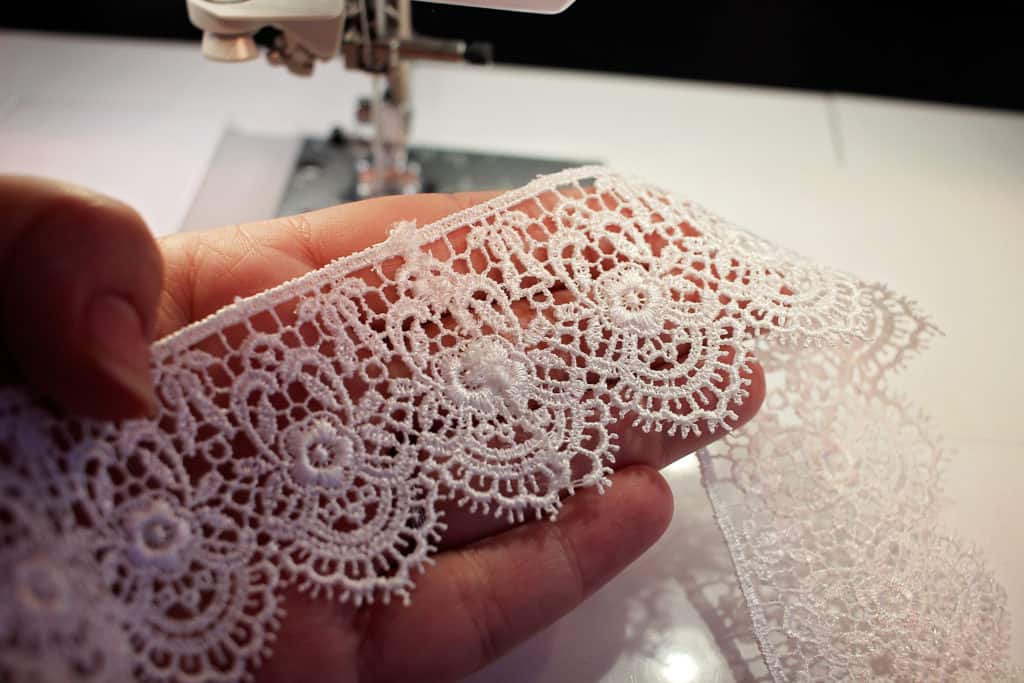
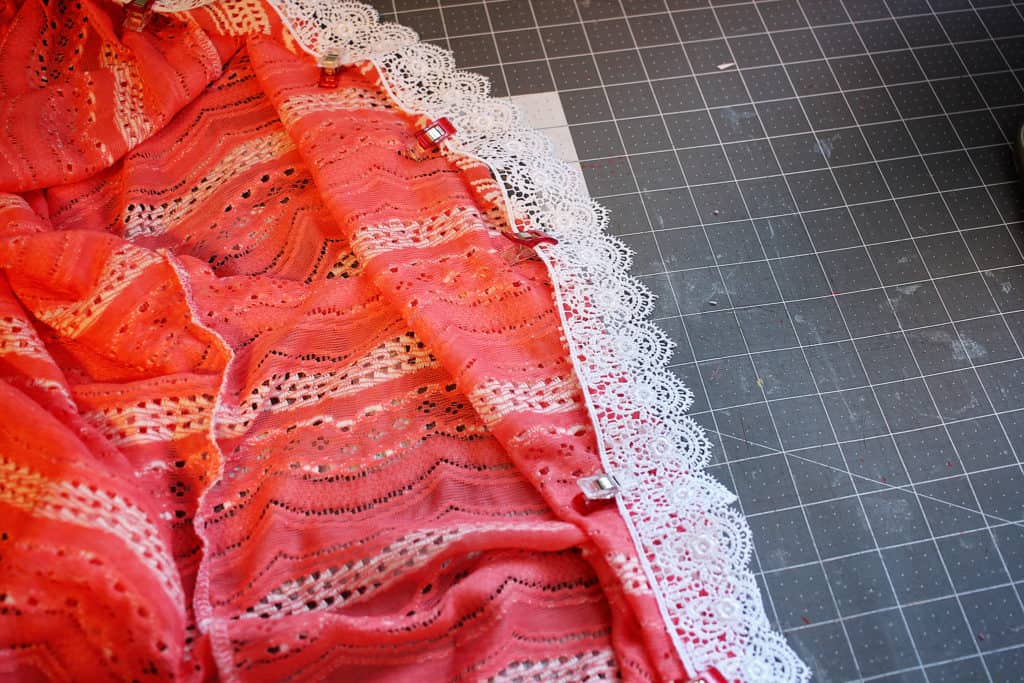
Pin (or clip) your lace to the cardigan raw edge, right sides together. Yes, there is a right side to the lace trim too! 🙂 Pin all around the edge, making sure you do not stretch the cardigan. When you get to the curved edge pin even closer since that part is not only stretchy but also on the bias.

IMG_5289

IMG_5290

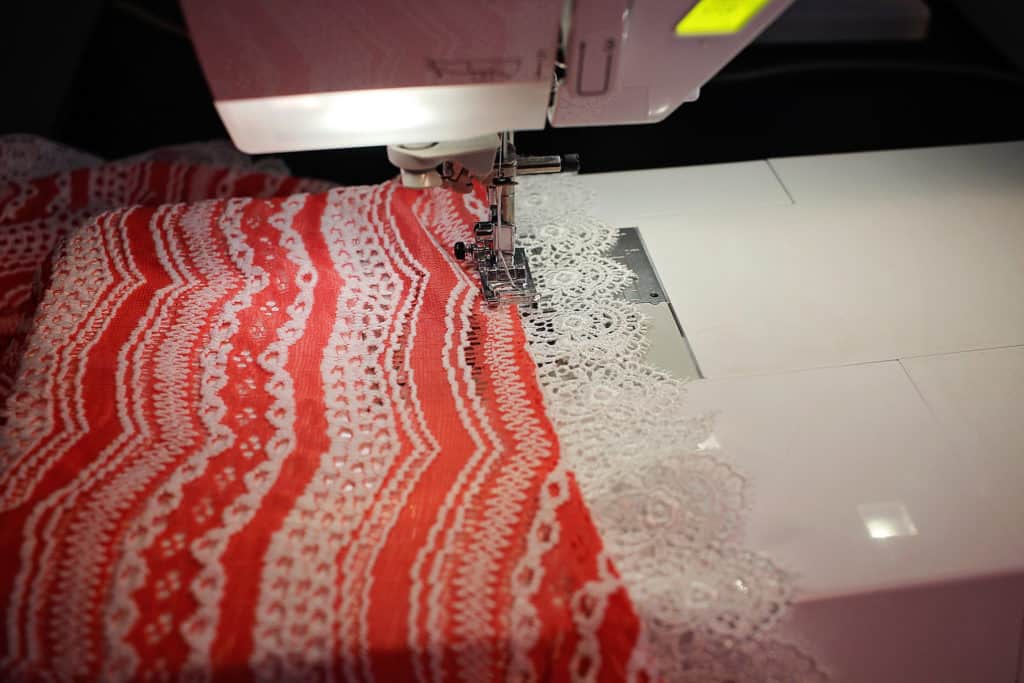
IMG_5291Once it’s all pinned in place sew the lace around the opening very slowly. I like to use my sewing machine for this step, instead of the serger. A stitch length of 3.5 with a 3.4-3.6 tension should be all you need. All you have to do now is top stitch around the opening, about 1/4-1/8 inch away from the trim and you are all set. See how easy that was?

IMG_5389

IMG_5371

Take a look at our jam-packed schedule of cardigan love!

Saturday, January 21: #P4PCardiWeek Announcement

                                                  Sunday, January 22: Cocoon Lace Hems and Butterfly Ruffle

Monday, January 23: Ribbon Tie Closure Hack

Tuesday, January 24: Carefree Cardigan Fringe Hack

Wednesday, January 25: Duster-Length Adjustment

Thursday, January 26: Kimono Ruffle Sleeves + Hem

Friday, January 27: Varsity Sweater Style Hack

Saturday, January 28: Carefree Cardigan Flannel + Vest Hack

Monday, January 30: #P4PCardiWeek Winner Announcement

You can follow along on the blog here, or in our Facebook group.  Search #P4PCardiWeek to be able to find our posts all over social media.  And please feel free to sew-along with us on one or all of the days.  The more the merrier!

But wait, there’s more!  We wanted to create a friendly pirate-y competition with our P4P Cardi Week!

Between tomorrow and Saturday, January 28, sew up a Patterns for Pirates cardigan using one of our hacks, or by keeping the pattern as-is.  Share your photo with us on Instagram or in our Facebook group and use the tag#P4PCardiWeek We will pick our favorite and the winner will win a free P4P pattern of choice AND be featured on this blog.  Fun right?

To make it even better we have put all the cardigan patterns in the shop on sale all week (no code needed)!

Now get out there and sew some cardigans, matey!

Filed Under: Pattern Hacks, Pattern Release, Uncategorized 2 Comments

FST/LMU Mash Nursing Hack

November 25, 2015

20151123_15051720151123_150313

I love the FST and LMU mash for after baby.  It makes me feel stylish, put together and comfortable! The loose aline look hides any left over baby belly and the tighter top doesn’t feel you leaving frumpy.

For this hack I essentially did a double layer body.  I can lift up the top layer and have the bottom layer covering my back/belly during nursing. And it looks like a perfectly “normal” everyday shirt! 🙂

20151123_150449

I made mine completely doubled because we are going into winter here and I didn’t mind the added warmth.  If I was making this for spring or summer months I would probably tinker with a faux double layer for the back piece.

I cut 2 front and back pieces.

SAMSUNG CAMERA PICTURES

Then took 1 front piece to modify for the under layer.  I measured on myself from the neckline to under my bust (I did happen to have on the same shirt, so I didn’t even need to guess where the neckline hit ;)). Then I transferred that measurement to the front center and curved up to the armpit.

SAMSUNG CAMERA PICTURES

SAMSUNG CAMERA PICTURES

Since the FST flares out under the bust it was a little loose there.  So I added a thin elastic to the raw edge.  I just held the elastic taute (not tight) on my body from seam to seam (again, I happen to be wearing this shirt, so there was no guessing!). This way the two layers would have the same finish length–without the elastic holding up the center it would droop lower then the top layer.  As well as not worry about holding it up while nursing–bonus :).

SAMSUNG CAMERA PICTURES

I choose to put my elastic on the right side of my under layer, because I didn’t want to feel it against my skin.  But you can put it on the wrong side so that it is hidden when you nurse– whatever you prefer! You will need to stretch the elastic to fit the curve.  I serged mine on, but any stretch stitch will work! It will line up right at the armpit.

SAMSUNG CAMERA PICTURES

I sewed the shoulder seams and sleeves on like normal.  Then when going down the side seams I kept the main body layers seperate (so you can lift the top layer freely).  It is a bit tricky right at the armpit, but just go slowly  and remember you wont be showing anyone the inside of your armpit seam! 😉

SAMSUNG CAMERA PICTURES

SAMSUNG CAMERA PICTURES

SAMSUNG CAMERA PICTURES

Now for hemming, I choose to hem the top layer completely normal with a 1″ allowance.

For the under layer I choose to add a pretty lace trim to stick out longer then the top layer.  I wanted the seam hidden, so I trimmed off 1″ from the bottom.

SAMSUNG CAMERA PICTURES

I serged my lace on right sides together trimming off about 1/2″ of both shirt and lace (the top of the lace that was blank).

SAMSUNG CAMERA PICTURES

Then flipped up and top-stitched (I didn’t want that seam flipping and showing through the dainty lace trim!).  So, I trimmed 1″ and took off another 1/2″.  This means my seam on the under layer should be 1/2″ above the hemmed edge of my top layer and the lace will peek out below.

SAMSUNG CAMERA PICTURES

SAMSUNG CAMERA PICTURES


I attached the neckband normally catching both layers on the back piece and top layer of the front piece.

SAMSUNG CAMERA PICTURES

SAMSUNG CAMERA PICTURES


Tada! I love my new warm winter nursing friendly shirt! It screams fashionable and not I’m nursing! 🙂 When you’re done nursing you can still wear it as is… or cut out the under layer!

20151123_150424


Filed Under: Pattern Hacks, Uncategorized 9 Comments

  • « Previous Page
  • 1
  • 2

Newest Patterns

  • Uptown Joggers - Youth $10.00 $8.50
  • Uptown Joggers $12.00 $10.50
  • Uptown Joggers - Bundle $20.00 $18.00
  • Notch Top & Dress $12.00
  • Notch Top & Dress - Youth $10.00
  • Privacy Policy
  • Refund Policy
  • Affliliate Program
  • Contact Us
  • About

Copyright © 2023 Patterns for Pirates

Copyright © 2023 · Genesis Framework · WordPress · Log in