Patterns for Pirates

P4P stylish, modern, wearable patterns

  • Home
  • Blog
    • Frequently Asked Questions
    • Pattern Releases
      • Free Patterns
    • P4P University
      • Fitting
      • Sewing with Stretch, Knit Fabrics
      • Sewing with Woven Fabrics
      • Sewing Machines
    • Sew-A-Longs
    • Fabric for Pirates
    • Pattern Hacks
    • Announcement
      • Blog Tours
      • Contest/Giveaway
  • Shop
  • Bundle Discounts
  • Flash Friday
  • Gift Cards
  • My Account
  • Cart

New Pattern Release :: Valley Swing Dress (Adult + Youth Sizes!)

July 11, 2022

We are so excited to release our newest pattern by crew member Katy!

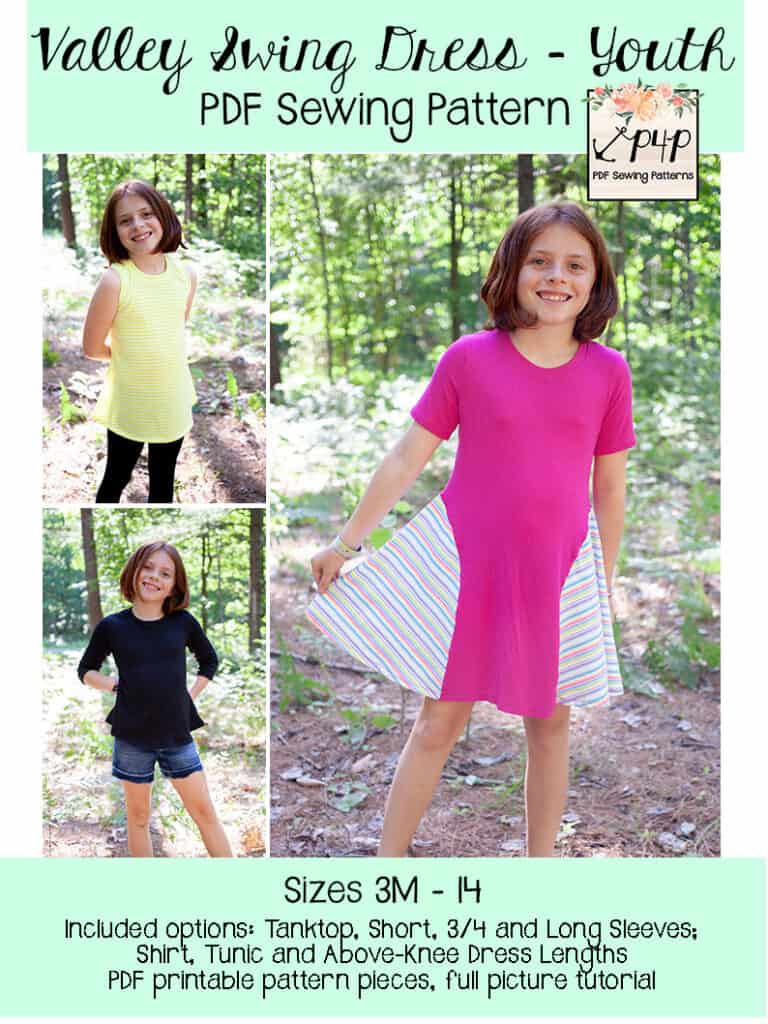
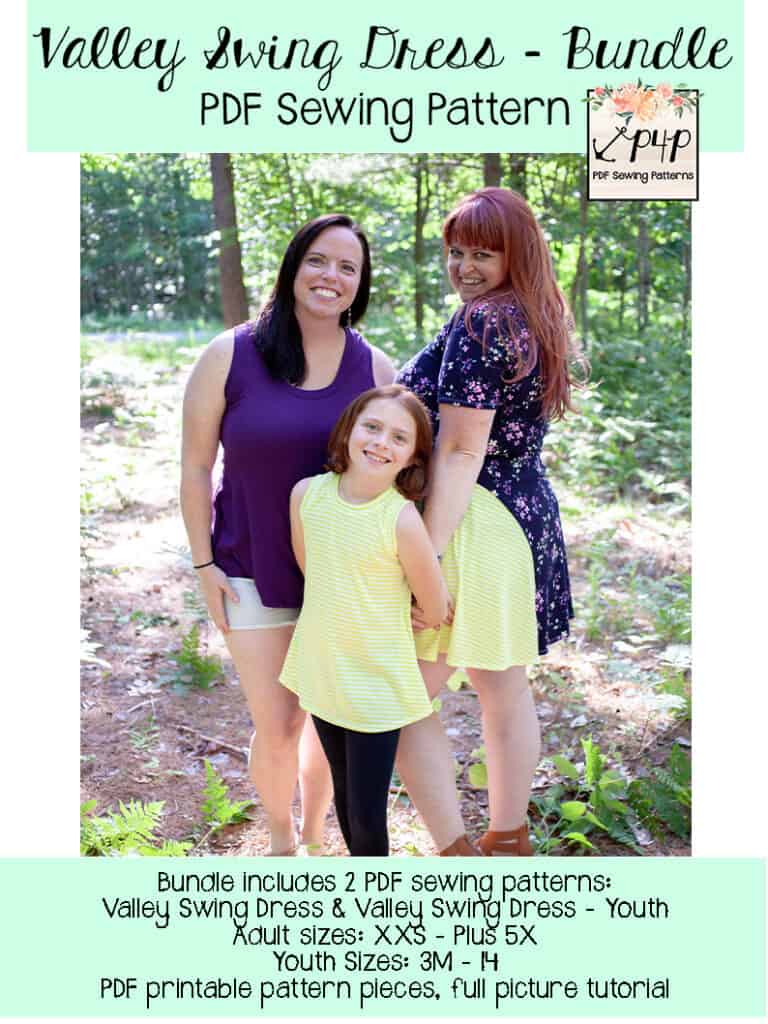
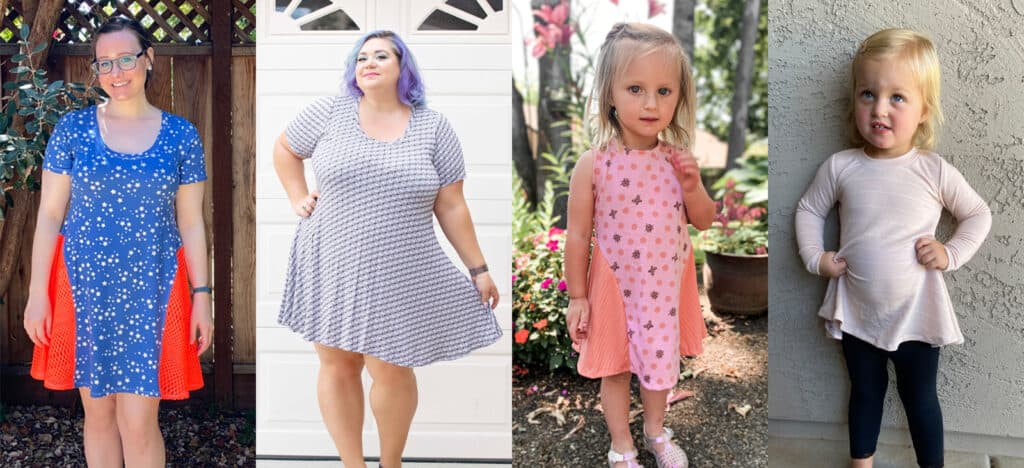
Say hello to your new favorite dress: The Valley Swing Dress, available for both our Adult Hourglass Figure (XXS – Plus 5X sizes) and Youth (3m – 14 sizes).  Like all of her pattern releases so far, Katy’s giving a nod to her home state.  The Valley Swing Dress is named after where she lives in West Virginia: the Ohio Valley.

Are you ready to swish, sway, and (of course!) swing yourself into a new pattern with us?  Let’s tell you all about it!


The Valley Swing Dress pattern lives up to it’s name, in that it’s got some swing to it!  These patterns are fitted in the bust, semi-fitted in the waist, and have an oversized fit in the hips.  The ease of the bodice creates an incredibly flattering silhouette, before it swings out to a swishy, flowy skirt.  This beginner friendly pattern is a perfect wardrobe staple for all seasons.  Pair it with a lightweight knit and a tanktop and you’ve got the cutest summer dress to keep cool in.  Or sew it up with a drapey sweater knit and some long sleeves, throw on your favorite tights and booties and you’ll be incredibly fashionable this fall and winter!  The colorblocked skirt hits right at the waist and allows for some fun pattern, print and color mixing combos.  Or just pick a plain dress option for an even faster sewing project.  Either way, you’ll love how comfortable, charming and easy this dress is to throw on!
Choose from these options:
  • tanktop, short, 3/4 and long sleeves
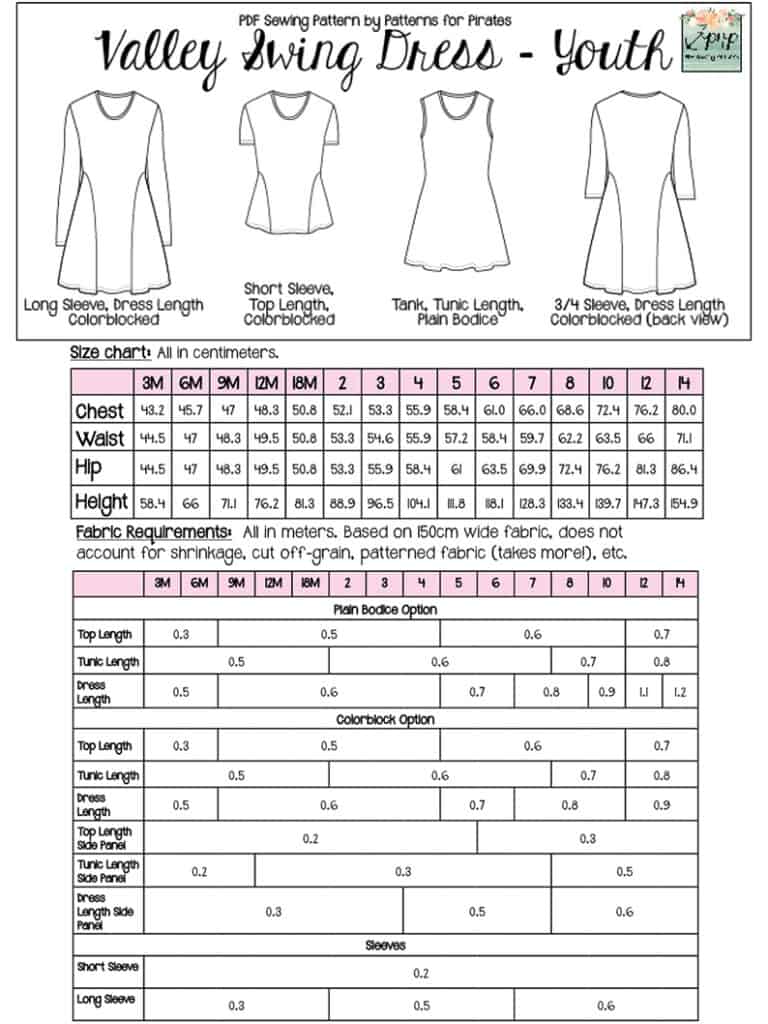
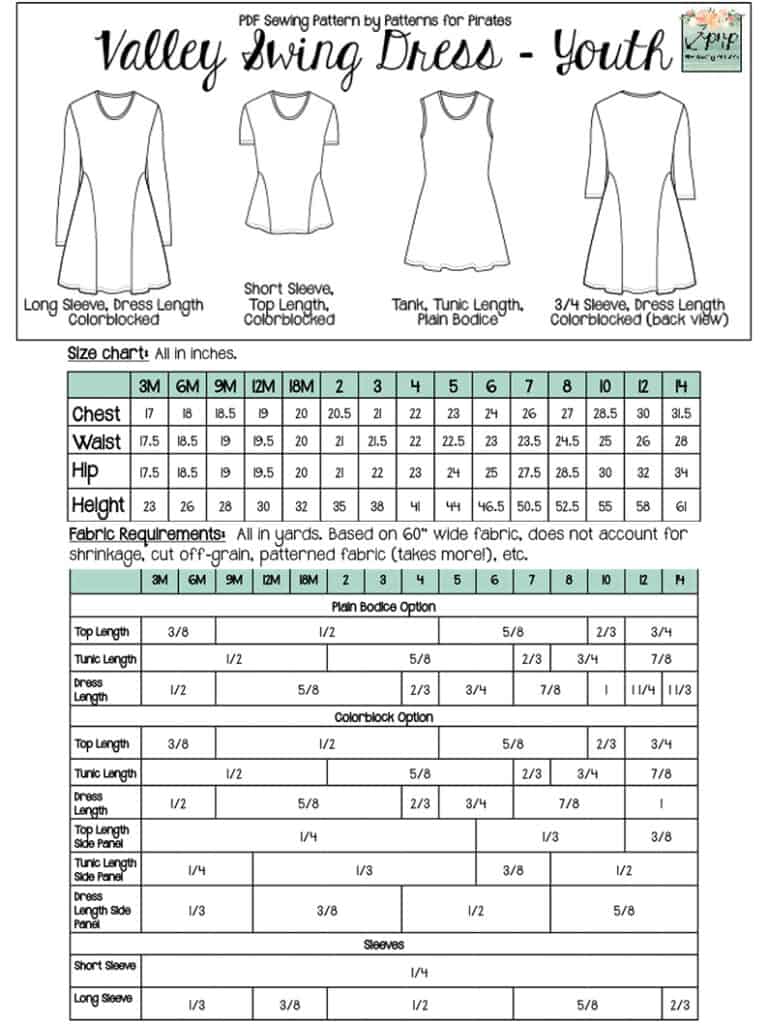
  • top, tunic and above-knee hem lengths
  • colorblock or plain skirted options
The Valley Swing Dress is drafted for a mid-to-lightweight knit fabric with at least 30% horizontal stretch.
Some of our favorites are: rayon spandex, ITY, poly spandex, brushed polyester, ribbed knit, waffle knit, modal, bamboo lycra, etc.
**Keep in mind that fabric content will affect drape and fit!  Stiffer/heavier fabrics, such as cotton lycra, are not recommended.  And fabrics with less recovery, such as some rayon spandex, may “grow” with wear and fit longer than intended.


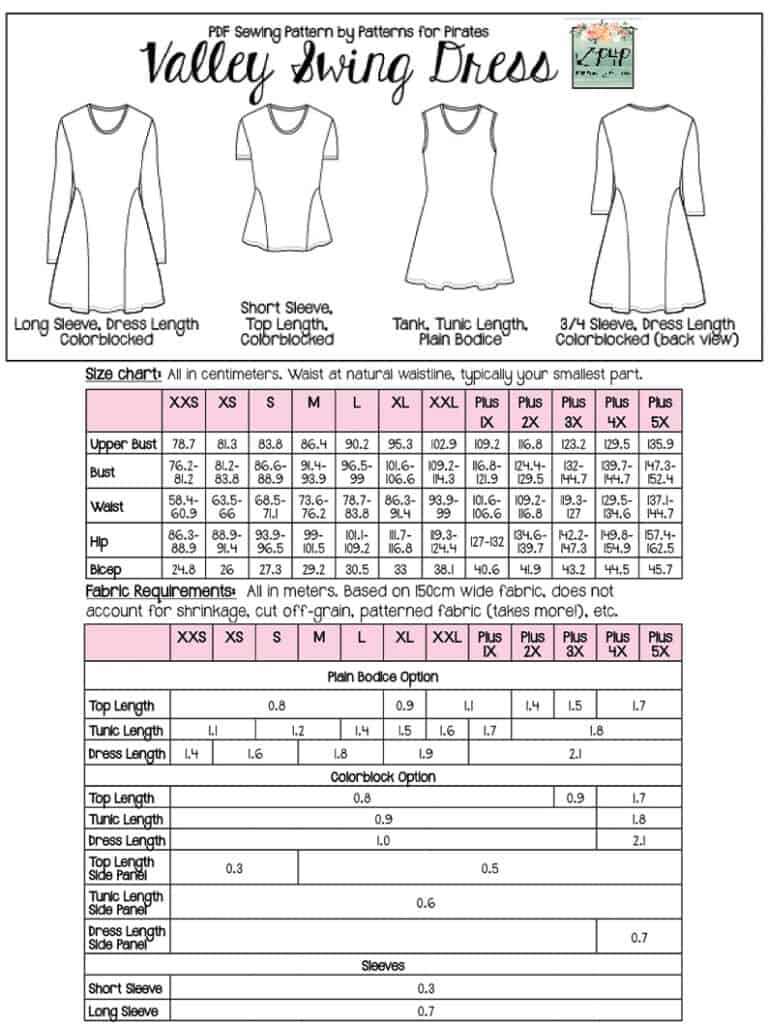
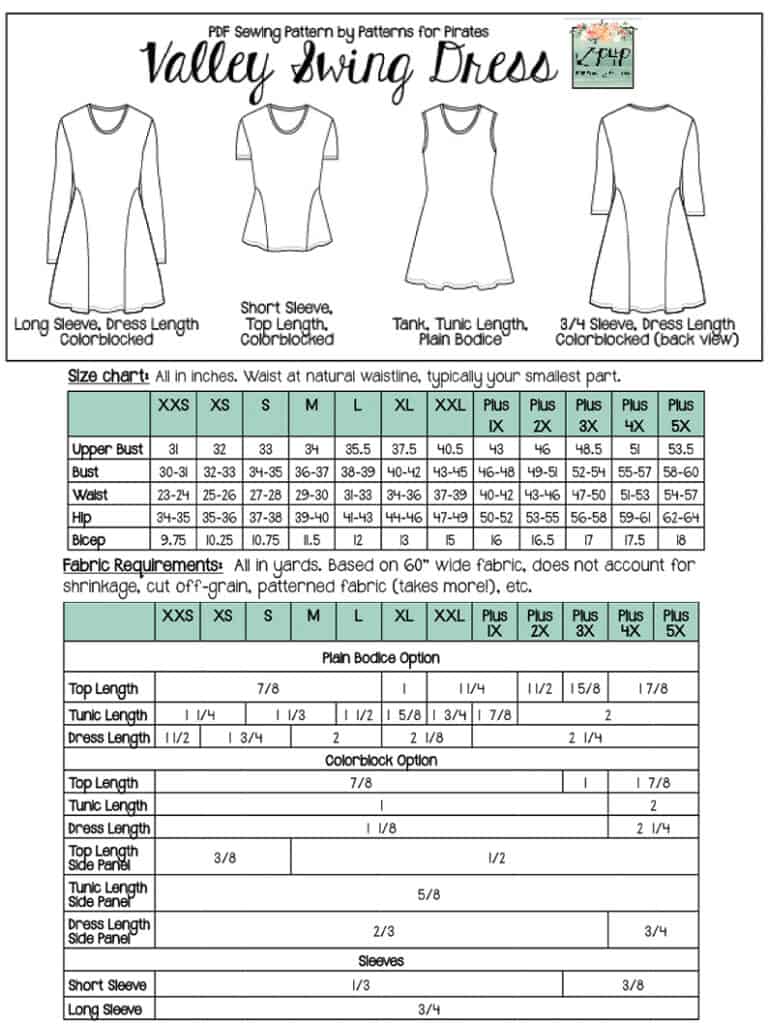
The youth sizes range from 3m – 14 and the adult sizes are for the full, newer size chart, extending from XXS – Plus 5X for the Adult Hourglass Figure.

  • *Want to learn more about how to measure yourself for these pattern?  We’ve got you covered with an in-depth blog HERE.  And for even more helpful fun, we have a free* printable that you can use to help record your measurements as you take them.
  • And in case you’re new to Patterns for Pirates and PDF patterns in general, we have a great blog full of new-user tips HERE to help you get started!
  • As with all of our current releases and updates, the pdfs now include our layers feature and can be found in Letter, A4, A0 and projector sizes.
Consider yourself to be a visual learner and need a little extra hand-holding before you sew?  We’ve got you!  Take a peek at this video, where we walk you through the entire sewing process of the Valley Swing Dress!

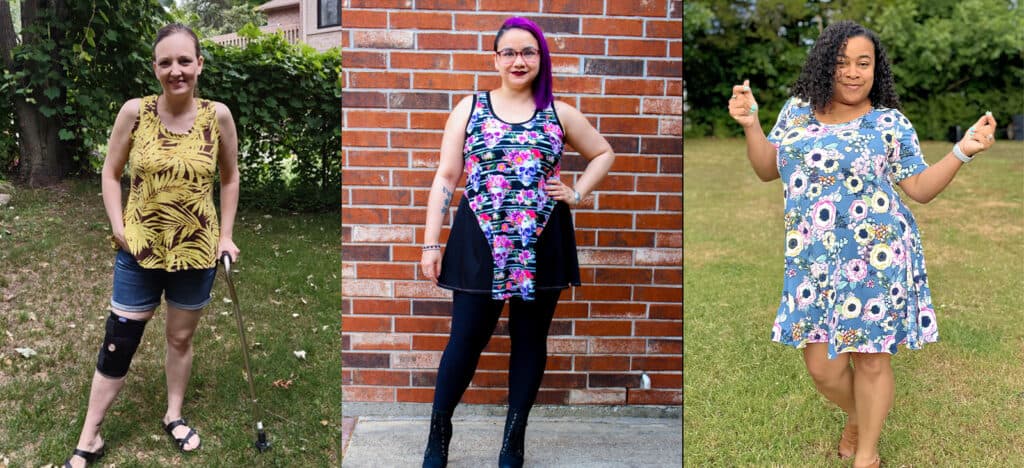
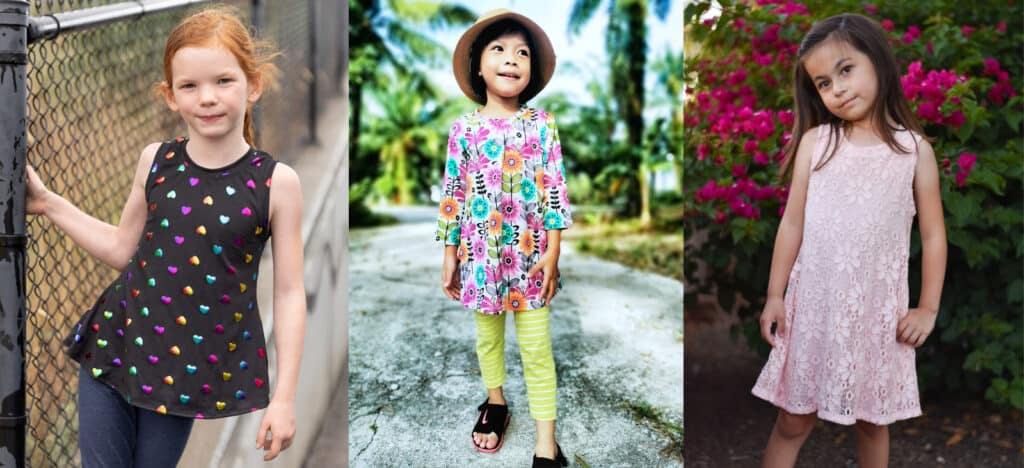
Okay….let’s check out some of the different features, modeled by our incredible testers:

TOP + TUNIC + DRESS HEM LENGTHS

TANK + SHORT + 3/4 + LONG SLEEVE LENGTHS
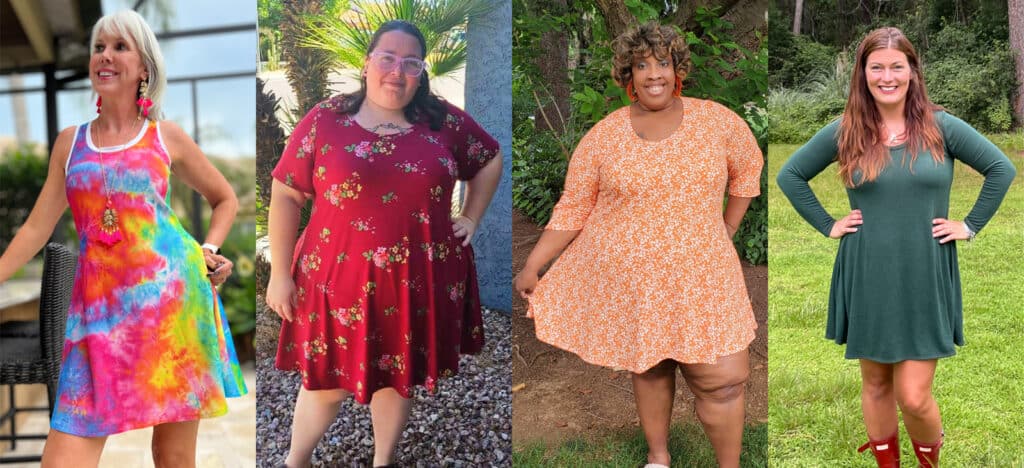
COLORBLOCK + PLAIN OPTIONS

We are looking forward to see what you make with the new Valley Swing Dress patterns!  Head on over to the shop and grab yourself a copy and get to sewing!  They are available on sale (no code needed) through 11:59pm CST, July 17th, 2022.

Valley Swing Dress | Valley Swing Dress – Youth | Valley Swing Dress – Bundle

Hoping for a little inspiration before diving into some swing dress sewing?  Journey over to our Facebook group where you can see tester albums full of amazing images!

Valley Swing Adult Album | Valley Swing Youth Album

Filed Under: Pattern Release Leave a Comment

Using A Projector For Sewing – The Basics

June 18, 2021

I am going to be spending some time today talking about how I use my projector for sewing. We’ll discuss what type I have, and why I chose it as well as discussing the other options available; how I link it up to the pattern itself; how I ensure it is projecting at the right size; and some of the pros and cons of projecting. Hopefully it will answer a few of the questions you may have about this new sewing craze, and maybe give you the confidence to get involved too! 


I first heard about using a projector for sewing patterns a few years ago.  The idea is that you link a projector up to your pattern, and then rather than printing out the paper pattern pieces to cut and use, you project those pattern images straight onto fabric, cutting out the middle man, so to speak.

I didn’t really give it much thought, it sounded like an interesting idea but presumed it would be a bit too technical for me, and perhaps a bit cumbersome, but I liked the idea of doing away with paper pattern pieces and so when I started to see more people using projectors I decided to dive in and see if I could work out how practical it might actually be.

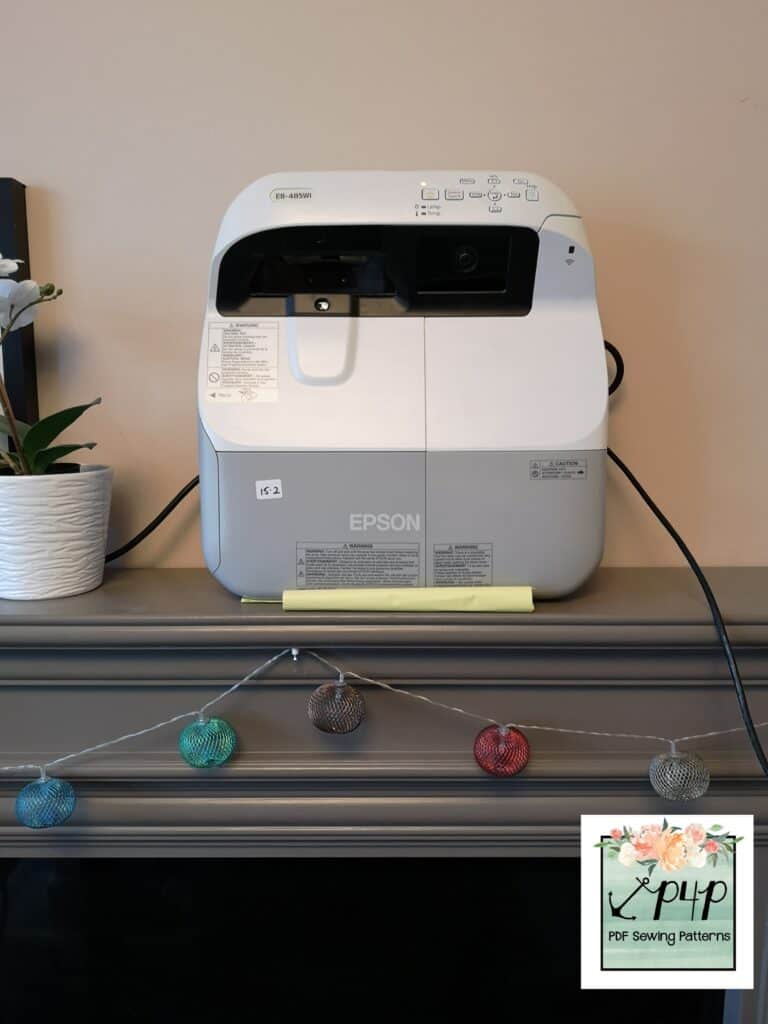
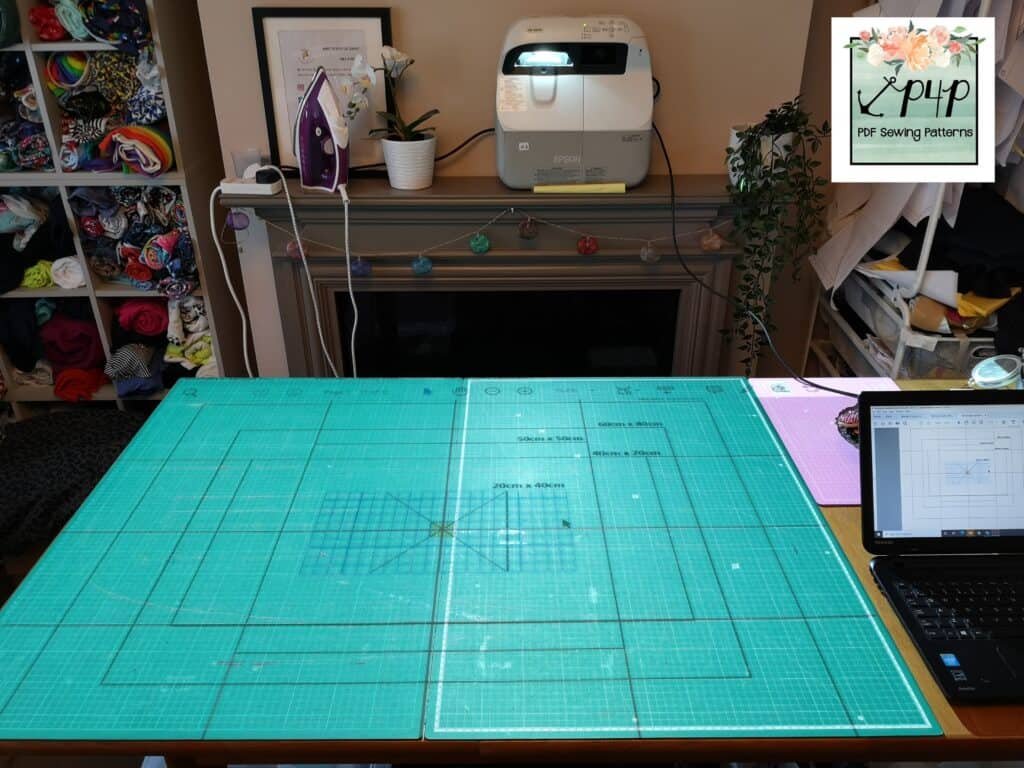
My projector is an Epson 485WI. I bought it in May 2020 after doing a lot of research about the kind of set up I would need for my own sewing room. I was lucky enough to find it reconditioned, on Ebay, being sold by a private school that was refurbishing its classrooms, and I have to say that it has been absolutely brilliant. Brand new, these types of projectors can be extremely expensive, but if you can find a reconditioned model like mine it’s a great way to make it more affordable.  Things to be aware of are the seller’s returns policy and reviews, and the age of the bulb. Older bulbs will be dimmer, so a new bulb with fewer hours on the clock will give you a brighter image. Some less powerful projectors will need to be used in a darkened room, however mine can be used in the middle of the day, quite comfortably.  The make and model you are looking at should be able to tell you the Lumens rating of the projector, that is it’s measure of brightness.  My projector has a rating of 3100 lumens. 

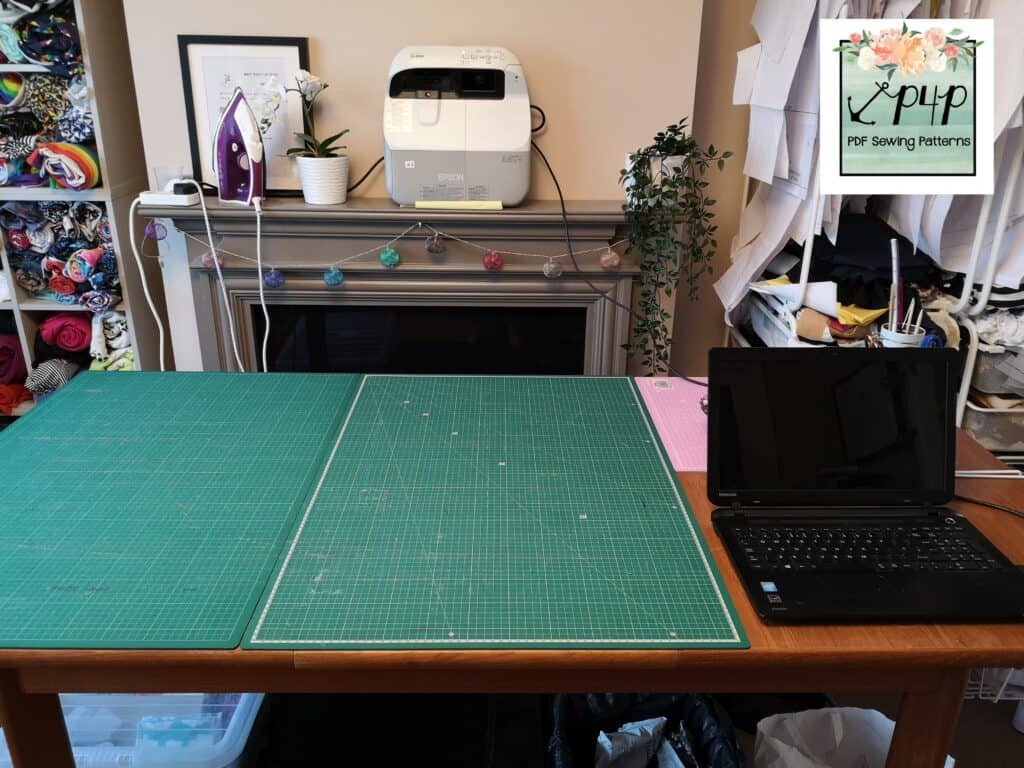
 I chose it because it is an Ultra Short Throw projector. This means that you do not need to have a large distance between the projector itself and your cutting mat. I did not want to have to mount a projector on the ceiling, as we have a ceiling light right above my cutting table, so I had to look at other options. This type of UST projector sits next to the cutting table, raised slightly above it, and projects down onto the surface of the mat. I have a mantelpiece right behind my table (which is lifted up on risers to a more comfortable height for cutting), and I knew I would be able to sit the projector on the mantelpiece nice and neatly, away from my daughter and my dog – both crash hazards!

If you don’t have this set up, or you would prefer a ceiling mounted projector you can find them relatively inexpensively on Amazon or elsewhere online. You will need to measure the distance between your cutting mat/table and where your projector would be mounted to help choose the right projector for your space. The specifications for the projector you are looking at should detail the minimum distance needed and the size of projection this will give you. Generally speaking, the further away from the cutting mat the projector is, the bigger the projected picture you will get. If you want to get very adventurous, I have seen people setting up their projectors to reflect the picture down to the cutting mat via a mirror, to make a larger projected image, but I don’t have experience of dealing with this myself. 


As well as the Ultra Short Throw projector that I have, you can also get Short Throw projectors that are specifically designed to project down from the ceiling but at a closer distance to the cutting mat. Again, the individual projector specs will give you details of how close you can mount the projector to the projection surface. 

My projector is connected via an HDMI cable to the projector directly. Some people use a Chrome cast plugged into the projector and cast the image from their laptop or tablet and others have a cable tethered to the ceiling and wall that runs from their digital device to the projector. However, one way or another you need to be able to connect your projector to your pattern image being displayed on Adobe Acrobat. Some sewists using a tablet can use software called Zodo to display the pattern but I believe there are issues using the zoom function to accurately display the pattern at the correct size every time, so that may be something to do some further research into, if you don’t have a laptop/desktop computer to use. 


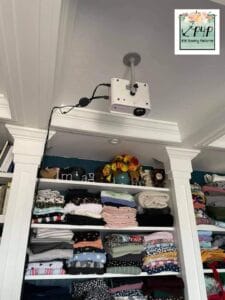
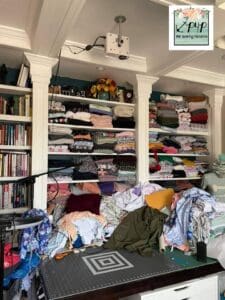
Some of the other admins at P4P have kindly taken some photos of their projector setups, to give you an idea of how people are using these new sewing tools!

• Bekah uses a GooDee Wifi mini projector, with a short throw.  She has about 4ft from ceiling to cutting table and so she chose to sink the projector in a recess cut into the ceiling space of her sewing room.  She gets a cutting space of about 24″ x 36″.  Her installation team were very hard workers!


• Lizzy has an Ultra Short Throw Epson 585w Powerlite mounted on a stand at the back of her cutting table.

• Trissa uses a Vivimage Explorer 2 connected to her Mac laptop with a 3rd generation Chromecast.


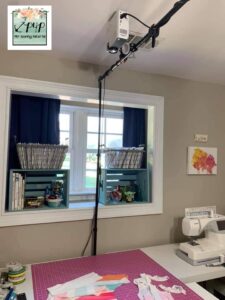
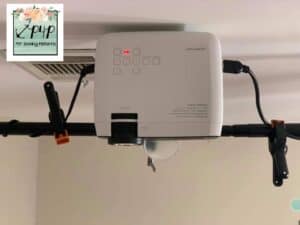
• Rachel has an Apeman projector mounted on a backdrop stand, for a non-permanent setup option.


So you can see that there are lots of different options out there for you to consider.  My thanks to all my Pirate shipmates for their help supplying pics and setup details.


Watch THIS VIDEO to see my projector setup in action as I go through turning it on, calibrating it, selecting options and demonstrate cutting using a projected image.


The most important thing about using your projector is that you will need to calibrate it to make sure it is projecting at the correct size. Otherwise you will find that your pattern pieces are too large/small and your garment will not fit. 


First of all you will ensure that your projector is casting a correct rectangular shape, with 90° right angles at the corners. This shape can be adjusted by either moving the projector itself, or using the Keystone adjustments on the projector settings. You may also need to adjust the focus as well.


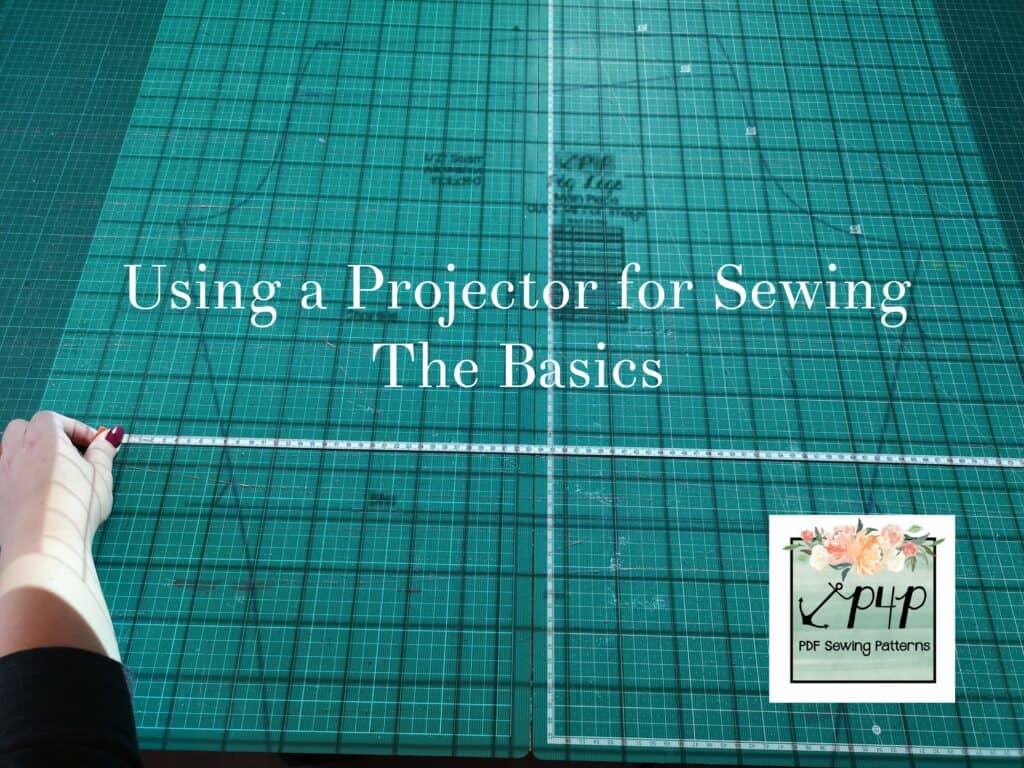
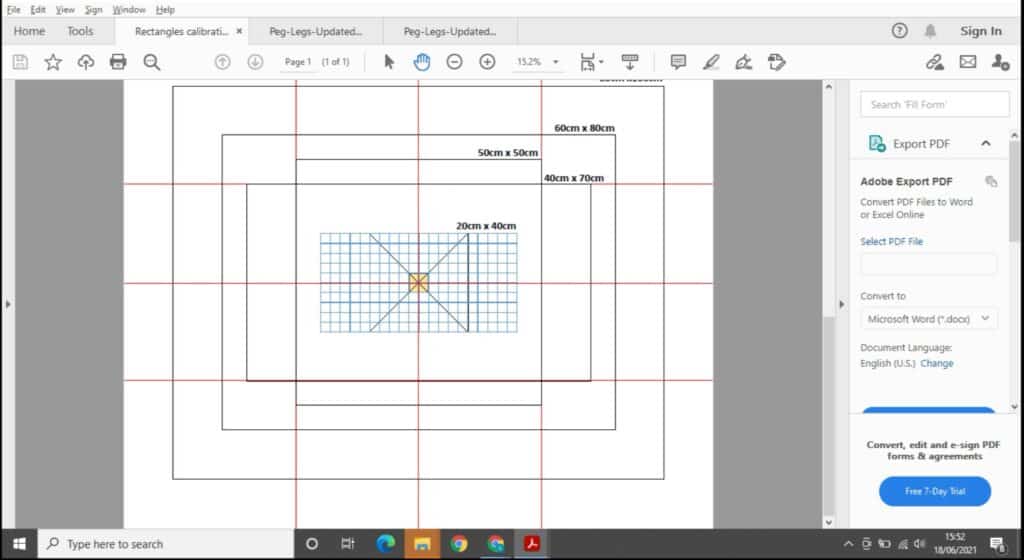
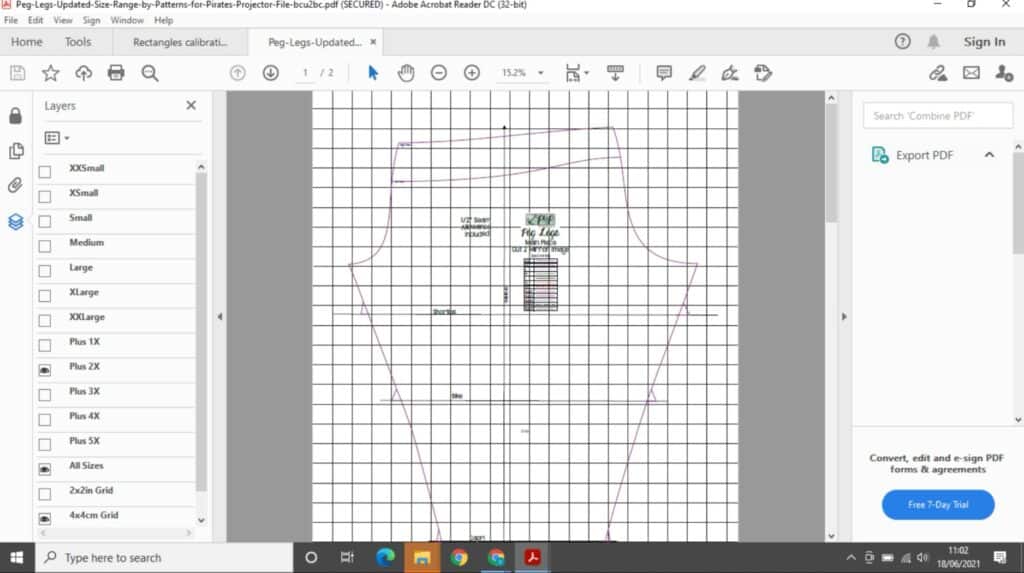
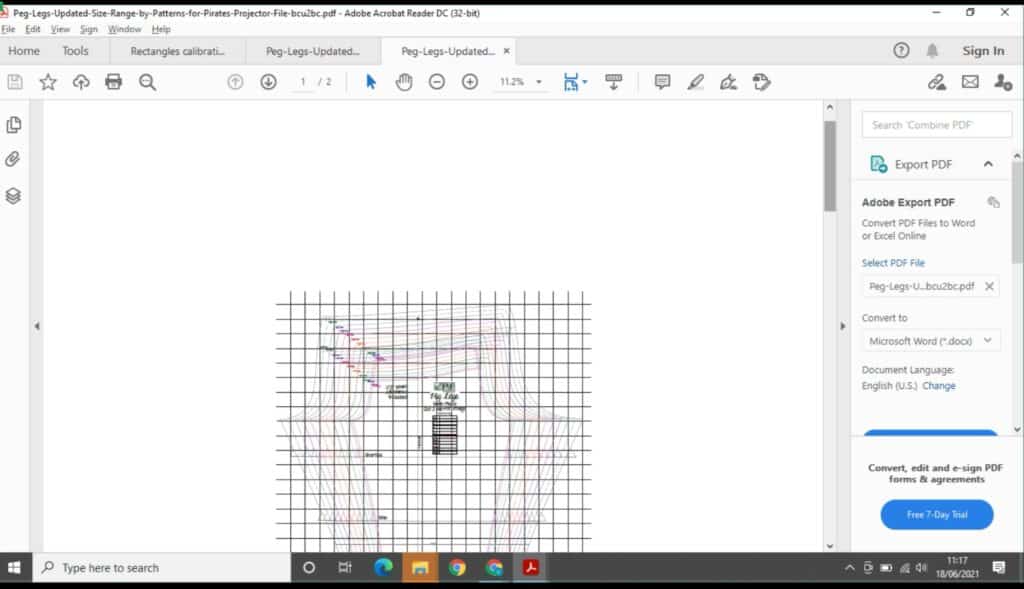
Next you will adjust the zoom on Adobe Acrobat to make sure that the pattern pieces being projected will be the correct size. The Facebook group, Projectors For Sewing has a lot of information that will help guide you through this process, which has kindly been provided for free by the page admins. It includes several calibration grid files, which you can download and bring up in Adobe Acrobat. Here is a screen grab of my laptop displaying one of the calibration grids that can be used.  Each line is a certain length as indicated on the grid, and your projected image has to be adjusted so that the projected line measures at the correct length.

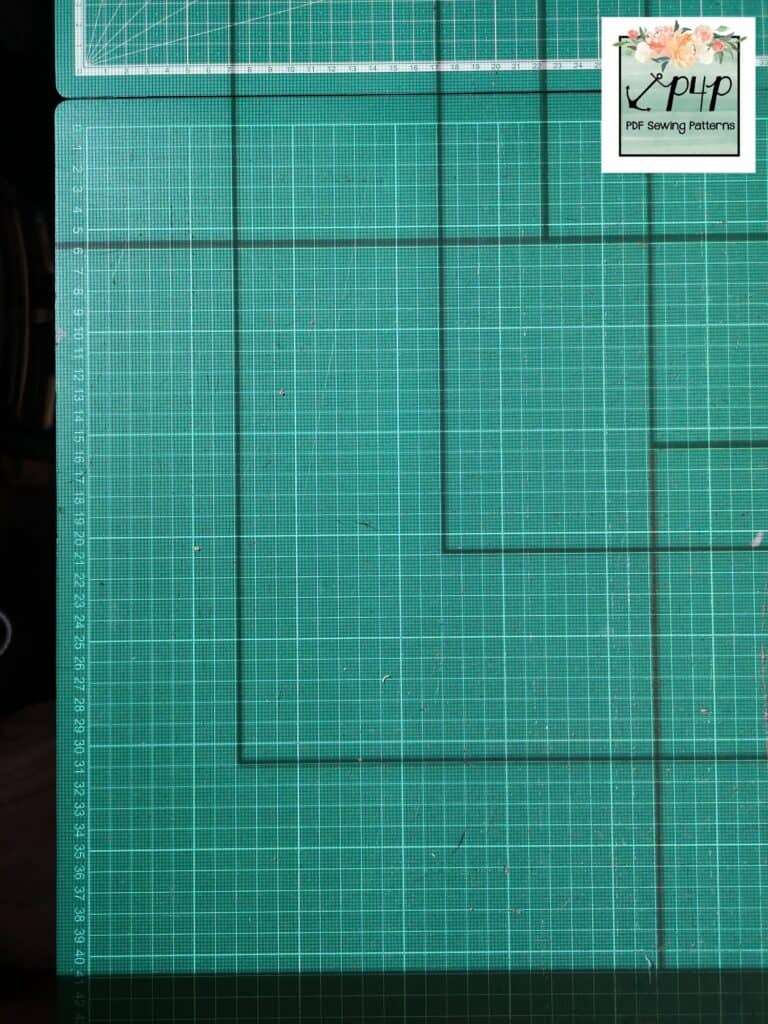
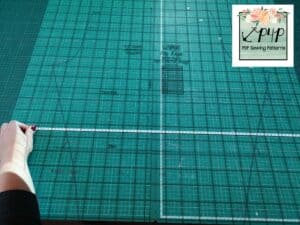
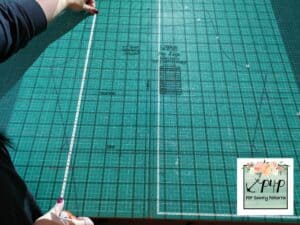
These calibration grids will help you adjust the zoom in Adobe to the correct scale, by measuring the lines on the boxes once they are projected onto your cutting table. If the projected line measures 90cm on your tape measure, for example, and the grid says it should measure 80cm, you will need to decrease your zoom to make the image smaller.  There is a little trial and error to start with, but it’s pretty easy once you understand the logistics of it. Once all the lines measure the correct size, your projector is calibrated.   I use a centimetre grid as I am in the UK and use metric, but there are also imperial options too.  You can watch the video linked above to see me doing this live, and see some stills below:


My machine stays in place on the mantelpiece, so I do not have to re-calibrate every time I turn it on. I set the zoom to the correct setting (which for me is 15.2%) and then just measure off a couple of lines on the calibration grid to make sure nothing has shifted. 


When you open your P4P projector file, you will see two options at the bottom of the size layers, 2x2in grid and 4x4cm grid. These will bring up a grid which measures either 2×2 inch squares or 4×4 centimetre squares, superimposed over your pattern pieces.

You can then sit your tape measure or quilting ruler next to these to ensure you have got the right setting on your zoom, also. It is important to check the measurements at the top, and the bottom of your projected image, in case the projection has tilted in some way. 


You do not need a projector file, however; some of our older patterns produced before this new projector craze have a layered A0 file, and this can also be used to project your pattern very effectively. The differences will be that the A0 file will not have the sizing grid option included, and the lines on the projector file are a little thicker and easier to see. 


There are many great benefits that you get from using a projector for sewing. The time saving aspect of not having to tape/glue pattern pieces together or cut out paper patterns is astonishing. Plus you will be saving a massive amount of paper from your recycling bin. It’s great for being able to quickly cut out multiple sizes of the same pattern, for siblings etc. 

You will save money on ink and paper too, and at £30 for a cartridge of ink for my printer every few months, it quickly adds up to a cost saving overall. 


I find it easy to mash patterns by cutting/drawing part of the pattern out using one pattern image, and then flipping into the next pattern pieces to draw/cut the remainder.


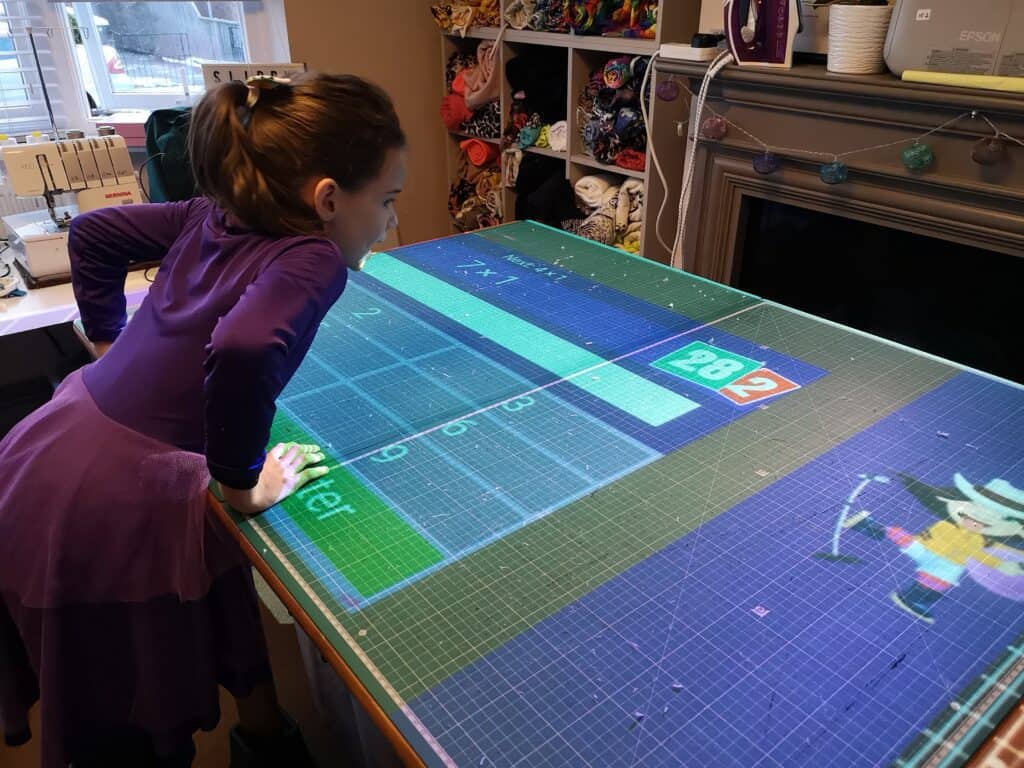
You can use it for other things too, we had great fun during homeschooling, projecting my daughter’s maths and spelling homework onto my cutting table, which she really enjoyed. A lot of people use their projectors for home cinema setups, too. Just remember you will need to re-calibrate it afterwards, once you get it back into position. 

If you make lots of pattern alterations, like full bust adjustments, sway back adjustments etc, you may need to get to grips with a software called Inkscape, which allows you to make adjustments to the pattern pieces digitally. Alternately, some sewists like to use their projectors to project the pattern image onto tracing paper, and then make adjustments to the paper pattern pieces as they go. Some adjustments can be made on the fly as you project, just by marking the pattern in a specific location, and then sliding your cutting board along the table to a new position, and then cutting again, but more advanced adjustments will need to be done in one of the ways discussed above. 

With my projector, because the projection area is so large, sometimes I have to add a buffer of blank space around my pdf pattern so that I can manoeuvre it into the right place on my cutting table.  I use a website called sedja.com to do this, and you can find full instructions on how to do this in the helpful files on the Projectors for Sewing Facebook page.  I like to add a 25 inch buffer on every side.  If you’re not sure what I mean here, the video linked above will show you how this works.


The only other downsides I have so far come across, is that if you do not note what adjustments you have made to a pattern then when you come back to it later, because you may not have a hard, paper copy to refer to, you will have forgotten what you did. For example, my daughter is tall and slender, and I always have to grade sizes for her. At the moment she is an age 8 height, 5 waist and 6 hip. I might make something for her and love the fit, but if I don’t note down what grading I did, if I want to make another I will have forgotten.   You can add notes to your pattern on Adobe Acrobat however, just remember to make them!


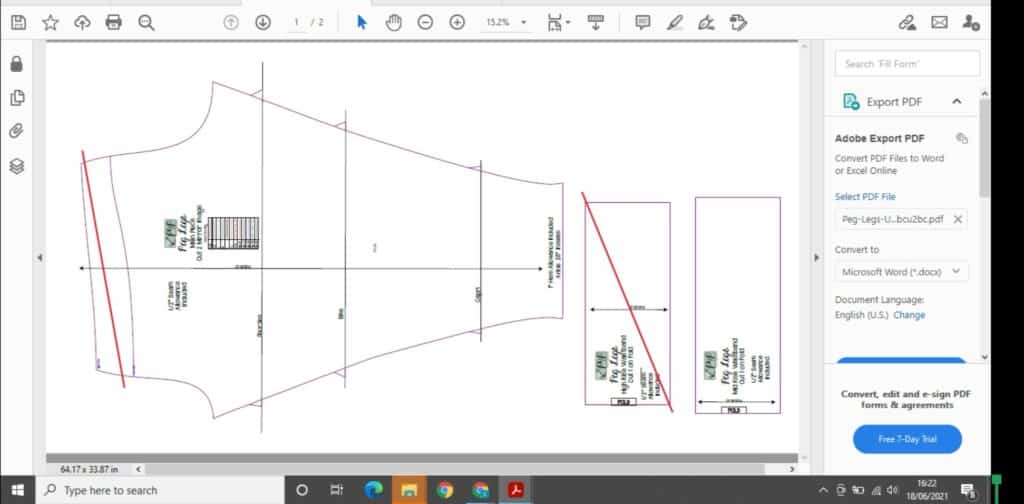
Sometimes it is also difficult to see which pieces to cut when looking at the projected image, as the text may be a little blurry. I find that if I turn on the tools and comments section, I can use a large red line to score out the pieces I don’t need to cut, so I don’t get confused when cutting out. 


The only other downside? Sometimes, especially in the middle of summer, the fan on the projector can kick out quite a lot of heat.  I cut out a pattern wearing a bikini during a particularly hot spell last year!


Overall, it’s a fantastic tool to have in your sewing arsenal, the time and money saving aspect alone is enough to make it worthwhile to give it a go. I certainly haven’t looked back. 

I would recommend doing a lot of research before you dive in and make a purchase. There is a vast amount of information on the Projectors for Sewing page, and I would recommend joining  and seeing what setups people have to get a little inspiration. 


Hopefully this has helped you get an idea of how projectors can be used in your sewing room to help you and maybe inspire you to join this growing community.

Happy Sewing!

Dana x


Dana is a sewing teacher and fabric fancier living in Suffolk, UK.  She specialises in plus size womenswear and funky kids clothes, and she loves testing and blogging for P4P.  You can find her at The Slippy Chicken Company

Filed Under: P4P University 18 Comments

Vintage Jumper Sew Along – day 7

March 30, 2021

Thank you all for joining me last week for the Vintage Jumper Sew Along. I loved seeing all the beautiful jumpers being created. I know you have been waiting for this post so I won’t keep you in suspense any longer. 

Our sew along winner is: Brianna Lynn! Brianna sewed not one, not two but THREE Vintage jumpers for her beautiful little one. What an outstanding job! Brianna won a $20 gift certificate to Patterns for Pirates and a $50 gift card to The Styled Magnolia Custom Fabrics.


We have a runner up winner to announce too. Congratulations, Darci Friberg! Darci will receive a $20 gift card from Made for Mermaids. 


Huge THANK YOU to our Sew Along sponsor for not only providing the prize but also the fabric I used for my own Vintage Jumper.


As I pass the baton to Colleen from M4M, I wanted to remind you about the Spring Sale and Capsule Contest going on right now on both the P4P and the M4M sites. See you back for our next sew along in May!

Vintage Jumper SAL | DAY 1 (cut fabric)

Vintage Jumper SAL | DAY 2 (Back darts, front & back pockets, crotch & in seam)

Vintage Jumper SAL | DAY 3 (out seam)

Vintage Jumper SAL | DAY 4 (straps, front bib)

Vintage Jumper SAL | DAY 5 (waistband)

Vintage Jumper SAL | DAY 6 (button holes, buttons and hem)

Vintage Jumper SAL | DAY 7 (winners announcement)

Filed Under: Sew-A-Long Leave a Comment

Vintage Jumper Sew Along – day 6

March 27, 2021

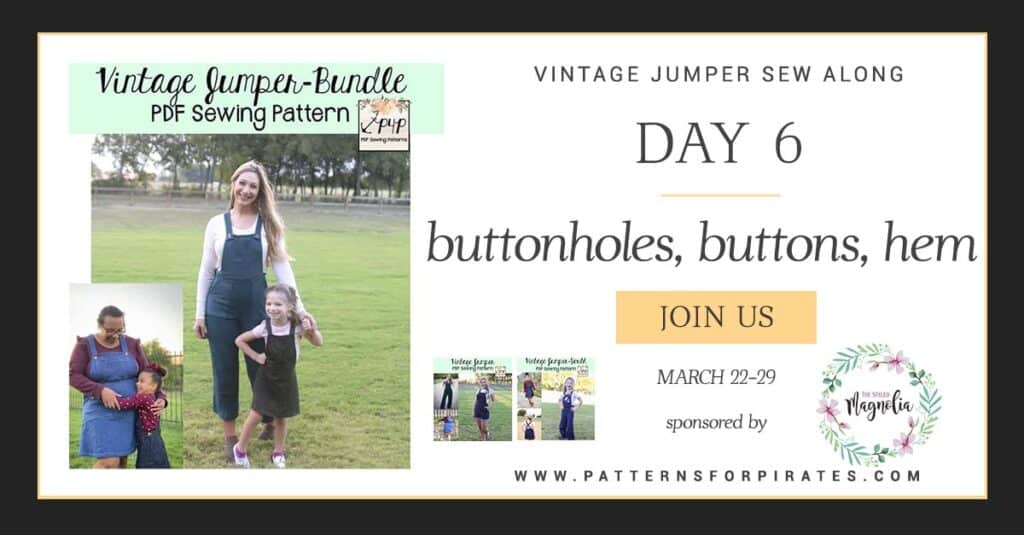
Good morning, pirates! We made it to the last day of our Vintage Jumper sew along. Today we put the finishing touches on the jumper by adding the 3 buttons and buttonholes as well as hemming the skirt/pants. 

I start with the side button. If your machine came with the buttonhole foot attachment, grab it now. If not, you can manually make the buttonhole by marking the location and stitching a rectangle (the size of your button) with a tight zig zag stitch (also known as satin stitch). If you’re new to sewing buttons, check out our P4P University Buttons and Buttonholes blog, where I show you various techniques. 

If you did not try on the jumper yesterday, do that now and mark where you would like the straps to be for best fit. Check out the Vintage Jumper Hacks blog where you will find a great alternative to the bib buttons. Rachel shows you (with a video too!!) how to add overall buckles instead!

Last step of the day is to hem the skirt or the pants. Ohh, and remember to give your finish garment a good press!


Check out today’s video below! Once you complete your project, add a picture of your jumper to the comments of day 6 photo of the sew along album. This is where the P4P team will look to select the winners for the sew along. I do encourage you to share your Vintage Jumper in the main group too so we can all admire it. 

Vintage Jumper SAL | DAY 1 (cut fabric)

Vintage Jumper SAL | DAY 2 (Back darts, front & back pockets, crotch & in seam)

Vintage Jumper SAL | DAY 3 (out seam)

Vintage Jumper SAL | DAY 4 (straps, front bib)

Vintage Jumper SAL | DAY 5 (waistband)

Vintage Jumper SAL | DAY 6 (button holes, buttons and hem)

Vintage Jumper SAL | DAY 7 (winners announcement)

Filed Under: Sew-A-Long Leave a Comment

Vintage Jumper Sew Along – day 5

March 26, 2021

Hurray! Day 5 is here! By the end of today you will have a jumper, albeit without buttons and hems but a jumper nonetheless. Today we add the waistband that will be attached to the skirt/pants and bib/straps. 

Start by interfacing the waistband main and lining with knit interfacing. If you did not add the notches when you cut the fabric, do your markings now! Don’t skip these steps, the markings will be very helpful when you sew up the waistband. Below you can see how Judy creates the youth one. Check it out!

In today’s video I show you how I add the adult waistband to my skirt jumper. My favorite part is that the band has no exposed edges! Everything is enclosed so it makes for more sensory friendly garment. When attaching the straps to the back waistband, make sure that the “pointy” side faces out. This will ensure that the straps will lay flat on the back.

After you finish today’s steps, try the jumper on. Check if you like the back pocket placement and where you will want the buttons on the straps. That’s the beauty of sewing for yourself! You get to customize it to your figure. Don’t forget to check in with your progress photo in the comments of day 5 thread in the Sew Along group on Facebook. See you back here tomorrow to finish up the Vintage Jumper!

Vintage Jumper SAL | DAY 1 (cut fabric)

Vintage Jumper SAL | DAY 2 (Back darts, front & back pockets, crotch & in seam)

Vintage Jumper SAL | DAY 3 (out seam)

Vintage Jumper SAL | DAY 4 (straps, front bib)

Vintage Jumper SAL | DAY 5 (waistband)

Vintage Jumper SAL | DAY 6 (button holes, buttons and hem)

Vintage Jumper SAL | DAY 7 (winners announcement)

Filed Under: Sew-A-Long Leave a Comment

Vintage Jumper Sew Along – day 4

March 25, 2021

Good morning, pirates! Today we start working on the top part of the jumper. It features a cute bib and straps that attach to the waistband and bib. 

The bib is lined and it has a fun color-blocked pocket. While the pocket is optional, I wouldn’t skip it. If you are making the youth Jumper you can add a cute embroidery, a monogram a heat transfer vinyl graphic, you name it! Another way to add a little something extra to the pocket is to do some decorative top stitching. So much opportunity for embellishments!

The pocket itself is not lined, however, I did decide to line mine because the fabric was thin enough. If you are using a heavier, thicker woven, don’t line it or use a thin fabric for the back. You can see how I did it in the video below.  

When creating the two long straps, don’t forget to as some tricot interfacing to both the main and the lining. Sew each strap lining and main, right sides together along the 3 straight edges, not the slanted one with the notch. Using your favorite turning tool, turn your straps right side out, press and top stitch. That’s it! You have completed the steps for day 4. All you have to do now is add your check in photo to the sew along album on Facebook.
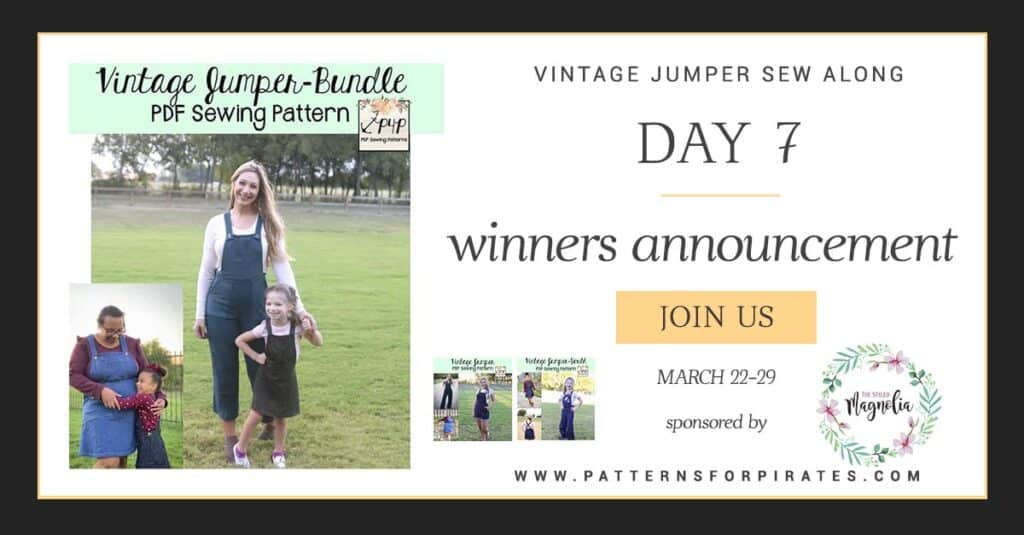
See you tomorrow! 

Vintage Jumper SAL | DAY 1 (cut fabric)

Vintage Jumper SAL | DAY 2 (Back darts, front & back pockets, crotch & in seam)

Vintage Jumper SAL | DAY 3 (out seam)

Vintage Jumper SAL | DAY 4 (straps, front bib)

Vintage Jumper SAL | DAY 5 (waistband)

Vintage Jumper SAL | DAY 6 (button holes, buttons and hem)

Vintage Jumper SAL | DAY 7 (winners announcement)

Filed Under: Frequently Asked Questions, Sew-A-Long, Uncategorized Leave a Comment

Vintage Jumper Sew Along – day 3

March 24, 2021

Ahoy, pirates! Day 3 is reserved for sewing the side seams. Once side will be sewn “normally”, on the other we will add a zipper. When sewing the side with no zipper, remember to place your fabrics right sides together and stitch with your sewing machine. You can finish the raw edge after with a serger stitch, a zig zag or an overlock stitch. 

I know a lot of sewists may be “scared” of zippers but trust me, they are not as frightening as they seam. Judy is showing you in the videos below, her two favorite methods for adding the little side zipper. Think about it this way, it’s just 7 inches of zipper…how scary can that be? 😉

Day 3 video is posted below. Once you finish today’s steps, grab a picture of your “almost” finished pants or skirt and add it to the Day 3 photo comments in the Vintage Jumper Sew Along album. You can find the album in the Facebook SAL group. 


Vintage Jumper SAL | DAY 1 (cut fabric)

Vintage Jumper SAL | DAY 2 (Back darts, front & back pockets, crotch & in seam)

Vintage Jumper SAL | DAY 3 (out seam)

Vintage Jumper SAL | DAY 4 (straps, front bib)

Vintage Jumper SAL | DAY 5 (waistband)

Vintage Jumper SAL | DAY 6 (button holes, buttons and hem)

Vintage Jumper SAL | DAY 7 (winners announcement)

Filed Under: Frequently Asked Questions, Sew-A-Long, Uncategorized Leave a Comment

Vintage Jumper Sew Along – day 2

March 23, 2021

\

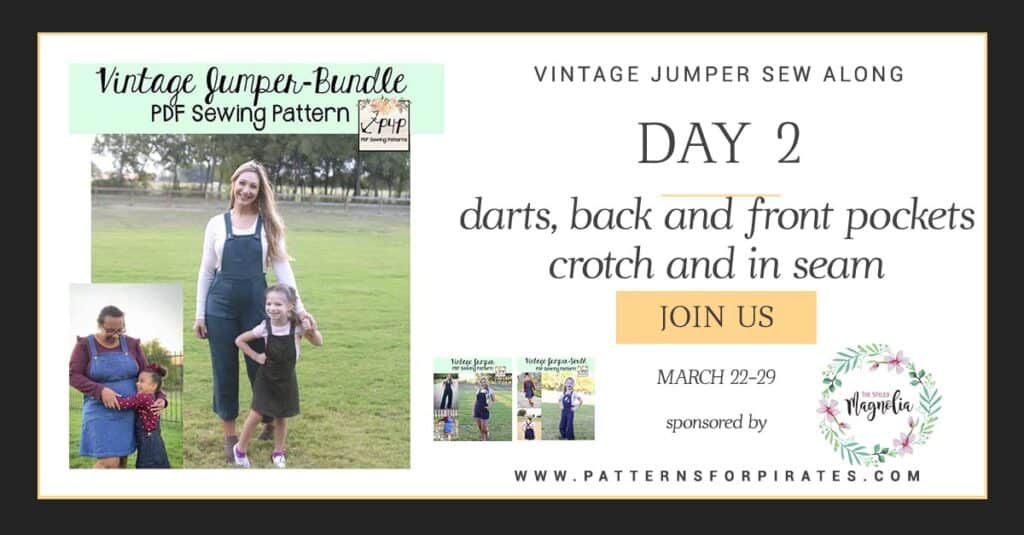
Welcome to day 2 of our Vintage Jumper Sew Along! Today we sew the darts for the shorts, capris and pants. We also add the front and back pockets as well as the pants crotch and in seam. 

When sewing the darts, remember to not back backstitch. Simply pull both threads on the wrong side of the fabric and tie them in a knot. This will reduce the bulk in the dart stitches. While I am not showing the darts in my day two video (I am making the skirt) I do recommend reading our P4P University Darts 101 if you are new to sewing this step. 

Both the pants and skirt options include a front pocket style. I recommend not skipping them, they are so adorable! I went “off the script” 😉 and added even the back pockets to my skirt. The pattern only has you adding the back pockets to the shorts, capri and long pants style. Remember to just baste your back pockets in place, try the jumper on after day 5 steps and only then sew them in place. You want to make sure you love the placement! It can make or break the look of your pants. 

If you are making the skirt option, you have completed the steps for today. If you are sewing the pants style, you still need to sew the crotch and in seam. Today’s video is below. Don’t forget to snap a picture of your completed steps and add it to the day to photo comments in the Vintage Jumper Sew Along album. 

Vintage Jumper SAL | DAY 1 (cut fabric)

Vintage Jumper SAL | DAY 2 (Back darts, front & back pockets, crotch & in seam)

Vintage Jumper SAL | DAY 3 (out seam)

Vintage Jumper SAL | DAY 4 (straps, front bib)

Vintage Jumper SAL | DAY 5 (waistband)

Vintage Jumper SAL | DAY 6 (button holes, buttons and hem)

Vintage Jumper SAL | DAY 7 (winners announcement)

Filed Under: Frequently Asked Questions, Sew-A-Long, Uncategorized Leave a Comment

Vintage Jumper Sew Along – day 1

March 22, 2021

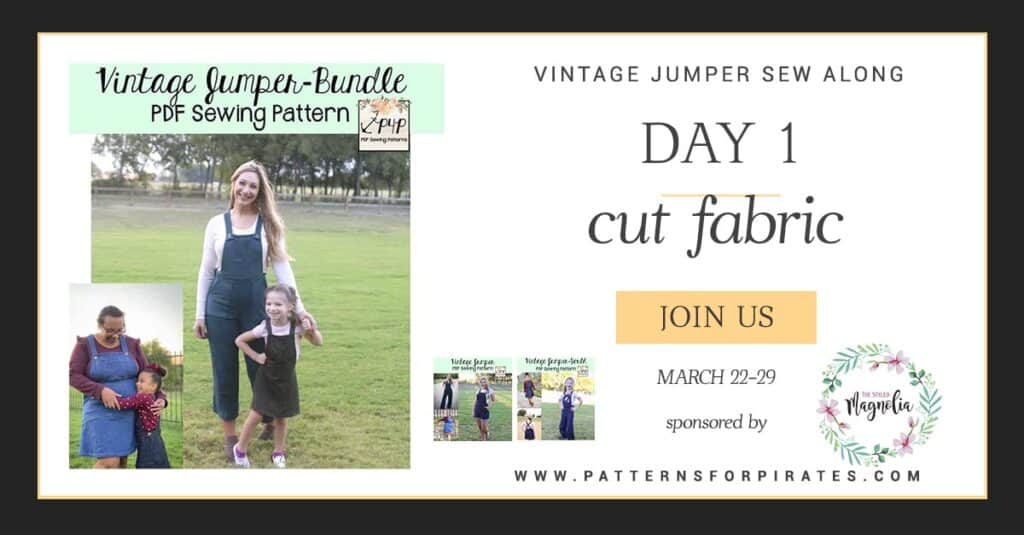
Welcome to the Vintage Jumper Sew Along! 

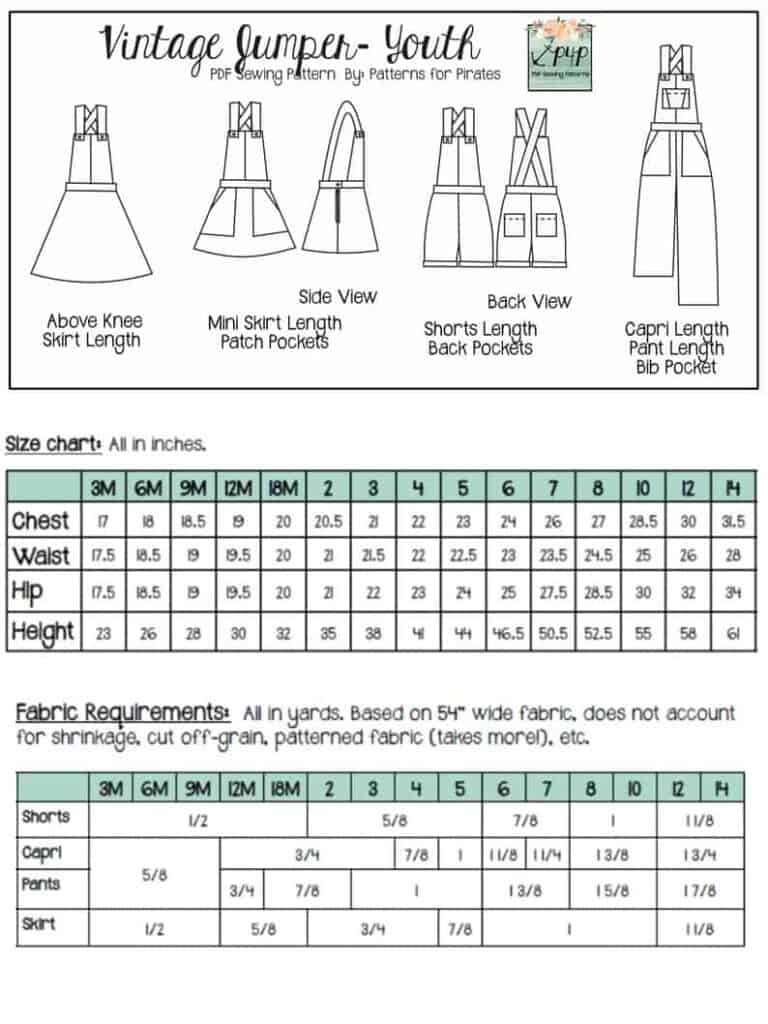
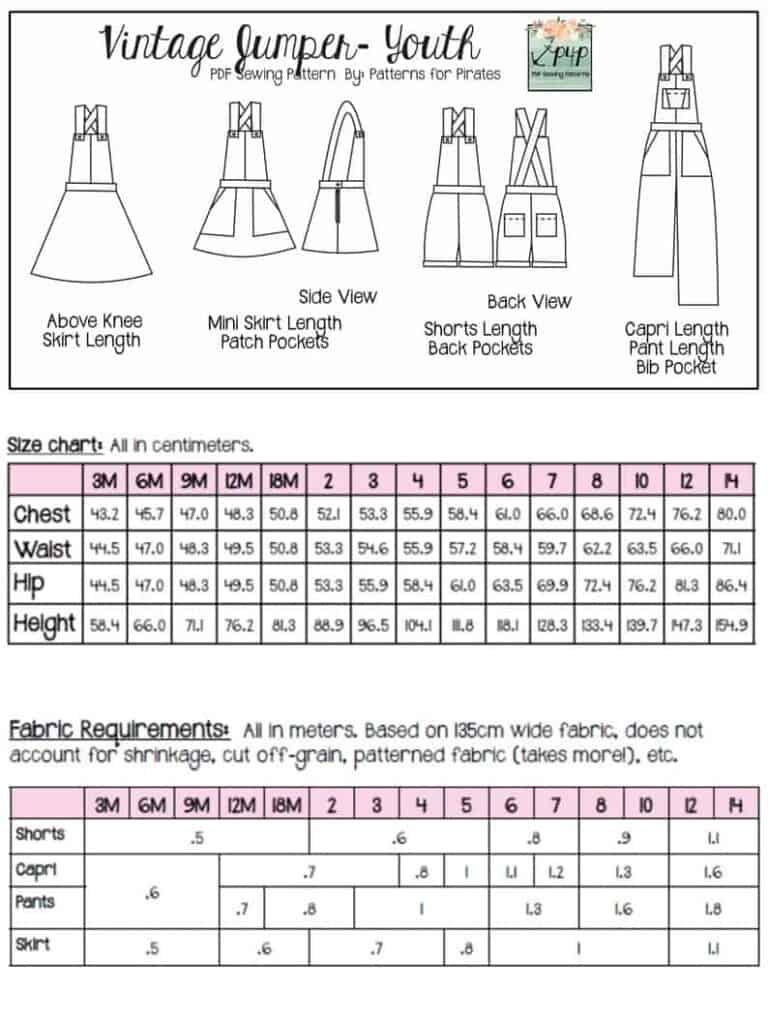
Day One of the sew along is for purchasing the pattern and cutting the fabric. If you did not buy the patterns yet, stop by the Sew Along Facebook Group to grab an exclusive coupon code. You can grab the adult Vintage Jumper here. If you plan to sew for a little one, be sure to snag the  Youth Vintage jumper or the Bundle. If you are still undecided which style to make, our Round Up blog will give you an overview of all options included, from skirts to pants lengths. You can also use the Easy Hacks blog for added options.

Now that we have the patterns it’s time to select which method of using them you would like to do. Both the Youth and the Adult come in A4 and Letter format to print at home, A0 format to print with a plotter or at a copy shop AND a projector file. If you use the projector file you will not have to print anything!! That’s definitely my favorite way! You can see in today’s video how I use the file to cut the fabric. 

Let’s start by taking the measurements needed for the best fit. P4P has an amazing blog that gives you tips for accurately taking your measurements. You can read all about it here. If your measurements put you in a different size for chest/waist/hips be sure to check out our P4P University blog and grade to achieve the perfect fit. Our most recent patterns include videos as well so be sure to check them out!


Still debating which knit type will work best for your desired look? Take a look over our P4P University Knit Types blog. We also included a cheat sheet that you can print. If you are like me and sometime are just keen on using a specific print for a specific pattern, read our Different fabric, different fit blog post before you cut your fabric. This pattern is drafted for stretch woven such a stretch suede, stretch velvet or stretch denim.

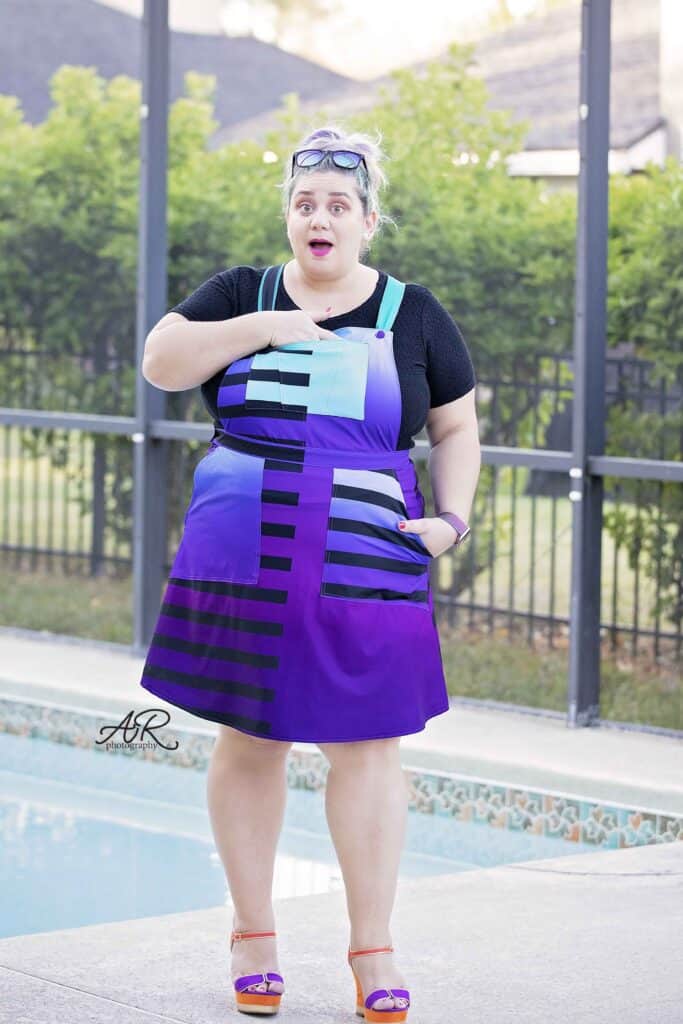
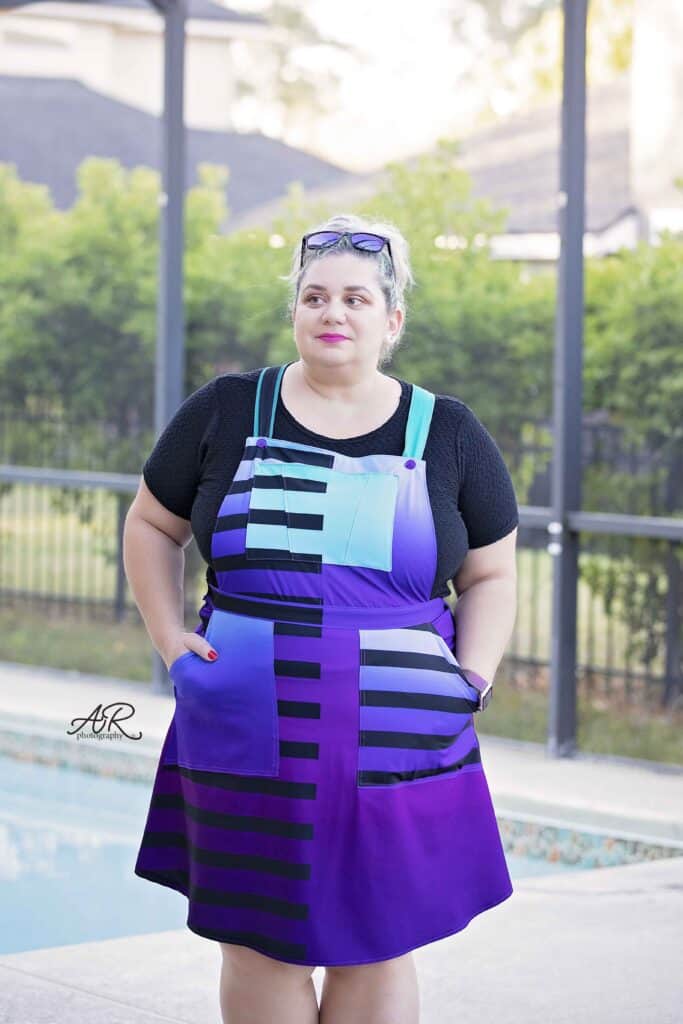
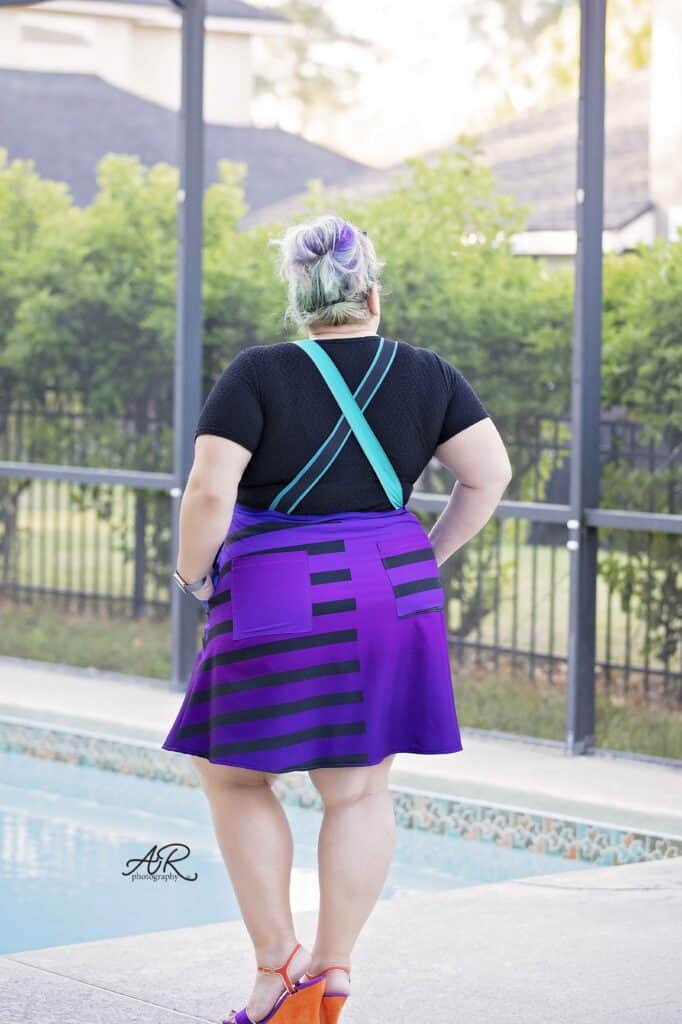
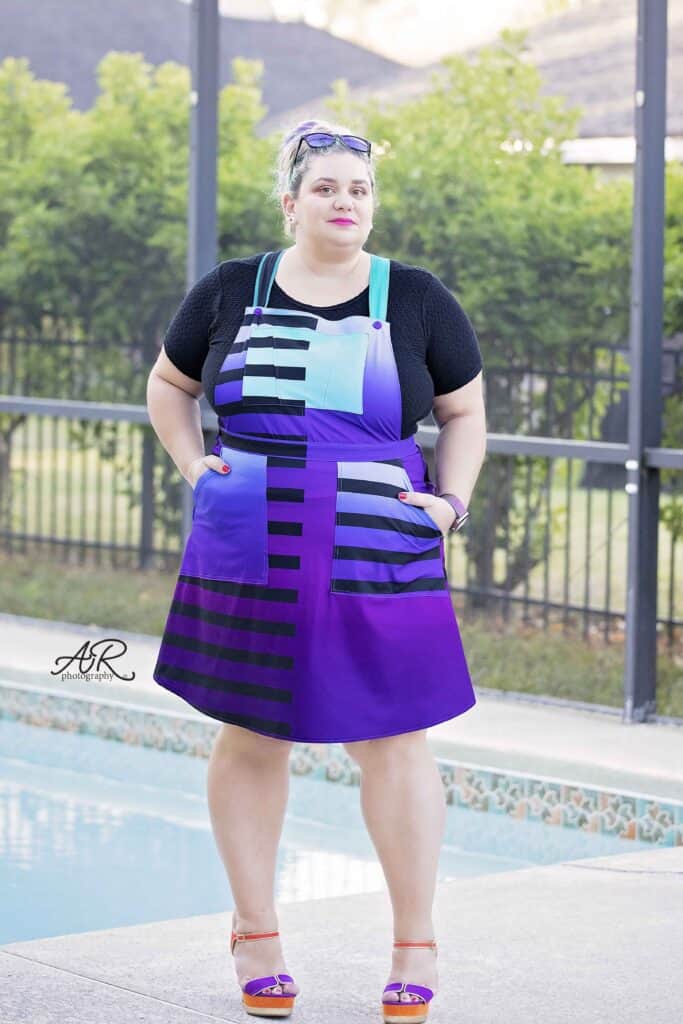
I have opted for a fun Half Black Stripes Tropical Ombre stretch woven from The Styled Magnolia. TSM is this sew along’s sponsor so our winner will get to try some of their goodies too. 


You can see day 1 video below. Once you complete you pretty pile of cut fabric, take a picture and post it in the comments of day 1 photo. This sew along album will be in the M4M & P4P Sew Along Facebook group. 

Vintage Jumper SAL | DAY 1 (cut fabric)

Vintage Jumper SAL | DAY 2 (Back darts, front & back pockets, crotch & in seam)

Vintage Jumper SAL | DAY 3 (out seam)

Vintage Jumper SAL | DAY 4 (straps, front bib)

Vintage Jumper SAL | DAY 5 (waistband)

Vintage Jumper SAL | DAY 6 (button holes, buttons and hem)

Vintage Jumper SAL | DAY 7 (winners announcement)


Filed Under: Frequently Asked Questions, Sew-A-Long, Uncategorized Leave a Comment

Cozy Wrap Sew Along – day 5

January 29, 2021

Welcome to day 5 of our Cozy Wrap sew along. Today is probably my favorite day because I get to make those cute, trendy gathered sleeves. The pattern includes a banded short sleeve, a cuffed regular sleeve and a gathered one. 

If you opted for short sleeve, you will create the bands by sewing each one right sides together to form loops. I highly encourage you to pre-press the cuffs wrong sides together before creating the loops. Just like we did the past few days. 

The standard long and gathered sleeves are attached in the round. That means you are sewing the side seams of the sleeves first. Matching the armpit seam to the sleeve side seam, attach the sleeves to the opening. If you opted for the gathered sleeves, you need to run a gathering stitch or two at the wrist. Pull the gathering threads so that the opening matches the cuff. I personally love gathering with my serger. Our P4P University Gathering blog covers a few gathering methods. 

To attach the cuff, simply match the cuff seam to the sleeve seam and sew right sides together. We have a tips and tricks P4P University cuffs 101 blog that I encourage you to check out. 

We are so close to finishing! All we have left to do is create the waist tie tomorrow. You can see today’s video below. Check in with your progress in the comments of day 5 photo of the Cozy Wrap sew along album. 


Cozy Wrap SAL day 1 | Cut fabric

Cozy Wrap SAL day 2 | Sew shoulder and side seams

Cozy Wrap SAL day 3 | Add bottom bands

Cozy Wrap SAL day 4 | Add neckband

Cozy Wrap SAL day 5 | Add sleeves

Cozy Wrap SAL day 6 | Add waist tie

Cozy Wrap SAL day 7 | Winners announcement  

Filed Under: Fabric for Pirates, Frequently Asked Questions, Sew-A-Long, Uncategorized Leave a Comment

  • 1
  • 2
  • 3
  • Next Page »

Featured Patterns

  • Loosey Goosey Loosey Goosey $12.00
  • Loosey Goosey- Youth Loosey Goosey- Youth $10.00
  • Loosey Goosey - Bundle Loosey Goosey - Bundle $20.00
  • Everyday Shirt Everyday Shirt $12.00
  • Everyday Shirt- Youth Everyday Shirt- Youth $10.00
  • Privacy Policy
  • Refund Policy
  • Affliliate Program
  • Contact Us
  • About

Copyright © 2025 Patterns for Pirates

Copyright © 2025 · Genesis Framework · WordPress · Log in