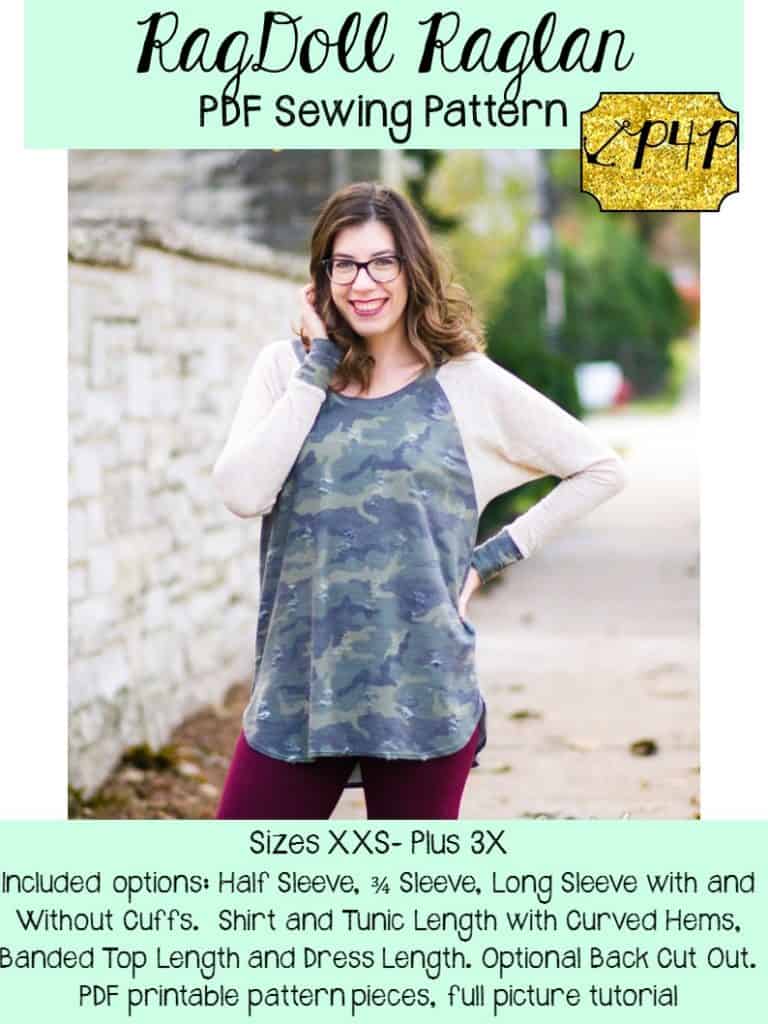
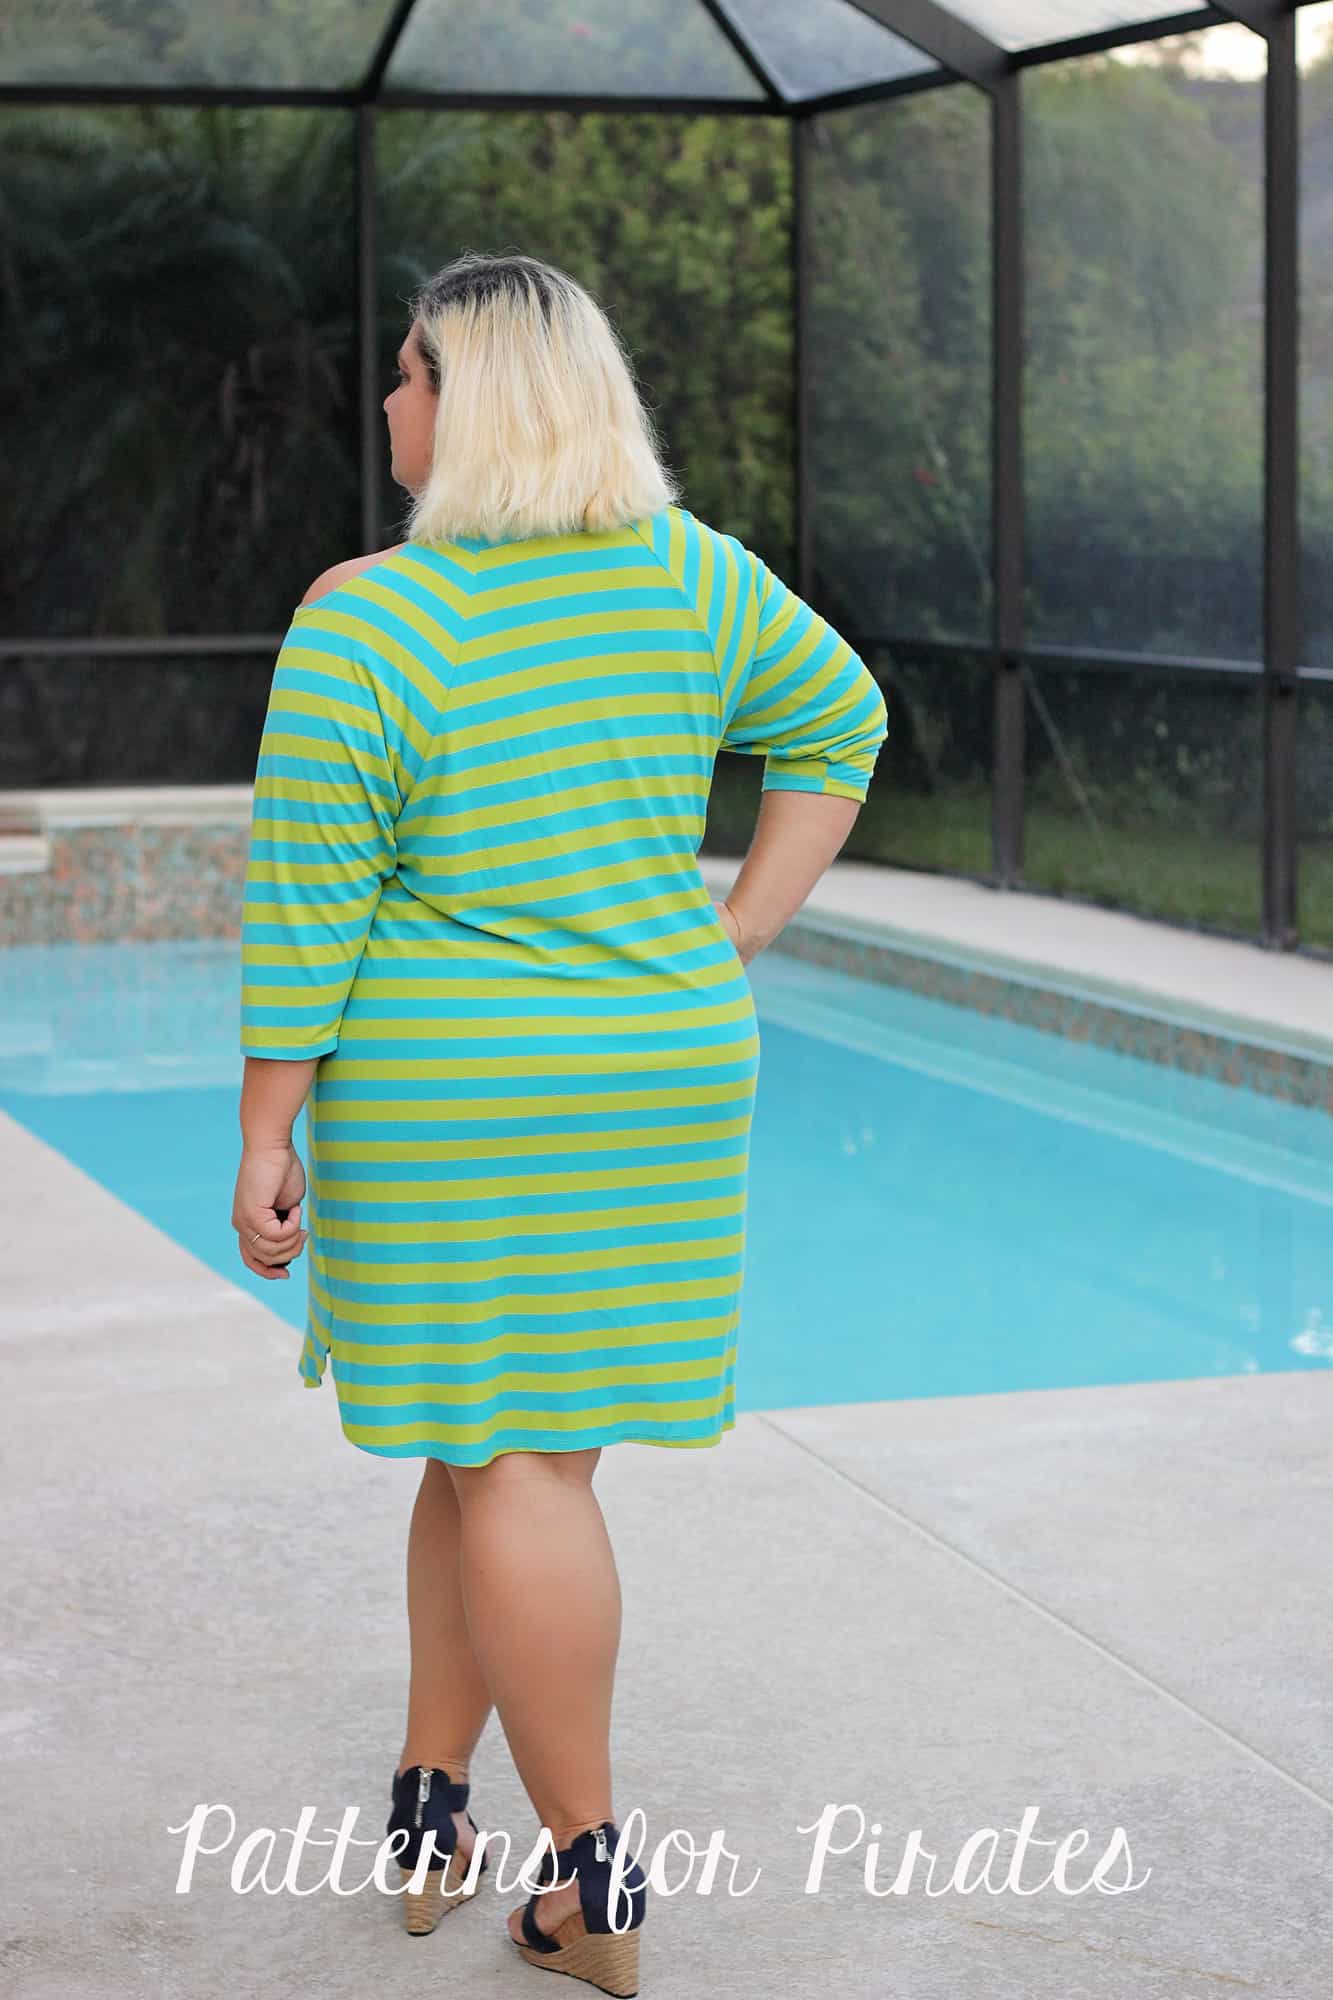
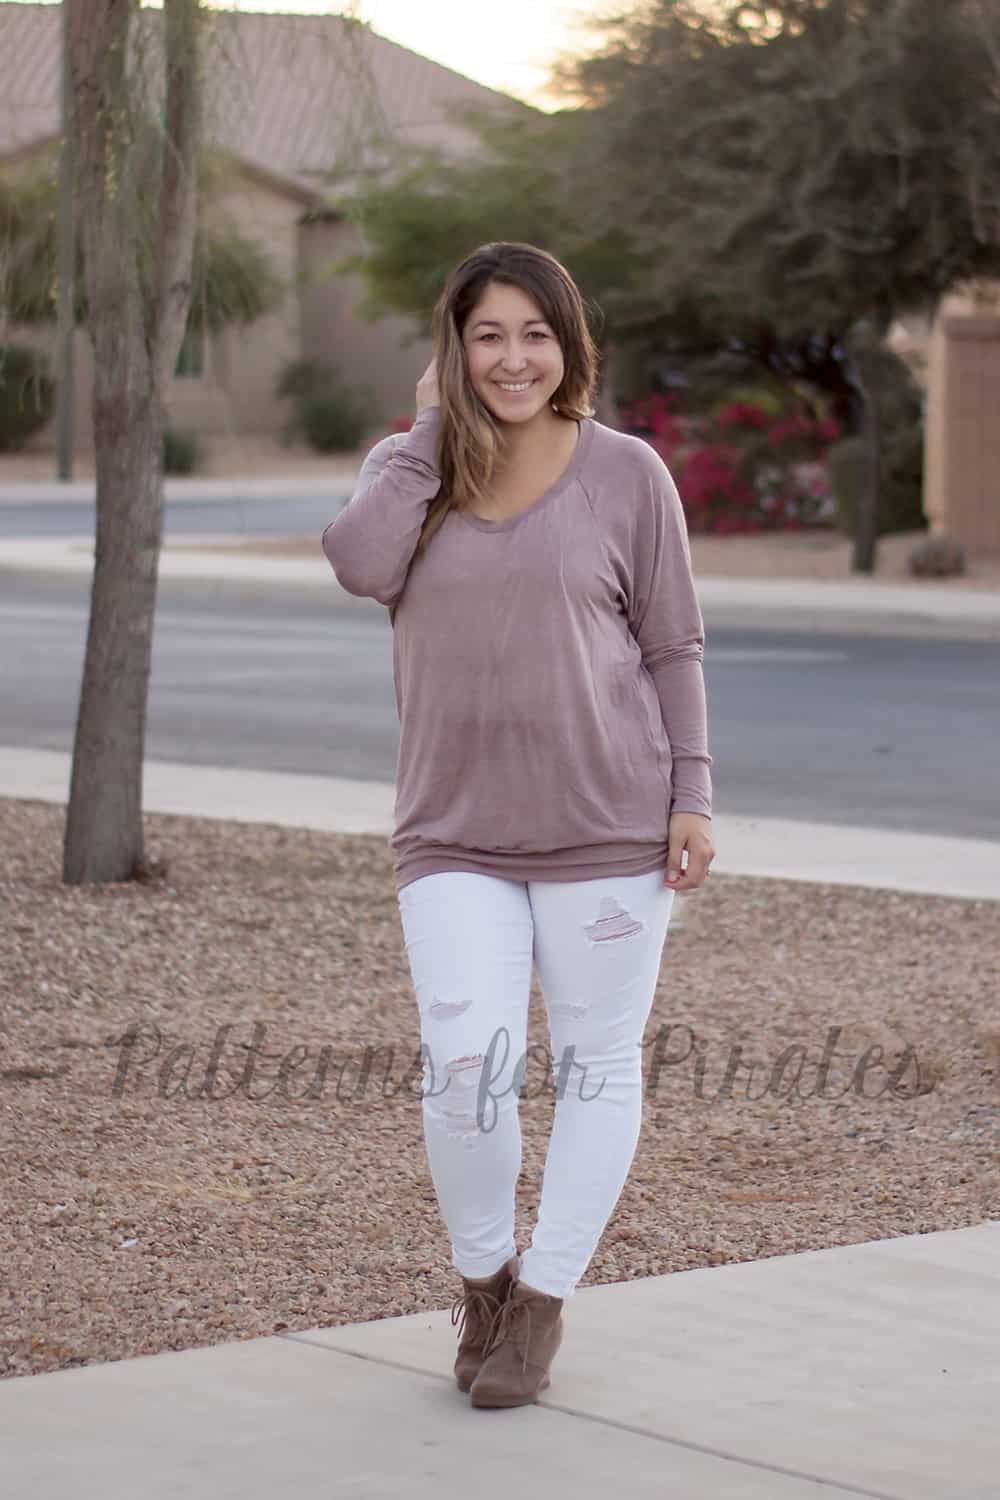
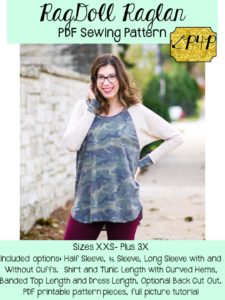
Are you like me and you LOVE a good raglan pattern? Hands down, it’s one of my favorite things to sew. They’re fast, provide for fun pattern and color mixing options without any effort, and they make such a great casual tee.
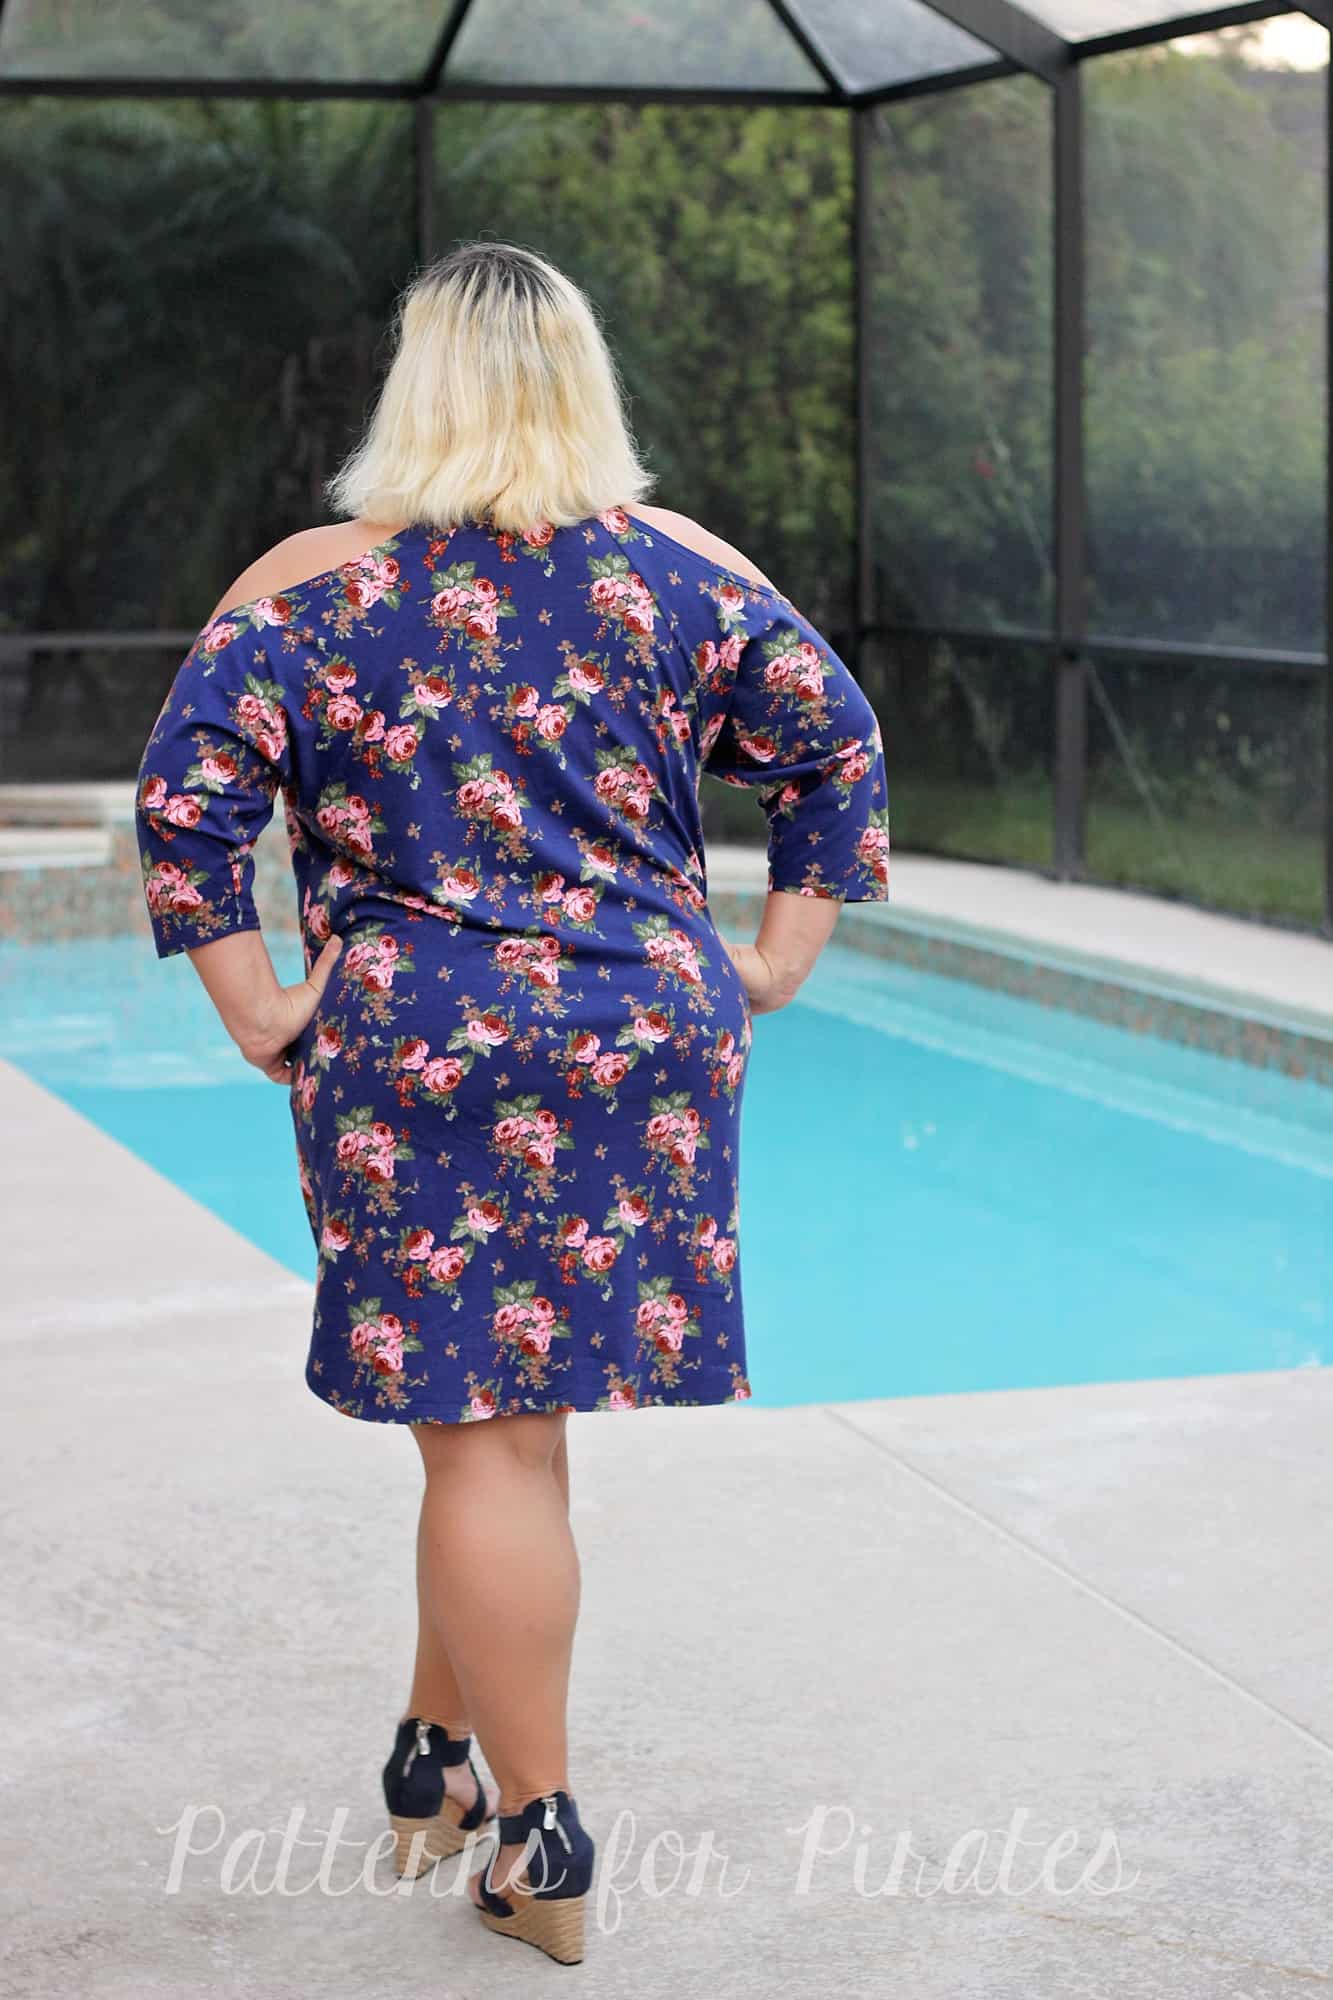
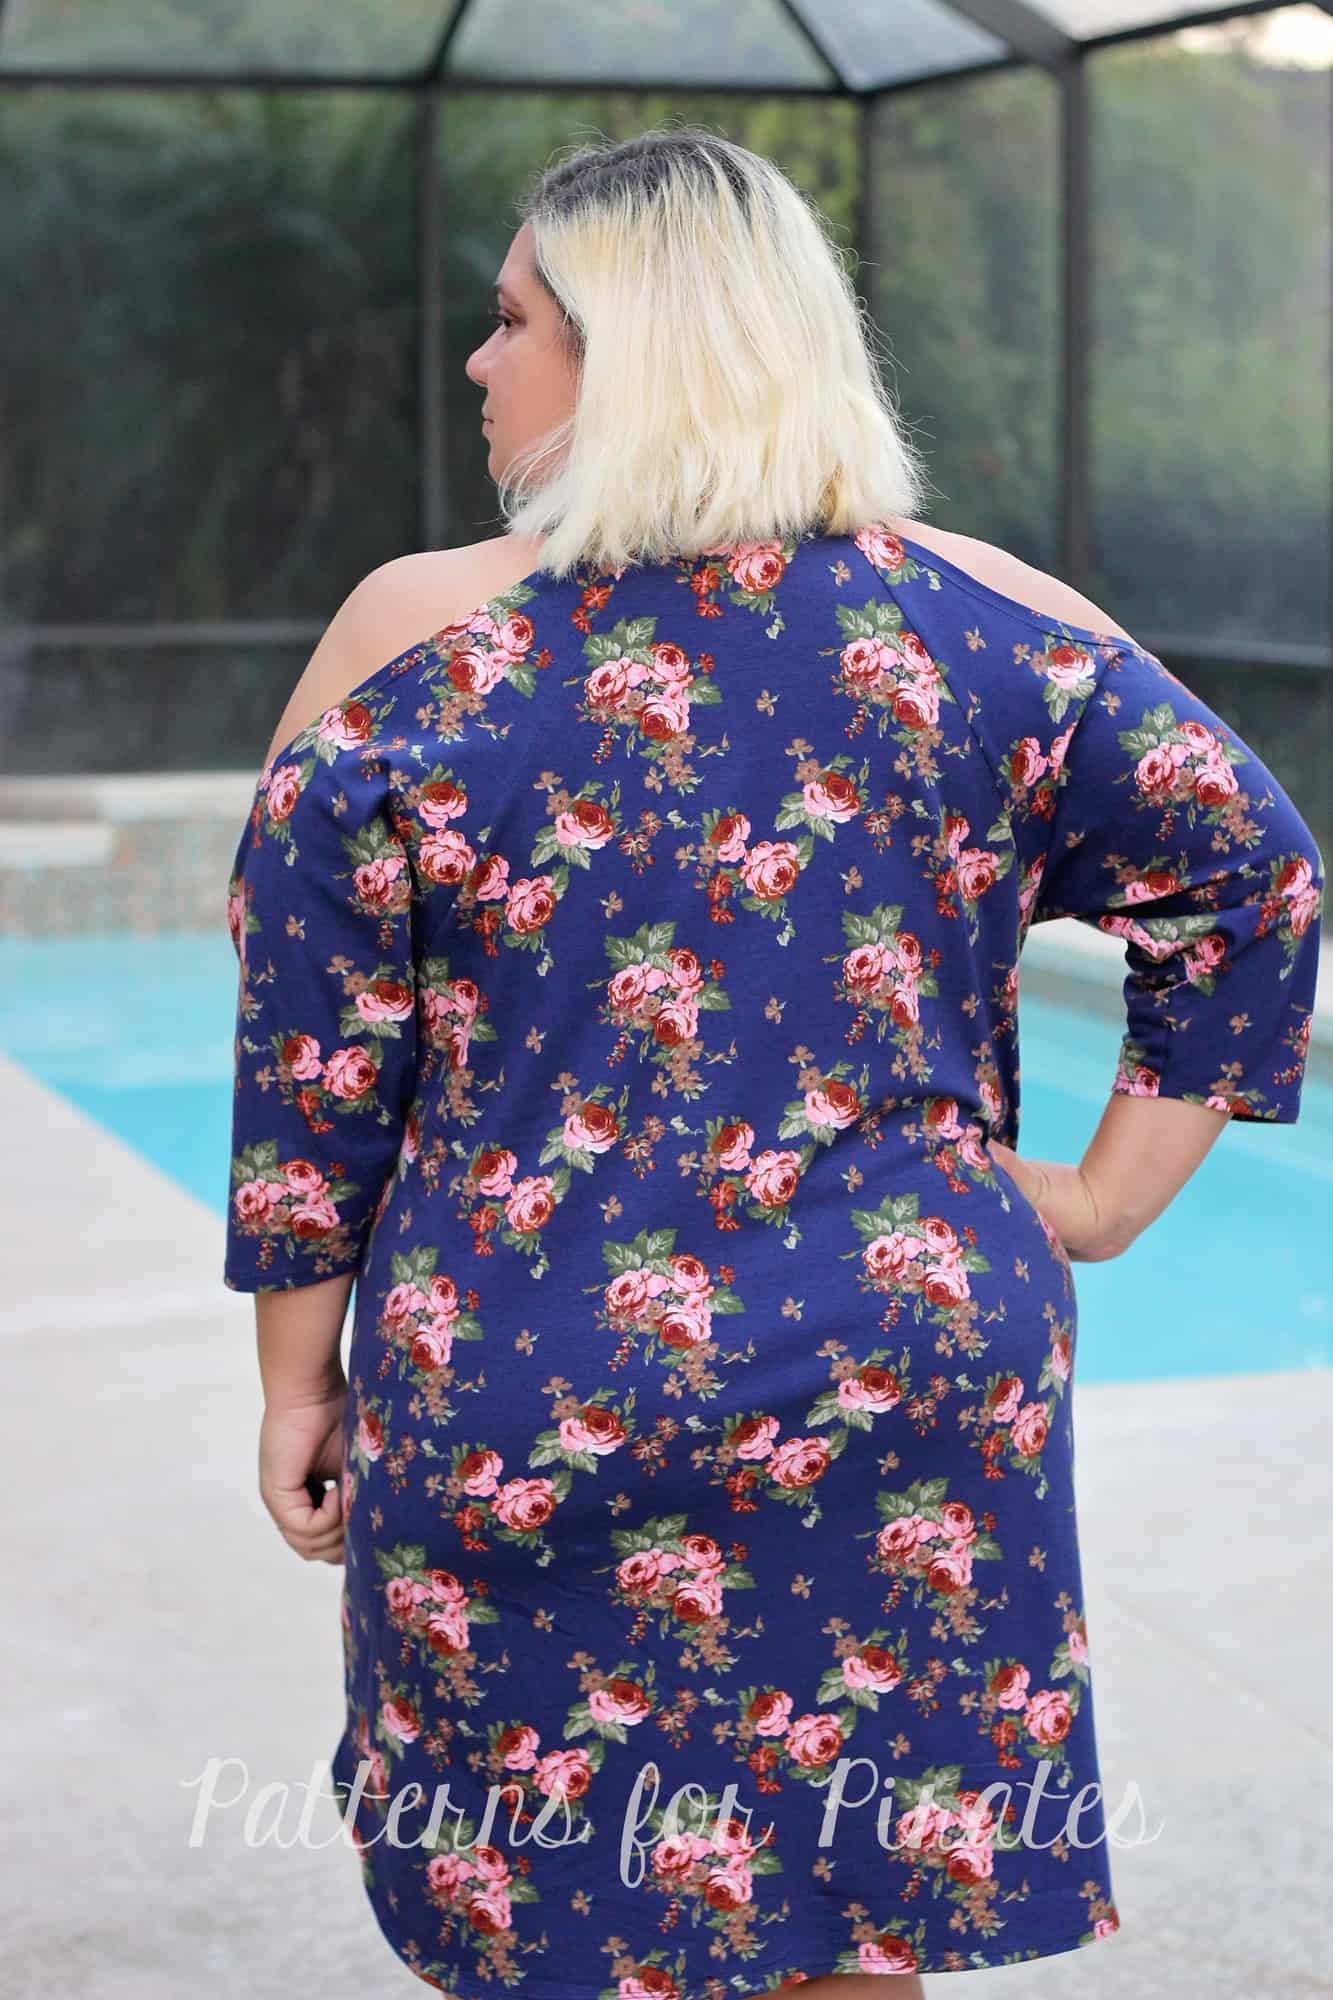
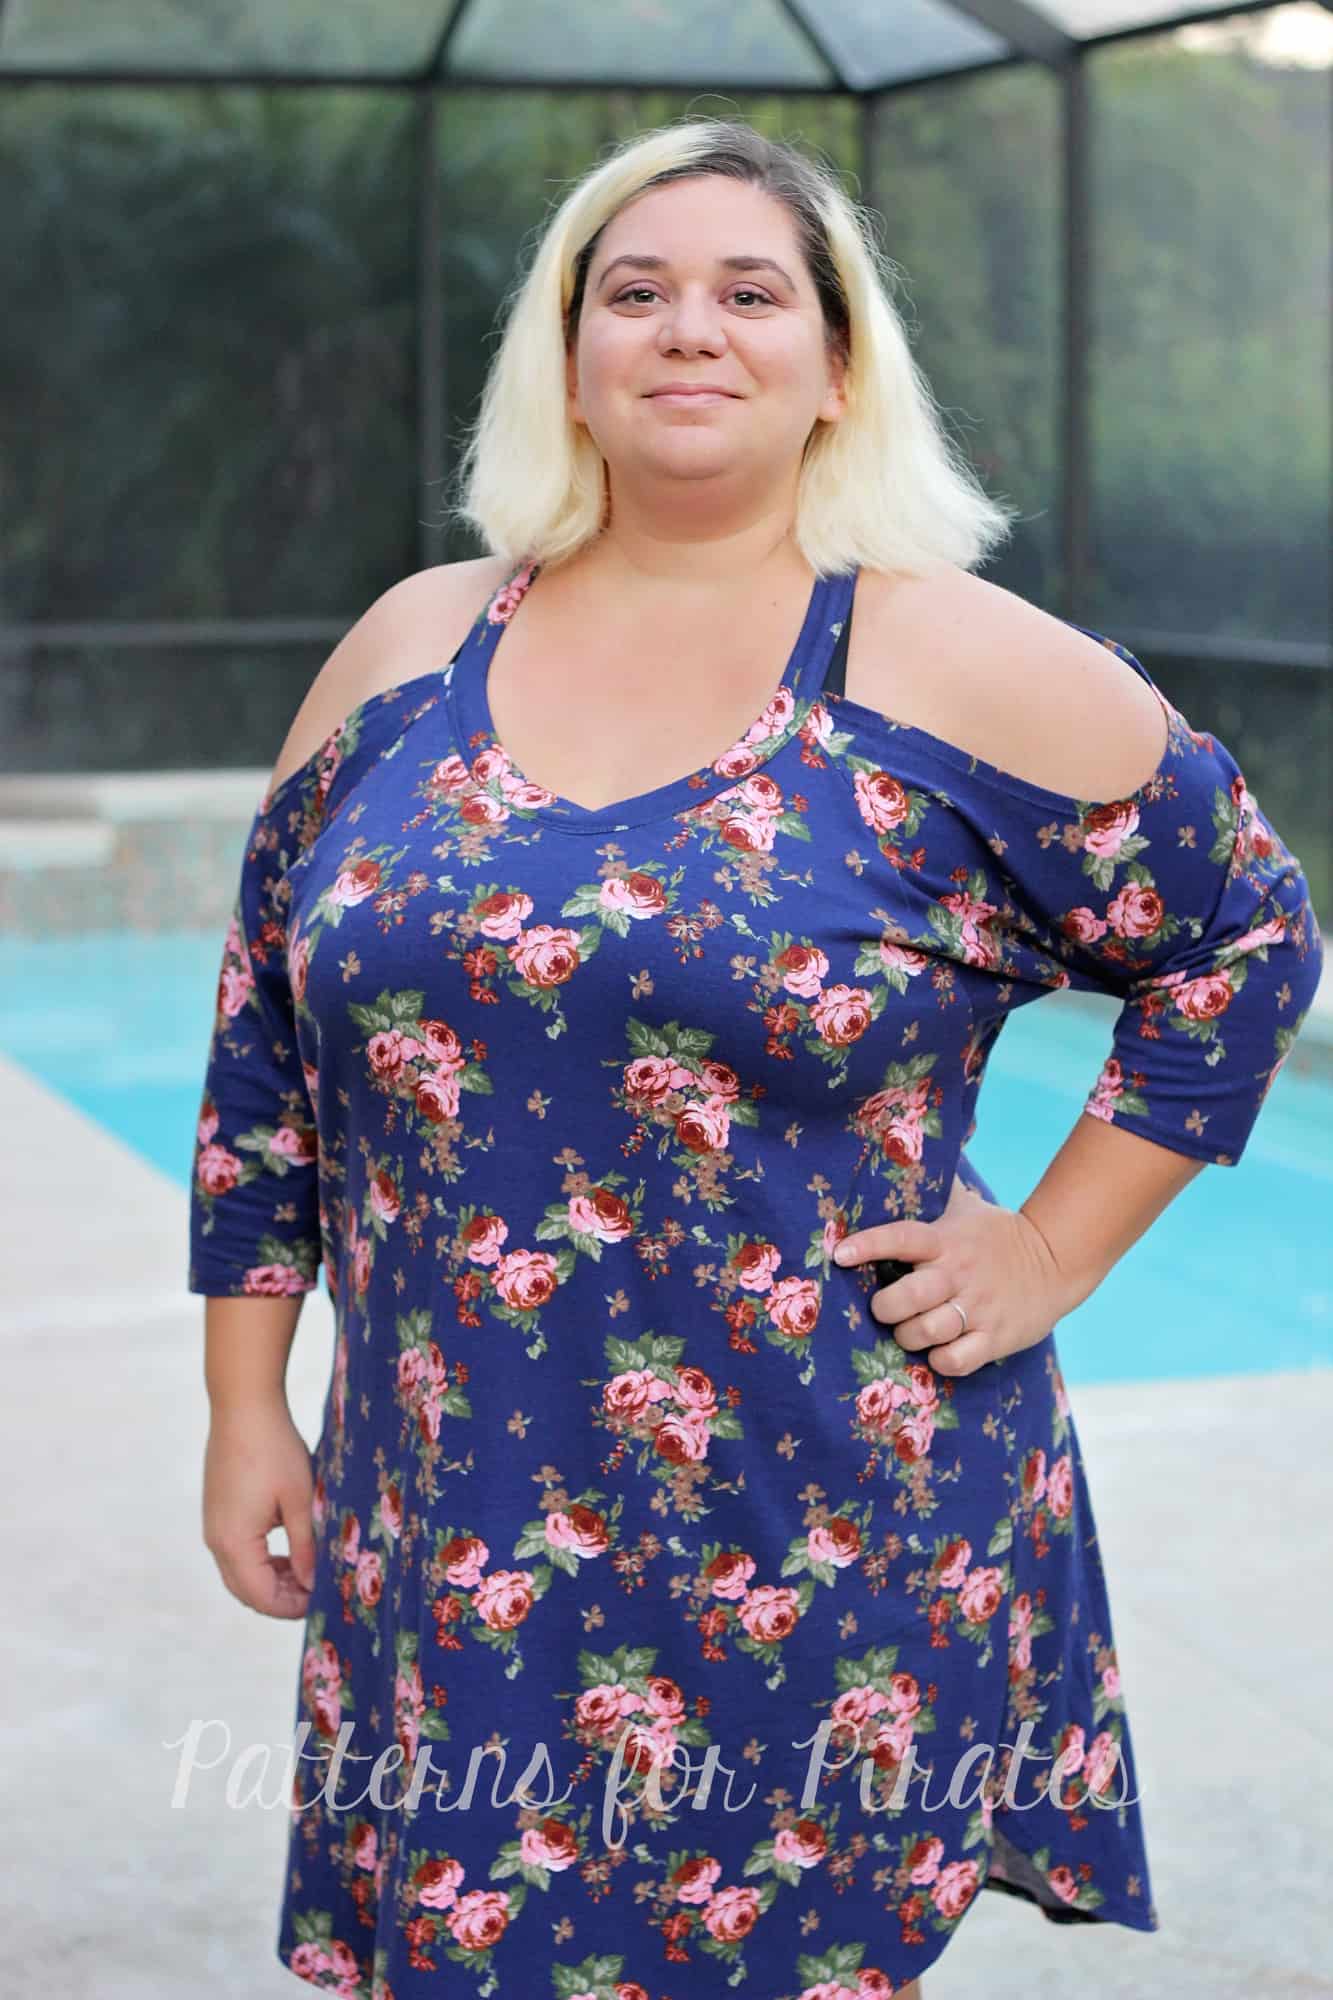
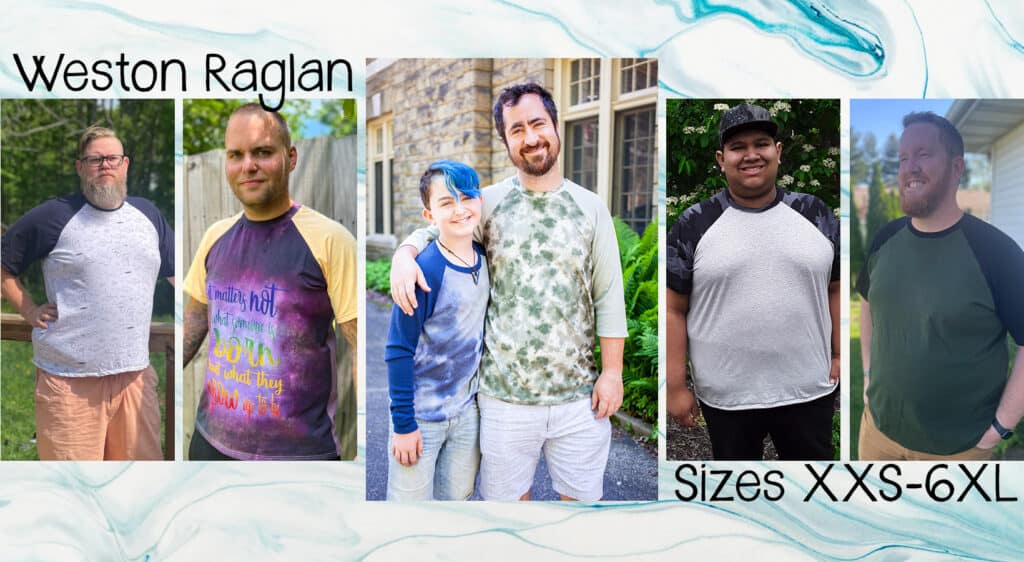
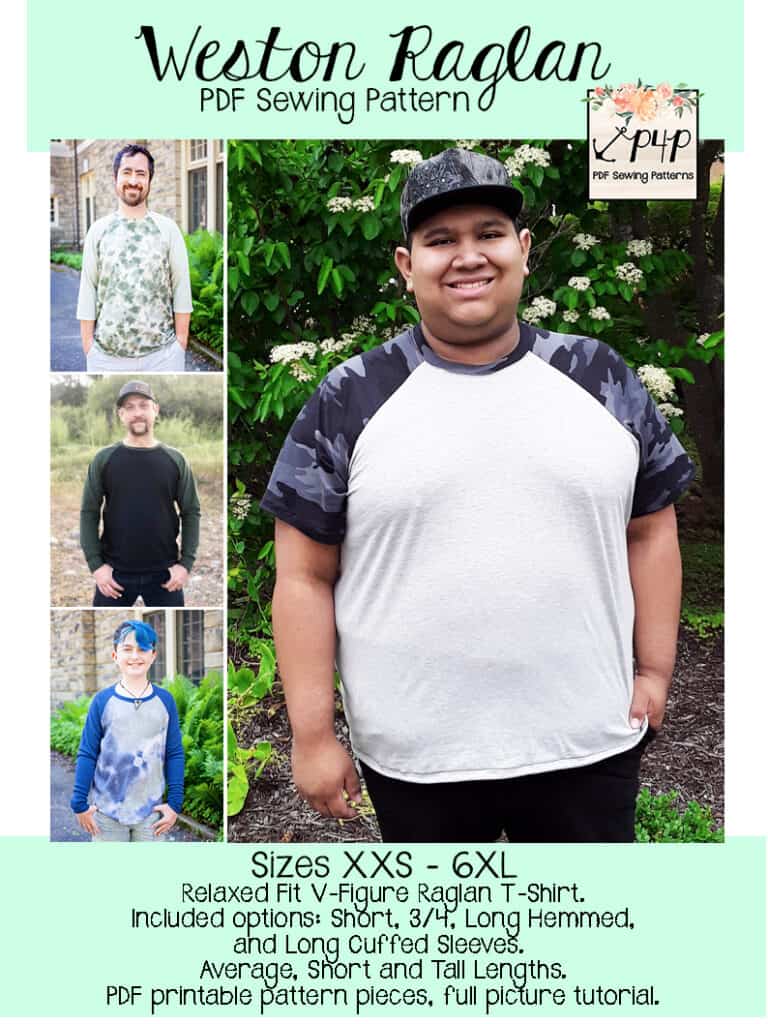
The P4P pattern lineup has been needing a V-Figure raglan for quite some time now and the wait is finally over! Meet the Weston Raglan!
The Weston Raglan is drafted for our Adult V-Figure size chart!
What’s the Adult V Figure size chart? It’s based upon the ASTM Men’s Standard Body Measurements. V Figures typically are taller, have a broader shoulder, larger bicep, straighter waist-to-hip ratio, etc. Who typically fits this chart? Male / male presenting / non-binary / whoever feels better suited for this size chart (verses our Adult Hourglass Figure chart). If you want to wear it, we want you to sew it with one of our patterns!
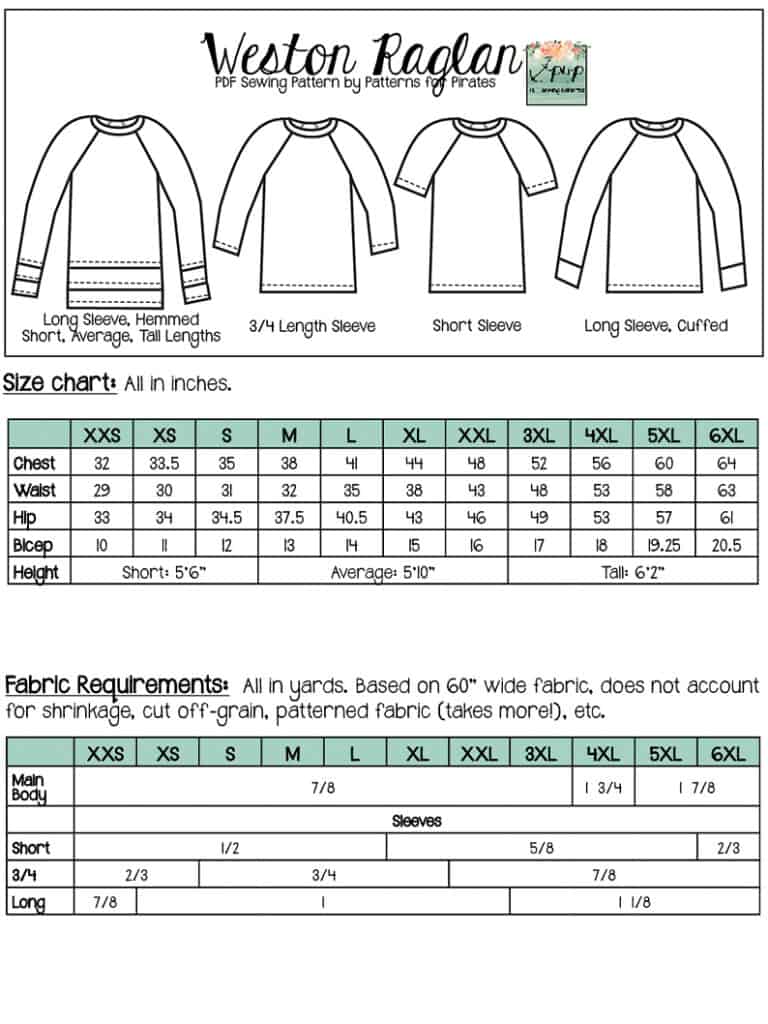
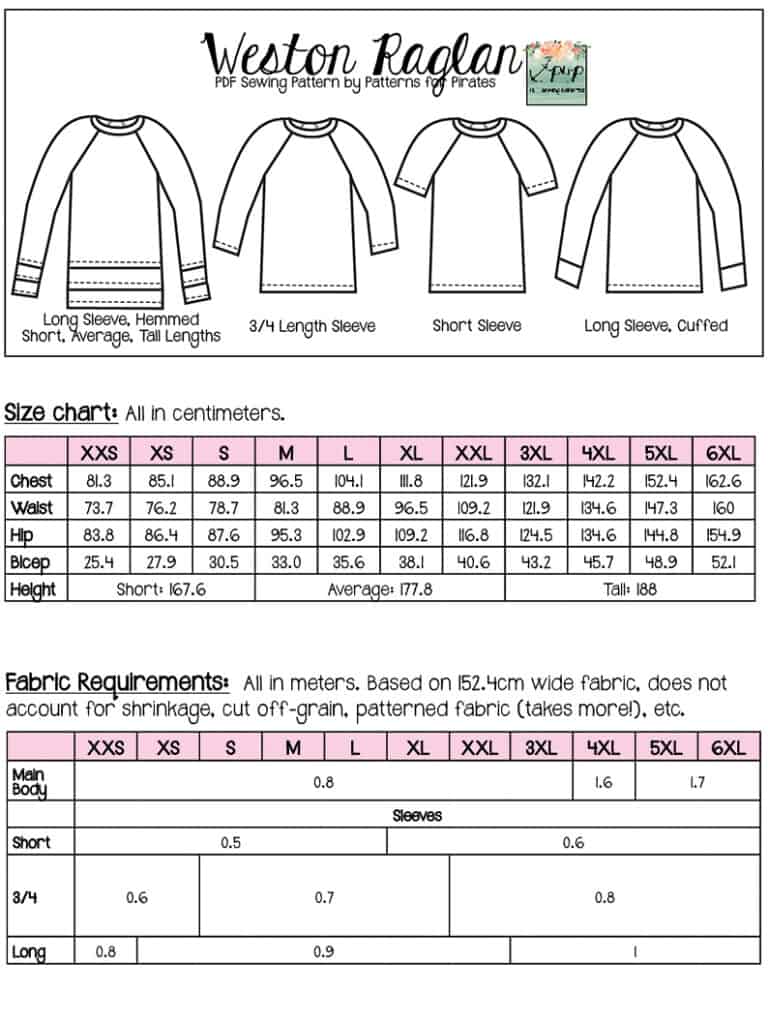
The Weston Raglan goes along with the newer, extended sizing that we brought out with our V-Figure chart as well! If you haven’t measured yourself in a while, you might want to check yourself against the chart below.
Need help with how to measure? We’ve got you covered! Check out our “how to measure yourself” in-depth blog HERE. For some extra helpful fun, we have a free* printable that you can use to help record your measurements as you take them. And in case you’re new to Patterns for Pirates and PDF patterns in general, we have a great blog full of new-user tips HERE to help you get started! As with all of our current releases and updates, the pdfs now include our layers feature and can be found in Letter, A4, A0 and projector sizes.
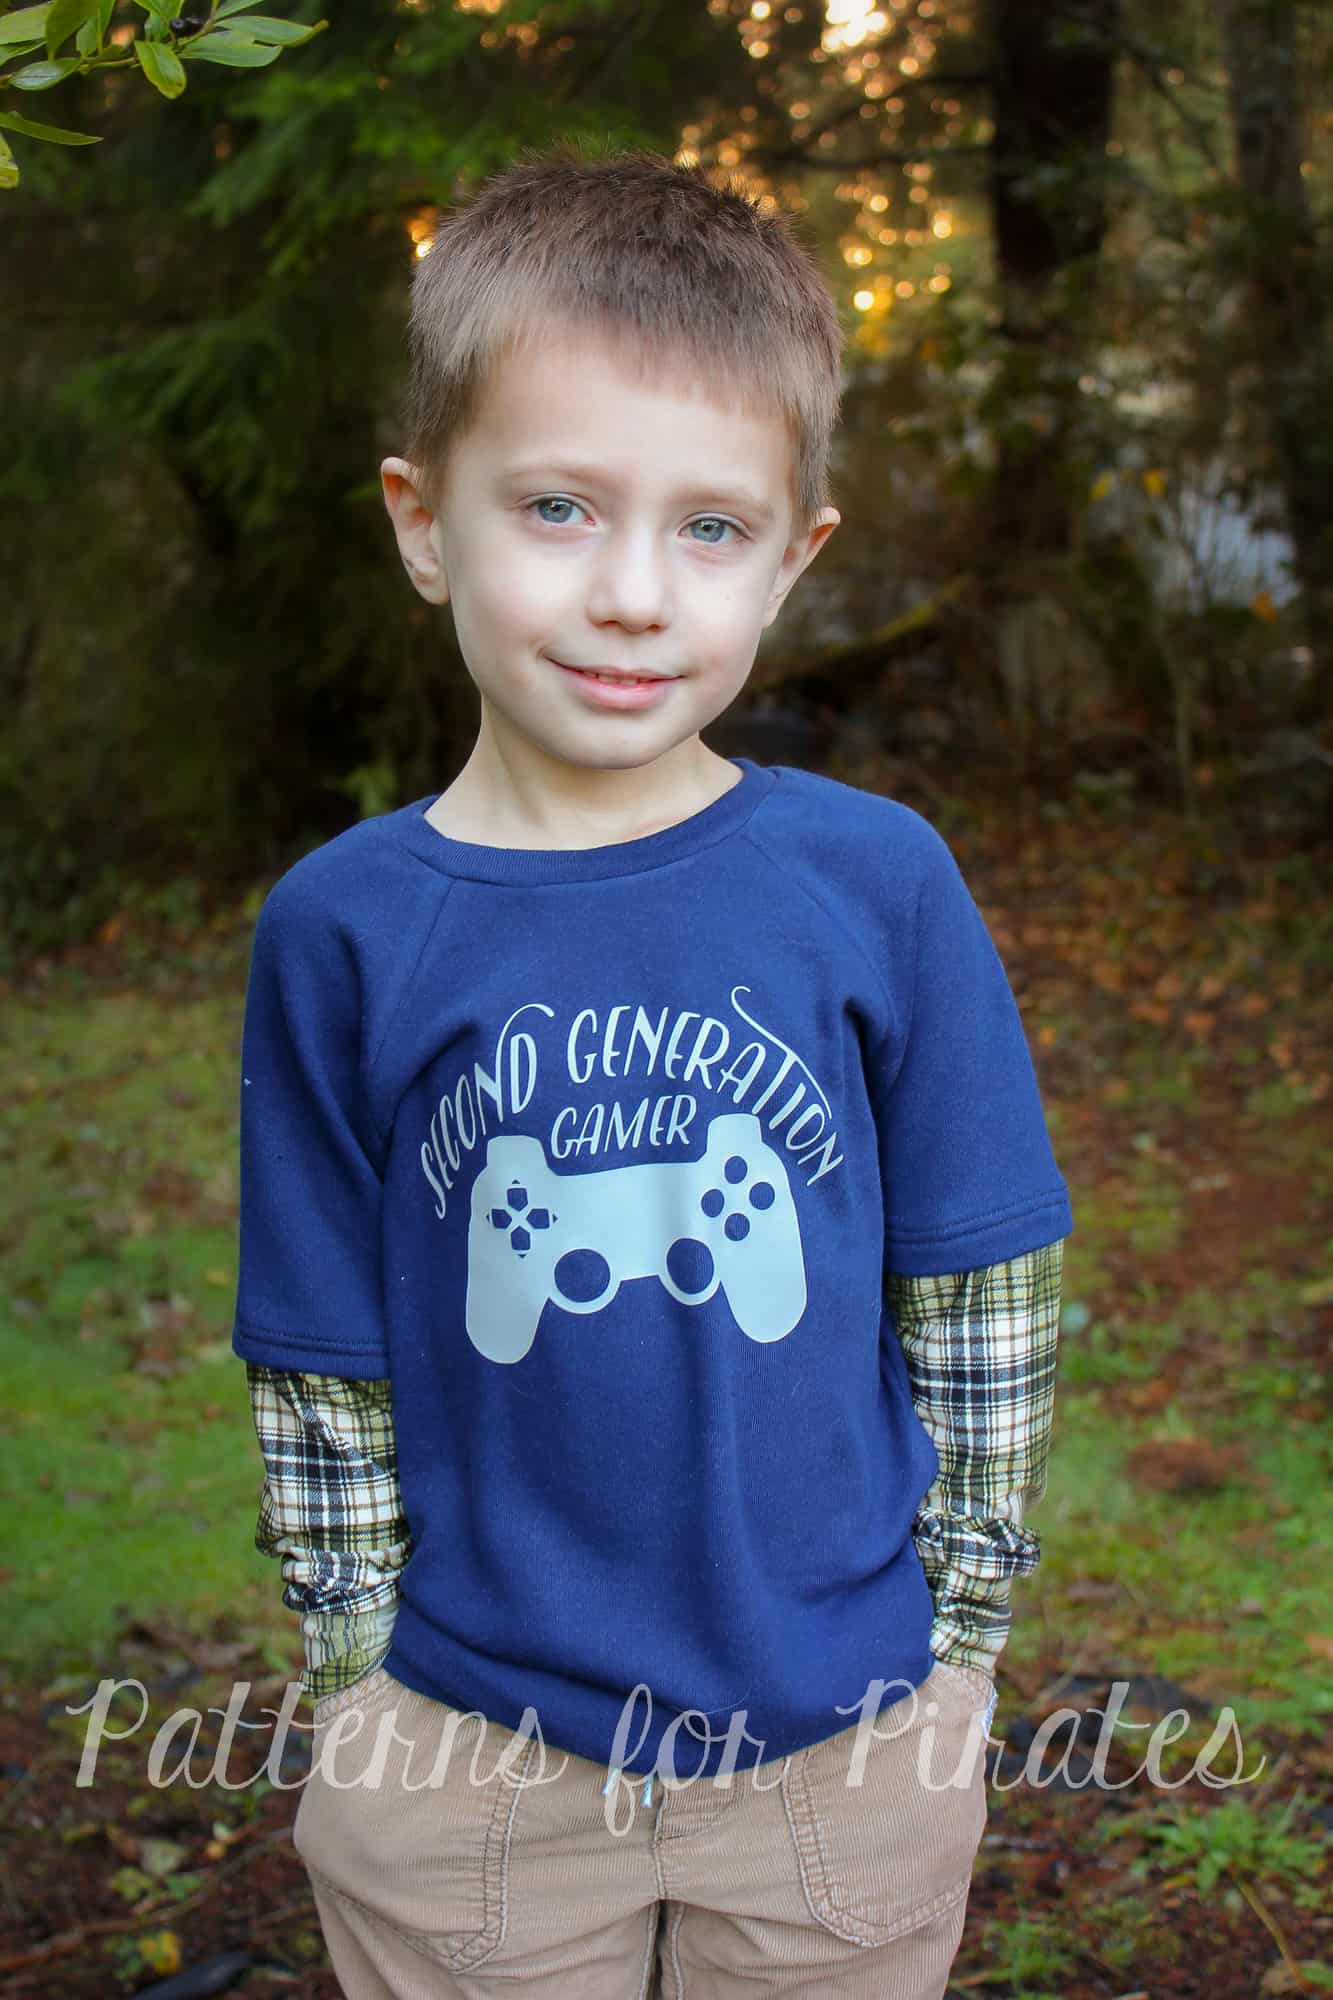
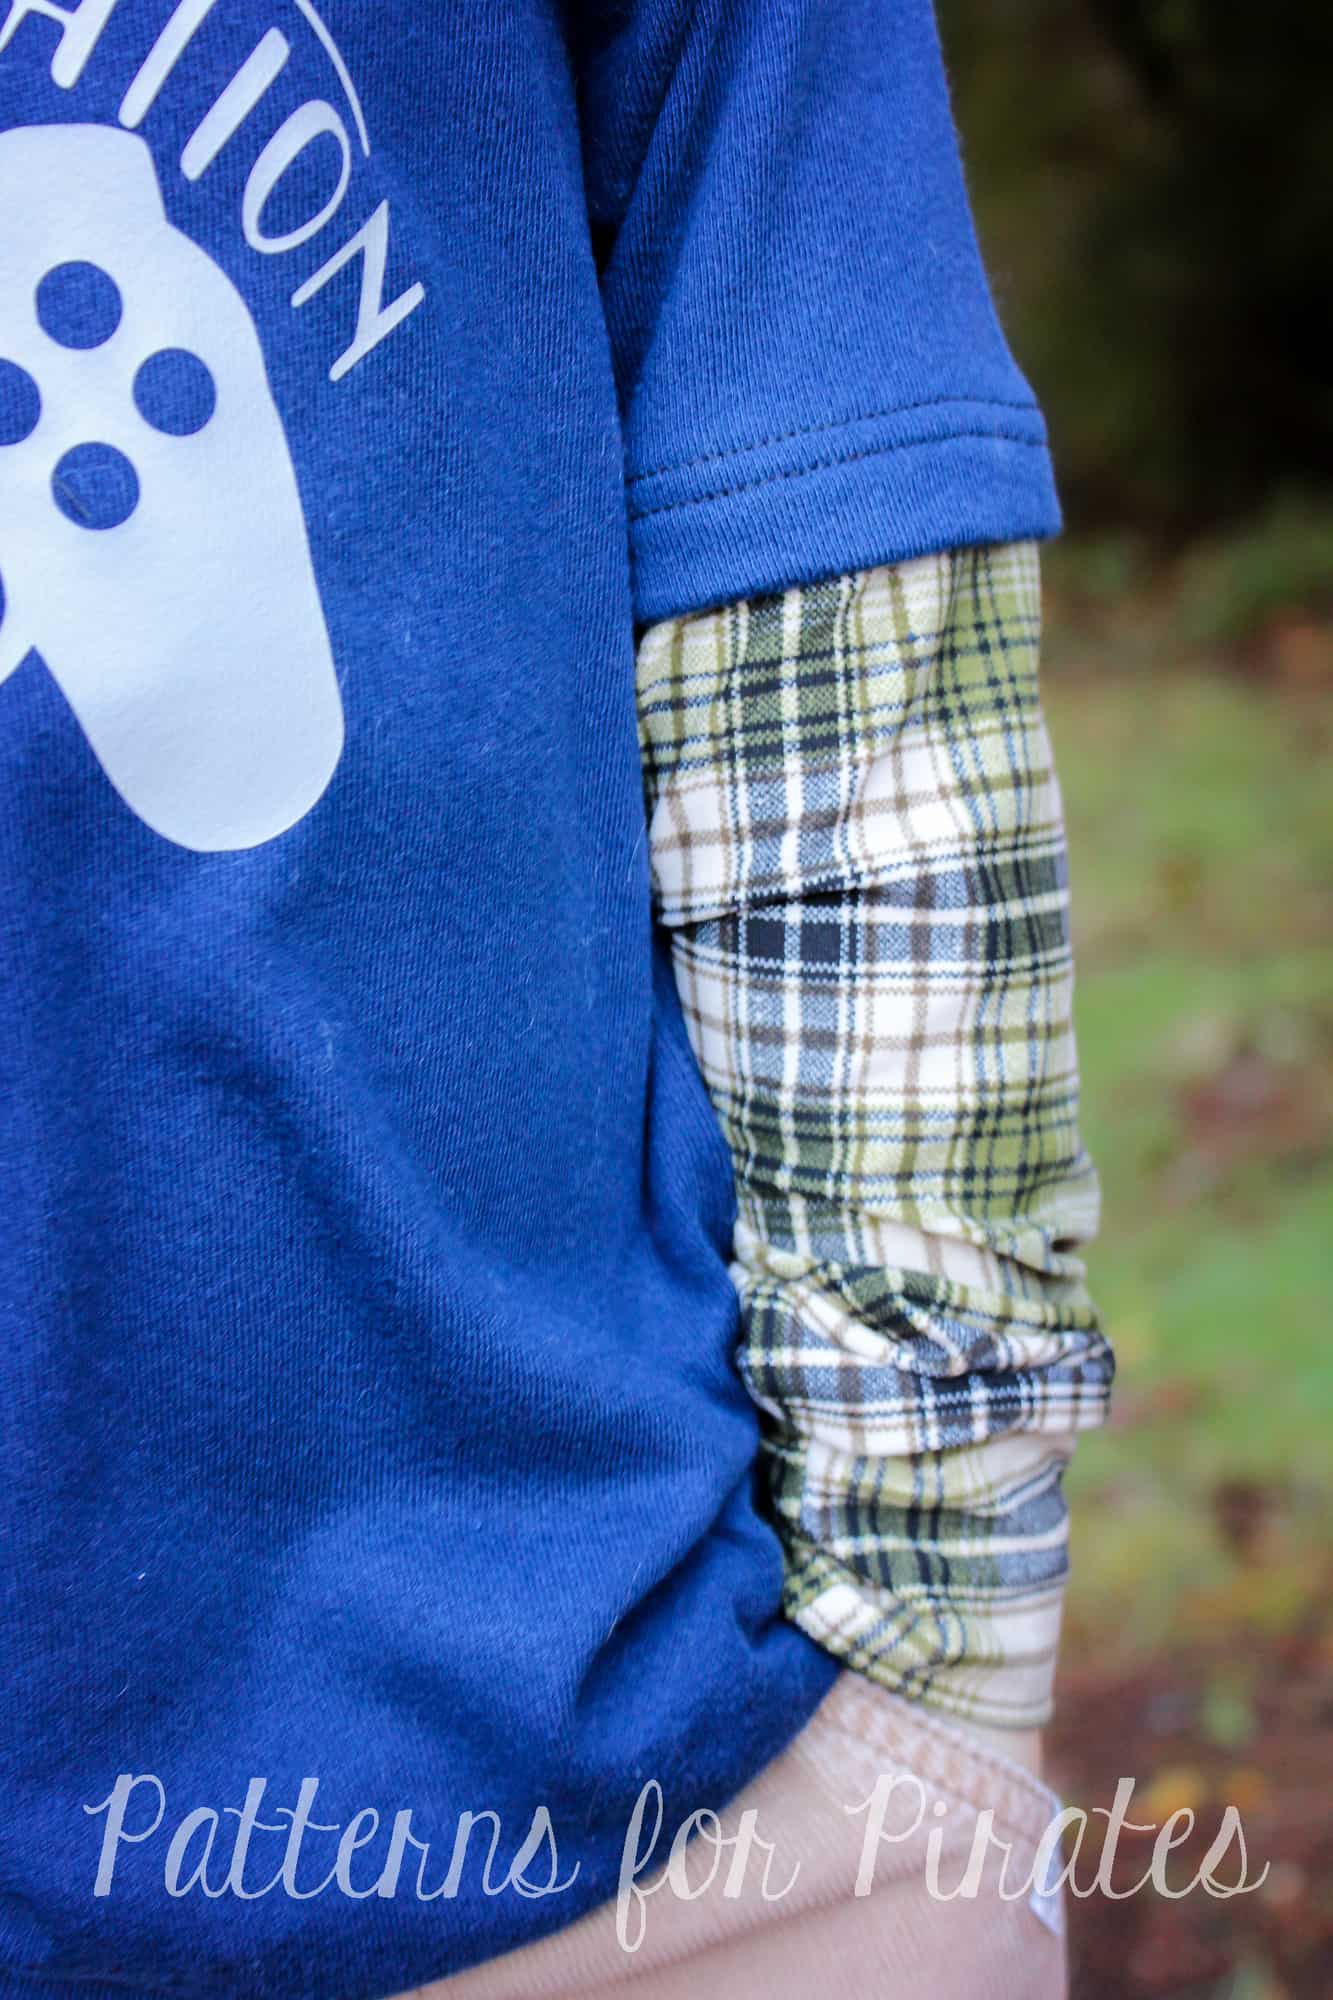
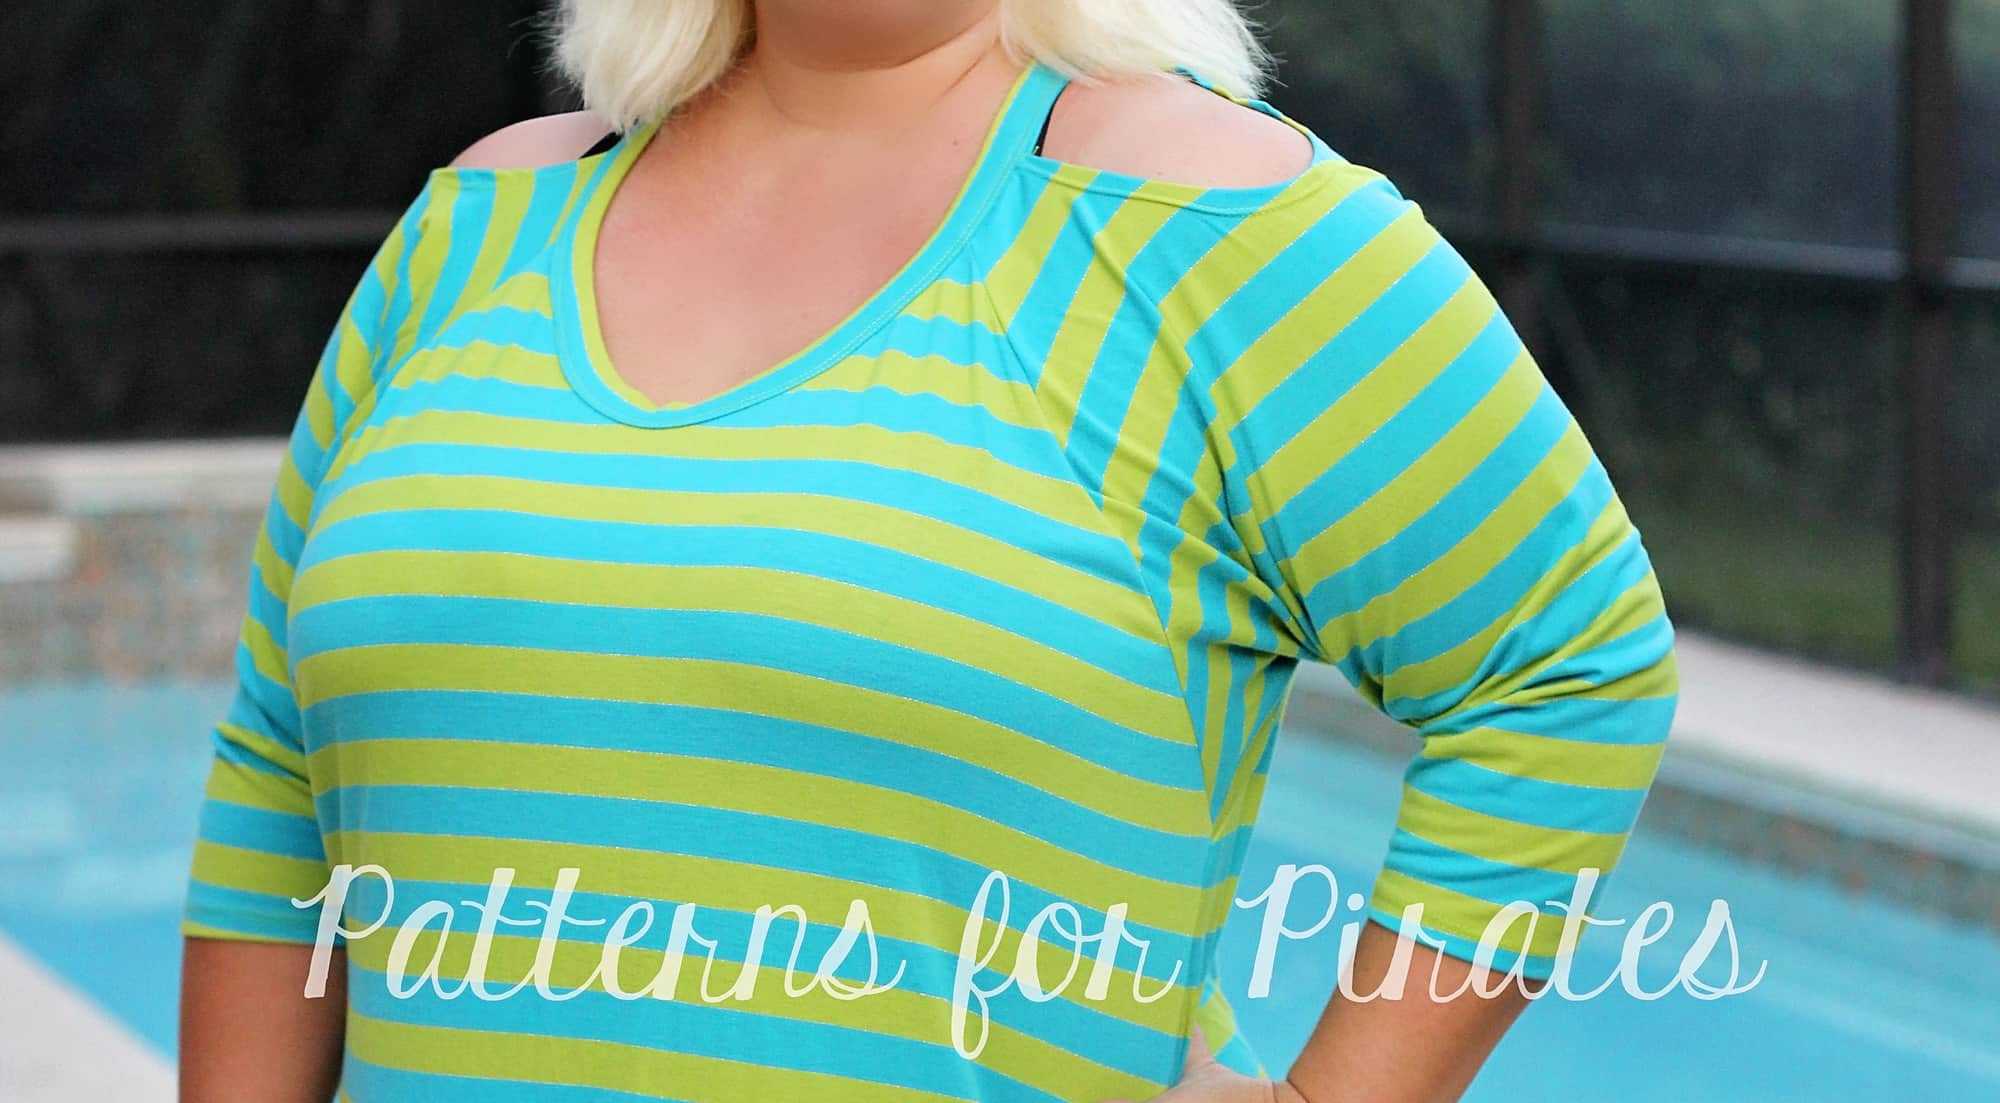
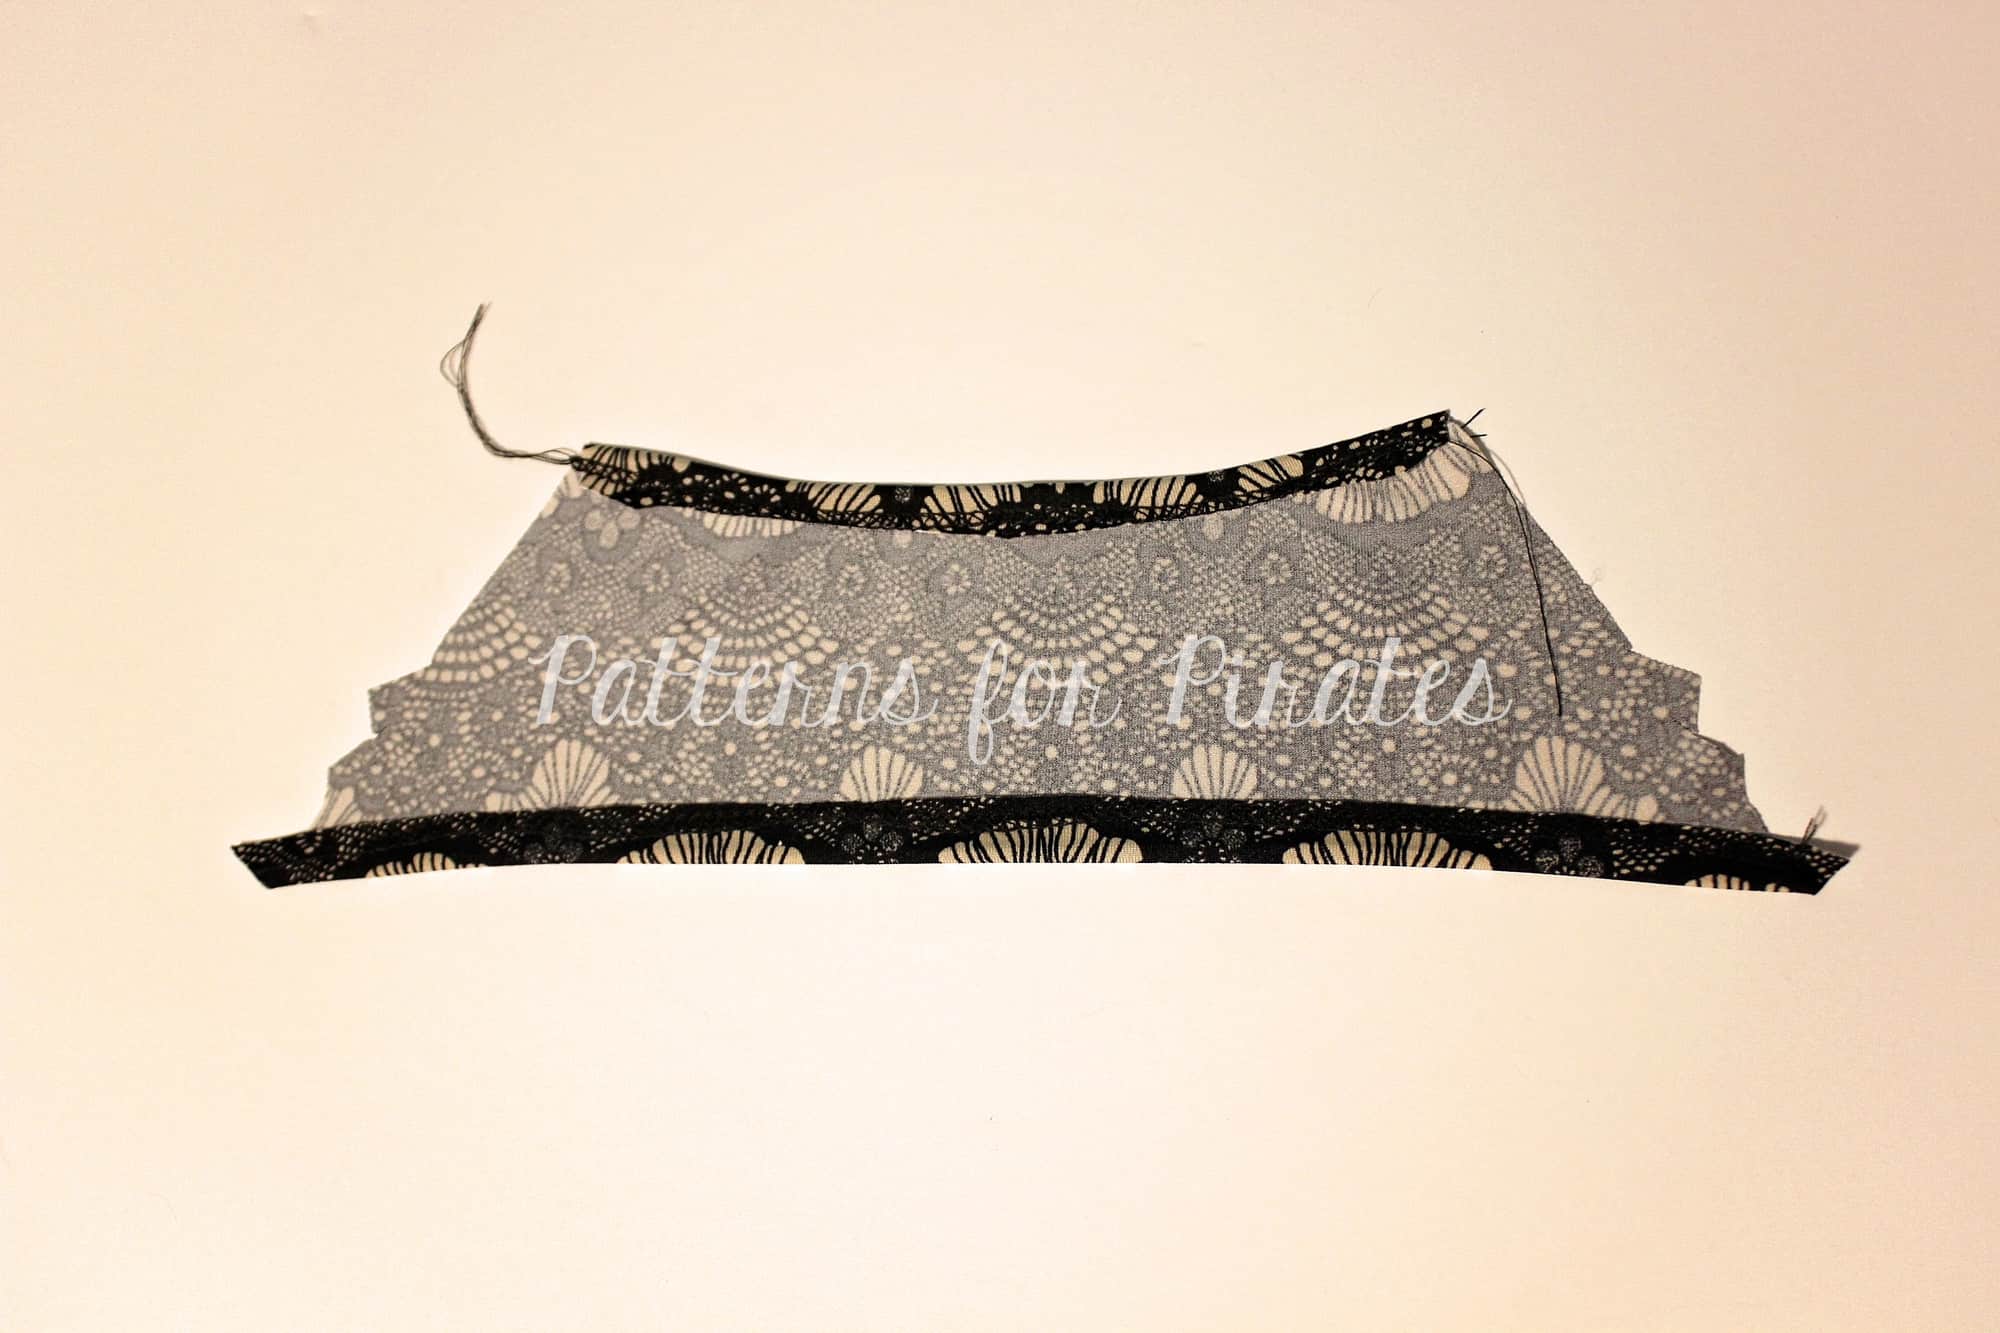
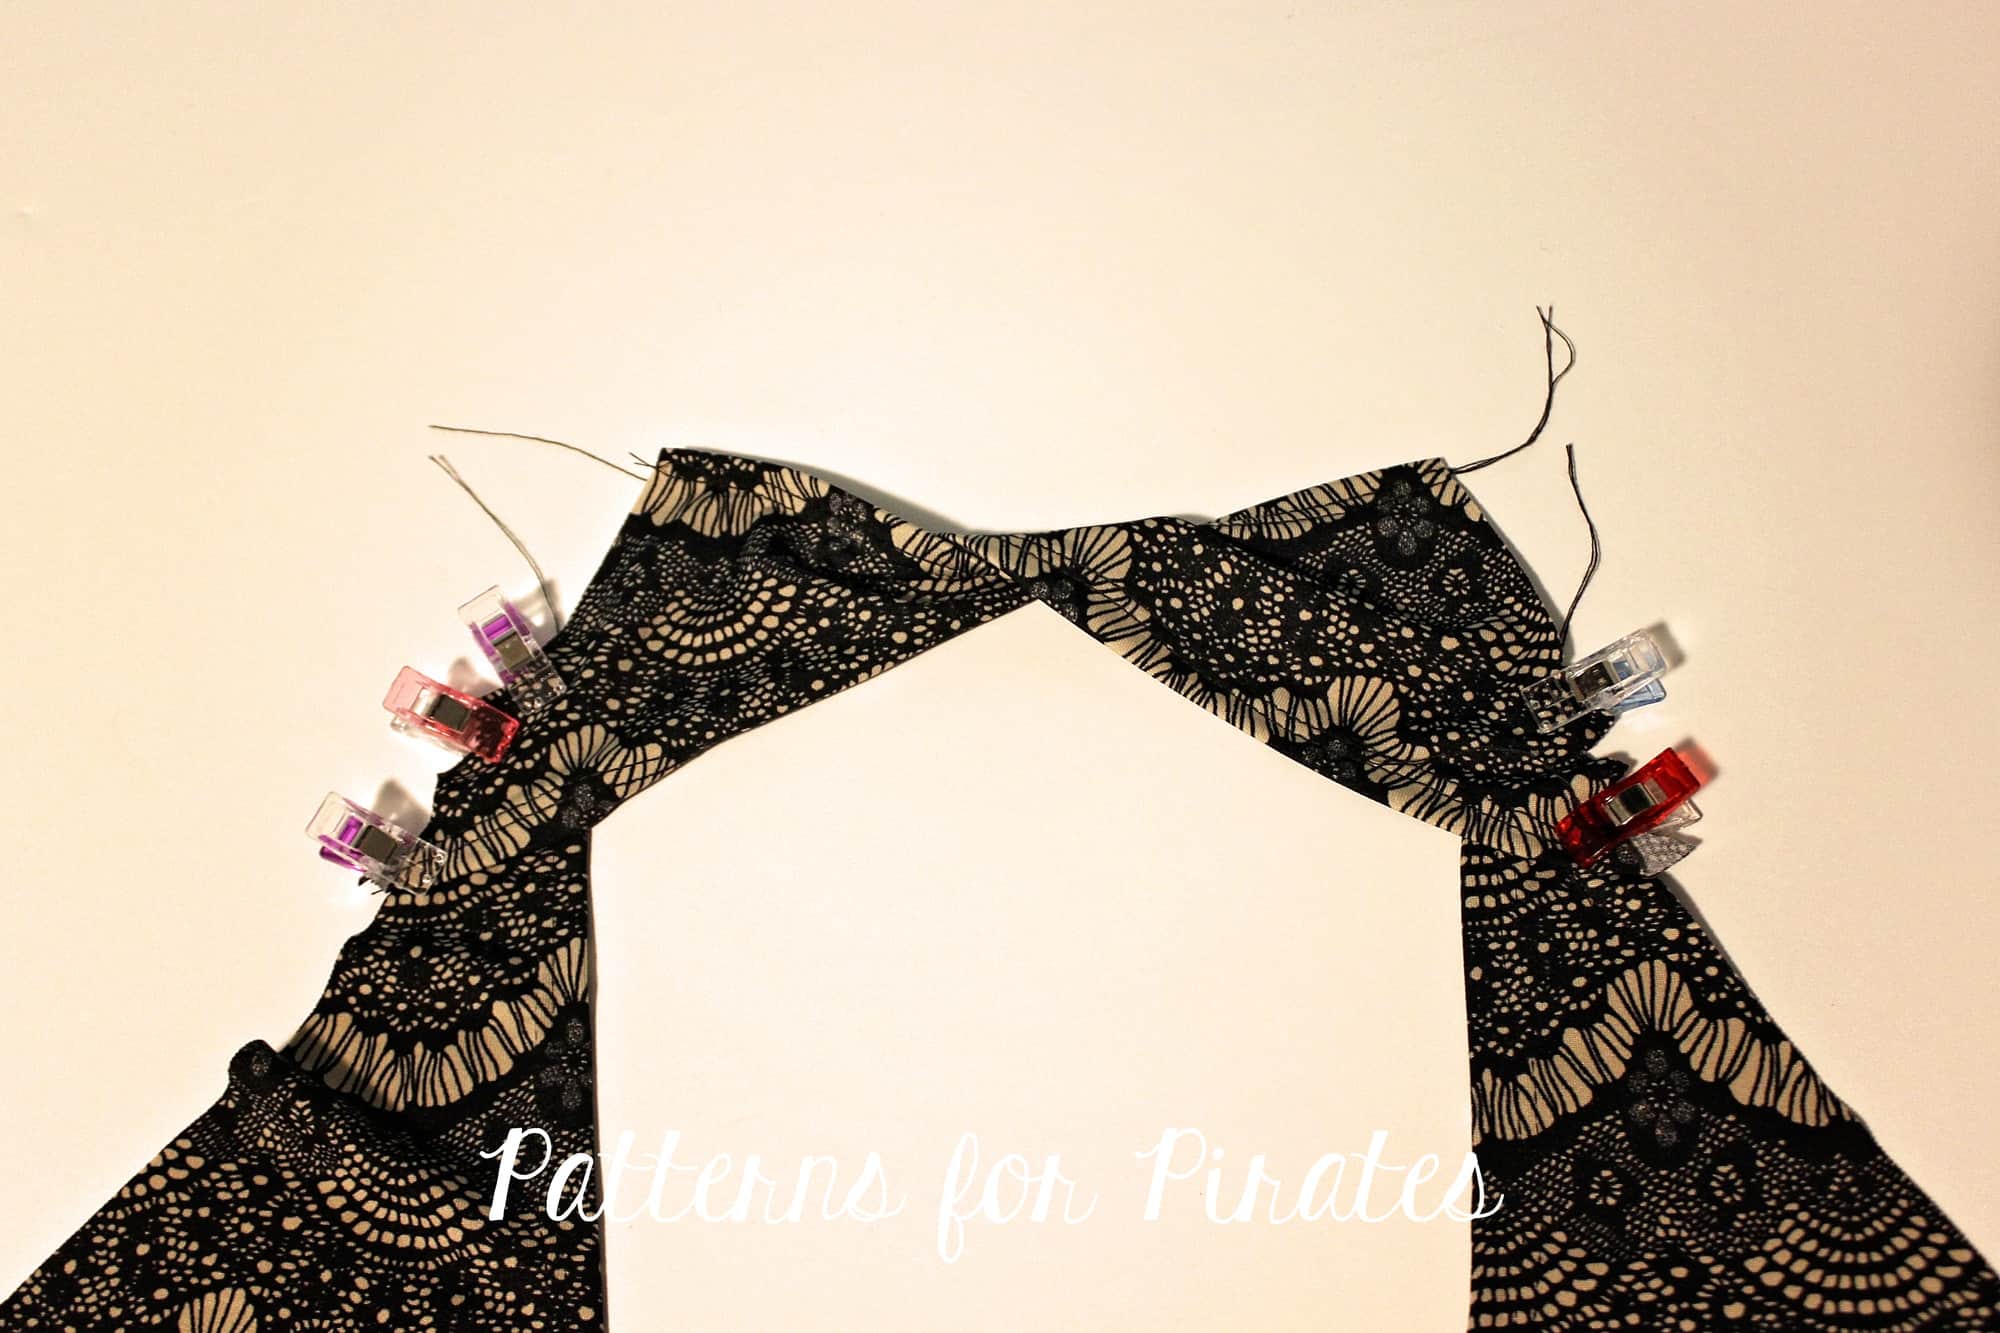
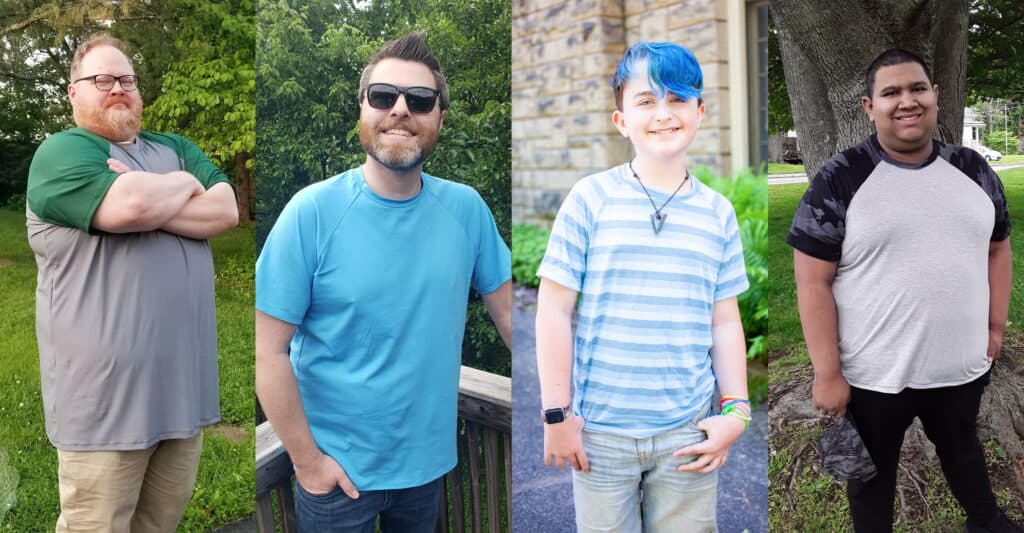
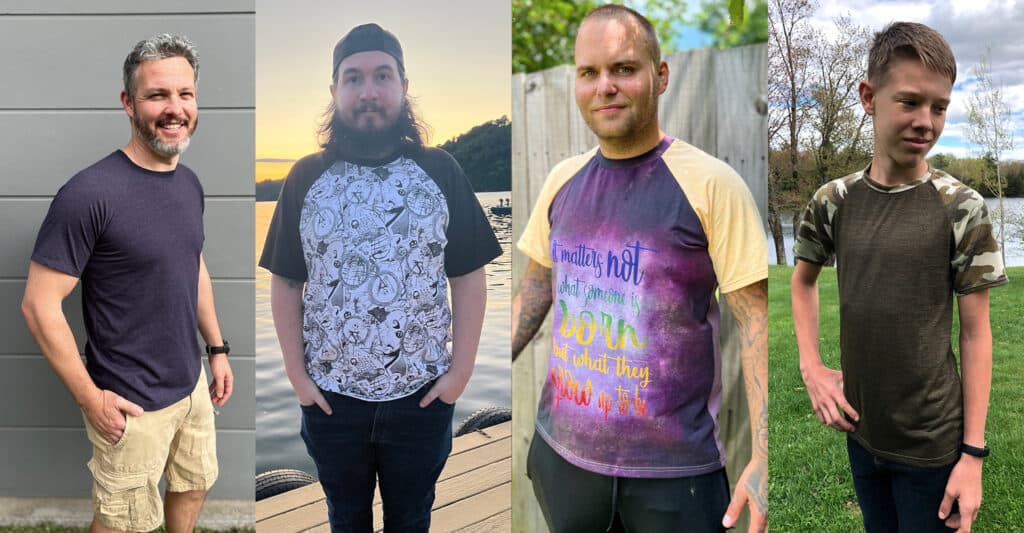
The Weston Raglan is a traditional, raglan t-shirt with ease throughout the bodice and sleeves. There are multiple sleeve lengths included (short, 3/4, long sleeve hemmed, and long sleeve cuffed) and is a beginner friendly sew.
Sizes include: XXS – 6XL for the Adult V-Figure. Our V-Figure patterns have multiple lengths, based upon height.
- Short is drafted for 5’6″
- Average is drafted for 5’10”
- Tall is drafted for 6’2″
Not only is there a bodice cut line for each height, but we’ve included separate sleeve lengths to accommodate for them as well.
Looking for fabric recommendations? The Weston Raglan is drafted for t-shirt knits like tri-blend jerseys, ribbed knits, spun poly jersey, modal/rayon/bamboo knit, double brushed poly, lightweight cotton spandex, sweater knit, waffle knit, and the like.
***Want to use something thicker (think custom cotton spandex or french terry), you’ll need to size up to keep the same look and feel.
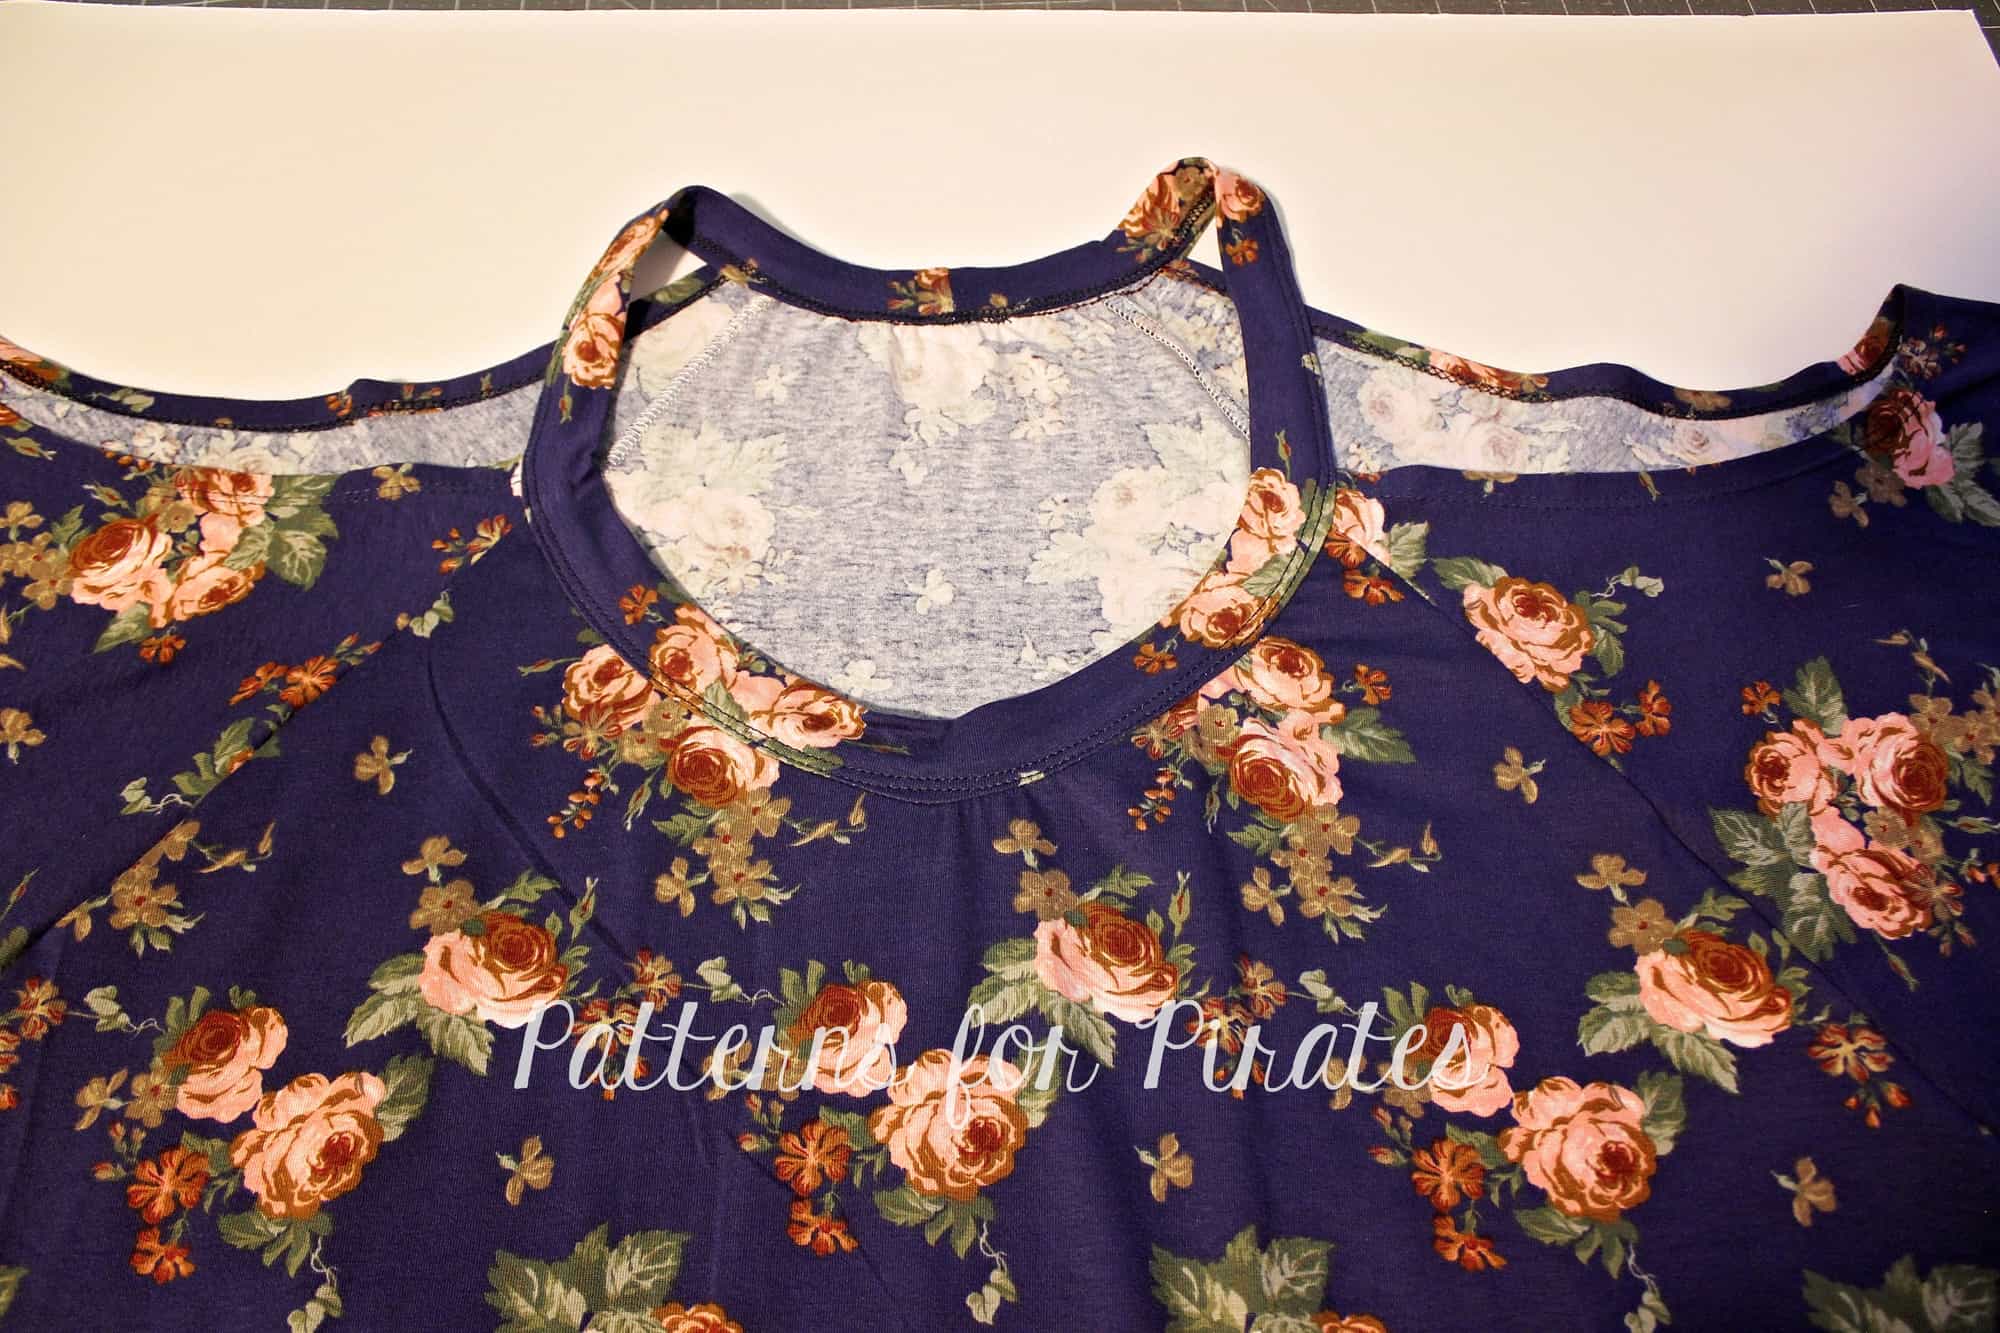
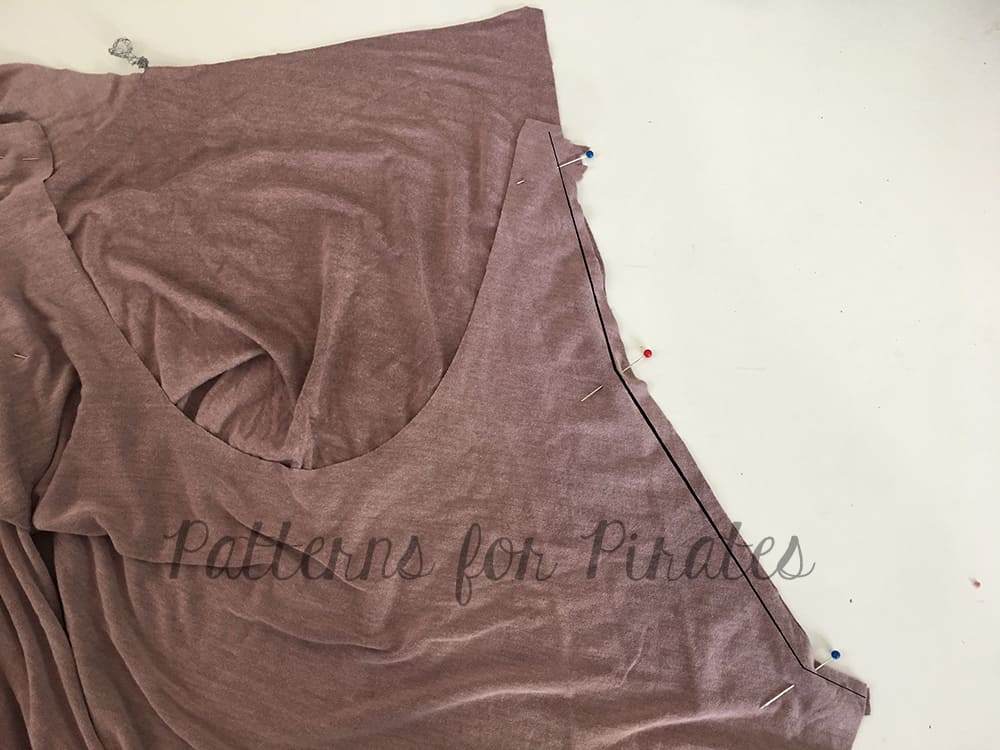
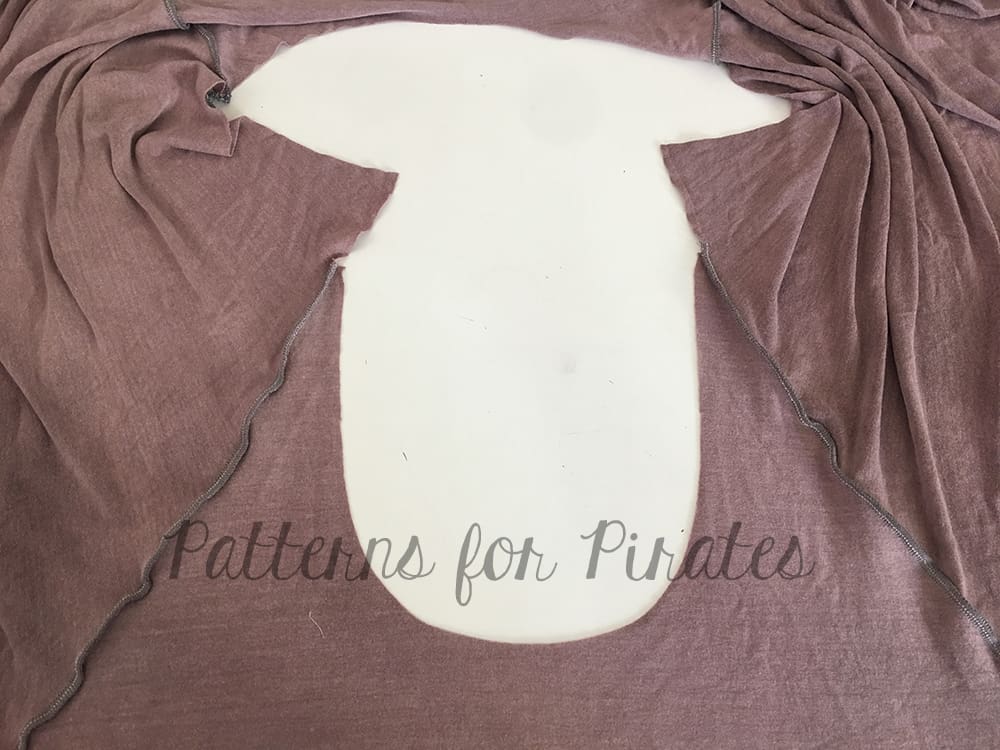
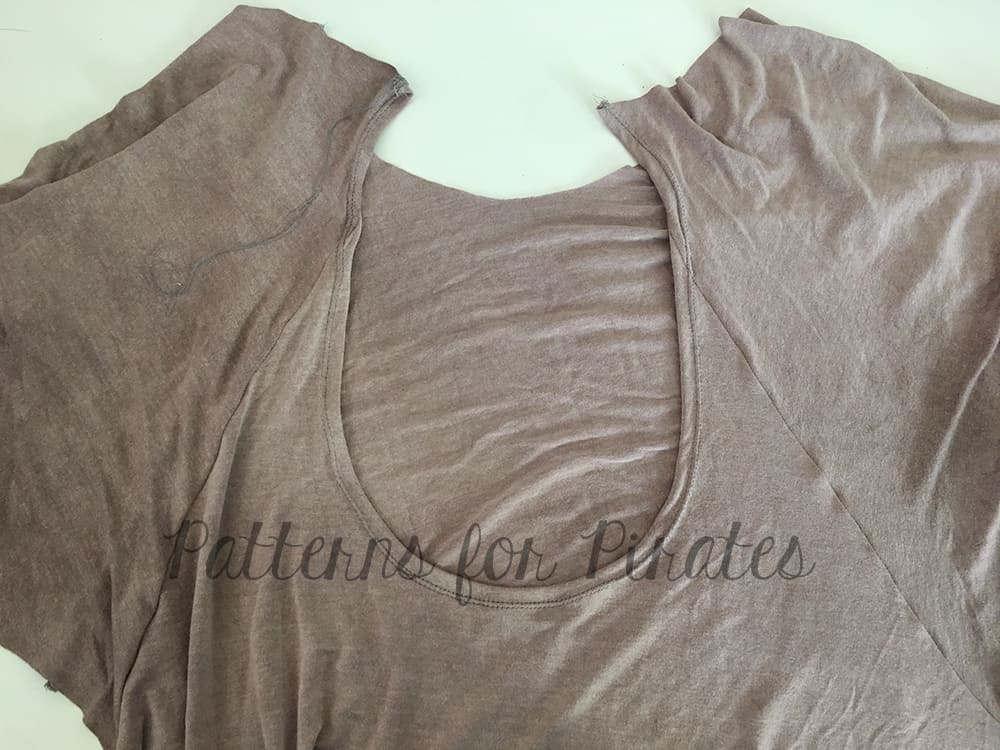
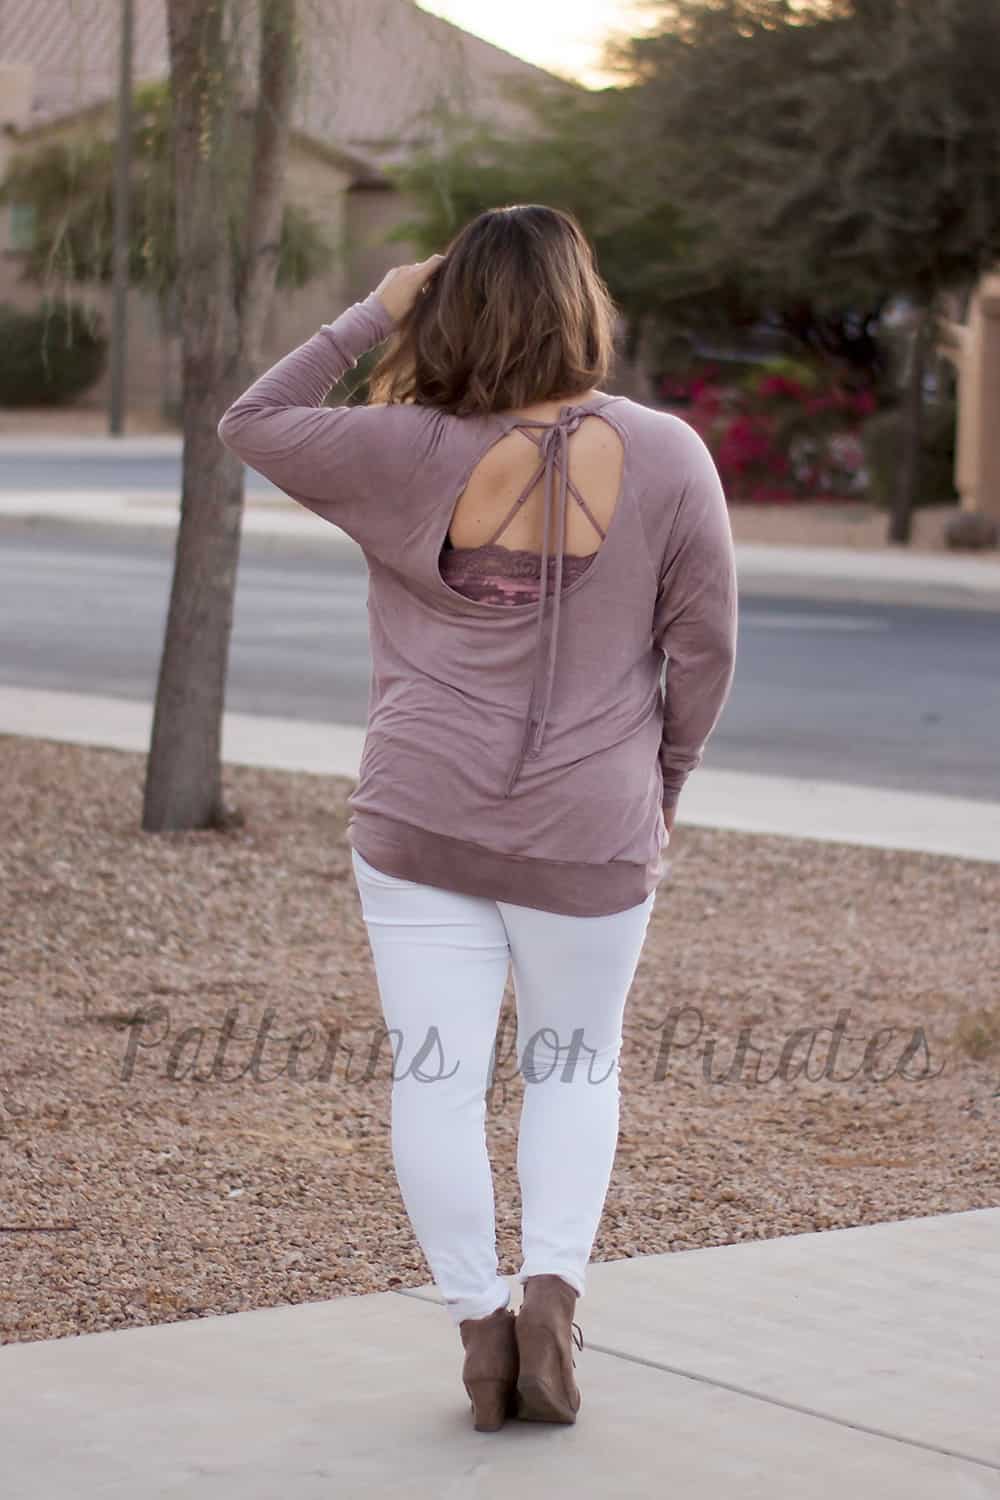
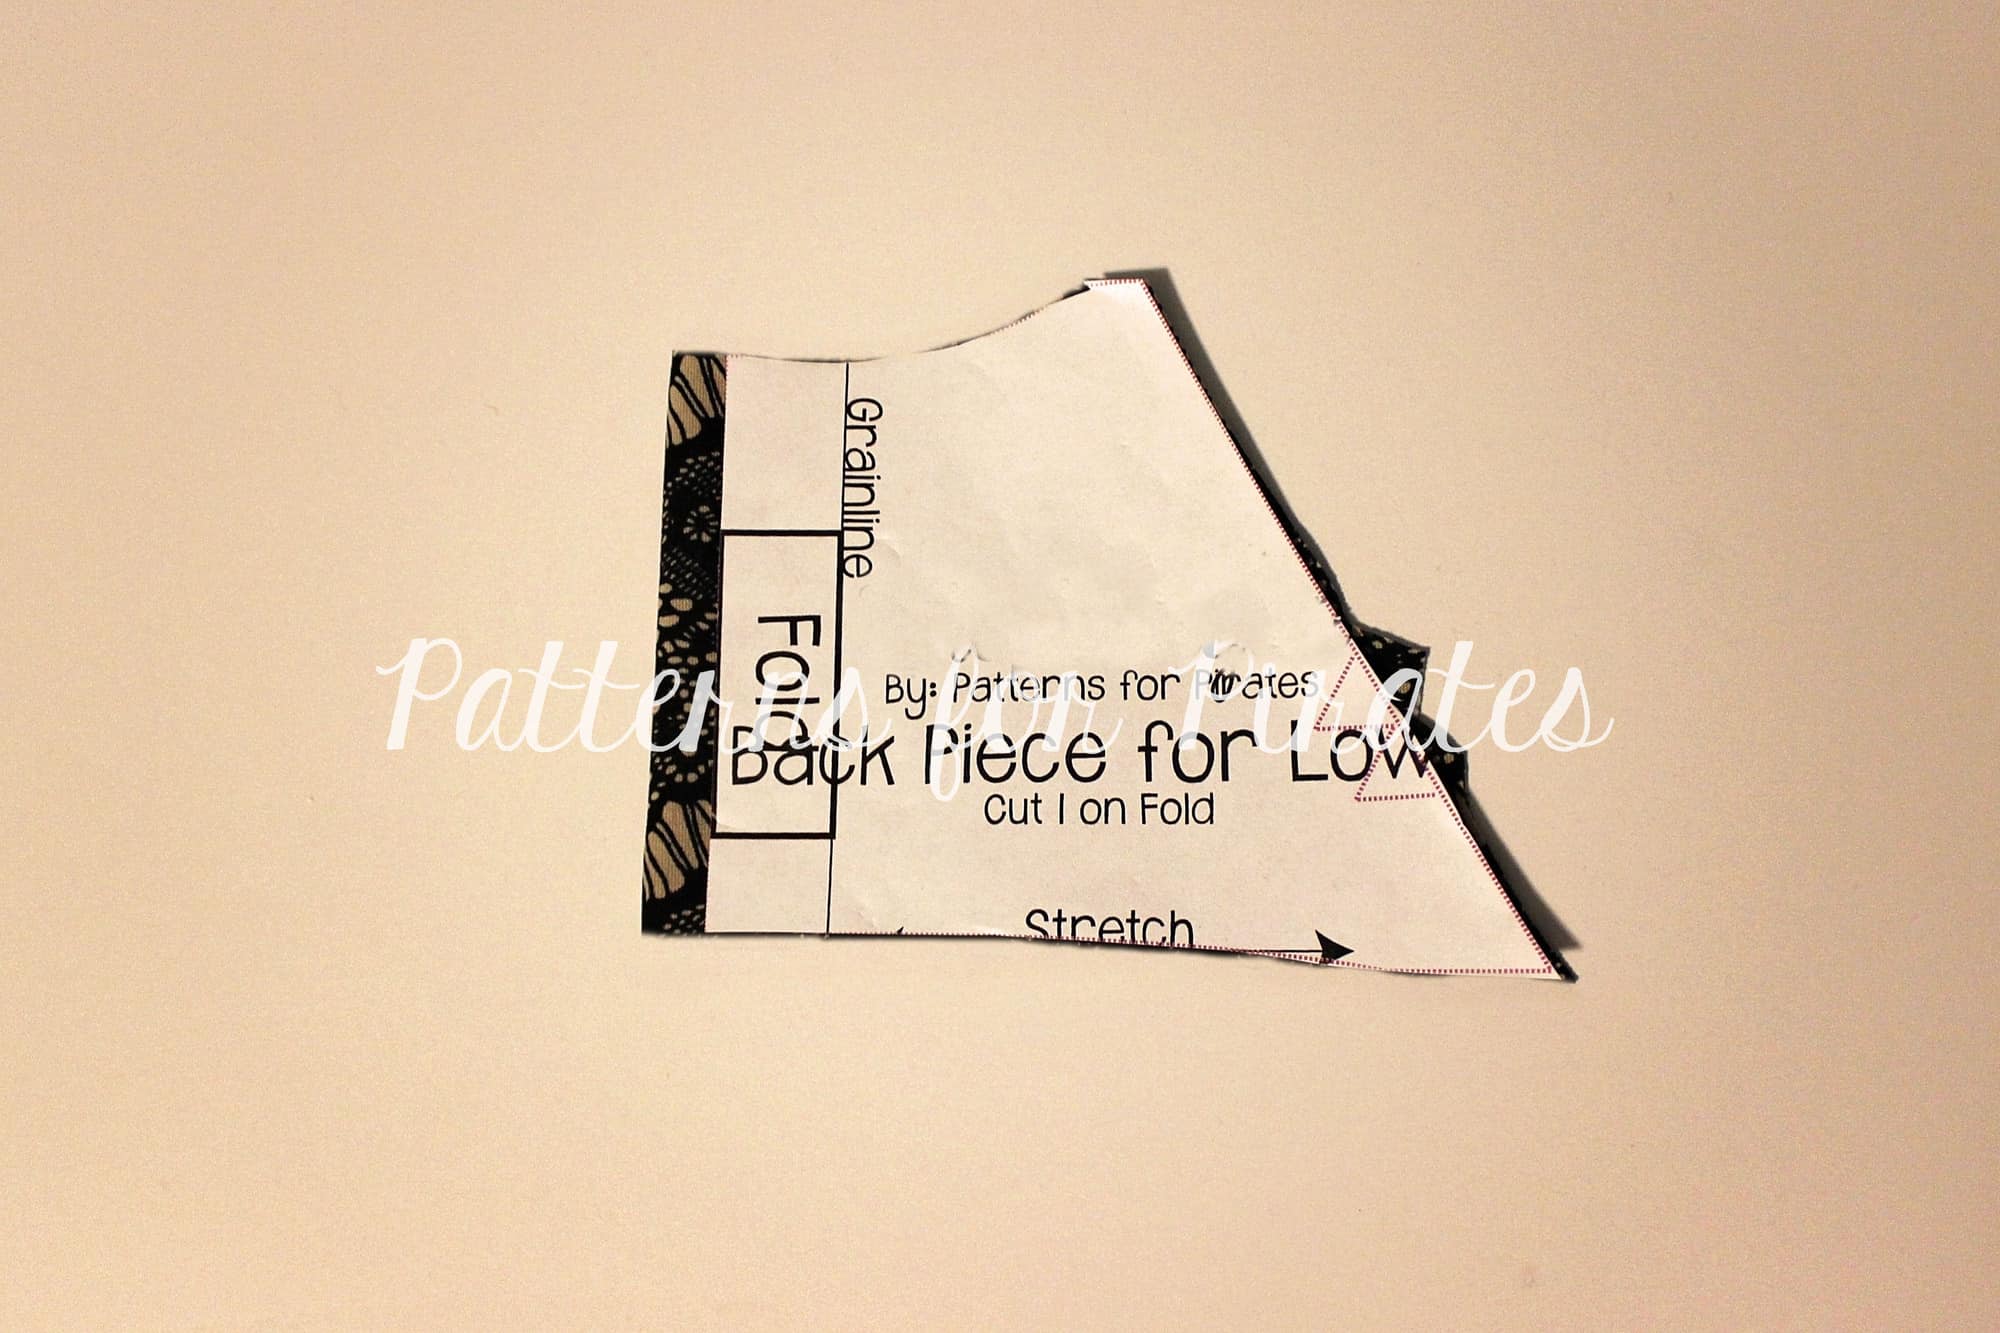
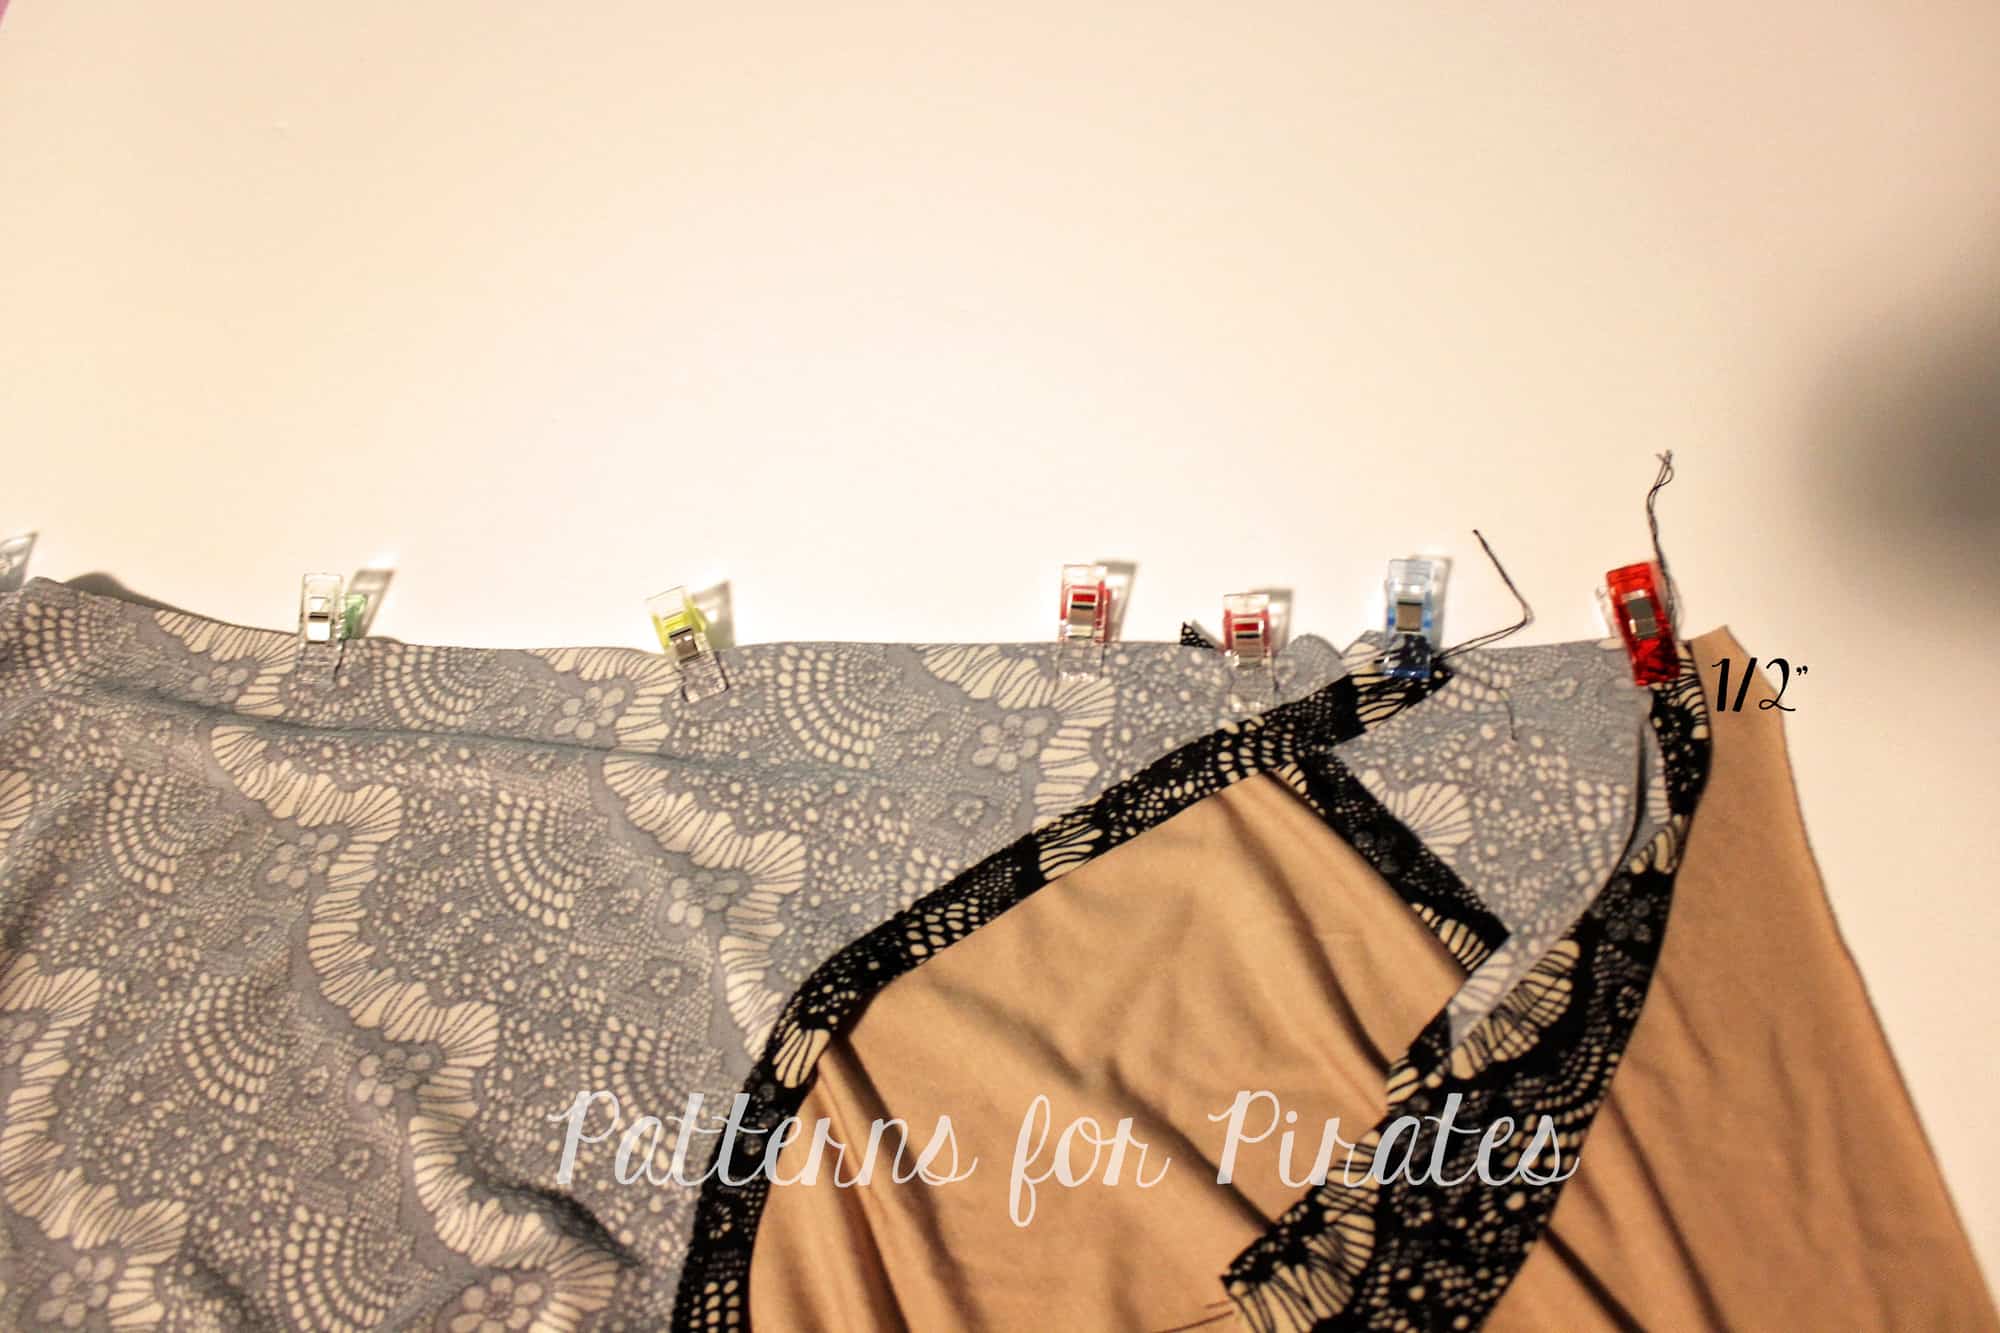
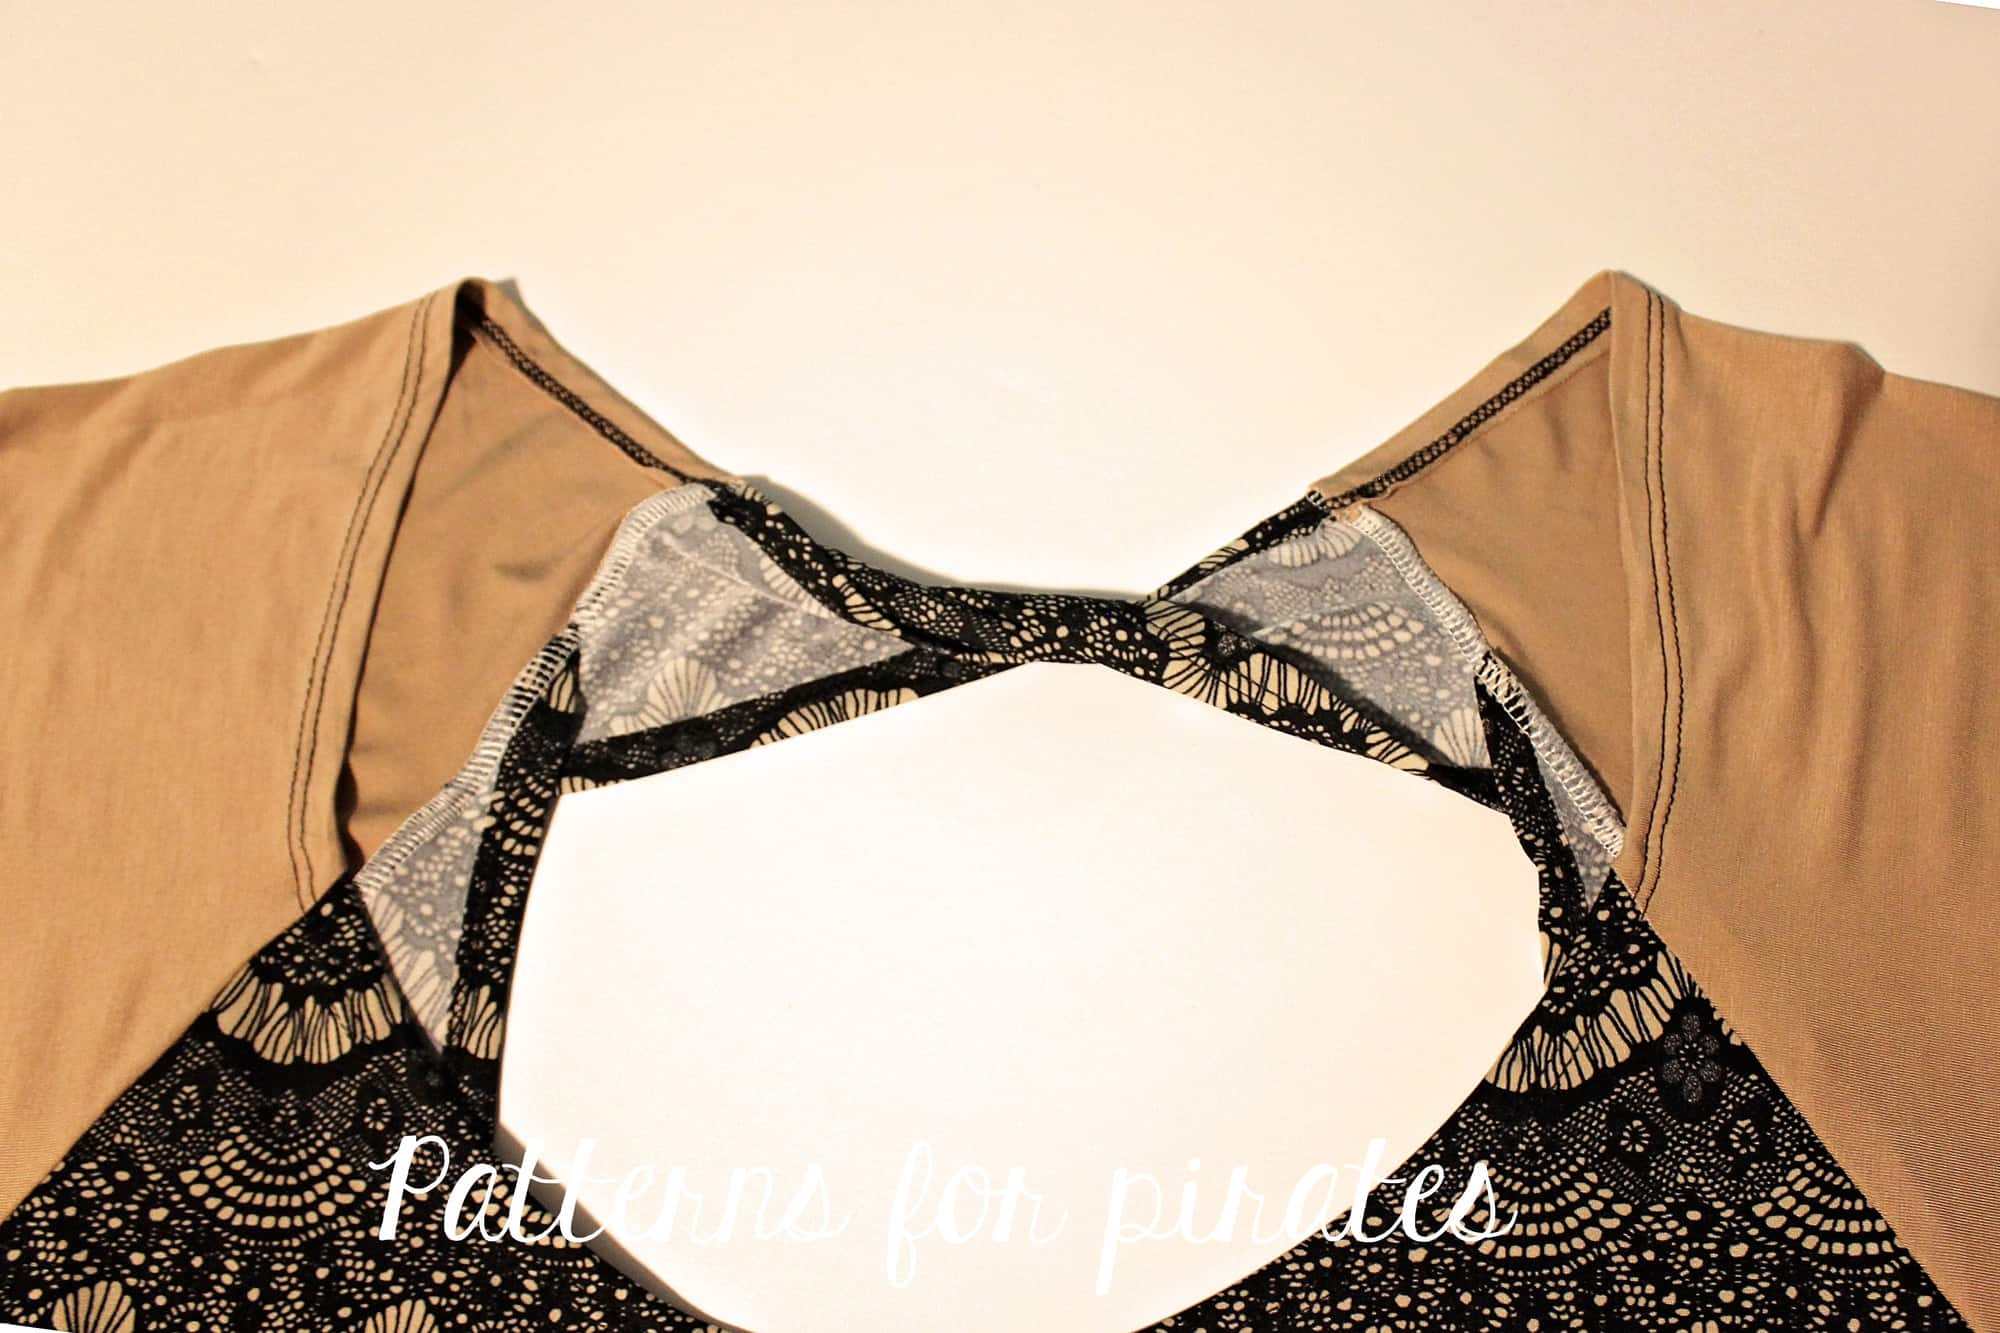
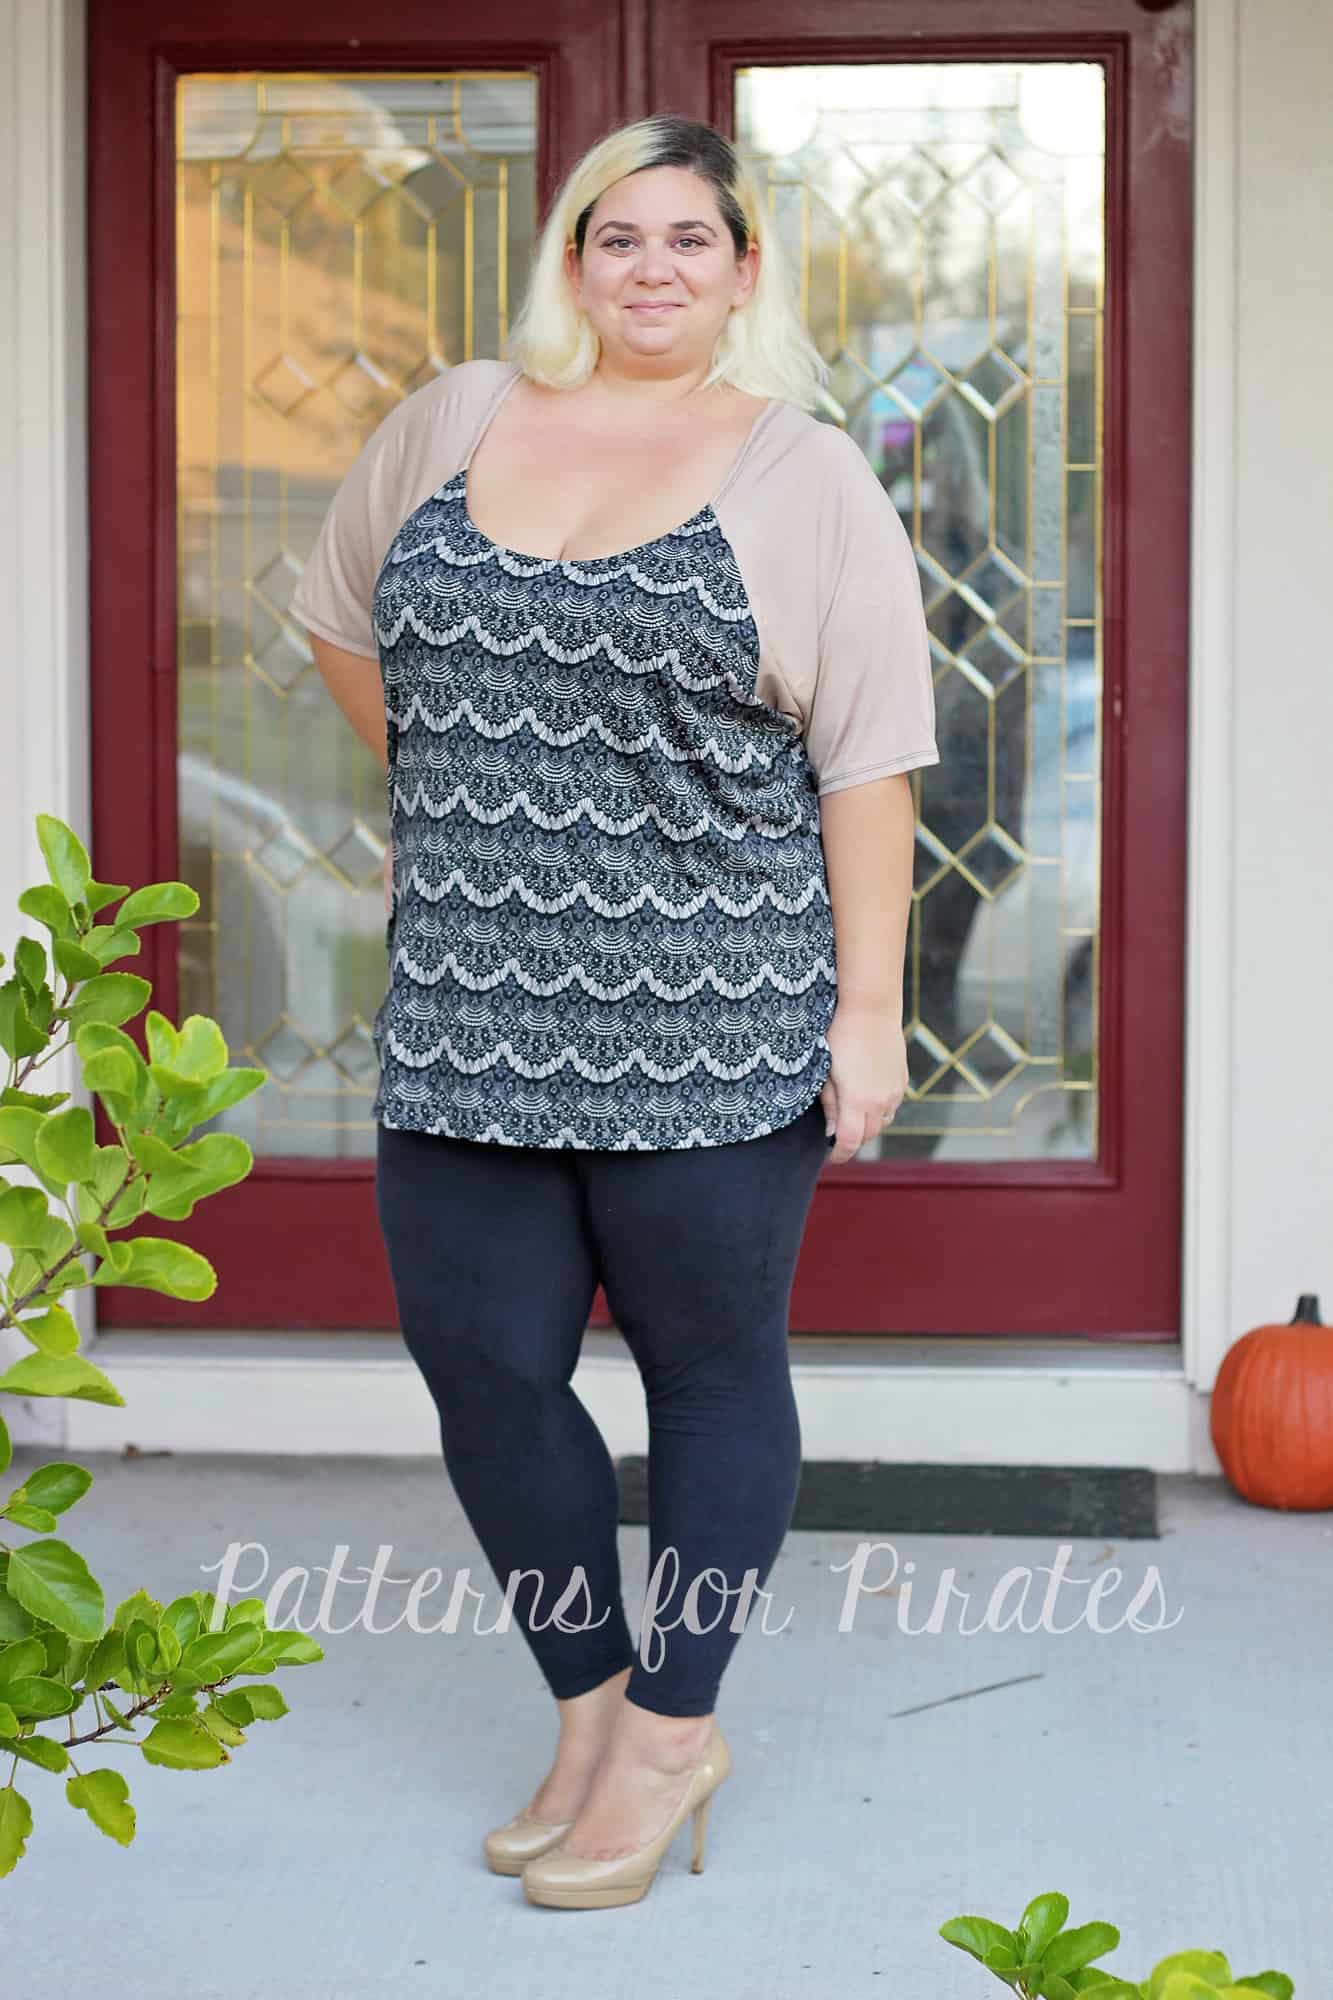
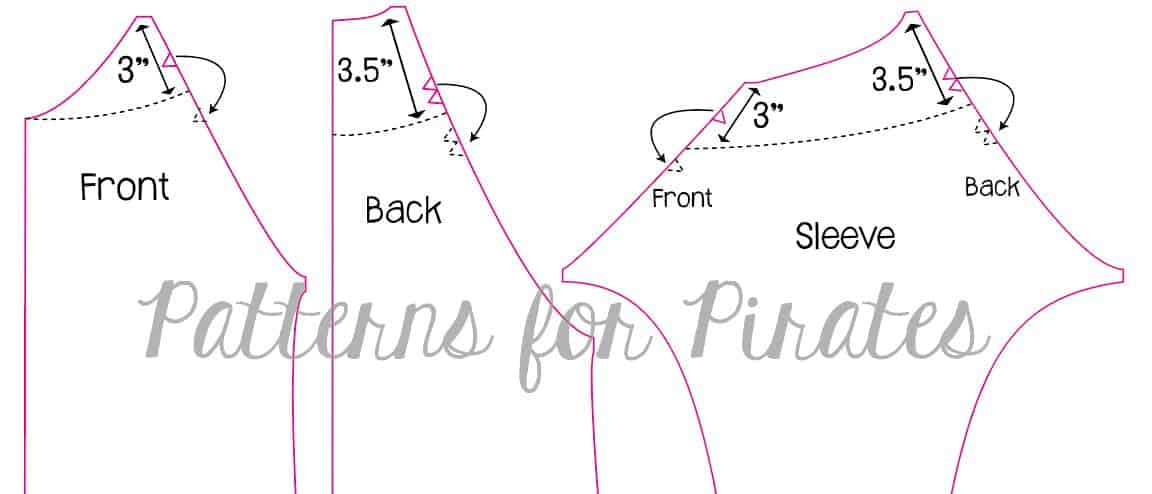
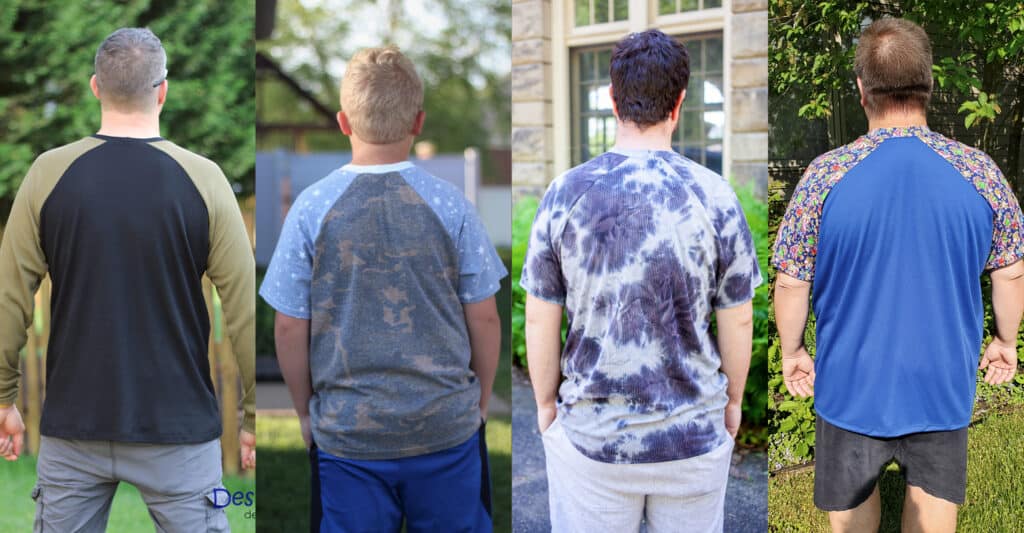
One of my favorite design features of the Weston Raglan is the hem on the front bodice. Instead of leaving it a straight hem, we graded a curved hemline starting at the 6XL size and down, to help accommodate for chests and bellies. As wild as it sounds, adding a curve to the front actually straightens out the hem when being worn!
If you look at the pattern pieces and wonder exactly what that design element was for, here’s an amazing example!
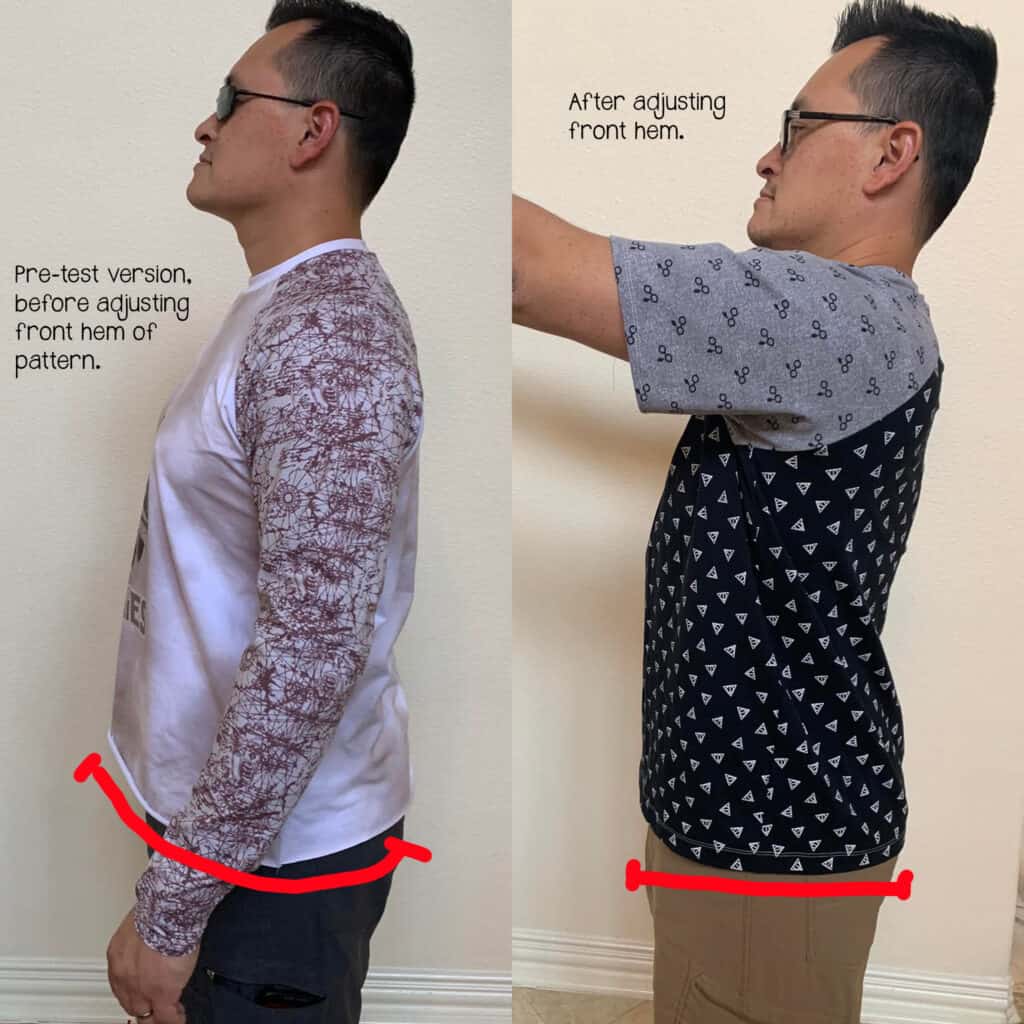
Big thanks to Chandy Mueller and all of her help during pre-testing of the Weston pattern. That’s her model above!
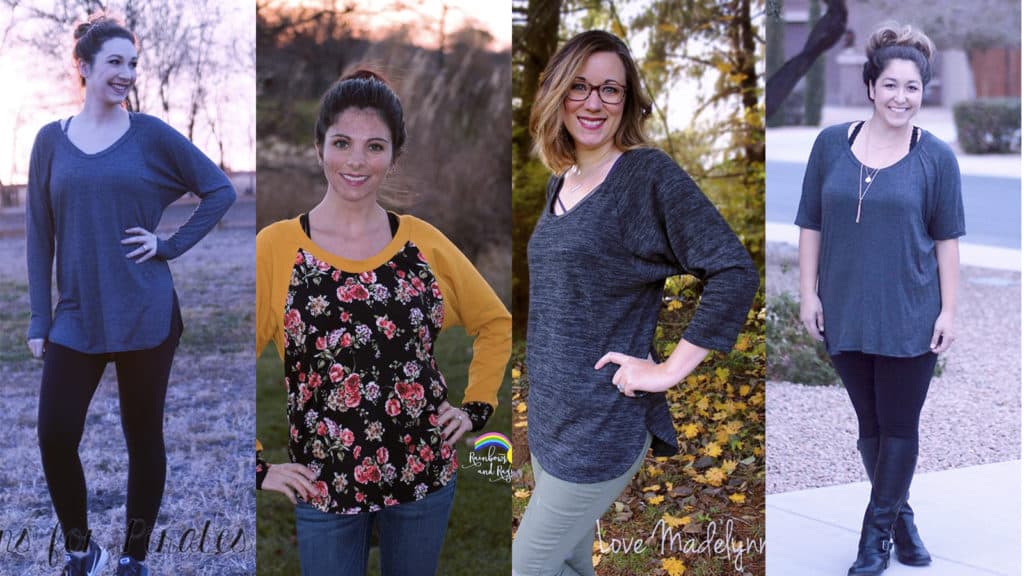
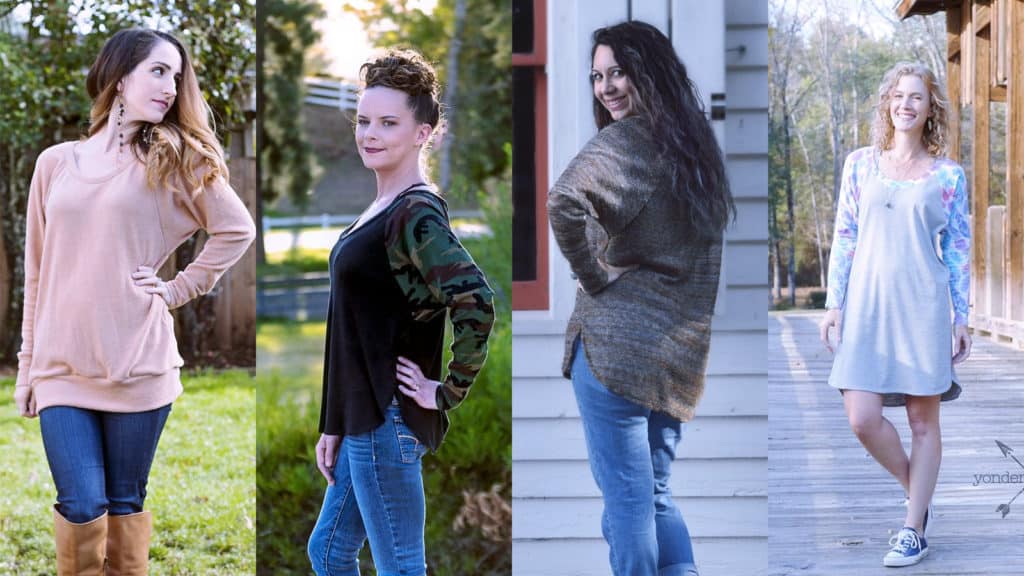
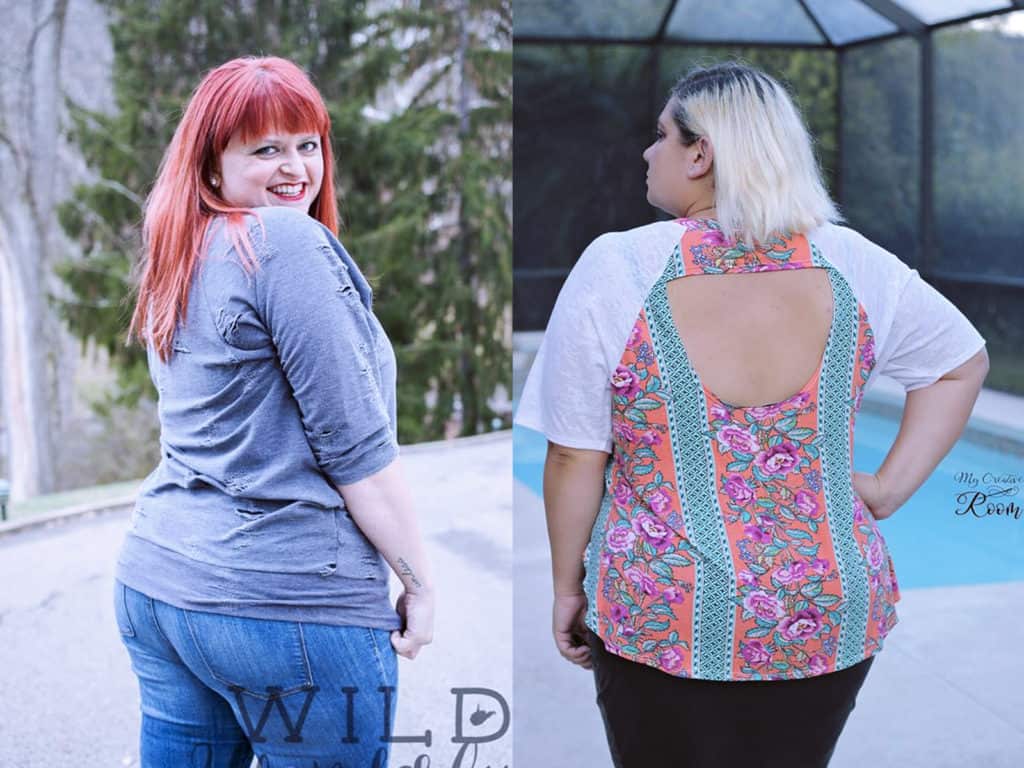
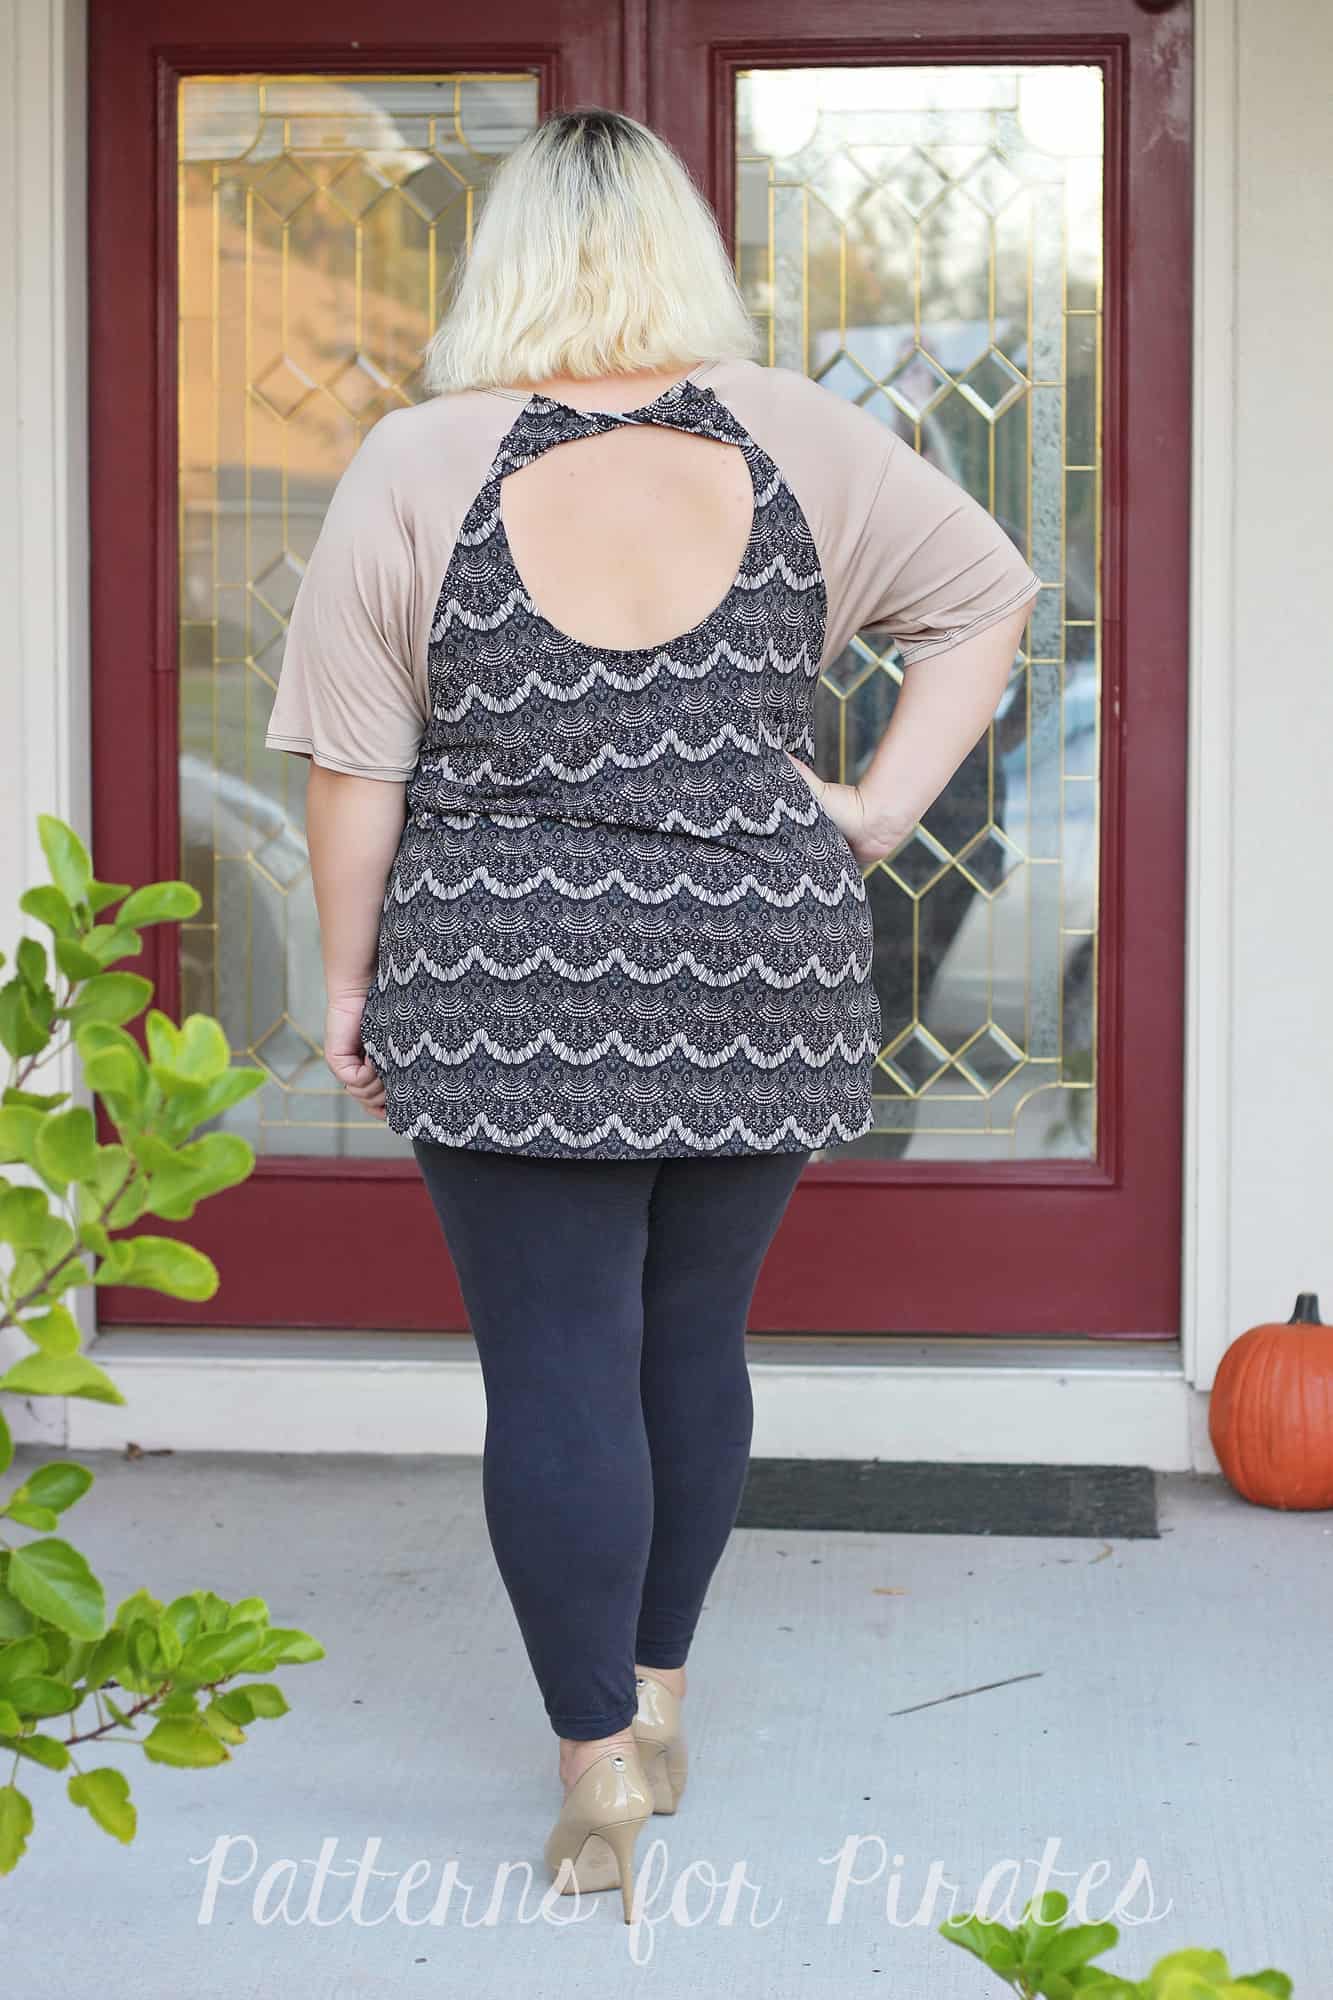
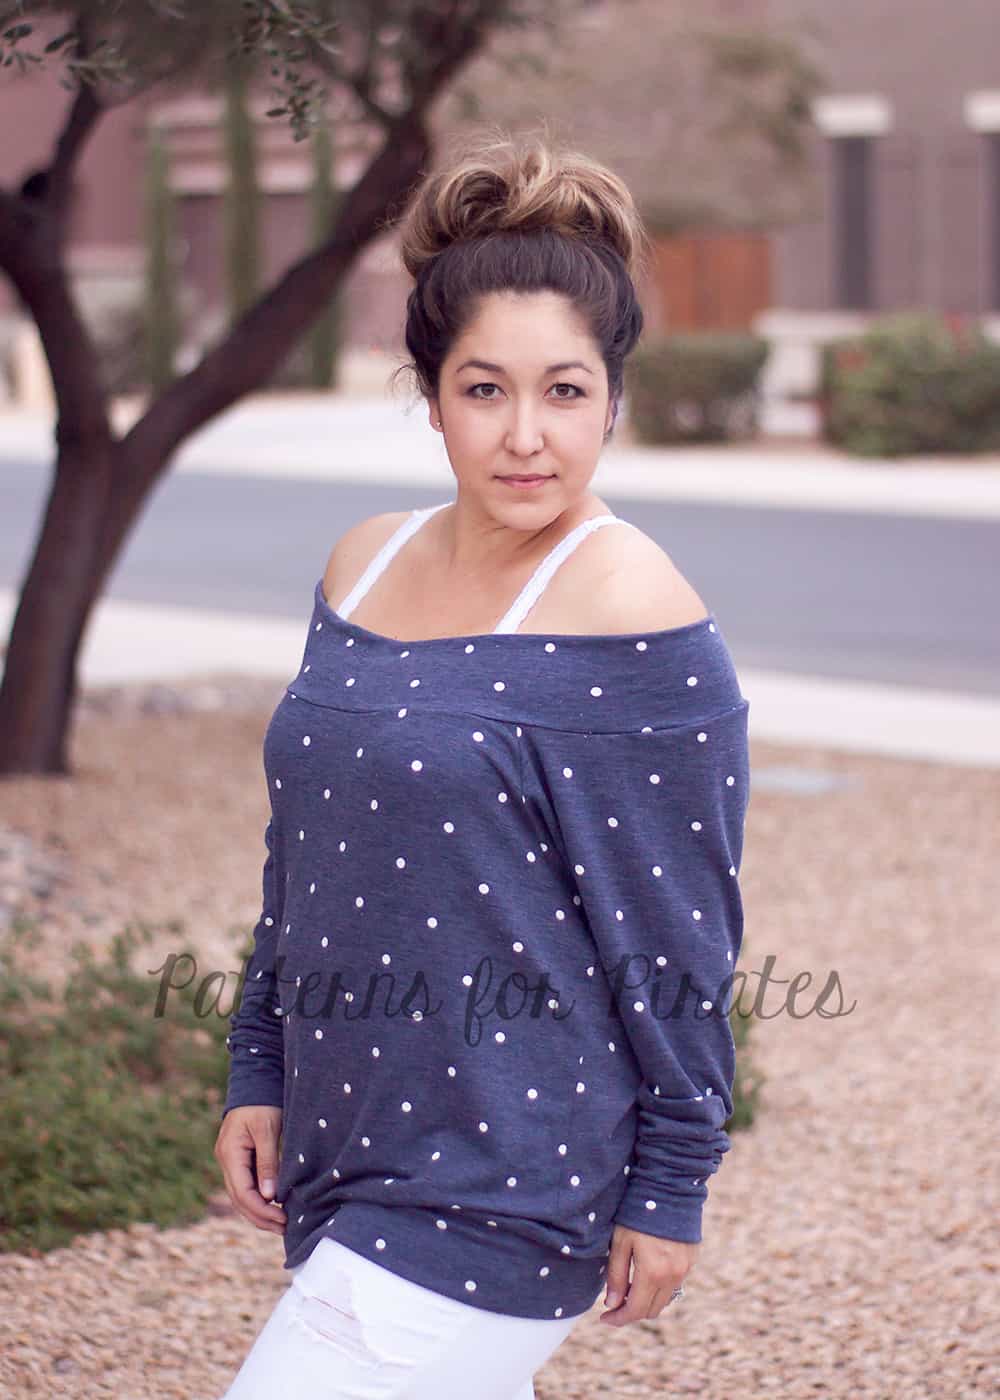
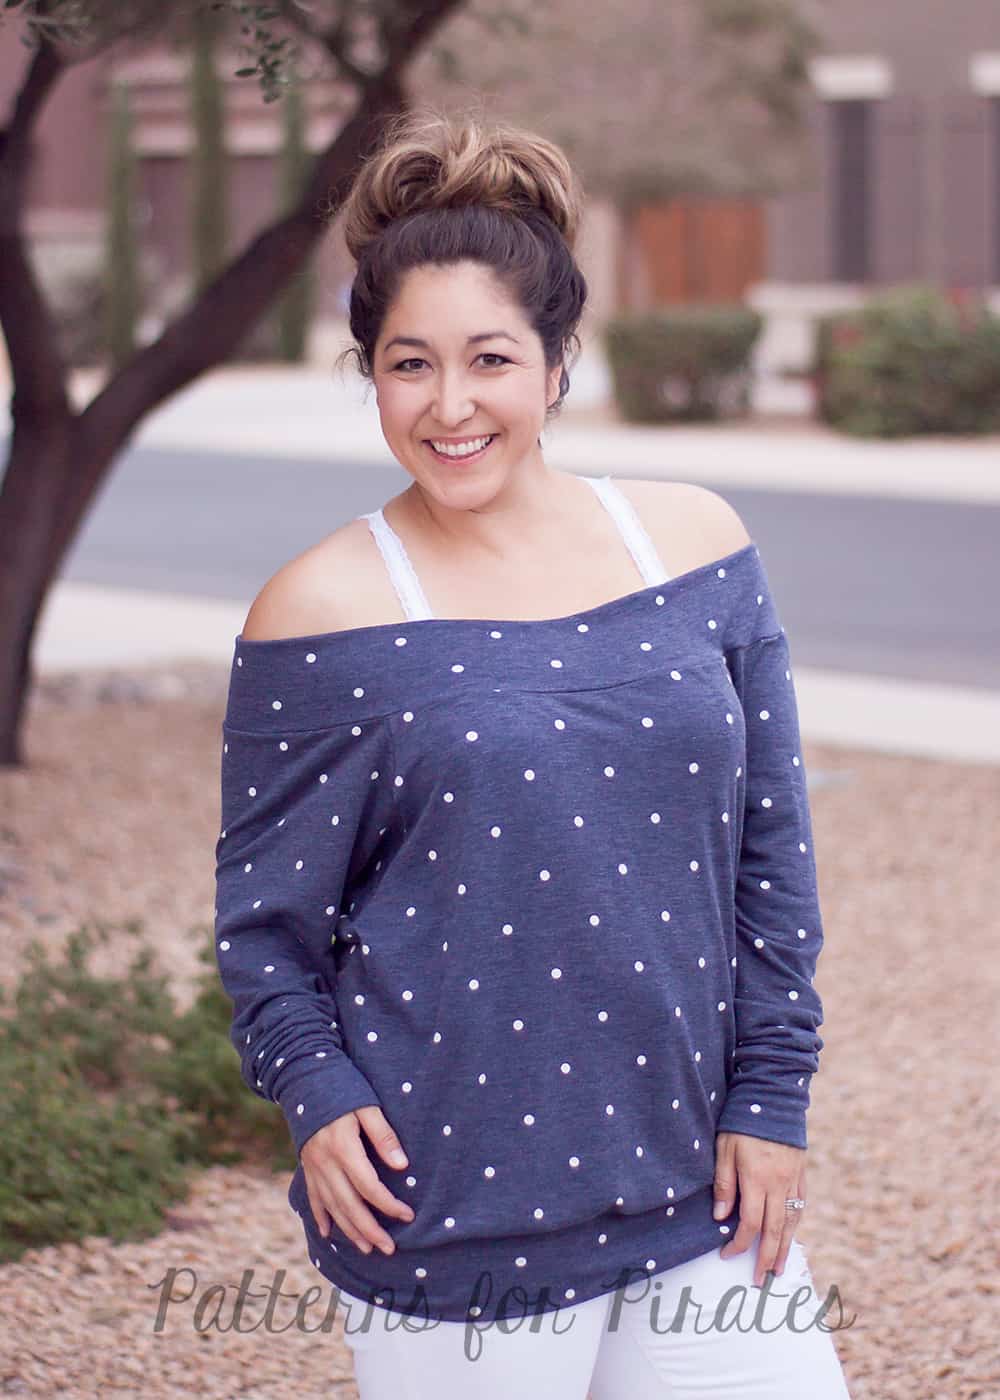
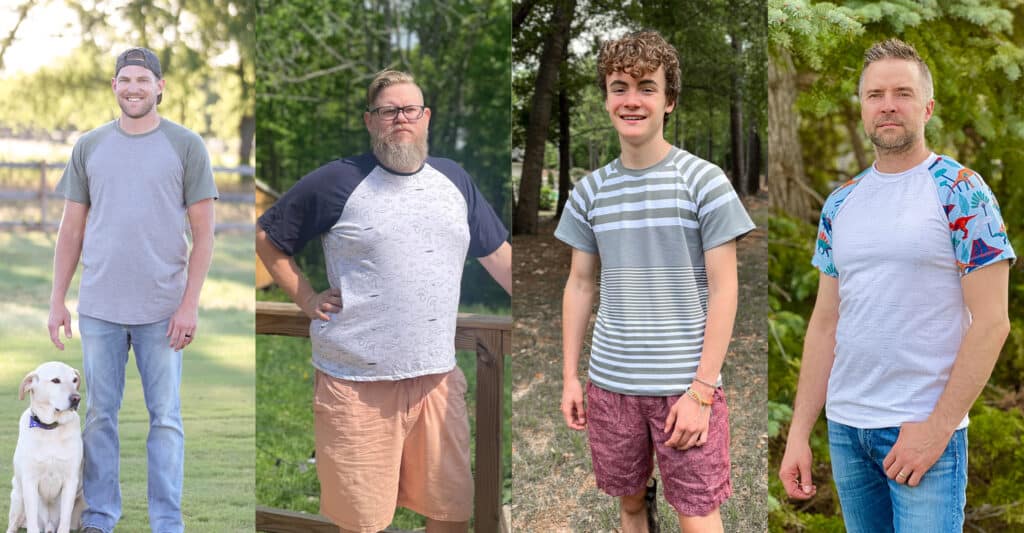
Let’s take a look at some of our stellar sewists and models, in the new Weston Raglan pattern!
- Sleeves and Their Wrinkles
- JRR Woven Fabric Hack
- JRR Animal Faces Add-On
- Contrast Band Hack for Kangaroo Pockets
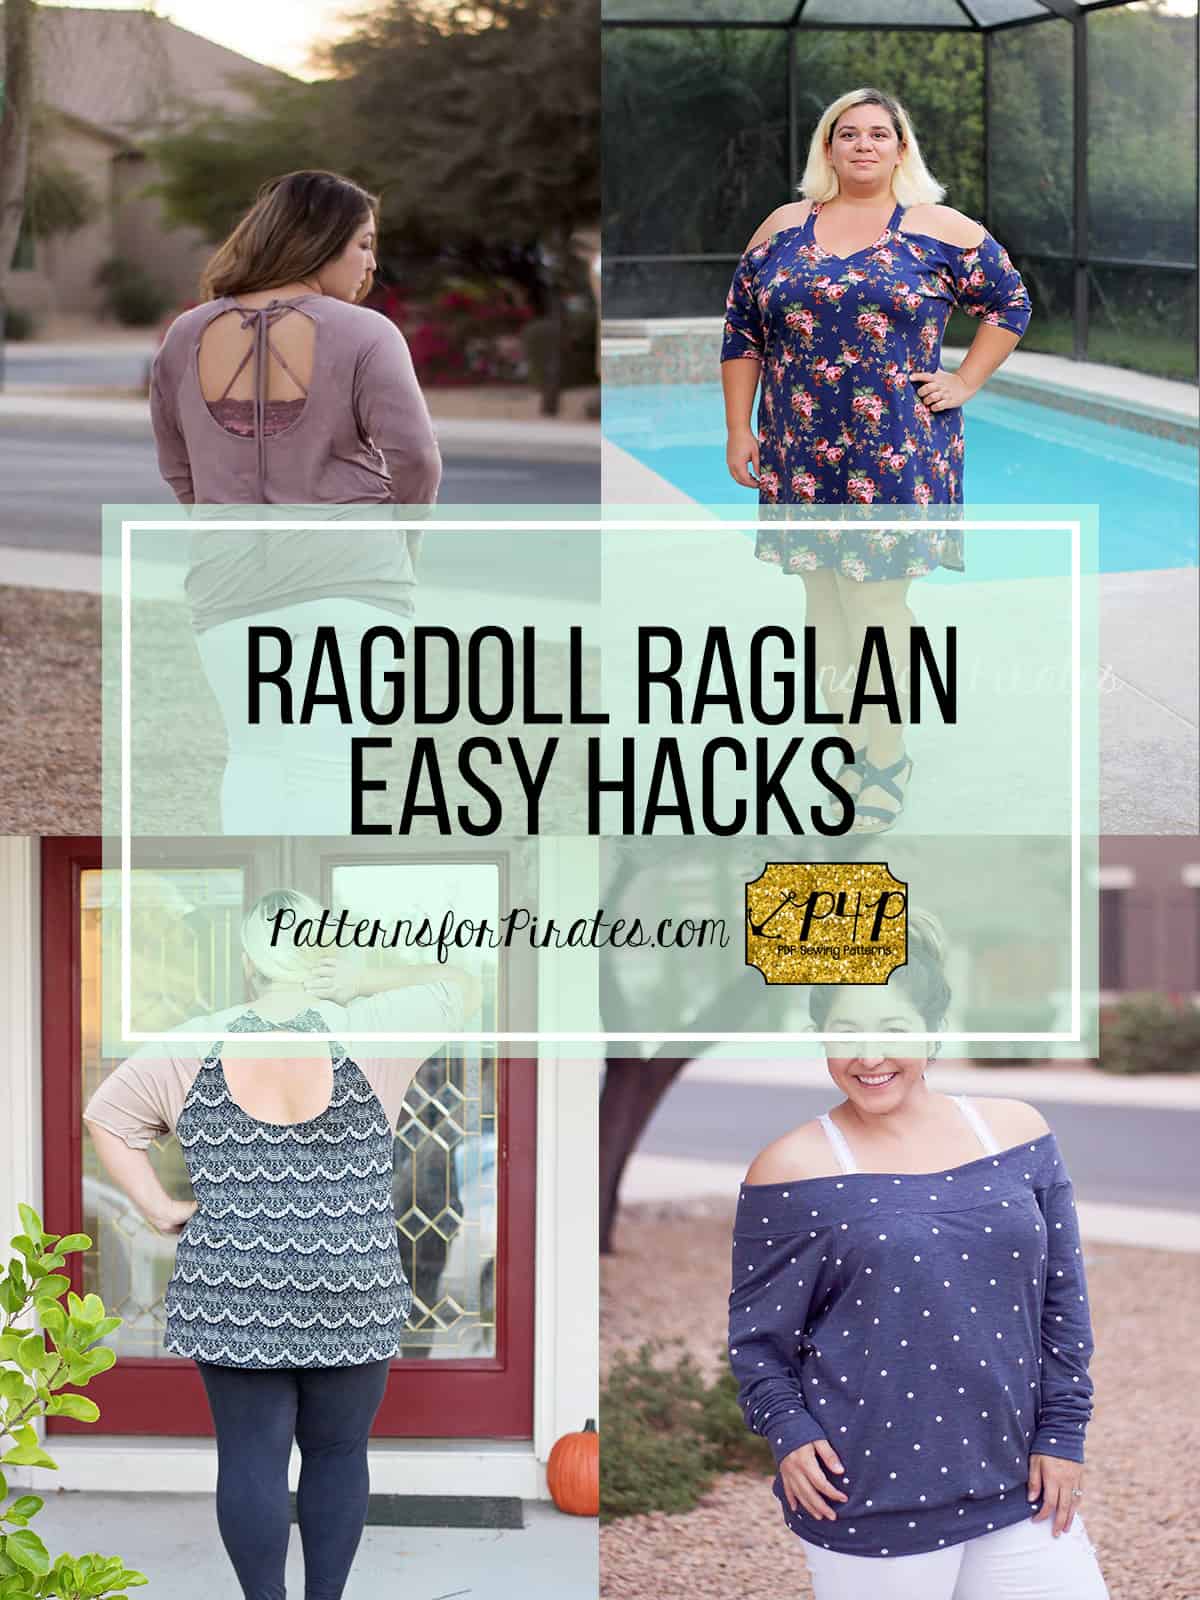
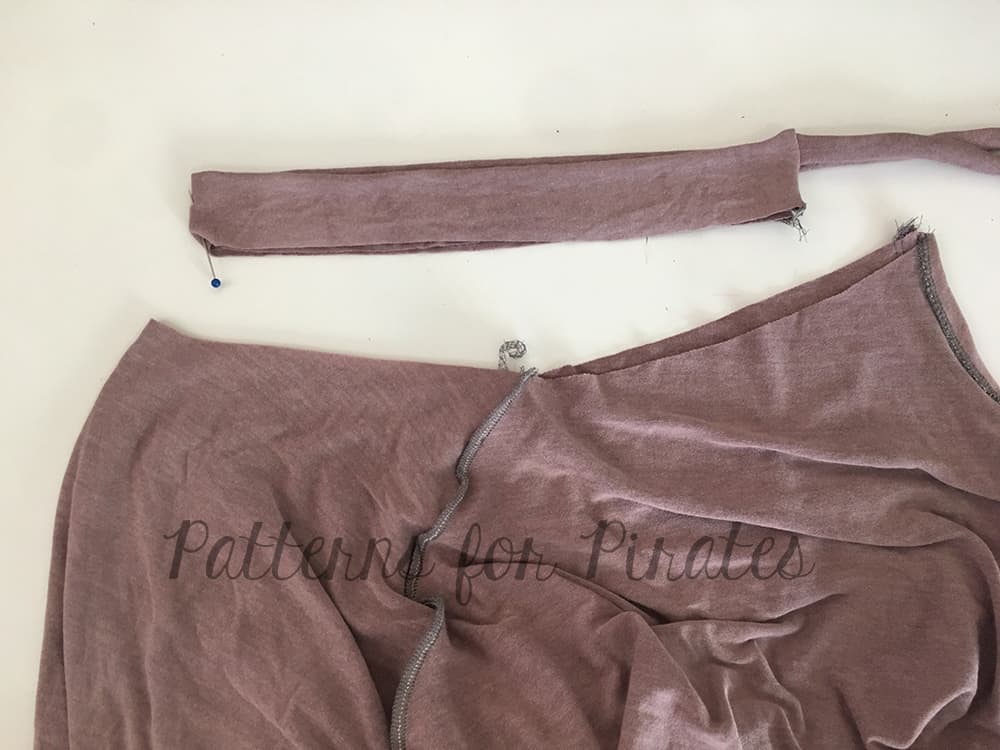
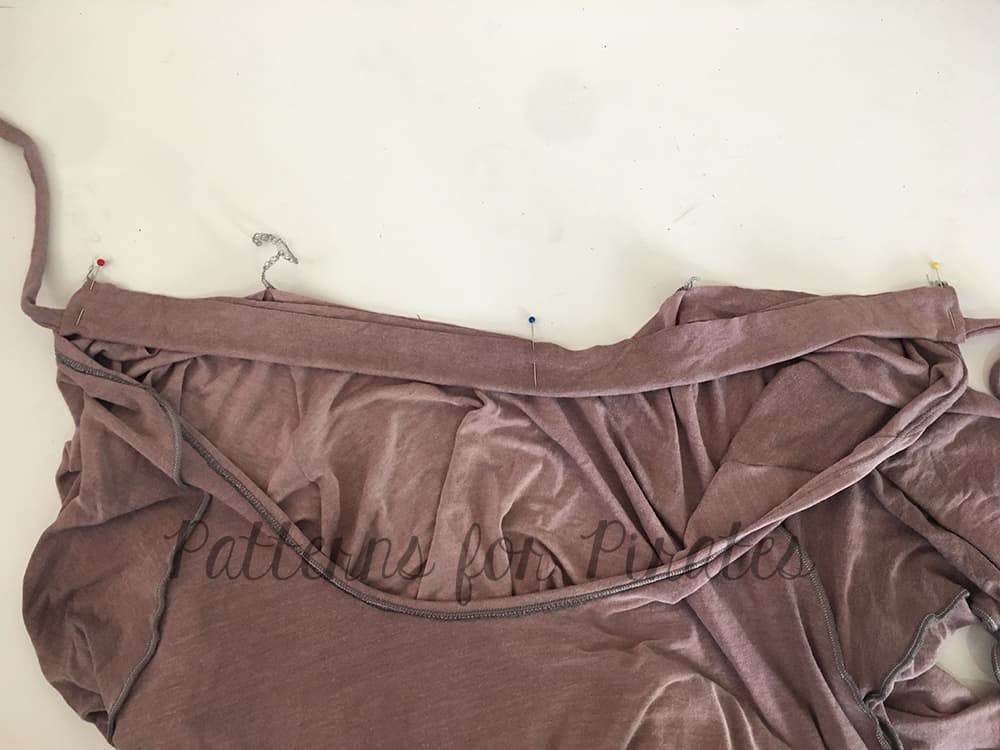
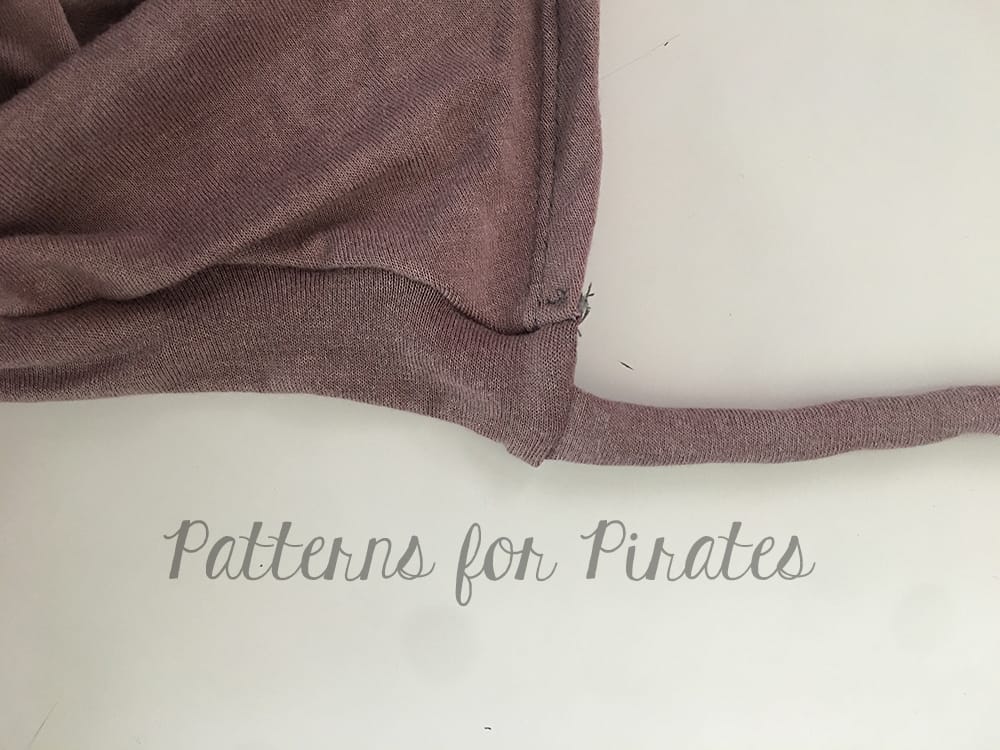
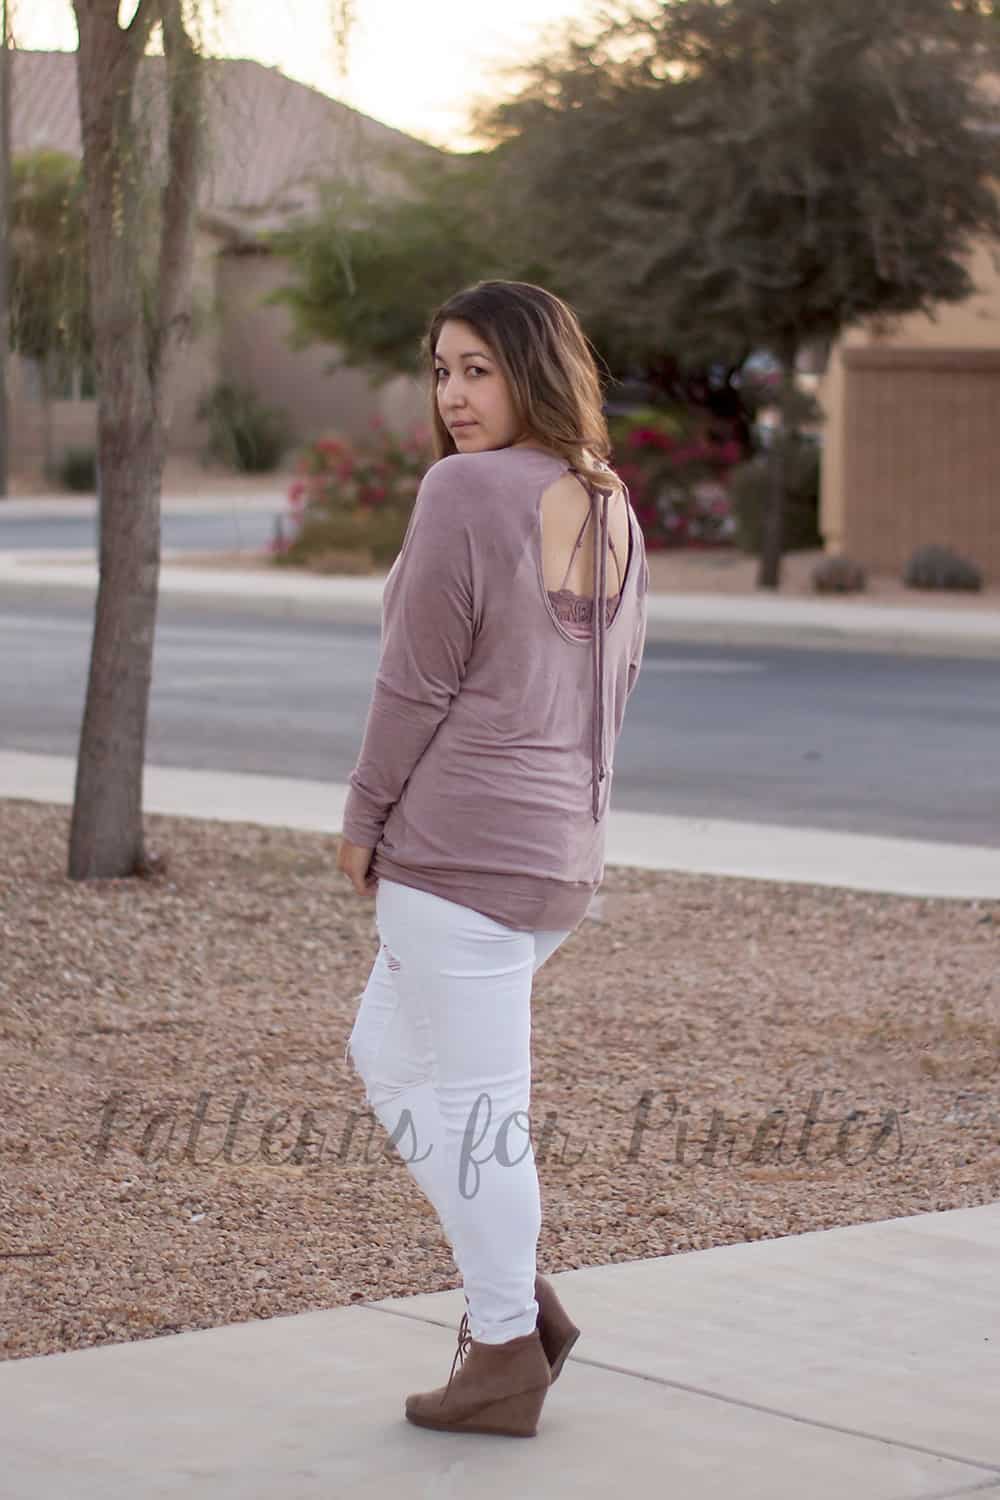
- Keyhole / Scoopback Raglan Hack
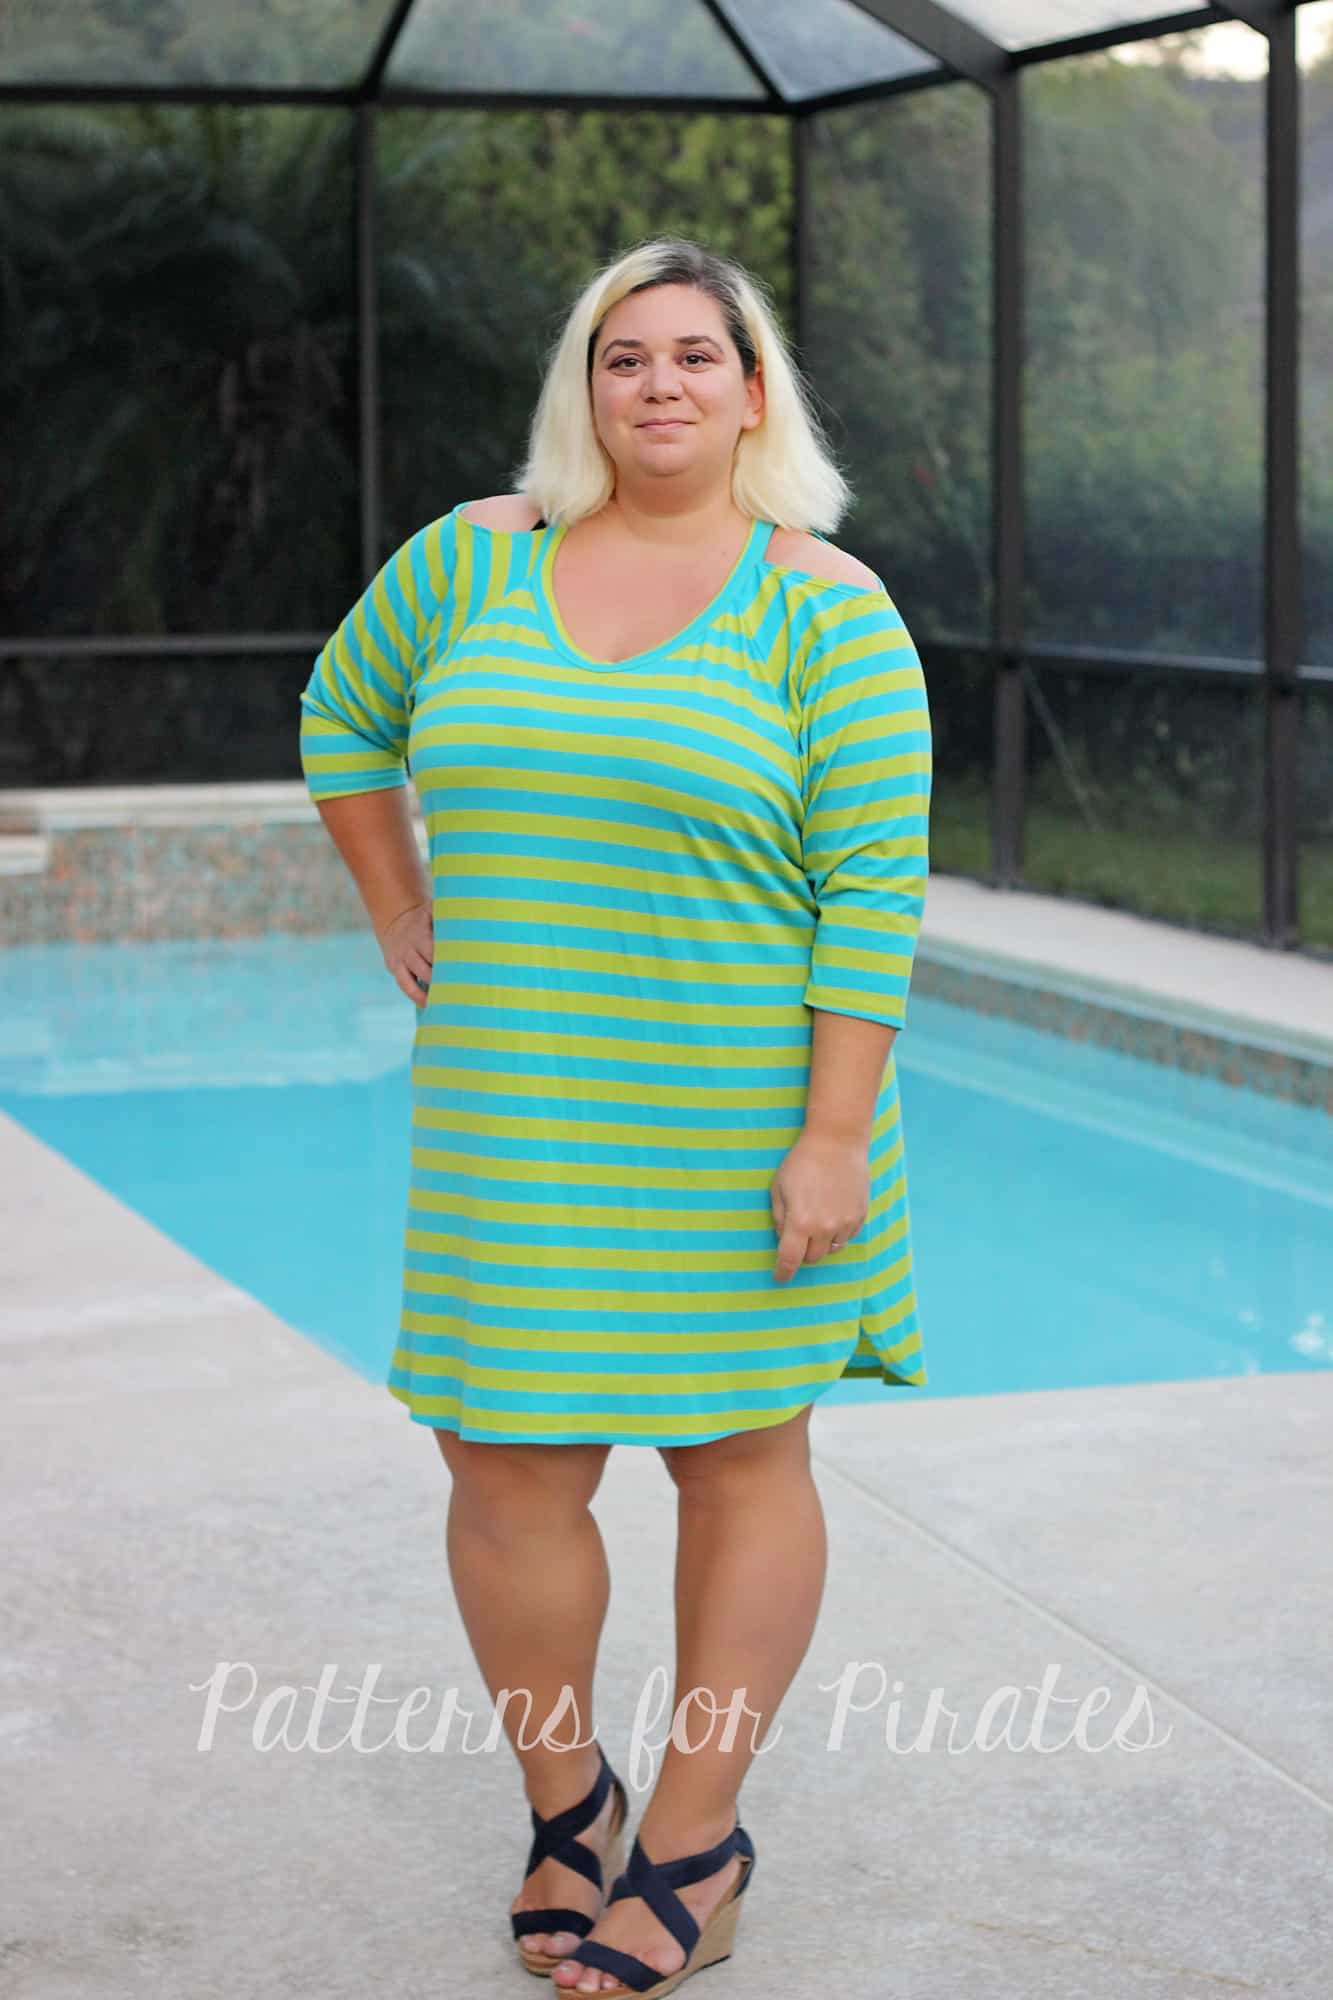
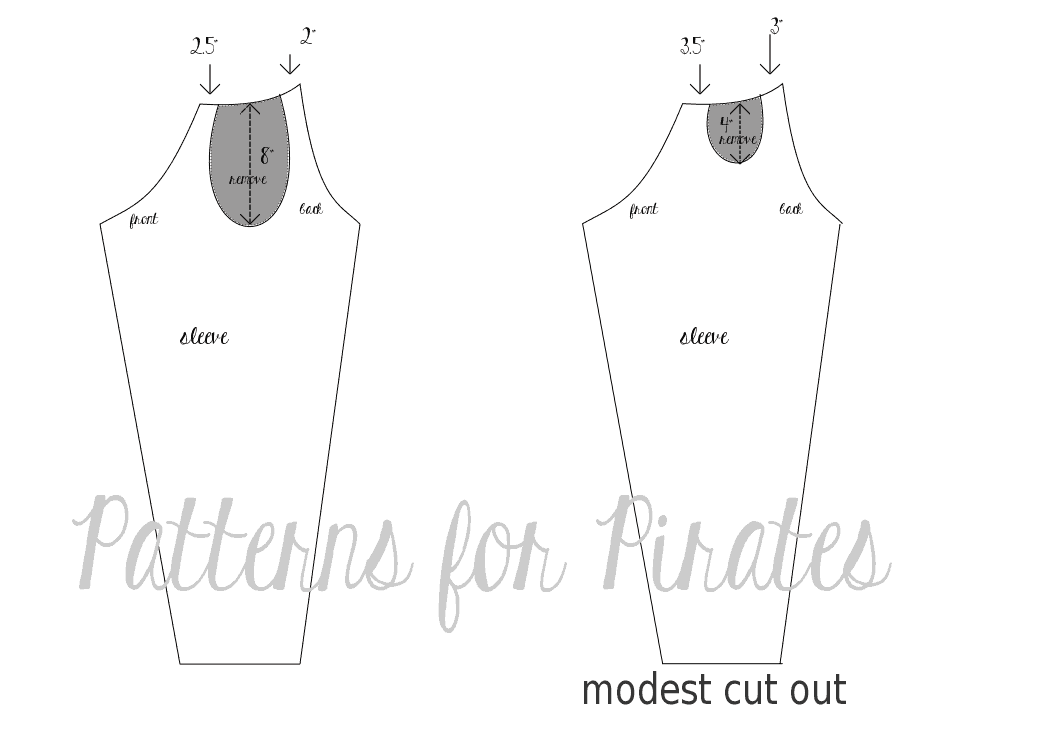
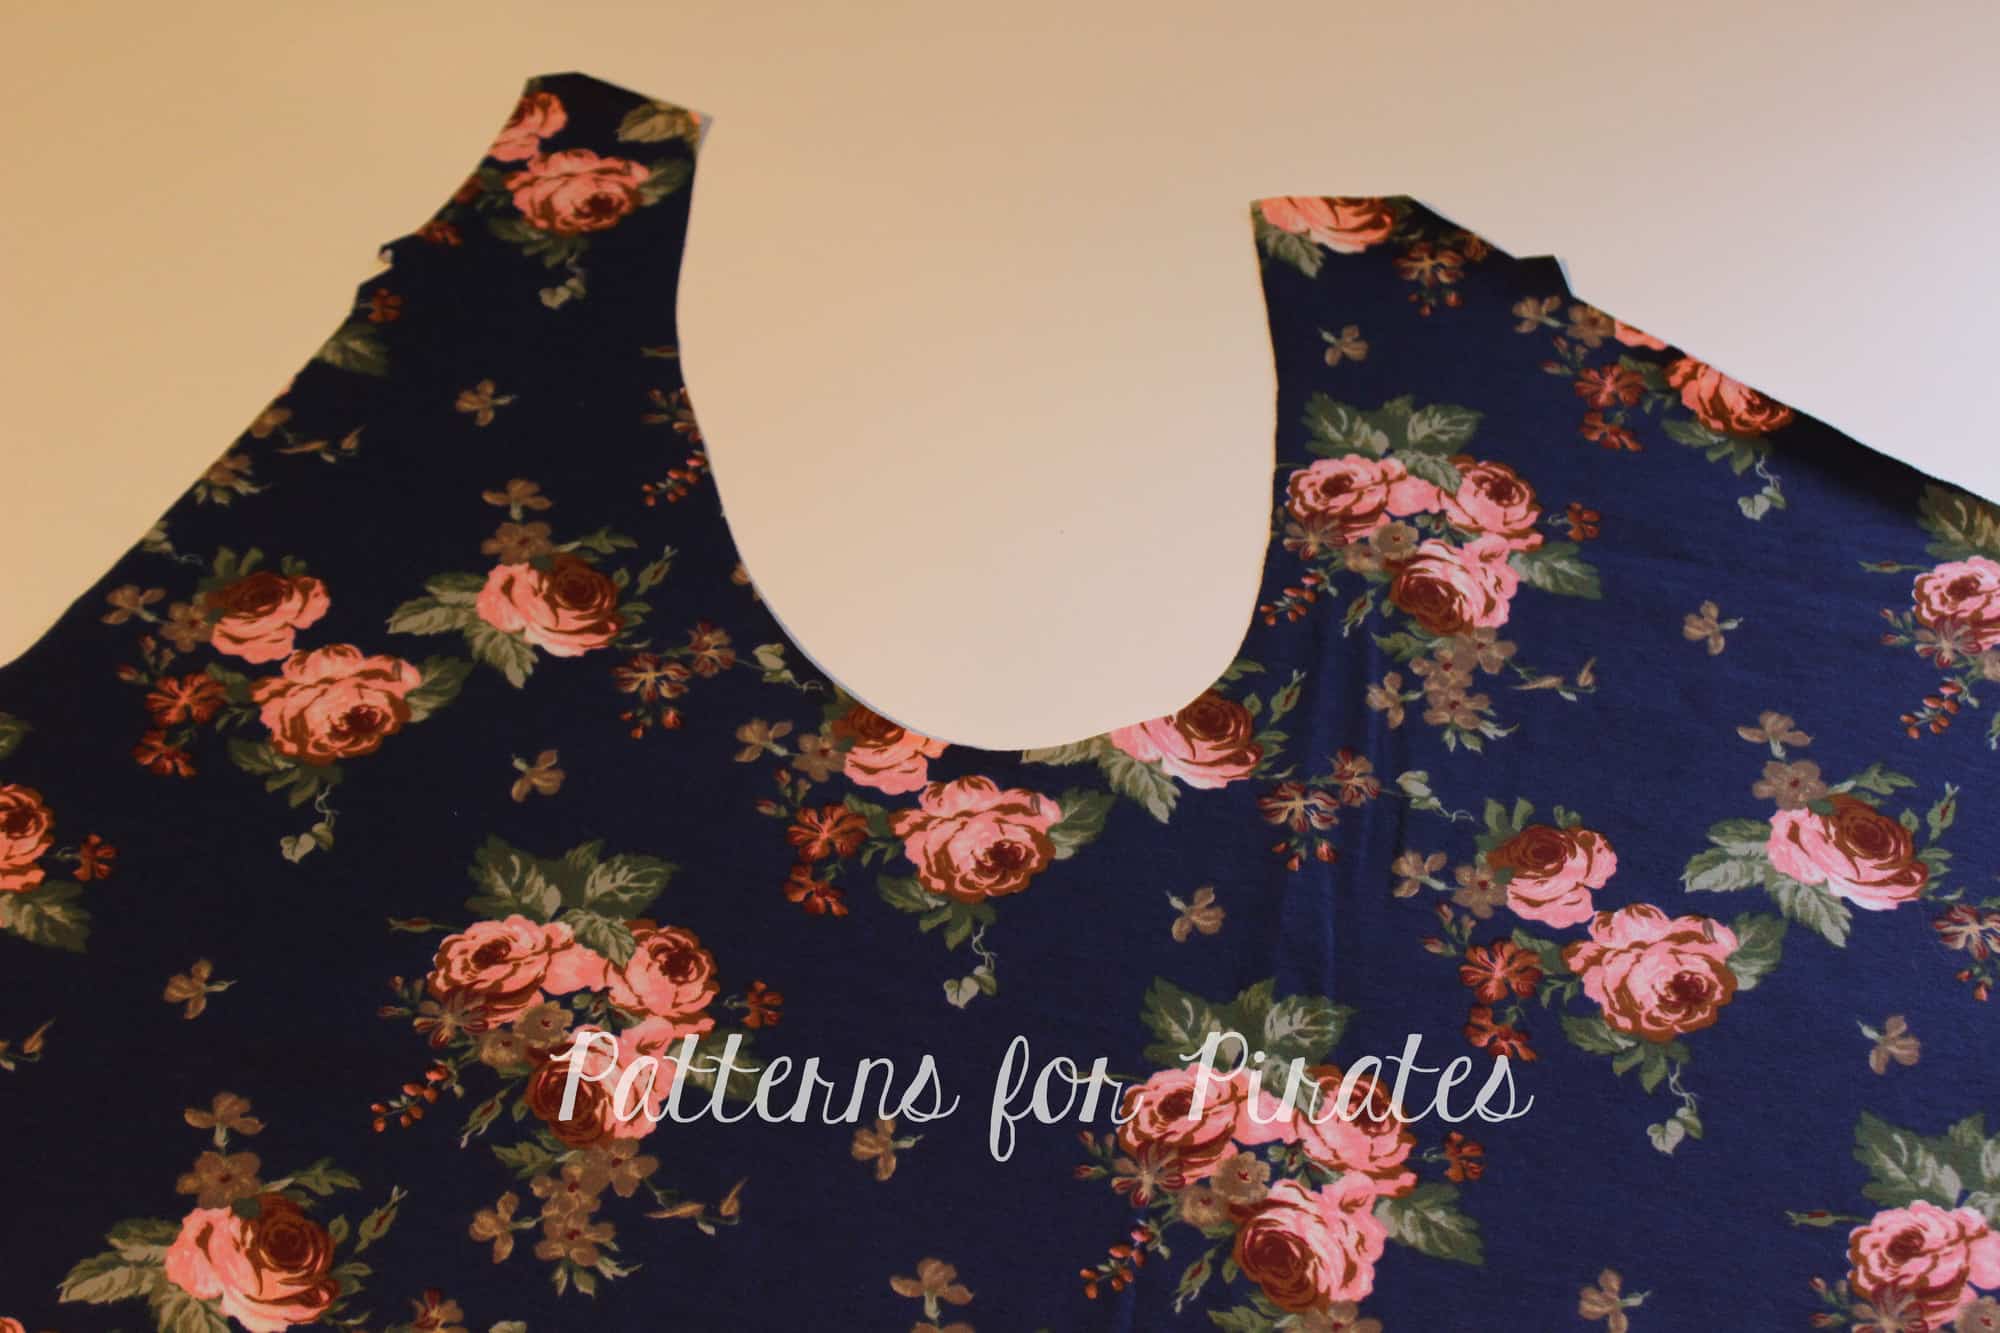
- Off-The-Shoulder Raglan Hack
- Adding Stripes to Your Raglan Sleeves