Patterns for Pirates

P4P stylish, modern, wearable patterns

  • Home
  • Blog
    • Frequently Asked Questions
    • Pattern Releases
      • Free Patterns
    • P4P University
      • Fitting
      • Sewing with Stretch, Knit Fabrics
      • Sewing with Woven Fabrics
      • Sewing Machines
    • Sew-A-Longs
    • Fabric for Pirates
    • Pattern Hacks
    • Announcement
      • Blog Tours
      • Contest/Giveaway
  • Shop
  • Bundle Discounts
  • Gift Cards
  • My Account
  • Cart

It’s a Cinch…Bag FREE Sewing Pattern + Tutorial!

April 4, 2019

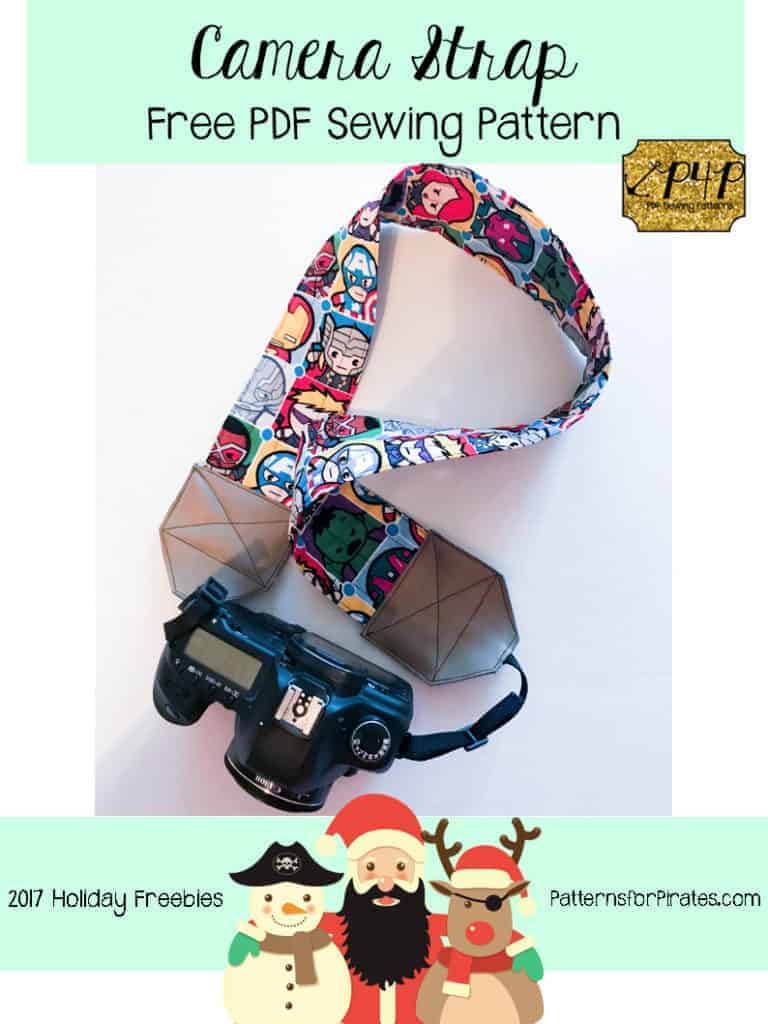
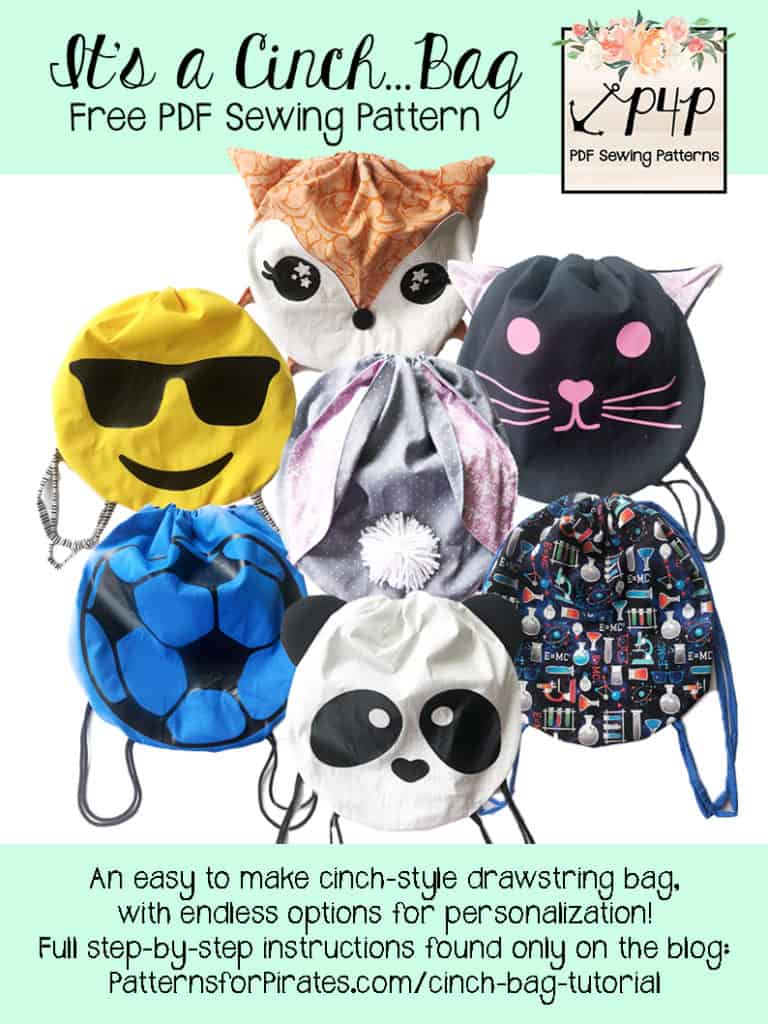
I have been having the hardest time containing myself over these bags!  I just love them so much and I hope you have the same feelings about them….because this is our newest FREE pattern and it’s launching RIGHT NOW!

Let’s make some It’s A Cinch….Bags!

Included in the pattern below are instructions on how to make a basic bag, or one of the animals like the fox, kitty cat, panda, or bunny!  There are also downloadable files for all of the animal faces (and the emoji face pictured), which you can use for htv, fabric paint or embroidery.  But wait, there’s more!  Included along with all of that are downloadable files for a soccer ball, volleyball, basketball and baseball!  I’ve got you covered all over the place!

Plus I totally spared you from having to install zippers this time.  (I know you were worried.)

**Stick around all the way to the bottom of this post for a full video tutorial of the assembly of these sweet cinch bags as well!

— It’s a Cinch…Bag PDF free pattern pieces, animal face files, and sports ball designs (found HERE)
— 1/2 yard main fabric
— 1/2 yard lining fabric
— 3 yards cording for straps, cut into 2 – 1.5 yard lengths.
— Optional: Small amounts of accent fabrics for ears, etc.
— Optional: Small amounts of fiberfill for the animal ears.
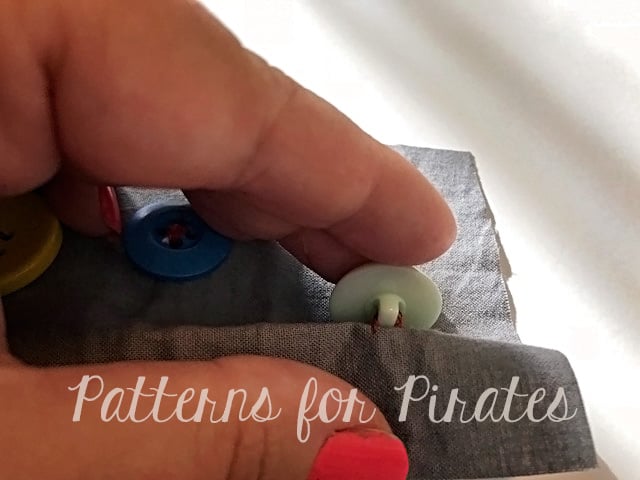
— Optional: Heat Transfer Vinyl / Embroidery Floss / Fabric Paint / Buttons / etc for Details

Recommended fabrics: quilting cotton, kona cotton, etc.

BASIC BAG CONSTRUCTION

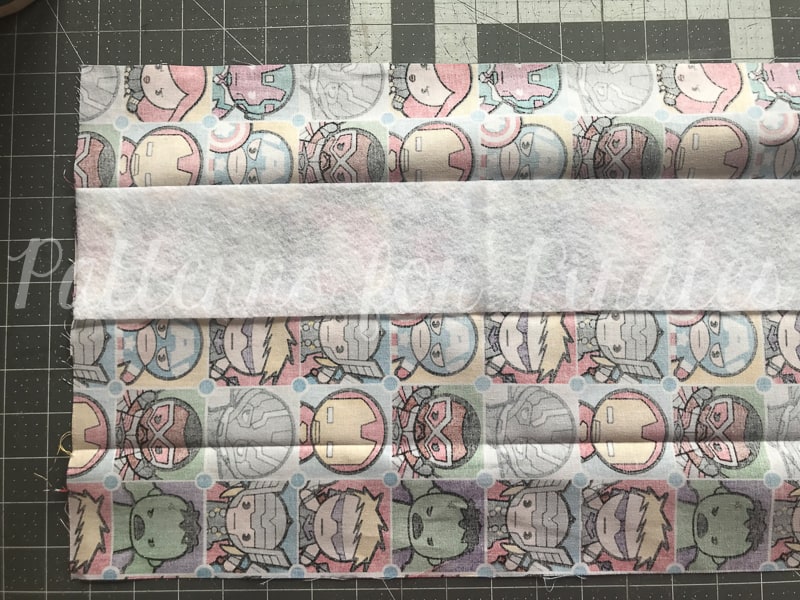
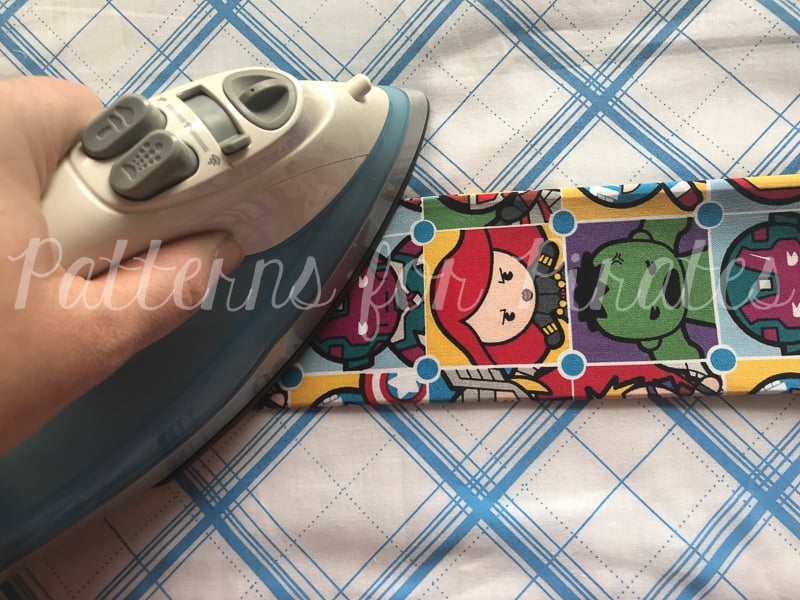
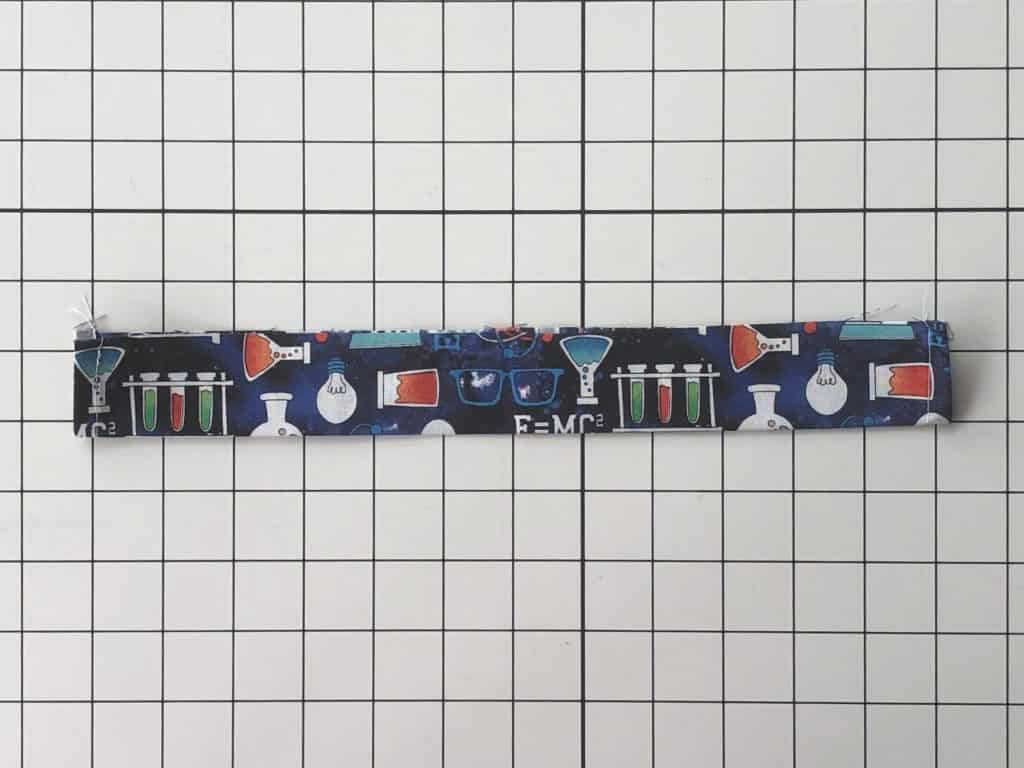
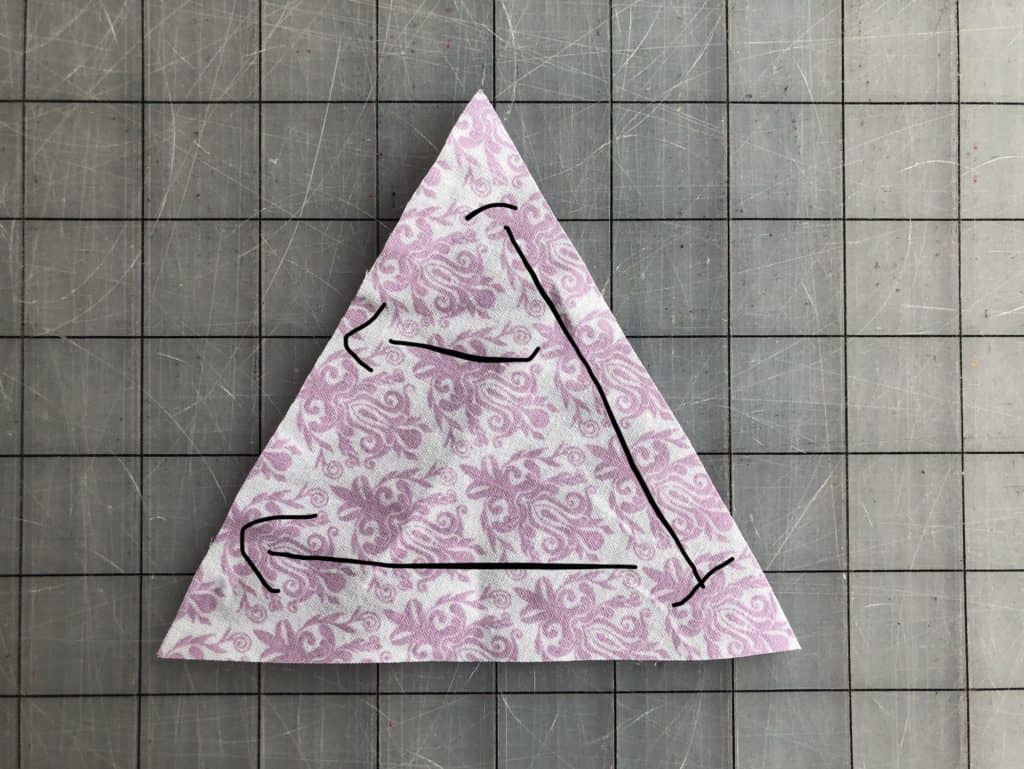
Step 1: Using a strap channel piece, fold one of the short ends (wrong sides together) at 1/4″ and press.

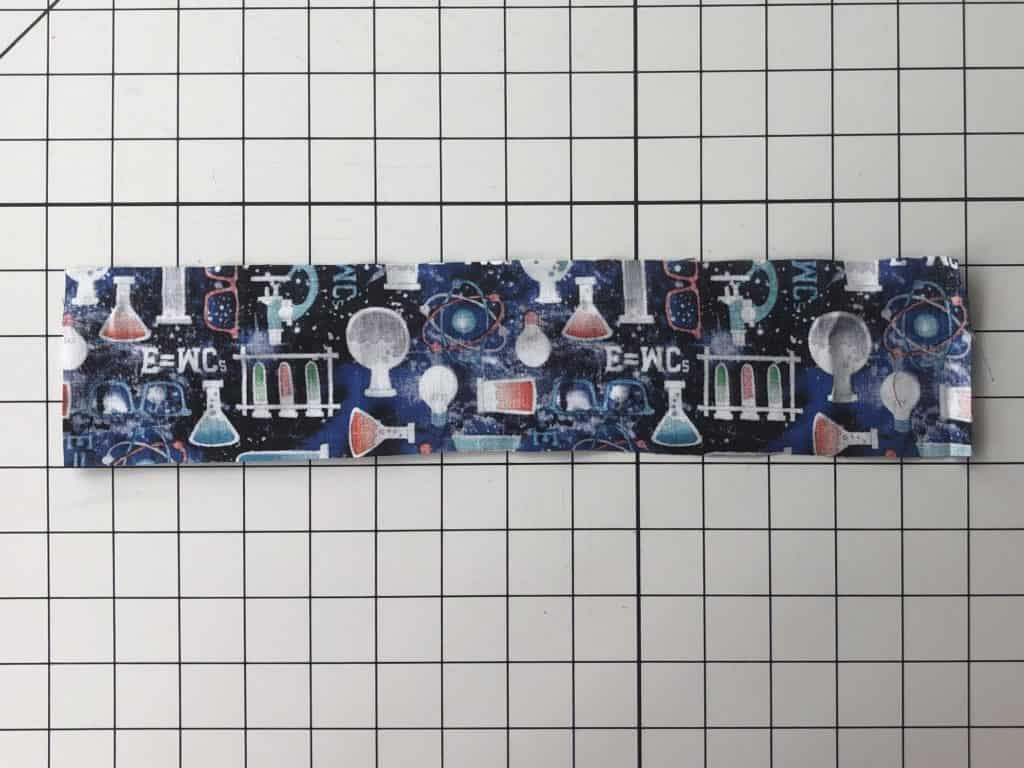
Fold another 1/4″ to enclose raw edges and press again.

Repeat on the other short side of strap channel.  Repeat with other strap channel piece.

Step 2: Top stitch along both edges of strap channel pieces.

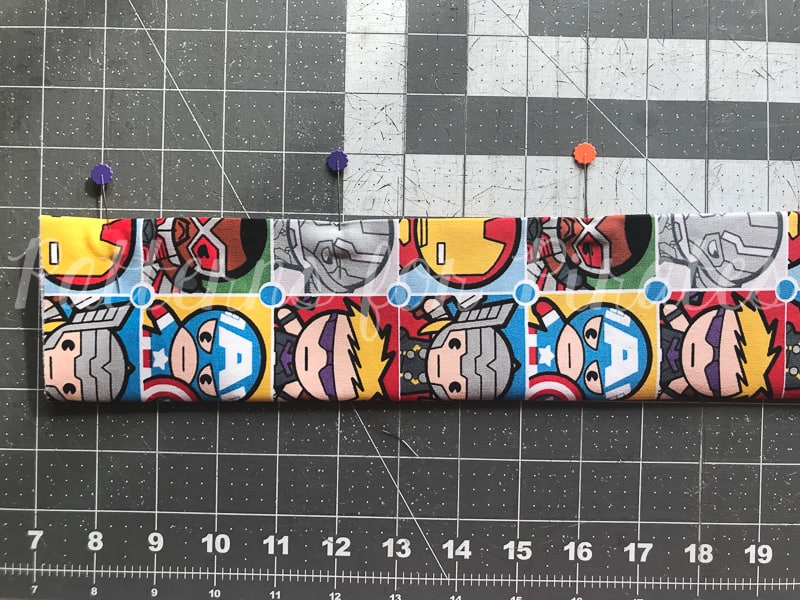
Step 3: With wrong sides together, fold the strap channel in half, meeting the long raw edges together.  Press.  Repeat with other strap channel piece.

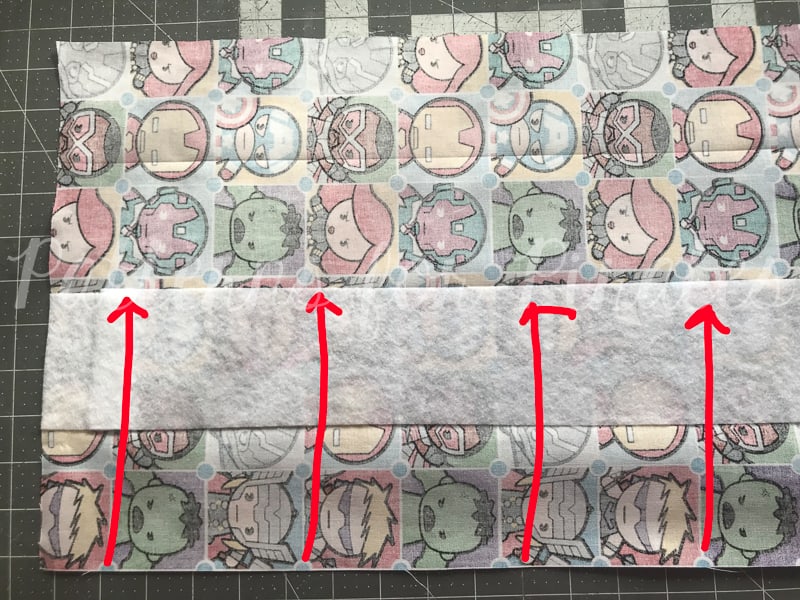
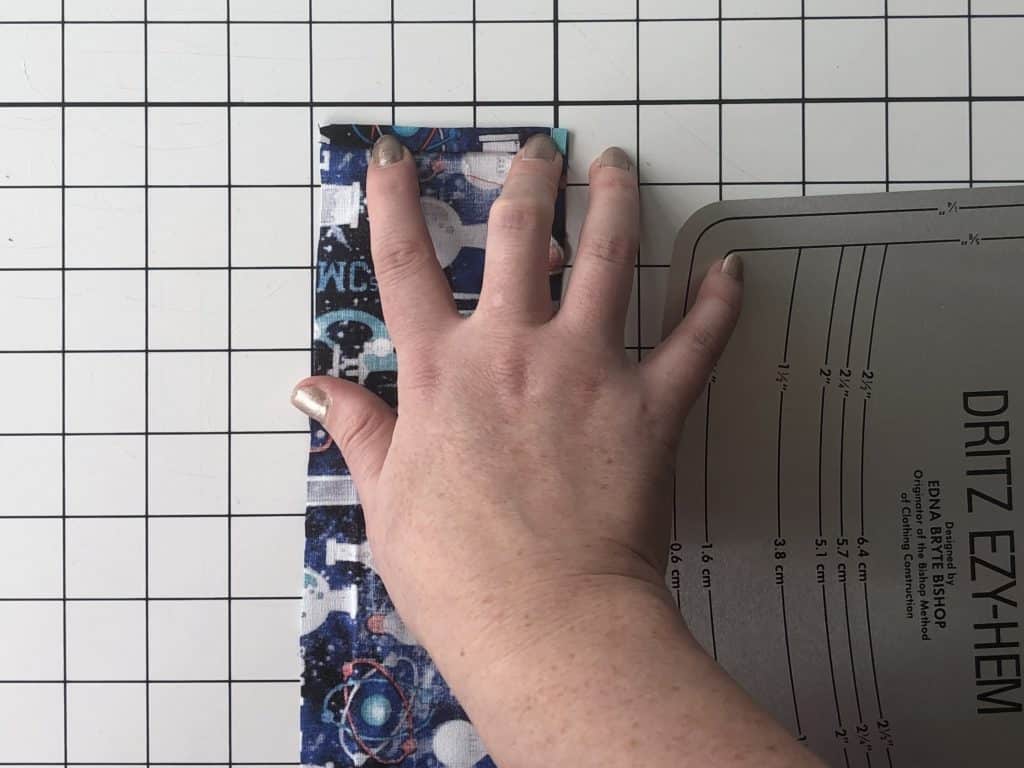
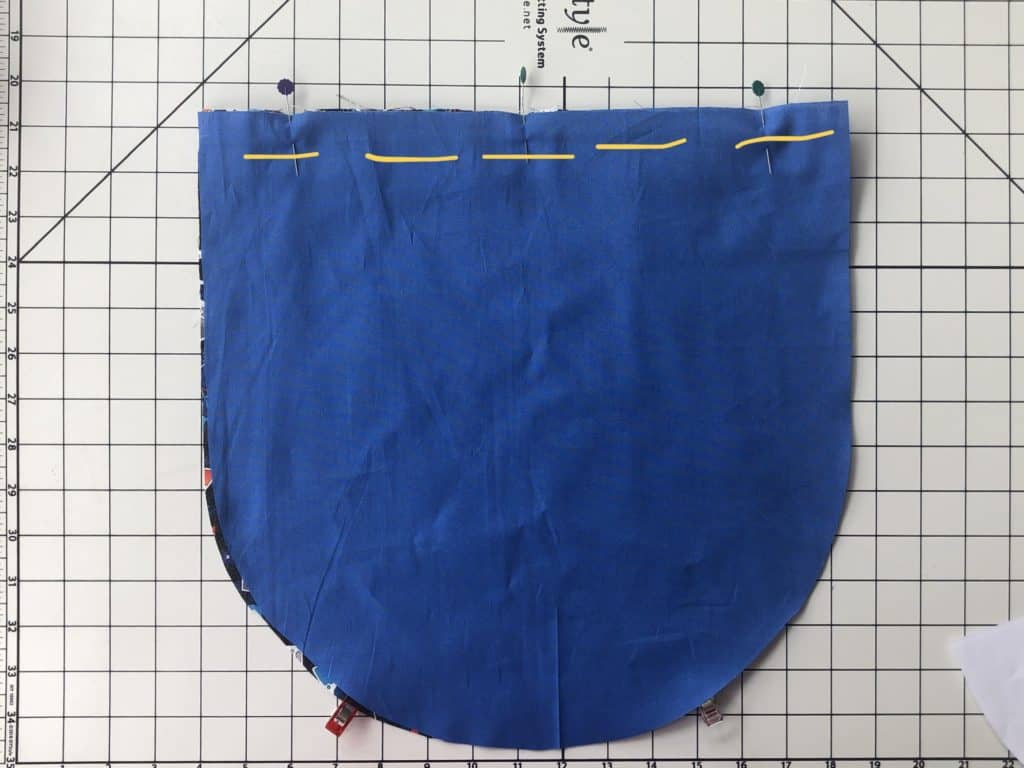
Step 4: Fold channel pieces in half and place a pin to mark the center along the raw, unfolded edges.

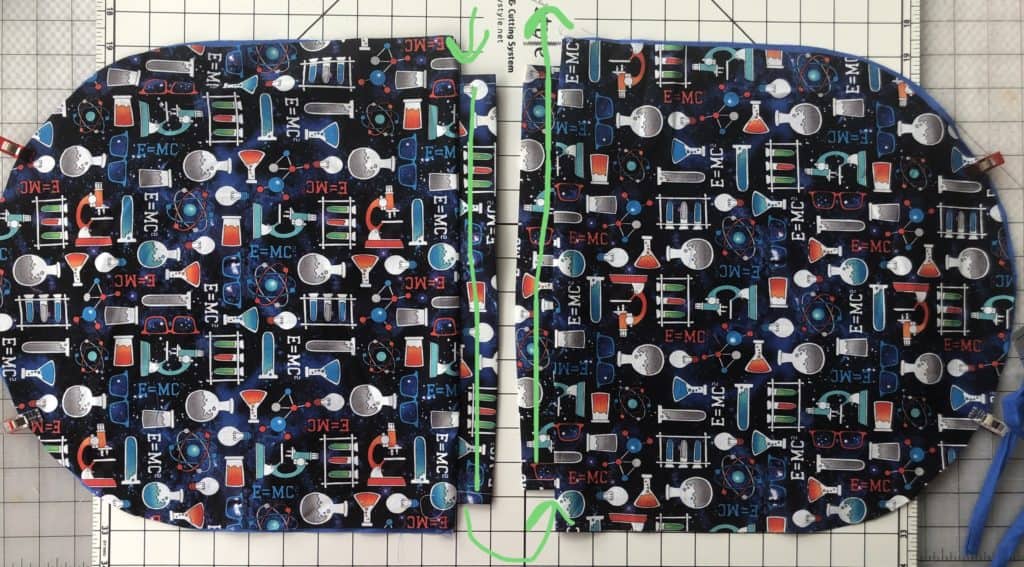
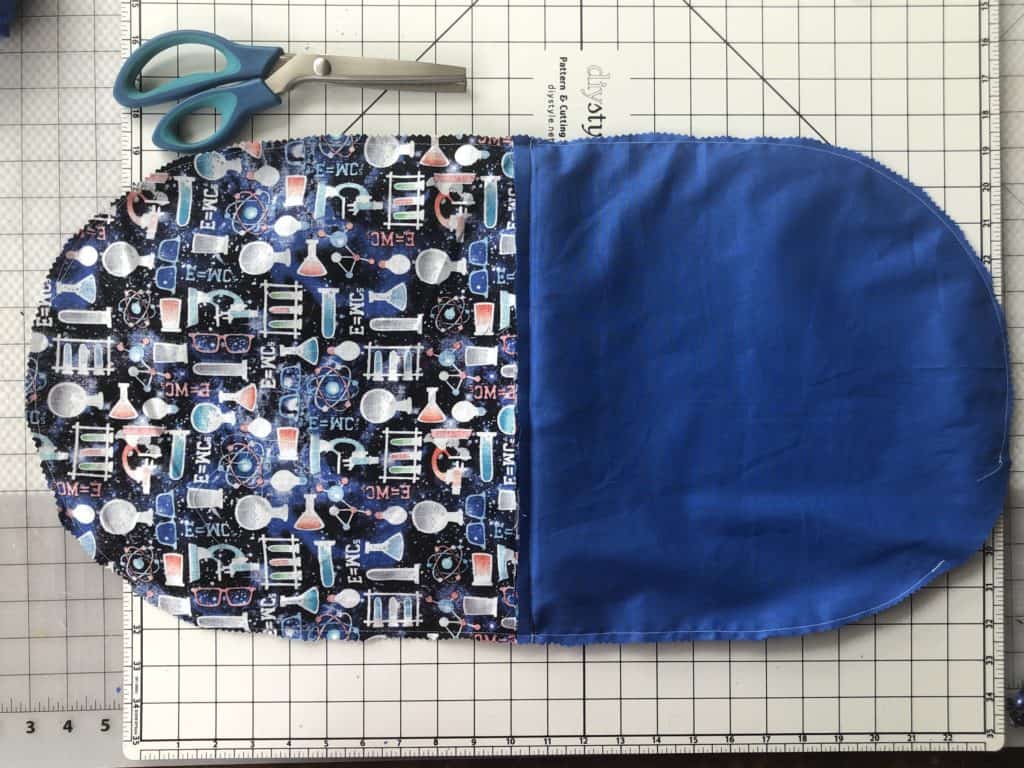
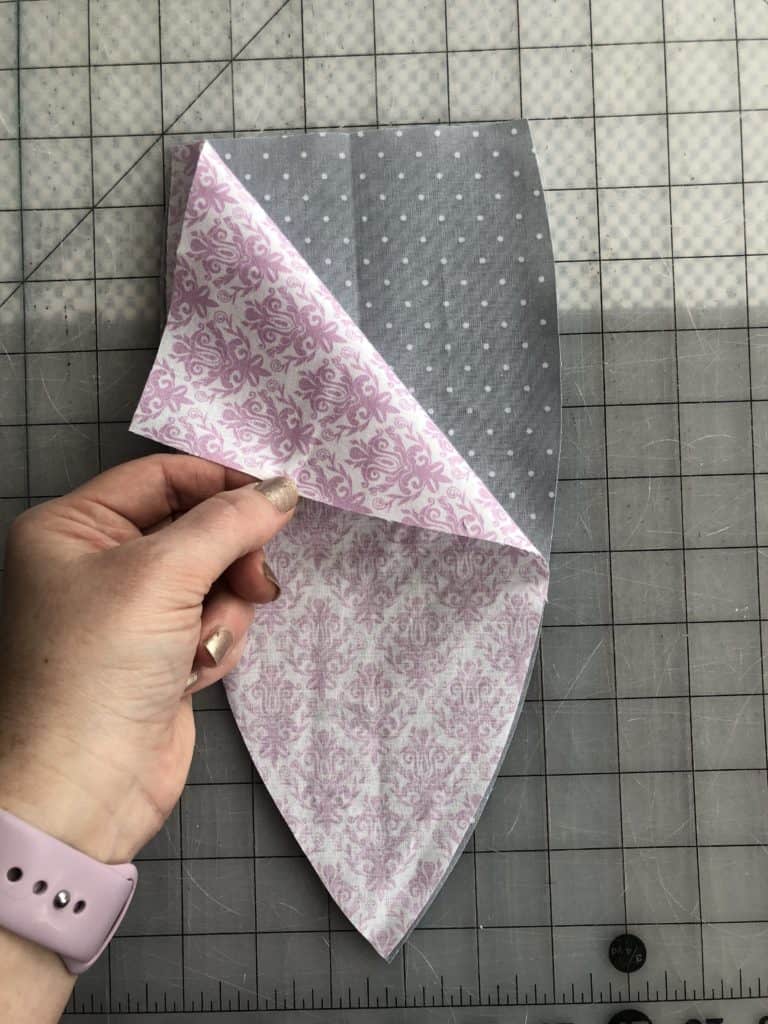
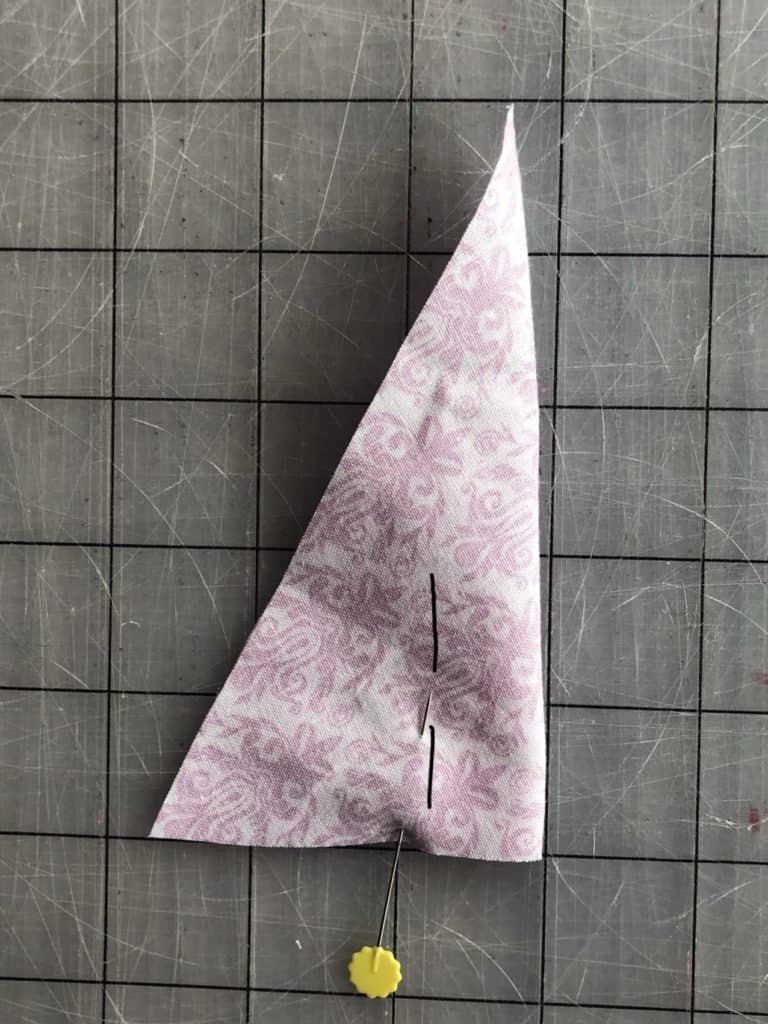
Step 5: Grab one of the Main Bag pieces, in your main fabric and place it right side up.  Using your pattern pieces for alignment, place a pin or clip at the strap placement guides at the bottom, as well as the center top of the piece.

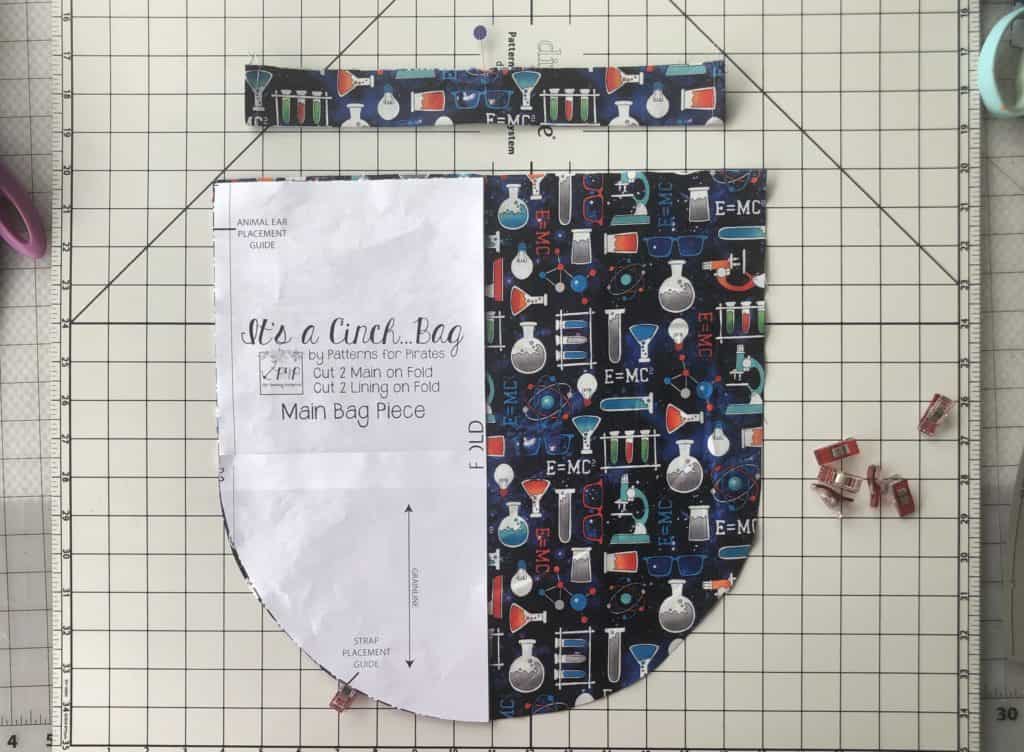
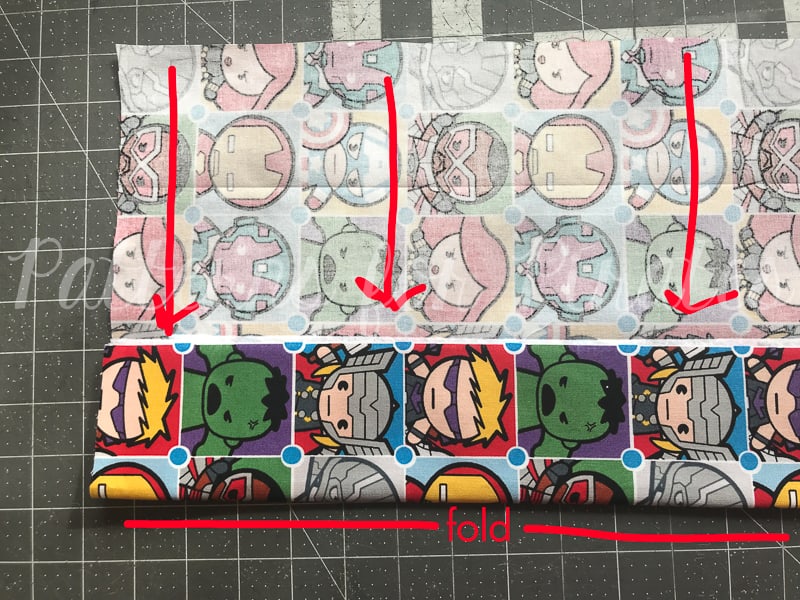
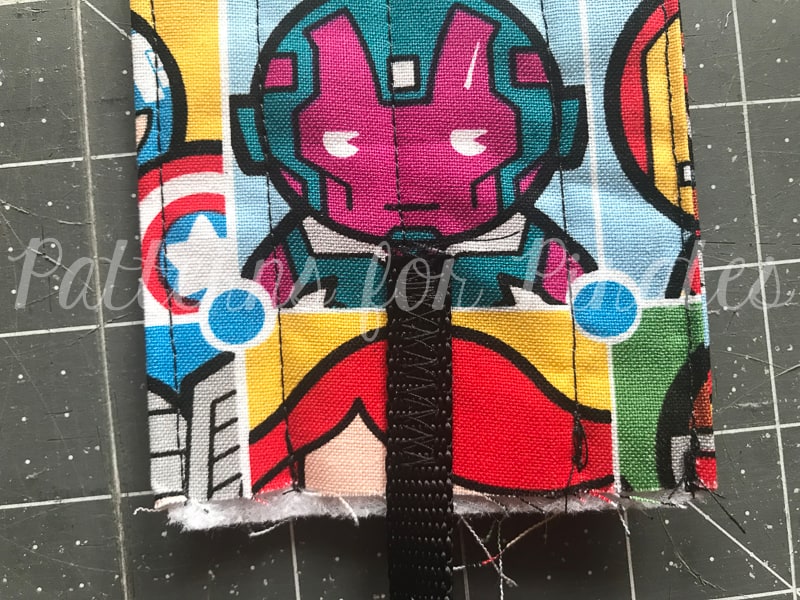
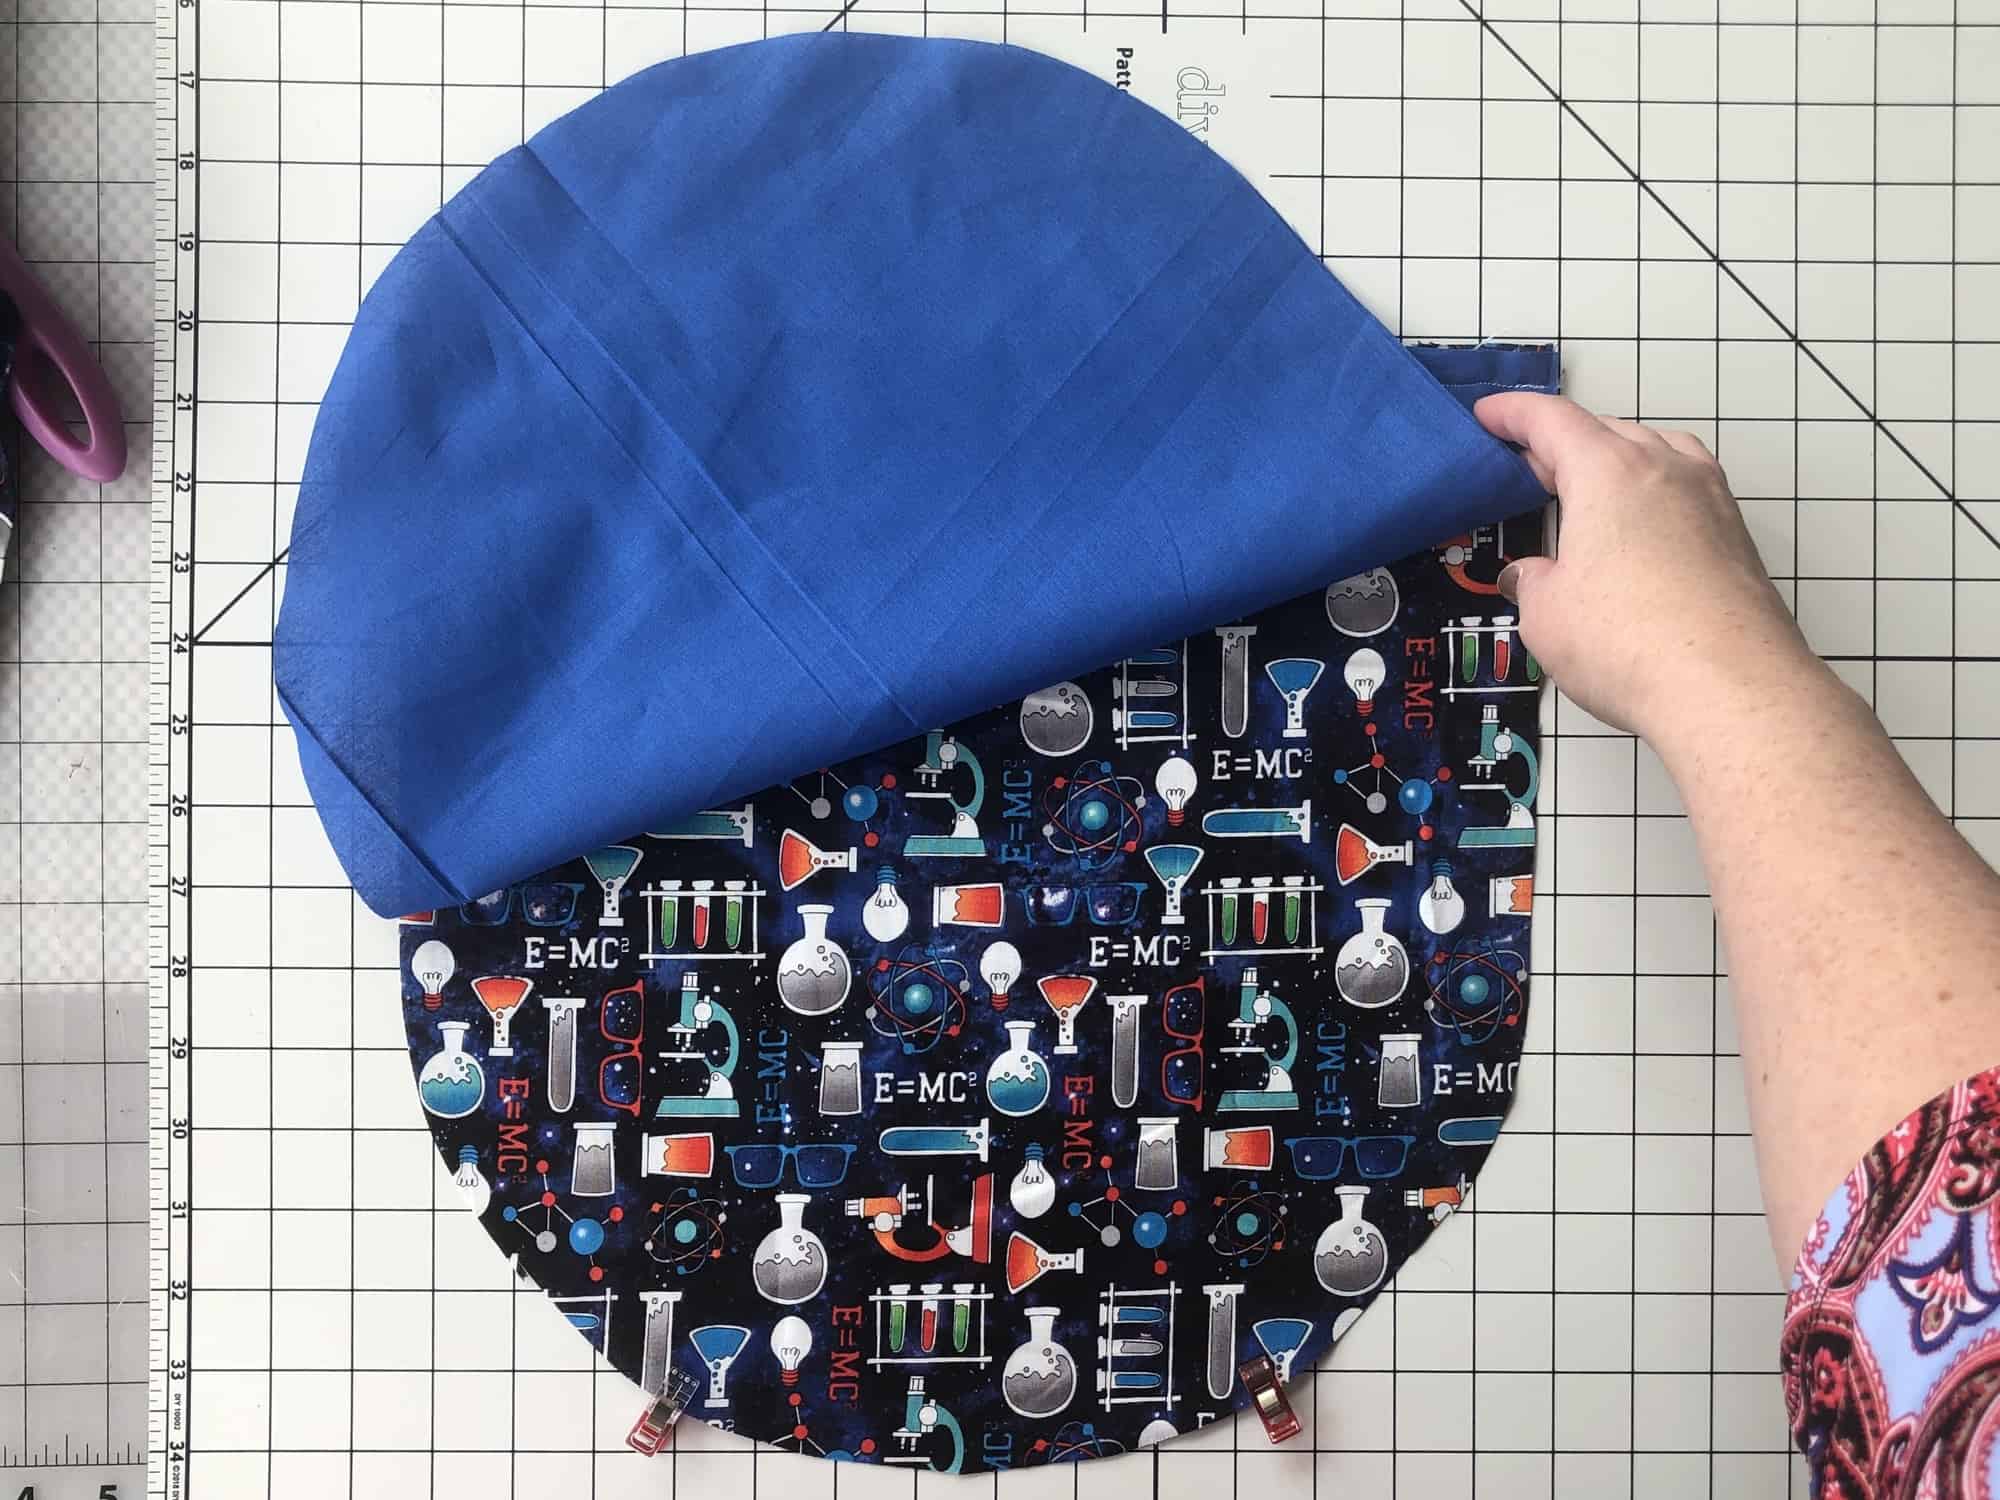
Step 6: Align one of the strap channel pieces along the top of the main bag piece, with the raw edges all matching, centered against each other.

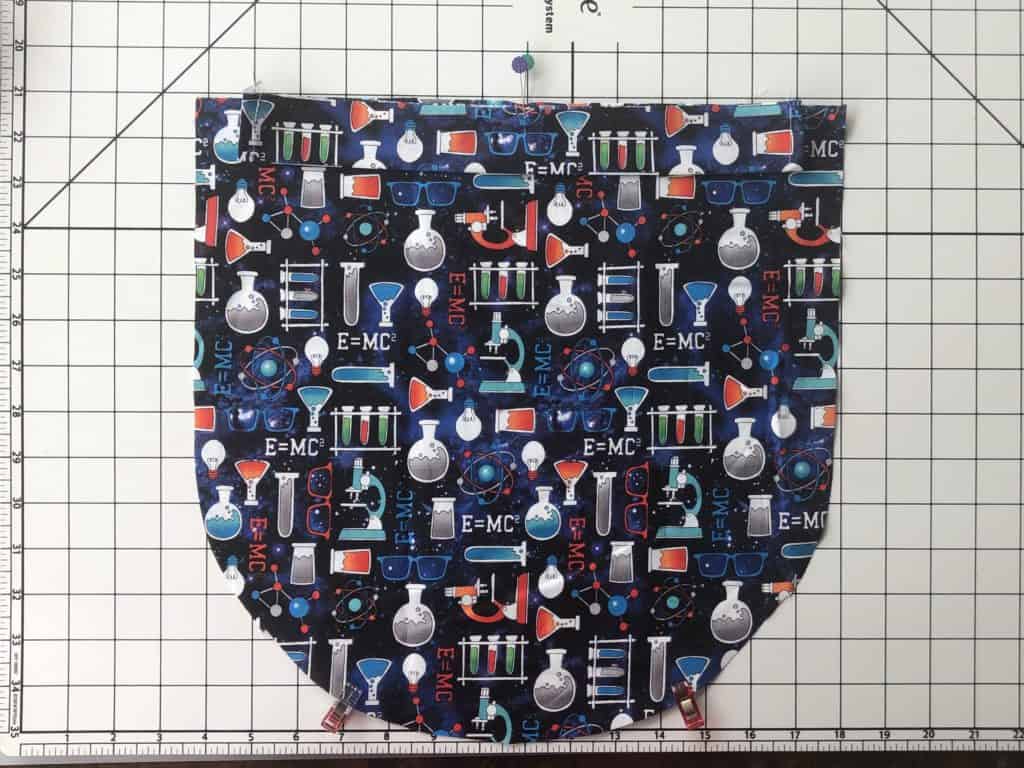
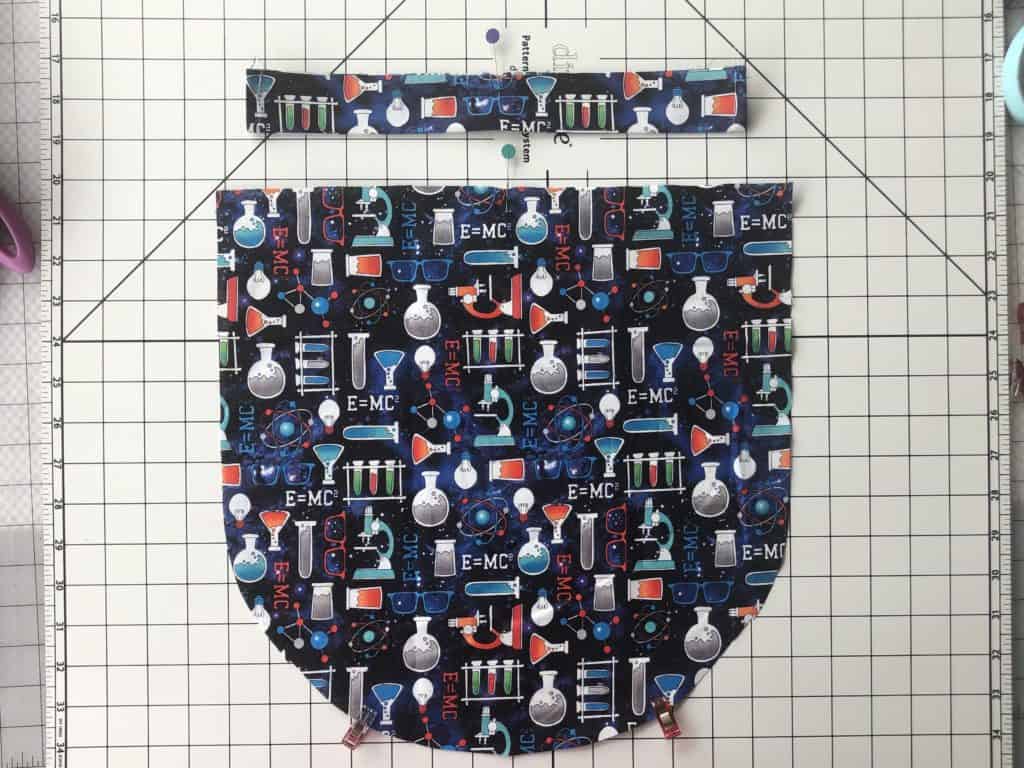
Step 7: With one of the lining pieces face down, lay it on top, sandwiching the strap channel piece between the two body pieces.

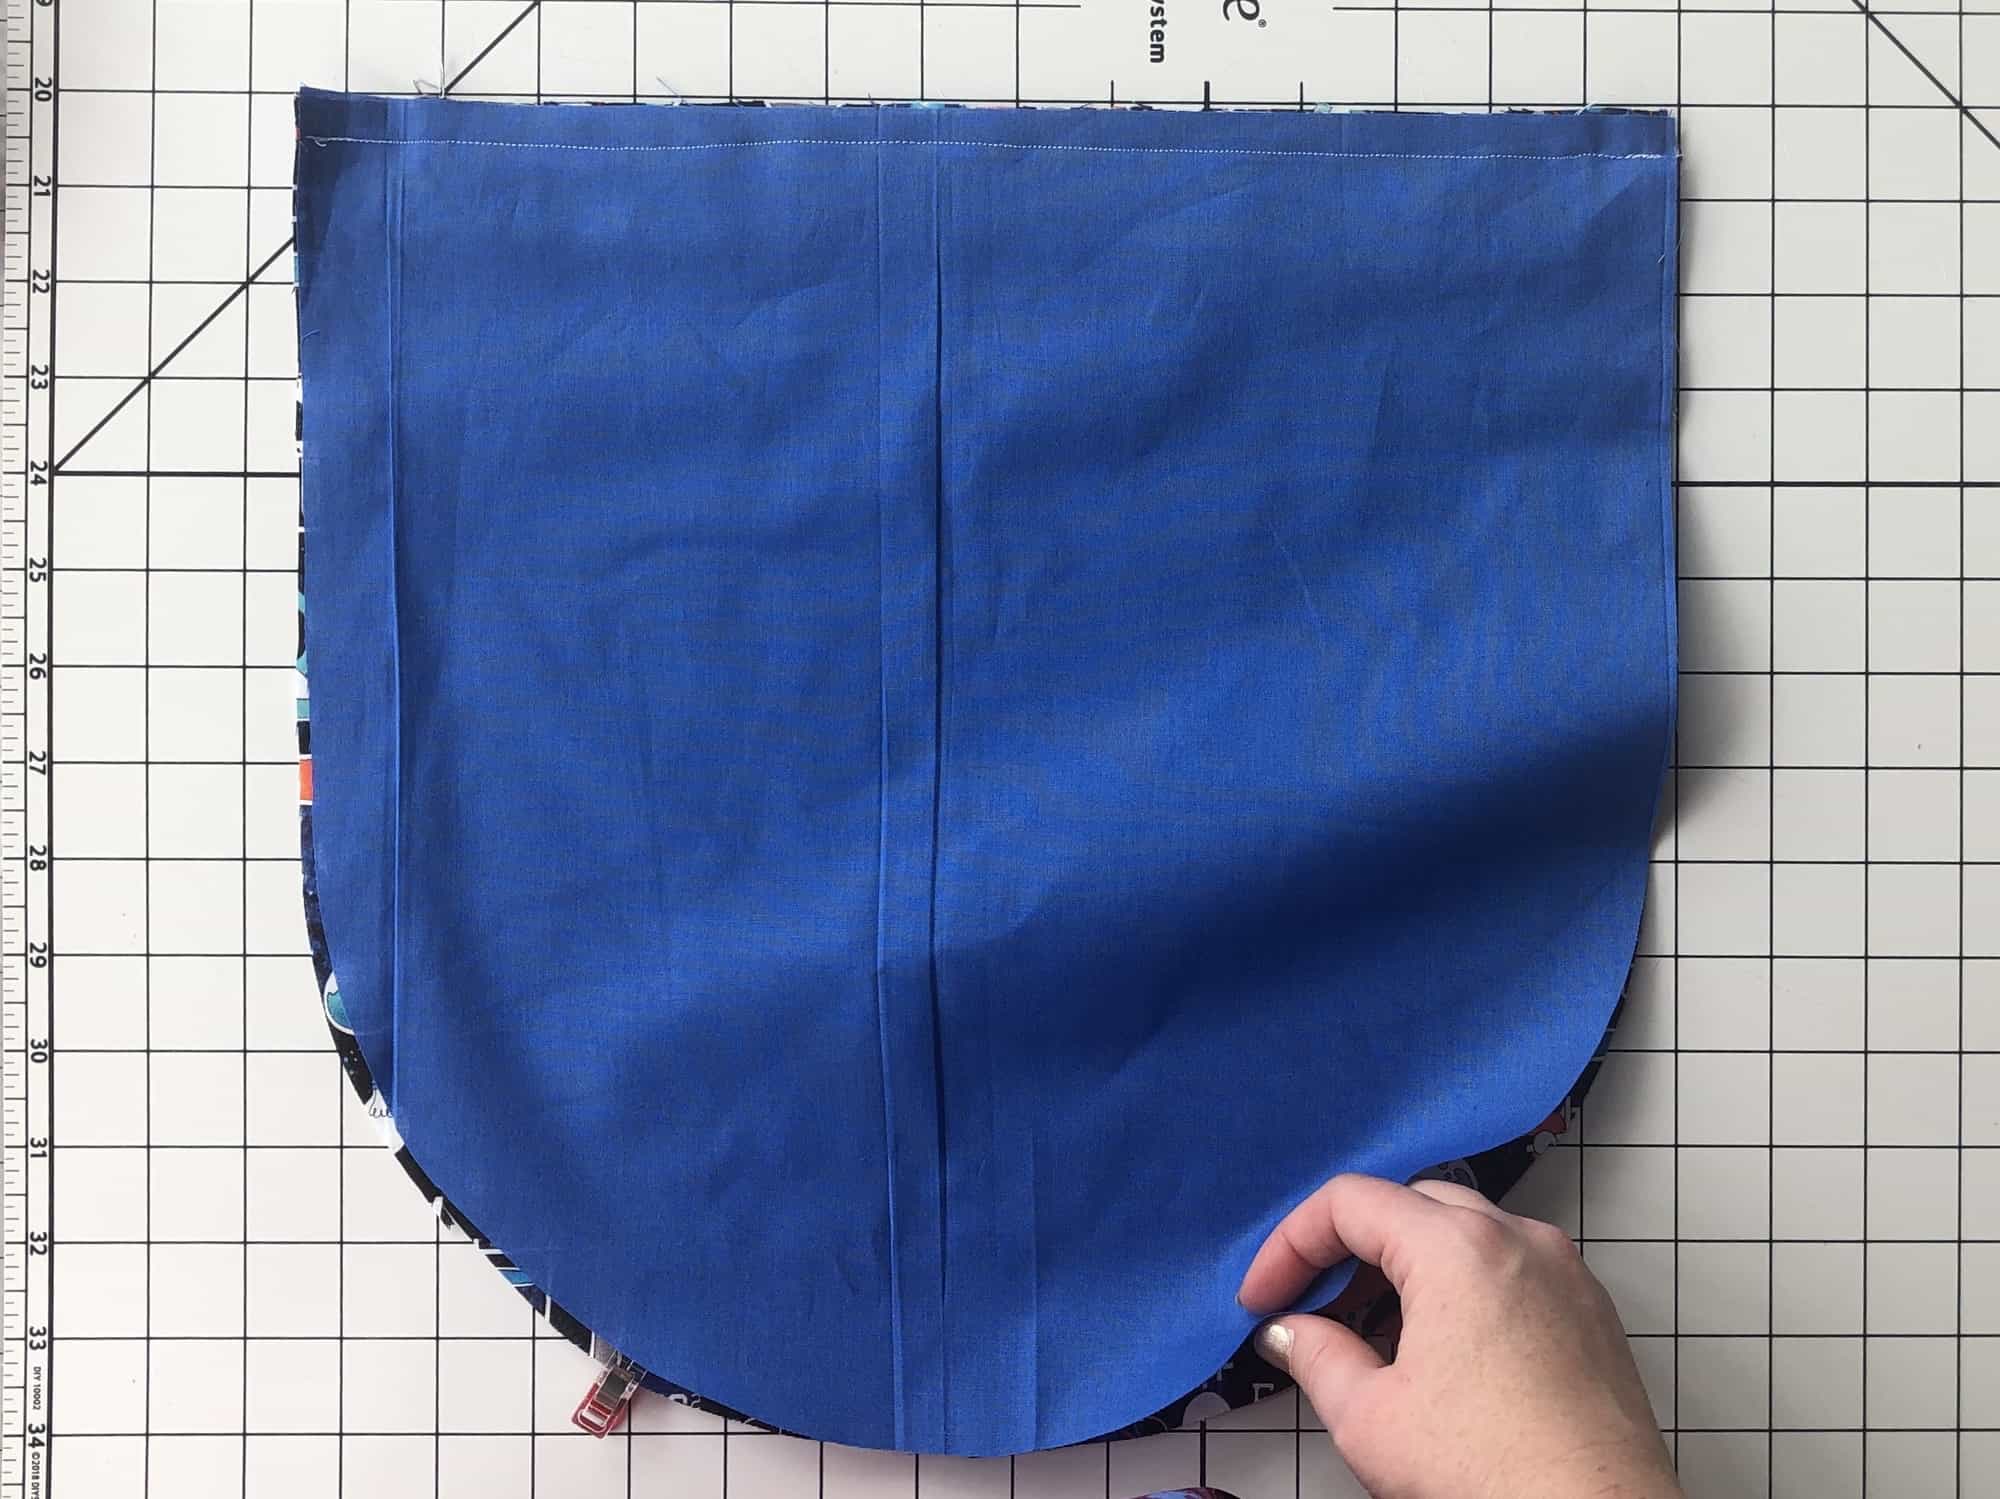
Step 8: Using 1/2″ seam allowance, stitch along the entire top, straight edge.

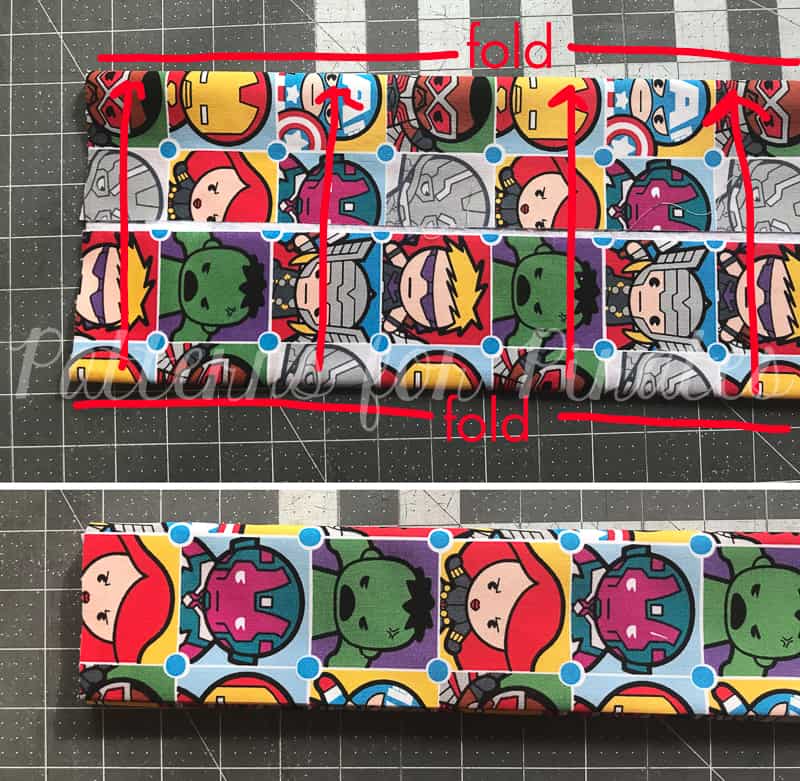
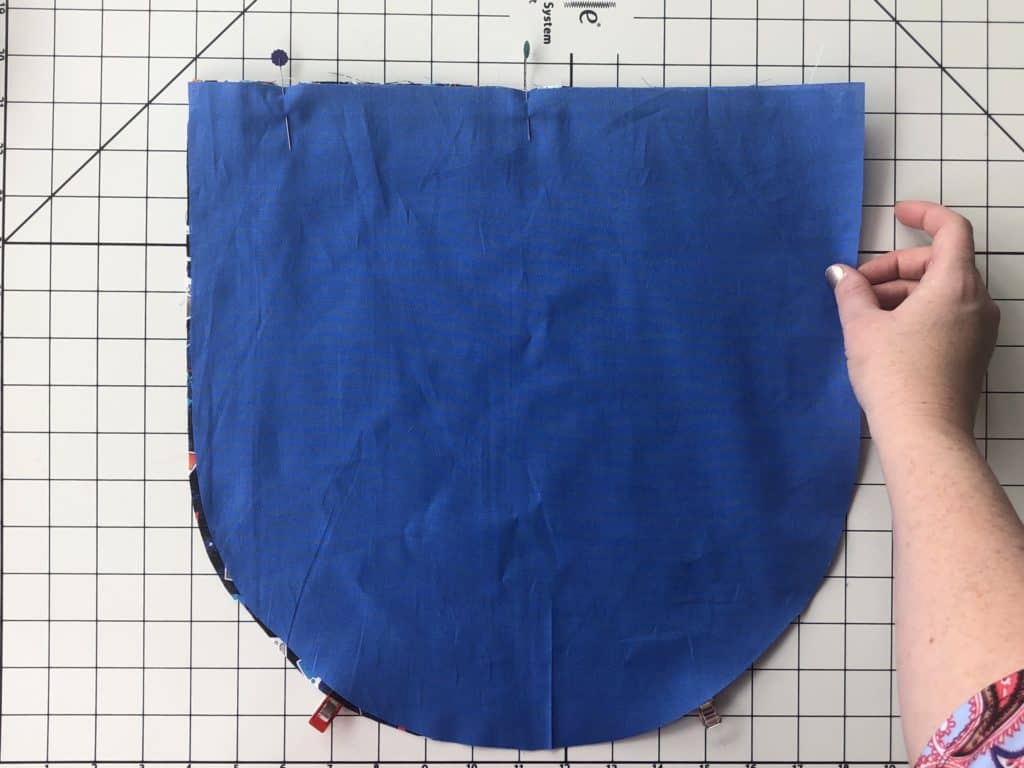
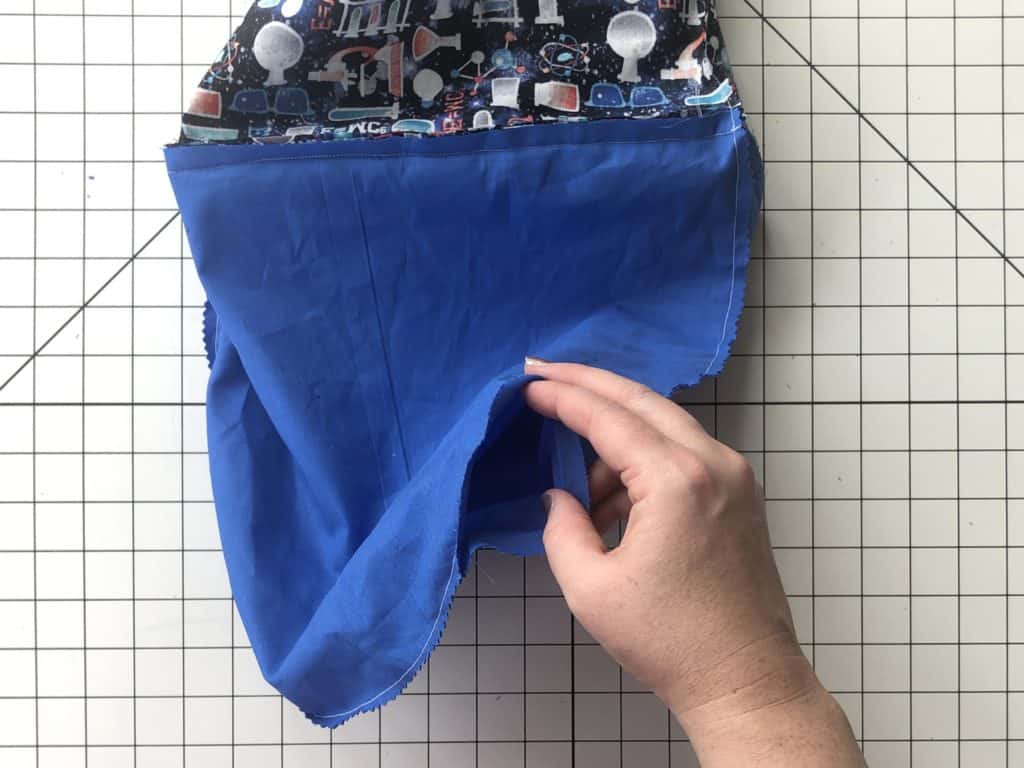
Step 9: Flip your fabrics so they are now right sides facing out, and the strap channel is sticking above the body pieces.  Press.  Repeat with other main, lining and strap channel pieces.


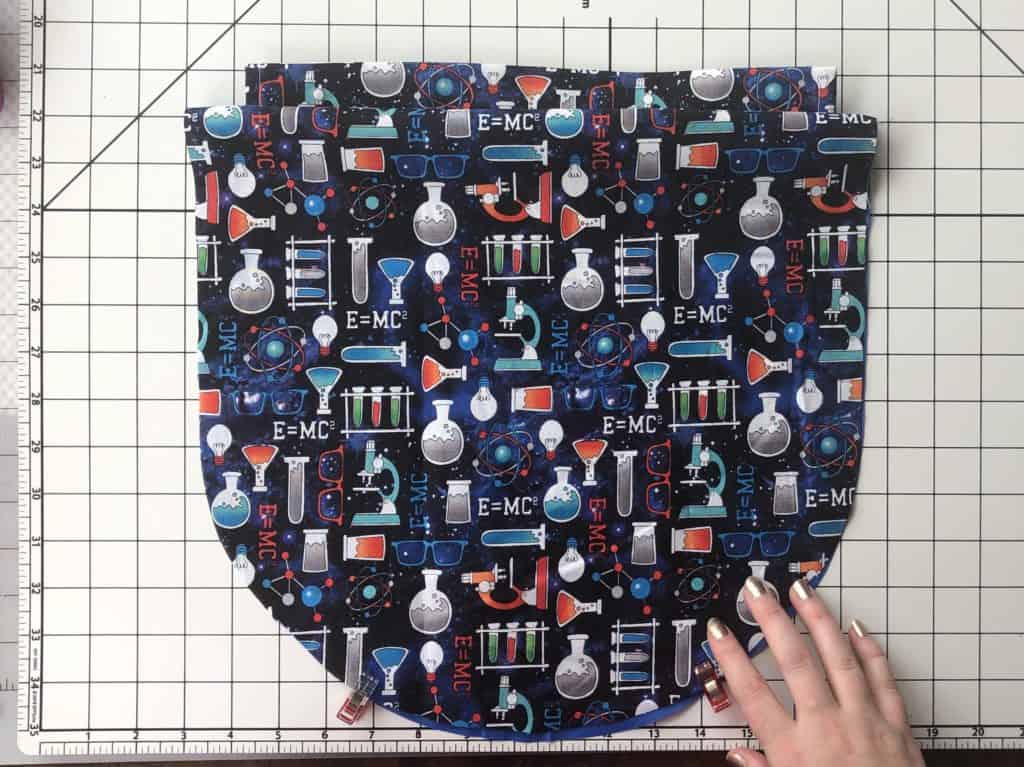
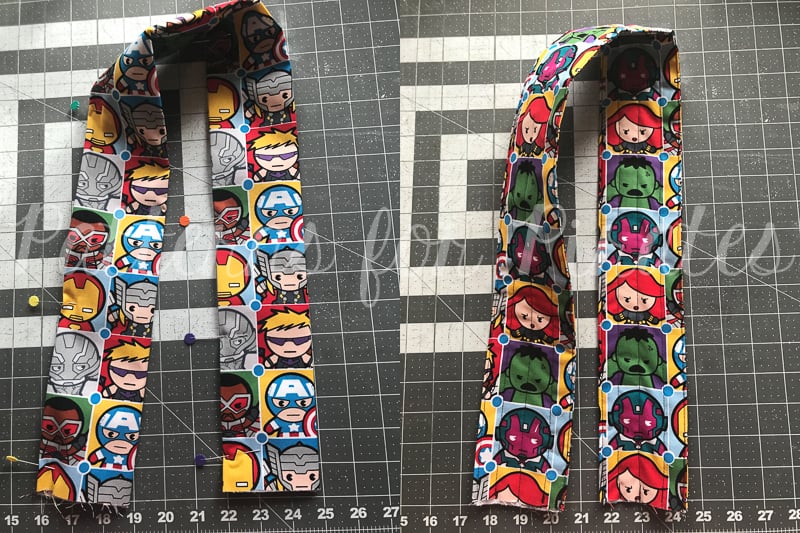
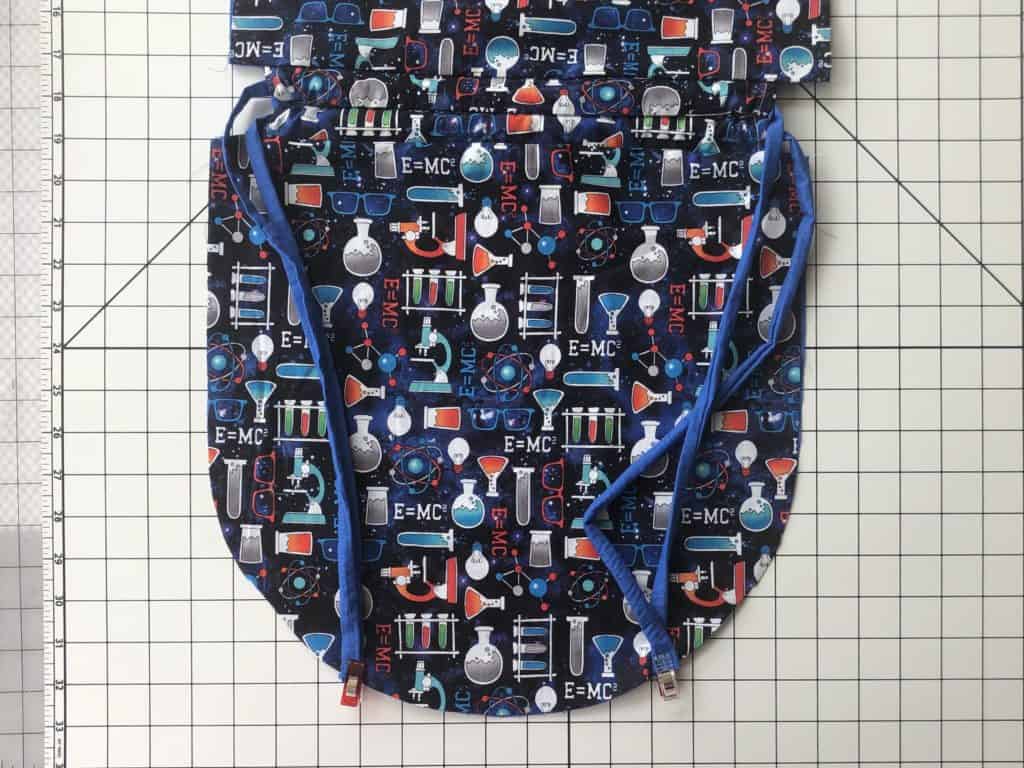
Step 10: With the main fabrics facing up, lay your bag pieces so that they are mirrored and the strap channels are closest to each other.

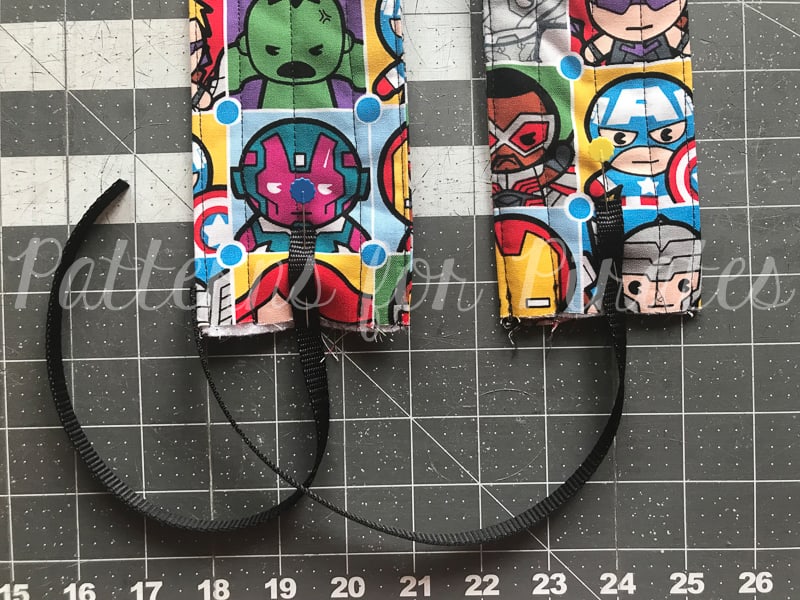
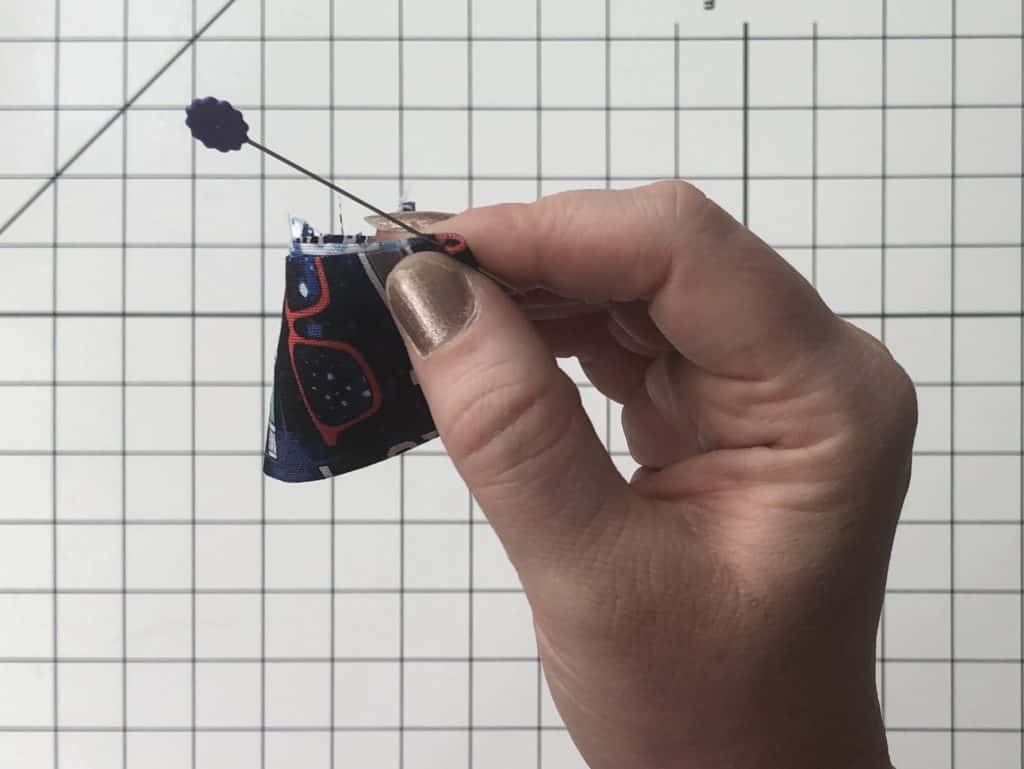
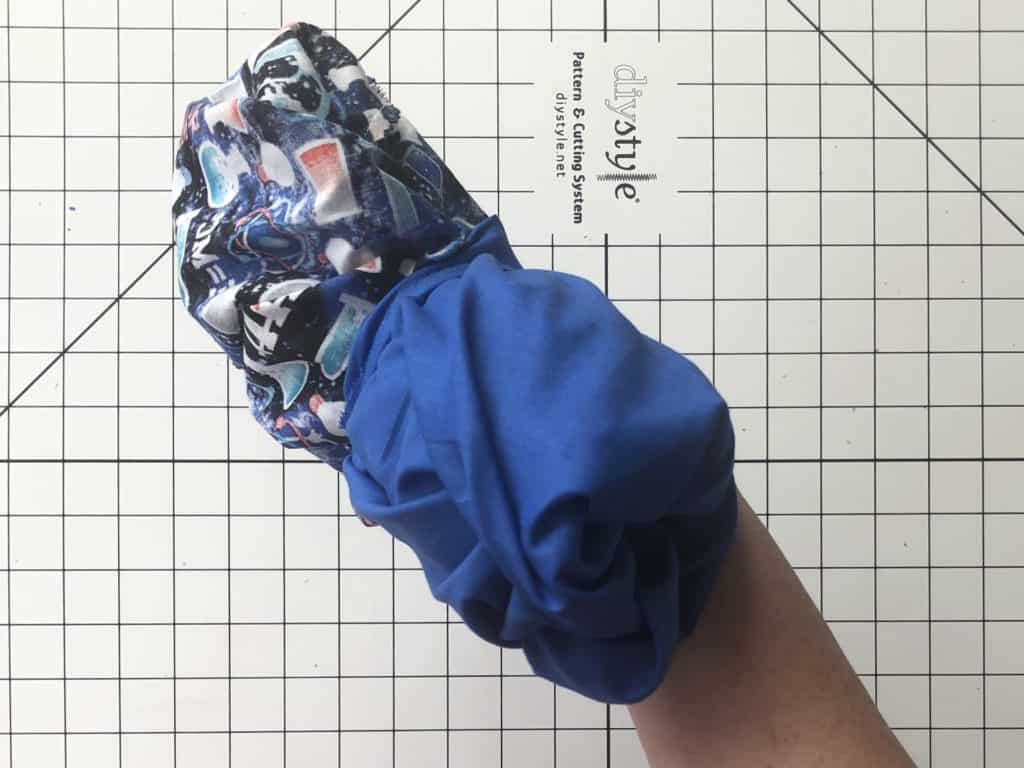
Take one of your straps and using a bodkin, safety pin, or other threading tool, feed your strap through the channels.

Feed into the bottom left channel, out the top, and back down through the top right channel.

Repeat with the opposite by feeding a strap through the top left channel, out the bottom, and back up the bottom right channel.

You will now have two raw ends of your straps on either side of your bag pieces.

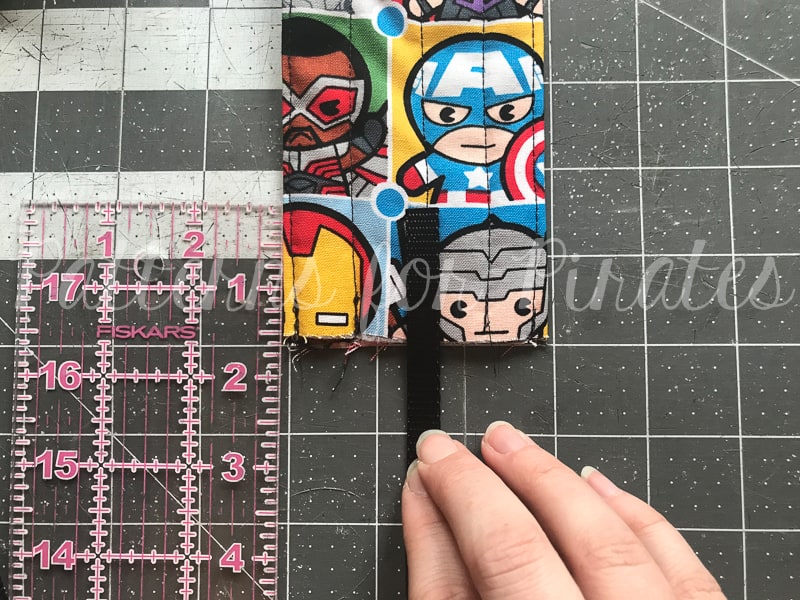
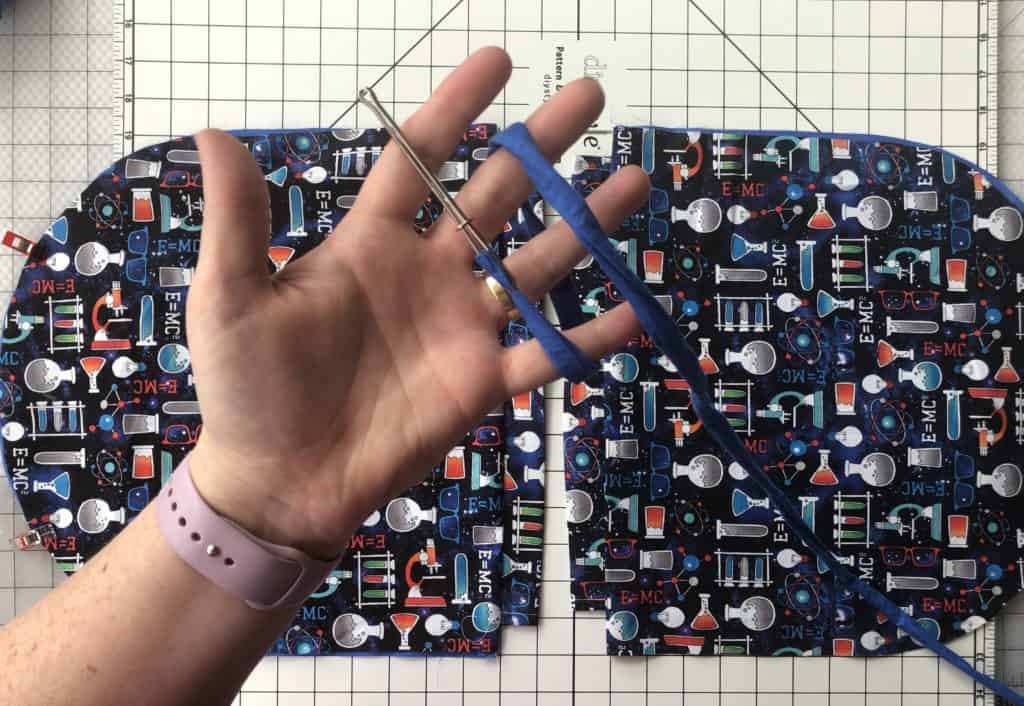
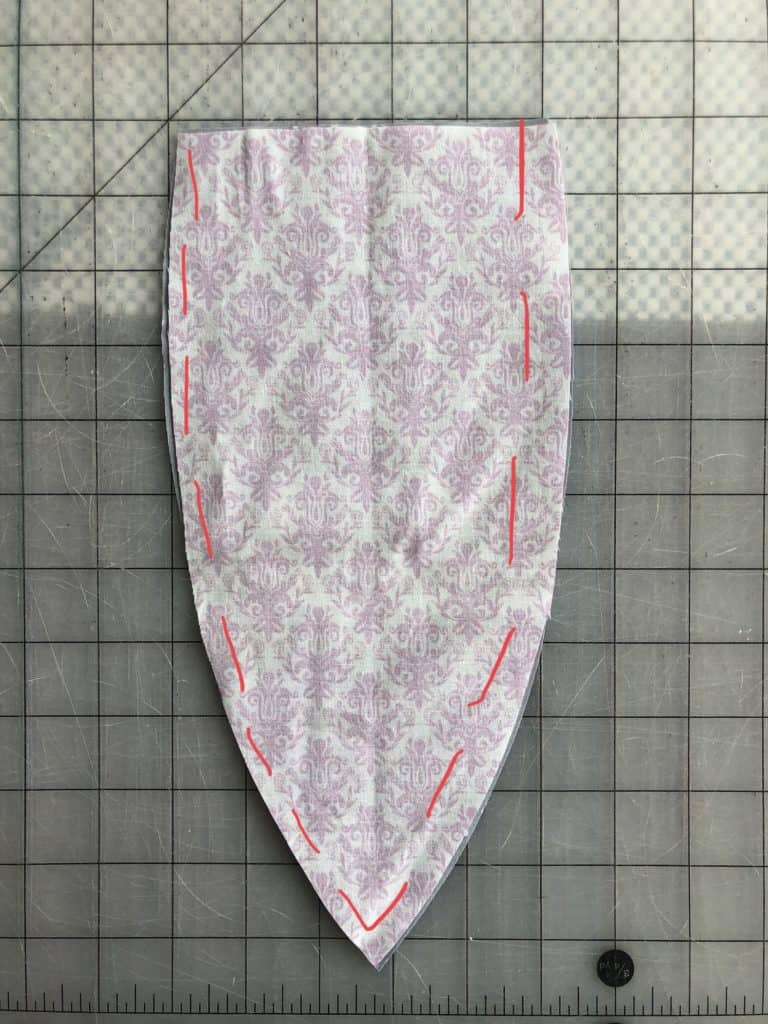
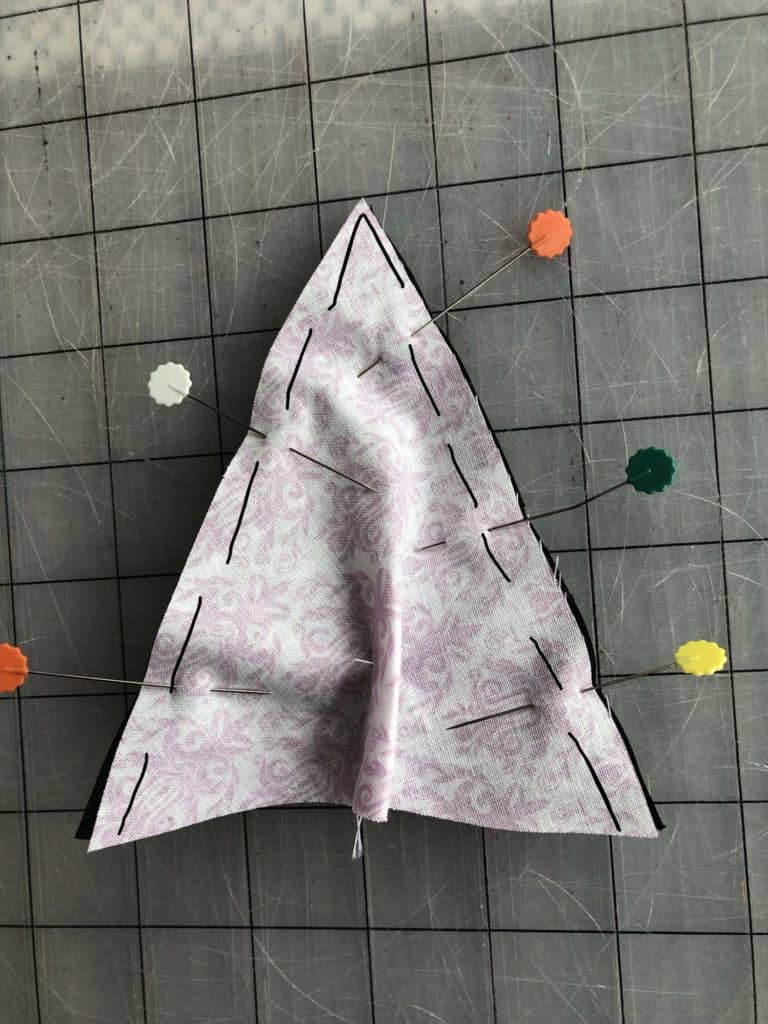
Step 11: Adjust your bag to have the outer, front of the bag facing you.  And clip or pin your straps with the raw edges facing away from the bag, to where you previously marked with the strap placement guides.

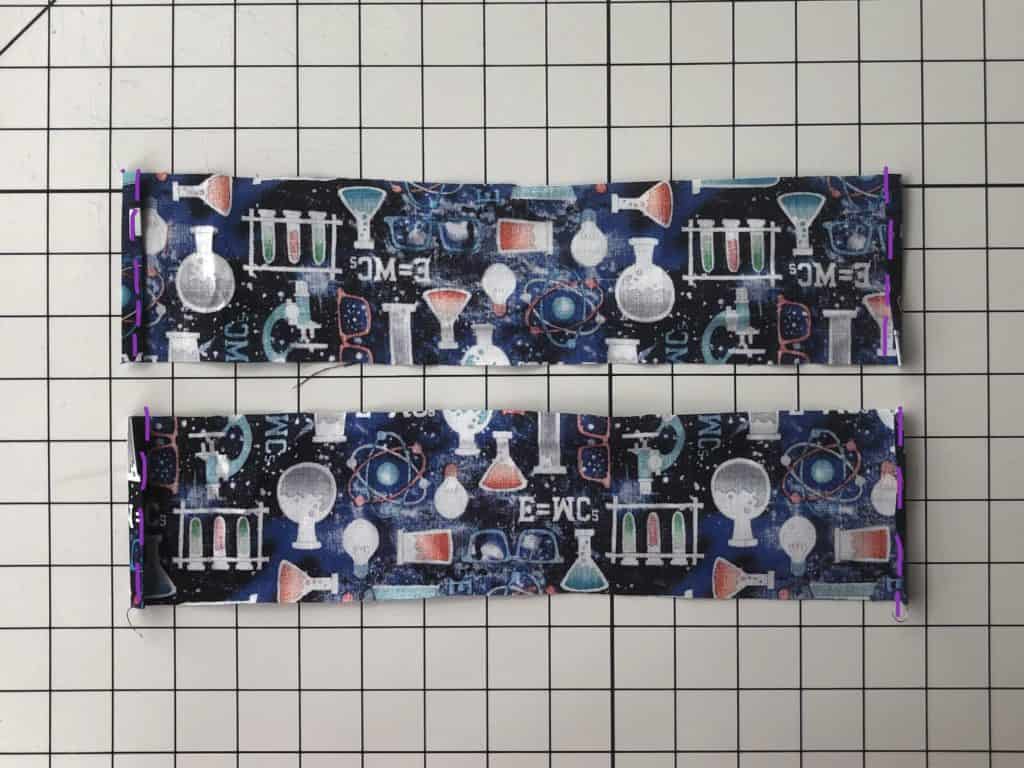
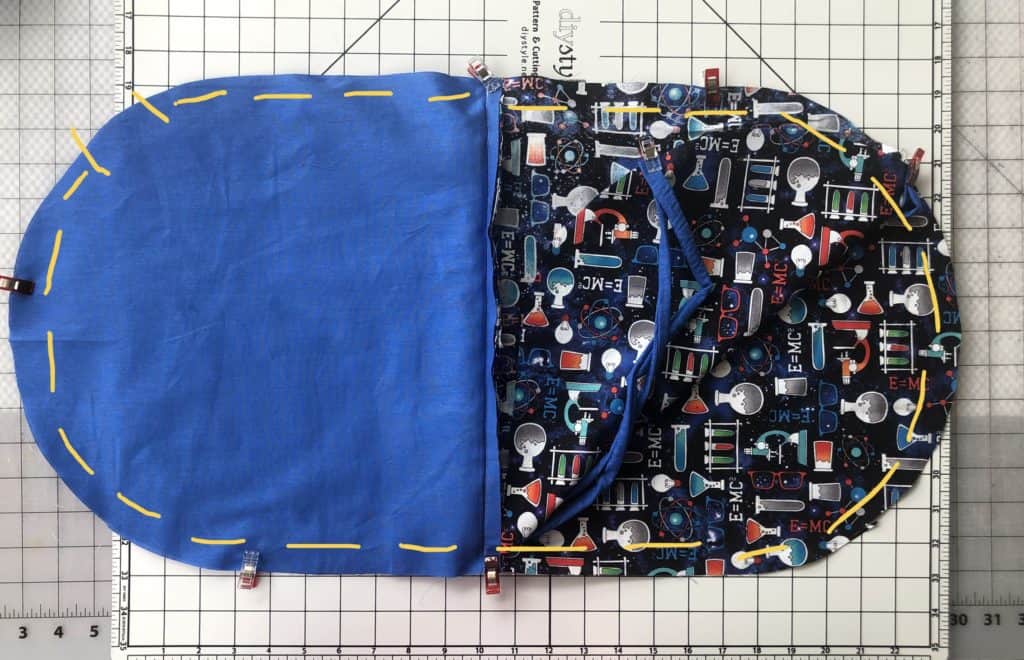
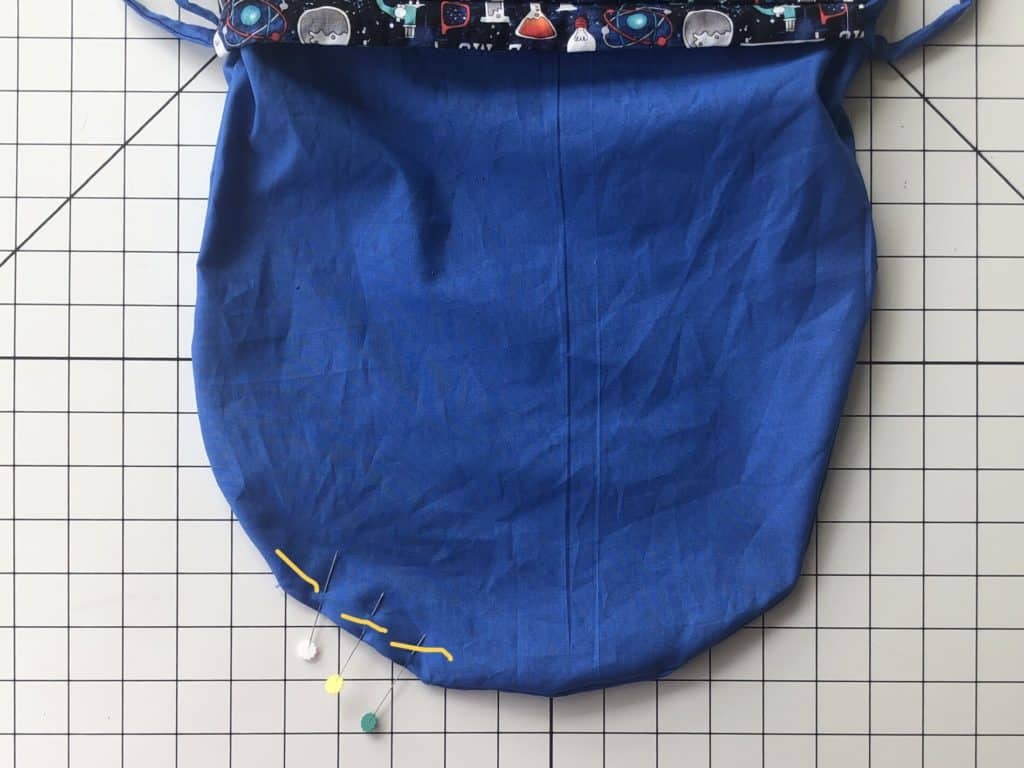
Step 12: Flip open your bag, so that the lining pieces are right sides together, and the main fabric pieces are right sides together, and the straps are nestled neatly inside.

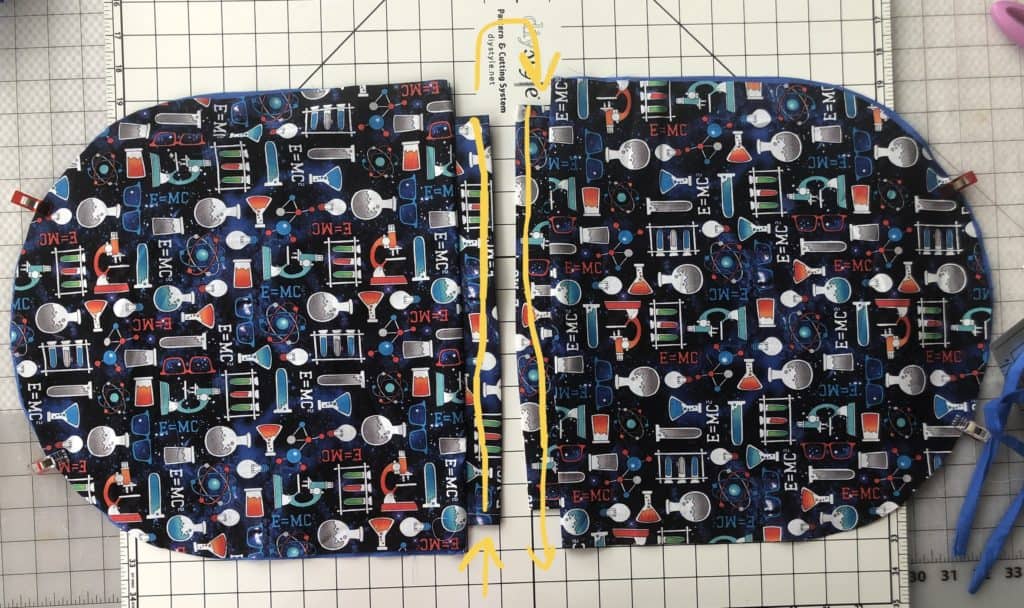
Align all edges and sew with a 1/2″ seam allowance around the entire edge, leaving open only a 4-5″ space for turning.  Be careful not to sew your strap pieces into the seam on accident.

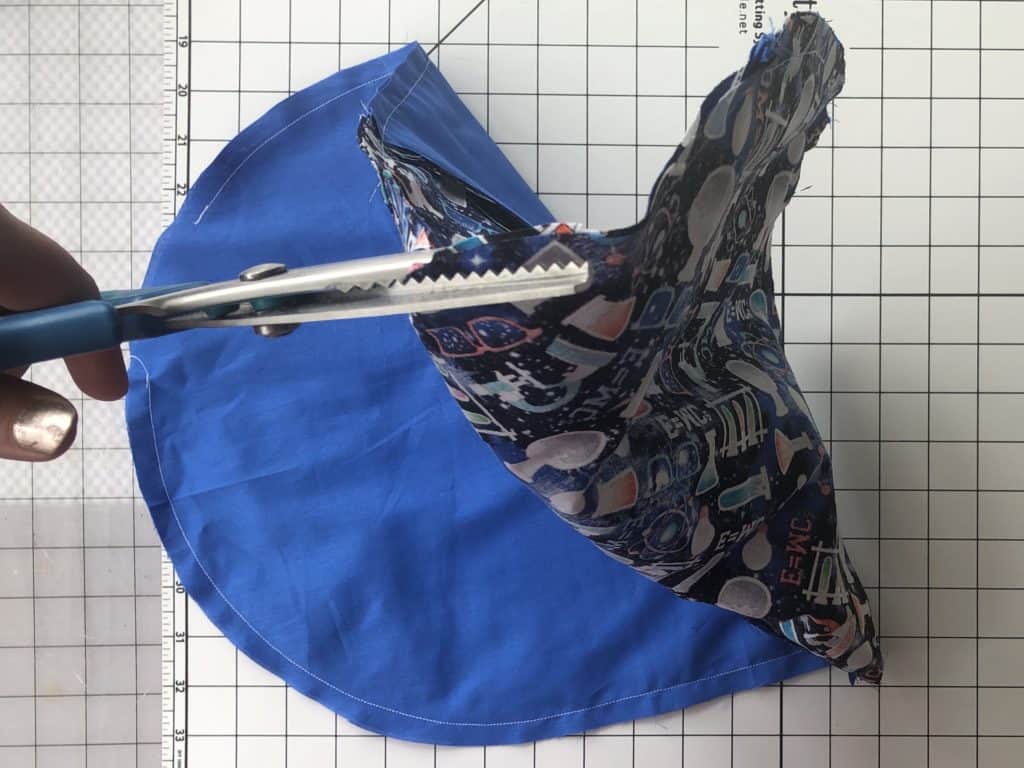
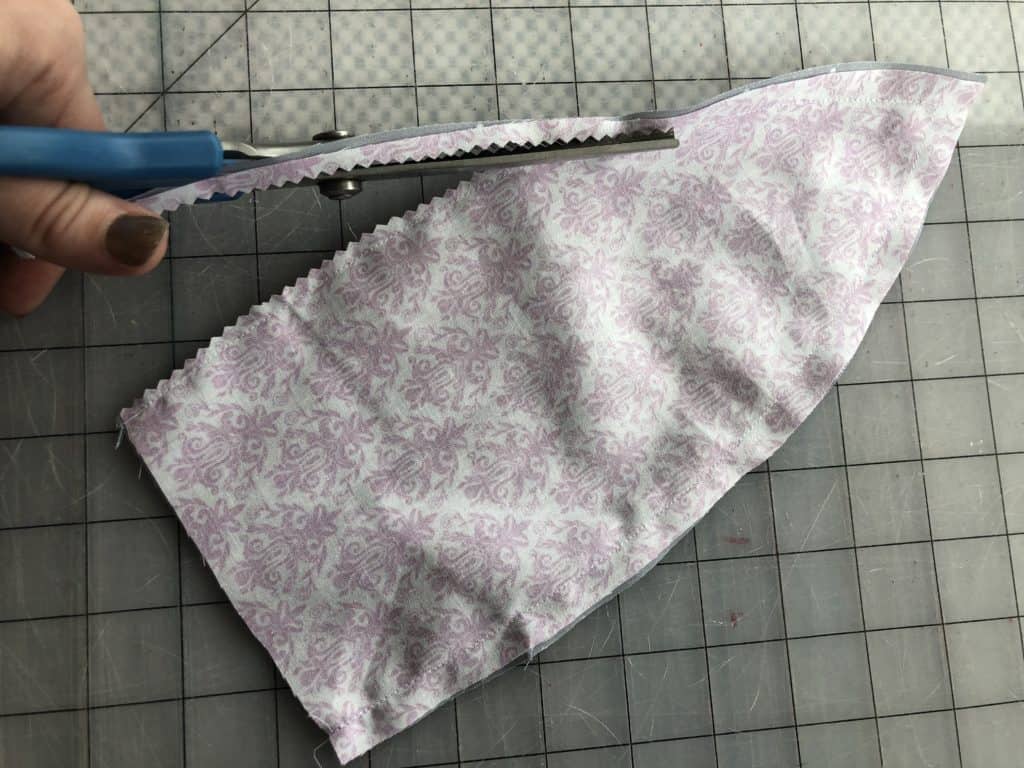
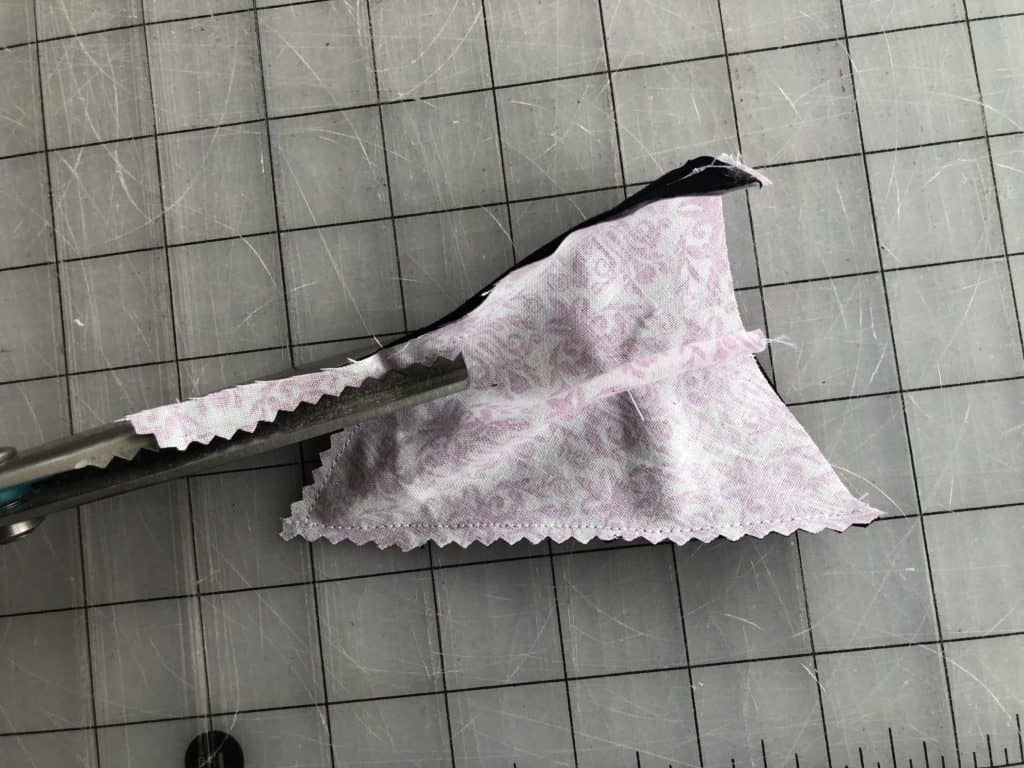
Step 13: Careful not to clip through your seams, trim your seam allowances down to help with a more precise curve.

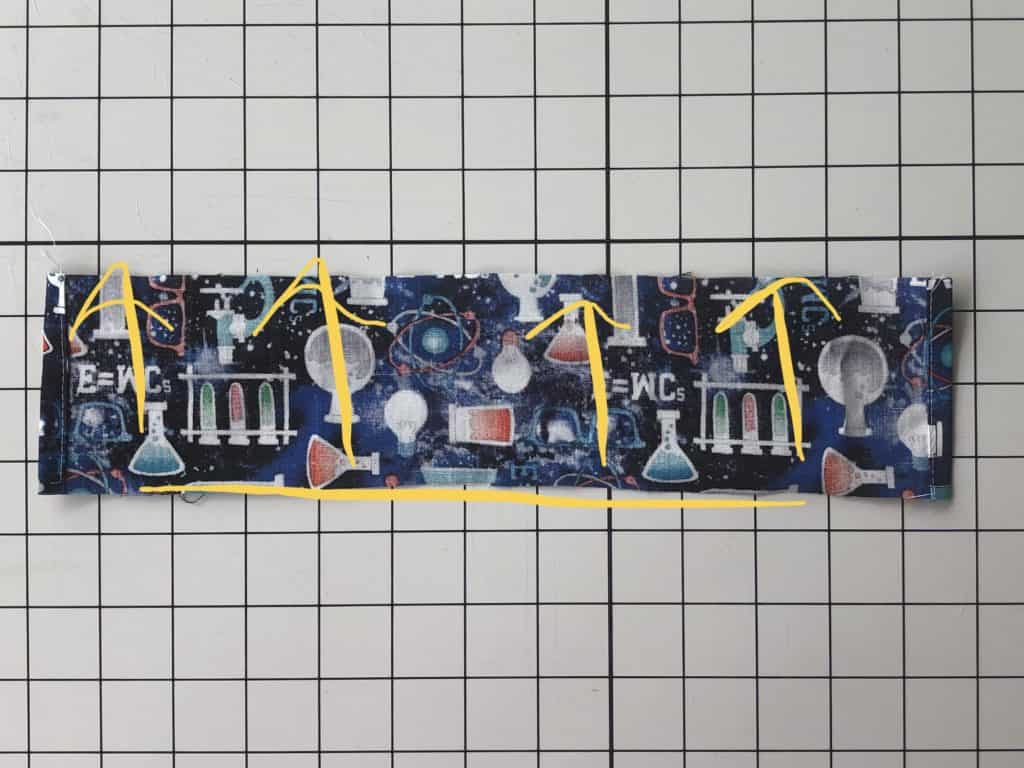
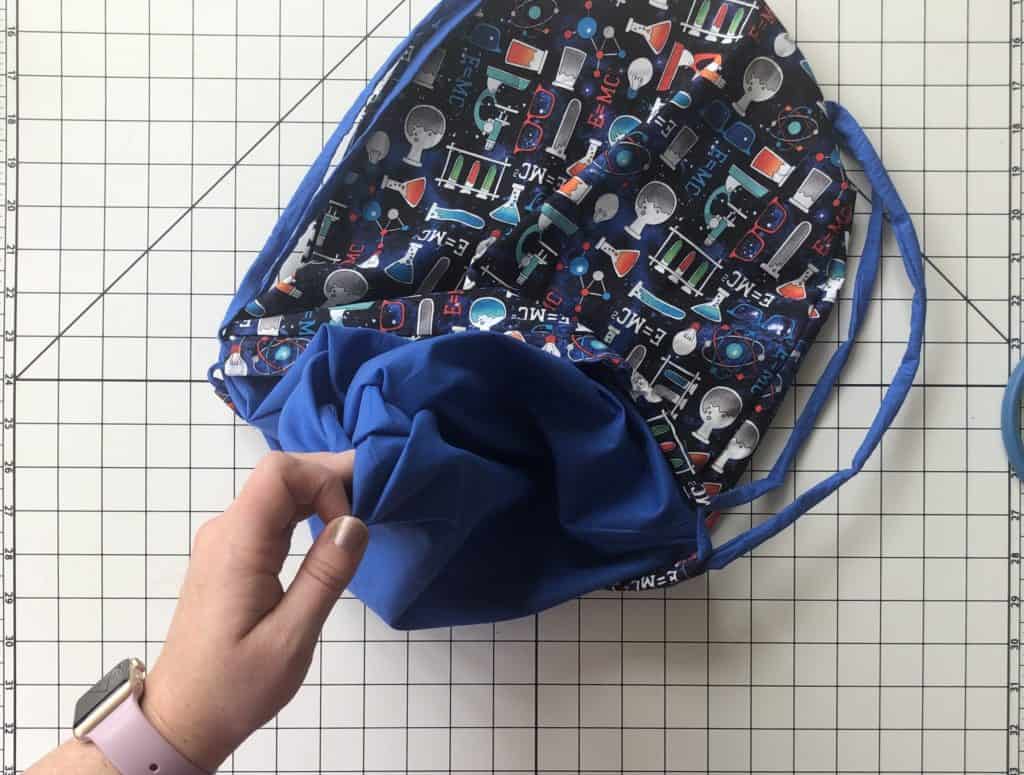
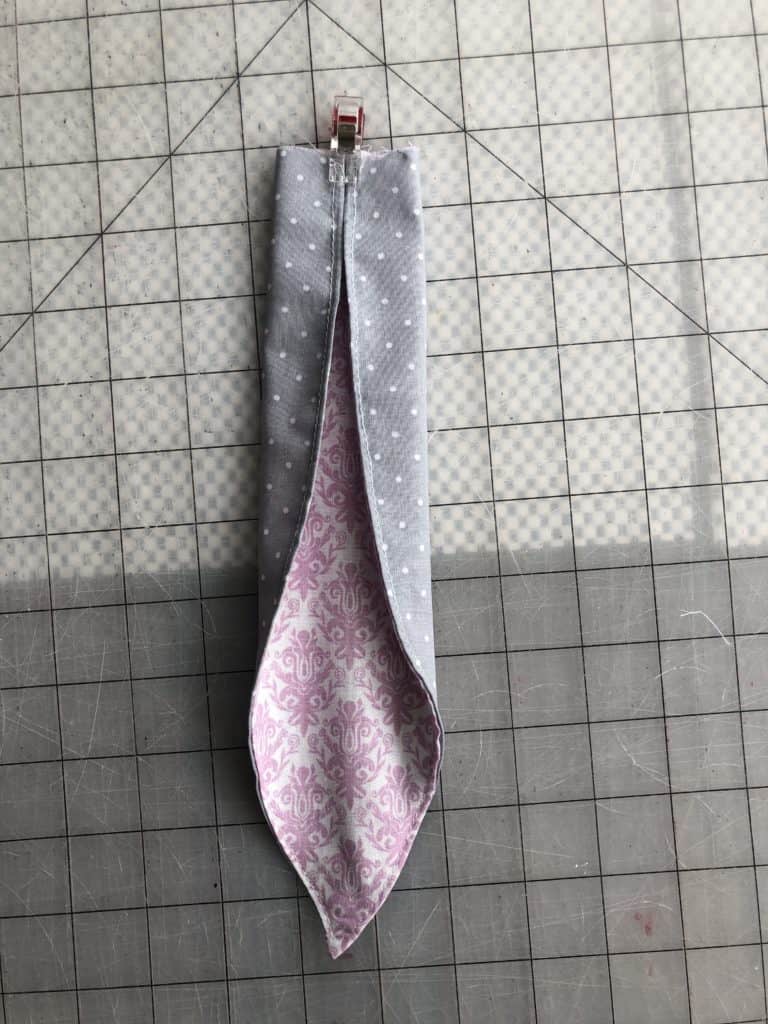
Step 14: Turn your bag right sides out, through the opening you created in Step 12.

Step 15: Tuck your seam allowance back into the opening.  Pin or clip.  And using your favorite method, stitch it shut.

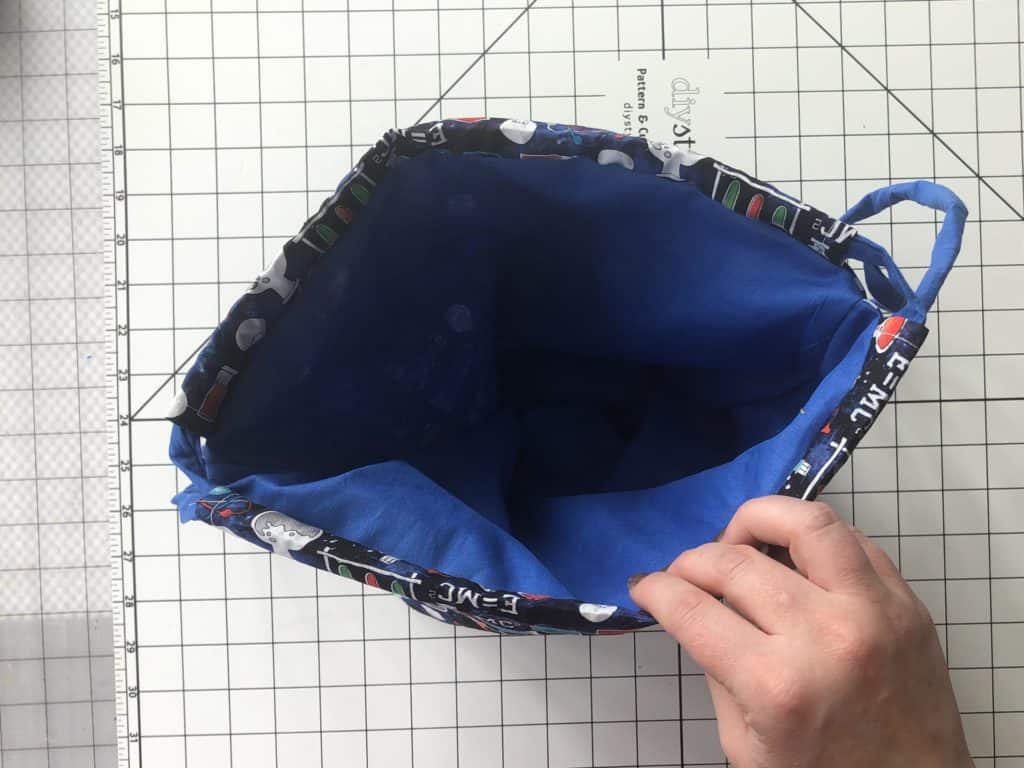
Step 16: Push your lining fabric into the main fabric side.

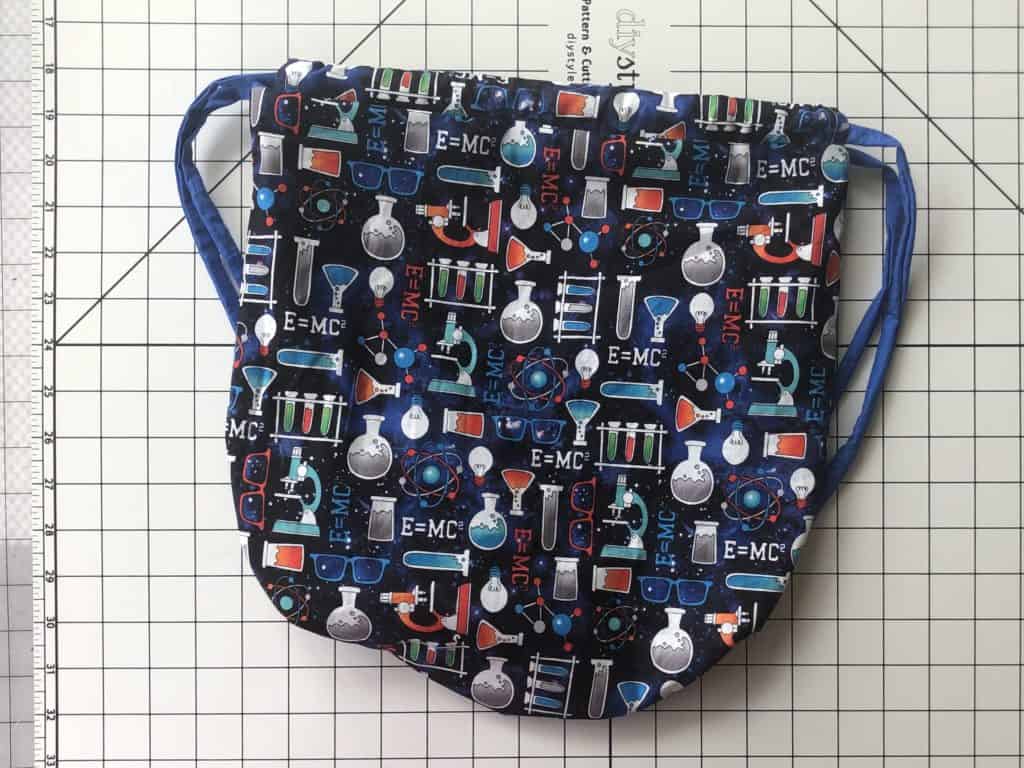
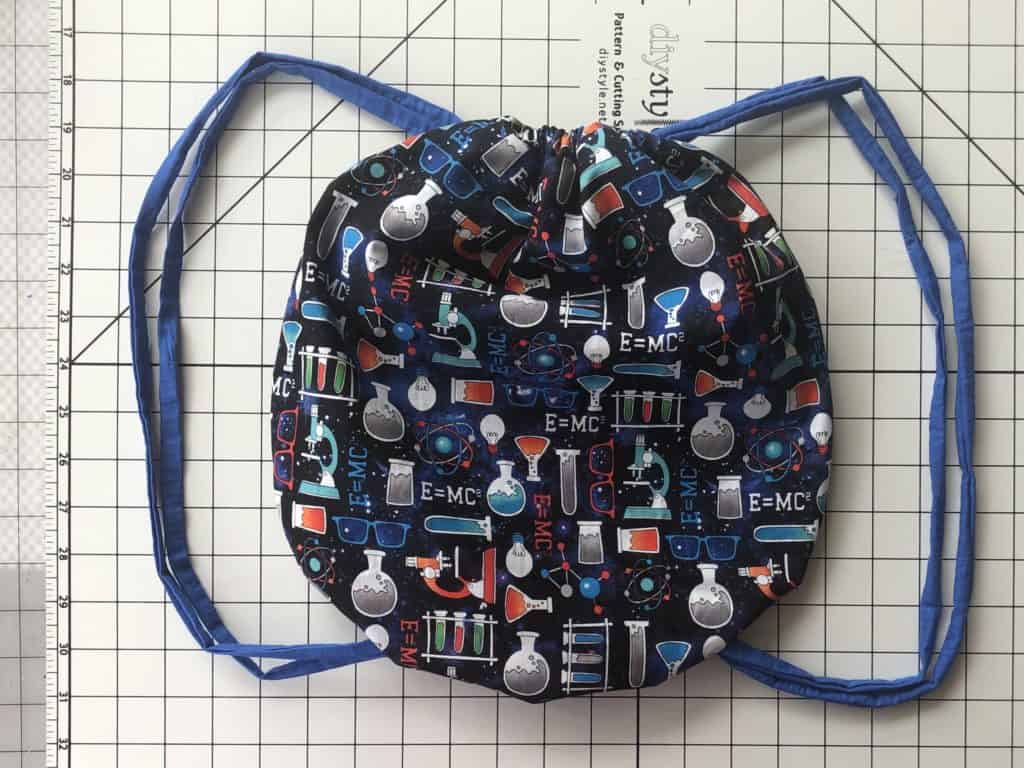
Step 17: Give your brand new bag a good press, pull the straps tight, gift it to your favorite person and make another!

BUNNY BAG CONSTRUCTION

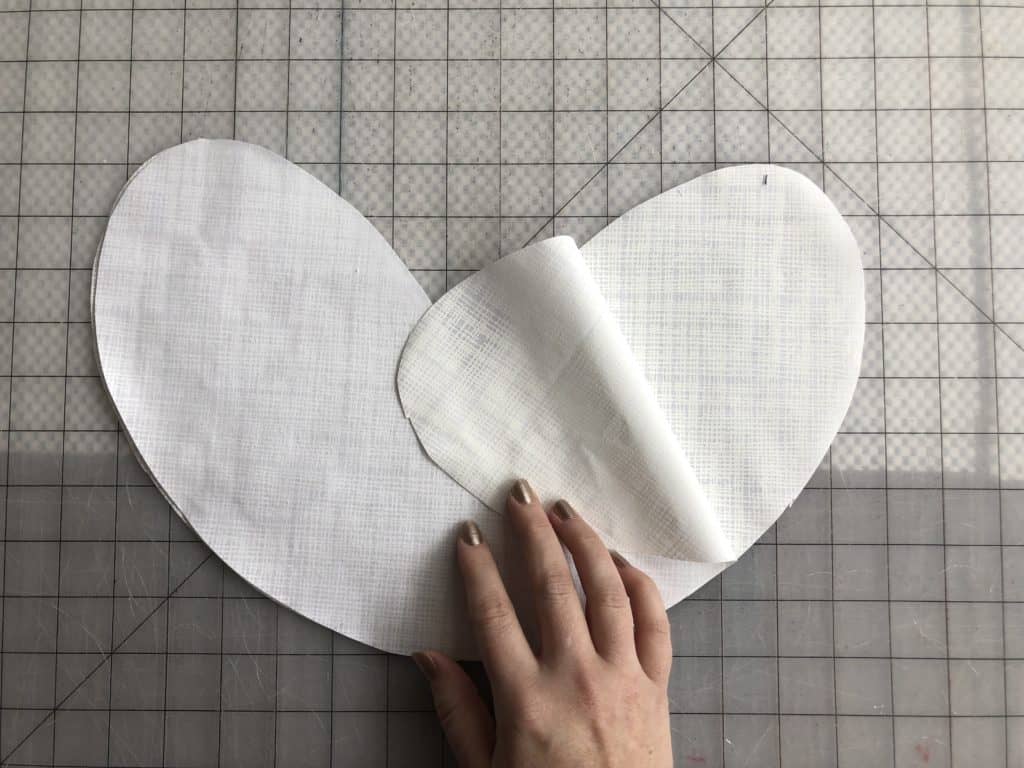
Step 1: Place the ear fabrics right sides together.

Step 2: Using 1/2″ seam allowance, stitch long outer edges together.

Step 3: Trim seam allowance, being careful not to clip through your stitches.

Step 4:  Turn and press, topstitch if desired.

Step 5: Fold along the top, raw edge, meeting the corners together.  Clip or baste top edge in place.  Repeat with other ear.

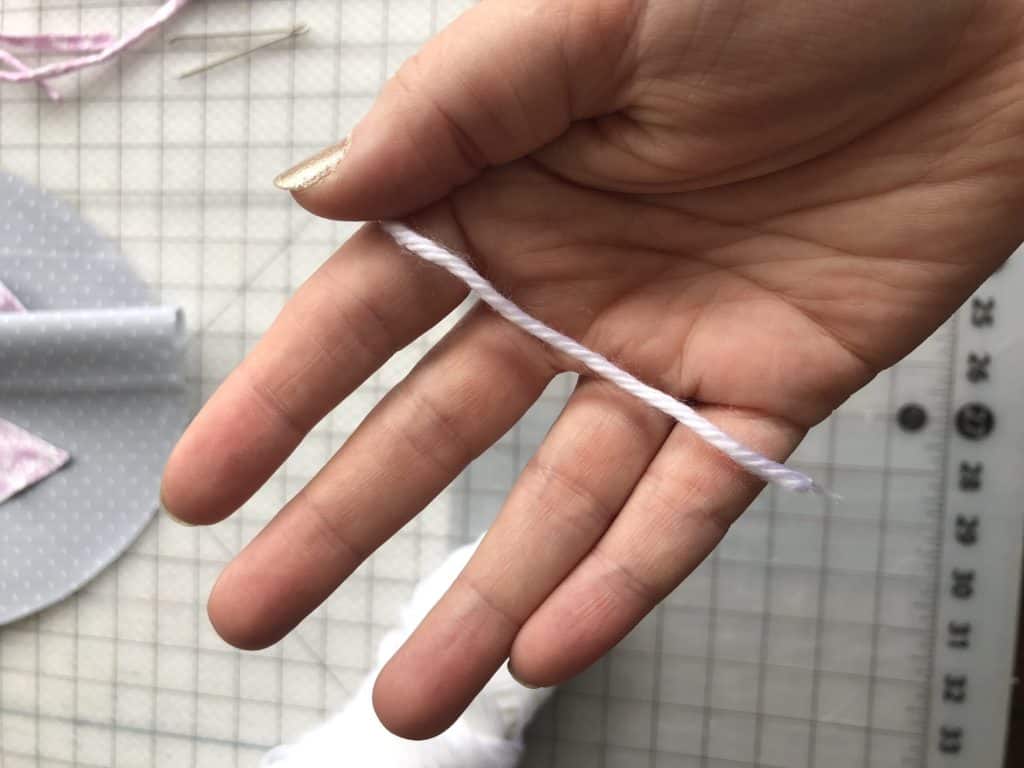
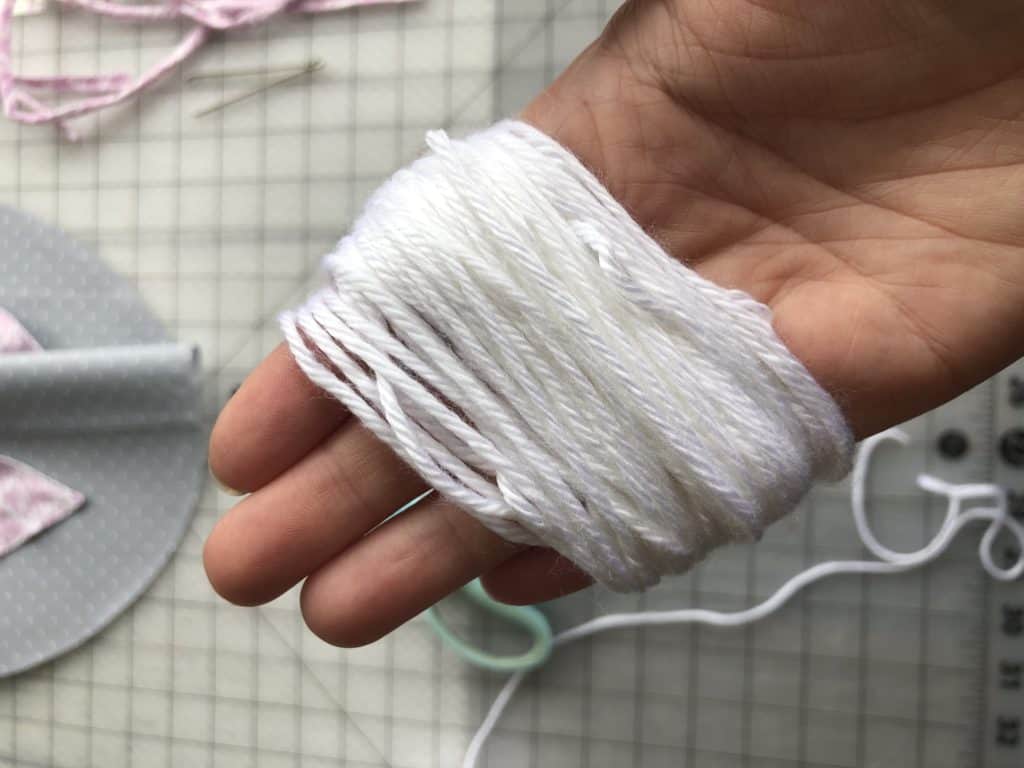
Step 6: If using yarn for the bunny tail:

Wind the yarn around and around (and around!) your fingers.  The more you wrap, the fuller the pompom’s poof will be.

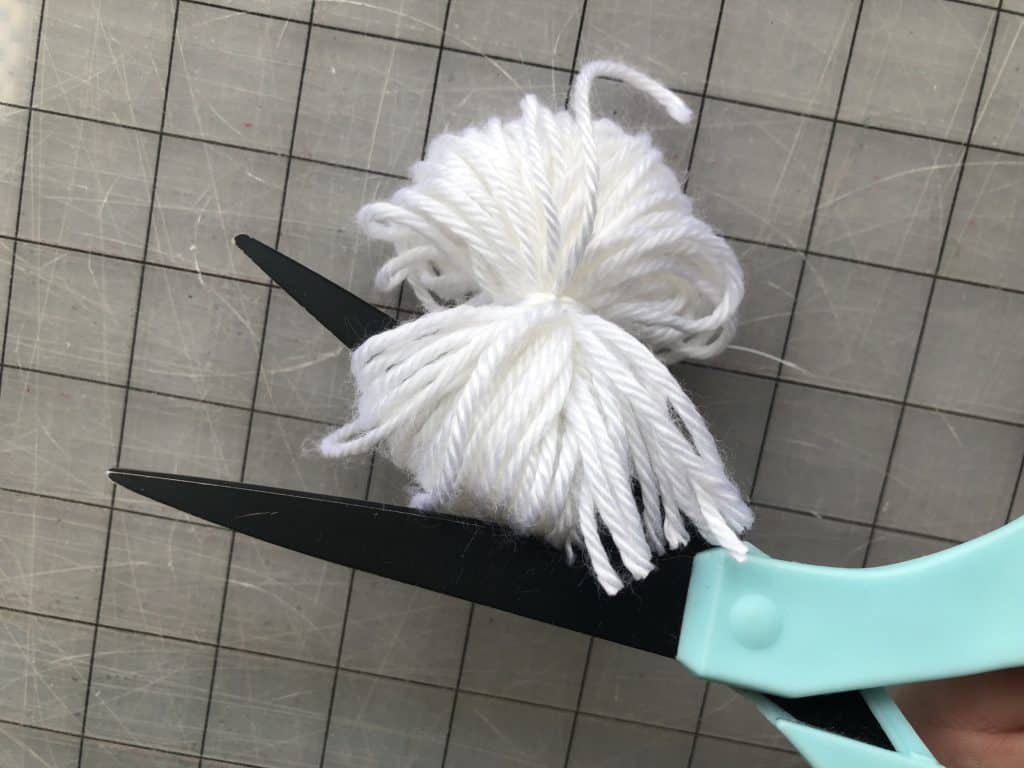
Once you’ve reached that desired poof, carefully slide the yarn off your hand.  Take a piece of yarn and tie it directly in the center.  Make the knot is as tight as you can get it.  I often secure the knot, and then switch my strands to the other side, and create a second tight not…just for safe measure.  Take your scissors and cut through the loops on each side of the knot.

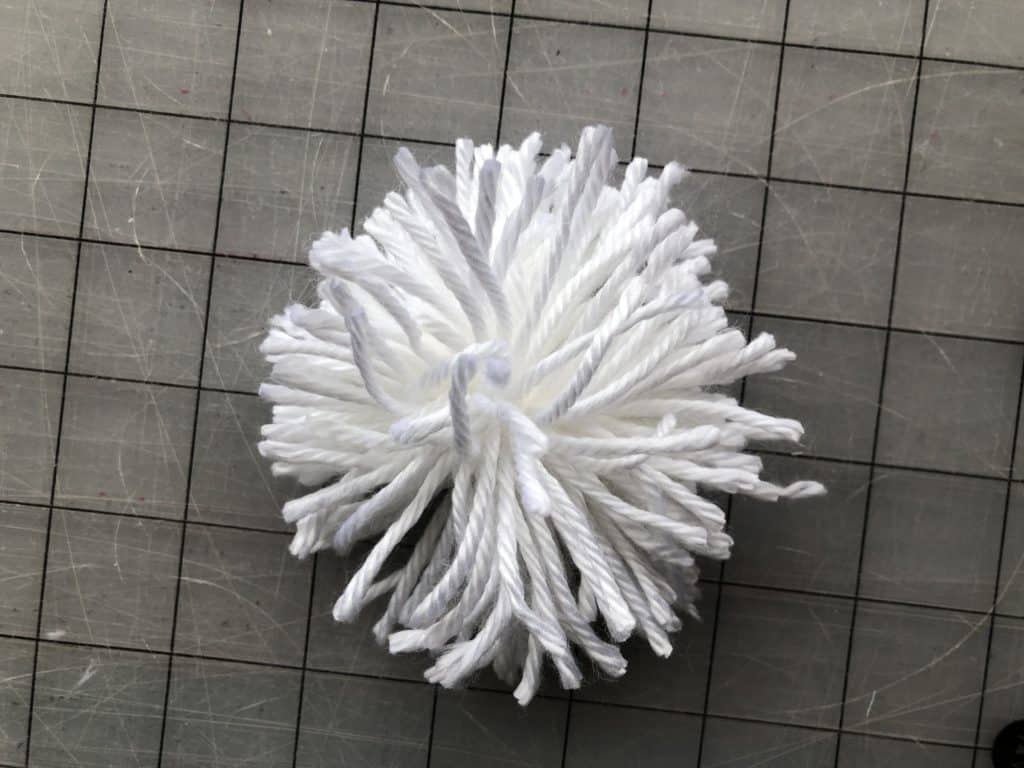
4.) Fluff your new yarn ball…cutting the ends to make them more even if necessary.

Step 7:  Align your ears with the outer ear measuring 3″ from the edges.  And your bunny tail centered between the bottom of the ears.

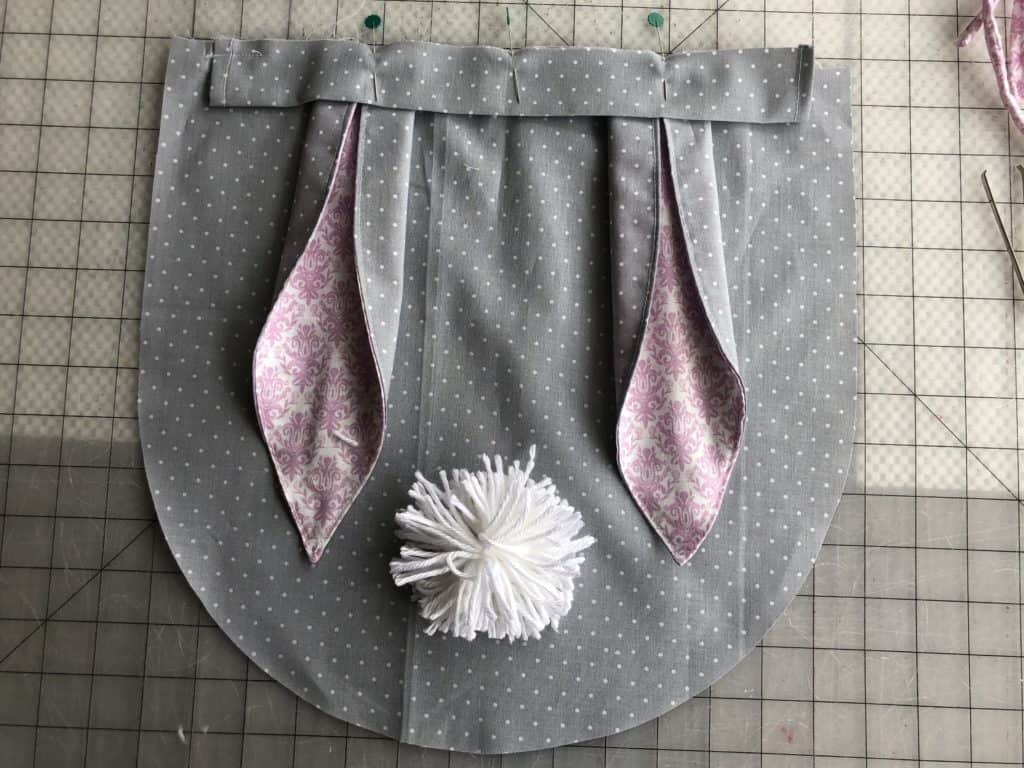
Step 8:  Finish the basic bag construction per the instructions.

FOX BAG CONSTRUCTION

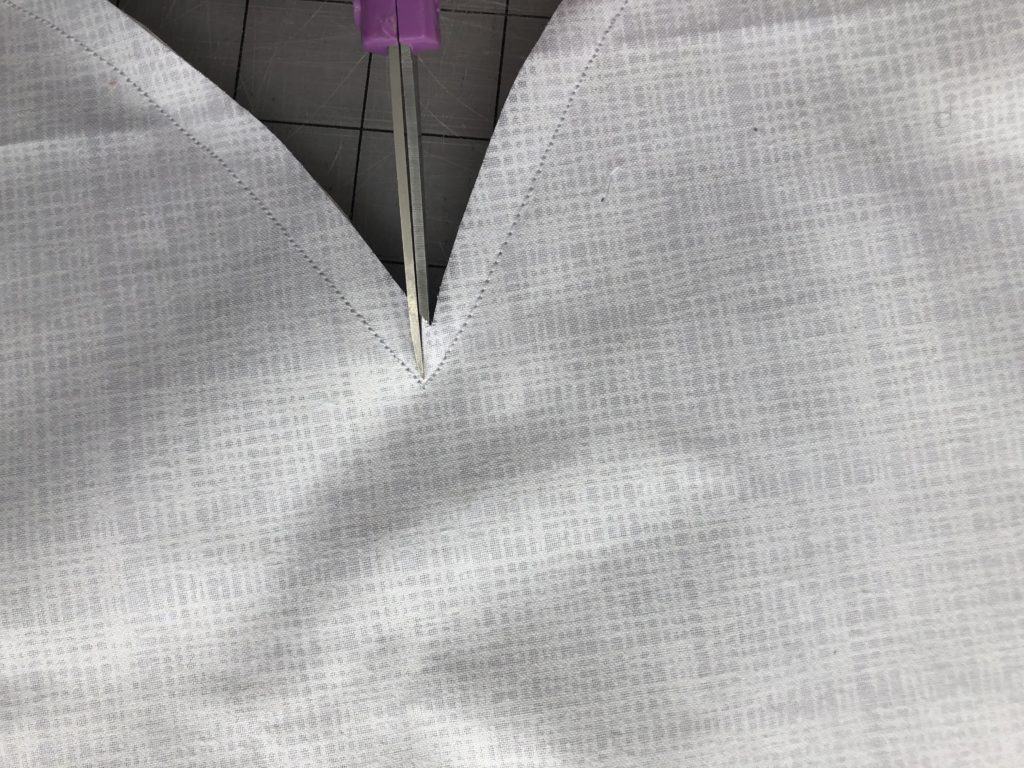
Step 1: Lay the face pieces with right sides together.

Step 2: Stitch with 1/2″ seam allowance, stopping at the marking guides on the pattern piece.

Step 3: Clip the center point and trim around top curves for a cleaner turning.

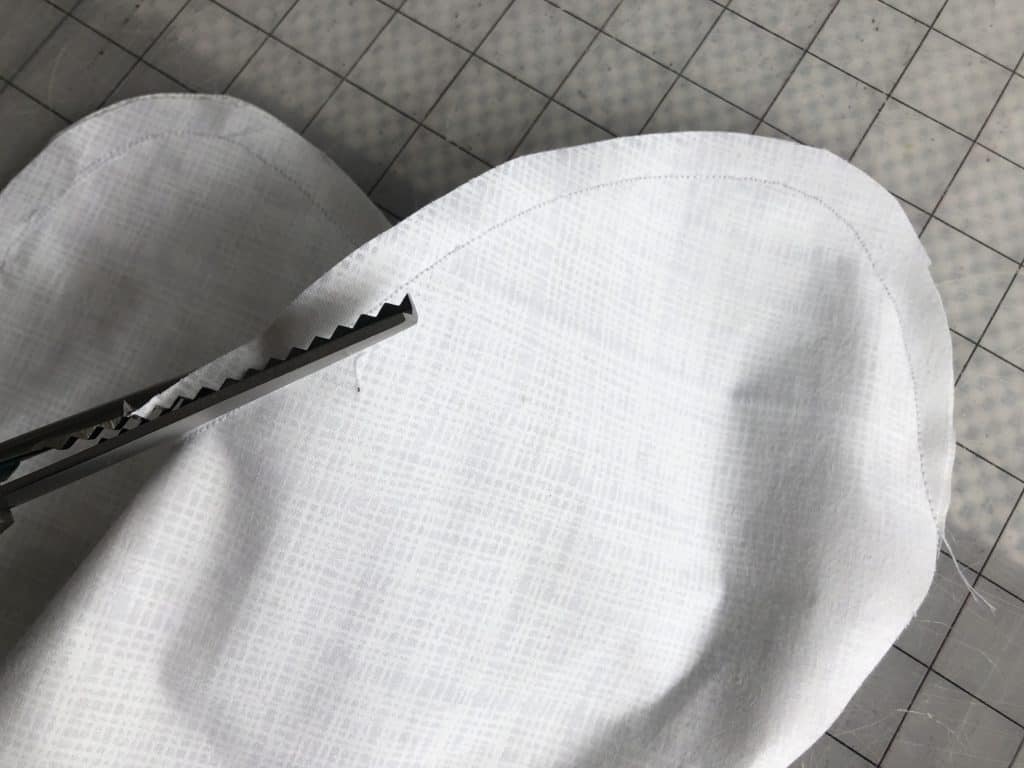
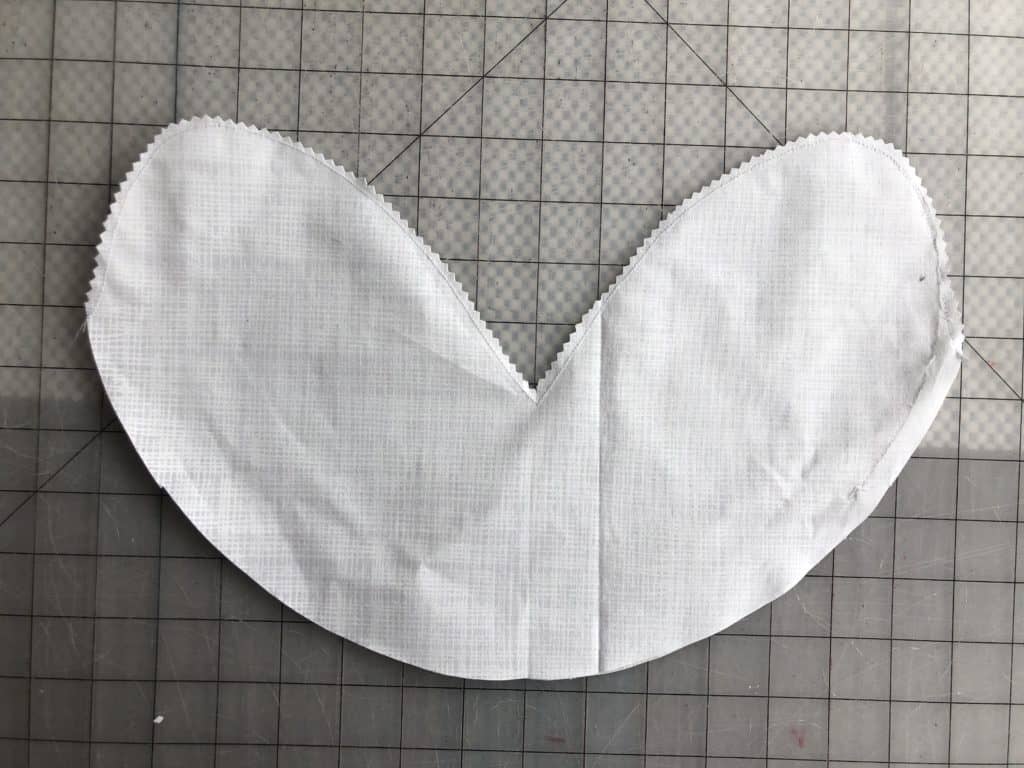
Step 4: Turn right sides out and press.

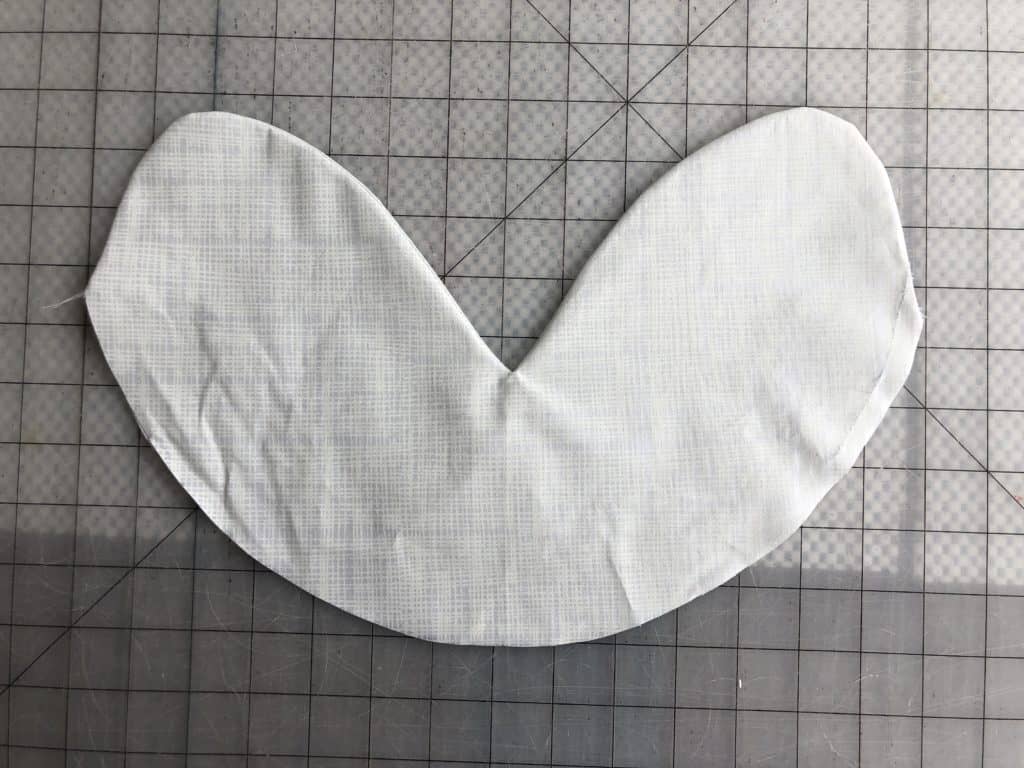
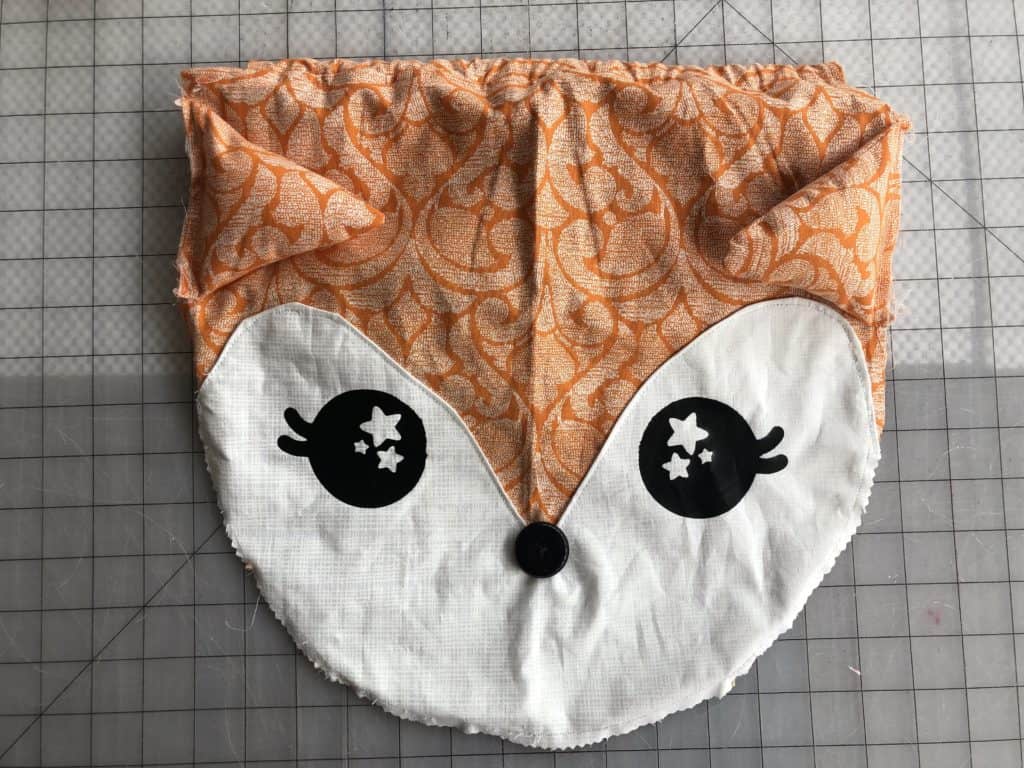
Step 5: Align with main fabric piece and topstitch the upper curves.

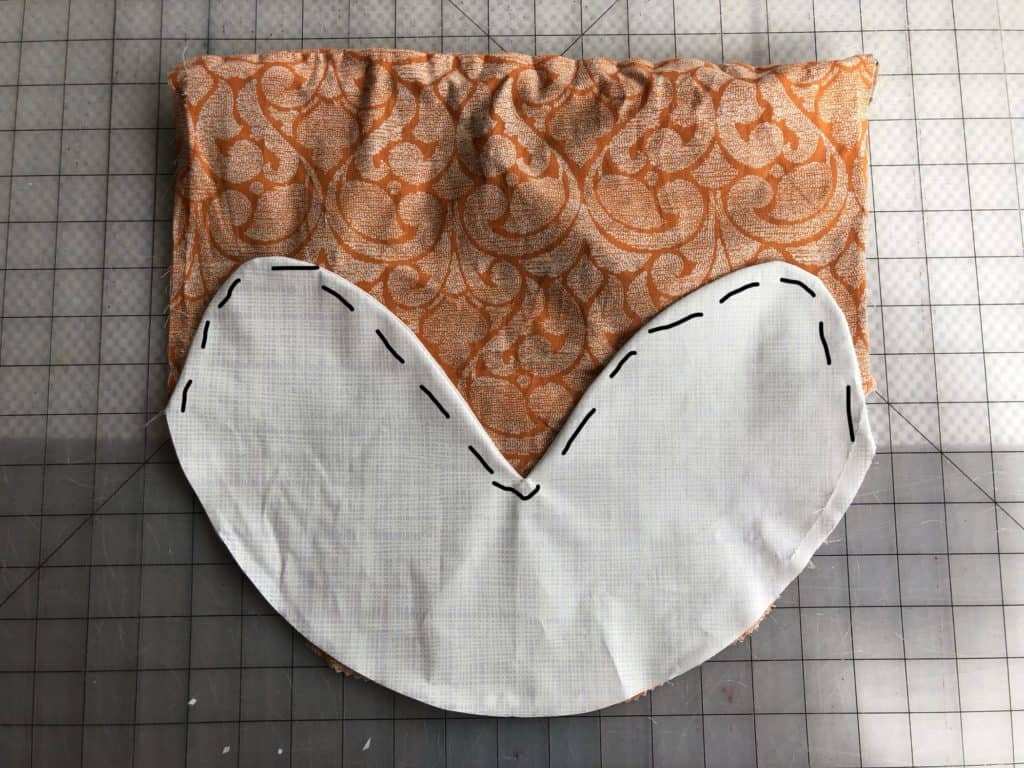
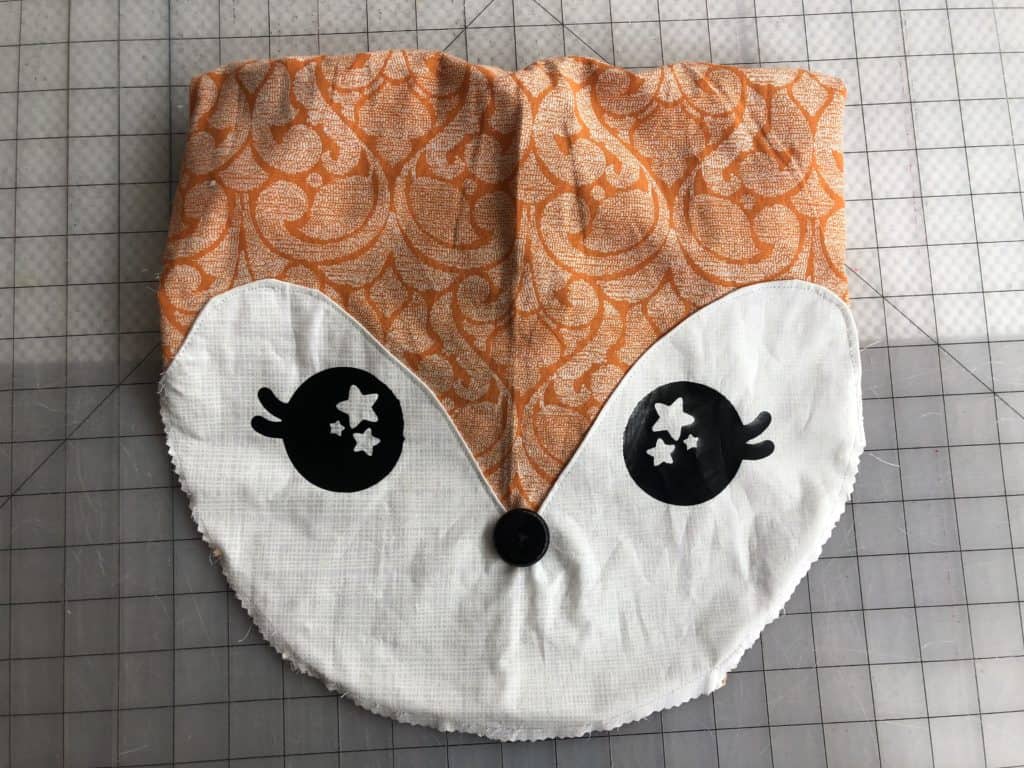
**Add your face details now.  Either the htv designs, paint, or embroidery.  It’s easiest to add everything at this step while all of the pieces are flat and unattached to other items of the bag!

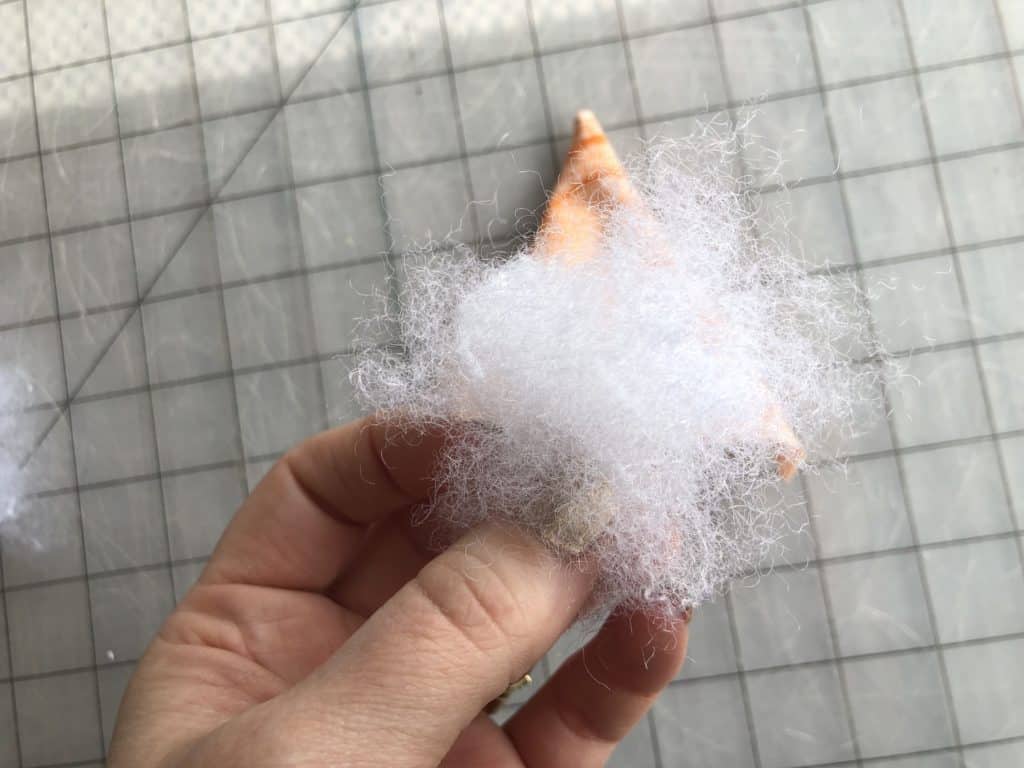
Step 6: With right sides together, stitch ear pieces using 1/2″ seam allowance.  Trim seam.

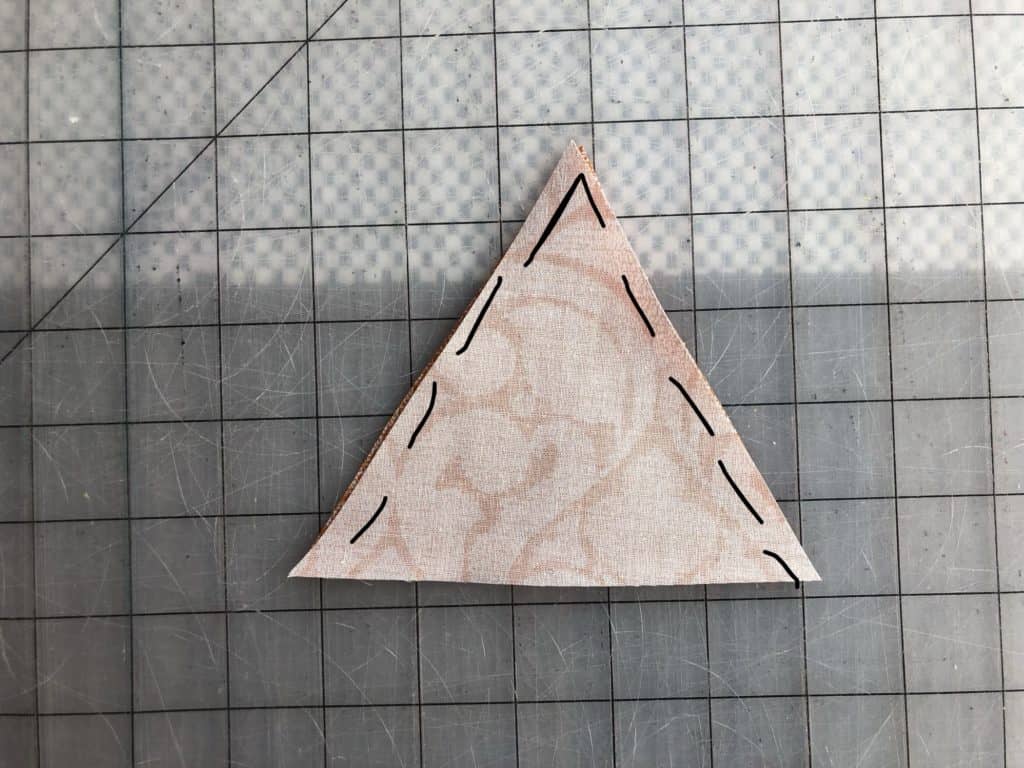
Step 7: Using a small amount of polyfil (if desired), stuff the ear.  Repeat with other ear.


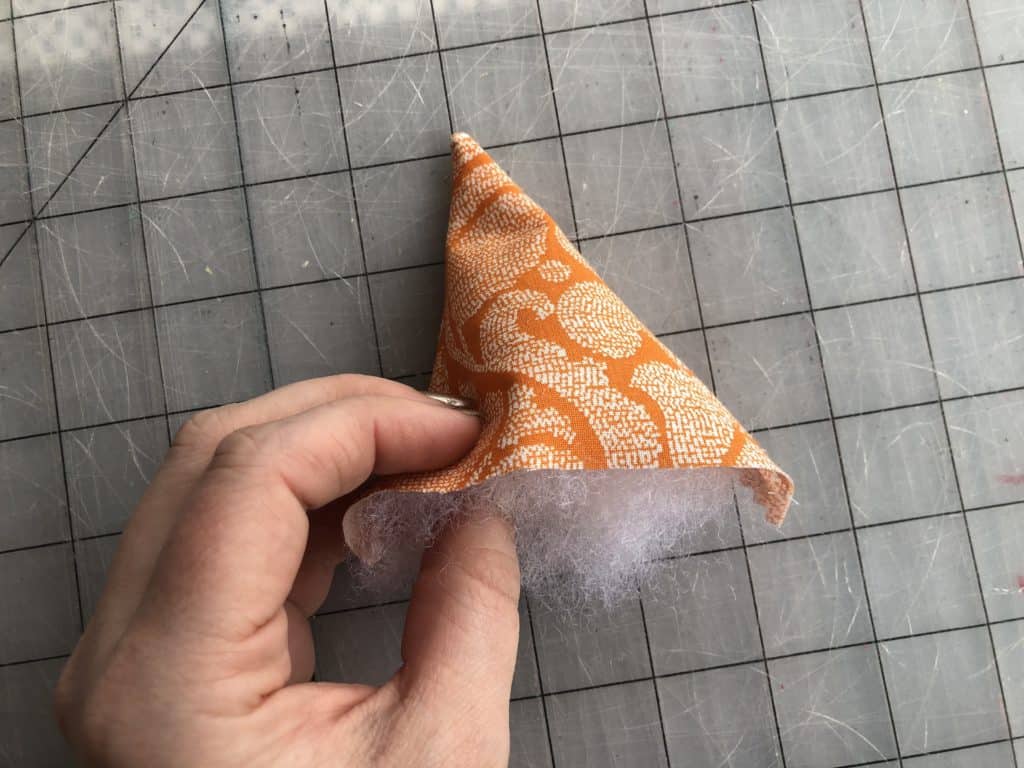
Step 8: Using the placement guide on the pattern piece, align and baste ears.

Step 9: Finish the basic bag construction per the instructions.

KITTY CAT BAG CONSTRUCTION

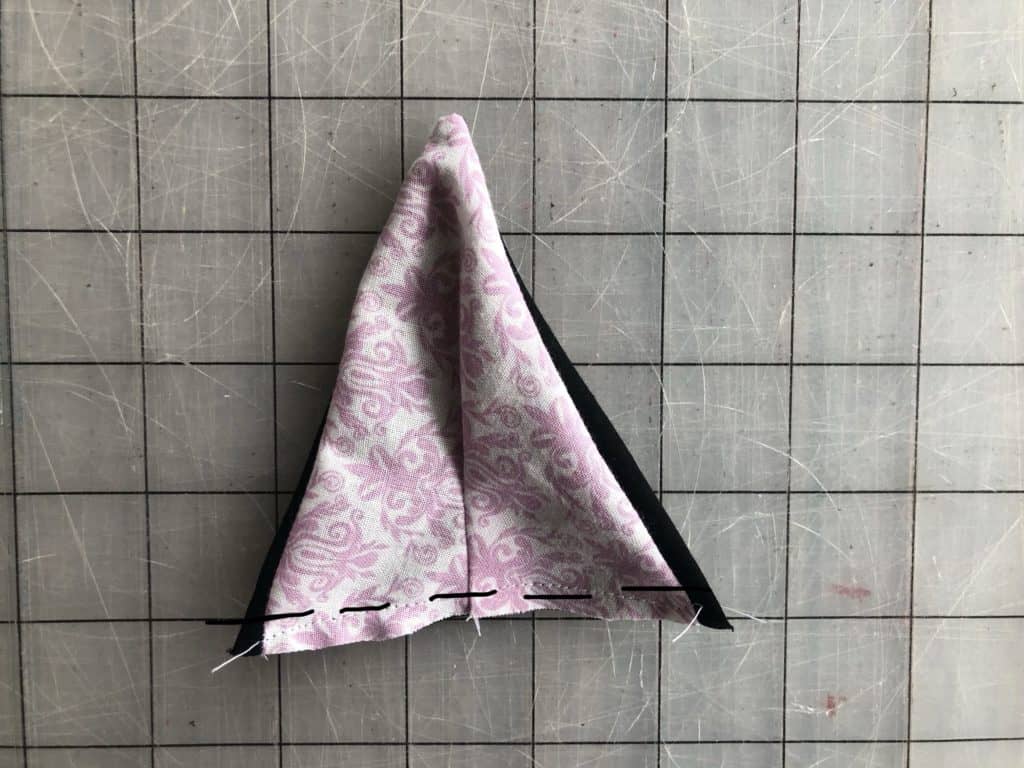
Step 1: Fold the inner ear fabric in half, with right sides together.

Step 2: About 1/2″ from the fold, sew a 1-2″ vertical line.

Step 3: With right sides together, align the two side edges to the outer ear fabric.  Sew using 1/2″ seam allowance.

Step 4: Trim your seam allowance down, for cleaner turning.

Step 5: Turn ear right-side-out and press.  Baste along bottom edge of ear, to help for easier assembly.  The “pinch” we created should fold the outer ear fabric a little bit in the front, creating a little more of a cat ear effect. 🙂  Repeat other ear.

Step 6: Add any face details.  And then using the placement guide on the pattern piece, align and baste ears.

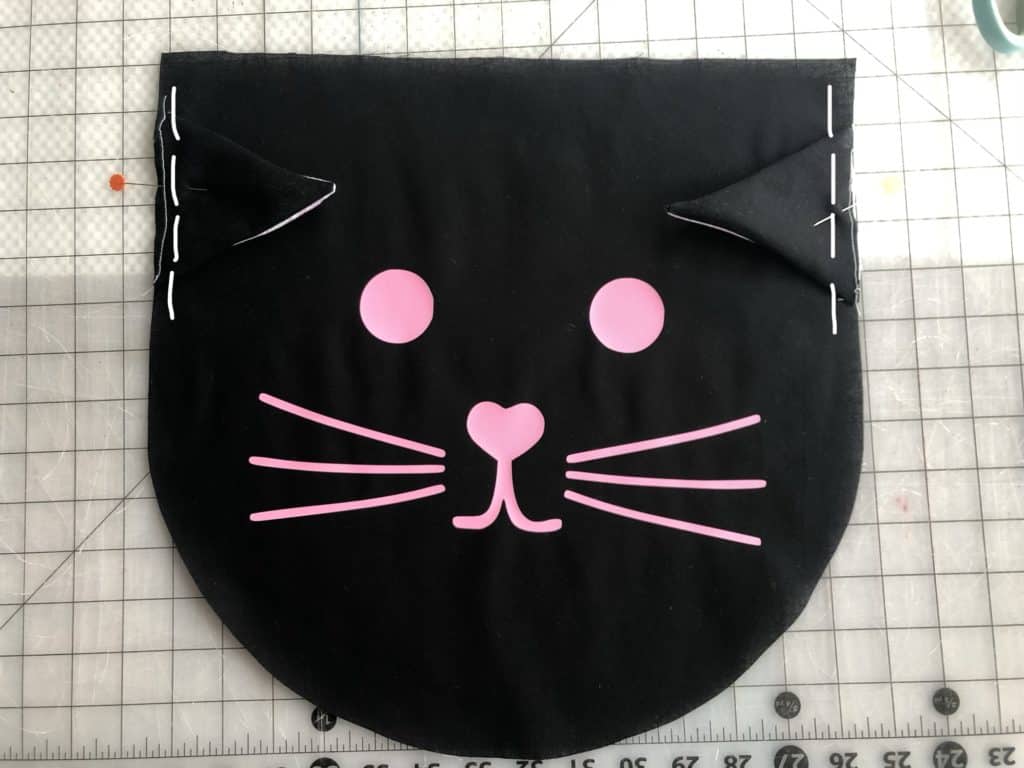
Step 7: Finish the basic bag construction per the instructions.

PANDA BAG CONSTRUCTION

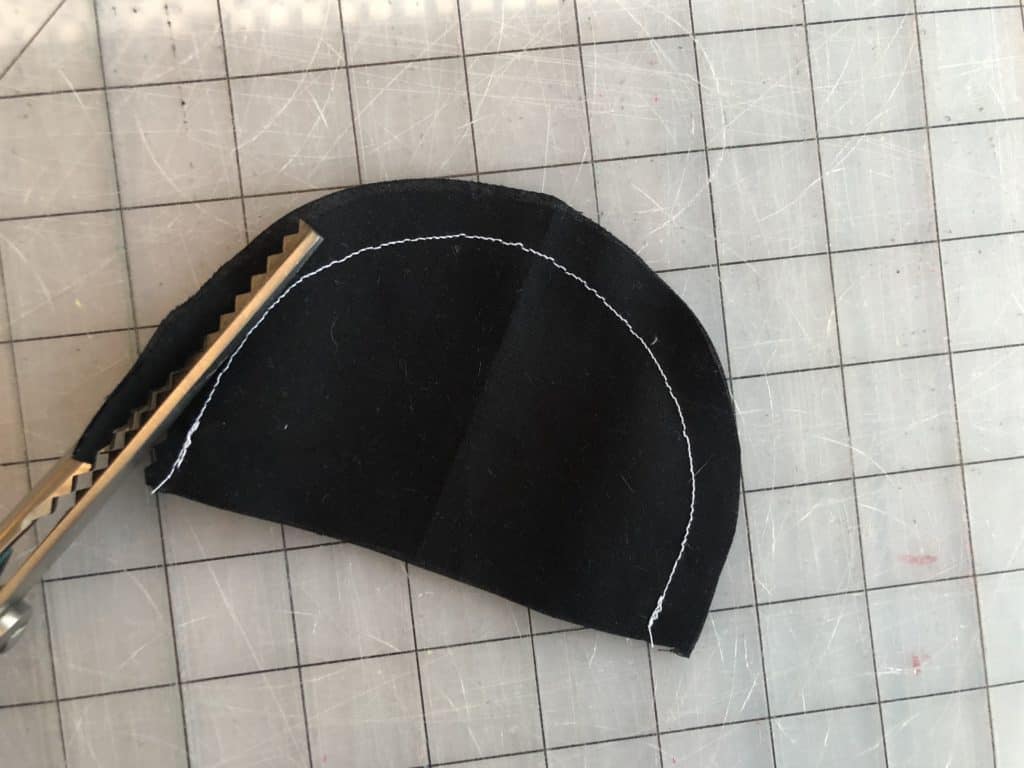
Step 1: Align two ear pieces, right sides together.  Using 1/2″ seam allowance, stitch around entire curved edge.

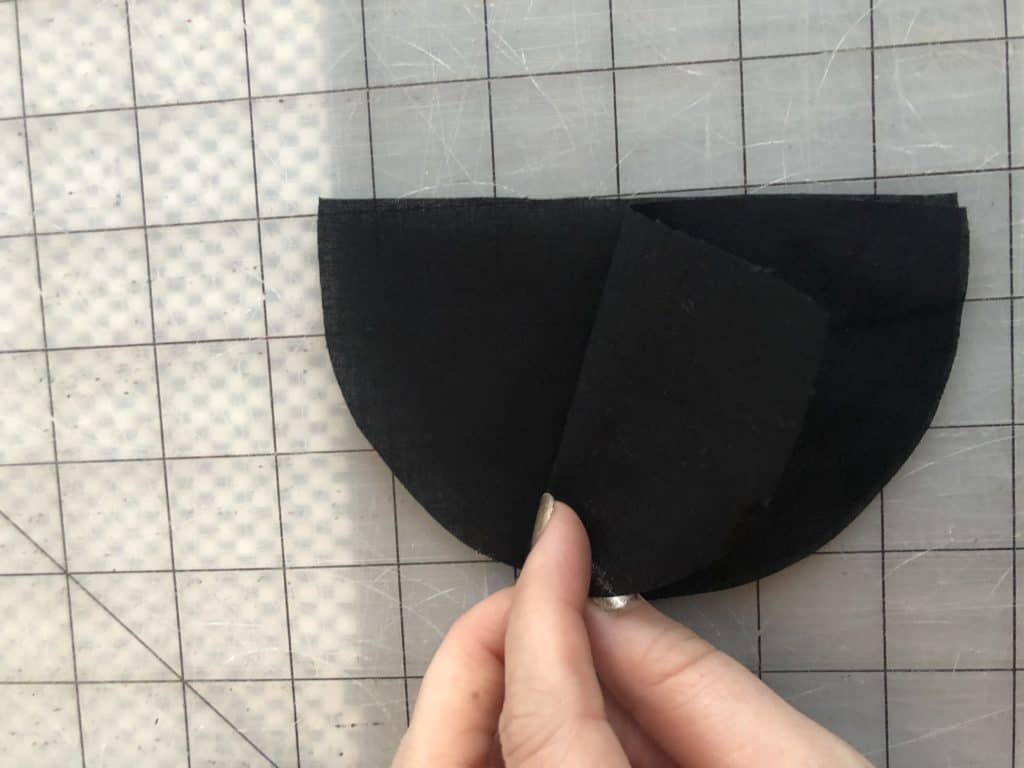
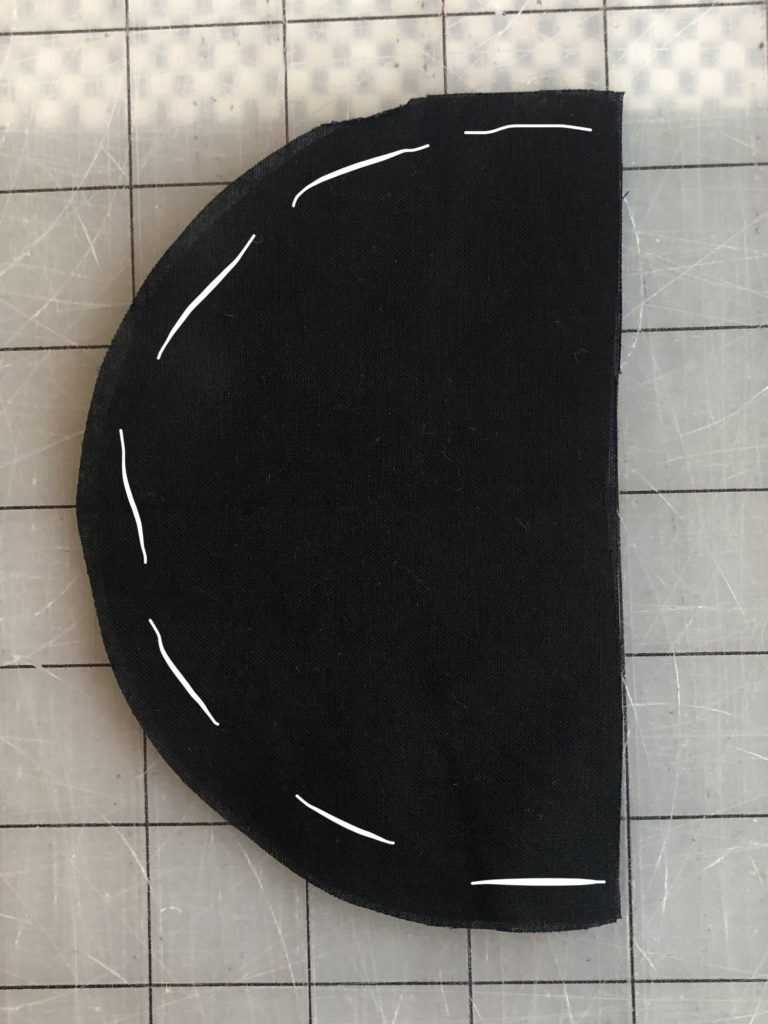
Step 2: Careful not to clip through your stitches, trim down the seam allowance.

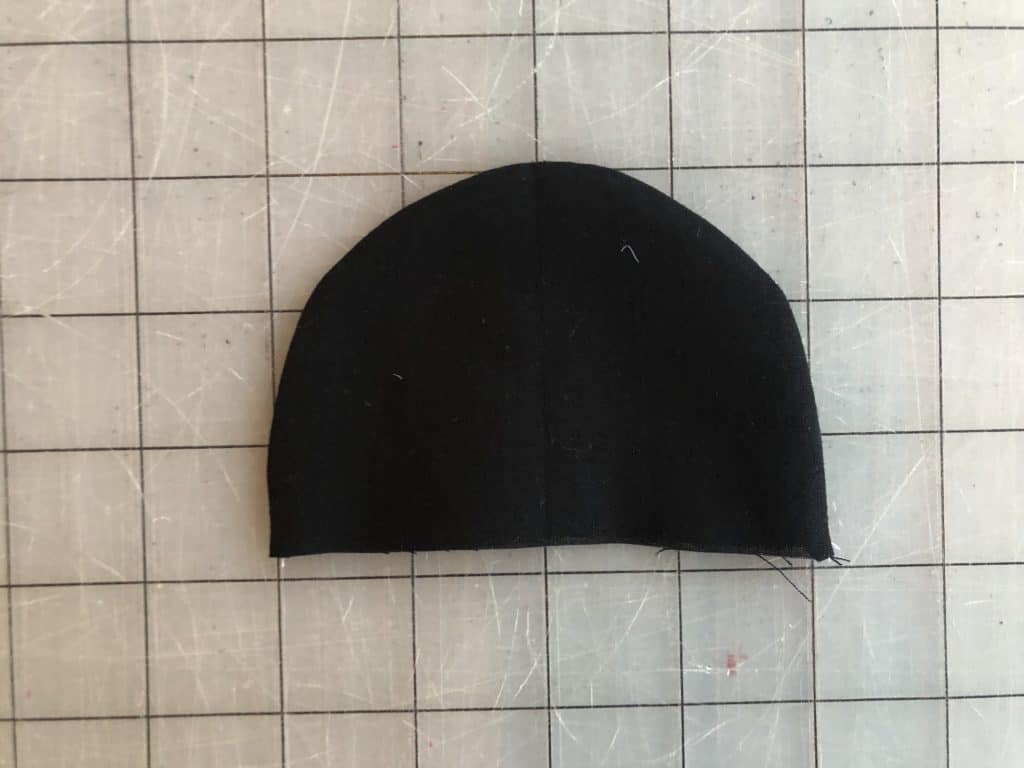
Step 3: Turn right side out and press.

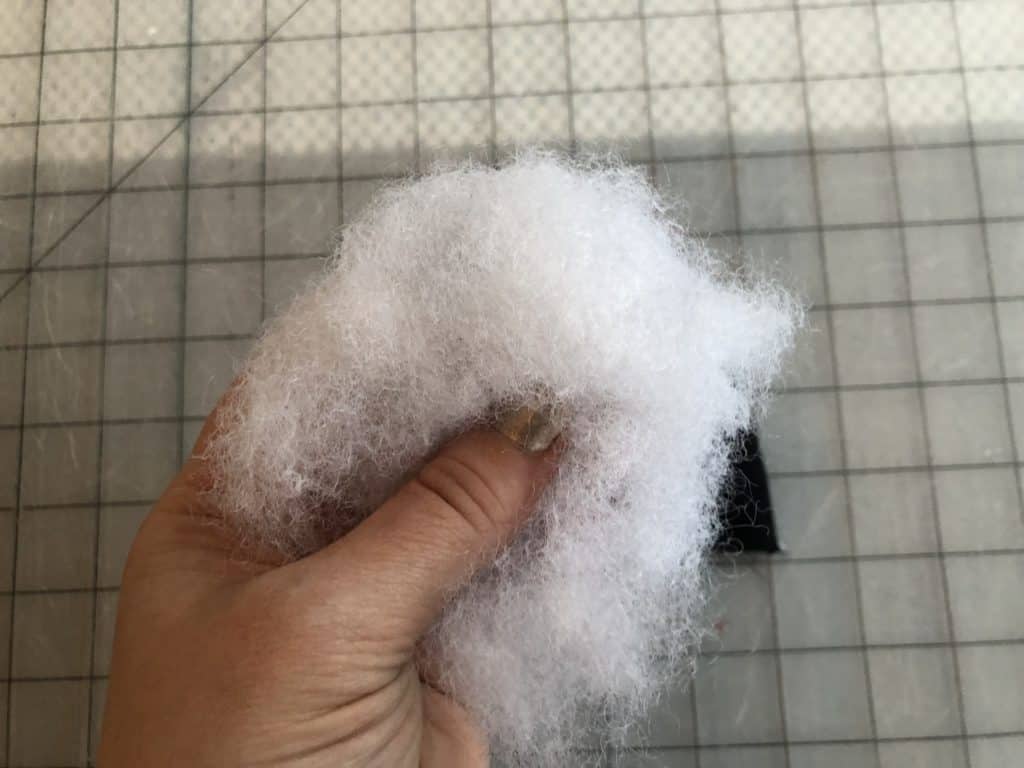
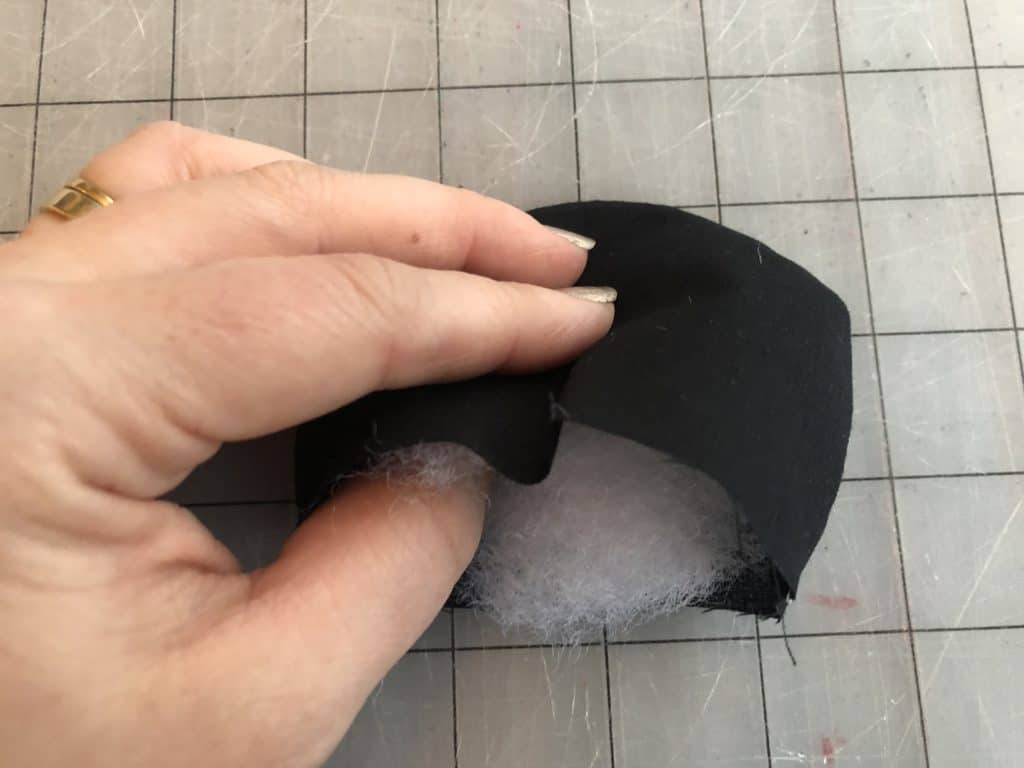
Step 4: Using a small amount of polyfil (if desired), stuff the ear.  Repeat with other ear.


Step 5: Add any face details.  And then using the placement guide on the pattern piece, align and baste ears.

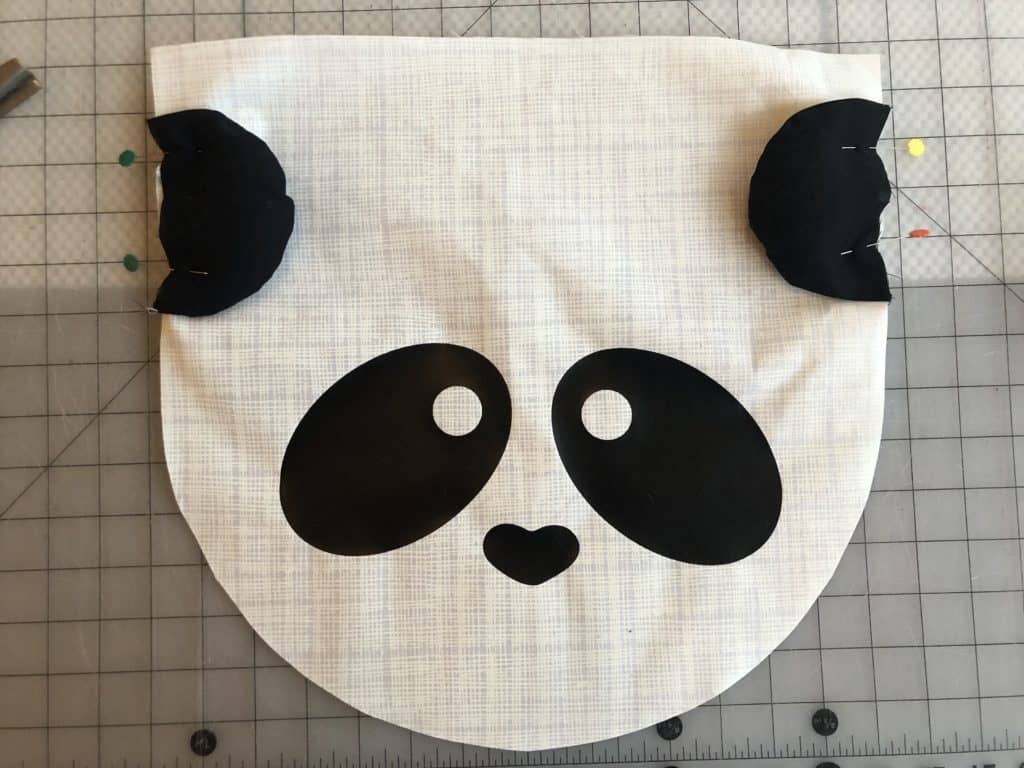
Step 6: Finish the basic bag construction per the instructions.

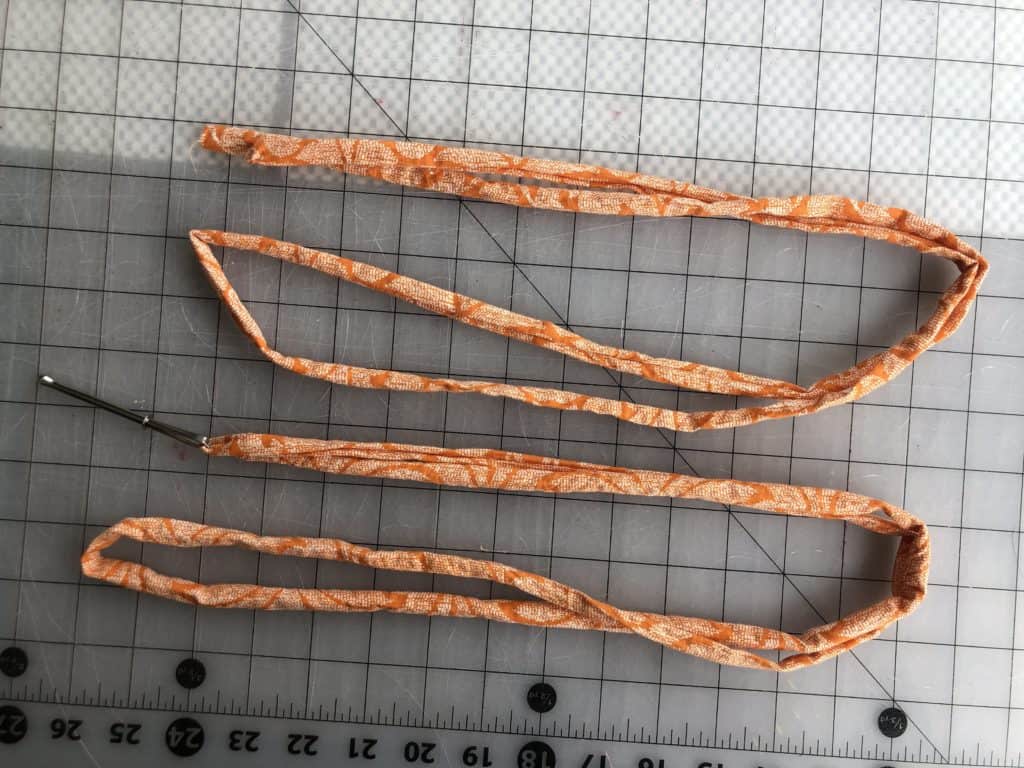
HOW TO MAKE YOUR OWN CORDING

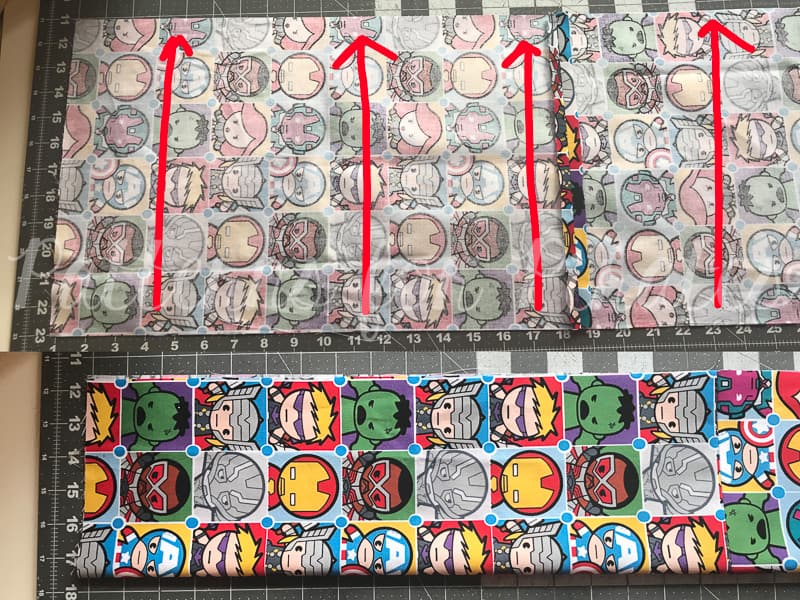
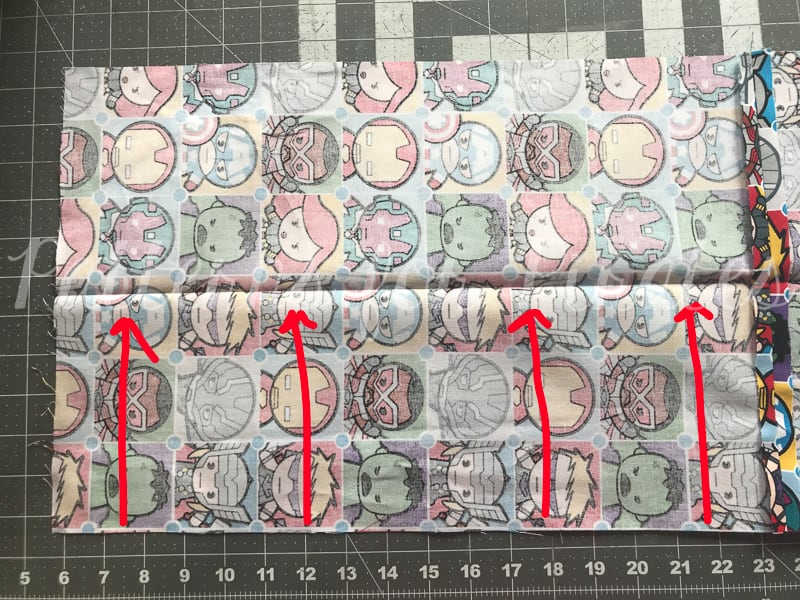
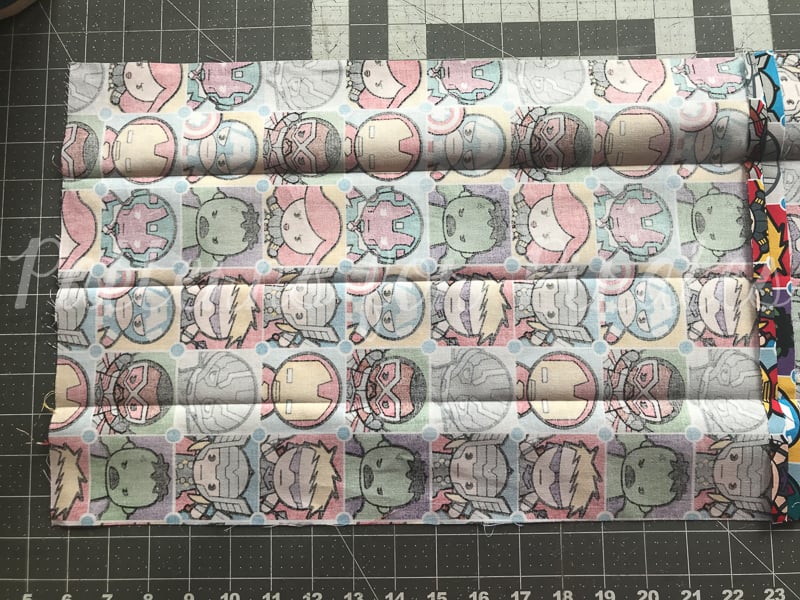
Step 1: Cut several strips of fabric at 1.5″ wide.  You’ll need 3 yards total of length (or 108″).

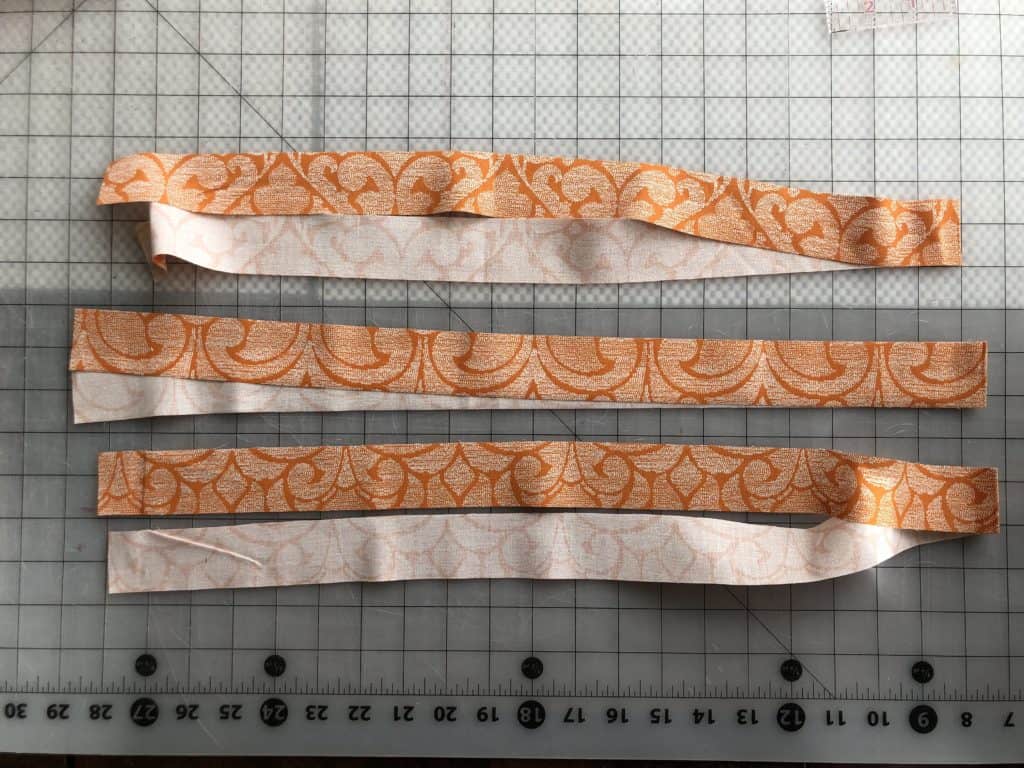
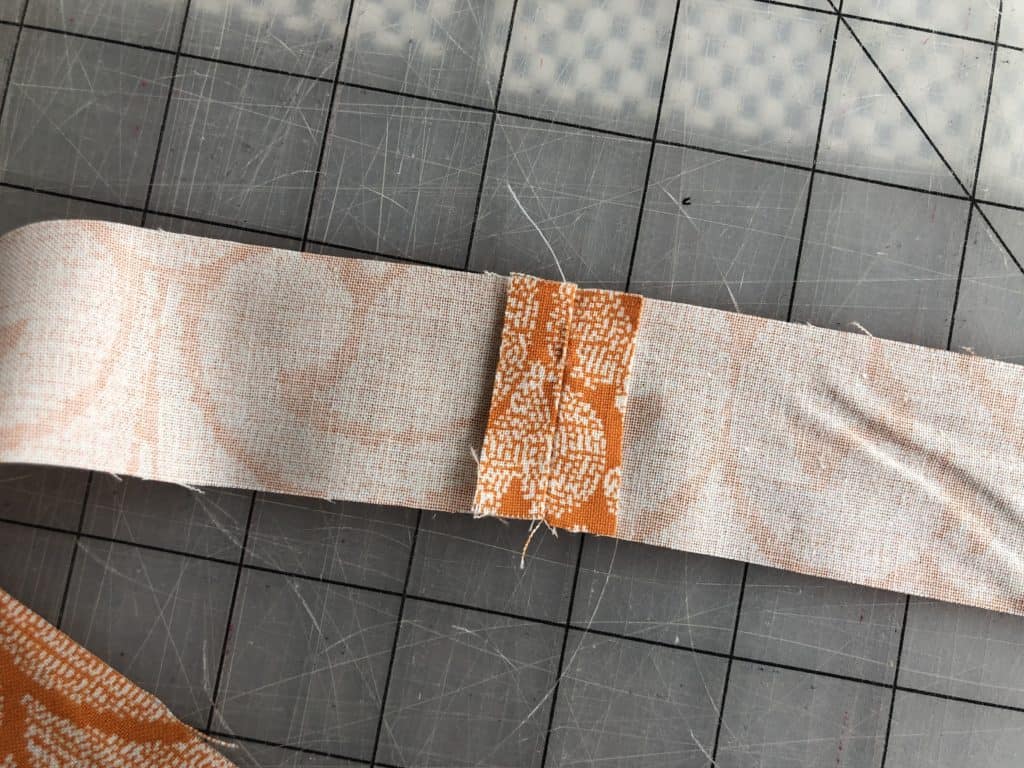
Step 2: Sew strips together across the short edge, right sides together.

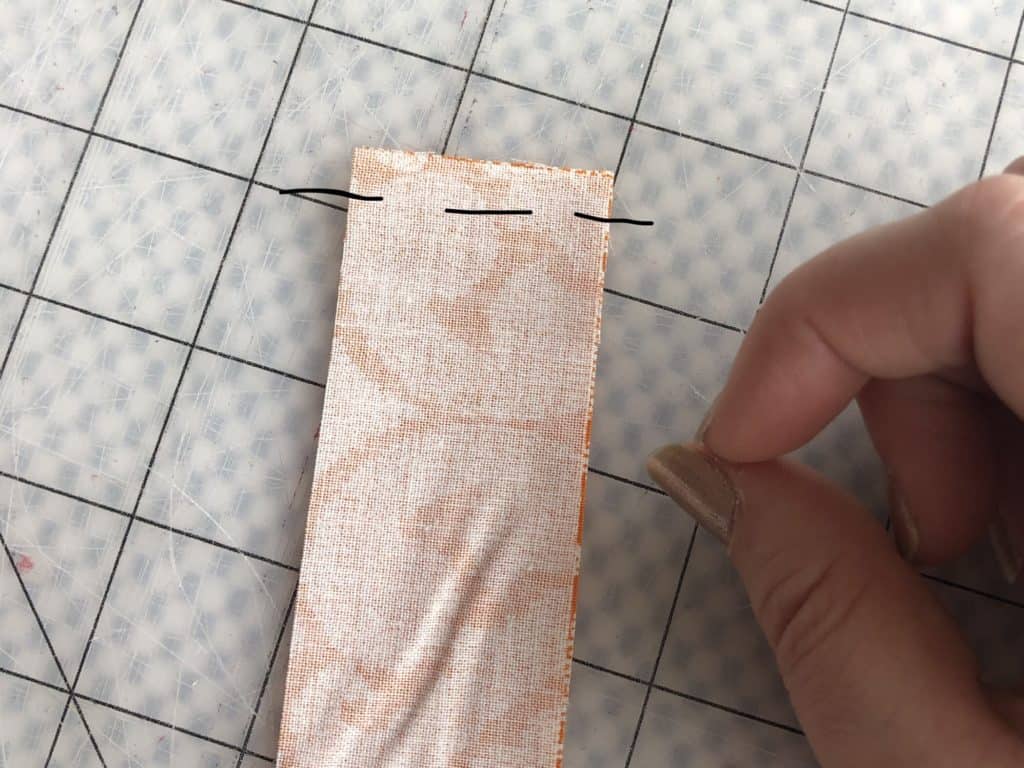
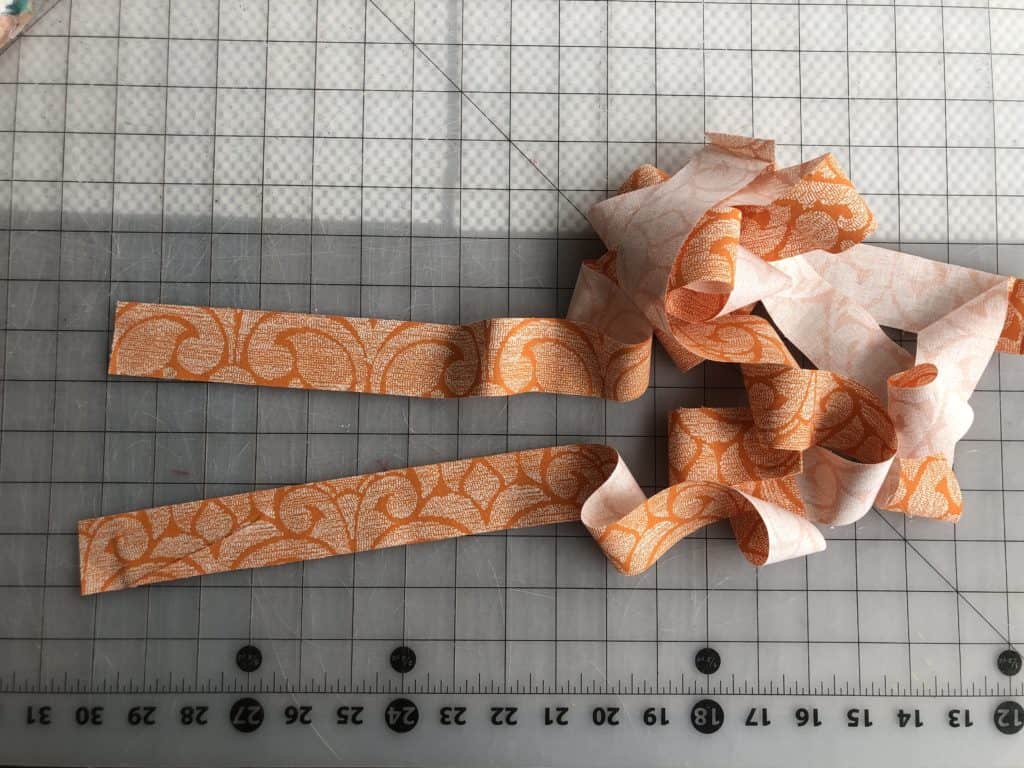
Step 3: Press open seam allowance.

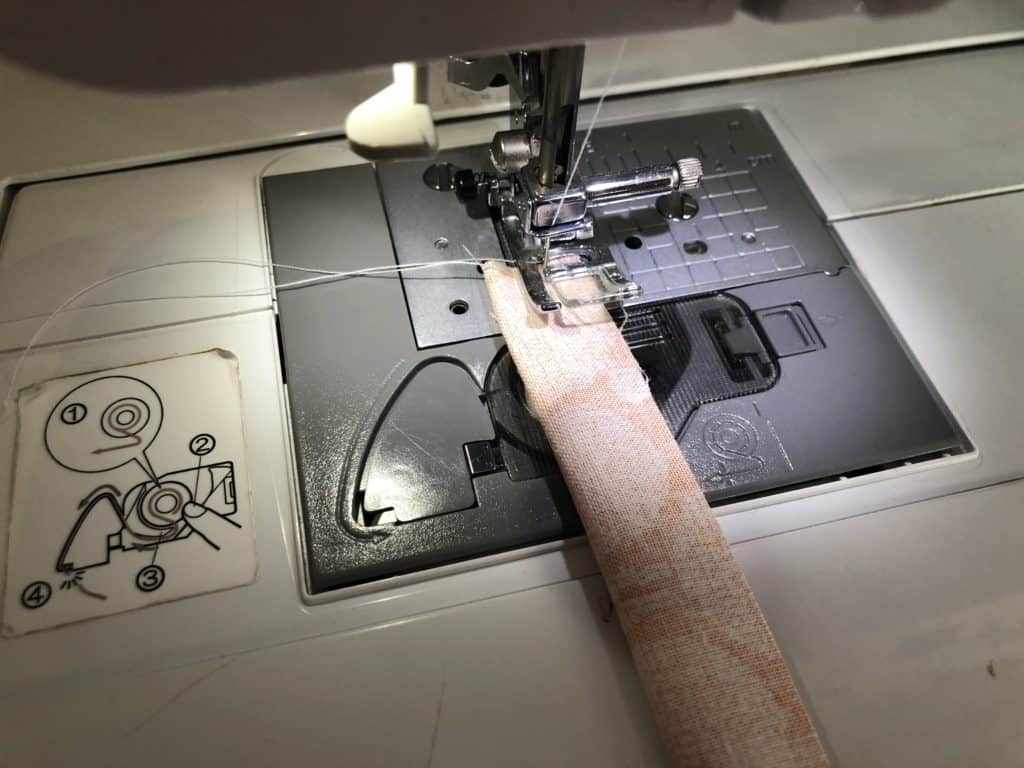
Step 4: Fold your fabric right sides together, with the long edges now touching.  And sew with 1/2″ seam allowance down the entire length.

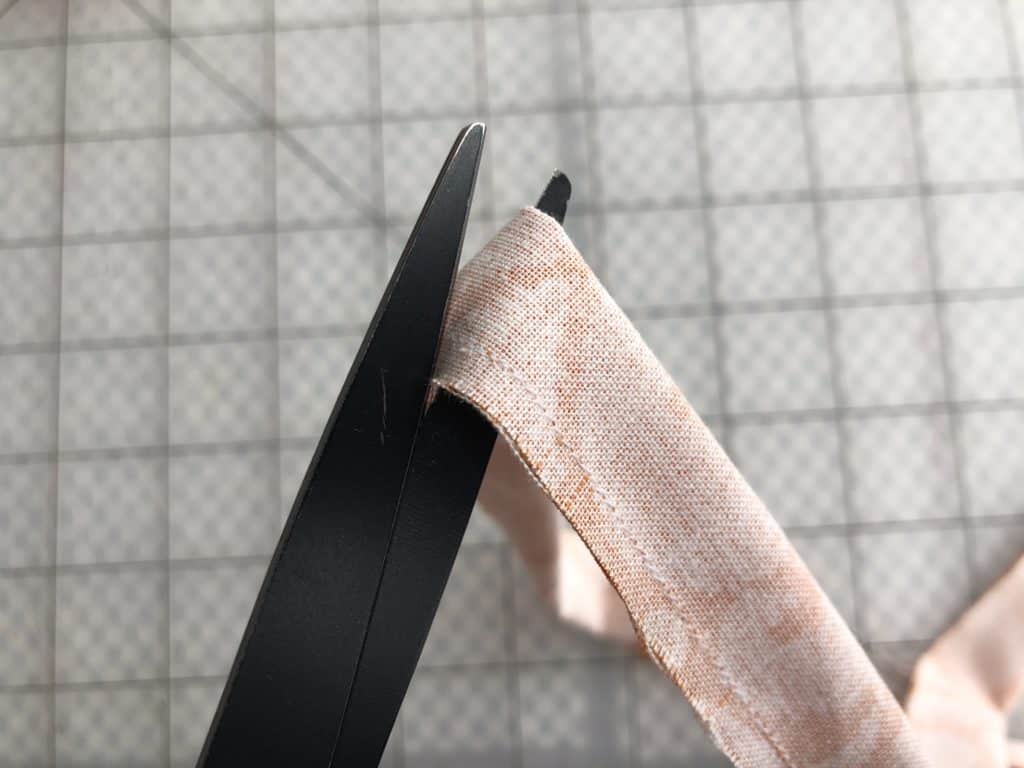
Step 5: Carefully trim down your seam allowances and cut the straps to the desired length.  In this instance, you need 54″ per strap.

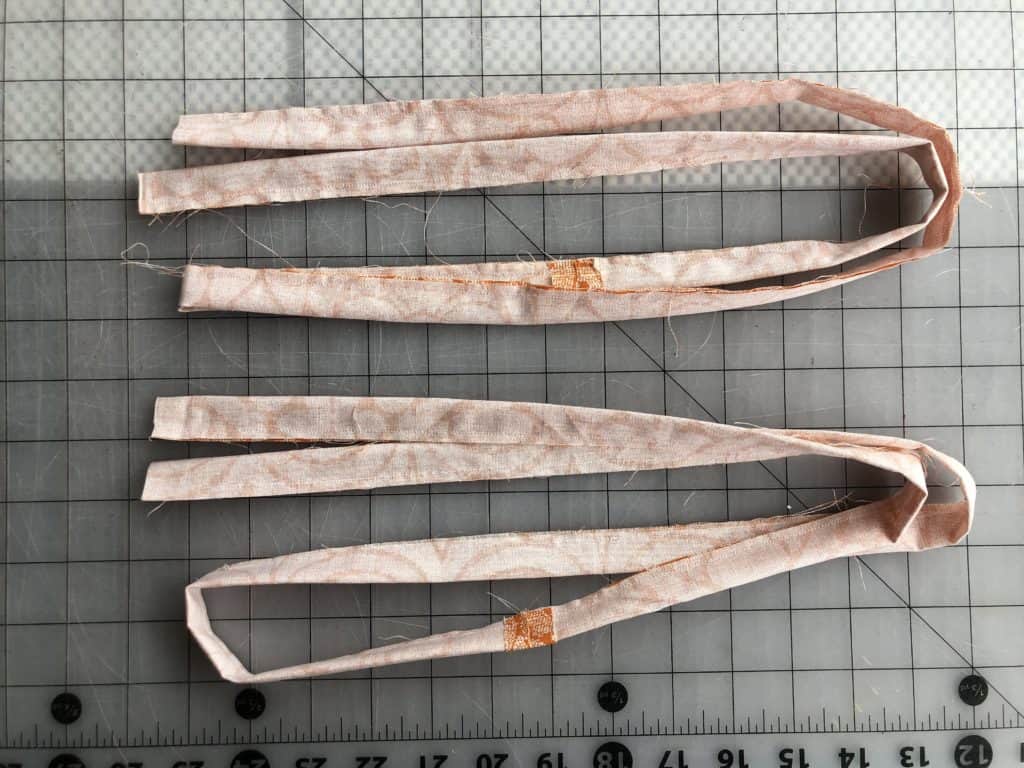
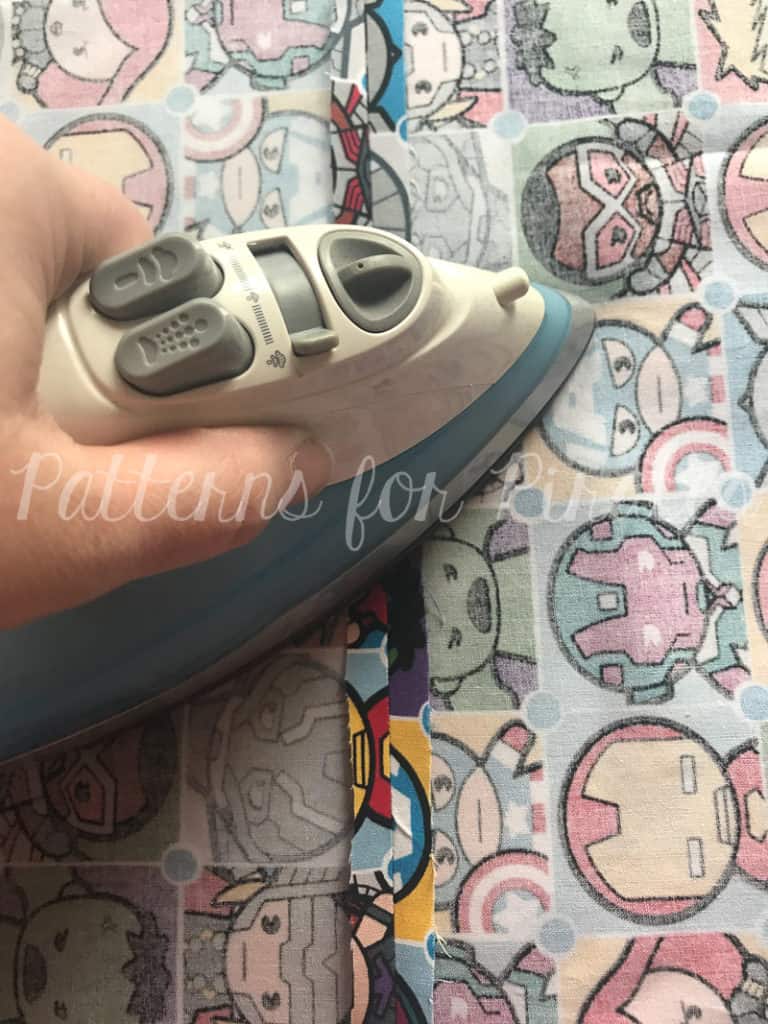
Step 6: Using your favorite turning method, turn the tubes right side out.  Press your new straps, and top stitch along edges if desired.

Are you someone who considers themselves to be more of a visual learner?  Here’s a video that walks you through all of the same steps above.  Hopefully it helps!

As always, we love when you share what you’ve made with us.  Head over to the Patterns for Pirates Facebook group and show off the adorable It’s a Cinch…Bag that you’ve managed to make from our freebie pattern!  Have a great week, Pirates!

Filed Under: Free Pattern, Pattern Release 1 Comment

P4P University – Buttons and Buttonholes

June 26, 2018

Ohh the dreaded buttons and button holes!!! Well…fear them no more. Today on the blog I wanted to talk to you about buttons and how easy it can be to add buttonholes to your projects.


Buttons

I am sure you noticed a few styles of buttons while walking around the notions sections of you favorite fabric store. The most commonly used buttons are 2-hole ones, 4-hole buttons and shank buttons.

  • 2 hole buttons are usually used for decorative purposes or for items that will not require a heavy use of the buttons. That being said, I personally prefer the look of the 2 hole button for day to day wear so I just reinforce the stitching to make it more durable.
  • 4 hole buttons will yield a sturdier construction. You can sew them on using an ” X “ style stitch or a ” = ” style. Either one of the methods can be done using a sewing machine or hand sewing.
  • Shank buttons are buttons that once sewn will not lay flushed with the fabric. They have a shank that will allow for some space between the button and the garment. These style buttons can be used for decorative purposes but they are mainly used when adding buttons to coats or heavy jackets.

You can sew buttons by hand or using your sewing machine. All 3 types of buttons listed above can be sewn by hand while only the 2 hole and 4 hole buttons can be sewn with the machine.

Note: when using a 4 hole button it is generally preferred to add a thread shank so there is some space between the button and the fabric. That can only be achieved by hand sewing.

In the video below I am showing you how to attach two-hole buttons with your sewing machine and different button feet available.


Buttonholes

Now that we have added buttons, we need to add button holes. Here are some must-does when adding buttonholes.

Always interface!

The key to successful buttonholes is interfacing the fabric. Whether you are using knit, light weight of medium weight woven always interface the areas you plan on adding buttonholes. Light to medium weight interfacing would work best.

Chose the right buttonhole style for your fabric! 

You might have noticed that your machine has quite a few options for button holes.

The one I use most is the squared one (as you can see in the video below) because I sew mainly medium weight fabrics. This buttonhole is also used for home decor sewing. If you use light weight fabrics, silks or chiffons, use the “oval” buttonhole, the one that has a round top and bottom.

If you are sewing coats or heavy weight jackets you will want to use a keyhole buttonhole because it will make pulling a thicker button through it much easier. When sewing knit outfits, if you need to preserve the stretch of the fabric around the buttonhole then the “knit buttonhole” is the one to use. It features a wider zig zag or a criss-cross stitch.

All you have to do now is make a slit in the fabric to allow for the button to pull through the hole. I like to use my seam ripper for that (make sure it’s not dull!!) and mark the top and bottom ends of the hole with pins as shown below.

This will help prevent any unwanted snips of the thread.

In the next video you can see the buttonhole foot in action.

Now that we have all that covered and hopefully you feel more confident sewing buttons and buttonholes, go sew some Henley and Lumberjack shirts and Brunch Blouses and be sure to show them off in the P4P group.

Filed Under: P4P University, Sewing Machines, Sewing Techniques, Uncategorized 3 Comments

2017 Holiday Freebies: DIY Camera Strap

December 7, 2017

What?  We are on day four of the 2017 Holiday Freebies already?  I hope you’re having as much fun as I am!  If you need to back and review the past three days, I can wait!

Here are some links: Slouchy Headwarmer / Emoji Pillows / Clothing Size Tags

Now that we’ve covered that, let’s get to today’s free pattern!  Sewing and photography seem to go hand-in-hand more often, because we want to share what we’ve made with our sewing community!  Why not sew yourself a sweet little strap to wear while you’re using that camera of yours?  It’s super easy to do and way more fun than using what came with your camera originally.  Let’s get to it!

Prep your pieces, you will need:

  • Pattern Piece for Vinyl Ends
  • 36″ L x 12″ W Quilting Cotton
  • 2 – 12″ cuts of nylon webbing (1/2″ or 3/8″ both work) — I used THIS
  • 2 – 1/2″ or 3/8″ sliding adjusters — I used THESE black versions as well as THESE fun colored ones!
  • 36 L x 3″ W Fusible Fleece Interfacing
  • Small scraps of Vinyl/Pleather

**If you can’t find the nylon webbing / sliding adjusters in your local fabric store, a quick trick is to buy a small dog collar from the dollar store.  They tend to have the right width strap, and usually include the adjuster on it as well.

Important: The ends of nylon wedding need to be heat sealed to prevent fraying.  Make sure to do this before sewing it to your strap pieces!

**If your fabric is directional, you will want to cut two pieces for your strap and then stitch them together. Cut two 18.5″ x 12″ pieces from your quilting cotton.

For directional fabric, place your pieces right sides together, and sew along the short edge, using 1/2″ seam allowance.

Press open your seam.

For all straps: Fold your main fabric wrong sides together, meeting the long edges to one another. Press.

Open up your piece and fold one of the raw edges toward the middle crease you just made.

Repeat with the second raw edge. Press.

If you open your piece, you’ll now have 3 creases, spread evenly across four total sections.

On one of the middle sections, following the directions provided by the manufacturer, iron your fusible fleece to your strap piece.

We will be refolding the strap in the same method as before. Take one of the raw edges and fold it toward the middle crease.

Repeat with other raw edge.

Fold along middle crease, meeting both folded edges. All of your raw edges will be fully enclosed now.

Press, press, press.

I like to clip/pin my outer edges together, to make sure they’ll align properly when I go to stitch them. Straight stitch along the entire edge you just pinned, getting as close to the edge as you can.

This part is up to you, and how fancy you want to get with your quilting. I like to run an edge stitch along the other long edge. And then three even lines across the rest of the strap. You can stitch as much or as little as you’d like!

Take your nylon strap and overlap it 1.5″ from the edge of your strap, aligning it directly in the center of the strap.

Pin and repeat for the opposite end.

Using a wide zig zag stitch, secure your nylon strap to the end.

For the vinyl pieces, I recommend to only cut one actual piece — and to have an oversized rectangle for the other. It’s easier than trying to get them to line up perfectly. Especially since vinyl can be fussy to topstitch.

I like to run a line of fabric glue at the top of the vinyl backside. It helps keep it in place when sewing.

Two inches up from the bottom of your strap piece, lay out one of the vinyl pieces. The vinyl should be slightly wider than your strap.

Flip over your strap.

Throw another line of glue on the edge of your vinyl square.

Place it 2″ up from the bottom of your strap.

Flip your piece back over and stitch your vinyl on. This is the path I take and it allows for a continuous stitch. You can take whatever path you want. 😉

I HIGHLY recommend using a teflon foot for this. Vinyl can be a huge brat. I know they carry them at JoAnn Fabrics, or you can snag one on Amazon.

Finished stitches.

Trim the vinyl to match your other pieces.

Be careful not to cut off your nylon strap. Just tuck it out of the way when you’re trimming.

Take your slider.

Slide it onto your strap.

Put the cord in from the bottom-up on your camera.

Give yourself a little slack.

Run the cord back through the bottom and secure the strap to your camera. Easy peasy!


I am SO EXCITED to see your new, stylin’ camera straps!  I’ve been using my me-made strap for years now (so has my hubby) and we get compliments on it all the time.  I’m betting you will too!  Please, if you do make one for yourself, share it with us in the Patterns for Pirates Facebook Group!

**Also, as a quick note, there are some affiliate links scattered within this post.  I make a small commission for purchases made through those links, but I only link products that I’ve used and actually recommend myself.

Filed Under: Free Pattern 2 Comments

50K Fan Celebration :: Ruched Ankles PegLegs Hack

April 23, 2017

Ahoy Pirates!

Today I’m going to show you how to add some ruching to the ankles of your PegLegs.  This is a super easy way to amp up their cuteness factor and take them to the next level.

For this hack, I’ll be ruching using elastic.  Depending on your preferences, you’ll need about 12″ of braided (non-roll) elastic.  I used 1/2″, though you can also use 1/8″, if you’d prefer.  You will also need matching thread.

1. The first thing you need to do is decide how long you want your line of ruching to be.  For mine, I chose 5″.

2. You’ll need to add length to the pattern to accommodate the fabric the ruching will take up; you’ll add the same number you originally chose.  So for me, the length to add was also 5″.  And now the total ruched amount will be 10″.

3.  Add the extra length at the capri cut line.  To do this, cut your pattern on the capri line, add however many inches you chose earlier.  I added 5″.  Then cut out your leg pieces with this added length, and your choice of waistband.  Your leggings will look crazy long – this is good!

4. I highly suggest hemming the bottom edge now, before ruching.  It will be so much easier this way; I chose to do a faux blind hem with my serger.  Or, let’s be real…if you’re not planning on hemming, then this doesn’t apply to you! 😉

5. Cut your elastic pieces.  To determine the length, add 1″ to your original measurement.  So I cut mine 6″.

6. Now, before you sew up the side seams, find the middle of the piece on the end, and mark it.  Pin/clip your elastic in place in this place, right above your hem.


7.  From the marked spot, measure up your total ruched amount, determined in step 2.  My ruched amount was 10″, so I measured 10″ above my marked spot.  Add a pin to this spot as well.


8. Now bring the other end of the elastic to the pin and pin it to the fabric.  This is the spot which will be ruched.


9. You’ll be sewing the elastic to the fabric now, stretching as you sew.  This can be a little tricky, so I advise you test this out on a scrap before sewing your actual ruched piece.

10. Using a slightly shorter zigzag stitch (my length was 1.8, you may also need to reduce the width as well, I used 2.5), start sewing at the end of your elastic.  Don’t worry about pulling the elastic until you can grab the end of it from behind the presser foot.  This should be about 1/2″ of stitching until you can grab it.


11. The trick now is to hold the elastic from the back while you also pull it from the front, as you are sewing (I couldn’t show this while also holding the camera to take this picture). 😉  This way, you can control it pretty well.  I find it helpful to stretch the elastic before sewing, and then pin the middle part to the fabric.  Now you can pull from the pin to the presser foot instead of from the very end.  Once you get to the pin, then pull from end to end until you are finished sewing.  Be sure to backstitch carefully.  Don’t worry about making it absolutely perfect, because the ruching will bunch up quite a bit.


12. Now, assemble your PegLegs as usual…sewing the side seams, the waistband, etc.  Good news is you’ve already hemmed!  Or chosen not to…

That’s it – you’re done!  Feel free to play around with different lengths of ruching as well, you may prefer more or less than me.  Also, you can also ruche using elastic thread hand-wound in your bobbin.  With this method, you’d also lengthen your pattern, and then sew a straight line however many inches you added.  I don’t mind using elastic though, since I always have it on hand (not the case with elastic thread!).

Be sure to post your ruching hacks in our Facebook group so we can have all the “heart eyes” for your creations! 😍

~Elisabeth


We are celebrating reaching 50K fans in our Facebook group!  To make it a party, our beloved PegLegs pattern just got an update AND some new add-ons.  Before you go running to your machine to sew up your own leggings, make sure to read our PegLegs 101 blog post.  This way, you’ll have all the the information you’ll need to make the perfect pair before you even cut into your gorgeous fabric.

But wait, there’s more!  After any good party is an after-party.  We are taking it one step further and sharing some easy hacks that’ll bring even more flavor to your favorite leggings pattern!  We hope you check them out, make your new favorite pair of leggings, and know that we appreciate every single one of you amazing sewing guys and gals!

Here are our hacks / tutorials / latest tricks:

Lace Waistband Alternative | Drawstring Waistband Tutorial
Exposed Elastic Waistband | Stirrup Pant Hack
Ruched Ankles Adjustment | Decorative Topstitching Tutorial
Ruched Side Panel Hack

Filed Under: Pattern Hacks 1 Comment

P4P University :: Twin Needle Tips

March 16, 2017

Hello Pirates!  Today I’ll be walking through some tips on using a twin needle for topstitching as an alternative to a coverstitch machine.  The end goal (of either twin needles or a coverstitch) is two lines of parallel stitching on the right side of the fabric, with the ability to stretch and not break threads when pulled.  This is usually used when hemming, but these tricks will especially come in handy when topstitching binding on our new cami pattern!


1. Stretch Needles

The most important point is to make sure you buy stretch needles.  Schmetz is the most common brand that people tend to use, they are available on Amazon.  I prefer the wider 4.0 width the best because it works better for me; it also comes in a 2.5 width.  These are both 75/11 needle size.


2. Threading

When threading, it helps to thread as shown in the below picture.  This helps stop the threads from twisting when sewing.  Also, make sure your threads are not caught on anything (or each other) at the top of your machine.


5. Stitch Type

Use a regular straight stitch for this; no need to use a triple stretch stitch (|||) or any other stretch stitch like that.


4. Tension

Tunneling is what happens when there is a large bump in between your two rows of stitching.  To avoid this, I’ve found it helps to increase your top thread tension.  Your machine may vary, but I usually set my tension to 3.  If possible, you should also decrease your bobbin tension as well.


5. Stitch Length

Increasing stitching length usually also helps with tunneling, especially on trickier, slipperier fabrics.  Your machine may also vary on this too, but I set mine between 3.0 – 4.0, depending on fabric.  The lower number will help things stretch more though, so you may need to find a happy medium.


6. Go Slowly!

This is a huge one.  It’s so tempting to go full steam ahead, especially if you using a twin needle to hem.  You’re almost done with your project, but don’t ruin it with a sloppy hemming job!  Going slowly can make all the difference between a wavy hem and a perfectly flat one.  If you encounter any thicker areas of fabric, it may also be a good idea to use the hand crank on your machine, turning it slowly to ensure no mistakes as you pass over the thicker area.


7. Don’t Stretch as You Sew

This applies to all knit fabric projects, but especially when using a twin needle.  Don’t pull or stretch the fabric as you feed it into the needle area.  I’ve found that even creating a little extra negative tension as you guide the fabric can help to avoid any pulling as you sew.


8. Top vs. Bottom

When everything is done correctly, you should have two parallel lines on the top of your fabric, and a perfect zigzag on the back.  The zigzag is what allows your fabric to stretch after it’s sewn, so if you have super tight or non-existent zigzags, then you likely need to adjust (likely increase – confusing, I know) your top thread tension.  Here’s how it should look, the underside of the fabric is at the top of the picture and the right side is on the bottom.  Note the zigzags!


I hope these tips help you as you prepare to topstitch lots of fun binding or finish up a fancy new garment with a twin needle hem!  Let us know in our Facebook group or here in the comments if you have any questions about twin needles!

Elisabeth

Filed Under: Frequently Asked Questions 15 Comments

Newest Patterns

  • Uptown Joggers - Youth $10.00
  • Uptown Joggers $12.00
  • Uptown Joggers - Bundle $20.00
  • Notch Top & Dress $12.00
  • Notch Top & Dress - Youth $10.00
  • Privacy Policy
  • Refund Policy
  • Affliliate Program
  • Contact Us
  • About

Copyright © 2023 Patterns for Pirates

Copyright © 2023 · Genesis Framework · WordPress · Log in