New Pattern Release :: Tie Up Top (Adult + Youth Sizes!)
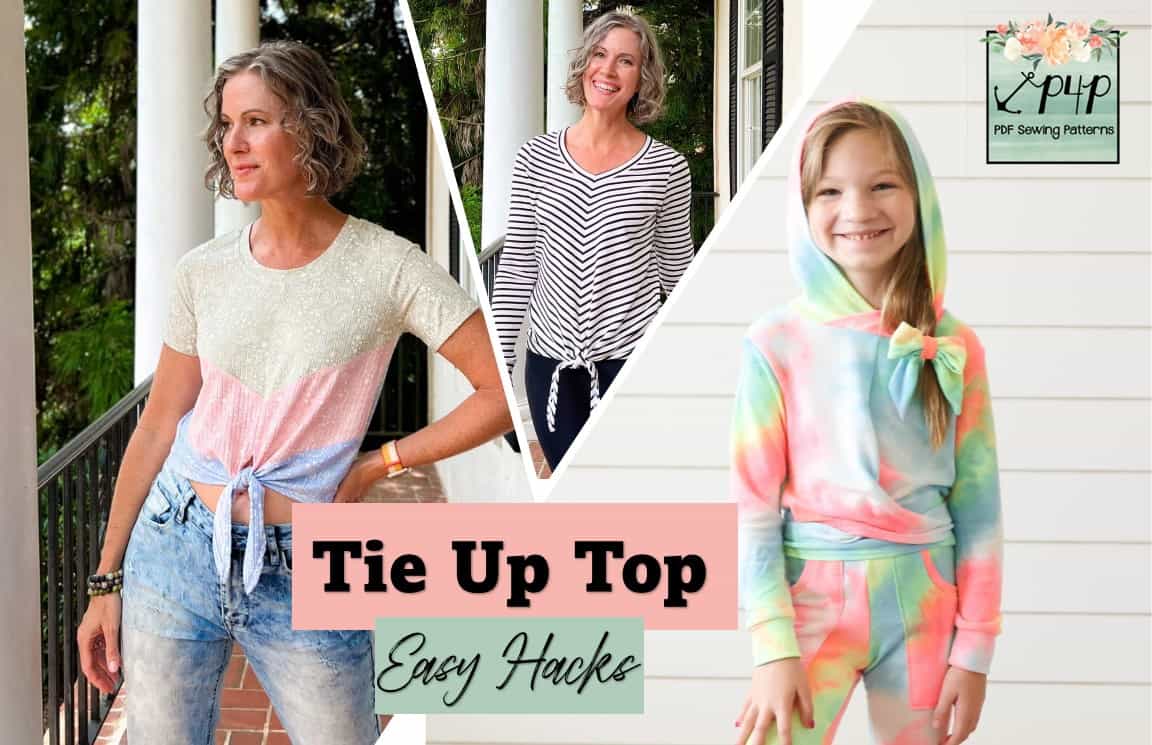
We are super duper excited to be sharing our latest pattern to hit the P4P lineup today! It’s perfectly timed for this in-betweener season….where you’re kinda over summer and ready for fall but still needing clothing to carry you through the warm weather. The Tie Up Top patterns (in both Youth and Adult – Hourglass sizes) are everything you’ve been waiting for.
They’re cute. They’re on trend. And they’re adaptable for all the seasons you’re in, and all the seasons you’re wishing would happen sooner!
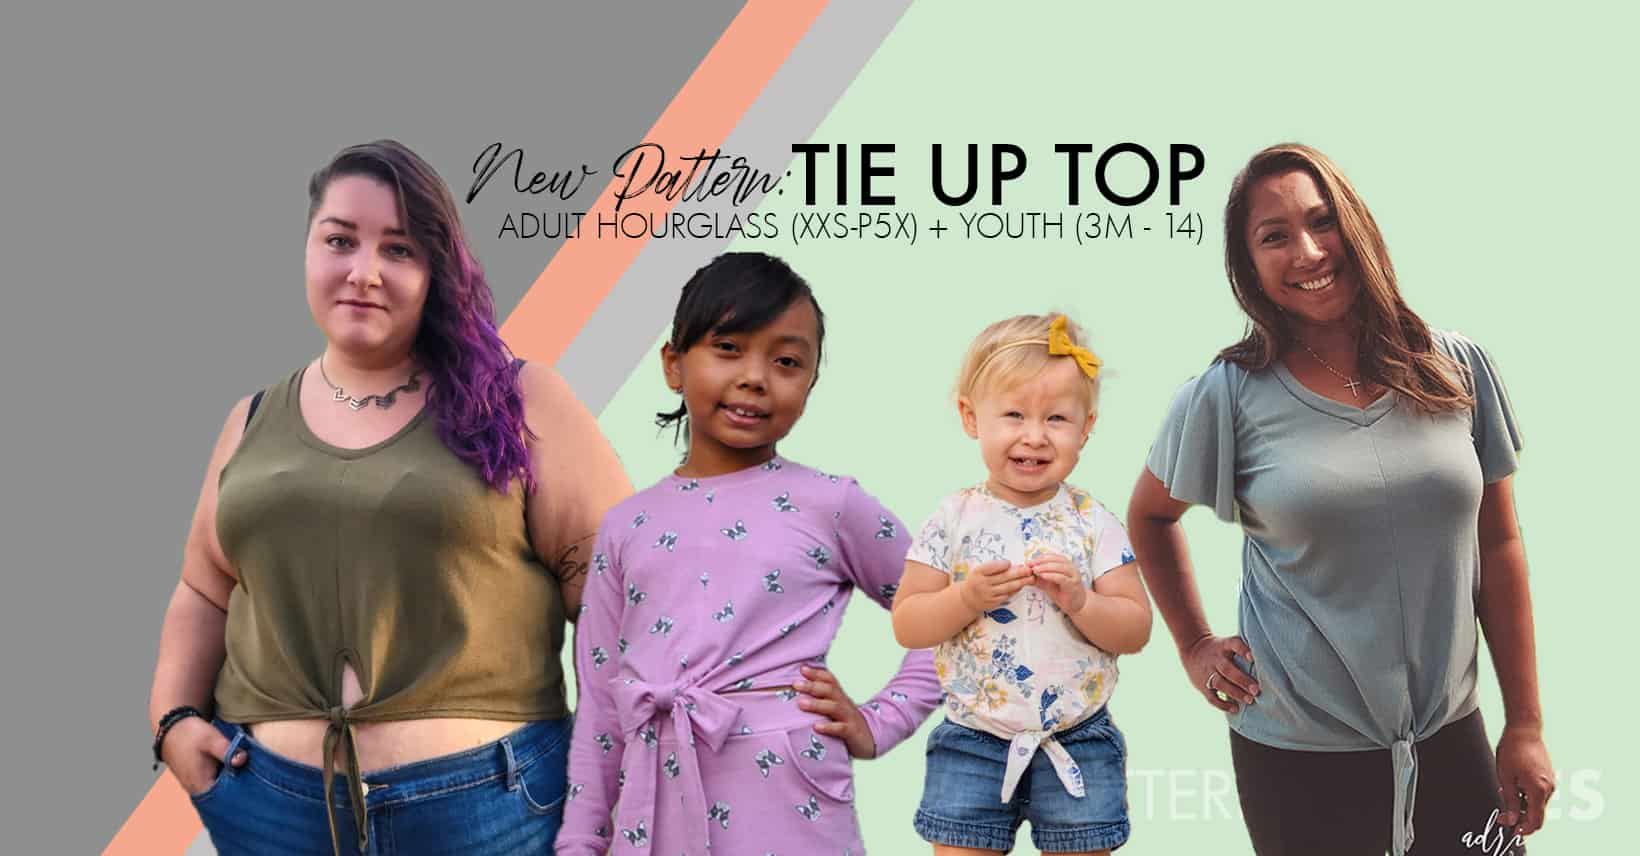
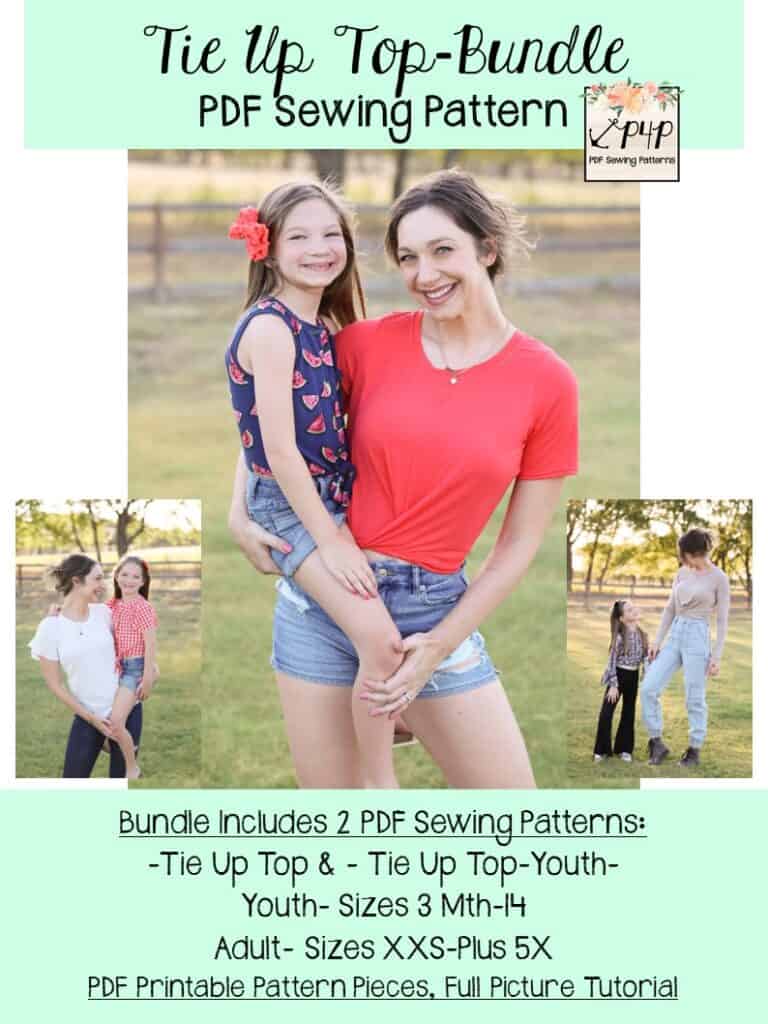
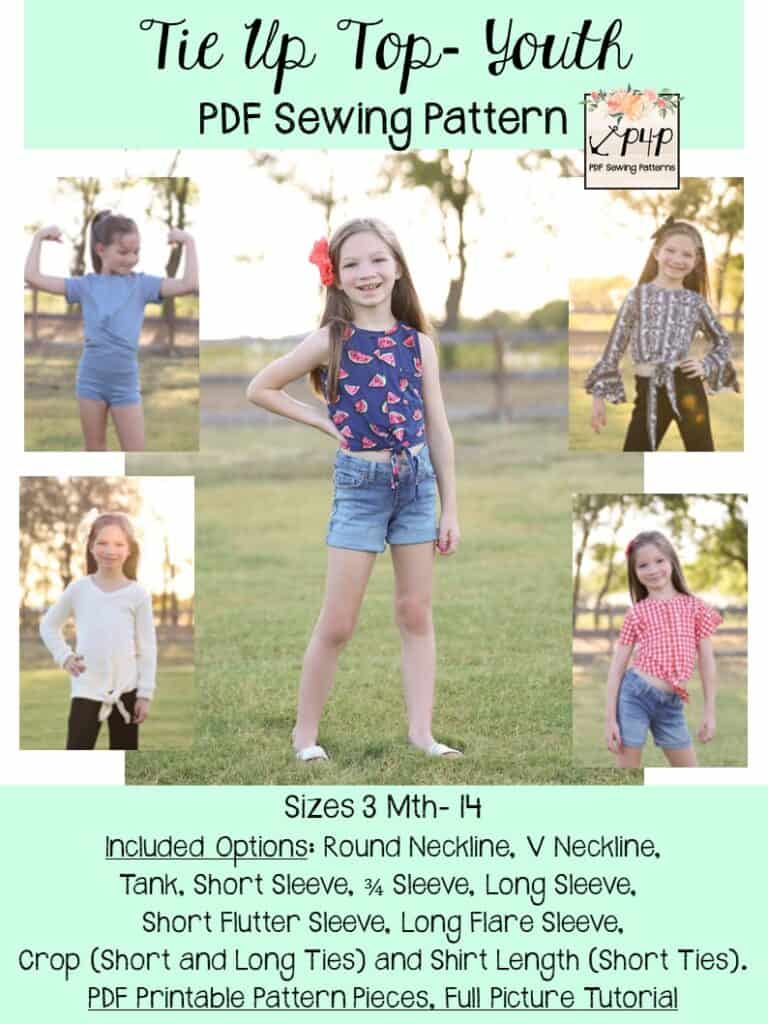
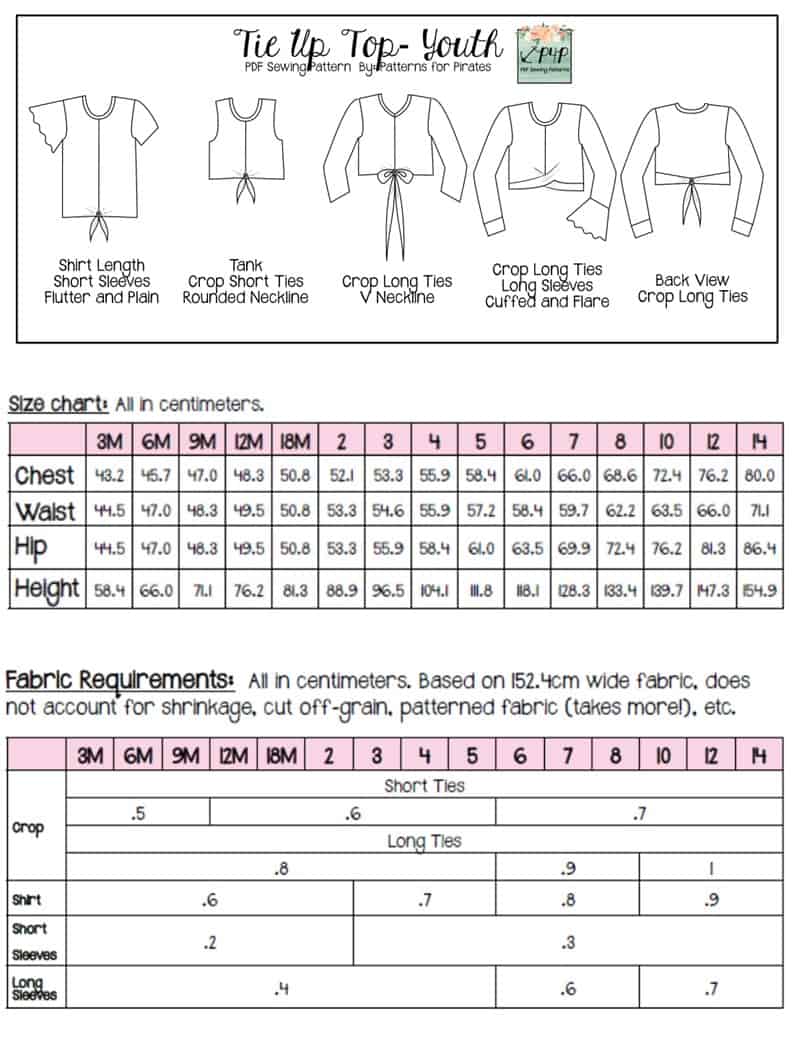
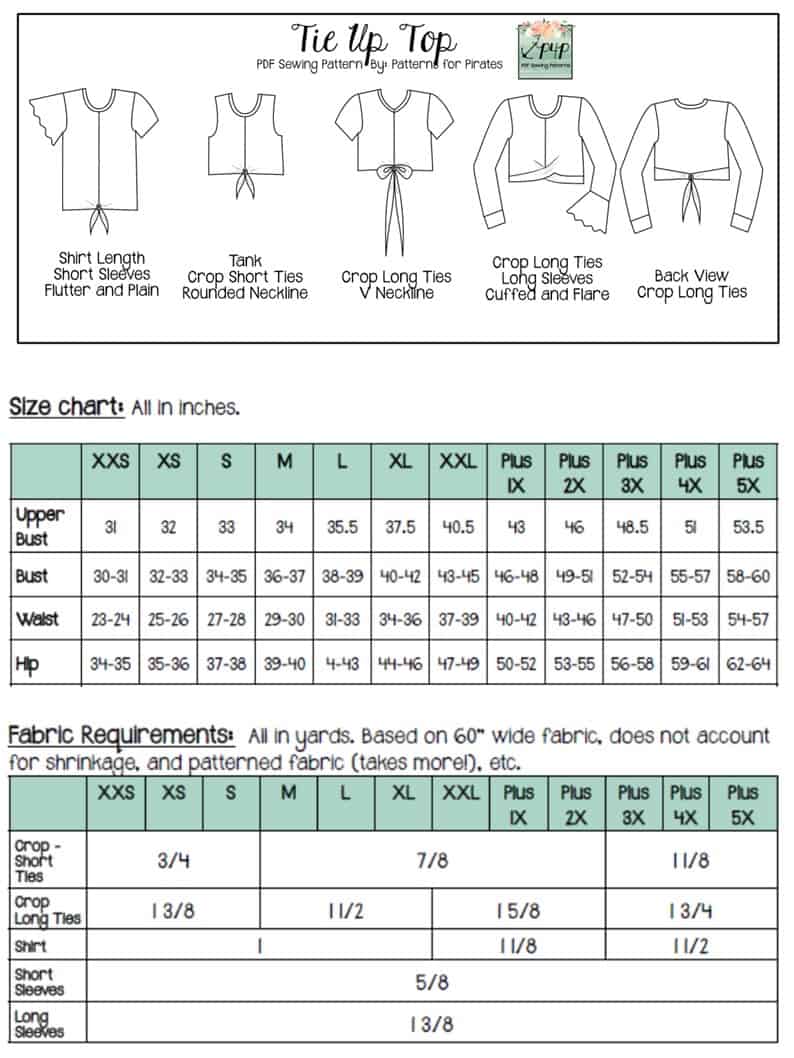
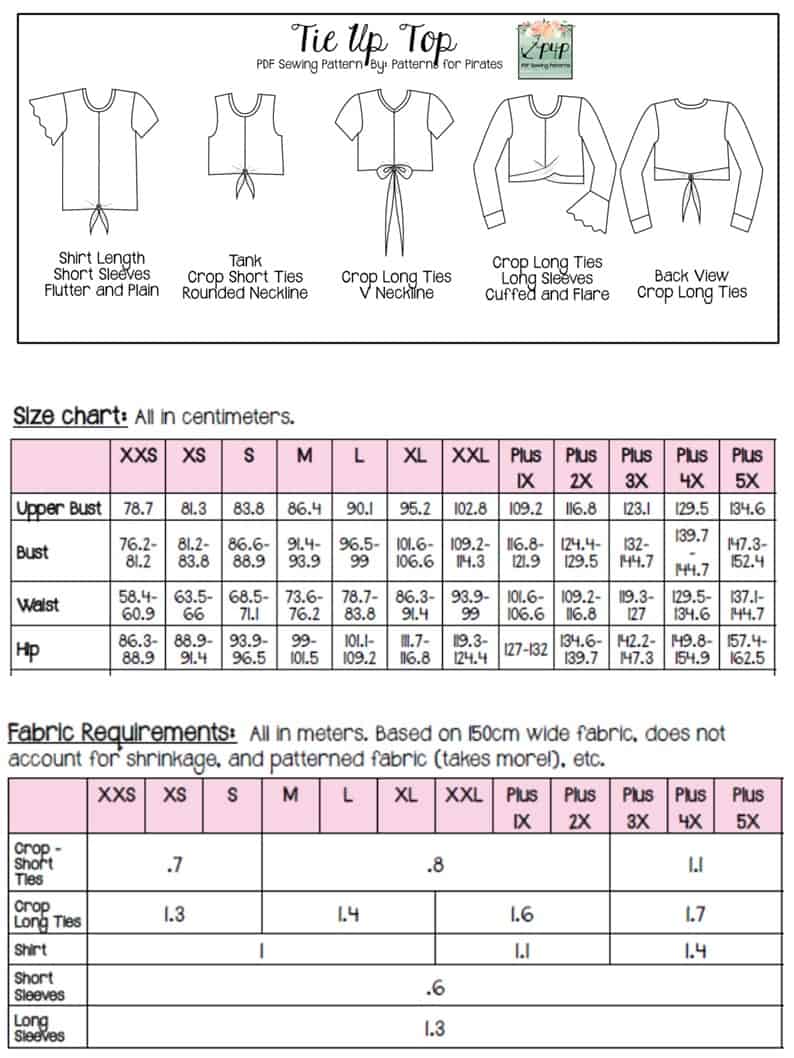
The youth sizes range from 3m – 14 and the adult sizes are for the full, newer size chart, extending from XXS – Plus 5X for the Adult Hourglass Figure.
- *Want to learn more about how to measure yourself for these pattern? We’ve got you covered with an in-depth blog HERE. And for even more helpful fun, we have a free* printable that you can use to help record your measurements as you take them.
- And in case you’re new to Patterns for Pirates and PDF patterns in general, we have a great blog full of new-user tips HERE to help you get started!
- As with all of our current releases and updates, the pdfs now include our layers feature and can be found in Letter, A4, A0 and projector sizes.
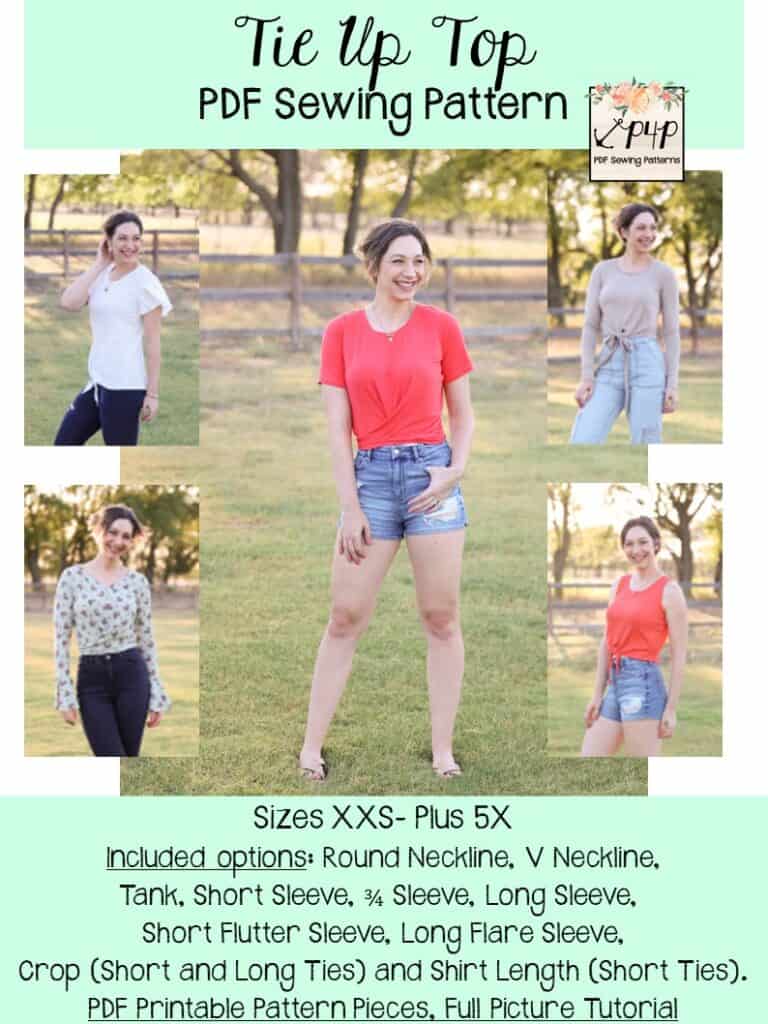
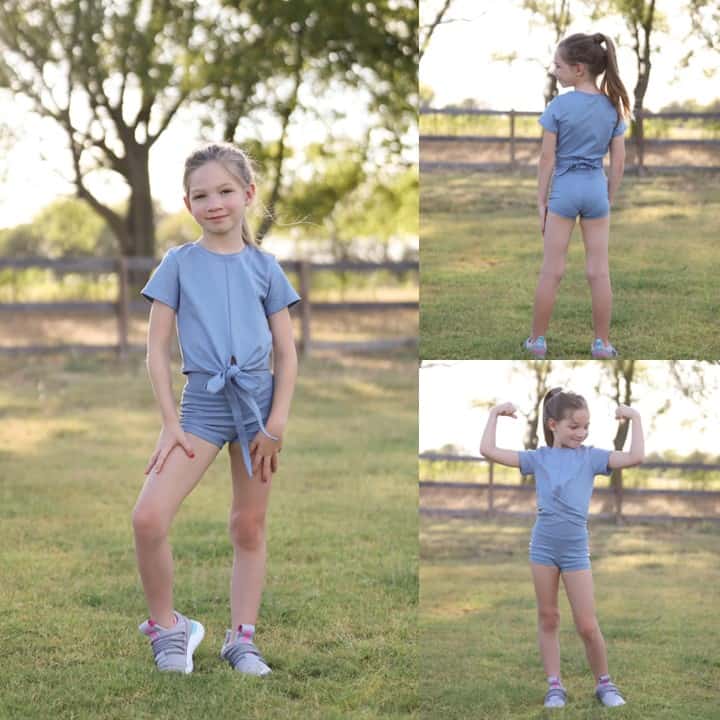
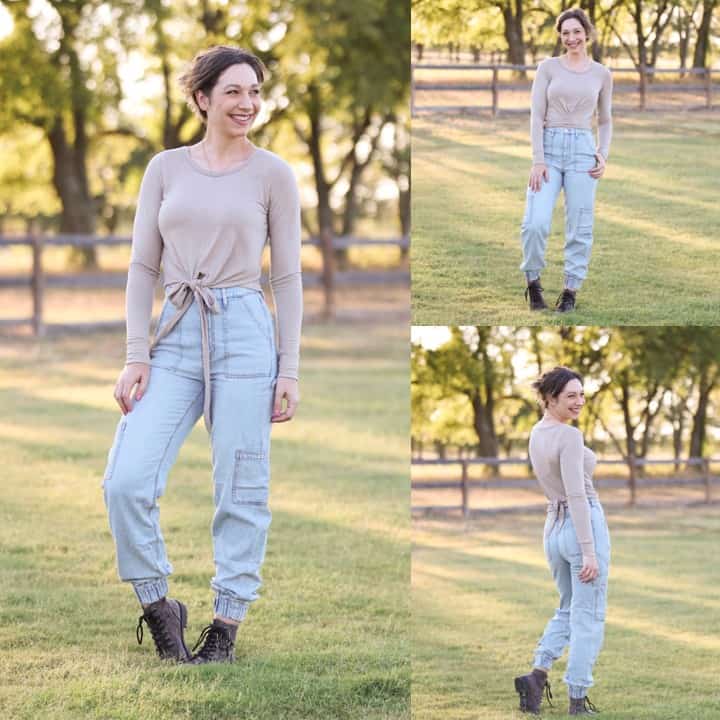
The Tie Up Top is a perfect, flattering and versatile shirt. With all the options you can take it through all seasons from tank to long sleeves. The looser fit means you can grab almost any stretch knit fabric and make it perfect for the season you’re needing… think a lightweight, breathable rayon jersey for a summery tank to a thick, cozy sweater knit for winter time. I adore this top for an athletic look as well. You can tie is looser in front or the crop with long ties has the option to wrap the ties around to the back and make it as fitted as you’d like at the waist. It makes a great layer over a tank, leotard, dress for a different option than an open cardigan in cooler months as well. With the seam down the front you are open to some fun fabric combinations and it makes the construction on the ties simple and easy.

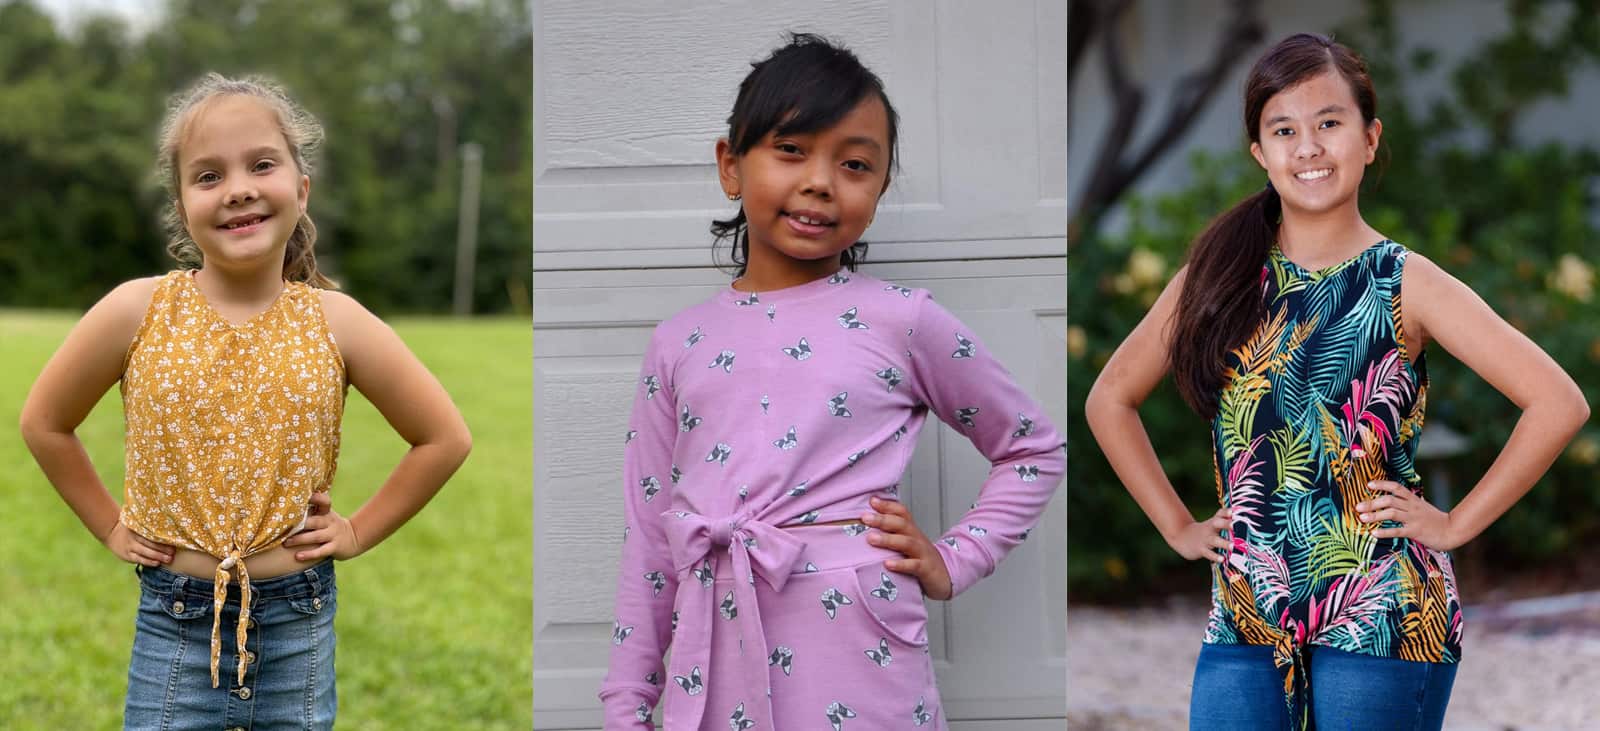
Okay….let’s check out some of the different features, modeled by our incredible testers:
Round Neckline | V Necklines
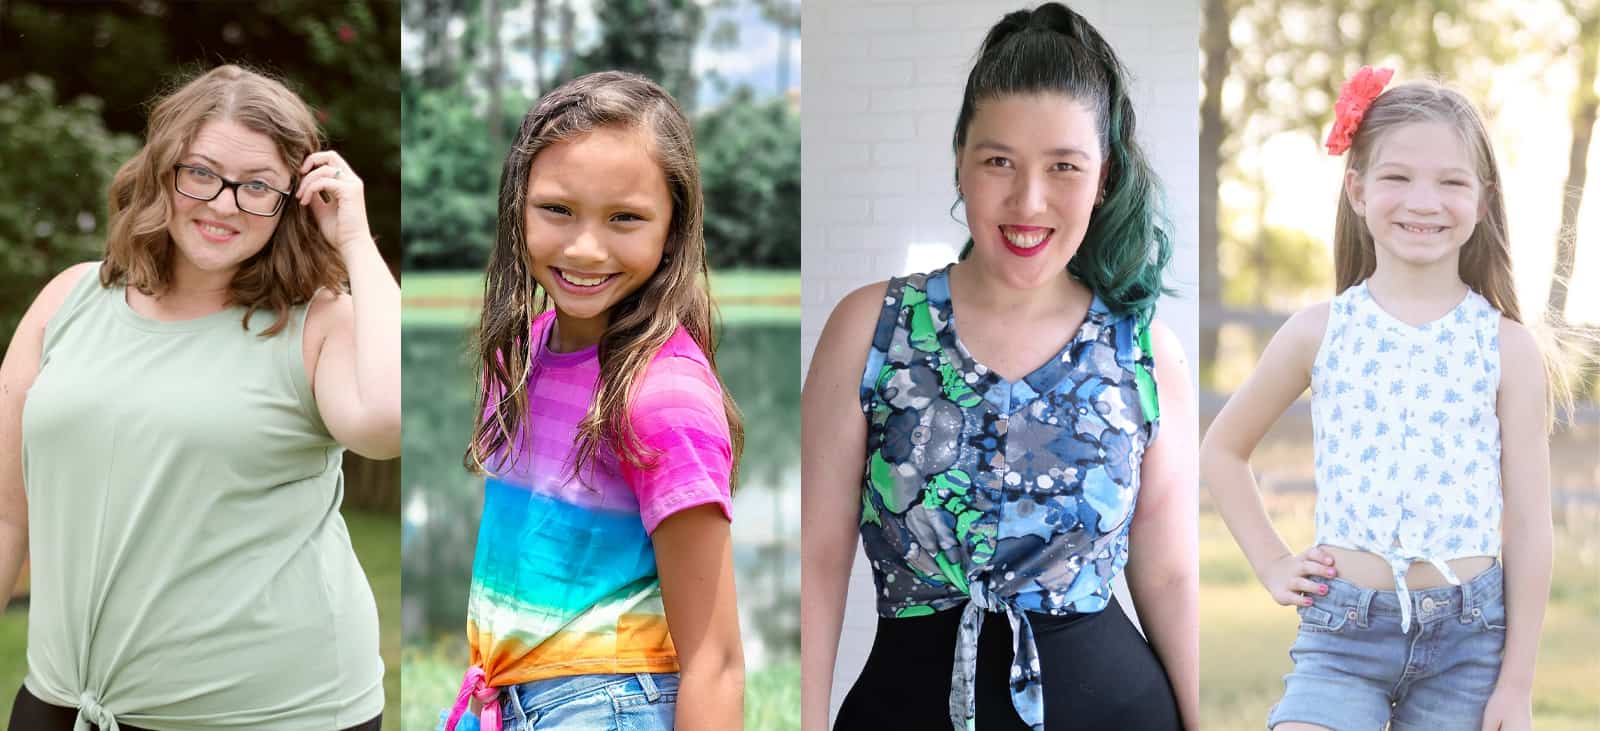
Tank | Short Sleeve | 3/4 Sleeve | Long Sleeve | Flutter Sleeve | Flare Sleeve
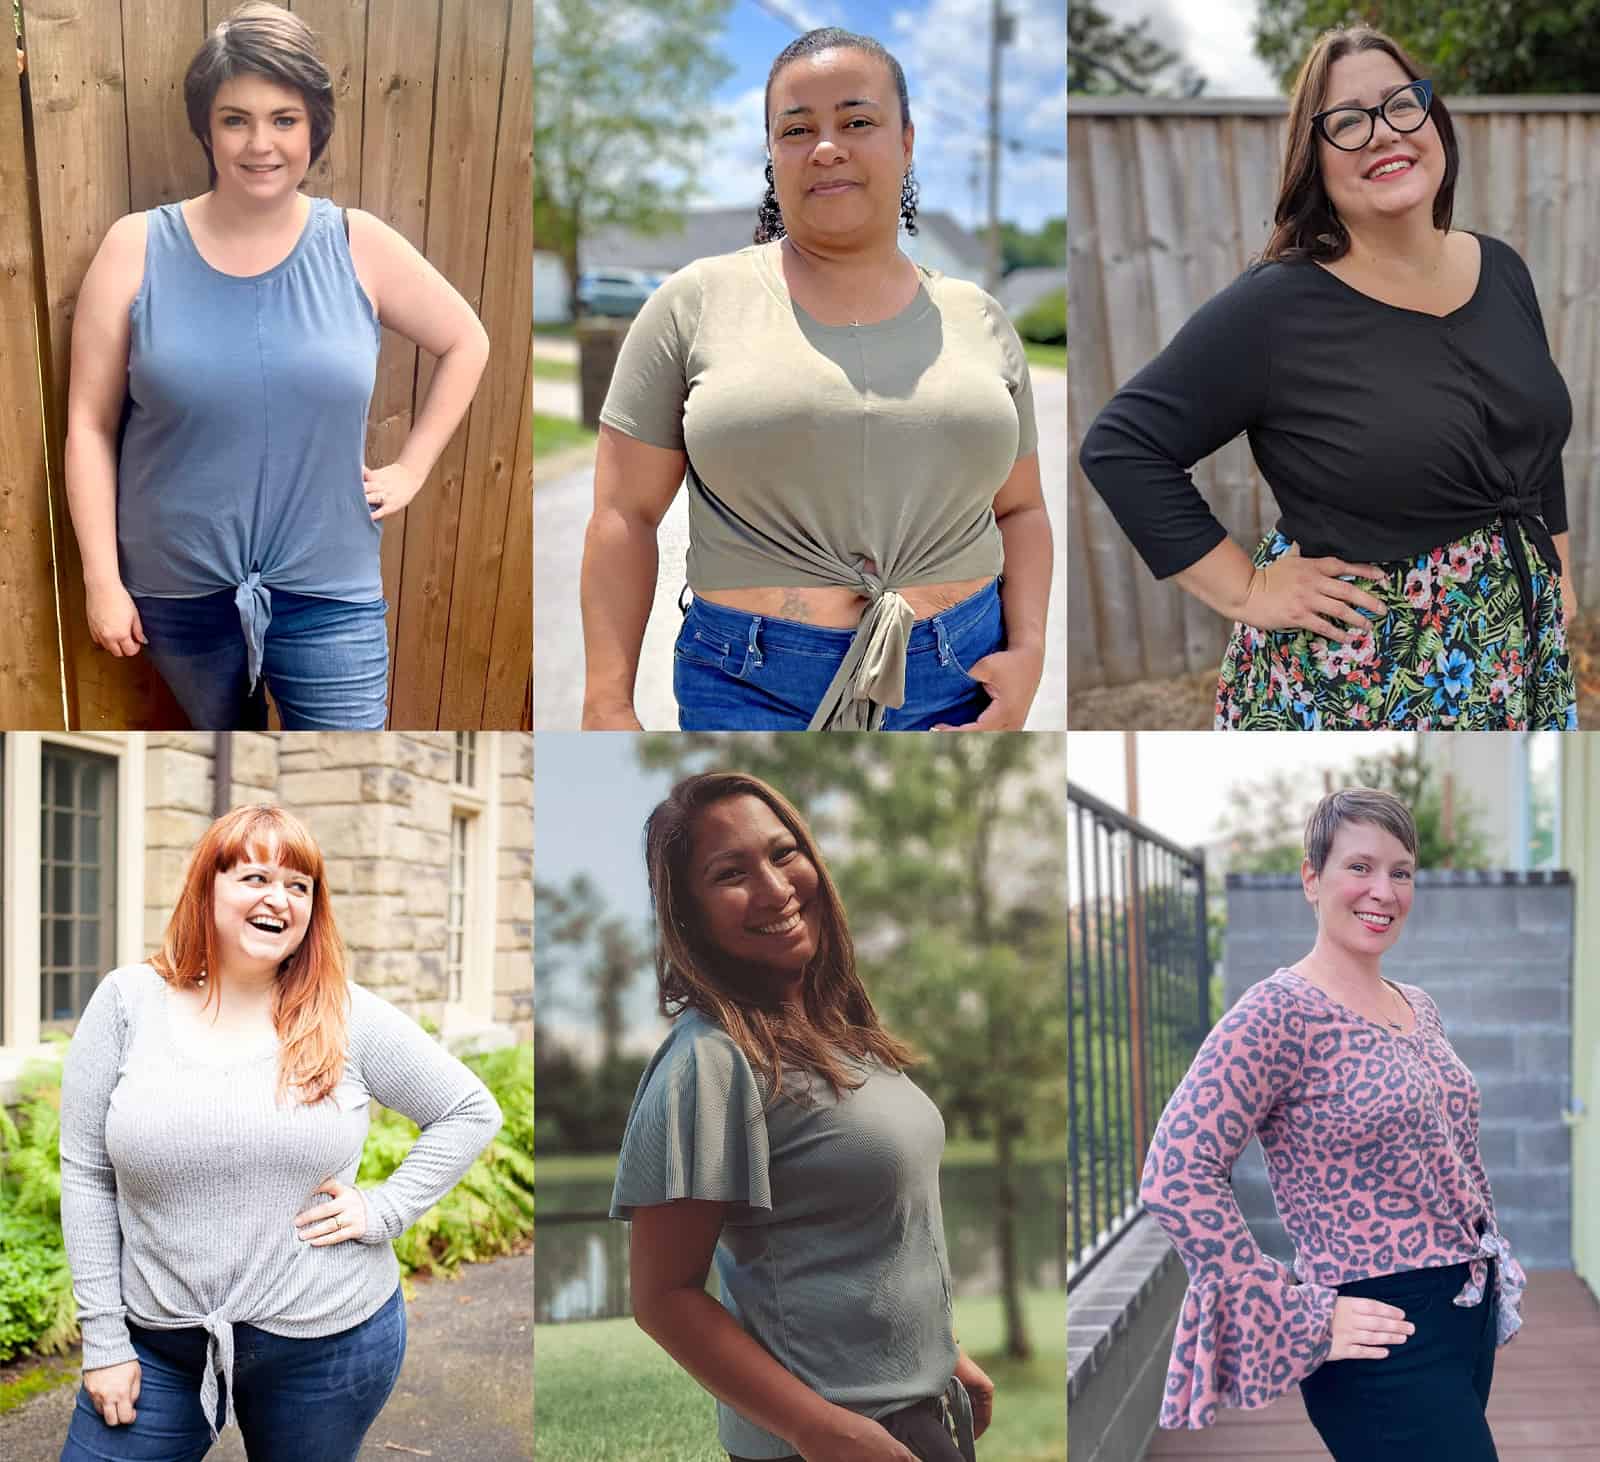
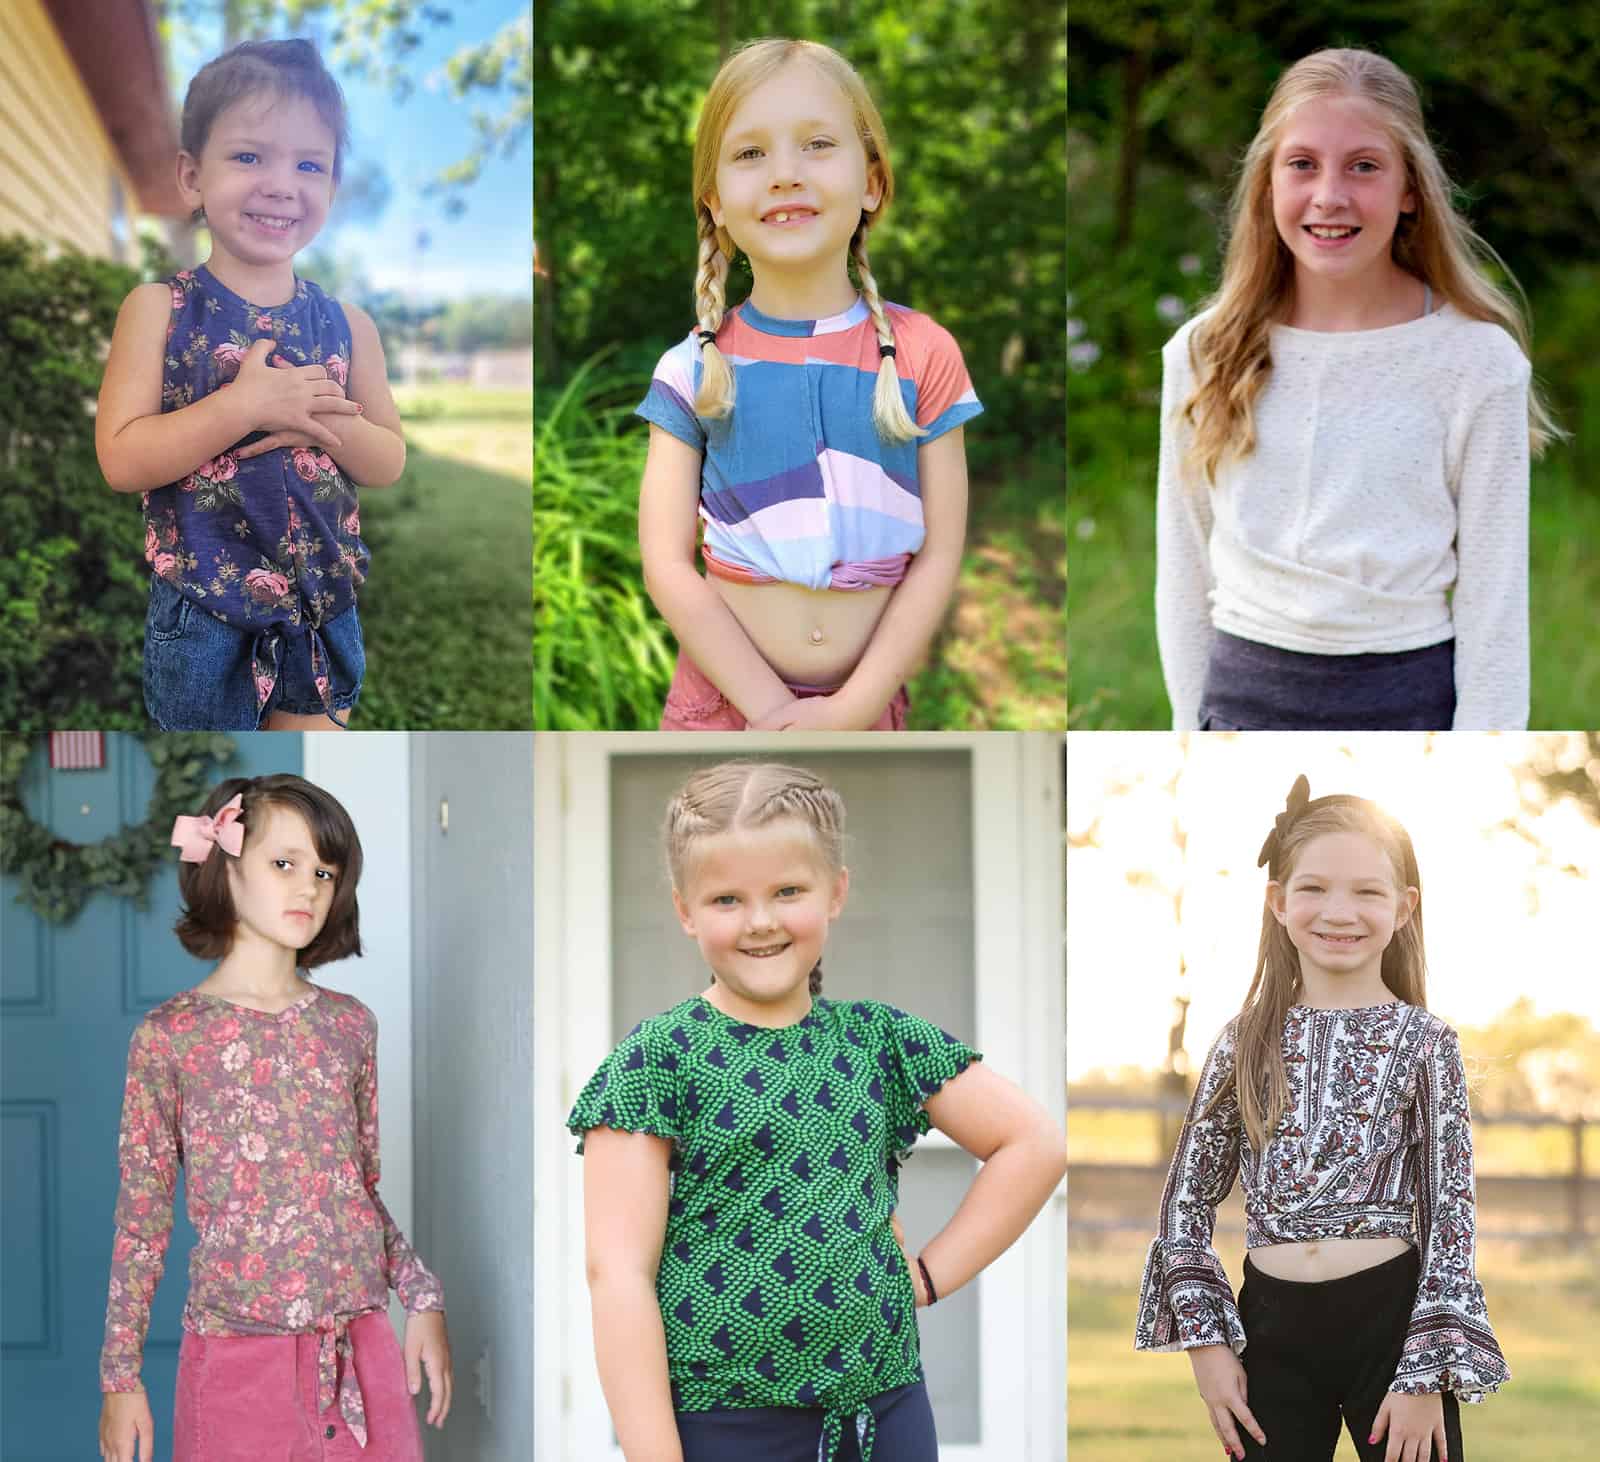
Crop w/Short Ties | Crop w/Long Ties | Shirt Length
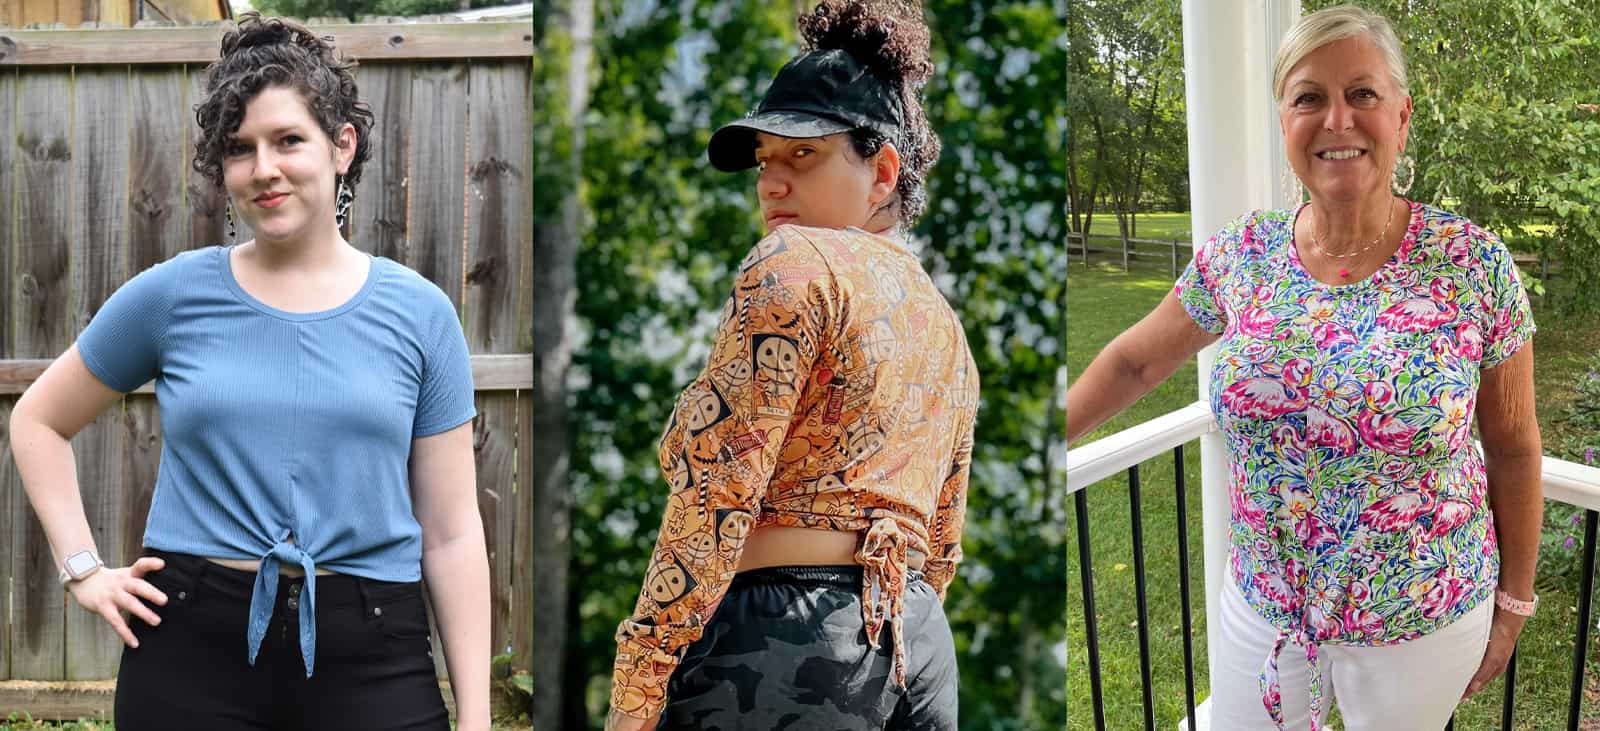
The Crop with long ties can be tied both in front in a long bow or wrapped around to the back and tied in the back for a more fitted waist.
We are so excited to see what you sew up with the new Tie Up Top patterns! Head on over to the shop, grab yourself a copy, and get to sewing! They are available on sale (no code needed) through 11:59pm CST, August 8, 2022.
Tie Up Top – Adult Hourglass | Tie Up Top – Youth | Tie Up Top – Adult + Youth Bundle
Hoping for a little inspiration before diving into some Tie Up Top sewing? Journey over to our Facebook group where you can see tester albums full of amazing images!
Tie Up Top Adult Album | Tie Up Top Youth Album
But wait, there’s more! We’ve put together an awesome “Easy Hacks” blog post, that will help you take your sewing a little further! Go check out what Judy and Rachel put together for you, in the ways of some simple tutorials!

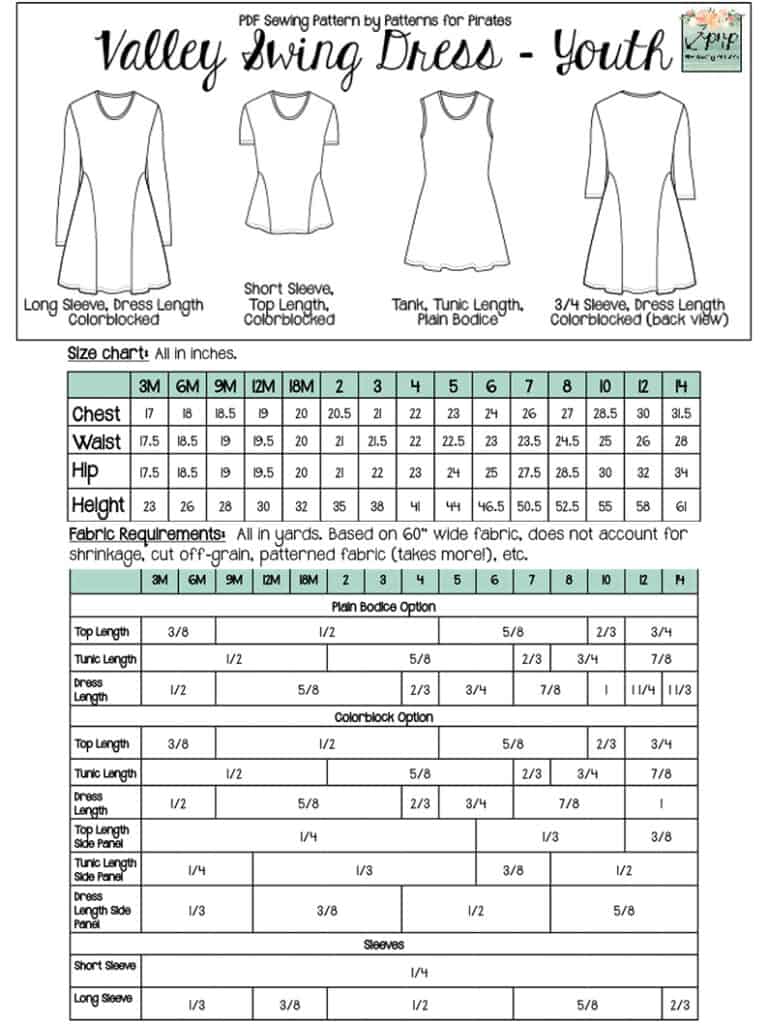
New Pattern Release :: Valley Swing Dress (Adult + Youth Sizes!)
We are so excited to release our newest pattern by crew member Katy!
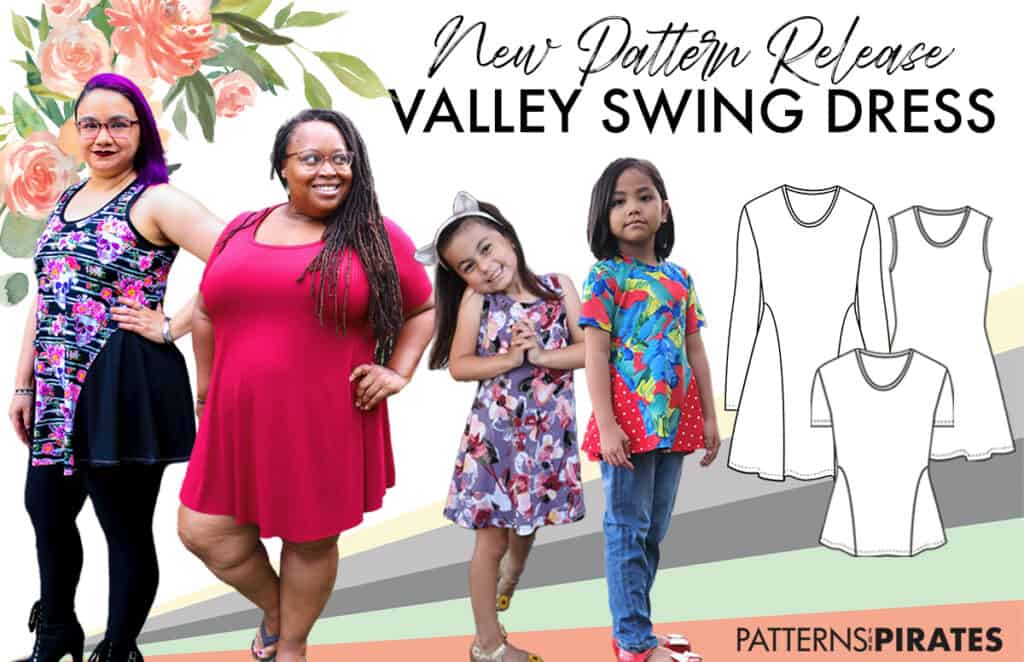
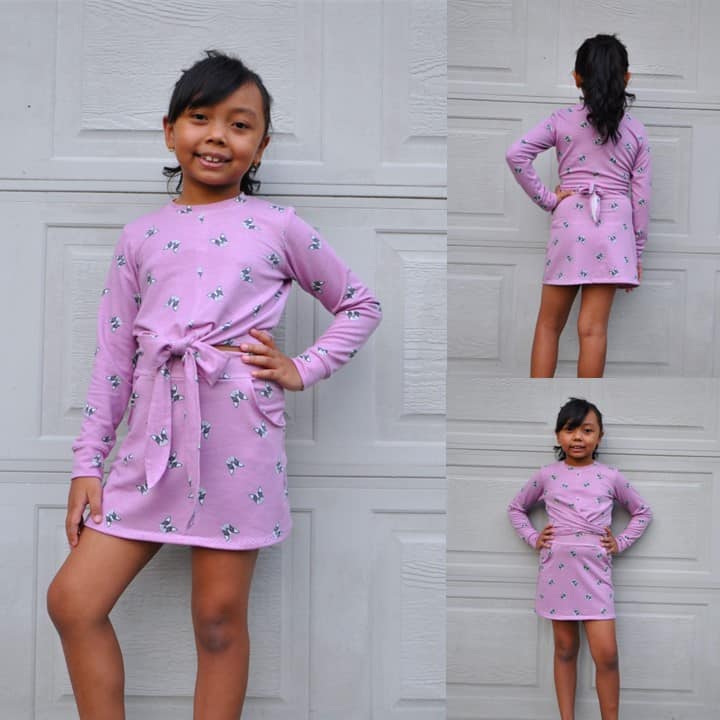
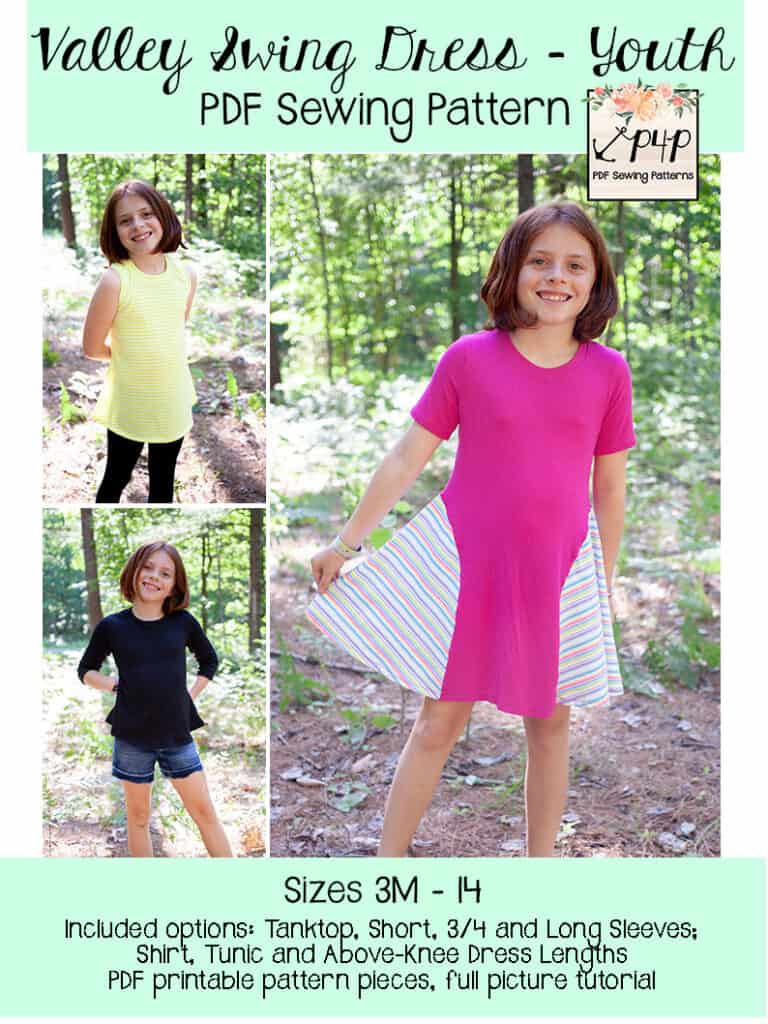
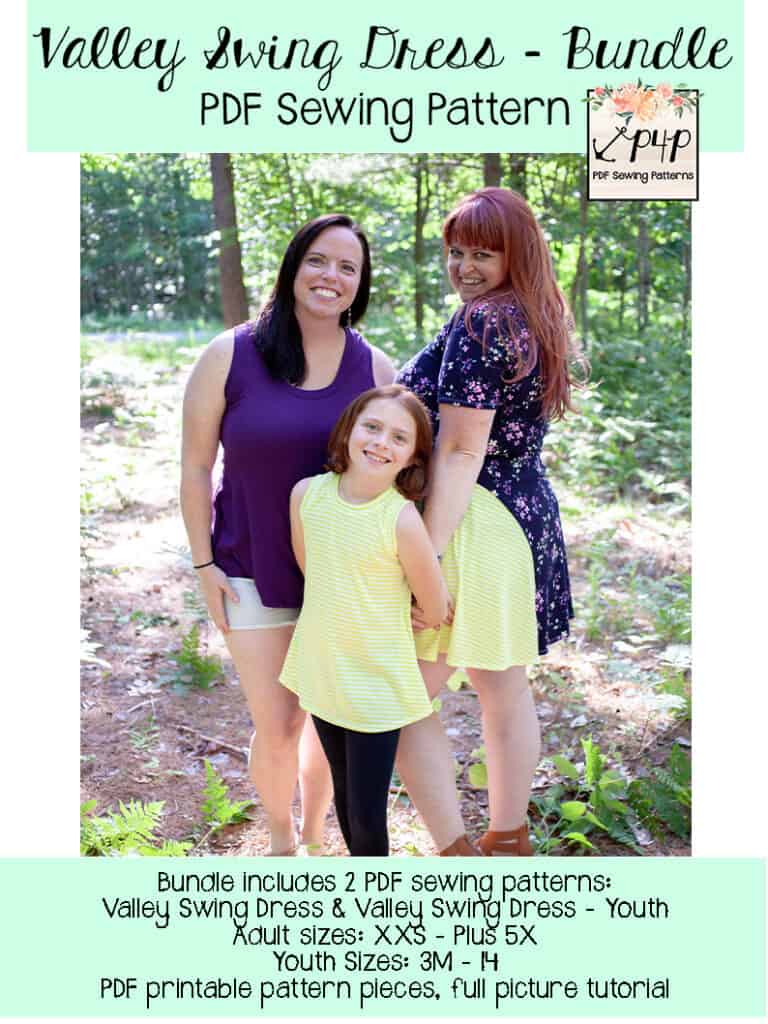
Say hello to your new favorite dress: The Valley Swing Dress, available for both our Adult Hourglass Figure (XXS – Plus 5X sizes) and Youth (3m – 14 sizes). Like all of her pattern releases so far, Katy’s giving a nod to her home state. The Valley Swing Dress is named after where she lives in West Virginia: the Ohio Valley.
Are you ready to swish, sway, and (of course!) swing yourself into a new pattern with us? Let’s tell you all about it!
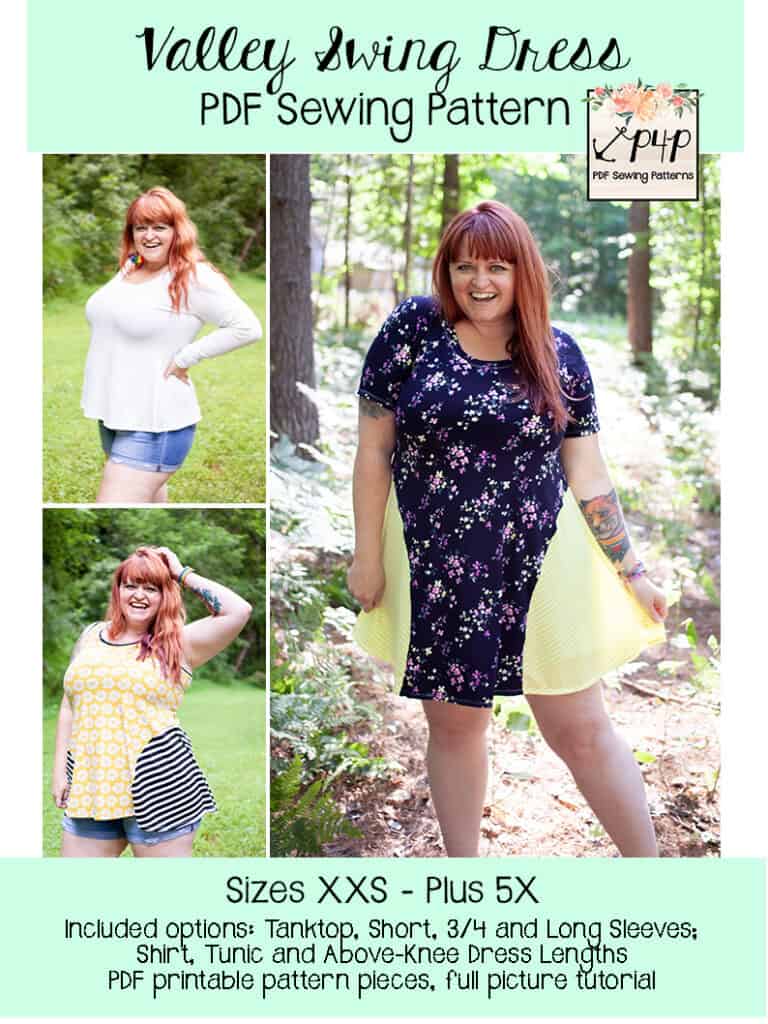
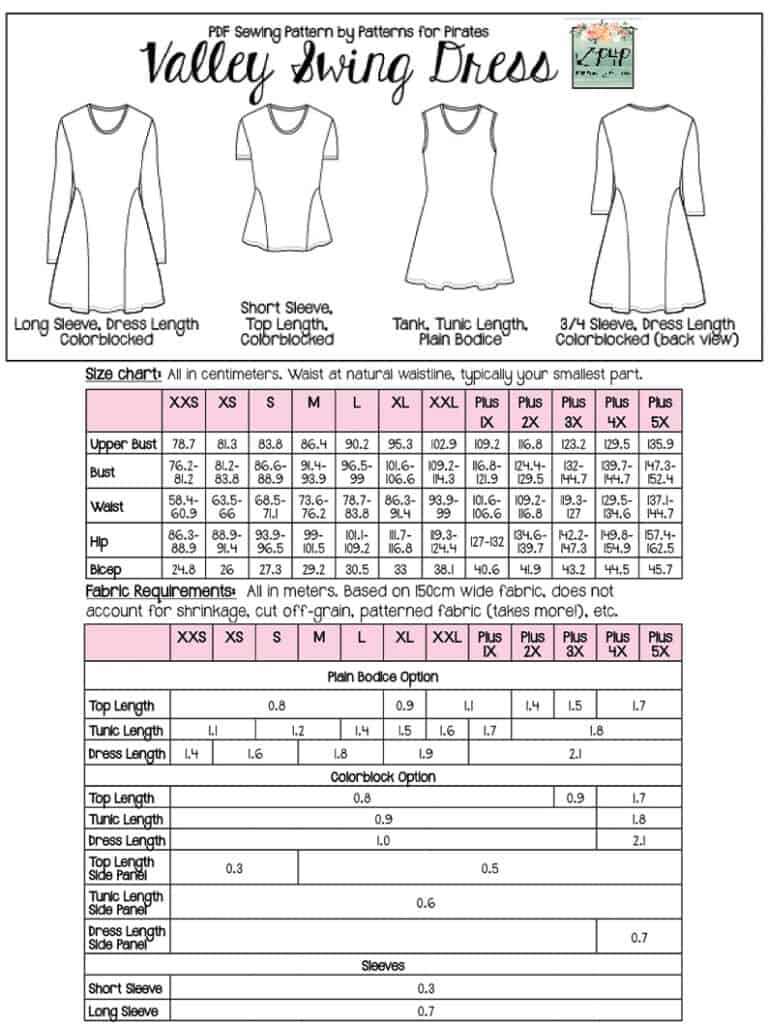
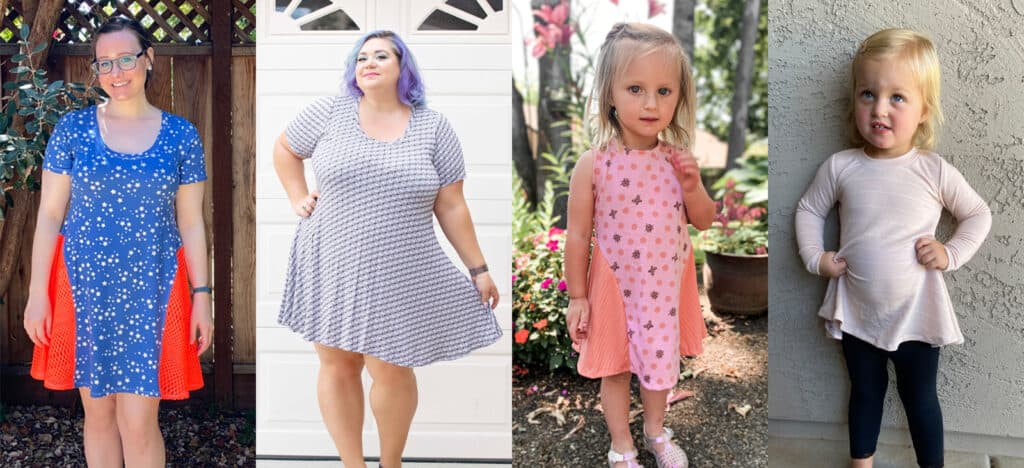
The Valley Swing Dress pattern lives up to it’s name, in that it’s got some swing to it! These patterns are fitted in the bust, semi-fitted in the waist, and have an oversized fit in the hips. The ease of the bodice creates an incredibly flattering silhouette, before it swings out to a swishy, flowy skirt. This beginner friendly pattern is a perfect wardrobe staple for all seasons. Pair it with a lightweight knit and a tanktop and you’ve got the cutest summer dress to keep cool in. Or sew it up with a drapey sweater knit and some long sleeves, throw on your favorite tights and booties and you’ll be incredibly fashionable this fall and winter! The colorblocked skirt hits right at the waist and allows for some fun pattern, print and color mixing combos. Or just pick a plain dress option for an even faster sewing project. Either way, you’ll love how comfortable, charming and easy this dress is to throw on!
Choose from these options:
- tanktop, short, 3/4 and long sleeves
- top, tunic and above-knee hem lengths
- colorblock or plain skirted options
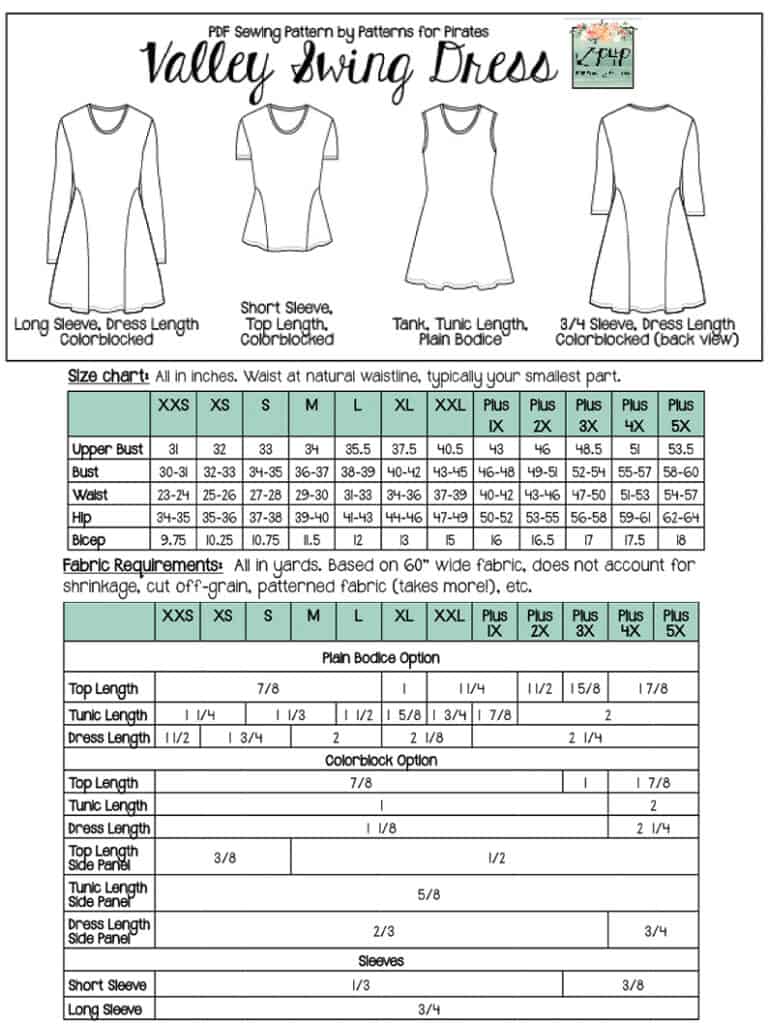
The Valley Swing Dress is drafted for a mid-to-lightweight knit fabric with at least 30% horizontal stretch.
Some of our favorites are: rayon spandex, ITY, poly spandex, brushed polyester, ribbed knit, waffle knit, modal, bamboo lycra, etc.
**Keep in mind that fabric content will affect drape and fit! Stiffer/heavier fabrics, such as cotton lycra, are not recommended. And fabrics with less recovery, such as some rayon spandex, may “grow” with wear and fit longer than intended.
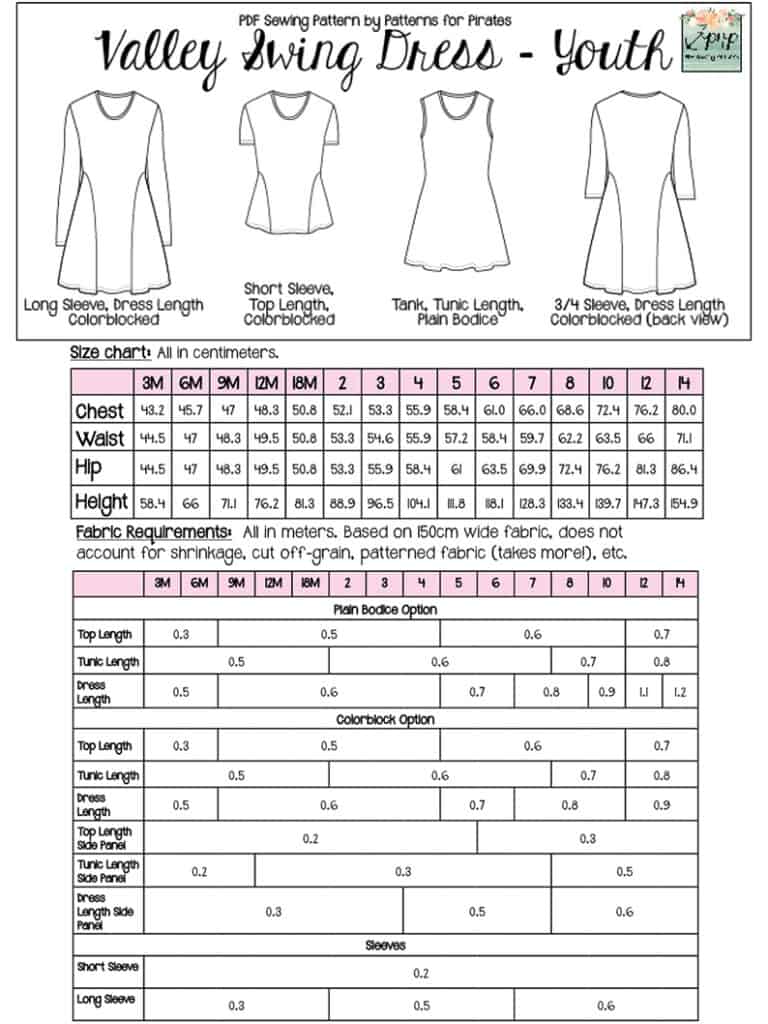
The youth sizes range from 3m – 14 and the adult sizes are for the full, newer size chart, extending from XXS – Plus 5X for the Adult Hourglass Figure.
- *Want to learn more about how to measure yourself for these pattern? We’ve got you covered with an in-depth blog HERE. And for even more helpful fun, we have a free* printable that you can use to help record your measurements as you take them.
- And in case you’re new to Patterns for Pirates and PDF patterns in general, we have a great blog full of new-user tips HERE to help you get started!
- As with all of our current releases and updates, the pdfs now include our layers feature and can be found in Letter, A4, A0 and projector sizes.
Consider yourself to be a visual learner and need a little extra hand-holding before you sew? We’ve got you! Take a peek at this video, where we walk you through the entire sewing process of the Valley Swing Dress!
Okay….let’s check out some of the different features, modeled by our incredible testers:
TOP + TUNIC + DRESS HEM LENGTHS
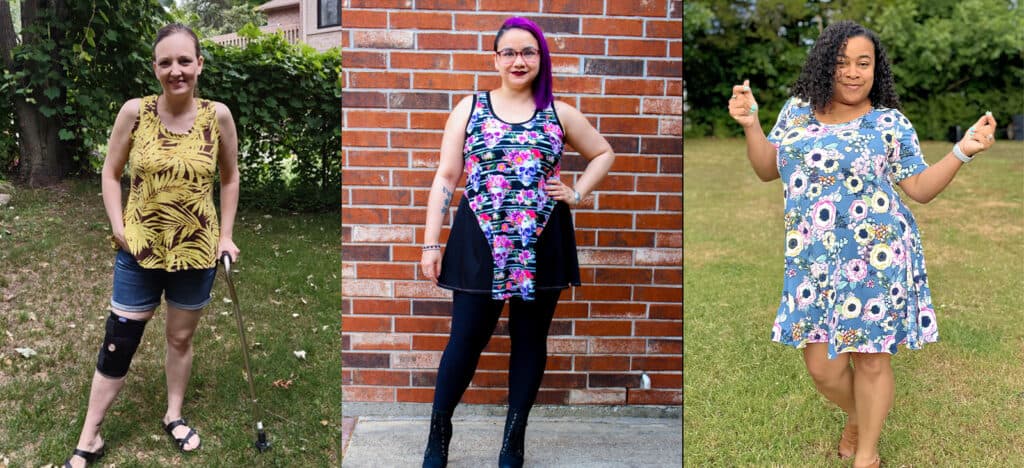

TANK + SHORT + 3/4 + LONG SLEEVE LENGTHS
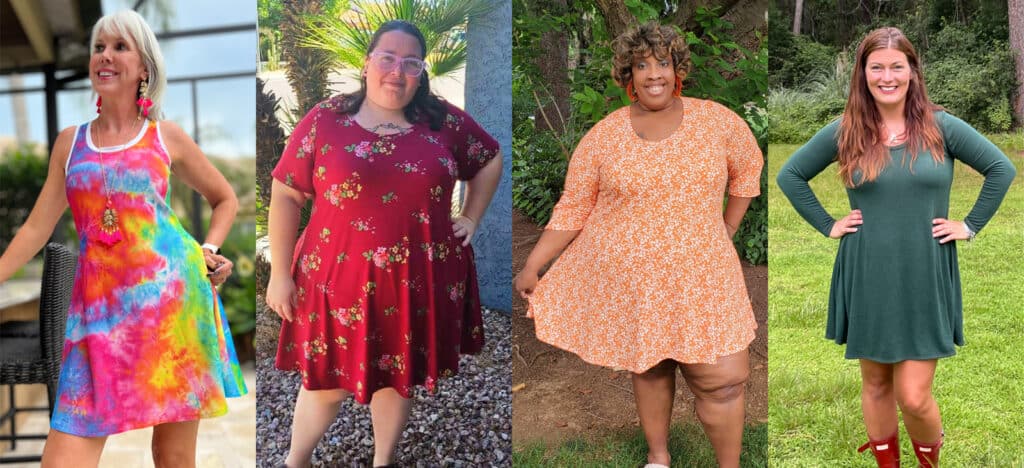
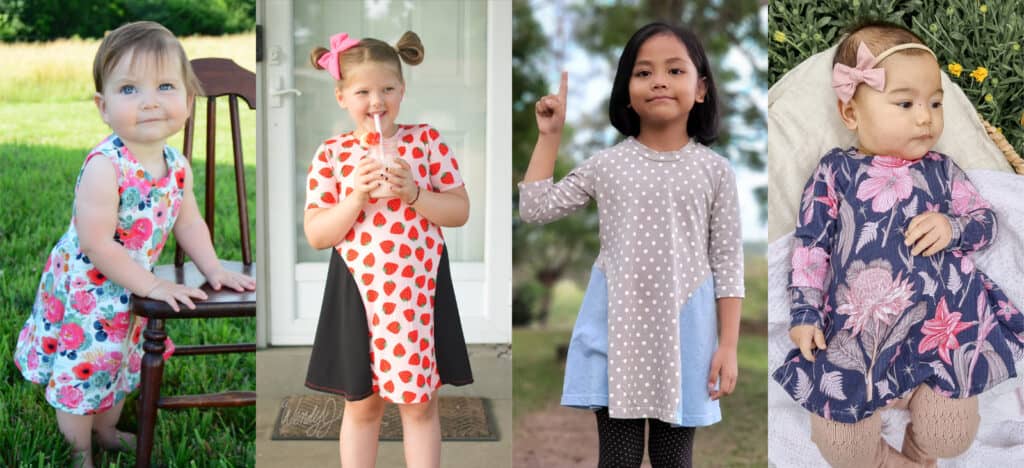
COLORBLOCK + PLAIN OPTIONS
We are looking forward to see what you make with the new Valley Swing Dress patterns! Head on over to the shop and grab yourself a copy and get to sewing! They are available on sale (no code needed) through 11:59pm CST, July 17th, 2022.
Valley Swing Dress | Valley Swing Dress – Youth | Valley Swing Dress – Bundle
Hoping for a little inspiration before diving into some swing dress sewing? Journey over to our Facebook group where you can see tester albums full of amazing images!
Valley Swing Adult Album | Valley Swing Youth Album
Protected: Fabric for Pirates :: July 2022 Reveal
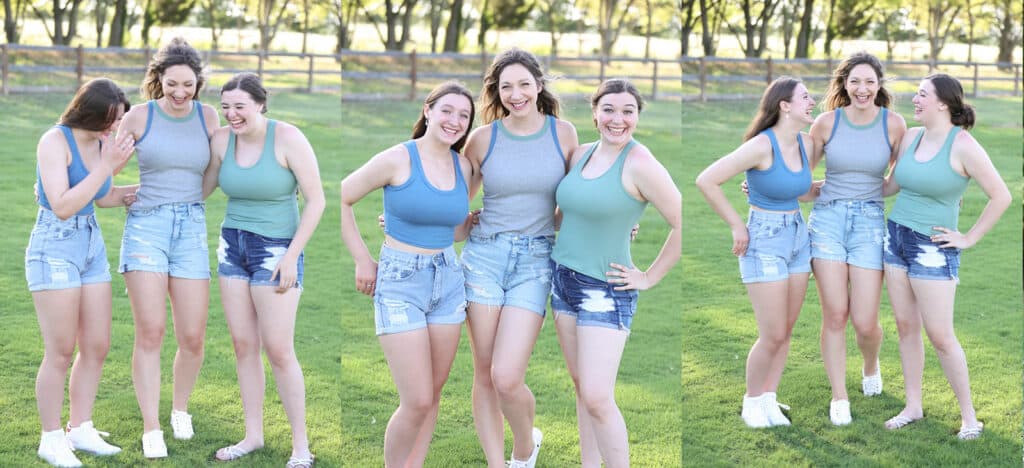
New Pattern Release :: 24/7 Tank (Youth and Adult Sizes!)
While this pattern was in it’s pre-testing phase and we were trying to come up with a name for it, our incredible testers dubbed it the “24/7 Tank”, since they can see themselves wearing it all day, all night, on repeat. And when your testers give you a brilliant idea, you go with it. So we did!
Let’s talk all about the 24/7 Tank and introduce y’all to the latest and greatest pattern to hit the P4P lineup!
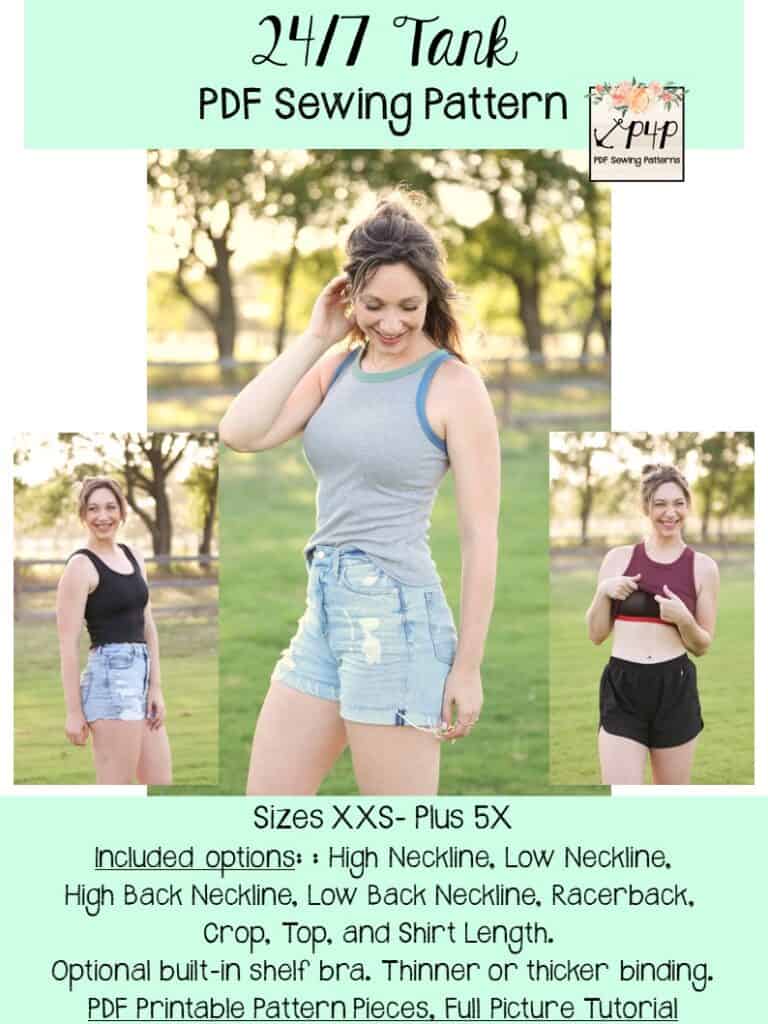
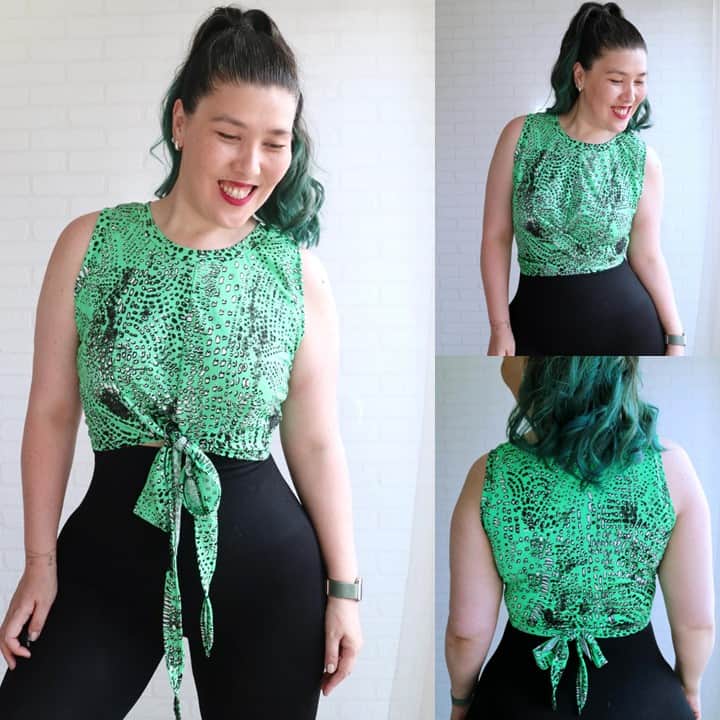
The 24/7 Tank is the perfected fitted tank. It’s great for summer on it’s own and also works during cooler months for layering with it’s fitted silhouette. Take your choice of two different binding options, with both a thick and a thin binding for two different looks. With so many options you can use the same pattern over and over, for styles that change as quickly as the weather does!
By simply choosing a different fabric, you can create a totally different look for your 24/7 Tank.
- Pick up an athletic knit and use that shelf bra, add in clear elastic into the thin binding and you have the perfect long line sports bra.
- Switch out the athletic knit for swim knit and use swim elastic and you’ve got yourself an adorable tankini swim top!
- Make it comfortable in a soft modal fabric and make the shelf bra in just something soft with no powermesh or cups and you have the perfect sleep tank.
- Leave the shelf bra out completely and use an everyday knit… you have the perfect tank for summer or for layering under in cooler months.

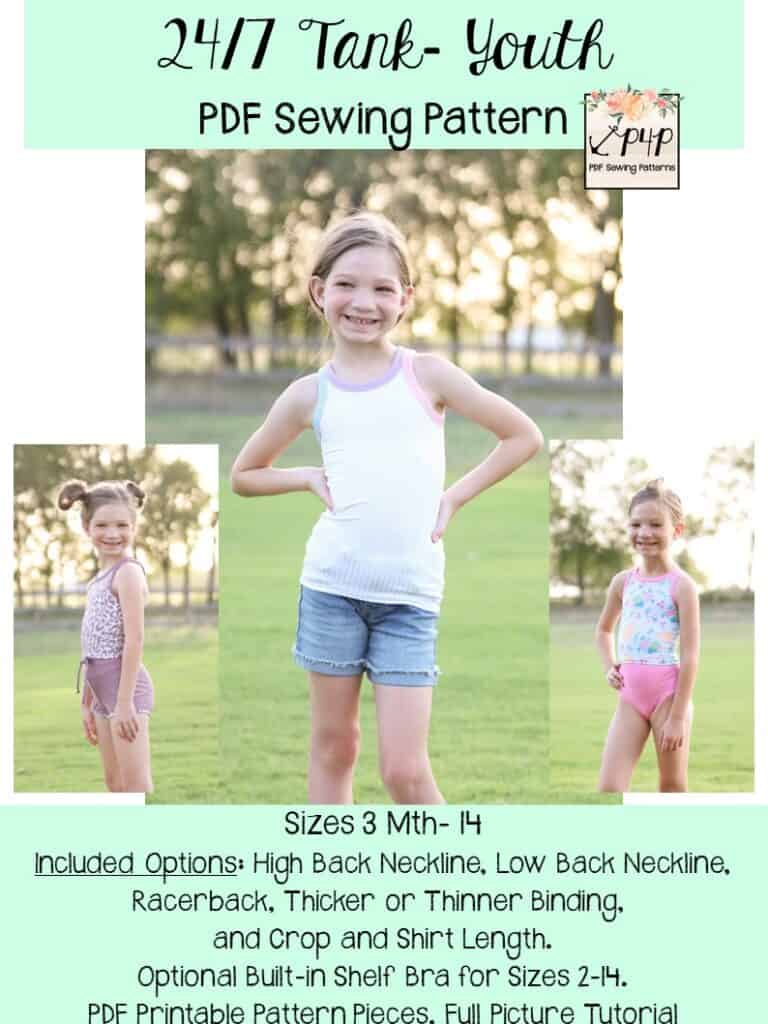
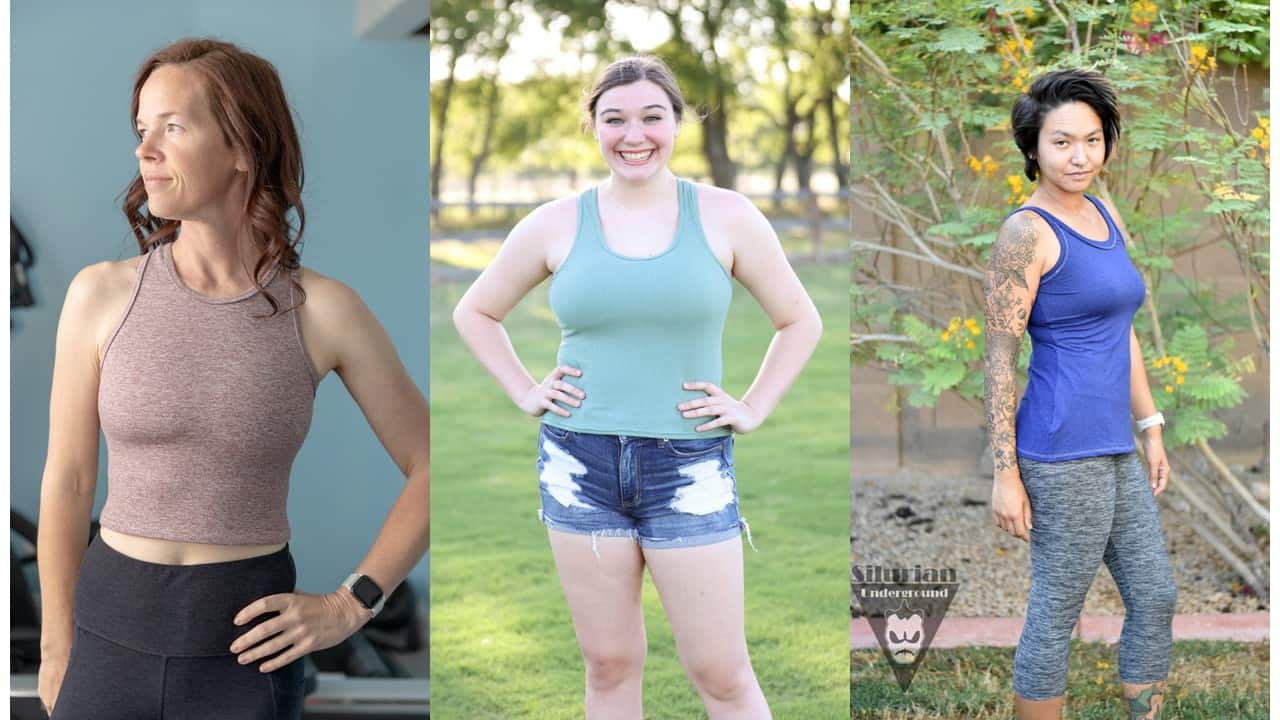
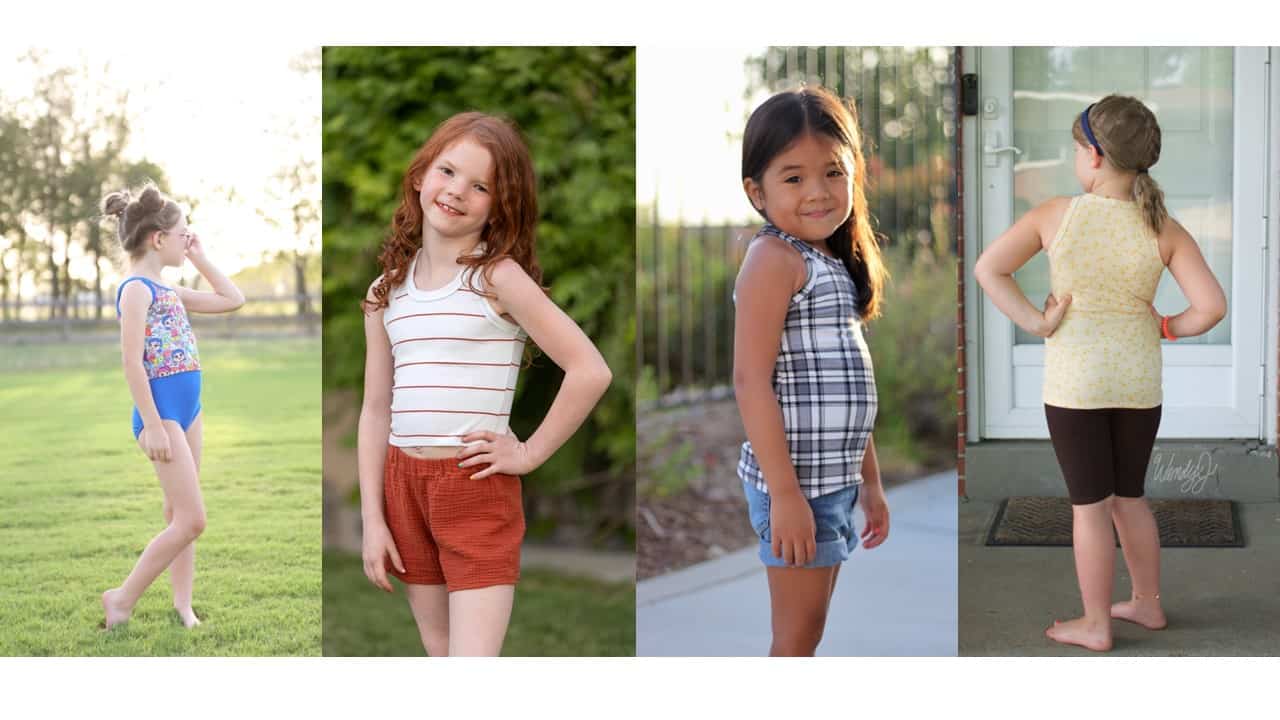
Choose from these options: high back neckline, low back neckline, racerback neckline, thin binding (can add elastic for sports bra or swimsuit), thick binding, crop length, shirt length and shelf bra (sizes 2-14 in youth, and all sizes in the adult-hourglass pattern).
Worried about sewing up the binding on the 24.7 Tank? DON’T BE! We have helpful videos linked for that single step in the tutorial!
The 24/7 is drafted for a high stretch knit fabric.
Some of our favorites are: athletic knit, swim knit, ribbed knits, double brushed poly, yummy rib knit, rayon/modal/bamboo knit, ITY/DTY knit, etc.
Some of our favorites are: athletic knit, swim knit, ribbed knits, double brushed poly, yummy rib knit, rayon/modal/bamboo knit, ITY/DTY knit, etc.
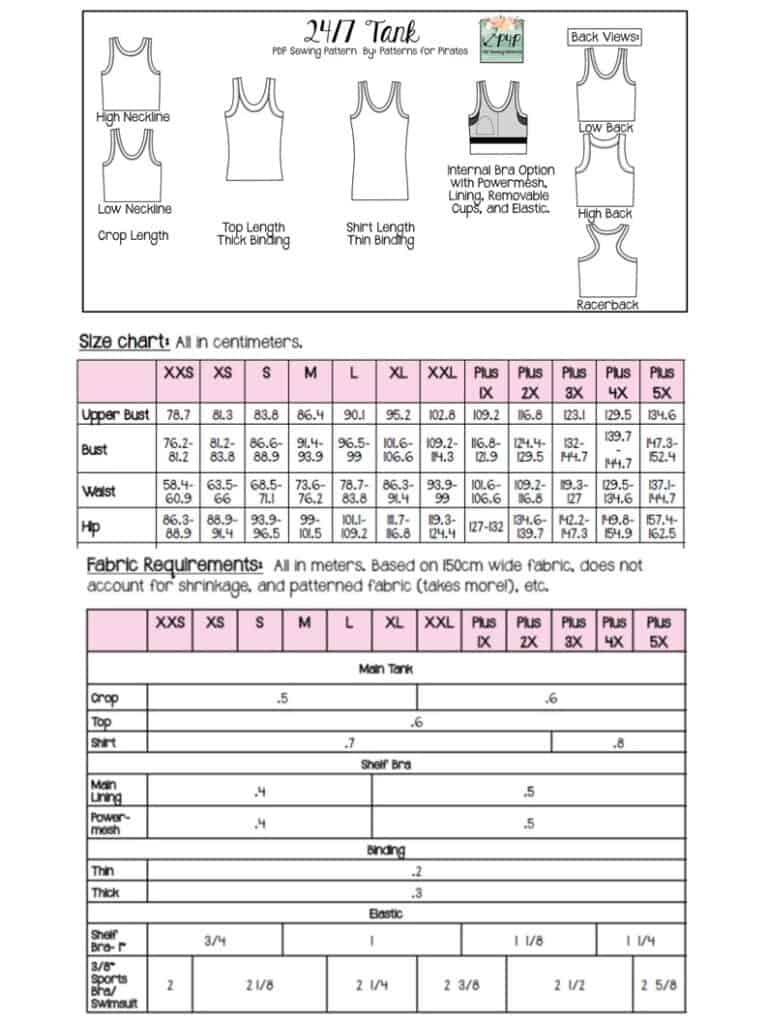
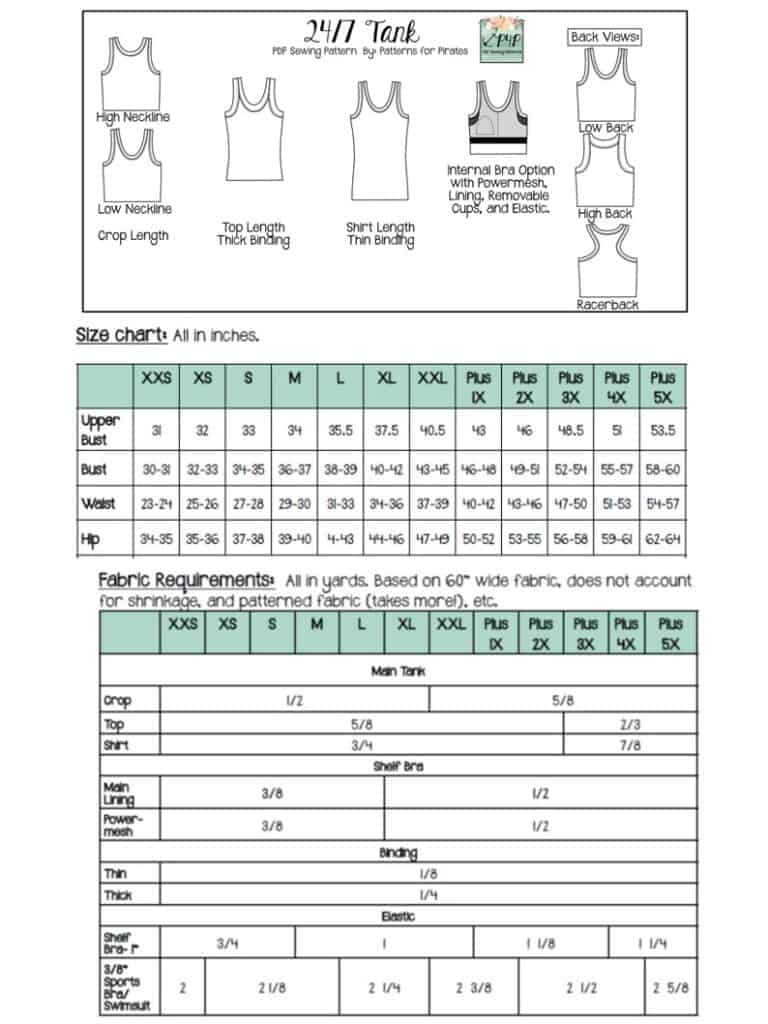

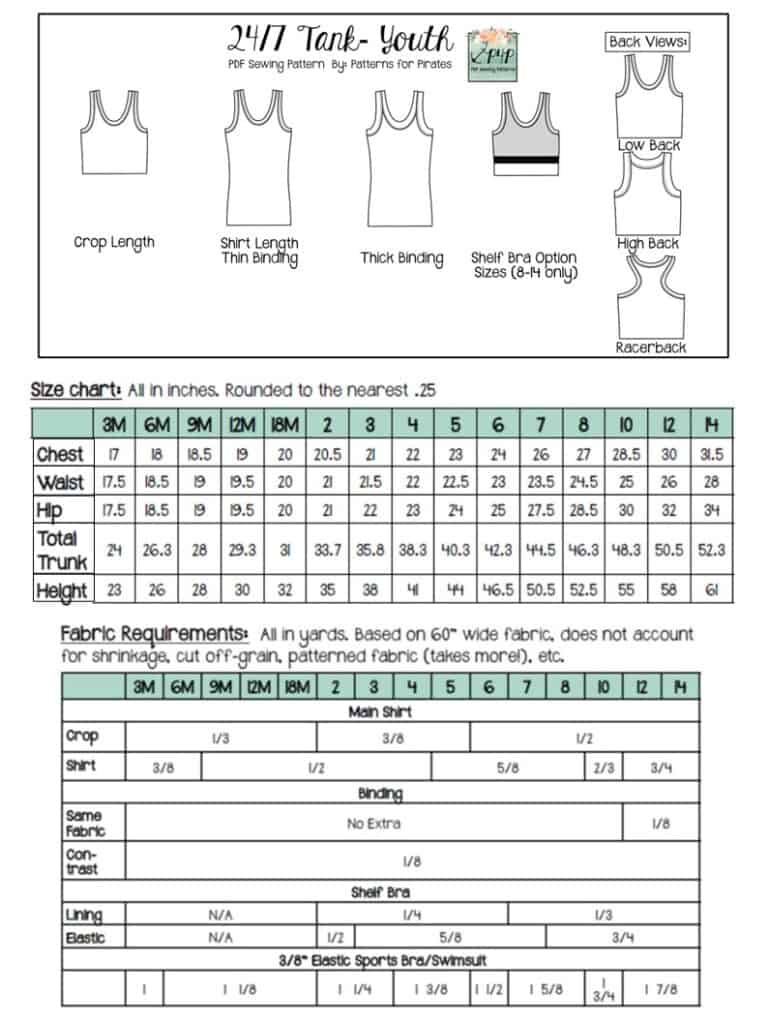
The youth sizes range from 3m – 14 and the adult sizes are for the full, newer size chart, extending from XXS – Plus 5X for the Adult Hourglass Figure.
*Want to learn more about how to measure yourself for these pattern? We’ve got you covered with an in-depth blog HERE. And for even more helpful fun, we have a free* printable that you can use to help record your measurements as you take them.
And in case you’re new to Patterns for Pirates and PDF patterns in general, we have a great blog full of new-user tips HERE to help you get started!
As with all of our current releases and updates, the pdfs now include our layers feature and can be found in Letter, A4, A0 and projector sizes.
Okay….let’s check out some of the different features!
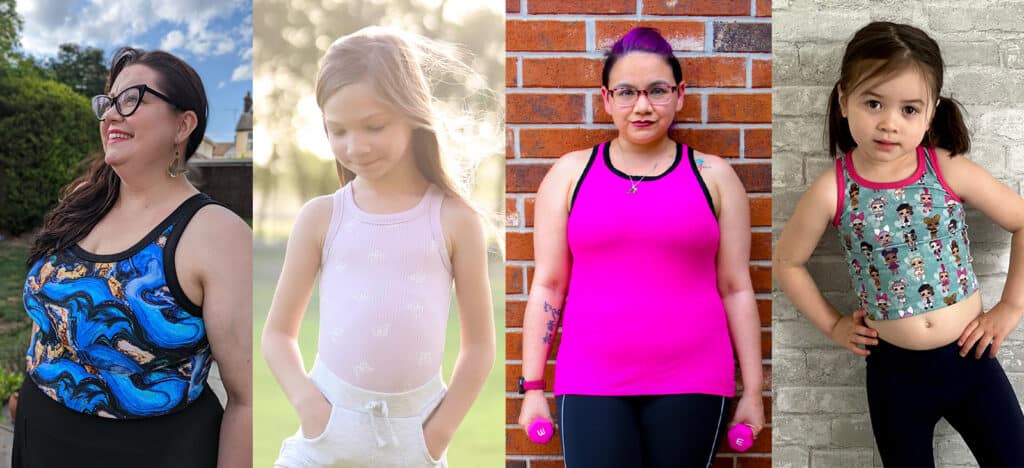
FRONT NECKLINES :: LOW / HIGH (adult only)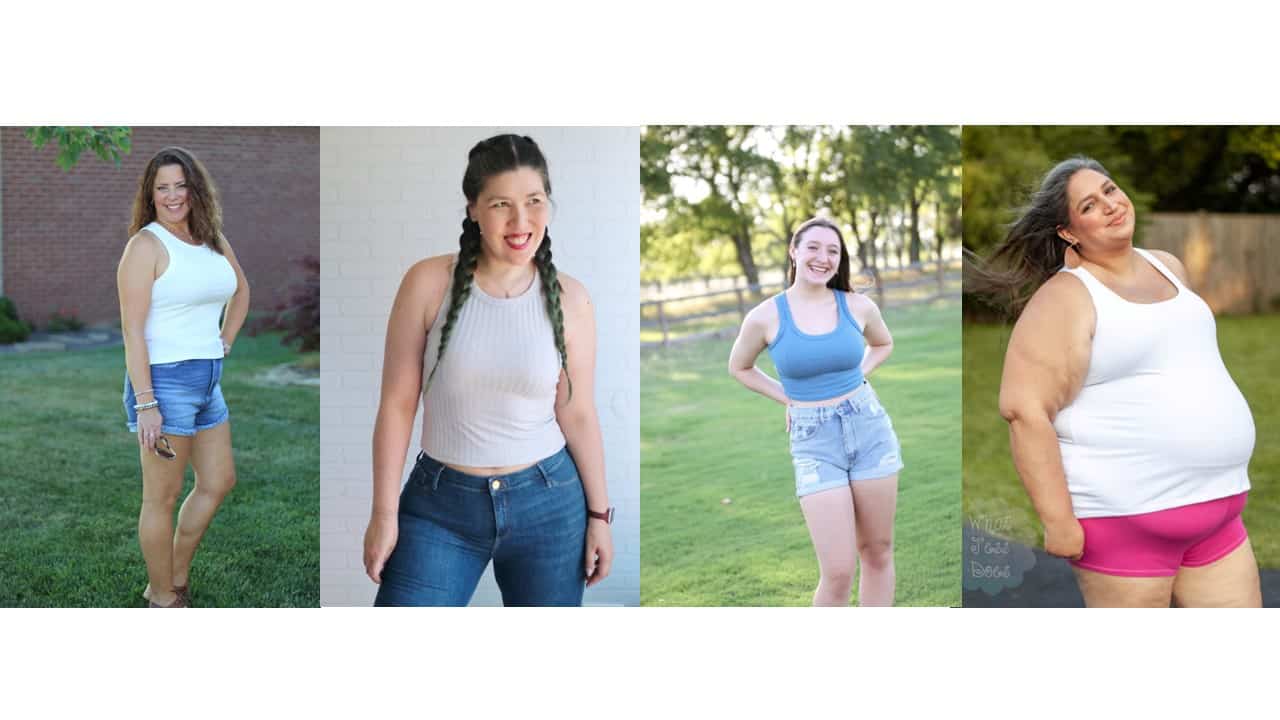 LENGTHS :: CROP / TOP (adult only) / SHIRT
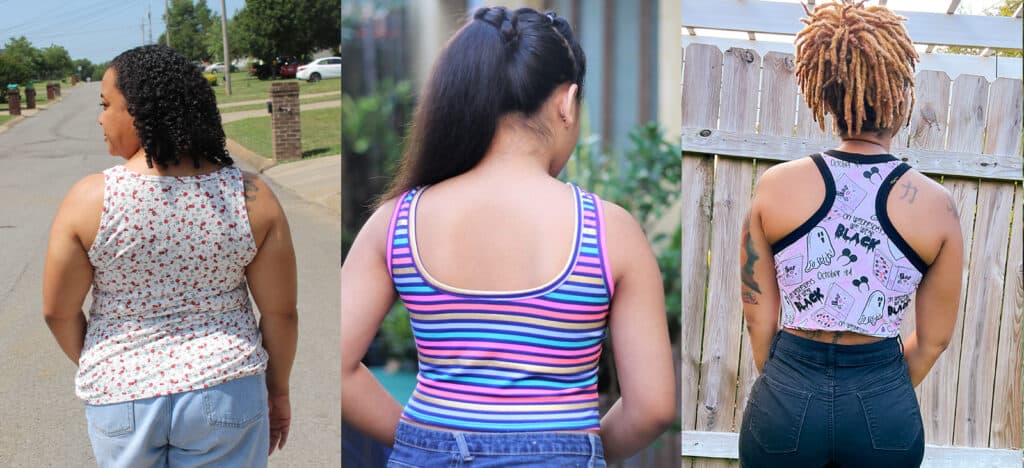
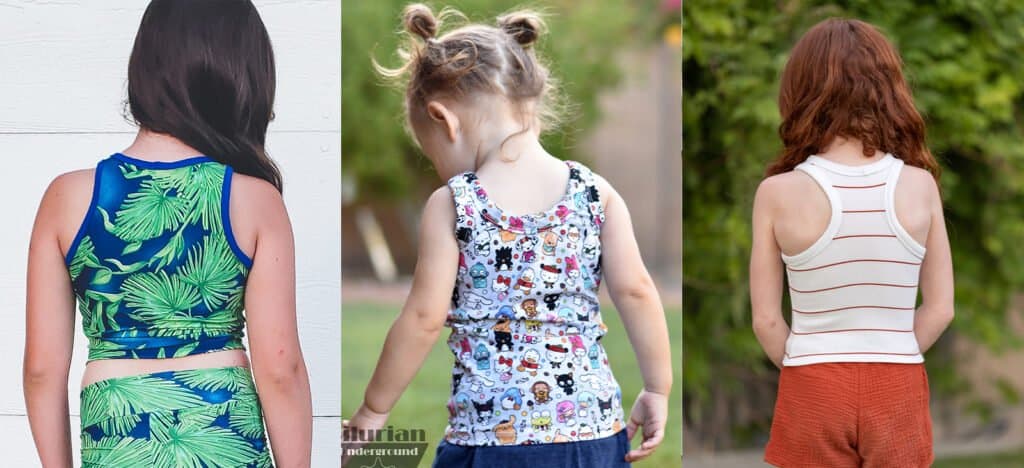
 BACK VIEWS :: HIGH / LOW / RACERBACK
BINDING STYLES :: THICK / THIN (optional- add elastic for sports bra or swimsuit)
OPTIONAL BUILT-IN SHELF BRA

We are super excited to see all of the new 24/7 Tanks that you’re about to make! Head on over to the shop and grab yourself a copy of these new patterns! They are available on sale (no code needed) through 11:59pm CST, June 27th, 2022.
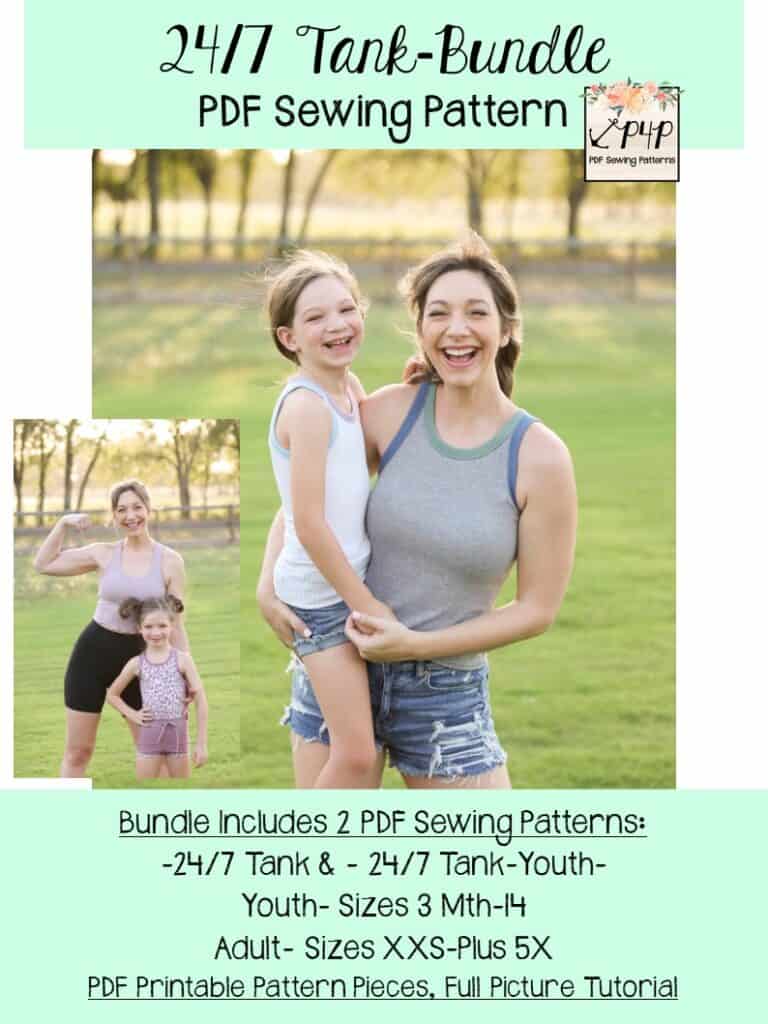
24/7 Tank | 24/7 Tank – Youth | 24/7 Tank – Bundle
Hoping for a little inspiration before diving into some delightful tank top sewing? Head over to our Facebook group where you can see tester albums full of amazing images!
24/7 Tank Youth Album | 24/7 Tank Adult Album
Protected: Fabric for Pirates :: June 2022 Reveal
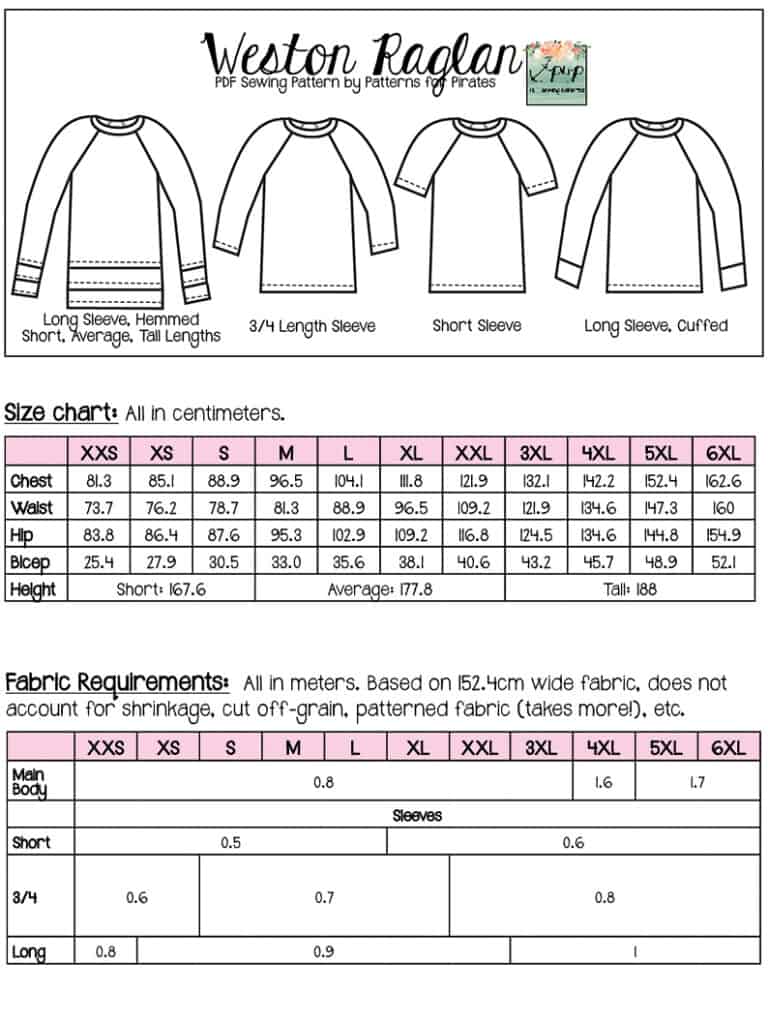
New Release :: Weston Raglan
Are you like me and you LOVE a good raglan pattern? Hands down, it’s one of my favorite things to sew. They’re fast, provide for fun pattern and color mixing options without any effort, and they make such a great casual tee.
The P4P pattern lineup has been needing a V-Figure raglan for quite some time now and the wait is finally over! Meet the Weston Raglan!
The Weston Raglan is drafted for our Adult V-Figure size chart!
What’s the Adult V Figure size chart? It’s based upon the ASTM Men’s Standard Body Measurements. V Figures typically are taller, have a broader shoulder, larger bicep, straighter waist-to-hip ratio, etc. Who typically fits this chart? Male / male presenting / non-binary / whoever feels better suited for this size chart (verses our Adult Hourglass Figure chart). If you want to wear it, we want you to sew it with one of our patterns!
The Weston Raglan goes along with the newer, extended sizing that we brought out with our V-Figure chart as well! If you haven’t measured yourself in a while, you might want to check yourself against the chart below.
Need help with how to measure? We’ve got you covered! Check out our “how to measure yourself” in-depth blog HERE. For some extra helpful fun, we have a free* printable that you can use to help record your measurements as you take them. And in case you’re new to Patterns for Pirates and PDF patterns in general, we have a great blog full of new-user tips HERE to help you get started! As with all of our current releases and updates, the pdfs now include our layers feature and can be found in Letter, A4, A0 and projector sizes.
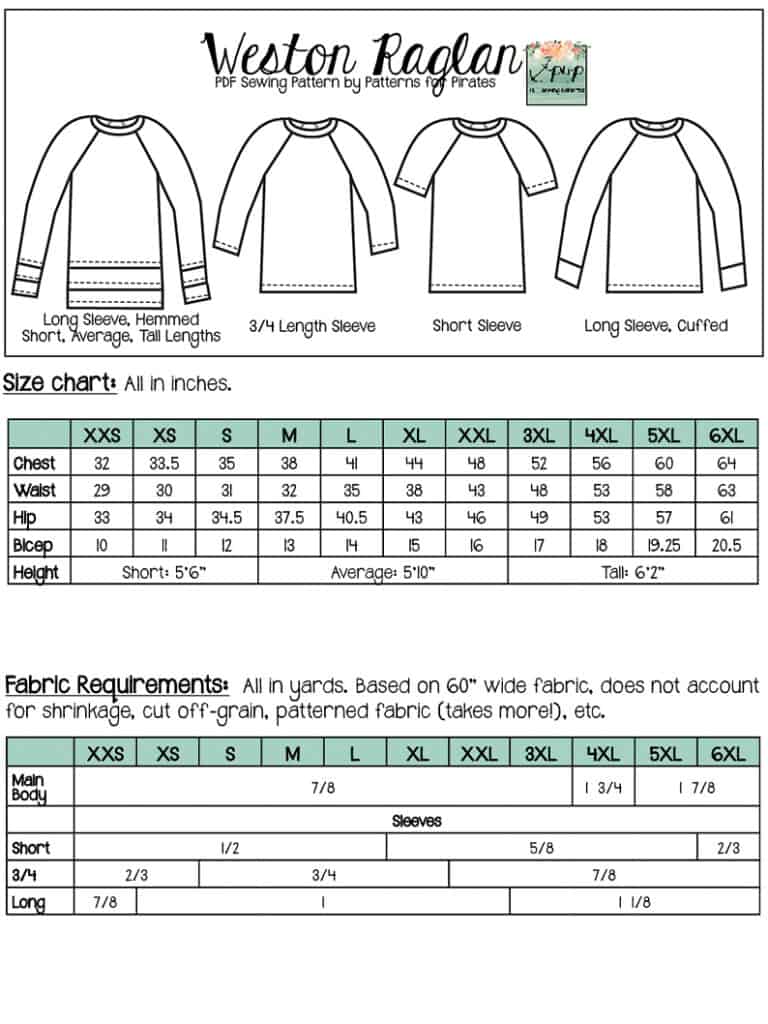
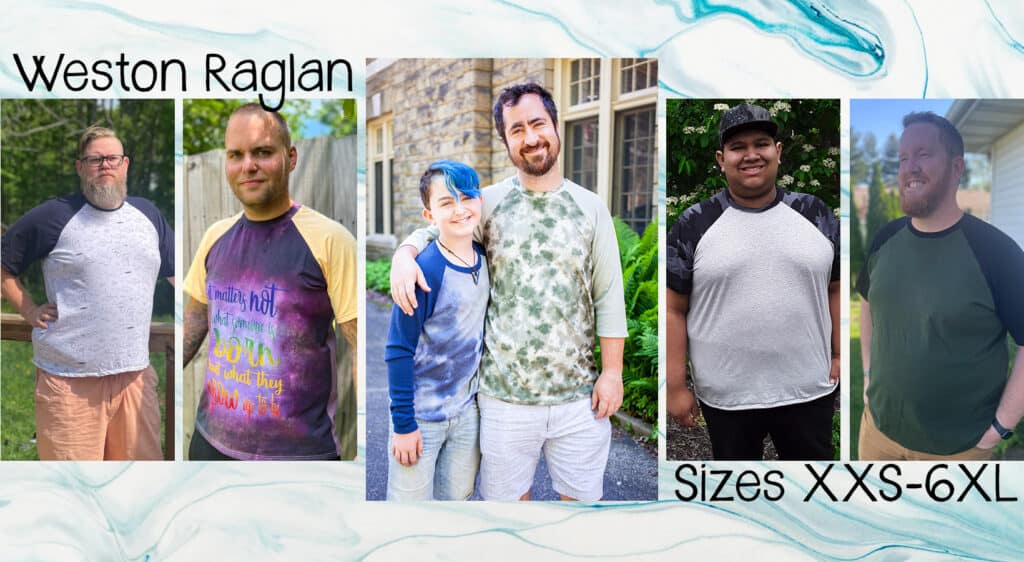
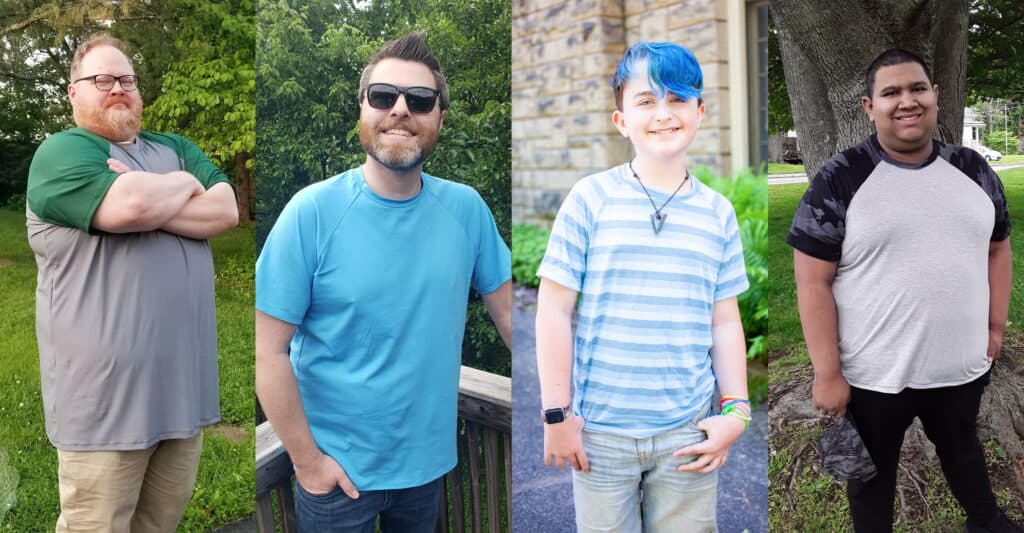
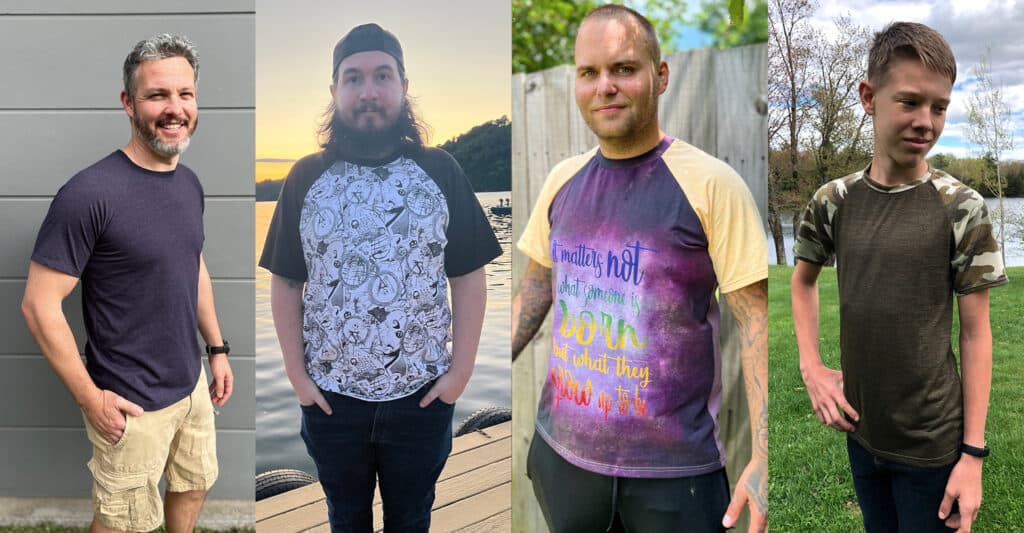
The Weston Raglan is a traditional, raglan t-shirt with ease throughout the bodice and sleeves. There are multiple sleeve lengths included (short, 3/4, long sleeve hemmed, and long sleeve cuffed) and is a beginner friendly sew.
Sizes include: XXS – 6XL for the Adult V-Figure. Our V-Figure patterns have multiple lengths, based upon height.
- Short is drafted for 5’6″
- Average is drafted for 5’10”
- Tall is drafted for 6’2″
Not only is there a bodice cut line for each height, but we’ve included separate sleeve lengths to accommodate for them as well.
Looking for fabric recommendations? The Weston Raglan is drafted for t-shirt knits like tri-blend jerseys, ribbed knits, spun poly jersey, modal/rayon/bamboo knit, double brushed poly, lightweight cotton spandex, sweater knit, waffle knit, and the like.
***Want to use something thicker (think custom cotton spandex or french terry), you’ll need to size up to keep the same look and feel.
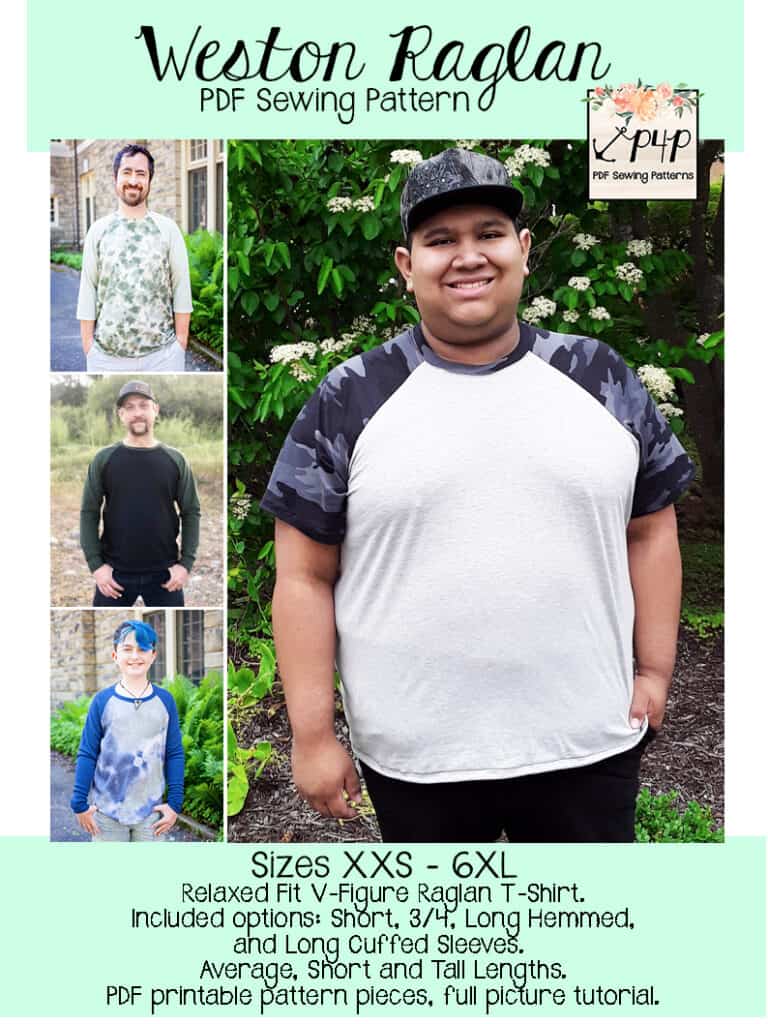
One of my favorite design features of the Weston Raglan is the hem on the front bodice. Instead of leaving it a straight hem, we graded a curved hemline starting at the 6XL size and down, to help accommodate for chests and bellies. As wild as it sounds, adding a curve to the front actually straightens out the hem when being worn!
If you look at the pattern pieces and wonder exactly what that design element was for, here’s an amazing example!
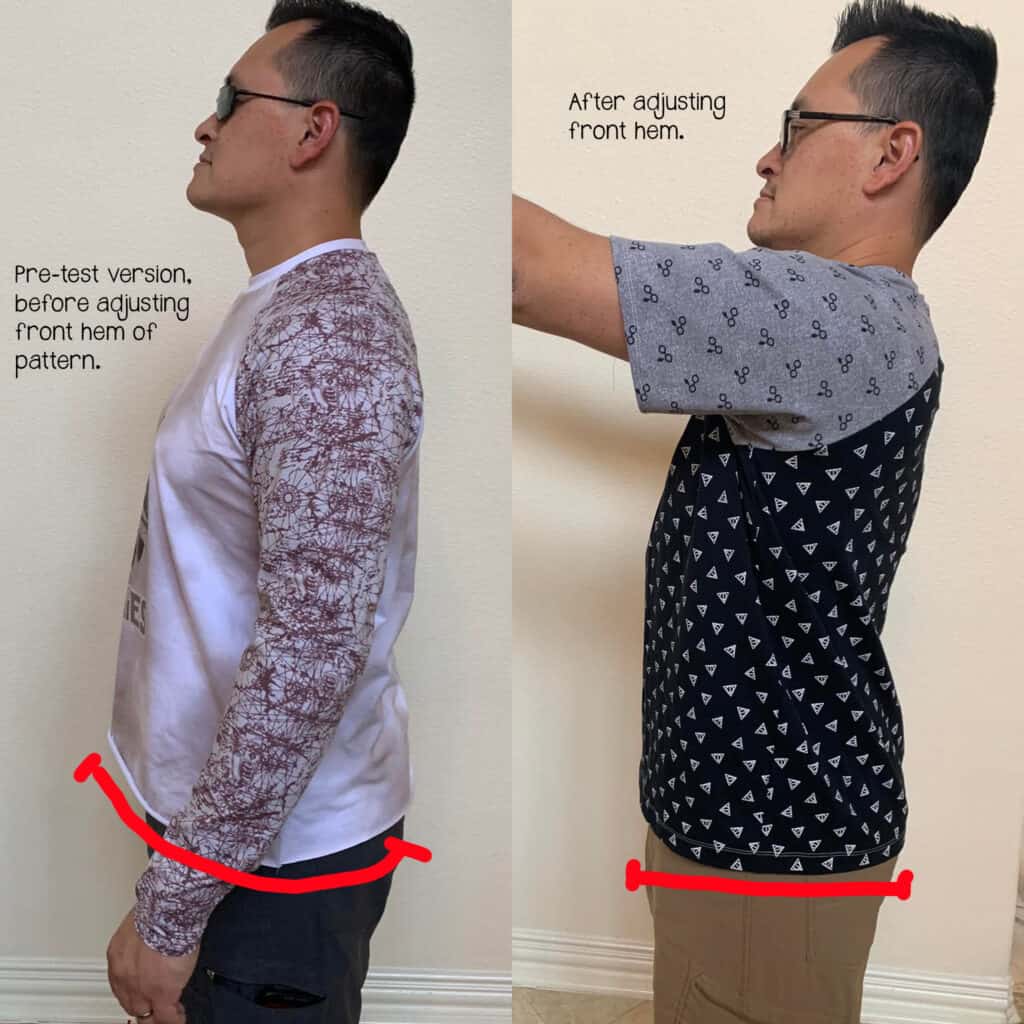
Big thanks to Chandy Mueller and all of her help during pre-testing of the Weston pattern. That’s her model above!
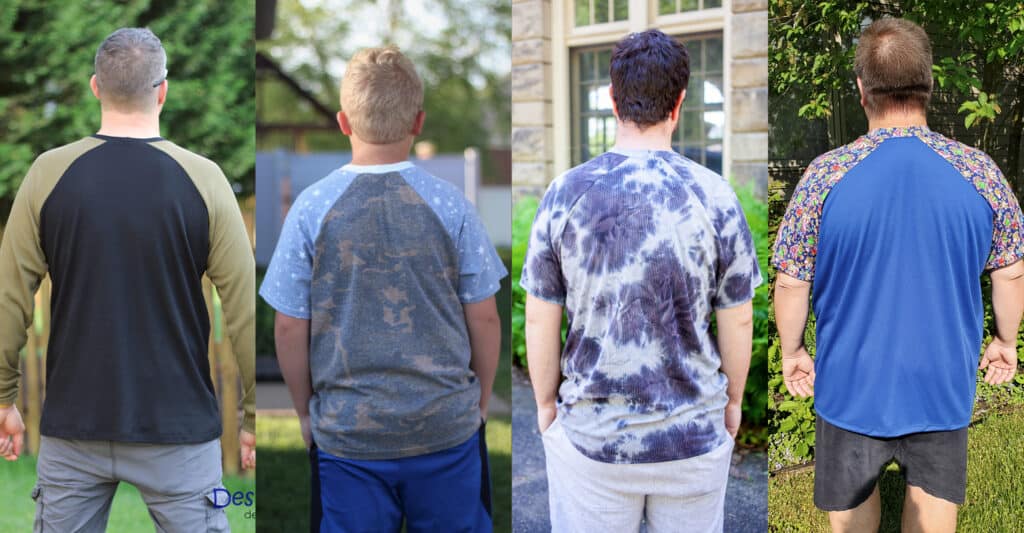
Let’s take a look at some of our stellar sewists and models, in the new Weston Raglan pattern!
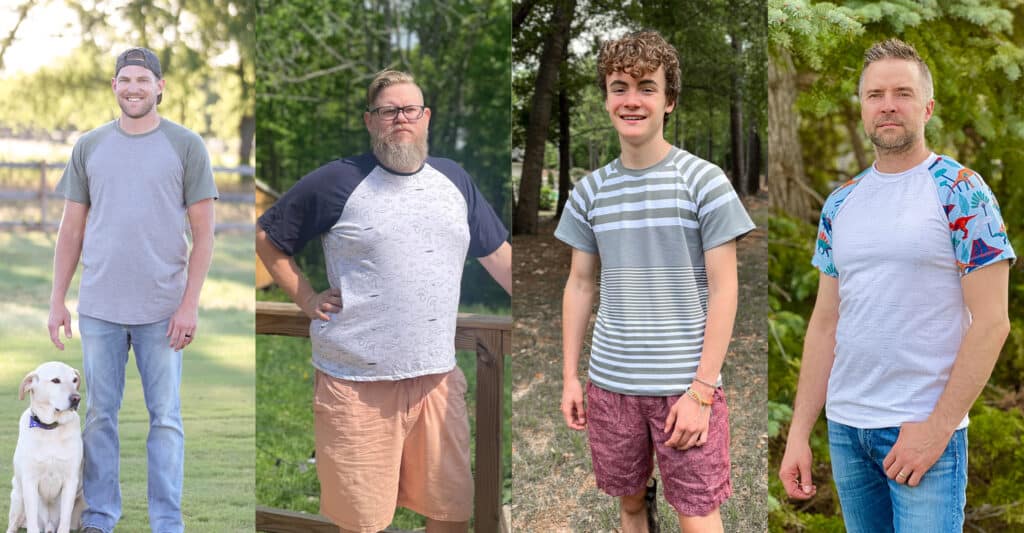
The back angle of the sleeve is one of my favorite features!
Hoping for some additional inspiration and want to see more photos of all of our testers? Head to the album on Facebook to check them all out!
The Weston Raglan is on release sale from now until 11:59PM CST June 7th, 2022. Don’t forget to grab a copy for yourself!
As we’d mentioned earlier, the Weston Raglan is the newest addition to the family of raglan patterns here at P4P. Don’t sleep on the other patterns in our lineup! If you add 3 raglans to your cart you will get an automatic discount too, so make your own raglan bundle perfect for you!
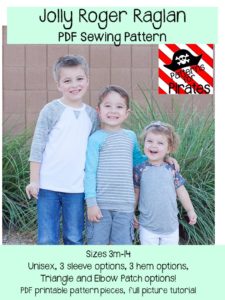
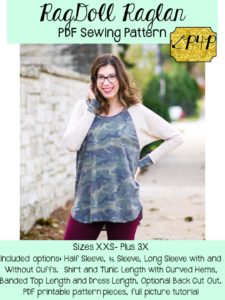
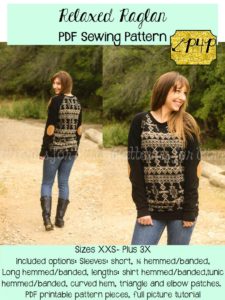
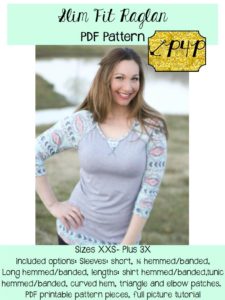
We have a ton of resources for sewing up raglan style tees, already on this blog! Here are some great reading resources:
- Sleeves and Their Wrinkles
- JRR Woven Fabric Hack
- JRR Animal Faces Add-On
- Contrast Band Hack for Kangaroo Pockets
- Keyhole / Scoopback Raglan Hack
- Off-The-Shoulder Raglan Hack
- Adding Stripes to Your Raglan Sleeves
Protected: Fabric for Pirates :: May 2022 Reveal!
Spring Time Means Sale Time at P4P
Spring time is here…and with it flowers are blooming and sales are happening!
Please enjoy our Spring Sale Monday, April 25 thru Monday, May 2 (11:59PM US Central Time Zone) with code: springtime for 30% off your total purchase!
The code will pop up on your checkout page and you can just click to apply 🙂 So no need to worry about jotting it down or trying to remember it exactly!
We only have site wide sales 2-3 times a year, so grab the patterns you’ve been eyeing while you have the chance!
Have fun shopping and then sewing!
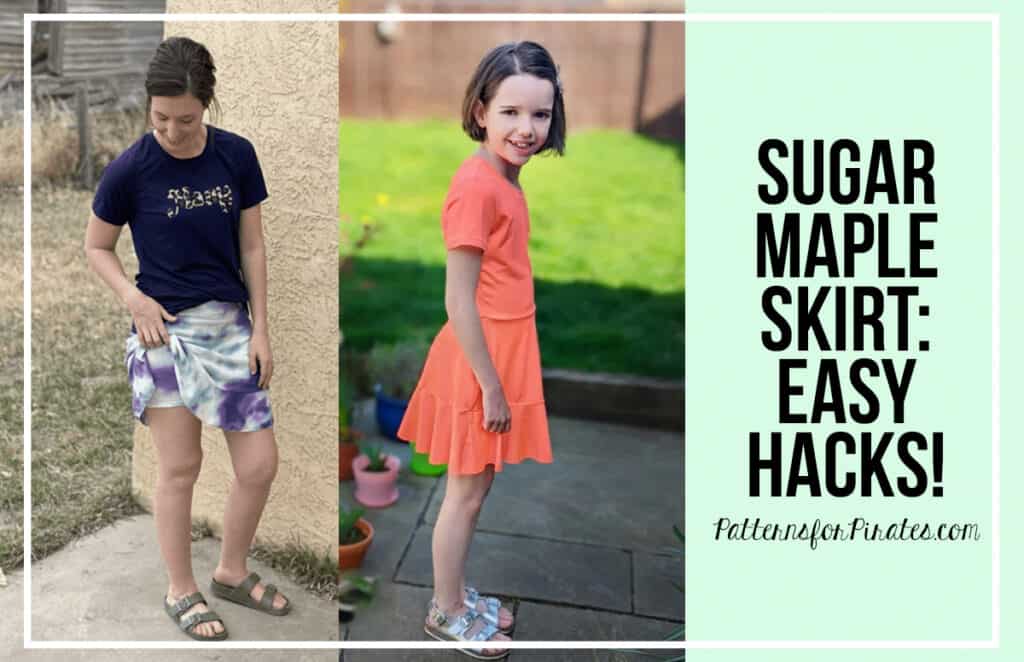
Sugar Maple Skirt :: Easy Hacks
Have you heard the news? P4P just dropped our latest pattern and it’s the swishiest, twirliest thing we’ve put out in a while!
The Sugar Maple Skirt is an a-line skirt with a full circle drop yoke. It is designed to be worn at the natural waist and comes in four lengths: mini, knee, tea and maxi. The top yoke has a flattering, body skimming silhouette, while the fuller part of the skirt joins just below the booty.
Whichever length you choose, each provides for ALL the swishy, twirly goodness that you could hope for in a skirt. The Sugar Maple is a great basic skirt pattern to have, an excellent sewing project for beginners, and it comes together so quickly that you’ll end up making multiple before you even know what happened!
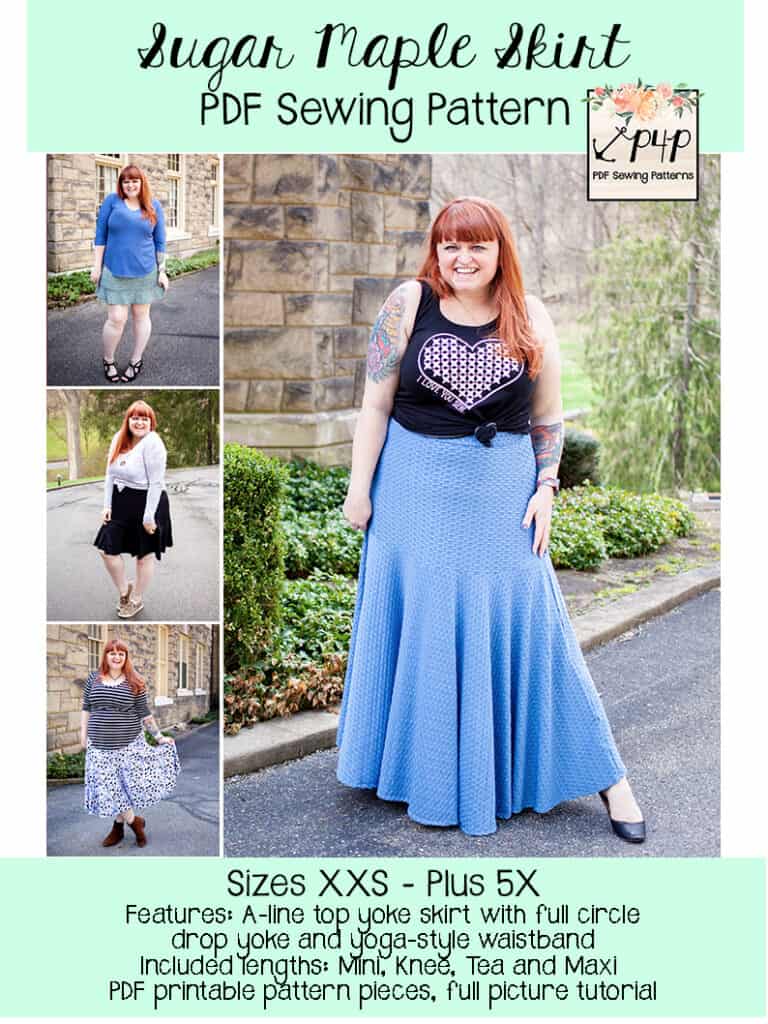

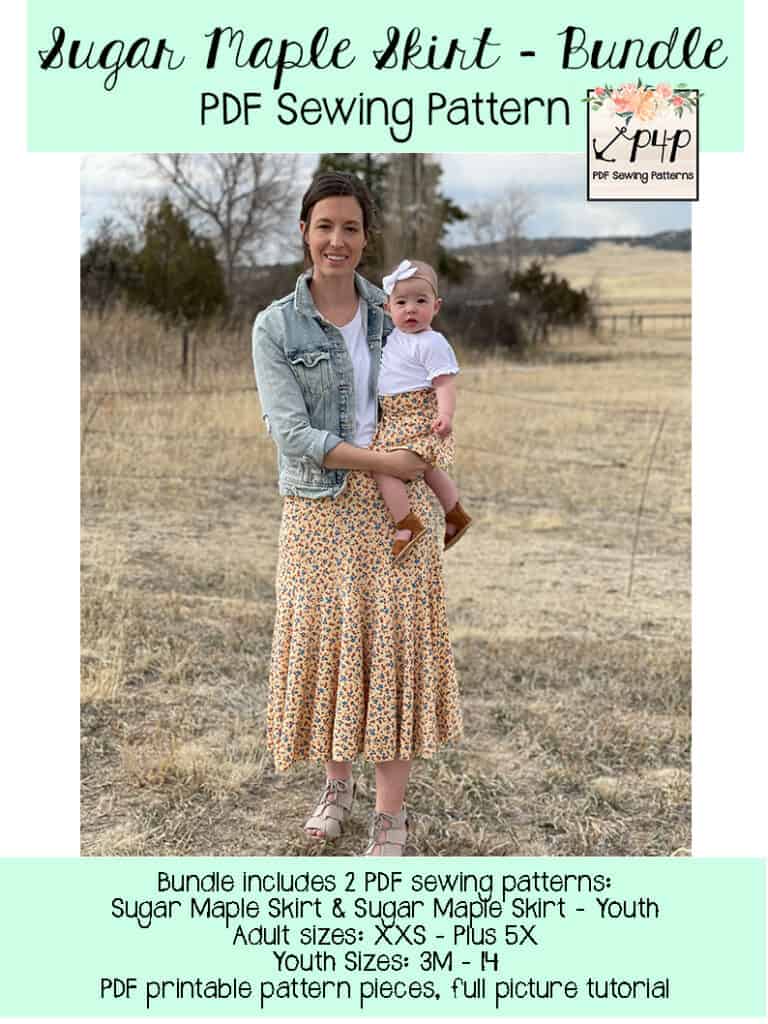
Before you do anything else, go read all about the newest pattern: the Sugar Maple Skirt! It’s available in Adult – Hourglass and Youth sizes and is just the sweetest.
But guess what we went and did? We made it even sweeter by giving you some super easy, super fun pattern hacks to take the pattern a little further!
Dress Hack
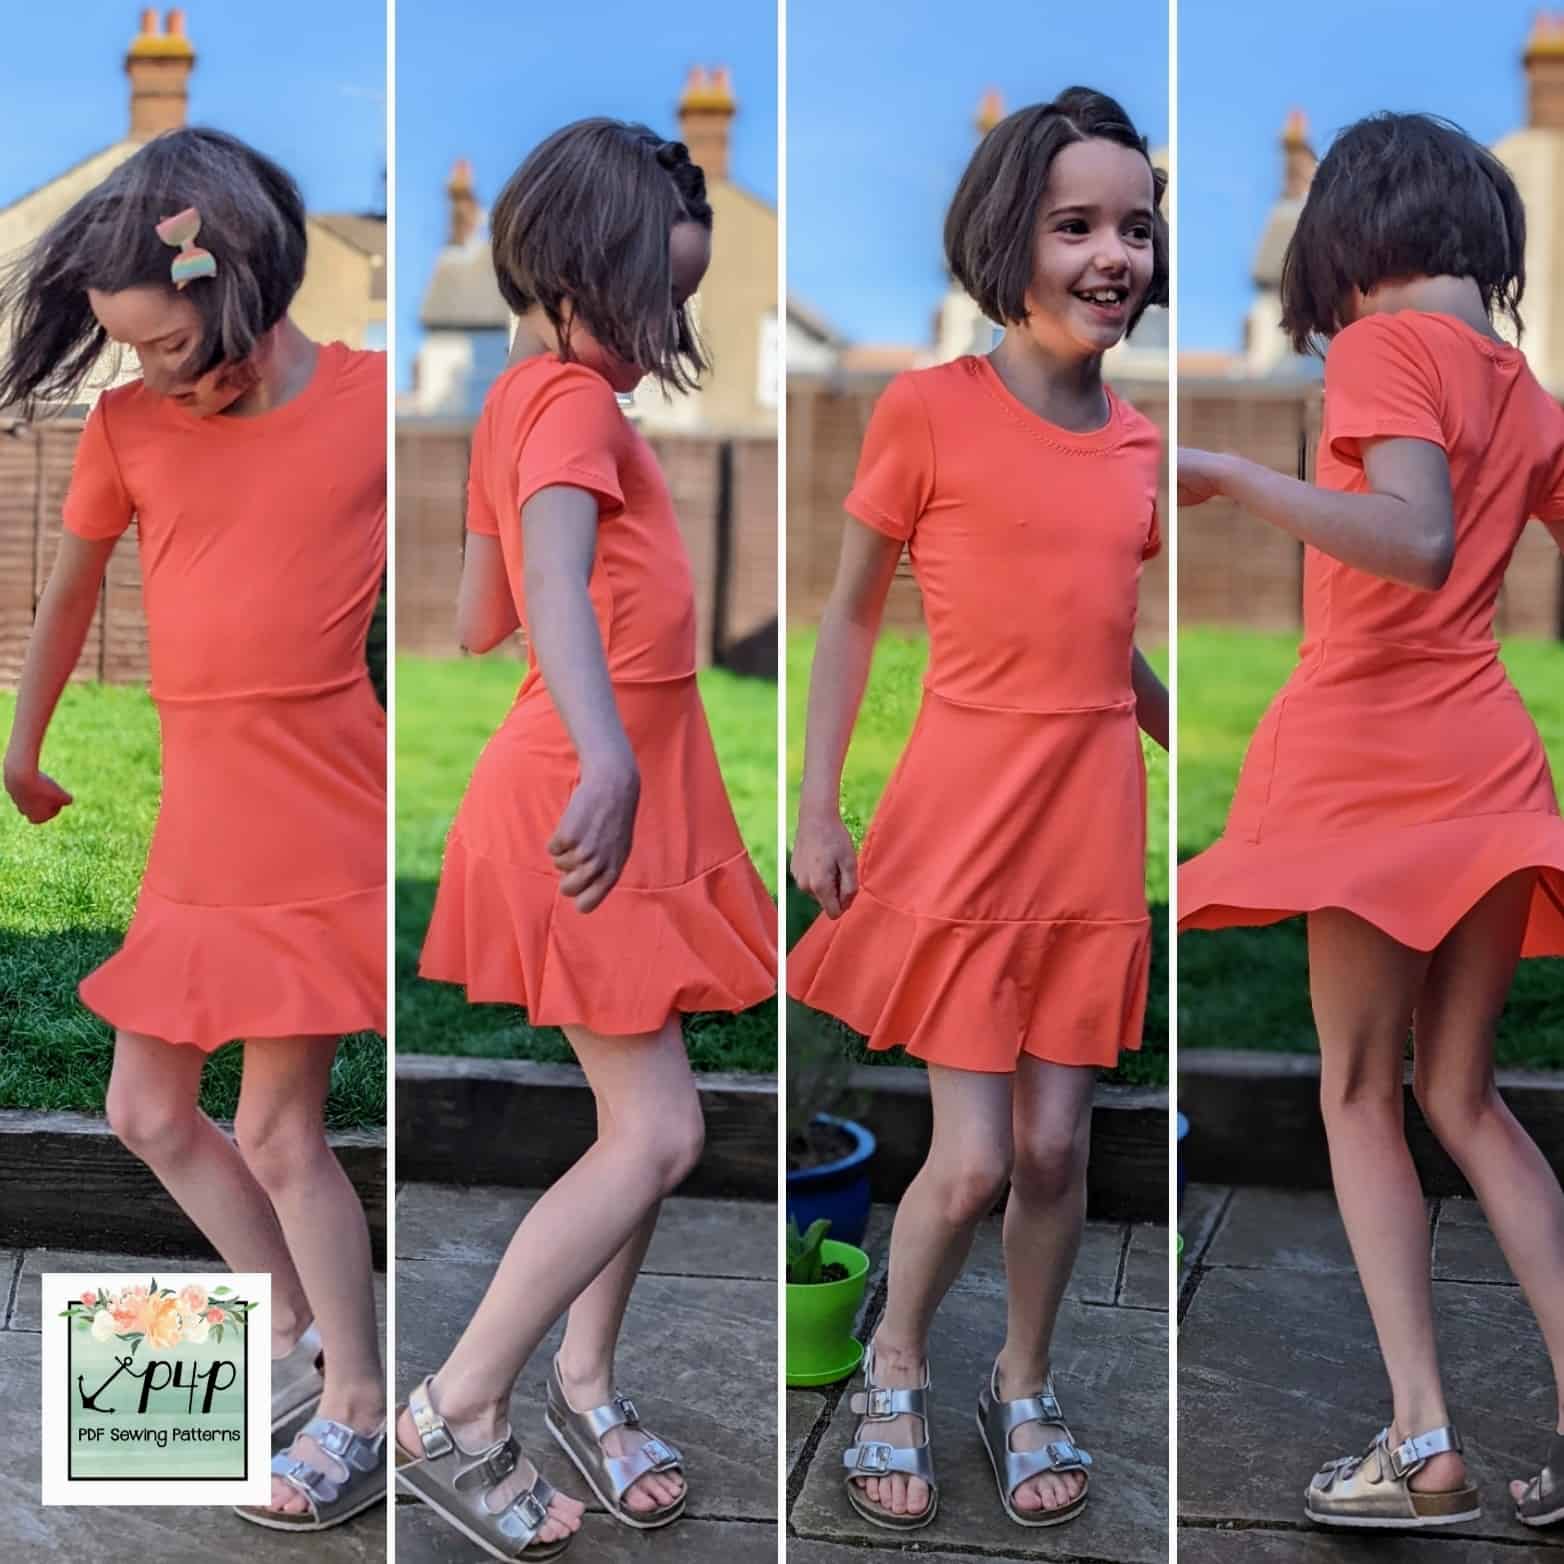
The best way to get a little bit of twirl into your life is with the new Sugar Maple Skirt, I think we can all agree on that! If you love the twirly, whirly skirt but like the ease of a dress then this hack is for you. My daughter is now 8 and insists on picking her own outfits, but some of her choices can be pretty adventurous and she loves a colour clash. For me, a dress is the easiest option every time. I matched the Sugar Maple Skirt with the bodice of the Rainbow Dress Youth
 They meshed together perfectly!
-

- Sugar Maple Skirt
-

- Rainbow Dress bodice
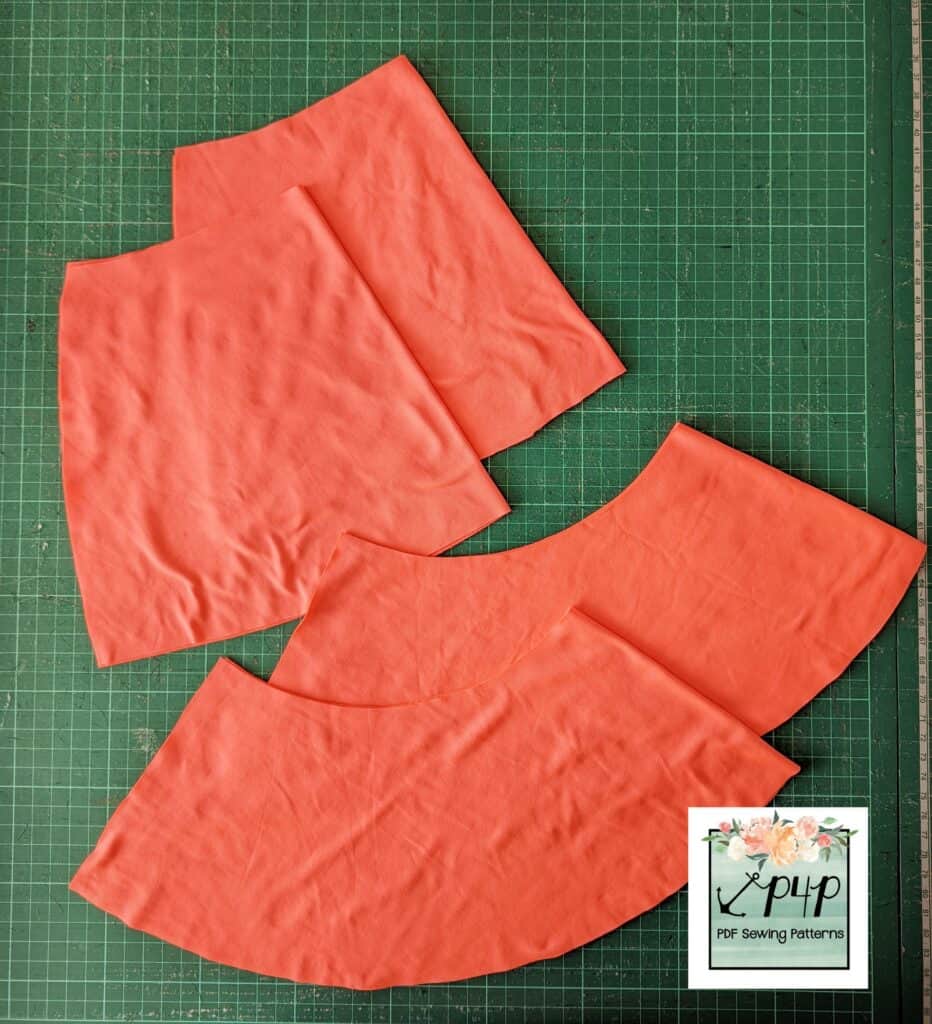
All I had to do was cut out the bodice of the Rainbow Dress and Sugar Maple Skirt as normal and just omit the waistband for the skirt. I sewed them each up individually as per their instructions and then laid them down next to each other to check they would fit together nicely at the waist.
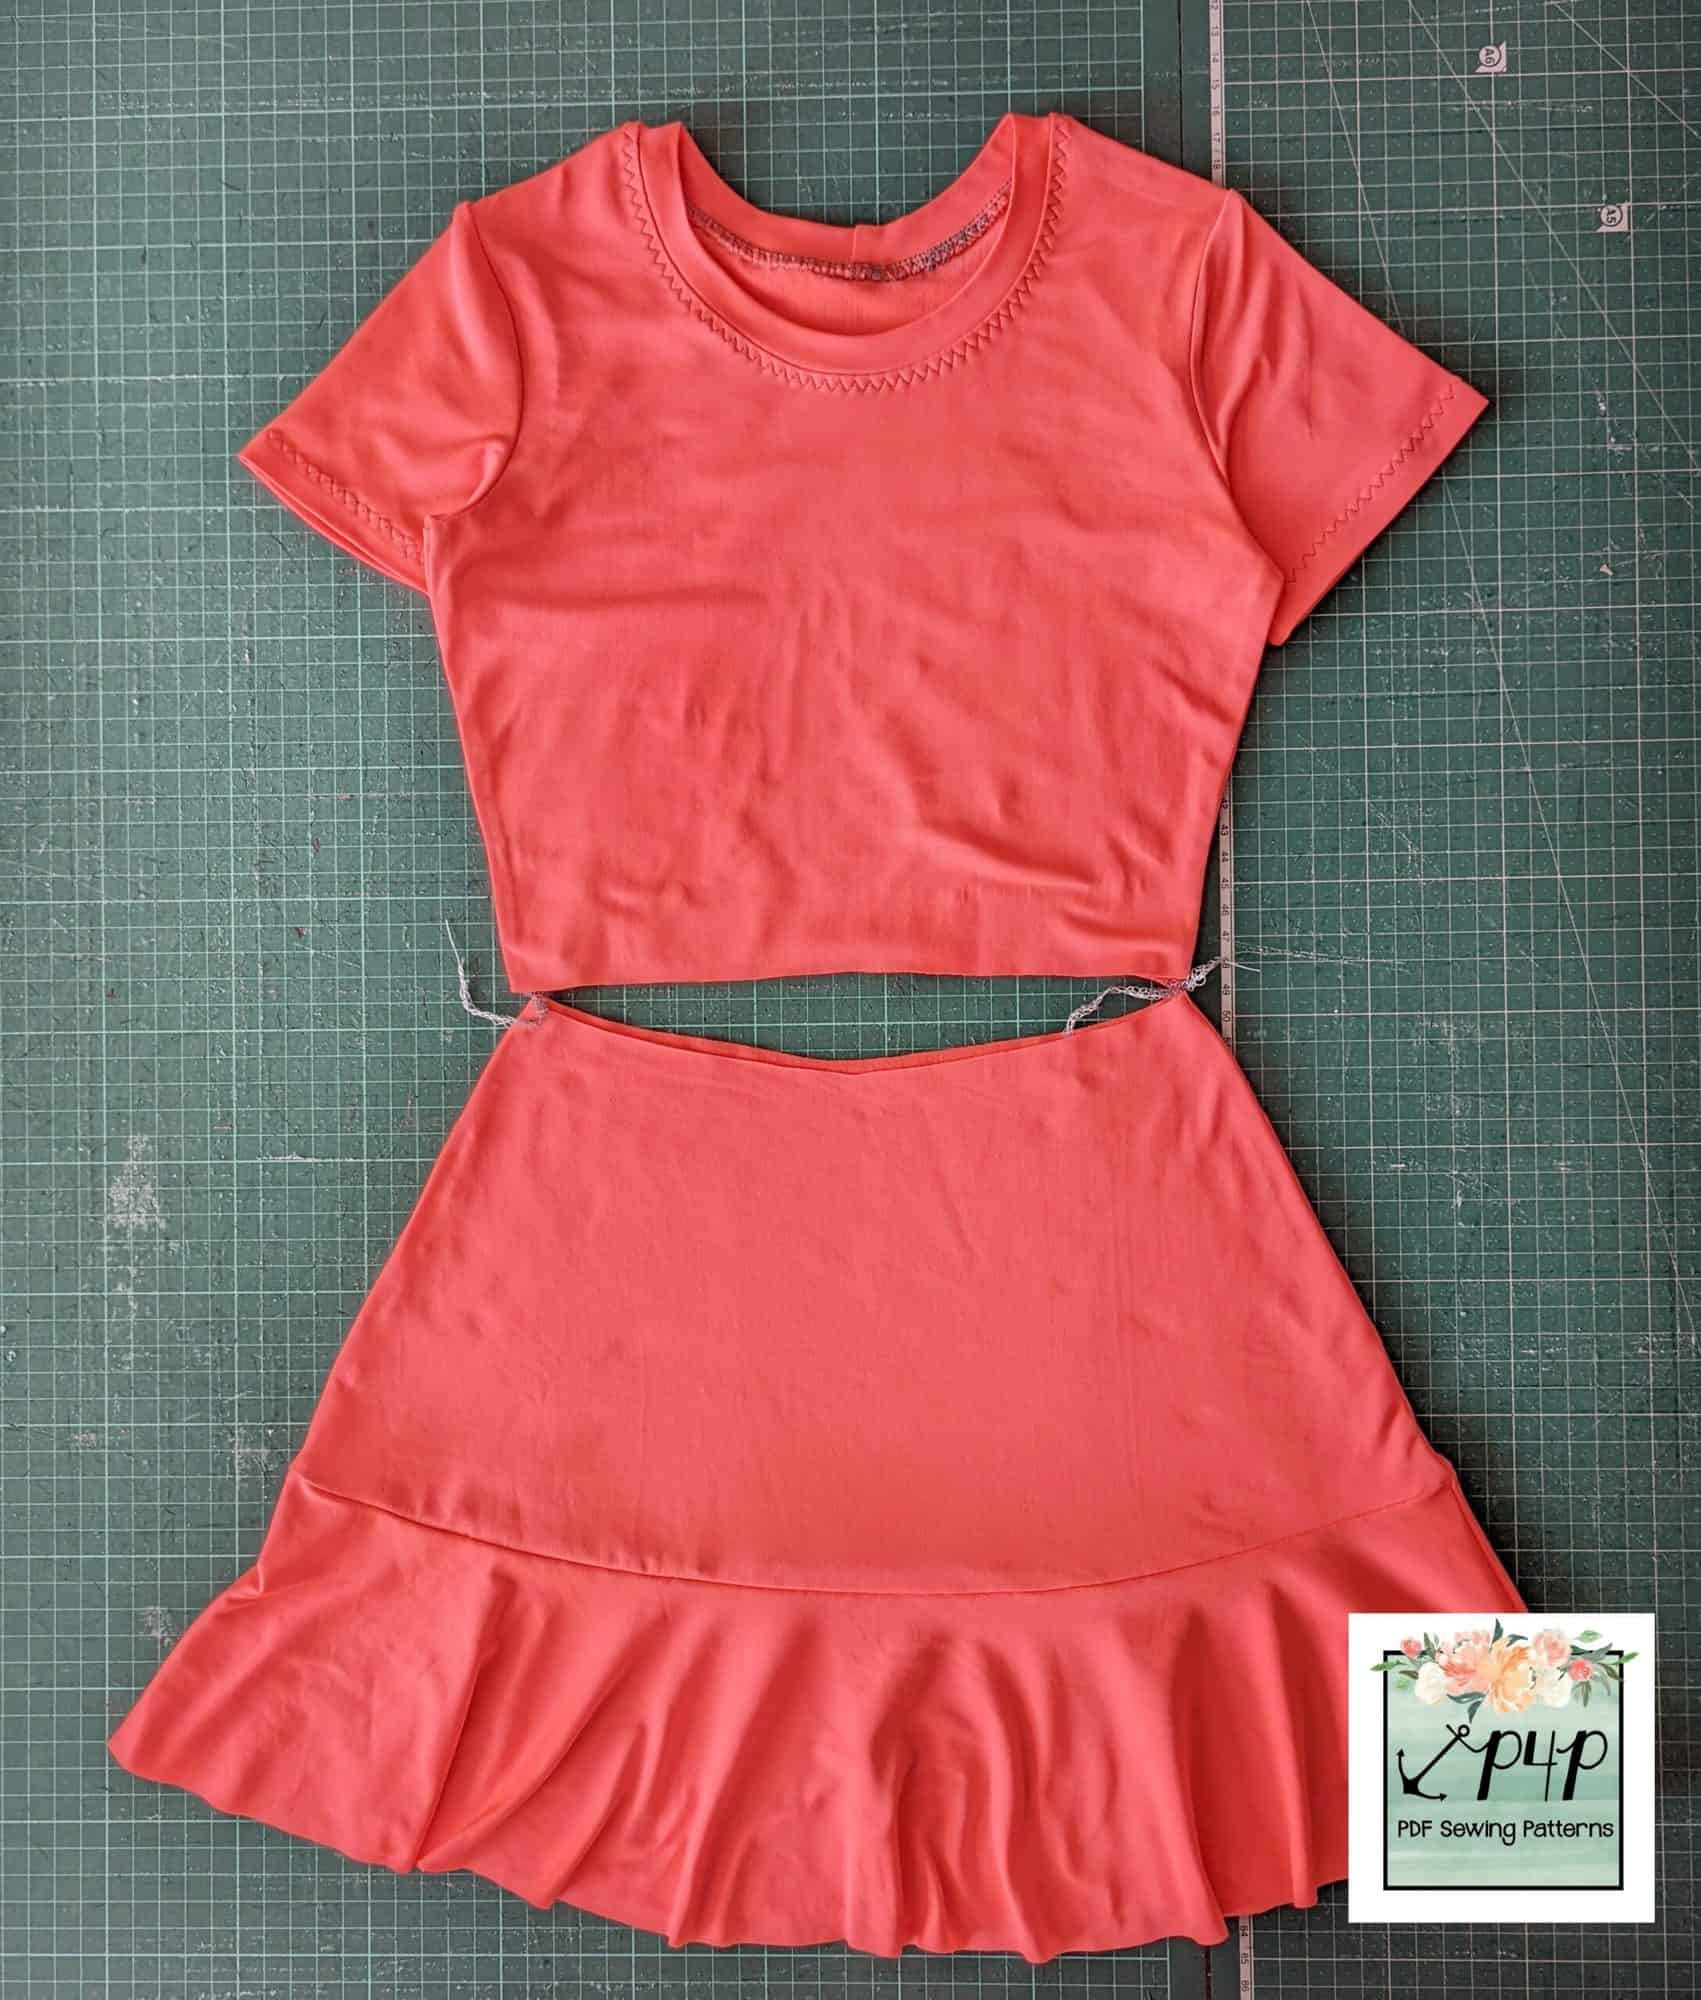
I had to shave a smidge off the side seams at the waist of the bodice to get a perfect fit, but it was only 1/4″ either side. Then quarter your bodice and skirt pieces at the waist, using clips or pins.
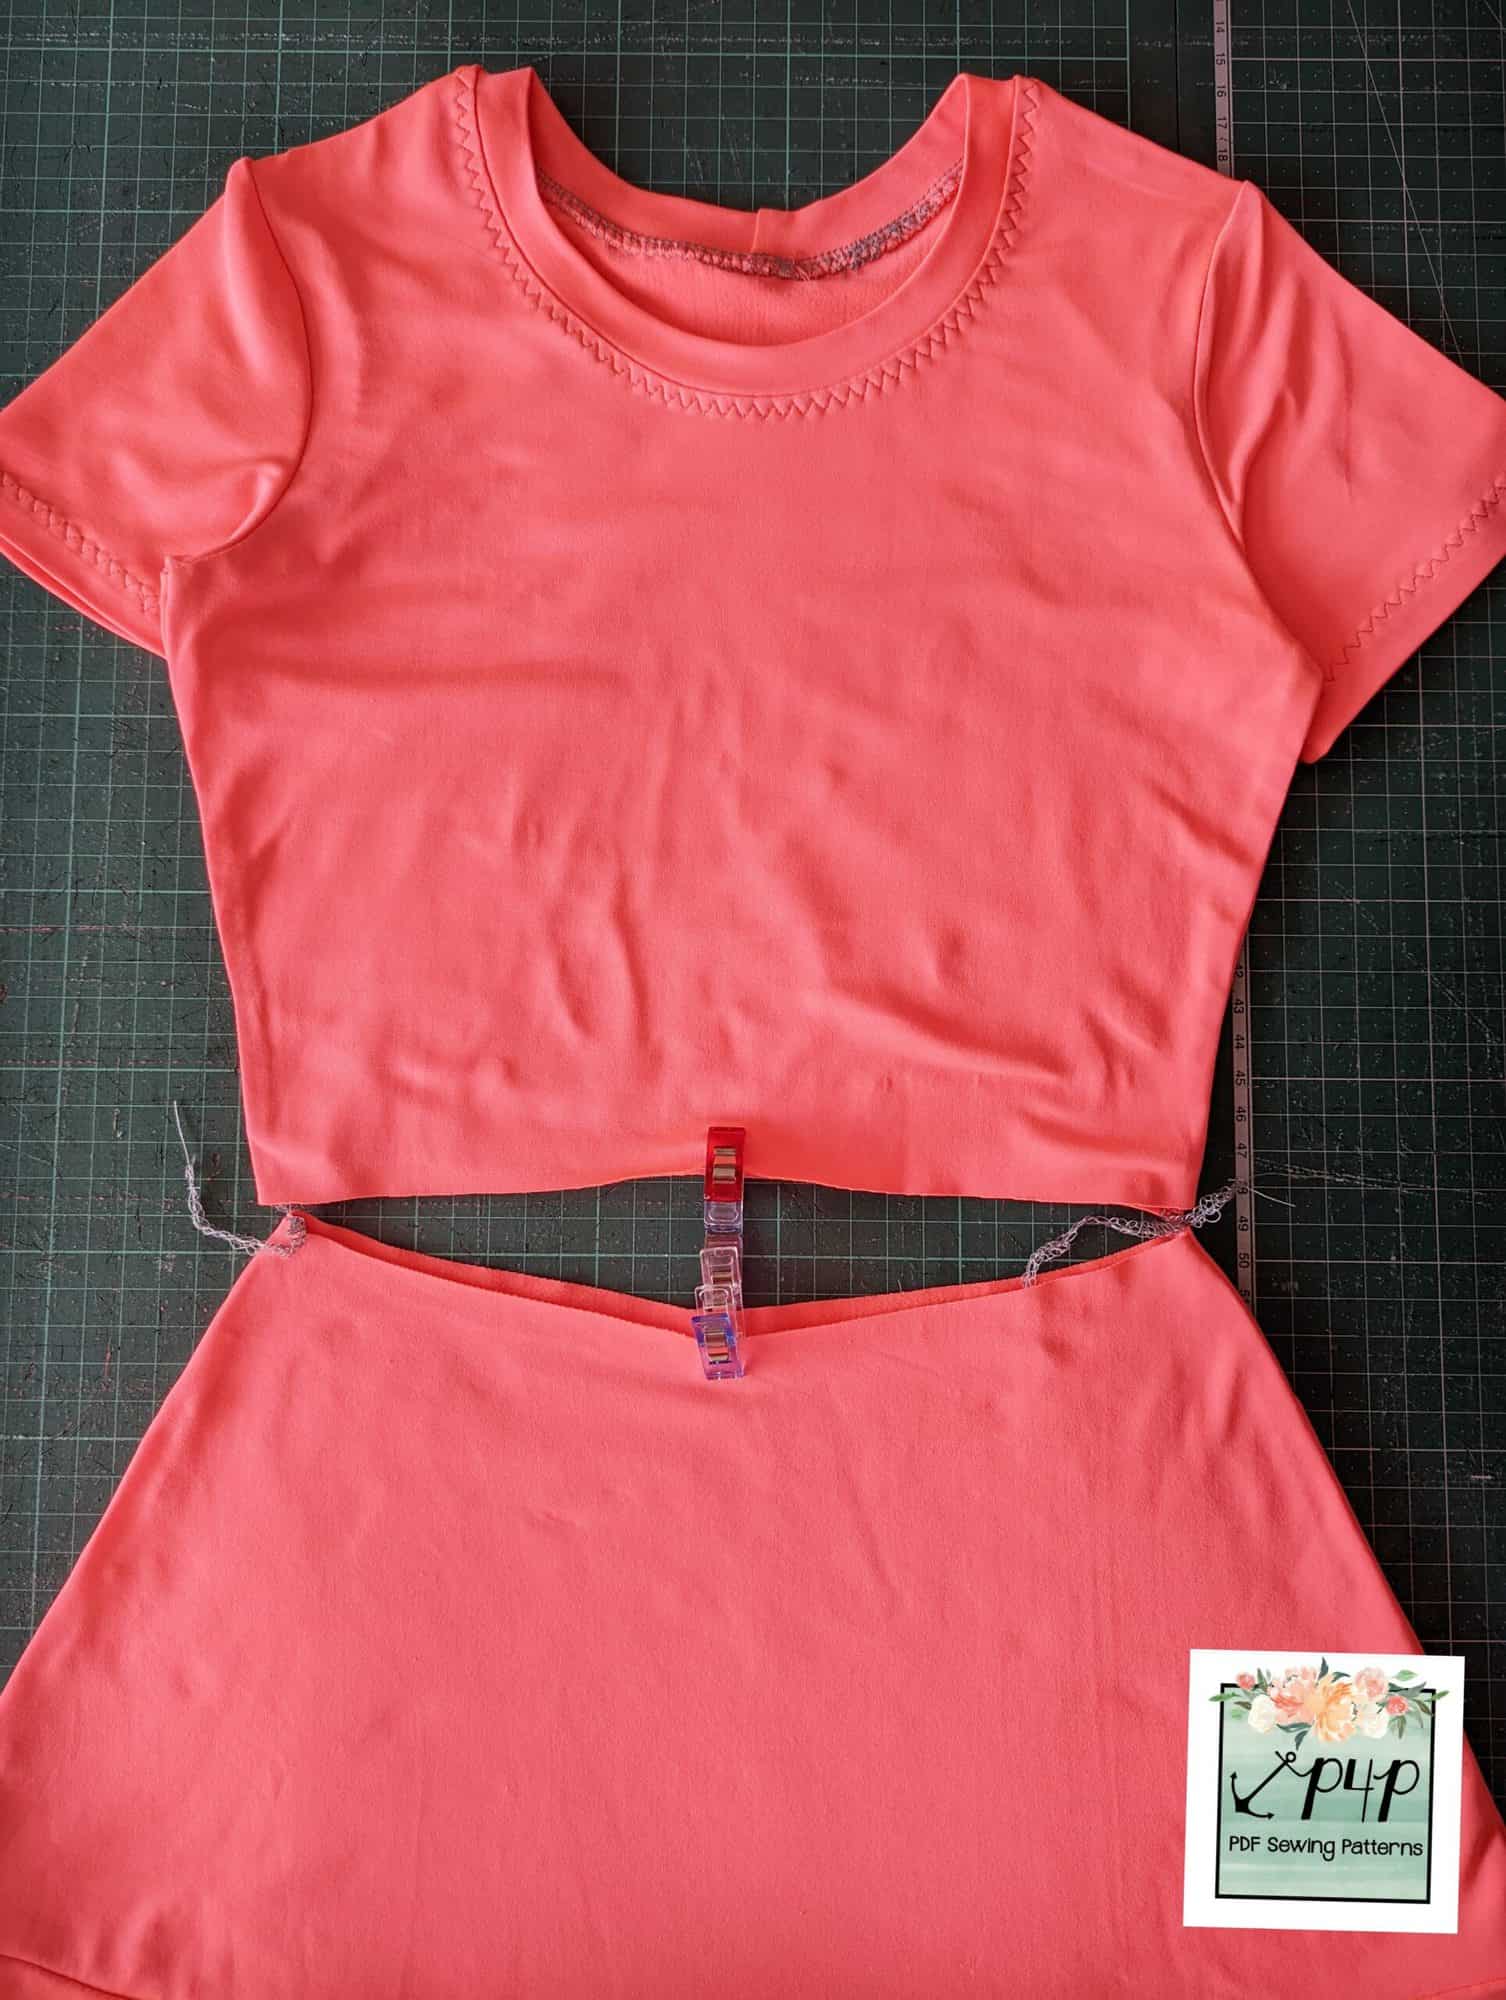
Flip the skirt up and over the bodice so they are right sides together, and clip them together.
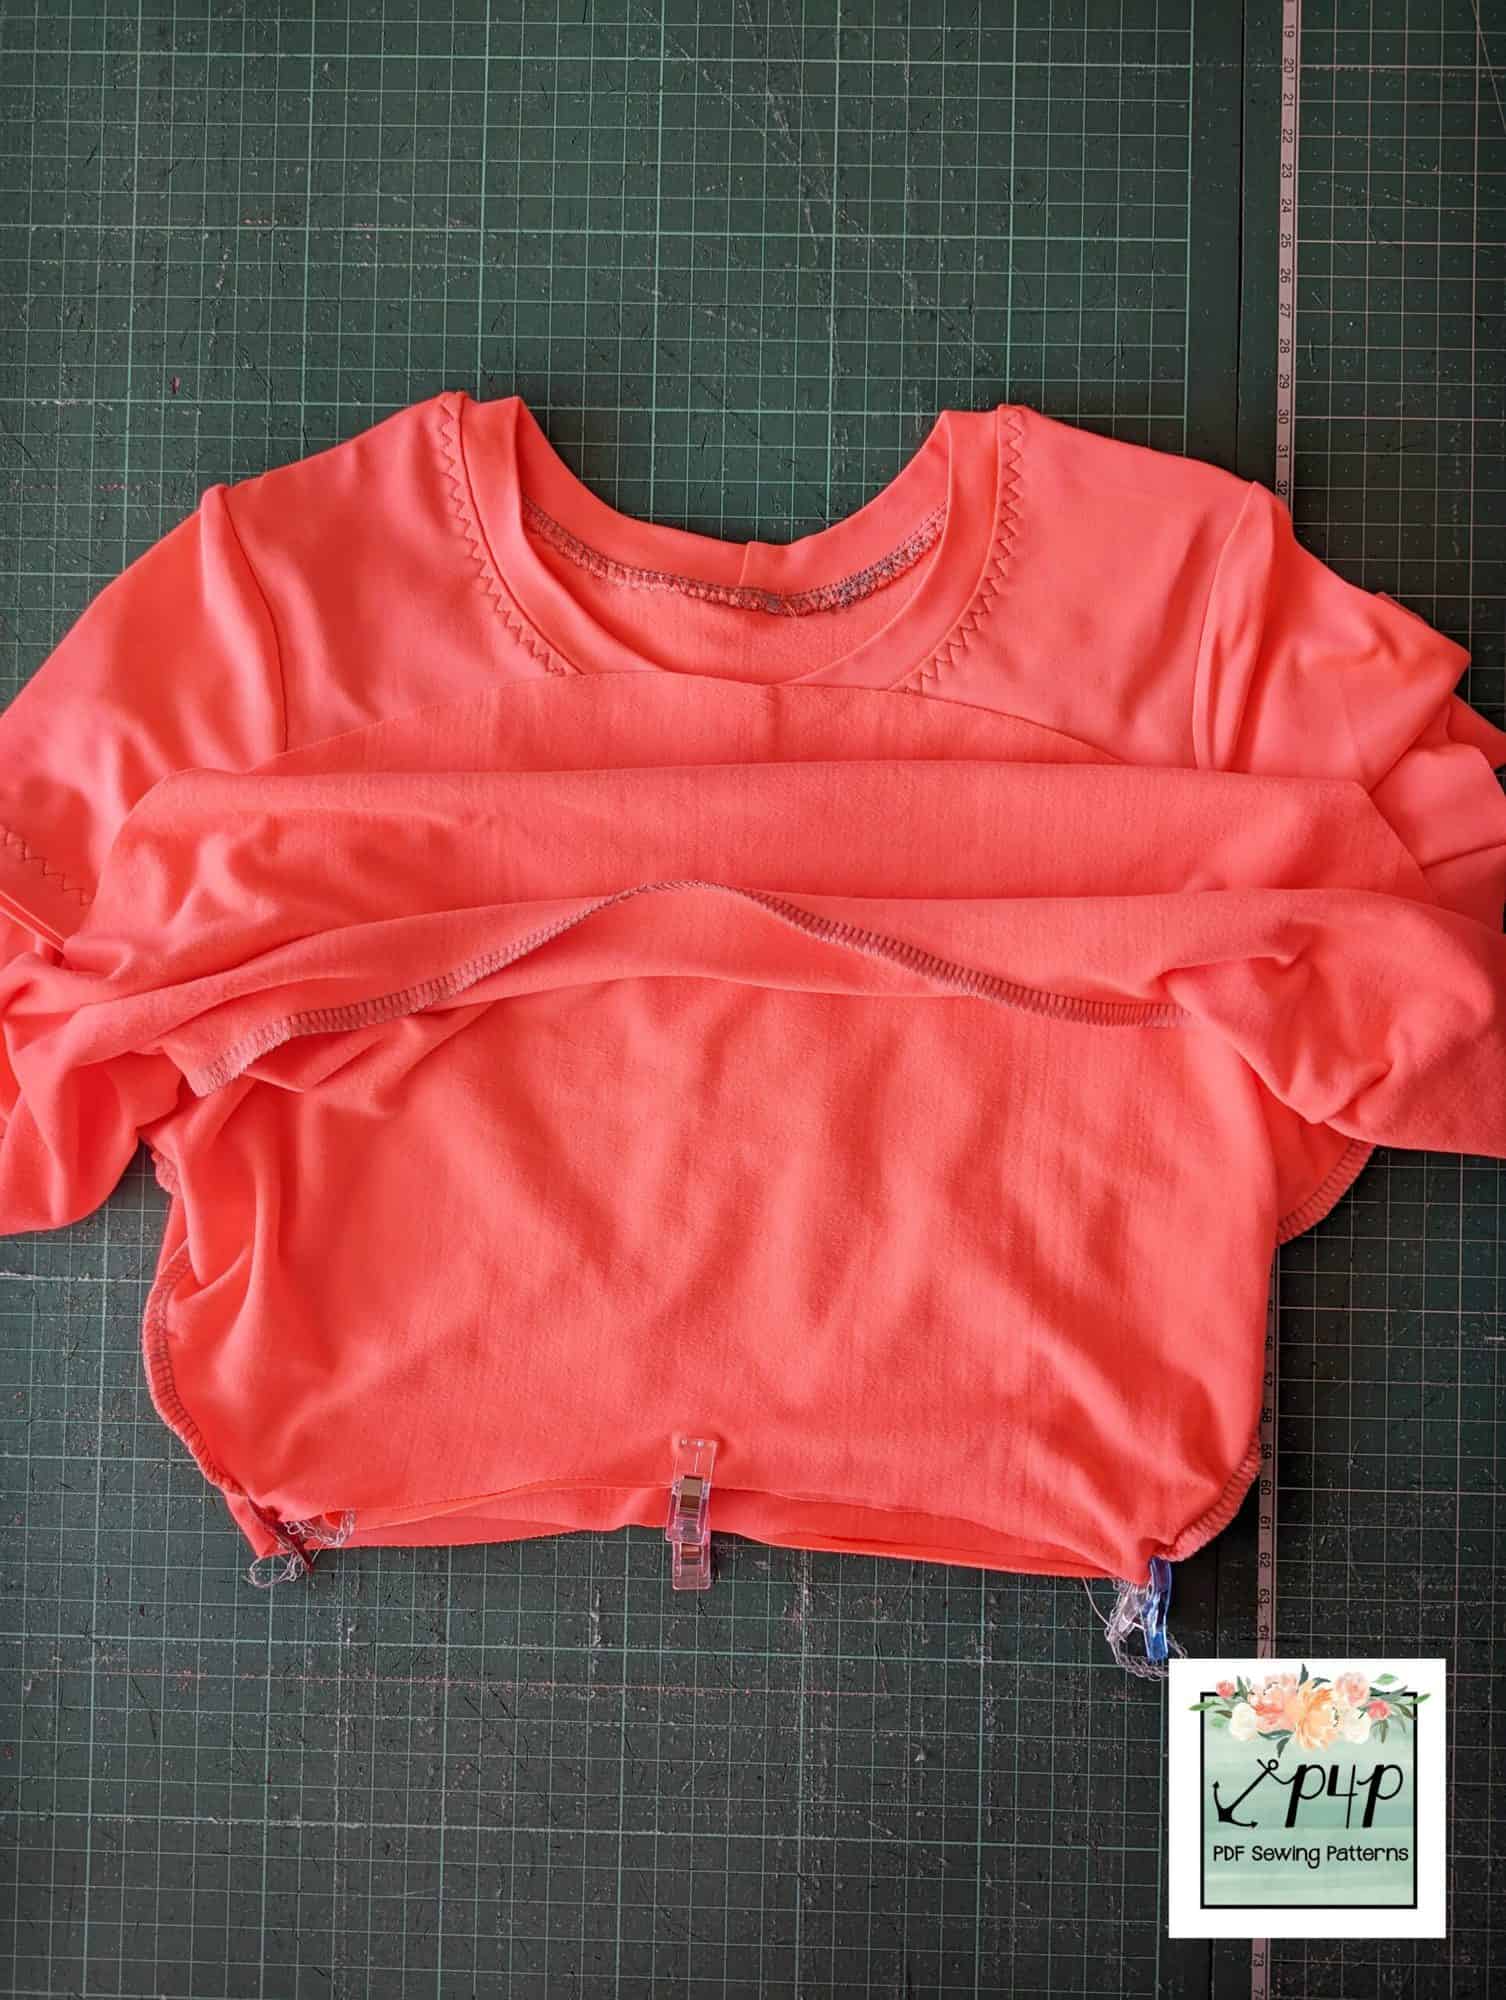
Finally, just sew the skirt to the bodice and you’re done. It’s as easy as that!
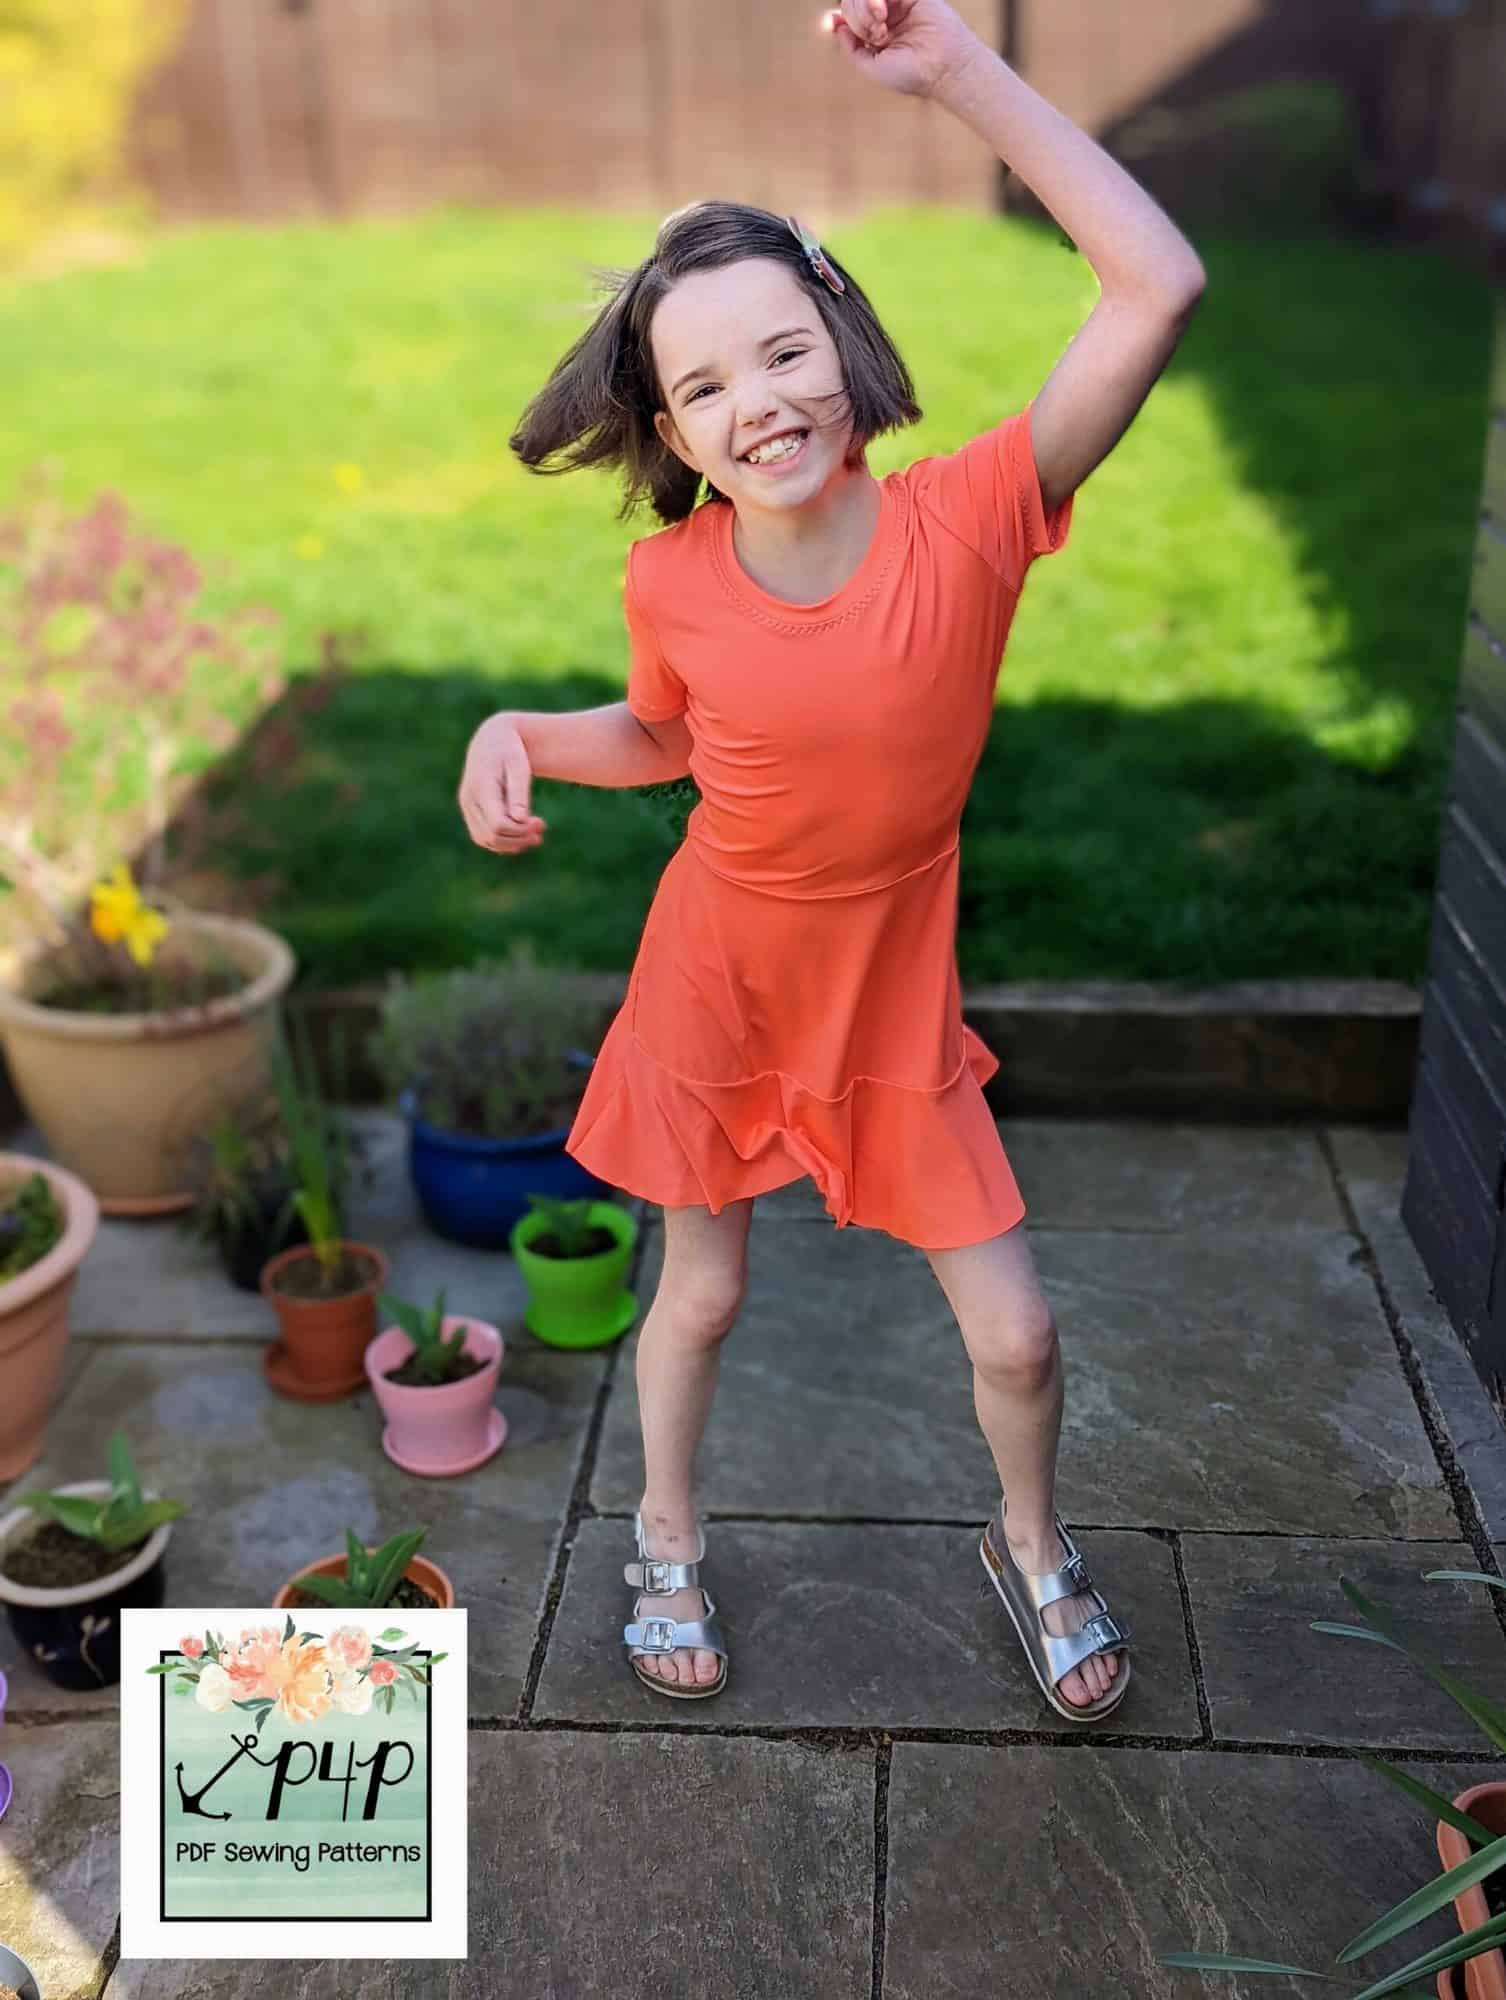
Twirl away to your heart’s content. I hope you love your new dress as much as we do. Happy Sewing! Dana xx
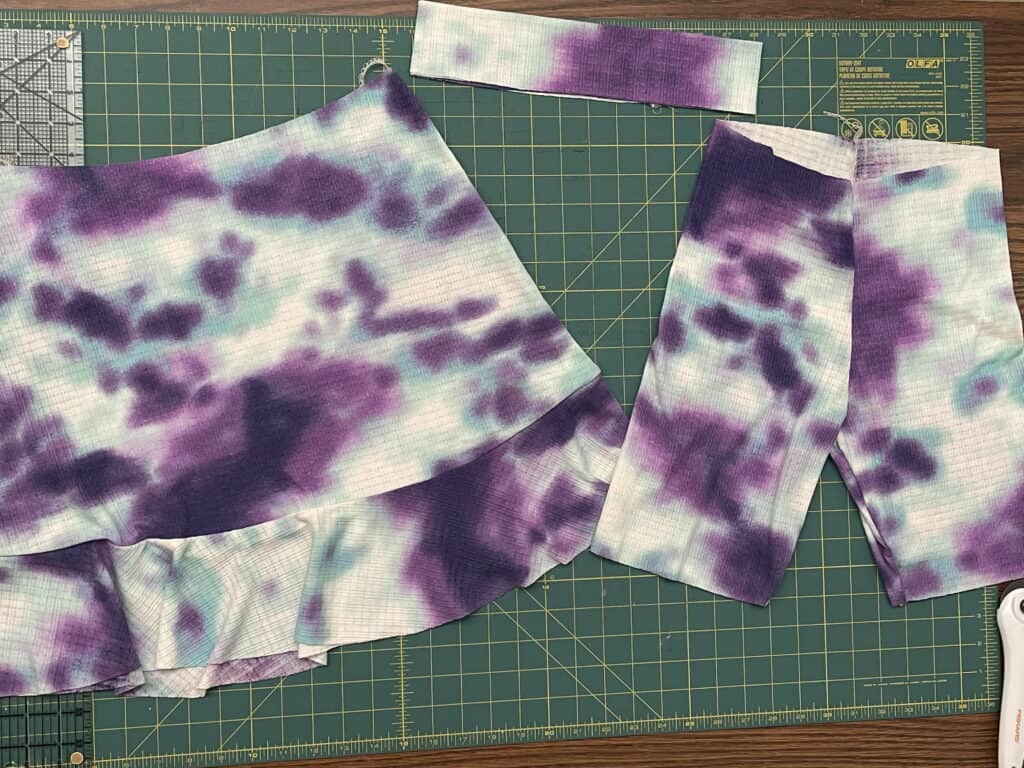
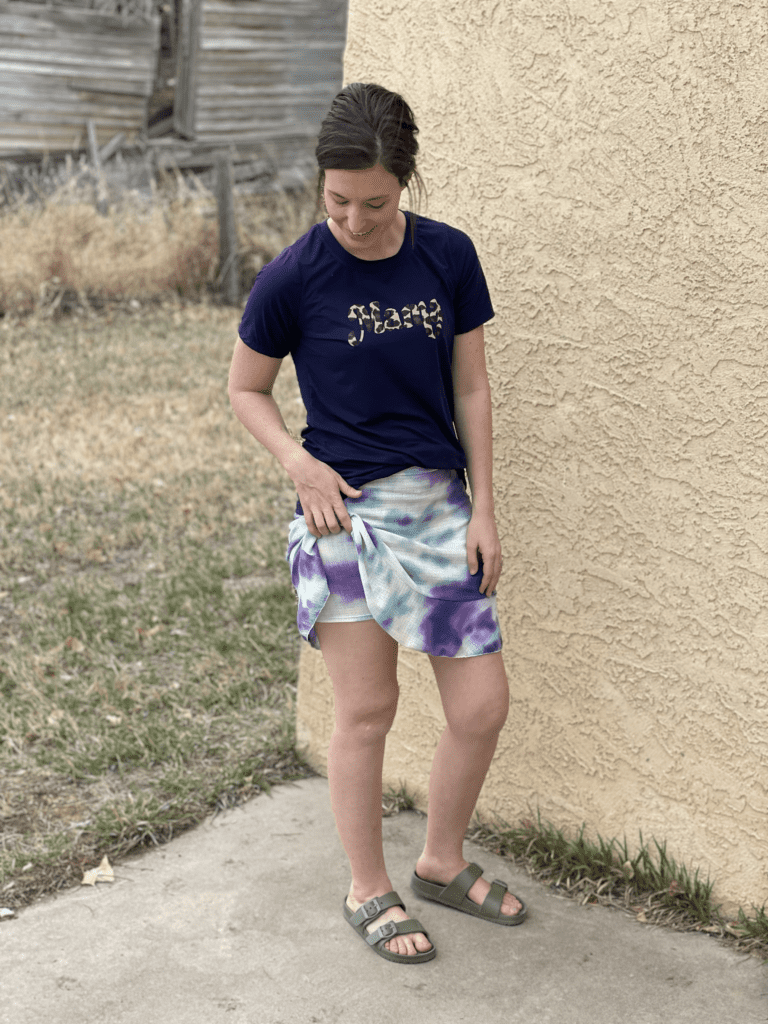
Skort Hack
As soon as the testers started talking about their plans for the Sugar Maple Skirt, many of them decided that it’d be the perfect skirt to turn into a skort — and we have the perfect pattern to help create that with the Peg Leg Leggings! Many thanks to Kalene Bartlett, our tester extraordinare, who photographed her steps of making the ::perfect:: skort! My sisters-in-law are big runners and I think they’d adore a running skirt like this! But I’ve also heard that plenty of mommas would love to have some added coverage for chasing littles around during the warmer months….not to mention it’s a perfect solution for fighting off that dreaded thigh chafing experience while rocking skirts. Because the Sugar Maple Skirt is meant to sit at the high waist, you’ll want to cut the Peg Legs pattern at the high-waisted cut line. You’ll need:
- Peg Legs Leggings, in shortie / biker length…depending on the length of your skirt (assembled per the pattern instructions)
- Sugar Maple Waistband
- Sugar Maple Skirt top + drop yokes (assembled per the pattern instructions)
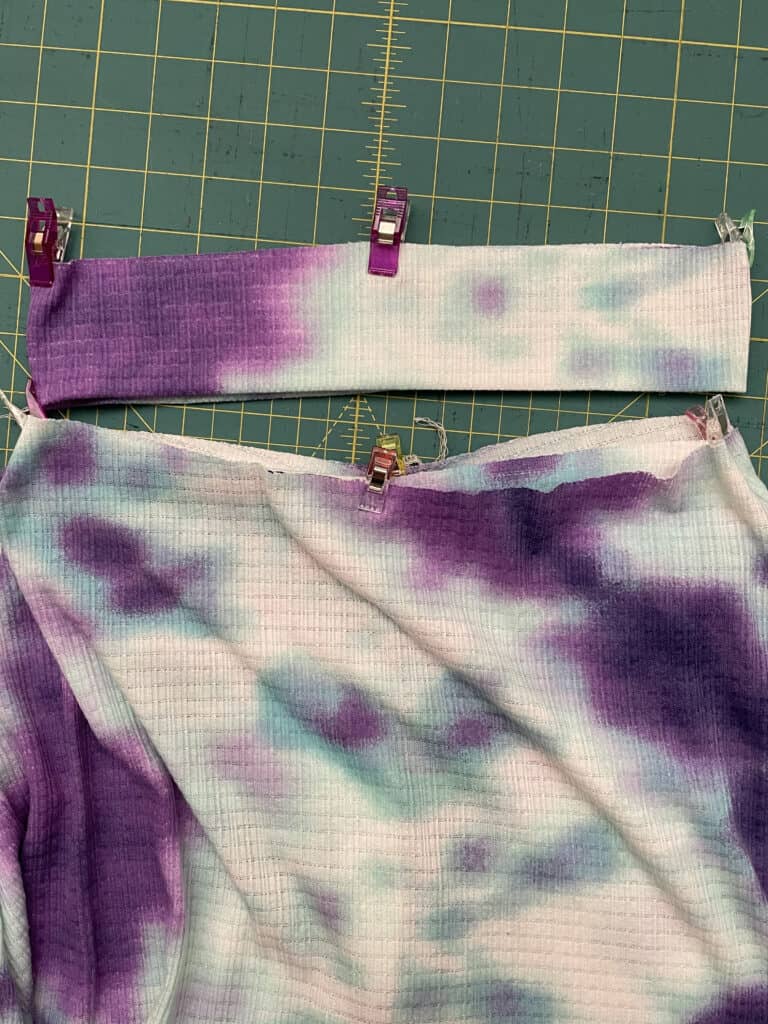
Mark the quarter points on both the Peg Legs and Sugar Maple skirt. Slide the Peg Legs inside of the skirt, right side of the Pegs facing the wrong side of the Sugar Maple. Pin/clip in place.
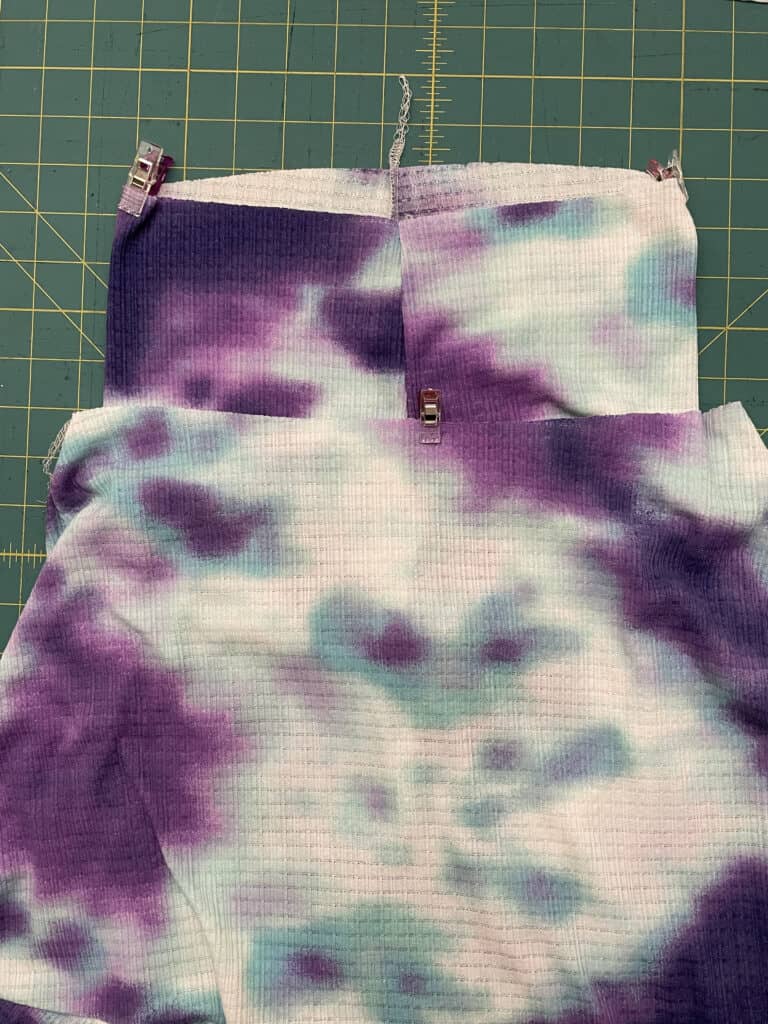
Find the quarter points of the waistband, and slide over the Sugar Maple / Peg Legs pieces…matching previously marked quarter points.
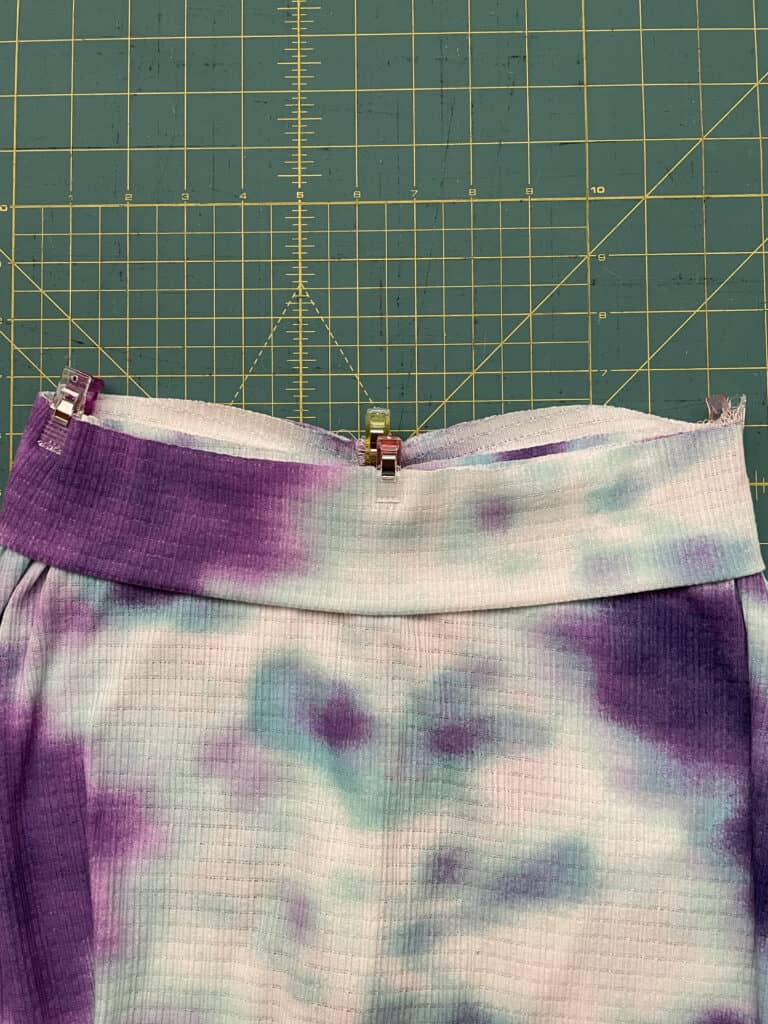
Sew all 3 pieces together, stretching the waistband and Peg Legs slightly to match — careful not to stretch the skirt opening.
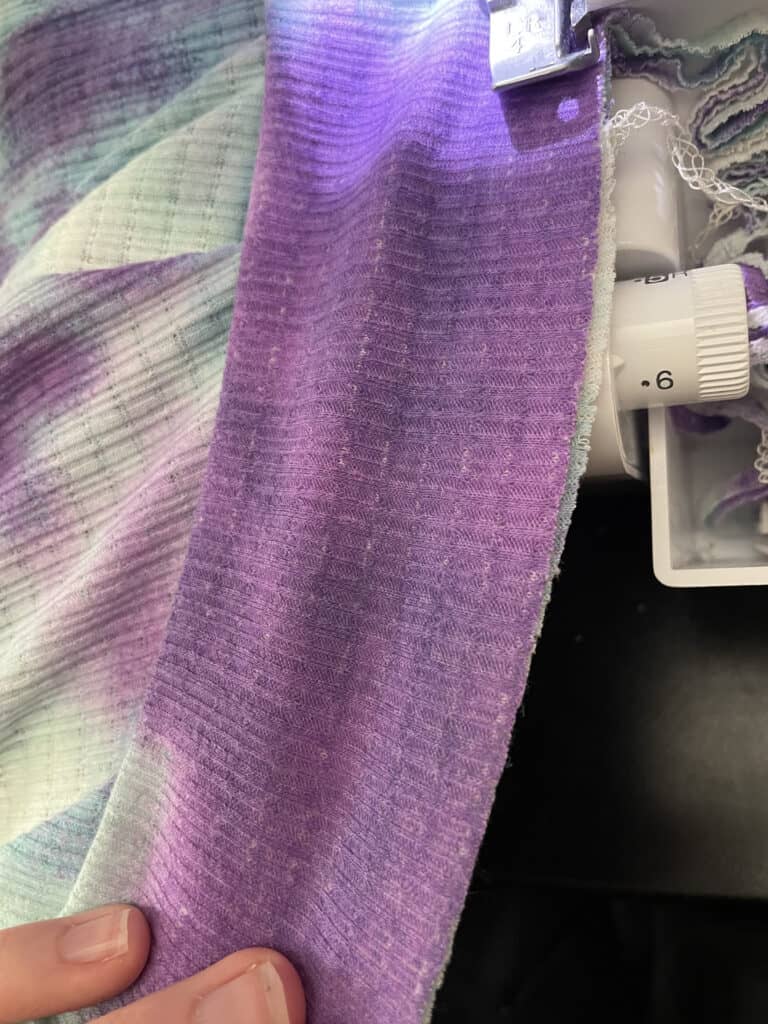
Flip waistband up. Hem skirt and shorts.
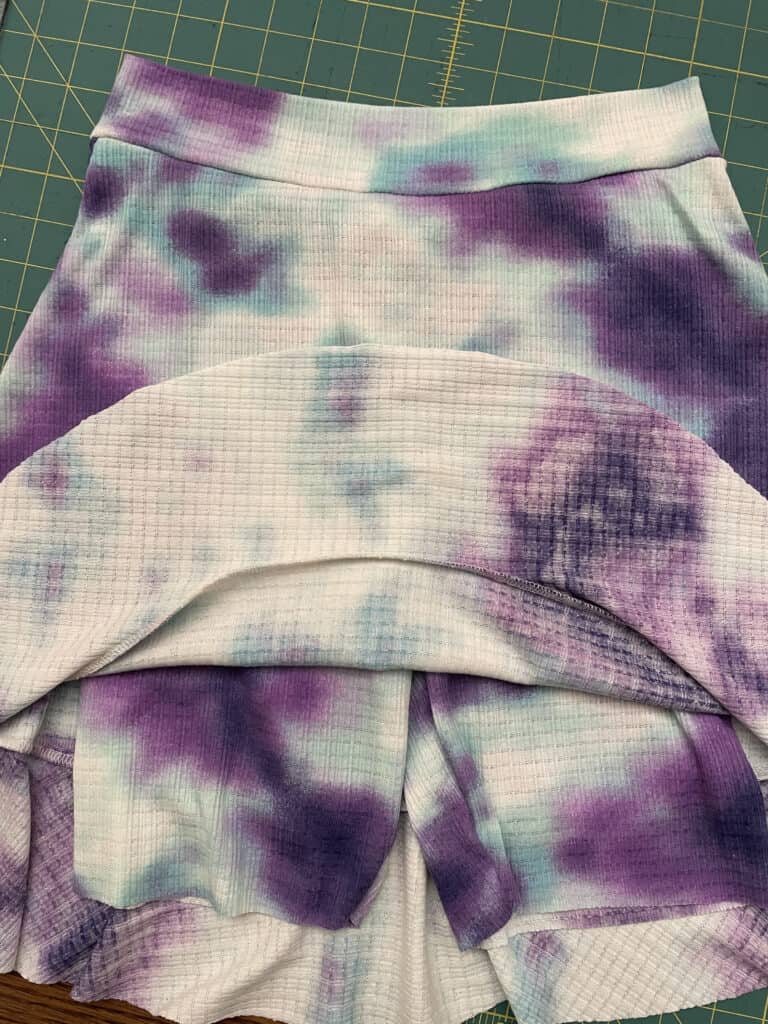
You’re finished! Now go be like Kalene and be cut, comfortable AND covered in your new Peg Legs / Sugar Maple Skort!
I am beyond excited to see the Sugar Maple Skirts that you make! Head on over to the shop and grab yourself a copy of these new patterns! They are available on sale (no code needed) through 11:59pm CST, April 17, 2022.
Sugar Maple Skirt – Adult | Sugar Maple Skirt – Youth | Sugar Maple Skirt BUNDLE
Hoping for a little inspiration before diving into some Sugar Maple sewing? Head over to our Facebook group where you can see tester albums full of amazing images!
Sugar Maple Skirt: Adult Album | Sugar Maple Skirt: Youth Album
- « Previous Page
- 1
- …
- 6
- 7
- 8
- 9
- 10
- …
- 28
- Next Page »