Patterns for Pirates

P4P stylish, modern, wearable patterns

  • Home
  • Blog
    • Frequently Asked Questions
    • Pattern Releases
      • Free Patterns
    • P4P University
      • Fitting
      • Sewing with Stretch, Knit Fabrics
      • Sewing with Woven Fabrics
      • Sewing Machines
    • Sew-A-Longs
    • Fabric for Pirates
    • Pattern Hacks
    • Announcement
      • Blog Tours
      • Contest/Giveaway
  • Shop
  • Bundle Discounts
  • Flash Friday
  • Gift Cards
  • My Account
  • Cart

New Pattern Release :: Sugar Maple Skirt

April 11, 2022

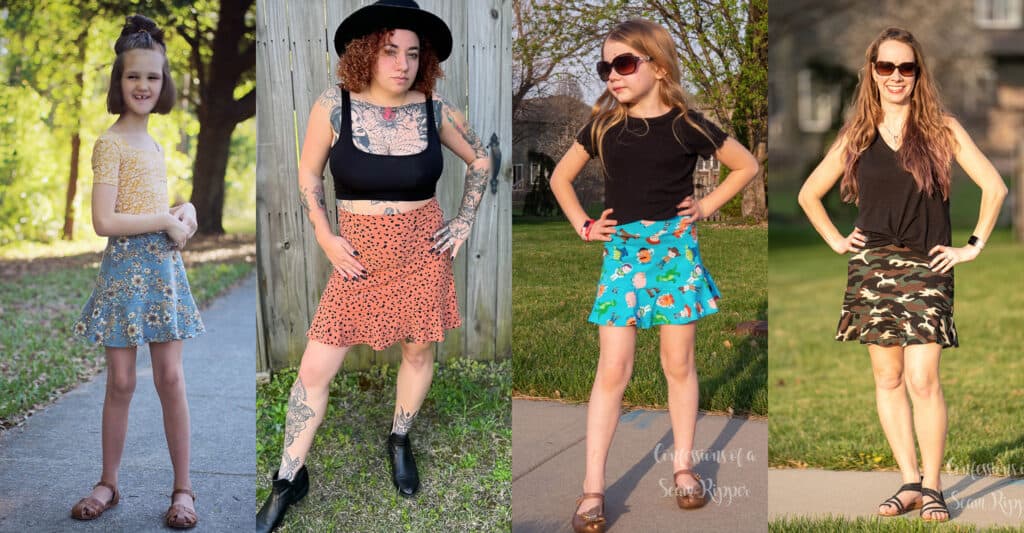
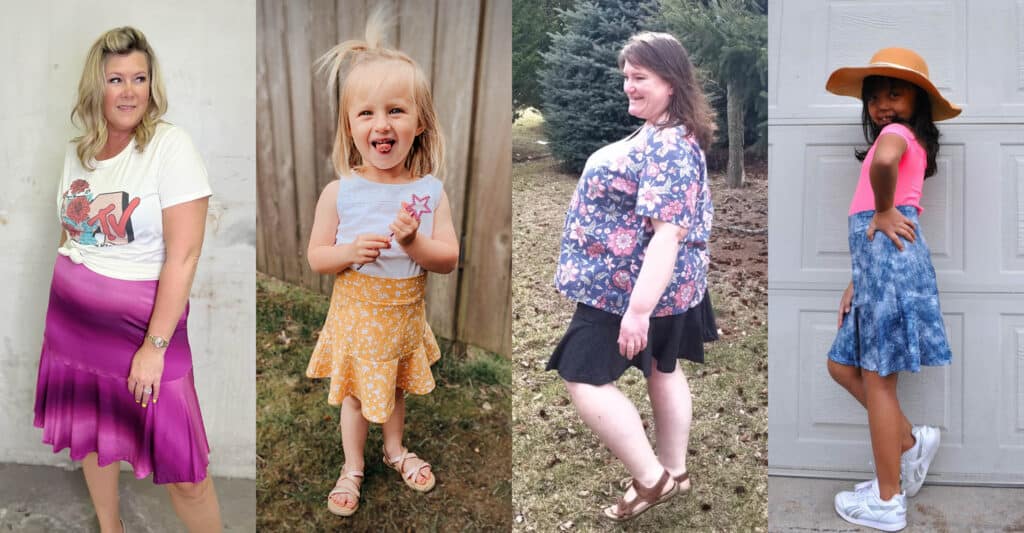
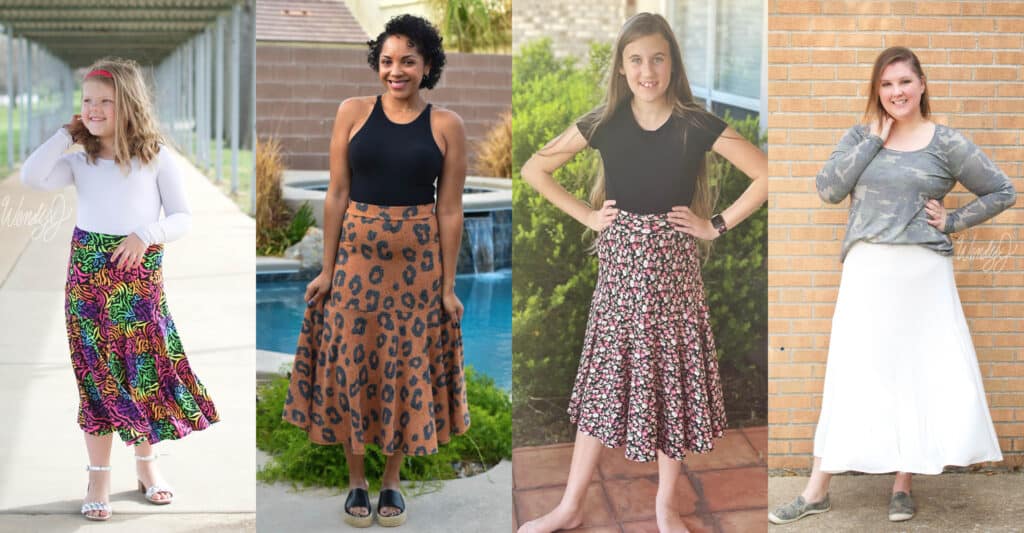
Happy Spring, Pirate Friends!  I have a confession to make: I love wearing skirts.  Love them!  If you see me during the warmer months, I’m rocking a skirt all the time.  It’s such an easy way to look like you’re put together, and they actually help keep you cooler than a pair of shorts.  Plus if the skirt has a twirl or swish factor to it, it’s just bonus!

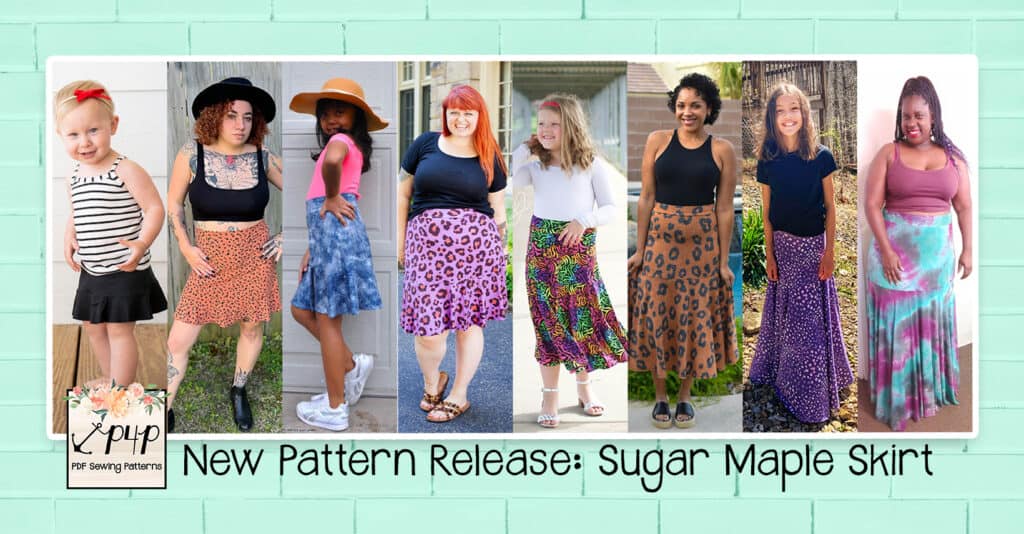
I am so beyond excited to share with you my first ::official:: pattern launch with P4P!  Thank you all so much for being part of my journey in the sewing world, it’s like a dream come true to be here today sharing with you my pattern: the Sugar Maple Skirt! 

I (Katy) have been living in West Virginia since I moved here for college, and to infuse my love for the Mountain State into things I produce, the names will all be WV inspired.  The Sugar Maple is our state tree — thus it’s now the name of our ::new:: set of patterns!


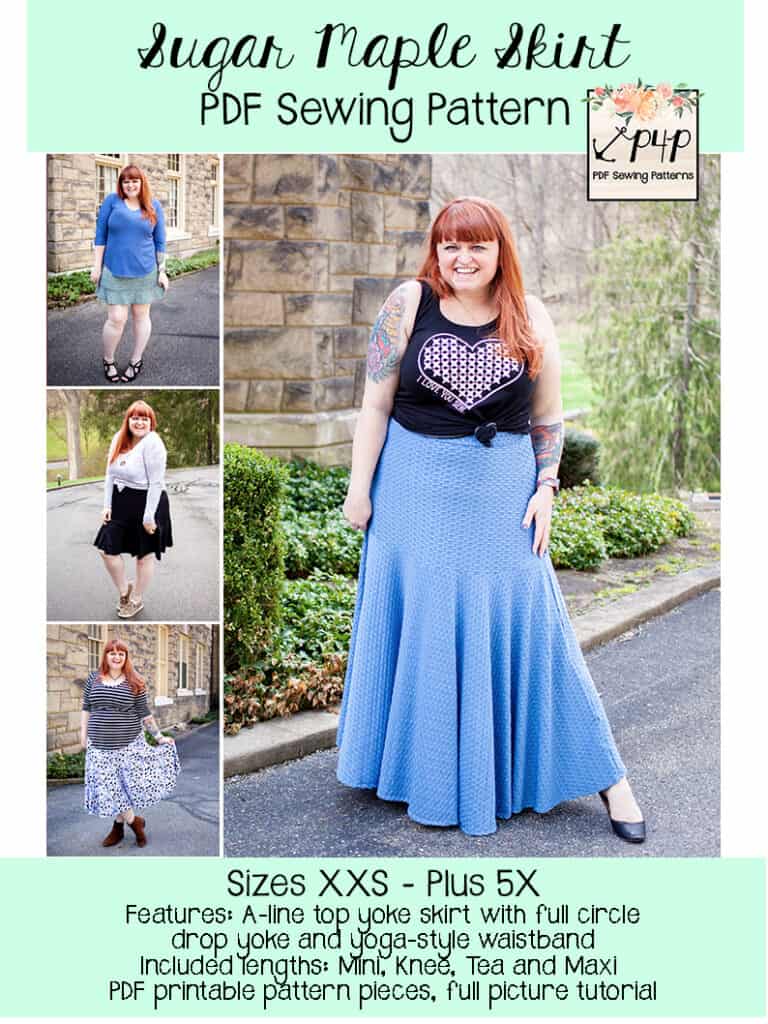
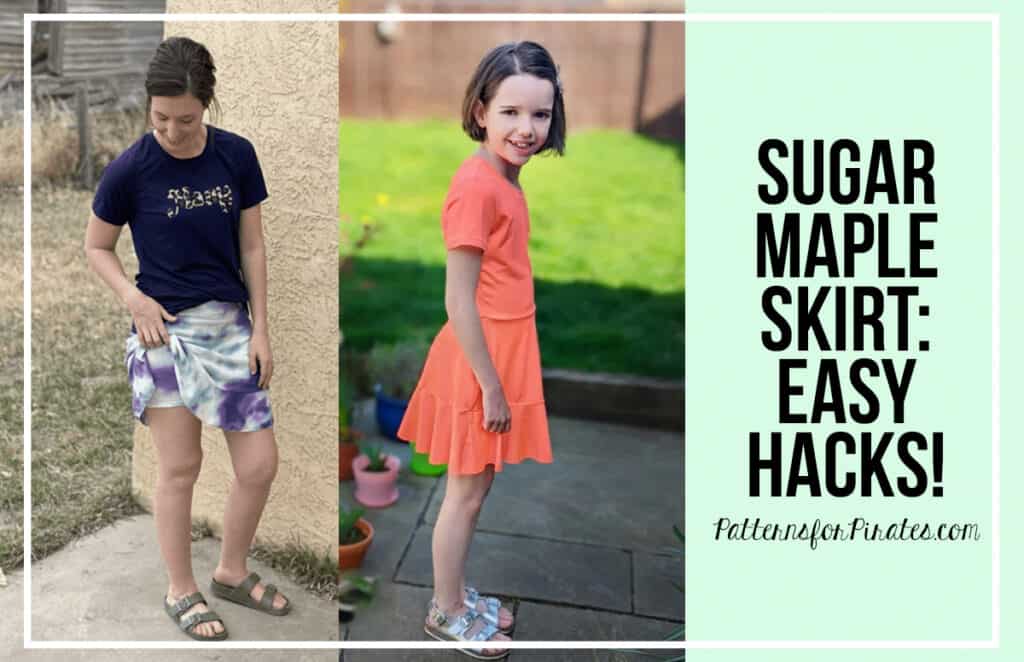
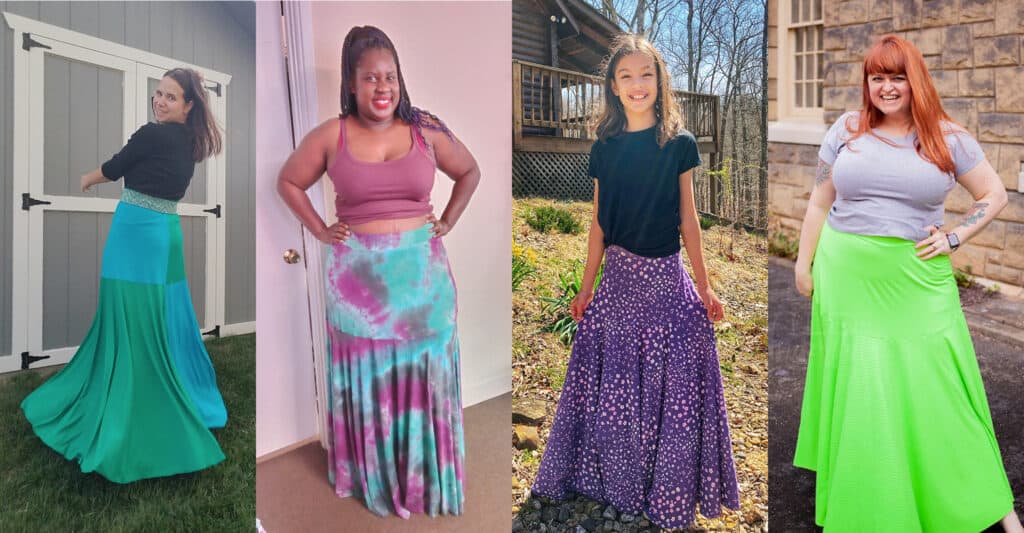
The Sugar Maple Skirt is an a-line skirt with a full circle drop yoke.  It is designed to be worn at the natural waist and comes in four lengths: mini, knee, tea and maxi.  The top yoke has a flattering, body skimming silhouette, while the fuller part of the skirt joins just below the booty.  Whichever length you choose, each provides for ALL the swishy, twirly goodness that you could hope for in a skirt.

The Sugar Maple is a great basic skirt pattern to have, an excellent sewing project for beginners, and it comes together so quickly that you’ll end up making multiple before you even know what happened!  You can use this pattern to create something casual, flirty, conservative, dressy, and everything in between.  The simple construction of the knit yoga style waistband is geared for comfort in wearing and the different lengths provide opportunity for any style you’re after.

The Sugar Maple Skirt is drafted for knit fabrics with at least 30% stretch.  Practically any light-to-medium weight knits will work.  Think: jersey knits, rayon/spandex blends, scuba, liverpool, dbp, “yummy” ribbed knits, etc.  The waistband will need at least a 50% stretch horizontally, and requires good recovery.  Look for a spandex/lycra content of 5% or more for your waistband.  The higher the spandex content, harder your waistband will work to keep your skirt in place.


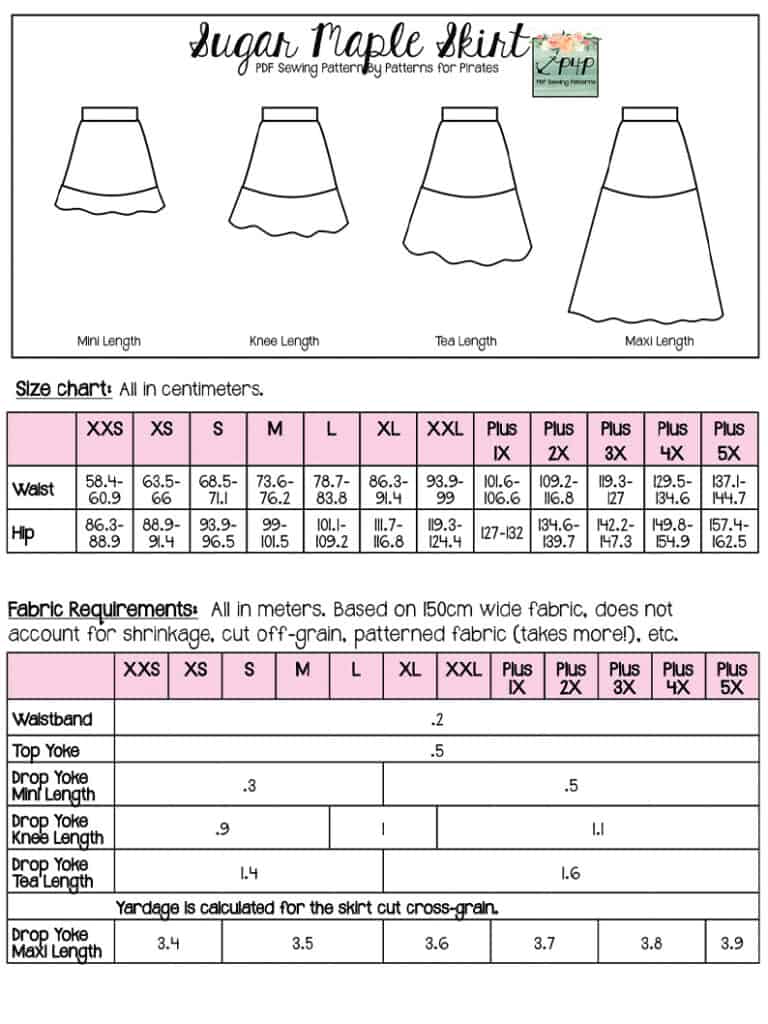
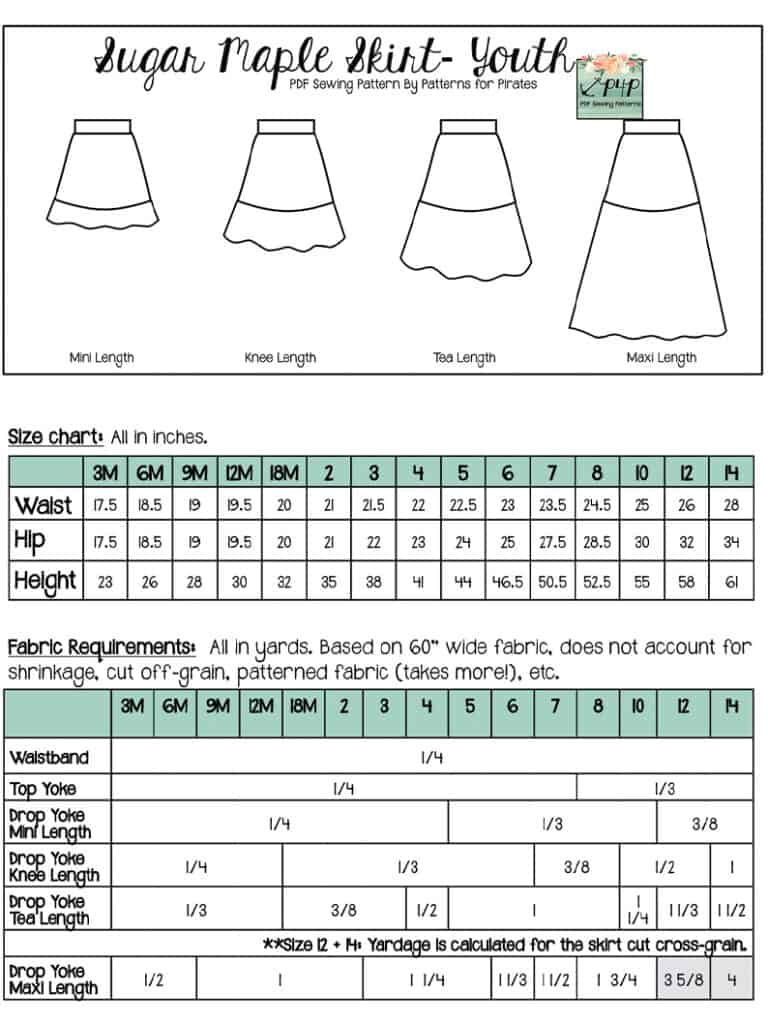
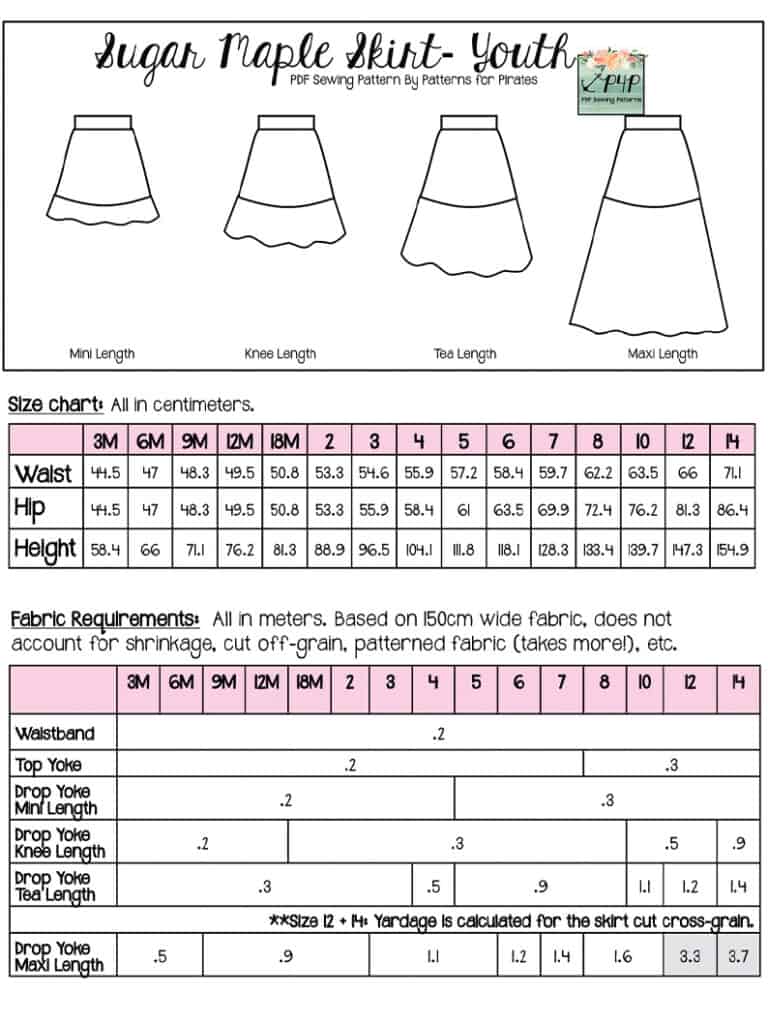
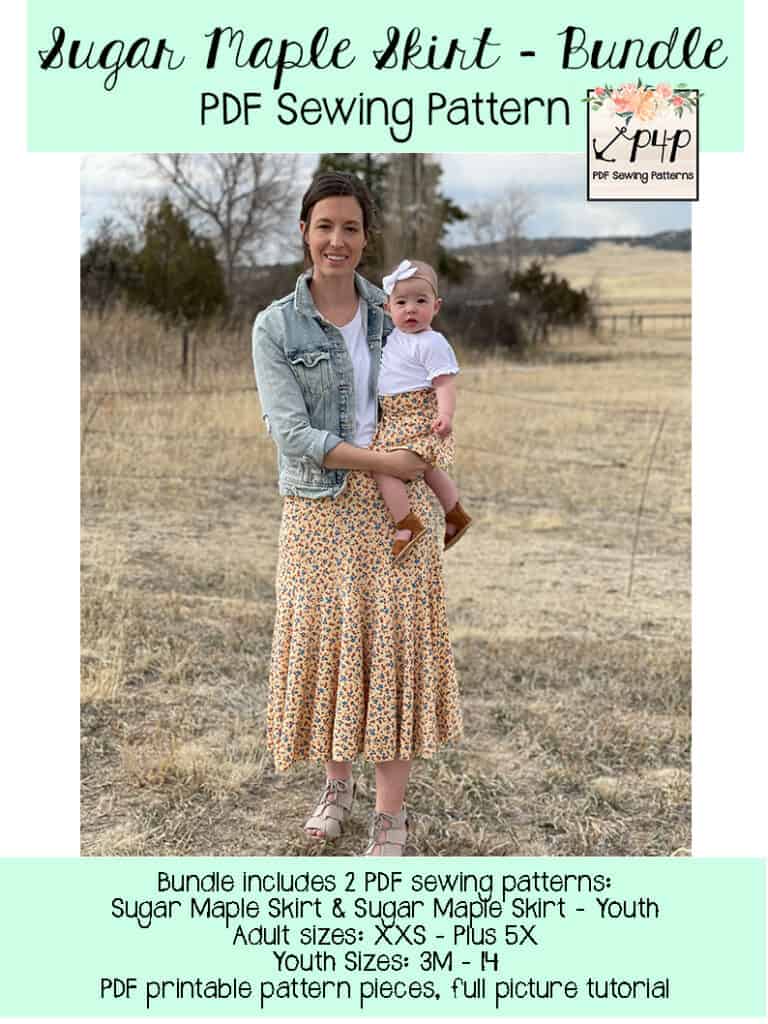
The youth sizes range from 3m – 14 and the adult sizes are for the full, newer size chart, extending from XXS – Plus 5X for the Adult Hourglass Figure.

*Want to learn more about how to measure yourself for these pattern?  We’ve got you covered with an in-depth blog HERE.  And for even more helpful fun, we have a free* printable that you can use to help record your measurements as you take them.

And in case you’re new to Patterns for Pirates and PDF patterns in general, we have a great blog full of new-user tips HERE to help you get started!

As with all of our current releases and updates, the pdfs now include our layers feature and can be found in Letter, A4, A0 and projector sizes.  

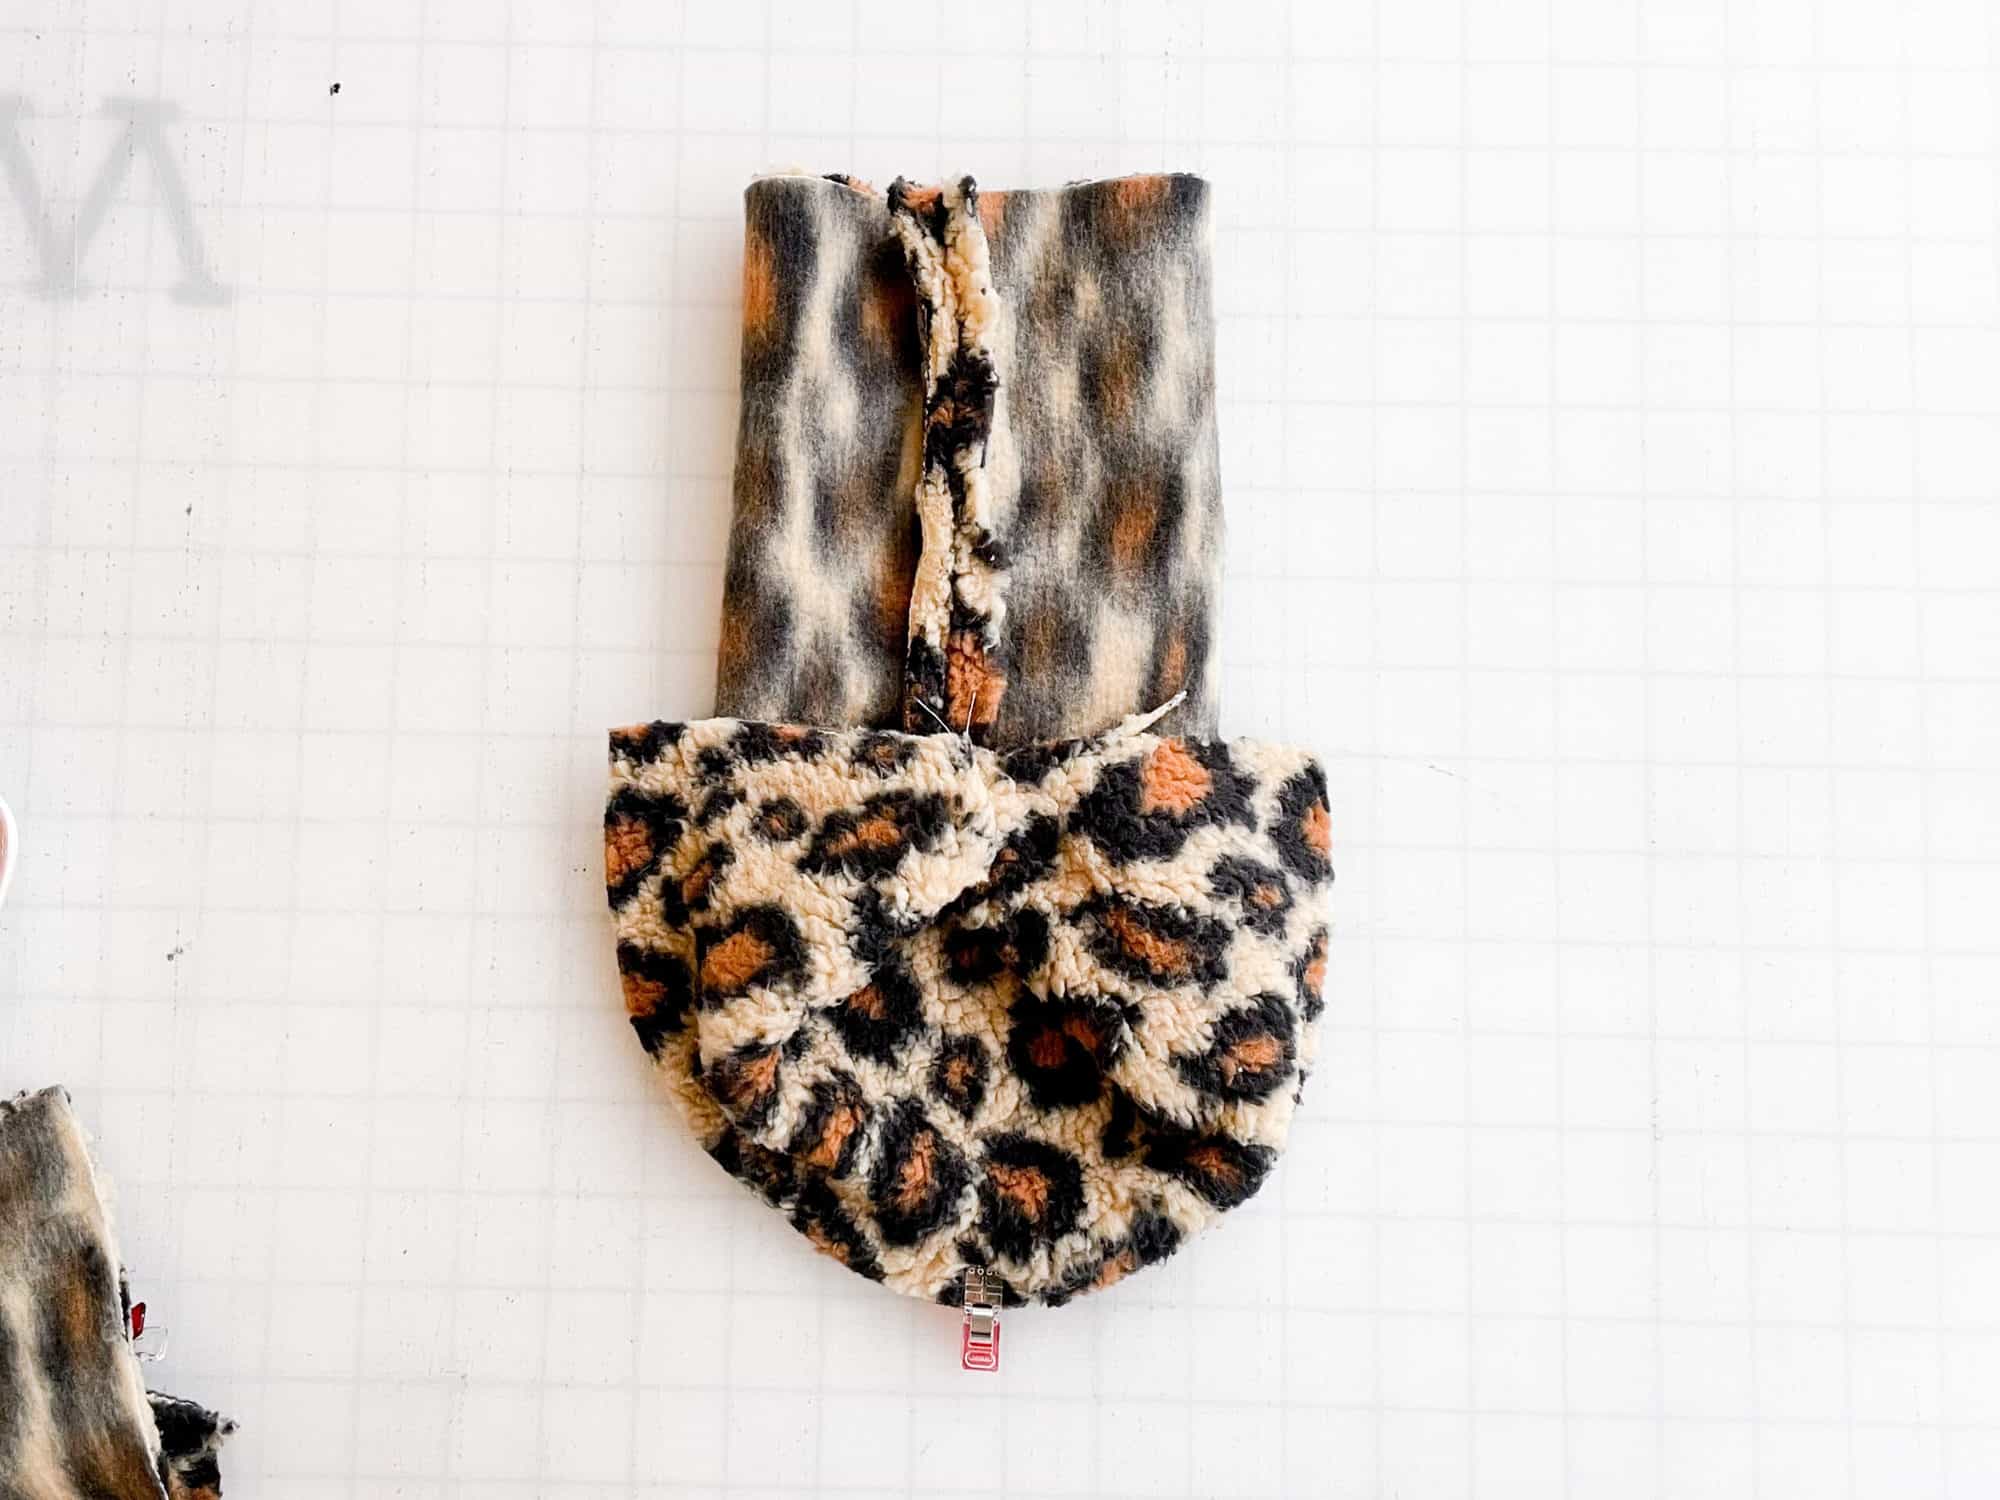
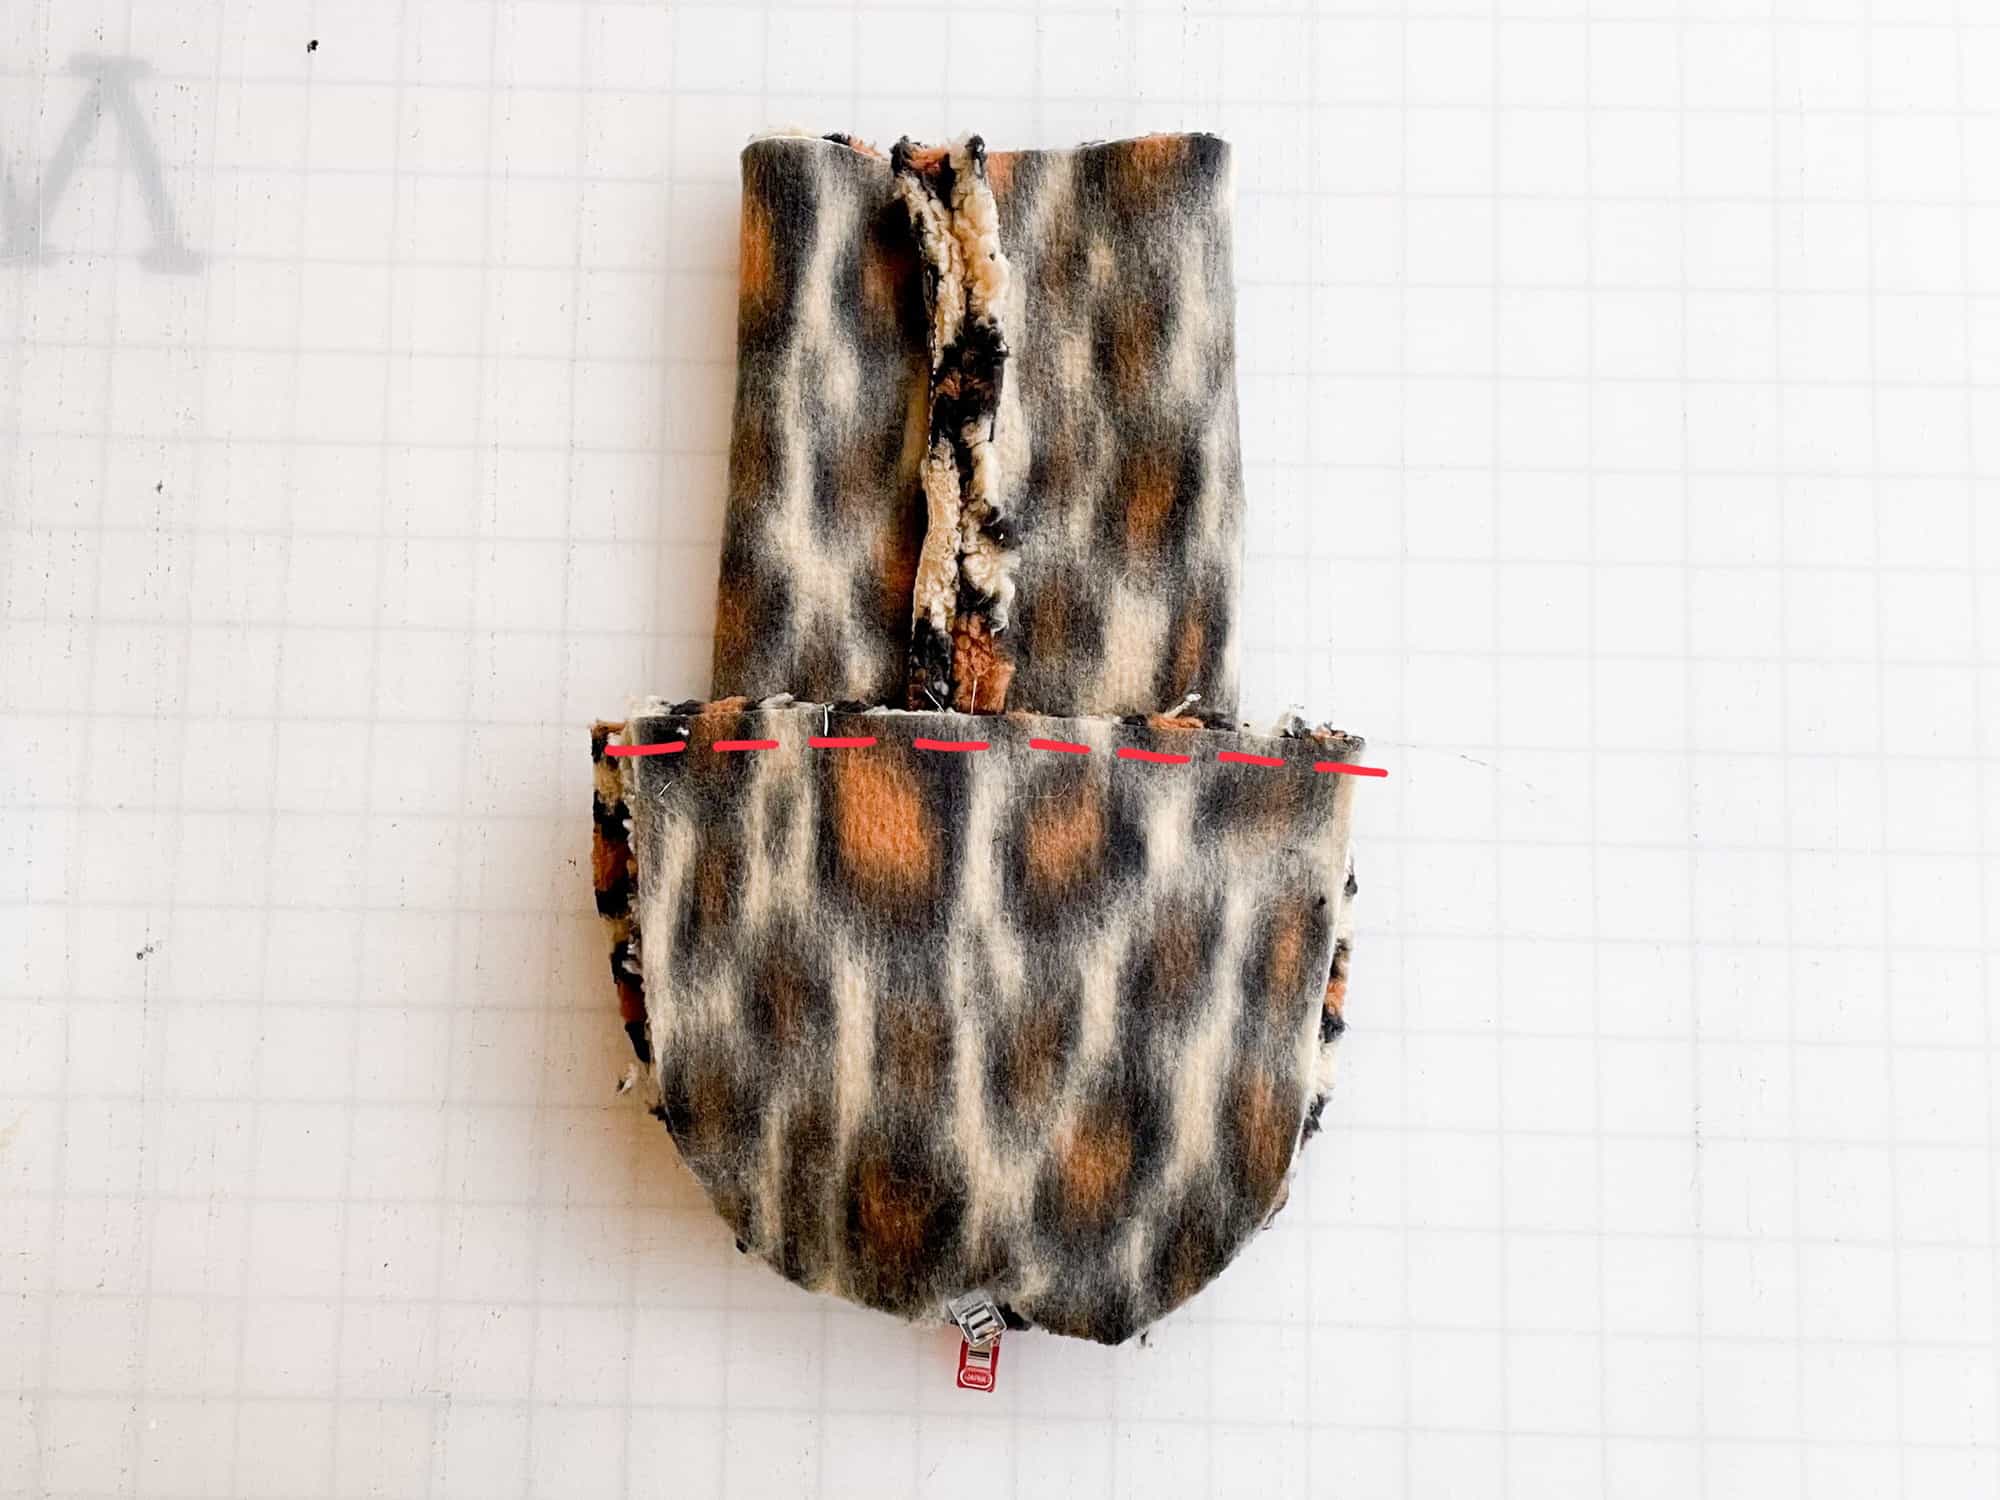
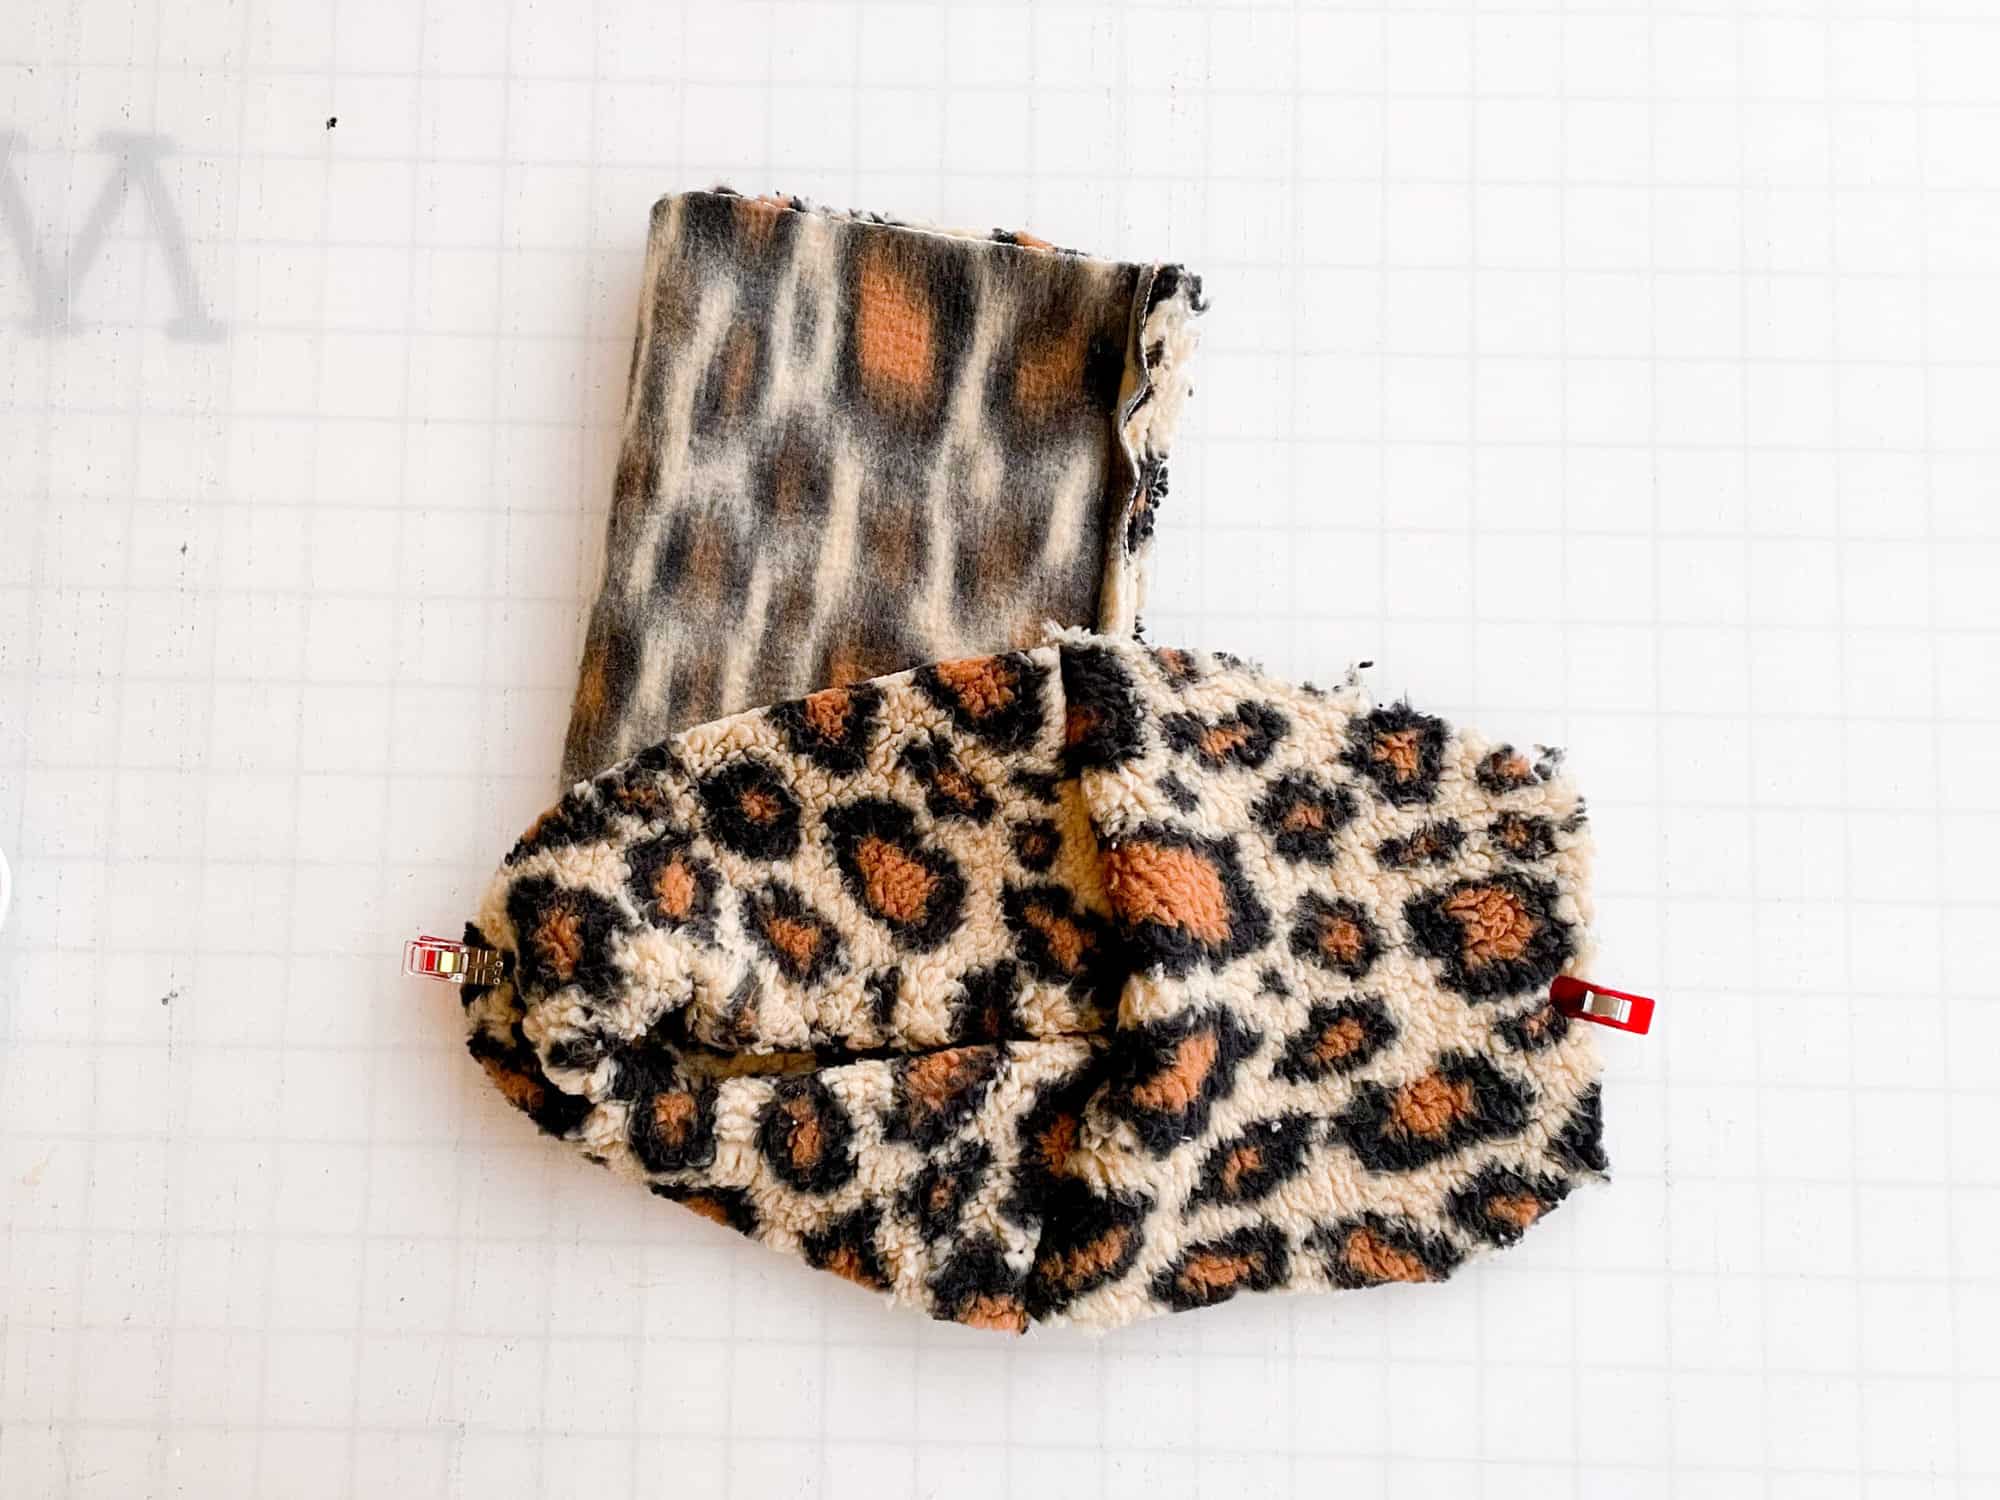
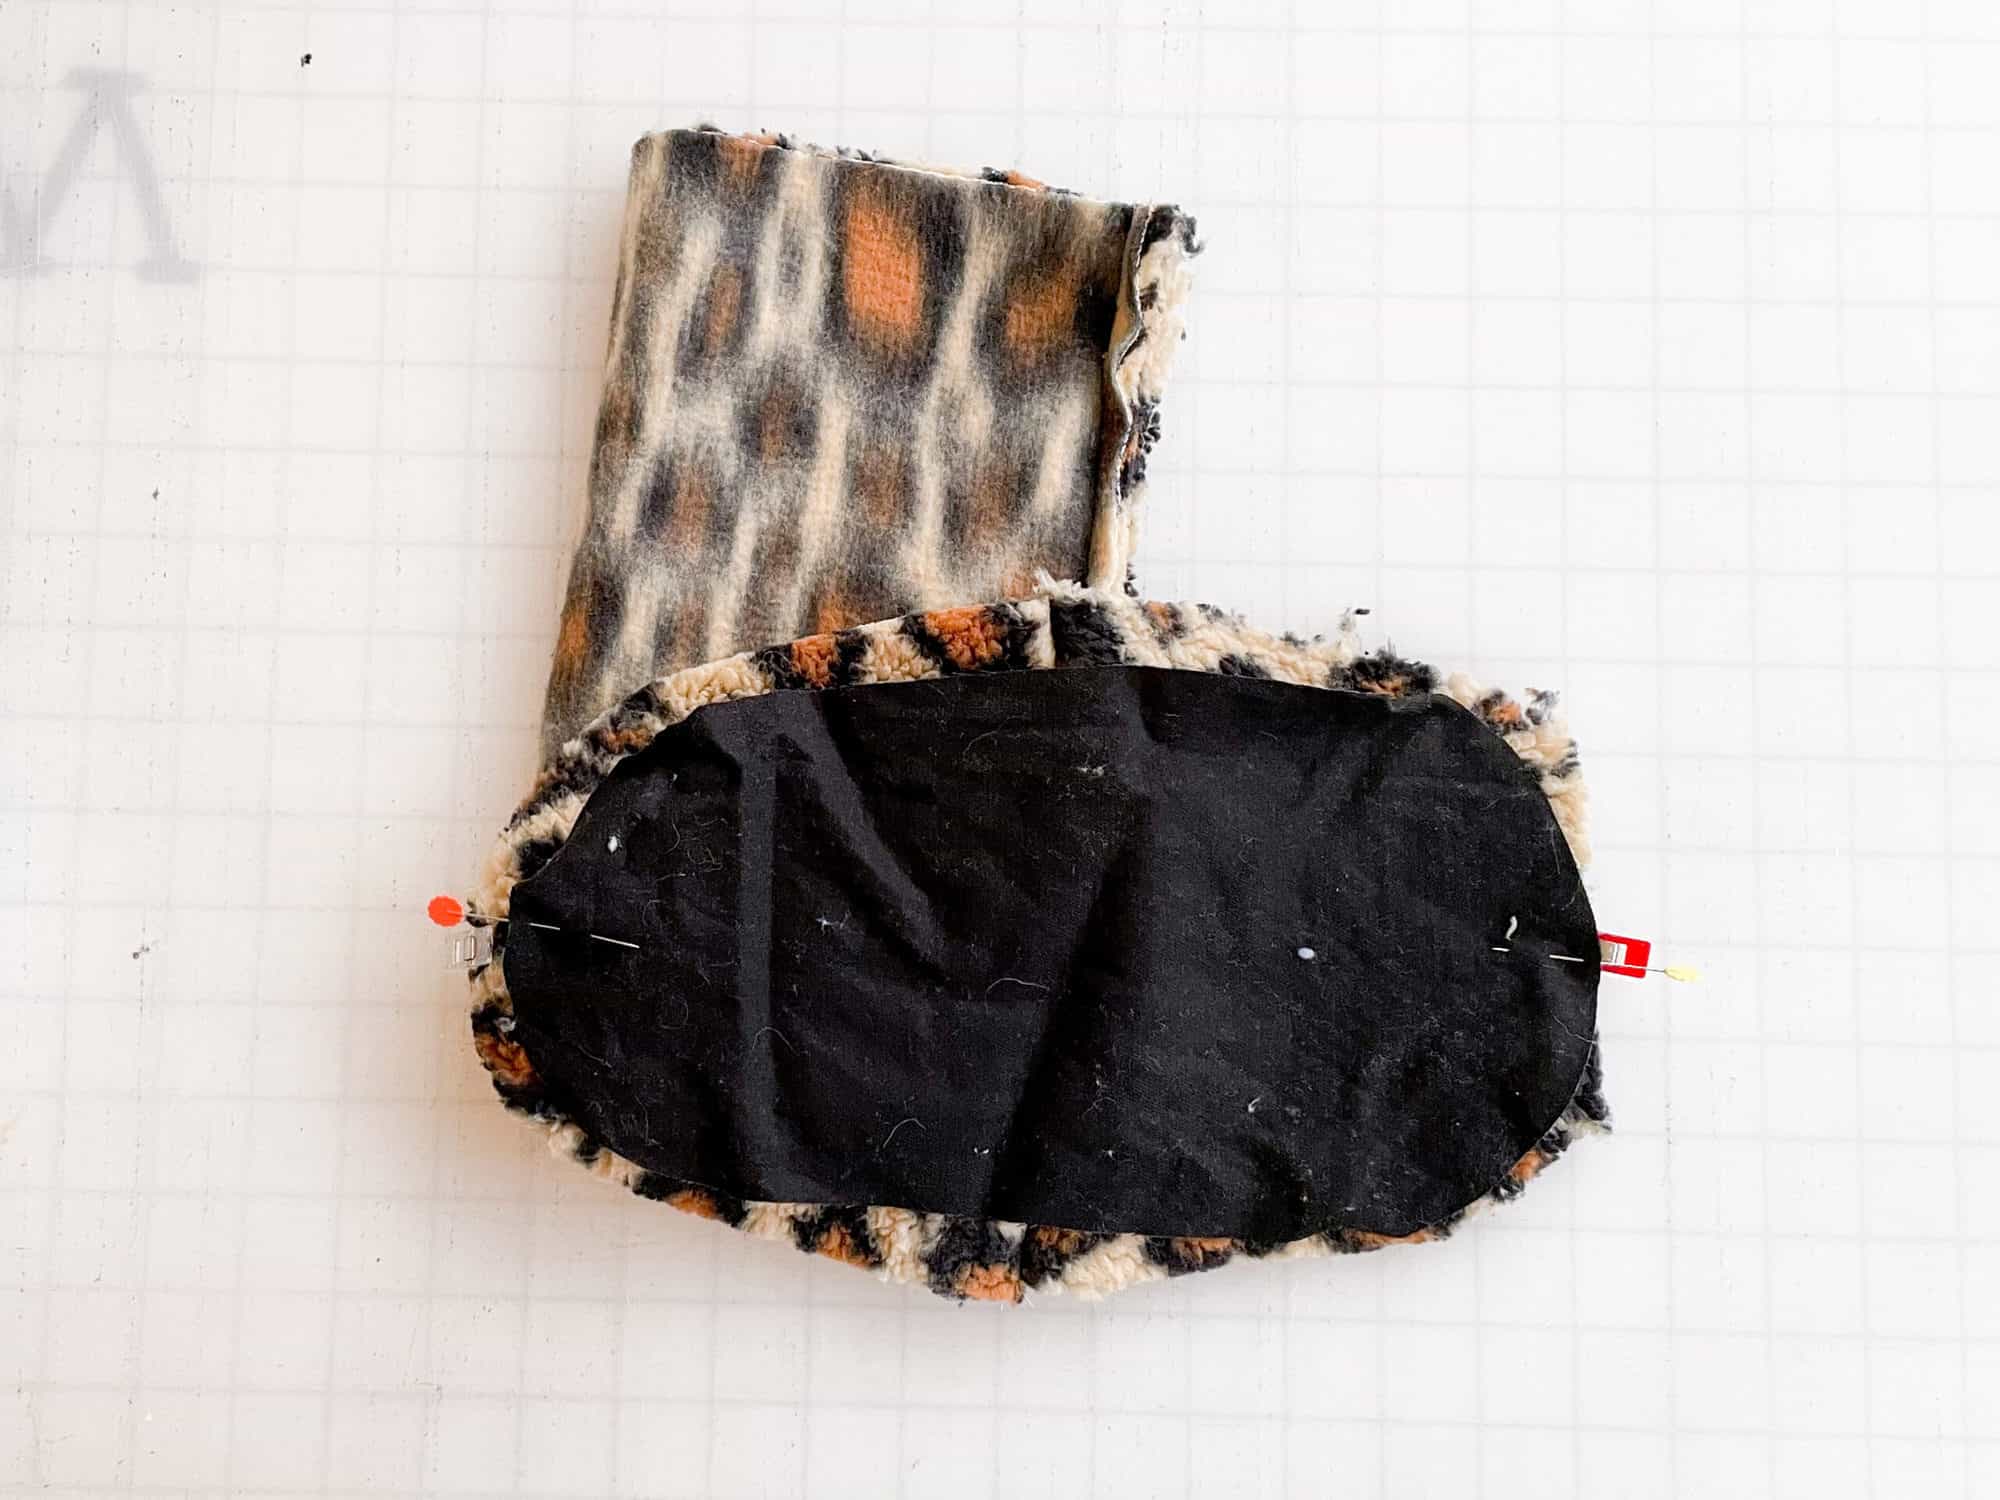
Worried about sewing up the Sugar Maple Skirt?  Don’t be! We have a video that walks you through the entire construction process:

Let’s take a look at the different ways we can sew up these patterns!

SUGAR MAPLE SKIRT OPTIONS:
 
MINI LENGTH
KNEE LENGTH
TEA LENGTH
MAXI LENGTH
 

I am beyond excited to see the Sugar Maple Skirts that you make!  Head on over to the shop and grab yourself a copy of these new patterns!  They are available on sale (no code needed) through 11:59pm CST, April 17, 2022.

Sugar Maple Skirt – Adult | Sugar Maple Skirt – Youth | Sugar Maple Skirt BUNDLE

Hoping for a little inspiration before diving into some Sugar Maple sewing?  Head over to our Facebook group where you can see tester albums full of amazing images!

Sugar Maple Skirt: Adult Album | Sugar Maple Skirt: Youth Album

We also provided for a couple extra ways to extend this pattern with our Sugar Maple Skirt – Easy Hacks.  Go take a look!

Filed Under: Pattern Release Leave a Comment

Protected: Fabric for Pirates :: April 2022 Reveal

April 4, 2022

This content is password protected. To view it please enter your password below:

Filed Under: Fabric for Pirates 1 Comment

Protected: Fabric for Pirates :: March 2022 Reveal

March 8, 2022

This content is password protected. To view it please enter your password below:

Filed Under: Fabric for Pirates Leave a Comment

Protected: Fabric for Pirates :: February 2022 Reveal

February 8, 2022

This content is password protected. To view it please enter your password below:

Filed Under: Fabric for Pirates Leave a Comment

Protected: Fabric for Pirates :: January 2022 Reveal

January 9, 2022

This content is password protected. To view it please enter your password below:

Filed Under: Fabric for Pirates Leave a Comment

Protected: Fabric for Pirates :: December 2021 Reveal

December 6, 2021

This content is password protected. To view it please enter your password below:

Filed Under: Fabric for Pirates 3 Comments

2021 Holiday Freebies :: Claire Wrap

December 2, 2021

Happy Holidays, Pirate Friends!  We are excitedly back for another year and another round of holiday freebies to share with you!  Over the years, we’ve compiled different tutorials and patterns that we think would make *perfect* gifts for your friends and family. Curious about what we’ve already released in the way of holiday freebies? Head right here to see all of them: Holiday Freebies Roundup.

Today, we are bringing you the: Claire Wrap!

This wrap is inspired by no other than Claire Fraser from the show Outlander. I’ve not personally seen the show, but I have plenty of people in my life that watch it religiously. I saw a wrap Claire was wearing in an image from the show and felt like it’d be such a great accessory to have for myself!

As there are four sizes, it felt right to name them like this. 😉

Supplies Needed:

  • Claire Wrap pattern pieces
  • 2 Yards Knit Fabric

**A wide range of knit fabrics can be used for this. I recommend something with a little bit of stretch, so when it’s being worn over the shoulder it moves more easily with you.

TUTORIAL

  • With right sides together, sew along edge of main pieces.
  • Fold strap, right sides together, matching along the long ends. Sew along one short side and raw long side.
  • Using your favorite turning tool, turn straps right side out.
  • Repeat with second strap.
  • Align strap, with right sides together, in center top corner of main piece. Sew.
  • Flip strap towards wrong side of main piece. Hem top and edges of wrap, using 1/2″ hem allowance. You’re finished!

——–

In case you consider yourself a more “visual learner” here’s a video tutorial that walks you through the entire tutorial, start-to-finish.

Check out what our fabulous testers were able to create with this very same tutorial!

The best part about this wrap is that it can be worn SO MANY different ways!

I la-la-love when you share your photos with me!  Head over to the Patterns for Pirates Facebook Group and show us what you’ve made!

Happy Holidays, Pirates!

Filed Under: Free Pattern, Pattern Release Leave a Comment

2021 Holiday Freebies :: Earflap Hat

December 2, 2021

Happy Holidays, Pirate Friends!  We are excitedly back for another year and another round of holiday freebies to share with you!  Over the years, we’ve compiled different tutorials and patterns that we think would make *perfect* gifts for your friends and family. Curious about what we’ve already released in the way of holiday freebies? Head right here to see all of them: Holiday Freebies Roundup.

Today, we are bringing you the: Earflap Hat!

Who doesn’t love a quick and easy (and comfy) knit hat?? It’s a perfect go-to for the cooler months, and this hat is actually an incredible basic — I have so many ideas for how to dress it up! All seams end up fully enclosed, so it’s actually reversible too! Grab your favorite combo of fabrics and you’ll get 2-in-1 hats from this sweet little pattern!

Supplies Needed:

  • Earflap Hat pattern pieces
  • Less than 1/3 yard knit fabric

**if using a thicker fleece / fun fur for the lining, I’d recommend sizing up!

TUTORIAL

  • Step 1: Place back piece, right sides up.
  • Step 2: With right sides facing each other, place the front piece on top, aligning long curved side edges.
  • Step 3: Stitch, using 1/2″ seam allowance.
  • Step 4: Open hat in opposite direction, matching the seams you just created at the top.
  • Step 5: Sew the opening shut, using 1/2″ seam allowance.
  • Repeat Steps 1-5 with lining fabric.
  • Step 6: Place hat lining wrong sides out, and with main hat right sides out, slide the main hat inside of the lining.
  • Step 7: Align all raw edges and sew using 1/2″ seam allowance. Leave 3-4″ opening for turning.
  • Step 8: Turn hat right sides out.
  • Step 9: Push lining fabric inside of main hat. Edge stitch along entire bottom of hat.
  • You’re finished!
  • And it’s reversible!

——–

In case you consider yourself a more “visual learner” here’s a video tutorial that walks you through the entire tutorial, start-to-finish.

Check out what our fabulous testers were able to create with this very same tutorial!

I la-la-love when you share your photos with me!  Head over to the Patterns for Pirates Facebook Group and show us what you’ve made!

Happy Holidays, Pirates!

Filed Under: Free Pattern, Pattern Release 3 Comments

2021 Holiday Freebies :: Shiver Me Slipper Socks

December 1, 2021

Happy Holidays, Pirate Friends!  We are excitedly back for another year and another round of holiday freebies to share with you!  Over the years, we’ve compiled different tutorials and patterns that we think would make *perfect* gifts for your friends and family. Curious about what we’ve already released in the way of holiday freebies? Head right here to see all of them: Holiday Freebies Roundup.

Today, we are bringing you the: Shiver Me Slipper Socks!

My feet are ALWAYS cold in the winter. And big, fluffy slipper socks are pretty much my favorite thing ever to help combat the cold. It’s been on my list to make this pattern for a couple of years now and I’m super excited to be officially bringing them to y’all!

Supplies Needed:

  • Shiver Me Slipper Socks pattern pieces
  • less than 1/2 Yard each, Lining + Main Fleece Fabric

TUTORIAL

  • Fold one of the main Sock pieces in half, with right sides together. Using 1/2″ seam allowance, stitch along the curve.
  • Open the sock up to create a straight line with the seam you just created in the center of that line.
  • With right sides facing down, place the toe piece on top, matching along that straight edge. Sew using 1/2″ seam allowance.
  • Mark toe front and heel back with pins/clips.
  • With right sides facing each other, place the sole piece on top, aligning the front and back markings.
  • Pin/clip pieces together, carefully easing the curves into one another. Using 1/2″ seam allowance, sew around entire outer edge.
  • Repeat with lining fabric.
  • Flip the main boot right sides out, keeping the lining piece with wrong sides facing outward, then stuff the main boot inside of the lining.
  • This will allow them to have right sides of the fabric facing each other.
  • Align the raw edges along the top. Sew, using 1/2″ seam allowance, while keeping a 3-4″ opening for turning.
  • Turn fabric right sides out through the opening you left.
  • Push the lining fabric into the main fabric.
  • Either by using a blind stitch in the opening, or top stitching around the entire upper edge, sew the opening shut.
  • Complete all steps for second slipper. You’re finished!

I left enough height on these slippers so you can wear them folded, for a cute cuffed look, or unfolded for a taller sock. Your choice! I’m excited to see what you prefer!


In case you consider yourself a more “visual learner” here’s a video tutorial that walks you through the entire tutorial, start-to-finish.

Check out what our fabulous testers were able to create with this very same tutorial!

I la-la-love when you share your photos with me!  Head over to the Patterns for Pirates Facebook Group and show us what you’ve made!

Happy Holidays, Pirates!

Filed Under: Free Pattern, Pattern Release 11 Comments

2021 Holiday Freebies :: Scrunchie Crown

November 30, 2021

Happy Holidays, Pirate Friends!  We are excitedly back for another year and another round of holiday freebies to share with you!  Over the years, we’ve compiled different tutorials and patterns that we think would make *perfect* gifts for your friends and family. Curious about what we’ve already released in the way of holiday freebies? Head right here to see all of them: Holiday Freebies Roundup.

Today, we are bringing you the: Scrunchie Crown!

The Scrunchie Crown will having you feel like royalty in no time at all. At it’s most basic form, it’s a headband. At it’s Pirate form, it’s a gorgeous crown-like headband that is super fun to wear (and can also double as a standard oversized scrunchie for buns).

Supplies Needed:

  • Scrunchie Crown pattern pieces
  • Less than 1/4 yard knit or woven fabric
  • 3/4″ elastic

TUTORIAL

  • Step 1: Fold the top headband piece, with right sides together, meeting the long edge. Sew using 1/2″ seam allowance.
  • Step 2: Repeat with the bottom headband piece, folding with right sides together, meeting the long edge. Sew using 1/2″ seam allowance.
  • Step 3: Turn right sides out.
  • Step 4: Using your favorite elastic threading tool, add your elastic in the top and bottom headband pieces.
  • The fabric is a lot longer than the elastic. It’s easiest to first pin / clip the fabric to the elastic ends before basting. Be sure not to twist your fabric while adding the elastic in the tubes.
  • For both pieces, you’ll want to align the elastic with the seam centered on it.
  • Step 5: Baste the fabric to the elastic on both pieces.
  • Step 6: Place your top headband piece on the table, with right sides facing you (aka, the seam should be on the table right now).
  • Step 7: Aligning the raw edges, place the bottom headband piece on top, with wrong sides facing you. (This will allow for both right sides of the top + bottom to be facing one another.)
  • Step 8: Fold the excess fabric from the top headband piece around the bottom headband.
  • Your bottom headband will be completely encased by the top headband at this point.
  • Step 9: Using 1/2″ seam allowance, sew along raw edge.
  • Step 10: Without cutting through your stitches, clip off excess fabric and elastic ends.
  • Step 11: Pull to flip fabric right sides out. The top headband piece will fold and hide your seams. Repeat Steps 6-11 on other side of headband pieces.
  • You’re finished!!

——–

In case you consider yourself a more “visual learner” here’s a video tutorial that walks you through the entire tutorial, start-to-finish.

Check out what our fabulous testers were able to create with this very same tutorial!

I la-la-love when you share your photos with me!  Head over to the Patterns for Pirates Facebook Group and show us what you’ve made!

Happy Holidays, Pirates!

Filed Under: Free Pattern, Pattern Release Leave a Comment

  • « Previous Page
  • 1
  • …
  • 7
  • 8
  • 9
  • 10
  • 11
  • …
  • 28
  • Next Page »

connect with me

  • Email
  • Facebook
  • Instagram
  • Pinterest
  • YouTube
Privacy & Cookies: This site uses cookies. By continuing to use this website, you agree to their use.

To find out more, including how to control cookies, see here: Cookie Policy
  • Privacy Policy
  • Refund Policy
  • Contact Us
  • About

Copyright © 2026 Patterns for Pirates

Copyright © 2026 · Genesis Framework · WordPress · Log in