Patterns for Pirates

P4P stylish, modern, wearable patterns

  • Home
  • Blog
    • Frequently Asked Questions
    • Pattern Releases
      • Free Patterns
    • P4P University
      • Fitting
      • Sewing with Stretch, Knit Fabrics
      • Sewing with Woven Fabrics
      • Sewing Machines
    • Sew-A-Longs
    • Fabric for Pirates
    • Pattern Hacks
    • Announcement
      • Blog Tours
      • Contest/Giveaway
  • Shop
  • Bundle Discounts
  • Flash Friday
  • Gift Cards
  • My Account
  • Cart

P4P Cocoon/Butterfly Cardigan SAL day 4

February 20, 2020


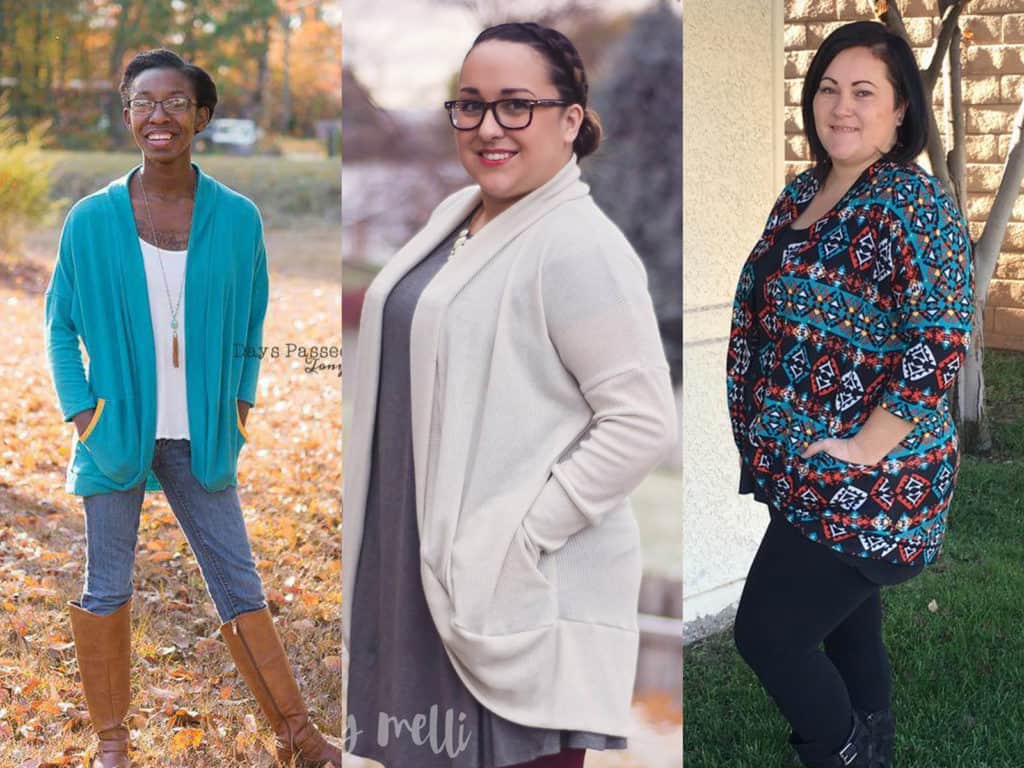
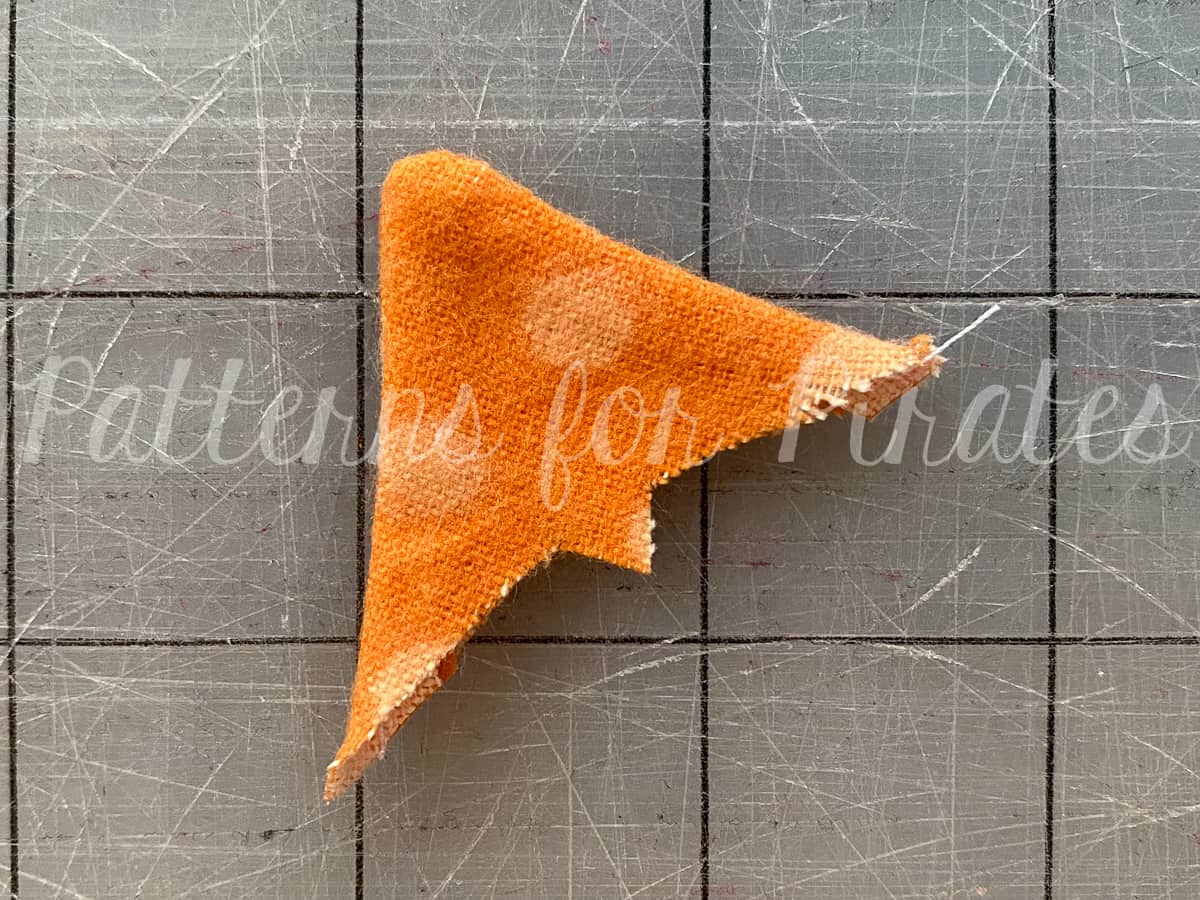
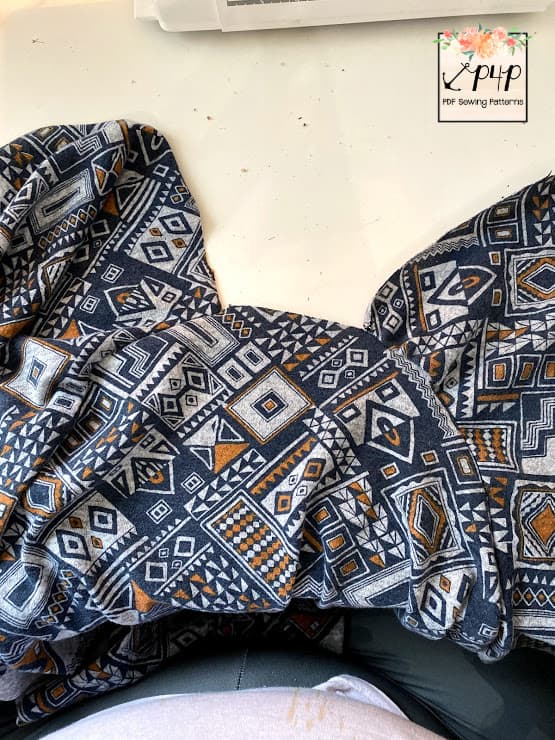
Good morning and welcome to day 4 of our sew along. Today we add the elbow patches and the sleeves. The patches are great for an accent color or print. You can pretty much use any fabric for them. I went with a custom cotton spandex in a maps print because…why not? I can totally see the patches made with some cute sparkle or sequence fabric.

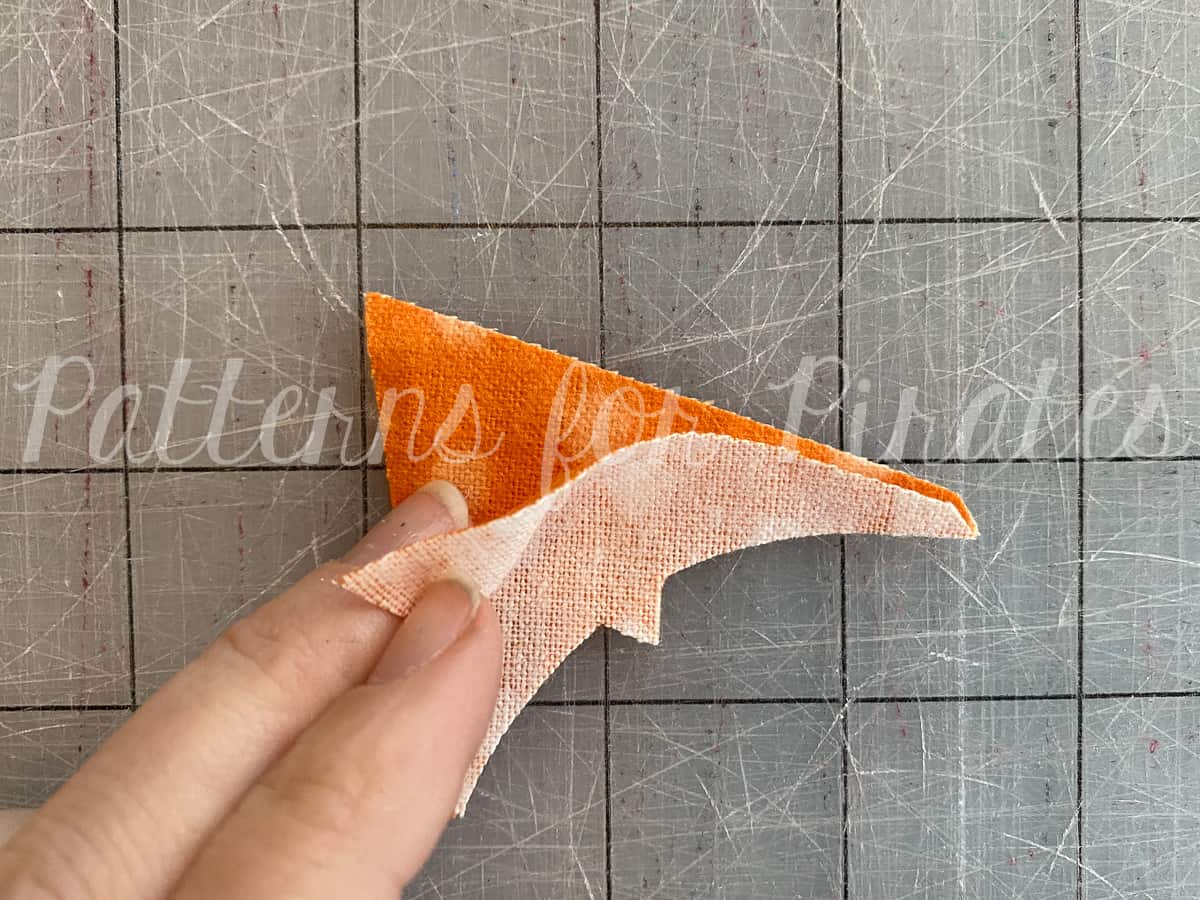
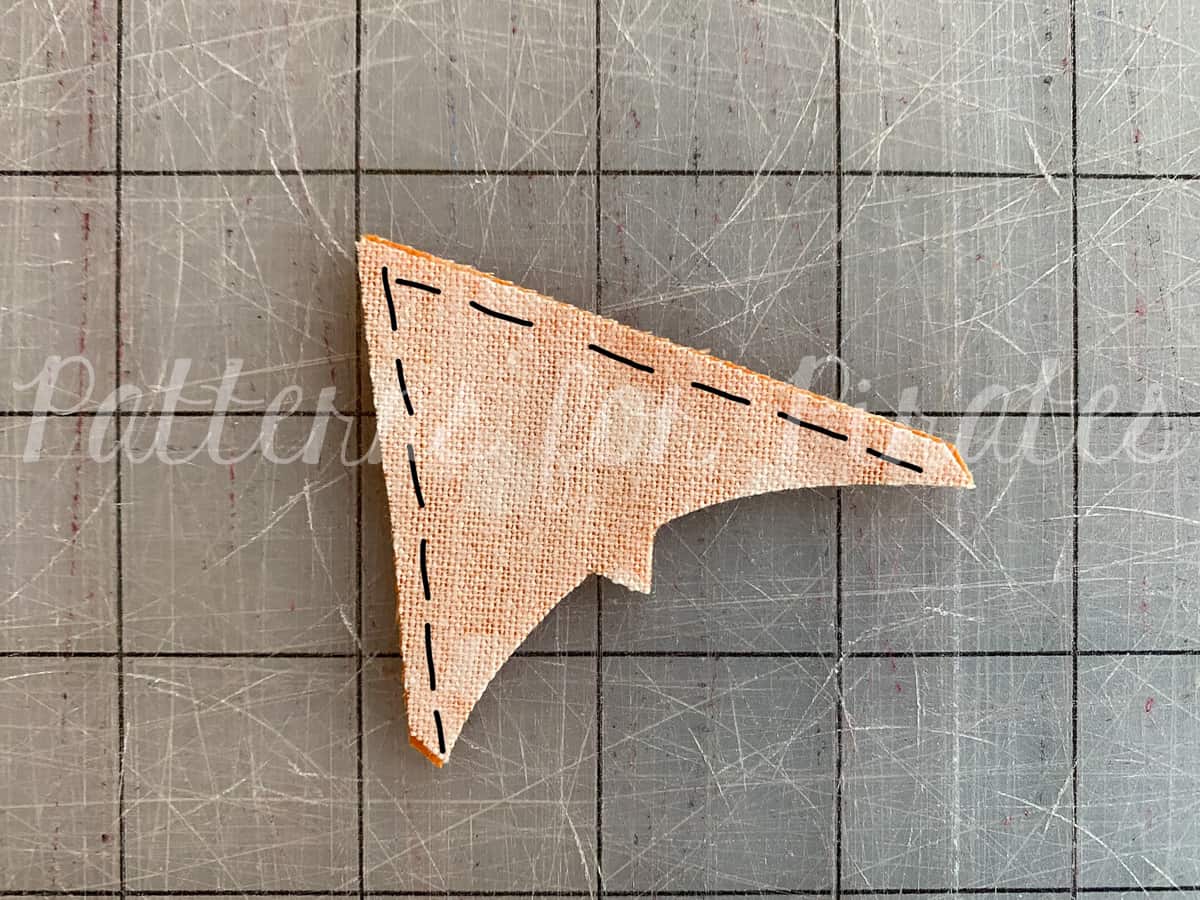
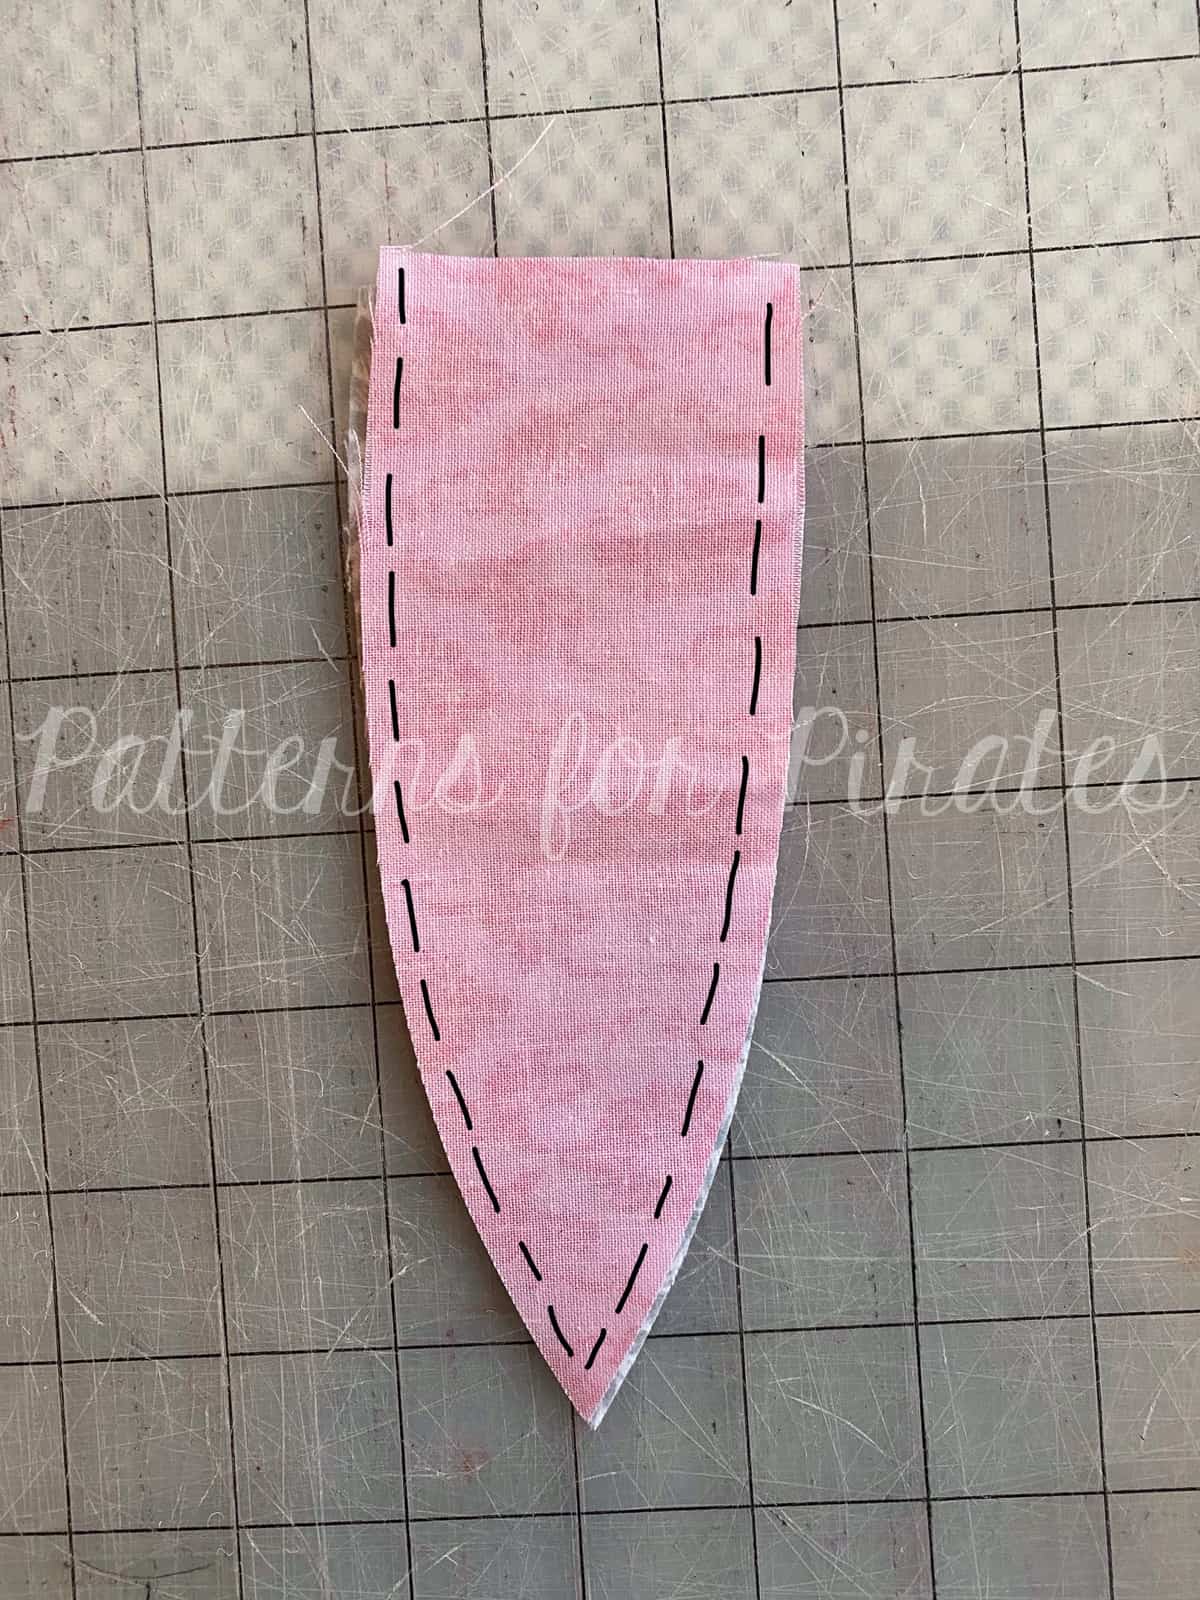
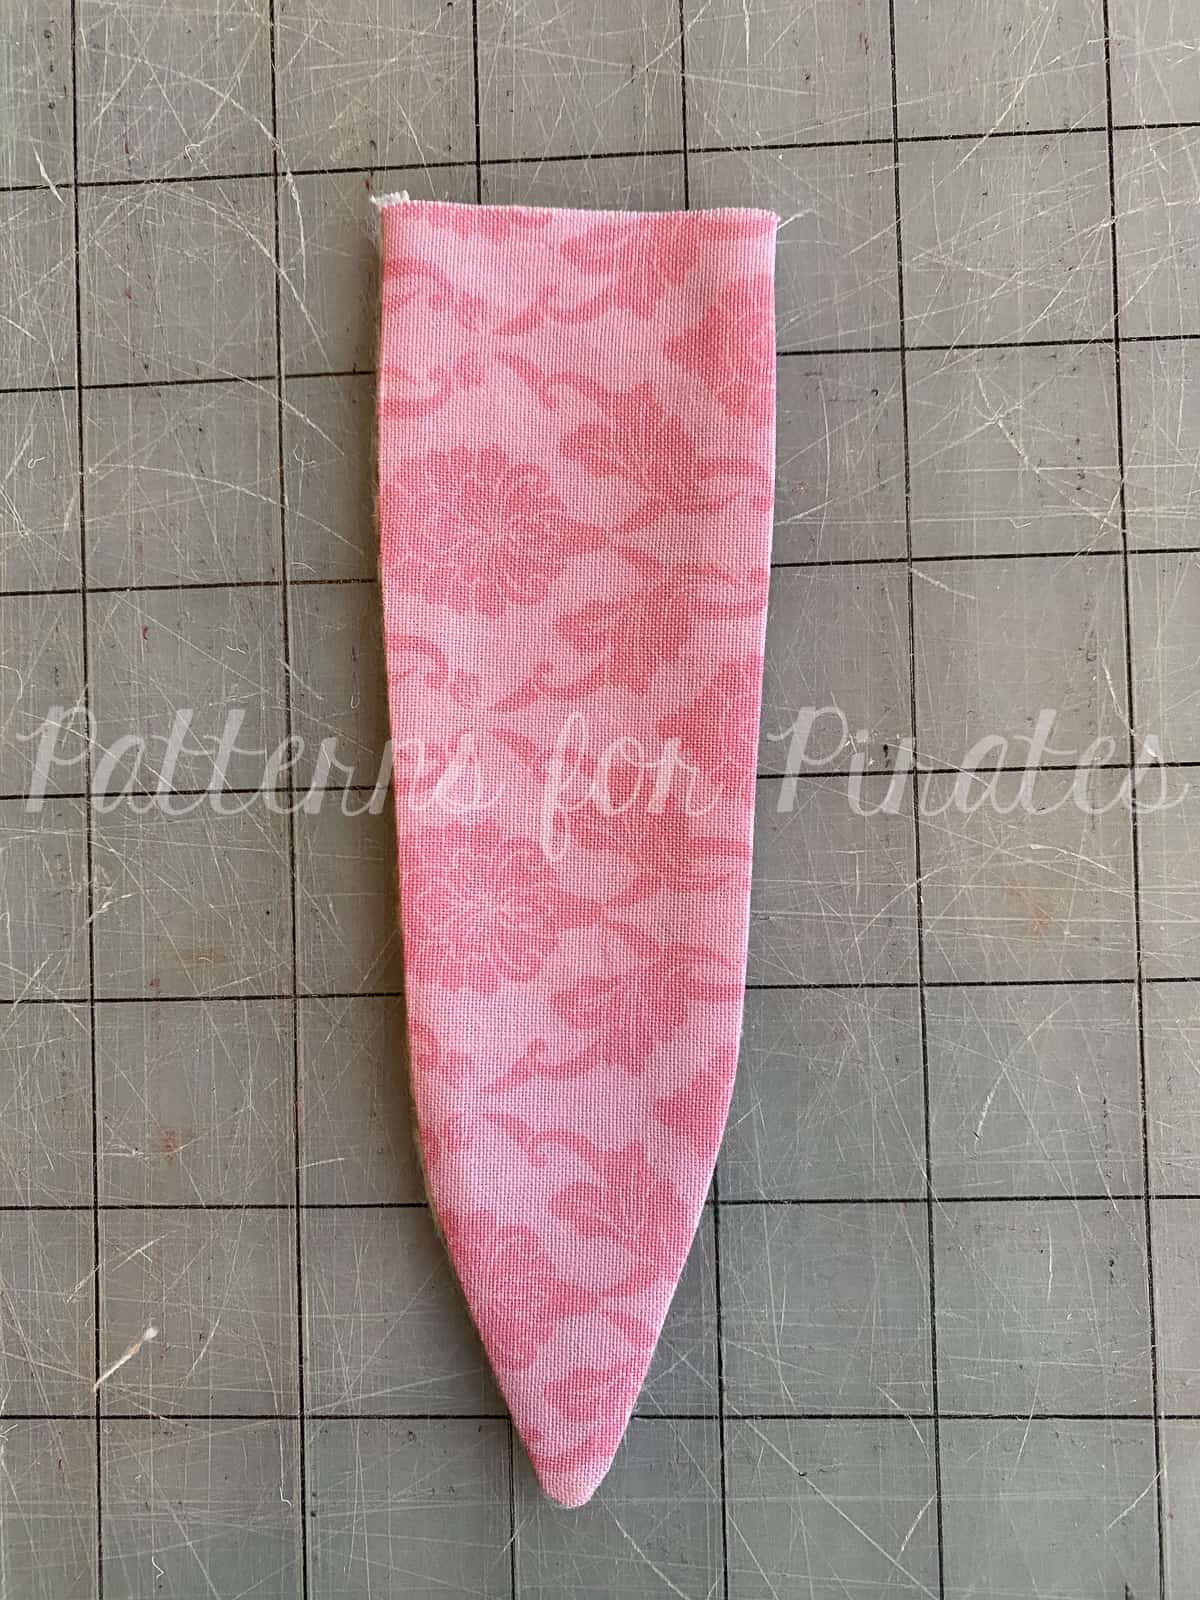
If you are using a thinner material for the elbow patches, I highly encourage you to add a lightweight interfacing to the outer fabric. This will ensure that the patch won’t lose its shape when sewn. For fabrics like thicker cotton spandex, french terry and the likes, interfacing is not a must.

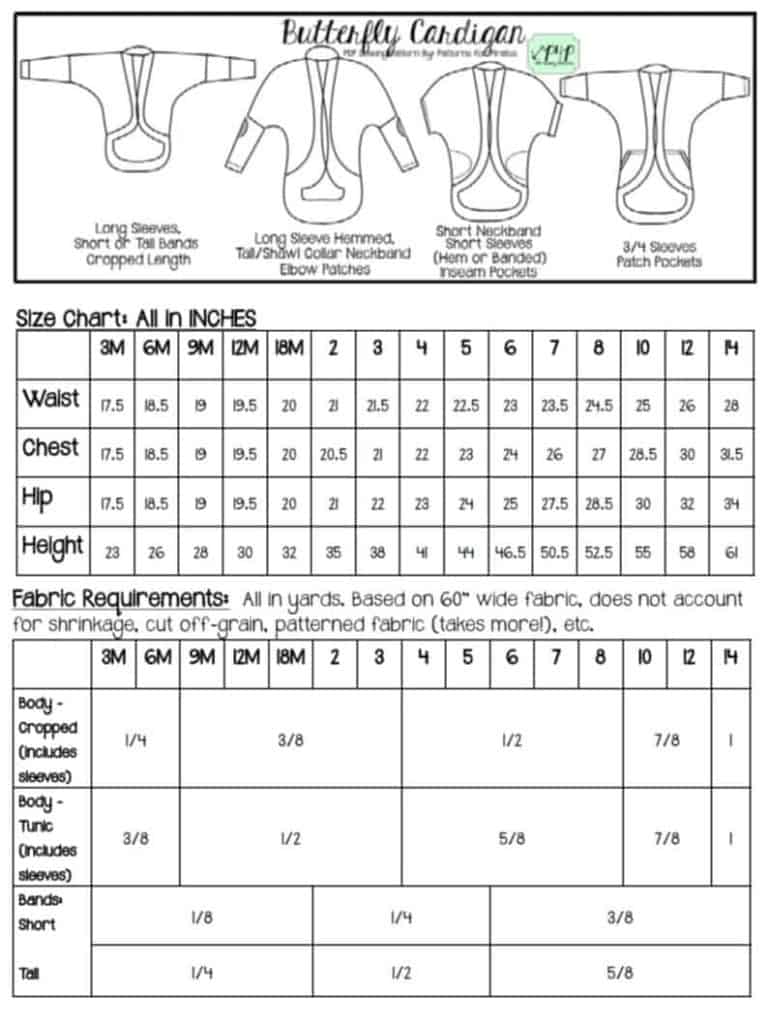
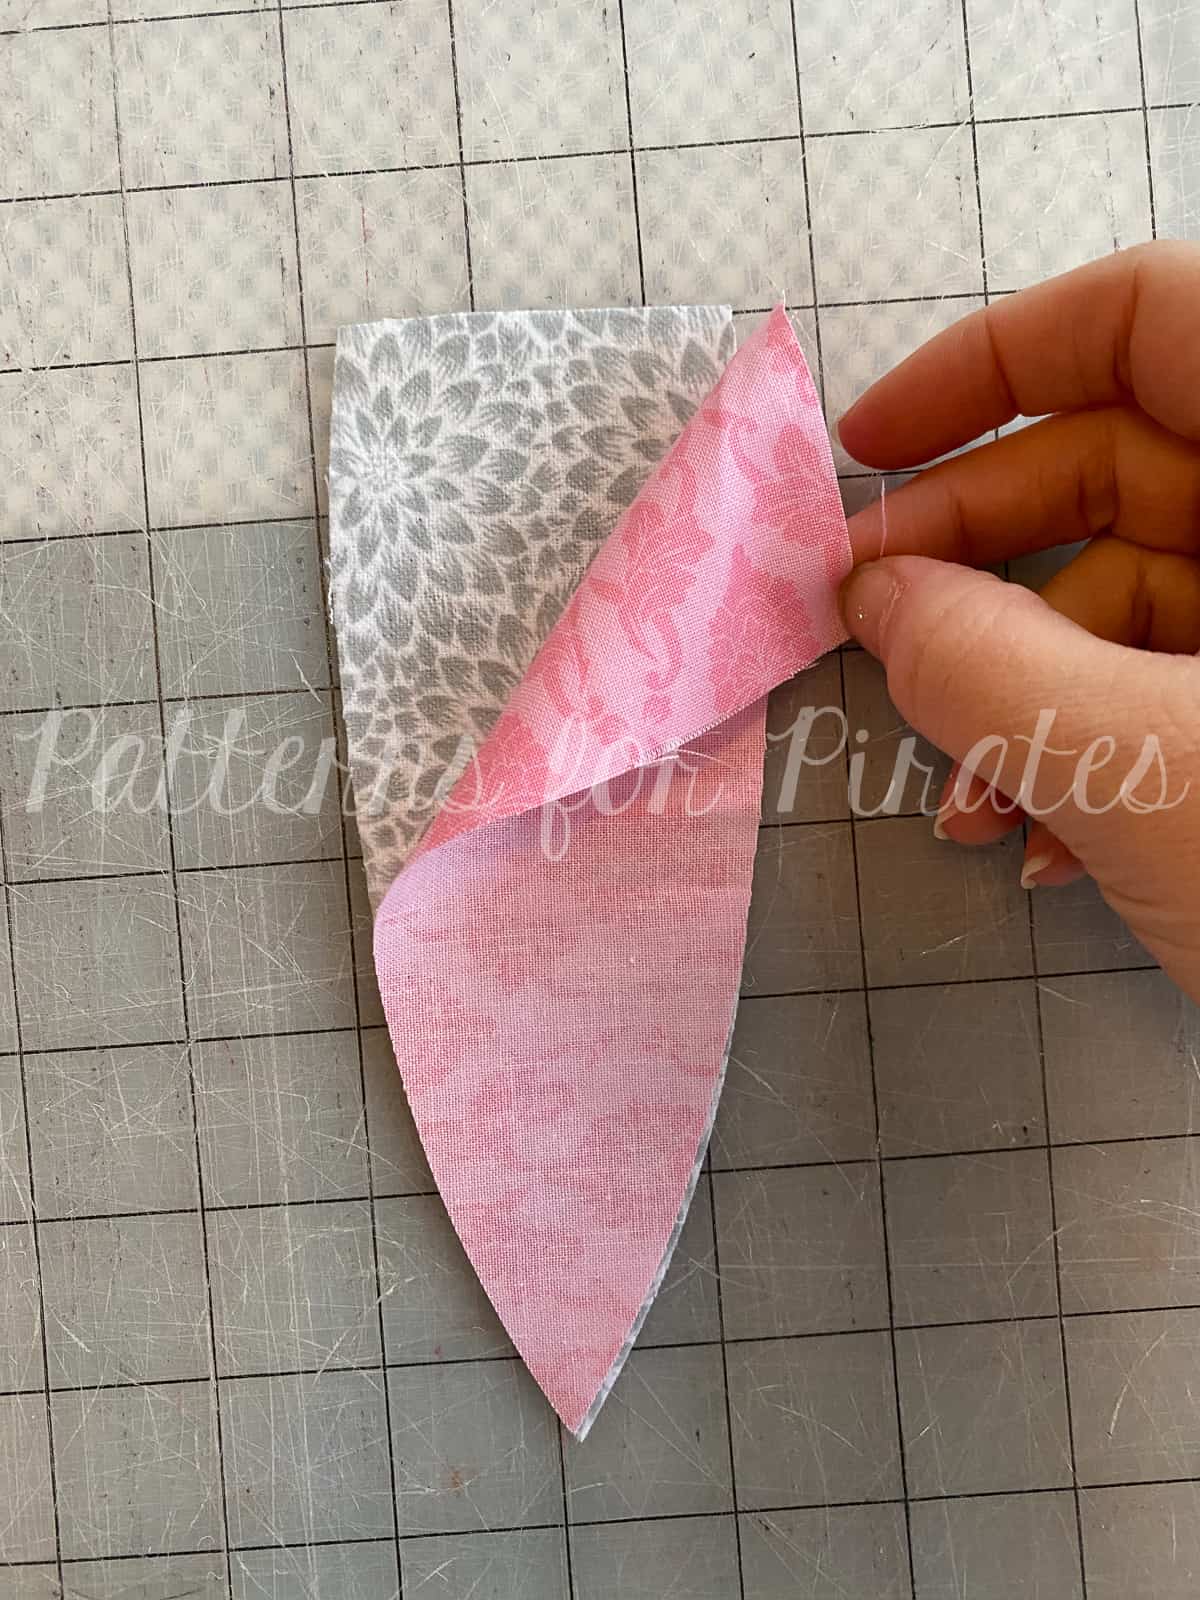
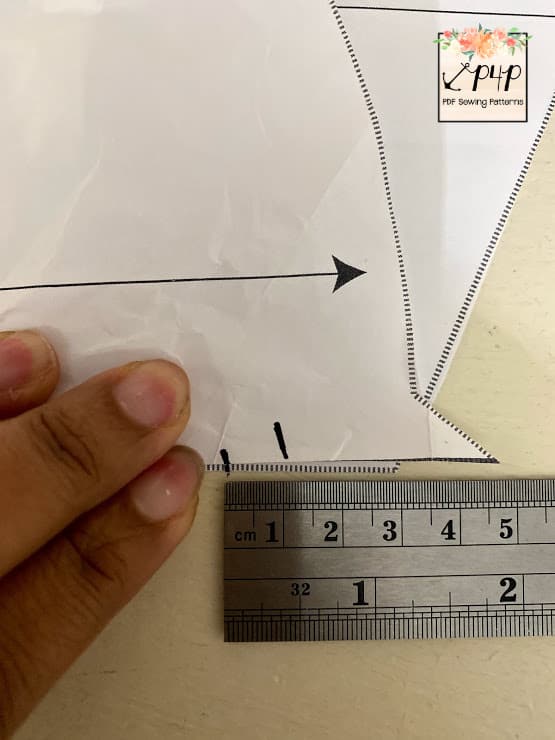
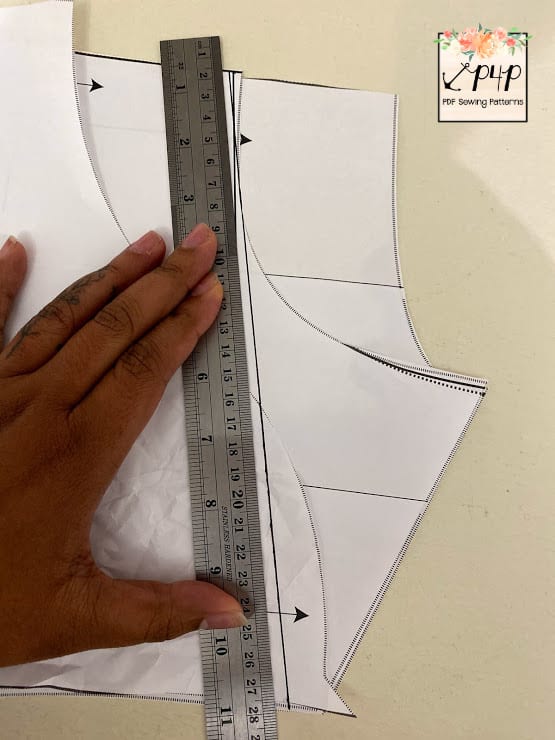
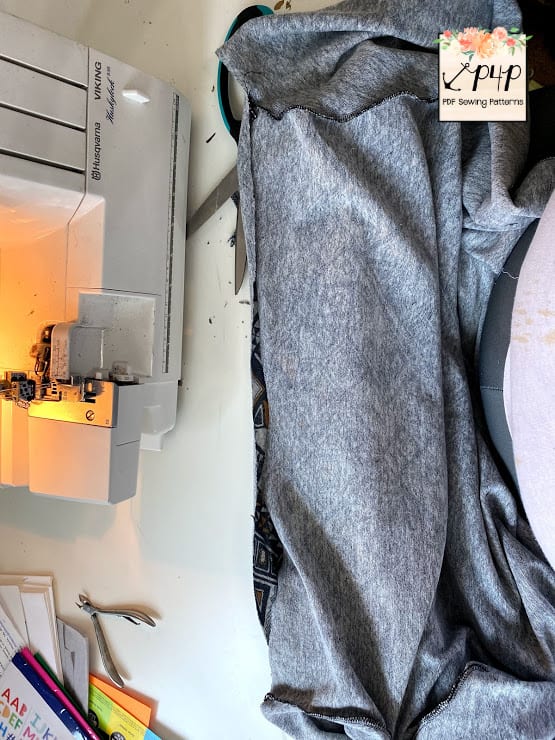
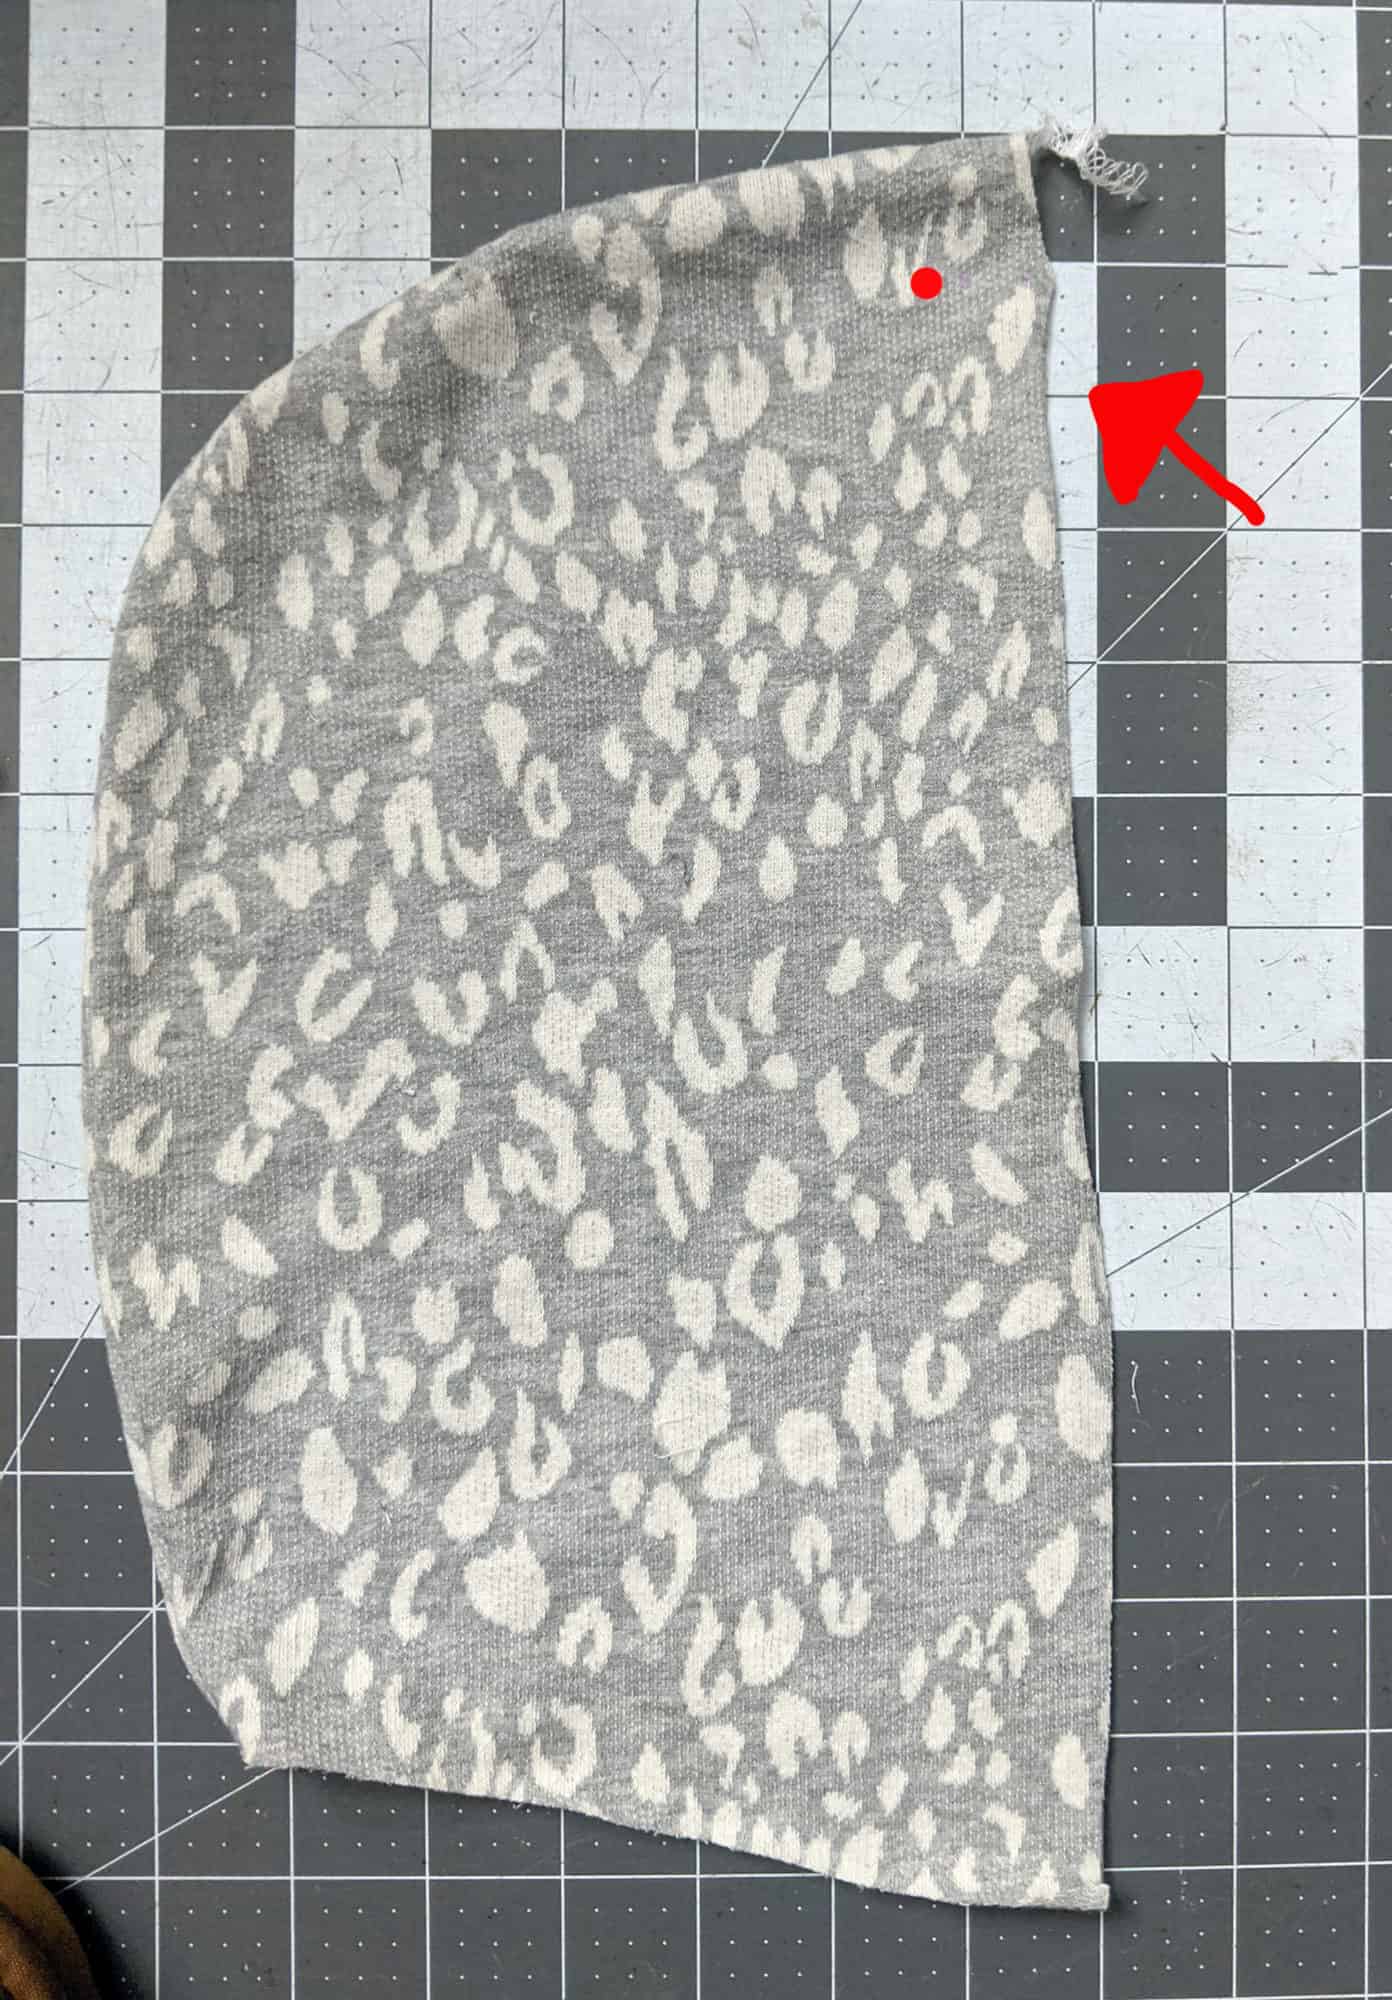
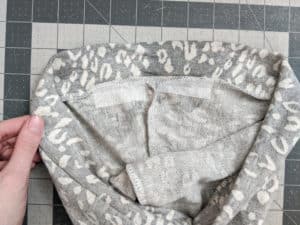
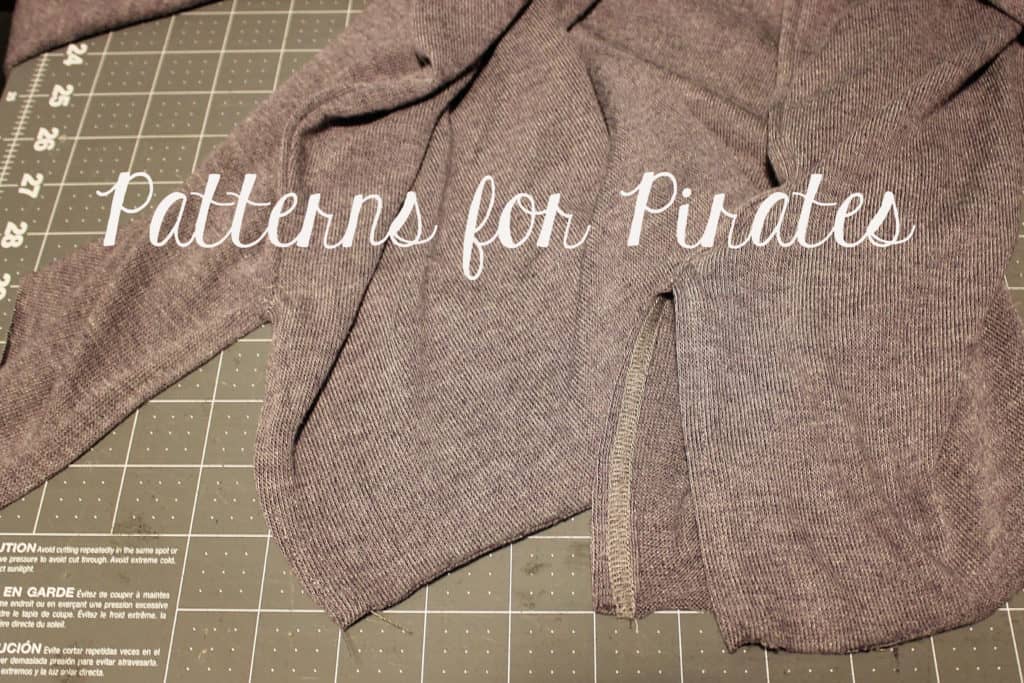
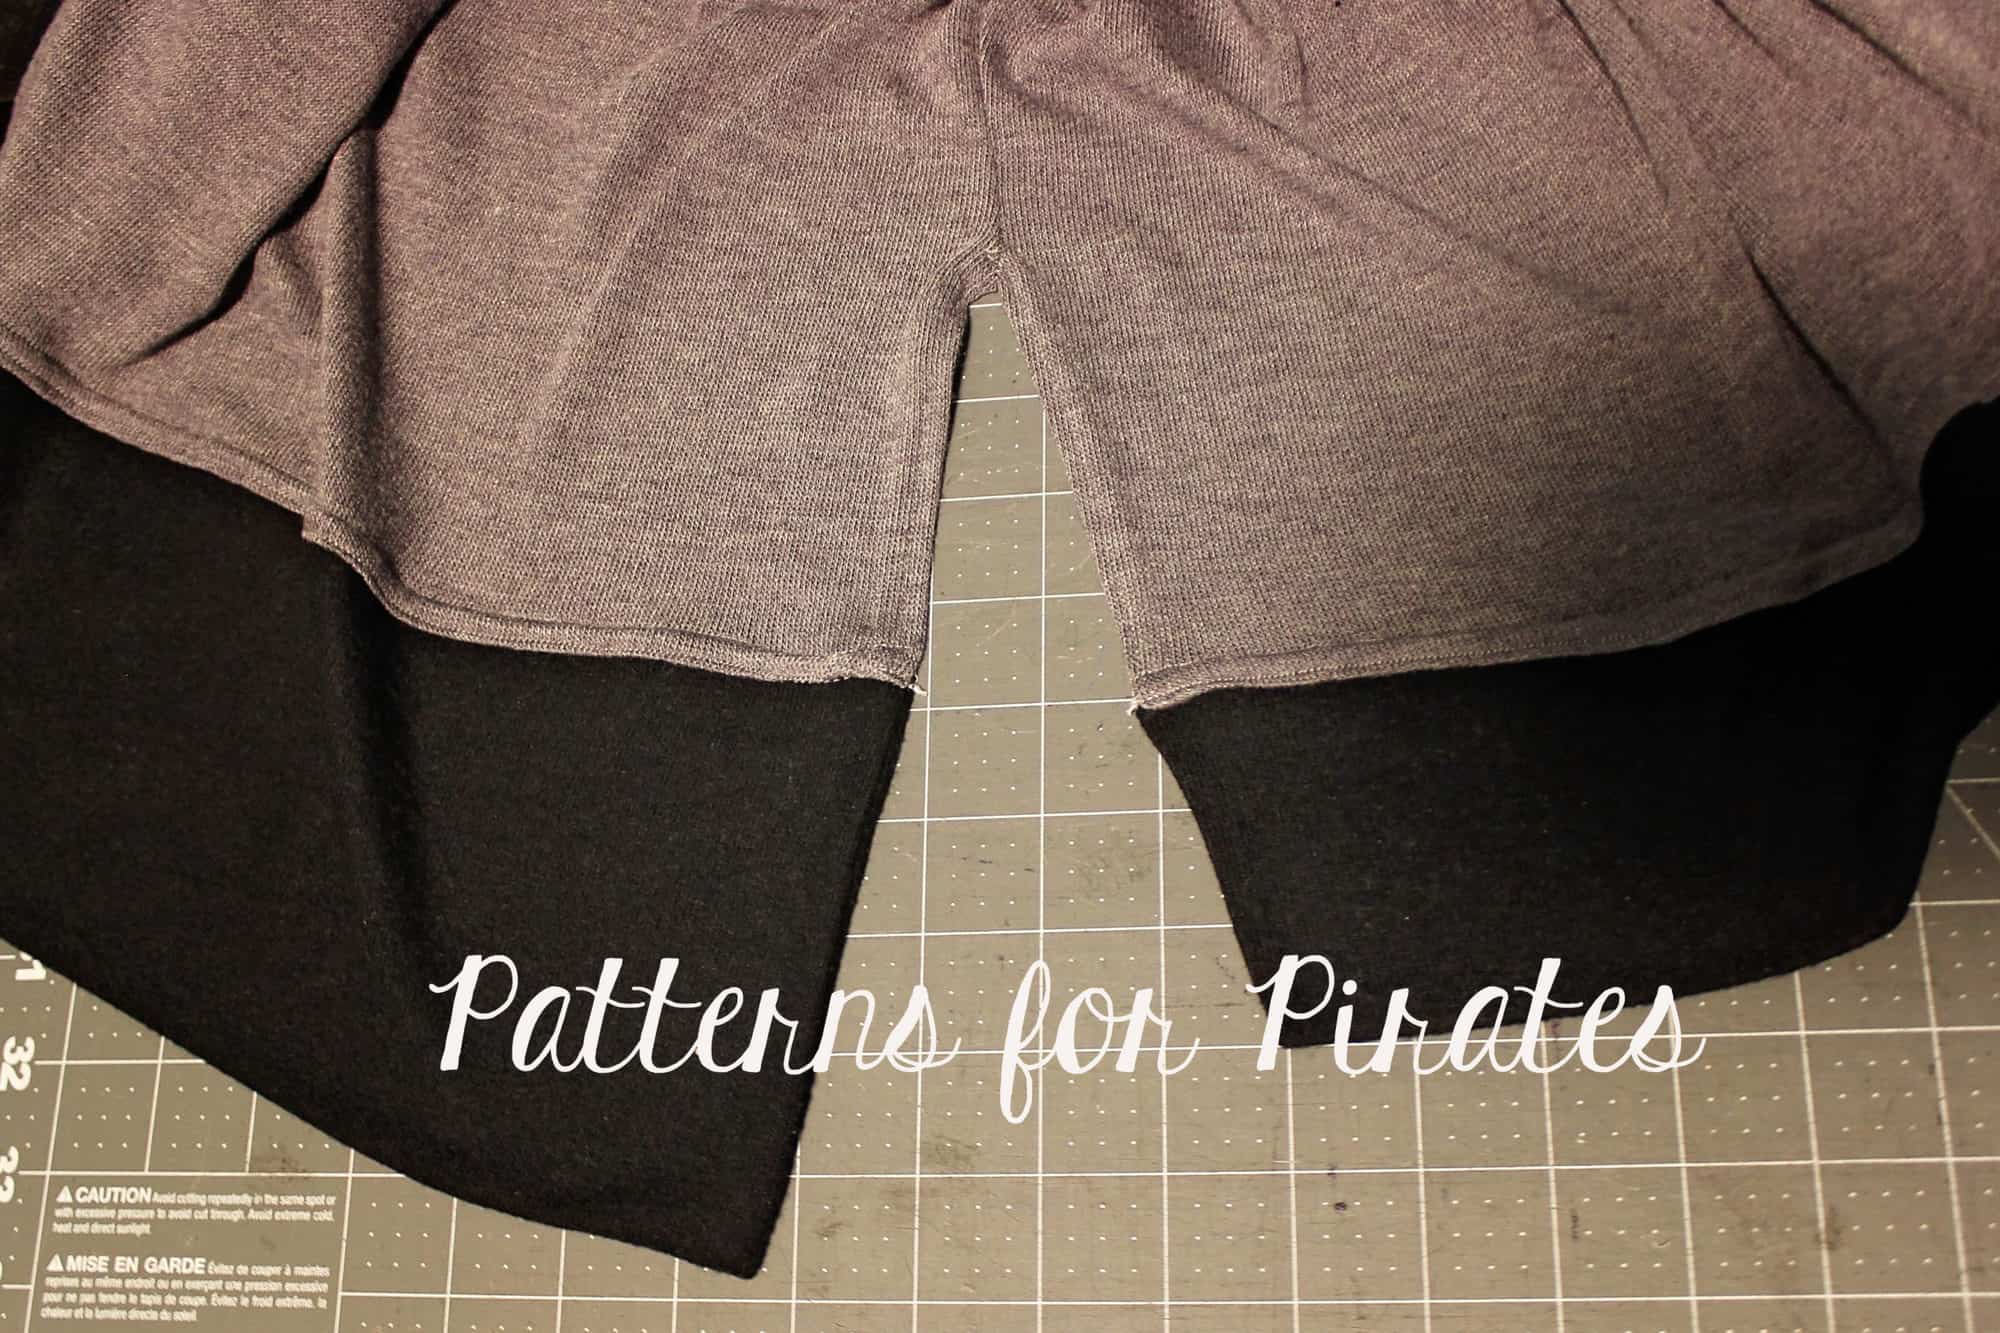
All that is left to do today is sew the sleeves to the main bodice, making sure to match the center sleeve to the shoulder seam. If you added the patches triple check that they are towards the back of the cardigan!!! If you opted for the short sleeve style, today is pretty much a free day as you will not have any sleeves to add.

You can see my progress in the video below. As always, once you complete today’s steps, post a picture of the cardigan in the comments of day 4 photo of the Butterfly/Cocoon SAL album.


P4P Cocoon/Butterfly Cardigan SAL day 1

P4P Cocoon/Butterfly Cardigan SAL day 2

P4P Cocoon/Butterfly Cardigan SAL day 3

P4P Cocoon/Butterfly Cardigan SAL day 4

P4P Cocoon/Butterfly Cardigan SAL day 5

P4P Cocoon/Butterfly Cardigan SAL day 6

P4P Cocoon/Butterfly Cardigan SAL day 7

Filed Under: Frequently Asked Questions, Pattern Release, Uncategorized Leave a Comment

P4P Cocoon/Butterfly Cardigan SAL day 3

February 19, 2020

Day 3 is here! Let’s start sewing! Today we will add the pockets and sew the shoulder seam. The Butterfly and Cocoon patterns include inseam and patch pockets. They are optional but I would not skip them!


The key to the patch pocket, as you can see in my video is to press and steam after every step. This style pocket is perfect to add a pop of color to the cardigan or showcase a print you love. If you are skipping the pockets all together, all you have to do today is match the shoulder front and back right sides together and stitch with a 1/2 seam allowance.

Tip: Add clear elastic to the shoulder seams to strengthen them and make sure the shoulders don’t stretch throughout the day. 

You can see my progress below. Once you add your pockets and sew the shoulder seams post a picture of the cardigan in works in the comments of DAY 3 photo of the cardigan album in the SAL group.


P4P Cocoon/Butterfly Cardigan SAL day 1

P4P Cocoon/Butterfly Cardigan SAL day 2

P4P Cocoon/Butterfly Cardigan SAL day 3

P4P Cocoon/Butterfly Cardigan SAL day 4

P4P Cocoon/Butterfly Cardigan SAL day 5

P4P Cocoon/Butterfly Cardigan SAL day 6

P4P Cocoon/Butterfly Cardigan SAL day 7

Filed Under: Frequently Asked Questions, Sew-A-Long, Uncategorized Leave a Comment

P4P Cocoon/Butterfly Cardigan SAL day 2

February 18, 2020

Welcome to day 2 of our Butterfly and Cocoon Cardigan sew along! Today we will be deciding on the fabric(s) and cutting the pieces. You should have your pattern ready from yesterday.

But first let’s talk a little about the right fabric for this pattern. As you can see in the video below I am using a pretty pin dots mint French Terry from Raspberry Creek Fabrics. These two cardigans can be made with virtually any knit fabric with soft drape. Some favorites include Double Brushed poly, Rayon Spandex, Rayon French Terry, sweater knits or bamboo spandex. Raspberry Creek Fabrics is this SAL’s sponsor too, our two lucky winners will be getting gift cards to their shop so you can treat your to some gorgeous knits (and not only) too.


If you are unsure about which knit type will work best for your desired look, take a look over our P4P University Knit Types blog. Judy also included a cheat sheet that you can print. If you are like me and sometime are just keen on using a specific print for a specific pattern, read our Different fabric, different fit blog post before you cut your fabric.

The Day 2 video is posted below. Check it out and once you are done cutting your fabric post a picture of your pretty pile in the comments of the Day 2 photo of the Cocoon/Butterfly Cardigan SAL album in the M4M & P4P Sew Along group.


P4P Cocoon/Butterfly Cardigan SAL day 1

P4P Cocoon/Butterfly Cardigan SAL day 2

P4P Cocoon/Butterfly Cardigan SAL day 3

P4P Cocoon/Butterfly Cardigan SAL day 4

P4P Cocoon/Butterfly Cardigan SAL day 5

P4P Cocoon/Butterfly Cardigan SAL day 6

P4P Cocoon/Butterfly Cardigan SAL day 7

Filed Under: Frequently Asked Questions, Sew-A-Long, Uncategorized 1 Comment

P4P Cocoon/Butterfly Cardigan SAL day 1

February 17, 2020

Welcome to the Cocoon and Butterfly Cardigan  Sew Along!

Day 1 is reserved for purchasing the patterns, printing and cutting the size(s) you need. If you plan on sewing for yourself you can get the Cocoon Cardigan here, if you’re sewing for your little one, the Butterfly Cardigan can be purchased here and if you’re sewing for both of you (just think of the mommy and me matching outfits!) you can get the bundle. Back in 2016, P4P did a Cardi week where the blog team showcased some easy hacks to our cardigan patterns. We included a ruffled edge Butterfly and a lace edge Cocoon. You can sew these styes for the sew along too!


This Sew Along will take place in the M4M & P4P Sew Along group so be sure to join the group not only for the exclusive discount code available for the Cocoon and Butterfly Cardigan patterns but also to post your progress this week. As always, we have a Cocoon/Butterfly cardigan SAL album and your daily check in will be in the comments of each day photo.

Now that you purchased the pattern(s), print the size needed. In order to do that it is very important that you take your most accurate measurements


You will need your waist, hips and chest measurements in order to choose the correct cardigan size. The cardigans are relaxed fit throughout the body and slim fit arms. P4P has an amazing blog that gives you tips for accurately taking your measurements. You can read all about it here. If your measurements put you in a different size for chest/waist/hips be sure to check out our P4P University blog and grade to achieve the perfect fit.

Check out the day 1 video below and then comment “done” on the Day 1 picture of the Cadigan SAL album in the sew along group. We don’t allow pictures of the pattern pieces so this will count as your day 1 check in.


P4P Cocoon/Butterfly Cardigan SAL day 1

P4P Cocoon/Butterfly Cardigan SAL day 2

P4P Cocoon/Butterfly Cardigan SAL day 3

P4P Cocoon/Butterfly Cardigan SAL day 4

P4P Cocoon/Butterfly Cardigan SAL day 5

P4P Cocoon/Butterfly Cardigan SAL day 6

P4P Cocoon/Butterfly Cardigan SAL day 7

Filed Under: Frequently Asked Questions, Sew-A-Long, Uncategorized 6 Comments

Plushie Pals :: Free Sewing Pattern + Tutorial!

February 3, 2020

It’s February, which means I’m already brainstorming cute gift ideas for Valentine’s Day for the kiddos in my life.  I love sending little packages of things to my niece and nephew up north, and including something handmade is always at the top of my list.  And that’s exactly why these Plushie Pals were born!

We are bringing our newest pattern to you today, keeping in mind that you’re probably short on time like the rest of us.  The Plushie Pals are super duper fast to sew, and end with the cutest results!  The fox, bunny and bear pattern pieces are all included, but the pattern itself would be incredibly easy to adjust into just about any animal or character that you could think of!  Let’s get to sewing, shall we?


Grab your “PLUSHIE PALS” pattern pieces here!

Oh! This time around, I loaded the pieces onto Cricut Design Space so you could cut them with your Maker.  Find them here: Plushie Pals for Cricut Maker

Fabric Requirements (based upon 44″ wide fabrics): 

– 1/3 yard main body fabric.  Directional prints will require more.  (I like to use flannel, but quilting cottons / kona cottons / felt will all work for this!)
– Felt for fox face and bear/fox bellies.  The edges are left raw on these pieces, so you’ll want to use something that won’t fray.
– Scrap sizes of fabrics for ear accent colors.
– Buttons, embroidery thread for facial features.
– Fiberfill.

1/4″ seam allowance used throughout pattern, unless otherwise indicated.

  • For Fox/Bear options: With both fabrics facing up, align the belly piece to one of the main body pieces and stitch along long, outer curve, at around 1/8″ inch.

  • For Fox option only: With both fabrics facing up, align the face piece to main body piece and stitch along top and bottom edges, at around 1/8″ inch.

  • For all options: This is the best time to add facial features to your Plushie Pal.  Using a fabric marker (I used a permanent one so it would show easier in photos), draw a triangular nose shape to help guide your stitches, if choosing to embroider the details.  Details could also be applied and look adorable in fabric paints or using HTV.  We didn’t include any specific facial details in the pattern because there are so many different ways to make a face. 🙂

  • For Fox/Bear options: Place two ear pieces, right sides together.

  • Sew along outer edge(s).

  • Clip seam allowances and turn ears right sides out.  Press.  Topstitch if desired.  *repeat with second ear.

  • For Bunny option: Place two ear pieces, right sides together.

  • Sew along outer curved edges.

  • Clip seam allowances and turn ears right sides out.  Press.  Topstitch if desired.

  • Fold along the top, raw edge, meeting the corners together.  Clip or baste top edge in place.  Repeat with other ear.

  • For all options: With right sides together, align ears using the markings on the pattern pieces.

**Note: The bear and fox ears will need to be eased in along the curved edges.  While the bunny ears will simply be centered against the marking on the body piece, be sure to tuck them out of the way while sewing so you don’t catch them in the next steps.

  • With the front body piece facing upwards, place the back body piece on top (right sides together).

  • Sew along entire outer edge, leaving only about a 3″ opening along one of the sides for turning.

  • Clip corners and seam allowances before turning.  It is recommended to use pinking shears around all of the curved edges for a cleaner look once turned and stuffed.  I circled the most important parts to make sure to clip, in order to avoid wrinkles or pulling at the “joints” of the arms and legs.

  • Turn your Plushie Pal right sides out, through the opening you left in the previous step.

  • Using fiberfil, stuff your Pal to your liking.  Be careful not to overstuff.  And using a tool like a chopstick / bodkin is incredibly helpful for filling the arms and legs and getting the stuffing into the corners easily.

  • Tuck your seam allowance back into the opening.  Pin or clip.  And using your favorite method, stitch it shut.

You’re all done!  Be careful — once you make one, you’re going to want to make ten more!  (Ask me how I know…..)  They’re just so darn cute!

As always, we love when you share what you’ve made with us.  Head over to the Patterns for Pirates Facebook group and show off the fabulous Plushie Pals that you’ve managed to make from our freebie pattern!  Happy Valentine’s Day, friends!

Filed Under: Free Pattern, Pattern Release 7 Comments

#allP4Ptoday 2020 winners

February 1, 2020


Welcome to the 2020 #allP4Ptoday winner circle! I will be adding each monthly winner here so be sure to check out the blog often. You can get the contest details here.

JANUARY

Let me start this winner’s post by thanking you for being a part of this contest for the last 3 years. It was fun seeing you all shine in your all P4P outfits every month. As we move on to new exciting contests, I wanted to announce one last #allP4Ptoday winner for January 2021…

Congratulations, Patricia Mastin!

Patti is looking cozy in her Sweater Weather shirt and Peg legs. We loved how she sewed the Sweater Weather as soon as it was released. Great job!

DECEMBER

As 2020 comes to an end, I couldn’t stop from looking back at this blog and feel joy and gratitude for all the amazing makes I was honored to see. Thank you all for being a part of the P4P family.

We couldn’t end this month without announcing the final #allP4P winner for 2020. Congratulations Jenny Sherman Richards!

Jenny look so comfy and chic in her Cozy Wrap, Layer Me Up and Cozy Pants. I may need to replicate that look. 😉

See you back on the blog in 2021! Happy New Year!!

NOVEMBER

We have been busy here in P4P land this November! While we were FALLing into FASHION, I kept an eye on the Facebook group and IG for all of your #allP4Ptoday posts. I can’t leave the month pass by without giving one of you a free pattern, right?

Congratulations, Felisha Jones!! She is rocking the Pegs with Fierce Bra and Twist Back Top. So gorgeous!

I can’t wait to see all your P4P creations in December!

OCTOBER

Can you believe we are just two months away from the new year? WOW! We couldn’t end October without announcing the #allP4Ptoday winner.

Congratulation Els Wijnands van Hengel! Els celebrated her last day at work in full P4P gear. Talk about a great fall outfit –  SOS pants, Favorite Tee and Go to Jacket! Thank you for sharing!

t

Remember to keep those #allP4Ptoday coming and to check back this blog next month for a new winner!

SEPTEMBER

Fall is here, pirates! Time for Ragdoll raglans and SOS pants…and pumpkin spice. Shauna inspired me to break out my Ragdoll pattern so I know what I’ll be sewing soon.

Congratulations, Shauna Anderson! She not only inspired me to make a new Ragdoll raglan but she is also our September #allP4Ptoday winner. Great job and thank you for sharing.

I look forward to seeing all your fall P4P creations in the Facebook group and on Instagram.

AUGUST

My birthday month sure was a hot one around here. But hey, my P4P dresses kept me comfortable. We have seen many beautiful back to school (whatever that means this year) creations as well as summer staples.

Our August #allP4Ptoday winner is Kimberly Ransom! Kimberly’s cuties stole my heart as soon as I saw the post. It was only normal that mama would get a FREE P4P pattern as a reward 😉

Keep those entries coming every month and don’t forget the hashtag #allp4ptoday . YOU could be our next winner!

JULY

Ahoy, pirates! As we start another hot summer month (at least in my neck of the woods), we couldn’t let the previous end without picking a winner for our on going #allP4Ptoday contest.

Congratulations Leah Dominy! Leah looks amazing in her Tulip Tee shirt and SOS shorts. Such a cute and easy set to make for comfortable day to day wear. Did you know the Tulip Tee is a FREE pattern?

Keep the amazing #allP4Ptoday creations coming! See you back here next month.

JUNE

And just like that, June is over. Most of us are in full blown summer sewing so don’t forget to hashtag #allP4Ptoday when you post your creations in the FB group or IG.

The June winner is Bethany Ann Hutchinson! Or is Mr Hutchinson the winner 😉 ?

The P4P team absolutely loved how proud daddy looks in his custom made outfit. He is rocking the Papa Bear Joggers and Basic Tee. Great job, Bethany!


See you back in a month for a new FREE P4P pattern winner!

MAY

Ohh wow!! May has been an amazing month in the P4P group. Between the #p4pspiritmonth and the #allp4ptoday posts, you made us smile from ear to ear. So many gorgeous P4P makes!!

Our May winner is Lindsey White! 

Lindsey is absolutely radiant in Flutter Wrap dress, so, so pretty!

Hope you will all have a fantastic summer! Don’t forget to tag your #allP4Ptoday posts in June too. You may be our next winner!

APRIL

Ahoy, pirates! It’s that time again…let’s give one pattern of choice to one of you. You were busy bees in April and we loved every moment of it!

Congratulations Catherine Hesse !


Catherine looks so adorable in her P4P makes. She made me want to pull out my SFR and sew myself one!


MARCH

Spring is here!! We’ve seen so many cute outfits this month that have truly brought joy to the P4P team. One of these beautiful pictures that made us go “awww” is our March #allP4Ptoday winner!

Congratulations Anita Reutiman! 

Anita’s little man looks mighty dapper and comfy in his mama-made JRR and Baby Bear Joggers!

We hope you stay healthy and keep creating ❤️! See you back her in May!

FEBRUARY

Good morning, pirates! As this leap year’s last full winter month comes to a close, I am delighted to announce the February #allP4Ptoday winner:

Congratulations Amy Brooks!

Your daughter put a big smile on my face as I was scrolling through all the hashtags. The Boundless looks gorgeous on her…plus! Who doesn’t need a donuts Go To Jacket?


I can’t wait to see all your spring #allP4Ptoday creations in March!

JANUARY

New Year, fresh start. We are still keeping an eye on Facebook and Instagram, spotting you wearing your ALL P4P outfits. Time to announce the first winner of 2020:

Congratulations Jill Auxford!

Jill and her little one love the Gala dress and they look so precious in their creations.


Here’s to a fantastic #allP4Ptoday 2020!

Filed Under: Contest/Giveaway, Uncategorized 2 Comments

New Pattern Release :: Oversized Sweater!

January 23, 2020

January for the majority of us means sweater weather.  The trend right now seems to be leaning toward an oversized, super cozy, slouchy sweater — and we jumped right on board with that style!  Aptly named, the Oversized Sweaters are about to be your new best friends.  Let’s talk about them, shall we?


The Oversized Sweater patterns are super classic loose sweater / sweatshirt / jumper patterns. The fit and style is so versatile and can be used with all the cozy fabrics everyone loves and stockpiles during the winter months! It’s time to use that stack of fluffy fabrics you’ve accumulated!  This fast and easy sew will fill up your closets with pieces your whole family will love!

You can pick from 3 different necklines: a classic crew neckband, a tall turtleneck, or a hood — and the youth pattern even comes with optional ears! You can get creative with the short pointy ears (kitty, fox, wolf), rounded ears (bear, koala, panda), and long bunny ears. Who can resist those adorable ears? The hemline also includes 3 options: tight waistband, curved hemline and a split high low hem.

With the loose fit and many options you can create so many different looks with fabrics like french terry, sweater knits, sweatshirt fleece, fleece, sherpa, etc.


**Want to learn more about how to measure yourself for these pattern?  We’ve got you covered with an in-depth blog HERE.  And in case you’re new to Patterns for Pirates and PDF patterns in general, we have a great blog full of new-user tips HERE to help you get started!  As with all of our current releases and updates, the pdfs now include our layers feature and can be found in Letter, A4 and A0 sizes.  And for even more helpful fun, we have a *free* printable that you can use to help record your measurements as you take them.

Let’s take a quick look at the different options!

HEM OPTIONS: HIGH-LOW SPLIT / CURVED / TIGHT WAISTBAND

NECKLINE OPTIONS: FOLD-OVER TURTLENECK / CREW / HOODED

OPTIONAL ANIMAL EARS INCLUDED IN THE YOUTH PATTERN: POINTED EARS / ROUNDED EARS / BUNNY EARS

How about some fabric inspiration?  The looser fit means you can use something super drapey or super thick for different looks. Here are some of the favorite tester choices:

SWEATER KNITS:

This slideshow requires JavaScript.

WAFFLE KNITS:

This slideshow requires JavaScript.

FRENCH TERRY:

This slideshow requires JavaScript.

SHERPA:

This slideshow requires JavaScript.

OTHERS:

This slideshow requires JavaScript.

In case you were looking for some more inspiration, you can find all of our tester images in our Facebook group!  Go check them out: Oversized Sweater Facebook Album | Oversized Sweater – Youth Facebook Album

Are you ready to sew your new favorite sweater?  Go grab the patterns now!

OVERSIZED SWEATER | OVERSIZED SWEATER – YOUTH | OVERSIZED SWEATER – ADULT/YOUTH BUNDLE

And if our pattern alone doesn’t provide enough options for you, we’ve also included a blog post that will help take your Oversized Sweaters to the next level!  Go check out our Easy Hacks Post to see how to make some slight alterations to the original pattern, to customize it even further!

The release sale (no code needed) will be through Saturday February 1 (11:59PM US Central Time Zone).

Happy Sewing, Pirates!

Filed Under: Pattern Release Leave a Comment

Oversized Sweater :: Easy Hacks

January 23, 2020

It’s here! It’s here! The comfiest, snuggliest, coziest sweater you will ever have. The Oversized Sweater includes so many options for both youth and adult but we couldn’t help ourselves…we wanted more! The P4P blog team is showing you how to make an Off the shoulder sweater, a mini dress, a color blocked one, the cutest pom poms hack ever and a higher side slit one. Enjoy!


…..

Off the shoulder

Off-the-shoulder shirts are my jam. I still remember falling all the way in love with the first one I saw Alex do for the Relaxed Raglan. This Oversized Sweater is the PERFECT top to hack into your favorite Pinteresty slouchy off-the-shoulder sweater. And it’s pretty easy! Grab your fabric and pattern pieces–let’s get started!

Layer your front, back and sleeve pieces on top of each other.

Measure down 1/2 inch.

Draw a line. This is going to be your new cut line.

Cut out your pieces.

**Tip: Place a clip on the front of the sweater to differentiate your pieces.

Sew your sleeves on first. They aren’t going to be sewn all the way up so remember that. You’re going to sew them on similarly to how raglan sleeves are done. They’ll look like this:

Once the sleeves have been attached to both the front and back pieces, it’ll look like this.

Cut a neckband 3 inches in width by 85% of your measurement of your shoulders (with shoulders down, measure around your body). Add the neckband.

Finish assembly as instructed in the tutorial and then rock the hell out of it!

I’m wearing a hachi sweater knit in a straight P1 with a curved hem.


…..

Mini dress

Next up, we have a mini dress hack. I love anything that I can wear that’s comfy, but that’s also really sexy, and this mini dress hack fits the bill perfectly.

For this version, we’ll be using the high-low hem option of the sweater.  Because the bottom of both the front and back pieces of the bodice are straight, it’s very easy to simply add length to the bottom of these to lengthen your sweater into a dress. How much length you add to the bottom of your pattern pieces is completely up to you, but I found that 4 inches was perfect for the “mini” look I was going for.

When cutting out both the front and back pieces of your sweater, simply add 4 inches to the length at the bottom of each. Please note that the high-low bands were not changed at all for this hack; only the length of the main body pieces have been altered.

Cut and sew together the rest of the sweater as described in the tutorial, and voila! You now have a cute and very trendy mini dress, ready to go!

…..

Poms

If you’re anything like me you might have an addiction to Faux Fur Poms especially on the littles! They are just so cute! I’m going to show you a quick and easy way to substitute the ears for Poms! You’ll sew your hood together exactly the same as all of the instructions but before sewing the hood I recommend marking your ear placements slightly past the seam allowance in a washable pen that way you know where to place your poms. Then I highly recommend adding interfacing where your poms will be for added durability especially if using a pom with snaps.


Now if you have a sew on pom you’ll sew it right along the markings you made for the ears. I recommend going directly through the seam allowance, once again for added durability.


If you are using a pom with snaps (which I recommend for washing purposes as well as pom changing fun!), push your seam allowance toward the back of the hood and attach your snap through your interfacing and the seam allowance.

and wallah! You are done and now have super cute pom ears!


Happy Sewing,

Michelle


…..

Colorblocked

I am all in anytime that I have a chance to sport some spirit gear for our local team (Go Grizzlies!). Awhile ago, I was doing some aimless browsing and came across a colorblocked sweatshirt that was absolutely perfect. Of course they didn’t have our team colors, but the oversized sweater was the perfect starting point to recreating this sporty look.

To begin, you will want to divide the front and back bodice pieces, as well as the sleeve, into the sections. For mine, I began with the front bodice piece. I measured 5″ down from the neckline and placed a vertical line. I then measured 6″ below that to create my second color block. The remaining section will be for my third color block.  For the back bodice, I lined up the bottom hemline of both front and back piece, and transferred my lines to this piece as well.

To create the colorblocked sleeve, I began by aligning to top of the sleeve with the front bodice neckline and again, transferring these lines.

Once the lines are drawn, you will then need to cut your pieces on these lines (you can also fold your pattern on each of these lines if you’d rather not cut your original). To cut the fabric, you will need to add an additional 1/2″ to each line you drew, both to the top and bottom colorblocked sections of this line, to account for the seam allowance.

Now that you’ve cut out your pieces (phew, wasn’t that fun?! haha), you will begin to reassemble the bodices and sleeves. With right sides together, match up each colorblock section and sew using a 1/2″ SA.

Once your pieces have been sewn together, you will then follow the original tutorial to construct your sweatshirt.  And just like that, you’re now ready to show off your favorite colors, prints, or school spirit all in one fun, colorblocked sweater!

…..

Higher side split

Let’s end this easy hacks series with a Pinterest inspired hack. One of the testers shared a picture of a high side slit oversized sweater and I knew I just have to have one. This is super easy look to achieve!

I chose to make the slit 5″ but that is just a mild suggestion. You can certainly make it bigger (or smaller) if you’d like. Mark 5″ up from the bottom raw edge on all 4 side seams. You can use pins, clips or a tailor chalk.

Sew the pattern as instructed in the tutorial but stop the at the 5″ mark. You may find this step easier to be done if you sew (at least the last few inches) with a sewing machine. Repeat the steps on the other side.

Press a 1/2″ hem on both sides of the side seam. Stitch the hem down with a zig zag stitch, twin needles or a coverstitch.


Continue adding the front and back bands ad in the tutorial. See that was super easy!

I did the hack on my turtleneck version but it would be super cute on all neckline.

Tip: If you would like to make the high side seam on the curved hem option you would have to sew the side seams the same way you do the high low option. 


Hope you enjoyed these as much as we loved making them for you. As always, don’t forget to show off your creations in the P4P Facebook group or Instagram (use #patternsforpirates) so we can ohhh and ahhh over them!

Filed Under: Pattern Hacks, Pattern Release, Uncategorized Leave a Comment

2019 Review

January 2, 2020

I love looking back at everything we did throughout the year as we close out the year and begin a new one! I always feel like I’m not producing enough new things during the year, but always look back proudly at what we did!

Here are the NEW patterns we added to the site during 2019:

The Basic Tee – Mens | The Basic Tee – Womens | The Basic Tee – Youth | The Basic Tee – Bundle
Loggers | Loggers – Youth | Loggers Bundle
Sporty Piko | Sporty Piko – Youth | Sporty Piko Bundle
Minute Maillot | Minute Maillot – Youth | Minute Maillot – Bundle
Summer PJs | Summer PJs – Youth | Summer PJs – Bundle
Hepburn | Hepburn – Youth | Hepburn – Bundle
Twist Back Top | Twist Back Top – Youth | Twist Back Top – Bundle
Fierce Bra | Fierce Bra – Youth | Fierce Bra – Bundle
Fierce Undies | Fierce Undies – Youth | Fierce Undies – Bundle
Gala Gown | Gala Gown – Youth | Gala Gown – Bundle

We also started adding Metric measurement charts into our patterns, more videos, and extended our size range to Plus 5X this year starting with the Twist-Back Top <3

Here are all the NEW FREEBIES we added this year:

Heart Pouch | It’s a Cinch…Bag | Adventure Hat
Just Write Skirt | Witch Hat | Festive Fabric Trees | Hey Cookie Apron
Hooded Blanket | Pixie Hat | Ugly Sweater Party DIYs

We did a few fun events!

So many Sew A Longs! If you’re not part of our Sew A Long Facebook Group make sure to join in the fun 🙂

I always like to see what are the most popular patterns through the year as well, here are the most loved patterns during 2019:

The Basic Tee – Mens | The Basic Tee – Womens | The Basic Tee – Youth | The Basic Tee – Bundle
Cocoon Cardigan | Butterfly Cardigan | Cocoon/Butterfly Cardigan Bundle
Gala Gown | Gala Gown – Youth | Gala Gown – Bundle
Loggers | Loggers – Youth | Loggers Bundle
Wiggle Dress
Boundless Knit Dress | Boundless – Youth | Boundless Bundle
SOS Knit Pants | SOS Knit Pants – Youth | SOS Knit Pants Bundle
Essential Tank
Minute Maillot | Minute Maillot – Youth | Minute Maillot – Bundle


I can’t wait to add more to the site this year and continue to grow Patterns for Pirates with you!


Filed Under: Announcement Leave a Comment

1st Annual Holiday Charity Week

December 18, 2019

I love the holiday season and the kindness that comes along with it.  To help spread the love, I have decided to start an annual tradition of giving a percentage of sales the during the week leading up to Christmas Day to a charity.  I plan on picking a different charity each year or at least rotating them.

This year I will be giving 40% of all sales this week (12-18-2019 to 12-25-2019) from the P4P website to charity.  For 2019, I’ve decided to split the total between a local DFW food bank and a global charity: Action Against Hunger.


Together, we can help others this week and help to spread some of the holiday kindness.  If you happen to need a pattern, make sure and grab it now and know that your purchase will be felt by others!  Have all the patterns you need?  Consider taking a few moments to donate to either charity directly instead <3  No matter what, I’m here wishing every single one of you reading this Happy Holidays!!

-Judy

Filed Under: Announcement 4 Comments

  • « Previous Page
  • 1
  • …
  • 32
  • 33
  • 34
  • 35
  • 36
  • …
  • 68
  • Next Page »

connect with me

  • Email
  • Facebook
  • Instagram
  • Pinterest
  • YouTube
Privacy & Cookies: This site uses cookies. By continuing to use this website, you agree to their use.

To find out more, including how to control cookies, see here: Cookie Policy
  • Privacy Policy
  • Refund Policy
  • Contact Us
  • About

Copyright © 2026 Patterns for Pirates

Copyright © 2026 · Genesis Framework · WordPress · Log in