Patterns for Pirates

P4P stylish, modern, wearable patterns

  • Home
  • Blog
    • Frequently Asked Questions
    • Pattern Releases
      • Free Patterns
    • P4P University
      • Fitting
      • Sewing with Stretch, Knit Fabrics
      • Sewing with Woven Fabrics
      • Sewing Machines
    • Sew-A-Longs
    • Fabric for Pirates
    • Pattern Hacks
    • Announcement
      • Blog Tours
      • Contest/Giveaway
  • Shop
  • Bundle Discounts
  • Gift Cards
  • My Account
  • Cart

Fall Into Fashion – November 1 :: Straight Palazzos

November 1, 2020

All November long, we are looking to “Fall Into Fashion” with some sewing and style fun. As the weather cools down, fashion heats up! This time of year can provide some of the best opportunities for styling yourself.

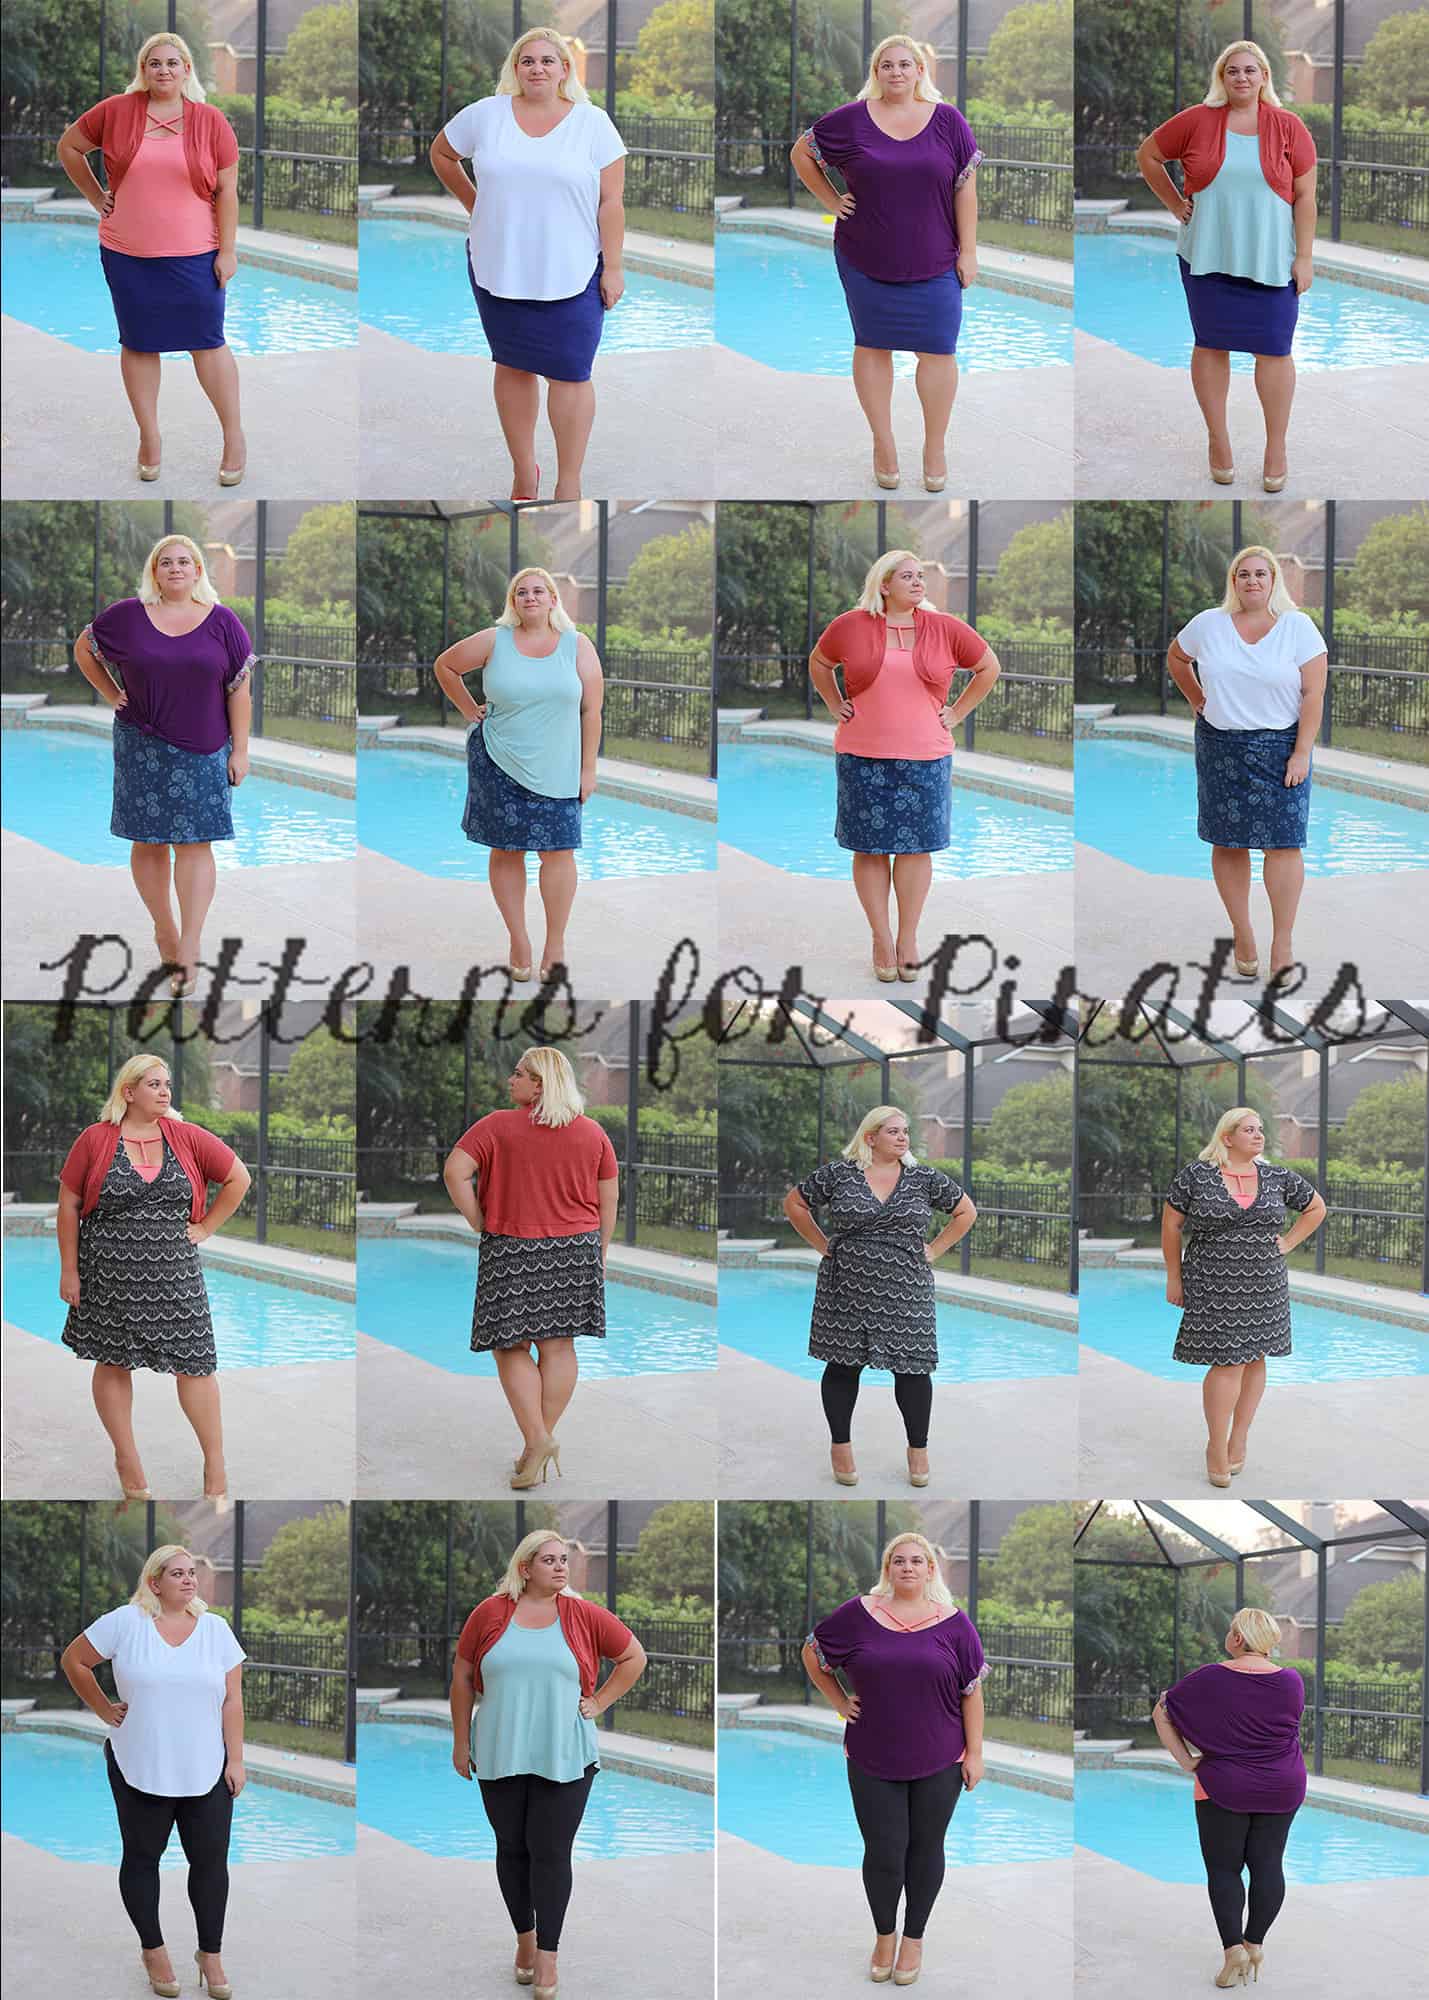
Have you ever heard the term “capsule wardrobe”?  It is the practice of editing your wardrobe down to your favorite clothes (aka the items that fit your fashion sense, your body, and your lifestyle right now), remixing them regularly, and shopping/sewing less often and more intentionally.

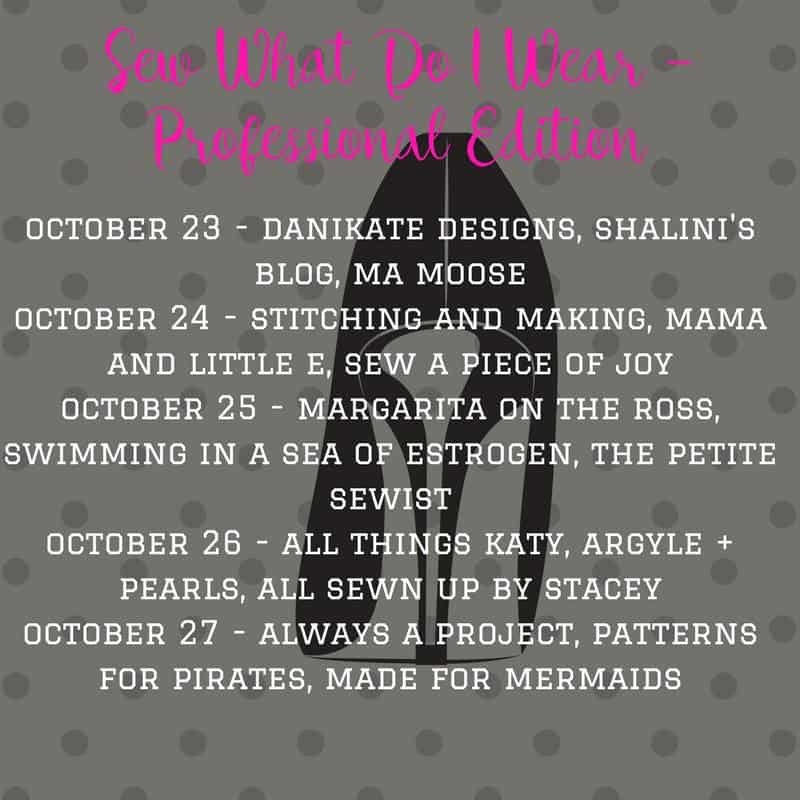
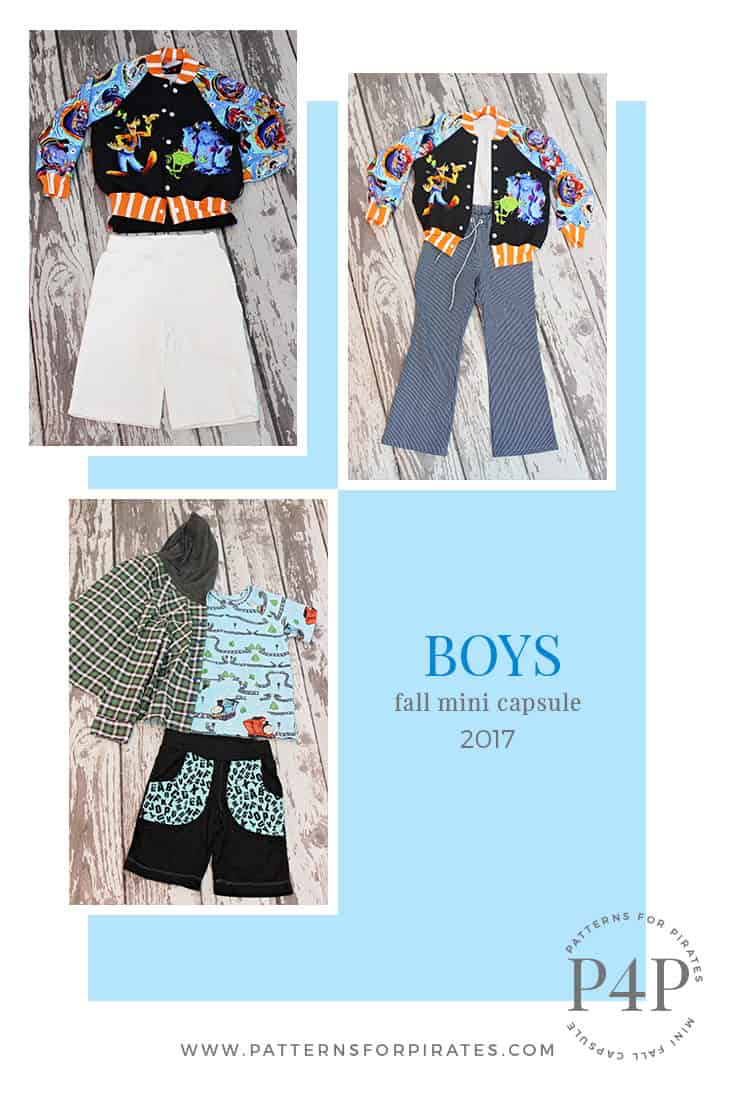
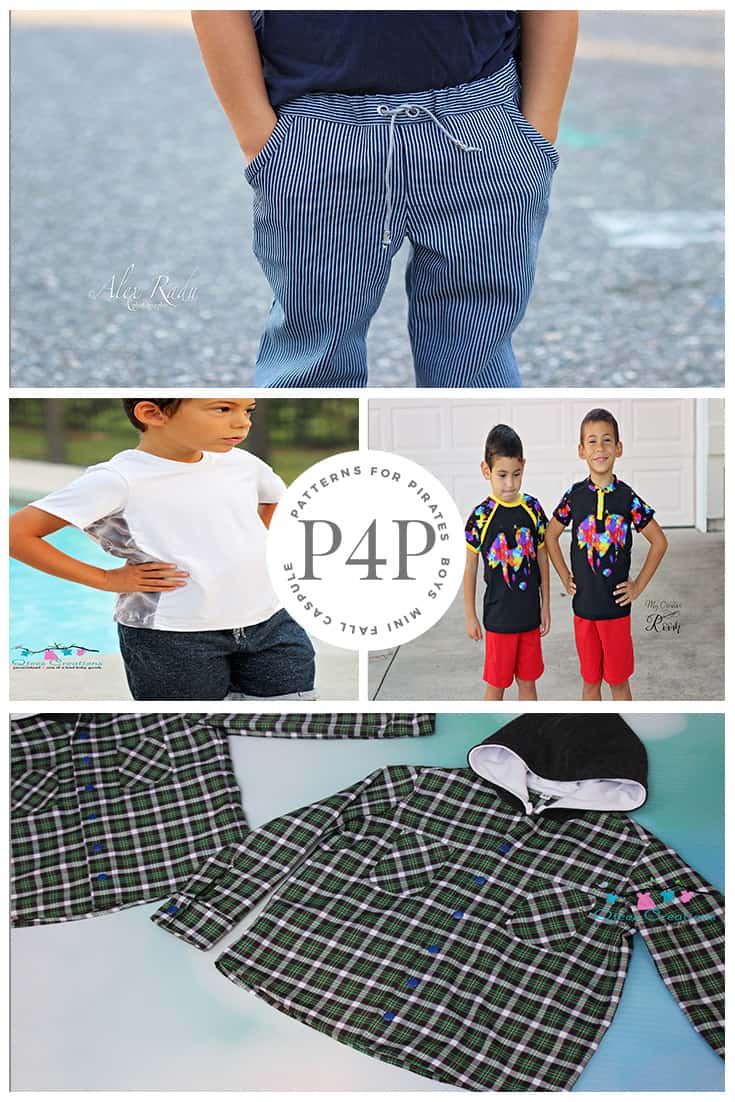
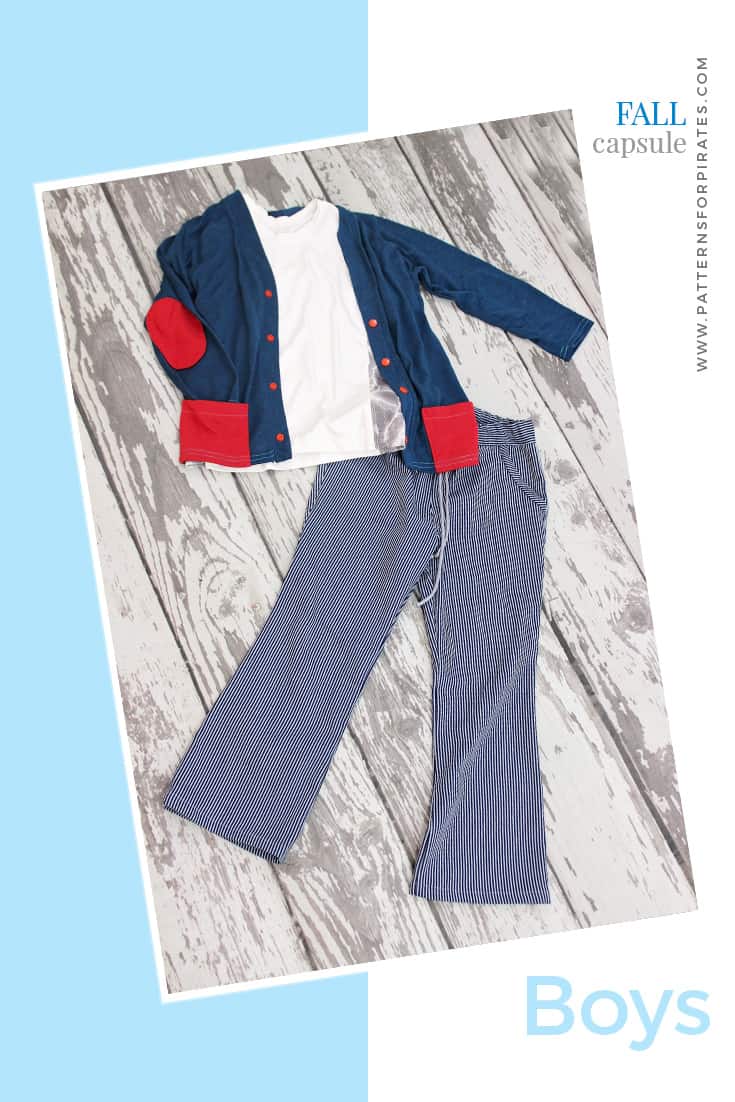
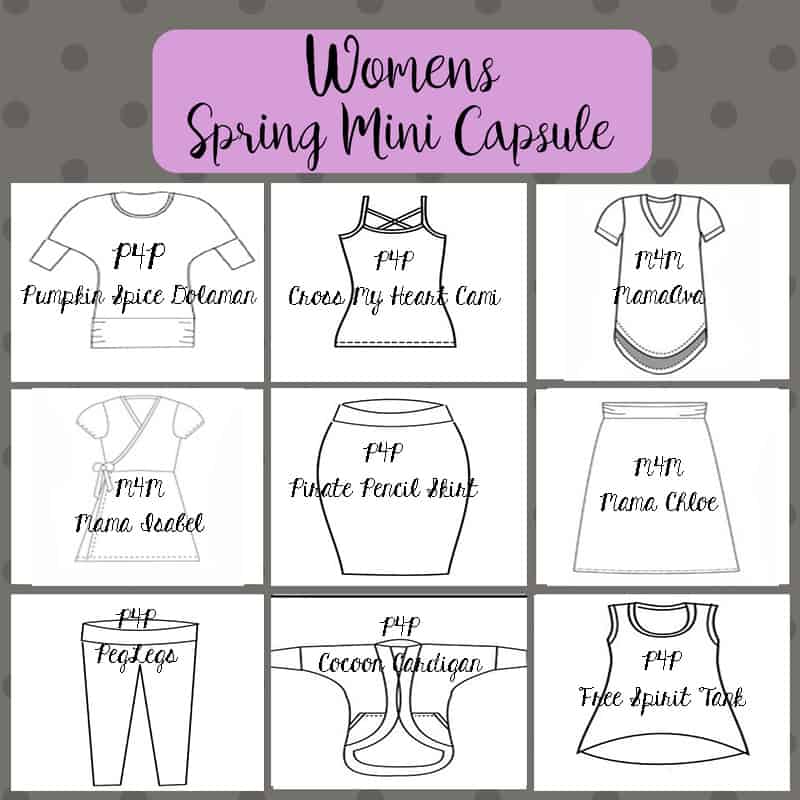
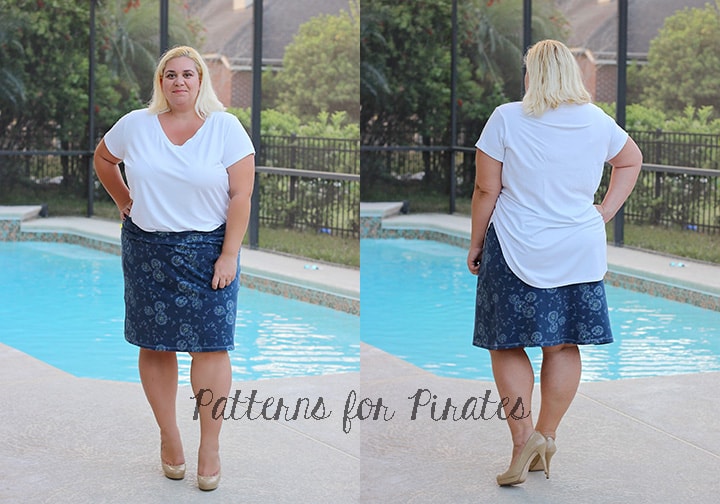
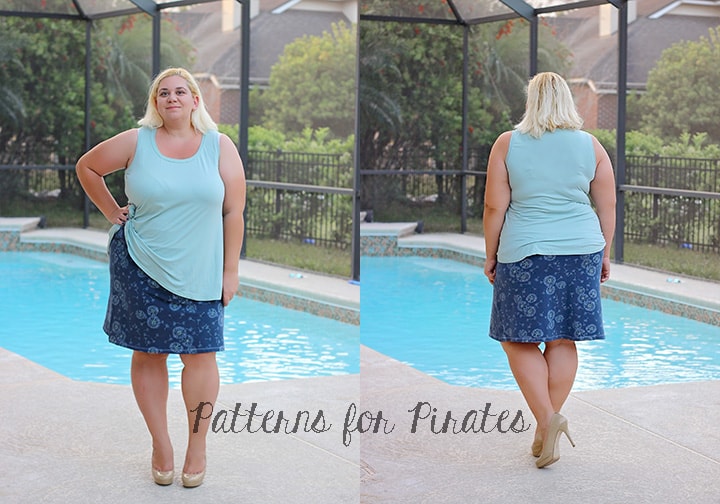
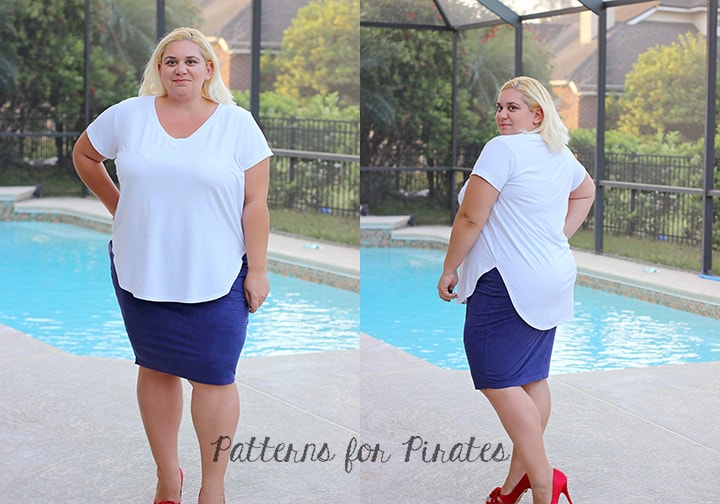
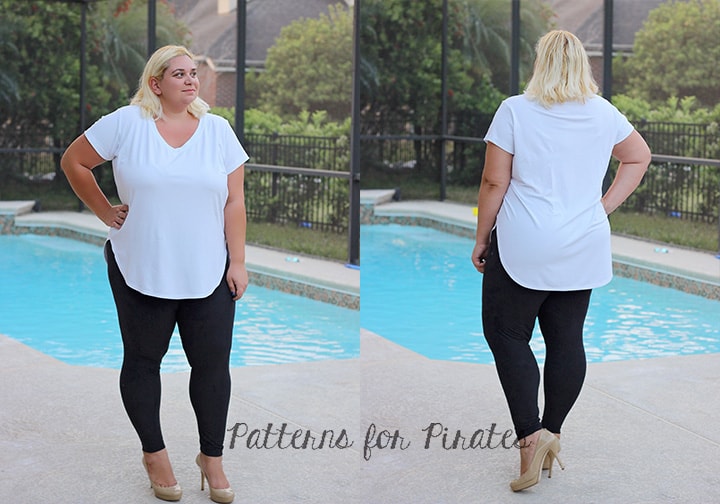
Here at Patterns for Pirates headquarters, we thought it would be so fun to show you how to do this with your handmade wardrobe!  We hired some incredible sewists from the Pirate Community and asked them to sew a pattern from our collection, and then show you how to get more wearability out of it.  They are showing up each day to remix a different P4P pattern AND the pattern of the day will be on sale for that 24-hour period.  So fun, right?

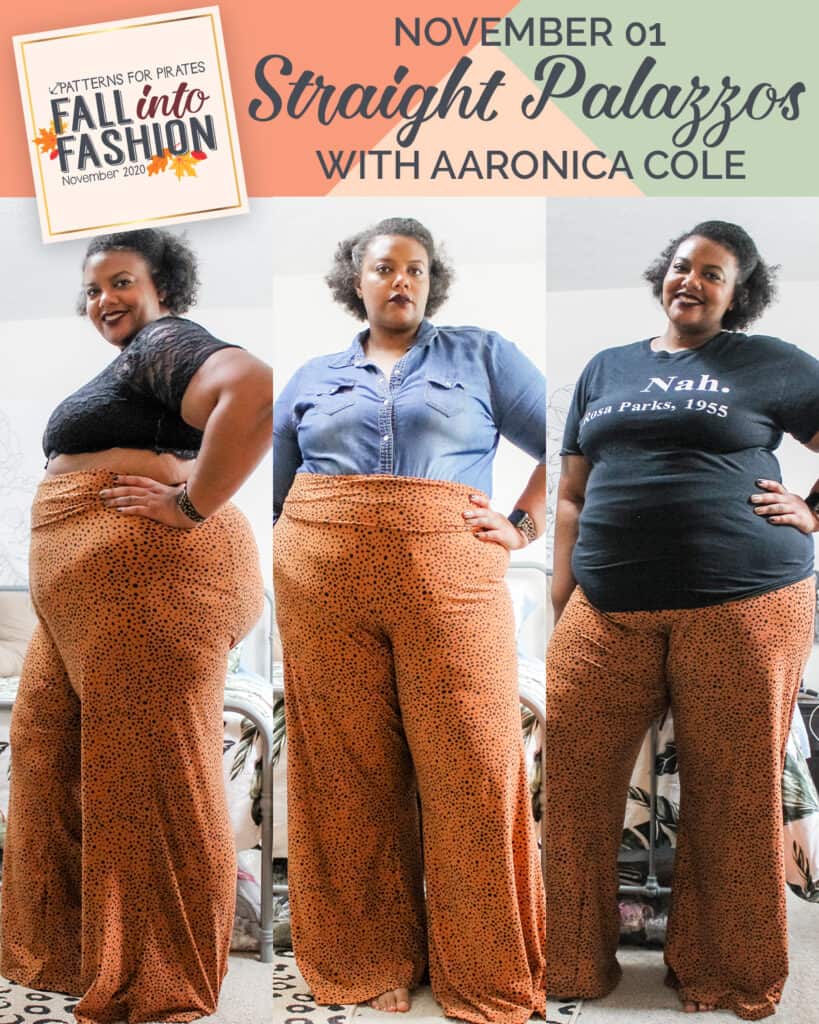
TODAY’S FEATURED PATTERN

SHOP NOW

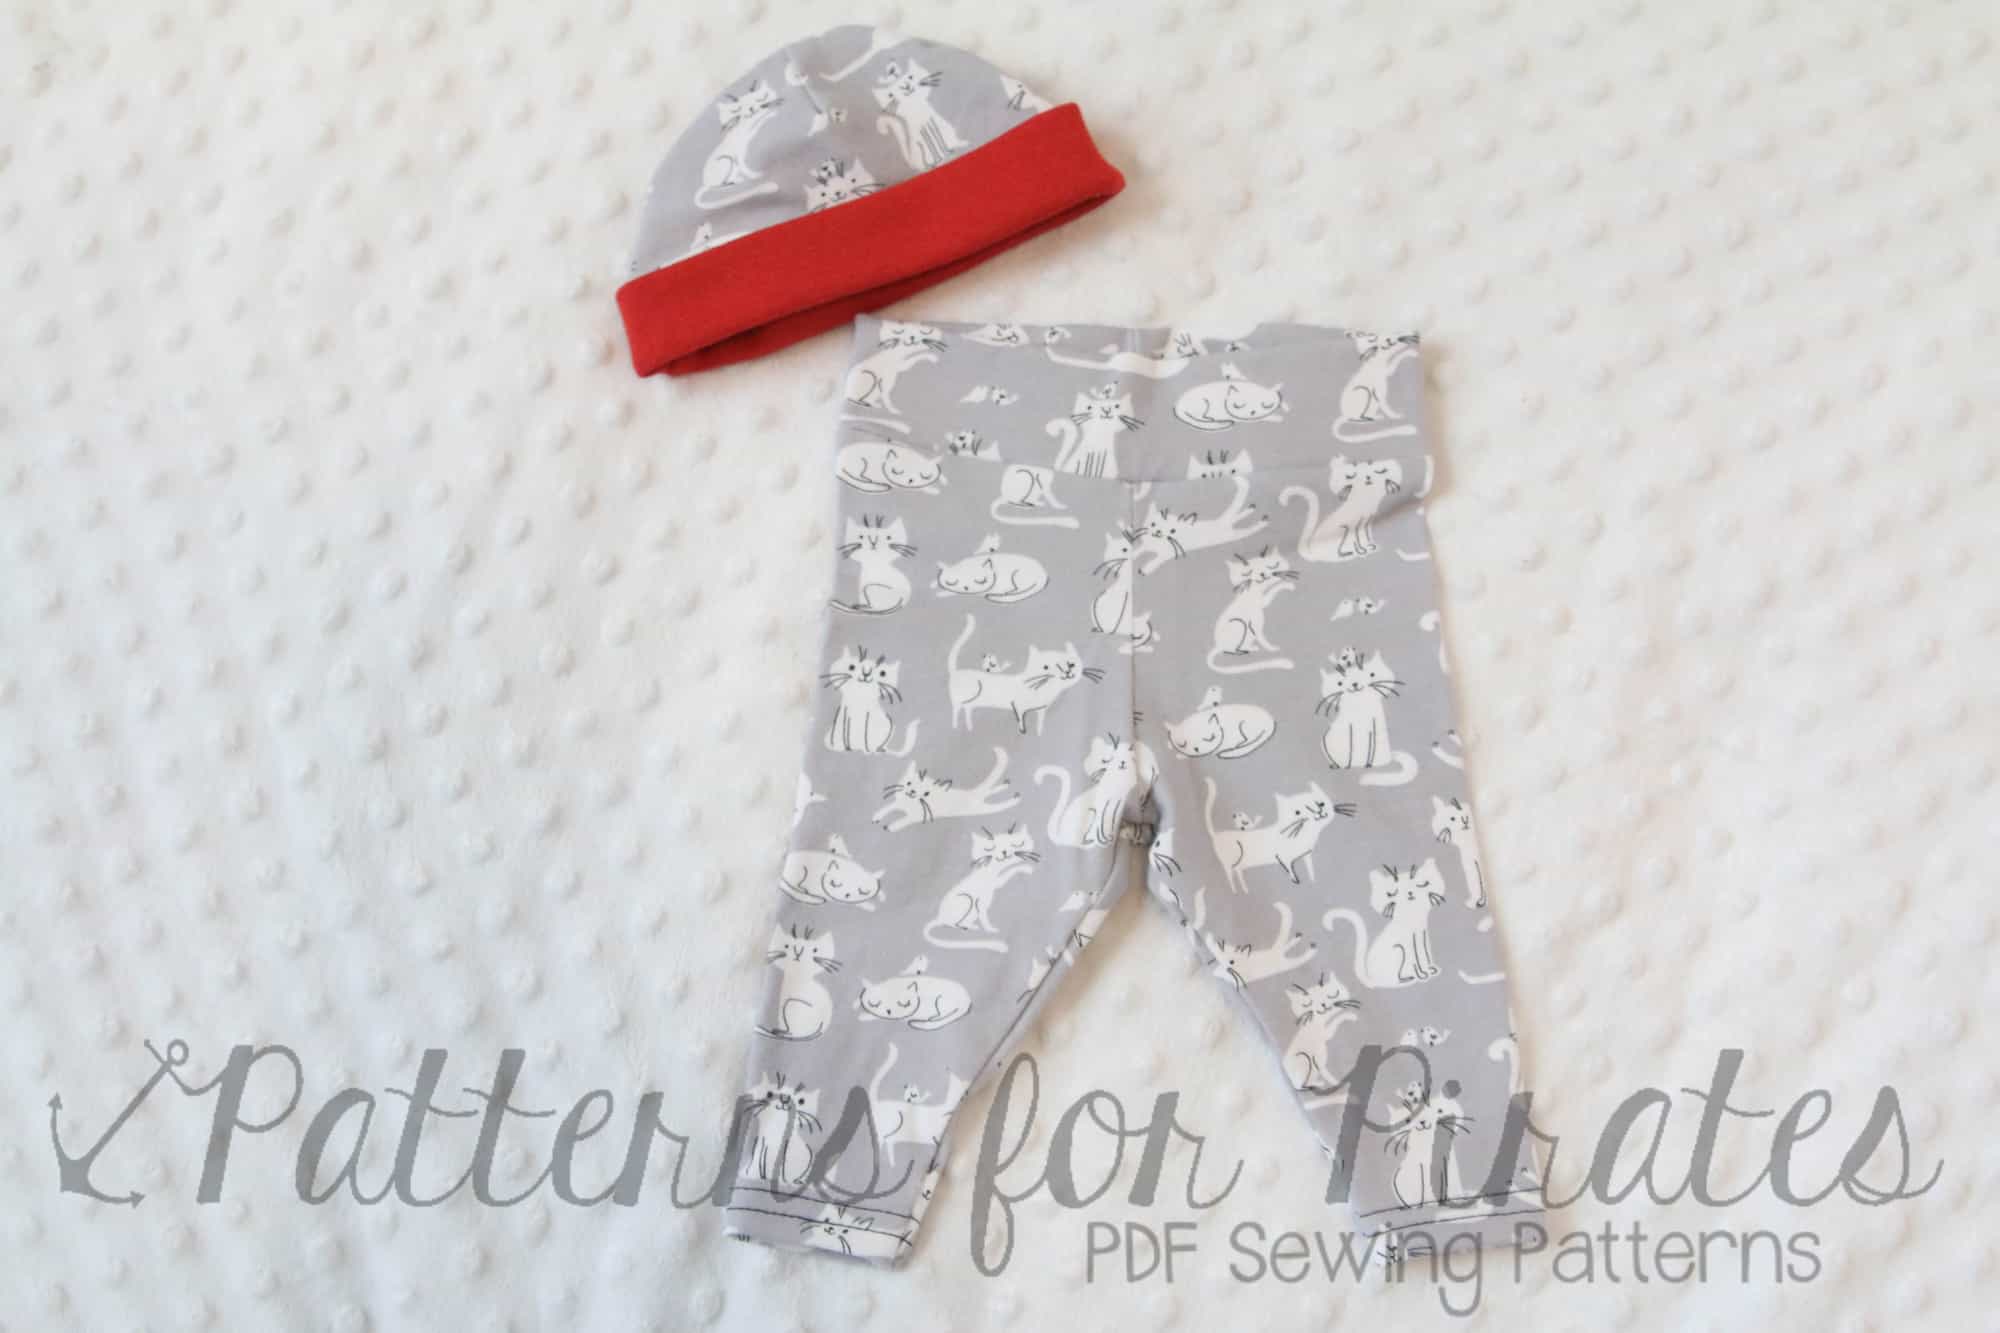
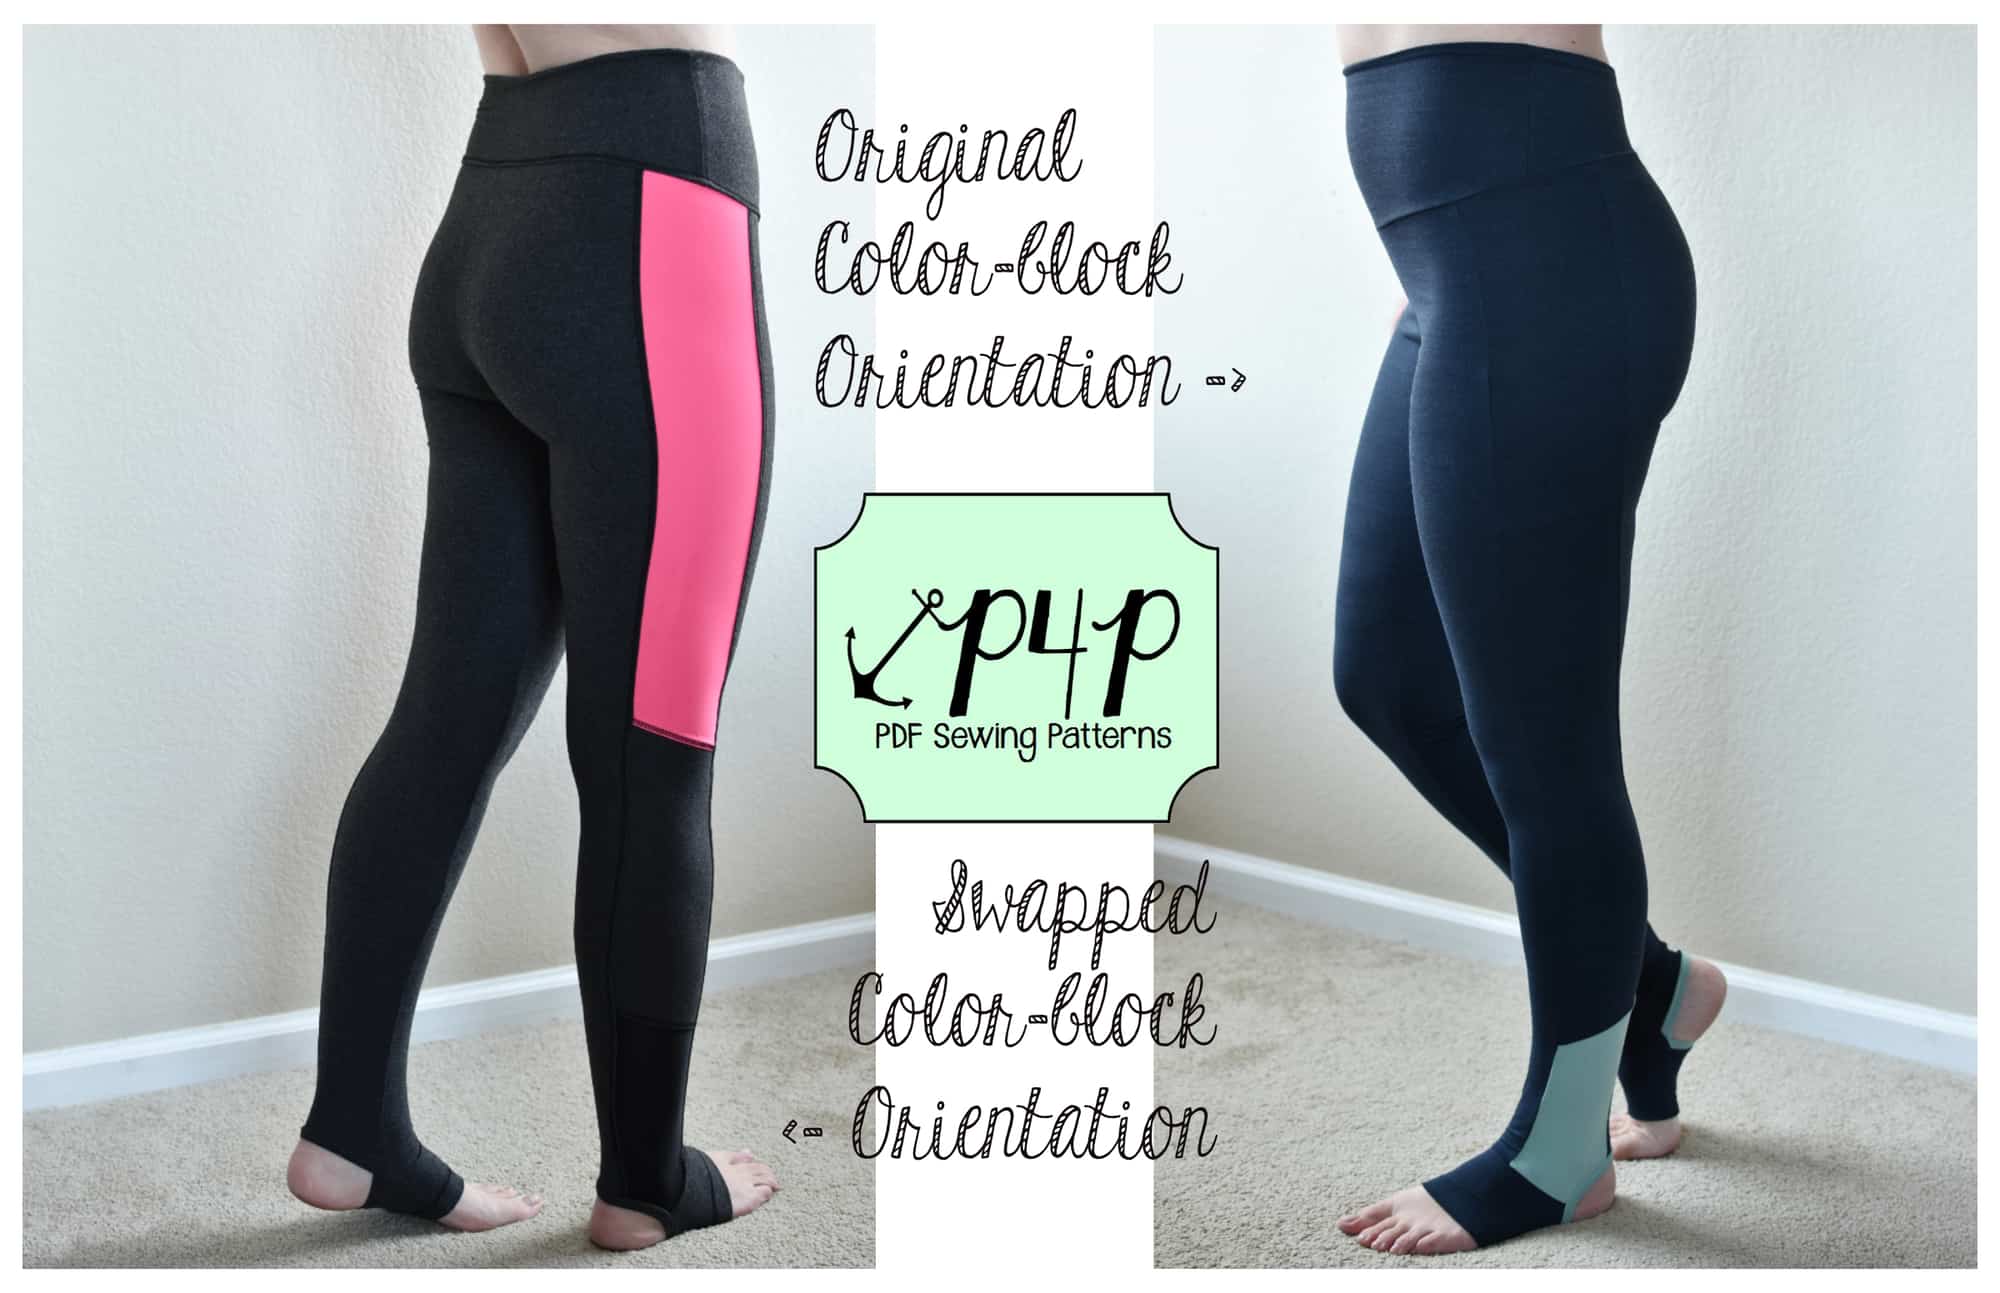
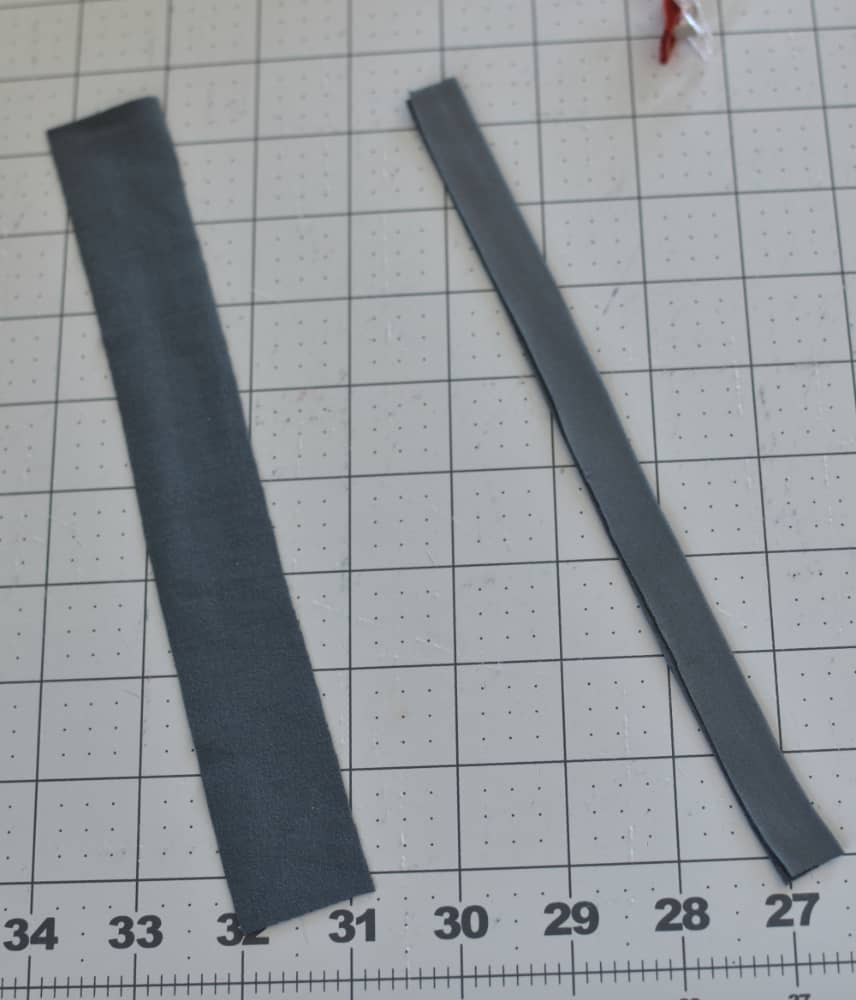
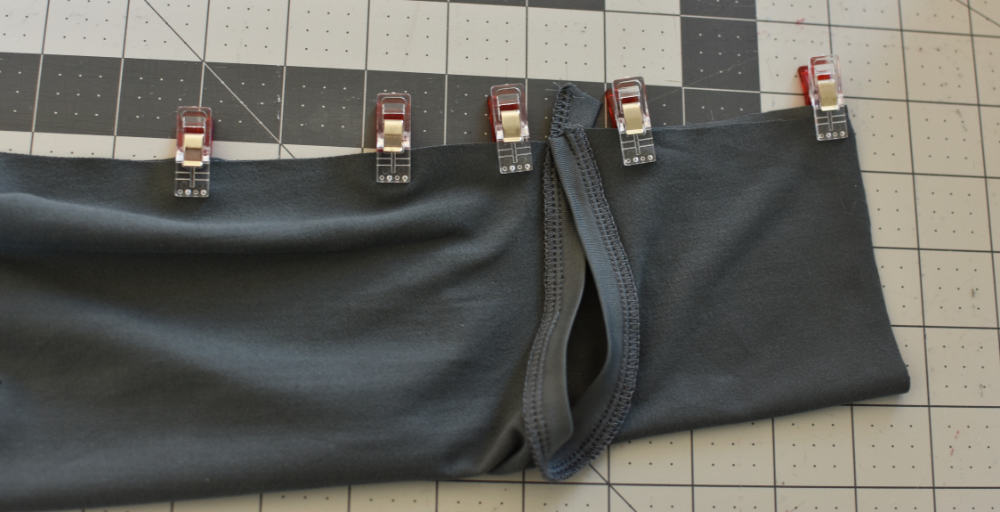
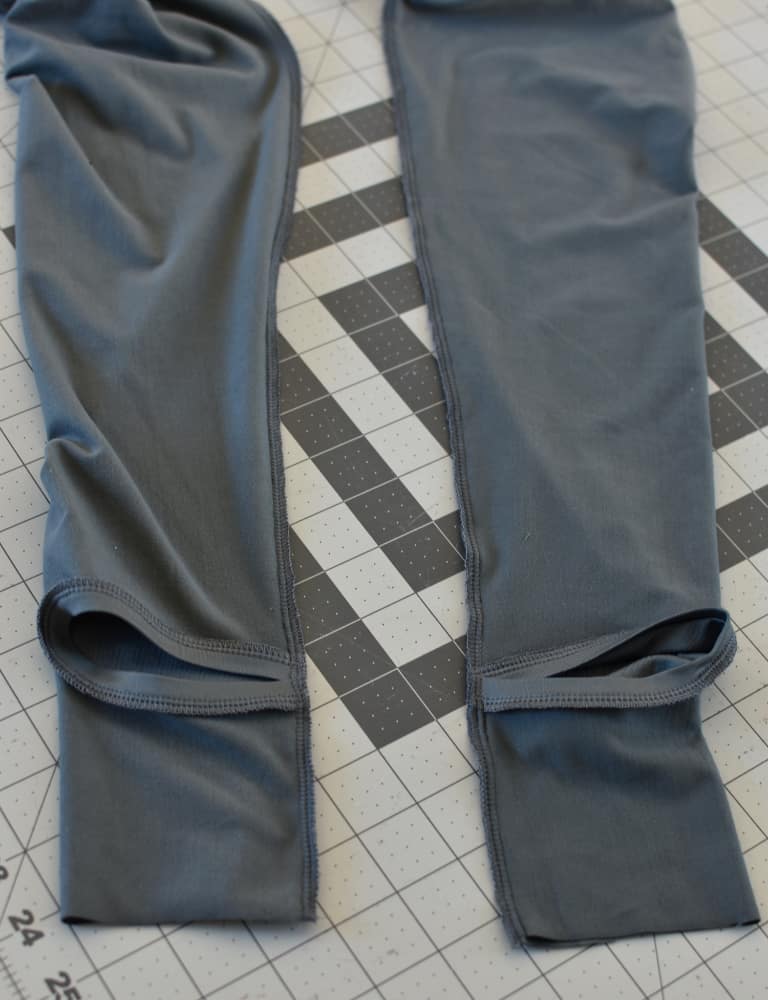
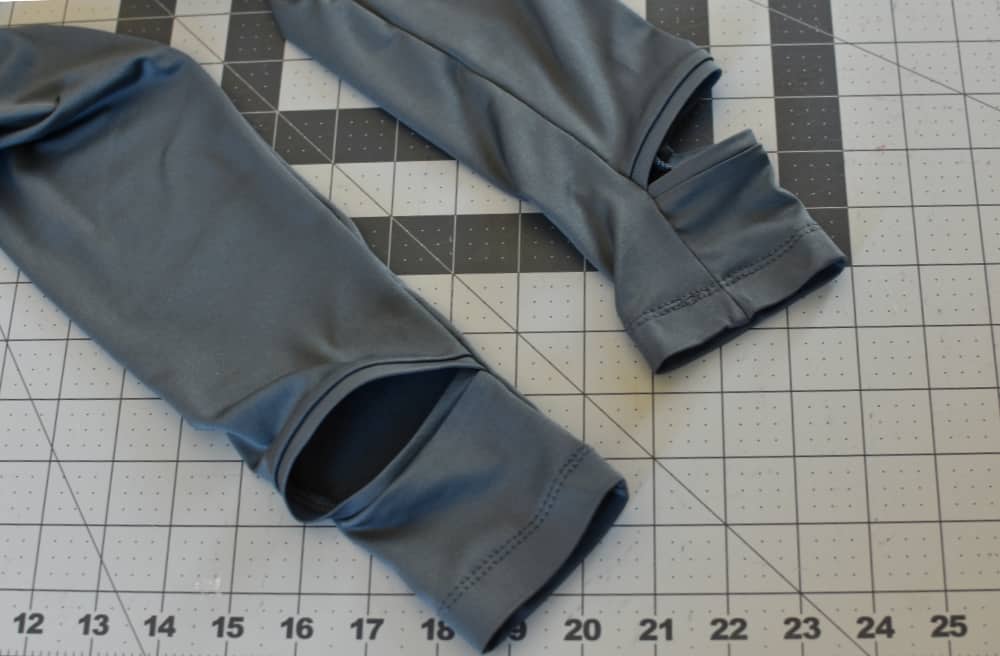
Pattern: Straight Palazzos

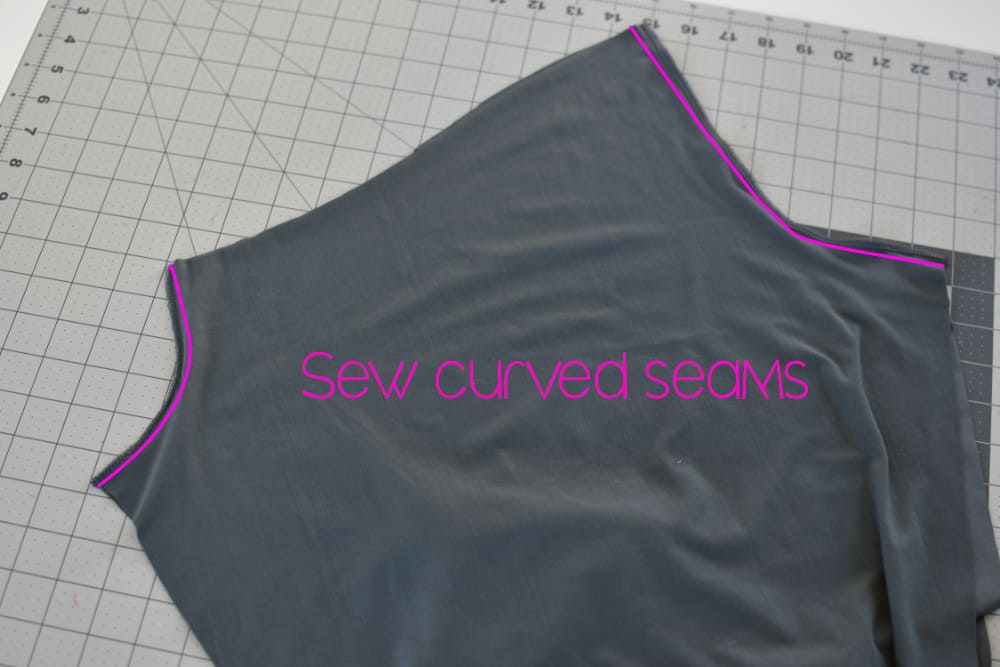
Quick Summary: This beginner knit pattern has all the style you need in a soft comfortable pant! It is a slim fit over booty and falls straight/wide down legs for a flattering fit on any size!
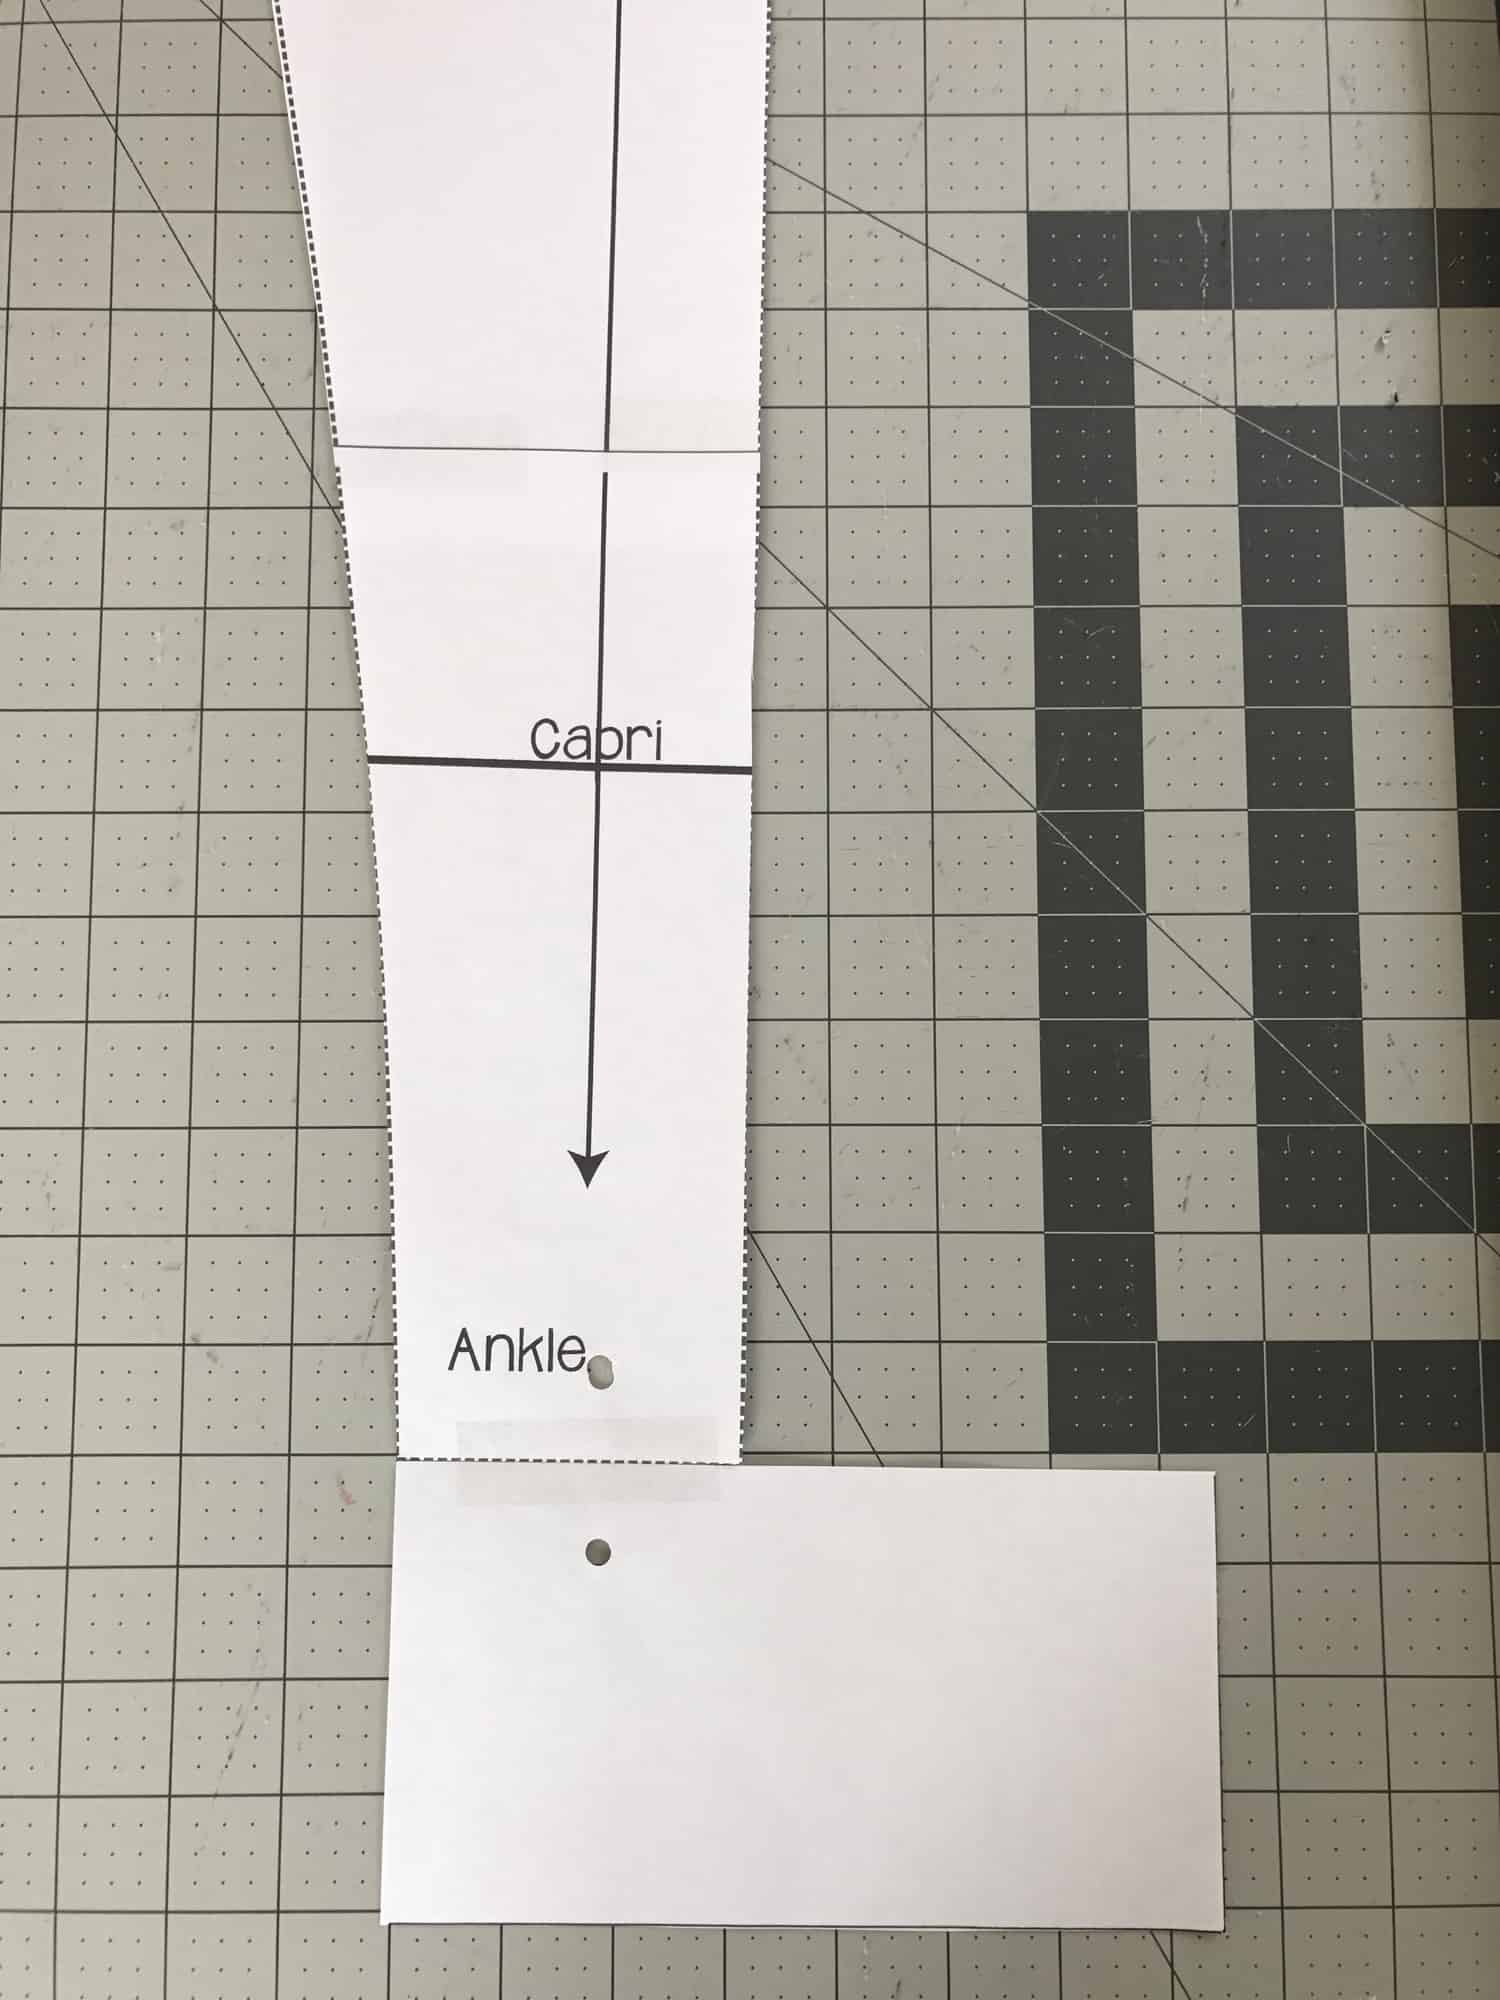
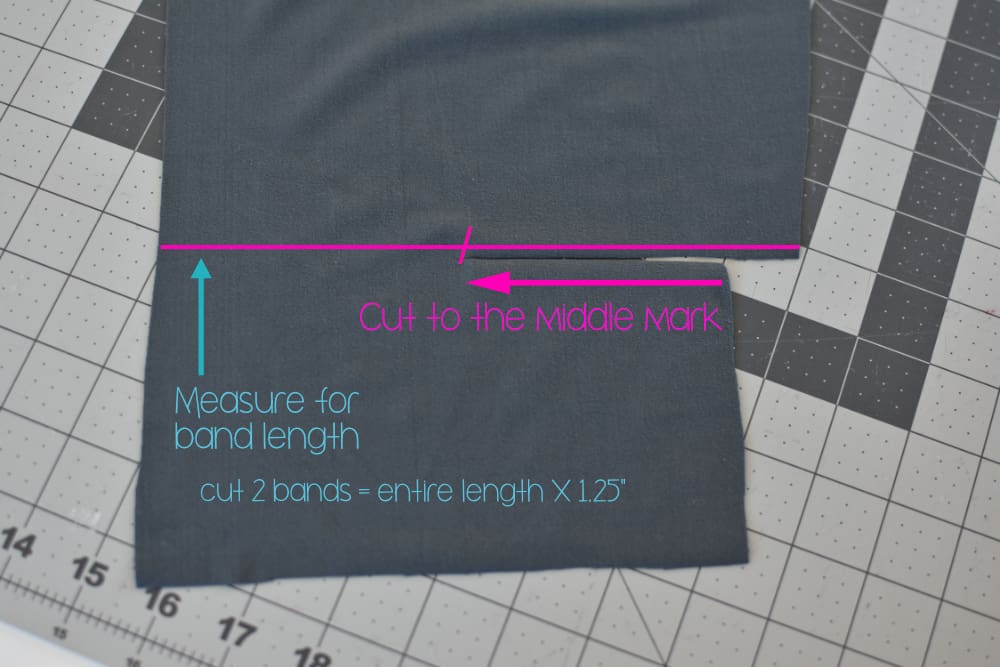
Options include: shorts, capri, and pant length with 30″,32″, and 34″ inseam cut lines. Yoga wasitband you can fold over or wear high waisted, and enclosed elastic waistband. (Thicker width elastic for a much more flattering look!)

This pattern is on sale only thru tonight, at 11:59pm CST. If you’ve had your eye on it, don’t wait to jump on the deal!

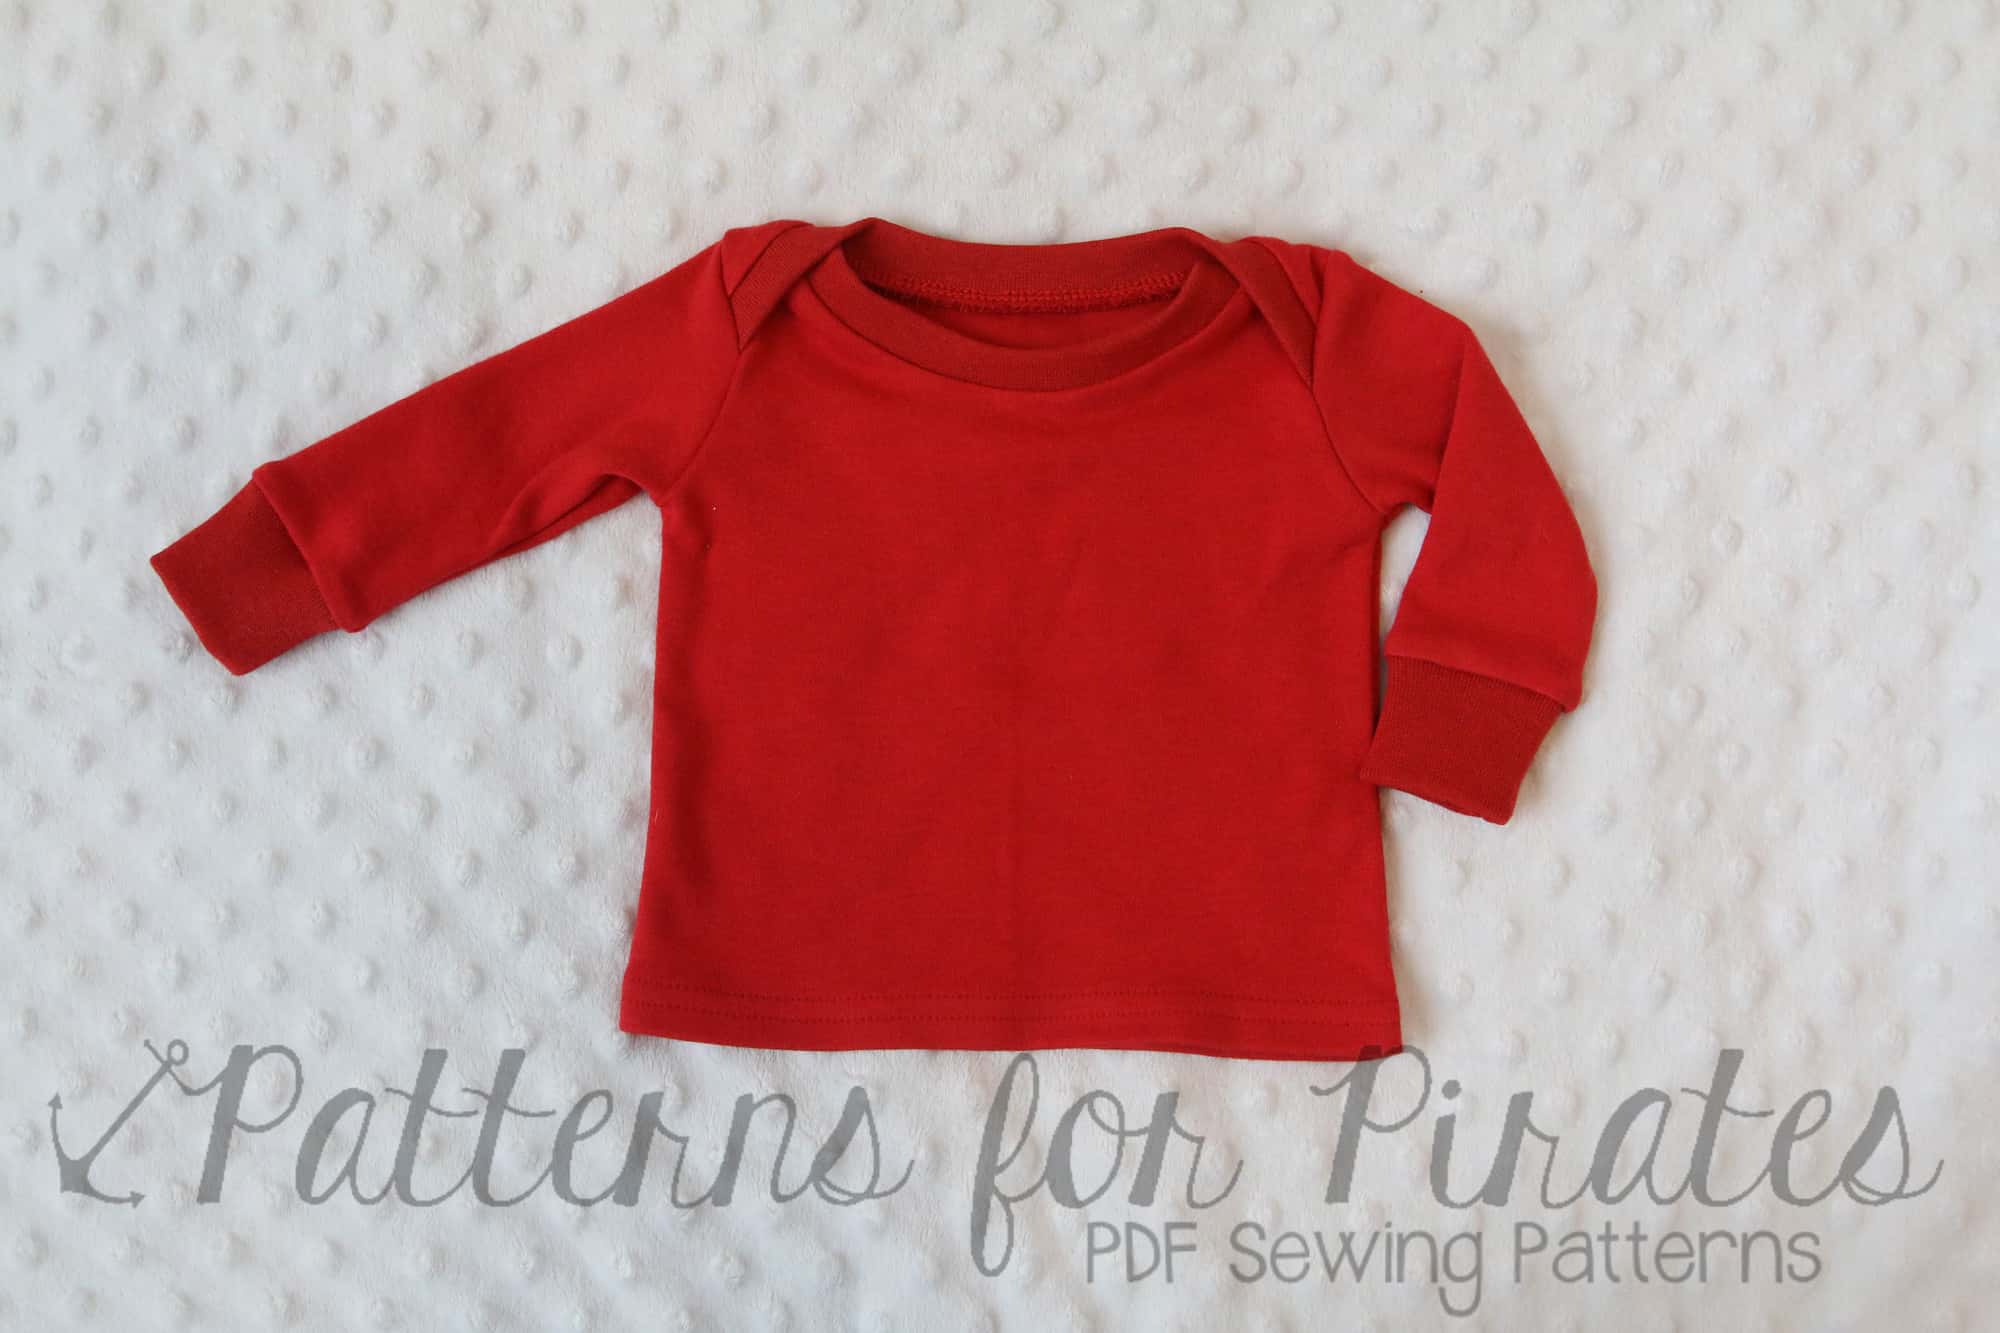
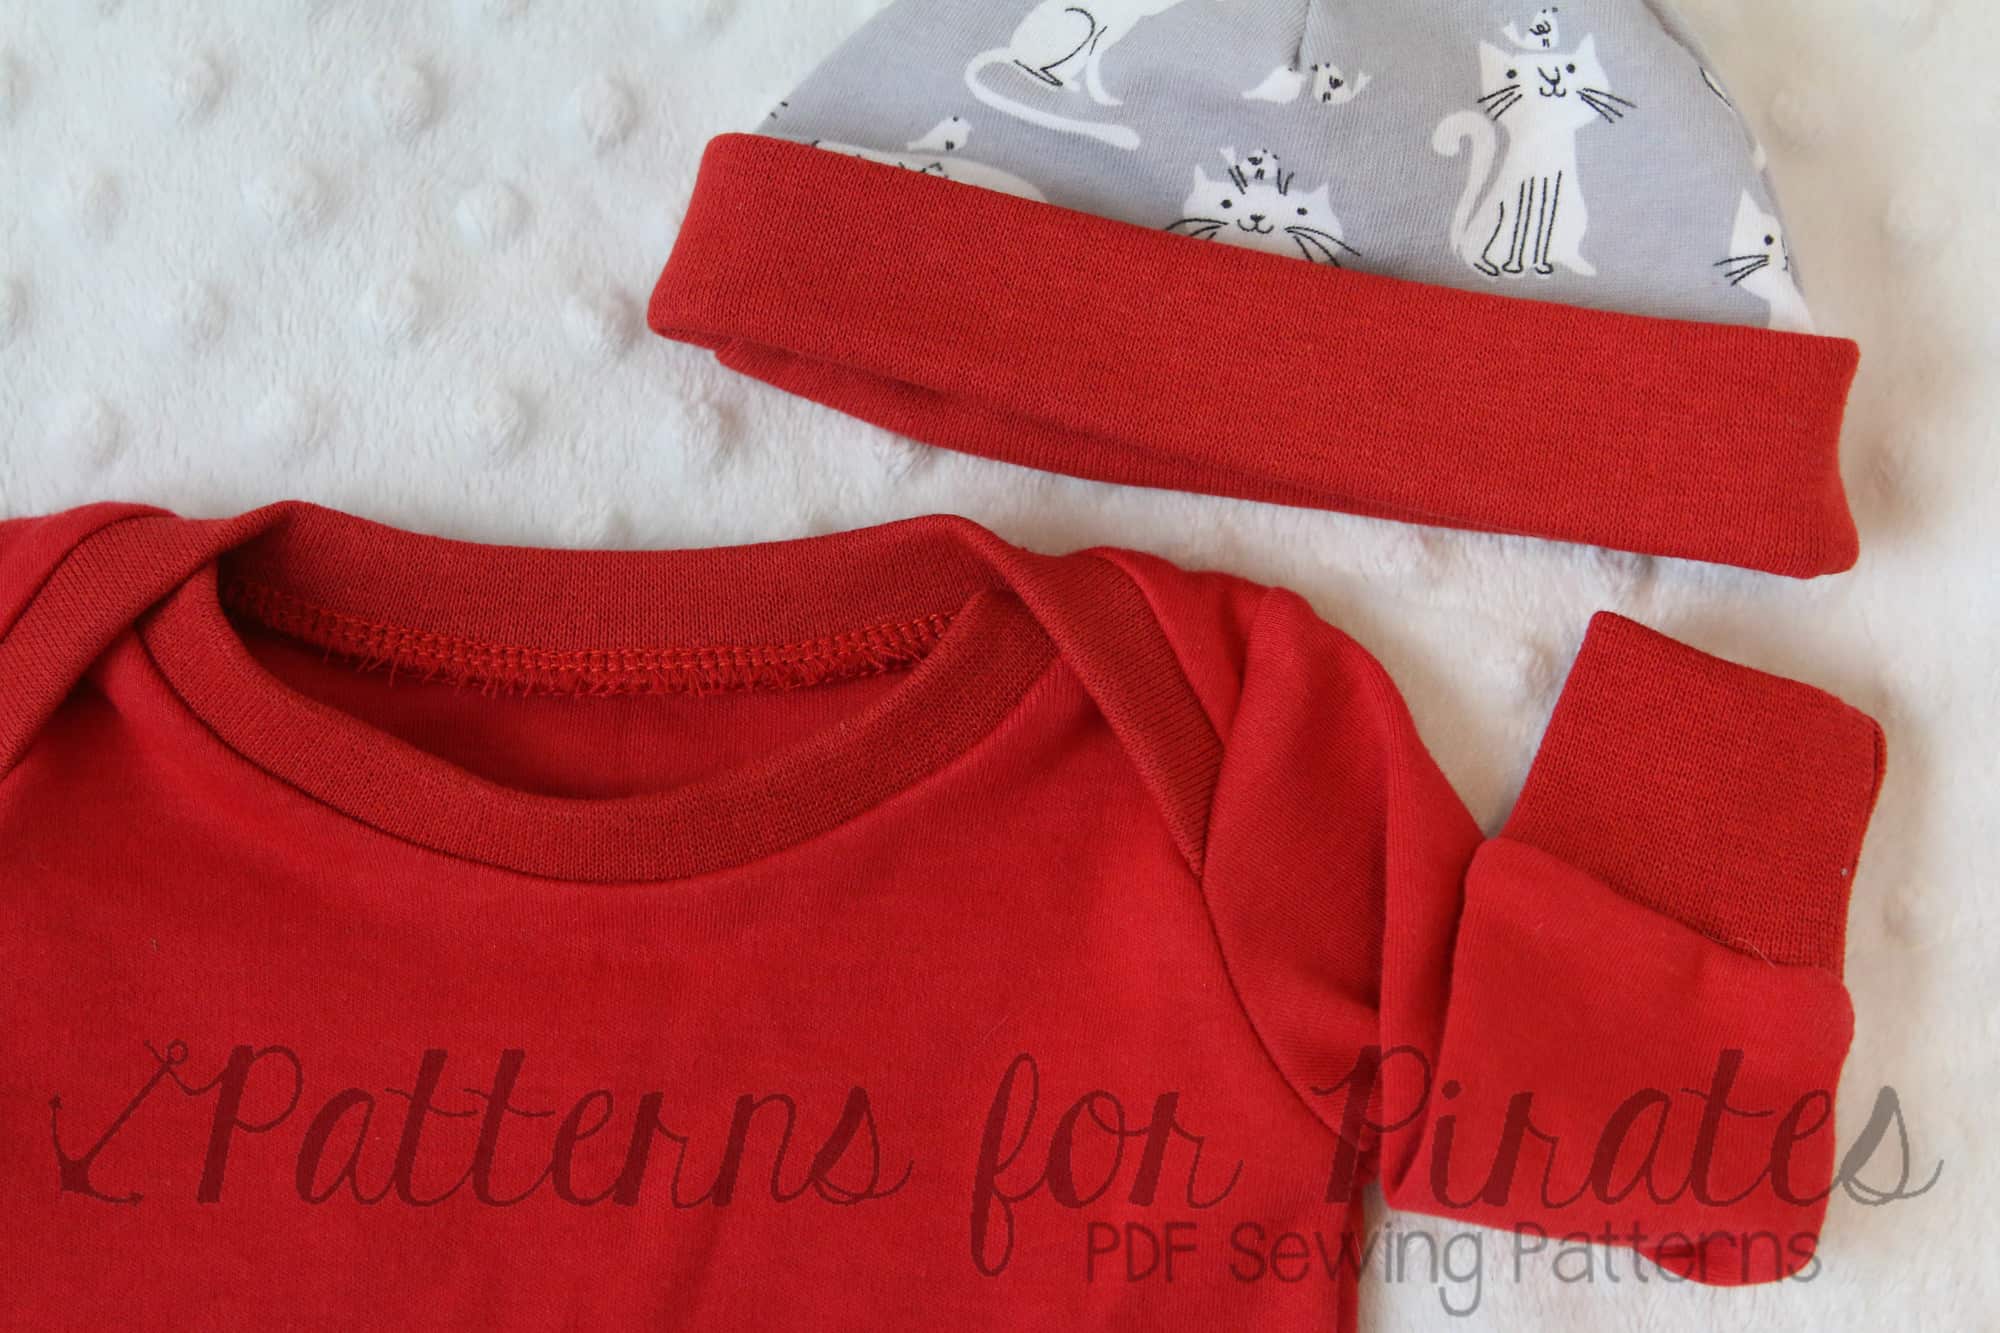
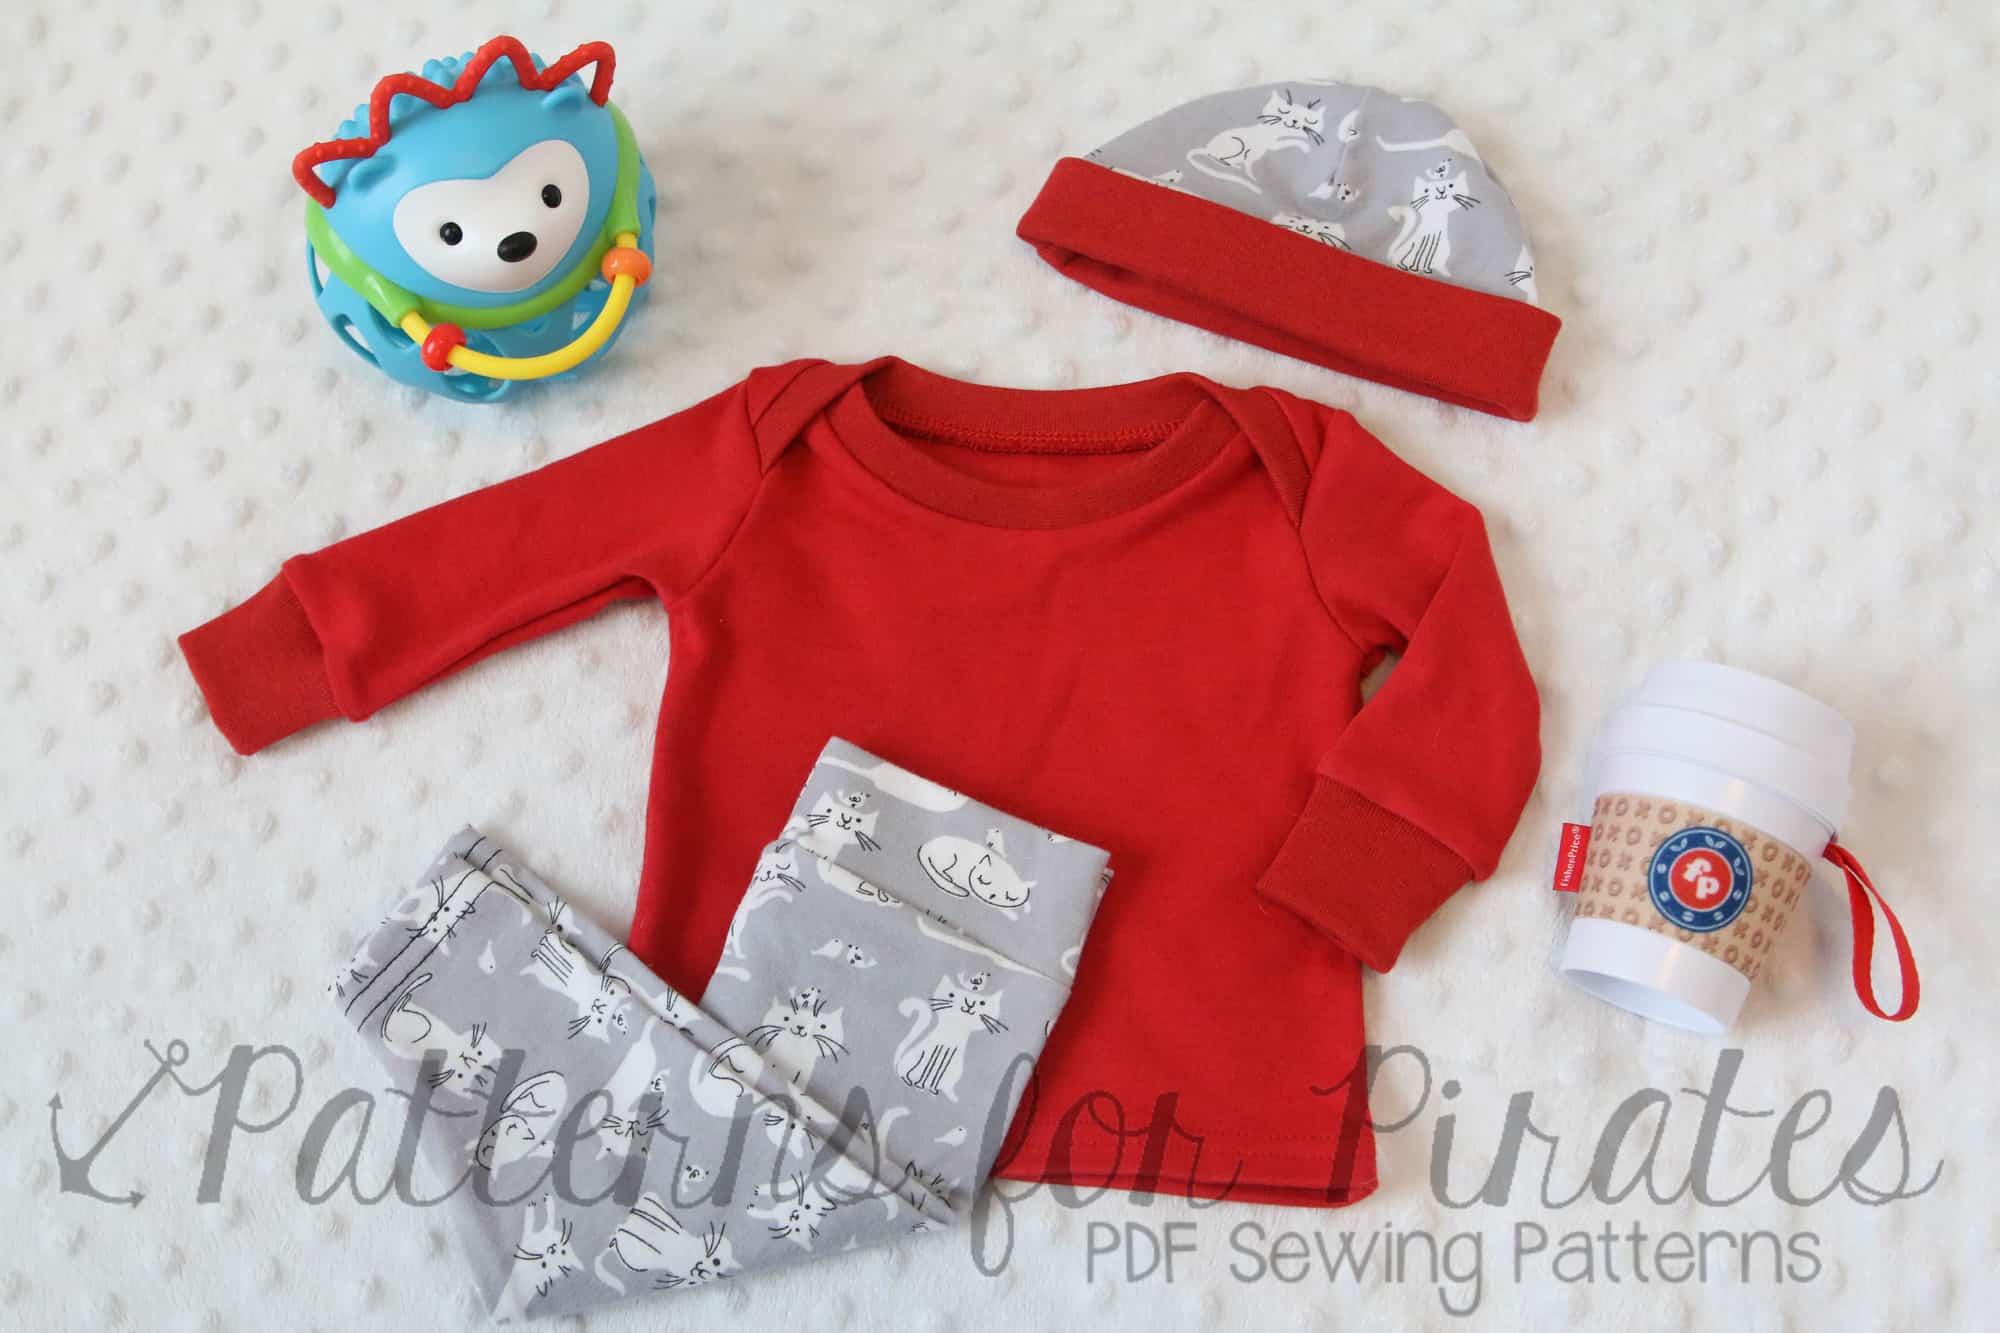
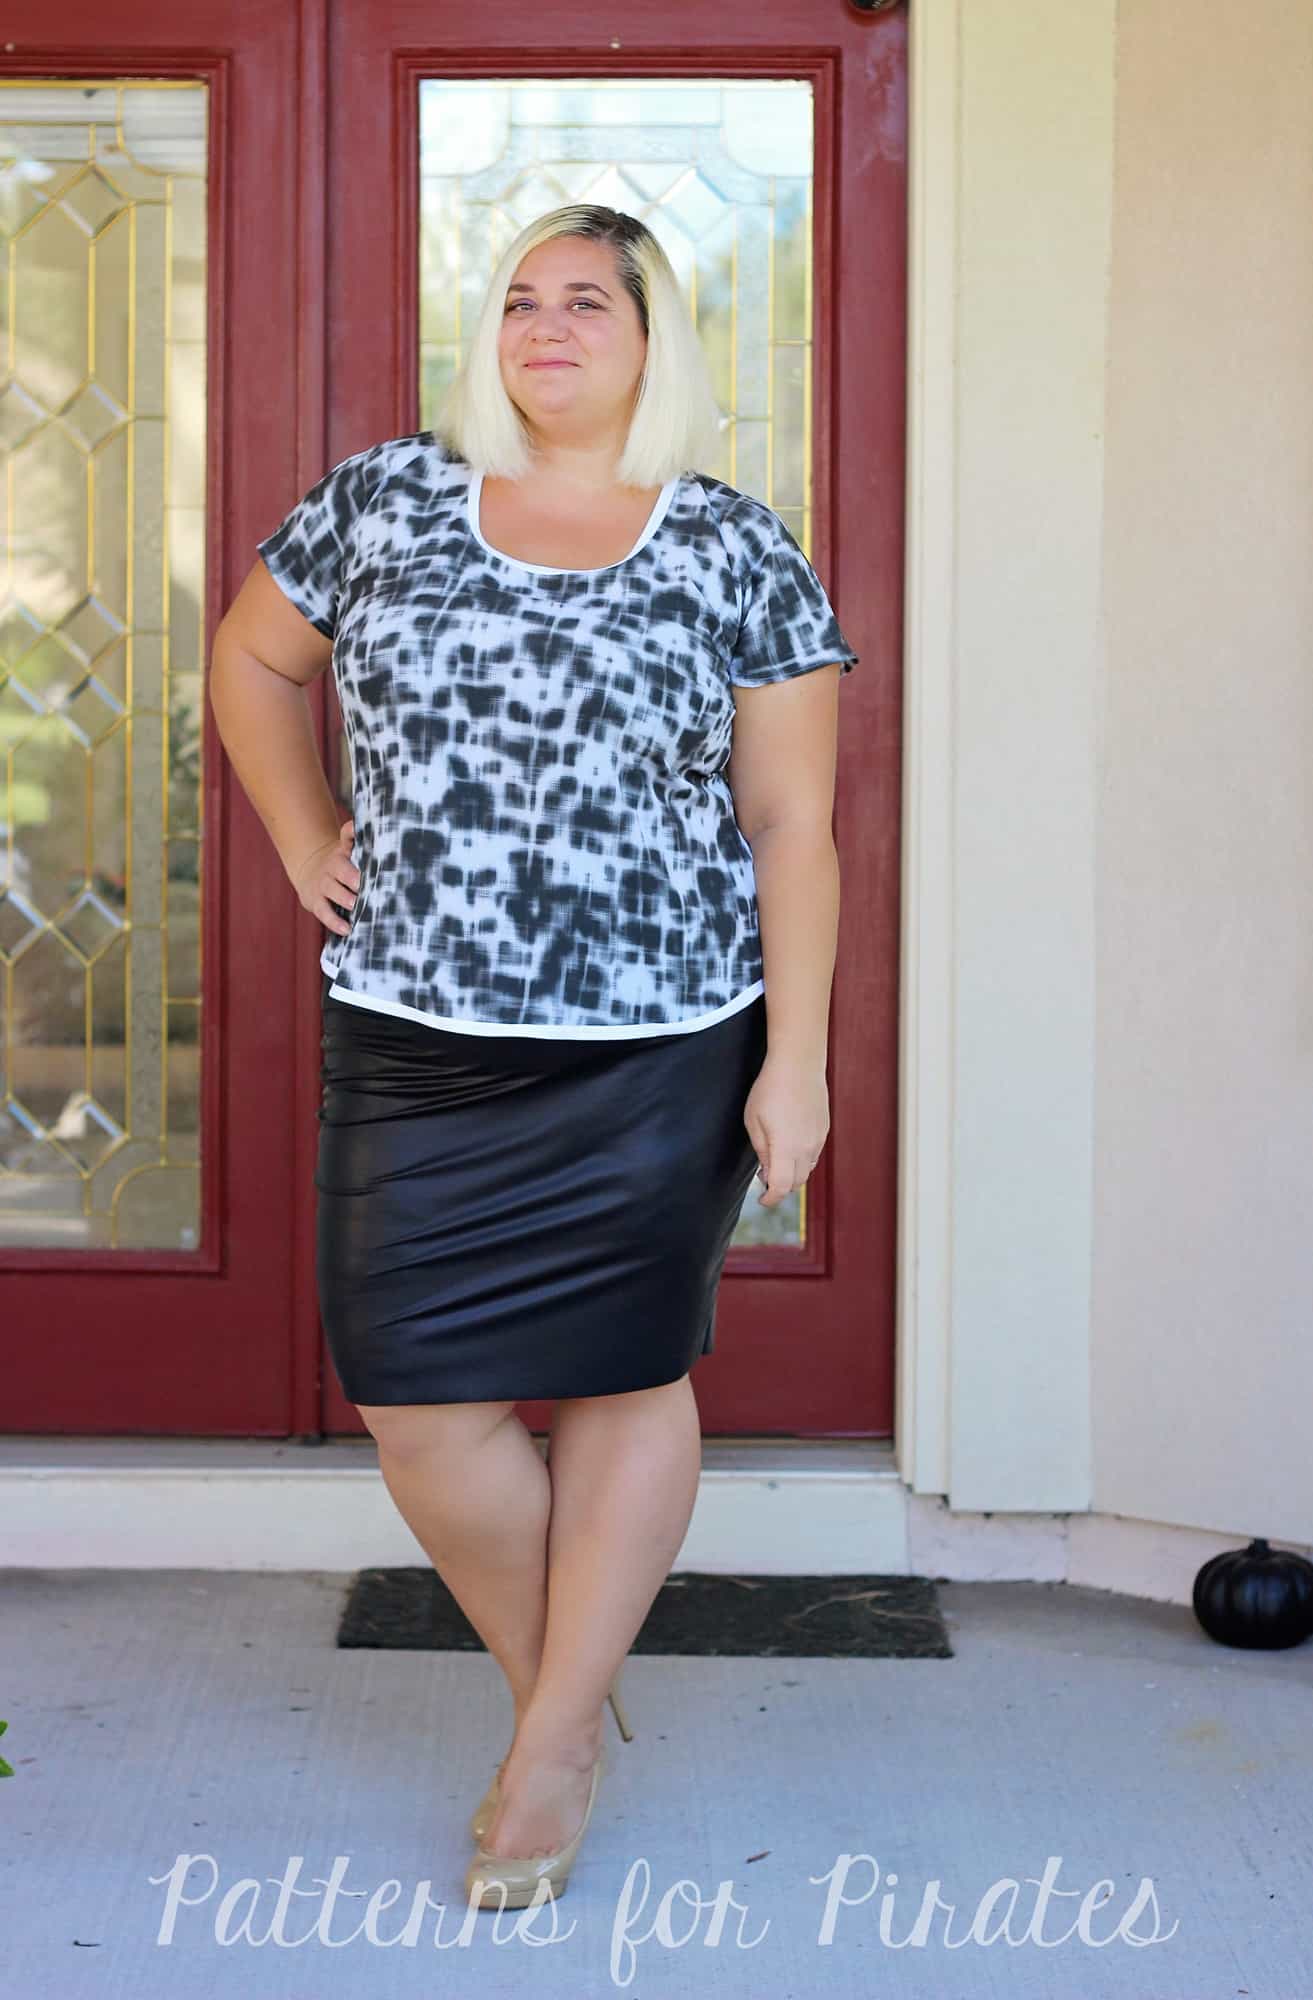
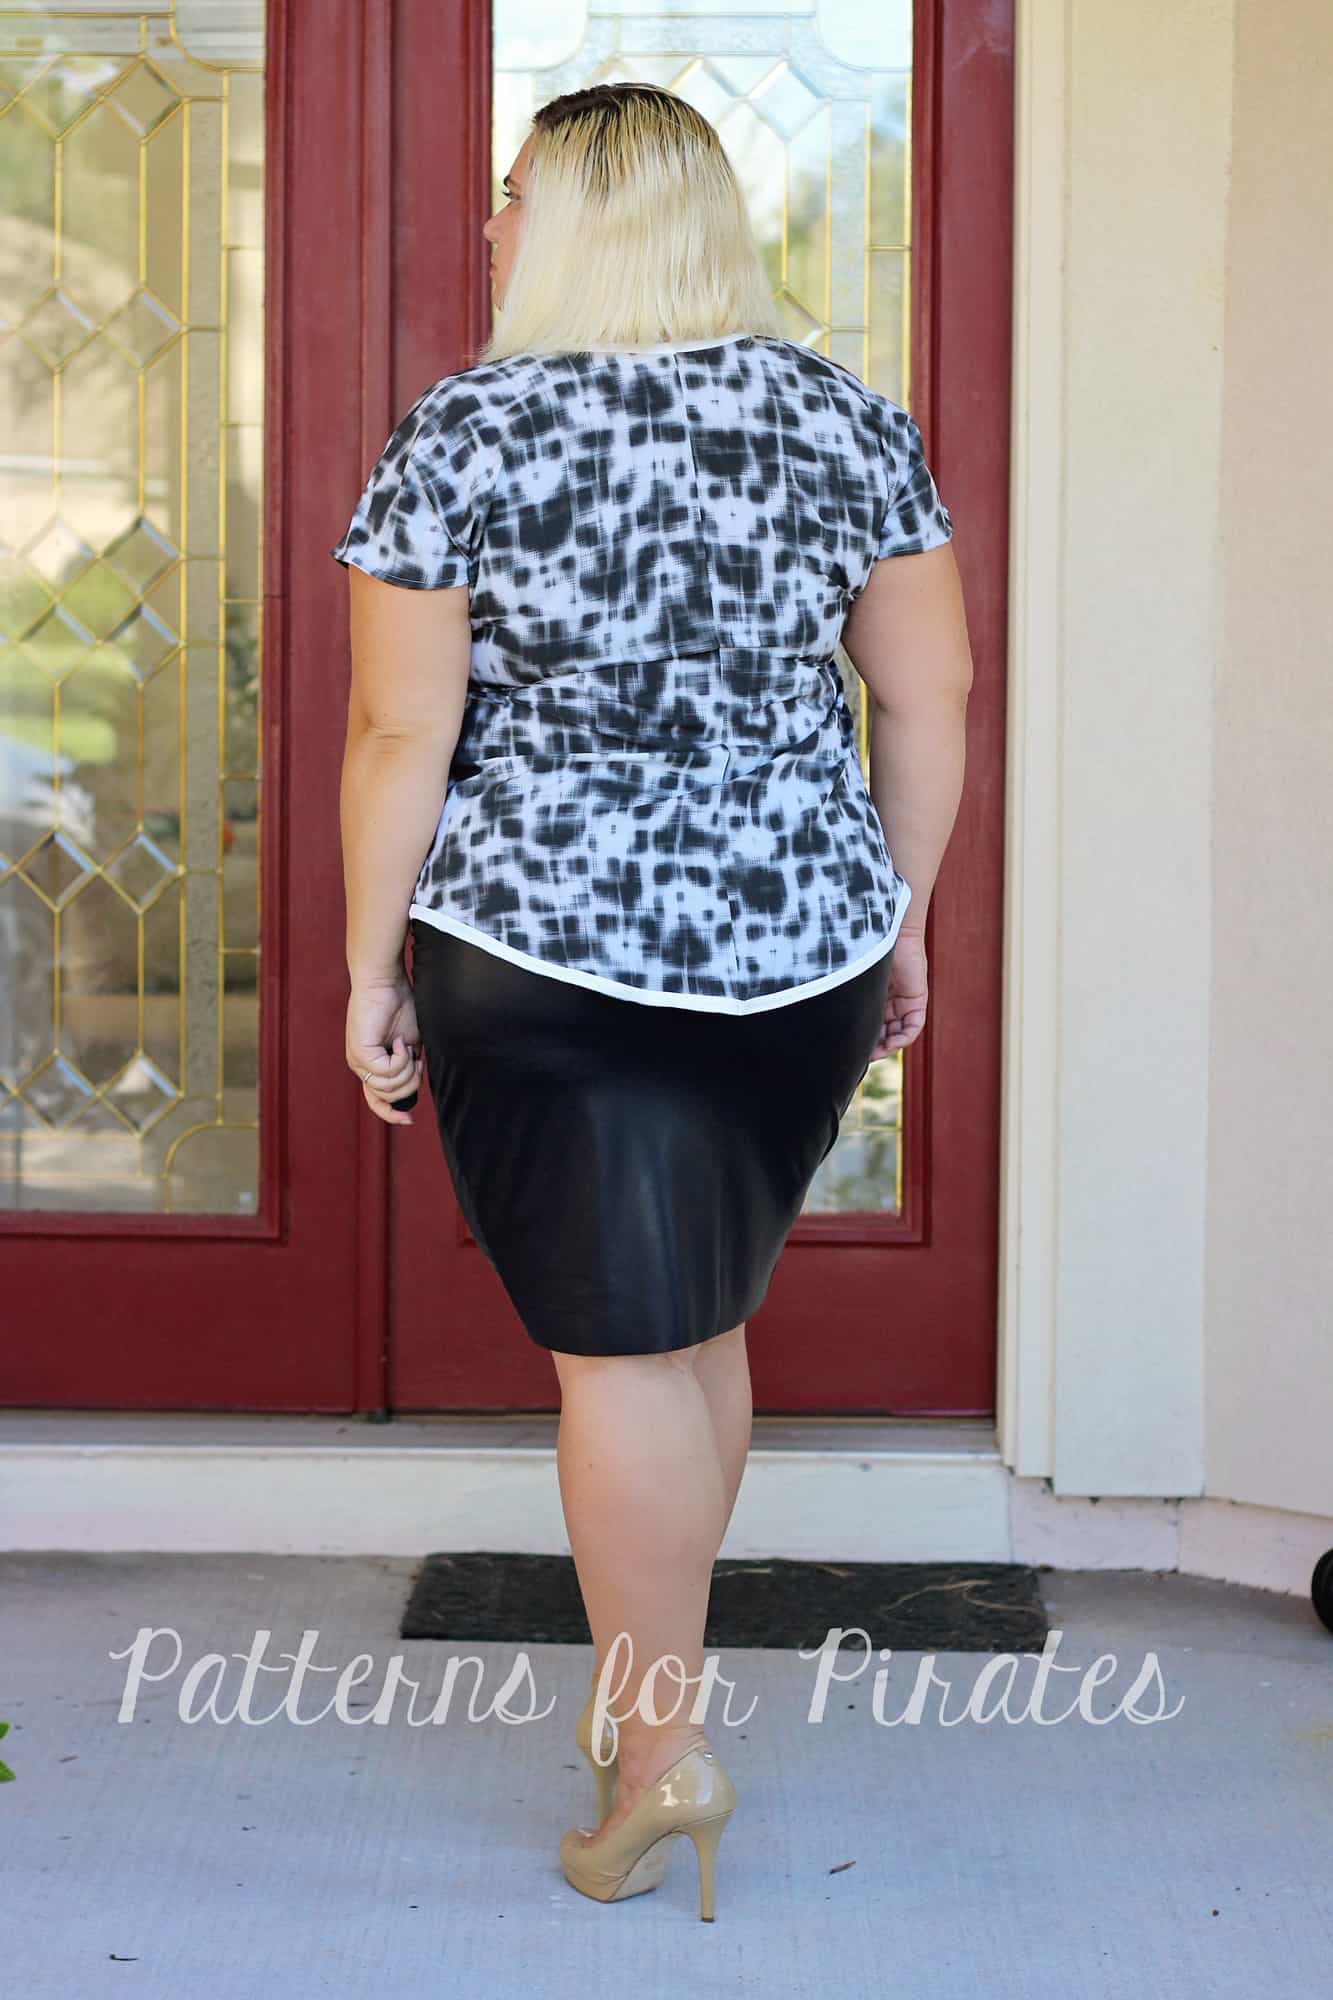
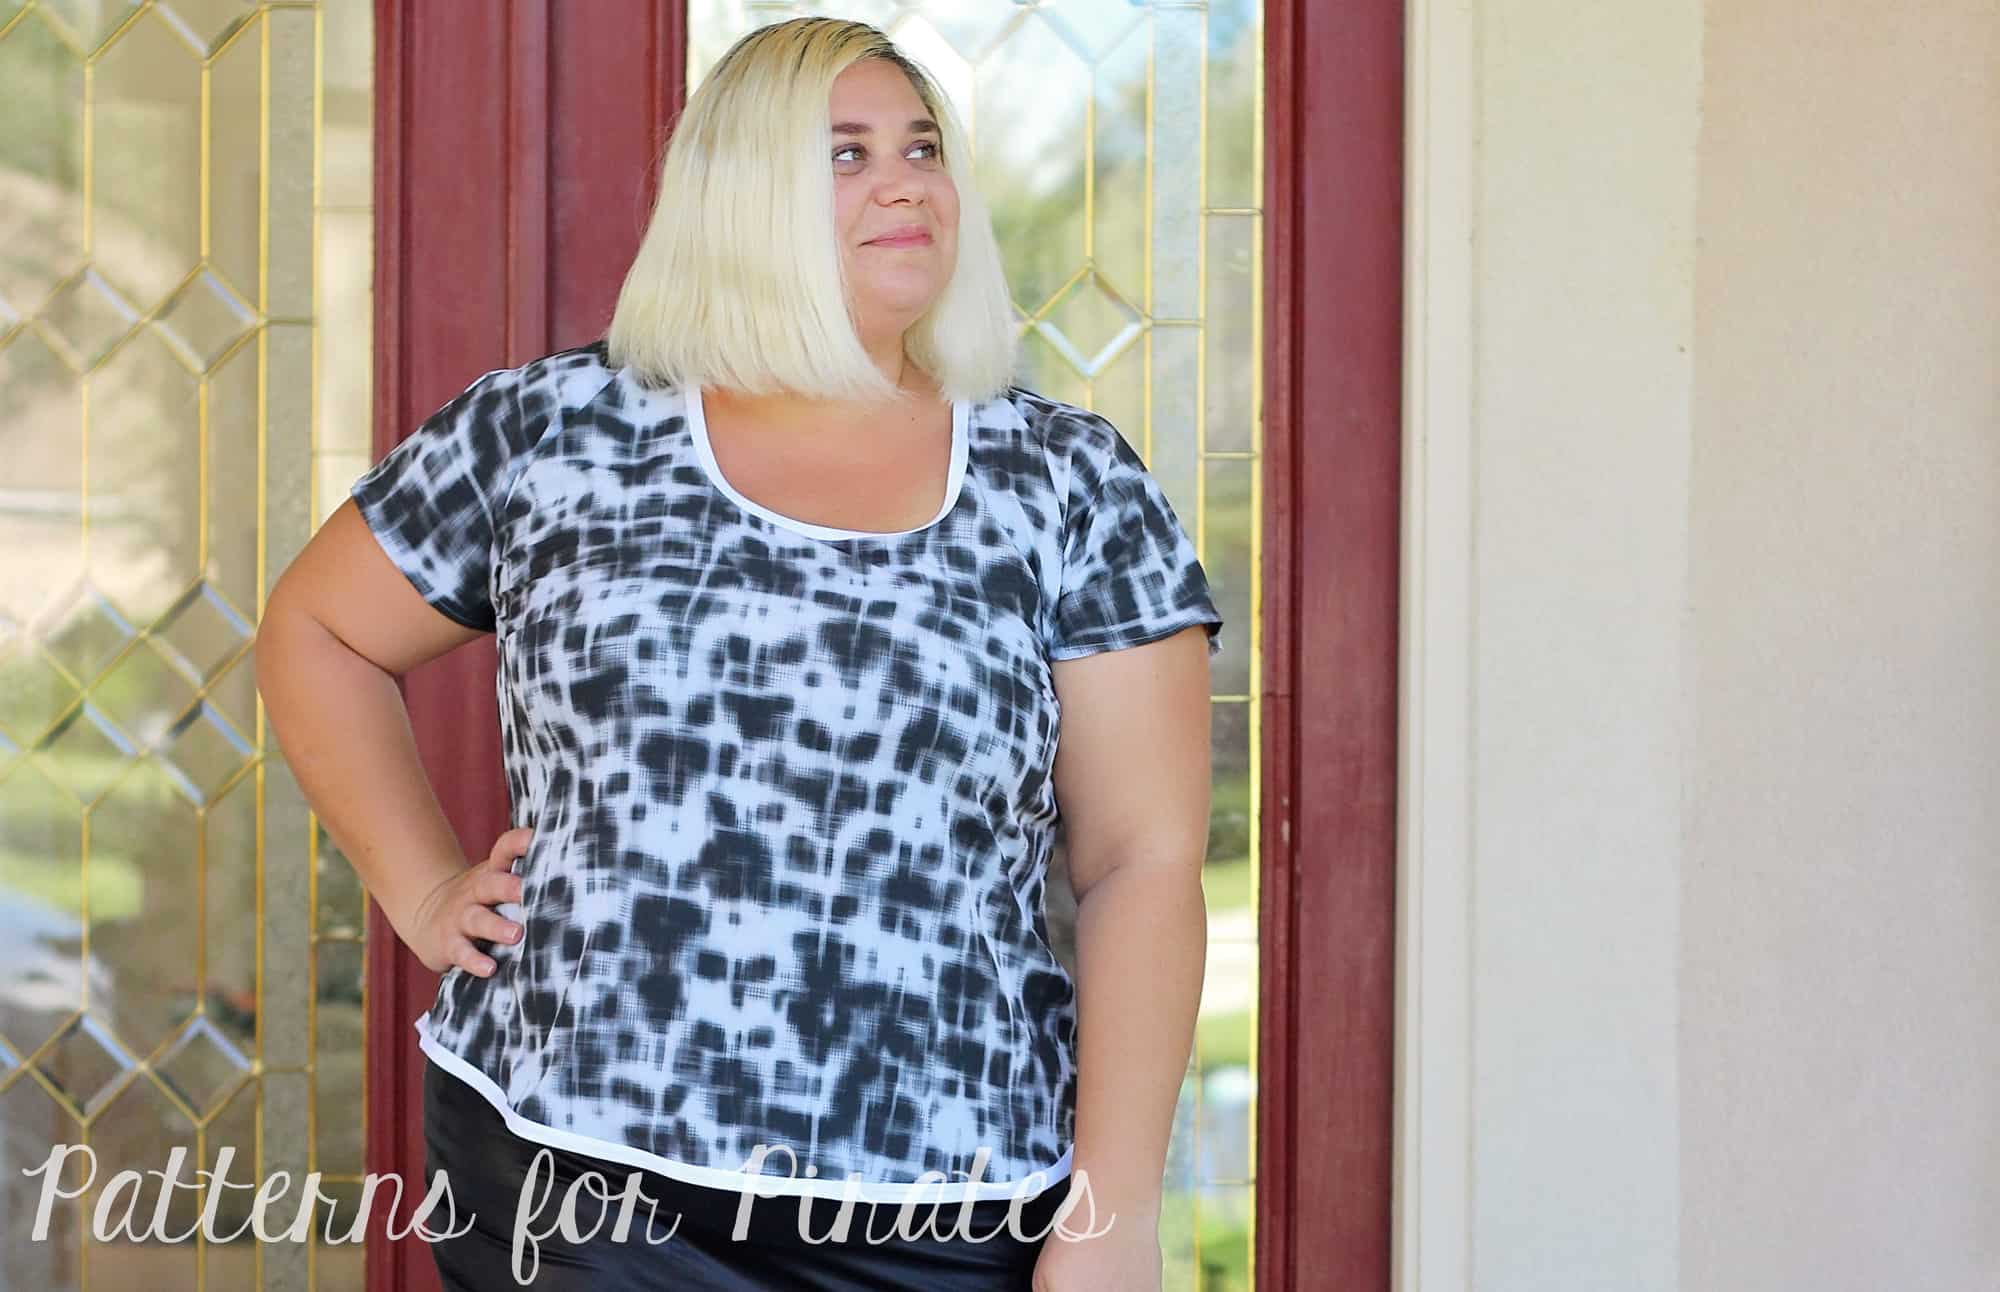
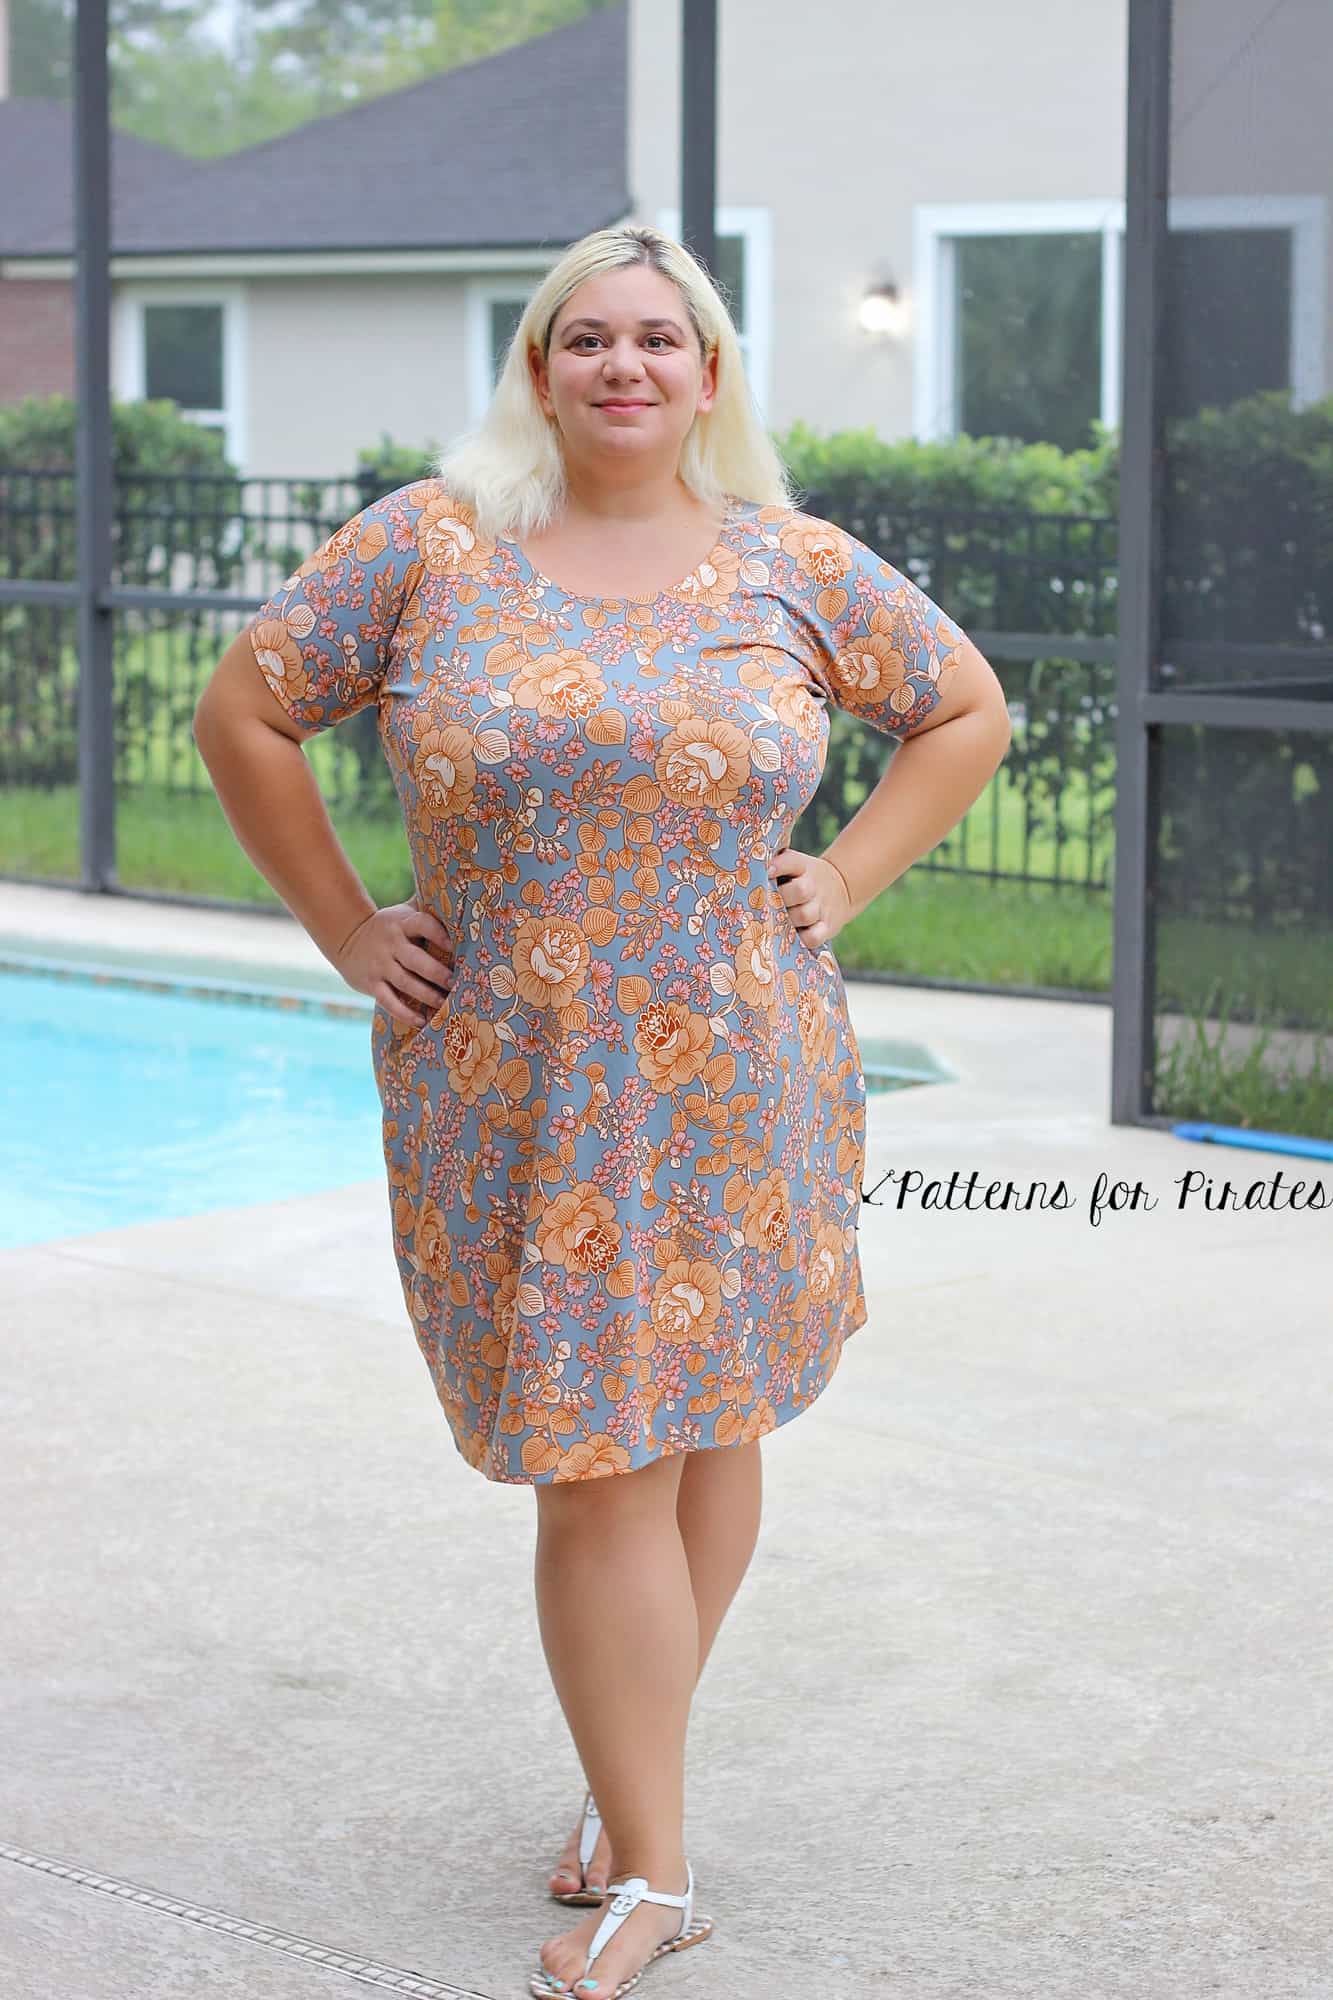
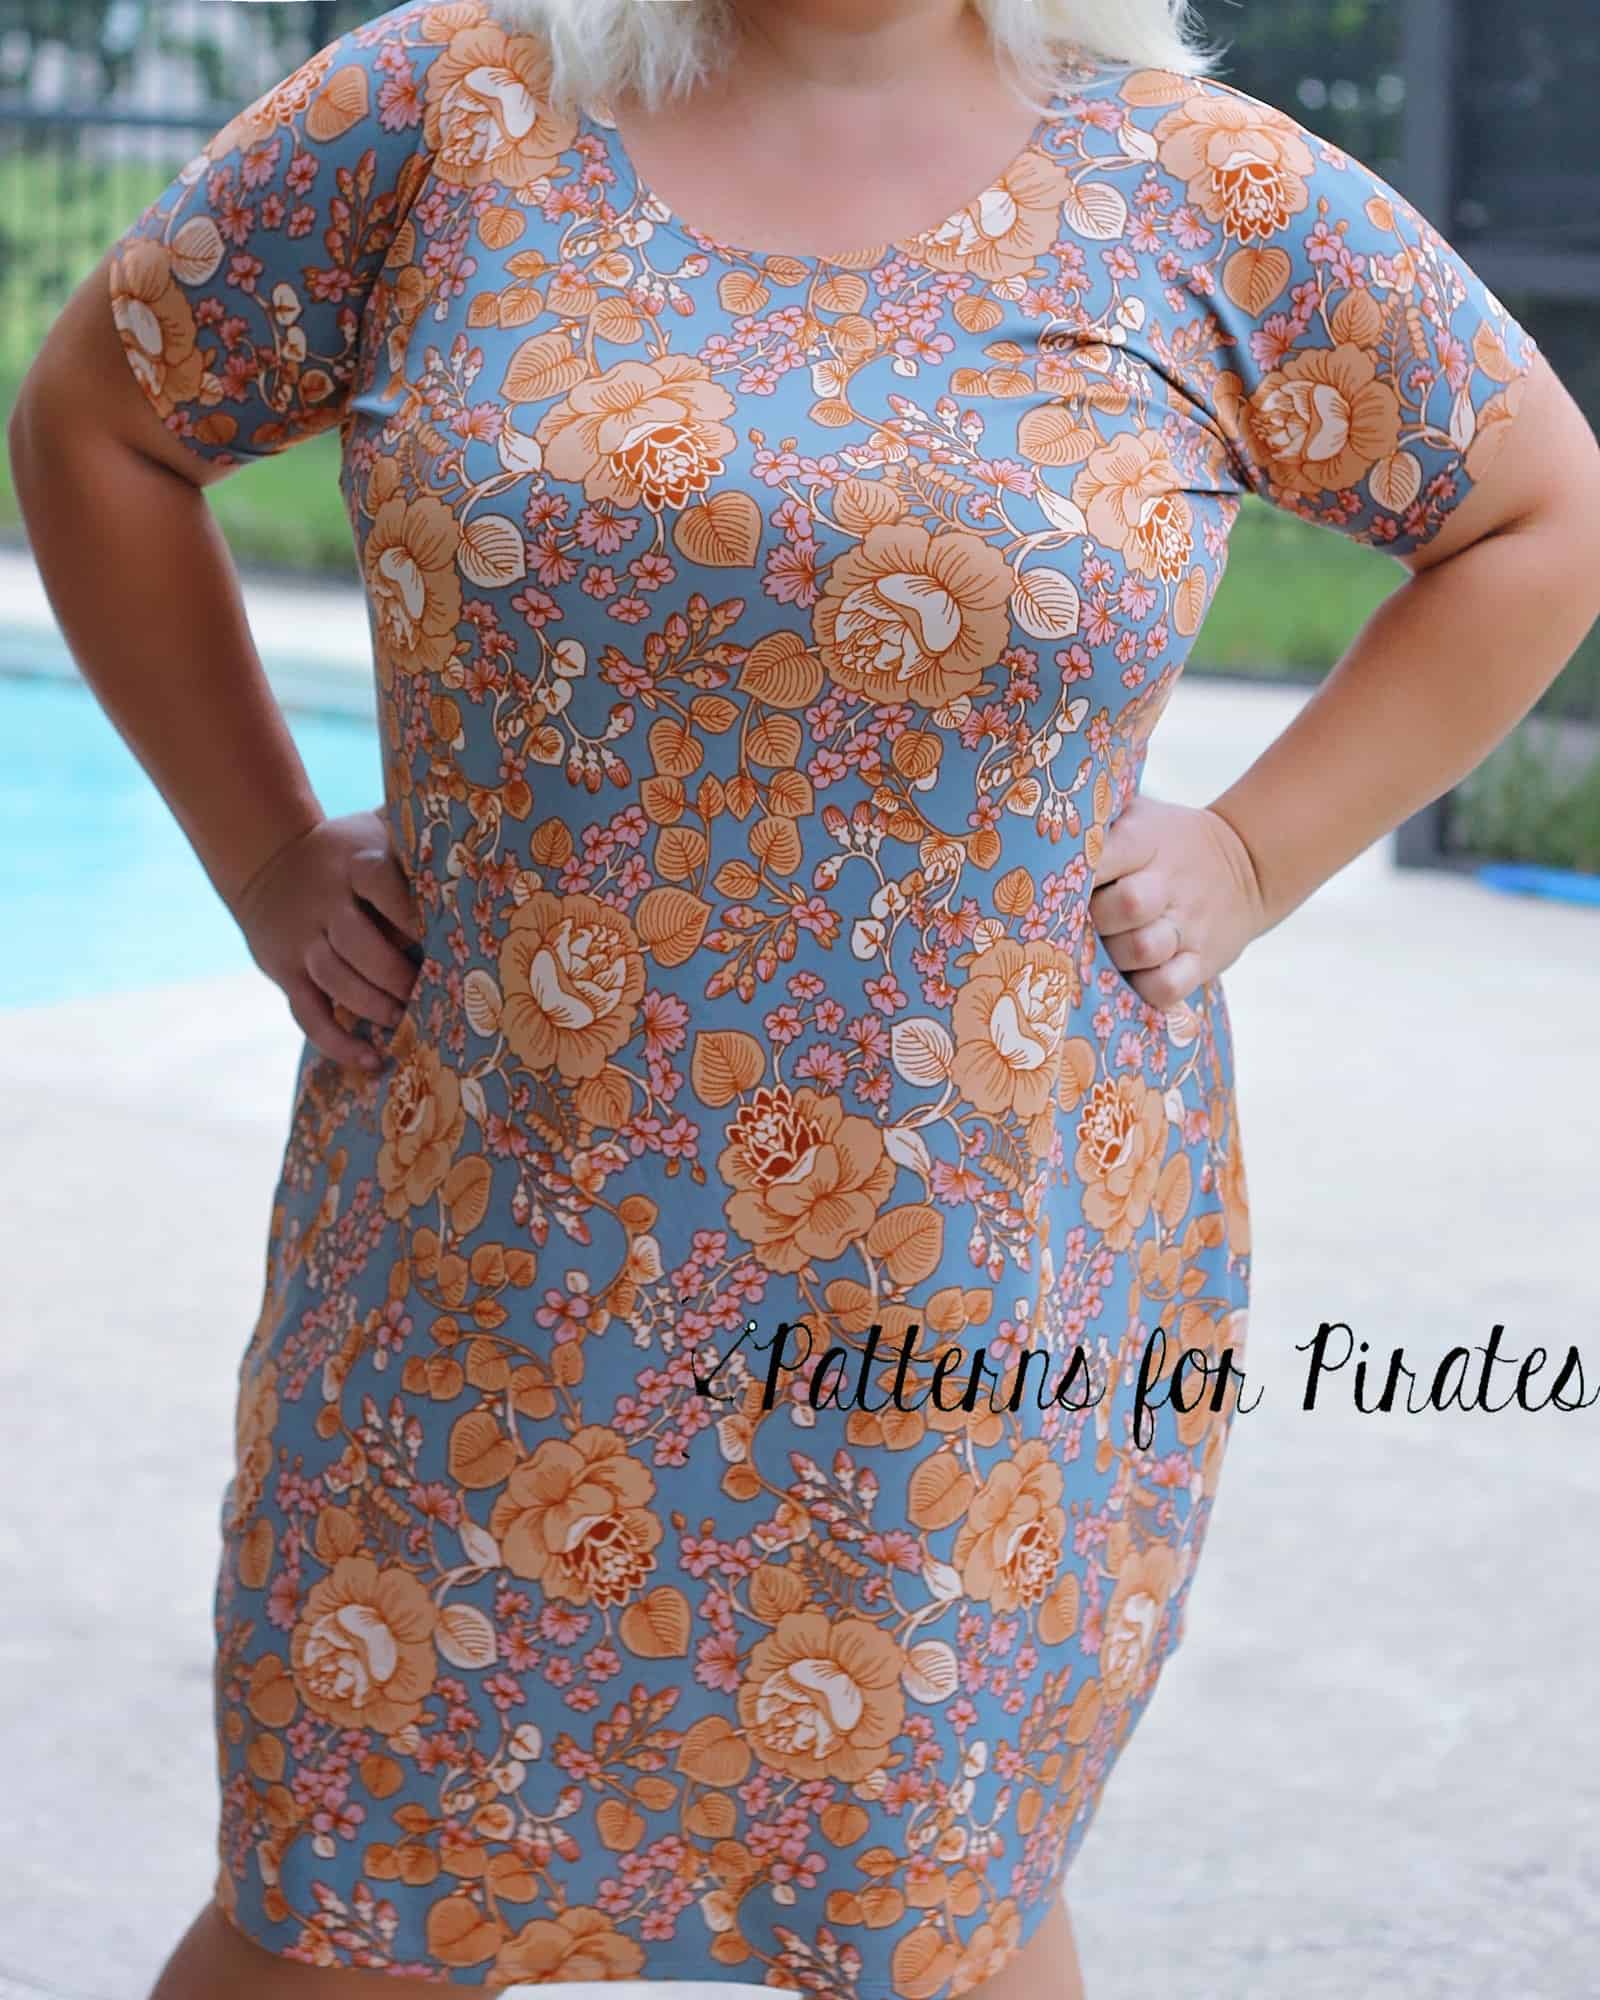
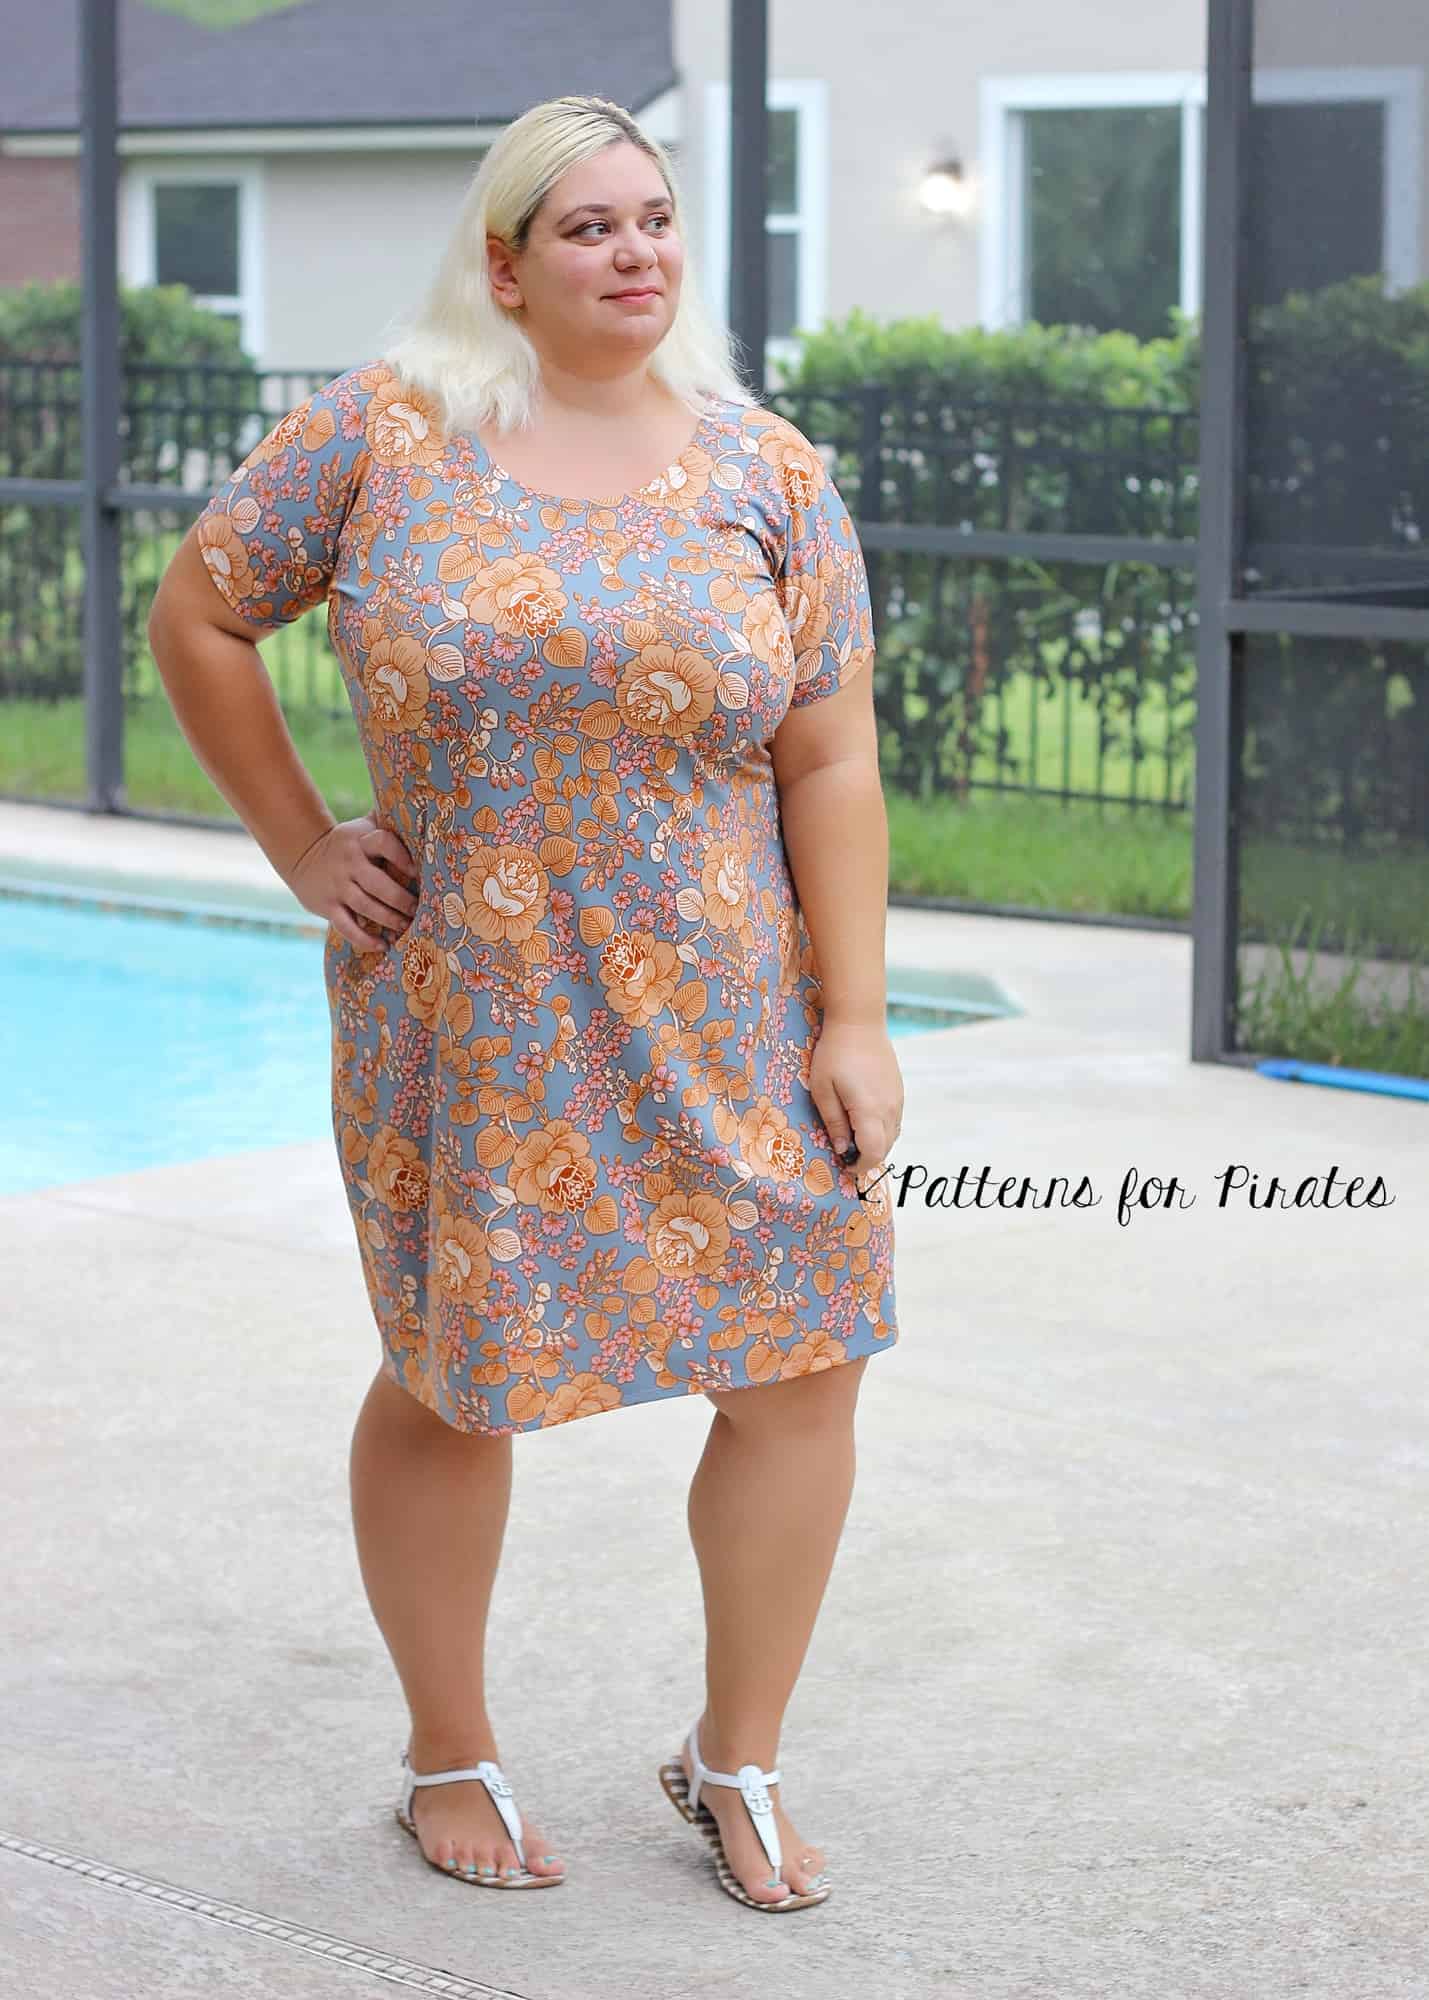
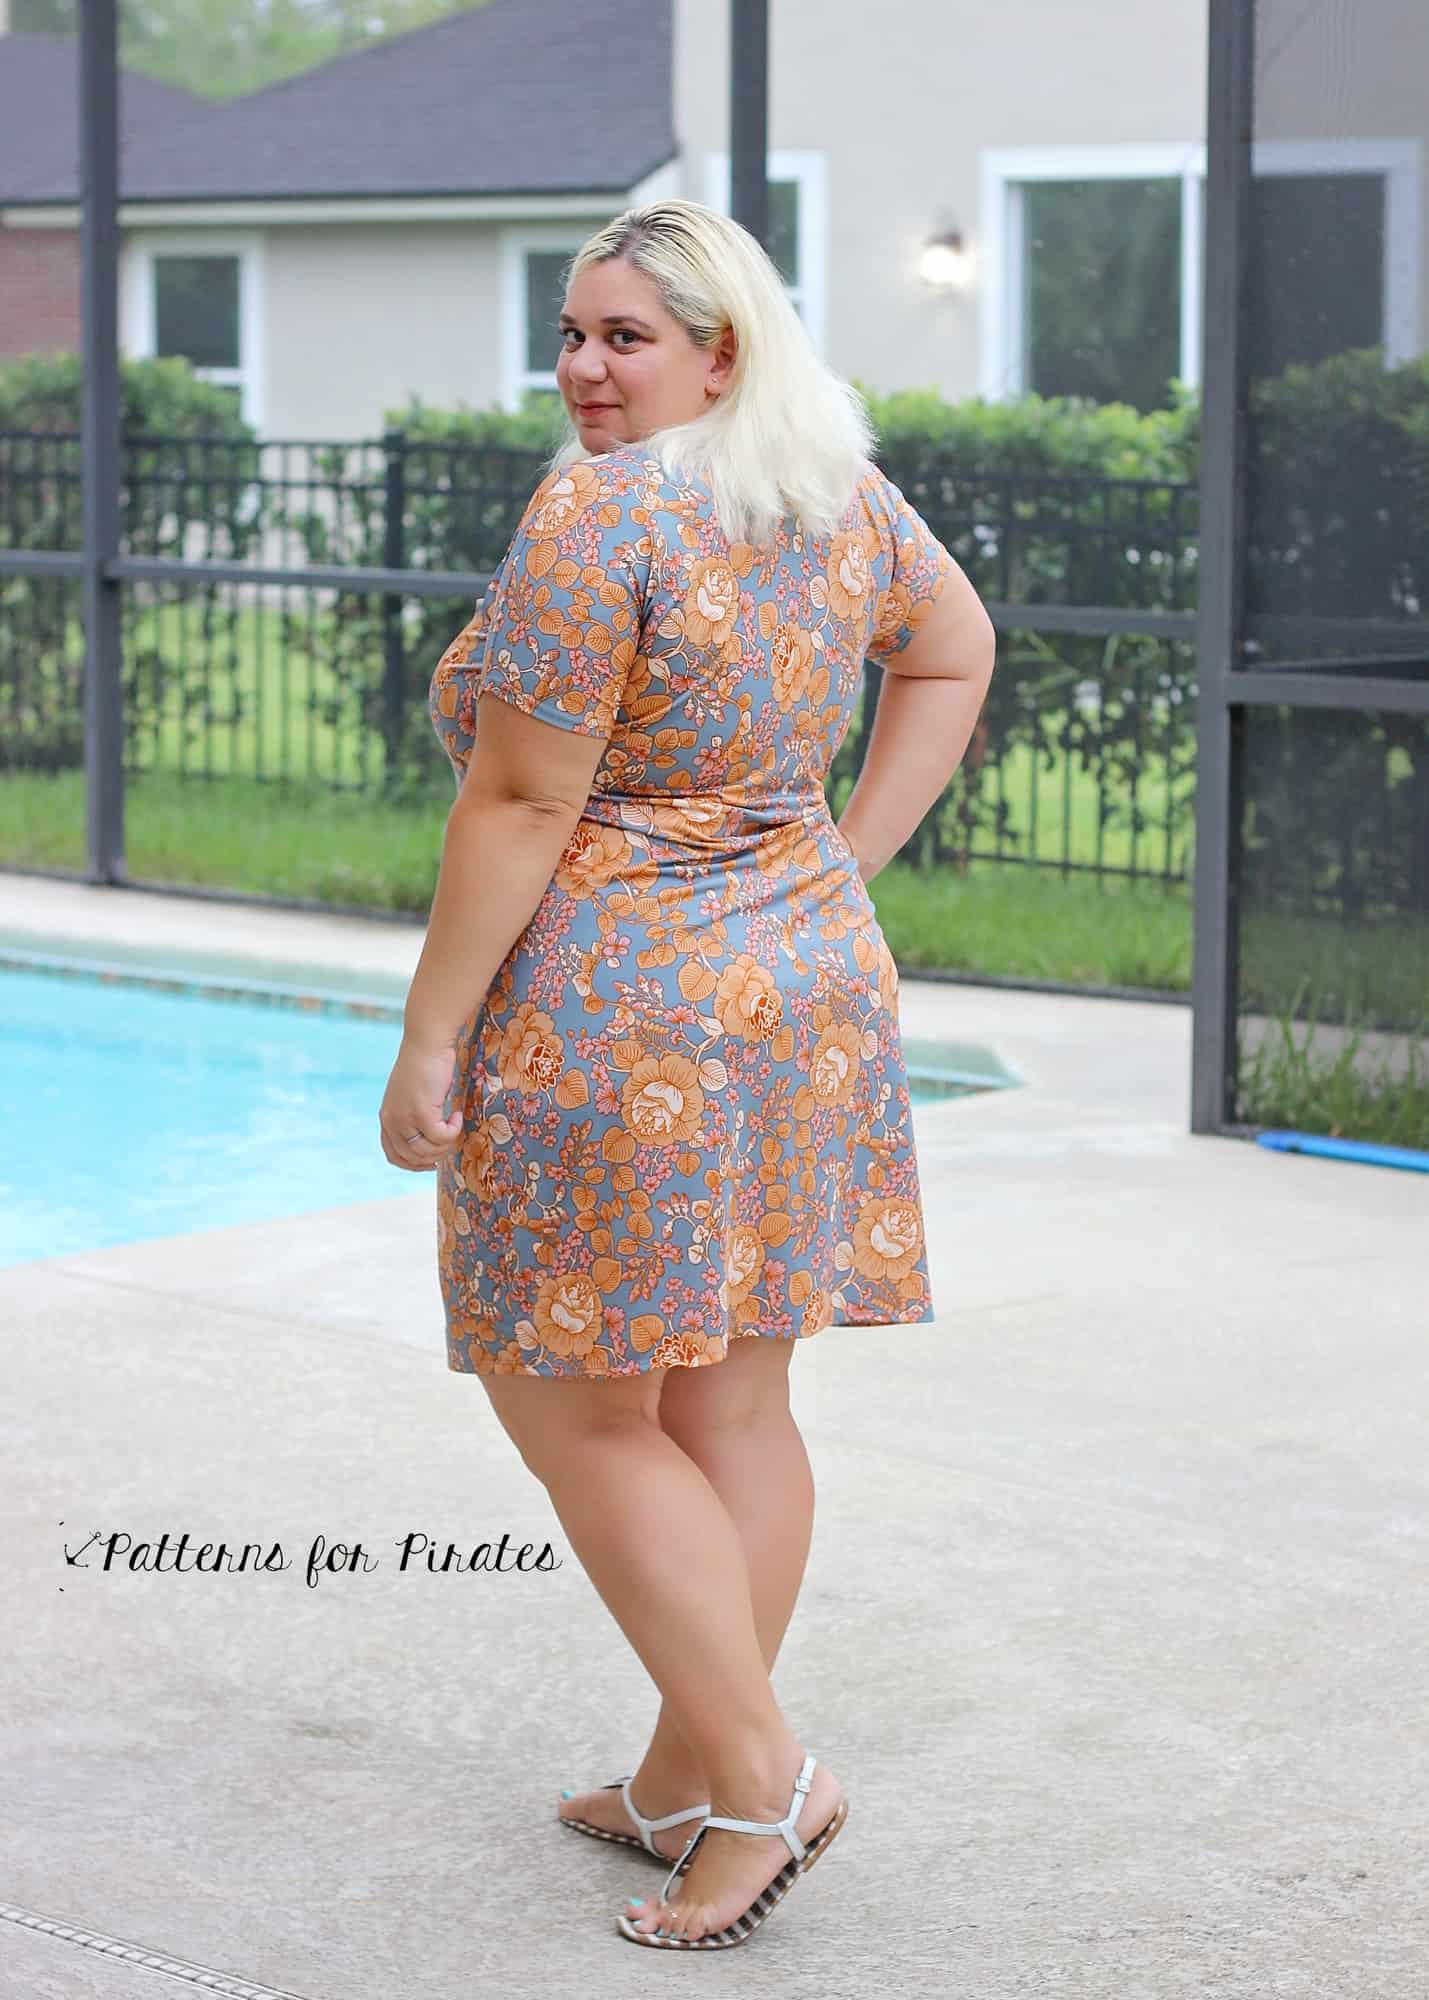
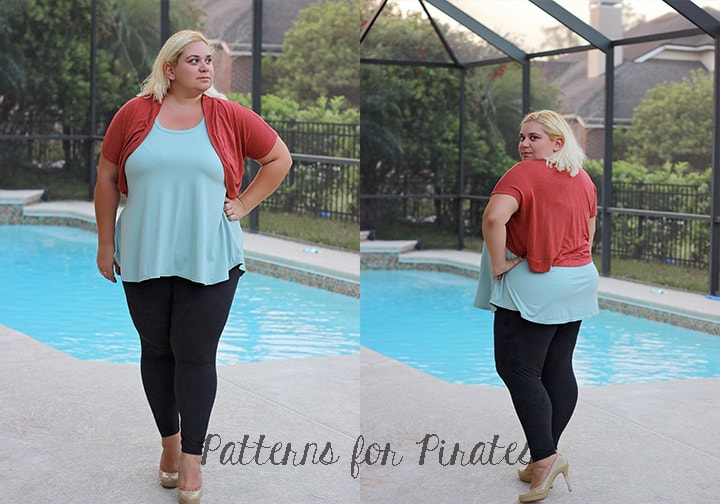
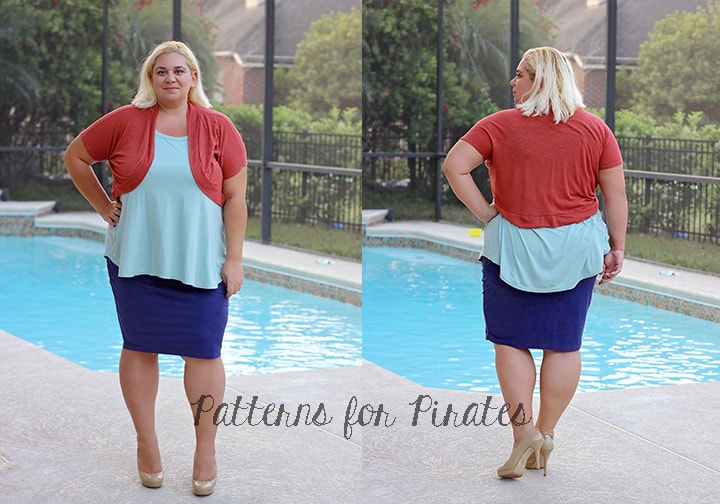
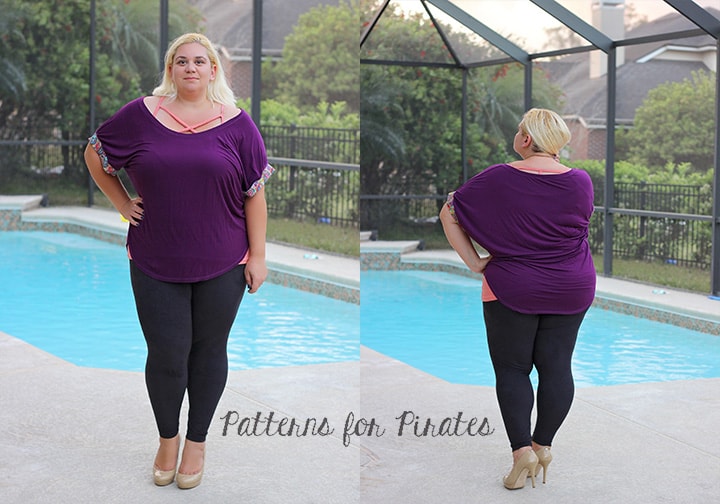
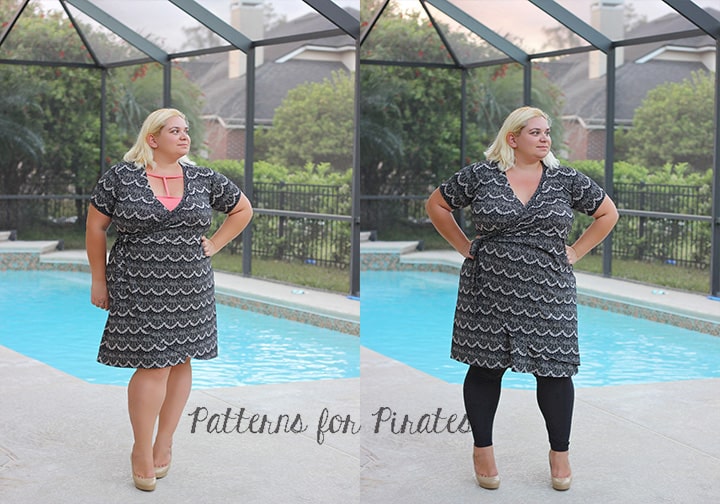
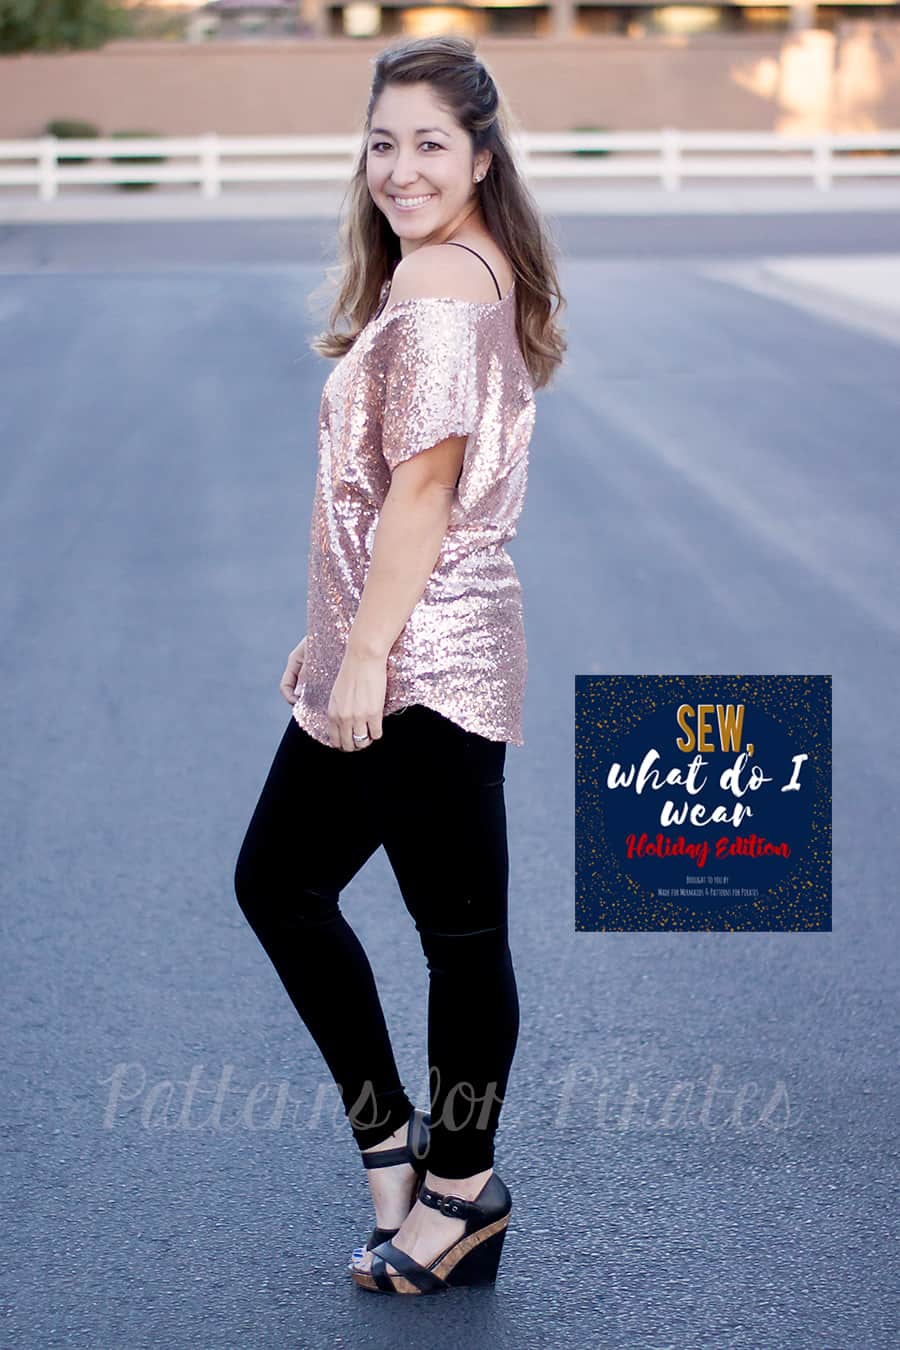
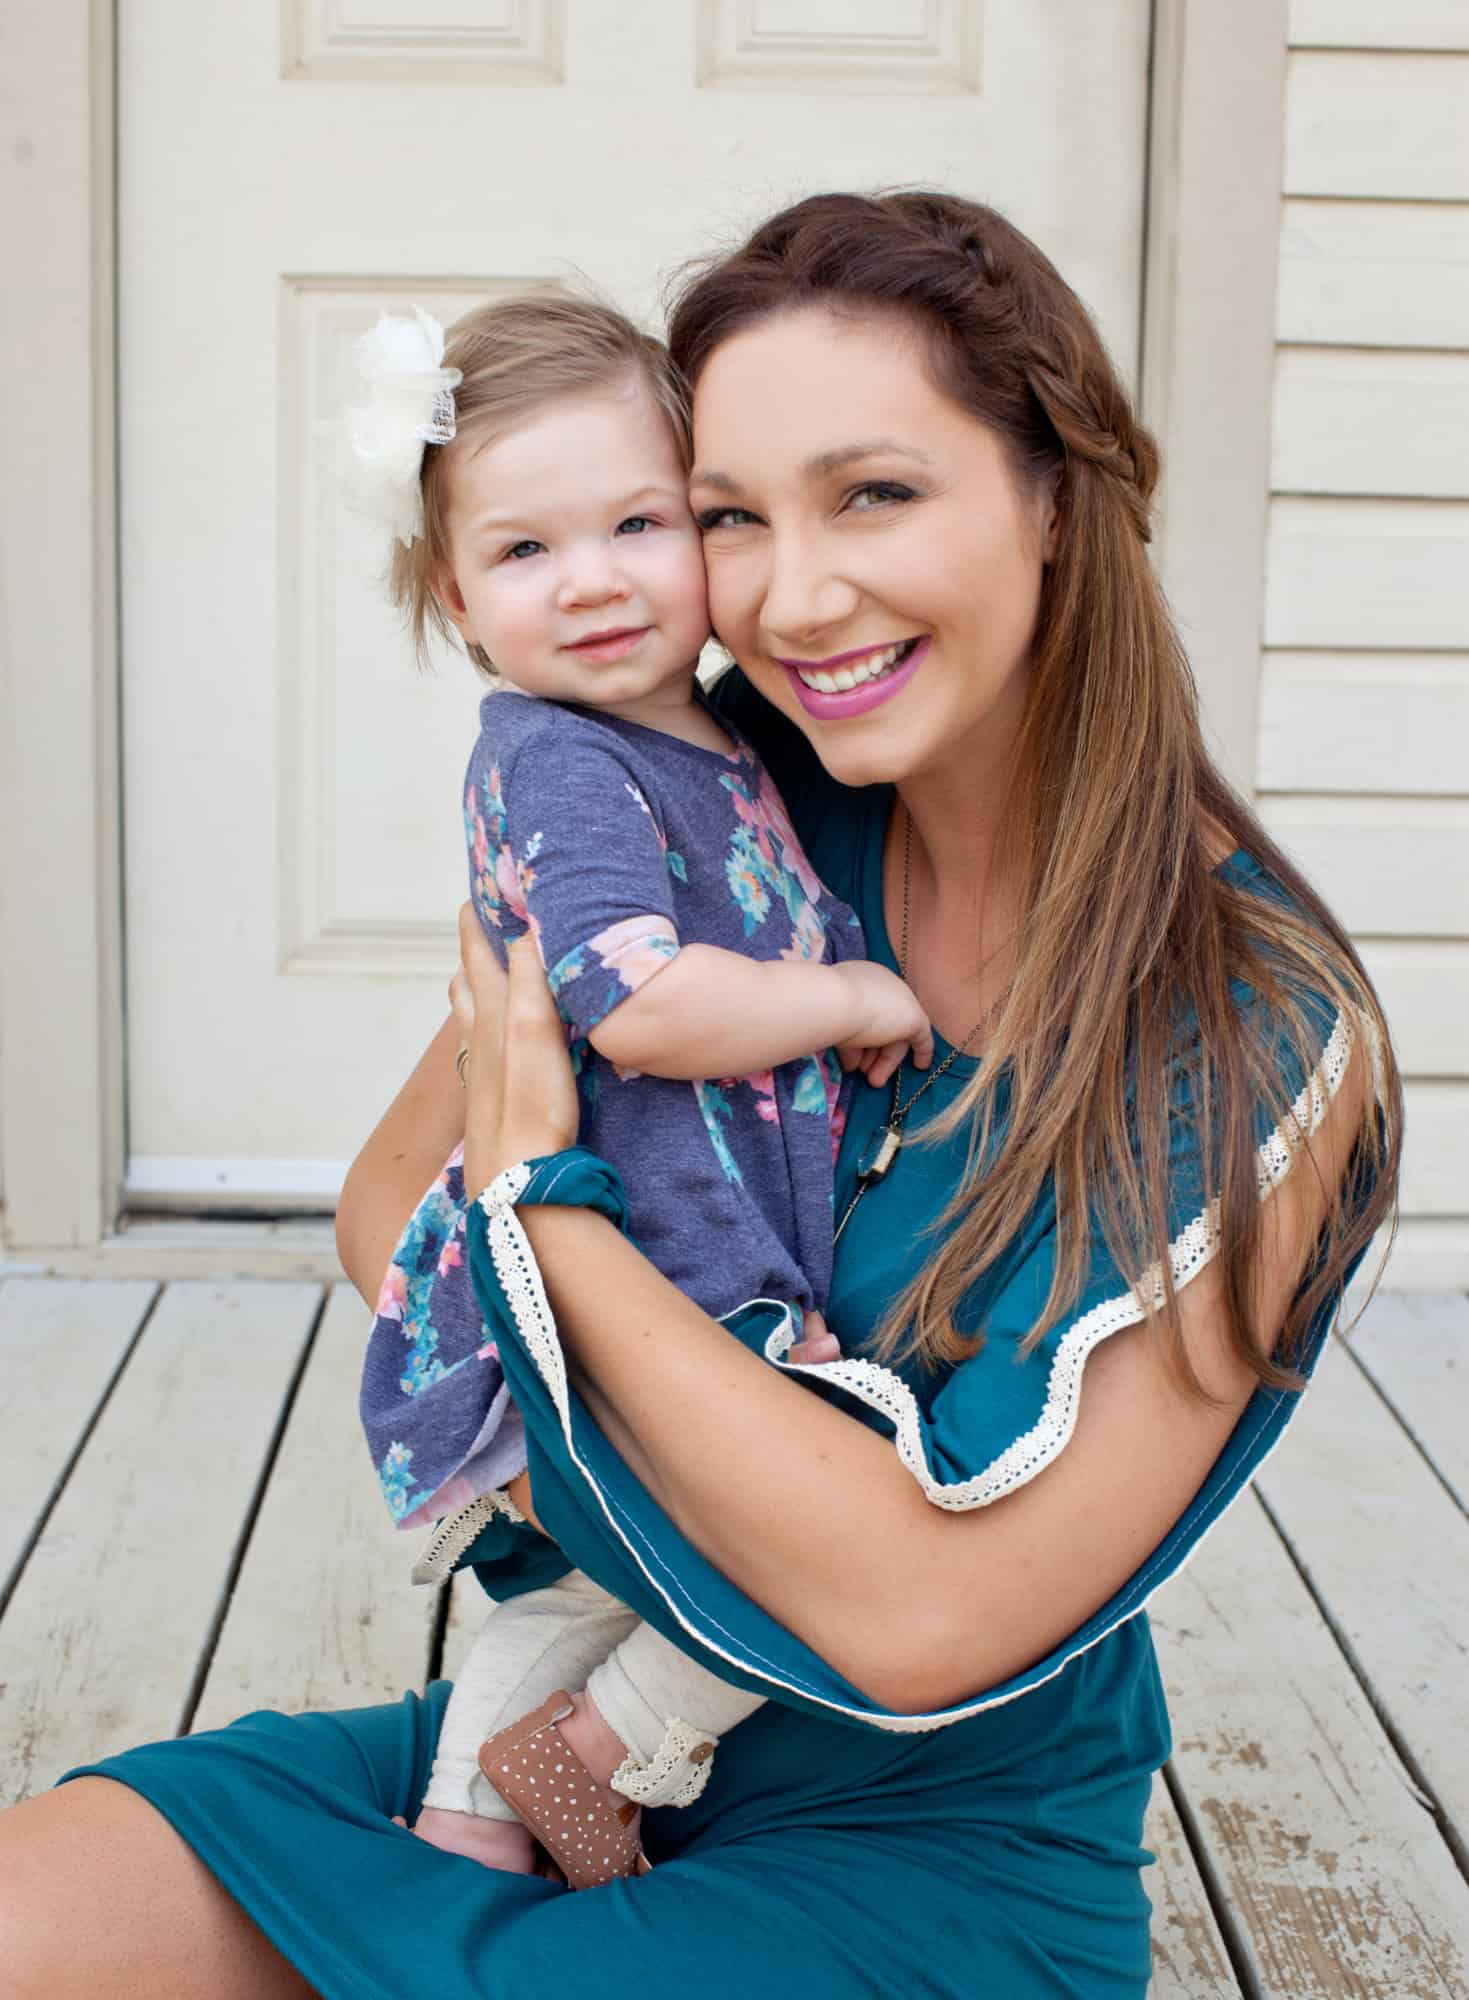
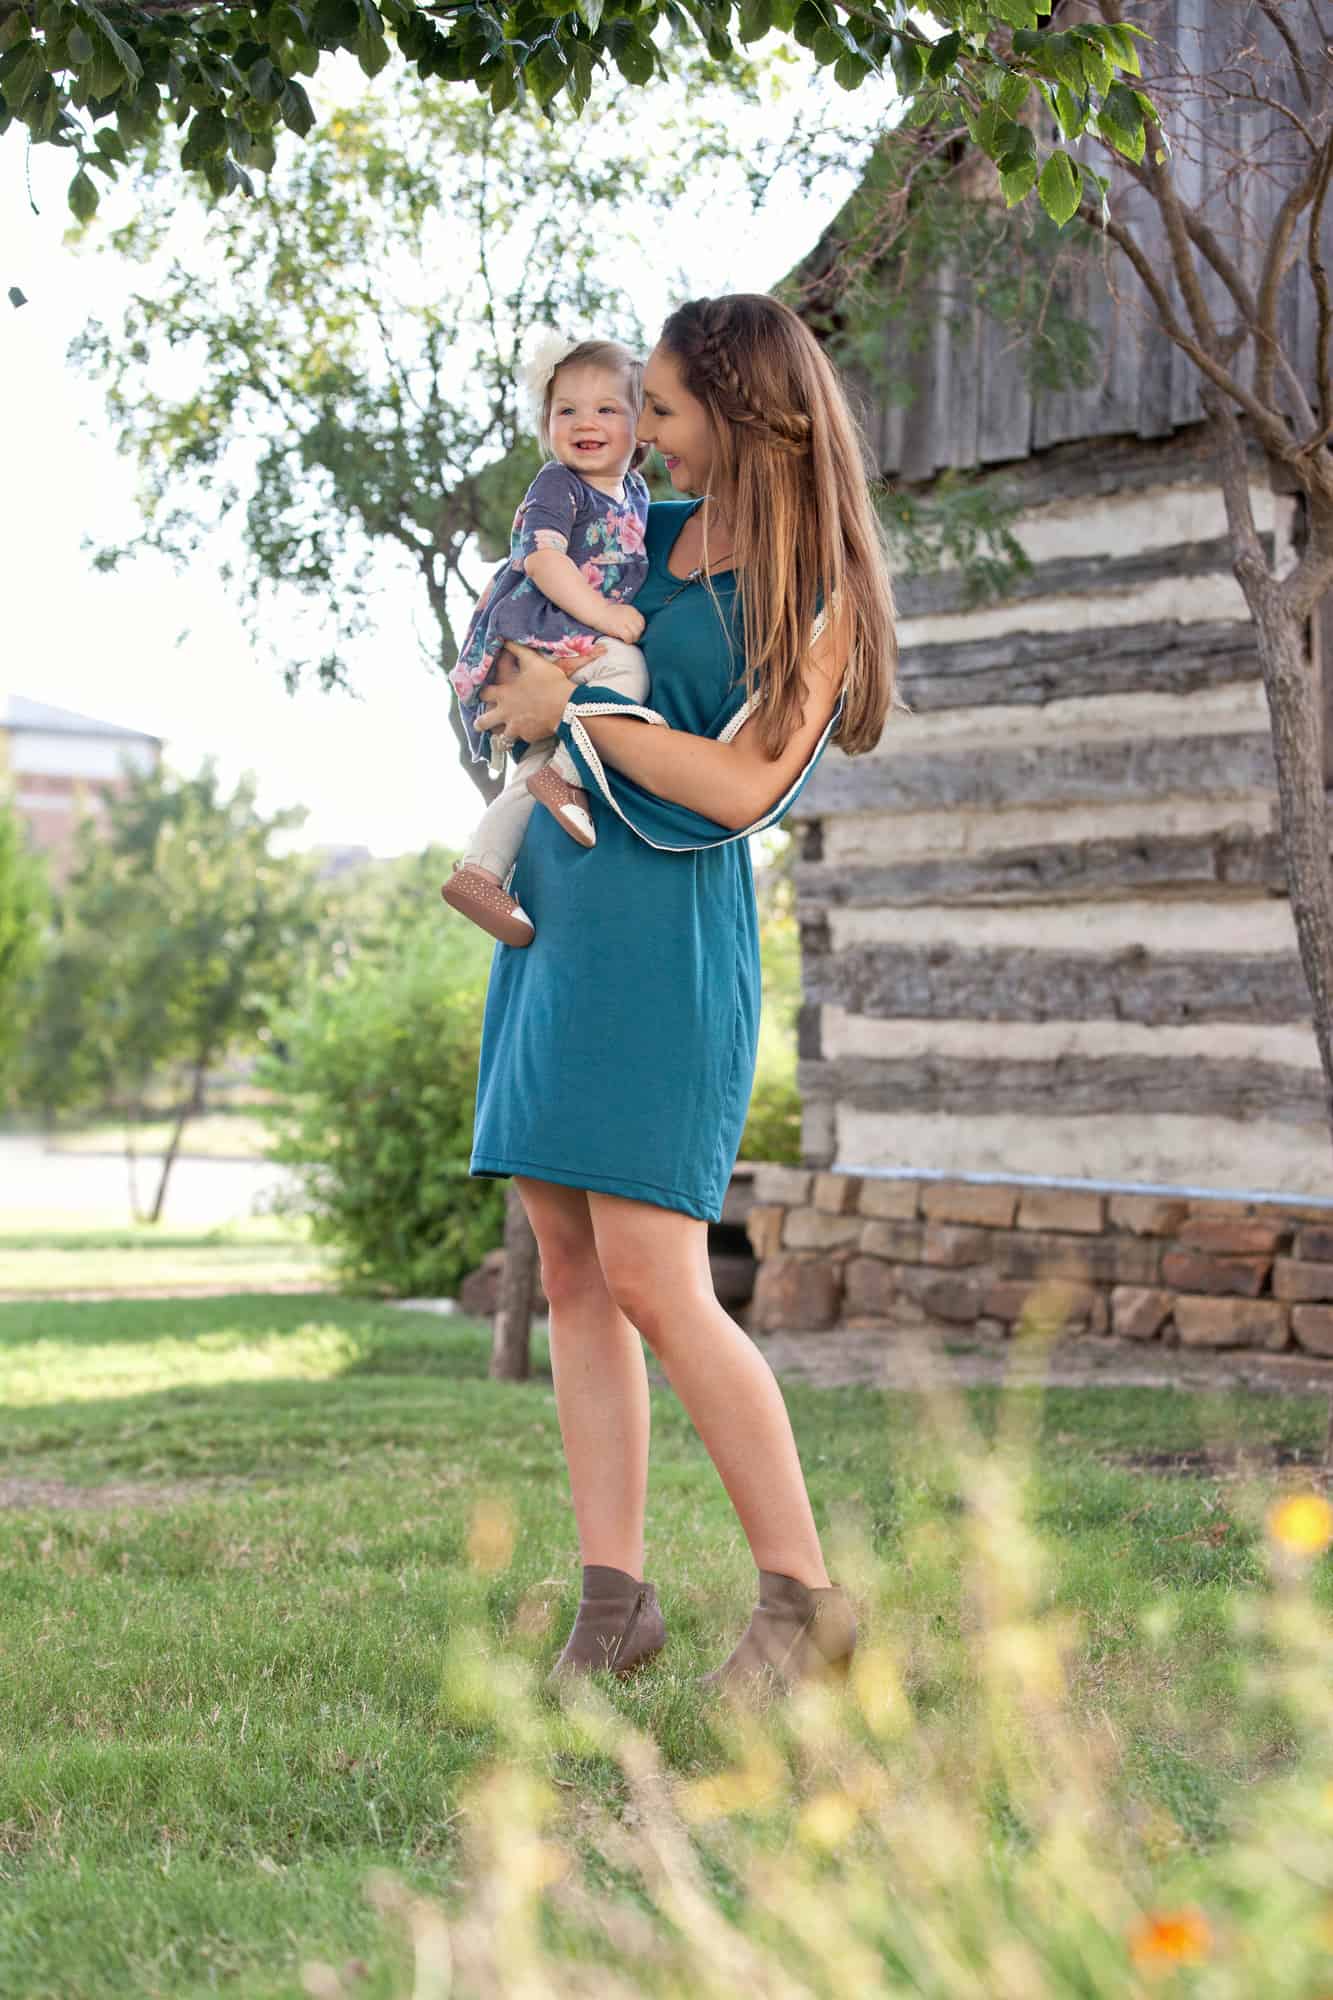
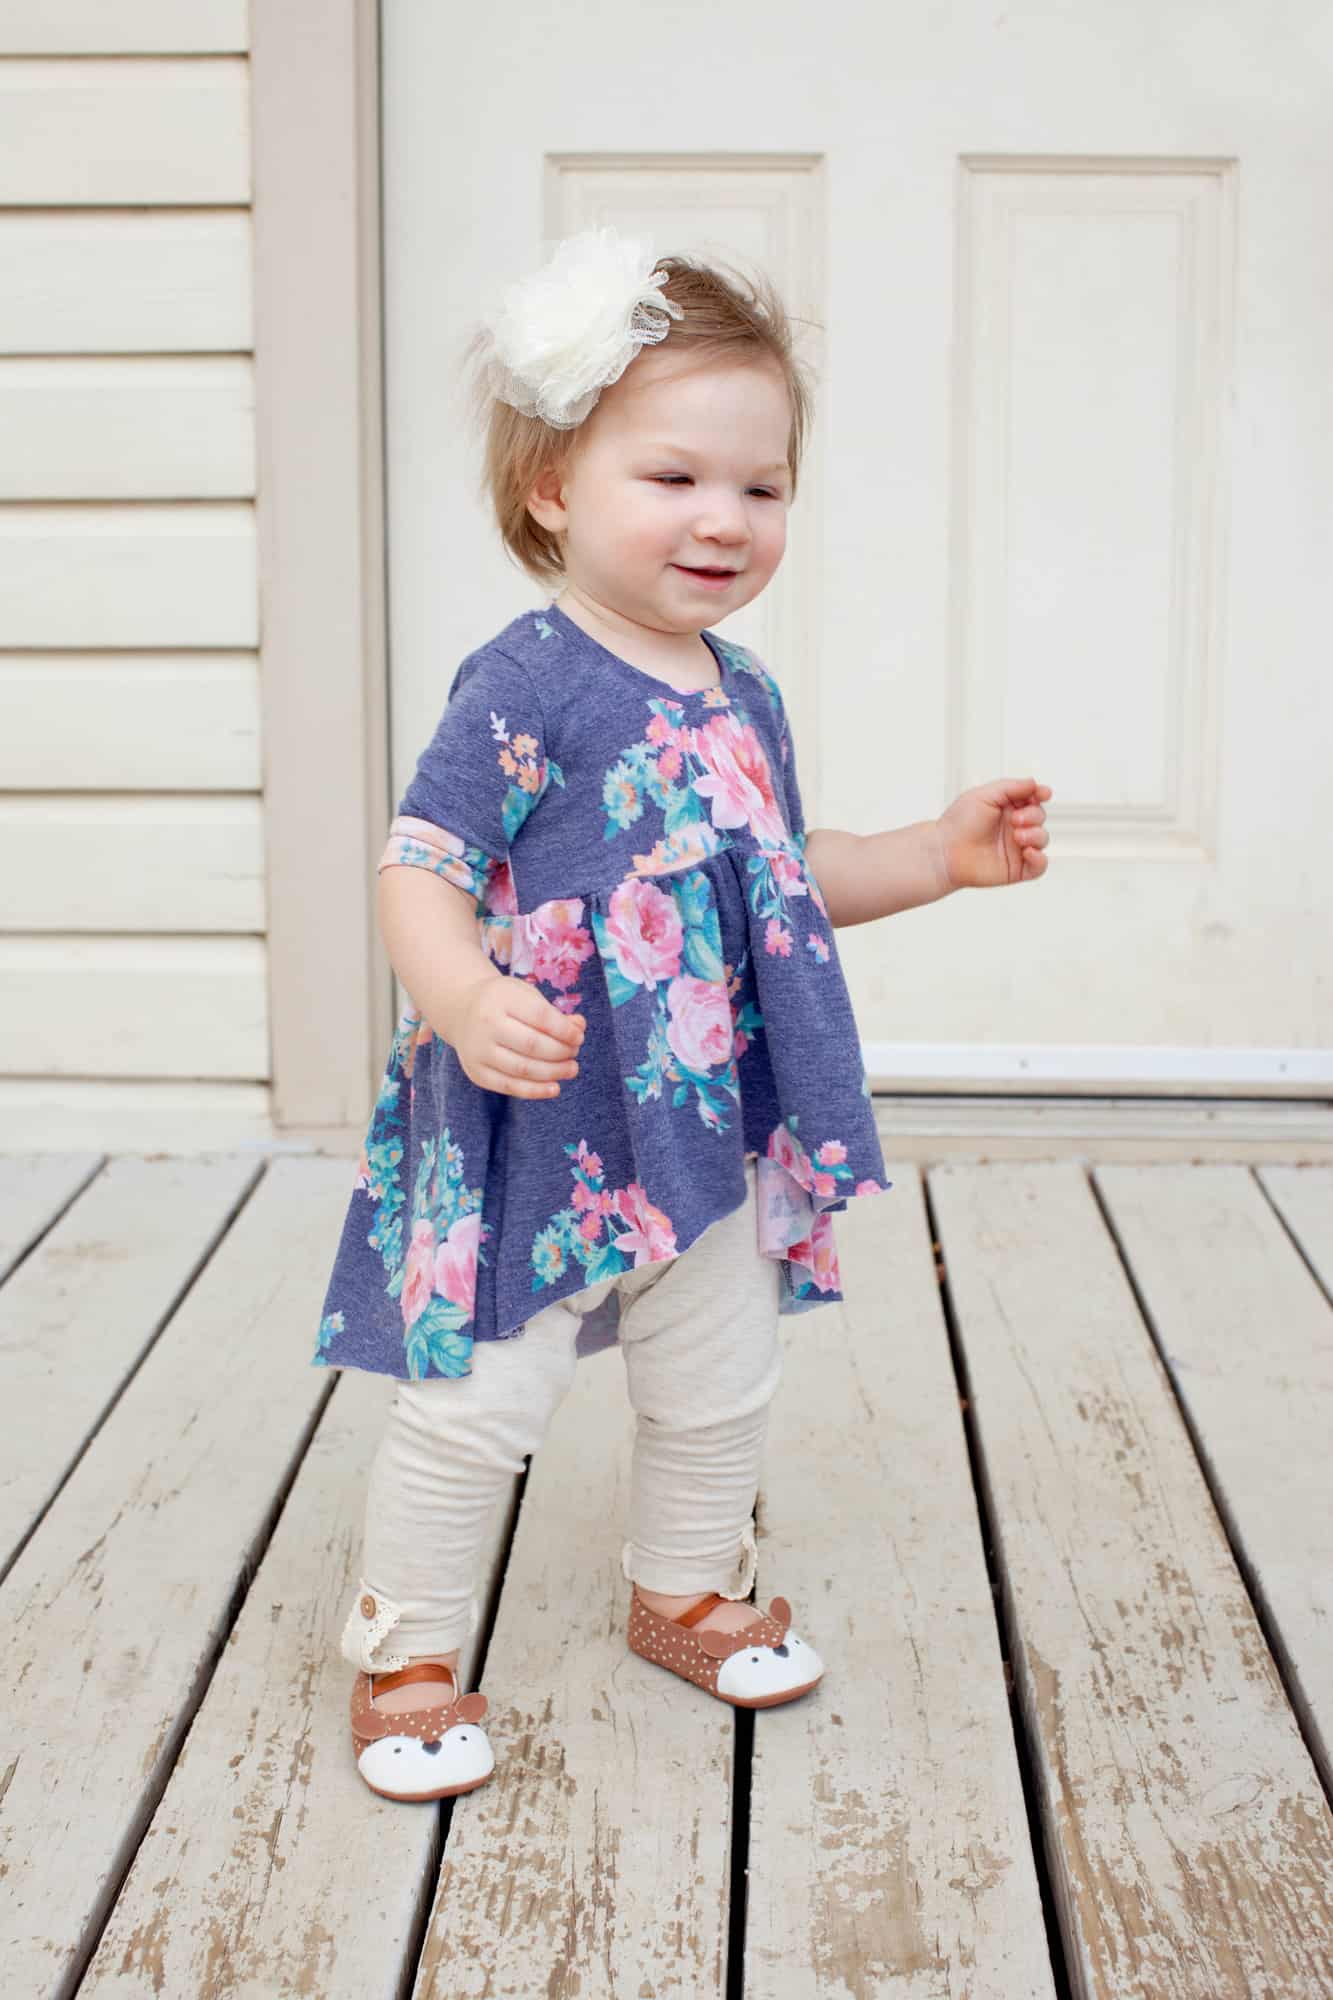
Make sure you check out Instagram and Facebook today, for more fun videos and photos from our featured sewist! But before you go, here are a few quick pics to keep you inspired!

Filed Under: Blog Tours, Uncategorized Leave a Comment

Fall Into Fashion – November 2020

October 31, 2020

Happy Fall, Pirate Friends!! We are beyond thrilled to finally be able to announce what we’ve been working on behind the scenes here at Patterns for Pirates! Get ready for a super fun-filled November — because we sure are!

Each day during the month of November, we are going to be featuring a different Patterns for Pirates pattern.

On that day you can expect:

  • a 24-hour sale for the daily featured pattern.
  • videos and photos from your favorite sewists + bloggers.
  • daily styling inspiration.

We challenged our promo team by asking them to make one item from the daily featured pattern, and style it three (or more!) ways. For the next thirty days, you’ll see our team take something like that a basic t-shirt and make it look sporty, professional, and casual — simply by styling it differently. Or pairing a Wiggle Dress with different items from their closet to dress it up, or dress it down.

I’ve been blown away by everyone’s creativity and fashion know-how and I think you will be as well!

Be sure to keep an eye out each day in the Facebook Group / Page, on Instagram, or at this blog — because that’s where we will be notifying you of the featured pattern, and letting you know how to get your hands on that 24-hour sale price.

We could not have done this without our team of talented, creative, amazing people! Let’s meet each of them!

Judy Hale – Owner and head designer for Patterns for Pirates. Instagram | Facebook | Facebook Group | Website

Nicole Lanzarotto – P4P Crew Member and Owner of Edge Apparel and Accessories. Facebook

Alex Radu – P4P Crew Member and blogger at My Creative Room. Instagram | Facebook | YouTube

Ashley Toombs – Designer at Lexi Lee Handmade. Instagram | Facebook

Brad Schultz – Designer at Brad Schultz Design. Instagram

Kamali Obiagu – Blogger at Obiagu Makes. Instagram | Blog

Livia Jonker-Yamada – Blogger at Liviality. Instagram | Blog | Facebook

Katy McKinley – P4P Crew Member and Owner/Blogger at Wild + Wanderful. Instagram | Facebook | Facebook Group | Website + Blog

Erinn Ounsted – P4P Crew Member, teacher, blogger at Love Madelynn. Instagram | Blog

Aaronica Bell Cole – Blogger at Crunchy Mommy Blog and Needle and the Belle. Instagram | Facebook | Blog

Becca Eutsler – Owner of Black Sheep Fabrics. Instagram | Facebook | Facebook Group

Kaara King – Blogger at Poppie Darling. Instagram | Facebook | Blog

Leanne Fayard – Blogger at Thready for It. Instagram | Blog

Rachel Hopkins – Blogger at Always a Project. Instagram | Blog

We are so looking forward a month full of celebrating fashion, fall, and sewing at Patterns for Pirates. Are you ready for the fun??

Filed Under: Blog Tours, Uncategorized Leave a Comment

Baby Set with Nancy’s Notions

October 30, 2018

This post was created in partnership with Nancy’s Notions.  All opinions are my own.

Today’s blog is a rare occasion here on the P4P site… Generally I don’t do a lot of sponsored posts, but when Nancy’s Notions contacted me to do a little show off for their 2018 holiday blogger gift program I just couldn’t resist. I grew up watching Nancy on PBS with my mom and was honored to hear from them <3

Nancy is absolutely a great sewing icon who taught so many so much! I still have her fitting book sitting right on my desk 🙂

They sent me some adorable kitty fabric, red interlock and red ribbing to match.

The kitty fabric is a cotton spandex – perfect for baby clothing since it’s natural fibers, soft and easy to get on and off with the high stretch.

I used it for the Petite Pegs and part of the Teeny Beanie.

The red interlock I used for the main body of the Wee Lap Tee and the matching driving worked perfectly for the neckband, wristbands, and the band for the hat as well.

Although Nancy’s Notions has been a go to shop for quilters  they’re starting to carry more and more apparel items as well! So, if you’ve never checked them out or haven’t looked in their shop for apparel sewing in some time I’d click on over and check it out.  You can use this code for free shipping on orders $49 or more as well: 189501-1121 🙂

All the patterns I used for this baby set you can find in our freebie section here on the site! A great little gift for a baby shower or an easy and quick basic set to fill up baby’s wardrobe!

It’s part of Nancy’s Notion’s Holiday Blogger Gift Program 2018!

Filed Under: Blog Tours, Sewing Techniques, Uncategorized 2 Comments

Sew what do I wear…Professional Edition

October 27, 2017

It’s that time of the year again…time for the Sew What do I wear blog tour hosted by Made for Mermaids and P4P. This season a group of very talented women are bringing you inspiration for business wear outfits so make sure to check them all out.

As busy professionals on the go one of the most important thing to keep in mind when sewing your office outfits is time! How much spare time to you have? How many outfits can you treat yourself to in the allotted sewing time? Easy and fast patterns will help you get many looks in a short amount of time.

Keeping that in mind, for today’s blog I chose two of the fastest to sew P4P patterns, the Brunch Blouse and the Pirate Pencil skirt. Both patterns have a minimal number of pattern pieces and are super fast to put together.

For a more edgy look I use some vegan stretch leather when I made the Pirate Pencil Skirt . I loved the look of the skirt un-hemmed so I just skipped this step all together…boom! Even a faster sew now!

As I was sewing the top length Brunch Blouse I realized I wanted to add some extra details to it but without much work 😉 Store bought single fold bias tape to the rescue! Instead of finishing the neckline with the bias tape on the inside (as per the pattern tutorial), I did a switcharoo and put the bias tape on the outside of the neckline. I finished the bottom of the shirt using the same technique. The bias tape hem add a little extra to the shirt, doesn’t it?

There you have it! Two easy to sew patterns and a pair of of stilettos and you made yourself a edgy office attire. If you live in a colder weather are, throw a Cocoon Cardigan over and you’re ready for a stylish day at work.

Make sure you check out all the amazing blogs that joined us for this tour!

Filed Under: Blog Tours, Frequently Asked Questions, Uncategorized 2 Comments

Fall Capsule

August 1, 2017

Once again Patterns for Pirates teamed up with Made for Mermaids and Cole’s Corner and Creations to bring you some Fall Capsule inspiration. As before we will be giving you some ideas how to create Women, Boys and Girls mini capsules.

Today I will show you how to create a perfect mini fall/back to school capsule for your little men. As some of you know, I live in Florida so my kids’ capsules will reflect the warm climate. For the rare days when it’s chilly (and by chilly I mean 70s 🙂 ) I love to have some layering pieces ready. I find Cpt Mack’s Cardigan to be the perfect layering piece for short or long sleeves tshirts. Those elbow patches are so fun!

When you built your boy’s fall capsule be sure to add a button up shirt like the Lumberjack Shirt. They can be worn as stand alone tops but also make great layering tops. You can make the collar option or go for a fun, cool look and add a hood.

Every boy needs a cool jacket! Am I right? Well…look no further than the Spirit jacket from Cole’s Corner and Creations. The raglan style sleeves make it such an easy sew that you’ll be whipping those in no time.

Between the 3 sisters pattern companies you have so many tops options. For Noah’s fall capsule I went with my 3 favorite choices…the P4P Jolly Roger Raglan, the M4M Dylan Tee and the P4P Yo Ho Henley. All patterns feature a long sleeve and short sleeve option so you can pick whatever style works best for your area.


When choosing the bottoms for the mini fall capsule I kept in mind one thing: COMFORT! My little man lives in shorts all year long so I went with the Pirate Playground shorts and a modified knee length Baby Bear Joggers. I like the loose fit of the Playground Pants for PE days and the slimmer fit of the Baby Bear Joggers for everyday wear.

For the occasional colder day I had to add a pair of the new Little Loungers pants. This pair is made with a striped linen blend and it’s such a classic look. It pairs beautifully with the Yo Ho Henley, the JRR and the Dylan Tee.


We can’t wait to see your little one’s capsules this fall! You can read the contest details on the M4M blog here. Regardless of which top, layering piece or bottoms you choose remember to: Keep it fun! Keep it simple! Keep it comfortable!

Filed Under: Blog Tours, Uncategorized Leave a Comment

Sew What Do I Wear on Vacation

June 16, 2017

Once again, Patterns for Pirates teamed up with Made for Mermaids  to bring some amazing vacation outfits inspiration. This blog tour is full of outfits that would be perfect for any destination.

Whether I pack for a quick getaway weekend or a week long trip, I always make sure to bring clothes that do not wrinkle easily and do not take a lot of space in my luggage. With two boys to keep up with I also need my outfits to be super comfortable.

My next vacay suitcase will certainly include a few Favorite Tee dresses since I have sewn at least ten of them since the pattern launched. I am all about tshirt dresses this summer, comfortable and stylish. My favorite ones are rayon spandex, since they hardly ever wrinkle when packed and they feel great in high temperatures.

It is no secret that my closet is full of Sweet Tee dresses so they will definitely be a staple in my vacation wardrobe. They are such a quick sew and a very flattering silhouette. I do lengthen my Sweet Tee dresses about 3.5 inches, but that is just a personal preference. You can rock your flirty shorter pattern version for sure!

The Sweet Tee pattern includes a banded short sleeve option and a neckband finishing of the neckline. To make it an ever faster sew I hem my sleeves by folding 1/2 ” and topstitching with my coverstitch. You can very well use a zig zag stitch or a twin needle too.

I like to use the same technique to the neckline as well. I simply fold it 1/2″ wrong sides together and clip it in place…use a lot of clips (or pins) and press it well. all you have to do now is top stitch it the same way you did your sleeves.

Tadah! A super quick 30 minutes sew, comfy and elegant….perfect for vacation. I love that the Sweet Tee can be dressed up or dressed done, wear it with heels for an evening out or with flats for a fun day of vacation activities.

Don’t forget to check out the other blogs in this tour! The ladies really delivered!

June 12:  Little Heart Threads , The Crunchy Mommy , All_Sewn_Up_By_Stacey , Heavenly Threads Blog

June 13 : SewSophieLynn , Love Madelynn , Stitches by Laura  ,  All Things Katy!

June 14: Middle River Studio, Ammon Lane , The Art of Oh, Ma Moose

June 15: Sewing Curves, Margarita on the Ross, Stitching and Making, Very Paige,

June 16: Sewing with Sarah, I’m Just Like Mommy, Vinya Sew,

Made for Mermaids, Patterns for Pirates

Filed Under: Blog Tours 3 Comments

50K Fan Celebration :: Stirrup Pant PegLegs Hack

April 22, 2017


Written by Kelly Bailey (P4P Blog Contributor)

For this tutorial I will be showing you how to take the updated Patterns for Pirates Peg Leg pattern and hack it into a pair of leggings featuring the stylish yoga stirrups! Have you seen these store purchased versions in your gym classes, or maybe on Pinterest, or maybe you’ve been looking for a comfortable pattern for stirrup leggings to compliment a casual outfit? This simple hack is both comfortable and durable. Follow along with this tutorial and please share your results in the P4P sewing group!

Step One: Fabric

My first, and most important, advice is to choose your fabric wisely. This pattern is intended for 4-way stretch knit with at least 50% stretch. See Peg Leg 101 to review the way the fabric contents and stretch will affect your results. Not all knits are meant for leggings due to the degree of stretch this pattern requires. For all 3 of my versions I have used a brushed polyester spandex knit with varying weights. Athletic knits, such as supplex or heavy weight brushed poly, are the best option if you intent to vigorously work out in your finished garment.


Step Two: Stirrup Pattern Piece

Print out and assemble your Peg Leg pattern as normal, being sure to add or take away height as necessary for you. See Peg Leg 101 for more information on how, where and when this is necessary. The Peg Leg pattern is drafted for an average height of 5’5” and an inseam of 28”. This hack can be applied to both the “plain” version and the “color-blocked” versions. Beware that once you’ve sewn this up you will not be able to simply trim off length at the very end of construction as you would with the standard pattern. So be sure to make a traditional pair and know these height adjustments before attempting this hack.

Next cut out a paper rectangle measuring 7.5” x 4”. The 4” height fits my size 9 foot perfectly but you may need to add or remove a little bit to that measurement depending on your shoe size.

Step Three: Modifying the Peg Leg Pattern

If you’re modifying the “plain” version tape your rectangle to the ankle of your peg pattern as shown. Be sure to pay attention to the side you’re attaching the rectangle to. You want to line the edge of the stirrup rectangle with the FRONT side of the leg piece.

If your modifying one of the “color-blocked” versions line up and attach your stirrup rectangle with the edge of the FRONT pattern piece as pictured.

NOTE: You can switch up the top and middle color-block panel pieces and the pattern will still go together without issue if you are not attaching the pocket. If you do attach the pocket still, it would just sit lower on your leg. My charcoal and hot pink pair show what this swap looks like. My navy and seaglass version show the color-block panel assembly as instructed in the original pattern. I also chose to give a faux flatlock look to my pink version. Follow Alex’s decorative top stitching blog to get this look yourself!

Step Four: Cut Out Your Pieces & Assemble Color-block

Use your modified pattern to cut from your fabric all legging pieces. Add to this the addition of two 1.25” x width of ankle strips with the greatest stretch going with the longer length. Theses will be the bands that stretch around the heel of your foot. The width measurement will leave extra that will get trimmed off after attachment. For a size small I cut a 8″x 1.25″ sized heel band.

For the “plain version” make a cut in each leg piece, as shown in the image below, just to the center width of the leg. This is where you will attach the heel band.

For the “color-blocked” version you are going to sew together all color-block pieces as normal, creating two full leg pieces. You will need to pivot the seam 90 degrees to attach the stirrup to the ankle at the front of the leg. Be sure to only sew the stirrup to the halfway mark along the ankle (mid color-block). Leave the rest unattached so that you can sew the heel band in place.

Step Five: Sew Crotch Seams

Lay your fully assembled leg pieces right sides together on top of one another. Sew your crotch curves together.

Step Six: Attach Heel Bands

Press your heel bands wrong sides together lengthwise and then pin along the unfinished slit along ankle edge. Sew in place being sure to use a stretch stitch but not to stretch either the band or the leg piece.


Step Seven: Pin Inseam in Place

Start by pinning your crotch seams right sides together then go to the stirrup piece and start lining up inseams there. Work your way up the leg making sure to overlap the bands as shown in the photo below. Sew inseam together using stretch stitch. Trim off excess heel band.


Step Eight: Finishes

At this point you can attach your waistband using the directions in the patterns tutorial and then hem the bottom of the stirrups using a stretch stitch and your preferred hem width. Press.

All Done!

Try them on and enjoy. Keep your feet cozy whether in yoga class or sewing your next garment at home!


We are celebrating reaching 50K fans in our Facebook group!  To make it a party, our beloved PegLegs pattern just got an update AND some new add-ons.  Before you go running to your machine to sew up your own leggings, make sure to read our PegLegs 101 blog post.  This way, you’ll have all the the information you’ll need to make the perfect pair before you even cut into your gorgeous fabric.

But wait, there’s more!  After any good party is an after-party.  We are taking it one step further and sharing some easy hacks that’ll bring even more flavor to your favorite leggings pattern!  We hope you check them out, make your new favorite pair of leggings, and know that we appreciate every single one of you amazing sewing guys and gals!

Here are our hacks / tutorials / latest tricks:

Lace Waistband Alternative | Drawstring Waistband Tutorial
Exposed Elastic Waistband | Stirrup Pant Hack
Ruched Ankles Adjustment | Decorative Topstitching Tutorial
Ruched Side Panel Hack

Filed Under: Blog Tours, Pattern Hacks, Pattern Release, Uncategorized 2 Comments

Spring Women Capsule

March 30, 2017

As I was going though my closet a couple of weeks ago I realized that I barely have any solid color pieces. I made it a point to make more solid clothes so as soon as I learned of the P4P/M4M capsule collaboration plans I knew I have to step up my game and have a plan. I started with building just a start off, mini spring capsule. I chose the pieces based on what I feel most comfortable wearing and what will suit the hot Florida spring.

I made myself sew mostly solids…you have no idea how hard that is when you’re used to making only outfits in bold prints 🙂 . The best thing to  consider when building a mini capsule is how the pieces will mix and match together. Try to use solids that will visually complement one another.

If you do want to add print to your capsule, use prints that will include some of your colors in your solid line up. For example, I chose this dandelion Art Gallery cotton spandex for my M4M Chloe skirt because there is white and aqua in the print and the background color complements my capsule tops beautifully.

I highly recommend including a white or black top in your capsule. For my white option I chose the M4M Mama Ava because it’s relaxed fit will work with all my bottom pieces.

Layering pieces are a must when you plan out your capsule. I went with the Free Spirit Tank and a short sleeve Cocoon because I can easily transition them in summer.

The Cross My Heart Cami was a must because…just look how perfect it layers with the Pumpkin Spice Dolman and the Mama Isabel Dress.

I hope my mini capsule inspired you to try one for yourself too. I know now I am even more motivated to make a capsule for my boys. Their closet lacks solid basics pieces even more than mine…but that will change! 🙂

So there you have it…9 pieces…a lot of possibilities.

Don’t forget to check out the P4P/M4M capsule contest for a chance to win some amazing prizes!

Spring Mini Capsule Sewing & Contest

Alex

Filed Under: Blog Tours, Contest/Giveaway, Uncategorized 4 Comments

Sew, what do I wear? Holiday Edition

November 19, 2016

swdiwlogo

We teamed up with the Made for Mermaids ladies and have been sharing some great inspiration pieces to add to your holiday wardrobe; whether it be for family photos, dinners, or parties.   You can usually find me in some SOS Pants and a Sweet Tee or Mama Bear Joggers and a Boyfriend Tee but we have some fun holiday parties and a trip to Las Vegas coming up so decided to go all out and use some sparkly and luxurious fabrics.  My three little ones keep me pretty busy and if you’re anything like me, I tend to wait until the very last minute to sew up my items and am left running out the door, trimming my last thread.  So, with that, here’s my take on our ever famous Peg Legs  and Pumpkin Spice Dolman, two of the quickest and most beginner friendly patterns, to make them party worthy.

img_7674-2

First, let’s talk about Peg Legs.  If you haven’t heard what Pegs legs are…Check out this blog post: Peg Leg 101.   My drawer is full of basic pegs, but I didn’t want just any old pair so I decided to use stretch velvet.  While the fabric does meet the minimum stretch requirements, I opted to take a slightly smaller seam allowance just to ensure that they wouldn’t end up a little sheer at the booty and looking more like tights. I also used supplex for my waistband since I wasn’t sure if the velvet would cause the waistband to slip too much.   Changing the type and texture of the fabric took my “mom-iform” pants to luxurious!

Now on to my top.  I’ve recently made a few Off -the-Shoulder Raglans using our raglan hack from a few weeks ago and am really liking the look so I thought it would be a perfect addition to the Pumpkin Spice Dolman to take it up a notch. I was also limited on my fabric and ended up using two front pattern pieces so I could use it for both the front and back.  The back pattern piece of the PSD is wider since naturally our curves (our booty and shoulders) need the extra ease but I was ok with slightly slimmer fit through the hip that I would end up with by using the same pattern piece for the front and back.

Peg Legs & Pumpkin Spice Dolman Holiday

To create the off the shoulder look, I widened the neckline at the shoulder seam by removing 2″.  I also turned the edge 1/4″ and hemmed it rather than adding a neckband.

off-the-shoulder-psd

I hemmed the bottom and sleeves as well.   To be honest, my serger hated the sequins and I ended up having to do most of the construction on my sewing machine. The blade was able to handle them, but with the combination of the speed, my needles kept breaking.  So just as a cautionary tale, if you decide to use sequins, go slow!  Even with my serger issues though, I was still able to complete my entire outfit in just over an hour…yes, you read that right; an hour! Now, run and grab all the sparkly fabric you can find and shine straight into the New Year!

Peg Legs & Pumpkin Spice Dolman Holiday  Peg Legs & Pumpkin Spice Dolman Holiday

Don’t forget to check out all the amazing ladies and their makes, if you haven’t already!  There is sure to be something that inspires  you!  Have you joined in on the fun and made a P4P or M4M holiday outfit?  Join the Facebook Group and share away.  We’d love to your creations.

Nov 14 – Wild & Wanderful/ What Does She Do All Day?/ My Creative Room
Nov 15 – Sew A Piece of Joy / Red Stitch Blue Stitch/ Sewn Of A Stitch
Nov 16 – MaMoose / Rebel & Malice / On Wednesdays We Sew
Nov 17 – It’s Liesel / Stitching and Making / The Kisses Co
Nov 18 – SewSophieLynn/ I’m Just Like Mommy/ Lady and the Gents / The Crunchy Mommy


Filed Under: Blog Tours, Pattern Hacks 2 Comments

Sew, what do I wear? Planning and Sewing for Family Pictures

November 19, 2016

swdiwlogo

I, along with a lot of apparel seamstresses LOVE to sew up something special for family pictures! We get our family pictures done every fall.  And each year I like to think I get a little bit better at my part, which is coordinating/sewing the outfits.  Or most of them!

1185182_10101089986360483_1574504116_n 10660348_10101707723280743_4188534425432925783_n

_dsc4951

2047

I think the most important “rule” is to have solid back ups.  I like to pick out a true back-up plan with clothes we already have.  I’m a last minute kind of girl, but nothing is worse than really being under pressure to finish something right before you need to look happy in front of a camera! And, you never know when a project decides to be a “doomed project”… you know it happens from time to time that it just isn’t meant to be… everything that could go wrong goes wrong! So… have a REAL back-up… something you will genuinely be happy with and have picked out and ready just in case.  It will take off pressure, stress and be there in case you need it 🙂 This year we slipped into someone’s “spot” after they cancelled… so I only had about 24 hours to get ready. I made Little Guy a Deep Sea VNeck and he wore a pair of Cpt Comfort Jeans I had already made him.  Hubs and I both wore all store bought.  And I still love the pictures 🙂 and I’m glad we could slip in with this photographer that I love!  This year we did navy, green and cream/khaki and my undershirt had a little tiny bit of pink.

10653650_10101707723320663_7624800562902864647_n

On to the next… I don’t ever try to sew every single piece of clothing in the picture.  That’s a lot to take on, especially if your family is growing and has lots of bodies to clothe! I like to pick the most important to me and make those extra special.  That way I have time and energy to make those “show stoppers” and leave the rest to store bought or something that was made a few months ago! My poor husband pretty much never gets anything made for him…maybe next year 😉  Last year when I was at the end of my pregnancy I only made my shirt (a Layer Me Up )! I wore some SOS skinny pants I had and my Little Guy wore a Yo Ho Henley I had also made previously.  I paired a sweater that was my Granny’s (so still a special to me piece) and the rest was store bought we had on hand.  I had set out to make a cardigan and pants for Little Guy, but those back ups came in handy when I couldn’t muster up the energy!

_dsc4958

When picking colors I love to pick colors that I think compliment both our skin tones and my house! I print the pictures and have them in our living room every year… so I don’t want some crazy colors that aren’t going to go well with all my other decor.  We happen to all be very fair skined, so it’s easy to compliment all our skin tones with the same cooler tones.  If your family has different skin tones, no biggie! You can mix in cooler and warmer tones with different shades and colors. When I’m deciding I love to search Pinterest for family photo in the colors I’m deciding between.  I can’t pull off brighter warmer tones like yellow and orange, so we usually do cooler greens and blues.  I did do a bold lip color this year, but I don’t think I’ll be repeating that 🙂

2011

I like to pick only a couple colors to use in our pictures and just add neutrals to fill it in.  I almost always go for navy as a base.  It’s super easy to use because you can find it so easily in male and female clothes, jeans and chambray are great and easy neutrals to work with navy/blue as well.  I also always add in white/cream as another neutral.  It helps balance the picture having a dark, mid and lighter tone color.  Then I pick a midtone color or two to work in.  This year we did navy, cream and darker khaki/caramel for the neutrals and teal for the color and I added in a tiny pop of pink since it was our first family pictures with Baby Girl and thought it needed that pop of pink to celebrate! Don’t worry about making everything the same exact shade either, adding different shades of the same color help give some dimension.

2000

Next is finding a good mix of texture, solids, prints in your outfits.  This can be tricky and honestly a bit time consuming.  But, I really cherish these pictures forever and I don’t mind sitting and staring at a mix of fabric and clothes for a day for them! I like to use jean, knit, plaid, stripes, prints, sweater, ect to make us have some depth.  I like a lot of solids or near solids as well though, because in the end I really want our faces to be the highlight of the picture not our clothes (as hard as that is for a seamstress ;)).  Adding things like buttons and trim to a solid can be the best of both worlds!  A little trim can really make your solid apparel look extra special without being distracting at all like a loud print can become. I usually like to do the kids in the bolder prints or colors but I have mixed it up where I wear a floral, like when I was a million months pregnant last year…. everyone was looking at the belly, so I thought I’d go ahead and highlight it!  And I put Little Guy with a pop of a brighter mustard color to bring some attention to him too.  Here we did navy, cream and olive with his pop of mustard and my floral brought in a bit of pink.

_dsc4917

Layering is a great way to add some more depth and texture.  But, if you’re finding it hard to pair that many items together don’t worry.  It doesn’t make or break your photos if you’re not layered! We did our first year in the summer months in Texas— no one was going to layer anything!  Again we’re in navy, white as neutrals and added that pop of red.  I put Little Guy in the boldest and we’re both in a more subtle print.

1175421_10101089987912373_2084890075_n

But, you know… if your personality is loud print, then go for it! It’s all about outfitting your family to show them off… put them in something that reflects who you guys are!

I do think it’s important to be comfortable enough that you and your kiddos can sit, stand, walk, and move around without having to adjust your clothes every time.  Otherwise you will spend more time in your session fixing clothing than taking pictures and no one wants that! Or even worse you get them back and  you look uncomfortable! You don’t want to wear something you feel like you need to stand a certain way to be flattering…so suck in the whole time! (This is also wear layers can help mamas cover areas they might be more self conscious of!)

Even though I was super pregnant and merely standing was pretty uncomfortable, I just had on stretchy SOS pants, a super soft rayon spandex Layer Me Up and sweater. So I could sit, squat without worrying about my clothes at all!  (A little secret though, I pulled my hamstring muscle squatting down for this picture, lol!)

_dsc5025

I almost always let my Little Guy wear some kind of t-shirt.  It’s what he always wears day to day and I want him to look like him! I want him to look and feel comfortable while we take the pictures as well.  This Deep Sea V Neck is in a sweater knit.  So the fabric choice dressed it up a bit while he was still very comfy!

10354875_10101707723774753_441210257010283846_n

For this year I used the Timeless Tunic for myself.  I did a solid teal rayon jersey in the dress length.  I did size down to a small since I used a very stretchy and drapey knit rather than a woven it’s drafted for.  I also drafted out the bust darts since it was knit.  I used the sleeve split hack that Angela had shared when it released and used a little crochet trim along the split.  I thought it gave the solid a little more umph! I also love to put us in trendy clothes, which is sometimes a “no-no” for family photos.  But, since we do them every year I love the idea and I can’t wait to look back through the fashion!  I paired it with a long necklace and wedge booties.  I was comfortable in the knit and the skirt wasn’t so tight that I felt like I needed spanx or to “suck in” the whole time.  The split sleeve was something I had to be aware of while taking pictures though and how they were laying.

2053

For Little Guy I made him a plain grey Jolly Roger Raglan in a heathered cotton jersey.  The heathering gave it a tiny bit of texture/interest even though it was a solid.  I also made him a Lumberjack out of a flannel (the poor baby was so hot! It was in the higher 90’s when we took these!).  I did the hood option and added quick knit bands in place of the cuffs.  I also didn’t have time to actually make the button holes if you look closely! But, I bet no one else will ever notice…I hope! He wore some store bought jeans with it.

2078

Baby Girl wore a High Low Tide Top in a french terry.  She was the only one is what I’d consider a more bold print.  Since she’s so little I thought it was a great way to drawl your eyes to her. She also had the pop of pink within the color scheme in the floral.  A nice soft knit for her too so she would be comfortable and I wouldn’t have to worry about it getting all wrinkled everything I held her or she plopped down walking a few steps.   I added a little of the crochet trim and the buttons on Little Guys’s Lumberjack to her leggings (I used the Bonny Leggings by M4M).  Just a tiny detail that no one else will probably notice coordinates and matches but me.

2024

Husband wore all store bought–sorry honey! Darker khakis, a button up and a sweater (he was also VERY hot— but he looks great right? 😉 Gotta love a man who will wear layers on a hot TX day for you!)

2094

I love seeing the family pictures pop up in the Patterns for Pirates Facebook Group!  And I see the questions for help from time to time too! So I hope this helps you get your family pictures planned and sewn  up for next time!

2002

Blue and Red- Photos by Crystal Ingle Photography, Green, Navy and Blue, Floral- Photos by Colleen Hauth Photography, and this years teal- Photos by Contemporary Portaits.

tourdates

Nov 14 – Wild & Wanderful/ What Does She Do All Day?/ My Creative Room
Nov 15 – Sew A Piece of Joy / Red Stitch Blue Stitch/ Sewn Of A Stitch
Nov 16 – MaMoose / Rebel & Malice / On Wednesdays We Sew
Nov 17 – It’s Liesel / Stitching and Making / The Kisses Co
Nov 18 – SewSophieLynn/ I’m Just Like Mommy/ Lady and the Gents / The Crunchy Mommy

Filed Under: Blog Tours, Frequently Asked Questions Leave a Comment

  • « Previous Page
  • 1
  • 2
  • 3
  • 4
  • 5
  • Next Page »

Newest Patterns

  • Uptown Joggers - Youth $10.00 $8.50
  • Uptown Joggers $12.00 $10.50
  • Uptown Joggers - Bundle $20.00 $18.00
  • Notch Top & Dress $12.00
  • Notch Top & Dress - Youth $10.00
  • Privacy Policy
  • Refund Policy
  • Affliliate Program
  • Contact Us
  • About

Copyright © 2023 Patterns for Pirates

Copyright © 2023 · Genesis Framework · WordPress · Log in