Patterns for Pirates

P4P stylish, modern, wearable patterns

  • Home
  • Blog
    • Frequently Asked Questions
    • Pattern Releases
      • Free Patterns
    • P4P University
      • Fitting
      • Sewing with Stretch, Knit Fabrics
      • Sewing with Woven Fabrics
      • Sewing Machines
    • Sew-A-Longs
    • Fabric for Pirates
    • Pattern Hacks
    • Announcement
      • Blog Tours
      • Contest/Giveaway
  • Shop
  • Bundle Discounts
  • Gift Cards
  • My Account
  • Cart

P4P Professional Looks

November 18, 2016

“How can I make this look more professional?” “Is this okay to wear for an interview?” These are just a few of the questions that we see asked all the time about P4P patterns. Well, Angela and I are here to help give you some ways of how you can make and wear Patterns for Pirates a part of your professional wardrobe- and trust us, it’s possible.  Angela works in the insurance world and I am a teacher and both of us admit to wearing P4P almost everyday! So here are a few tips and tricks from to help make you the envy of your office!

Fabric Content Choice
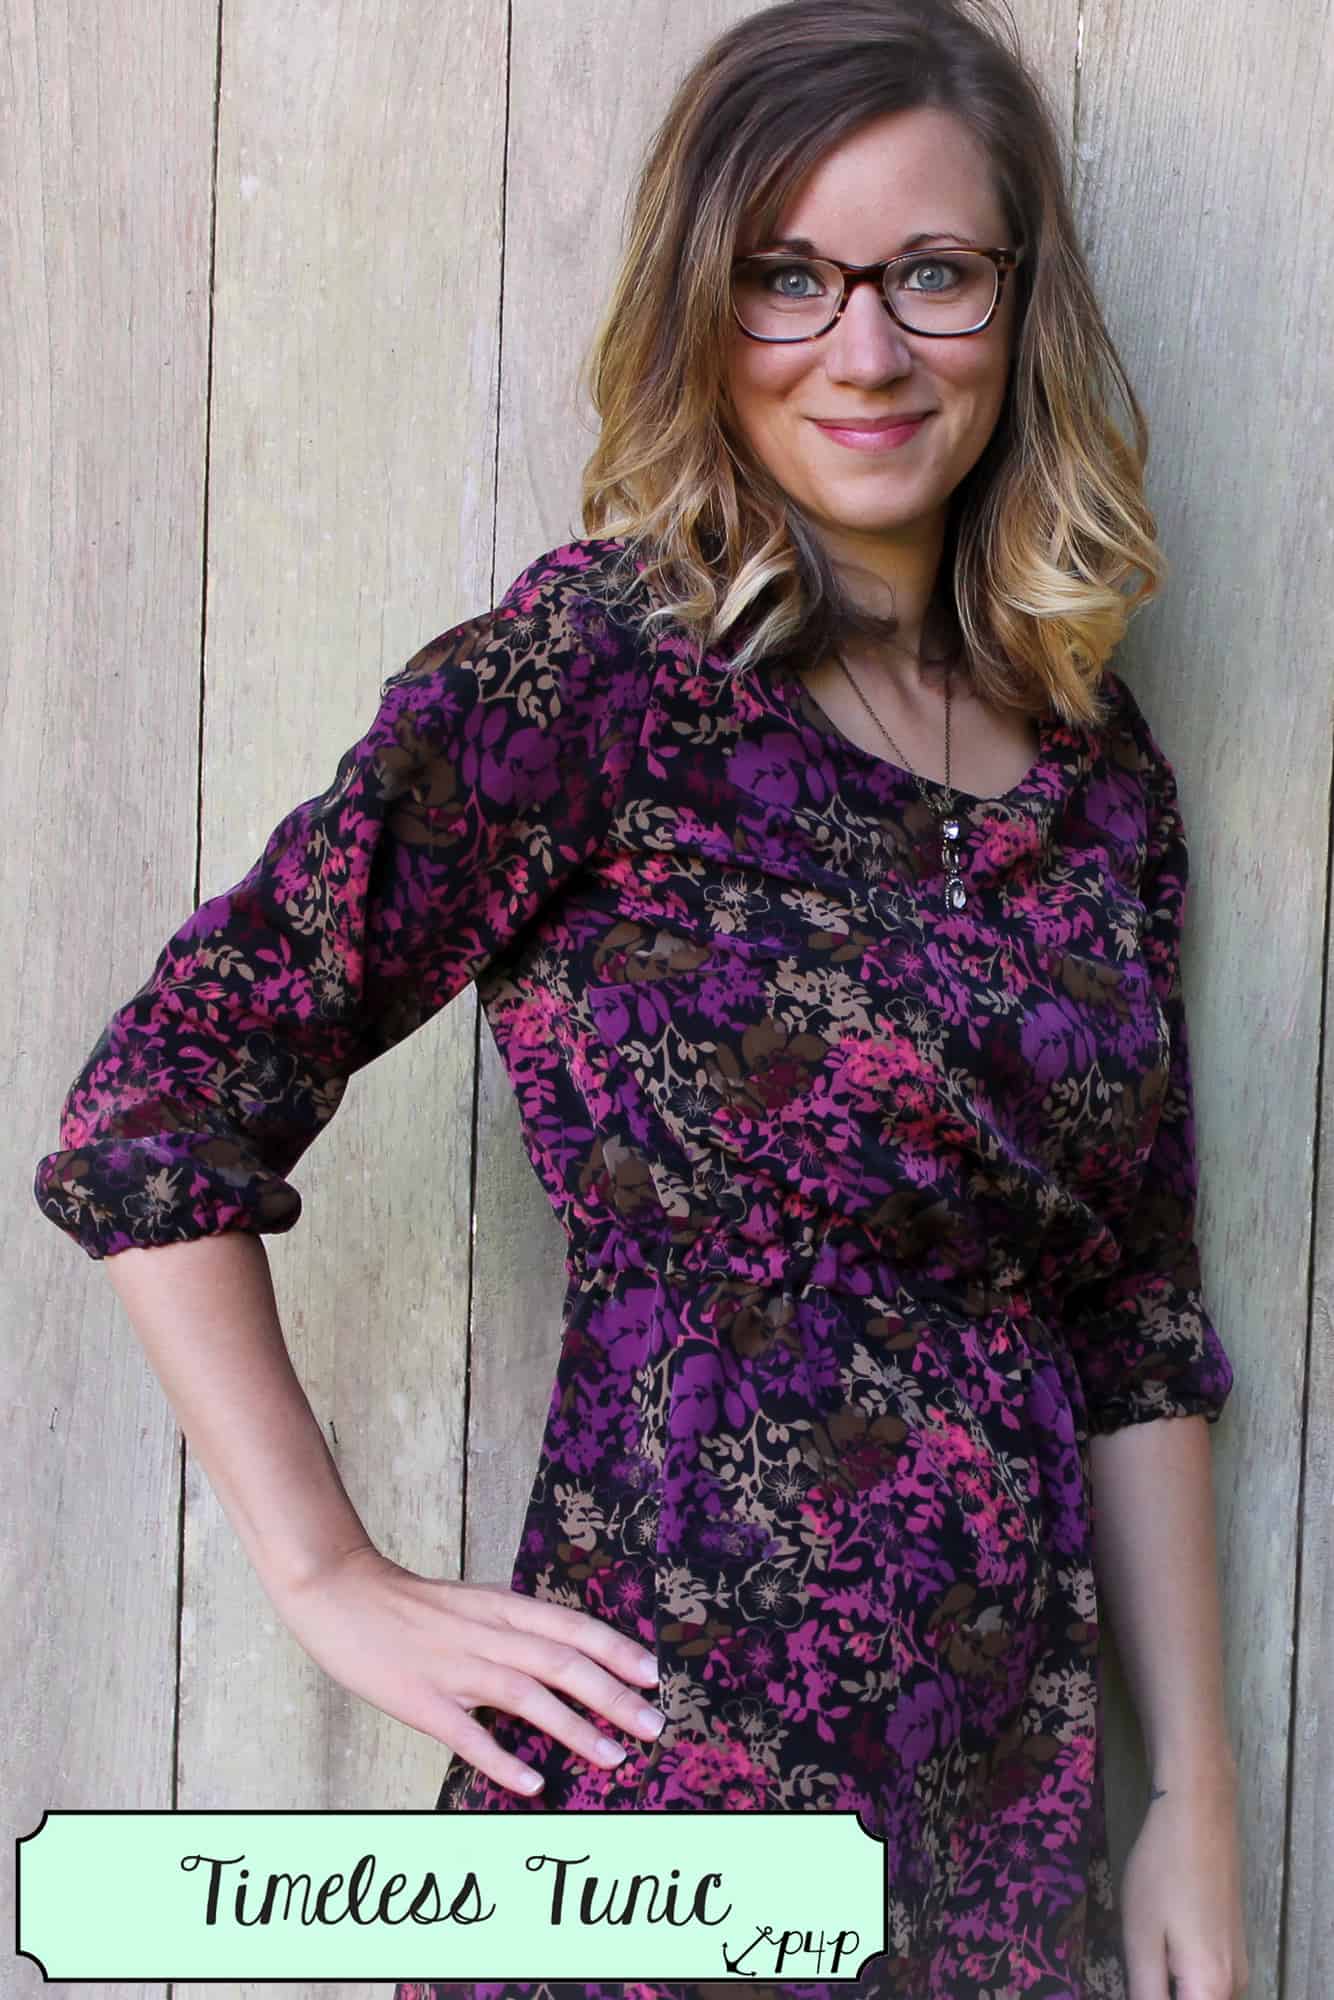
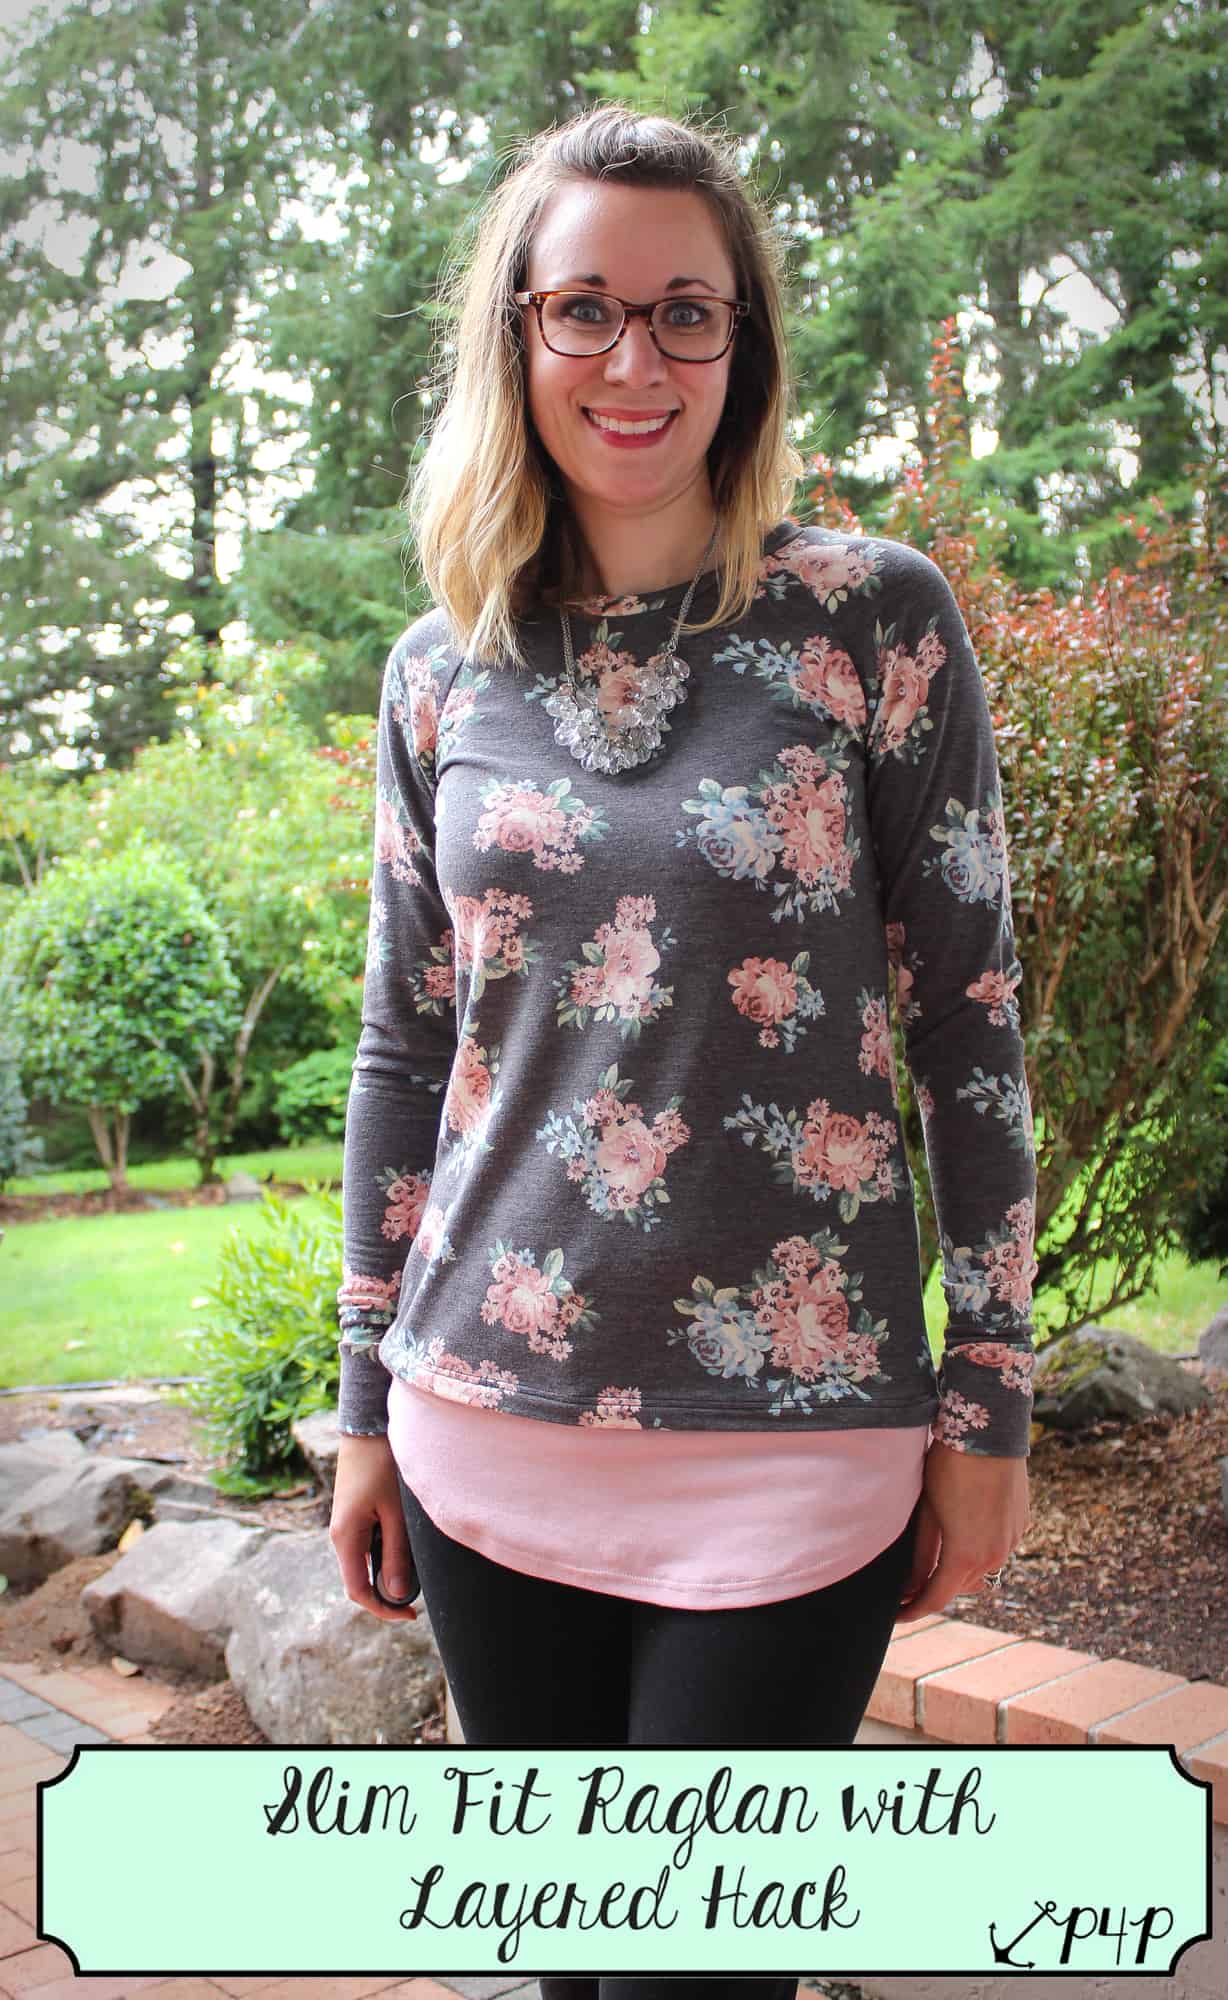
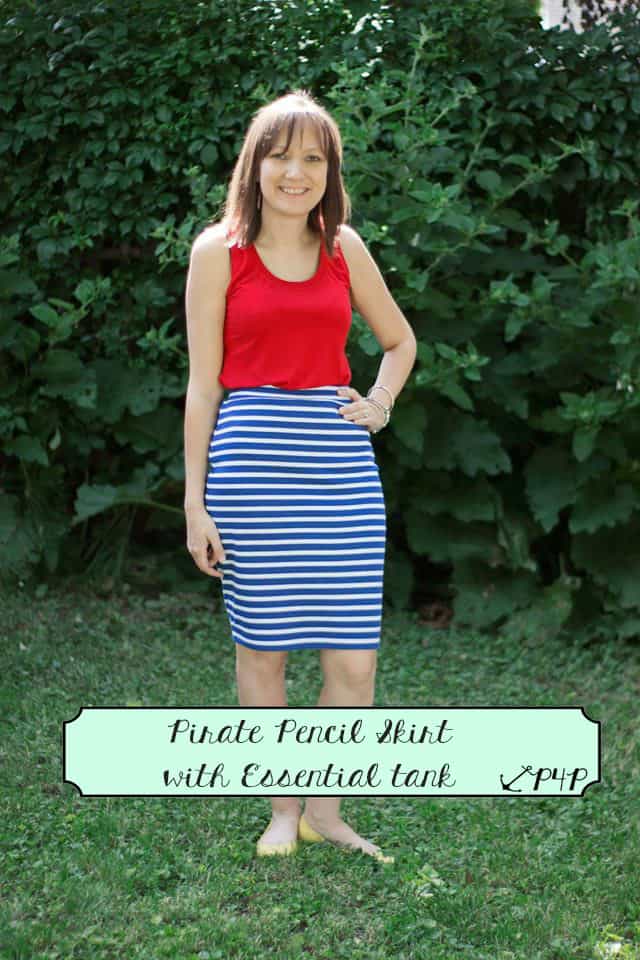
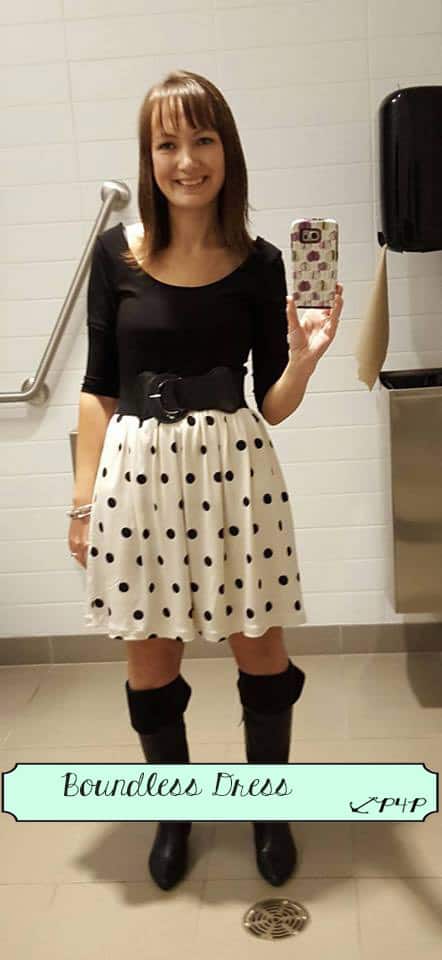
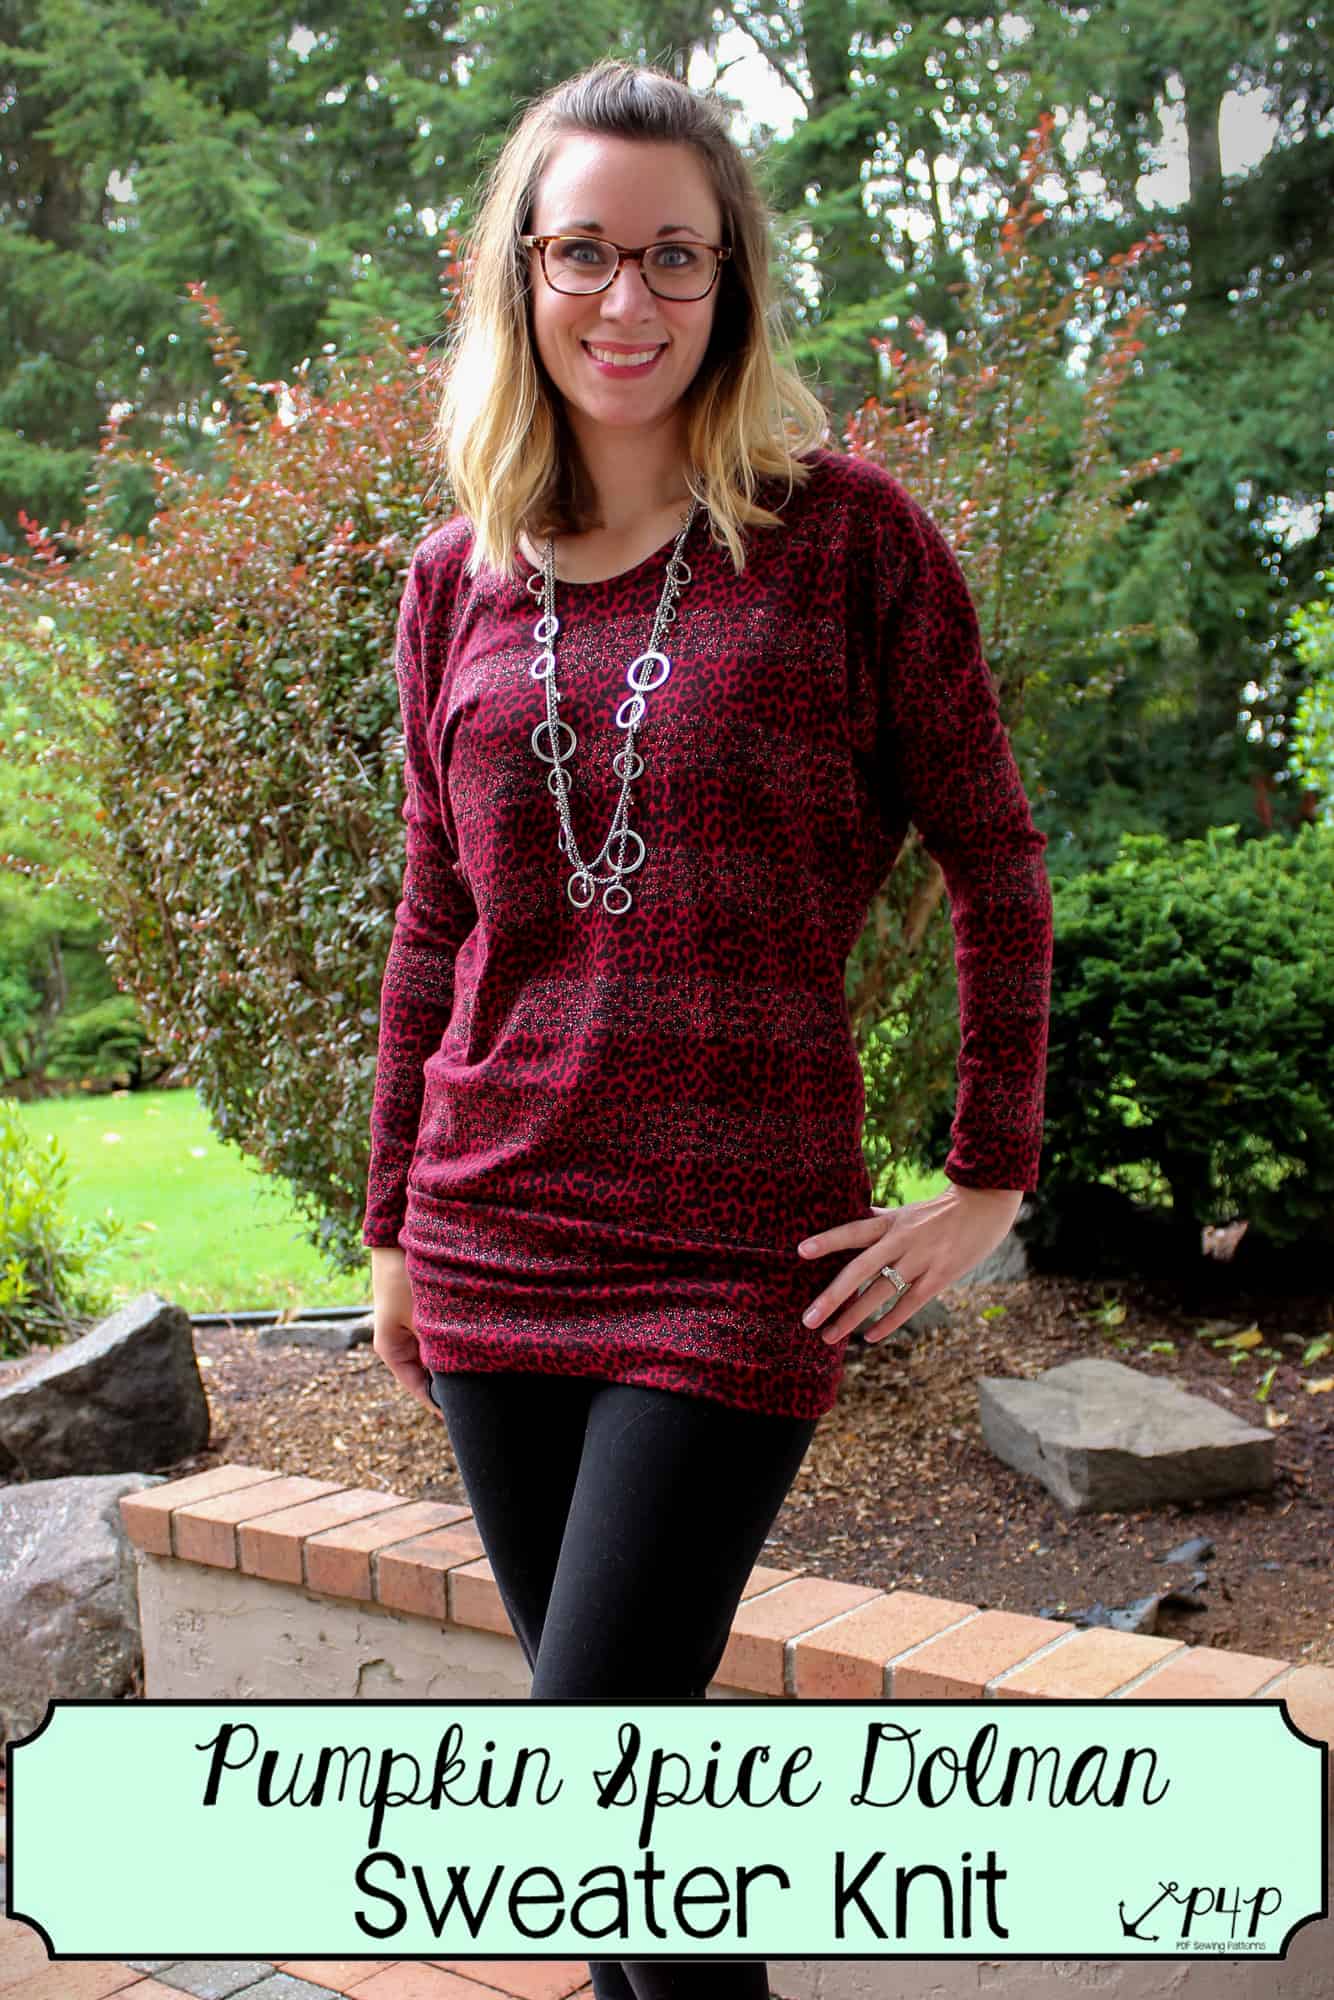
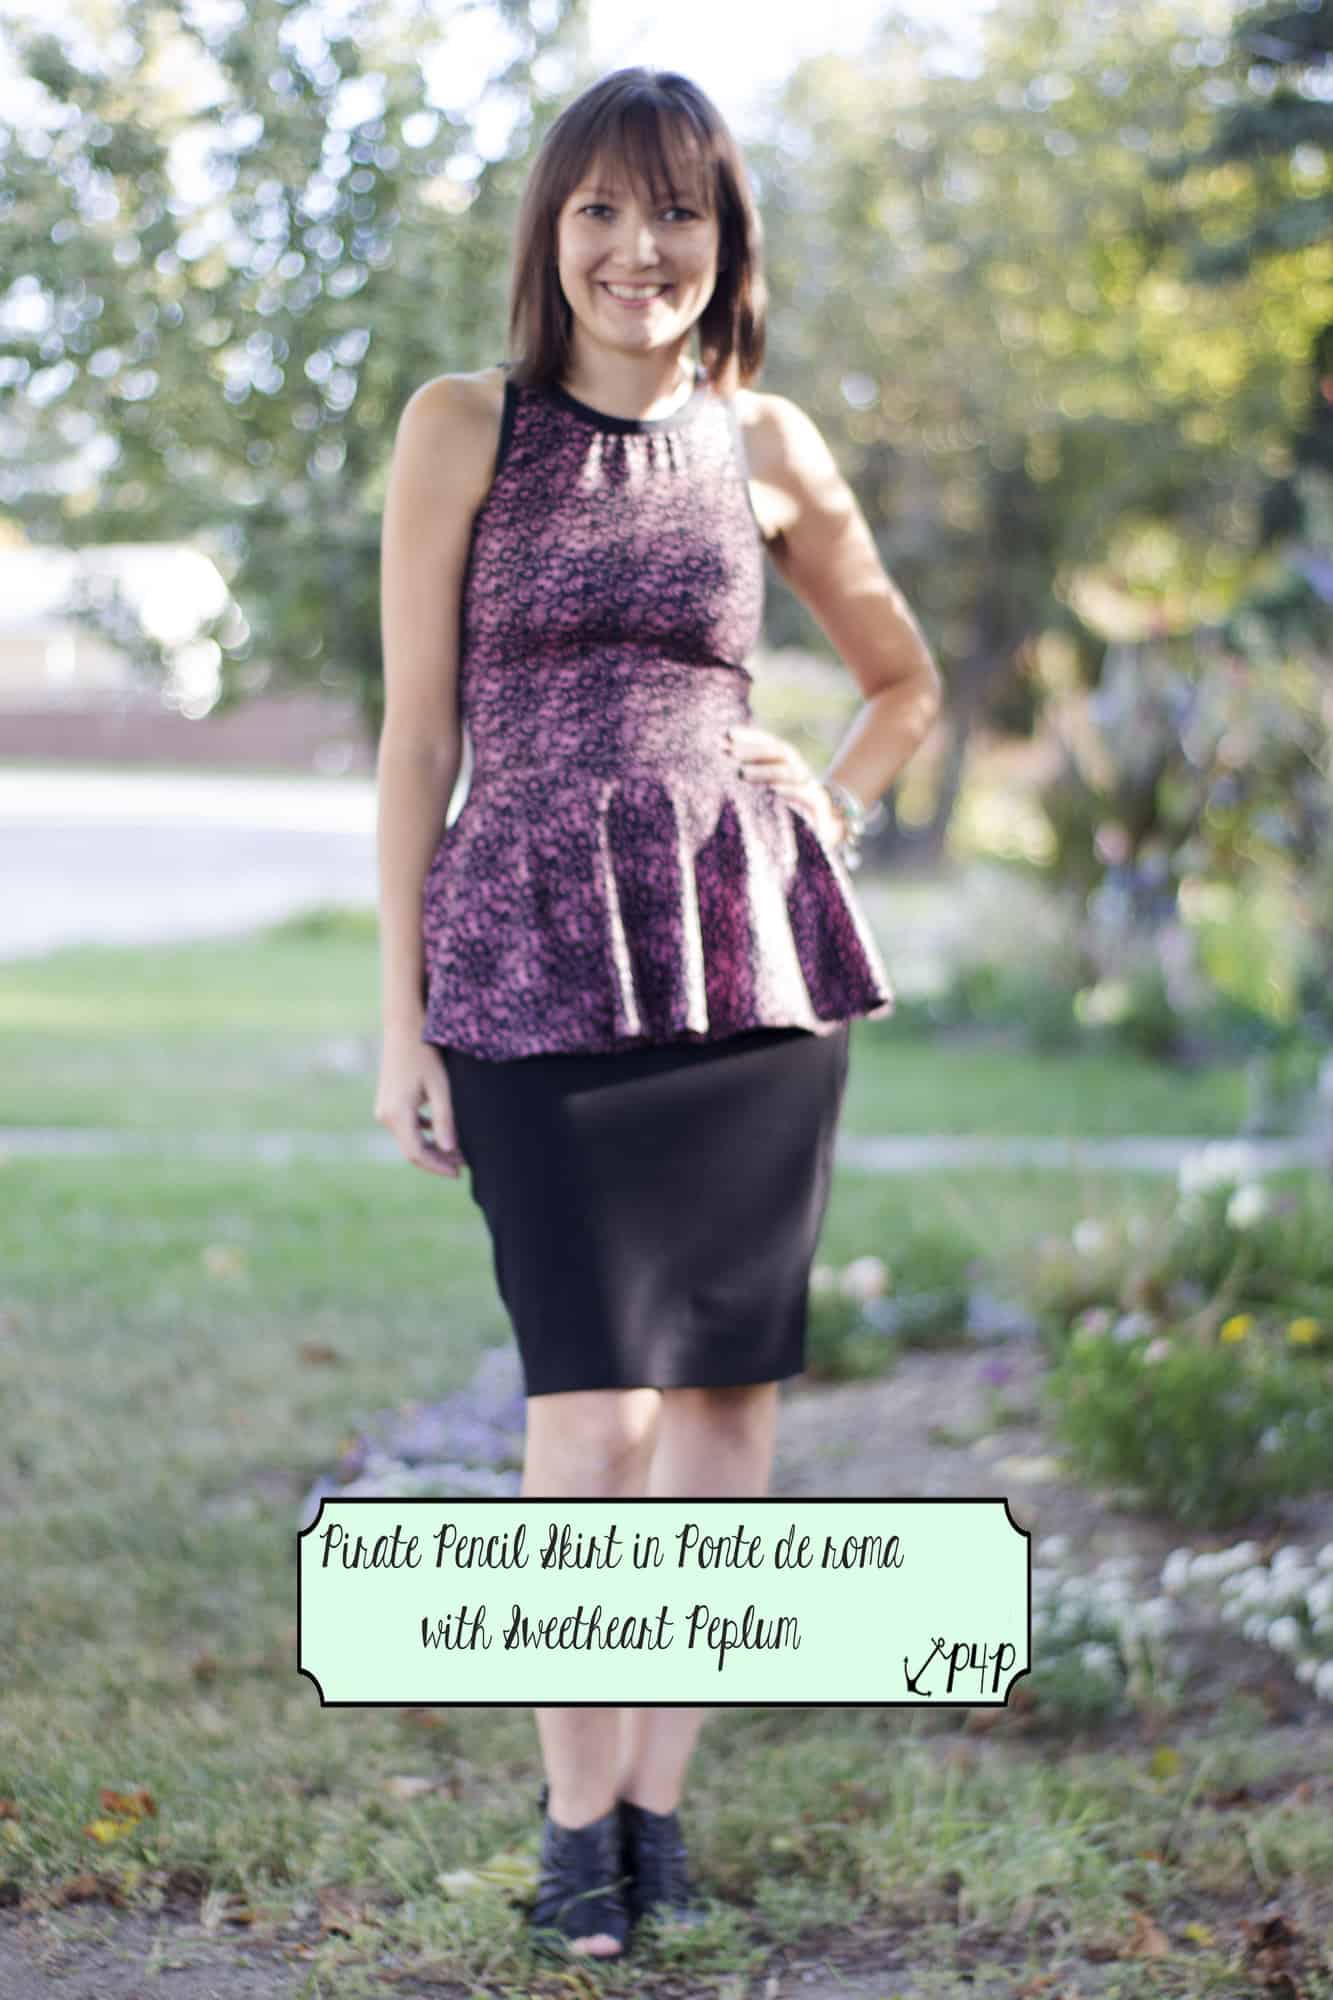
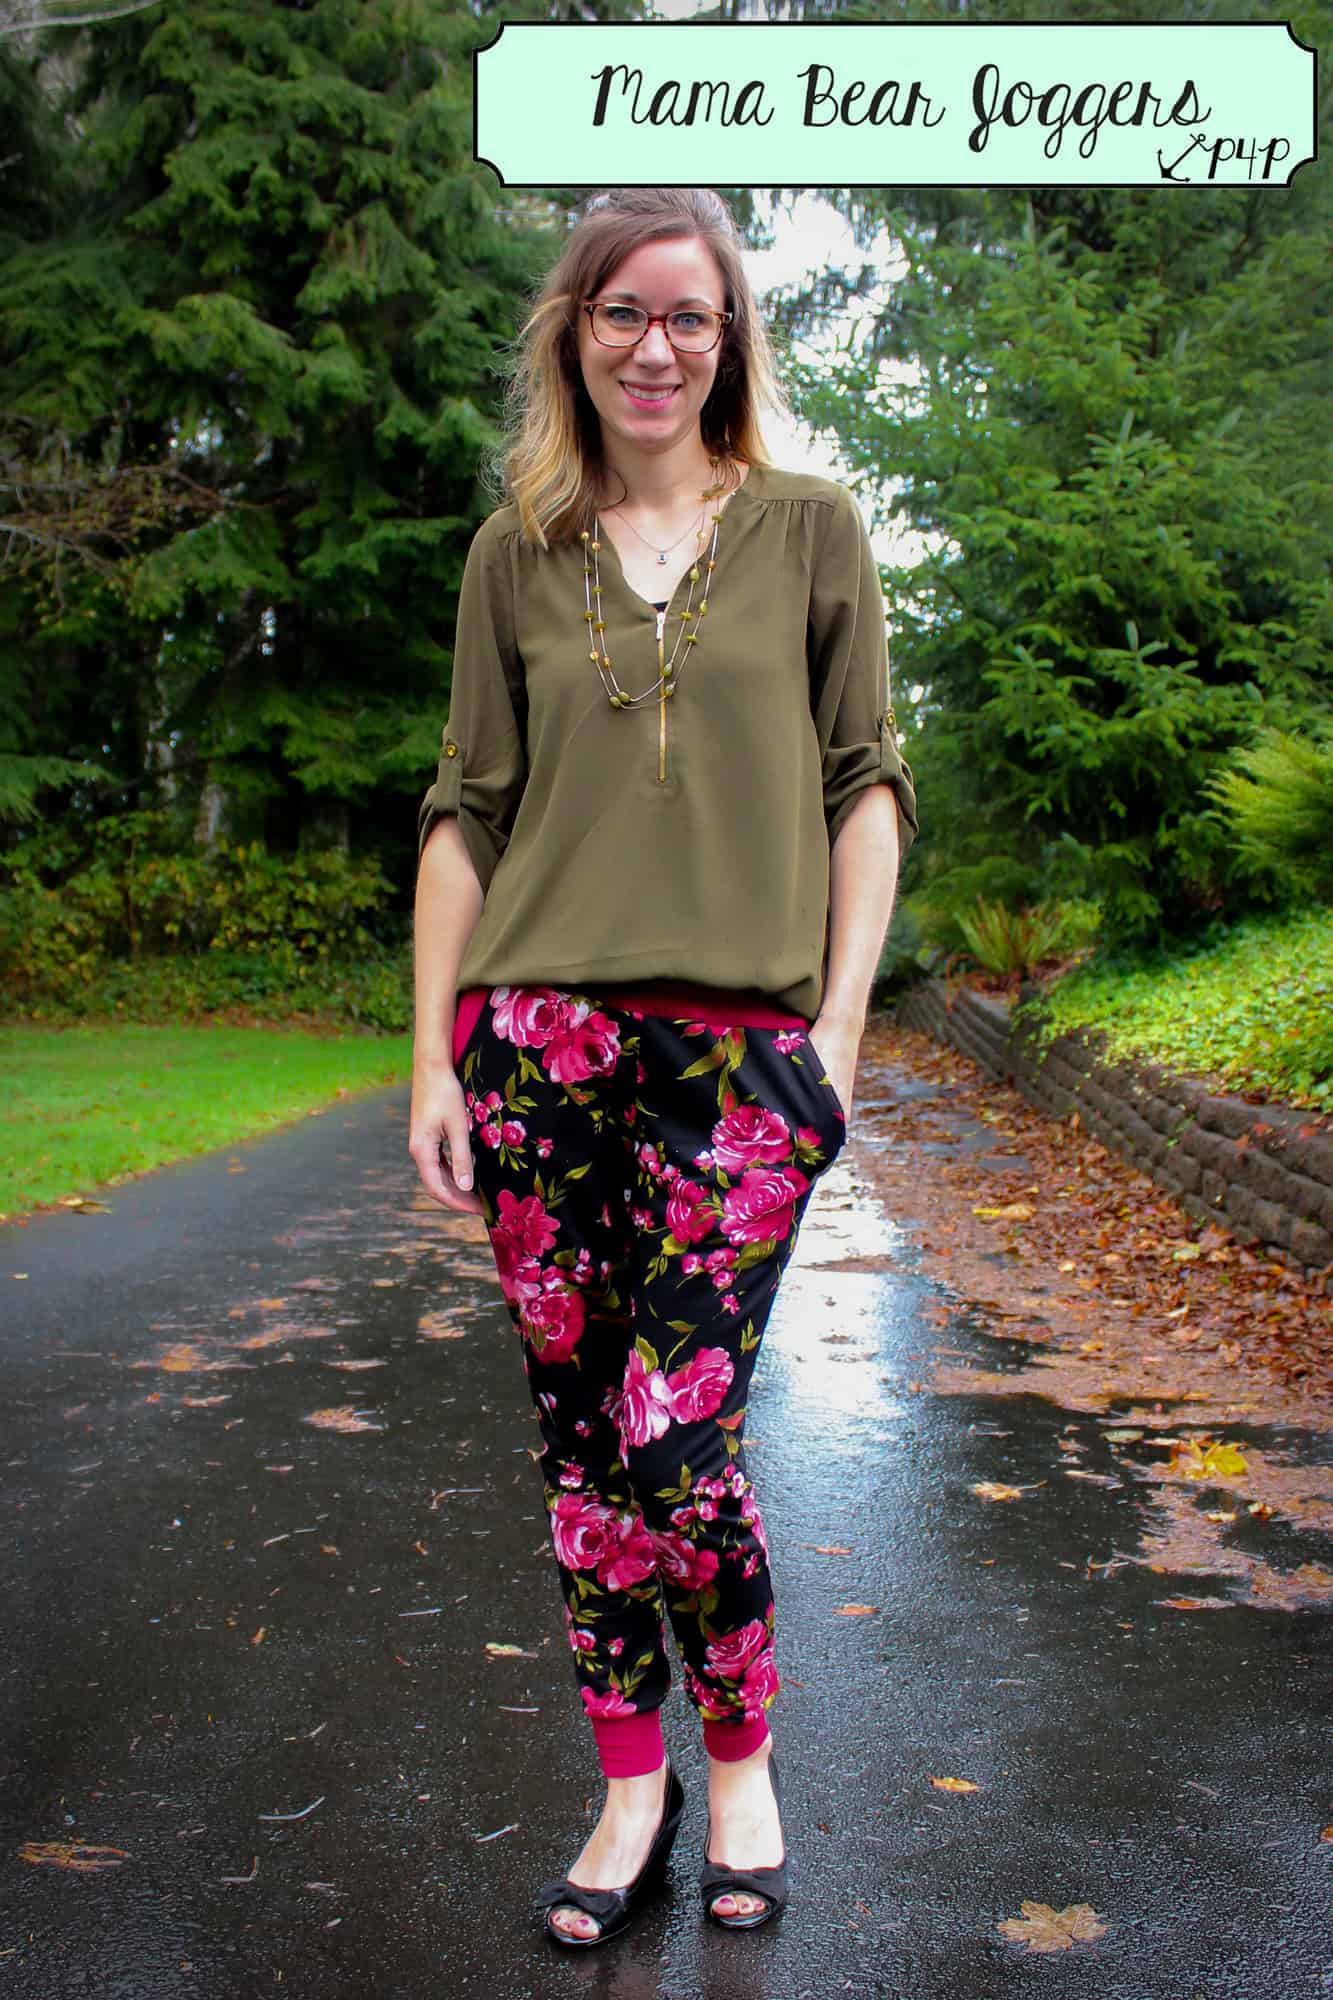
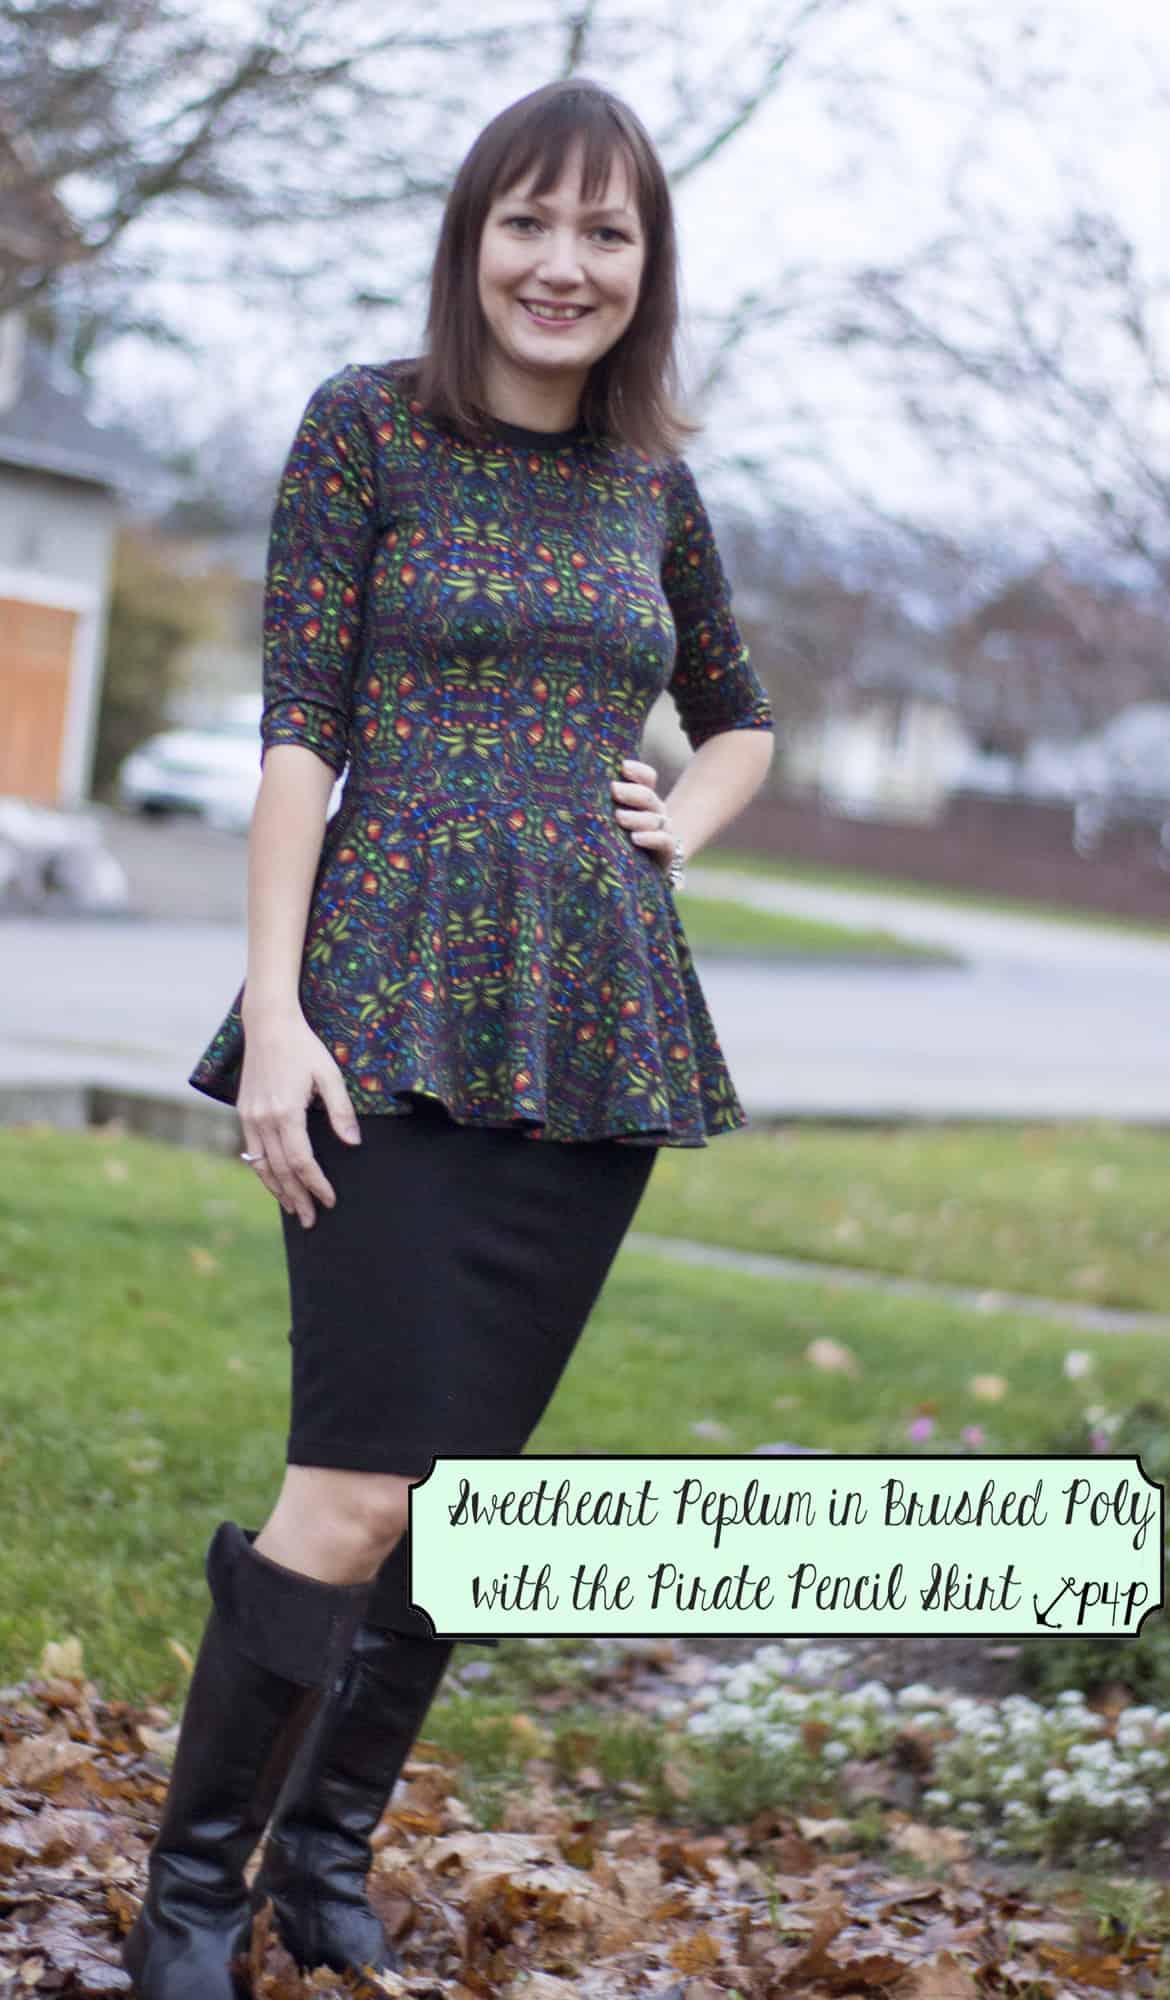
Every pattern will have a different look depending on which type of fabric you use. Some of our favorite contents for workwear are liverpool, ity, sweater knit, ponte de roma and brushed poly. It is important to be aware of the pattern you are using, as each fabric has a different drape and some are more suitable for different patterns. Liverpool is a more structured, textured fabric with great stretch. It is wonderful for patterns such as the Sweetheart, Sweet Tee, and SOS Knit Pants. Ity fabric is a very soft fabric with amazing drape and a smooth, soft texture. It comes in a variety of patterns and is great for making tops look more “dressy” and its a great choice for dresses like the Boundless Dress. Sweater knit is a very easy way to make patterns such as the Pumpkin Spice Dolman and the Grandpa Cardigan look professional for work. It can be found in a variety of weaves (loose to tight), textures, and weight. Another great option is ponte de roma, it is a nice weight and again is more structured so works well for the Pirate Pencil Skirt and bottoms like the SOS Knit Pants, Palazzo Pants and it really dresses up the Mama Bear Jogger shown below with a sweater knit Slim Fit Raglan with the cowl from the Add on Pack.  Another great fabric that seems to be popping up everywhere is brushed poly and it can be used for so much more than peglegs!  Brushed poly comes in various weights and can be single or double brushed and it has a great drape to it so it works well for tops and dresses.  Rayon spandex and bamboo spandex blends are another great choice for tops and dresses.

img_4825_edited-2img_57861img_60961


Fabric Pattern Choice
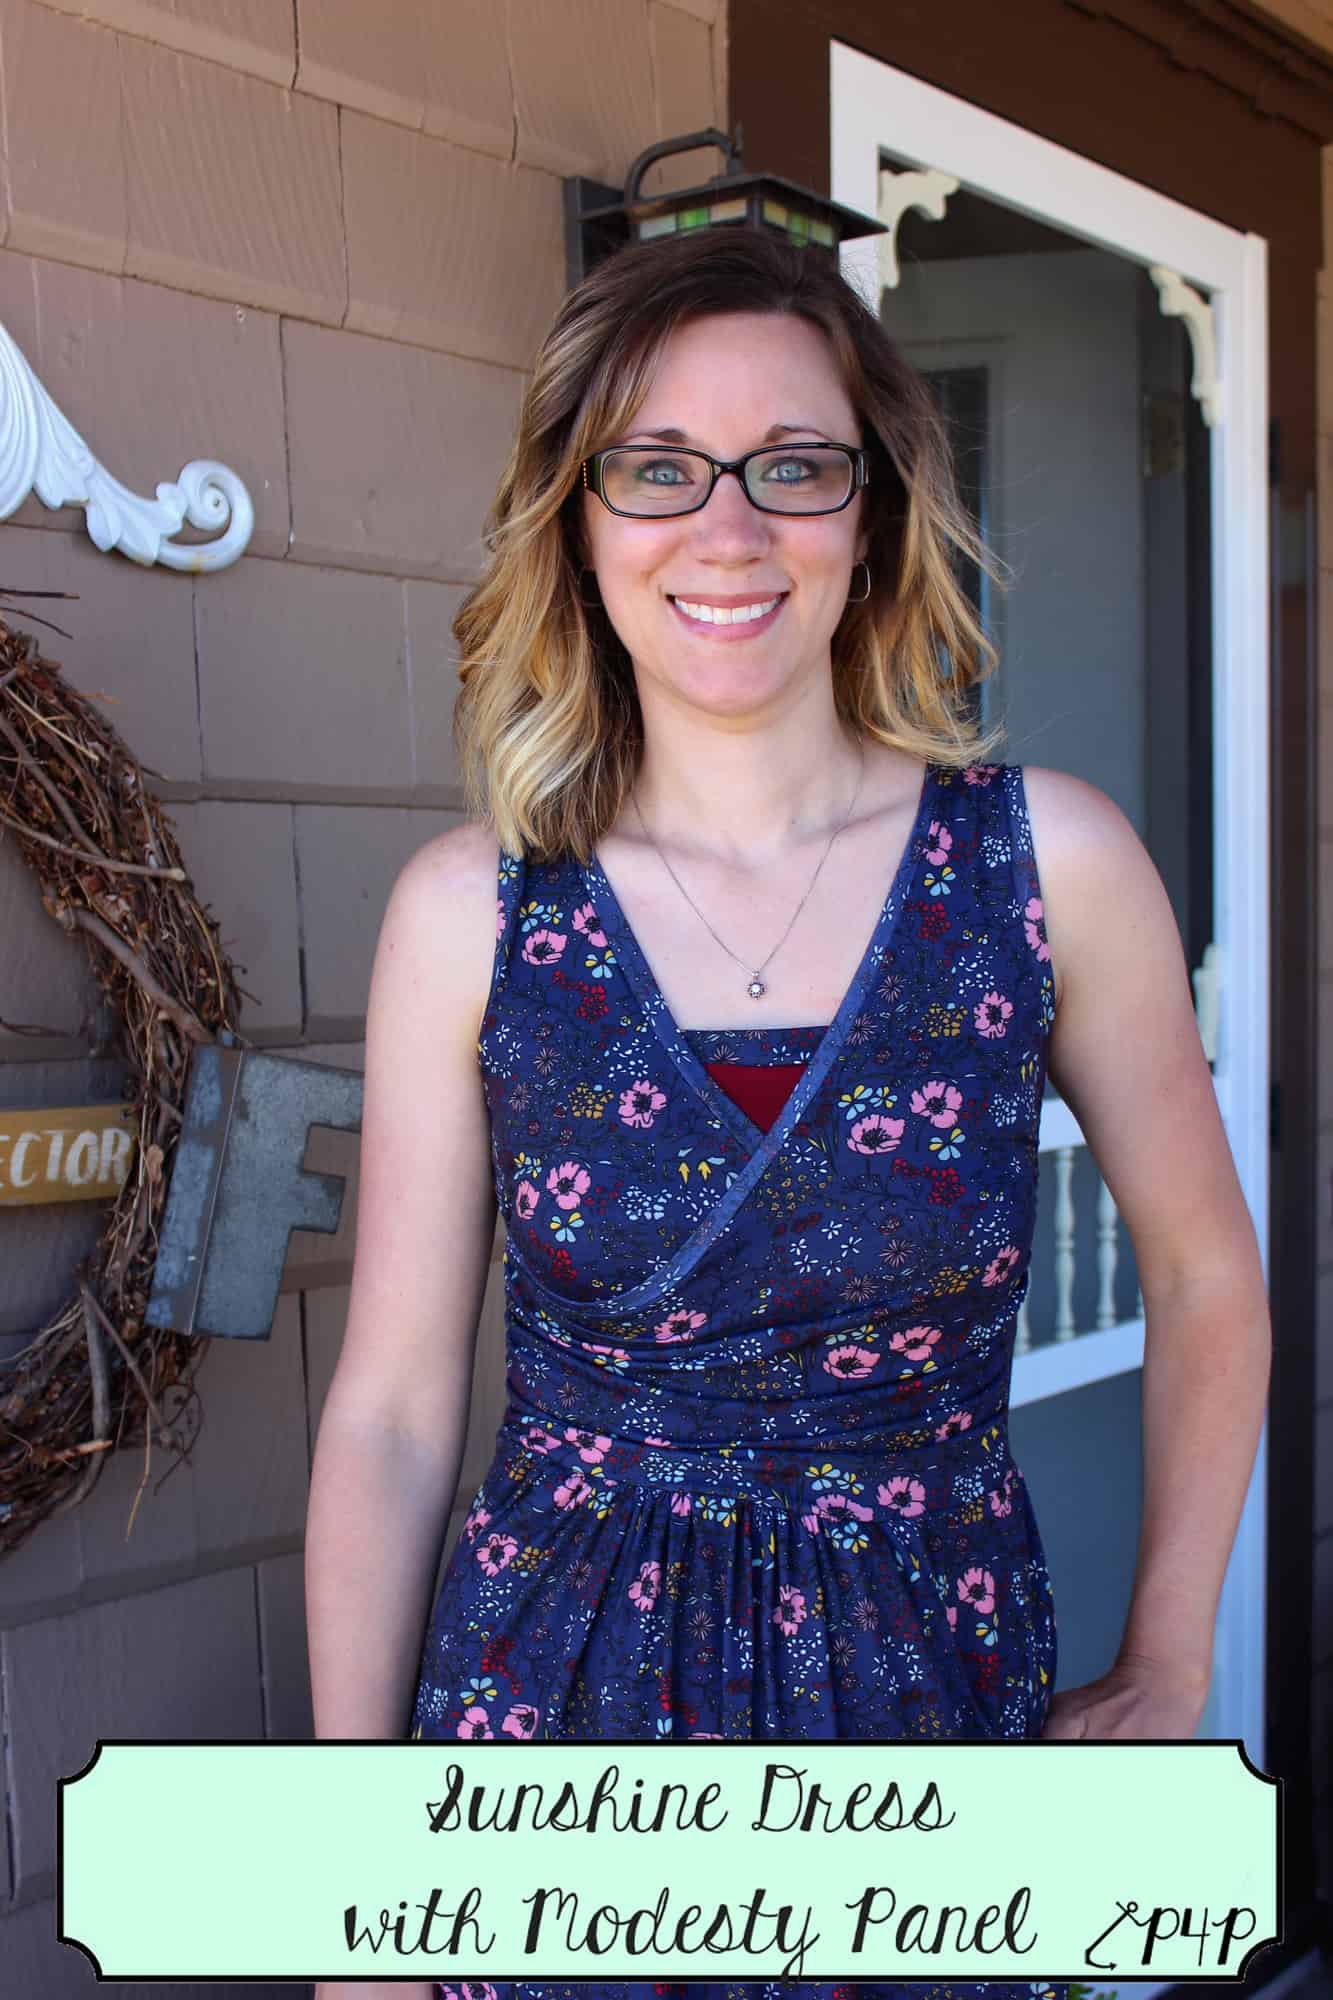
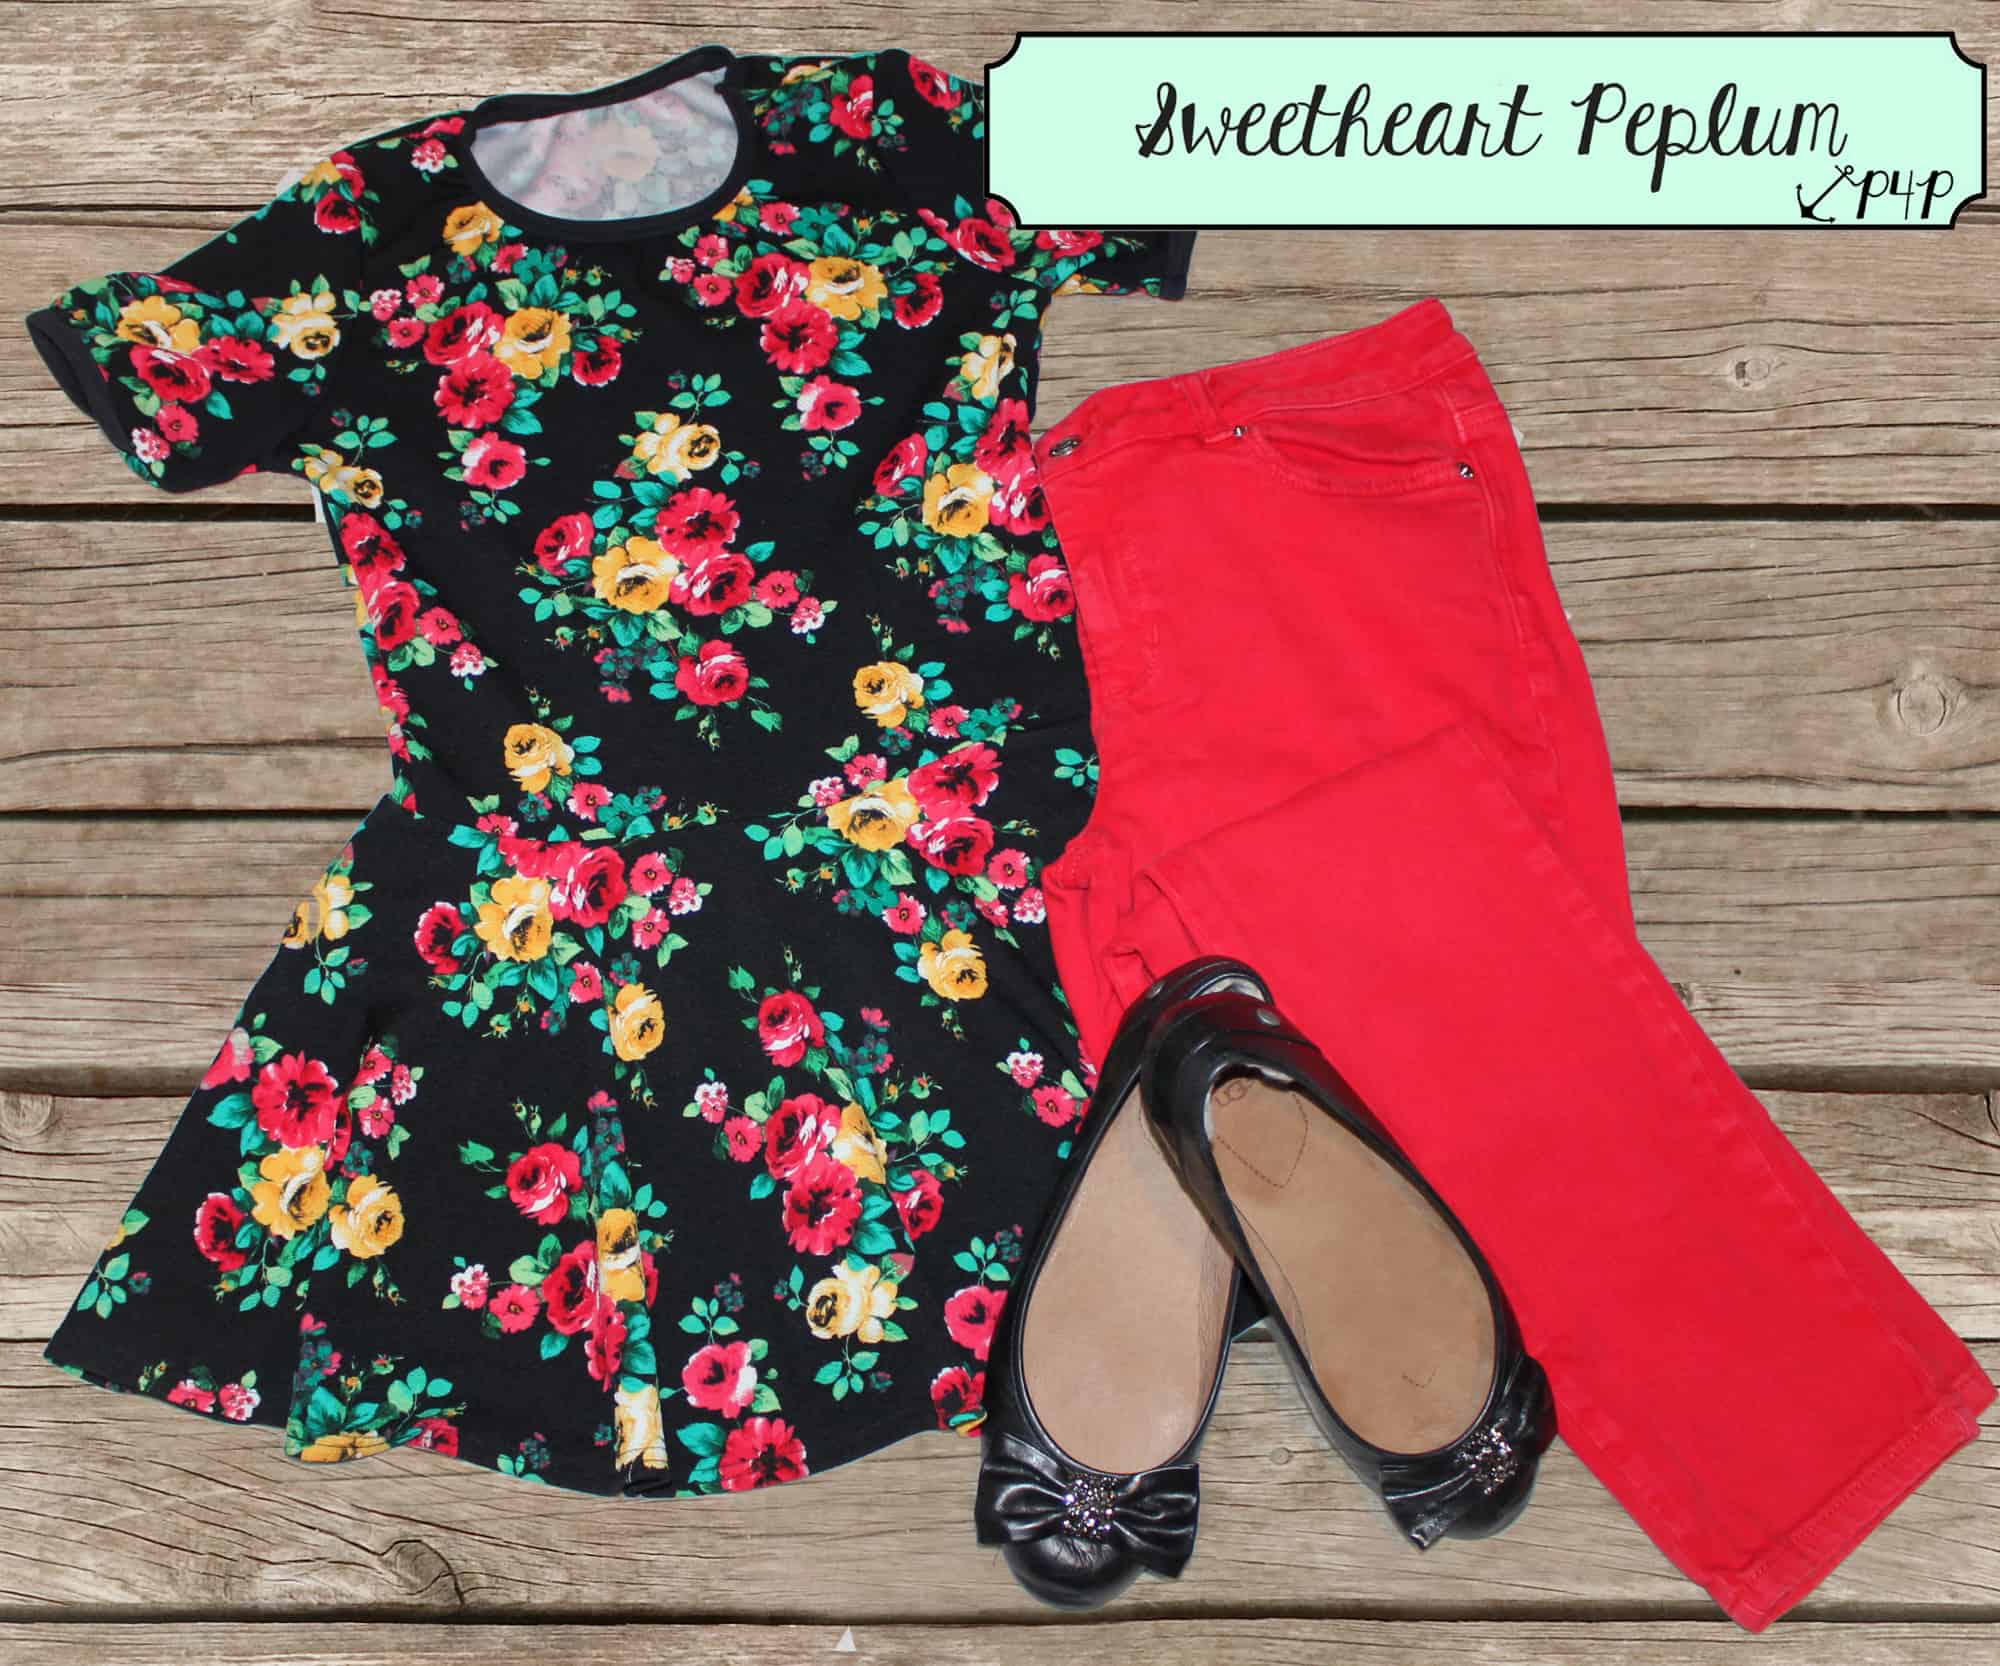
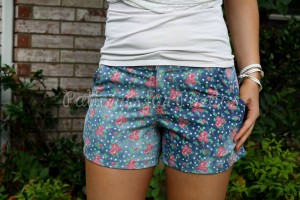
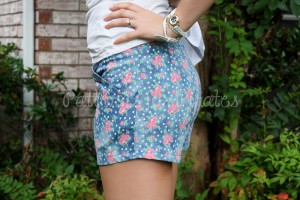
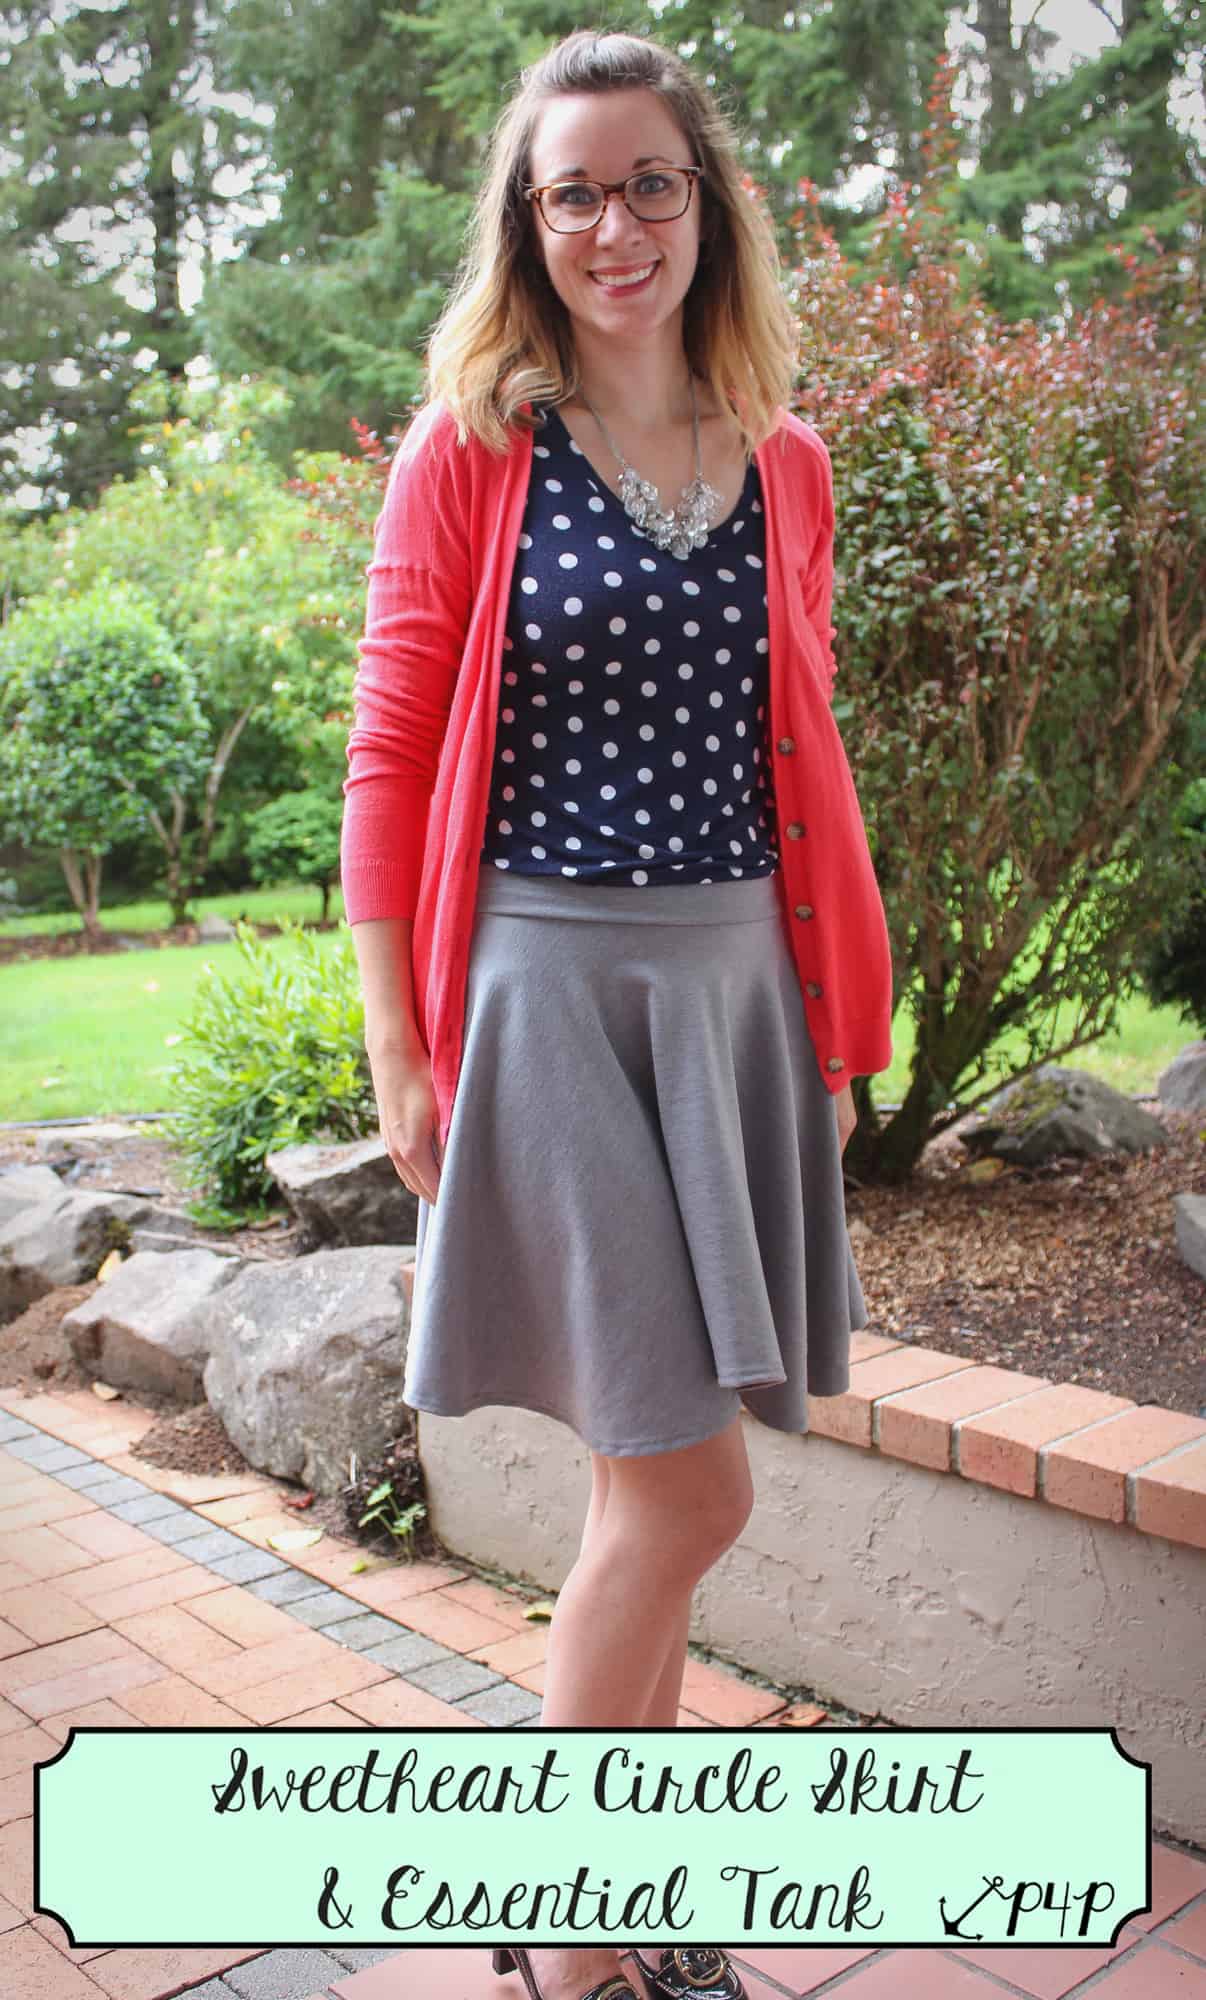
In the professional world, it is very easy to play it safe with neutral colors. Neutral colors can be a great base for any outfit- as you can see with most of ours. We both tend to have a solid color somewhere in an outfit and then will pair this with something more bold. For example, I used the Sweetheart skirt hack to create a circle skirt in a solid gray. I then paired this with a polka dot Essential Tank and a cardi. I have also paired the Mama Bear Joggers in a floral french terry with a solid top. And Angela has paired a solid black ponte de roma Pirate Pencil Skirt with a patterned brush poly Sweetheart Peplum.


img_5158_edited-1img_4816_edited-1img_61002

Adding Details
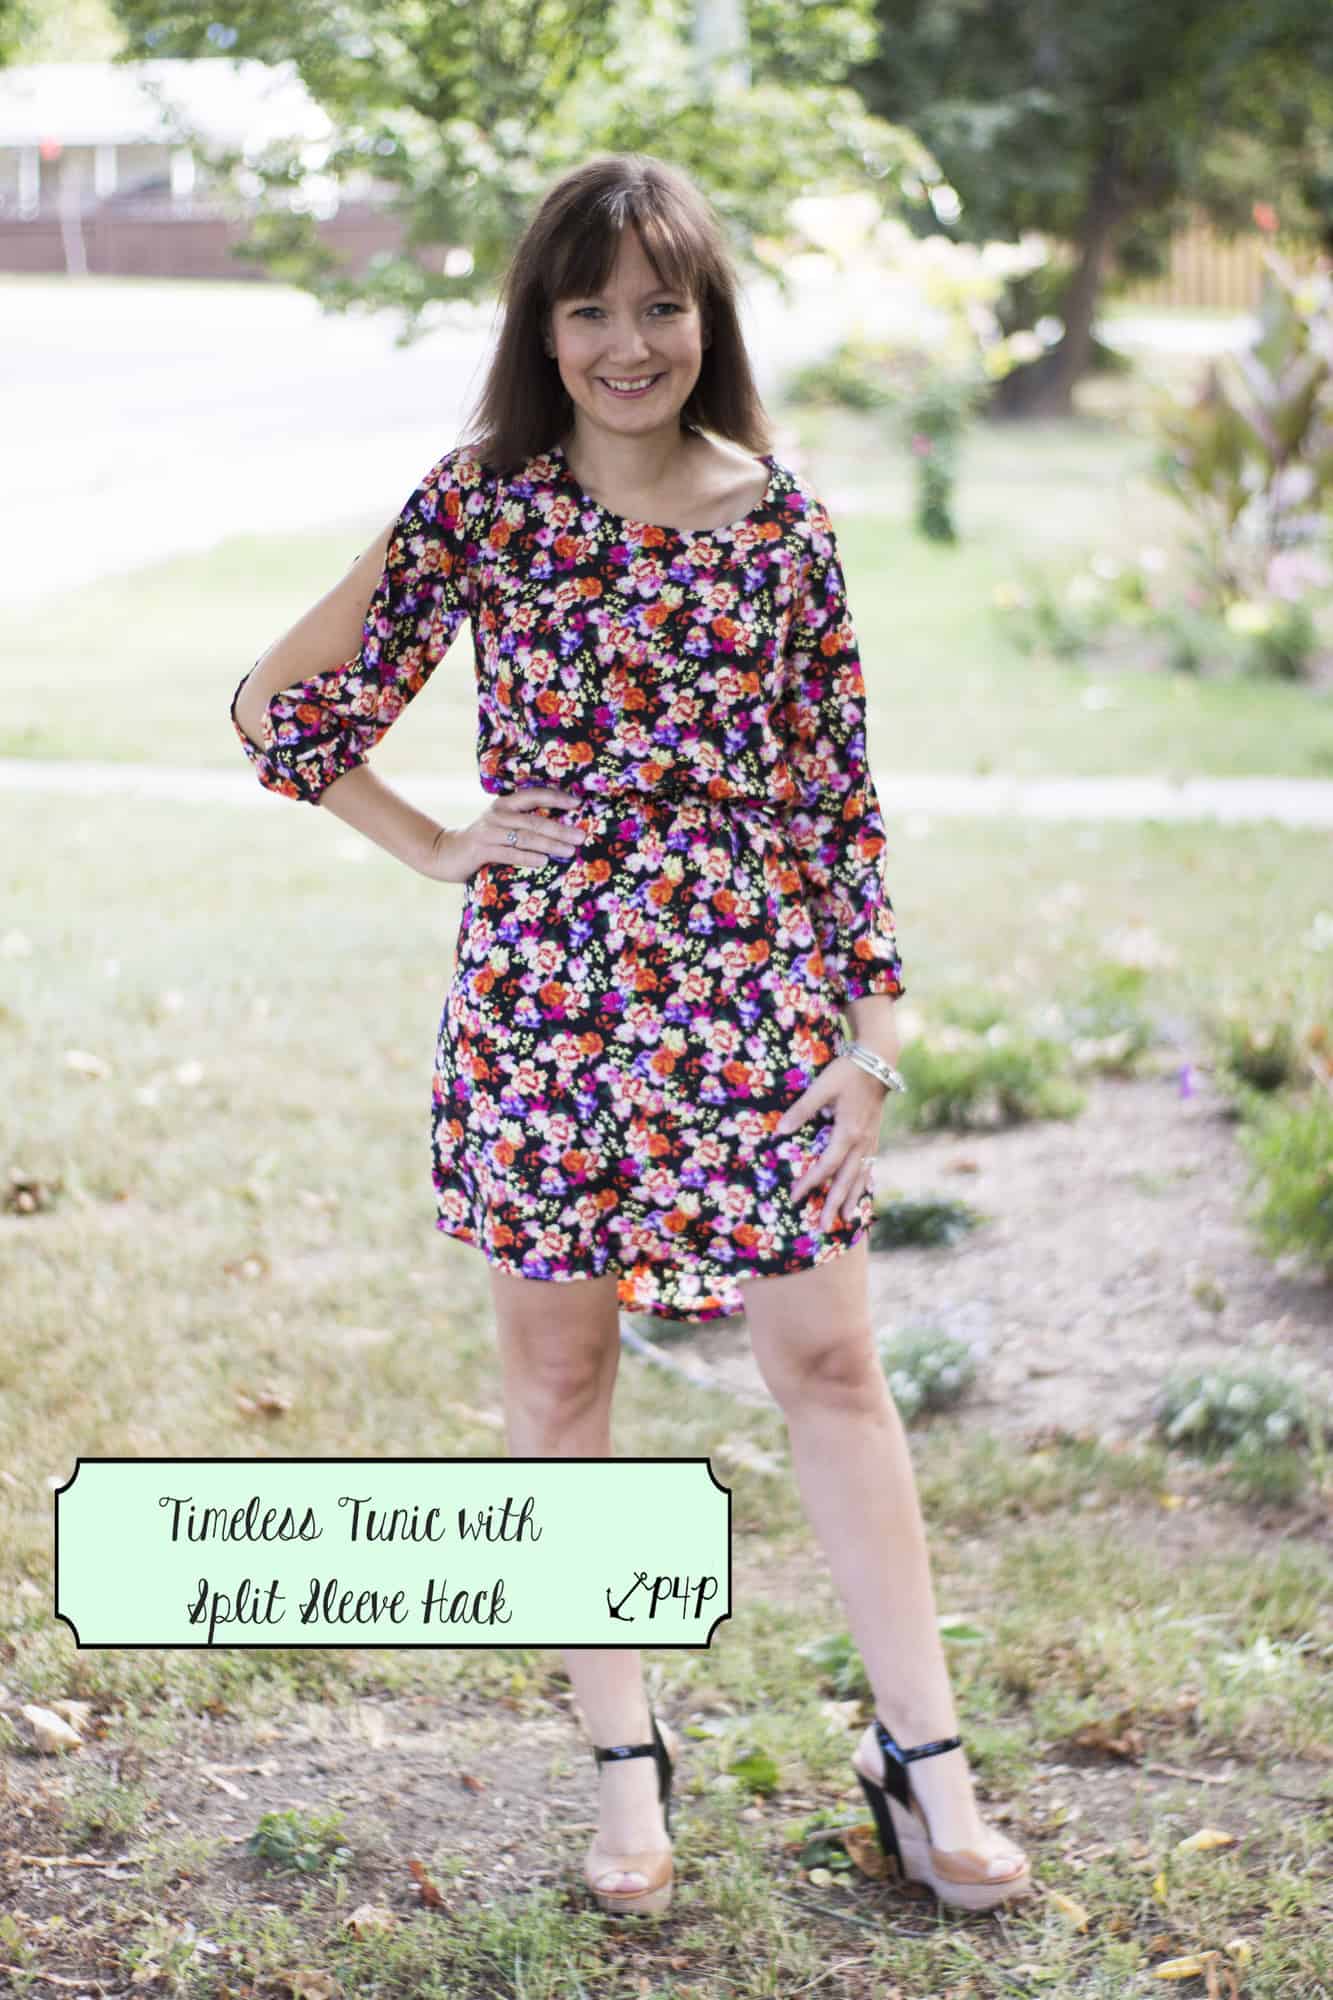
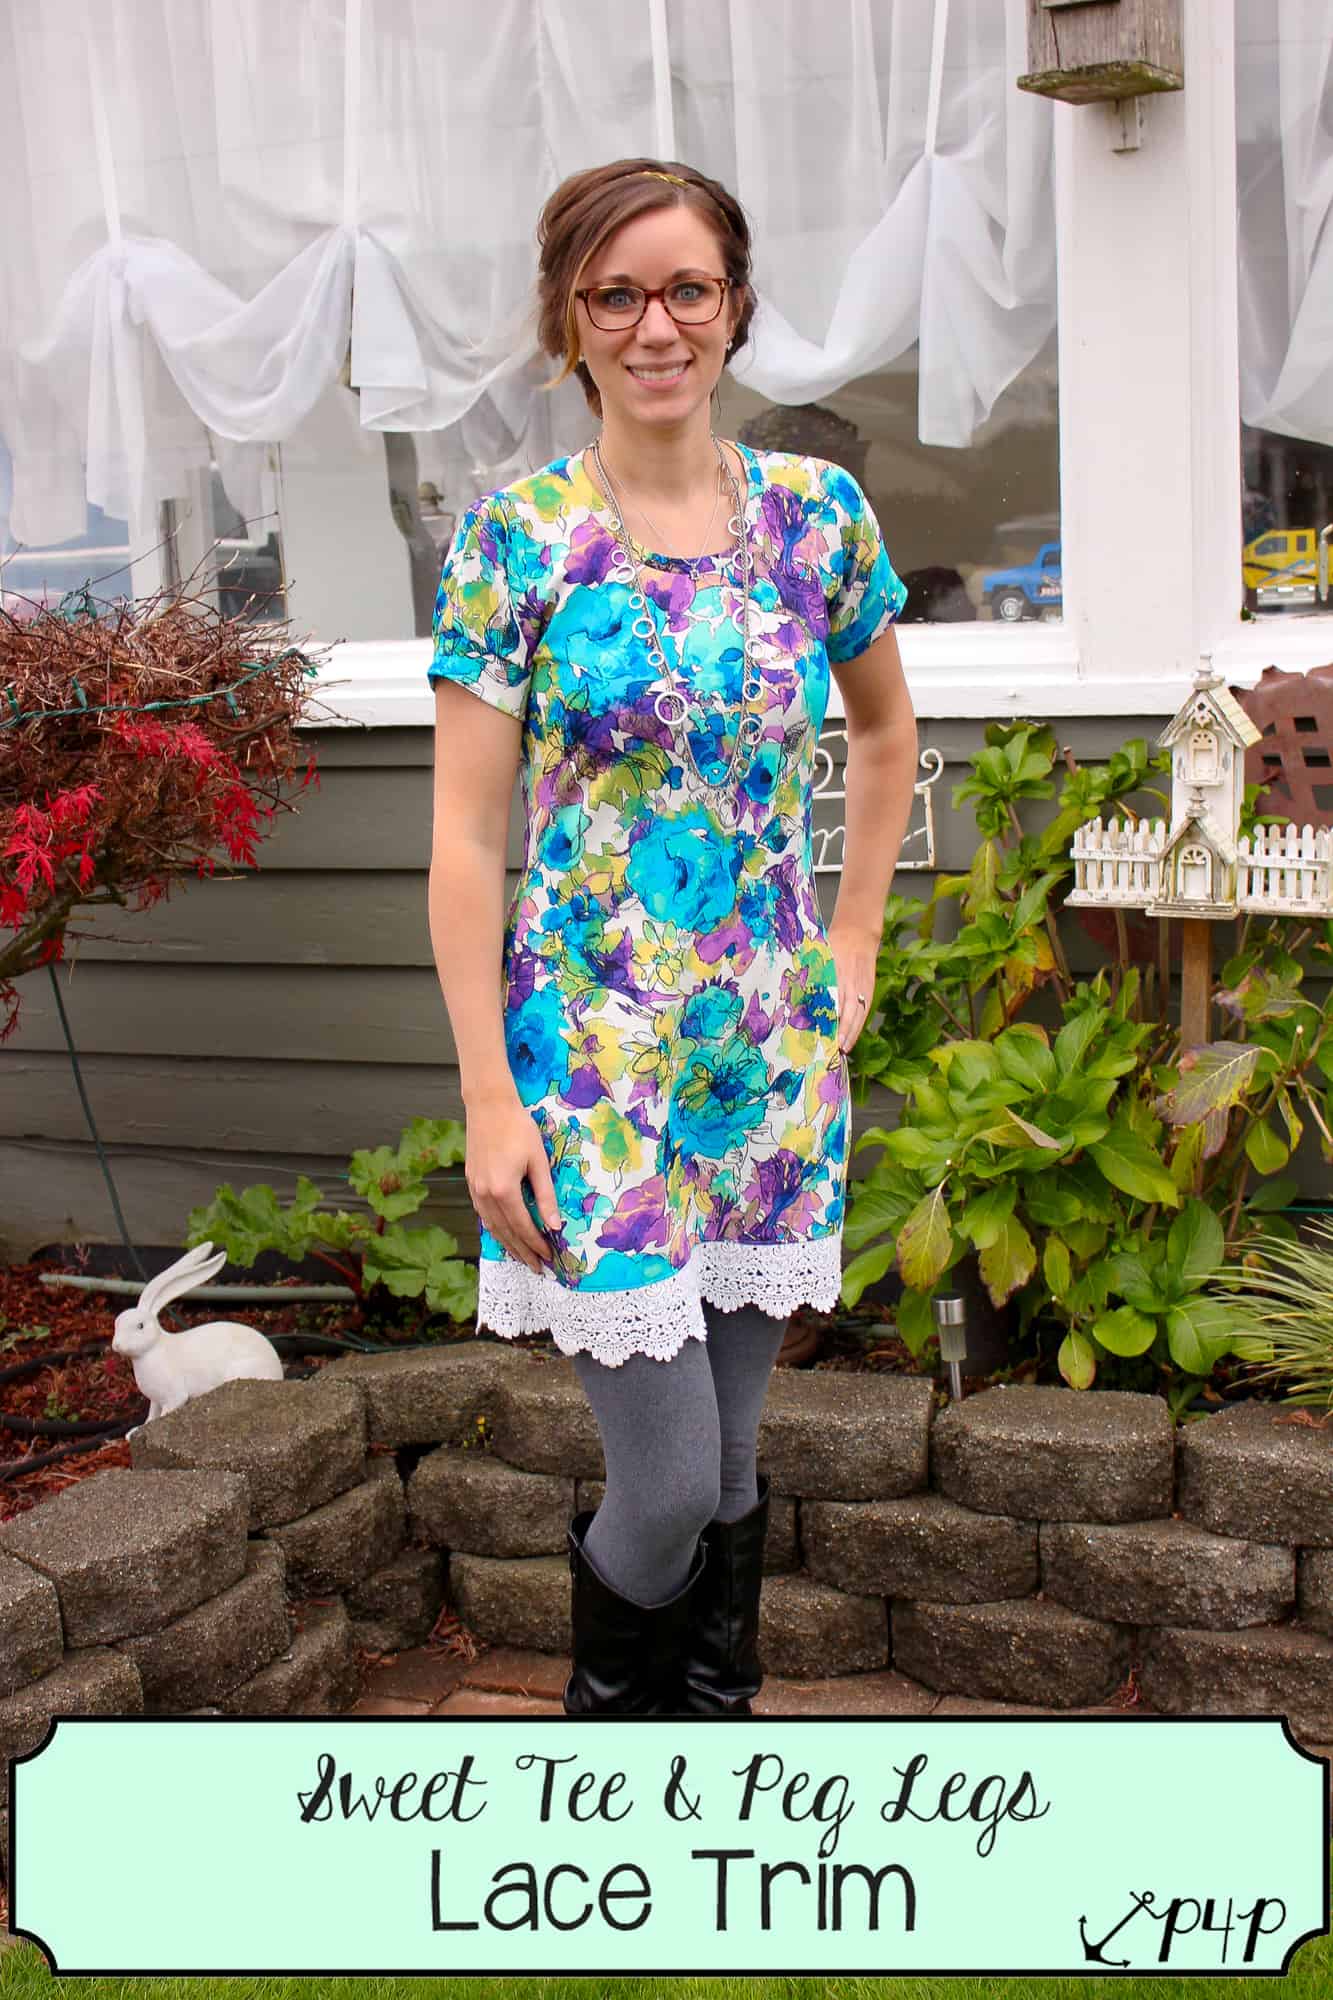
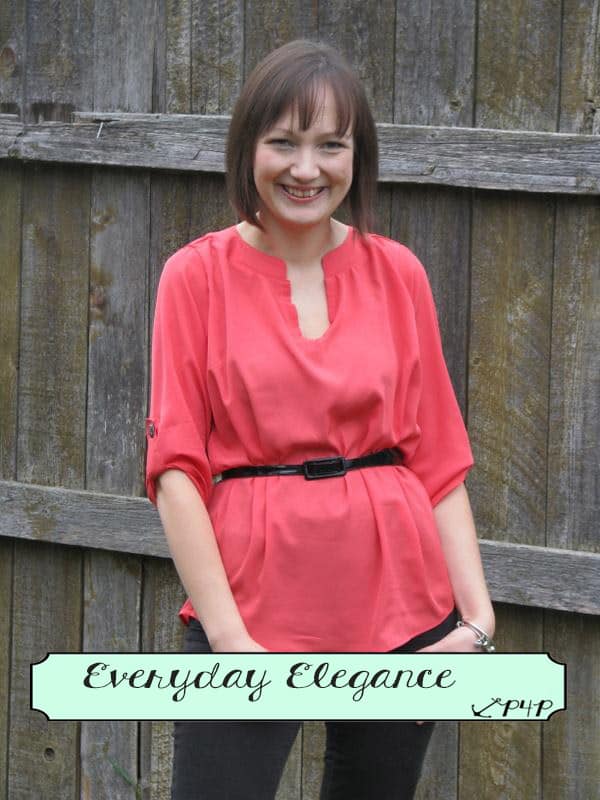
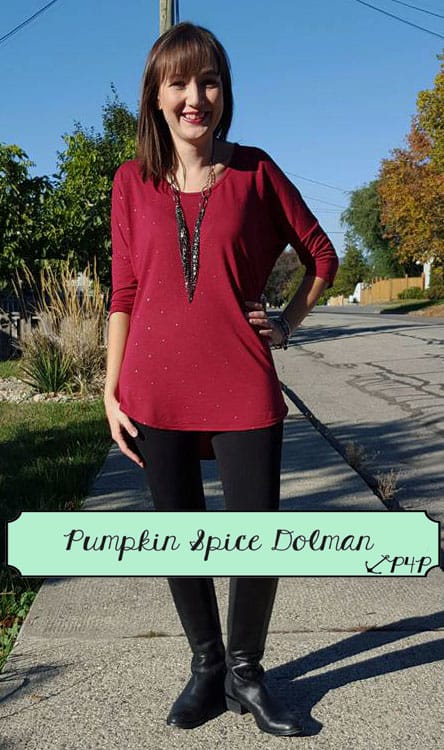
Adding details such as lace, trims, even a belt can help elevate a pattern to the next level. Lace is one of my favorite things to add to make an outfit look more professional. As you can see below, I used the Sweet Tee in the dress length, however added a lace trim to the hem. Angela added a belt to the Everyday Elegance to dress it up a bit. Or even just adding some jewelry like a necklace on a Pumpkin Spice Dolman. What shoes or boots your wear also can make such a difference on making your outfit look casual or office appropriate.

img_5273ee12105747_10153206085671033_1156641344939810881_n

Every office is going to be a bit different in what they allow and don’t allow. Some office will allow Peg Legs where as other office won’t allow any type of leggings, some won’t allow a skinny pant where as others will.  Patterns for Pirates have all your bases covered. Both Erinn and I get away with peg legs at the office but you will notice in pictures you see of us in our work attire we stick to solids for leggings. A lot of these looks would also pair nicely with a blazer for a more corporate look or try adding a Grandpa or Carefree Cardigan if your office is cold.  I know both of us have plans to sew a lot of the new Cocoon Cardigans for work as well.

And now that you’ve read some of the basics for becoming a “Professional Pirate”, here are a few more pictures for some inspiration!  And you know getting photo’s of your office attire isn’t easy so I’ve included some bathroom selfies cause I know that you all love seeing bathroom selfies 😉 Happy sewing and make sure to share your professional looks in the P4P Facebook group! ~ Erinn and Angela

img_46072img_4821_edited-1img_3606 14939622_10154070693911033_1112729001056391089_o10353639_10153256696556033_8649728710252151176_nimg_55351flatlay-sweetheartpepluem

Filed Under: Blog Tours, Uncategorized Leave a Comment

P4P Raglan Week: Keyhole/Scoopback Raglan Hack

September 23, 2016

raglan-week-day5

The classic basic silhouette of a raglan makes for a great base to play with fabric pairings and adding extra details to  change them up a bit.  I often look at boutique style for inspiration and the keyhole, scoop back has been a popular request among members in the P4P Facebook Group so we thought we’d share the how-to.  I used the Slim Fit Raglan for my example, but this could easily be applied to any of the raglan patterns.

  • Print and assemble your pattern as usual.
  • Decide how low you would like your key hole and measure from the nape of your neck to desired length.  I wanted the keyhole to sit just above my bra-line so went with 8″.
  • Draw your keyhole curve, starting 1″ inside the edge where you would attach your sleeve down to the length you desire.  I didn’t have a french curve handy, so actually used the curve from the armscye of the sleeve pattern piece as a guide.  Cut out keyhole.

P4P Raglan Week Keyhole


\


  • Construct your raglan as usual.
  • We are going to bind the keyhole with the traditional knit binding method but you could also do a t-shirt band (like the neckband in the pattern) as another option.  Measure the keyhole length then multiply by 90% (this is your width measurement)  You will stretch the binding just ever so slightly to fit the opening.  This will help keep the keyhole from gaping and lie flat.  Binding = 2″ x  width. 

P4P Raglan Week Keyhole


  • With right sides together, pin binding to keyhole, matching raw edges. Stitch with 3/8″ seam allowances.

P4P Raglan Week Keyhole

  • Press seam allowance up and fold binding down towards raw edge. Fold again, enclosing seam allowance.

P4P Raglan Week Keyhole P4P Raglan Week Keyhole

Alternatively, if using a thicker fabric for your binding, you can skip the first fold and just fold the binding over enclosing the raw edge.

P4P Raglan Week Keyhole

  • Top-stitch with your favorite stretch stitch.


For the neckline, we will use the same binding method as shown above for the keyhole but need to take a few measurements to determine the length of binding you will use for the neckline only.

  • Measure your neckline.  Pictured: shirt on the fold so my neckline is 2 times the length.

P4P Raglan Week Keyhole

Neckbands are typically smaller than the neckline to bring it in and prevent gaping.  To determine the amount of the binding for the neckline, multiply the length by 85%.  Neckline = 24″ (it looks like 23″ but actually measures 12″ on the fold) so my binding length for the neckline is about 20.5″.   Total Binding = 2″ x 58″.

  • Fold your binding in 1/2 to find the center point.  My neck binding length is 20.5″ so we will measure out 1/2 to each side of center point.  (or 10.25″ for my example). Mark end points.

P4P Raglan Week Keyhole

  • With right sides together and aligning raw edges, match center point and end points of neckline and binding. Stitch with 3/8″ seam allowance from endpoint to endpoint to endpoint (neckline only).

P4P Raglan Week Keyhole

  • Press seam allowance up and press binding down towards raw edge. Fold again, enclosing seam allowance.

P4P Raglan Week KeyholeP4P Raglan Week KeyholeP4P Raglan Week Keyhole

  • Continue folding towards the end of the tails.

P4P Raglan Week Keyhole

  • Top-stitch with your favorite stretch stitch.
  • Tie a bow and your done!

P4P Raglan Week Keyhole


P4P Raglan Week Keyhole P4P Raglan Week Keyhole

If you’ve created your very own version of a Keyhole, Scoopback Raglan during P4P Raglan week, we would love for you to share it with us!  Head over to the Facebook Group or share on Instagram.  And be sure to use the tag #P4PRaglanWeek so we can find you!


Curious about what else has been happening during our raglan-loving week of fun?

Just take a look at our schedule!

Monday, September 19: Jolly Roger Raglan Pattern Update + Jolly Roger Add-On Pack Pattern Release

Tuesday, September 20: JRR Woven Fabric Hack

Wednesday, September 21: JRR Animal Faces Add-On

Thursday, September 22: Contrast Band Hack for Kangaroo Pockets

Friday, September 23: Women’s Keyhole / Scoopback Raglan Hack

Saturday, September 24: Off-The-Shoulder Raglan Hack

Sunday, September 25: Adding Stripes to Your Raglan Sleeves

Filed Under: Blog Tours, Contest/Giveaway, Pattern Hacks, Uncategorized 1 Comment

P4P Raglan Week: Contrast Bands Hack

September 22, 2016

Say you bought this really pretty cotton interlock with zero stretch recovery and you just had to use it for a raglan with a kangaroo pocket.  The things is, you know your darling little rock collector isn’t going to understand that she can’t actually use her pocket or the openings will get stretched out.  The solution?  Stretchy bands on the pocket openings.

img_6282

If you haven’t bought your Jolly Roger Raglan and Add-ons, go do it now.

I’ll wait while you buy, print and glue.

Perfect.  Now, cut out your kangaroo pocket, mark and cut off a half inch from each pocket curve.  I marked on the back with the ruler and a fine tip washable kids’ marker.

img_6265

Next, you want to measure your curve by carefully, without stretching, pulling the curve straight along the ruler.  Make sure you measure the curve after you’ve trimmed off the extra half inch.

img_6266

Subtract half an inch and cut out bands that length by 2 inches wide.  If you don’t have a rotary cutter and mat, you need one.  Trust me, it makes a whole world of difference cutting out bands.

I’ll wait while you go buy one.

There, wasn’t that easier??

Press bands in half lengthwise.

img_6269

Pin band to the right side of the curve by pinning each end first and then stretching to fit.

img_6270

Serge or sew on, stretching to fit the pocket curve.  Do not stretch the pocket fabric.

Press the bands back.

Now continue with the pattern tutorial to complete your shirt.

img_6276

Now put it on your adorable child and snap pictures to share with us on Facebook!

– Patty Hamm

img_6292

img_6300

If you’ve hacked a kangaroo pocket of a raglan during P4P Raglan week, we would love for you to share it with us!  Head over to the Facebook Group or share on Instagram.  And be sure to use the tag #P4PRaglanWeek so we can find you!

Curious about what else has been happening during our raglan-loving week of fun?

Just take a look at our schedule!

Monday, September 19: Jolly Roger Raglan Pattern Update + Jolly Roger Add-On Pack Pattern Release

Tuesday, September 20: JRR Woven Fabric Hack

Wednesday, September 21: JRR Animal Faces Add-On

Thursday, September 22: Contrast Band Hack for Kangaroo Pockets

Friday, September 23: Women’s Keyhole / Scoopback Raglan Hack

Saturday, September 24: Off-The-Shoulder Raglan Hack

Sunday, September 25: Adding Stripes to Your Raglan Sleeves

Filed Under: Blog Tours, Frequently Asked Questions, Pattern Hacks, Sew-A-Long 1 Comment

P4P Raglan Week: Jolly Roger Raglan Update + Add-Ons Release!

September 19, 2016

Welcome to the first day of the P4P Raglan Week!  It’s looking like you are just as excited as we are!  Let’s get the party started with Day 1: the Jolly Roger Raglan update + Jolly Roger Raglan Add-On pattern release!

raglan-week-day1

Let’s talk the Jolly Roger Raglan update first!  It’s one of the most tried and true patterns for kids in the Pattern for Pirates family, and we did a little tweaking to make it even better.  First, we added the layers feature!  We also gave the entire tutorial and pattern an overall facelift to make sure everything was perfect from neckband to hem and everything in between.

14425408_10102913036683023_4848683499498318168_o

img_7894

We have also adjusted the angle of the raglan-sleeve to better match the style of our two women’s raglans (the Relaxed Raglan and the Slim Fit Raglan).  Our testers went through several rounds of the sleeve being adjusted before we all agreed on the fit.  I think you will all love it too!

**If you already own the Jolly Roger Raglan, you will not need to re-purchase to get the updates.  If you bought here (PatternsforPirates.com) or on the Craftsy store, you will simply need to sign into your account and re-download the file.  If your purchase was via Etsy, email help@patternsforpirates.com (WITH PROOF OF PURCHASE) and you will get an updated file.


Now let’s talk the highly requested Add-On Pack for the Jolly Roger Raglan!  You are going to love it so much!  **You must own the Patterns for Pirates Jolly Roger Raglan as well, since this is an add-on and not a stand-alone pattern.

14311484_10102912545716923_6741414687456728065_o

The Add-On Pack is full of super fun options:

  • Two hood types (traditional and cross-over funnel hoods)

14424963_10104358521989049_3747064700530049573_o 14289941_10210944418675163_8315798585323290006_o

  • Kangaroo Pocket

14311306_10207007364604832_362004355791744599_o 14305368_10153988962242877_9154033479605197205_o

  • Cowl Neck

img_9684 14242208_10210516508814415_2927786901913388326_o

  • Inseam Pockets

img_9693 14289893_10154511902671972_2765528919065172778_o

  • Funnel Collar

14324360_10153919372931033_8759815284094426481_o14289782_10154456917283433_4894254594844709762_o

  • Thumbhole Cuffs

14289845_10101035850150252_4649496919678406481_o 14352397_10104358521954119_8025388624738965920_o

  • Ruffle Hem

14324251_10210565851973658_6020903452005956770_o 14242252_10101029350026552_5253696604094059063_o

You can mix-match these options a million times over and still want to make more!  (Just ask our fabulous testers!)

The Jolly Roger Raglan is available for purchase HERE.
Find the Jolly Roger Add-On Pack for purchase HERE.
Or, you can bundle the Jolly Roger + Add-On Packs together HERE.

Be sure to head over to our Facebook Group and check out all of the amazing tester creations for the Jolly Roger Raglan and the Jolly Roger Add-On Pack!  They will provide for endless amounts of inspiration if you’re ever needing it!

listing-pictures-updated-1 listing-pictures

Are you joining us for P4P Raglan Week?  Be sure to share your creations on Instagram or in our Facebook group and use the tag: #P4PRaglanWeek !!  One lucky person will be featured on the blog and win a P4P pattern of their choice!

Here’s the rest of the schedule for the week:

Monday, September 19: Jolly Roger Raglan Pattern Update + Jolly Roger Add-On Pack Pattern Release

Tuesday, September 20: JRR Woven Fabric Hack

Wednesday, September 21: JRR Animal Faces Add-On

Thursday, September 22: Contrast Band Hack for Kangaroo Pockets

Friday, September 23: Women’s Keyhole / Scoopback Raglan Hack

Saturday, September 24: Off-The-Shoulder Raglan Hack

Sunday, September 25: Adding Stripes to Your Raglan Sleeves

Filed Under: Announcement, Blog Tours, Pattern Release, Sew-A-Long 3 Comments

P4P Raglan Week! It’s Coming!

September 18, 2016

Arrrrrrrre you ready for some raglan-sewing tips, tricks and add-ons?  We sure are!

In case you missed Nicole’s sneaky announcement yesterday, here’s another teaser to get you excited about the week ahead.  Patterns for Pirates is dedicating an ENTIRE week to all things Raglan!  And boy do we have the best week planned out for you!

14242253_10104318744847759_6014705790794734426_o

We are constantly being asked what the best patterns are for beginners.  Raglan-style shirts are excellent because of the sleeve type.  They’re super fast to sew, fun to mix/match fabrics and prints with, and leave an unlimited amount of style possibilities.  In fact, the Relaxed Raglan was the first ever P4P pattern that I (Katy) made for myself and I haven’t stopped making them since.  I do hope you join us for all of the fun we are about to have!

Just take a look at our schedule!

Monday, September 19: Jolly Roger Raglan Pattern Update + Jolly Roger Add-On Pack Pattern Release

Tuesday, September 20: JRR Woven Fabric Hack

Wednesday, September 21: JRR Animal Faces Add-On

Thursday, September 22: Contrast Band Hack for Kangaroo Pockets

Friday, September 23: Women’s Keyhole / Scoopback Raglan Hack

Saturday, September 24: Off-The-Shoulder Raglan Hack

Sunday, September 25: Adding Stripes to Your Raglan Sleeves

You can follow along on the blog here, or in our Facebook group.  Search #P4PRaglanWeek to be able to find our posts all over social media.  And please feel free to sew-along with us on one or all of the days.  The more the merrier!

But wait, there’s more!  We wanted to create a friendly pirate-y competition with our P4P Raglan Week!

Between tomorrow and Wednesday, September 28, sew up a Patterns for Pirates raglan shirt shirt using one of our add-ons, hacks, or keep the pattern as-is.  Share your photo with us on Instagram or in our Facebook group and use the tag#P4PRaglanWeek We will pick our favorite and the winner will win a free P4P pattern of choice AND be featured on this blog.  Fun right?

To make it even better we have put all the raglan patterns in the shop on sale all week (no code needed)!

Now get out there and sew some raglans, matey!

Filed Under: Announcement, Blog Tours, Sew-A-Long 6 Comments

Designer Pattern Swap

June 13, 2015

I hardly ever have time to sew up other designer’s patterns, but I’m always wishing I had more time to!

So, I loved the idea of this designer swap! I could sign up and have a deadline to “make” me finish 😉

10382167_813201762096592_3349078359874250572_n

Here is a link to the original announcement along with sales by the designers that participated (pssst Patterns for Pirates has a coupon code there! 😉 )

We are also doing a giveaway, rafflecopter posted at the bottom of the page! 

I got assigned the California dress by EYMM, which happened to be one of my very favorite designs in Kymy’s collection!  And she put it on sale-  code: californiasummer will save 25% off the Women’s California or Girl’s California or the California Bundle good April 20 through 27 at 11:59pm PDT at www.eymm.com.  It’s a simple dress you could do in a ton of different looks/fabrics and wear all spring, summer, and fall long! She always has a ton of options that wrap up in a quick easy sew!

il_570xN.626626220_dx7s il_570xN.626736839_as12

I went with two fronts so I didn’t have to worry about bra straps 😉 These suckers aren’t staying up in a strapless anymore!

11174422_10100306631027707_5979736855787993_o

I really wanted to somehow squeeze out a maxi out of my 2 yds, although the pattern called for 3.5 yds.  So I had to do some modifying! I spliced the pattern along the casing line and added a little to the front bodice only to make up for my chest size.  Otherwise this style always ends up blousing in the back and not in the front on me! I’ve always thought it was one of the easiest styles to alter for a full bust!

11136228_10100306631002757_6947367550955224954_o11154933_10100306630638487_729926160472901635_o

I also cut the skirt pieces much less full to accommodate my tiny yardage! I knew it would be too tight to comfortably walk in, so I did slits up both side seams to the “above knee cut line” on the pattern. The lighting here shows off a little more then usually, lol… the fabric isn’t see through at all in person!

11162037_10100306630369027_6457652057315584012_o11174634_10100306630498767_6789779450964393256_o

I love this style dress for the spring, summer and fall… so easy to throw on and look stylish! I can chase my little guy around in it without worrying about showing anything 🙂

11174256_10100306630104557_3239395190234372115_o 11146430_10100306630099567_3671446381715494936_o

I had a great time sewing this up and plan on wearing it lots!

Giveaway:

https://www.rafflecopter.com/rafl/display/924f94de33

Filed Under: Blog Tours 1 Comment

Boys can wear Pink Blog Tour with Handmade Boy

June 13, 2015

10403212_10203606554227703_5404214825045129306_n

I <3 the Handmade Boy Blog! Kelly makes the CUTEST clothes for her son and daughters (and sometimes even herself when I can talk her into it 😉 ) She is the sweetest; always going above and beyond for me testing patterns and even trying to help me with photo tips!  So when she told me she was doing her first series I could never turn her down!

Boys Can Wear Pink!

10373803_10203669746407468_16103805812955764_n

To be honest, I’ve never put my little guy in pink before… I’m not a huge pink lover…I tend to always go with greys and blues for myself, my husband and for little guy! Boring, I know… if you could see my fabric stash, it is pretty dull! I also tend to dress him like a little macho man in camo, dinosaur, anything you would label “very boyish”…So, this really pulled me out of my comfort zone to design and make something for him with pink!

I decided to go with a classic “pirate/sailor” look and theme to help me get inspired…since I love this look and theme! I went with a white and pink stripe I got from my local Hobby Lobby, in their spring collection. In person the pink is almost neon.

IMG_1477IMG_1529

I knew I wanted the oh so classic “Mom” heart tattoo on it as well (just pink instead of red).  I struggled on placement! But in the end I went with the shoulder, where a tattoo would be and I’m so happy with it!

IMG_1569 IMG_1527 IMG_1483 IMG_1416

I added an iron on transfer of a black anchor to the front right side to help fill and even it out overall.

IMG_1423 IMG_1455 IMG_1521 IMG_1544 IMG_1550

I paired it with his Cpt. Comfort Jeans that are distressed and bribed him to wear the black tennis shoes (instead of his Woody boots that he wears EVERY DAY!!!) It took a piece of candy and going outside to play to get them on!

IMG_1570 IMG_1464  IMG_1461

His hair… oh my… he woke up with the most wild hair ever that day… So I tried to put a little gel in it to calm it down and it didn’t help much! But it kind of fits the sailor look right? Wind blown? We’ll go with that 😉

IMG_1452 IMG_1434 IMG_1429IMG_1461

In the end I love the bright colors on him… it fits his wild, rambunctious personality so much better then the greys I usually go for! (Although, I tend to be quiet and shy…so I’ll stick with my muted tones for myself 😉 ) I am going to try to add more bright colors into his wardrobe for sure! Thank you Kelly for having me in your series!! <3

IMG_1634IMG_1655IMG_1675 IMG_1670   IMG_1635  IMG_1621  IMG_1482 IMG_1462

Now you can participate too!

  • Here is a pinterest board with inspiration! https://www.pinterest.com/simonsphoto/boys-can-wear-pink/
  • Here is a great “Sew for Boys” Facebook Group you can join and use the hashtag #boyscanwearpink https://www.facebook.com/groups/sewforboys/
  • You can also enter the Rafflecopter here to win some awesome prizes! https://www.rafflecopter.com/rafl/display/23c963171/

10451056_10203685980053299_4539772564669910279_n

Prizes:

One yard of http://www.mabelmadison.com/pit-stop-pink-stenzo-poplin.html Stop Poplin in pink http://www.mabelmadison.com/
$25 gift certificate, plus a surprise fat quarter from https://www.etsy.com/people/phatquarters?ref=pr_profile
One yard of solid cotton/lycra &amp; one yard of coordinating fabric from  https://www.facebook.com/pages/Purpleseamstress-Fabric/135198749843668
One pattern of choice from http://www.paisleyroots.com/
$20 store credit from http://peekaboopatternshop.com/
One pattern of choice from Patterns for Pirates http://www.craftsy.com/user/3301275/pattern-store
One pattern of choice from  http://www.welcometothemousehouse.com/shop

Bottoms Up Pants Pattern from http://ifonlytheywouldnap.net/

One Pattern of choice from http://www.titchythreads.com/patterns

Filed Under: Blog Tours Leave a Comment

Boys Bundle Up

June 13, 2015

10462459_10203577575173734_8733384568146067586_n

Is everyone getting excited about the next Bundle Up? I know I have been excited about it since I heard plans of it ages ago!!

Link: www.bundleupsale.com

I have the Lumberjack pattern in the bundle up: It is a traditional button up shirt with collar, but also has a few more options like hood and full lining. My Little One will be wearing these all fall and winter!

listing pictures1  listing pictures3 listing pictures4 listing pictures5 listing pictures6    listing pictures10

But here are some other Bundle Up patterns I had the time to whip up!

First up is the Aviator Pants by Winter Wear.  They are a knit pant with optional triangle accent pieces on the bottom leg, front slit pockets, back welt pocket, and a shorts cut line.  They were so quick to make and knit, which of course I LOVE!

IMG_6995

Okay, so my little one has mama’s backside 😉 He measured much larger for his hip/booty measurement then all the rest… SO I went to work doing a full butt adjustment…for my not quite 2 year old! WHAT! But I’m glad I did because they fit great… look at that little round tushy! 🙂 I took a few pictures and I will get another post on how to do that!

Suzanne over at Winter Wear did a great job keeping her pattern easy to use with all the cutting info on the pattern pieces (love that!). If I’m honest I put them together without reading her instructions, but I’m sure they are fab!  I love knit patterns for boys…for our photo-shoot, I took him to be in his element… OUTSIDE!

IMG_7072IMG_7079-2

And in these knit pants and shirt he could run (away from me!) and play freely and comfortably…and still look adorable!

IMG_6928IMG_7071

The knit shirt is my Deep Sea V-neck… I did a contrast camo sleeve and free-hand deer applique. My husband LOVED this outfit! Little One LOVED sticks… ha ha ha!

IMG_6909IMG_6929

He could climb, jump, bend over, and I didn’t have to worry about a stiff waistband being uncomfortable for him. I know lots of beginner seamstress have a little fear of working with knits, but I jumped RIGHT into knits when I got serious sewing! I knew I wanted my little one to be COMFORTABLE! Make the jump ladies! You’ll never look back!!! 🙂 IMG_6911IMG_6918

Okay, now I really tortured my son, but I made him model this, oh so cute and trendy, long sleeve pull over in the 100 degree weather… But look how cute he looks in it! This is Greenstyle’s Shawl Collar Pull-Over in the Bundle Up.

Again, it is knit… super quick sew and soft and cuddly! I used a super soft sweater knit and some ribbed knit.

IMG_6966IMG_6936

I made him a size up, because it wont be cool here until Oct/Nov, but he will be ready! I really love the no trim pages for Greenstyle’s new patterns! Since I’ve started doing mine like that, I’ve gotten pretty spoiled to it! I printed out my V-neck to assemble and HAD TO CUT THEM! Ha ha ha, which reminds me I need to go back and update those patterns with no trim pages! 😉

IMG_6951 IMG_6965

I used a toggle button on the lower part of the collar… I think it gives it a great touch since I used a solid muted sweater knit. I really loved how it turned out…and so did my mom! Which is always a plus to hear compliments on something you made!

IMG_6967 IMG_6970

Okay…I HAVE to share… I snapped “a few” pictures of my adorable dad with my little one… he came with us to model, because he’s the sweetest dad/pops ever! It’s SO much easier for me to get some shots of him when somewhere else is there! I mean… aren’t they CUTE?!?!?!!

IMG_7054IMG_7064

My son ADORES my dad! I had a hard time not making every. single .picture. black and white because I just thought they were so sweet! <3

IMG_6976 IMG_6980

He was having so much fun with his Pops throwing rocks into the creek!

IMG_7018 IMG_7020

I think the adoration is mutual too 🙂

IMG_7024-2 IMG_7035

Thank you for coming with us Dad!

Here is the link to go get your BOYS BUNDLE UP! 🙂 I’ve made 3 so far, but I have the Sleepy Bear PJS by Ellie Inspired already printed, taped, and cut! I just <3 sewing for my Little Guy! Don’t leave the boys out!!!

www.bundleupsale.com

10462459_10203577575173734_8733384568146067586_n

Filed Under: Blog Tours Leave a Comment

Bundle Up

June 13, 2015

Have you seen all the fabulous women’s patterns in the new Pattern Revolution Bundle Up deal?? There are so many great patterns to sew up for yourself! I don’t sew for myself as often as I’d like…. but my sister Judy sews almost her whole wardrobe… NO joke! It’s awesome! She actually sews for me too, even more awesome! She’s so sweet making me things when I don’t have time, so I thought I would return the favor and sew her up the Four Seasons Cardigan & Duster pattern for Everything Your Mama Made (EYMM).

IMG_0723

Judy was making herself the Greenstyle Taylor shorts, so I decided to make the sleeveless option for her to pair with the shorts. There are LOADS of options in this pattern, cardigan length, duster length, hood, no hood, no sleeves, short sleeves, 3/4 sleeves, long sleeves PLUS it includes 10 sizes, XS – 5X plus! I mean it really is for all four seasons 😉

To say this sleeveless option  is a quick sew is an understatement! FOUR seams ladies, FOUR seams and you’re done! I cut out and whipped this up in less than 15 minutes. Now I did not hem the bottom, Judy is 5’9 and I forgot to add length…oops, but it looks great unhemmed!! Plus bonus that it was quicker. I used my serger to construct the entire thing… well my 4 seams I used the serger 😉

If you have never made a EYMM pattern, the ‘no trim’ pattern piece pages are AMAZING! I actually started using this method on my own patterns I love it so much. In a women’s pattern where you are printing several pages, this really really saves time! Here are some photos of Judy looking adorable… It actually started raining on us, oh no! But we always have fun, so OH WELL! IMG_0721IMG_0729

I can’t wait to make some of these up for myself. I love wearing cardigans and these will be very flattering while I’m getting my pre baby body back 🙂

Judy is going to tell you about her cute Taylor shorts now!!

Megan

IMG_0742

I was so excited to see the GreenStyle Taylor shorts design! Angela always has such great designs that are perfect for a comfortable, stylish look…just my thing! I love sewing for myself! I’m much taller then average, so I find it very hard to find clothes that fit at all, let alone fit well and are stylish!

So I started with my hip/booty measurement which put me at a medium… But I have a much smaller waist and legs then that measurement. So I like to size down and do a full butt adjustment for a better fit! Here is a quick shot of how I to the adjustment:

IMG_1308

I love that she has no trim pages for her pattern like mine! I mean who doesn’t want to skip that tedious step? Especially in an adult pattern! I used a very light weight denim with a sweet little print on it, because I’m in love with the floral trend!

IMG_1311

I did my construction a tad different only because I wasn’t patient enough to wait to sew them up before I had time to go buy a great zipper! So I constructed the whole shorts besides the zipper and waistband– I’m always so anxious to get started and whip through something I know I will love!!  Since I used a denim I added a few modifications that are only popular with jeans, like lots of topstitching and a metal zipper 🙂 I also love to use topstitching thread when I with with denim! The thicker thread really looks so much better, it really is worth changing it out for every time you topstitch!

IMG_1392IMG_1393

I really liked that she had instructions to double stitch the crotch for durability! That area sees a lot of stress… Especially those of us who needs full butt adjustments 😉 I also adding a couple rows of topstitching to the inside inseam for the same reason!

IMG_1397

I always like when patterns have hem gauges for a cleaner hem line! I like to iron up my hem in the flat… Sew per instructions, then when it is time to hem it folds so nicely into place… It’s the best of both worlds hemming in the flat vs round BC you have the ease of folding/pressing in the first, but have the nicer, cleaner finish off hemming in the round! I went in between the hem lines for a 3″ inseam… I love SHORT shorts, but since I’m tall short inseams tend to look extra short on me, plus as much as I HATE to admit it I’m starting to get older and need that extra inch!

IMG_1399IMG_1401

I also did french seams on my pockets… I didn’t want the serging to be touching my hands in the pockets or my thighs… so I just sewed the pockets wrong sides together, then flipped them right sides together and stitched around the seam.

IMG_1394 IMG_1395

Inside of the pocket:

IMG_1396

I love them! They fit so much nicer then any RTW shorts since I’m tall and need that full booty adjustment!  I can’t wait to make up since more!

IMG_0733 IMG_0735

IMG_0743

June 20
Max California, Gloria June, Mother Sews Best
June 21
Feather’s Flights, Gloria June, Becca Duval Photography,
June 22
The Mother Huddle, Gloria June
June 23
Mother Sews Best, Idle Fancy, Swoodson Says
June 24
Shaffer Sisters, That’s What She Crafted
June 25
Friends Stitched Together, Handmade Dress Haven, Sprouting Jube Jube
June 26
Modern Handmade, Rebel and Malice, Lulu and Celeste
June 27
Sew McCool, Pienkel, Gloria June, Sew Maris

Filed Under: Blog Tours Leave a Comment

Dive Into Swimsuit with Coles Creations

June 13, 2015

Swimwear week- bloggers designers Talented bloggers  you've never made a swimsuitPrizes!

It’s my turn on the “Dive into Swimsuits” blog tour hosted by Coles Creations! You can find all the blog posts and enter to win prizes over at Cole’s page!

I love making my little guy swim trunks, they’re quick and easy and so much more comfortable then the store bought with those itchy netting panties (WHO thought those were the answer???)

10488311_10152282667058214_9048176137652269596_n10509702_10152282667323214_5187630289628509110_n

These are my pattern, the Swashbuckler Swim Trunks and my FAVORITE feature is the boxer brief style lining pieces…SO much better then those netting panties! I would always cut them out of his before he was potty trained. Then once he was potty trained I thought he needed some lining and support under there, but no way were those netting panties the answer!

I have a great picture of the boxer brief lining piece, BUT for some reason my wordpress wont upload it today!!!! 🙁

IMG_5458IMG_5473

I use either swim lining or a swimsuit fabric (nylon spandex). I love to coordinate the lining piece to a matching rash guard! Of course I don’t have any finished modeled pictures of that (and no one else will likely see the lining piece) but I love it!

I get asked a lot where to find the fabric for swim trunks.  You can grab a remnant or scrap piece of swim fabric or lining for the boxer brief lining again, you’ll want a nylon spandex 4 way stretch swim knit.  For the main shorts you can use “boardshort fabric” as some shop labels it (top skull print was labeled this from Funkaliicious Fabrics), “woven supplex” is a thinner version (great for super hot climates- the tricolor here is woven supplex from Chez Ami, who have since gone out of business.) I also know the Fabric Fairy usually has some in stock as well as Rockywoods Outdoor Fabric also carries it.

IMG_5461IMG_5484

And of course sewing always provides you with the ability to give your little one the perfect fit if they need a different width to height ratio and don’t fit into the “average” sizes.

IMG_5465

I hope you dive in this summer and make some swimsuits! Have fun!

Filed Under: Blog Tours Leave a Comment

  • « Previous Page
  • 1
  • …
  • 3
  • 4
  • 5

Newest Patterns

  • Notch Top & Dress $12.00 $10.50
  • Notch Top & Dress - Youth $10.00 $8.50
  • Notch Top & Dress - Bundle $20.00 $18.00
  • Friendly City Sweater $12.00
  • Friendly City Sweater - Youth $10.00
  • Privacy Policy
  • Refund Policy
  • Affliliate Program
  • Contact Us
  • About

Copyright © 2023 Patterns for Pirates

Copyright © 2023 · Genesis Framework · WordPress · Log in