Patterns for Pirates

P4P stylish, modern, wearable patterns

  • Home
  • Blog
    • Frequently Asked Questions
    • Pattern Releases
      • Free Patterns
    • P4P University
      • Fitting
      • Sewing with Stretch, Knit Fabrics
      • Sewing with Woven Fabrics
      • Sewing Machines
    • Sew-A-Longs
    • Fabric for Pirates
    • Pattern Hacks
    • Announcement
      • Blog Tours
      • Contest/Giveaway
  • Shop
  • Bundle Discounts
  • Flash Friday
  • Gift Cards
  • My Account
  • Cart

Go Team Patterns :: New Pattern Releases!!

October 15, 2021

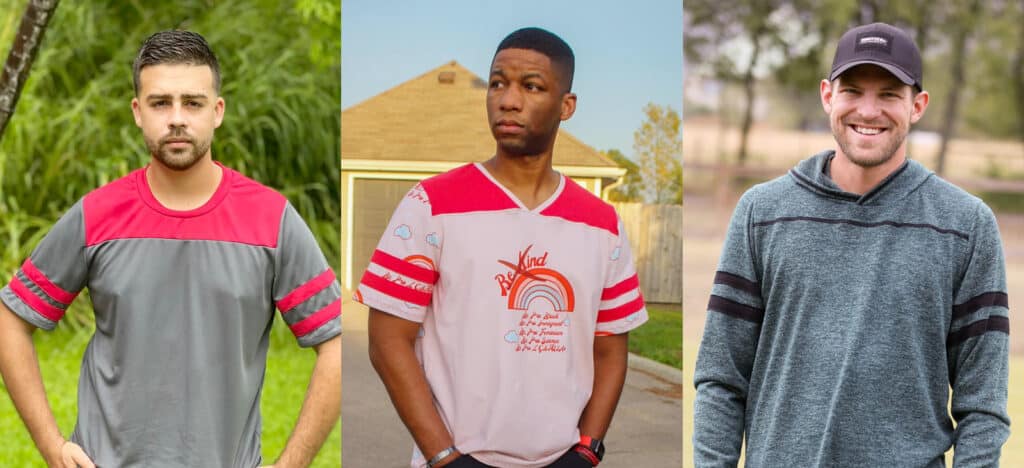
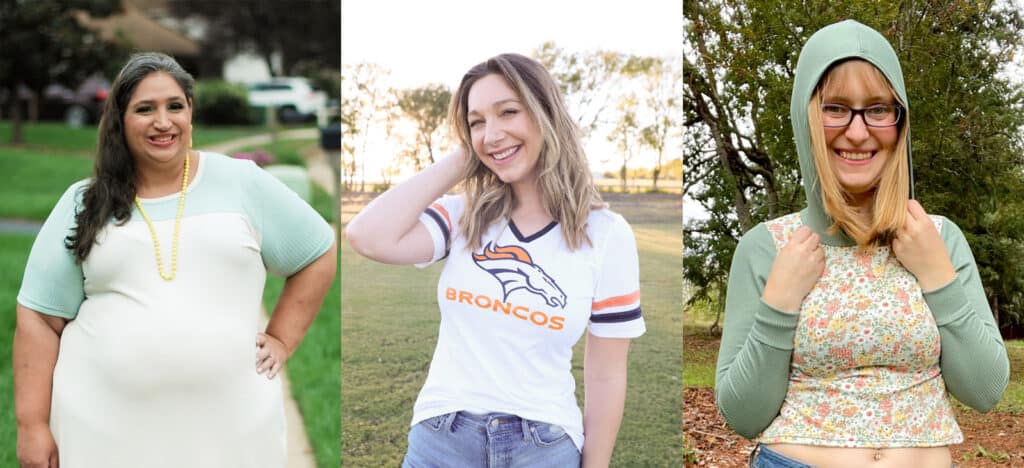
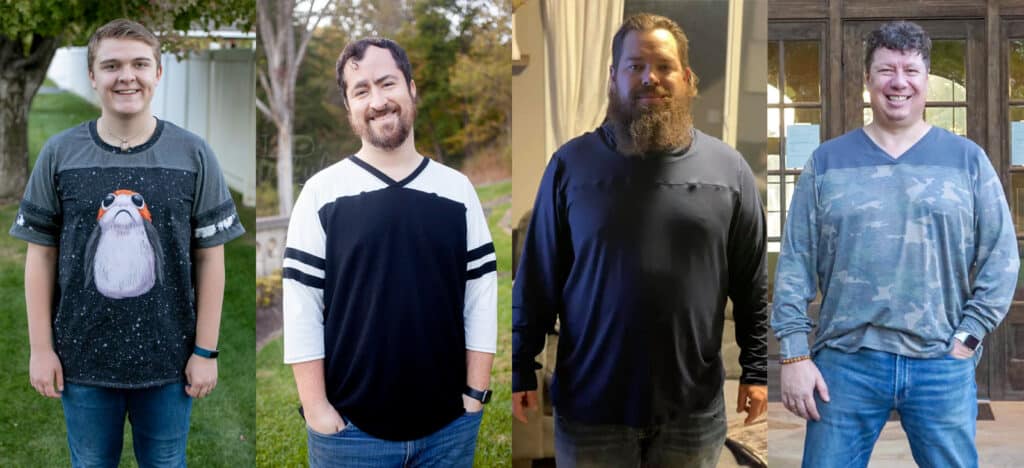
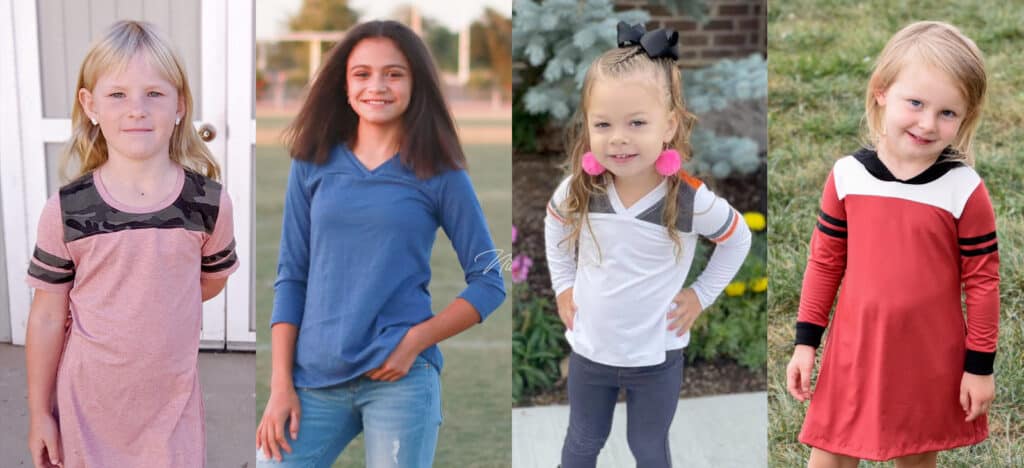
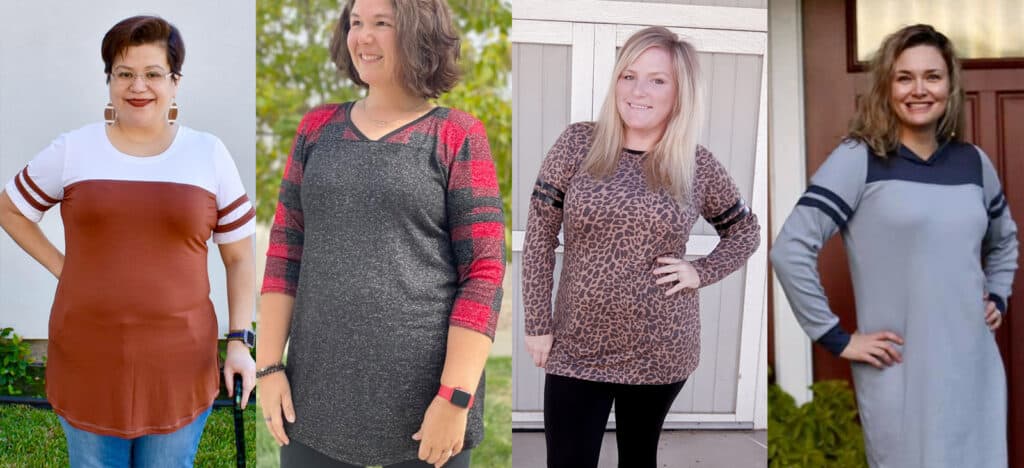
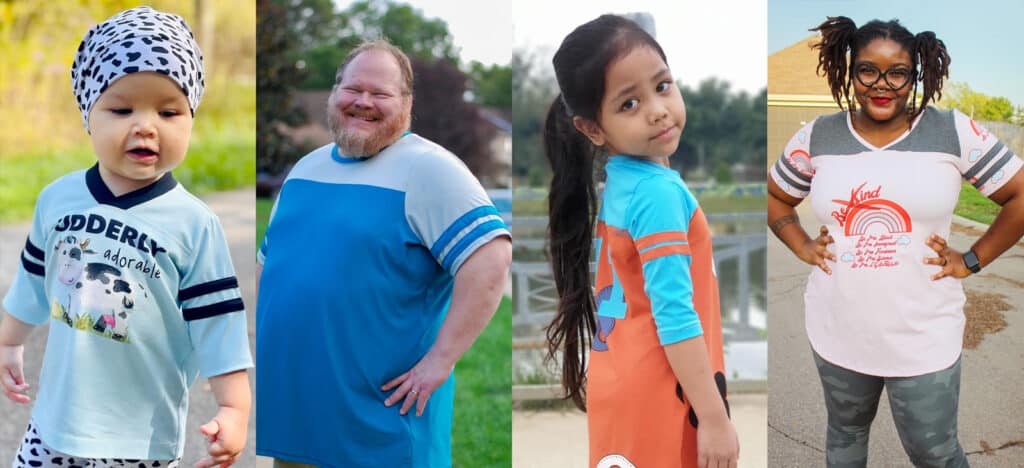
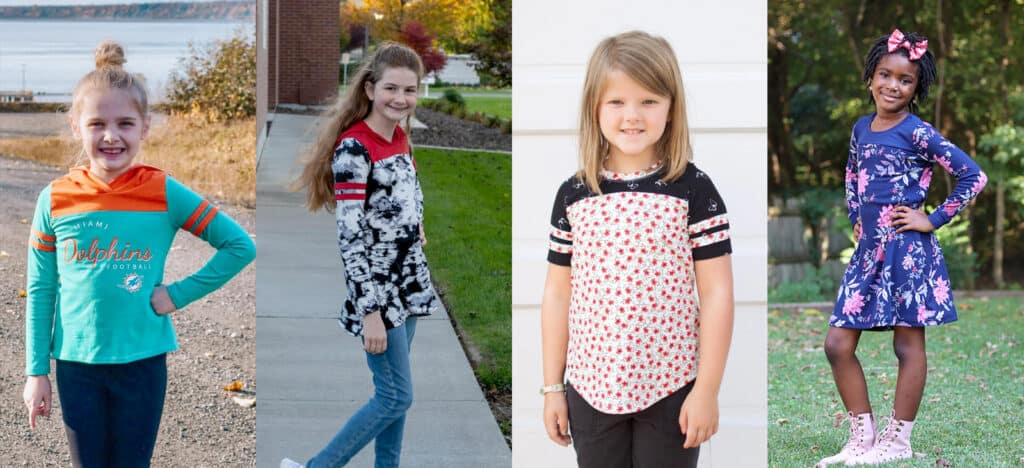
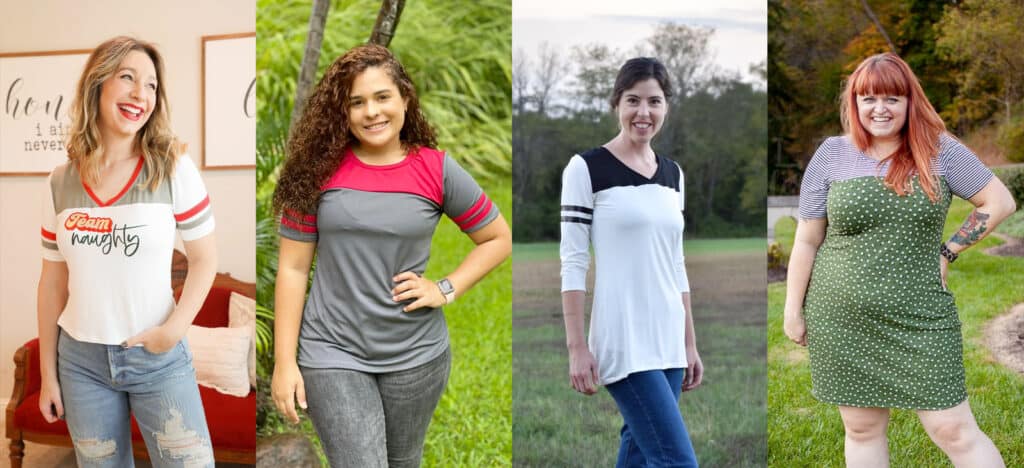
IT. IS. GO. TEAM. TIME.  We have been working our bootys off on a set of four amazing patterns and today is the day, y’all!  We are ready to release them to our favorite pirate community!

Let’s talk allllll about the Go Team Jerseys and the Go Team Dresses!!
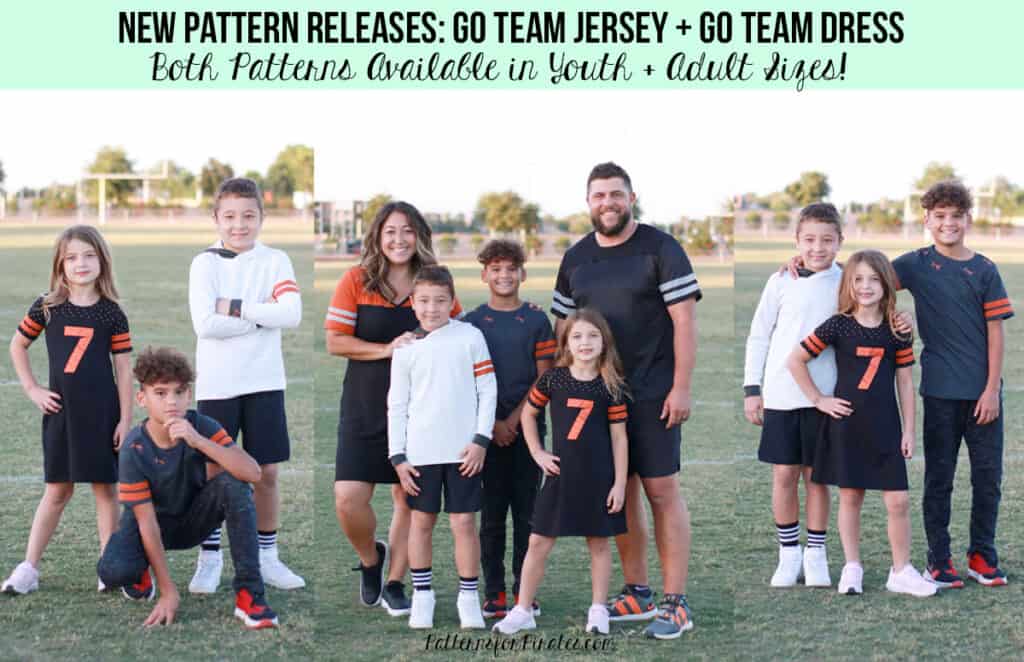
Whether you’re a fan of a sports team or just a fan of looking and feeling great, the Go Team Jersey is a great t-shirt for your wardrobe. The relaxed fit is super comfortable and the sporty details set it apart from your everyday tee. The front and back yoke give a great opportunity for mixing fabrics, decorative stitching or adding wording. The sleeve stripes are another great detail you can add for a sporty feel. You can pick from crew or V neckline, or even add a hood instead. This pattern works great year around with short, 3/4, long hemmed or long cuffed sleeve options. Shirt length options for average, short, and tall heights along with separate sleeves for each height.
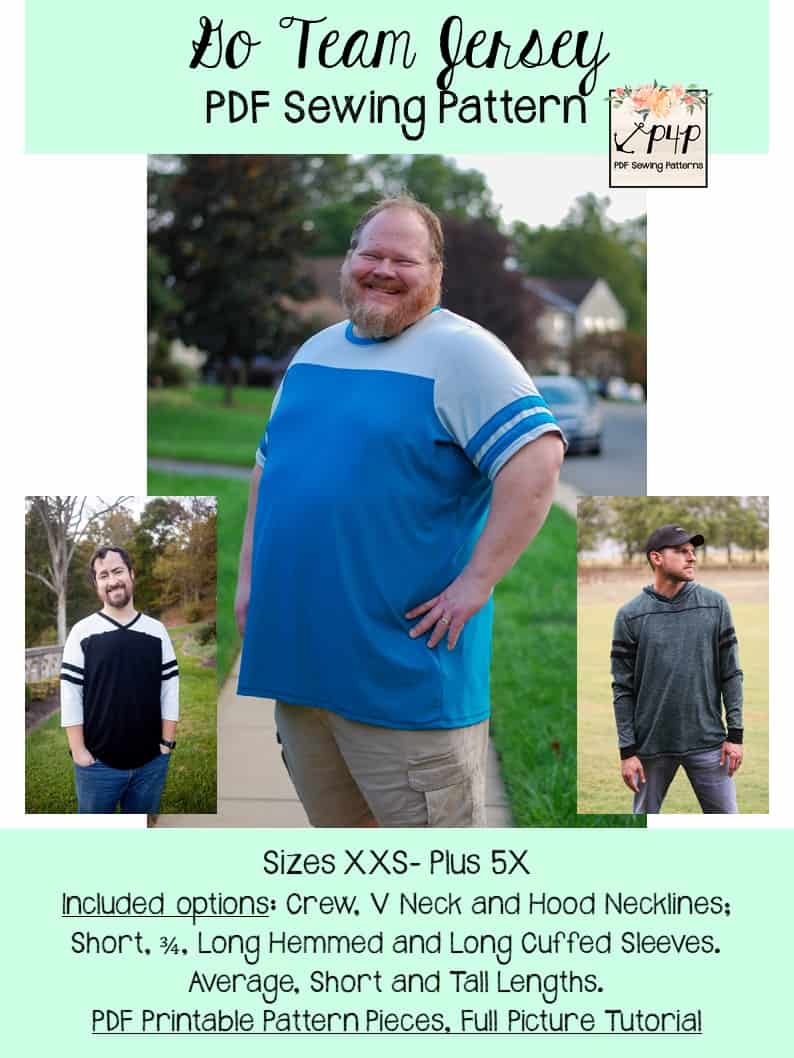
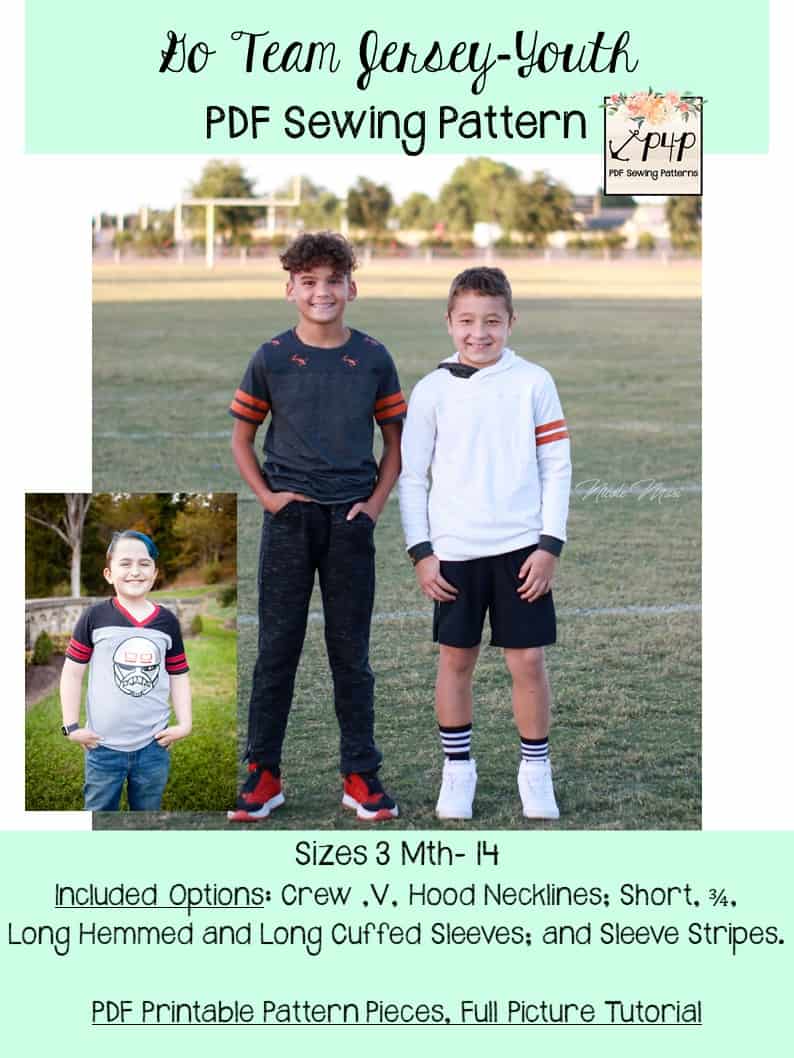
The options for the Go Team Jersey includes:

  • Crew, V and Hooded Necklines.
  • Short, 3/4, Long Hemmed, and Long Cuffed Sleeve Lengths.
  • Adult sizes include Short, Average and Tall lengths for Sleeves and Bodice.
  • Stylish front + back yokes.
  • Optional Sleeve Stripes.

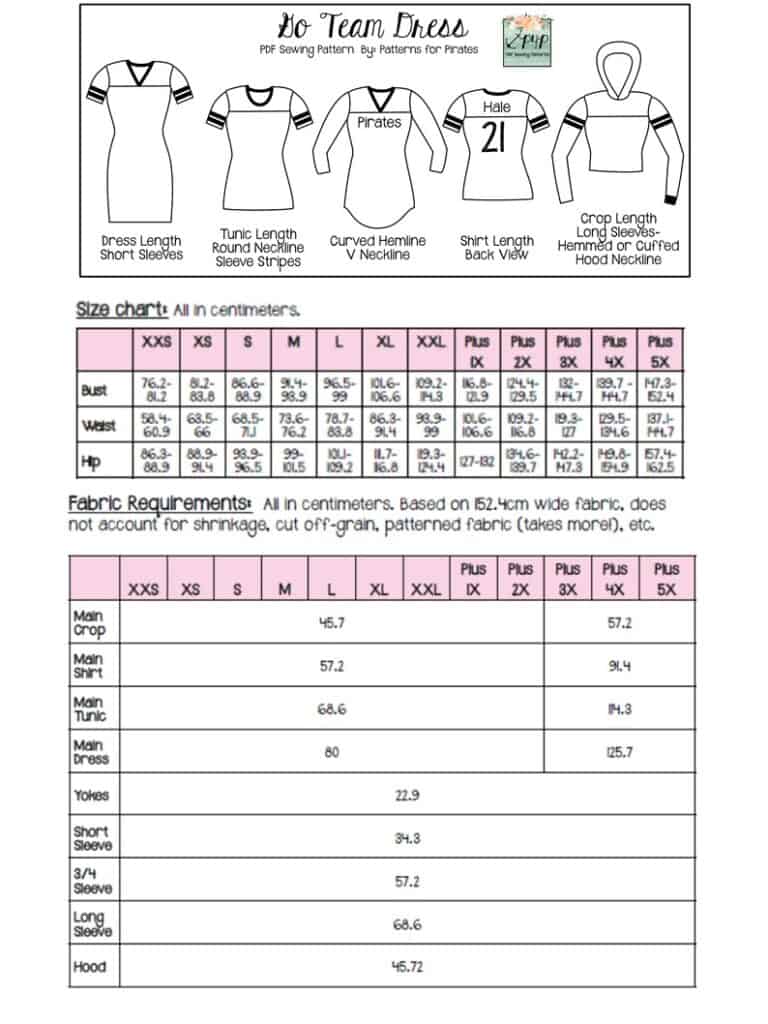
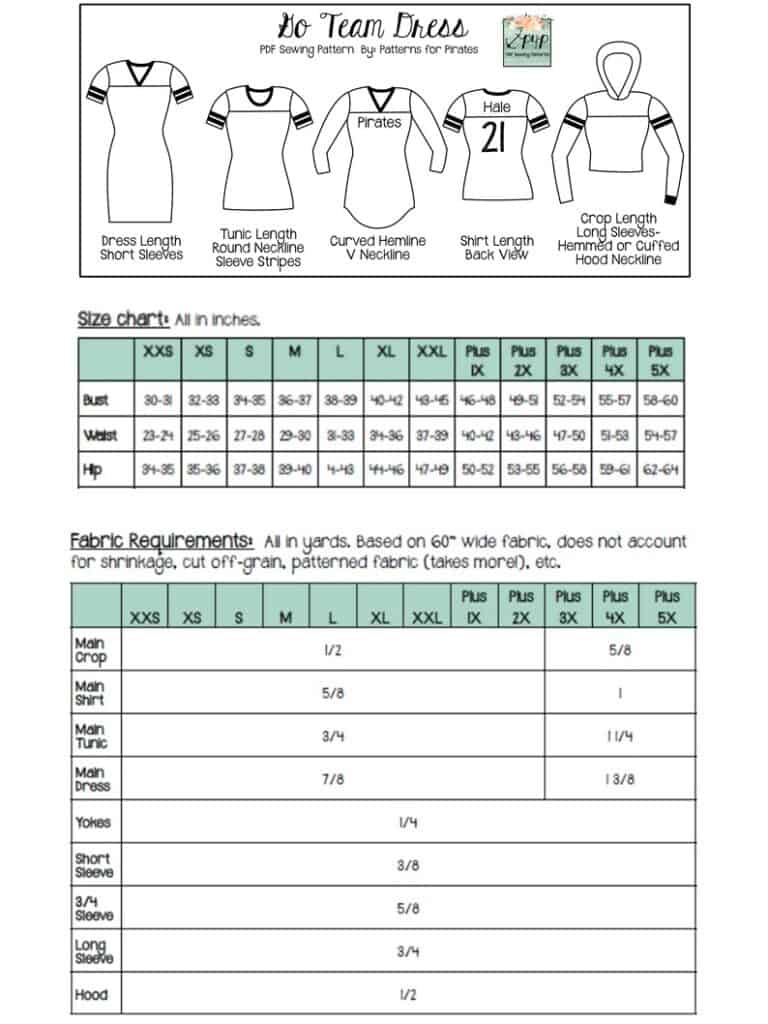
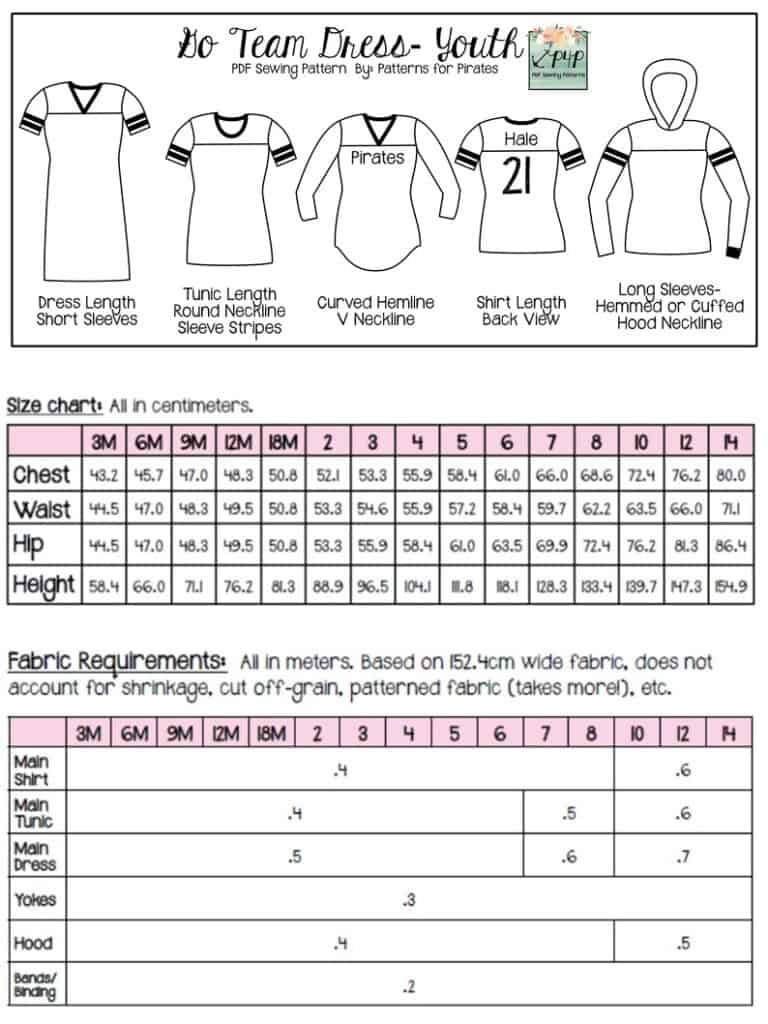
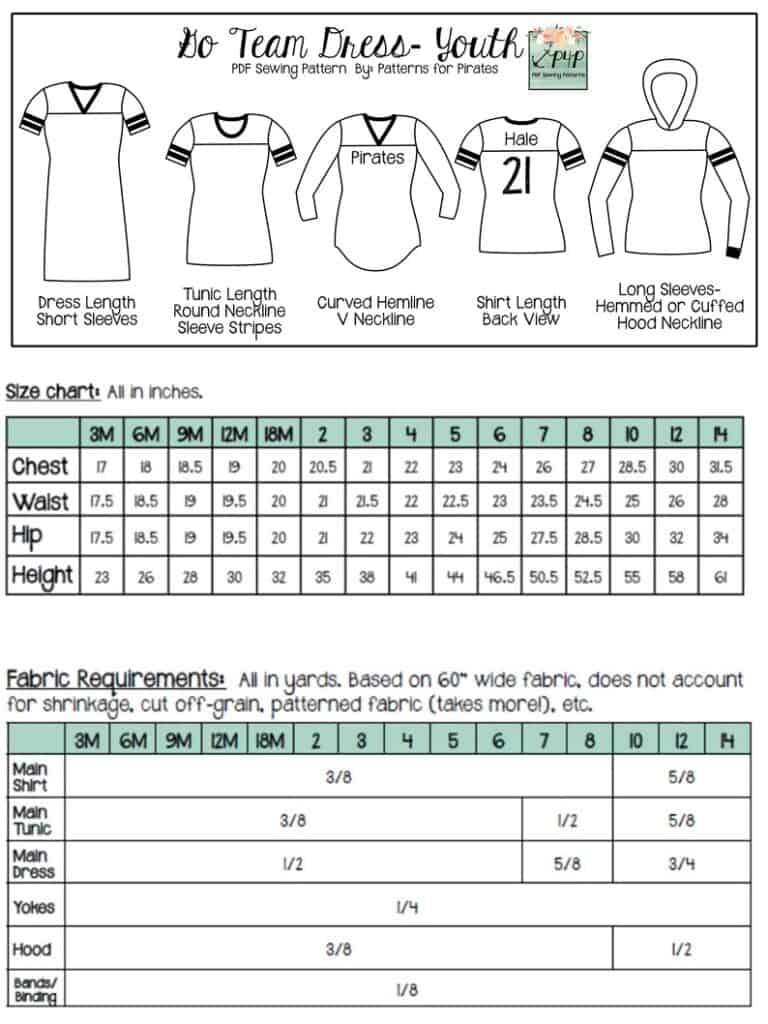
The youth sizes range from 3m – 14 and the adult sizes are for the full, newer size chart, extending from XXS – Plus 6X!  Please make sure to check the size charts, as there were slight adjustments made to accommodate the new size range for adults.
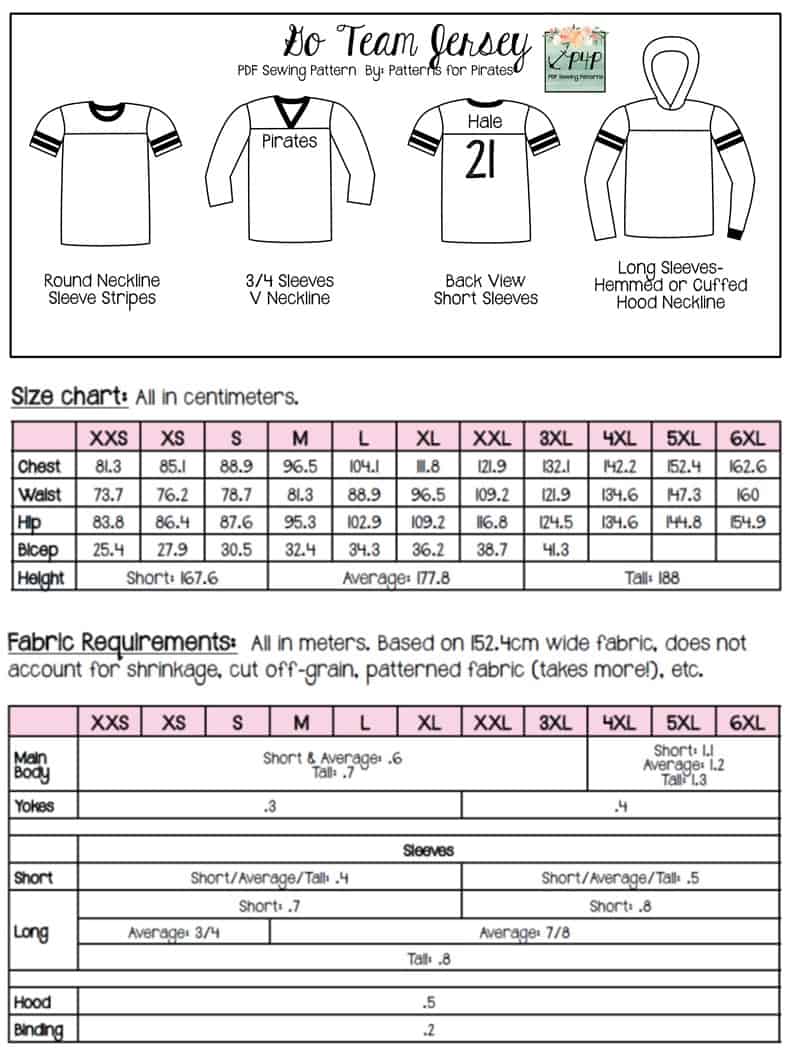
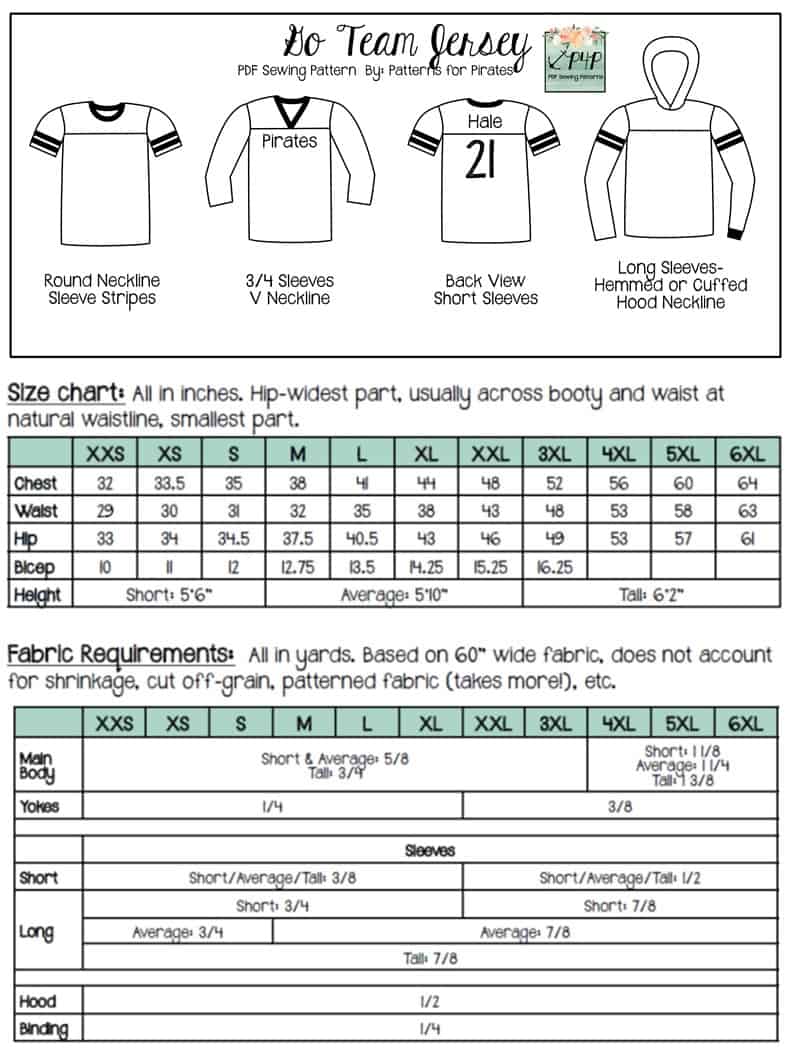
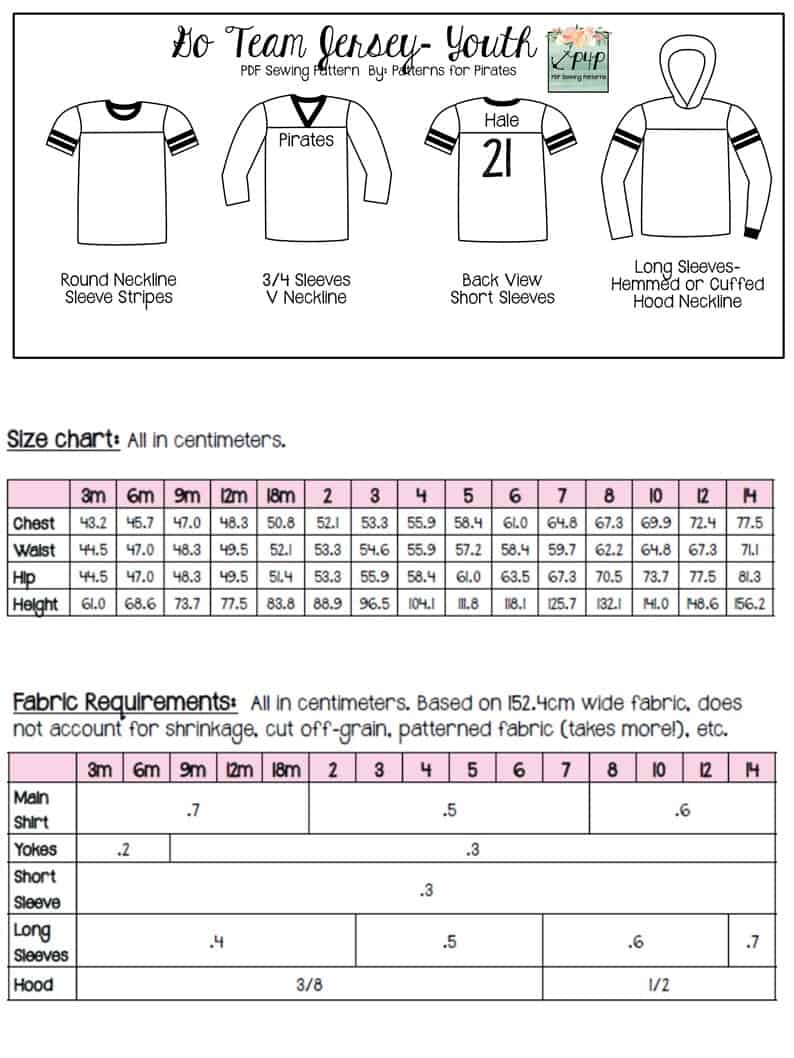
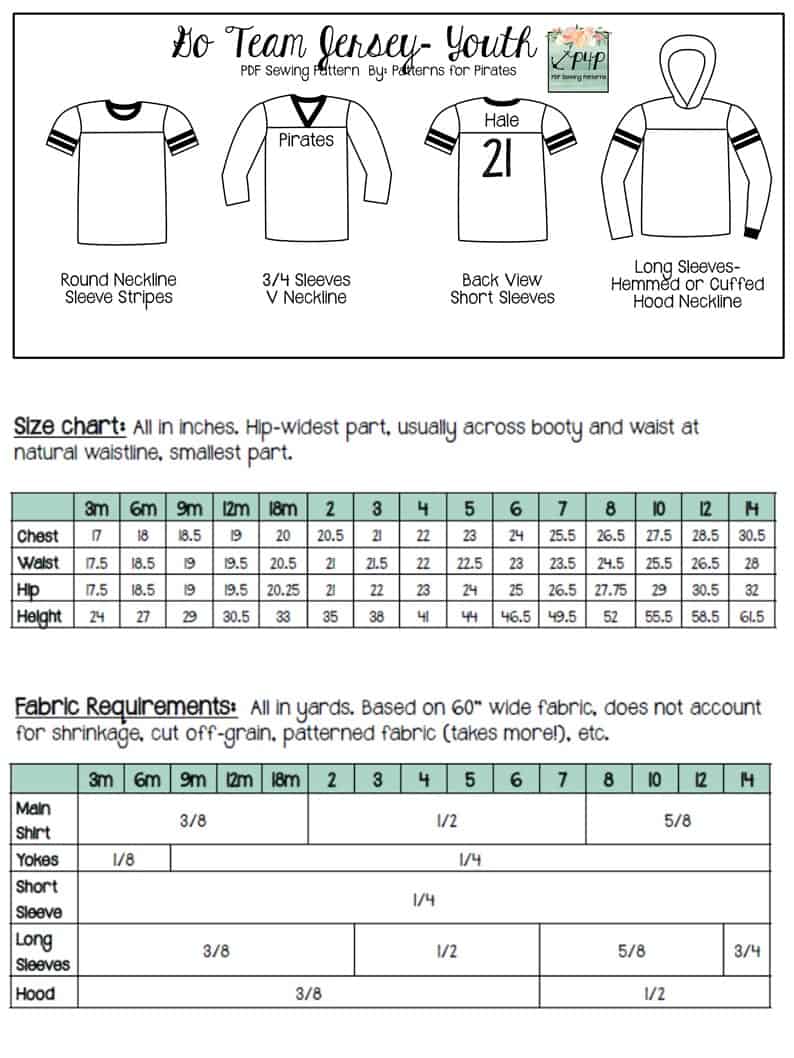
Goooo Team! Whether your “team” is for sports, foodie, fan fiction, or anything else, the Go Team Dress is the perfect way to show off your team spirit!  Or you can take this pattern and make a plain top for a great basic tee…while also allowing the perfect opportunity for fabric mixing with the front and back yoke. The stripes on the sleeves are another fun sporty detail you can add or leave off. You can choose from a crew, V or hood neckline. Don’t worry about what time of year it is because this pattern has you covered with short, 3/4, long hemmed or long with cuff sleeve options. Have a certain bottom you’re plaining on pairing your Go Team Dress with? No worries there… you can opt for crop, which goes great with high waisted bottoms, shirt, that hits mid booty, tunic, that hits under booty, curved hemline, also below booty, and dress, that hits at a flattering couple inches above knees. The semi-fitted, figure skimming silhouette is comfortable and flattering at the same time.
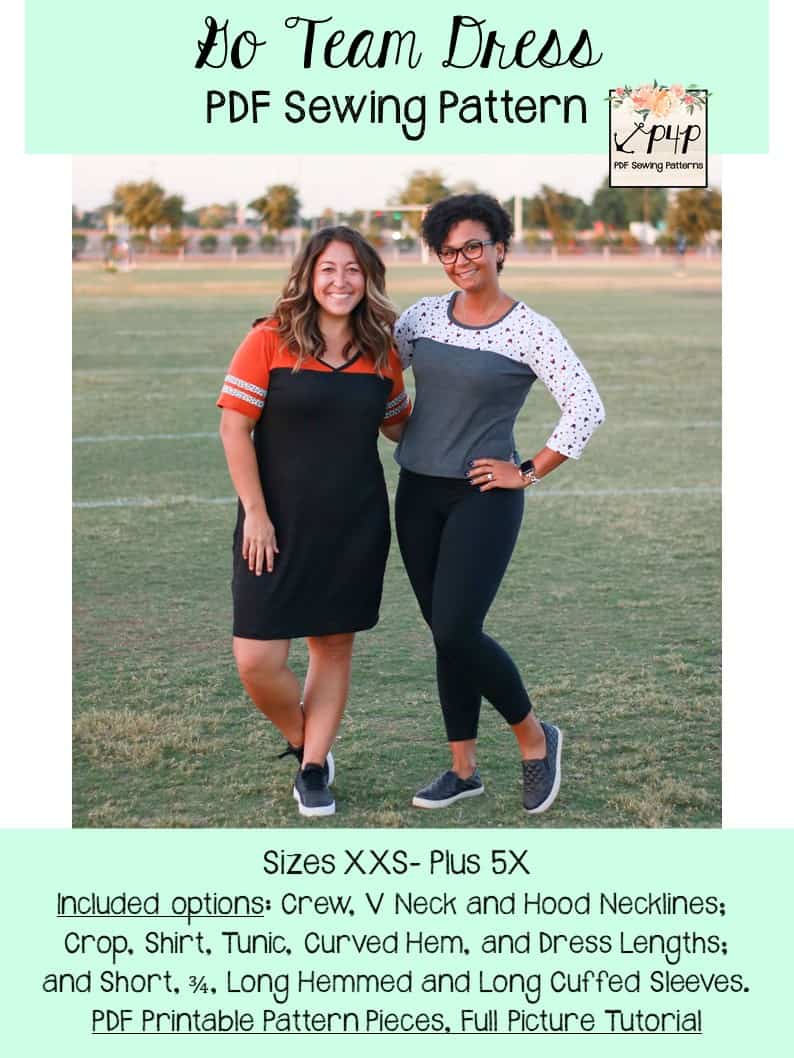
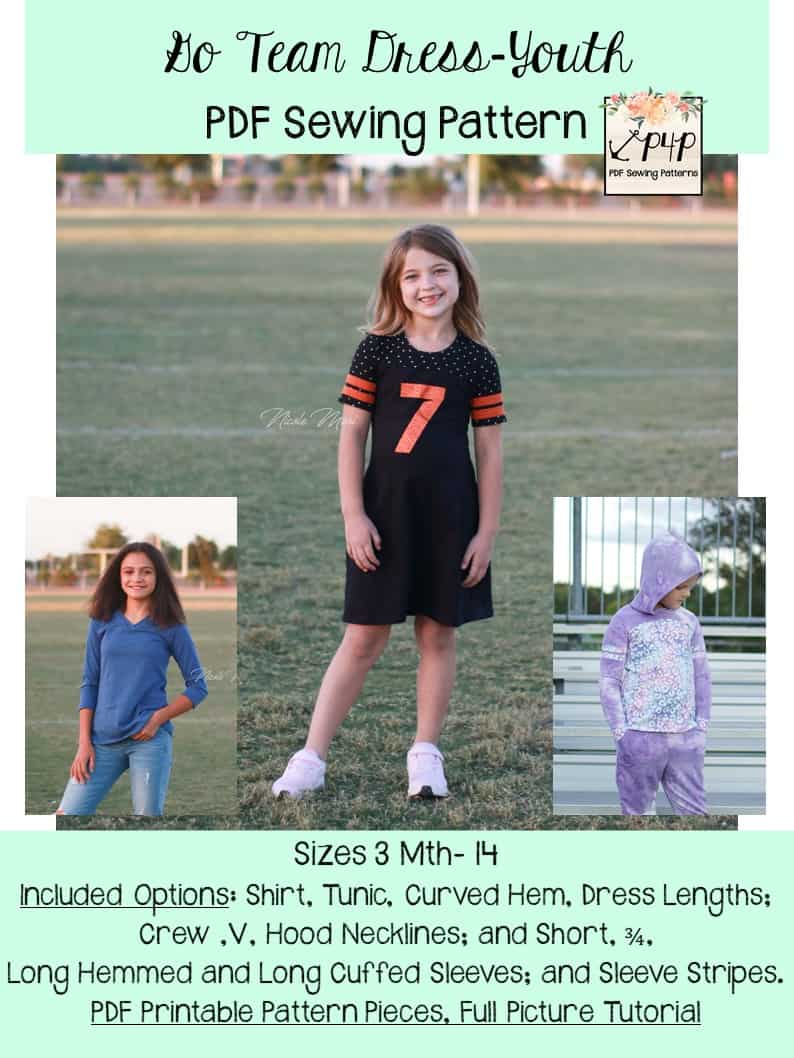
For this pattern, the youth sizes range from 3m – 14 and the adult sizes are for the size ranges from XXS – Plus 5X!  

The options for the Go Team Dress includes:

  • Crew, V and Hooded Necklines.
  • Short, 3/4, Long Hemmed, and Long Cuffed Sleeve Lengths.
  • Adult sizes hem lengths: Crop, Shirt, Tunic and Knee.
  • Youth sizes hem lengths: Shirt, Tunic, Curved Hem, and Dress Lengths.
  • Stylish front + back yokes.
  • Optional Sleeve Stripes.


*Want to learn more about how to measure yourself for these pattern?  We’ve got you covered with an in-depth blog HERE.  And in case you’re new to Patterns for Pirates and PDF patterns in general, we have a great blog full of new-user tips HERE to help you get started!  As with all of our current releases and updates, the pdfs now include our layers feature and can be found in Letter, A4, A0 and projector sizes.  And for even more helpful fun, we have a free* printable that you can use to help record your measurements as you take them.

Let’s take a look at the different ways we can sew up these patterns!

GO TEAM JERSEY + GO TEAM DRESS – NECKLINES
 
GO TEAM JERSEY + GO TEAM DRESS – SLEEVE LENGTHS
 
GO TEAM JERSEY + GO TEAM DRESS OPTIONAL SLEEVE STRIPES
 
GO TEAM DRESS – HEMLINES

What are you waiting for?  Head on over and grab yourself a copy of the Go Team patterns!  They are available on sale (no code needed) through 11:59pm CST, Friday October 22, 2021.

GO TEAM JERSEY | GO TEAM JERSEY – YOUTH

GO TEAM DRESS | GO TEAM DRESS – YOUTH

GO TEAM DRESS + JERSEY BUNDLE

Maybe hoping for a little more inspiration before you make the purchase?  Head over to our Facebook group where you can see tester albums full of amazing images!

Go Team Jersey Album | Go Team Jersey – Youth Album

Go Team Dress Album | Go Team Dress – Youth Album

 

Filed Under: Pattern Release 2 Comments

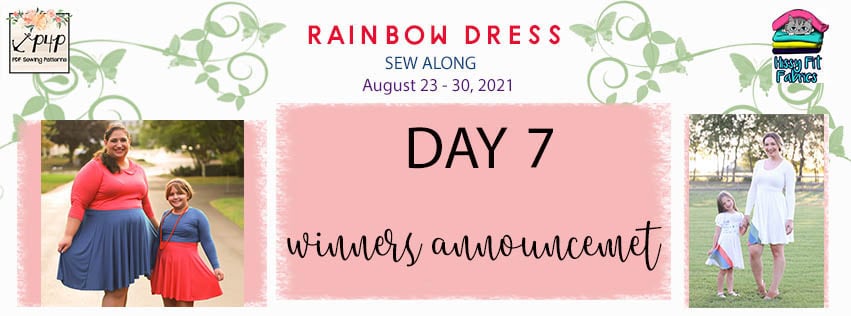
Rainbow Dress SEW ALONG – day 7

August 31, 2021

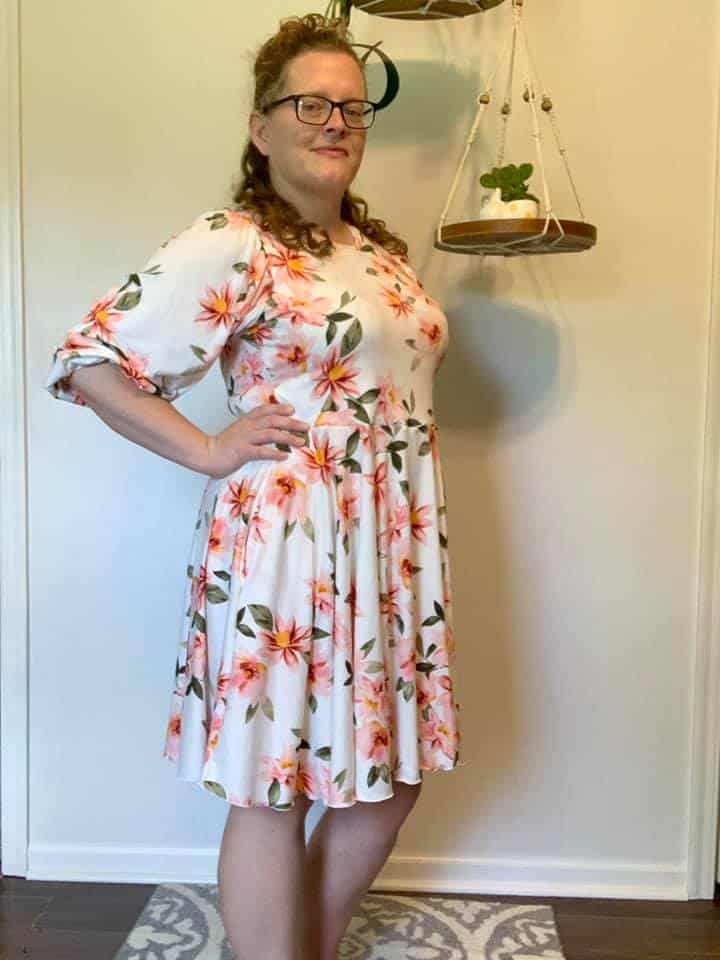
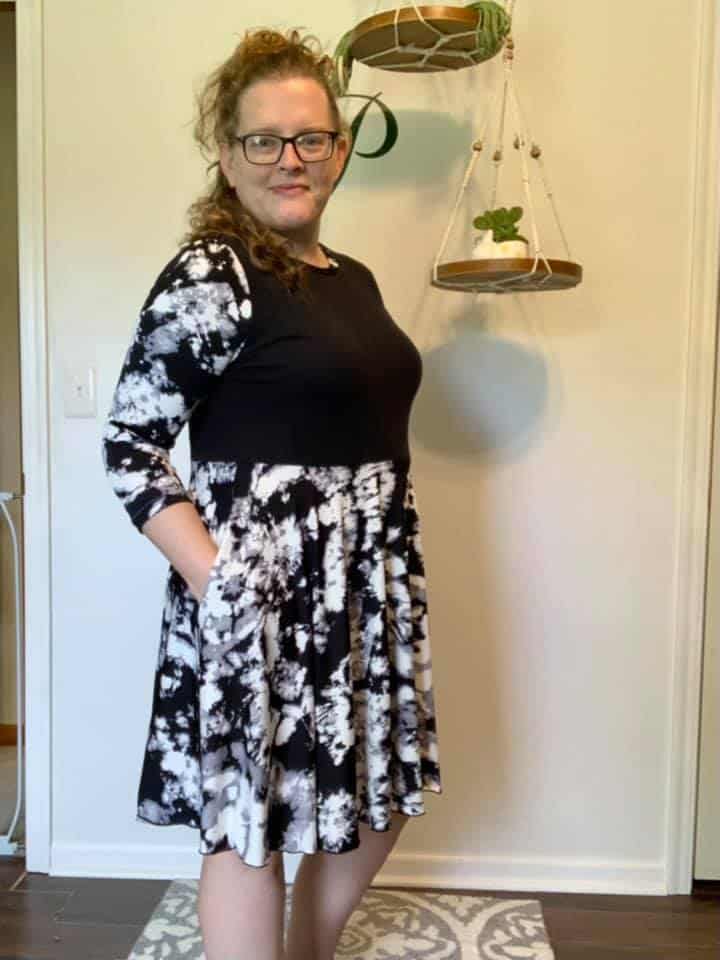
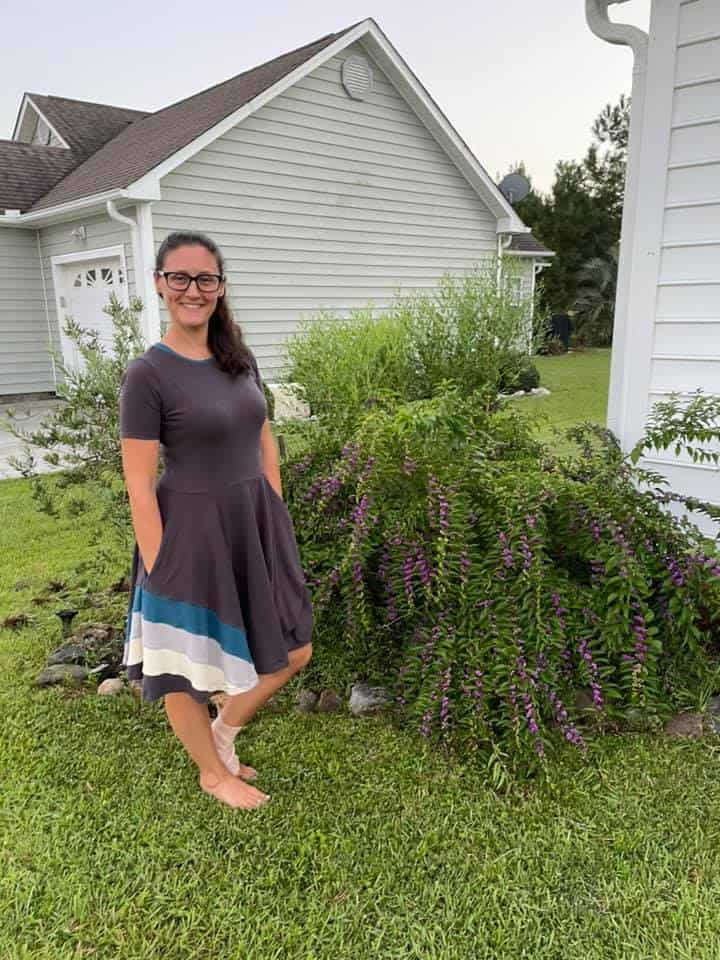
Hello, friends! Thank you so much for joining me last week. We absolutely loved seeing your Rainbow dress creations. Without further ado…

Our first winner is Patricia Mastin ! Patricia won a $20 gift card to Patterns for Pirates as well as a $50 shop credit to Hissy Fit Fabrics.


Congratulations Azure Glowacki Bednarcik ! She is our second winner! Azure won a $20 gift card from Made for Mermaids and a $50 shop credit to Hissy Fit Fabrics.


A big THANK YOU to our sew along sponsor. Make sure you check out Hissy Fit Fabrics on Facebook to keep up to date with their sales and preorders.


Thank you for joining us this week and make sure you share your gorgeous creations in the P4P Facebook group and Instagram. Stay tuned in the Sew Along group for the mermaids’ next sal announcement.

Rainbow Dress SAL – day 1 | Cut fabric

Rainbow Dress SAL – day 2 | Create rainbow skirt and add optional pockets

Rainbow Dress SAL – day 3 | Create collar

Rainbow Dress SAL – day 4 | Sew shoulder seams and add neckband

Rainbow Dress SAL – day 5 | Add sleeves and sew side seams

Rainbow Dress SAL – day 6 | Add skirt and hem

Rainbow Dress SAL – day  7 | Winners Announcement 

Filed Under: Pattern Release, Sew-A-Long, Uncategorized Leave a Comment

Rainbow Dress SEW ALONG – day 6

August 28, 2021

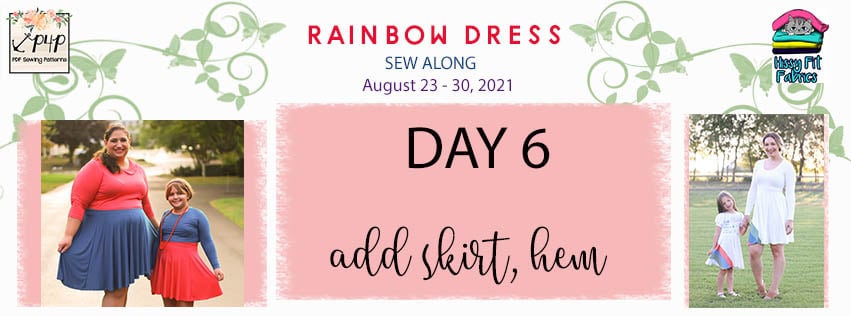
Wooohoo! You did it! Last sew along day is here and all we have to do is add sew then skirt to the bodice and hem it. Easy peasy!

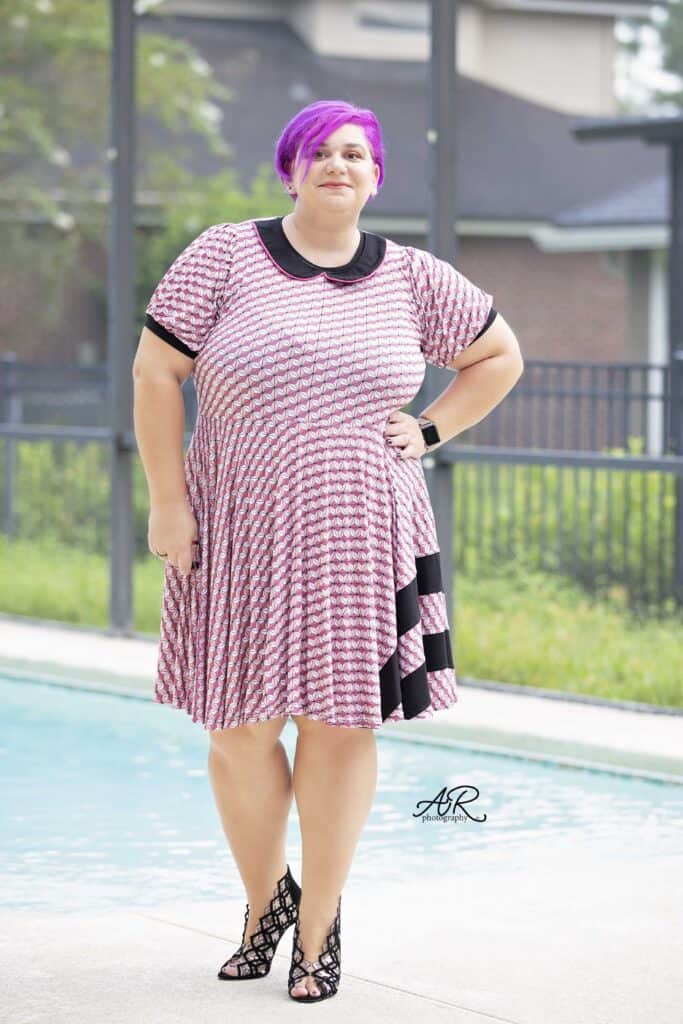
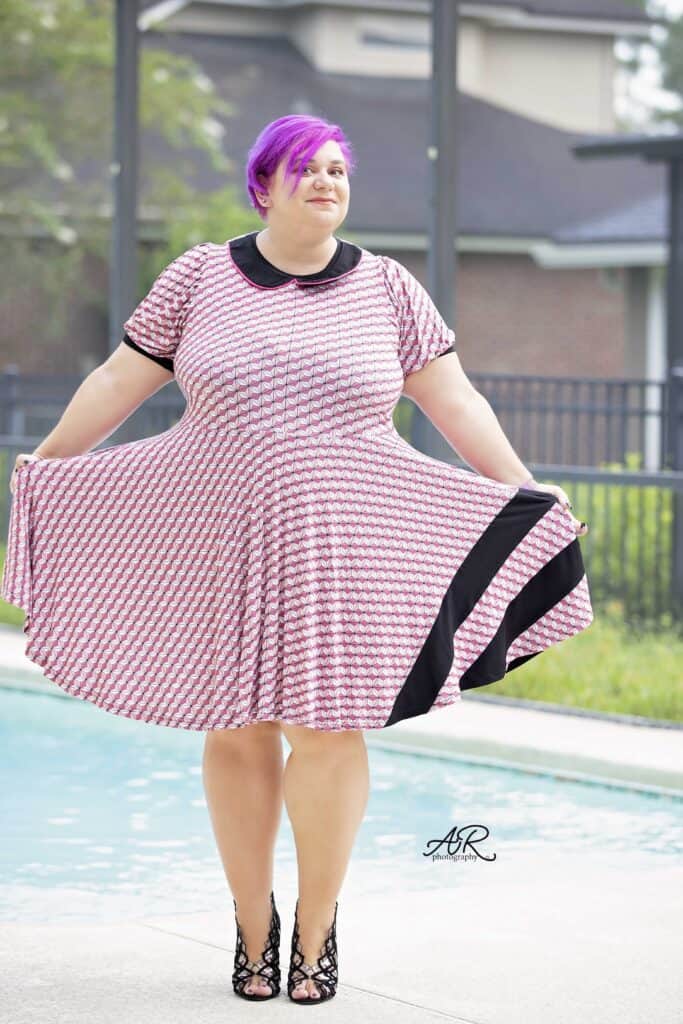
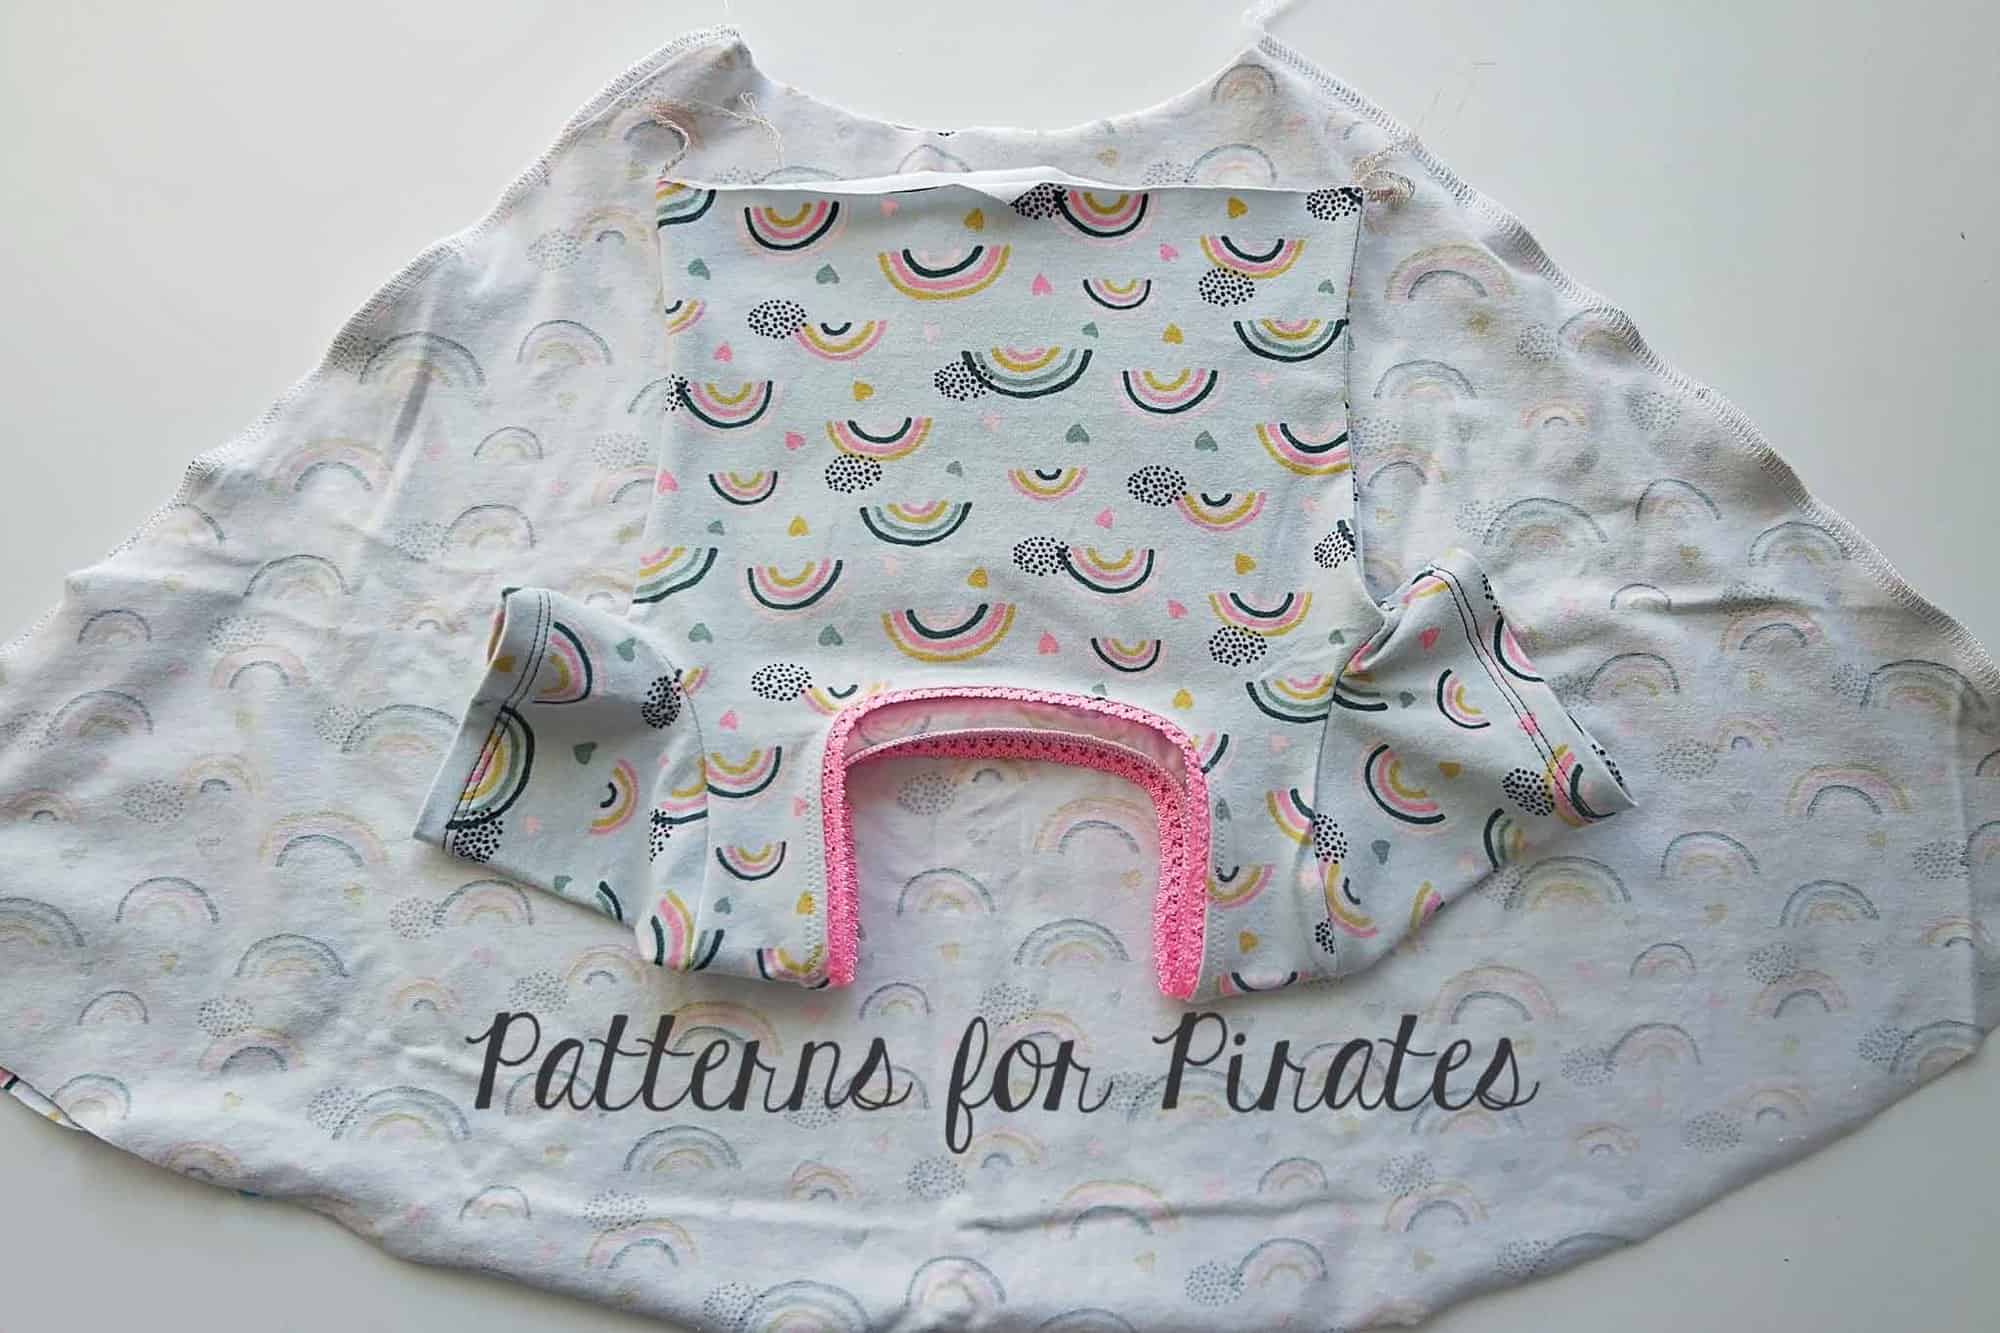
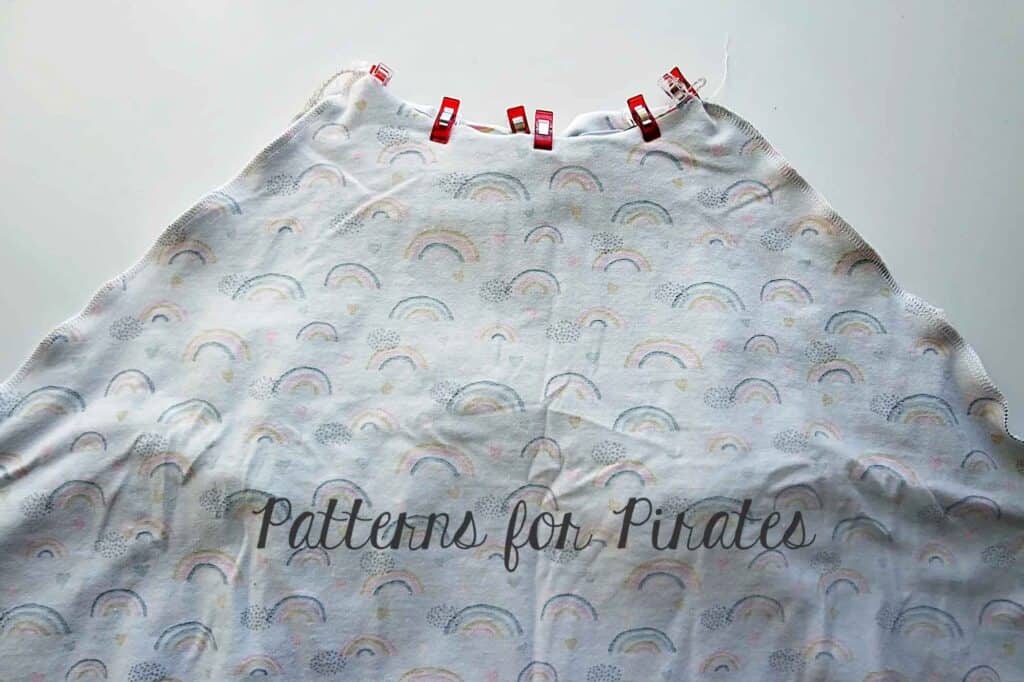
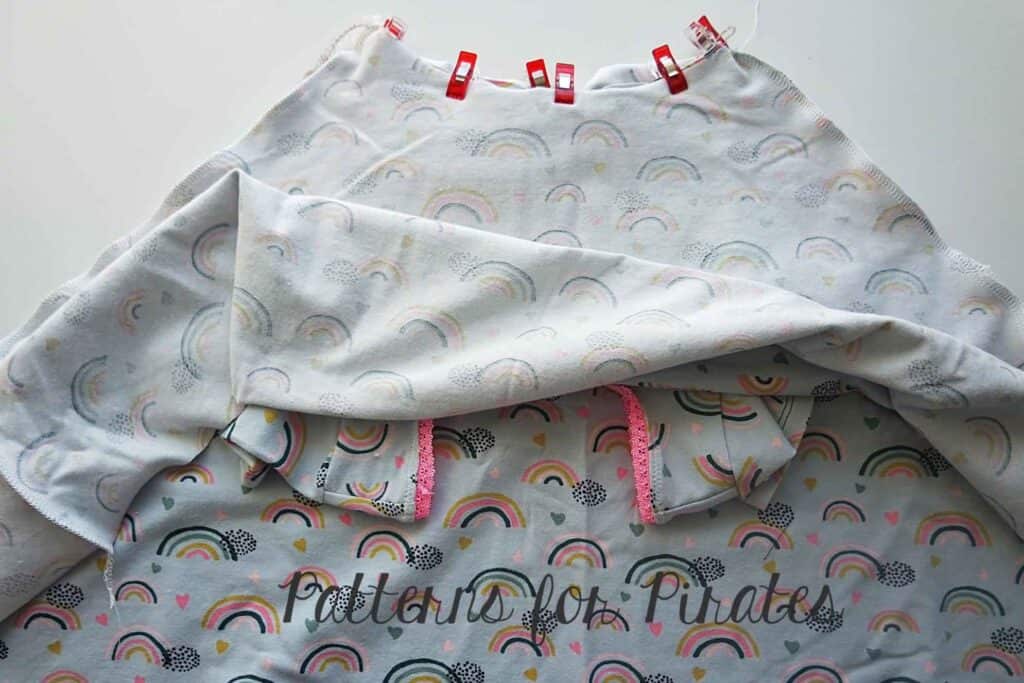
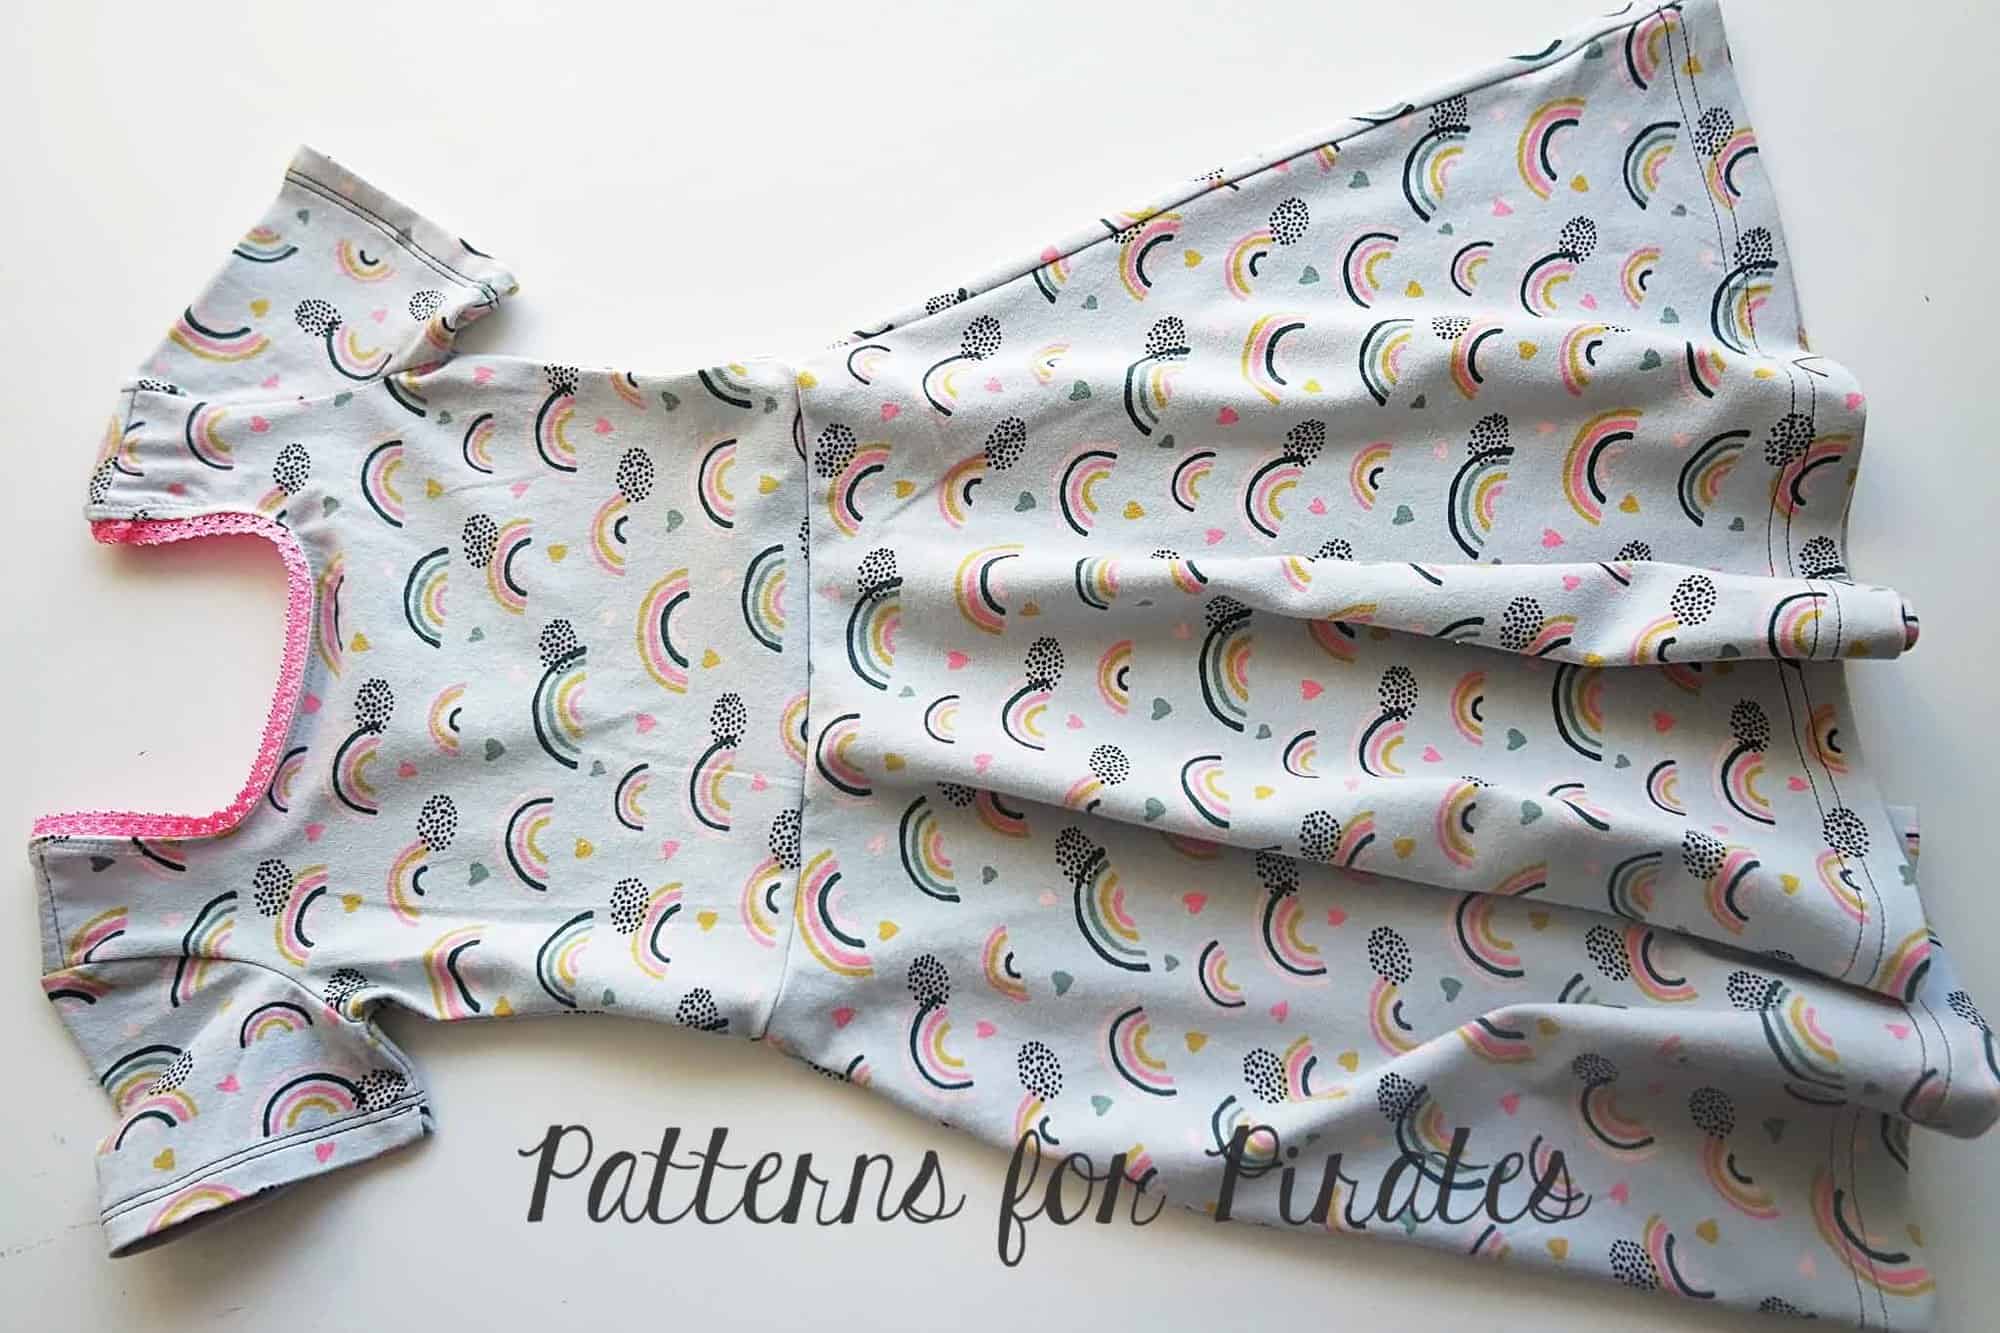
Mark the center of the front and back bodice with a pin or a clip. The skirt pattern has notches to show its center. Pin the skirt to the bodice, right sides together, matching the center marks and the side seams. Sew with the serger or a stretch stitch. Optionally you can top stitch the seam allowance up.

Lastly, hem the bottom of the skirt by folding 1” and PRESSING! Do not skip steam pressing before you sew…and after. You sew the hem using your sewing machine’s twin needles option or your coverstitch as I have. Before you start, take a look over our Hemming blog because we have a few tips for easy and successful hemming. If you are finishing the bottom hem using twin needles, a good refresher blog is the P4P University Twin Needles Tips.

Last Rainbow dress SAL video is below. Once you complete your project, post a picture of your finished dress in the comments of day 6 photo of the sew along album. That’s where the team will pick the two winners. I will announce them on the blog on Tuesday. 


Rainbow Dress SAL – day 1 | Cut fabric

Rainbow Dress SAL – day 2 | Create rainbow skirt and add optional pockets

Rainbow Dress SAL – day 3 | Create collar

Rainbow Dress SAL – day 4 | Sew shoulder seams and add neckband

Rainbow Dress SAL – day 5 | Add sleeves and sew side seams

Rainbow Dress SAL – day 6 | Add skirt and hem

Rainbow Dress SAL – day  7 | Winners Announcement 

Filed Under: Pattern Release, Sew-A-Long, Uncategorized Leave a Comment

Rainbow Dress SEW ALONG – day 5

August 27, 2021

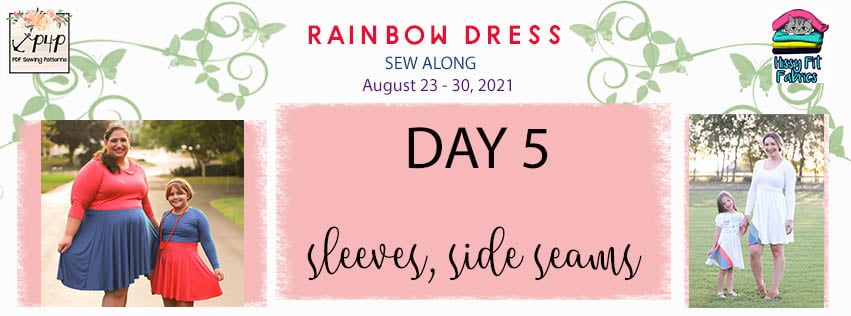
Ahoy, matey! We are almost there! Today we finish the bodice by adding the sleeves. 

The Rainbow Dress includes 2 style sleeves, a fitted style and a gathered one. Both available in short, 3/4 and long length. The fitted sleeves are finished with a hem. The gathered sleeves are banded.

I opted for the gathered style, so you can see this option in today’s video. Start by sewing two rows of stitches, one about 1/4” and one 3/8” away from the raw edge, in between the two notches. Use the longest stitch length your machine allows. Do not backstitch! Leave long tails at the beginning and end of each row. Pull on then tails to gather the sleeve, matching the 3 notches on the arm curve with the ones on the bodice (front, shoulder seam, back).  Pin in place and stitch. 

Sew each of the arm bands, right sides together at the short ends to create a loop. Gather the bottom of the sleeves to match then arm bands. All you have left to do is sew the bands to the sleeves, right sides together, and press. 

Here is day 5 video. Once you finish the bodice, post a picture of your progress in the comments of day 5 photo in the sew along album. See you back here tomorrow for the final steps!

Rainbow Dress SAL – day 1 | Cut fabric

Rainbow Dress SAL – day 2 | Create rainbow skirt and add optional pockets

Rainbow Dress SAL – day 3 | Create collar

Rainbow Dress SAL – day 4 | Sew shoulder seams and add neckband

Rainbow Dress SAL – day 5 | Add sleeves and sew side seams

Rainbow Dress SAL – day 6 | Add skirt and hem

Rainbow Dress SAL – day  7 | Winners Announcement 

Filed Under: Pattern Release, Sew-A-Long, Uncategorized Leave a Comment

Rainbow Dress SEW ALONG – day 4

August 26, 2021

Welcome to the fourth day! Today we start working on the bodice, pretty quick sewing day. 

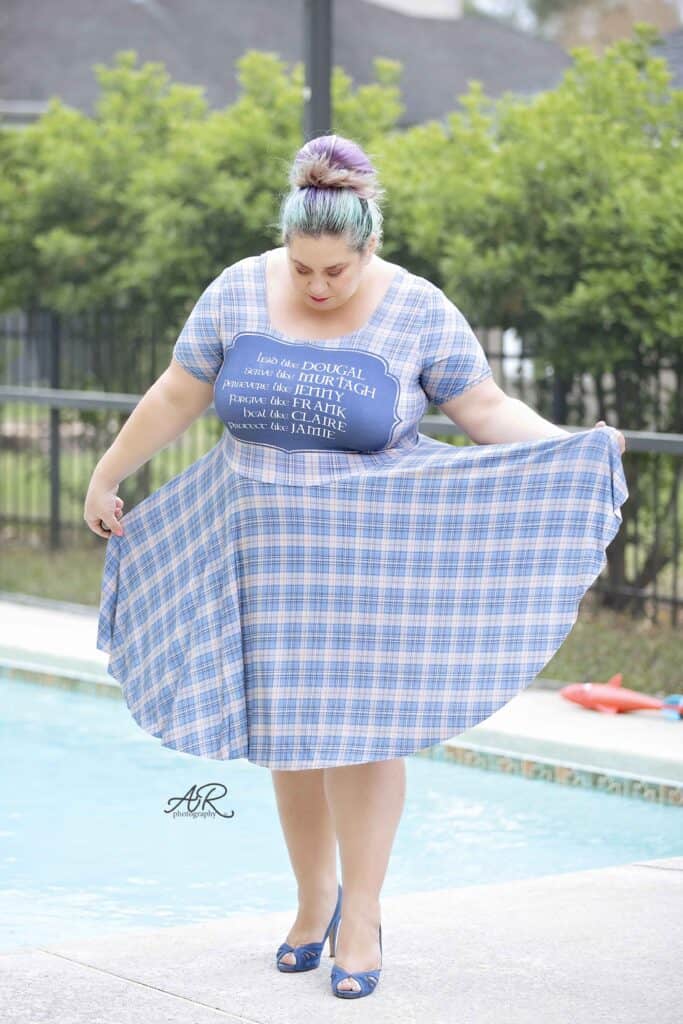
Let’s start by placing the bodice front and back, right sides together, aligning the shoulder edge. If your fabric is on the stretchier/heavier side, you can add clear elastic into the seam. Just remember to keep the seam allowance 1/2”, even if the clear elastic is narrower than that. Sew the shoulder seam with the serger or a stretch stitch on your sewing machine.

Whether you chose the high or the low scoop neckline(adult pattern only), take a look over our P4P University Neckbands 101 before you attach then neckband. 

Top stitching then neckband is optional. However, if you to decide to top stitch the collar style, I strongly recommend using a triple stretch stitch or a lightning bolt stitch for this step. 

In the video below I show you how to sew the shoulder seam and add the neckband using a serger. When you finish these steps be sure to post a picture of your progress in the comments of the Day 4 photo  (album is in the M4M & P4P Sew along group). See you back here tomorrow!
Rainbow Dress SAL – day 1 | Cut fabric

Rainbow Dress SAL – day 2 | Create rainbow skirt and add optional pockets

Rainbow Dress SAL – day 3 | Create collar

Rainbow Dress SAL – day 4 | Sew shoulder seams and add neckband

Rainbow Dress SAL – day 5 | Add sleeves and sew side seams

Rainbow Dress SAL – day 6 | Add skirt and hem

Rainbow Dress SAL – day  7 | Winners Announcement 

Filed Under: Pattern Release, Sew-A-Long, Uncategorized Leave a Comment

Rainbow Dress SEW ALONG – day 3

August 25, 2021

Welcome to day 3 of our Rainbow dress sew along! 

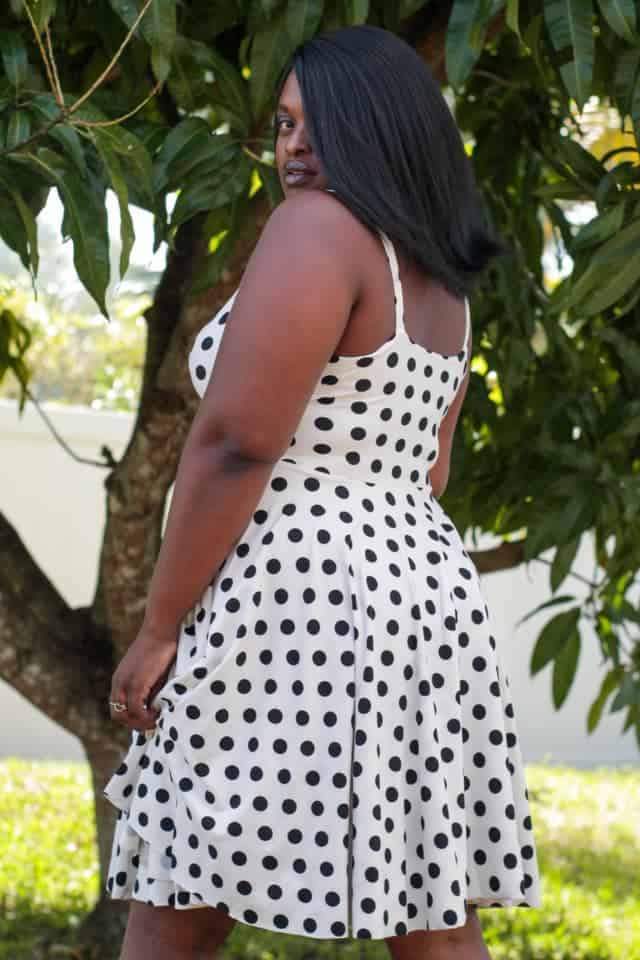
Today we create the collar and baste it to the front bodice. You will notice that the collar lining pieces are slightly smaller than the main lining. That is intentional, it will help the collar lay nice and flat once sewn. The Rainbow dress collar can be woven or knit. I strongly encourage you to interface at least the lining piece with a woven interfacing, such as Pellon SF101. 

I have decided to add a little extra detail to my Rainbow dress collar so you will see how I incorporate piping in this project. I prefer store bought piping because it saves me the effort and time, but you can certainly make your own. To create your piping from scratch, simply cut strips of woven fabric that are 1.25″ wide on the bias. Press the strip lengthwise wrong sides together. Lay your cord in the crease and stitch with a long straight stitch as close to the cord as possible. OR….go to Joann or Walmart and grab some pre made piping 😉

Pin the piping to the outer curve of the main collar pieces, aligning the raw edges. Start about 1/2″ lower than the top and finish about 1/2″ from the end, veering your piping. This detail will ensure that there is no extra bulk in the shoulder seam or neckline. Baste it in place. I show you this step in the day 3 video.

Tip: use a zipper foot when working with piping! 

Now that the piping is added, place your lining piece over the main, right sides together. Ease the collar pieces as show in Judy’s video below and stitch.  

Turn the two collar pieces right side out and give them a good steam press! Optionally, you can top stitch the outer edge. If you added piping, use the zipper foot when top stitching.

The final step for today is to baste your collar to the front bodice. Align  the raw edges of the collar with the neckline and shoulder seam. Remember that for the adult Rainbow dress this option is only available for the high neckline. 

You can see how I created the collar in the day 3 video below. Once you complete these steps, add your check in photo in the comments of day 3 pic. You can find the check in album on FB, in our sew along group. 
Rainbow Dress SAL – day 1 | Cut fabric

Rainbow Dress SAL – day 2 | Create rainbow skirt and add optional pockets

Rainbow Dress SAL – day 3 | Create collar

Rainbow Dress SAL – day 4 | Sew shoulder seams and add neckband

Rainbow Dress SAL – day 5 | Add sleeves and sew side seams

Rainbow Dress SAL – day 6 | Add skirt and hem

Rainbow Dress SAL – day  7 | Winners Announcement 

Filed Under: Pattern Release, Sew-A-Long, Uncategorized Leave a Comment

Rainbow Dress SEW ALONG – day 2

August 24, 2021

Welcome to the second day of our Rainbow dress Sew Along! Today we create the skirt by sewing the colorblock pieces and adding the the optional pockets. But let’s be honest here, who would skip the pockets? 😉

I love to lay the pieces in order (1 to 5) on the table, right side up to make sure I don’t mix them up. Place piece 5 over piece 4 and sew along the edge. I like to use my serger for this step (just remember the seam allowance is 1/2″!) however, you can sew the colorbloking part with a straight stitch. That part of the skirt will not be stretched when worn. 

Top stitching the seams is optional, however, encouraged. I don’t like the feel of the seam allowance  against my skin so I always top stitch it down. You can do this with your coverstitch, twin needles or just a simple straight stitch. 

It’s pockets time! Using the marking on the pattern, place your pocket pieces on the skirt, right sides together. Sew this step with your sewing machine! I show you in today’s video how to alternate between the sewing machine and serger when you add pockets to the skirt. 

You can see how I create my skirt in the video below. Once you complete today’s steps, post a picture of your progress in the comments of day 2 photo. You can find the Rainbow dress SAL album in the M4M/P4P sew along group on Facebook. 
Rainbow Dress SAL – day 1 | Cut fabric

Rainbow Dress SAL – day 2 | Create rainbow skirt and add optional pockets

Rainbow Dress SAL – day 3 | Create collar

Rainbow Dress SAL – day 4 | Sew shoulder seams and add neckband

Rainbow Dress SAL – day 5 | Add sleeves and sew side seams

Rainbow Dress SAL – day 6 | Add skirt and hem

Rainbow Dress SAL – day  7 | Winners Announcement 

Filed Under: Pattern Release, Sew-A-Long, Uncategorized Leave a Comment

Rainbow Dress SEW ALONG – day 1

August 23, 2021

Welcome to the 🌈 Rainbow🌈 Dress SEW ALONG! 

Day 1 is reserved for printing the pattern and cutting the fabric. But first, if you have not purchased the Rainbow dress you can grab it here. If you’re sewing for a little one, a youth pattern is available too. You will get the most bank for your buck with the Bundle option, just think of all the matching dresses and tops! Before you select which style you are sewing along, browse over the Round Up Blog where we show you all options available.

Now that you have the patterns it’s time to select which file format you would like to use. Both the Youth and the Adult come in A4 and Letter format to print at home, A0 format to print with a plotter or at a copy shop AND a projector file. If you use the projector file you will not have to print anything!! That’s definitely my favorite way! You can see in today’s video how I use the file to cut the fabric. 

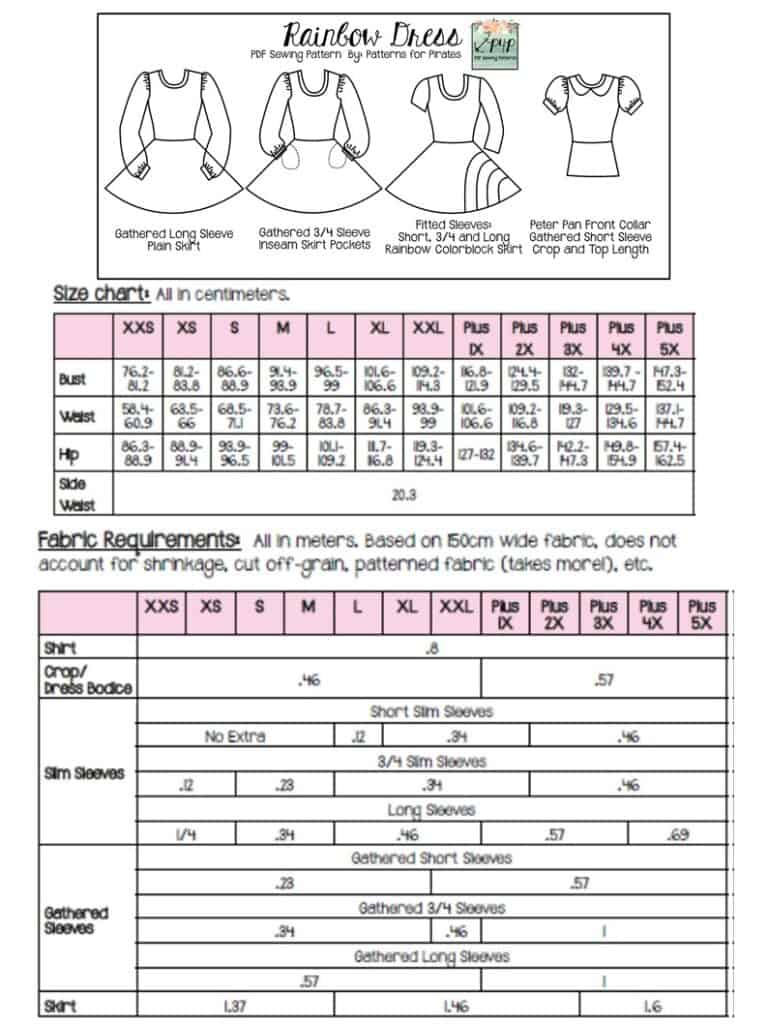
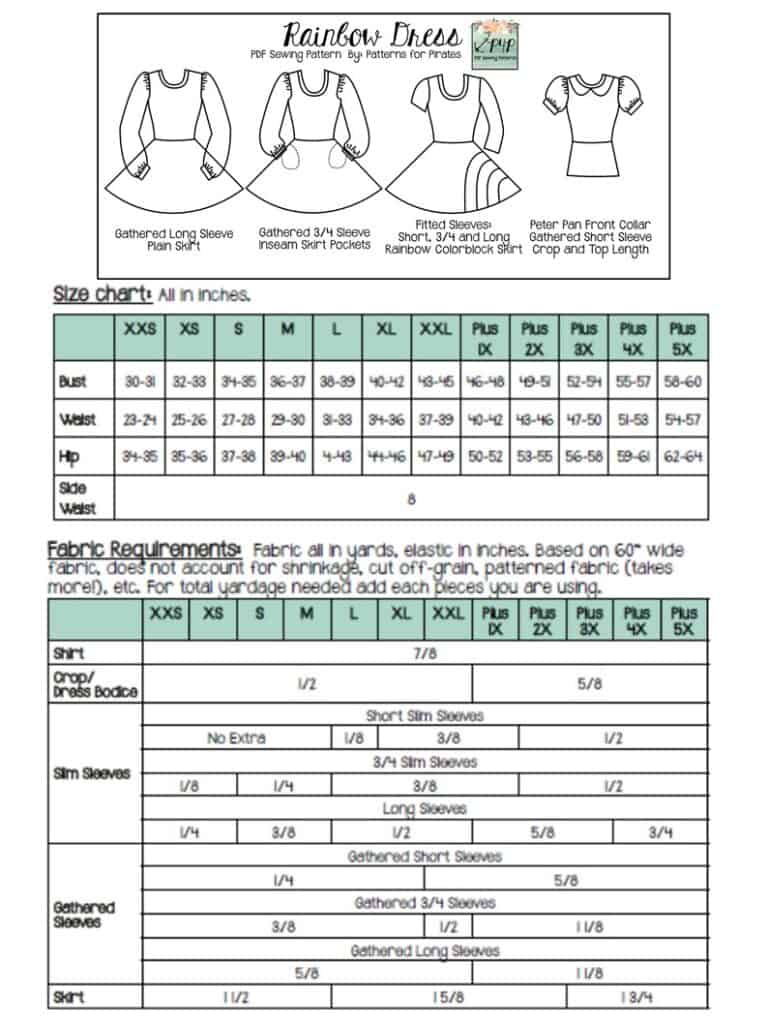
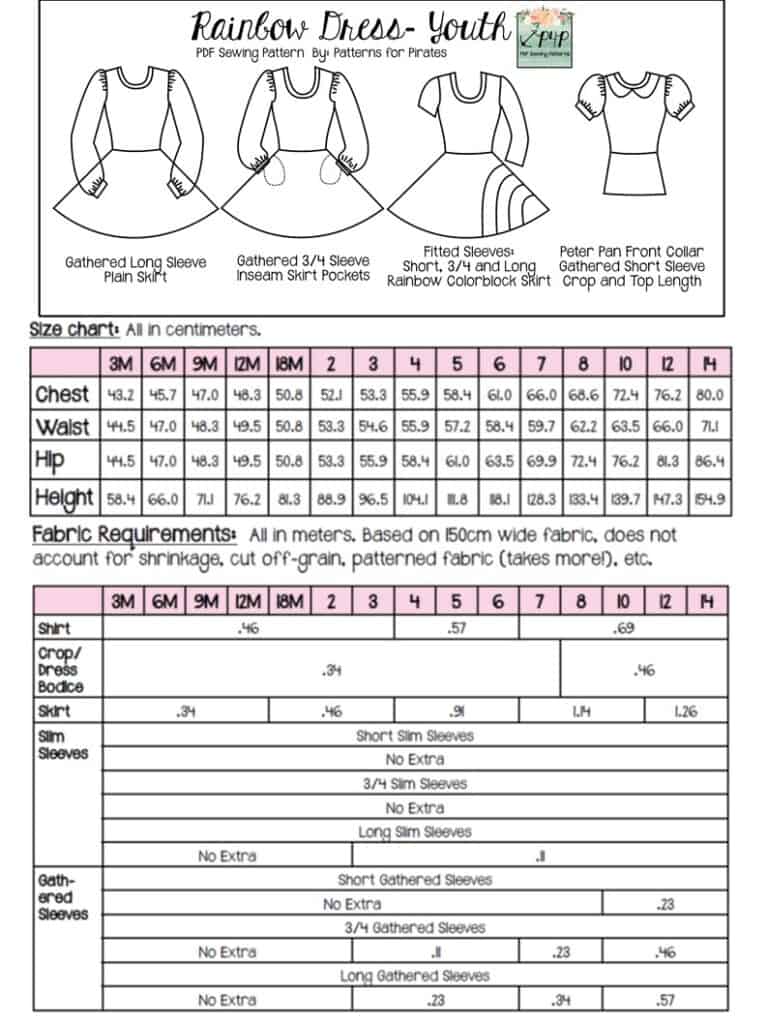
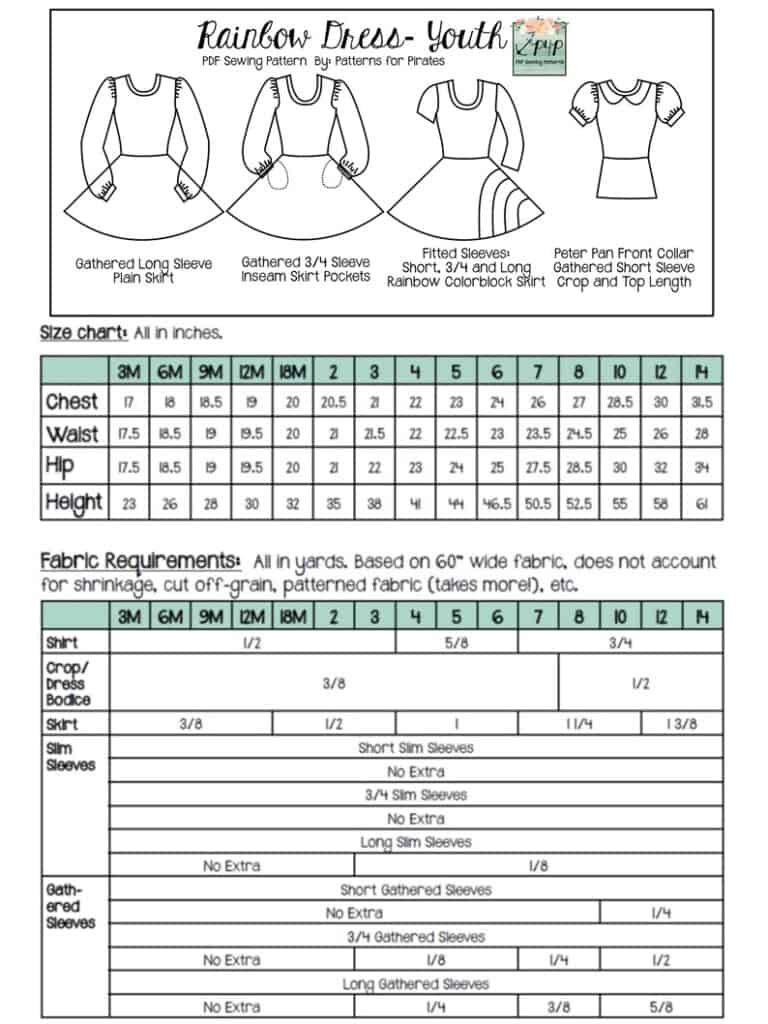
Let’s start by taking the measurements needed for the best fit. P4P has an amazing blog that gives you tips for accurately taking your measurements. You can read all about it here. If your measurements put you in a different size for chest/waist/hips be sure to check out our P4P University blog and grade to achieve the perfect fit. Our most recent patterns include videos as well so be sure to check them out!

Youth Metric
Youth Imperial

Youth Metric
Adult Imperial

Let’s talk a little about the right fabric for this pattern. As you can see in the video below I am using Bamboo Spandex from Hissy Fit Fabrics for my dress. This is by far my favorite knit type for this pattern. I also like a soft Cotton Spandex, sweater knit, Rayon Spandex, Modal, ITY, Cupro and Double Brushed Poly for it. All these bases can be layered so beautifully for cooler weather.

Hissy Fit Fabrics is also the sponsor for this sew along so our two lucky winners will receive gift cards to their shop.

If you are unsure about which knit type will work best for your desired look, take a look over our P4P University Knit Types blog. Judy also included a cheat sheet that you can print. If you are like me and sometime are just keen on using a specific print for a specific pattern, read our Different fabric, different fit blog post before you cut your fabric.

I decided to add a cute piping detail to my collar. I love store bought piping but you can certainly make your own or just use faux piping. 

Day 1 video is posted below. Check it out and once you are done cutting your fabric post a picture of it in the comments of the Day 1 photo of the Rainbow Dress SAL album  in the M4M & P4P Sew Along group.
 

Rainbow Dress SAL – day 1 | Cut fabric

Rainbow Dress SAL – day 2 | Create rainbow skirt and add optional pockets

Rainbow Dress SAL – day 3 | Create collar

Rainbow Dress SAL – day 4 | Sew shoulder seams and add neckband

Rainbow Dress SAL – day 5 | Add sleeves and sew side seams

Rainbow Dress SAL – day 6 | Add skirt and hem
Rainbow Dress SAL – day  7 | Winners Announcement 

Filed Under: Pattern Release, Sew-A-Long, Uncategorized Leave a Comment

Be Bold Bodysuit – Easy Hacks

March 10, 2021

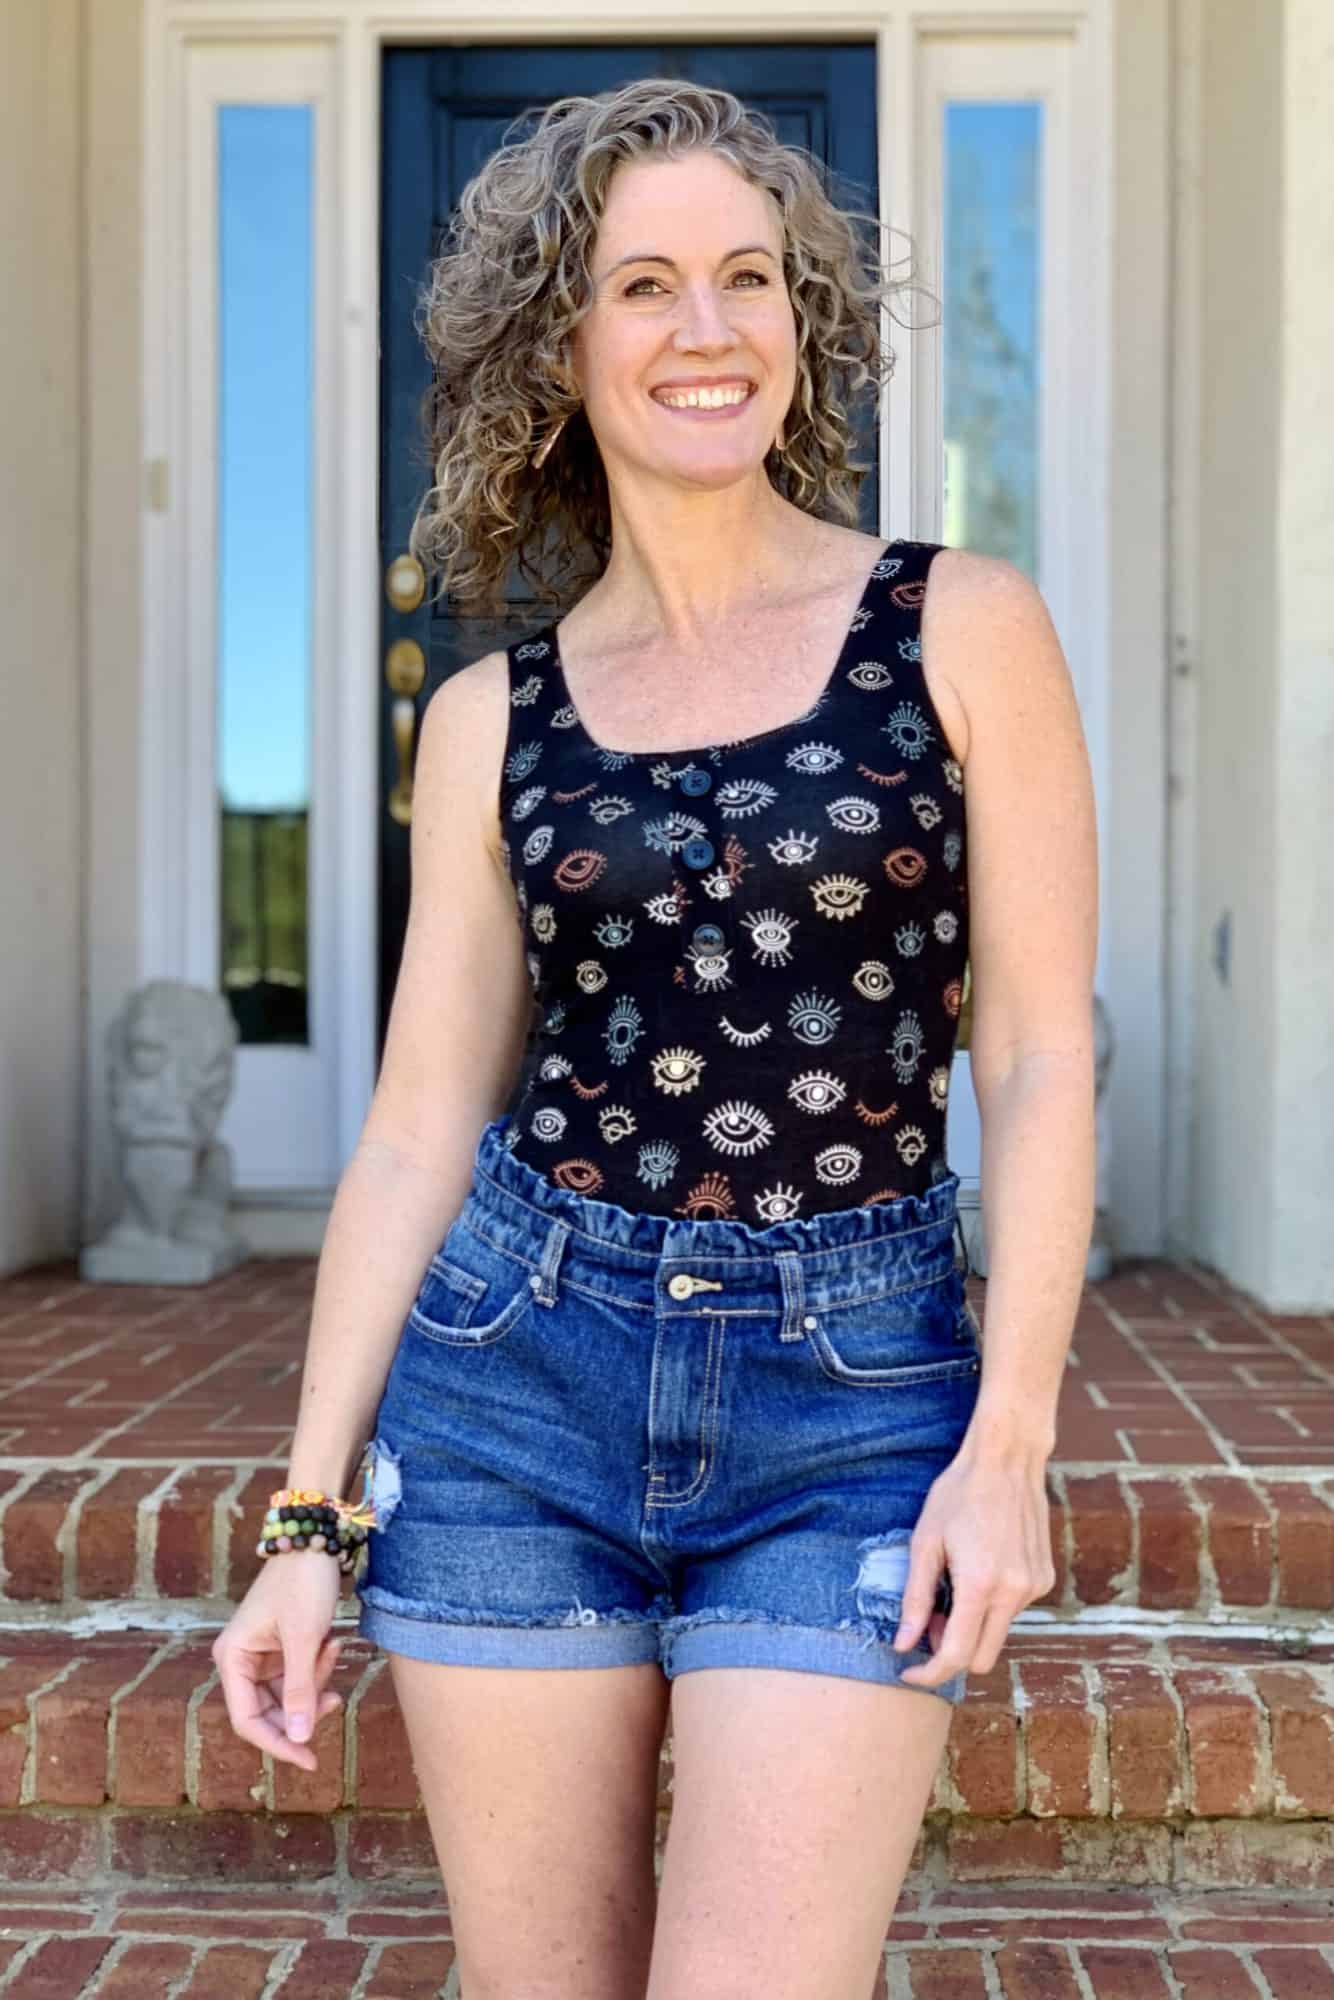
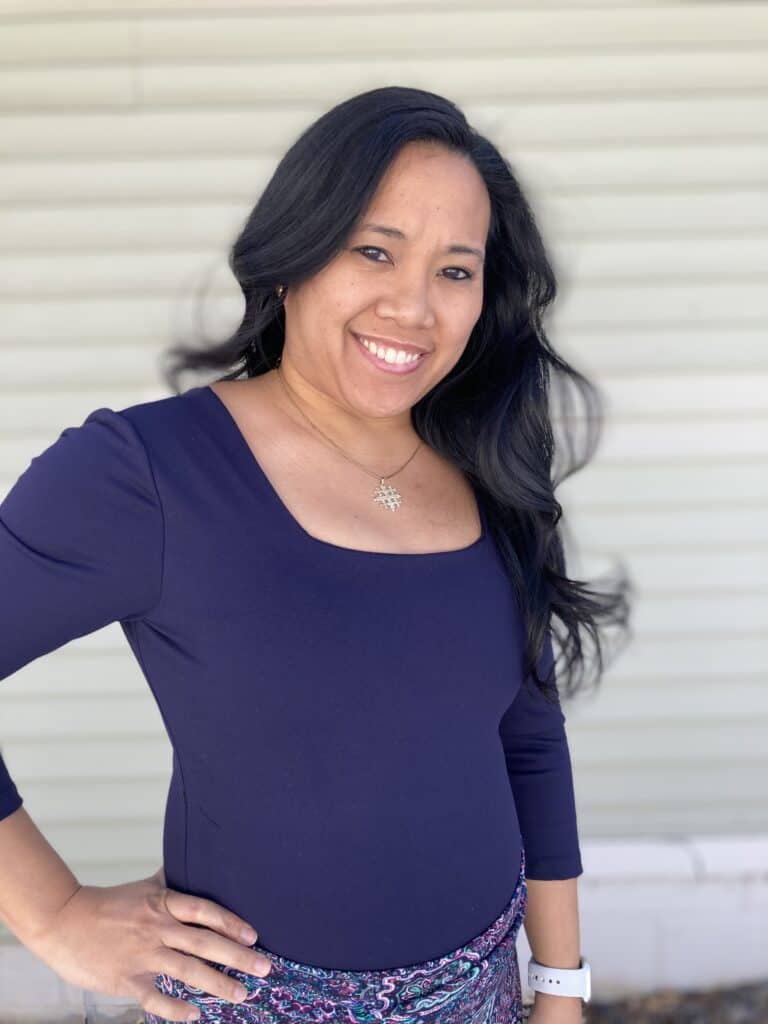
The much anticipated Be Bold Bodysuit has now released. I couldn’t be more thrilled to share with you some easy hacks that the P4P blog team has prepared for you. We will show you how to add a your favorite P4P skirt to the crop top and make it a custom dress. Rachel is adding a faux placket to her Be Bold Bodysuit and Shannon is making a very cropped 😉 crop option. Ohh and did I mention that you can turn the BBB into an undergarment compression bodysuit? Djem is showing you how below. 

…..

Dress 

Let’s start off this easy hacks series with my favorite of all – a dress!! Hello, beautiful! The Be Bold Bodysuit includes a crop top option which makes an excellent bodice for many of the P4P skirt patterns. 


In the mini tutorial below, Judy shows you how to add the X Factor skirt to the Be Bold crop to to create a gorgeous, comfortable square neckline dress. Print the skirt portion of the X Factor pattern and cut the fabric. Sew the side seams right sides together. 

Mark the center of the skirt front and back as well as the centers of the bodice front and back. 

Matching the marked points, pin the skirt and bodice right sides together. Serge or sew with you favorite stretch and a 1/2″ seam allowance. 


Hem the skirt and enjoy your new Be Bold dress! 


I used the same method as above to make a Be Bold – Sweetheart mash. Instead of using the X Factor, I use the Sweetheart dress, Easy peasy! My next mash will be with the Boundless dress. If you chose to to the Be Bold crop with the Boundless gathered skirt, make sure that you use the cutting chart for the natural waist skirt, NOT the empire one. 

My dress below is bamboo spandex and Judy’s baby girl’s dress above is cotton spandex. 


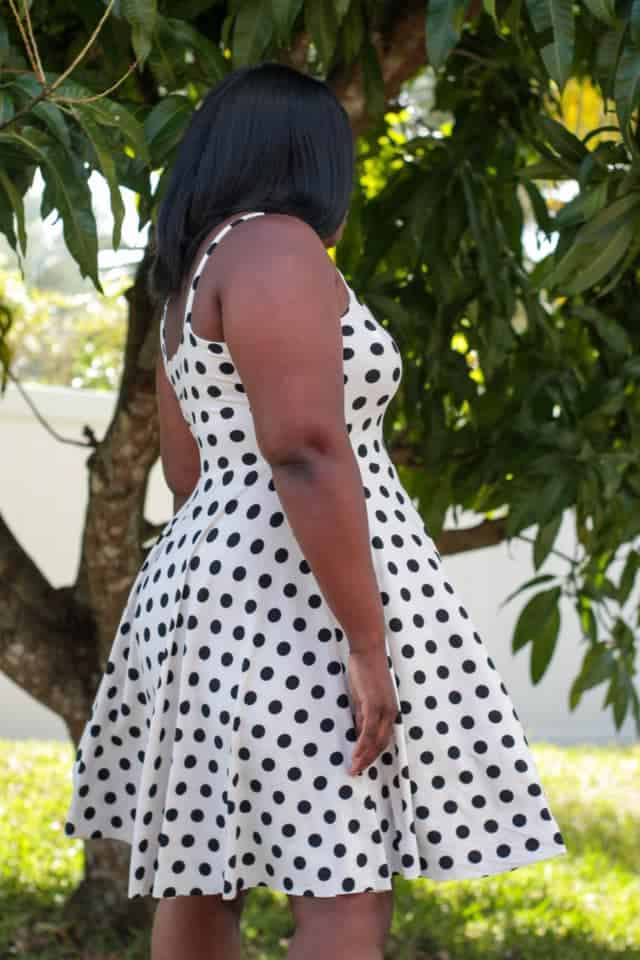
Just look how stunning Sylvia looks in her Be Bold thin strap option mashed with the Sweetheart dress. Her polka dots fabric is double brushed poly. Just radiant! 


…..

Faux Placket

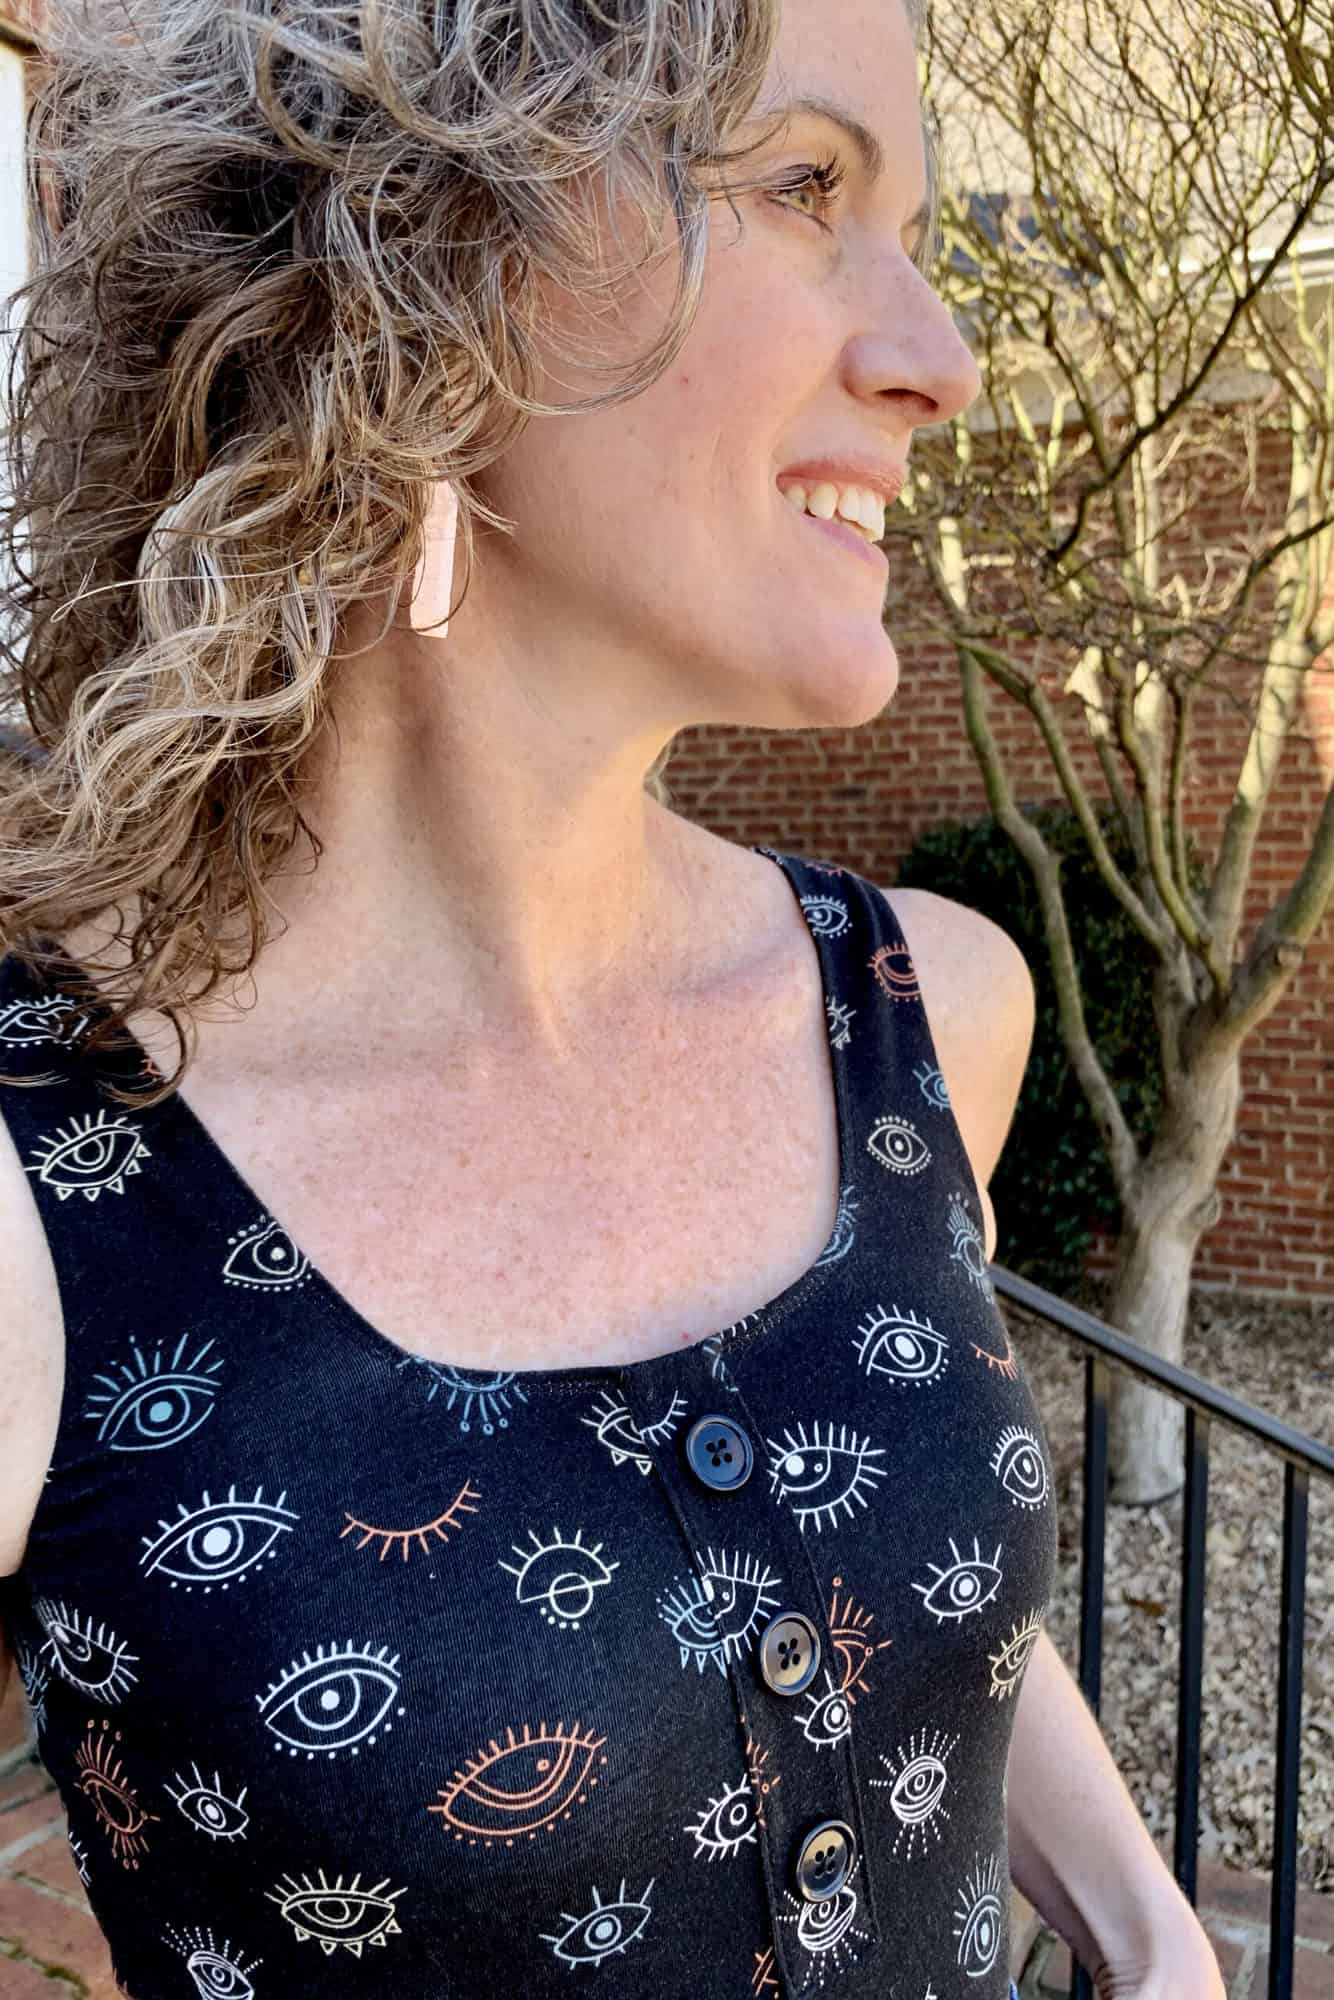
Adding a faux placket is an easy way to gain extra mileage from your Be Bold pattern. And it couldn’t be easier!

You can add a faux placket to any of the Be Bold styles, but I chose to add mine to the tank bodysuit.

Did I say that it couldn’t be easier? Keep reading…

Cut the pattern pieces for your preferred Be Bold style.

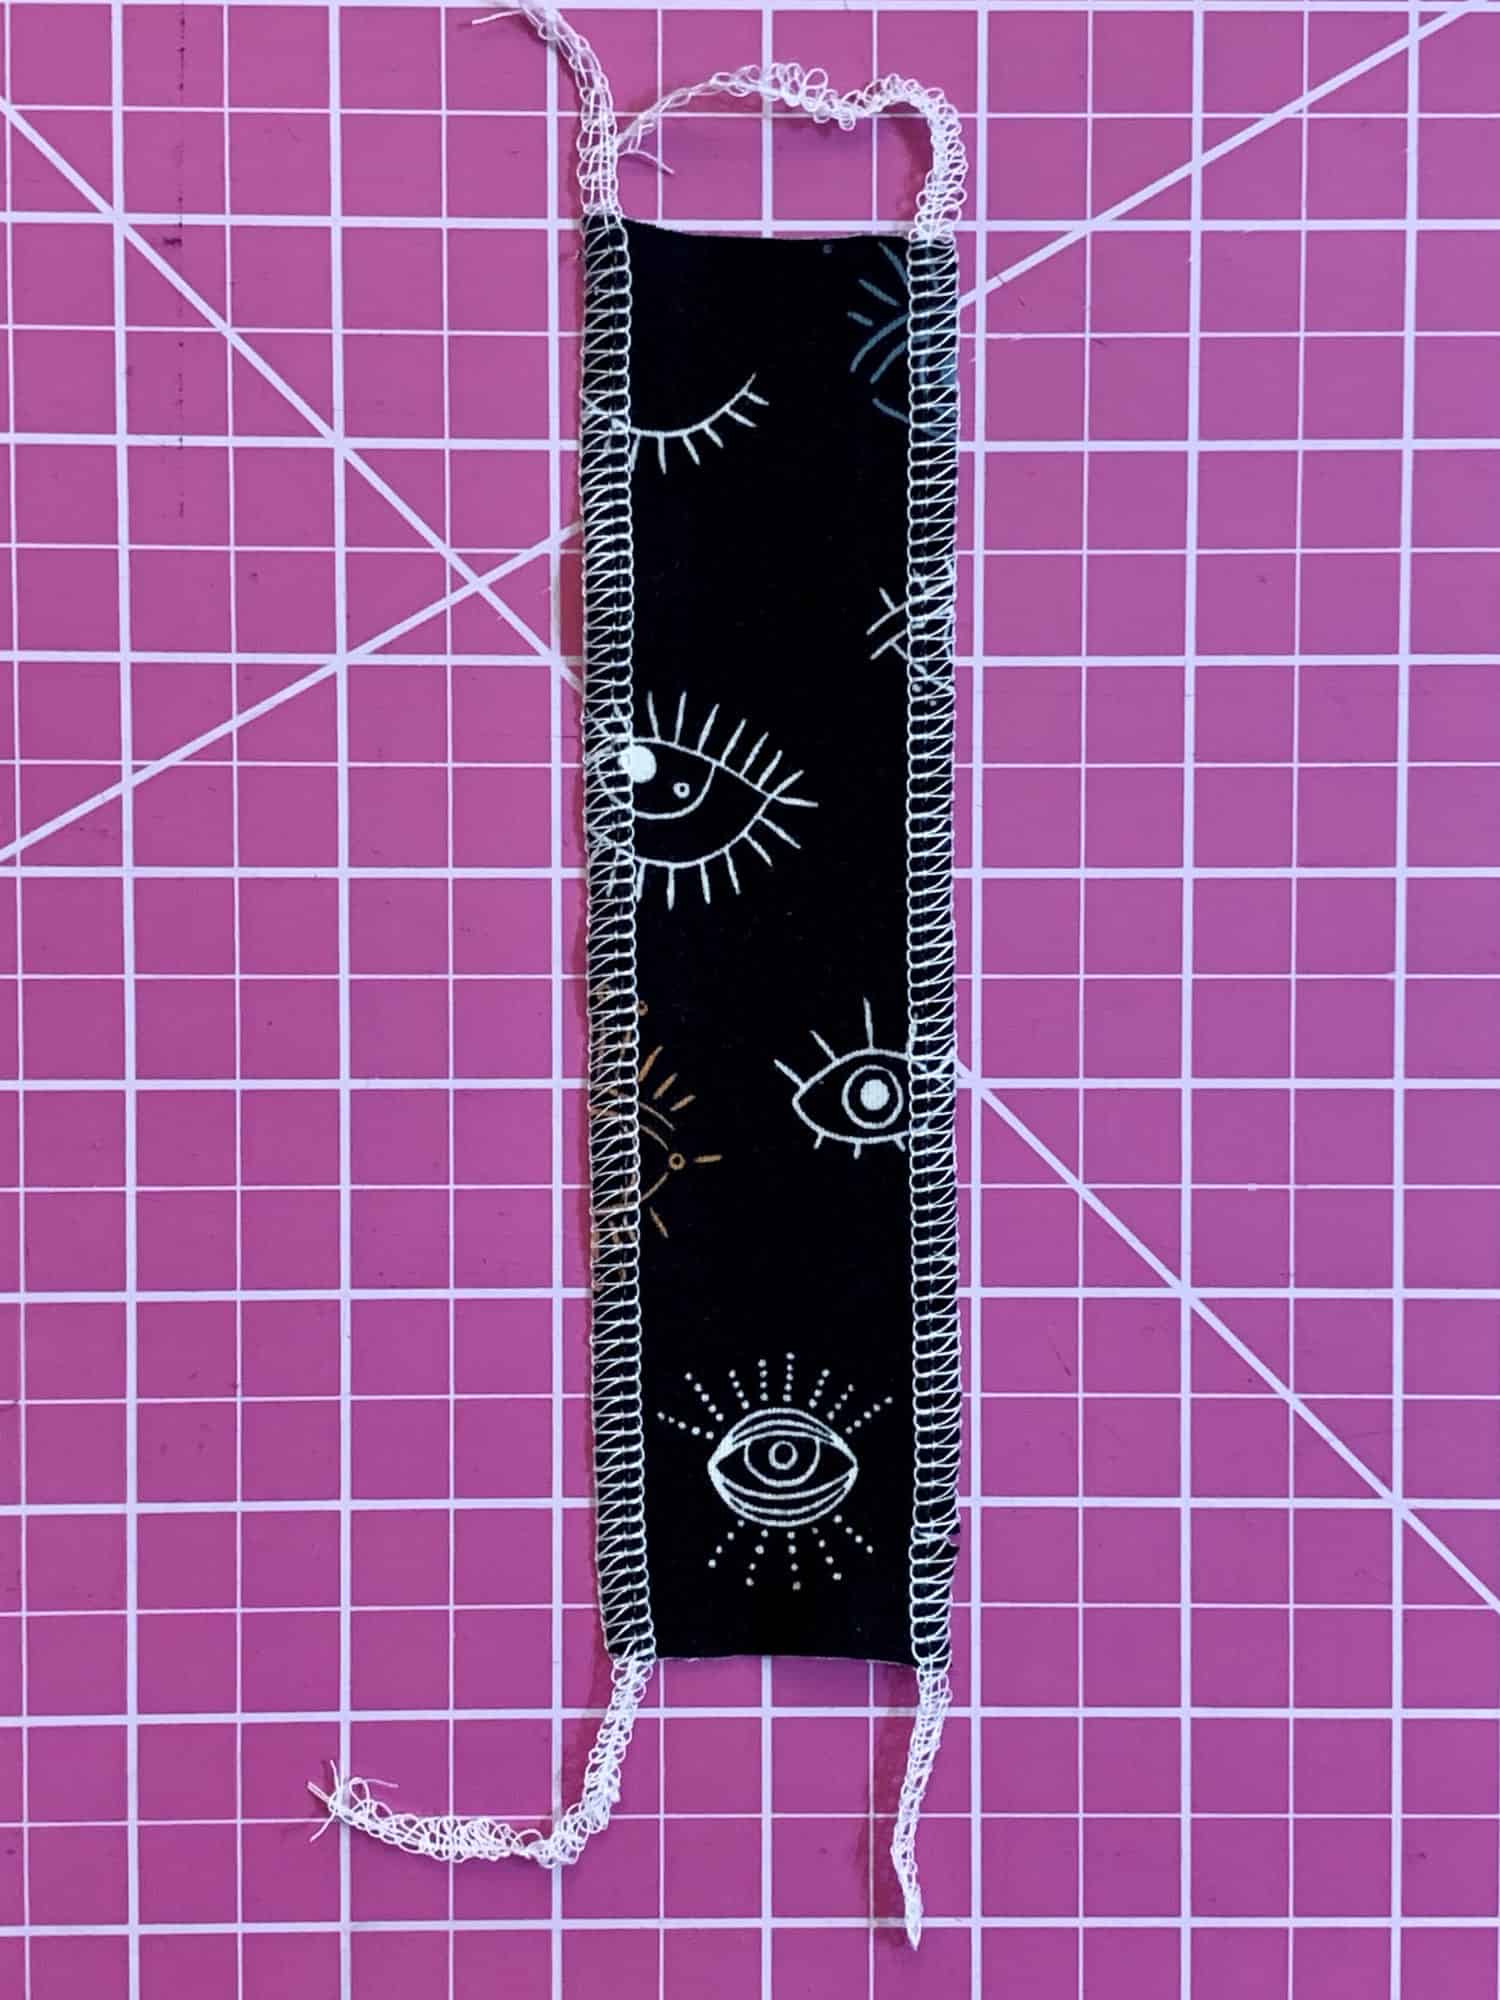
Cut an additional rectangle, 6.5” x 1.75”.

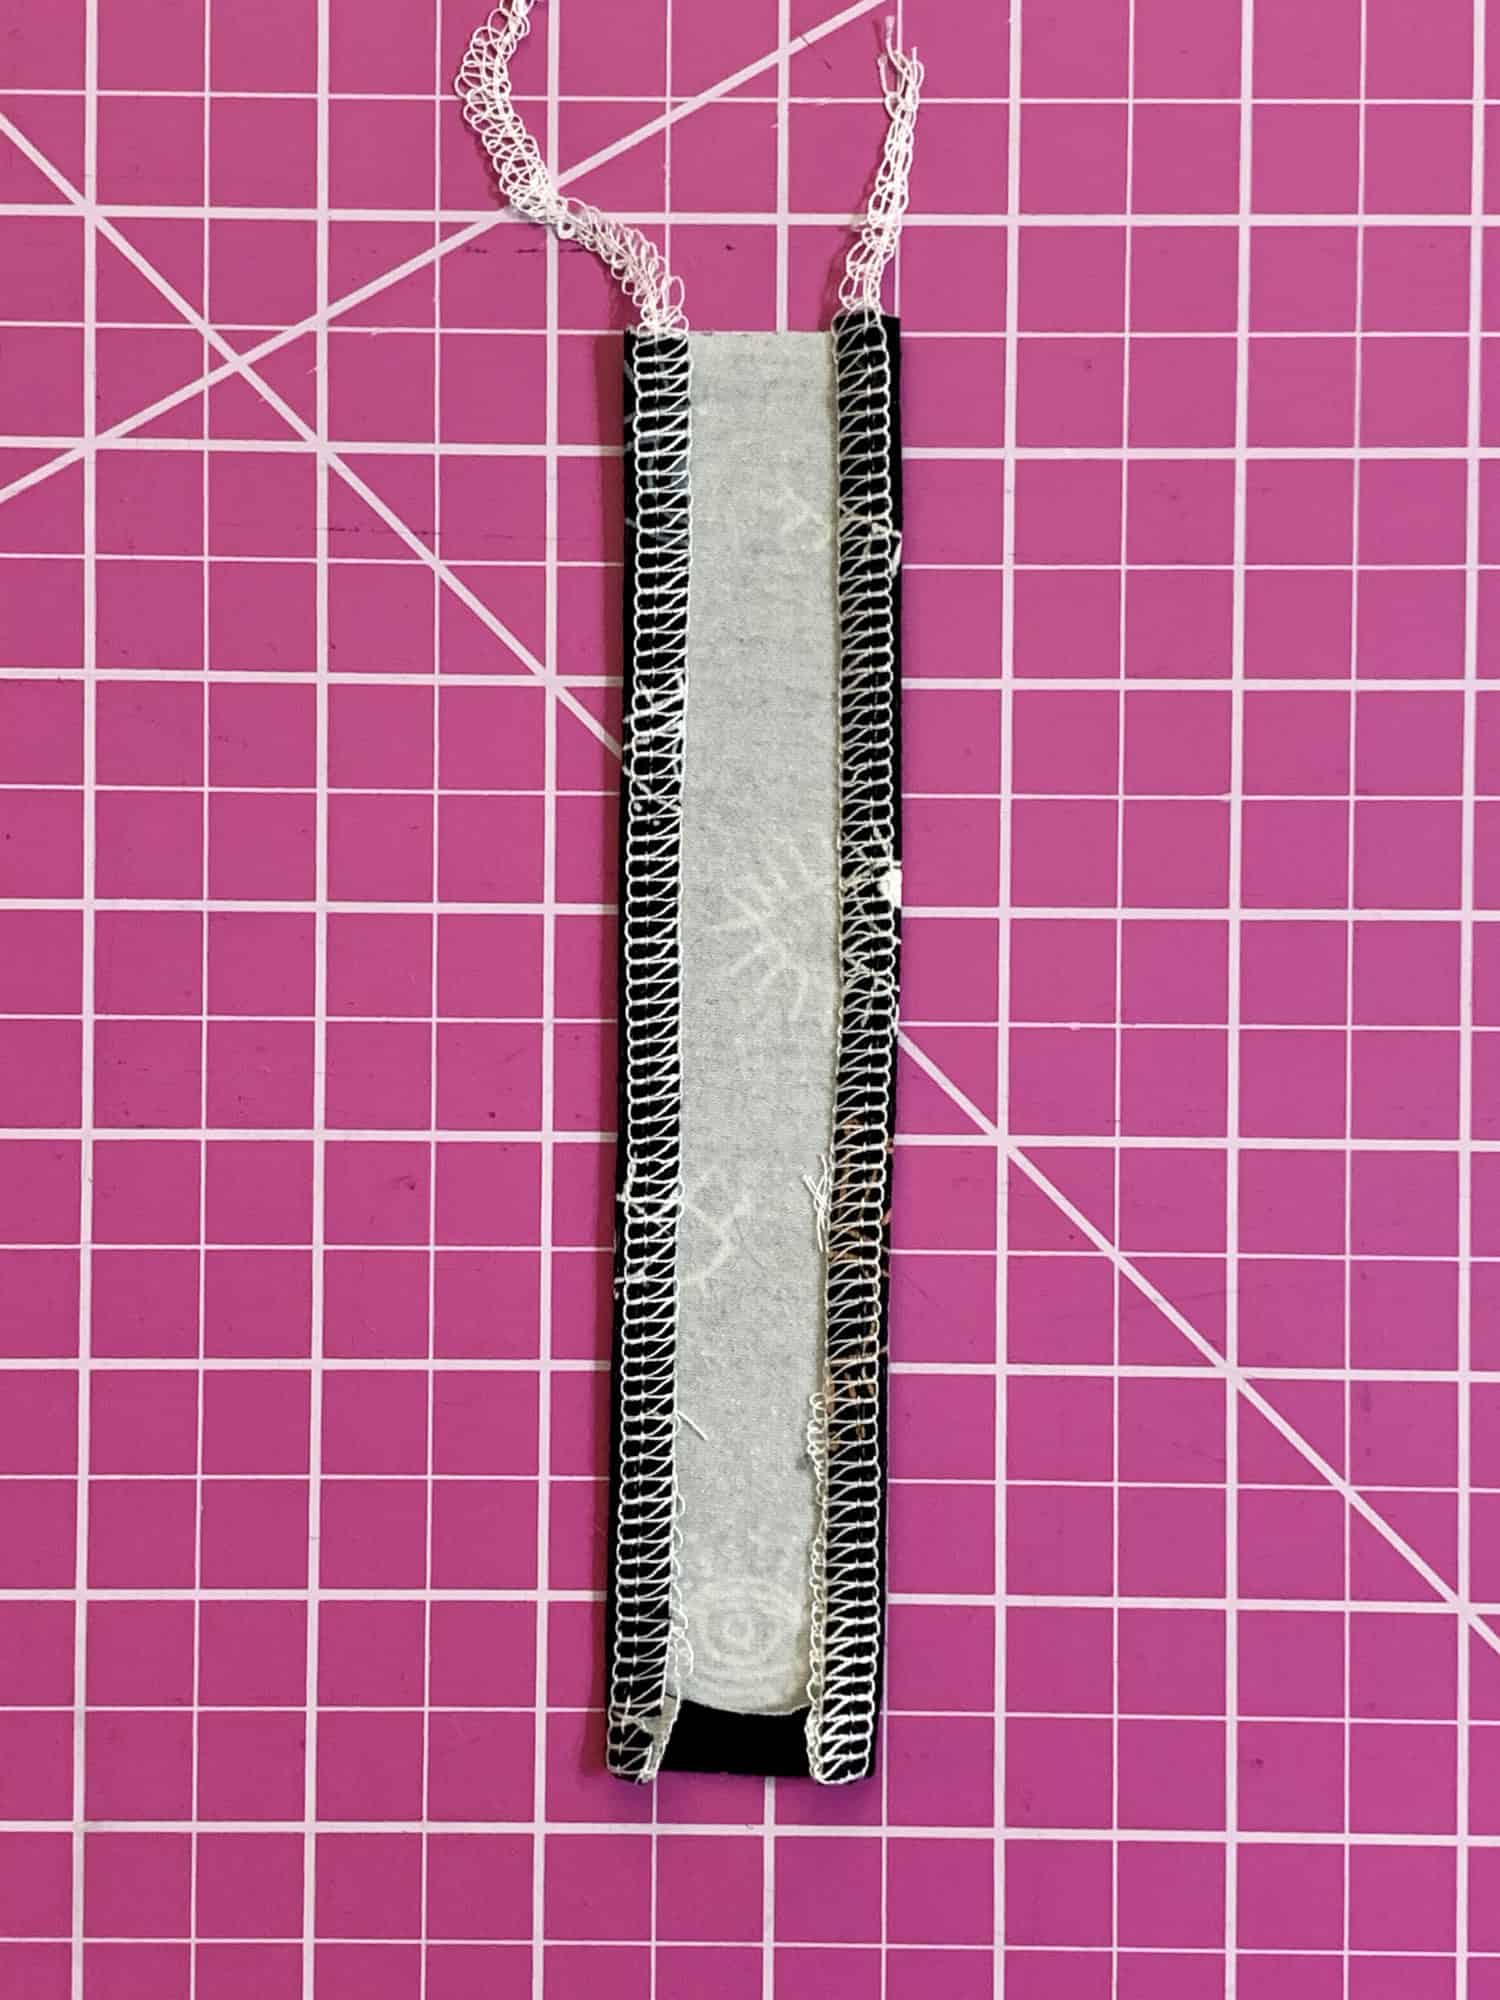
Optional! Finish the edges on your serger, without cutting off any of the seam allowance. It adds a bit of stability to your placket.

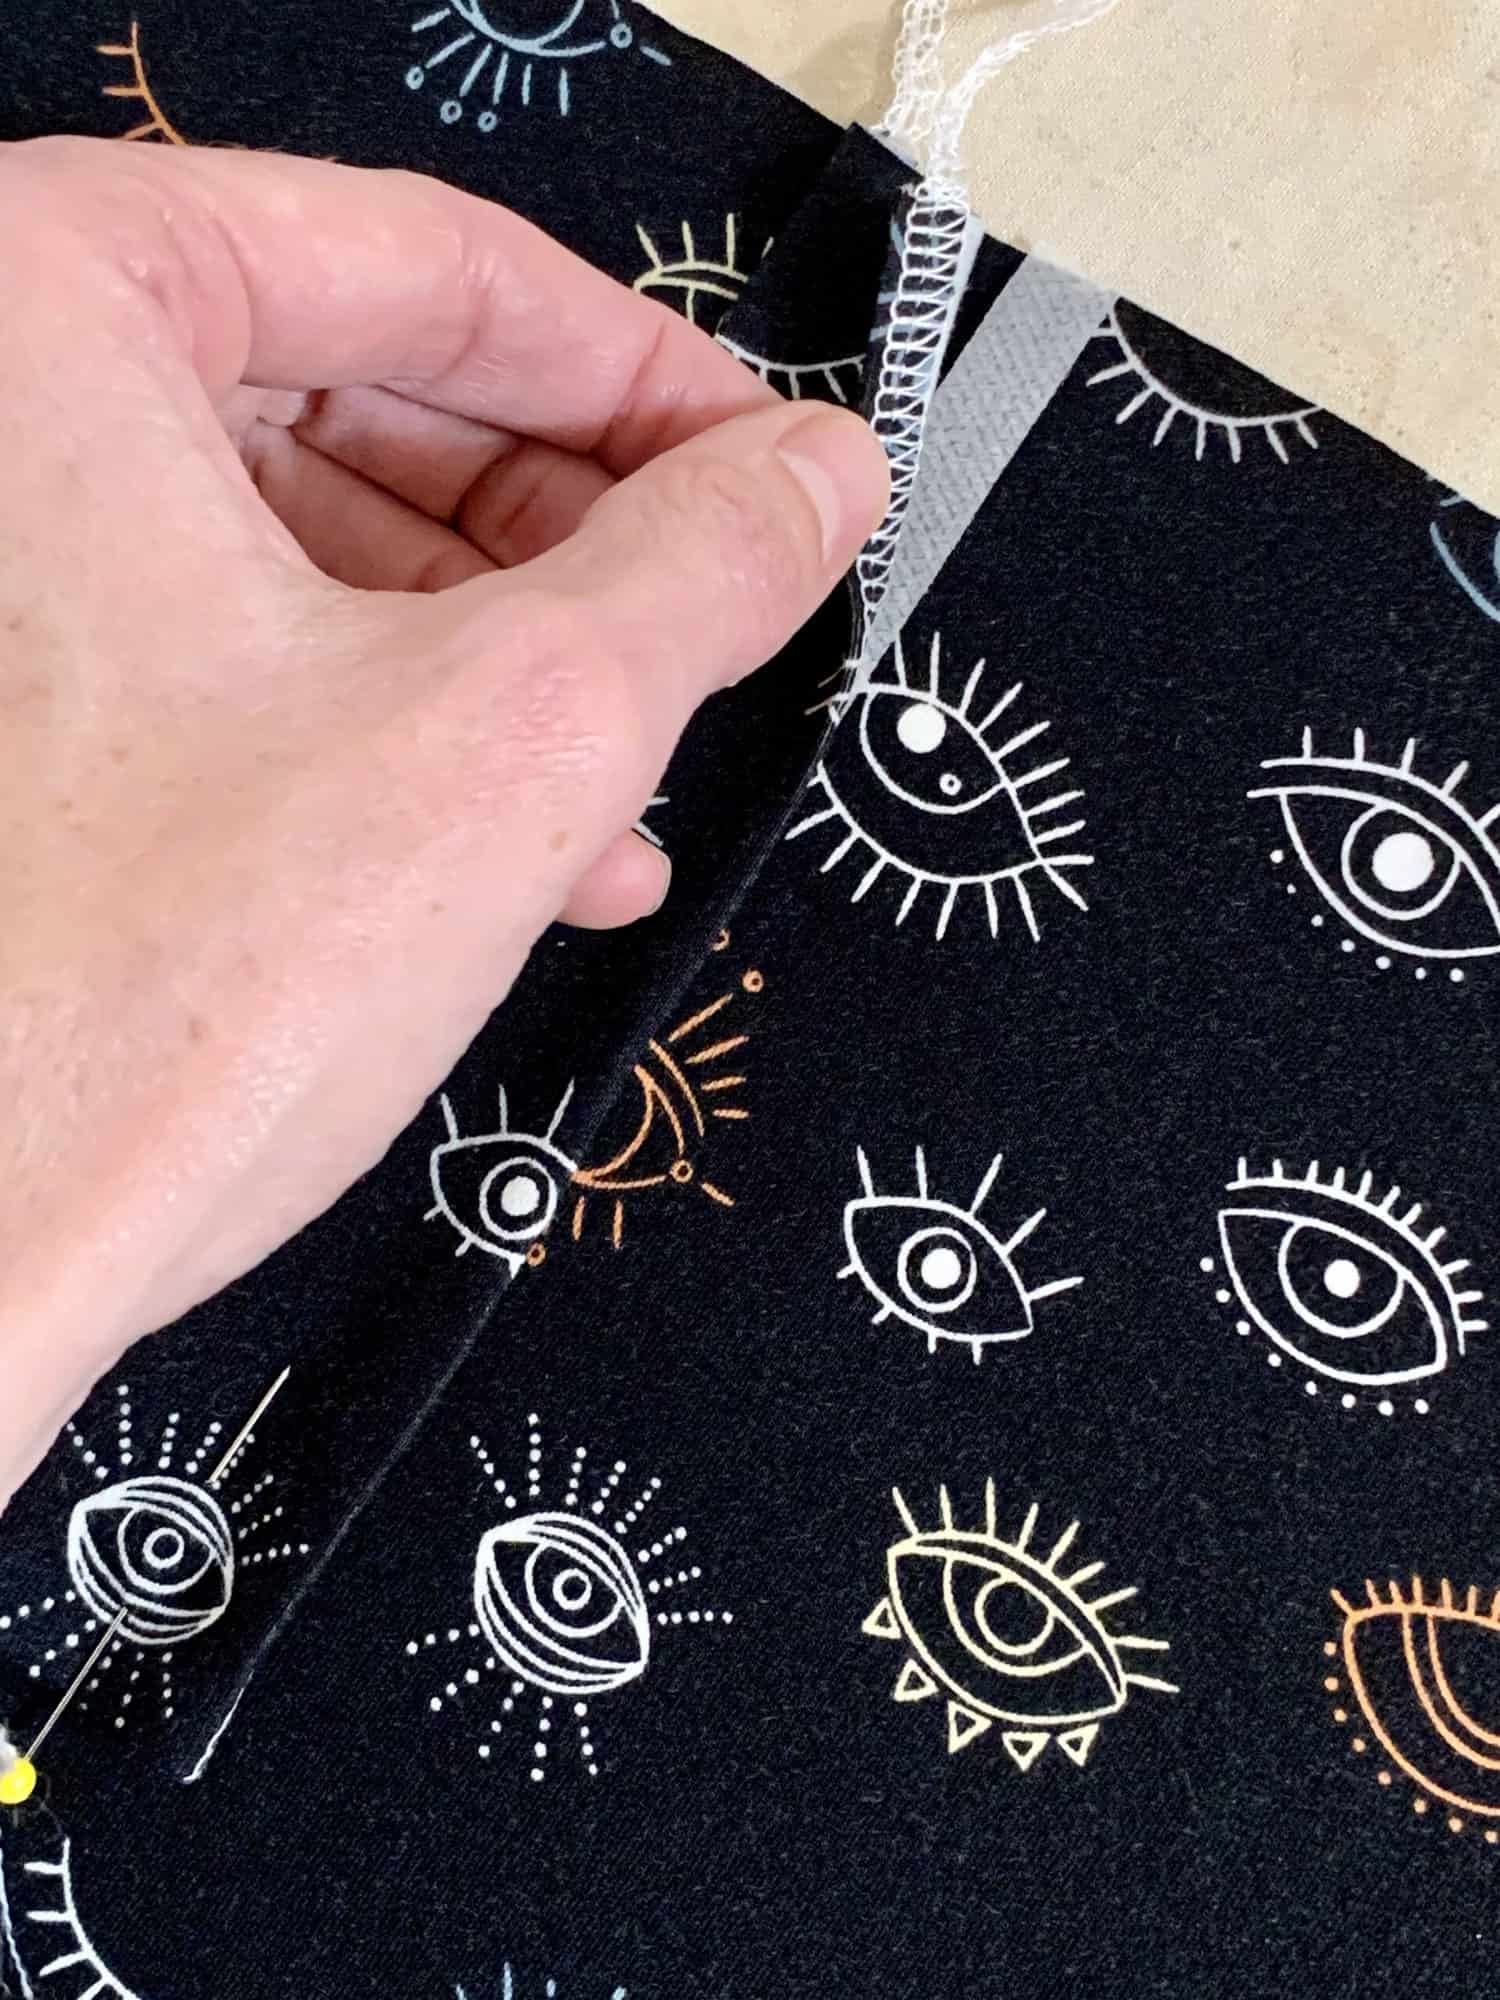
Fold the bottom and side edges in ¼” towards the wrong side and press into place.

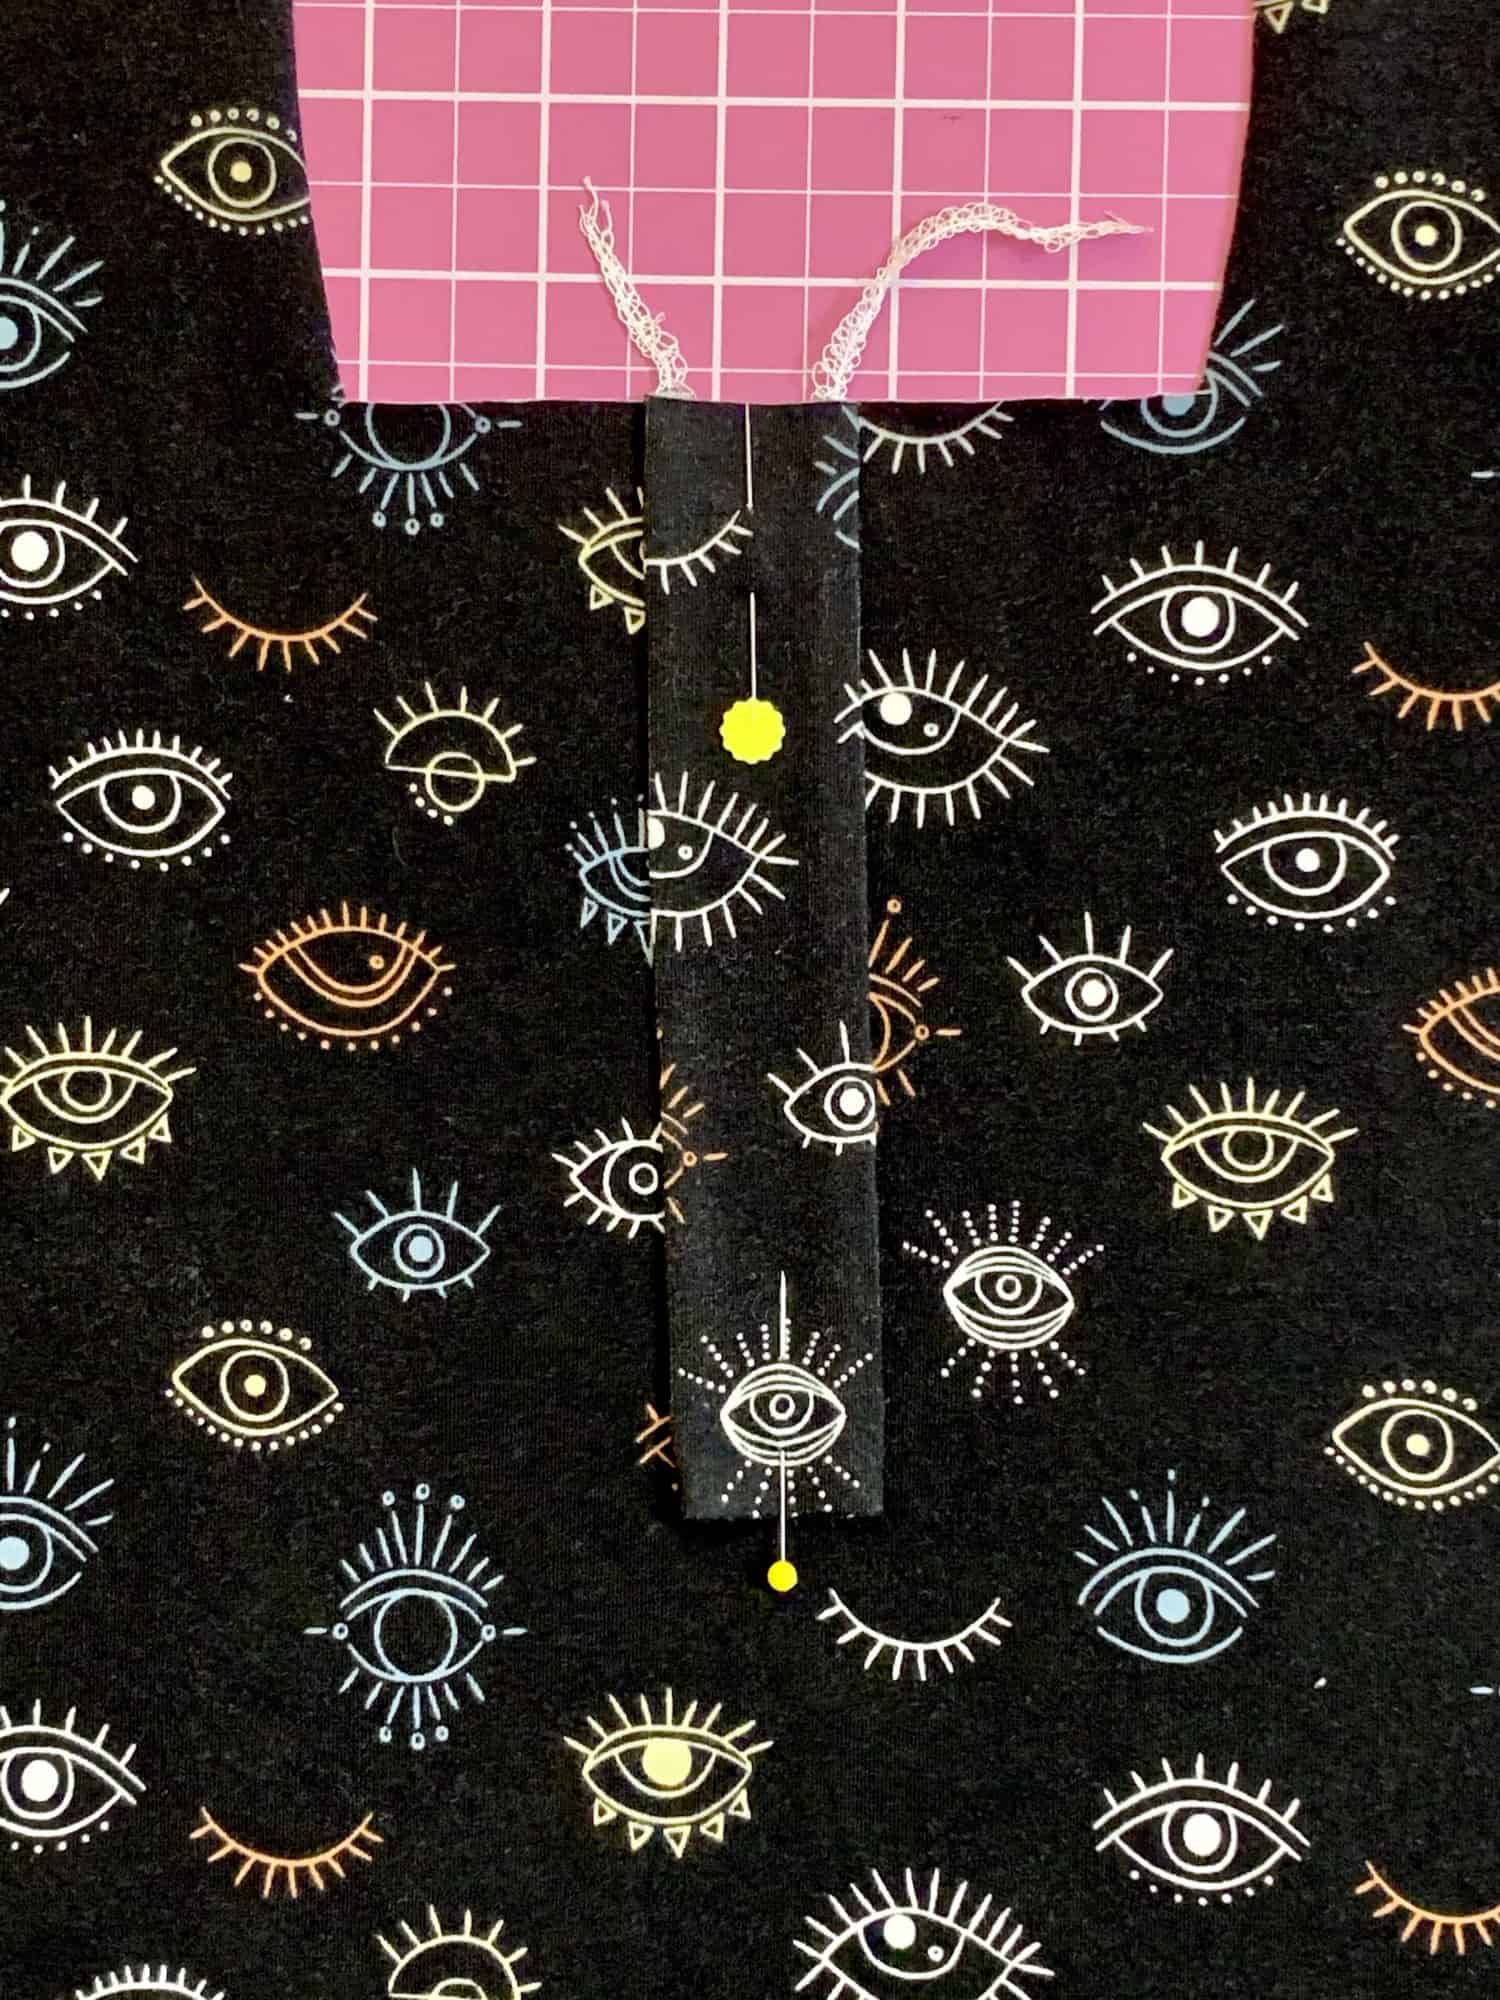
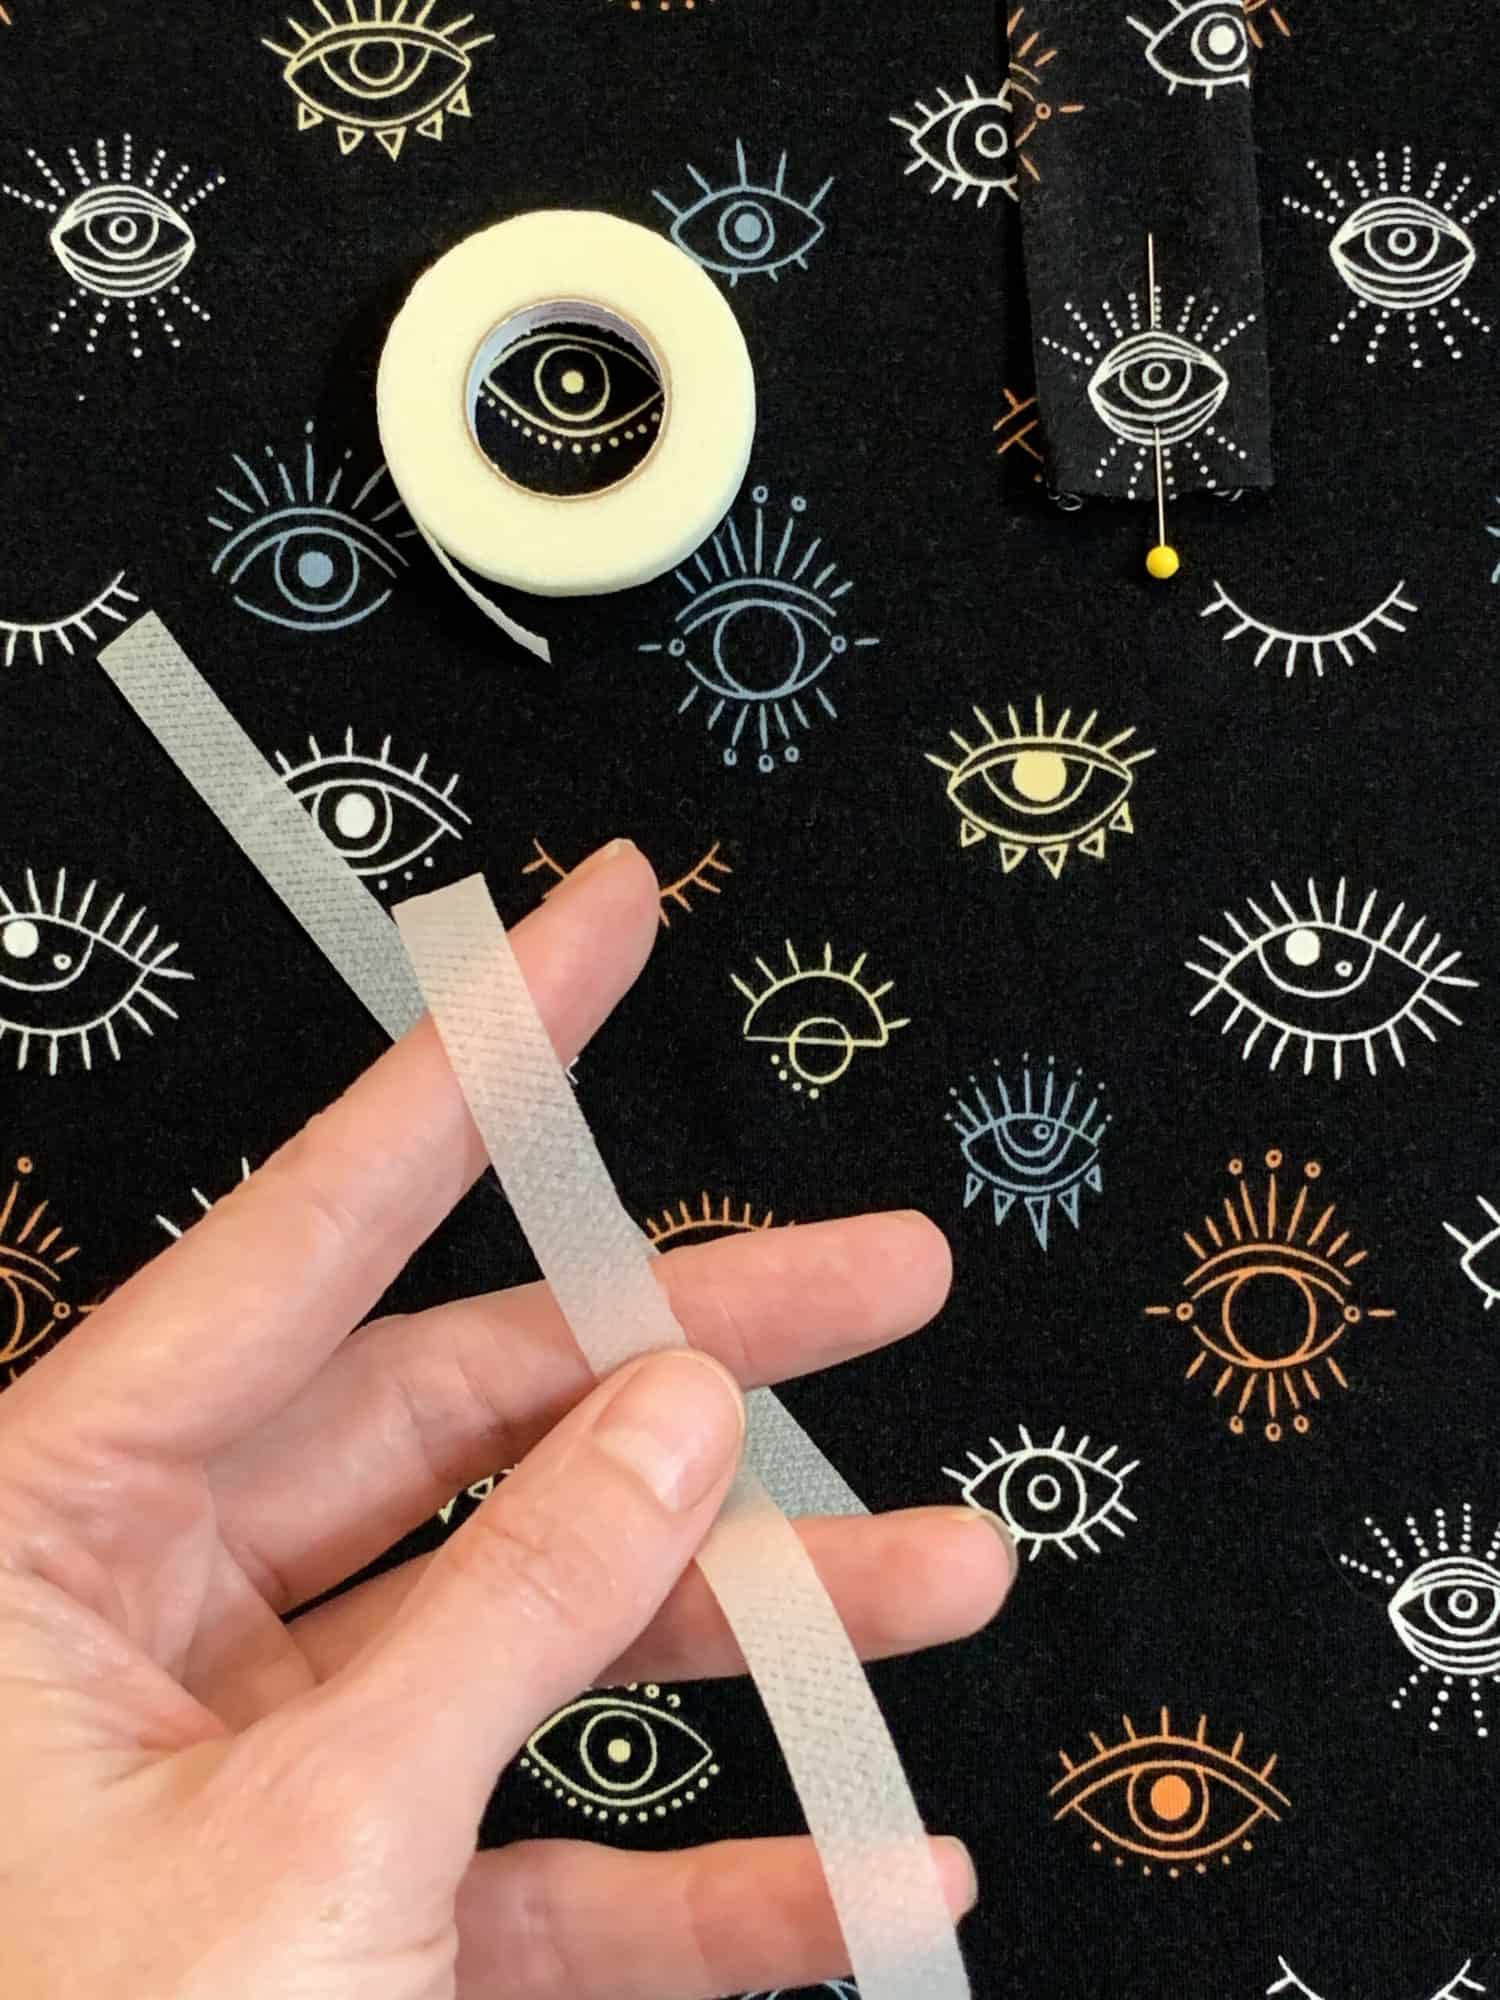
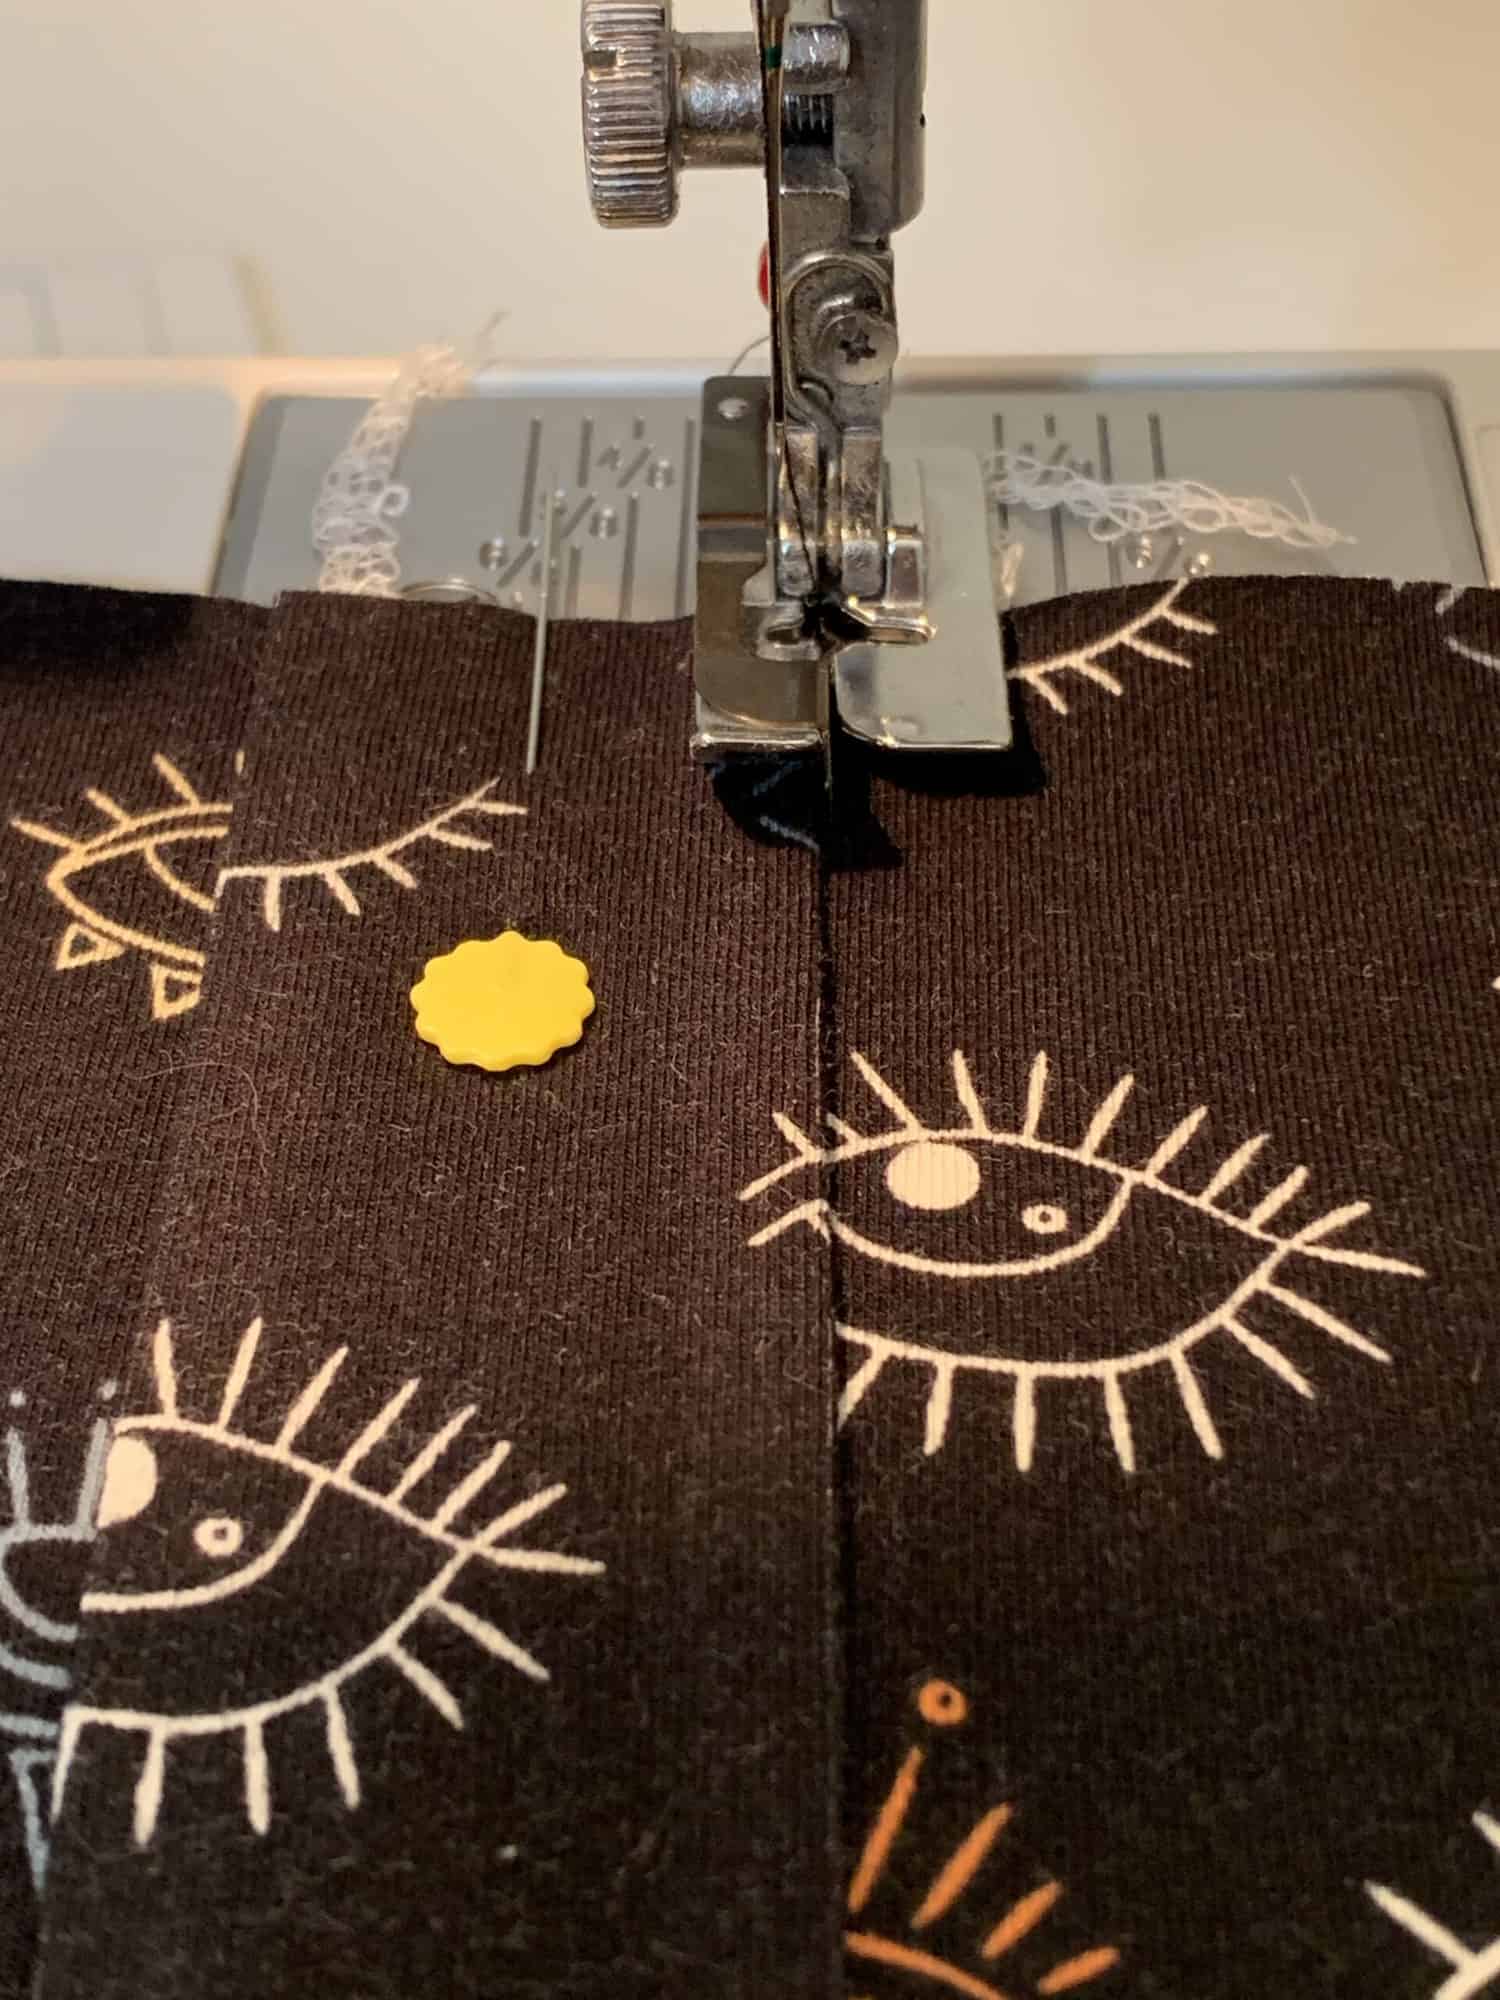
Pin your placket piece to the center line of your bodice, aligning raw edges at the top of the placket and neckline. At this point, I like to use hem tape to secure the placket into place.

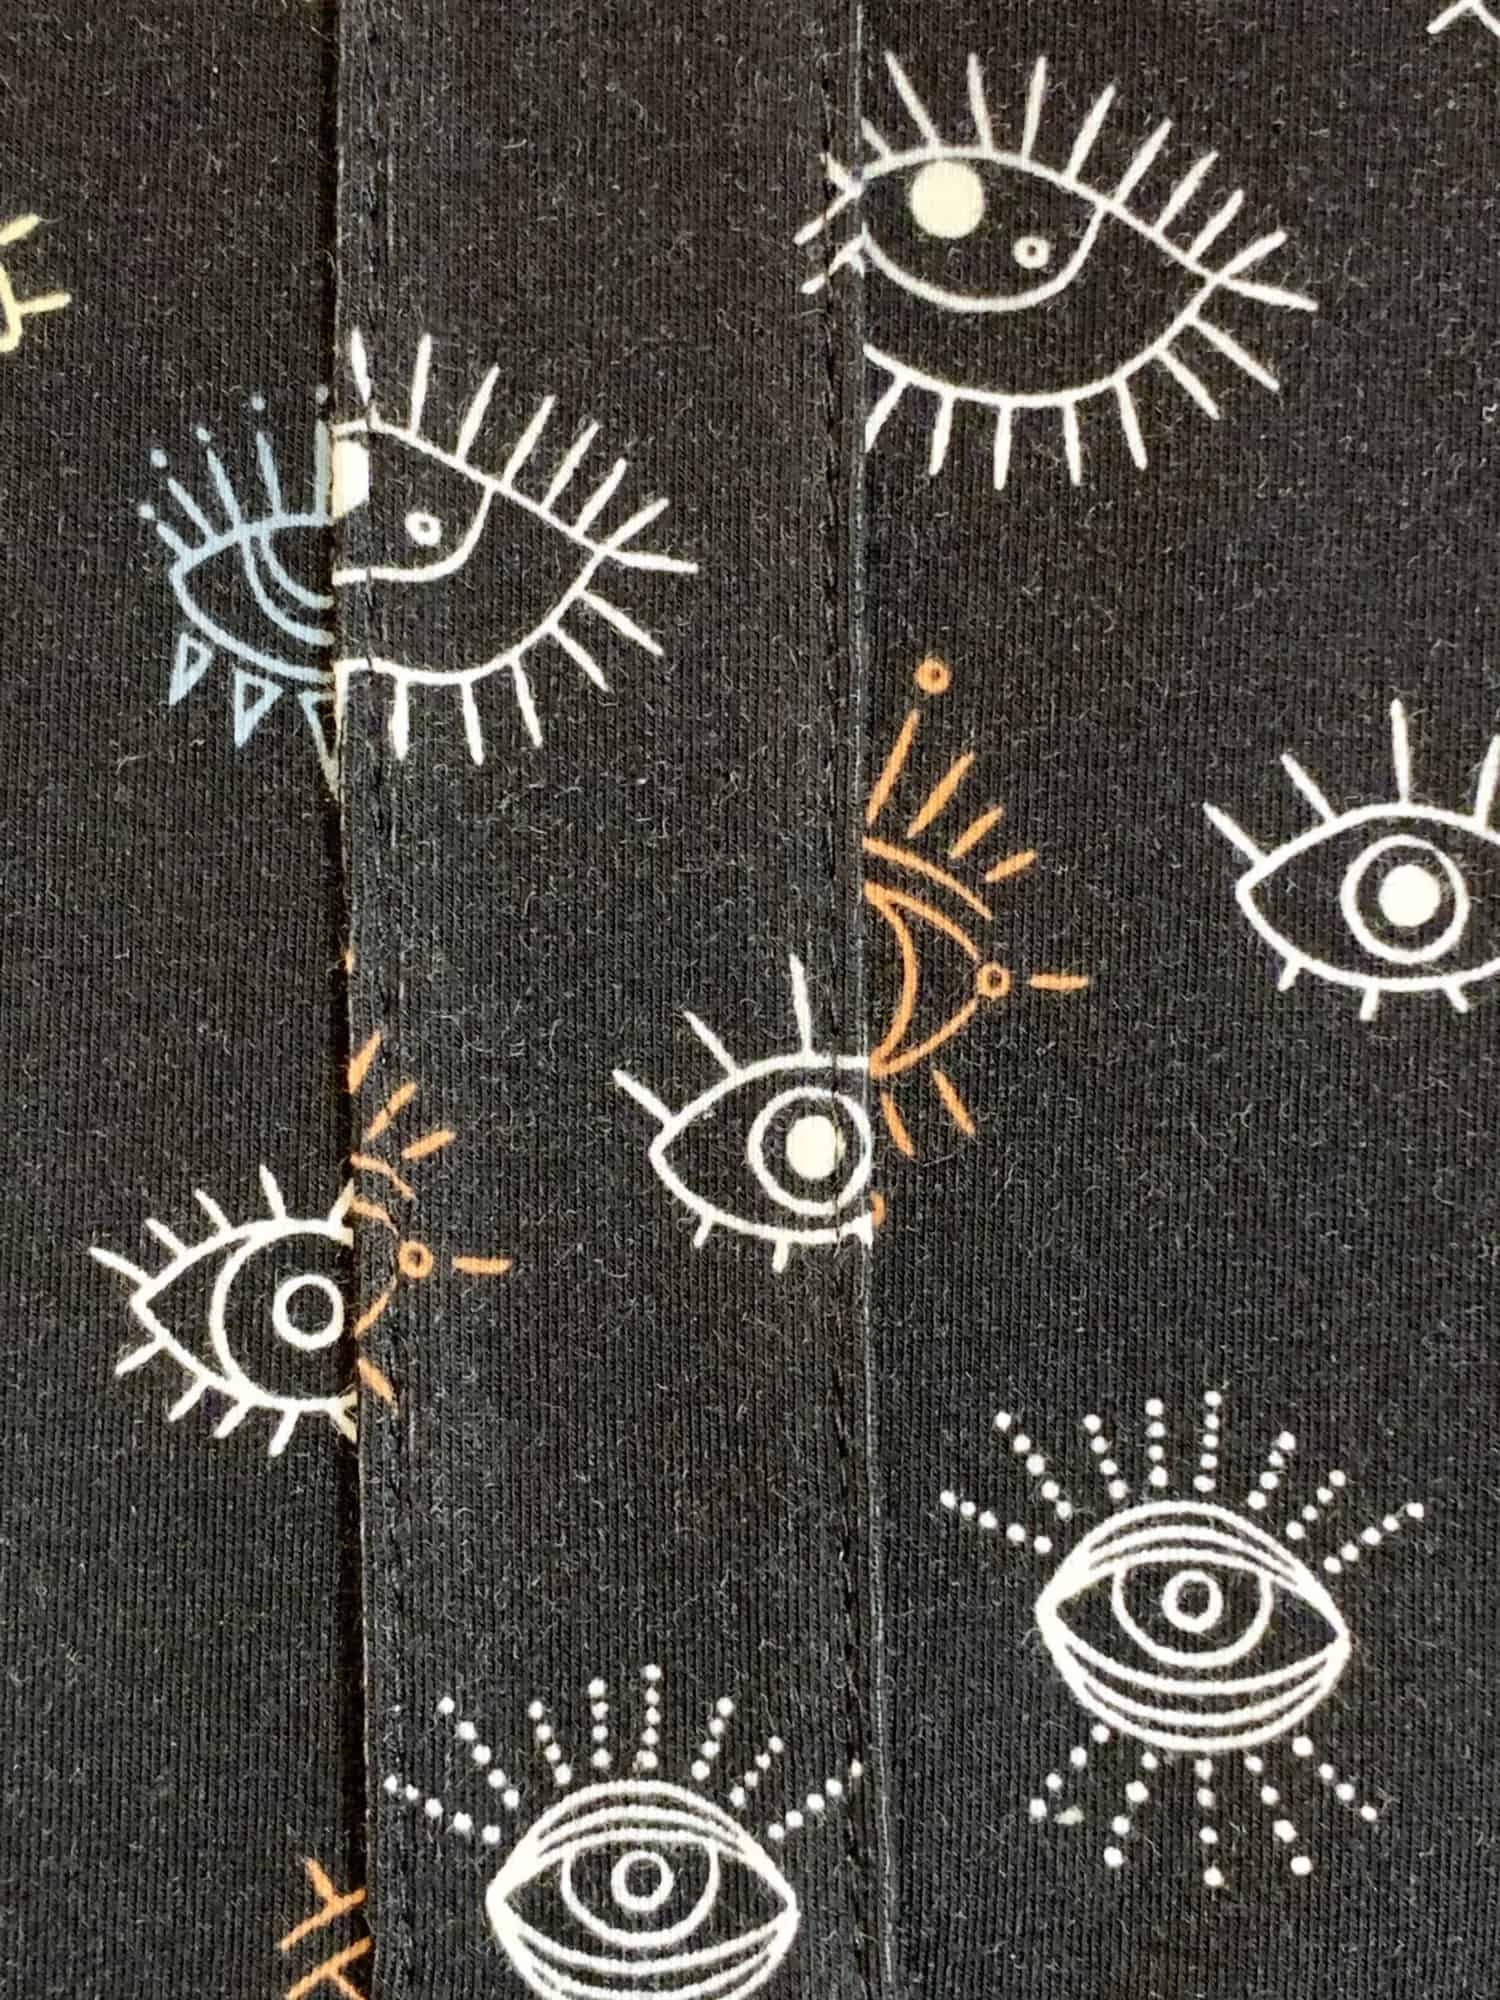
Edgestitch into place. Fun tip! Use your blind hem foot to help keep your topstitching super-straight!

Assemble the rest of the garment per the pattern instructions.

Add your buttons once your garment is complete so they don’t get in the way of your construction.

I mentioned it was simple, right?? Enjoy the newest addition to your spring wardrobe!

…..

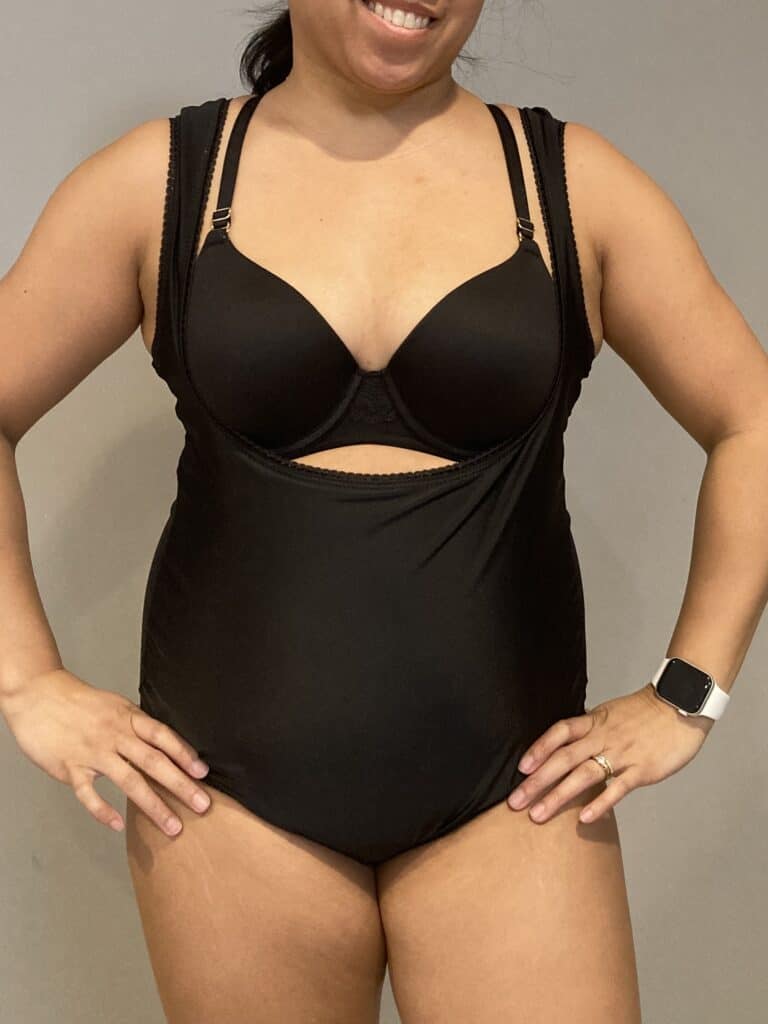
Compression undergarment

Love the Be Bold Bodysuit, but want a little tummy control? No problem. It’s all about fabric choice. You’ll want to use a heavy athletic knit with a high spandex content, like supplex or compression tricot. In my navy bodysuit below, I used supplex for the main fabric and lined the front and back bodysuit with power mesh. I treated the supplex and power mesh as one layer and followed the tutorial as written. However, if you are looking for something compressive, that can be worn as an undergarment, you’ll want something a little more like the black bodysuit on the right.


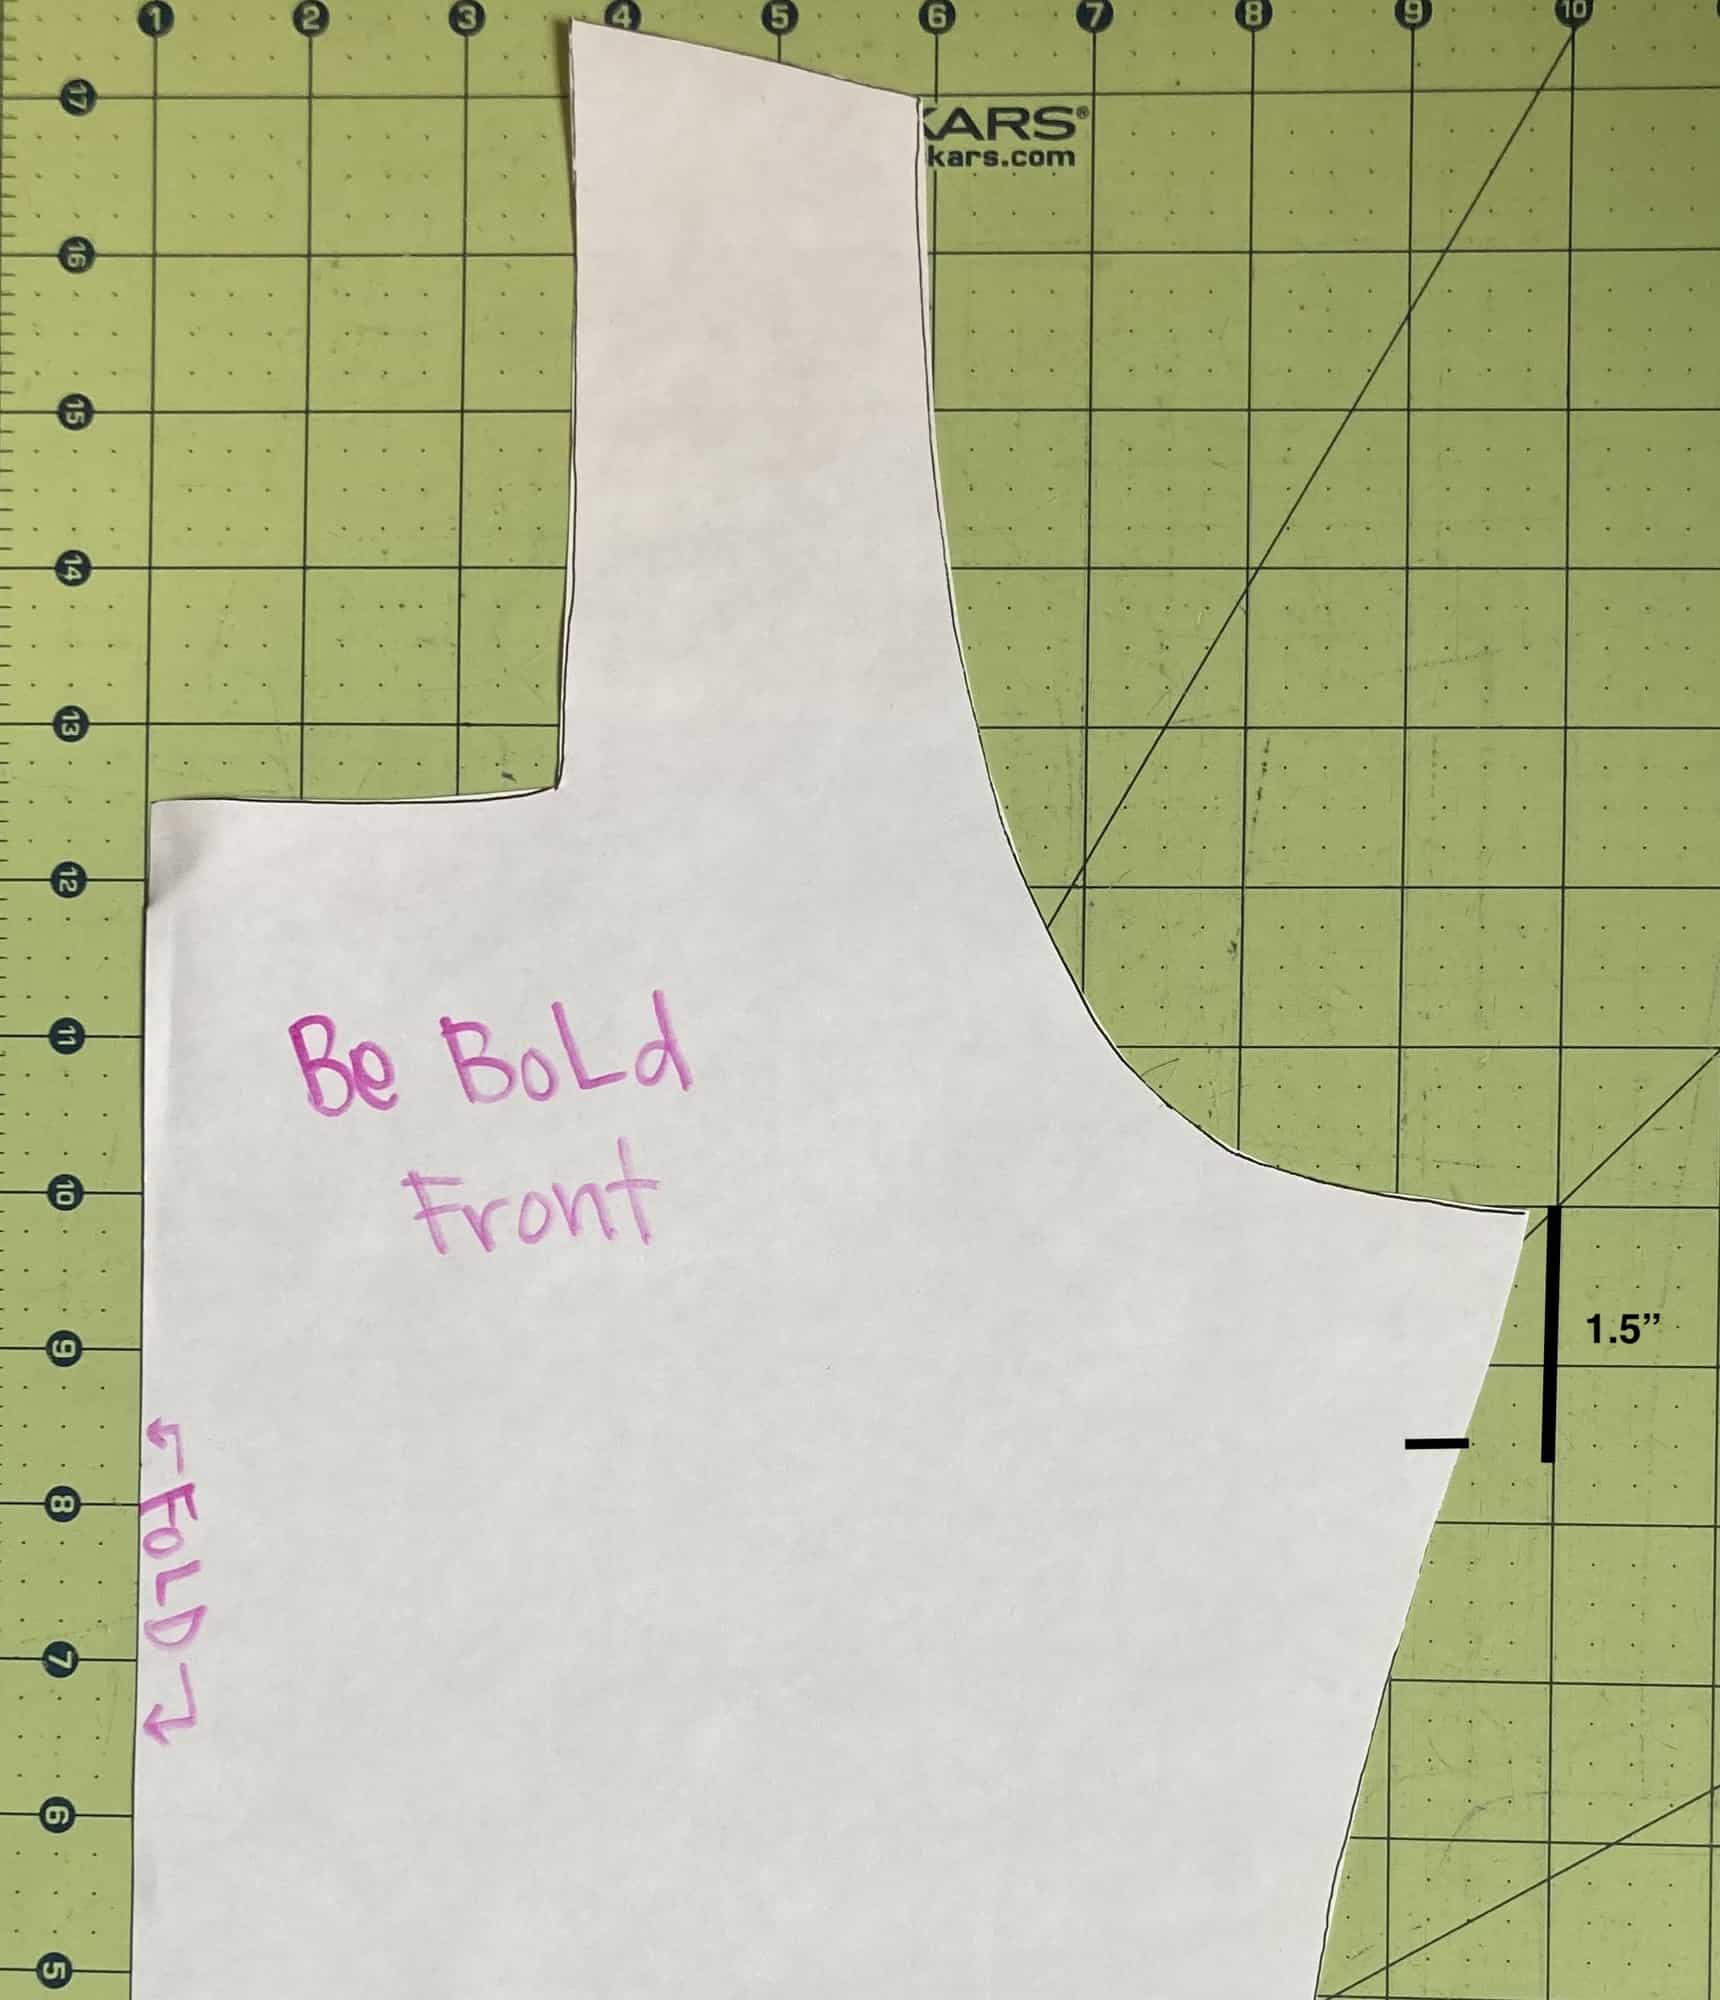
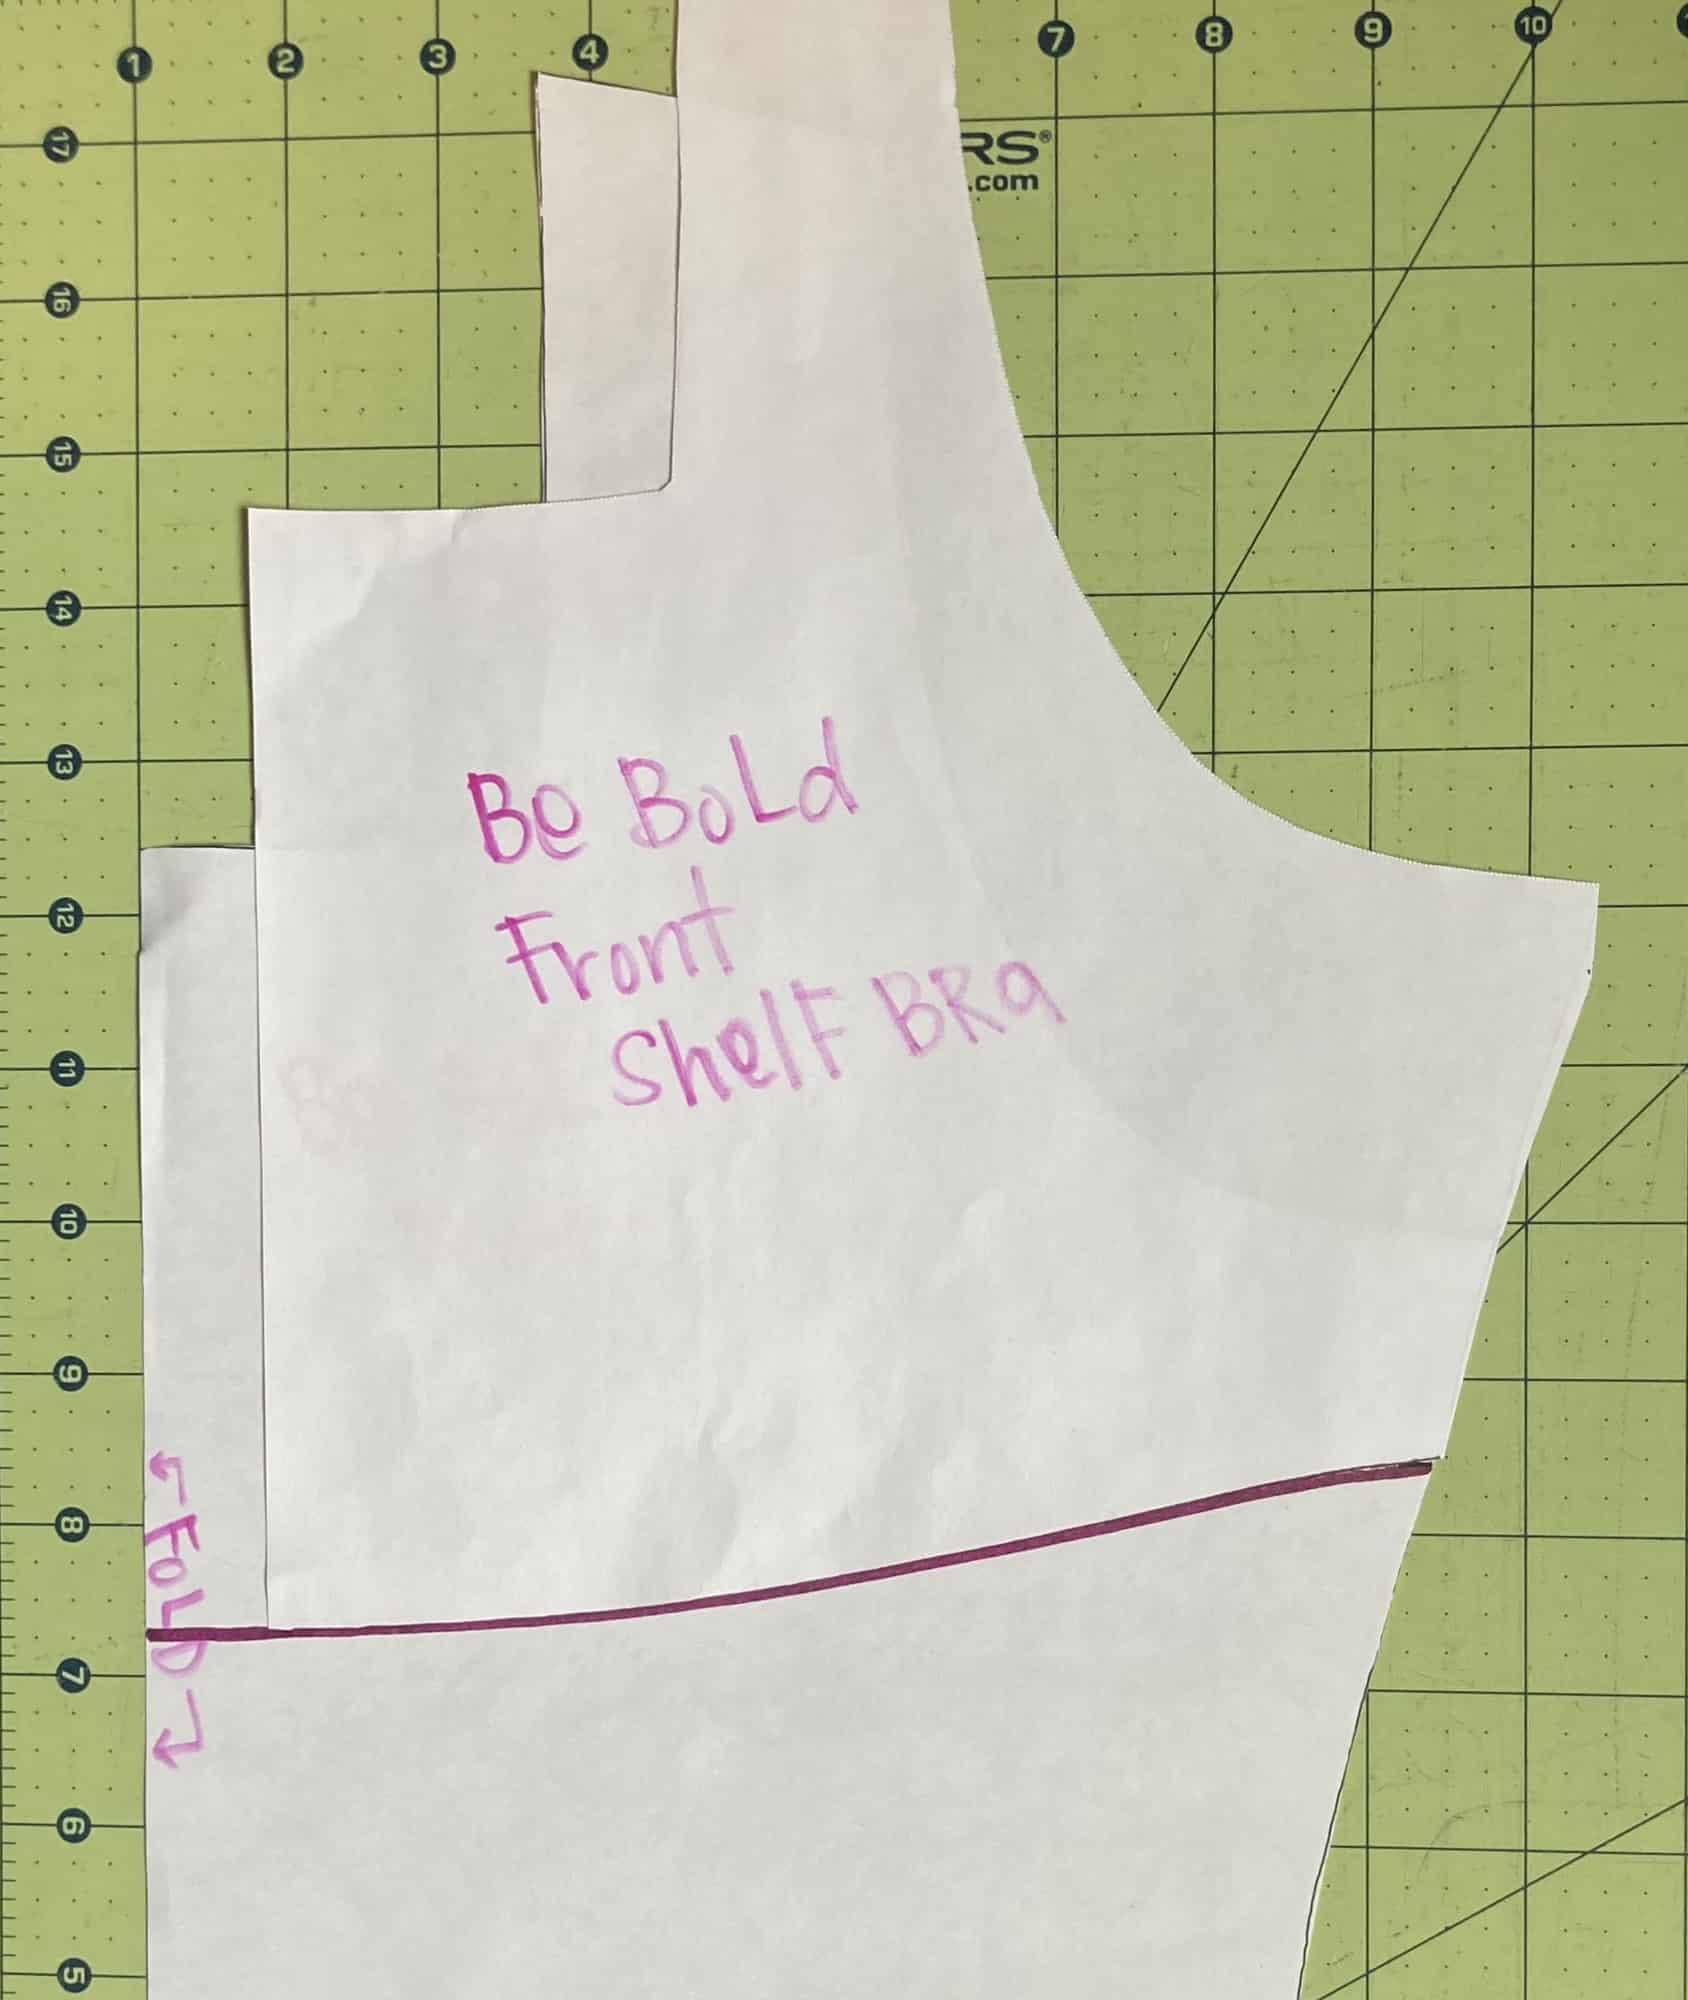
For the black bodysuit, I used tricot for the main fabric and power mesh for the lining. The only adjustments were made to the front bodice pattern piece.


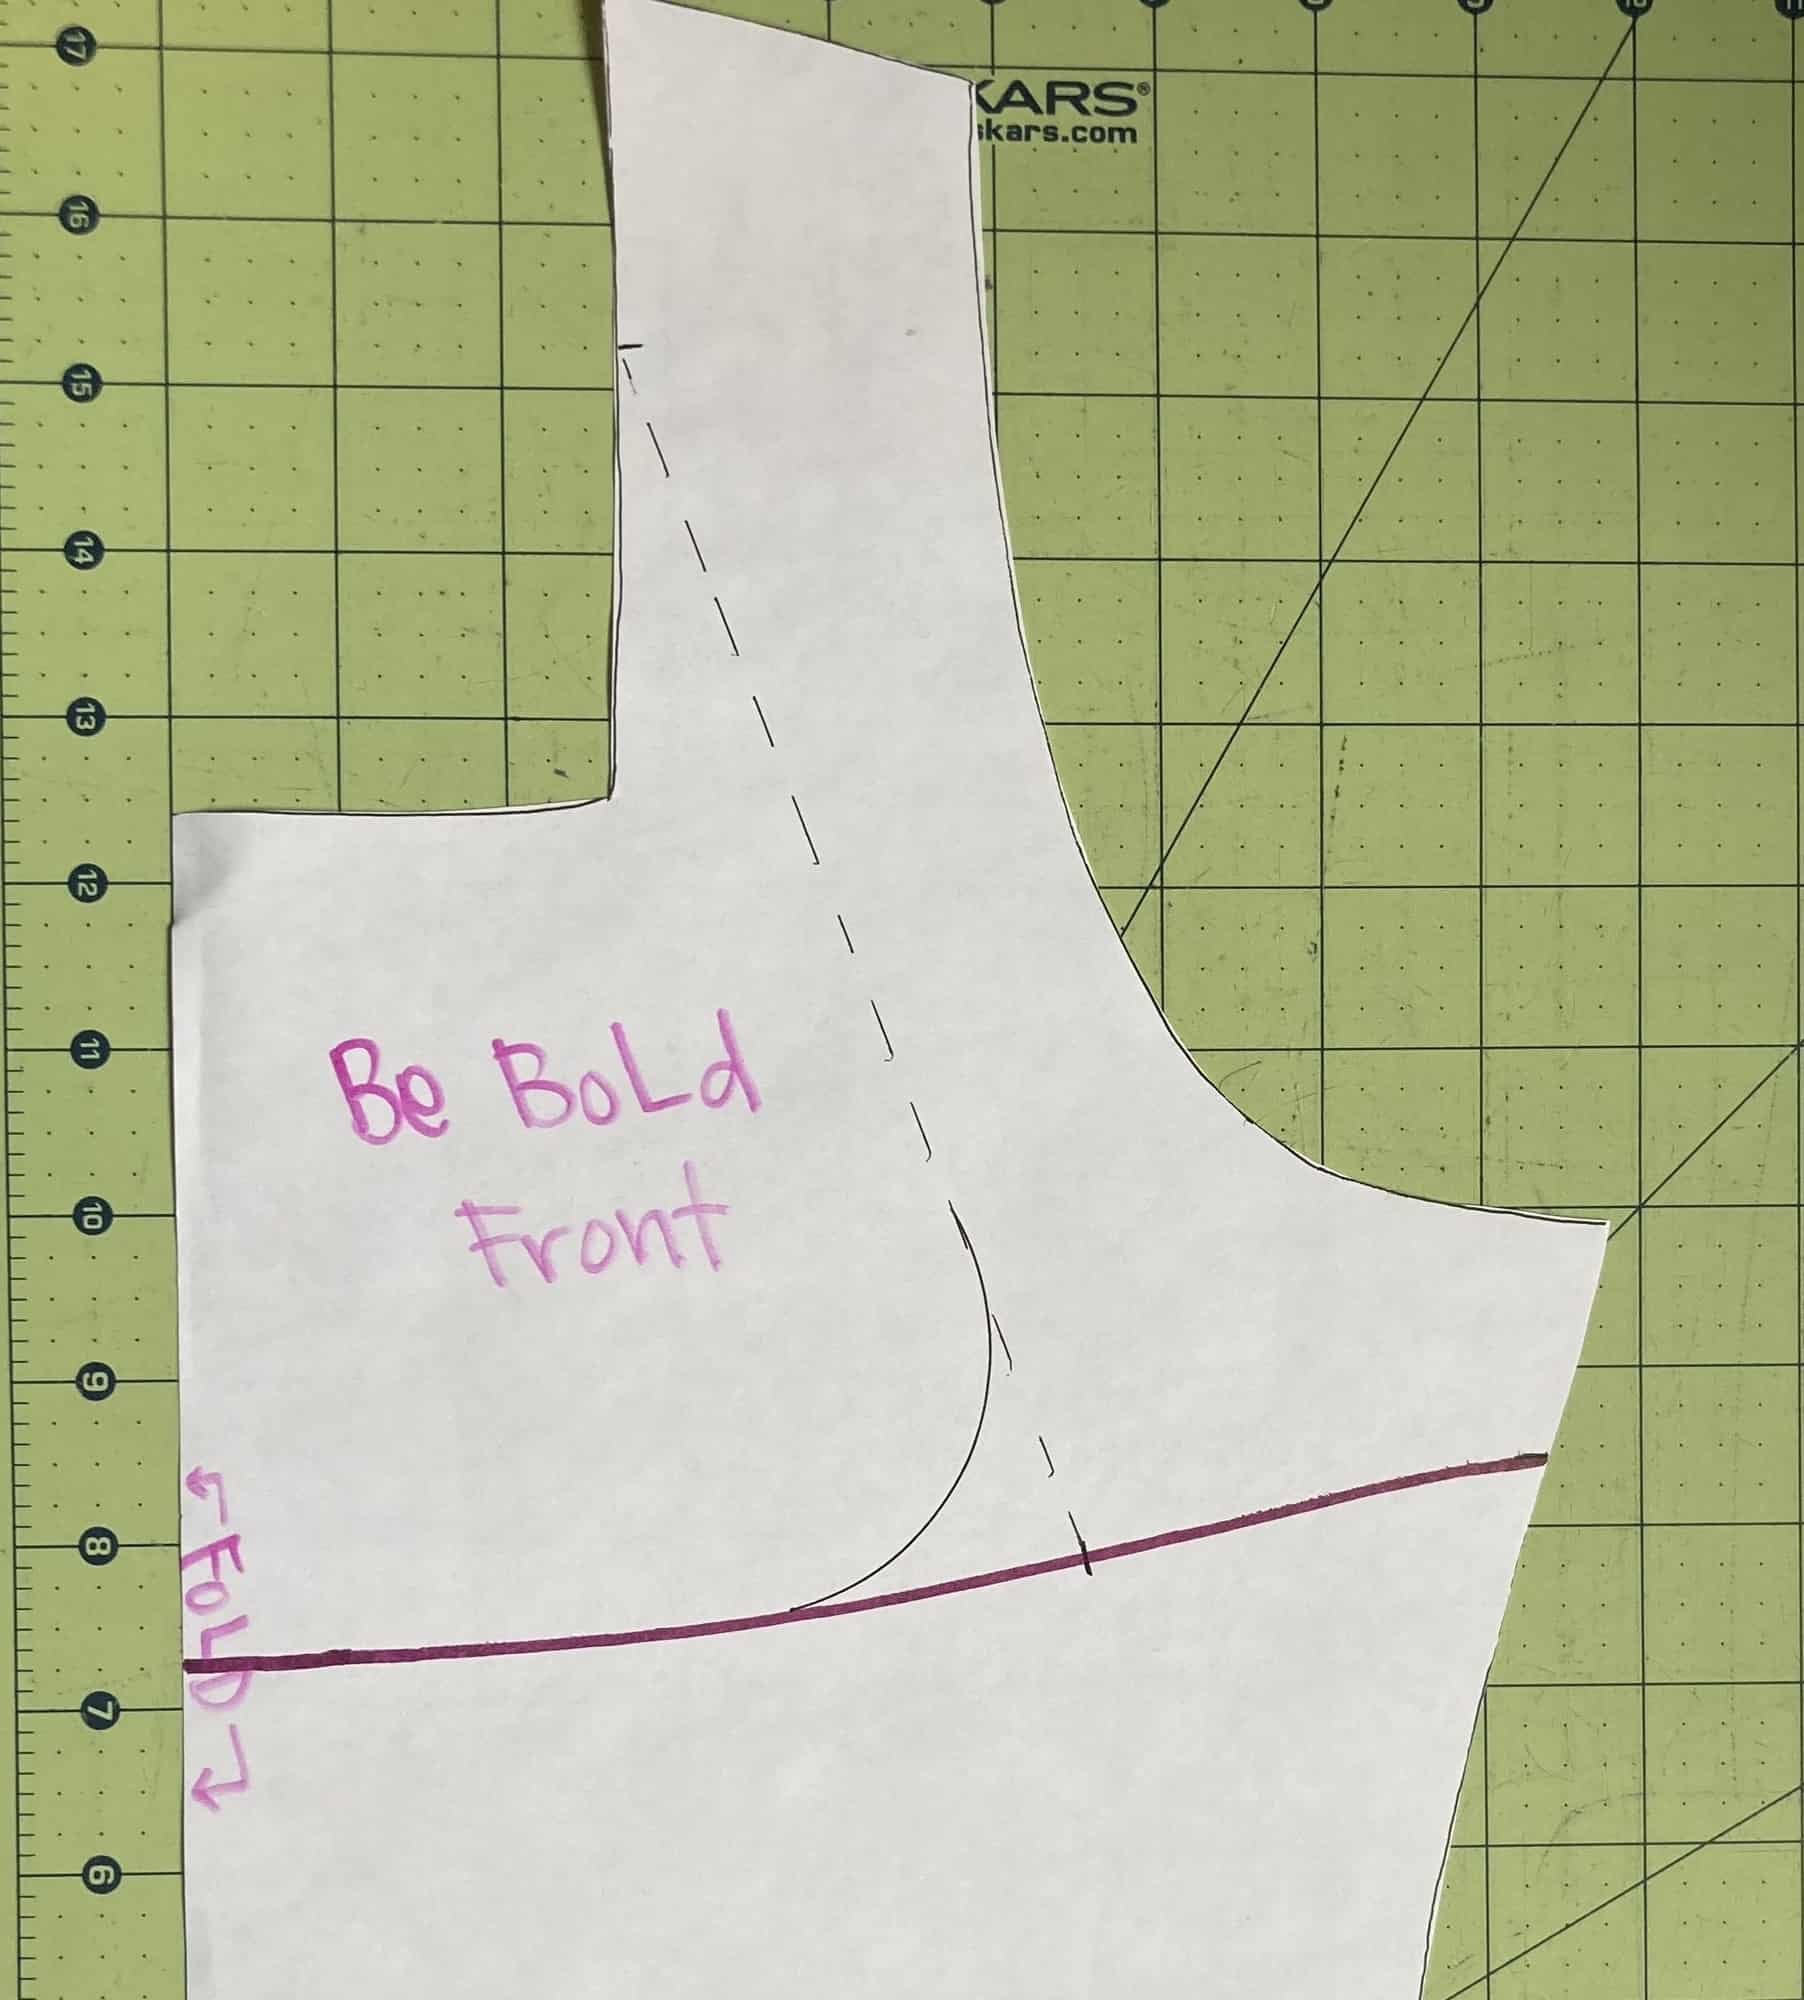
  1. Mark 1.5″ down from the armpit of the front pattern piece.
  2. Using the bottom curve of the Front Shelf Bra as a guide, create a line.


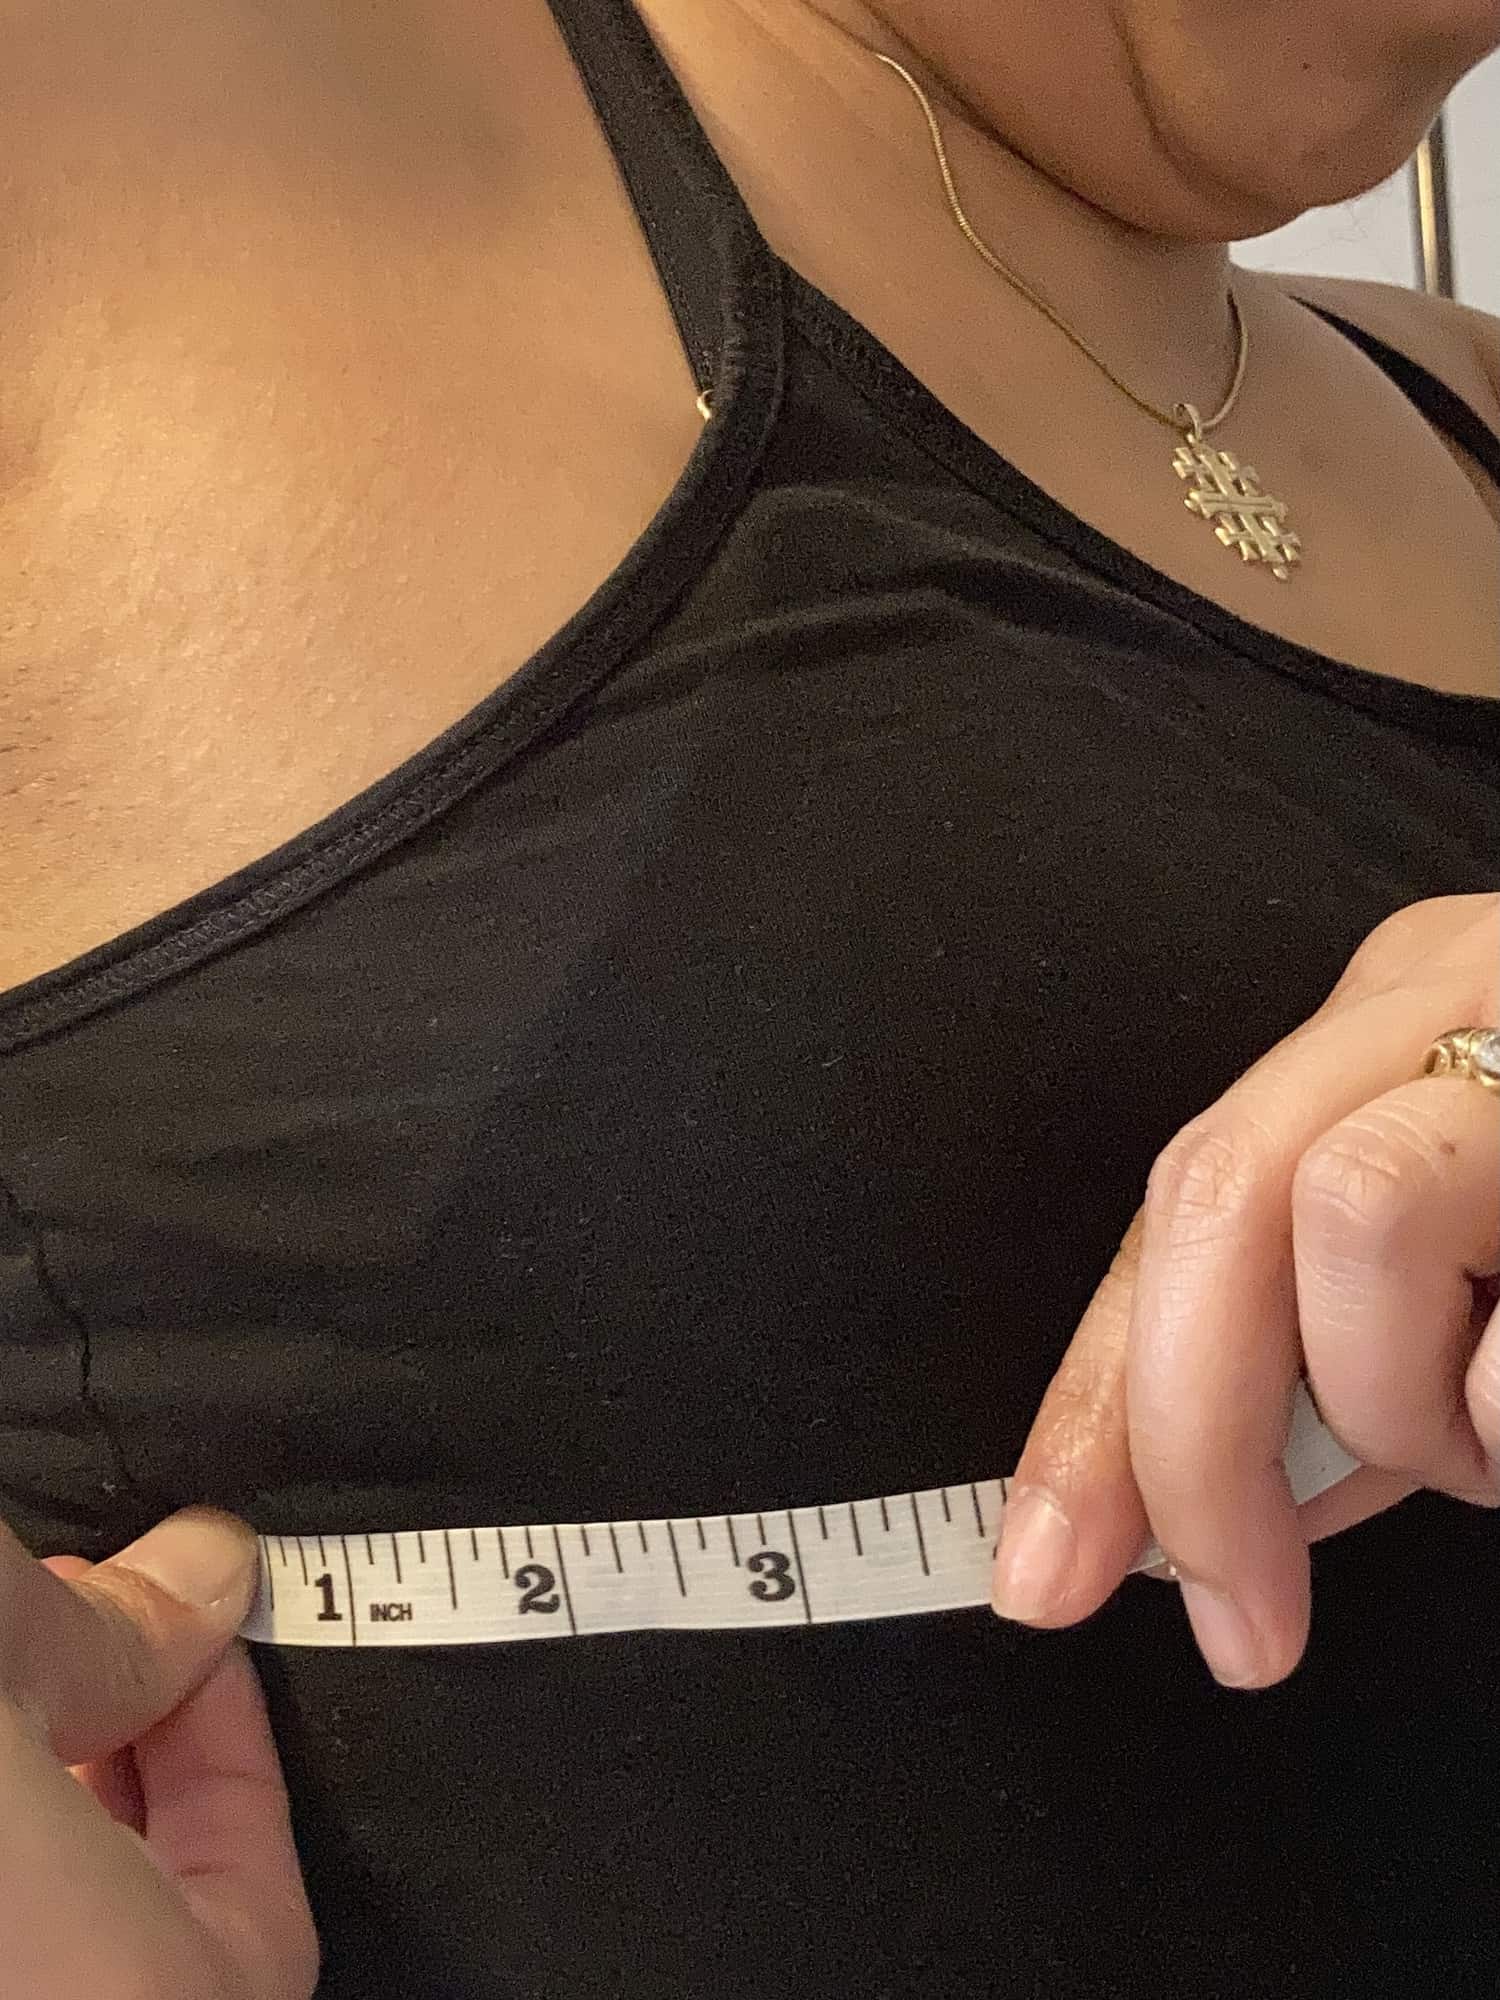
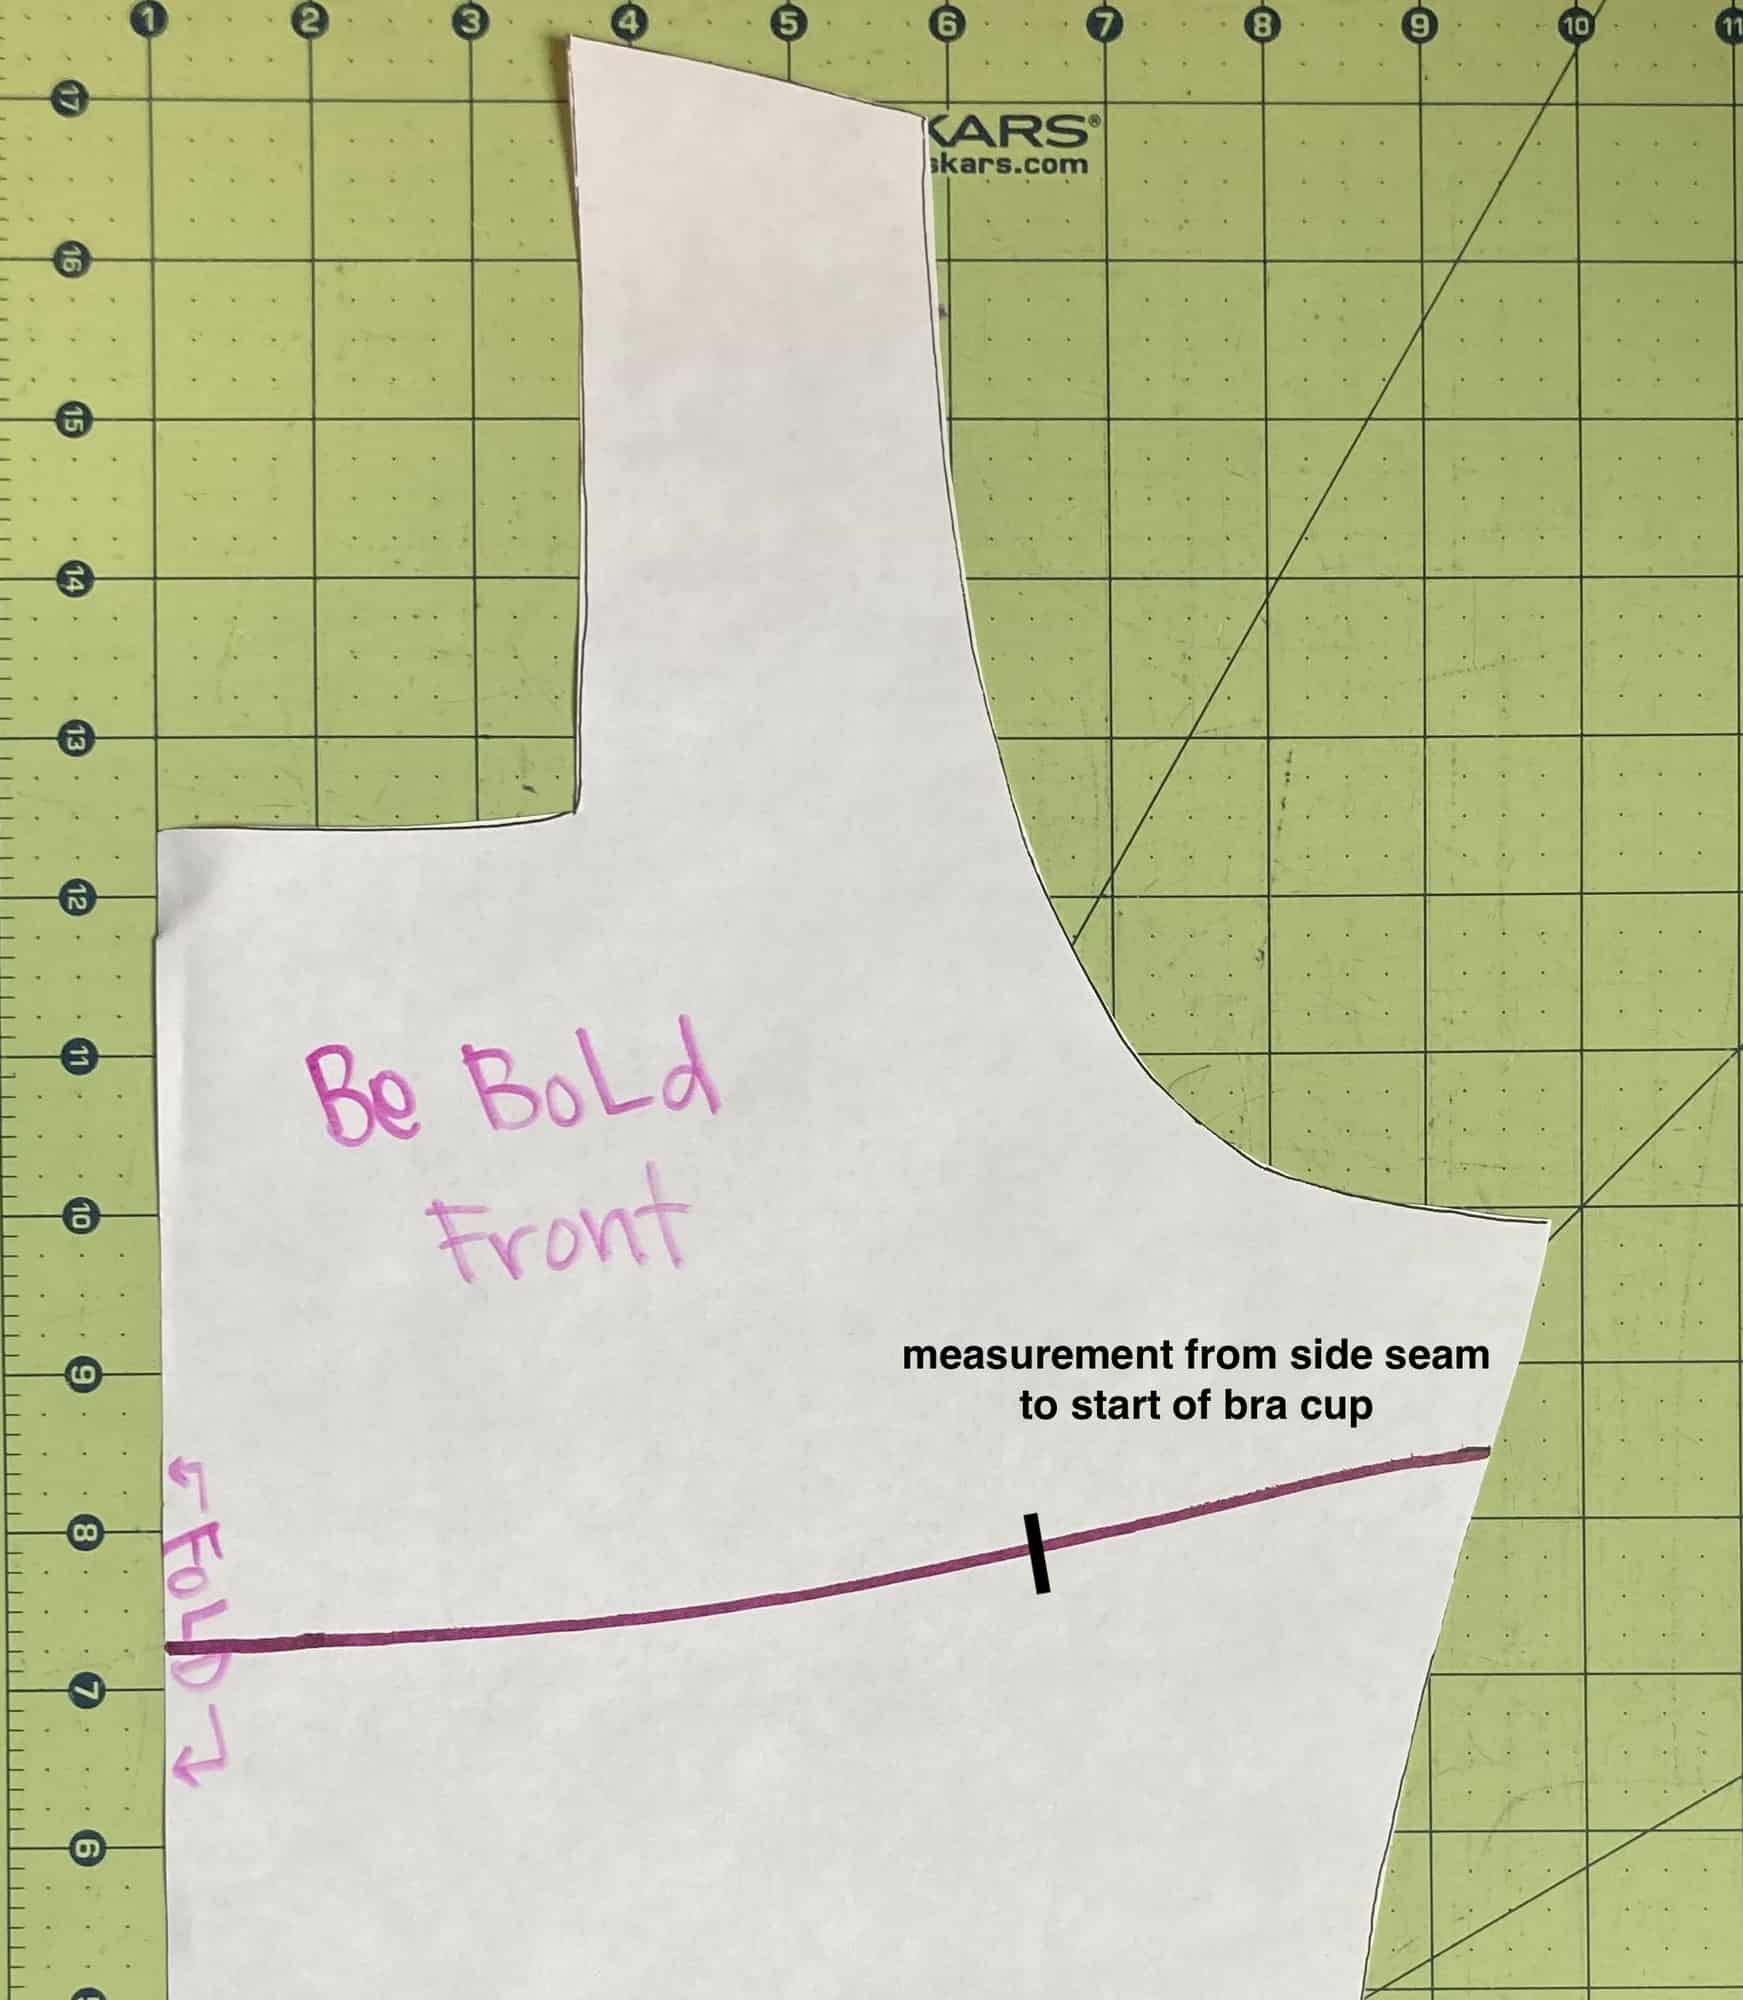
3.  Measure from your side seam to where you feel the start of your bra cup. Mine is about 3″, mark this measurement on your pattern.

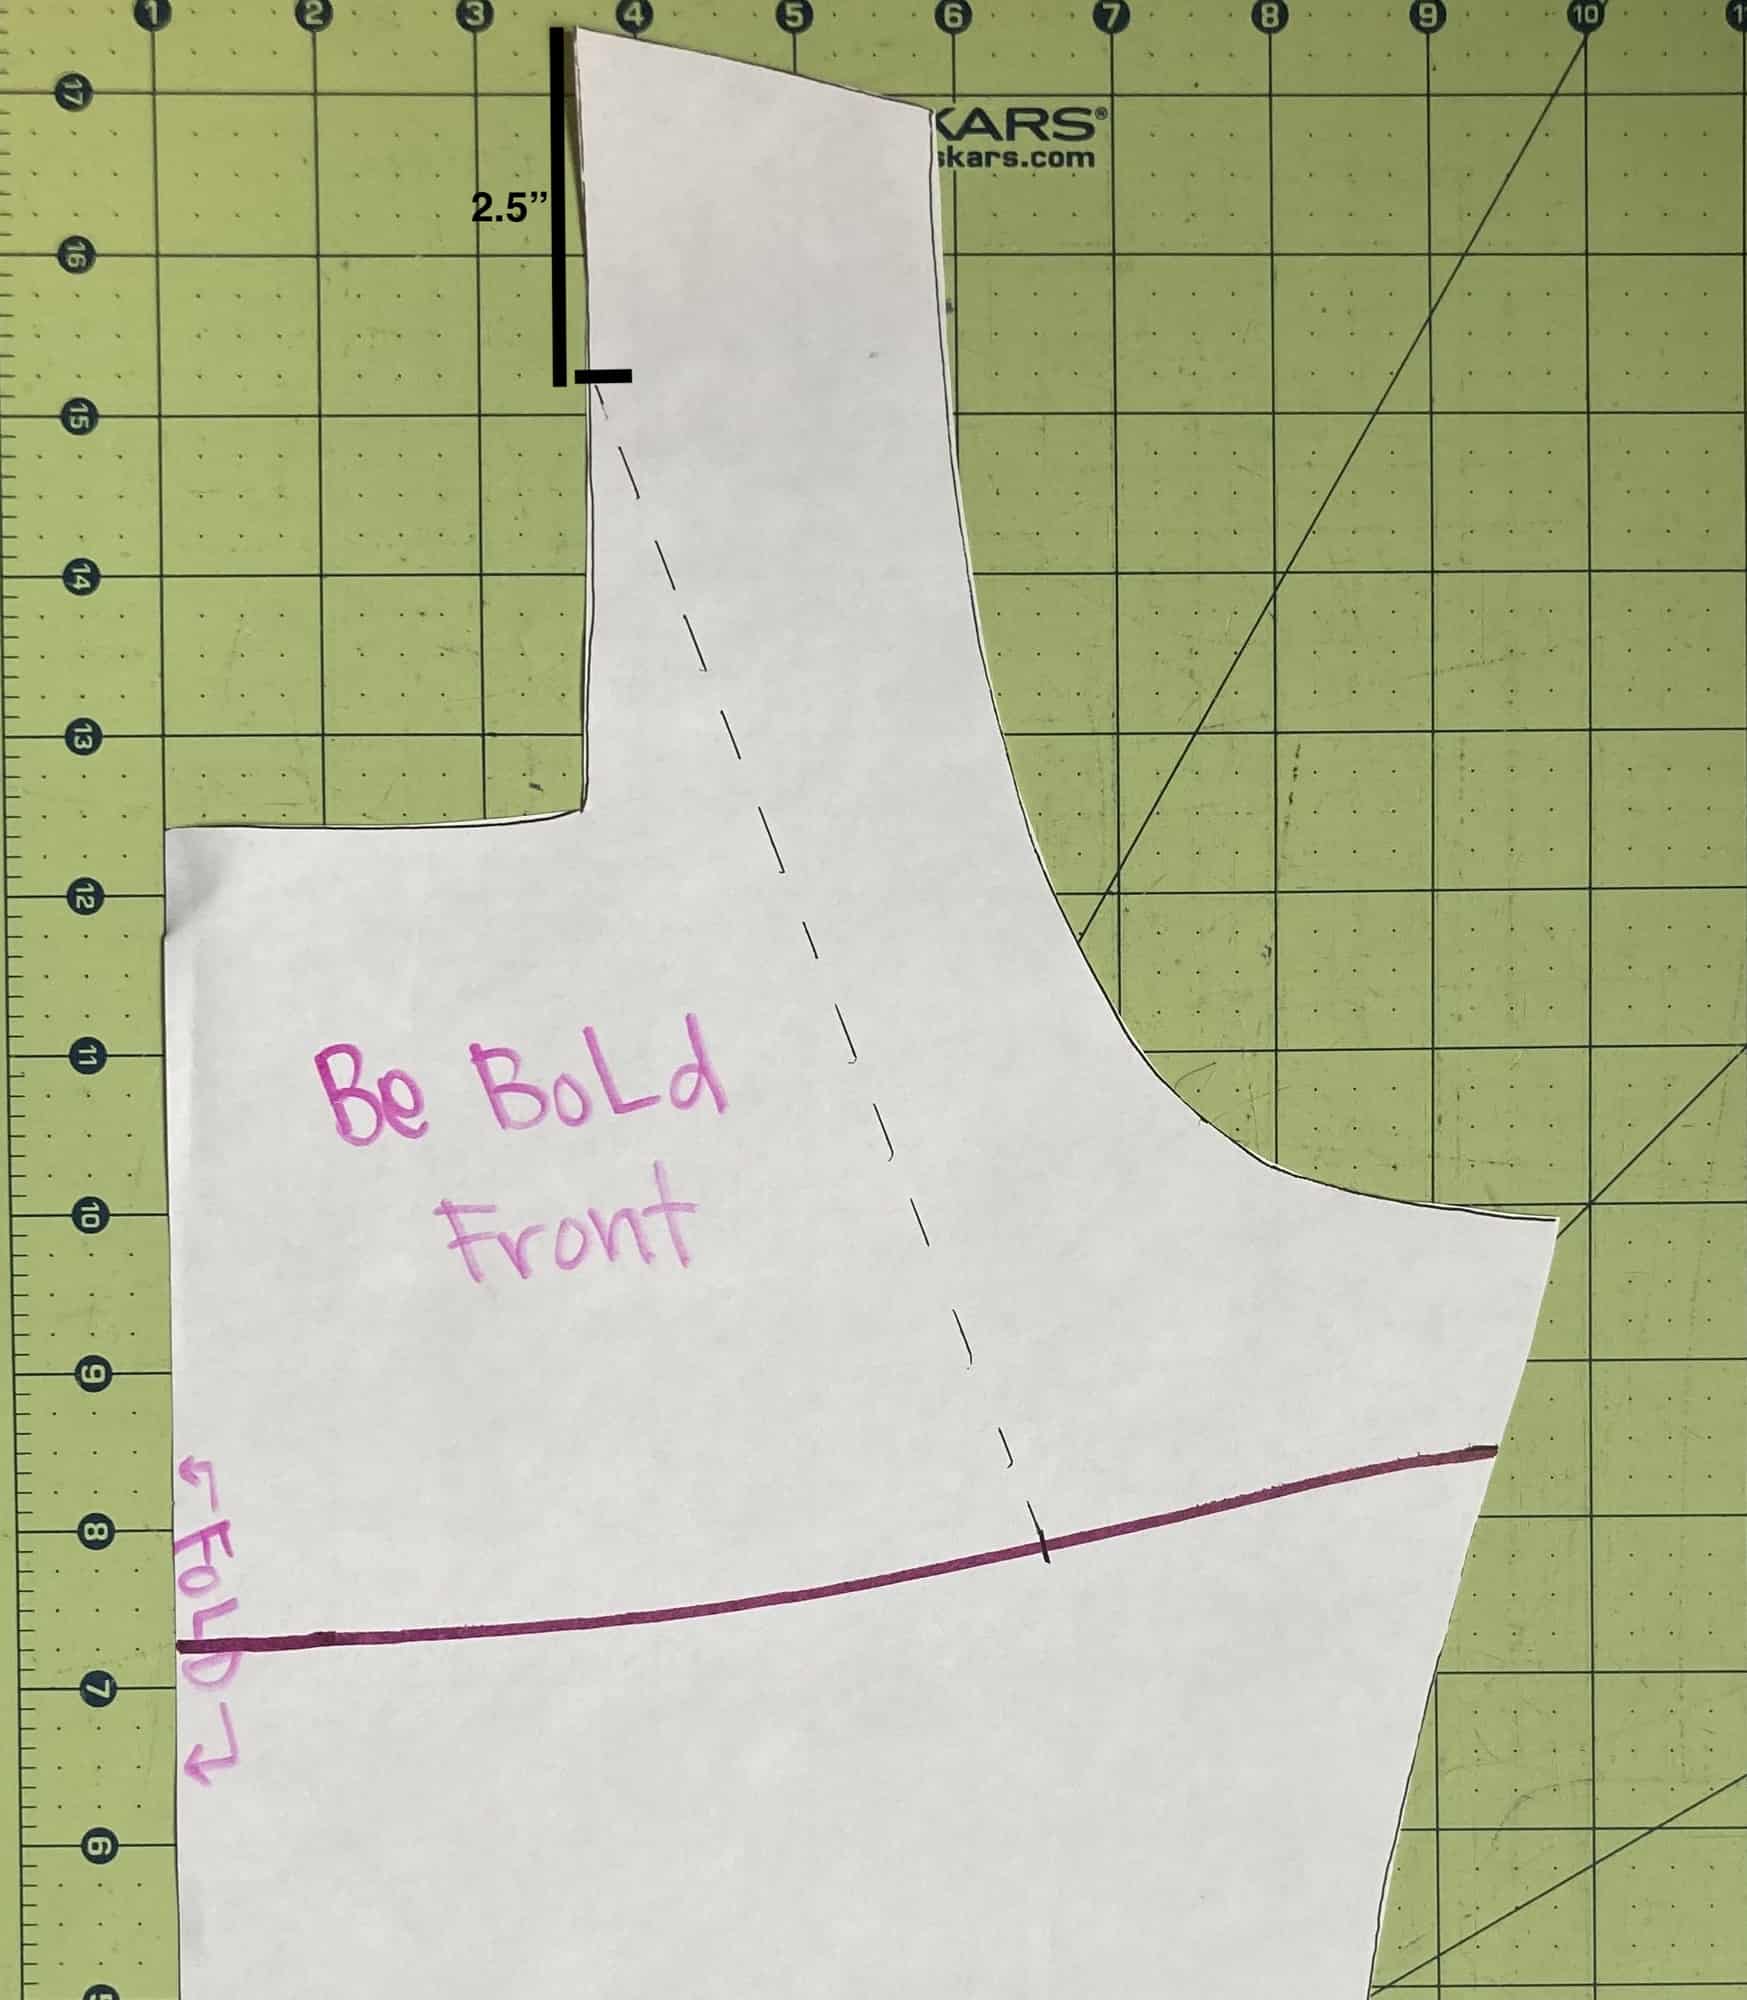
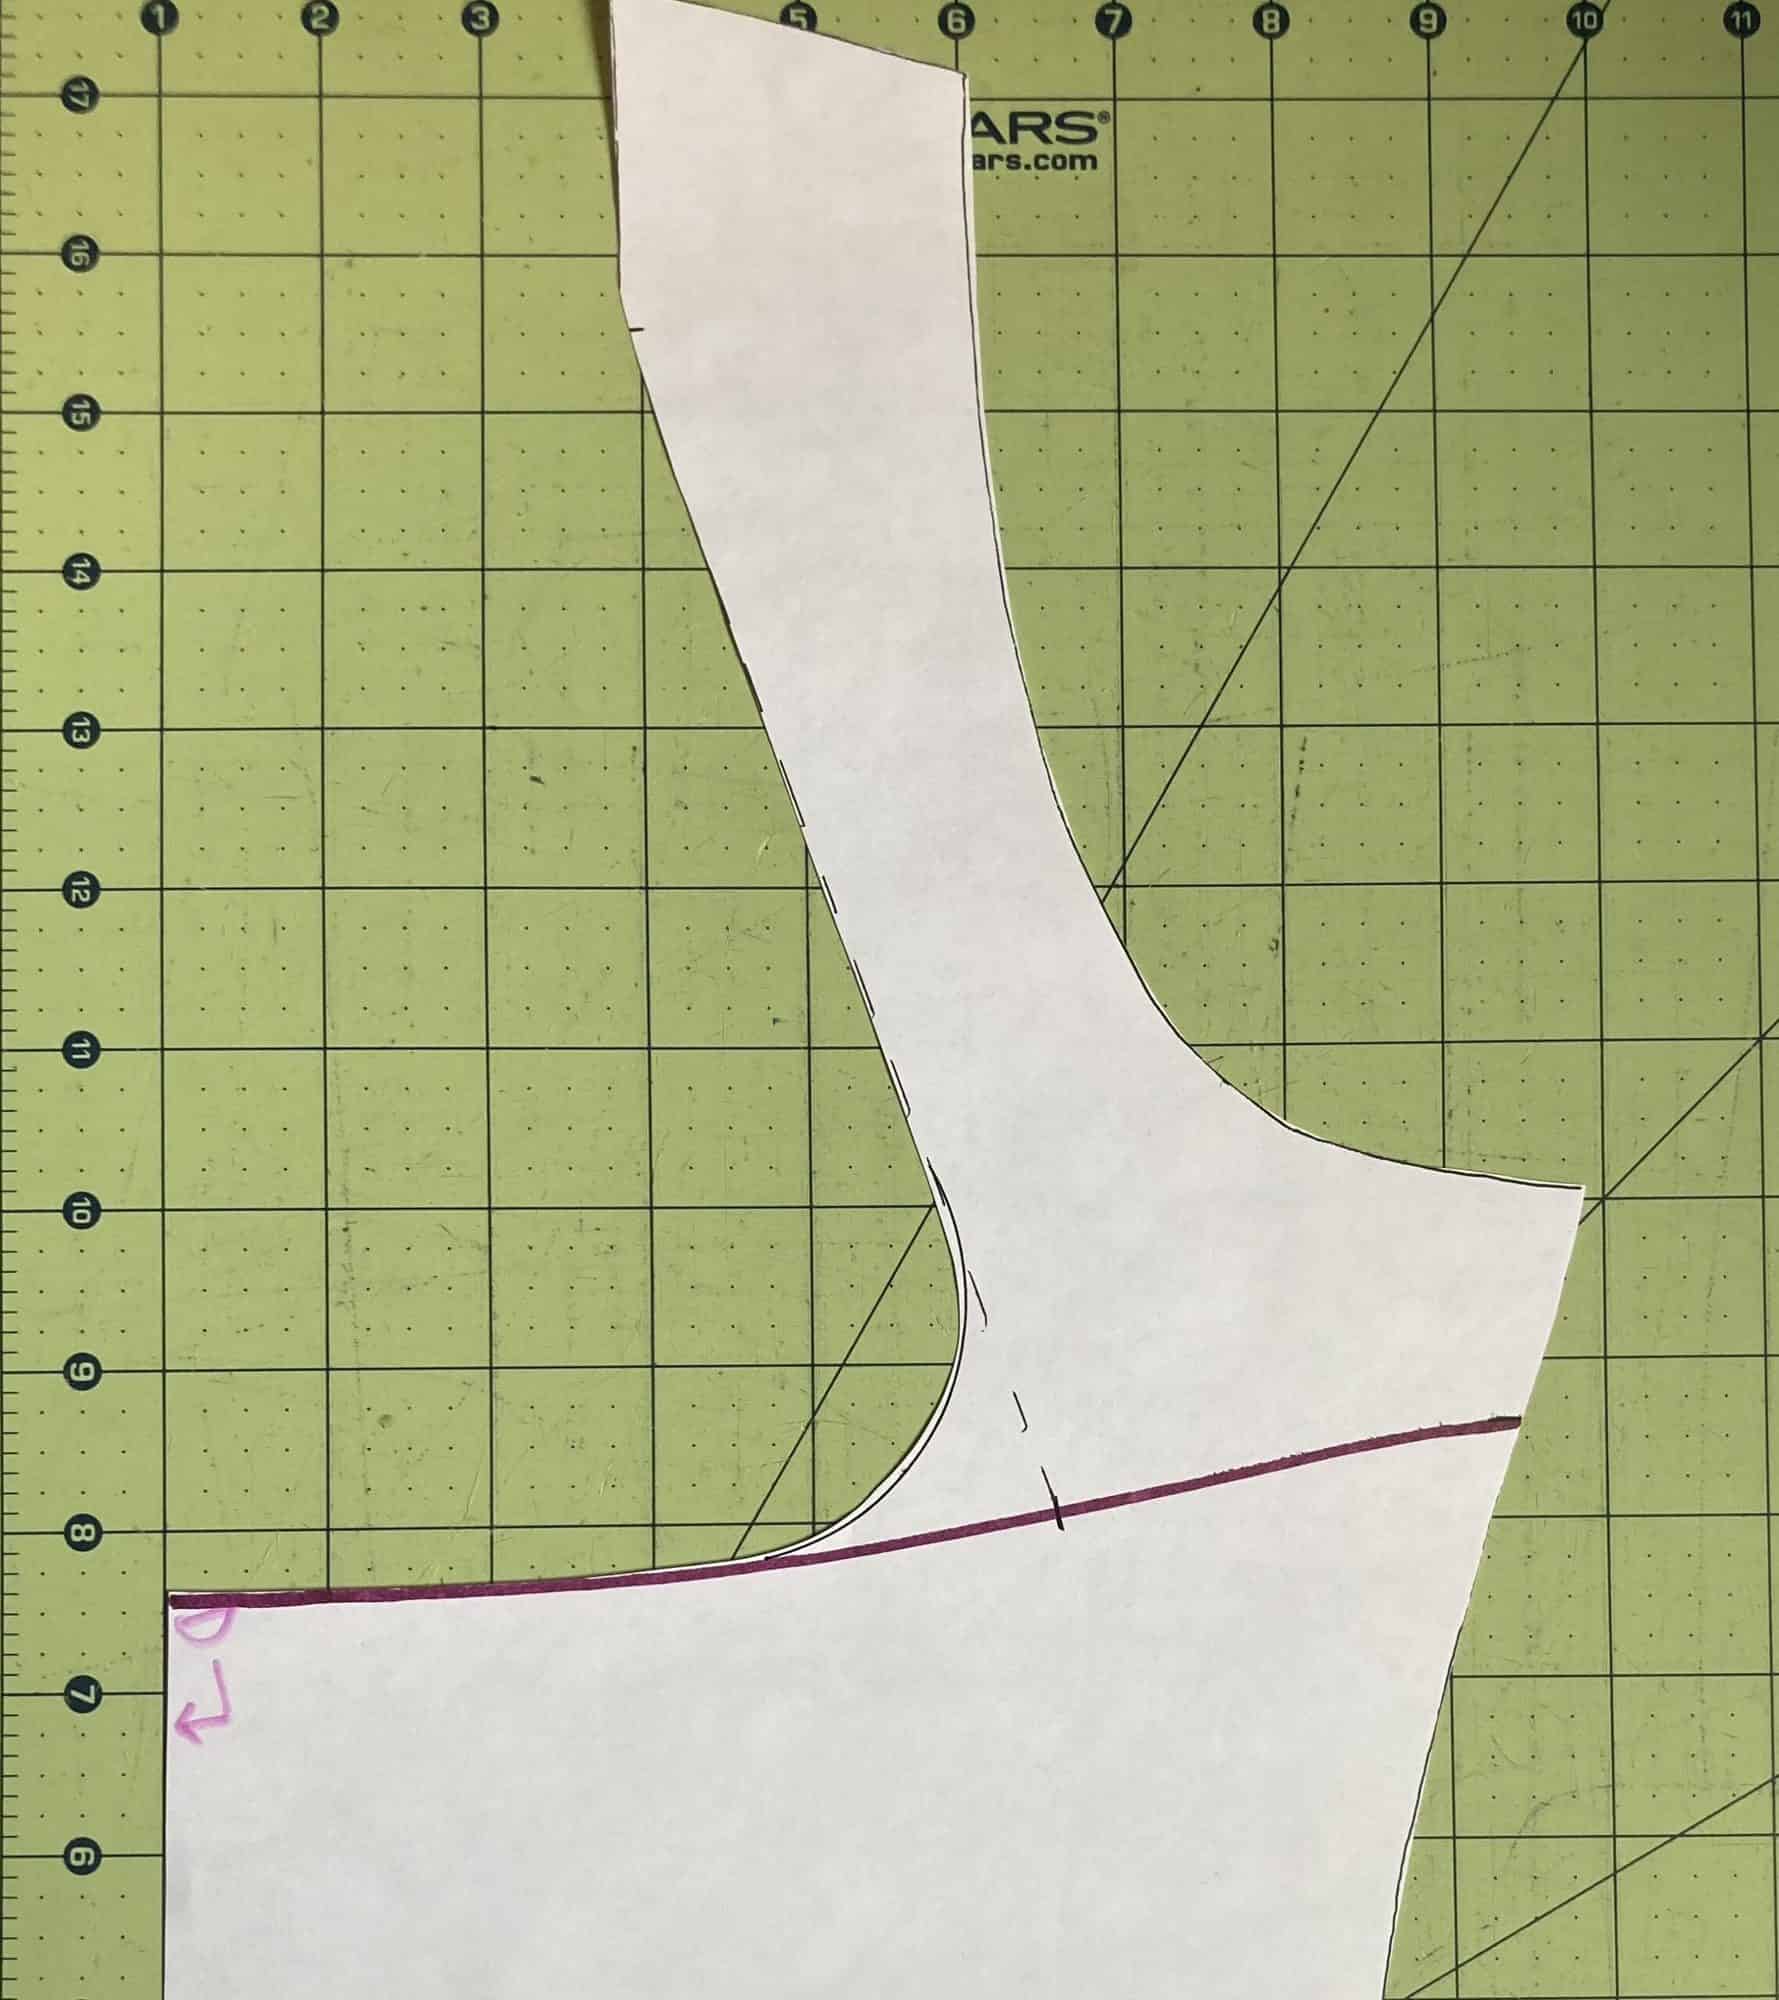
4. From the top of the shoulder seam, mark 2.5″ down. Connect the lines as illustrated above.

5. Using a french curve ruler or whatever you have around (I used a drinking glass), create a curve connecting the shoulder seam line and the underbust line.

6.  Cut out that section, and you now have your new front pattern piece! Using this piece, cut out your main fabric and lining on the fold.

7. Follow the construction of the tutorial as written, treating the deep plunge as a normal neckline. You will want to use a 1:1 ratio for the picot, while slightly stretching along the curve.

…..

Very crop top

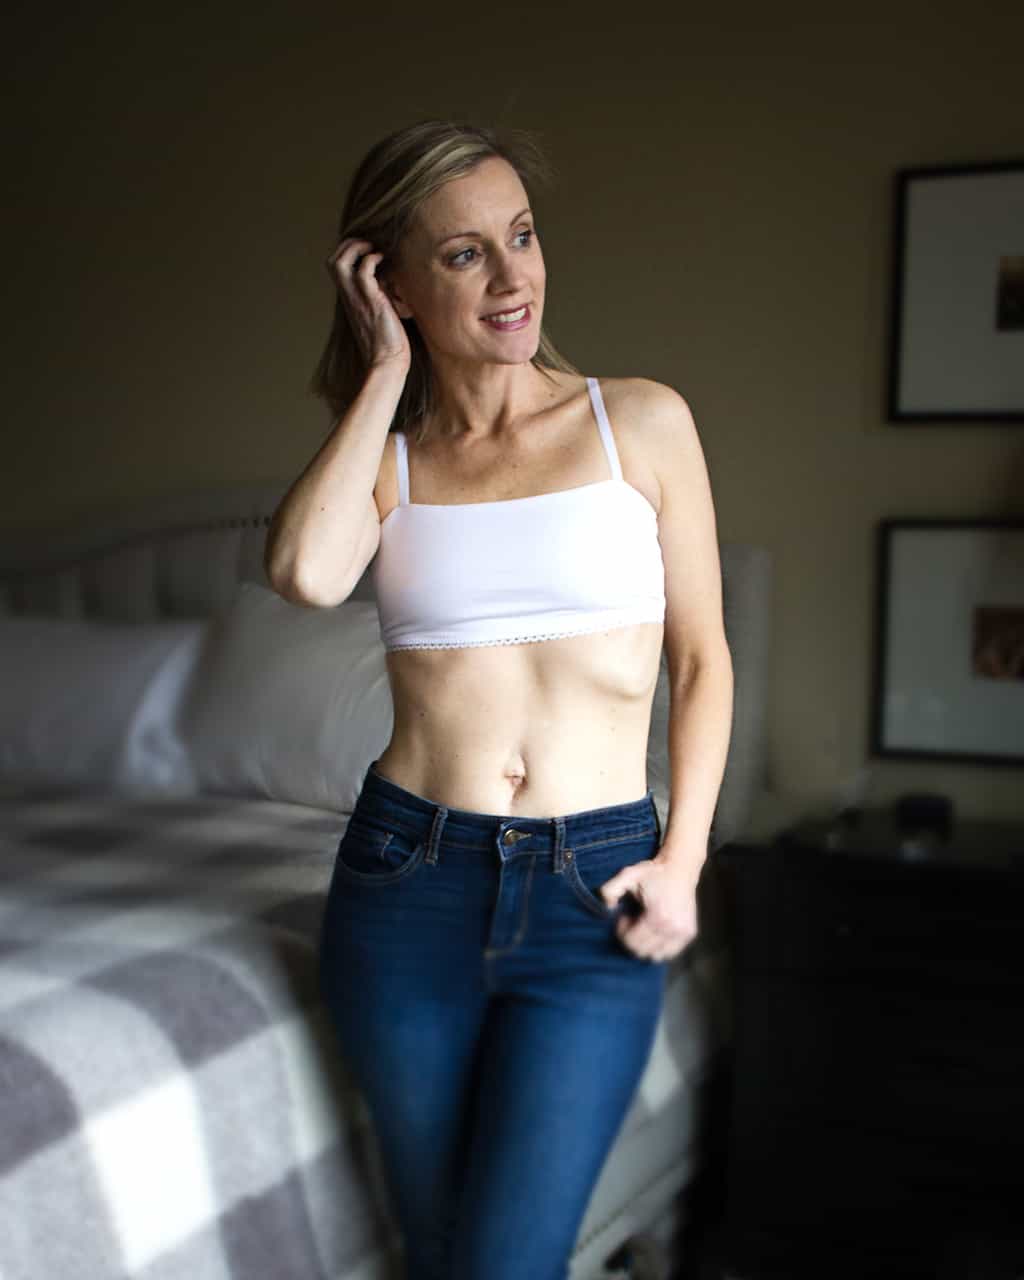
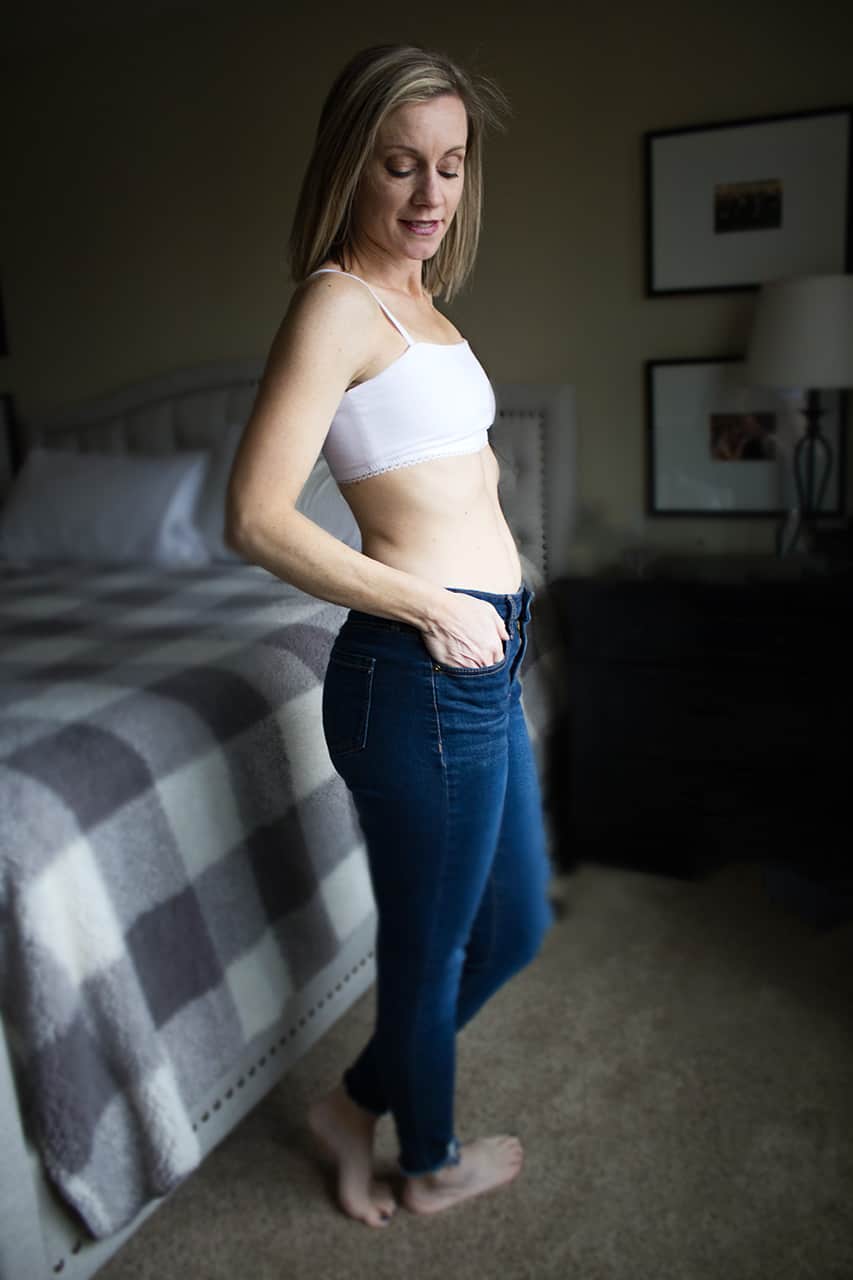
This very cropped cami and top are super comfortable and perfect to wear under low-cut tops and for loungewear. I will be living in these and the best part is they are so quick and easy to make. Here are the two tutorials for creating the crop. The first shows the tutorial using the thin strap option and the second is the tank option.

Very Crop Cami Using the Thin Strap Option:

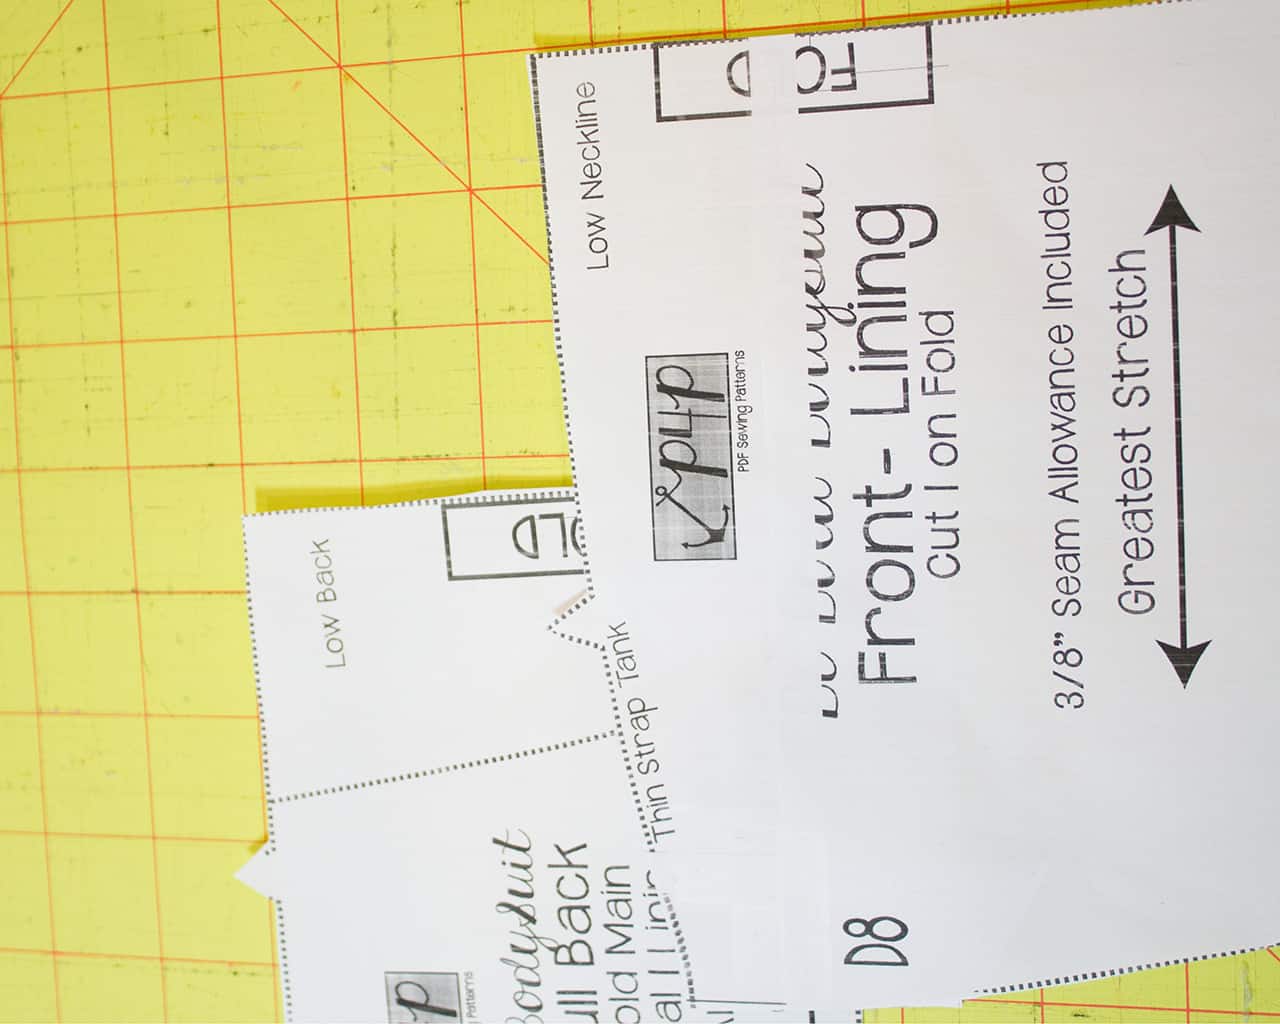
  1. Take your lining pieces for your pattern. Simply cut 2 fronts and 2 backs following the thin strap tank lines to create a cropped cami with lining. 
  2. Sew the top together using the thin strap tank directions from the tutorial. 
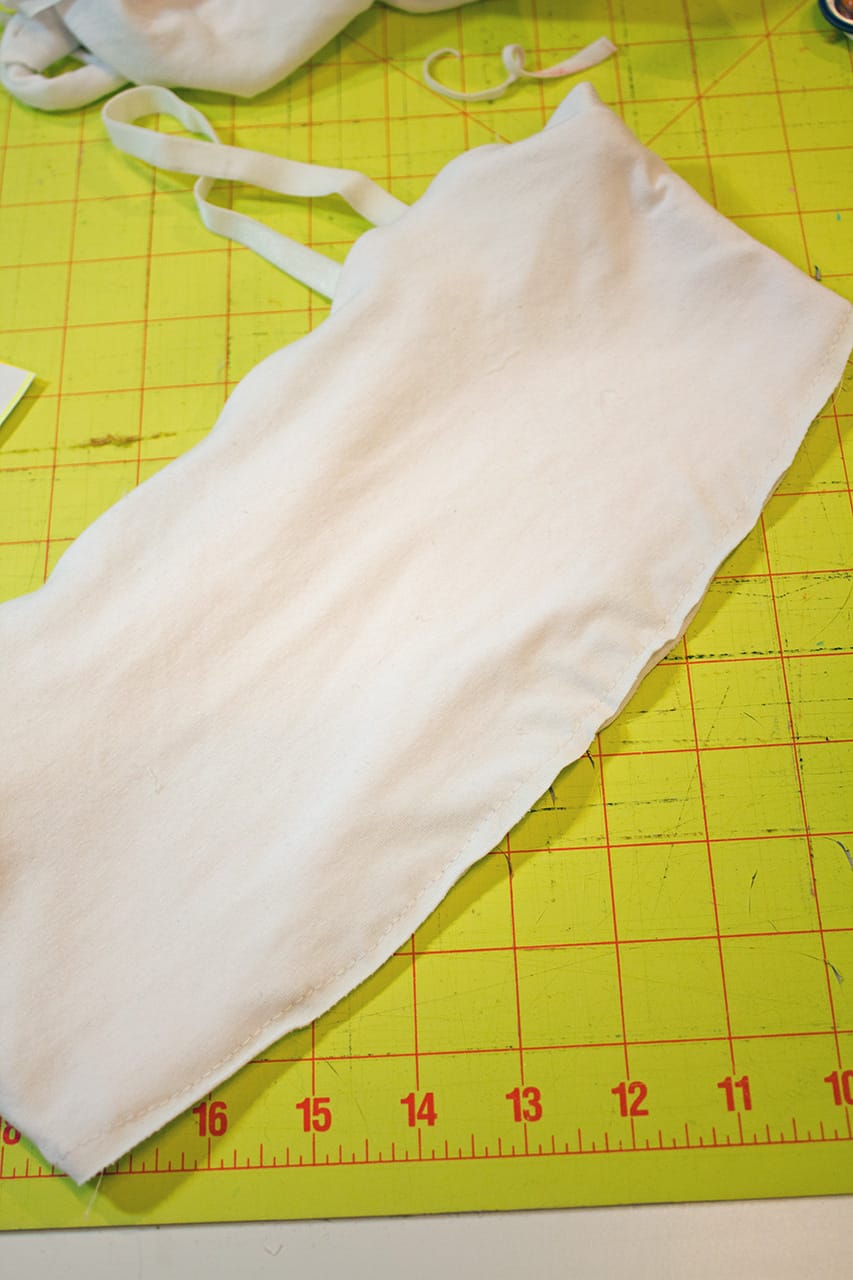
  3. Once you have sewn the side seams, baste the main and lining pieces together along the bottom edge. Treat these two as one while you attach the picot as directed in the pattern.  

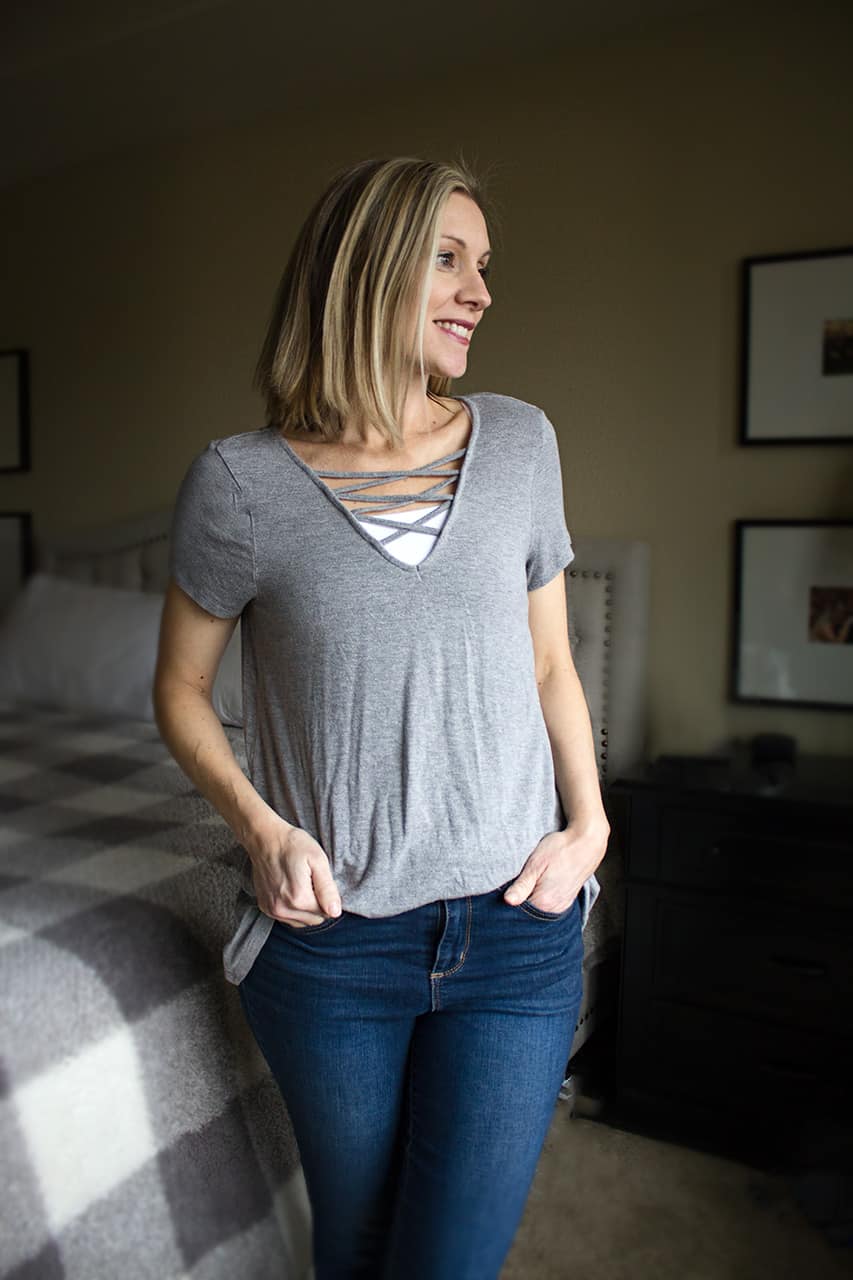
This cropped cami is great for pairing with low cut tops for some extra coverage. I made this option in white cotton jersey, lined with the same fabric and used bra strap elastic in place of fabric straps. (paired here with RTW Jeans and Top).

Very Cropped Top Using the Tank Option

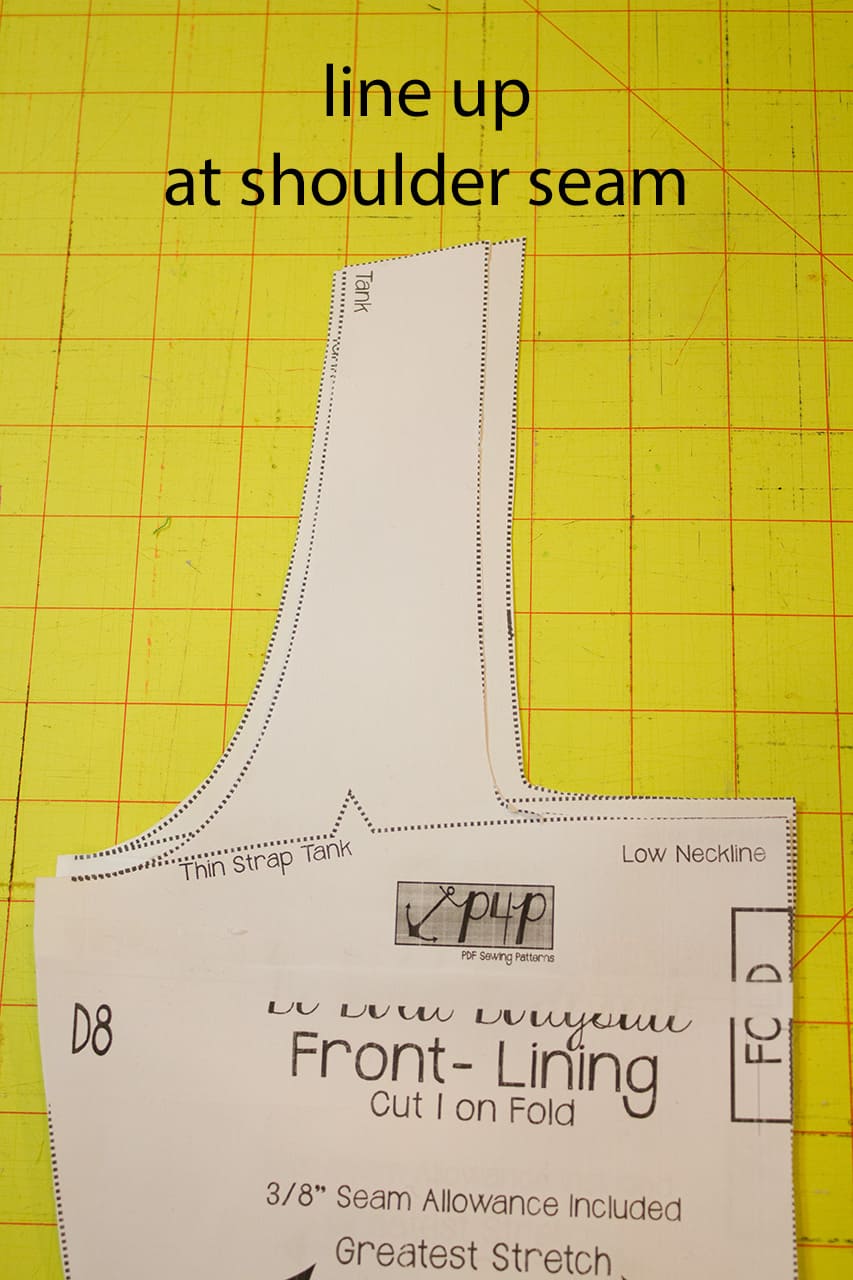
  1. Take both your front and back bodice pieces and lay the front and back shelf bra liner pieces on top, lining up the shoulders. 
  2. Draw a line on your front and back main bodice pieces along the bottom of the shelf bra piece. 
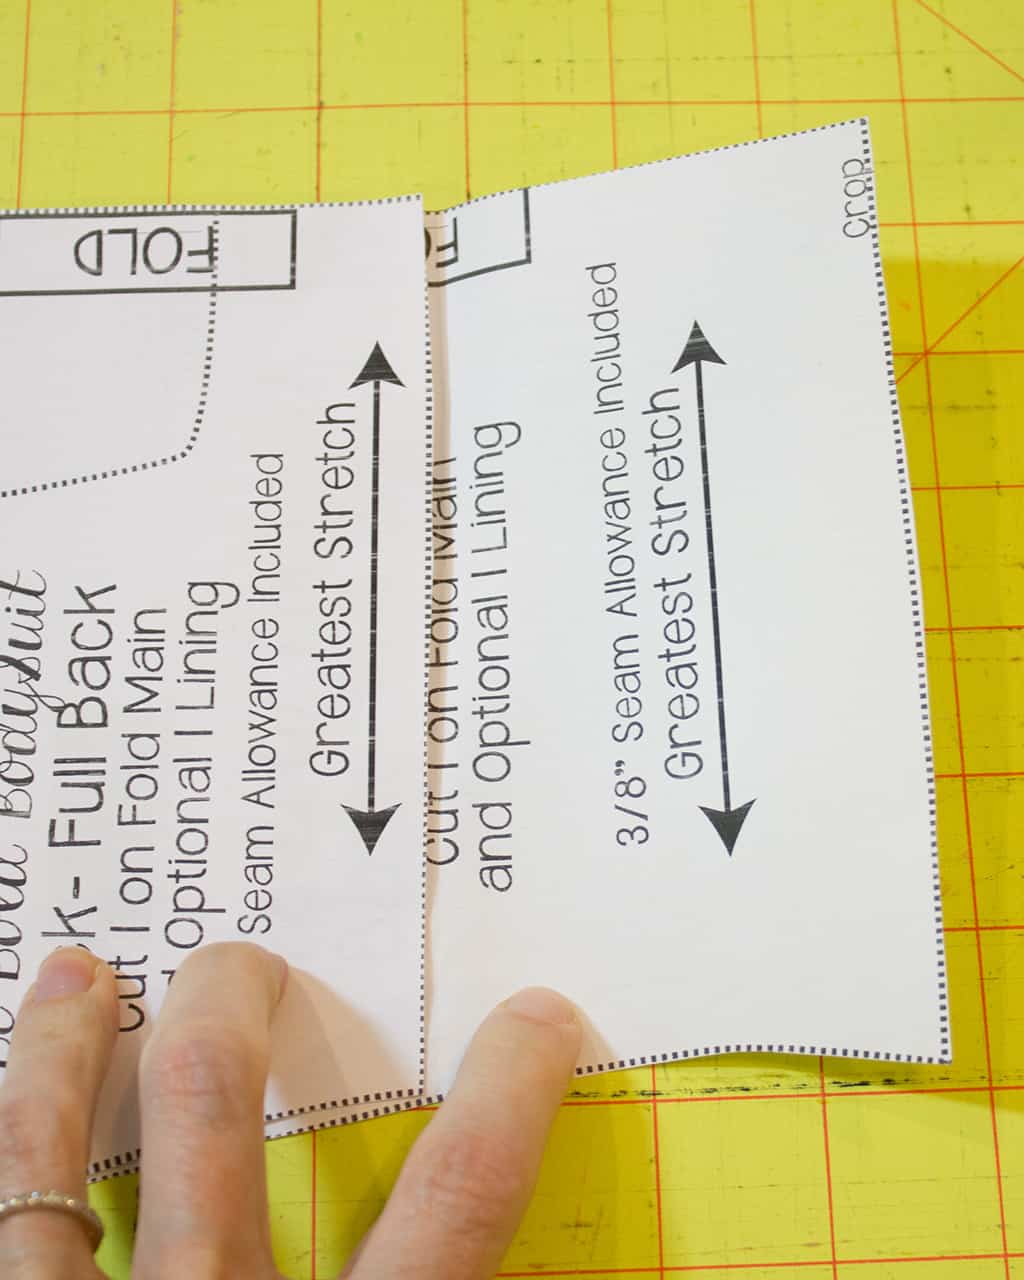
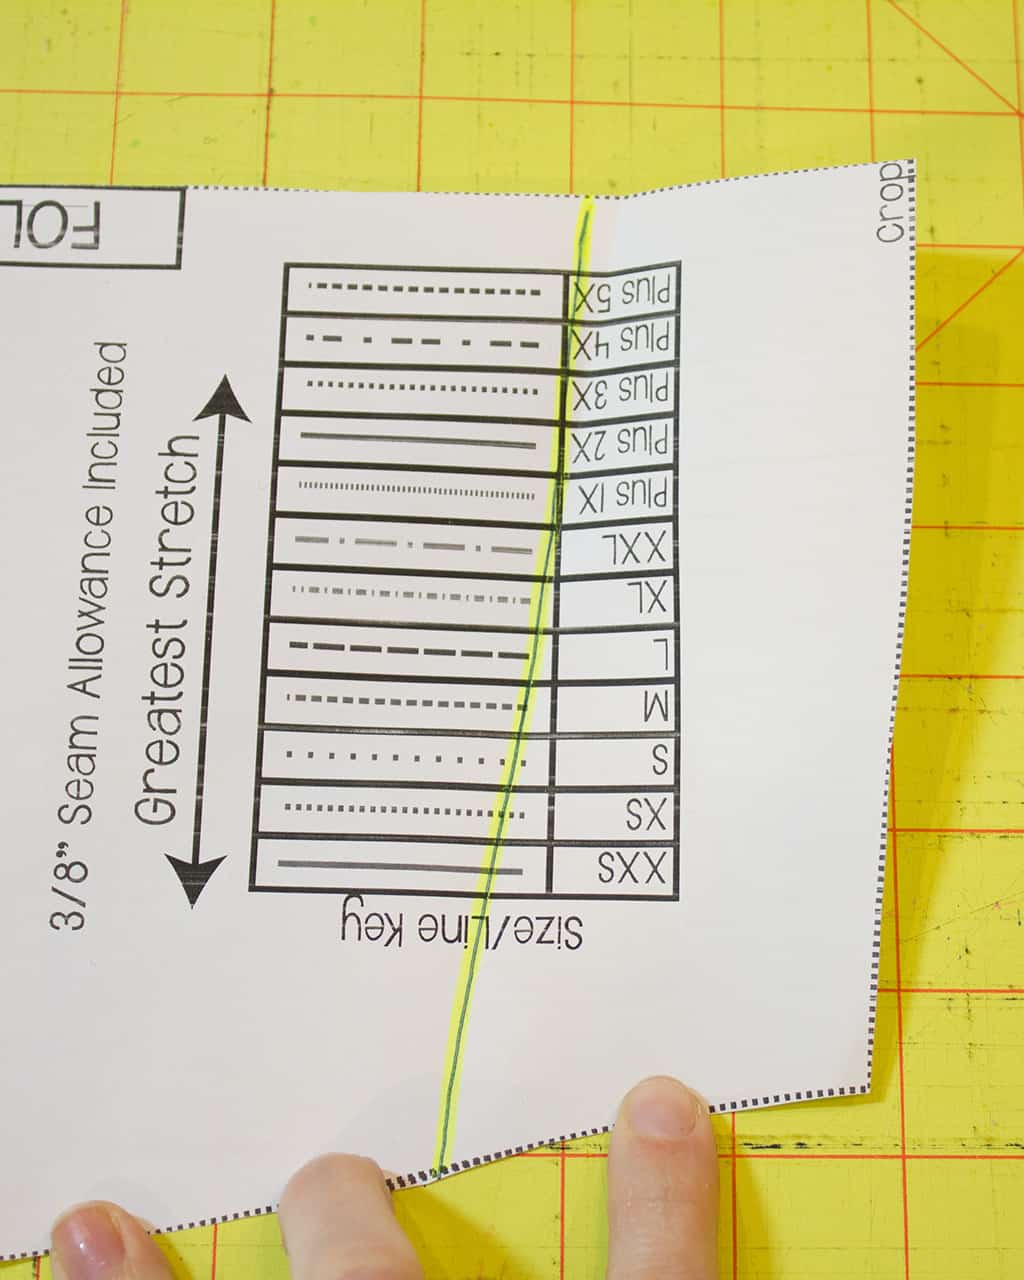
  3. Cut your main bodice pattern pieces on this line and use this for your new pattern.
  4. Cut your main fabric for the very crop tank top using your new pieces and cut your lining from the shelf bra lining pieces. Follow the tutorial for sewing the tank top. Once you have the neckline, arms, and side seams sewn, baste the lining and main fabric together along the bottom edge. You will now treat the two fabrics as one piece. Last, apply picot elastic according to the tutorial for the shelf bra.  That’s it.

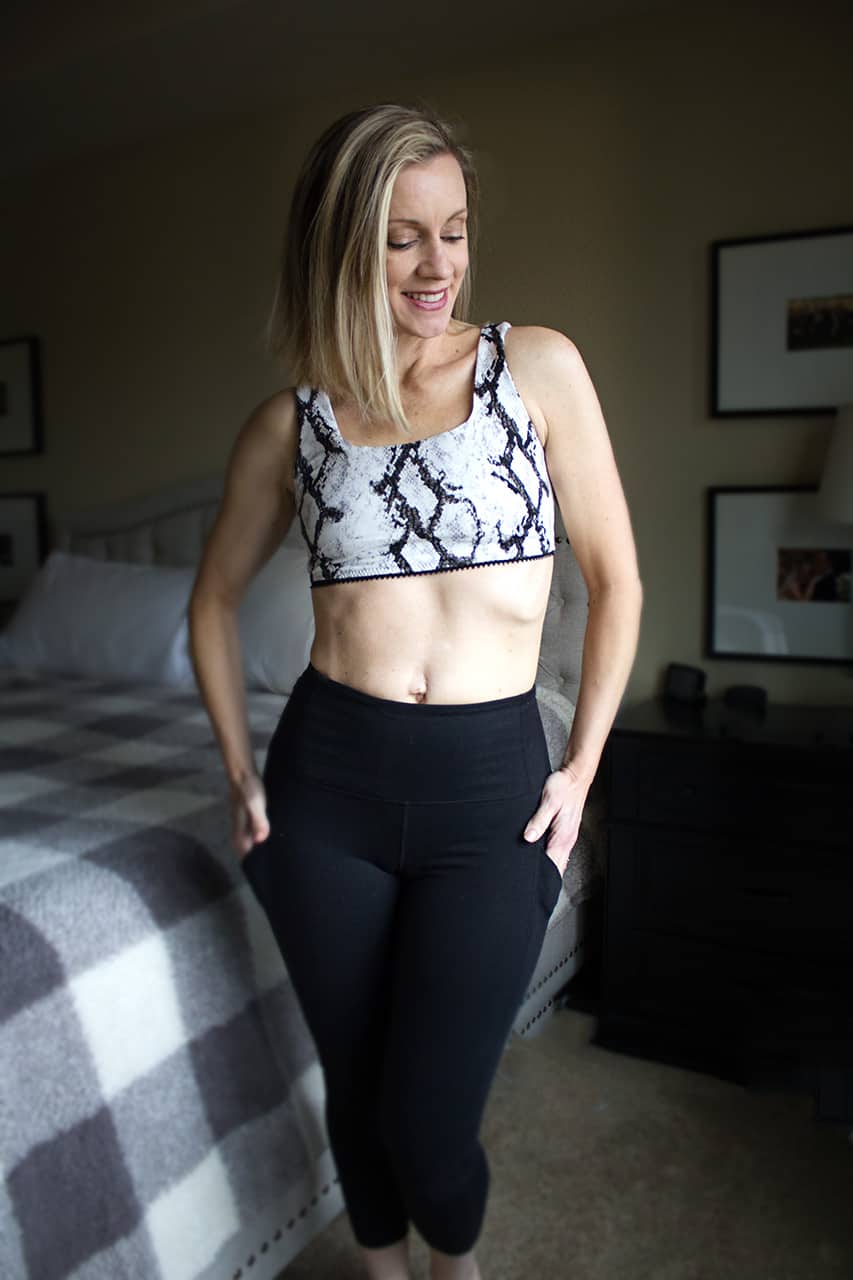
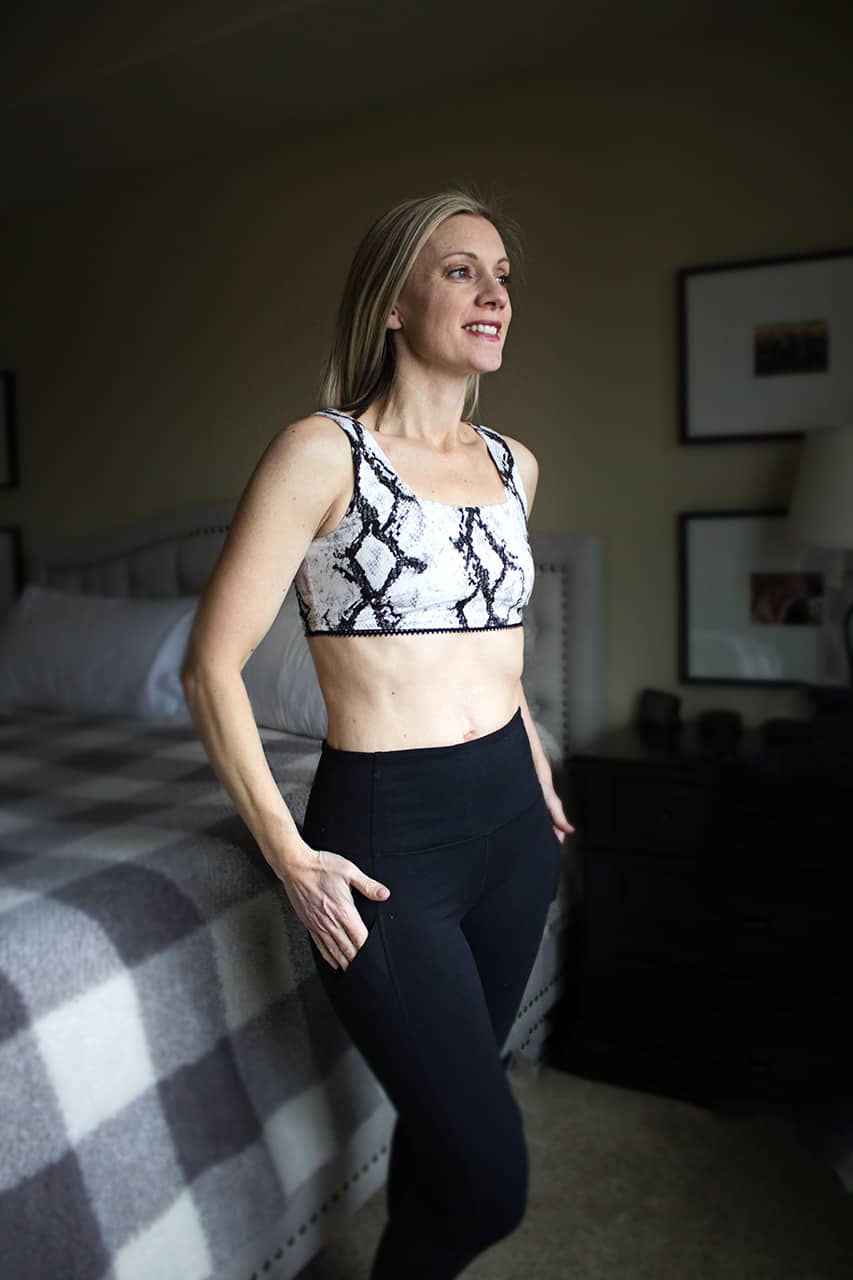
This very cropped top is great to wear in place of a bra or sewn up in athletic fabric to match with your favorite workout wear. This is not supportive enough to be a sports bra, but very comfortable for lounging, a sleep bra, or paired with your own bra as a very cropped top.


I hope you will get to give these easy hacks a try. Which one will you do first? Don’t forget to share them in the P4P Facebook group and on Instagram so we can admire your work too! 

Filed Under: Frequently Asked Questions, Pattern Hacks, Pattern Release, Uncategorized Leave a Comment

Sweater Weather – easy hacks

January 23, 2021


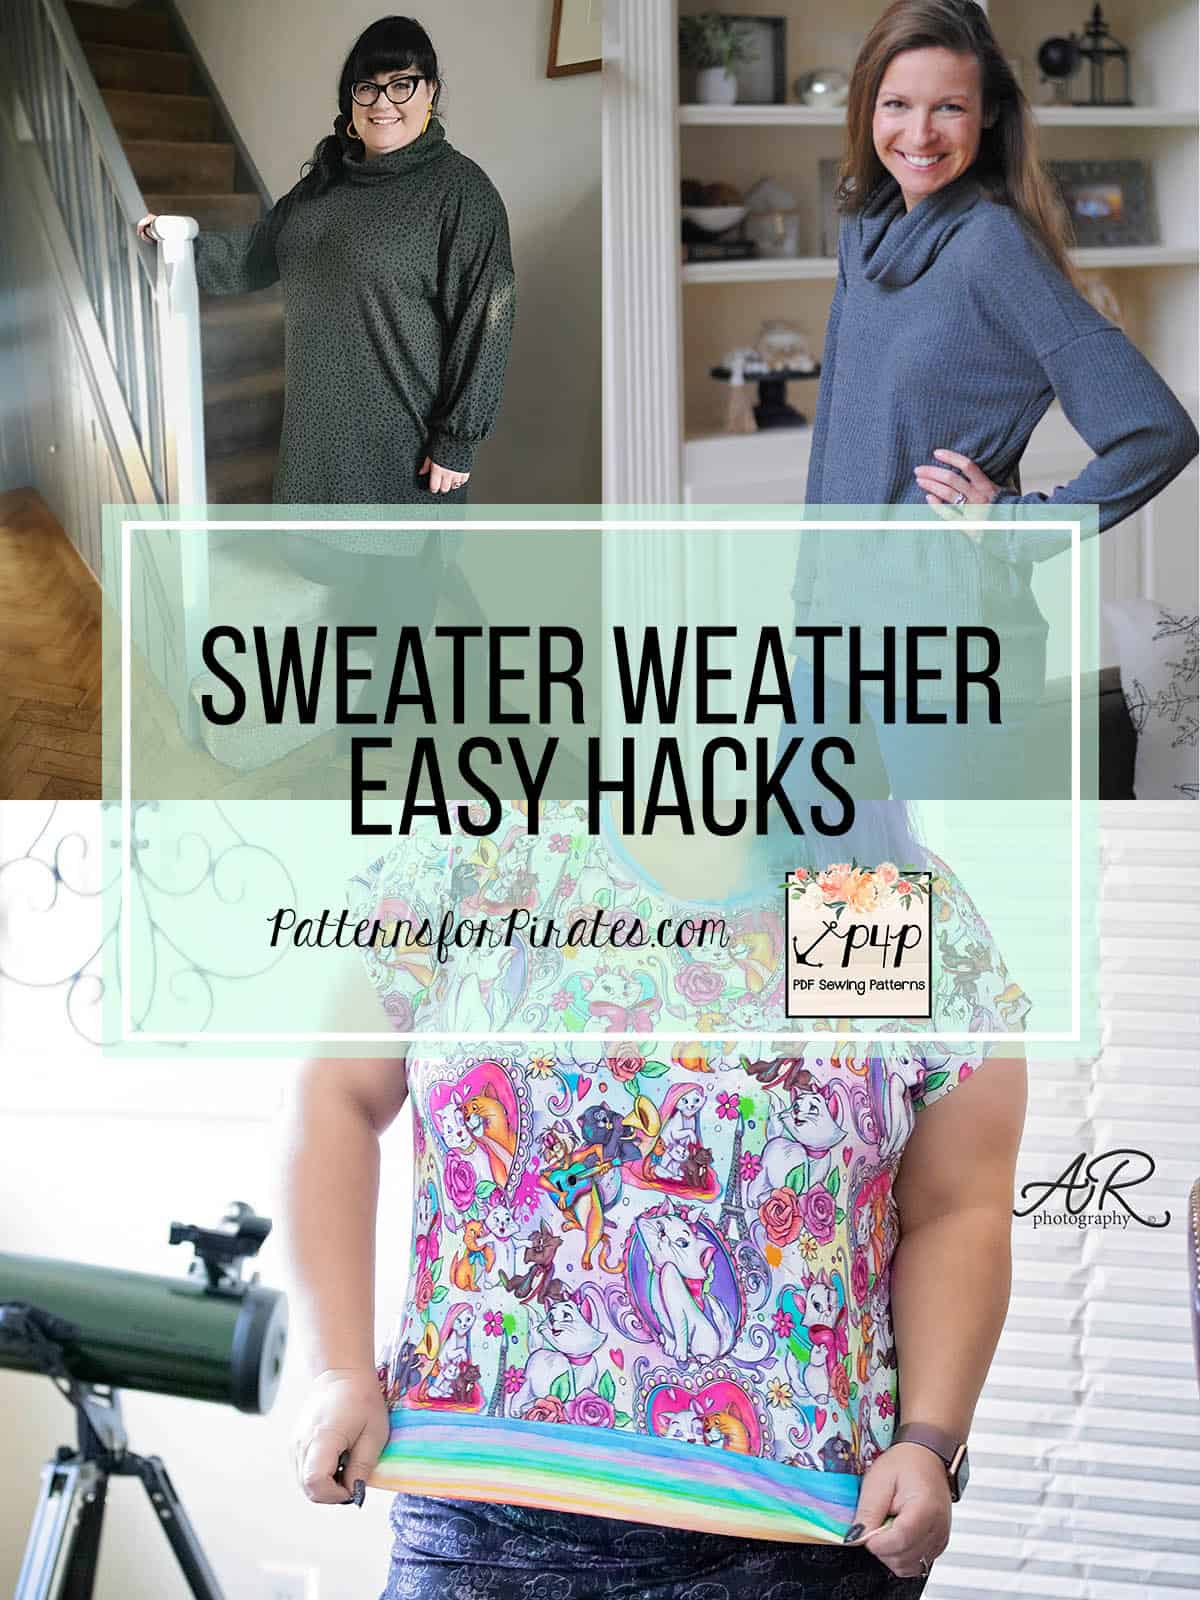
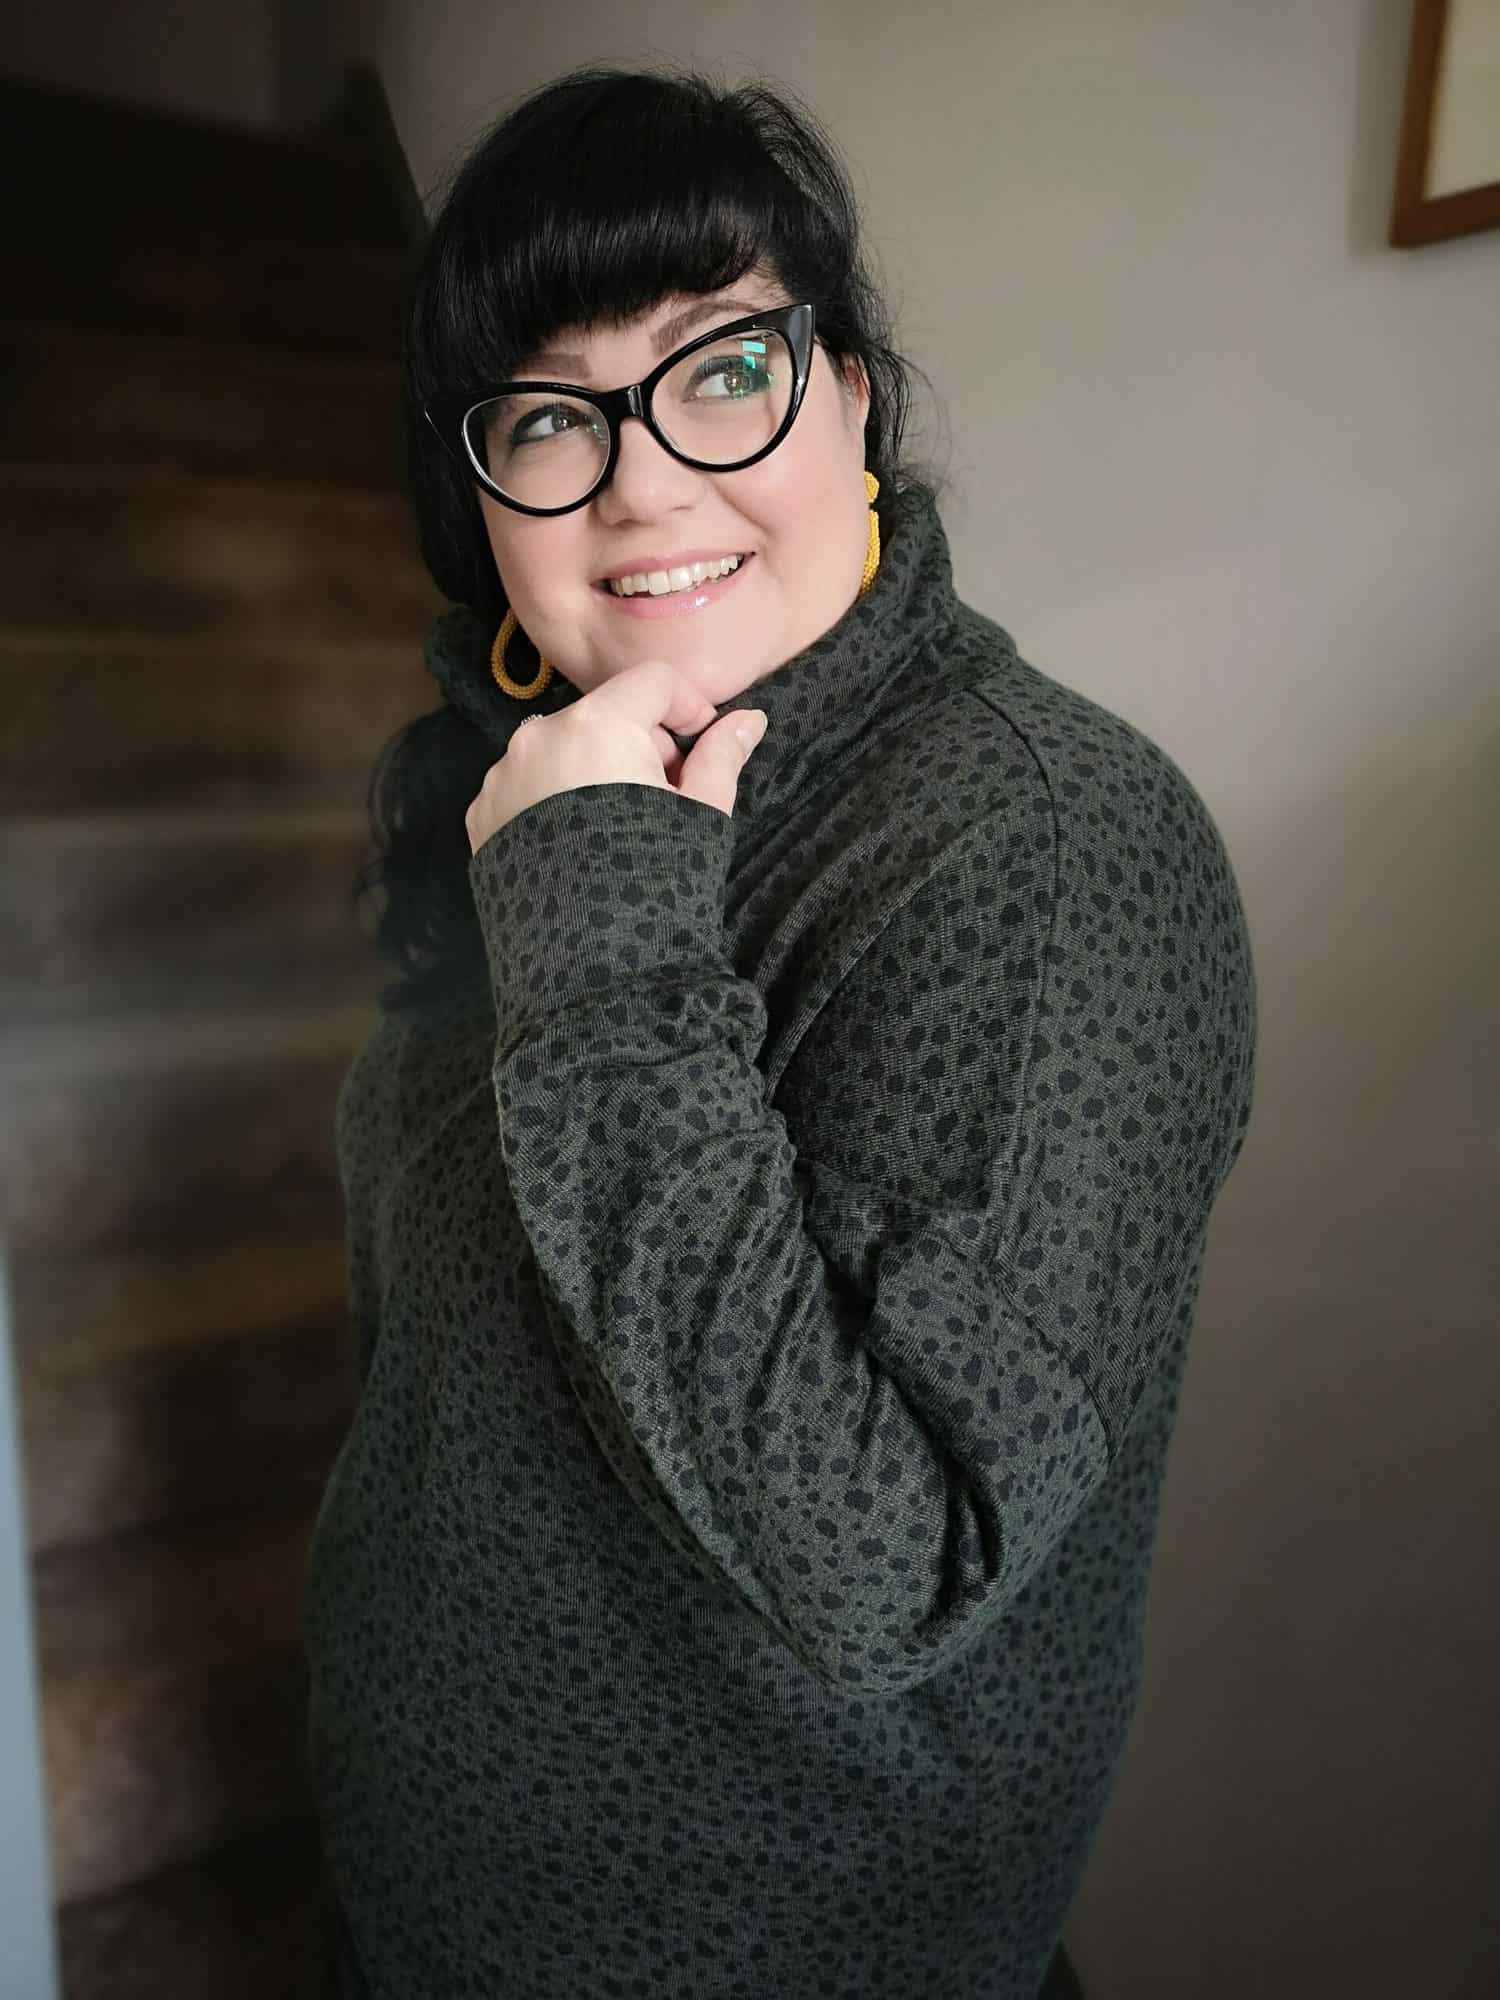
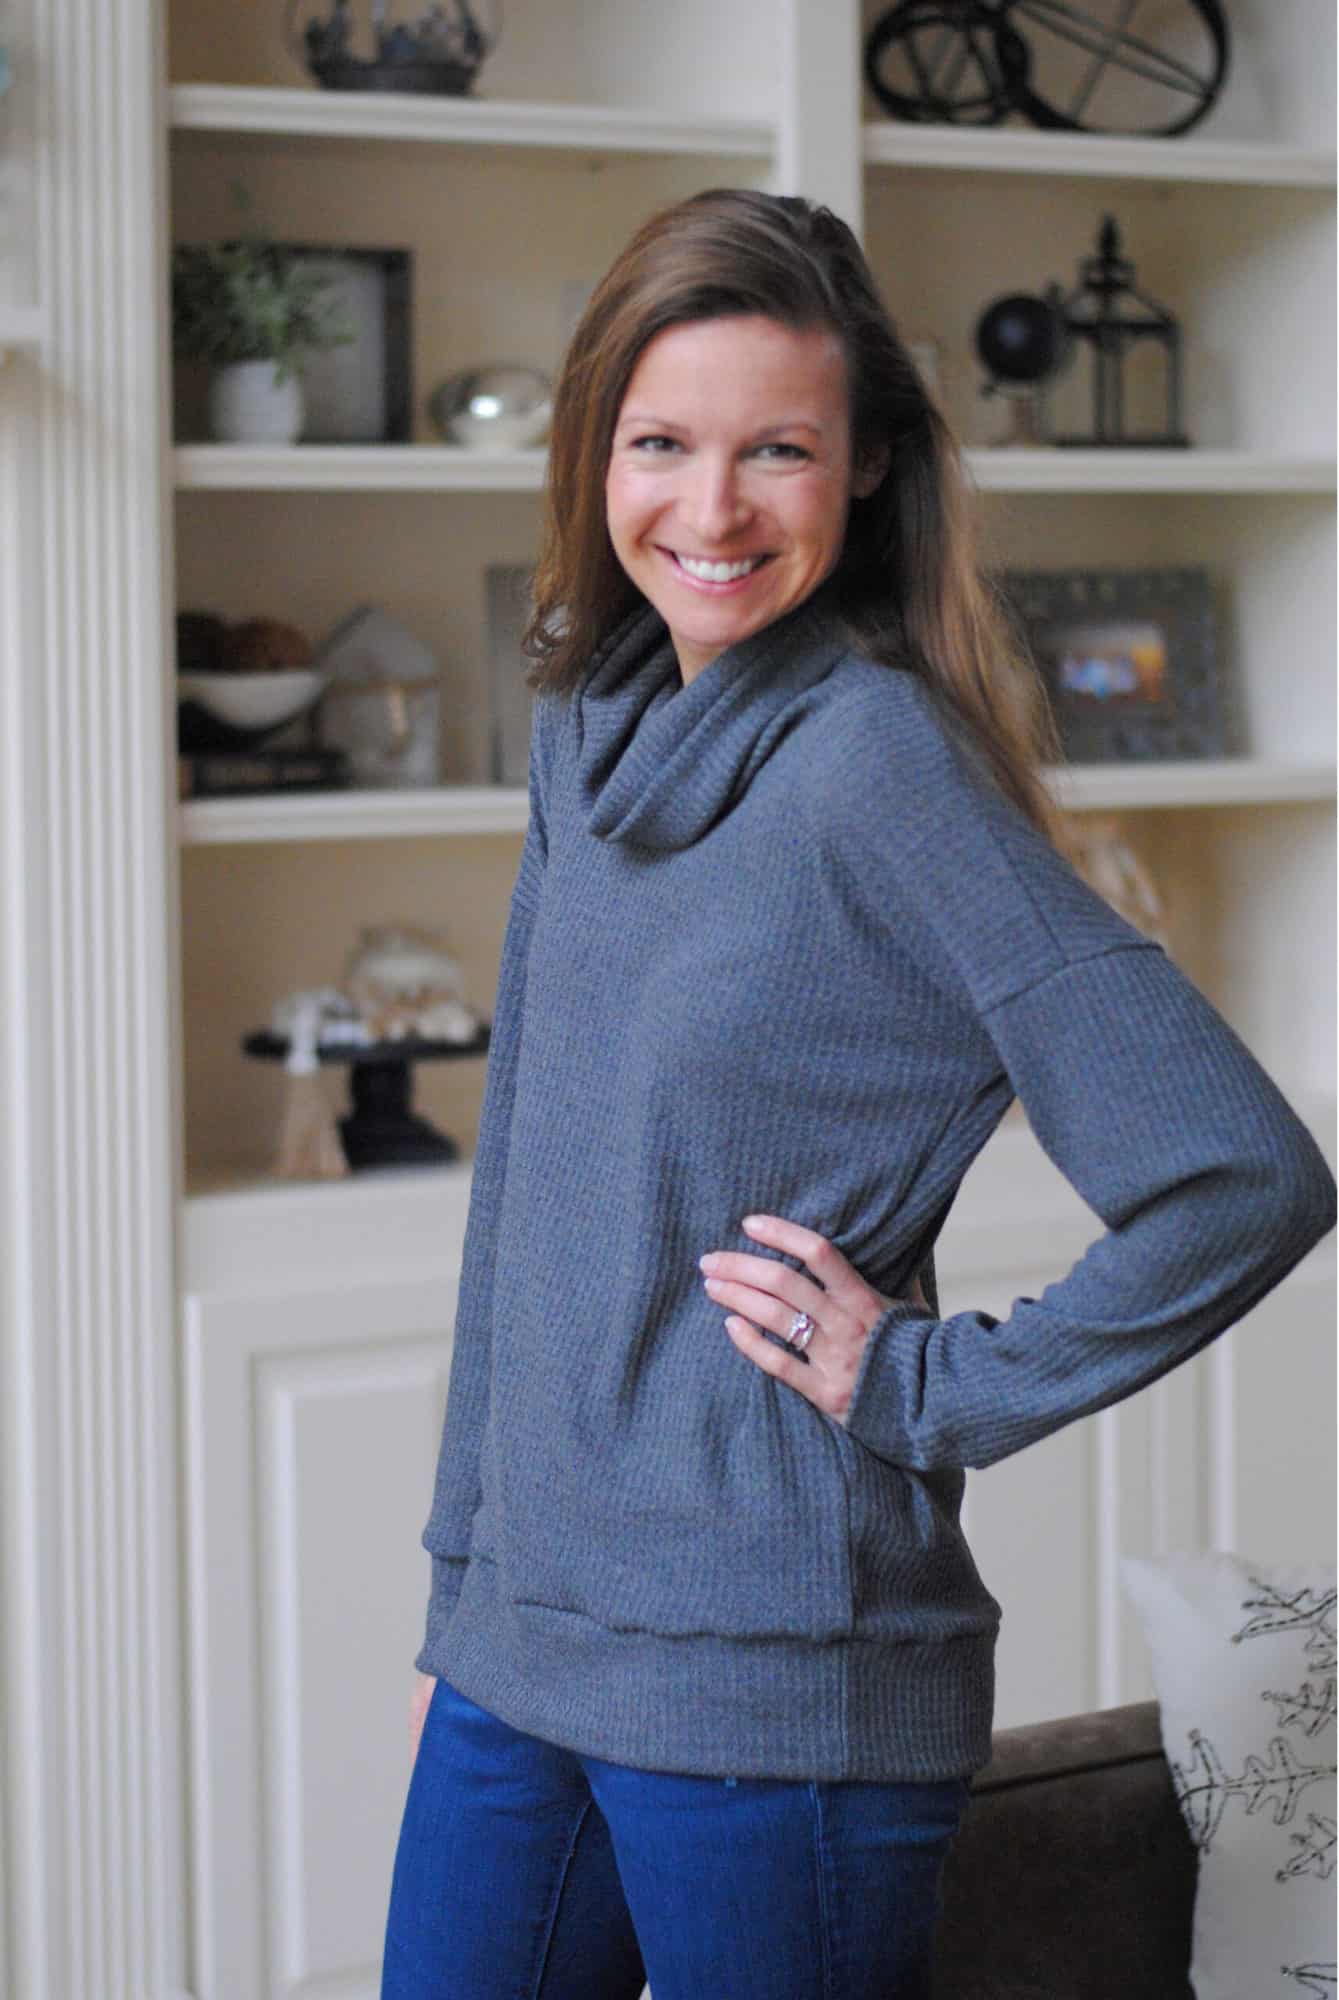
From brrrrrr to ummmm! This cold days, stay nice and warm with the newest P4P pattern, the Sweater Weather! Our blog contributors team has put together some quick and easy hacks to give you even more options to the pattern. Dana is showing you how to make a wonderful Sweater Weather dress, Jody ditches the side seams for a classic banded look and I took the sweater from winter to summer. Let’s get started! 

…..

Dress

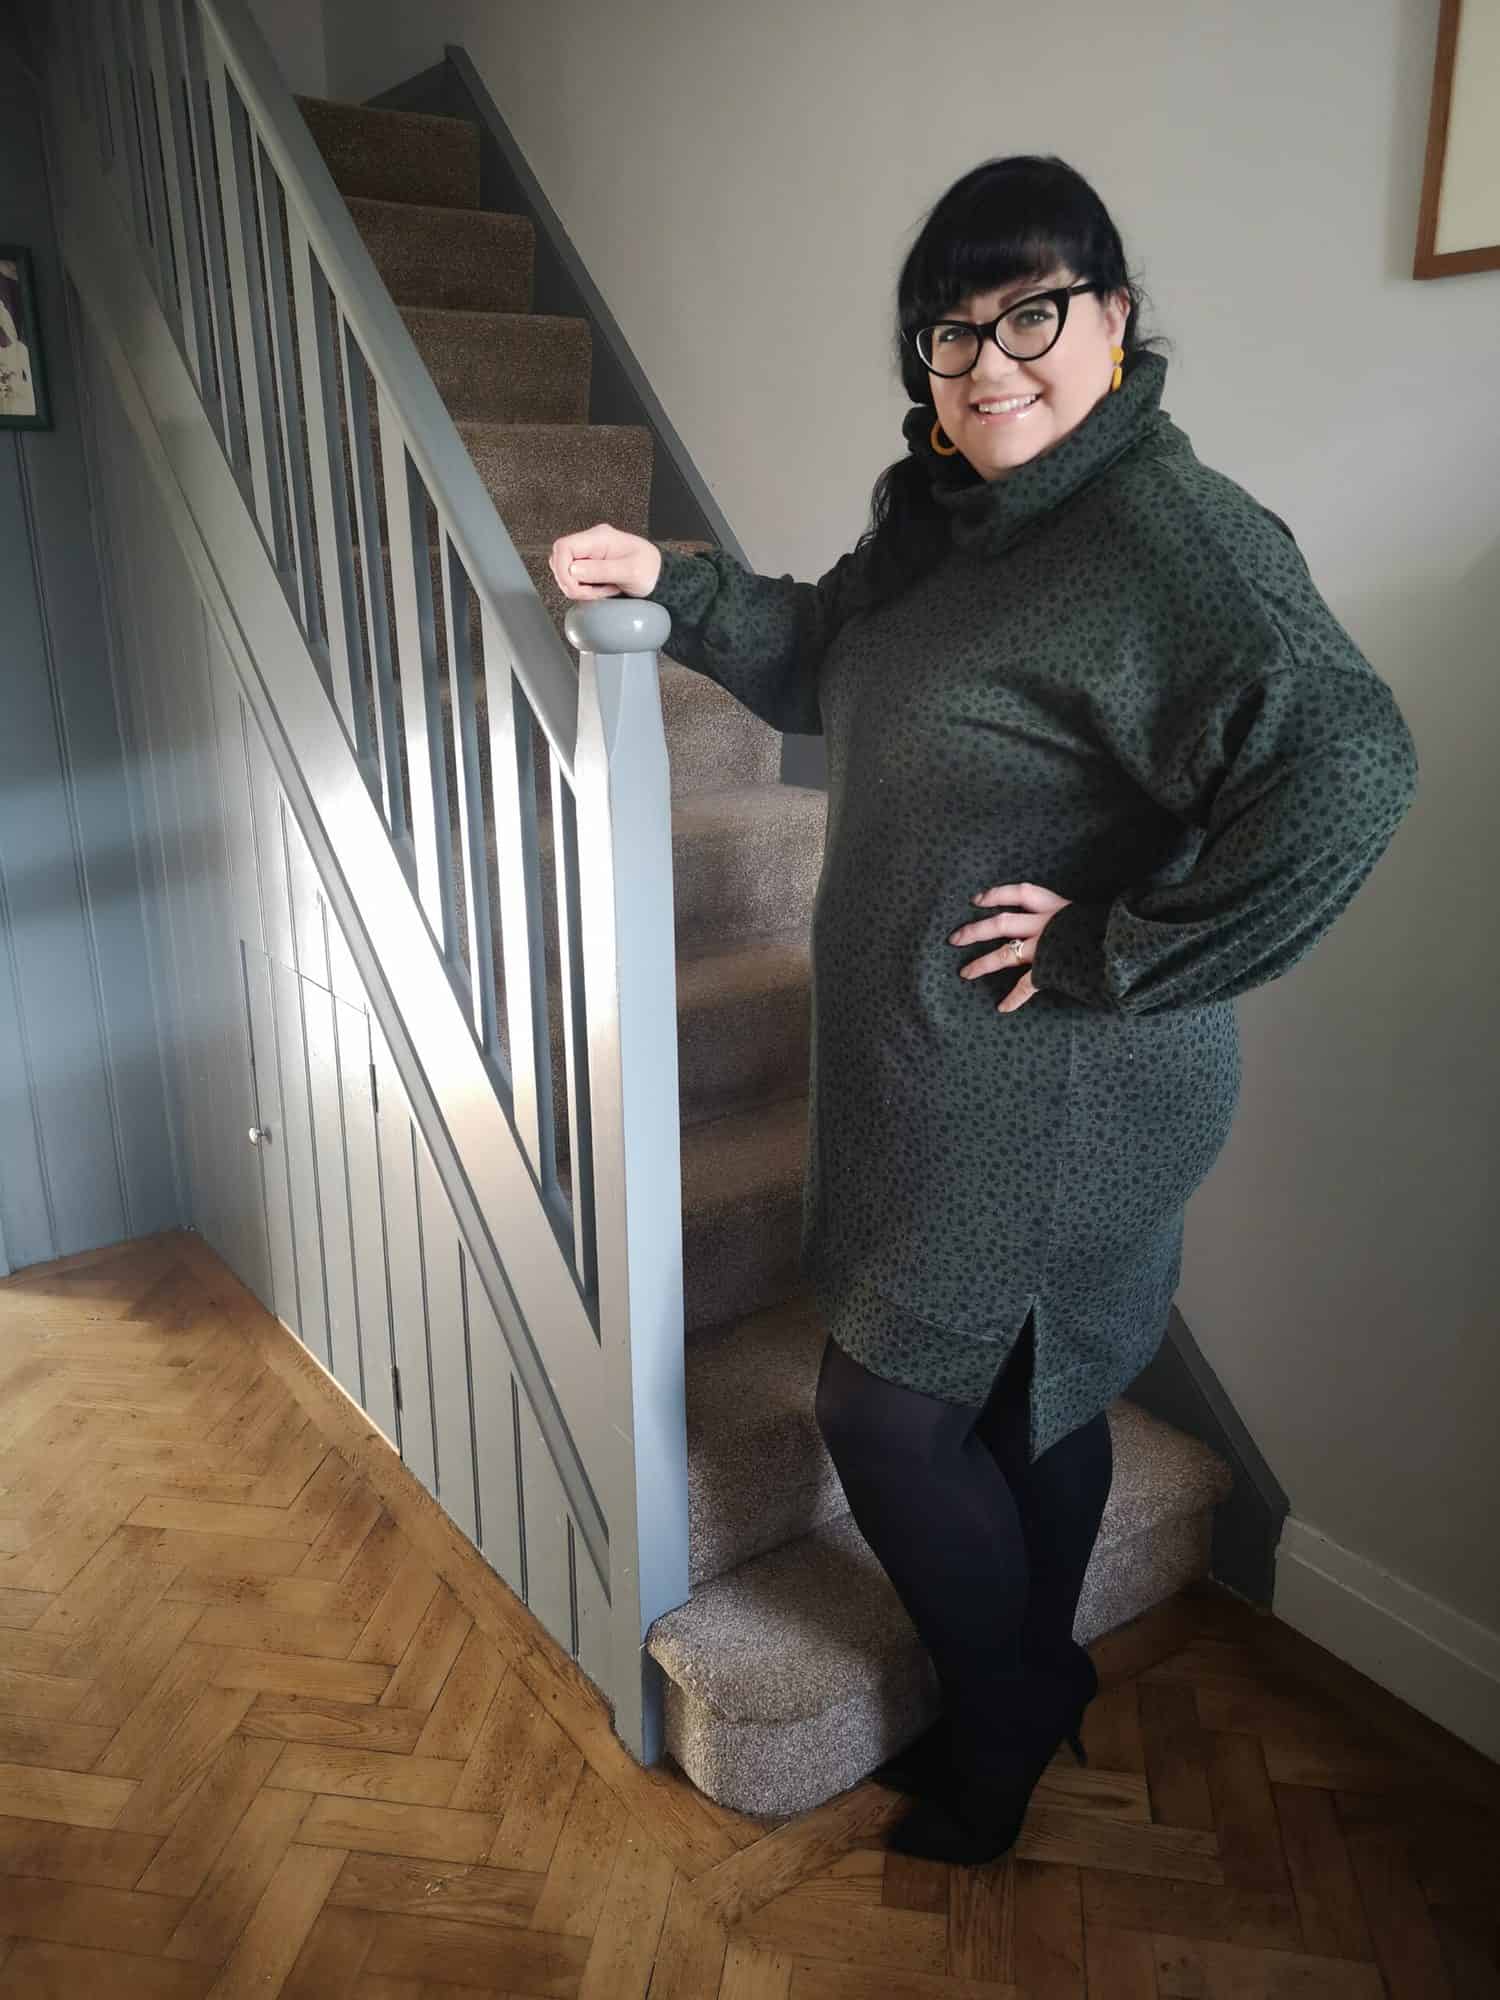
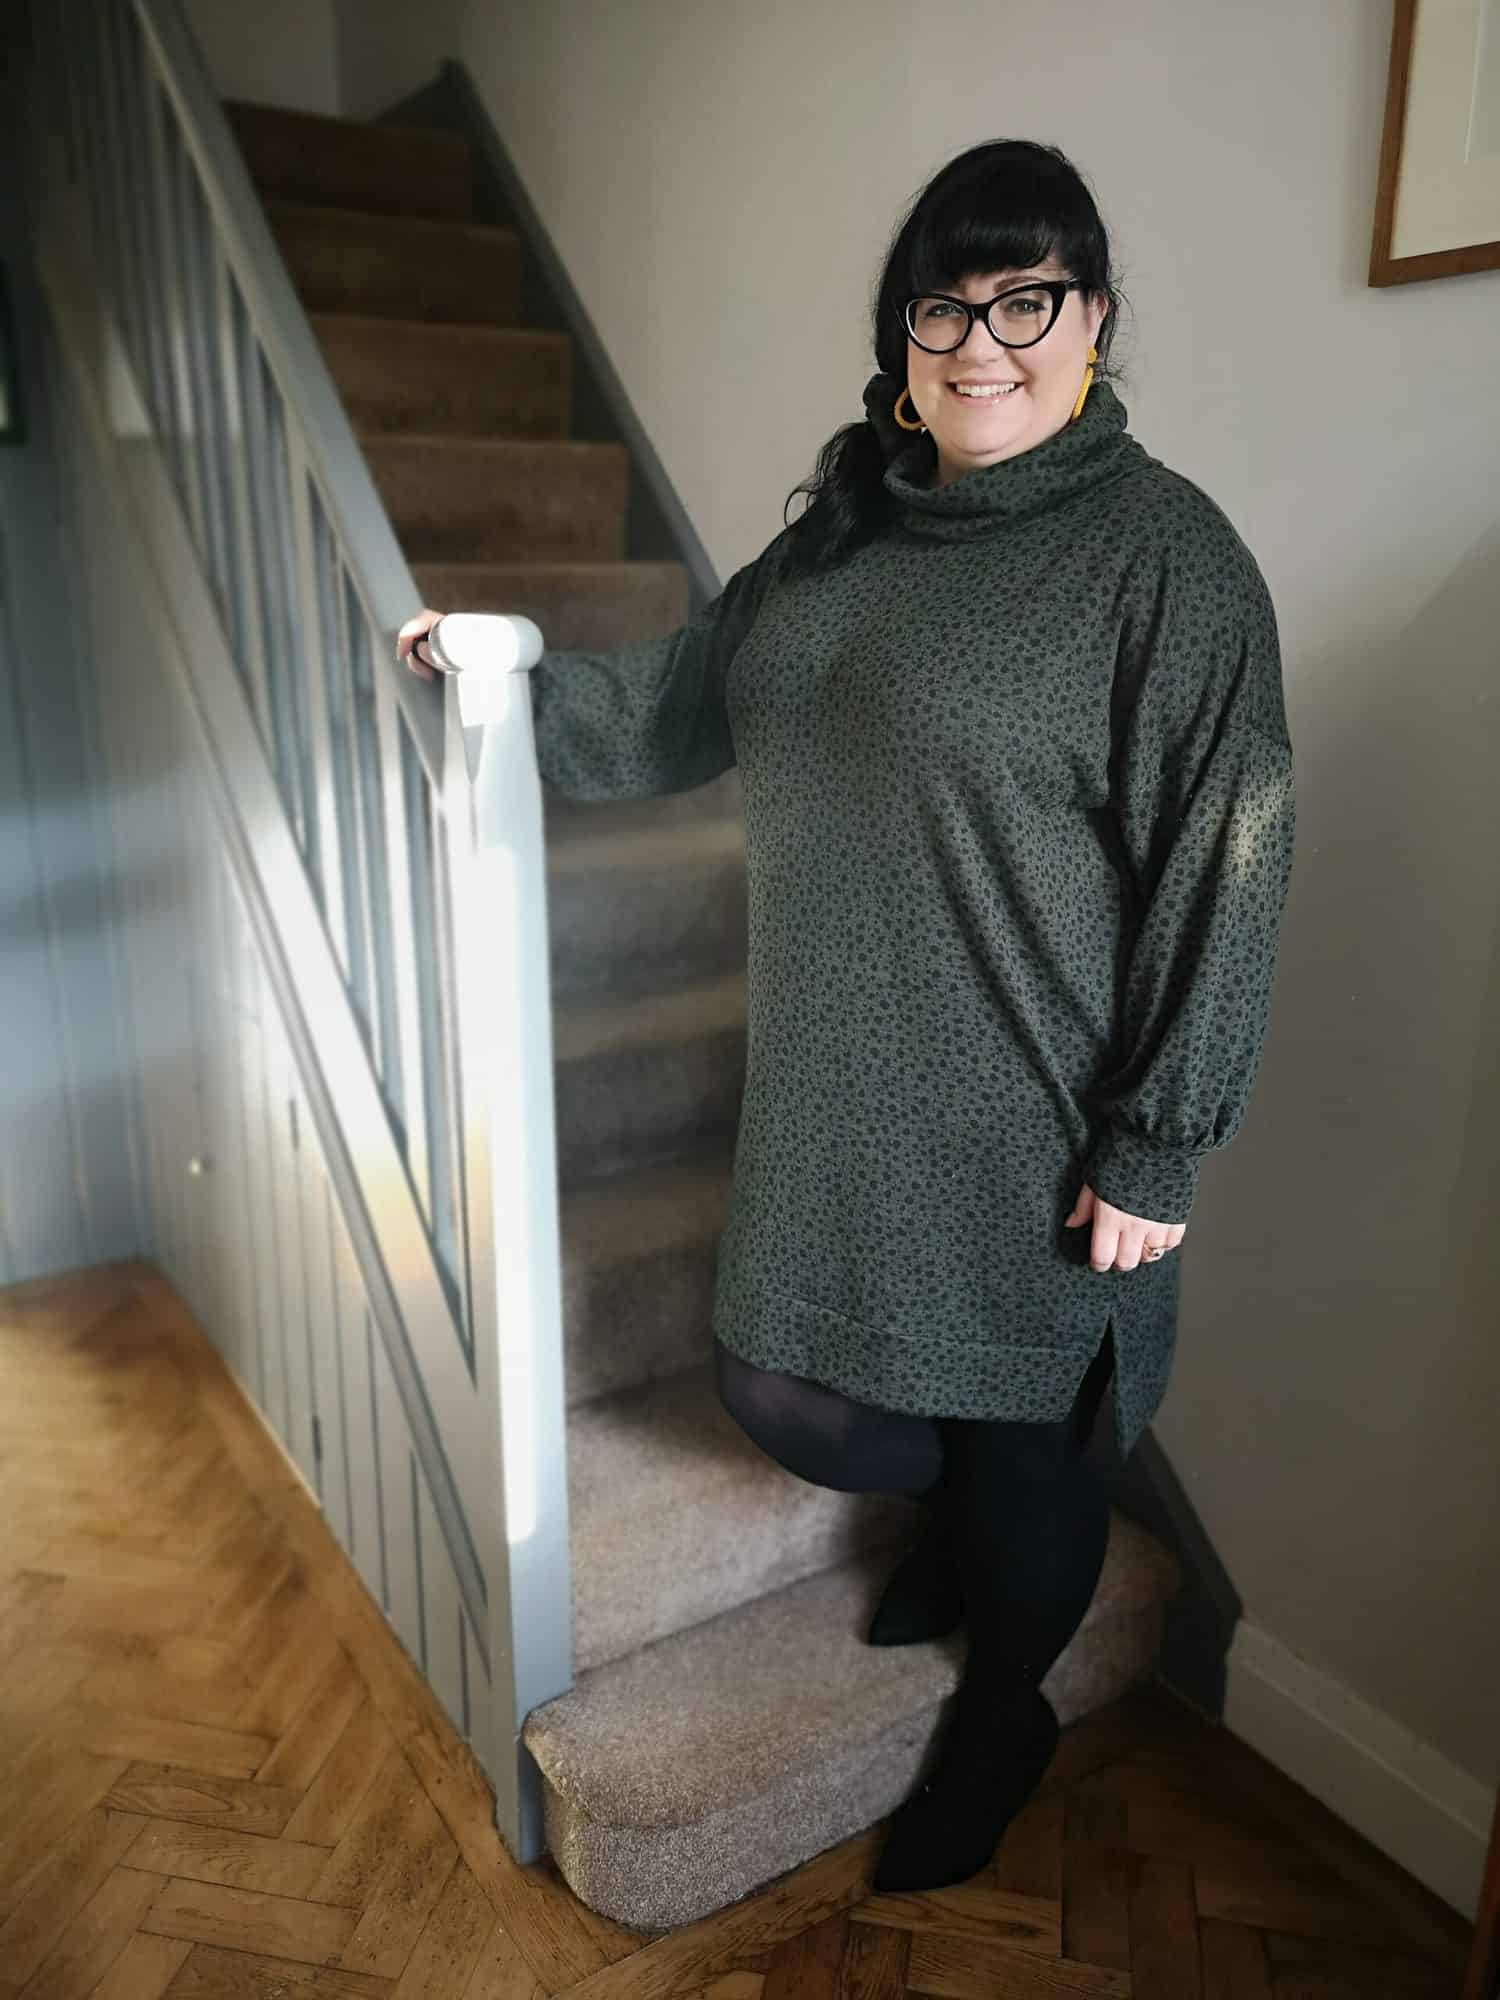
I live in sweater dresses in the winter months because it gets cold in the UK.  I couldn’t resist doing a little hack to the new Sweater Weather length to recreate a Pinspiration I’ve had on my to-do list for a while.

I measured the front pattern piece and then held the tape measure up to myself to decide how much length I wanted to add.  I decided to go with 6 inches extra added to the tunic length, which is a little more that I would normally add but there is a hi-low cutline, and so I wanted to make sure the front would be long enough for decency. 


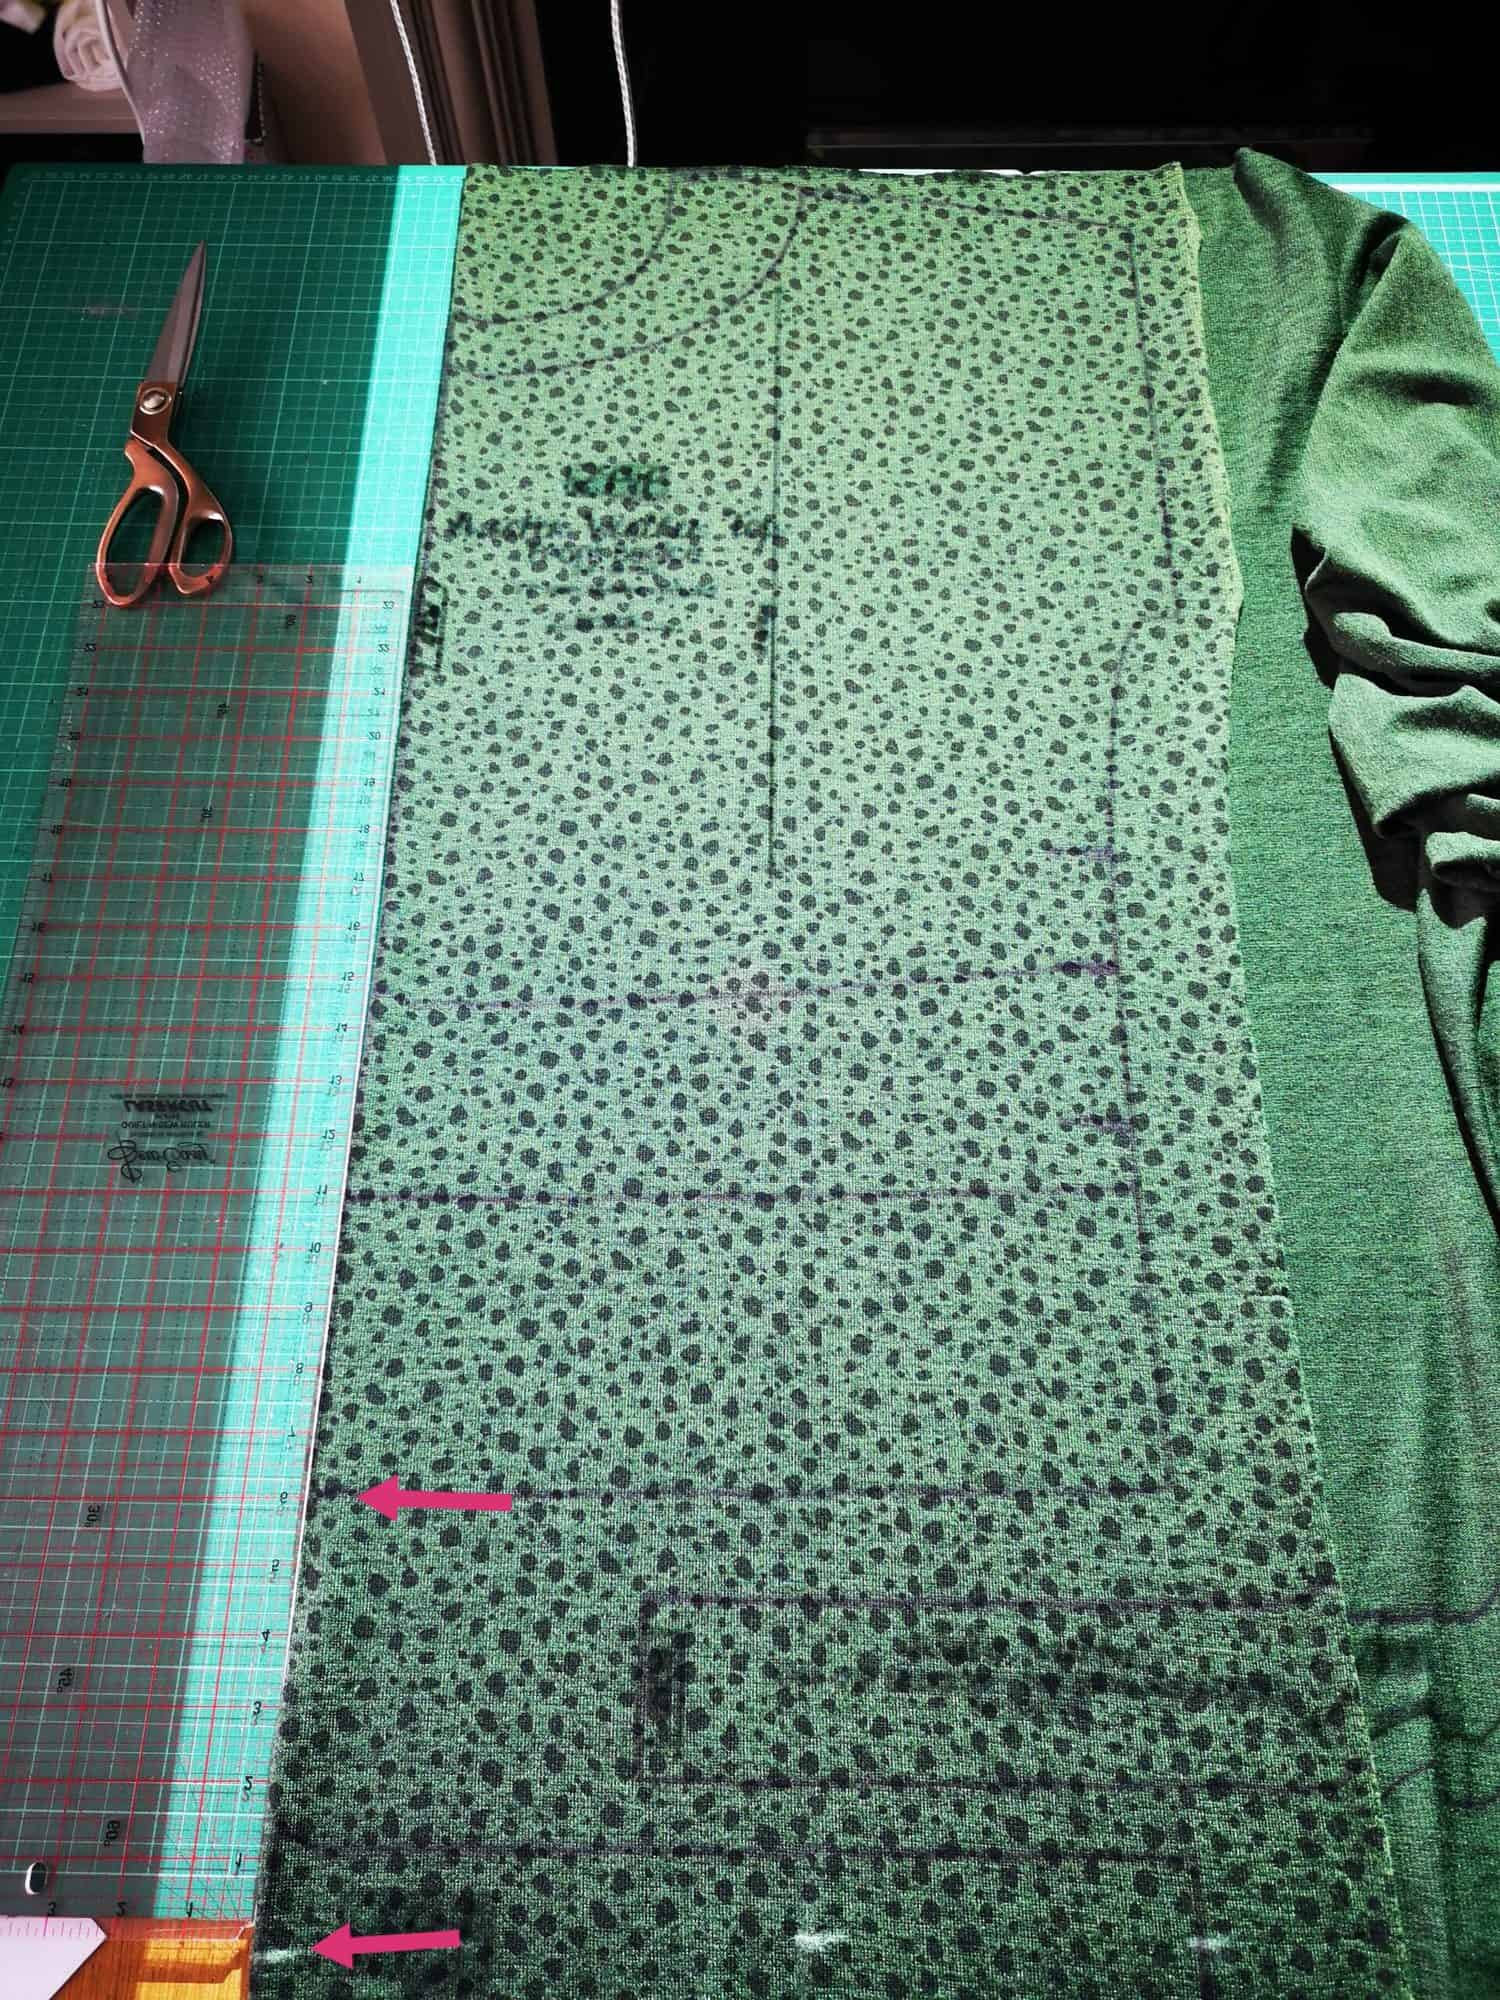
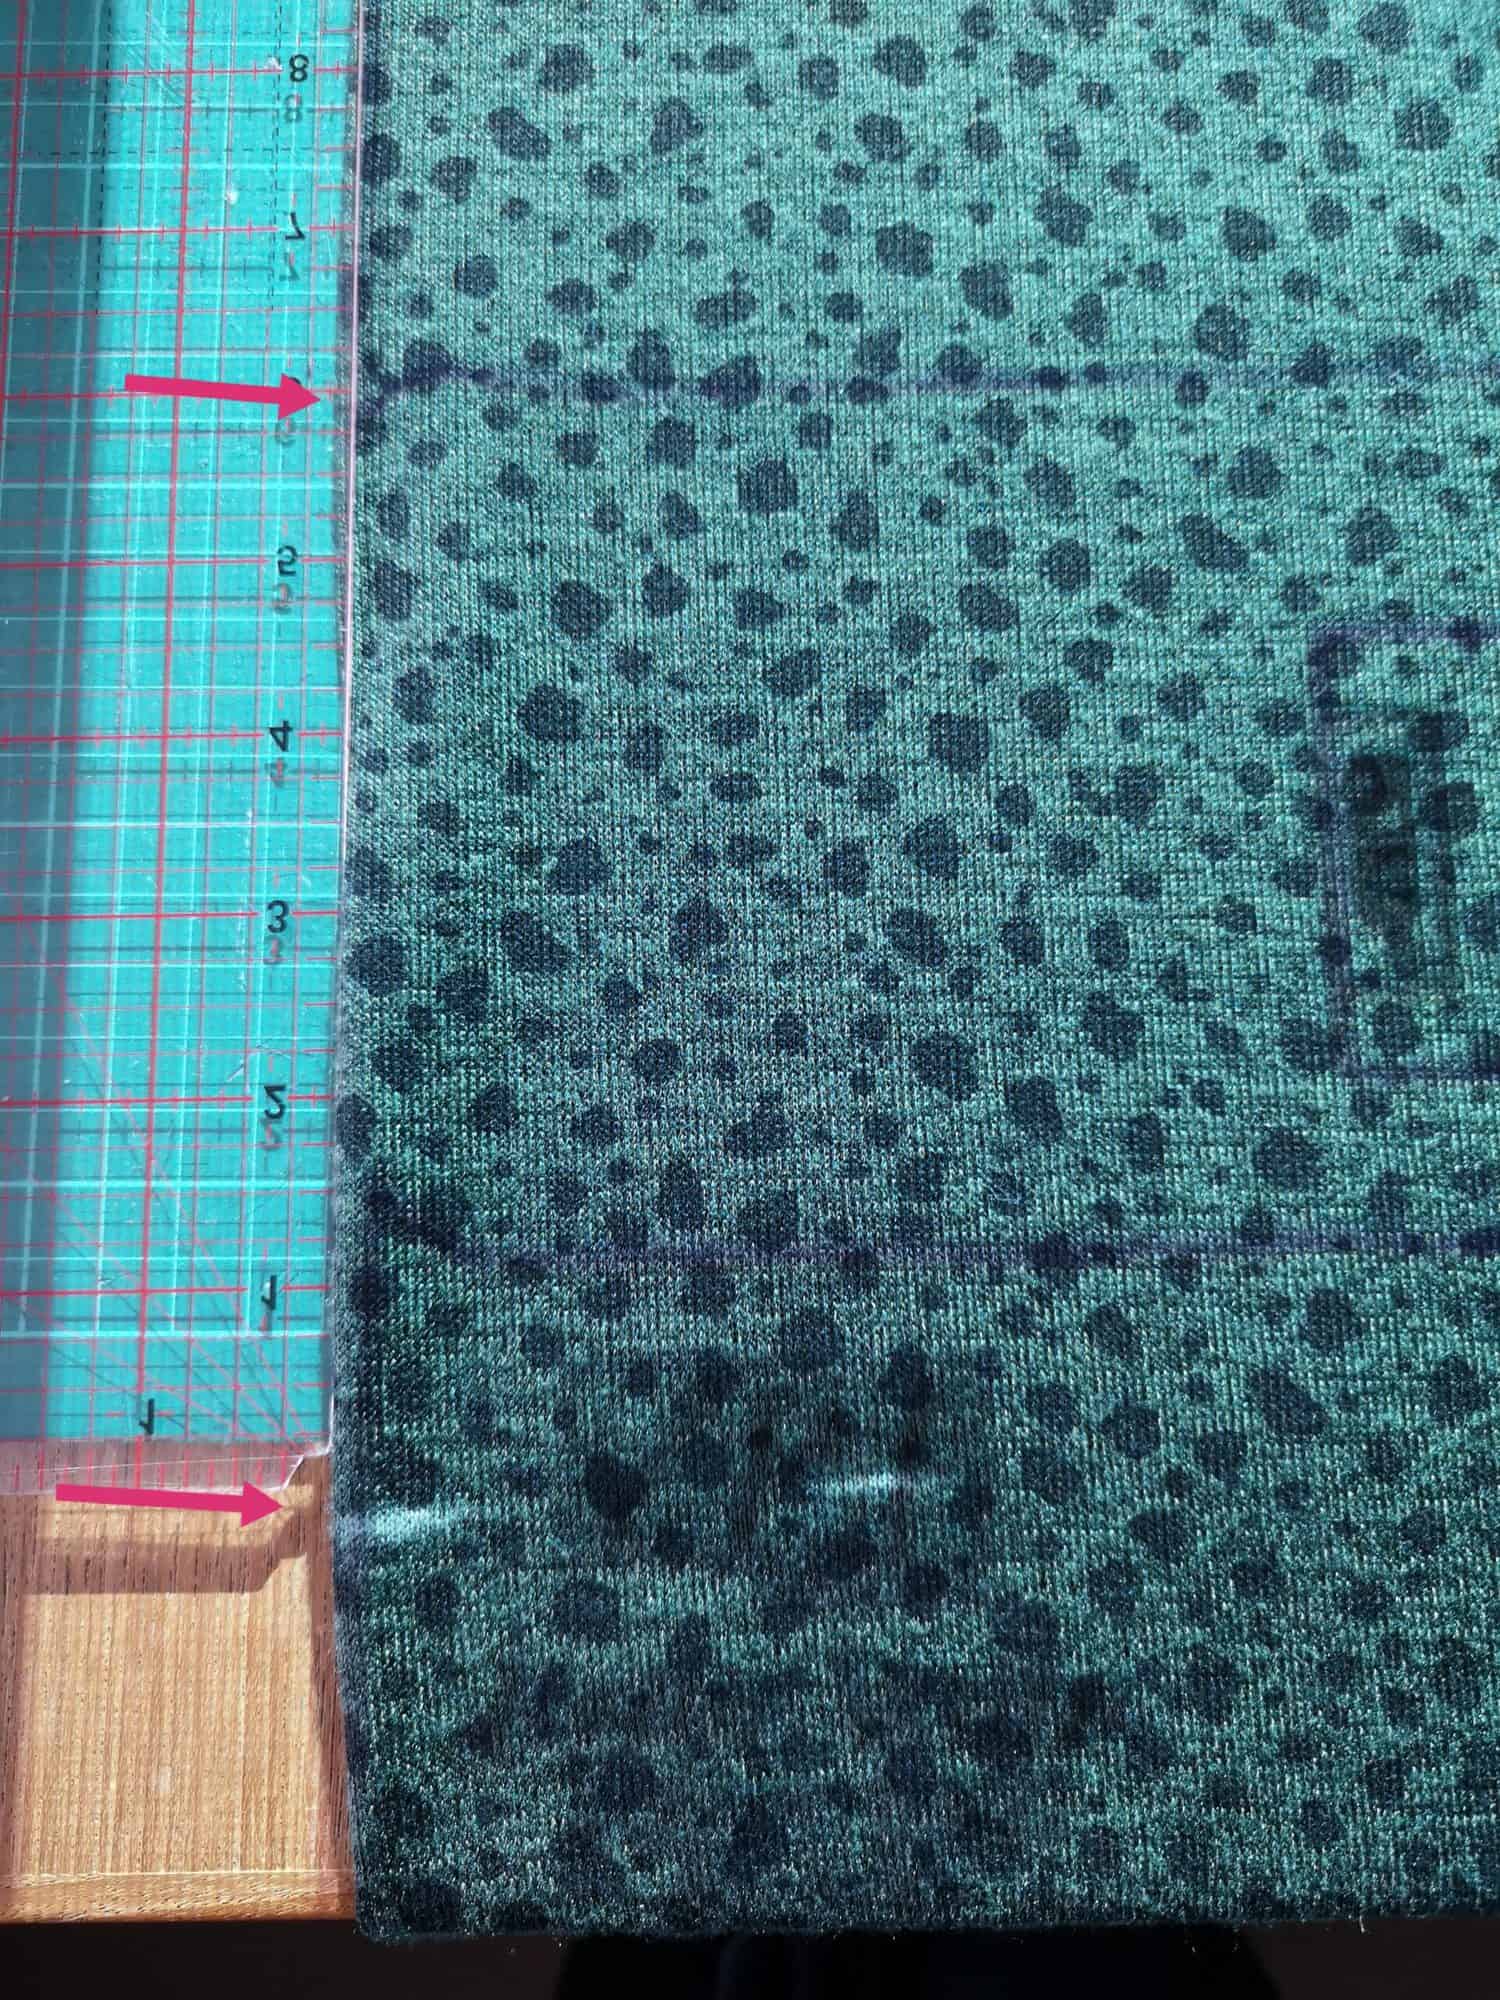
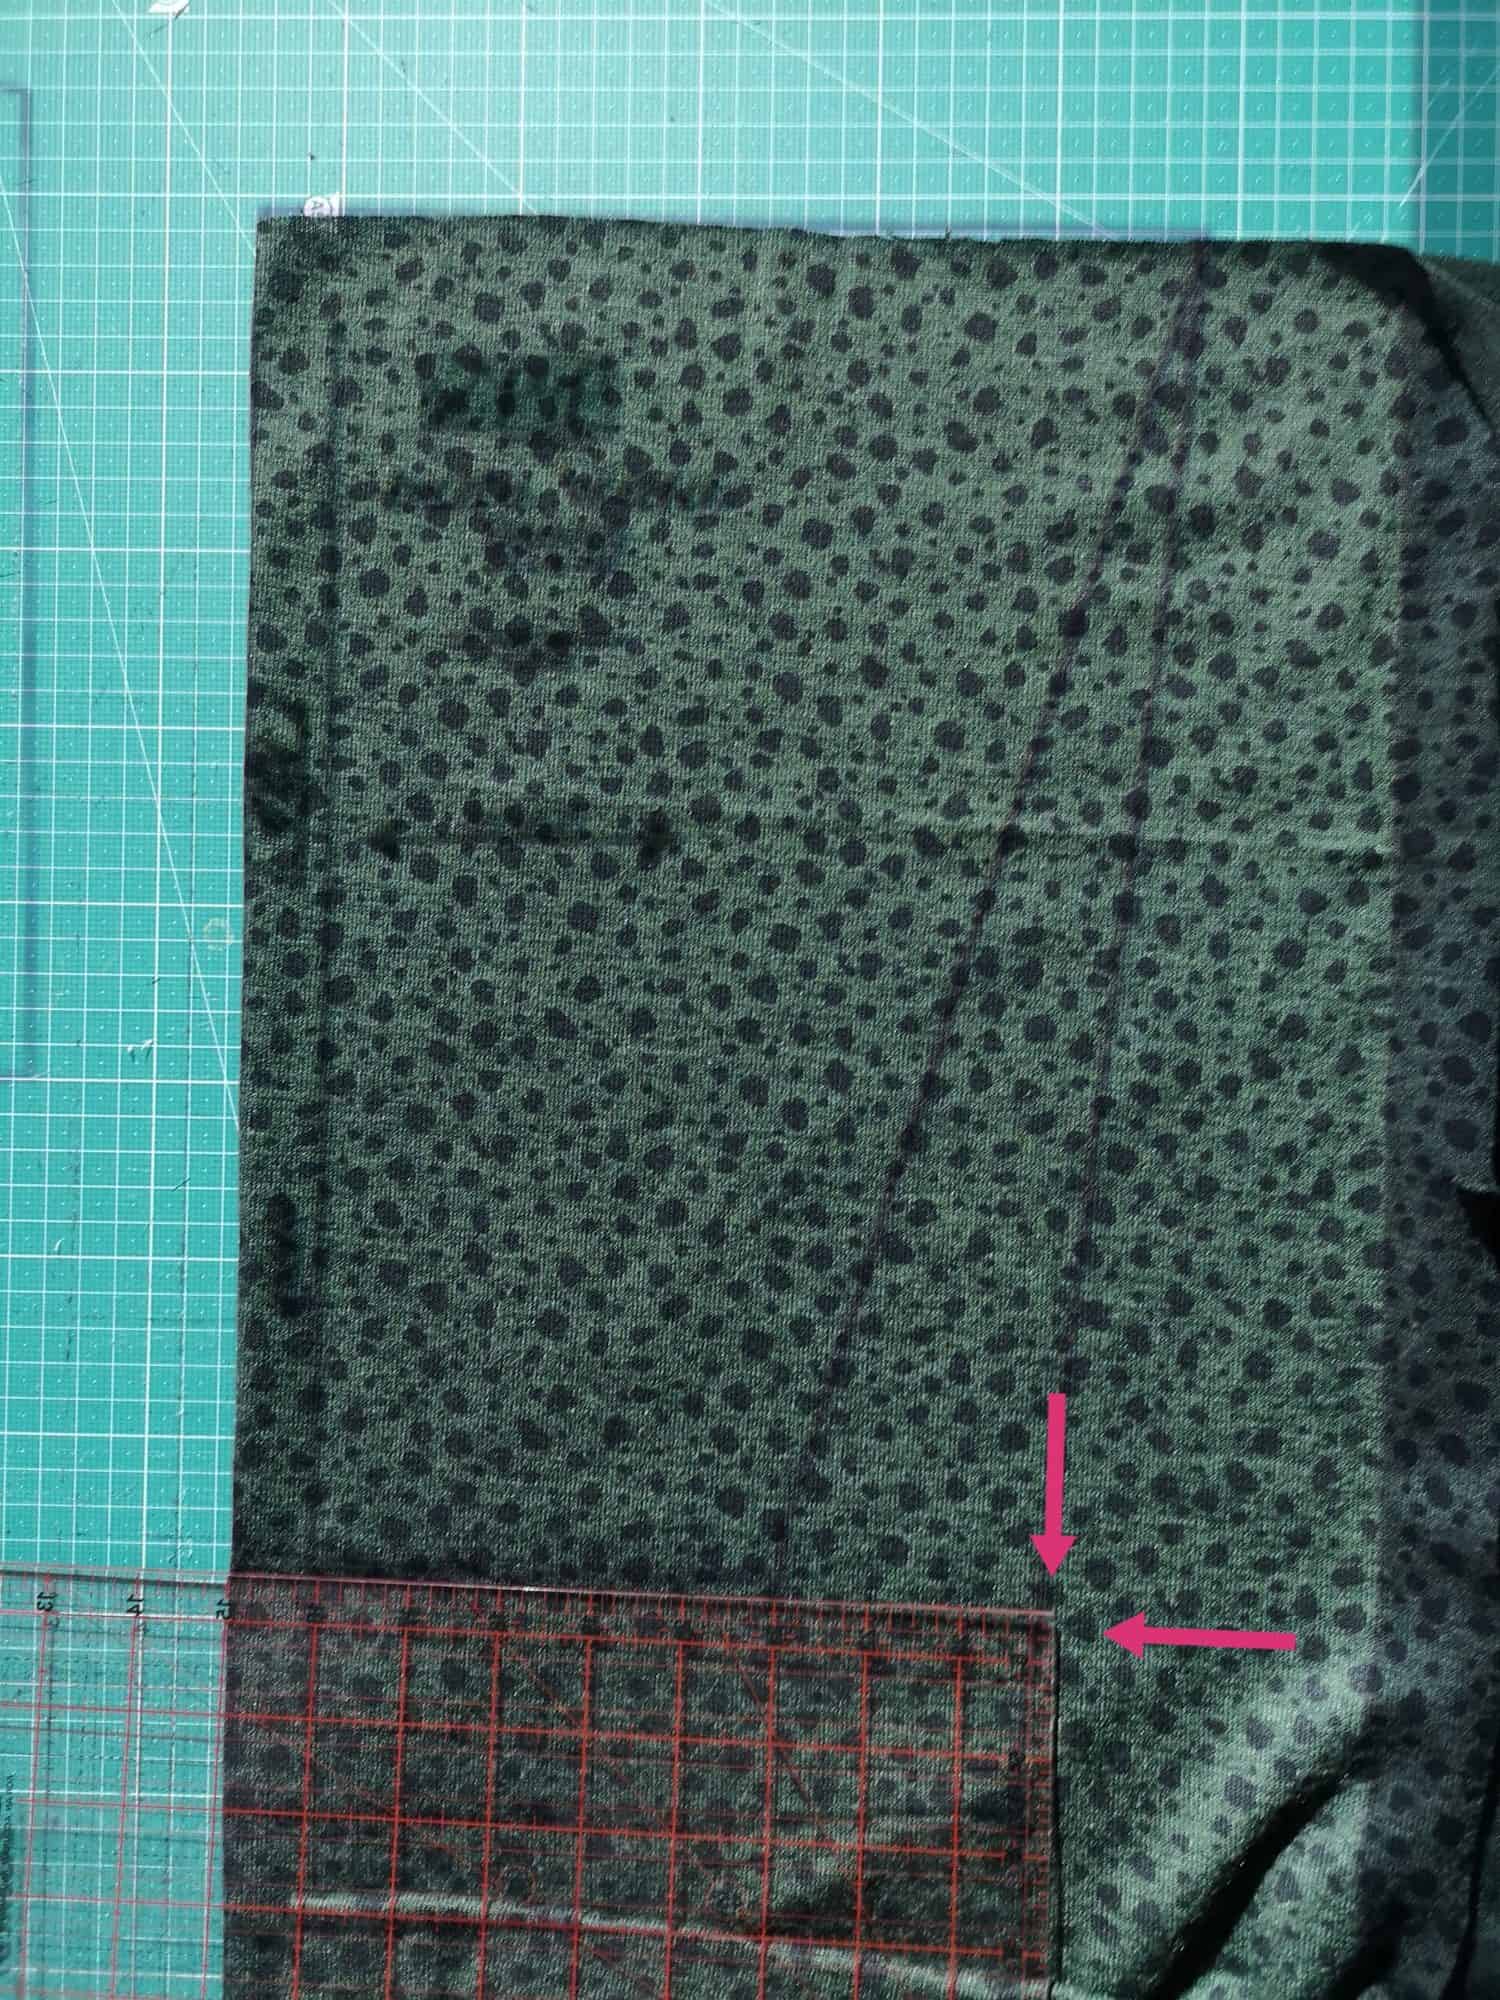
I use a projector these days and it was as simple as adding 6 inches extra length to the bottom of the front and back bodice pattern pieces, which I did on the fly with my perspex quilting ruler and rotary cutter.

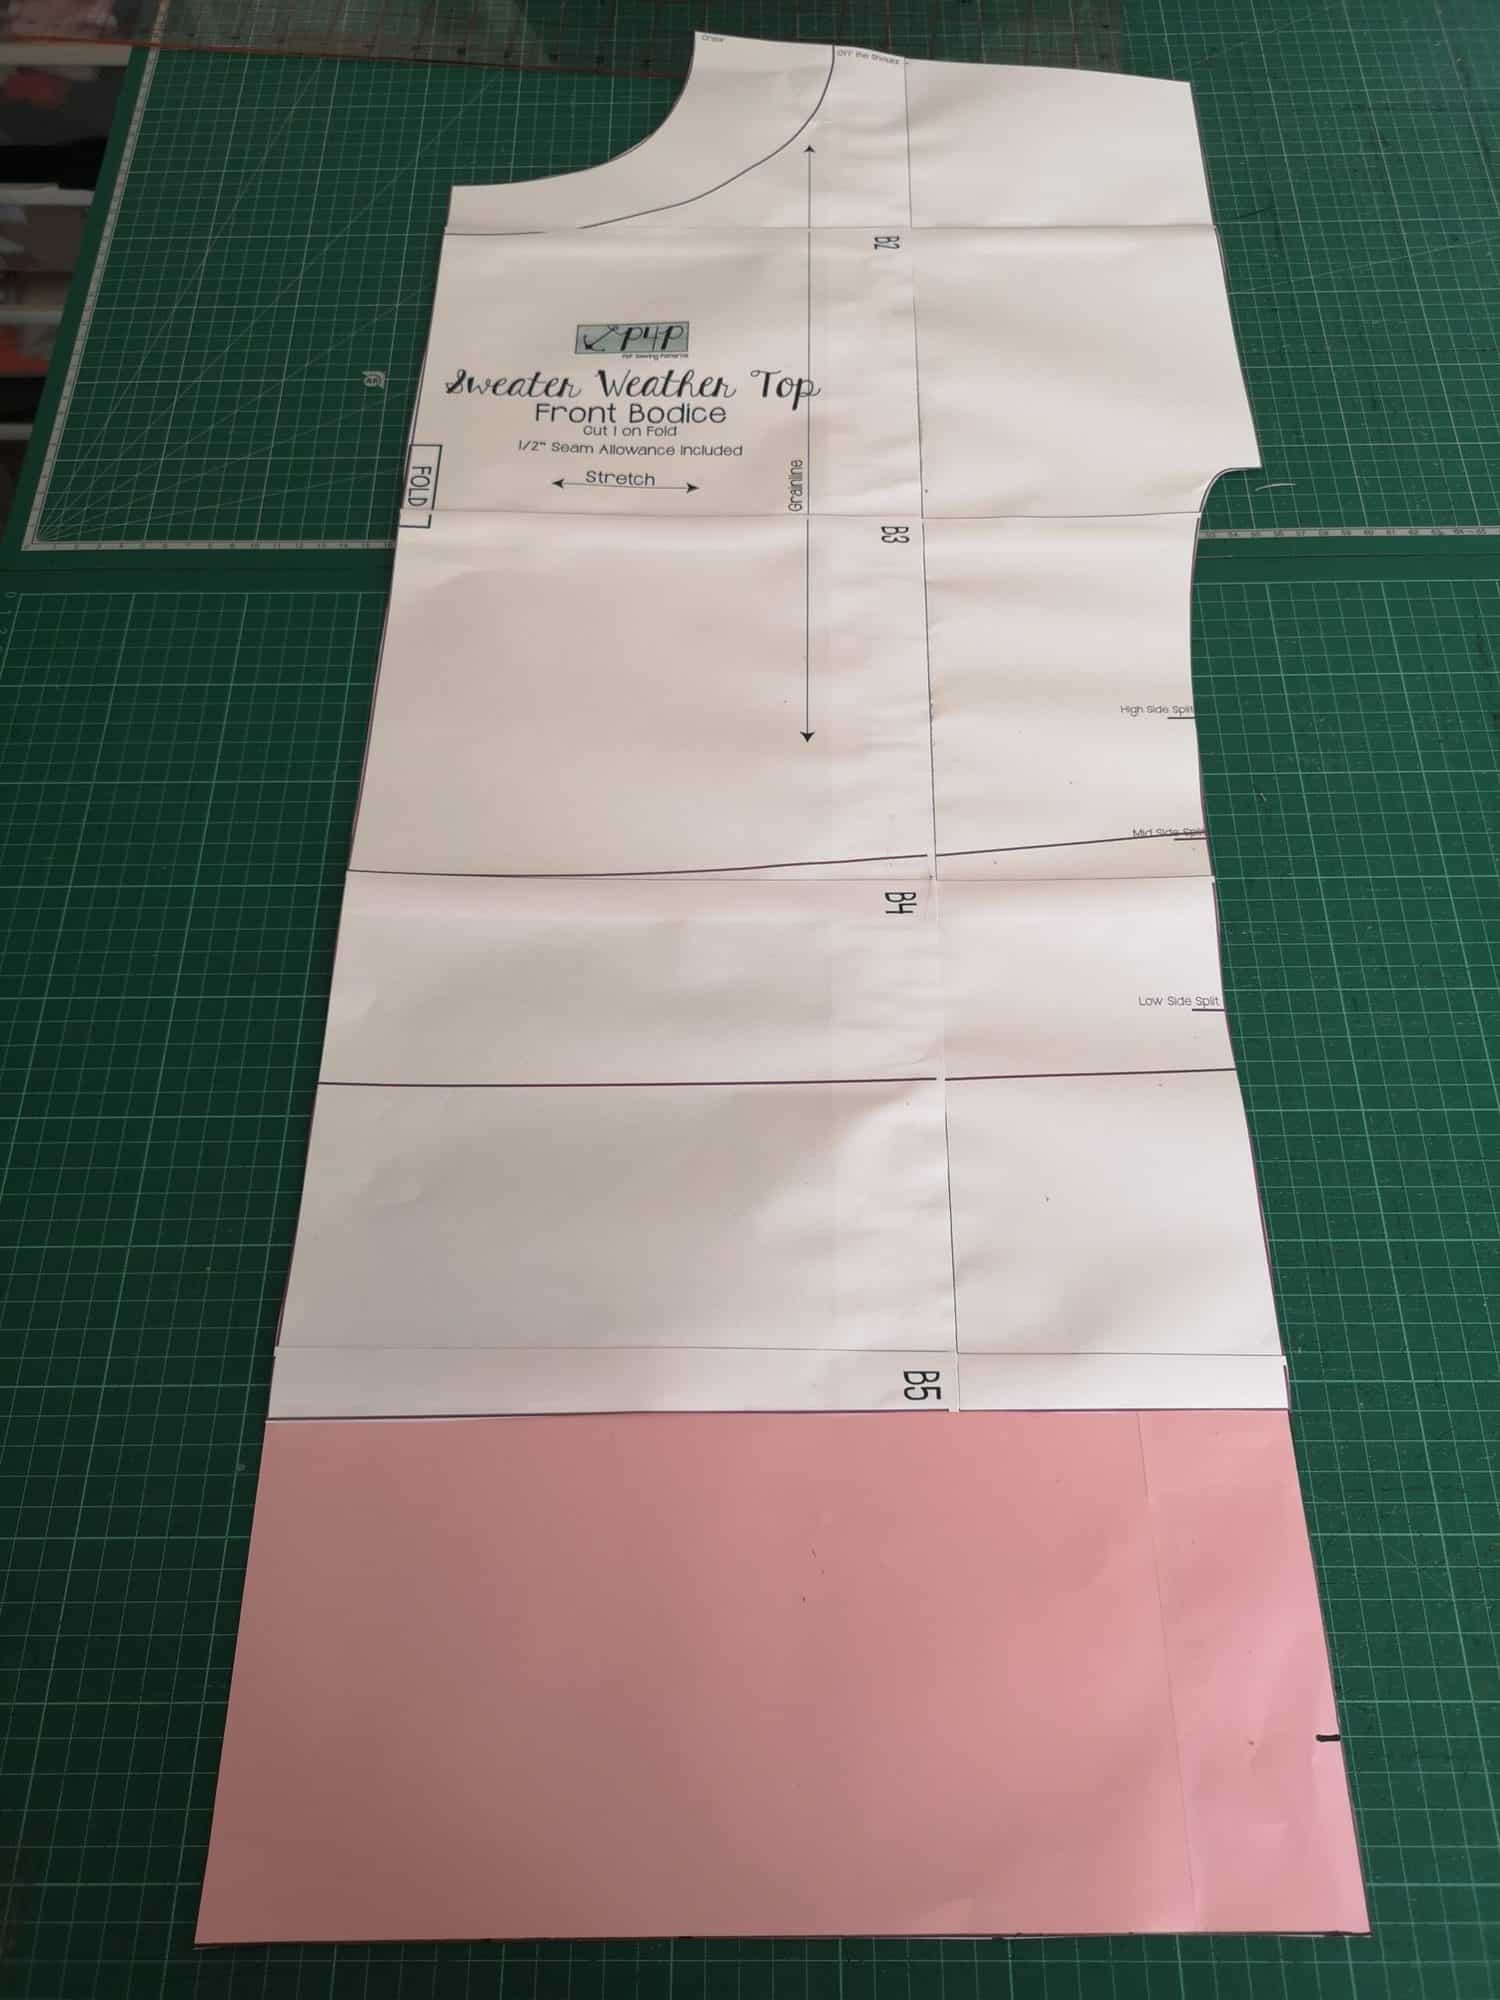
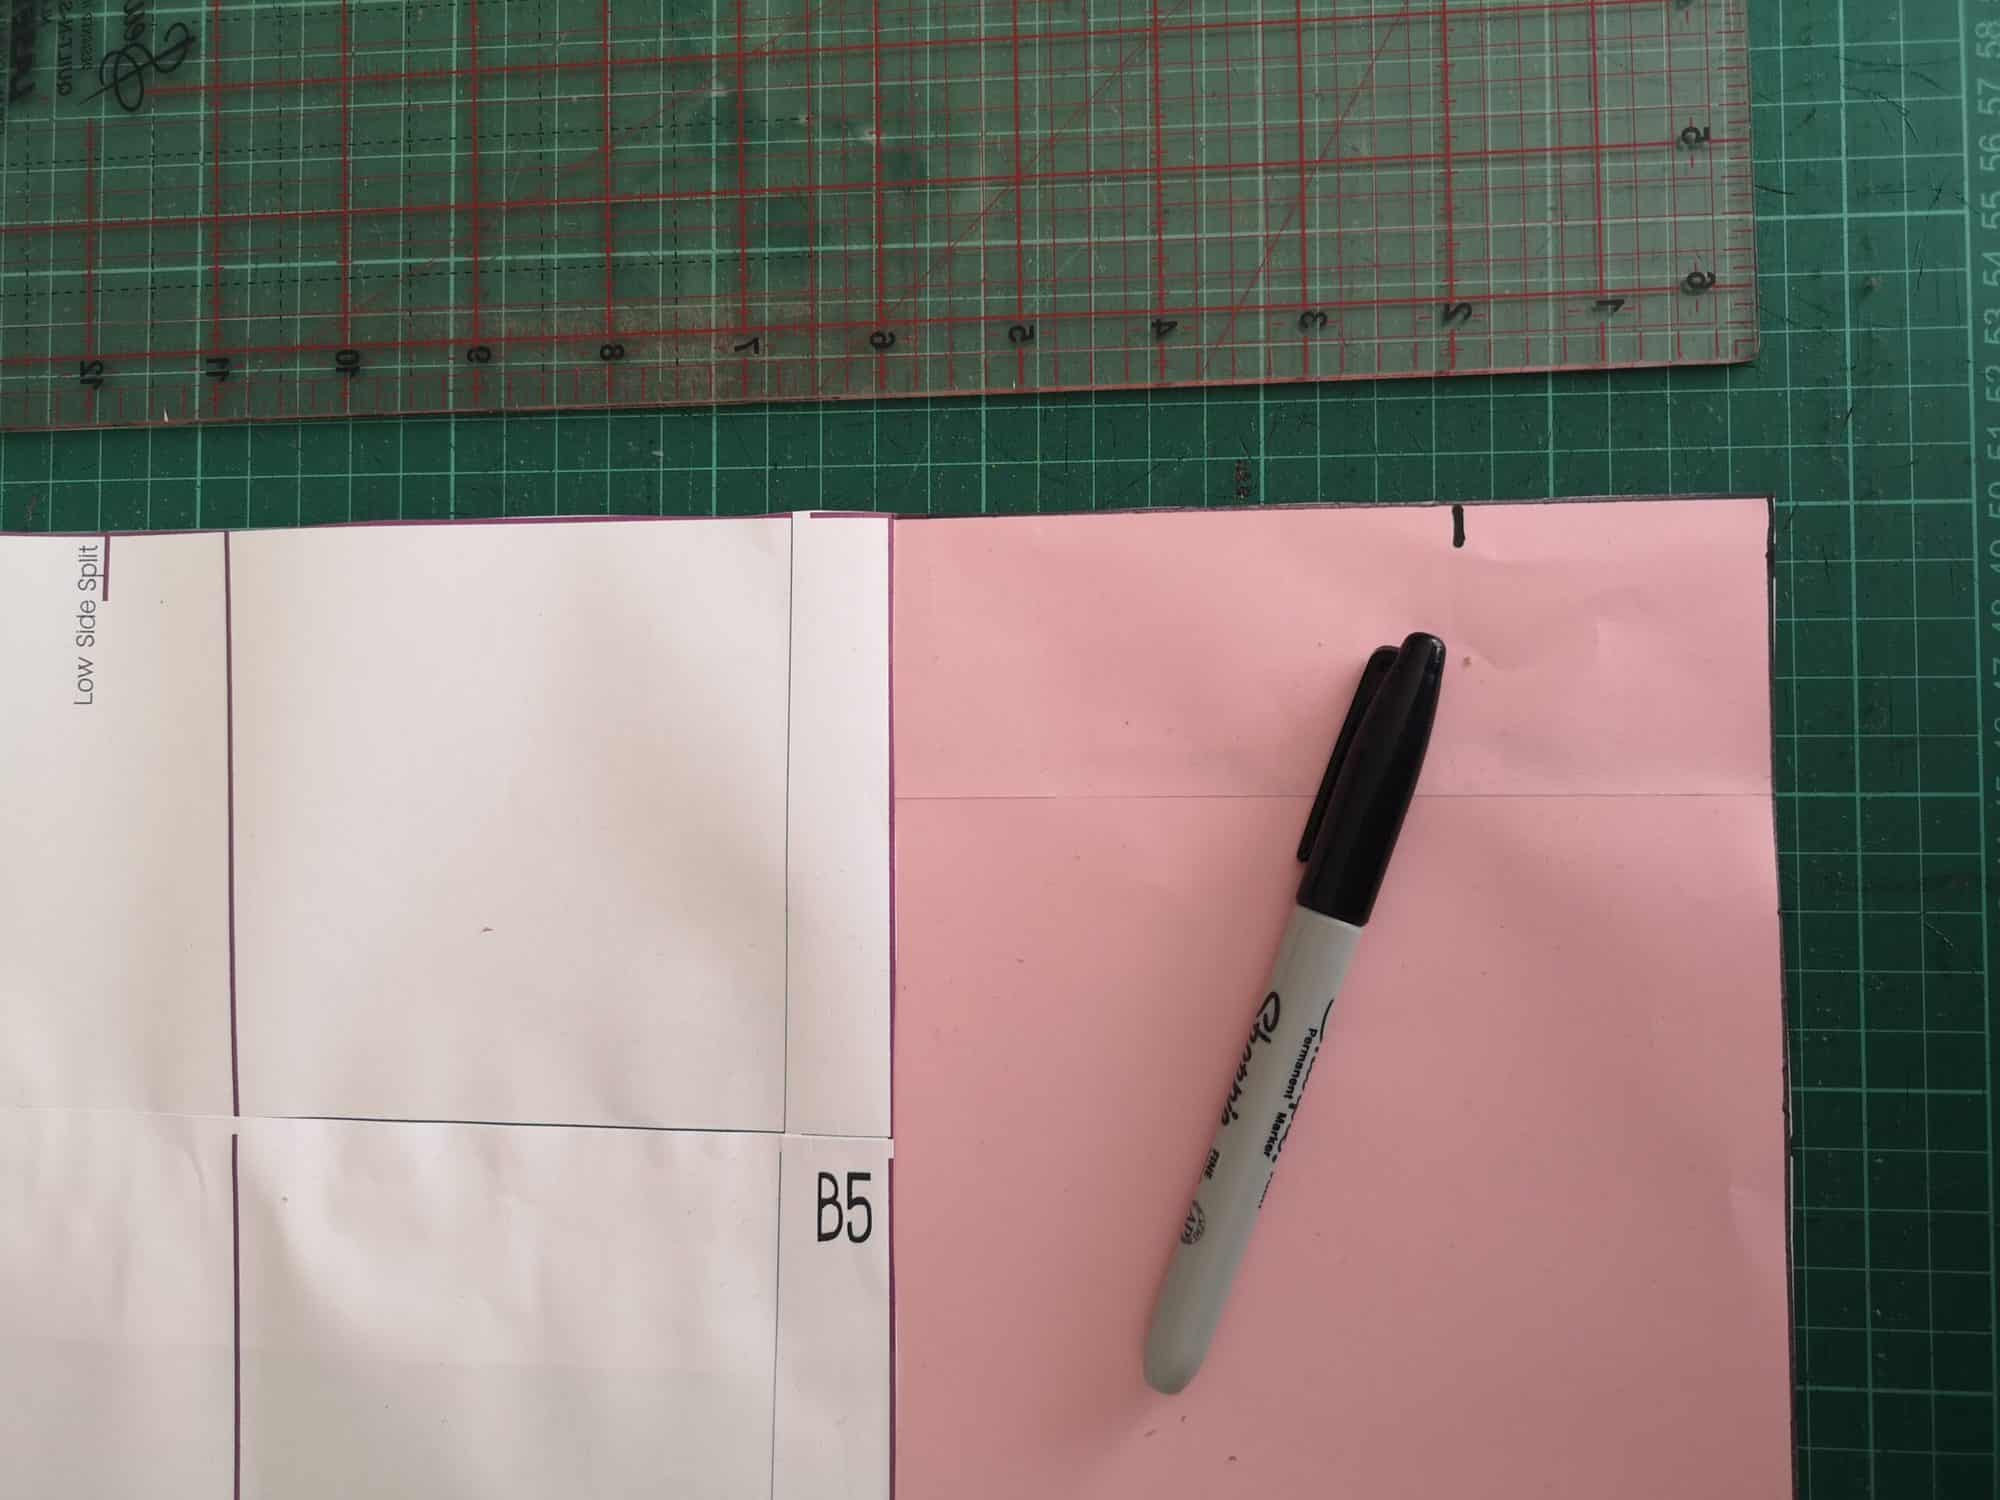
However I also printed out the pattern piece so you could see how it would work on paper too.  The pink paper is the added section. I then decided to mark the notch for my side slit 2 inches up from the bottom edge of the pattern, but this would be up to you.  I chase a 7 year old and a puppy around all day so I didn’t want that side split going too high, but you could go with whichever height you choose.  Then repeat for your back piece.

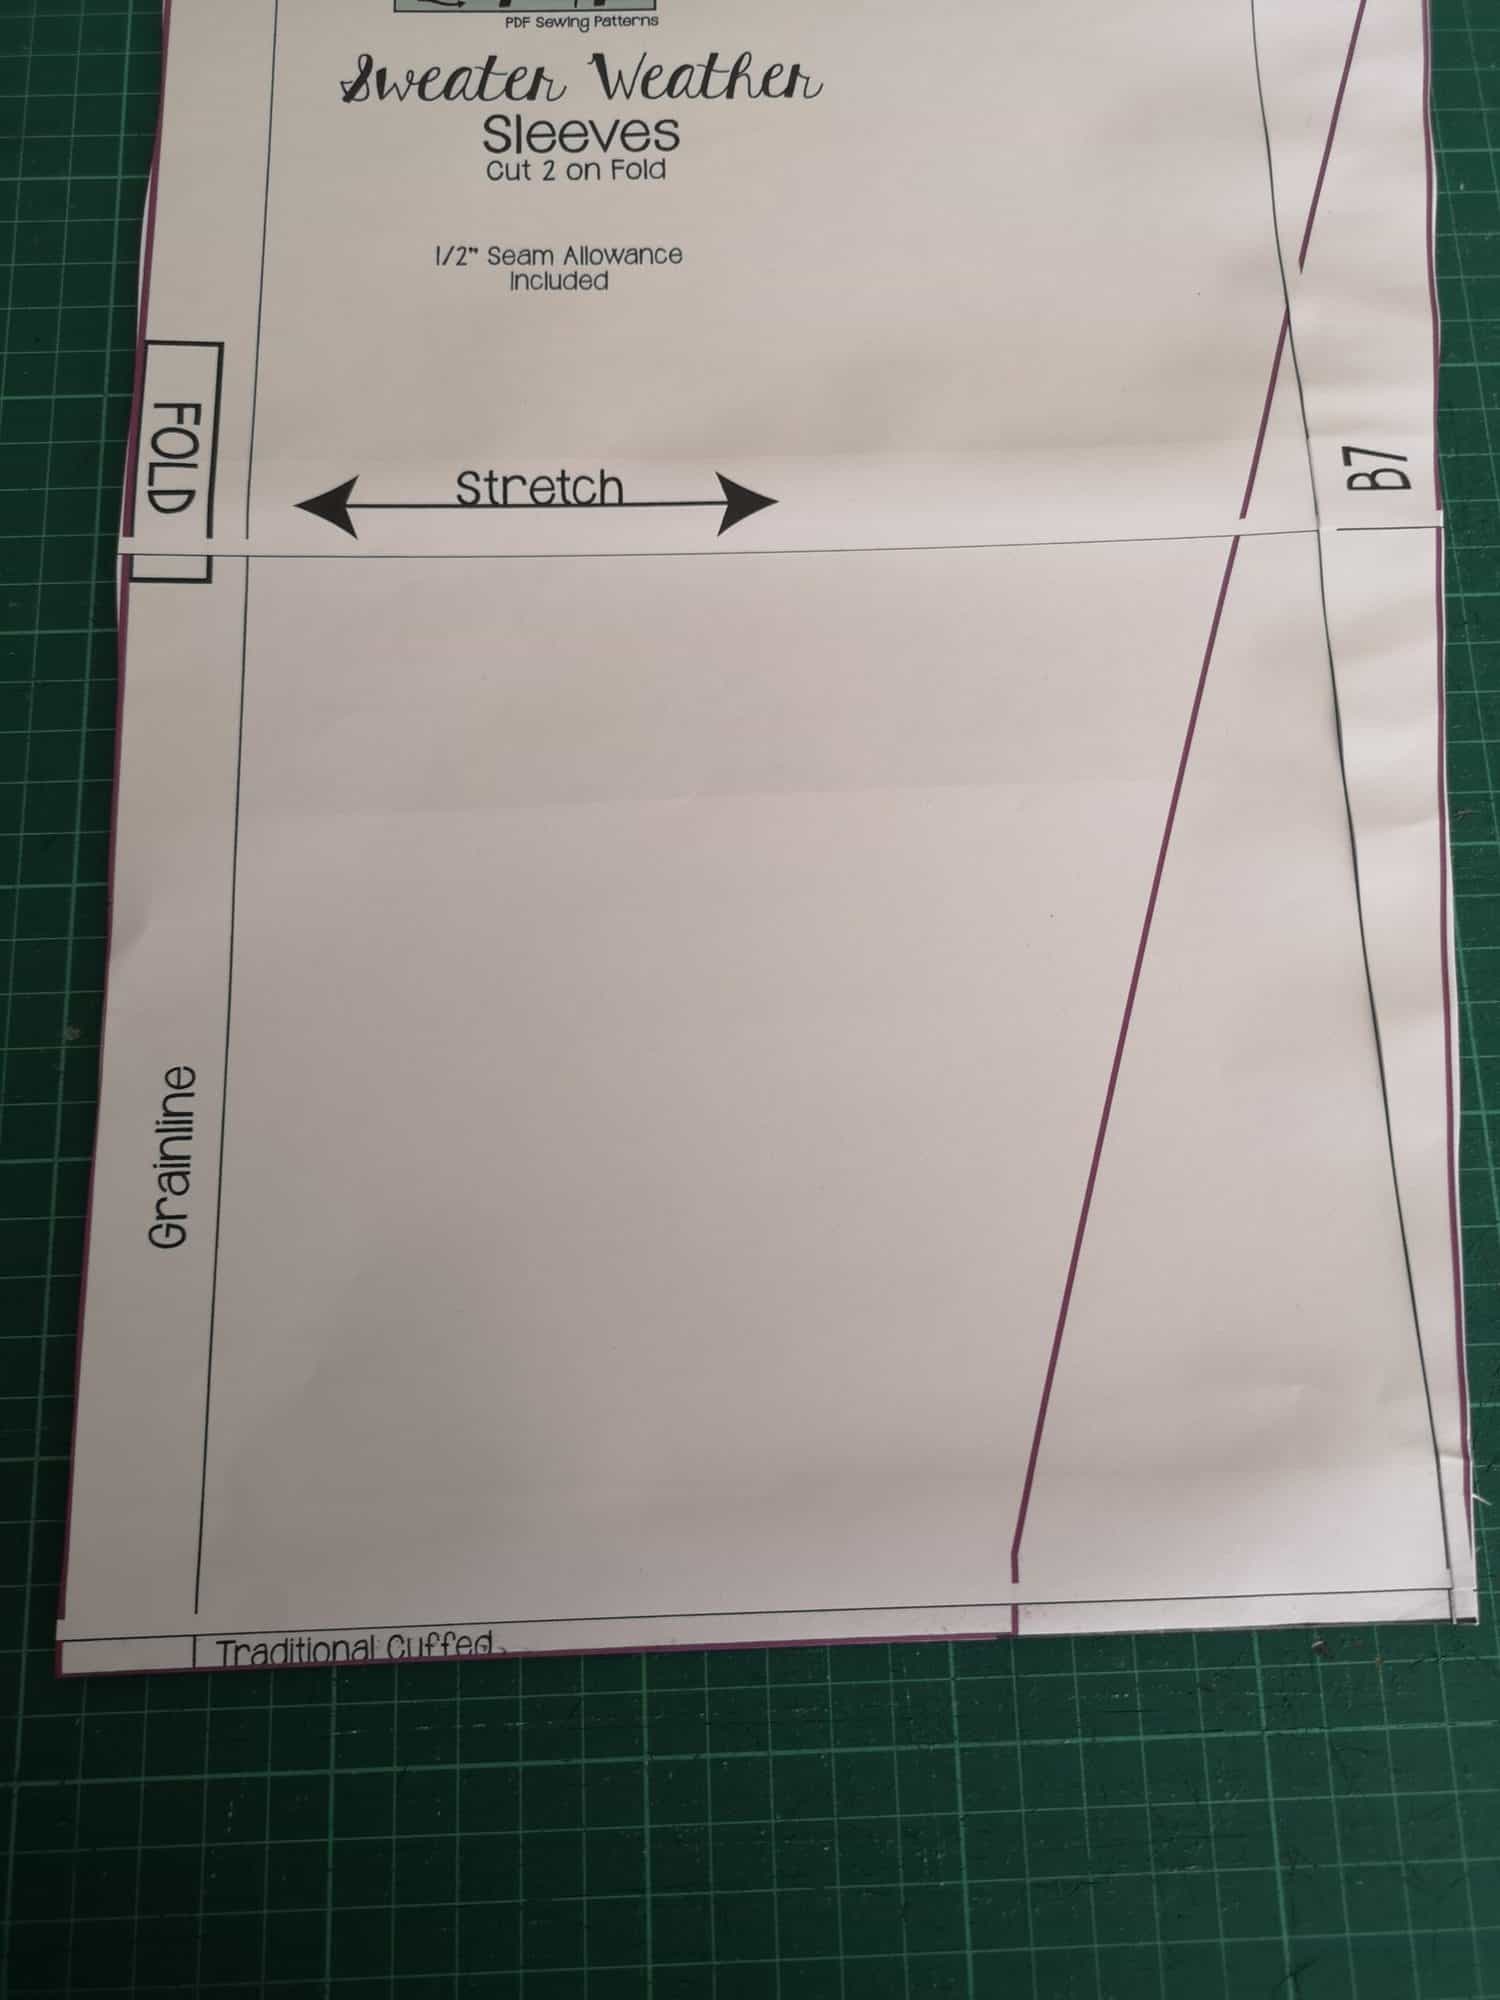
The only other change I made was to copy the bishop sleeve look from my inspiration pic, and I did that by just cutting the bell sleeve width to the slim cuffed sleeve length.  Projector and paper pattern piece pictures below:

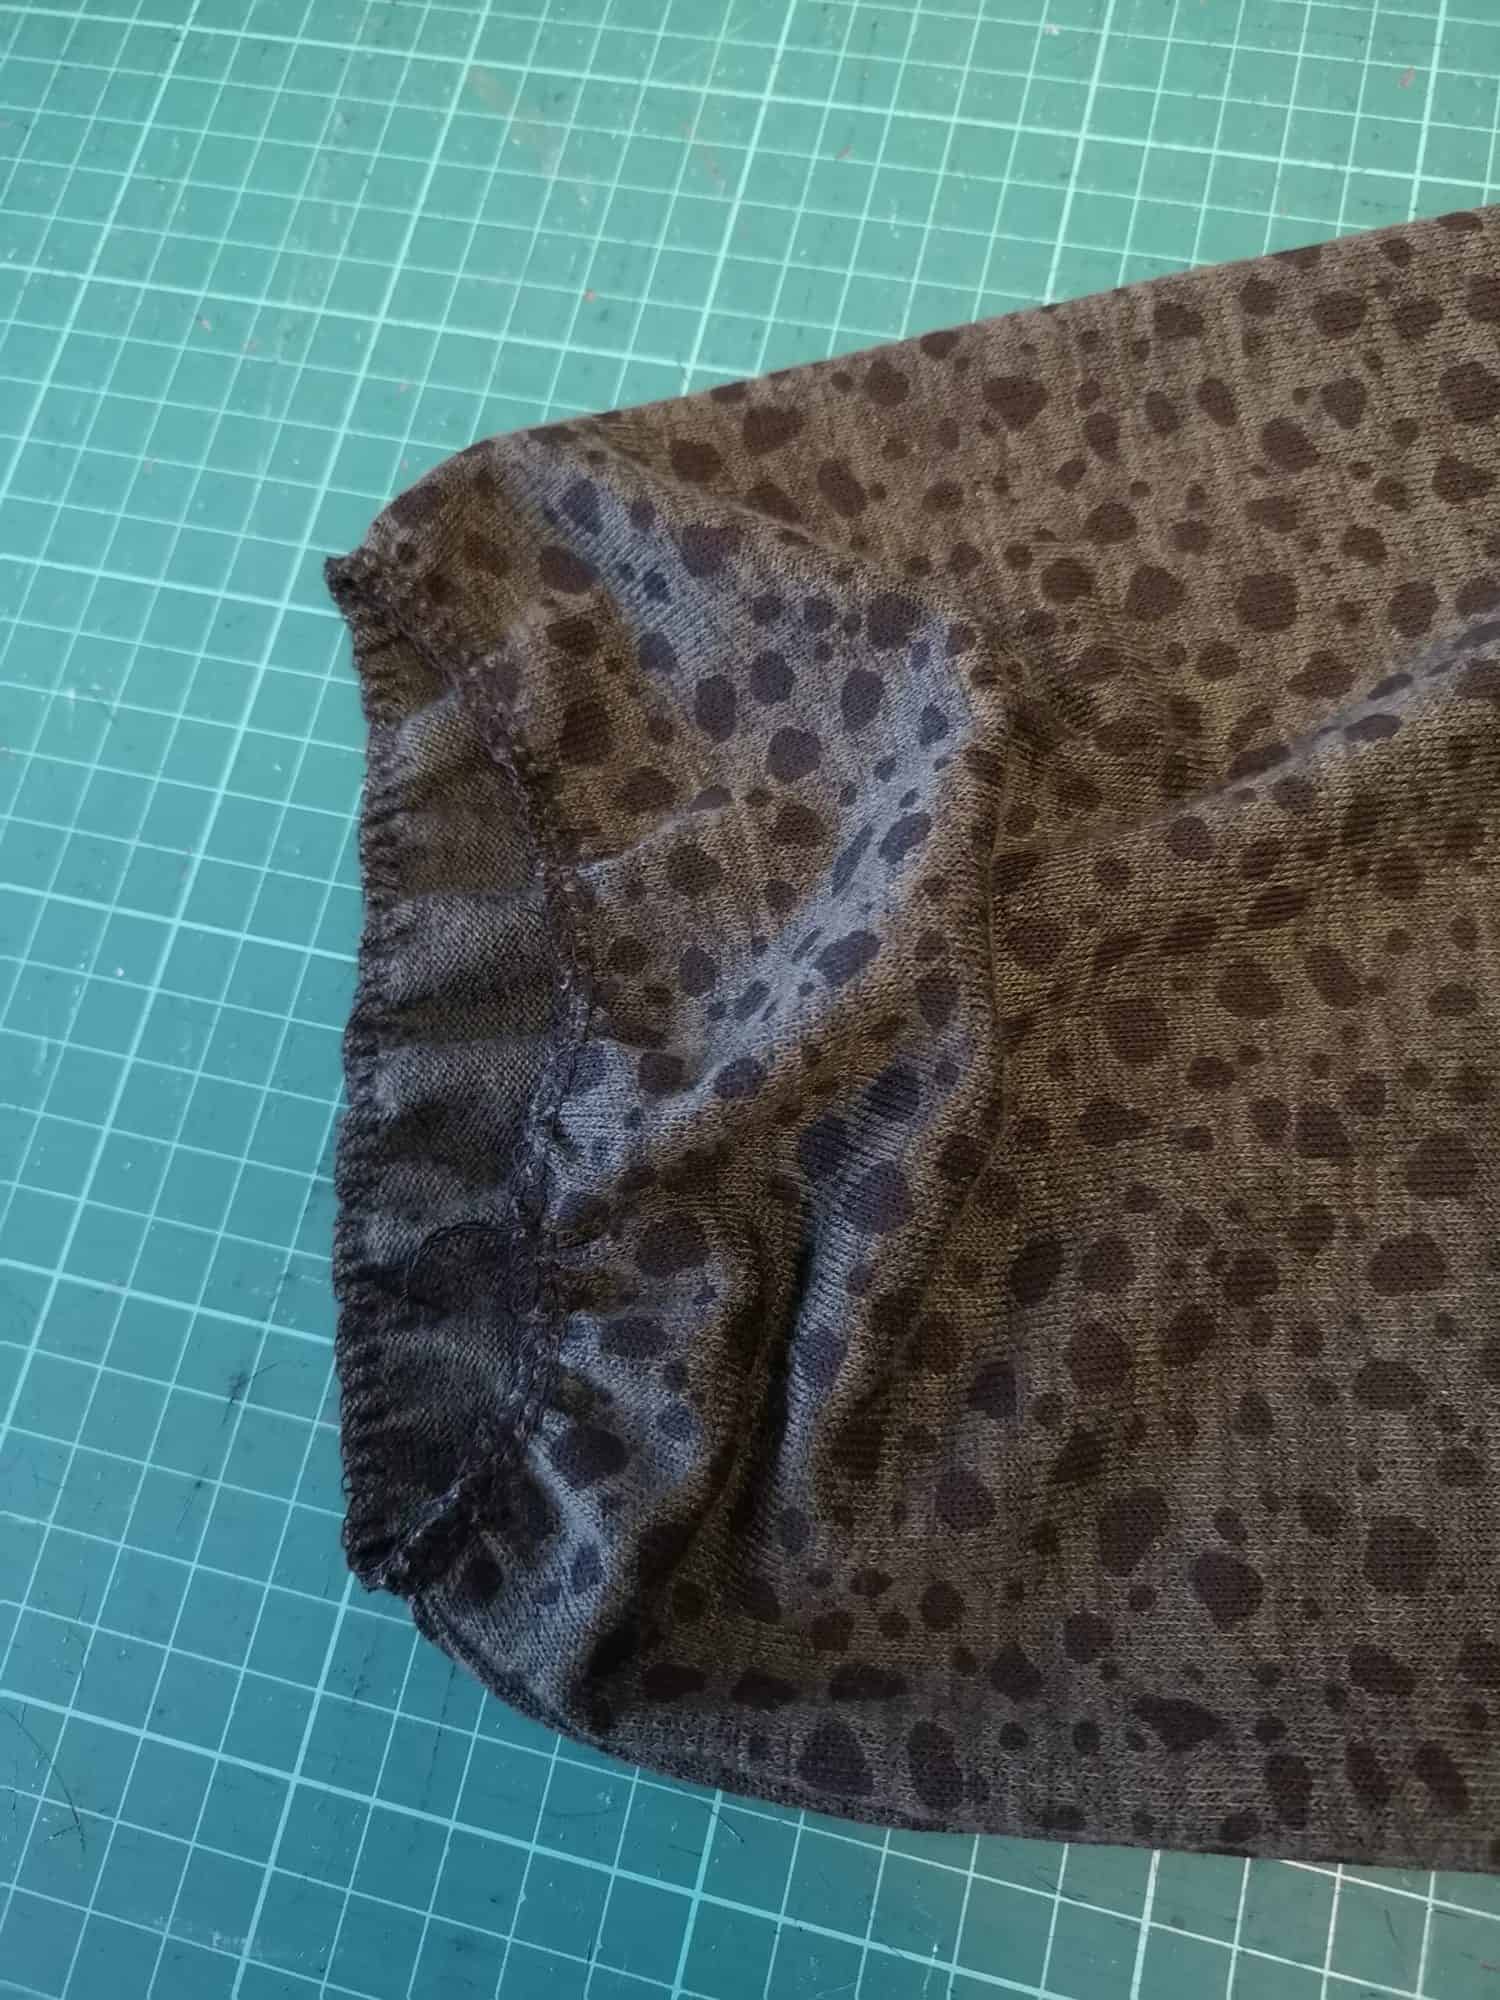
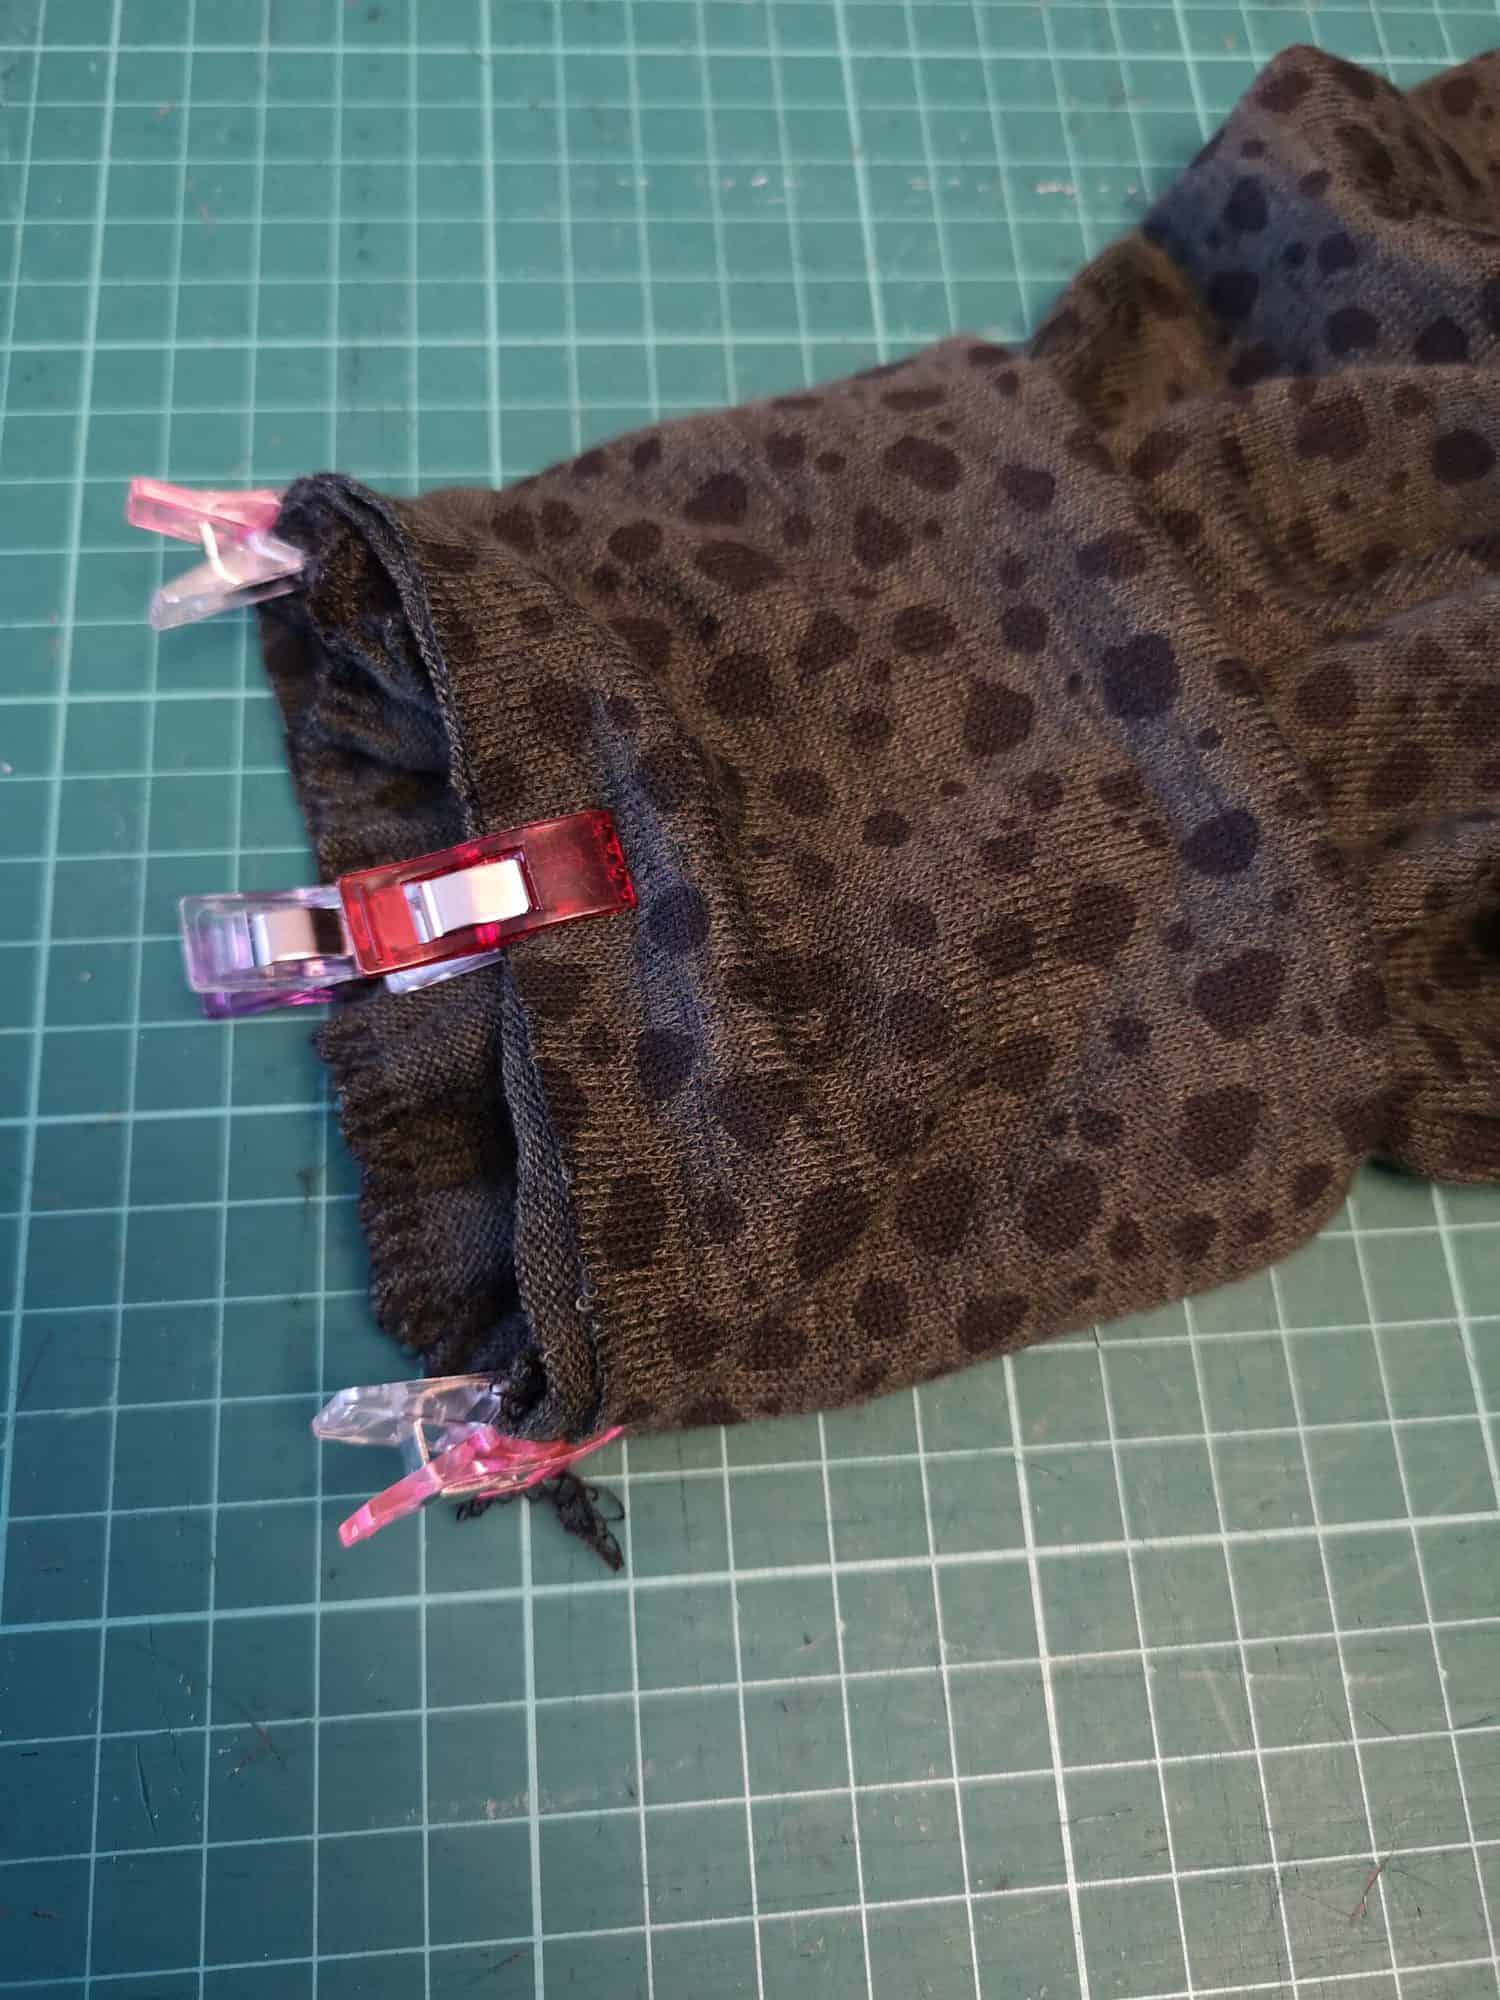
Then I cheekily used my overlocker/serger to gather the bottom of the sleeve by increasing my stitch length and differential feed to their highest setting and whipping round the bottom of the sleeve piece, which gathered it in just enough to fit the cuff. Perfect!

Finally just construct the rest of the garment as per the instructions in the tutorial, and you’re done!

Happy Sewing!

Dana x

…..

No side split

Hey everyone! I have another super quick hack for you. As fun as that side split is that comes in the pattern, I was wanting a most basic top, so I decided to do without the side split for this! It’s as simple as adding a bit of length to the front bodice piece, and sewing the two waistband pieces together in a circle! I’ll break it down for you below.

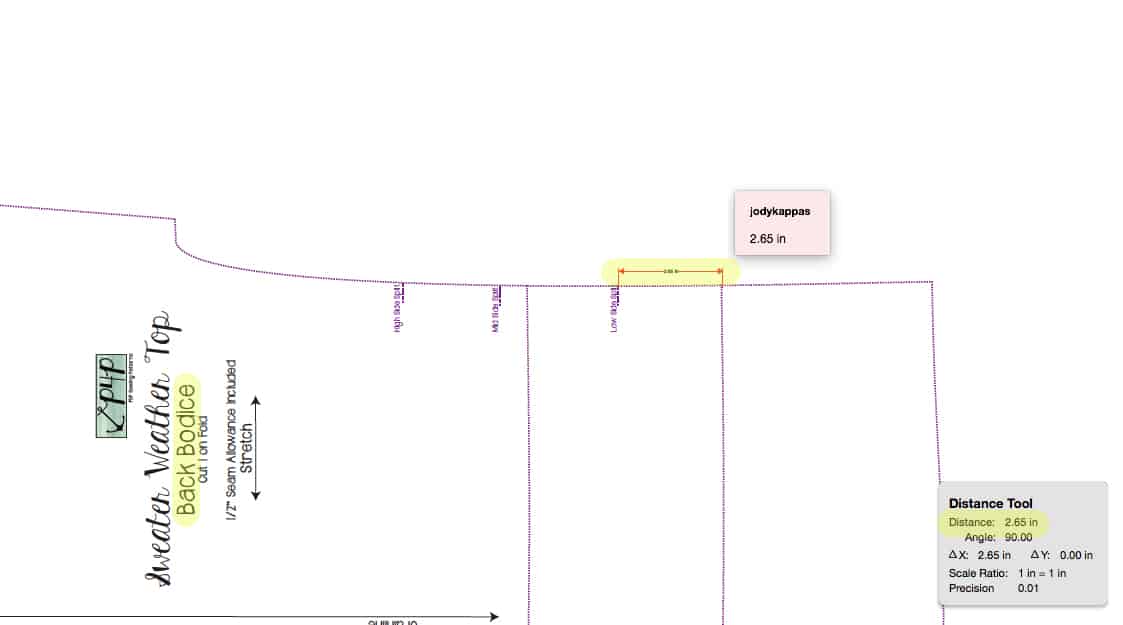
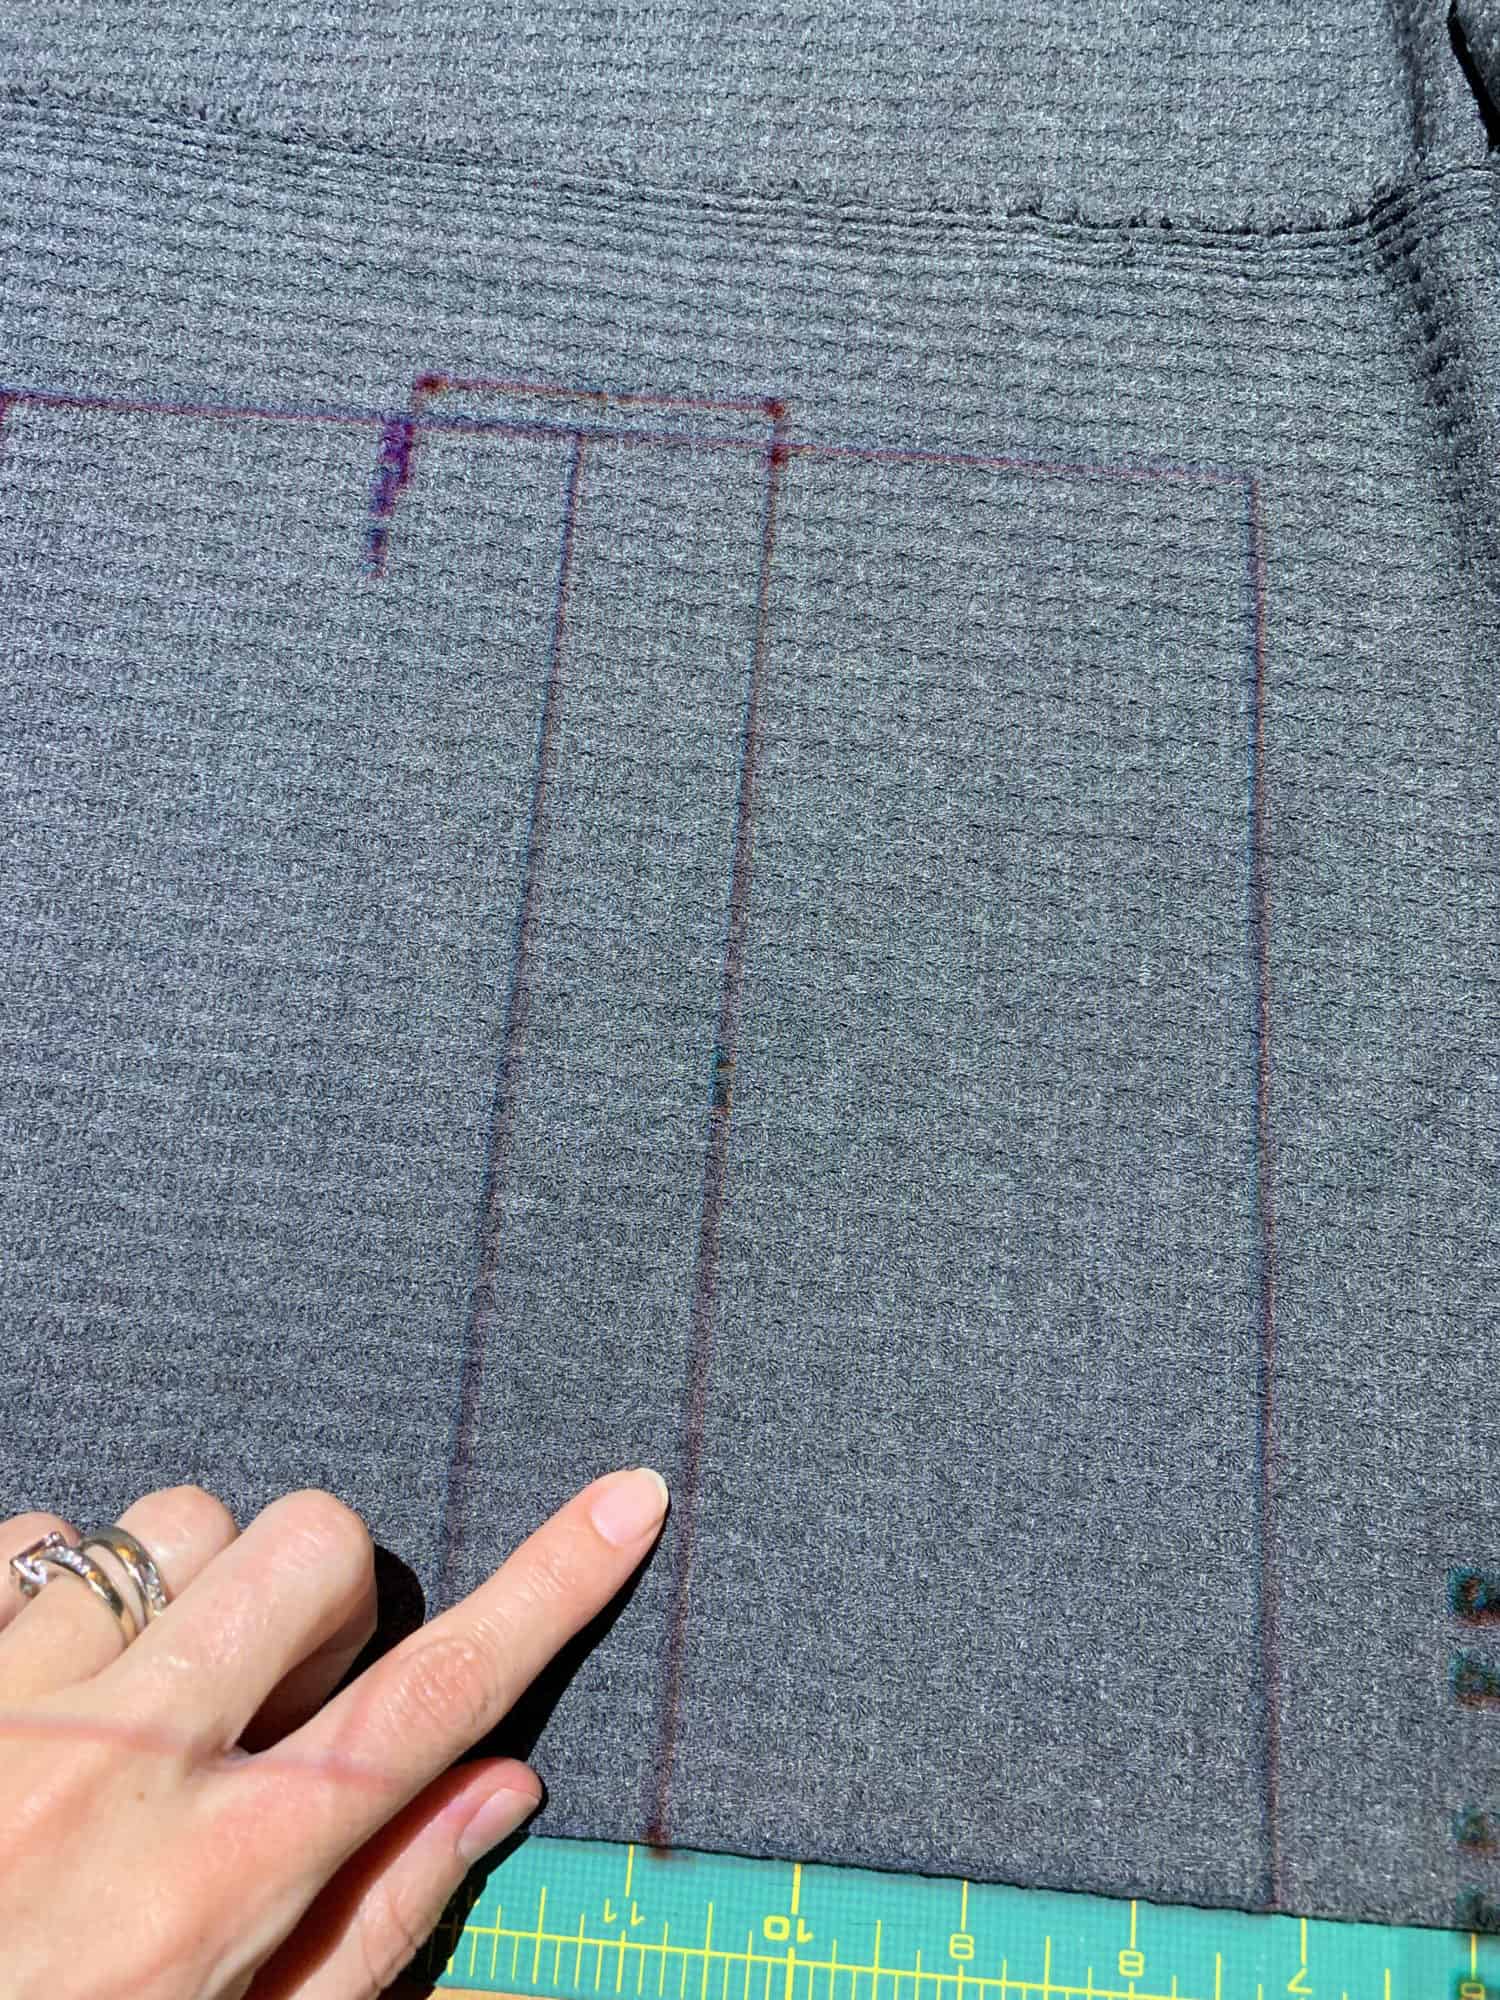
First, you’ll need to make your front and back bodice pieces the same length. I chose to do Top length for this one, and the front bodice piece was about a little over an inch shorter than the back. Since I also use my projector and don’t print out the pattern pieces, I marked the new Top cut line digitally on my PDF file on my computer. In order to figure out how much length to add, I measured from the Split Marking on the side seam down to the Top cut line on the BACK bodice piece. For my size, that distance measured 2.65 inches.

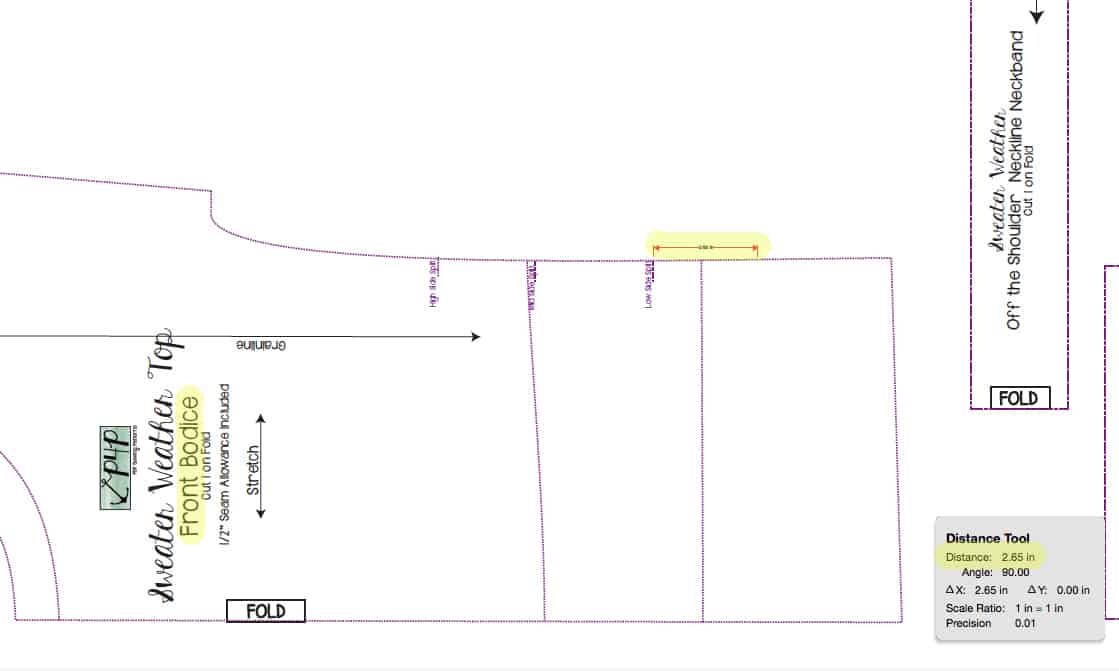
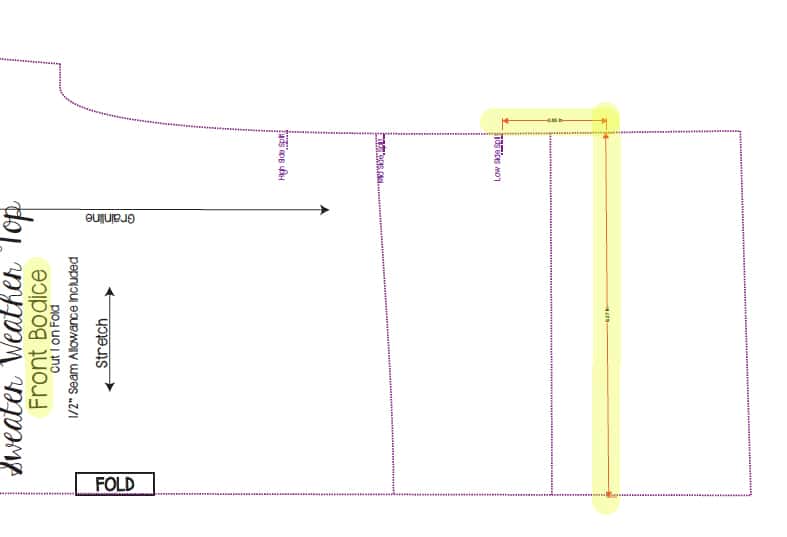
I then measured down from the Split Marking on the side seam of the FRONT bodice piece and marked where the new Top cut line should be. (Doing this with Paper pattern pieces, you would simply lay the back bodice piece over the front piece and see how much extra to add to the bottom of the front!)

This is what the new digitally measured cut line looks like when projected.

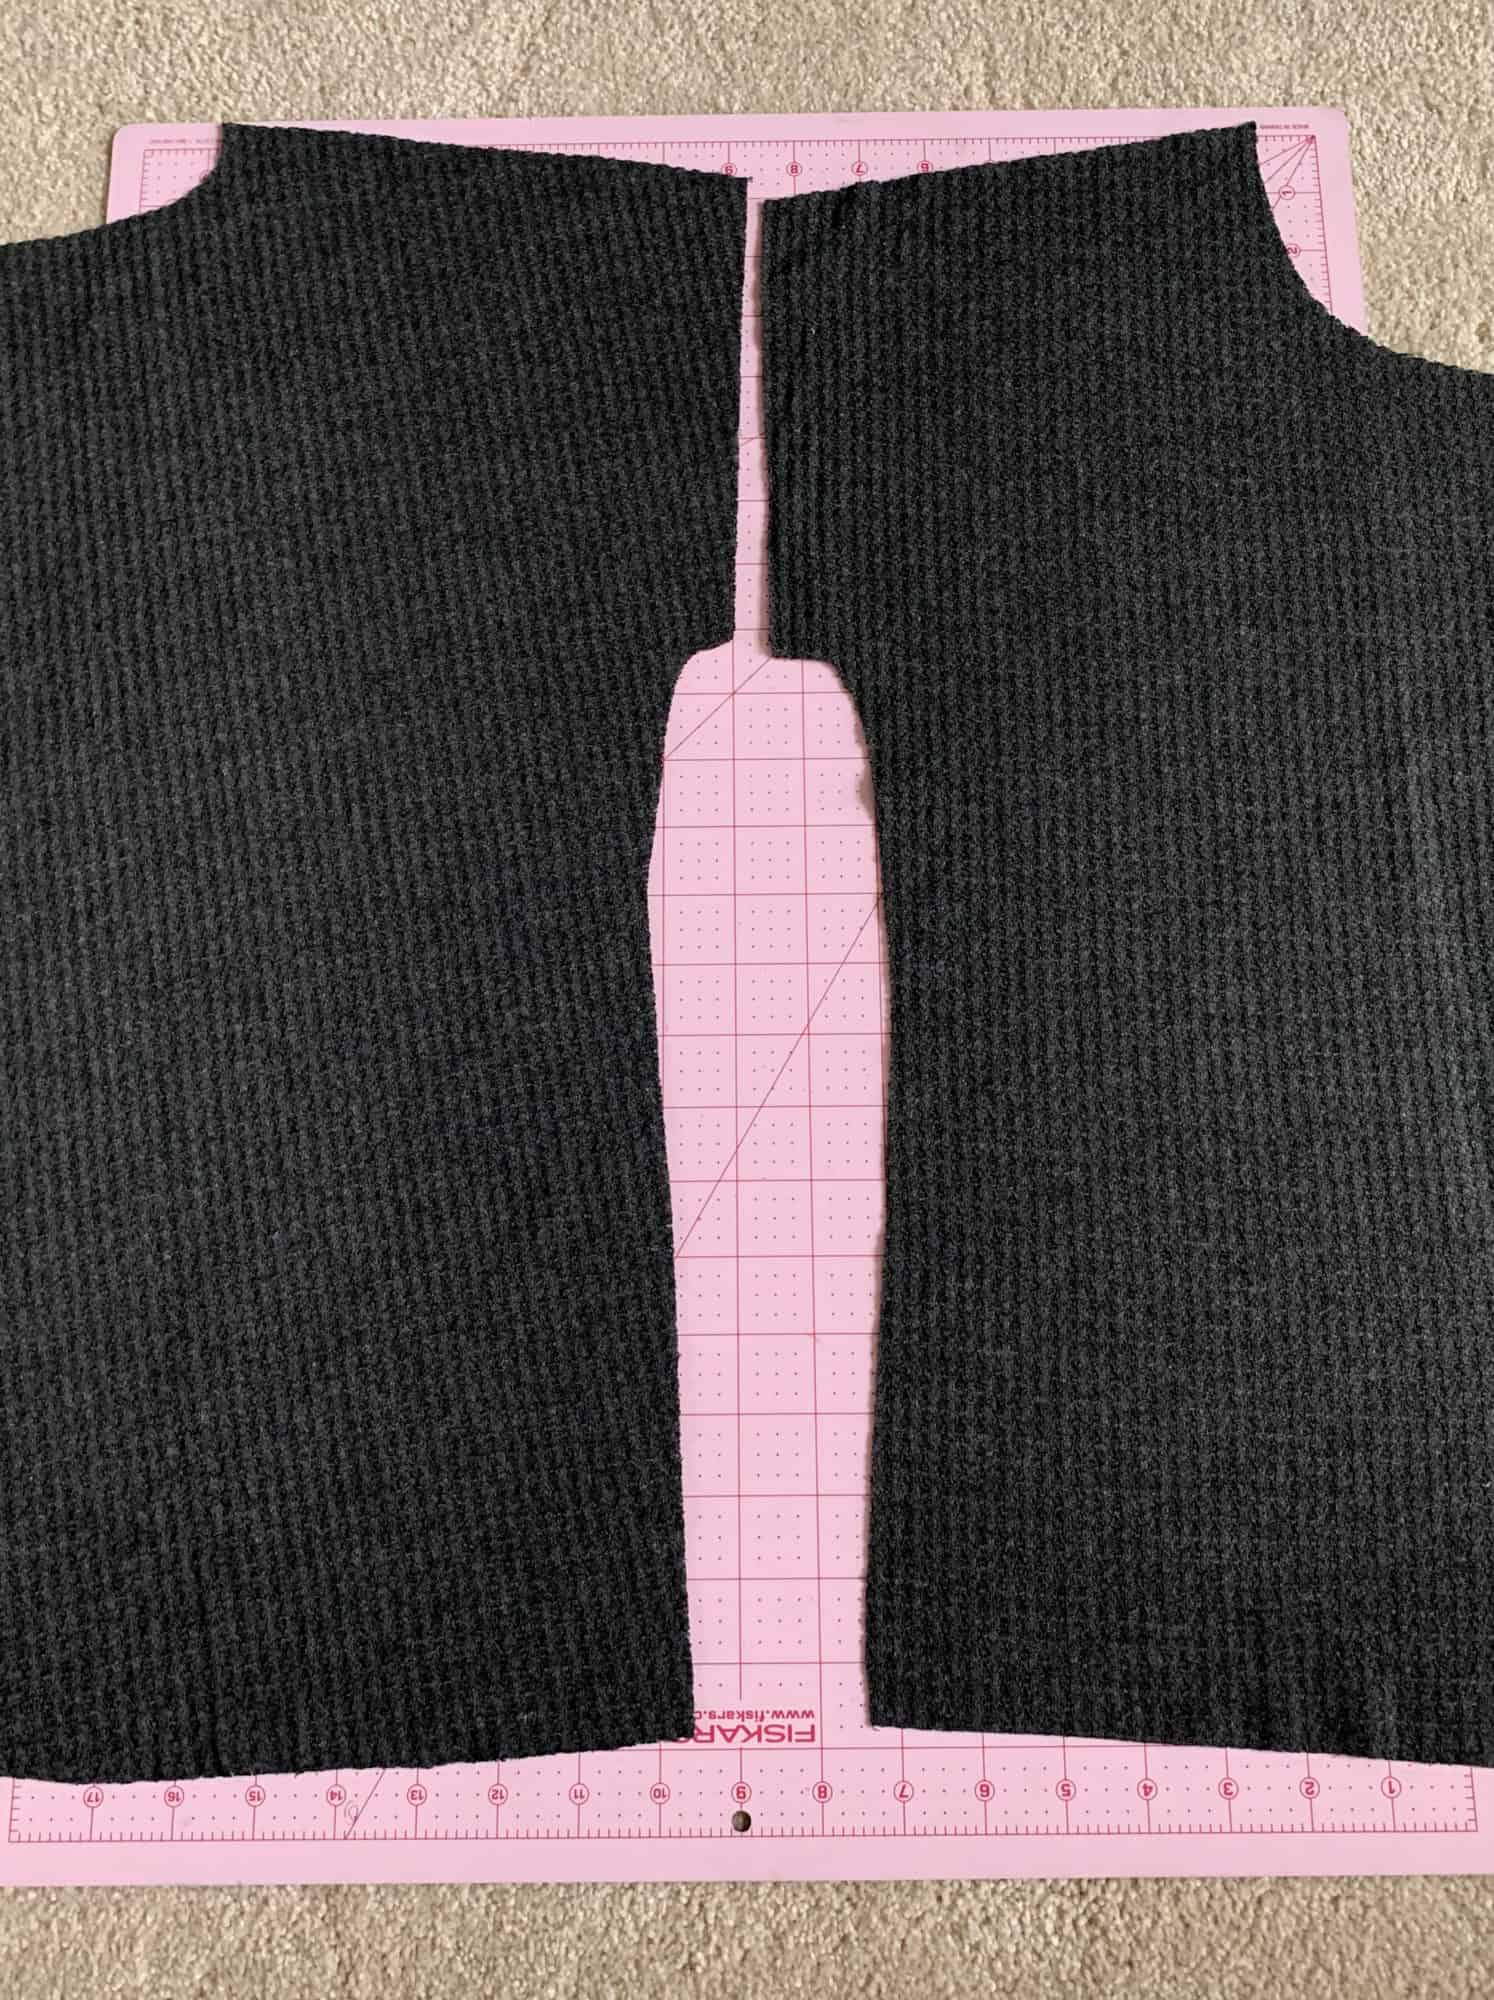
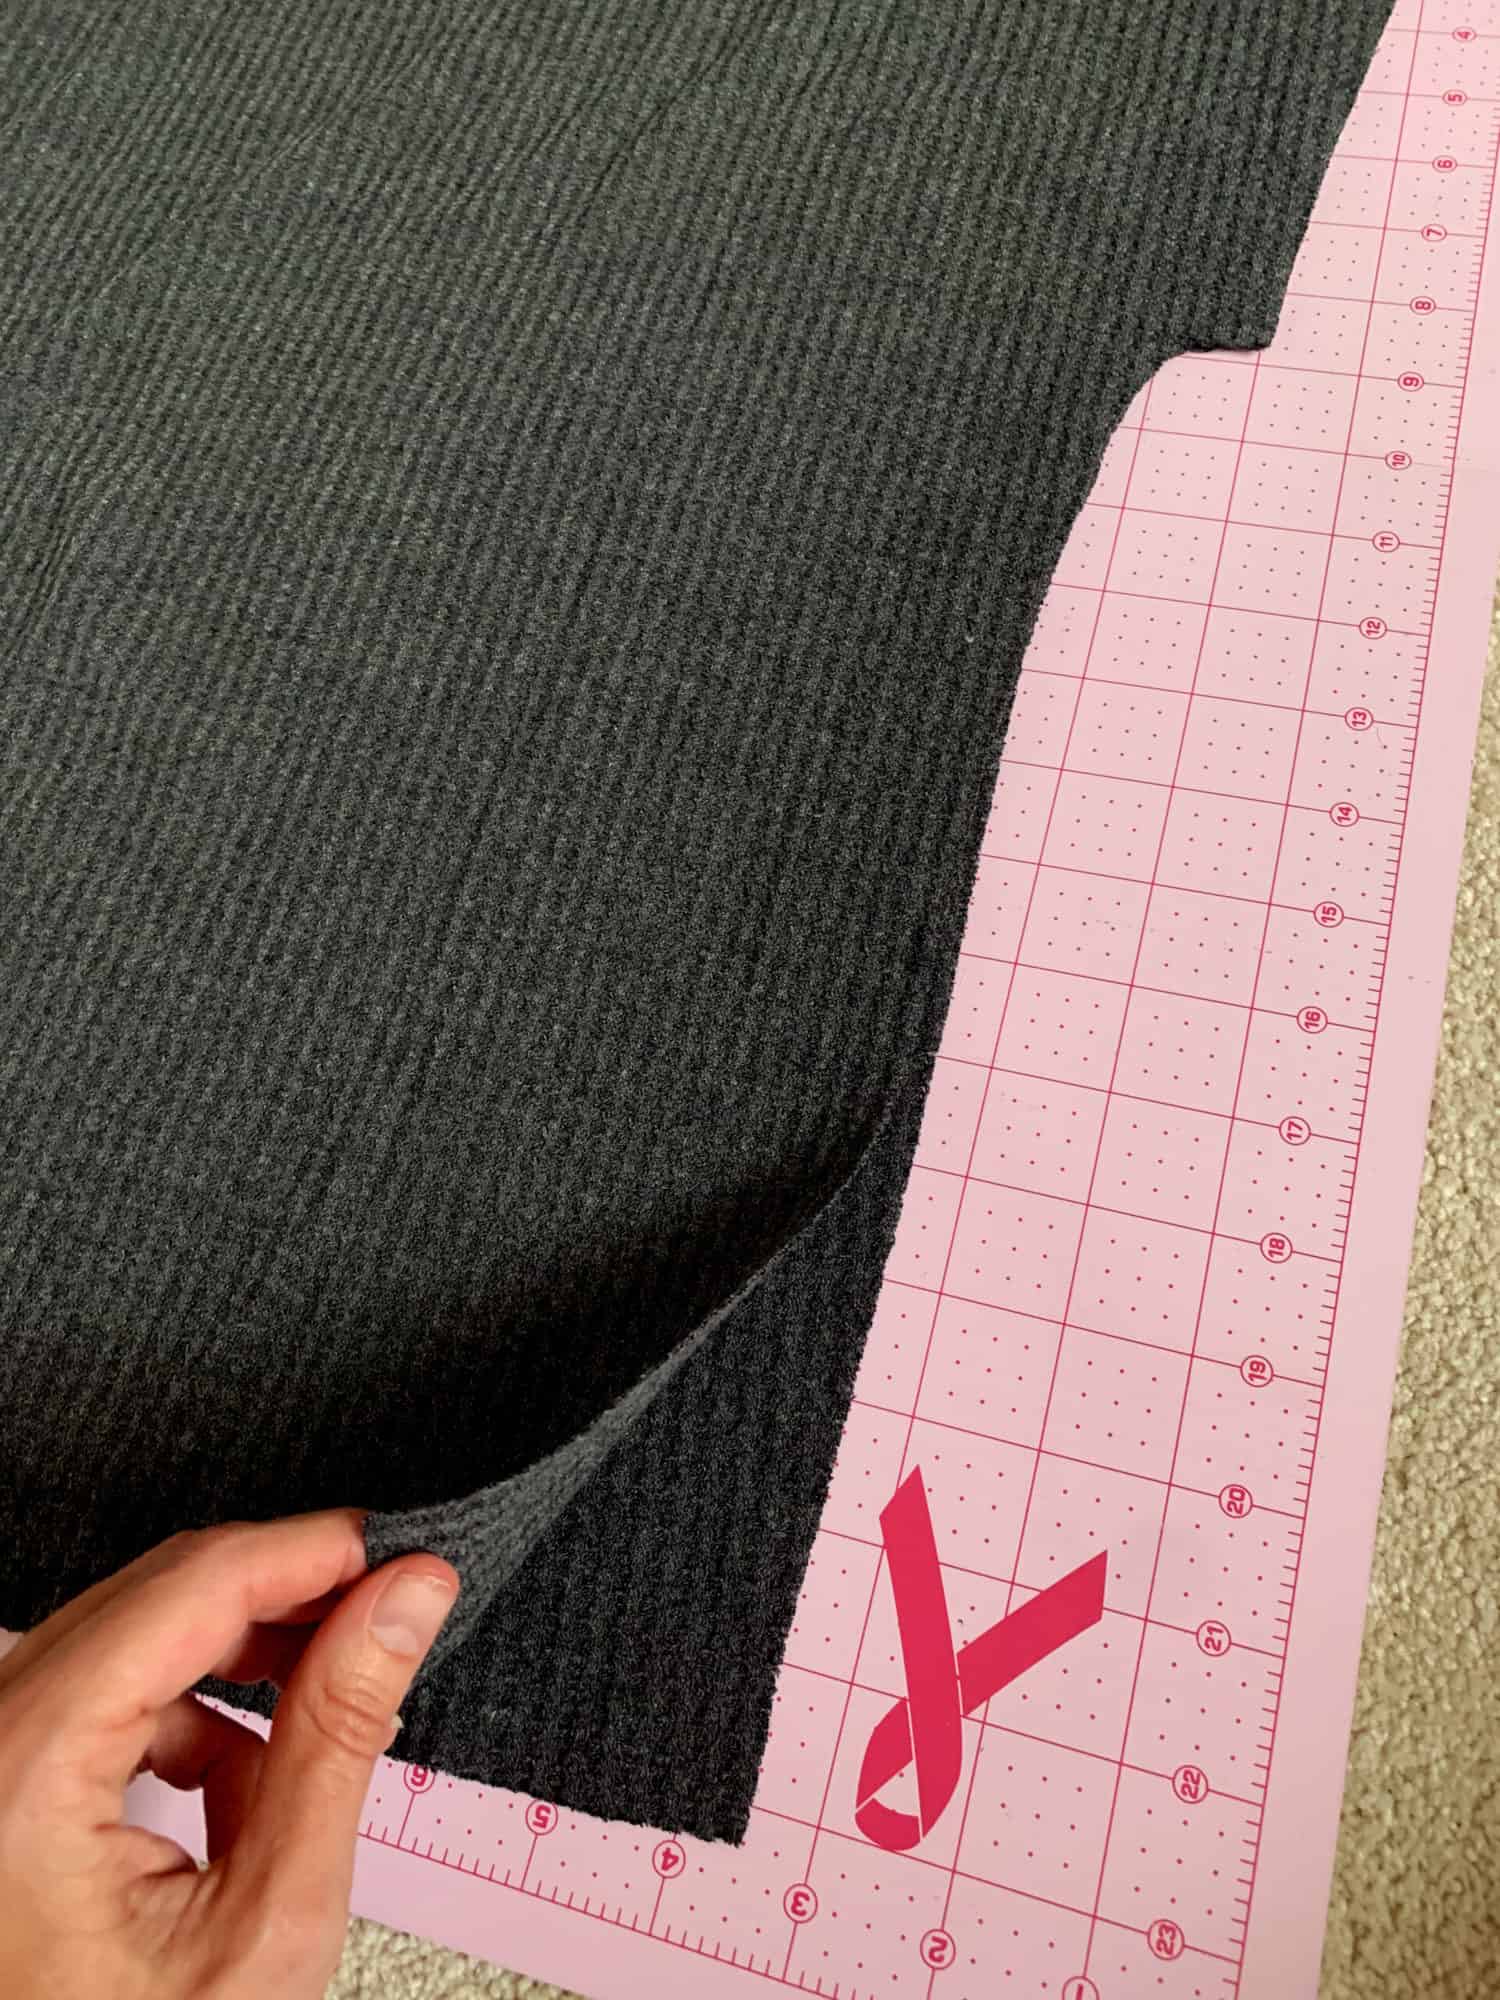
Once I cut my bodice pieces (following the newly marked cut line for the front bodice!) You can see that my front and back bodices are the same length now!

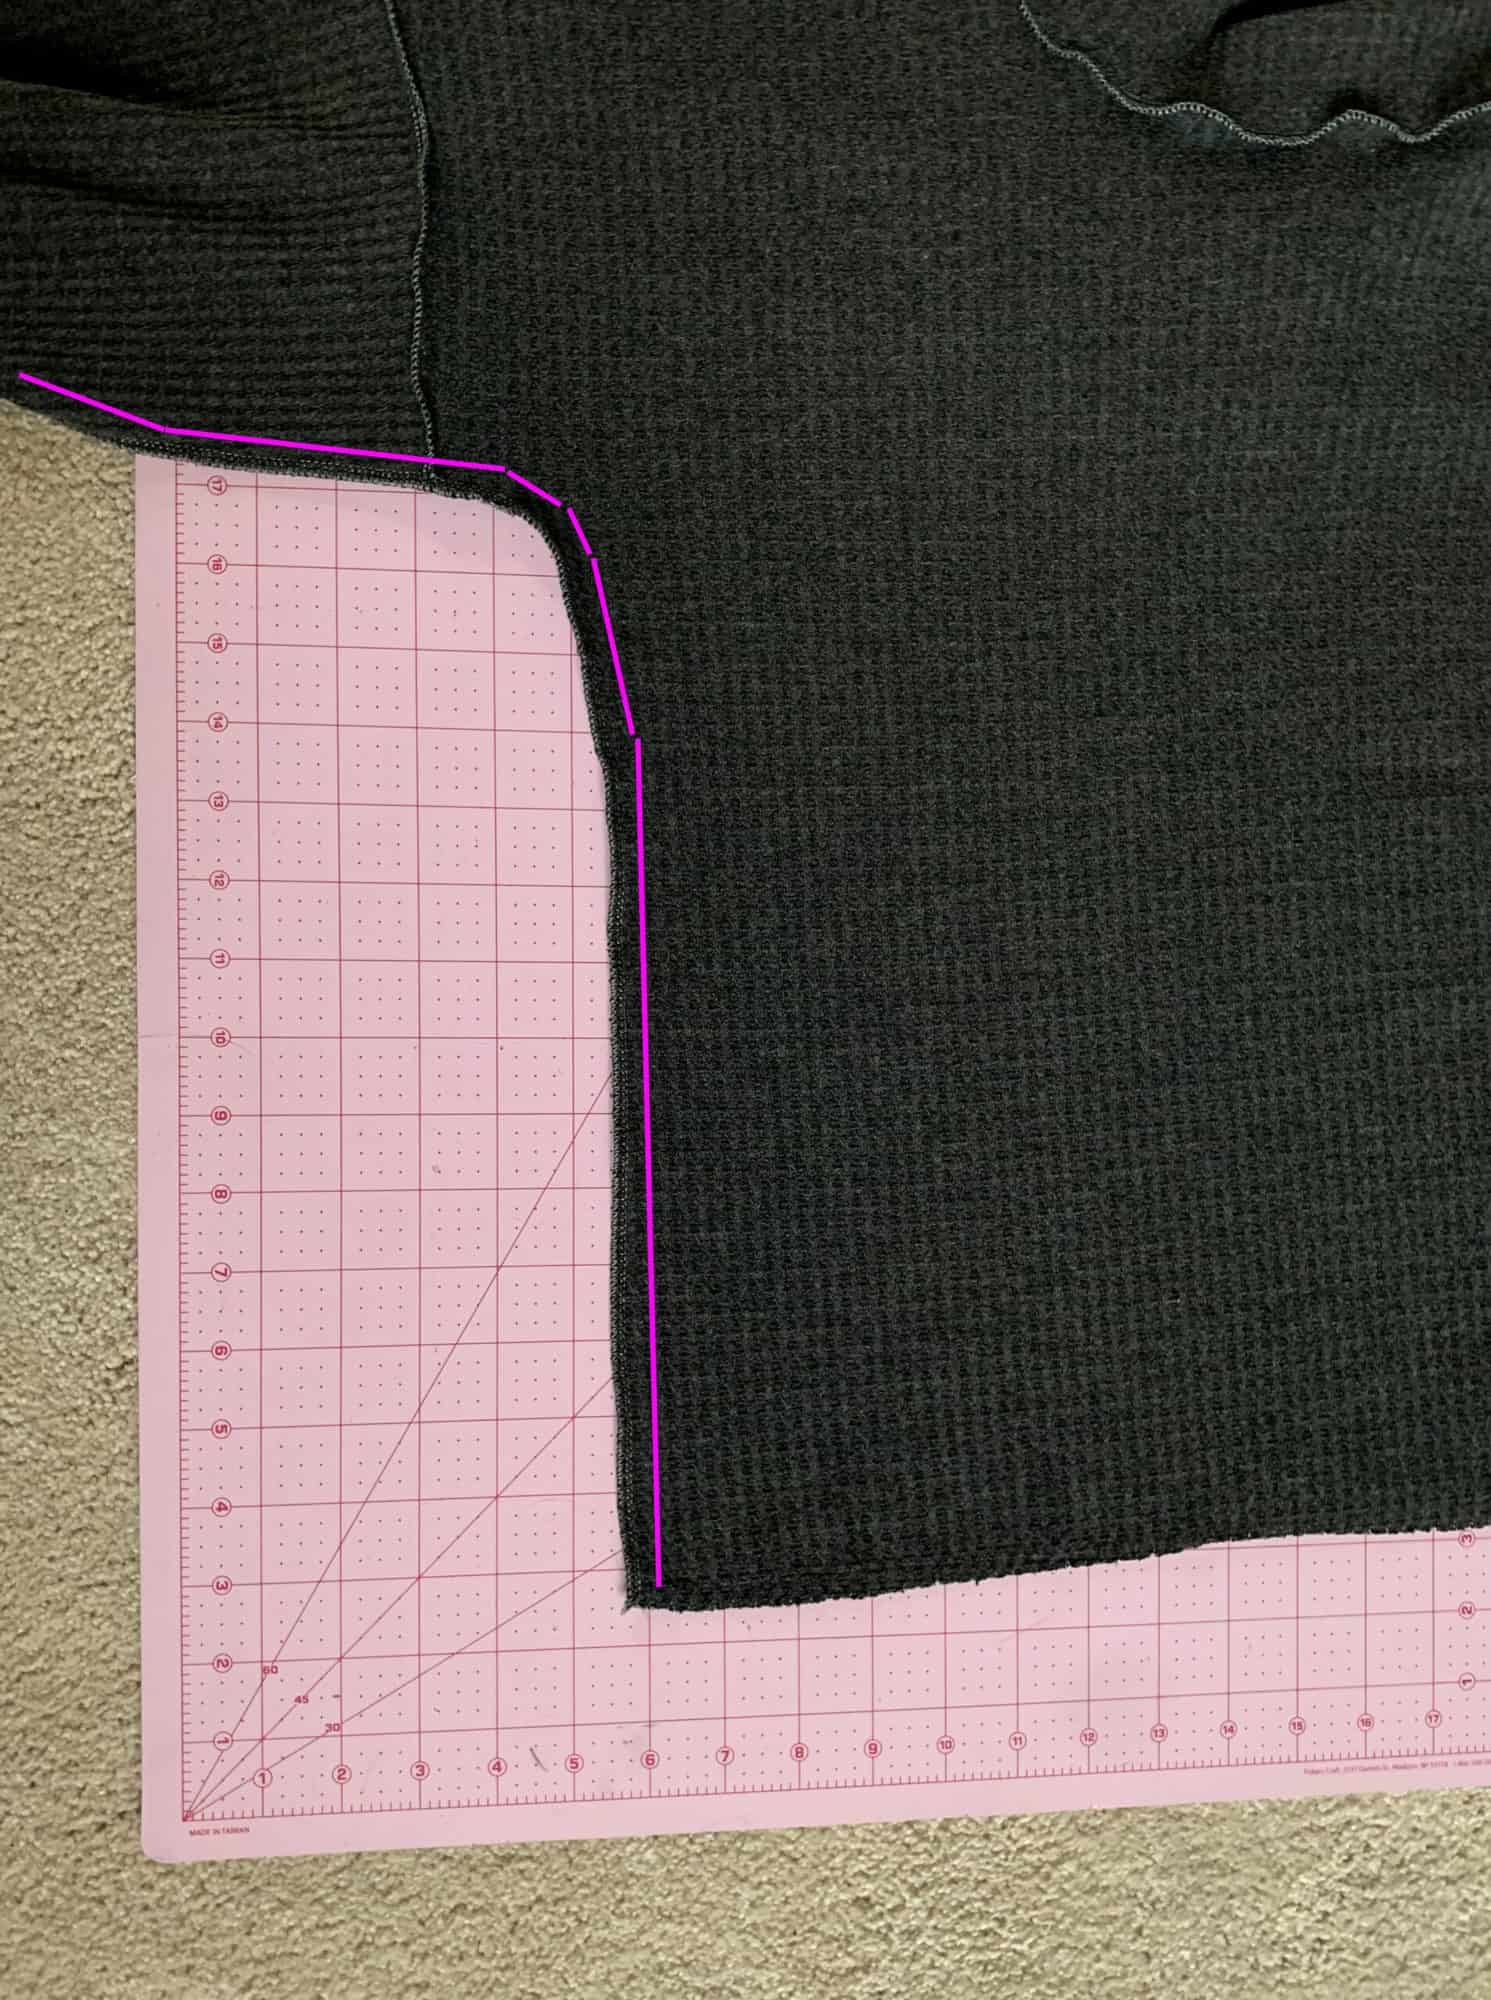
Next, you can sew up your shoulder seams, add the sleeves, and then sew your side seams. When sewing the side seams, instead of stopping your stitches at the split marking like you would have to do if you were making the side split, you can just keep on keeping on and sew right on down to the bottom! Like so:

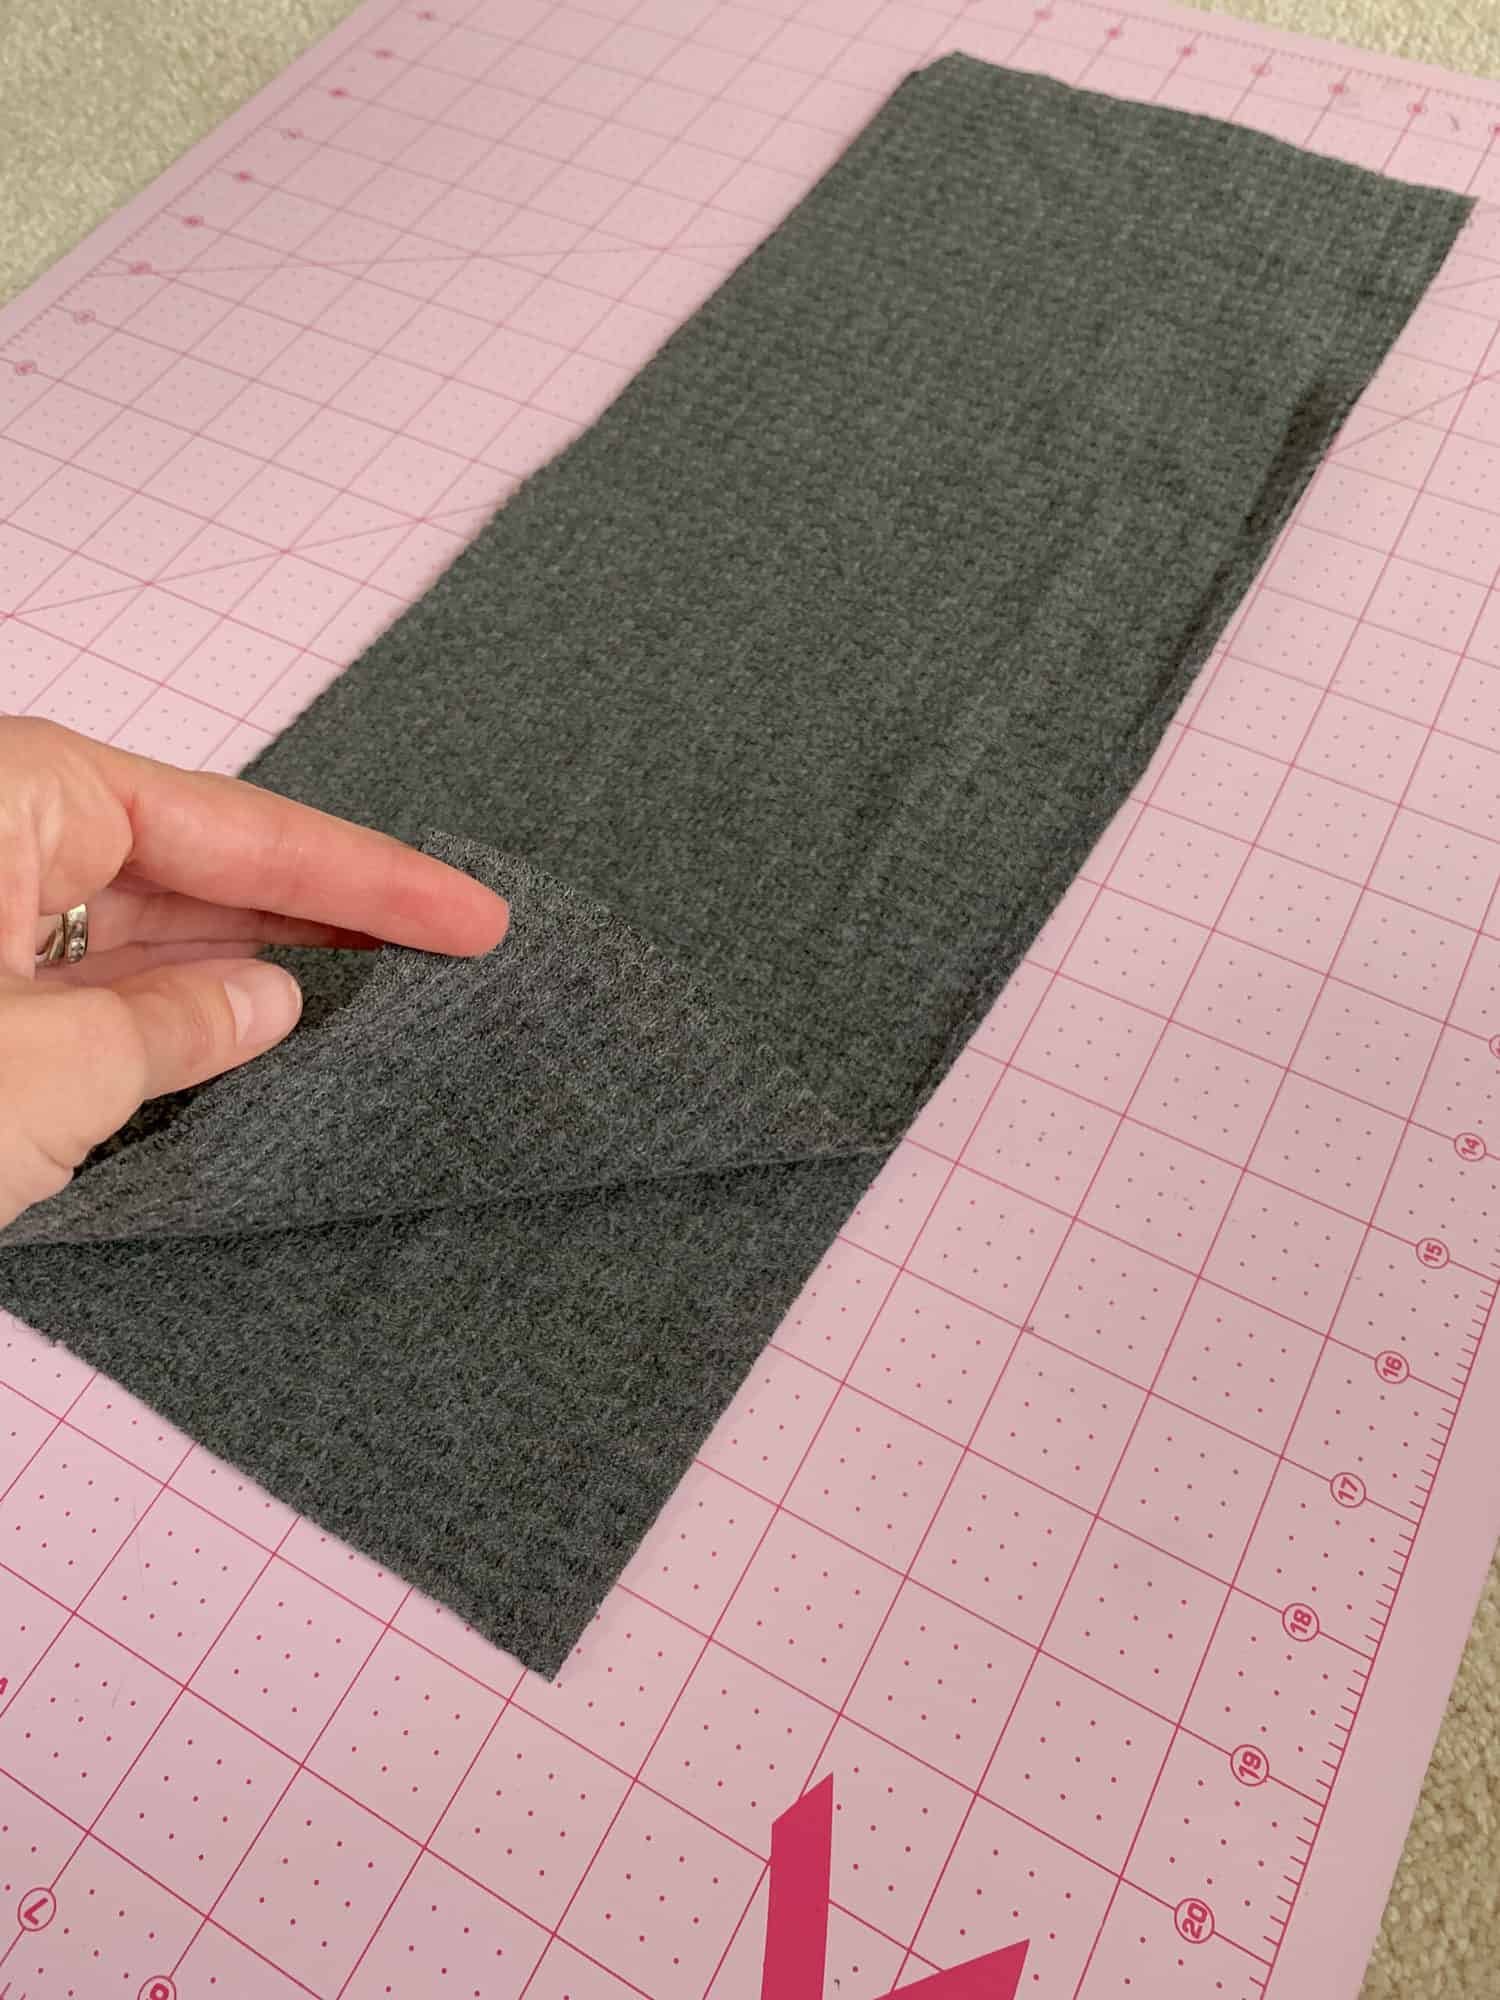
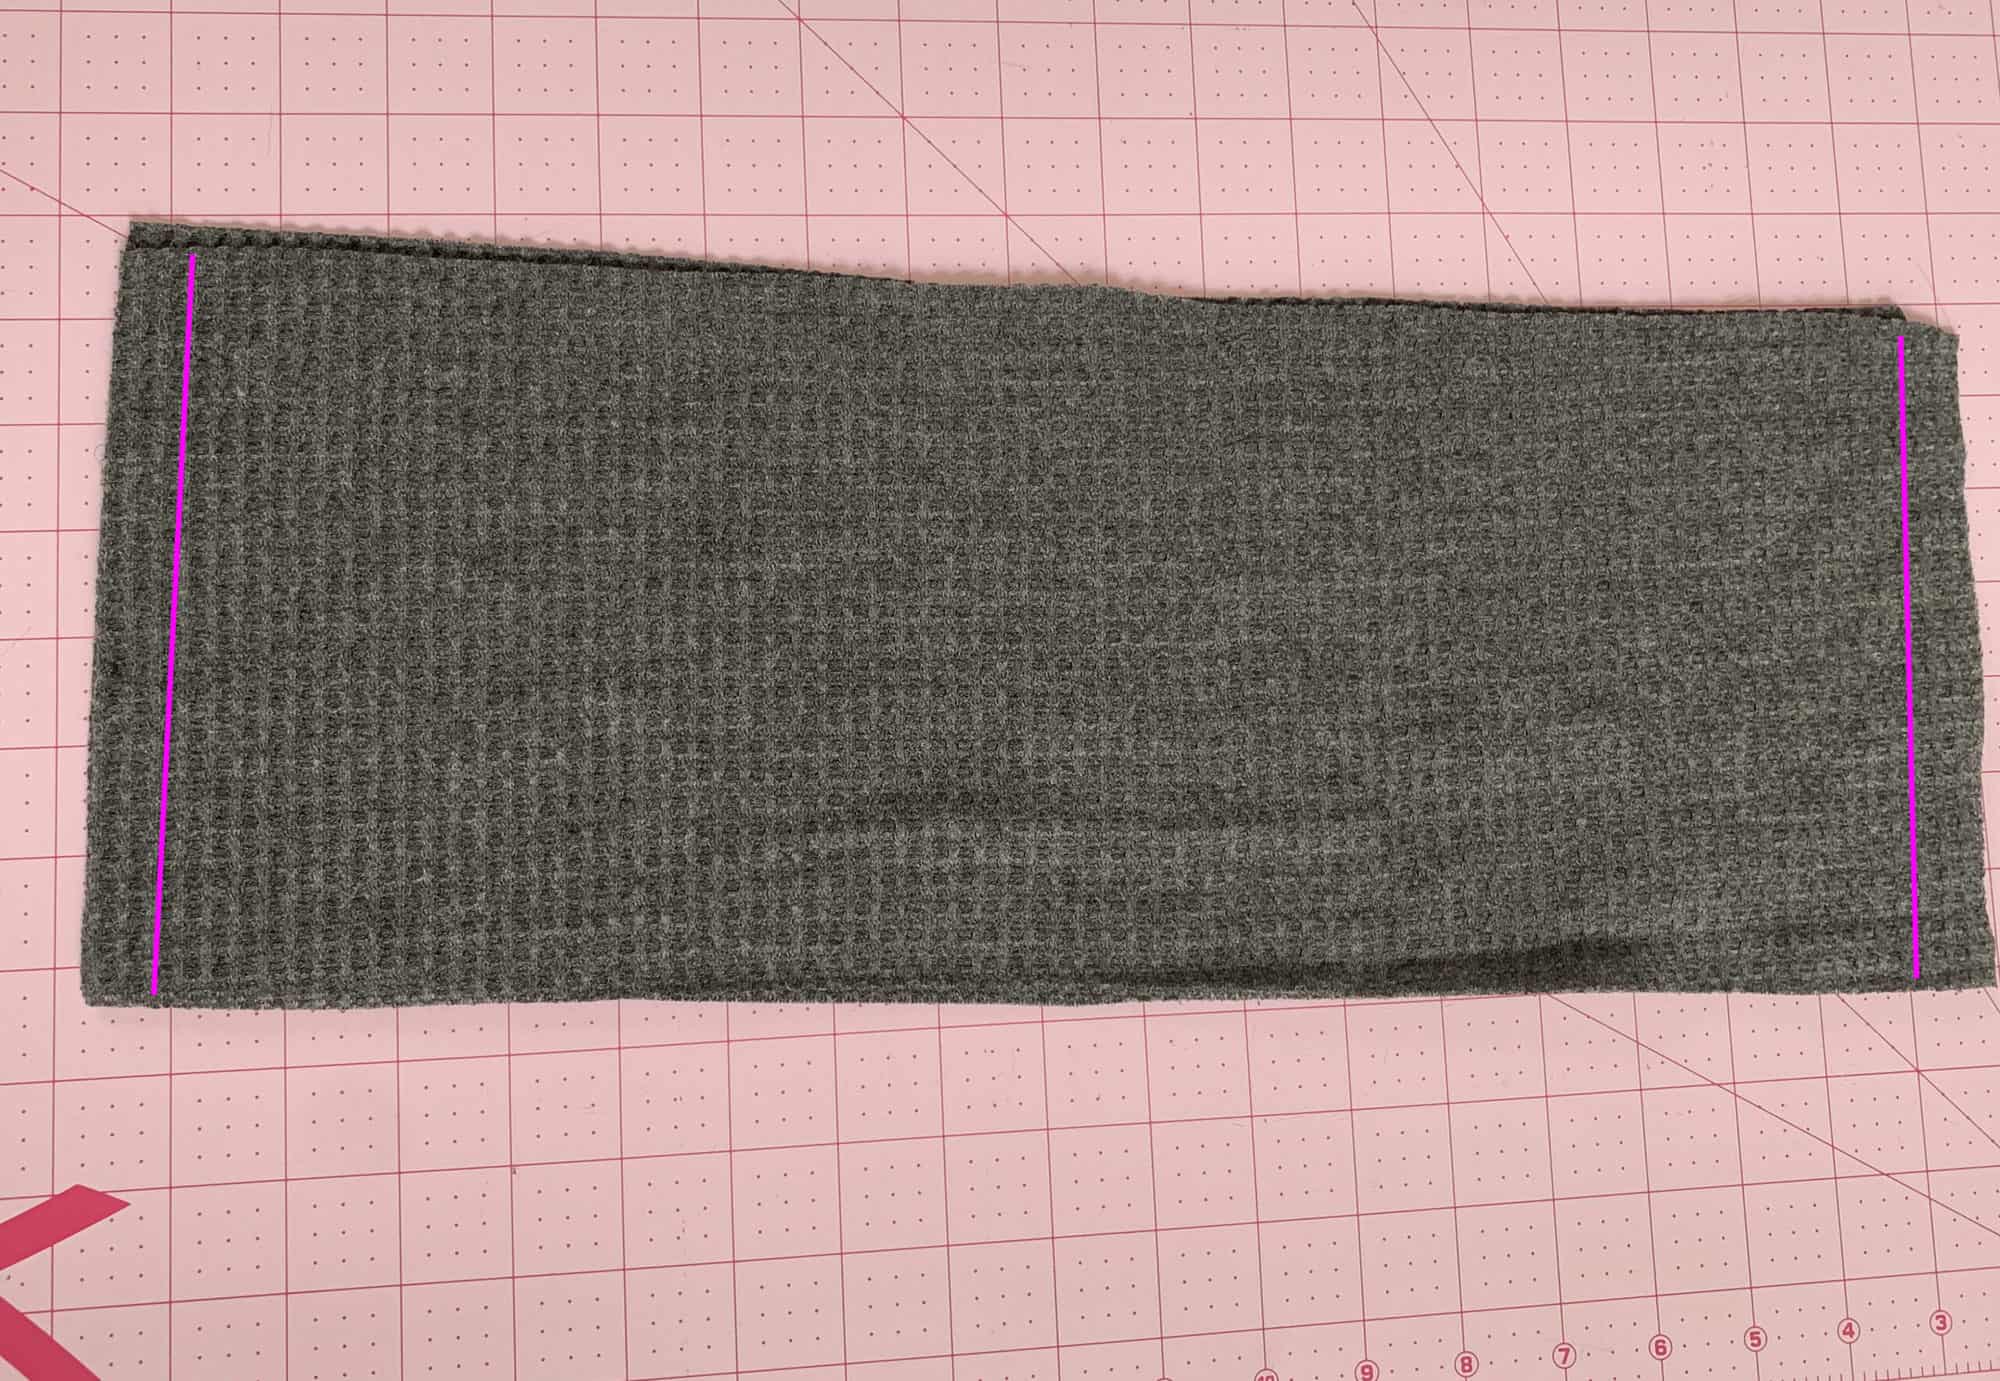
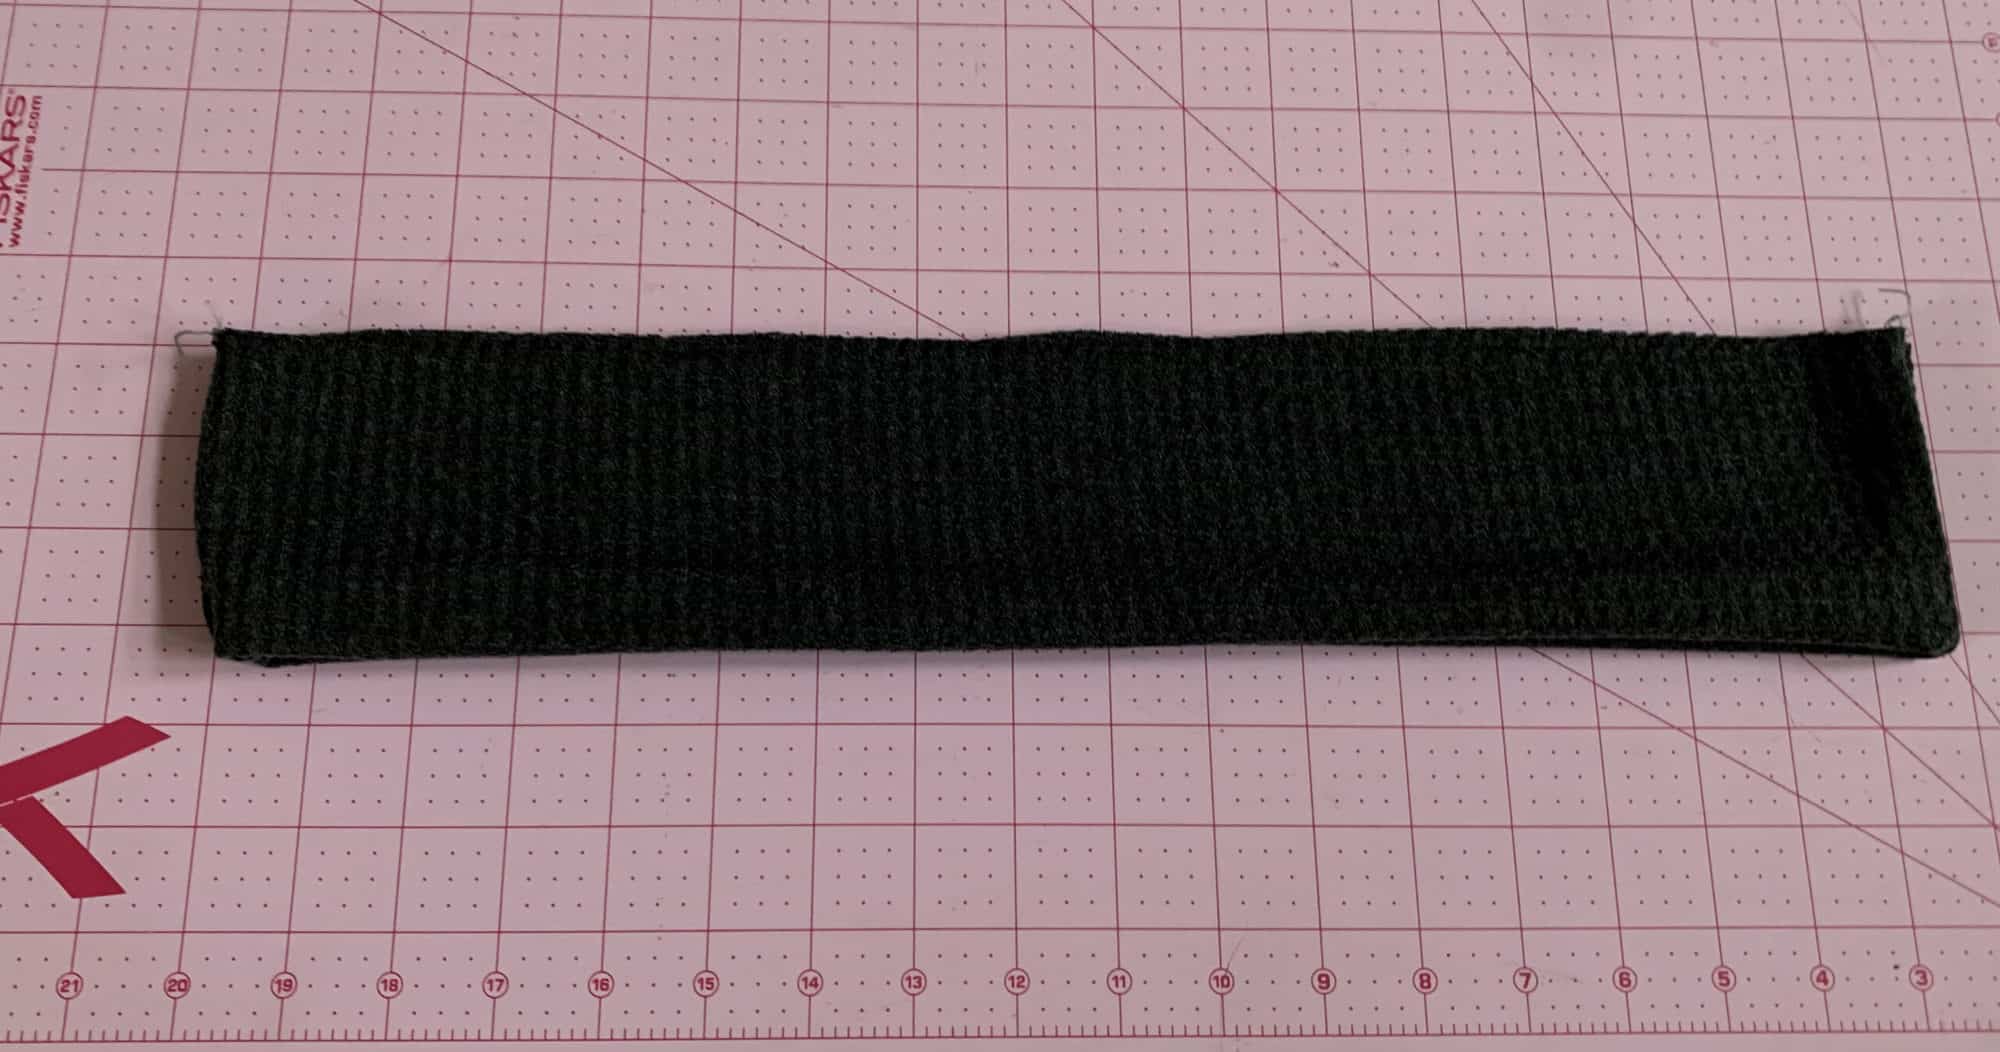
Lastly, you’ll need to create and attach your waistband. Take your two waistband pieces and place them right sides together. Stitch them together along the short ends.

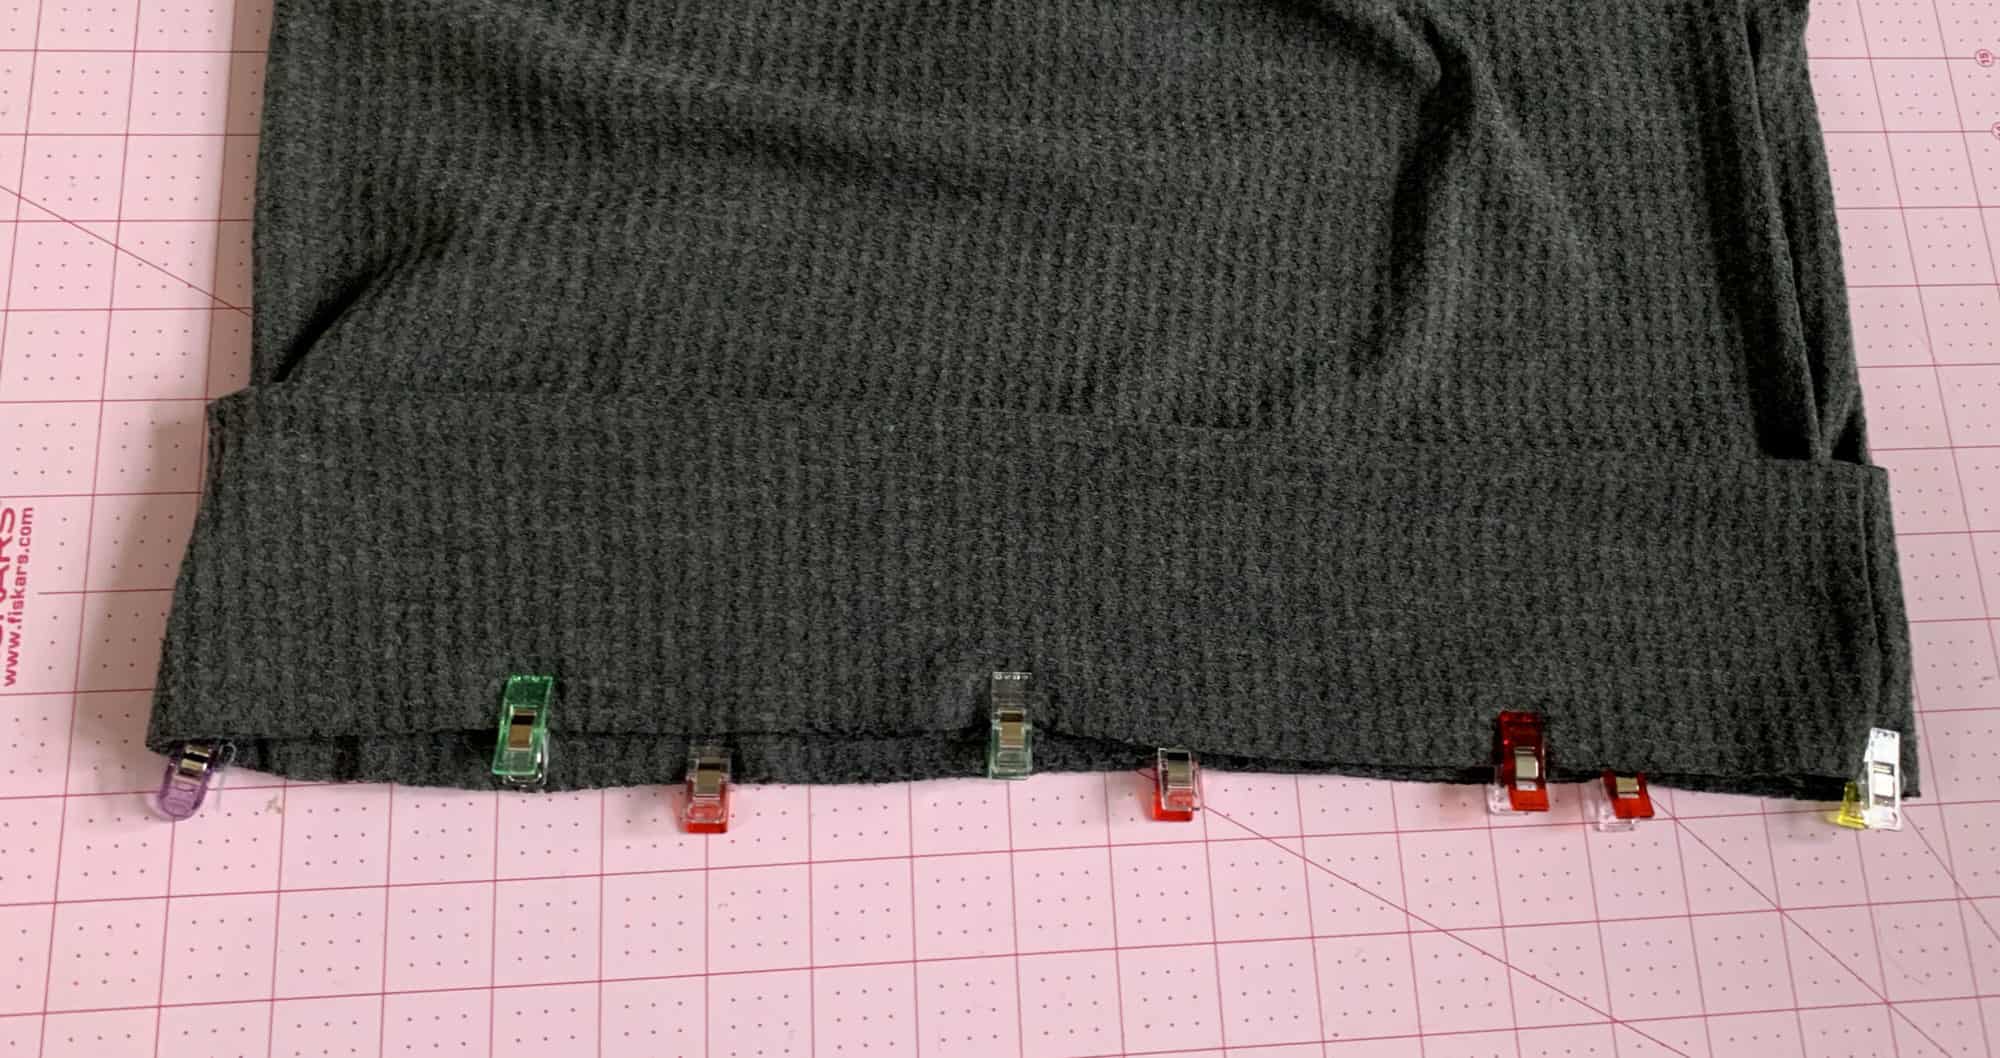
Now fold the waistband circle wrong sides together aligning the raw edges.  You can now slip the waistband on the bottom of the sweater, aligning raw edges, and sew in place.

Now you have a comfy sweater without the extra side split!

Happy Sewing!

-Jody

….

Short sleeves

Last but certainly not least I wanted to show you how easy it is to take the Sweater Weather from chilly months to hot summer days. It’s as simple as using lighter fabric and making it short sleeves. For my example, I used custom bamboo spandex (my favorite fabric base!). There are not many modifications you need to do to get the look. Simply skip cutting the sleeves and sleeve cuffs when you gather your pieces. 

Sew the shoulder seems and instructed. Press the sleeve opening 1/2″, wrong sides together as shown below. This will create a memory hem. 

Sew the shirt side seams. Using your favorite stretch stitch (I used my coverstitch) hem the sleeves 1/2″. Press again for a crisp look. 

Tadah! Easiest hack ever! Continue sewing your Sweater Weather top as per the tutorial. 

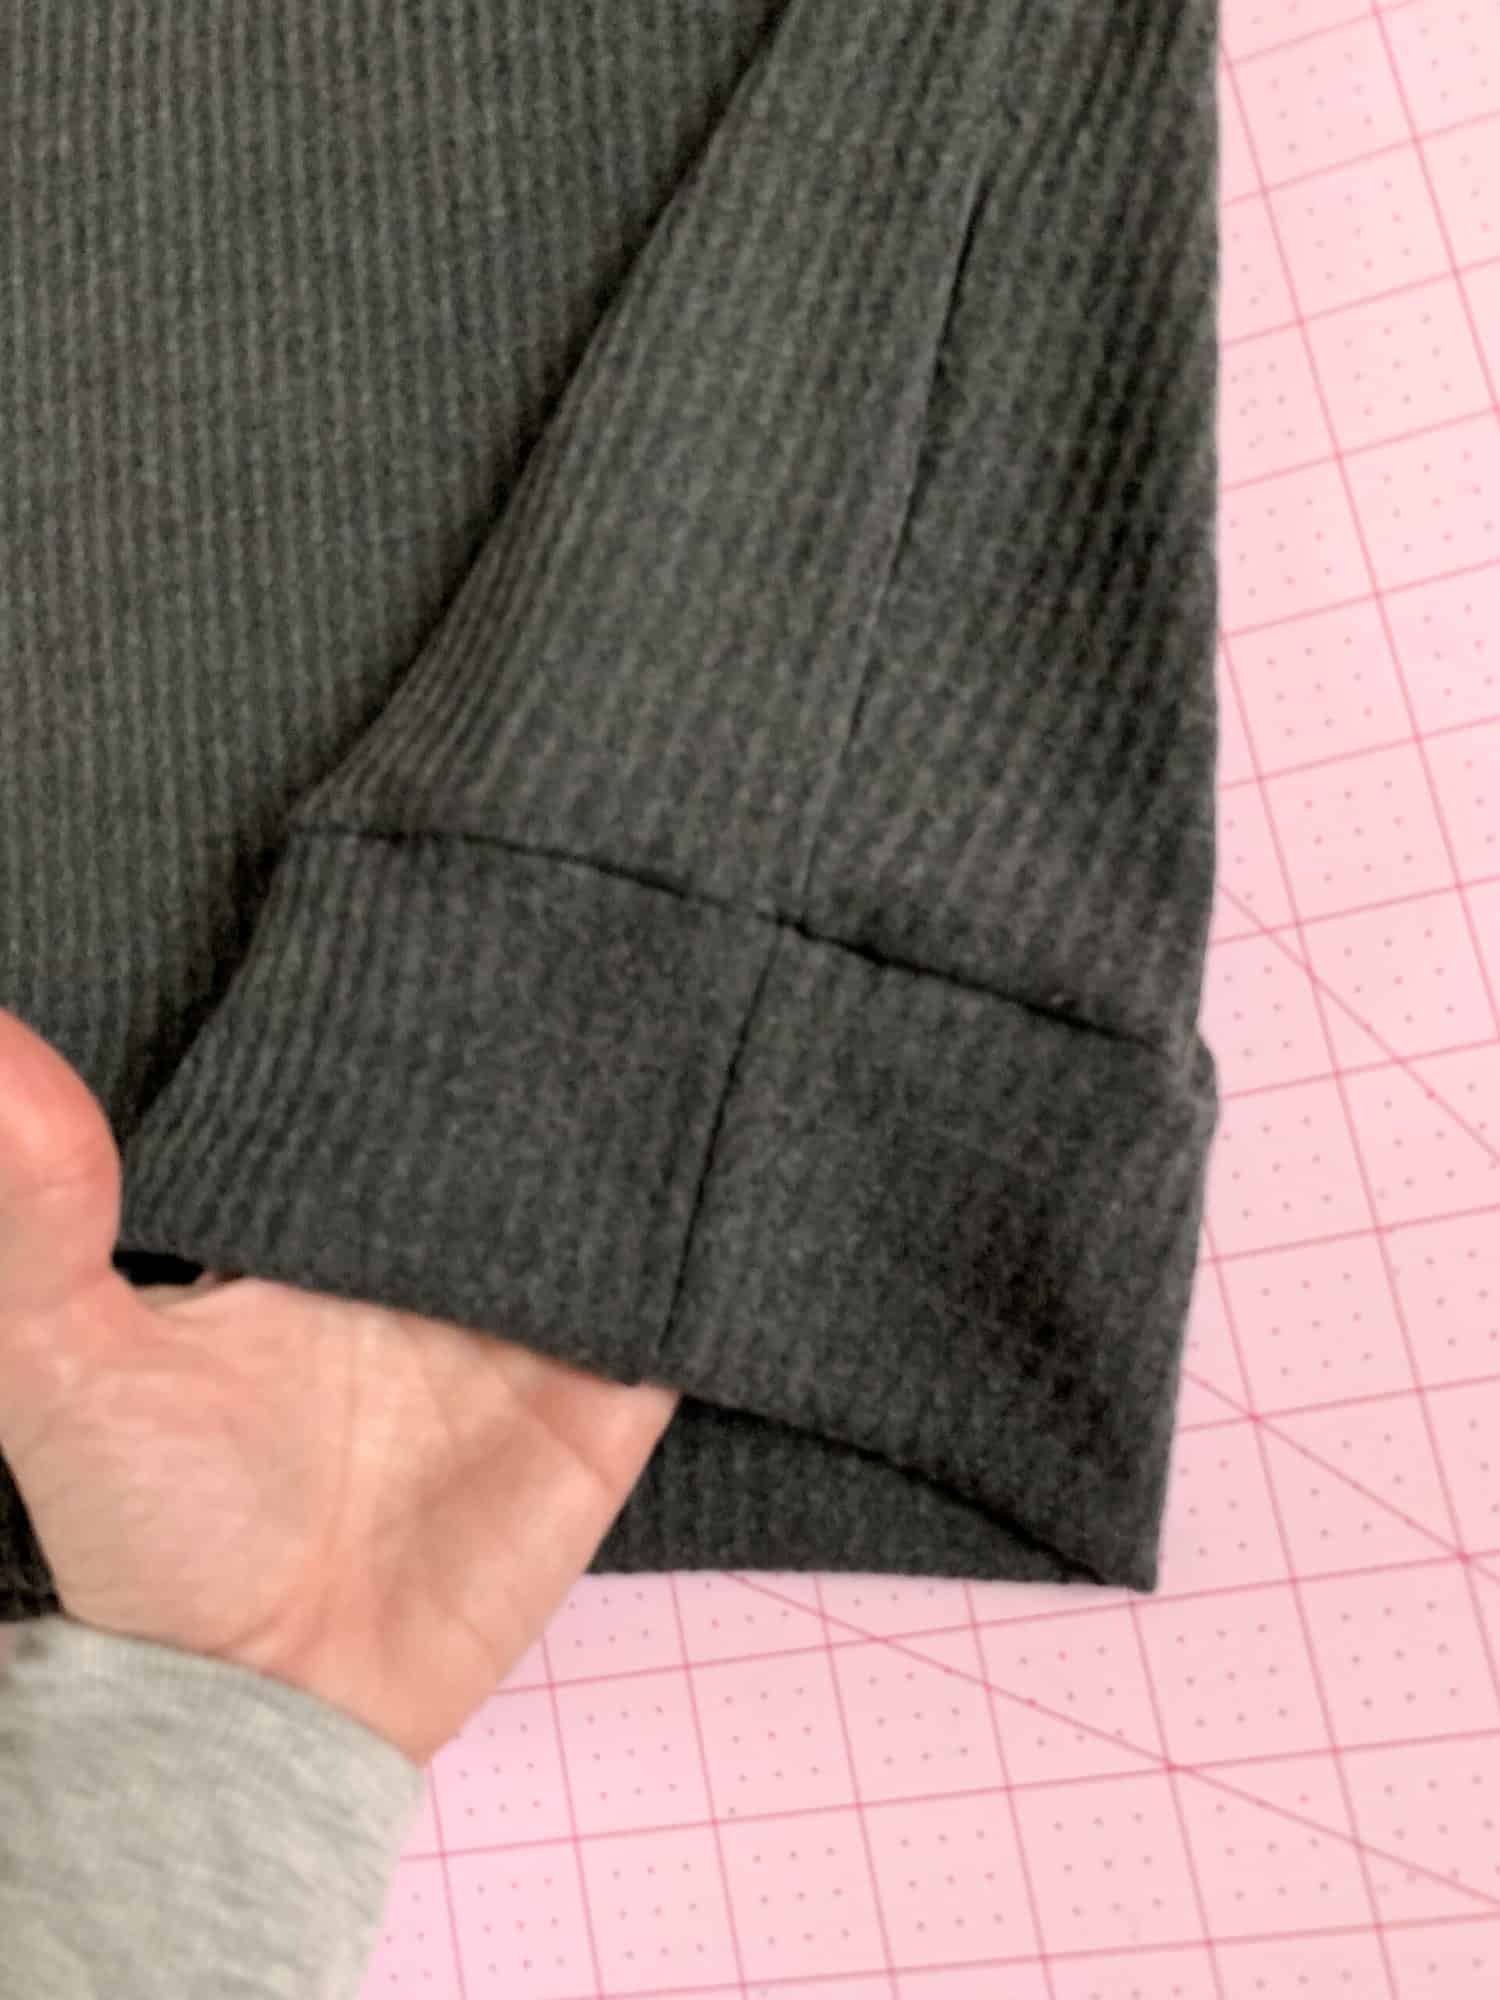
ALTERNATIVE HACK: If you prefer a longer short sleeve, you can band it instead of hemming it. Before sewing the side seams, measure the opening. Cut two bands 4″ tall by the measurement you just did. Sew each band in a loop (at the short ends) using 1/2″ seam allowance. Press length wise, wrong sides together. Sew the shirt side seams. Attach the cuffs to the sleeve opening, matching the side seam. Press and optionally top stitch the seam allowance towards the sleeve. There you have it! A cuffed short sleeve. 


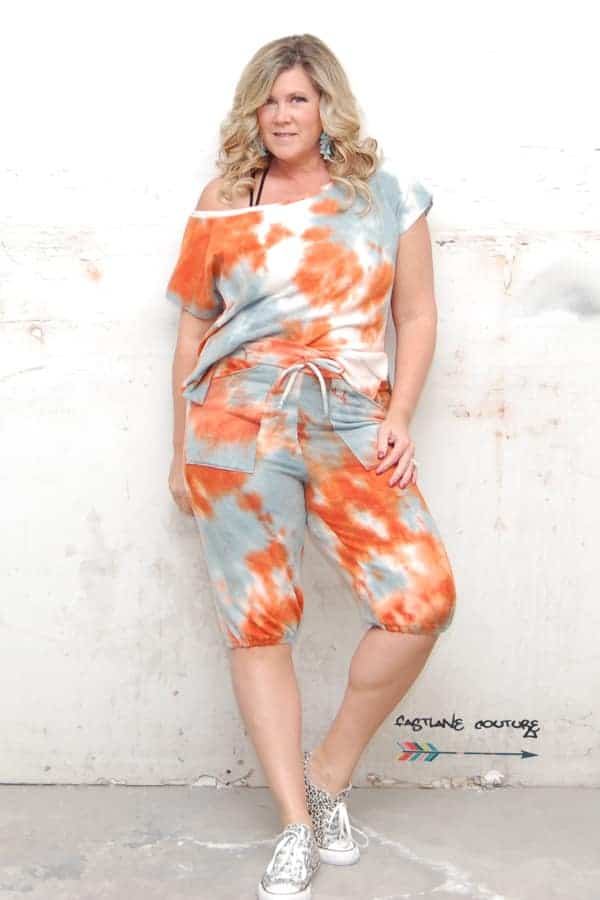
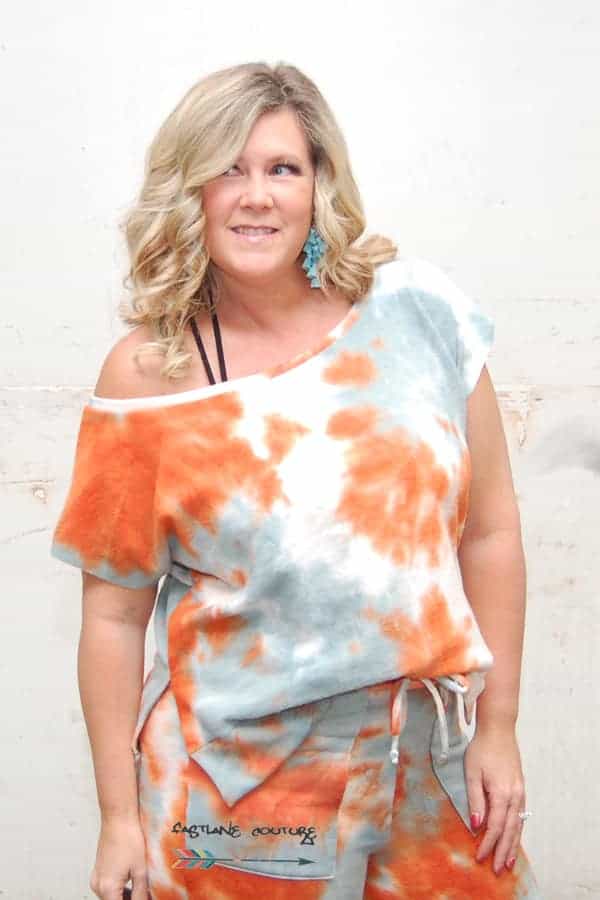
How adorable is Teri? She tested the Sweater Weather top and made herself a tie die short sleeve one too.


How fun and easy were these? We can’t wait to see your take on these hacks. Share your creations in the Patterns for Pirates FB group or on any social media platforms you use! 

Filed Under: Pattern Hacks, Pattern Release, Uncategorized 1 Comment

  • « Previous Page
  • 1
  • 2
  • 3
  • 4
  • 5
  • Next Page »
Privacy & Cookies: This site uses cookies. By continuing to use this website, you agree to their use.

To find out more, including how to control cookies, see here: Cookie Policy
  • Privacy Policy
  • Refund Policy
  • Contact Us
  • About

Copyright © 2026 Patterns for Pirates

Copyright © 2026 · Genesis Framework · WordPress · Log in