Patterns for Pirates

P4P stylish, modern, wearable patterns

  • Home
  • Blog
    • Frequently Asked Questions
    • Pattern Releases
      • Free Patterns
    • P4P University
      • Fitting
      • Sewing with Stretch, Knit Fabrics
      • Sewing with Woven Fabrics
      • Sewing Machines
    • Sew-A-Longs
    • Fabric for Pirates
    • Pattern Hacks
    • Announcement
      • Blog Tours
      • Contest/Giveaway
  • Shop
  • Bundle Discounts
  • Gift Cards
  • My Account
  • Cart

P4P Cardi Week:: Butterfly Ruffle

January 22, 2017

butterfly-ruffle-main

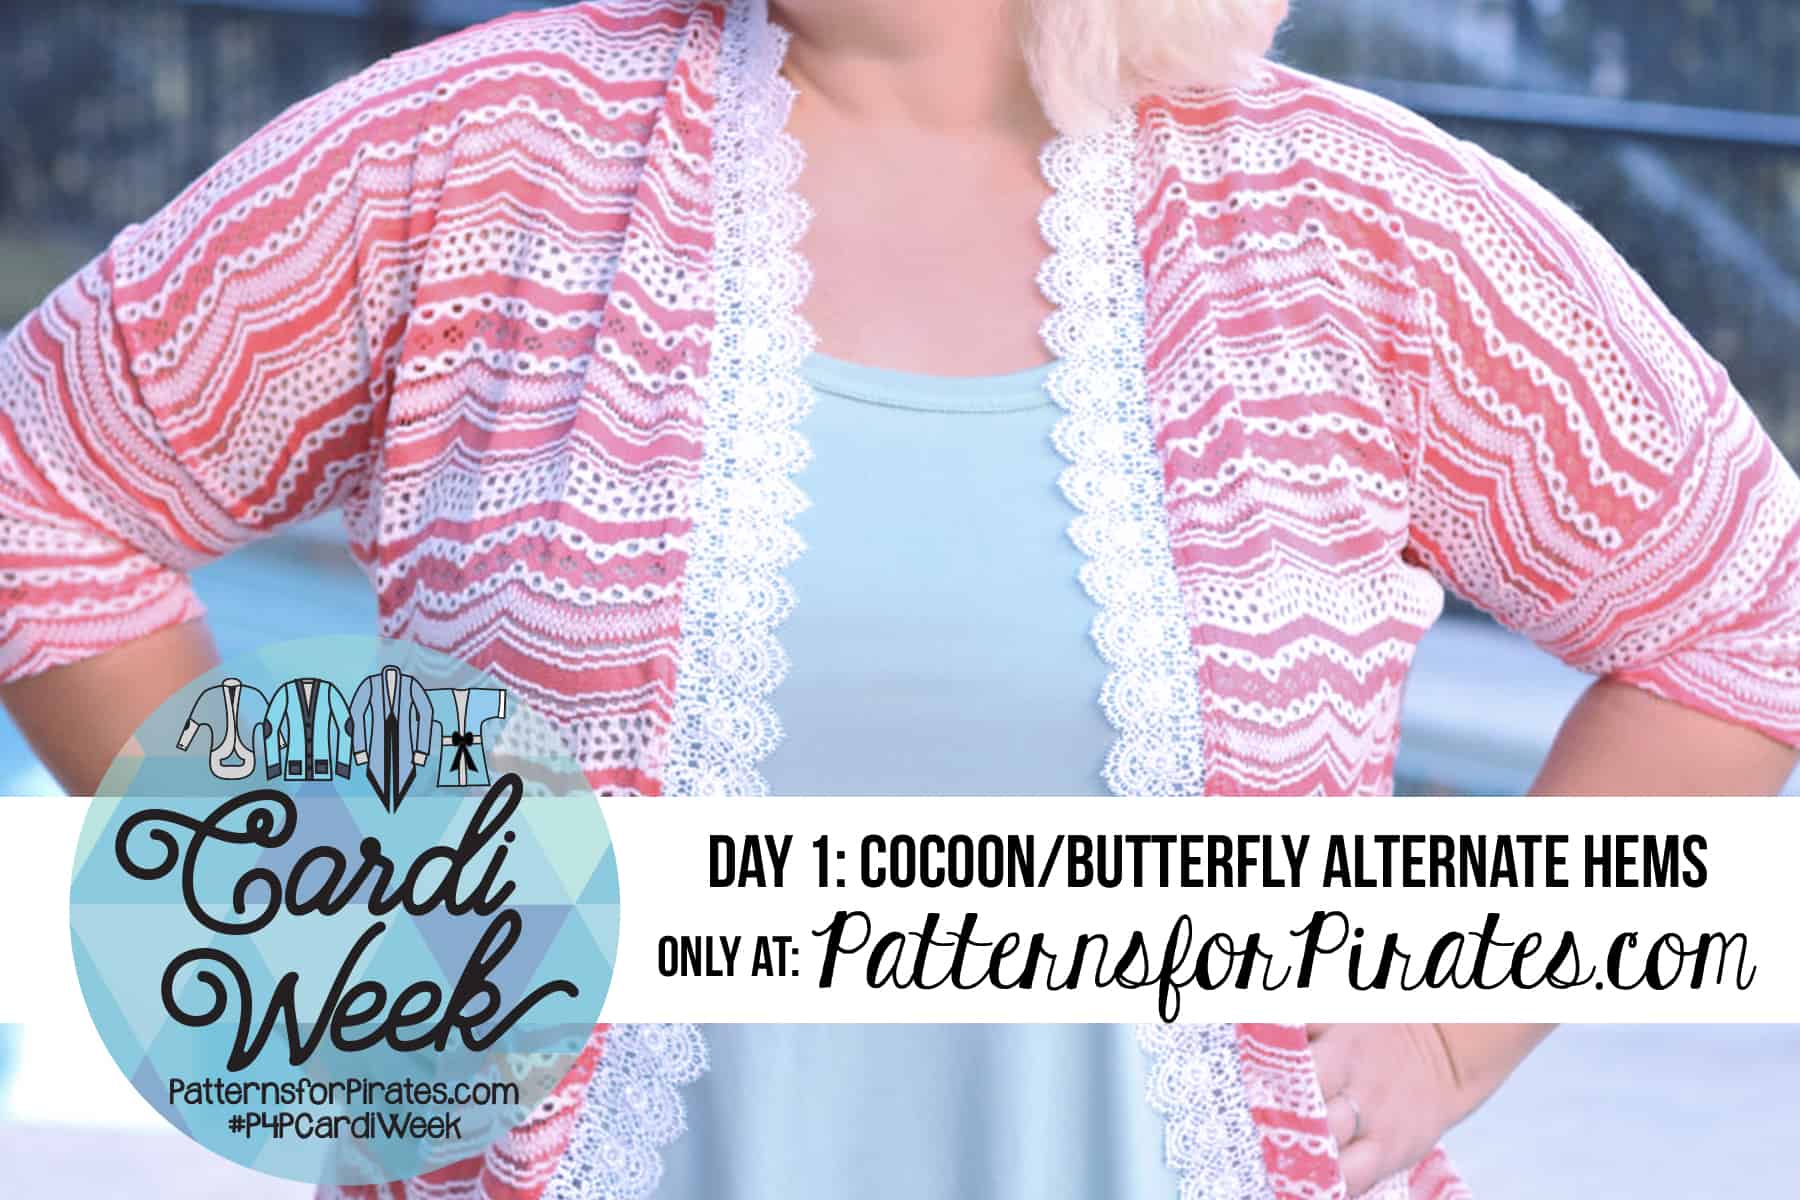
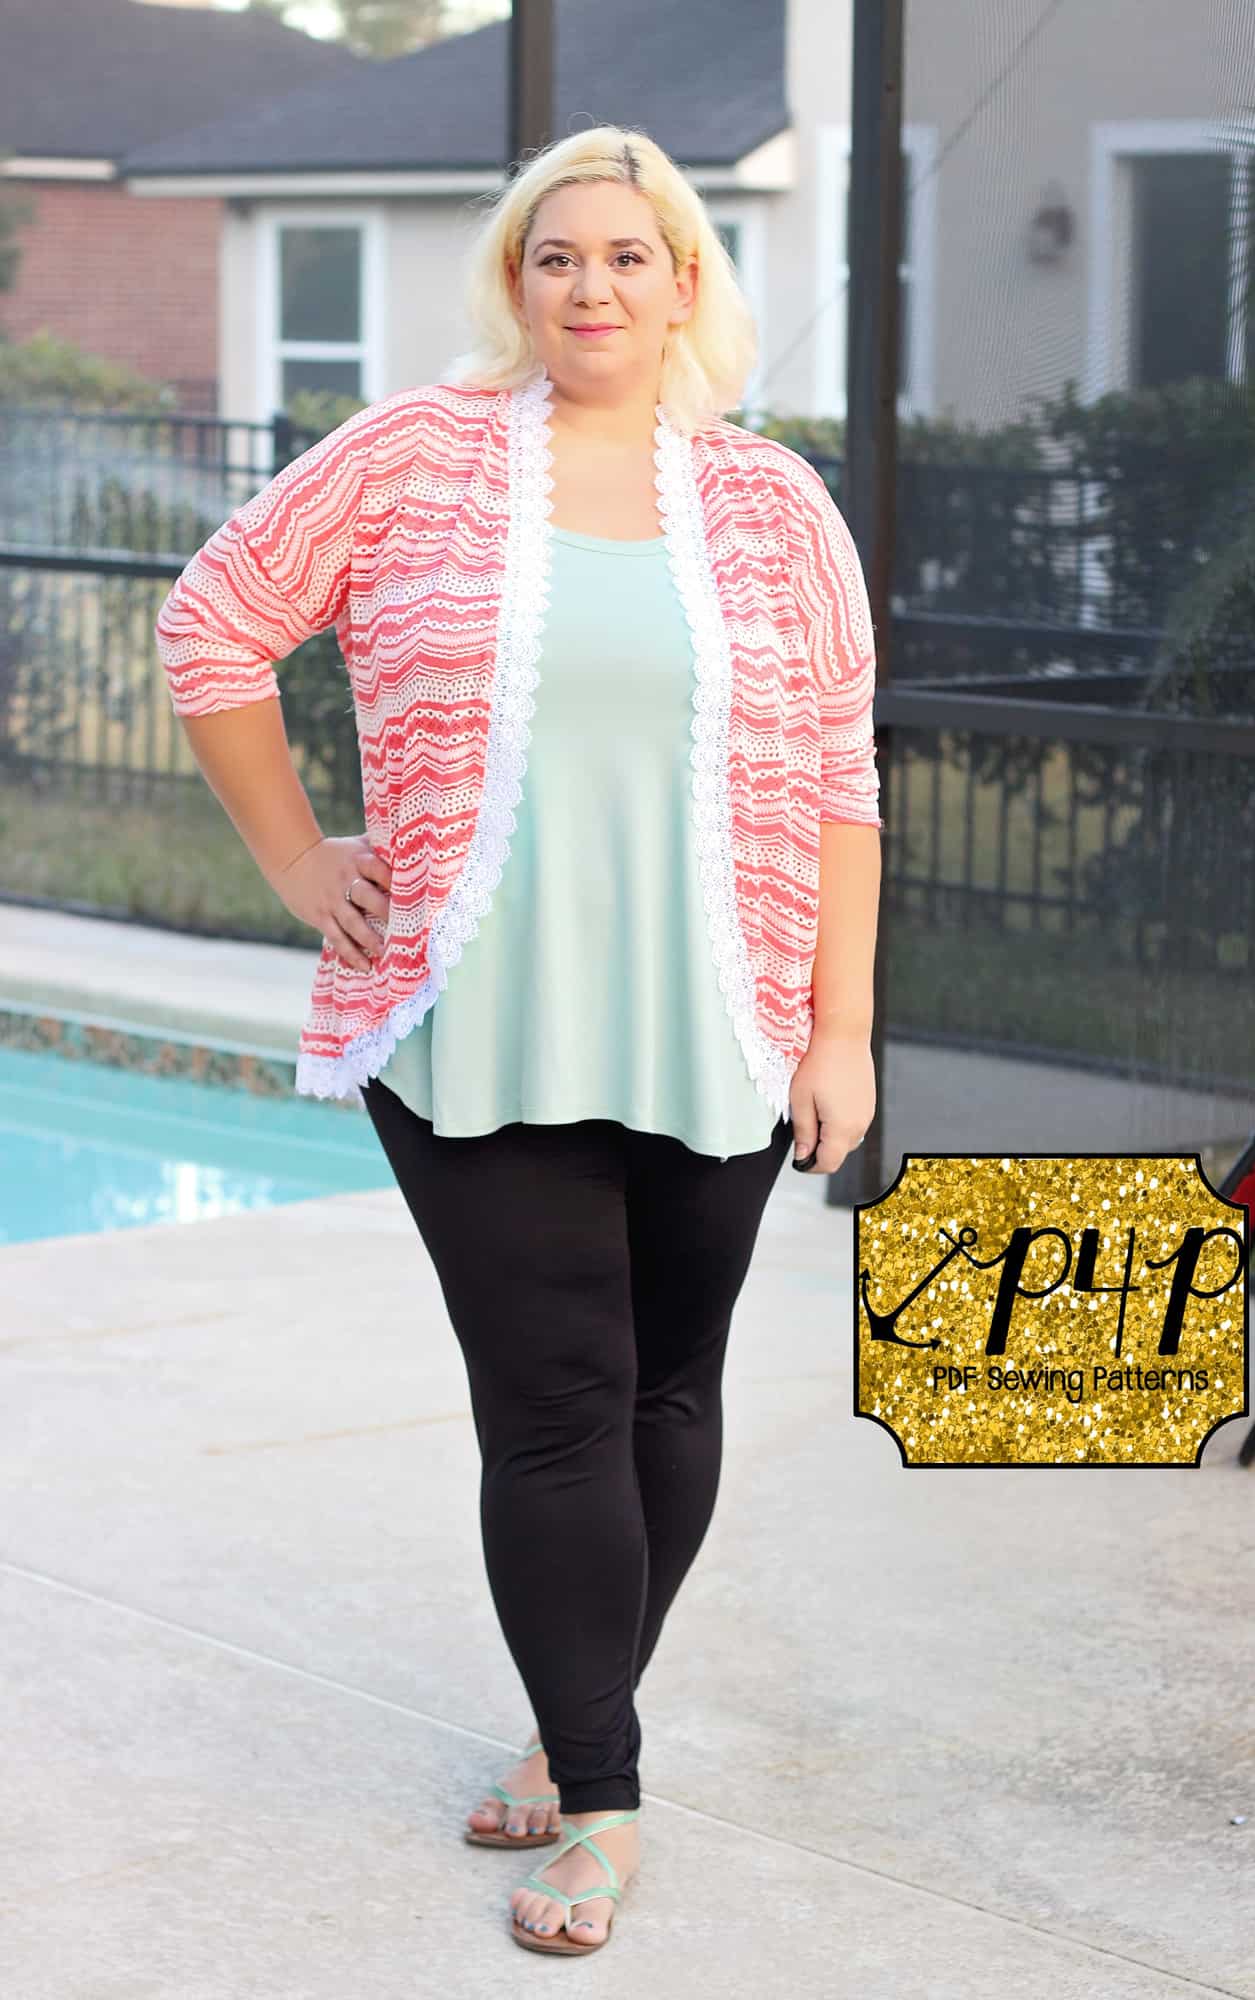
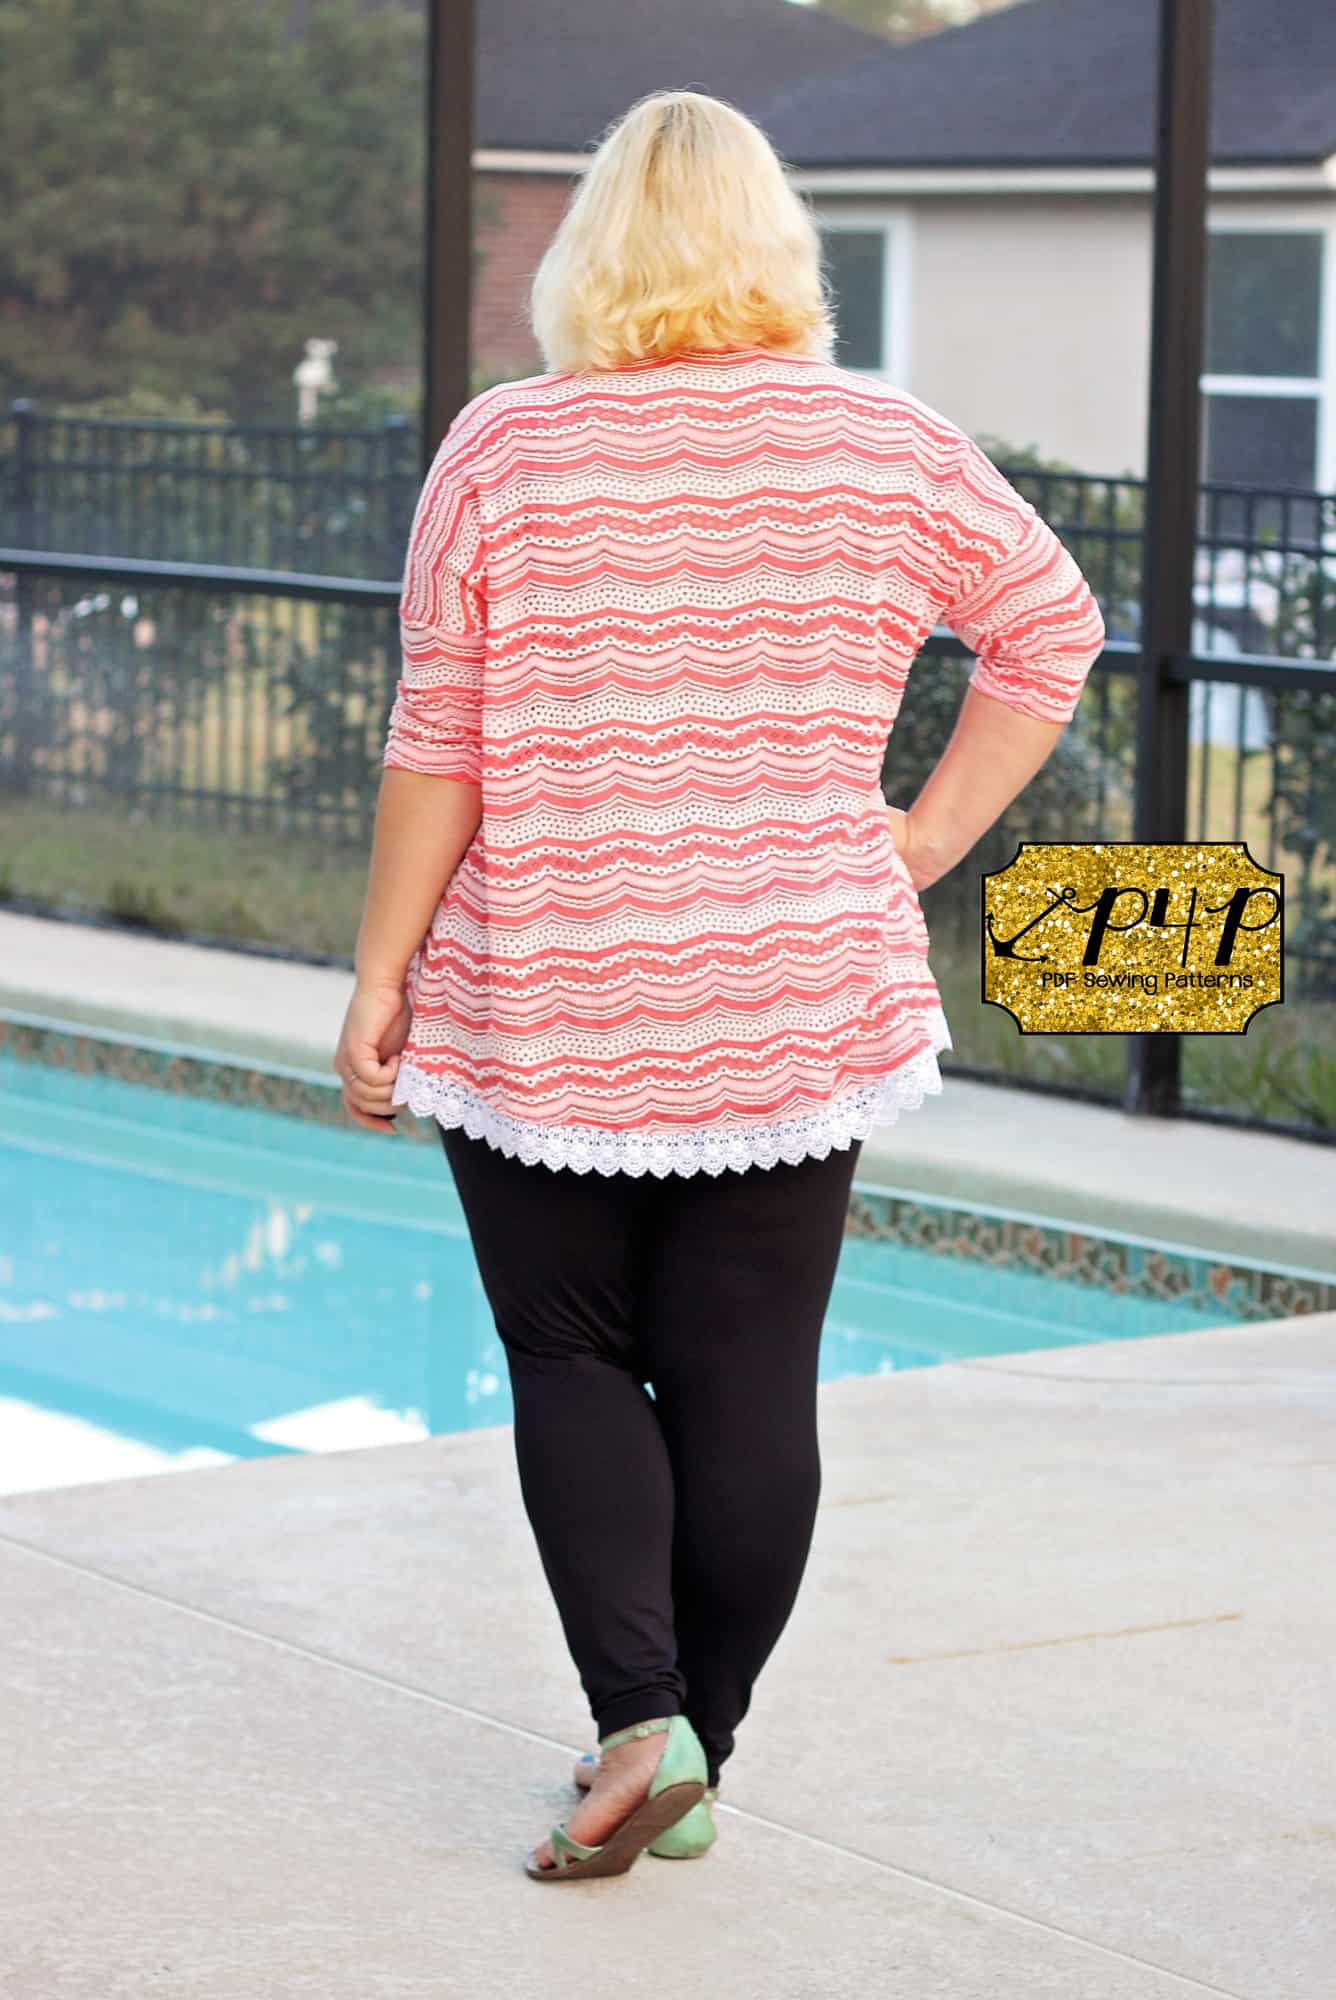
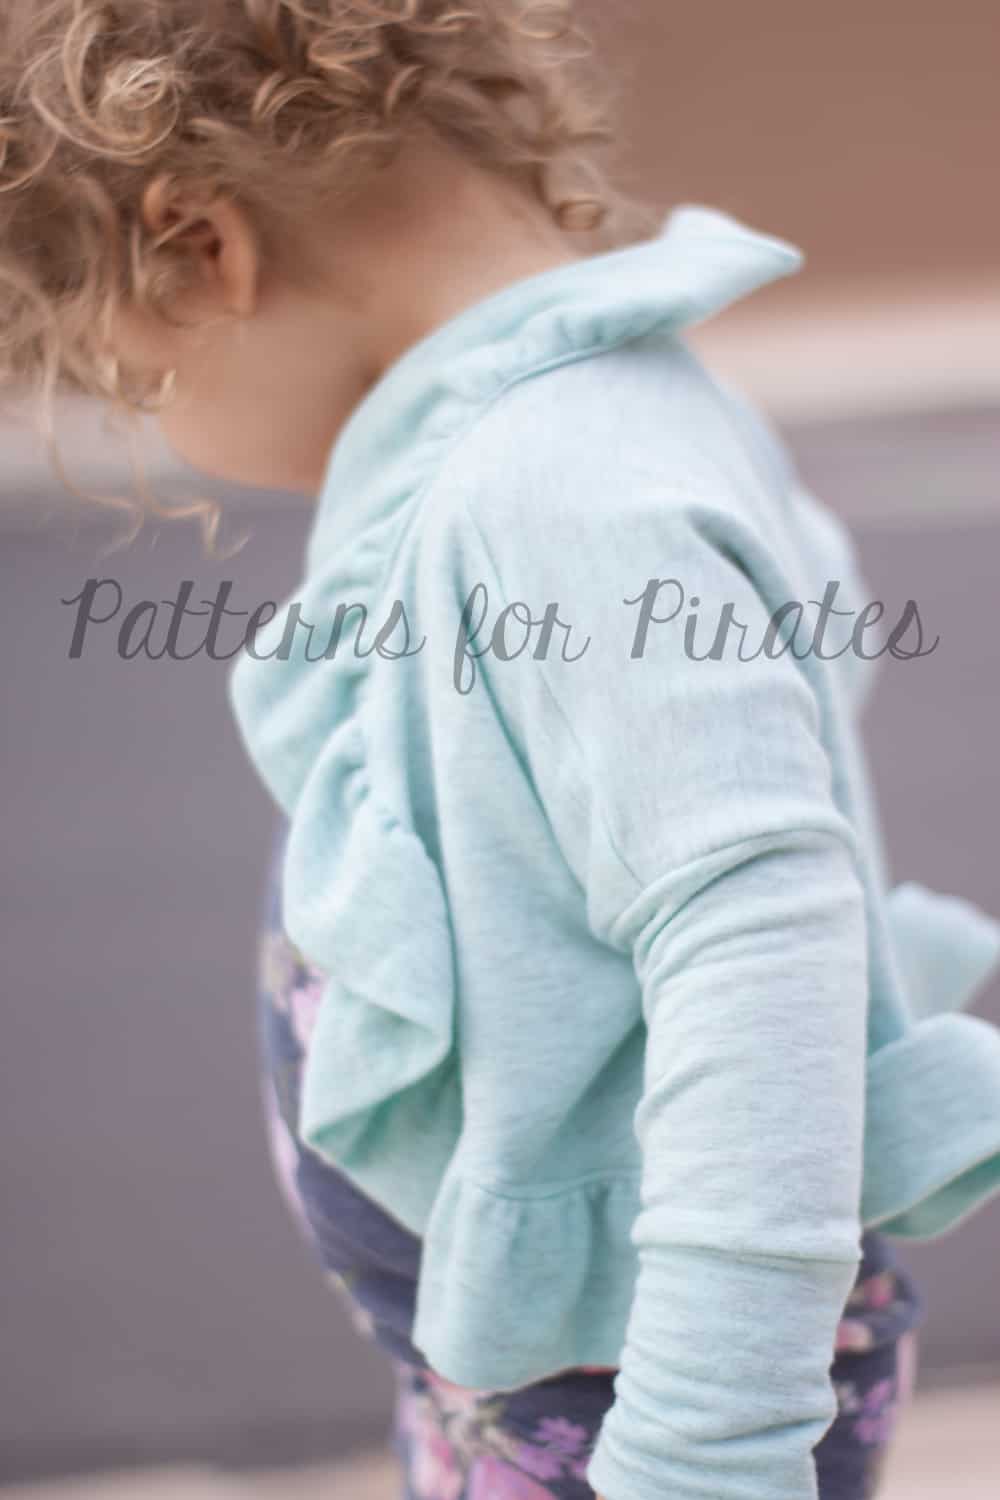
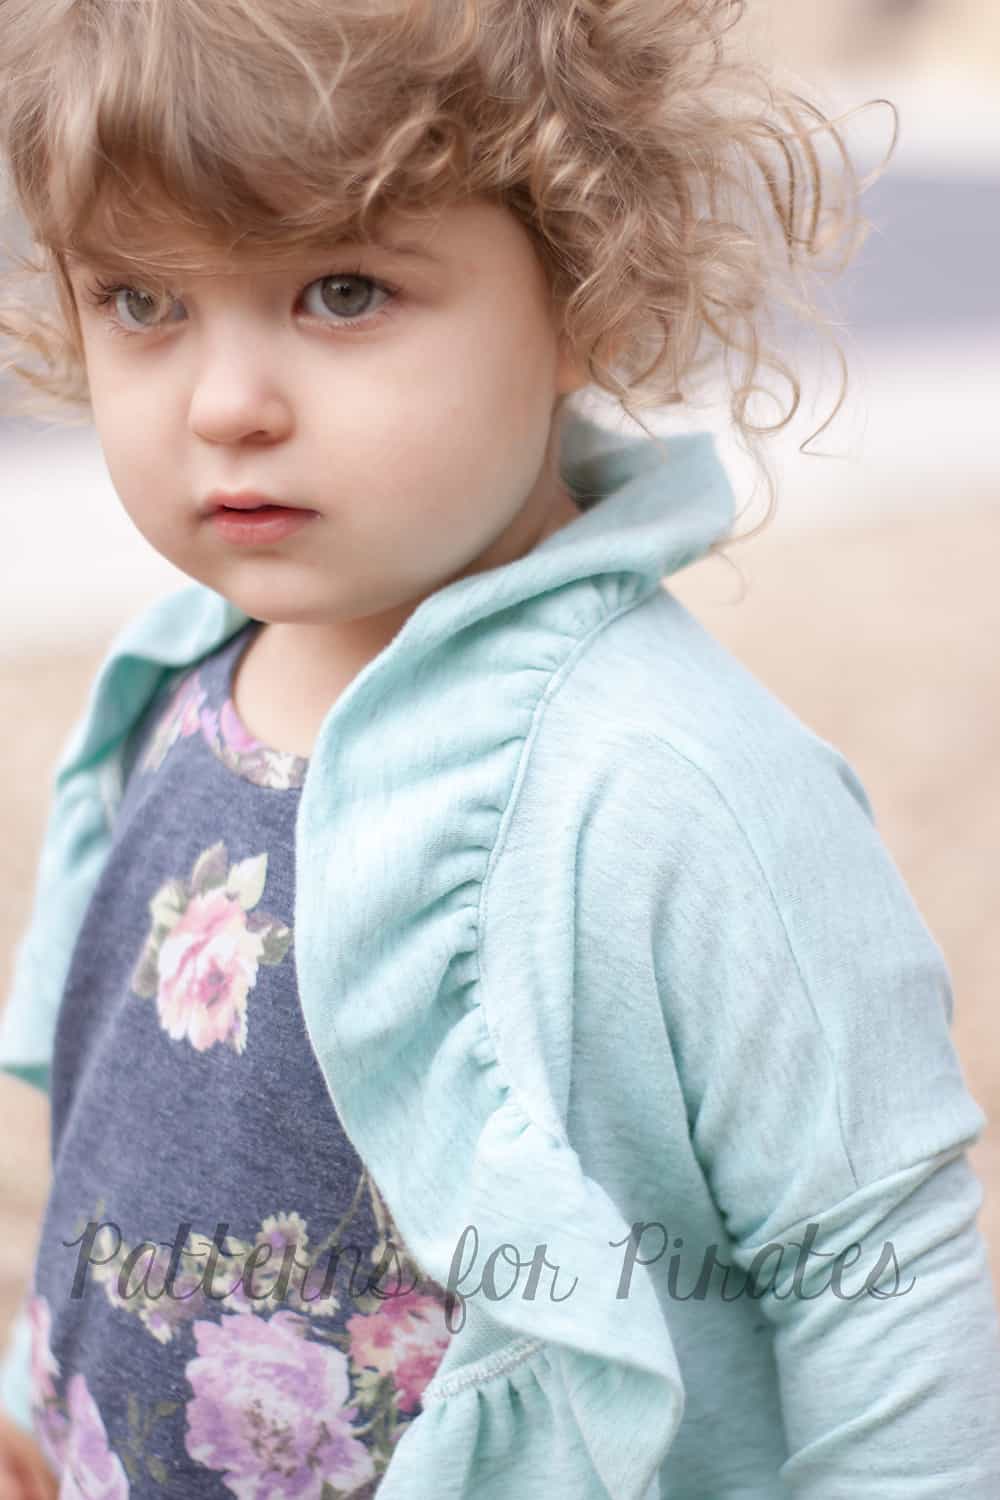
Last week we released the Butterfly Cardigan, the mini version of the Cocoon Cardigan and is so cute on the younger girls.  In case you missed the round up post, check it out HERE.  To add some extra girly details to the Butterfly, we thought why not add a ruffle? We’ve had a similar cardigan pinned as inspiration for awhile so here’s our take on it.

The construction of the main cardigan (body, lower sleeve and cuffs (if chosen) remains the same, however, you will need to cut longer neckbands. You will then ruffle the band and attach in the same manner as you do for the original cardigan.  Depending on the thickness of the fabric you are using, you will want to adjust the amount you multiply the band measurements by.  I used a thinner rayon French Terry spandex so went with 2.5 times the band measurements listed in the cut chart of the tutorial.  Use 2.5 to 3 times the width for thinner fabrics (rayon spandex, cotton lycra, etc) and 2 to 2.5 times the width for thicker fabrics (sweater knits and French Terry).

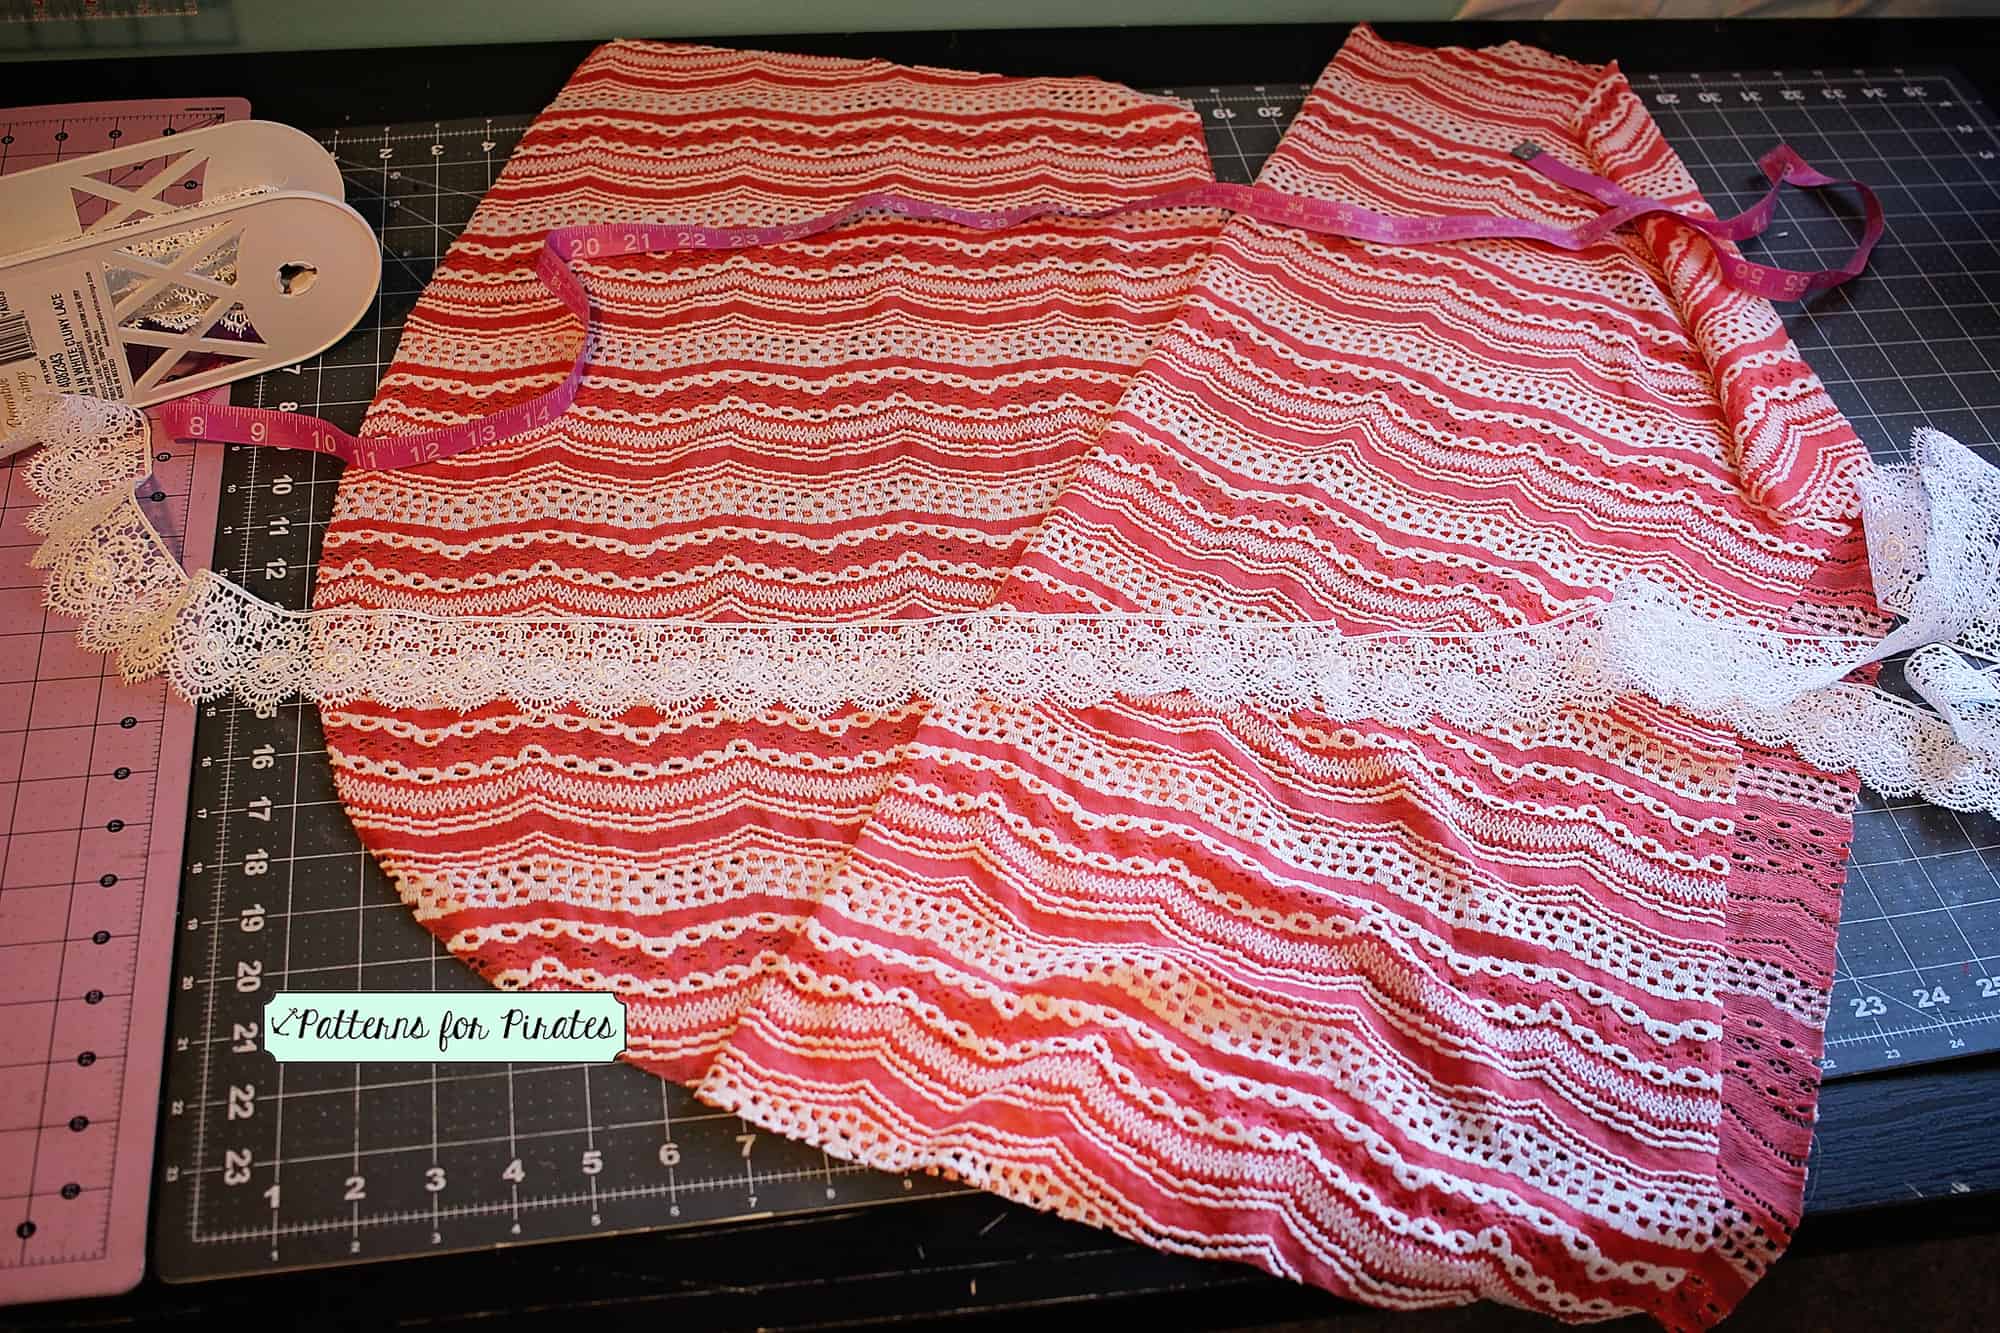
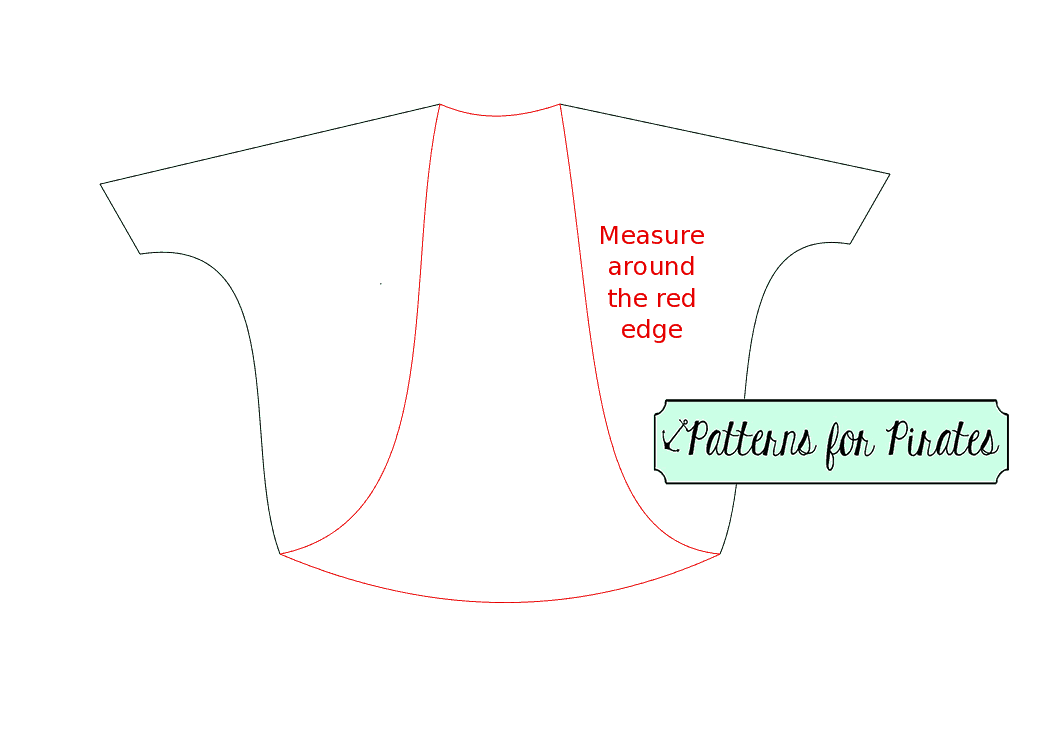
  • My original width measurements for a size 2 are as follows:  Cropped front band: 31.5″  /  Cropped back band: 13″  – Multiply by 2.5
  • My ruffle width measurements are as follows: Cropped front band: 78.75″  /  Cropped back band: 32.5″.  Since most knits are only 58″-60″ wide I will need to piece my front band so I chose to divide in half so will have equal pieces.   I will now cut 2 front bands 39.5″ (I rounded up for the simplicity of cutting).  Use the same length as indicated in the pattern.  ( I added 1/2″ to mine but in hindsight should have kept it to the original 4″ for her size.  The top neck tends to flop backwards too much with the weight of the extra height and ruffle.)
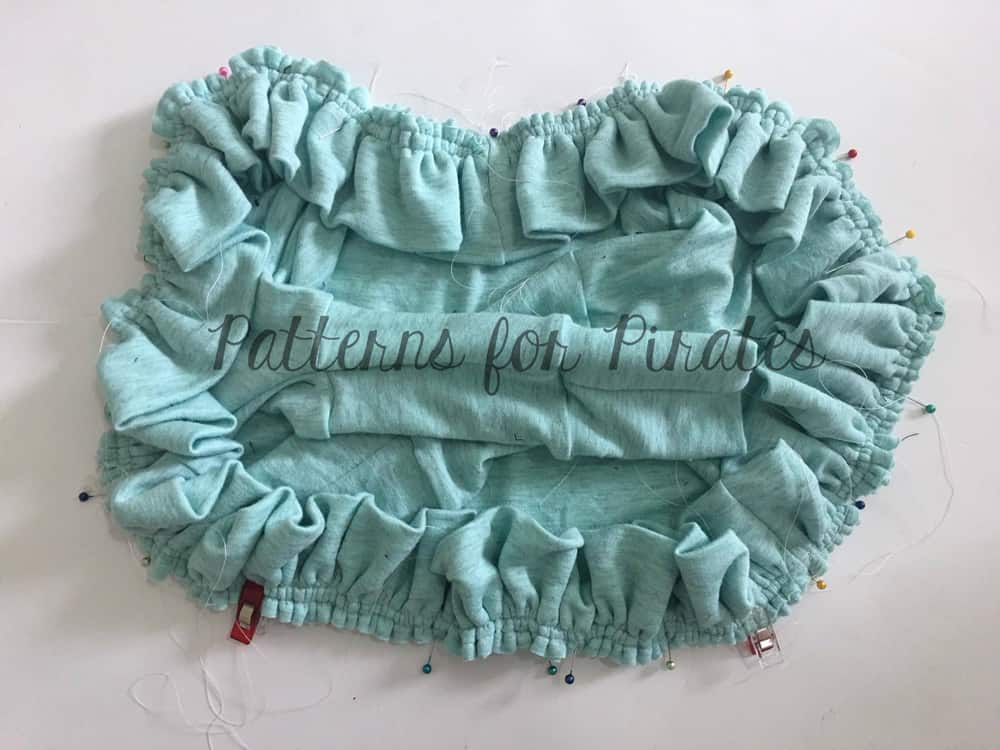
CREATING THE RUFFLE

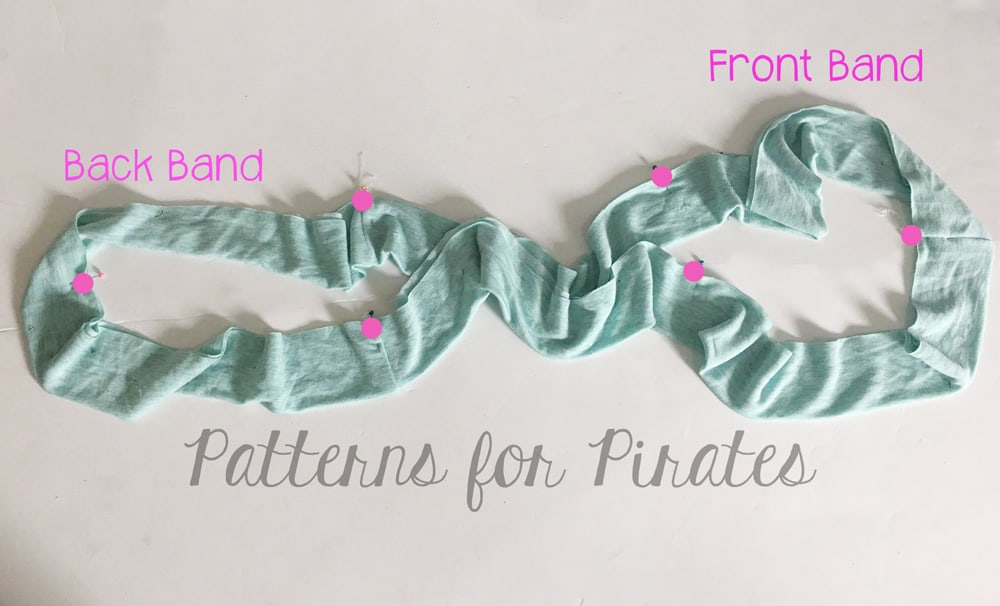
1.  Stitch short ends of front and back bands, creating a circle.
butterfly-ruffle1a


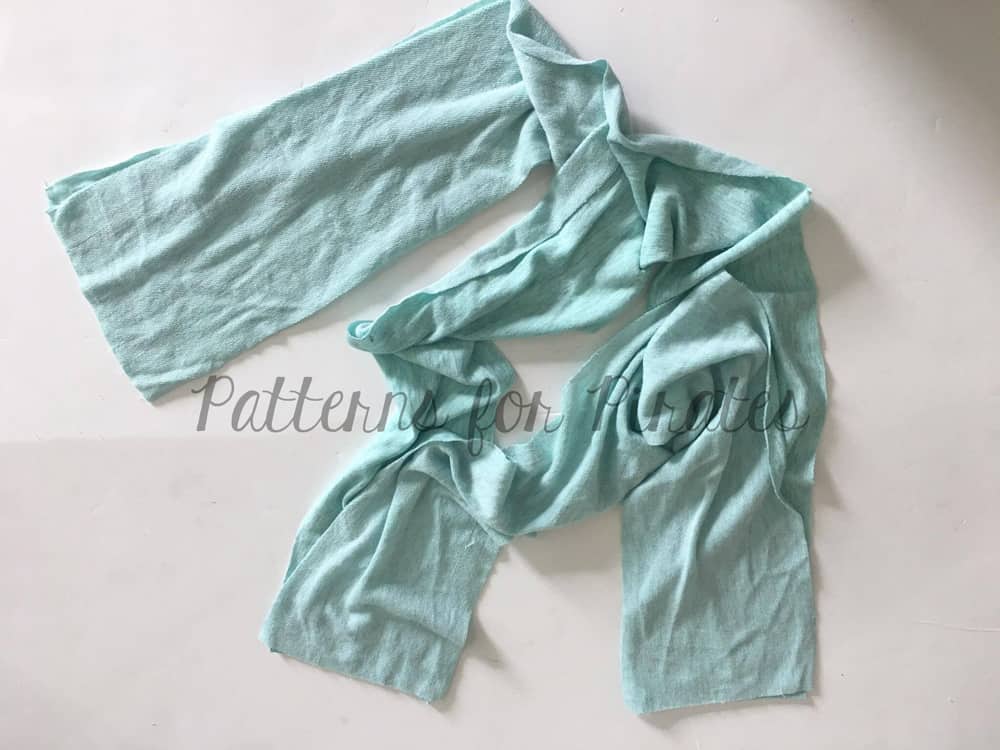
2. Fold in half lengthwise, wrong sides together and press. Mark the midpoint of front and back bands.  This will make it easier to match and attach your ruffle to the cardigan.


butterfly-ruffle4a

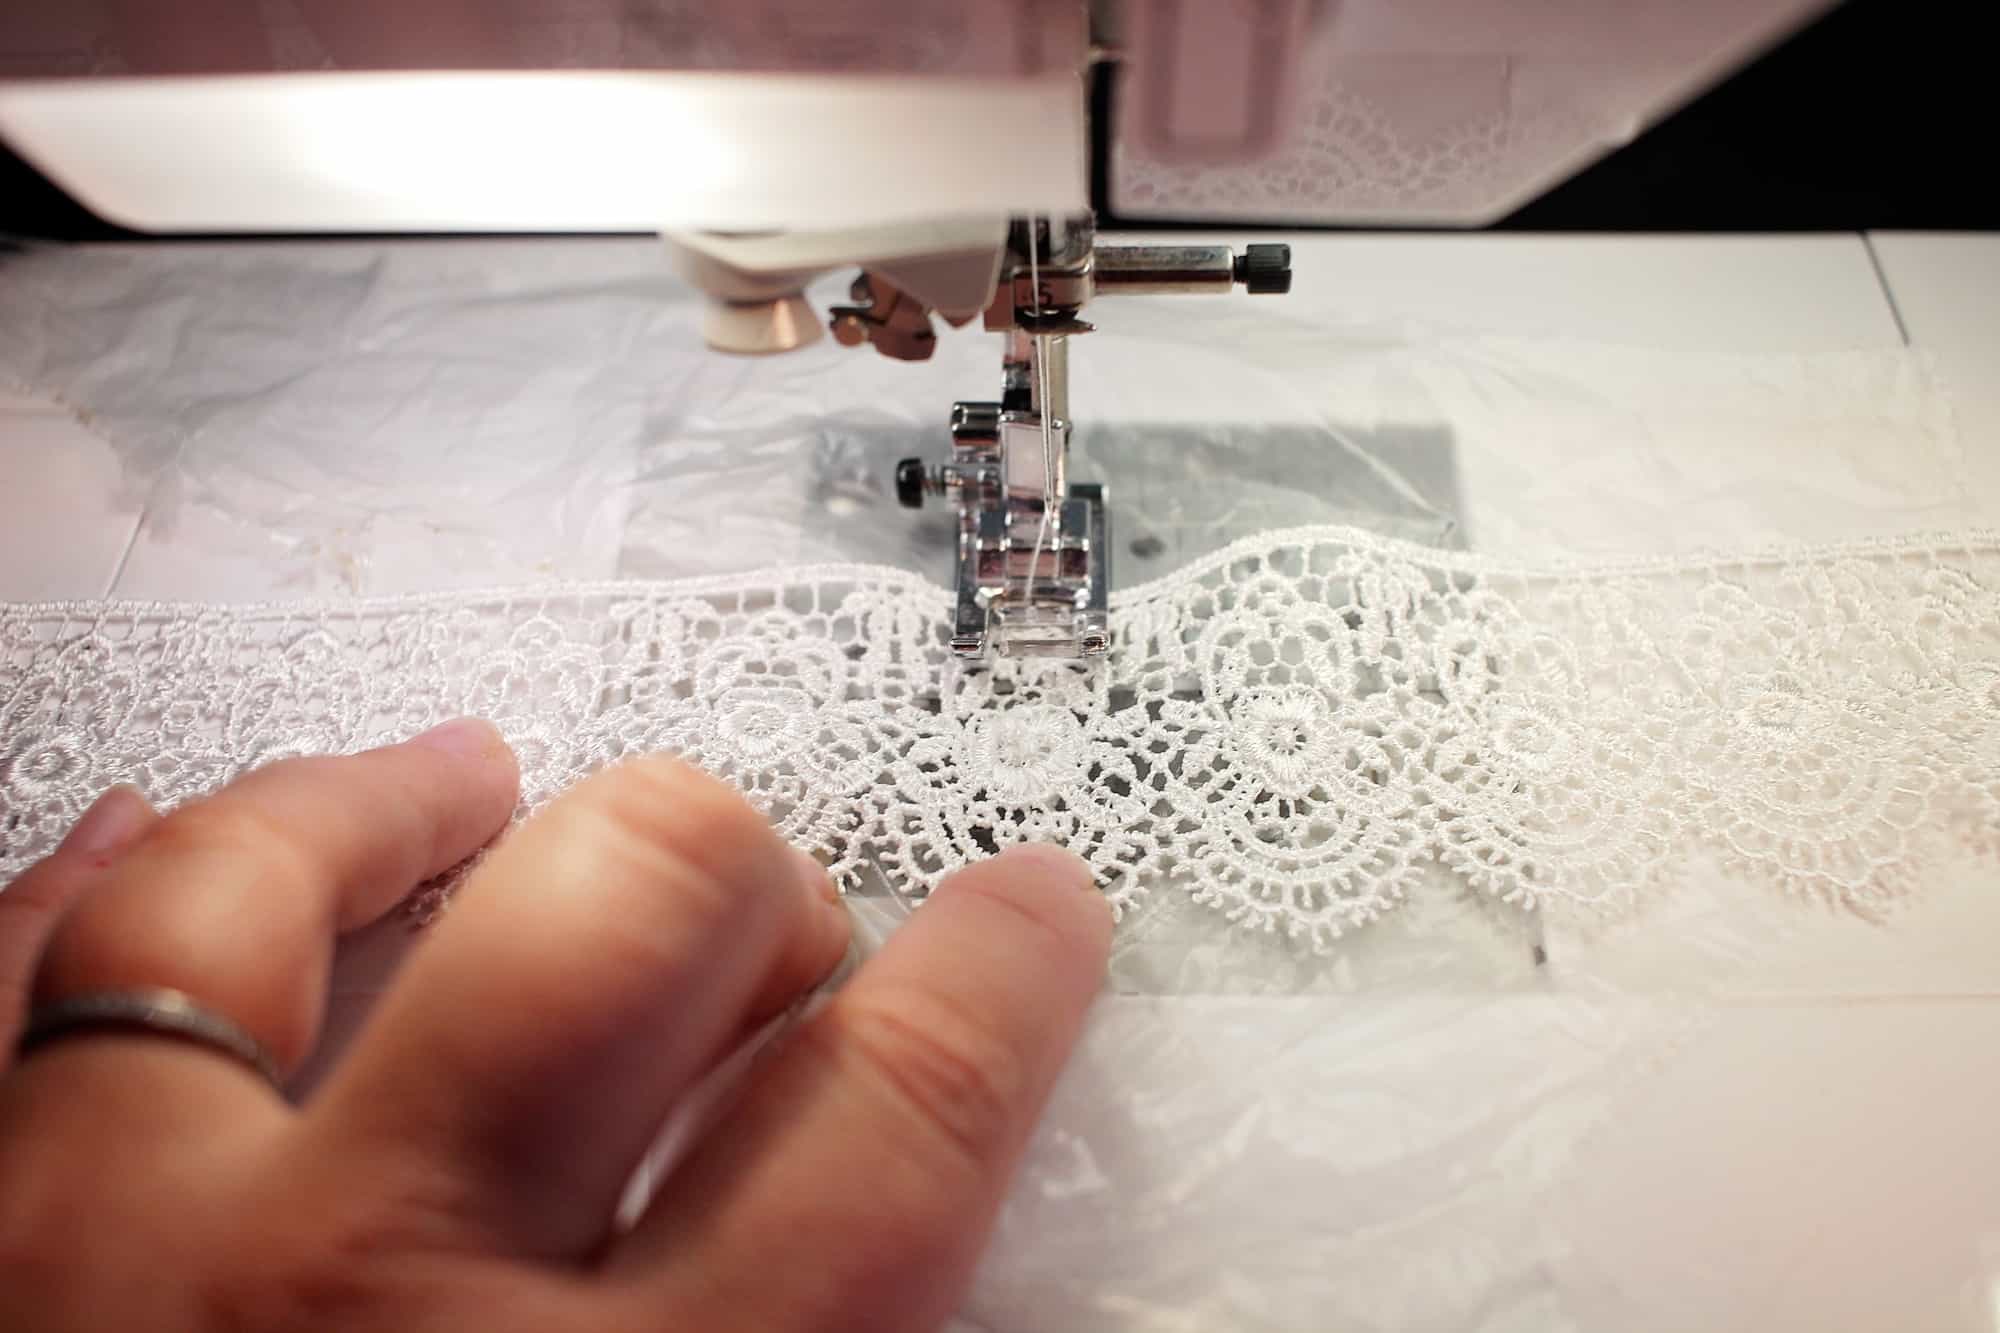
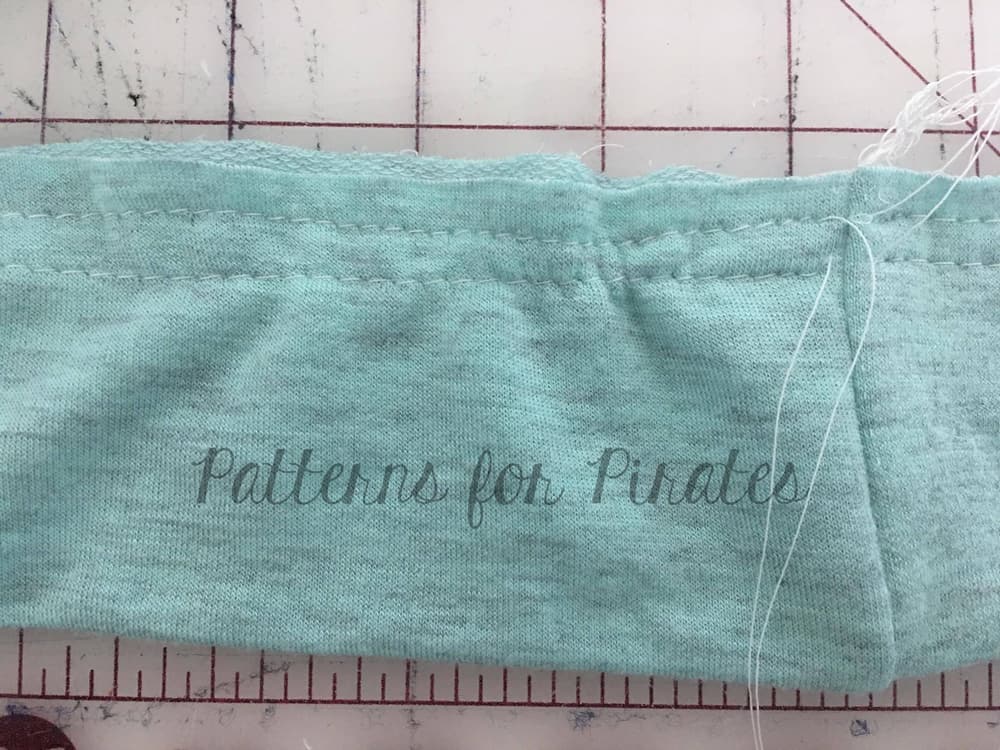
3. Stitch a gathering/basting stitch (set your stitch length to the longest possible on your machine) at 3/8″ and 5/8″ from raw edge.  Do not skip out on the second row of stitches.  I promise, that extra step is worth it!  You will have more even gathers and if one line of stitching breaks you have a backup without having to redo them.  I also like to gather in shorter sections so will stop and start at each seam of the band.  Be sure to leave a thread tail for easy pulling later.

butterfly-ruffle1

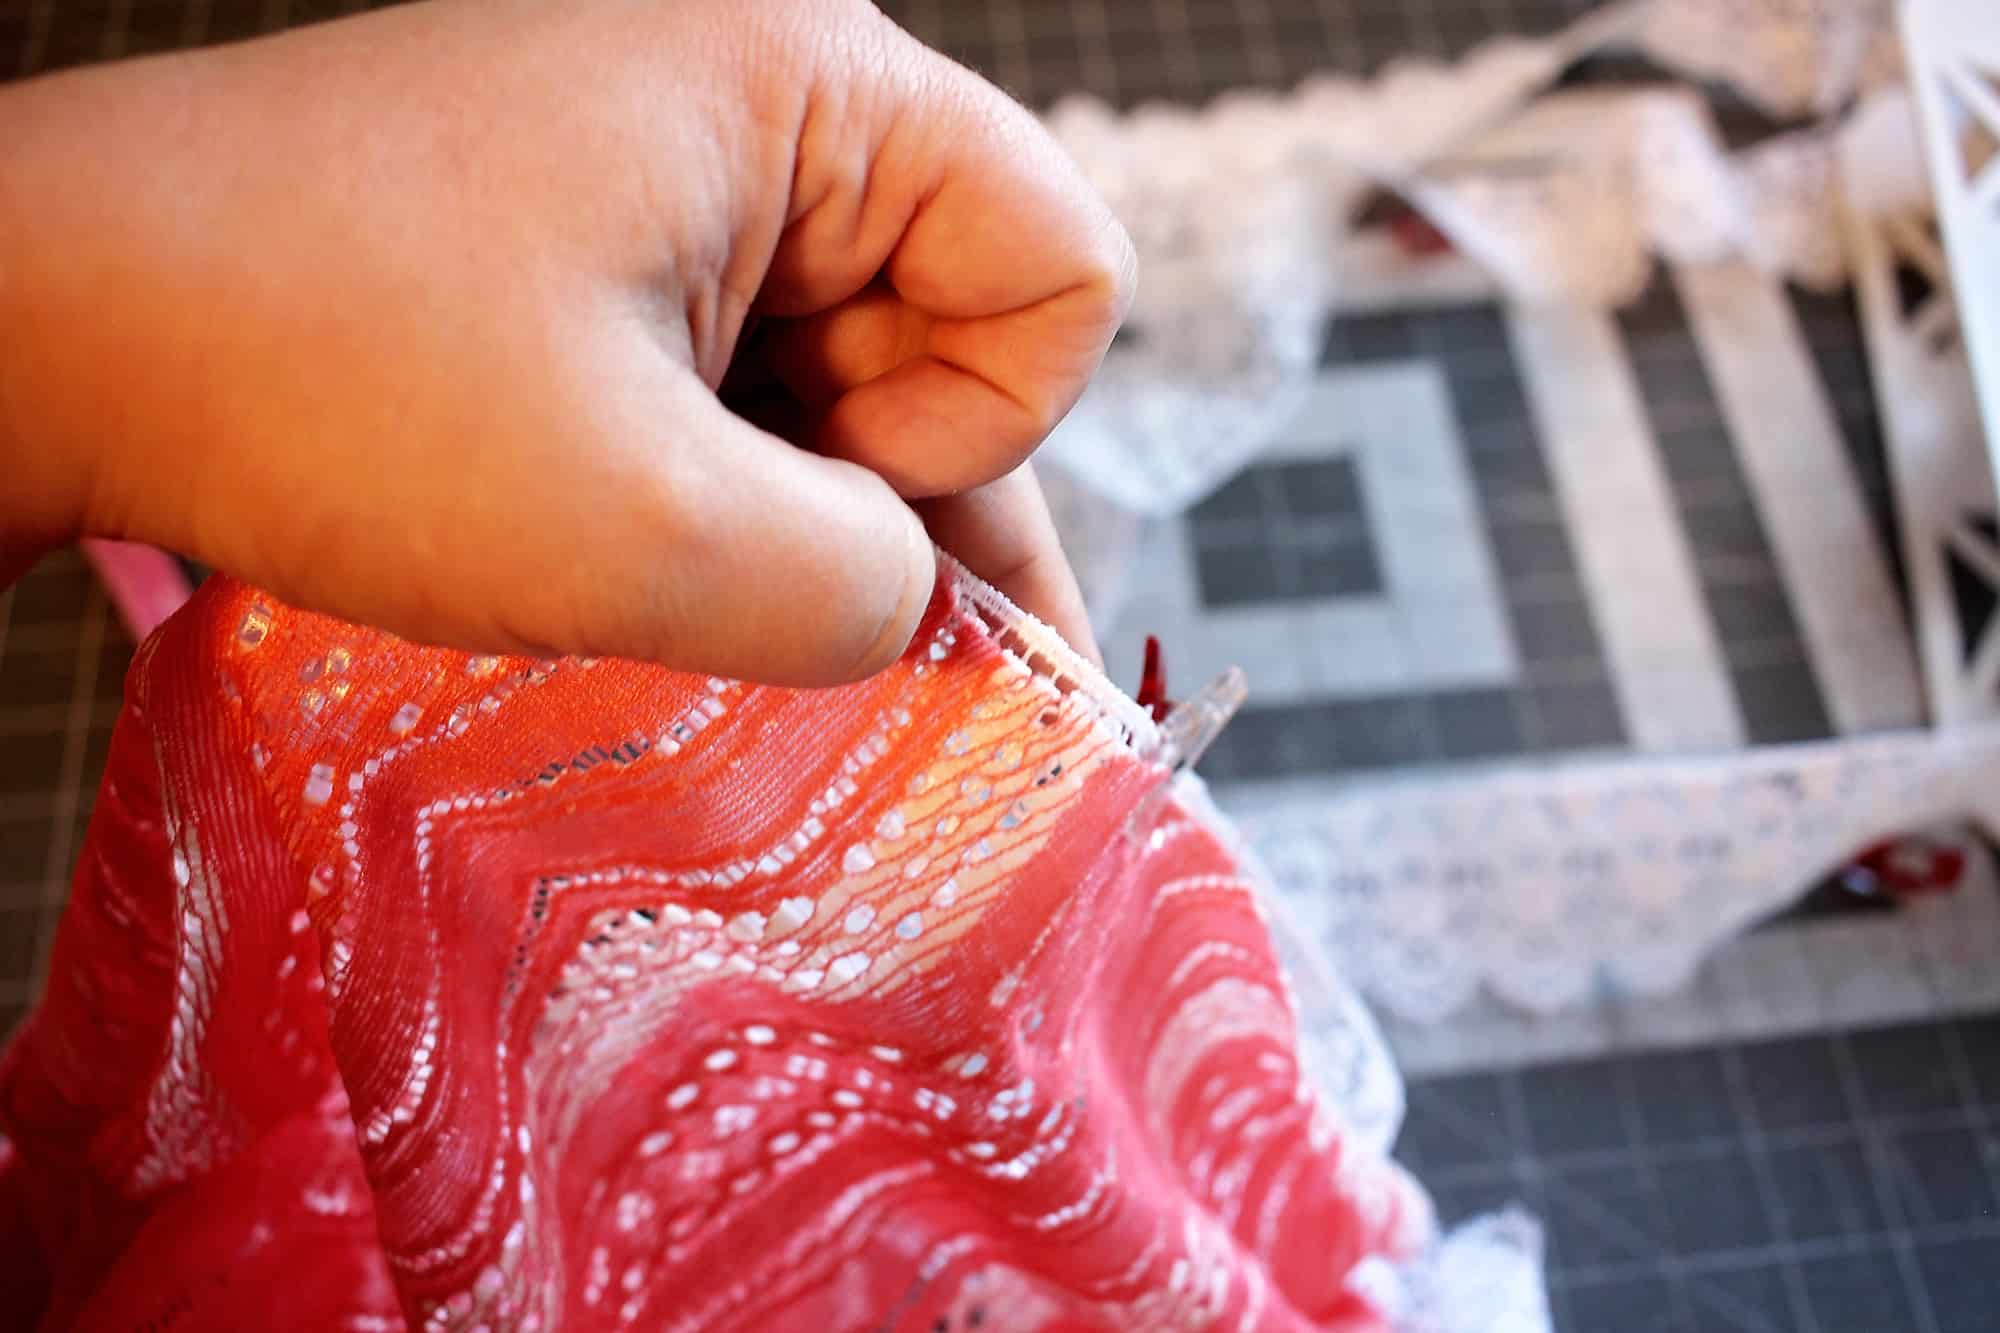
4. Match raw edges and align the side seams of the cardigan to the seam of the band.  Pin/Clip in place.  Match raw edges and align the seam of the front neckband to center back neckline.  Pin/Clip in place.

butterfly-ruffle3

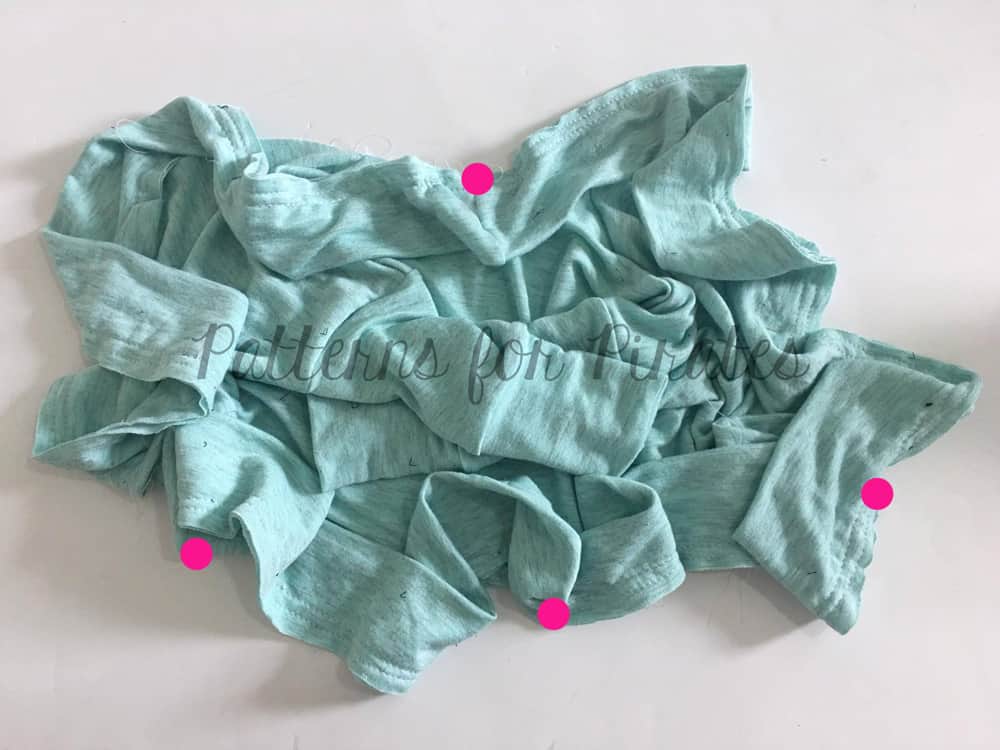
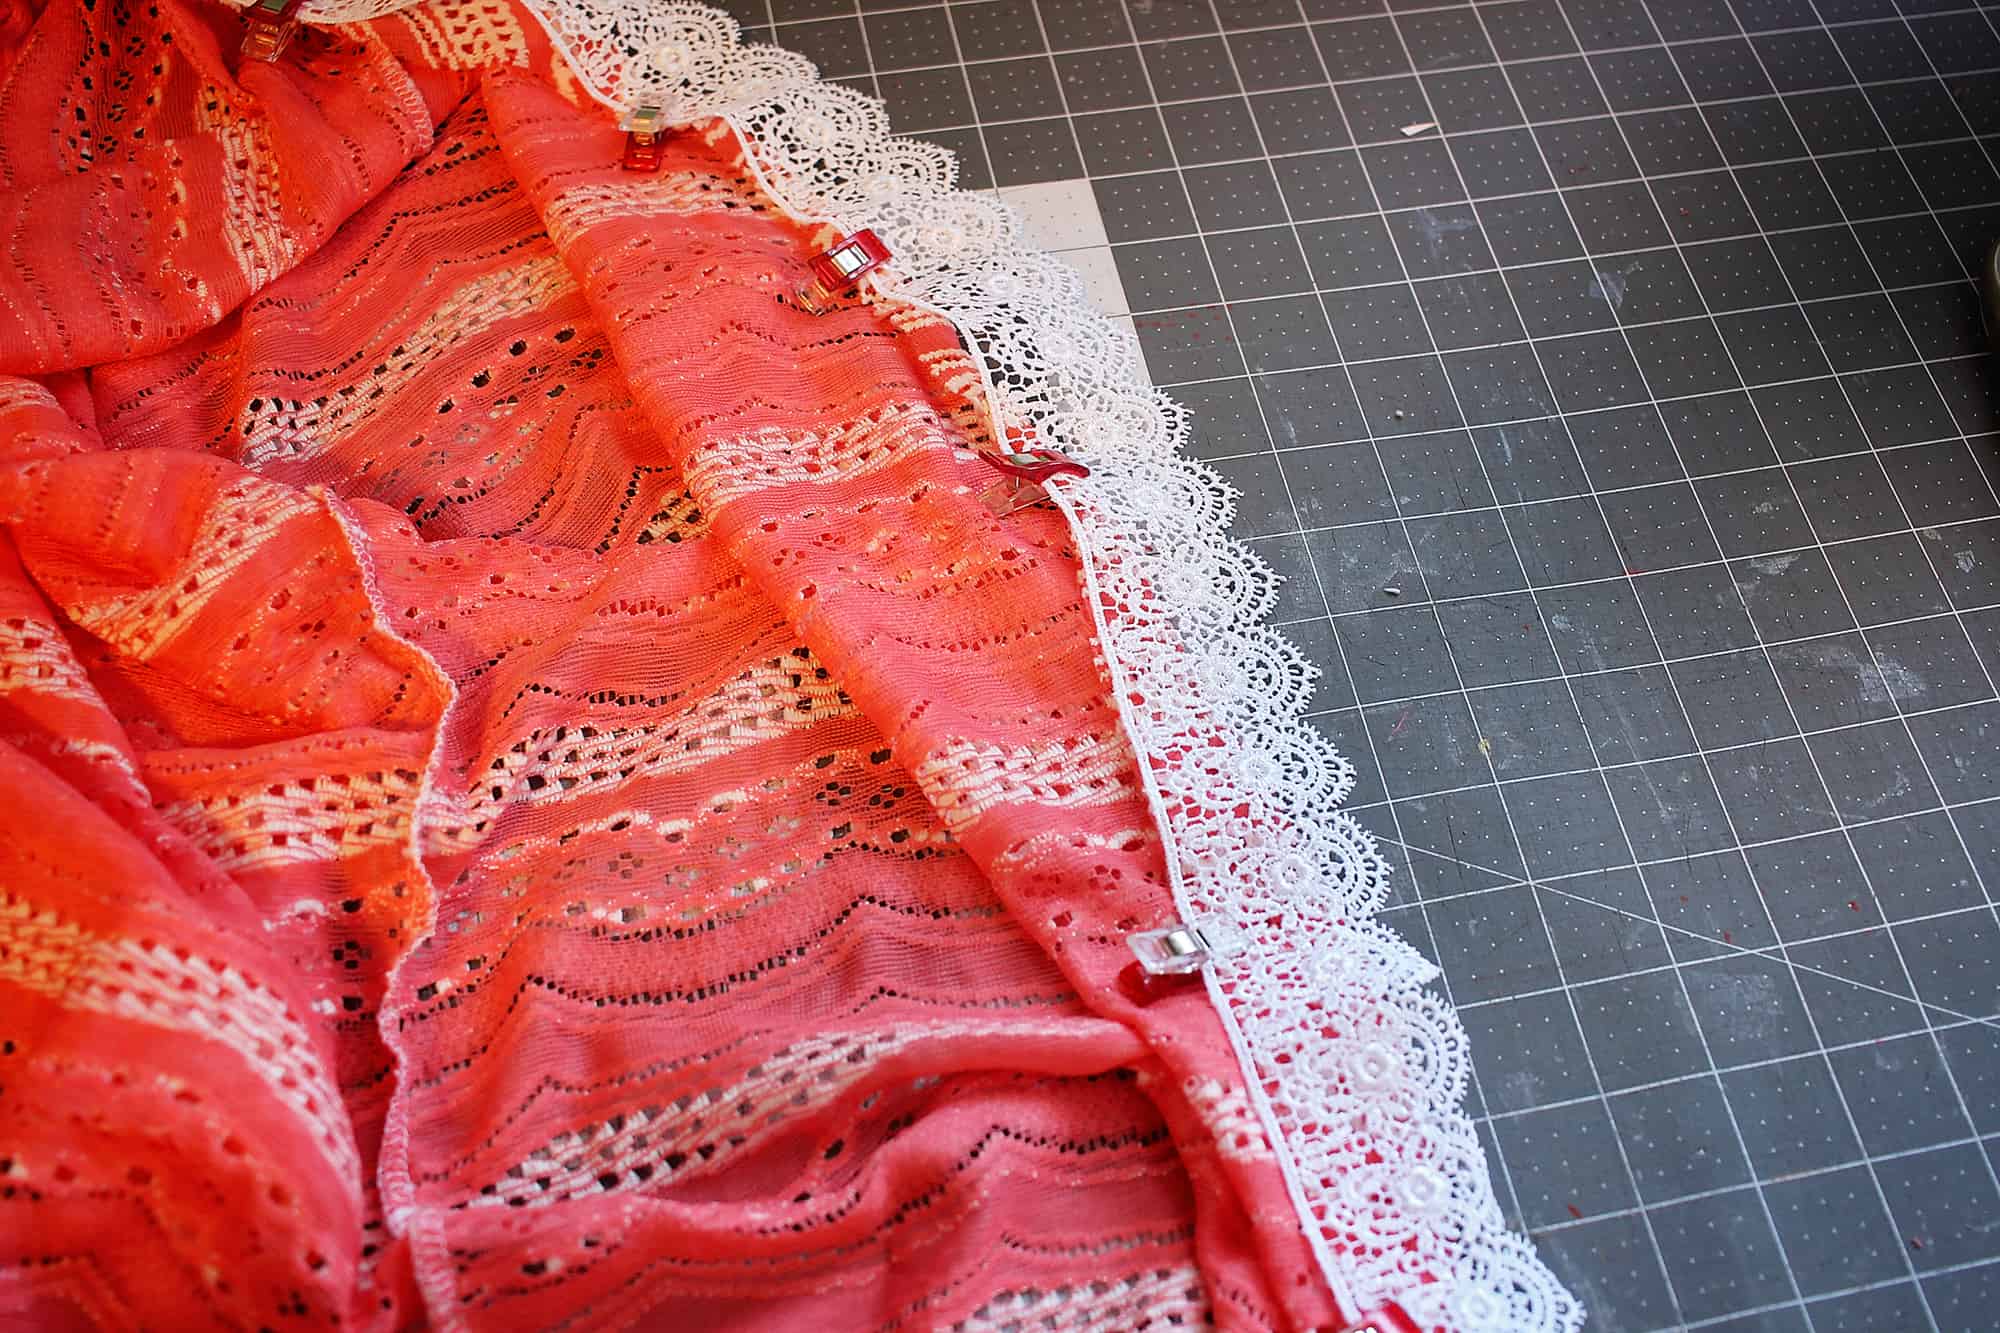
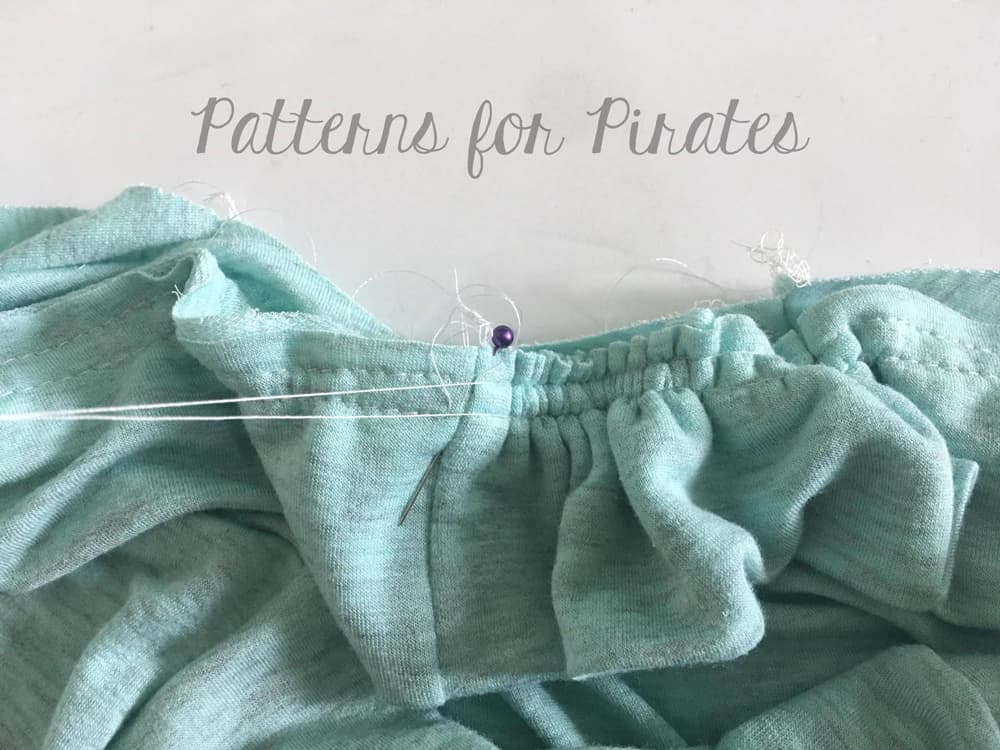
5.  Pull gathering/basting stitch (top threads) to gather band to match the length of the cardigan.  *Tip: once your gather reaches desired length, tie off your thread tails.  It will help keep the gather in tact while you even them out. Continue gathering each section until your band is completely gathered.  Pin/Clip in place.

butterfly-ruffle2butterfly-ruffle5

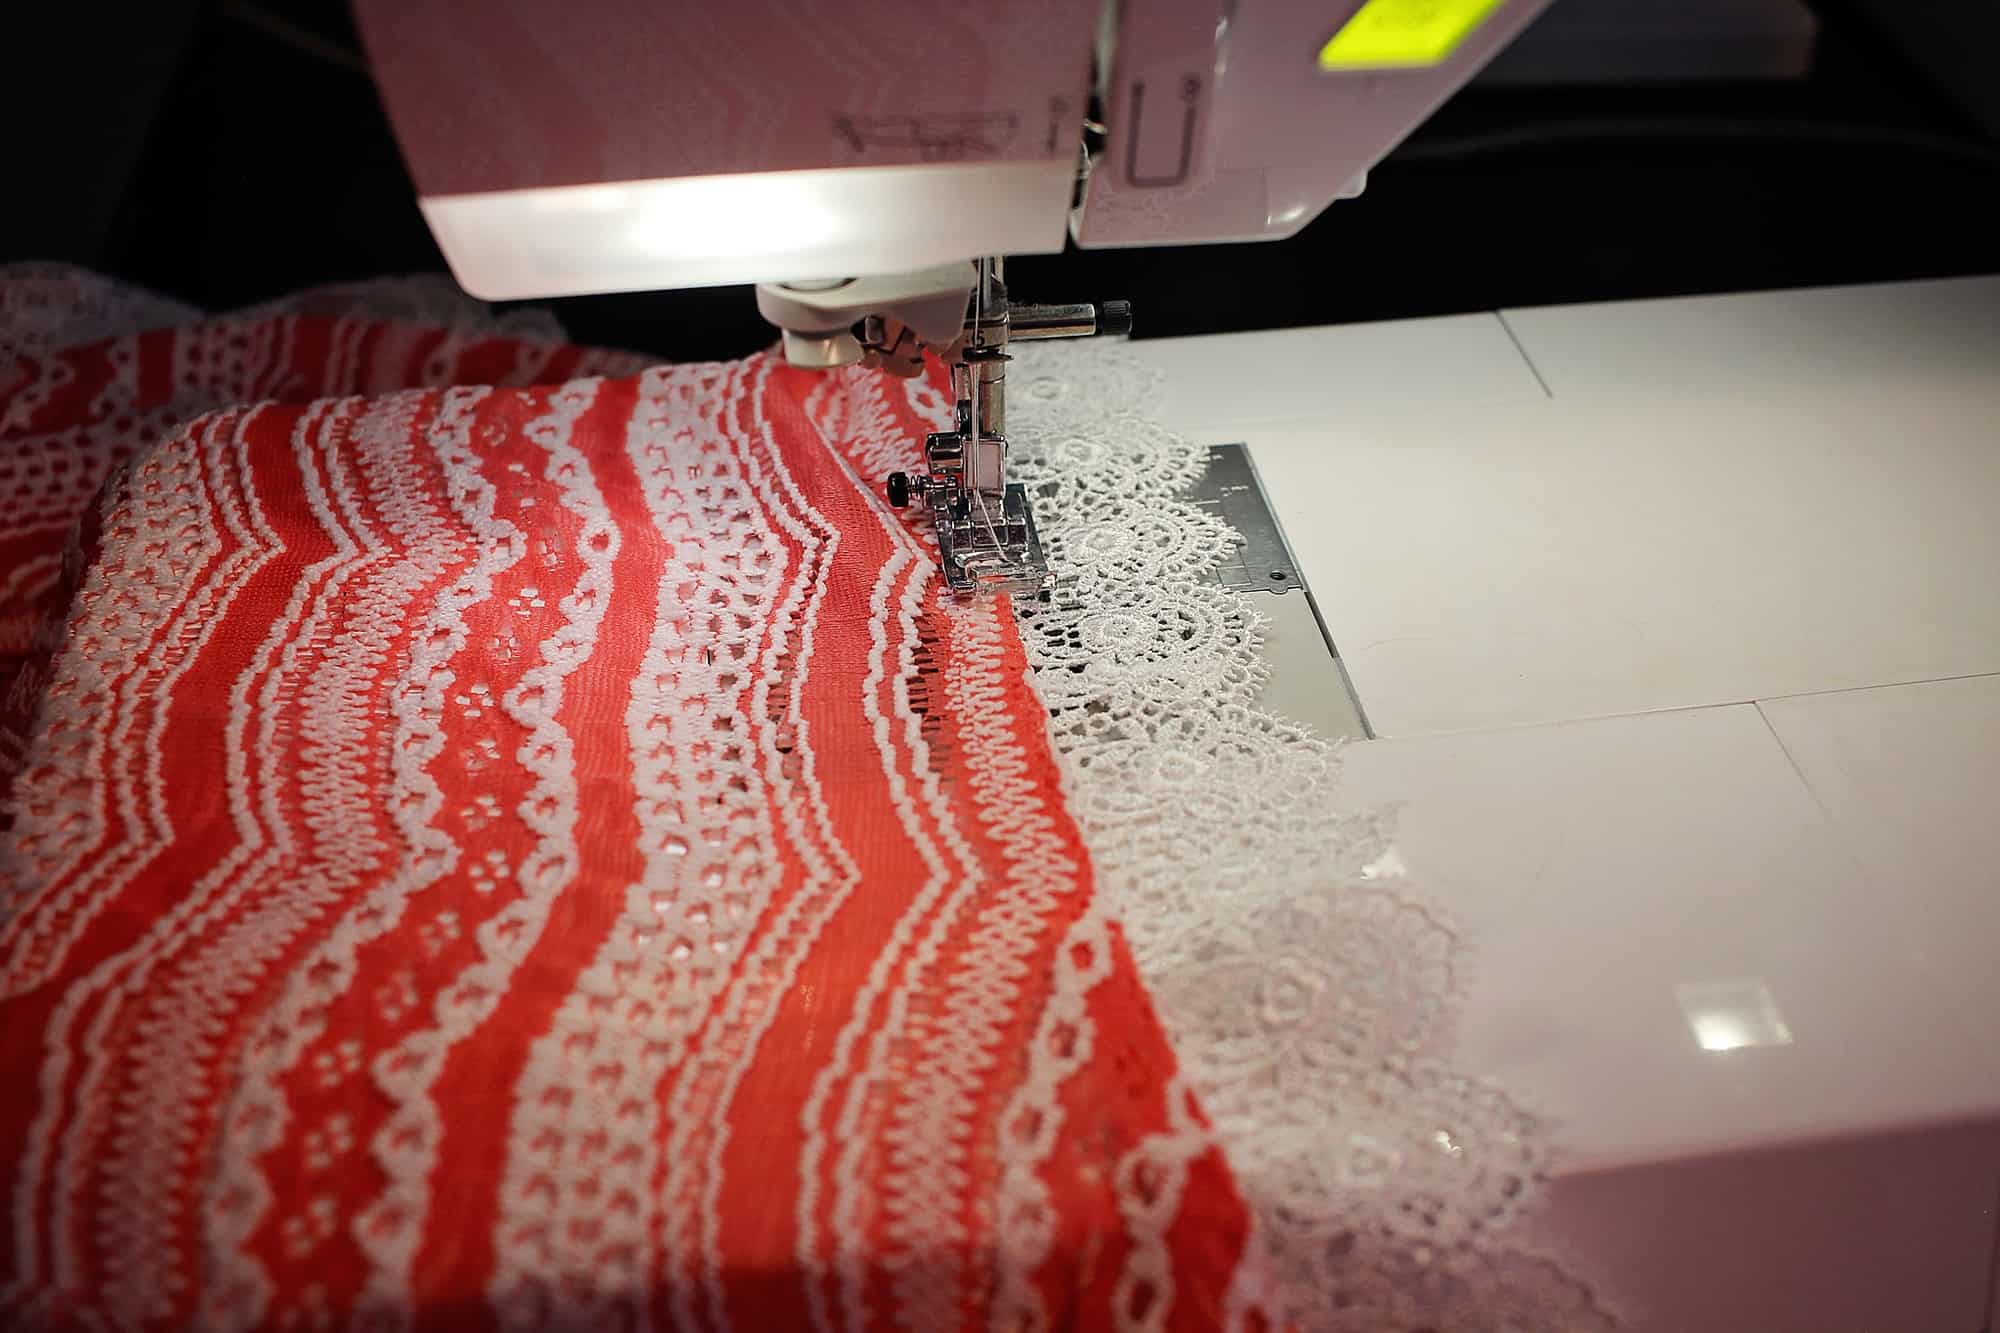
6. Stitch your band to your cardigan body.  Flip down, press and top-stitch (if desired).

butterfly-ruffle6


If the Butterfly Cardigan wasn’t already cute enough as it is, this surely made it!  Now add it to your cart and make your very own Butterfly Cardigan for your little! 😉

IMG_8689

IMG_8692 IMG_8687

Take a look at our jam-packed schedule of cardigan love!

Saturday, January 21: #P4PCardiWeek Announcement

Sunday, January 22: Cocoon Lace Hems and Butterfly Ruffle

Monday, January 23: Ribbon Tie Closure Hack

Tuesday, January 24: Carefree Cardigan Fringe Hack

Wednesday, January 25: Duster-Length Adjustment

Thursday, January 26: Kimono Ruffle Sleeves + Hem

Friday, January 27: Varsity Sweater Style Hack

Saturday, January 28: Carefree Cardigan Flannel + Vest Hack

Monday, January 30: #P4PCardiWeek Winner Announcement

You can follow along on the blog here, or in our Facebook group.  Search #P4PCardiWeek to be able to find our posts all over social media.  And please feel free to sew-along with us on one or all of the days.  The more the merrier!

But wait, there’s more!  We wanted to create a friendly pirate-y competition with our P4P Cardi Week!

Between tomorrow and Saturday, January 28, sew up a Patterns for Pirates cardigan using one of our hacks, or by keeping the pattern as-is.  Share your photo with us on Instagram or in our Facebook group and use the tag#P4PCardiWeek We will pick our favorite and the winner will win a free P4P pattern of choice AND be featured on this blog.  Fun right?

To make it even better we have put all the cardigan patterns in the shop on sale all week (no code needed)!

Now get out there and sew some cardigans, matey!

Filed Under: Contest/Giveaway, Pattern Hacks, Uncategorized 3 Comments

P4P Cardi Week :: Cocoon Lace Hems

January 22, 2017

cocoon-lace

I’m sure by now you’ve all browsed Pinterest for cardigan inspiration, I know I have. When I saw a dolman style cardigan with lace trim I knew right away I needed to make myself one so in today’s blog I’ll show you how easy it is to get the look and I’ll also give you some tip for working with lace.

IMG_5383

Start by cutting the Cocoon Cardigan pattern pieces. You will not need to cut the the band, we will be replacing it with trim. I made a tunic length, 3/4 hemmed sleeves with no pockets but you can apply this technique to either one of the styles. The fabric and lace I used are both from Hobby Lobby.

IMG_5282

Assemble your pattern pieces as per the instruction. I like to leave the band for the end so you now have your cardigan ready to add the lace trim. The pattern band is shorter than the edge circumference and since most lace trims have no stretch we will have to measure the opening. The trim you will need will be equal to this length.

cocoondrawing1

TIP: If your trim comes in 2 yards or less increments you will need to  attach two pieces together. To do that I like to use a zig zag stitch and just slightly overlap the ends. Stitch them together with a narrow zig zag stitch. Don’t forget to place a little piece of water soluble stabilizer under your lace when you stitch it.

IMG_5284

IMG_5285

Pin (or clip) your lace to the cardigan raw edge, right sides together. Yes, there is a right side to the lace trim too! 🙂 Pin all around the edge, making sure you do not stretch the cardigan. When you get to the curved edge pin even closer since that part is not only stretchy but also on the bias.

IMG_5289

IMG_5290

IMG_5291Once it’s all pinned in place sew the lace around the opening very slowly. I like to use my sewing machine for this step, instead of the serger. A stitch length of 3.5 with a 3.4-3.6 tension should be all you need. All you have to do now is top stitch around the opening, about 1/4-1/8 inch away from the trim and you are all set. See how easy that was?

IMG_5389

IMG_5371

Take a look at our jam-packed schedule of cardigan love!

Saturday, January 21: #P4PCardiWeek Announcement

                                                  Sunday, January 22: Cocoon Lace Hems and Butterfly Ruffle

Monday, January 23: Ribbon Tie Closure Hack

Tuesday, January 24: Carefree Cardigan Fringe Hack

Wednesday, January 25: Duster-Length Adjustment

Thursday, January 26: Kimono Ruffle Sleeves + Hem

Friday, January 27: Varsity Sweater Style Hack

Saturday, January 28: Carefree Cardigan Flannel + Vest Hack

Monday, January 30: #P4PCardiWeek Winner Announcement

You can follow along on the blog here, or in our Facebook group.  Search #P4PCardiWeek to be able to find our posts all over social media.  And please feel free to sew-along with us on one or all of the days.  The more the merrier!

But wait, there’s more!  We wanted to create a friendly pirate-y competition with our P4P Cardi Week!

Between tomorrow and Saturday, January 28, sew up a Patterns for Pirates cardigan using one of our hacks, or by keeping the pattern as-is.  Share your photo with us on Instagram or in our Facebook group and use the tag#P4PCardiWeek We will pick our favorite and the winner will win a free P4P pattern of choice AND be featured on this blog.  Fun right?

To make it even better we have put all the cardigan patterns in the shop on sale all week (no code needed)!

Now get out there and sew some cardigans, matey!

Filed Under: Pattern Hacks, Pattern Release, Uncategorized 2 Comments

Timeless Hacks

September 13, 2016


We are so excited to share the Timeless Tunic with you guys that we couldn’t help but share just a few easy mods you can do to have even more fun with this new woven pattern!

timeless-tunic-pattern-hacks


First up is the Crop Length: This is a super easy mod that is great for pairing with high-waisted bottoms.


img_3002img_2943

img_2987


Cut bodice pieces and skip the 2 skirt pieces.  Sew up the bodice following the tutorial like normal.  When you’re at the point of attaching the skirt you will instead create a casing with just the bottom edge of the bodice (just like the 3/4 and long sleeve options).

img_9407

Fold up the bottom raw edge 1/2″ to wrong side, and again another 1/2″ hiding raw edge.

img_9409

Edge stitch along top fold, leaving about 1.5″ un-stitched.  Feed your waist elastic in, around and out of the casing using a safety pin or other tool.

img_9410

Stitch elastic ends together using a wide zigzag (Make sure not to flip or twist your elastic as you’re guiding it through and stitching into a circle).

img_9414

Pull elastic all the way into the casing.  Stitch remaining 1.5″ closed.

img_9416

Wah-Lah!

img_9418

Now you have an adorable crop length that you can pair with your favorite high-waisted bottoms and not have to worry about tucking i in and getting any lumps and bumps from the bottom. I paired mine with the Pirate Pencil Skirt in the high waist and midi length option.

img_2948

img_2980


Split Sleeve and Curved Dress Hemline by Angela.

cover2

A big fashion trend that I’ve been seeing recently is a pretty split sleeve and the new Timeless Tunic and dress is the perfect pattern to easily add a split sleeve.  I’m also a big fan of a curved hem, so I’m also going to show you how to add the curved hem to the dress length.  Let’s get started!

First thing we are going to do is draw a line from the shoulder seam directly down the middle all the way down to the bottom of our sleeve piece.  This is going to be our extra cut line to create 4 pieces.  Now, if you’re lazy like me, you can just cut your sleeve out as normal and then cut down the center line that you created right thru your pattern and fabric. Make sure you don’t forget your notches!! It’s really easy to make a mistake without those notches as you will now have 4 sleeve pieces.  Next you’re are going to need to create your binding strips. To do this, I just measured that line we created on the pattern to determine how long the binding needs to be and I added a inch extra just to be safe.  As we are binding a straight piece you don’t have to worry about cutting your binding on the bias.  I just cut mine the length of my piece by 1.5 inches wide.

img_54241

Next you’re going to press your binding just like you would any other binding or bias tape. Fold in half lengthwise and press and then press the edges into the center.

img_54341

You’re going to pin the right side of the binding to the wrong side of your sleeve and sew in the first pressed line which is a 3/8″ seam.

img_54381

Once you have sewn the seam, press the seam allowance up towards the binding and then fold your binding down and repin so that the fold on your binding meets the seam line.  I like to pull mine just slightly over the seam so that when you edge stitch you don’t see the seam underneath.  You will then edge stitch your binding down.  You are going to do this on all 4 of your sleeve pieces.

img_54391img_54401


Time to sew the sleeves on! Easy peesy- you just match the top of your binding to the top center of your sleeve and make sure that your sleeve binding are right against each other.  Make double sure that your notches match here too, ask me how I know!  Now you will continue constructing as shown.  When you get to your sleeve casings you can sew your casing flat and insert your elastic.  I then sewed the elastic together to form your circle and then pull your casing over the elastic so you can’t see it.

img_54471img_54481 img_54501


On to the curved hem! This is super simple too.  I started by tracing off the tunic curve on the front skirt and then lined up the curve to the side seam so that the bottom of the curve was at the bottom of of the dress length and traced it on. You will need to extend your line just a tad at the center as the dress is aline so it doesn’t match on both edges. (This is going to make your dress length a bit shorter on the sides so if you are worried about that add a little length) I then cut my new curved hem.  For the back you want to also trace off your tunic curved hem but as it is a different curve then the front you want to make sure that your side seams are going to match.  The back hem will dip a bit lower then the dress length so you will need to tape some paper onto the bottom of your back piece so that you can trace your curve easily.  I found the easiest way to get your hems to match was to take your front piece and place it on your back piece, matching the side seams and mark where your front curve starts on the back piece and then place you back curve on that mark and trace.  Cut your new hem line and continue constructing as normal.

img_54201img_54211img_54231img_54311

img_55401

img_55361

Hope you enjoyed these easy hacks and please share your creations in the Patterns for Pirates Facebook group, we love seeing what you make!


V Neck Modification by Alex.

IMG_1214

The much anticipated woven tunic and dress is finally here! The Timeless Tunic includes 3 sleeve lengths, a sleeveless option and two hem lengths. So why not add a V-neckline to the mix? 😉 I am a very big fan of V-necklines, I find them flattering on all sizes and shapes so today I will show you how I hacked the Timeless Tunic to get a V-neck look.

First of all print your pattern in the size needed, grab a ruler, a marker and some paper because we’ll do some light drafting. Ready?

IMG_1180

Tape your pattern as per the instructions and set aside the front facing. We will  draft another front facing shortly. Grab the front bodice piece and mark 3 inches. You can do less or more depending on how deep you’d like the cleavage. For my example I lowered the neckline about 3 inches. Once you mark that point on the center fold line, draw a straight line from where the neckline begins to curve to your marked point. Cut along the line and discard the little pieces.

TIP: If you prefer to save the original front bodice piece, then just fold along the marked line and tuck the little piece under the pattern. This way you can re-use this pattern for the regular curved neckline again simply by unfolding it.

IMG_1181-1

Now that you have your front bodice piece ready, all we have to do is draft the front bodice facing. My V-neck Timeless dress is the sleeve option so you’ll see the sleeve facing throughout this tutorial. You can use the same suggestions and draft the sleeveless front facing option, too. Grab the original front facing, lay it over the front bodice and mark the shoulder width on it.

IMG_1184

Now lay a piece of paper (preferably  tracing paper but good ole printer paper will do, too, as you can see) over the V-neck front bodice. Trace the shoulder and the V-neckline on the paper. Mark about 2.75 inches down where the fold line will be. Using a French Curve (or drawing very slowly), draw a curve from the outer shoulder point to the bottom point of the center fold. That’s it! You’ve now drafted a new V-neck front facing.

IMG_1185 IMG_1187-1

Cut the fabric (and interfacing) using the V-neck bodice and the new V-neck front facing you just created. The rest of the pattern pieces and elastic will remain the same as the original pattern.

IMG_1189

Sew your dress or tunic following the pattern’s directions. When sewing the bodice to the facing around the neckline, I prefer to start from the V point, sew around the neckline and end at the V point where I started. If you start at the shoulder seam, make sure to pivot when you get to the V point of the neckline.

IMG_1194-1

TIP: When you snip the seam allowance around the neckline, don’t forget to cut a little V piece at the pointed spot. It will make your neckline lay nice and flat once you press it.

IMG_1195

Finish sewing the tunic or dress as per the pattern tutorial. Now you have your very own Timeless Tunic with a V-neckline. As always, I can’t wait to see your creations in the group . Sew like a pirate!


Sheer Overlay by Nicole

img_6704

There are some gorgeous woven fabrics available but some may be a little too sheer to wear sans under-layer or finish the neck and armholes with the facings method found in the pattern.  With a couple of easy changes, you can use fabrics like chiffon or lace.  I chose to use a chiffon and left my sleeves sheer but needed the extra coverage in the bodice and skirt.

Once you decide on your fabrics (that’s the hard part, right? 😉 ) you will cut the following:

(1) Main fabric bodice – front and back, (1) Main fabric skirt – front and back, (1) lining – front and back, (1) lining skirt – front and back ( I shortened the hem by 1″ as I used a rolled hem on the edges and did not want it to peek out the bottom edge)  (1) front and back facing (2) main fabric sleeve mirror image.  Note: Lightweight woven fabrics like chiffon are delicate.  When ironing the fusible interfacing, proceed with caution and use a pressing cloth.

img_6603 img_6606

For assembly of the bodice, you will treat your front and back as one piece.  Place main fabric and lining right sides up (wrong side of main fabric touching right side of lining) and baste along the edges or using a washable basting spray to keep the two layers together.  Construct main bodice as shown in pattern.

img_6608

For the skirt, I did not want them attached at the side seam so I stitched the side seams of both the main fabric and lining separately, creating two skirts.  Slip your lining skirt inside your main fabric with right sides out (wrong side of main fabric touching right side of lining).  I serged my two skirt together at the top edge to make attaching them to the bodice a little easier.  Continue construction as shown in the pattern.

img_6612  P4P Timeless Tunic PDF Pattern Sheer Overlay


Easy enough….right?! The constructions doesn’t change any and should not be any more difficult to put together.  Working with slinky fabrics is the hard part but with a little patience you’ll get through it in no time.

P4P Timeless Tunic PDF Pattern Sheer Overlay P4P Timeless Tunic PDF Pattern Sheer Overlay


Make it in knit!

We all love the quick and ease of sewing up a knit, right?! You can sew this pattern in a knit with no modifying! Here is Alex’s in a rayon spandex with no modifications other than about 1.5″ added to skirt length for a personal preference on skirt length.  She kept the dart and facings as is in the pattern exactly and sewed her size on the measurement chart.  With knits you can have less wearing ease and be comfortable, so you could size down if you wanted a more fitted look compared to the woven option.  She looks fabulous and she didn’t have to iron it 😉 lol!

14310375_10153881465478317_8390996610783788831_o 14231855_10153881465828317_6125367821420674475_o

Filed Under: Pattern Hacks 2 Comments

Free Spirit Tank – mash up & high low hem

August 30, 2016

IMG_0490

I’m sure by now we’ve all been invited to a least one “Buy these clothes” Facebook party and we’ve been tempted to buy some outfits only to think “nah…I can make it myself”.  Am I right? Well that was my thought when I saw one of this big online company’s newest relaxed fit dress that features a high low hem.

IMG_0556-1

Today on the blog I wanted to show you my version of this popular dress and teach you how to use your favorite P4P patterns to make yourself one. First you will need the Free Spirit Tank (which just got updated to include the Layer Feature!) and the Boyfriend Vneck shirt patterns, a ruler, markers, paper, your fabric of choice, a measuring tape and a French curve ,if possible (A great investment if you don’t have one!). Start by printing the patterns according to the instructions and then cut your size and the high low option.

Screen Shot 2016-08-26 at 11.15.13 AMScreen Shot 2016-08-26 at 11.16.06 AM

I used the sleeves and armcyce from the Boyfriend V neck shirt because it has a looser fit. If you are unsure how to mash the two patterns to add sleeves to the FST, use Judy’s Free Spirt Tank- Layer Me Up mash up tutorial. You would apply the same guidelines and tutorial. Even better, the Vneck Boyfriend tee includes a pocket piece too!

Now that we have the sleeves part covered, let’s move on the the high low hem. Grab your measuring tape because it’s time to take some additional measurement to create the above knee dress length. Measure the length from underarm to above knee, now measure the FST pattern piece from underarm to the hi low hem mark line. In doing so you’ll figure out how many inches you’ll be extending the side. In my case it was approximately 10 inches.

Attach some blank papers to the bottom of your pattern so you extend it. Using a straight ruler add the 10 inches side extension to both the front and back pattern pieces. Now we will create the front and back curved hems. The back curve will be a much more deep one than the front. Take the front piece and mark 12 inches down from the high low hem. Using a French curve draw a curve from the side point to the center seam. We will draft the back curved hem the same way only this time we’ll mark the extended center  mark at 14 inches and carefully draw a curve between the side mark and the center.P4PGRAPHIC

That’s all! You’ve now drafted your own “Carly” inspired dress. Cut out the pieces and sew them according to the pattern instruction.  The Boyfriend V neck shirt includes a pocket so I added it to the FST front too. Simply mark the pocket placement from the Boyfriend shirt on the FST pattern.

TIP: the bottom hem will have a pretty big back curved hem so don’t forget the tips I gave you in a earlier blog about hemming knits.

IMG_0541IMG_0561IMG_0544

Let me know if you have any questions by posting them in the comments below. As always, don’t forget to show off your creations in the group. I can’t wait to see your versions of this dress.

Alex

Filed Under: Pattern Hacks, Uncategorized 16 Comments

Essential Tank- Open Back Hack

June 12, 2016

Presentation1

I’m excited to share another hack to the new Essential Tank pattern! I’ve seen this look in the popular athletic wear brands and love it! But being 5’10” means no way I can buy it off the rack, even if I wanted to splurge on the price tag 😉

So, I hacked the newest pattern in the P4P collection and I’m so in love with the result! I used a brushed polyester blend that is super soft.

listing pictures1 listing pictures3

I took the front and raise the neckline by 2″ (although the inspiration tank was probably 3″ higher I just can’t take a neckline that close!). Make sure your neckline ends at a straight angle or you will have a point when you open up your folded front.  If you have a french curve use it for a nice smooth neckline. If not, you can get it as smooth as possible.

IMG_6990

Next I cut the back. Here I cut the full piece to help demonstrate, but you can skip cutting the entire piece to save on fabric.

IMG_6993

I took my straight edge and alined it to the widest part of the racerback.  I sliced it straight from the top of the shirt to the bottom hem. (I’ll mention here I did shirt length cutline. but left it unhemmed).

IMG_6995

Then I cut another MIRROR image back piece.

I decided to leave my hem and back edges raw. If you wanted to hem, go ahead and hem those back center edges now.

Tip-I ALWAYS cut a center notch on the necklines of every shirt- they’re cut on the fold and you always need that center mark for attaching your neckband marked anyways.  It is such a quick, easy time to mark it with a notch!

With both right sides up and aligning the center, baste the overlapping sections along the neckline.  Looking back I would also advise to baste just outside the 3/8″ seam allowance as well to hold it in place while attaching the neckband. It’s such a small section that extra baste will really help keep it nice and neat.

IMG_6997

Then just sew up the shirt as the tutorial recommends, treating the back as 1 back piece.  If you make the neckline higher you will need to shorten your neckband a bit as well.  A good ratio is about 80-85% of the finished neckband plus your seam allowance.

IMG_6999 IMG_7001

And wa-lah! Now you can waer it open and loose or tie it at the bottom for a more fitted look! And a big bonus (for me anyways ;)) is that you can untie the back and it’s super nursing friendly! I already have 2 more fabrics that need to become this hack! I can see myself wearing these with some capri peglegs throughout the hot TX summer!  I have it paired with a cute Siren Swim Top I made for a sports bra!

13402172_151754171904282_974103483_n(1)

Don’t forget to share your final creations in the P4P Facebook group, tag me on Instagram, or in your favorite sewing forum! <3 I absolutely love to see your P4P creations!


Filed Under: Pattern Hacks Leave a Comment

Button Cuff Hack!

January 26, 2016

button-cuff-hack-final

I look to online boutiques and Pinterest for sewing inspirations all the time.  By adding small details to an existing pattern, P4P of course ;), you can transform your favorite finds into your very own me-made version.  During the entire month of January we are running a #PINspiredPIRATES contest. I took on the challenge and added a super cute button cuff to the Slim Fit Raglan.  You can use any of the knit shirt patterns as a base, but chose the Slim Fit Raglan since it was the best to recreate the overall look. (original inspiration pic credit: Three Birds Nest.)

Supplies: 4-6 buttons; knit scraps, small hair ties, fold over elastic, ribbon (whatever you’d like to use for the loops)

button-cuff-hack-cuffsMost of the cuffs included in the patterns are a little shorter than I wanted, so I added 1″ to the length.  Since both ends of the button cuff are finished, I added to the width to account for the seam allowance. Refer to your cut chart in the pattern for measurements, then add 1″ to each. Cut 2.


button-cuff-button-tabs

Cut 6 button loops.  You can choose what you would like to use for your loops.  I went the easy route and cut 1/2″ strips of knit that was the same fabric as my cuffs.  Since knit does not unravel, you can leave the edges raw. I pulled them taught so that it would roll in on itself.  I cut them 2.5″ long but after completion they ended up a little too long for the smaller size button I used.  I wrapped them twice around to keep the cuff closed. I would use 1.75″-2″ depending on your button size.

button-cuff-tabs


Fold cuffs right sides together.

Fold loops in half lengthwise and place them equal distance apart between your cuff layers. Be sure to leave at least 1/2″ from raw edge for your seam allowance when attaching your cuff.  I just kind of eyeballed their placement to be sure they were even.


button-cuff-stitched

Stitch Short ends.  Be sure to catch the raw edges of your loops.

Turn Right side out.


button-cuff-hack-with-buttons


Add buttons.  Be sure to attach buttons at opposite ends to create mirror images, otherwise, you will end up with 2 cuffs with tabs in the same direction.


button-cuff-tacked

Button the cuffs.  Again, be sure to button them so you have mirror images.

Baste open edges together.  I used a zigzag stitch to tack them together.  Do not stitch through all layers or you will sew your cuff shut.  You are only stitching through 2 layers of fabric.


button-cuff-sleeve 

Insert cuff inside sleeve with right sides together. Buttons should be lined up to the folded side of sleeve with button loops pointing to the back.


button-cuff-sew


Stitch with 1/2″ seam allowance.


VOILA!

p4p-button-cuff-hack-finished

Followed this hack?  Or came up with something of your own?  We would love to see it!  Share your latest make in the Patterns for Pirates facebook group, on Instagram (@patternsforpirates) and don’t forget to submit your PINspiredPIRATES entries by January 31st with tag: #PINspiredPIRATES

Filed Under: Pattern Hacks Leave a Comment

Layer Me Up Nursing Hack

November 23, 2015

I love wearing my Layer Me Up tanks under cardigans during the fall and long sleeve option during the winter.  I can pull down the neckline to nurse, but I love to have something up and down for nursing in public.  So, this hack was born!

It is quick and easy too, which is a plus if you’re nursing and taking care of baby!

I cut out one layer me up exactly as the pattern calls for.  I added one piece using the front piece.  I measured from my armpit to below my bust and transferred that to the pattern piece.  This will become my lift up piece hidden under my normal pieces.

SAMSUNG CAMERA PICTURES

Since the layer me up is a tight fit shirt that requires a 50% stretch spandex blend fabric, you don’t necessarily need to add any elastic to keep it from stretching out with wear/pulling throughout the day.  But, you might want to add it to the bottom raw edge of the hidden lift up piece just to add a little weight and to keep it from shifting around at all during wear.  I serged it on, then hemmed under.

SAMSUNG CAMERA PICTURES


SAMSUNG CAMERA PICTURES

I wanted the under piece hidden, so I trimmed about 1/2″ from the neckline.  You could hem it under if you wanted it to be pretty :).

SAMSUNG CAMERA PICTURES

Pin your under layer to the wrong side of the front piece and sew up your shirt normal–the only other modification is at the neckline.  You will attach the neckband only to the main shirt and leave your hidden piece loose.  This way it is free to come up when nursing.

SAMSUNG CAMERA PICTURES


SAMSUNG CAMERA PICTURES

Now you have a shirt that looks perfectly “normal” and can pull down the neckline and hidden piece up to nurse!  You can wear it after just as is, or cut out your hidden piece and wear :).

SAMSUNG CAMERA PICTURES


SAMSUNG CAMERA PICTURES

I grabbed a lovely colored ribbed knit without thinking (remember I have a tiny newborn 😉 ) and it had HORRIBLE recovery.  No spandex— it grew and grew and grew! So, I will be trying this hack again in the correct material!

SAMSUNG CAMERA PICTURES

And of course, one with Little Guy photobombing 🙂

Filed Under: Pattern Hacks, Uncategorized Leave a Comment

  • « Previous Page
  • 1
  • 2
  • 3

Newest Patterns

  • Uptown Joggers - Youth $10.00
  • Uptown Joggers $12.00
  • Uptown Joggers - Bundle $20.00
  • Notch Top & Dress $12.00
  • Notch Top & Dress - Youth $10.00
  • Privacy Policy
  • Refund Policy
  • Affliliate Program
  • Contact Us
  • About

Copyright © 2023 Patterns for Pirates

Copyright © 2023 · Genesis Framework · WordPress · Log in