Patterns for Pirates

P4P stylish, modern, wearable patterns

  • Home
  • Blog
    • Frequently Asked Questions
    • Pattern Releases
      • Free Patterns
    • P4P University
      • Fitting
      • Sewing with Stretch, Knit Fabrics
      • Sewing with Woven Fabrics
      • Sewing Machines
    • Sew-A-Longs
    • Fabric for Pirates
    • Pattern Hacks
    • Announcement
      • Blog Tours
      • Contest/Giveaway
  • Shop
  • Bundle Discounts
  • Flash Friday
  • Gift Cards
  • My Account
  • Cart

Take the Plunge Swim :: Easy Hacks

June 15, 2017

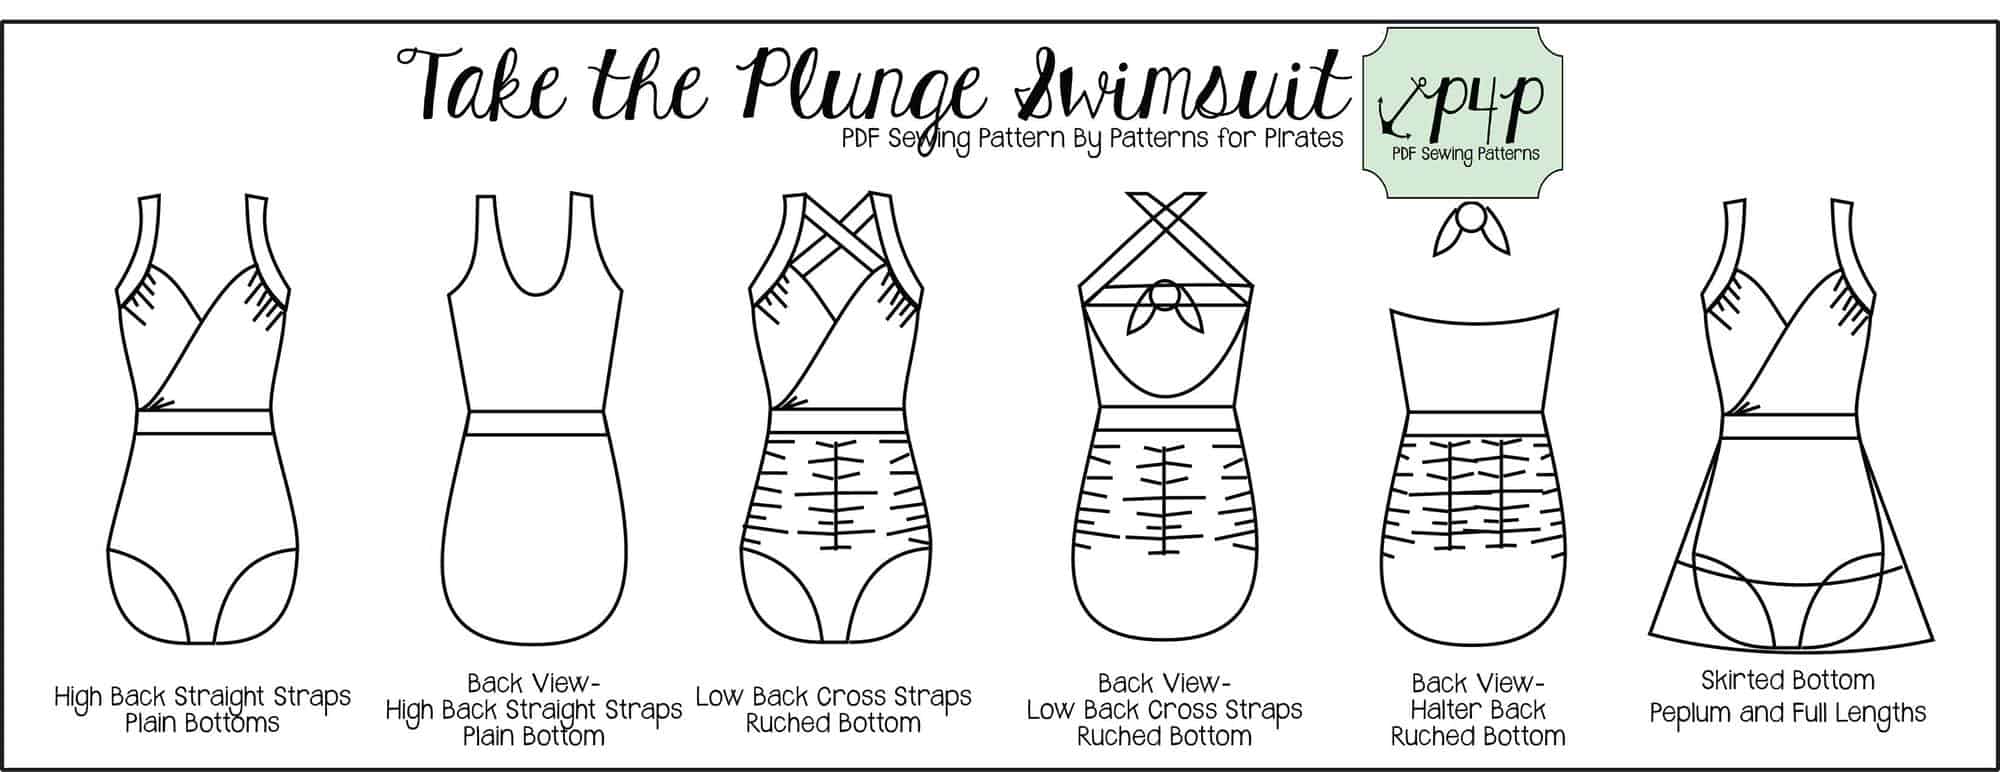
The ultimate one piece swimsuit is here and it’s packed with so many options. Mix and match the halter, low back or high back with any of the bottoms styles for a unique look every time but in true P4P fashion we could not have released this pattern without some easy hacks to get you even more looks out of your Take the Plunge Swimsuit.

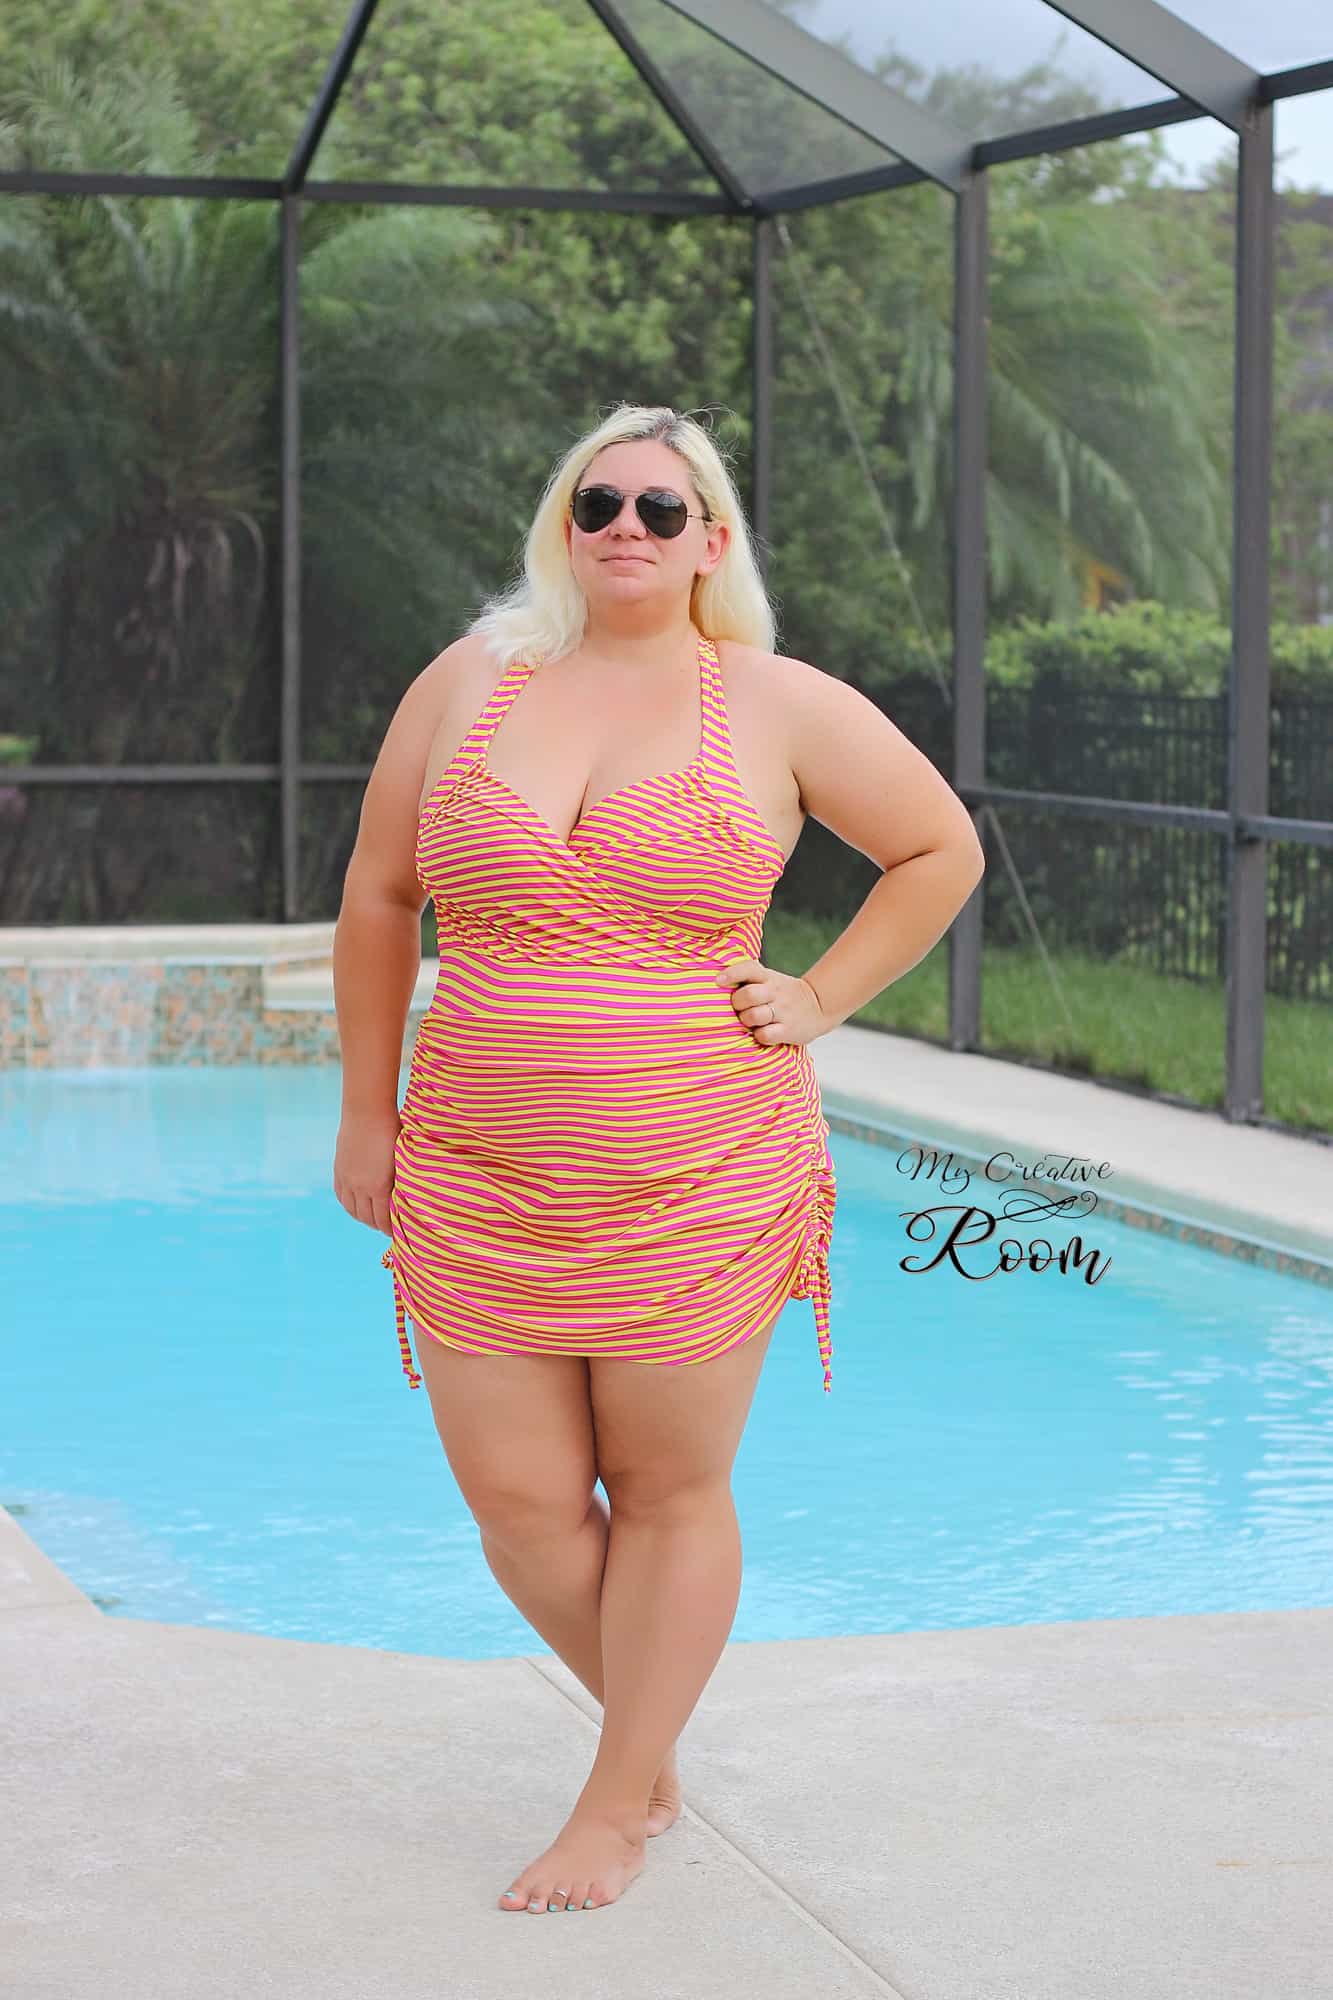
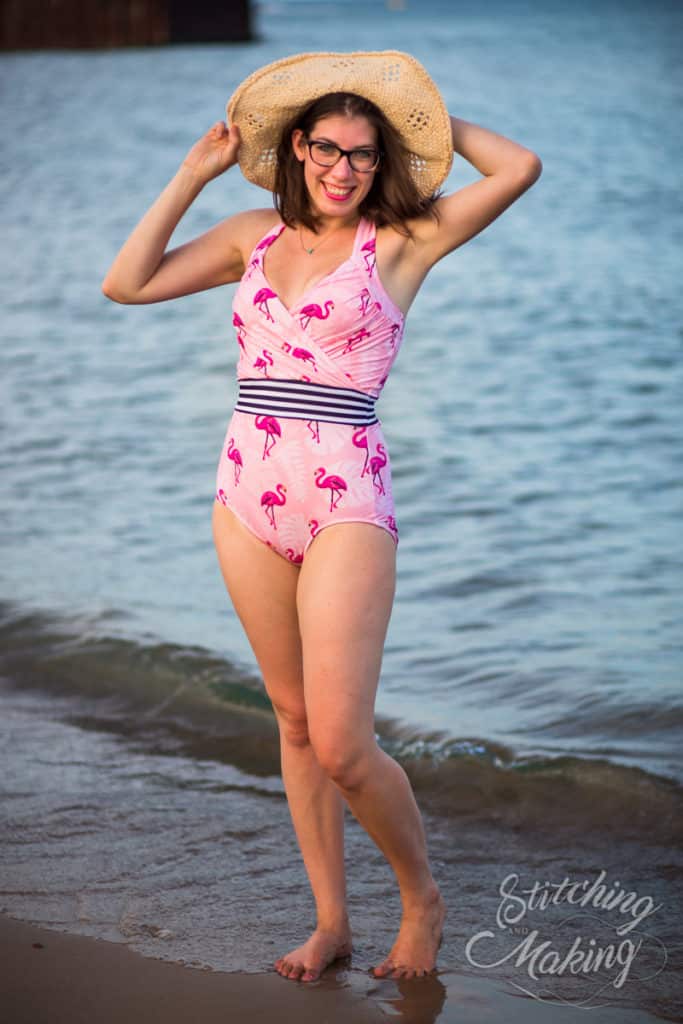
First on the hack line up is a super easy swicharoo! 🙂 Simply switch the half circle skirt included in the Take the Plunge swimsuit with the rushed skirt of the Hello Sailor  Swim Bottoms.

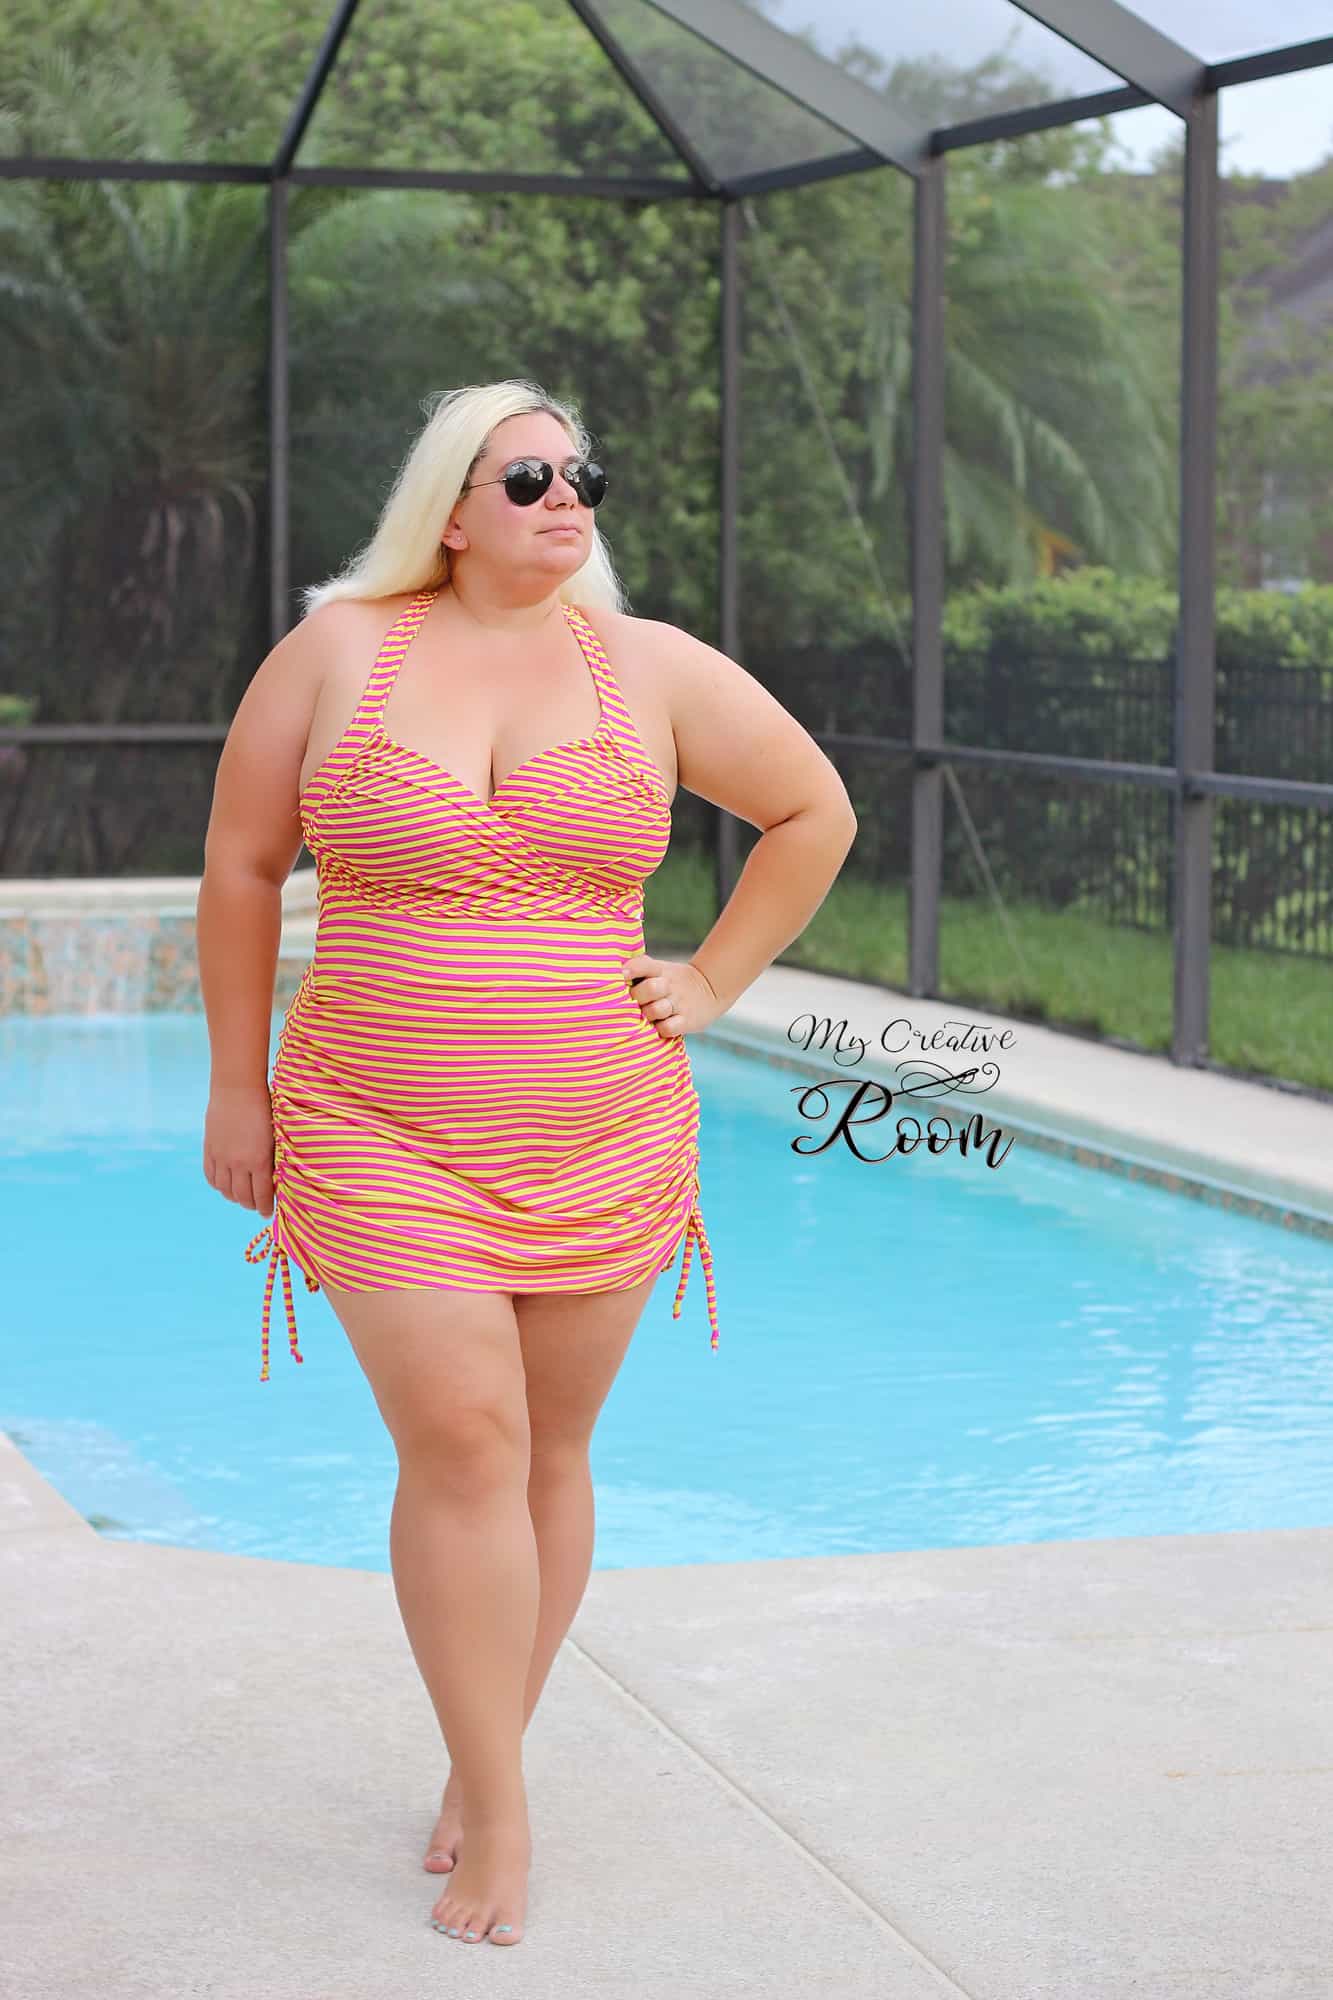
This “retro” look is so easy to achieve when using the ties option of the Hello Sailor Swim Bottoms. If you prefer to use the elastic rushing option included in the tutorial  you can certainly do that too.

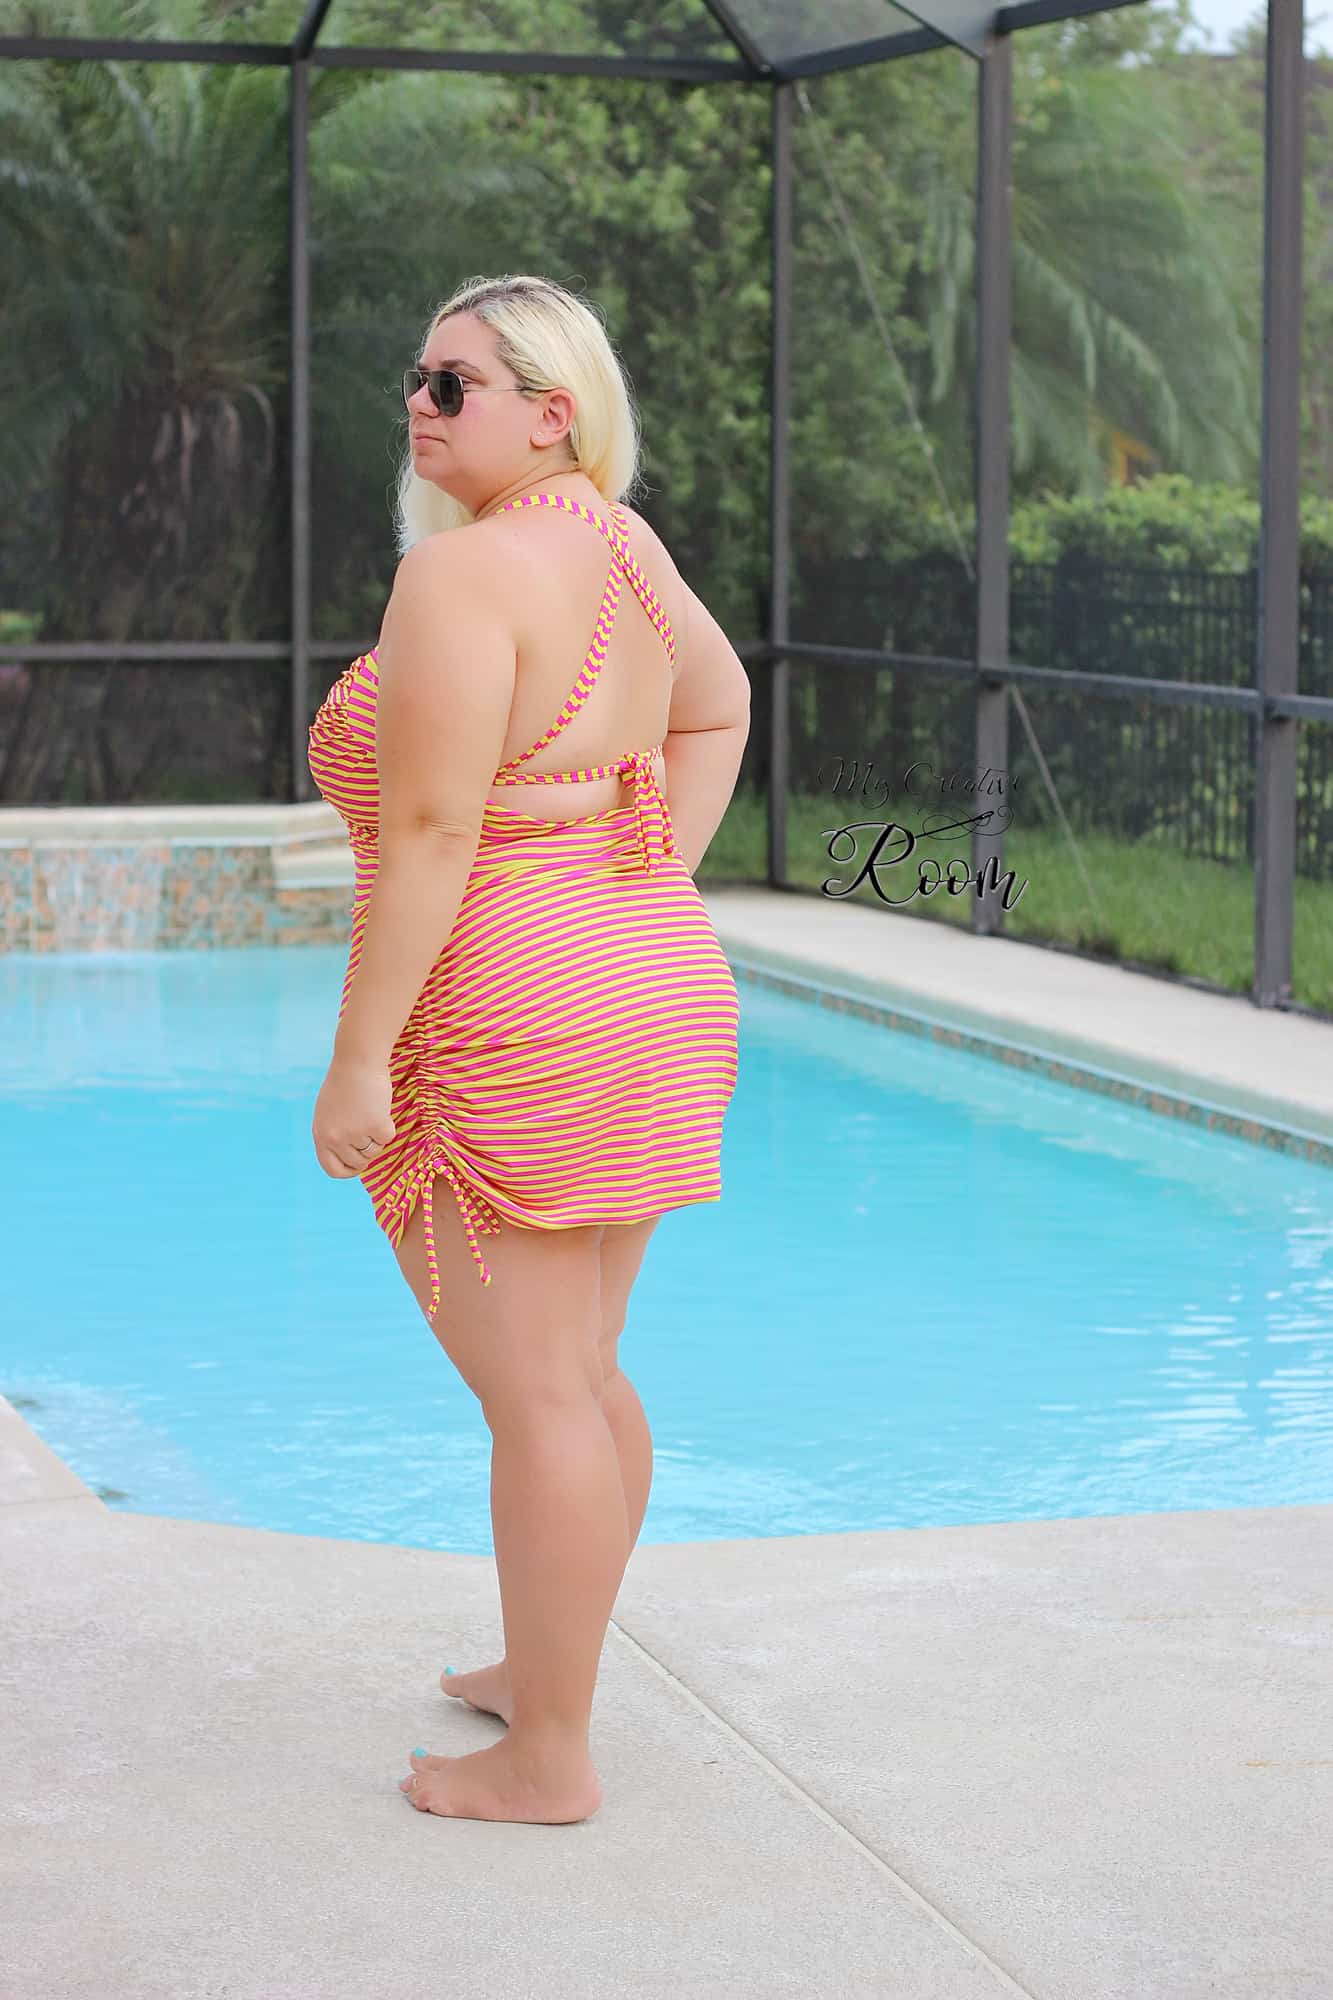
I used the low back option of the Take the Plunge swimsuit but either one of the other tops would look amazing with the skirted bottoms. Make yourself a high back option and you’ll be ready to chase your little ones at the beach this summer. 🙂

There was no alteration needed to make to the pattern.  Follow the tutorial for the Take the Plunge swimsuit and replace the skirt included with the Hello Sailor Swim Bottoms skirt. Easy peasy!

Alex

—

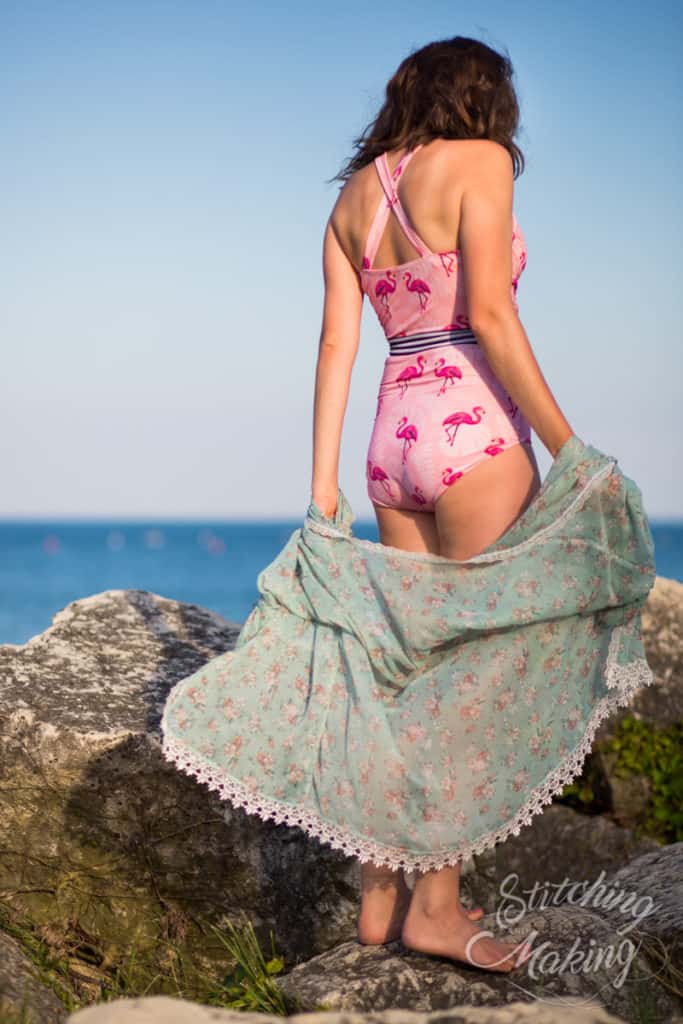
For another quick and easy way to mix up this pattern, try modifying the straps!  In this example, I’ll show you how to hack the halter back and straps into a trendy criss-cross.


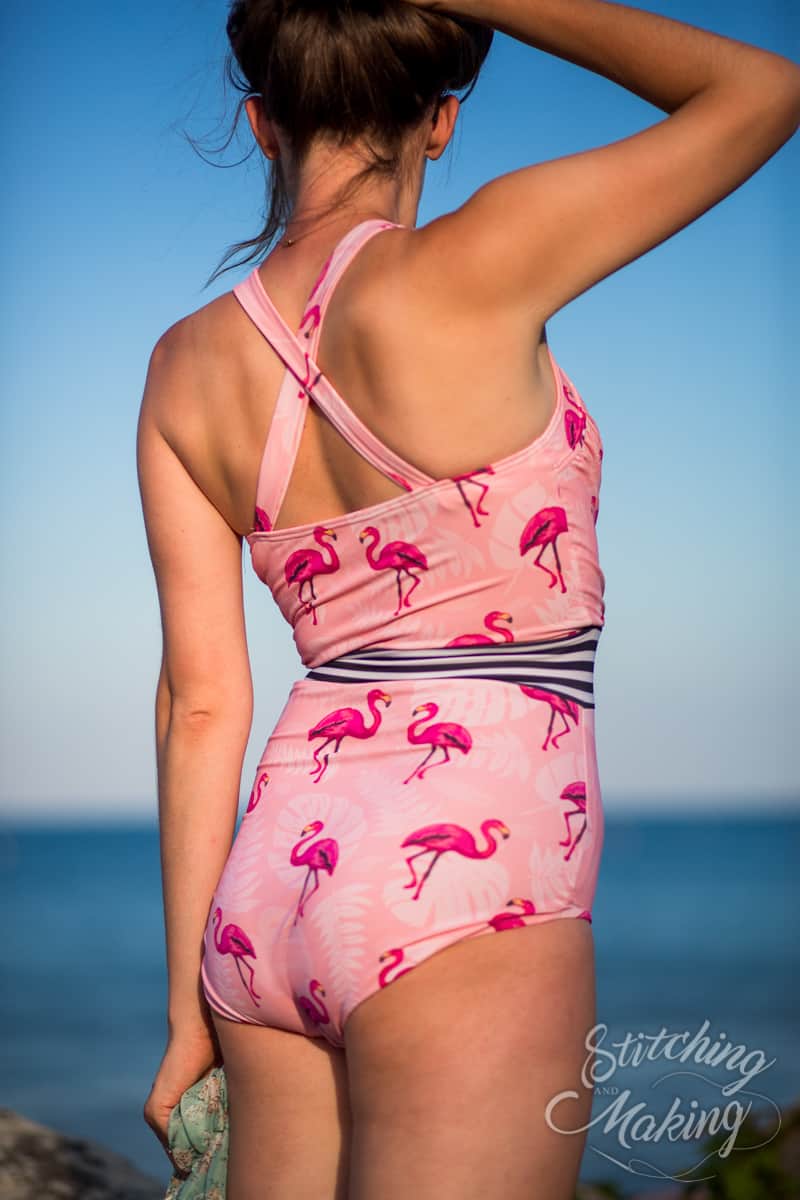
1. When cutting out your halter straps, you don’t need to cut the pointed tip.  Just straight across is easier.  For me, the length worked as-is, but if you are extra tall (I am 5’8″), you may want to cut a couple extra inches just to be safe.

2. Assemble the pattern as the instructions direct, until you get to the step for adding the elastic in the back.

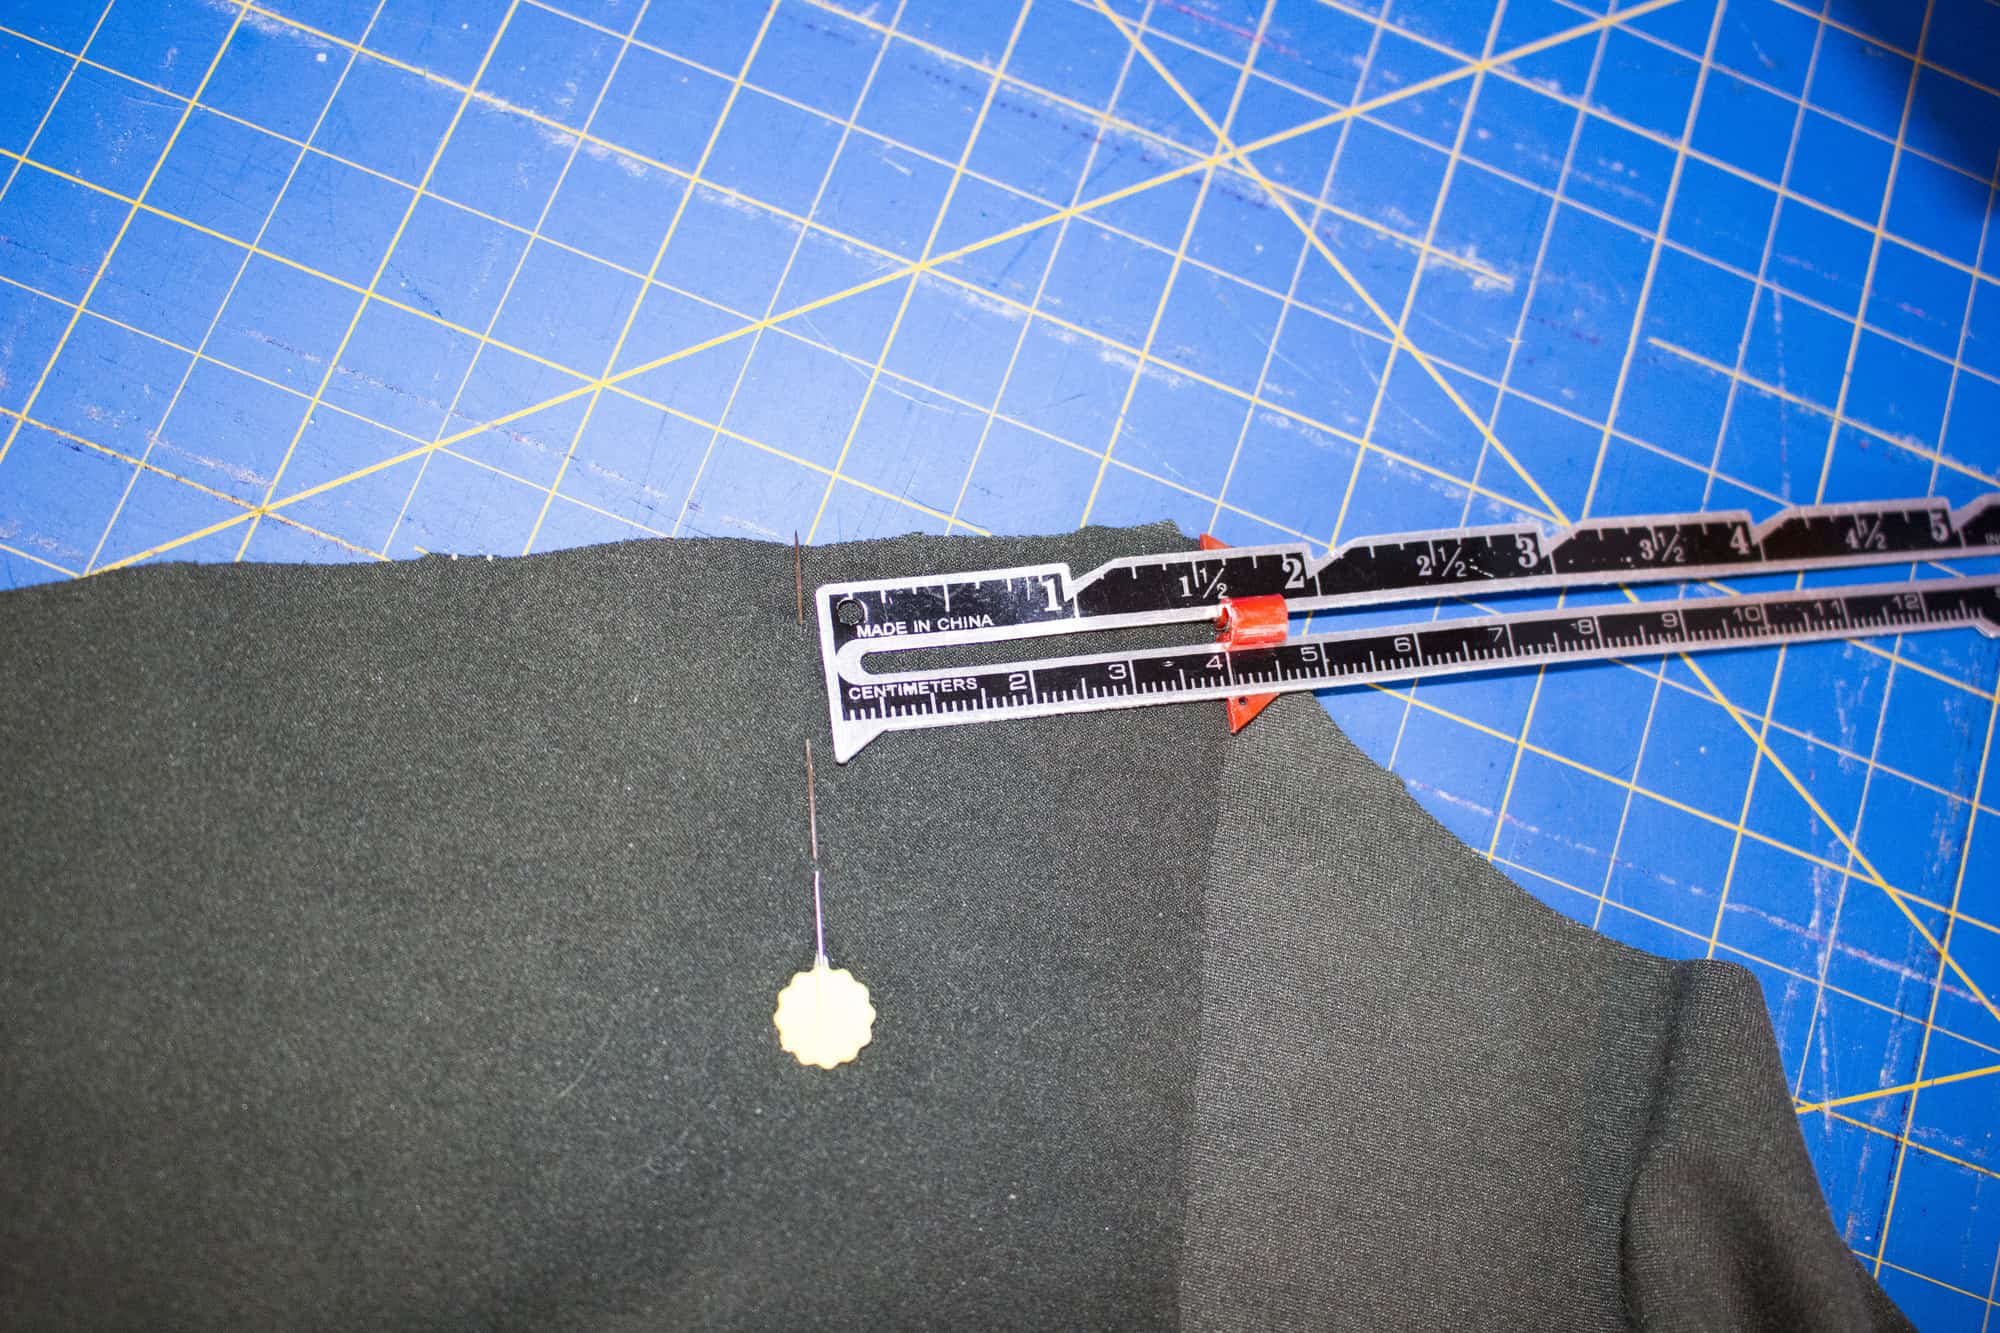
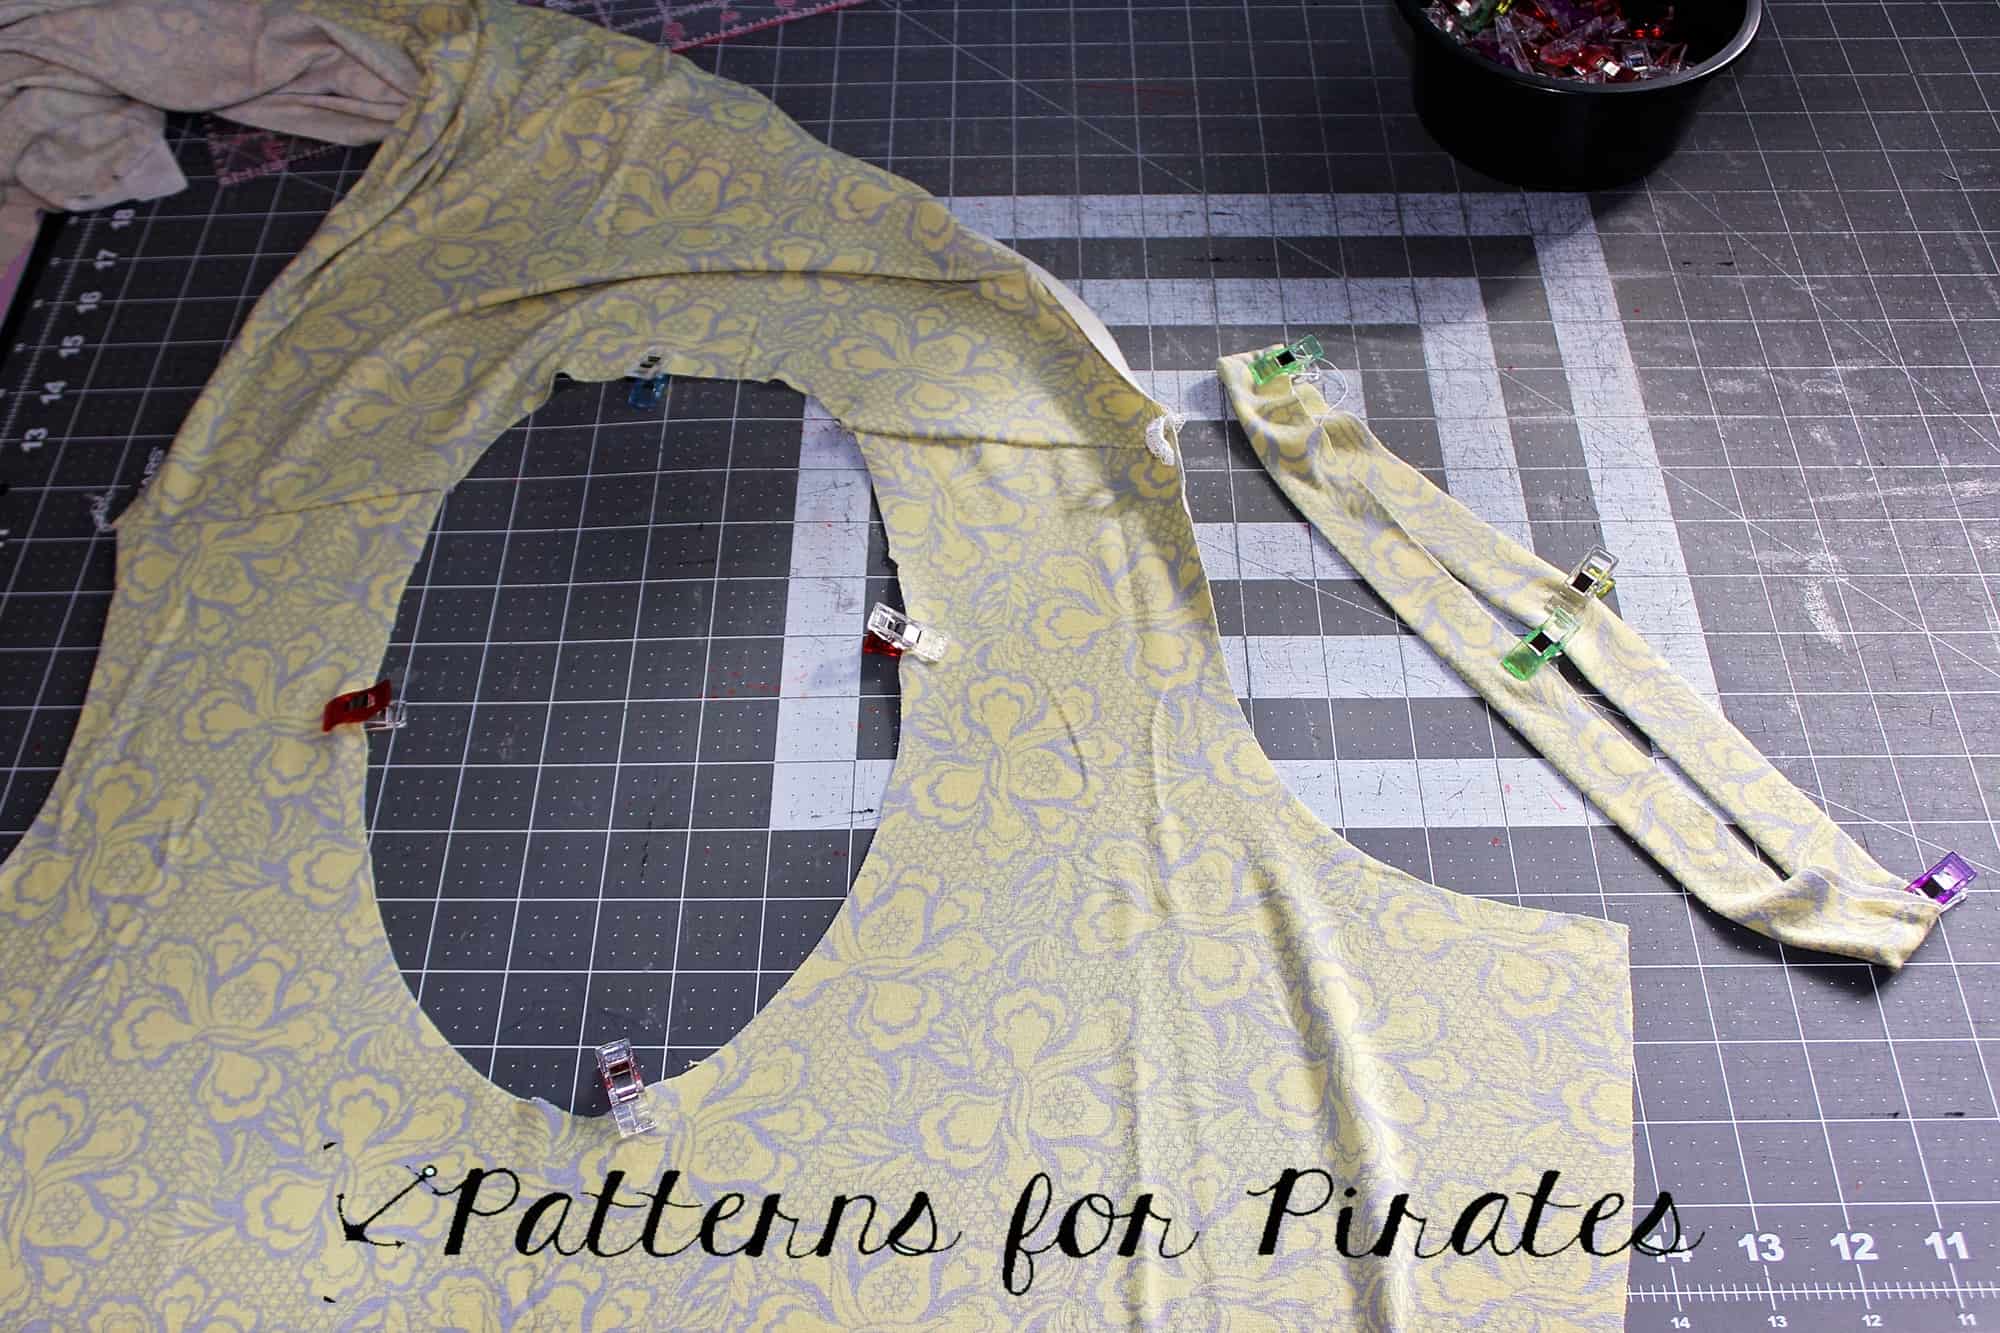
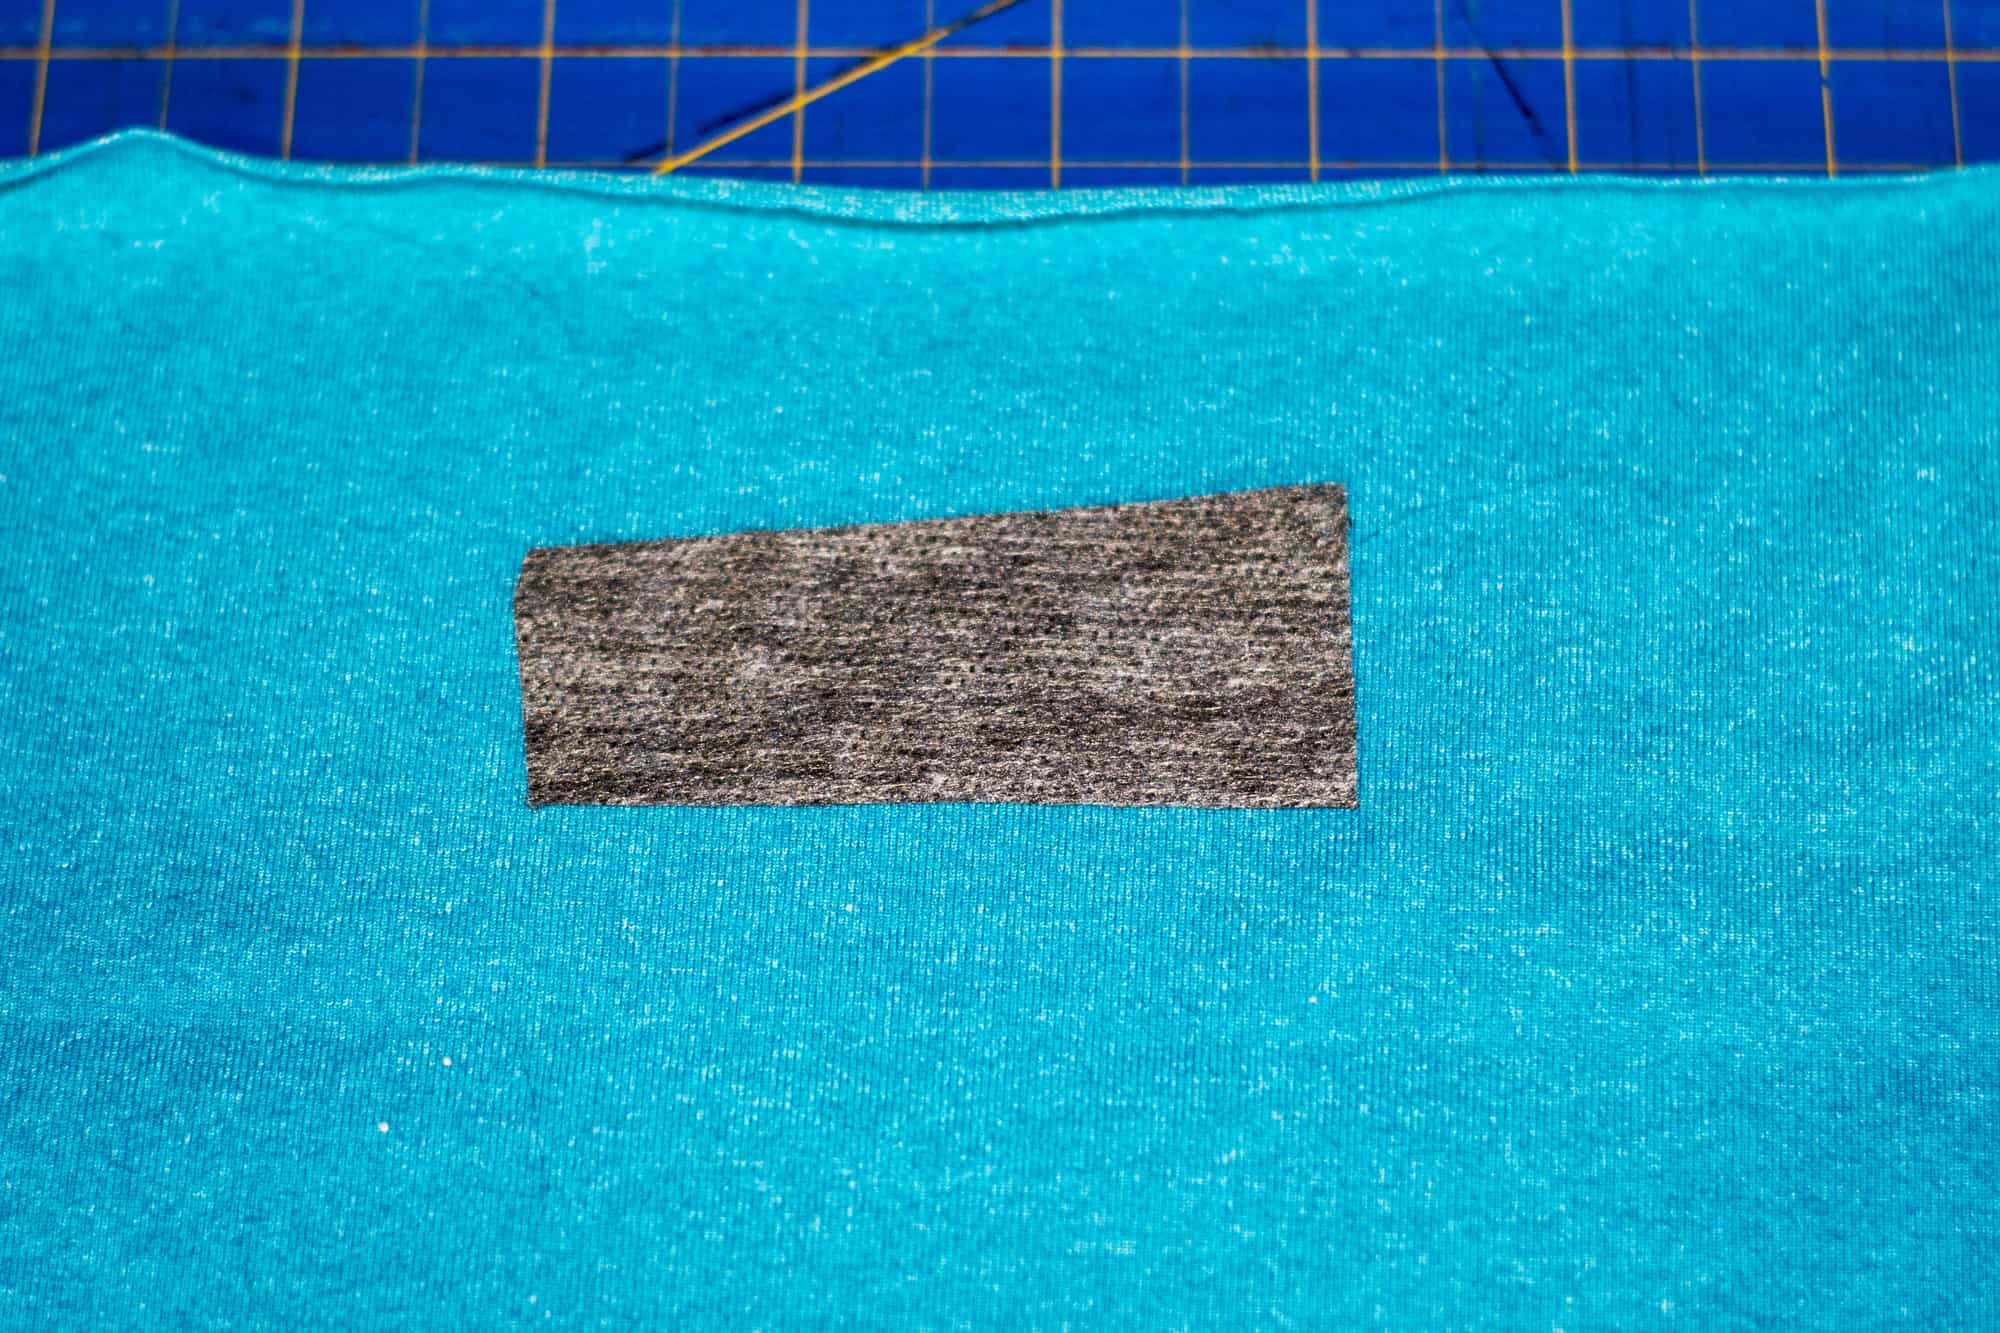
3. After you’ve added the elastic, on each side, mark the middle point between the center back and the side seams. (I happened to take this picture before I added the elastic, don’t be confused by that part!)

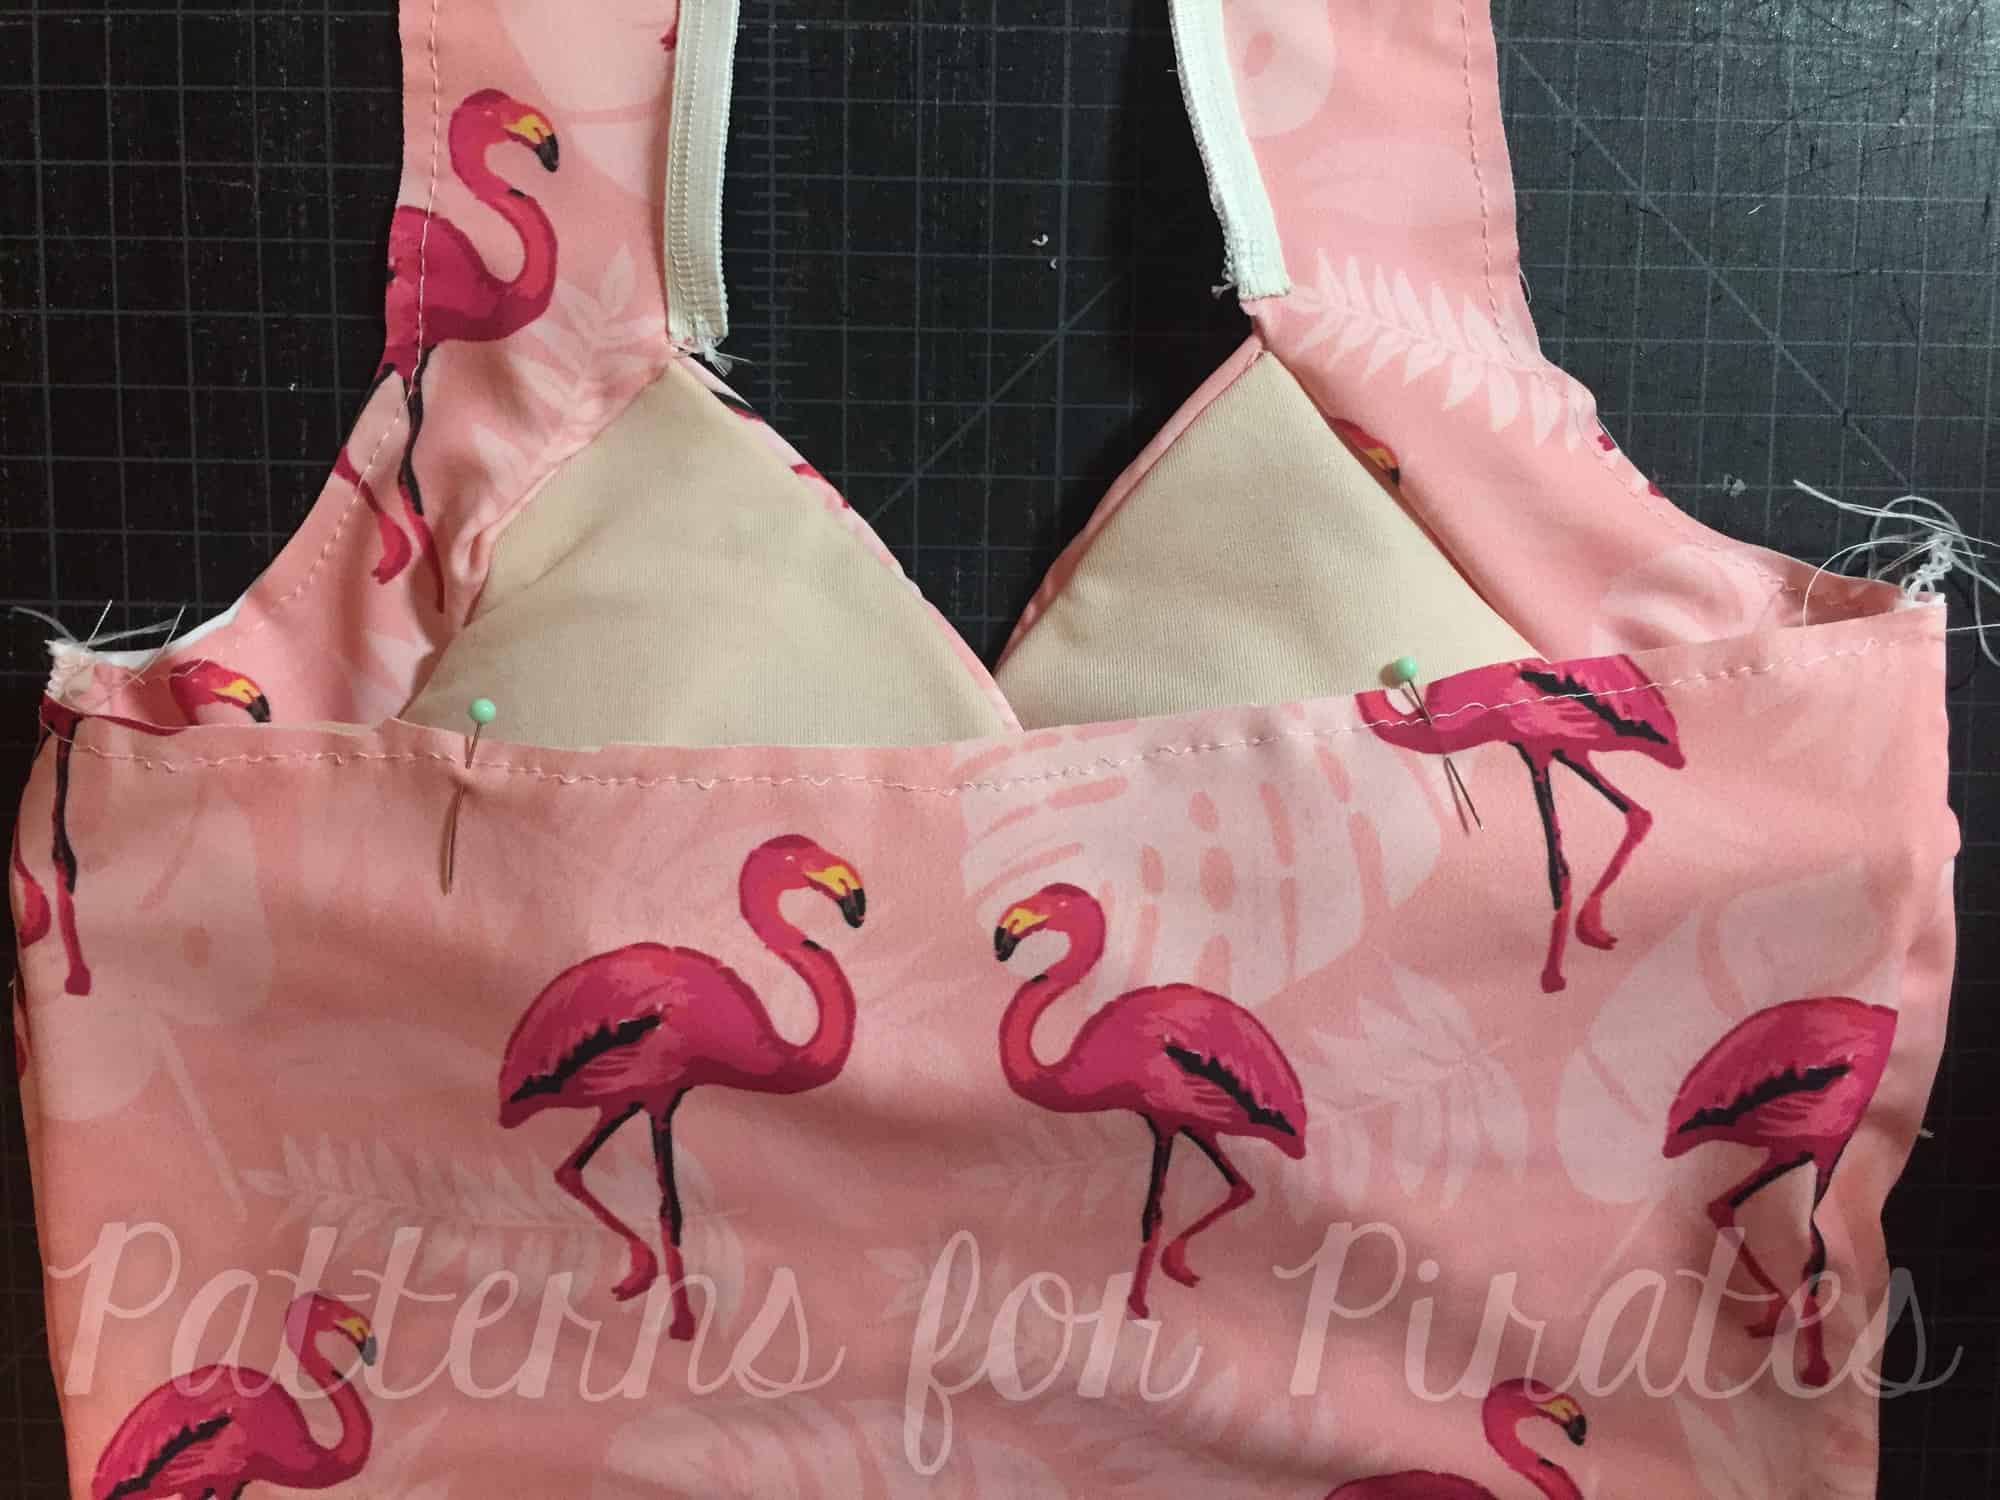
4. Pin/clip (or baste) the straps in place where you’ve marked – make sure to cross them and that they aren’t crooked.  You’ll want to try it on at this point to make sure the strap lengths are comfortable.  I found that I needed to attach the straps about 1.5″ from the end.

5. Once you know exactly where you want the straps placed, now you’re ready to sew them down.  There’s multiple ways you could do this, but I found this method reduced bulk the most.

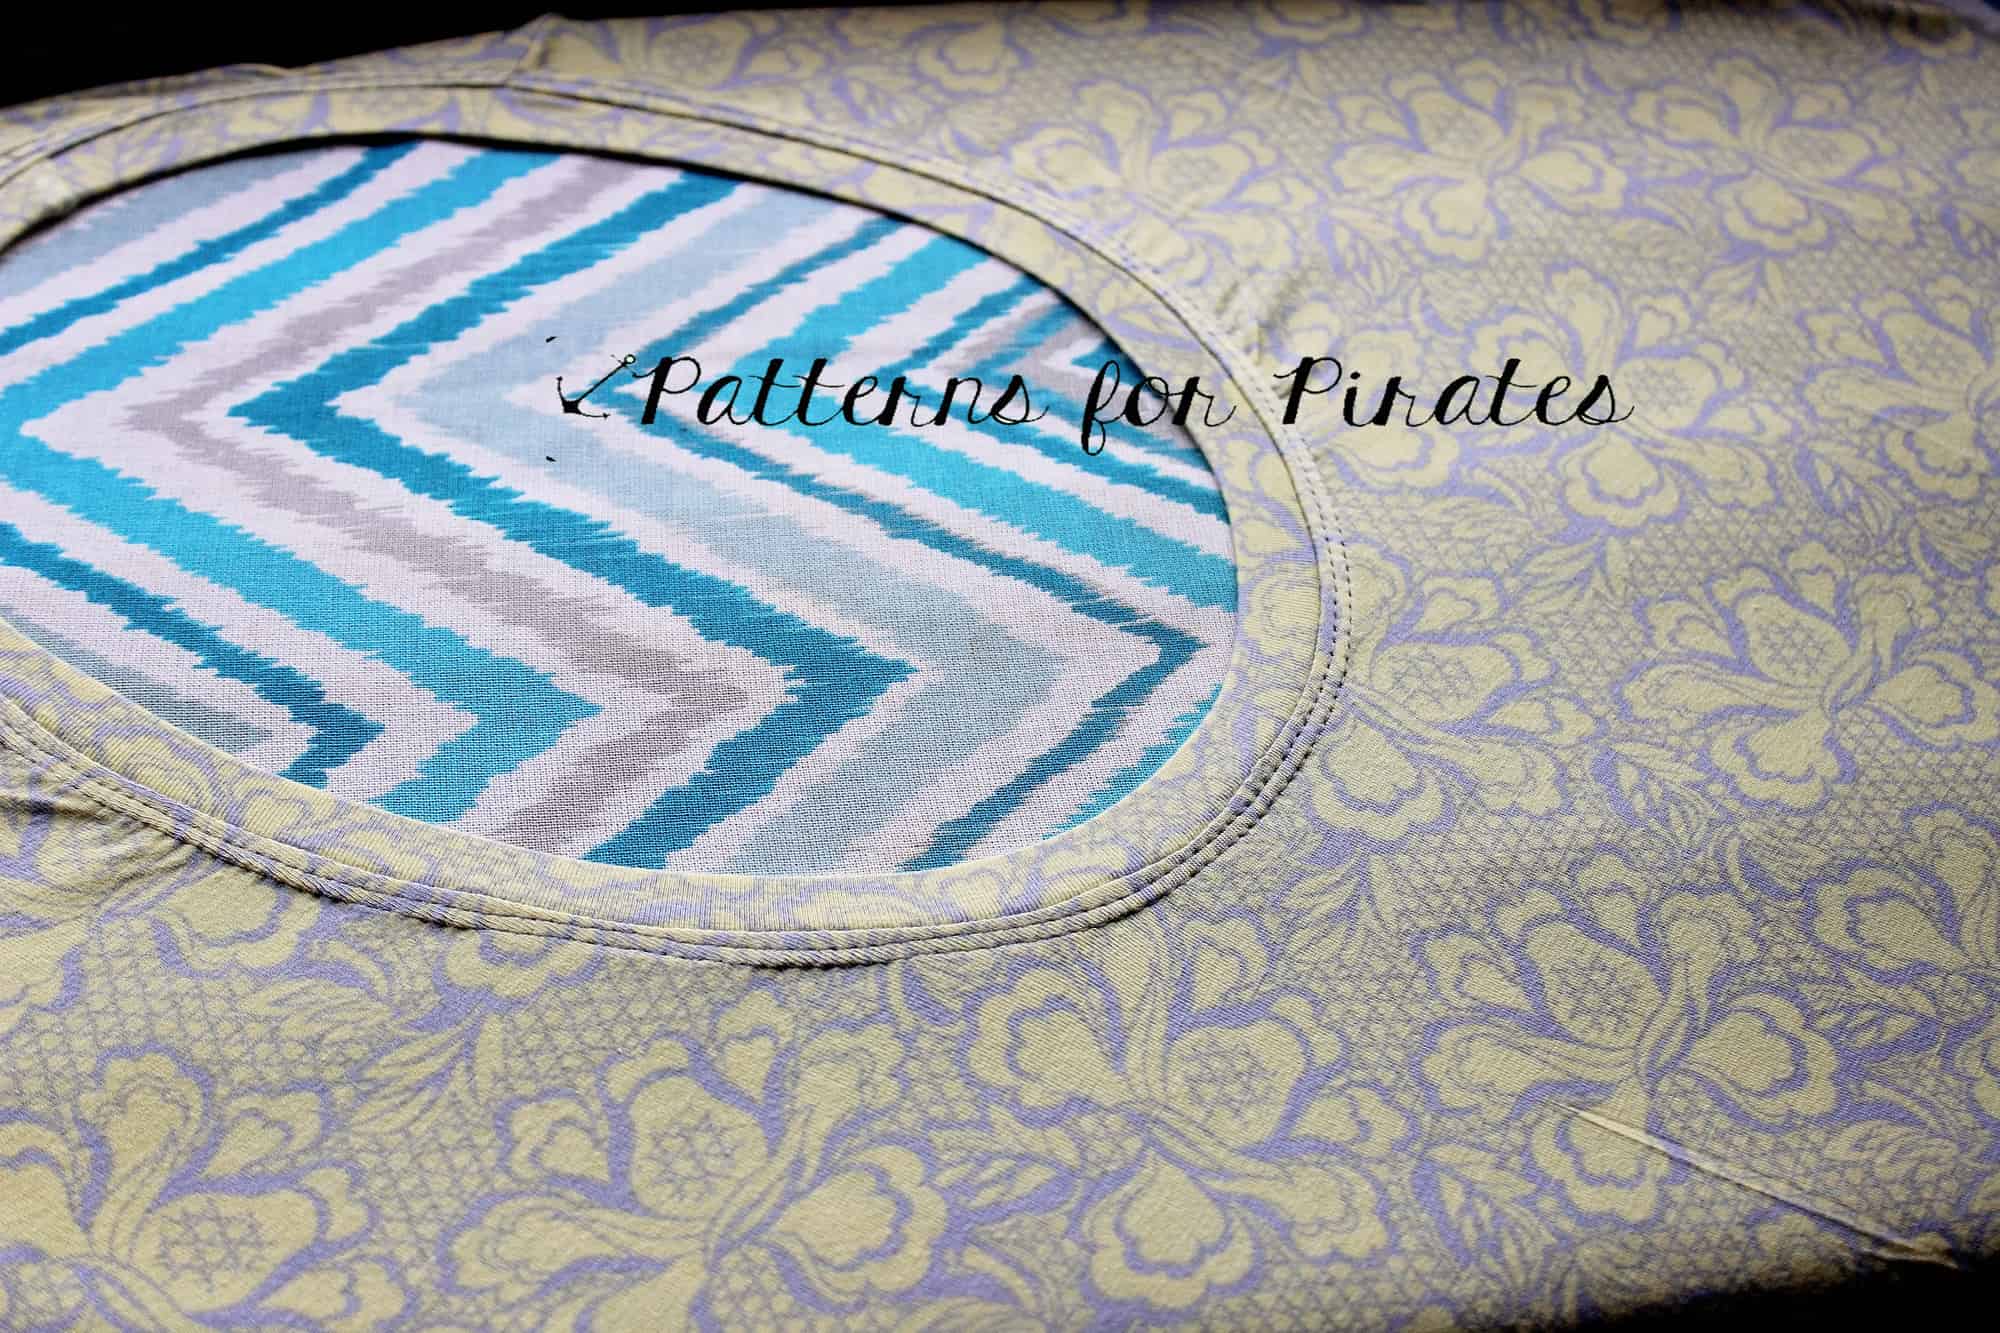
6. With your strap facing up, sew it through the elastic on the back.  This area will receive a lot of stress so make sure to use a good stitch – I like the triple stretch stitch or zigzag.

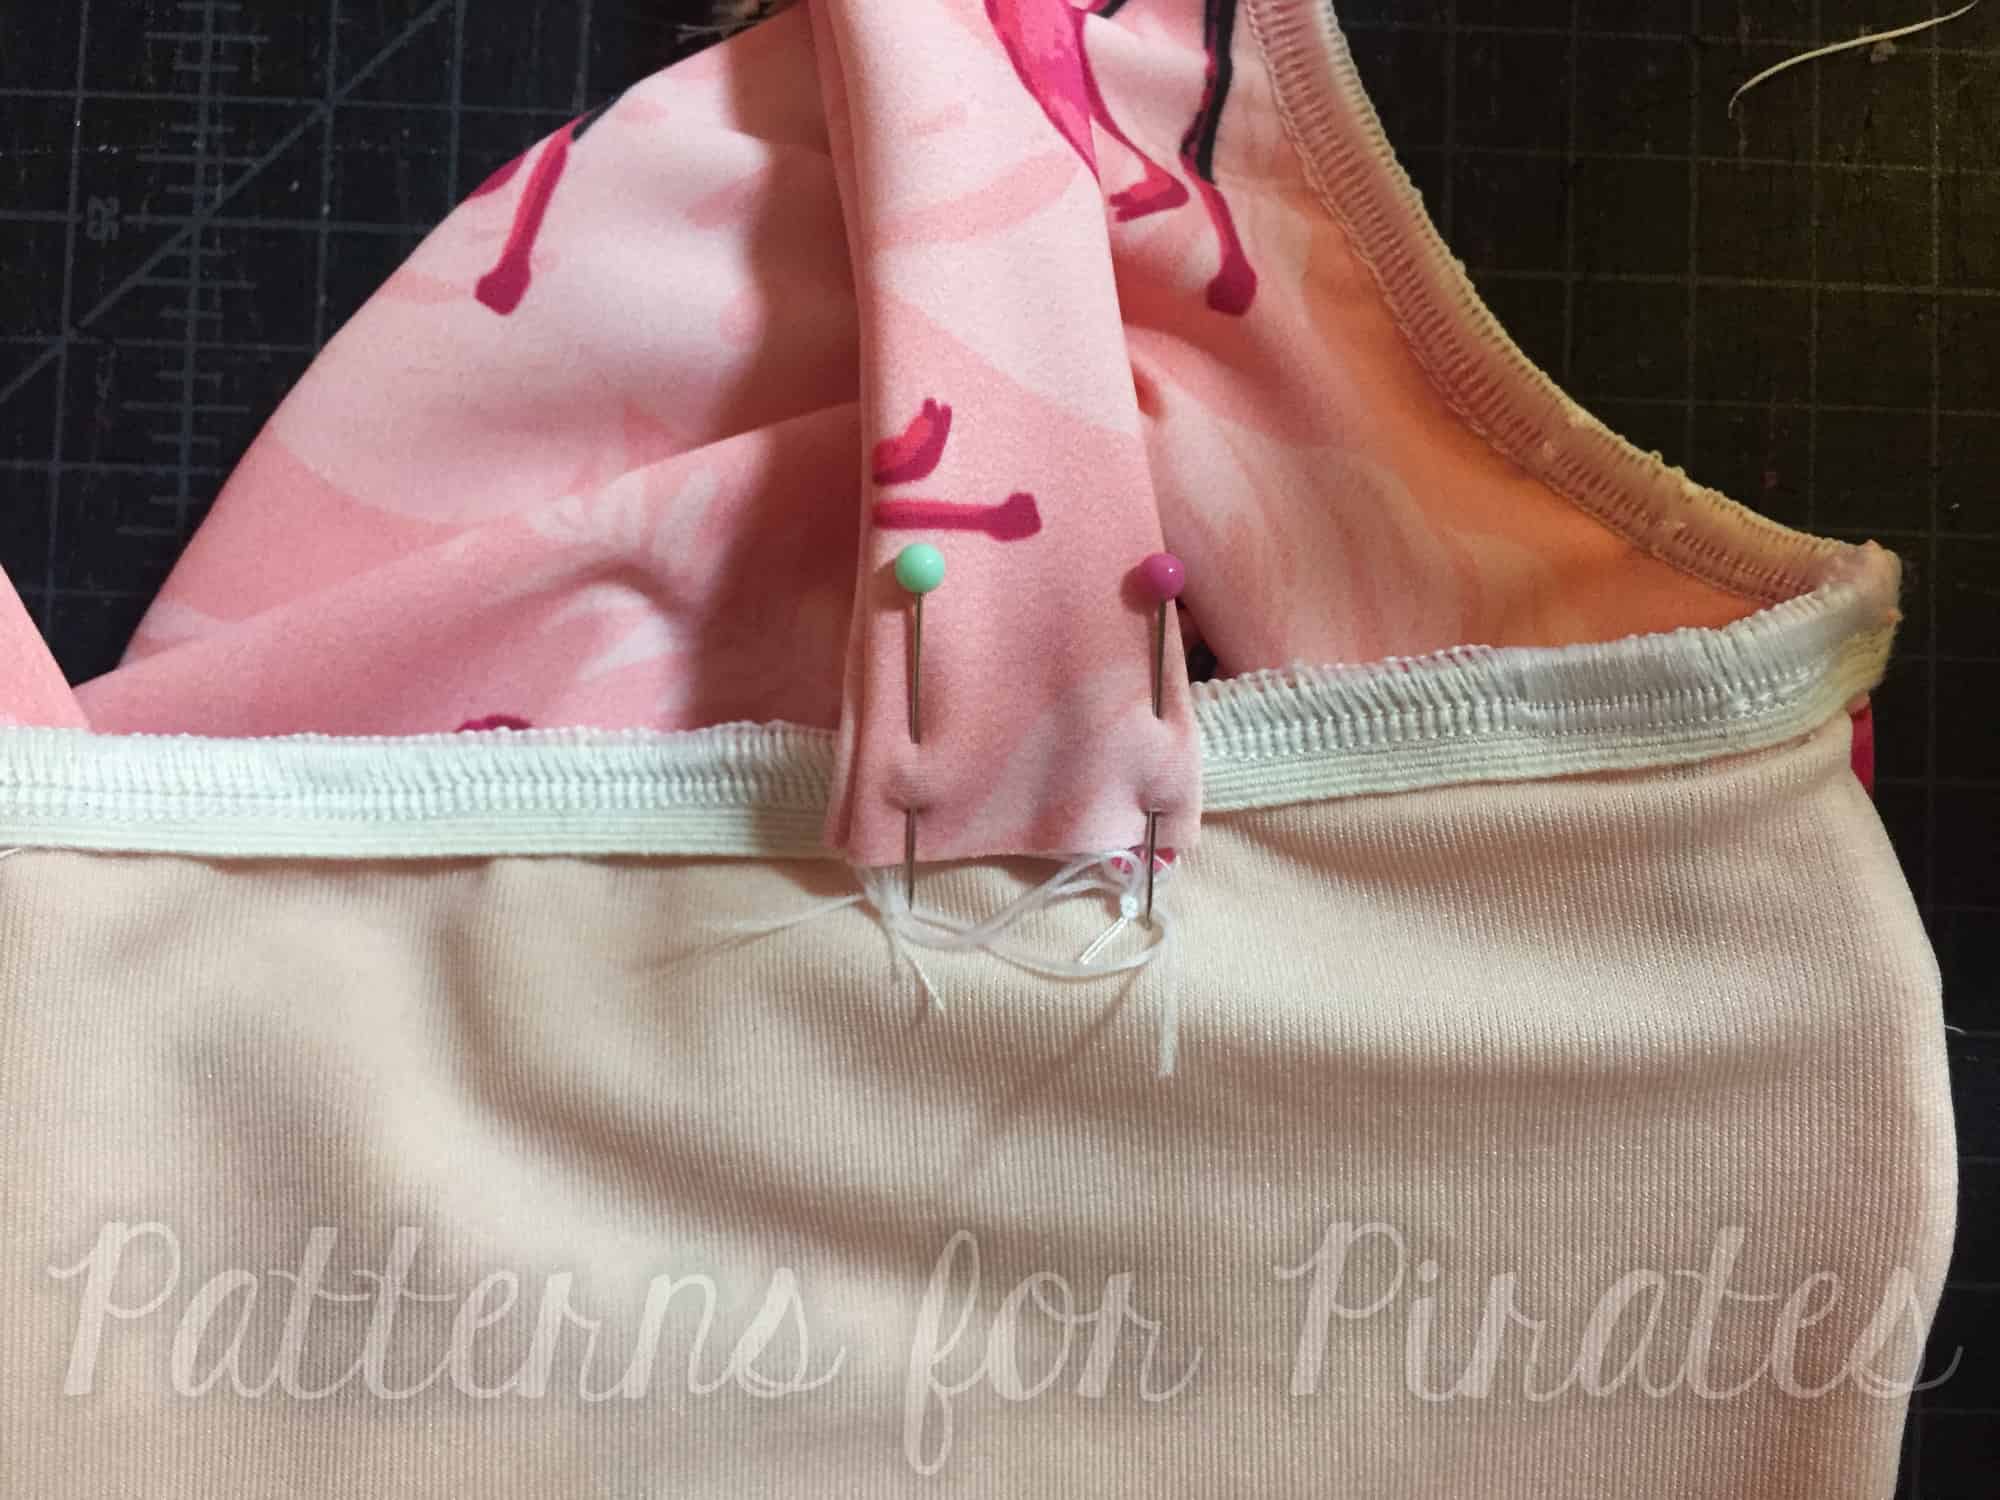
7. Now turn your elastic edge down to get ready to top-stitch along the edge as the pattern instruction indicate.

8. Before you top-stitch, pull the straps upwards again.  Now, you’ll also catch the strap as you top-stitch along the back of the suit.

9. That’s it!  Now finish the suit as usual.


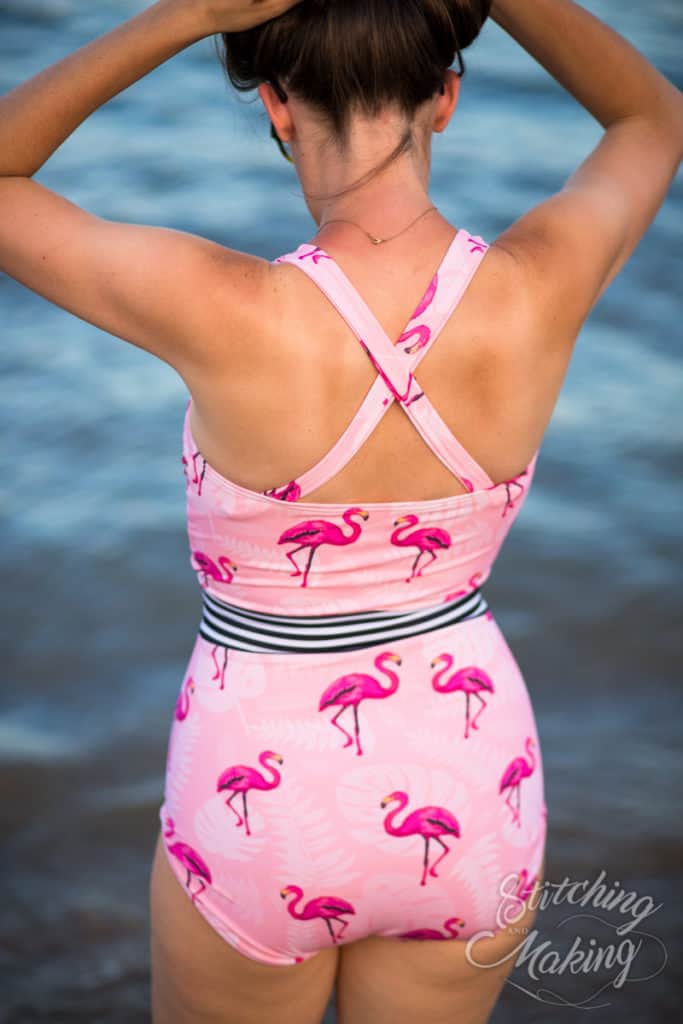
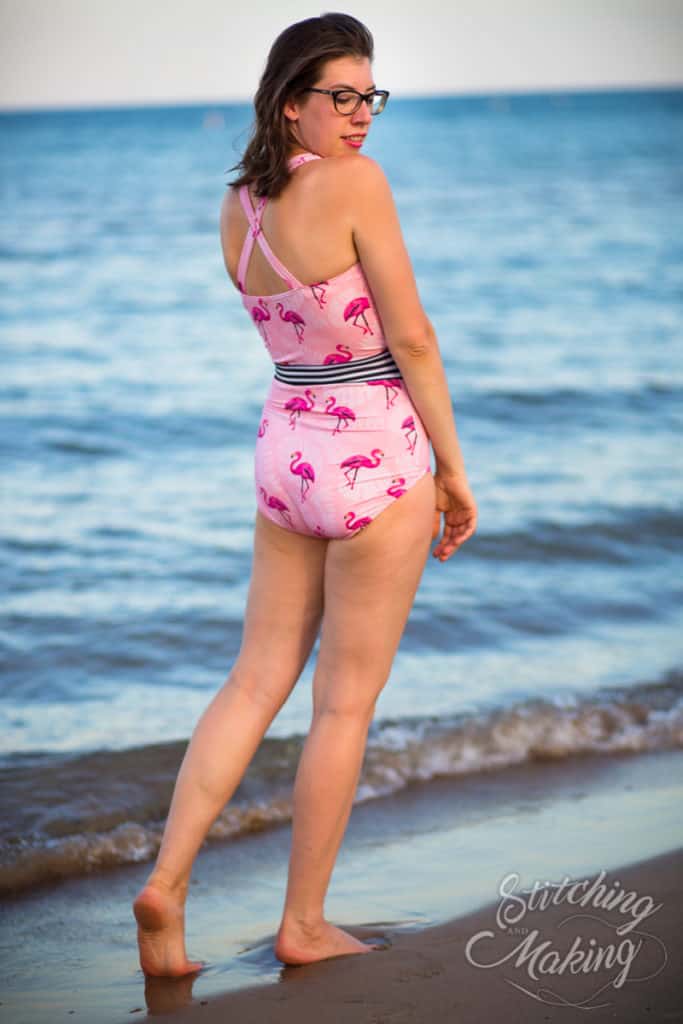
Have fun experimenting different ways to change up these straps.  You could try using the low back option instead of the halter,  double or even triple straps on each side, or even weave them together for a completely different look!

– Elisabeth

—

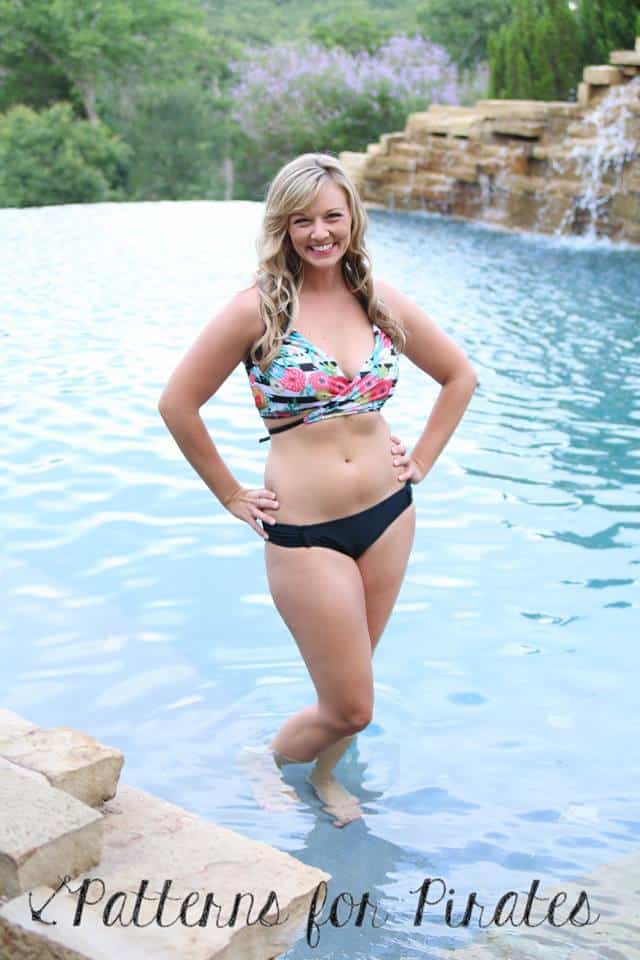
Not really a one piece kind of girl?  Whether you like to rock a bikini or prefer a little more coverage of a tankini,  with a few minor changes you can Take the Plunge to new depths (or looks 😉 )

First up, the Peplum Tankini.  I also had some fun and played with the straps a little and might blog those later but for now we will focus on the peplum.

Instead of attaching the skirt to the bottom portion of the waistband as directed in the pattern, you will attach it the to the bottom edge of the bodice.  Using a 1:1 ratio, add 3/8″ elastic and stitch together!  This will give you some extra stability and help keep the top in place. I wanted the skirt to hit just about my high hip so shortened the peplum length in the pattern by 1″.  You can choose any length of your preference though.  I paired this with the Hello Sailor Swim Bottoms, however you could easily use the bottoms in the Take the Plunge Swimsuit (I’ll show those later too!)


Now for the Bikini option…  Not one, but two!!

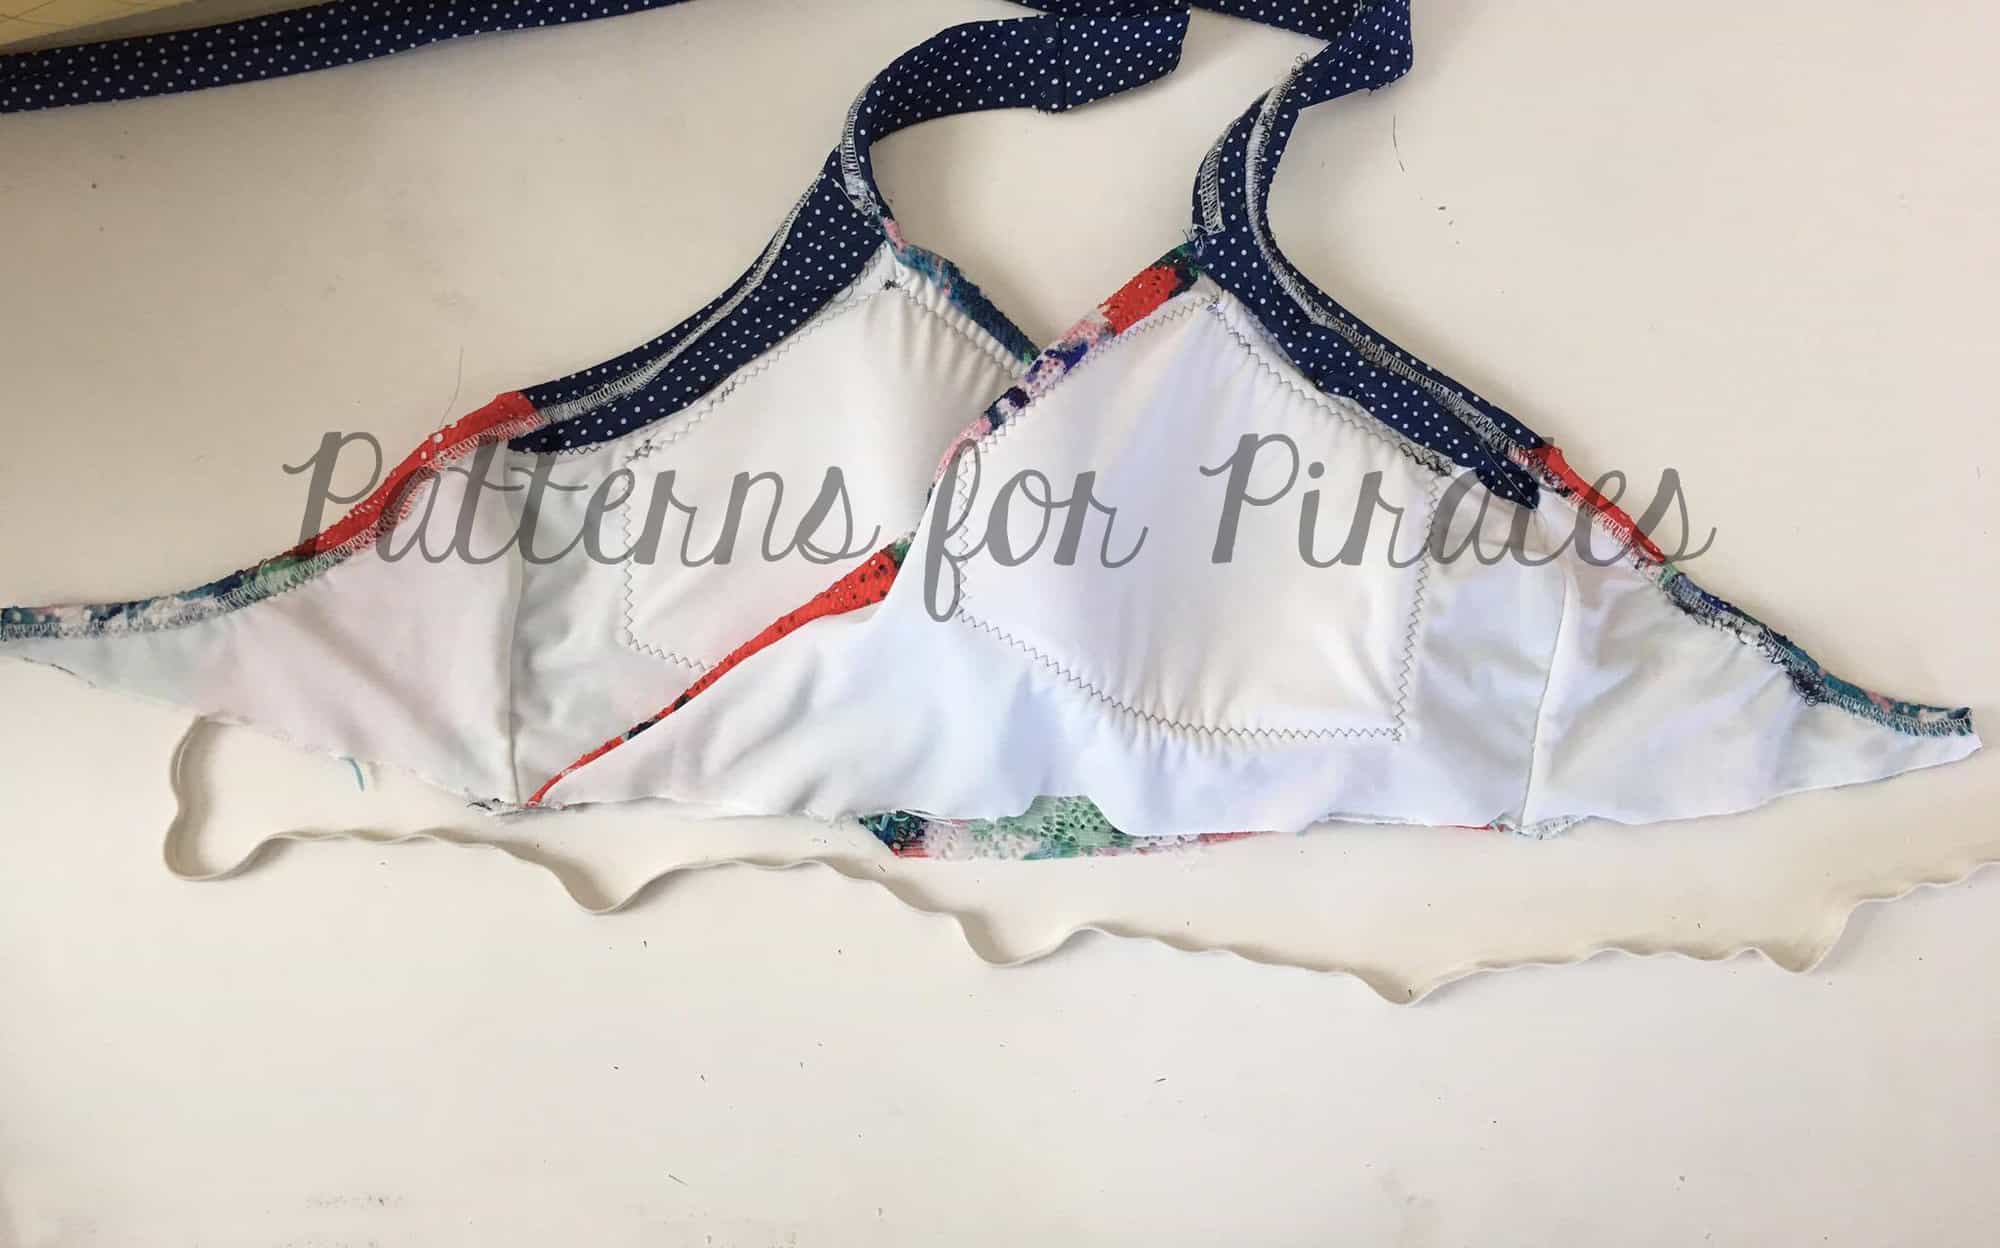
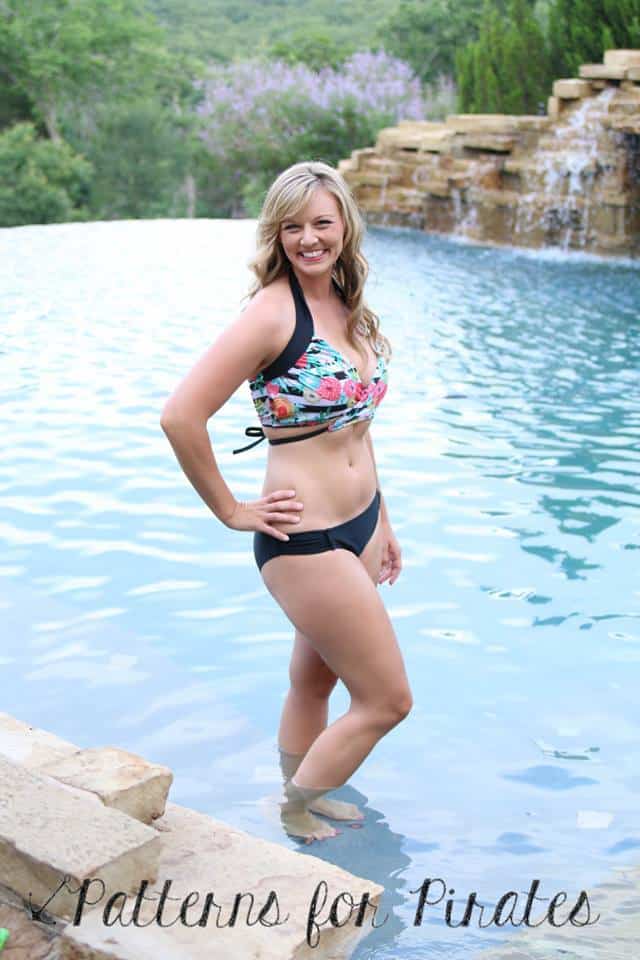
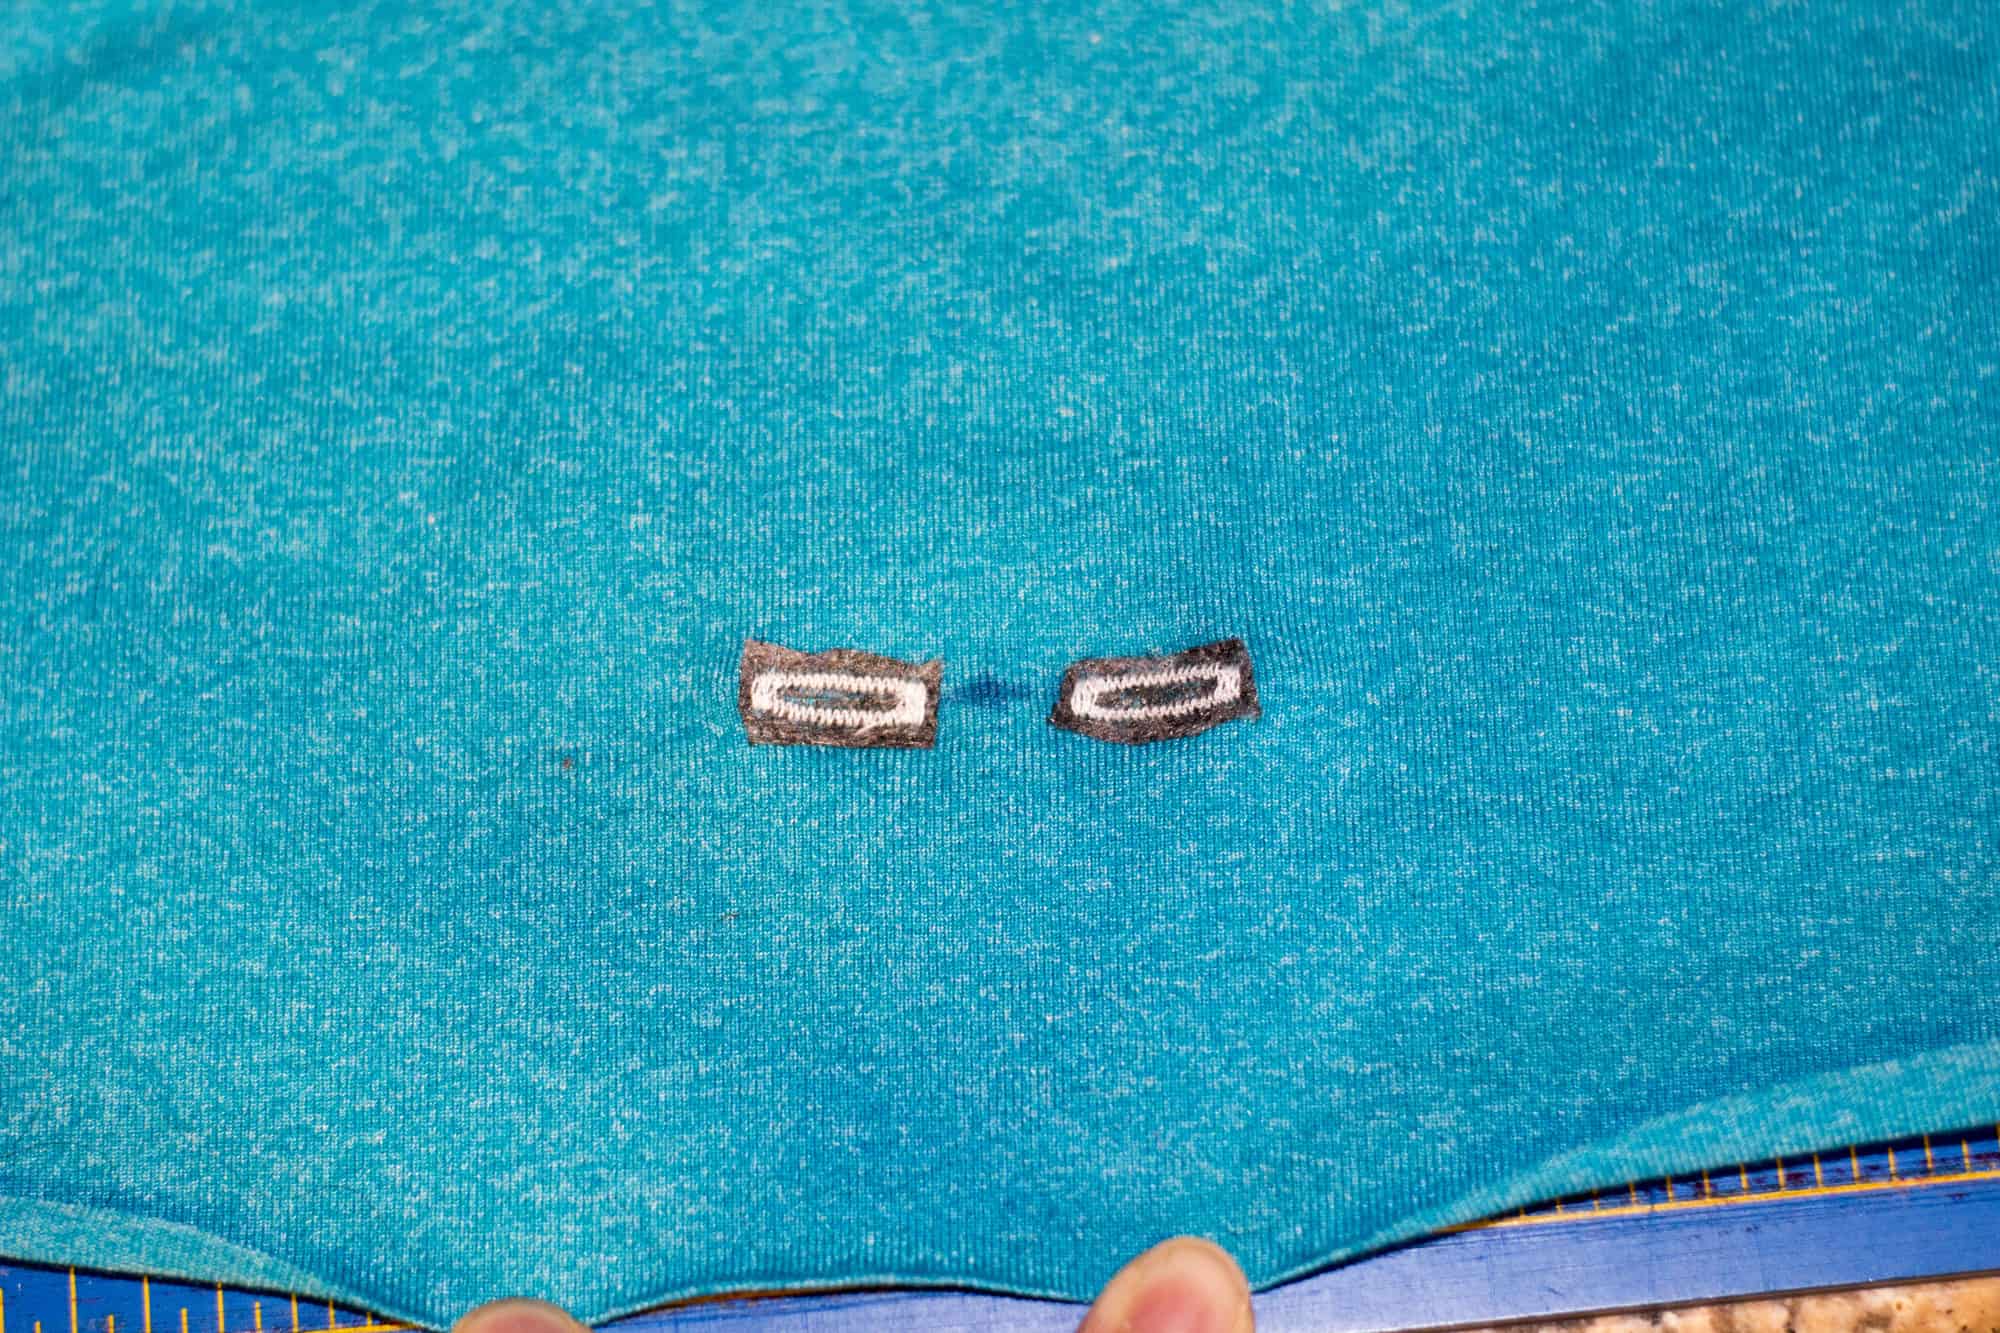
For this version, you will construct your top exactly as the pattern instructs and need to choose the low back crossover version.  You will also need a 3/4″ swim bra hook.

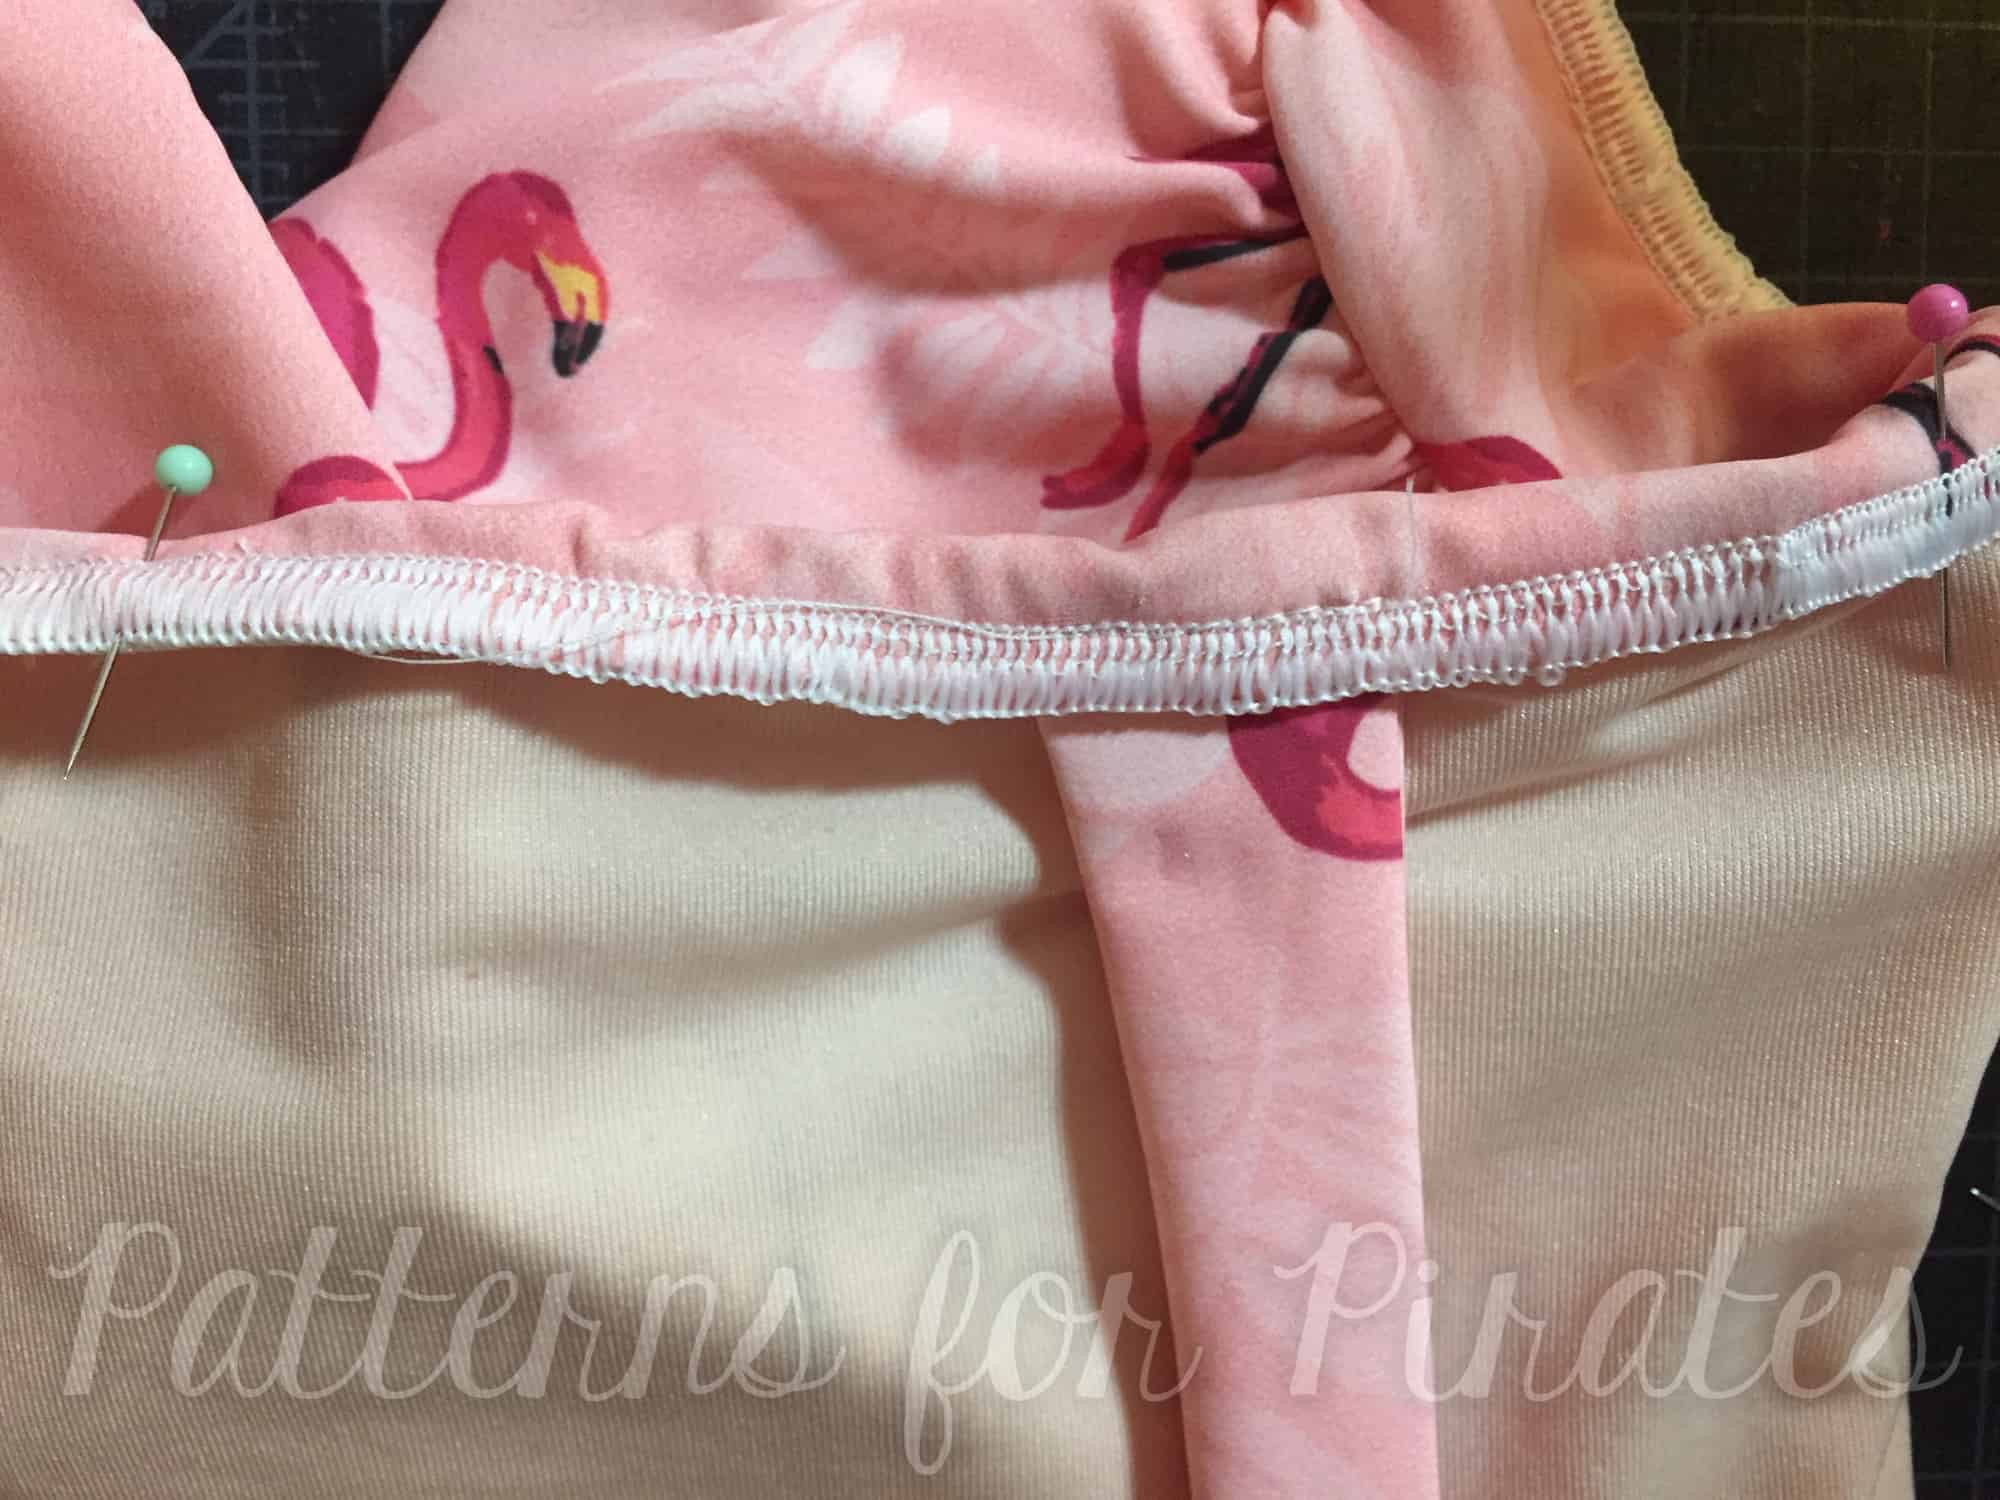
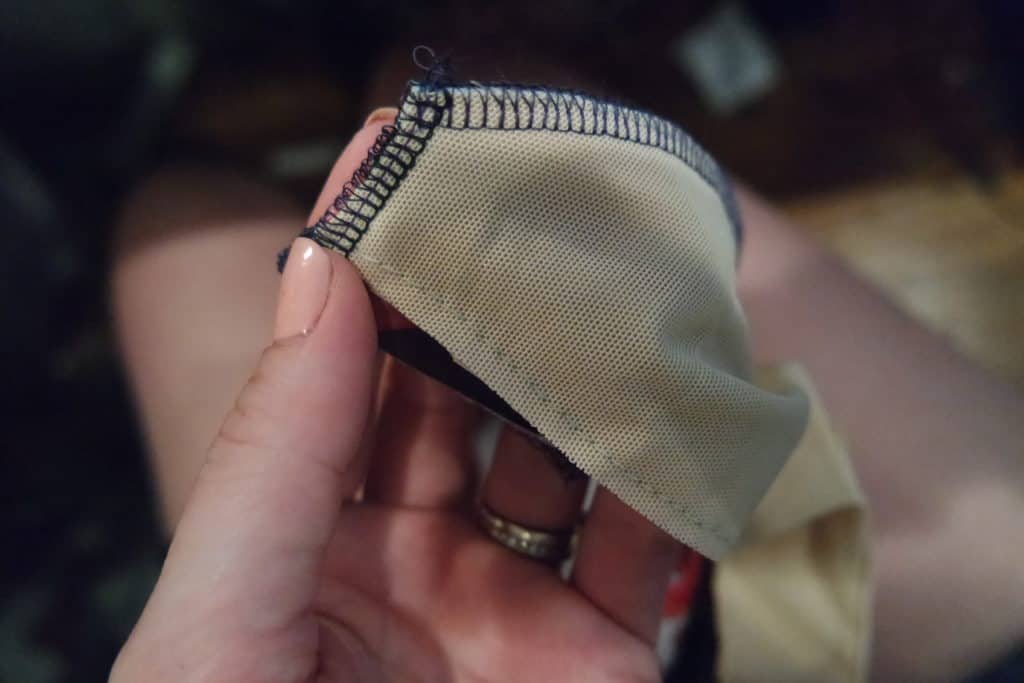
Construct your top exactly as you would in the pattern.  Once you have completed your top, find the center back and clip.  Be sure to baste the bottom edge of your bodice to ensure it is aligned correctly at the center notch and side seams. (Note: bottom edge has not been basted in this pic)

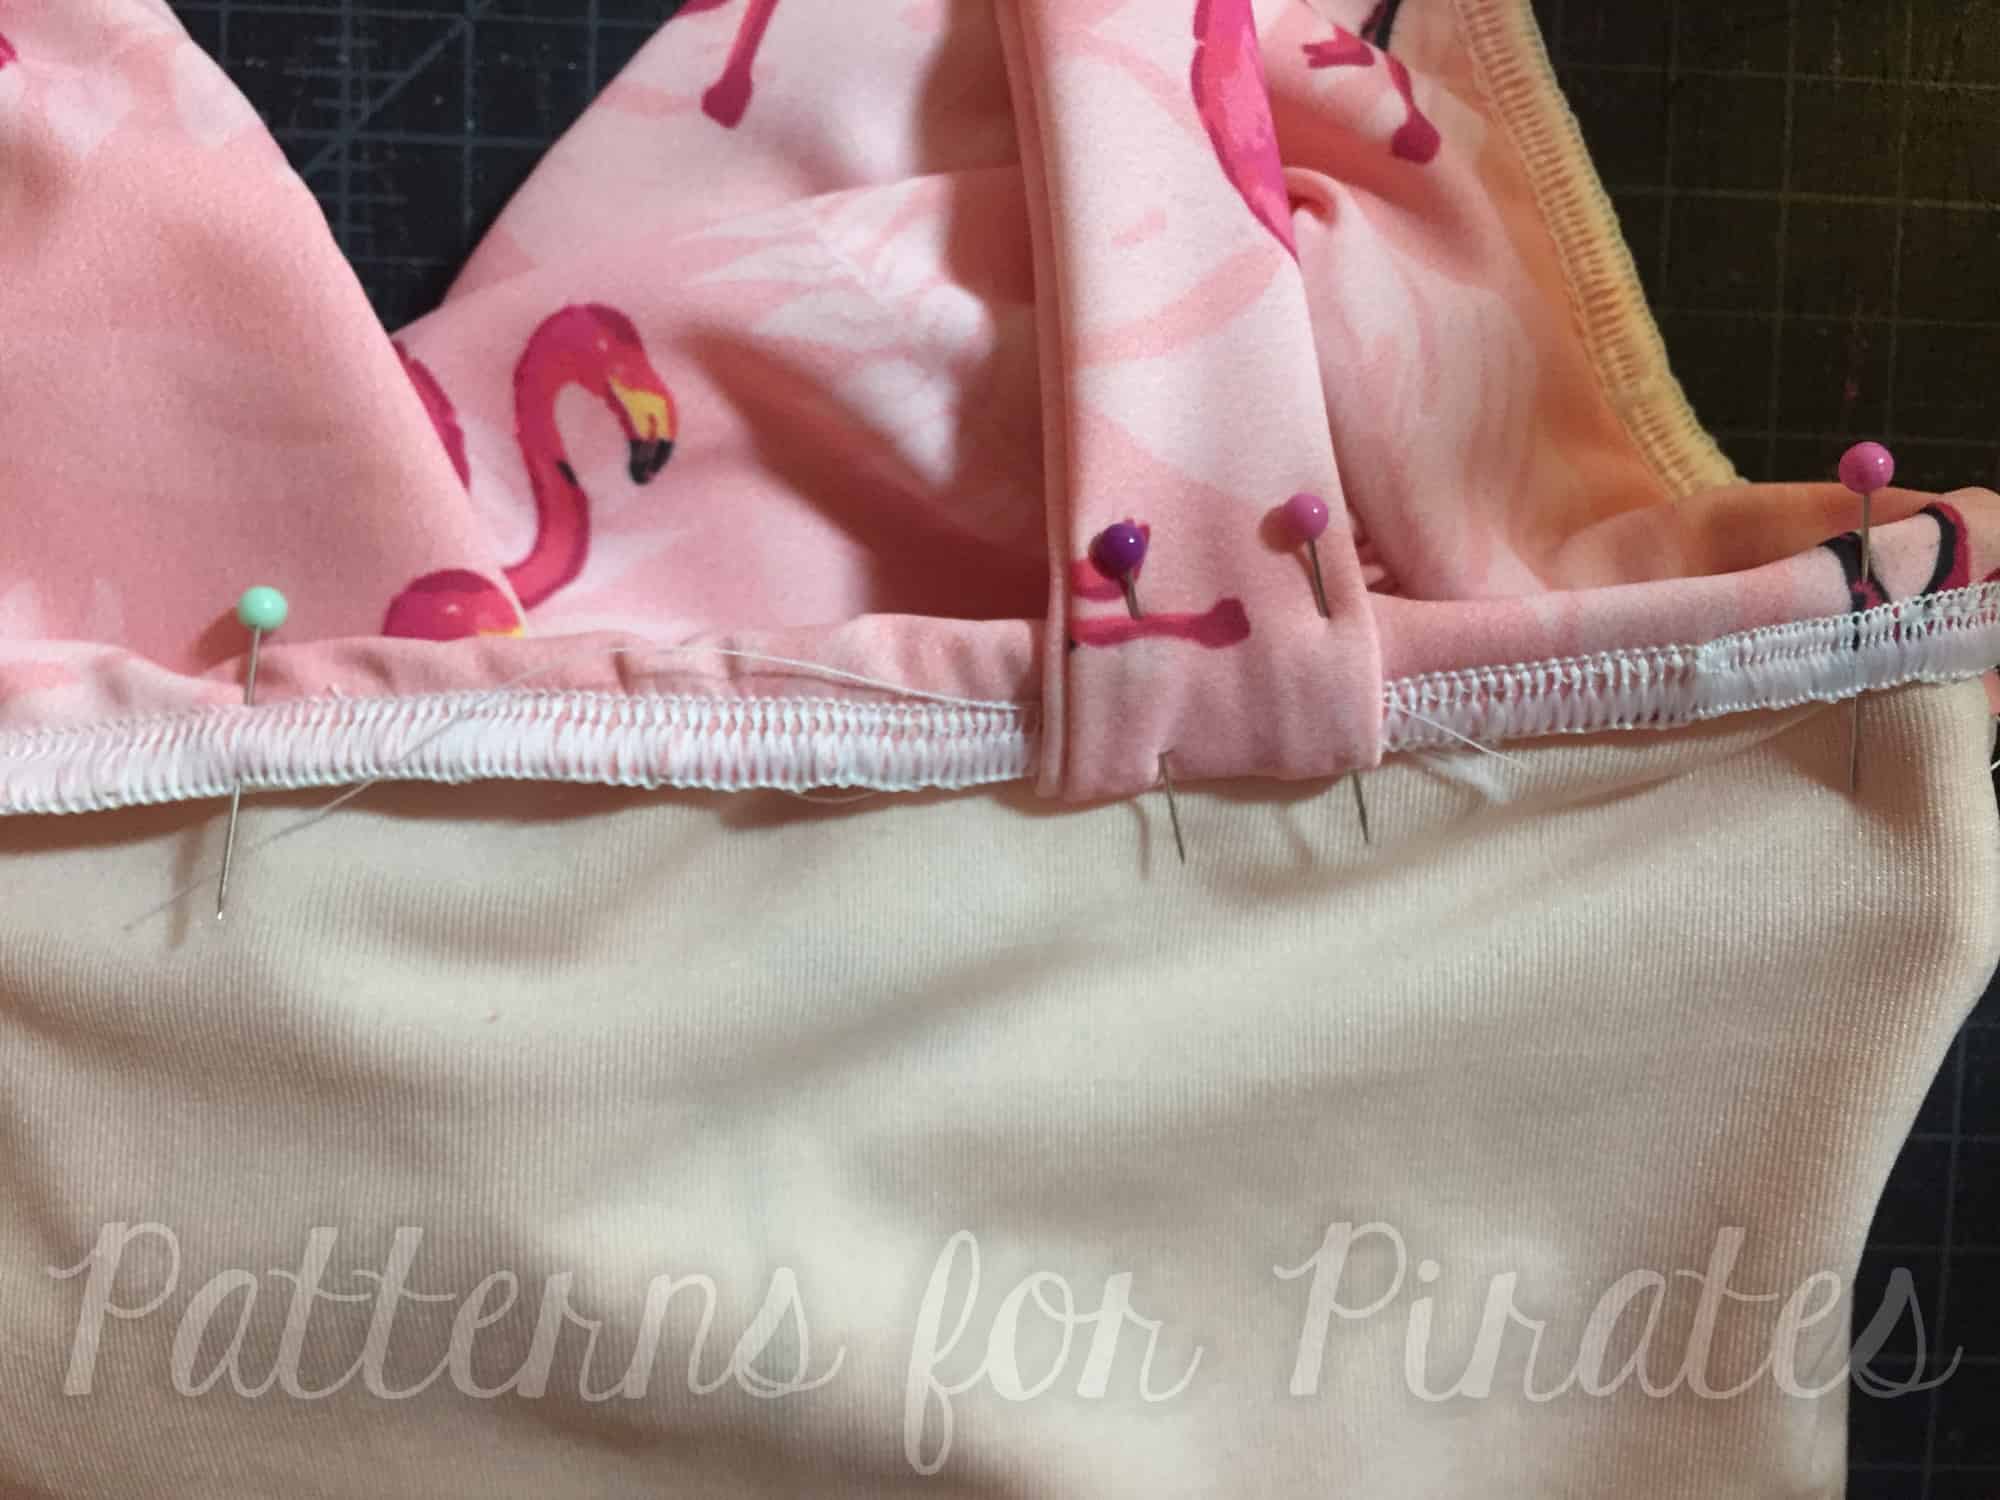
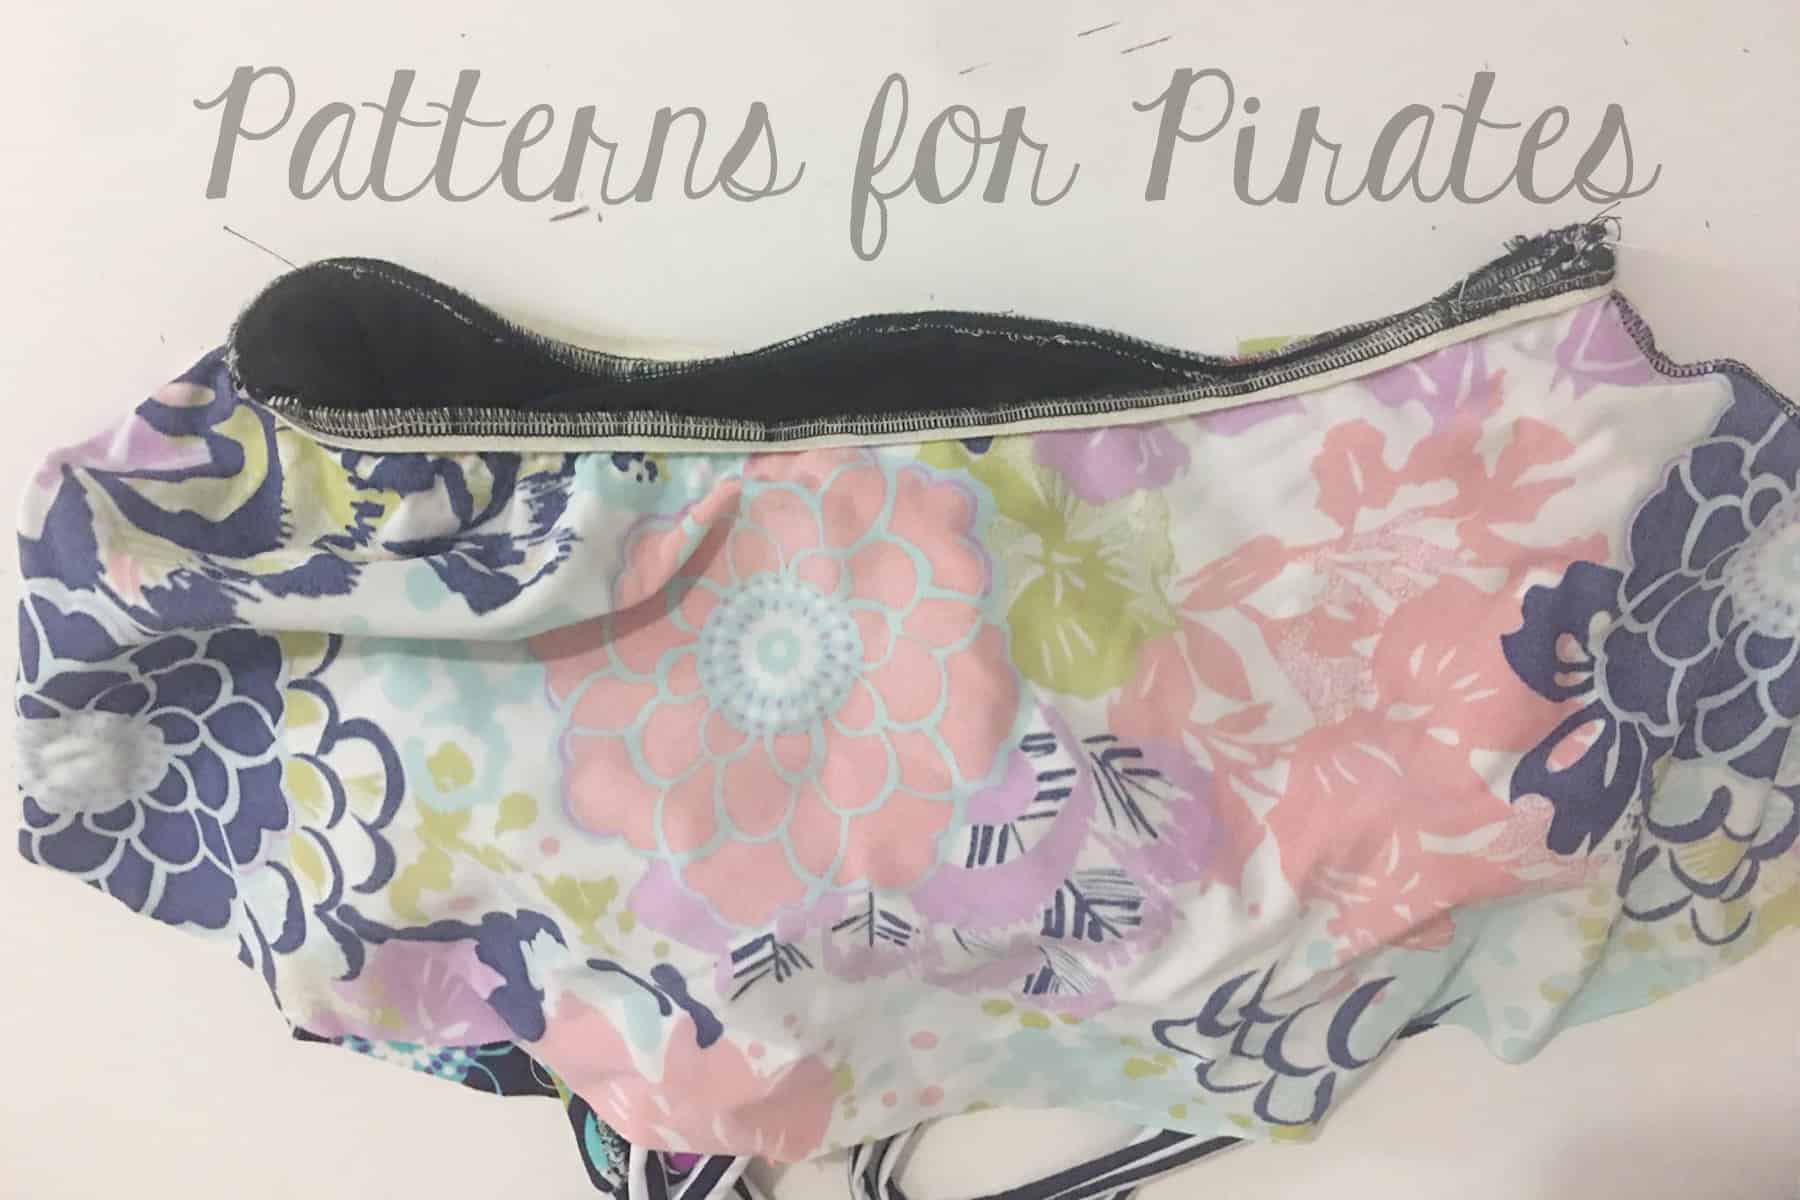
Using a 1:1 ratio, stitch elastic to the lining side along the bottom of the bodice edge.  Flip up and top-stitch.

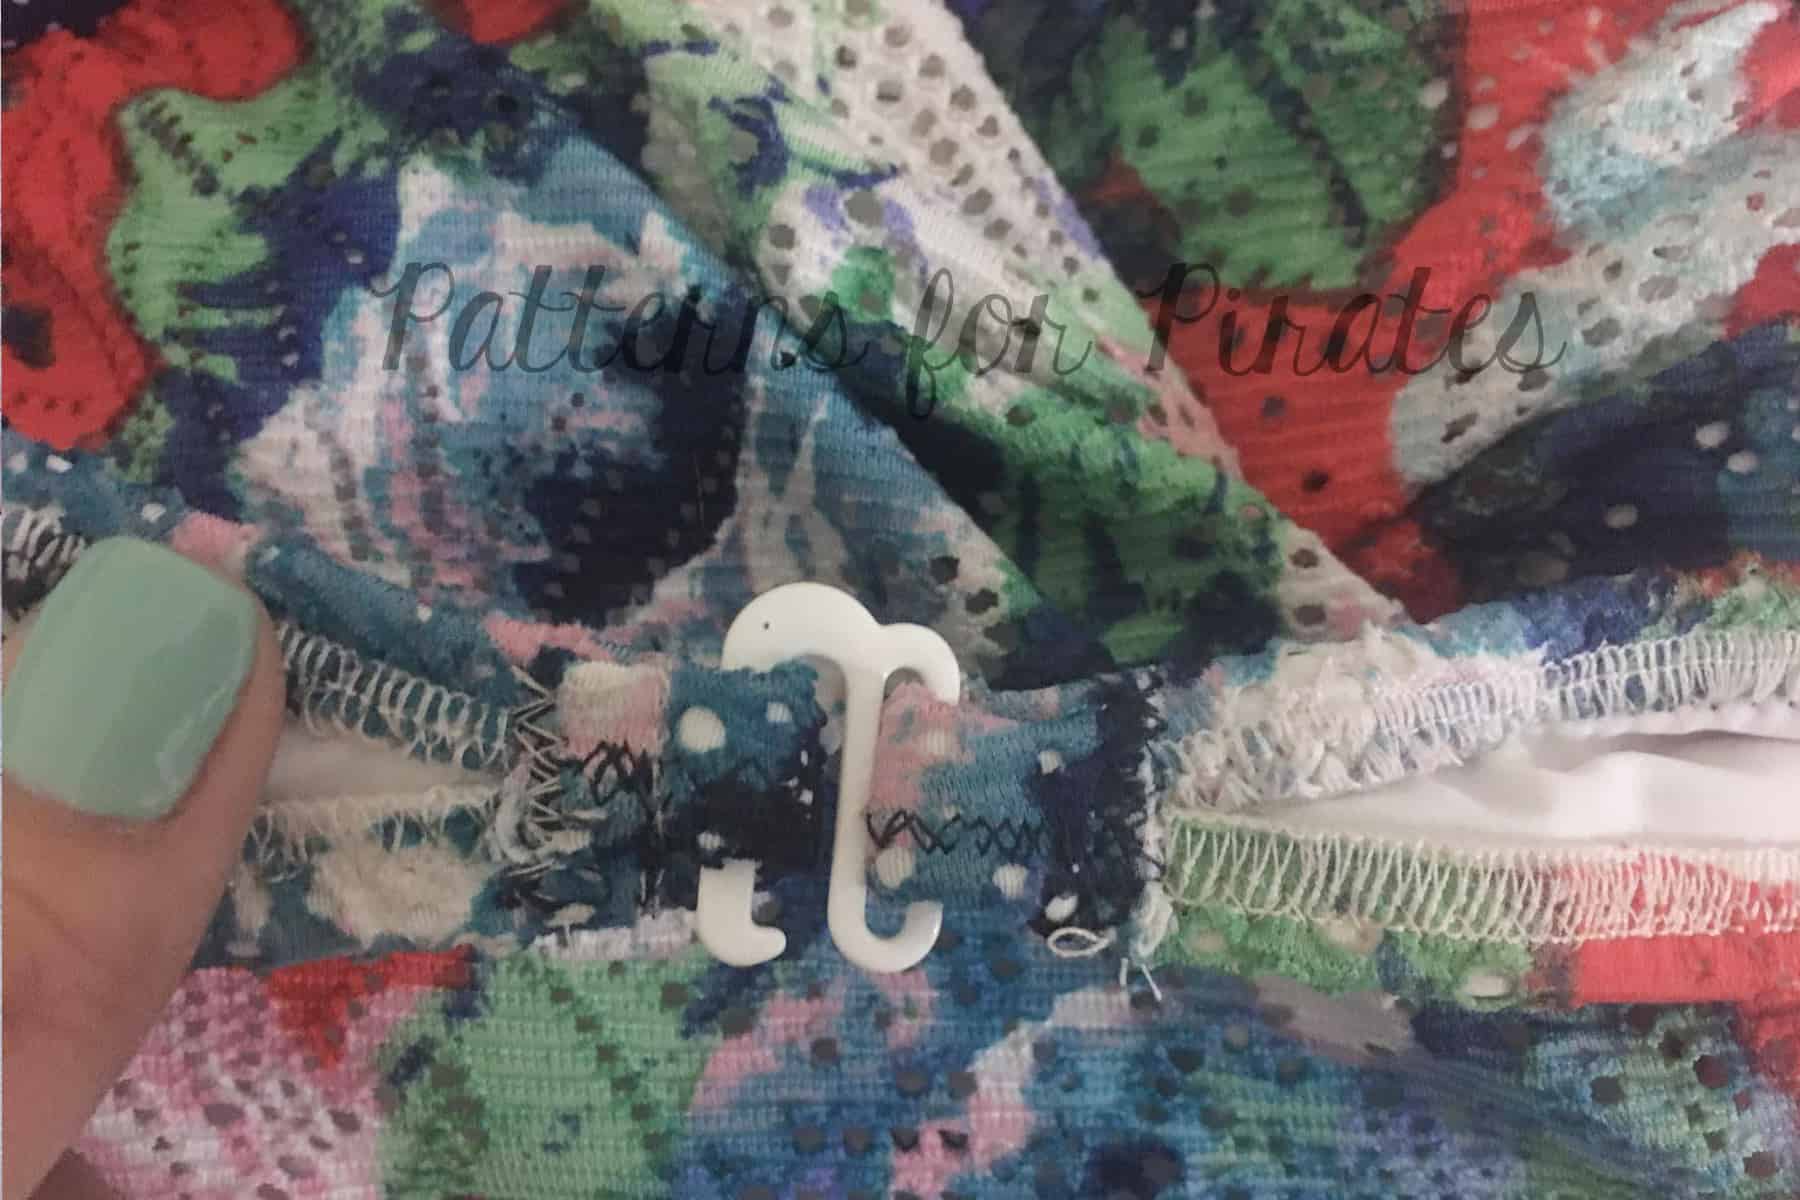
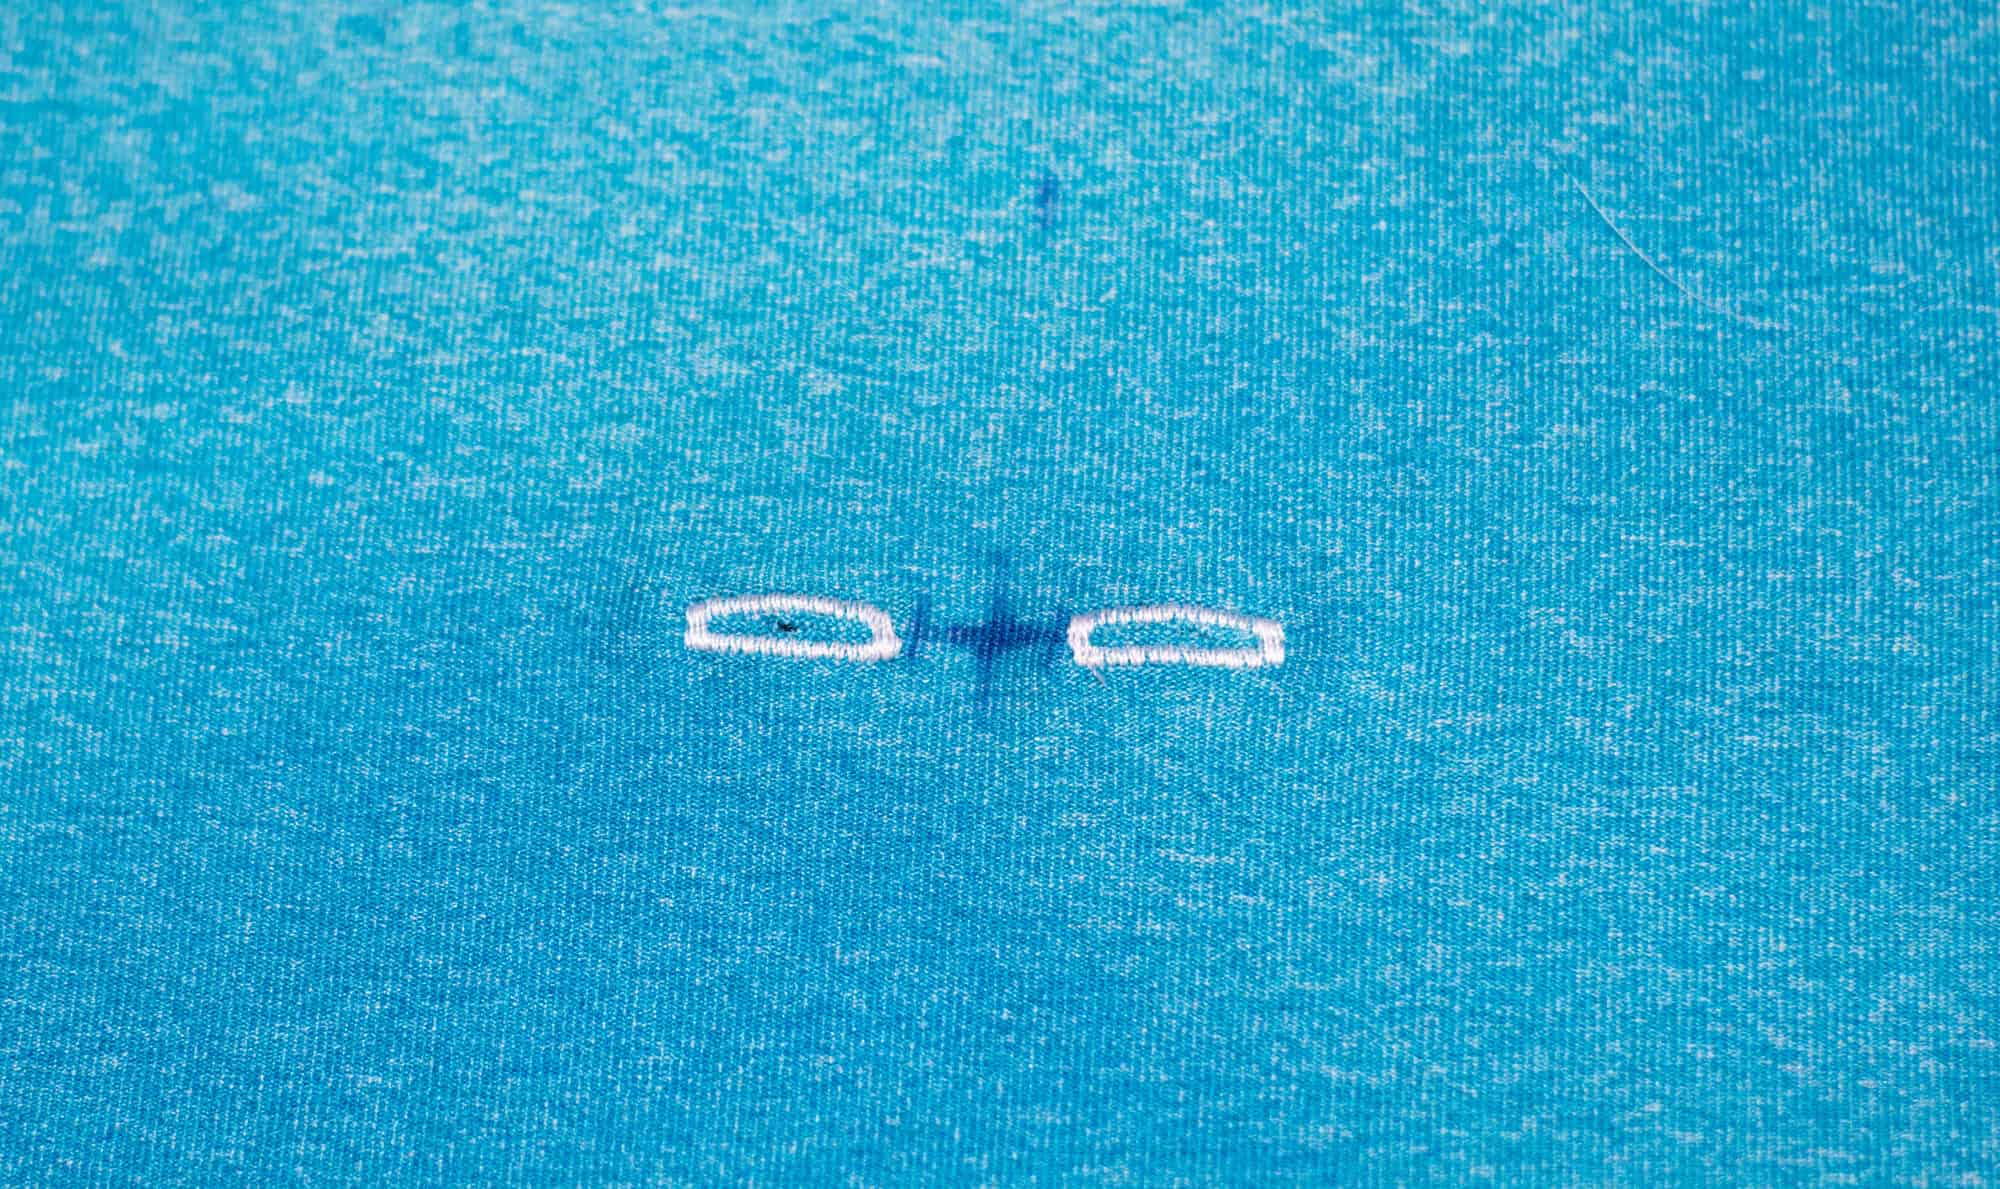
Slide one end in to the swim bra hook and stitch.  Fold over opposite end and stitch, creating a hole for the hook to go through.

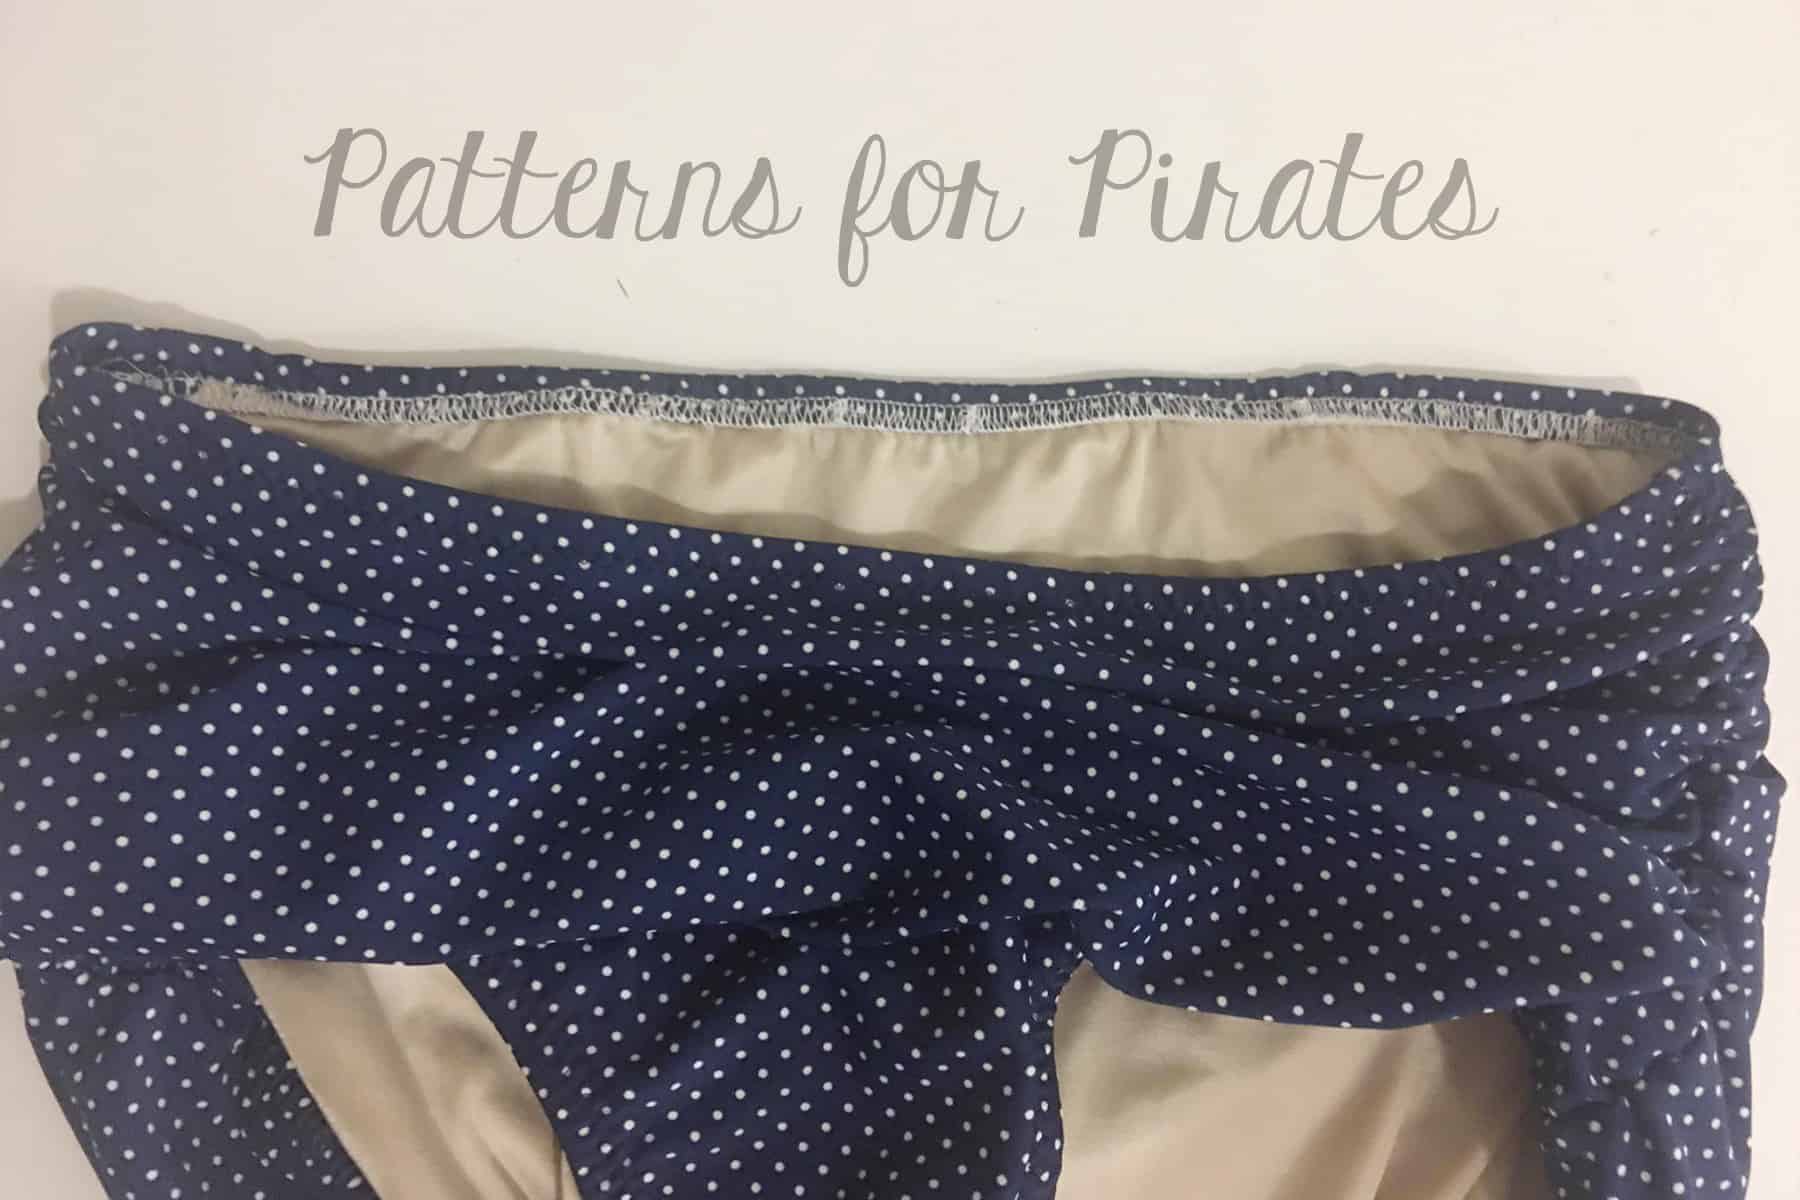
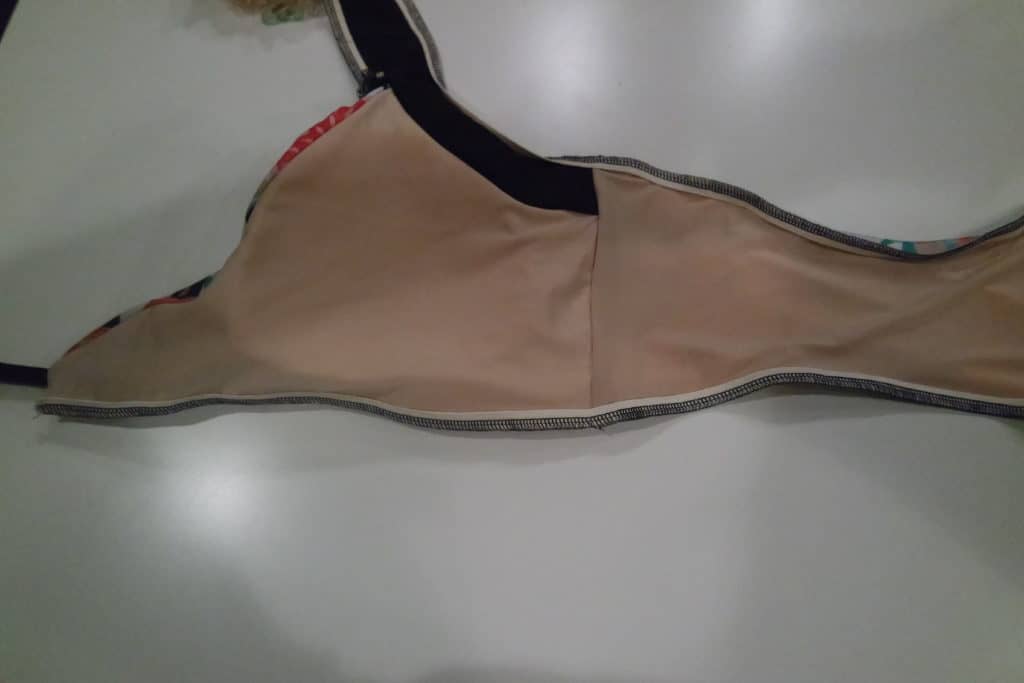
To create the separate Take the Plunge bottoms, construct as the pattern indicates.  Using a 1:1 ratio, stitch 3/8″ elastic to the lining side of the top edge of the bottoms.  Flip down and top-stitch.  I used the ruched version here with only the side elastic and omitted the front and back elastic ruching.


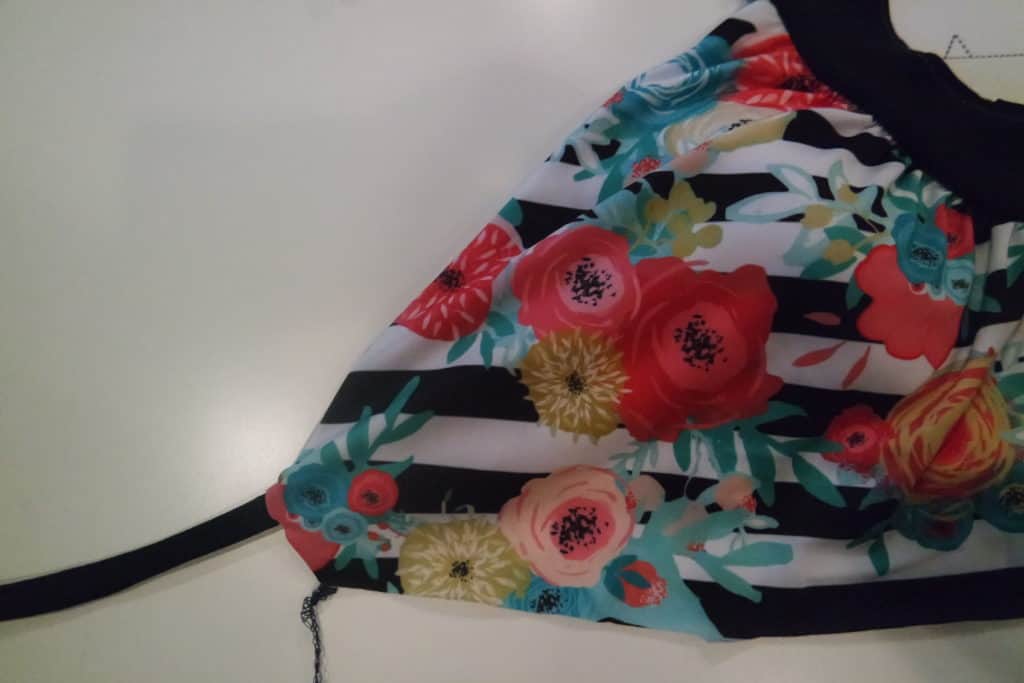
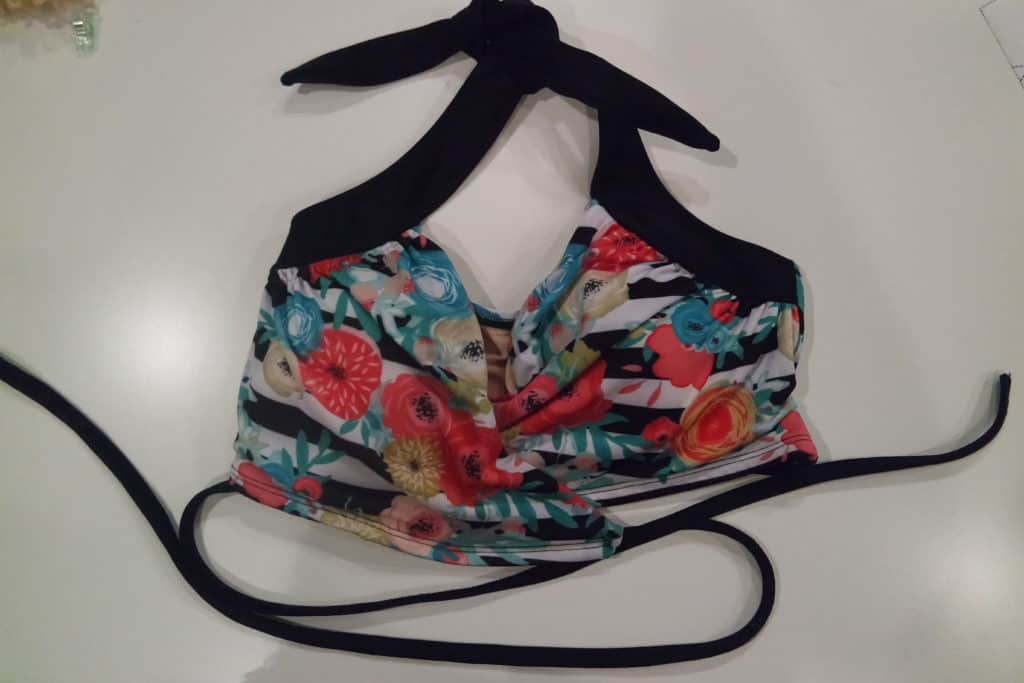
Our second bikini hack is super cute and ties around the back.  You will want to use the Halter back (or even the full back) option for this version.

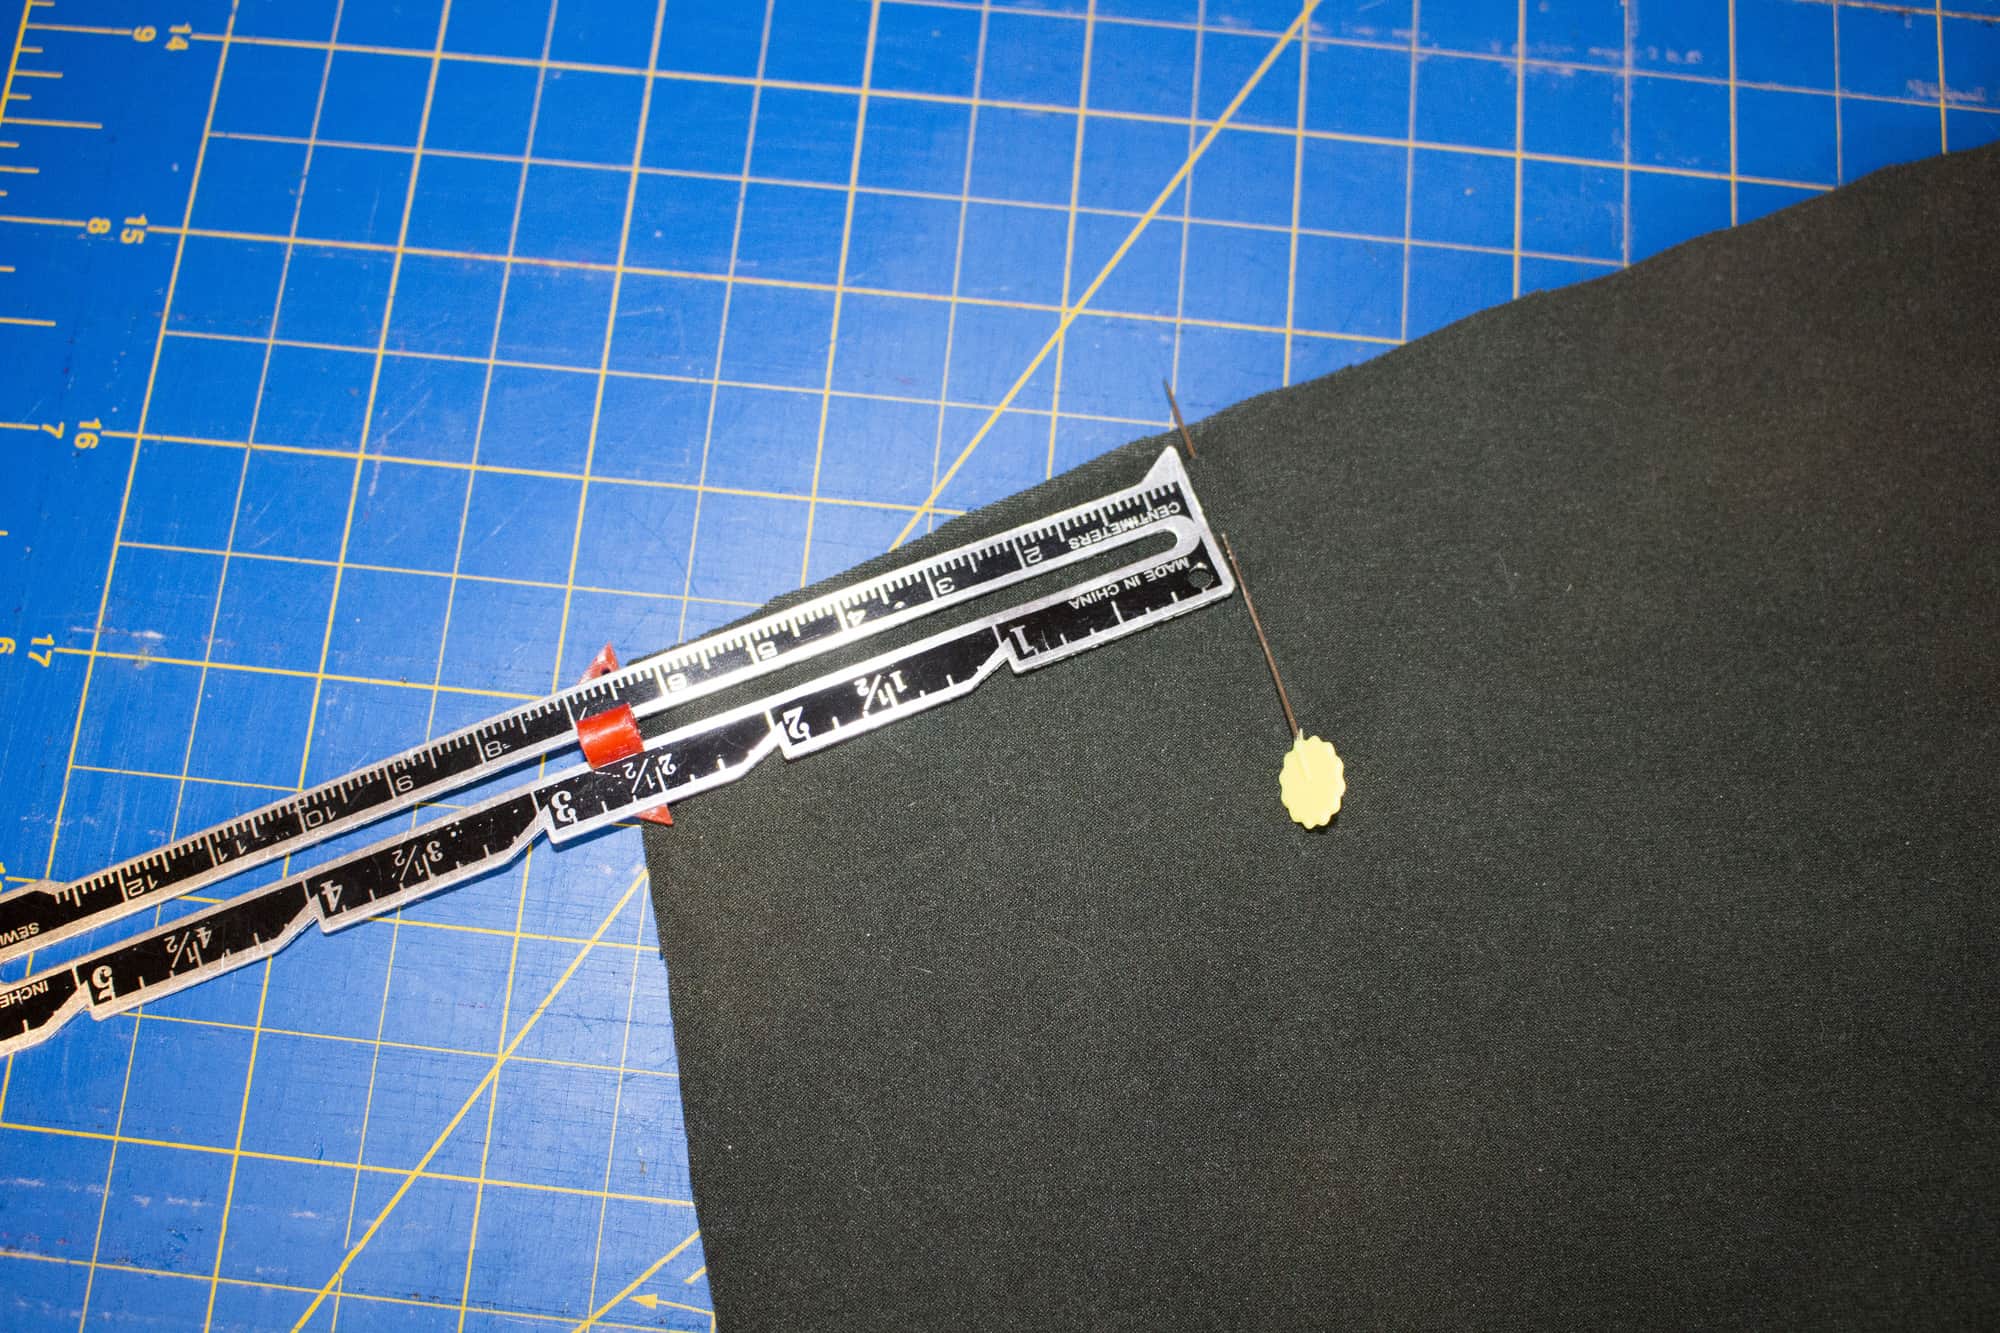
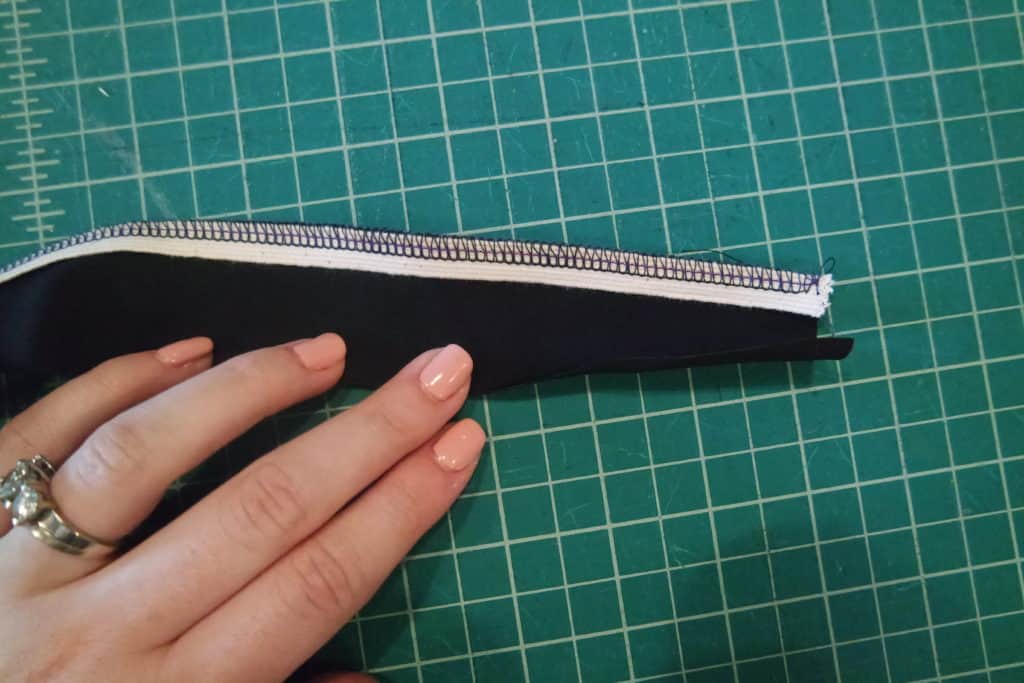
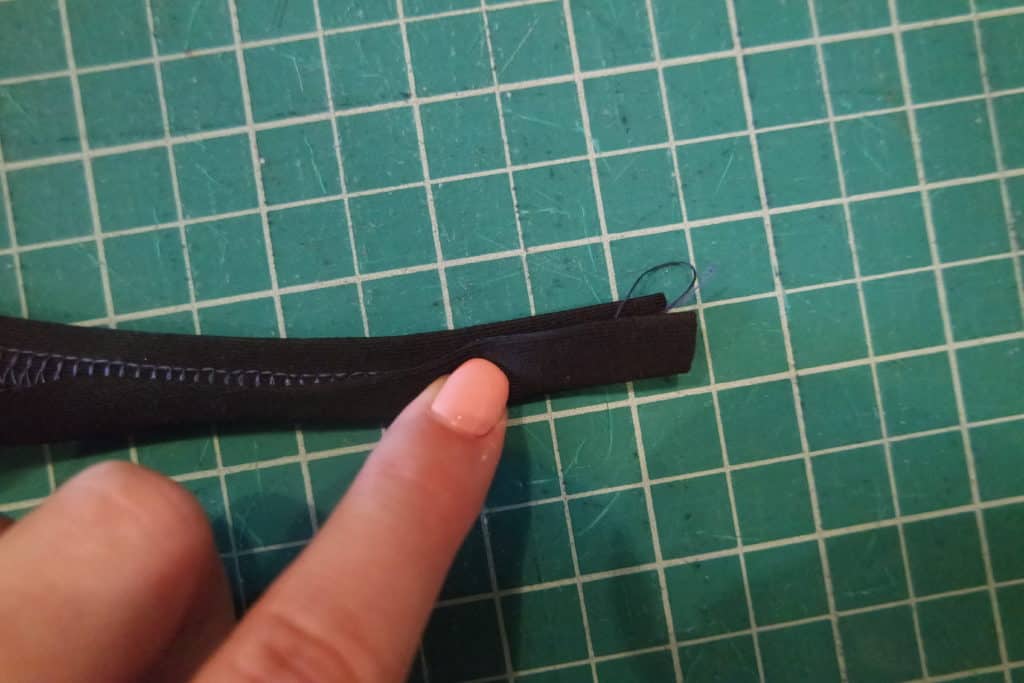
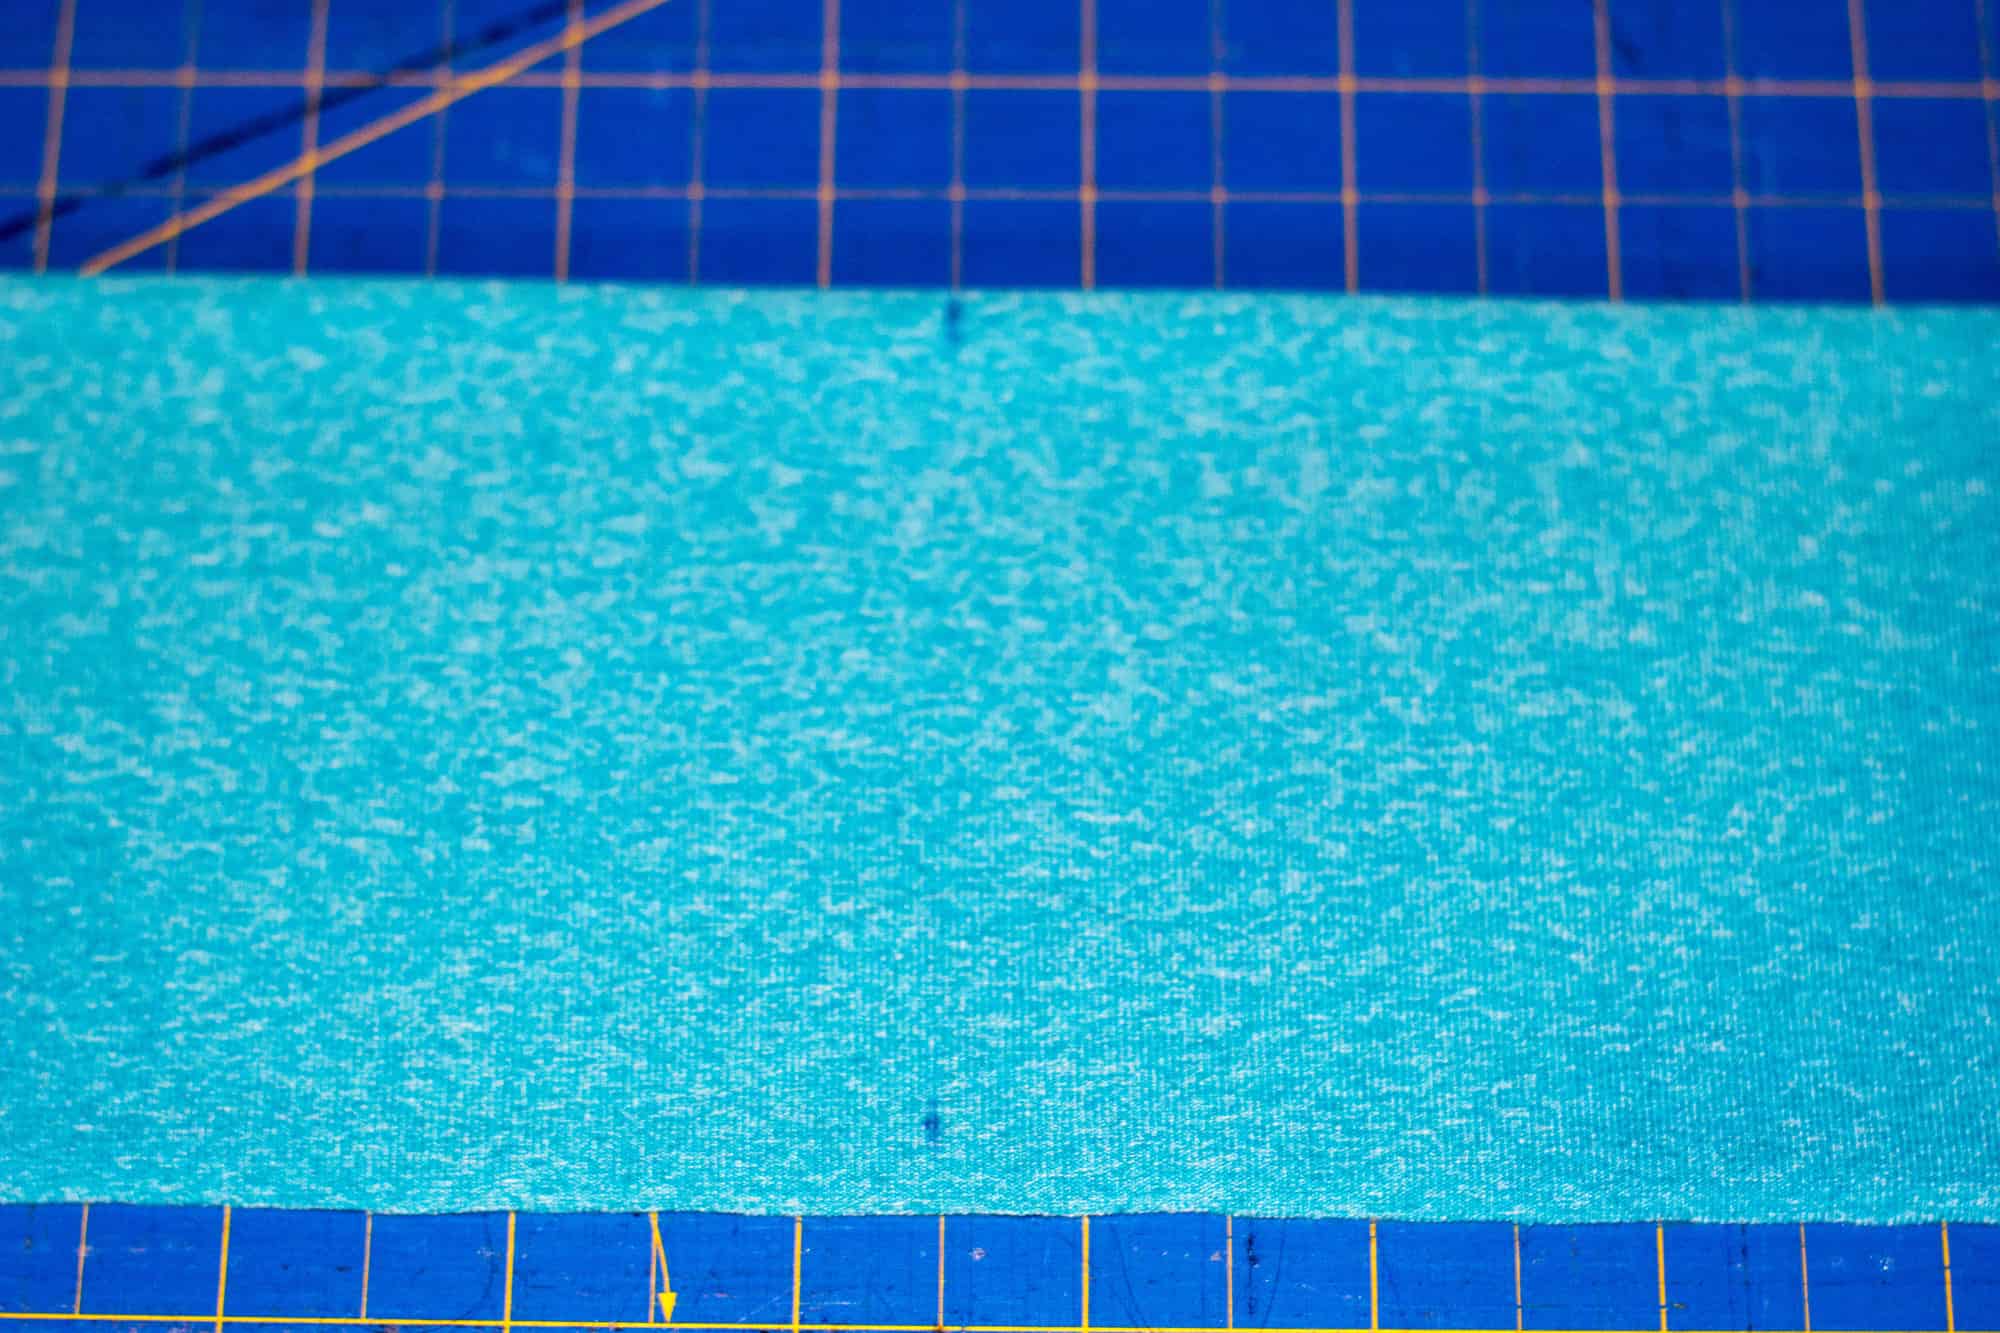
 First, create your bikini straps.  Cut a 1.5″ x 15″ strip.  You can adjust the length to your preference depending on how long you would like your ties.

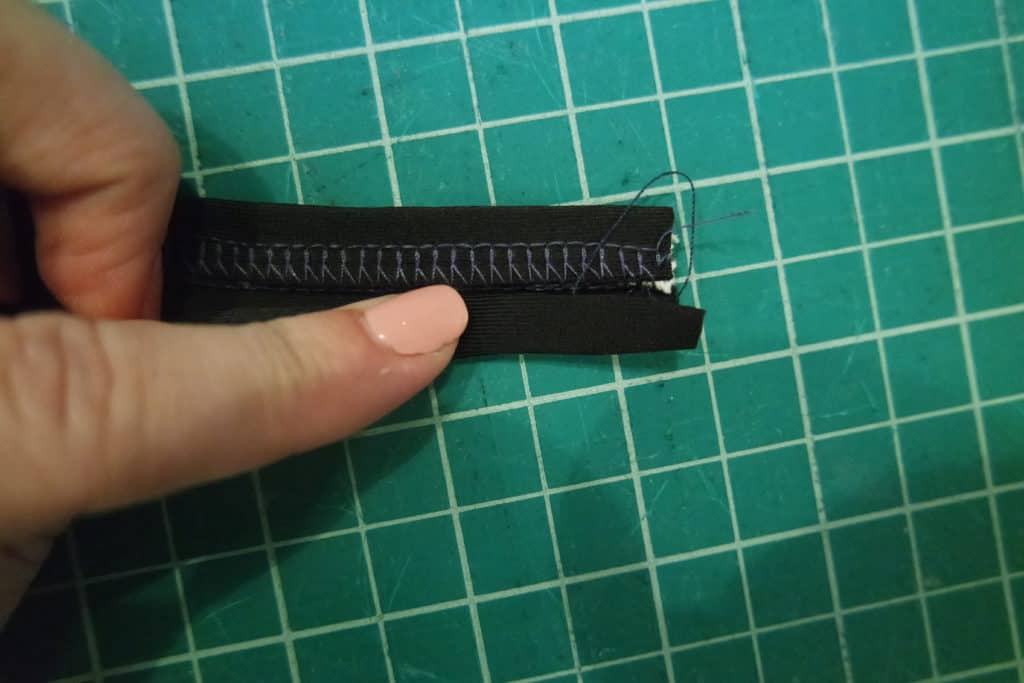
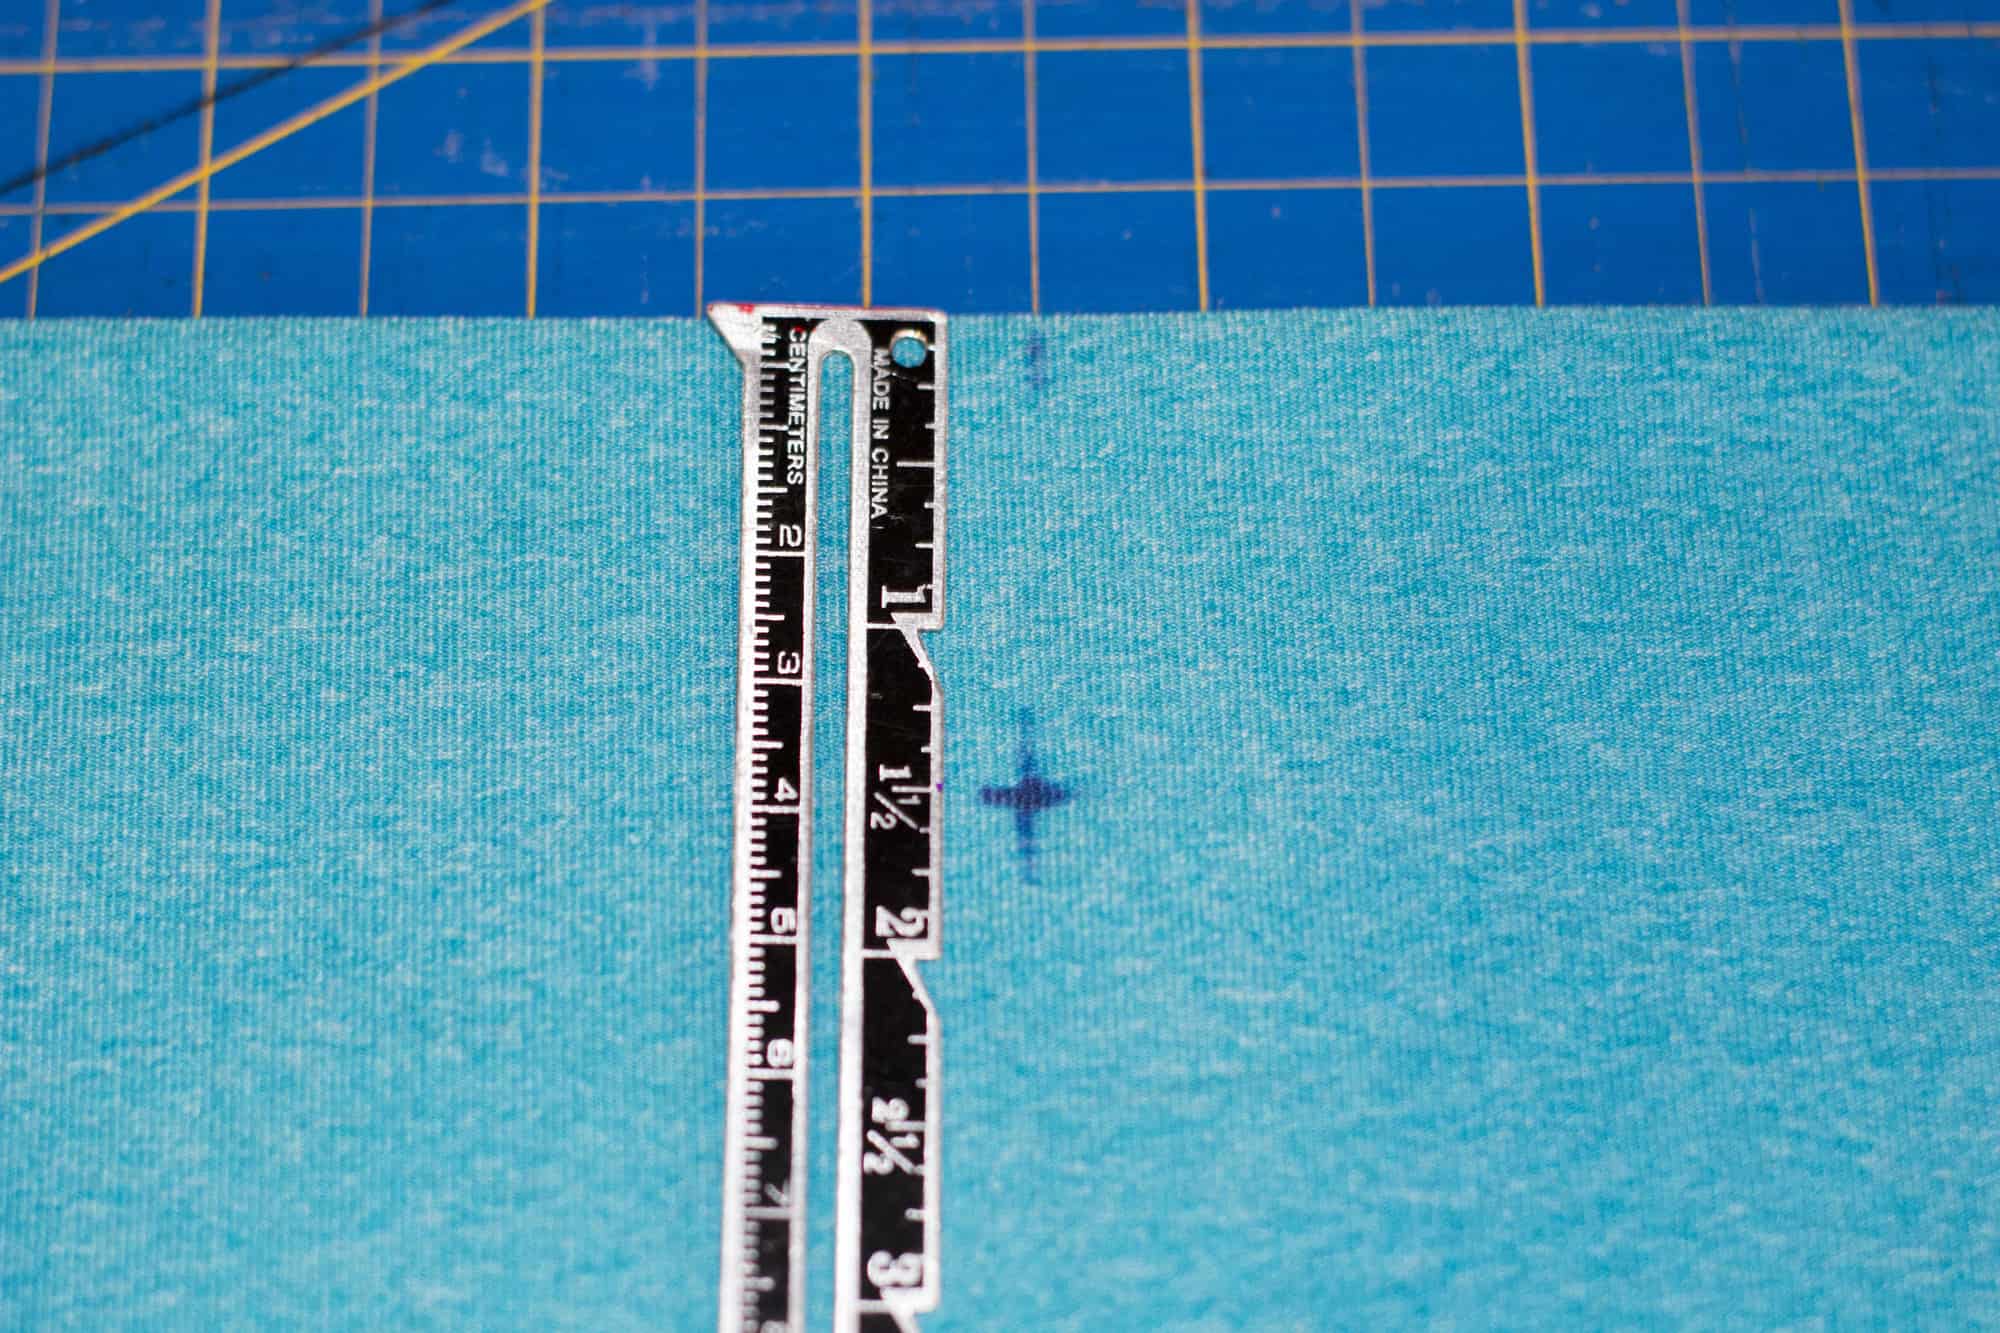
Stitch 3/8″ elastic to one raw edge.
Fold elastic to wrong side of fabric.

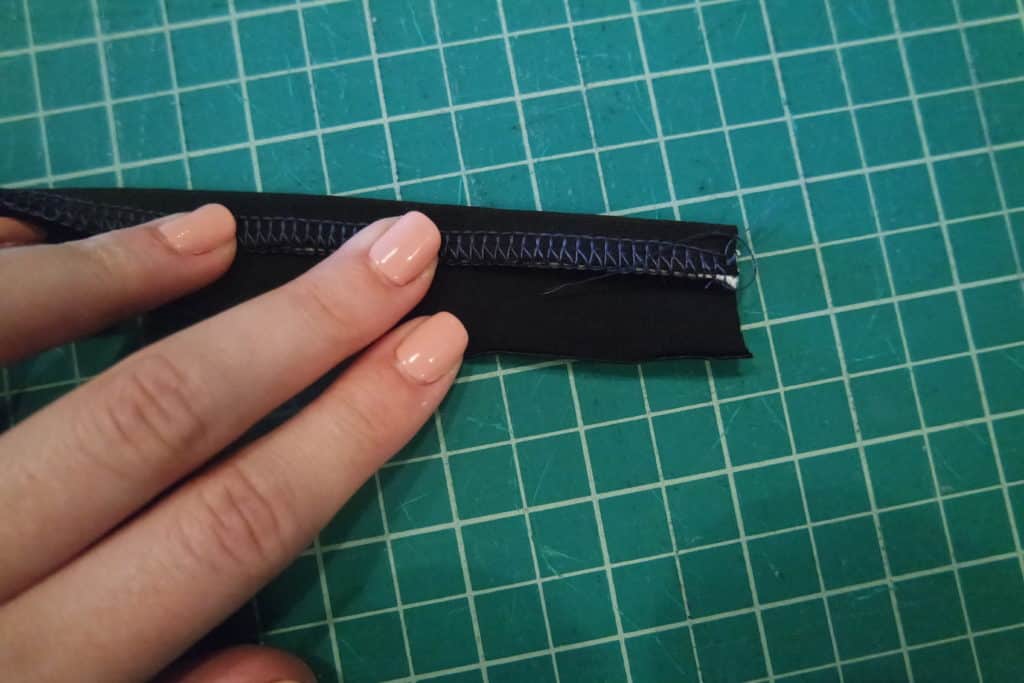
Fold opposite raw edge toward the elastic to the wrong side of fabric.
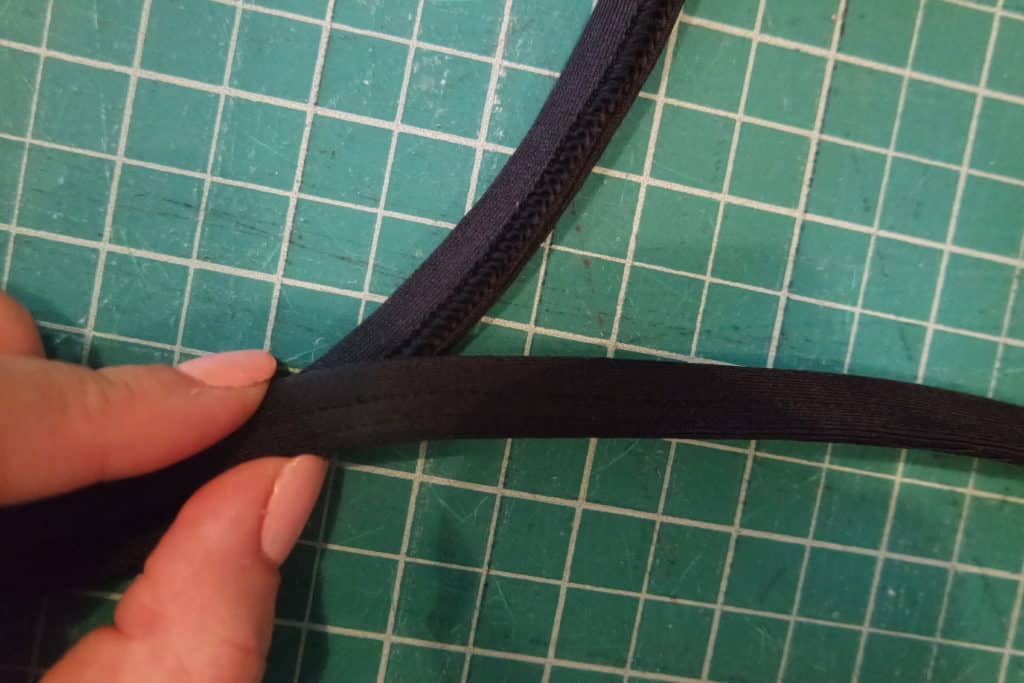
Fold again, encasing the raw edge and elastic.

Top-stitch.

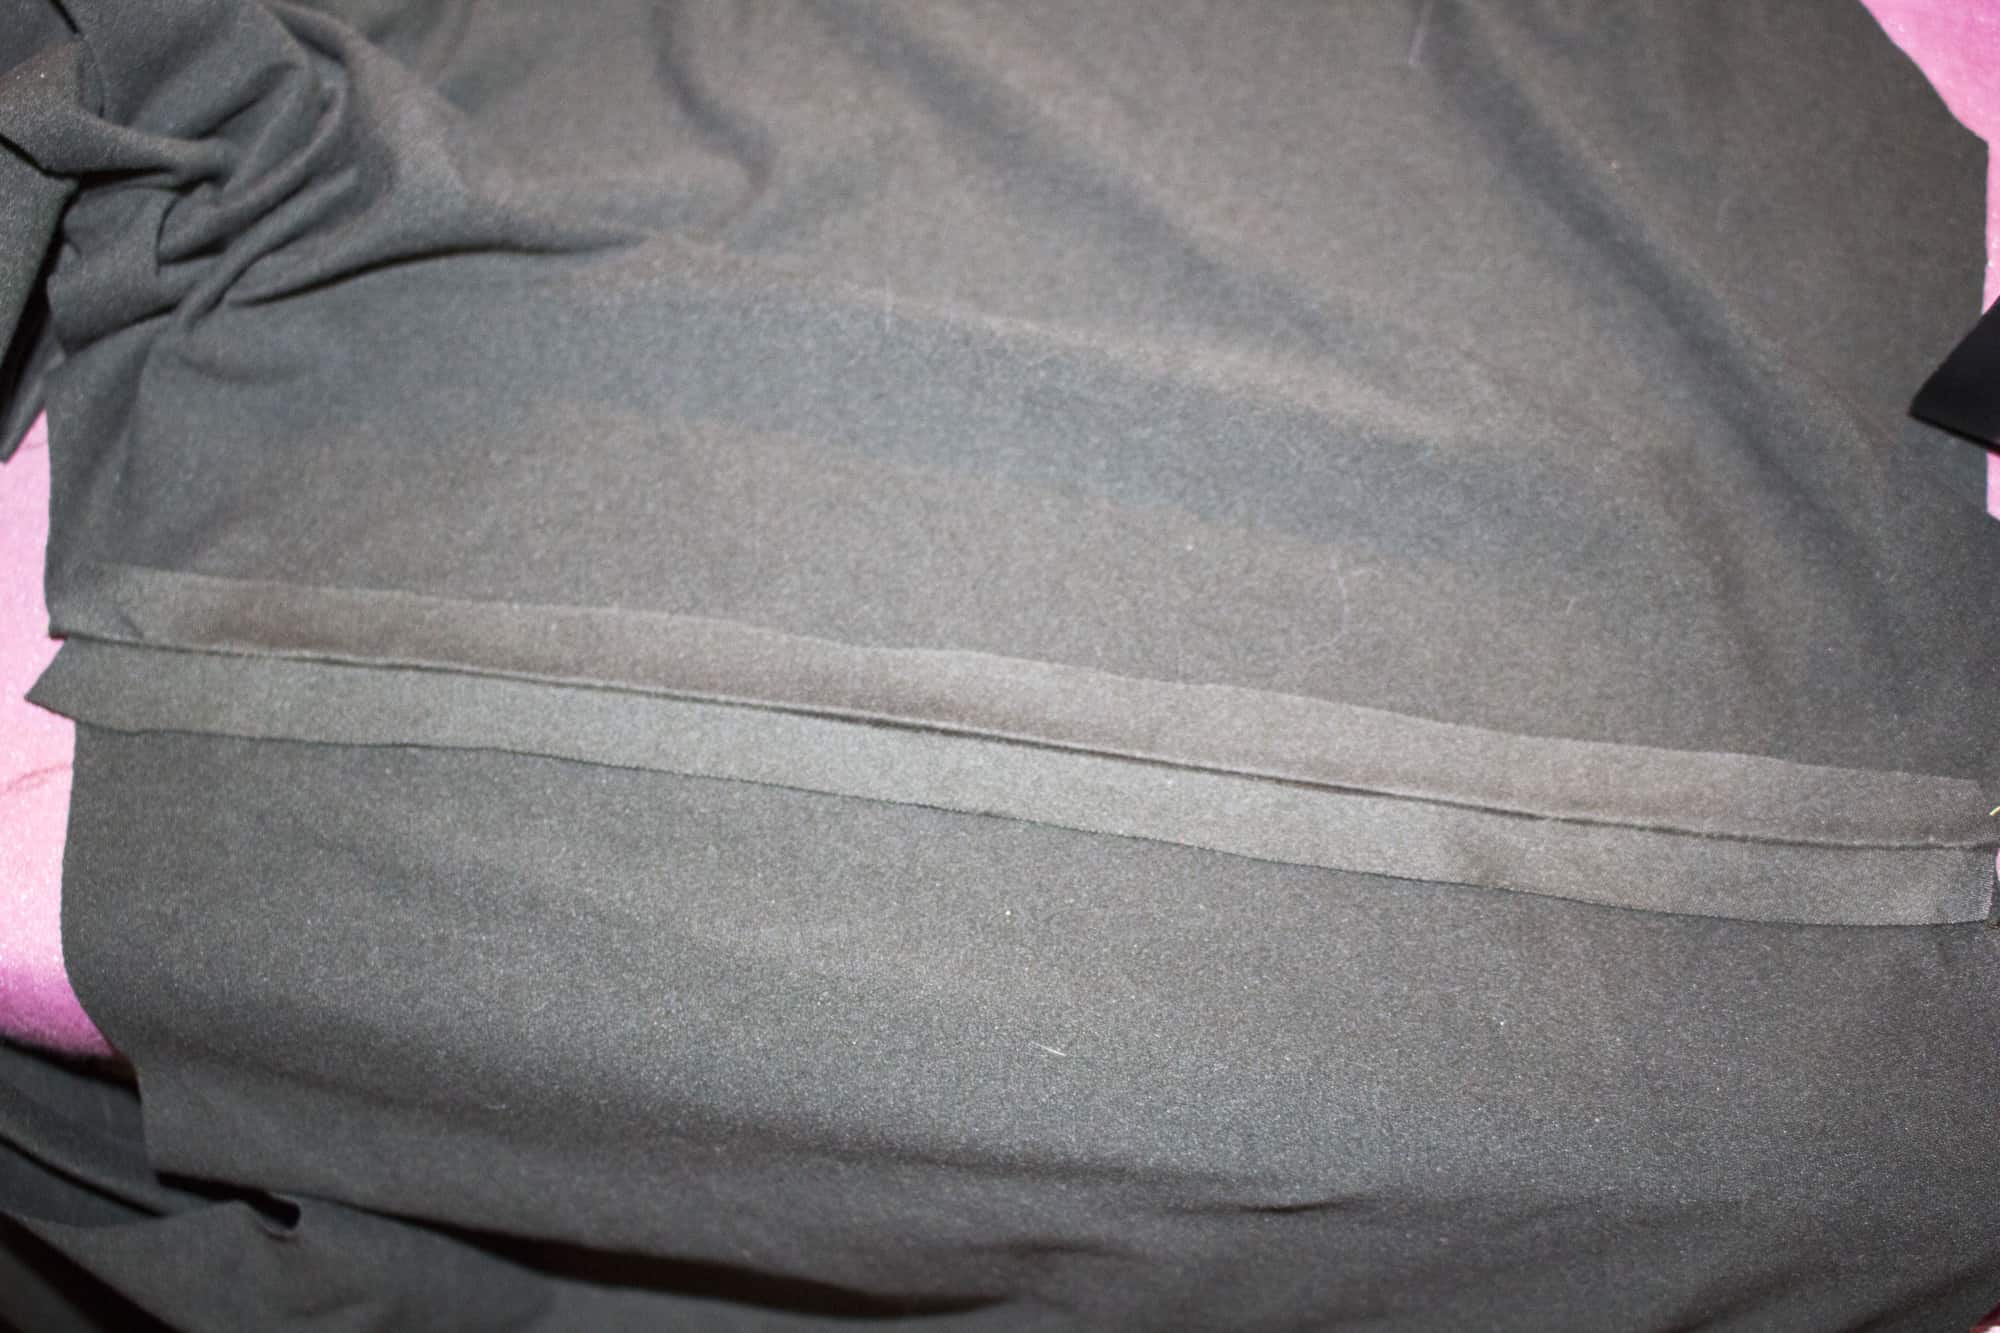
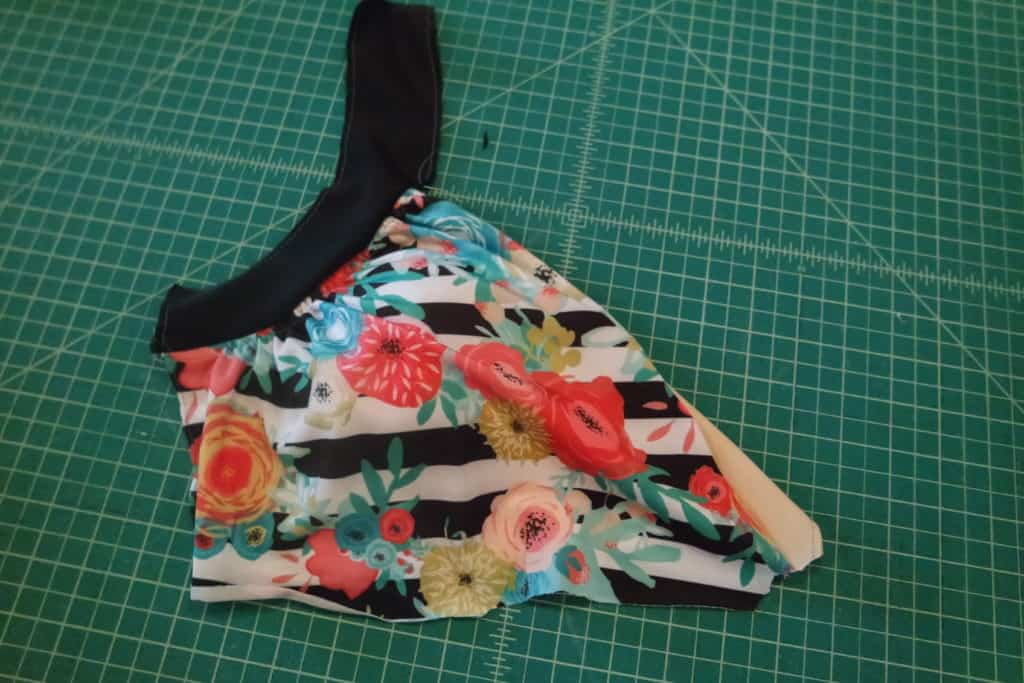
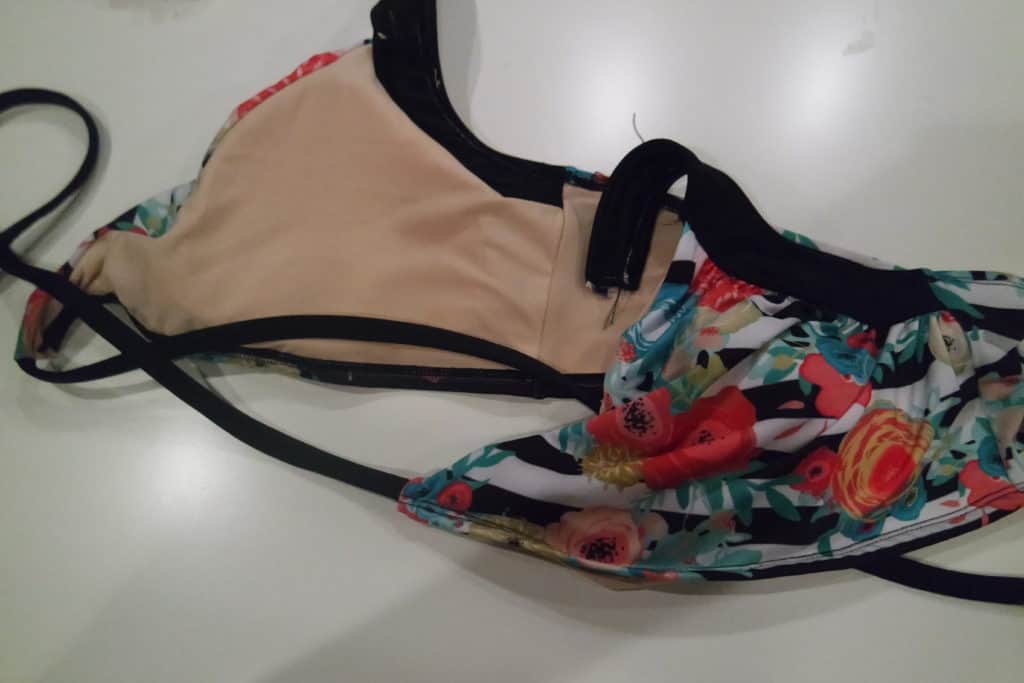
Now, on to the bodice. I trimmed the bottom 1″ off the bodice before beginning.

Construct your bodice as instructed in the pattern.
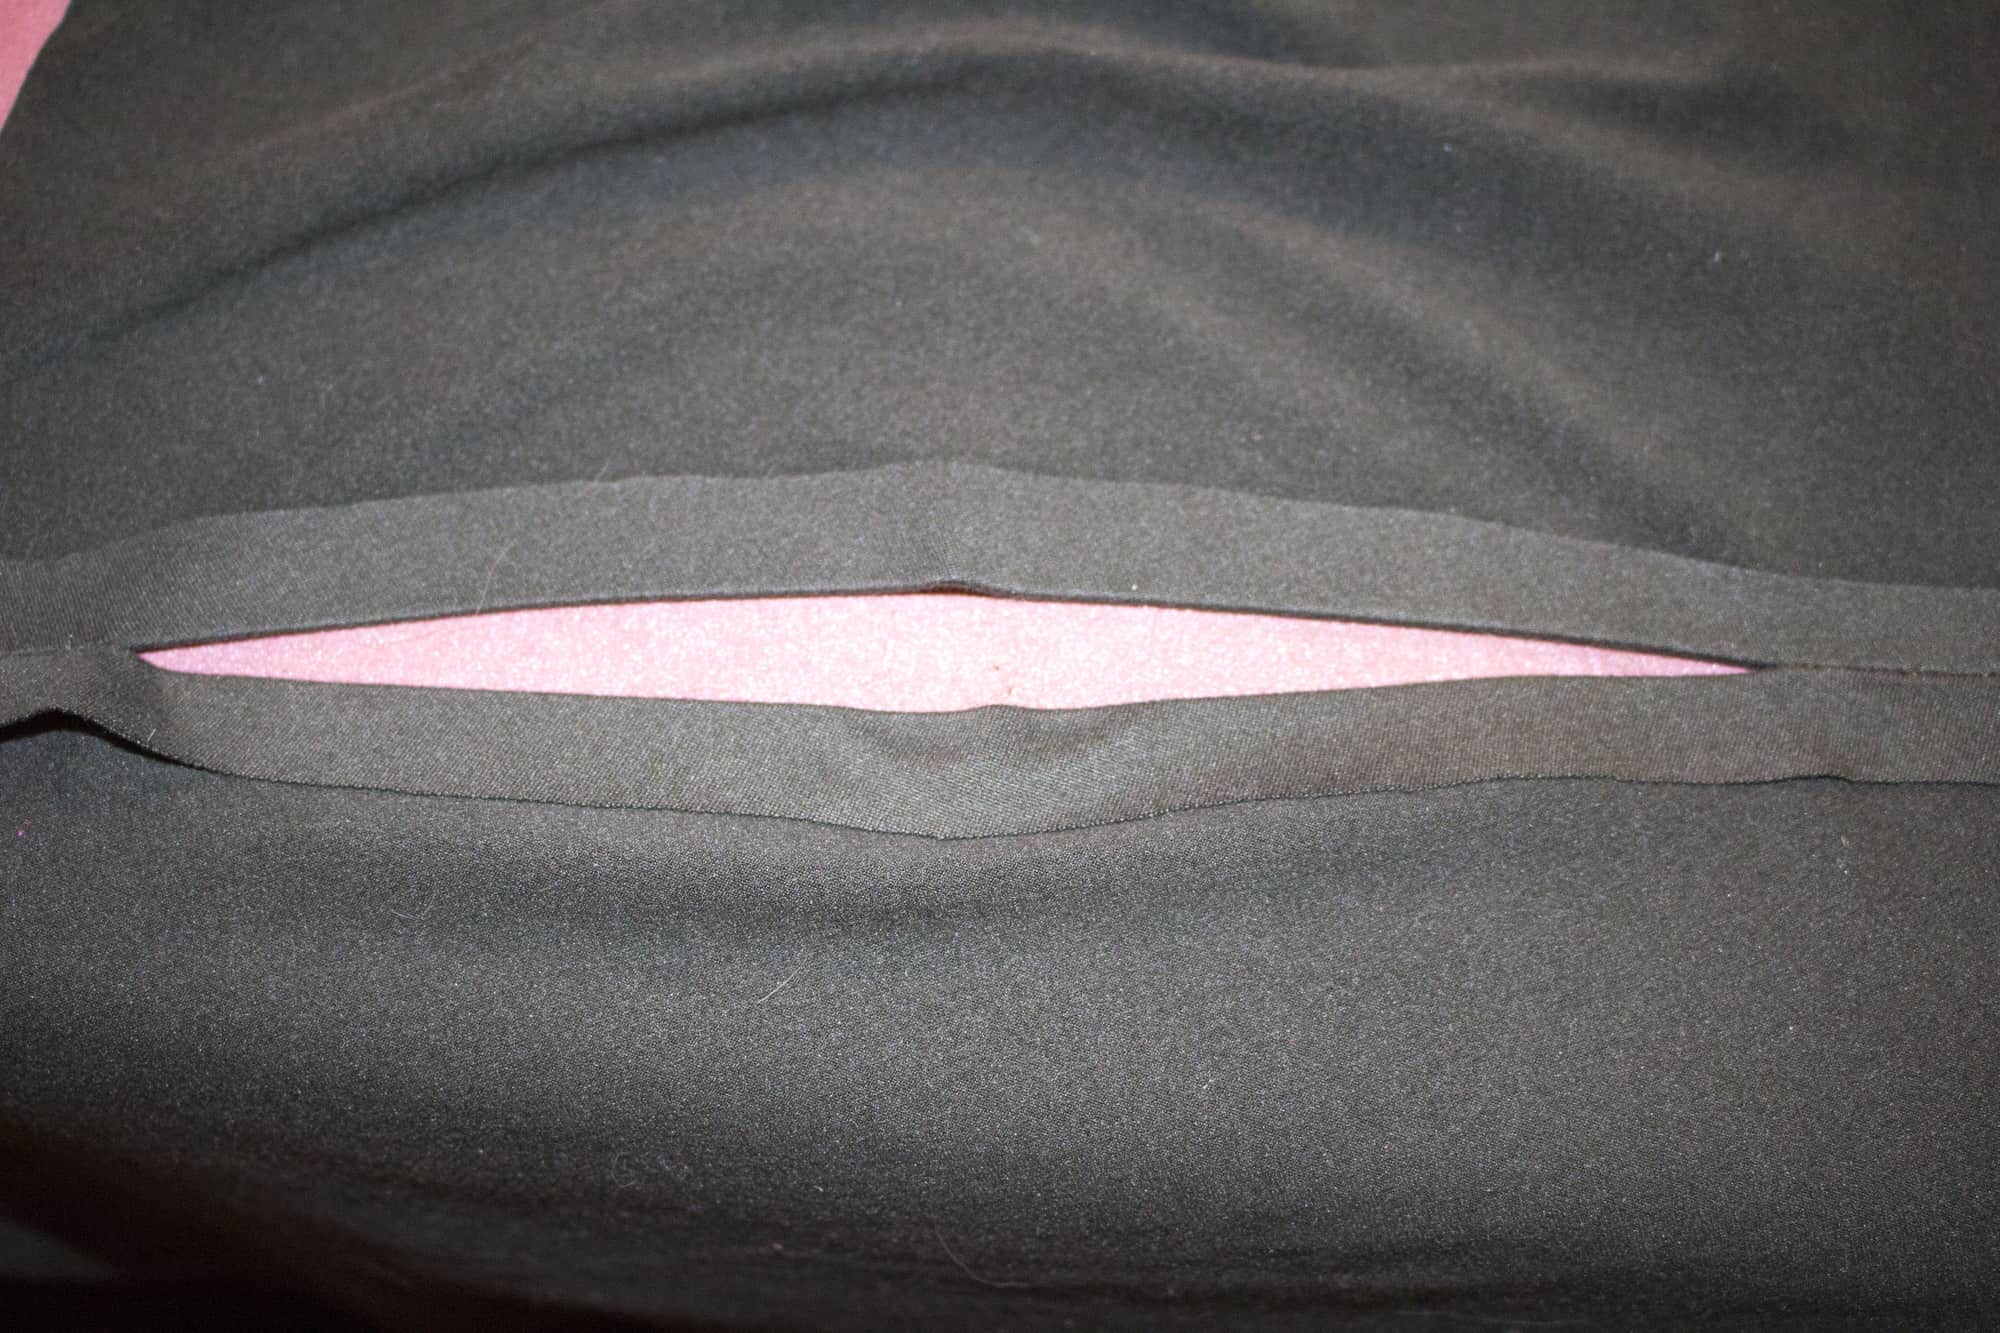
Turn bodice inside out. With right side of strap to the right side of the main front, pin or clip in place.

Baste.
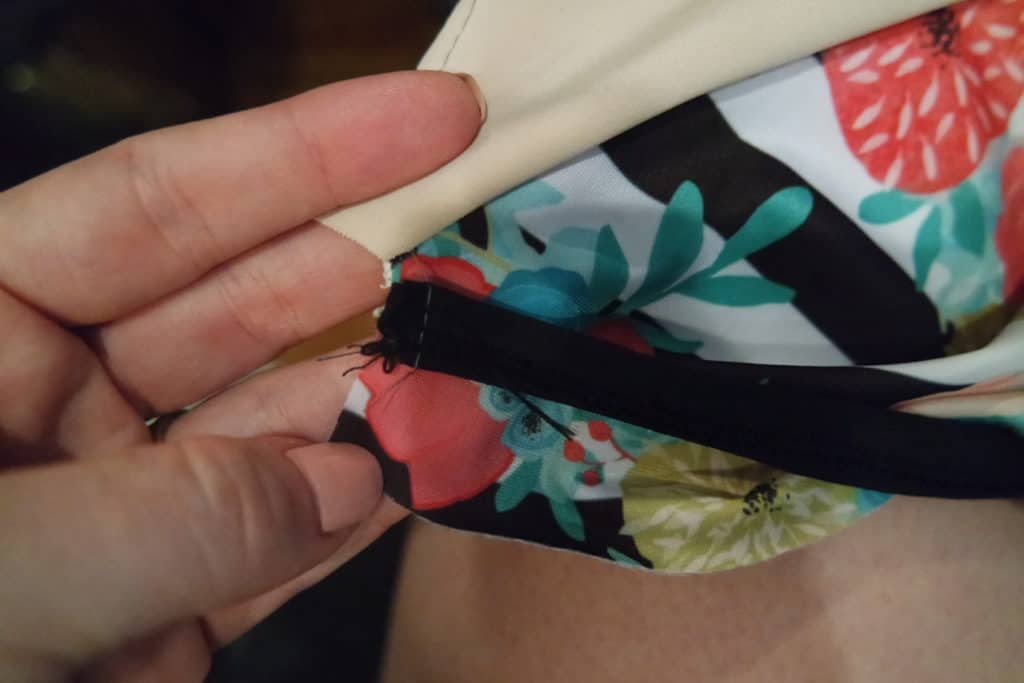
With right side of lining and main fabric together, stitch seam.

Turn bodice right side out and baste along the bottom raw edge.
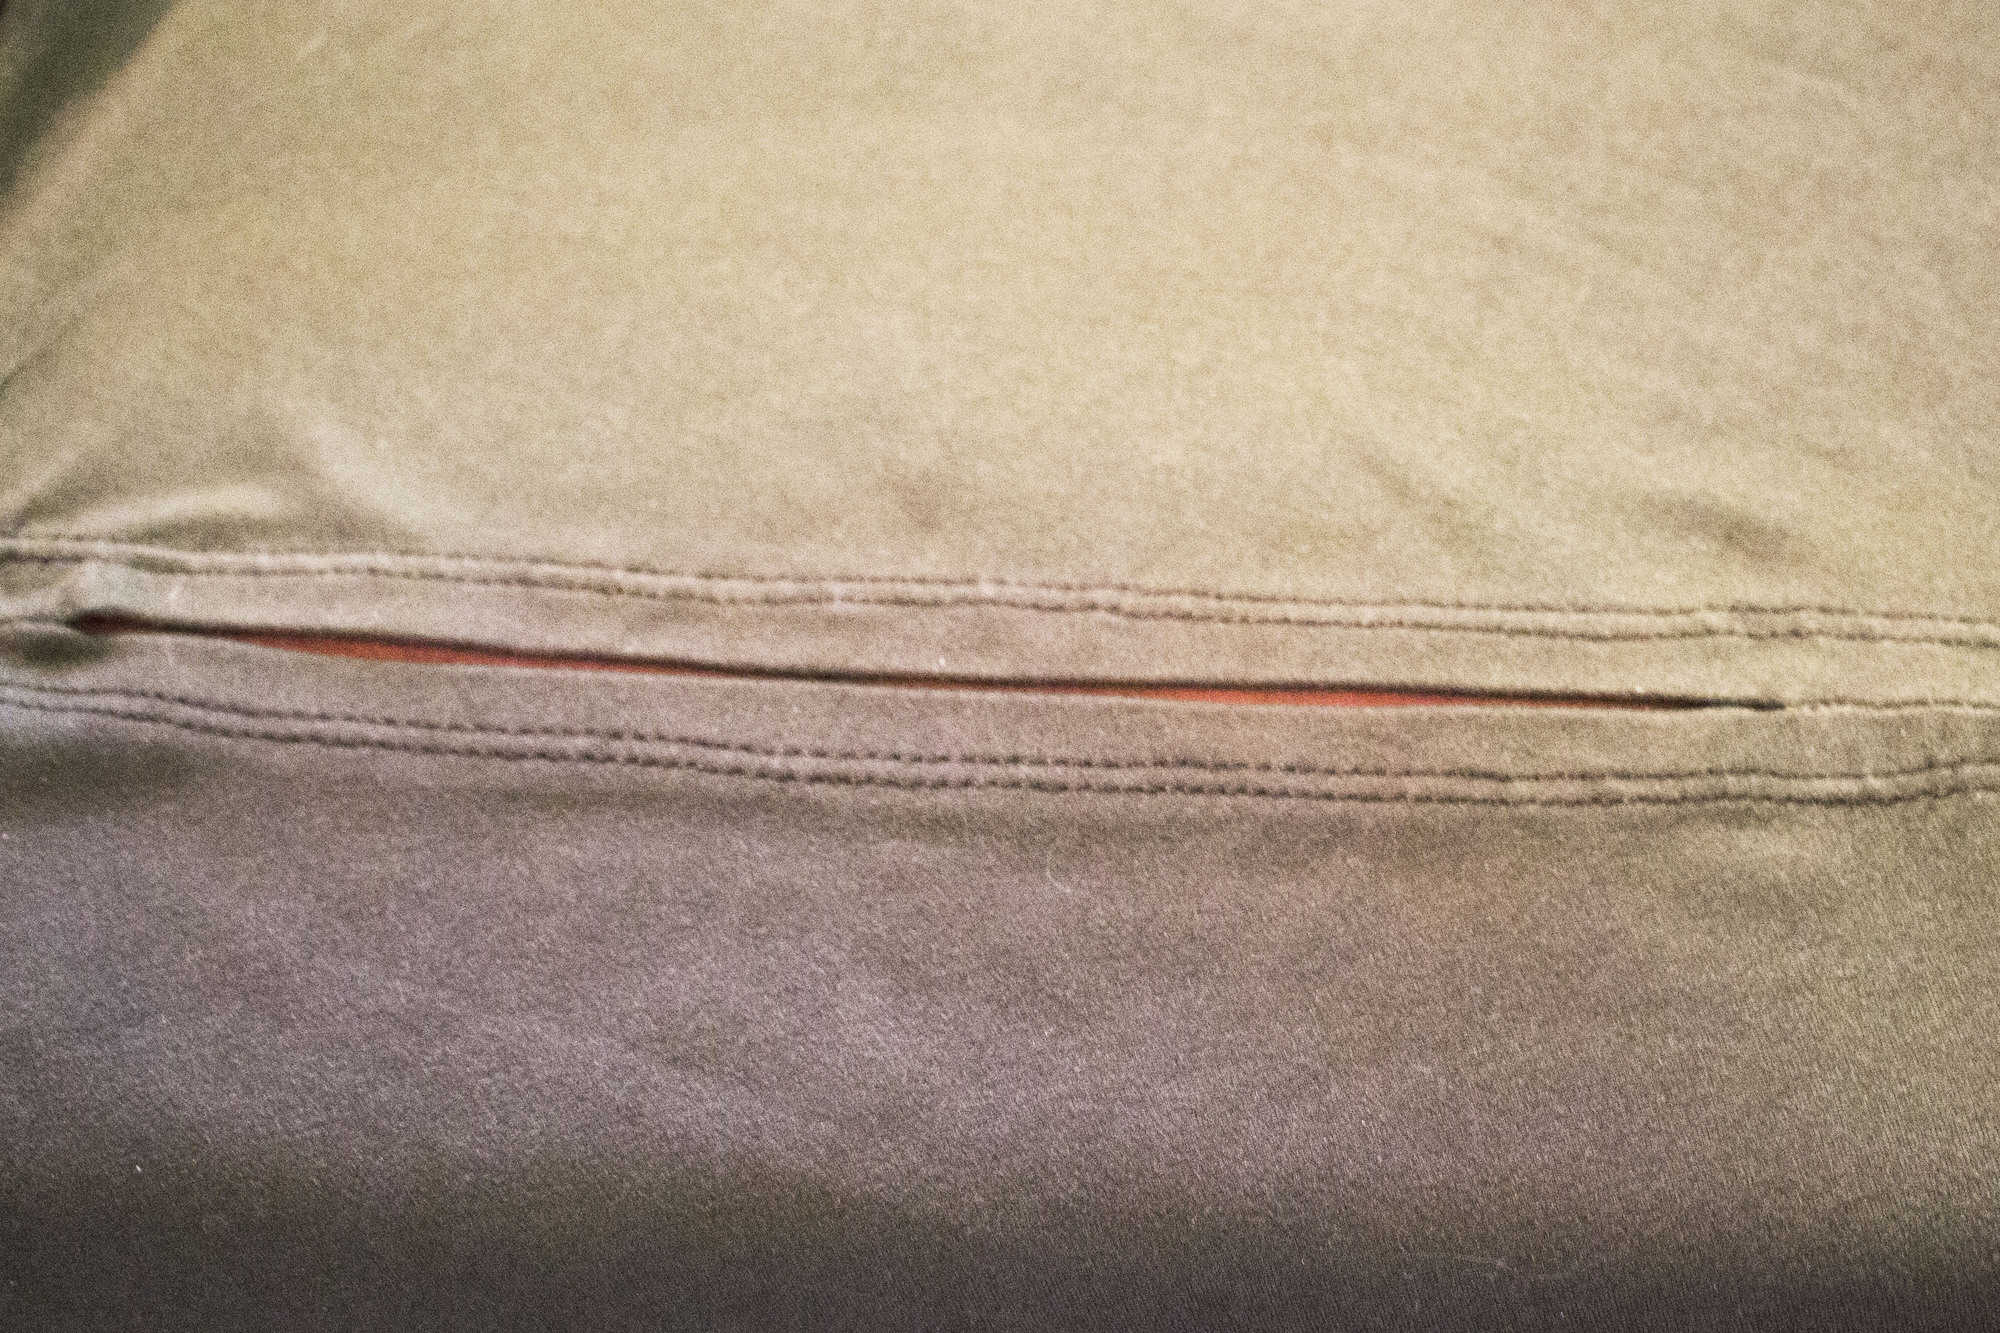
Using a 1:1 ratio, stitch 3/8″ elastic to bottom raw edge of the lining side of the bodice. You will stitch through both the main and lining fabrics.

Fold elastic towards lining and top-stitch.
All done!


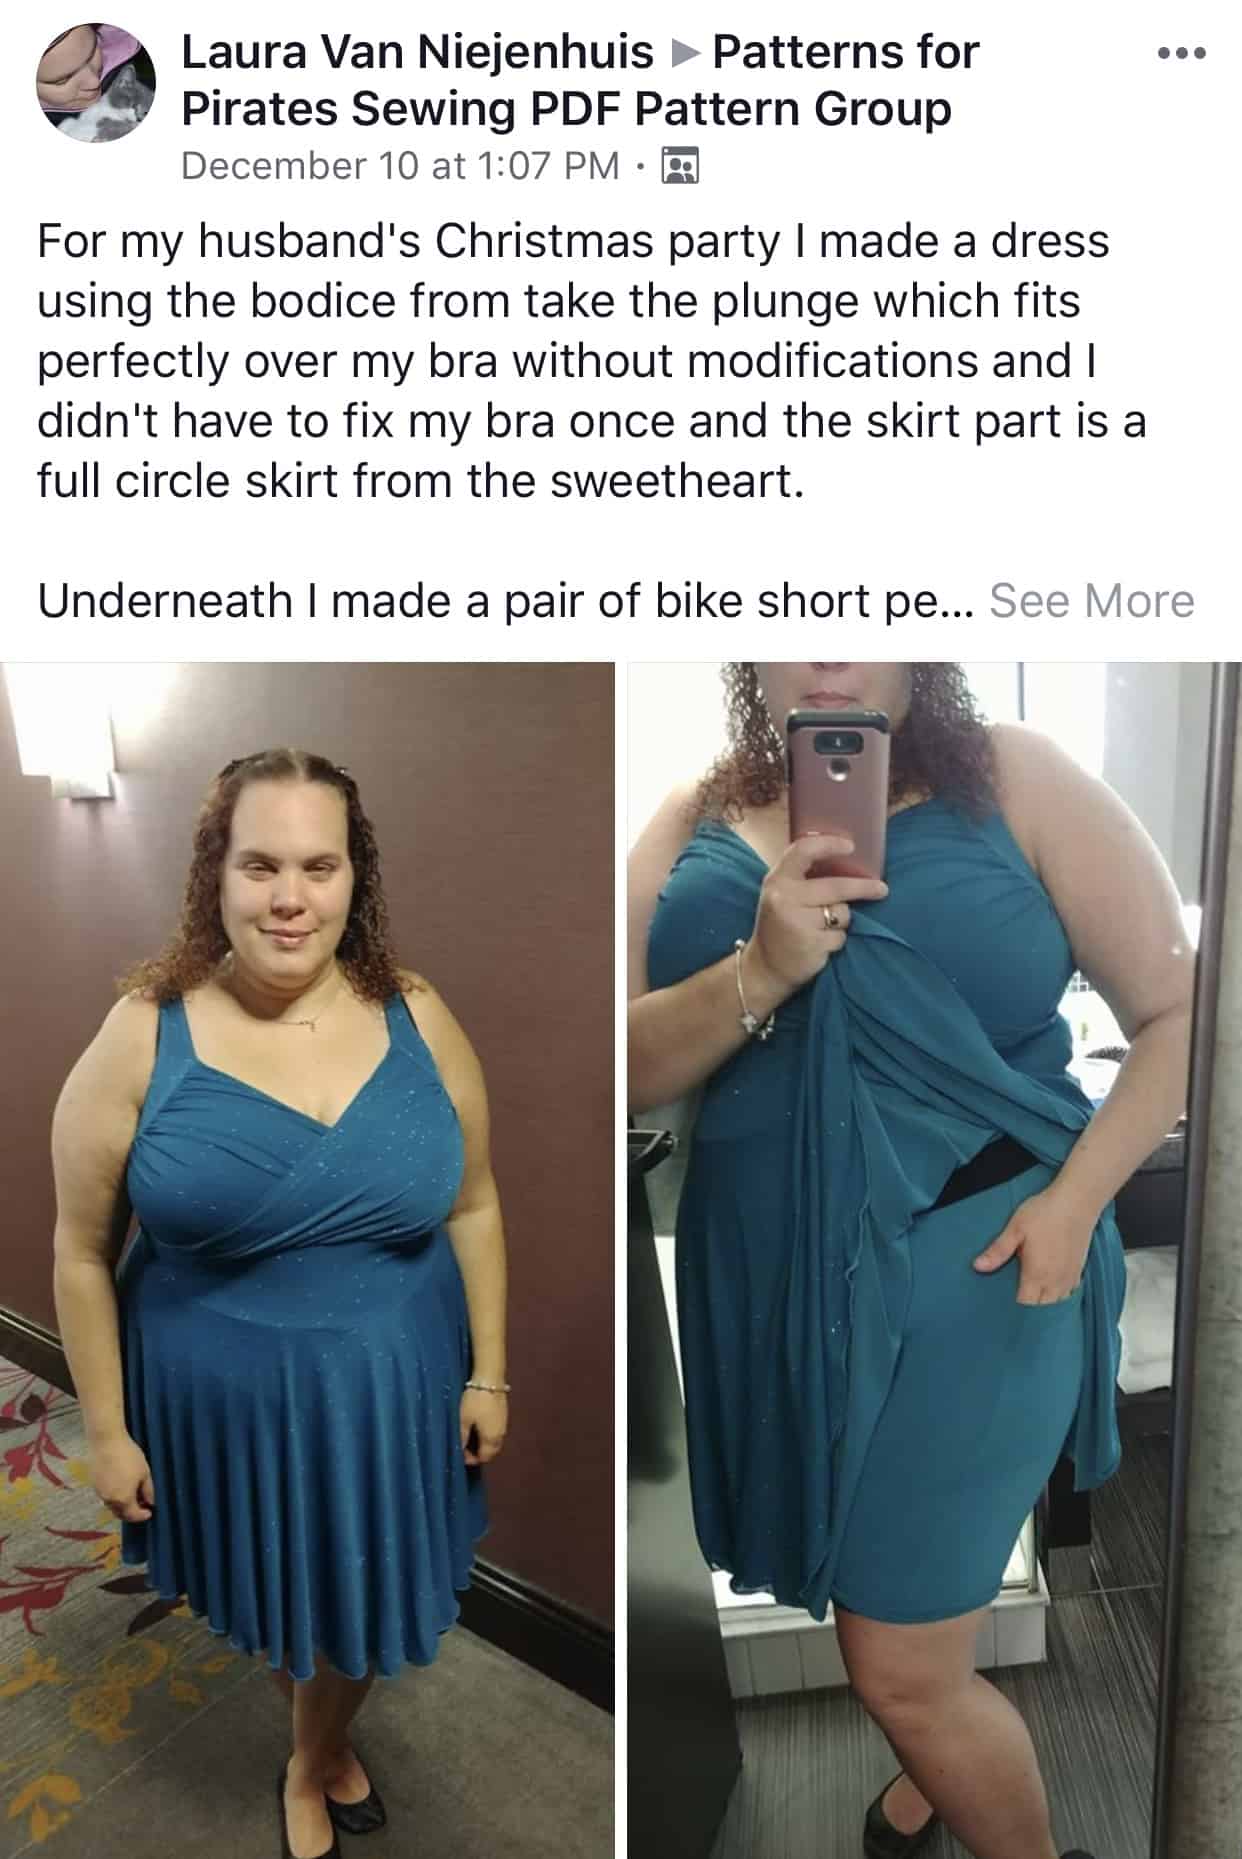
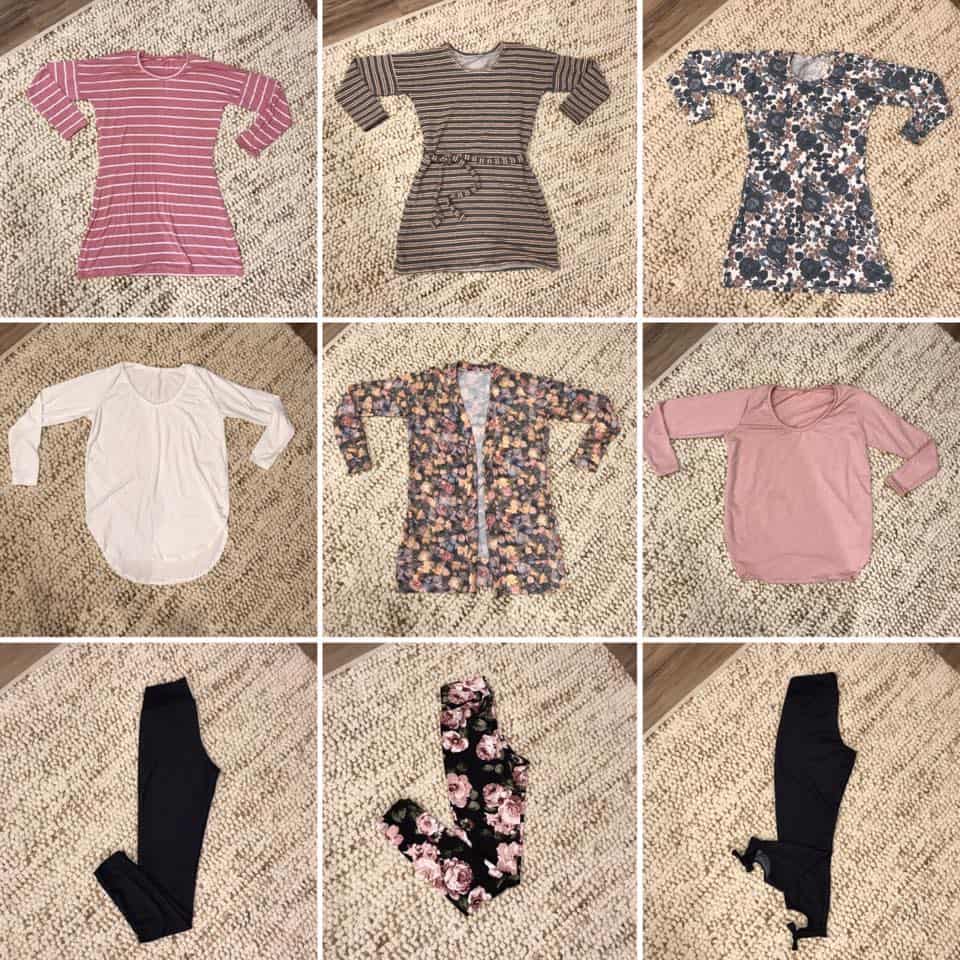
Looking for more inspiration?  Be sure to check out our Facebook album with all the lovely tester pics and how to take the pattern one step further and turn it in to a gorgeous top or dress HERE!
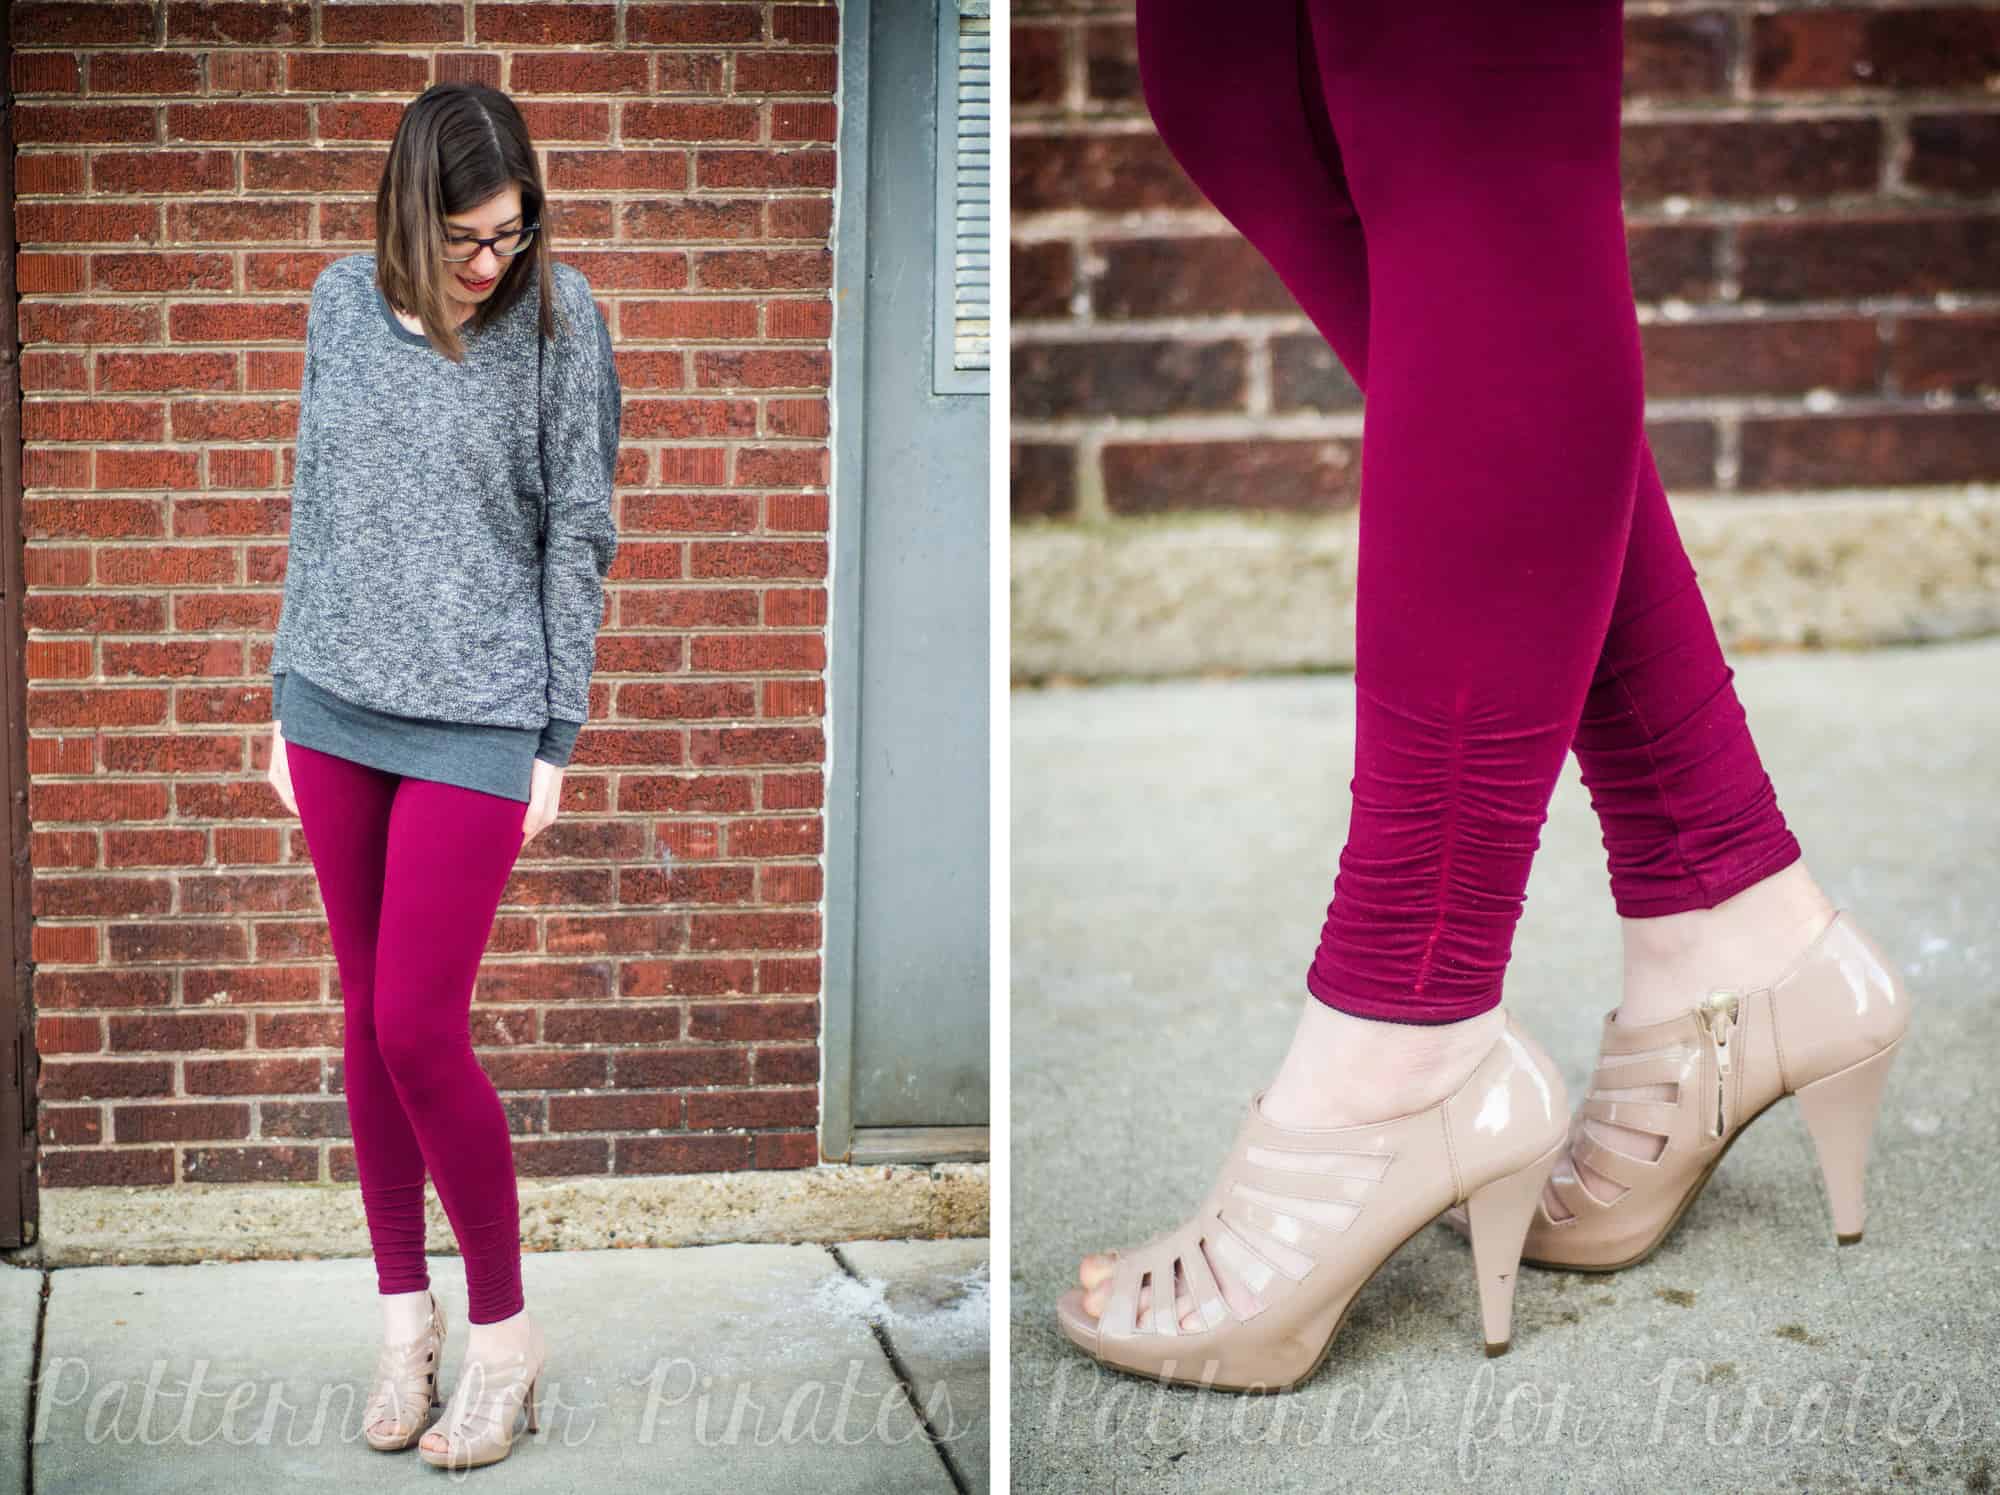
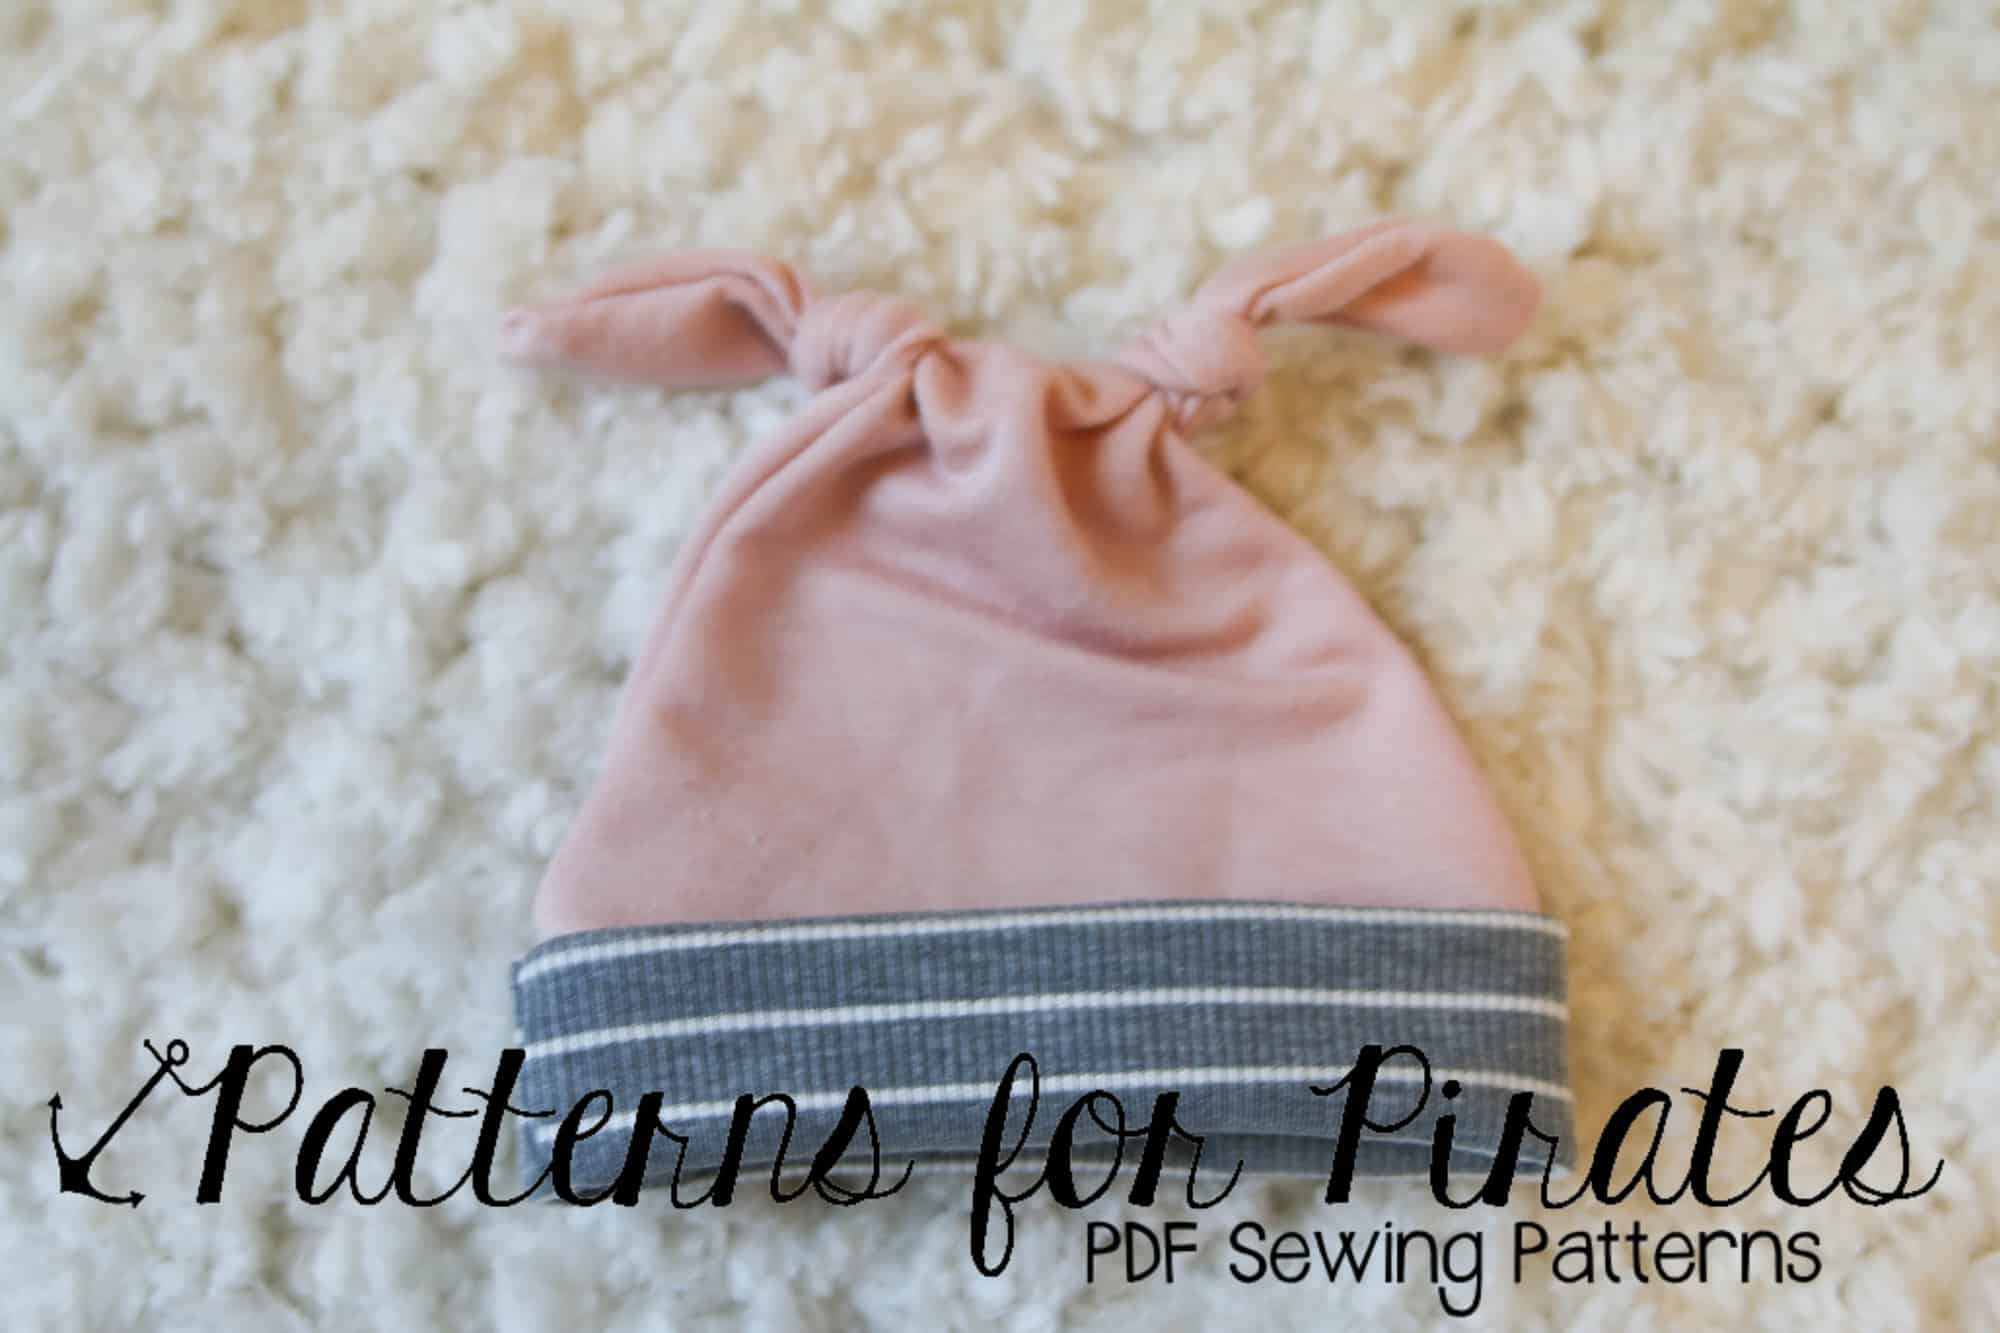


Filed Under: Pattern Hacks, Pattern Release 2 Comments

5 tips for adding neckbands

June 6, 2017

So you spent an hour picking the perfect fabric, perfect coordinates and matching thread. You’ve sewn your favorite P4P shirt and you only have one step left…the dreaded neckband. That’s when you start panicking and getting nervous about attaching the neckband and finishing your outfit. Fear no more!

Today on the blog I will give you 5 tips that will help you achieve that perfect neckband you are striving for all the time.

1. Choose the right fabric for your neckband!

Neckbands will be stretched when you attach them, they will be stretched when you put on or take off the shirt, so it is very important that fabric you use for the neckband has great stretch and great recovery. My favorite type of materials for neckbands are cotton spandex, rayon spandex, ribbing and rib knit. You can get away with using some brushed poly as long as the recovery is good. Avoid, scuba, french terry and 2 way poly blends.


2. Always cut the neckband cross-grain!

Never cut your neckbands along the grain. Even if your fabric has 4 way stretch (which it should) the vertical stretch is not going to be as much as the horizontal one. If you don’t have enough of the main fabric to cut the neckband is best to use a coordinating fabric than cutting the neckband along the grain.


3. Mark the quarters of your neckband and neck opening!

It’s very important that you find and pin (or clip) the quarter points of the neckband and neck opening. After you have sewn the neckband RTS at the ends so you have a loop, fold it length wise and mark where the seam is. This will be the back of your neck band.  The center front of the neckband will be on the opposite side. Now fold it in half bringing the center front and back markings together. The fold will mark your two quarters.

To find the front and back  neck opening centers, bring the shoulder seams wrong side together. Where centers will be where the folds are. Mark them with a pin, a clip or a small snip. With the fabric still laying flat, bring the center front and back together. Your quarter marks will be at the folds. Mark them as well. You will see that the side neck opening quarter marks are NOT at the shoulder seam. The front opening is larger than the back opening.

For all you visual learners, here is a video of the process.


4. Use the right stitches!

Avoid using a straight stitch when attaching the neckband. As I mentioned earlier, the neckband will be stretched and pulled so you want to make sure the stitches are up to the job. If you are using only your sewing machine, attach the neckband with either a stretch stitch or a narrow zig zag stitch. I prefer to use my serger for this step but it is not mandatory. Once you attached the neckband, press the seam allowance towards the shirt. You will now be top stitching it down with your coverstitch machine or your sewing machine. You can top stitch with a wide zig zag stitch, a stretch stitch or twin needles. Be sure to check out our Twin Needles tips and tricks blog too.

You can see how I attached the neckbands here:


5. Press, press, and steam some more!

If you’ve followed the tips I gave you and notice a slight waviness, don’t panic. It’s normal when sewing knits especially if they are on the bias (as is part of the neck opening). Go back to your ironing board and give the neckline a good hefty steam press. Most of the times my neckbands are cotton spandex based and I crank up my ironing machine all the way to the “linen” setting. Make sure you test the heat of your iron on a scrap fabric first. If your shirt is poly based you will need a lower ironing temperature, you do not want to melt your fabric 🙂

There you have it! 5 easy to follow steps to achieve a perfect neckband all the time!

Happy sewing, pirates!

Filed Under: Frequently Asked Questions, P4P University, Sewing Techniques, Sewing with Stretch, Knit Fabrics 11 Comments

Peg Legs SAL: Day 2 – Printing and measuring

April 27, 2017

Today we will be printing the pattern in the size needed. In order to do that it is very important that you take your most accurate measurements. You will need your waist, hips and inseam measurements in order to choose the correct Peg Legs size. P4P has an amazing blog that gives you tip for accurately taking your measurements. You can read all about it here.

If you are like me you may need to grade between sizes. My hips put me in a larger size than my waist….or maybe I should say my waist puts me in a smaller size than my hips? 🙂 Worry not! We have a blog post for easy grading too!


Two things are very important  to remember when grading the pattern.

  1. Smooth transitions between sizes! 
  2. Grade both the front and the back of the legs.

Now that we established which size(s) we need it’s time to print the pattern. Did you see that the new updated Peg Legs and Add On pack feature layers now? How amazing is that? Save that ink and print just what you need. Haven’t used layers before? Check out this blog before you do so. If you need to grade between sizes you just need to select the sizes needed when you print. Easy peasy.

Day two will not require you to post any pictures in the Peg Leg SAL event. See you all back here tomorrow!


Thank you to our sponsors!

Filed Under: Free Pattern, Frequently Asked Questions, Sew-A-Long, Uncategorized 1 Comment

50K Fan Celebration :: Ruched Ankles PegLegs Hack

April 23, 2017

Ahoy Pirates!

Today I’m going to show you how to add some ruching to the ankles of your PegLegs.  This is a super easy way to amp up their cuteness factor and take them to the next level.

For this hack, I’ll be ruching using elastic.  Depending on your preferences, you’ll need about 12″ of braided (non-roll) elastic.  I used 1/2″, though you can also use 1/8″, if you’d prefer.  You will also need matching thread.

1. The first thing you need to do is decide how long you want your line of ruching to be.  For mine, I chose 5″.

2. You’ll need to add length to the pattern to accommodate the fabric the ruching will take up; you’ll add the same number you originally chose.  So for me, the length to add was also 5″.  And now the total ruched amount will be 10″.

3.  Add the extra length at the capri cut line.  To do this, cut your pattern on the capri line, add however many inches you chose earlier.  I added 5″.  Then cut out your leg pieces with this added length, and your choice of waistband.  Your leggings will look crazy long – this is good!

4. I highly suggest hemming the bottom edge now, before ruching.  It will be so much easier this way; I chose to do a faux blind hem with my serger.  Or, let’s be real…if you’re not planning on hemming, then this doesn’t apply to you! 😉

5. Cut your elastic pieces.  To determine the length, add 1″ to your original measurement.  So I cut mine 6″.

6. Now, before you sew up the side seams, find the middle of the piece on the end, and mark it.  Pin/clip your elastic in place in this place, right above your hem.


7.  From the marked spot, measure up your total ruched amount, determined in step 2.  My ruched amount was 10″, so I measured 10″ above my marked spot.  Add a pin to this spot as well.


8. Now bring the other end of the elastic to the pin and pin it to the fabric.  This is the spot which will be ruched.


9. You’ll be sewing the elastic to the fabric now, stretching as you sew.  This can be a little tricky, so I advise you test this out on a scrap before sewing your actual ruched piece.

10. Using a slightly shorter zigzag stitch (my length was 1.8, you may also need to reduce the width as well, I used 2.5), start sewing at the end of your elastic.  Don’t worry about pulling the elastic until you can grab the end of it from behind the presser foot.  This should be about 1/2″ of stitching until you can grab it.


11. The trick now is to hold the elastic from the back while you also pull it from the front, as you are sewing (I couldn’t show this while also holding the camera to take this picture). 😉  This way, you can control it pretty well.  I find it helpful to stretch the elastic before sewing, and then pin the middle part to the fabric.  Now you can pull from the pin to the presser foot instead of from the very end.  Once you get to the pin, then pull from end to end until you are finished sewing.  Be sure to backstitch carefully.  Don’t worry about making it absolutely perfect, because the ruching will bunch up quite a bit.


12. Now, assemble your PegLegs as usual…sewing the side seams, the waistband, etc.  Good news is you’ve already hemmed!  Or chosen not to…

That’s it – you’re done!  Feel free to play around with different lengths of ruching as well, you may prefer more or less than me.  Also, you can also ruche using elastic thread hand-wound in your bobbin.  With this method, you’d also lengthen your pattern, and then sew a straight line however many inches you added.  I don’t mind using elastic though, since I always have it on hand (not the case with elastic thread!).

Be sure to post your ruching hacks in our Facebook group so we can have all the “heart eyes” for your creations! 😍

~Elisabeth


We are celebrating reaching 50K fans in our Facebook group!  To make it a party, our beloved PegLegs pattern just got an update AND some new add-ons.  Before you go running to your machine to sew up your own leggings, make sure to read our PegLegs 101 blog post.  This way, you’ll have all the the information you’ll need to make the perfect pair before you even cut into your gorgeous fabric.

But wait, there’s more!  After any good party is an after-party.  We are taking it one step further and sharing some easy hacks that’ll bring even more flavor to your favorite leggings pattern!  We hope you check them out, make your new favorite pair of leggings, and know that we appreciate every single one of you amazing sewing guys and gals!

Here are our hacks / tutorials / latest tricks:

Lace Waistband Alternative | Drawstring Waistband Tutorial
Exposed Elastic Waistband | Stirrup Pant Hack
Ruched Ankles Adjustment | Decorative Topstitching Tutorial
Ruched Side Panel Hack

Filed Under: Pattern Hacks 1 Comment

50K Fan Celebration :: Drawstring Waistband PegLegs Hack

April 21, 2017

Today I’m sharing a quick cute hack to your peg legs to add a drawstring to your waistband.  I wear peglegs all year round and the drawstring changes up the look just a bit.  Let’s get started.

  1. First you sew your legs together as per the pattern.
  2. Before we start the waistband we are going to make some markings.  I am using a disappearing ink pen from my fabric store to mark mine.  I folded my waistband in half to find the center and marked the center with my pen in a few spots.  Next I found folded the fabric long sides together to mark where I wanted my buttonholes.  I wanted my buttonholes in the middle of my waistband. Your waistband is 7 inchs wide so folded it is 3.5 inchs but the bottom .5 inch is your seam allowance therefore I measured 1.5 inchs down from the top fold and marked that as being the center right across the other mark that I had made.  Now I have a little cross right marked.

3. Buttonholes can be a bit of a pain on knits so I added a little piece of interfacing on the back, I didn’t actually iron it on to my fabric I just wanted something to give it a bit of stability, a tear away stabilizer would also do the trick or you can iron on a piece of knit interfacing.  I happened to have a bit of regular interfacing sitting here so that is what I used. I sewed the buttonholes on either side of my cross .25 inch from the center. I just did a really small buttonhole, it doesn’t need to be big cause you are just threading through some drawstring.  Now for all those people that hate sewing buttonholes not to worry knits don’t fray so you can always just cut some little slits in the waistband if that is the option you choose make sure to iron on some knit interfacing thou, it would prevent the knit from stretching out while wearing them.


4. Once you have the buttonholes are done we are going to create a casing for your drawstring.  First you are going to match the short sides of your waistband as the pattern directs and sew them together, fold the waist band in half and then your going to sew all the way around about .25 of an inch above the waistband and below the waistband. Now you can mark your lines here that you are going to sew but I’m a rebel and just went for it by sewing 1.25 inchs from my fold, for the second row of stitching I sewed .5 down from the first line I made.  Once your casing is all done just attach the waistband to your legs as normal.

5. Now you just need to add your drawstring.  I used 50 inchs of drawstring on the xxs size and I just tied off each end but you could certainly fold the ends over and hem the edges of your drawstring.  I like to just put the drawstring around me and leave long tails and then insert it into my casing try it them on and you can always cut the drawstring shorter so start with a long piece and then cut them the length you like best.  Remember you have to leave your drawstring fairly loose or you won’t be able to pull your leggings on! I figured this out while trying mine on! Another simple solution to use elastic for most of your drawstring, I would use 1/4 inch or 3/8 inch elastic.  You could cut your elastic slightly shorter then your drawstring and then sew drawstring onto each end of your elastic and thread it through your casing, it would give you just a bit more give when pulling them on and off.


I hope you try adding some drawstring in your peglegs and don’t forget to show them off in our Facebook group! – Angela


We are celebrating reaching 50K fans in our Facebook group!  To make it a party, our beloved PegLegs pattern just got an update AND some new add-ons.  Before you go running to your machine to sew up your own leggings, make sure to read our PegLegs 101 blog post.  This way, you’ll have all the the information you’ll need to make the perfect pair before you even cut into your gorgeous fabric.

But wait, there’s more!  After any good party is an after-party.  We are taking it one step further and sharing some easy hacks that’ll bring even more flavor to your favorite leggings pattern!  We hope you check them out, make your new favorite pair of leggings, and know that we appreciate every single one of you amazing sewing guys and gals!

Here are our hacks / tutorials / latest tricks:

Lace Waistband Alternative | Drawstring Waistband Tutorial
Exposed Elastic Waistband | Stirrup Pant Hack
Ruched Ankles Adjustment | Decorative Topstitching Tutorial
Ruched Side Panel Hack

Filed Under: Free Pattern, Pattern Hacks, Uncategorized 1 Comment

Spring Mini Capsule Winners

April 11, 2017

Wow, we have LOVED seeing everyone’s mini capsules they made during the contest! It was amazing to see so many wonderful outfits. Plus doesn’t it feel great being ready for Spring?? If you haven’t finished your mini capsule yet, please continue to work on it and post when you can. We would still love to see what you create 🙂 We enjoyed it so much, we will be hosting another capsule contest in the Fall. Now on to the winners! Winners will be tagged on Instagram and/or Facebook and simply need to email patternsforpirates@gmail.com AND madeformermaids@live.com for their pattern prizes. Fabric and grand prizes just email M4M. Drumroll please…

5 Winners each get to choose 1 pattern of choice from EACH M4M & P4P:

Alicia Zylstra from our FB groups.

@faerieflings from Instagram.

Debbie Brennan‎‎ from our FB groups.

@sillybugzboutique from Instagram.


Sara Marie from our FB groups.


3 Winners each get to choose 3 patterns from EACH P4P & M4M:

@sewing4sanity on Instagram.

Alyssa Arthur from our FB groups.

Amanda Massicotte Jones from our FB groups.

1 Winner for a $50 store credit to Sincerely Rylee ‎‎Fabric Shop:

@songofgrace on Instagram.

1 Winner for a $50 store credit to Pretty Posh Prints:

Cherie Williamson from our FB groups.‎

1 Winner for a $100 store credit to Knitpop:

Abby Mercer Eason from our FB groups.

GRAND PRIZE WINNER with their choice of a Brother Coverstitch Machine or $100 Joann Fabric Gift Card:

Nicole Joyce from our FB groups. 

CONGRATS to all the winners!! Thank you so much again to our sponsors and everyone who participated! If you blogged about your capsule sewing, please leave a link in the comment section below so we can check it out.

Filed Under: Contest/Giveaway 1 Comment

Favorite Tee | New Pattern Release!

April 11, 2017

After Judy teased you about a million times on Instagram with her pre-test versions of the Favorite Tee, we are finally going to give the people what they want.
No more teasers, it can be yours for keeps!  And guess what?  We made it in youth sizes too. Wahoo!

Here they are, your next most-sewn item: Favorite Tee (women’s) and Fav Tee (youth)

Both tees come packed full of options.  The women’s Favorite Tee is drafted for sizes XXS – Plus 3X.  There are a whopping FIVE hem options (shirt with side vent, tunic with side vent, banded knot tie hem, curved tunic length and curved dress length).  There are THREE sleeve lengths included (short, 3/4 and long) and even TWO options for neck finishes (scoop or vneck).

**Want to learn more about how to measure yourself for this pattern?  We’ve got you covered with an in-depth blog HERE.

The youth Fav Tee is drafted for sizes 3 months – 14 Youth.  It features nearly all of the same options as the women’s version with FOUR hem options (shirt with side vent, tunic with side vent, banded knot tie hem, and curved dress length), THREE sleeve lengths (short, 3/4 and long) and TWO neckline options (scoop and vneck).

Ready to see what those options look like?  Let’s do it!

THREE SLEEVE OPTIONS

SIDE VENT HEM

BANDED KNOT TIE HEM

CURVED TUNIC

CURVED DRESS

SCOOP NECK

VNECK

Ready to grab the patterns for yourself and start sewing?

Favorite Tee (women) | Fav Tee (youth) | Favorite Bundle (women + youth)

Need a little more inspiration?  Head over to our Facebook Group and check out the tester albums.  They are packed full of fabulous tester photos!
You can find the Favorite Tee album HERE, and the Fav Tee album HERE.

Happy Sewing!

Filed Under: Pattern Release 3 Comments

Spring Mini Capsule

April 10, 2017

We’re rounding out our Spring Mini Capsule Contest that we partnered with Made for Mermaids and I’m here to show you the two I got finished! (I wanted to make four…two got completed 😉 )

Katy , Alex, and Roberta  all shared theirs as well!

I finished up my Little Guy’s spring capsule quick! This totally gave me false hope of  finishing all of them lol! I did mostly tees and shorts since our spring gets pretty hot here in the south. Here was my plan for him.  I ended up leaving the yo-ho henley off for another raglan and the Lumberjack for a muscle tank.  I also didn’t quite make it to any undies…but he really needed the shorts and tees more anyways!  I switched out the joggers for the Cpt. Comfort jeans after finding some adorable striped denim that needed to be used.

I did 3 pairs of Pirate Playground Pants in the shorts length option.

These are a french terry with inseam pockets. I added some top-stitching to the pockets as well.

  Another french terry pair here with inseam pockets and I added a little stripe down the side in the wrong side of the french terry.

And yet another french terry 😉 Can you tell my favorite fabric for the Pirate Playground Pants yet? These are the patch pocket option I added a little band to the pocket with the wrong side of the french terry.

One pair of Cpt. Comfort Jeans that I modified to a shorts length in a striped denim.

And one pair of Swashbuckler Swim Trunks.  I still need to find the perfect drawstring for these!

Tops I did a three Jolly Roger Raglans in short sleeves. Two basic tees in cotton jerseys and one in swim fabric as a rash guard!

I added a Wingman Shirt in a cotton spandex.

And a Muscle Tank too.

We had fun with the silhouette machine and added a few of his favorite things to the plain ones.  The graphic ones took Mama a LOOOOONG time to get drawn out, but Little Guy is over the moon with them so I guess the time was worth it 😉

They can mix and match a bit and now he’s ready for that warm weather! <3 I loved this little challenge and contest so much I told Megan we’ll need to do another in the Fall!

My Little Guy isn’t one for modeling much- so here are a few shots of them on a super silly boy!


I also snuck in another mini capsule for a baby shower gift! Hers didn’t mix and match quite as well as a traditional capsule should…but I still thought it was a great little set 🙂

For bottoms I used the Baby Bear Joggers with yoga waistband and cuff options. As well as some quickly drafted size 3 month leggings (as I called Megan complaining her Bonny’s didn’t go down to a small enough baby size 😉 )

I did 3 tops for her.

A Heart Breaker Cami in the plain option.

A Sugar Pie in short sleeves and curved tunic hem option.  I added a cute little vinyl as well.

And a tiny Me Hearties in short sleeve and peplum options. I finished all the edges with a little scallop elastic.

For her layering pieces I did two Butterfly Cardigans.

One in tunic length with tall bands in a ribbed knit.

And one is a very lightweight sweater knit in tunic length and short bands.

I added in two little headbands using M4M knit headband and a little tiny hat too 🙂

Although you can mix and match a bit I paired them together for a few photos of my favorite outfit pairings! <3

The teeny tiny capsule was oh so cute to make and I think mama to be enjoyed it too!

We have absolutely loved seeing everyone’s mini capsules for this contest.  I think it must go down as one of my very favorite contests we’ve done!  Don’t miss out on the rest of the capsules that were shared here: Katy  , Alex and Roberta.

We will be announcing the winner tomorrow!

Filed Under: Contest/Giveaway 1 Comment

Pumpkin Spice Dolman Cold Shoulder Hack

April 4, 2017

Cold shoulder tops are all the rage right now and it’s a quick and easy hack to add to your Pumpkin Spice Dolman.  The Pumpkin Spice Dolman is one of my very favorites and they are in constant rotation in my wardrobe, so as soon as I saw someone in the Patterns for Pirates Facebook Group ask about a hack, I knew I had to make one ASAP.  Let’s get started!

First you are going to cut out all your pieces, I choose to do the 3/4 sleeve with the long band for mine. Once your pieces are cut, we are going to line up our shoulders seams but instead of sewing the hole seam we are going to make a couple of marks.  I marked 1.5 inches down from the neck and placed a pin there and then 2.5 inches up from where the arm attaches. I am sewing a XXS and that is what worked for me but feel free to adjust those measurements to make it perfect for you.  Now we are going to sew from the edge to where we put our pin on the sewing machine.  It’s really important that you don’t use your serger for this step!

Now that our seams are sewn, we are going to press them open and continue pressing where we didn’t sew open as well. Measure to make sure that you are pressing exactly your 1/2 inch seam allowance.  Once you have it pressed open we are going to top stitch both sides of the seam allowance.  I’m using my coverstitch here, but you can use a twin needle or a single needle, whichever you prefer.  You just created your cold shoulder, easy right?!  You will now continue constructing your top just as the pattern says.

And don’t forget the Pumpkin Spice Dolman has a matching girls pattern the Spice Cake so you can also make the girls in your life a matching cold shoulder top- I know that my daughter is all about the cold shoulder and I plan on making her a couple too!

Don’t forget to show off your creations in the Facebook Group, we adore seeing all your creations – Angela

Filed Under: Pattern Hacks, Uncategorized 3 Comments

#allP4Ptoday winners

March 31, 2017

DECEMBER

And just like that, a new year is almost here. Hope you all had a fantastic holiday season! We couldn’t end the year without announcing our last 2017 #allP4Ptoday winner!

So without further ado…our December winner is:

Laura Van Niejenhuis

Laura has been rocking #allP4Ptoday every month since we started the contest. From casual to party attire, Laura has made them all and looks radiant in them.

Thank you all for a fantastic 2017!🎉 Keep posting your all P4P outfits next year too, we will be watching! 😉

NOVEMBER

Ahoy, pirates! We hope you had a wobbly gobbly Thanksgiving celebration! We saw some awesome P4P outfits being shown off this month. As always choosing only one winner was super hard.

Drumroll…. our latest #allP4Pwinner is Maggie Runyon!

Maggie’s post brought a smile to all the team’s face so we just had to pick her as our November winner. She looks adorable in her Wiggle dress … but little miss stole the show in her Fav tee dress. Congratulations, Maggie!!

We can’t wait to see your holiday all P4P outfits! Use the hashtag #allP4Ptoday so we can spot you!

OCTOBER

Boo! The trick or treating month has come and gone! We absolutely loved seeing you rock the Gone Batty shirt and incorporating P4P in your fall sewing.

Our October #allP4Ptoday winner is…. MAGDELYN GAMBLE !

Magdelyn rocked those Disneyland family outfits! She is definitely an inspiration, she chose the perfect P4P patterns ( Henley, Peg Legs and Sugar Pie) so that everyone was comfortable for the long walks while still being “park ready” and cool.

The Sweetheart  dress gets a lot of love from our October winner, she looks absolutley gorgeous in both the dress and the peplum top. Thank you, Magdelyn for sharing your creations with the P4P group.

I can’t wait to see your November entries and how you incorporate P4P in your Thanksgiving sewing. Don’t forget to add the #allP4Ptoday to your posts so we can see YOU when we search for our monthly winner.


SEPTEMBER

And just like that fall is here!!! I think most of you are just as excited as I am for some cooler weather and some pumpkin spice everything.

September P4P group wall was filled with amazing creations! We’ve seen lots of pegs, SOS and cocoons…clear sign of autumn’s arrival. So without further ado….our September #allP4Pwinner is…

JESSIE KILGER!

Jessie rocked her Pegs, SOS, Cocoon Cardigans and Favorite Tees like a boss! I loved how she shows the versatility of our patterns and look adorable doing it.

Keep posting those #allp4ptoday outfits in the P4P group! Maybe October’s winner will be YOU!


AUGUST

Ahoy, pirates! The month of August brought a lot of fantastic #allP4Ptoday outfits. We’ve seen kids going back to school and teachers ready for a brand new school year. One mom and teacher really stood out this month so let’s give a big “Congratulations!” to our August winner…

Britina Gilkey


Britina really brought her A game this past month…check out how many cool #allP4Poufits she posted!

From PSD to Peg legs, she’s done it all! We were just so happy to see all the great posts.

Happy sewing, pirates and remember to hash tag your #allP4Ptoday outfits.


JULY

Another summer month has come and gone. Have you guys started sewing for fall? Personally, I am not quite ready to give up on summer just yet…so when I was scrolling to all the amazing #allP4Ptoday photos one stood out for being what summer is all about.

Our July all P4P today winner is…..

Callie Zerby

Doesn’t Callie look stunning in her Hello Sailor and Siren Swim Top ? We hope you had an amazing birthday party, Callie!

If you’re wearing all P4P, snap a pic, post it in the group and tag it #allP4Ptoday…you may be our next lucky winner!


JUNE

Summer is officially on and so are the #allP4Ptoday outfits! We loved seeing all the light and breezy creations you posted this month and the occasional layered look from our friends down under. You guys were really rocking your P4P this month and we couldn’t be more proud.

Without further ado…the June winner is:…Beth Pannecoucke !

Beth has been showing off her baby bump comfy looks throughout the month so she caught the team’s eye. Just look how adorable she looks in her Favorite Tee and Palazzo short.

From the Cross my Heart Cami to FST and Cocoon Cardi, Beth has been rocking them all!

Don’t forget to hash tag your all P4P outfits post in August too. We look forward to seeing some of your Summer of Wovens creations too!


MAY

Can’t believe we are at the end of May already. Another month has passed and you have all outdone yourself. We’ve seen so many beautiful #allP4Ptoday outfits…you guys really like to make it hard on us to choose the monthly winner.

We’ve seen some spring outfits, some summer ones, even some special event ones. MeMadeMay was big in the Pirates land!

Drumroll….May’s winner is…. Susan Priddy – Fox! Susan has done a beautiful job making her and her daughter’s outfit for such a special event. Congratulations, Susan!

Don’t forget that the #allP4Ptoday contest is ongoing so keep those hashtags coming. You never know, next winner may be YOU!


APRIL

Once again you guys have not made our job easy, but that’s a good thing! We absolutely love seeing all of you rocking P4P outfits. April brought a lot of stunning Easter entries, I wish we could list them all.

Ok, Ok…I won’t make you wait any longer. Our April winner is Emily Merkel! Just look at this cool dude and tell me you can resist his smile. I couldn’t. He is just the cutest showing off his #allP4Ptoday outfit.

Keep those hash tags coming as there will be a winner every month. Happy sewing, pirates!

MARCH

Ohh wow! You guys have not made it easy for us to choose a March winner. We loved seeing you all rocking #allP4Ptoday and everyday.

Without further ado….our March winner is….. Lizzy Price! Lizzy just shines in all her pictures and since I couldn’t choose just one of them, here are a few that stood out. I think she might just be our SOS pants queen 😉

Thank you all who posted during March and don’t forget to keep showing off those P4P outfits. Use hashtag #allP4Ptoday so we can find them and who knows? Maybe YOU will be our April winner. You can read the contest details here.

Filed Under: Contest/Giveaway, Uncategorized 1 Comment

  • « Previous Page
  • 1
  • …
  • 21
  • 22
  • 23
  • 24
  • 25
  • …
  • 29
  • Next Page »

connect with me

  • Email
  • Facebook
  • Instagram
  • Pinterest
  • YouTube
Privacy & Cookies: This site uses cookies. By continuing to use this website, you agree to their use.

To find out more, including how to control cookies, see here: Cookie Policy
  • Privacy Policy
  • Refund Policy
  • Contact Us
  • About

Copyright © 2026 Patterns for Pirates

Copyright © 2026 · Genesis Framework · WordPress · Log in