Patterns for Pirates

P4P stylish, modern, wearable patterns

  • Home
  • Blog
    • Frequently Asked Questions
    • Pattern Releases
      • Free Patterns
    • P4P University
      • Fitting
      • Sewing with Stretch, Knit Fabrics
      • Sewing with Woven Fabrics
      • Sewing Machines
    • Sew-A-Longs
    • Fabric for Pirates
    • Pattern Hacks
    • Announcement
      • Blog Tours
      • Contest/Giveaway
  • Shop
  • Bundle Discounts
  • Flash Friday
  • Gift Cards
  • My Account
  • Cart

Take the Plunge Swimsuit :: Dress & Peplum Hack

June 14, 2017

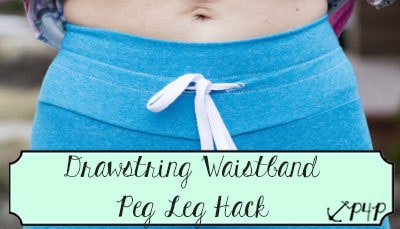
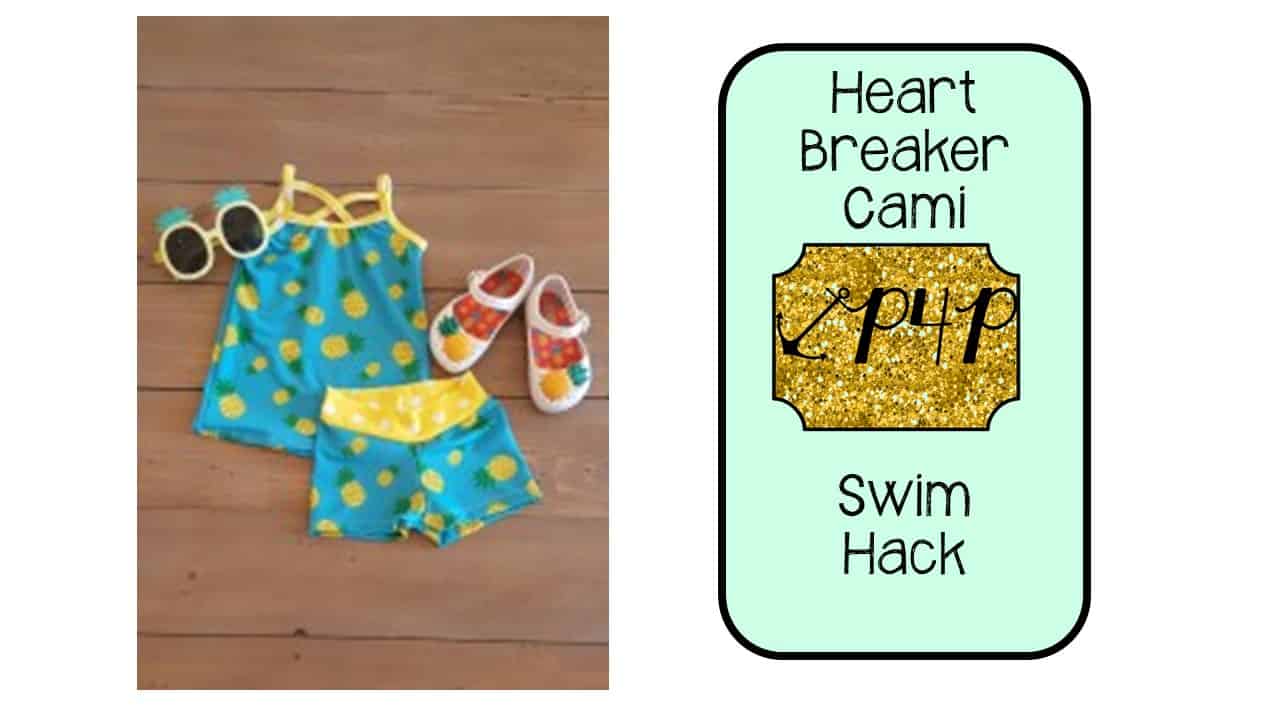
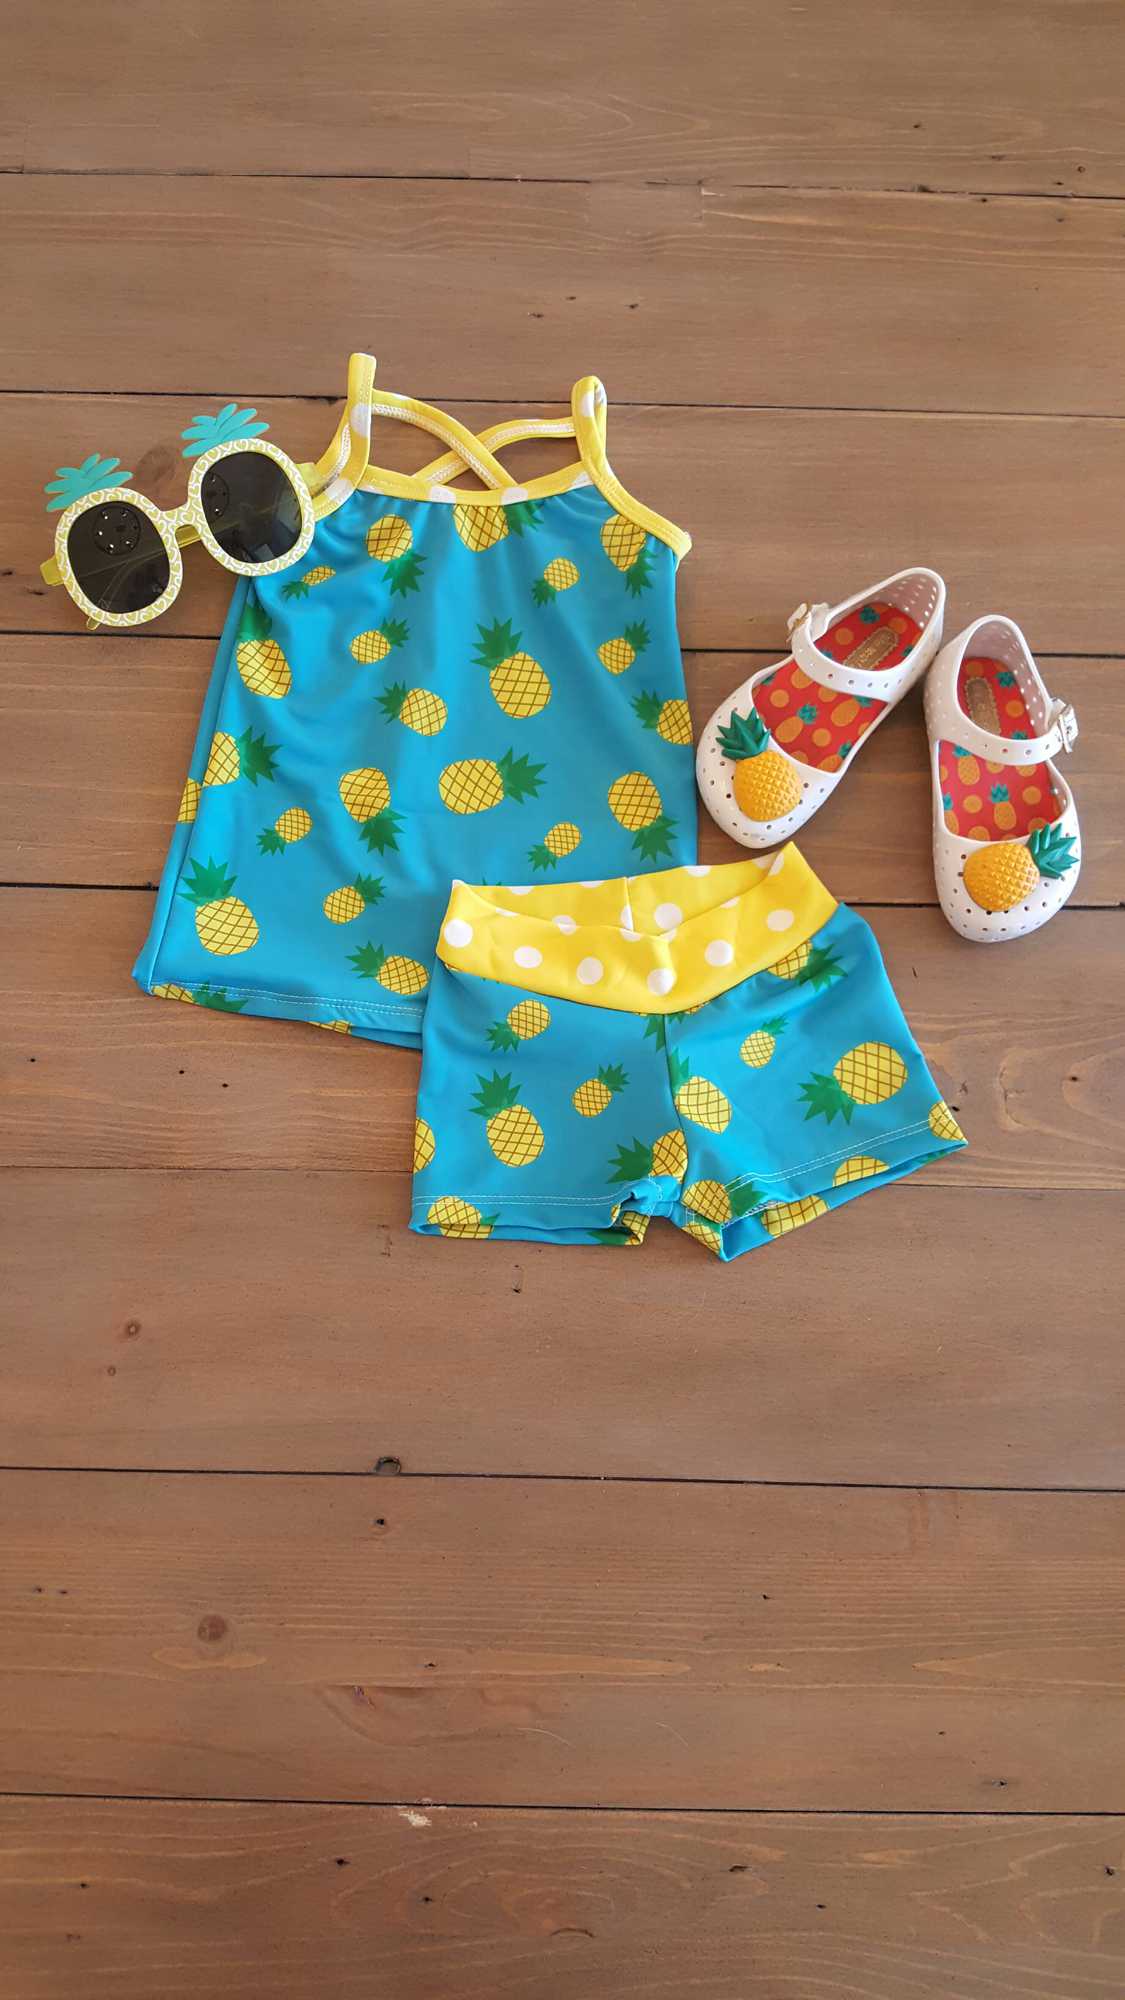
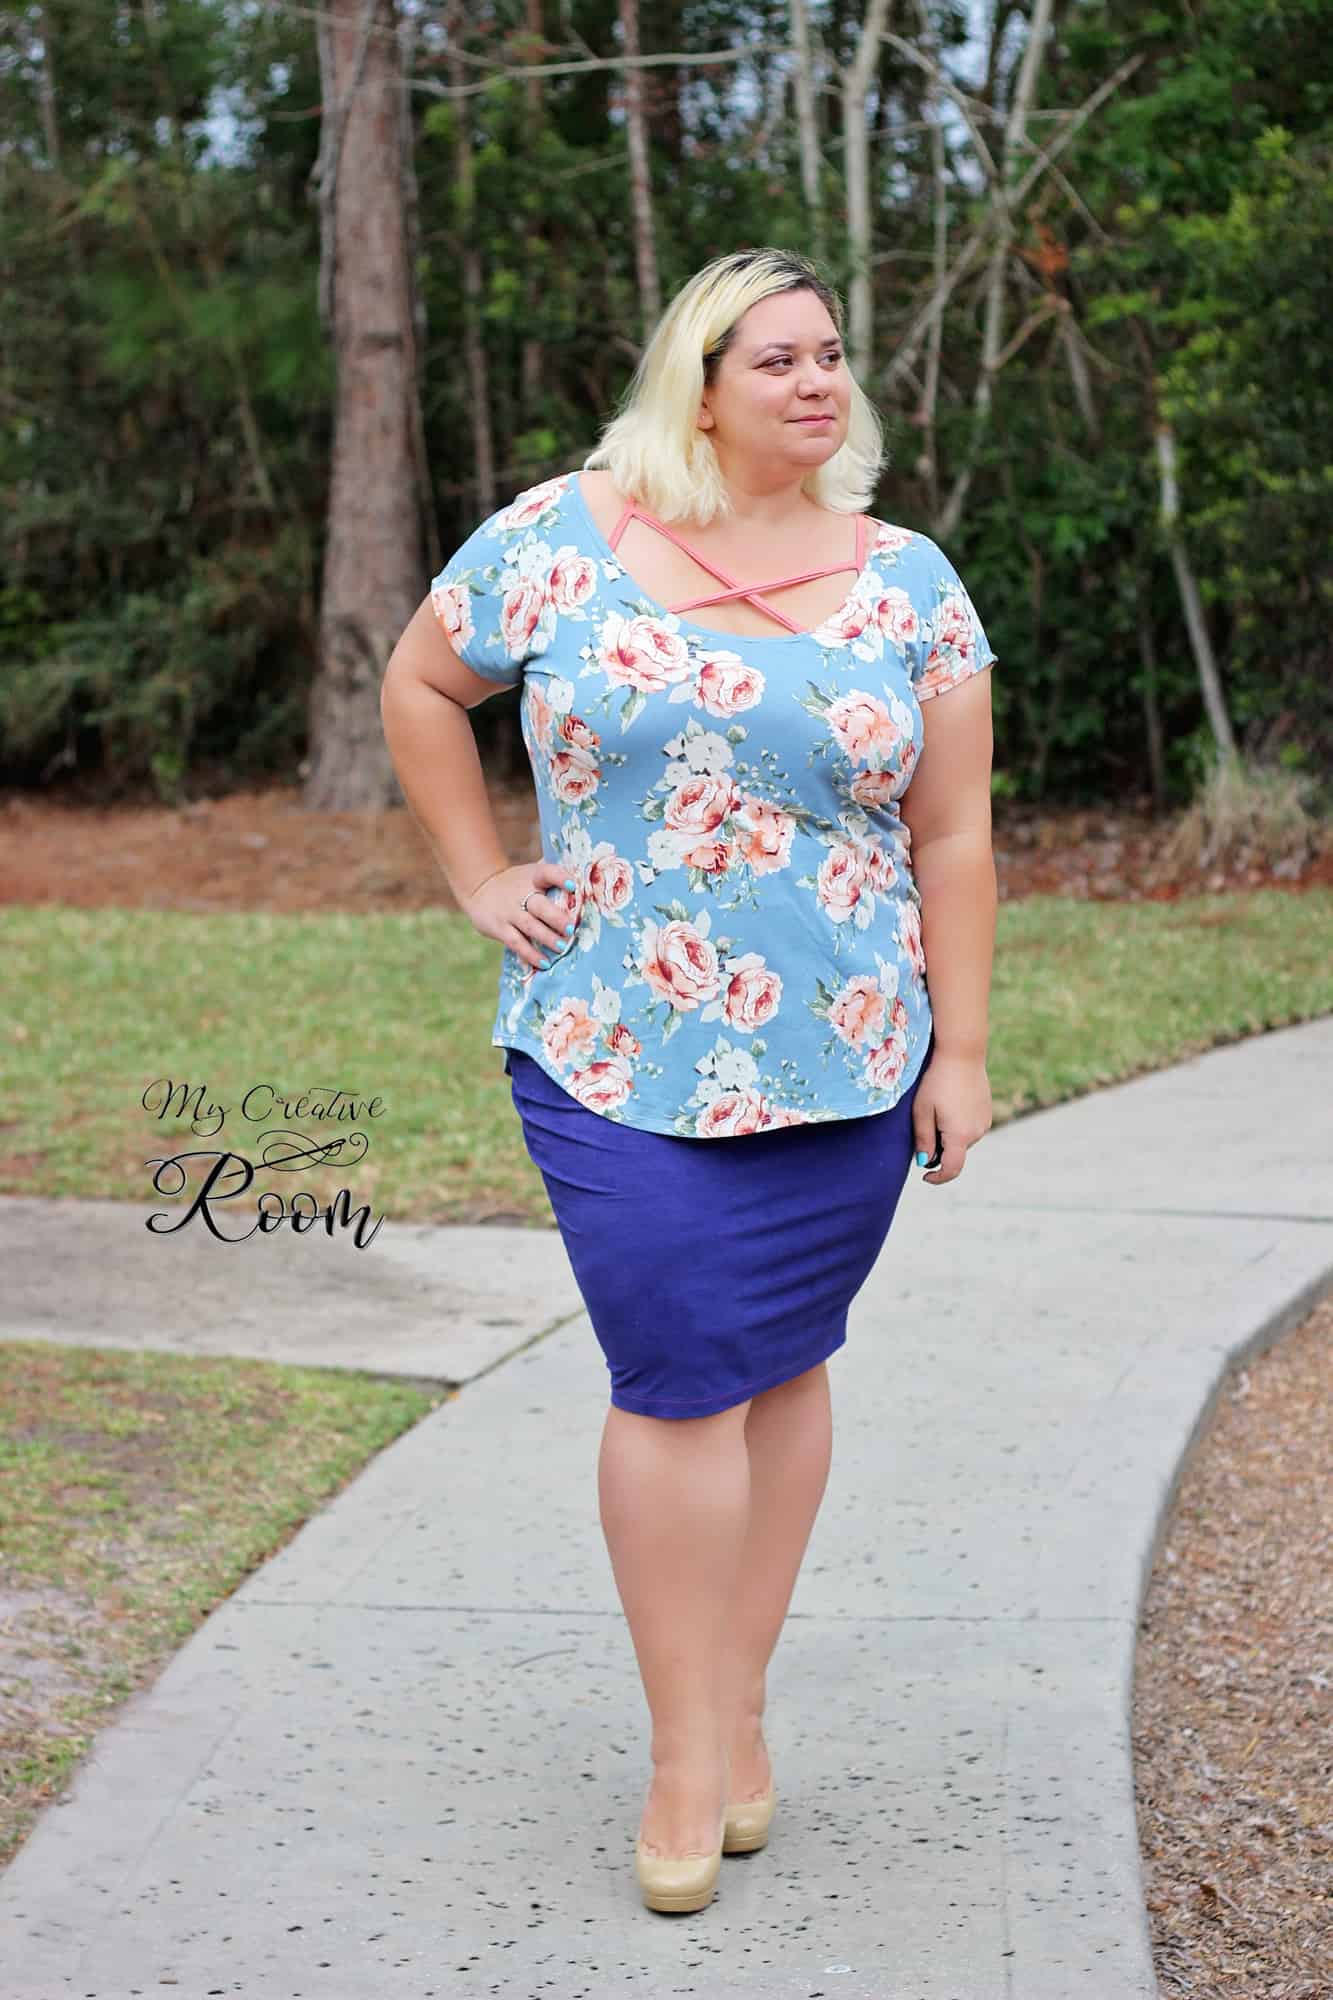
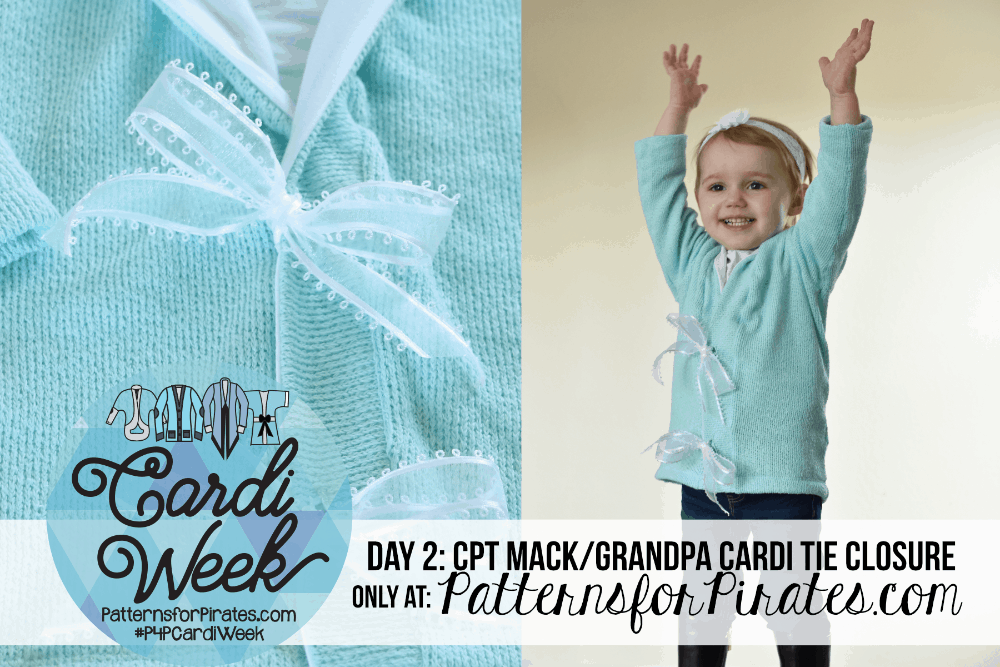
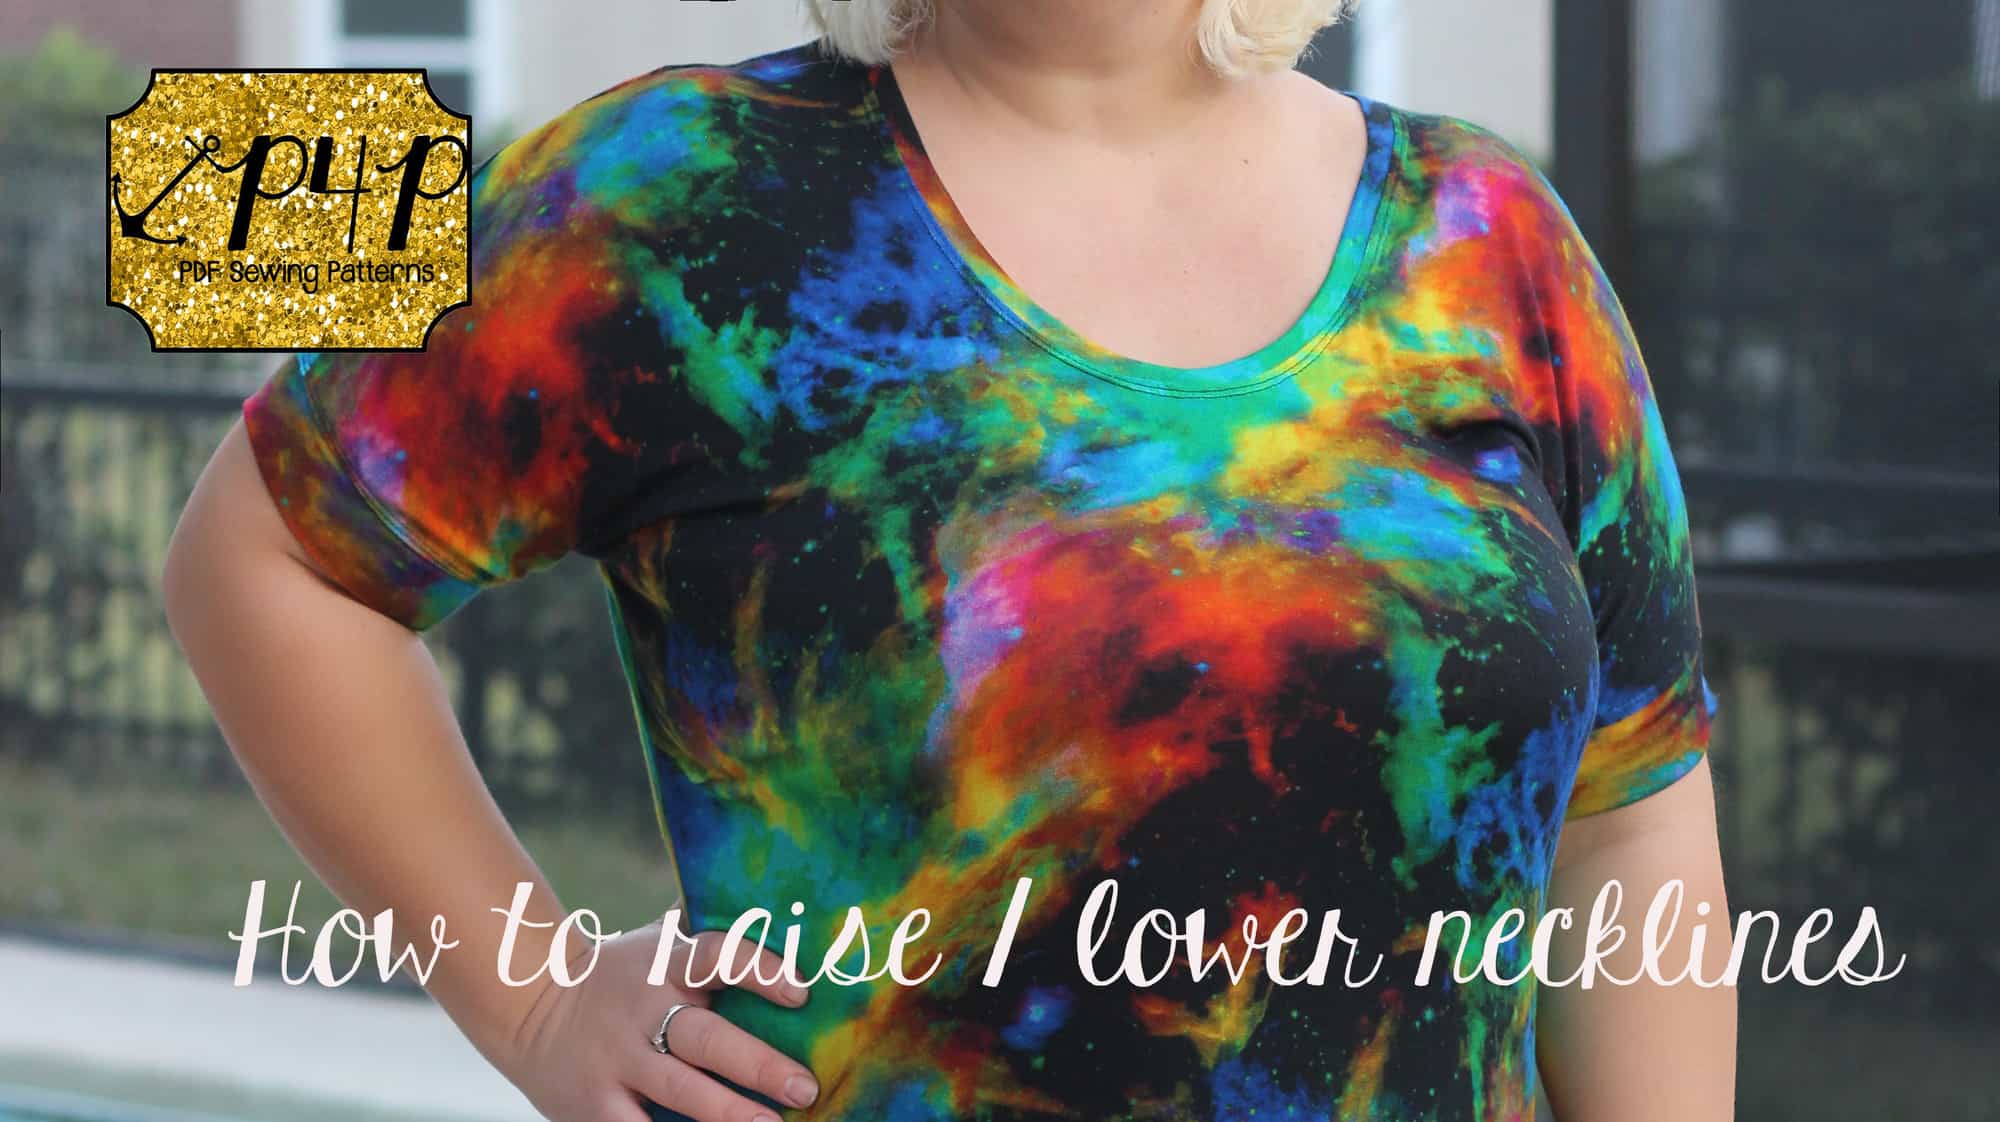
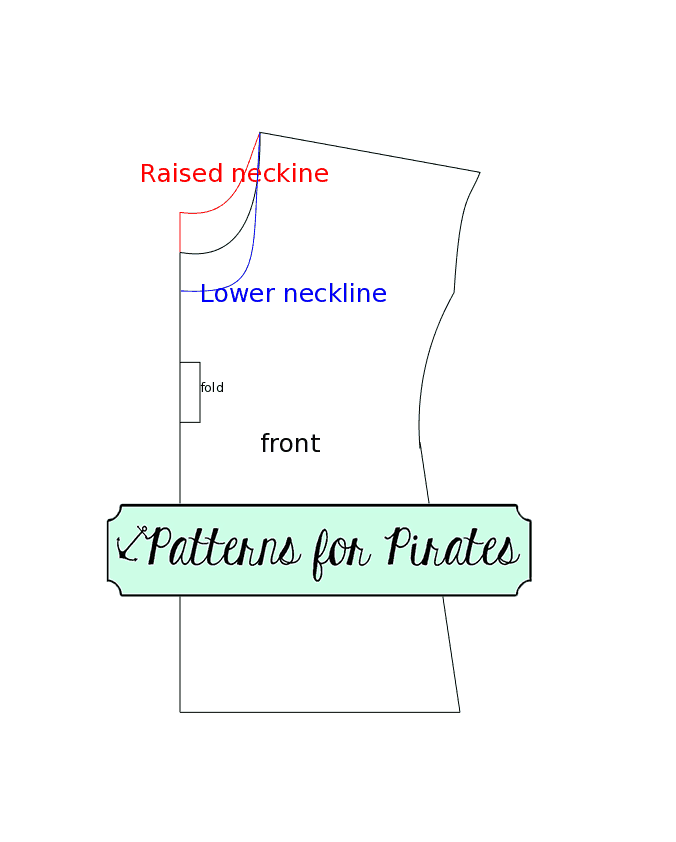
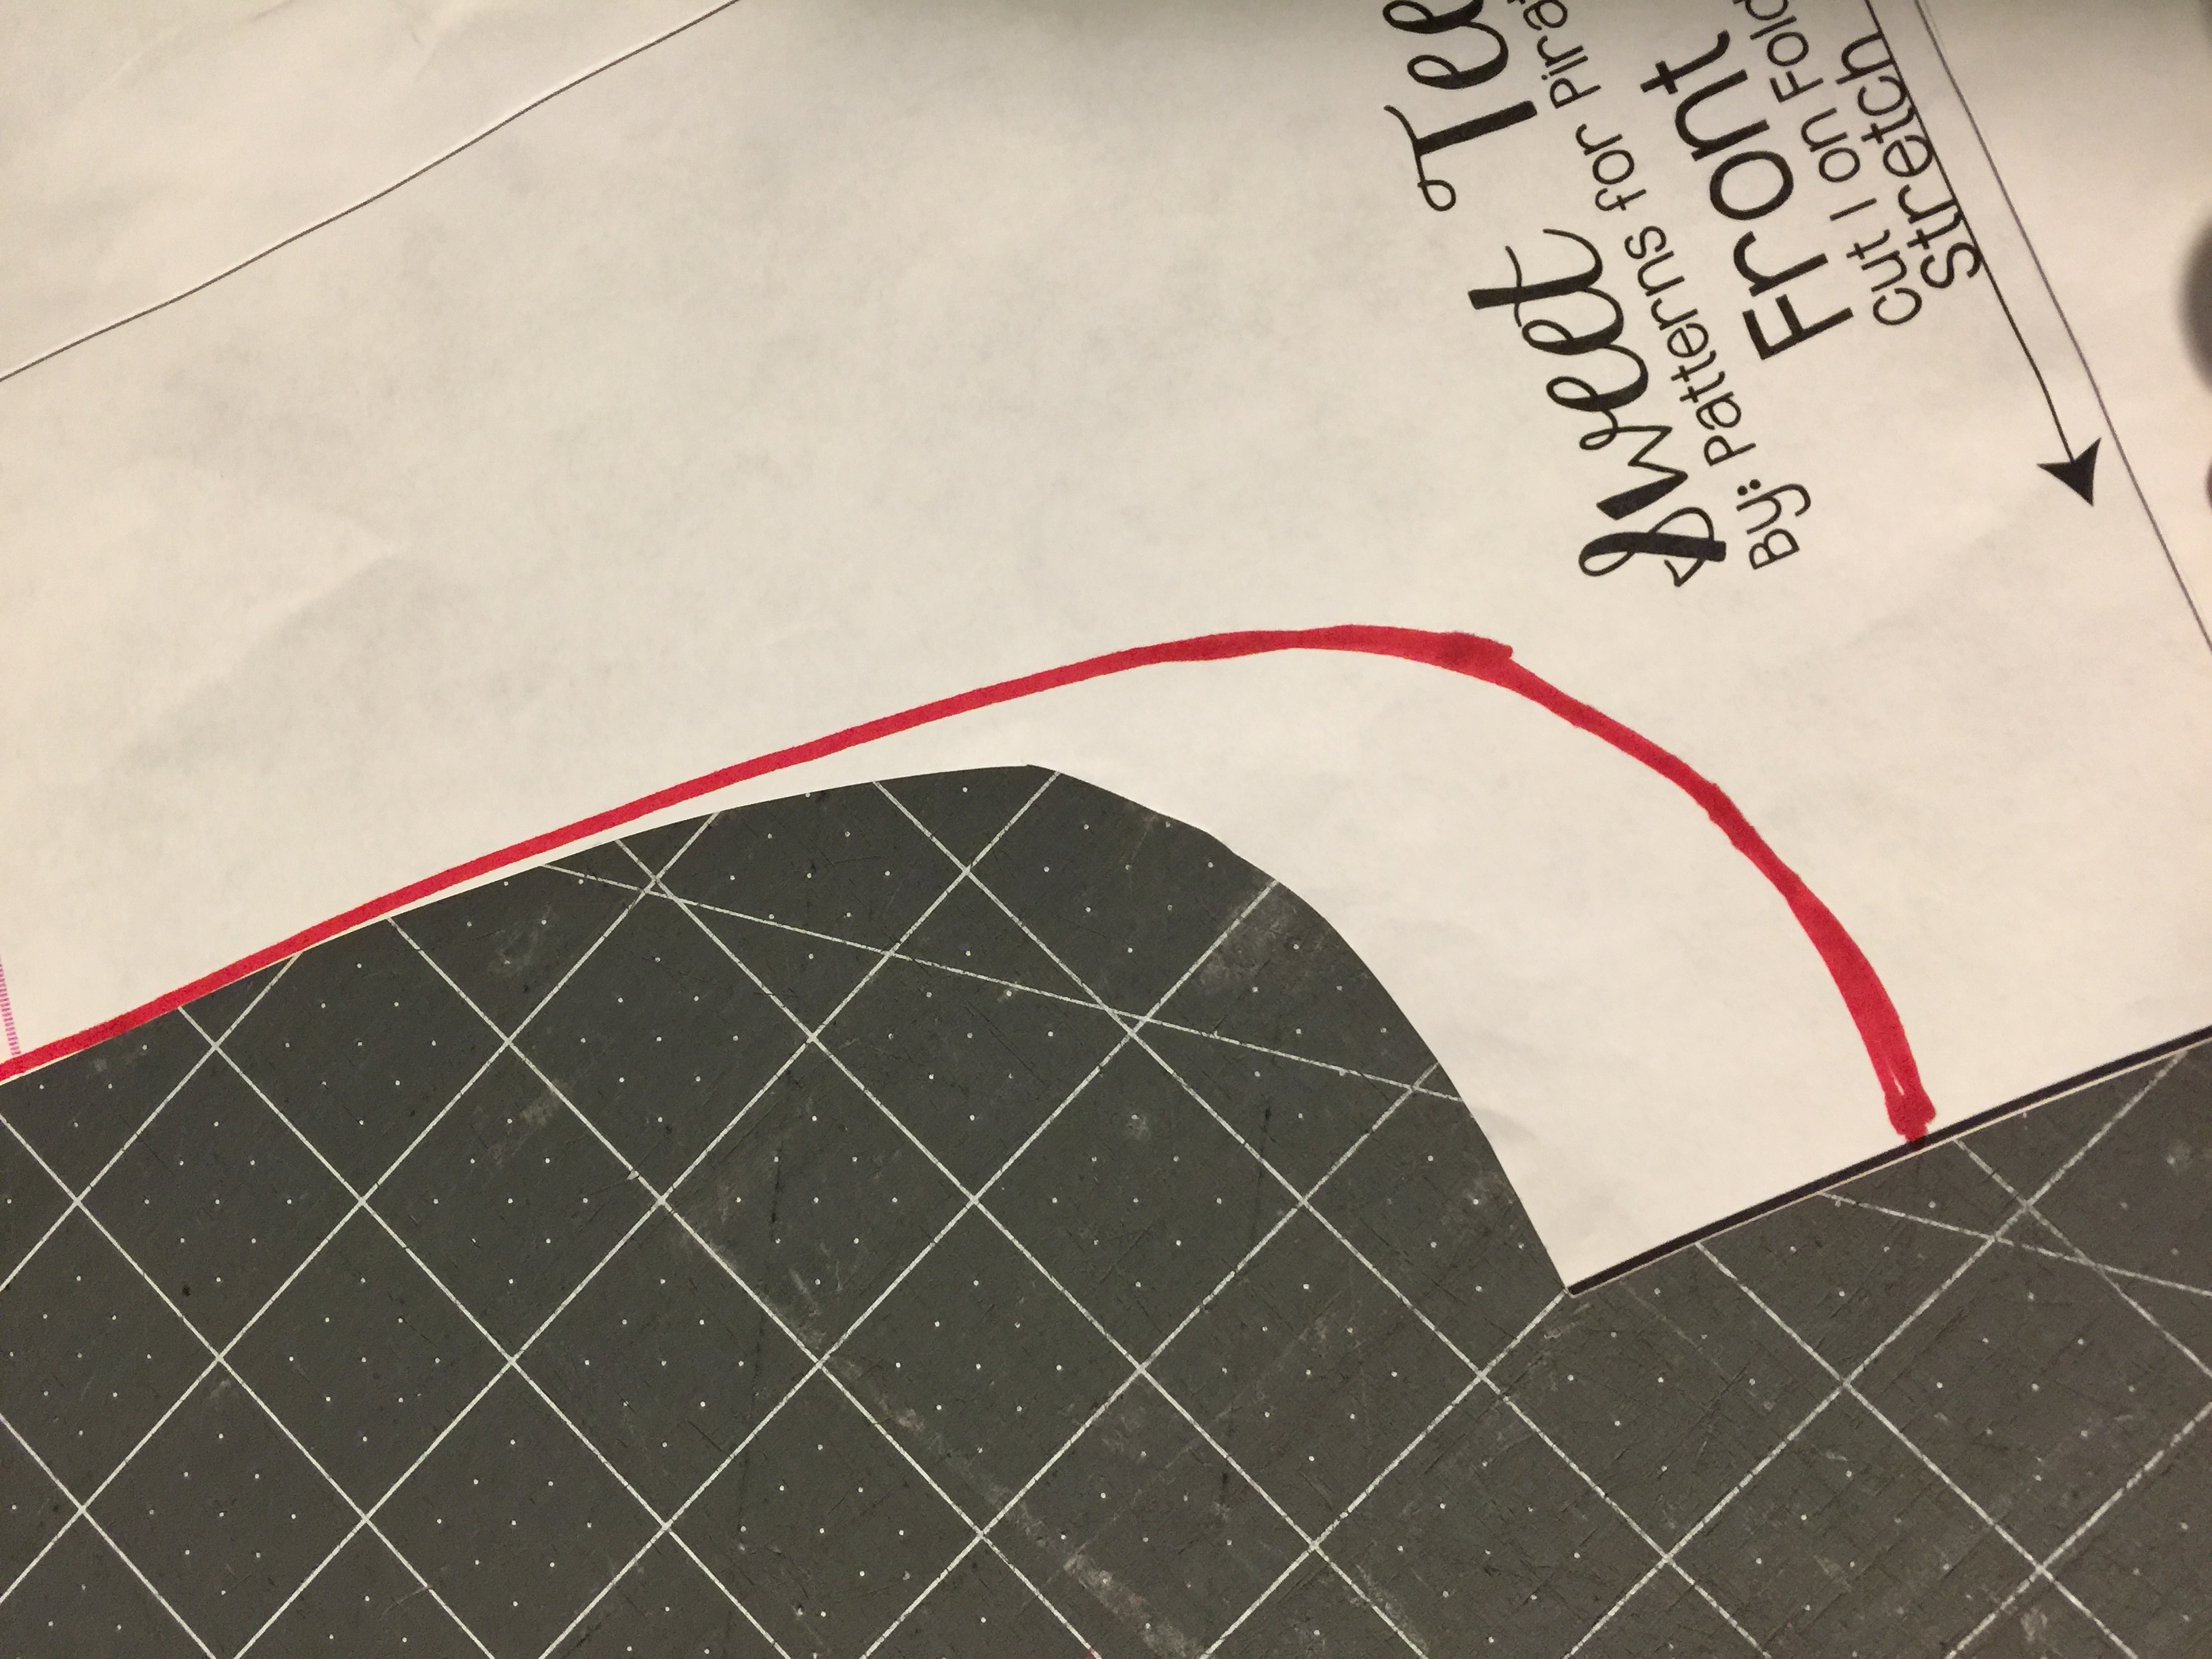
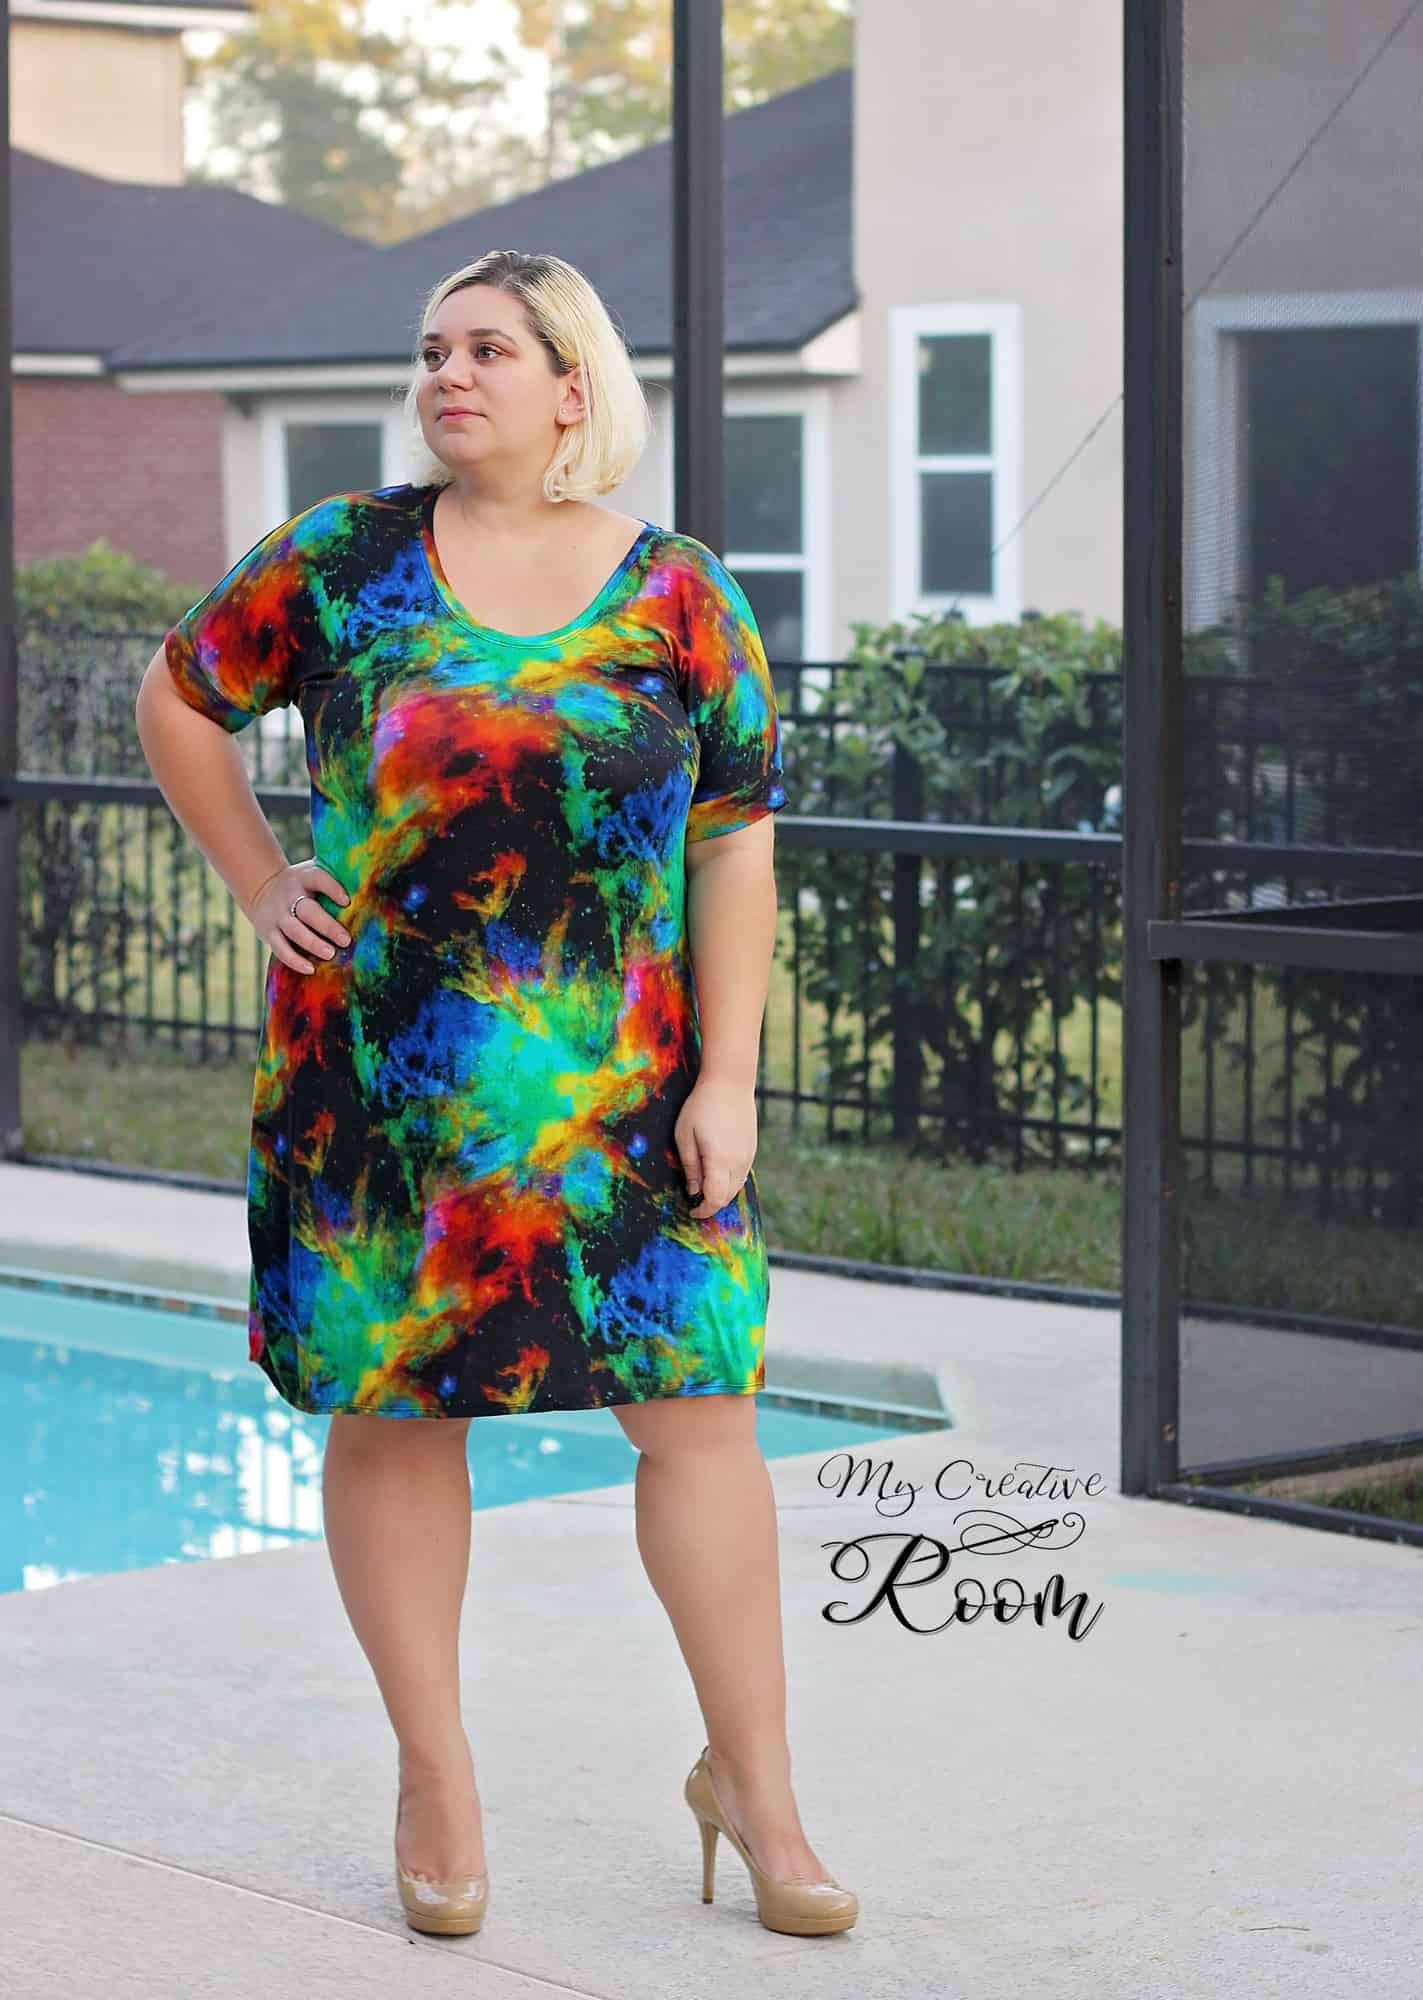
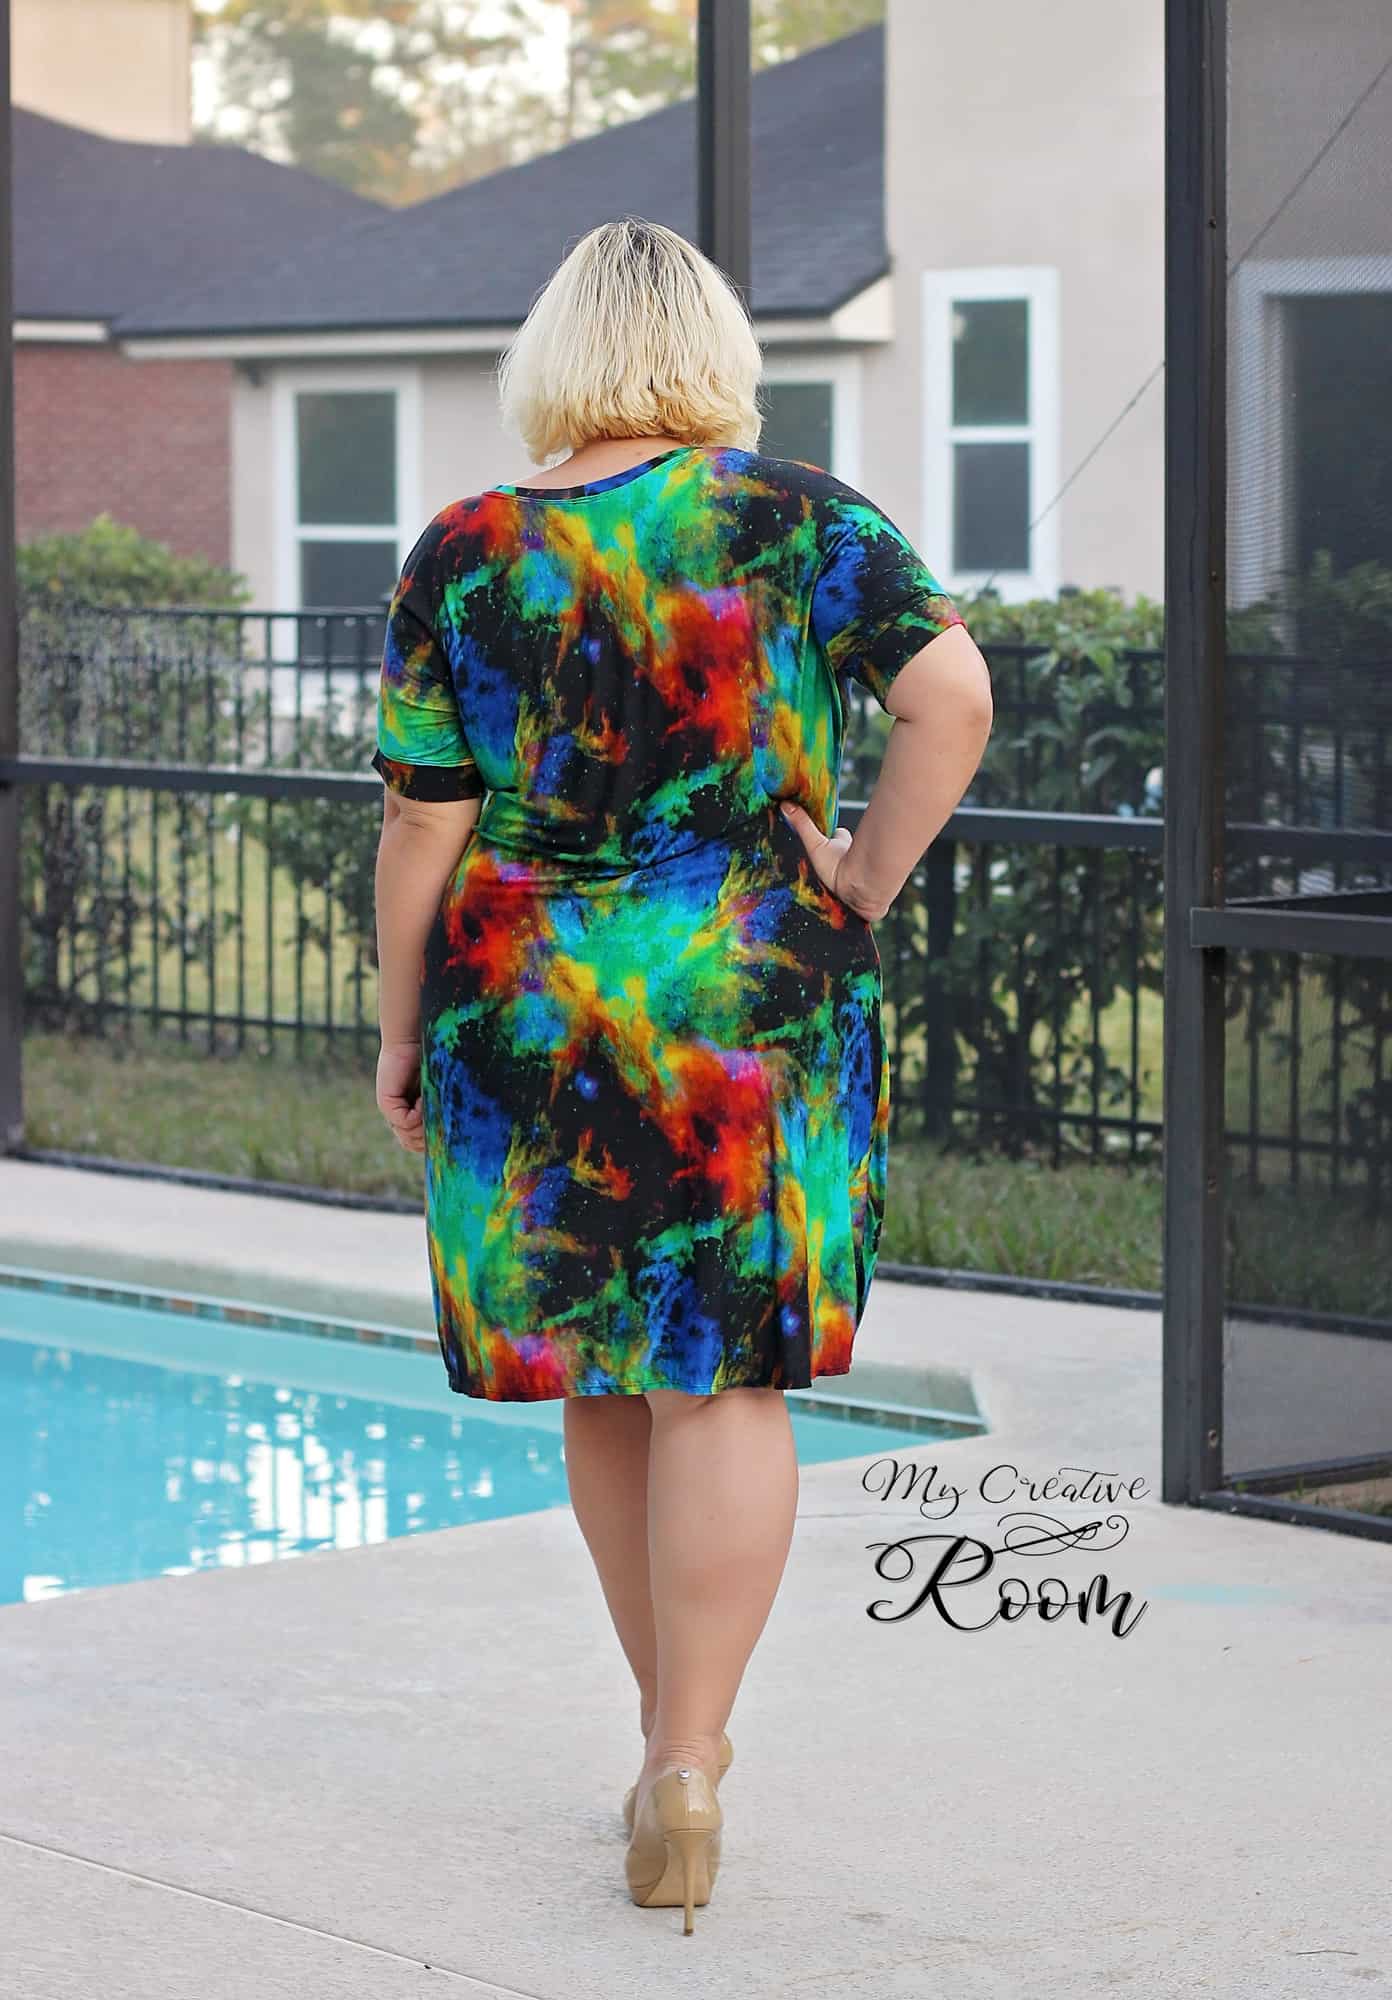
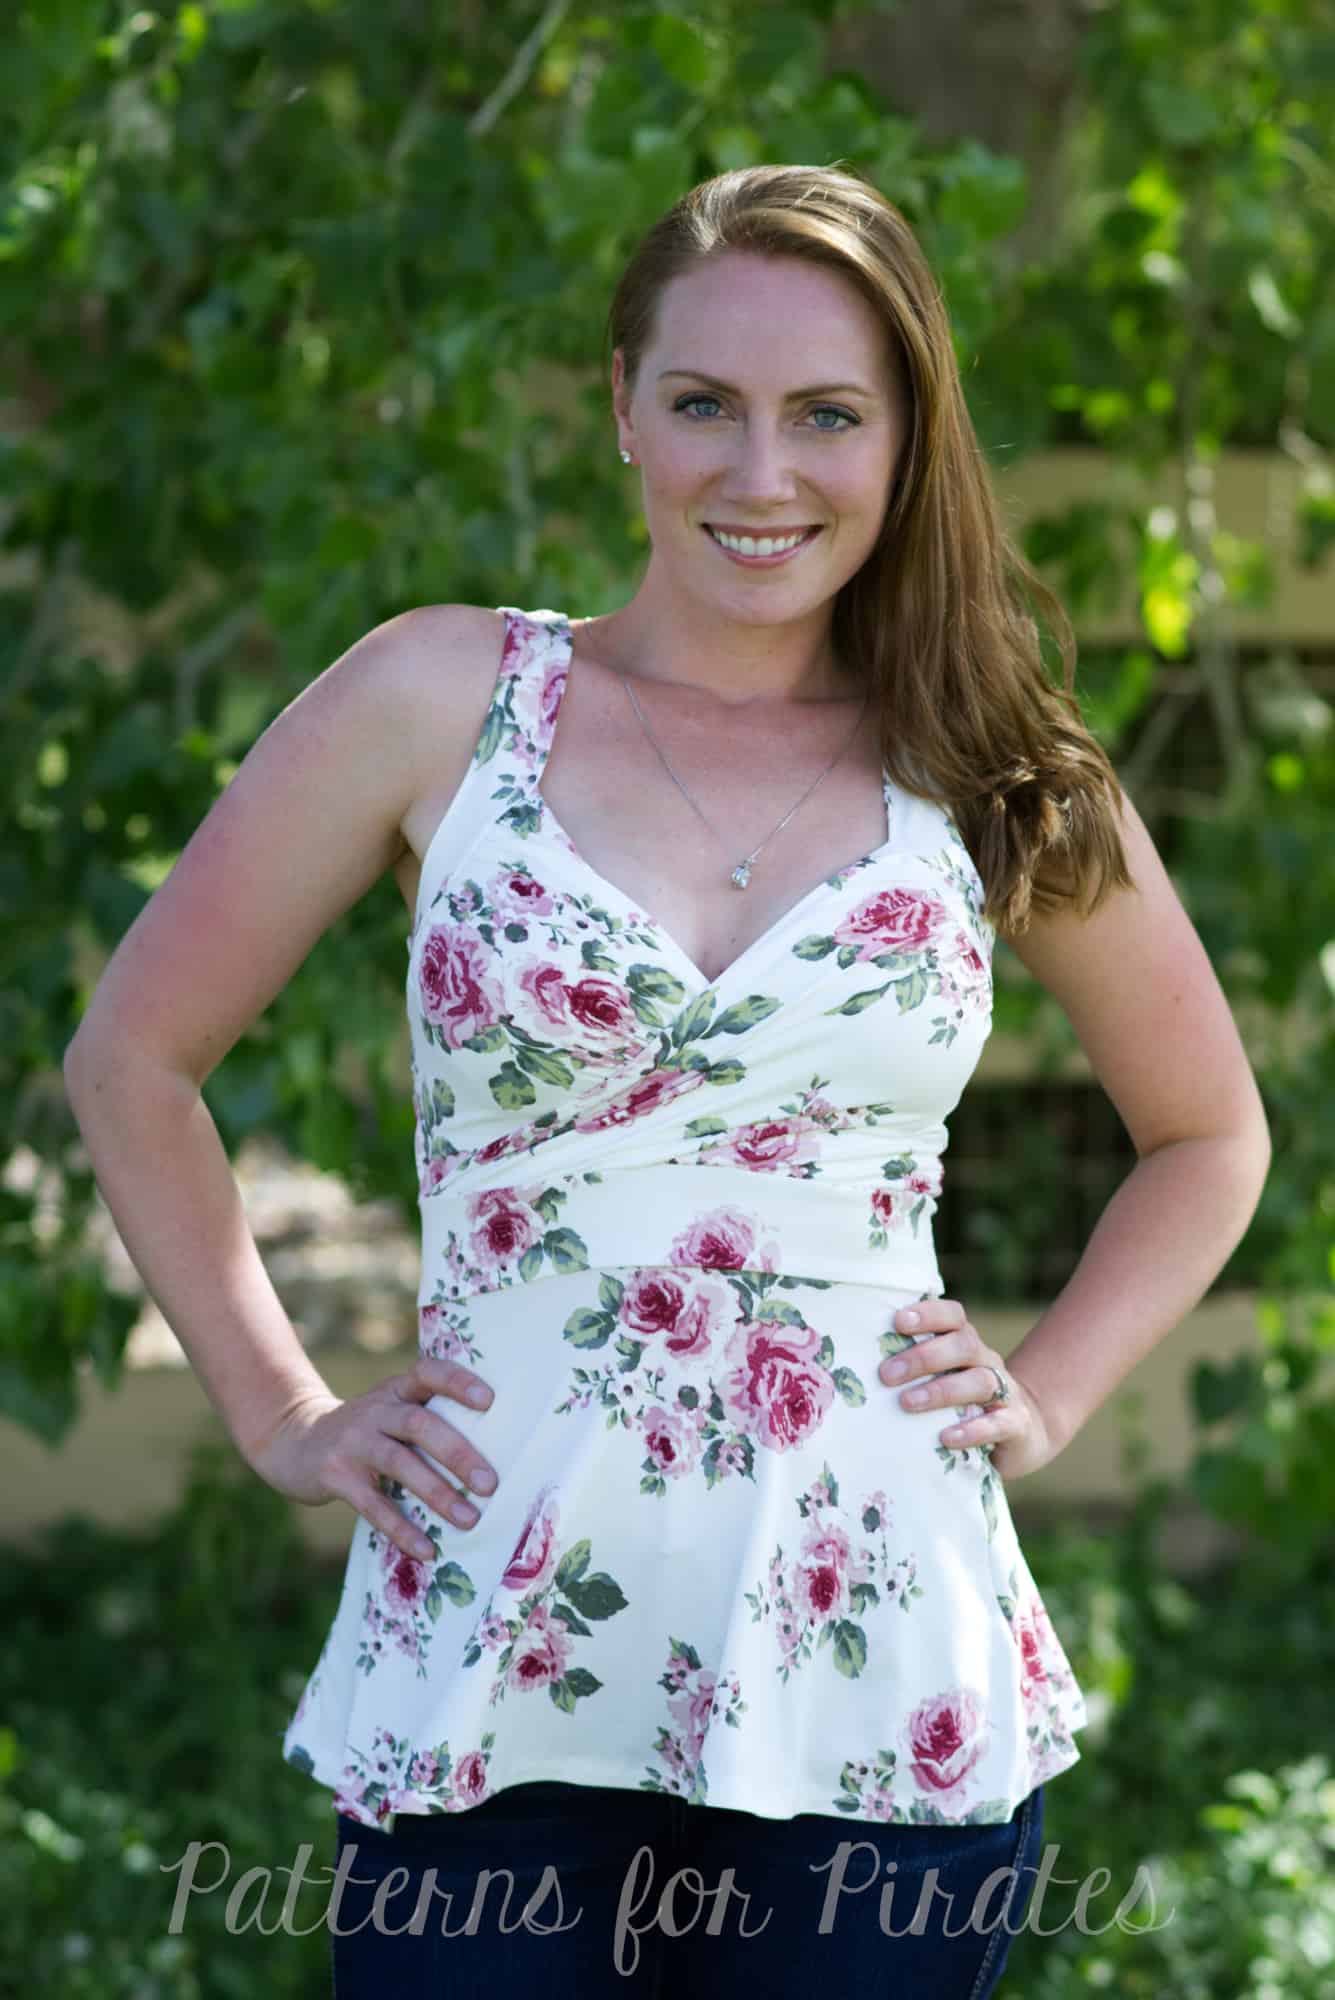
We are all loving the new Patterns for Pirates Take the Plunge Swimsuit that was just released! So naturally, we had to take this pattern a step further and morph it into some cute apparel! In this tutorial I am going to show you how to add some super cute skirts in place of the swim bottoms to create adorable everyday garments! As a total bonus you can follow the swim pattern instructions to add built in bra cups and under bust support. How awesome!

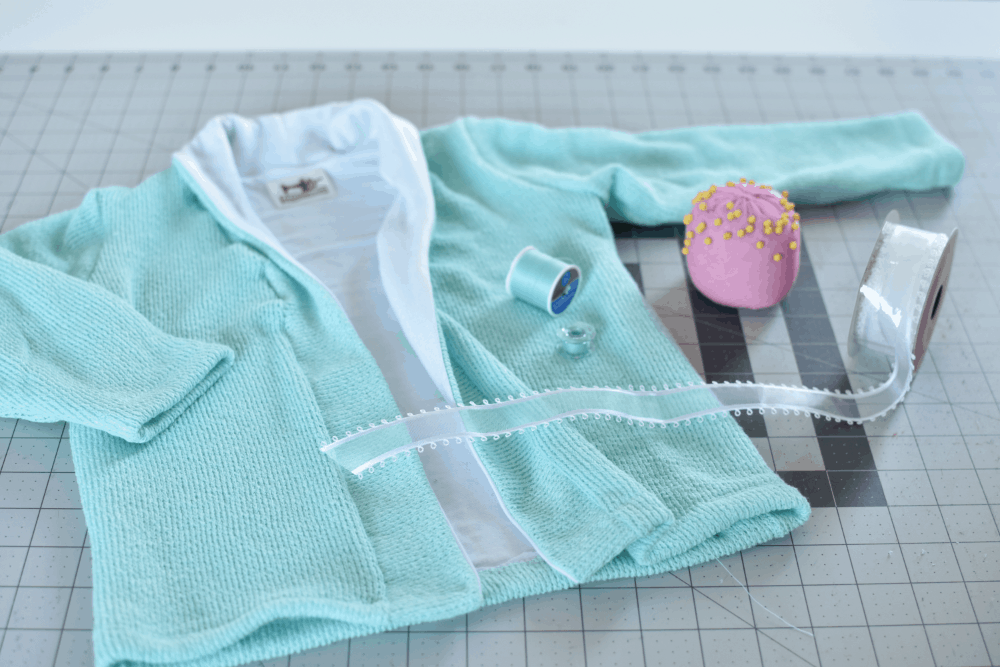
:: Fabric Requirements ::

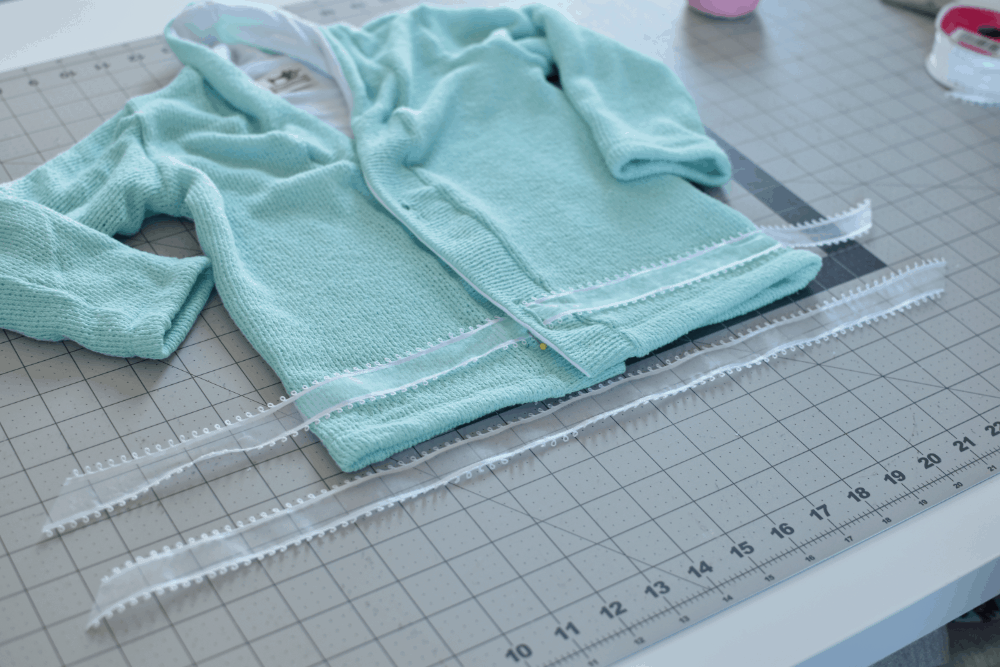
This pattern is intended for pretty sturdy but stretchy swim knit. So in order to turn this into a comfortable dress I recommend choosing a main (outside) fabric that has both great 4-way stretch and good recovery. Brushed poly, rayon spandex, cotton spandex and maybe a very very stretchy scuba or liverpool would work. For the bodice lining you will want to choose something light and stretchy such as rayon spandex or brushed poly. All versions pictured in this tutorial were made using double brushed poly spandex. Also, you do not need to use swim elastic on this, regular braided elastic is sufficient. I will also detail how you may omit the elastic altogether for the full back option.

:: Assemble your Bodice ::

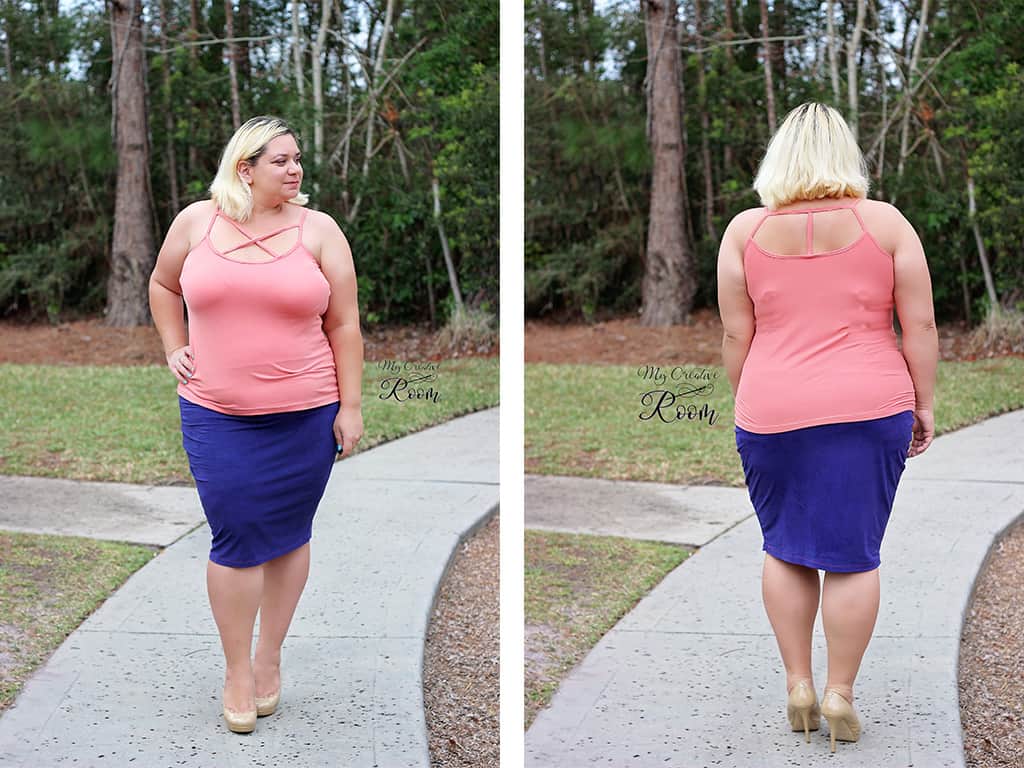
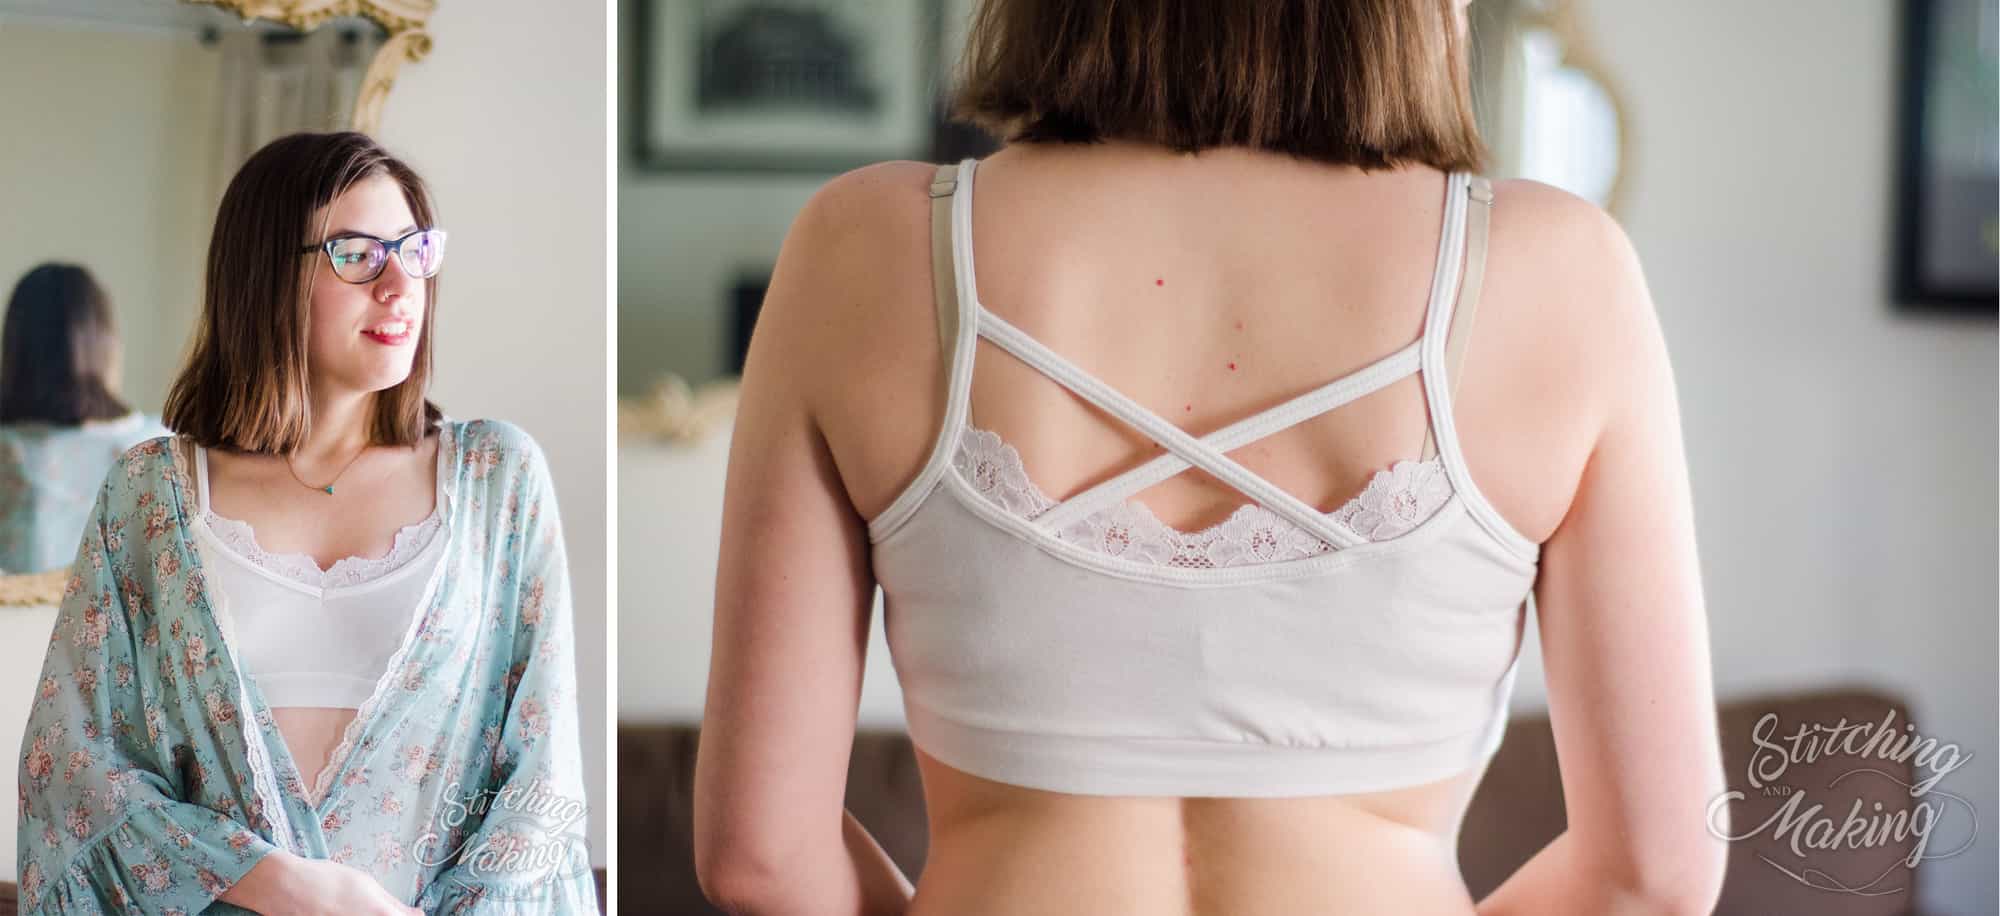
First things first. Go ahead, cut out all pieces of your bodice exactly as instructed in the pattern. None of these pieces need to be altered. You can choose any strap/back option. Choose to add bra cups and under bust support elastic if you feel like having an all-in-one dress! I personally love the push up bra cups for a little extra support when going with the all-in-one option. Remember, you do not need to use swim elastic for non-swim garments. Traditional braided elastic will be a little easier to sew with. Go ahead and assemble the bodice exactly as instructed by the pattern and skip to the Skirt Options portion of this tutorial.

{Optional} :: If you are choosing not to include bra cups, you are using the full back option AND you are using a sturdier fabric like brushed poly or cotton spandex, you may omit the elastic. Fabrics like rayon spandex and ITY, and built in bras that provide support do require that elastic be used to prevent your straps from stretching out. Also, the low back or halter version likewise require elastic to hold the dress up. To omit the elastic follow along with these next steps before getting to the skirt options.

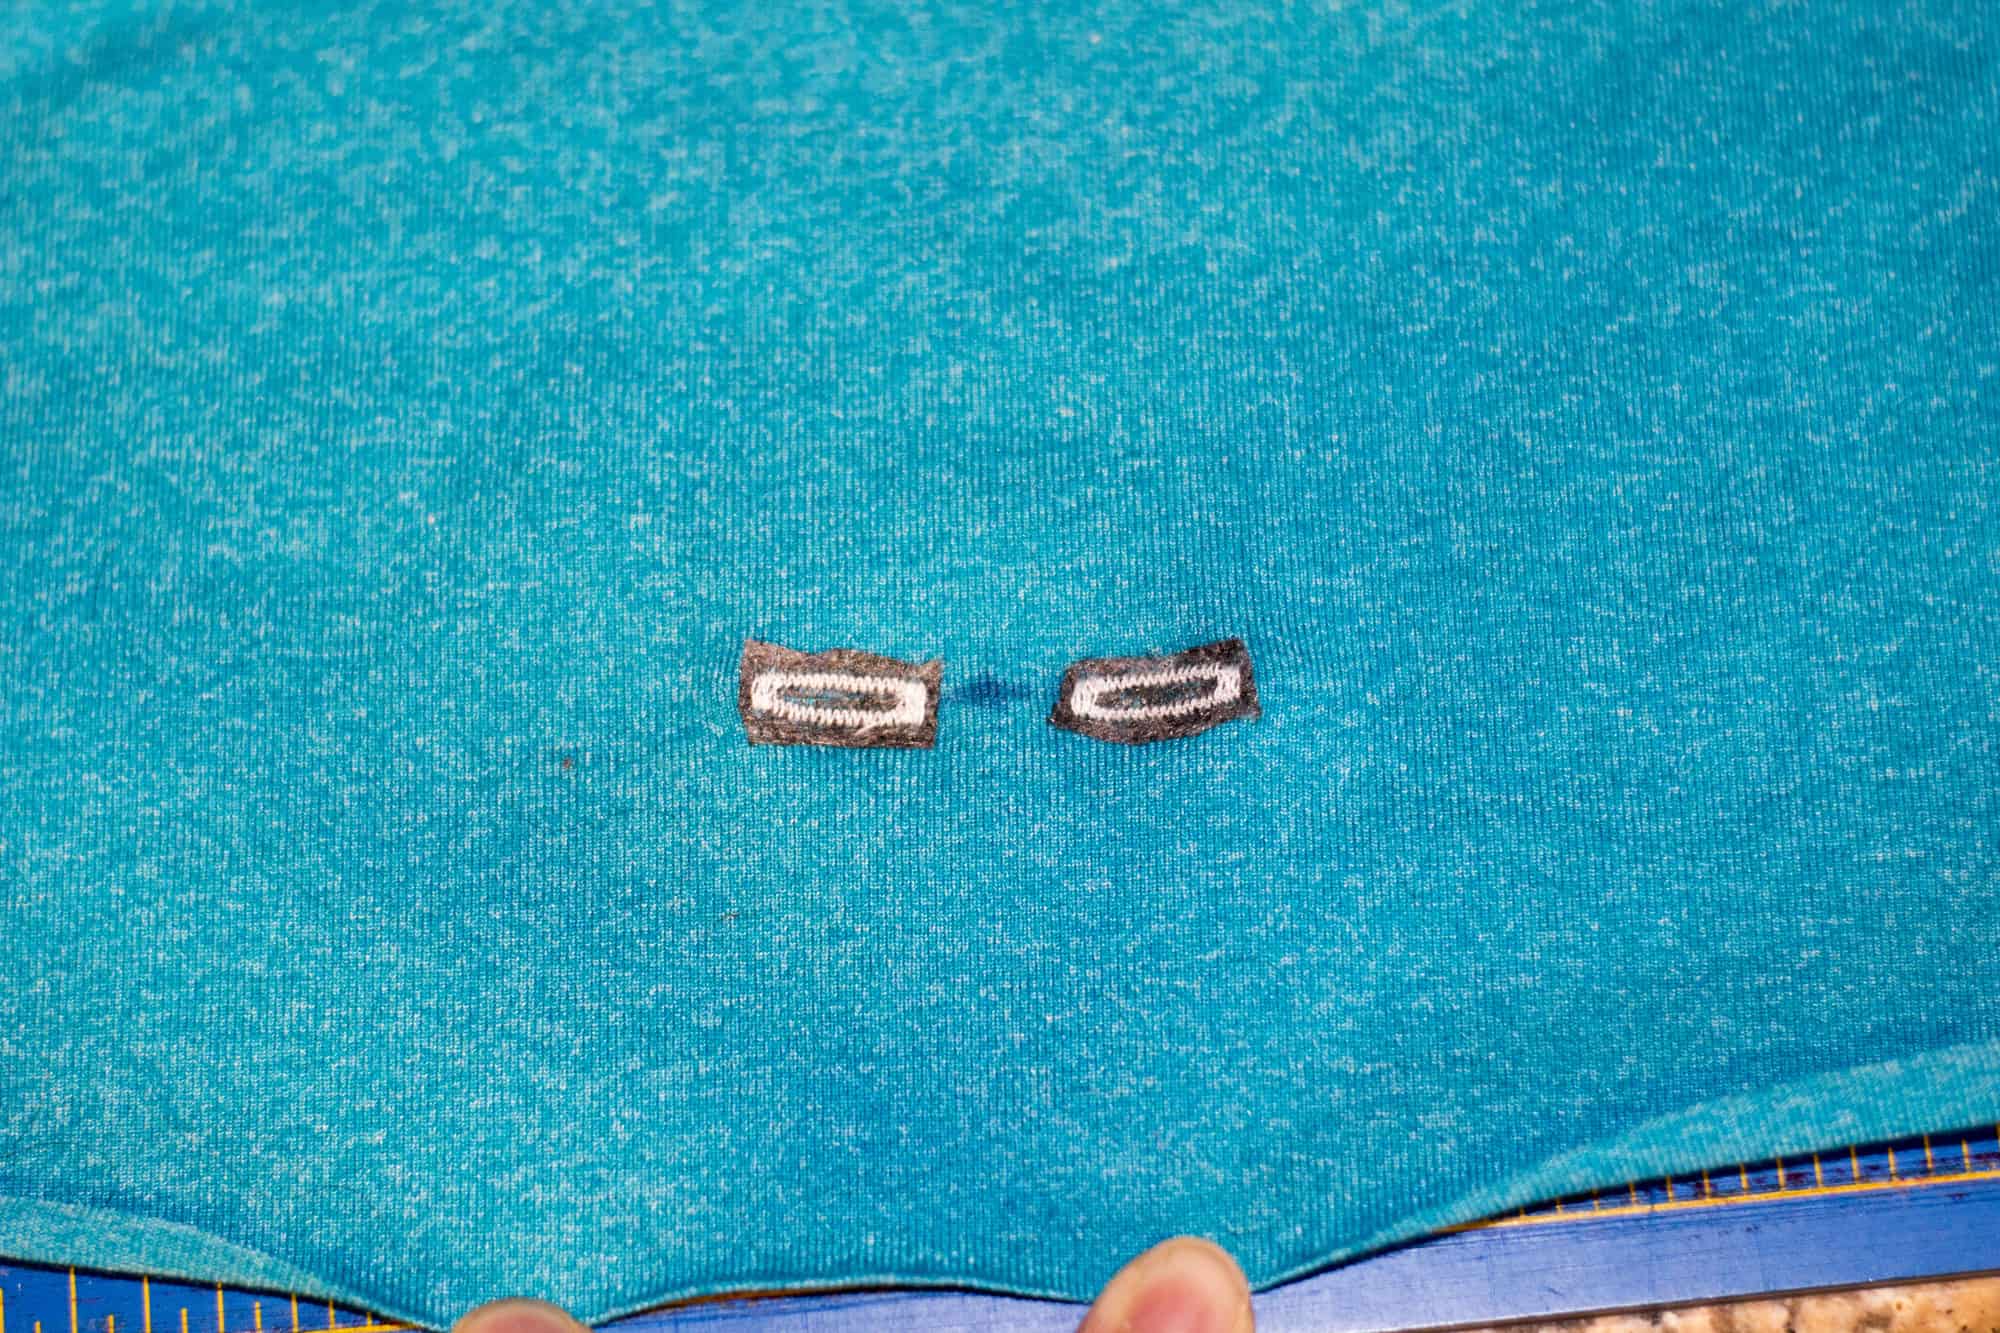
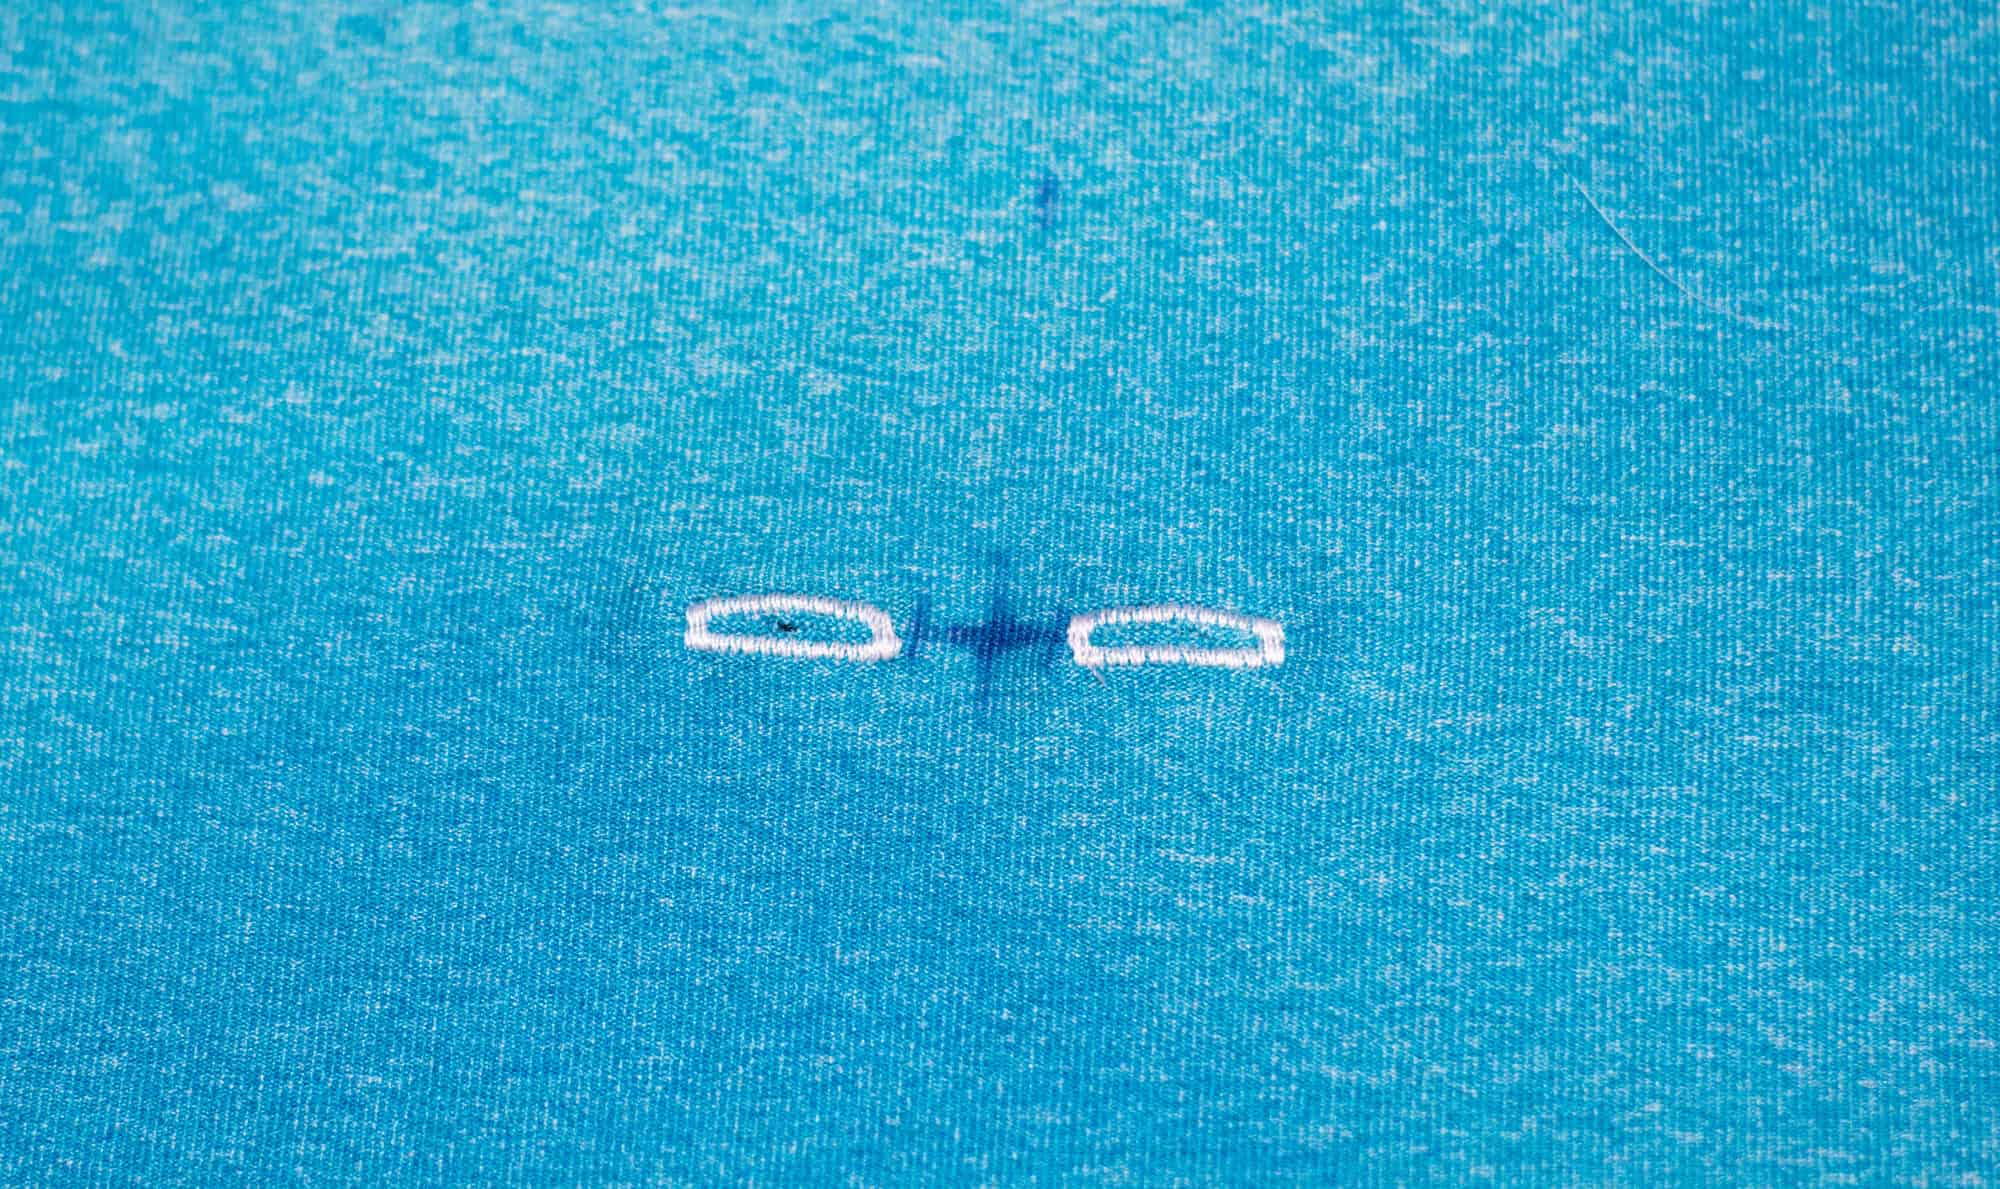
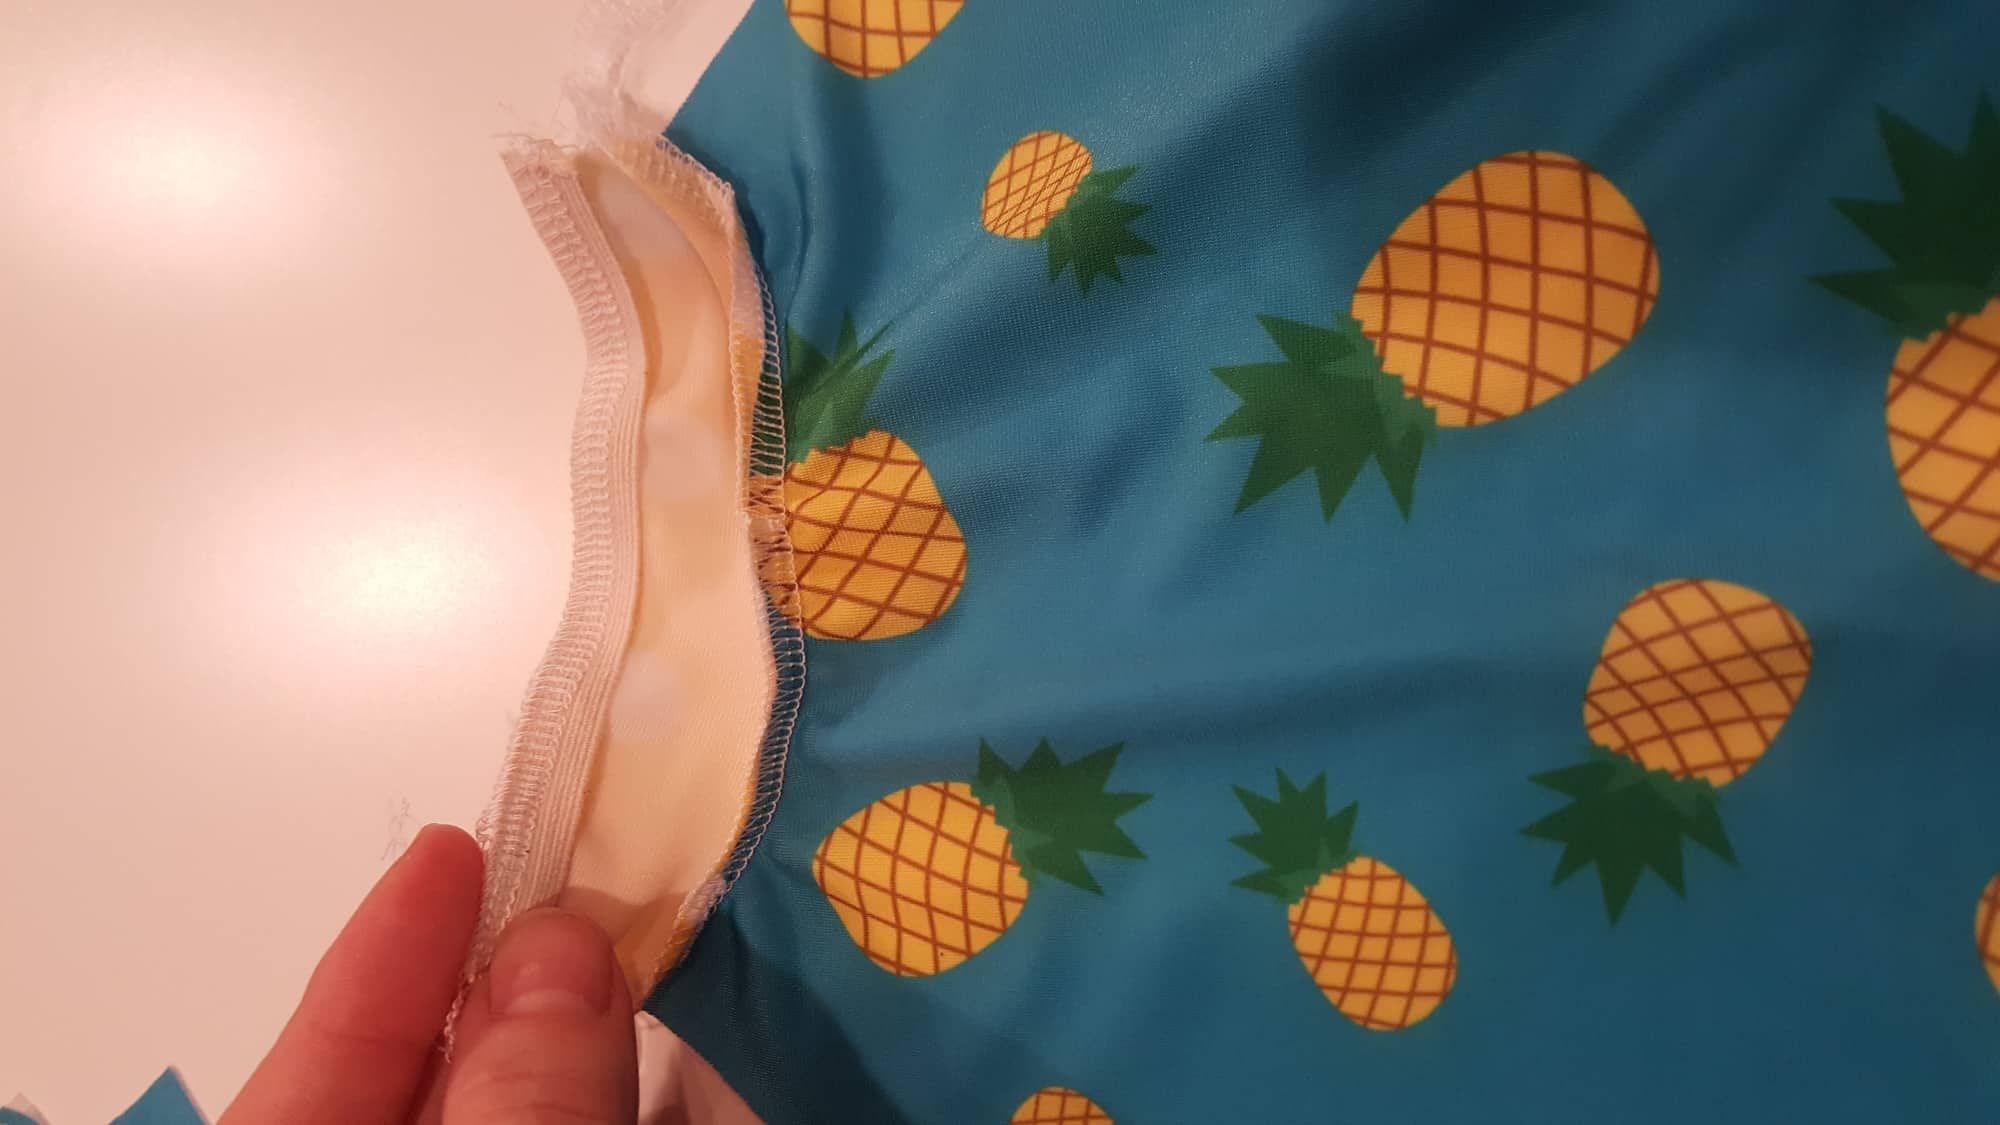
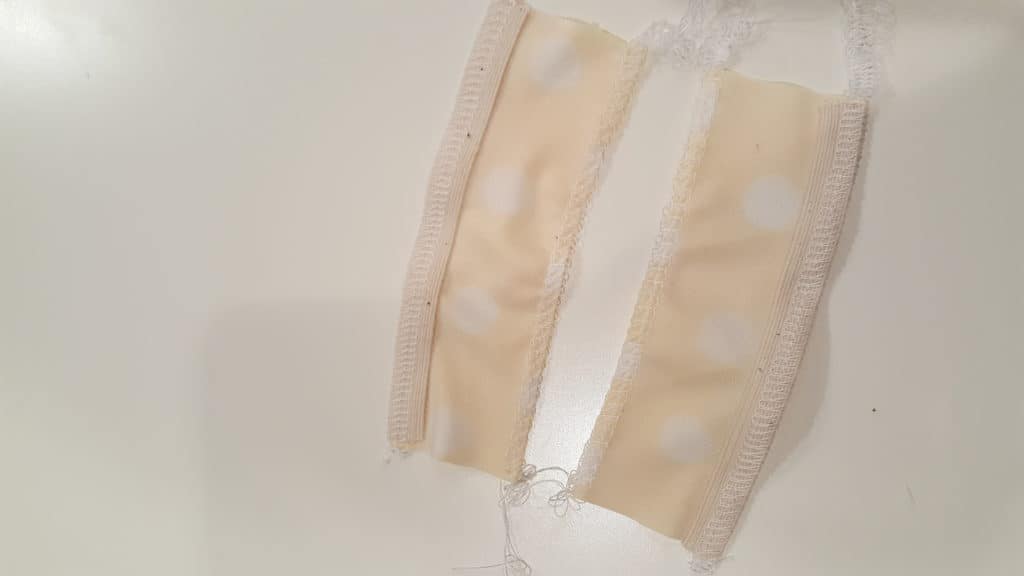
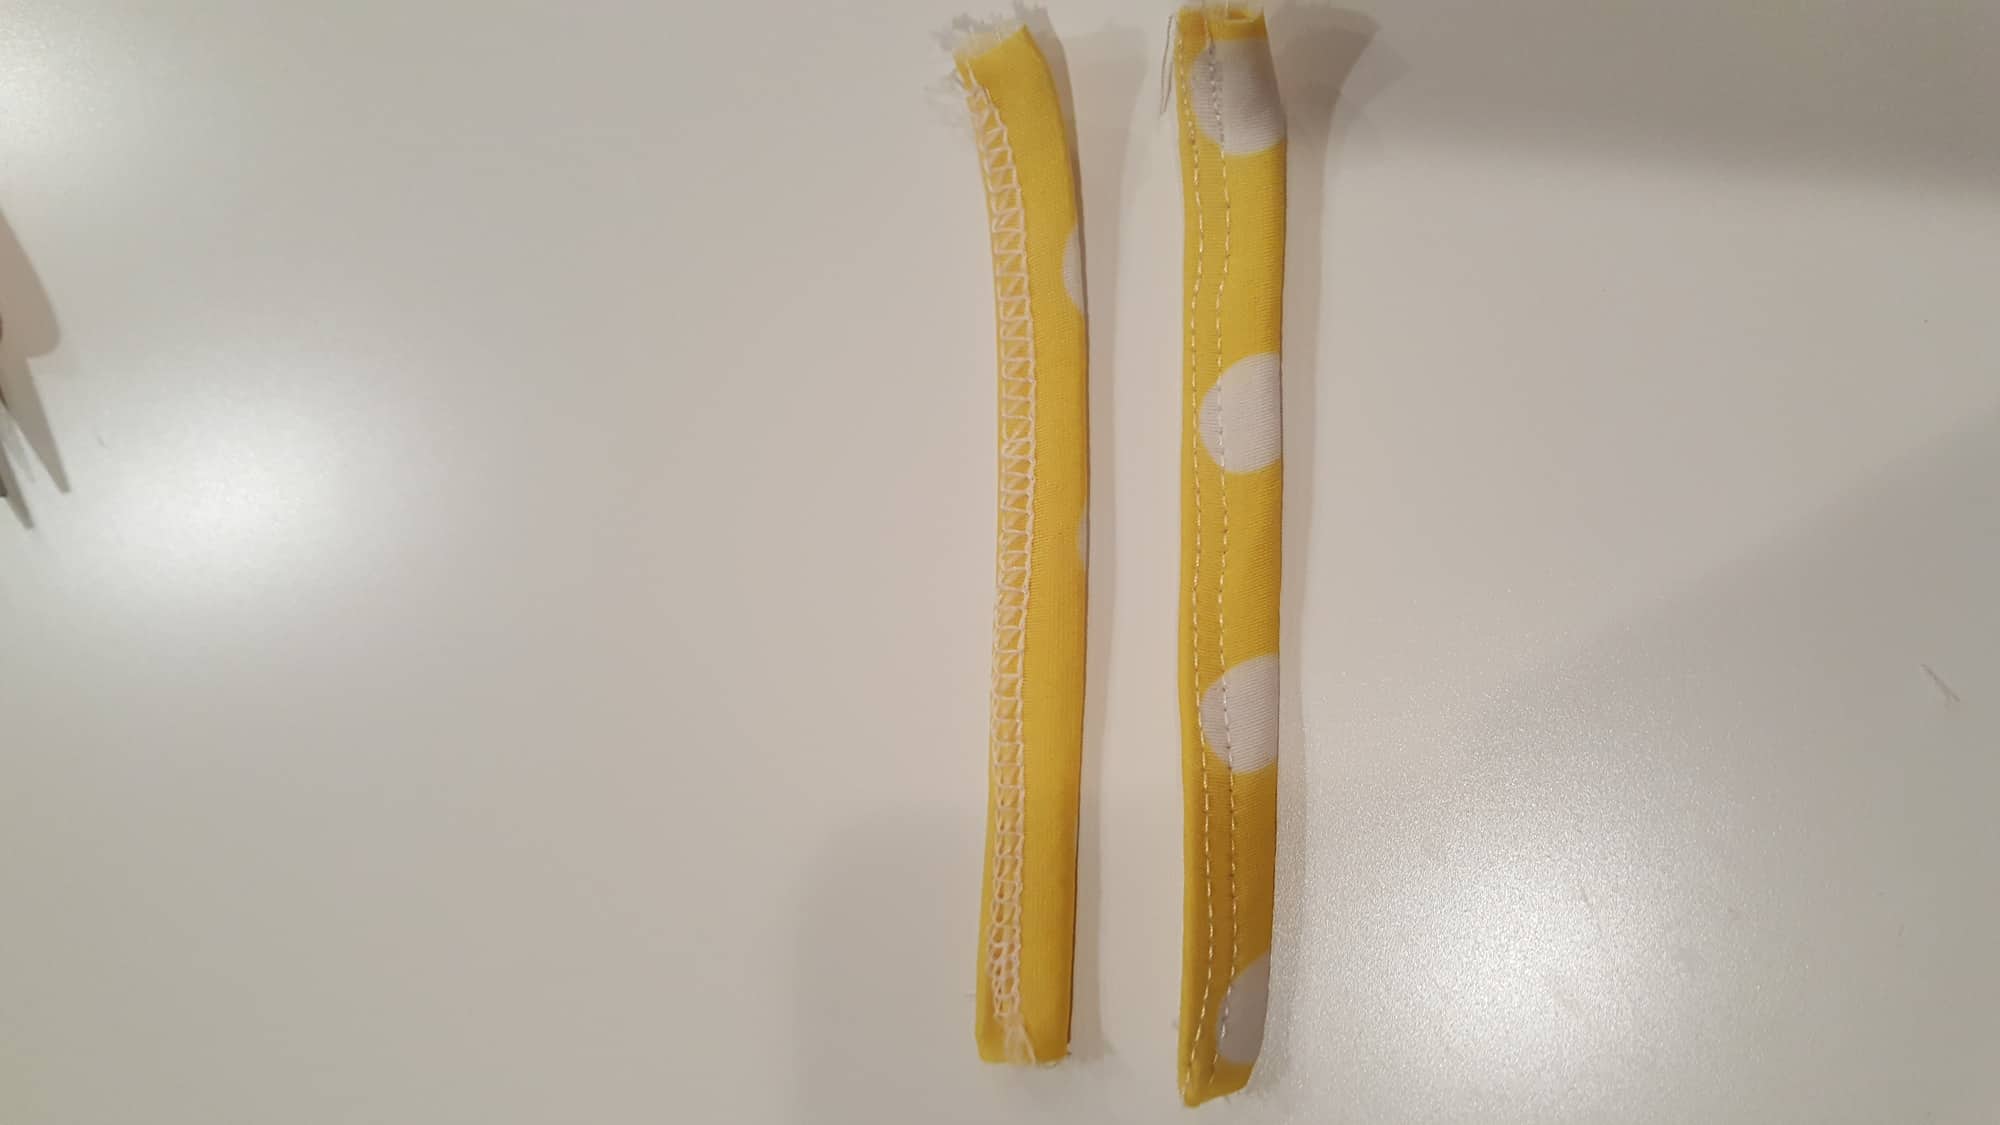
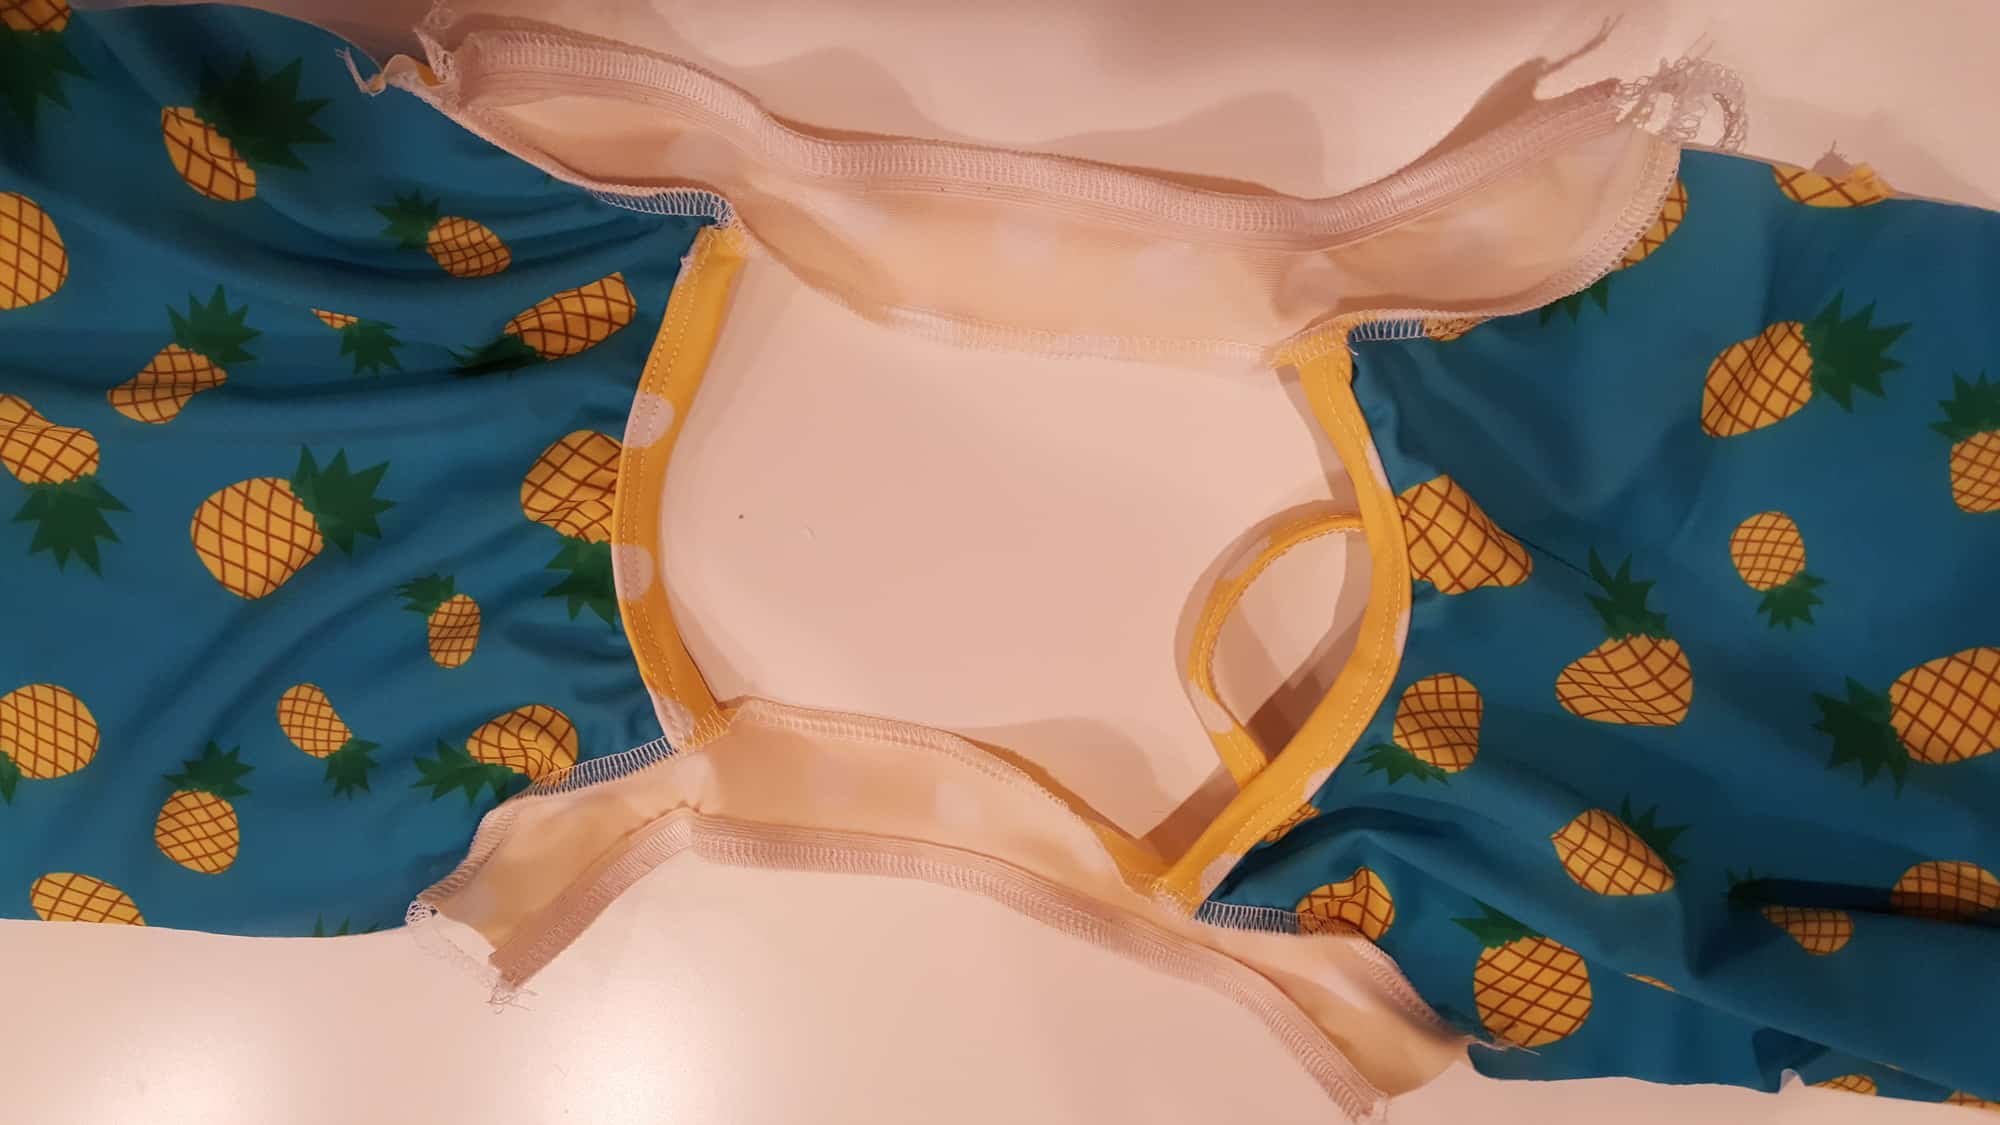
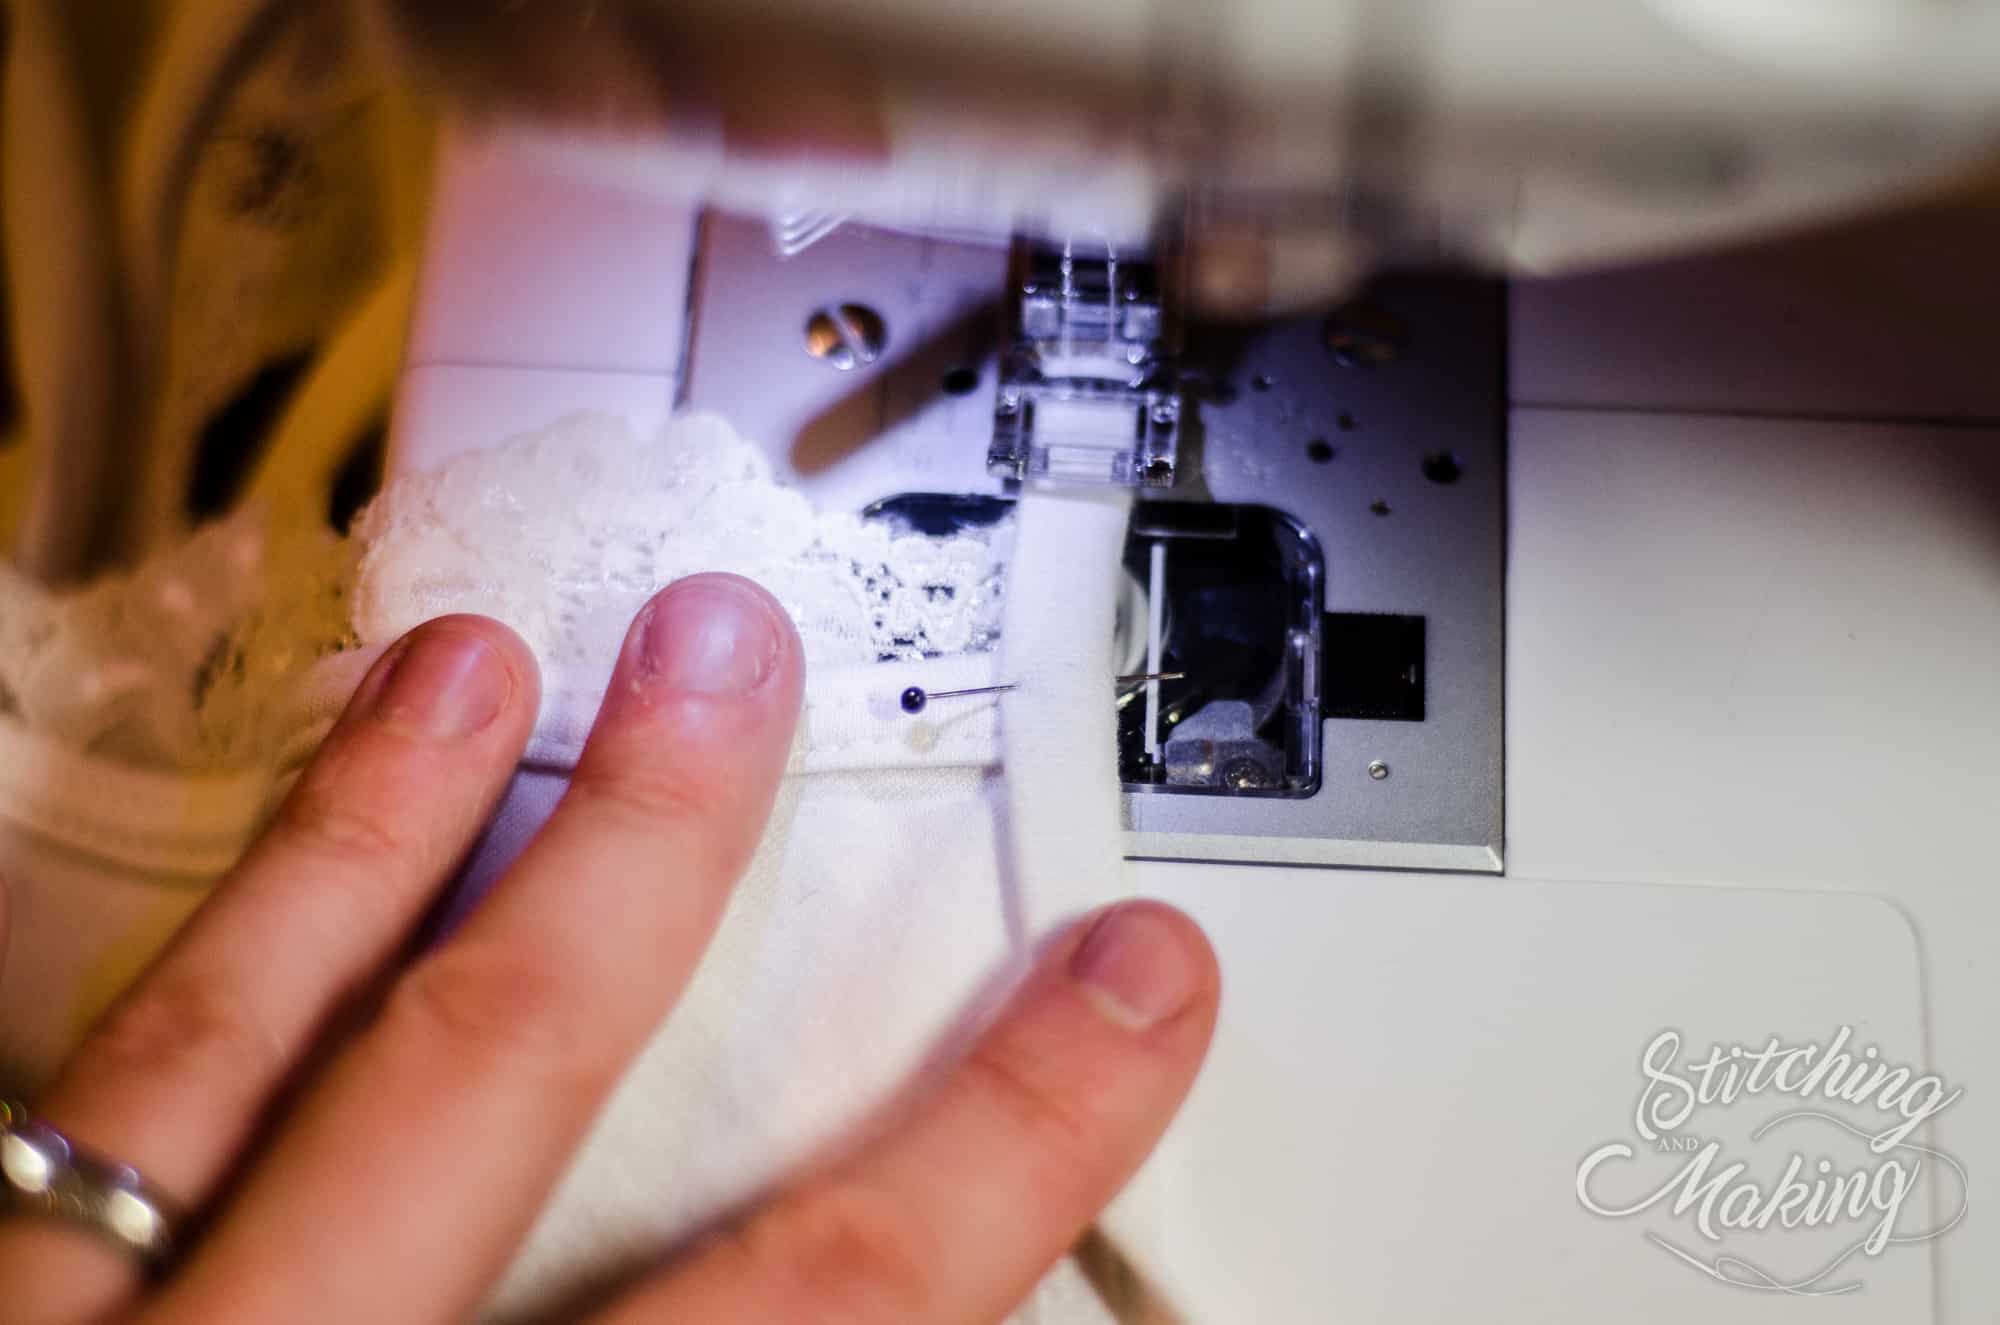
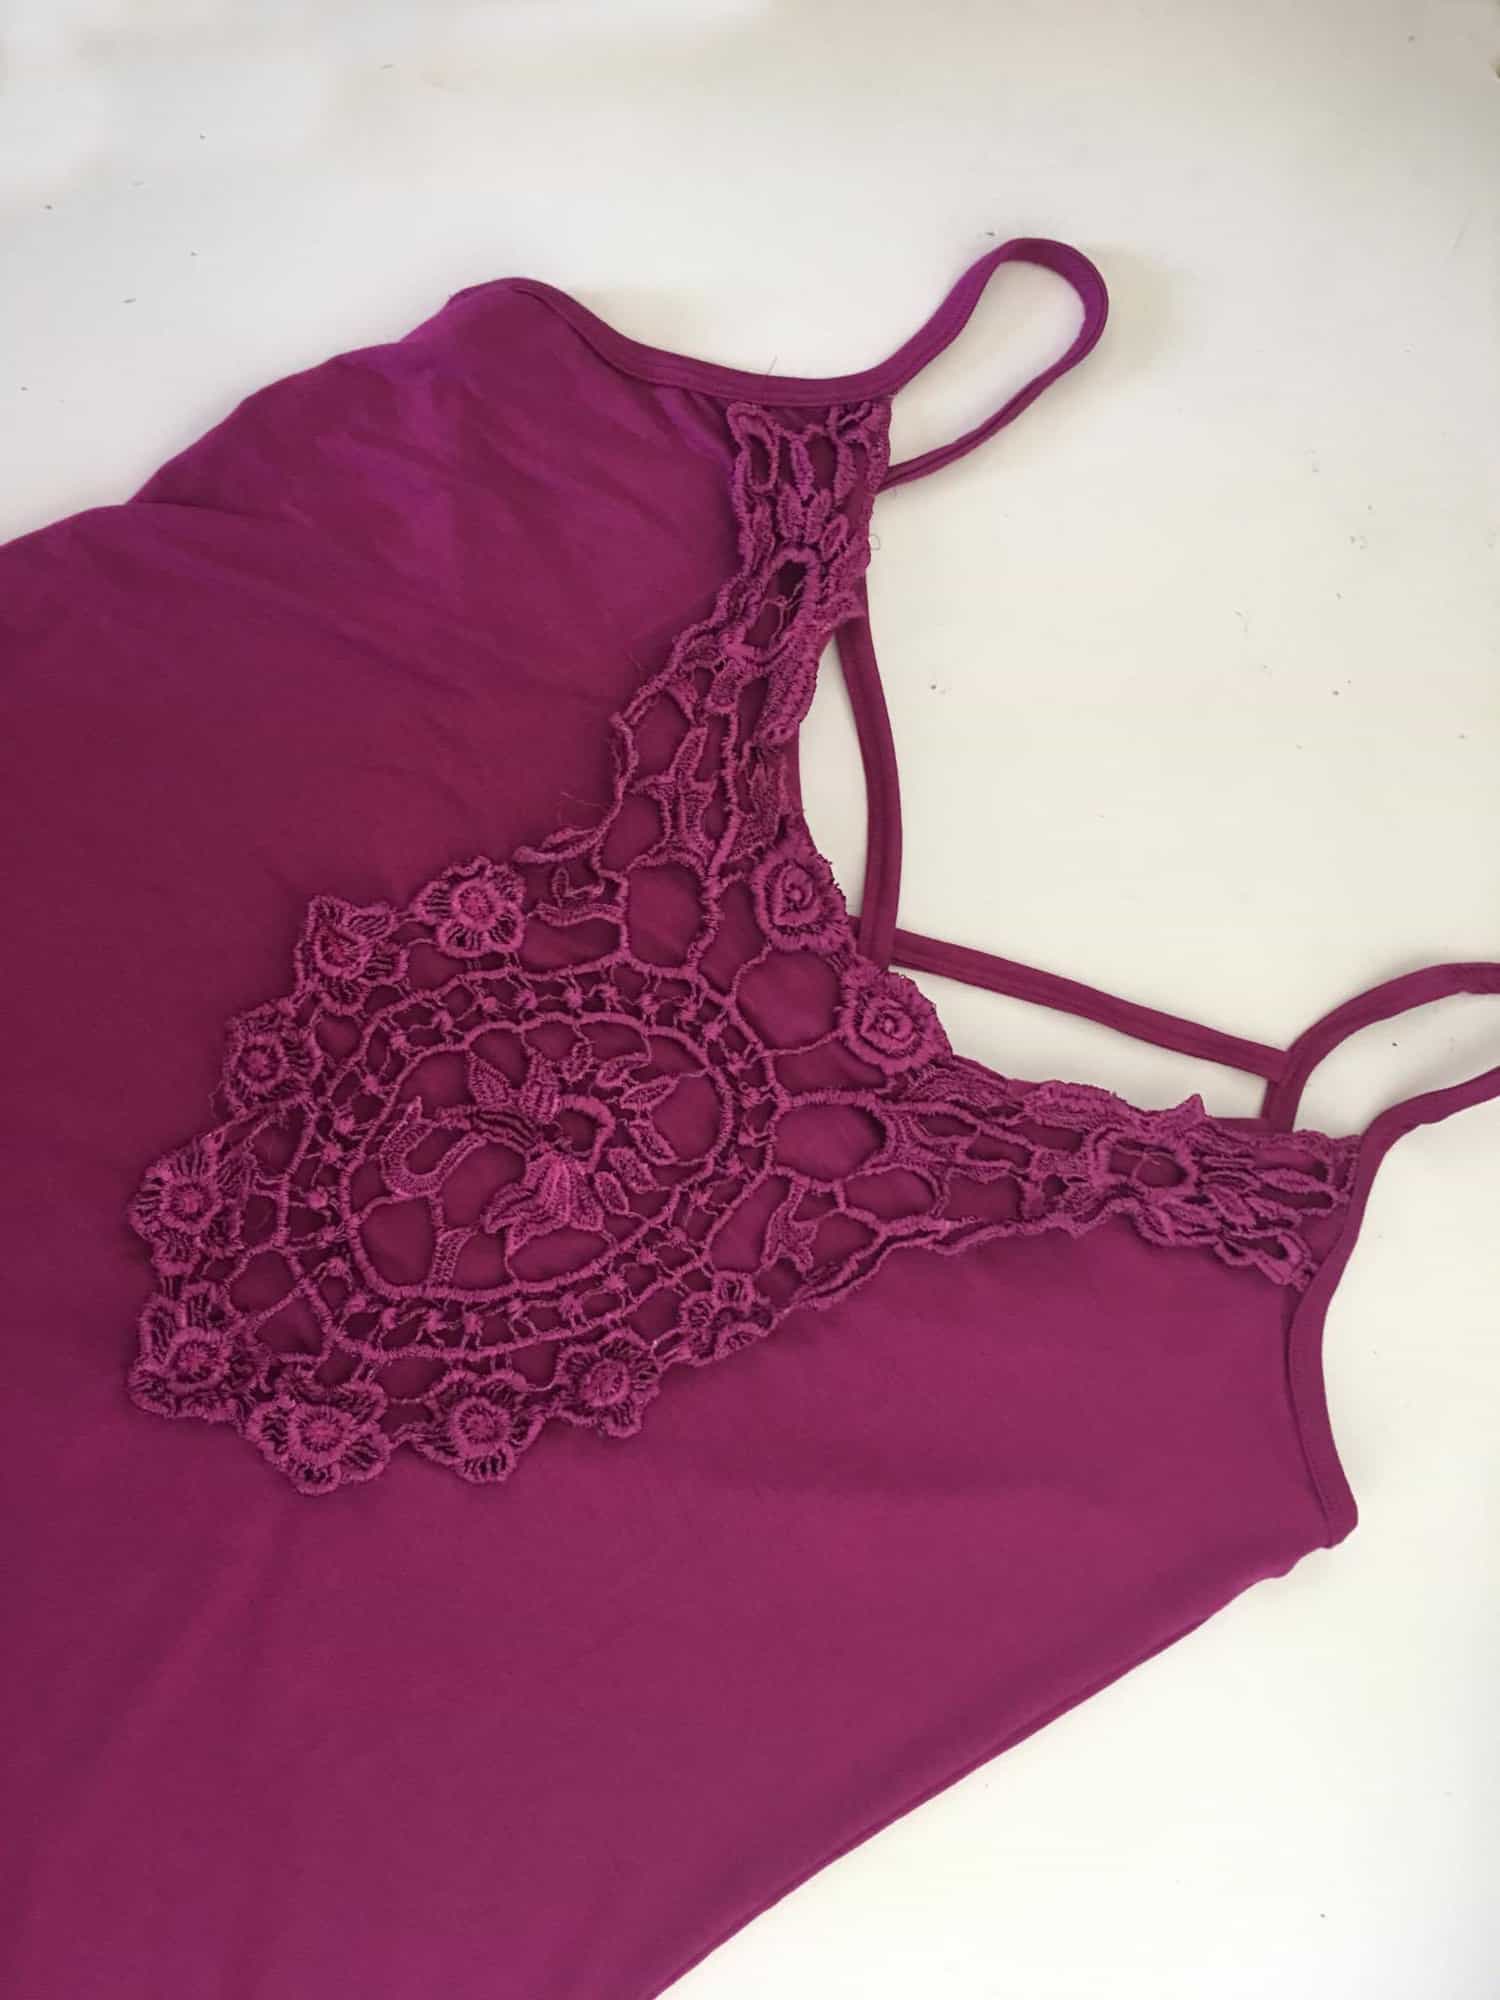
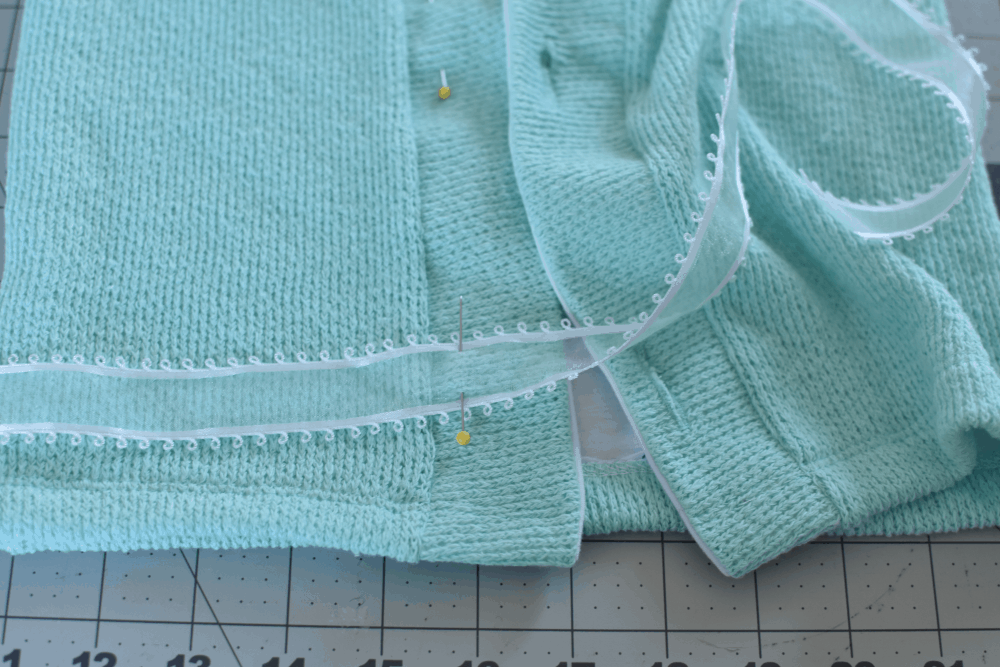
First construct the front bodice pieces as instructed by the tutorial. You can skip the part when you clip the inner strap to fold it over and attach elastic. Instead sew the entire length up the strap to give a nice seam.

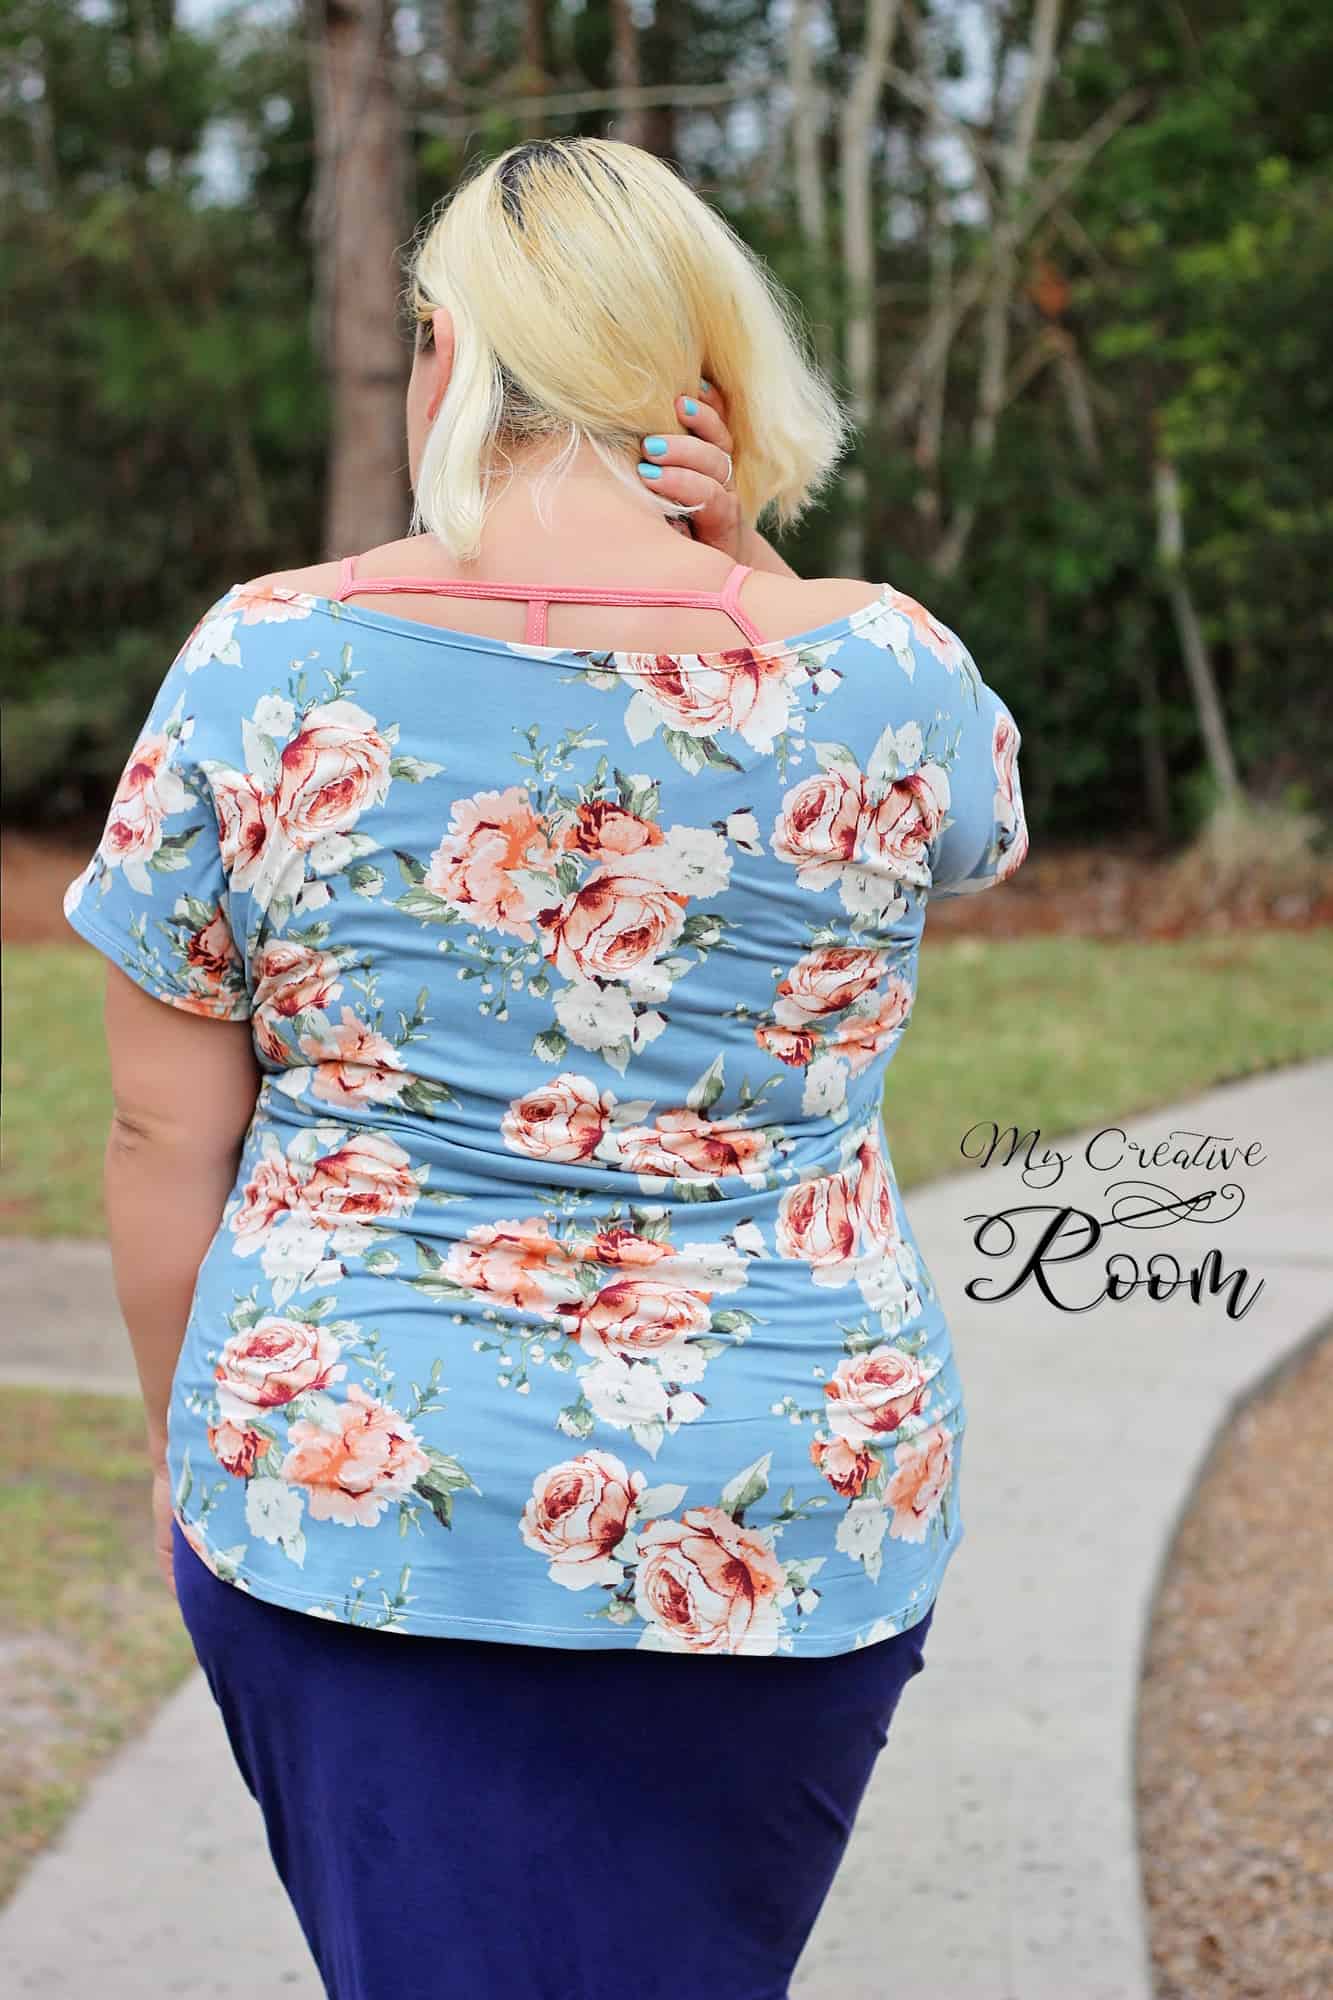
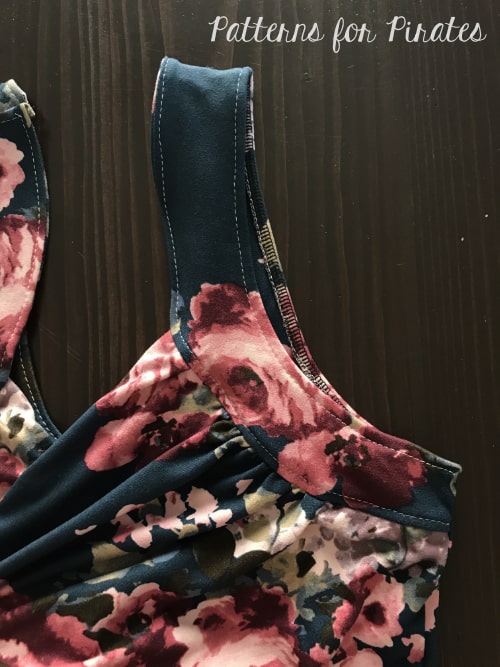
Next attach the main back bodice to the lining back bodice by laying them right sides together and stitching along the neckline. Then match up all bodice pieces at the shoulders right sides together and stitch.

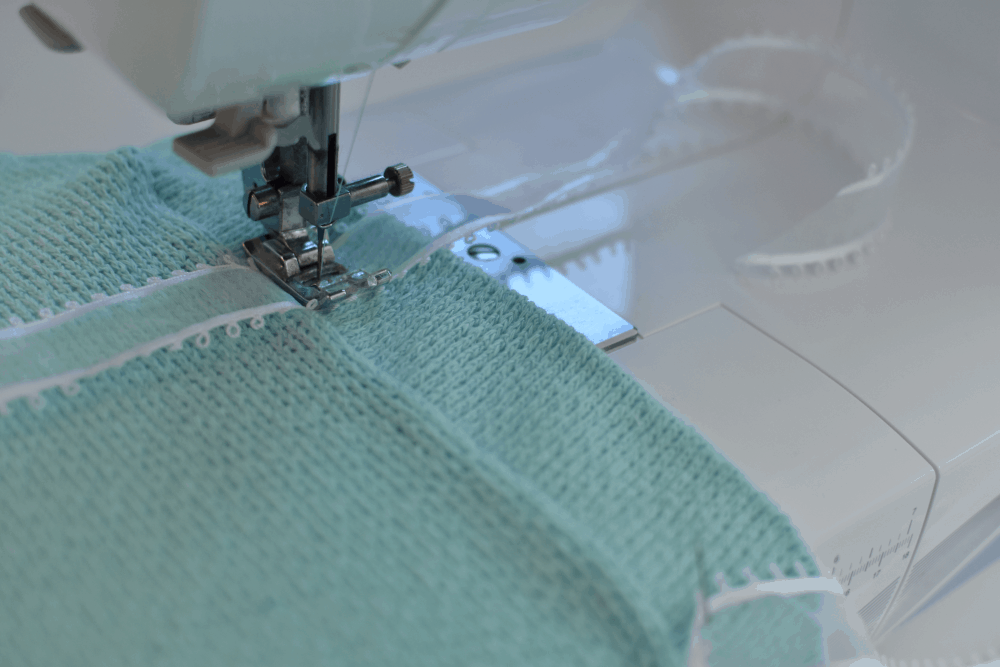
Topstitch inner neckline now if preferred. Next, lay your bodice out and fold the back bodice over on top of the front bodice pieces, matching up side seams main fabric to main fabric. Stitch side seams together and then baste the front bodice pieces together along the bottom as instructed in the pattern tutorial.

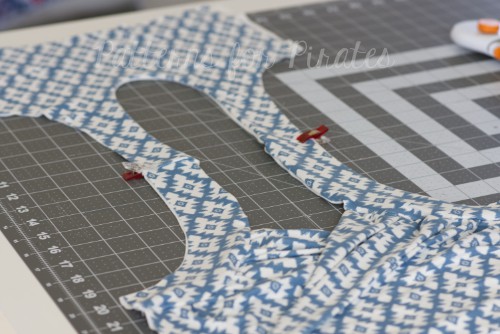
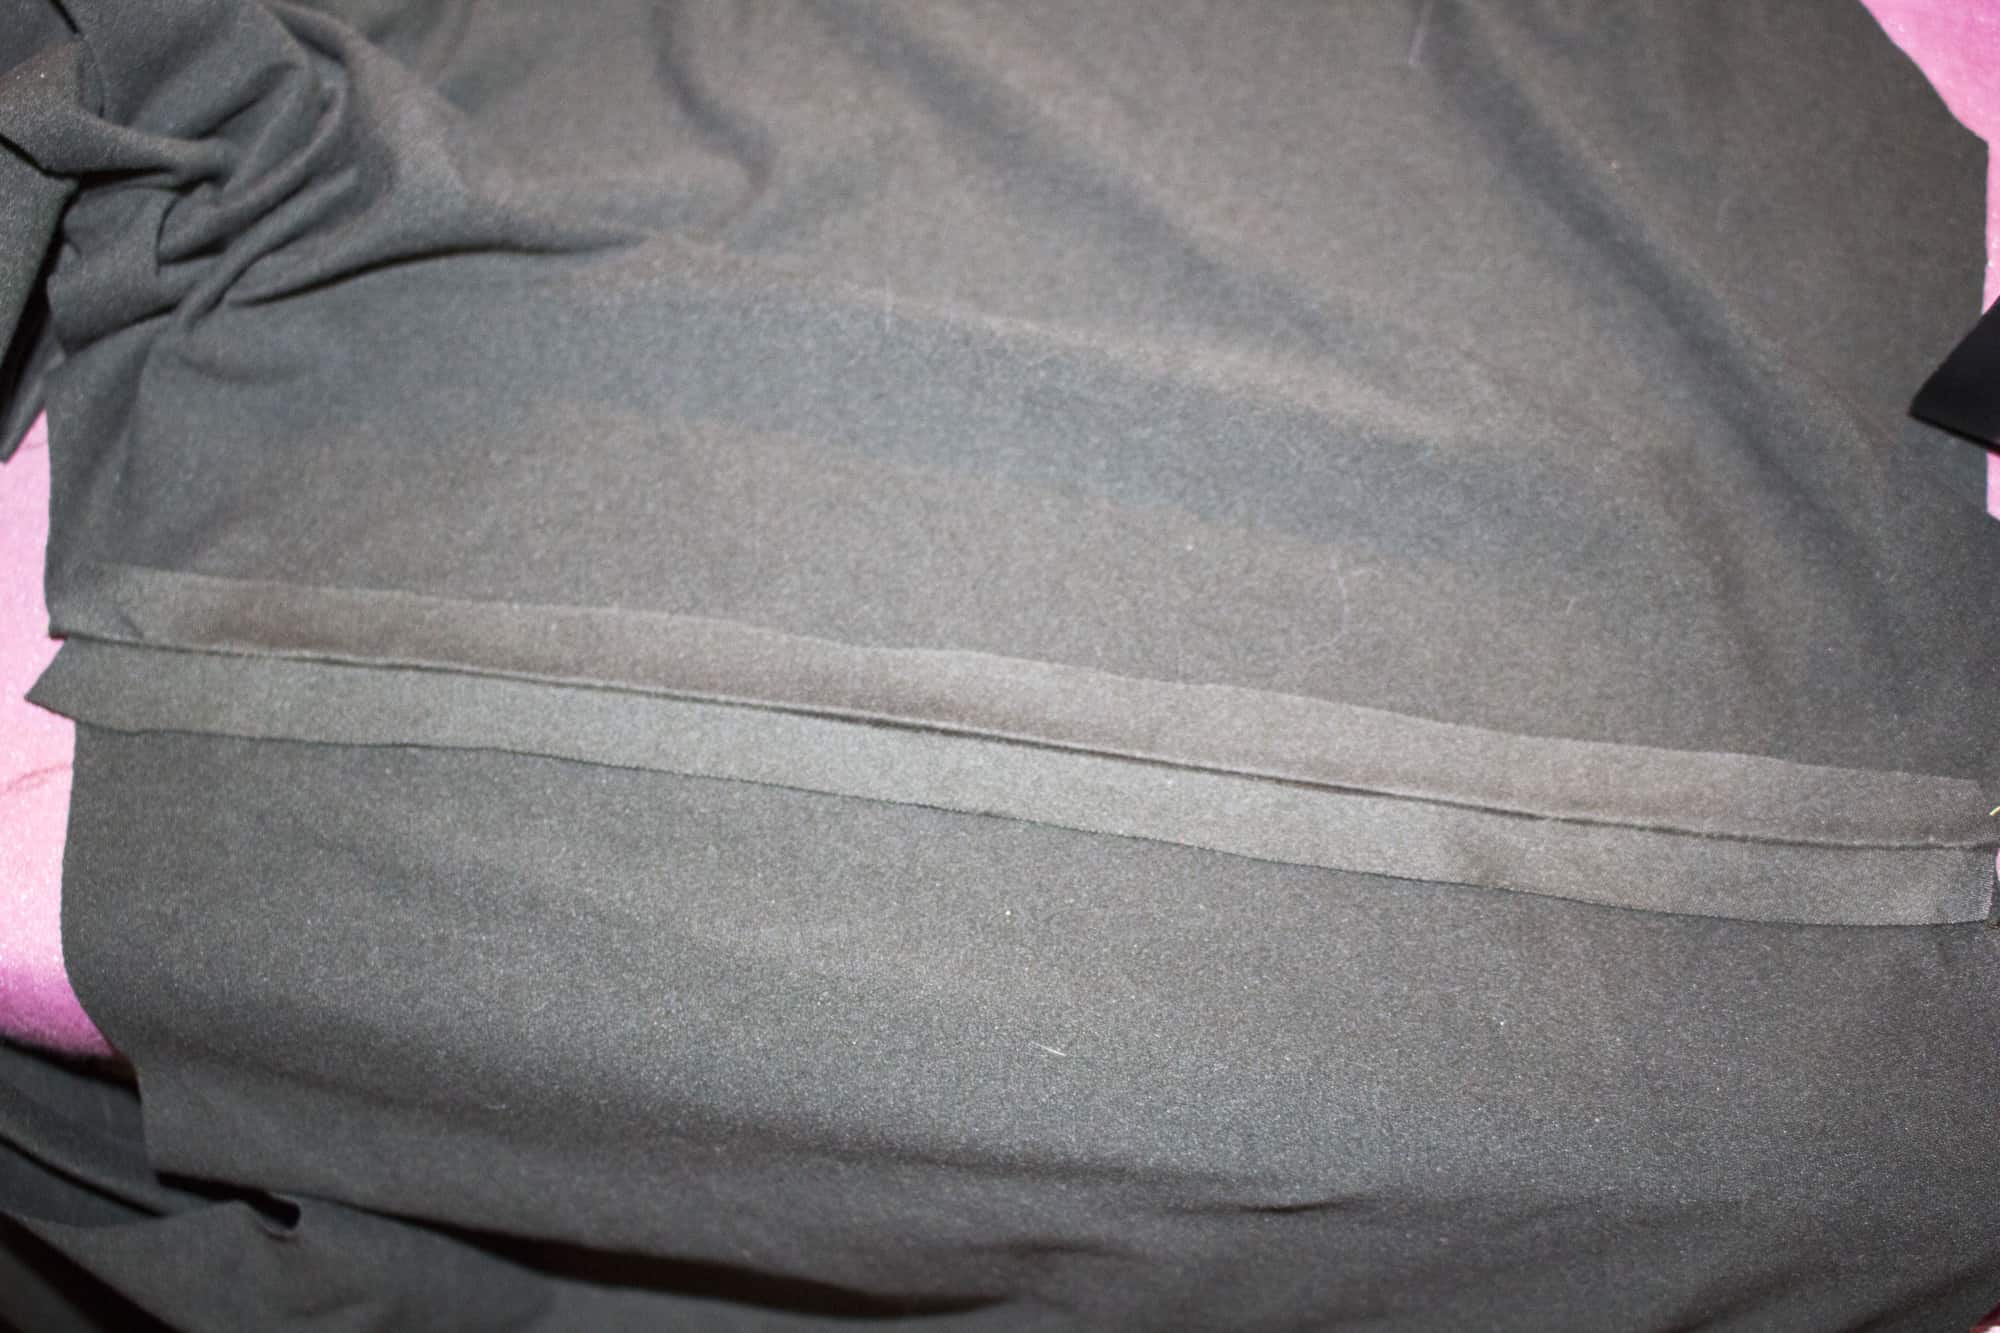
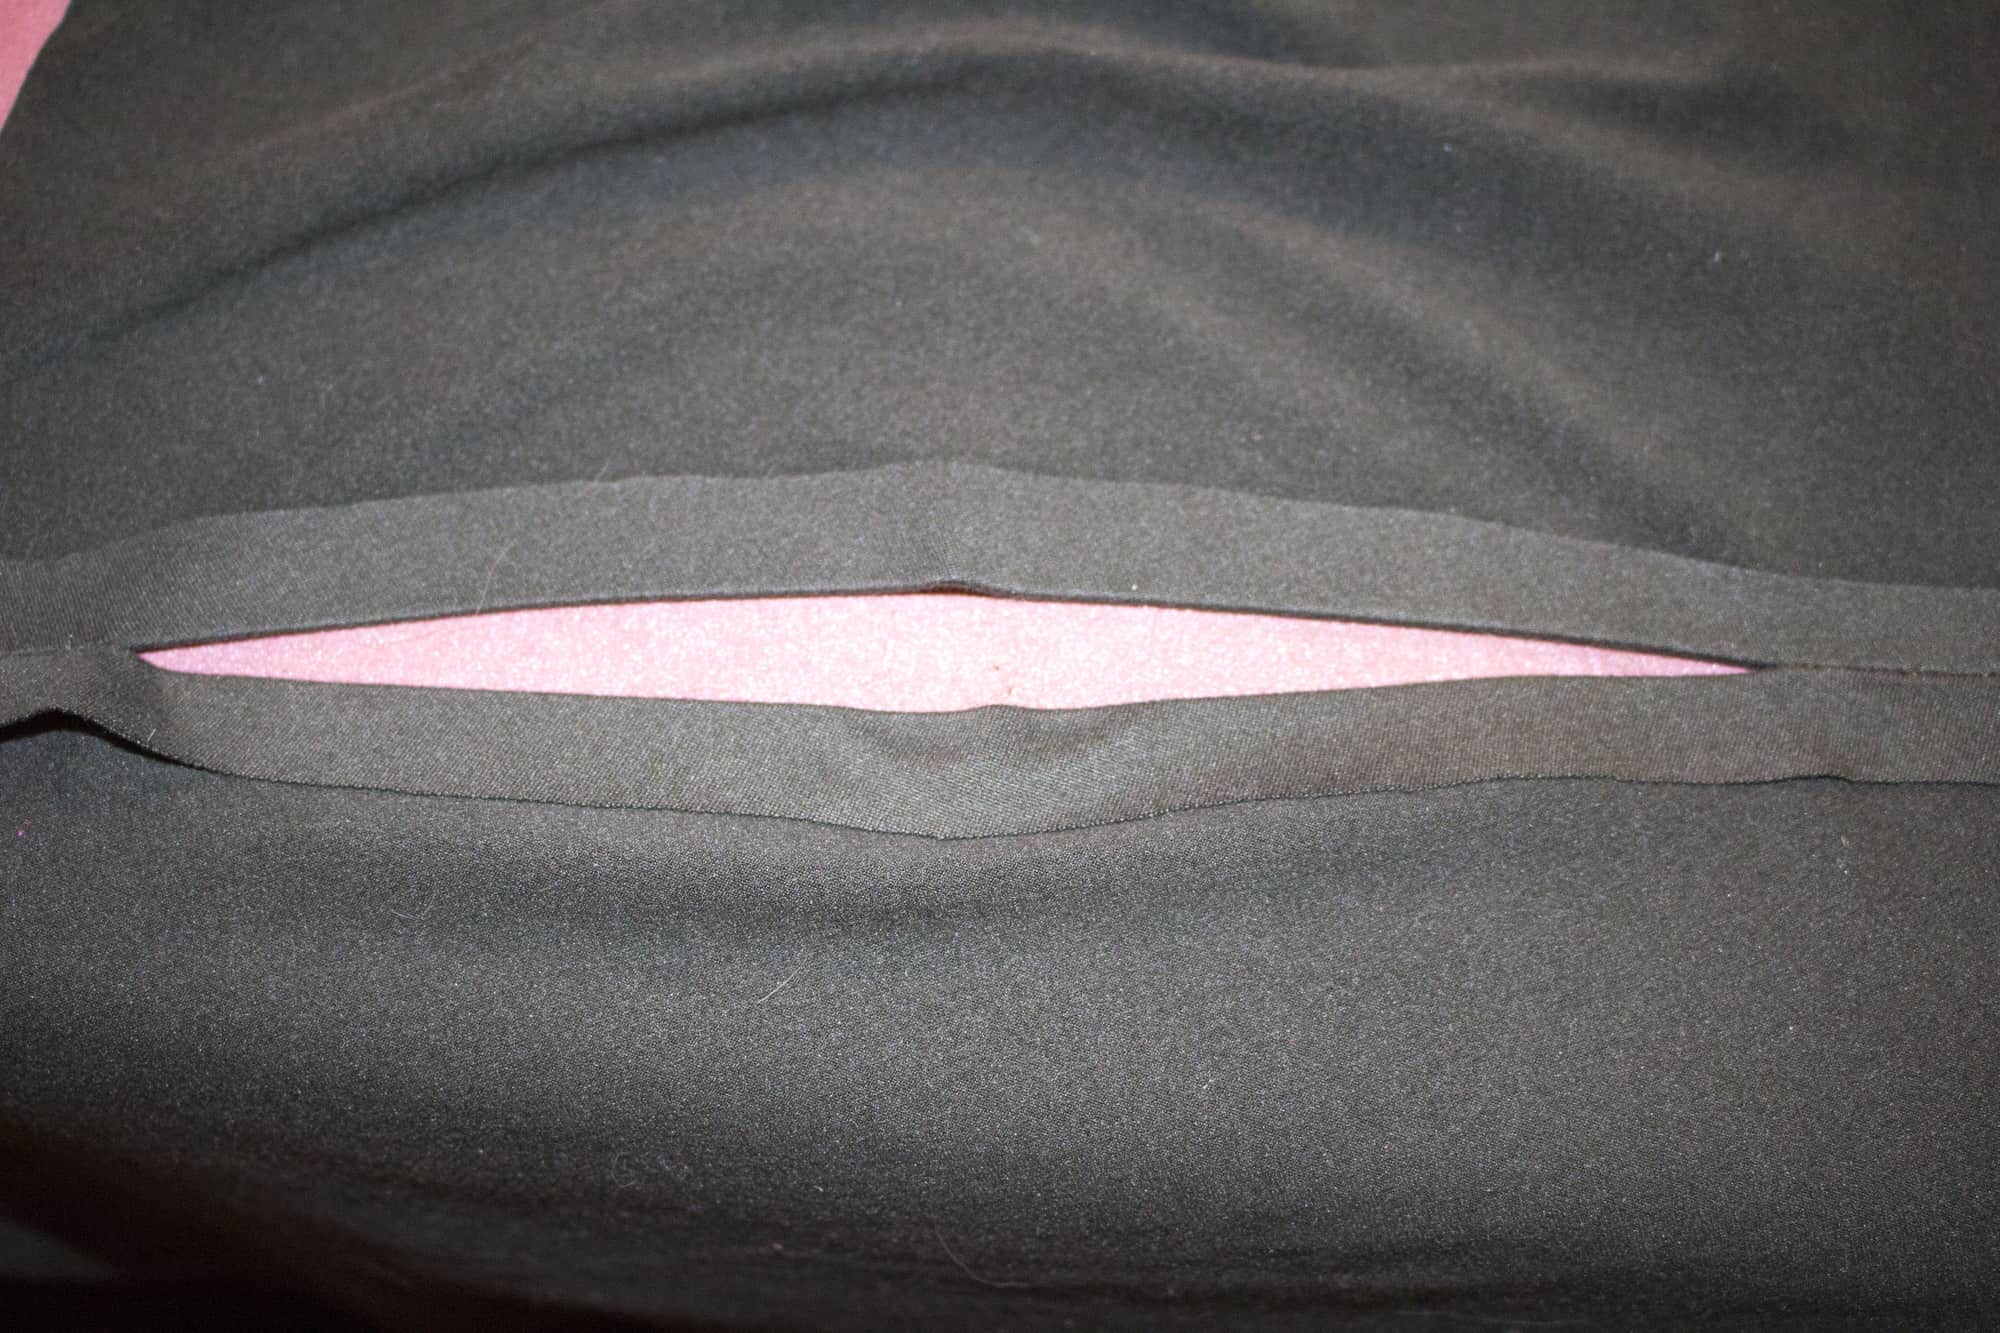
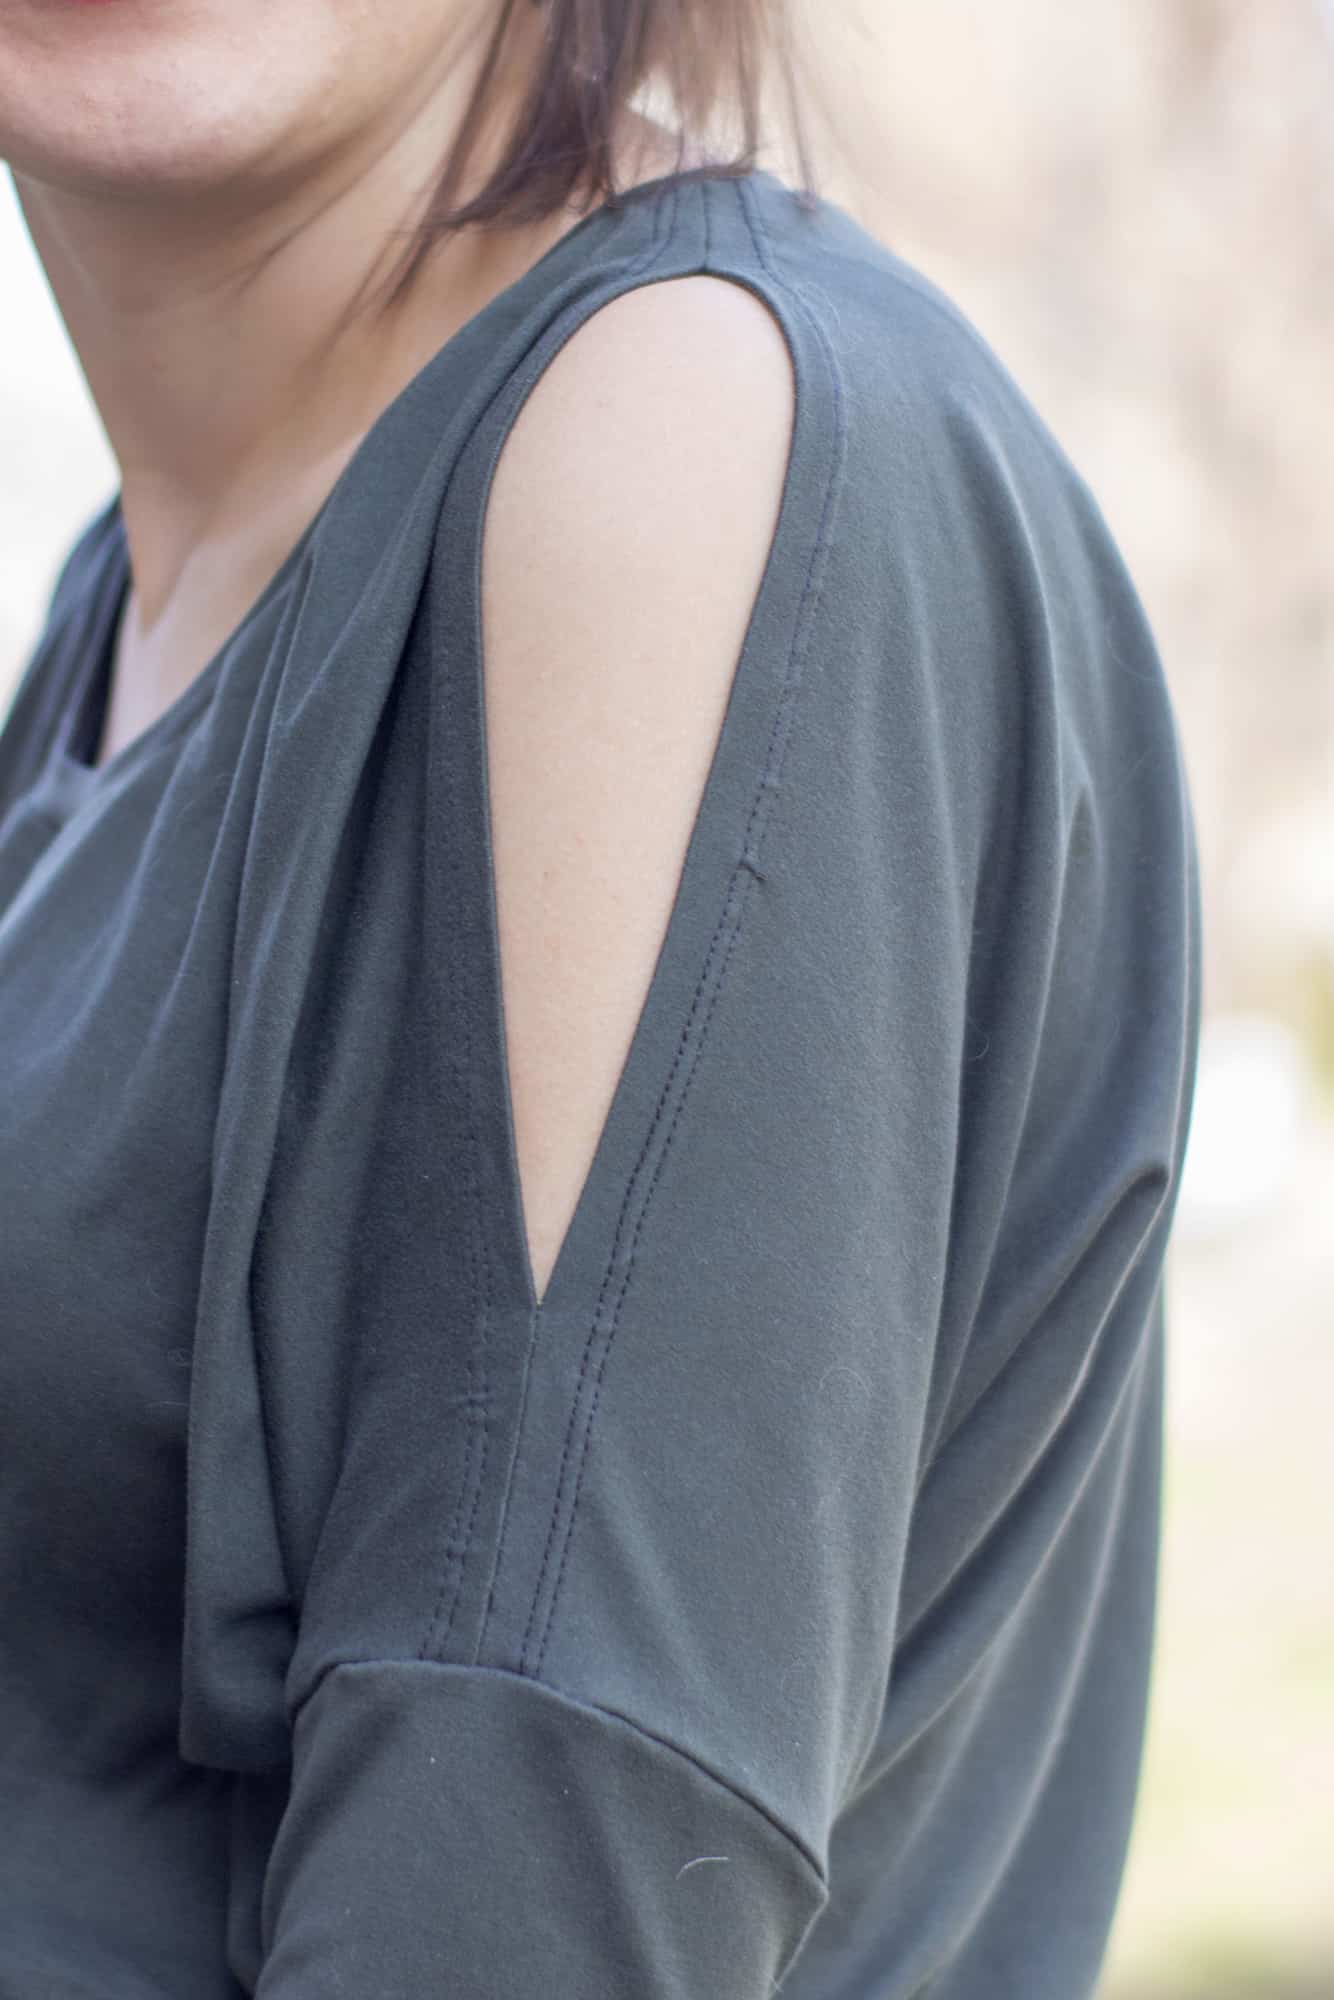
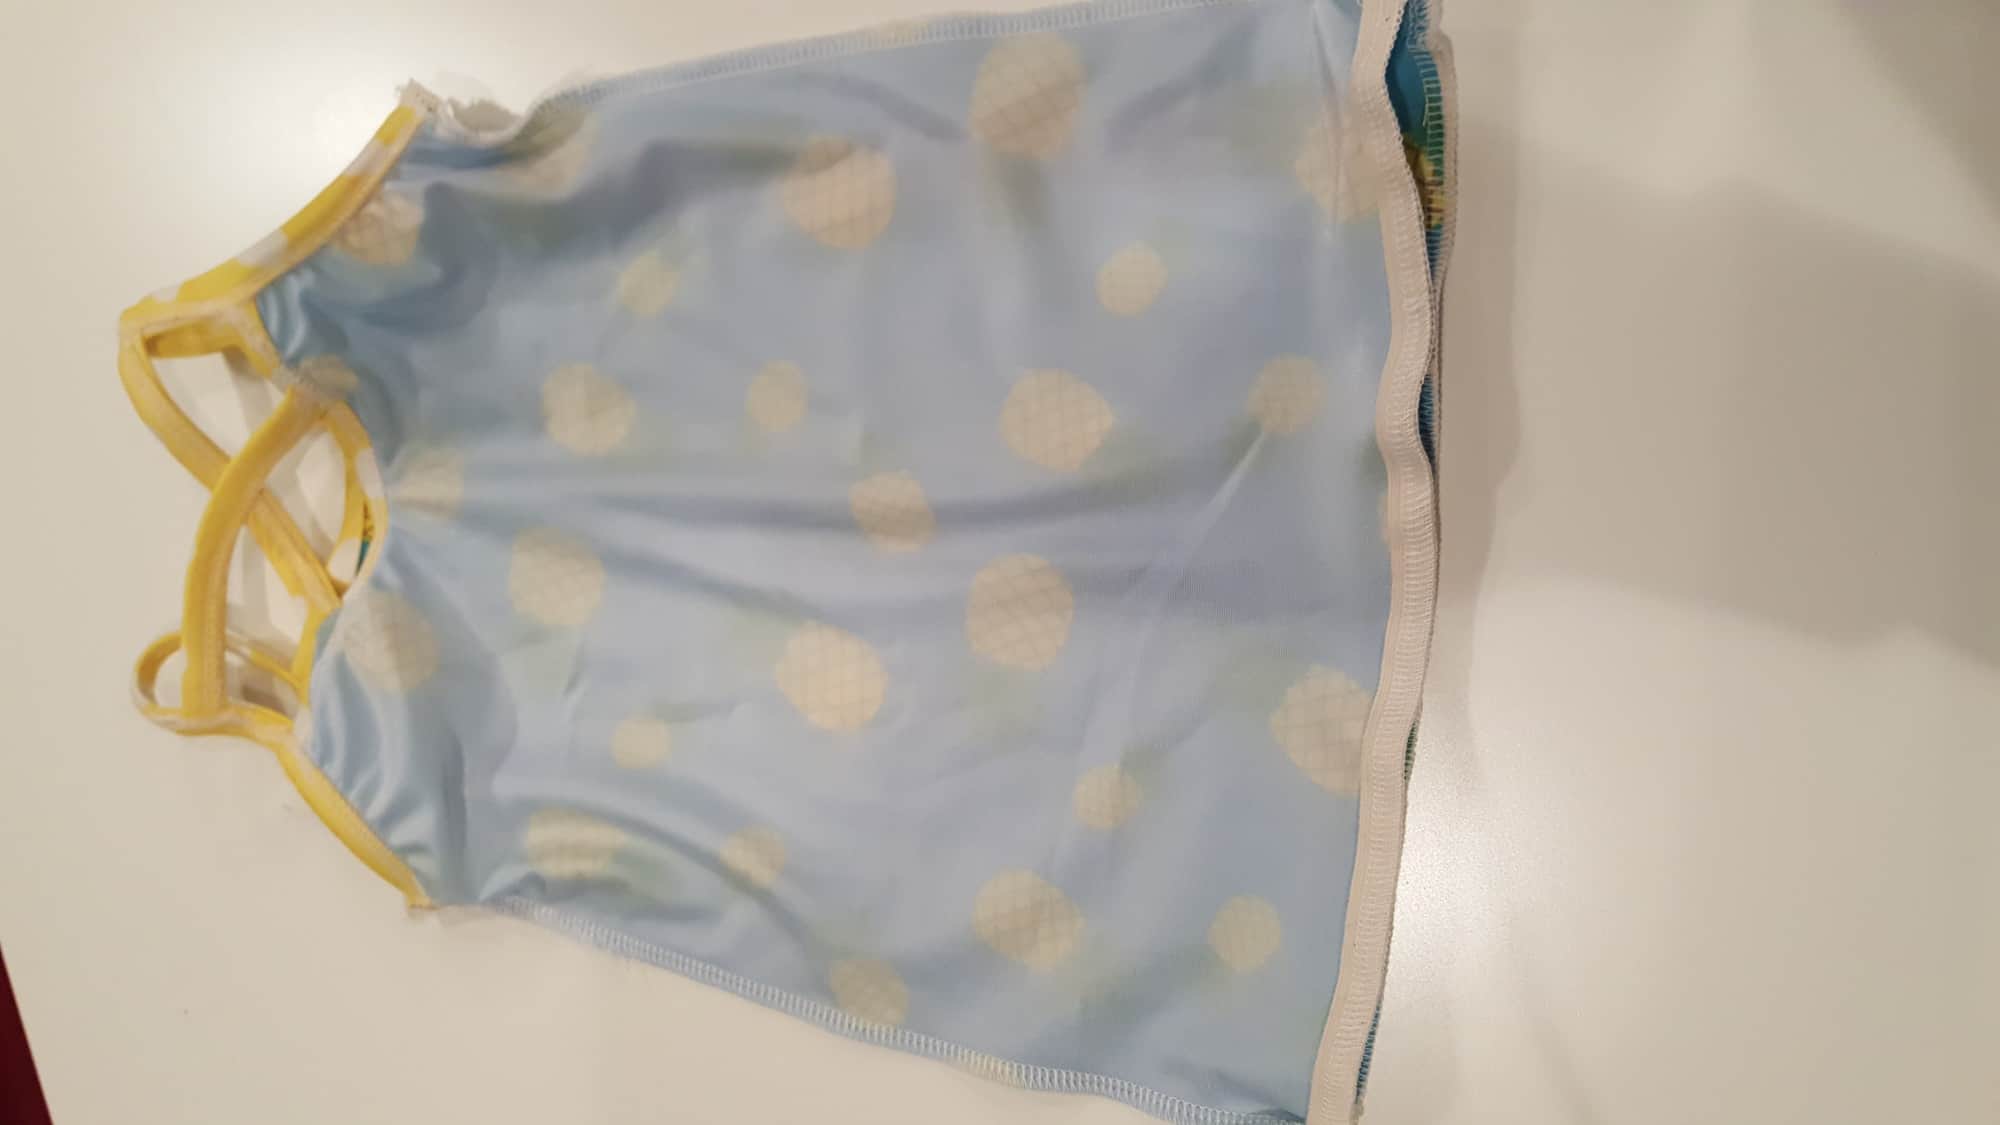
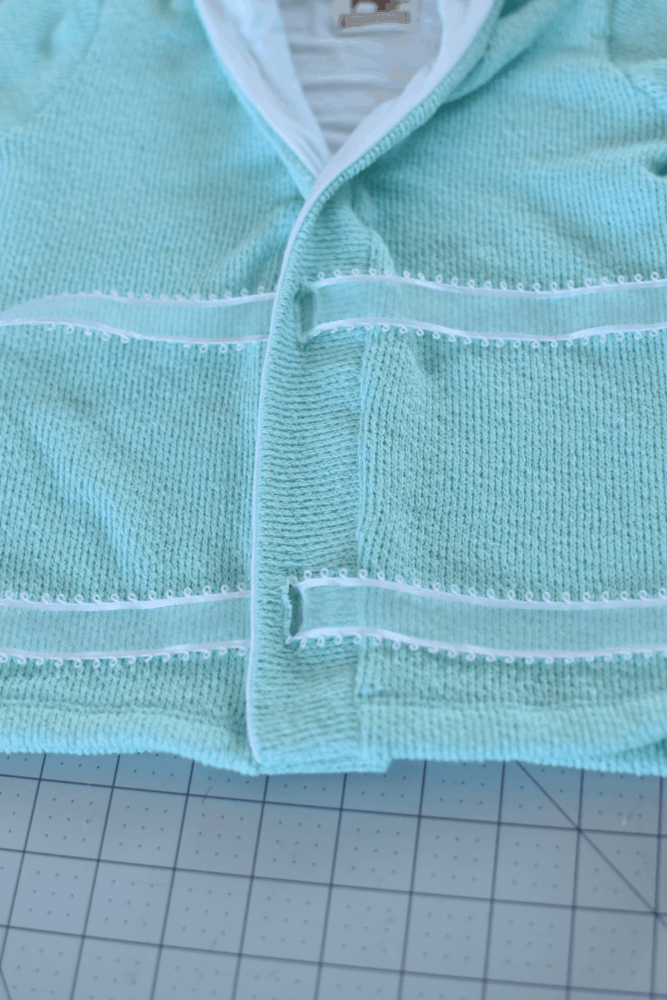
At this point you can baste stitch the outer armholes to prevent fabric shifting. I chose to run my serger around them. Fold the unfinished edges under about 3/8″  and topstitch armholes in place. The burrito roll method to enclose the armholes cleanly does not work here. There is simply too much fabric on the front bodice to work around. Now it’s time to add your skirt!

•  •  •  •  •  •  •  •  •  •  •  •  •  •  •  •  •  •  •  •  •

:: Skirt Options ::

There are 3 skirt options that I will show you. The first option is a super fun peplum length. Cut your peplum piece to match the “skirt length” on the swimsuit pattern. I suggest measuring yourself for a preferred peplum length and double checking it against the pattern. You might want to shorten it up an inch or possibly add length depending. See  the option below for more details on how to measure your skirt length. Once cut, simply follow the pattern directions and omit the swim bottoms to complete the top.

NOTE: The “peplum length” on the swim pattern will be too short for an everyday top.

•  •  •  •  •  •  •  •  •  •  •  •  •  •  •  •  •  •  •  •  •

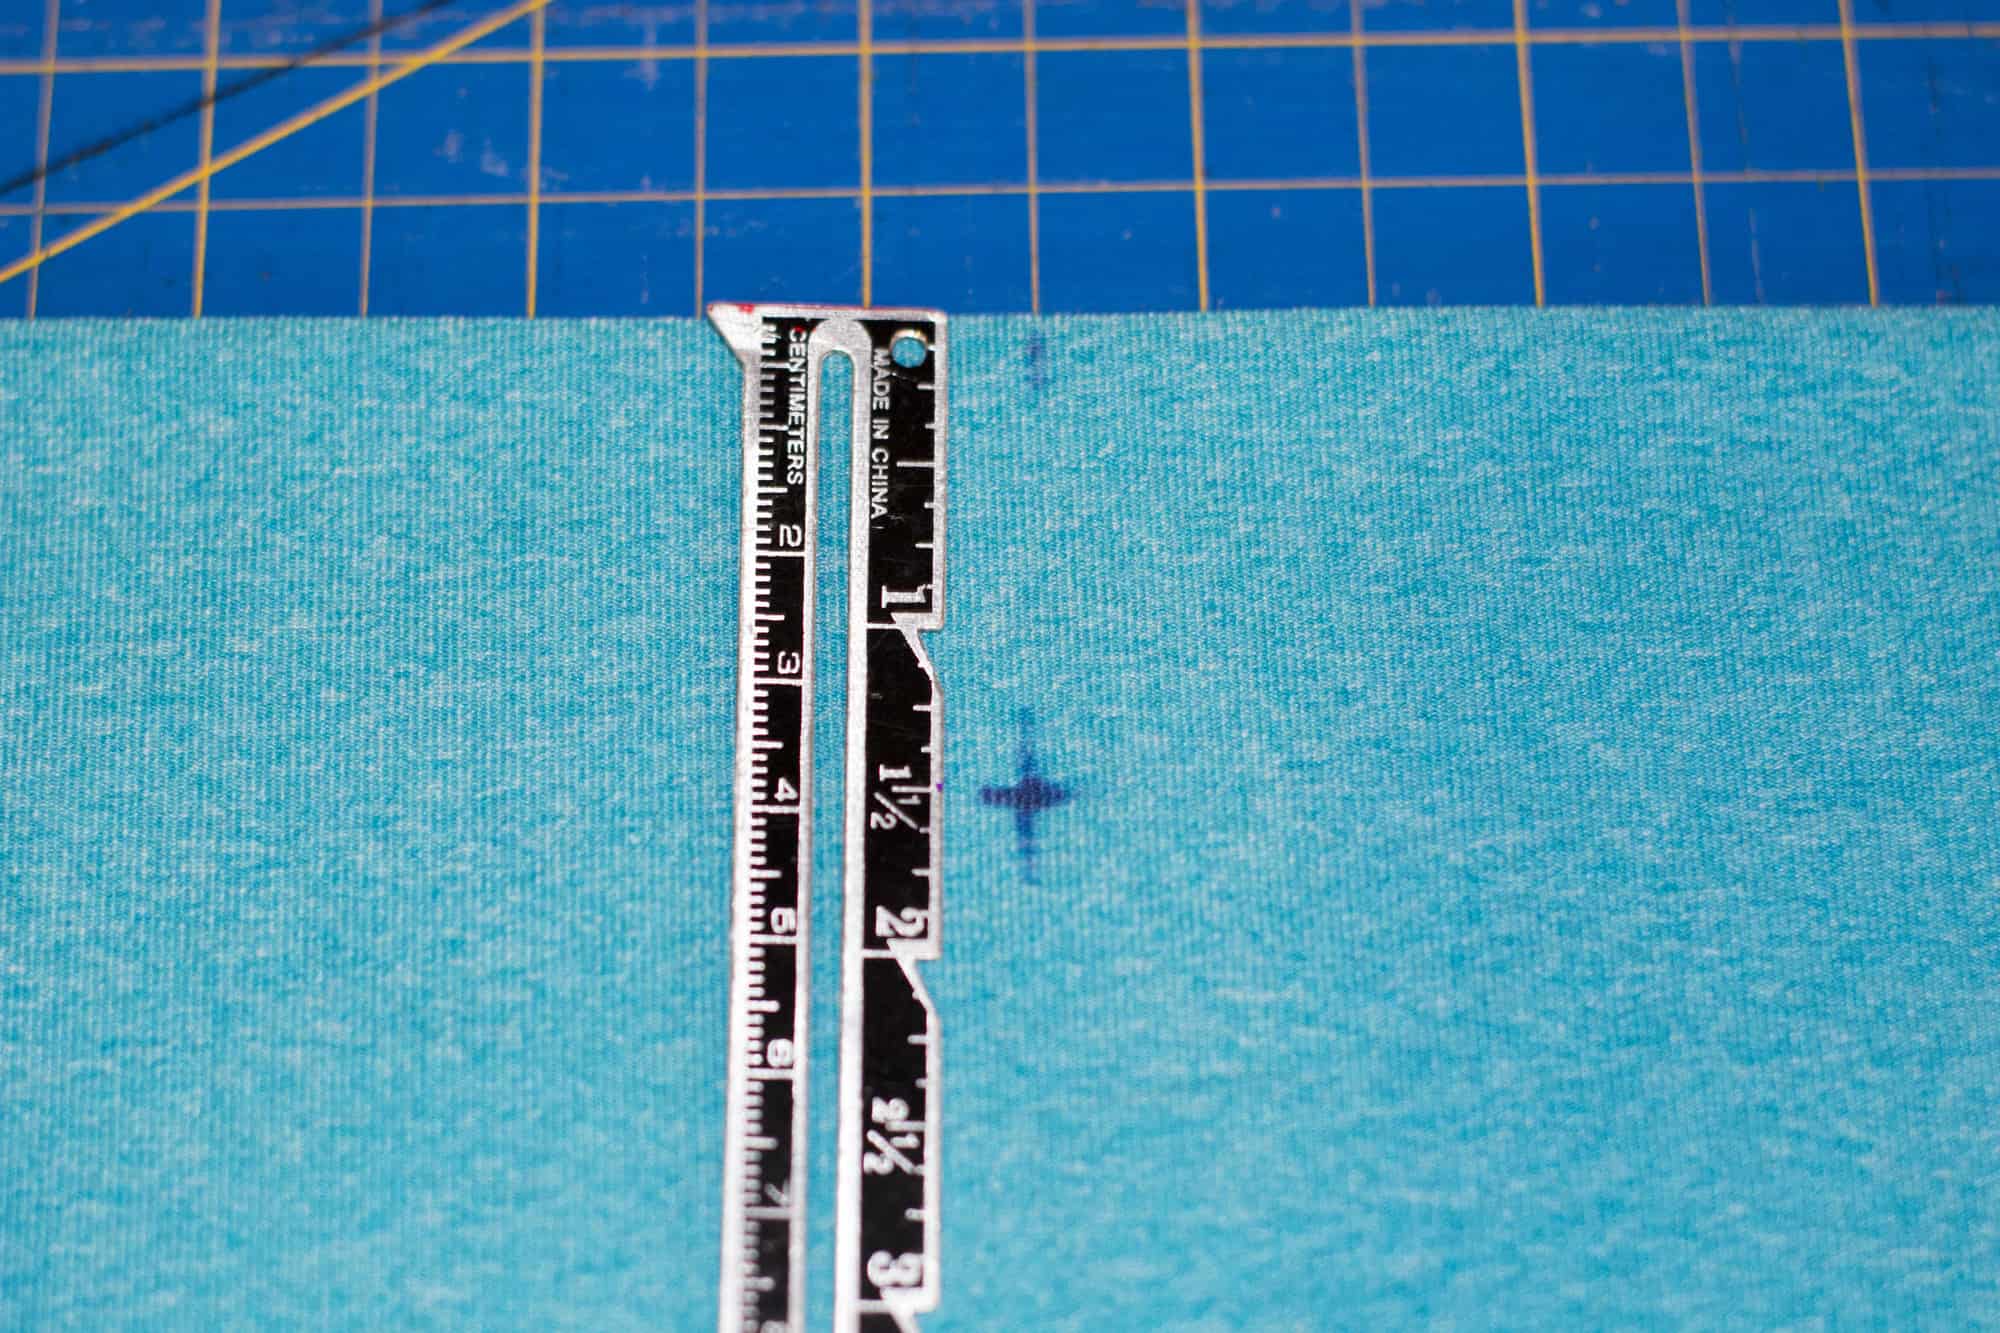
Next, I will show you an above the knee half circle skirt option. Decide where you would like your dress to land and measure skirt length by holding the end of the tape at your natural waist and allowing the tape to drape along your body. Add 1/2″ to that measurement for your bottom hem and another 3/8″ for your seam allowance. I also like to add an extra inch or so to this measurement just to be safe! You can always trim the hem length down at the end but you can’t easily add extra later! Place your TTP skirt pattern on your fabric and measure out as indicated below. Alternatively you can grab skirt lengths from the Patterns for Pirates Sweetheart Peplum and Dress for the ‘at the waist’ option if you already own that pattern.

Take the Plunge swimsuit dress peplum hack

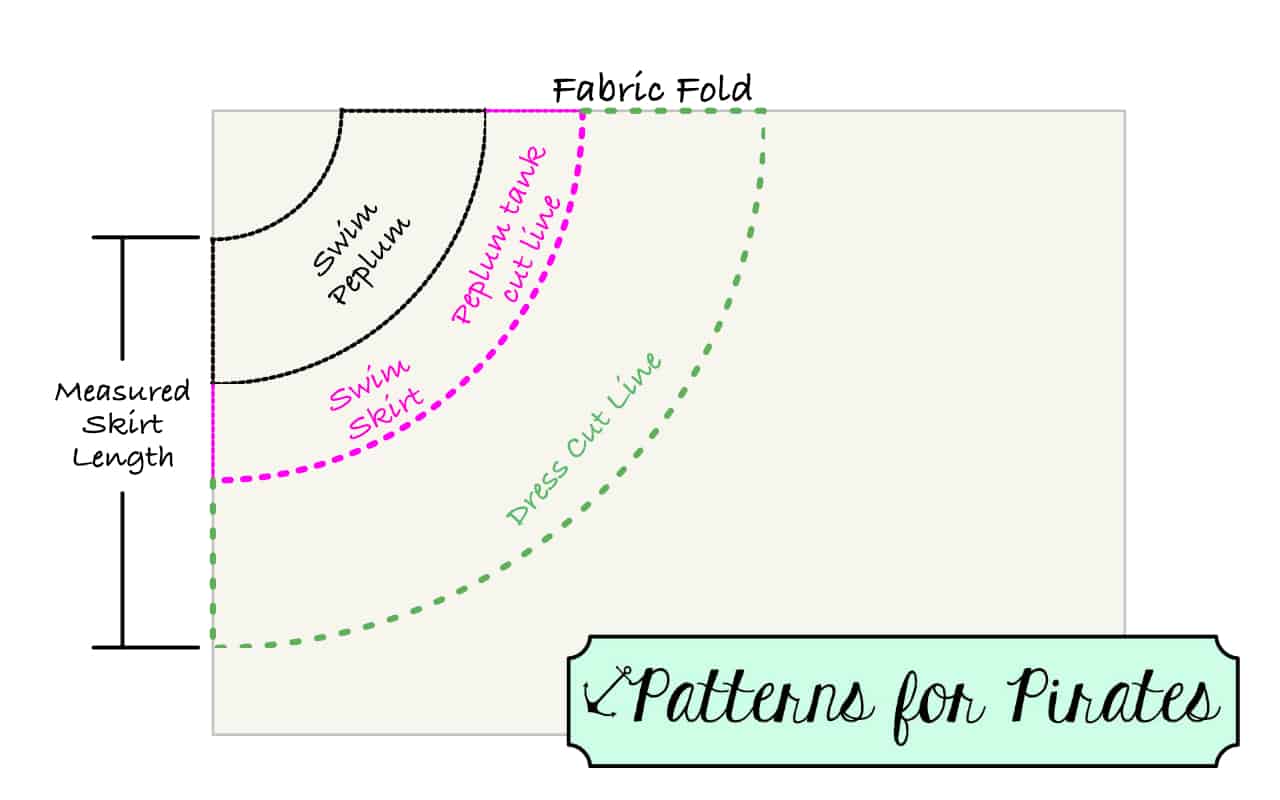
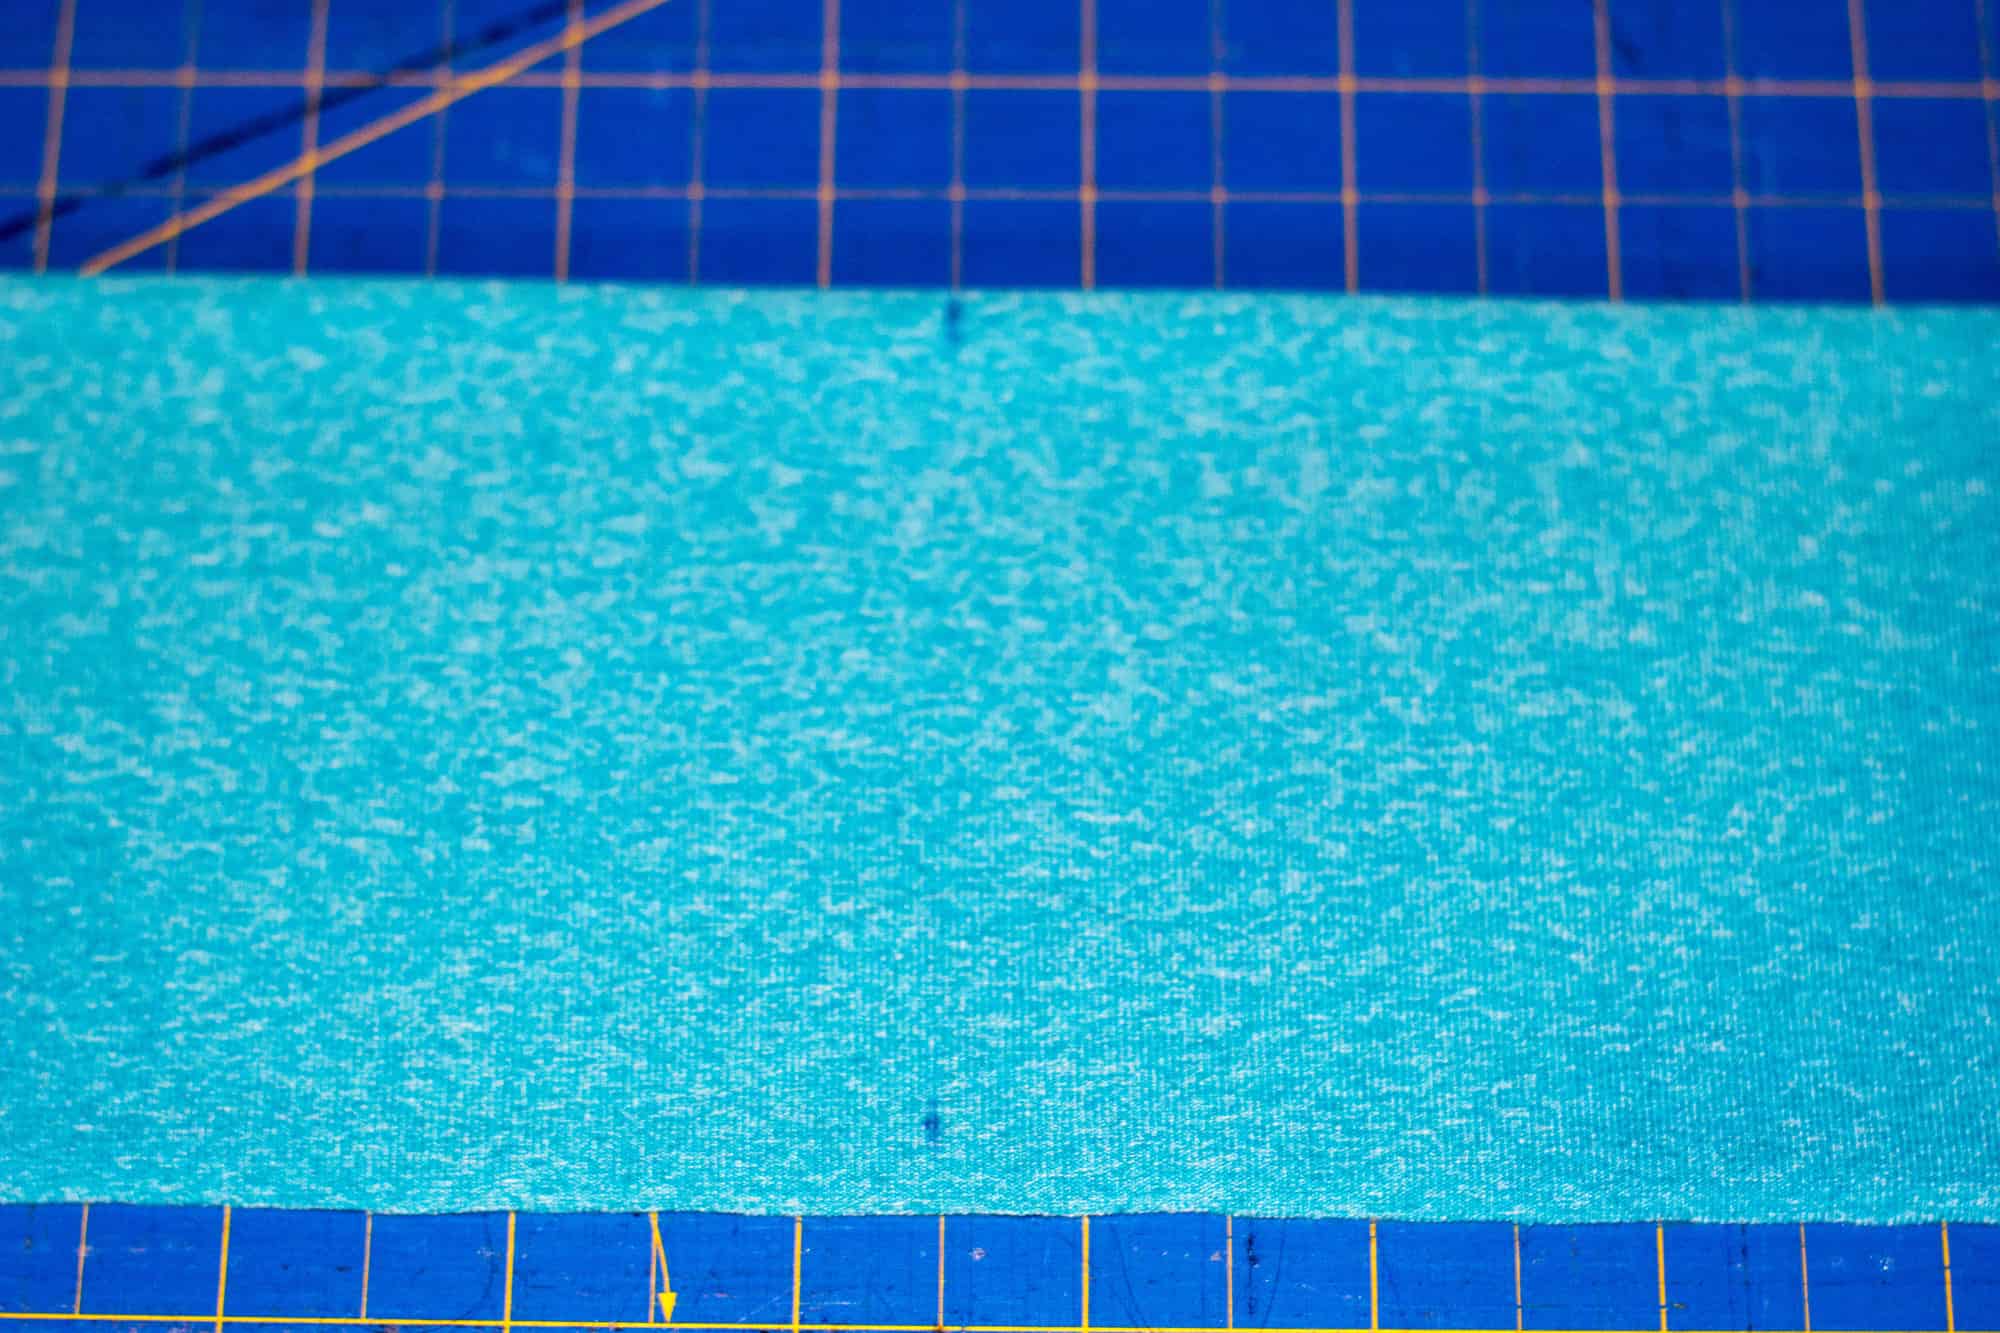
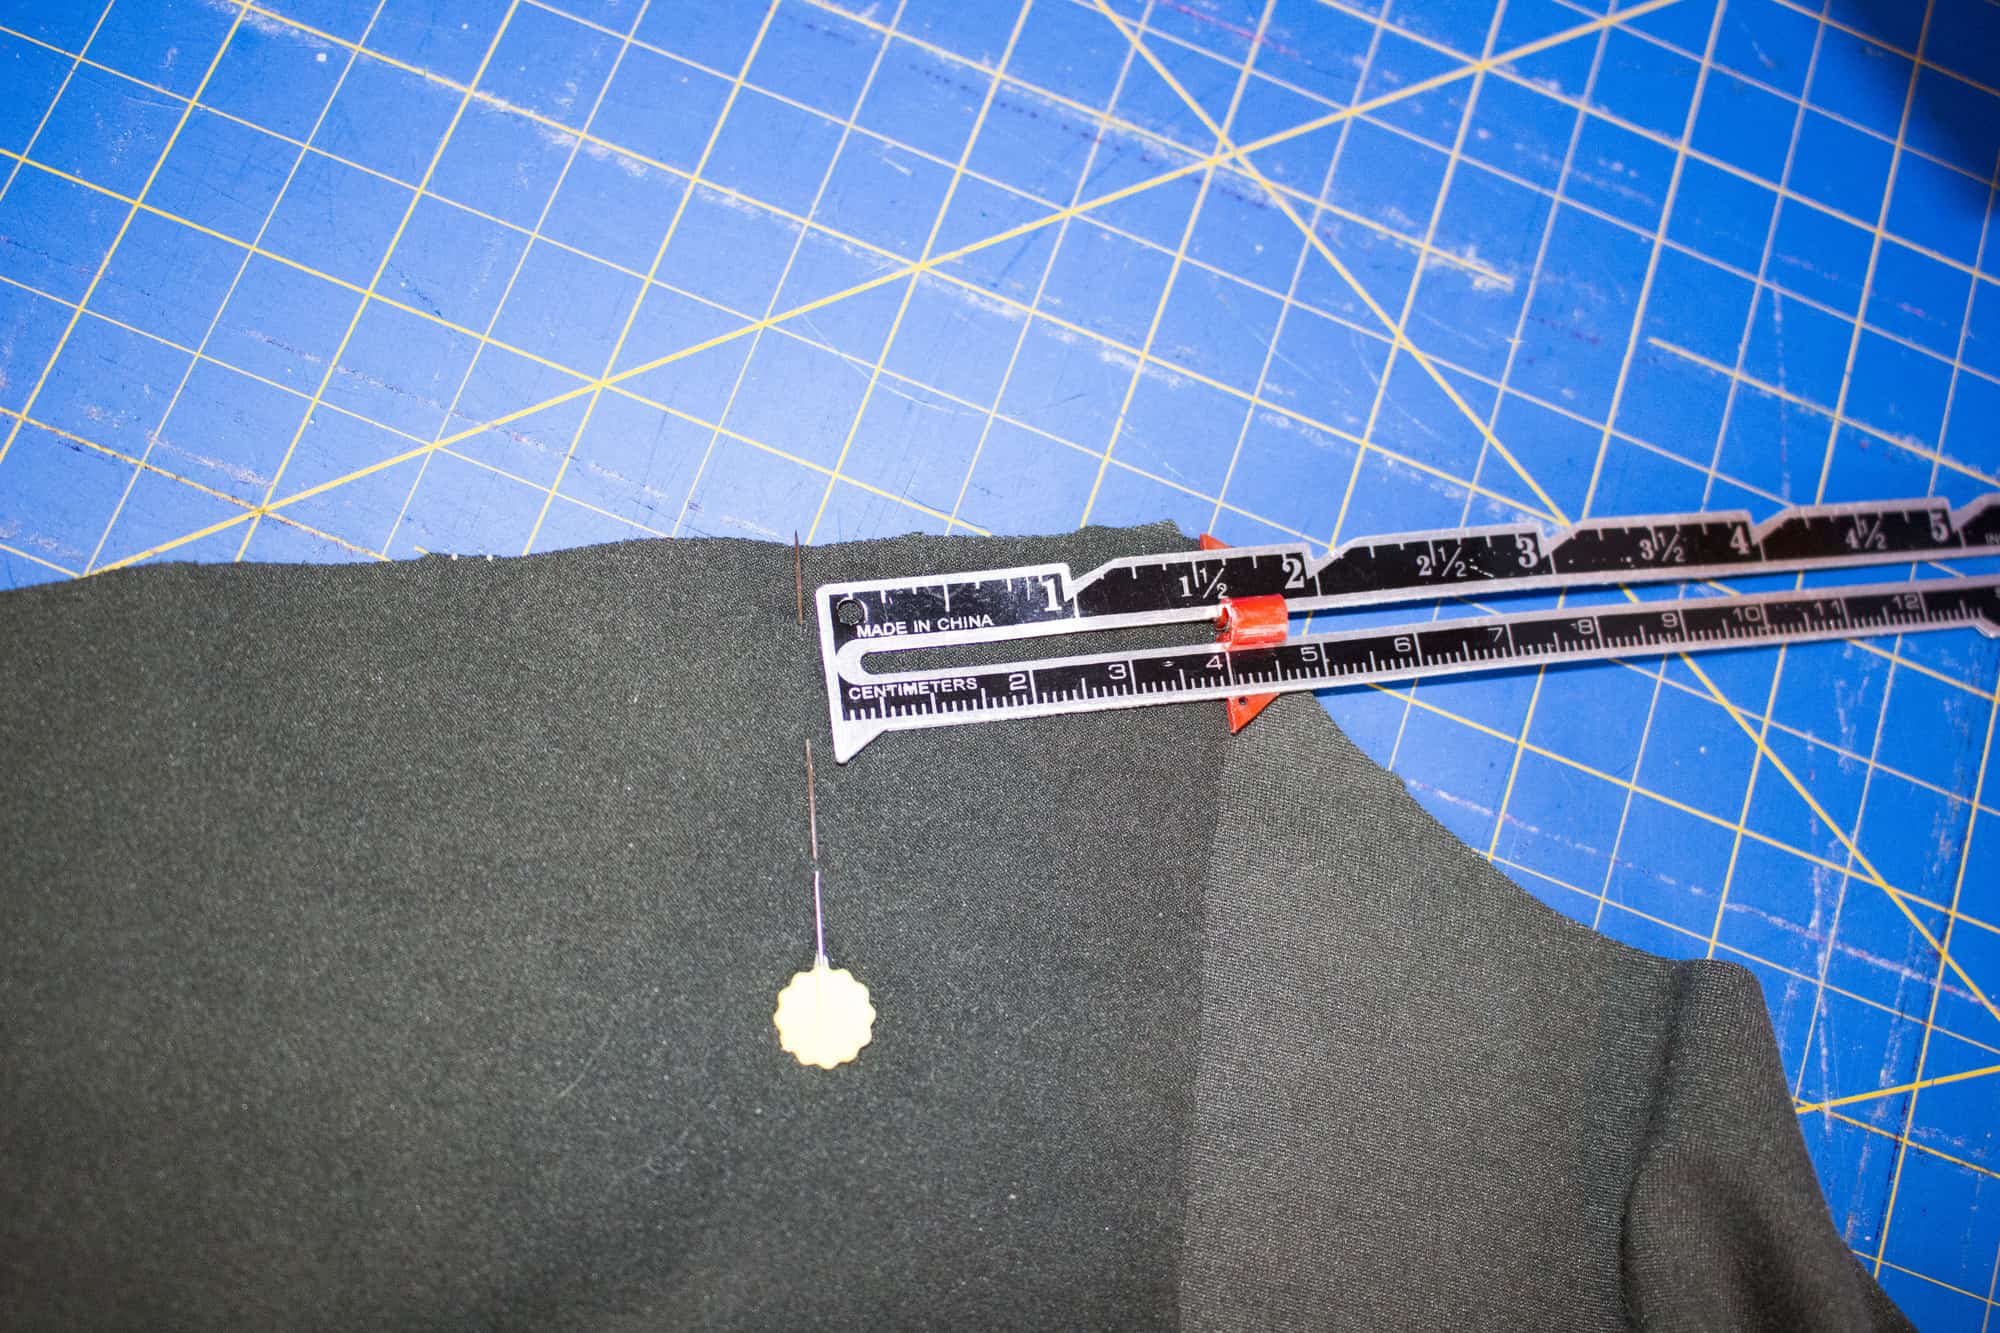
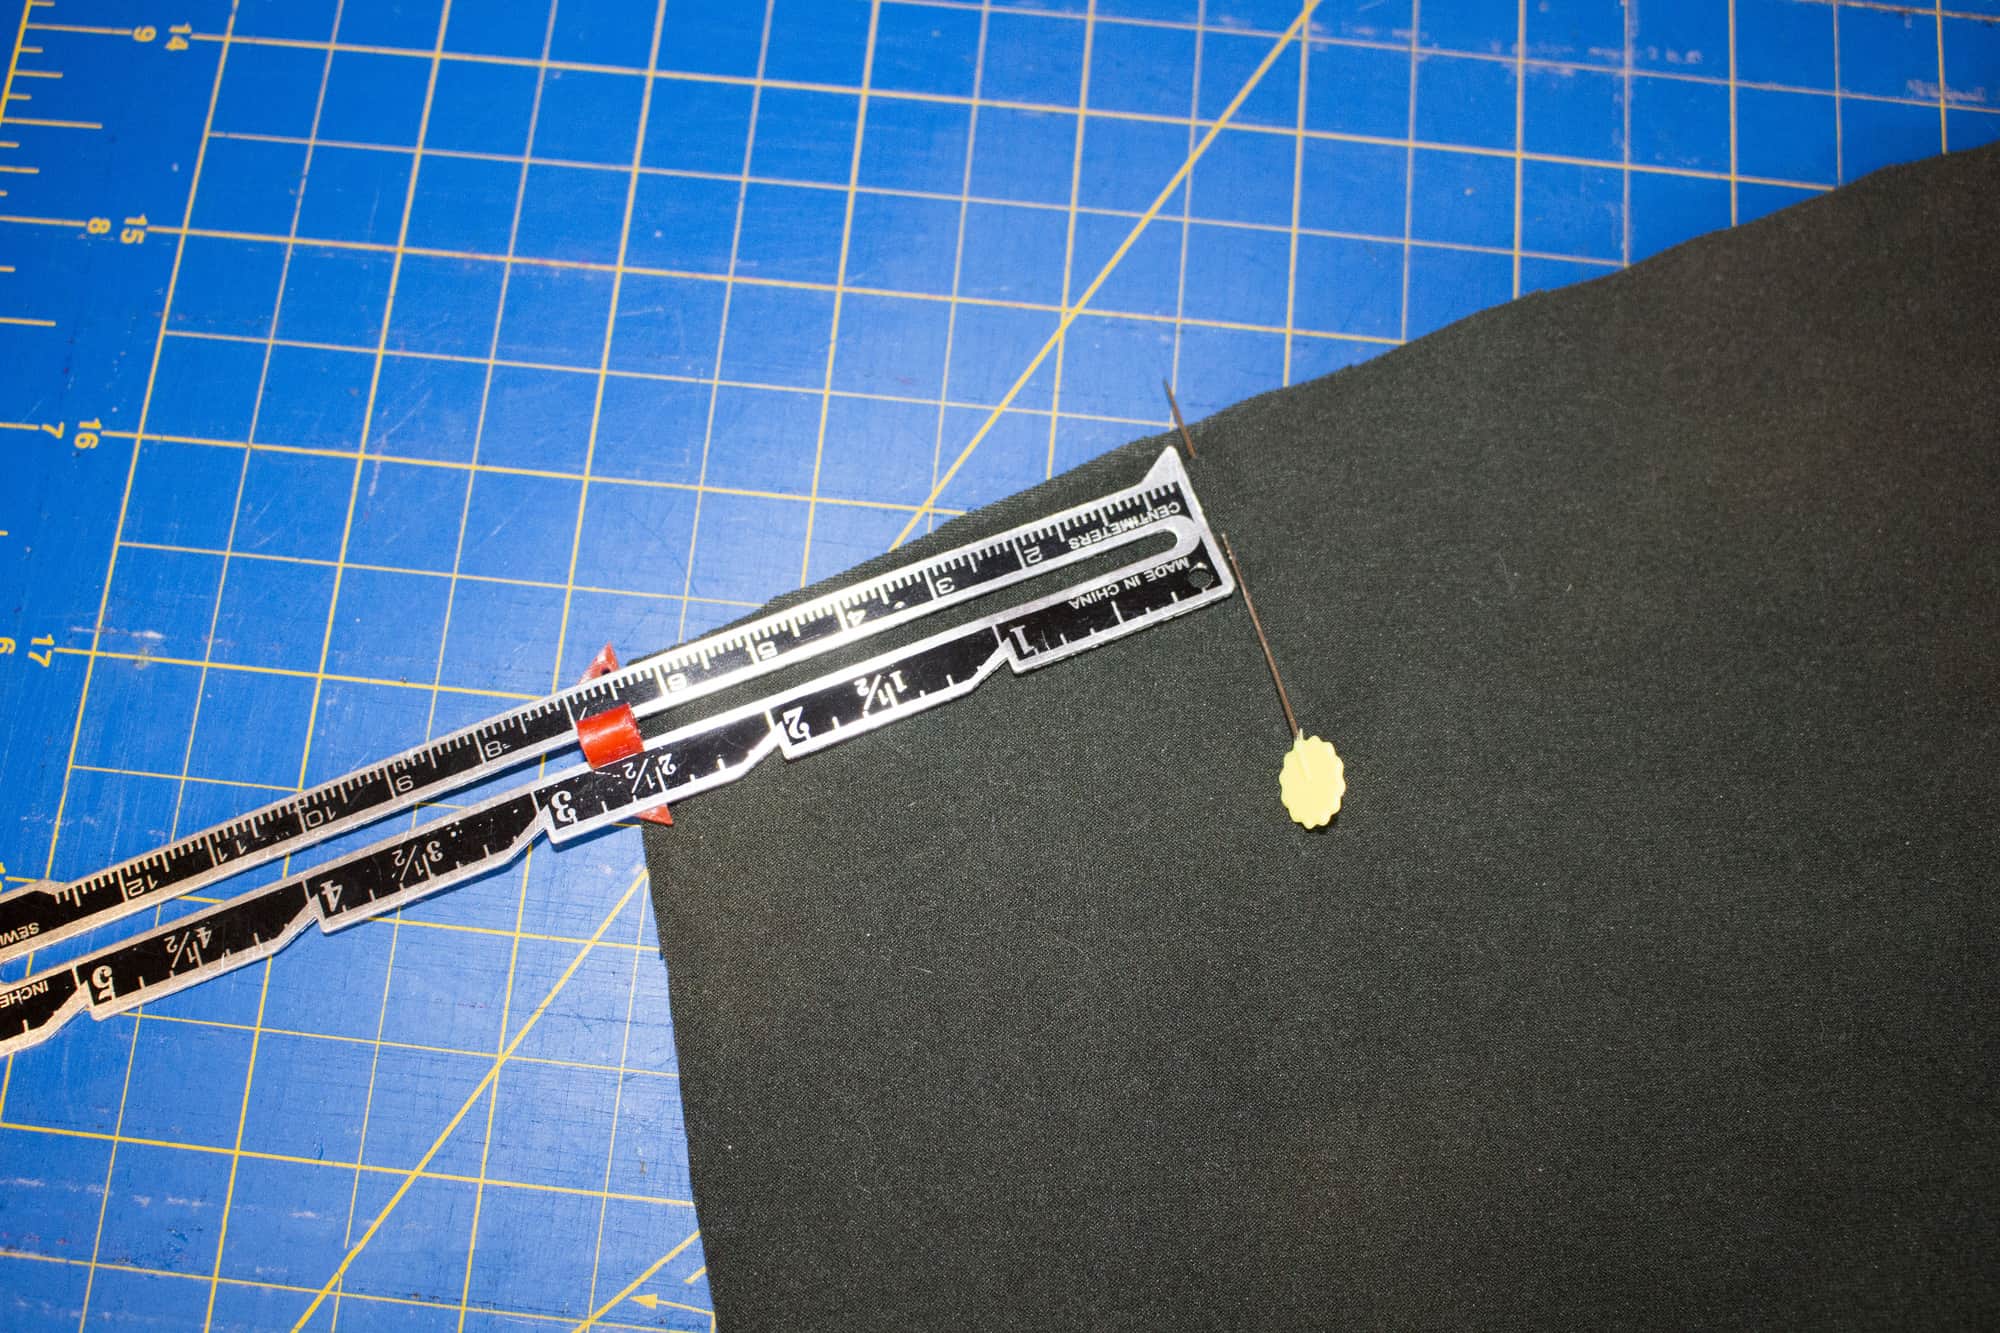
Cut out your skirt piece, trying to keep your curve as even as possible. Cut your waistband (main and lining as indicated the the pattern) and assemble as instructed omitting the swim bottoms. Attach your waistband/skirt to your bodice. I do recommend cutting both the main waistband and the lining waistband to add structure. Try on your dress for length, hem it and you’re finished!

•  •  •  •  •  •  •  •  •  •  •  •  •  •  •  •  •  •  •  •  •

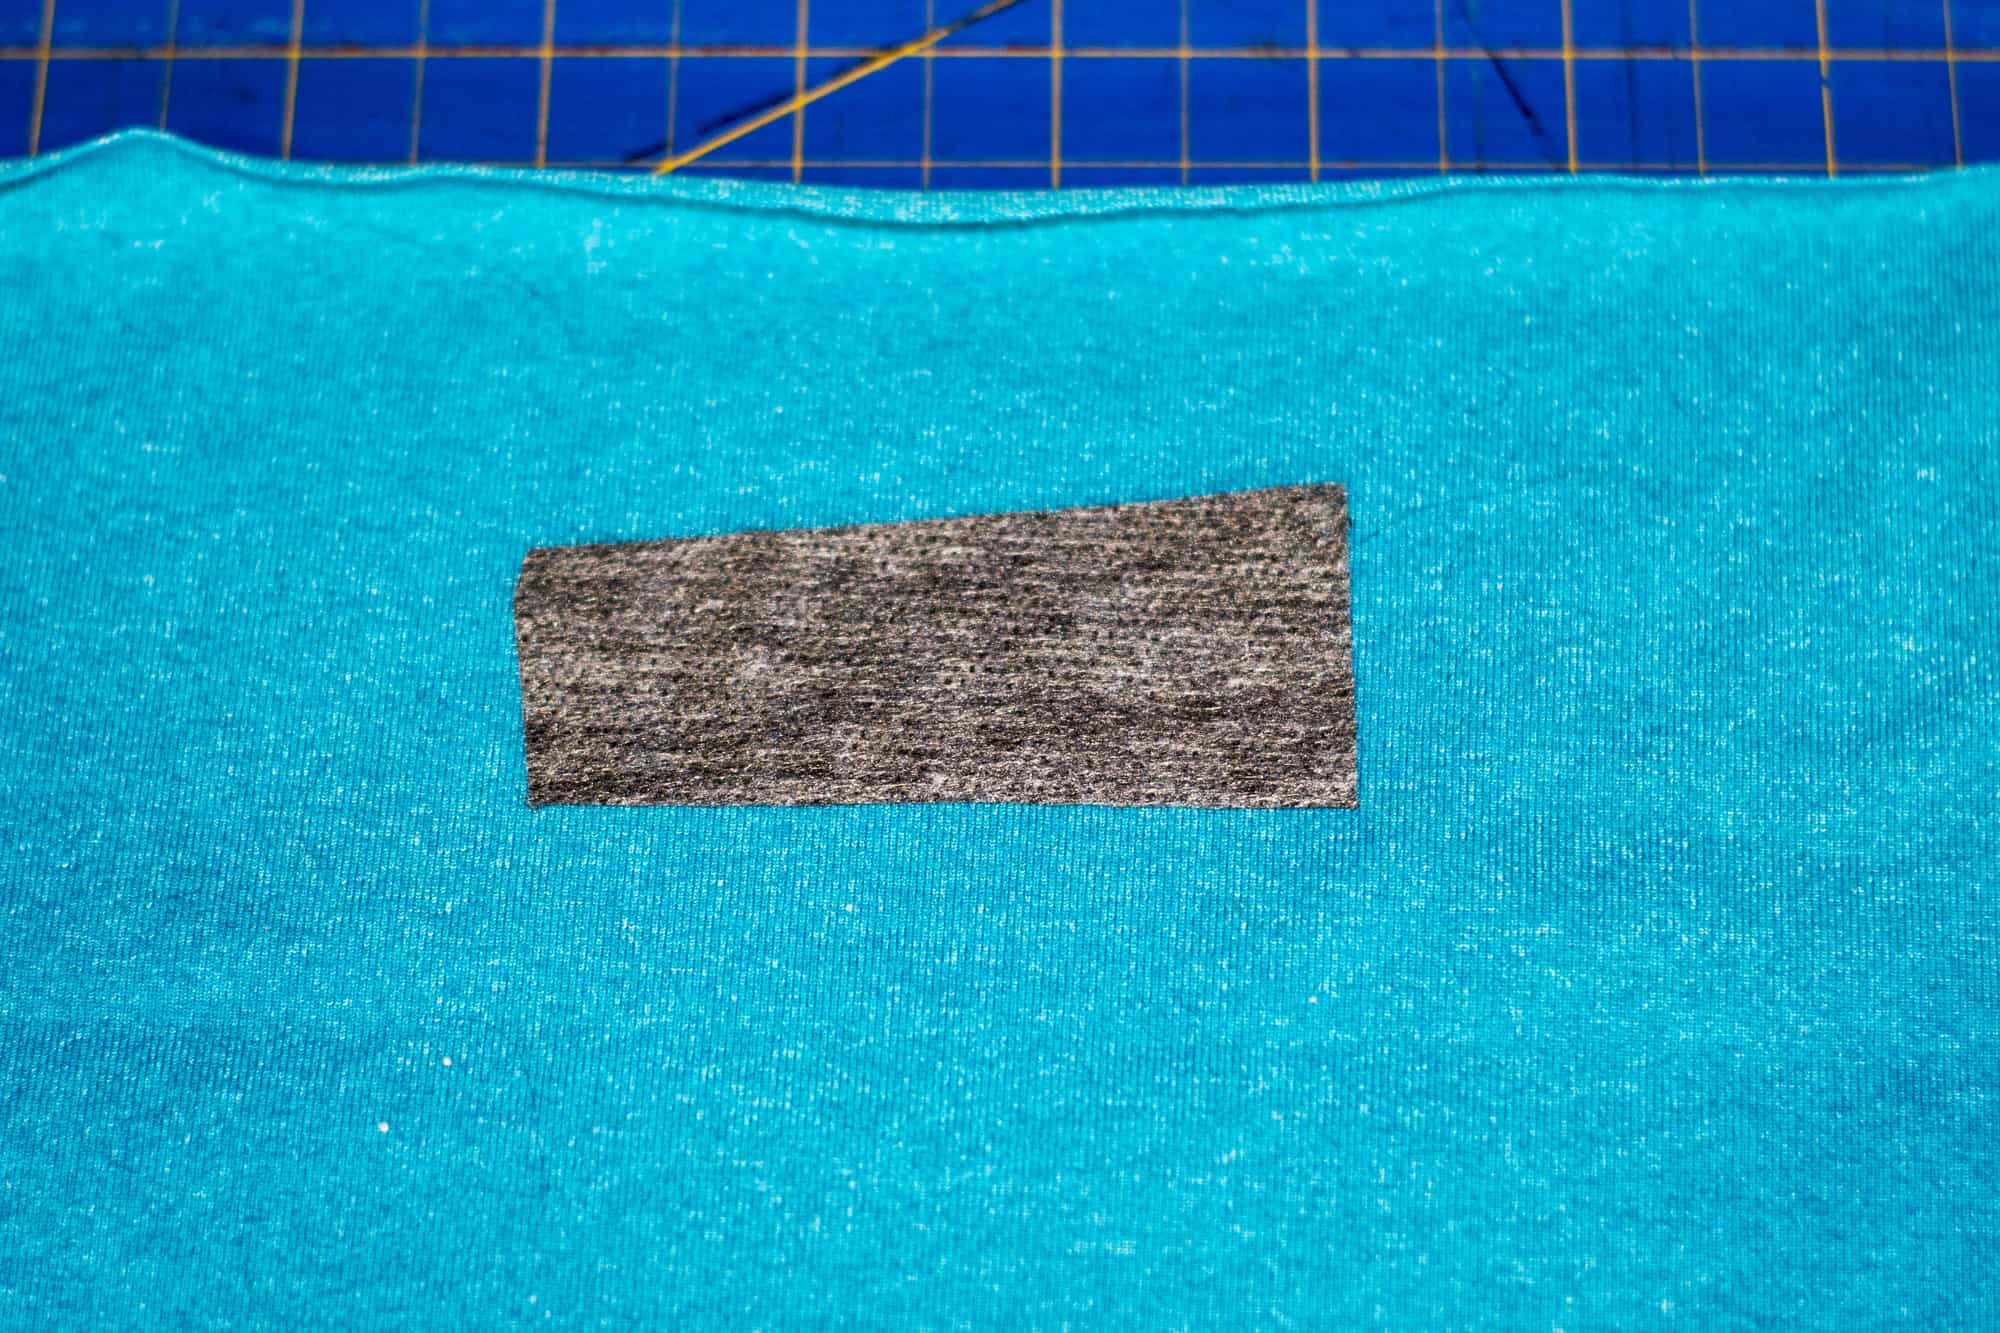
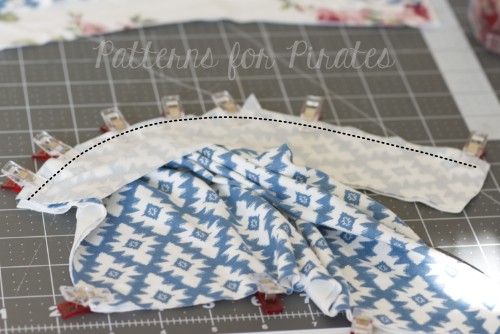
For the final option I will detail how to add a gathered skirt in place. This option is really simple. If you own the Boundless dress pattern you can simply attach the waistband from the TTP pattern instructions to the gathered skirt size from the Boundless. If you don’t own that one you can simply cut your rectangle skirt piece by doubling the waistband length and finding your desired skirt length through measuring as described in the previous option. Cut two skirt panels and sew them together if your fabric isn’t wide enough. Direction of greatest stretch should go across the 2x waistband length. See Illustration below:

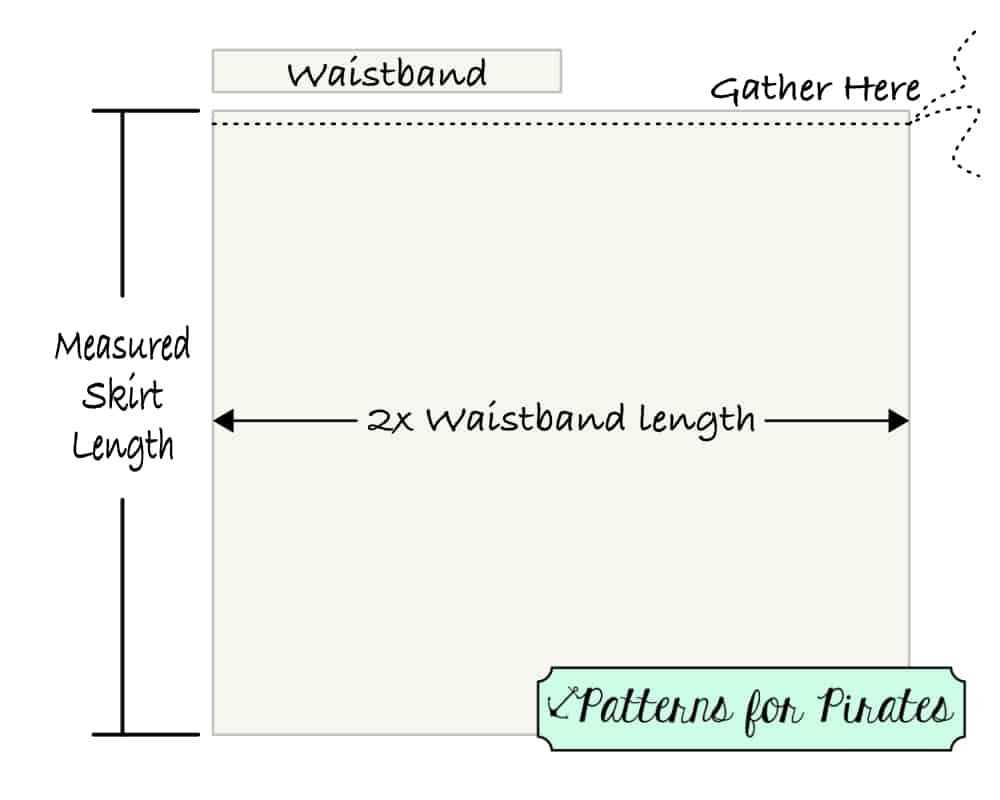
Gather one of the doubled waistband length sides by running a long baste stitch across and pulling the bobbin thread. Fit and sandwich the gathered end between the waistband pieces being sure the main fabrics are right sides together. Stitch in place.

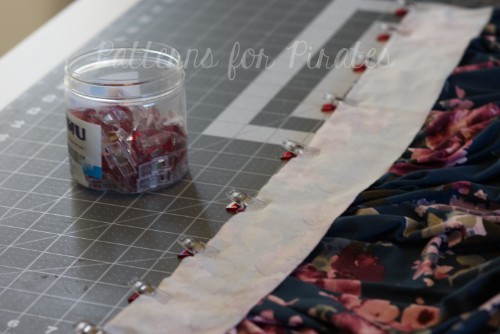
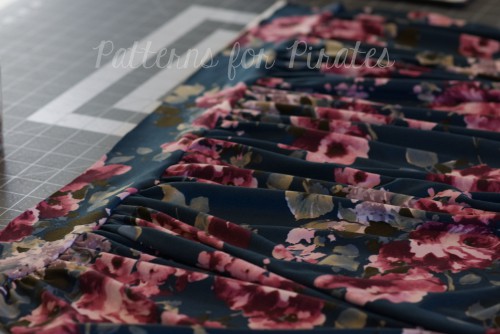
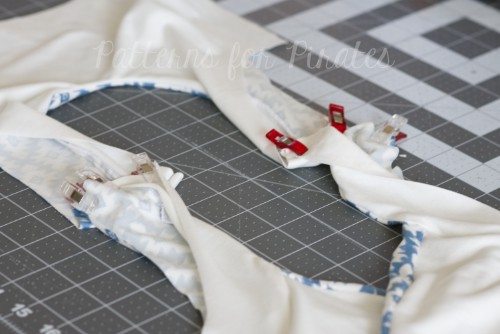
Fold the long ends of the skirt to meet right sides together. Stitch down the entire side seam, from waistband to bottom of the skirt. Now attach your skirt/waistband to your bodice, right sides together. Try on your dress and hem to the appropriate length. You’re all done!

•  •  •  •  •  •  •  •  •  •  •  •  •  •  •  •  •  •  •  •  •

So you can see how versatile this swim pattern really is! I hope you have all found this tutorial to be helpful. Go forth, make some swimsuits, peplum tanks and dresses for the summer. Share them with us in the Patterns for Pirates Facebook group. Don’t forget to check out the TTP pattern release roundup for some more swimsuit photos and check out the hack post for some more fun Take the Plunge swimsuit options!


Filed Under: Pattern Hacks, Pattern Release 1 Comment

50K Fan Celebration :: Exposed Elastic PegLegs Hack

April 24, 2017

Want to make your Peg Legs even easier? How about skipping the band? Today we have an easy hack for you- adding an exposed elastic band.

There are so many types of elastic available in a variety of colors and designs, as well as a multiple widths. For this hack, you will want to first determine how high you would like your band to come. When I was looking for mine, I searched online for “boxer elastic”  knowing that I wanted a large band and this gave me the biggest variety. I finally decided on one that was 5″ tall.

I chose to cut my Pegs as a low rise since the elastic I chose will add quite a bit of height. You can determine which rise is best for you, keeping in mind how tall your elastic is. You will then want to assembly your Peg Legs as per the tutorial until you reach the step of attaching the band.

For the width of my band, I used the cut chart as a guide. I added 2″ to this, as my elastic did not have the same amount of stretch as a fabric band would have had (you can always take more off if you need to, should your band be too large when attaching). Fold band in half width-wise, with wrong sides together, and stitch to create an elastic circle.

Mark both your elastic band and Pegs into even quarters, then slip band around waist of Peg (with right sides together), aligning quarter points. You will want to make sure that you will have to slightly stretch the band, not the waist of the Pegs. If you do not have to stretch, unpin and remove a small amount from the waistband. It is important to have the band stretch slightly to help hold the Pegs up!

Once you have the elastic waistband and Pegs clipped/pinned together, serge or sew around the waist as you would when attaching a fabric band using a 0.5″ seam allowance. Once attached, if you serged the elastic together in the first step, you will need to finish your seam. I prefer to weave my thread back through using a large needle, however you can also use one of the methods Alex described here. The last step is to hem your Pegs according to the tutorial directions and you’re all finished! Enjoy! ~Erinn


We are celebrating reaching 50K fans in our Facebook group!  To make it a party, our beloved PegLegs pattern just got an update AND some new add-ons.  Before you go running to your machine to sew up your own leggings, make sure to read our PegLegs 101 blog post.  This way, you’ll have all the the information you’ll need to make the perfect pair before you even cut into your gorgeous fabric.

But wait, there’s more!  After any good party is an after-party.  We are taking it one step further and sharing some easy hacks that’ll bring even more flavor to your favorite leggings pattern!  We hope you check them out, make your new favorite pair of leggings, and know that we appreciate every single one of you amazing sewing guys and gals!

Here are our hacks / tutorials / latest tricks:

Lace Waistband Alternative | Drawstring Waistband Tutorial
Exposed Elastic Waistband | Stirrup Pant Hack
Ruched Ankles Adjustment | Decorative Topstitching Tutorial
Ruched Side Panel Hack

Filed Under: Pattern Hacks, Uncategorized Leave a Comment

50K Fan Celebration :: Drawstring Waistband PegLegs Hack

April 21, 2017

Today I’m sharing a quick cute hack to your peg legs to add a drawstring to your waistband.  I wear peglegs all year round and the drawstring changes up the look just a bit.  Let’s get started.

  1. First you sew your legs together as per the pattern.
  2. Before we start the waistband we are going to make some markings.  I am using a disappearing ink pen from my fabric store to mark mine.  I folded my waistband in half to find the center and marked the center with my pen in a few spots.  Next I found folded the fabric long sides together to mark where I wanted my buttonholes.  I wanted my buttonholes in the middle of my waistband. Your waistband is 7 inchs wide so folded it is 3.5 inchs but the bottom .5 inch is your seam allowance therefore I measured 1.5 inchs down from the top fold and marked that as being the center right across the other mark that I had made.  Now I have a little cross right marked.

3. Buttonholes can be a bit of a pain on knits so I added a little piece of interfacing on the back, I didn’t actually iron it on to my fabric I just wanted something to give it a bit of stability, a tear away stabilizer would also do the trick or you can iron on a piece of knit interfacing.  I happened to have a bit of regular interfacing sitting here so that is what I used. I sewed the buttonholes on either side of my cross .25 inch from the center. I just did a really small buttonhole, it doesn’t need to be big cause you are just threading through some drawstring.  Now for all those people that hate sewing buttonholes not to worry knits don’t fray so you can always just cut some little slits in the waistband if that is the option you choose make sure to iron on some knit interfacing thou, it would prevent the knit from stretching out while wearing them.


4. Once you have the buttonholes are done we are going to create a casing for your drawstring.  First you are going to match the short sides of your waistband as the pattern directs and sew them together, fold the waist band in half and then your going to sew all the way around about .25 of an inch above the waistband and below the waistband. Now you can mark your lines here that you are going to sew but I’m a rebel and just went for it by sewing 1.25 inchs from my fold, for the second row of stitching I sewed .5 down from the first line I made.  Once your casing is all done just attach the waistband to your legs as normal.

5. Now you just need to add your drawstring.  I used 50 inchs of drawstring on the xxs size and I just tied off each end but you could certainly fold the ends over and hem the edges of your drawstring.  I like to just put the drawstring around me and leave long tails and then insert it into my casing try it them on and you can always cut the drawstring shorter so start with a long piece and then cut them the length you like best.  Remember you have to leave your drawstring fairly loose or you won’t be able to pull your leggings on! I figured this out while trying mine on! Another simple solution to use elastic for most of your drawstring, I would use 1/4 inch or 3/8 inch elastic.  You could cut your elastic slightly shorter then your drawstring and then sew drawstring onto each end of your elastic and thread it through your casing, it would give you just a bit more give when pulling them on and off.


I hope you try adding some drawstring in your peglegs and don’t forget to show them off in our Facebook group! – Angela


We are celebrating reaching 50K fans in our Facebook group!  To make it a party, our beloved PegLegs pattern just got an update AND some new add-ons.  Before you go running to your machine to sew up your own leggings, make sure to read our PegLegs 101 blog post.  This way, you’ll have all the the information you’ll need to make the perfect pair before you even cut into your gorgeous fabric.

But wait, there’s more!  After any good party is an after-party.  We are taking it one step further and sharing some easy hacks that’ll bring even more flavor to your favorite leggings pattern!  We hope you check them out, make your new favorite pair of leggings, and know that we appreciate every single one of you amazing sewing guys and gals!

Here are our hacks / tutorials / latest tricks:

Lace Waistband Alternative | Drawstring Waistband Tutorial
Exposed Elastic Waistband | Stirrup Pant Hack
Ruched Ankles Adjustment | Decorative Topstitching Tutorial
Ruched Side Panel Hack

Filed Under: Free Pattern, Pattern Hacks, Uncategorized 1 Comment

Pumpkin Spice Dolman Cold Shoulder Hack

April 4, 2017

Cold shoulder tops are all the rage right now and it’s a quick and easy hack to add to your Pumpkin Spice Dolman.  The Pumpkin Spice Dolman is one of my very favorites and they are in constant rotation in my wardrobe, so as soon as I saw someone in the Patterns for Pirates Facebook Group ask about a hack, I knew I had to make one ASAP.  Let’s get started!

First you are going to cut out all your pieces, I choose to do the 3/4 sleeve with the long band for mine. Once your pieces are cut, we are going to line up our shoulders seams but instead of sewing the hole seam we are going to make a couple of marks.  I marked 1.5 inches down from the neck and placed a pin there and then 2.5 inches up from where the arm attaches. I am sewing a XXS and that is what worked for me but feel free to adjust those measurements to make it perfect for you.  Now we are going to sew from the edge to where we put our pin on the sewing machine.  It’s really important that you don’t use your serger for this step!

Now that our seams are sewn, we are going to press them open and continue pressing where we didn’t sew open as well. Measure to make sure that you are pressing exactly your 1/2 inch seam allowance.  Once you have it pressed open we are going to top stitch both sides of the seam allowance.  I’m using my coverstitch here, but you can use a twin needle or a single needle, whichever you prefer.  You just created your cold shoulder, easy right?!  You will now continue constructing your top just as the pattern says.

And don’t forget the Pumpkin Spice Dolman has a matching girls pattern the Spice Cake so you can also make the girls in your life a matching cold shoulder top- I know that my daughter is all about the cold shoulder and I plan on making her a couple too!

Don’t forget to show off your creations in the Facebook Group, we adore seeing all your creations – Angela

Filed Under: Pattern Hacks, Uncategorized 3 Comments

Heart Breaker Cami- Swim Top Hack

March 27, 2017

During testing we had a lot of ladies used swim knit as a swim top for their littles! I think the design looked like a great swim top!

So, I thought I would share the very simple mods I did to use the Heart Breaker Cami as a swim top for my Baby Girl!  I recommend adding swim elastic around all the edges.  This helps the suit stay put when wet. I used 3/8″ swim elastic so I didn’t have to change any measurements to the binding 🙂

*I know a lot of ladies will be asking if they can skip the elastic.  Technically yes, you can sew it with just swim knit and it will stand up to the water.  BUT, the elastic will make it a “real swim suit”.  What does that mean exactly?  The swim elastic is made to hold up to the water and chlorine and doesn’t stretch out when wet.  The swim fabric does  stretch out and get heavier when wet.  For me personally, if I’m going to give the time to sew up a swim suit, I want it to be a nice, stay put, last all summer one! So, I absolutely take the time to put in the elastic 🙂 I don’t want it to grow and fall down on her while we’re swimming or constantly be slipping off her shoulders if I skip it.

Follow the tutorial for the first step of attaching binding.  Then serge or stitch your swim elastic along the opposite edge of binding that has not been attached yet.  You want the edge of the swim elastic to be even along the edge of the binding. For the front curved neckline you will want to put slight tension on the elastic as you’re attaching, you don’t need to stretch much- just a touch- so that it hugs to your little one’s body.

Finish the binding exactly per the tutorial.  Repeat these steps for the rest of the binding- putting a small amount of tension on the elastic only around the curved areas (under arms).  For the shoulder straps and X back binding pieces you do not need to stretch the elastic at all- use a 1:1 ratio.

I also added some swim elastic into the bottom hem to keep it from riding up.  For the cropped version I slipped elastic into the band there at the bottom.

And now she’s ready for the summer!  I can’t wait to see her in it (especially since I found these perfect accessories to go with it!)

Filed Under: Pattern Hacks 2 Comments

Cross My Heart Cami Hacks

March 14, 2017

So you love the X option but you also love the T option of the Cross My Heart Cami and now you’re in a pickle…which one do I make? The answer is obvious, you make both! And if you’re anything like I am, you make both style in one cami! 🙂

IMG_6658

IMG_6671

The beauty of the CMHC pattern is that you don’t even need to make any modifications to achieve this look. Simply cut two pieces of the front pattern and follow the directions for adding the T and the X details to the pieces. Finish the cami as per the tutorial and voila! You made yourself a brand new cami that can be worn both way. You can wear the X in the front and the T in the back like I did or you can wear the T in the front.

cami 2fronts

I paired this cami with a Pirate Pencil Skirt and a Sweet Tee with curved hem and an off the shoulder mod. Which styles will you be making first?

Judy made this one with two backs! Such a simple mode that can add so many more options to this pattern!

The V front and low x makes a sizzler! I mean, who doesn’t love to have that piece of clothing that you can pull out, slip on feel a little sexy every once in a while?

Are you looking for a more delicate, feminine feel?  Grab some stretch lace for an easy hack!

Here’s a simple how-to:

1. Cut the lace the same length as your binding pieces, for whichever neckline you are using.

2. After you’ve attached and folded over the binding as directed in the tutorial, pin the right side of the lace to the wrong side of the neckline/binding. In the picture below, the fabric is right side up.


3. Repeat for the back as well, if you’d like.  Then, sew it on as you top-stitch the binding, per the pattern tutorial.  Here’s how it should look all said and done; wrong side up shown on the bottom of the picture, right side up shown at the top.


4. Be sure to catch the edge of the lace on the side of the shoulder binding as you attach it.


5. Finish the shirt as the pattern tutorial directs.  That’s it – easy peasy!

~ Elisabeth


Not sure what to do with all those pretty lace appliques? Attach one to the front or back of the cami.  I happened to up-cycle one from an old shirt that didn’t fit anymore and have some knit on hand that matched perfectly!  I used to V back because of the shape of the applique.  I left the front neckline raw and stitched the lace just overlapping the top edge using a zigzag stitch.  (Knit does not unravel so no need to finish those edges).  Attach to the right side of the cami prior to doing the shoulder binding if your applique extends to the armholes.  For the main body of the applique, I chose to tack down in a few areas (center of the flowers) as the applique itself was pretty open throughout.  Easy Peasy!


Filed Under: Frequently Asked Questions, Pattern Release, Uncategorized 1 Comment

P4P Cardi Week:: Varsity Sweater Hack

January 27, 2017

p4pcardiweek varsity hack main

Let’s talk game day attire…  I know we have some sports fans in the Facebook group and if your house is anything like mine, it revolves around football.  Even if it doesn’t, the Varsity style sweater is a nod to a throwback classic look.  Some months back Judy showed us how to add a stripe accent to a raglan sleeve during our #P4PRaglanWeek (read more about it HERE) .  Using the same idea, I hacked the Cpt. Mack’s Cardigan to replicate a Varsity sweater.

Print, assemble and cut your pieces as instructed in the pattern.

After looking at a few Varsity style sweaters I decided to go with 2 stripes on the left sleeve only.  You can choose a number of different fabrics to use for the stripes.  I ended up using a flocked heat transfer vinyl but you could also use knit scraps.  Placement of your stripes is your preference depending on size and quantity.  My stripes are 3/4″ wide and are placed just below the short sleeve cut line and above the 3/4 sleeve cut line.  (Note: the left sleeve is with the back of the sleeve to your right hand side when looking at the fabric with right side up. The elbow patches are show on the pattern piece.)

varsity3 varsity4

I also added an applique to the left front body.  I used the flocked heat transfer vinyl again and pressed it directly to white knit and then used Heat & Bond Hem Tape to secure in place. Top-stitching is optional but decided to keep it as is.  If you choose to add an applique, embroidery or any additional embellishments to the main body, do it prior to construction.  It is  much easier to add when your pieces are not sewn together yet.

varsity5

Another design element that I noticed when searching for inspiration was the contrasting pocket bands.   Using Patty’s idea during #P4PRaglanWeek (details HERE) I added the feature to the patch pockets.

varsity6

That’s it!  Easy, right?!?! Use your favorite team colors or maybe even your little one’s school colors for the perfect school pride cardi.  This of course can be used to hack the women’s Grandpa Cardi as well.

varsity2

IMG_8807

We’re nearing the end of the #P4PCardiWeek but be sure to take a look at our jam-packed schedule of cardigan love!

Saturday, January 21: #P4PCardiWeek Announcement

Sunday, January 22: Cocoon Lace Hems and Butterfly Ruffle

Monday, January 23: Ribbon Tie Closure Hack

Tuesday, January 24: Carefree Cardigan Fringe Hack

Wednesday, January 25: Duster-Length Adjustment

Thursday, January 26: Kimono Ruffle Sleeves + Hem

Friday, January 27: Varsity Sweater Style Hack

Saturday, January 28: Carefree Cardigan Flannel + Vest Hack

Monday, January 30: #P4PCardiWeek Winner Announcement

You can follow along on the blog here, or in our Facebook group.  Search #P4PCardiWeek to be able to find our posts all over social media.  And please feel free to sew-along with us on one or all of the days.  The more the merrier!

But wait, there’s more!  We wanted to create a friendly pirate-y competition with our P4P Cardi Week!

Between tomorrow and Saturday, January 28, sew up a Patterns for Pirates cardigan using one of our hacks, or by keeping the pattern as-is.  Share your photo with us on Instagram or in our Facebook group and use the tag#P4PCardiWeek We will pick our favorite and the winner will win a free P4P pattern of choice AND be featured on this blog.  Fun right?

To make it even better we have put all the cardigan patterns in the shop on sale all week (no code needed)!

Now get out there and sew some cardigans, matey!

Filed Under: Contest/Giveaway, Pattern Hacks, Uncategorized 1 Comment

P4P Cardi Week :: Grandpa + Cpt. Mack Ribbon Tie Closure

January 23, 2017


Cpt Mack Ribbon Tie Closure Primary


Today I have for you a simple hack that can be applied to either the Patterns for Pirates women’s Grandpa Cardi or the youth version, the Cpt. Mack’s Cardigan. This mod is simple but it adds so much to the overall look! There are a few different ways that you could approach this; but grab your pattern and follow along the tutorial below to find out how I like to add a ribbon tie closure to the Cpt. Mack and Grandpa Cardigans.

For this tutorial I am using some simple satin and mesh ribbon to coordinate with my rayon spandex lined loose weave sweater knit Cpt. Mack.

MATERIALS

Step 1: Sew up your cardigan, stopping just before attachment of the collar.

IMAGE 0

Step 2: Iron on some interfacing along the inside of the collar where the buttonholes will be stitched. This will provide some stability to your knit and to prevent the holes from being stretched out with use. I know my kids aren’t gentle with their clothes!

IMAGE 1

Step 3: Now sew your collar onto the cardigan as directed by the pattern tutorial.

IMAGE 2

Step 4: Mark on the overlapping band (with pins) where you would like your bows to be located. I used two bows for my daughters size 2T tunic length cardigan. The width of the chosen ribbon should be considered when deciding how many bows to use as well. Now mark the corresponding location on the under lapping band.

IMAGE 4

Step 5: Use your machine to create buttonholes on the overlapping band locations. For this I used my automatic buttonhole presser foot. If you haven’t yet used your buttonhole foot I highly suggest reading your manual or searching YouTube for a quick video. These make it super simple! If you do not have a buttonhole setting and foot option on your machine you can certainly use a zigzag stitch to create one yourself. Follow along Judy’s Carefree Cardigan Button blog post to see how she likes to create a buttonhole in that circumstance. Once the buttonhole is stitched, it’s time to very carefully cut them open with your seam ripper.

IMAGE 5

Step 6: Next, use your ribbon to tie a bow to the size of your liking. Trim the ribbon tails a little longer than desired to allow for some wiggle room as we construct this. Untie your bow and cut an additional piece equal in length for as many bows as you would like to attach.

IMAGE 6

IMAGE 7

Step 7: Find the center of each piece of ribbon and secure it to the under lapping band at the pin locations. Sew a straight stitch vertically down the centerline of the ribbon to attach it to the cardigan. I stitched mine on along the left side of the band. This allows the overlapping band to fully cross over once tied.

IMAGE 8

IMAGE 8B

Step 8: Pull one end of each ribbon through its corresponding buttonhole and tie into bows once again, closing the cardigan front. Once all of your bows are tied you can trim the tails to the desired lengths. If you prefer these to be permanent bows you can certainly hand stitch them so that they may not come untied.

IMAGE 9

IMAGE 10

Step 9: If you have used a ribbon that frays easily, use a lighter to gently melt each ribbon end or some Fray Check to seal the weave. Be careful to use the heat from the flame and not the flame itself. If you mess up, no worries! Simply trim off the tip of the ribbon tail and try again.

There you have it. All done!

IMAGE 11B

Keep your eyes peeled for some other fun tutorials the ladies at Patterns for Pirates have prepared for you this week! Be sure to read all the way to the end of this post to find out how to participate in this week’s sewing contest!

-Kelly Bailey

P4P Blog Contributor


Take a look at our jam-packed schedule of cardigan love!

Saturday, January 21: #P4PCardiWeek Announcement

Sunday, January 22: Cocoon Lace Hems and Butterfly Ruffle

Monday, January 23: Ribbon Tie Closure Hack

Tuesday, January 24: Carefree Cardigan Fringe Hack

Wednesday, January 25: Duster-Length Adjustment

Thursday, January 26: Kimono Ruffle Sleeves + Hem

Friday, January 27: Varsity Sweater Style Hack

Saturday, January 28: Carefree Cardigan Flannel + Vest Hack

Monday, January 30: #P4PCardiWeek Winner Announcement

You can follow along on the blog here, or in our Facebook group.  Search #P4PCardiWeek to be able to find our posts all over social media.  And please feel free to sew-along with us on one or all of the days.  The more the merrier!

But wait, there’s more!  We wanted to create a friendly pirate-y competition with our P4P Cardi Week!

Between tomorrow and Saturday, January 28, sew up a Patterns for Pirates cardigan using one of our hacks, or by keeping the pattern as-is.  Share your photo with us on Instagram or in our Facebook group and use the tag #P4PCardiWeek. We will pick our favorite and the winner will win a free P4P pattern of choice AND be featured on this blog.  Fun right?

To make it even better we have put all the cardigan patterns in the shop on sale all week (no code needed)!

Now get out there and sew some cardigans, matey!

Filed Under: Contest/Giveaway, Pattern Hacks, Uncategorized 2 Comments

How to lower or raise a neckline

January 6, 2017

img_4108

We have seen a lot questions about raising or lowering the neckline of various P4P shirts or dresses. On the blog today I show you how easy it is to alter the neckline to achieve the look you want. For this tutorial I will use the Sweet Tee pattern in a beautiful viscose rayon (dress option lengthen 3.5″) but you can apply this technique to either one of the shirt patterns.

img_4118

Start by printing and cutting your pattern in the size needed. The only piece we will be altering will be the front of the shirt (or bodice).

For lowering the neckline you will need to mark on the center fold where you would like the new neckline to be. I usually lower my Sweet Tee neckline 1.5 inches. Using a French Curve (or going slowly) draw a curve similar to the original one from your mark to the inner shoulder point.

raiselowerneckline

img_4502

Cut your fabric using the new front pattern piece. The rest of the pattern pieces will remain the same. The only other change you will need to make is the length of the neckband or binding.

To raise the neckline you will need to grab your front bodice piece and a blank piece of paper. Align the center fold of the front pattern piece  with the side of your paper and glue them together.

Mark a point 1-2 inches above the original top center depending on how high you’d like the neckline. Using the French Curve draw a curve from the center point to the inner shoulder point. Cut the new front using this modified pattern piece and the rest of the pieces as in the original pattern.

img_4503

The only additional modification you will need  to make is to adjust the neckband or binding length. You will need to make it longer or shorter depending on the new neckline. I like to calculate the new neckband length after I sew the front and back pieces together at the shoulder. To find out the new neckline circumference lay the neck opening along a ruler and multiple it by 2.

img_4505

Your new neckband length will be 85% of this circumference plus 1 inch to accommodate the seam allowance. (C * 0.85 +1 ). Cut the new neckband/binding using the new length but keeping the width suggests in the pattern. All you have left to do now is sew the shirt or dress according to the tutorial and you have just made yourself a custom outfit. Easy peasy…right? 🙂

I can’t wait to see your creations in the Pattern for Pirates group.

img_4115

img_4113

Happy sewing, pirates!

Filed Under: Frequently Asked Questions, Pattern Hacks, Uncategorized 6 Comments

P4P Raglan Week: Off-The-Shoulder Raglan Hack

September 24, 2016

raglan-week-day6

IMG_0881 Did you start your fall sewing, pirates? Even though it doesn’t look like fall outside I like to tell myself cooler weather is coming. One of the staples in my fall/winter wardrobe is the raglan tunic. It is perfect for wearing it with Peg Legs (and we all know peg legs are practically fall uniform) and SOS pants. For my blog today I’ll show you how to get an “off the shoulder” look using the Relaxed Raglan. You can certainly use the Slim Fit Raglan if you prefer. I just am going for a looser, more casual look so I used the Relaxed Raglan pattern.

Screen Shot 2016-08-30 at 9.13.22 AM

First off, select your size, print and cut the pattern pieces according to the instructions. Don’t cut the fabric just yet! We’ll now make some small hacks to the pattern to get a wider neckline. Take the front pattern piece and measure 3 inches down on the center fold and mark that spot. Then measure 3 inches down on the sleeve part and mark that point too. Using a french curve (or just going slowly) and following the original pattern, draw a curve line between the two points. Repeat with the back and the sleeve pattern pieces.

testraglan

Once you drew the new cut line, remove the top part and cut the fabric following the new pattern pieces. At this point you will have a front, back and two sleeve pieces plus and additional cuffs or waistband you may need depending on the style raglan you chose. Do not cut the neckline as per the original pattern suggestion. If you do, the neckband will be too small for the new neckline.

Sew the raglan according to the instruction, leaving the neckline as is. Once sewn, take the shirt/tunic, lay it flat on a table and measure the neckline opening circumference. You will calculate the new neckband based on this measure. The new neckband will be 85% of the opening plus seam allowance. So you will do Opening X 0.85 + 1 (for SA). You now have the new length of the neckband. The width stays the same as the pattern.

You’re almost there. All you have to do now is cut the neckband and attach it to the shirt. Tadah! All done, you have a cool new off the shoulder raglan.

IMG_0903 IMG_0882 IMG_0888

I can’t wait to see what you create.  Don’t forget to show off your raglan in the group and keep an eye out for all the surprises during this Raglan Week.

IMG_0905

If you’ve hacked a sexy off-the-shoulder look of a raglan during P4P Raglan week, we would love for you to share it with us!  Head over to the Facebook Group or share on Instagram.  And be sure to use the tag#P4PRaglanWeek so we can find you!

Curious about what else has been happening during our raglan-loving week of fun?

Just take a look at our schedule!

Monday, September 19: Jolly Roger Raglan Pattern Update + Jolly Roger Add-On Pack Pattern Release

Tuesday, September 20: JRR Woven Fabric Hack

Wednesday, September 21: JRR Animal Faces Add-On

Thursday, September 22: Contrast Band Hack for Kangaroo Pockets

Friday, September 23: Women’s Keyhole / Scoopback Raglan Hack

Saturday, September 24: Off-The-Shoulder Raglan Hack

Sunday, September 25: Adding Stripes to Your Raglan Sleeves

Filed Under: Pattern Hacks, Uncategorized 4 Comments

  • « Previous Page
  • 1
  • 2
  • 3
  • Next Page »

Featured Patterns

  • Loosey Goosey Loosey Goosey $12.00 Original price was: $12.00.$10.50Current price is: $10.50.
  • Loosey Goosey- Youth Loosey Goosey- Youth $10.00 Original price was: $10.00.$8.50Current price is: $8.50.
  • Loosey Goosey - Bundle Loosey Goosey - Bundle $20.00 Original price was: $20.00.$18.00Current price is: $18.00.
  • Everyday Shirt Everyday Shirt $12.00
  • Everyday Shirt- Youth Everyday Shirt- Youth $10.00
  • Privacy Policy
  • Refund Policy
  • Affliliate Program
  • Contact Us
  • About

Copyright © 2025 Patterns for Pirates

Copyright © 2025 · Genesis Framework · WordPress · Log in