Many moons ago, I can remember calling my mom in a panic. I had printed out my first pattern for a garment, assembled it, and then just stared at all of the markings! Even though I’d sewn quilts for years before, this was my first attempt at making clothes and the pattern looked like a map in which I had no clue how to follow. After my “what did I get myself into” talk with her, she slowly walked me through each question I had and now after all these years we’ve come full circle and I’m making clothes for her!
Like many people, you will probably experience (or already have!) the “What have I done?” moment in sewing and question why you started a project to begin with. Have no fear! We’re here to help. We decided it was time to break that map down for you and help you learn how to navigate through the amazing world of garment sewing. In this post, you’ll find a description of all the key terms and symbols you might expect to see when starting your sewing adventures! So let’s get those patterns printed, assembled and let the fun begin! (If you’re staring at all of those pages you’ve just printed- don’t worry there either! Click here for our First Time User Tips, which includes how to assemble patterns).
Grainline
The grainline tells you which direction the grain of your fabric should run. The grainline will run parallel between the selvages, or finished edges of your fabric. There are usually printer markings, contrasting trims, solid colors, etc found on the selvage. Typically, your grainline will have the less amount of stretch in knit fabric. A few weeks ago, Roberta shared some details and information about grainlines, why they’re important, and much more. You can check that out here.
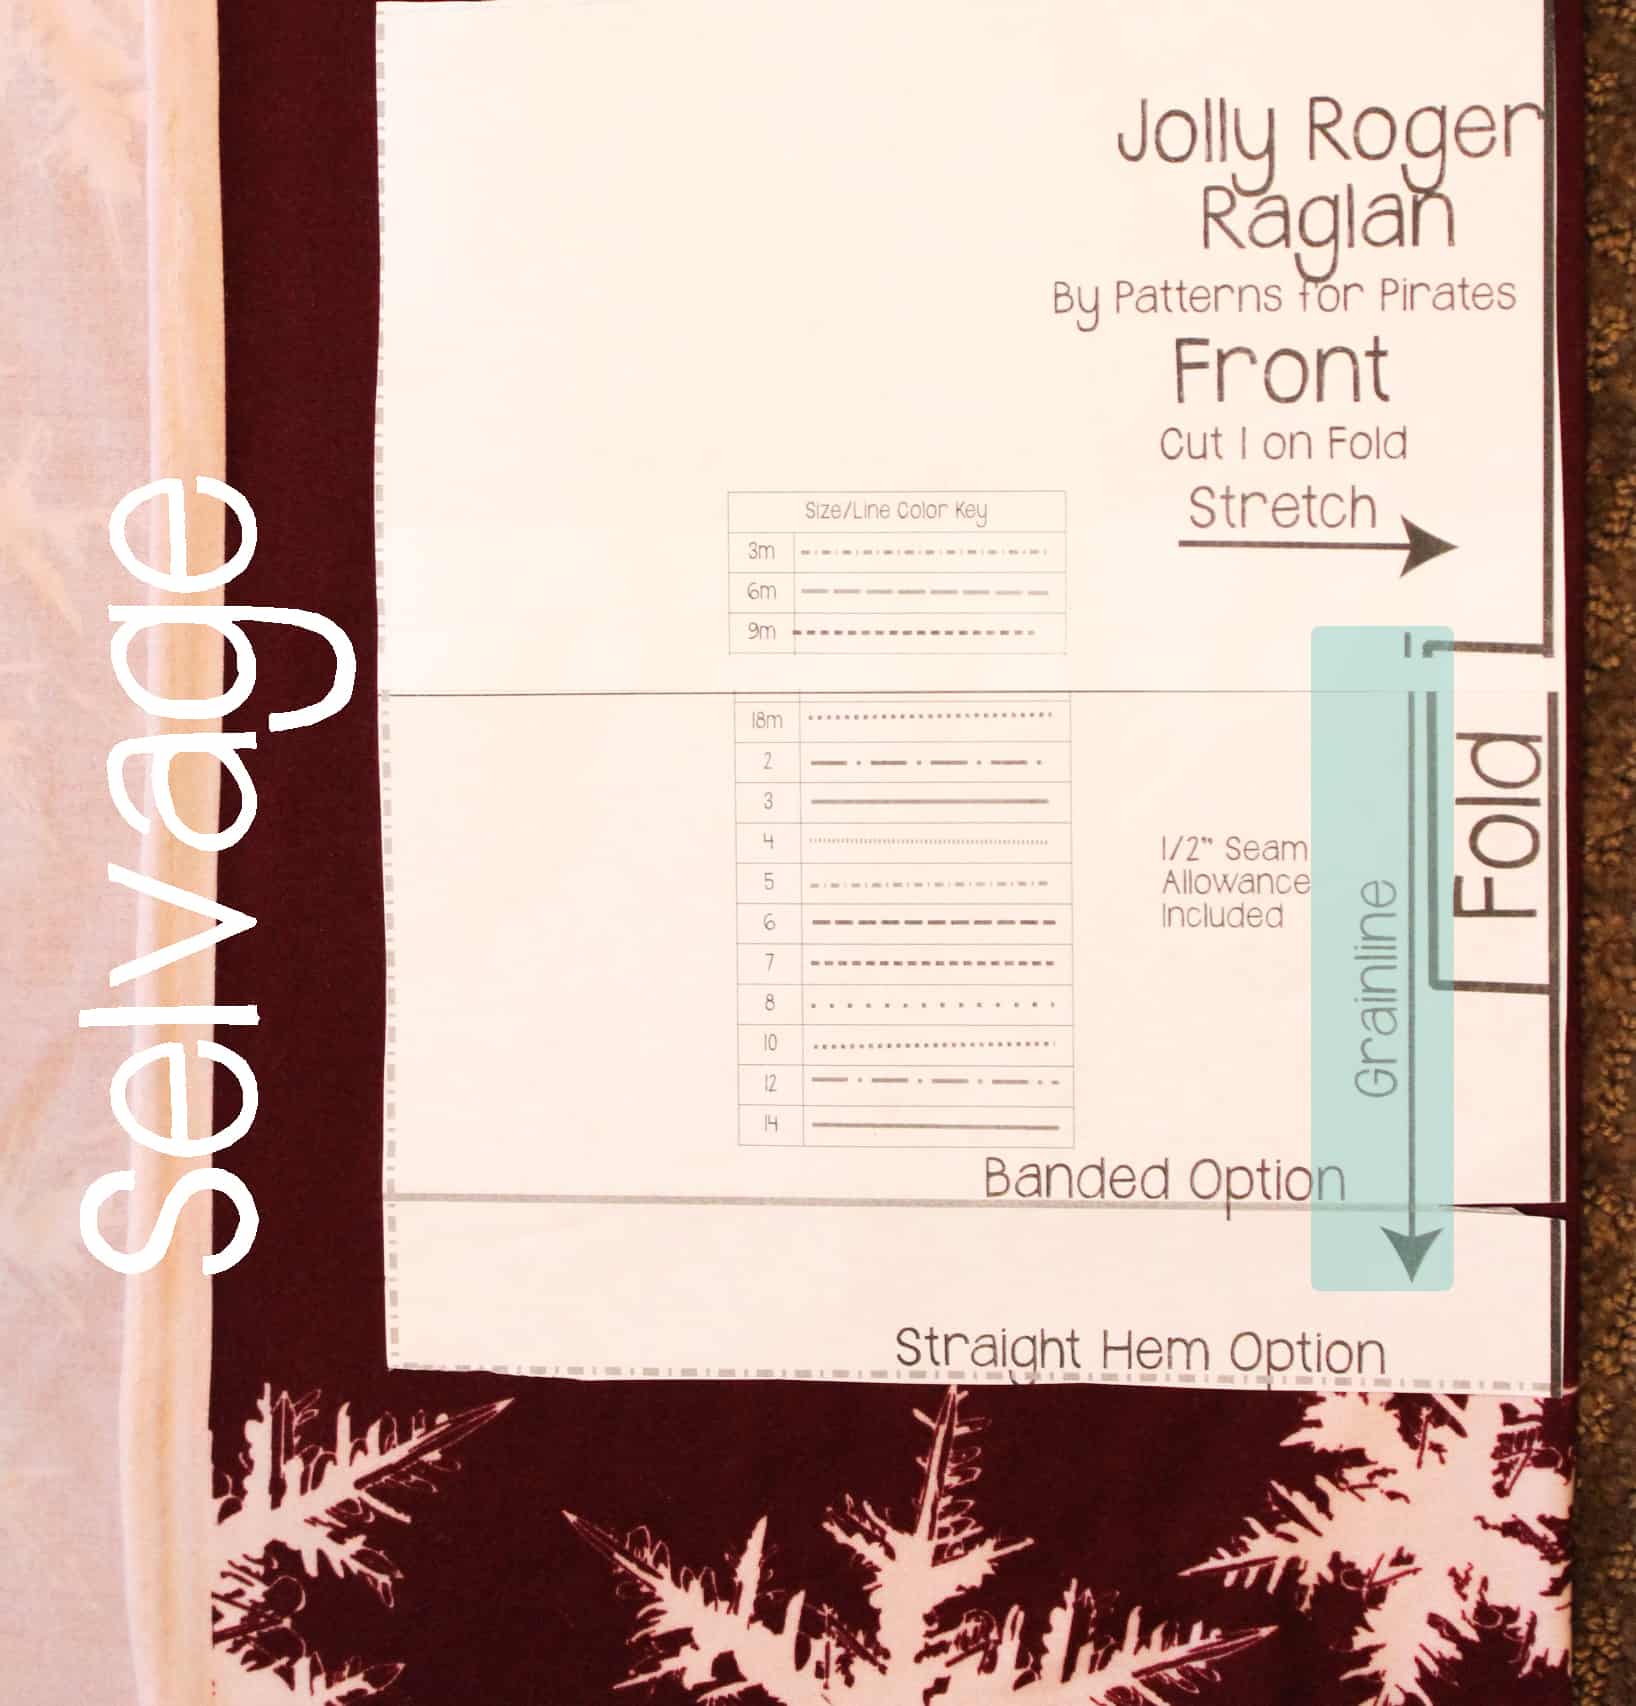
Stretch
The stretch of your fabric will run perpendicular to the grainline/selvage and will be the direction with the most stretch. As you can see in the picture below, the stretch is running the opposite way as the grainline. It is extremely important to have the right direction of stretch when it comes to the fit of your garment. The stretch will go around your body for most pattern pieces and is accounted for when the ease of a pattern is drafted (read more about ease here). For example, if a pattern is drafted with negative ease (finished measurements are smaller than your body) and you have the stretch going in the wrong direction, chances are, it won’t fit.
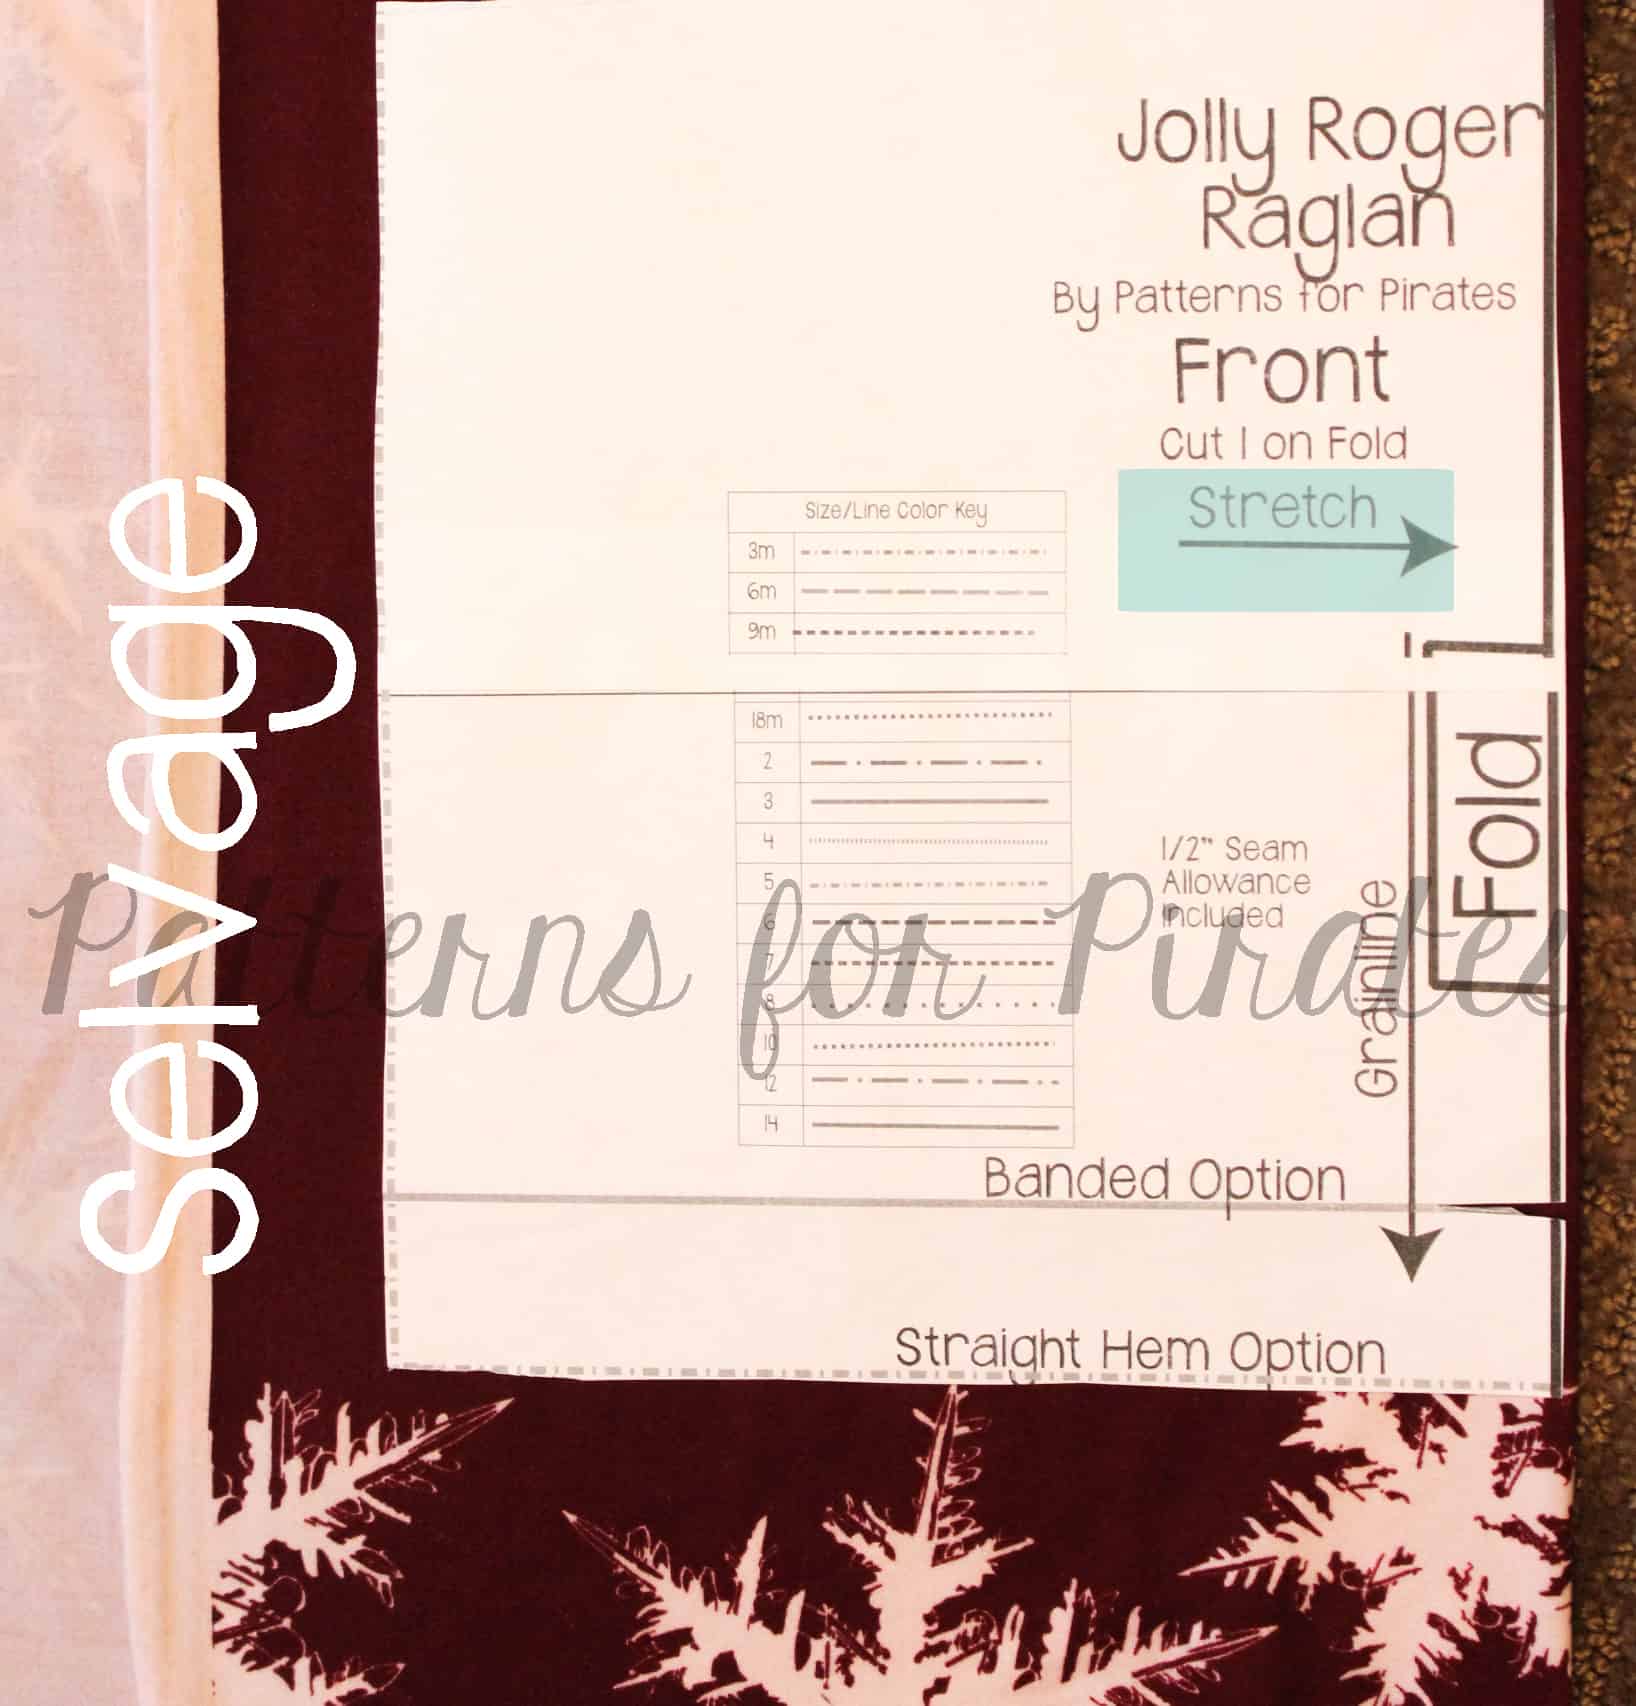
Fold
If a pattern piece is symmetrical on both sides, you will notice the center with a “FOLD” marking. This is commonly found on pieces such as the bodice, back, or sleeve in which both the left and right sides have the same appearance. You will want to fold your fabric wide enough for your pattern piece and align this marking to the fold of the fabric. To help conserve fabric, I like to fold it just wide enough for the pattern piece (shown above). A common error can be to fold the fabric exactly down the middle, leaving wasted material.
Notches
You might have noticed small triangles on some pattern pieces. These notches serve several different purposes. One of the purposes is to help distinguish the back from the front. For example, something like a raglan style top can easily get mixed up when assembling. These notches will help keep the front with the front and back with the back. The second purpose is to help with alignment. By matching these notches up, your pieces will be in the correct position.
TIP: I always cut my notches out rather than in as to avoid accidentally cutting too far into the seam allowance.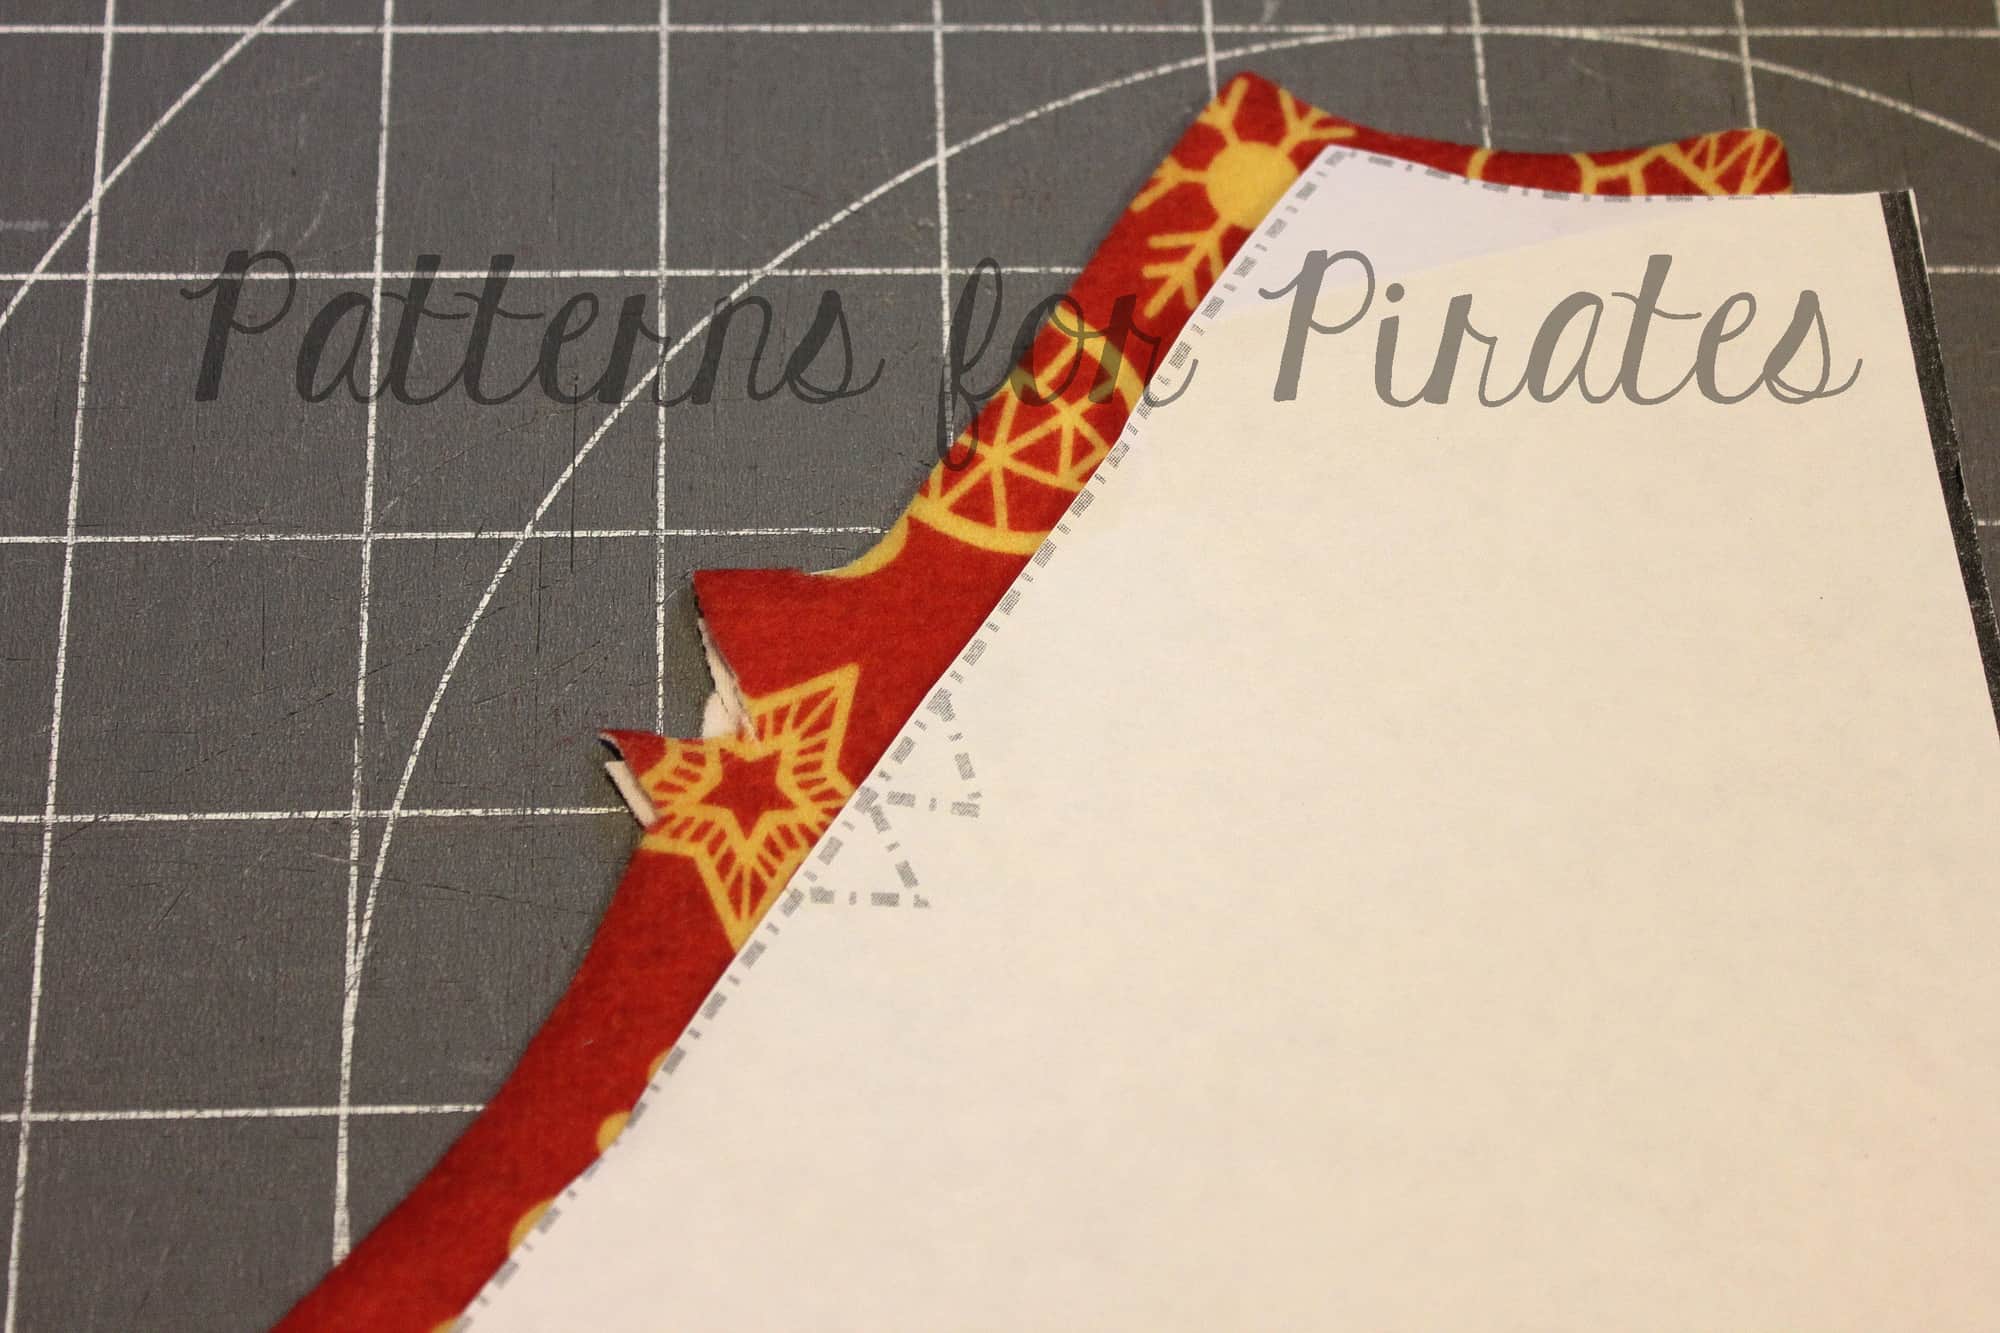
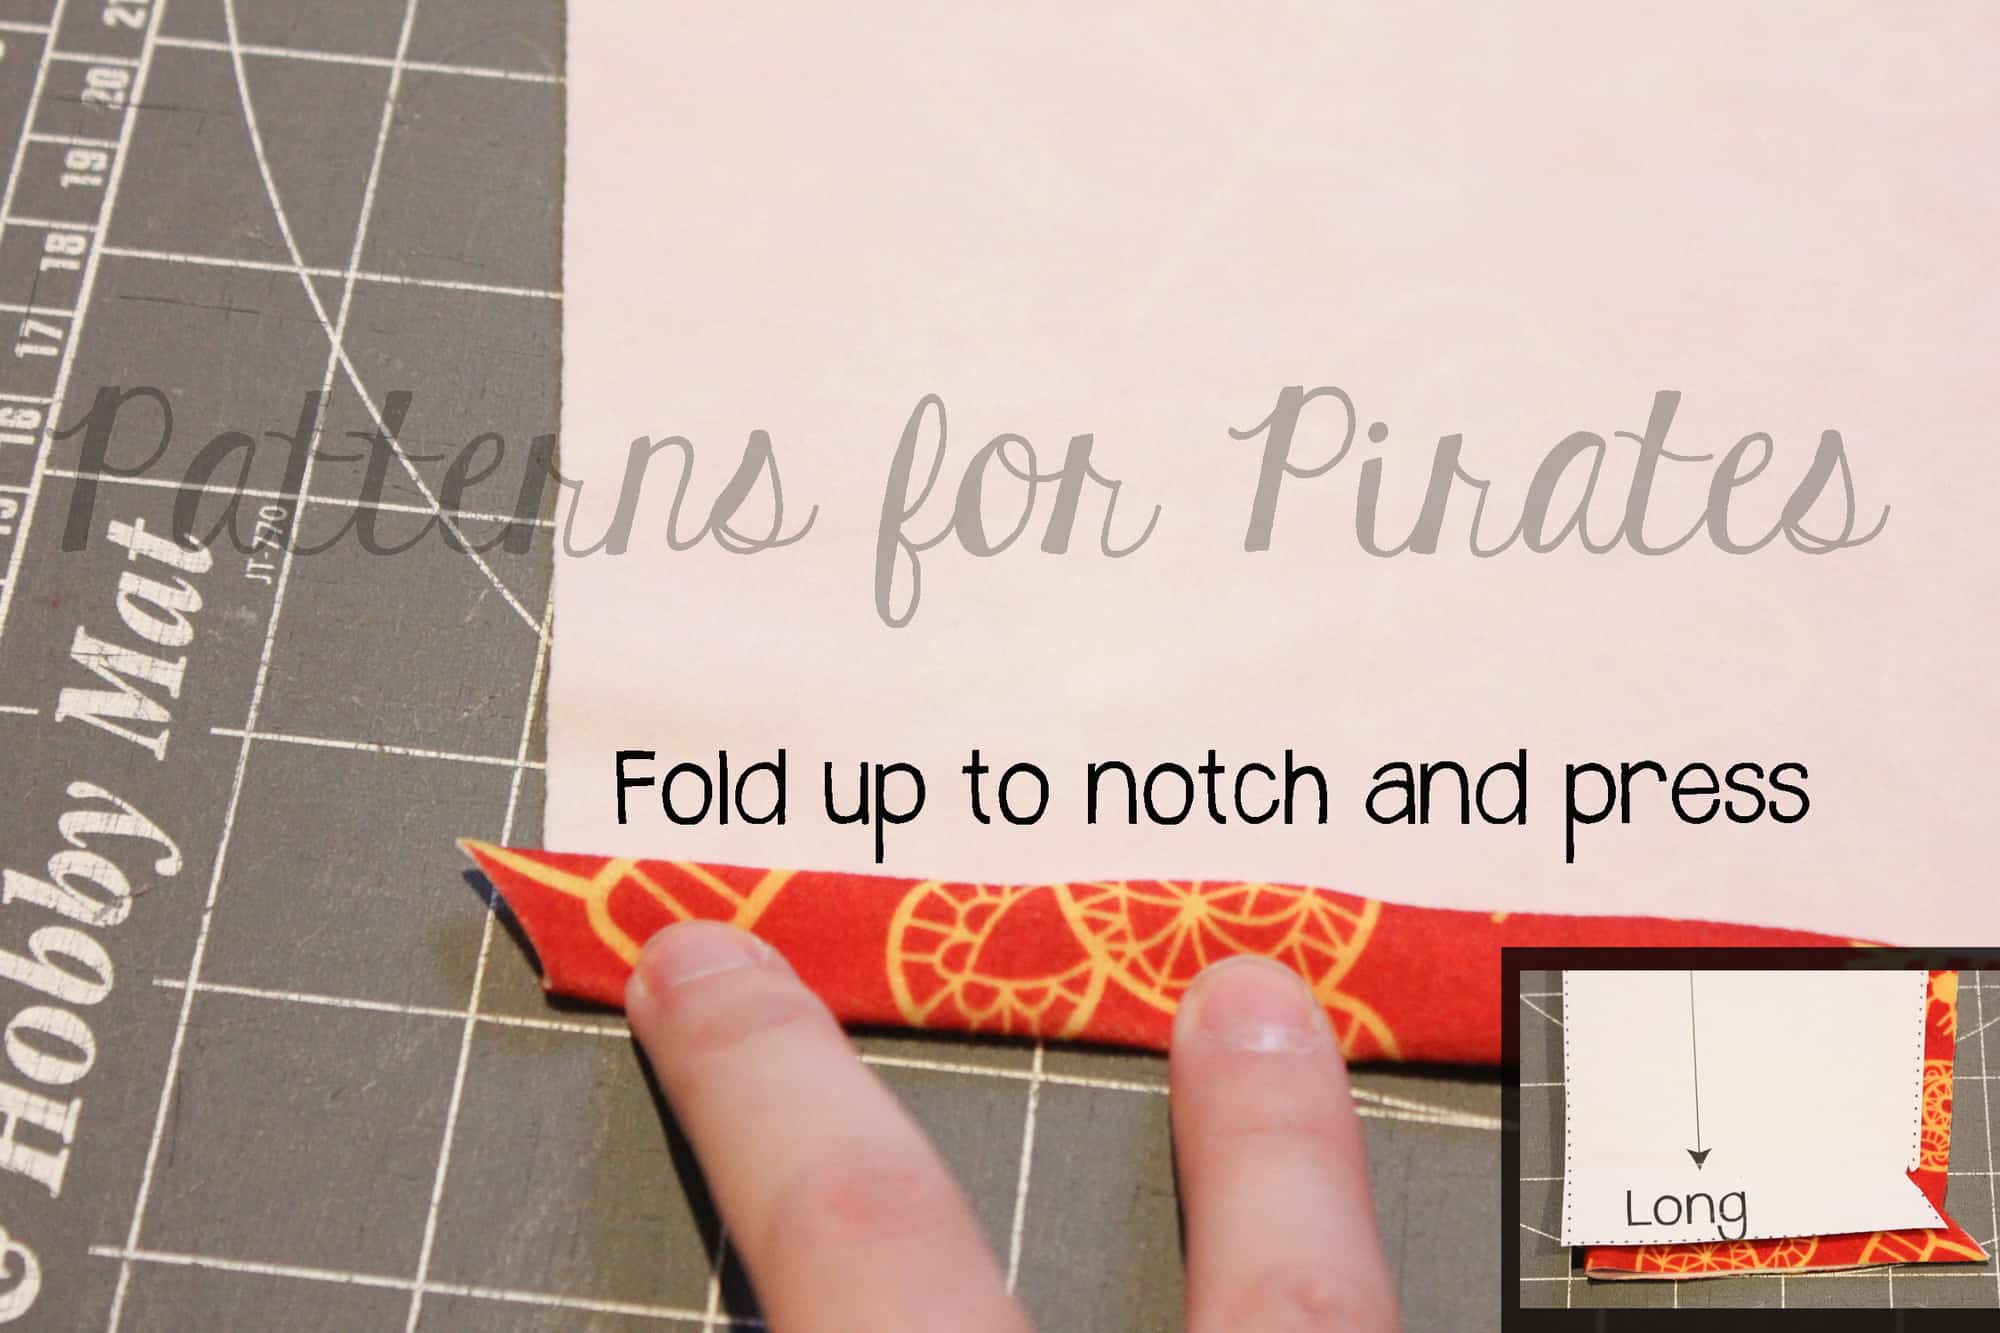
Hem Gauge
You will typically find a hem gauge on both the sleeves and bottom edges. This is usually a triangular shape that notches out. It will mark the correct allowance for your hem. This is particularly useful when creating a memory hem. All you will need to do is fold your fabric up to this notch, press and unfold. Once you’ve sewn the seams, you will still have your pressed fold in place with the correct seam allowance.
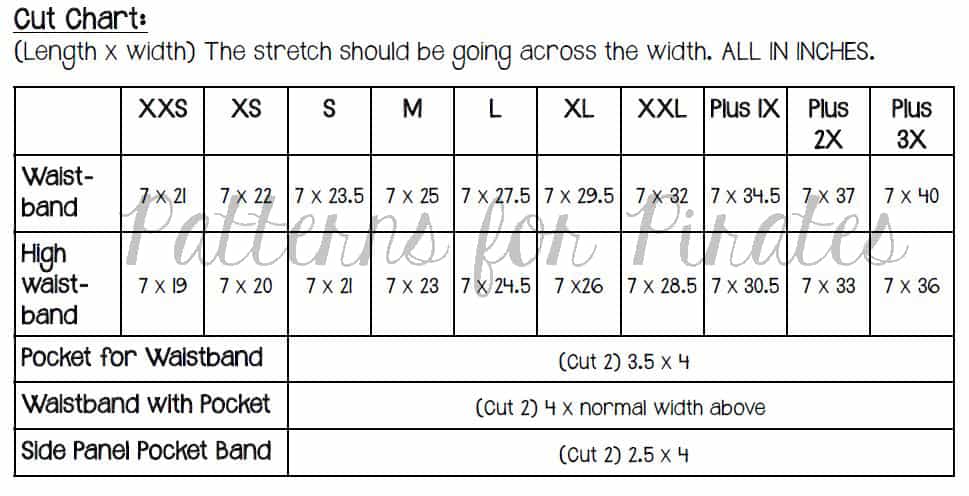
Cut Chart
Most Patterns for Pirates patterns will include a cut chart. The cut chart is typically found within the first few pages of the tutorial and will give measurements for any rectangular pieces. For example, items like neckbands, cuffs, waistbands and elastic would all be found here. Some designers will included these as actual pattern pieces, however by providing a cut chart, you are able to save on both paper and ink. When cutting these pieces, I find it easiest to do so using a quilters ruler and rotary cutter.
Hopefully these tips help! Remember that we are always here to help, especially in our Facebook group. If you’re not a already a member, be sure to join so that you can ask questions and share all of your amazing Patterns for Pirates creations!
~ Erinn