Patterns for Pirates

P4P stylish, modern, wearable patterns

  • Home
  • Blog
    • Frequently Asked Questions
    • Pattern Releases
      • Free Patterns
    • P4P University
      • Fitting
      • Sewing with Stretch, Knit Fabrics
      • Sewing with Woven Fabrics
      • Sewing Machines
    • Sew-A-Longs
    • Fabric for Pirates
    • Pattern Hacks
    • Announcement
      • Blog Tours
      • Contest/Giveaway
  • Shop
  • Bundle Discounts
  • Flash Friday
  • Gift Cards
  • My Account
  • Cart

P4P University – Sewing Curves

March 9, 2021

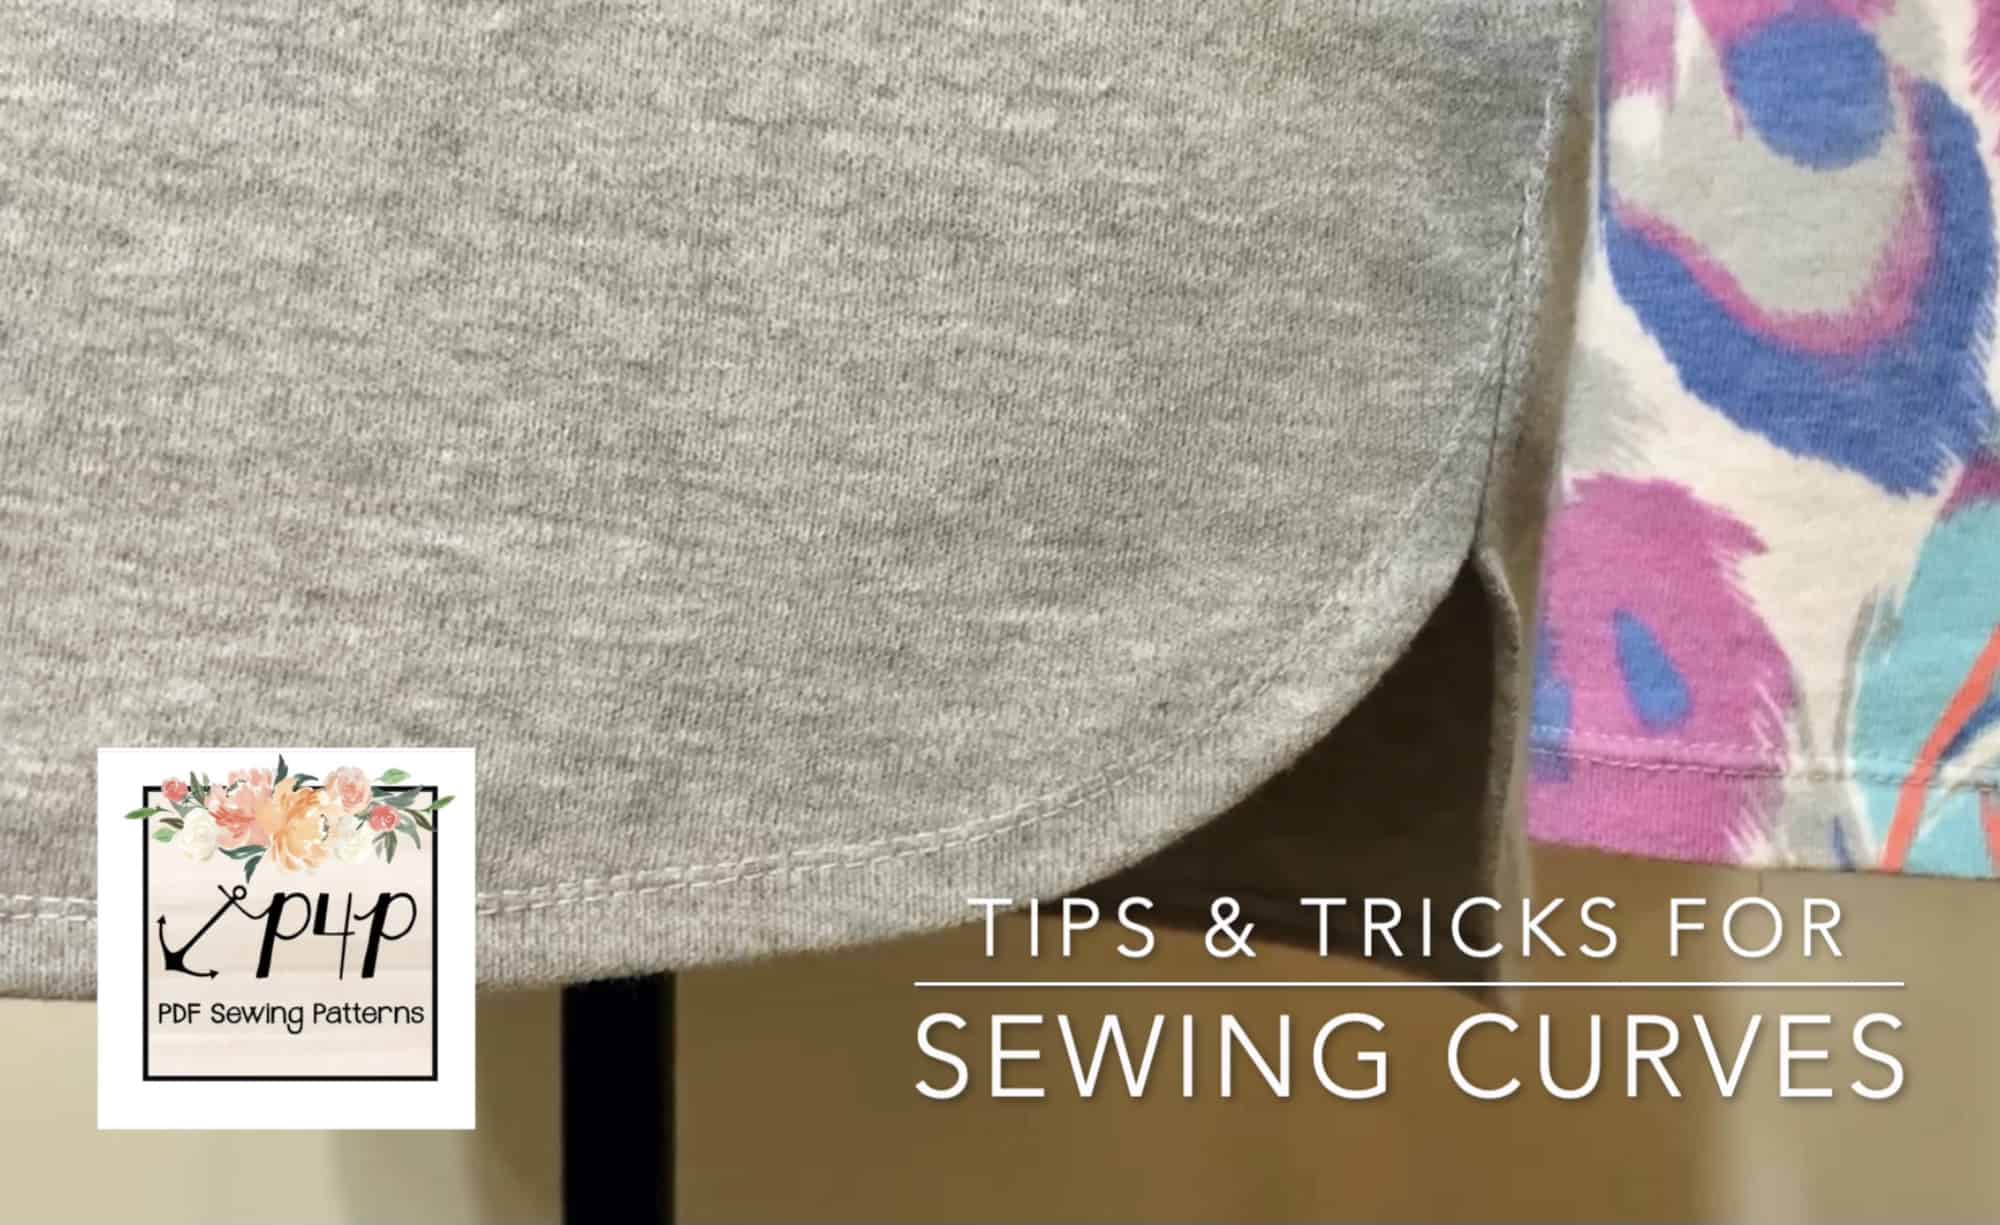
Knowing how to properly sew curves makes a huge difference in giving your garments a more professional finish! There are different techniques, whether you are sewing a convex or concave curve… think neckline versus bust. At the core, the key is all about eliminating bulk and resistance so your curves can lay as designed.

Clip The Seams

The first technique works for curves, like necklines, that require the fabric to spread in an array. It’s simple!

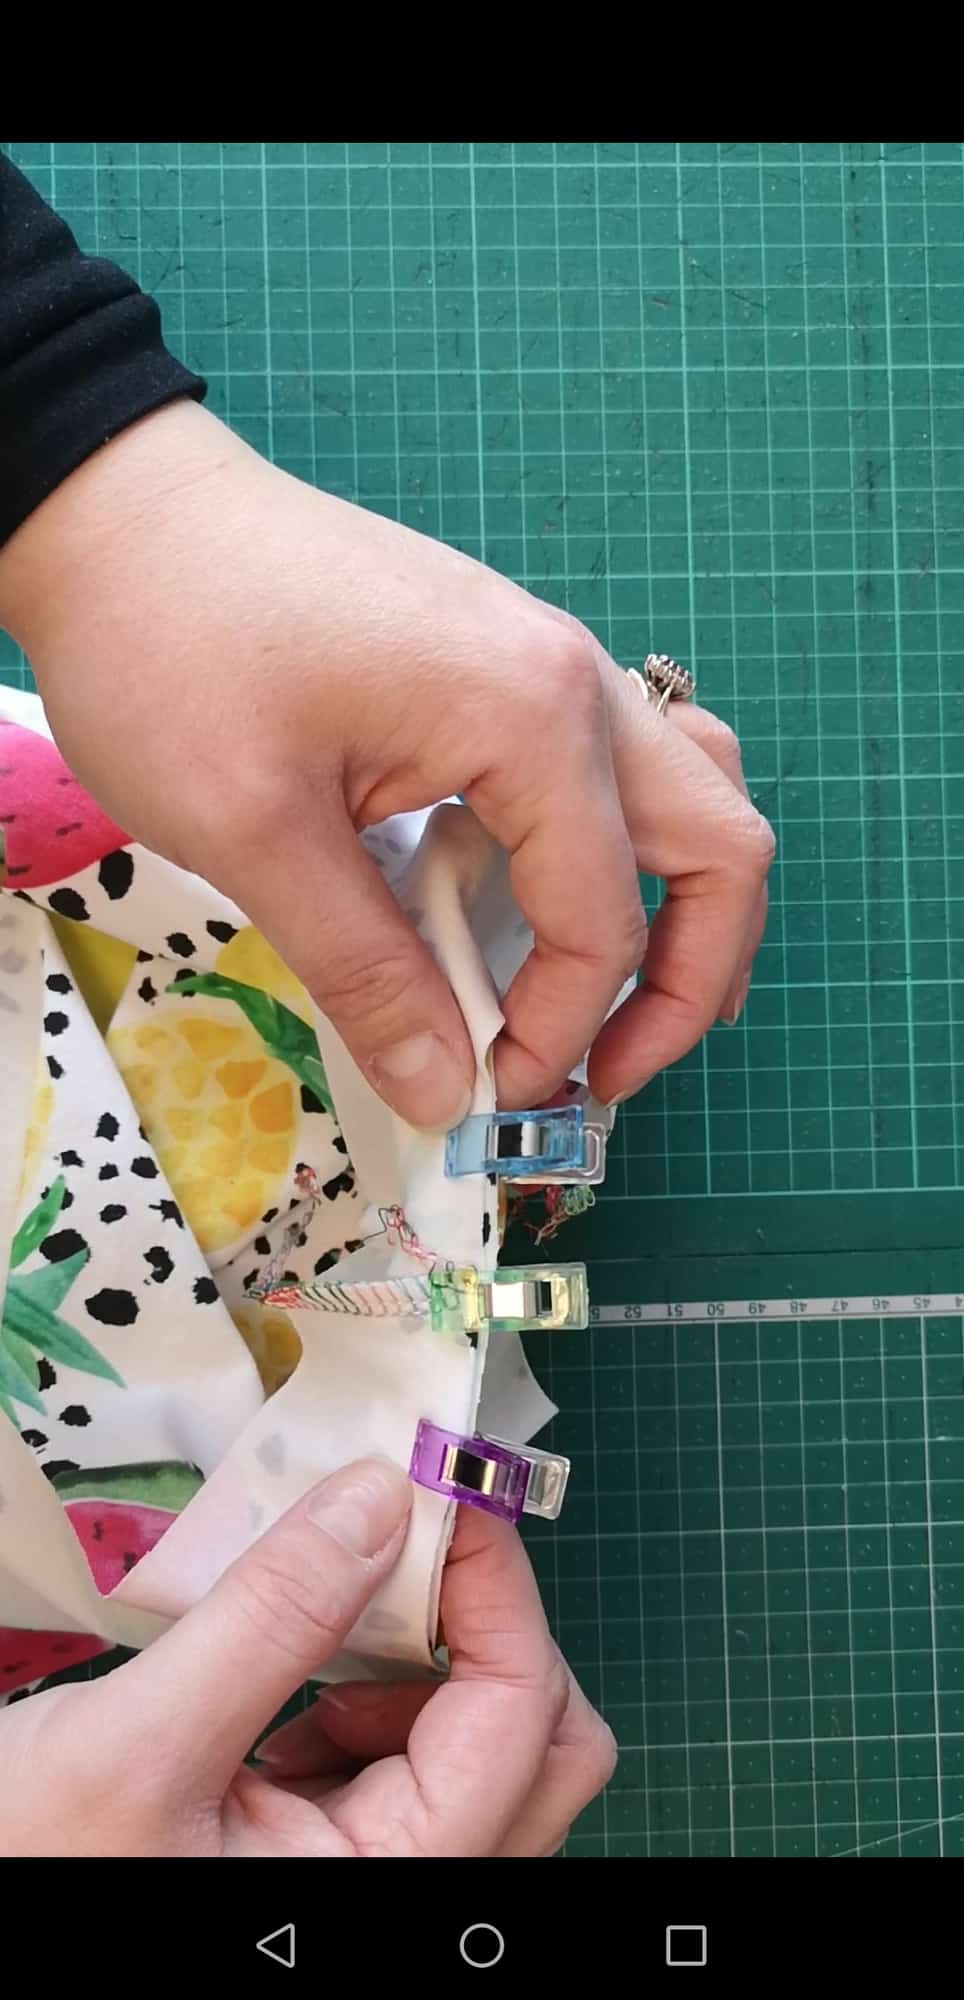
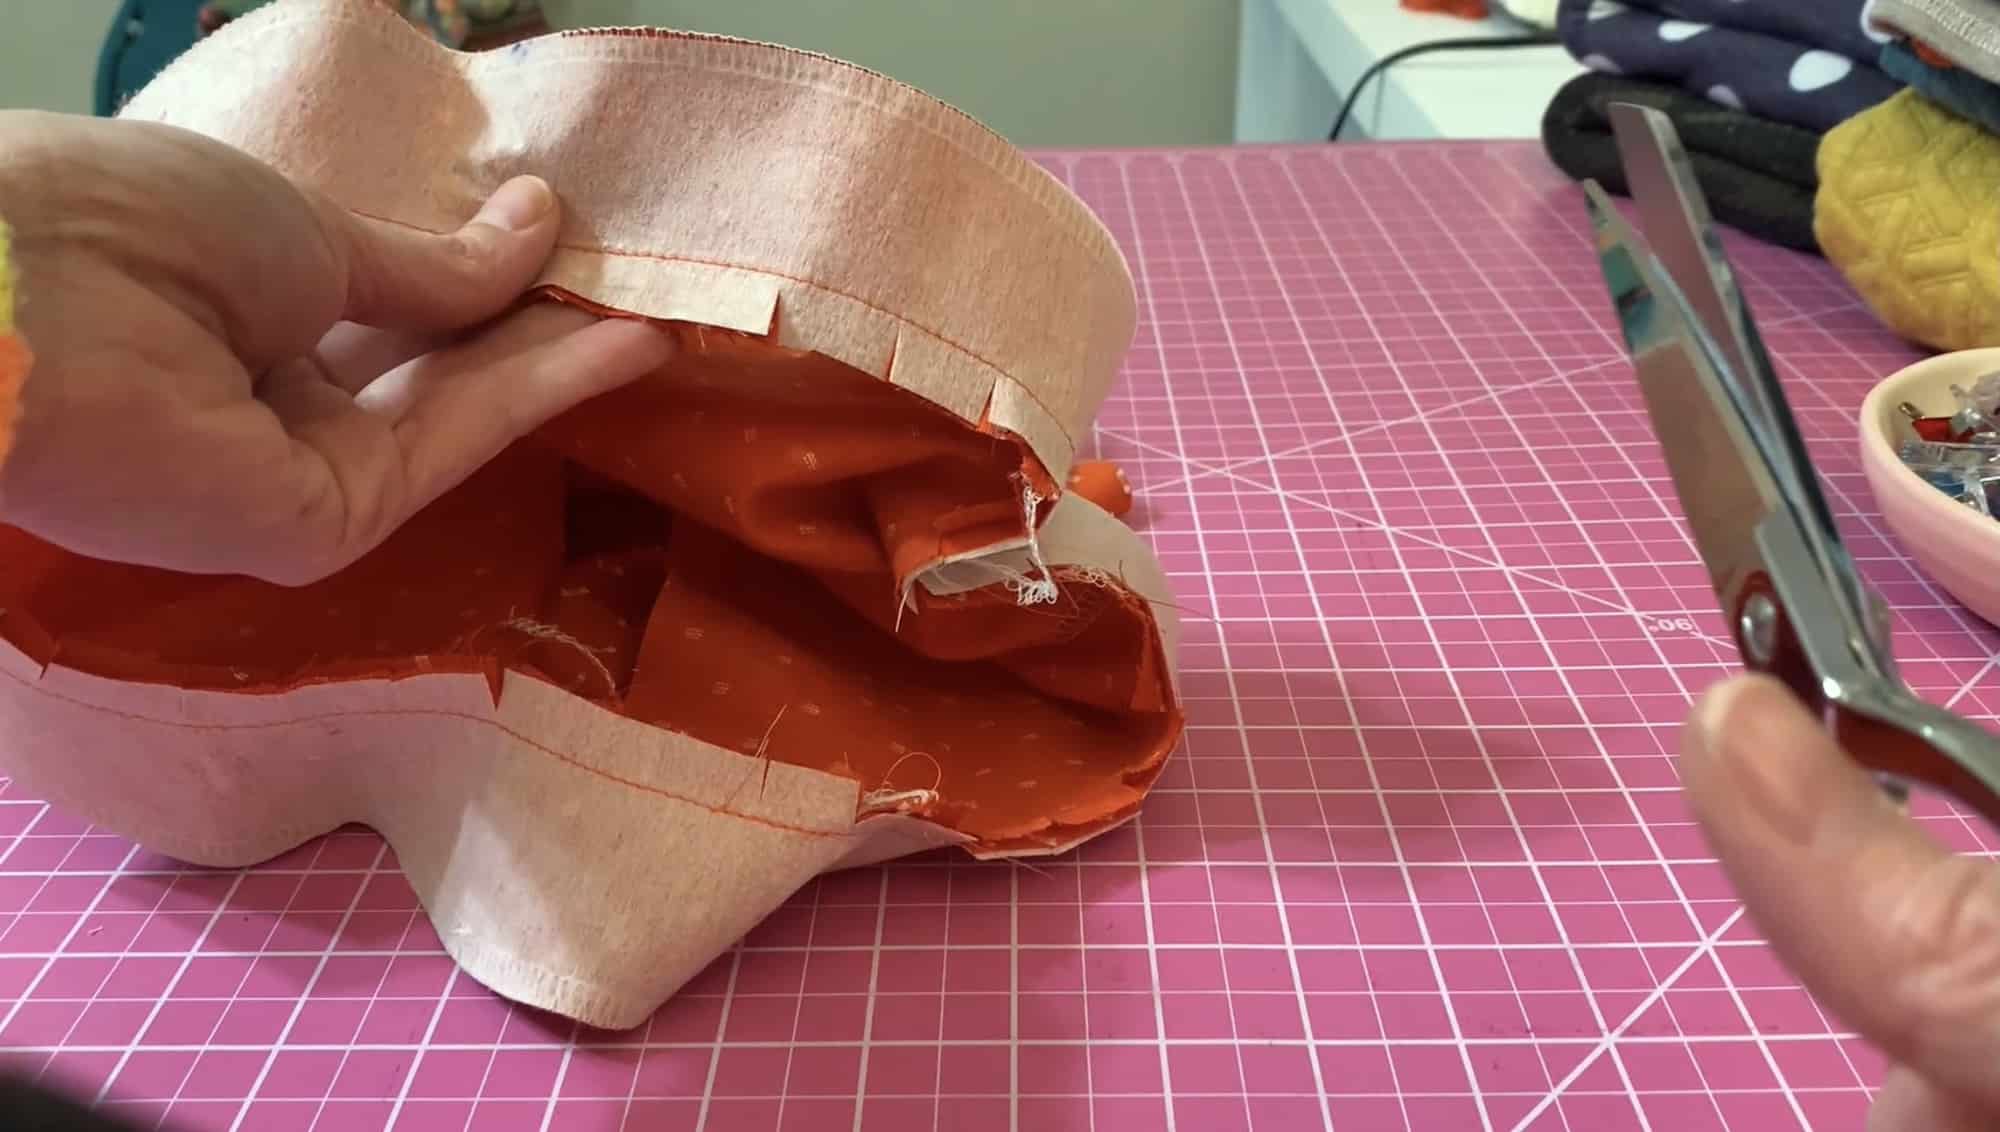
Once you have your pattern pieces stitched together, clip into the seam allowance every half inch or so. Take good care not to snip through your seam!

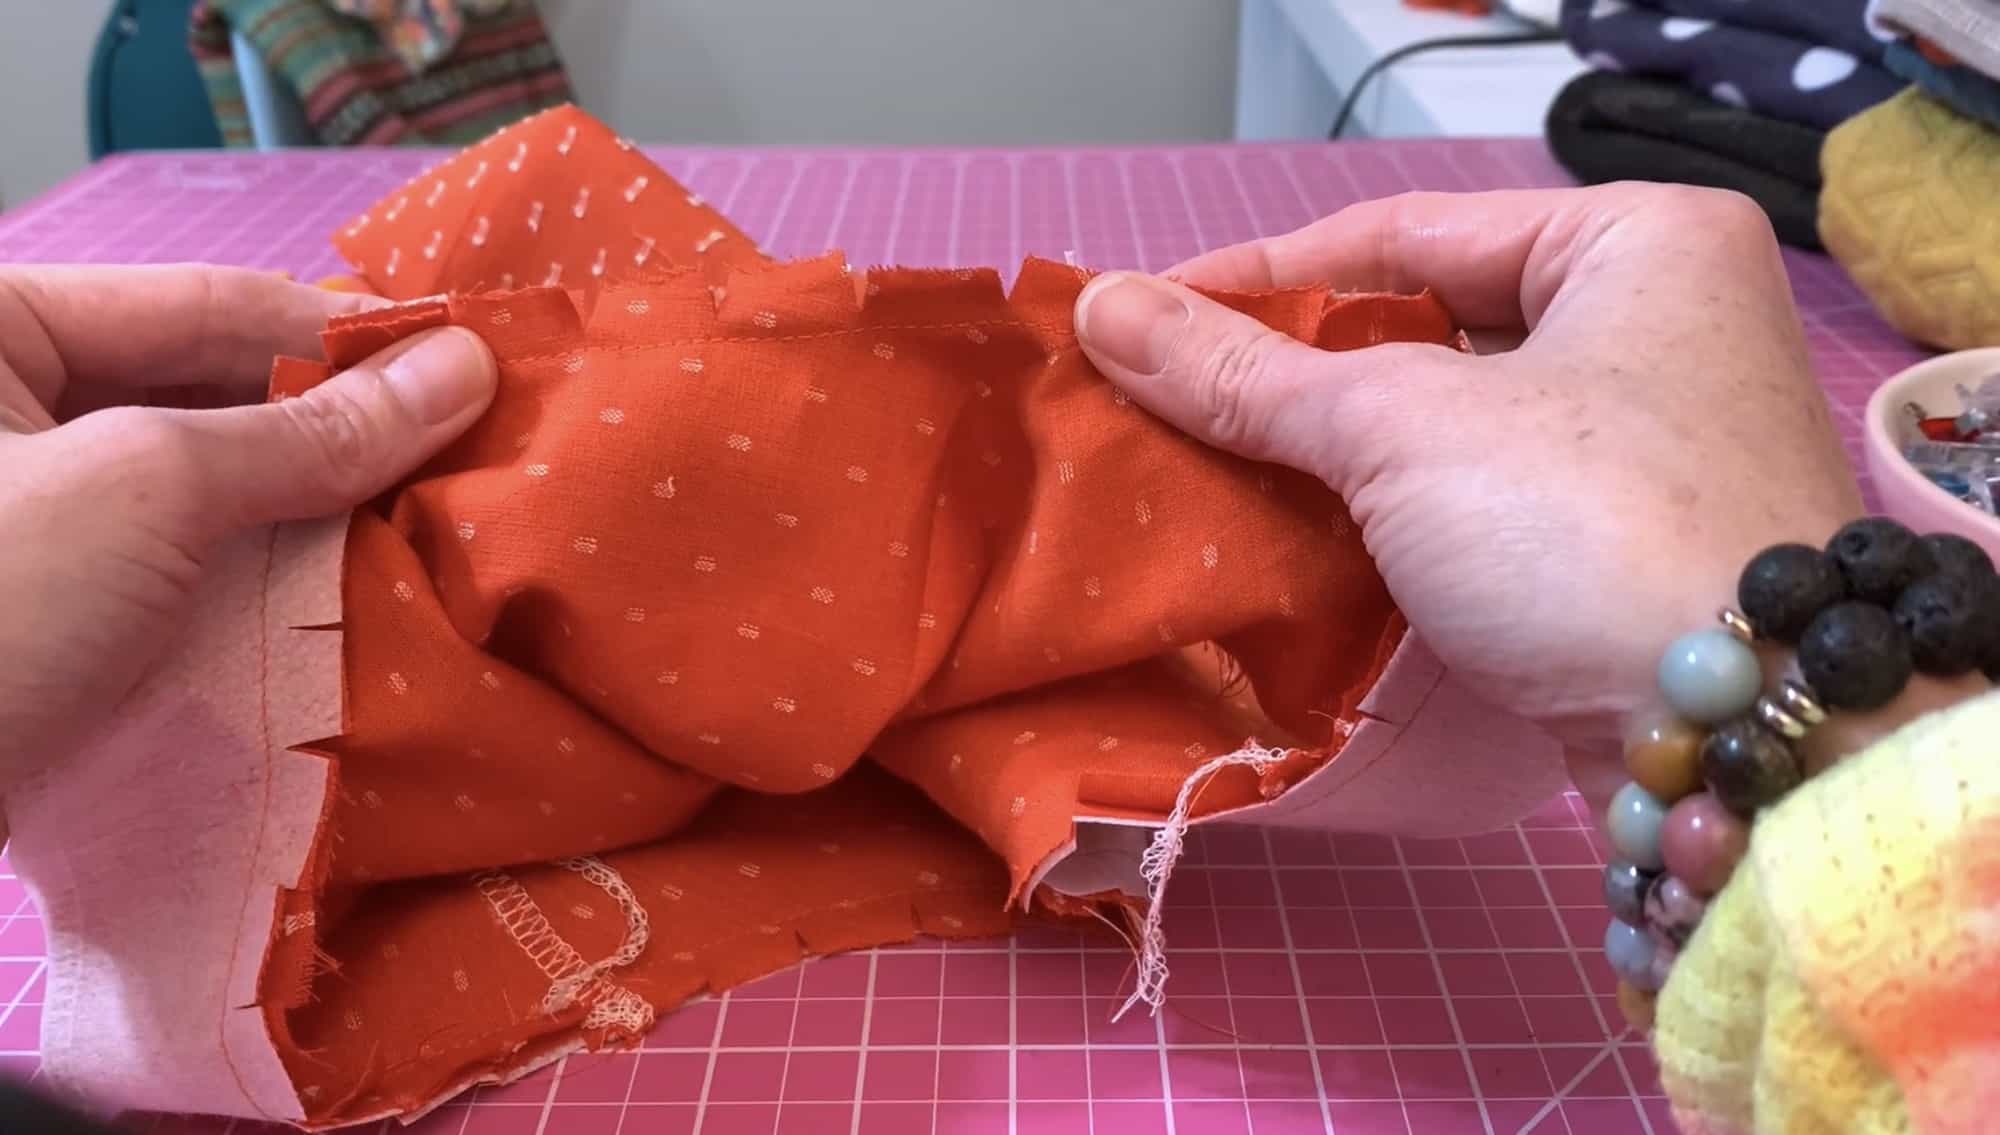
You’ll notice that the fabric relaxes because the tension in the curve is gone!

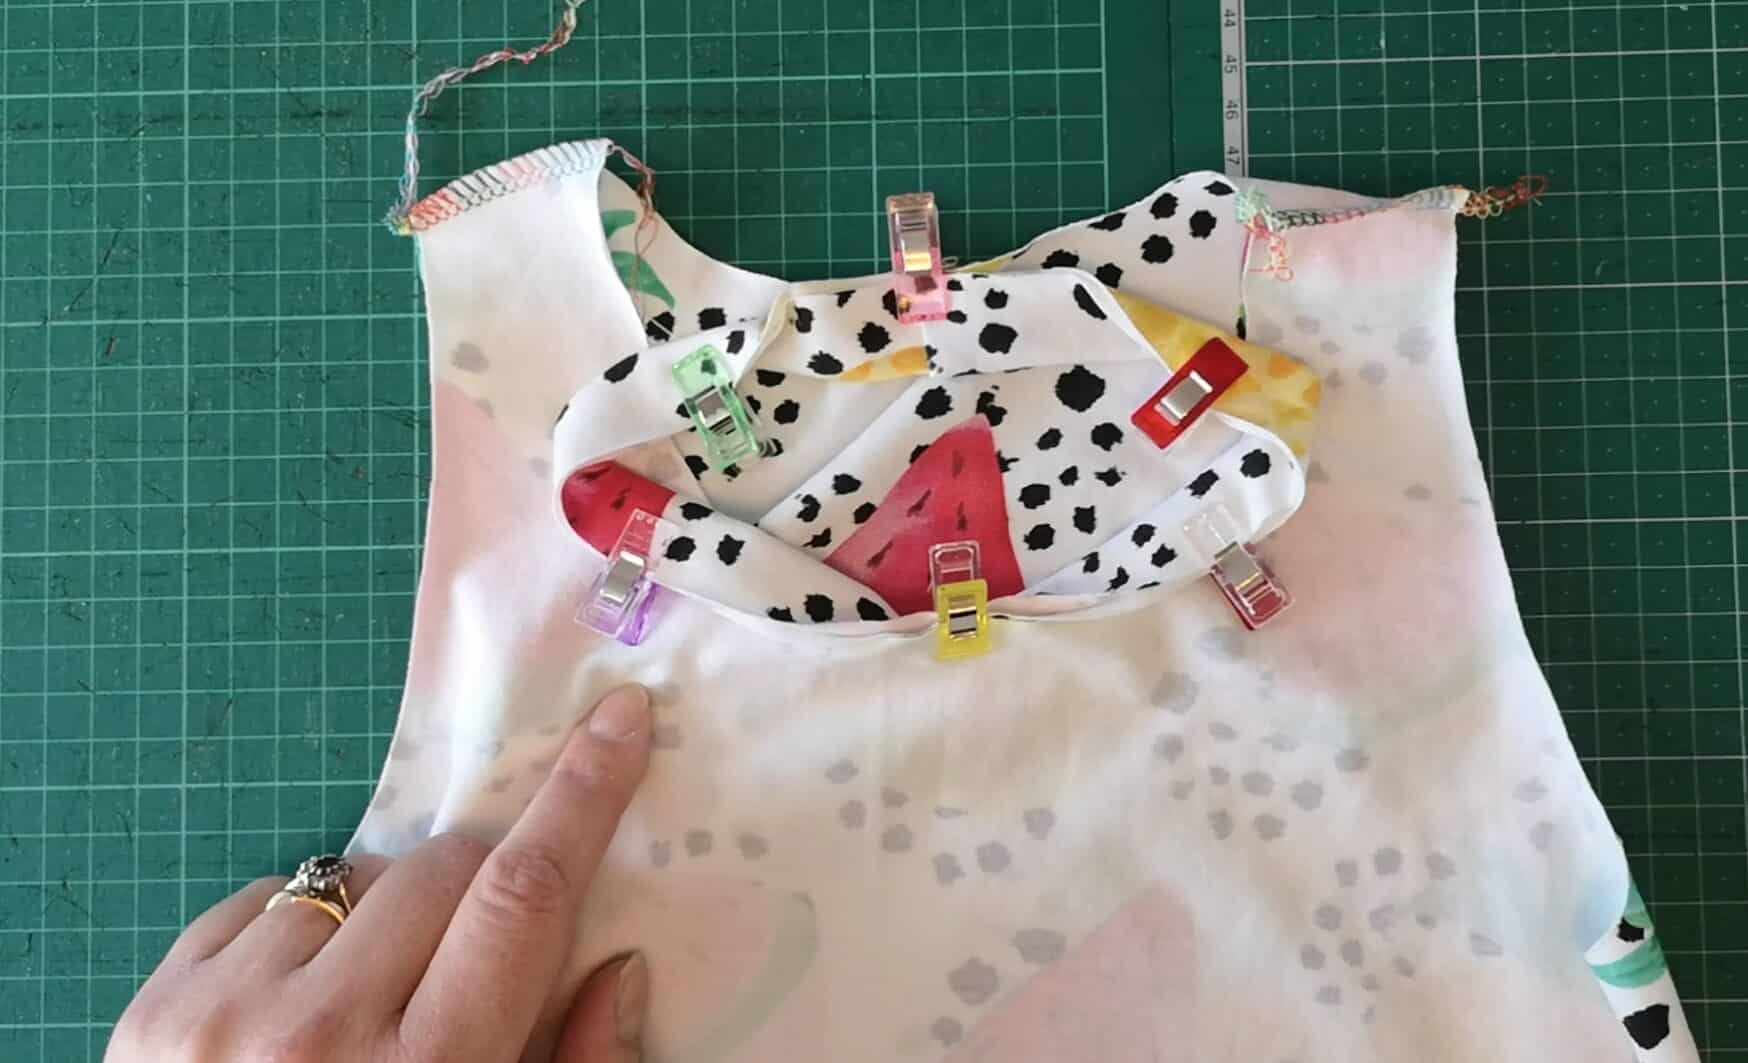
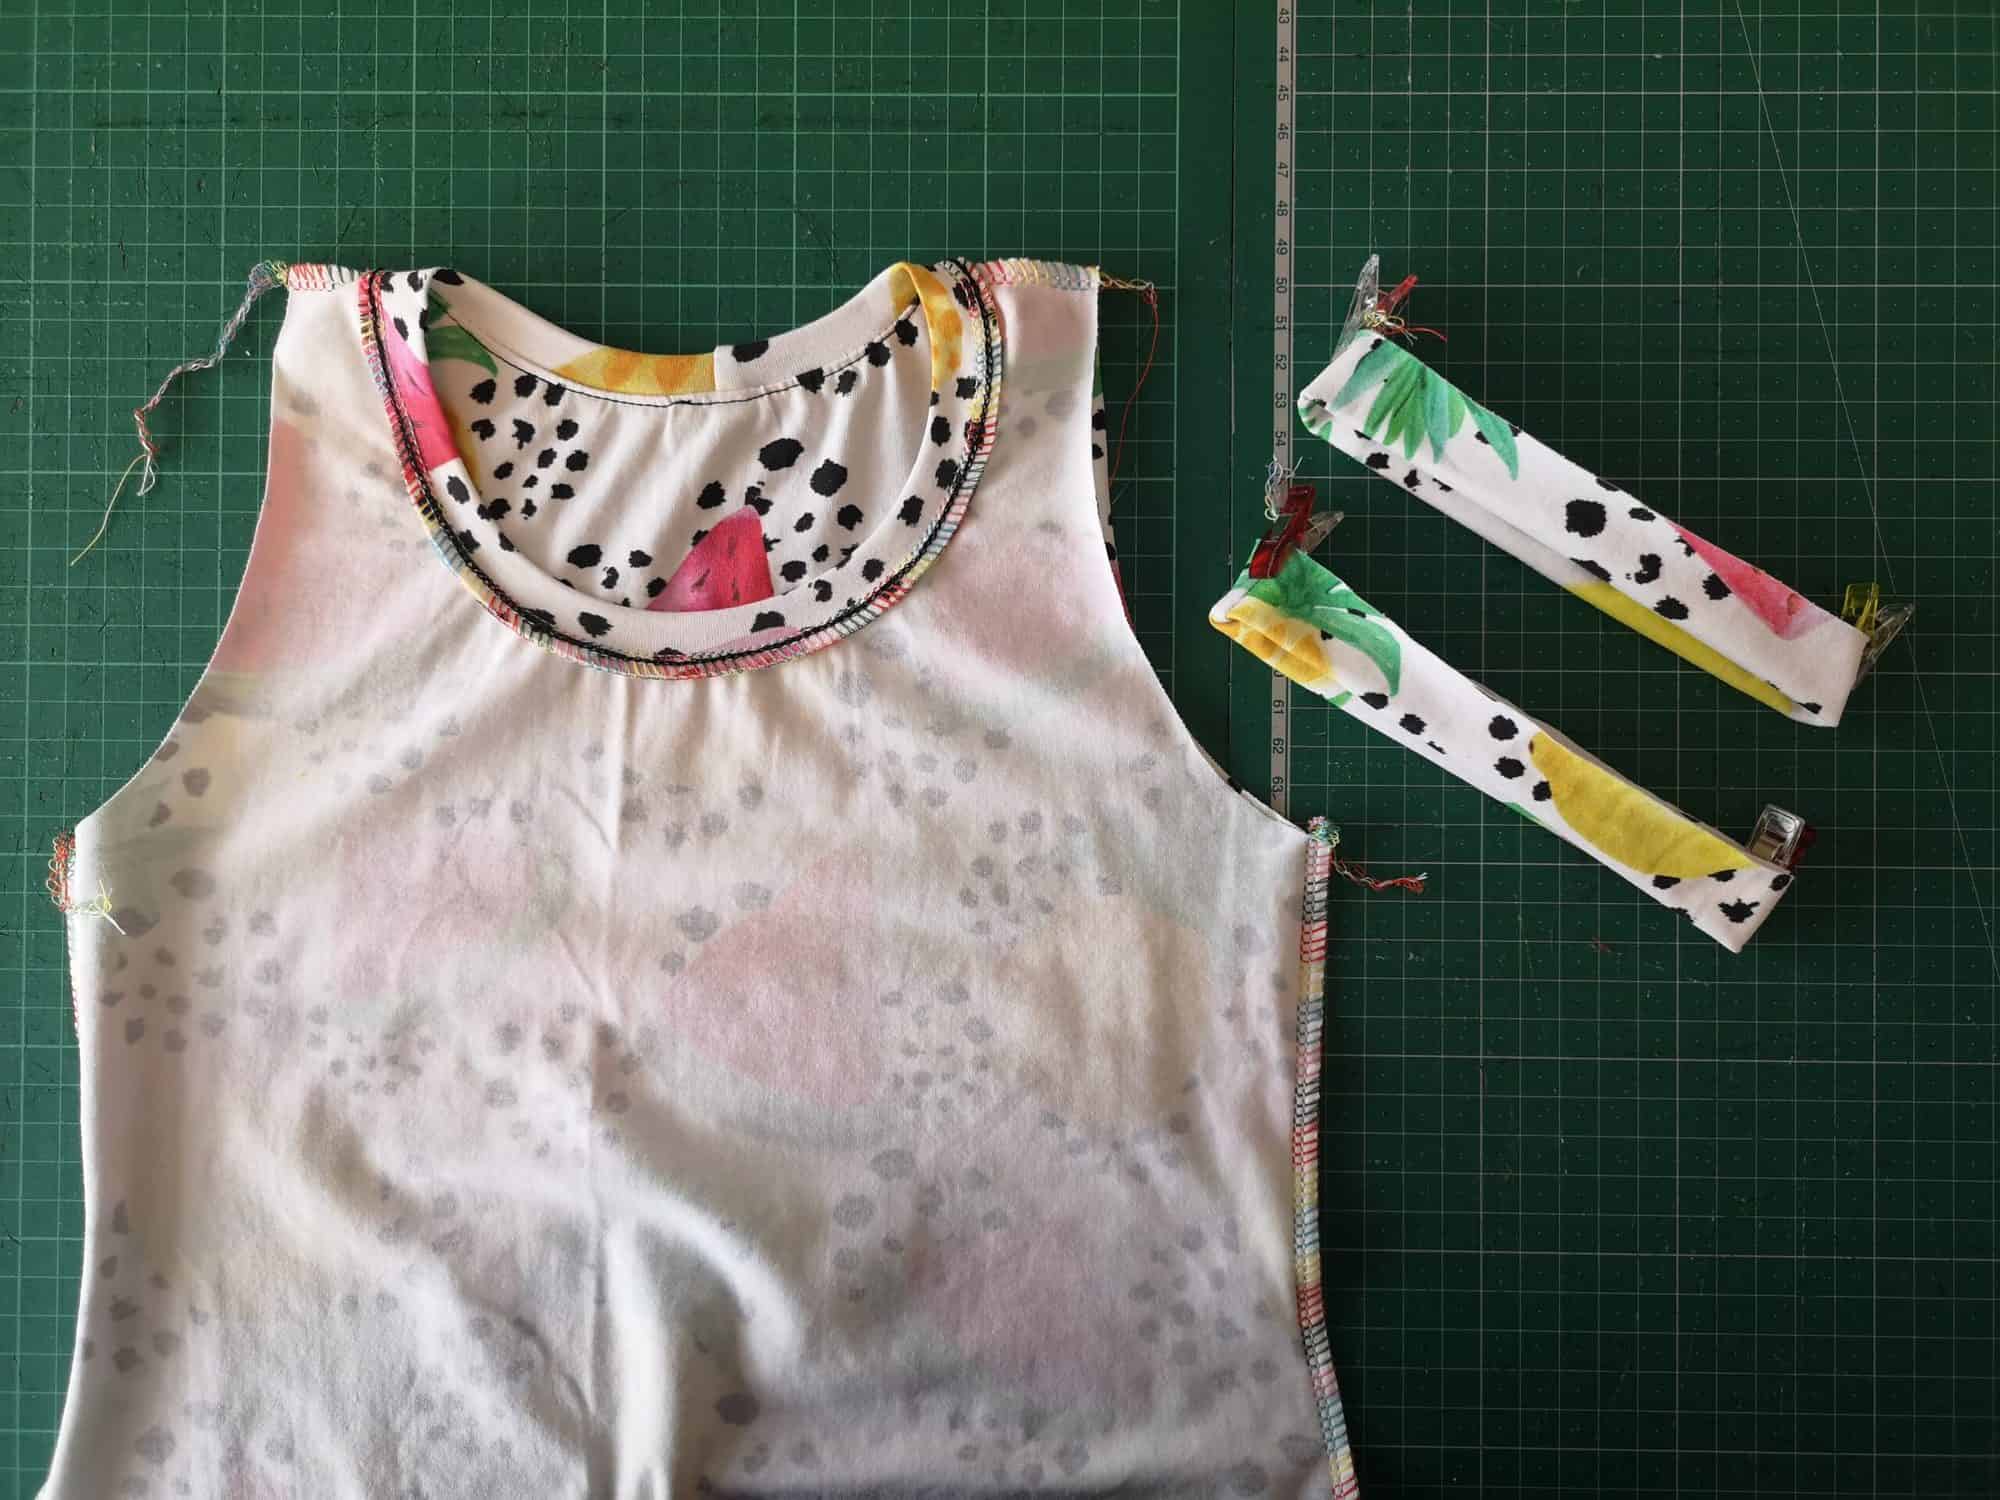
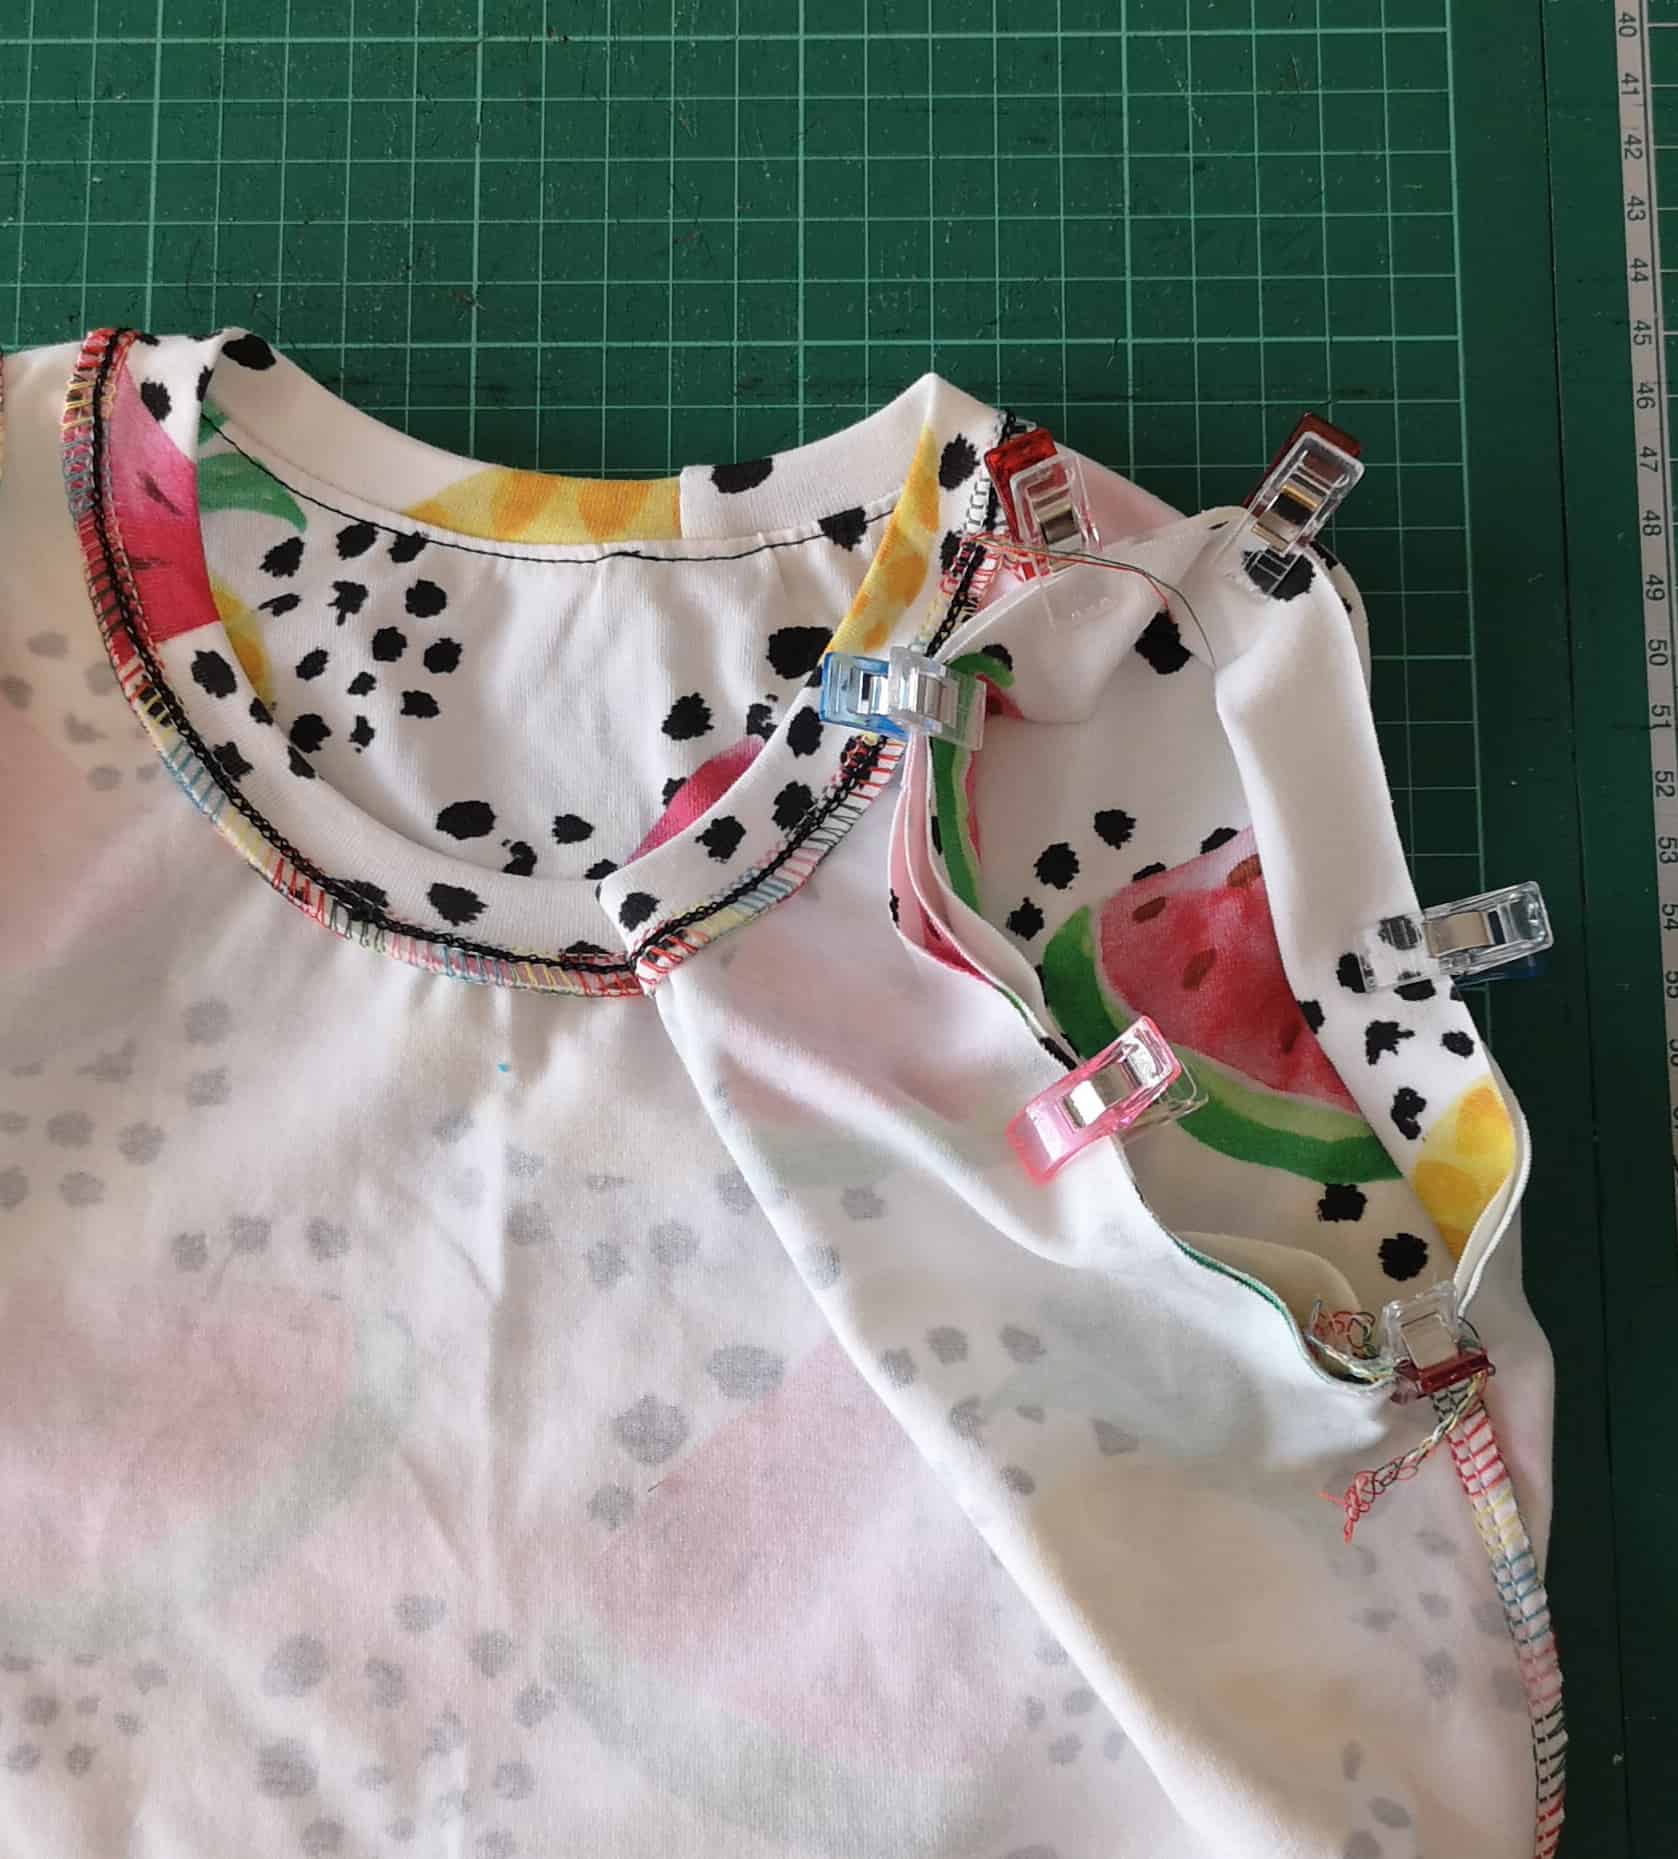
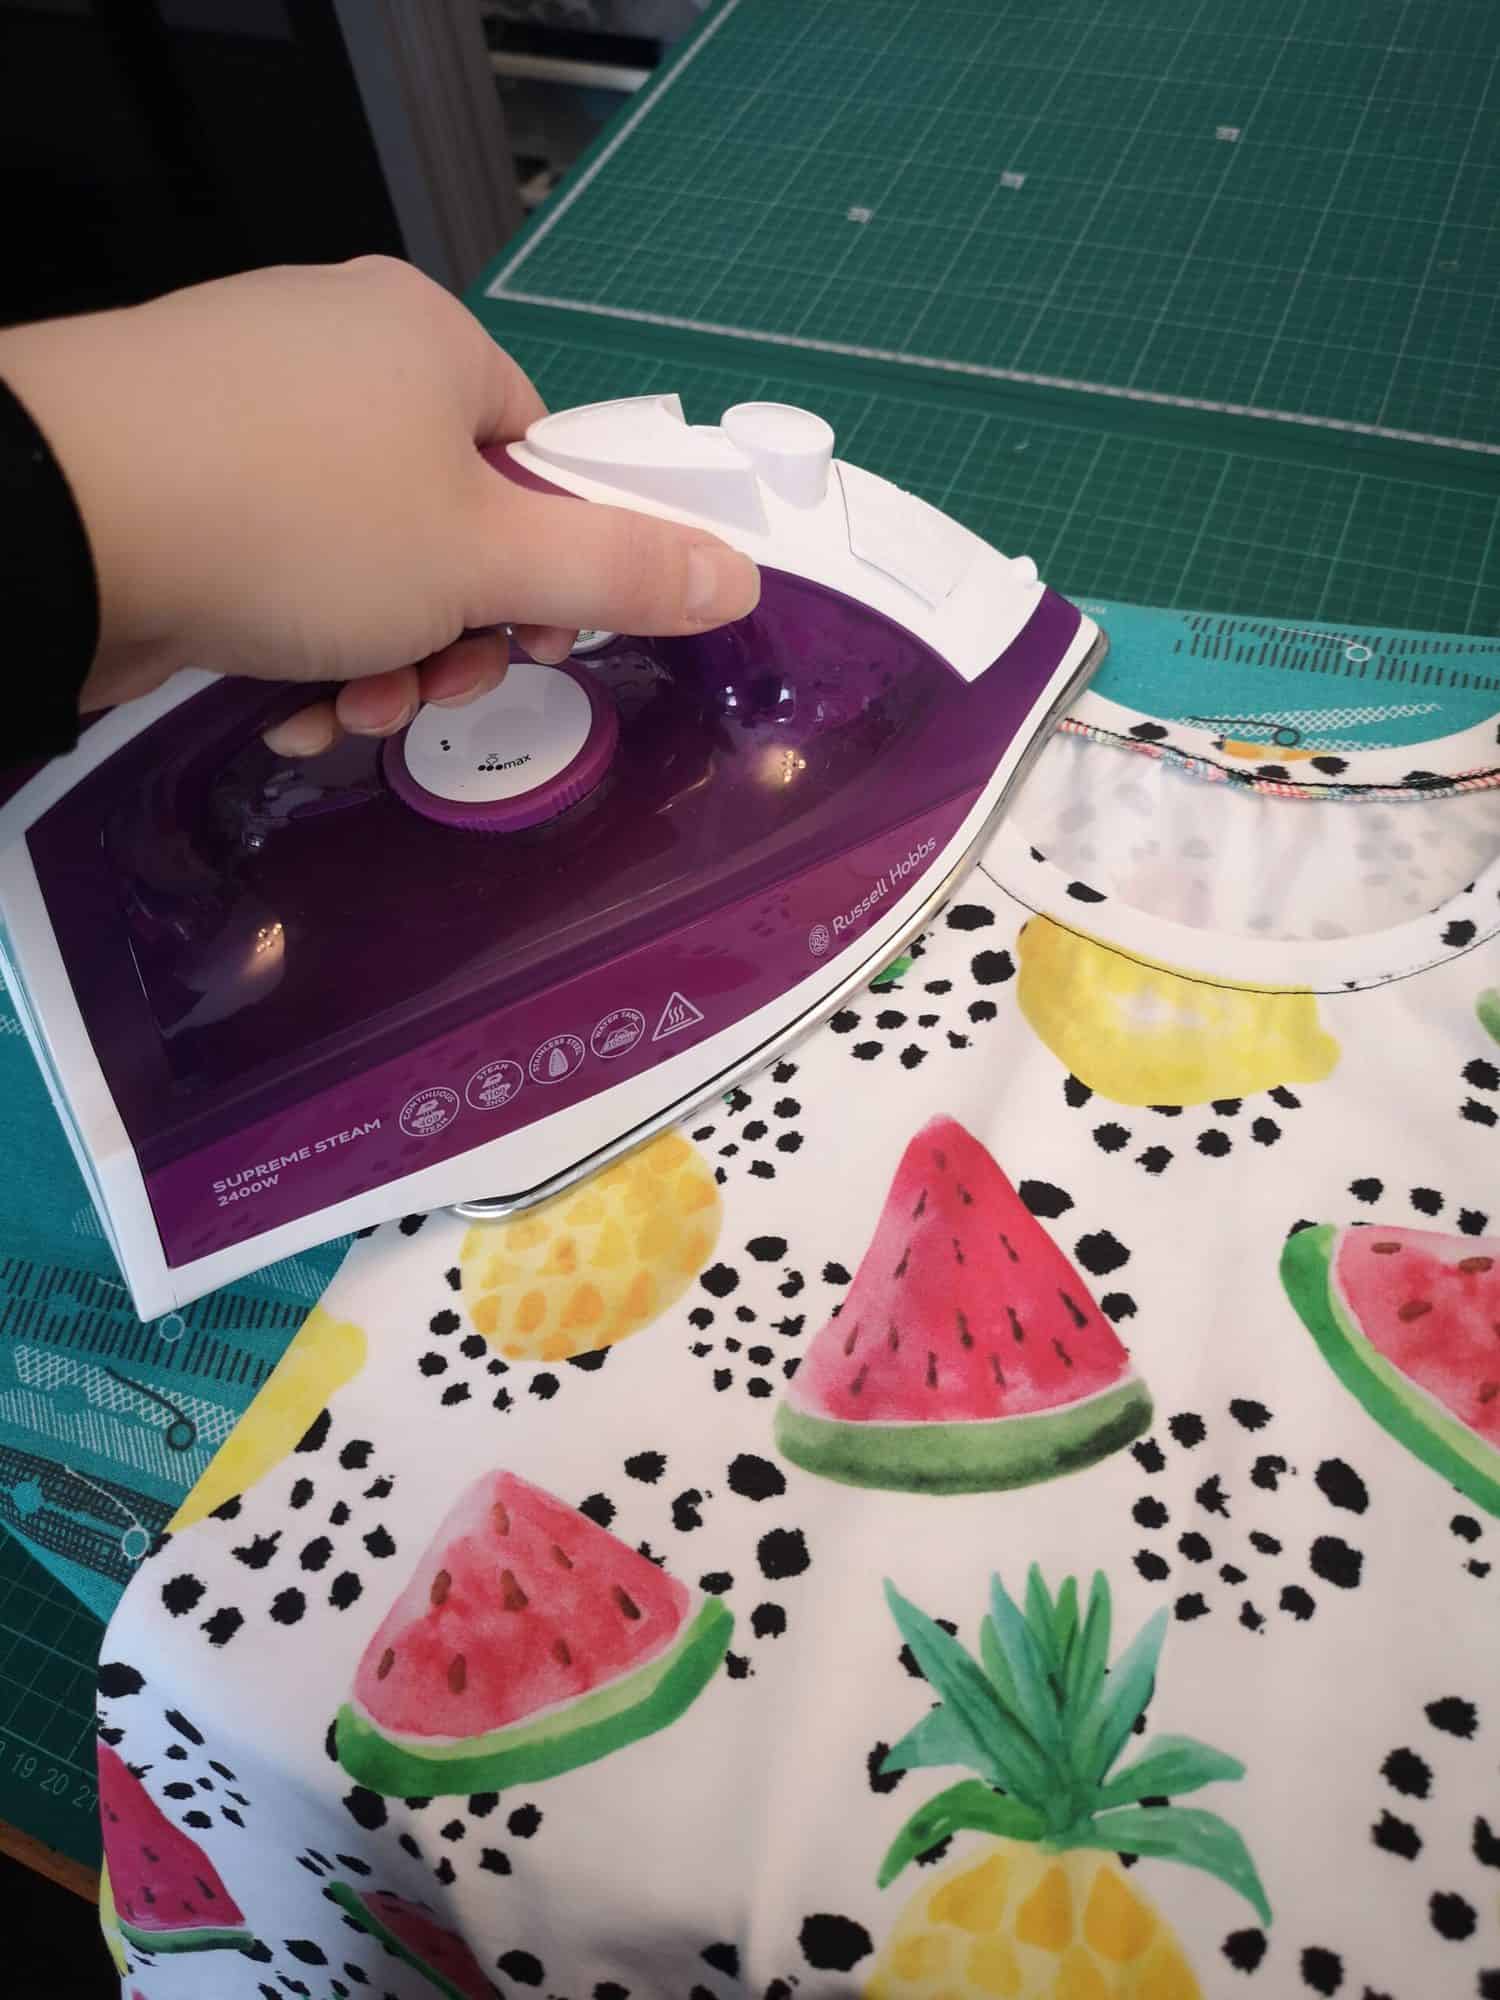
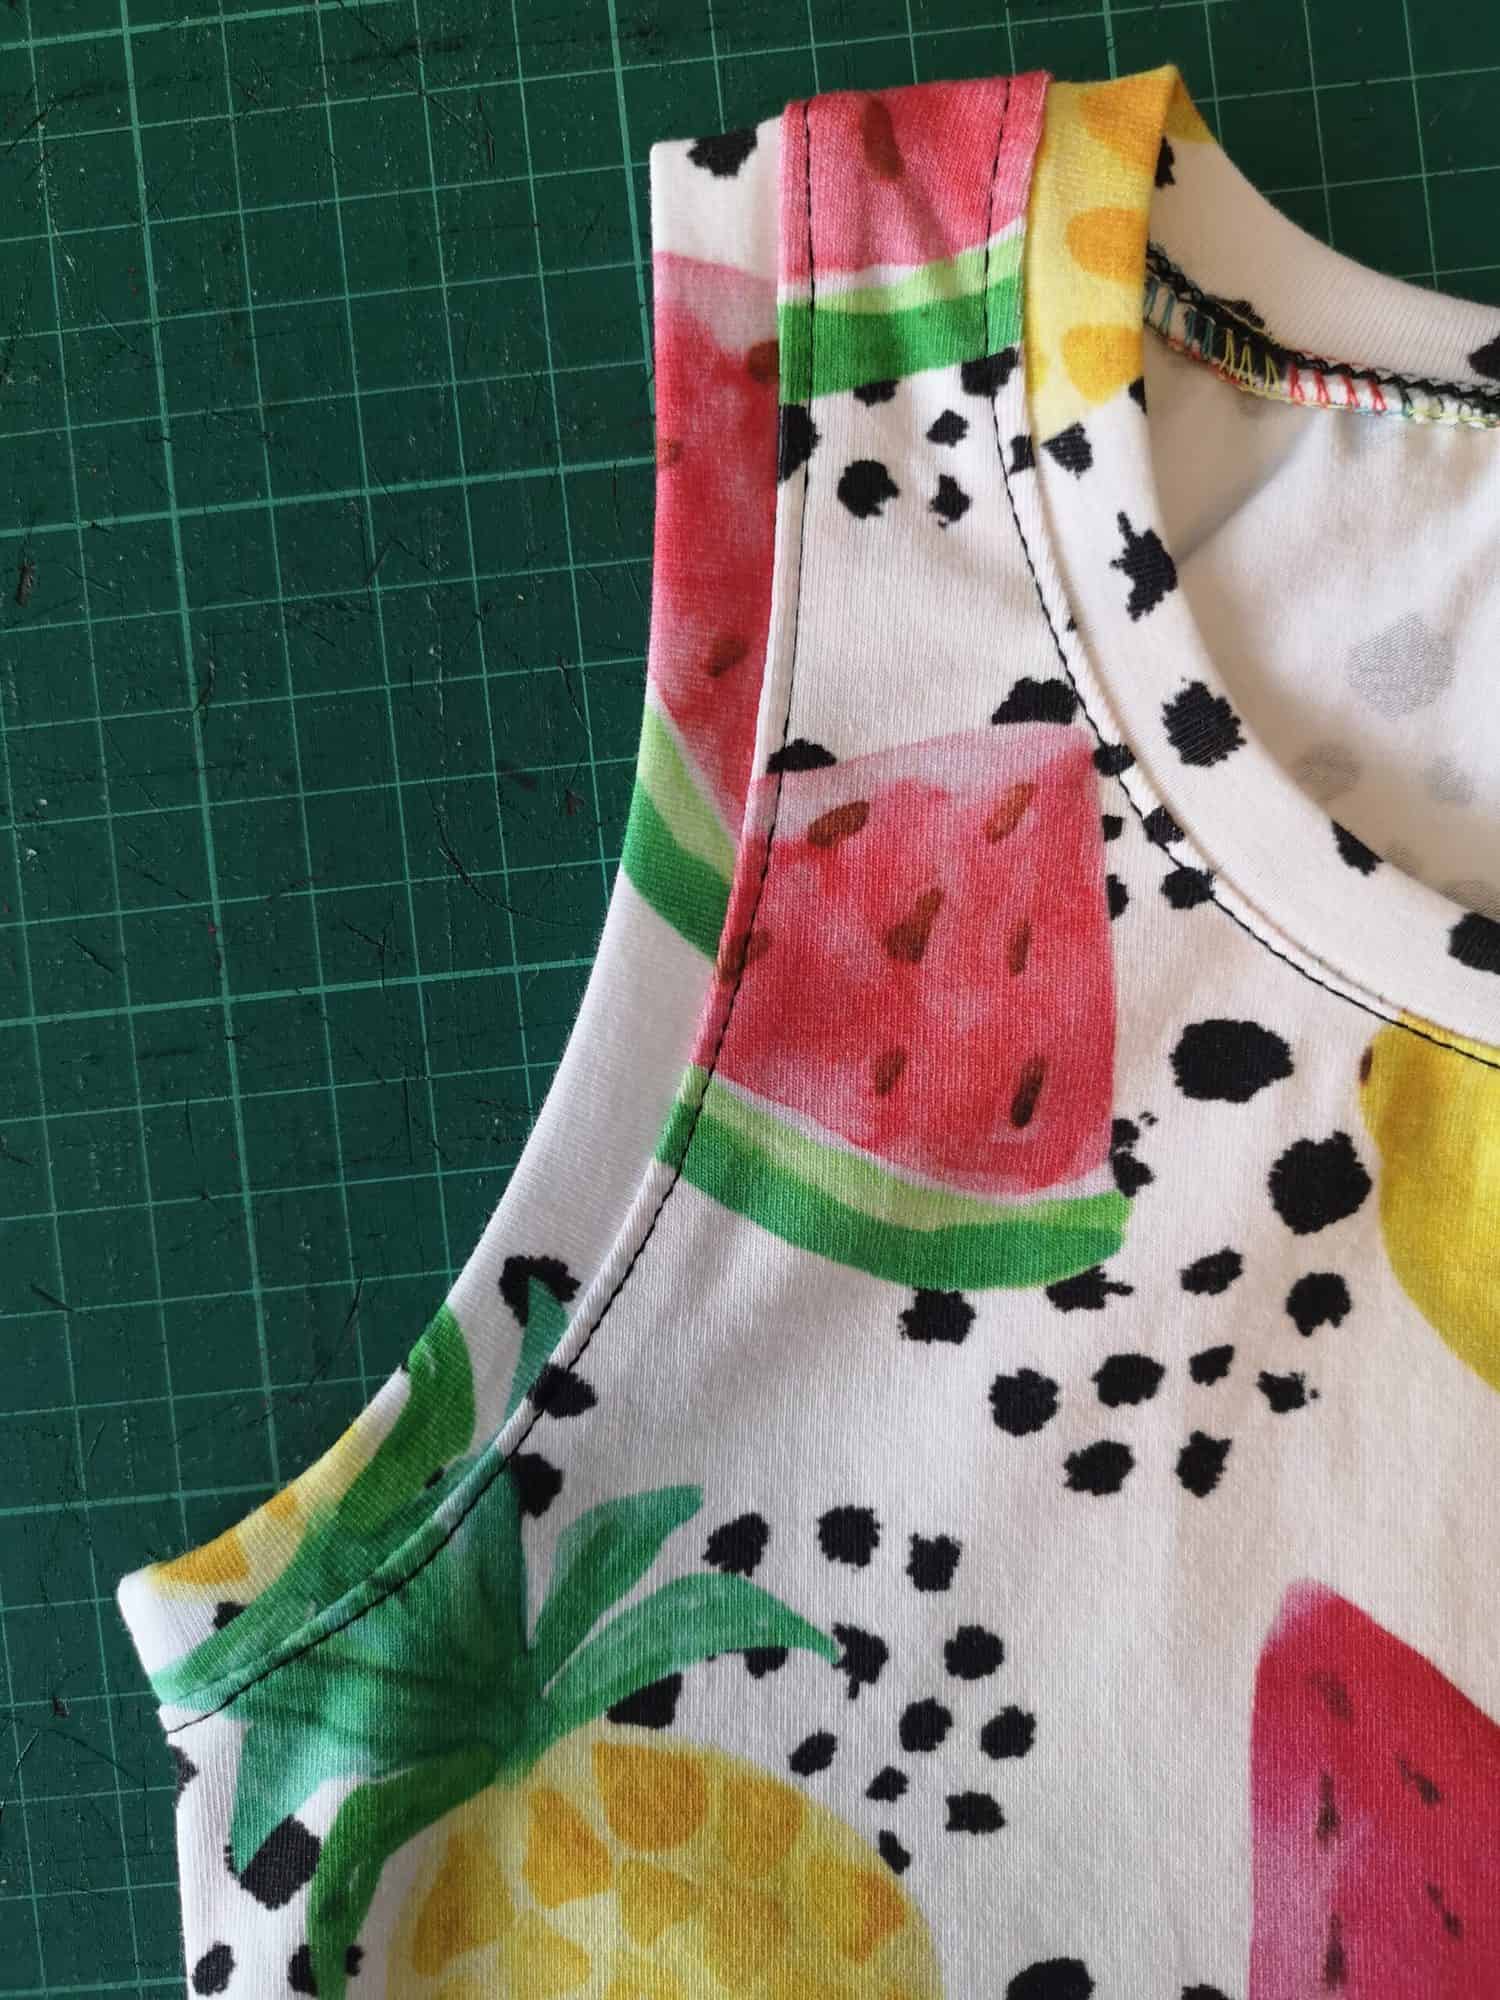
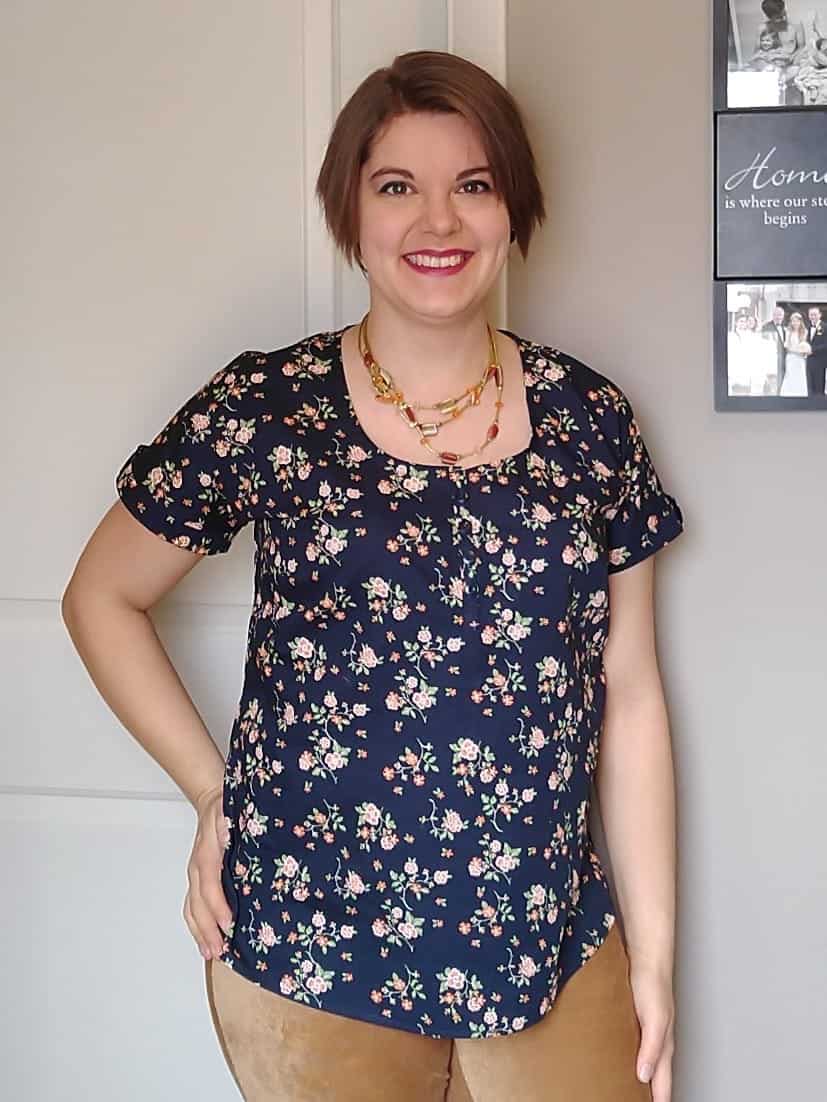
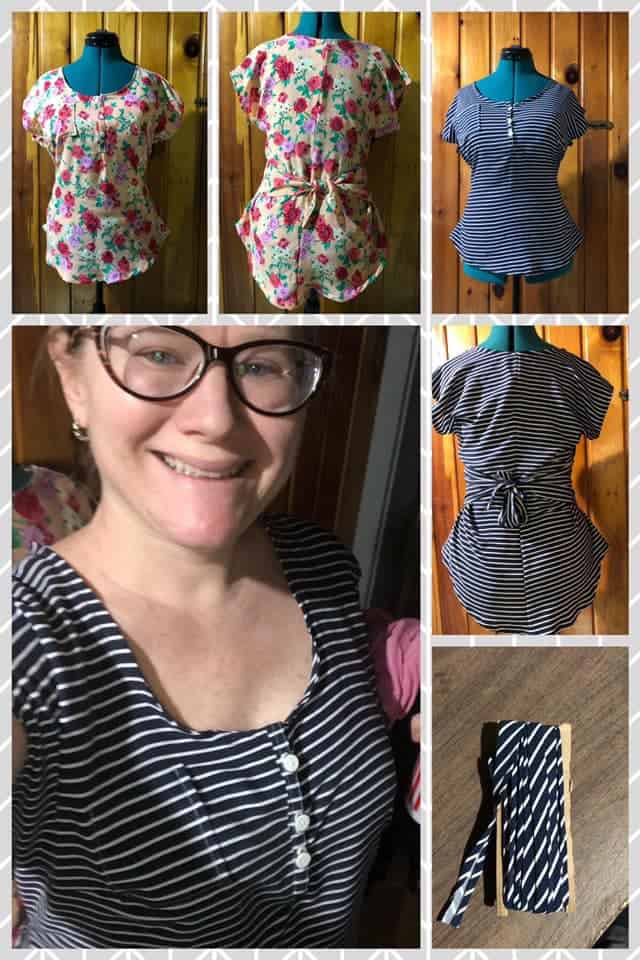
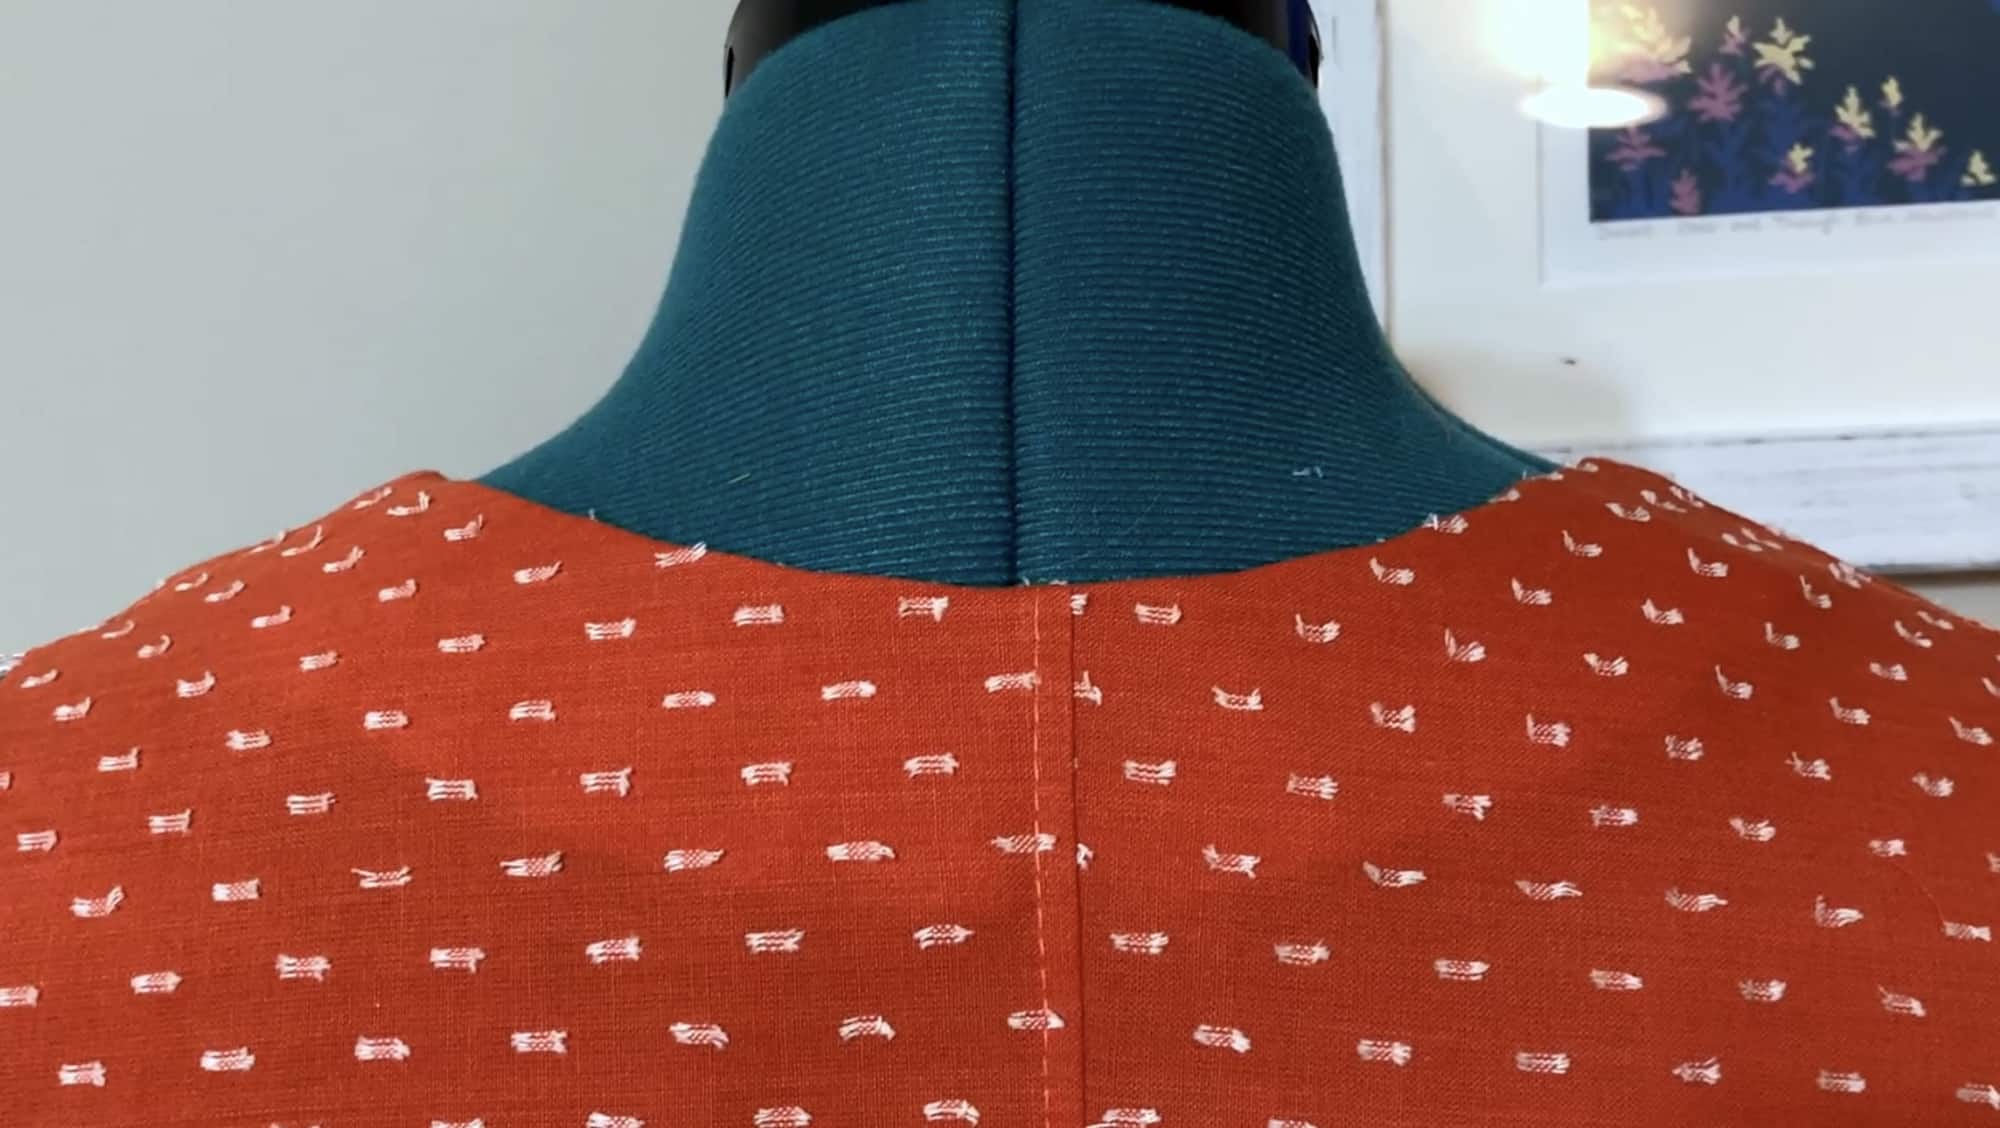
To demonstrate, I’ve added a facing to the neckline of the Brunch Blouse. After stitching together and clipping my seams, I turned the facing to the inside of the shirt and gave it a good pressing.

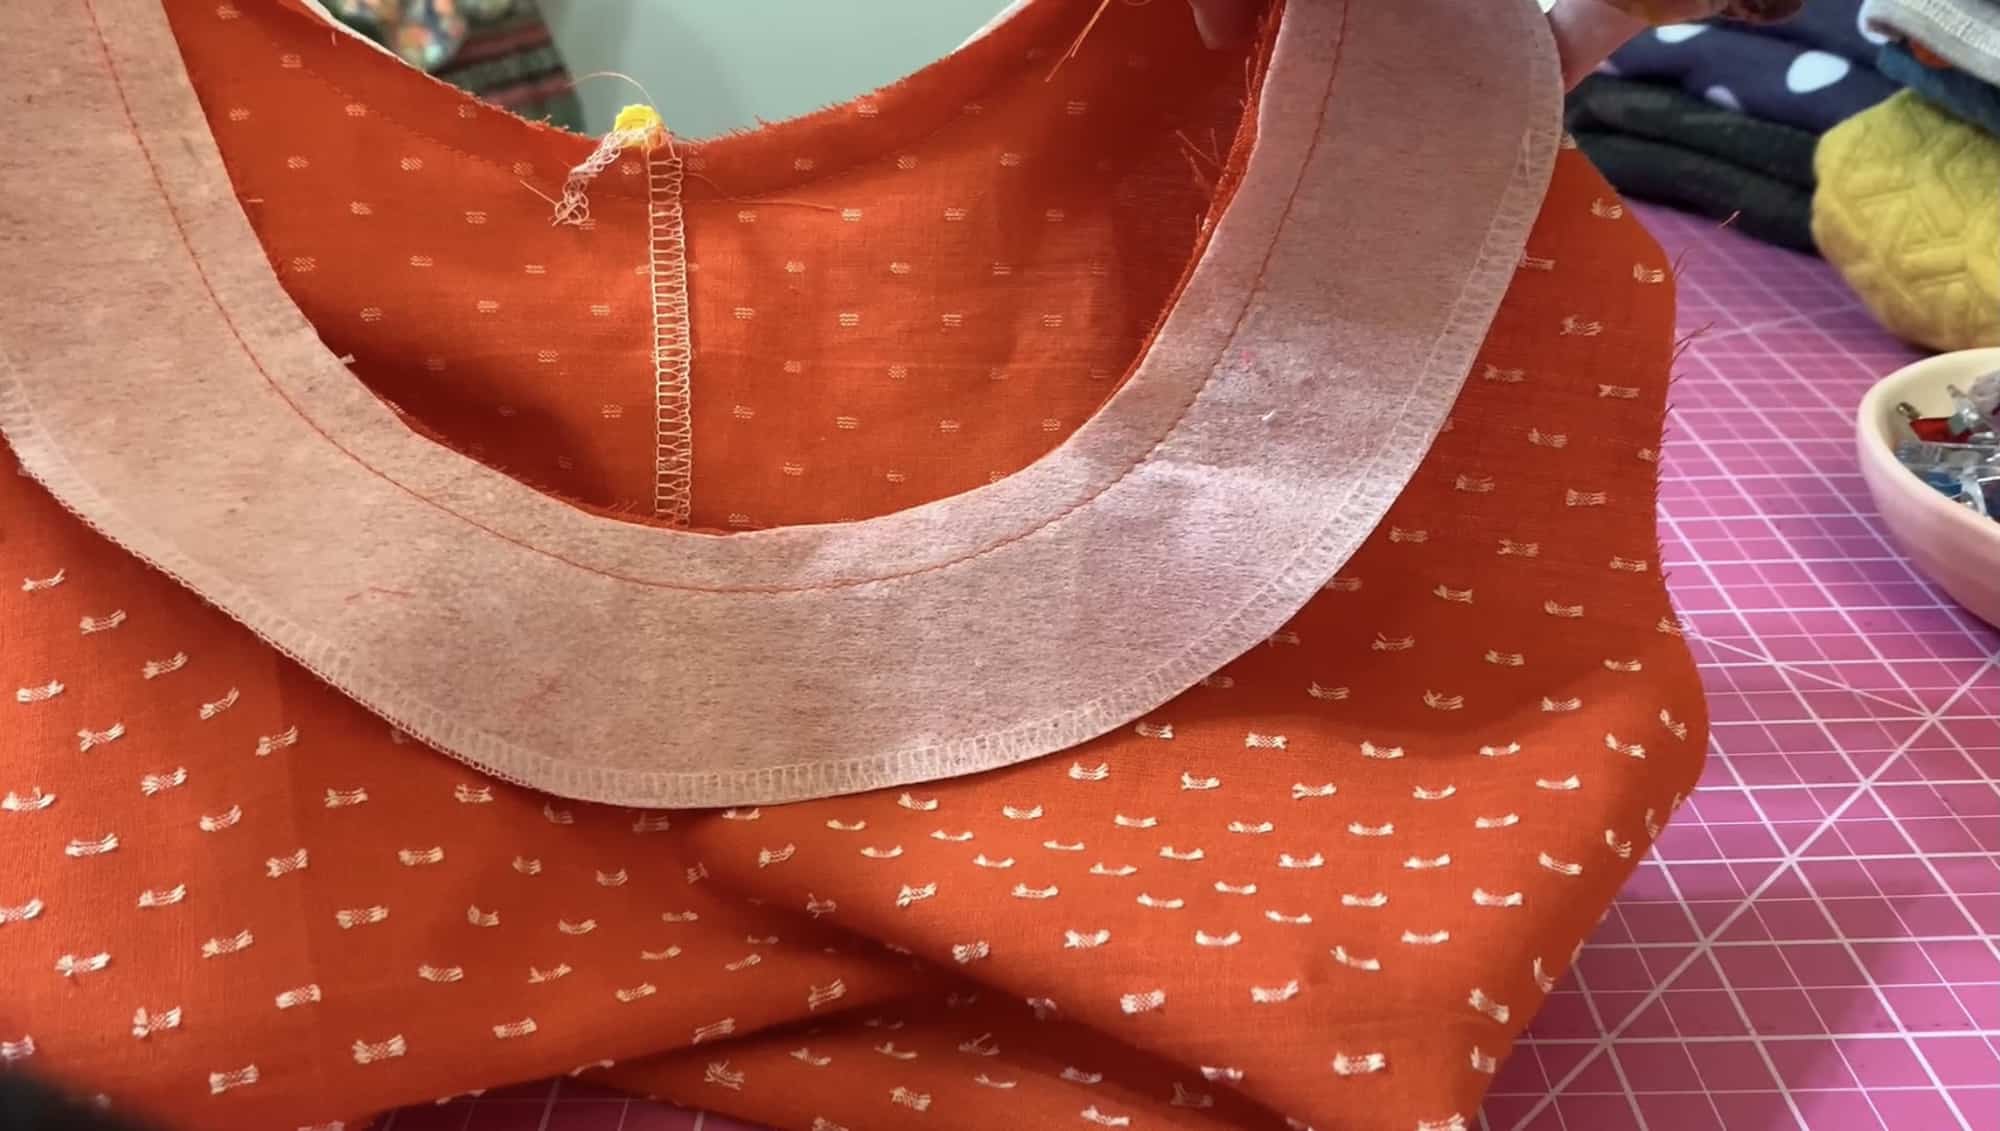
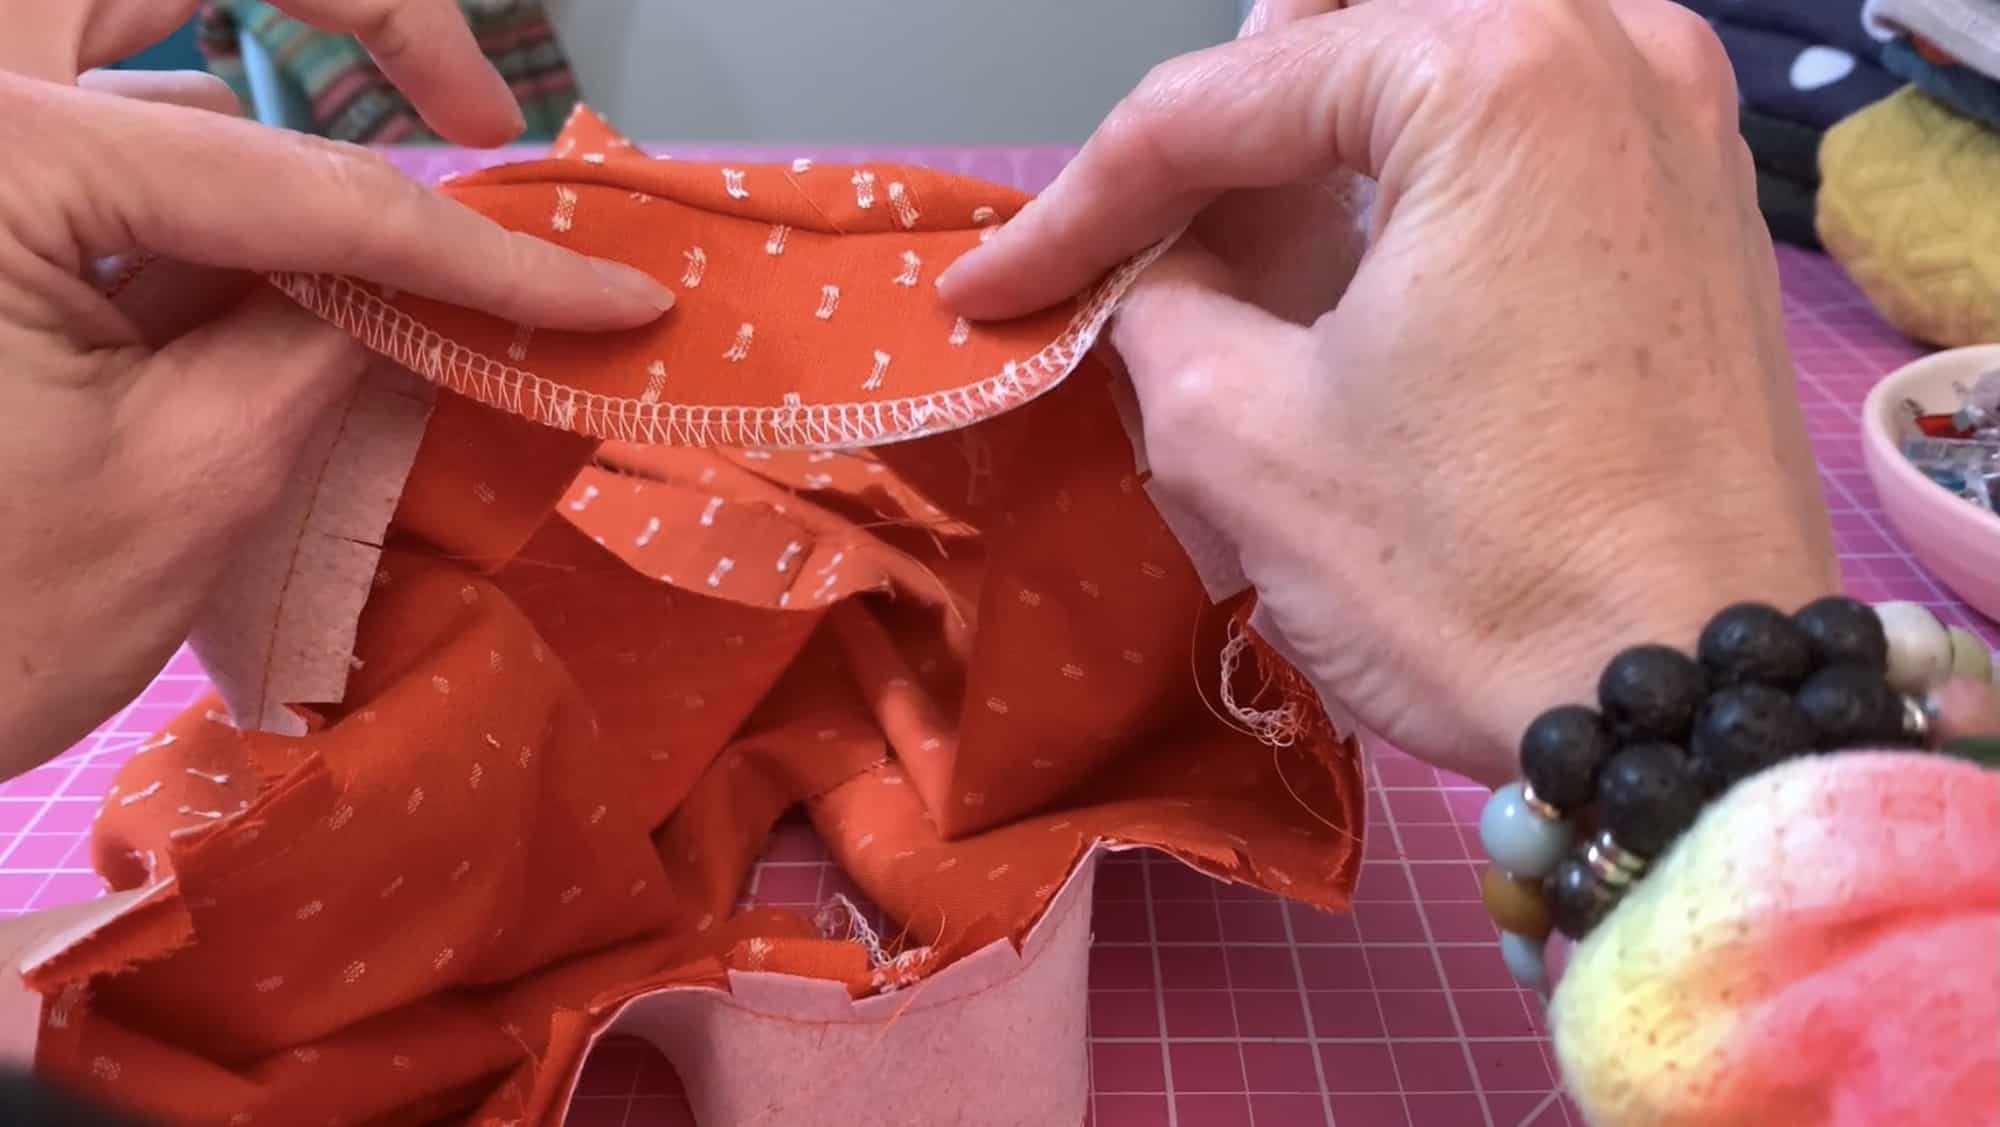
Look at that result!

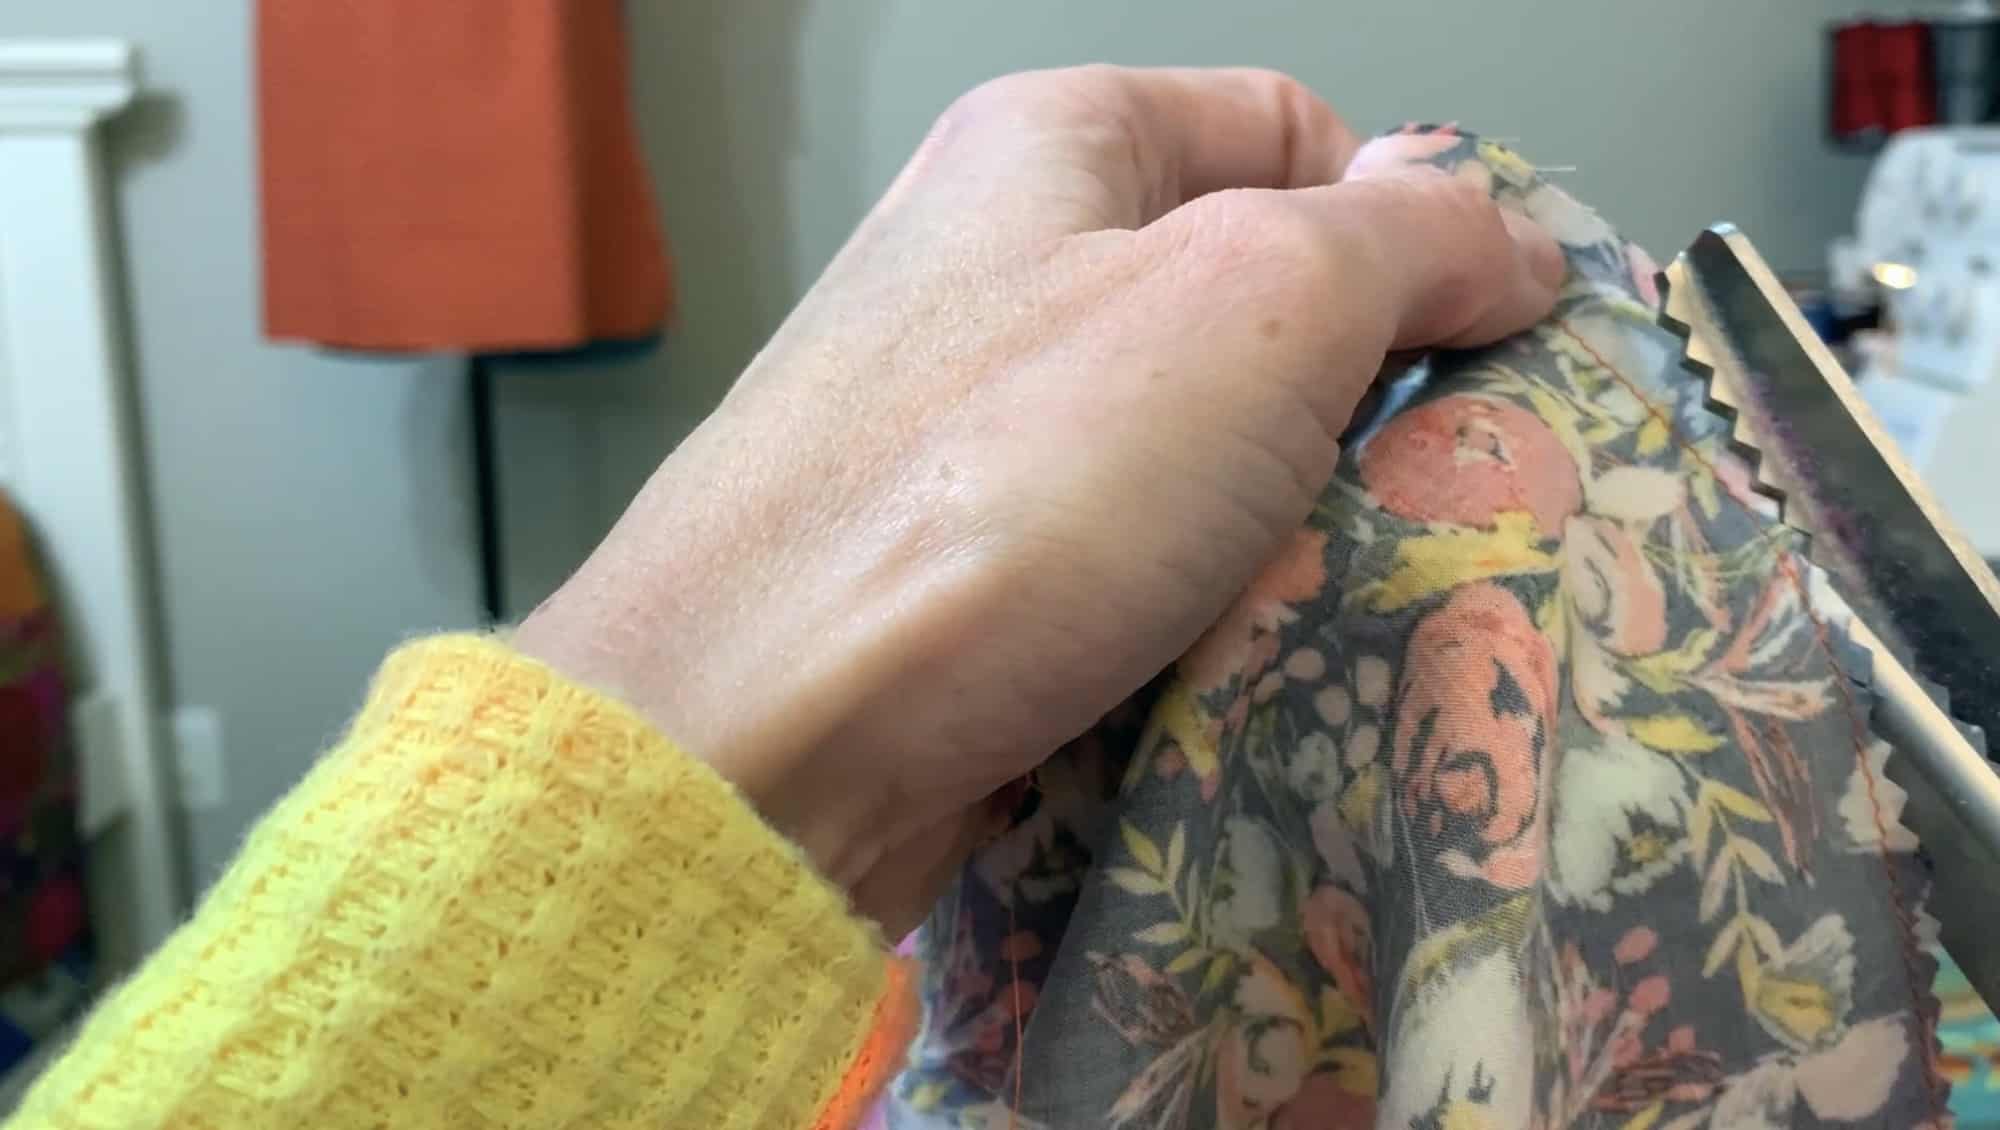
Grab Those Pinking Shears

Pinking shears can pretty much do it all… they can reduce bulk and relieve tension in your curves. Even more, they stop fabric from fraying!

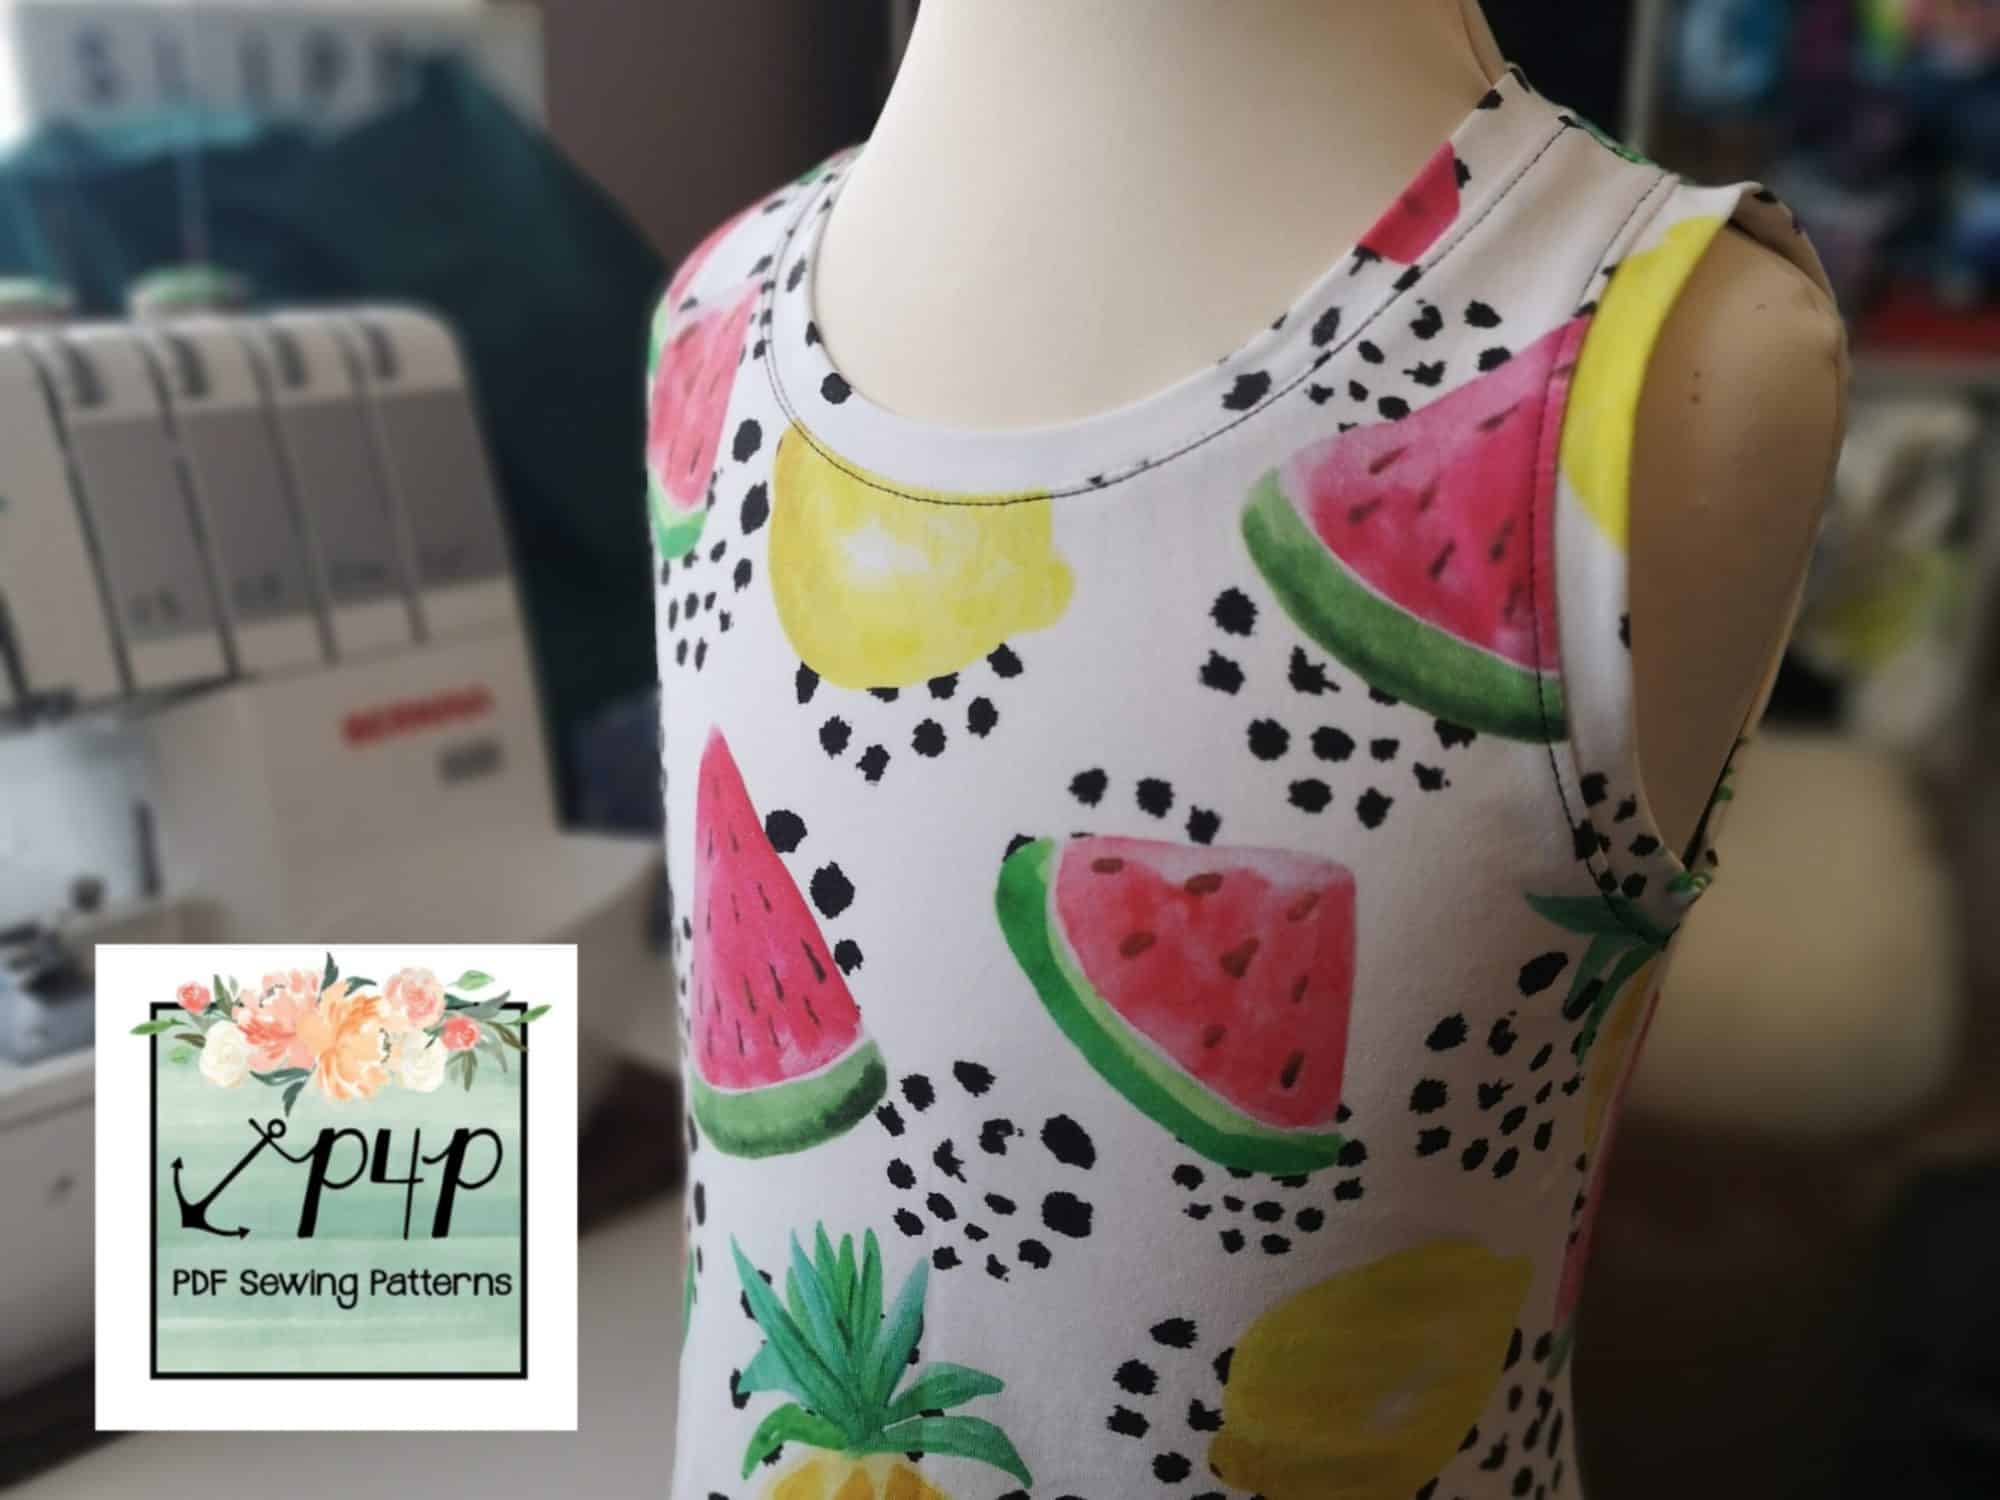
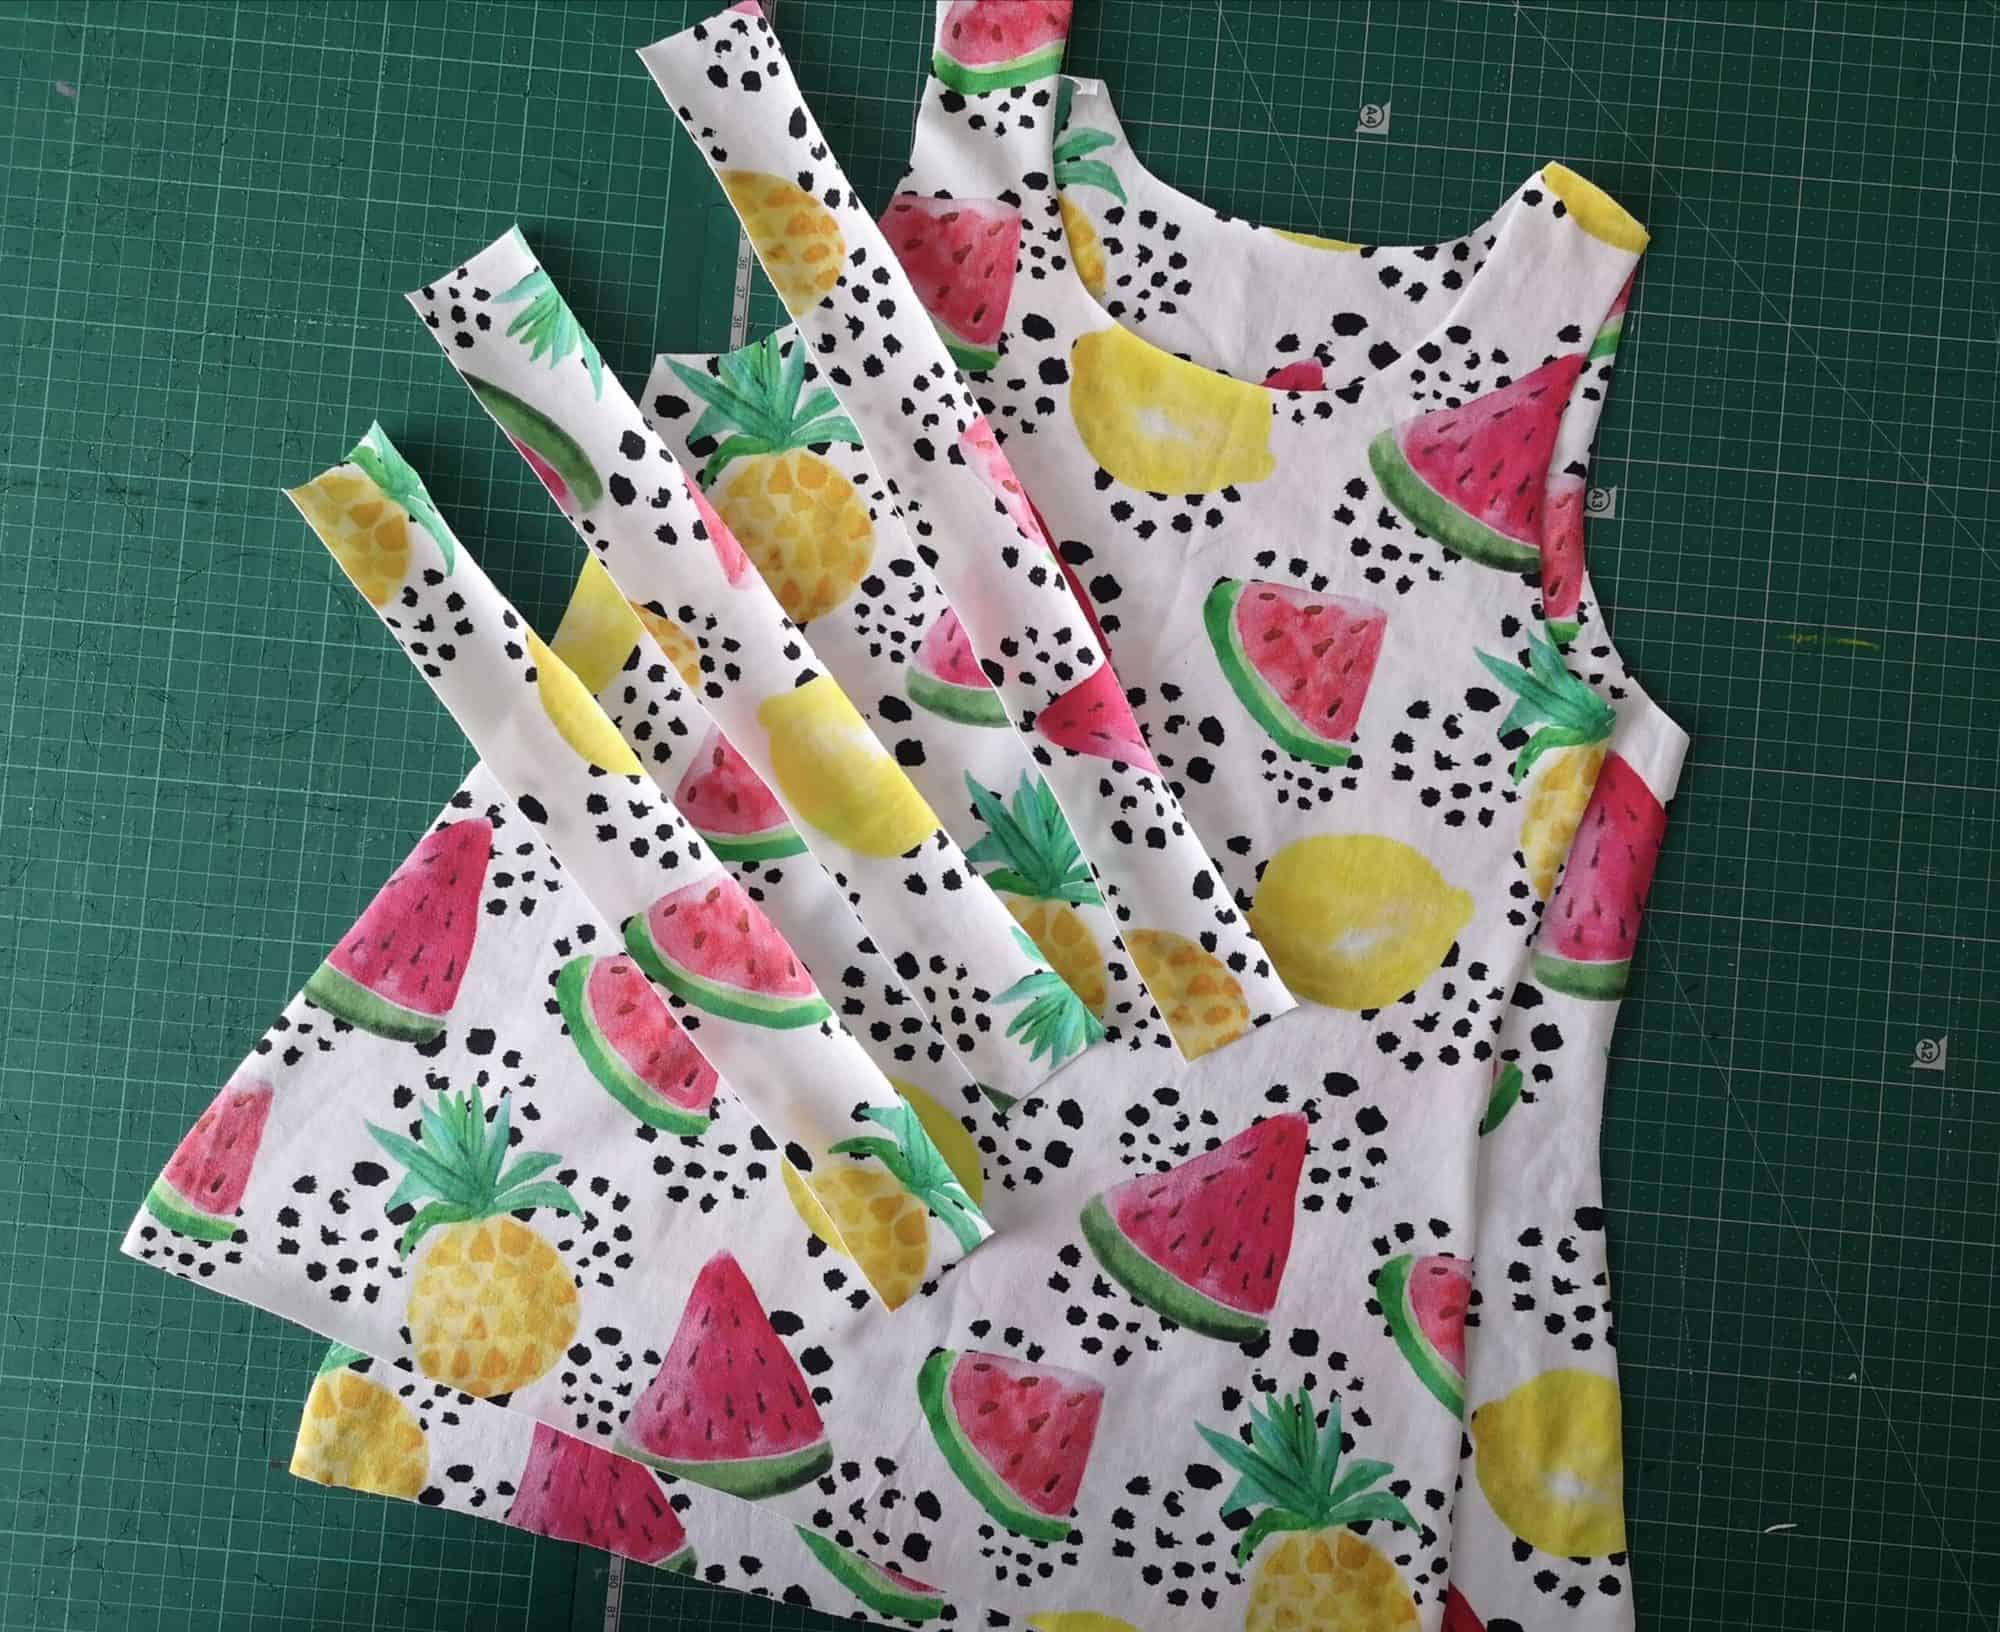
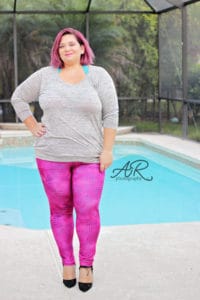
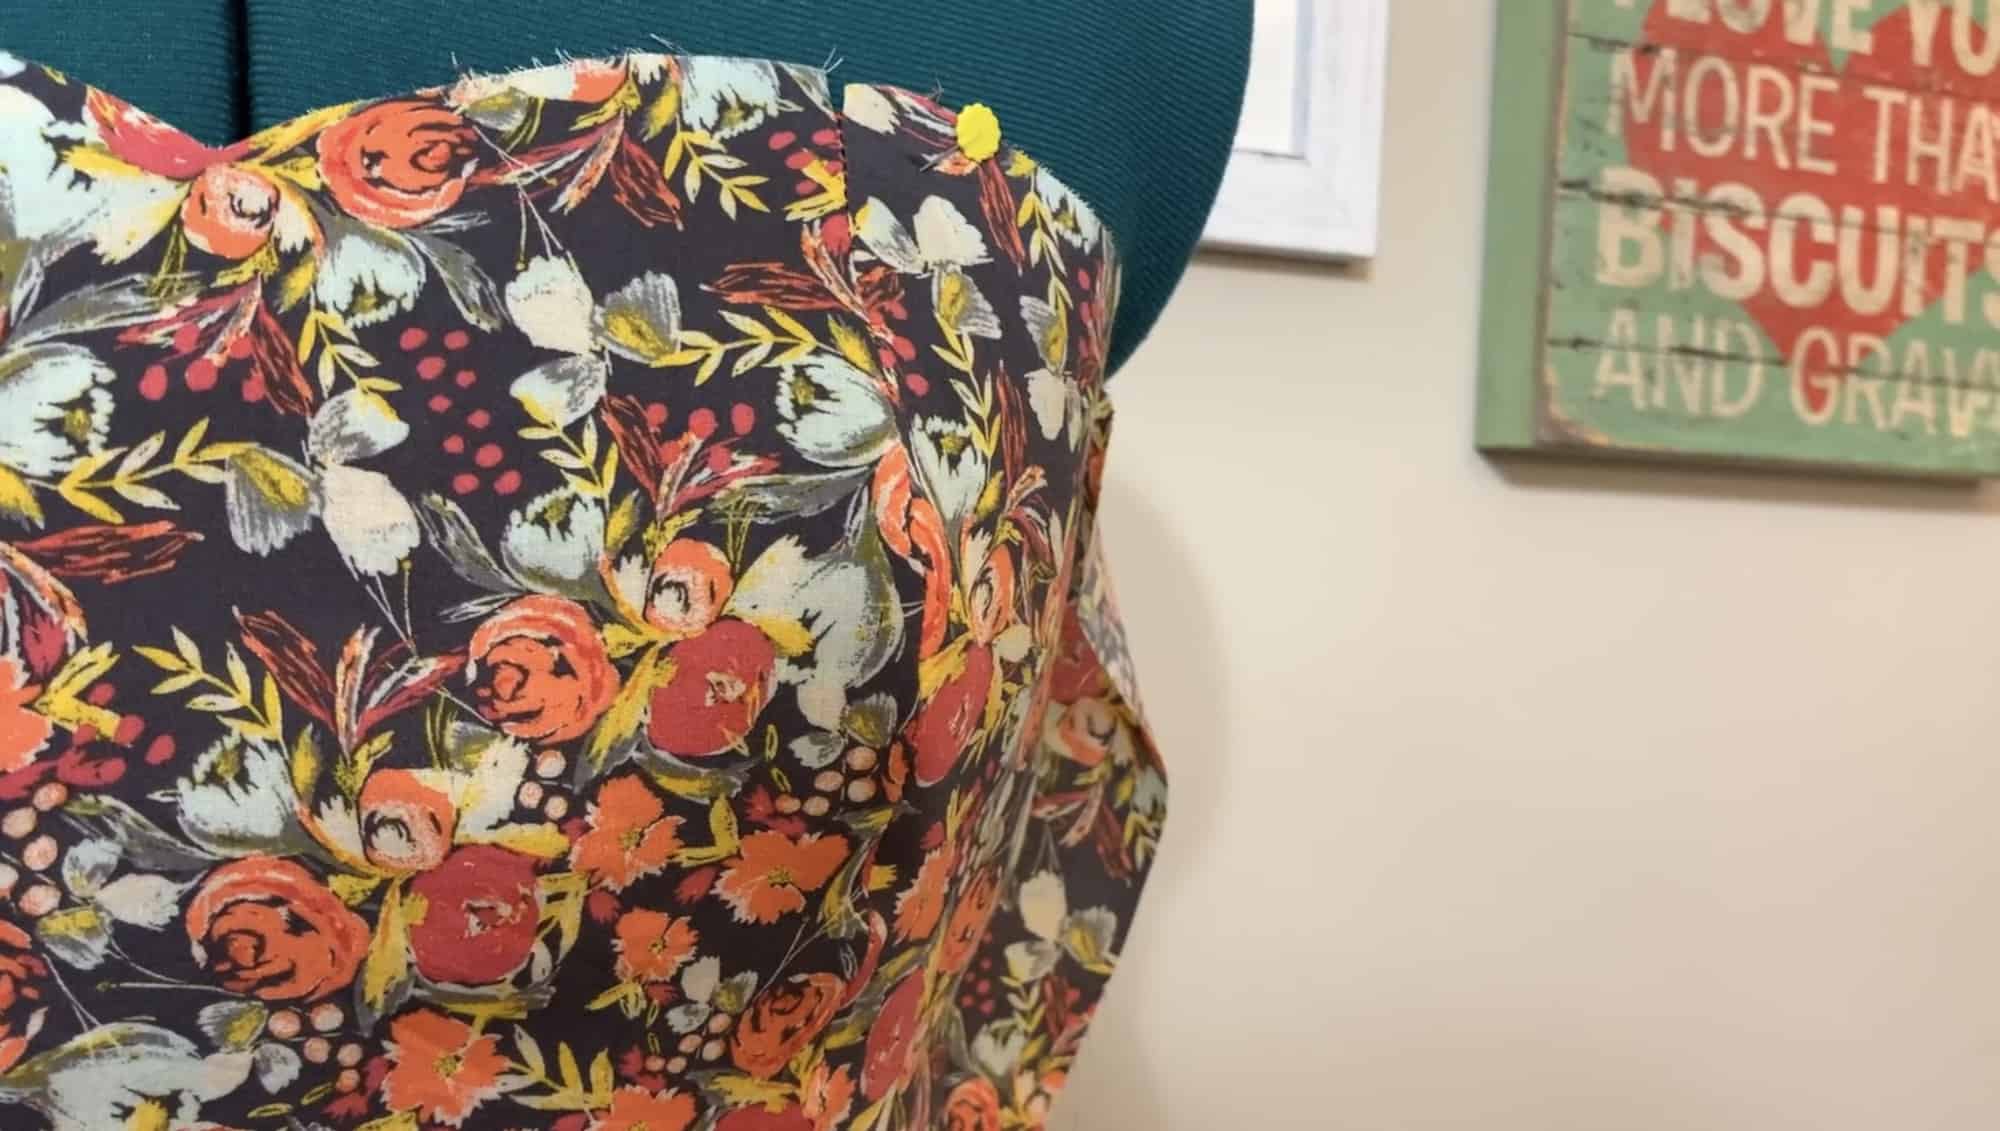
To demonstrate, I’ve stitched up the front bodice of the So Classic Sundress. This gorgeous pattern features princess seams. You definitely want to reduce the bulk in those princess seams that run right along the front of your bust!

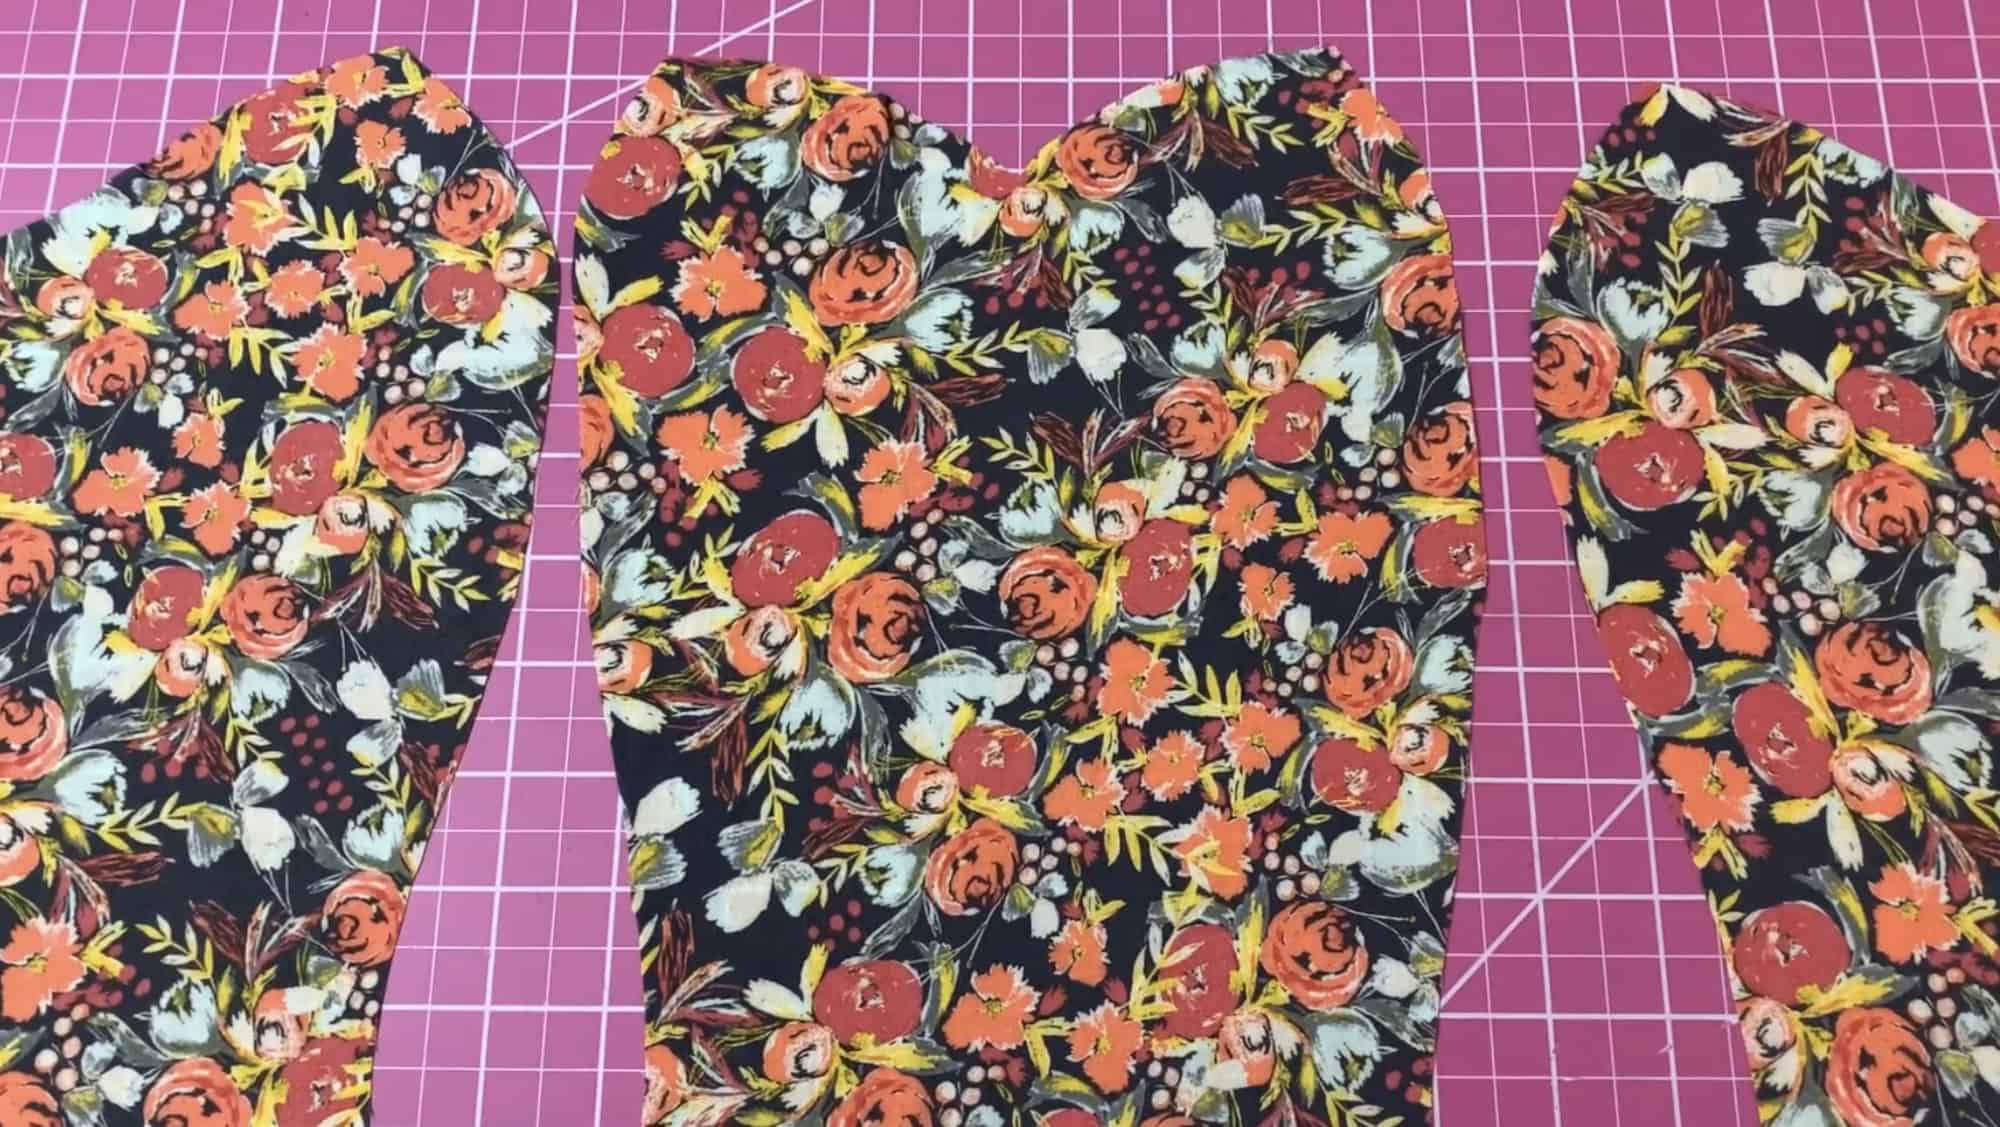
After stitching my pieces together, I trimmed the seam allowance with pinking shears and pressed the seam open.

Here’s the result!

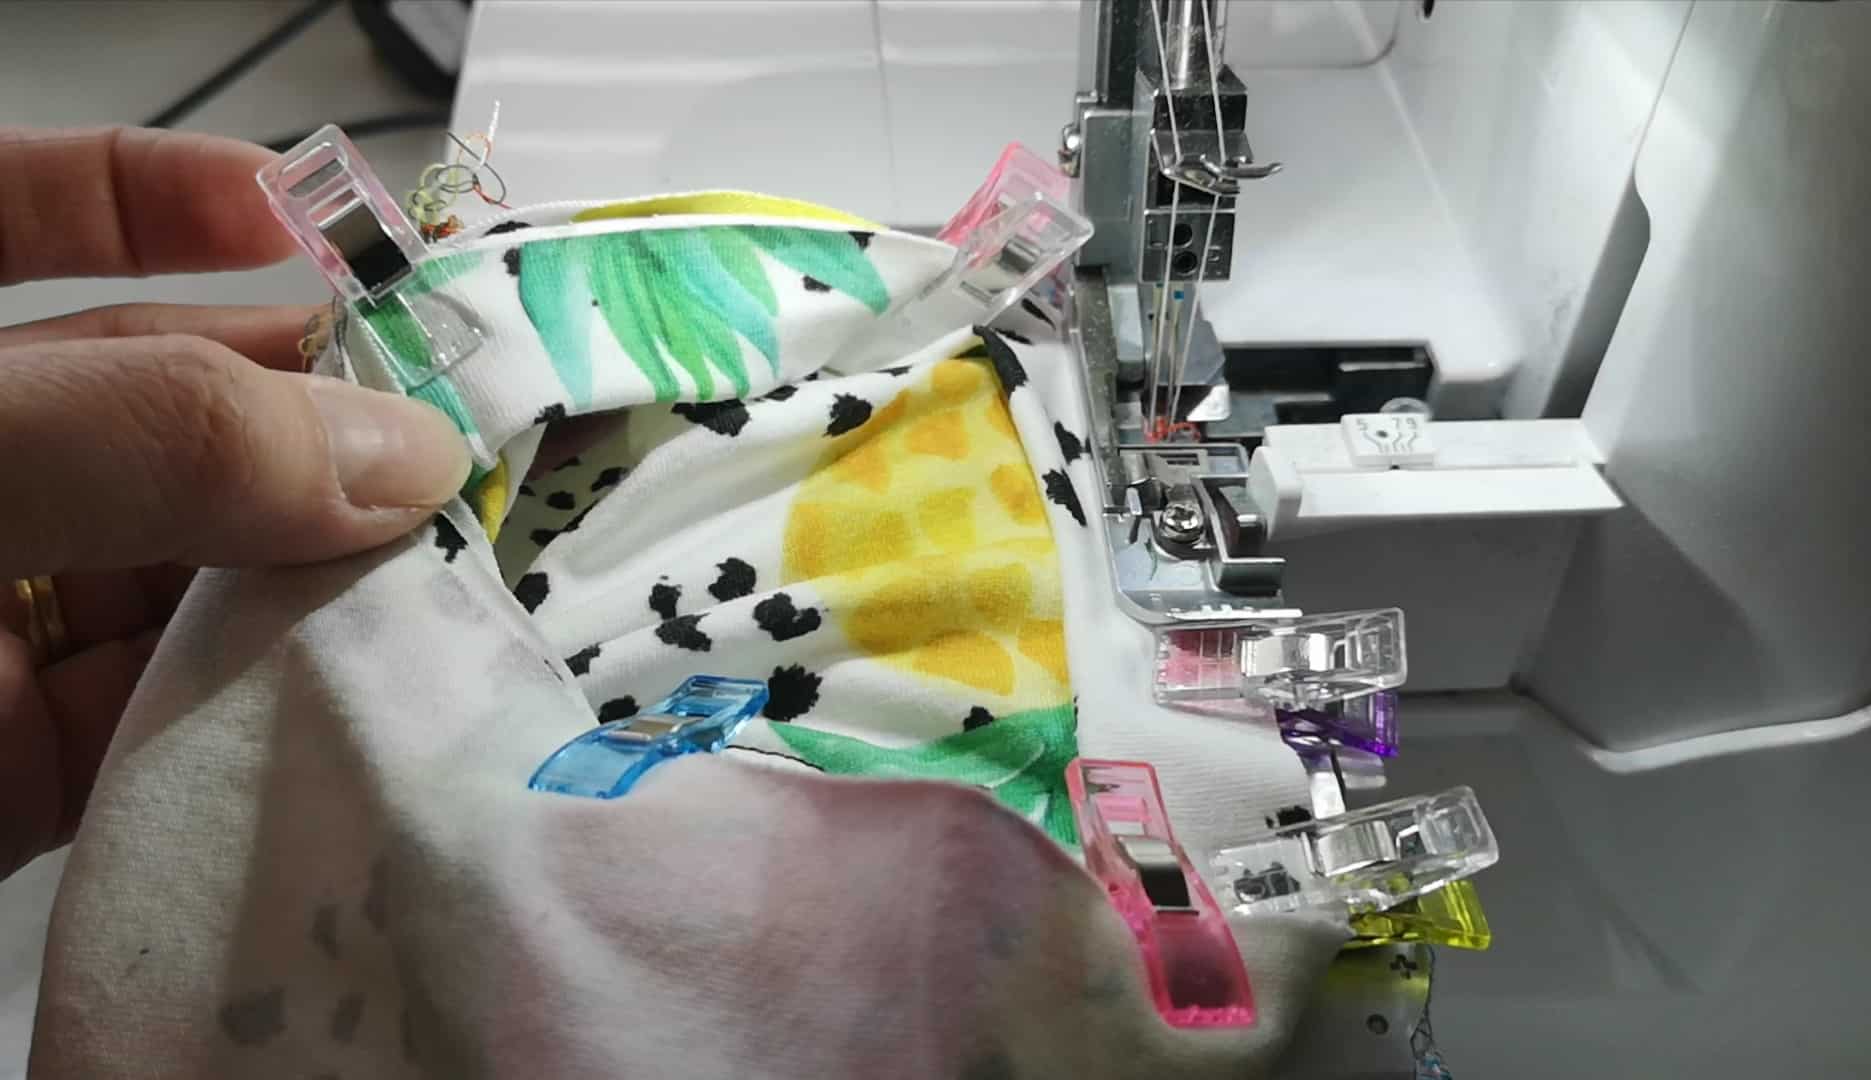
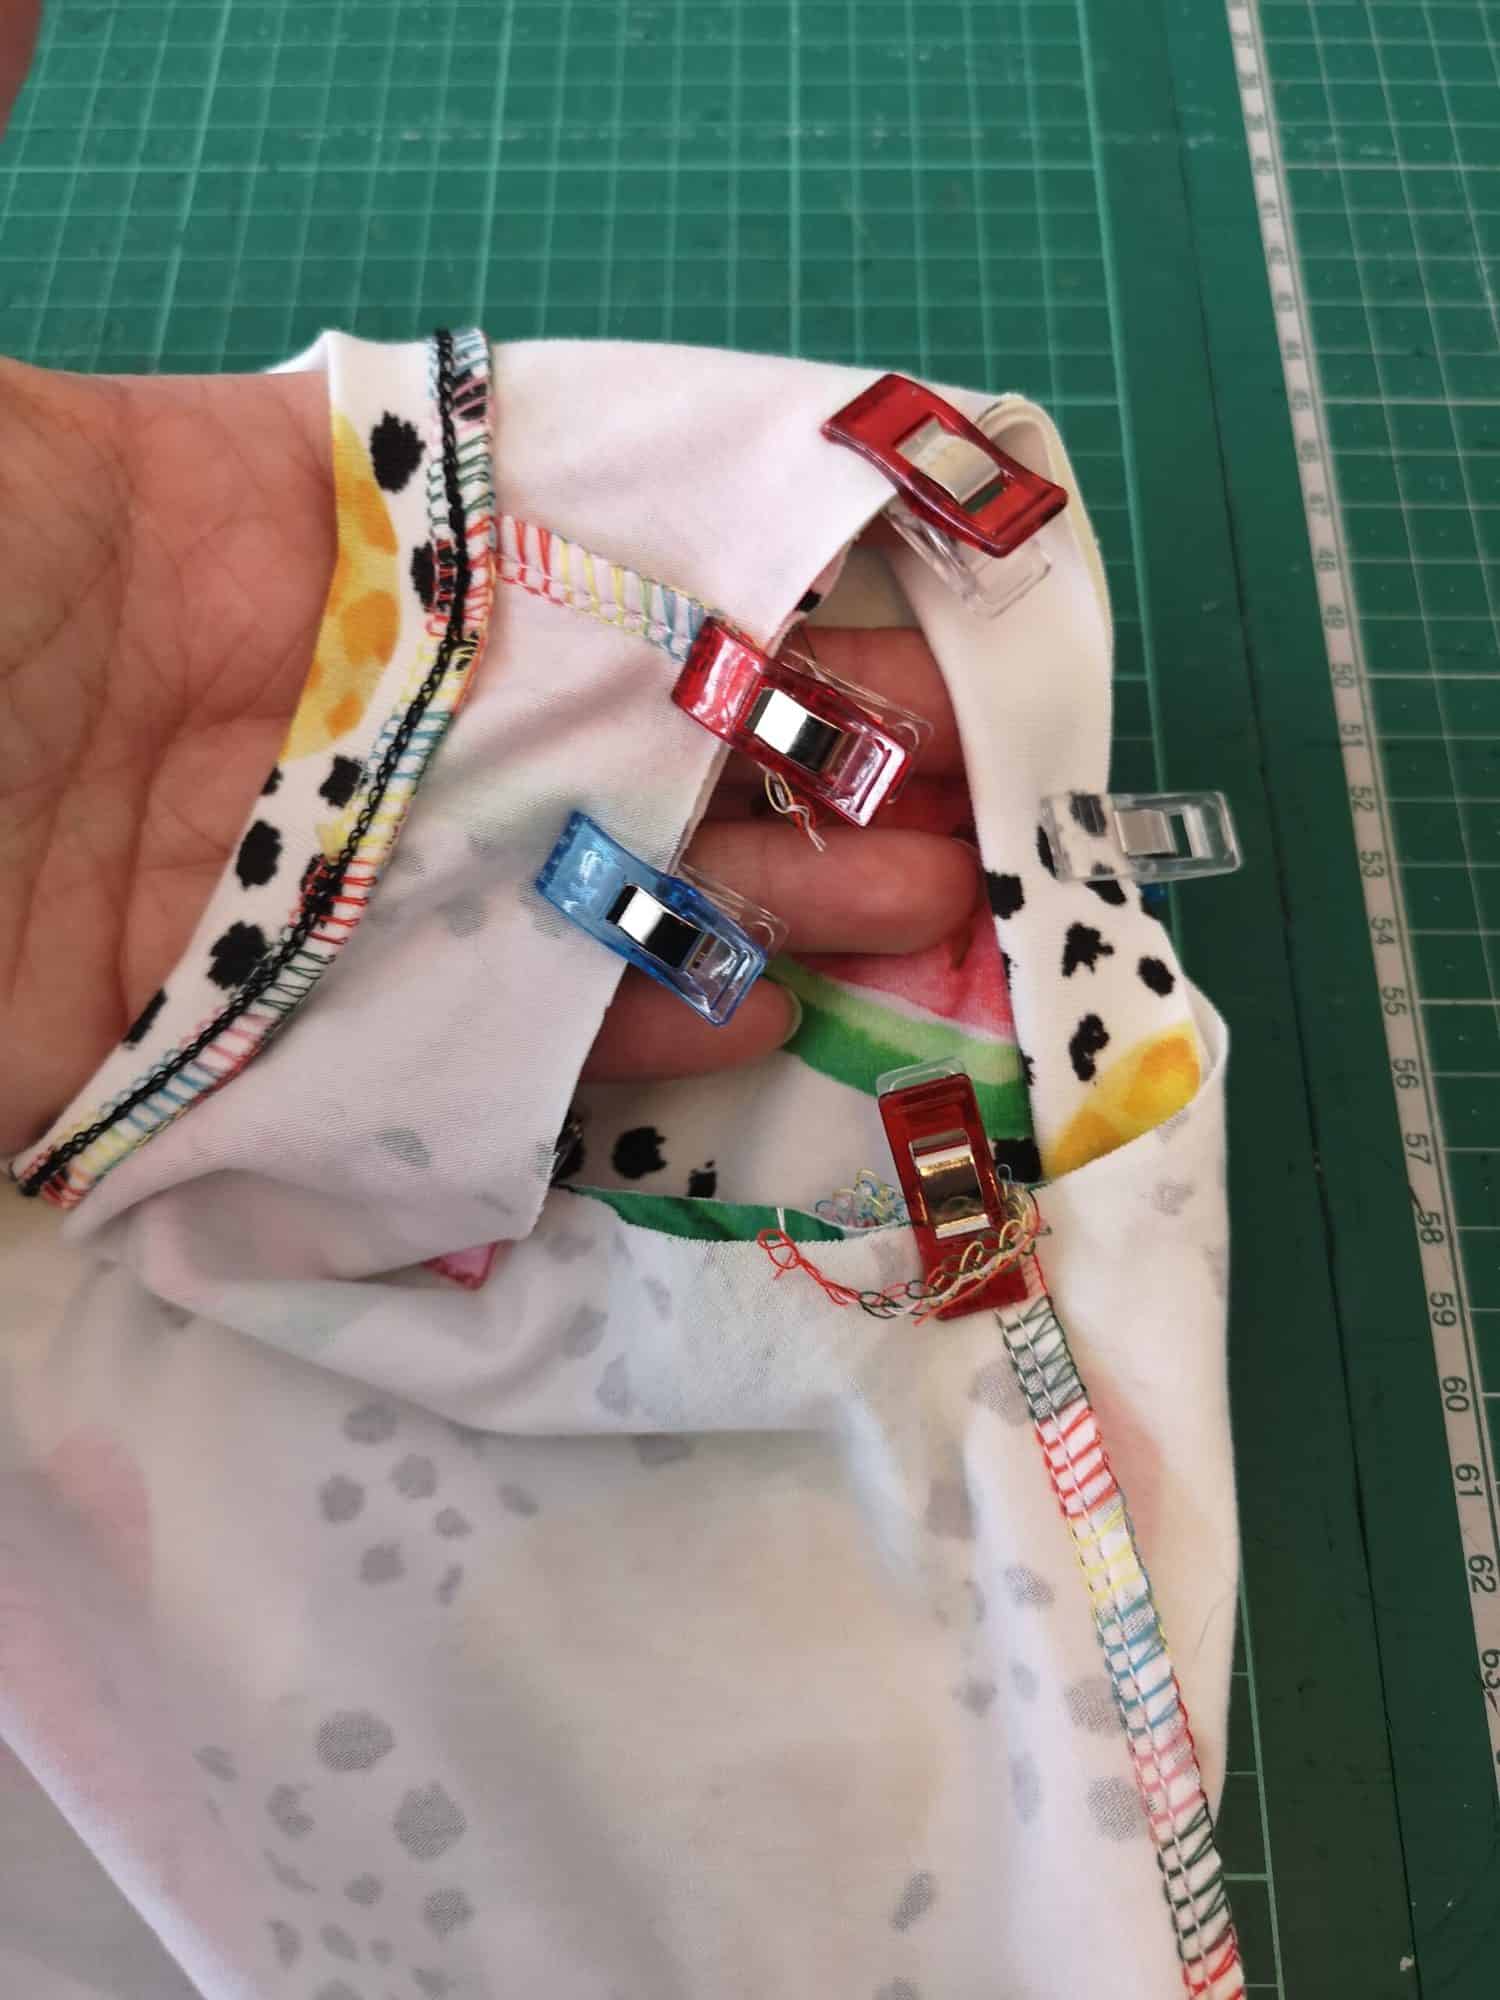
Your Serger is Magic

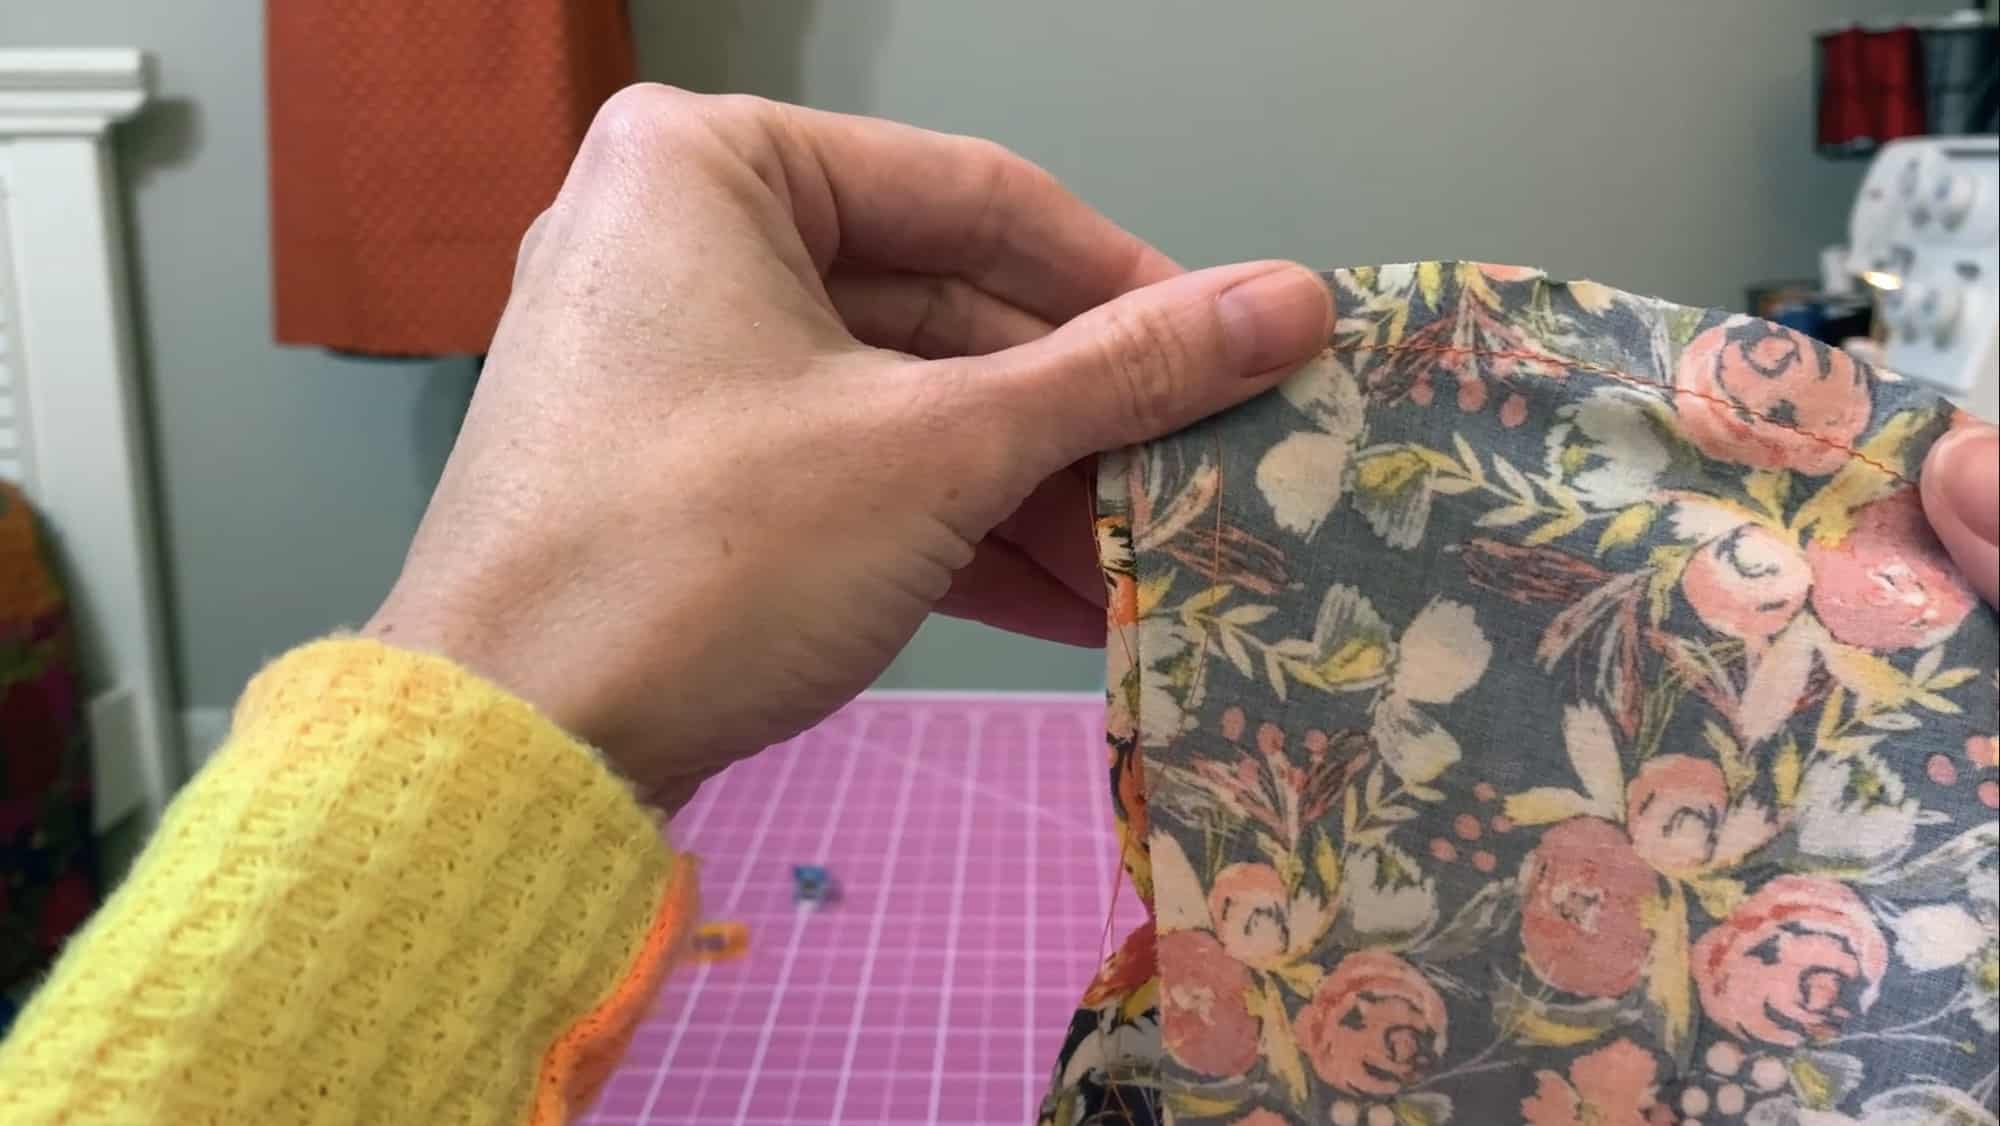
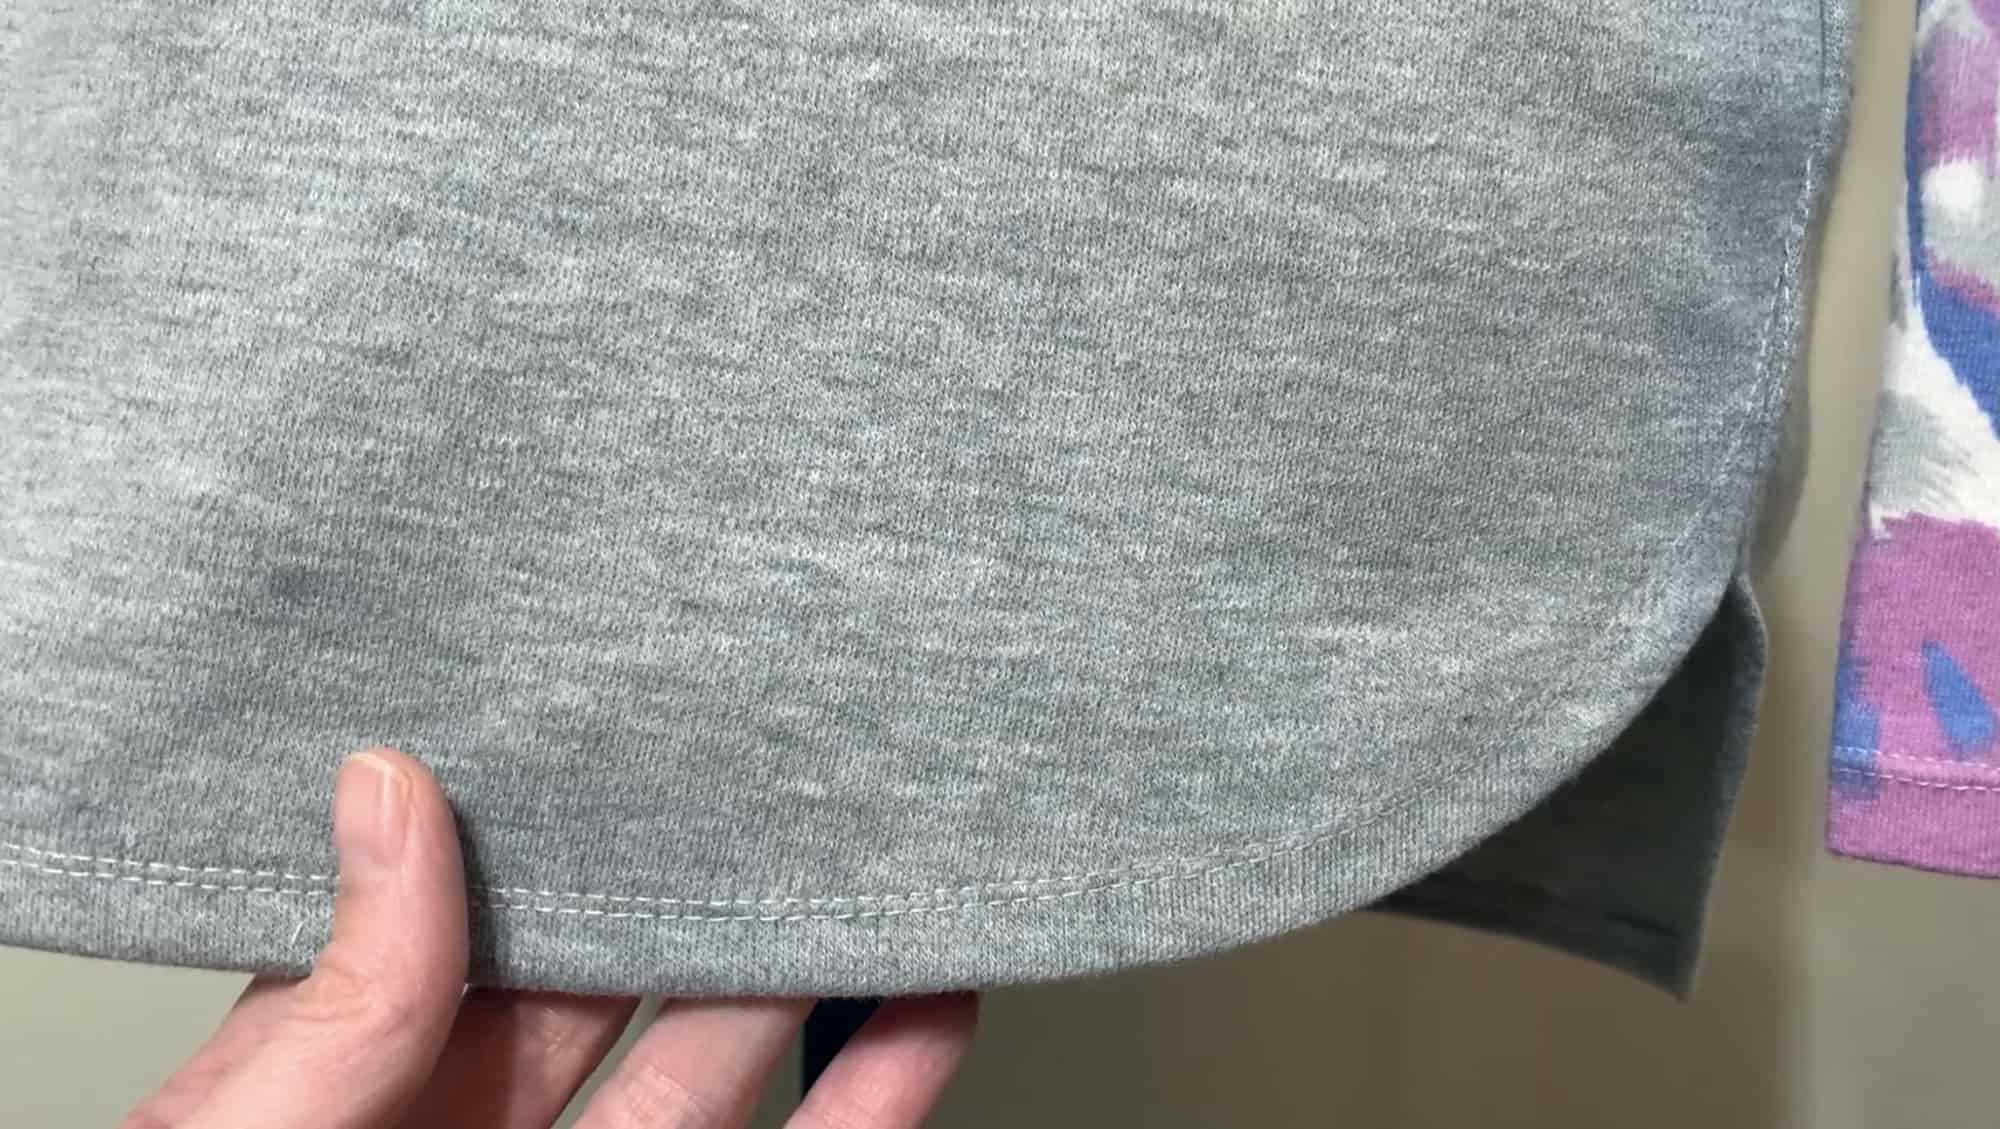
Once I learned how to gather on my serger, I wanted all the ruffles! It turns out that you can also make small adjustments that will help you to achieve the perfect curved hem on knits.

All you need to know… turn up that differential dial! You’ll want to test on a few scraps to determine how much to adjust the dial.

In this instance, tension is your friend! You want to create slight tension along the raw edge of your hem. That will cause the hem to naturally turn inward and help you to maintain that beautiful curved edge without fighting fabric folds. All you have to do is pin and stitch!

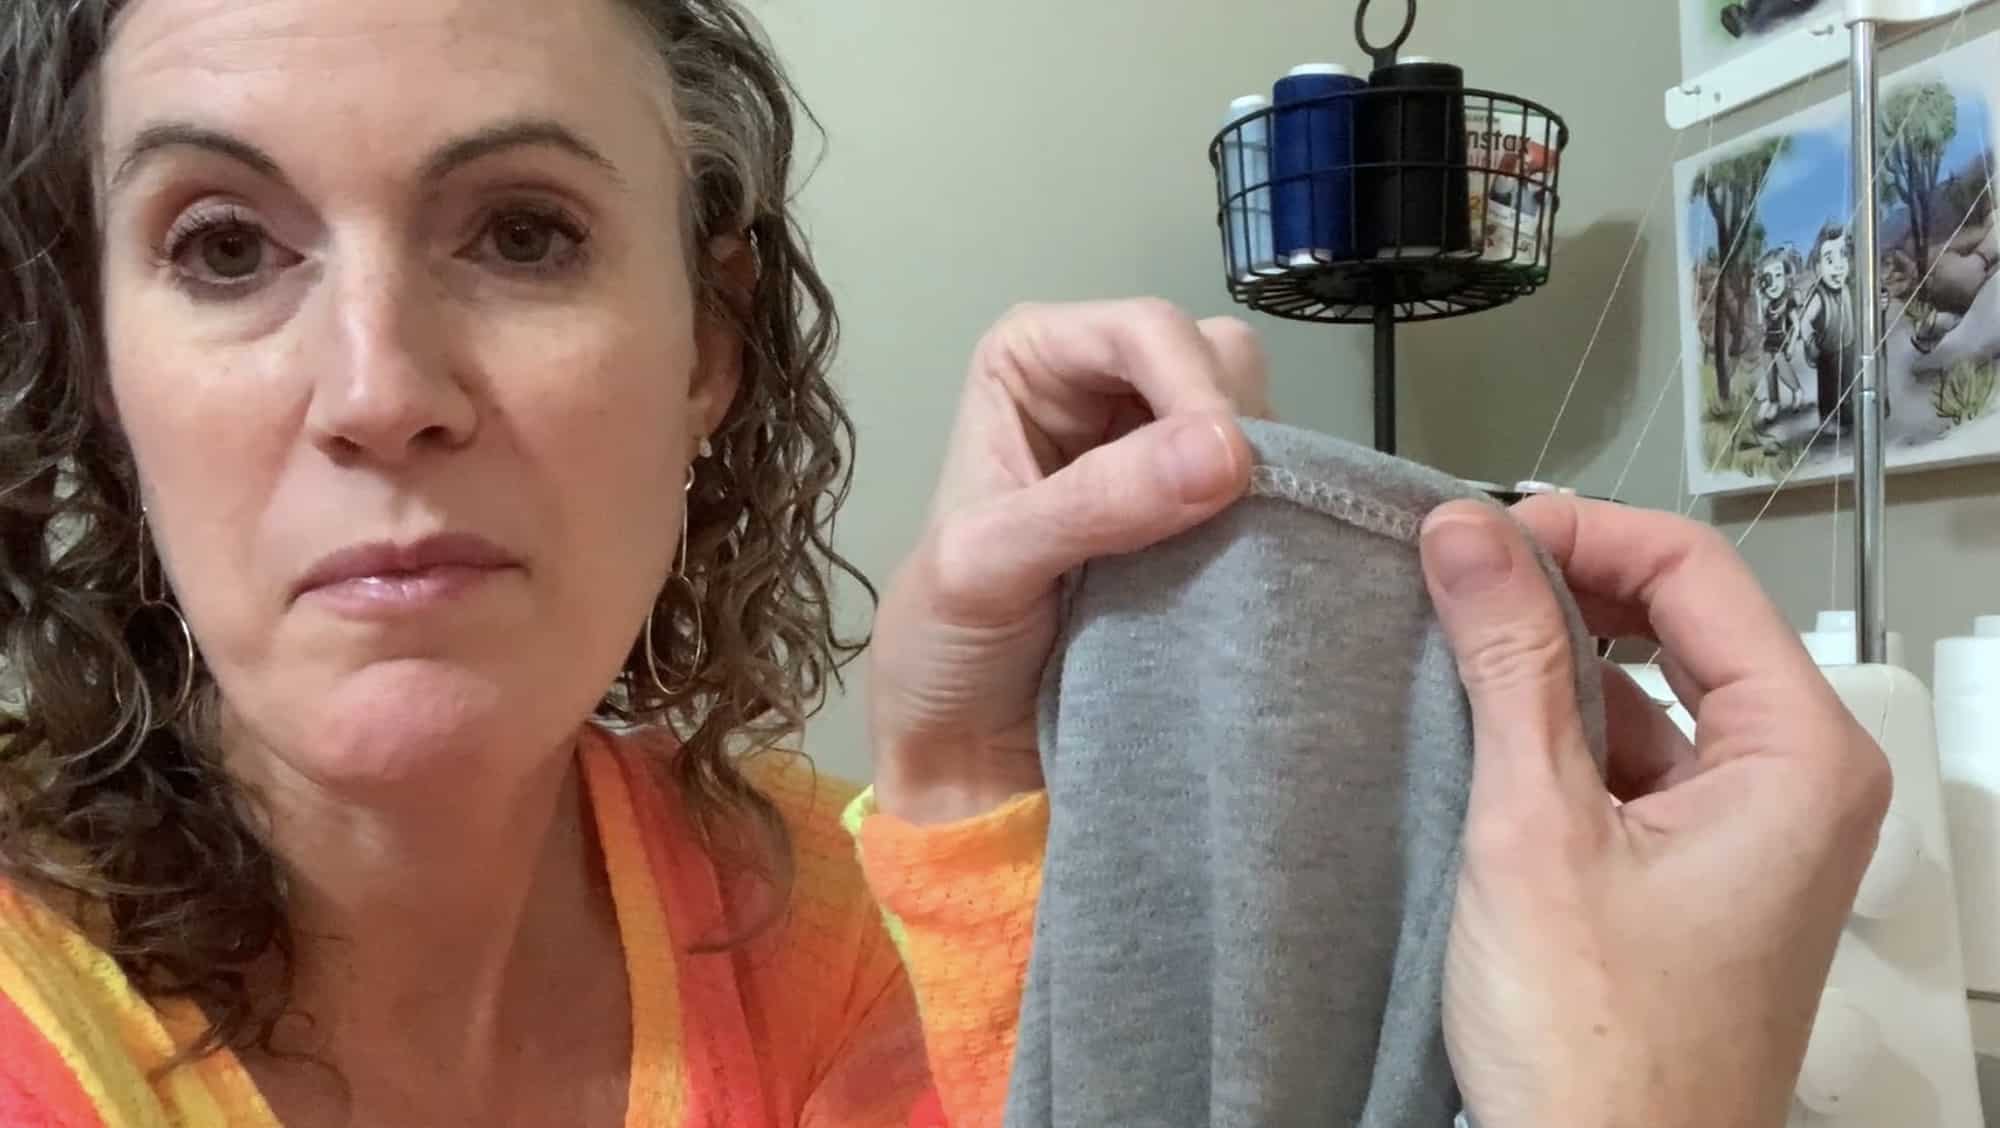
My fabric was a heavier knit so I adjust the differential feed all the way up. A lighter knit wouldn’t require the same adjustment.

Again, once I learned this trick, it changed my relationship with curves! I love it.

I hope you find these techniques helpful! Please drop questions in the comments below and join us in the Patterns for Pirates Facebook Group.

Happy sewing!

Filed Under: P4P University, Sewing Techniques, Sewing with Stretch, Knit Fabrics Leave a Comment

P4P University – Armbands Tips and Tricks

February 10, 2021

P4P University – Armbands Tips and Tricks


I’m going to spend a little time today showing how I get the best finish on my armbands.  They can be quite tricky to get right and people often struggle with ‘bubbling’ over the shoulder, which can ruin the look of an otherwise perfect neckline.

The pattern I will be using to illustrate how I sew my armbands is the Youth Essential Tank.  There are many different cut lengths, from shirt to dress length and the option for a regular tank or a racerback cutline.  Today I will be sewing the shirt length tank option for my daughter, ready for the summer weather which we are all desperate for right now!

The first thing to remember is that there are pattern pieces for you to use for the neckband and armband options and these are calculated at 85% of the opening, but the fabric you use may need you to make some adjustments to those pieces to get the perfect fit.  A fabric like a 100% cotton interlock won’t have as much stretch as you may need and you will probably want to add a little length to your bands, perhaps recalculate at 90%.  Something like a ribbing/cuffing has lots of stretch and that could be cut at 75 or 80% to get the same look. Either way you will want to ensure that you sew the shoulder and side seams of your garment at the full ½” seam allowance or you will find that the bands won’t be long enough, as not using the full seam allowance will make your neck/arm openings wider than they were drafted to be.

If you prefer a video, I filmed the process of making my Essential Tank here:

https://www.patternsforpirates.com/wp-content/uploads/2021/02/2021-02-07-16-32-02.mp4

Sew your shoulder seams and then prep your neckband by sewing the short sides, right sides together to form a loop.  Fold your fabric wrong sides together around the long edge and then place a clip at the joining seam.  Place another clip at the other end of the band by stretching the band a little to find the centre point opposite the joining seam.  Unlike a regular neckband, we won’t be quartering the neckhole and the neckband, just halving. Find the centre front and centre back of your neckhole and place clips. You should have this.

Next, evenly stretch the neckband until it fits the neckhole and clip the neckband to the neckhole at the shoulder seam (this won’t be the normal quarter point as the shoulder seam will be further towards the back). Then also place clips 1 inch either side of the shoulder seam NOT STRETCHING THE NECKBAND BETWEEN THESE THREE CLIPS. (If making an adult sized tank I wouldn’t stretch for 2 inches either side of the shoulder seam), then ease the remaining neckband in between the clips either side of the shoulder seam and the centre front and back clips.

Sew the neckband on, making sure to use the full seam allowance, and remembering not to stretch the neckband over the shoulder seams.  This reduces the tension on the neckband here and helps to stop the ‘bubbling’ we spoke of earlier.  I prefer to sew with the band uppermost as it helps me keep an eye on the seam allowance. I also like to start sewing just before the shoulder seam as this is the area we will NOT be stretching as we sew.  It is easy to forget about this if you come to it at the end of sewing the neckband on, so I like to do this part straightaway so I don’t have to worry about forgetting about it later.

TIP – If you have difficulty managing the three layers when sewing the neckband on, or if your fabric has a tendency to curl badly, I recommend sewing the neckband together around the long raw edge before attaching it to the bodice.  You can either use your overlocker/serger without trimming any seam allowance off, or do a zig zag stitch with your sewing machine right at the edge (you may need to stretch the neckband slightly as you sew round, just to make sure it will still fit in the neckhole after sewing this temporary stitch).  It just keeps those two layers together whilst you are sewing it onto the bodice, then you simply trim if off with your serger blade when you attach it, or trim with scissors if using a sewing machine.

Press with steam and then topstitch.  You can either use a chain stitch as I have here, or a regular 2 or 3 needle coverstitch.  If you have a sewing machine then you can choose a twin needle, long straight stitch or zig zag/stretch stitch of your choosing.

Next we move onto the armbands which are sewn in the same way as the neckband.  First sew the short ends to form a loop, then fold wrong sides together and mark the seam and opposite point on the band with clips or pins.

The armbands are a little easier because more often than not you find the shoulder and underarm seams are opposite one another.  I like to put the armband seam at the bottom of the armscye, for comfort and so you cannot see it when it is worn, then clip in place.  Next clip the opposite end of the armband to the shoulder seam.  Again, clip the armband to the armhole WITHOUT STRETCHING for 1 inch either side of the shoulder seam (again for a larger sized adult tank, I would not stretch for 2 inches either side of the shoulder seam), then ease the rest of the armband into the armhole between the other clips.  The idea behind this is that it should allow the armband to run flat over the shoulder seam, but then the added tension around the bottom of the armband will encourage it to flip up and sit snug against the side of the body at the bottom and sides.  

Sew, using the full seam allowance, then press with steam and top stitch as before.

Finish the rest of your garment as usual, and you’re done.

I hope you found this tutorial helpful and don’t forget if you have any questions we have a large community on our Facebook page who are always happy to help.


Happy Sewing!


Dana x

Filed Under: P4P University, Sewing with Stretch, Knit Fabrics Leave a Comment

SOS sal day 2 (cut fabric)

May 16, 2019


Welcome to day 2 of our SOS knit pants sew along. Today we will be choosing the fabric, cutting it and gathering all necessary notions. You should have your pattern pieces ready from yesterday. If you haven’t removed the top part of the pocket on the front pieces, now is the time to do it.

But first let’s talk a little about the right fabric for the SOS pants. As you can see in the video below I am using a gorgeous athletic knit from Kammie Lou Lou for my SOS skinny pants. This poly base knit is custom printed and the perfect medium weight. For the straight leg I absolutely love French Terry or Baby French Terry for a casual/sporty feel and ponte for a more elegant look. I highly encourage you to avoid thinner knits like double brushed poly, low weight cotton spandex or bamboo spandex.

Custom Brushed Poly
Jacquard
Baby French Terry
Jeggings
Athletic poly

Kammie Lou Lou is this sew along’s sponsor too, so one of you will be getting a $75 Gift Card to the retail shop so you can treat your to some gorgeous custom printed fabric.


You will also need 1″ or 1.25″ elastic for the waistband. Not all elastic is the same, so keep that in mind when you choose knit elastic vs no roll elastic.

The Day 2 video is posted below. Check it out and once you are done cutting your fabric post a picture of your prepped fabric in the comments of the Day 2 photo of the SOS SAL album in the M4M & P4P Sew Along group.


SOS sew along | Day 1 – Print and cut pattern

SOS sew along | Day 2 – Cut fabric

SOS sew along | Day 3 – Back: pocket, yoke, inseam

SOS sew along | Day 4 – Front: pocket, inseam

SOS sew along | Day 5 – Leg inseam, side seam, hem

SOS sew along | Day 6 – Waistband

SOS sew along | Day 7 – Winners announcement

Filed Under: Frequently Asked Questions, Sew-A-Long, Uncategorized Leave a Comment

Brunch Blouse|Bitty Brunch Blouse SAL day 8 (winners announcement)

March 20, 2019

Let me start this much anticipated blog post with a “wow” ! You have outdone yourself this past week, braving technical difficulties and Facebook glitches. We have seen so many gorgeous Brunch Blouse and Bitty Brunch Blouses being sewn and as always we had a hard task at hand…so… Without further ado: our big sew along winner is

STACIA ZINK! Her bright yellow bitty blouse caught the team’s eye, so adorable!

We loved that Stacia treated herself to a Brunch Blouse too. Great job! You have won a $20 gift card to Patterns for Pirates and a $50 gift card to Backstitch SoFlo.

As always, we have a runner up prize too! Congratulations, Melanie Carr!

Melanie’s BB tops are so beautiful and I’m sure they will become a staple in her closet. Melanie won a $20 gift card to Made for Mermaids and a $25 gift card to Backstitch SoFlo. Happy stitching!

A huge THANK YOU to Backstitch SoFlo for sponsoring this sew along.


Before I let you go, I wanted to show off my Mane Attraction Brunch Blouse dress that I absolutely love.

Stay tuned for the mermaids’  sew along announcement. You do not want to miss it!

Brunch Blouse|Bitty Brunch Blouse SAL day 1 (print pattern)

Brunch Blouse|Bitty Brunch Blouse SAL day 2 (cut fabric)

Brunch Blouse|Bitty Brunch Blouse SAL day 3 (darts and placket)

Brunch Blouse|Bitty Brunch Blouse SAL day 4 (pocket/waist ties/back seam)

Brunch Blouse|Bitty Brunch Blouse SAL day 5 (shoulder/side seams)

Brunch Blouse|Bitty Brunch Blouse SAL day 6 (neckband)

Brunch Blouse|Bitty Brunch Blouse SAL day 7 (finish sleeves/hem)

Brunch Blouse|Bitty Brunch Blouse SAL day 8 (winners announcement)

Filed Under: Frequently Asked Questions, Sew-A-Long, Uncategorized 2 Comments

Brunch Blouse|Bitty Brunch Blouse SAL day 7 (finish sleeves/hem)

March 18, 2019

And just like that we made it to the last sewing day. Today we are putting the finishing touches on out Brunch Blouses.

  • If you have sewn the tank option, you will be finishing the arm opening with bias binding. Here is a refresher blog on woven bias binding if you didn’t get to check it out yesterday.
  • If you opted for the cap sleeve style, I highly encourage you to fold your sleeve hem 1/4″ press, fold again 1/4″ and press and only then stitch. This will yield a very polished sleeve look.
  • I have selected the short sleeve option with a cuff and a snap tab. This is a great way to add accent colors and even use some decorative buttons.

The last sew along video is posted below. Take a look and once you are done sewing post your final picture in the DAY 7 COMMENTS of the BB/BBB sal album in the group…you know the drill 🙂 The team will pick out two winners on Wednesday so you have an extra day to catch up on your project.

Brunch Blouse|Bitty Brunch Blouse SAL day 1 (print pattern)

Brunch Blouse|Bitty Brunch Blouse SAL day 2 (cut fabric)

Brunch Blouse|Bitty Brunch Blouse SAL day 3 (darts and placket)

Brunch Blouse|Bitty Brunch Blouse SAL day 4 (pocket/waist ties/back seam)

Brunch Blouse|Bitty Brunch Blouse SAL day 5 (shoulder/side seams)

Brunch Blouse|Bitty Brunch Blouse SAL day 6 (neckband)

Brunch Blouse|Bitty Brunch Blouse SAL day 7 (finish sleeves/hem)

Brunch Blouse|Bitty Brunch Blouse SAL day 8 (winners announcement)

Filed Under: Frequently Asked Questions, Sew-A-Long, Uncategorized Leave a Comment

Brunch Blouse|Bitty Brunch Blouse SAL day 6 (neckband)

March 17, 2019

Two more sewing days let in this SAL. Can you believe it? Today we will be focusing on the neckband. The Brunch Blouse and Bitty Brunch blouse neckline is finished with bias binding. The pattern calls for single fold bias tape.

I am a huge supporter of store bought bias tape because it gives me more time to focus on other projects, plus the finishing tape is not visible from the outside of the BB shirt/dress. If you have a local Joann or Walmart, look through their notions walls, you will see single and double fold bias tape in a variety of colors.

However, if you are keen on matching the bias binding with the fabric you can certainly create your own. In this P4P University blog, Nicole and Judy teach you how to diy bias tape. Take a look over it and get to cutting.

Tip: The neckline gives you plenty of opportunity to add a personal touch to your blouses. Think, double fold bias tape or placing the single fold on the outside for a pop of color…think, decorative stitches …ohh the possibilities!

Go ahead and read the tutorial and watch day 6 video below. Once you finish sewing the bias binding one, snap a picture and add it to the comments of Day 6 photo of the BB/BBB sew along album.

Brunch Blouse|Bitty Brunch Blouse SAL day 1 (print pattern)

Brunch Blouse|Bitty Brunch Blouse SAL day 2 (cut fabric)

Brunch Blouse|Bitty Brunch Blouse SAL day 3 (darts and placket)

Brunch Blouse|Bitty Brunch Blouse SAL day 4 (pocket/waist ties/back seam)

Brunch Blouse|Bitty Brunch Blouse SAL day 5 (shoulder/side seams)

Brunch Blouse|Bitty Brunch Blouse SAL day 6 (neckband)

Brunch Blouse|Bitty Brunch Blouse SAL day 7 (finish sleeves/hem)

Brunch Blouse|Bitty Brunch Blouse SAL day 8 (winners announcement)

Filed Under: Frequently Asked Questions, Sew-A-Long, Uncategorized Leave a Comment

Brunch Blouse|Bitty Brunch Blouse SAL day 5 (shoulder/side seams)

March 16, 2019

The 5th day of our sew along is here. Today we sew the shoulder and the side seam, probably the easiest day of the sew along 😉 Remember to use your sewing machine for this steps and just finish the raw edge with the serger or a zig zag stitch.

TIP: If you’re doing a hemmed sleeve now would be a good time to press your memory hem. This will make it so much easier to hem later on. 

The Brunch Blouse and Bitty Brunch Blouse patterns follow a 1/2″ seam allowance so be sure to not deviate from it when you sew the shoulder seams and side seams.

Watch the day 5 video below and be sure to post a picture of today’s progress in the day 5 photo comments of the BB / BBB sew along album in the M4M & P4P Sew Along Group.


Brunch Blouse|Bitty Brunch Blouse SAL day 1 (print pattern)

Brunch Blouse|Bitty Brunch Blouse SAL day 2 (cut fabric)

Brunch Blouse|Bitty Brunch Blouse SAL day 3 (darts and placket)

Brunch Blouse|Bitty Brunch Blouse SAL day 4 (pocket/waist ties/back seam)

Brunch Blouse|Bitty Brunch Blouse SAL day 5 (shoulder/side seams)

Brunch Blouse|Bitty Brunch Blouse SAL day 6 (neckband)

Brunch Blouse|Bitty Brunch Blouse SAL day 7 (finish sleeves/hem)

Brunch Blouse|Bitty Brunch Blouse SAL day 8 (winners announcement)

Filed Under: Frequently Asked Questions, Sew-A-Long, Uncategorized 1 Comment

Brunch Blouse|Bitty Brunch Blouse SAL day 4 (pocket/waist ties/back seam)

March 14, 2019

Good morning, pirates! Today we will be focusing on the pocket(s), waist ties and back seam. The pocket and waist ties and optional so if you are skipping them, you would only sew the back seam. Easy peasy!

You can add two pockets or just one, both would look just as cute. I personally like one contrasting pocket on the left side but I also like the look of two pockets from the same fabric.

The Brunch Blouse is a relaxed fit throughout the waist so the ties will help “cinch” you in, if you are going for an hour glass look. I absolutely love the shape of the ties and that you can tie them in the front or the back.

When you sew the back seam, remember to follow the 1/2 inch seam allowance and to stitch with your sewing machine. I know temptation to use just your serger is big but remember that a serger stitch is not as resilient to wear as a sewing machine straight stitch. Use your serger, but to finish the raw edges!

Take a look over today’s video and once you finish sewing post a picture of your progress in the comments of the Day 4 photo of the BB/BBB sew along album in the M4M & P4P Sew Along group.

Brunch Blouse|Bitty Brunch Blouse SAL day 1 (print pattern)

Brunch Blouse|Bitty Brunch Blouse SAL day 2 (cut fabric)

Brunch Blouse|Bitty Brunch Blouse SAL day 3 (darts and placket)

Brunch Blouse|Bitty Brunch Blouse SAL day 4 (pocket/waist ties/back seam)

Brunch Blouse|Bitty Brunch Blouse SAL day 5 (shoulder/side seams)

Brunch Blouse|Bitty Brunch Blouse SAL day 6 (neckband)

Brunch Blouse|Bitty Brunch Blouse SAL day 7 (finish sleeves/hem)

Brunch Blouse|Bitty Brunch Blouse SAL day 8 (winners announcement)

Filed Under: Frequently Asked Questions, Sew-A-Long, Uncategorized 2 Comments

Brunch Blouse|Bitty Brunch Blouse SAL day 3 (darts and placket)

March 13, 2019

Welcome to day 3 of our Brunch and Bitty Brunch sew along. Today we will be focusing on the darts (if you are sewing the women top or dress) and the placket.

Make sure that you transfer the dart marking from the pattern to the fabric’s wrong side. I love using water soluble marking pen because I know the lines with disappear once I stem it. Another tip I have for you when sewing darts is to press the dart before AND after you sew. Ironing it will help keep the fabric in place while stitching.

Second part of the day is dedicated to the henley style placket. This is a step that may scare first time henley makers but trust me when I say it, if you go slow and you press frequently, you will see that it is not as a daunting task as you thought. Before you get started, take a look over our Placket 101 blog. The videos I have in the P4P University blog are actually of the Brunch Blouse placket so you can certainly refer to it.

Below is a link to the Day 3 sew along video which includes both the dart and placket construction. Once you complete today’s steps, be sure to post a picture of your progress in the comments of day 4 photo of the Brunch/Bitty Brunch sew along album.


Brunch Blouse|Bitty Brunch Blouse SAL day 1 (print pattern)

Brunch Blouse|Bitty Brunch Blouse SAL day 2 (cut fabric)

Brunch Blouse|Bitty Brunch Blouse SAL day 3 (darts and placket)

Brunch Blouse|Bitty Brunch Blouse SAL day 4 (pocket/waist ties/back seam)

Brunch Blouse|Bitty Brunch Blouse SAL day 5 (shoulder/side seams)

Brunch Blouse|Bitty Brunch Blouse SAL day 6 (neckband)

Brunch Blouse|Bitty Brunch Blouse SAL day 7 (finish sleeves/hem)

Brunch Blouse|Bitty Brunch Blouse SAL day 8 (winners announcement)

Filed Under: Frequently Asked Questions, Sew-A-Long, Uncategorized Leave a Comment

Brunch Blouse|Bitty Brunch Blouse SAL day 2 (cut fabric)

March 12, 2019


Welcome to day 2 of our Brunch and Bitty Brunch  sew along. Today we will be choosing the fabric, cutting it and gathering all necessary notions and accessories. You should have your pattern pieces ready from yesterday.

But first let’s talk a little about the right fabric for this pattern. As you can see in the video below I am using a gorgeous woven from Backstitch Fabrics for my Brunch Blouse. This woven is custom printed and the perfect weight. For the women’s blouse I absolutely love rayon fabric and chiffons. I highly encourage you to avoid quilter cottons because they do not have the necessary drape to make the top or dress flattering….and we all want that, am I right? You can get away with good quality quilter cotton for the Bitty Brunch though.


Backstitch SoFlo is this sew along’s sponsor too, so one of you will be getting a $50 Gift Card to the shop shop so you can treat your to some gorgeous custom printed woven fabric. Our second winner will receive a $25 gift card to Backstitch SoFlo too.

If you picked the henley style option you will also need buttons or snaps. My recommendation for buttons or snaps is smaller size ones. The placket finished width is aprox 1/2 inch so your buttons must be smaller than this.

The Day 2 video is posted below. Check it out and once you are done cutting your fabric post a picture of your prepped fabric in the comments of the Day 2 photo of the Brunch Blouse/Bitty Brunch Blouse SAL album in the M4M & P4P Sew Along group.

Brunch Blouse|Bitty Brunch Blouse SAL day 1 (print pattern)

Brunch Blouse|Bitty Brunch Blouse SAL day 2 (cut fabric)

Brunch Blouse|Bitty Brunch Blouse SAL day 3 (darts and placket)

Brunch Blouse|Bitty Brunch Blouse SAL day 4 (pocket/waist ties/back seam)

Brunch Blouse|Bitty Brunch Blouse SAL day 5 (shoulder/side seams)

Brunch Blouse|Bitty Brunch Blouse SAL day 6 (neckband)

Brunch Blouse|Bitty Brunch Blouse SAL day 7 (finish sleeves/hem)

Brunch Blouse|Bitty Brunch Blouse SAL day 8 (winners announcement)

Filed Under: Frequently Asked Questions, Sew-A-Long, Uncategorized Leave a Comment

  • 1
  • 2
  • Next Page »

Featured Patterns

  • Mae Top - Bundle Mae Top - Bundle $20.00 Original price was: $20.00.$18.00Current price is: $18.00.
  • Mae Bottom - Bundle Mae Bottom - Bundle $20.00 Original price was: $20.00.$18.00Current price is: $18.00.
  • Loosey Goosey - Bundle Loosey Goosey - Bundle $20.00
  • Bacall Bodysuit Bacall Bodysuit $12.00
  • Privacy Policy
  • Refund Policy
  • Affliliate Program
  • Contact Us
  • About

Copyright © 2025 Patterns for Pirates

Copyright © 2025 · Genesis Framework · WordPress · Log in