Patterns for Pirates

P4P stylish, modern, wearable patterns

  • Home
  • Blog
    • Frequently Asked Questions
    • Pattern Releases
      • Free Patterns
    • P4P University
      • Fitting
      • Sewing with Stretch, Knit Fabrics
      • Sewing with Woven Fabrics
      • Sewing Machines
    • Sew-A-Longs
    • Fabric for Pirates
    • Pattern Hacks
    • Announcement
      • Blog Tours
      • Contest/Giveaway
  • Shop
  • Bundle Discounts
  • Flash Friday
  • Gift Cards
  • My Account
  • Cart

Kelli Dress Hacks

January 8, 2022

Straight Cut Skirt

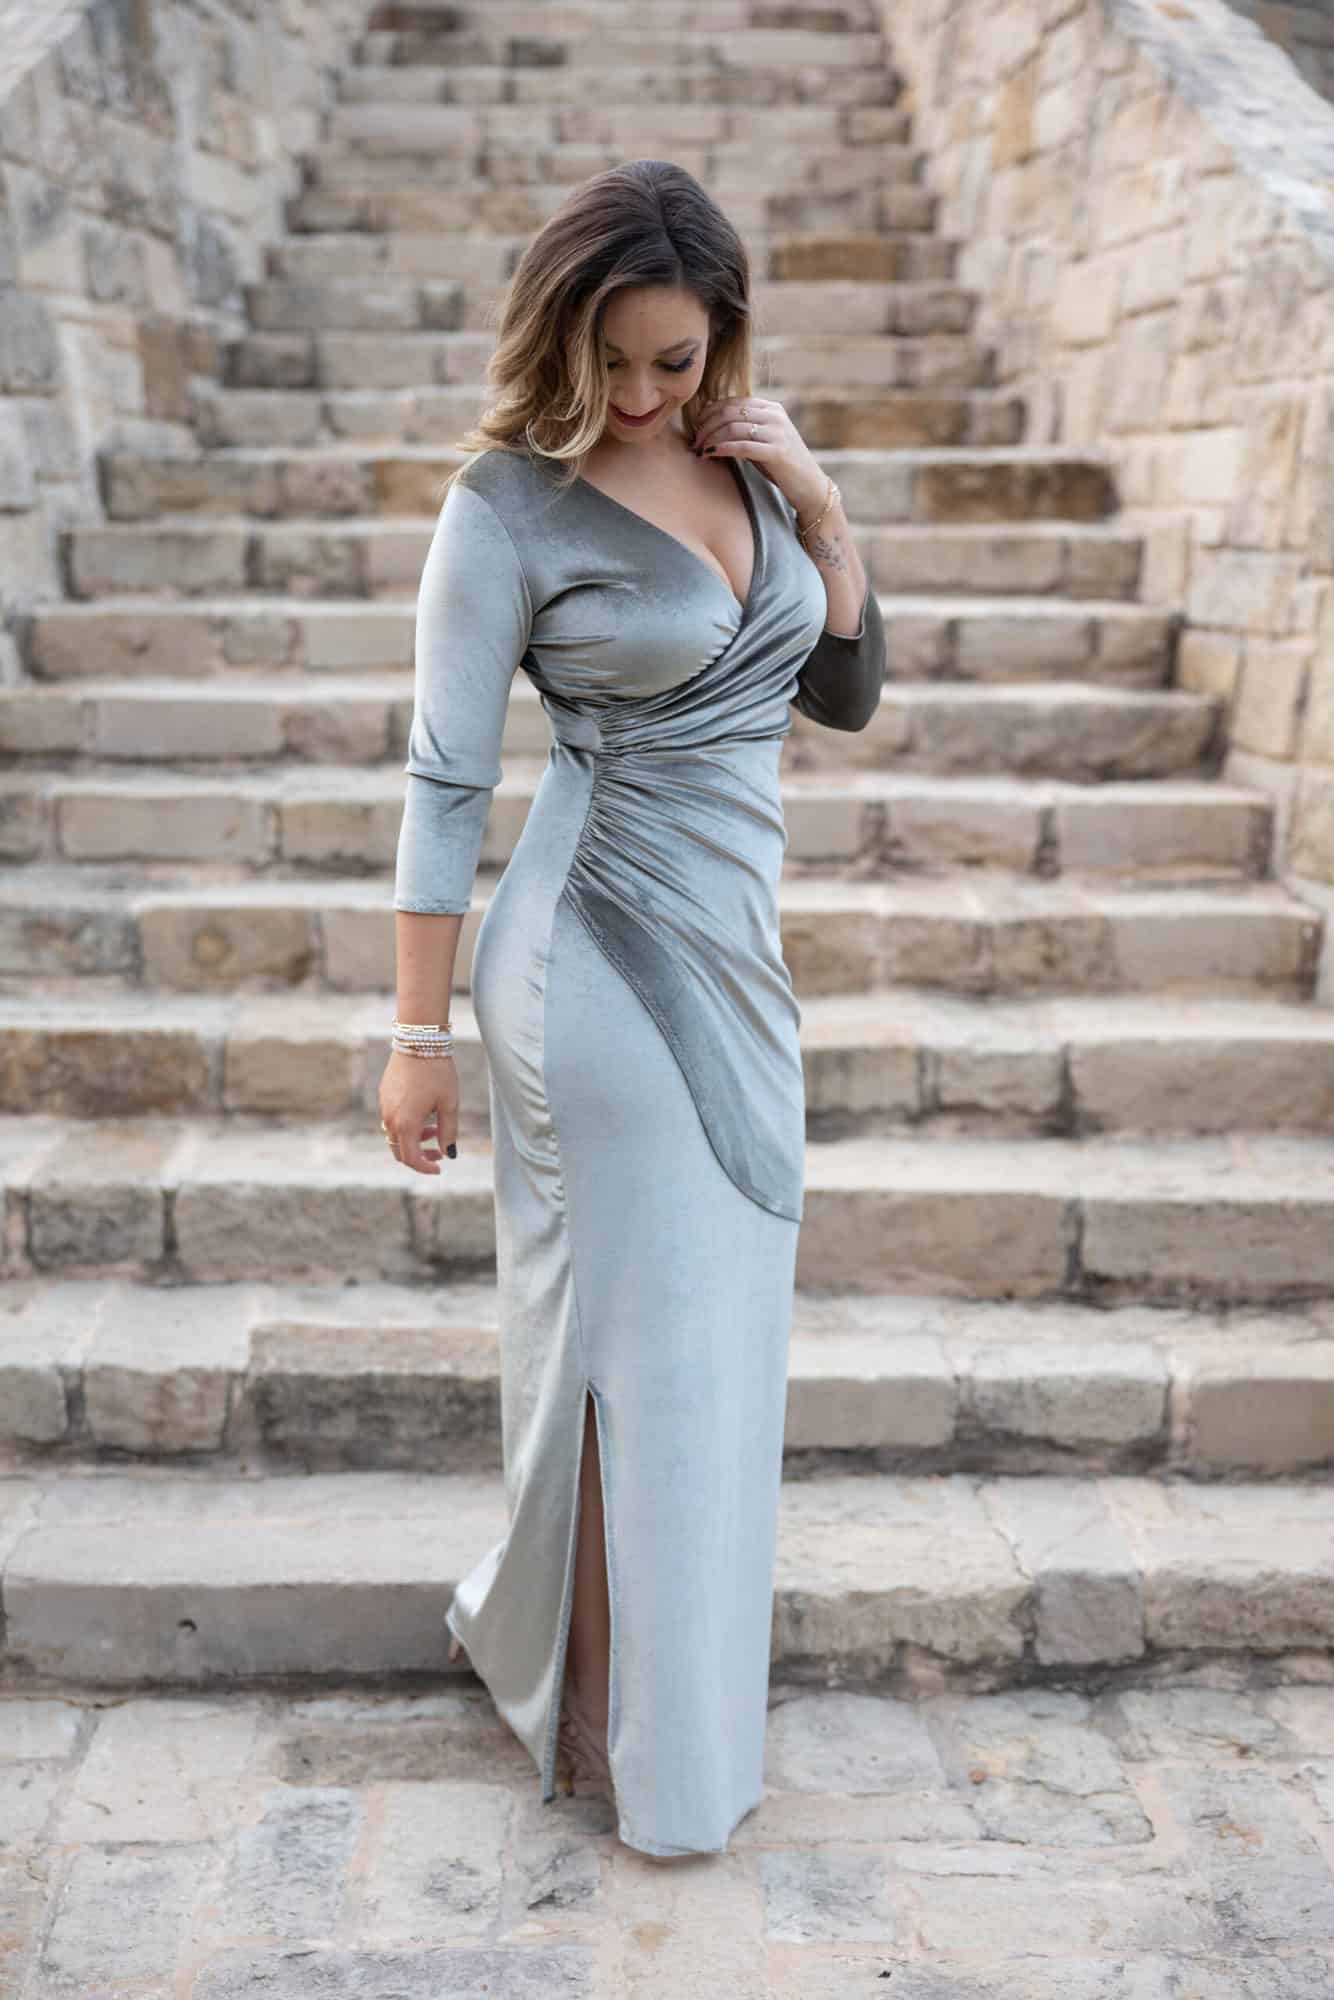
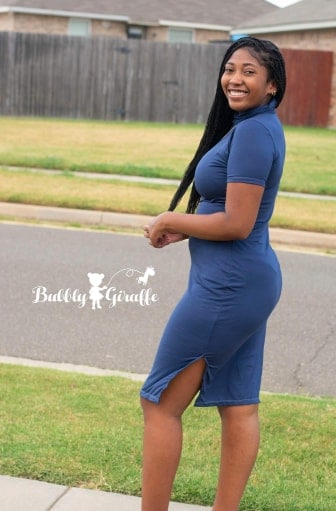
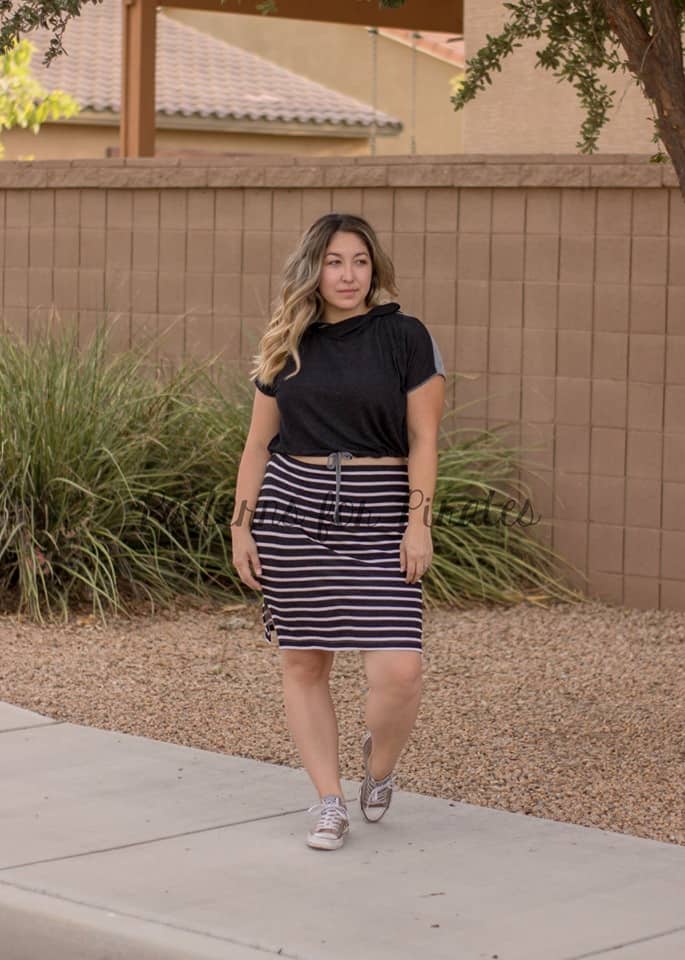
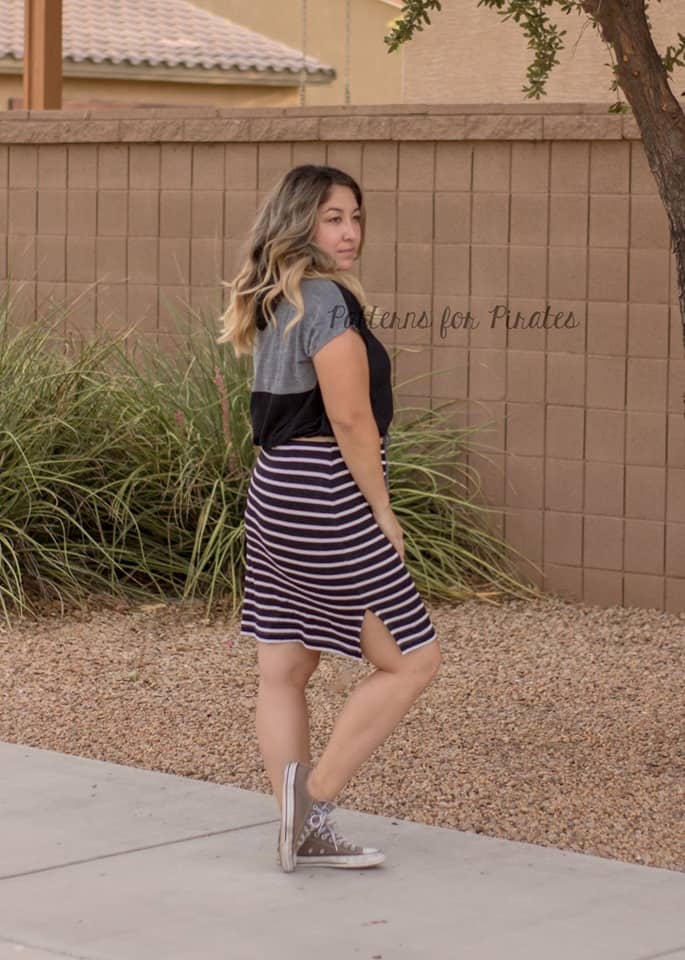
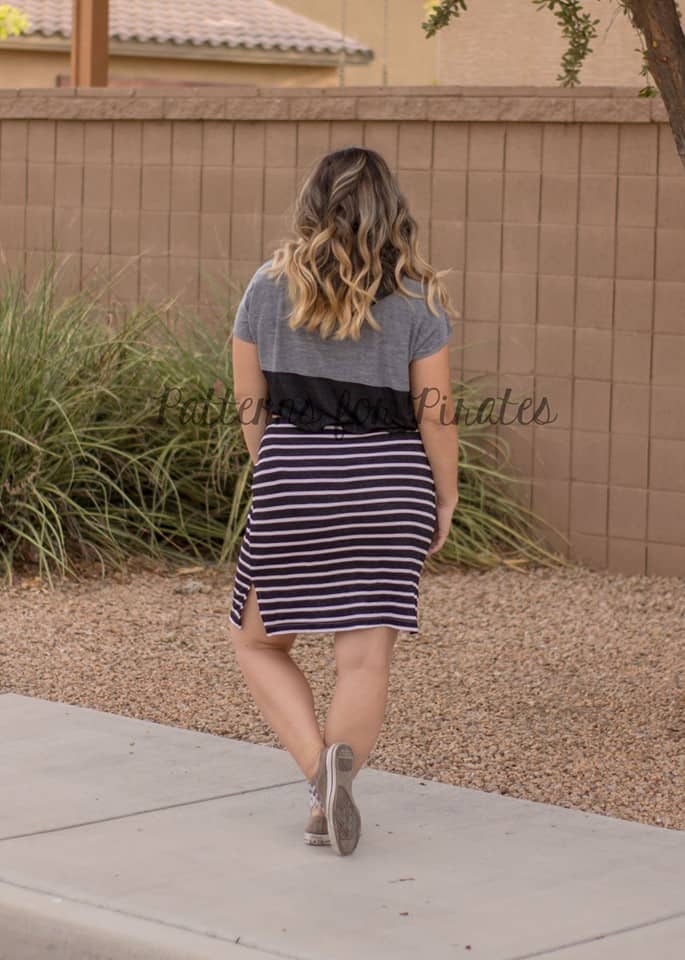
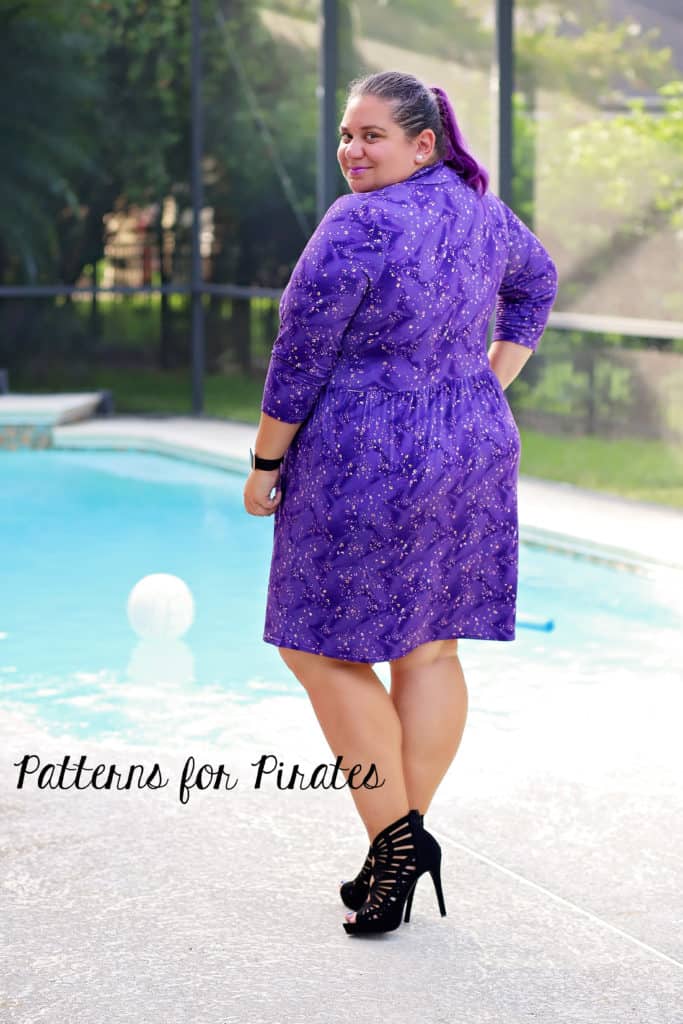
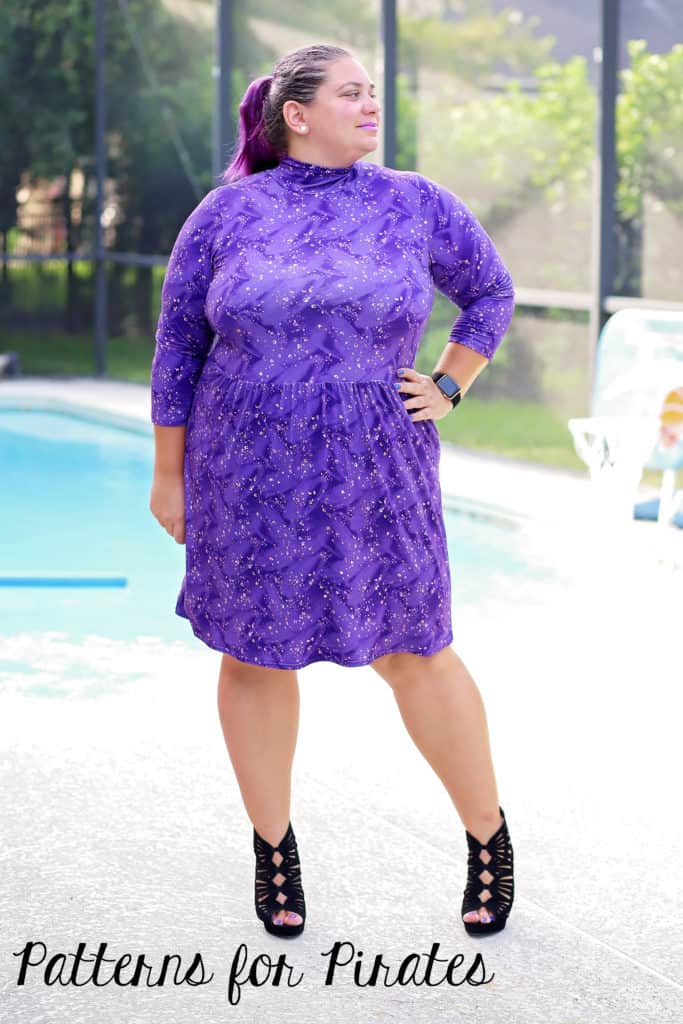
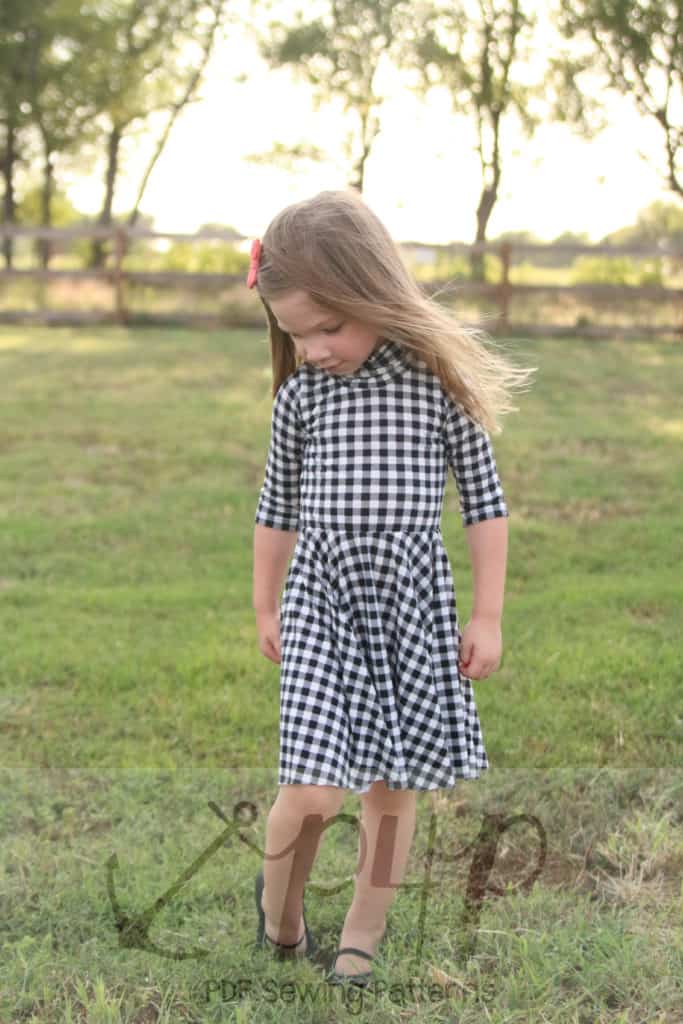
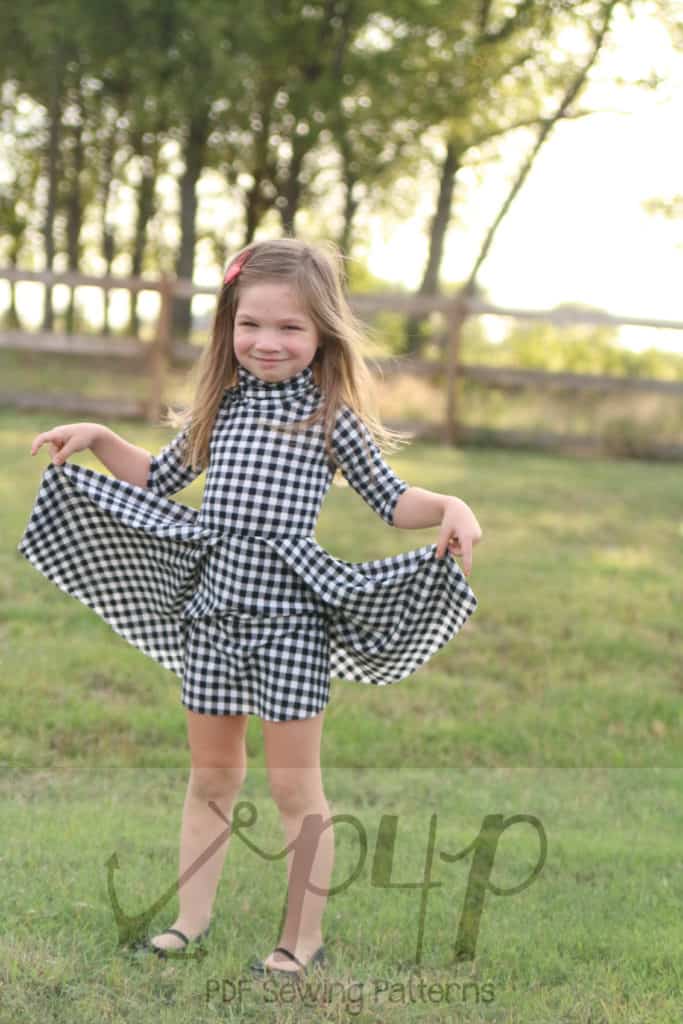
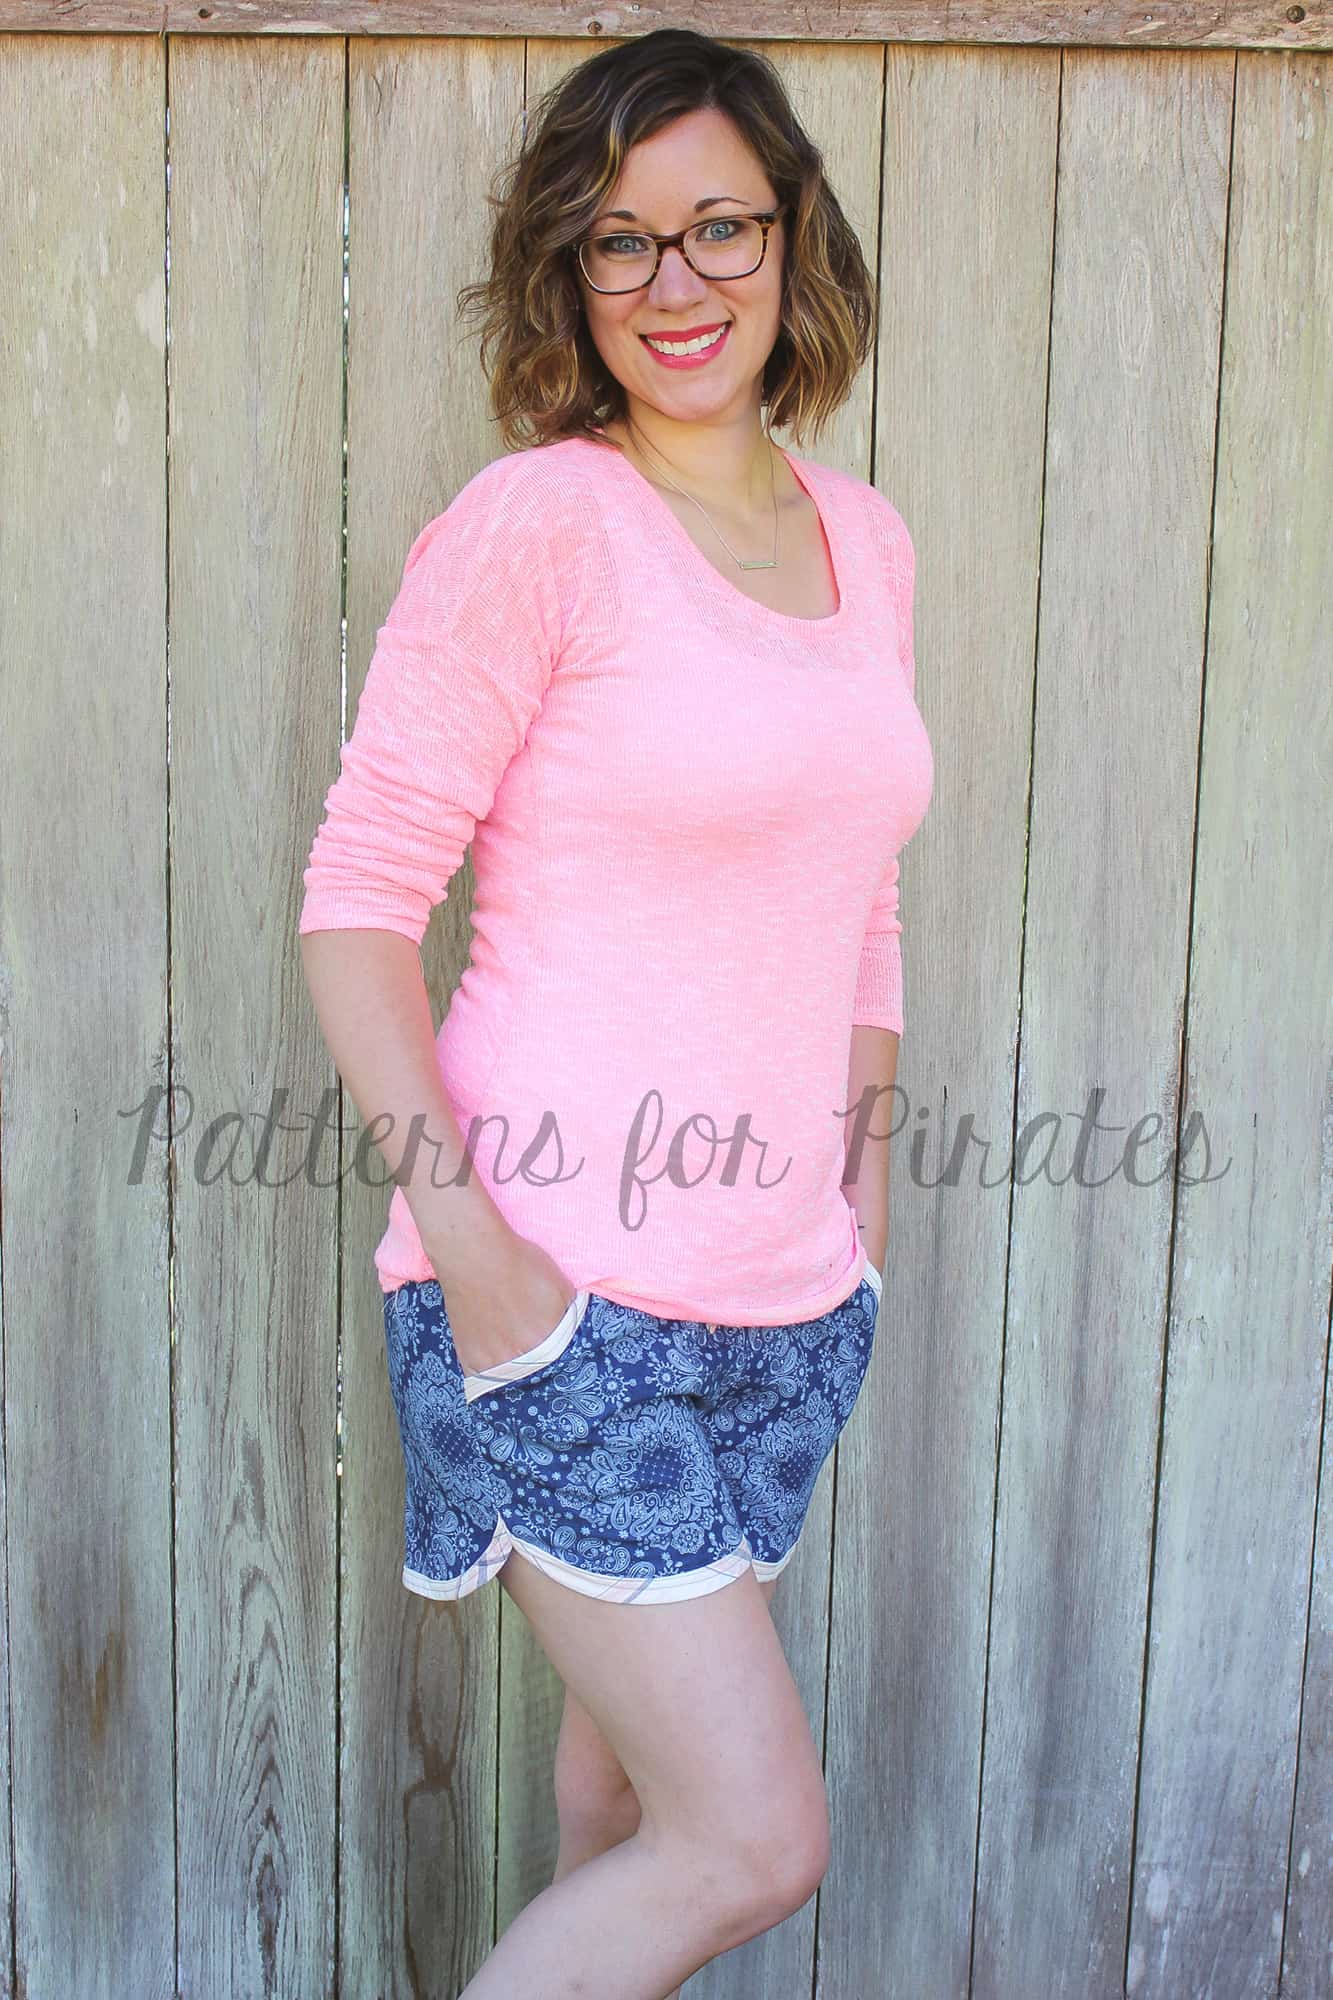
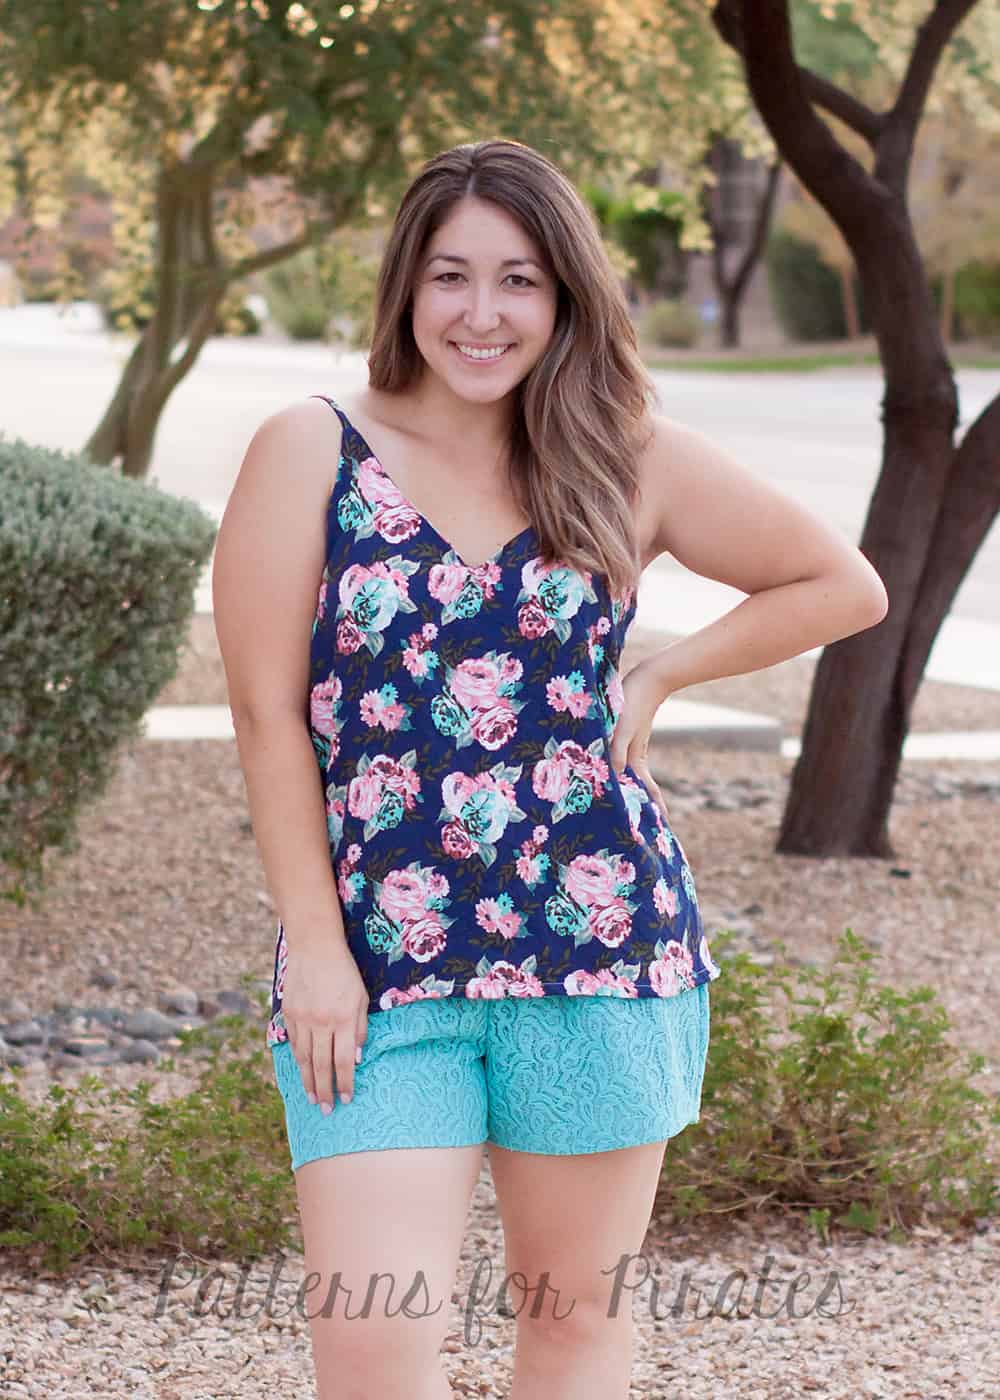
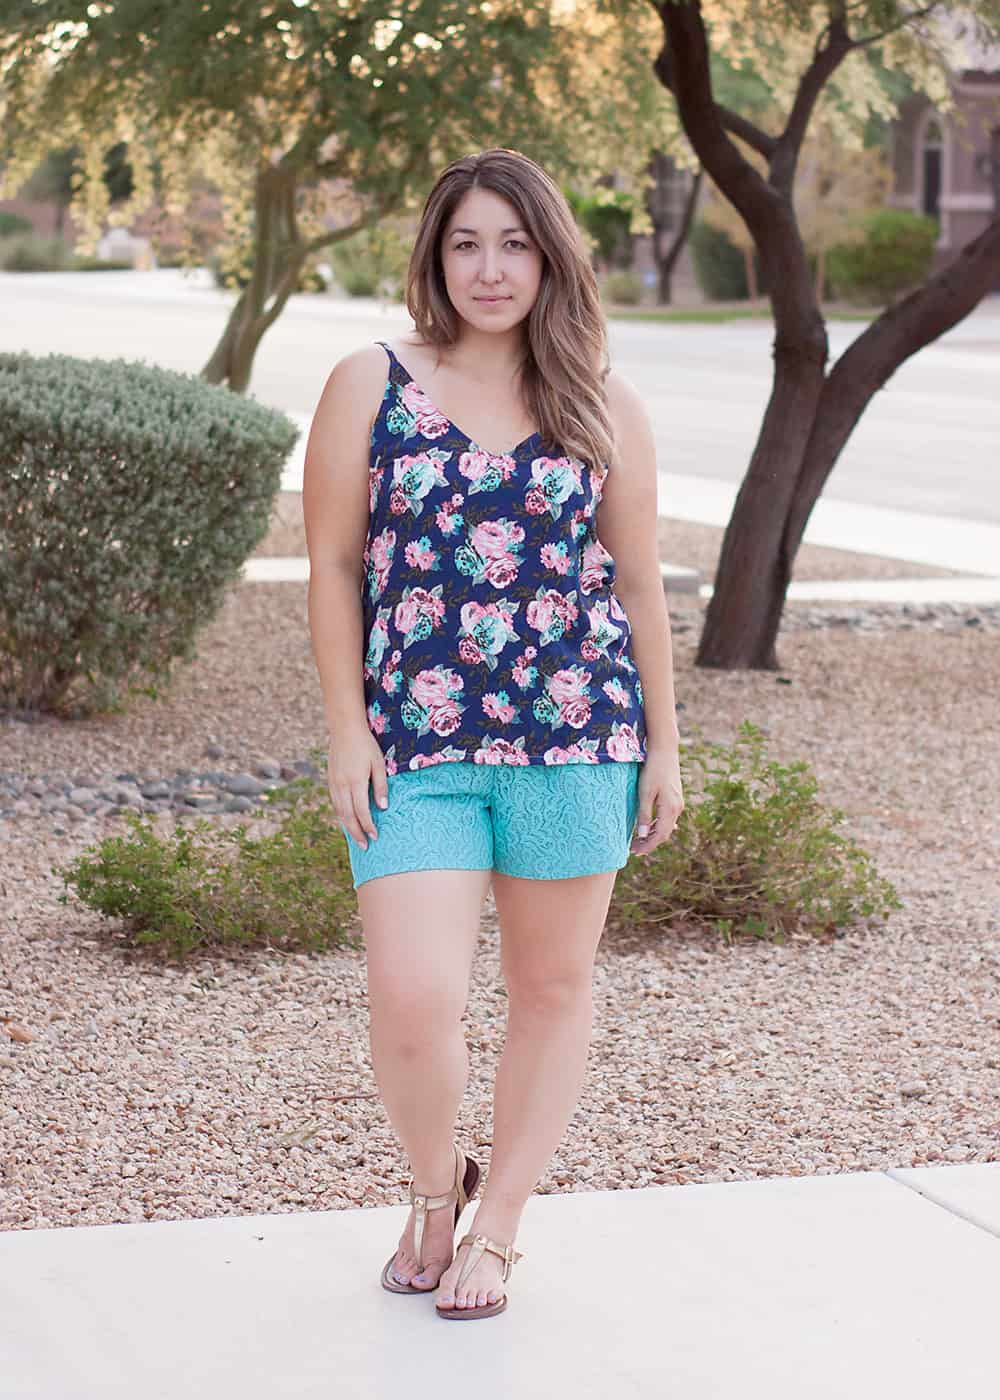
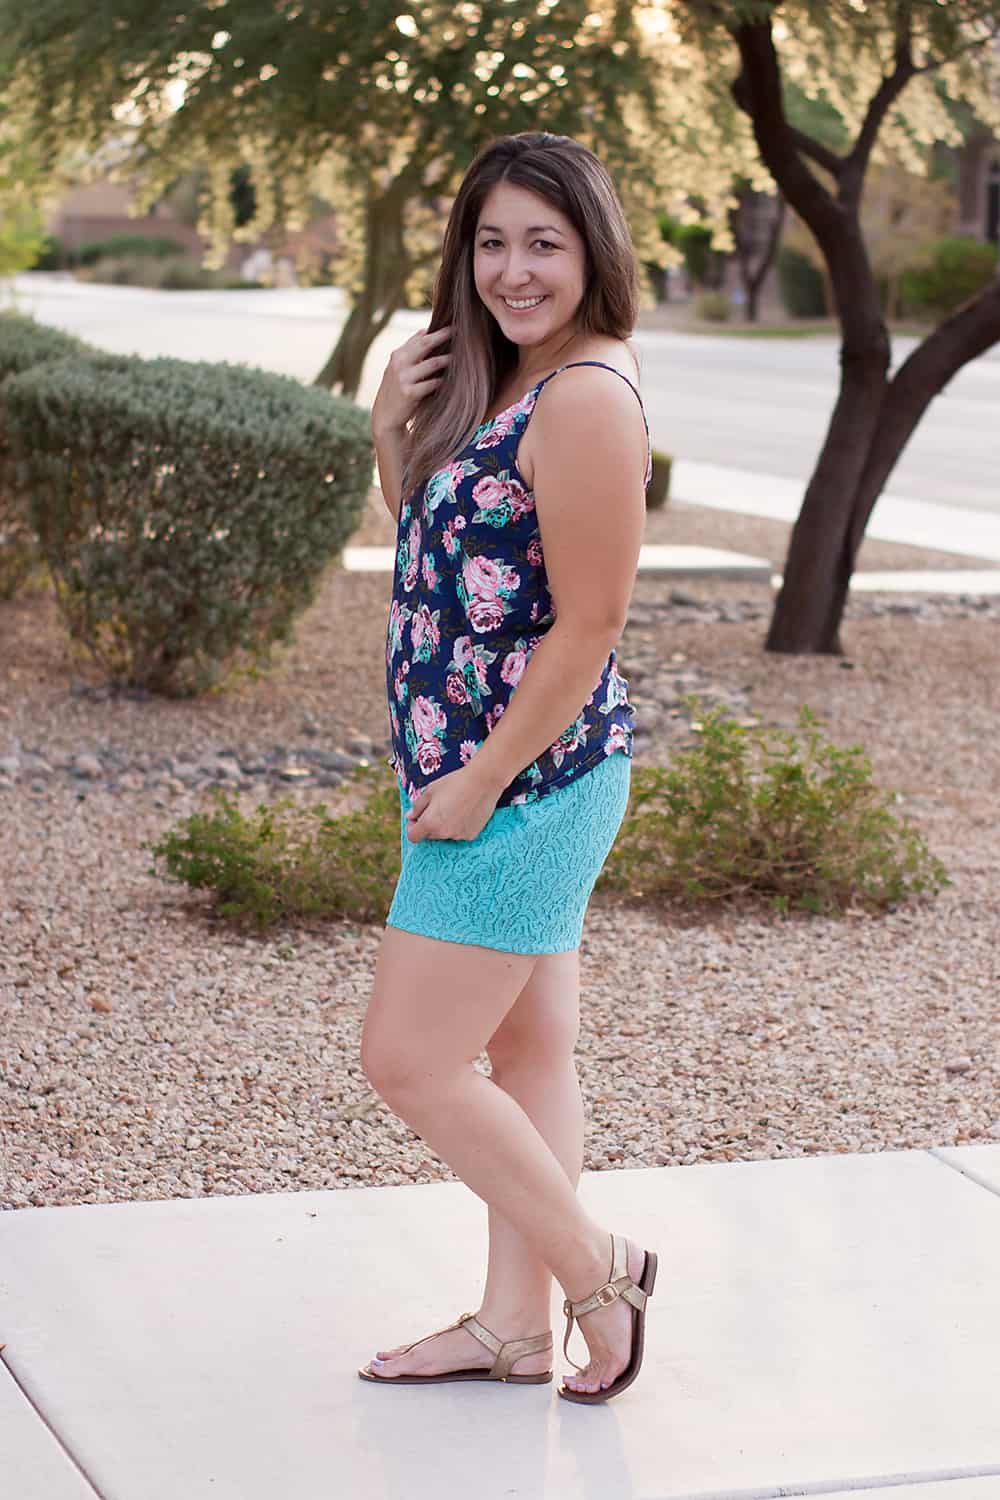
I absolutely had to make this dress as soon as I saw Judy’s first sketches for the pattern. I love the cinched in waist and wrap over top and skirt, it’s just my kind of look. Sometimes it’s nice to have a little more coverage on a skirt, though, and I knew I wanted to try a really simple little hack to straighten the bottom edge of the underskirt piece, for a faux wrapover look.

The option is included for the full length skirt pieces, so it was the easiest hack to do and got me just the look I wanted for me.


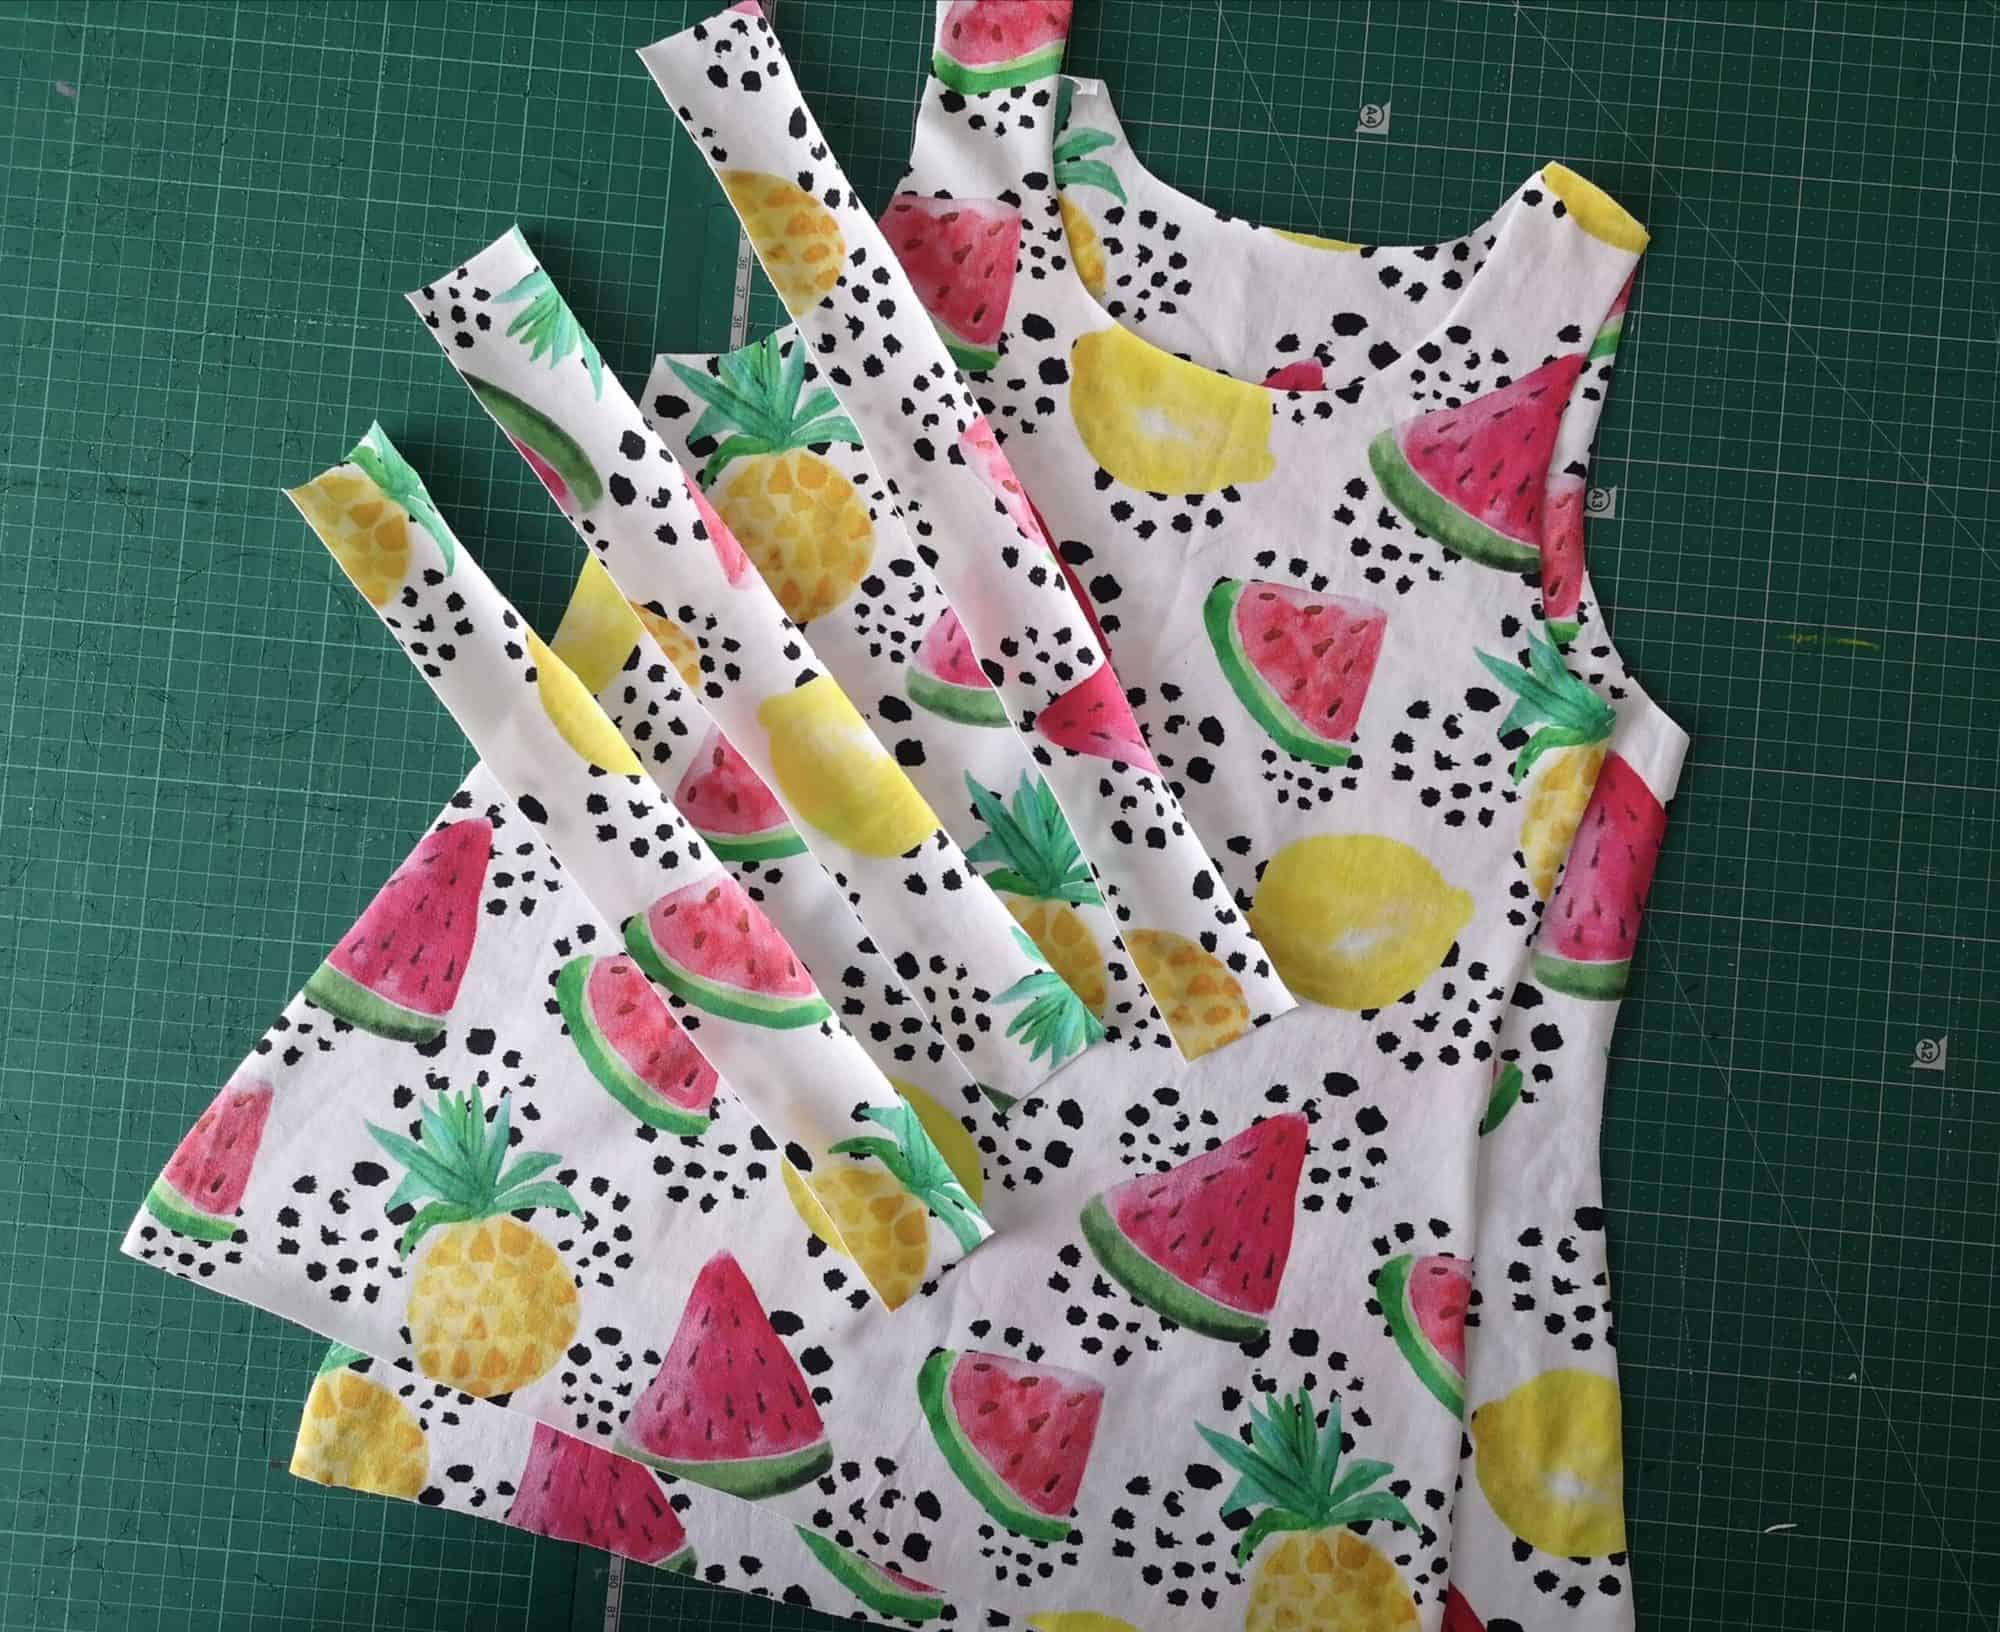
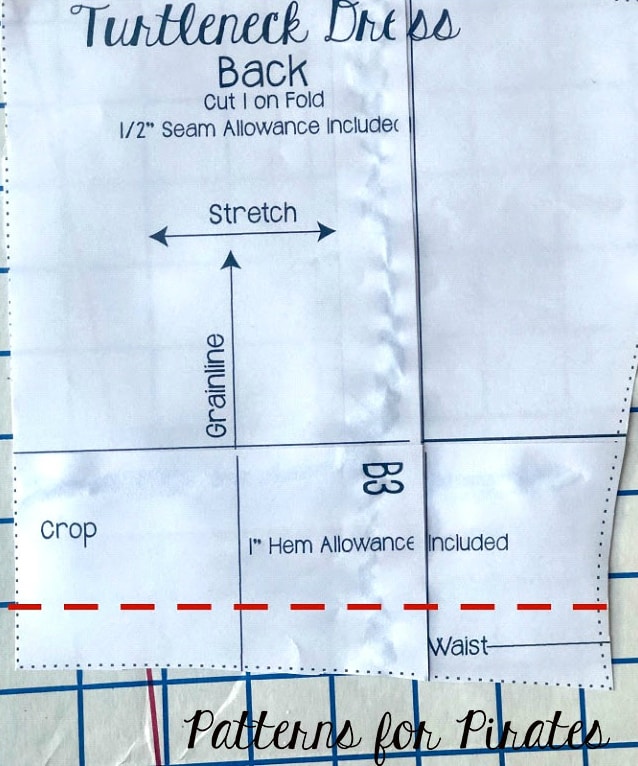
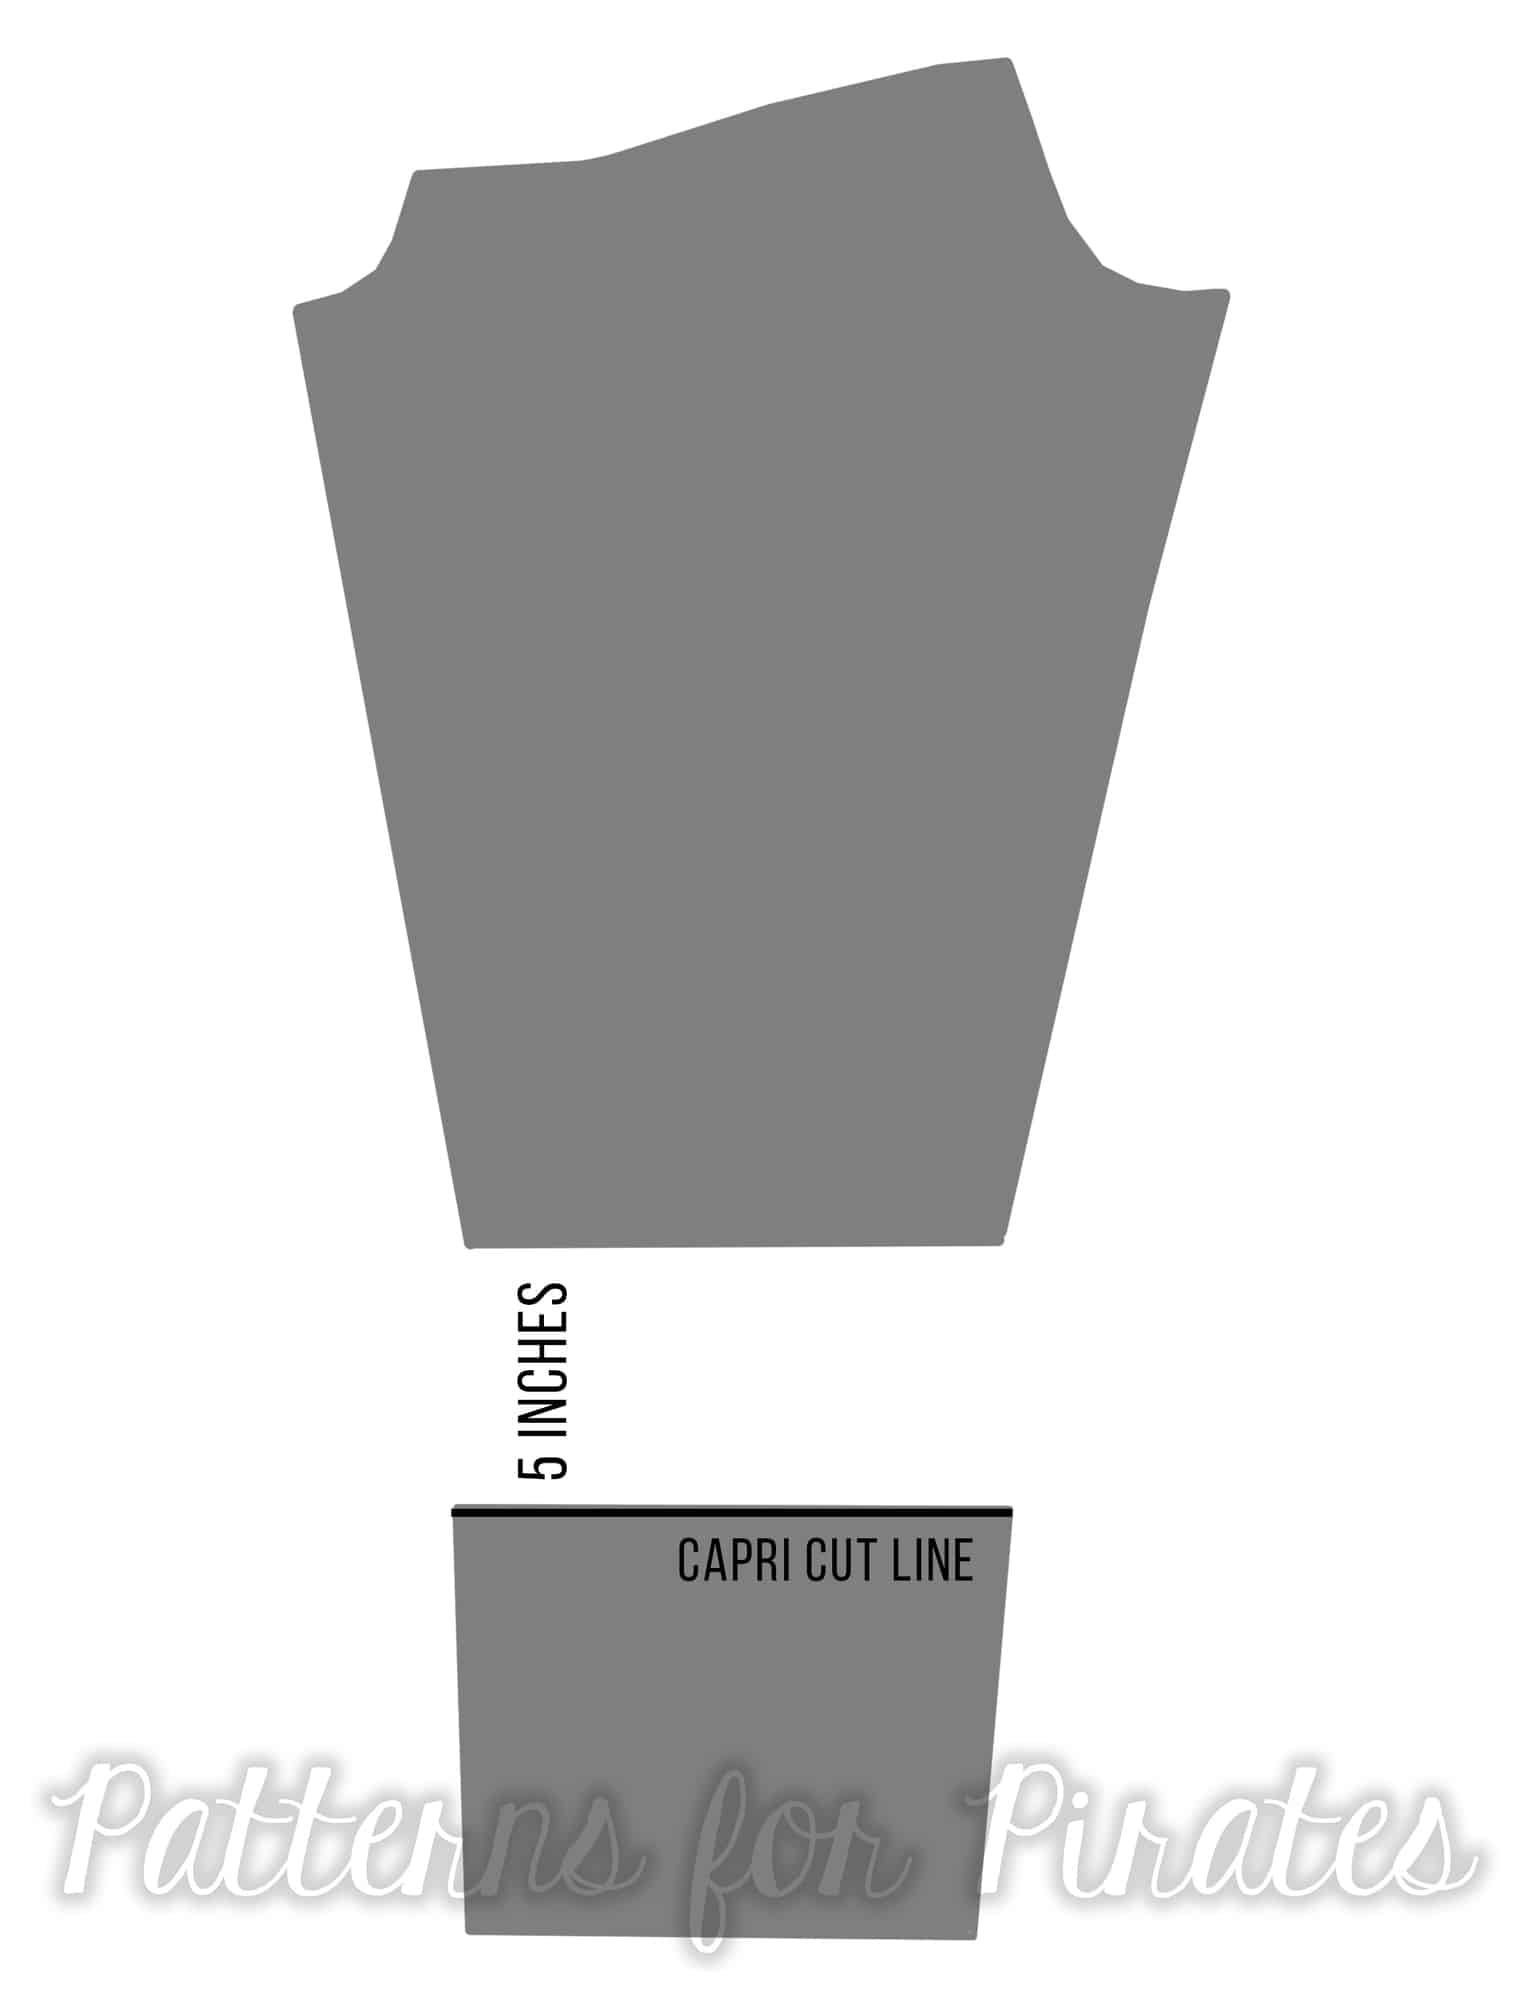
The rest of the pattern is cut out as normal, the only piece we will be adjusting is the underskirt piece (the un-ruched skirt piece).

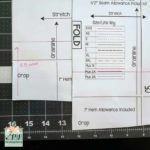
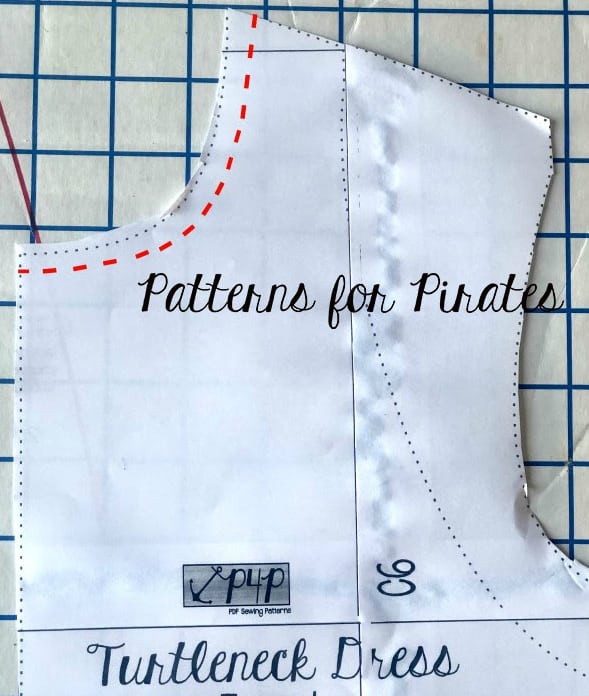
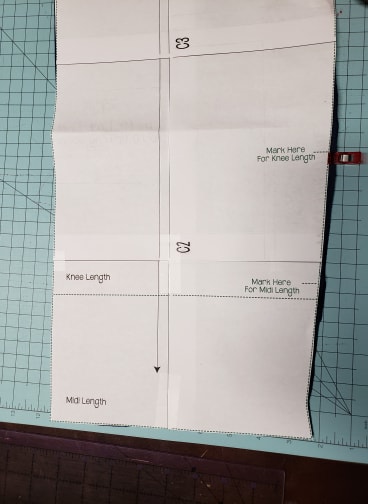
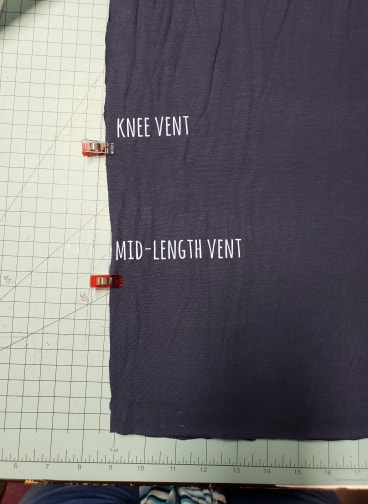
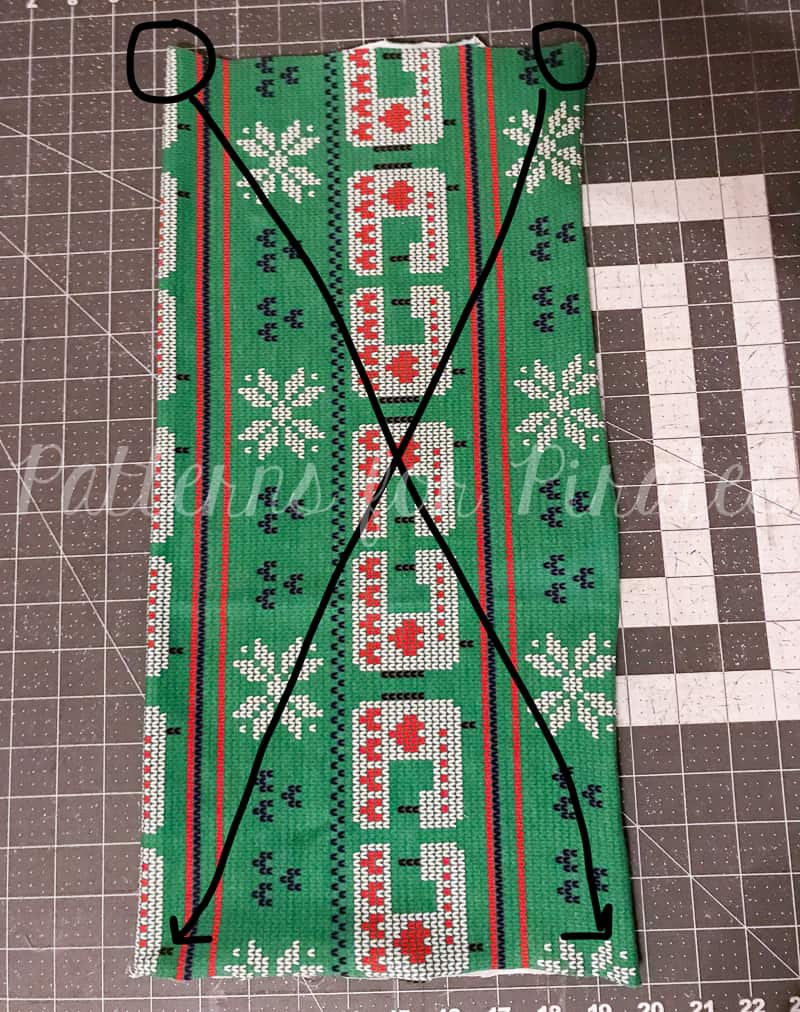
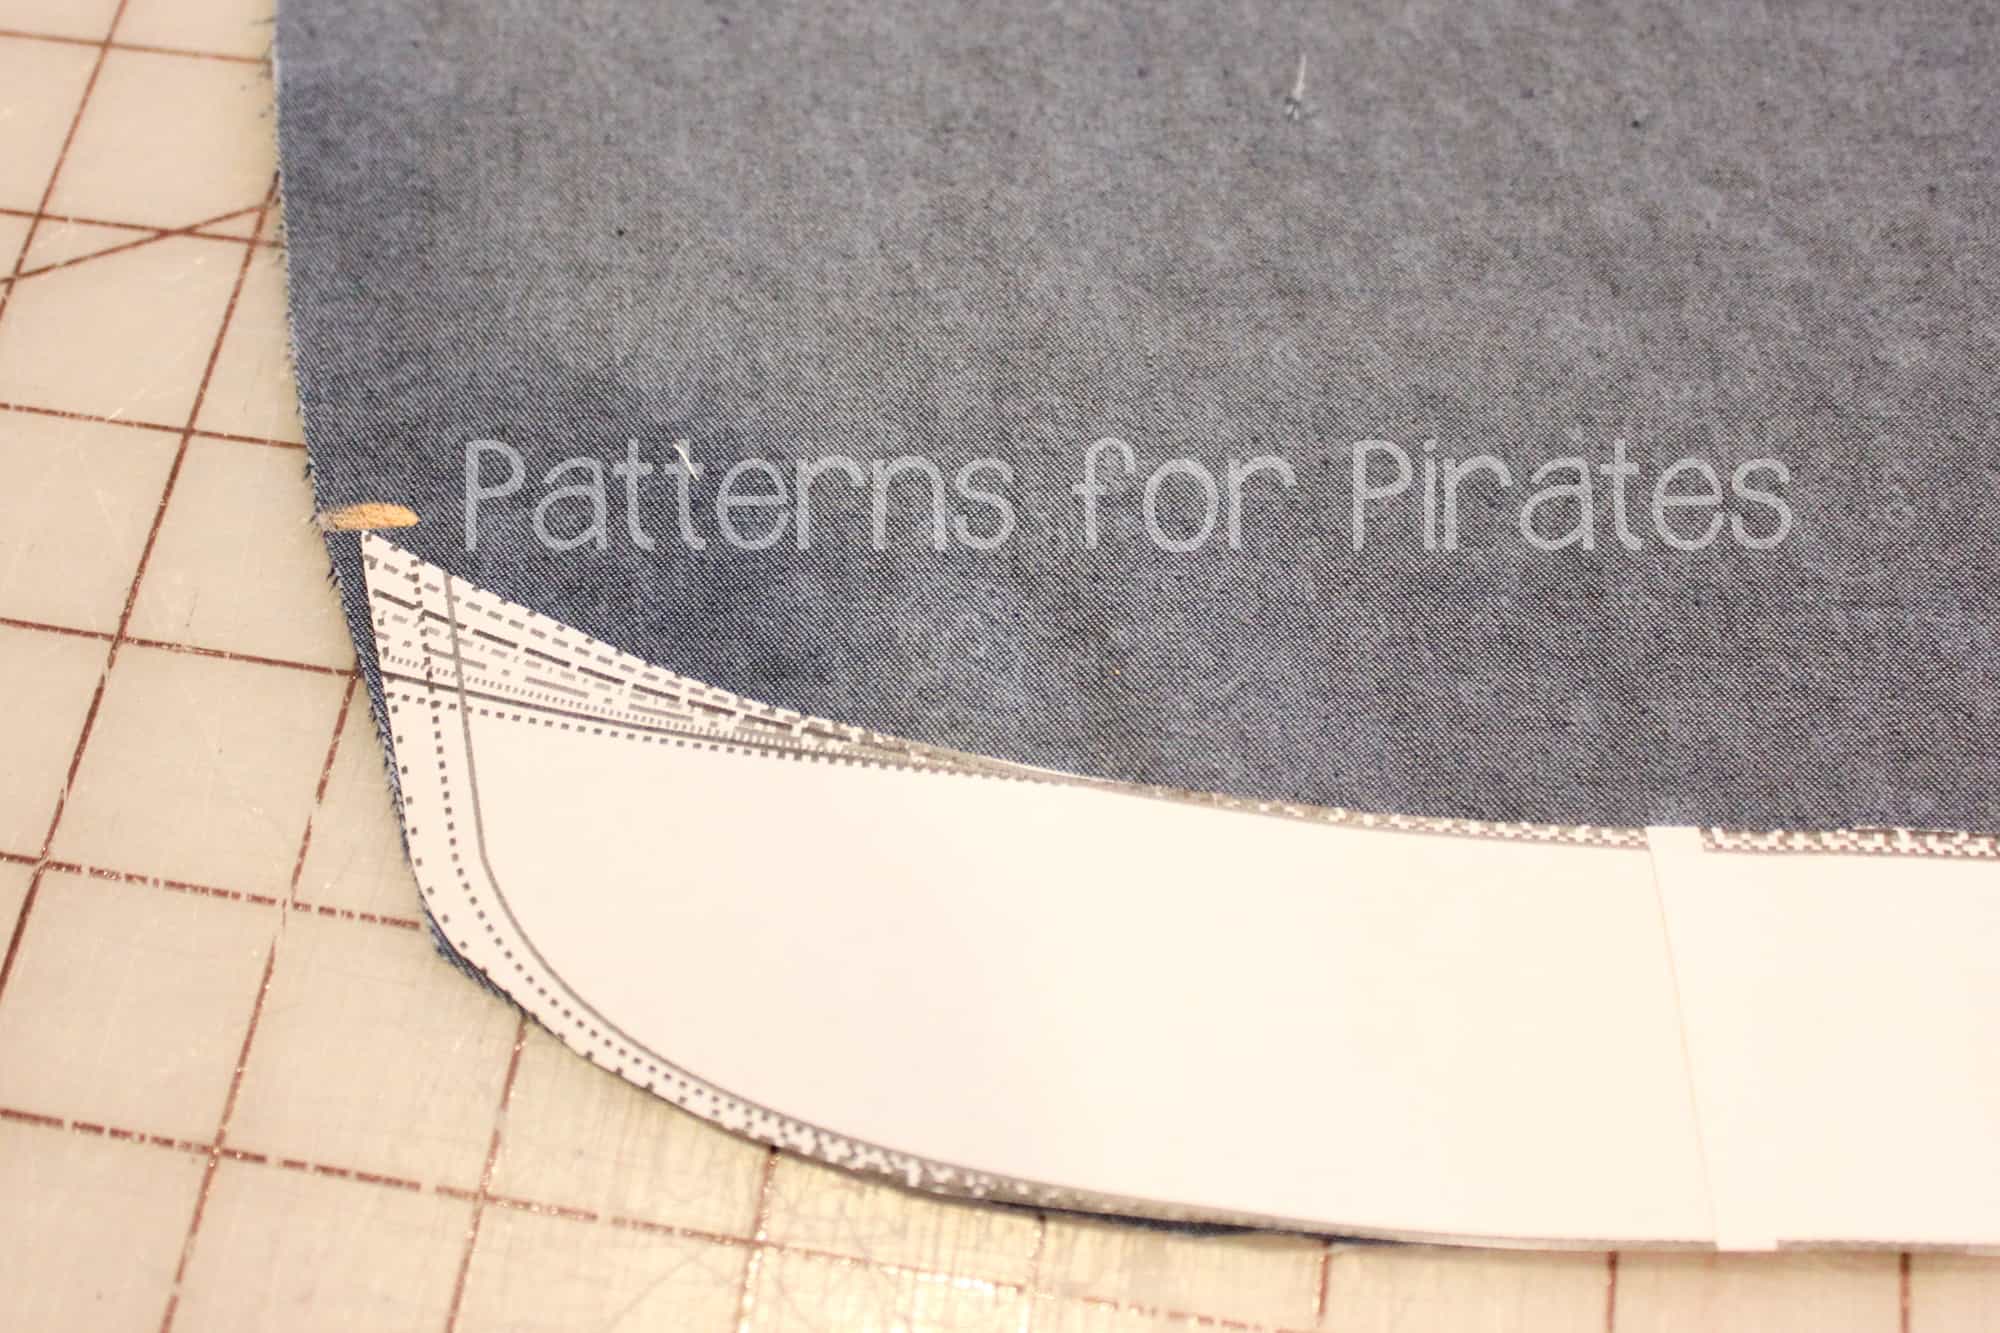
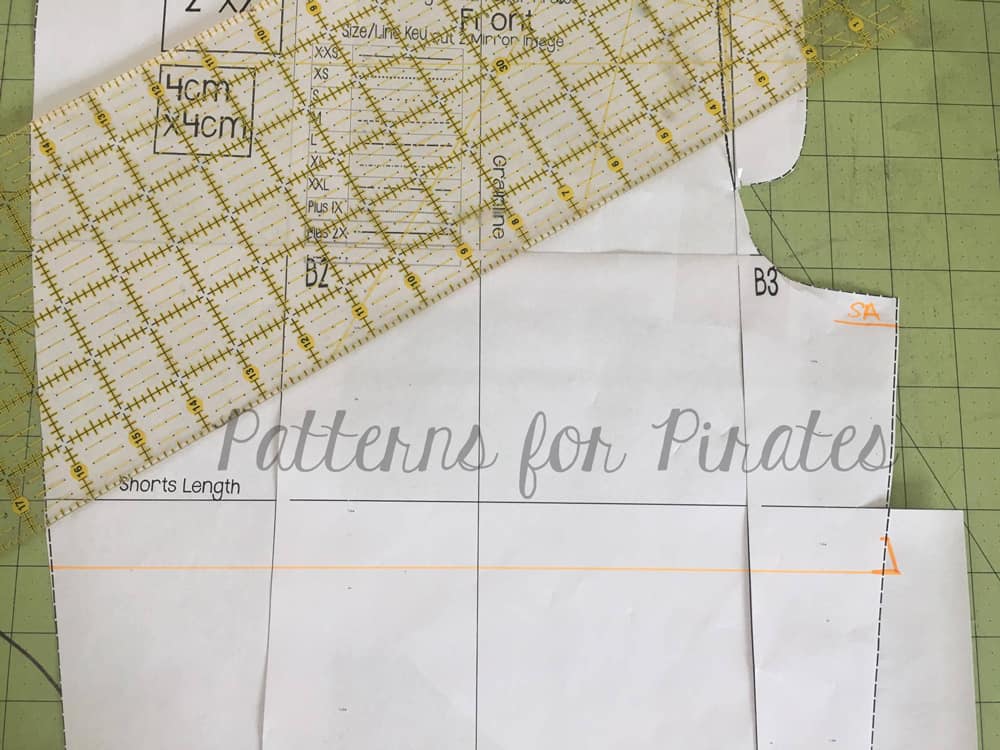
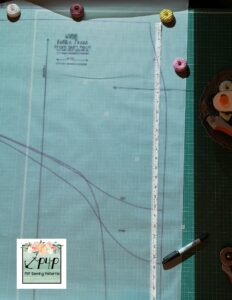
I was making the knee length, so I simply measured from the top of the skirt down to the knee length cut line on the right of the skirt pattern piece.  Then I took that measurement (for me making the plus 2X size it was 25 3/4″), and used it to measure down the same length on the left side, using the full length skirt piece as a guide.

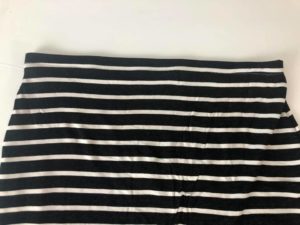
I am projecting onto tracing paper here to make it easier for you to see, as my fabric was a bit busy!


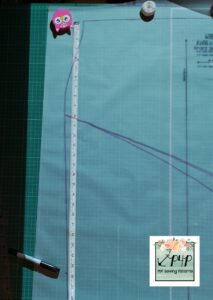
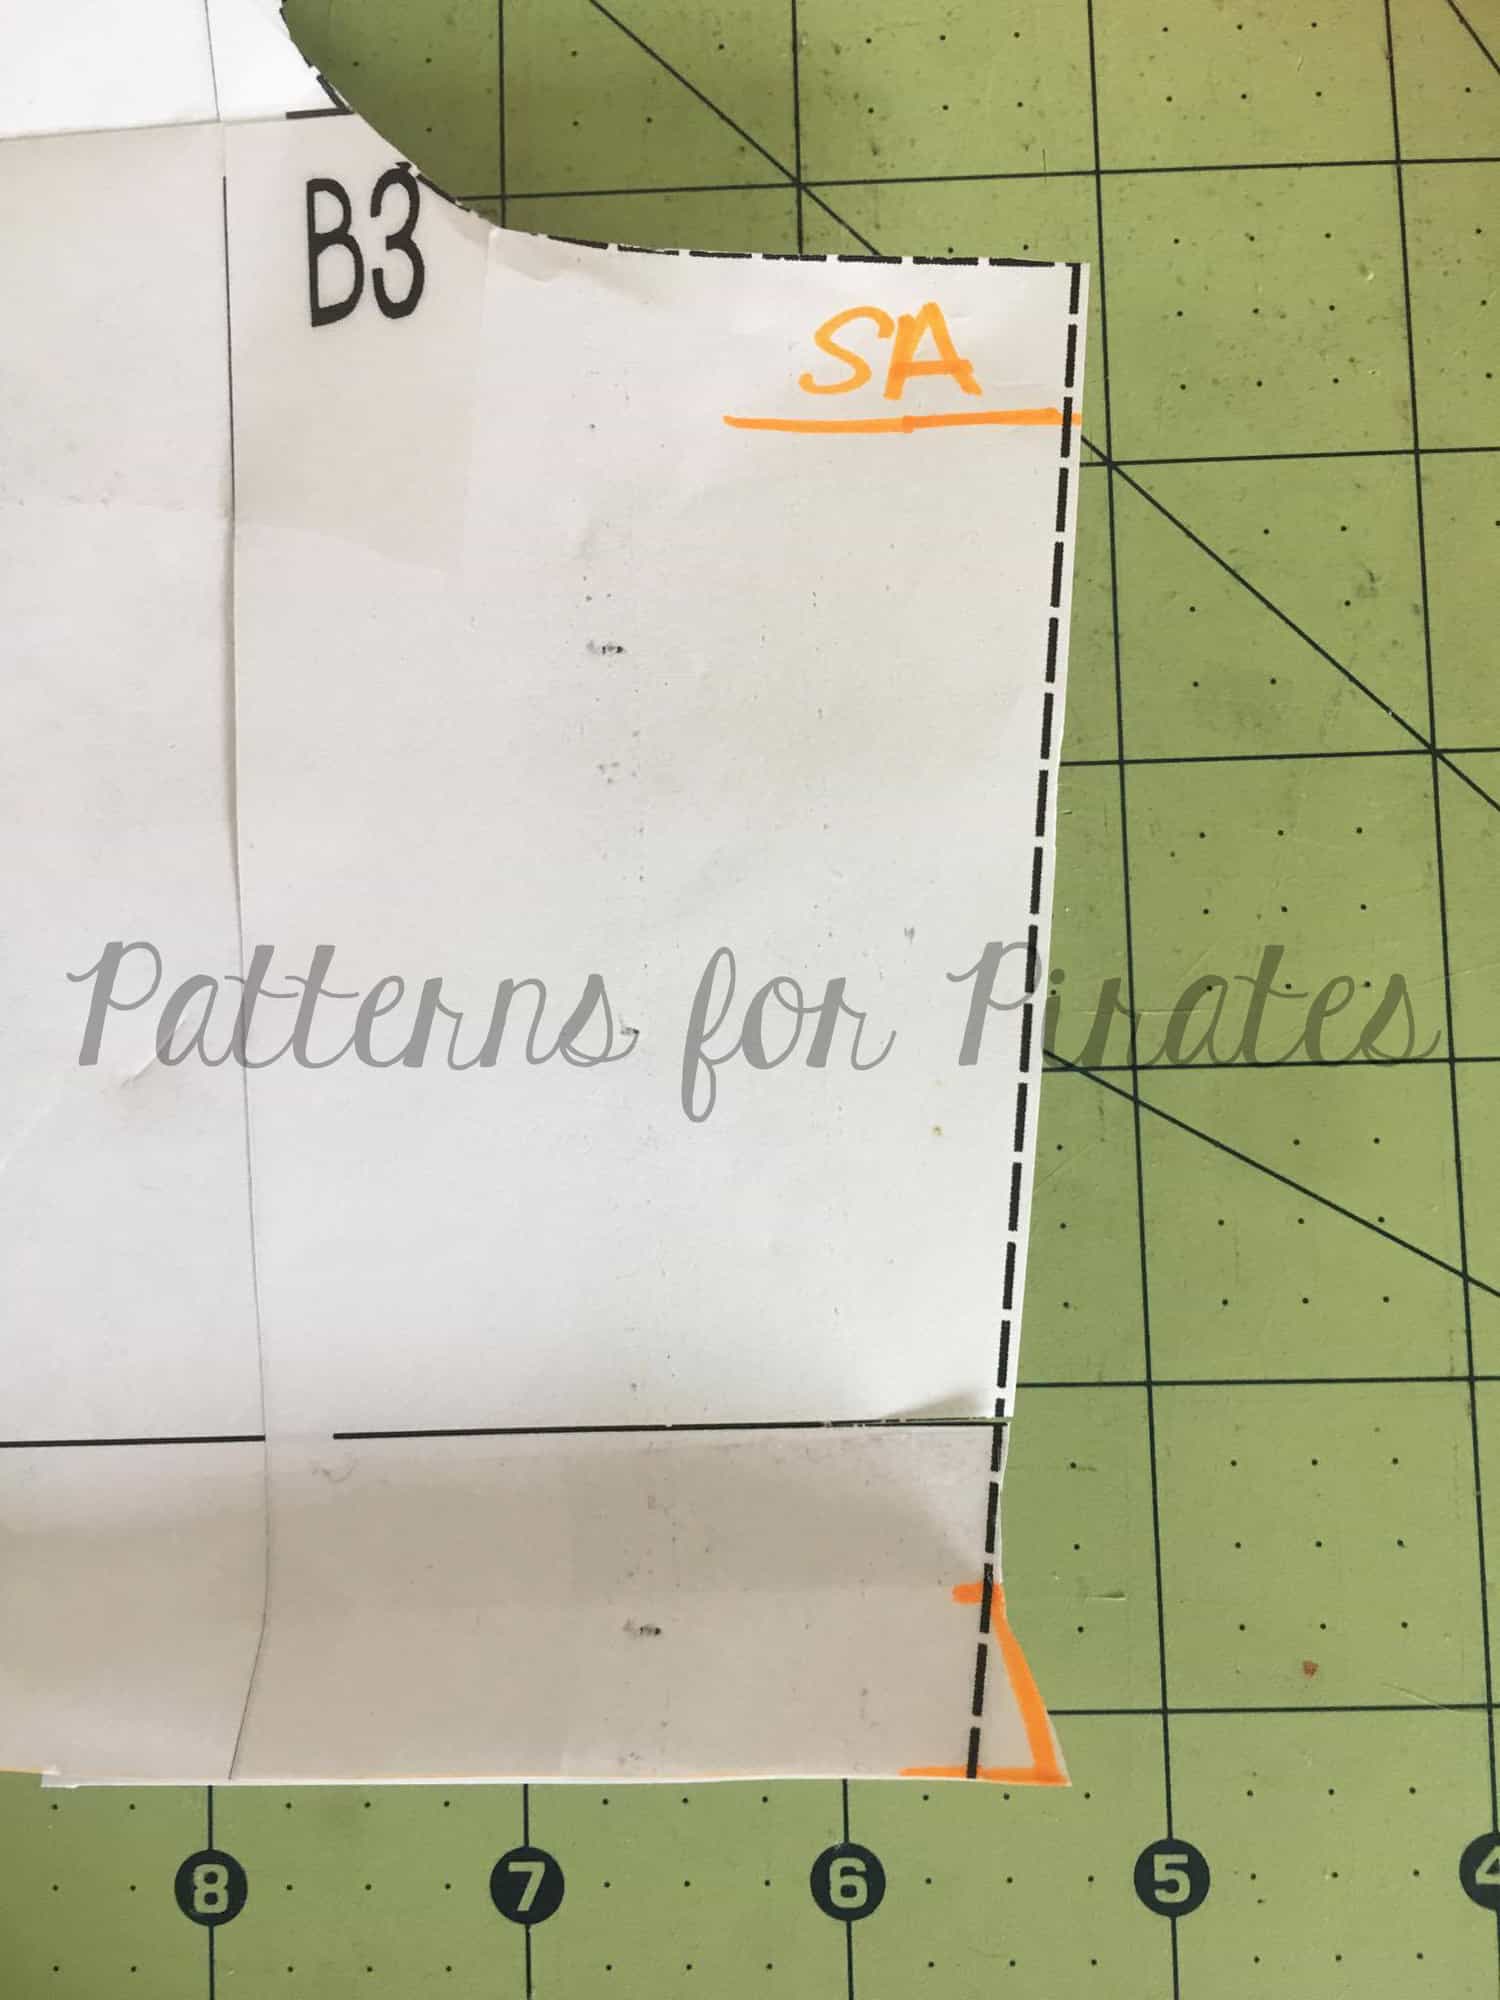
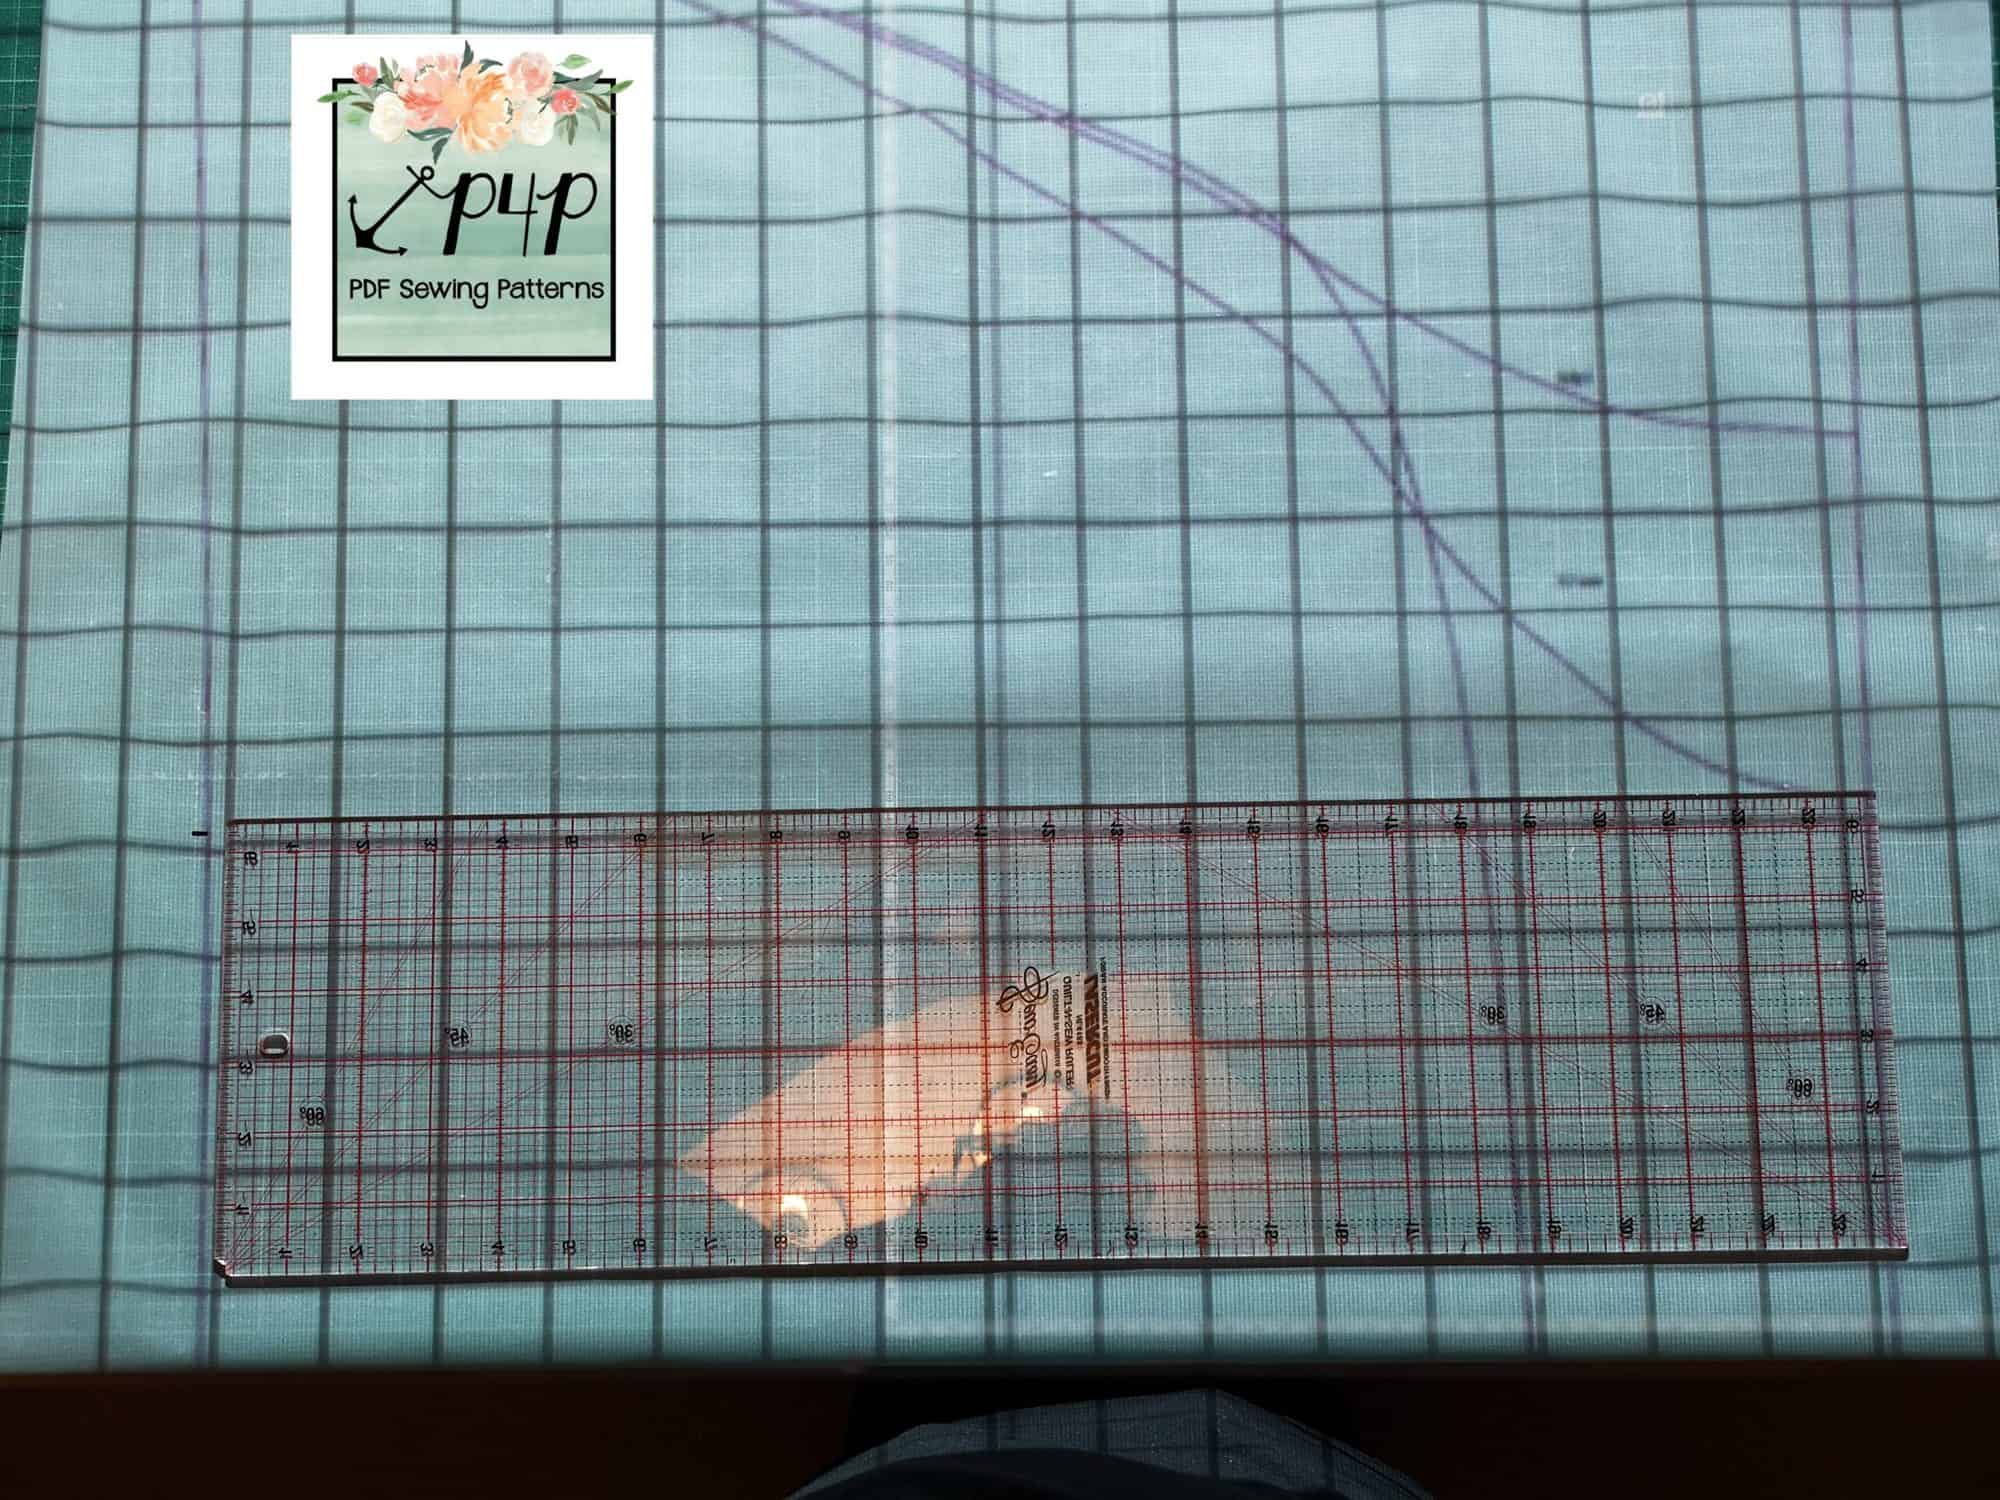
Then just draw a straight line across the bottom of the pattern piece to create your new straight hem skirt piece.

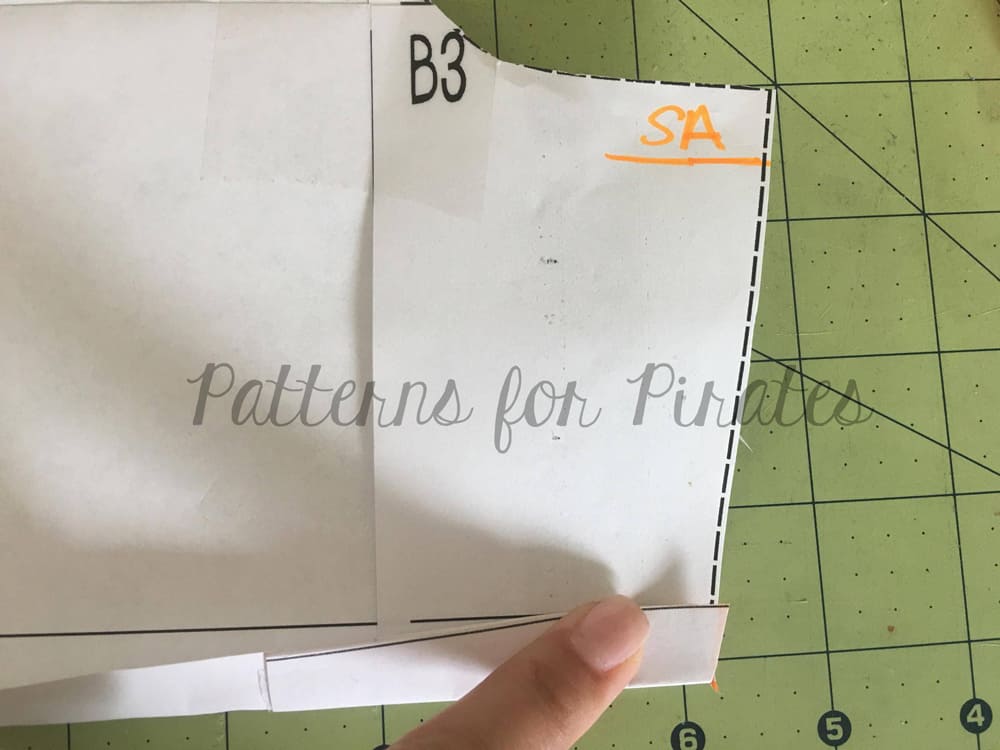
If you are using a projector, like me, you can also bring up the handy measurement grid included with the file for calibration, and use that as a guide for drawing a nice straight line across the pattern piece.


As I said, this is the only pattern piece that needs adjusting.  Then just sew up your dress as per the tutorial for the pattern, until you get to the instructions for the skirt pieces.

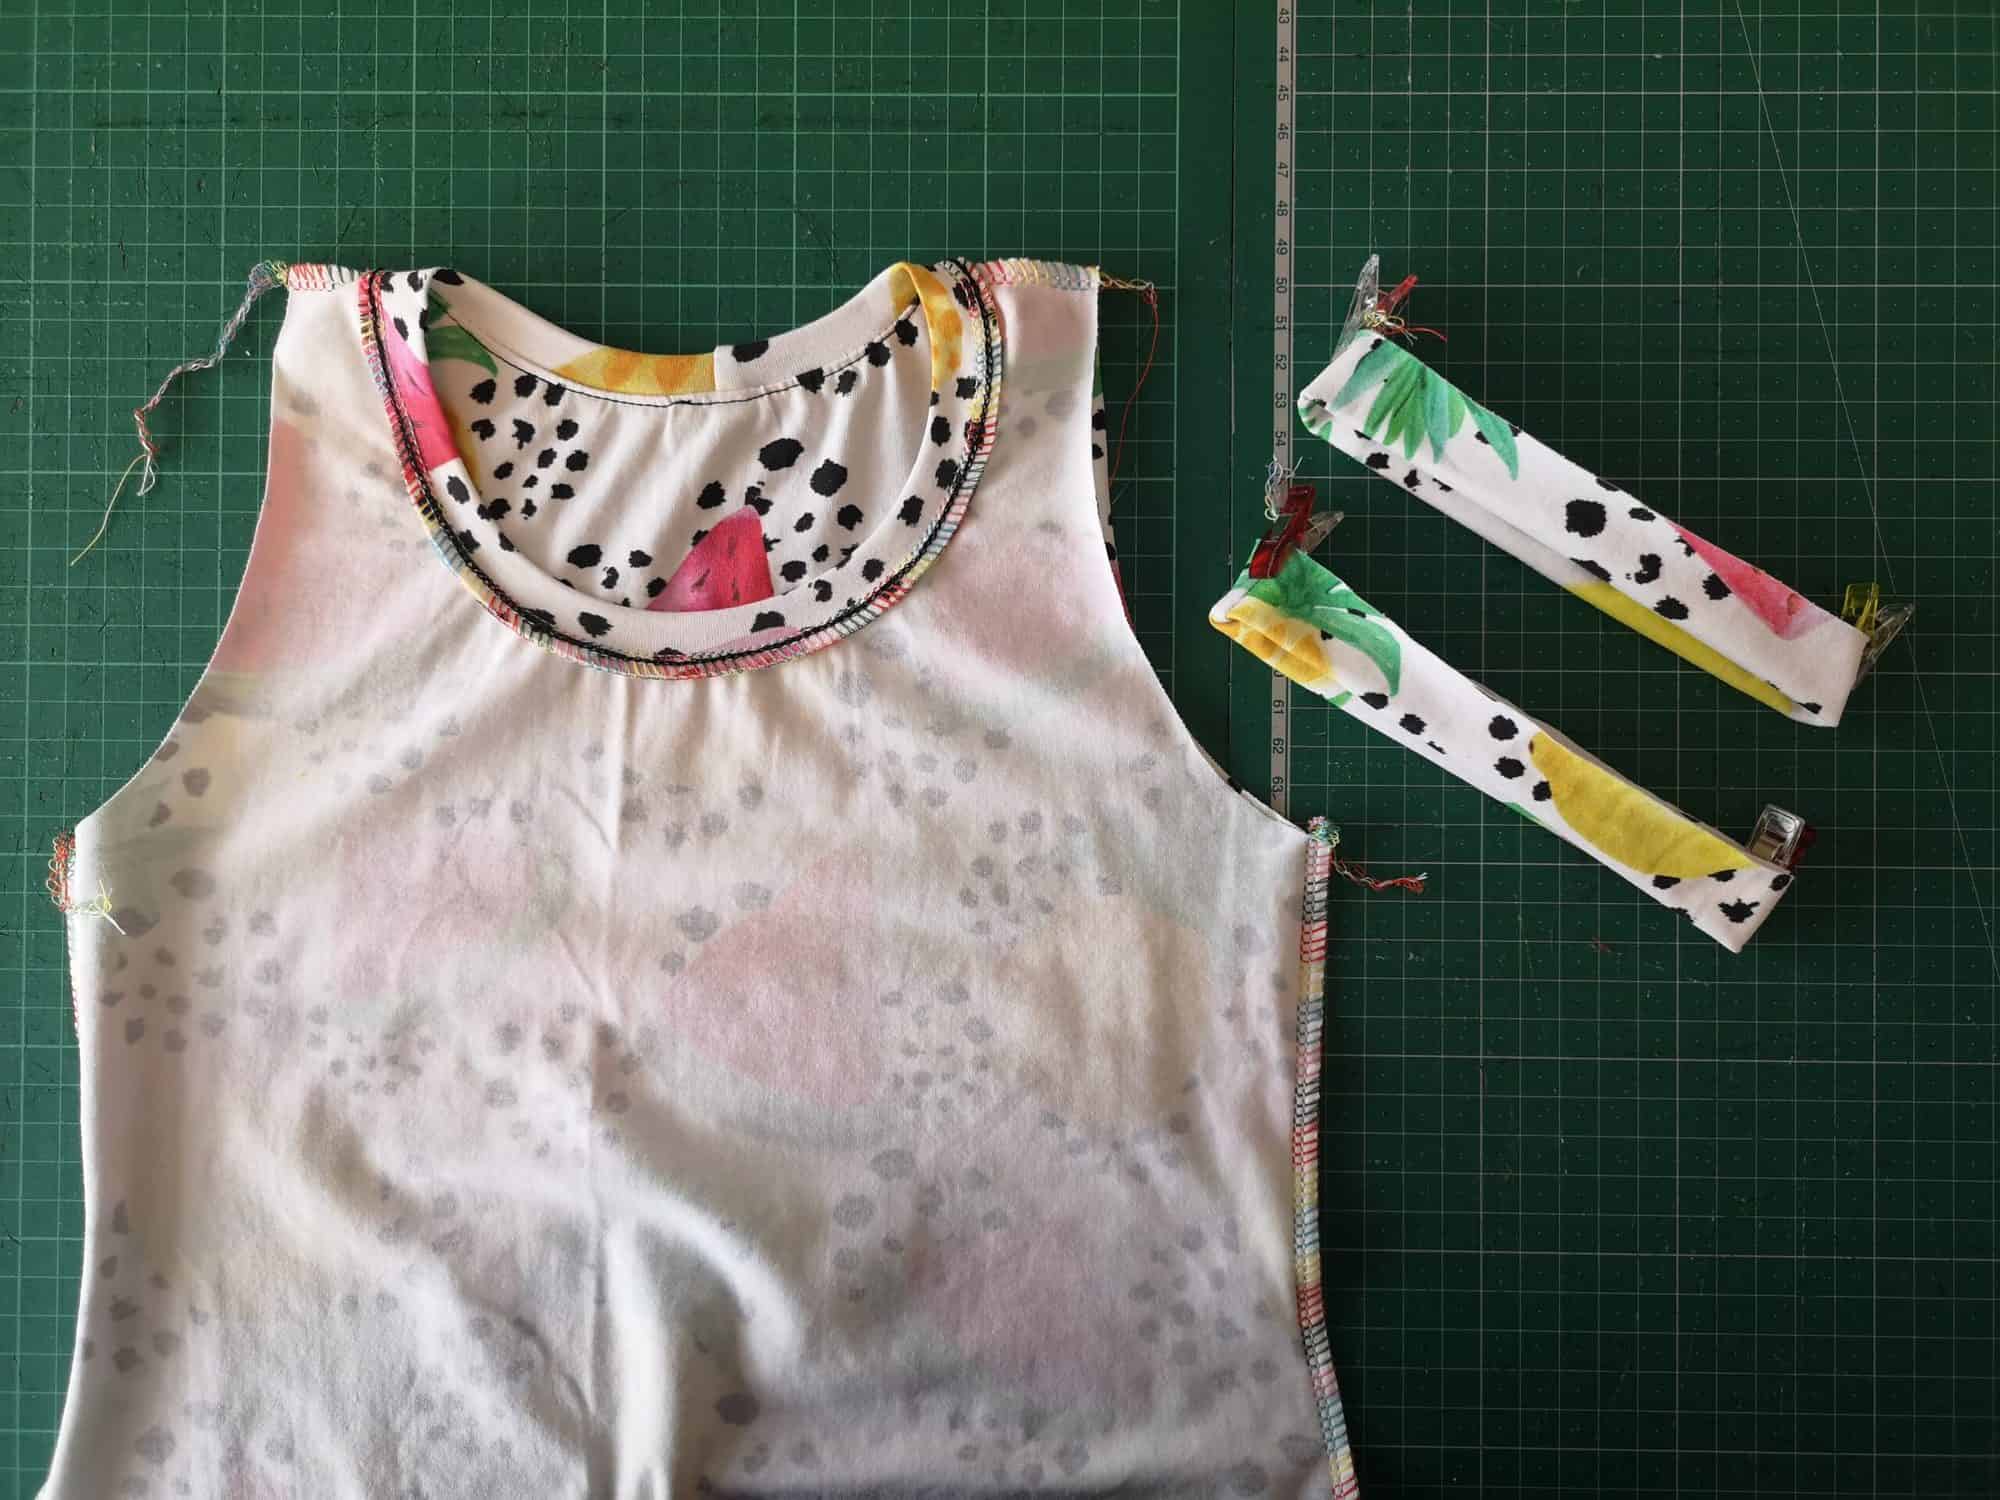
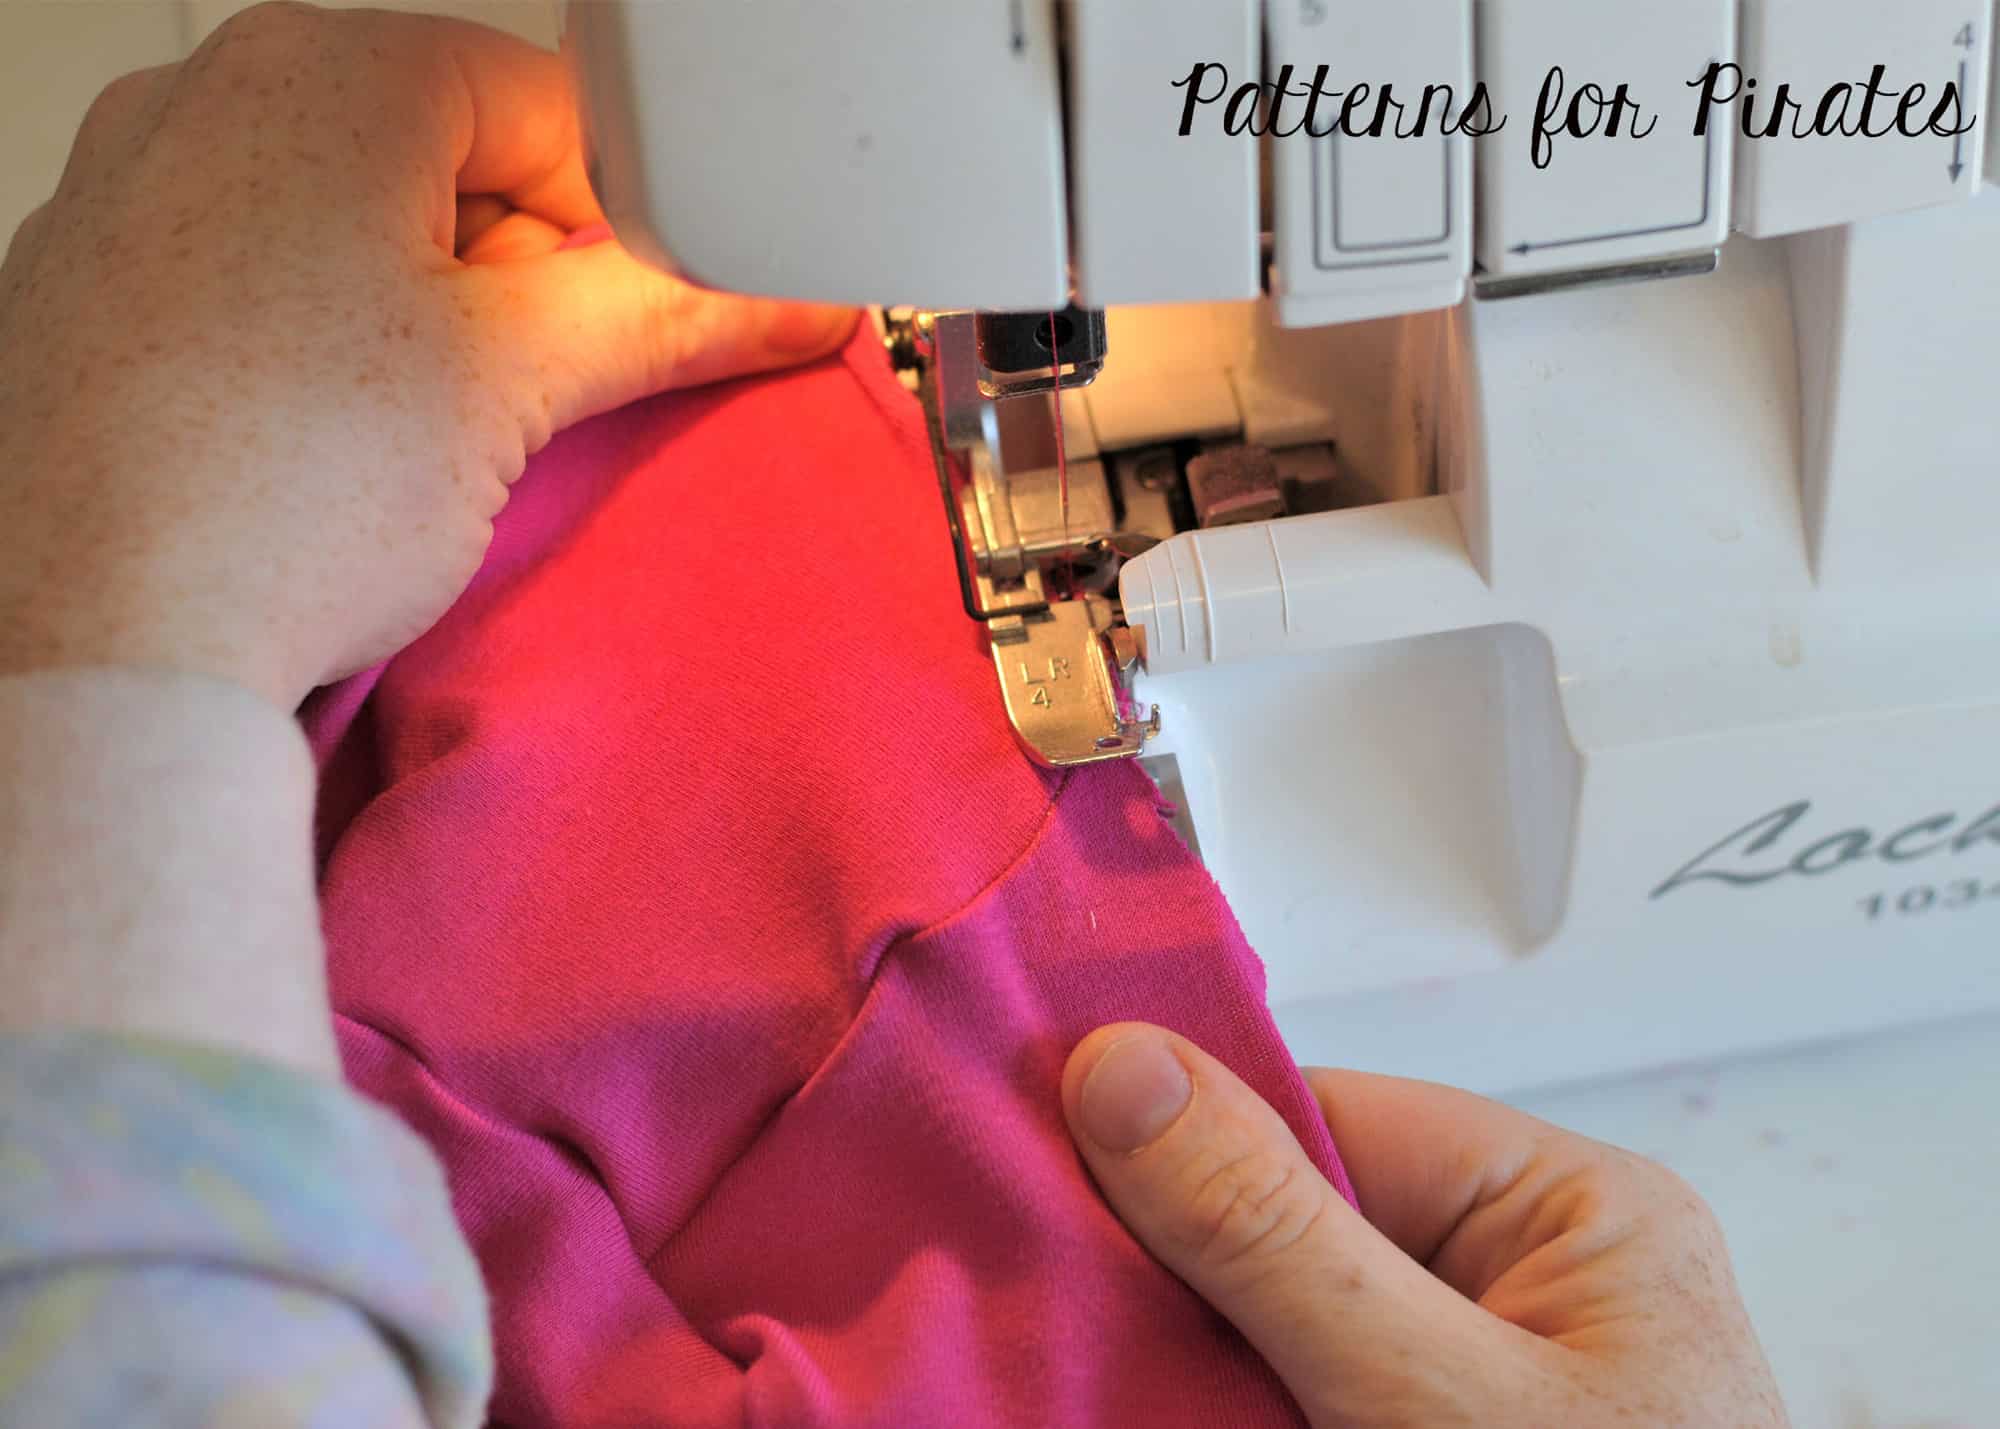
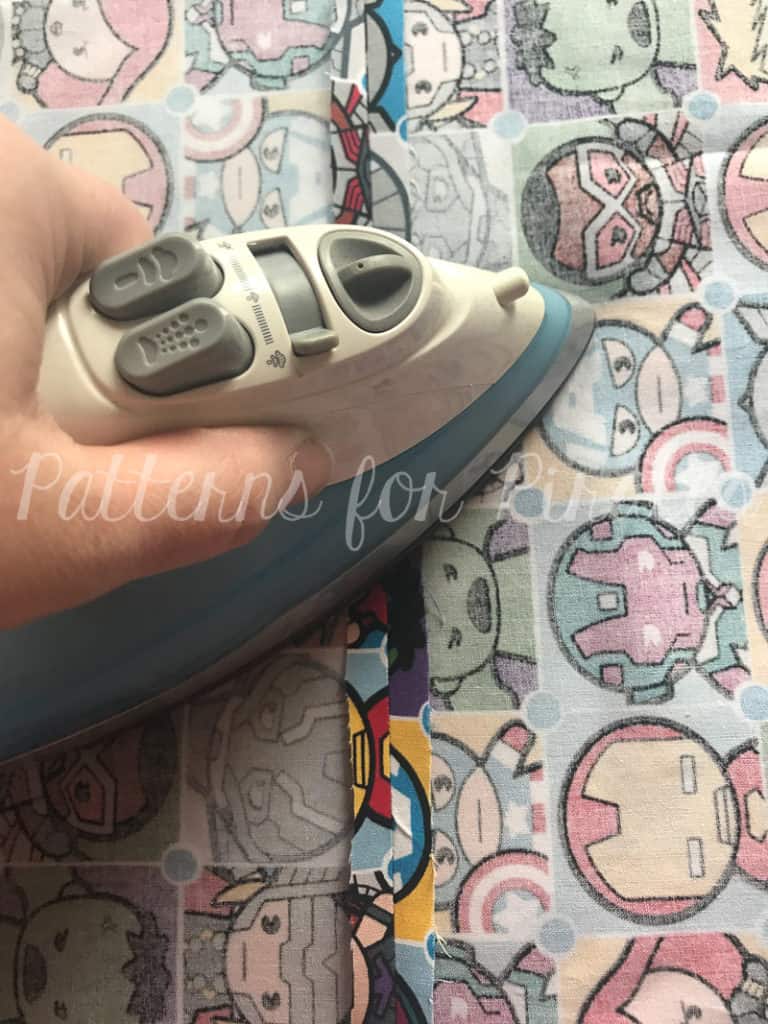
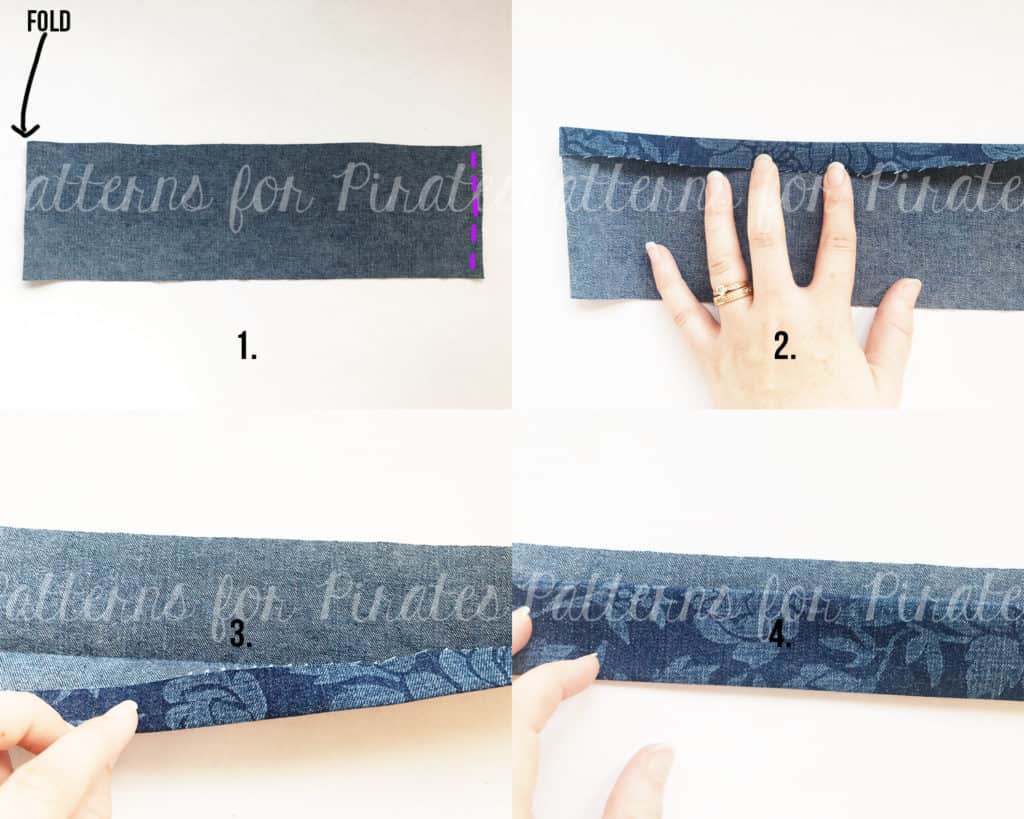
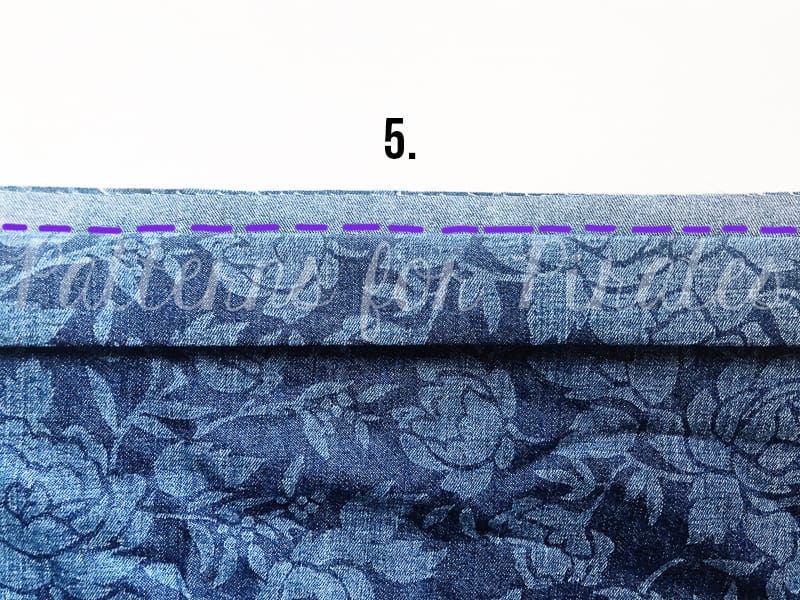
Follow the instructions for the floor length skirt pieces and hem the bottom of the ruched skirt piece, then gather the side as per the tutorial.  Next construct the back skirt and then hem both the back and un-ruched skirt pieces (the piece we adjusted) separately.

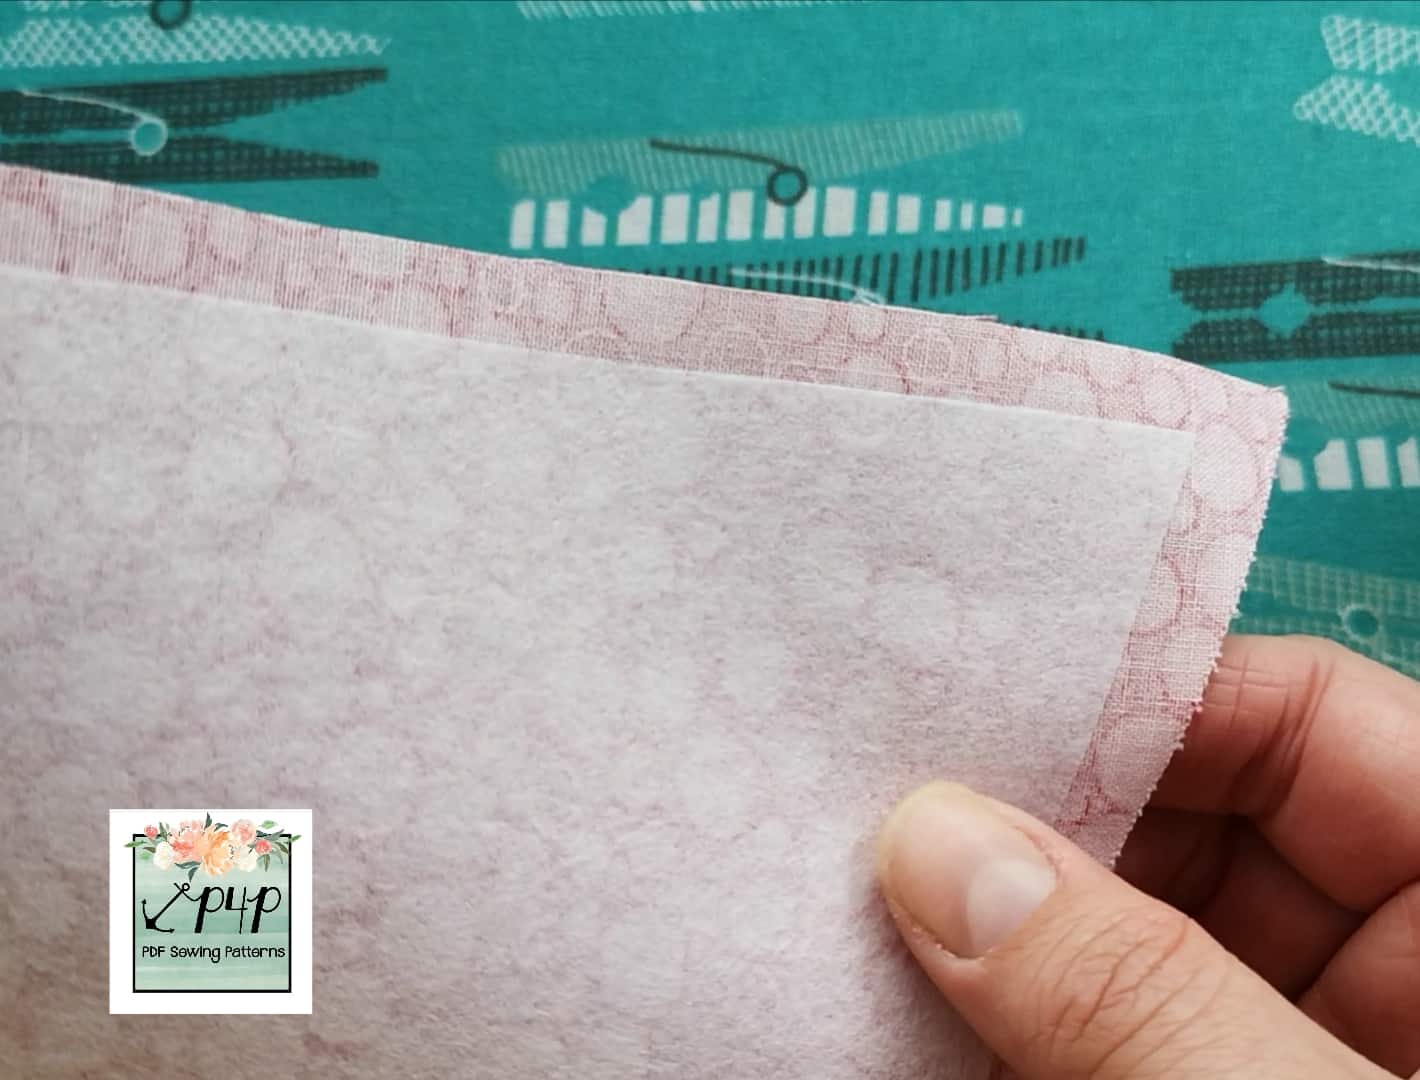
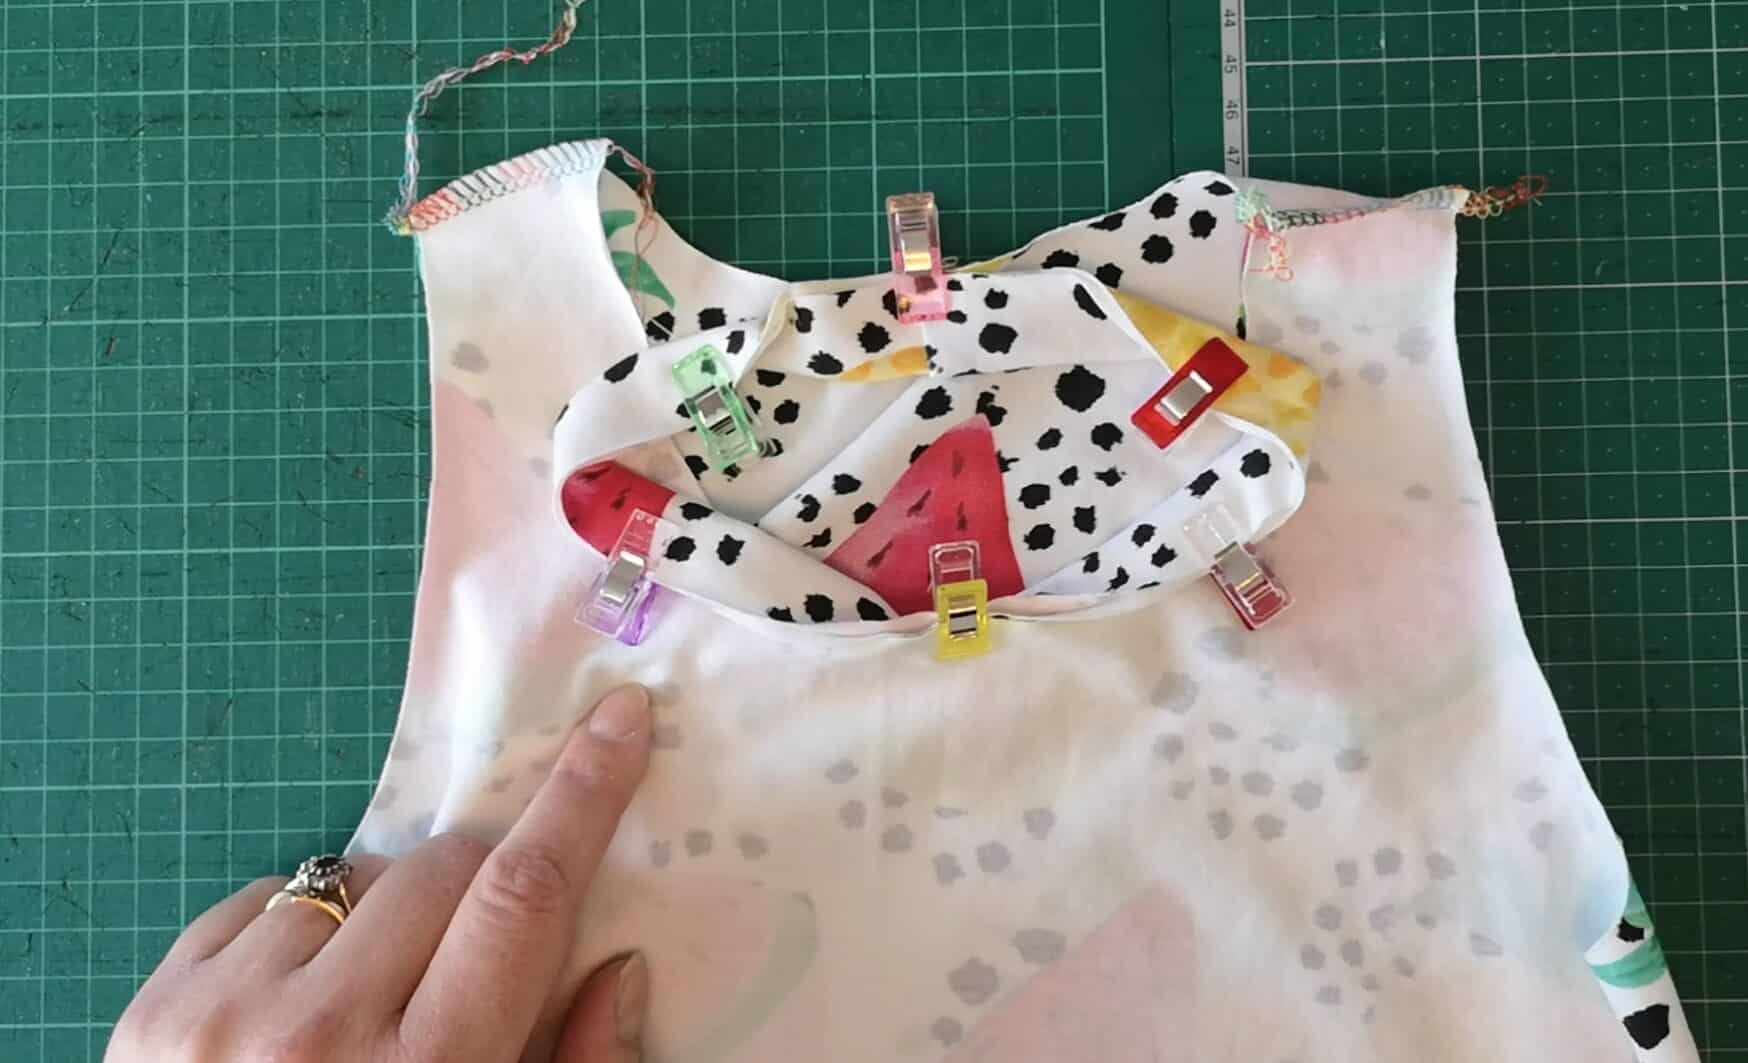
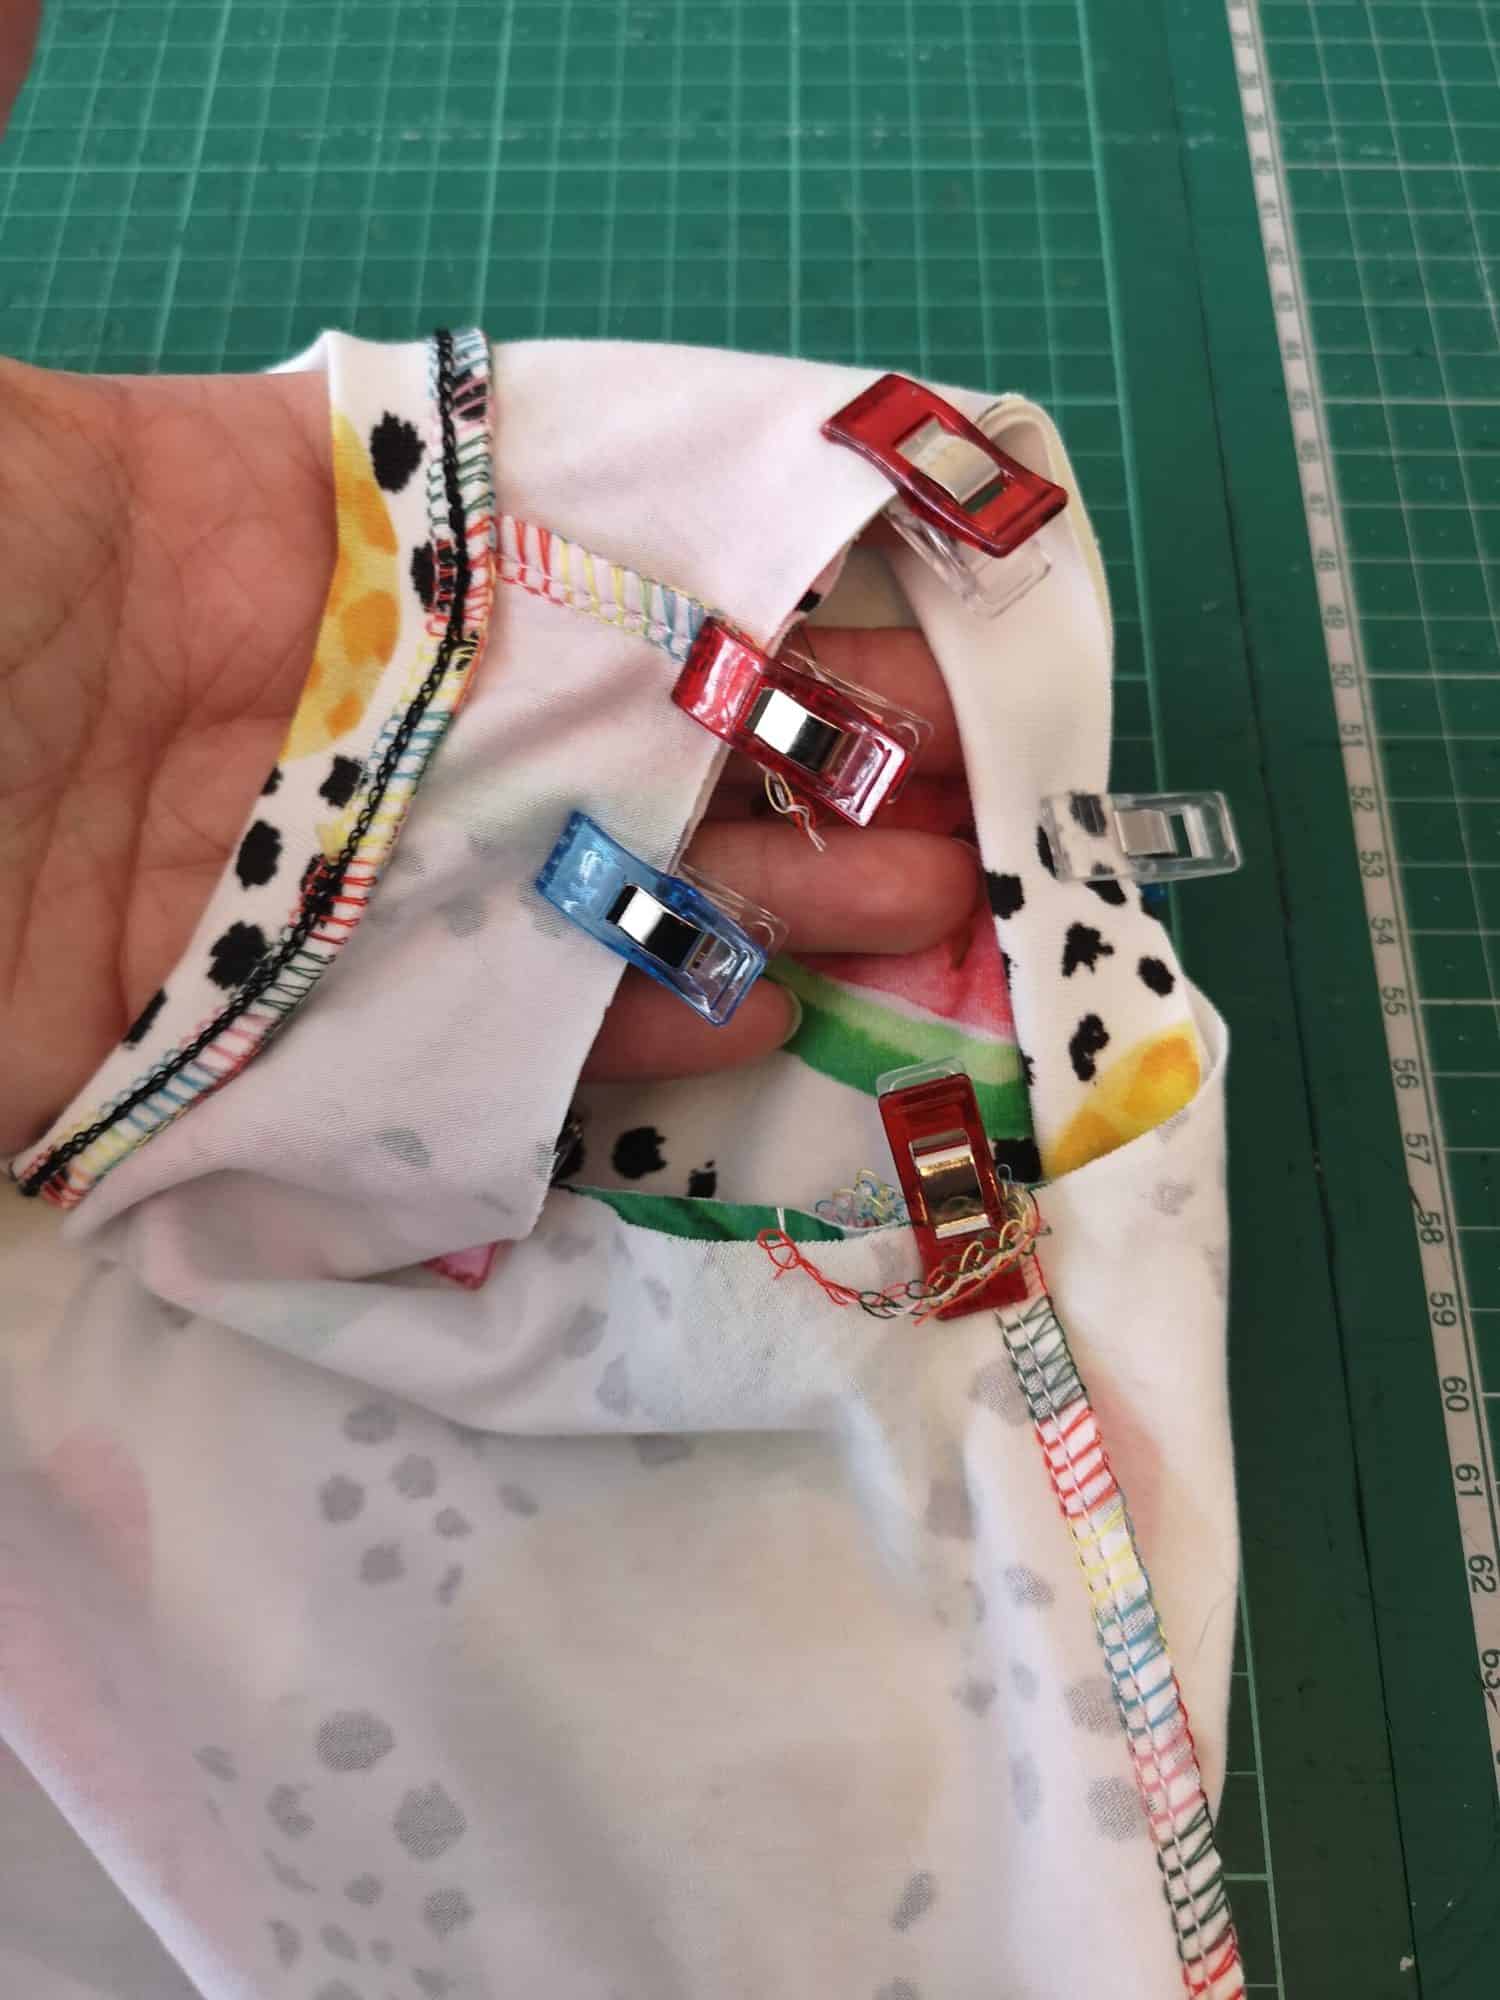
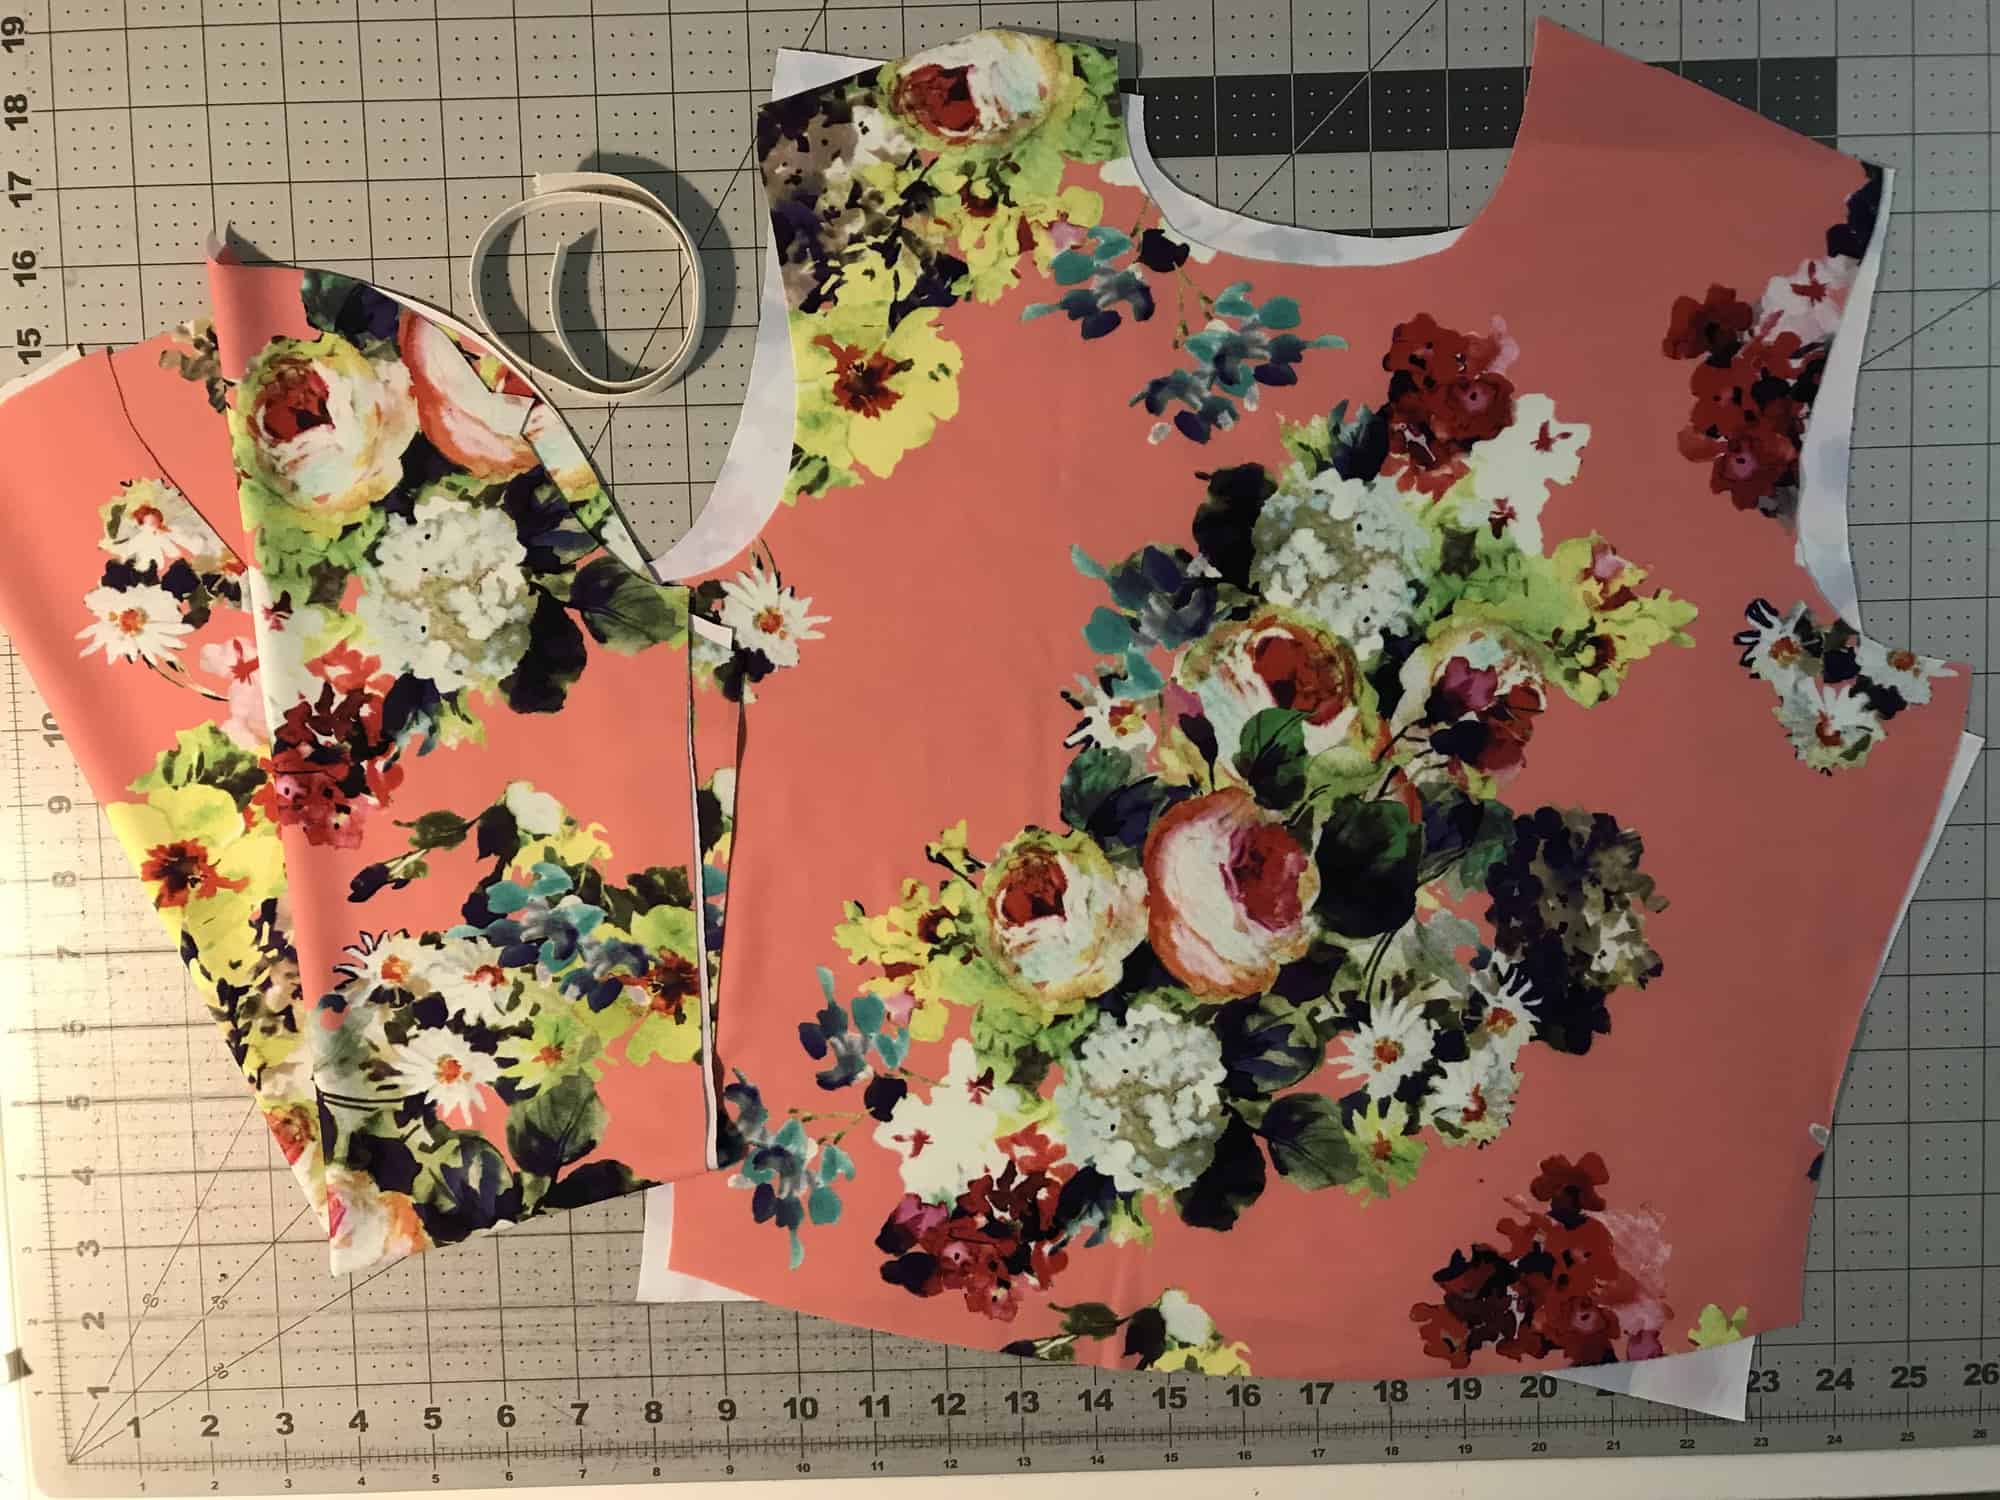
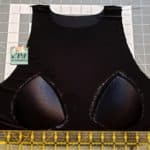
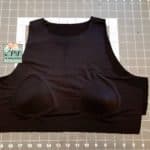
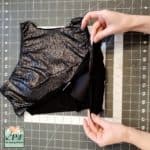
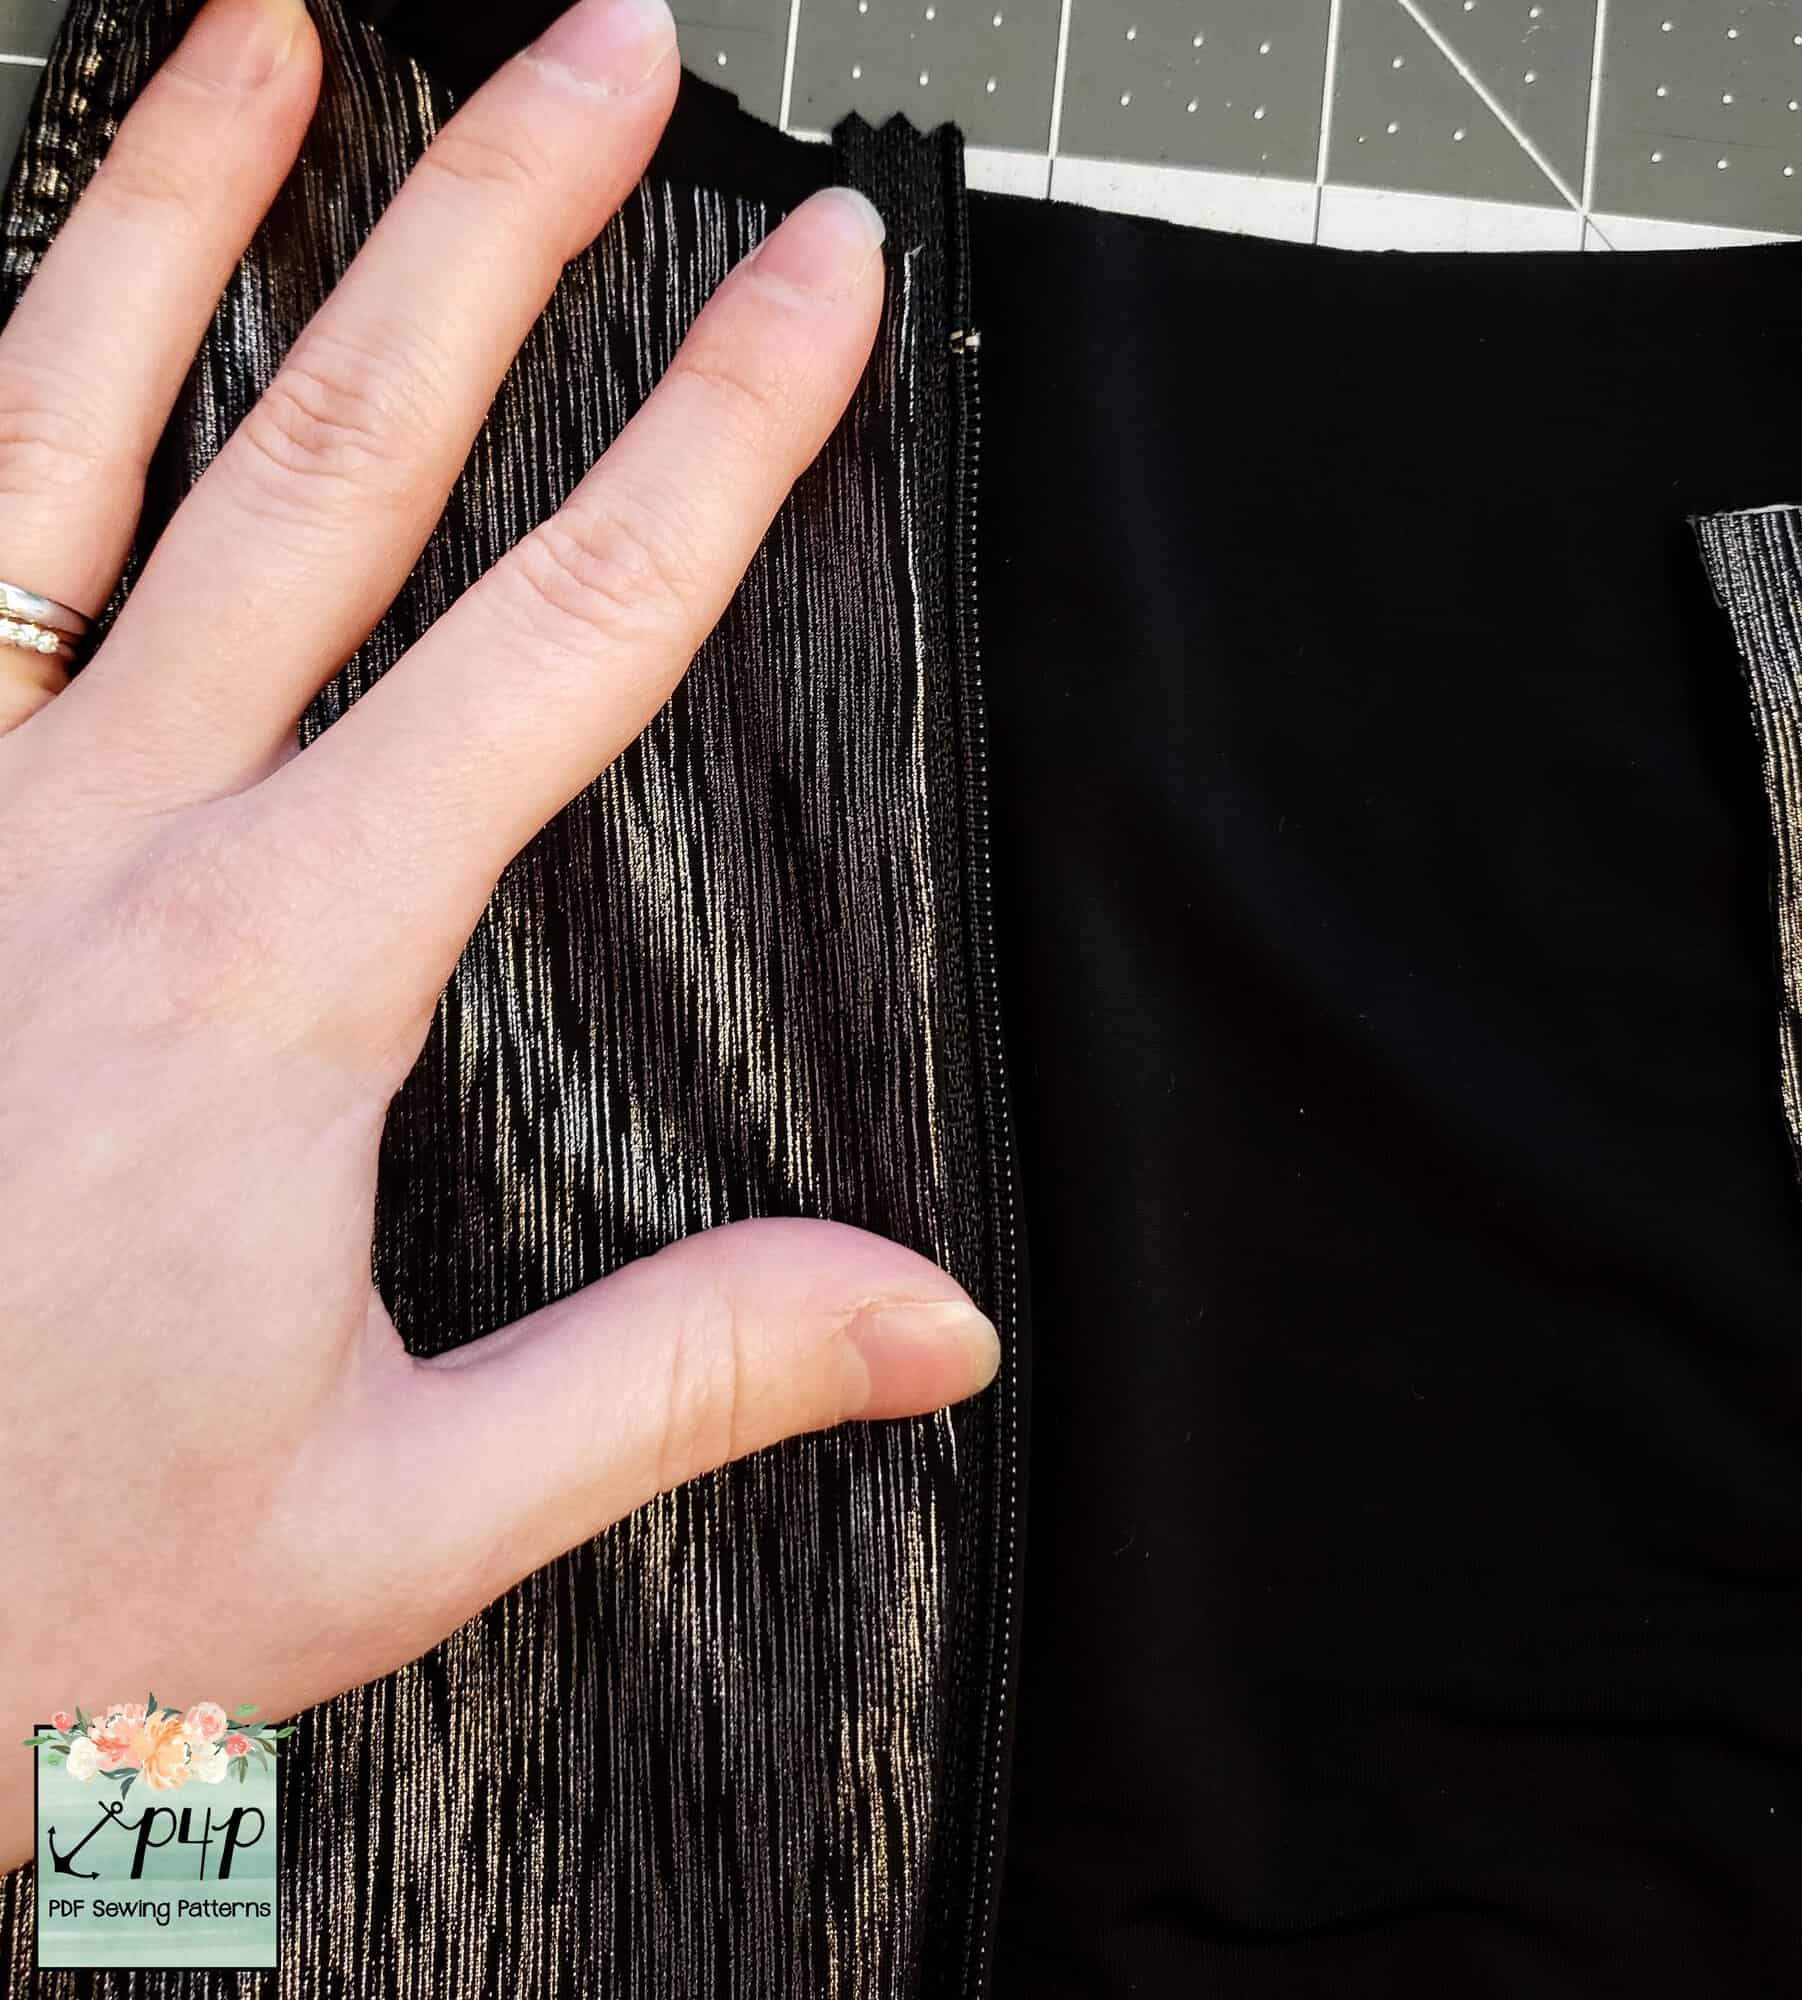
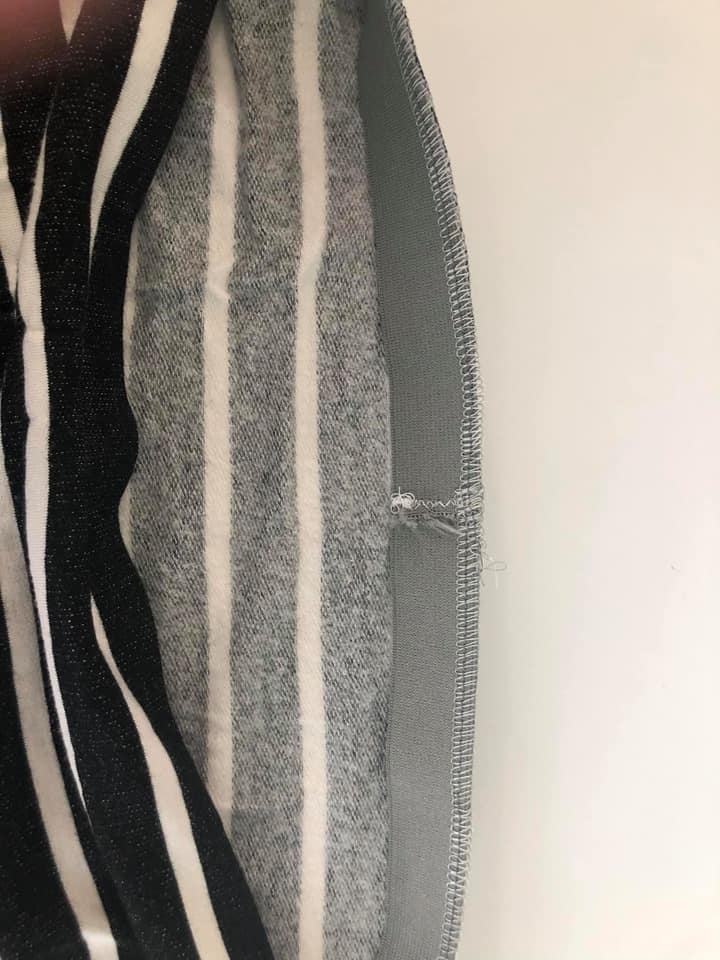
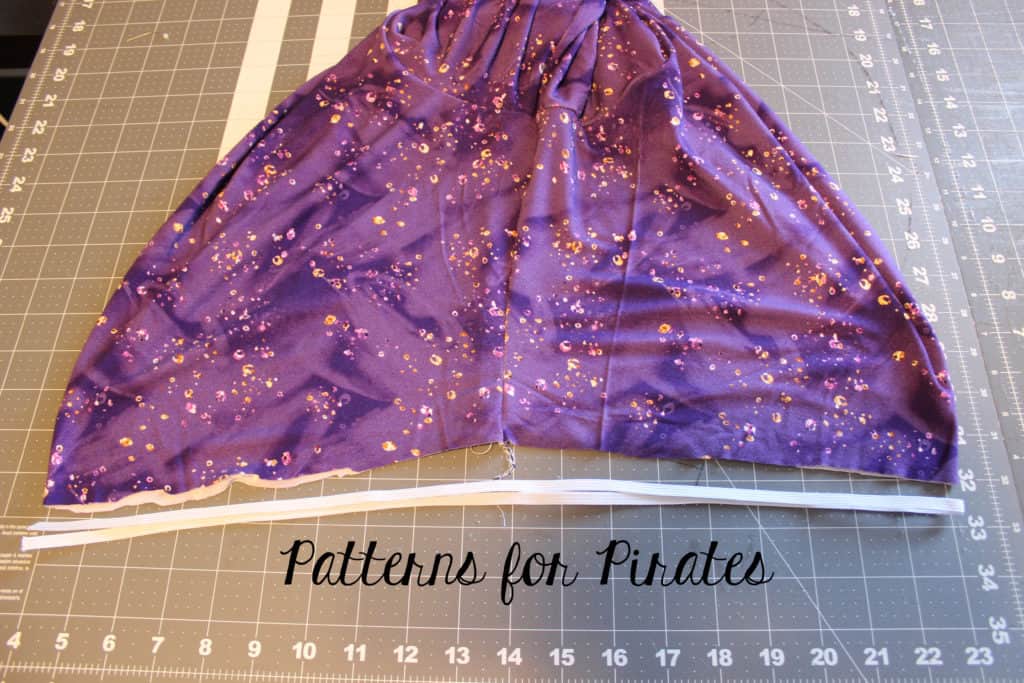
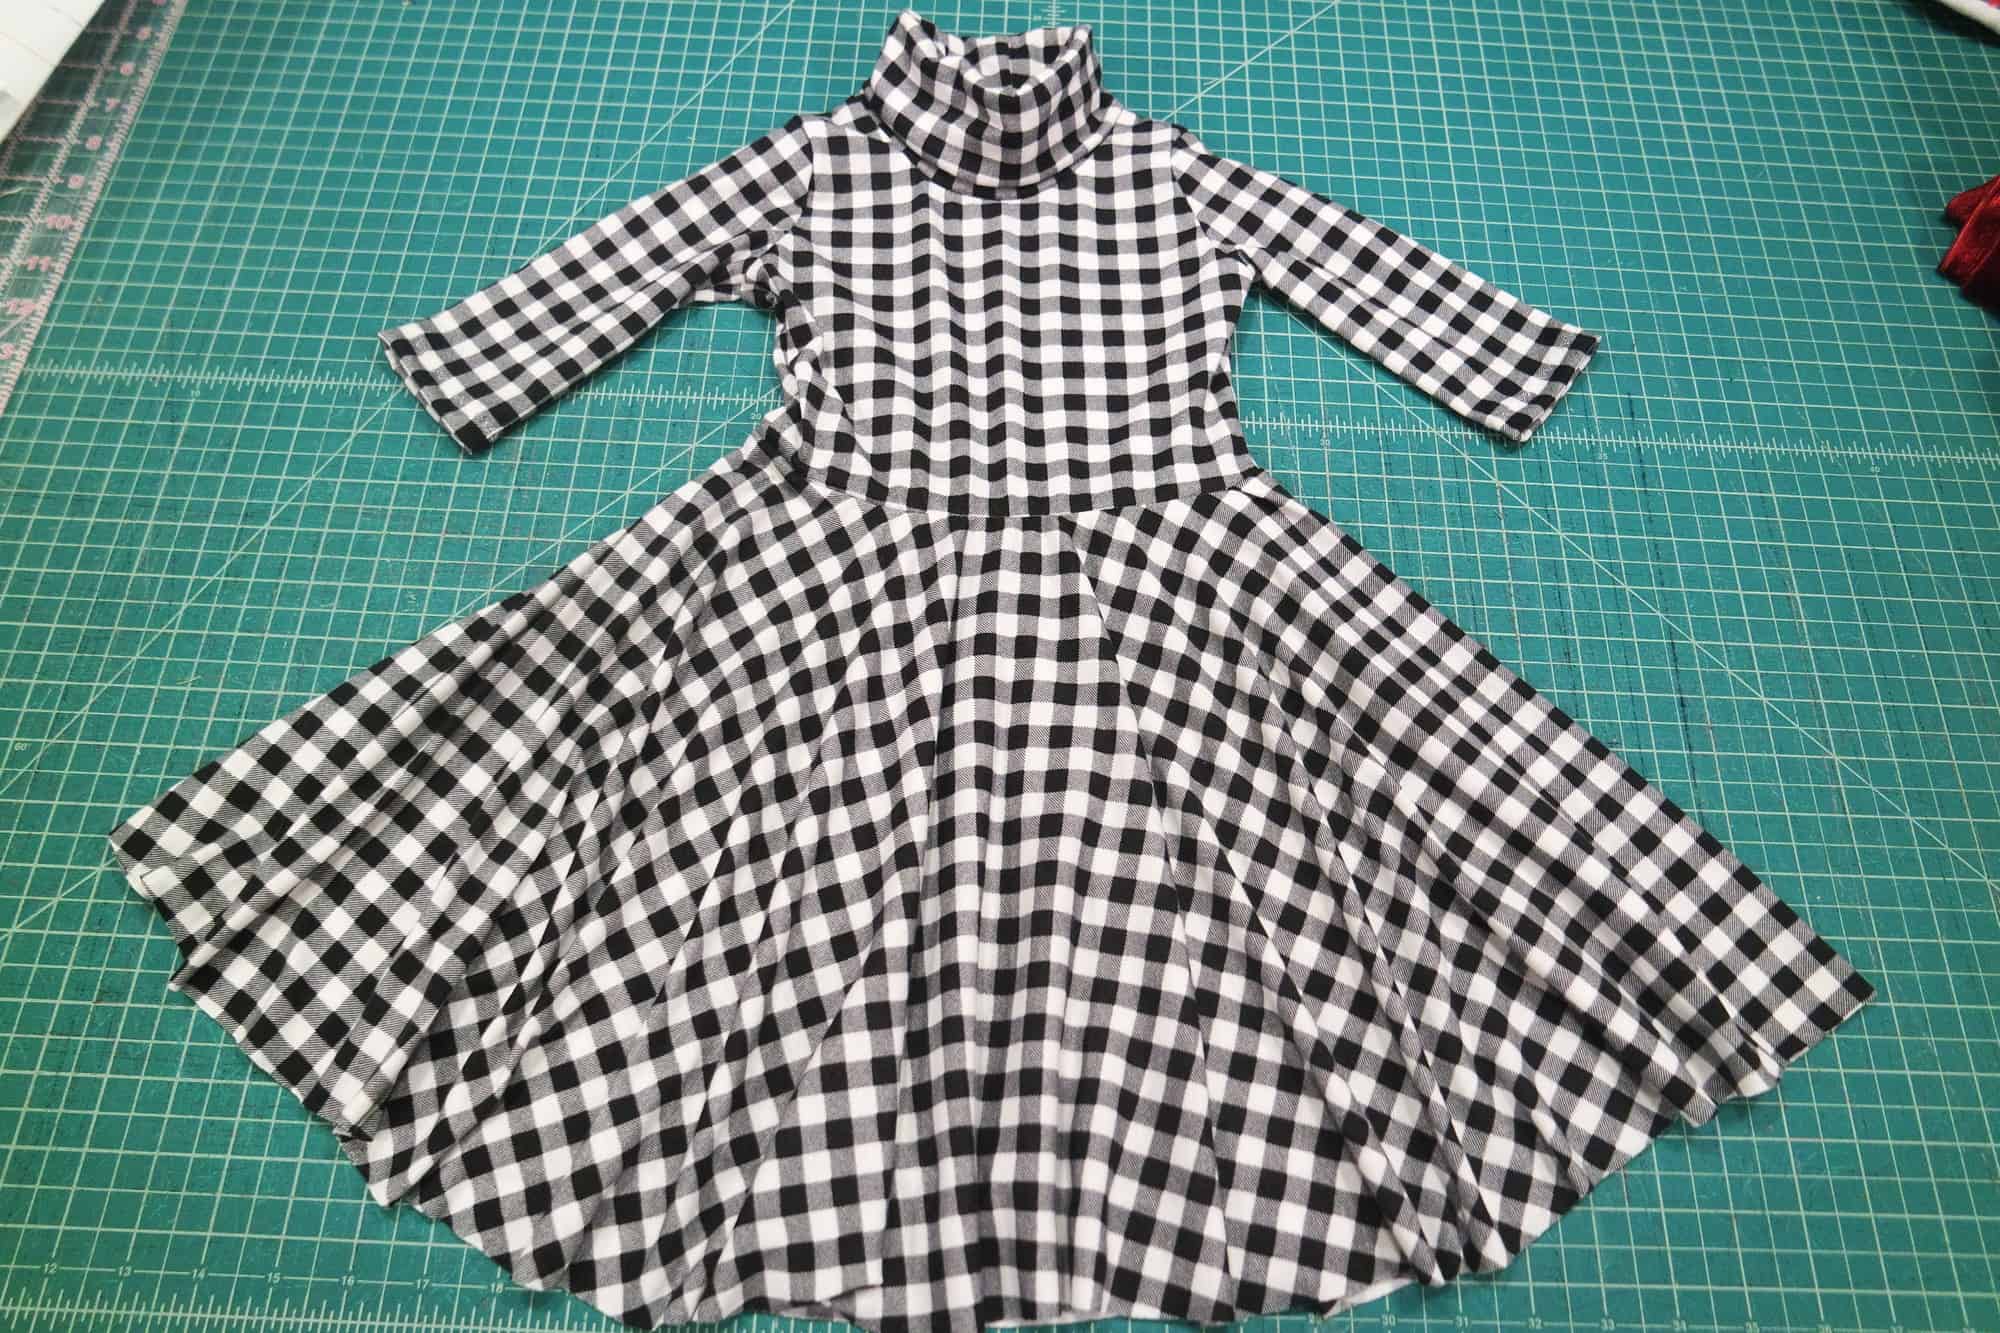
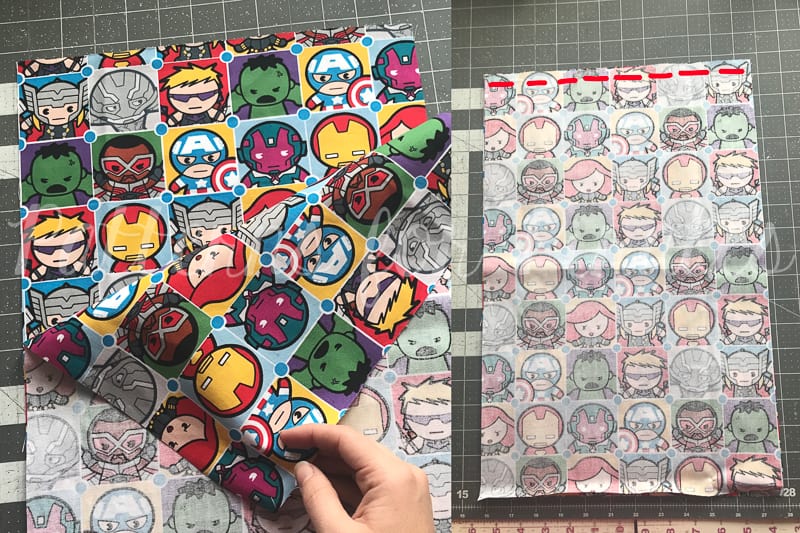
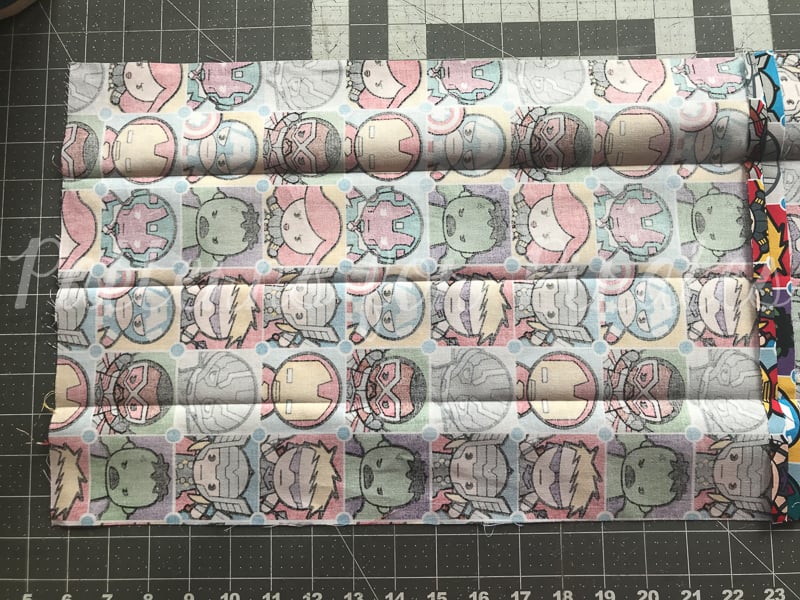
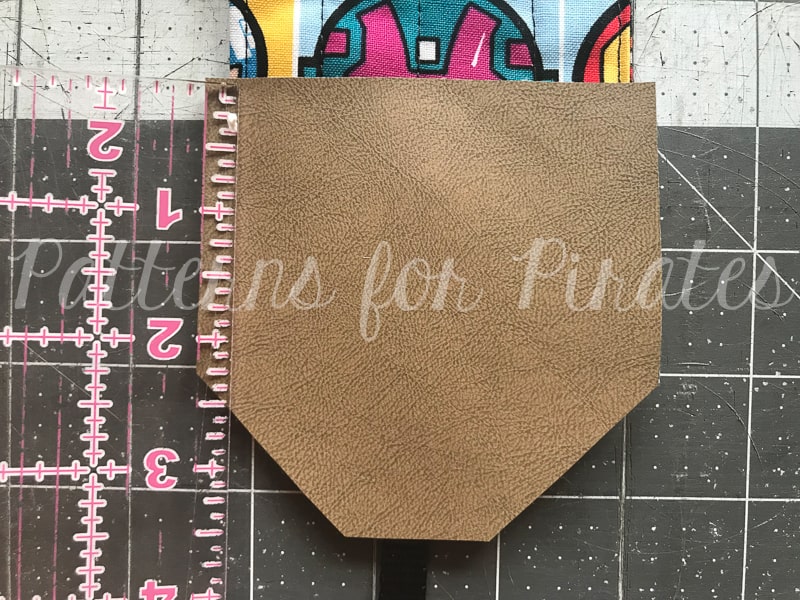
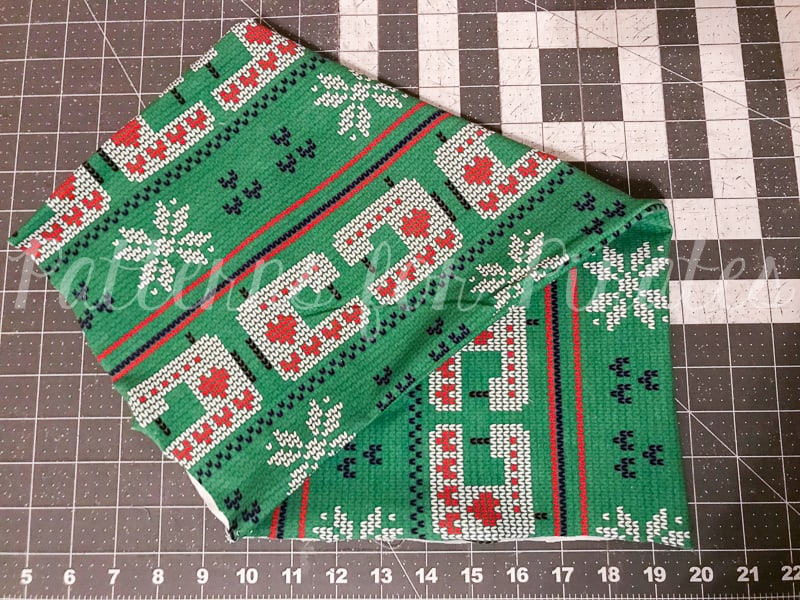
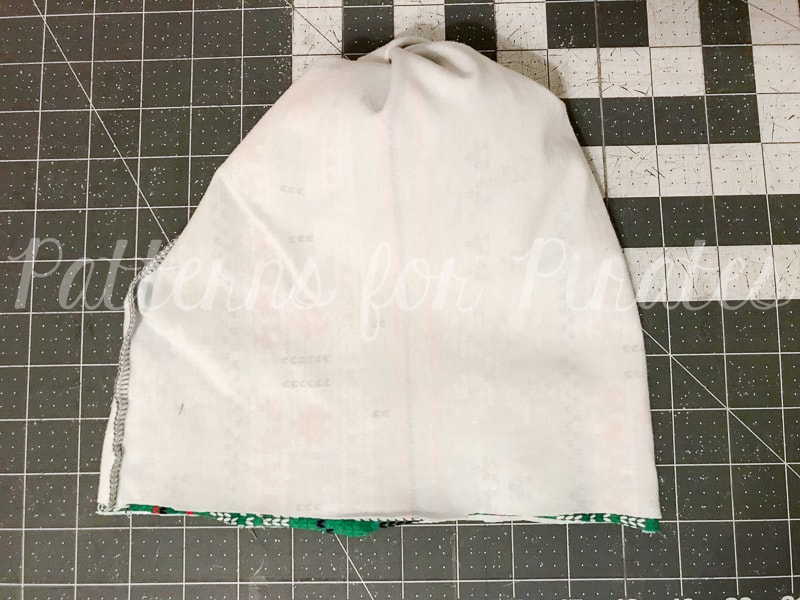
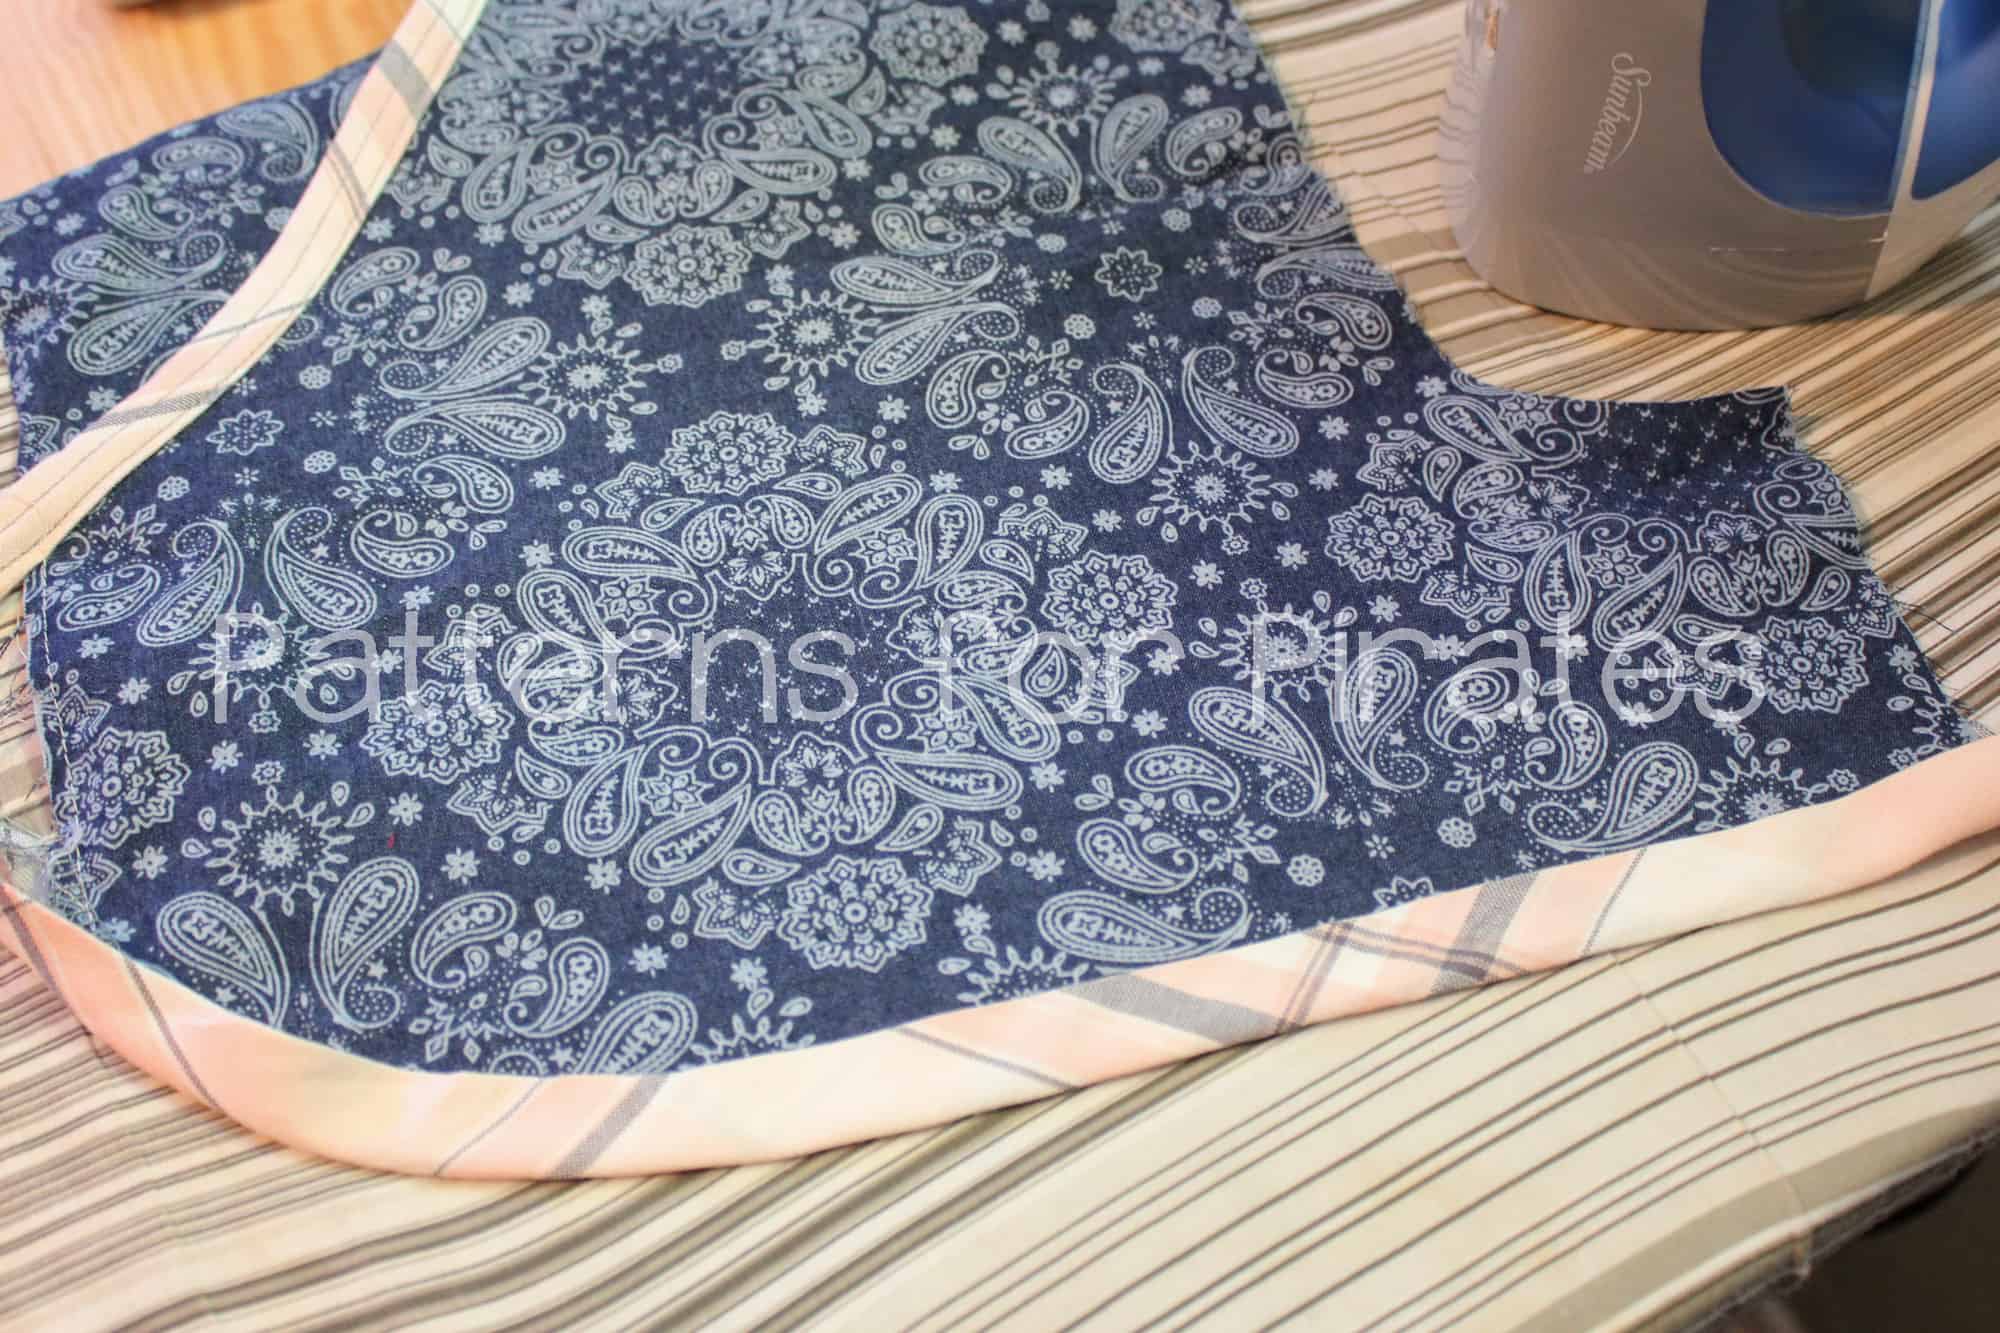
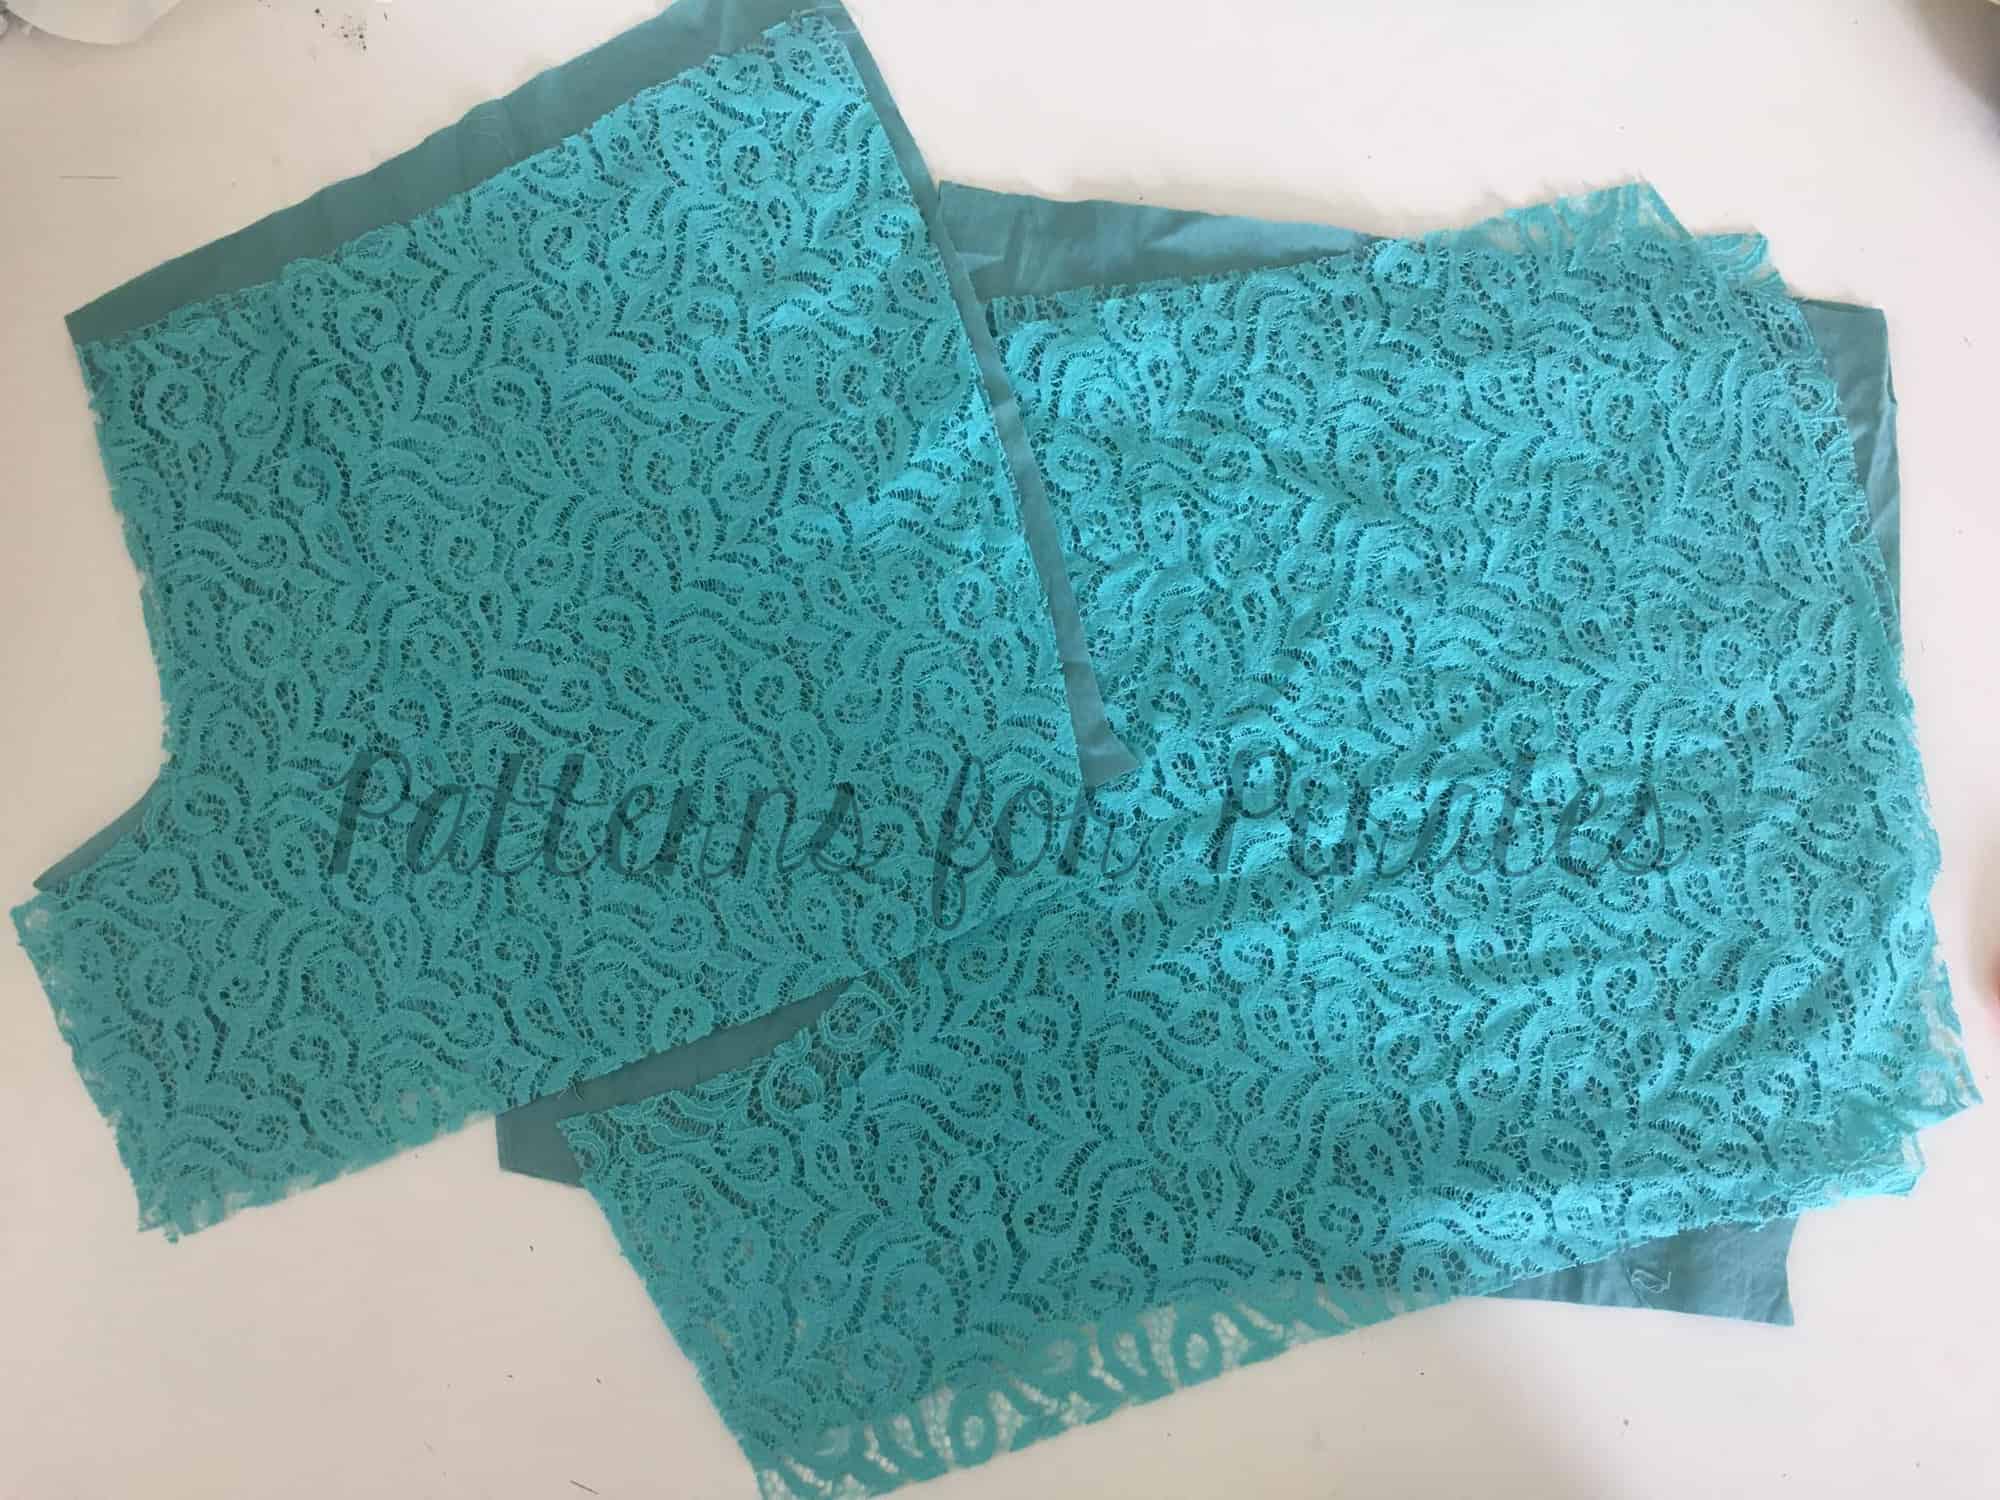
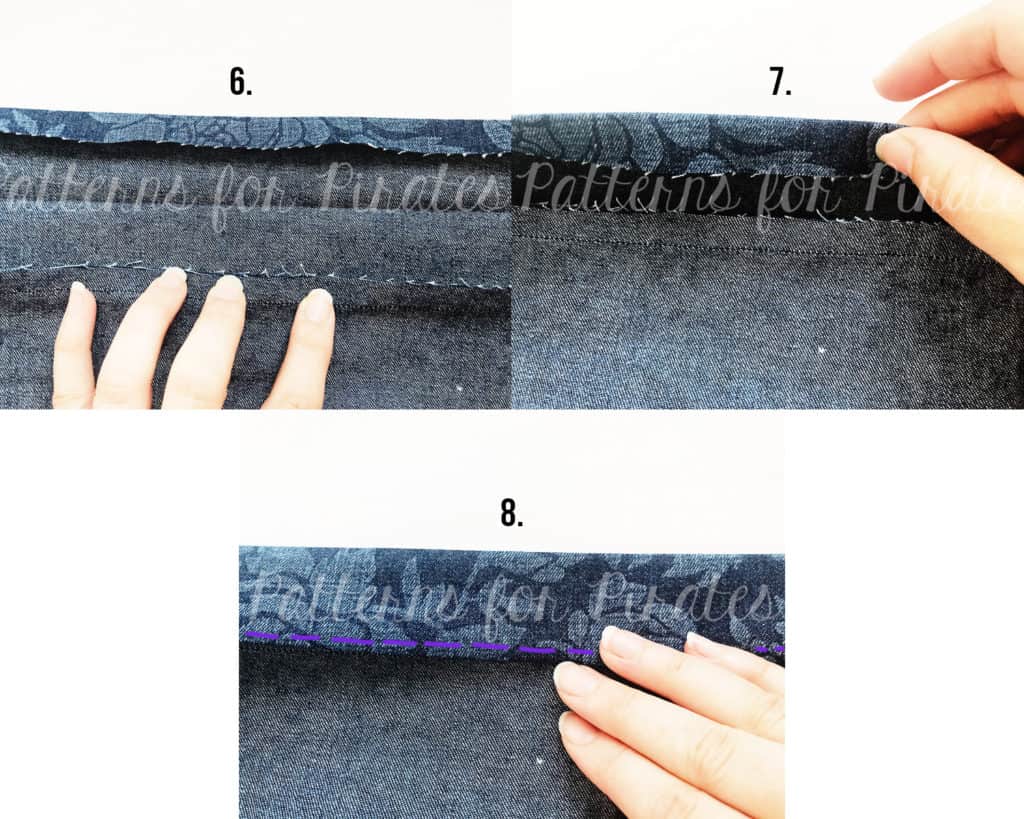
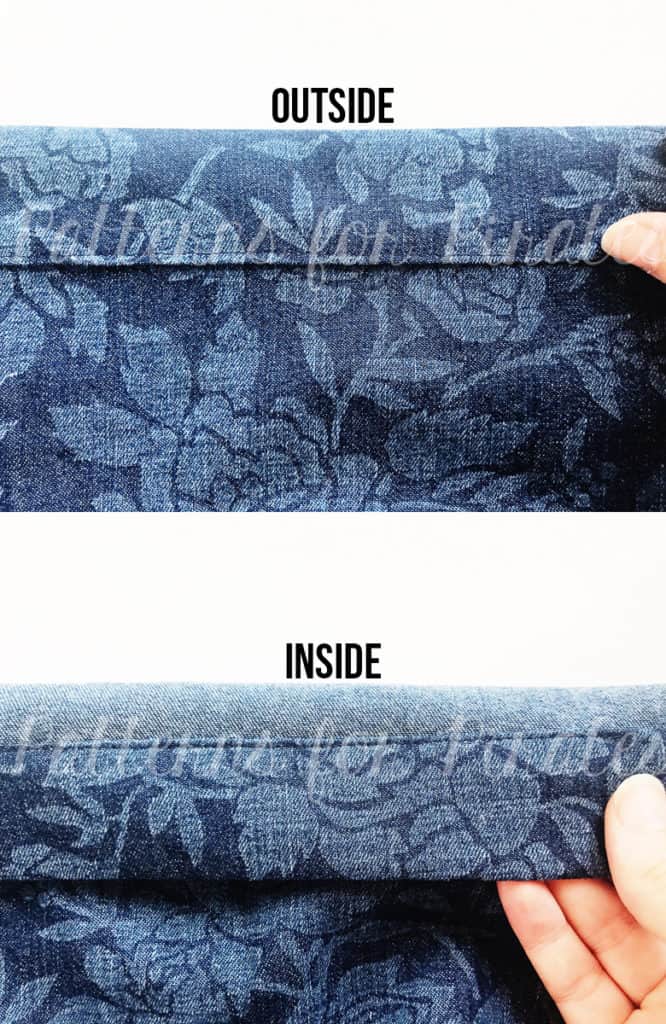
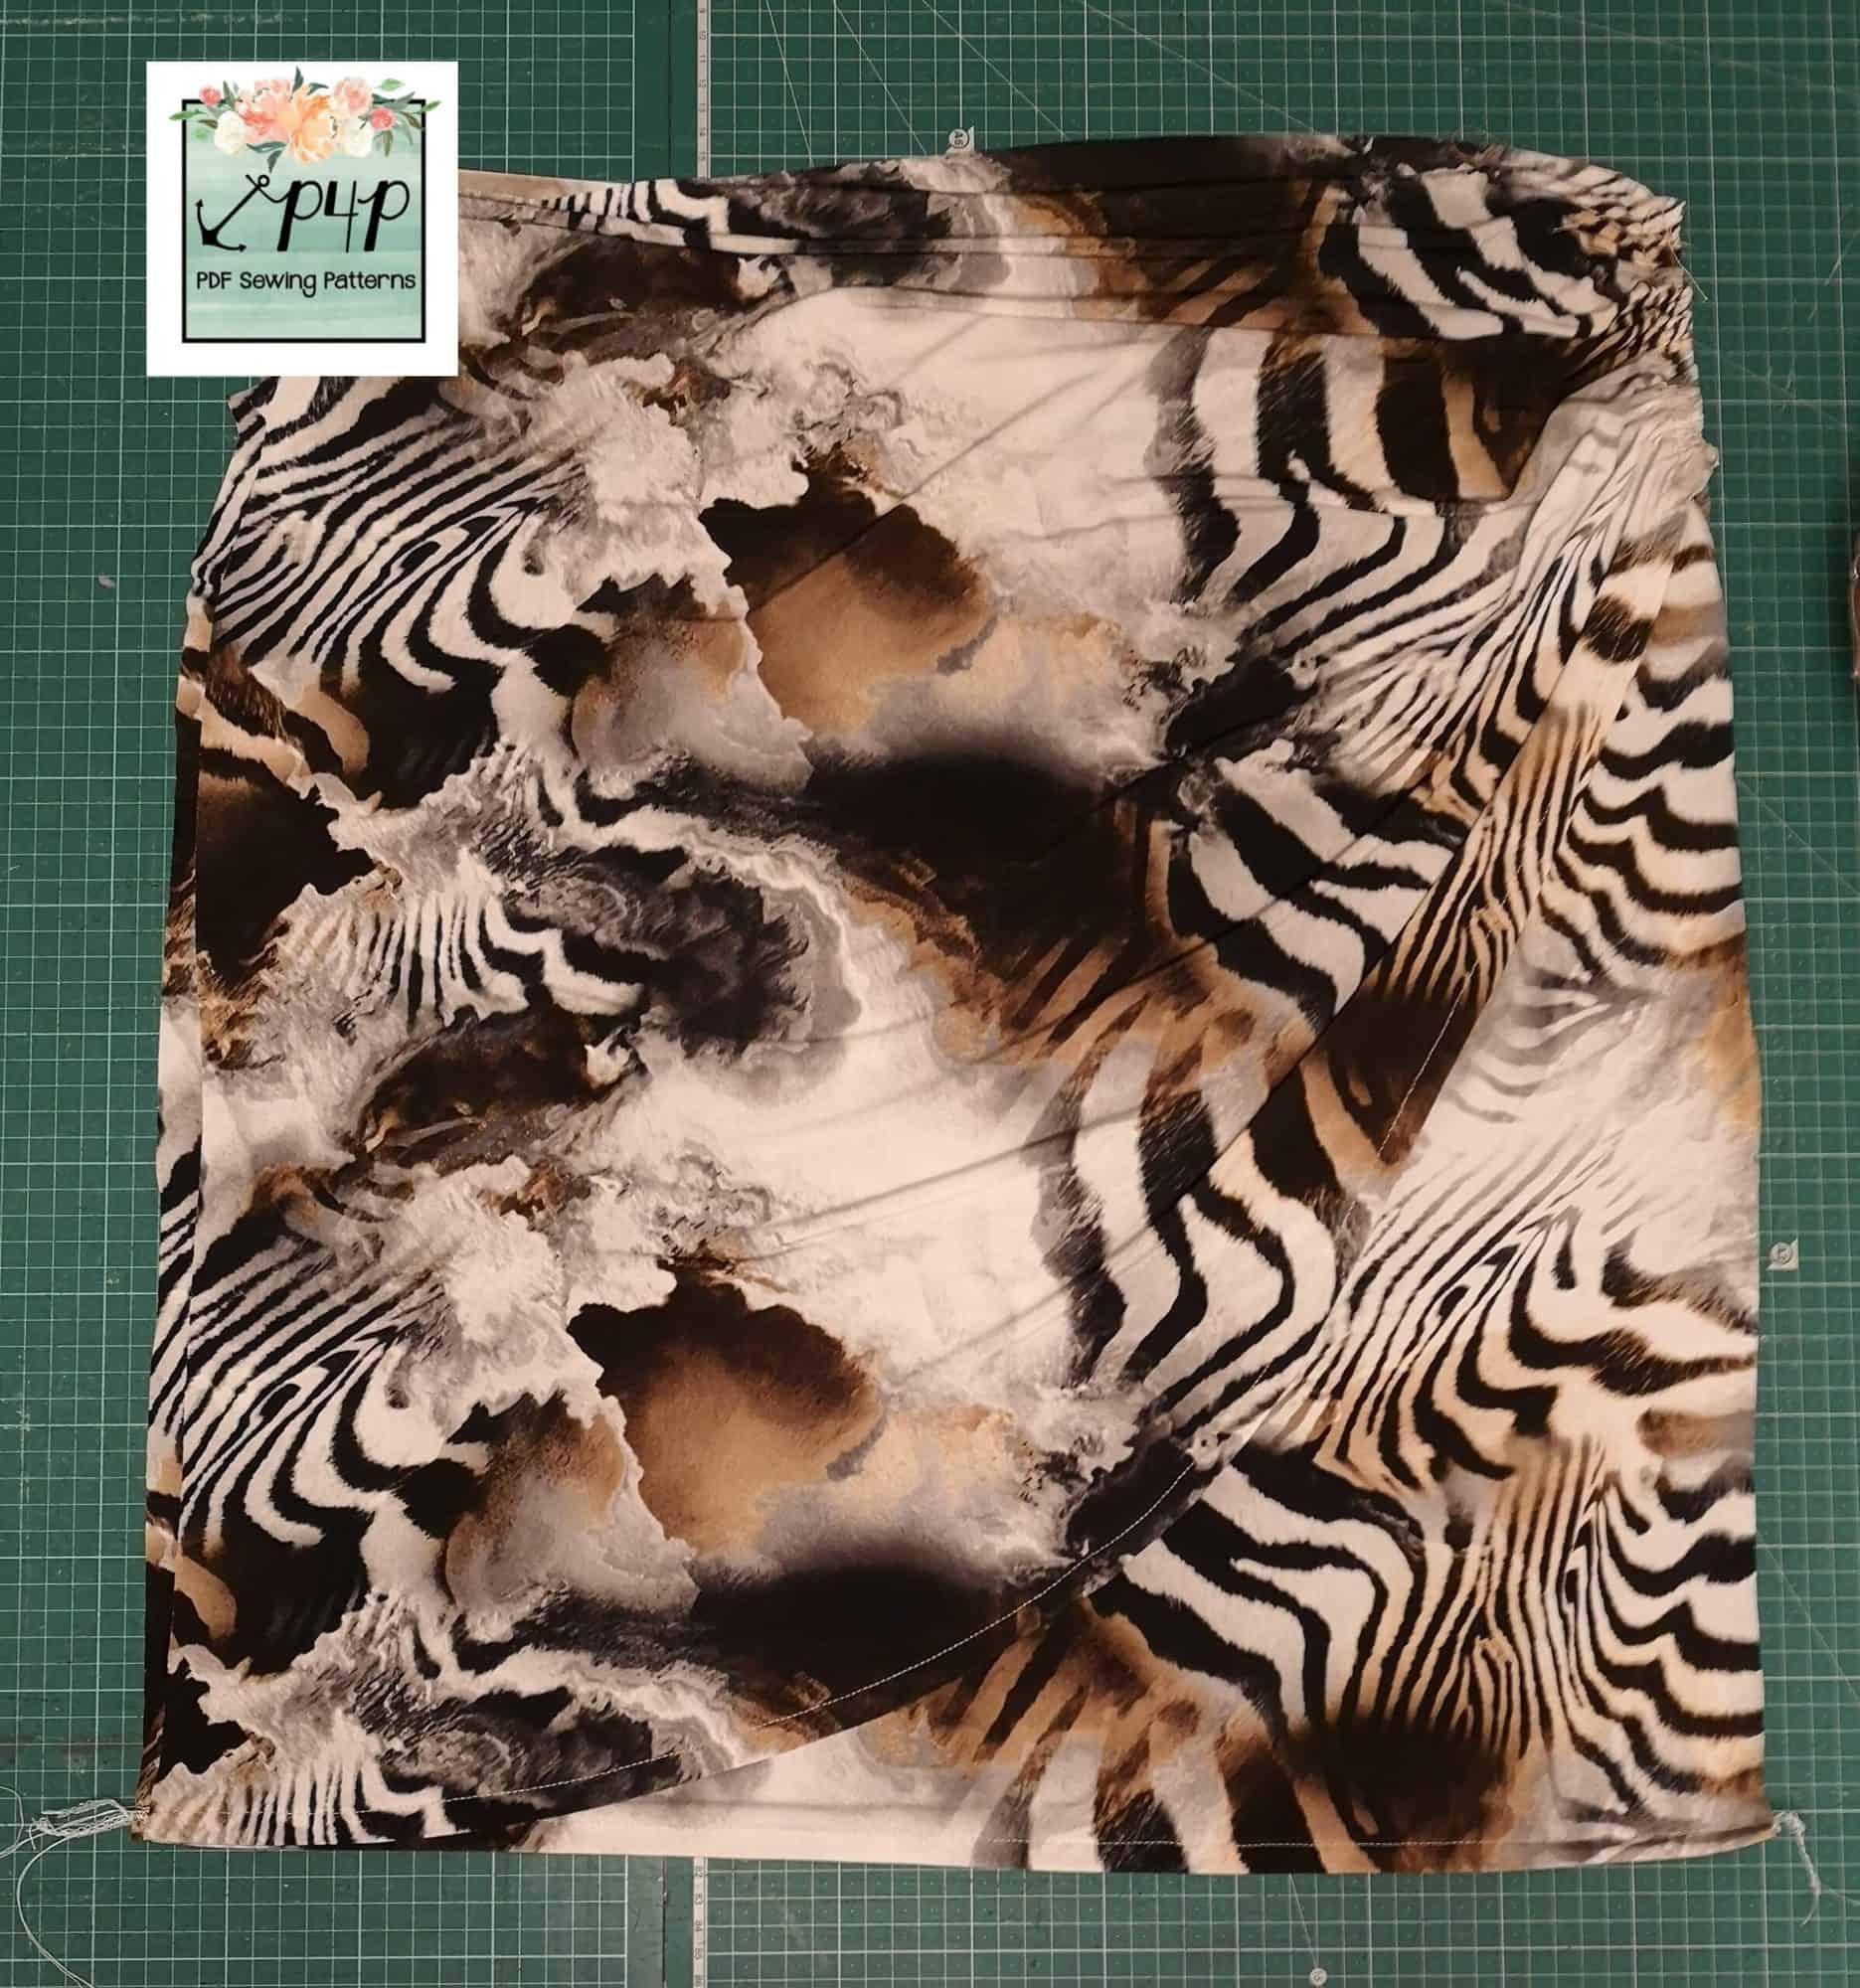
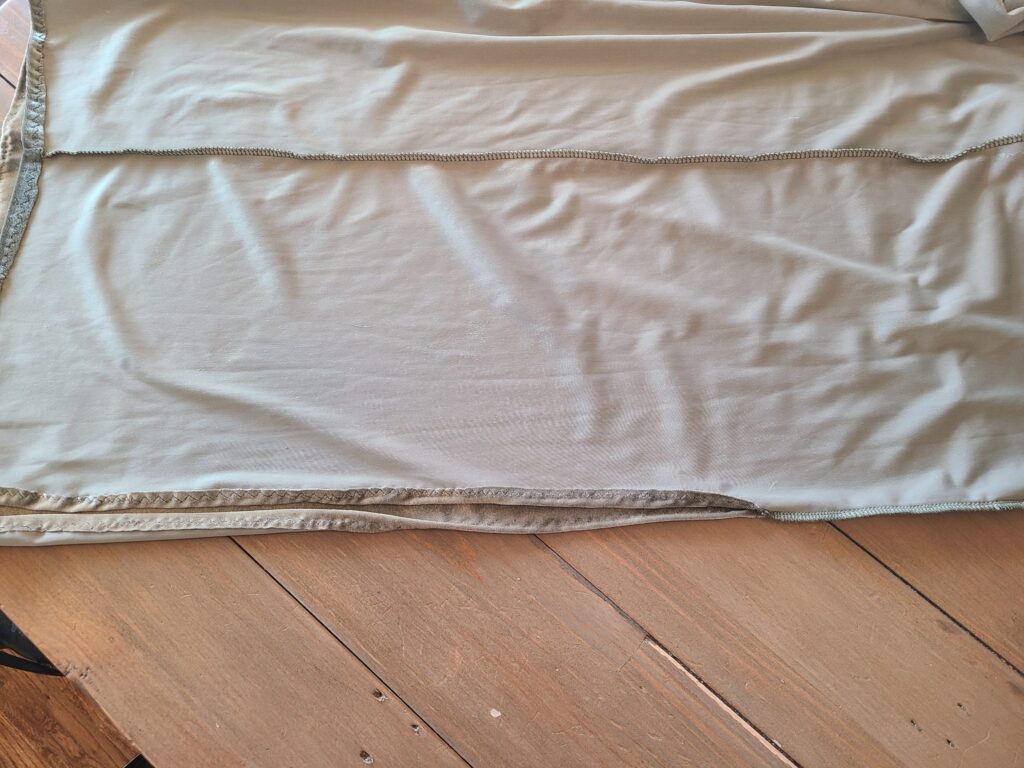
Finally, lay the un-ruched skirt piece facing up.  Then lay the ruched skirt piece facing up on top of it. Baste them together along the top and sides, making sure the hems line up nicely with one another.  Here is a picture of the ruched skirt piece laying on top of the un-ruched skirt piece prior to basting.

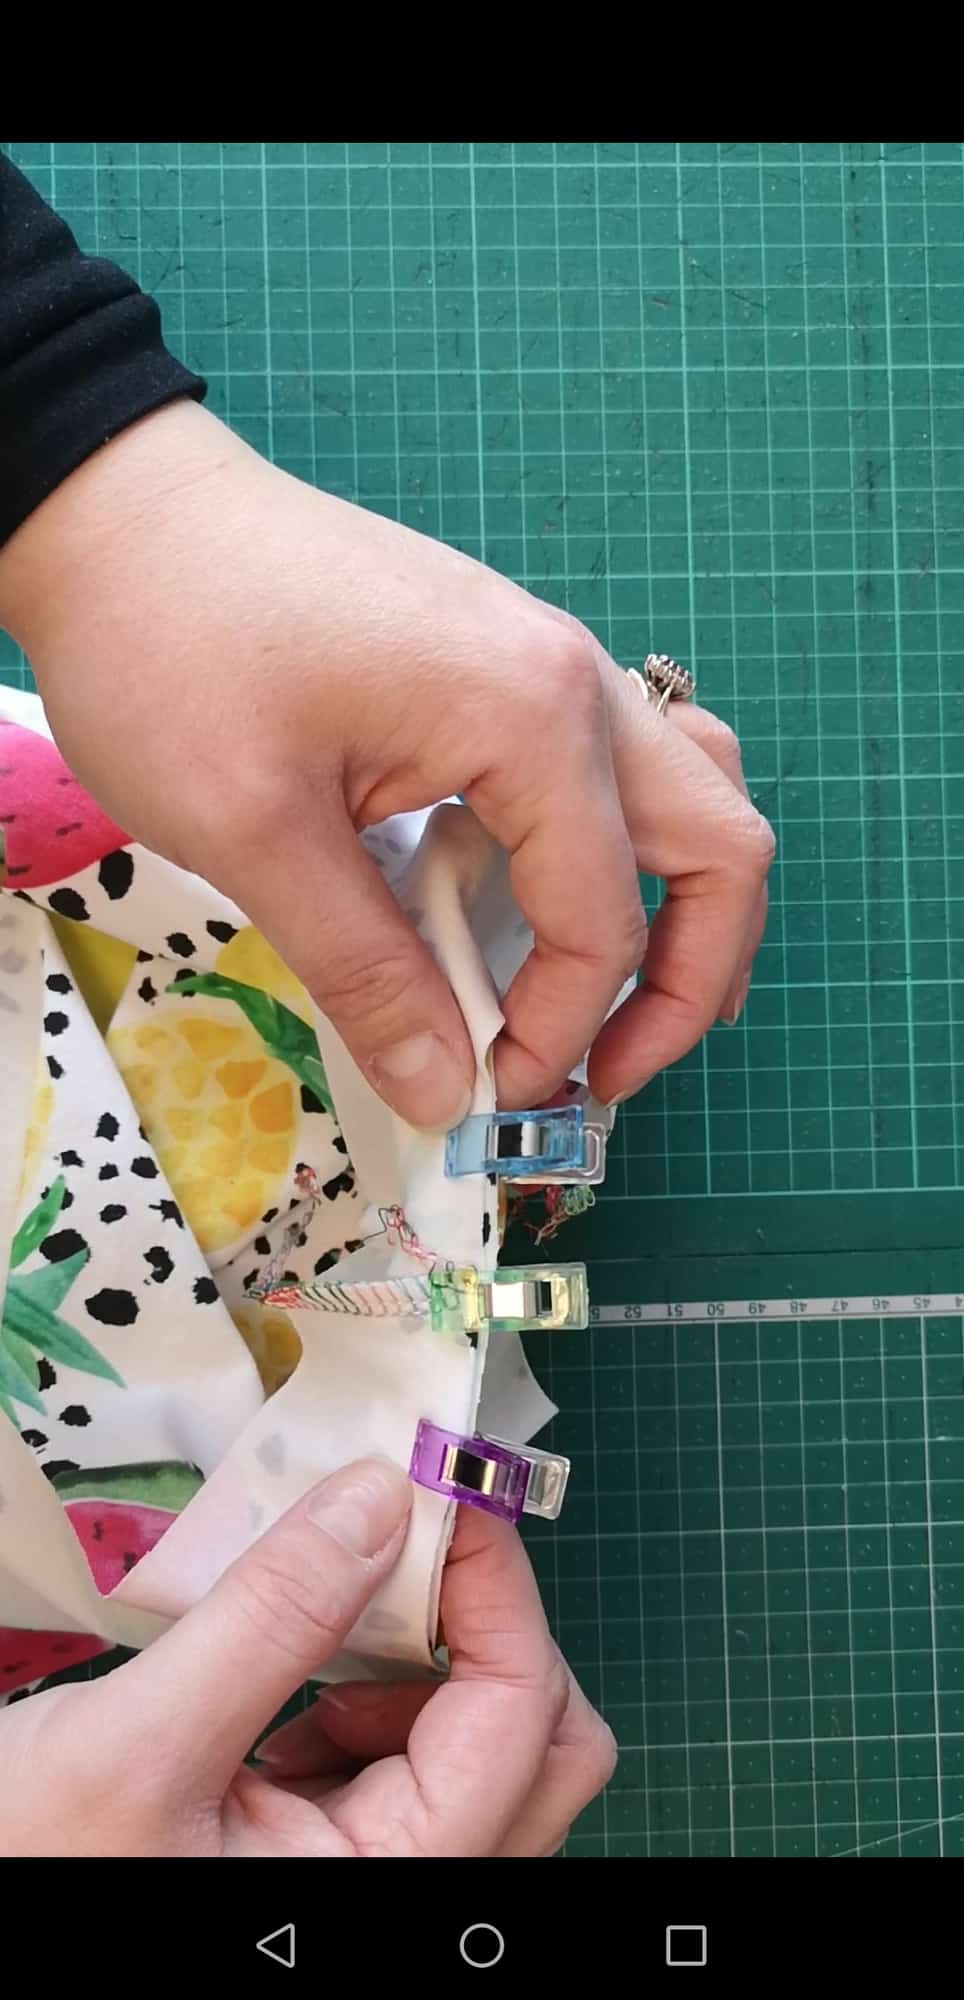
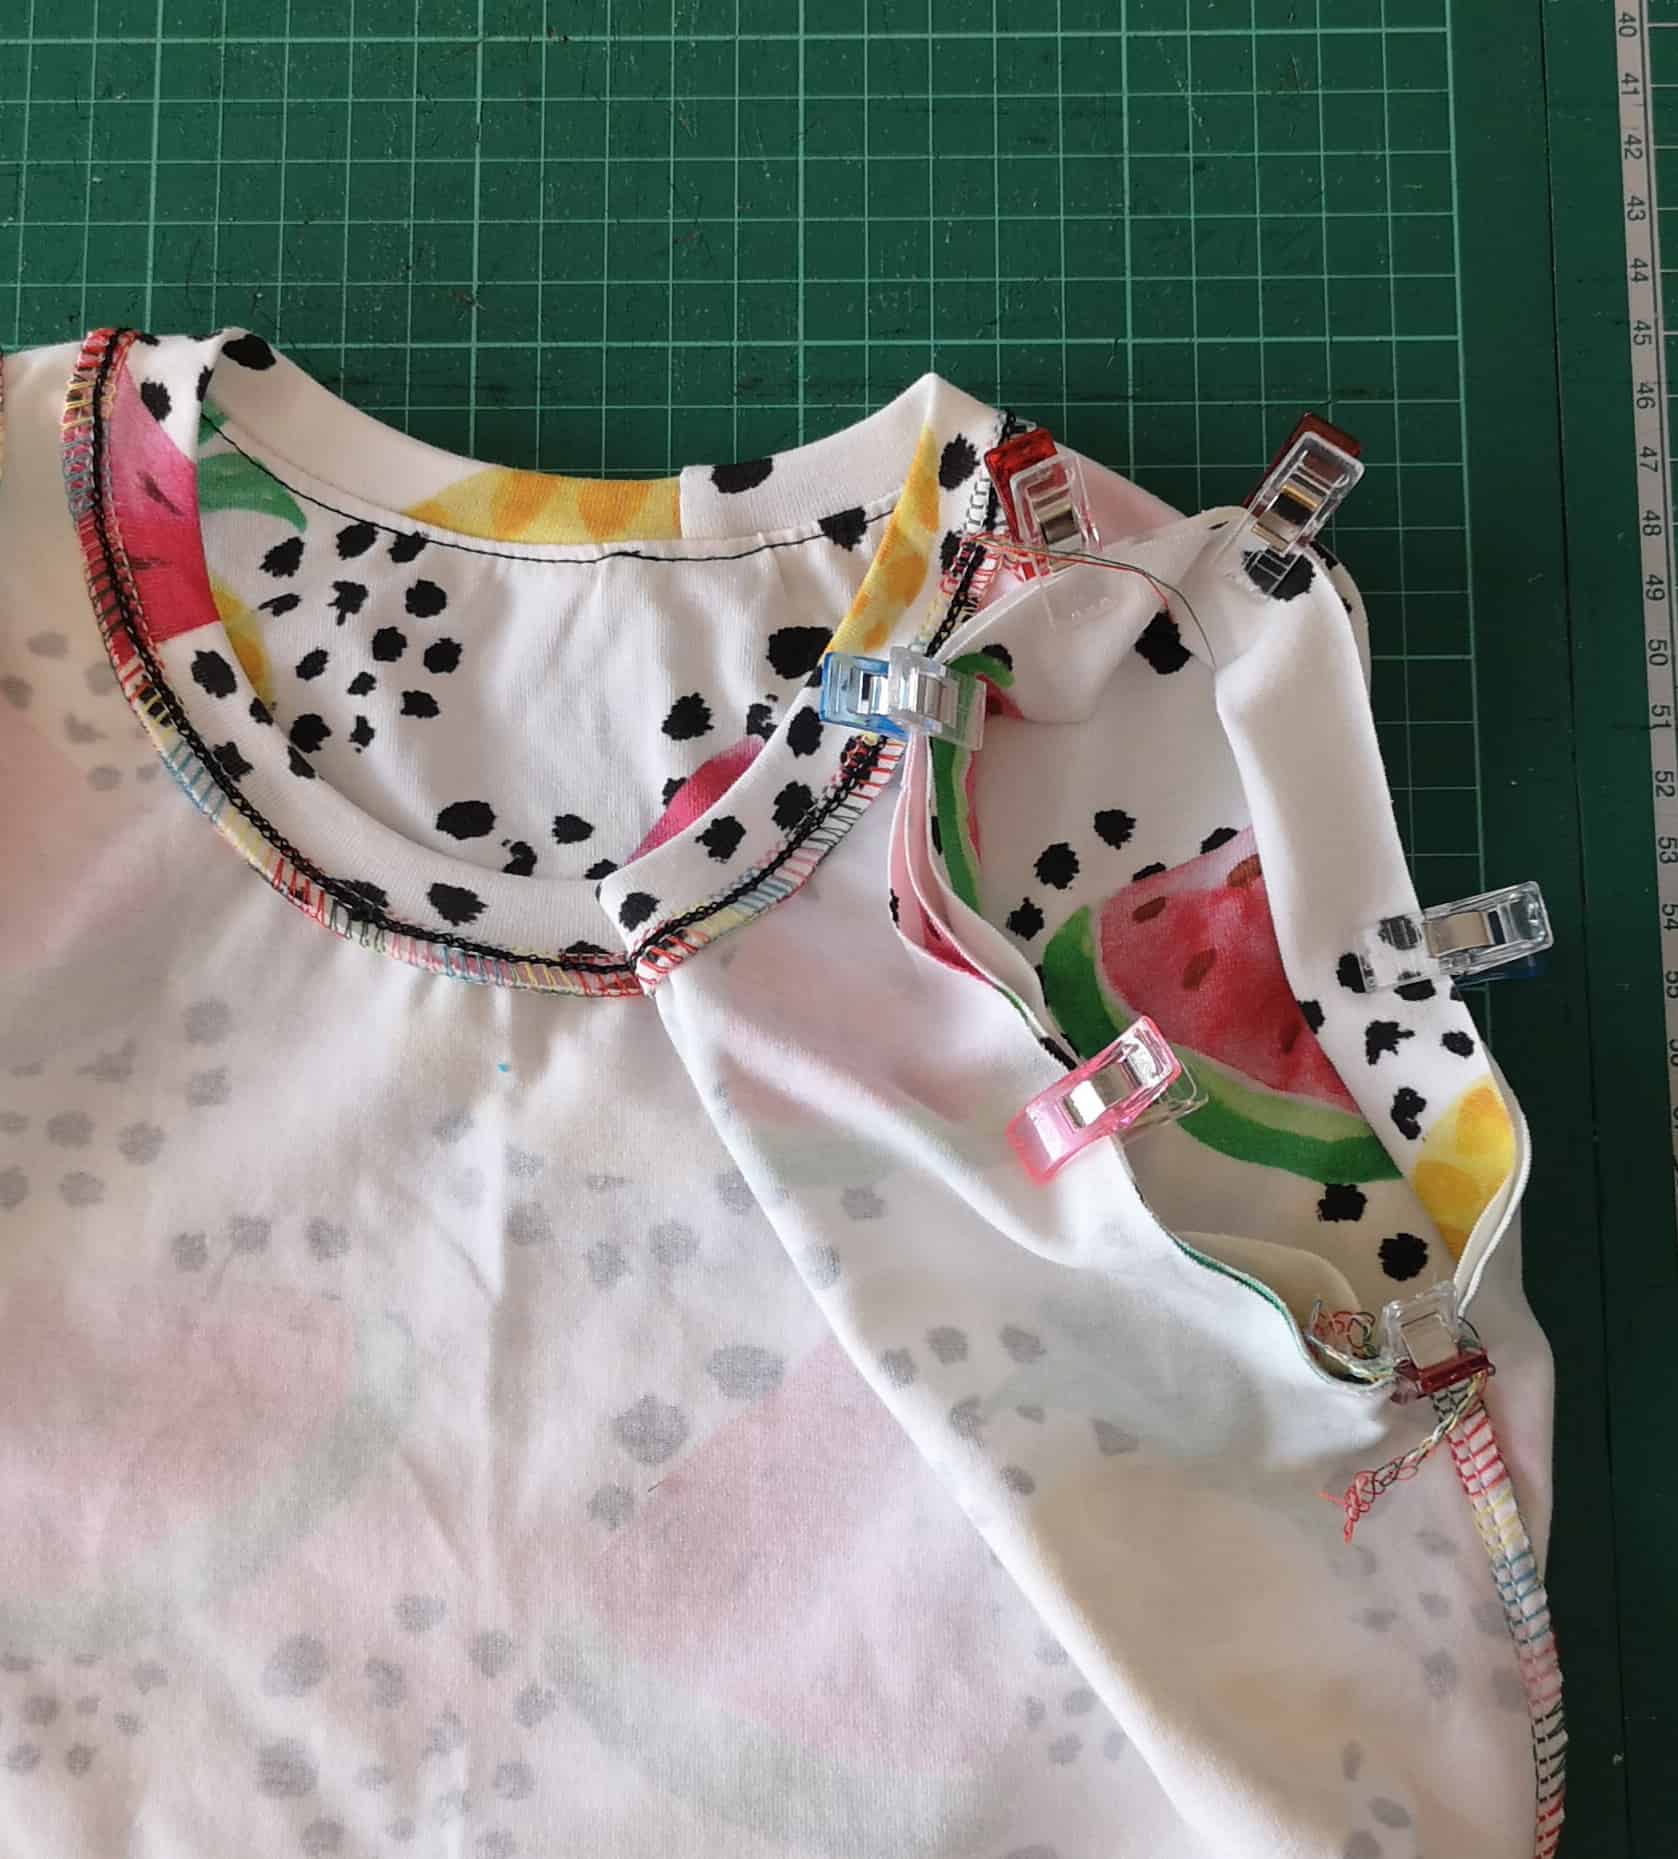
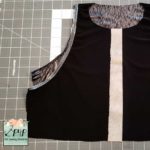
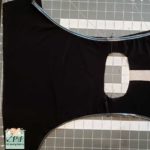
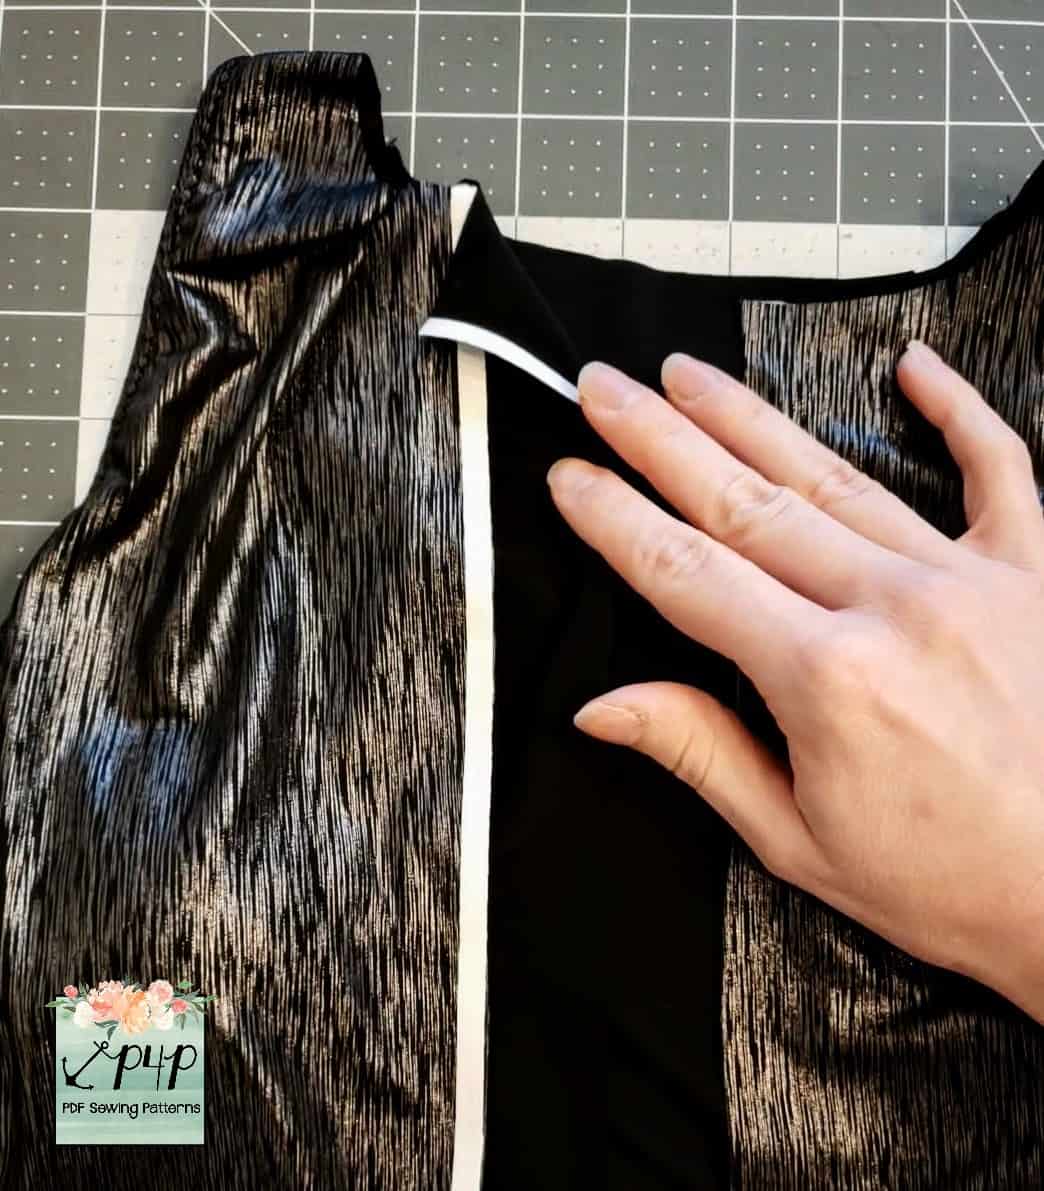
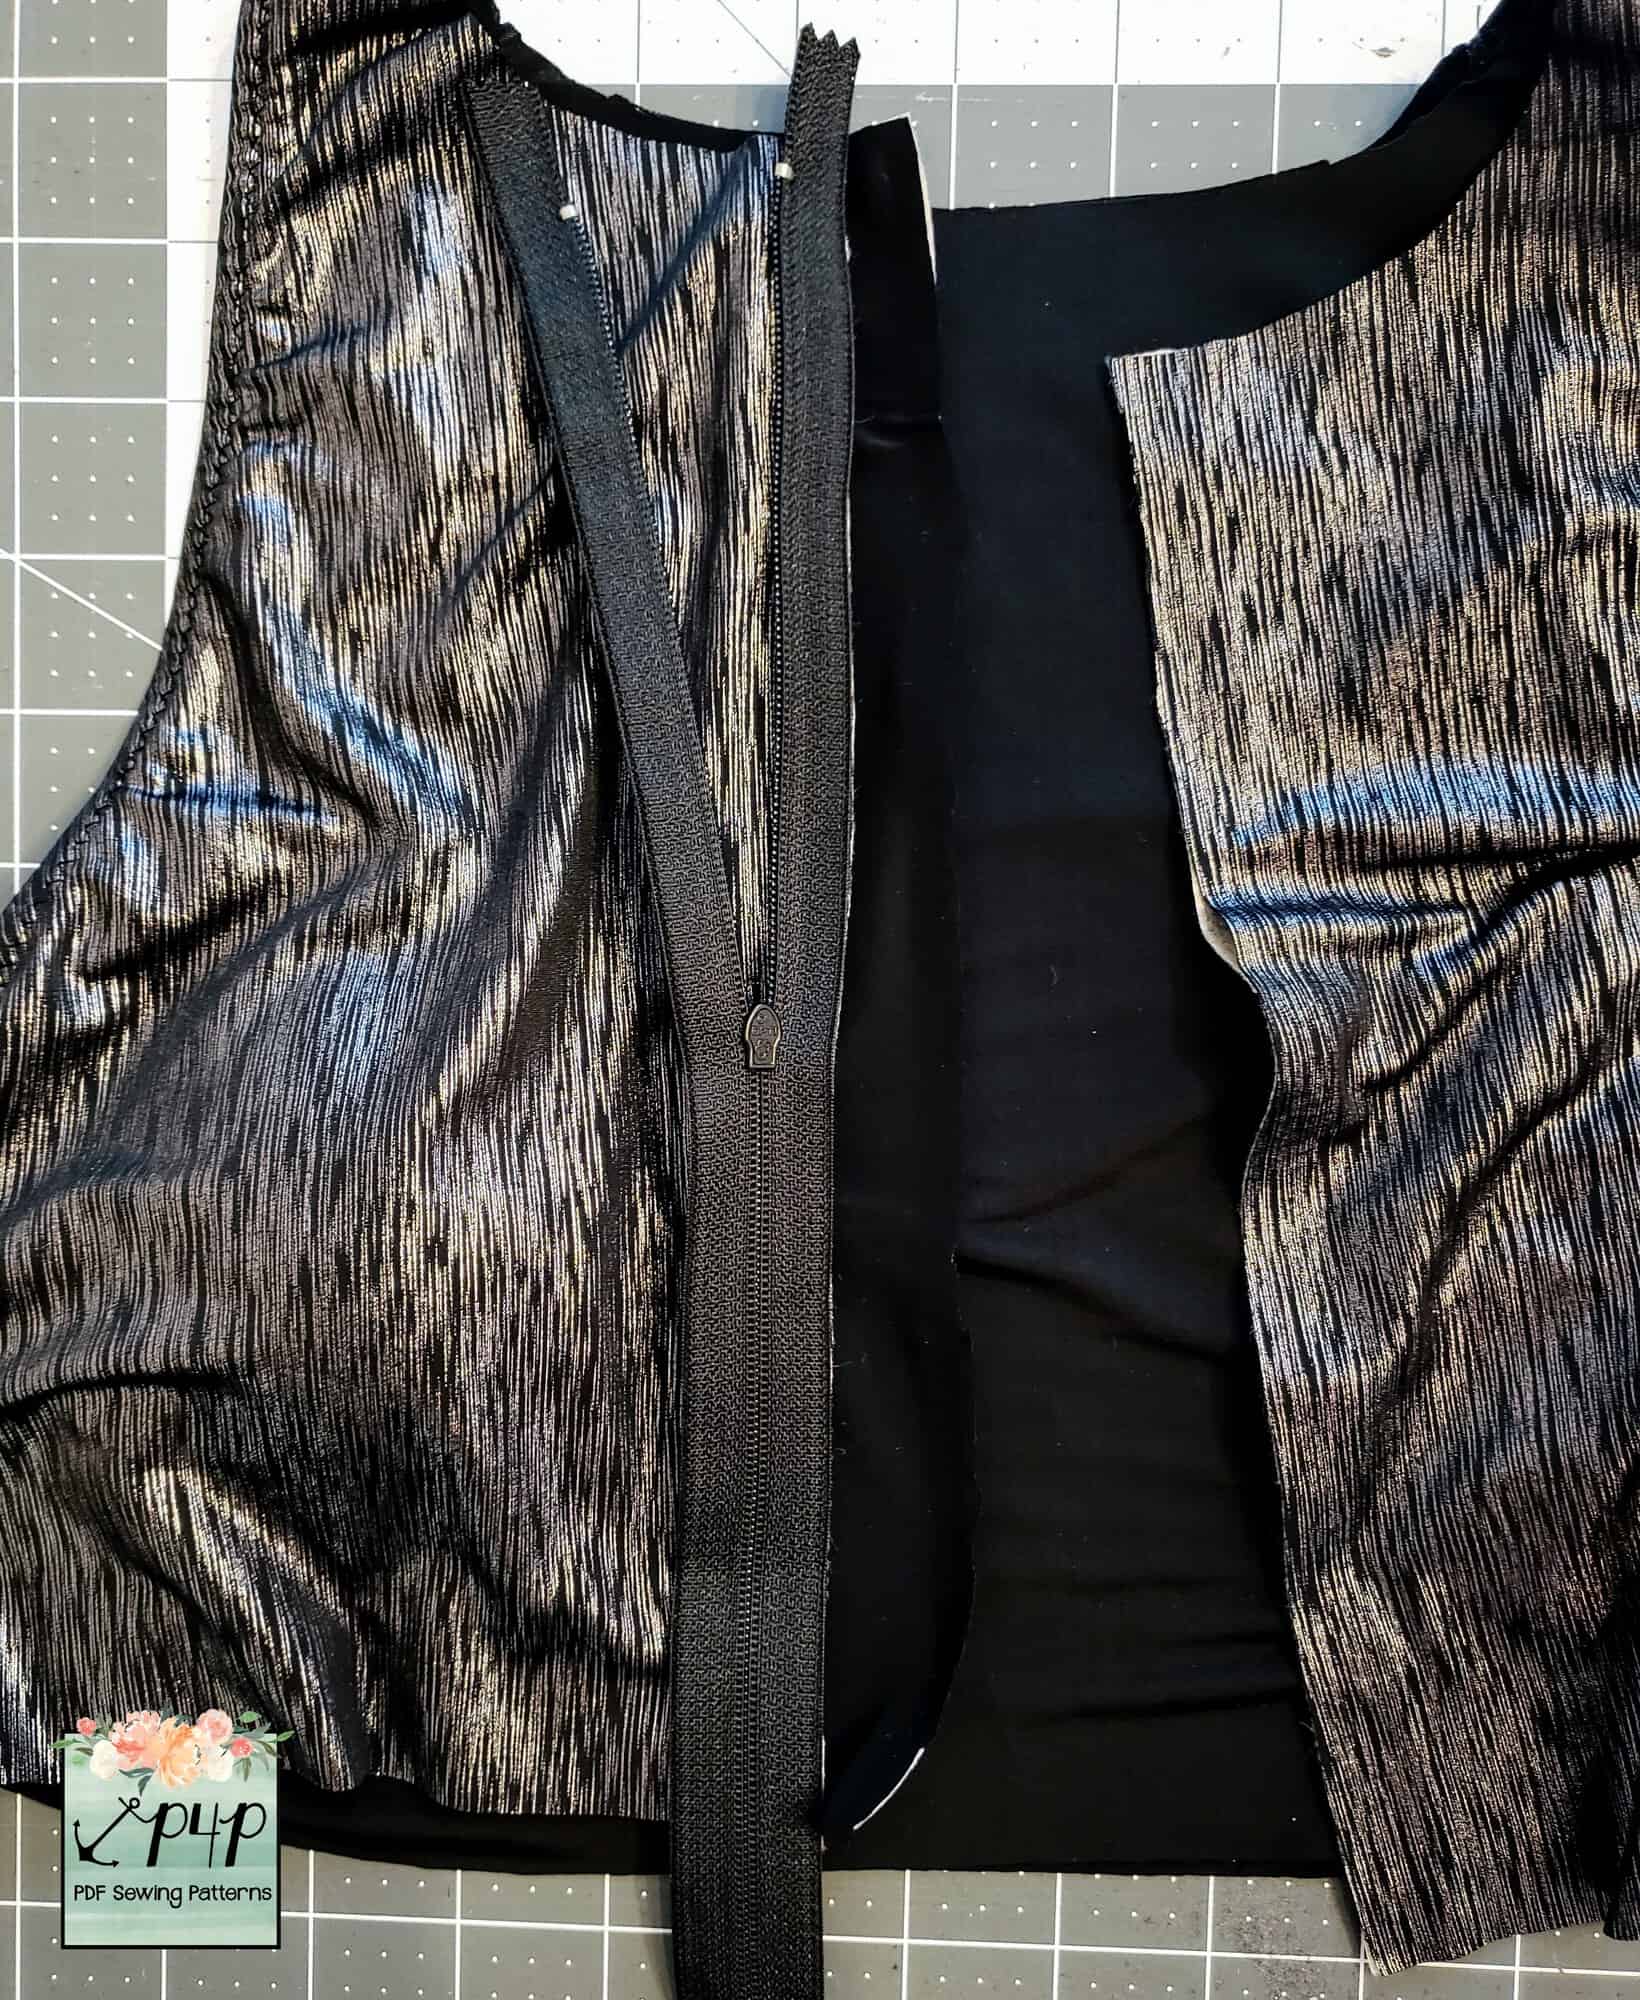
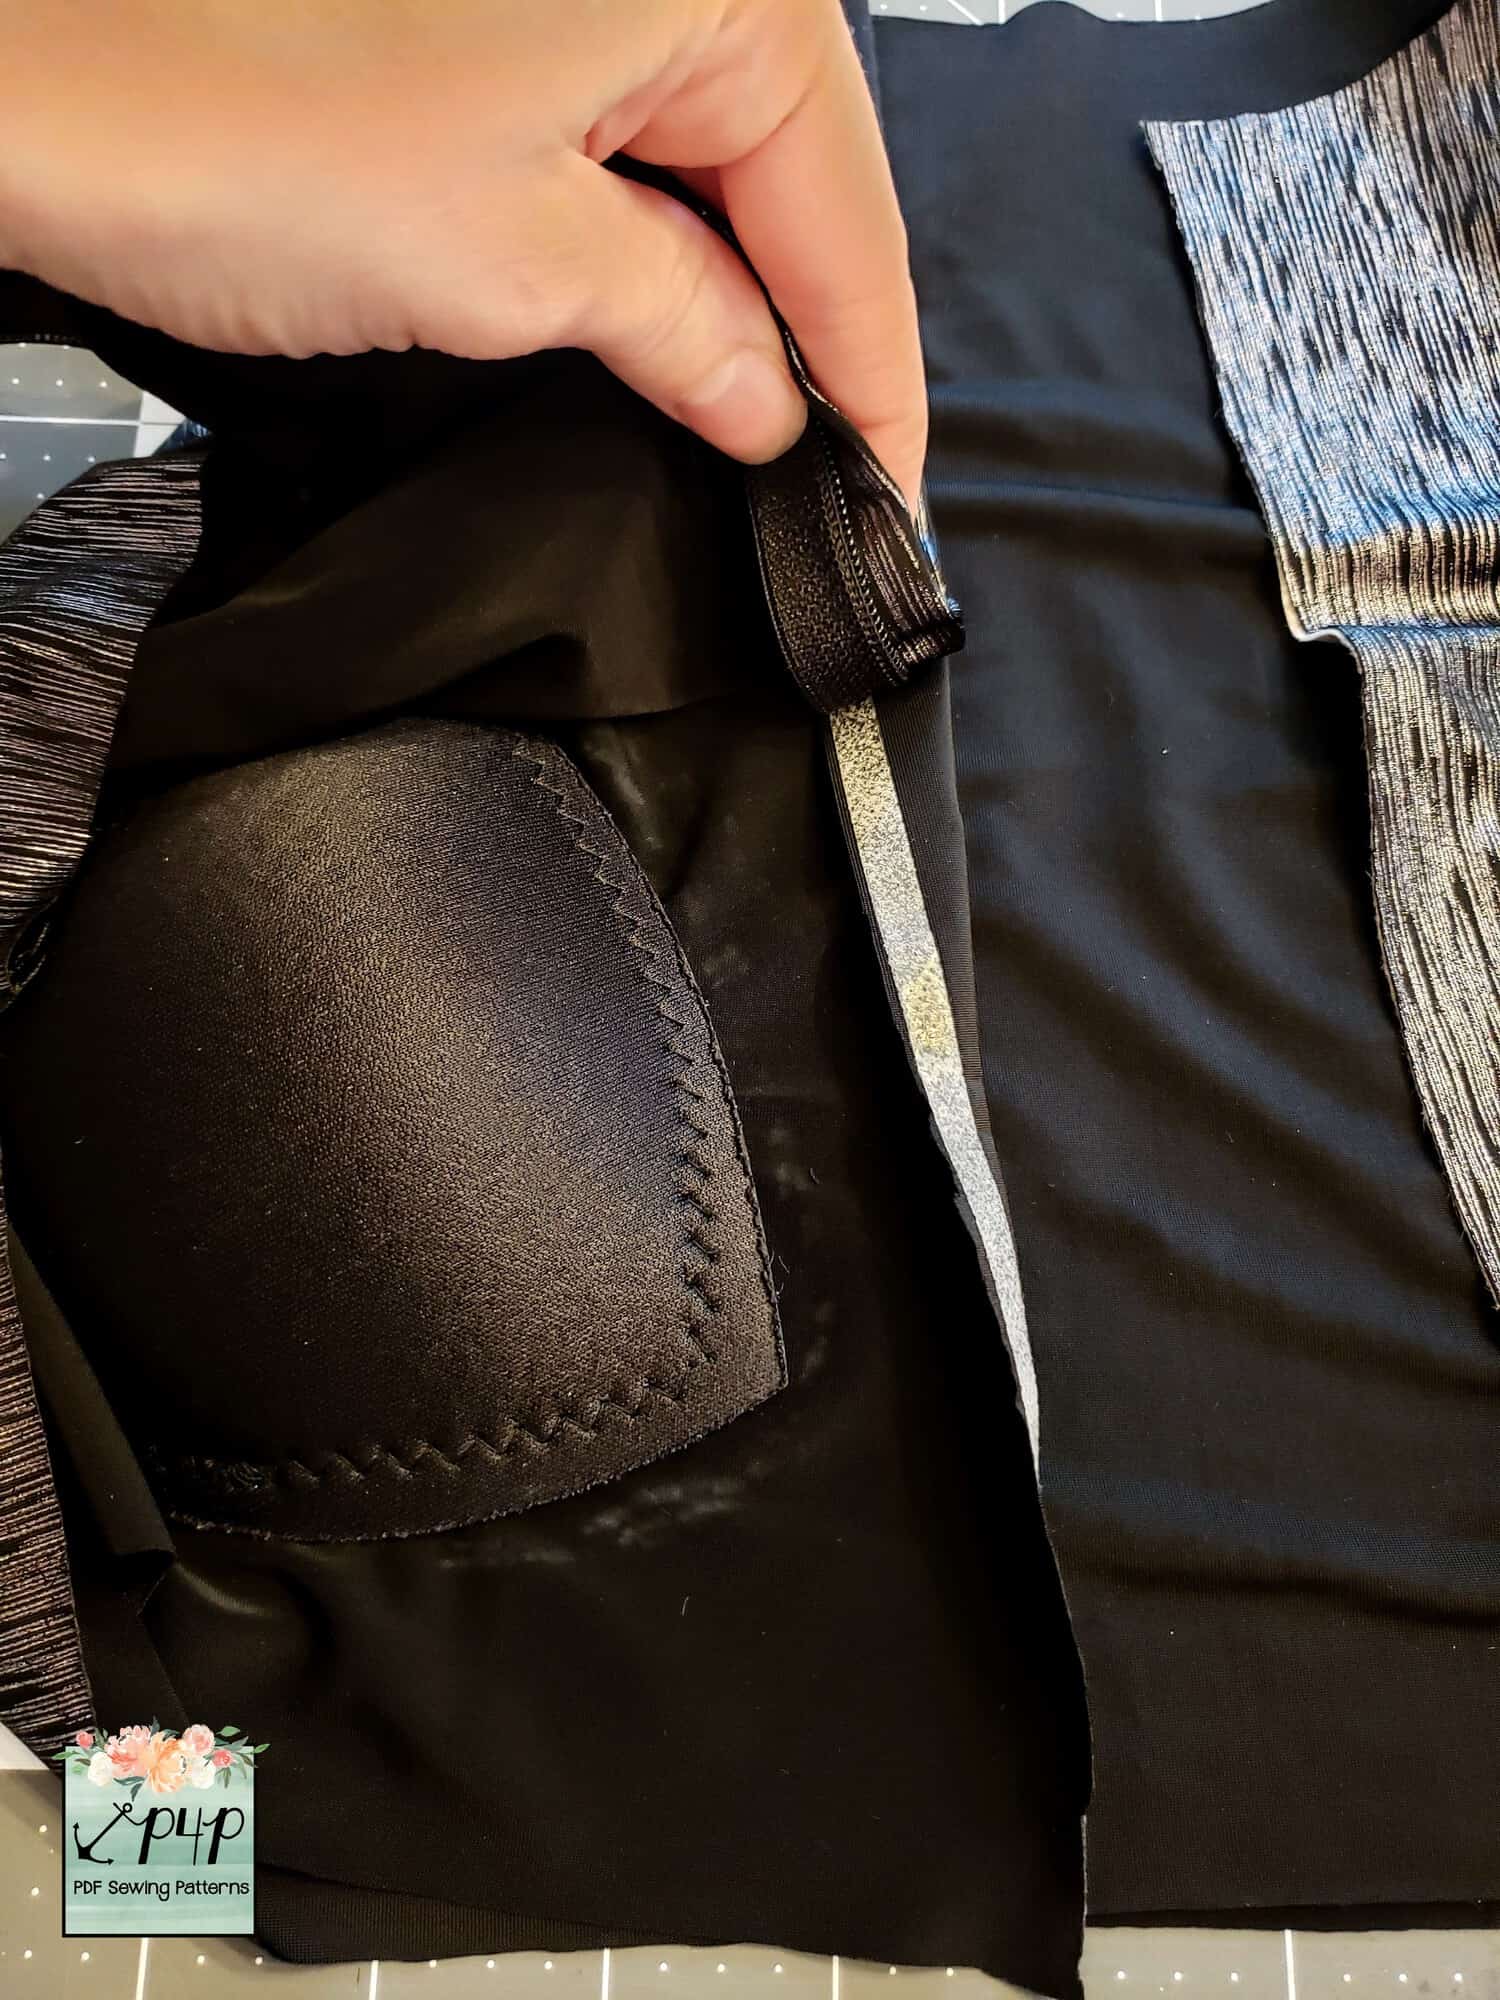
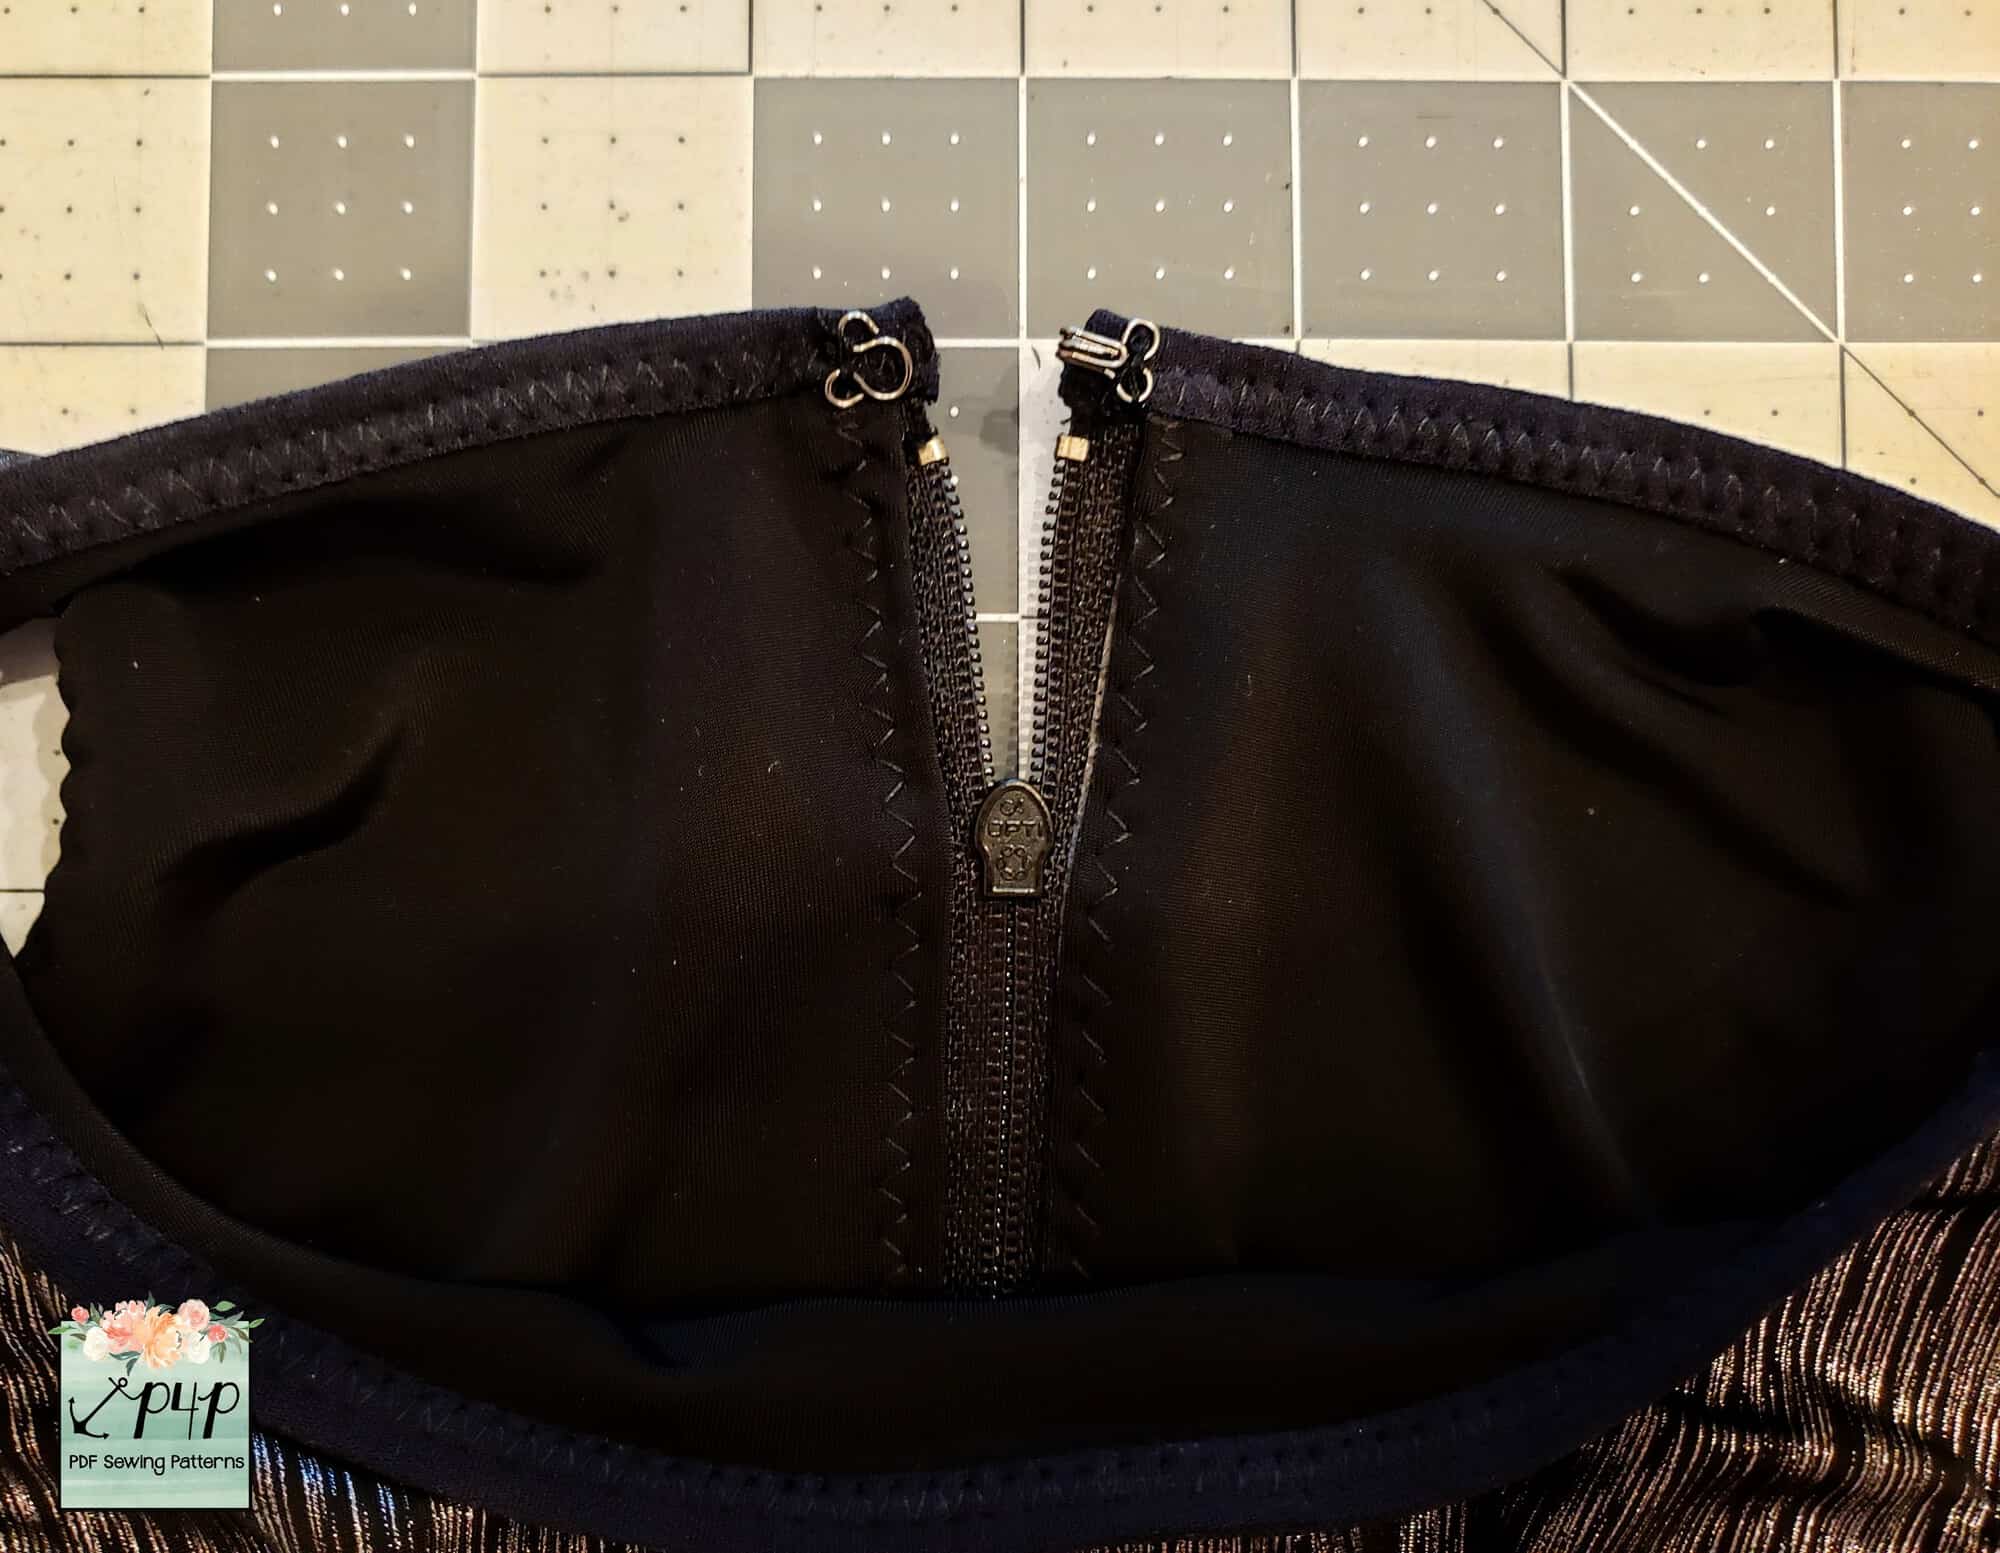
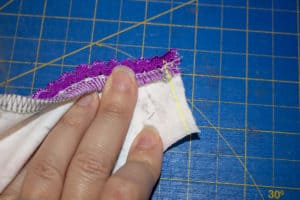
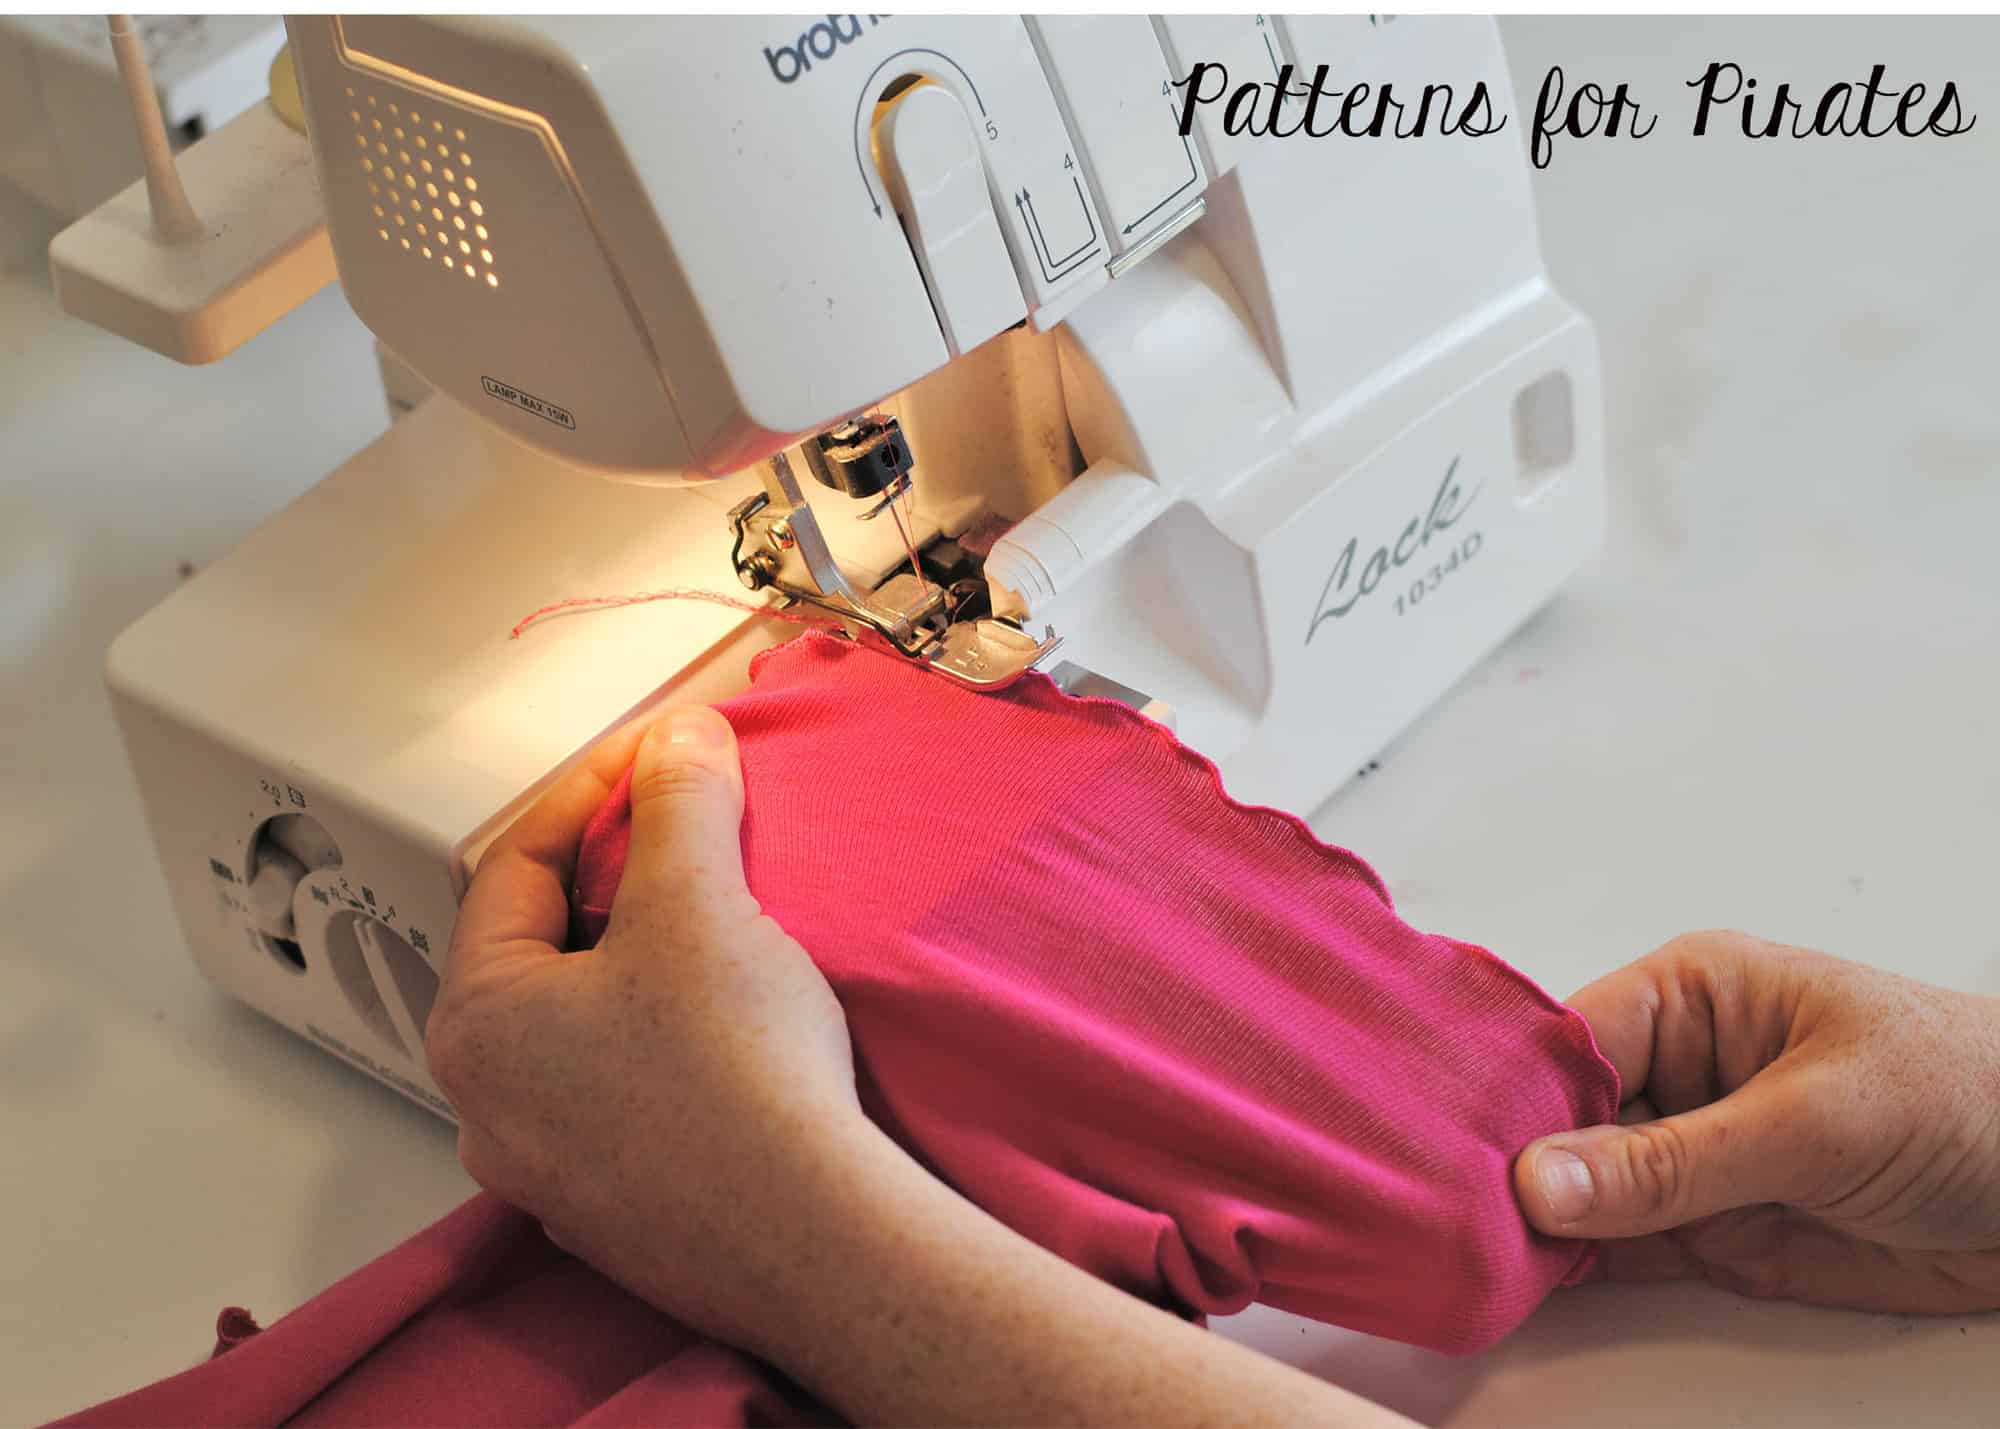
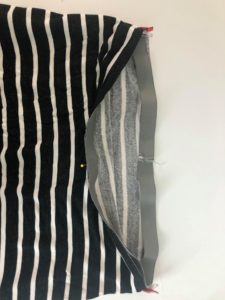
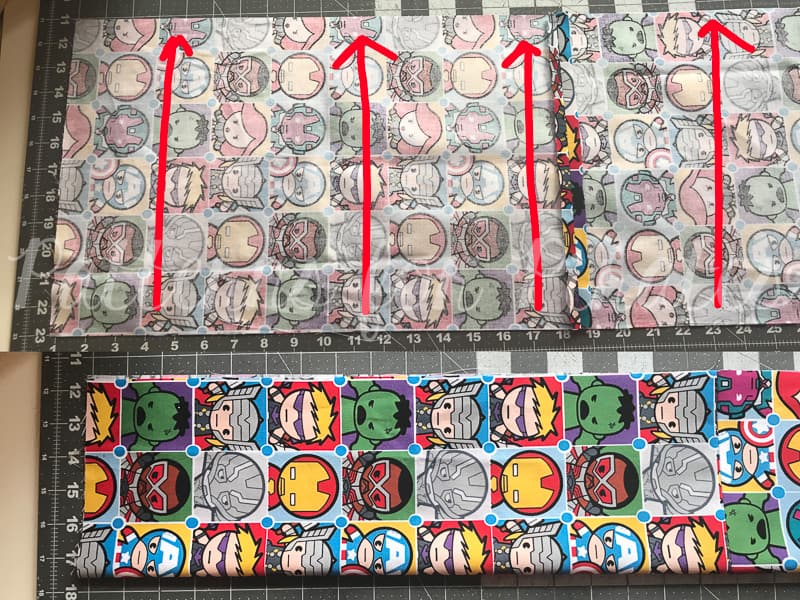
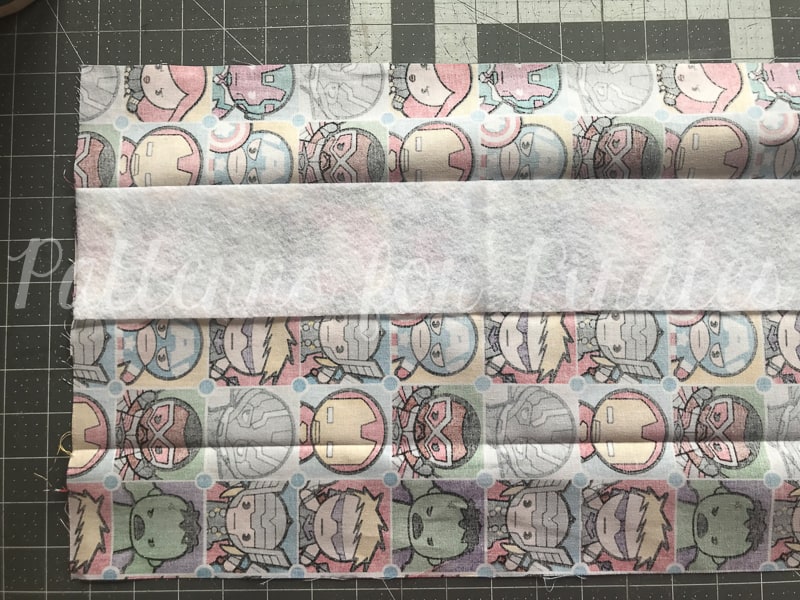
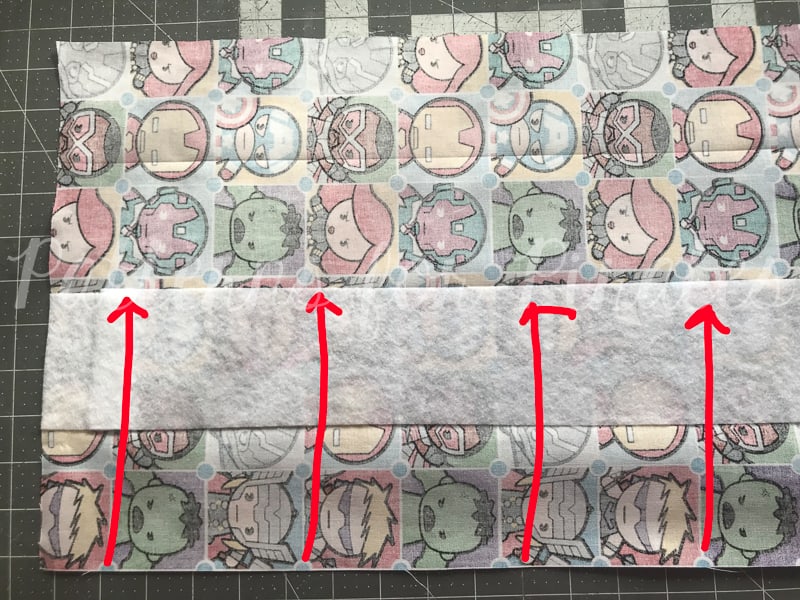
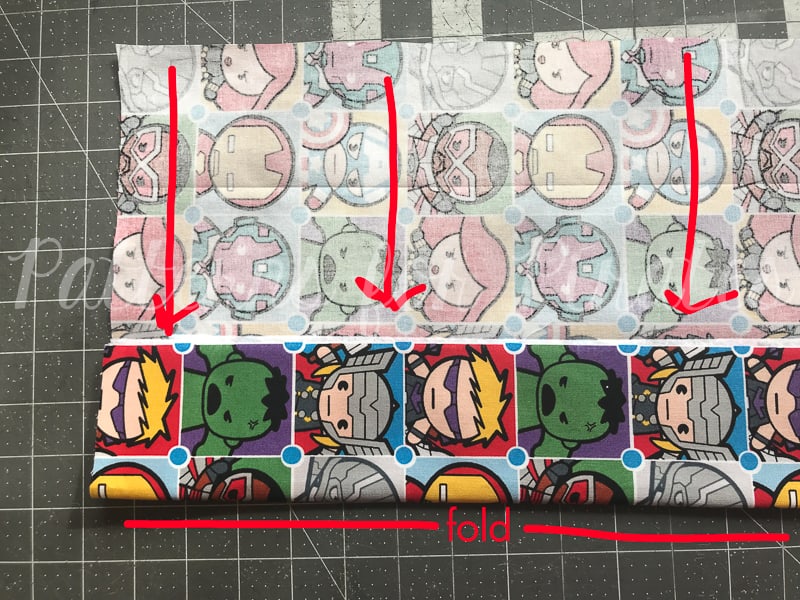
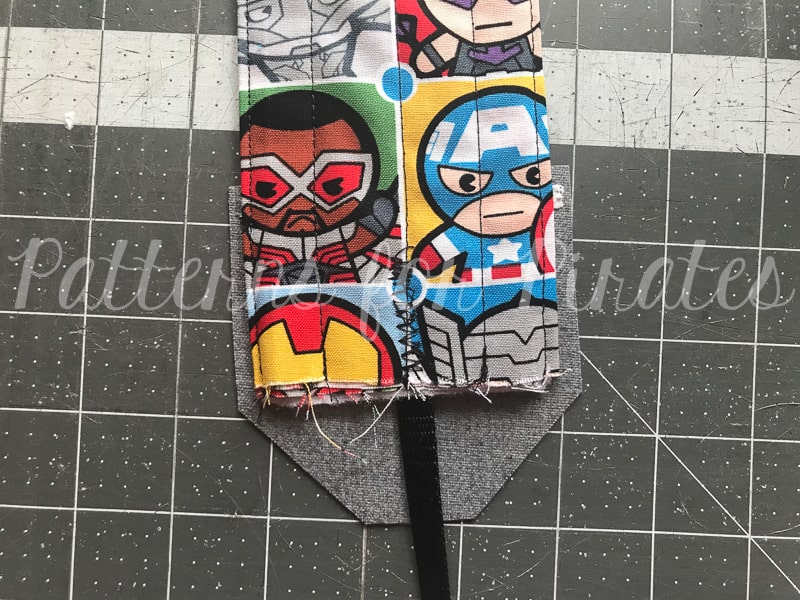
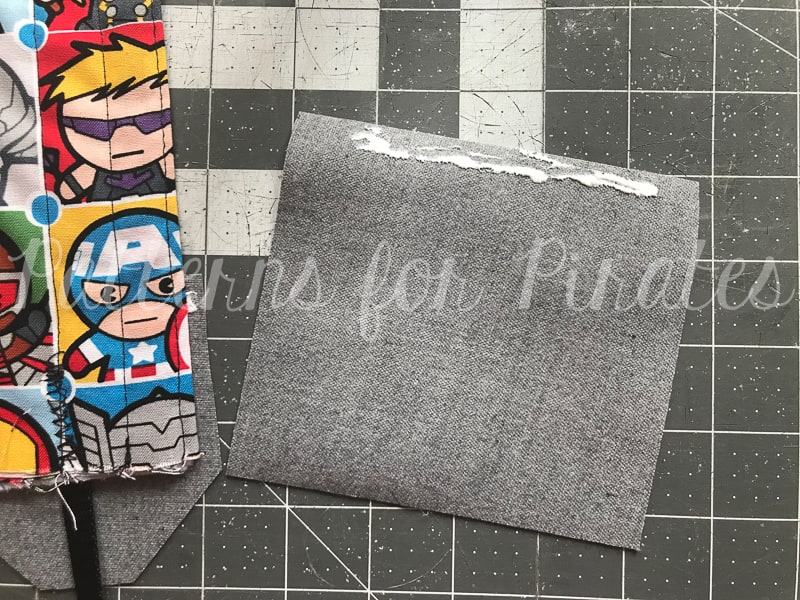
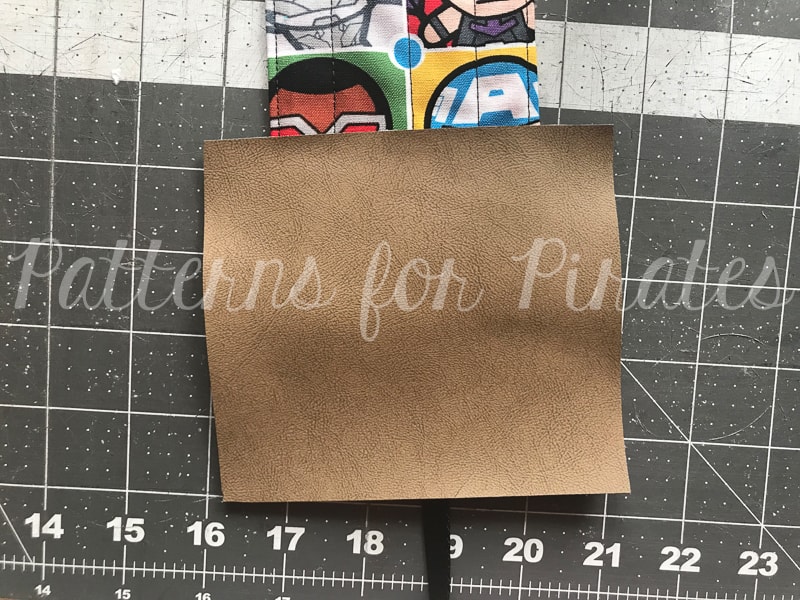
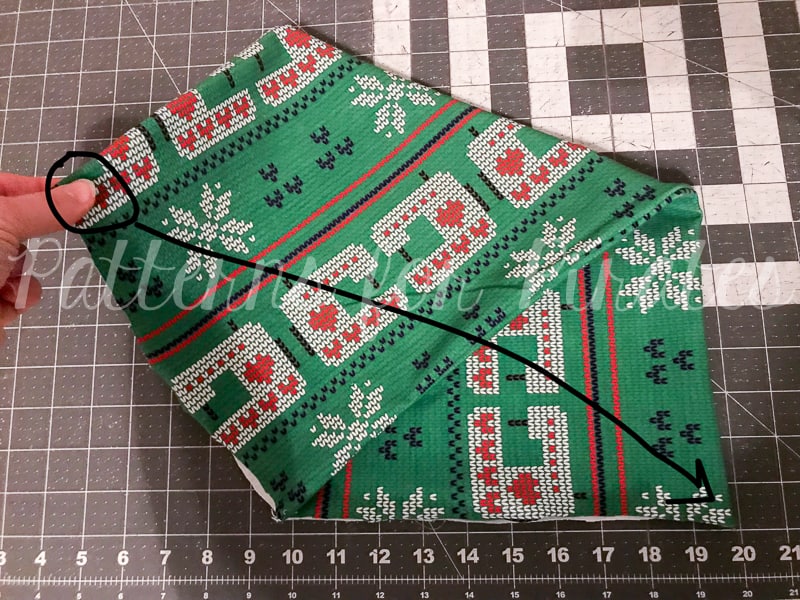
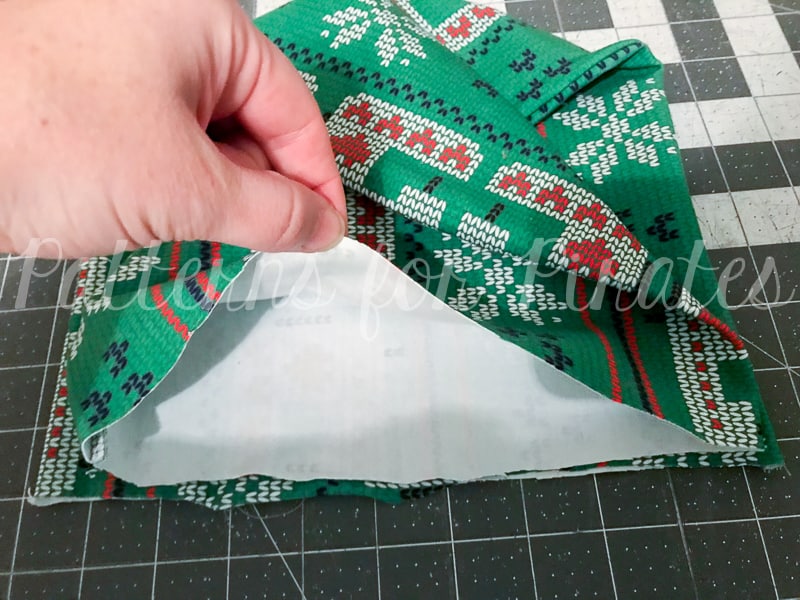
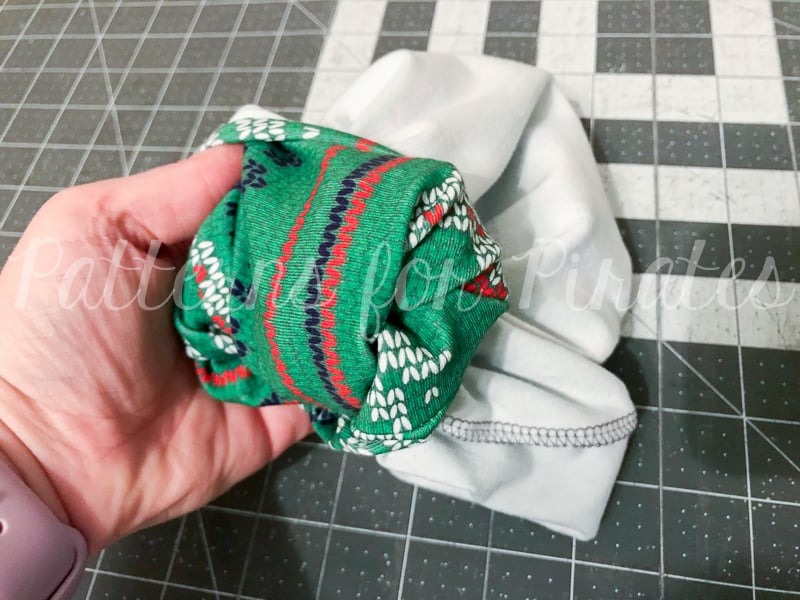
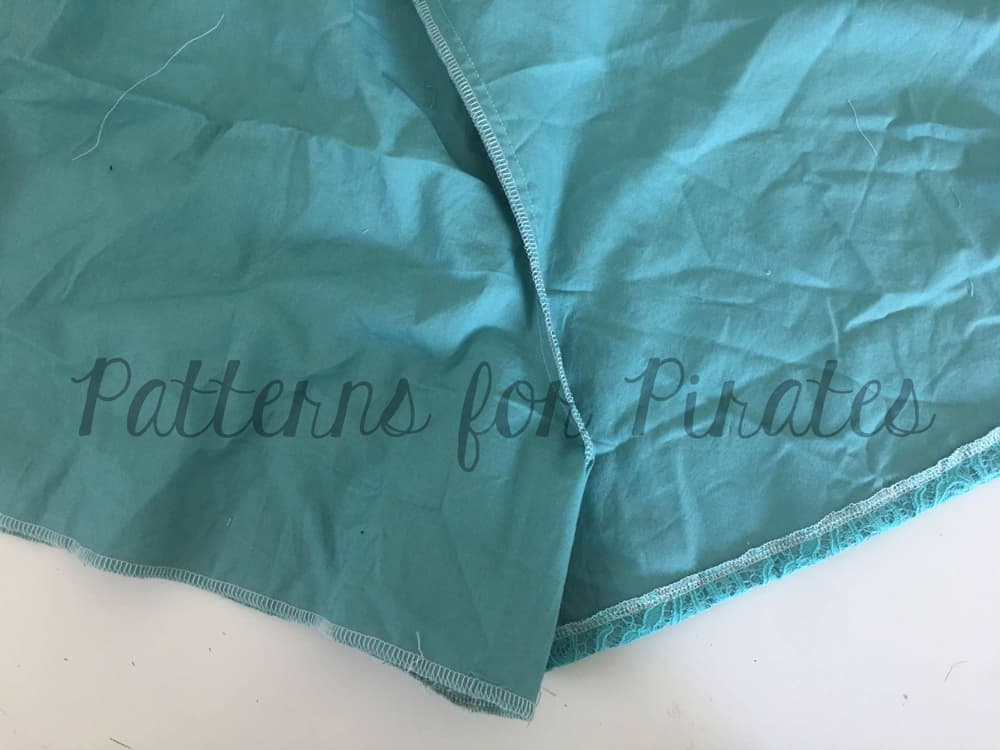
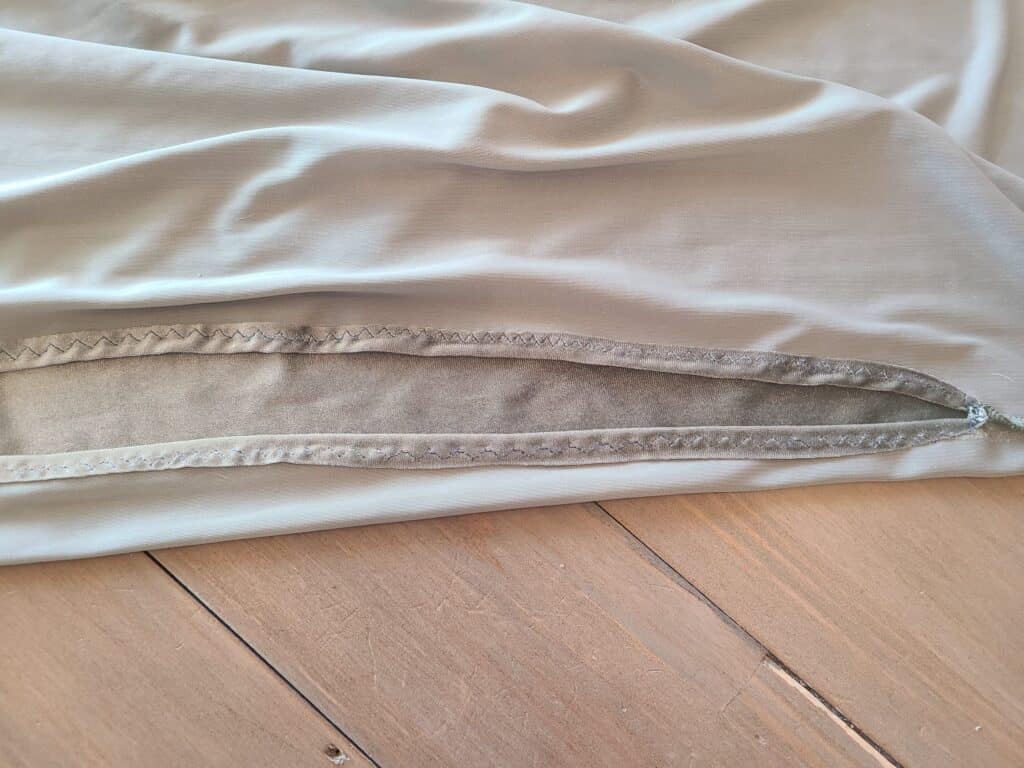
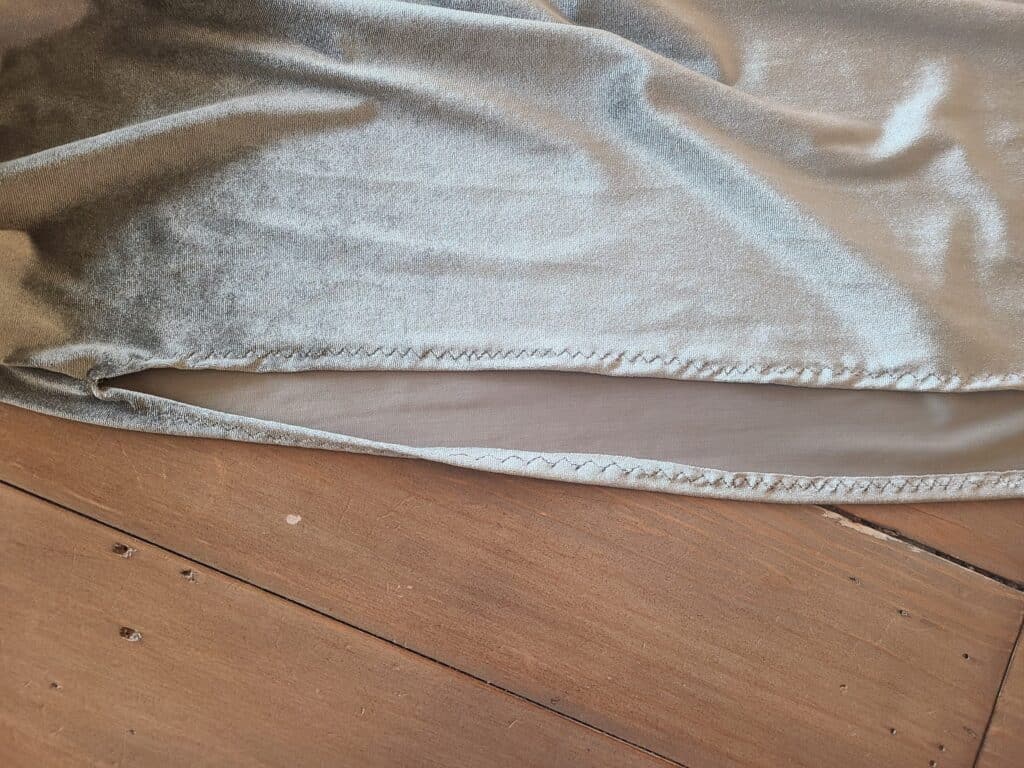
Lastly, you will want to lay your back skirt piece, right side facing down on top of the two front skirt pieces.  Here pictured below with the bottom corner flipped up so you can more easily see the layers.

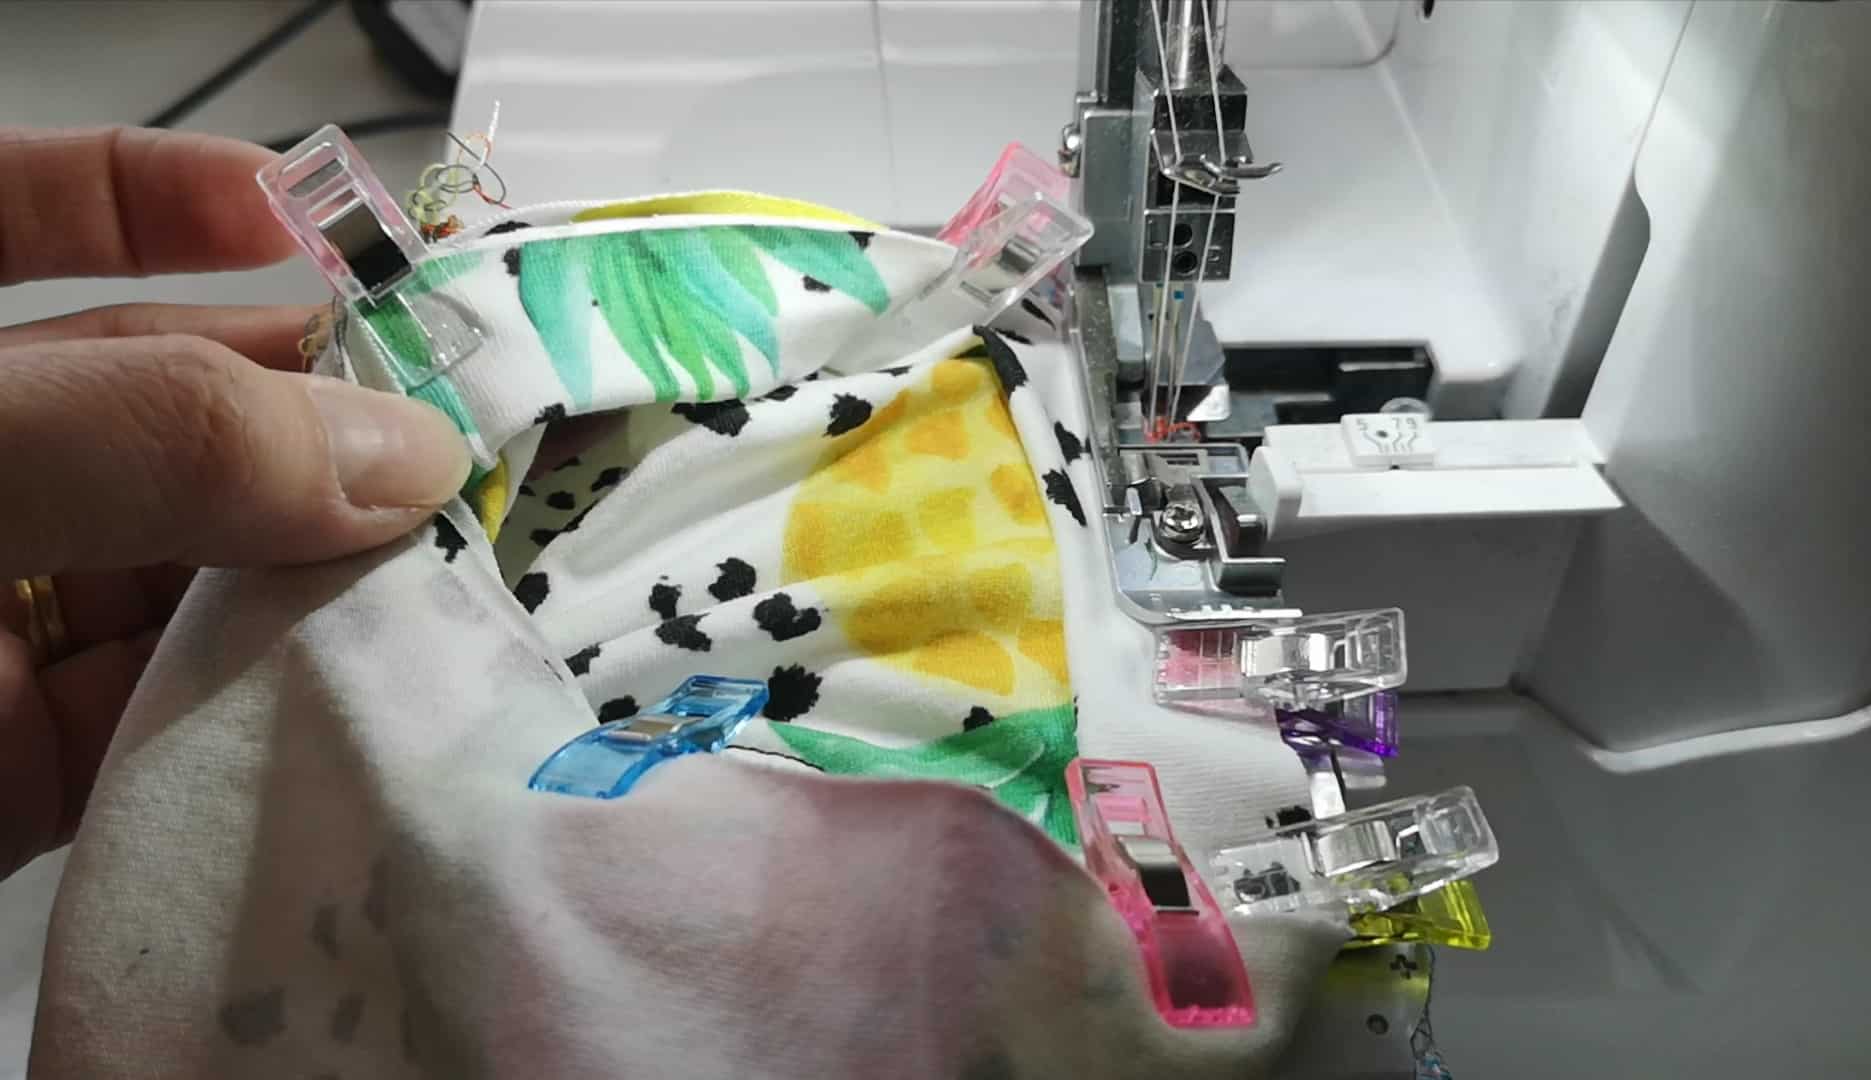
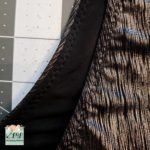
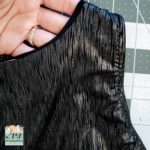
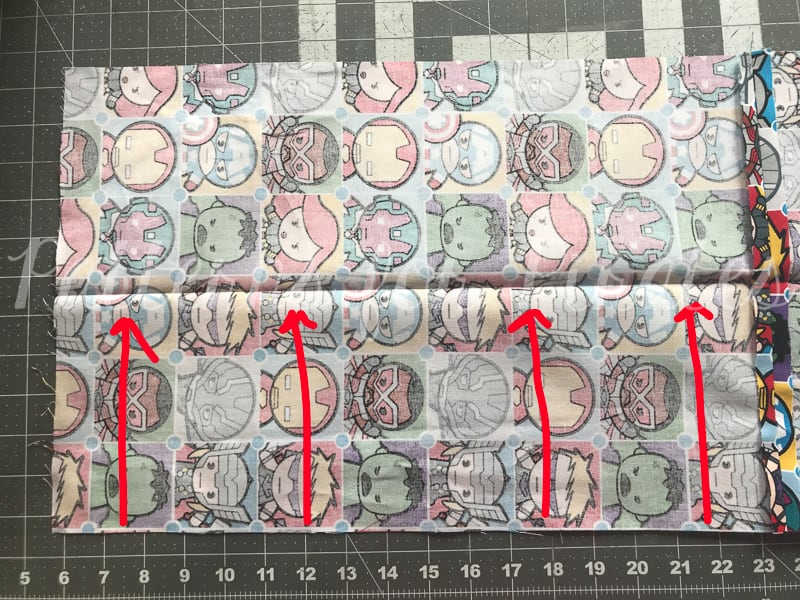
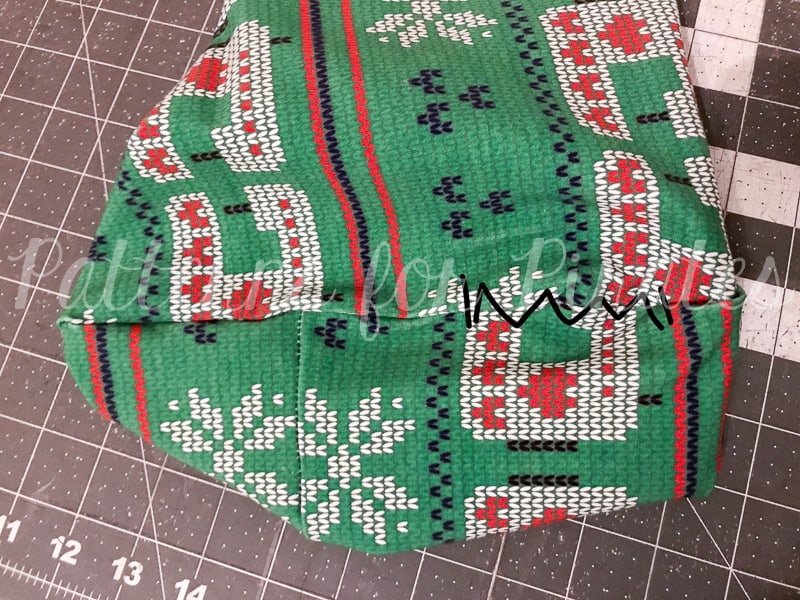
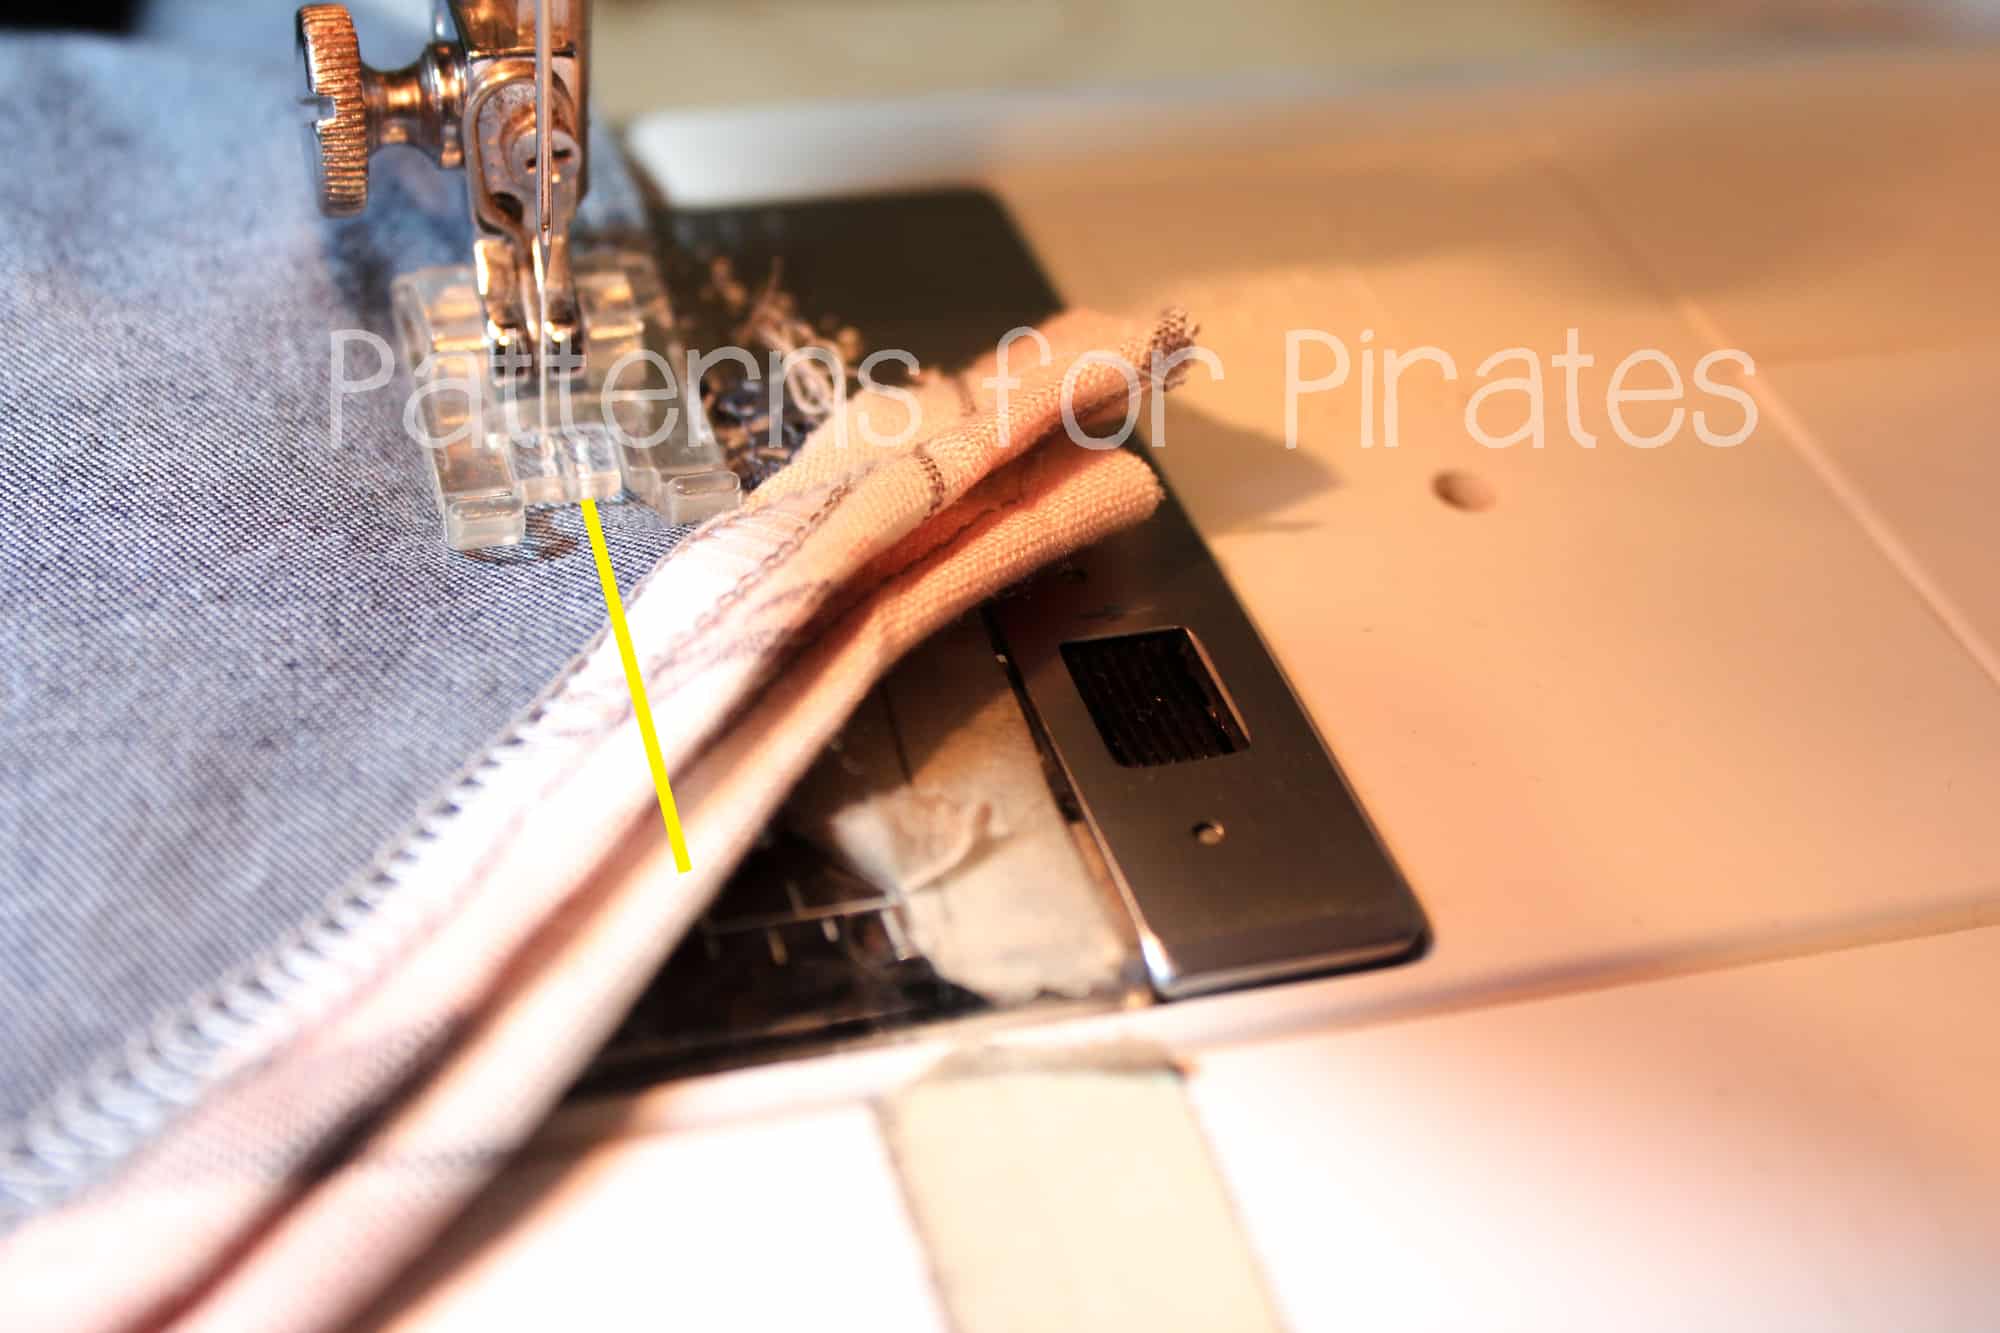
Sew the side seams, taking care to make sure the hems all line up together nicely.  Basting the first inch of each side seam at the hemline can help with that.

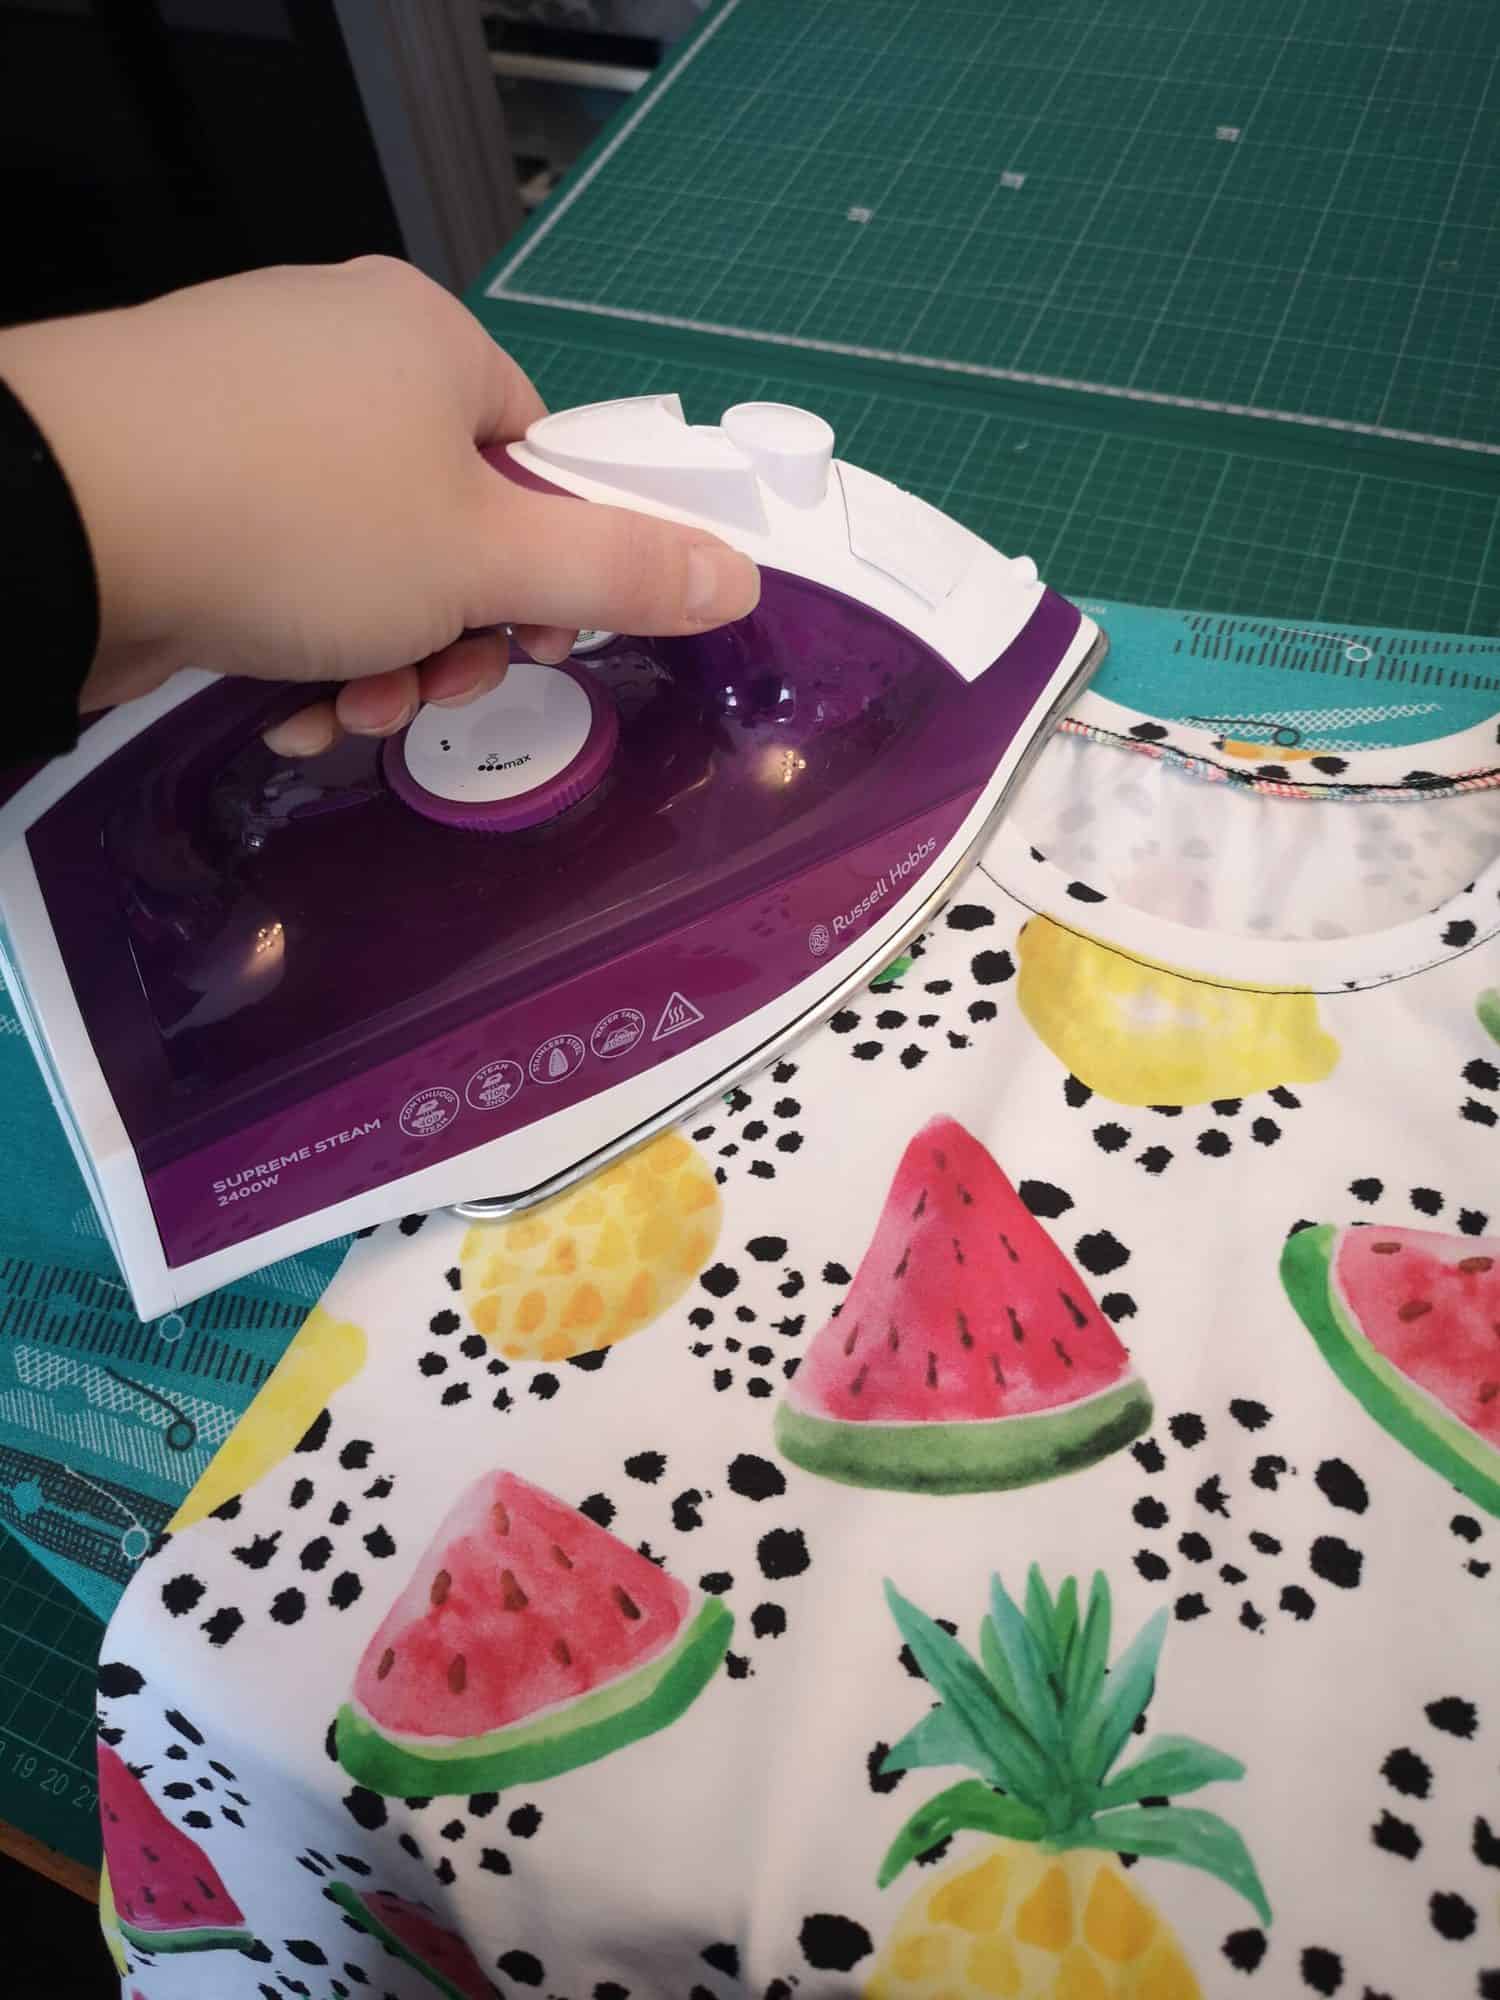
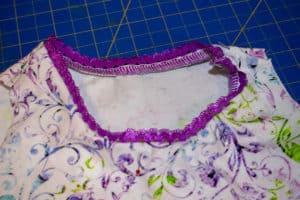
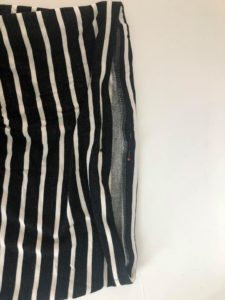
Flip the skirt through right sides out, and finish the construction of the waist seam as the tutorial instructs and you’re done!

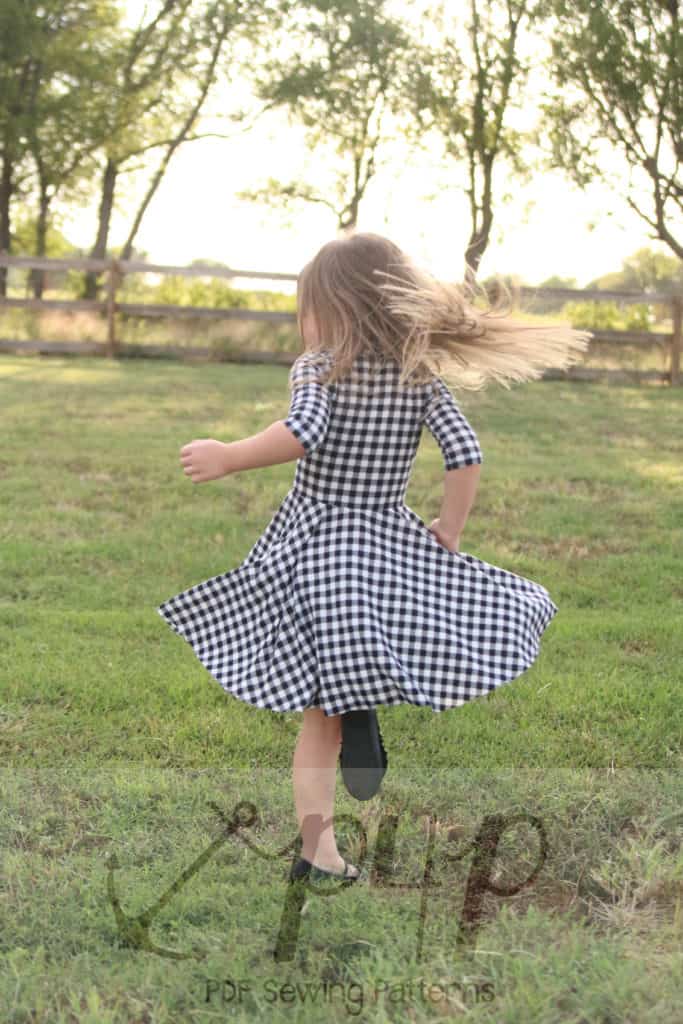
Nice and quick and easy.  I hope you love your new straight hem skirt as much as I do mine (which is quite a lot!)


Happy Sewing!

Dana xxx


Side Seam Splits for Floor Length with No Slit

If you feel like you need a little more stride/walking room in the floor length with no split you can easily add a side split (or apply this same method to the back seam for a back slit).

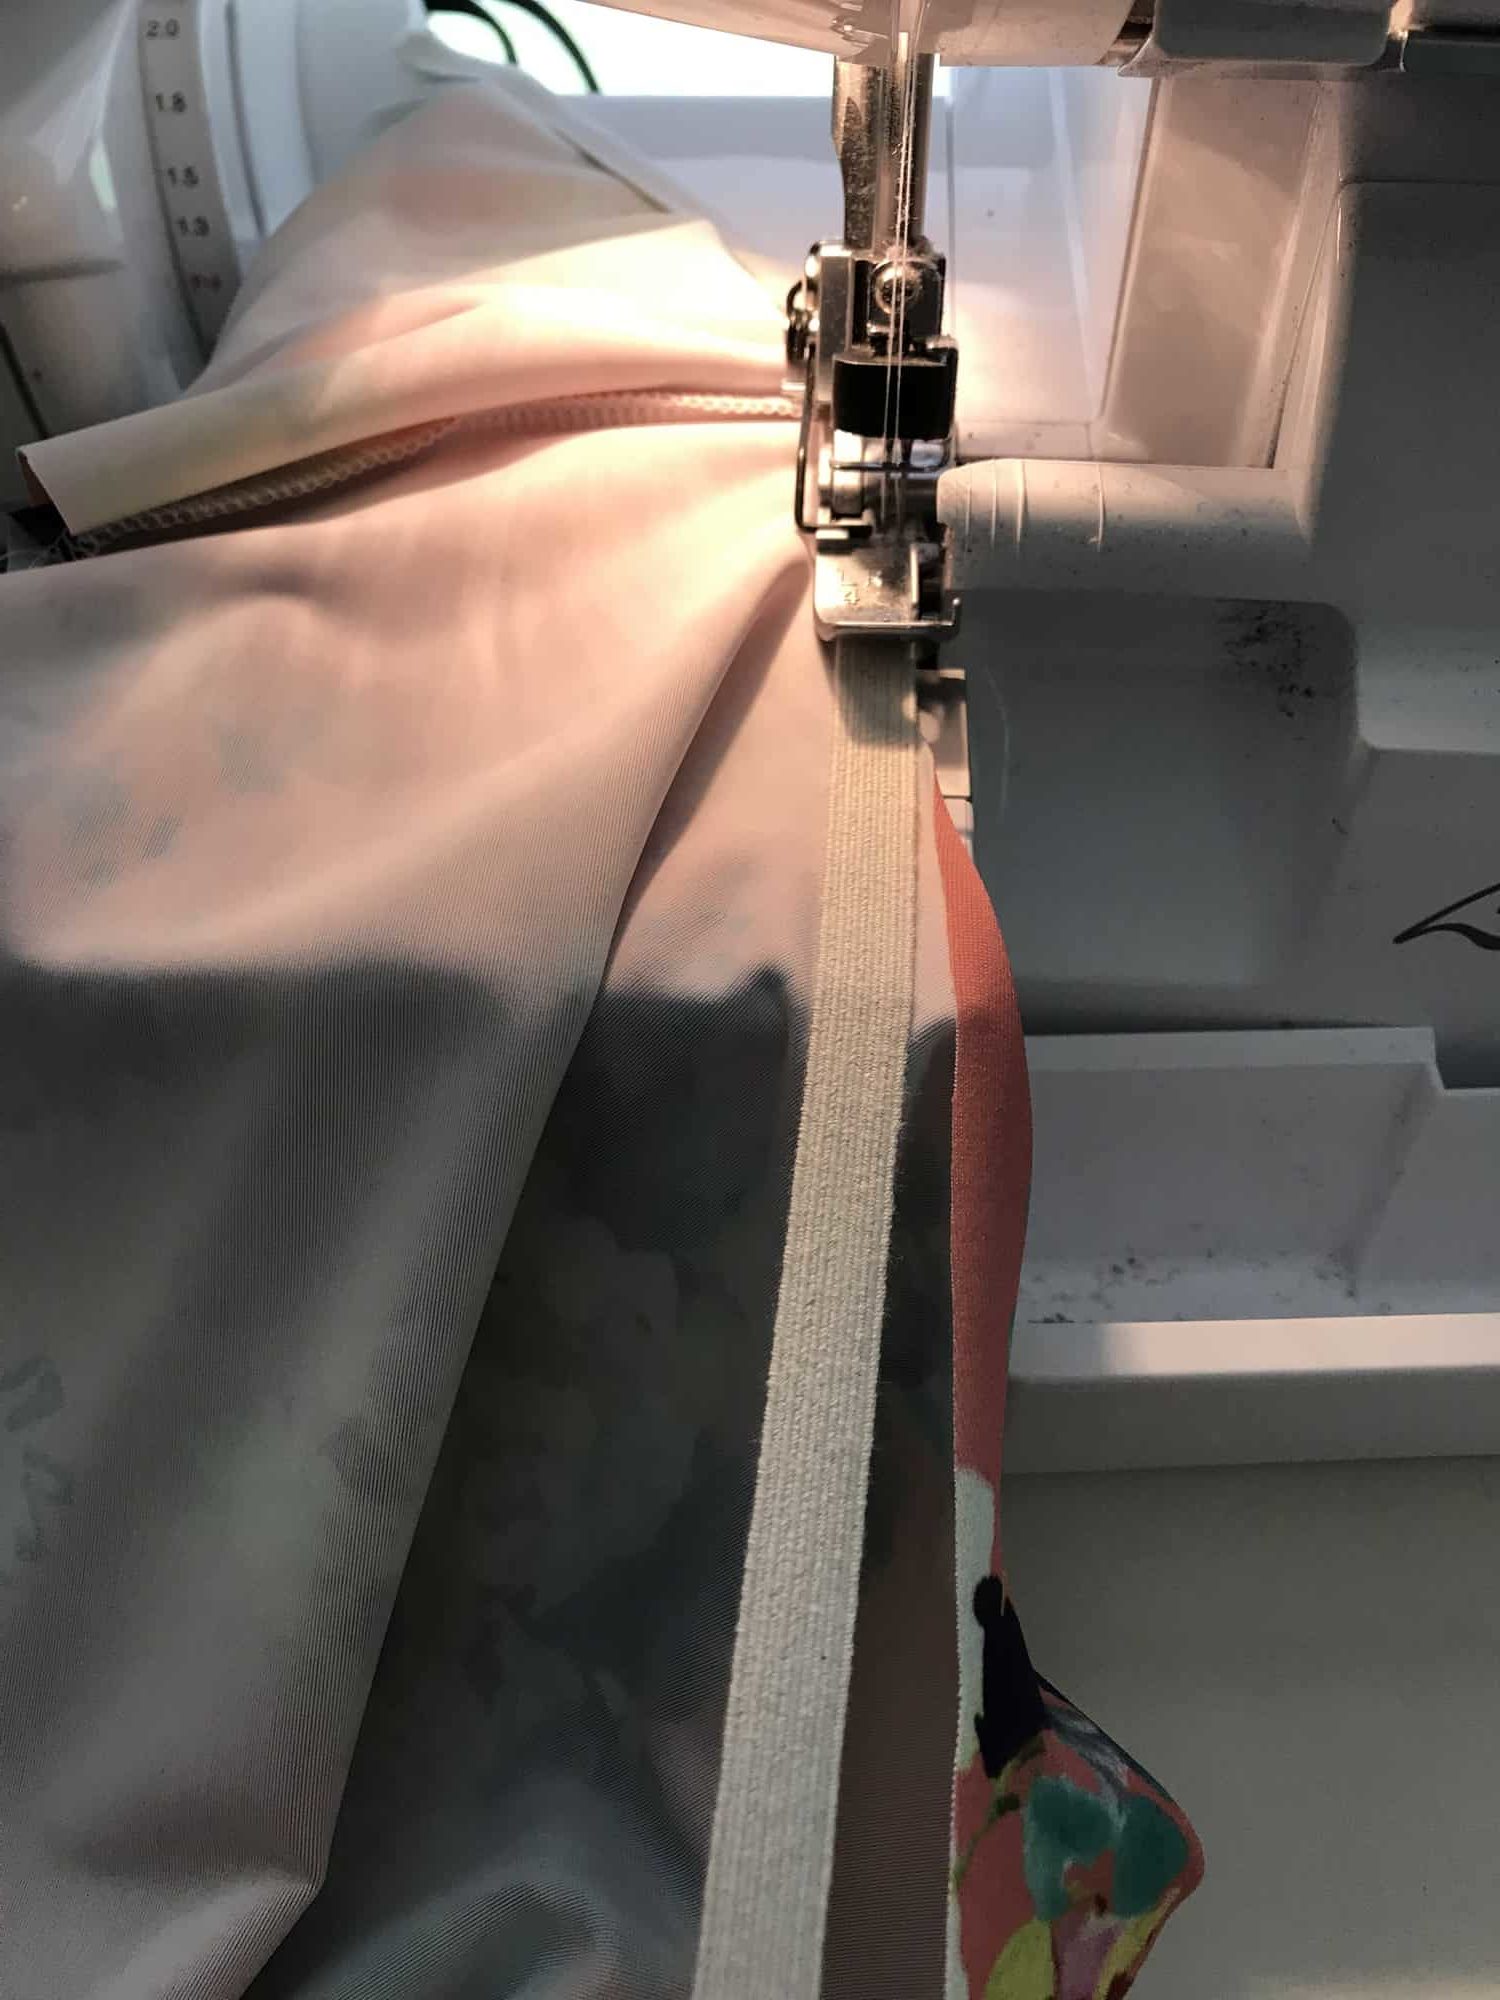
Simply stop stitching the side seams of the skirt where you would like the slits to go to.  Press remaining 1/2″ seam allowance not sewn to wrong side and hem.


It’s that’s simple! Now enjoy your extra walking room in your floor length dress!


Filed Under: Pattern Hacks 1 Comment

P4P University – Interfacing for Garment Sewing

May 17, 2021


The correct use of interfacing is one of the main things that takes your garment sewing to the next level.  Today we will be talking about different types of interfacing, why you might want to use it and how to correctly apply it.


The first thing we need to clarify is the difference between stabiliser and interfacing.  Getting these two confused is easy to do, and people can often buy the wrong one for their needs, but their uses are quite different.


STABILISER

Stabiliser is a type of textile used to add extra weight to a particular part of a piece of fabric, usually so some sort of decorative work can be added to that section.  For example, you might add stabiliser to the wrong side of the front of a pair of children’s pyjamas to add some embroidery or applique to the bodice.  The stabiliser helps keep the fabric from distorting when adding the decoration to it.  It can be left on, trimmed down or torn off after use, depending on it’s type.  The picture below shows some embroidery on the reverse of a pair of pyjamas.  You can see the tear-away stabiliser still sitting between the A and the Y, after the rest has been removed.


INTERFACING

Interfacing is a type of textile used on the wrong side of a fabric to make that particular area stronger/more weighty.  For example it is often used in shirt collars to help them stand upright.  The interfacing gives the fabric more rigidity and is not removed, it is permanently attached. 


There are two types of interfacing, differentiated by the way you attach them to your fabric.  ‘Sew In’ interfacing is sewn onto the wrong side of your main fabric, within the seam allowance so it is not visible when the garment is finished.  Alternatively it can be quilted on in a particular pattern of your choice, so that it is visible when completed.  It seems to be less popular these days, but is the traditional, couture interfacing.

More popular is ‘Fusible’ interfacing.  This is the same as ‘Sew In’ but it has a layer of heat activated adhesive on the wrong side, which means it can be ironed directly onto the wrong side of your main fabric and adheres permanently.  The instructions for ironing will either be printed on the selvedge, if you have bought it by the metre, or they will be on the packet if you have bought it bagged.  It is important that you ensure the interfacing is fully adhered before sewing the garment together because otherwise it can start to peel off and look messy. This picture below shows an example of an iron-on interfacing attached to the wrong side of a piece of cotton.


Interfacing comes in many different weights, from a light weight interfacing used to add a little extra body to the facing on a silk blouse, to a very heavy weight interfacing used to reinforce the brim of a cap/hat.  I used a medium weight interfacing along the placket of my So Classic Sundress to give added support for the poppers and stop it distorting with wear.

Pattern instructions will advise you which weight of interfacing you will need, so that you can ensure you purchase the type needed to get the finish shown in the pattern listing pictures. For example, the Timeless Tunic notions require a lightweight interfacing for adding body to the neckline facing to help it keep the correct shape.

You will also find interfacing used in woven patterns to add body/structure/strength to shoulder seams, around pocket openings, along plackets, in collars, and even over entire bodice and sleeve pieces in jackets and coats.

KNIT/STRETCH INTERFACING

As well as woven interfacing, you can also find knit/stretch interfacing used for adding greater structure or strength to knit fabrics.  It can be used to stop these fabrics from stretching out too far, for example it is often used around pockets in a knit dress, so that the dress doesn’t become misshapen with use.  I like to use it to add greater structure to the front of my Go To Jacket before sewing on the zipper, as it helps stop the fabric stretching out when attaching the non-stretch zipper to the stretch fabric.


In this video I discuss a few different types of interfacing and show how they are adhered to fabric.  Sometimes seeing the fabrics being handled can give you a much clearer idea of what they would be like to use in real life.

Whichever type or weight of interfacing you need, the pattern you are using will give you details of what you need and when you need to use it.


Now that you know more about how to use interfacing, why not take a look at one of these patterns above or the Timeless Tunic or Tiny Timeless and put your new found skills to use.


Happy Sewing!

Dana x


Filed Under: P4P University, Sewing Techniques, Sewing with Stretch, Knit Fabrics, Sewing with Woven Fabrics Leave a Comment

P4P University – Armbands Tips and Tricks

February 10, 2021

P4P University – Armbands Tips and Tricks


I’m going to spend a little time today showing how I get the best finish on my armbands.  They can be quite tricky to get right and people often struggle with ‘bubbling’ over the shoulder, which can ruin the look of an otherwise perfect neckline.

The pattern I will be using to illustrate how I sew my armbands is the Youth Essential Tank.  There are many different cut lengths, from shirt to dress length and the option for a regular tank or a racerback cutline.  Today I will be sewing the shirt length tank option for my daughter, ready for the summer weather which we are all desperate for right now!

The first thing to remember is that there are pattern pieces for you to use for the neckband and armband options and these are calculated at 85% of the opening, but the fabric you use may need you to make some adjustments to those pieces to get the perfect fit.  A fabric like a 100% cotton interlock won’t have as much stretch as you may need and you will probably want to add a little length to your bands, perhaps recalculate at 90%.  Something like a ribbing/cuffing has lots of stretch and that could be cut at 75 or 80% to get the same look. Either way you will want to ensure that you sew the shoulder and side seams of your garment at the full ½” seam allowance or you will find that the bands won’t be long enough, as not using the full seam allowance will make your neck/arm openings wider than they were drafted to be.

If you prefer a video, I filmed the process of making my Essential Tank here:

https://www.patternsforpirates.com/wp-content/uploads/2021/02/2021-02-07-16-32-02.mp4

Sew your shoulder seams and then prep your neckband by sewing the short sides, right sides together to form a loop.  Fold your fabric wrong sides together around the long edge and then place a clip at the joining seam.  Place another clip at the other end of the band by stretching the band a little to find the centre point opposite the joining seam.  Unlike a regular neckband, we won’t be quartering the neckhole and the neckband, just halving. Find the centre front and centre back of your neckhole and place clips. You should have this.

Next, evenly stretch the neckband until it fits the neckhole and clip the neckband to the neckhole at the shoulder seam (this won’t be the normal quarter point as the shoulder seam will be further towards the back). Then also place clips 1 inch either side of the shoulder seam NOT STRETCHING THE NECKBAND BETWEEN THESE THREE CLIPS. (If making an adult sized tank I wouldn’t stretch for 2 inches either side of the shoulder seam), then ease the remaining neckband in between the clips either side of the shoulder seam and the centre front and back clips.

Sew the neckband on, making sure to use the full seam allowance, and remembering not to stretch the neckband over the shoulder seams.  This reduces the tension on the neckband here and helps to stop the ‘bubbling’ we spoke of earlier.  I prefer to sew with the band uppermost as it helps me keep an eye on the seam allowance. I also like to start sewing just before the shoulder seam as this is the area we will NOT be stretching as we sew.  It is easy to forget about this if you come to it at the end of sewing the neckband on, so I like to do this part straightaway so I don’t have to worry about forgetting about it later.

TIP – If you have difficulty managing the three layers when sewing the neckband on, or if your fabric has a tendency to curl badly, I recommend sewing the neckband together around the long raw edge before attaching it to the bodice.  You can either use your overlocker/serger without trimming any seam allowance off, or do a zig zag stitch with your sewing machine right at the edge (you may need to stretch the neckband slightly as you sew round, just to make sure it will still fit in the neckhole after sewing this temporary stitch).  It just keeps those two layers together whilst you are sewing it onto the bodice, then you simply trim if off with your serger blade when you attach it, or trim with scissors if using a sewing machine.

Press with steam and then topstitch.  You can either use a chain stitch as I have here, or a regular 2 or 3 needle coverstitch.  If you have a sewing machine then you can choose a twin needle, long straight stitch or zig zag/stretch stitch of your choosing.

Next we move onto the armbands which are sewn in the same way as the neckband.  First sew the short ends to form a loop, then fold wrong sides together and mark the seam and opposite point on the band with clips or pins.

The armbands are a little easier because more often than not you find the shoulder and underarm seams are opposite one another.  I like to put the armband seam at the bottom of the armscye, for comfort and so you cannot see it when it is worn, then clip in place.  Next clip the opposite end of the armband to the shoulder seam.  Again, clip the armband to the armhole WITHOUT STRETCHING for 1 inch either side of the shoulder seam (again for a larger sized adult tank, I would not stretch for 2 inches either side of the shoulder seam), then ease the rest of the armband into the armhole between the other clips.  The idea behind this is that it should allow the armband to run flat over the shoulder seam, but then the added tension around the bottom of the armband will encourage it to flip up and sit snug against the side of the body at the bottom and sides.  

Sew, using the full seam allowance, then press with steam and top stitch as before.

Finish the rest of your garment as usual, and you’re done.

I hope you found this tutorial helpful and don’t forget if you have any questions we have a large community on our Facebook page who are always happy to help.


Happy Sewing!


Dana x

Filed Under: P4P University, Sewing with Stretch, Knit Fabrics Leave a Comment

P4P University – Elastic

September 27, 2020

P4P University – Elastic 101


Hi,  I’m Dana one of the P4P team and I’m here today to talk all about elastic with you! We’ll be covering lots of different types of elastic that you may want to use in your sewing and showing your some examples of what they look like sewn up into finished garments, the times you may want to use them and the stitches I like to use to get the best finish.

To go alongside this blog post, I have filmed a video which you can find on the P4P You Tube channel here:

P4P University Elastics 101 Video

So, first things first, before you sew with any elastic there is one thing you will always want to do with it before you begin – exercise it!  Give it a good tug several times to make sure if it is going to stretch out it does it now and not after you have finished your garment.  There is nothing worse than something which fits great at first and then soon starts to get baggy.


Let’s introduce and cover off some types of elastic you are likely to encounter when home sewing:

Regular Knit Elastic

This comes in many different widths, depending on your need.  Pictured are 1″, 1.5″ and 2″ elastics.  Usually white or black in colour, I generally choose white because you can’t see it under lighter coloured fabrics.  This plain version is usually used for something like an enclosed elastic waistband, where the elastic is fed through a casing to form the waistband.  These SOS Pants have an enclosed elastic waistband.  It makes for a soft and comfortable to wear garment.

SOS Pants with enclosed elastic waistband

However, you can also find patterned elastics, like this:

Patterned Knit Elastic

and these can be used as a waistband in their own right, just by top stitching in place of a casing.  Super quick and easy way to finish a skirt or pair of shorts!  Just wrap around your waist and cut to size, then butt the short ends and zig zag stitch together to form a loop. Quarter the elastic, quarter the top of the garment and sew right on.

Buttonhole Elastic

This is great if you have small people that keep shooting up overnight, like me! You can use it in a waistband secured with a button, and then unbutton it as they grow.  Great for things with lots of ease drafted in, like the Walk The Planks.  Just remember to cut it a little longer than needed when you first sew it in so you have room to lengthen it.

Clear Elastic

Clear Elastic is one of the things I had never heard of before I started sewing and now it’s the thing I use the most.  I use it for gathering skirts to fit bodices, like the Sweetheart Dress; for stabilizing shoulder seams on lightweight stretchy fabrics like rayon spandex, that have a tendency to grow otherwise; for adding ruching; and for adding extra strength to the seams of stretch fabrics under pressure, like in a sports bra, where it just serge it right on when sewing the seam itself.  Again this comes in different widths, pictures is 3/8″ and 1/4″.

Swim Elastic

As it’s name suggests Swim Elastic is used in swimwear.  Regular elastic can perish under the combined attack of both strong sunlight and chlorine, so it is best to use this type of elastic in swimwear to ensure it stands up to the test of time.  I often use clear elastic in swimwear too, both work fine, you just don’t want to use a regular knit elastic because when your pull your swimsuit out after a winter in storage you will probably find that the elastic has perished and lost all it stretch. If you’re going to take all that time to make a custom swim suit, you may aswell try and make sure it lasts.

Sunflower Swim Top

I used several different widths of swim elastic in this Sunflower Swim Top to get the best fit for me, including 3/8″, 1/2″ and 1″.

Picot Elastic

Picot Elastic is often thought of as a lingerie elastic, and it’s great for that but I think it’s also really pretty when used to finish the neckline and sleeves of a dress, where you just see the little picots popping out from the inside.

Me Hearties Dress

I used picot to finish the neckline and sleeves of this Trixie Lulamoon dress I made for my daughter’s birthday using the Me Hearties Dress pattern.  I just serged it on right sides together, flipped it down to the inside and then top stitched it with a triple zig zag stitch.  This is my favourite stitch for top stitching elastic because it is a really great stretchy stitch but it is also quite a wide stitch and that helps stop the elastic from flipping up.

Fold Over Elastic

You will often see Fold Over Elastic being abbreviated to FOE in sewing groups, but as you would imagine from its name you fold it over the raw edge of the fabric and top stitch in place. You can either use your coverstitch if you have one, or just sew with a triple zig zag stitch.

Fierce Bra and SOS Pants

It is used in the Fierce Bra to finish the top raw edge of the bra and also form the straps.  It takes a bit of practise to get used to handling it at first but it a very useful tool to have in your arsenal!

Soft Waistband Elastic

Lastly we’re going to talk about Soft Waistband Elastic.  You will probably recognise this as the type of elastic used on men’s boxers.  It is thick, soft, super stretchy and has great recovery and we use it both as the underbust band on the Fierce Bra and the waistband on the Fierce Undies.

Fierce Bra and Undies

You can either serge or sew the band on like a regular knit band, flip up and top stitch the seam down or you can just sew the band into a loop by butting the short ends together and then topstitch it right onto the top raw edge of the fabric, like in the picture above.  It makes sure your undies don’t shift all day whilst still being super comfortable to wear.  It comes in lots of different colours and some fun printed designs too and is designed to stay visible and not be sewn inside a casing.

Hopefully that has helped give you an idea of the types of elastic you might encounter whilst sewing and what yu may need them for.  Don’t forget to watch the video that accompanies this post for more examples to guide you and…

Happy Sewing!

Dana x

Filed Under: P4P University, Uncategorized Leave a Comment

Hepburn Top and Dress – Easy Hacks

August 13, 2019

The Hepburn Top & Dress has released and it will surely become a staple in your year round wardrobe. Our amazing (and growing) team of blog contributors has some easy hacks for the new pattern. Take a look and get sewing!

…..

Swim top/rashguard

The fit of the Turtle Neck Dress is so fantastic that modifying it to be a a rashguard is very simple!

The first thing you need to do is decide which pattern options you would like to use and gather your supplies. Swap out your sweater knit for some swim knit, and your clear elastic for swim elastic.

Cut out your pattern pieces and neckline elastic according to the tutorial. For all options, you will continue on following the tutorial until it is time to hem.

If you choose to make a cropped swim top, like I am, you may want additional swim elastic for the bottom hem. This will help keep the hem from rising up while swimming. For this option, you will want to trim half an inch from the bottom of the front and back bodice pieces.


I simply wrapped the elastic around my waist and cut at a comfortable length. The elastic will be attached in the same way you attach the neckline elastic for the crew neck.

All other hemming options can follow the tutorial. Now you can enjoy your new swim top!


…..

Zipper Workout Bra

For this hack, we will be working with the crew neck, crop, tank option. In addition to the materials listed in the pattern, you will also need: 

  • Fabric for the lining
  • Zipper that is slightly longer than the shortened crop bodice (detailed below)
  • Wash away wonder-tape (our new BFF!)
  • FOE/knit binding
  • 1” elastic
  • Soft bra cups
  • (Optional Hook & Eye Closure)

1. Assemble Bodice and Lining

Remove about 3.5 inches of length from bodice pattern pieces (adjust as needed). Then cut bodice pieces from main fabric and from lining fabric.
Add a strip of interfacing down the center of the wrong side of the front lining piece. Sew together bodice at shoulders, add elastic to armscyes as instructed in the pattern.
Sew together your lining pieces at shoulder seams and baste side seams. Slip lining on yourself and mark cup placement with chalk. Lay out your lining & use a ruler to align and adjust as needed.

Pin cups in place, sew on cups with a long zigzag stitch to wrong side of lining. After trying on the lining again to ensure proper cup placement, carefully remove basting stitches at the side seams.
Match armscyes right sides together, stitch armscyes with ⅜” seam allowance (pull bodice layer taut while stitching).
Flip right side out, press seam so elastic is flat and you cannot see lining. Topstitch while pulling slightly so elastic and fabric are taut.

Trim the extra lining that is now left over around the neckline.
Lay bodice with bottom edges together, hold together the two lining pieces at the bottom corner, and lift up bottom corners of outer bodice pieces to meet.
You should now be holding side seams with right sides together. Match corners and seams, stitch. Repeat with other side.

2. Attach Zipper with Wonder Tape!

Find the center of the front neckline, cut straight down from top to bottom.

Place a strip of wonder tape from top to bottom along the edge of one half of the bodice. Do the same for the coordinating lining piece, peel off the paper strip.

With right sides together, place zipper along the edge of bodice.

Next, peel off paper strip on lining and place wrong side of zipper along right side of lining.

Check to be sure zipper is placed correctly, gently finger press in place. (Clip in place if needed).

Stitch 1/4’’ away from the zipper from top to bottom.

Repeat with other side. Your fully lined zipper is now attached with just two lines of stitching!! Zip up zipper, add reinforcement stitches across the bottom of the zipper, and trim the extra zipper fabric from off the top and bottom.

Finish neckline with your favorite finish. I used FOE, but you could also do a knit binding. Just be sure to fold the ends under so the edges are finished.

3. Add Bottom Band

Cut a band with the following formula (adjust length as needed): Length = 3.5” by Width = (75% of Underbust Measurement) + 1”

Fold width wise right sides together and stitch along short side.
Fold band lengthwise with wrong sides together. Cut strip of 1” elastic using the same length measurement as the band, sew together at short ends and slip into folded band.
Mark quarter points on band and on bodice. Match quartered points and stitch!

*Optional* Hand sew hook and eye closure at top of zipper.

And you are done!!!


…..

Picot trim

Anyone else buy tons of picot elastic thinking you are going to make all the bras and underwear? Well picot elastic can easily be used for other items and is a great finish for a necklines as well!  This is a quick easy hack and all you need that is different from the original requirements is picot elastic!

We are only going to make very minimal changes.  My picot elastic was 1/4 inch so I did not bother trimming the neckline down at all.  We are going to cut the picot the same length as what the pattern calls for for the clear elastic.

Pin or clip the center of the picot right sides together to the middle of the shirt. You can also mark quarter points if you choose but as the elastic is very close to the same length of the neckline I choose not too.
Sew or serge with a 1/2 inch seam allowance. If using a serger make sure to disable the knife so you don’t risk cutting your elastic.
Flip your picot out with your seam allowance down towards the shirt and sew your shoulder seam with 1/2 inch seam allowance.
Flip your picot up, seam allowance down and pin in place.
Top stitch in place, make sure that you are stitching a close to the edge of the seam allowance as you can, this prevents the picot from flipping out and showing your seam. I used my coverstitch but you can easily use your sewing machine with a zig zag or double needle as well.


Now press that top stitch cause pressing is the key to a really great finished product and finish the rest of your top as instructed.  You can also use this method for the armholes if you choose but sometimes picot can be scratchy, mine was super soft but I choose to just use it for the neckline.


…..

Lettuce hem

Next up we have the lettuce hem hack. This is an easy and fast way to finish your edges with a little added style!

First off, we need to trim the hem allowances at the neckline, sleeve edges, and bottoms of both front and back pieces of the pattern to account for not using a traditional hem on these edges.

Trim 3/8″ off of the neckline.

Trim 1/2″ from the sleeve edges.

And trim 1″ from the bottoms of both the front and back bodice pieces.

Now that we’ve got our pattern pieces properly modified, cut and sew up your top as usual, using the new trimmed pattern pieces.

Next, set up your serger for a rolled hemline. Consult your serger’s manual for exactly how to do this on your machine, but in a nutshell, you will use only one needle, narrow the stitch width, decrease the length and increase the lower looper tension.

Begin with the neckline of the shirt. Sew the neckline as if you were finishing with a rolled hem, but stretch the fabric firmly before and after the presser foot. The tighter you pull, the more waves your lettuce hem will have!

Repeat on the raw edges of both sleeves and bottom hemline.

And that’s it! Now you have a beautifully finished tee with cute lettuce hems.


Caitlin

…..

Higher side vents


Let give this dress a nice higher vent to add extra sexy to it!

 Here’s how I made this little hack.

I started with cutting the mid-length version and marking the vent line for the knee length.

I continue sewing up the dress according to the instructions. 

Here is a picture to show the different vent lines. I followed the directions for the vent except I used the knee length instead of the mid length marking. 

Hope you all love this hack!!

Andrea

….

Skirt

Next up we have a super easy, fun skirt hack. Nicole paired her skirt with the Sporty Piko crop but you can certainly wear it withe the cropped Hepburn top. Start by deciding where you would like the skirt to hit. Nicole is wearing a high waist style so she cut the pattern 1″ front and back pieces above the waist line. Now grab a 1″ knit elastic piece and stretch it around your waist (or high hip, depending on your skirt preference). Cut the elastic based on your waist and comfort. Sew the side seams and hem the bottom of the skirt following the tutorial instruction.

Sew the elastic in a loop.
Find the quarter point of both the elastic and skirt waist opening and match them.

Using your serger or a zig zag stitch attach the elastic to the waist.

Fold the elastic over and pin in place.
Use a zig sag stitch or a coverstitch to stitch in place.

That’s it! All you have left to do now is enjoy your new skirt.


…..

Hepburn / Boundless mash

My turn!! You know there’s nothing I like more than a good dress! So once I have sewn the dress included in the pattern I just had to try mashing it with the Boundless skirt. Here is what I did:

Cut the preferred Hepburn style (tank, sleeves, etc) CROP top. Now grab the Boundless pattern (or even the Sunshine) and cut the waist skirt (not the empire one).

Sew the Hepburn crop top as instructed in the tutorial. Now grab some 1/4″ elastic and measure the opening of the bottom hem. Cut the elastic the same size as the measurement you just took and sew it in a loop.


All you have to do now is attach the skirt to the Hepburn top following the Boundless (or Sunshine) tutorial. Boom! One top…so many new possibilities!


…..

Hepburn / Sweetheart or Me Hearties mash


We could not end this hacks series without showing you how beautiful a Hepburn / Me Hearties (or Sweetheart) mash can be. Here is what how to get the look.

Judy has made he little star a 3/4″ sleeves, turtleneck crop top Hepburn and omitted hemming the bottom. Of course, you can choose any of the crop top styles included in the Hepburn pattern. Then she simply cut a Me Hearties circle skirt, sewed the side seams and hemmed the bottom.

All that left to do it attach the skirt to the top, following the Me Hearties instructions. Don’t forget the seam allowance is 1/2″.

Now tell me this cutie is not making you want to sew a Hepburn/Sweetheart mash for you too. I know that’s my next project!


Hope you enjoyed these easy hack as much as we enjoyed making them for you! Time to get sewing and remember to post your creations in the Patterns for Pirates Facebook group so we can all admire them.

Filed Under: Pattern Hacks, Pattern Release, Uncategorized Leave a Comment

Pattern Markings 101

December 19, 2017

Many moons ago, I can remember calling my mom in a panic. I had printed out my first pattern for a garment, assembled it, and then just stared at all of the markings! Even though I’d sewn quilts for years before, this was my first attempt at making clothes and the pattern looked like a map in which I had no clue how to follow. After my “what did I get myself into” talk with her, she slowly walked me through each question I had and now after all these years we’ve come full circle and I’m making clothes for her!

Like many people, you will probably experience (or already have!) the “What have I done?” moment in sewing and question why you started a project to begin with. Have no fear! We’re here to help. We decided it was time to break that map down for you and help you learn how to navigate through the amazing world of garment sewing. In this post, you’ll find a description of all the key terms and symbols you might expect to see when starting your sewing adventures! So let’s get those patterns printed, assembled and let the fun begin! (If you’re staring at all of those pages you’ve just printed- don’t worry there either! Click here for our First Time User Tips, which includes how to assemble patterns).

Grainline

The grainline tells you which direction the grain of your fabric should run. The grainline will run parallel between the selvages, or finished edges of your fabric. There are usually printer markings, contrasting trims, solid colors, etc found on the selvage. Typically, your grainline will have the less amount of stretch in knit fabric. A few weeks ago, Roberta shared some details and information about grainlines, why they’re important, and much more. You can check that out here. 

Stretch

The stretch of your fabric will run perpendicular to the grainline/selvage and will be the direction with the most stretch. As you can see in the picture below, the stretch is running the opposite way as the grainline. It is extremely important to have the right direction of stretch when it comes to the fit of your garment. The stretch will go around your body for most pattern pieces and is accounted for when the ease of a pattern is drafted (read more about ease here). For example, if a pattern is drafted with negative ease (finished measurements are smaller than your body) and you have the stretch going in the wrong direction, chances are, it won’t fit.

Fold

If a pattern piece is symmetrical on both sides, you will notice the center with a “FOLD” marking. This is commonly found on pieces such as the bodice, back, or sleeve in which both the left and right sides have the same appearance. You will want to fold your fabric wide enough for your pattern piece and align this marking to the fold of the fabric. To help conserve fabric, I like to fold it just wide enough for the pattern piece (shown above). A common error can be to fold the fabric exactly down the middle, leaving wasted material.

Notches

You might have noticed small triangles on some pattern pieces. These notches serve several different purposes. One of the purposes is to help distinguish the back from the front. For example, something like a raglan style top can easily get mixed up when assembling. These notches will help keep the front  with the front and back with the back. The second purpose is to help with alignment. By matching these notches up, your pieces will be in the correct position.

TIP: I always cut my notches out rather than in as to avoid accidentally cutting too far into the seam allowance.

Hem Gauge

You will typically find a hem gauge on both the sleeves and bottom edges. This is usually a triangular shape that notches out. It will mark the correct allowance for your hem. This is particularly useful when creating a memory hem. All you will need to do is fold your fabric up to this notch, press and unfold. Once you’ve sewn the seams, you will still have your pressed fold in place with the correct seam allowance.


Cut Chart

Most Patterns for Pirates patterns will include a cut chart. The cut chart is typically found within the first few pages of the tutorial and will give measurements for any rectangular pieces. For example, items like neckbands, cuffs, waistbands and elastic would all be found here. Some designers will included these as actual pattern pieces, however by providing a cut chart, you are able to save on both paper and ink. When cutting these pieces, I find it easiest to do so using a quilters ruler and rotary cutter.

Hopefully these tips help! Remember that we are always here to help, especially in our Facebook group. If you’re not a already a member, be sure to join so that you can ask questions and share all of your amazing Patterns for Pirates creations!

~ Erinn

Filed Under: Frequently Asked Questions, P4P University, Sewing Techniques, Uncategorized 2 Comments

2017 Holiday Freebies: DIY Camera Strap

December 7, 2017

What?  We are on day four of the 2017 Holiday Freebies already?  I hope you’re having as much fun as I am!  If you need to back and review the past three days, I can wait!

Here are some links: Slouchy Headwarmer / Emoji Pillows / Clothing Size Tags

Now that we’ve covered that, let’s get to today’s free pattern!  Sewing and photography seem to go hand-in-hand more often, because we want to share what we’ve made with our sewing community!  Why not sew yourself a sweet little strap to wear while you’re using that camera of yours?  It’s super easy to do and way more fun than using what came with your camera originally.  Let’s get to it!

Prep your pieces, you will need:

  • Pattern Piece for Vinyl Ends
  • 36″ L x 12″ W Quilting Cotton
  • 2 – 12″ cuts of nylon webbing (1/2″ or 3/8″ both work) — I used THIS
  • 2 – 1/2″ or 3/8″ sliding adjusters — I used THESE black versions as well as THESE fun colored ones!
  • 36 L x 3″ W Fusible Fleece Interfacing
  • Small scraps of Vinyl/Pleather

**If you can’t find the nylon webbing / sliding adjusters in your local fabric store, a quick trick is to buy a small dog collar from the dollar store.  They tend to have the right width strap, and usually include the adjuster on it as well.

Important: The ends of nylon wedding need to be heat sealed to prevent fraying.  Make sure to do this before sewing it to your strap pieces!

**If your fabric is directional, you will want to cut two pieces for your strap and then stitch them together. Cut two 18.5″ x 12″ pieces from your quilting cotton.

For directional fabric, place your pieces right sides together, and sew along the short edge, using 1/2″ seam allowance.

Press open your seam.

For all straps: Fold your main fabric wrong sides together, meeting the long edges to one another. Press.

Open up your piece and fold one of the raw edges toward the middle crease you just made.

Repeat with the second raw edge. Press.

If you open your piece, you’ll now have 3 creases, spread evenly across four total sections.

On one of the middle sections, following the directions provided by the manufacturer, iron your fusible fleece to your strap piece.

We will be refolding the strap in the same method as before. Take one of the raw edges and fold it toward the middle crease.

Repeat with other raw edge.

Fold along middle crease, meeting both folded edges. All of your raw edges will be fully enclosed now.

Press, press, press.

I like to clip/pin my outer edges together, to make sure they’ll align properly when I go to stitch them. Straight stitch along the entire edge you just pinned, getting as close to the edge as you can.

This part is up to you, and how fancy you want to get with your quilting. I like to run an edge stitch along the other long edge. And then three even lines across the rest of the strap. You can stitch as much or as little as you’d like!

Take your nylon strap and overlap it 1.5″ from the edge of your strap, aligning it directly in the center of the strap.

Pin and repeat for the opposite end.

Using a wide zig zag stitch, secure your nylon strap to the end.

For the vinyl pieces, I recommend to only cut one actual piece — and to have an oversized rectangle for the other. It’s easier than trying to get them to line up perfectly. Especially since vinyl can be fussy to topstitch.

I like to run a line of fabric glue at the top of the vinyl backside. It helps keep it in place when sewing.

Two inches up from the bottom of your strap piece, lay out one of the vinyl pieces. The vinyl should be slightly wider than your strap.

Flip over your strap.

Throw another line of glue on the edge of your vinyl square.

Place it 2″ up from the bottom of your strap.

Flip your piece back over and stitch your vinyl on. This is the path I take and it allows for a continuous stitch. You can take whatever path you want. 😉

I HIGHLY recommend using a teflon foot for this. Vinyl can be a huge brat. I know they carry them at JoAnn Fabrics, or you can snag one on Amazon.

Finished stitches.

Trim the vinyl to match your other pieces.

Be careful not to cut off your nylon strap. Just tuck it out of the way when you’re trimming.

Take your slider.

Slide it onto your strap.

Put the cord in from the bottom-up on your camera.

Give yourself a little slack.

Run the cord back through the bottom and secure the strap to your camera. Easy peasy!


I am SO EXCITED to see your new, stylin’ camera straps!  I’ve been using my me-made strap for years now (so has my hubby) and we get compliments on it all the time.  I’m betting you will too!  Please, if you do make one for yourself, share it with us in the Patterns for Pirates Facebook Group!

**Also, as a quick note, there are some affiliate links scattered within this post.  I make a small commission for purchases made through those links, but I only link products that I’ve used and actually recommend myself.

Filed Under: Free Pattern 2 Comments

2017 Holiday Freebies :: Slouchy Headwarmer

December 4, 2017

I. Am. So. Excited.

We are kicking off another year of P4P Holiday Freebies and today is the first of FIVE days of freebies.  I hope you love each and every one of them as much as I do.  We brainstormed pretty hard to find things that were unique, quick to make, and totally giftable for people on your holiday lists.  (And if you’re on your own holiday list, we don’t judge at all!)  Today’s freebie is like four-in-one!  It’s a slouchy headwarmer that can convert into a headband, hat, cowl, and messy bun hat!

Suggested fabrics: Brushed Poly, Rayon/Spandex, (some) Sweater Knits, Cotton Lycras, etc.  The fabric has to have a really good stretch and recovery factor.

Cut square: 20” wide x 20” long.
**The average woman’s head size is 21″ in circumference.  If your head measures smaller/larger than this, it’s easy to adjust accordingly.  I also recommend to add an inch or two if you’re using a thicker cotton/lycra blend or something with a high spandex percentage, as it can be extra tight and end up a little uncomfortable if it’s too tight.

Fold in half, right sides together. Stitch with 1/2” allowance.  Turn right side out.

Fold top right corner to meet bottom left corner.

Grab the outer corner (which was top left corner before we folded in the last step) and have it meet the right bottom corner.

Shown folded with the twist.

Grab the top layer of the four raw edges.

Flip it around the entire headband, so you have a pocket with right sides together.

Stitch around open edge closed, leaving a 2-3” opening for turning.

Pull your headband back through opening, turning it right-sides out.

Blind stitch opening shut.

And now comes the fun part!  This headwarmer can be worn FOUR different ways.  Four!  Amazing, right?  Especially for such a simple sew!  You can…..

…rock it as a headband/earwarmer.

…wear it like a hat.

…throw it on over a messy bun.

…or keep your neck warm, while wearing it like a cowl.

As always, we love when you share what you’ve made with us.  Head over to the Patterns for Pirates Facebook group and show off the fabulous Slouchy Headwarmer that you’ve managed to make from our freebie pattern!  Happy Holidays, friends!

Filed Under: Free Pattern 36 Comments

LL – easy hacks

July 20, 2017

In true Pirate fashion we could not have let this double release go by without showing you some easy but fun hacks for the Little Loungers and Linen Loungers. Erinn will start you off with an adorable bias binding hack for the curved hem shorts.

…..

Bias Binding curved hem

Adding bias bindings to the hemline of the curved shorts is a quick and easy way to create an entirely different look. One of the things that I love most about this look is that it’s a great way to add a pop of contrasting or coordinating fabrics.

To create this look, cut out your pattern pieces as you would per the pattern. The only additional thing you will need are your bindings. For mine, I cut them 2″ wide by a length that was longer than the hemline. As you can see below, I used the curved pattern pieces and marked the top edge. I will connect my bias binding pieces up to this marking.

If you are attaching pockets, you can complete everything through these steps. Before sewing up the inseam and sides, you will want to complete your bindings along the curves. Place your shorts facing down and bias binding pieces face down and then gently ease them along the curves. You will want to pin/clip this in place. As you can see, my pieces are longer than the edges, but these will be trimmed later. Attach with a 1/2″ seam allowance, then clip into seam allowance along curve.

Once you’ve attached your binding, press binding piece and seam up. Press bias binding piece to align with top edge, then press again as you fold binding over (these are the same steps as were completed on pockets).  Edge stitch along folded edge and repeat on the other three hemlines.

Once you’ve attached all bias bindings, you will assembly your pattern as directed. When reaching the curved seam and inseam, you will want to make sure to use a straight stitch for the last few inches to create a cleaner finish (With wovens, it is advised to use a straight stitch first and then go back over with a serger if desired. If doing so, end your serged section a few inches before your straight stitch to help create that cleaner look). Trim any bias binding pieces that might be longer than your seam allowance.


…..

Cuffed capri pants

Next I will show you how easy it is to add  cuffs to the capri pants. The patterns include a cuff option for the short so we will use the same tutorial techniques. Start by printing the pattern in your desired size. I made a size 6 Little Loungers with patch pocket and elastic waistband.

There are two changes you will need to do to the original pattern. You must cut the capri length 1 inch shorter than the cut line for both the front and back pieces. We do that because we won’t be hemming anymore, we will be adding the cuffs. That brings me to the second change you’ll need to make. The cuffs in the pattern are drafted to fit 1:1 ratio to the shorts leg opening. The capri leg opening is smaller so we will need to shorten the width of the cuff. How much you shorten the width will vary for each size. The length of the cuff will remain the same.

Don’t forget to cut and attach the button tabs too! They add such a cute touch to the capris!

Sew the pants as per the tutorial. Easy peasy! Don’t be afraid to add some detail stitching to the button tabs or the pockets! I used my coverstitch to add a touch of blue but you can certainly use a twin needle or your preferred decorative stitches.

If you love the look of the cuff but prefer the bermuda length you can certainly apply the same principals and created a cuffed bermuda linen lounger or little lounger…the sky’s the limit! 🙂


…..

 Hemmed and lined shorts

We always like to mix up our finishing options to give you a wide variety that you can apply to any pattern so we went with a cuffed or curved hem facing for the shorts this time.  If you’ve been following P4P for awhile, you’ll notice Judy loves some short shorts 😉 but that may not be your  preference.  I’m going to show you how to lengthen your inseam and do a simple hemmed edge.  I also wanted to use this gorgeous embroidered lace so will give some insight on how to line them.

First, decide what you would like  your finished inseam length to be.  The current inseam finishes at 2.5″.  For my finished length I went with 3.5″.  Decide the length of your preferred hem (I did 1/2″) and add this to your desired inseam length.  Measure and transfer to your pattern.  Don’t forget all seam allowances are 1/2″ so your total inseam on the pattern should be 1/2″ longer.  Example for my 3.5″ finished inseam: 1/2″ seam allowance at the crotch curve + 3.5″ inseam length + .5″ hem allowance = 4.5″ total inseam.

Now that you have adjusted your inseam length we will make our hem gauge for the hem.  You’ll notice these outward notches on other cutlines (bermuda) as well as on sleeves hems.  It may look a little funny, but it actually serves a purpose.  Cutting the outward notch will allow the hem to lay flat once folded.  The angle of the gauge should be a mirror image of the seam just above it so that when its turned under it will lay flush.  Again, my hem allowance is 1/2″, if you choose to do a wider hem, you will want to extend your hem gauge to match the same length of your hem allowance.


Proceed to cut your pattern and construct as instructed in the tutorial.  To make a lined pair, cut every piece from both your main and lining fabric.  Lay your main fabric on top of your lining piece (right sides up) and construct as usual, treating them as one piece.

To hem, I serged both the main and lining fabric together to finish the edge . Then turned and top-stitched.  Easy right?


You can also line the shorts by treating your lining and main fabric as separate items.  So construct a main short and lining short then slip them inside one another and attach your waistband to both the lining and the main.  I chose to it the other way since I would be hemming them together anyway.


…..

Fully Enclosed Seams on Cuffed Shorts

When it comes to seams on my pants, I tend to gravitate toward wanting to enclose all of them.  It gives a nicer, neater look to your pant, and just feels more “handmade” than “homemade” to me.  The Loungers tutorial already tells you how to enclose the waistband on your pants, but what if you wanted to enclose the cuff hems too?

Here’s a quick rundown of how to make that happen:

  1. Prepare your cuff as the pattern states.  Right sides together, fold piece in half and stitch along unfolded edge.
  2. Working from the wrong side of the fabric, fold and press 1/2″ on one of the long edges of entire cuff piece.
  3. With right sides together, fold and press your cuff piece, leaving 1/2″ seam allowance at the top edge.
  4. Press, press, press.

5. With your pant leg piece right side up, place your cuff piece on top (pinning carefully and aligning all of your seams.  Stitch at a 1/2″ seam allowance.

6. Flip your fabric over so you’re looking at the wrong side of your pant leg.  Open up your cuff piece and press the raw edges away from the pant leg, toward your cuff.
7. Using those beautifully pressed lines that you created for yourself back in steps 2-4, fold your cuff piece so it encloses all of your raw edges.
8. Press and edge stitch.

You now have a beautifully enclosed hem on your pant leg!  Do a small happy dance, pat yourself on the back, and then repeat the steps for your other cuff.

(I didn’t have a chance to grab photos in my new shorts made from the tutorial yet, but I used that same method on the short pictured below and I LOVE them!  You will too!)


Use one of these hacks?  Be sure to hop on over to the Facebook Group and share your Linen and Little Loungers love. 🙂

Filed Under: Pattern Hacks, Uncategorized 1 Comment

50K Fan Celebration :: Ruched Ankles PegLegs Hack

April 23, 2017

Ahoy Pirates!

Today I’m going to show you how to add some ruching to the ankles of your PegLegs.  This is a super easy way to amp up their cuteness factor and take them to the next level.

For this hack, I’ll be ruching using elastic.  Depending on your preferences, you’ll need about 12″ of braided (non-roll) elastic.  I used 1/2″, though you can also use 1/8″, if you’d prefer.  You will also need matching thread.

1. The first thing you need to do is decide how long you want your line of ruching to be.  For mine, I chose 5″.

2. You’ll need to add length to the pattern to accommodate the fabric the ruching will take up; you’ll add the same number you originally chose.  So for me, the length to add was also 5″.  And now the total ruched amount will be 10″.

3.  Add the extra length at the capri cut line.  To do this, cut your pattern on the capri line, add however many inches you chose earlier.  I added 5″.  Then cut out your leg pieces with this added length, and your choice of waistband.  Your leggings will look crazy long – this is good!

4. I highly suggest hemming the bottom edge now, before ruching.  It will be so much easier this way; I chose to do a faux blind hem with my serger.  Or, let’s be real…if you’re not planning on hemming, then this doesn’t apply to you! 😉

5. Cut your elastic pieces.  To determine the length, add 1″ to your original measurement.  So I cut mine 6″.

6. Now, before you sew up the side seams, find the middle of the piece on the end, and mark it.  Pin/clip your elastic in place in this place, right above your hem.


7.  From the marked spot, measure up your total ruched amount, determined in step 2.  My ruched amount was 10″, so I measured 10″ above my marked spot.  Add a pin to this spot as well.


8. Now bring the other end of the elastic to the pin and pin it to the fabric.  This is the spot which will be ruched.


9. You’ll be sewing the elastic to the fabric now, stretching as you sew.  This can be a little tricky, so I advise you test this out on a scrap before sewing your actual ruched piece.

10. Using a slightly shorter zigzag stitch (my length was 1.8, you may also need to reduce the width as well, I used 2.5), start sewing at the end of your elastic.  Don’t worry about pulling the elastic until you can grab the end of it from behind the presser foot.  This should be about 1/2″ of stitching until you can grab it.


11. The trick now is to hold the elastic from the back while you also pull it from the front, as you are sewing (I couldn’t show this while also holding the camera to take this picture). 😉  This way, you can control it pretty well.  I find it helpful to stretch the elastic before sewing, and then pin the middle part to the fabric.  Now you can pull from the pin to the presser foot instead of from the very end.  Once you get to the pin, then pull from end to end until you are finished sewing.  Be sure to backstitch carefully.  Don’t worry about making it absolutely perfect, because the ruching will bunch up quite a bit.


12. Now, assemble your PegLegs as usual…sewing the side seams, the waistband, etc.  Good news is you’ve already hemmed!  Or chosen not to…

That’s it – you’re done!  Feel free to play around with different lengths of ruching as well, you may prefer more or less than me.  Also, you can also ruche using elastic thread hand-wound in your bobbin.  With this method, you’d also lengthen your pattern, and then sew a straight line however many inches you added.  I don’t mind using elastic though, since I always have it on hand (not the case with elastic thread!).

Be sure to post your ruching hacks in our Facebook group so we can have all the “heart eyes” for your creations! 😍

~Elisabeth


We are celebrating reaching 50K fans in our Facebook group!  To make it a party, our beloved PegLegs pattern just got an update AND some new add-ons.  Before you go running to your machine to sew up your own leggings, make sure to read our PegLegs 101 blog post.  This way, you’ll have all the the information you’ll need to make the perfect pair before you even cut into your gorgeous fabric.

But wait, there’s more!  After any good party is an after-party.  We are taking it one step further and sharing some easy hacks that’ll bring even more flavor to your favorite leggings pattern!  We hope you check them out, make your new favorite pair of leggings, and know that we appreciate every single one of you amazing sewing guys and gals!

Here are our hacks / tutorials / latest tricks:

Lace Waistband Alternative | Drawstring Waistband Tutorial
Exposed Elastic Waistband | Stirrup Pant Hack
Ruched Ankles Adjustment | Decorative Topstitching Tutorial
Ruched Side Panel Hack

Filed Under: Pattern Hacks 1 Comment

  • 1
  • 2
  • 3
  • Next Page »

Featured Patterns

  • Loosey Goosey Loosey Goosey $12.00
  • Loosey Goosey- Youth Loosey Goosey- Youth $10.00
  • Loosey Goosey - Bundle Loosey Goosey - Bundle $20.00
  • Everyday Shirt Everyday Shirt $12.00
  • Everyday Shirt- Youth Everyday Shirt- Youth $10.00
  • Privacy Policy
  • Refund Policy
  • Affliliate Program
  • Contact Us
  • About

Copyright © 2025 Patterns for Pirates

Copyright © 2025 · Genesis Framework · WordPress · Log in