Patterns for Pirates

P4P stylish, modern, wearable patterns

  • Home
  • Blog
    • Tutorials
    • Pattern Releases
    • Sew-A-Longs
    • Blog Tours
    • Fitting
  • Shop
  • Bundle Discounts
  • Gift Cards
  • Affliliate Program
  • My Account
  • Cart

P4P University – Armbands Tips and Tricks

February 10, 2021

P4P University – Armbands Tips and Tricks


I’m going to spend a little time today showing how I get the best finish on my armbands.  They can be quite tricky to get right and people often struggle with ‘bubbling’ over the shoulder, which can ruin the look of an otherwise perfect neckline.

The pattern I will be using to illustrate how I sew my armbands is the Youth Essential Tank.  There are many different cut lengths, from shirt to dress length and the option for a regular tank or a racerback cutline.  Today I will be sewing the shirt length tank option for my daughter, ready for the summer weather which we are all desperate for right now!

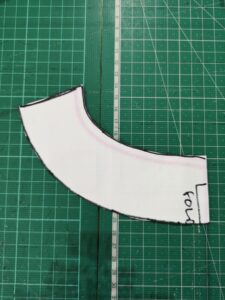
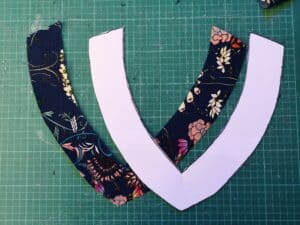
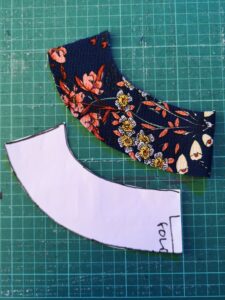
The first thing to remember is that there are pattern pieces for you to use for the neckband and armband options and these are calculated at 85% of the opening, but the fabric you use may need you to make some adjustments to those pieces to get the perfect fit.  A fabric like a 100% cotton interlock won’t have as much stretch as you may need and you will probably want to add a little length to your bands, perhaps recalculate at 90%.  Something like a ribbing/cuffing has lots of stretch and that could be cut at 75 or 80% to get the same look. Either way you will want to ensure that you sew the shoulder and side seams of your garment at the full ½” seam allowance or you will find that the bands won’t be long enough, as not using the full seam allowance will make your neck/arm openings wider than they were drafted to be.

If you prefer a video, I filmed the process of making my Essential Tank here:

https://www.patternsforpirates.com/wp-content/uploads/2021/02/2021-02-07-16-32-02.mp4

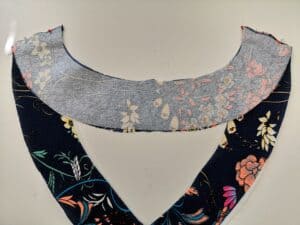
Sew your shoulder seams and then prep your neckband by sewing the short sides, right sides together to form a loop.  Fold your fabric wrong sides together around the long edge and then place a clip at the joining seam.  Place another clip at the other end of the band by stretching the band a little to find the centre point opposite the joining seam.  Unlike a regular neckband, we won’t be quartering the neckhole and the neckband, just halving. Find the centre front and centre back of your neckhole and place clips. You should have this.

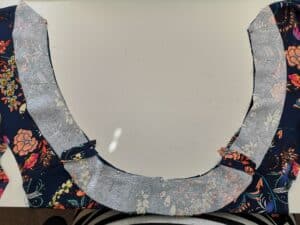
Next, evenly stretch the neckband until it fits the neckhole and clip the neckband to the neckhole at the shoulder seam (this won’t be the normal quarter point as the shoulder seam will be further towards the back). Then also place clips 1 inch either side of the shoulder seam NOT STRETCHING THE NECKBAND BETWEEN THESE THREE CLIPS. (If making an adult sized tank I wouldn’t stretch for 2 inches either side of the shoulder seam), then ease the remaining neckband in between the clips either side of the shoulder seam and the centre front and back clips.

Sew the neckband on, making sure to use the full seam allowance, and remembering not to stretch the neckband over the shoulder seams.  This reduces the tension on the neckband here and helps to stop the ‘bubbling’ we spoke of earlier.  I prefer to sew with the band uppermost as it helps me keep an eye on the seam allowance. I also like to start sewing just before the shoulder seam as this is the area we will NOT be stretching as we sew.  It is easy to forget about this if you come to it at the end of sewing the neckband on, so I like to do this part straightaway so I don’t have to worry about forgetting about it later.

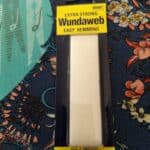
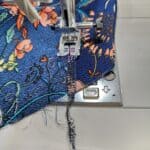
TIP – If you have difficulty managing the three layers when sewing the neckband on, or if your fabric has a tendency to curl badly, I recommend sewing the neckband together around the long raw edge before attaching it to the bodice.  You can either use your overlocker/serger without trimming any seam allowance off, or do a zig zag stitch with your sewing machine right at the edge (you may need to stretch the neckband slightly as you sew round, just to make sure it will still fit in the neckhole after sewing this temporary stitch).  It just keeps those two layers together whilst you are sewing it onto the bodice, then you simply trim if off with your serger blade when you attach it, or trim with scissors if using a sewing machine.

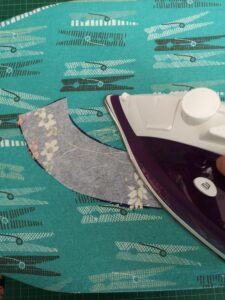
Press with steam and then topstitch.  You can either use a chain stitch as I have here, or a regular 2 or 3 needle coverstitch.  If you have a sewing machine then you can choose a twin needle, long straight stitch or zig zag/stretch stitch of your choosing.

Next we move onto the armbands which are sewn in the same way as the neckband.  First sew the short ends to form a loop, then fold wrong sides together and mark the seam and opposite point on the band with clips or pins.

The armbands are a little easier because more often than not you find the shoulder and underarm seams are opposite one another.  I like to put the armband seam at the bottom of the armscye, for comfort and so you cannot see it when it is worn, then clip in place.  Next clip the opposite end of the armband to the shoulder seam.  Again, clip the armband to the armhole WITHOUT STRETCHING for 1 inch either side of the shoulder seam (again for a larger sized adult tank, I would not stretch for 2 inches either side of the shoulder seam), then ease the rest of the armband into the armhole between the other clips.  The idea behind this is that it should allow the armband to run flat over the shoulder seam, but then the added tension around the bottom of the armband will encourage it to flip up and sit snug against the side of the body at the bottom and sides.  

Sew, using the full seam allowance, then press with steam and top stitch as before.

Finish the rest of your garment as usual, and you’re done.

I hope you found this tutorial helpful and don’t forget if you have any questions we have a large community on our Facebook page who are always happy to help.


Happy Sewing!


Dana x

Filed Under: P4P University, Uncategorized Leave a Comment

New Pattern Releases :: Sunflower Swim Top + Busy Bee Swim Bottoms!

June 27, 2020

To help your summer go swimmingly well (ba-dum-ching!) we are bringing you a brand new set of swimwear tops and bottoms!  And we couldn’t be more excited about sharing them with you all.  In both adult and youth sizes, we are happy to introduce you to the Sunflower Swim Top and the Busy Bee Swim Bottoms!  For both of these patterns, the youth sizes range from 3m – 14.  And the adult sizes are for the full, newer size chart, extending from XXS – Plus 5X!  If you haven’t sewn with us in a while, please make sure to check the size charts, as there were slight adjustments made to accommodate the new size range for adults.

Okay, now that we’ve got that out of the way, let’s start first by telling you all about the Sunflower Swim Top, shall we?


The Sunflower Swim Top is a great beginner swim top to try out if you’re wanting to start sewing swim for adults! The open back is very forgiving in fit since you can tie it a bit tighter or looser to get your perfect preferred fit. You can pick your bust coverage with a higher straight neckline or the lower scoop neckline. The full back is a very quick and easy sew that you can sew up for a simple and quick top. The flattering fit ends right at your smallest point to show off your natural waistline. But if you want a little more coverage you can add the optional ruffle. The top is fully lined and has the optional shelf bra. You can also add innerlining and removable cups to the shelf bra for even more support.

Options include: high straight neckline, scoop neckline, full back, open back, shelf bra, removable cups, and ruffle.

Enjoy several videos throughout the tutorial like complete sew ups of 2 different tops which cover all the options.

SUNFLOWER SWIM TOP | SUNFLOWER SWIM TOP – YOUTH | SUNFLOWER SWIM TOP – BUNDLE


The Busy Bee Swim Bottoms will have your swimsuit drawer full in no time with a variety of looks! You can mix and match with your tops easily, depending on your mood or where and who you’re going swimming with!  In case you’re feeling like you want more coverage, you can grab the high rise and brief options.  But in the event that you’re feeling like baring it all for less obtrusive tan lanes…go for the cheeky and low rise. Or you can pick between those two with a mid-rise, which hits just below the belly button.  Mix in some ruching at the side seams for a fun detail. These bottoms are very simple and quick to make with the waistline and leglines hemmed under with swim elastic. You can also choose to partially line or fully line.

Options include: low rise, mid rise, high rise, cheeky booty cutline (adult only), brief booty cutline, ruched side seams, partially lined or fully lined.

Enjoy several videos throughout the tutorial like adding/removing length, complete sew ups of ruched, plain, partially and fully lined bottoms.

BUSY BEE SWIM BOTTOMS | BUSY BEE SWIM BOTTOMS – YOUTH | BUSY BEE SWIM BOTTOMS – BUNDLE


**Want to learn more about how to measure yourself for this pattern?  We’ve got you covered with an in-depth blog HERE.  And in case you’re new to Patterns for Pirates and PDF patterns in general, we have a great blog full of new-user tips HERE to help you get started!  As with all of our current releases and updates, the pdfs now include our layers feature and can be found in Letter, A4 and A0 sizes.  And for even more helpful fun, we have a *free* printable that you can use to help record your measurements as you take them.

Let’s take a quick look at the different options and features!

SUNFLOWER BACK FINISHES

SUNFLOWER TOP HEMS

SUNFLOWER NECKLINES

BUSY BEE RISES

BUSY BEE LEG LINES (ADULT ONLY)

What are you waiting for?  Head on over and grab yourself a copy of these swim separates!  The Sunflower Swim Top and Busy Bee Swim Bottoms will be on sale (no code needed) through 11:59pm CST, July 5, 2020.

Don’t see the perfect bundle for the patterns you’d like to buy? Don’t forget you can always make your own bundle!

SUNFLOWER SWIM TOP | SUNFLOWER SWIM TOP – YOUTH | SUNFLOWER SWIM TOP – BUNDLE
BUSY BEE SWIM BOTTOMS | BUSY BEE SWIM BOTTOMS – YOUTH | BUSY BEE SWIM BOTTOMS – BUNDLE

Maybe hoping for a little more inspiration before you make the purchase?  Head over to our Facebook group where you can see tester albums full of amazing images!

Sunflower Swim Album | Busy Bee Swim Album | Sunflower Swim Youth Album | Busy Bee Youth Album
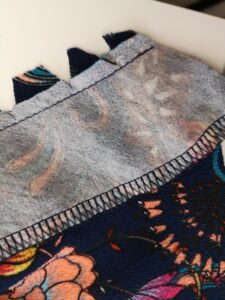
If you’re looking for even more options, we show you a few more ways you can use this pattern in our Sunflower Swim Top Easy Hacks Blog Post!

Filed Under: Pattern Release Leave a Comment

SOS sal day 7 (winner announcements)

May 21, 2019

Amazing job these past 7 days! We were in awww of the beautiful creations we’ve seen and once again you have not made our job easy.

Without further ado….the first prize winner is:

Cathryn Larkin!


Congratulations, Cathryn!  You won a $20 Patterns for Pirates gift card and a $75 Kammie Lou Lou retail fabrics store credit.

As always we have a second winner too:

Leah Bashover-Nichols


Leah , congratulations! You won a Made for Mermaids $20 store credit to treat yourself to some new patterns.

A big thank you to the SOS knit pants sew along sponsor, Kammie Lou Lou Custom Fabrics who also provided this beautiful brushstrokes athletic knit I used for my skinny pants.


Stay tuned for the mermaids’ June sew along announcement.

SOS sew along | Day 1 – Print and cut pattern

SOS sew along | Day 2 – Cut fabric

SOS sew along | Day 3 – Back: pocket, yoke, inseam

SOS sew along | Day 4 – Front: pocket, inseam

SOS sew along | Day 5 – Leg inseam, side seam, hem

SOS sew along | Day 6 – Waistband

SOS sew along | Day 7 – Winners announcement

Filed Under: General Sewing, Sew-A-Long, Using P4P Patterns- Tips and How Tos 1 Comment

SOS sal day 6 (waistband)

May 20, 2019

Woo hoo! We made it to the last sewing day. Today we are adding the waistband and bragging 😉 The SOS knit pants feature a mid rise (they will hit just under the belly button) with an elastic enclosed waistband. My main tip for today is to try the elastic on once you sew the loop. Not all elastics are the same, some will stretch more some will stretch less. When possible it’s always advisable to try the elastic to make sure you love the fit before you add the waistband.

If you are a fan of the Peg Legs contour waistband you can certainly replace the waistband with the contour one. I talk about how here, in the hacks blog.

Be sure to watch Day 6’s video below and post your finished SOS pants  (modeled or not) in the comments of the day 6 photo of this sew along’s album. Reminder, only photos posted in the comments of DAY 6 photo will qualify for the prize. You are most definitely welcome to share on the wall as well (the SAL group and P4P group). Good luck!

SOS sew along | Day 1 – Print and cut pattern

SOS sew along | Day 2 – Cut fabric

SOS sew along | Day 3 – Back: pocket, yoke, inseam

SOS sew along | Day 4 – Front: pocket, inseam

SOS sew along | Day 5 – Leg inseam, side seam, hem

SOS sew along | Day 6 – Waistband

SOS sew along | Day 7 – Winners announcement

Filed Under: General Sewing, Sew-A-Long, Using P4P Patterns- Tips and How Tos Leave a Comment

SOS sal day 5 (leg inseam, side seam, hem)

May 19, 2019

Ahoy, matey! Today our project will start to take the shape of pants 😉 Whether you have opted for the skinny, straight, youth or adult option, you will be sewing the inseam and the side seam. The video below shows you how my preferred technique. I like to pin the front to the back at the inseam, the side seams and lastly sew them.

The pattern follows a 1/2″ seam allowance so if you are using your serger, remember to remove 1/4″ with the serger blade.

Hem the bottom of each leg by folding 1″ and stitching it with a STRETCH stitch. It is very important that you do use either a zig zag, a triple stretch or a coverstitch when sewing the hem. There will be tension and stretching applied to it when putting the SOS knit pants on and wearing them so a straight stitch may pop.

Take a look over the Day 5 video below and when you complete your step, post a picture of your progress in the comments of day 5 photo of the SOS sew along album.

SOS sew along | Day 1 – Print and cut pattern

SOS sew along | Day 2 – Cut fabric

SOS sew along | Day 3 – Back: pocket, yoke, inseam

SOS sew along | Day 4 – Front: pocket, inseam

SOS sew along | Day 5 – Leg inseam, side seam, hem

SOS sew along | Day 6 – Waistband

SOS sew along | Day 7 – Winners announcement

Filed Under: General Sewing, Sew-A-Long, Using P4P Patterns- Tips and How Tos Leave a Comment

SOS sal day 4 (front pocket, inseam)

May 18, 2019

Good morning mermaids and pirates! Today, on day 4, we will be sewing the front pockets and the front seam. Let’s start with the pockets! The SOS knit pants feature slat pockets with an French seam. As I mentioned in the previous video, I strongly encourage you to use a thinner knit fabric for the pocket lining. This will reduce the bulk considerably.

If you have opted for the MOTO HACK  (free hack and pattern on the blog) today is the day when you will be sewing the pin tucks and putting together the front legs. 

Once you added your pocket, all you have left to do today is sew the front crotch seam and make sure to post a picture of your progress in the comments of DAY 4 photo of the SOS sal album.

SOS sew along | Day 1 – Print and cut pattern

SOS sew along | Day 2 – Cut fabric

SOS sew along | Day 3 – Back: pocket, yoke, inseam

SOS sew along | Day 4 – Front: pocket, inseam

SOS sew along | Day 5 – Leg inseam, side seam, hem

SOS sew along | Day 6 – Waistband

SOS sew along | Day 7 – Winners announcement

Filed Under: General Sewing, Sew-A-Long, Using P4P Patterns- Tips and How Tos 1 Comment

SOS sal day 3 ( back pockets, yoke, inseam)

May 17, 2019

Today we start sewing! Day 3 is reserved to attaching the back pocket, the back yokes and sewing the back seam.

Let’s start with the back pocket (s). You can add two or just one, it’s all a matter of preference. The main thing I want to mention regarding the back pocket is the importance of BASTING it in place before you stitch it down. As Judy mentions in the tutorial, the back pocket can make or break the look of the pants. So do use the suggested pocket placement but just baste them in place and only after trying the pants on sew them down.

Once you add the pocket(s), it’s time to add the back yoke. This is where you will see how important having cut the notches yesterday really is 🙂 Be sure to match the notches and attach the yoke with a 1/2″ seam allowance and top stitch.

Below is a link to the Day 3 sew along video which includes the back pocket, yoke and inseam construction. Once you complete today’s steps, be sure to post a picture of your progress in the comments of day 3 photo of the SOS knit pants sew along album.

SOS sew along | Day 1 – Print and cut pattern

SOS sew along | Day 2 – Cut fabric

SOS sew along | Day 3 – Back: pocket, yoke, inseam

SOS sew along | Day 4 – Front: pocket, inseam

SOS sew along | Day 5 – Leg inseam, side seam, hem

SOS sew along | Day 6 – Waistband

SOS sew along | Day 7 – Winners announcement

Filed Under: Sew-A-Long, Using P4P Patterns- Tips and How Tos Leave a Comment

SOS sal day 2 (cut fabric)

May 16, 2019


Welcome to day 2 of our SOS knit pants sew along. Today we will be choosing the fabric, cutting it and gathering all necessary notions. You should have your pattern pieces ready from yesterday. If you haven’t removed the top part of the pocket on the front pieces, now is the time to do it.

But first let’s talk a little about the right fabric for the SOS pants. As you can see in the video below I am using a gorgeous athletic knit from Kammie Lou Lou for my SOS skinny pants. This poly base knit is custom printed and the perfect medium weight. For the straight leg I absolutely love French Terry or Baby French Terry for a casual/sporty feel and ponte for a more elegant look. I highly encourage you to avoid thinner knits like double brushed poly, low weight cotton spandex or bamboo spandex.

Custom Brushed Poly
Jacquard
Baby French Terry
Jeggings
Athletic poly

Kammie Lou Lou is this sew along’s sponsor too, so one of you will be getting a $75 Gift Card to the retail shop so you can treat your to some gorgeous custom printed fabric.


You will also need 1″ or 1.25″ elastic for the waistband. Not all elastic is the same, so keep that in mind when you choose knit elastic vs no roll elastic.

The Day 2 video is posted below. Check it out and once you are done cutting your fabric post a picture of your prepped fabric in the comments of the Day 2 photo of the SOS SAL album in the M4M & P4P Sew Along group.


SOS sew along | Day 1 – Print and cut pattern

SOS sew along | Day 2 – Cut fabric

SOS sew along | Day 3 – Back: pocket, yoke, inseam

SOS sew along | Day 4 – Front: pocket, inseam

SOS sew along | Day 5 – Leg inseam, side seam, hem

SOS sew along | Day 6 – Waistband

SOS sew along | Day 7 – Winners announcement

Filed Under: Sew-A-Long, Uncategorized, Using P4P Patterns- Tips and How Tos Leave a Comment

Grandpa Cardi/Cpt Mack’s Cardigan SAL – day 2 (pick and cut fabric)

January 15, 2019

Welcome to day 2 of our Grandpa Cardi/Cpt Mack’s Cardigan sew along. Today we will be choosing the fabric and cutting it. You should have your pattern pieces ready from yesterday.

But first let’s talk a little about the right fabric for this pattern. As you can see in the video below I am using a gorgeous rose gold sweater knit from Sincerely Rylee for my Grandpa Cardi. This my favorite knit type for this pattern. For Cpt Mack’s I like the structured look of cotton lycra. These two cardigans can be made with virtually any knit fabric since they only require 20% stretch.

Sincerely Rylee is this SAL’s sponsor too, so one of you will be getting a $50 Gift Card to their shop so you can treat your to some gorgeous sweater knits (and not only) too.

If you are unsure about which knit type will work best for your desired look, take a look over our P4P University Knit Types blog. Judy also included a cheat sheet that you can print. If you are like me and sometime are just keen on using a specific print for a specific pattern, read our Different fabric, different fit blog post before you cut your fabric.

Writing this blog brought back some memories…the set below is my first ever Grandpa cardi/Cpt Mack’s cardigan I ever made. It’s a thin sweater knit from Joann and I still wear it today. My little man wore his at school for two years. It makes an great uniform piece too.

Got some sequins fabric you absolutely love? Use them for the elbow patches. Colleen’s Grandpa cardi is to die for…afterall, who doesn’t need a fancy elbow pocket patch?

For my cardigan I decided to add bamboo lycra shoulder patches and pockets. I’m using a rose gold striped main fabric so I chose a gold and roses print for the patches. Get it Get it? 😉

The Day 2 video is posted below. Check it out and once you are done cutting your fabric post a picture of it in the comments of the Day 2 photo of the Grandpa Cardi/ Cpt Mack’s SAL album in the M4M & P4P Sew Along group.

Grandpa Cardi | Cpt Mack’s Cardigan Sew along  – Day 1 (Print & cut pattern)

Grandpa Cardi | Cpt Mack’s Cardigan Sew along  – Day 2 (choose and cut fabric)

Grandpa Cardi | Cpt Mack’s Cardigan Sew along  – Day 3 (pockets and elbow patches)

Grandpa Cardi | Cpt Mack’s Cardigan Sew along  – Day 4 (shoulder seams and add sleeves)

Grandpa Cardi | Cpt Mack’s Cardigan Sew along  – Day 5 (finish sleeves and bottom edge)

Grandpa Cardi | Cpt Mack’s Cardigan Sew along  – Day 6 (collar/shawl and buttons)

Grandpa Cardi | Cpt Mack’s Cardigan Sew along  – Day 7 (winners announcements)

Filed Under: General Sewing, Sew-A-Long, Uncategorized, Using P4P Patterns- Tips and How Tos 1 Comment

Go To Jacket :: New Pattern Releases!

March 2, 2018

Stop the presses!  P4P is releasing THREE new patterns today and we couldn’t be more excited!  The Go To Jacket is available in enough sizes that you can make one for every member of your family.  Because we made it for Men, Women and Kids!


Just like the rest of our patterns, we’ve packed the Go To Jackets full of as many options as we could!  It is drafted for women (sizes XXS – Plus 3X), men (sizes XXS – XXXL) and youth (3M – 14) and can be made into a bomber style, or finished with a 3-piece hood.  There are two pocket options, two length options and three different sleeve hem types.

The Go To Jacket patterns were drafted for knit fabrics, which can range for lightweight fabrics to something on the heavier side, like fleece.

Don’t be scared of those zippers!! We have a couple very helpful links to walk you through them in the tutorial- you’ll be zipping ALL THE THINGS soon 😉

**Want to learn more about how to measure yourself for this pattern?  We’ve got you covered with an in-depth blog HERE.  And in case you’re new to Patterns for Pirates and PDF patterns in general, we have a great blog full of new user tips HERE to help you get started!  And, as with all of our current releases and updates, the pdfs now include our layers feature and can be found in Letter, A4 and A0 sizes.

Let’s see some options in action, shall we?

Bomber Style

Hooded

Tunic + Shirt Lengths

Cuffed / Hemmed / Thumbhole Sleeves

Kangaroo + Inseam Pockets

The jacket also boats a zipper/chin guard so your little one can zip up themselves and not worry about getting their little chins rubbed by the zipper all day! We also include instructions how to finish the neckline and zipper with a clean nice finish on the inside for extra gorgeous-ness!


Ready to grab your patterns?  You won’t regret it!

Go To Men’s | Go To Women’s | Go To Youth | Go To Bundle

Need more convincing?  Just take a look at this pattern on all of the amazing shapes and sizes of our testers, and get a look at more examples of all the options in our albums in the P4P Facebook group! Men’s Album / Women’s Album / Youth Album
The sale price will last through March 8 (11:59 PM US Central time zone) so grab it while you can at the introductory price!

And if that wasn’t enough options, make sure to check out the hacks post to help take your patterns even further.  Also head over to the P4P University post to learn all about shortening zippers for your Go To Jackets!

Happy Sewing, friends!

Filed Under: Pattern Release 4 Comments

  • 1
  • 2
  • Next Page »

Newest Patterns

  • Sweater Weather $10.00 $8.50
  • Sweater Weather- Youth $9.00 $7.50
  • Sweater Weather- Bundle $18.00 $15.00
  • Cozy Wrap $10.00
  • Cozy Wrap- Youth $9.00

Copyright © 2021 Patterns for Pirates

Copyright © 2021 · Genesis Framework · WordPress · Log in