Patterns for Pirates

P4P stylish, modern, wearable patterns

  • Home
  • Blog
    • Frequently Asked Questions
    • Pattern Releases
      • Free Patterns
    • P4P University
      • Fitting
      • Sewing with Stretch, Knit Fabrics
      • Sewing with Woven Fabrics
      • Sewing Machines
    • Sew-A-Longs
    • Fabric for Pirates
    • Pattern Hacks
    • Announcement
      • Blog Tours
      • Contest/Giveaway
  • Shop
  • Bundle Discounts
  • Flash Friday
  • Gift Cards
  • My Account
  • Cart

The Essential Tank | Pattern Release!

June 9, 2016

If you’re like a ton of other women on our Facebook group, you’ve been checking the page daily…ever since Judy posted that first sneak of the new tank top pattern.  Well guess what?  The wait is over!  It’s here!

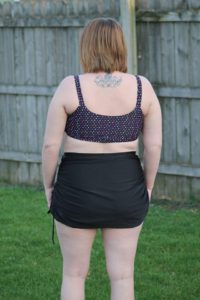
Allow me to introduce you to the newest P4P pattern: The Essential Tank.

listing pictures1

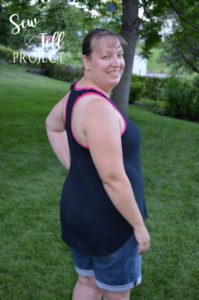
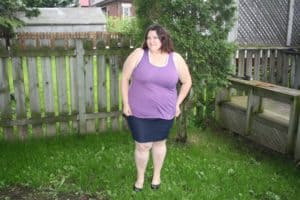
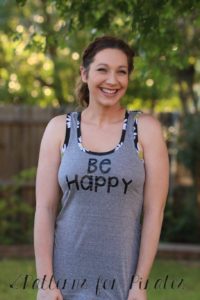
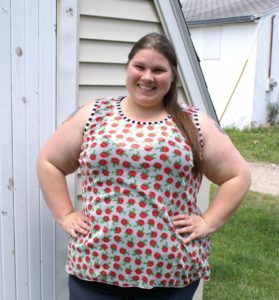
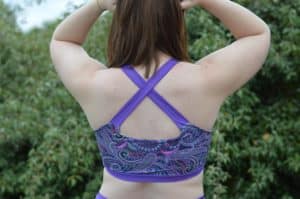
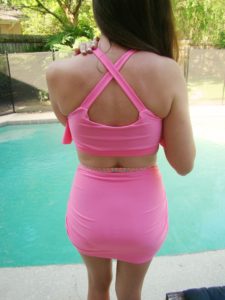
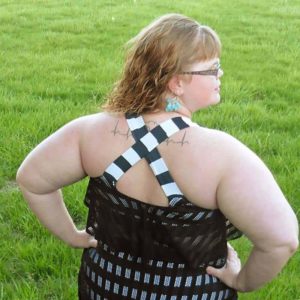
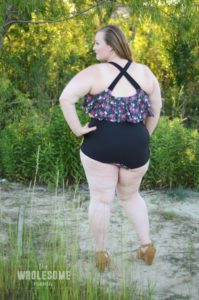
Probably one of the most appropriately named patterns in the lot, this is going to be your new essential for summer.  It’s a quick, easy, and super flattering sew.  And is jam packed full of options!

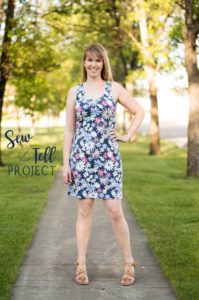
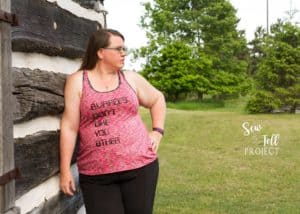
The Essential Tank is the perfect everyday tank. It is fitted at bust and semi-fitted through waist and hips.  Wondering where it stacks up against the other P4P patterns with fit?  Judy has an amazing blog that compares the fits of her patterns HERE.

listing pictures3

The pattern is drafted for sizes XXS – Plus 3X.  There are FIVE hem lengths (dress, shirt, tunic, curved and maxi), two strap types (straight and racerback), and two arm/neck finishing options (binding and traditional tshirt bands).  And on top of all of that, we have also included a  PDF layers feature for printing.  Want to learn more about how to measure yourself for this pattern?  We’ve got you covered with an in-depth blog HERE.

Go grab yourself a copy of the Essential Tank.  It will be discounted through the end of the weekend, no coupon needed.

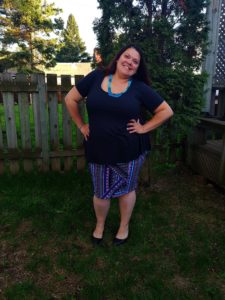
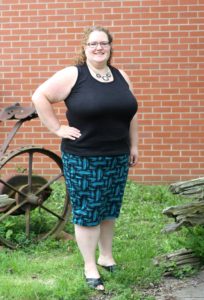
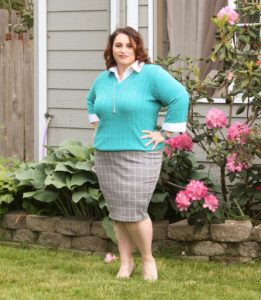
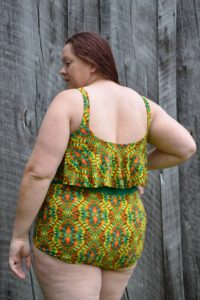
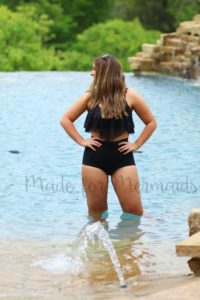
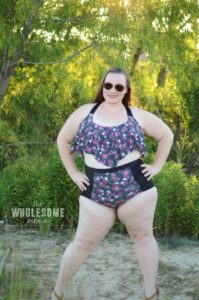
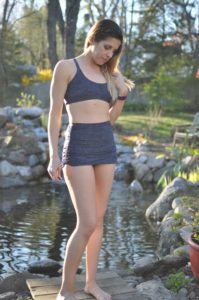
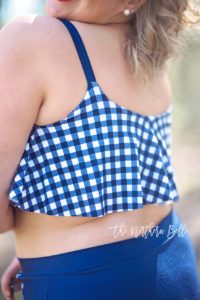
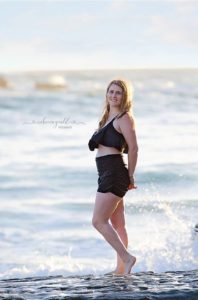
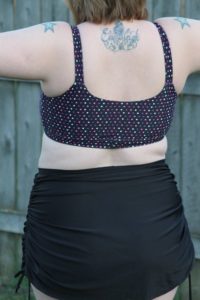
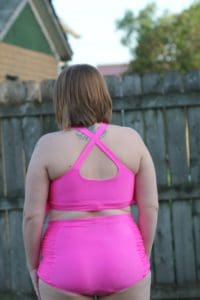
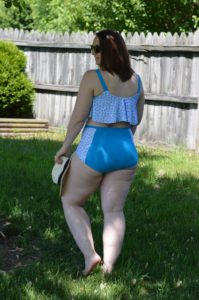
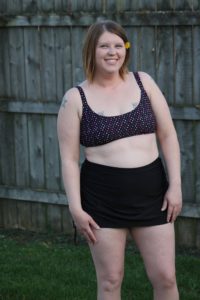
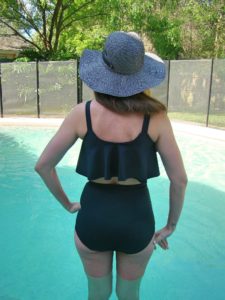
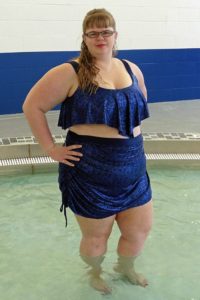
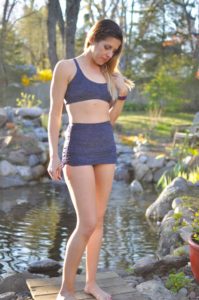
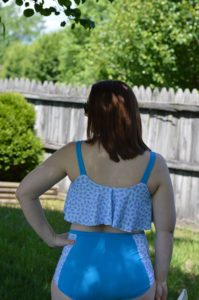
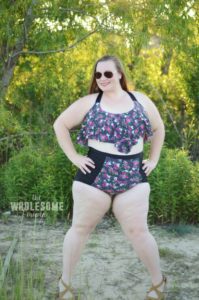
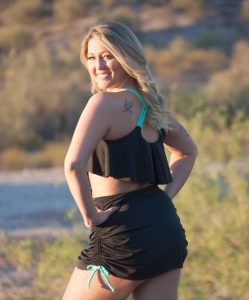
Hoping for more inspiration?  Take a peek at all of our fabulous testers!  And if that’s not enough, head over to the Essential Tank album on Facebook for more.  Happy sewing!


Filed Under: Pattern Release 1 Comment

Essential Tank Maternity Hack | Guest Post

June 9, 2016

MATERNITY BLOG TUTORIAL: Applying the Layer Me Up Maternity Modification to Other Patterns For Pirates Patterns

Guest Blog Written by Kelly Bailey

LAYER ME UP_edited-1

Hi there! I’m Kelly and I am here to share with you my knowledge of making maternity garments; more specifically, how to apply Judy Hale’s Layer Me Up maternity modification to the rest of her other patterns. I have been a pattern tester for Judy for a while now and love it. I also run my own sewing shop Spindle & Seams and I work for the fabric shop So Sew English! If you are here I imagine you are expecting or expecting to sew for somebody who is. Congratulations! This is a step by step tutorial and I hope that after reading through this you feel much more comfortable trying your hand at maternity wear. For this tutorial you will need your pattern of choice and the Patterns for Pirates Layer Me Up Maternity pattern.

NOTE: I am 20 weeks gestation (4th baby) in all of these photos.

PHOTO 1

STEP 1: Does the pattern even require a maternity modification?

Does the pattern your thinking of making really need a maternity modification? There are several patterns out there that are maternity friendly without even trying to be and some that would turn into a mess if you tried. Two of my favorites are the Patterns for Pirates Free Spirit Tank in the curved hem and the Boundless dress in the empire waist option. The Free Spirit tank leaves lots of ease throughout the bodice and angles out wider as it approaches the bottom hemline. The Boundless dress, in an empire waist, is only fitted just under the bust and accentuates the baby belly in the most darling way! The Everyday Elegance can also be maternity friendly if you opt to make it using a knit fabric with great stretch. This one has a lot of ease throughout the bodice even without using knit fabric but definitely will fit you until the end if knit is used. Some patterns just are not meant to be altered to be maternity. There is one P4P pattern that I just wouldn’t attempt for this purpose; the Sweetheart dress and peplum. This pattern is drafted to be an “at the waist” and is very fitted from the waist up. The Sweetheart looks best in thicker, more stable knits like ponte or scuba that only provide restricted stretch and are the most fitted in a location where your belly is going to grow drastically.

So when looking at a pattern ask yourself; Does the pattern have an empire waist? Does it have an at the waist skirt/peplum? What is the ease like through the waist and hips? What patterns cannot be modified easily for maternity and which ones IMO just wouldn’t look great on me? What kinds of patterns are COMFORTABLE for maternity wear? Will I be able to wear this garment post partum to ease the transition back into non pregnancy clothes?

Here is a rough guide of the patterns I would, wouldn’t or might alter:

Patterns that don’t necessarily require maternity modifications:

  • Everyday Elegance
  • Free Spirit Tank
  • Boundless Dress

Patterns that I wouldn’t attempt to make maternity:

  • Sweetheart Dress and Peplum Top

Patterns that can be easily modified for maternity:

  • Layer Me Up
  • Pumpkin Spice Dolman
  • Sweet Tee
  • Relaxed Raglan
  • Slim Fit Raglan
  • Women’s Henley
  • Boyfriend Vneck
  • Essential Tank and Dress

BOUNDLESS DRESS_edited-1 FREE SPIRIT TANK_edited-1EVERYDAY ELEGANCE_edited-1

STEP 2: Choose your fabric content wisely. What fabrics to use for maternity and what to avoid.

Sometimes you can get away without making any maternity modifications if you use the right fabric on a pattern that has enough length to accommodate. Tunic length garments can be a great way to have a before and after baby closet staple. But most of the time you will need to make the modifications to comfortably fit until after baby is born. Here are a list of some knit fabrics to use and some to try to stay away from when sewing maternity.

Fabrics that are great for maternity use:

  • Rayon Spandex Blends (This can include french terry)
  • Polyester Spandex Blends (like ITY or brushed poly)
  • Cotton Spandex/Lycra Blends (This can include french terry)
  • Cotton Spandex Interlock Knits
  • Liverpool depending on the amount of horizontal stretch
  • Lightweight Sweater knits with lots of stretch

These fabrics all have great stretch and recovery. 4-way stretch is great but because you are adding in length to the front bodice you can easily use 2-way stretch knits as long as the horizontal stretch is pretty good.

Fabrics to try your best to steer clear of using for maternity wear:

  • 100% cotton Jersey knits or Interlock
  • 100% cotton French Terry
  • Ponte
  • Scuba
  • Nylon spandex and other athletic knit blends

These types of knits typically do not have very good overall stretch or they have what I call restricted stretch. Restricted stretch would be a fabric that has good overall stretch but is tougher to pull to get there. Similar to how some athletic knits try to hold you in as you work out. Maternity garments made with these knits may fit for a little while, but will likely not comfortably last you up until that cute little babe pops out of your full-grown belly.

Now that you have chosen a good sewing pattern and paired it with the right fabric we can move on to altering the front bodice piece of your chosen pattern. There is no need to alter any other pattern pieces. Yay!

STEP 3: Assembling and analyzing your maternity modification pattern piece and what the modifications mean.

Your Layer Me Up maternity pattern is going to give that belly some ease throughout the waist to accommodate growth width wise. It is also going to give you more length through the front bodice to completely cover your full-grown baby belly. You definitely don’t want your hand crafted top turning into an early 90’s belly shirt ¾ of the way through your pregnancy! For this tutorial you are going to need to purchase the Layer Me Up maternity mod pattern and a maternity mod friendly pattern of your choice. Now is the time to assemble both of these patterns and to cut out your sizes. Pay attention to your current bust and hip size. They may have changed since before you became pregnant. You may need to do some pattern grading because of it. See Judy’s blog post on pattern grading if this is something new to you.

PHOTO 2


STEP 4: Picking the pattern you wish to modify and lining up the maternity mod pattern correctly on top of it.

Now we are going to lay the pattern pieces on top of one another to see where we need to make modifications to our non maternity pattern. We will only be modifying the FRONT BODICE piece of the non maternity pattern. We are using the Layer Me Up maternity piece as a guide to adjust our original pattern. Line up your maternity pattern piece on top of your original pattern piece using the armpit at the reference point. The Layer Me Up mod piece should be placed a couple inches below the armpit of our front bodice piece. As you can see in this photo I have also laid the top original Layer Me Up front bodice piece to show that the reference point. If you do not own the Layer Me Up original pattern, don’t worry, just place the maternity piece a couple of inches below the armpit.

photo 3


STEP 5: Adding paper along the original patterns waist curve for tracing.

You can see from the above photo that some parts of the maternity piece fall within the bodice piece of your original pattern, but there are parts that stick out as well. We are going to do some gentle transitioning and tracing on our original pattern to accommodate. First things first, decide where you need to add your tracing paper to your original pattern. Tape that piece of paper into your original pattern like so.

PHOTO 4

Now once again lay your maternity pattern piece over the top so that we can trace the new curve.

PHOTO 5

Be sure to use some gentle grading to transition the curve from your original pattern bodice piece to the maternity pattern piece. Trace along the maternity curve. When you are finished tracing trim off the excess paper.

PHOTO 6

Here is where you can decide to use the full width of the maternity curve or to trim it down about 1/3” to be more fitted for early pregnancy. If you choose to slim it down your top may not fit all the way up to your due date.

STEP 6: Adding Length to the front bodice piece.

Analyze the pattern pieces to see how much length discrepancy there is for the hem lengths. Pick a good location on the original pattern to cut and add in more length there. I like to add the length in at the shortest hem length on the original pattern. Once again, we are going to lay the Layer Me Up maternity piece on top of your original pattern piece.

PHOTO 7

As you can see from the above photo there is several inches of difference between the hem lengths. For this part of the tutorial I am going to illustrate how to add in the length necessary for rouching. Take measure of the difference.

PHOTO 8PHOTO 9

Take note of this measurement and then cut your original pattern piece at the shortest hem length. On this particular pattern, this falls at the curved hem.

PHOTO 10

Add in your blank paper here and tape your original pattern pieces to the blank sheet being sure to only add the measured difference back into the original pattern. Trace a smooth transition line and trim off excess paper on the sides.

PHOTO 11

Now once again lay the Layer Me Up maternity pattern piece on top of your now altered original pattern and be sure that your hem lengths now line up with one another.

PHOTO 12

STEP 7: Transfer over the elastic sewing markings.

Line up the two pattern pieces and from the Layer Me Up maternity add on pattern and transfer the triangle elastic markings to your now altered original pattern.

PHOTO 13

Wallah! You now have altered your original front bodice pattern piece to be maternity! 

STEP 8: Check out your new maternity pattern.

It’s super easy from here! Cut out your altered front bodice piece from your fabric and follow the LMU Maternity mod instructions as written. Make any adjustments through the bodice as necessary for a better fit for you! Again, you do not need to modify any other pieces from your pattern to make it maternity. I highly suggest trying on your top or dress BEFORE you attach the binding or hem in order easily make any necessary adjustments.

ESSENTIAL DRESS_edited-1ESSENTIAL TANK_edited-1


Filed Under: Pattern Hacks 3 Comments

20K Celebration : A Pirate Pencil Skirt!

May 25, 2016

Is today the best day ever or what?  The Patterns for Pirates Facebook Group just hit TWENTY THOUSAND fans!  That’s 20K women (and men!) who are learning, supporting, and sewing along with each other on a daily basis.  That’s so amazing!

13256412_10102686577129783_6823916064658558011_n

To celebrate, and to thank you all for being the best pirate seamstresses ever, we are releasing a new pattern.  AND (hint hint) if you’re a member of the Facebook group, there is a special discount code just for you for this pattern. (Please remember this is a thank you to group members.  So if you would like to share, please direct them to joining the group and not share the code 🙂 )

Now let’s talk about the new pattern: The Pirate Pencil Skirt.  It’s so fast, easy, and flattering on all body types that you’ll be sewing up a ton of them for yourself before summer is over.  Trust us.

Slide1

The pattern is drafted for sizes XXS – Plus 3X.  There are three lengths and two waist rises included in the pattern, as well as the new PDF layers feature for printing.  Want to learn more about how to measure yourself for this pattern?  We’ve got you covered with an in-depth blog HERE.

listing pictures

Pick up your copy of the Pirate Pencil Skirt: HERE (And don’t forget to head to the group for the discount code! We keep ALL current sale and promo codes in the COMMENTS of the PINNED POST! 🙂 )

Here are a few images from our fabulous testers for the Pirate Pencil Skirt.  Take a peek through for some styling inspiration!  Need more?  Head over to the Facebook album to see the rest!


Filed Under: Free Pattern, Pattern Release 14 Comments

#SewLikeAPirate :: Freebies and a Contest!

May 23, 2016

Who doesn’t love a good graphic tee?  We sure do!
P4P girl Katy has created four FREE designs to help transition you into a full blown pirate sewist.  Are you ready?

noevil 13268127_10102683251304763_664552423215925727_osewlikeawind in sails

You can go pick up your copy of these designs right HERE.

Don’t own a die cutting machine like a Silhouette or Cricut?  No sweat!  We have included two extra file types (PNG and PDF) that will allow you to work with the designs however you’d like.

— Go old school and use an iron on transfer paper and your at-home printer.
— Use Heat Transfer Vinyl and your die cutter.
— Try your hand at Freezer Paper Stenciling.  (Dana from Made Everyday has a great tutorial HERE.)

But wait, there’s more!  We wanted to create a friendly pirate-y competition with this new release.

Between today and Saturday, June 4, sew up a Patterns for Pirates shirt and apply one of these fab new designs.  Share your photo with us on Instagram or in our Facebook group and use the tag #SewLikeAPirate We will pick our favorite and the winner will win a free P4P pattern of choice AND be featured on this blog.

What are you waiting for?  Get to sewing!

Filed Under: Contest/Giveaway, Free Pattern 6 Comments

Hello Sailor Swim Bottoms | Pattern Release!

April 25, 2016

Happy pattern release day!

We are coming at you live with the Hello Sailor Swim Bottoms.  And you’re going to LOVE them as much as we do!

listing pictures1

There will be no disappointment in options with these swimwear bottoms!  They are a classic, high-waisted fit (think: full coverage with a slimming effect).  And you get to pick and choose how you want to put them together.  Solid, paneled, ruched side panels, multiple skirt options, and an easily-customizable fit are all features of the Hello Sailor Swim Bottoms.

listing pictures3

On top of that, we are providing you with some extras for this release!

Sewing your own swimwear can be intimidating.  We understand.  But it doesn’t have to be!  That’s why we created this post to help ease some of your worries: Basics of Sewing Swim.  On top of that, Judy and Nicole came up with some incredible hacks for the new release: Siren + Hello Sailor Hacks.

A huge kudos goes out to our gorgeous testers!  Not only did they all survive several revisions until we got the pattern *just right*, but they were also willing to deliver some fabulous photos.  It’s not easy putting yourself on the internet in a bathing suit, but these beauties made it look effortless.  Feel free to poke through the photos and get some inspiration from them.  And then hop on over to our Facebook group and look for more photos in our Hello Sailor Album.

And then get to sewing!  It’s swimsuit season and you’re about to have the first one to ever fit you perfectly!  Woot!


Filed Under: Pattern Release 2 Comments

Siren Swim Top | Pattern Release!

April 25, 2016

Today is such a treat.  And a total labor of love.  We’ve been working hard behind the scenes to bring you the perfect swimsuit top and today is release day!  Woohoo!

The Siren Swim Top is a winner.  Just trust us!  Have we steered you wrong yet?

listing pictures1

Swimsuit season doesn’t have to be dreaded this year.  The Siren Swim Top will get you the perfect fit, comfort, and lift all in one easy-to-sew top.  AND you also get to choose your best style and level of coverage.

Not only does the pattern accommodate you for the proper fit around, but it also includes cup sizes!  You can take your bathing suit this season one step further by sewing your A – G cup size.  Can’t get any better than that!

listing pictures3

Like all Patterns for Pirates patterns, this walks you through all of the steps in an easy to read manner.  While it could sound super intimidating to work with special swim fabrics, it’s broken down into simple steps that will turn you into a bathing beauty in no time.  On top of the step-by-step instructions in the pattern, we’ve also handed you some basic bullet points for sewing swimwear in a blogpost here: Basics of Sewing Swim.

The Siren Swim Top pattern comes packed full of options: cup size, pointed/straight/back flounce, criss-cross/regular straps, cups, power mesh, etc.  As a bonus, Judy and Nicole also took it one step further and gave you some really fun and easy hacks.  Check out their blog post here: Siren + Hello Sailor Hacks.

And don’t forget to gather all of the inspiration you can from our darling testers.  We are lucky to have such gorgeous women, willing to share these images with us!  If these pictures aren’t enough, be sure to head over to our album on Facebook: Siren Swim Top Album.   Now get to sewing!


Filed Under: Pattern Release 5 Comments

Sweetheart SAL: Recap

March 21, 2016

Holy potatoes you guys!  For our first Sew-A-Long, this was an amazing way to make it happen.  Last week was an absolute blast and we’d like to thank you for hanging with us the entire time.  There were so many remarkable dresses and peplums sewn in the last week…I can’t even handle it.

If you’d like to look back on the Sweetheart + Me Hearties dresses and peplums that were sewn and shared, go check out the album HERE.

Now let’s talk about the friendly little competition we were having.  We had our gorgeous gals put their finished items into the album on Facebook and let the rest of the P4P family vote (with “likes”).  Here are the three lucky gals that are walking away with some new P4P patterns!  Congratulations ladies!

Fan Favorite: Molly Wynne Stonesifer

1534973_10102392979444008_7759311727901340748_o

Admin Pick: Brianna K. Karle

1013346_10103865208388459_2544093315592240746_n

Random Draw (but also incredibly gorgeous dress!): Heidi Hilmerson

12440736_10208609543133856_7287690053435667545_ofloral

I hope you all had as much fun, and got as much out of it, as we did.  Now go rock those circle skirts all over town!
Day 1: Fabric Selection.
Day 2: Printing + Measuring.
Day 3: Cutting Fabric.
Day 4: Bodice + Sleeves.
Day 5: Skirt + Hemming.
Day 6 & 7: Catch-Up Days.
Day 8: Recap + Winners Announced!

Filed Under: Sew-A-Long, Uncategorized 4 Comments

Sweetheart SAL Day 5: Skirt + Hemming

March 18, 2016

This is it!  Your dress is almost finished!  Today we are attaching the skirt to the bodice and hemming it.  So excited!

floral

Since there is no gathering involved in the skirt portion, it is super easy and fast to attach the skirt.  But because it’s a circle skirt, the bottom hem is vast…yet totally manageable.   Here are some hem options that we like!

Hem option #1: Traditional Hem

For this, you simply fold the fabric up 1/2″ toward the wrong side, press, then fold another 1/2″ and topstitch.  I like to run the serger around the edge of the fabric first, so there’s more of a solid edge to work with while folding.  But it’s not necessary.

hem1

Hem option #2: Bind/Use Trim

Just like you did for the arm and neck openings, you can use knit binding, FOE, trim, or even a lace.  Make sure you aren’t stretching your bindings at all.  And be aware that this will make your length 1 inch longer.  (The circumference lengths are already included in the pattern, to make it even easier on you!)

hem2

If using a trim, simply stitch your trim to the skirt edge, right sides together.  Flip the trim down and topstitch.

12499373_10154011406224666_1339663035_o12873423_10154011406269666_945694377_o

Hem option #3: Coverstitch

This gives you a more professional finish on your hems, but requires a coverstitch machine.  (If you don’t have a coverstitch machine, you can simulate this look by serging the edge of your fabric, folding your fabric up 1/2 inch, and sewing with a double needle.)

IMG_5295

Hem option #4: DON’T HEM!

Sound too good to be true?  Perhaps.  But in some cases, it just makes sense to leave the edges raw.
I totally left this new dress of mine with a raw edge on the skirt and I loved it.  So much so that it called for a one-woman dance party.

sweetheart finished dance

**Hem tape is HUGELY helpful.  With all versions of hemming, really.  Some prefer a wash-away tape (like THIS), while others like to use a different type of stabilizer (like THIS).

YOU GUYS!  We did it!  You made it to the end and have finished a new, amazing, custom-fit, piece of clothing.  We are so proud of you!  If you’re sewing along with us, be sure to tag @PatternsforPirates and #P4PSWEETSAL on Instagram.  And don’t forget to join us on the P4P event page: Sweetheart SAL on Facebook.

Thanks for sewing with us!  Come back tomorrow to catch the linkup/contest for your completed Sweetheart or Me Hearties outfit.  It’s going to be so amazing to see what you’ve made!

Day 1: Fabric Selection.
Day 2: Printing + Measuring.
Day 3: Cutting Fabric.
Day 4: Bodice + Sleeves.
Day 5: Skirt + Hemming.
Day 6 & 7: Catch-Up Days.
Day 8: Recap + Winners Announced!

Filed Under: Sew-A-Long, Uncategorized 4 Comments

Sweetheart SAL Day 4: Bodice + Sleeves

March 17, 2016

So.  You’ve printed your pattern, figured out your size, and now cut your fabric.  What’s next?

Let’s get to sewing!  Today is about the top half of your pattern.  We are going to stitch your bodice together.  And we’ve got a trick to get a lower neckline (if that’s what you’re wanting in your pattern) as well as a sleeveless option for the Me Hearties pattern.  Let’s get to it!

floral

There are a ton of options for the bodice part of the Sweetheart/Me Hearties dresses.  You can colorblock, do an overlay, choose your sleeve lengths, use FOE (fold over elastic)/trim/t-shirt neckband bindings, etc.  Pick your poison when it comes to how you want to style your dress.  The sky is the limit!

But let’s say that you wanted a lower neckline than what the pattern calls for.  Can we do it?  YES WE CAN!

I have a larger than average bust and tend to like a lower neckline on my shirts.  Luckily, when you sew for yourself, this is super simple to do.  Cut your front bodice piece out and determine where you’d like the neckline to sit.

**Keep in consideration your neckline finishing.  For this particular top, I used a standard tshirt binding for the neck.  But using FOE or trim will give you a wider neckline opening.  So just make your adjustments according to your final vision for your top/dress.

P4P SAL-003 copy

Because we are adjusting the actual size of the opening, we will need to figure out new measurements for the neckband.  Once your front and back bodices are pieces are sewn together at the shoulder, fold your piece out flat at the neckline.  Without stretching your fabric, lay it flat and measure the opening.  Multiply that number by 2.  This is your new neckline circumference.

P4P SAL-005 copy

But what is your new neckband/FOE length requirements?
Neckline circumference X .85 + 1″ (for seam allowance) = Neckband/FOE length

Use your new length and finish the neckline however you’d like!

Sweetheart SAL-024

~SLEEVELESS AND OPTIONAL NECKLINE AND ARMHOLE FINISHING METHODS~

The girls Me Hearties does not have a tank option in the pattern but we are going to show you how to hack it… two ways!  You can also apply these methods to the Sweetheart if you want a wider sleeveless option as well.

For both methods, you will calculate the bands the same.  For consistency and as shown in the pattern, I did the bands in the flat.   You can do it in the round if you prefer but will need to adjust your band measurements to include a seam allowance (like the neckband measurement shown above).  If using the Trim Method, trim your pattern pieces first, then calculate your armbands.

How to calculate armband measurements: Sew one shoulder seam with 1/2″ seam allowance.  Measure the armscye (as shown below) and multiply by .85.

Me Hearties PDF Pattern measure armscye

TRIM METHOD:  For this method, you will use your existing pattern pieces for the bodice (either the full front and back bodice or the top front and back of the color-block) and trim 1/2″ off each armscye.  Proceed with the instructions in your pattern  and use your favorite method to finish the neckline and armholes. (FOE, traditional knit binding, or lingerie elastic)

Me Hearties PDF pattern sleeveless option

HIDDEN SEAM TURNED FACING ARMBANDS:armbands

(I also used the same method on my neckline.  Note: This will lower your neckline by 1/2″)

Me Hearties PDF pattern sleeveless option                                   armbands3

Me Hearties PDF pattern sleeveless optionMe Hearties PDF pattern sleeveless option


ay 1: Fabric Selection.
Day 2: Printing + Measuring.
Day 3: Cutting Fabric.
Day 4: Bodice + Sleeves.
Day 5: Skirt + Hemming.
Day 6 & 7: Catch-Up Days.
Day 8: Recap + Winners Announced!

Filed Under: Sew-A-Long 4 Comments

Sweetheart SAL Day 3: Cutting Fabric

March 16, 2016

Welcome back!  So far, we’ve learned how to pick the perfect fabrics and get the perfect fit.  And today, we are diving right in and cutting into your beautiful fabrics.  And we are also going to be sharing TWO new options for the skirt portion.  So before you cut, maybe you’ll want to consider these “hacks” as well!

Let’s get started!

floral

The circle skirt is the trickiest part of the pattern to cut.  But once you realize how to fold your fabric for cutting, it is actually pretty easy!  The pattern includes a full circle skirt and has the option to cut with a pattern piece, or to save on some paper and just cut with a small guide and your own measurement.

Screen Shot 2016-03-15 at 9.22.07 PMScreen Shot 2016-03-15 at 9.25.47 PM

I prefer to cut my own circle skirt length, by just using the cut out piece provided.  It gives me full control of the length I really want.  But it is purely preference in this case.  When you are using the cut out, make sure you’re measuring from the end of the circle you’d cut out…and not from the corner of your folded fabric.  Otherwise your length will be off by several inches.  (Ask me how I know this.)

We wanted to provide a couple of fun alternates for your circle skirts.  So before you cut into your fabric, consider these alternatives!

Alternate #1: Full Circle Skirt with Waistband.

You can take the skirt portion of the Sweetheart + Me Hearties patterns, skip the bodice, and add a waistband.  And it’s super easy to do!  We are providing you with measurements for a yoga-style waistband…no elastic required.

1374928_10102565519250743_3974045494731135566_n1517669_10102562265321643_7875112105210616385_n

Alternate #2: High-Low Skirt

Getting a higher cut in the front, and lower dip in the back of a circle skirt is SO EASY.  It’s as simple as moving the waist cut-out to a different place on the skirt itself.  Three steps and you’ll have a fishtail-esque skirt!  (This would also work well with the skirt-only adjustment that we explained above. ^^^)

Sweetheart SAL-014

1.) Open up your skirt so you’re seeing a folded semi-circle.  Slide the very top layer until it’s the length that you want for the front of your skirt (be sure to take into account the waist cutout!).  Sturdier fabrics are way easier to handle with this process.  My skirt above was a slinky rayon blend and it took a lot of patience to get into place.  So go slow.  Make sure everything is flat and even before you make your cut!

2.) Carefully, fold your skirt in half again, so that it is quartered.  You will be back to four layers of fabric, just like when you were originally cutting the circle.  Take your waist cut-out piece and cut your opening.

3.) Open up your skirt.  You should now see a large circle with a smaller waist circle cut out, somewhere off center.  Your high-low skirt is now ready to attach to the bodice!

floral

Is your fabric all prepped, cut and ready for tomorrow’s next step?
Show us your pretty stack of fabrics, just begging to be sewn into something amazing!  If you’re sewing along with us, be sure to tag @PatternsforPirates and #P4PSWEETSAL on Instagram.  And don’t forget to join us on the P4P event page: Sweetheart SAL on Facebook.

Thanks for sewing along with us!  We are having a blast sewing with you this week!

Day 1: Fabric Selection.
Day 2: Printing + Measuring.
Day 3: Cutting Fabric.
Day 4: Bodice + Sleeves.
Day 5: Skirt + Hemming.
Day 6 & 7: Catch-Up Days.
Day 8: Recap + Winners Announced!

Filed Under: Sew-A-Long 8 Comments

  • « Previous Page
  • 1
  • …
  • 24
  • 25
  • 26
  • 27
  • 28
  • Next Page »

connect with me

  • Email
  • Facebook
  • Instagram
  • Pinterest
  • YouTube
Privacy & Cookies: This site uses cookies. By continuing to use this website, you agree to their use.

To find out more, including how to control cookies, see here: Cookie Policy
  • Privacy Policy
  • Refund Policy
  • Contact Us
  • About

Copyright © 2026 Patterns for Pirates

Copyright © 2026 · Genesis Framework · WordPress · Log in