Patterns for Pirates

P4P stylish, modern, wearable patterns

  • Home
  • Blog
    • Frequently Asked Questions
    • Pattern Releases
      • Free Patterns
    • P4P University
      • Fitting
      • Sewing with Stretch, Knit Fabrics
      • Sewing with Woven Fabrics
      • Sewing Machines
    • Sew-A-Longs
    • Fabric for Pirates
    • Pattern Hacks
    • Announcement
      • Blog Tours
      • Contest/Giveaway
  • Shop
  • Bundle Discounts
  • Flash Friday
  • Gift Cards
  • My Account
  • Cart

Cross My Heart Cami Hacks

March 14, 2017

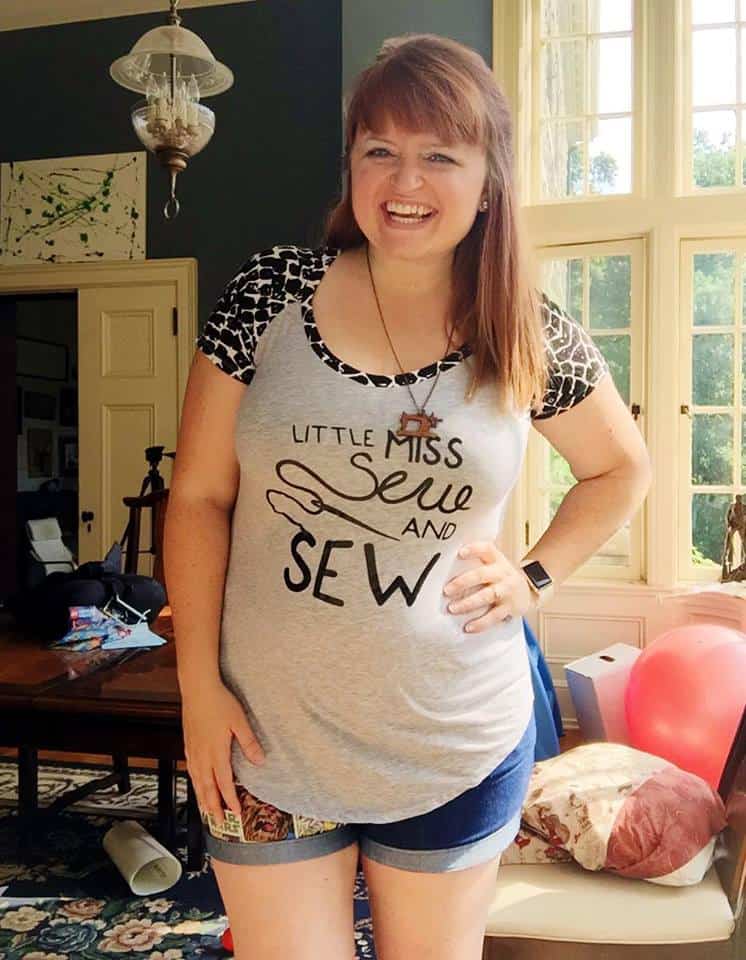
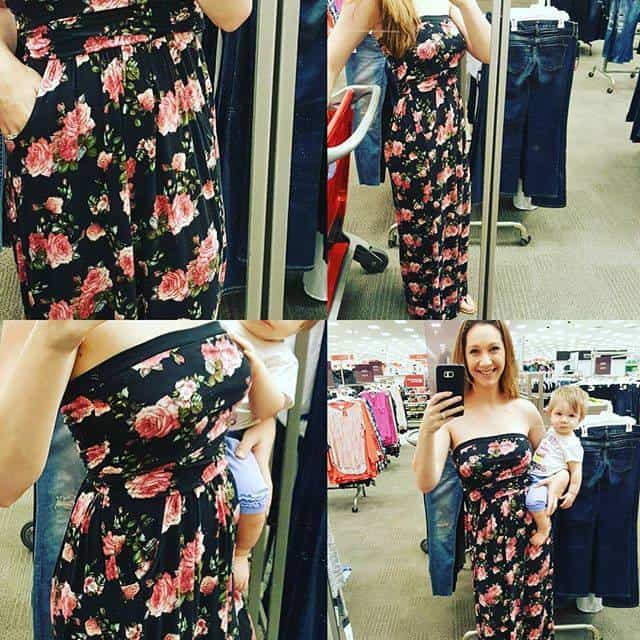
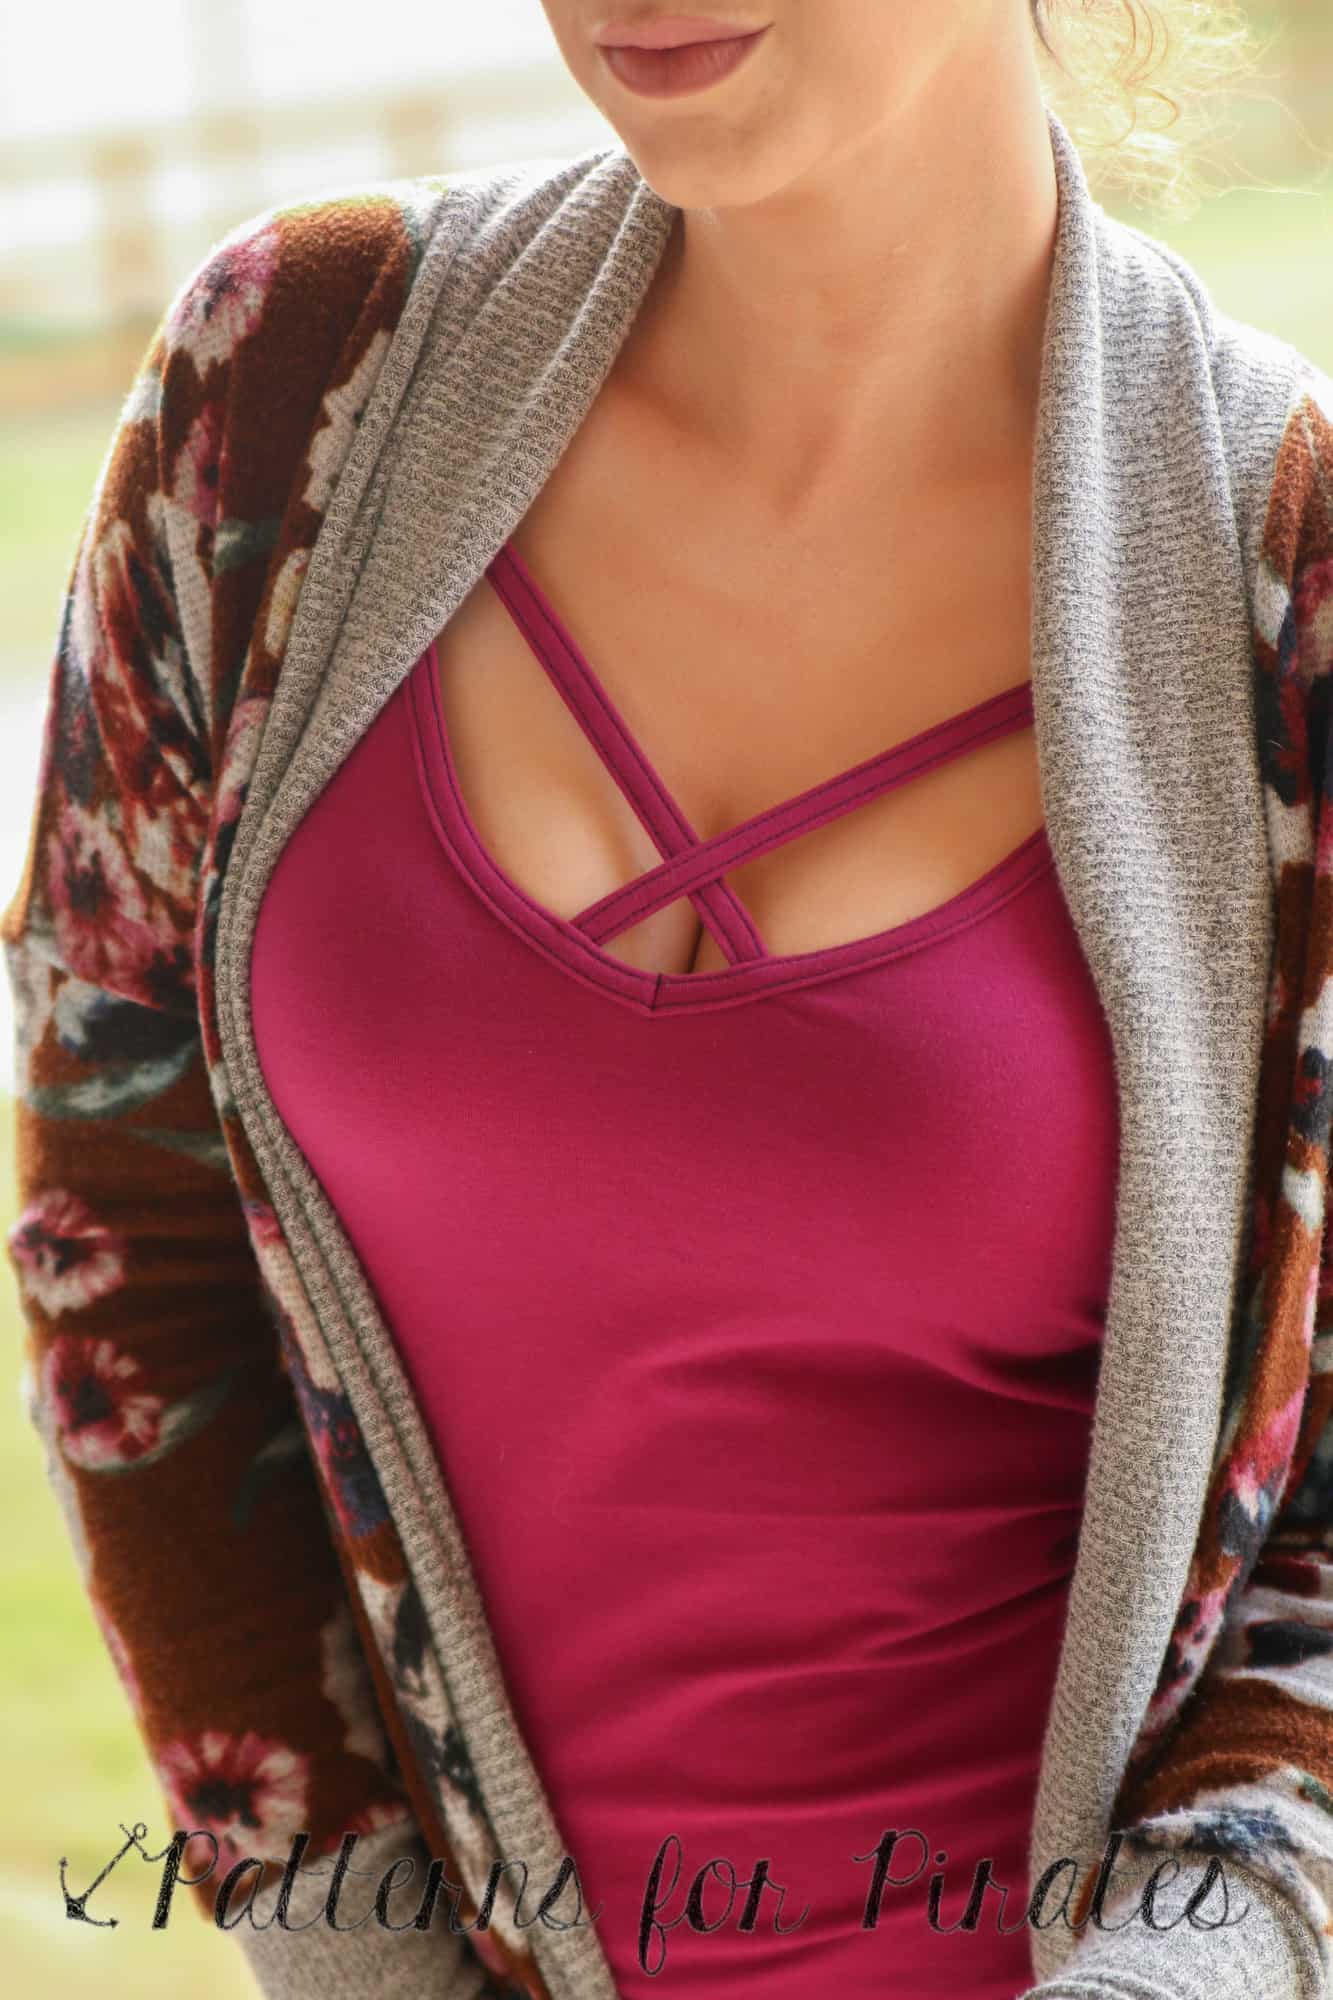
So you love the X option but you also love the T option of the Cross My Heart Cami and now you’re in a pickle…which one do I make? The answer is obvious, you make both! And if you’re anything like I am, you make both style in one cami! 🙂

IMG_6658

IMG_6671

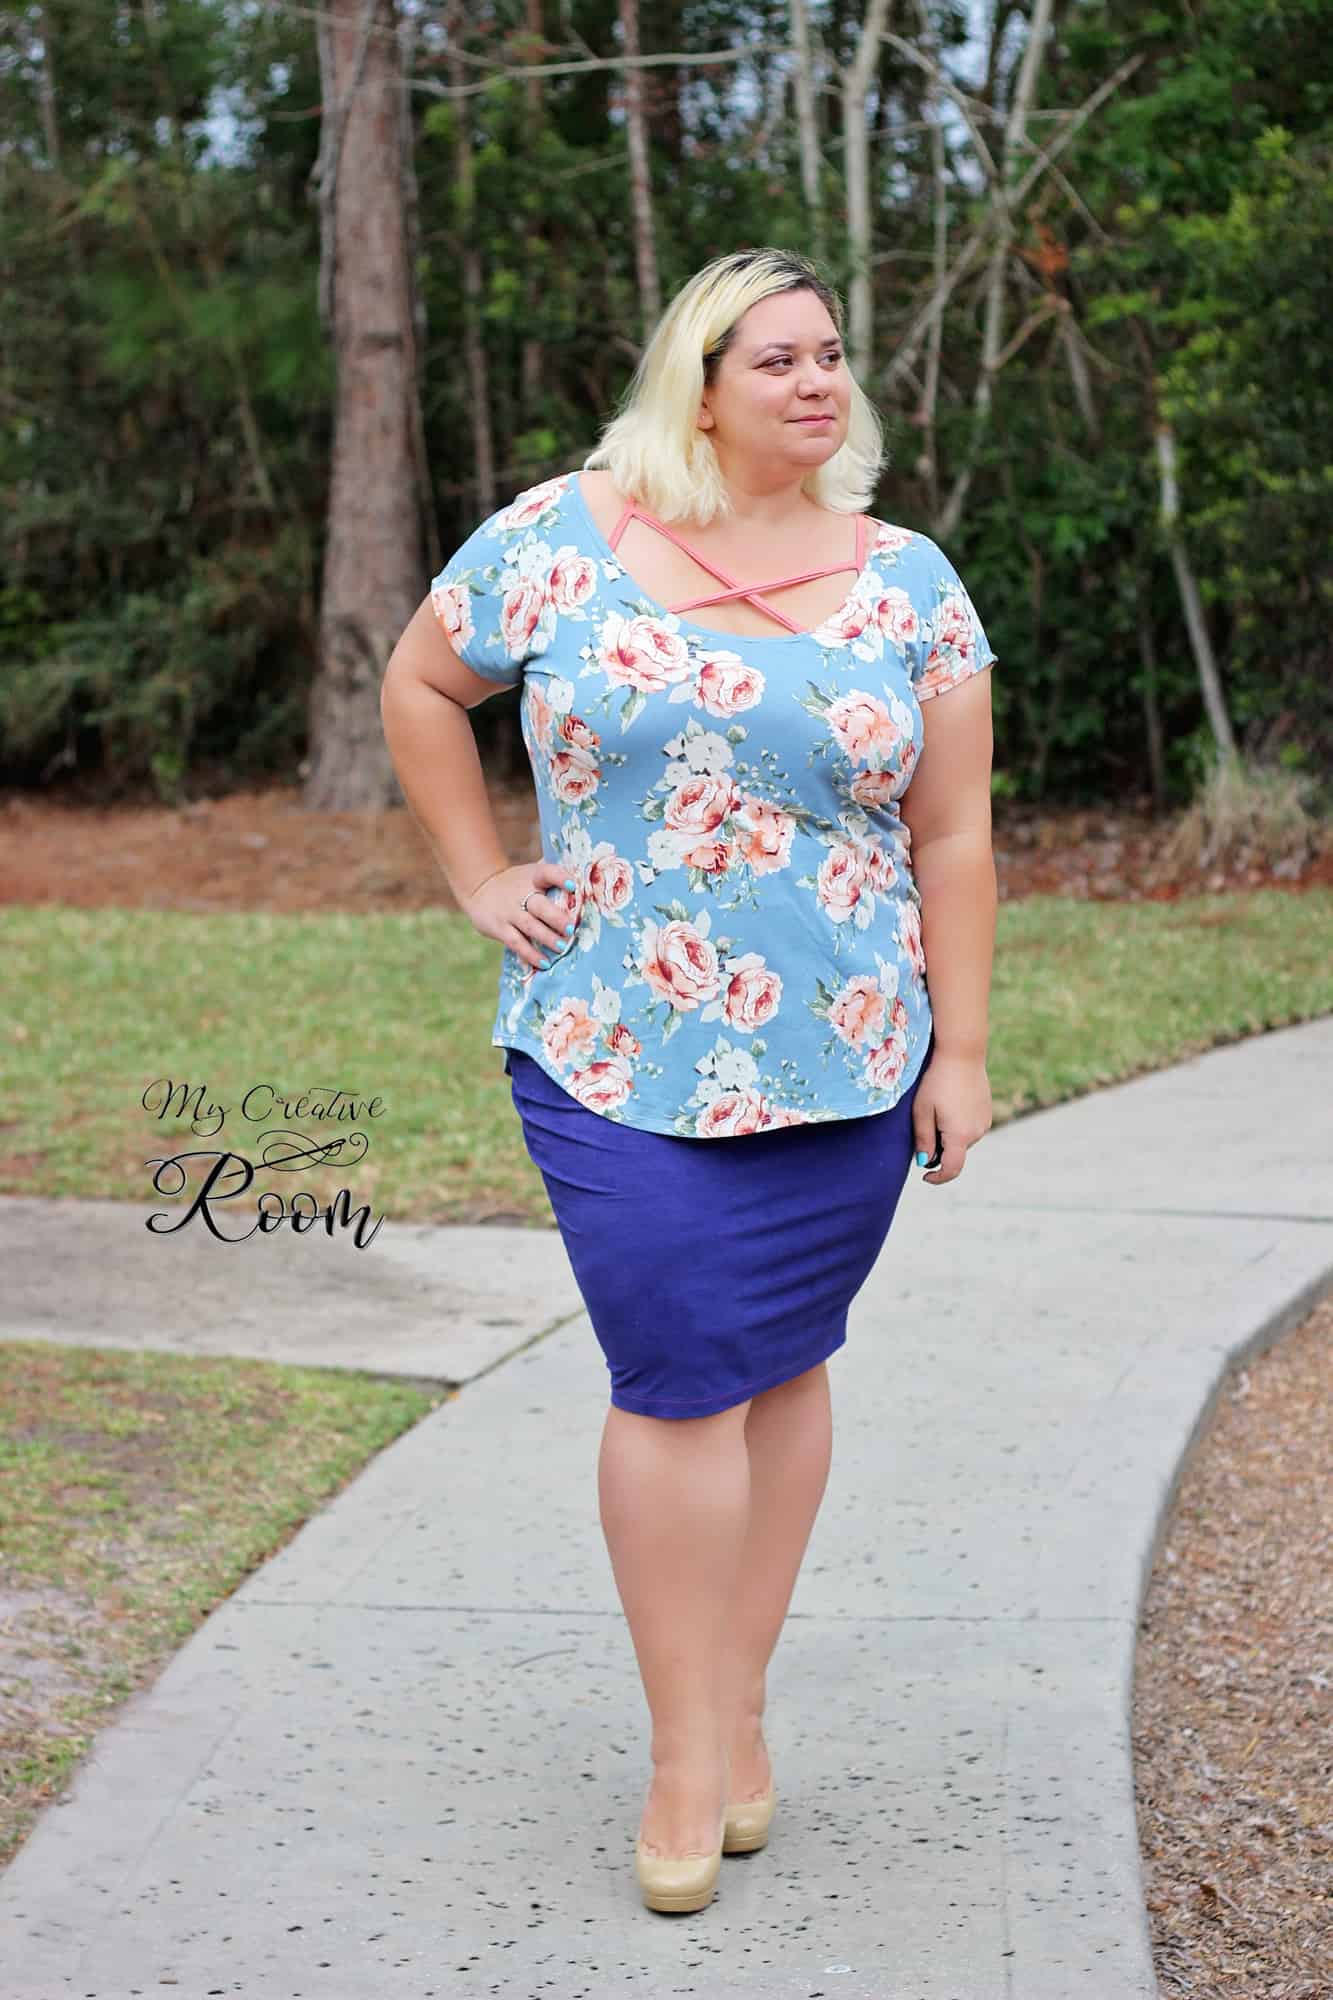
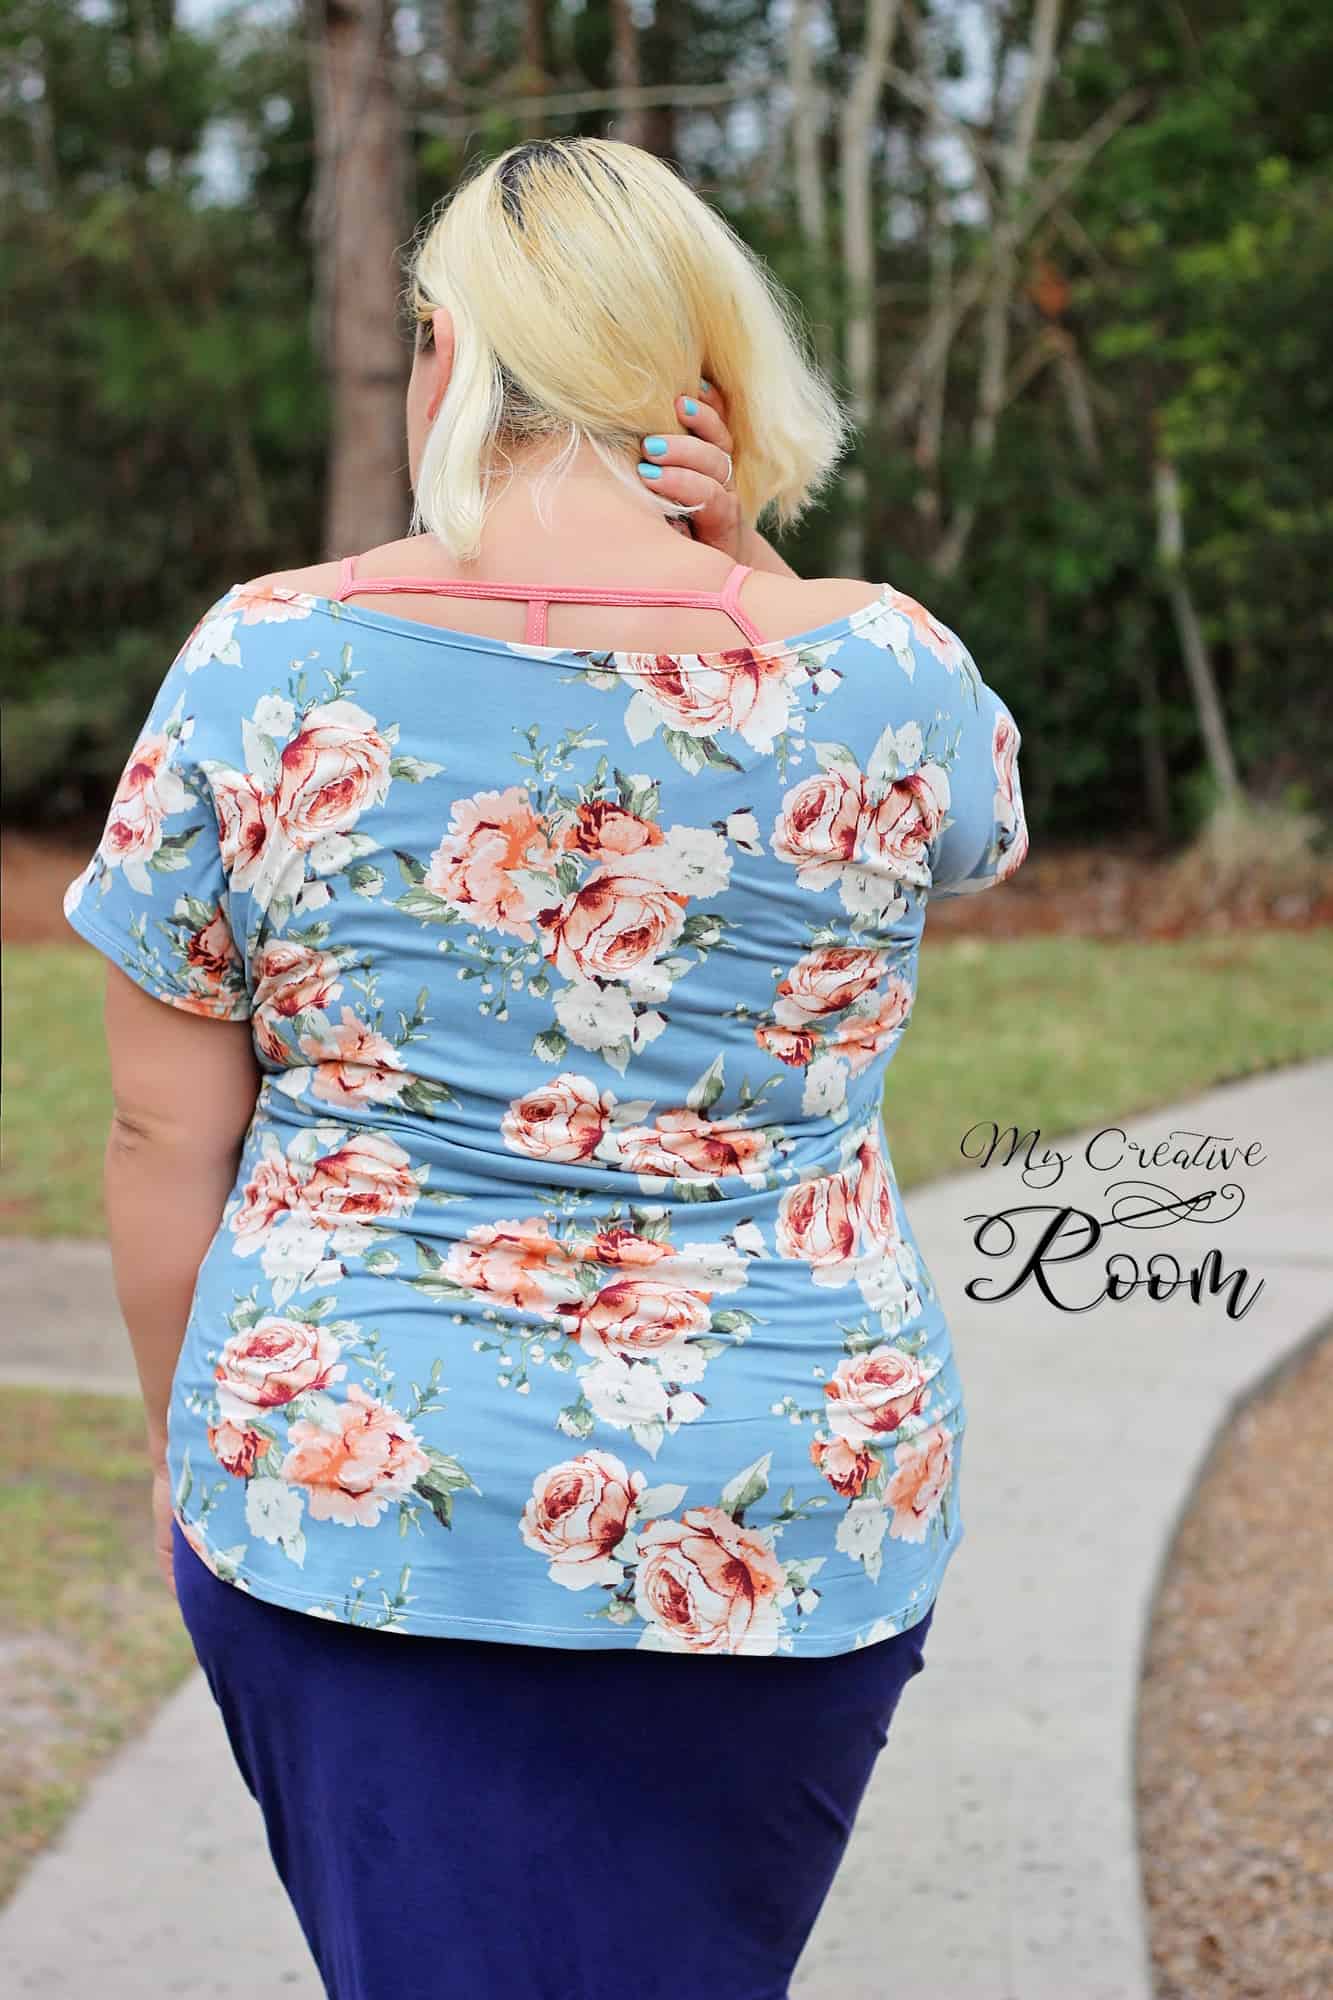
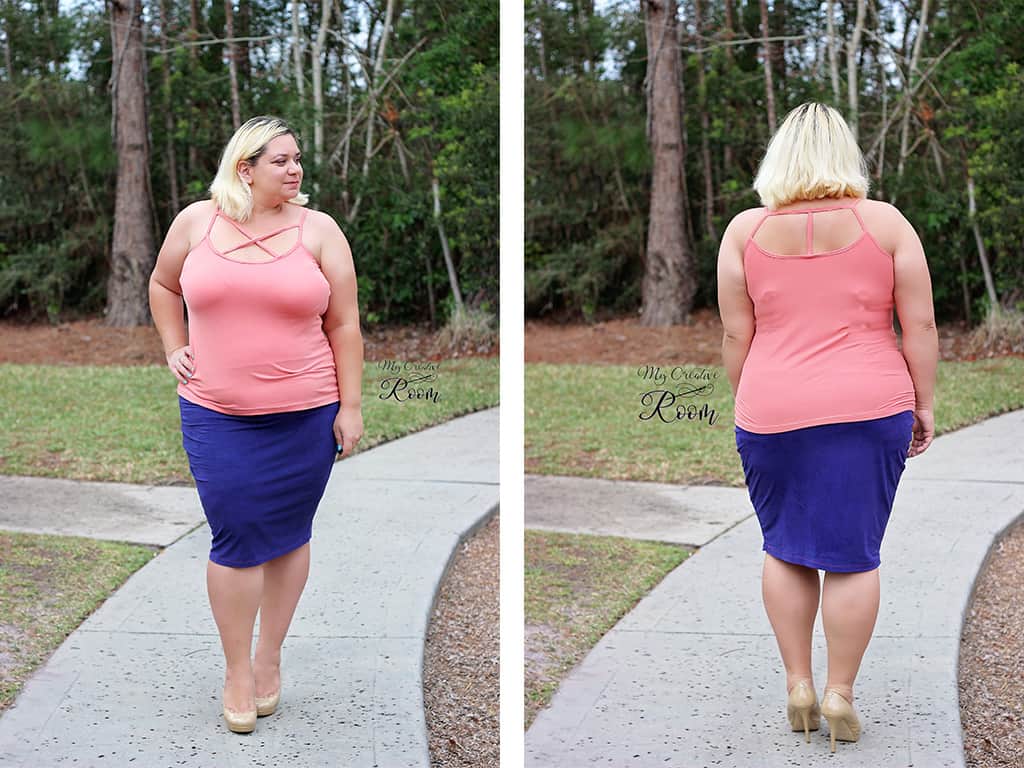
The beauty of the CMHC pattern is that you don’t even need to make any modifications to achieve this look. Simply cut two pieces of the front pattern and follow the directions for adding the T and the X details to the pieces. Finish the cami as per the tutorial and voila! You made yourself a brand new cami that can be worn both way. You can wear the X in the front and the T in the back like I did or you can wear the T in the front.

cami 2fronts

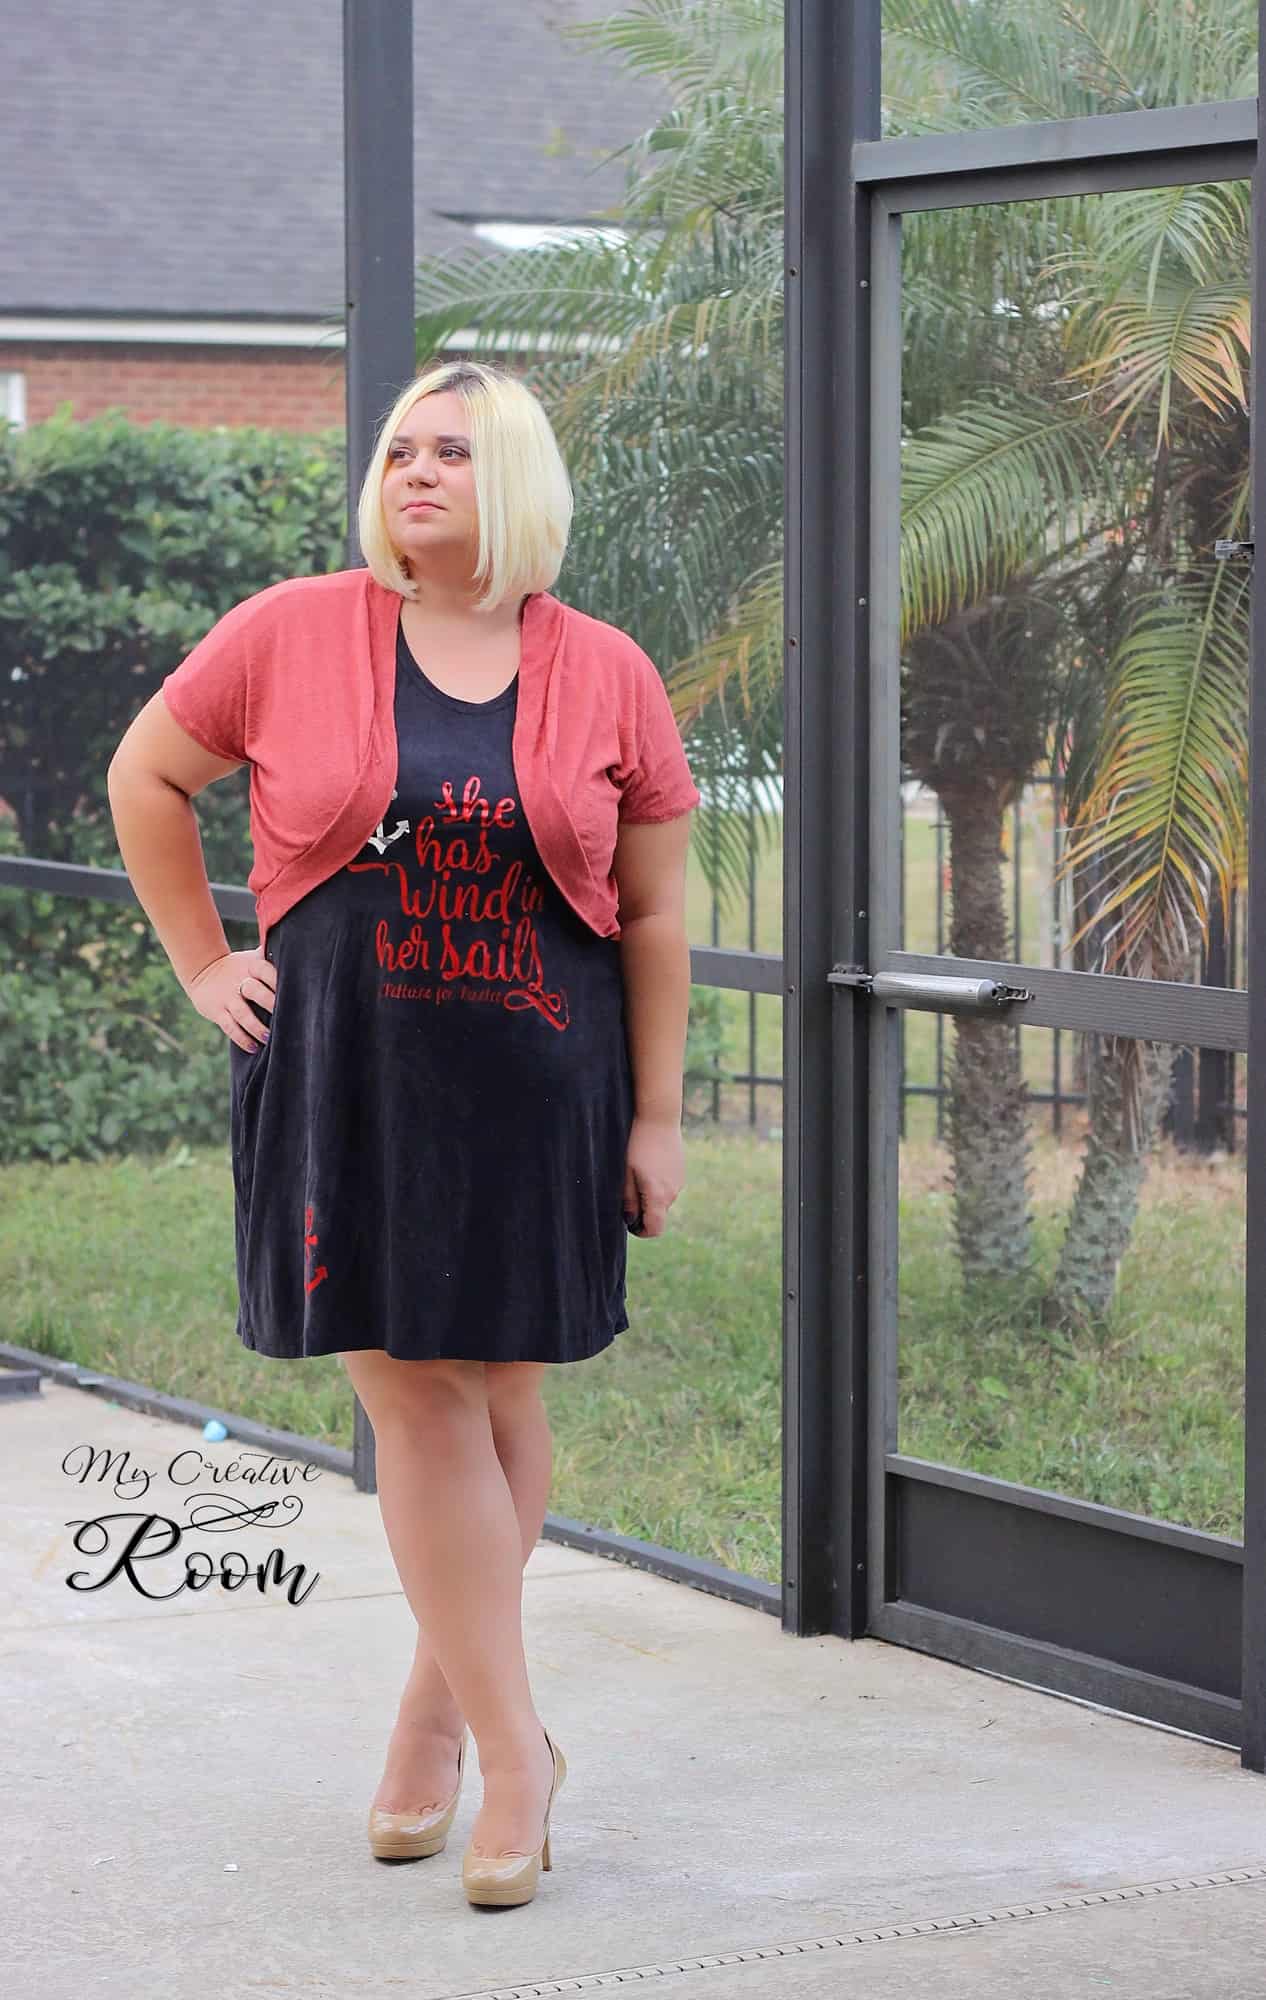
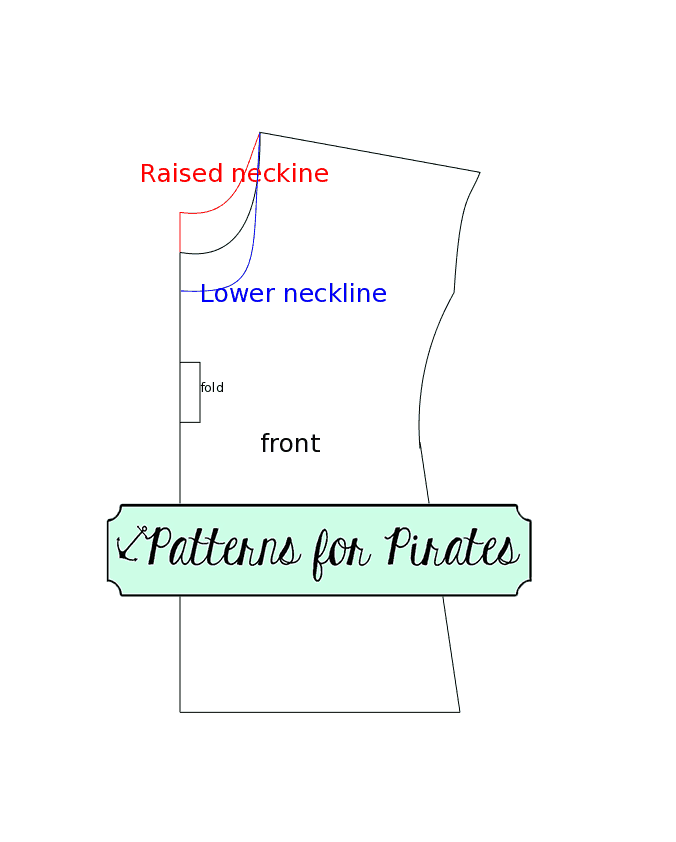
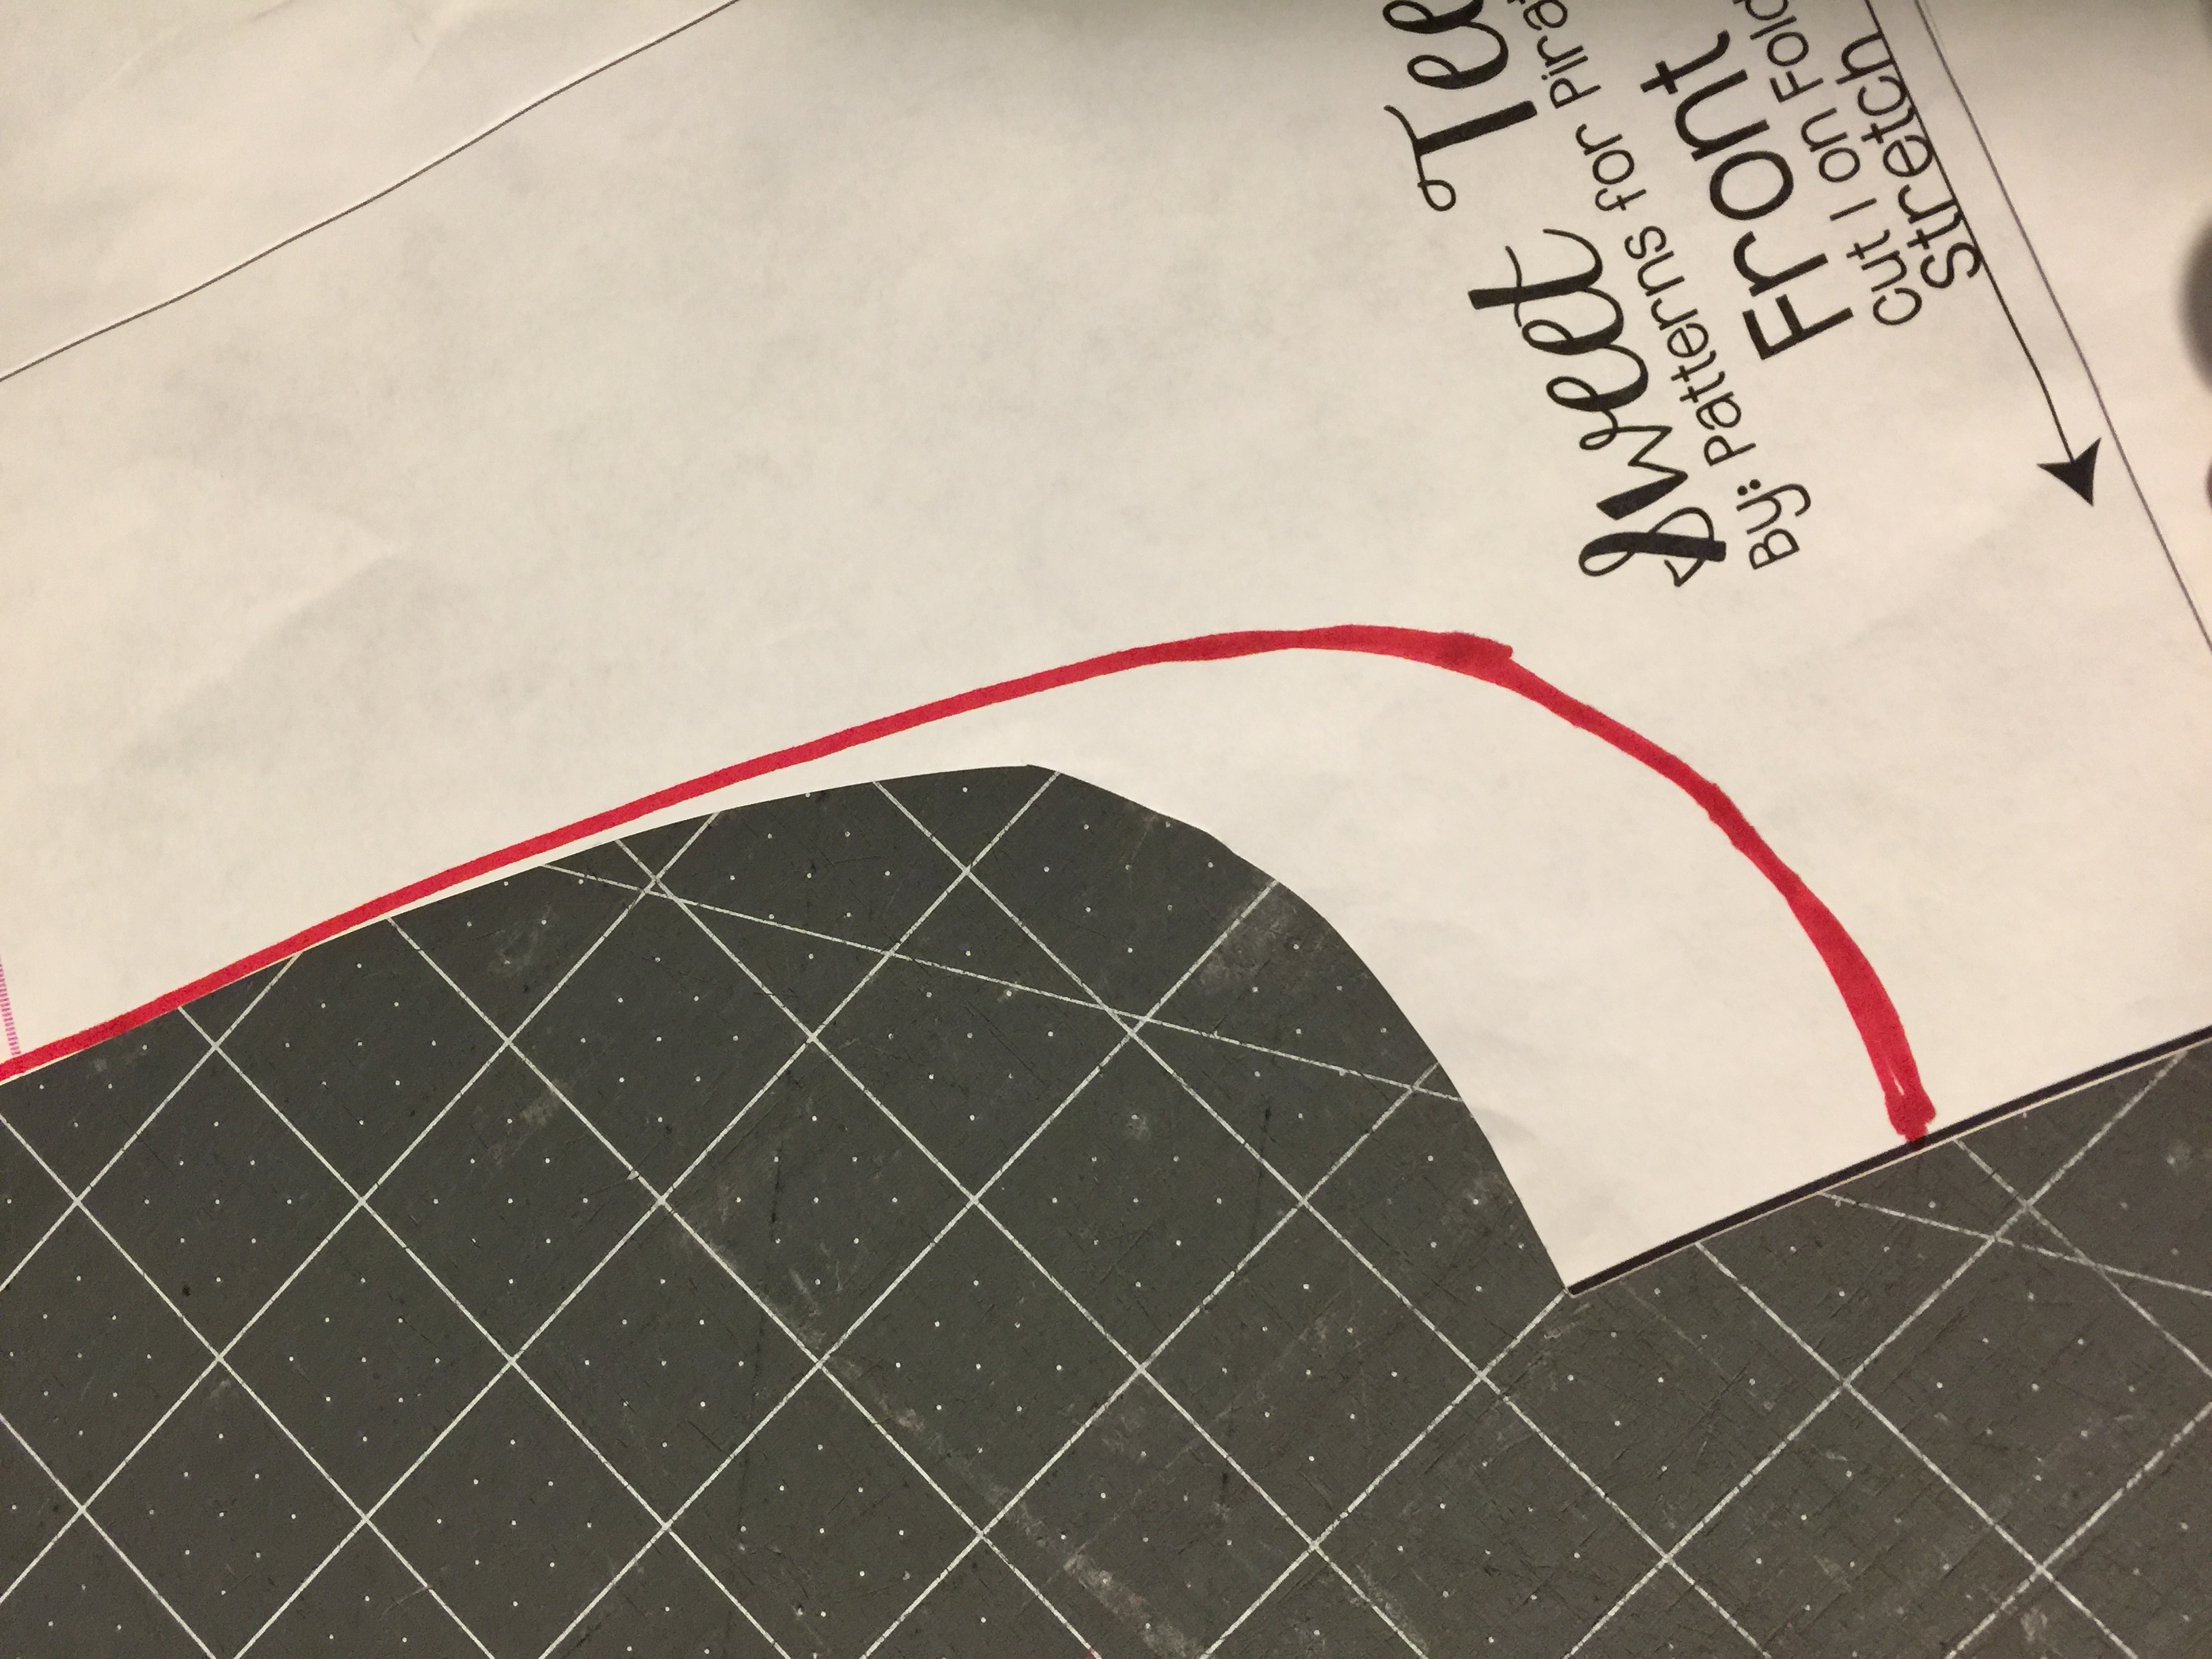
I paired this cami with a Pirate Pencil Skirt and a Sweet Tee with curved hem and an off the shoulder mod. Which styles will you be making first?

Judy made this one with two backs! Such a simple mode that can add so many more options to this pattern!

The V front and low x makes a sizzler! I mean, who doesn’t love to have that piece of clothing that you can pull out, slip on feel a little sexy every once in a while?

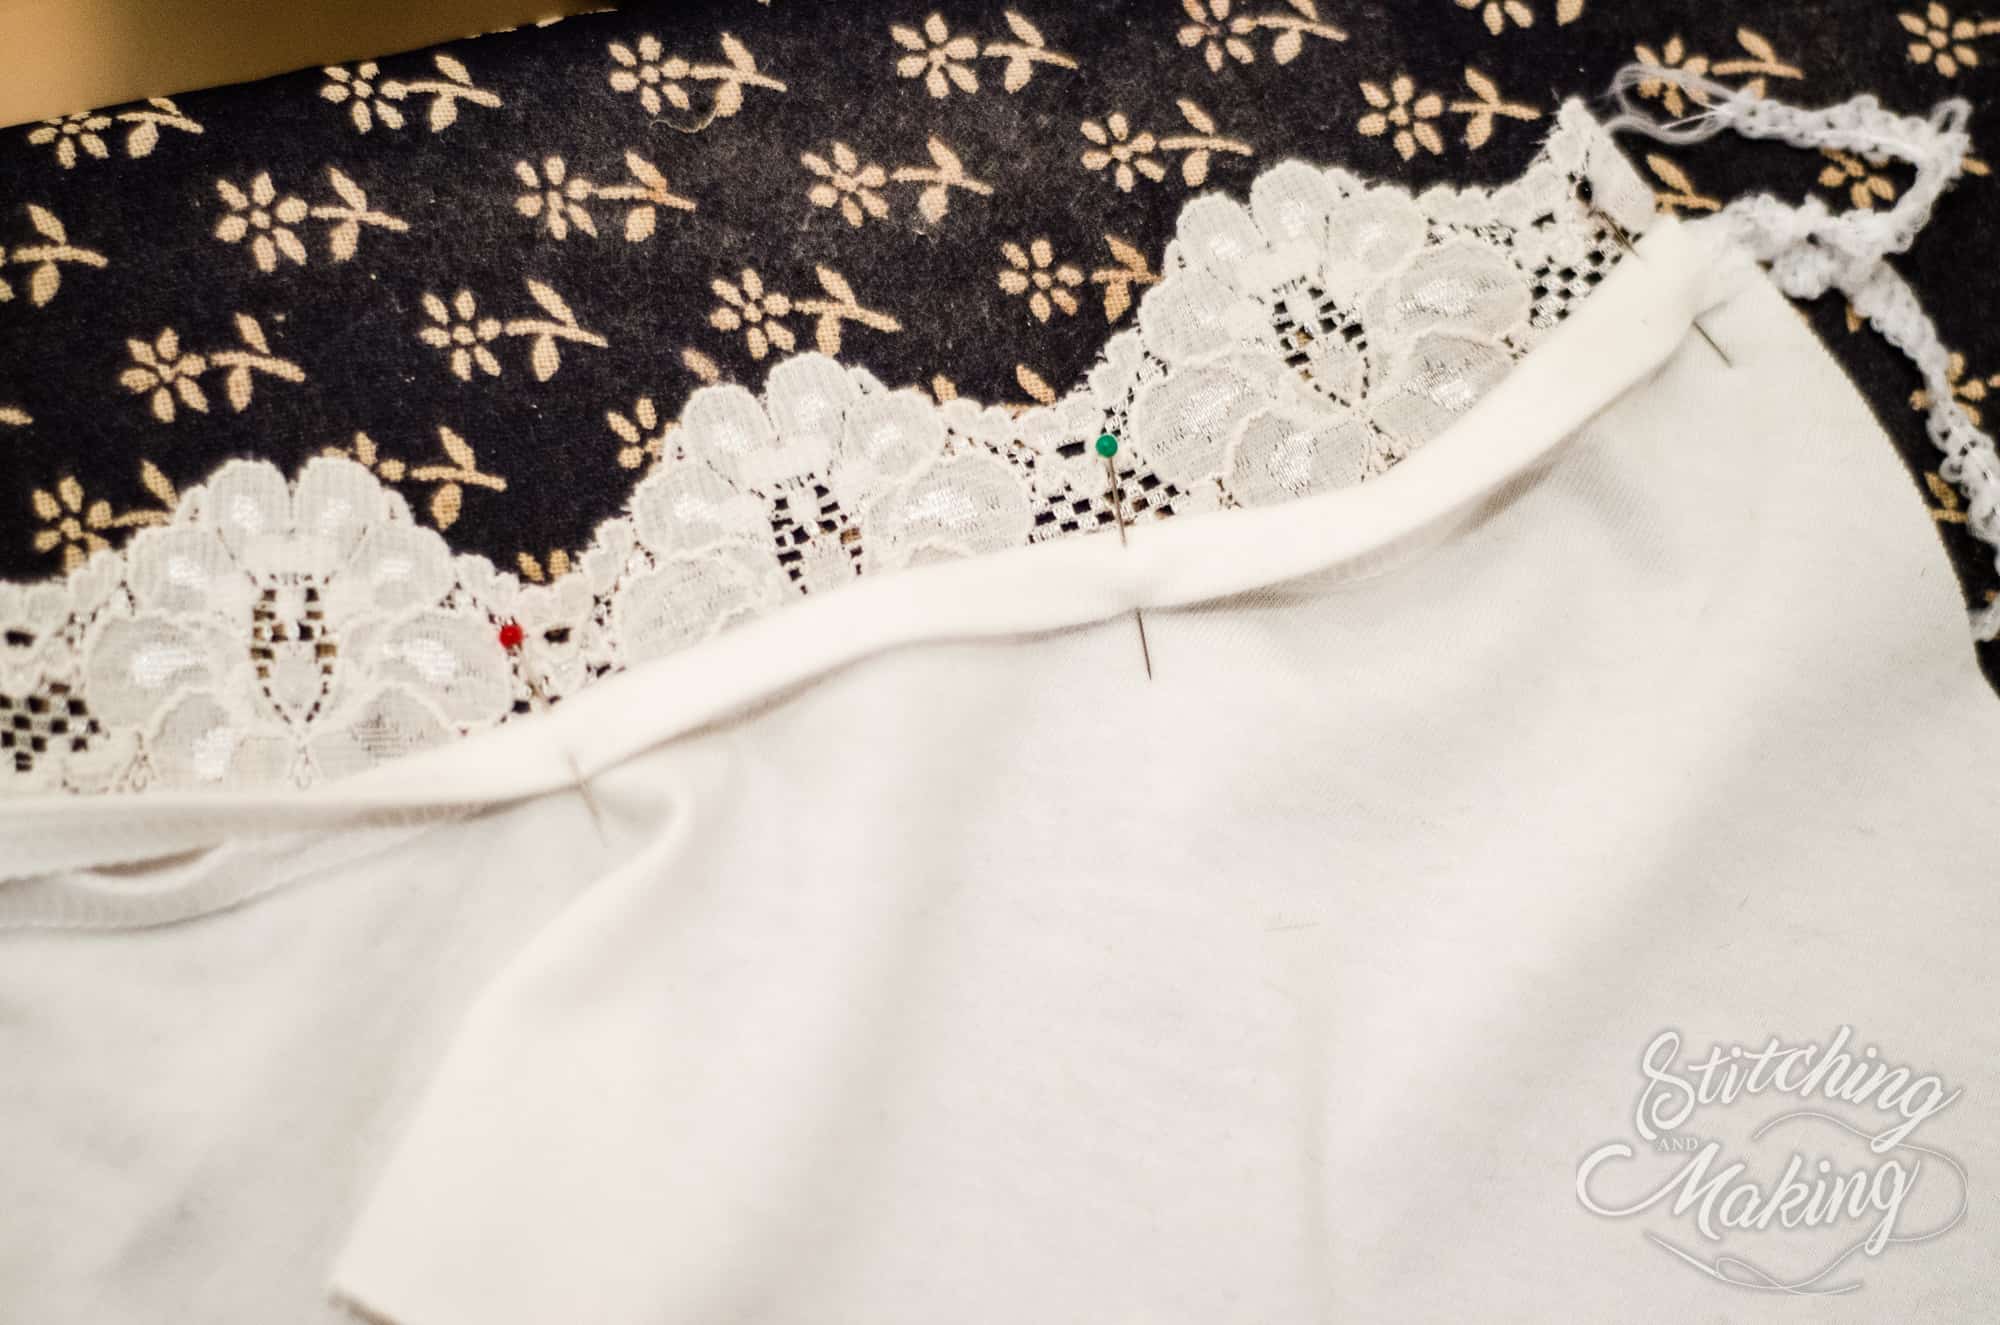
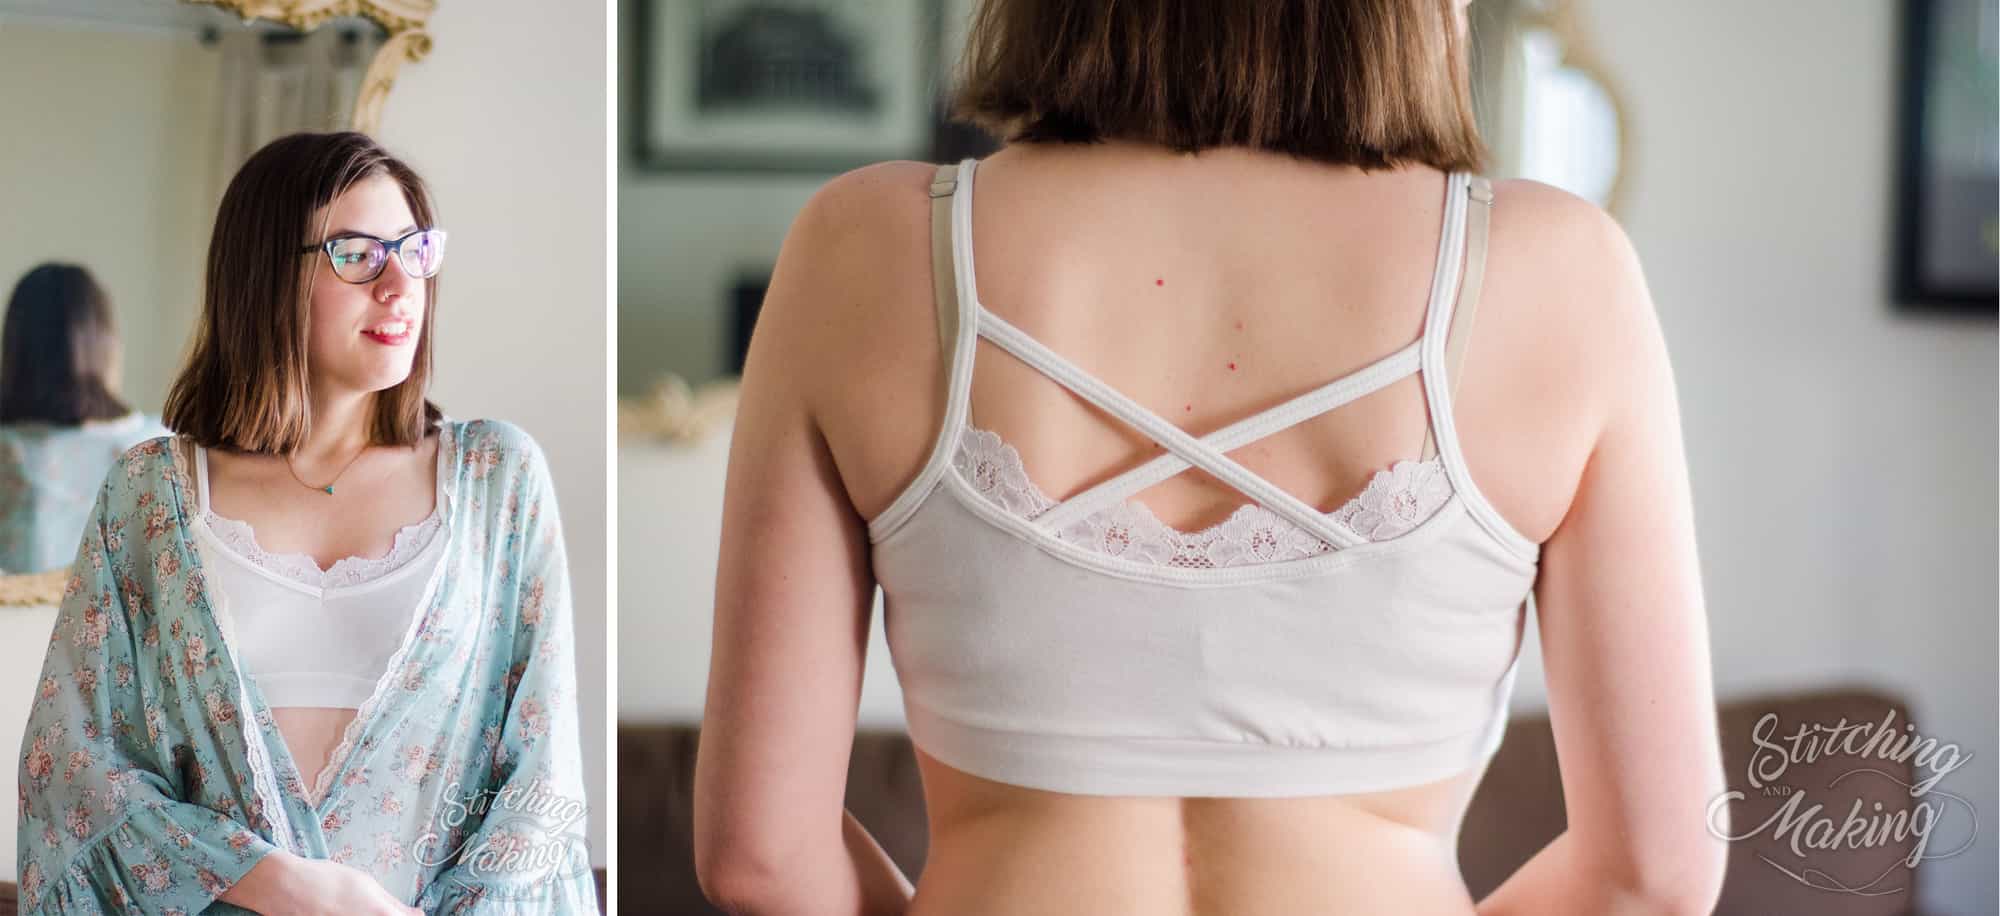
Are you looking for a more delicate, feminine feel?  Grab some stretch lace for an easy hack!

Here’s a simple how-to:

1. Cut the lace the same length as your binding pieces, for whichever neckline you are using.

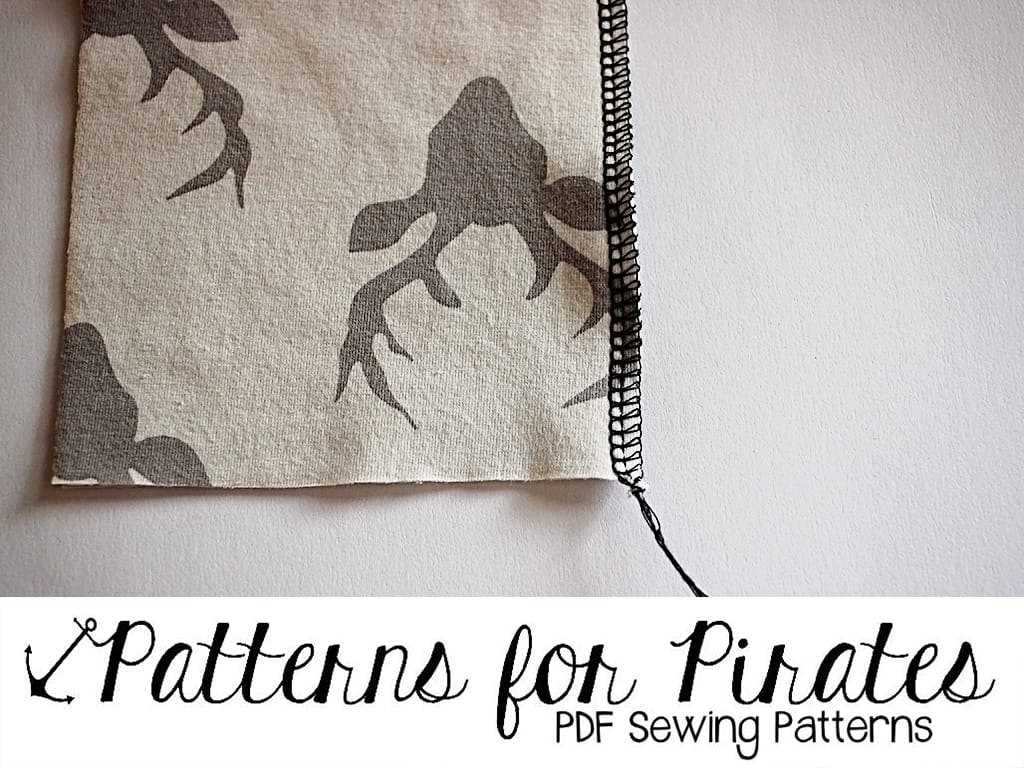
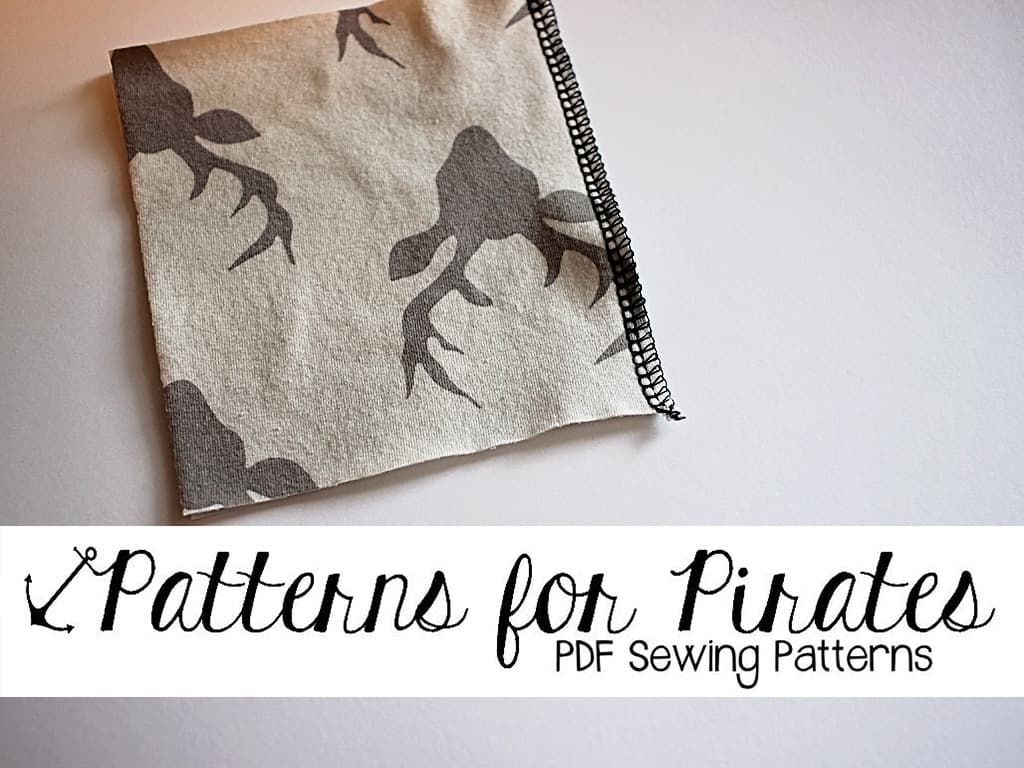
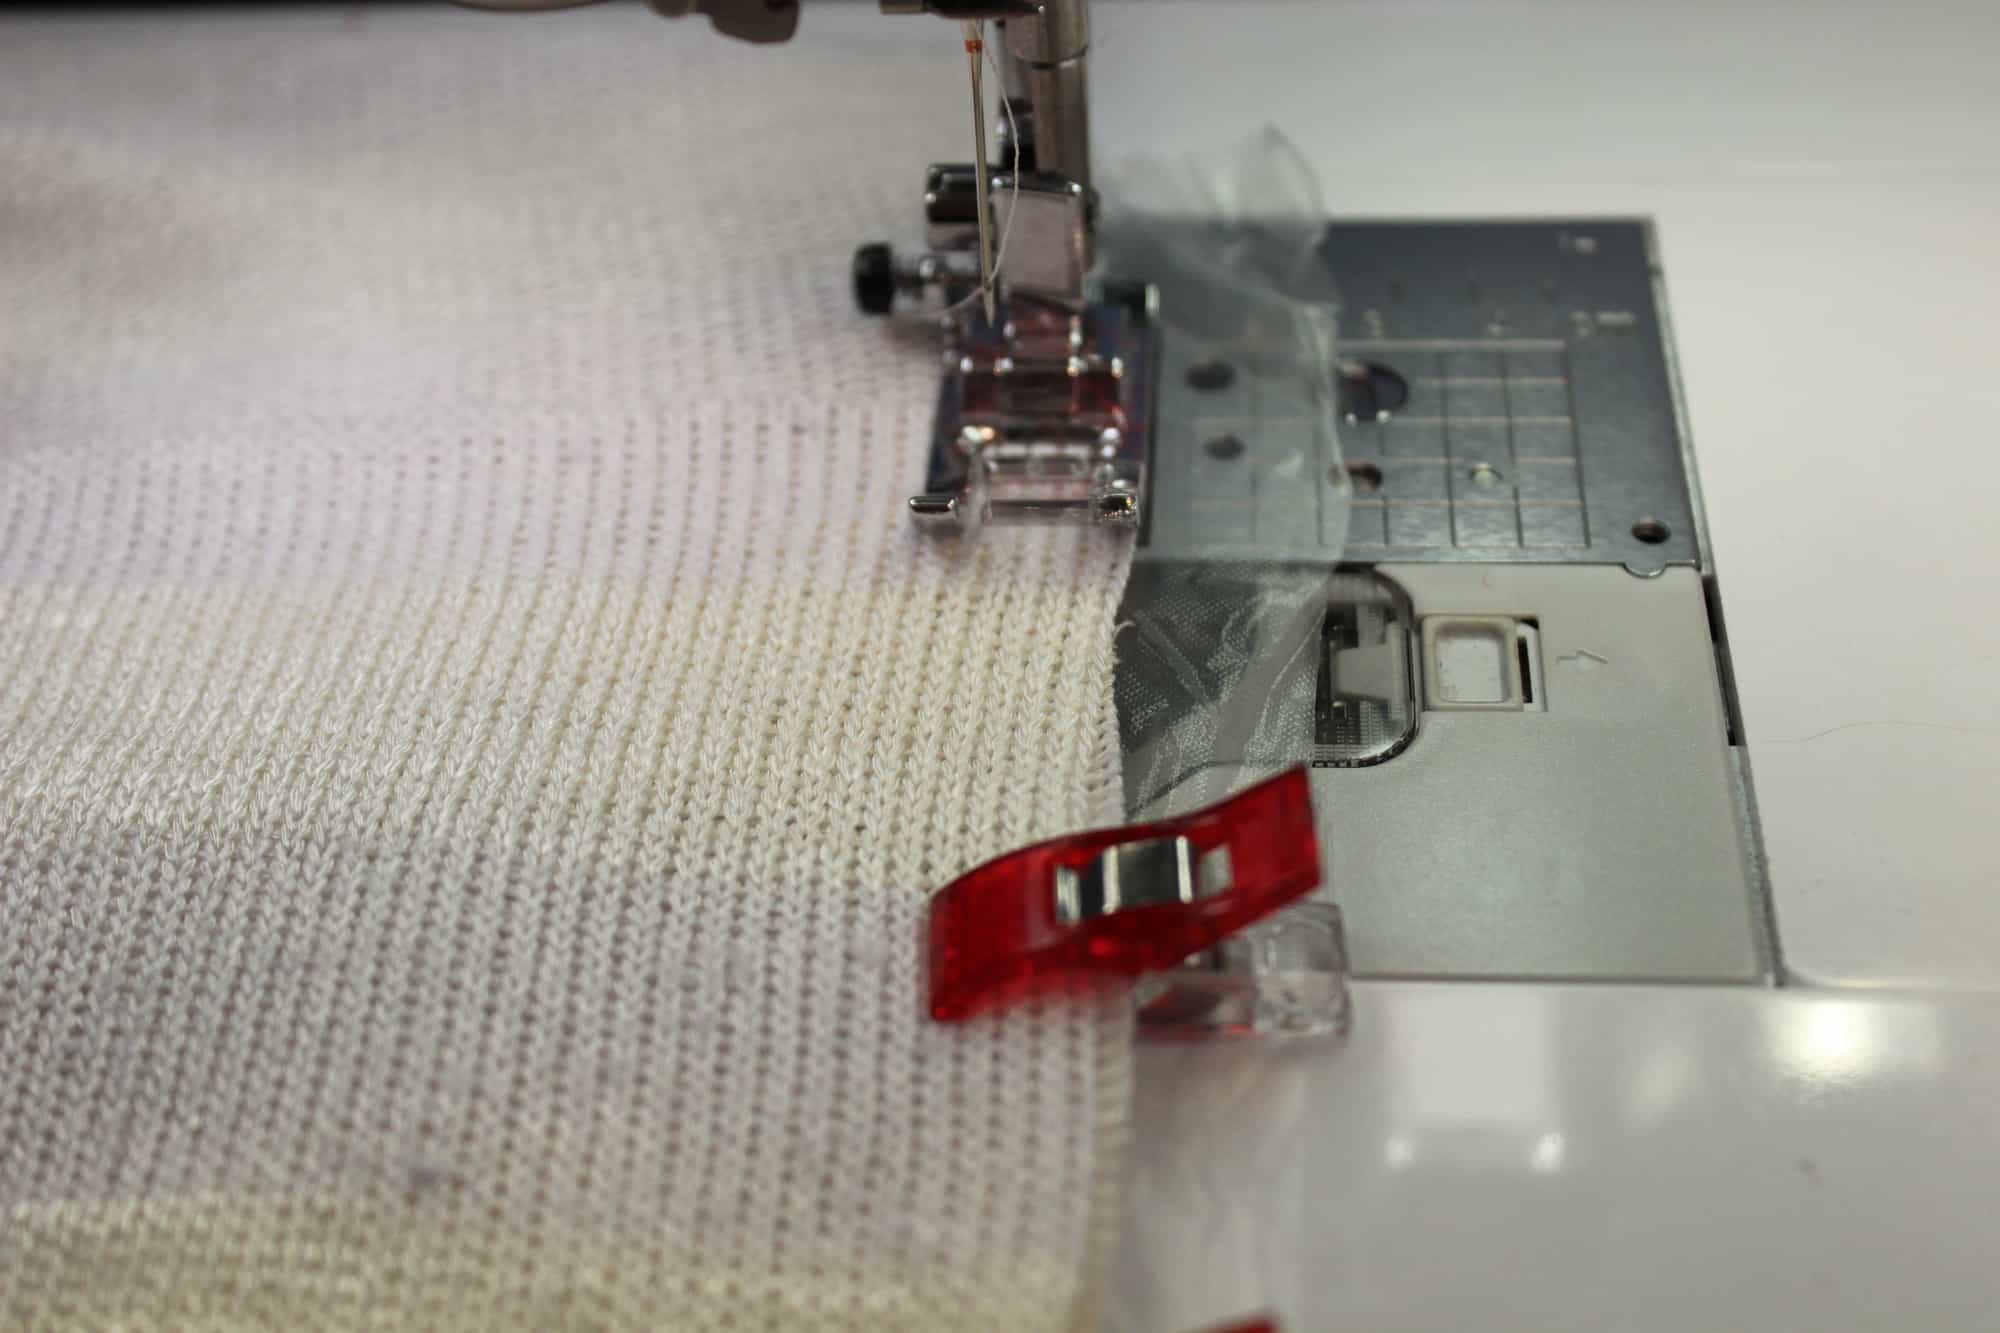
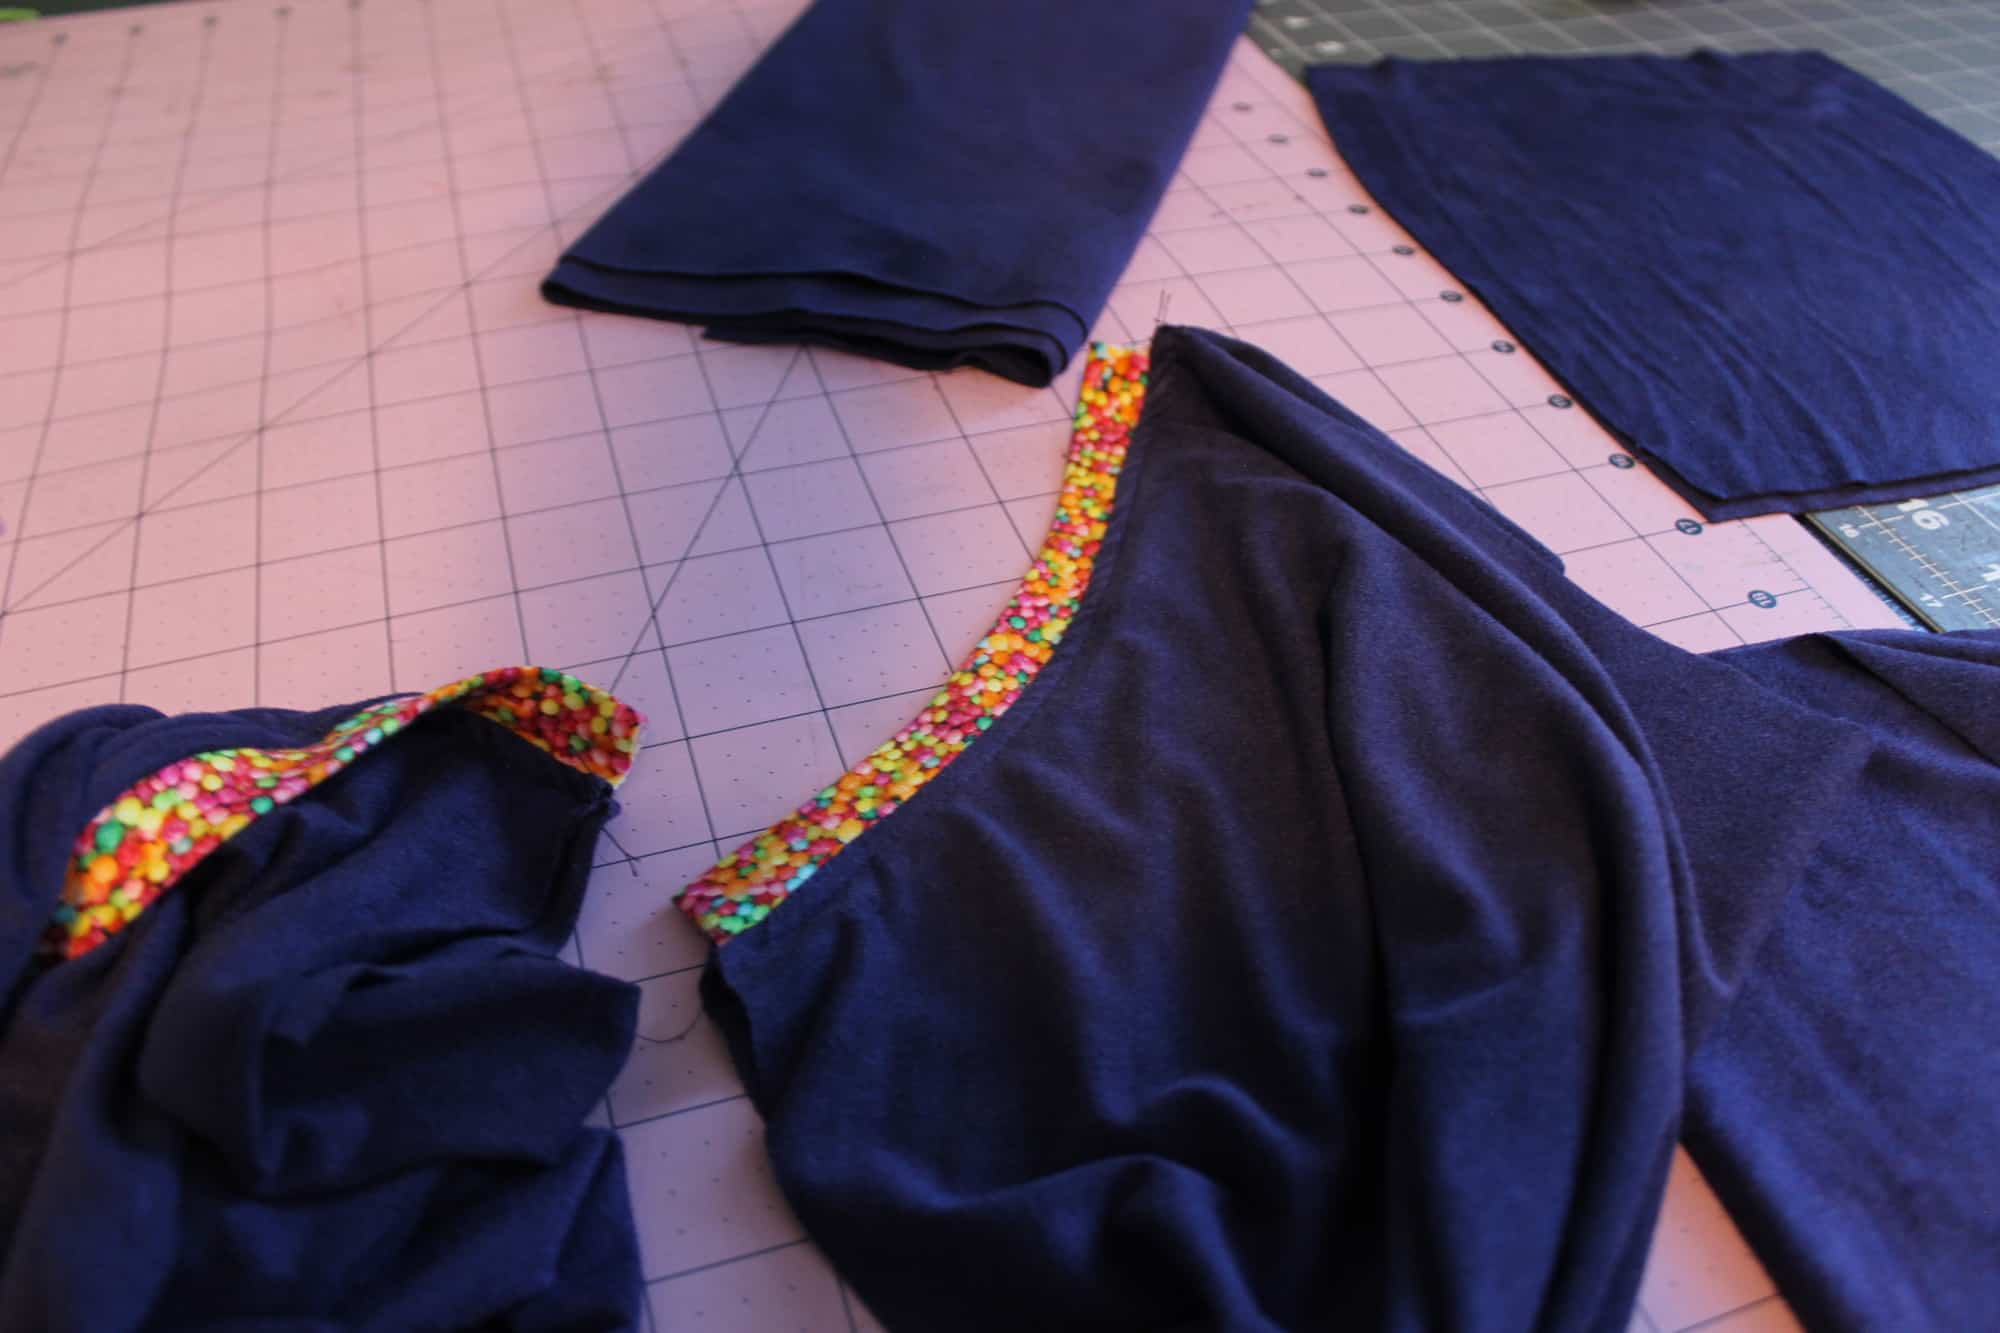
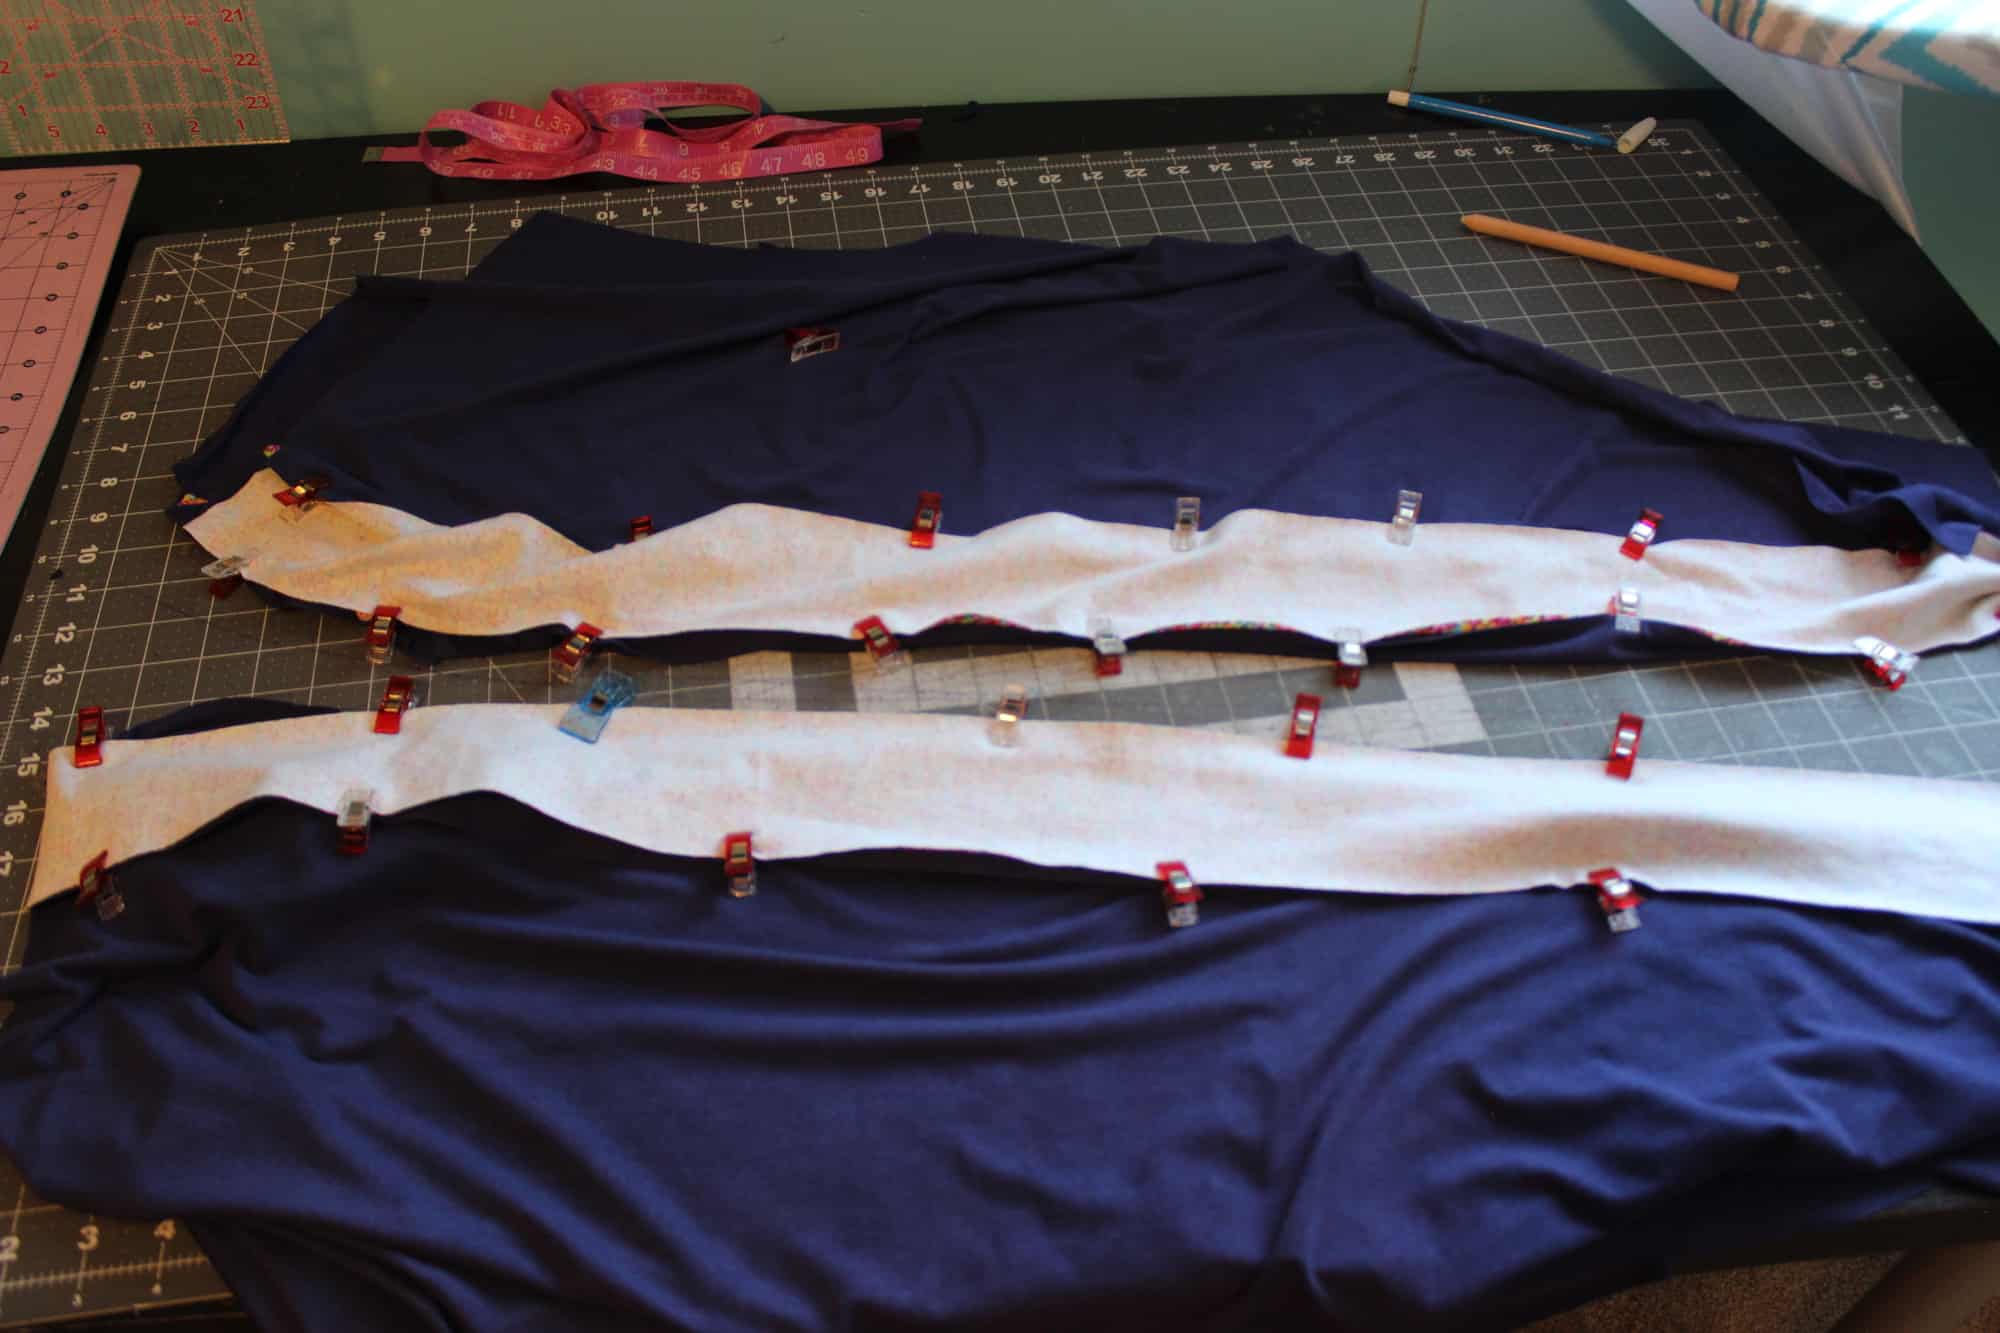
2. After you’ve attached and folded over the binding as directed in the tutorial, pin the right side of the lace to the wrong side of the neckline/binding. In the picture below, the fabric is right side up.


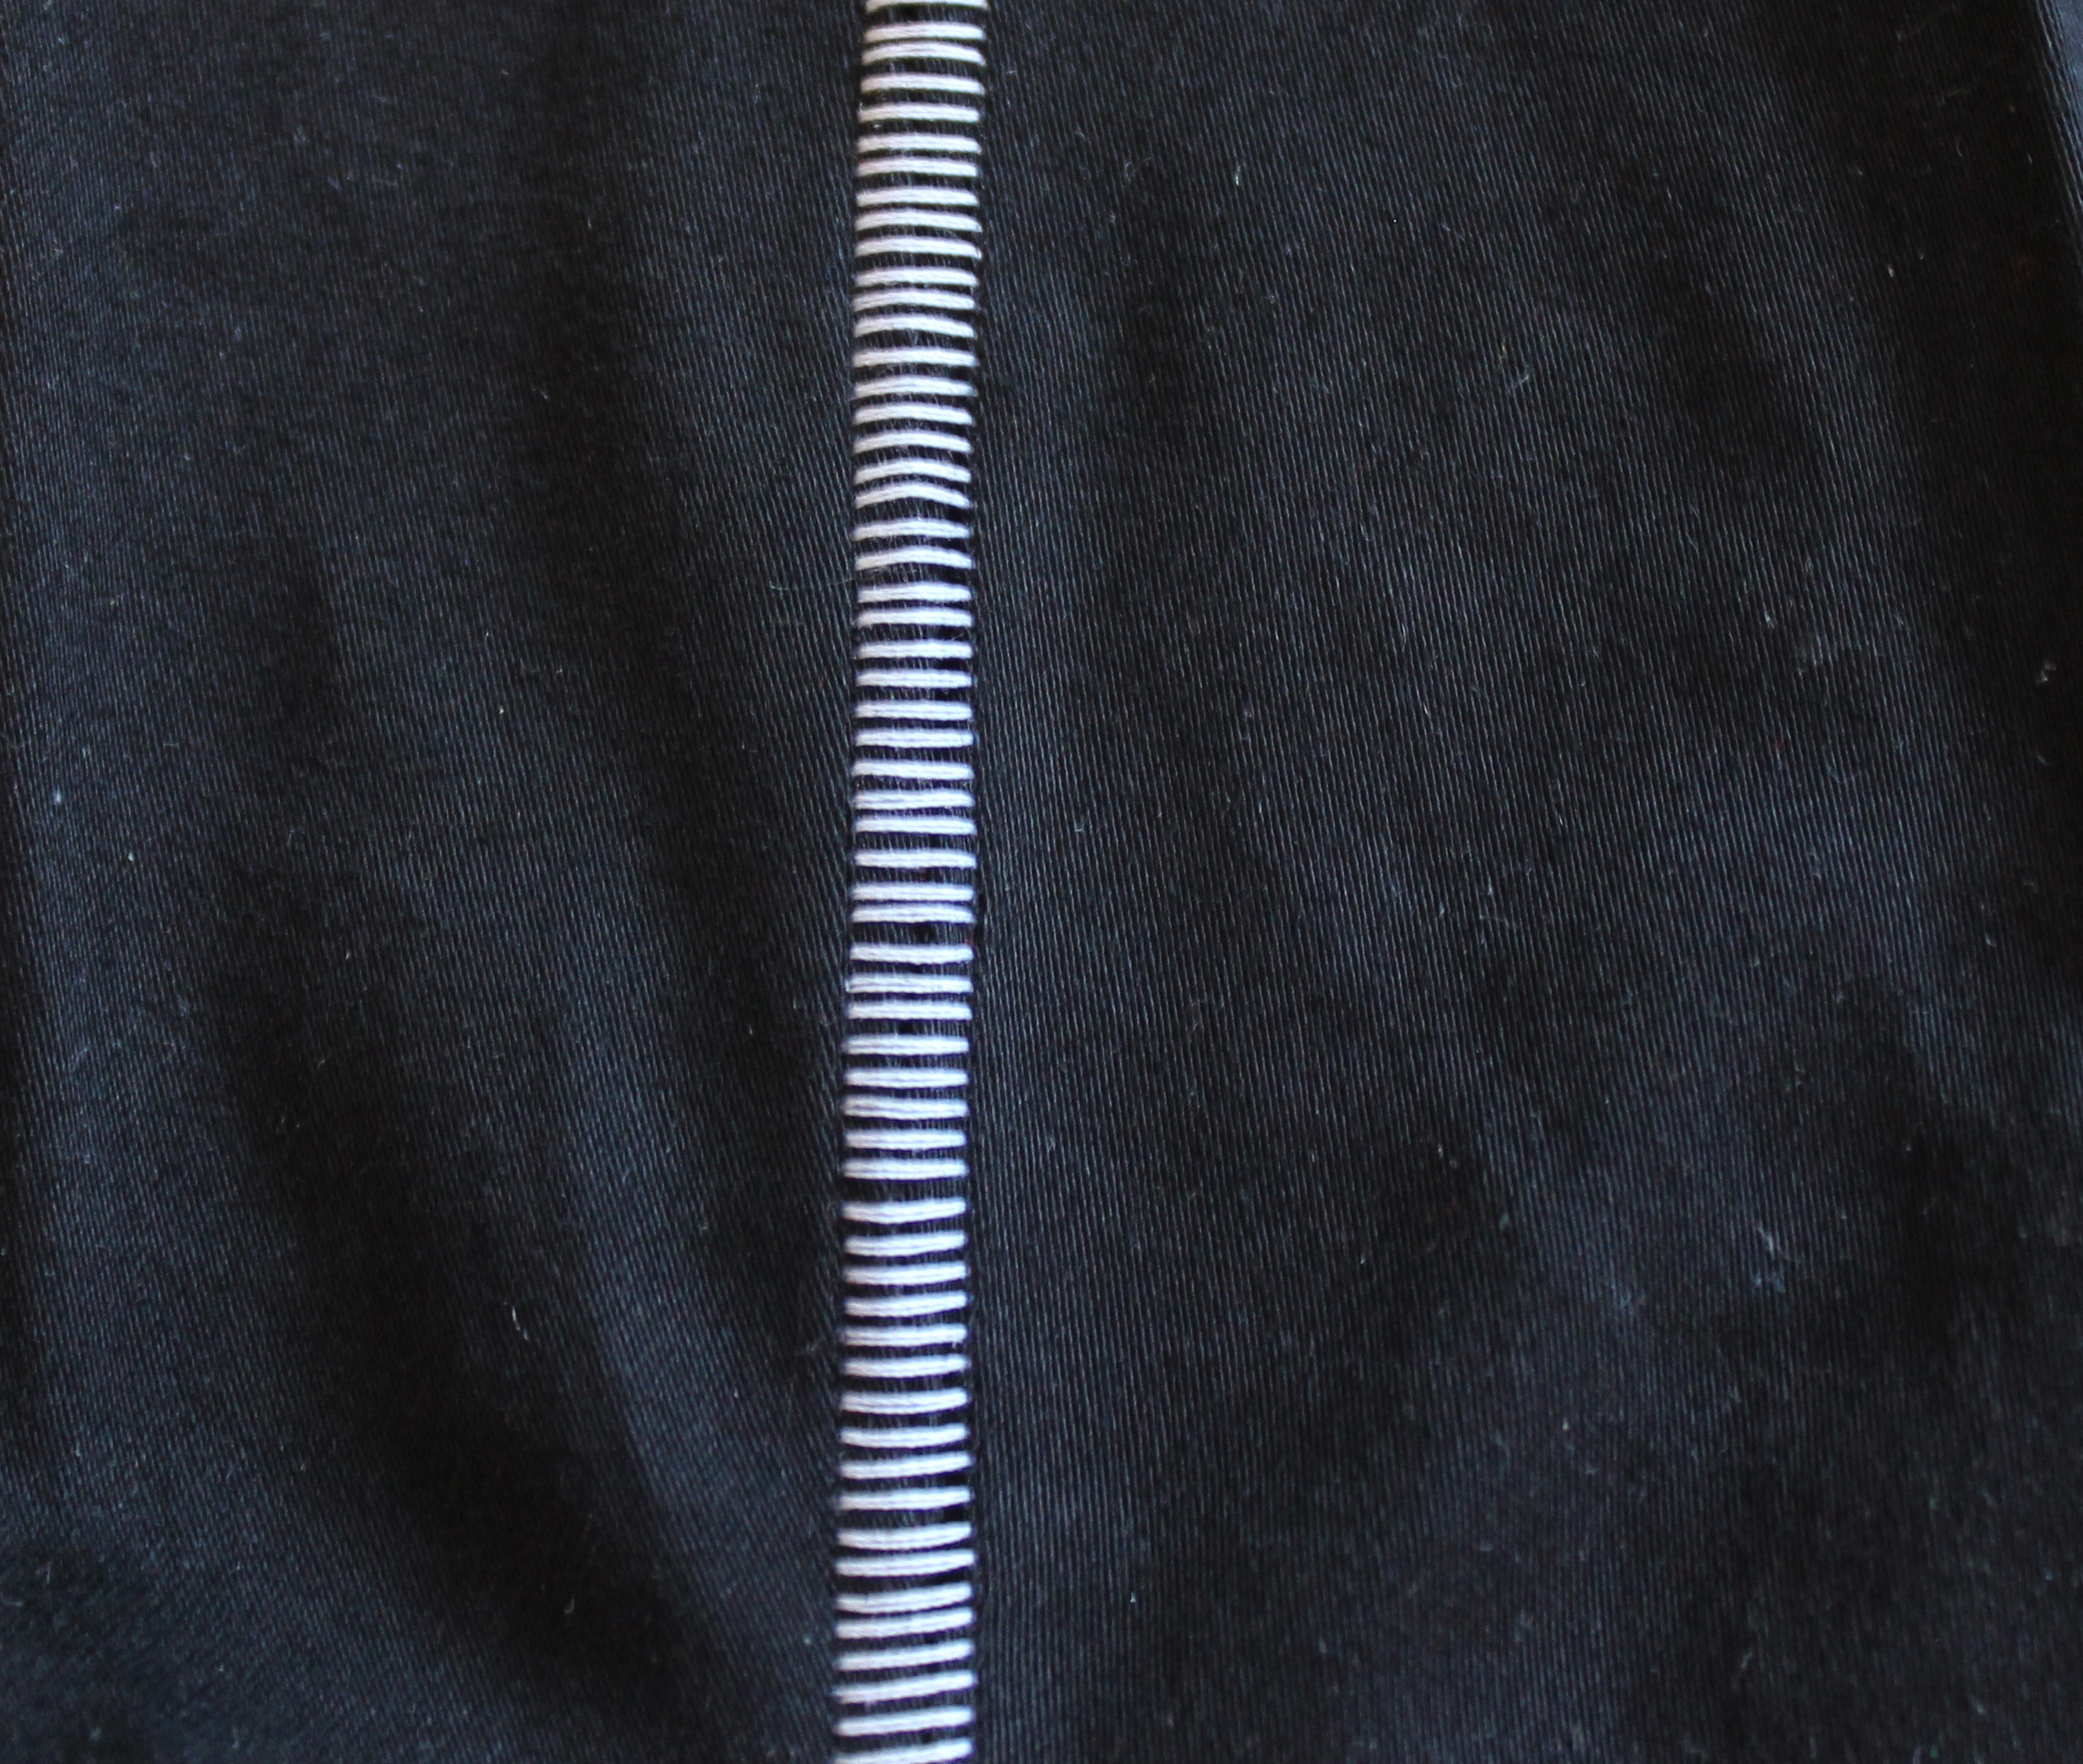
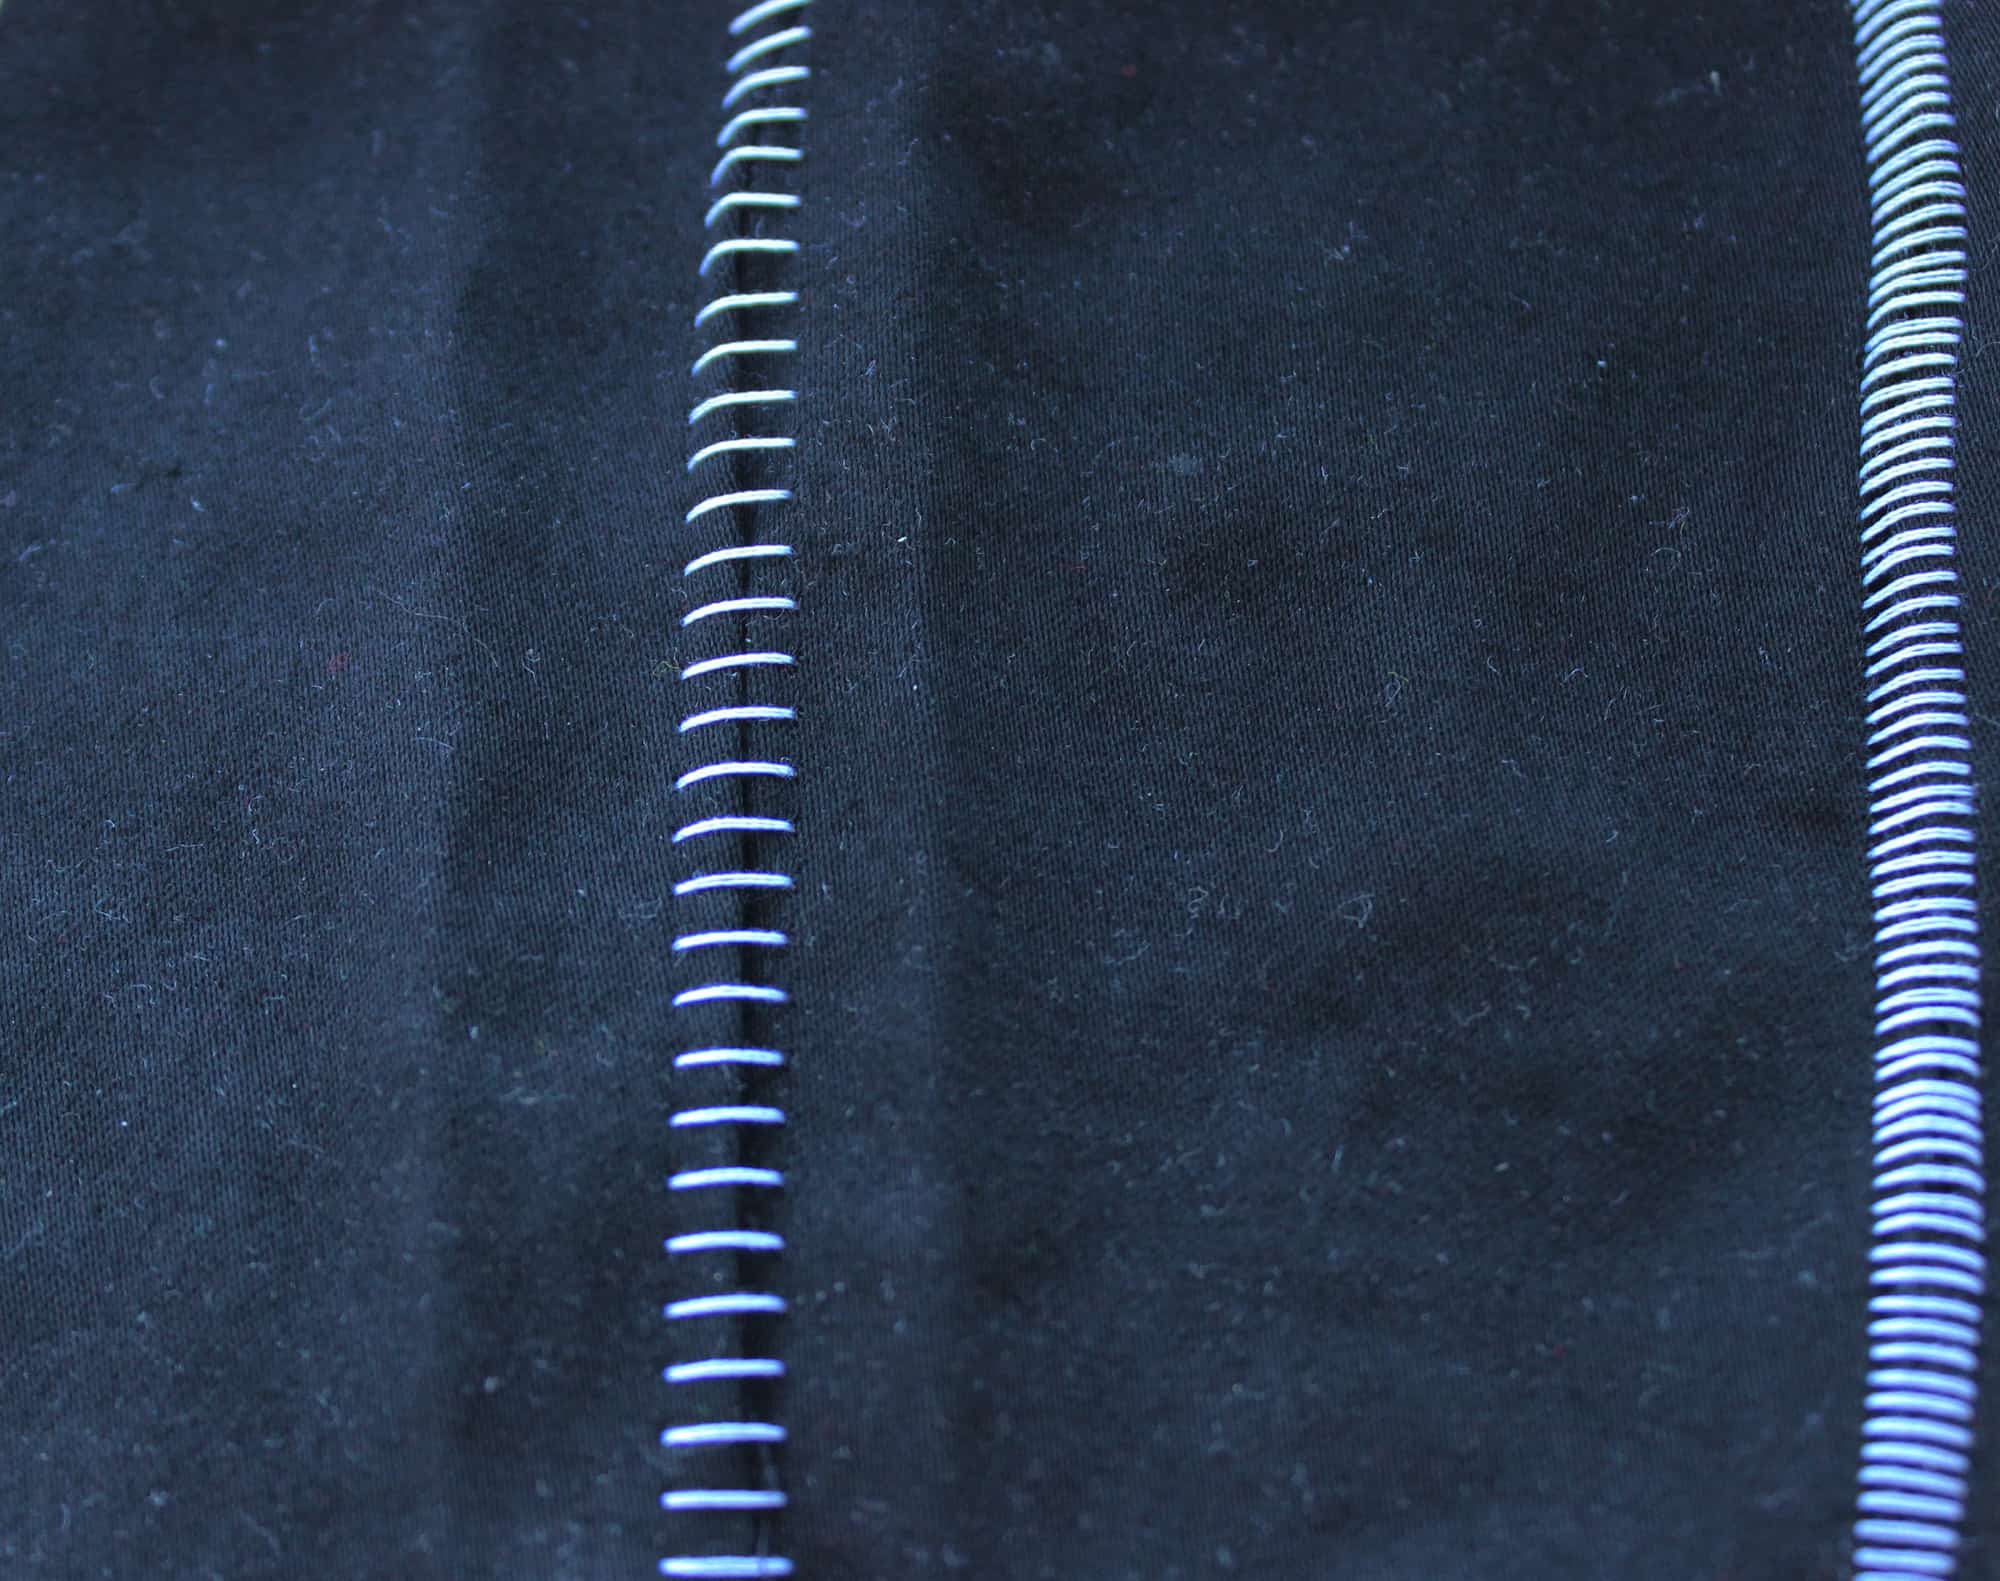
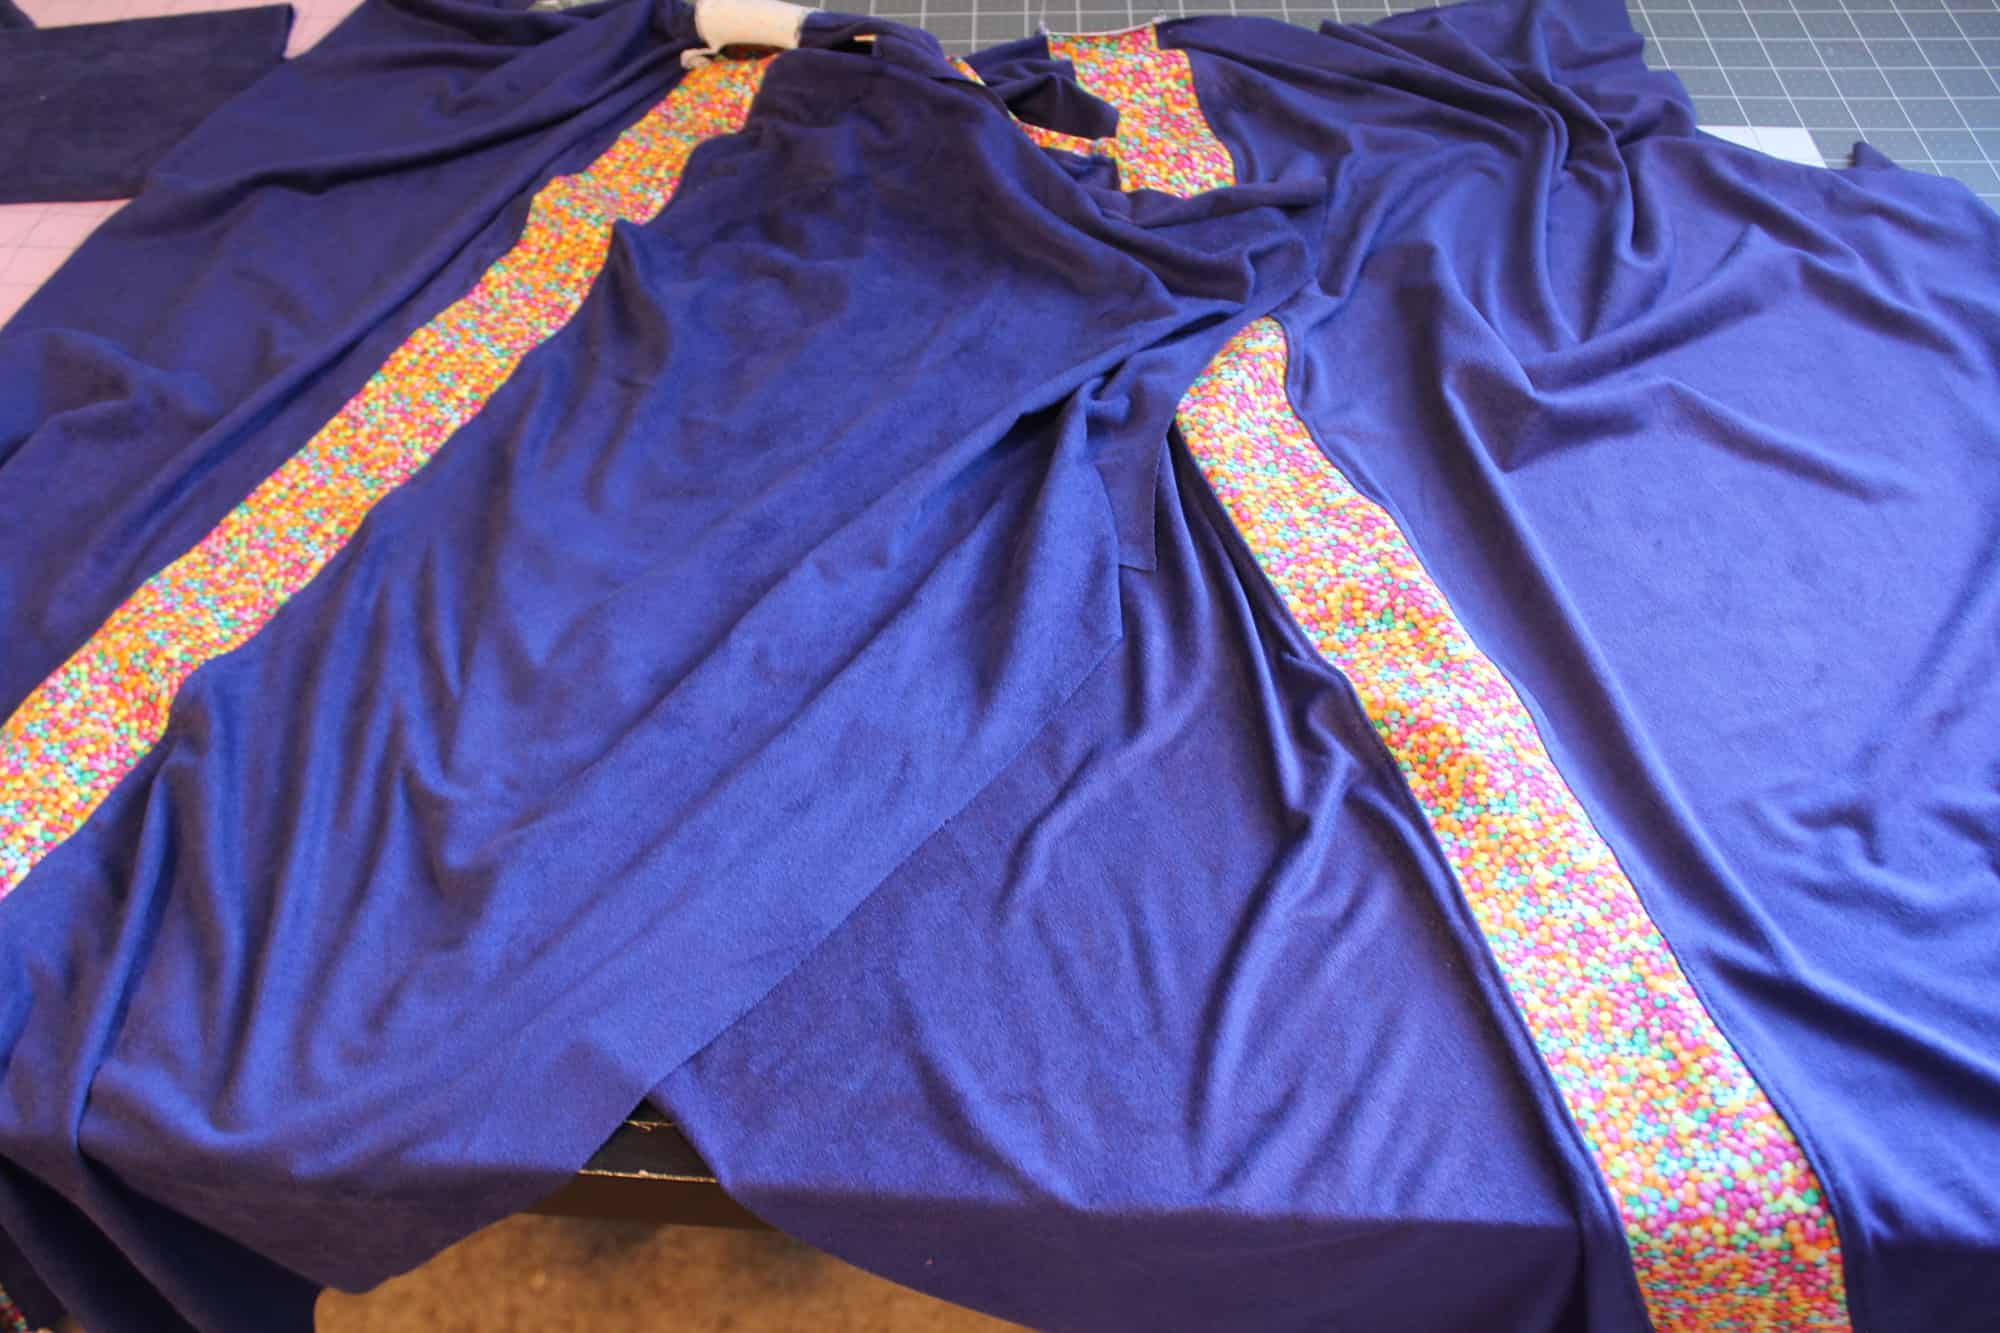
3. Repeat for the back as well, if you’d like.  Then, sew it on as you top-stitch the binding, per the pattern tutorial.  Here’s how it should look all said and done; wrong side up shown on the bottom of the picture, right side up shown at the top.


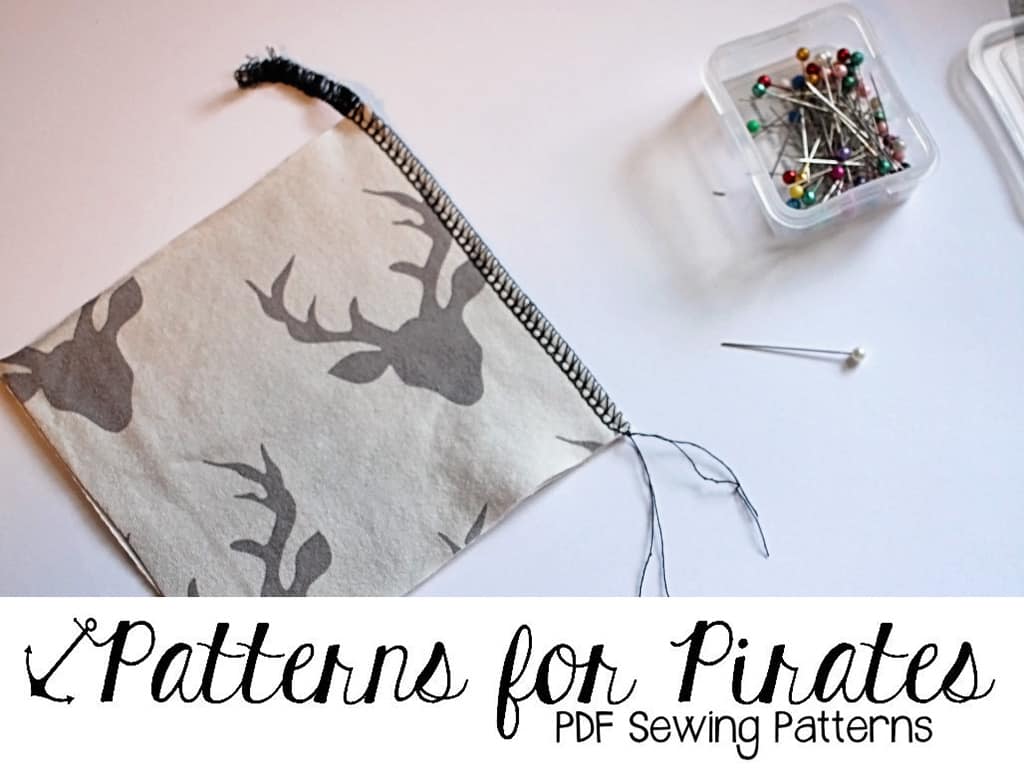
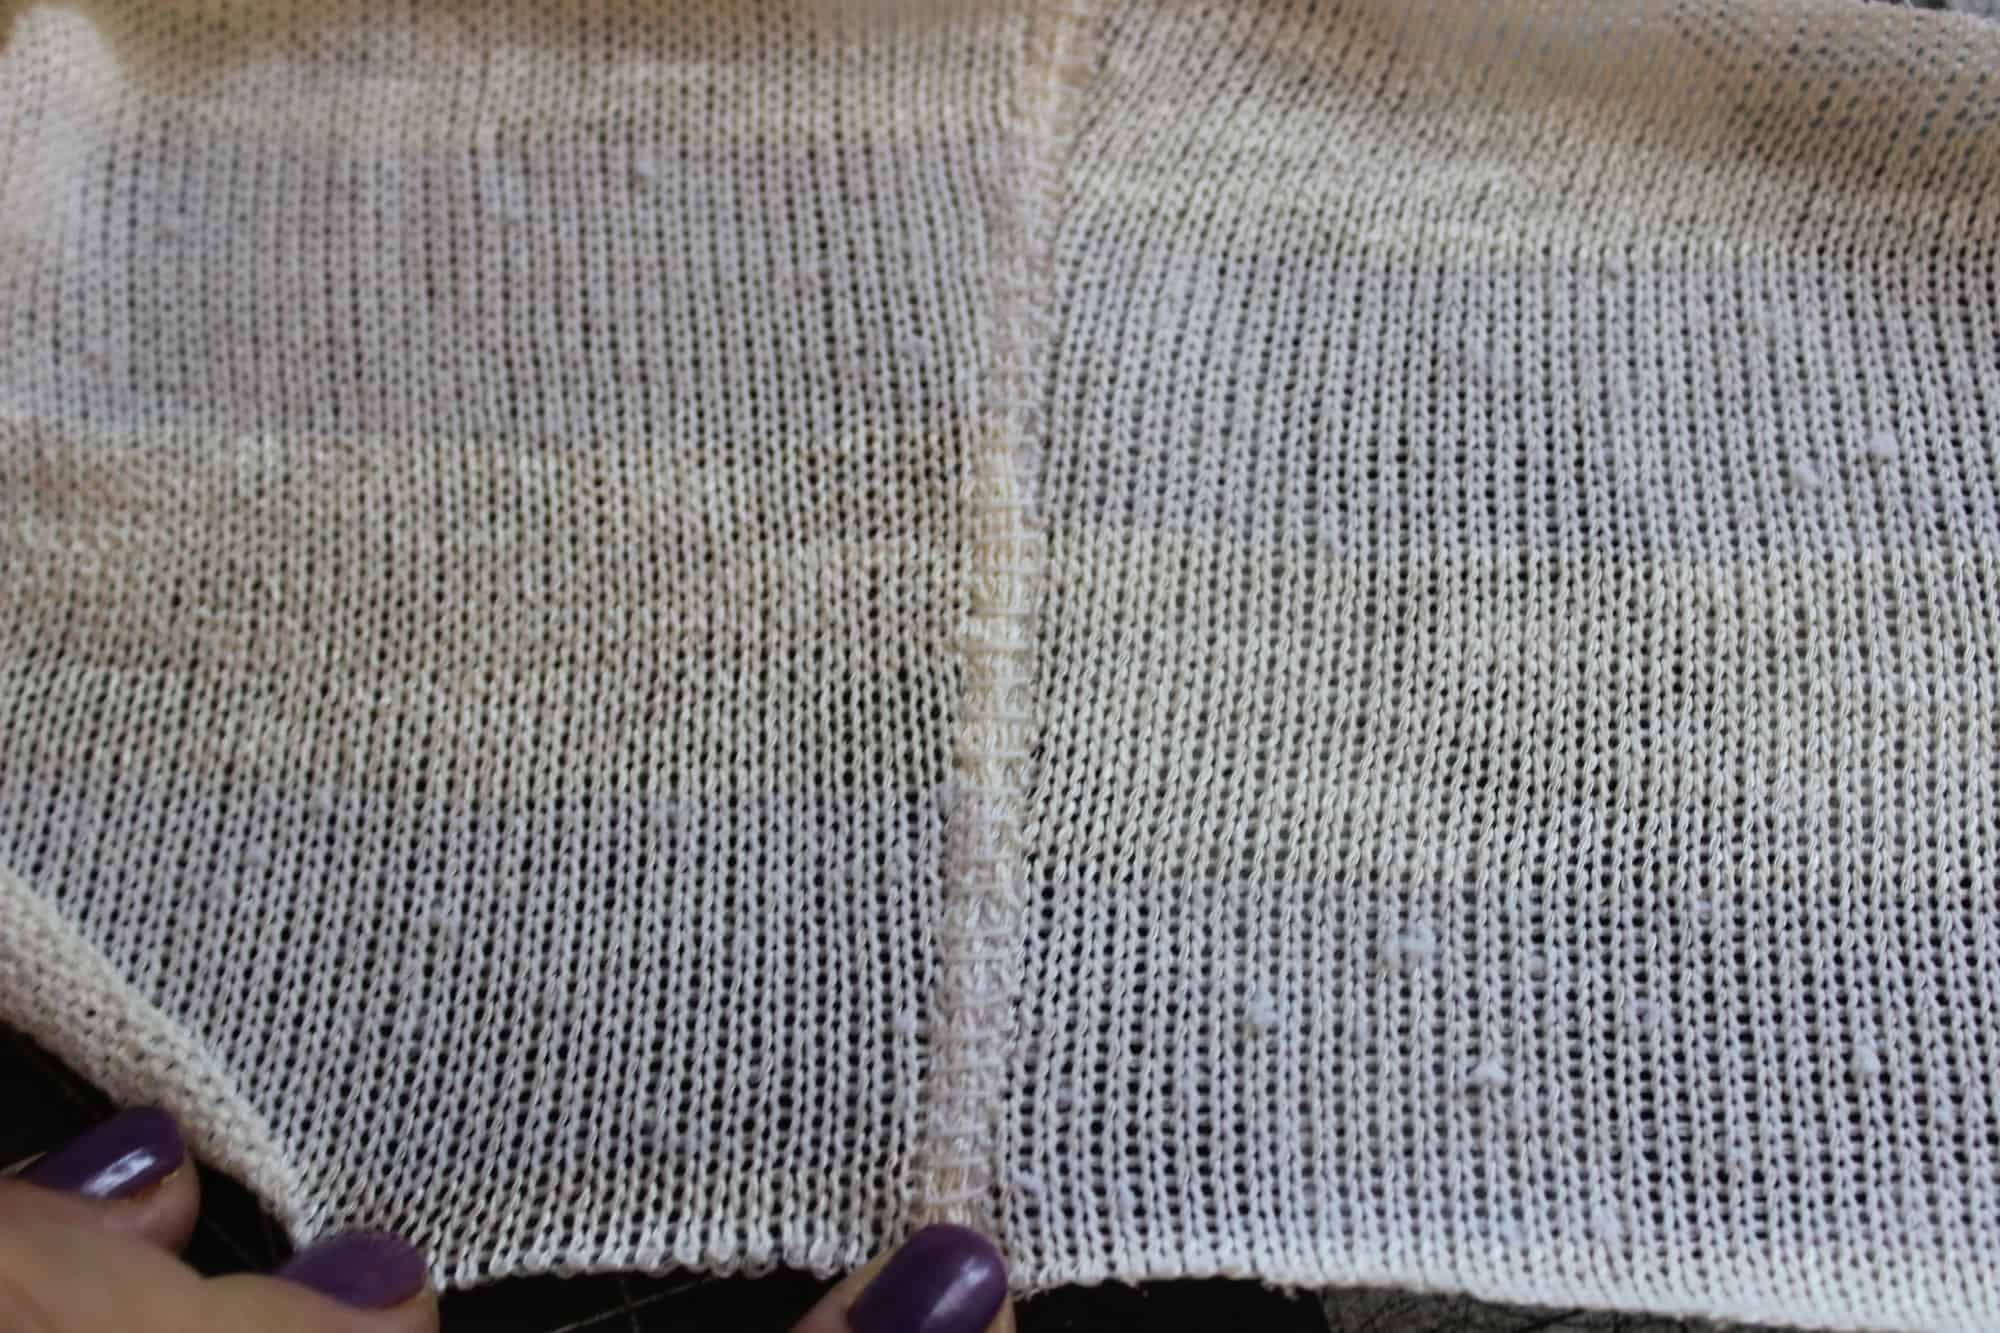
4. Be sure to catch the edge of the lace on the side of the shoulder binding as you attach it.


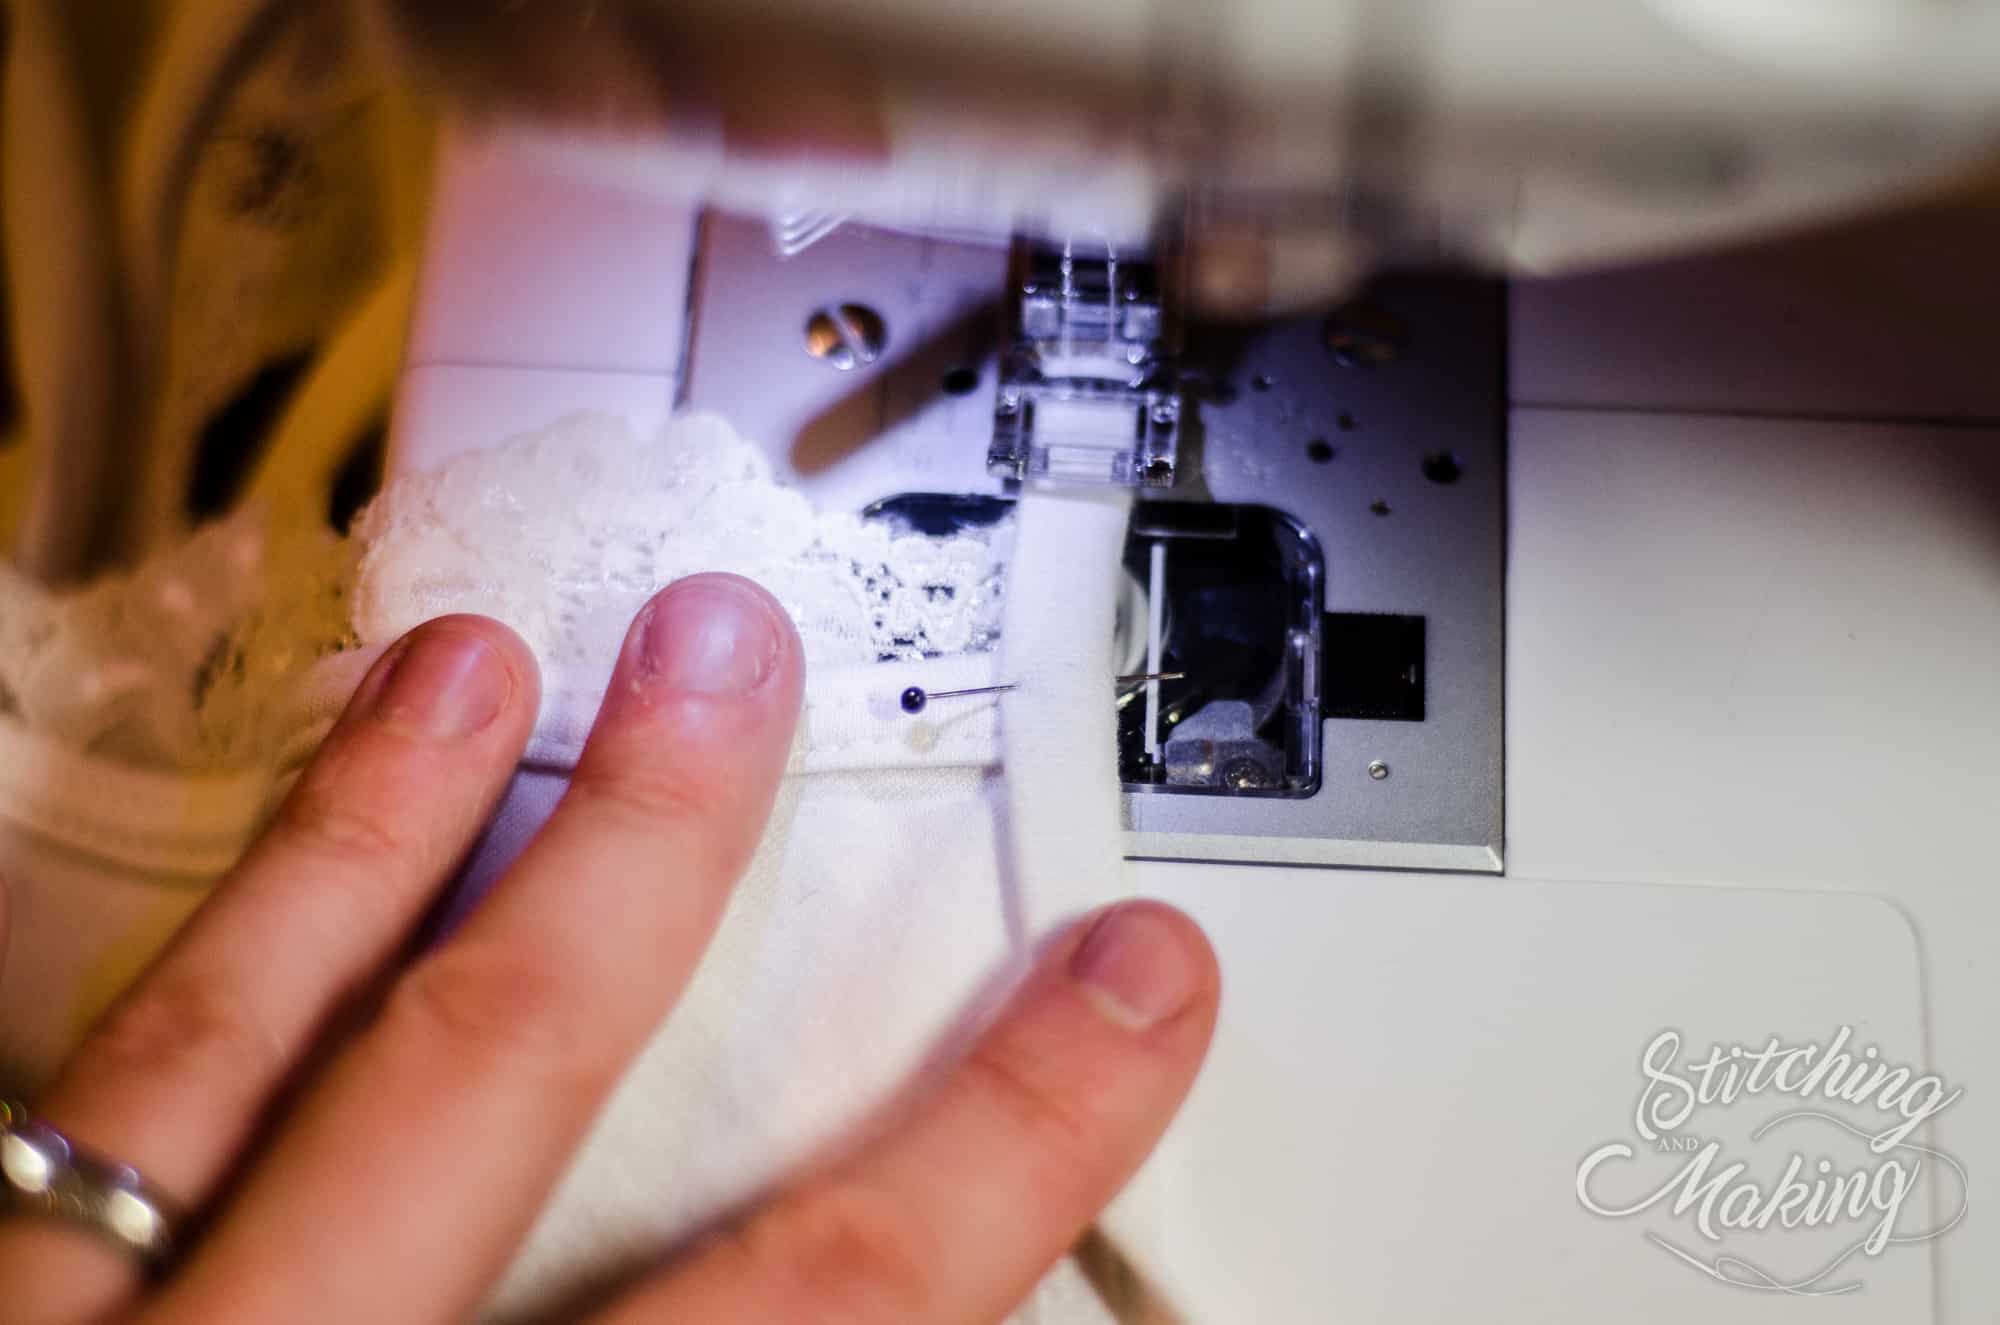
5. Finish the shirt as the pattern tutorial directs.  That’s it – easy peasy!

~ Elisabeth


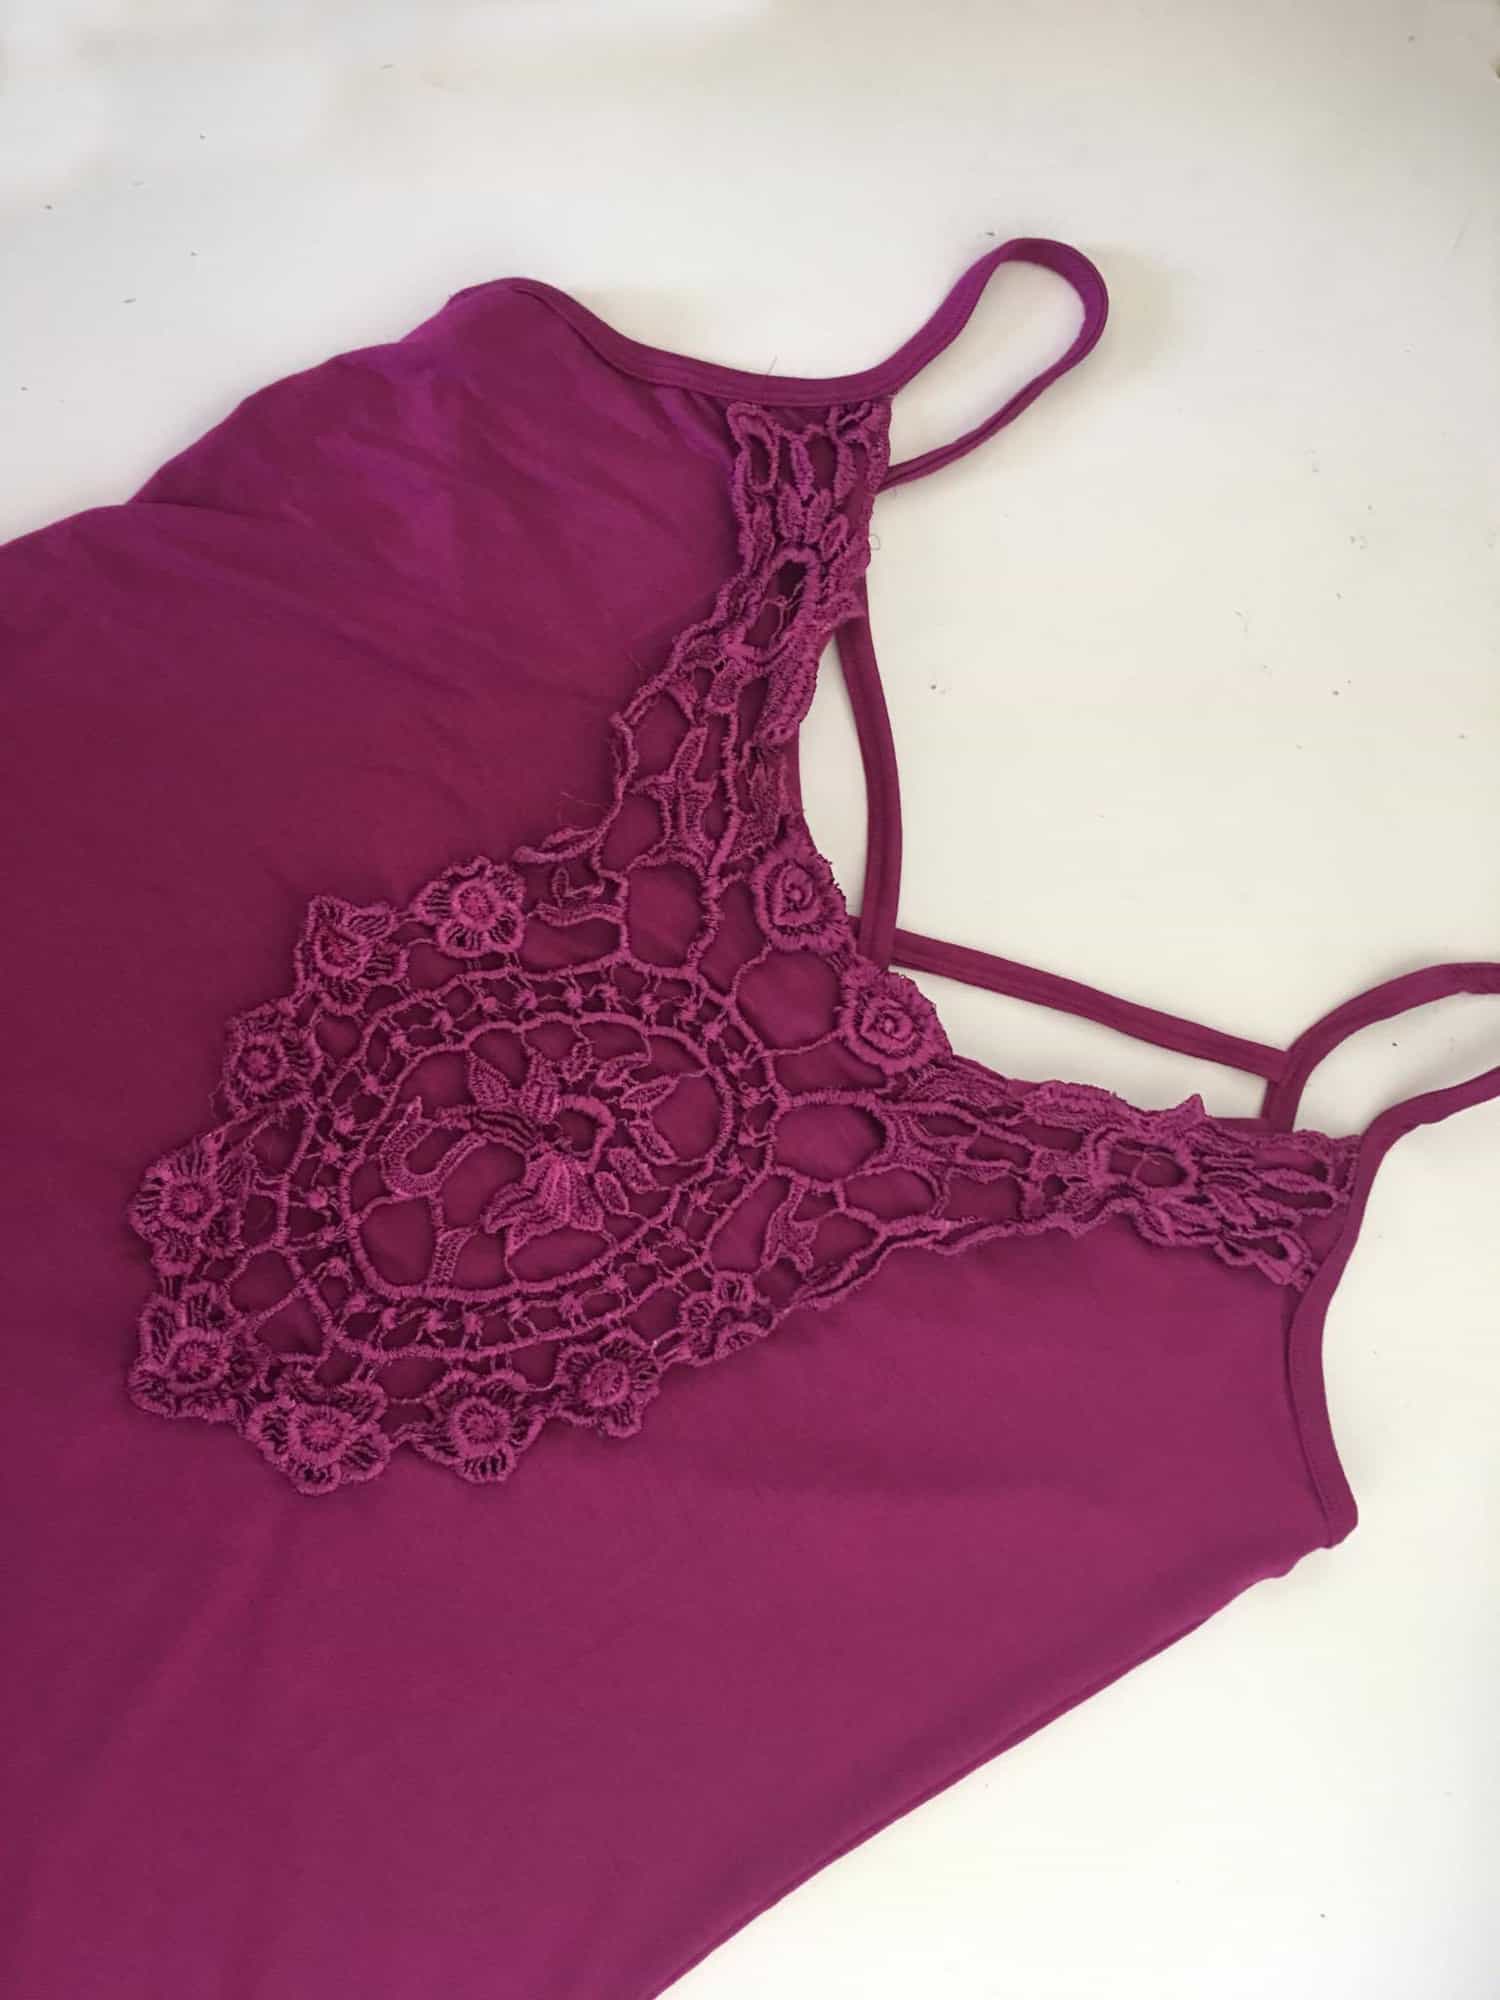
Not sure what to do with all those pretty lace appliques? Attach one to the front or back of the cami.  I happened to up-cycle one from an old shirt that didn’t fit anymore and have some knit on hand that matched perfectly!  I used to V back because of the shape of the applique.  I left the front neckline raw and stitched the lace just overlapping the top edge using a zigzag stitch.  (Knit does not unravel so no need to finish those edges).  Attach to the right side of the cami prior to doing the shoulder binding if your applique extends to the armholes.  For the main body of the applique, I chose to tack down in a few areas (center of the flowers) as the applique itself was pretty open throughout.  Easy Peasy!


Filed Under: Frequently Asked Questions, Pattern Release, Uncategorized 1 Comment

5 ways to finish a serger hem

March 9, 2017


IMG_6554

“How do you finish your serger stitch since you can’t back stitch?”; “What do I do with the long serger tail ?” ….just a few of the  serger questions we’ve seen in our group. So, today in the blog I will show you 5 easy ways to finish your serger seam. These techniques will definitely come in handy when your seams will not be enclosed in a hem or they won’t be serged over in a subsequent pattern step.

1. Let’s start with my most used one, and the easiest method since it does not involve any other tools. Serge your fabric together and chain off a 5- 6 inches tail. Simply tie a knot as close as possible to the edge and done! It will not unravel and it took you 20 seconds to do. 🙂

IMG_6537

IMG_6538

TIP: For a cleaner look you can tack down the seam with your sewing machine. Simply stitch down the serged edge half an inch  towards the back.

2. Another simple way to finish your serged seam is to snip the tail close to the edge and then add a little dab of Fray Block or Fray Check. This will prevent your seam from coming undone. This method is my least favorite since it takes a while for the liquid fray block to dry and they are not always 100% secure.

IMG_6539

3. A third way to insure that you have a nice smooth finish to your serged seam is to chain off 4-5 inches then using a needle gently unstitch the chain so you have 4 threads. Take the two needle threads and the two looper threads and tie a double knot. Carefully snip the threads as close to the knot as possible.

IMG_6540

IMG_6541

4. One of the most popular ways to finish a serger seam is the “weaving through” method. In order to do that you will be chaining off your stitches about 5 inches, then you will be using a knitting or crochet suture needle to weave the chain in the looper stitches. Grab the needle and thread the chain through the needle eye. Slowly weave the chain through the looper stitches about an inch or so. Carefully trim the rest of the chain stitch.

IMG_6542 IMG_6543 IMG_6544 IMG_6545

5. The last finishing method is the most “complex” one and it will need a bit of practice. It is not difficult, you just need to pay extra attention. Serge your seam and when you get to the end of the edge, lift your presser foot, gently but firmly pull the fabric just enough that you can flip it on the other side. Disengage the serger knife and serge in the opposite direction for an inch or two. Stop, lift your presser foot and carefully pull the fabric on the side away from the foot. Chain off a couple of inches and then cut the chain as close to the fabric as possible. In doing this “faux backstitching” you will end up with a beautiful finish that is also very secure.

IMG_6547 IMG_6548 IMG_6549

There you have it! Hope you found these 5 easy ways to finish off your seam helpful and that you’ll refer back to them when you’ll be sewing the new cami patterns that Judy sneaked on the P4P Instagram page. 😉

Alex


Filed Under: Frequently Asked Questions, P4P University, Sewing Techniques, Uncategorized 12 Comments

all p4p today

March 1, 2017

p4pcontest

One of our biggest joys is seeing you wear P4P outfits and feeling beautiful! From Slim Fit Raglans to SOS pants, from Timeless Tunics to Free Spirit tanks, we love them all!

Are you wearing head to to P4P today? Will you be rocking a full Patterns for Pirates outfit tomorrow? Post a picture in the Facebook group or on Instagram of your outfit and hash tag it #allP4Ptoday. We will pick our favorite each month. In order to qualify for the contest, the photo must be taken when you’re wearing the outfit, whether it’s at home or out and about. Selfies in the mirror in your sewing room will not count. We want to see you wearing what you’re sewing and love it!😊 The lucky winner will be receiving a P4P pattern of their choice! Sounds fun?

Just in case you need some inspiration here is some of our “all P4P” looks that we rocked this past year.

judypsd

Pumpkin Spice Dolman and SOS Pants

katy 1

Sweetheart peplum and pirate Pencil skirt

Nicole3

Boundless maxi dress and Men’s Henley

Nicole1

Essential Tank, Cocoon Cardigan and SOS Pants

Timeless Tunic and pirate Pencil Skirt

Timeless Tunic and pirate Pencil Skirt

Slim Fit Raglan

Slim Fit Raglan and SOS pants (adjusted for shorts)

Sunshine dress

Sunshine dress

Mama Bear Joggers and Women's Henley with faux layers

Mama Bear Joggers and Women’s Henley with faux layers

Essential Tank - dress length

Essential Tank – dress length

judy3

Free Spirit Tank dress with the LMU sleeves hack and the free scarf (available on the blog)

Nicole2

Relaxed Raglan and Peg legs

Sweet Tee dress and Cocoon cardi

Sweet Tee dress and Cocoon Cardigan


So get to sewing and show off your outfits, pirates! Don’t forget to hashtag #allP4Ptoday !

Alex

Filed Under: Contest/Giveaway, Uncategorized 8 Comments

How to lower or raise a neckline

January 6, 2017

img_4108

We have seen a lot questions about raising or lowering the neckline of various P4P shirts or dresses. On the blog today I show you how easy it is to alter the neckline to achieve the look you want. For this tutorial I will use the Sweet Tee pattern in a beautiful viscose rayon (dress option lengthen 3.5″) but you can apply this technique to either one of the shirt patterns.

img_4118

Start by printing and cutting your pattern in the size needed. The only piece we will be altering will be the front of the shirt (or bodice).

For lowering the neckline you will need to mark on the center fold where you would like the new neckline to be. I usually lower my Sweet Tee neckline 1.5 inches. Using a French Curve (or going slowly) draw a curve similar to the original one from your mark to the inner shoulder point.

raiselowerneckline

img_4502

Cut your fabric using the new front pattern piece. The rest of the pattern pieces will remain the same. The only other change you will need to make is the length of the neckband or binding.

To raise the neckline you will need to grab your front bodice piece and a blank piece of paper. Align the center fold of the front pattern piece  with the side of your paper and glue them together.

Mark a point 1-2 inches above the original top center depending on how high you’d like the neckline. Using the French Curve draw a curve from the center point to the inner shoulder point. Cut the new front using this modified pattern piece and the rest of the pieces as in the original pattern.

img_4503

The only additional modification you will need  to make is to adjust the neckband or binding length. You will need to make it longer or shorter depending on the new neckline. I like to calculate the new neckband length after I sew the front and back pieces together at the shoulder. To find out the new neckline circumference lay the neck opening along a ruler and multiple it by 2.

img_4505

Your new neckband length will be 85% of this circumference plus 1 inch to accommodate the seam allowance. (C * 0.85 +1 ). Cut the new neckband/binding using the new length but keeping the width suggests in the pattern. All you have left to do now is sew the shirt or dress according to the tutorial and you have just made yourself a custom outfit. Easy peasy…right? 🙂

I can’t wait to see your creations in the Pattern for Pirates group.

img_4115

img_4113

Happy sewing, pirates!

Filed Under: Frequently Asked Questions, Pattern Hacks, Uncategorized 6 Comments

Tips for working with sweater knits

November 25, 2016

img_3505

Have you seen the sneak peek Judy posted on Instagram? Check it out if you haven’t already. If you did you might have noticed that soon you will be sewing those pretty sweater knits you’ve been saving. In the blog today I will give you some of my tips and tricks to work with this kind of fabric.

1.Grab the lint roller! No, I have not lost my mind…believe me, you will want the lint roller close by when you cut sweater knit. Whether it’s a open weave or a dense one, sweater knits tend to leave a lot of residue when being cut.

img_3488

TIP: Use the lint roller to not only clean your cutting mat but also the edges of the fabric pieces you just cut. That will help keep your sewing machine cleaner.

img_3491

2. If cutting with a rotary cutter, use a new or very sharp blade. I find sweater knits to be more prone to getting a run in the fabric if  the cutter or scissors is not very sharp.

img_3489

3. Water soluble stabilizer is not just for embroidery! When working with sweater knits on your sewing machine I highly recommend placing a piece of WSS under your fabric. This will not only make sewing it easier but it will also prevent puckering and even more important it will stop your machine from “eating” your fabric. Sweater knits, especially open weave ones have a lot of “holes” so your machine is basically sewing through air.

img_3493

Tear away the excess, the remaining water soluble stabilizer will disappear when you first wash the garment. I prefer transparent WSS but opaque ones work just as well.

img_3494

4. You can sew sweater knit entirely with your sewing machine however a serger will make the process faster and easier. You might need to adjust your settings a bit to accommodate this type of fabric. My favorite serger stitch when sewing sweater knits is the FLATLOCK stitch. Check your serger user manual to make the proper settings for a flatlock stitch, they will vary from model to model. Here is an example of how a white thread flatlock stitch looks like on a black piece of fabric.

img_3498

A narrower flat lock stitch

img_3501

A wider flat lock stitch

I use this type of serger stitch when I make sweater knit bands and hems. Use a matching thread so the stitch will blend in with the fabric.

img_3504

5. Just as with all knits, always use a ball point needle in your sewing machine and serger. You’ll also need to lower the pressure foot tension of your sewing machine.

6. The markings on open weave sweater knits will need to be added with chalk/ a tailor pen or by adding tailor tacks. Notches are impossible to see on sweater knits.

I hope you find these tips helpful when you will be sewing the new Cocoon pattern releases soon. I will leave you with another sneak peek of this amazing cardigan. Now get the sweater knits stash out and as always post your creations in the group so we can all ohh and ahhh over them.

img_3638img_3518

Alex


Filed Under: P4P University, Sewing with Stretch, Knit Fabrics, Uncategorized 1 Comment

a cool way to add reinforced knees to the Captain Comfort Jeans

November 15, 2016


img_3369

As a mom of young kids I am always looking to make them cool clothes that are not only on trend but can withstand their active lifestyle. In today’s blog I will show you how to take the already cool Captain Comfort Jeans to the next level and reinforce the knees in a modern new way.  If you’re looking at the Cpt. Comfort and need some tips on sewing jeans we’ve done a blog post all about it here!

img_3979

img_3319

img_3321

Start by printing the pattern and cutting your fabric. I used an old pair of jeans I had saved for upcyling. (Here is a blog post about using an old pair of jeans for this pattern!) I find denim fabric by the yard to be pretty costly so I save all usable jeans pairs that my husband and I don’t wear anymore. You can make any style Comfort jeans with this hack, including the lined version.

Take your front piece pattern and measure 4 inches down from the top of the inseam, mark it on the pattern. Now measure and mark 6 inches from the bottom of the hemmed option cut line. I made a size 5 but I think these measurements would work well for sized 4-6. You will need to mark higher or lower depending on the size you need and how big you want the knee patch.

img_3936

img_3937

front-cpt-comfort

Draw a horizontal line from the two markings. Using a blank paper trace the knee patch between the two lines you just drew. Now you will draw another line parallel to these two 1/2 inch above the top line and 1/2″ bellow the bottom one. You just made the patch pattern piece.

patch

Cut two jeans patches using the pattern piece you just created. Don’t forget to mirror the pieces!! Measure the inner and outer leg part of the patch and divide it by 3. Grab your fabric marker or chalk  and draw a one inch line perpendicular to the sides of the patch at the markings.


img_3940

Using a your sewing machine and denim needles sew a small dart that starts 1/4 inch away from the marking. Repeat the process for the remaining 7 small darts on the two patches .

img_3942

Press the top dart up and the bottom darts down. Top stitch them in place. I love jeans thread for topstitching, It adds a nice touch to the finished look. Take your patches to the ironing board and press the top and bottom edges 1/2″ wrong sides together. Stitch in place 3/8 inch from the fold.

Place the patched on the front pieces (wrong side of the patch to the right side of the leg piece) making sure to match the right leg patch to the right patch and the left leg patch to the left leg.  Sew the patches on about 1/8 inch away from the folded edge.

img_3952


img_3953

There you go! You just added cool knee patches to the Cpt Comfort Jeans. Continue sewing the pants according to the pattern and don’t forget to show them off in our group.

img_3349

img_3353

img_3339

Happy sewing, pirates!

Alex

Filed Under: Frequently Asked Questions, Pattern Hacks, Uncategorized 1 Comment

Easy Bear Jogger Hacks

November 11, 2016

img_3221

The Mama Bear Joggers were just released and are packed with options. I have already made myself a few pairs so I was browsing Pinterest for styling ideas (don’t we all?). I came across a cute pair of joggers that had a tuxedo stripe on the side so I just had to make myself a pair like that. In today’s blog I’ll show you how I did the tuxedo stripe and an accent slat pocket band.

Start by printing and cutting the pattern in your size. (I grade mine in for the waist that’s why you’ll see two lines instead of one). Don’t cut the fabric just yet. If you’d like to do just the accent pocket band you’ll nee to place the pocket lining over your front piece and remove 1 inch from the curve. That can be done easily if using a French Curve.

img_3040

Now take your measuring tape and measure the new pocket opening. You will be cutting your accent band to be 2″ by 95% of the opening.

img_3043

Fold the band wrong sides together and give it a good press. Sandwich the  folded band between the right side of the front of the pants and the right side of the pocket lining. You will be stretching JUST the band slightly. Sew the 4 layers together.

img_3050

Turn the pocket over so its wrong side is on the wrong side of the front leg. You can now top stitch along the curve. Tadah! You’ve added a decorative band to the slat pocket. If you do not add the side strip proceed with sewing the joggers according to the pattern tutorial.

img_3052

If you add the stripe, we will be making some pattern alteration prior to cutting the fabric. Place your pocket lining and back on top of the front of the pants matching the top and  side lines. We will be removing 1.5 inches from the side of the front of the pants. Following the side curve draw a line parallel to the side, 1.5″ away.joggersstripe

Cut along the new line. Now grab the back of your pants and repeat the process on the side. You now have 4 new pattern pieces, front and back, pocket and pocket lining. We will measure the new side length with a measuring tape because it’s flexible. The tuxedo stripe will be 3″ by the new measured side. See? That wasn’t so bad.

img_3038

Add the pocket according to the tutorial. We will now sew RST the front piece with one side of the strip. Then attach the other side of the strip to the back of the leg, right sides together. Repeat with the the other leg.

img_3055

img_3056

That’s it! Those are the only changes we made to the pattern. You can now finish your joggers according to the tutorial. You can add the strip to either one of the leg options, cuffs, elastic or rolled.

img_3200img_3223

Get creative with all these joggers hacks and as always post your pretties in the group.

Alex

img_3225


Let’s face it- everyone loves a jogger and the Patterns for Pirates Joggers are perfect! One of the things that I love about joggers is that there are so many different ways to style them. One of my favorite looks is the addition of a moto patch. This simple detail can add an extra bit of edge and flair to your joggers and help take an already awesome look to the next level! So let’s get started…

img_52302

Creating Patch Piece

To start with, you will need to determine how far down to attach the patch. You will want to measure from your inseam to the top of where you want to attach the patch. As you can see in the picture below, mine measured 9.5″. Draw a line across your pattern piece at this measurement. Next, you will draw the bottom line for your patch- your next line should be 7″ down from this line (your finished patch will be at total of 6″). Using tracing paper, copy this section of your pattern to create your moto-patch.

img_5240

Quilting the Patch
You will need to cut out two mirror image pieces. Next, you will trace your quilting lines on each piece (make sure to do mirror images!). Begin by marking both the horizontal and vertical centers of your piece (if you don’t have a quilters ruler- this mod is a GREAT excuse to go purchase one!!). After marking centers, draw lines every 2 inches in both directions. The final markings will be on the diagonals- connecting your squares. Repeat on the other patch.

picmonkey-collage

After completing your markings, stitch across all of the diagonal marks only. Then, take a few minutes and admire all of the hard work you just did— Ok! Moment over, because now you get to repeat all of that beautiful stitching on the other patch! img_5214

Finishing and Attaching Patch
Press both the top and bottom of your patch, using a 0.5″ allowance to create a finished edge. Taking your front leg piece, place patch piece 0.5″ lower than original line (to account for your pressed seam… ex. Mine was at 9.5″ and I placed the patch at 10″ down) and pin in place.  img_5219
Using a 0.25″ seam allowance, stitch the top and bottom into place. Then stitch over the horizontal lines only to finish creating your quilted look. img_5222You can now complete your Joggers by following the pattern directions.

And if you needed a few other ideas for you patches, you could also…

  • Cut your patches at angles
  • Place patches on thighs
  • Mix and match fabric patterns
  • Use fabrics that are already quilted (Yes- They exist and would be a huge time saver for this!)

img_52363

I can’t wait to see how your patches (and joggers!) turn out. Make sure to share all of your creations on the P4P Facebook page!

~Erinn


img_60741I have been eying up all the adorable woven joggers that seem to be everywear this season and as soon as I saw the new P4P joggers I thought hmm, I wonder if then could be done in woven and guess what, they work great in woven for the baby bear joggers! I sewed up this pair for my daughter in a rayon challis remenant that I found and they are just too cute on her and super trendy right now! I didn’t alter anything while sewing but if your child has thicker calfs or ankles you may want to grade out one size to give a bit more room or take a smaller seam allowance from the calf down. These have the elastic waistband but as I had some 1 1/4 elastic in my stash Idecided to use it instead of doing the 3 rows of elastic. I inserted my elastic into the waistband and then basted the seam allowance before attaching the waistband to the pants. I did the elastic casing cuff which worked great the rolled cuff may be a touch to tight thou for wovens. No other changes to these and my girl has adorable woven joggers! I can’t wait till spring to make her a pile more!

img_60771

img_60751


I love the little shorties or bloomers look for my Baby Girl.  Show off those rolls on her legs that I love so much!  It’s very simple to use the new Baby Bear Joggers to create this cute, trendy look!

I determined the inseam by estimating how wide I would need it to cover her diaper.  I made hers about 1″ before bands…they could’ve used another 1/2″ really though.  I marked this on the inseam of back and front pieces.  The side seam length I determined by thinking about how long I needed it to cover the diaper.  I curved the bottom hem up towards the outer leg seam by about 2″ on both the back and front pieces.

I sewed the pattern up per the directions.  To finish the bottom hem I added thick bands.  I made them finish 1.5″ matching the waistband thickness.  So, I cut 4″ by slightly shorter than my leg opening.  You want to stretch the bands to fit the leg openings so that your bands are snug to their thighs.

Fold the bands in half width wise with right sides together (I wanted the “wrong side” to show on my bands.

img_0985

Fold the band in half lengthwise with wrong sides together.

img_0986

Align raw edges with raw edges of shorts and stitch, stretching band only as you sew all three layers together. Then flip band down with seam inside shorts.

img_0987

I think they’re so precious! My Baby Girl has been sick and wasn’t really up for pictures, but we snapped just a couple to show them a bit.     img_0990 img_0630  img_0659  img_0692 img_0693

Filed Under: Pattern Hacks 2 Comments

Flannel Kimono with pockets

October 28, 2016

img_2004

It is officially fall! The crisp morning air should make its appearance soon and what better way to embrace it than by treating ourselves with a cozy flannel top. For my blog today I’ll show you how you can take the Summer Kimono into fall and I’ll also give you some tips for working with flannel.

img_2008

You will need your printed and cut kimono pattern pieces. You can chose any of the styles, I went with the curved hem because it’s my favorite. 🙂 Now grab your Grandpa Cardi pattern and print just the pocket piece. It’s on page 22-23. img_1918

Sew your pockets according to the instructions. I opted for the band pocket but you can certainly use the non banded option too. Remember to press the bottom of the pocket too! You’ll now stitch them on to your two front pieces. Placement it’s a matter of personal preference so I’ll show you where I stitched mine on but you can certainly move them higher or lower. I placed the pocket about 4 inches from the center and about 2 inches from the bottom (remember the bottom is not hemmed yet). Sew the pockets on the front pieces.

img_1927You will now start assembling your kimono according to the instructions. Something very important to keep in mind, especially if you are sewing sizes L and up is that most flannel fabrics are 42-44 inches wide. Your fabric may not be wide enough to cut the entire length of the sleeve so in this case you have a few options. You can either do what I did and just shortened the sleeves length by 2.5 inches or so and either add the sleeve band (as per the pattern) or just hem it. The other option would be to attach additional fabric to the selvage and cut the pattern pieces as they are. You could use the same fabric as the main one or even coordinating/contrasting fabric for a colorblock look. Get creative!

TIP: When sewing a curved hem on woven fabrics I like to first serge the raw edge, making sure I don’t cut any of it with my serger knife.  This will basically give me the 1/4 inch mark and make the fabric more stable. Press the 1/4 inch hem, and then press again another 1/4 inches and sew in place. Wasn’t that easy? That’s the magic of serging the raw edge first.

img_1931

I know a lot of you have asked in the Facebook group is the Summer Kimono can be made with flannel fabric so now you know it can…and it’s pretty cozy on top of that! As always, don’t forget to show off your creations and tag me if you have any questions!

Alex

img_1988-1

img_1991 img_2013-1

Filed Under: Frequently Asked Questions, Pattern Hacks, Uncategorized 2 Comments

P4P Raglan Week: Off-The-Shoulder Raglan Hack

September 24, 2016

raglan-week-day6

IMG_0881 Did you start your fall sewing, pirates? Even though it doesn’t look like fall outside I like to tell myself cooler weather is coming. One of the staples in my fall/winter wardrobe is the raglan tunic. It is perfect for wearing it with Peg Legs (and we all know peg legs are practically fall uniform) and SOS pants. For my blog today I’ll show you how to get an “off the shoulder” look using the Relaxed Raglan. You can certainly use the Slim Fit Raglan if you prefer. I just am going for a looser, more casual look so I used the Relaxed Raglan pattern.

Screen Shot 2016-08-30 at 9.13.22 AM

First off, select your size, print and cut the pattern pieces according to the instructions. Don’t cut the fabric just yet! We’ll now make some small hacks to the pattern to get a wider neckline. Take the front pattern piece and measure 3 inches down on the center fold and mark that spot. Then measure 3 inches down on the sleeve part and mark that point too. Using a french curve (or just going slowly) and following the original pattern, draw a curve line between the two points. Repeat with the back and the sleeve pattern pieces.

testraglan

Once you drew the new cut line, remove the top part and cut the fabric following the new pattern pieces. At this point you will have a front, back and two sleeve pieces plus and additional cuffs or waistband you may need depending on the style raglan you chose. Do not cut the neckline as per the original pattern suggestion. If you do, the neckband will be too small for the new neckline.

Sew the raglan according to the instruction, leaving the neckline as is. Once sewn, take the shirt/tunic, lay it flat on a table and measure the neckline opening circumference. You will calculate the new neckband based on this measure. The new neckband will be 85% of the opening plus seam allowance. So you will do Opening X 0.85 + 1 (for SA). You now have the new length of the neckband. The width stays the same as the pattern.

You’re almost there. All you have to do now is cut the neckband and attach it to the shirt. Tadah! All done, you have a cool new off the shoulder raglan.

IMG_0903 IMG_0882 IMG_0888

I can’t wait to see what you create.  Don’t forget to show off your raglan in the group and keep an eye out for all the surprises during this Raglan Week.

IMG_0905

If you’ve hacked a sexy off-the-shoulder look of a raglan during P4P Raglan week, we would love for you to share it with us!  Head over to the Facebook Group or share on Instagram.  And be sure to use the tag#P4PRaglanWeek so we can find you!

Curious about what else has been happening during our raglan-loving week of fun?

Just take a look at our schedule!

Monday, September 19: Jolly Roger Raglan Pattern Update + Jolly Roger Add-On Pack Pattern Release

Tuesday, September 20: JRR Woven Fabric Hack

Wednesday, September 21: JRR Animal Faces Add-On

Thursday, September 22: Contrast Band Hack for Kangaroo Pockets

Friday, September 23: Women’s Keyhole / Scoopback Raglan Hack

Saturday, September 24: Off-The-Shoulder Raglan Hack

Sunday, September 25: Adding Stripes to Your Raglan Sleeves

Filed Under: Pattern Hacks, Uncategorized 4 Comments

How to Sew a Faux Layered Look using Just One Pattern

September 9, 2016

IMG_0856- p4p

The other day I was browsing Pinterest for some fall inspiration outfits but since I am now a resident of the sunshine state many of the fall looks I liked were not weather friendly. So what better way than to add “faux” layering to my shirts to pretend fall is in the air? 🙂

IMG_0869

Today I’ll show you how I used the Women’s Henley shirt to make myself a “layered” shirt. I chose the simple crew neckline and the rolled sleeves option but this style would look amazing with the Henley style neckline or the hooded style.

listing pictures

Start by cutting the pattern based on your measurements. Ohh, by the way…did you see that the Henley got an updated? It now has layers so you can just print your desired size. Cut the hemmed shirt option and grab a piece of paper so you can draft the faux layers part. It’s easy-peasy, don’t be scared! Simply trace the curved hem option of the front pattern piece, measure 1.25 inches on the side seam and draw a straight line from that point to the center seam. Repeat the procedure with the back piece of the pattern. Now you will have two extra pattern pieces (front and back) that you need to cut on fold at the center.

fauxlayeredpieces

IMG_0786

Sew your shirt according to the pattern instruction, iron the 1 inch memory hem and set it aside before stitching it. We will now prepare the “faux” layer. With the right sides together sew the side seams with 1/2 inch seam allowance.

IMG_0789

Once you have a loop-like piece you can go ahead and stitch the curved hem with your coverstitch or sewing machine. Press it! You are almost done. All you have left to do now is attach the layered part to your main shirt. Lay the main shirt on a flat surface and insert the faux layer piece matching the side seams. You can match the raw edges inside the shirt and pin all around the hem.

IMG_0798


If you prefer your faux layer to be just “peeking” from under your shirt you can certainly place the layer a little higher inside the main shirt and pin in place. Stitch the bottom hem of the shirt and the faux layer together at about 1 inch above the fold.


IMG_0799

You just made yourself a beautiful shirt that takes you from summer to fall. This style shirt pairs beautifully with the SOS pants and the Pirate Pencil skirt. As always, don’t forget to show off your layered creations in the group. Happy sewing, pirates!

Alex

IMG_0845-1IMG_0857

Filed Under: Pattern Hacks 9 Comments

  • « Previous Page
  • 1
  • …
  • 20
  • 21
  • 22
  • 23
  • Next Page »

Featured Patterns

  • Mae Top - Bundle Mae Top - Bundle $20.00 Original price was: $20.00.$18.00Current price is: $18.00.
  • Mae Bottom - Bundle Mae Bottom - Bundle $20.00 Original price was: $20.00.$18.00Current price is: $18.00.
  • Loosey Goosey - Bundle Loosey Goosey - Bundle $20.00
  • Bacall Bodysuit Bacall Bodysuit $12.00
  • Privacy Policy
  • Refund Policy
  • Affliliate Program
  • Contact Us
  • About

Copyright © 2025 Patterns for Pirates

Copyright © 2025 · Genesis Framework · WordPress · Log in