Patterns for Pirates

P4P stylish, modern, wearable patterns

  • Home
  • Blog
    • Frequently Asked Questions
    • Pattern Releases
      • Free Patterns
    • P4P University
      • Fitting
      • Sewing with Stretch, Knit Fabrics
      • Sewing with Woven Fabrics
      • Sewing Machines
    • Sew-A-Longs
    • Fabric for Pirates
    • Pattern Hacks
    • Announcement
      • Blog Tours
      • Contest/Giveaway
  • Shop
  • Bundle Discounts
  • Flash Friday
  • Gift Cards
  • My Account
  • Cart

5 tips for adding neckbands

June 6, 2017

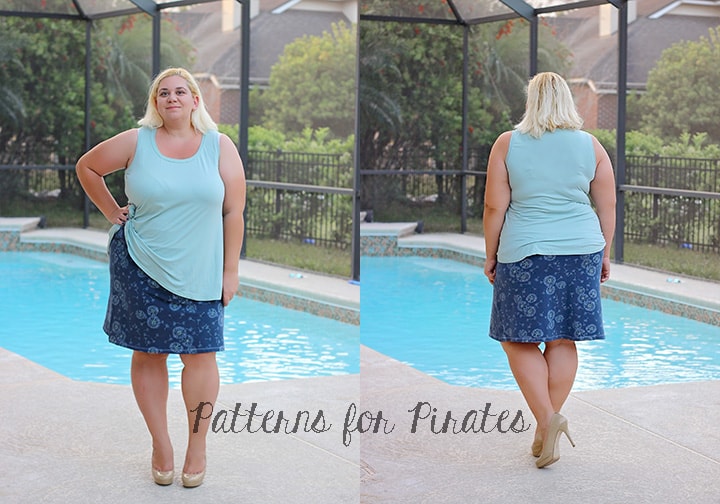
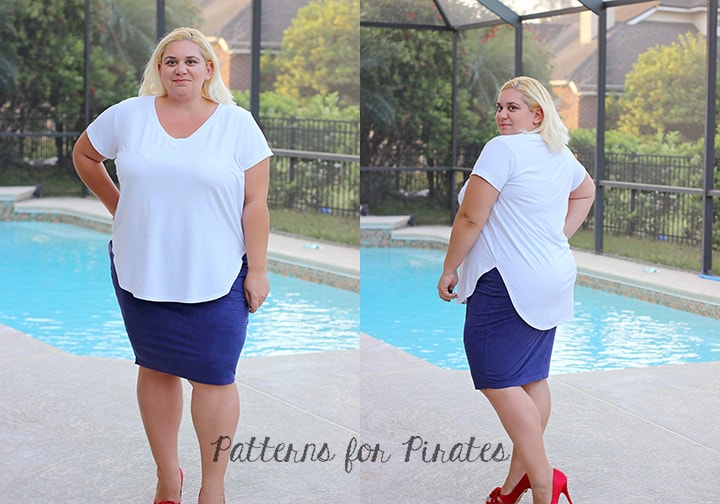
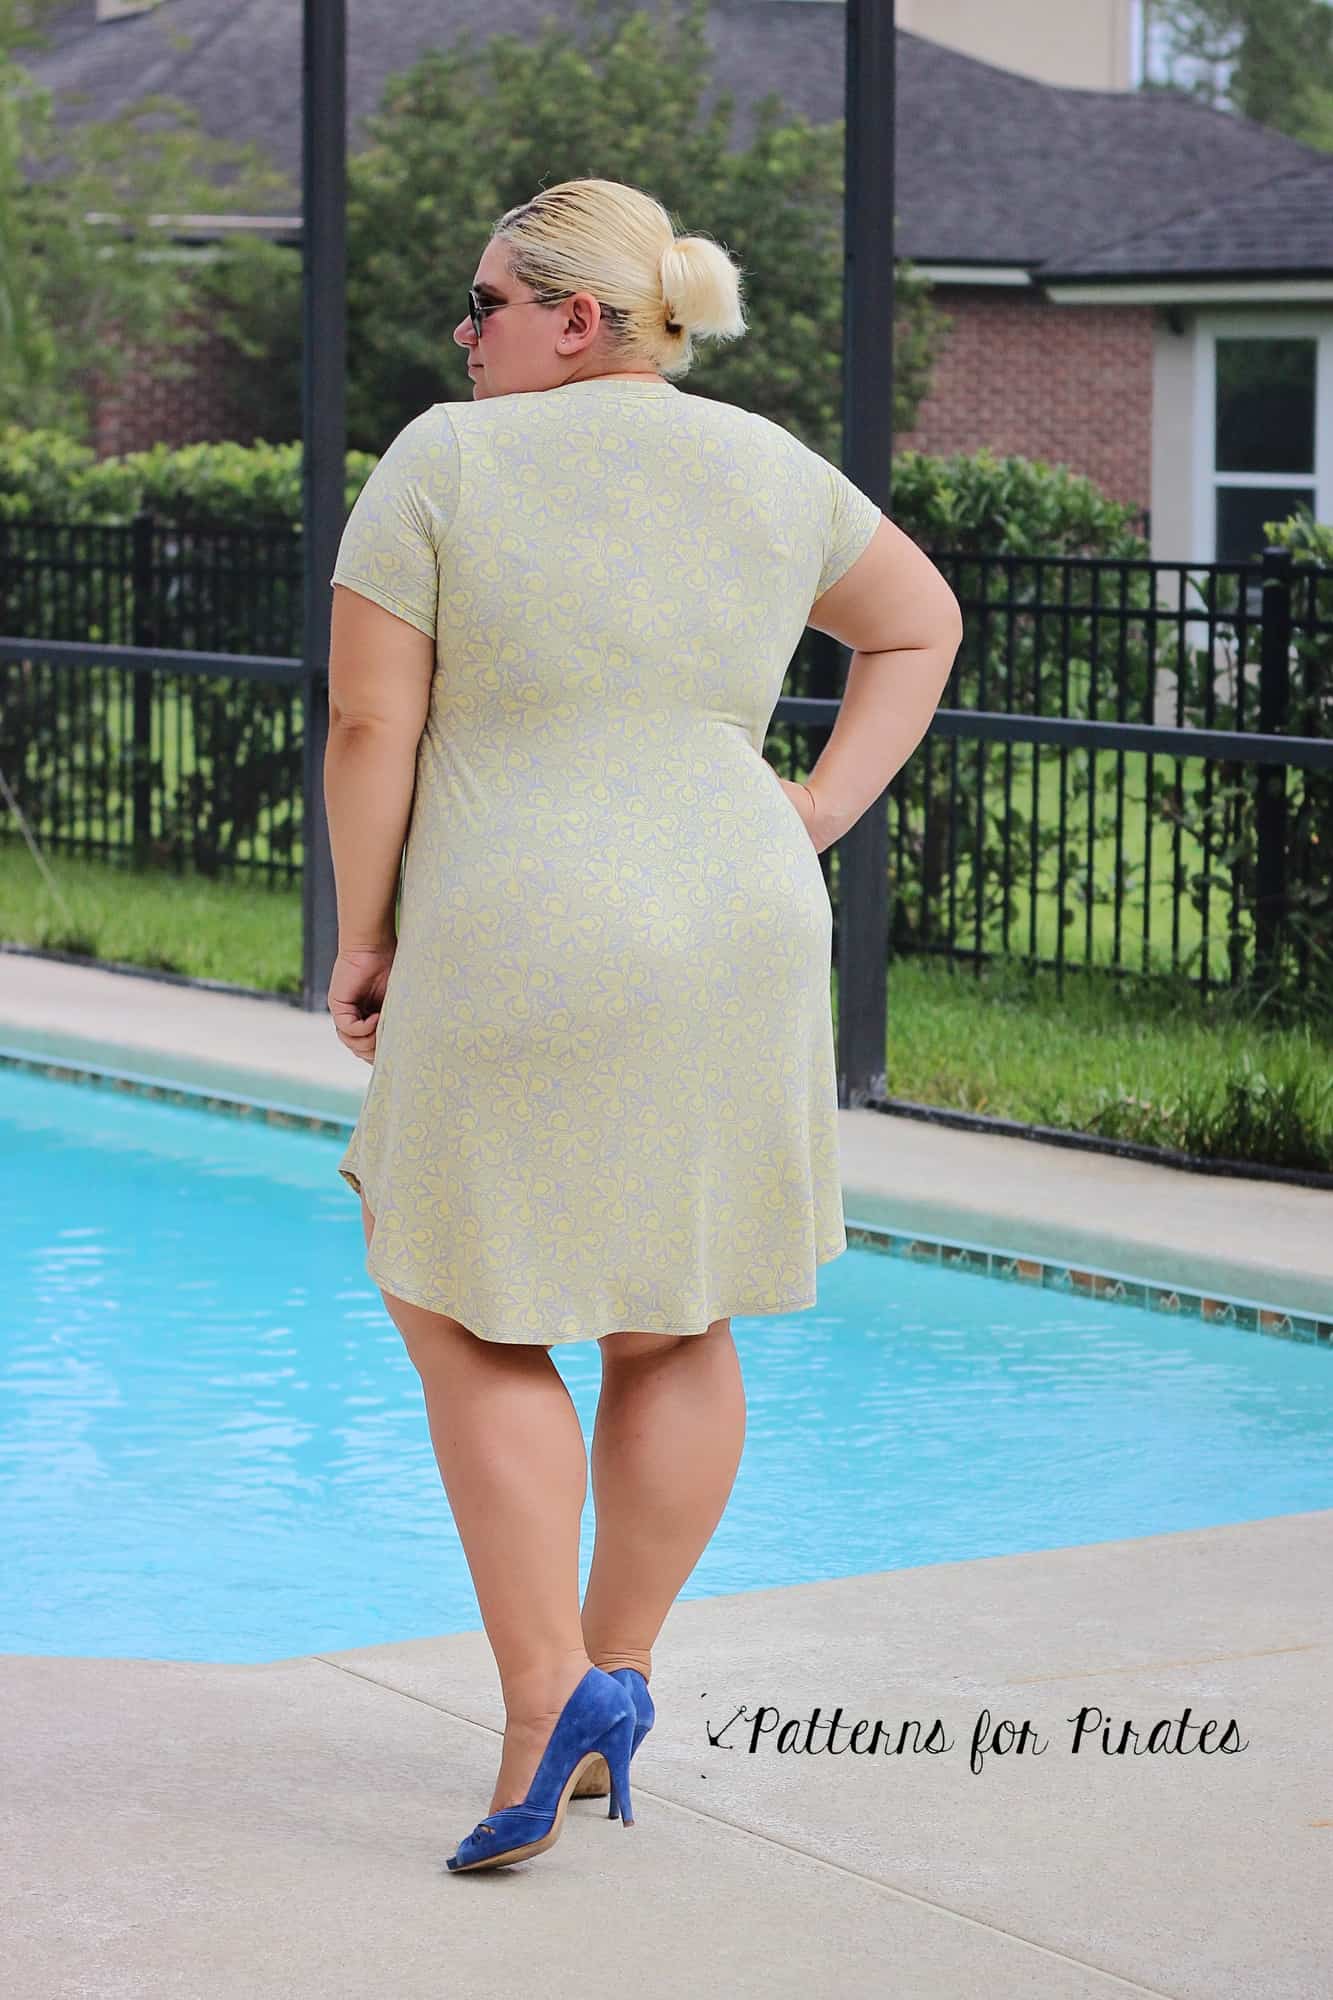
So you spent an hour picking the perfect fabric, perfect coordinates and matching thread. You’ve sewn your favorite P4P shirt and you only have one step left…the dreaded neckband. That’s when you start panicking and getting nervous about attaching the neckband and finishing your outfit. Fear no more!

Today on the blog I will give you 5 tips that will help you achieve that perfect neckband you are striving for all the time.

1. Choose the right fabric for your neckband!

Neckbands will be stretched when you attach them, they will be stretched when you put on or take off the shirt, so it is very important that fabric you use for the neckband has great stretch and great recovery. My favorite type of materials for neckbands are cotton spandex, rayon spandex, ribbing and rib knit. You can get away with using some brushed poly as long as the recovery is good. Avoid, scuba, french terry and 2 way poly blends.


2. Always cut the neckband cross-grain!

Never cut your neckbands along the grain. Even if your fabric has 4 way stretch (which it should) the vertical stretch is not going to be as much as the horizontal one. If you don’t have enough of the main fabric to cut the neckband is best to use a coordinating fabric than cutting the neckband along the grain.


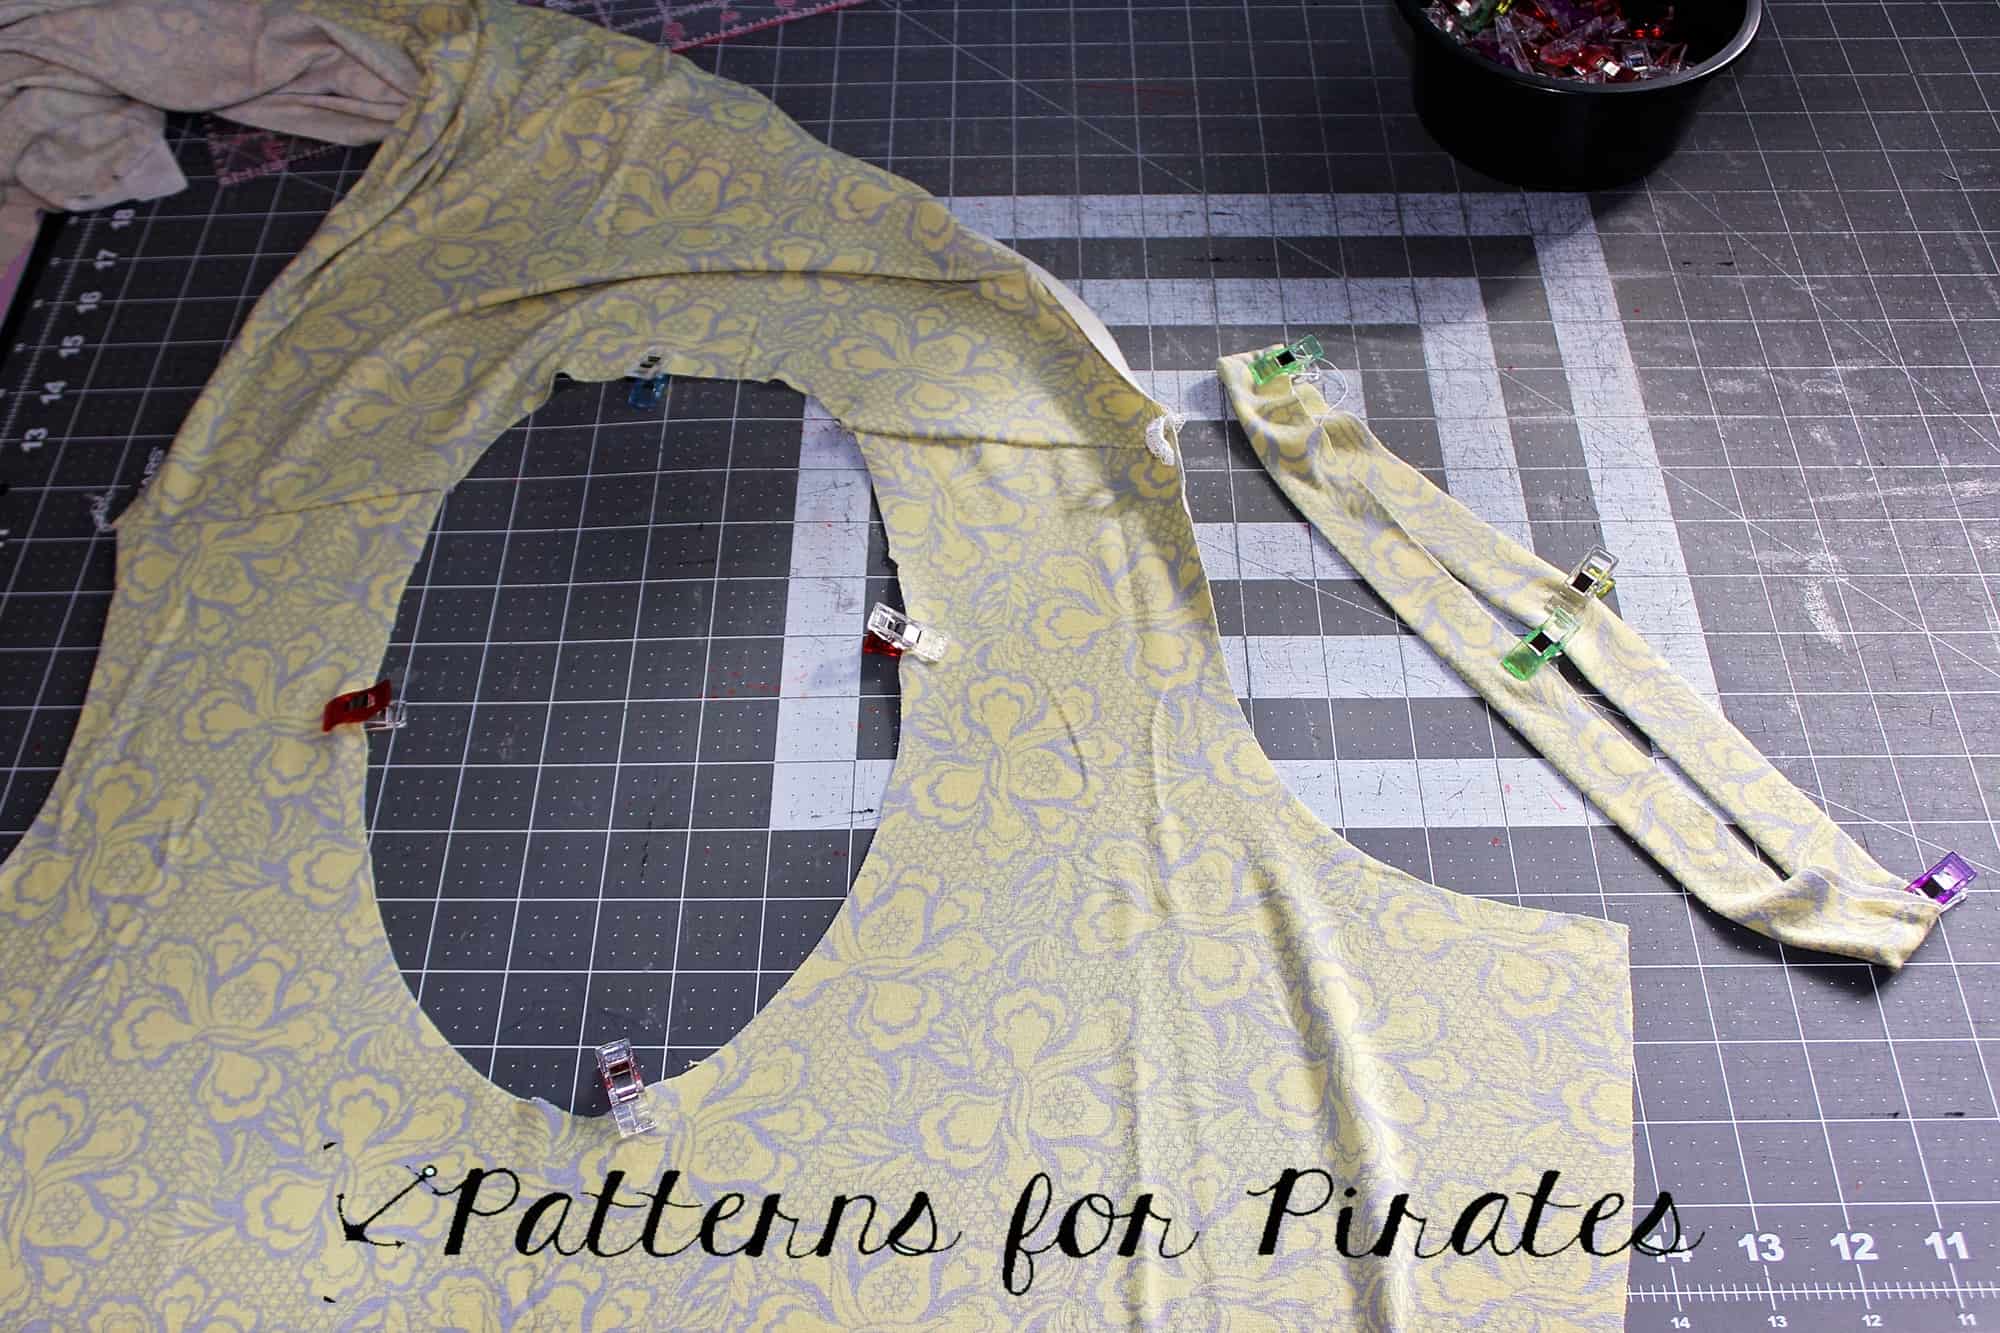
3. Mark the quarters of your neckband and neck opening!

It’s very important that you find and pin (or clip) the quarter points of the neckband and neck opening. After you have sewn the neckband RTS at the ends so you have a loop, fold it length wise and mark where the seam is. This will be the back of your neck band.  The center front of the neckband will be on the opposite side. Now fold it in half bringing the center front and back markings together. The fold will mark your two quarters.

To find the front and back  neck opening centers, bring the shoulder seams wrong side together. Where centers will be where the folds are. Mark them with a pin, a clip or a small snip. With the fabric still laying flat, bring the center front and back together. Your quarter marks will be at the folds. Mark them as well. You will see that the side neck opening quarter marks are NOT at the shoulder seam. The front opening is larger than the back opening.

For all you visual learners, here is a video of the process.


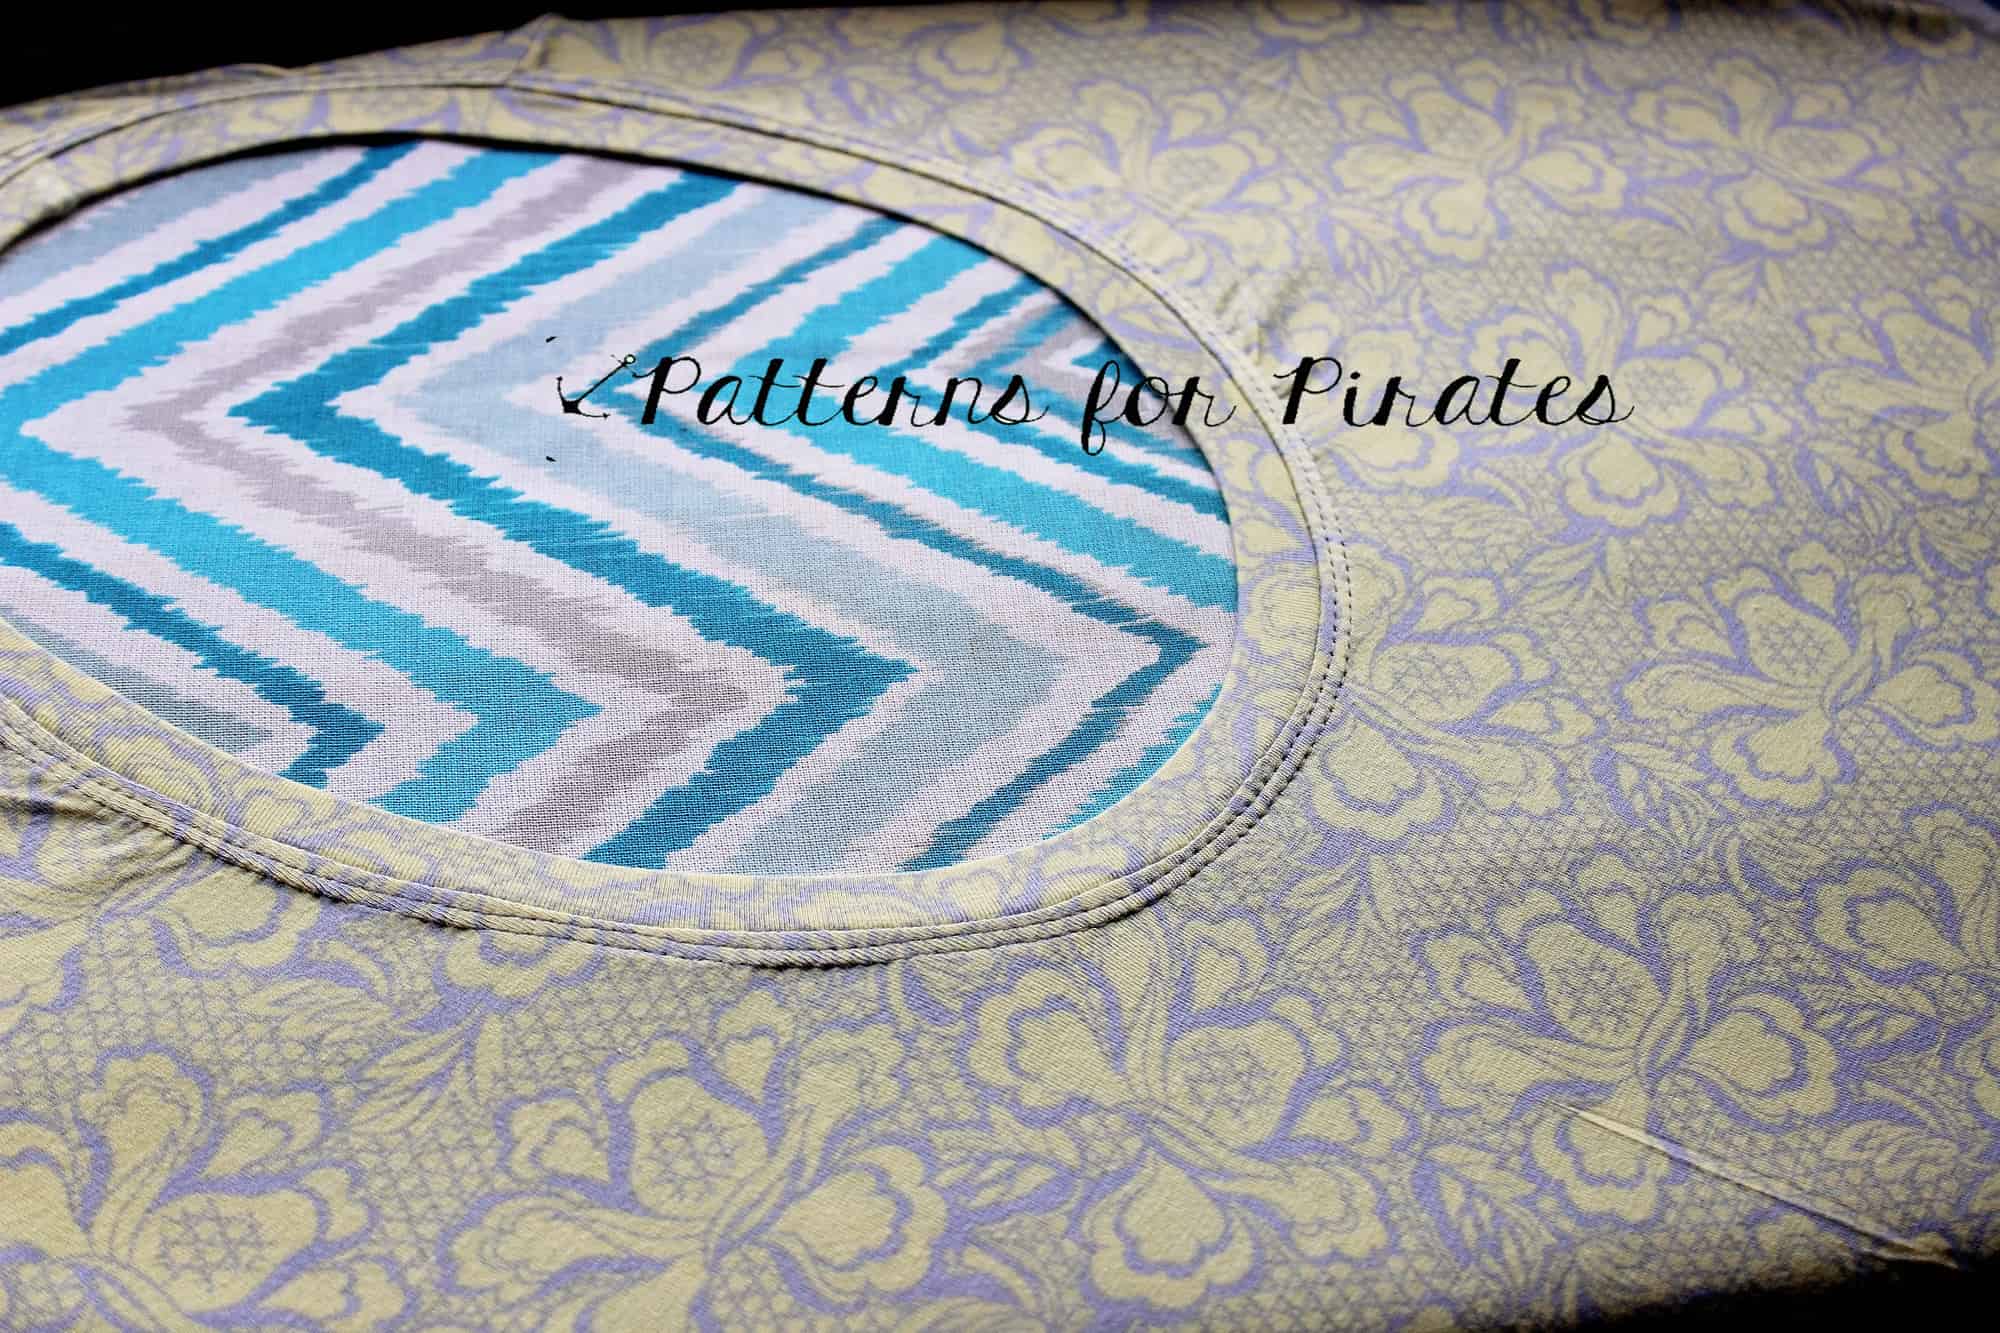
4. Use the right stitches!

Avoid using a straight stitch when attaching the neckband. As I mentioned earlier, the neckband will be stretched and pulled so you want to make sure the stitches are up to the job. If you are using only your sewing machine, attach the neckband with either a stretch stitch or a narrow zig zag stitch. I prefer to use my serger for this step but it is not mandatory. Once you attached the neckband, press the seam allowance towards the shirt. You will now be top stitching it down with your coverstitch machine or your sewing machine. You can top stitch with a wide zig zag stitch, a stretch stitch or twin needles. Be sure to check out our Twin Needles tips and tricks blog too.

You can see how I attached the neckbands here:


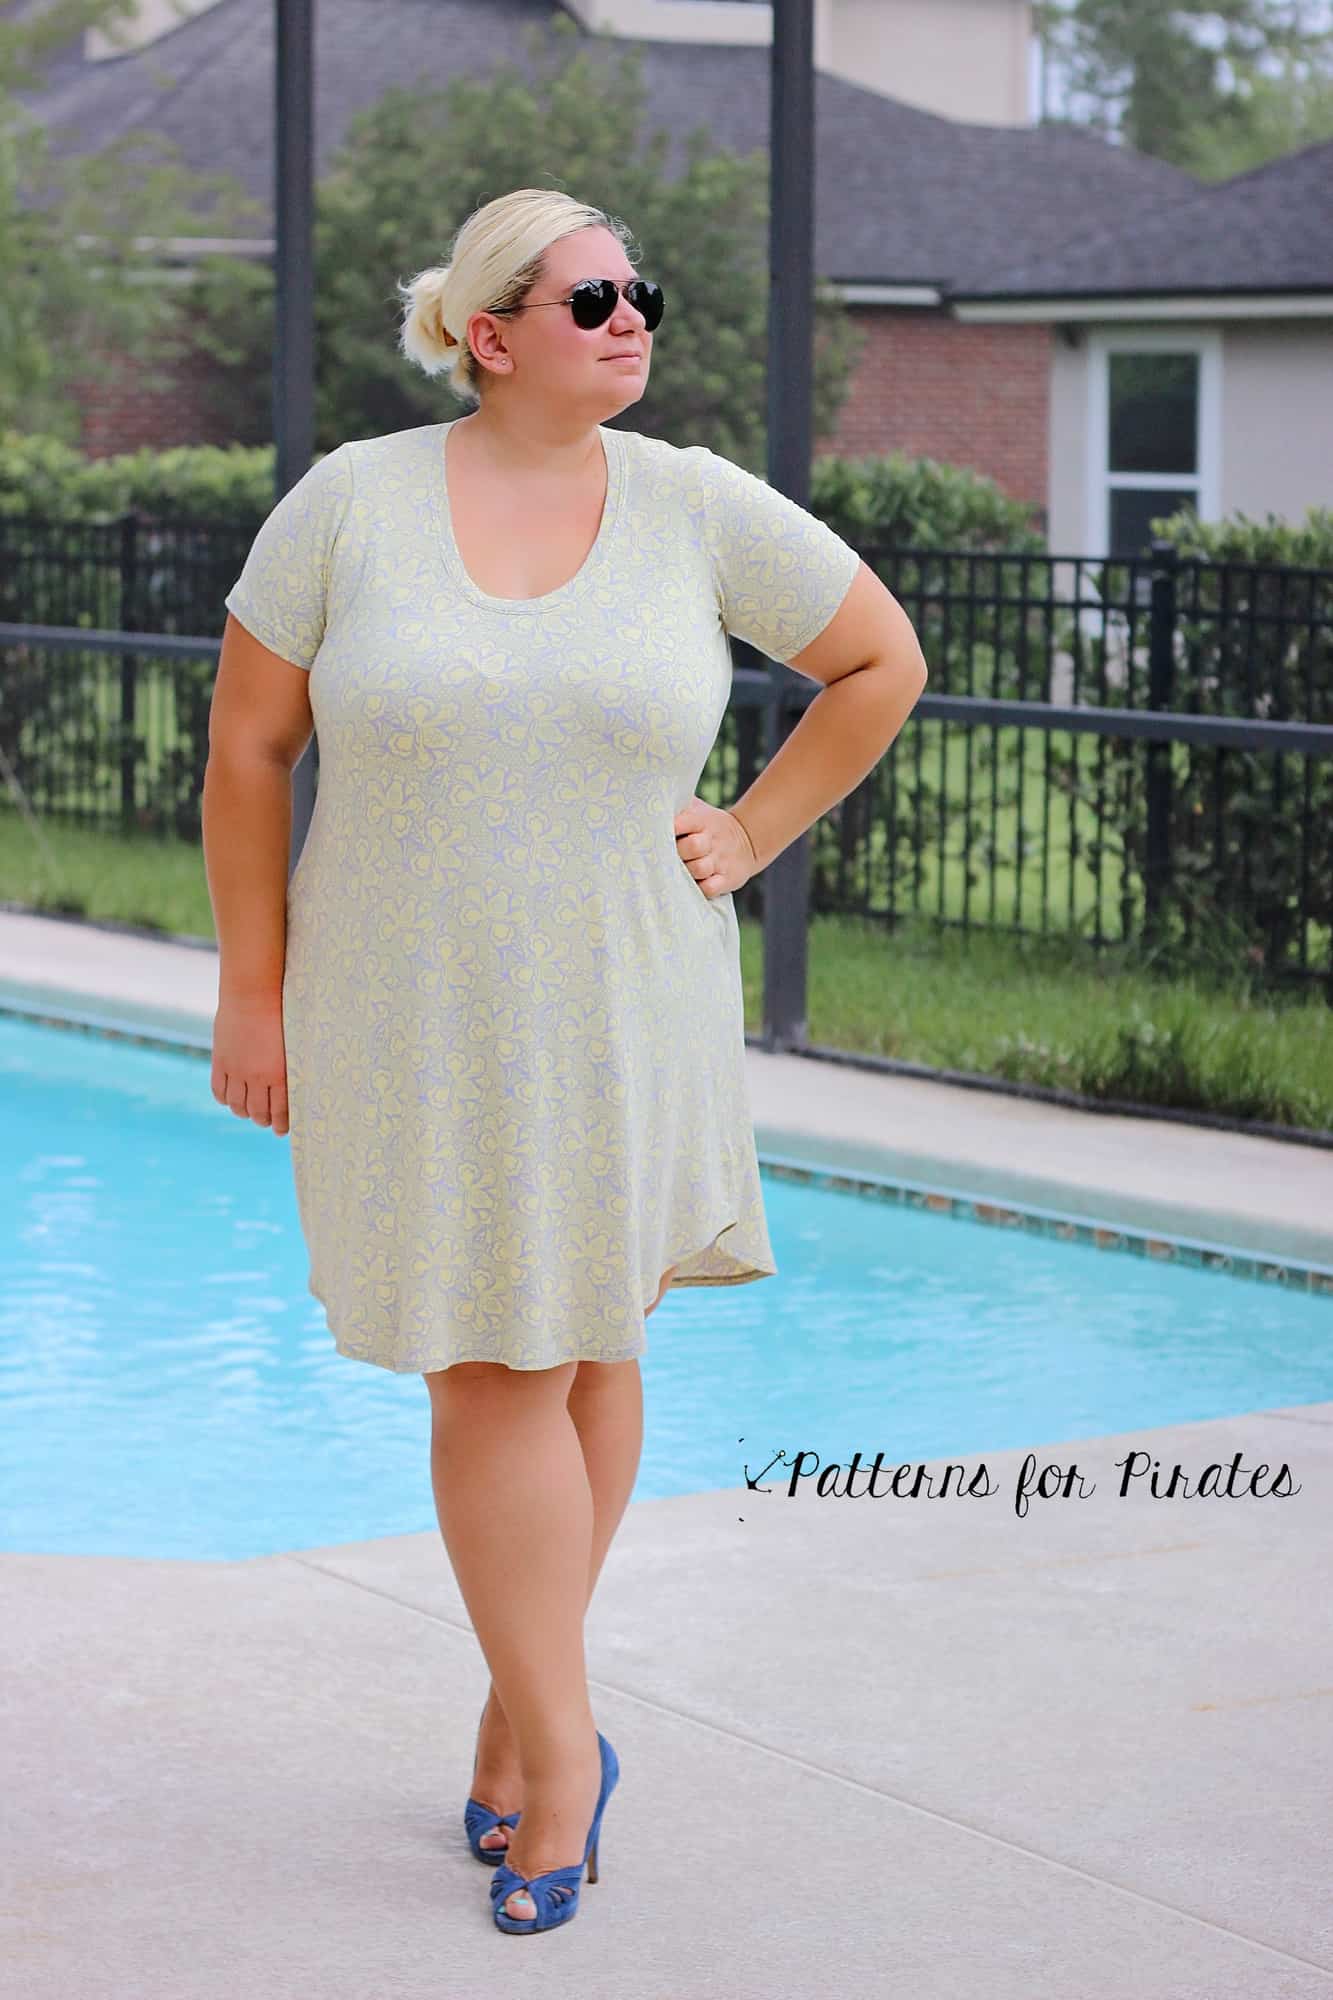
5. Press, press, and steam some more!

If you’ve followed the tips I gave you and notice a slight waviness, don’t panic. It’s normal when sewing knits especially if they are on the bias (as is part of the neck opening). Go back to your ironing board and give the neckline a good hefty steam press. Most of the times my neckbands are cotton spandex based and I crank up my ironing machine all the way to the “linen” setting. Make sure you test the heat of your iron on a scrap fabric first. If your shirt is poly based you will need a lower ironing temperature, you do not want to melt your fabric 🙂

There you have it! 5 easy to follow steps to achieve a perfect neckband all the time!

Happy sewing, pirates!

Filed Under: Frequently Asked Questions, P4P University, Sewing Techniques, Sewing with Stretch, Knit Fabrics 11 Comments

Peg Legs SAL: Day 7 – Recap and winners announcement

May 3, 2017

We made it to the last day of the Peg Legs sew along. You all did an amazing job this past week! I’ve seen so many beautiful pairs of Peg Legs being sewn.

Let’s recap what we did so far:

Day 1: Fabric selection

Day 2: Printing and measuring

Day 3: Cutting the fabric

Day 4: Attach add ons

Day 5: Sew inseam and attach legs

Day 6: Attach waistband

Without further ado…here are our 5 Peg Leg SAL winners


First winner: Sarah Wilkinson

$15 P4P store credit

$50 So Sew English store credit

$50 Stika Fabrics store credit

$50 Midnight Mountain Fabrics store credit

$25 Beanpop store credit

$50 RP Custom Fabrics store credit


Second winner:  Erin Cooper

$15 P4P store credit

$50 Aurora Designs store credit

$50 Little Bear Fabric + Trim store credit

$50 Smoogie Custom Fabric store credit

$25 Little Lady Bug Fabrics Gift Card

$30 Store Credit($50 NZD) Levana Fabrics


Third winner: Raven Brown

$15 P4P store credit

$60 Boss Lady Fabric store credit

$50 The Fabric Snob store credit

$50 RockerBye Destash Fabric store credit

$50 Water Tower Textiles Canada store credit

€25 Droomstoffen store credit


Fourth winner: Lorie Peugh Judd

$15 P4P store credit

$50 Made Whimsy/ You Made Something store credit

$25  Star Dust & Moon Beam Textile Company gift card to each store

$50 Pretty Posh Prints store credit

$50 Sash Fabrics store credit

$30 Phat Quarters store credit

Big prize winner: Phillipa Lyes

$50 P4P store credit

$100 Sincerely Rylee store credit

$75 Sew Vagabond store credit

LFRB full of fabric from Sly Fox Fabrics

$50 True North Fabrics store credit

$50 Sweet N Charmed Fabric store credit


Congratulations to all of the winner and all participants! Please contact the shop owners to claim your prizes.


Thank you to the sponsors who made all these amazing prizes possible. Be sure to check out their awesome fabric selections!

Made Whimsy Fabric

Sew Vagabond

Sly Fox Fabrics

True North Fabrics

Sincerely Rylee

RP Custom Fabrics

Smoogie Fabric and Design

Sitka Fabrics

Star Dust and Moon Beam Textile Company

Levana Fabrics

Midnight Mountain Fabrics

Water Tower Textiles

Droomstoffen

Aurora Designs

Boss Lady Fabrics

Little Bear Fabric and Trim

Sash Fabrics

Rockerbye  Destash

The Fabric Snob

So Sew English

Fabricmail Sweet N Charmed

Phat Quarters, Pretty Posh Prints

Little Ladybug Fabrics.

Filed Under: Contest/Giveaway, Free Pattern, Sew-A-Long, Uncategorized 4 Comments

Peg Legs SAL: Day 6 – Attach waistband (with optional pocket)

May 1, 2017

Can’t believe we’re almost at the end of the sew along. Today we’ll be attaching the waistband. Whether you’re doing the high or low rise or the contoured waistband like I did, now is the time to add it to the leggings. This step can also be done with the sewing machine or the serger. If you use a sewing machine, remember to set it for a stretch stitch. A triple stretch stitch will work great!

If you are attaching your waistband with your serger you can either do a regular overlock stitch or you can even do a flat lock stitch. Using a flatlock stitch will eliminate the bulk at the seam that you get with an overlock stitch.

For this sew along I used the new contoured  waistband which, let me tell you, is the best thing ever! Best tummy control while still comfortable.

It is very important to cut your fabric along the grain. We have seen some FB comments suggesting to cut the waistbands against the grain for more support. I highly discourage that because your peg legs will loose shape in the wash and will not fit as intended.

TIP: If you are more of a rectangular shape than hourglass, you can add elastic to the top seam of your contoured waistband.

You can see the waistband construction video here.

Don’t forget to post your final picture in the Peg Legs SAL event and hastag it #peglegsSAL before May 3rd 10 pm EST. Be sure to come back on Wednesday for the Sew Along recap and the winners announcement.

Filed Under: Contest/Giveaway, Free Pattern, Sew-A-Long, Uncategorized 11 Comments

Peg Legs SAL: Day 5 – Sew Inseam and attach legs

April 30, 2017

Welcome to day 5 of the Peg Legs Sew Along! Today we will be sewing the inseam, hemming each leg and attaching them. Start by pinning (or clipping) the inseams on each leg, right sides together. You can either serger it or stitch it with your sewing machine. If you use your sewing machine for this step, make sure to use a stretch stitch!

If you’re using your serger, test the stitches on a scrap piece of fabric, preferably the same as the one you used for your pegs.  Testing first will give you a chance to see if you need to make any adjustments to the tension or stitch length or width.

Once you’ve sewn the inseams you can either hem or sew the crotch curves. I prefer to hem first because I find it easier to maneuver if the legs are not attached together. When hemming your Peg Legs make sure you steam press before and after you stitch. You can use your coverstitch machine or your sewing machine for this step, just remember to use a stretch stitch.

Last step of the day is sewing the crotch curve. Pin or clip the curve right sides together, matching the inseam and the back and front rise. The easiest way to do this is to turn one of the legs inside out and place the other leg (right side out) inside.

You can see the day 5 video here !

When you’ve finished these steps, don’t forget to post a picture in the Peg Legs SAL Event and hashtag it #pegsalday5.

Filed Under: Contest/Giveaway, Free Pattern, Sew-A-Long, Uncategorized 1 Comment

Peg Legs SAL: Day 4 – Sew add ons (pocket, color block, side strip etc)

April 29, 2017

Hello there! Day 4 is here and we’re starting to sew! Woohoo! Today we’ll be putting the leg pieces together. If you added a pocket, or a side strip, or color blocked the side strip, now is the time to put them together.

I love to work “assembly line style” so I pin…well clip…all pieces together first. Then sew/serge and then topstitch. If you are using a sewing machine make sure you use a stretch stitch like the “thunderbolt” , a triple stretch stitch or a very narrow zig zag. When top stitching with a sewing machine I highly recommend using twin needles. Check out the Twin Needles Blog for some tips and tricks!

For my SAL Peg Legs pair I stitched with my serger and topstitch with the coverstitch machine. You can see how I put together the add ons in the day 4 video here!

If you want to take it up a notch you can use decorative top stitching too. The Decorative stitching blog is an excellent source for all of you who would like to take the Peg Legs up a notch!


Once you’ve assembled your leg pieces post a picture in the Peg Legs SAL Event and hash tag it #pegsalday4. See you back here tomorrow!

Filed Under: Contest/Giveaway, Free Pattern, Sew-A-Long, Uncategorized Leave a Comment

Peg Legs SAL: Day 3 – Cutting the fabric

April 28, 2017

Welcome to day 3 of our Peg Leg sew along. So far we have picked the fabric(s) we will use, measured for accurate sizing and printed the pattern. Today we will be cutting the fabric so grab those sharp scissors or rotary cutter and let’s get started.

It is imperative that you cut your fabric following the grain/stretch recommendation. Do not cut your pegs against the grain even if you feel that it may save you some fabric. The final product will not look as nice and you will notice sagging and misshaping.

Don’t forget to cut MIRROR pieces for both your main part and the color block ones! The easiest way to make sure you cut all the fabric correctly is to fold the fabric and make only one cut instead of two mirrored ones. Check out day 3 video here!

TIP: Cut all pieces of the same fabric before cutting the pieces of the coordinating fabrics.

Once you cut your fabric post a picture of the pieces in the Peg Leg SAL Event and hashtag it #pegsalday3. See you back here tomorrow!

Filed Under: Free Pattern, Sew-A-Long, Uncategorized 8 Comments

Peg Legs SAL: Day 2 – Printing and measuring

April 27, 2017

Today we will be printing the pattern in the size needed. In order to do that it is very important that you take your most accurate measurements. You will need your waist, hips and inseam measurements in order to choose the correct Peg Legs size. P4P has an amazing blog that gives you tip for accurately taking your measurements. You can read all about it here.

If you are like me you may need to grade between sizes. My hips put me in a larger size than my waist….or maybe I should say my waist puts me in a smaller size than my hips? 🙂 Worry not! We have a blog post for easy grading too!


Two things are very important  to remember when grading the pattern.

  1. Smooth transitions between sizes! 
  2. Grade both the front and the back of the legs.

Now that we established which size(s) we need it’s time to print the pattern. Did you see that the new updated Peg Legs and Add On pack feature layers now? How amazing is that? Save that ink and print just what you need. Haven’t used layers before? Check out this blog before you do so. If you need to grade between sizes you just need to select the sizes needed when you print. Easy peasy.

Day two will not require you to post any pictures in the Peg Leg SAL event. See you all back here tomorrow!


Thank you to our sponsors!

Filed Under: Free Pattern, Frequently Asked Questions, Sew-A-Long, Uncategorized 1 Comment

Peg Legs SAL: Day 1 – Choosing the fabric

April 26, 2017

Welcome to day 1 of our big 50K celebration Peg Legs Sew Along! With all the amazing things happening this week it was a given that we would sew together the new updated and FREE Peg Legs and add ons patterns.

Let’s get started by selecting the fabric. This step is very important as choosing the right fabric is extremely important ensure proper fit. Weather you choose, double brushed polyester, cotton spandex or performance knit, it is a must to check the vertical and horizontal stretch. The Peg Legs require the use of fabric with 50% horizontal AND vertical stretch. Typically fabric with 5% spandex or more will work.

  • Cotton Lycra/spandex (note- Lycra=spandex). Medium weight is usually 10oz or more
  • Rayon spandex.  This is typically thinner so may not be opaque.
  • Nylon spandex / Supplex – great for performance wear. This usually has a higher content of spandex and will feel tighter, much like compression wear.
  • Polyester spandex – brushed polyester spandex is what many of the boutique leggings are made from however, it is a slightly harder to find the fabric in retail stores. Be sure to check the vertical stretch percentage as some may be less than the 50% require stretch.
  • Stretch Fleece – Fabrics such as Polartec Powerstretch are a 4 way stretch fleece.  Regular fleece, like blizzard, anti-pill and cuddle fleece found in retail stores are NOT recommended.

Our Peg Leg 101 blog is full of useful information for first time Peg makers and not only so be sure to bookmark it.

Have you decided which add on will you be using? So many choices, right? I will be making the color block option with a pockets for this SAL. Make sure you also check out the awesome hacks we have been showing you this past week.

I decided to use a this Cosmic Thunder nylon spandex and accent it with Lime moisture wicking poly spandex (both from Made Whimsy fabric). If you would like to mix and match fabric types I recommend using fabrics with similar weights and stretch. Remember to always prewash your fabric before cutting it! If you’d like to know more about the various types of knit fabrics out there, be sure to check out Knit Types blog here.

Once you decided which fabric(s) you will be using post a picture of them in the Peg Leg SAL Event and hash tag it #pegsalday1

We could not end day 1’s blog without telling about the awesome prizes. Make sure you sew along with us this week and post your daily pictures in the Peg Legs SAL event because 5 lucky winners will be receiving P4P store credit and fabric from our sponsors.

Thank you:

Made Whimsy Fabric

Sew Vagabond

Sly Fox Fabrics

True North Fabrics

Sincerely Rylee

RP Custom Fabrics

Smoogie Fabric and Design

Sitka Fabrics

Star Dust and Moon Beam Textile Company

Levana Fabrics

Midnight Mountain Fabrics

Water Tower Textiles

Droomstoffen

Aurora Designs

Boss Lady Fabrics

Little Bear Fabric and Trim

Sash Fabrics

Rockerbye  Destash

The Fabric Snob

So Sew English

Fabricmail Sweet N Charmed

Phat Quarters, Pretty Posh Prints

Little Ladybug Fabrics.

Filed Under: Contest/Giveaway, Free Pattern, Sew-A-Long, Uncategorized 3 Comments

#allP4Ptoday winners

March 31, 2017

DECEMBER

And just like that, a new year is almost here. Hope you all had a fantastic holiday season! We couldn’t end the year without announcing our last 2017 #allP4Ptoday winner!

So without further ado…our December winner is:

Laura Van Niejenhuis

Laura has been rocking #allP4Ptoday every month since we started the contest. From casual to party attire, Laura has made them all and looks radiant in them.

Thank you all for a fantastic 2017!🎉 Keep posting your all P4P outfits next year too, we will be watching! 😉

NOVEMBER

Ahoy, pirates! We hope you had a wobbly gobbly Thanksgiving celebration! We saw some awesome P4P outfits being shown off this month. As always choosing only one winner was super hard.

Drumroll…. our latest #allP4Pwinner is Maggie Runyon!

Maggie’s post brought a smile to all the team’s face so we just had to pick her as our November winner. She looks adorable in her Wiggle dress … but little miss stole the show in her Fav tee dress. Congratulations, Maggie!!

We can’t wait to see your holiday all P4P outfits! Use the hashtag #allP4Ptoday so we can spot you!

OCTOBER

Boo! The trick or treating month has come and gone! We absolutely loved seeing you rock the Gone Batty shirt and incorporating P4P in your fall sewing.

Our October #allP4Ptoday winner is…. MAGDELYN GAMBLE !

Magdelyn rocked those Disneyland family outfits! She is definitely an inspiration, she chose the perfect P4P patterns ( Henley, Peg Legs and Sugar Pie) so that everyone was comfortable for the long walks while still being “park ready” and cool.

The Sweetheart  dress gets a lot of love from our October winner, she looks absolutley gorgeous in both the dress and the peplum top. Thank you, Magdelyn for sharing your creations with the P4P group.

I can’t wait to see your November entries and how you incorporate P4P in your Thanksgiving sewing. Don’t forget to add the #allP4Ptoday to your posts so we can see YOU when we search for our monthly winner.


SEPTEMBER

And just like that fall is here!!! I think most of you are just as excited as I am for some cooler weather and some pumpkin spice everything.

September P4P group wall was filled with amazing creations! We’ve seen lots of pegs, SOS and cocoons…clear sign of autumn’s arrival. So without further ado….our September #allP4Pwinner is…

JESSIE KILGER!

Jessie rocked her Pegs, SOS, Cocoon Cardigans and Favorite Tees like a boss! I loved how she shows the versatility of our patterns and look adorable doing it.

Keep posting those #allp4ptoday outfits in the P4P group! Maybe October’s winner will be YOU!


AUGUST

Ahoy, pirates! The month of August brought a lot of fantastic #allP4Ptoday outfits. We’ve seen kids going back to school and teachers ready for a brand new school year. One mom and teacher really stood out this month so let’s give a big “Congratulations!” to our August winner…

Britina Gilkey


Britina really brought her A game this past month…check out how many cool #allP4Poufits she posted!

From PSD to Peg legs, she’s done it all! We were just so happy to see all the great posts.

Happy sewing, pirates and remember to hash tag your #allP4Ptoday outfits.


JULY

Another summer month has come and gone. Have you guys started sewing for fall? Personally, I am not quite ready to give up on summer just yet…so when I was scrolling to all the amazing #allP4Ptoday photos one stood out for being what summer is all about.

Our July all P4P today winner is…..

Callie Zerby

Doesn’t Callie look stunning in her Hello Sailor and Siren Swim Top ? We hope you had an amazing birthday party, Callie!

If you’re wearing all P4P, snap a pic, post it in the group and tag it #allP4Ptoday…you may be our next lucky winner!


JUNE

Summer is officially on and so are the #allP4Ptoday outfits! We loved seeing all the light and breezy creations you posted this month and the occasional layered look from our friends down under. You guys were really rocking your P4P this month and we couldn’t be more proud.

Without further ado…the June winner is:…Beth Pannecoucke !

Beth has been showing off her baby bump comfy looks throughout the month so she caught the team’s eye. Just look how adorable she looks in her Favorite Tee and Palazzo short.

From the Cross my Heart Cami to FST and Cocoon Cardi, Beth has been rocking them all!

Don’t forget to hash tag your all P4P outfits post in August too. We look forward to seeing some of your Summer of Wovens creations too!


MAY

Can’t believe we are at the end of May already. Another month has passed and you have all outdone yourself. We’ve seen so many beautiful #allP4Ptoday outfits…you guys really like to make it hard on us to choose the monthly winner.

We’ve seen some spring outfits, some summer ones, even some special event ones. MeMadeMay was big in the Pirates land!

Drumroll….May’s winner is…. Susan Priddy – Fox! Susan has done a beautiful job making her and her daughter’s outfit for such a special event. Congratulations, Susan!

Don’t forget that the #allP4Ptoday contest is ongoing so keep those hashtags coming. You never know, next winner may be YOU!


APRIL

Once again you guys have not made our job easy, but that’s a good thing! We absolutely love seeing all of you rocking P4P outfits. April brought a lot of stunning Easter entries, I wish we could list them all.

Ok, Ok…I won’t make you wait any longer. Our April winner is Emily Merkel! Just look at this cool dude and tell me you can resist his smile. I couldn’t. He is just the cutest showing off his #allP4Ptoday outfit.

Keep those hash tags coming as there will be a winner every month. Happy sewing, pirates!

MARCH

Ohh wow! You guys have not made it easy for us to choose a March winner. We loved seeing you all rocking #allP4Ptoday and everyday.

Without further ado….our March winner is….. Lizzy Price! Lizzy just shines in all her pictures and since I couldn’t choose just one of them, here are a few that stood out. I think she might just be our SOS pants queen 😉

Thank you all who posted during March and don’t forget to keep showing off those P4P outfits. Use hashtag #allP4Ptoday so we can find them and who knows? Maybe YOU will be our April winner. You can read the contest details here.

Filed Under: Contest/Giveaway, Uncategorized 1 Comment

Spring Women Capsule

March 30, 2017

As I was going though my closet a couple of weeks ago I realized that I barely have any solid color pieces. I made it a point to make more solid clothes so as soon as I learned of the P4P/M4M capsule collaboration plans I knew I have to step up my game and have a plan. I started with building just a start off, mini spring capsule. I chose the pieces based on what I feel most comfortable wearing and what will suit the hot Florida spring.

I made myself sew mostly solids…you have no idea how hard that is when you’re used to making only outfits in bold prints 🙂 . The best thing to  consider when building a mini capsule is how the pieces will mix and match together. Try to use solids that will visually complement one another.

If you do want to add print to your capsule, use prints that will include some of your colors in your solid line up. For example, I chose this dandelion Art Gallery cotton spandex for my M4M Chloe skirt because there is white and aqua in the print and the background color complements my capsule tops beautifully.

I highly recommend including a white or black top in your capsule. For my white option I chose the M4M Mama Ava because it’s relaxed fit will work with all my bottom pieces.

Layering pieces are a must when you plan out your capsule. I went with the Free Spirit Tank and a short sleeve Cocoon because I can easily transition them in summer.

The Cross My Heart Cami was a must because…just look how perfect it layers with the Pumpkin Spice Dolman and the Mama Isabel Dress.

I hope my mini capsule inspired you to try one for yourself too. I know now I am even more motivated to make a capsule for my boys. Their closet lacks solid basics pieces even more than mine…but that will change! 🙂

So there you have it…9 pieces…a lot of possibilities.

Don’t forget to check out the P4P/M4M capsule contest for a chance to win some amazing prizes!

Spring Mini Capsule Sewing & Contest

Alex

Filed Under: Blog Tours, Contest/Giveaway, Uncategorized 4 Comments

  • « Previous Page
  • 1
  • …
  • 19
  • 20
  • 21
  • 22
  • 23
  • Next Page »

connect with me

  • Email
  • Facebook
  • Instagram
  • Pinterest
  • YouTube
Privacy & Cookies: This site uses cookies. By continuing to use this website, you agree to their use.

To find out more, including how to control cookies, see here: Cookie Policy
  • Privacy Policy
  • Refund Policy
  • Contact Us
  • About

Copyright © 2026 Patterns for Pirates

Copyright © 2026 · Genesis Framework · WordPress · Log in