I have been longing for spring weather…and with that day dreaming of warmer weather came the vision of the Grace Dress…but it is still flipping back and forth WILDLY from cold to warm here, so I made sure to have some cooler weather options too…
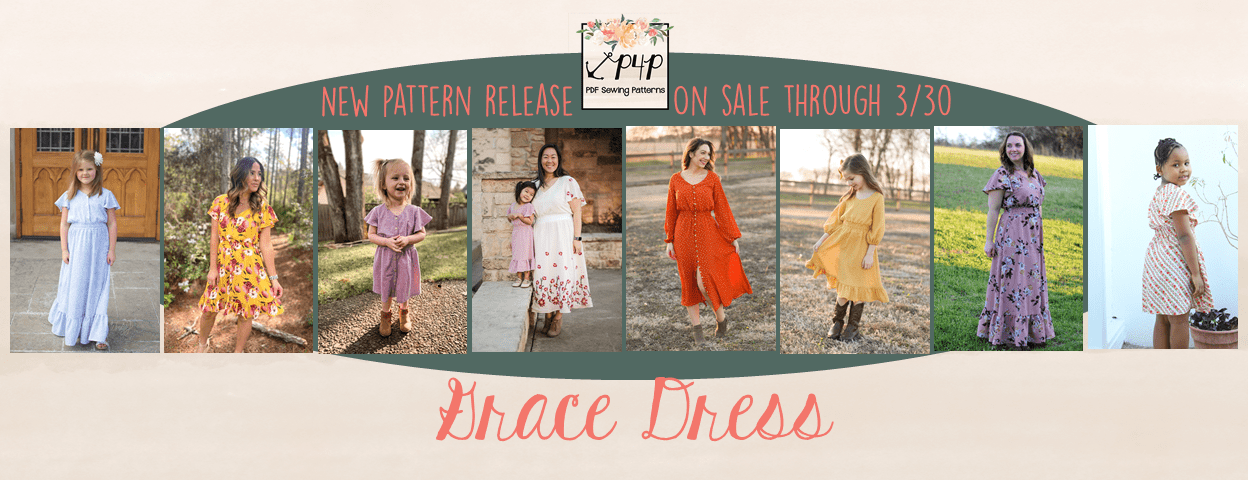
The Grace Dress is a perfect woven dress that can take you year round and give you enough styles to create some amazingly wardrobe staples. With all the different sleeves, length options, and the comfortable and flattering silhouette you will be fun, flirty, and romantic with this gorgeous flowy style.

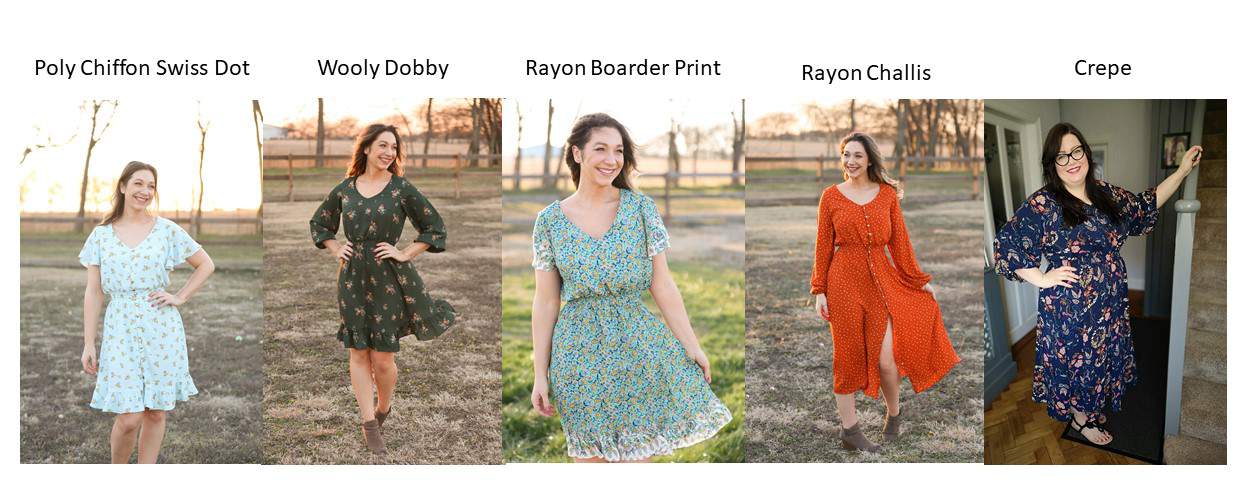
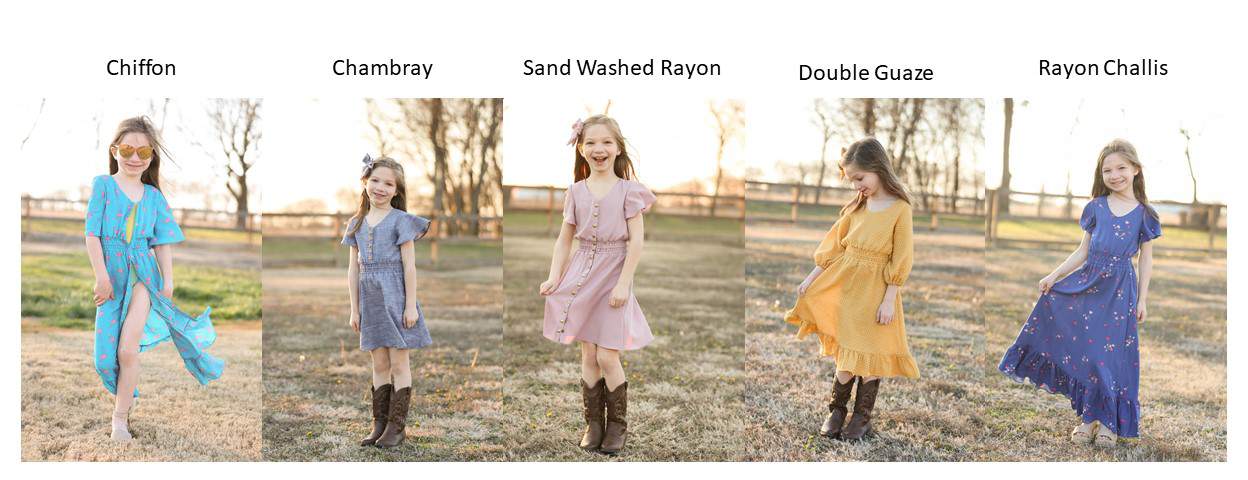
The Grace Dress is a great basic woven dress. You can use this pattern to build perfect classic dresses with that will take you to any occasion. Drafted for a non-stretch, woven apparel fabric with good drape means you will be able to swish and swoosh your skirts around feeling extra glamourous. The different length and sleeve options mean you can use this pattern to create a wide variety of finished dresses that work for any season.
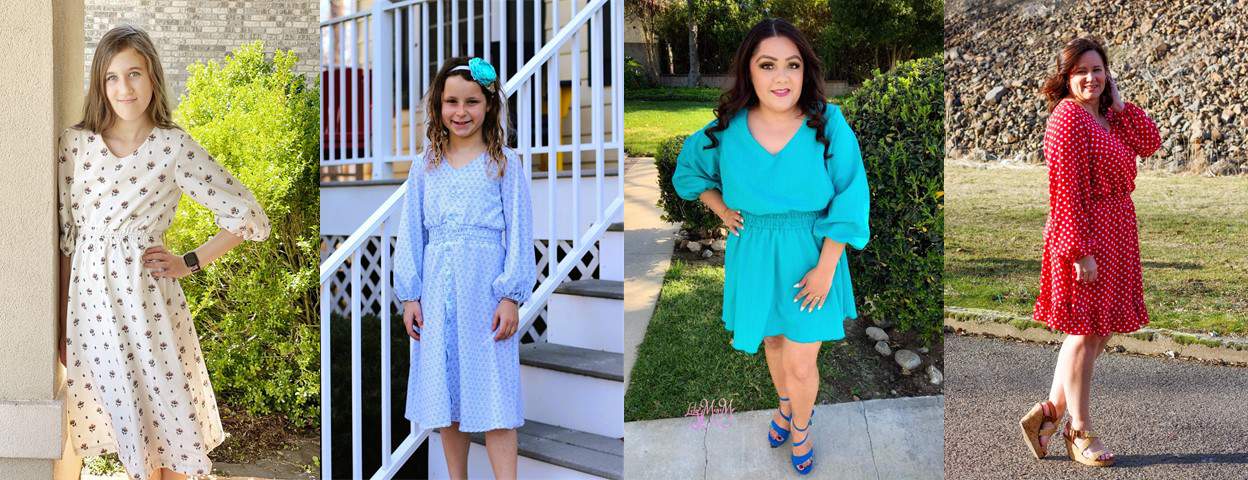
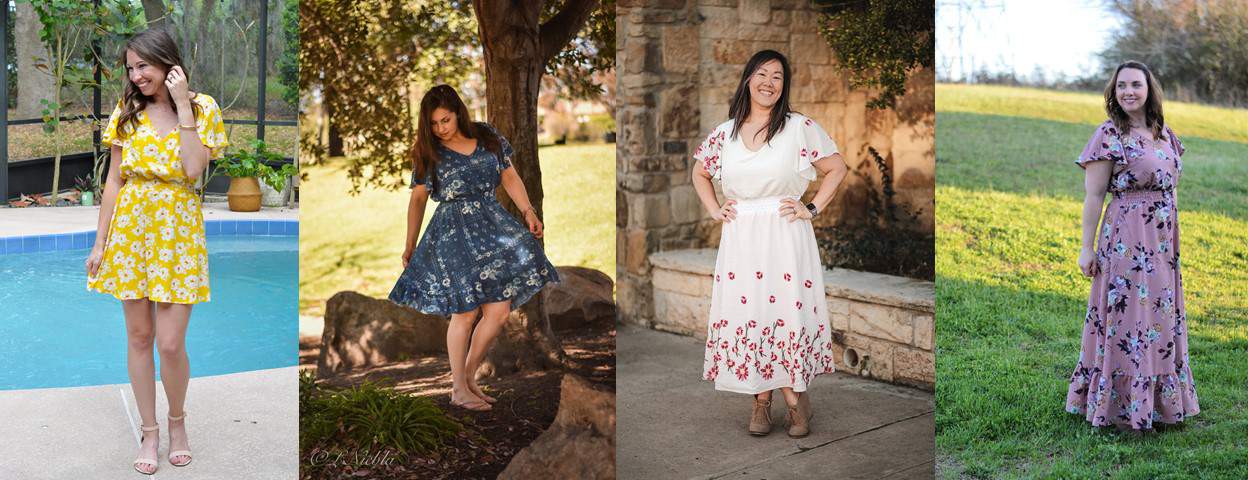
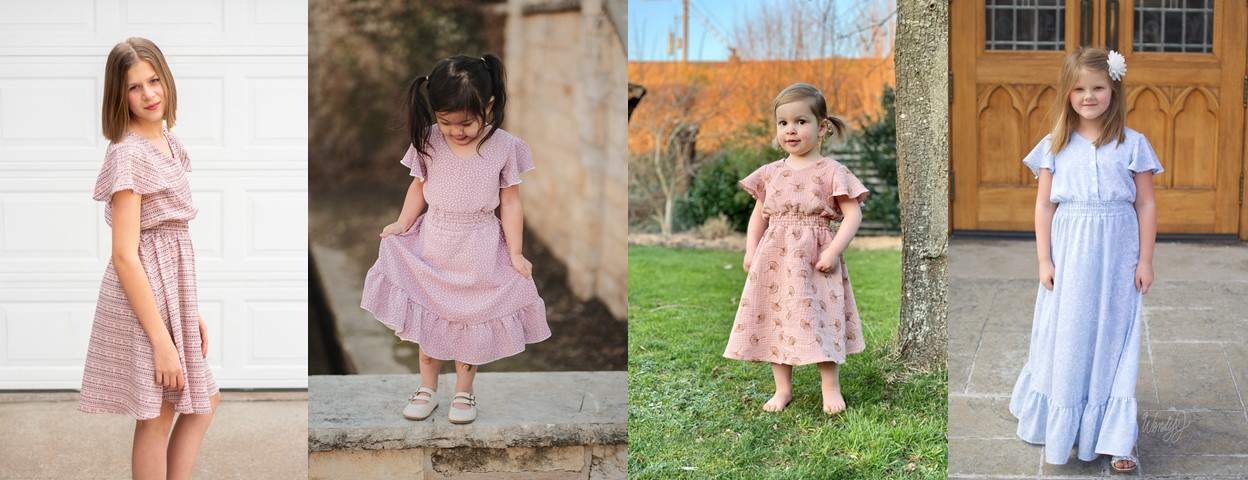
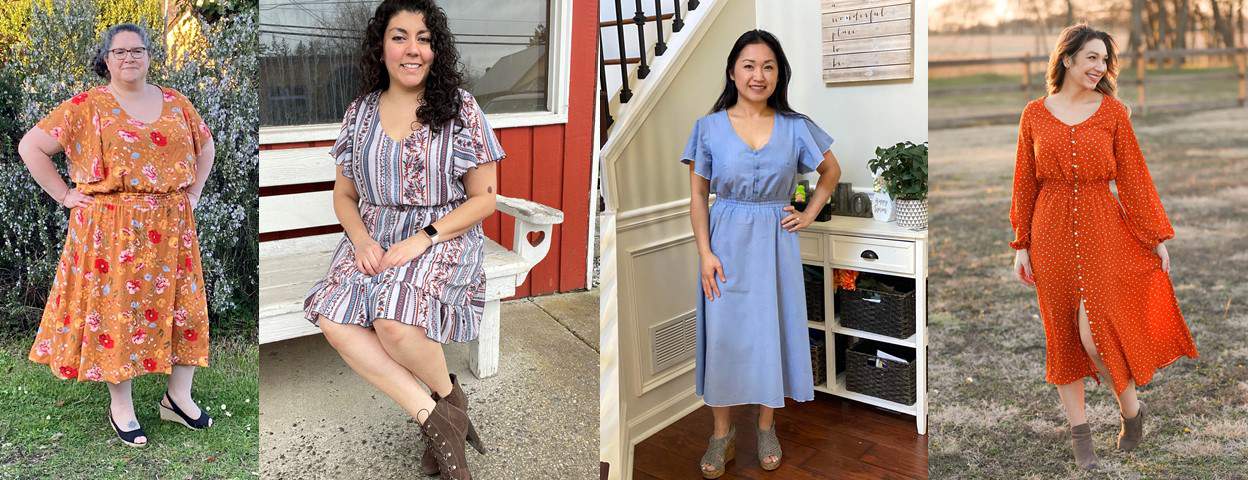
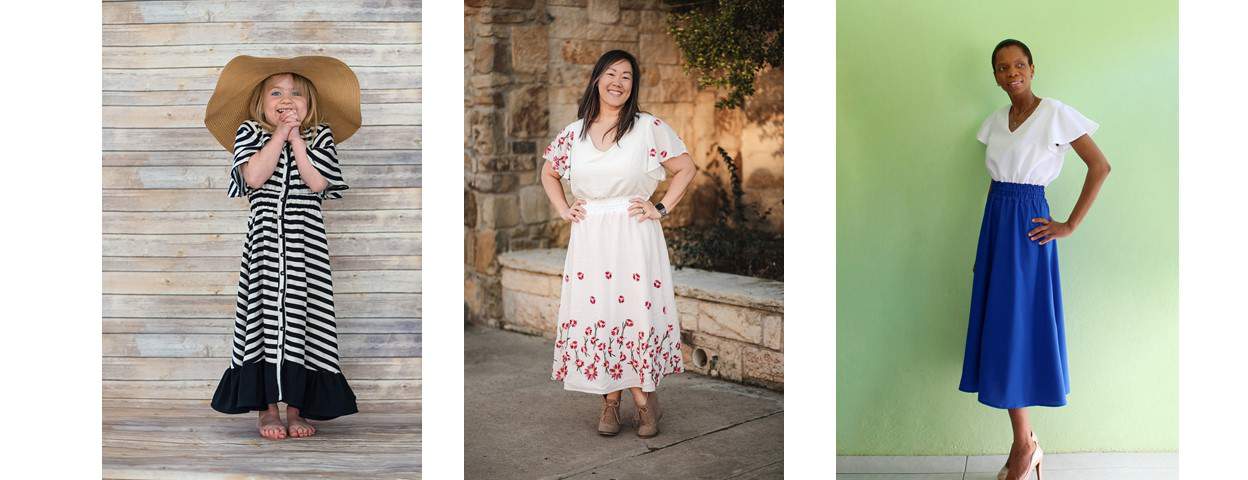
The above knee length is a fun length for warmer months, but if you prefer a little more coverage on your legs add the ruffle option to go to knee length. The midi length is a very on trend length going to mid calf and looking very polished. And the maxi length is a gorgeous vacation look with the ruffle along the bottom that will have you feeling like a million bucks!
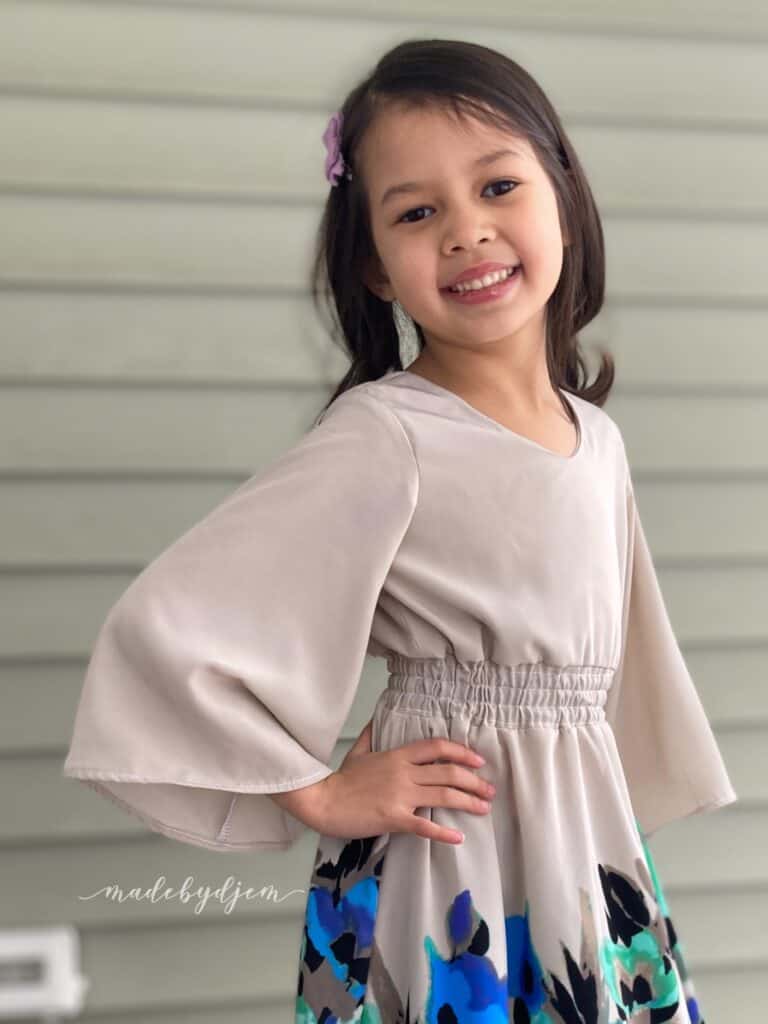
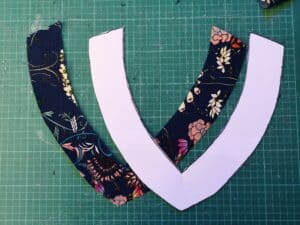
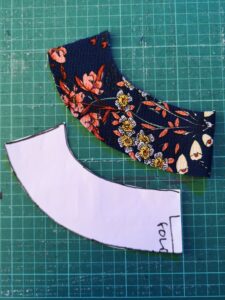
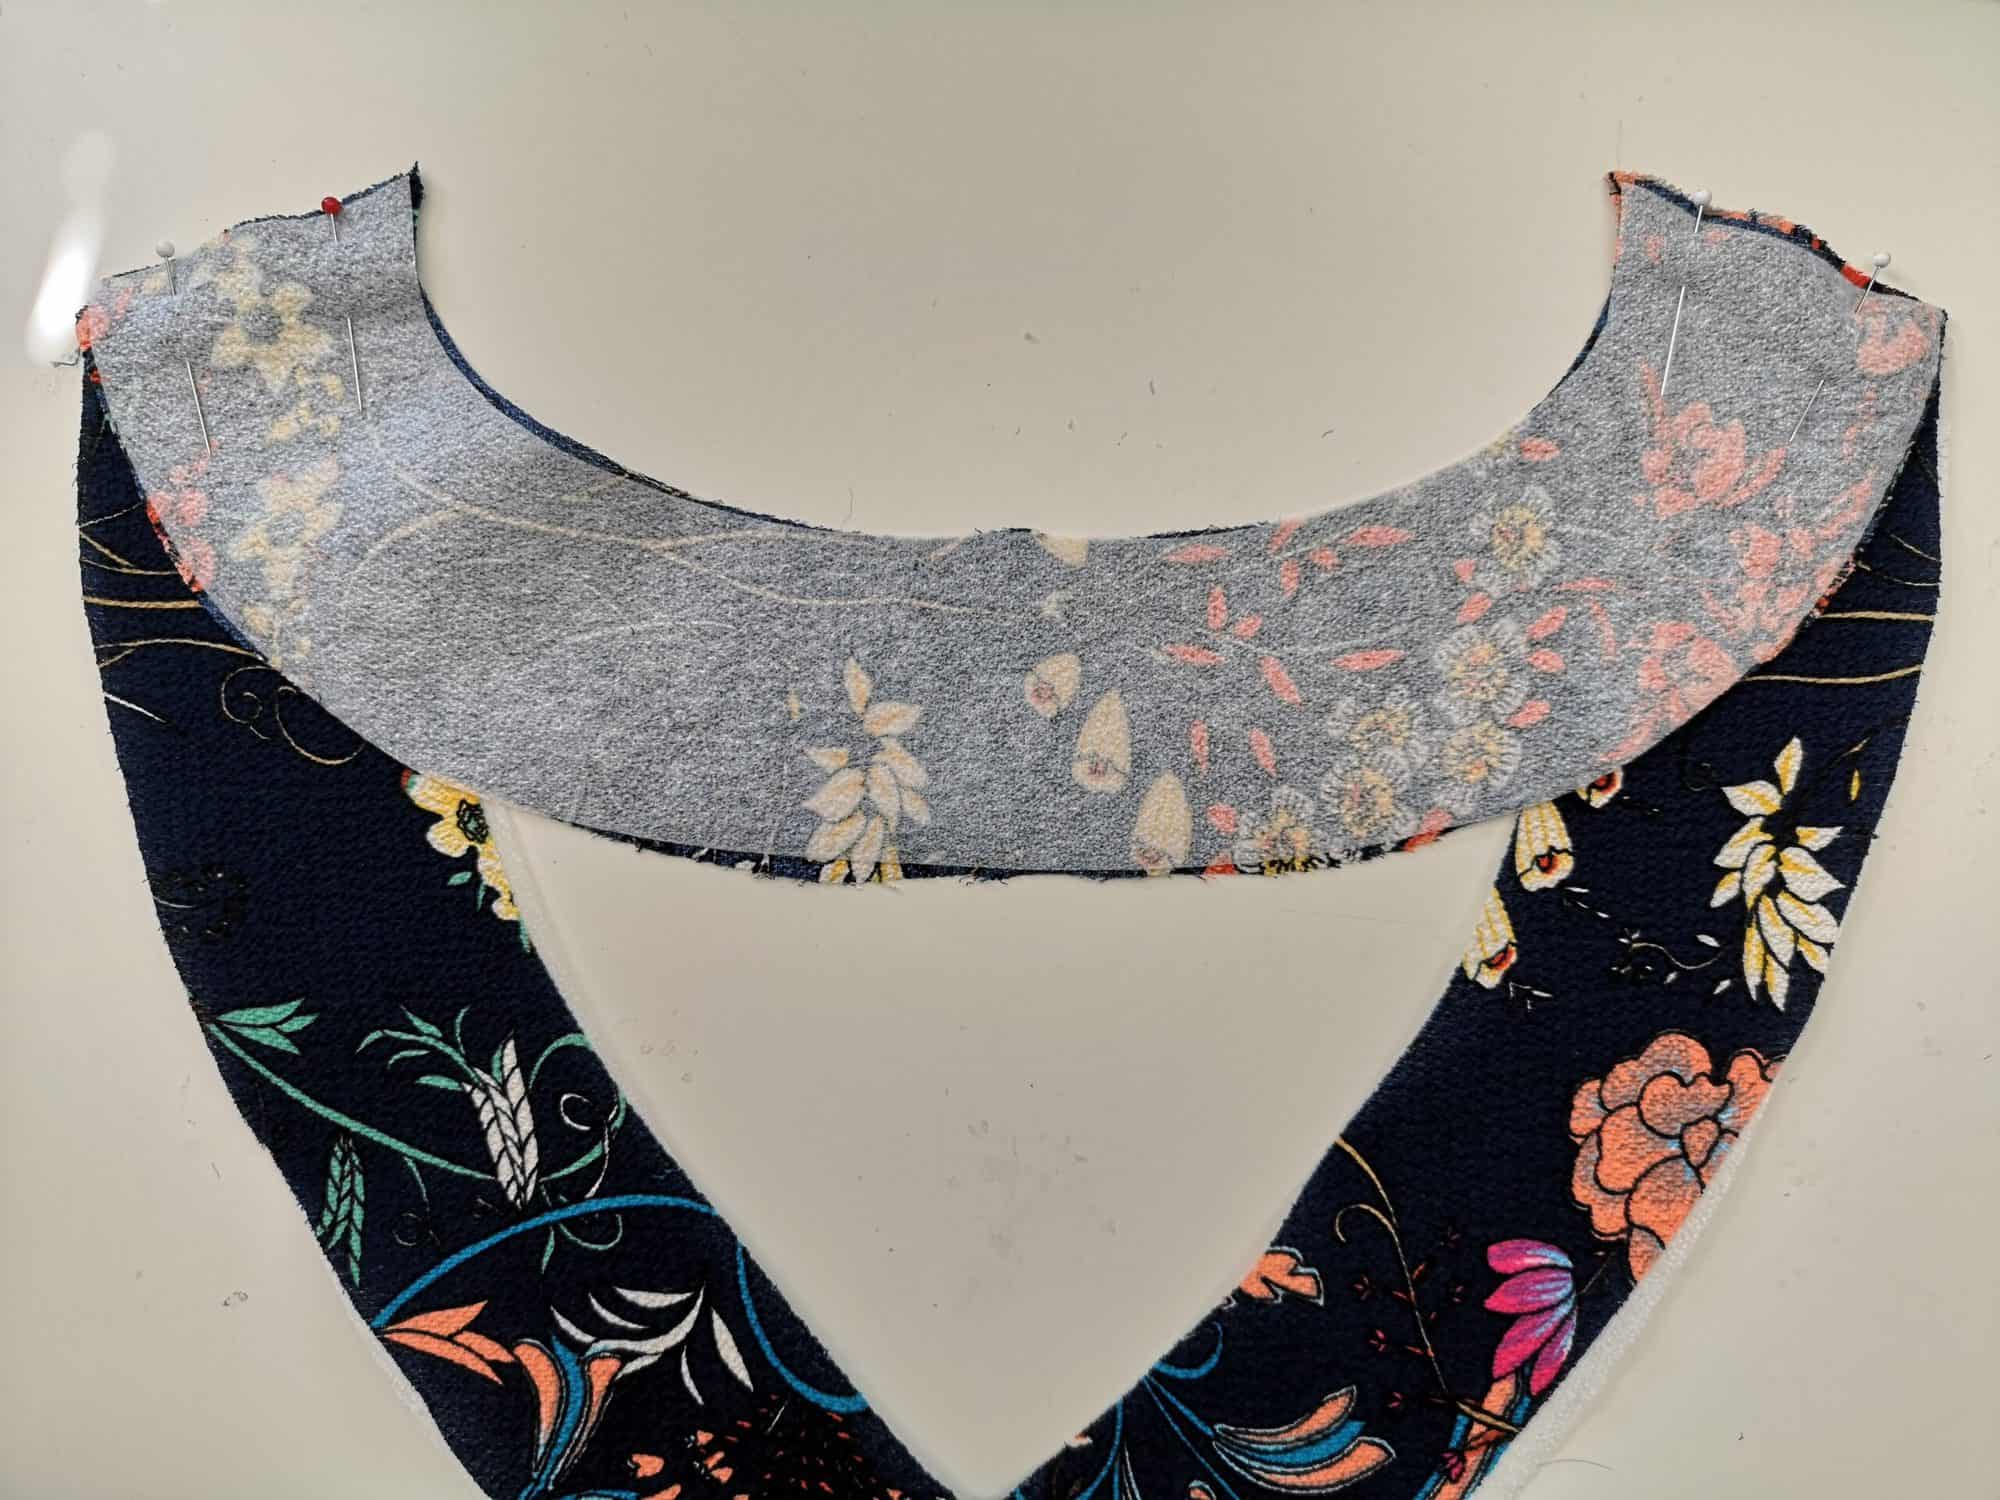
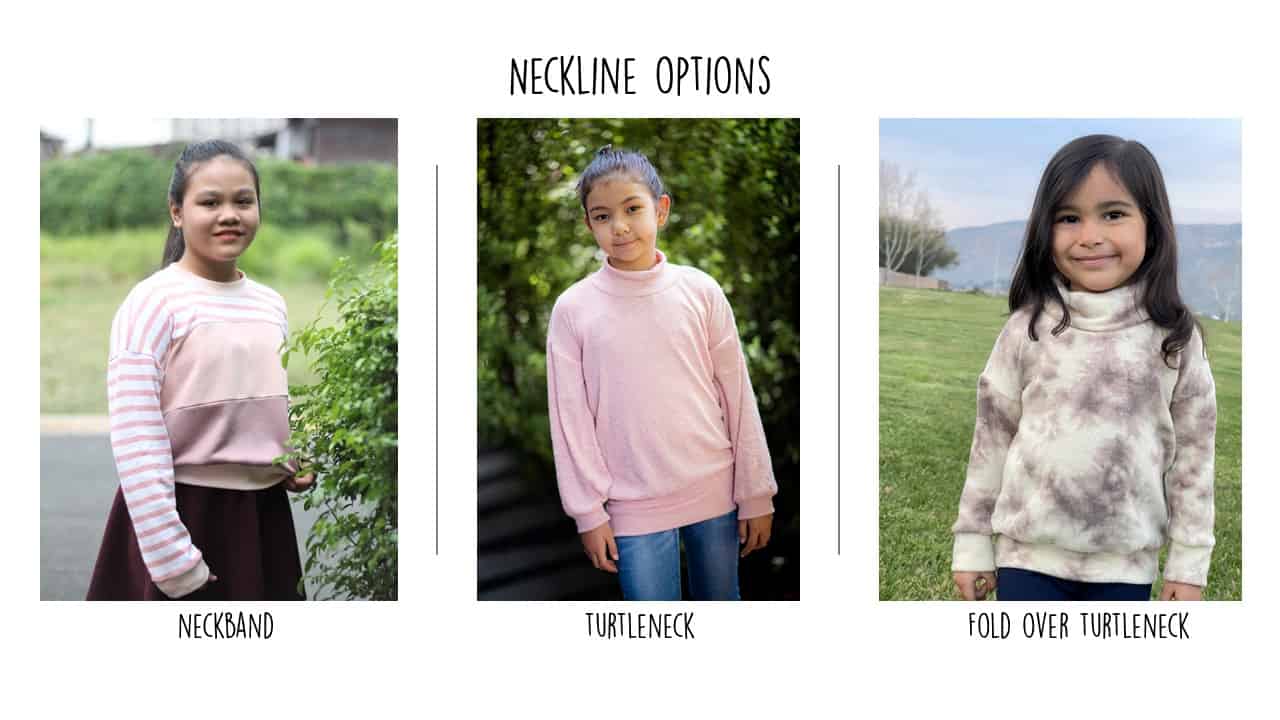
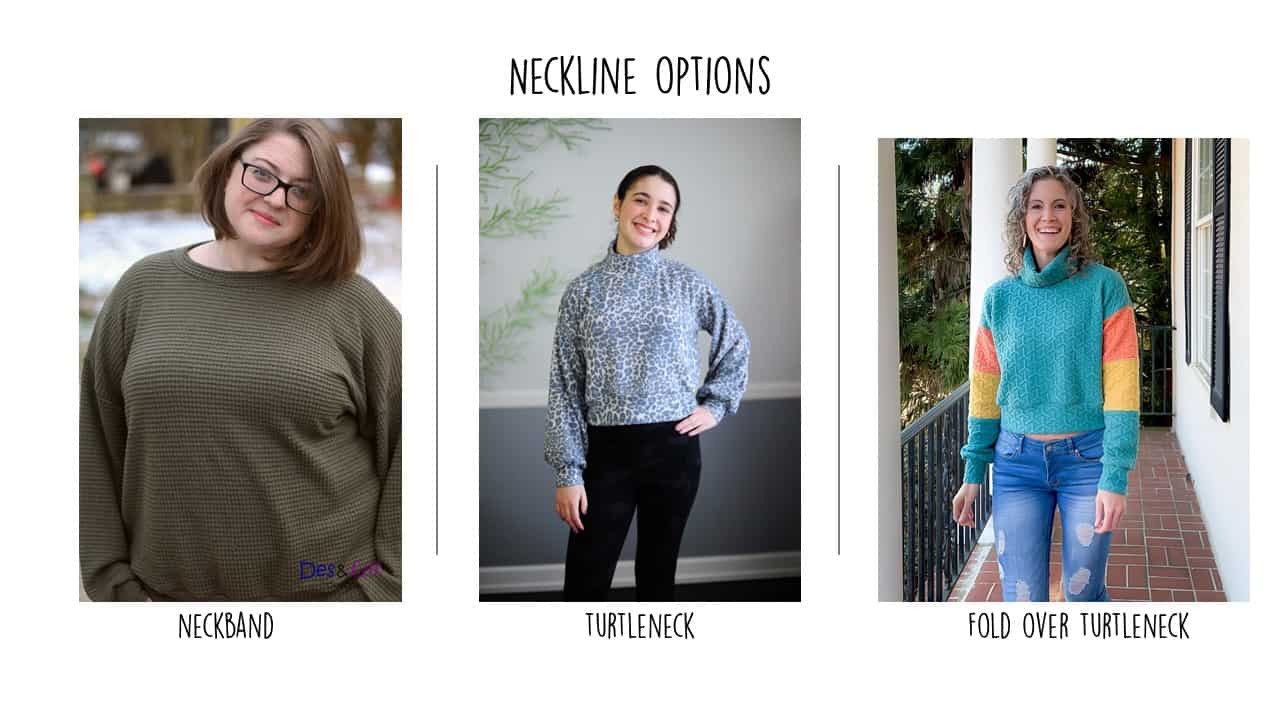
The sleeves are all a romantic silhouette with flutter sleeves both short sleeved and a half sleeve length for those who want that flutter look, but want more arm coverage. 3/4 and long sleeves are perfect for cooler weather and are a phenomenal bishop with all that lush fullness around the the bottom of the sleeve. The v neckline is a perfect open neckline that is super flattering, but high enough that it can be worn to all events.
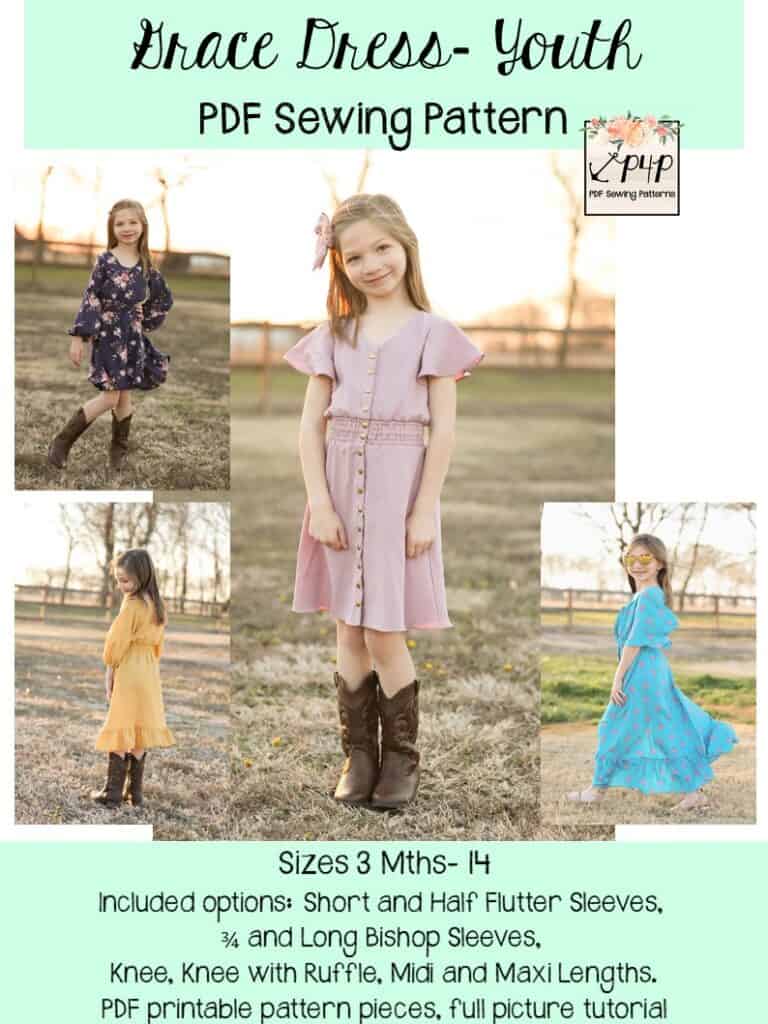
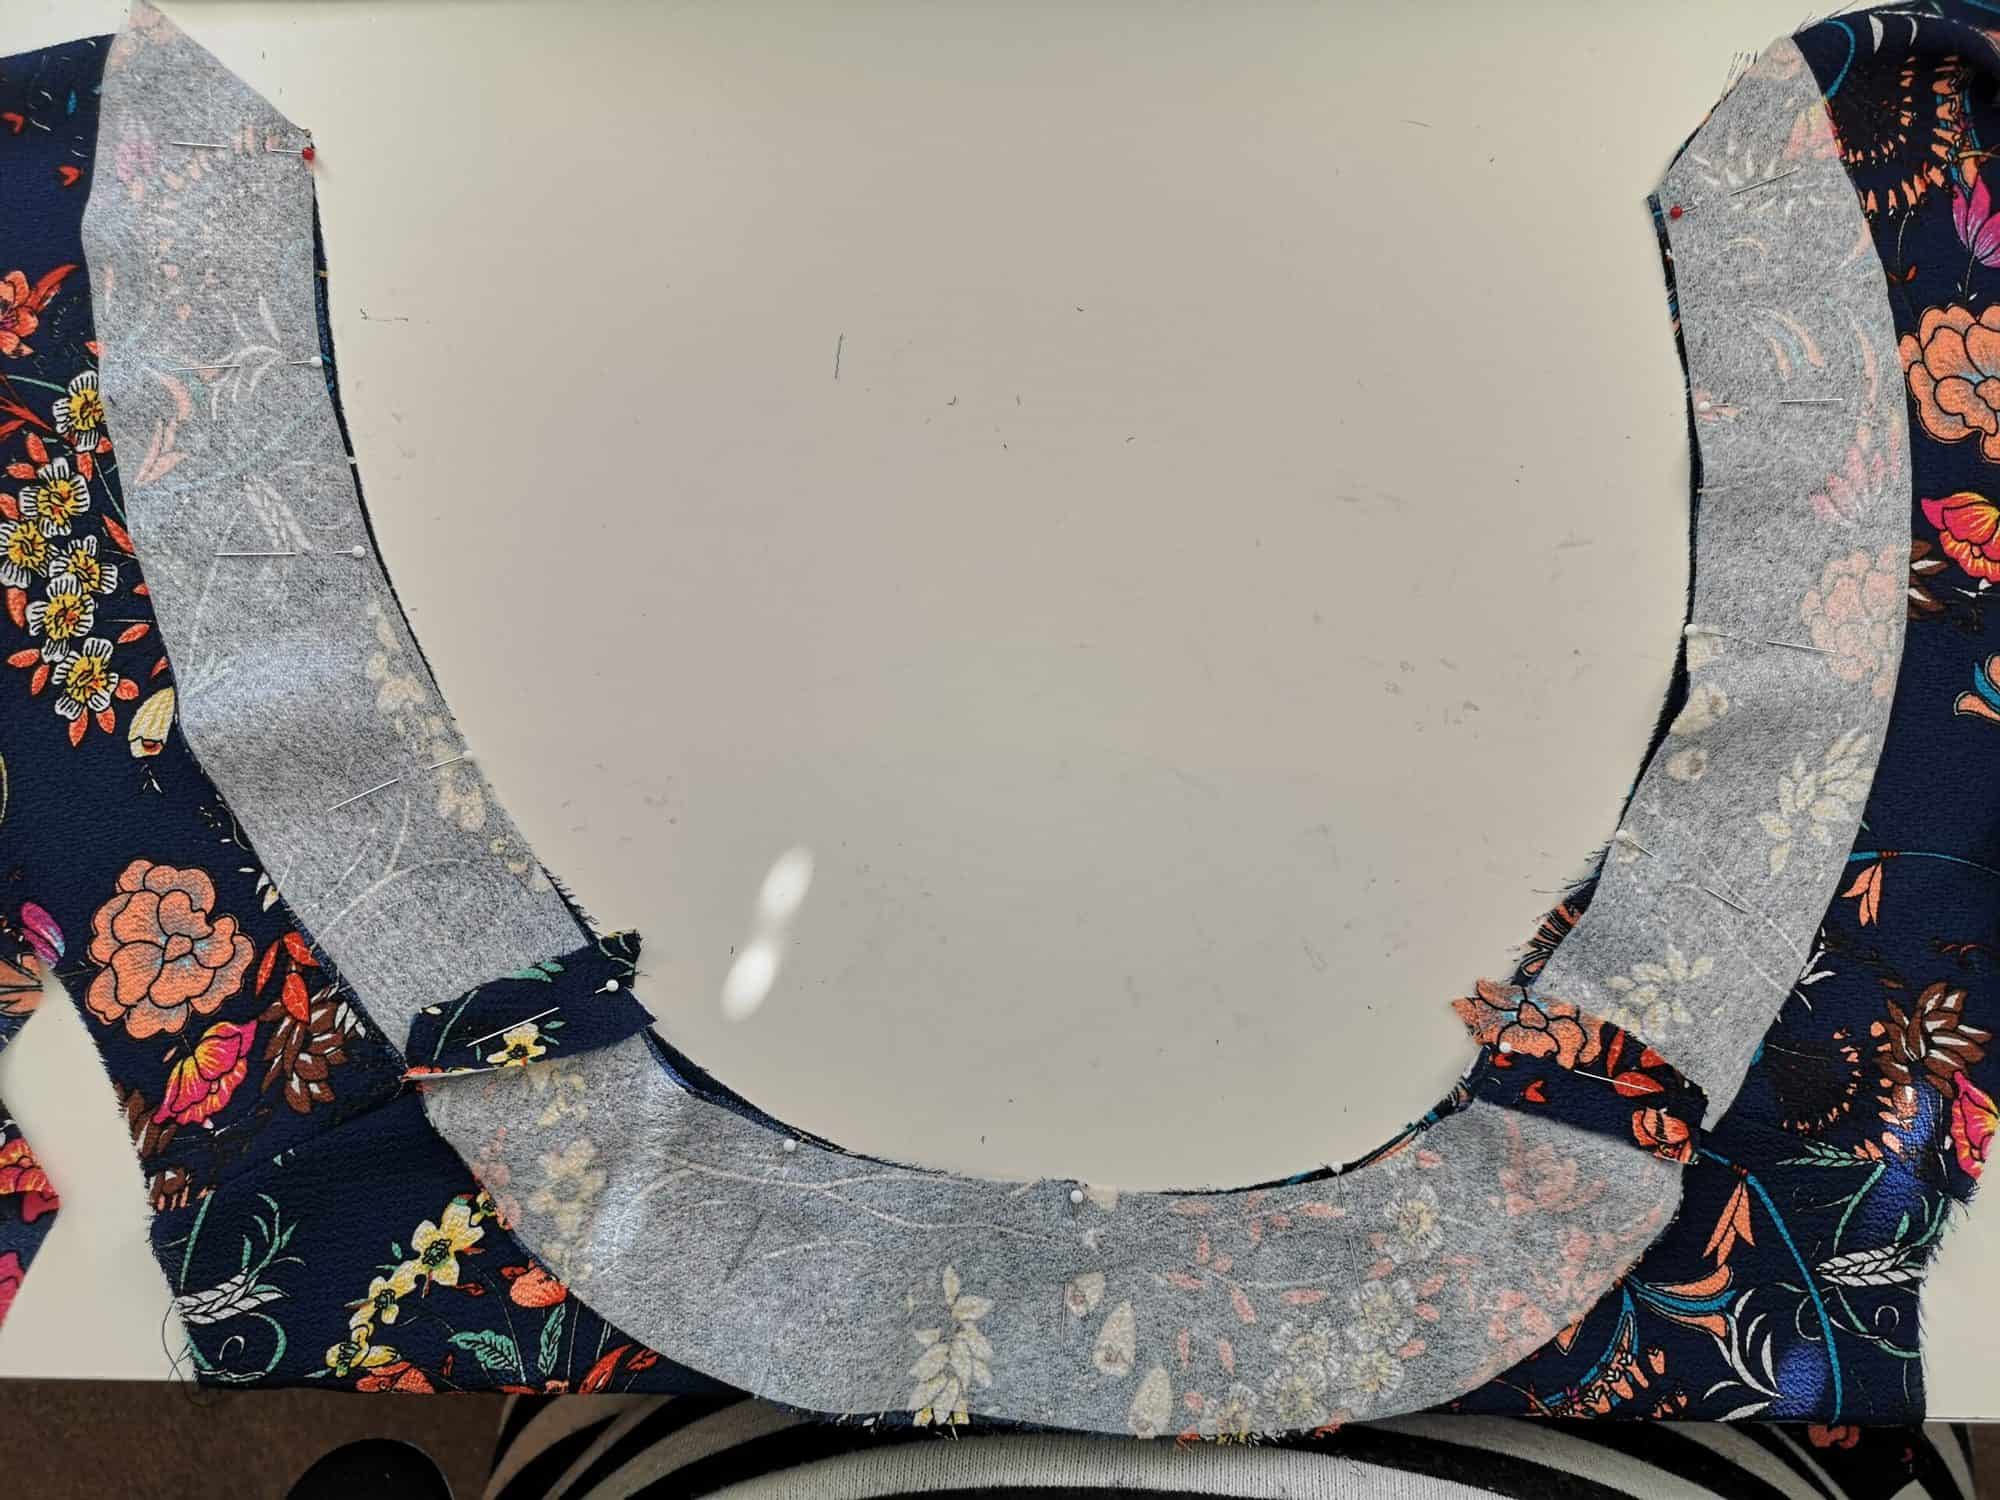
If these weren’t enough options, you can also choose to make the bodice a button up bodice (hello nursing friendly) or the entire dress button up… which is worth the extra time and effort of adding because it is absolutely adorable! Worried about sewing up the Grace? DON’T! We have helpful blog posts and videos linked on almost every single step in the tutorial! Here are just some of the videos in the tutorial in the Grace Dress Youtube Playlist.
The options for the Grace Dress include:
- Short Flutter Sleeve, Half Flutter Sleeve, 3/4 Bishop Sleeve, Long Bishop Sleeve
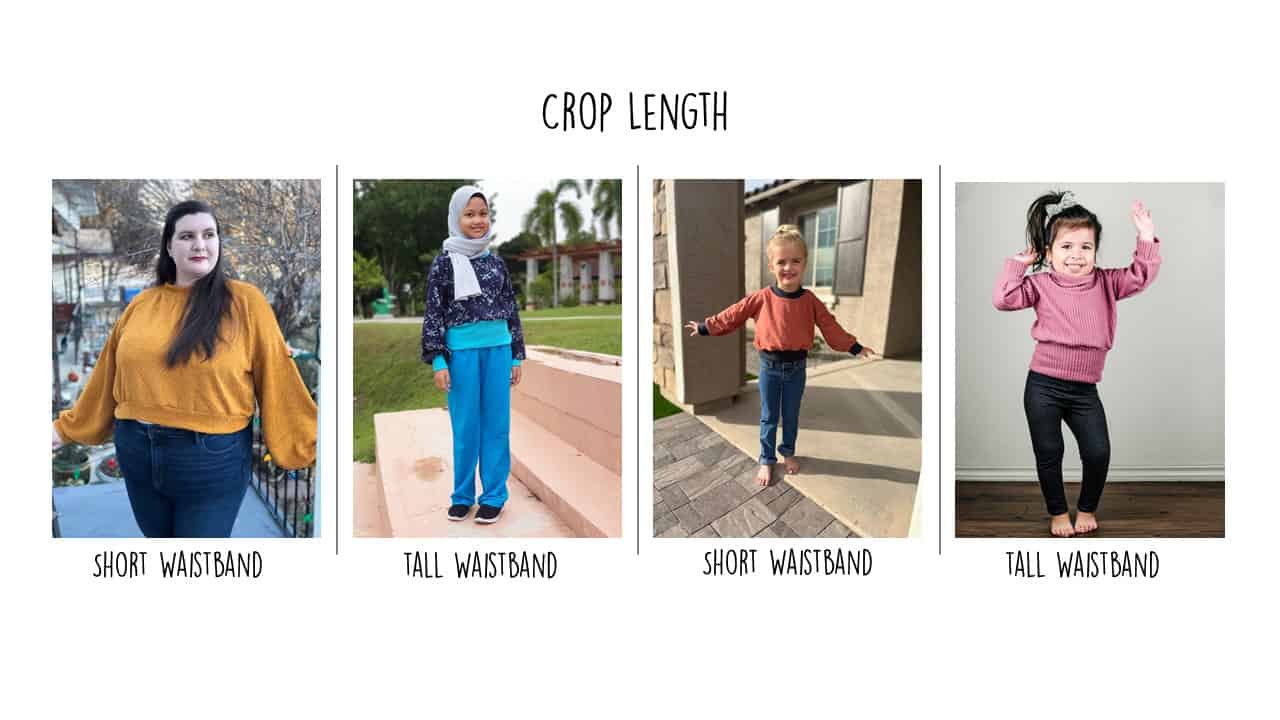
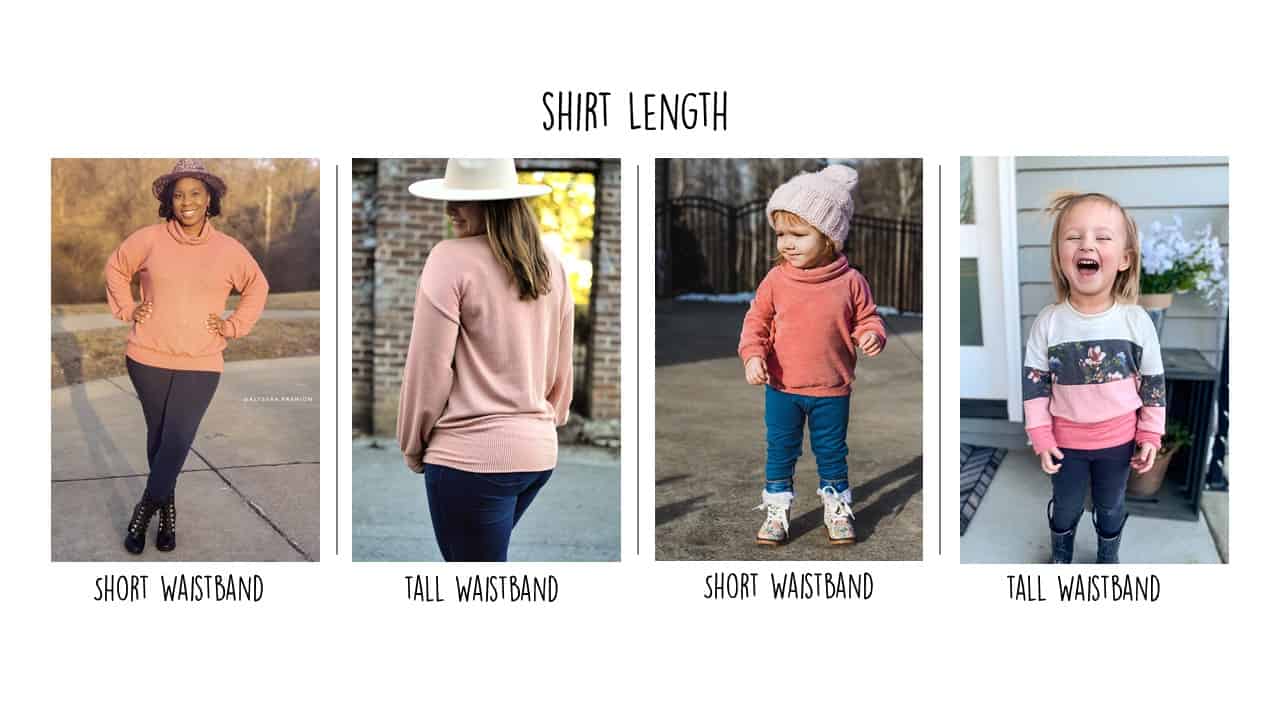
- Knee/Above Knee, Knee with Ruffle, Midi, and Maxi with Ruffle
- Plain Bodice, Button Up Bodice Only, Button Up Dress
- Youth also includes a button on back bodice for plain option for getting over baby/toddler noggins easily
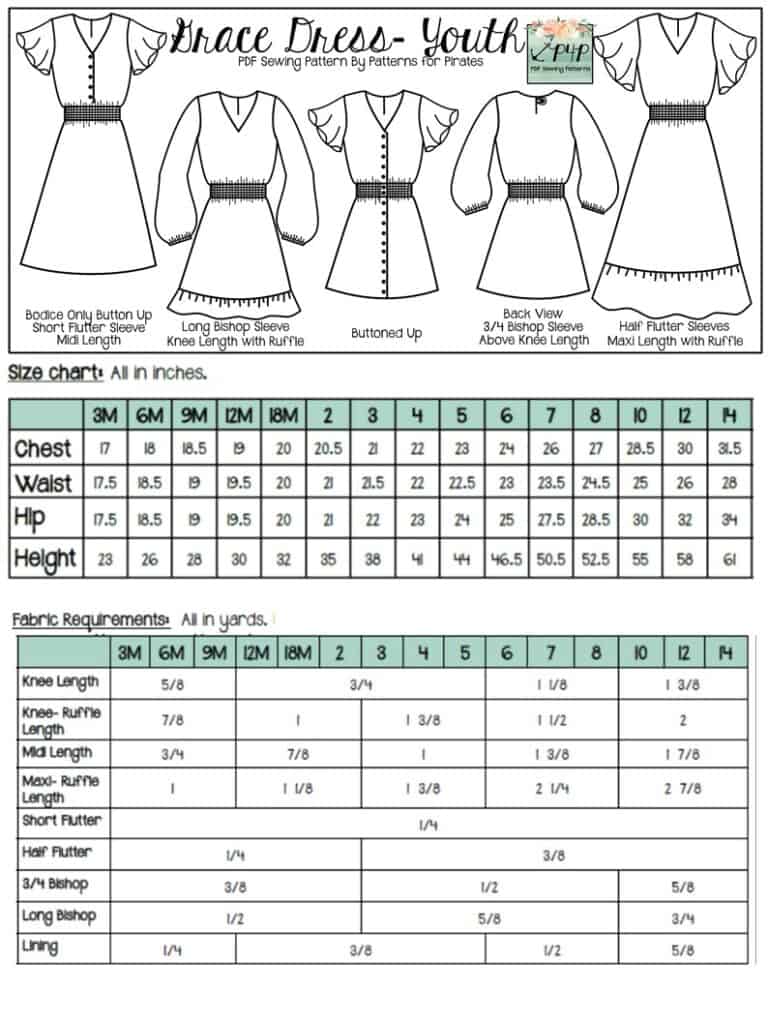
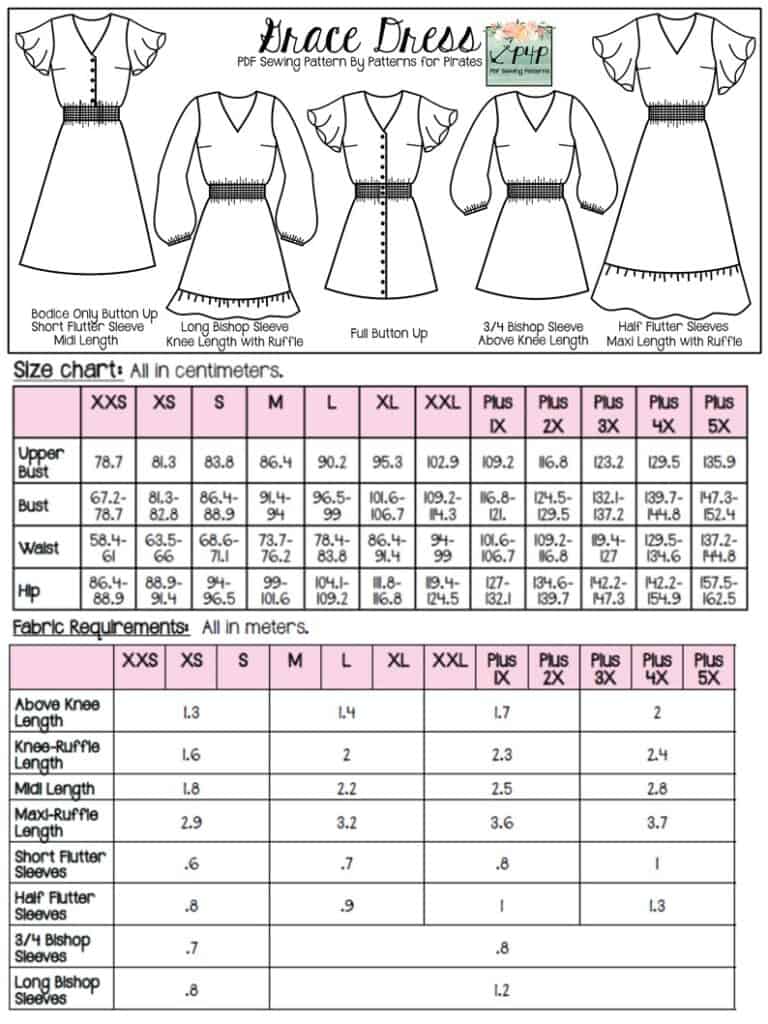
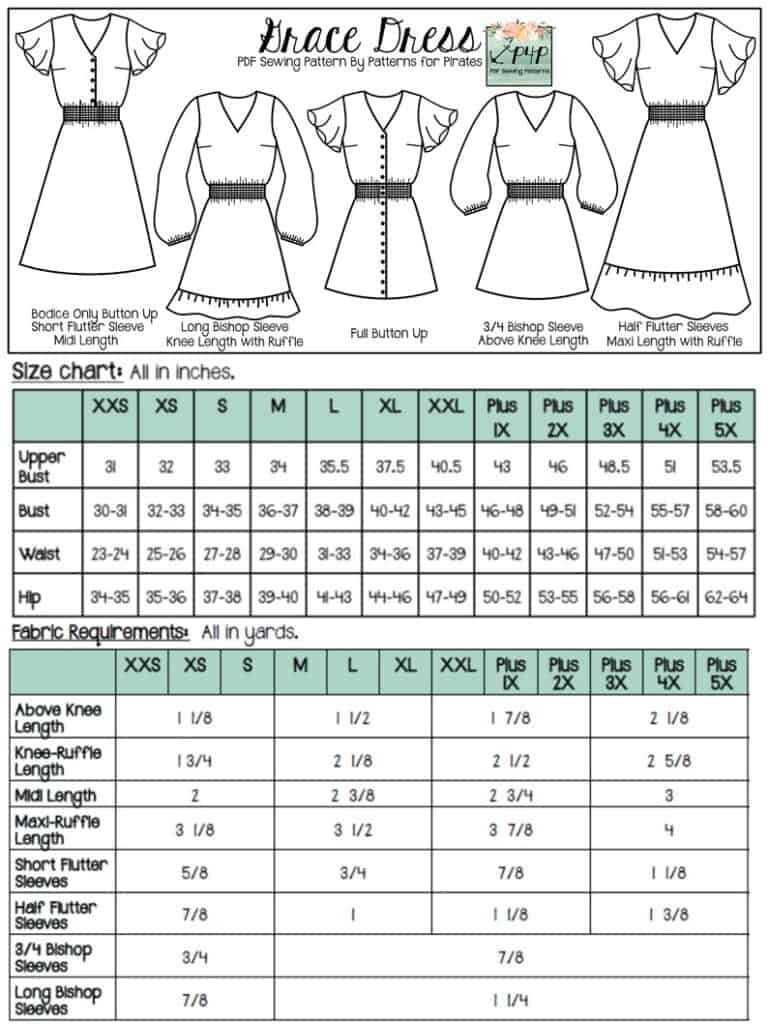
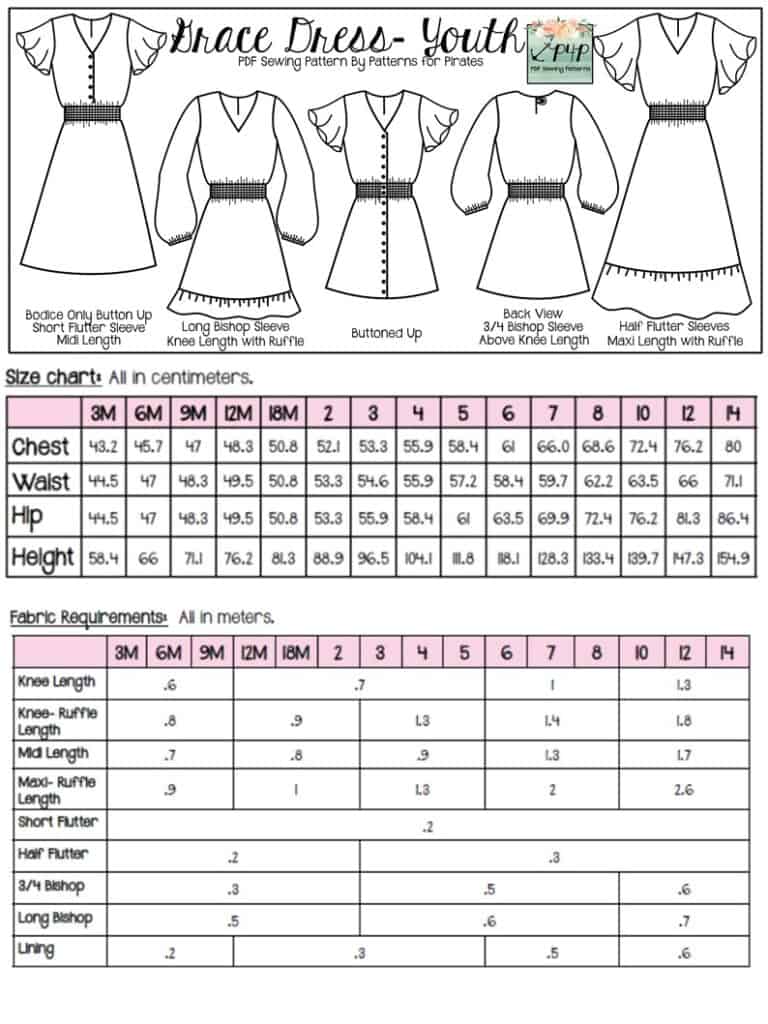
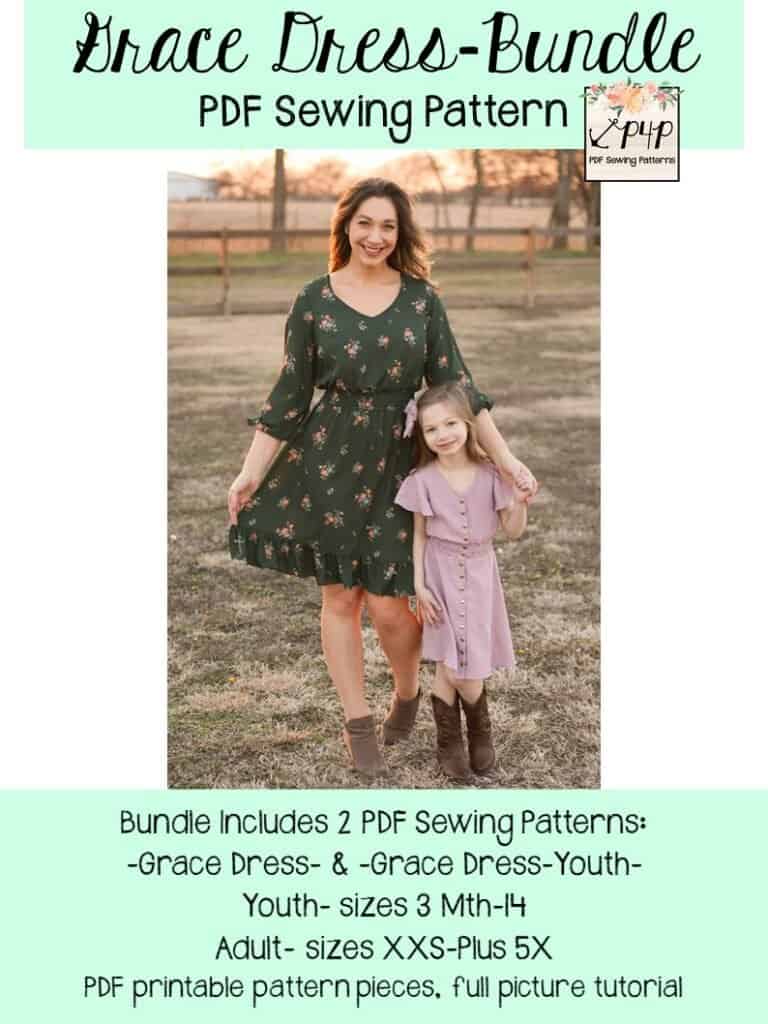
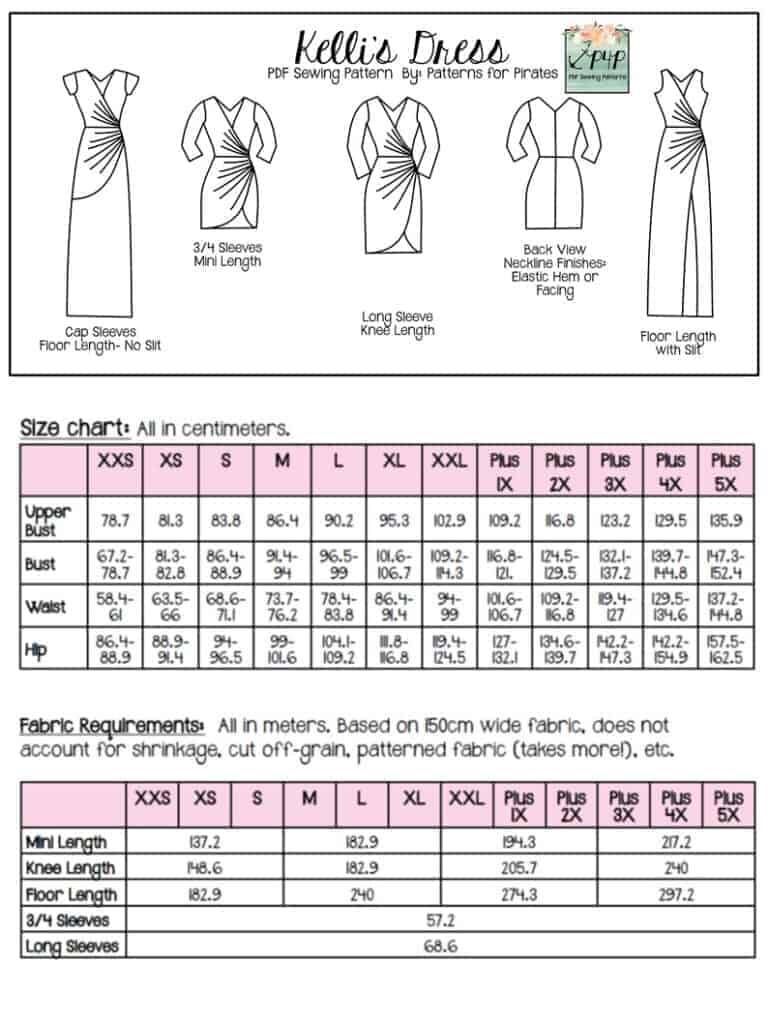
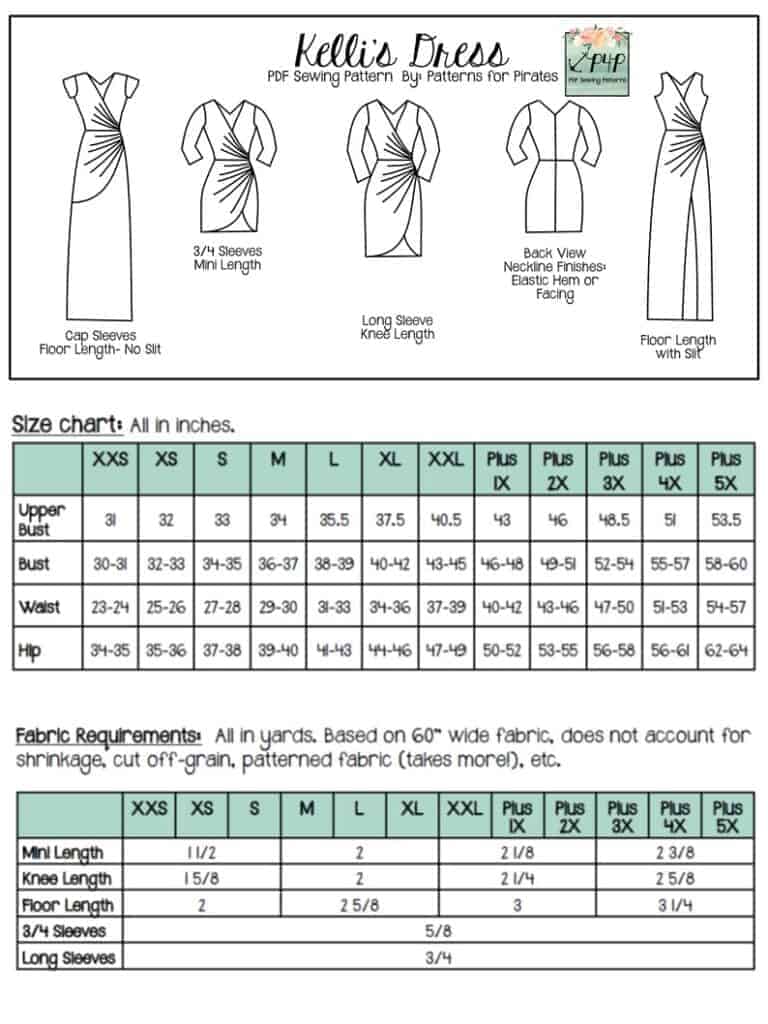
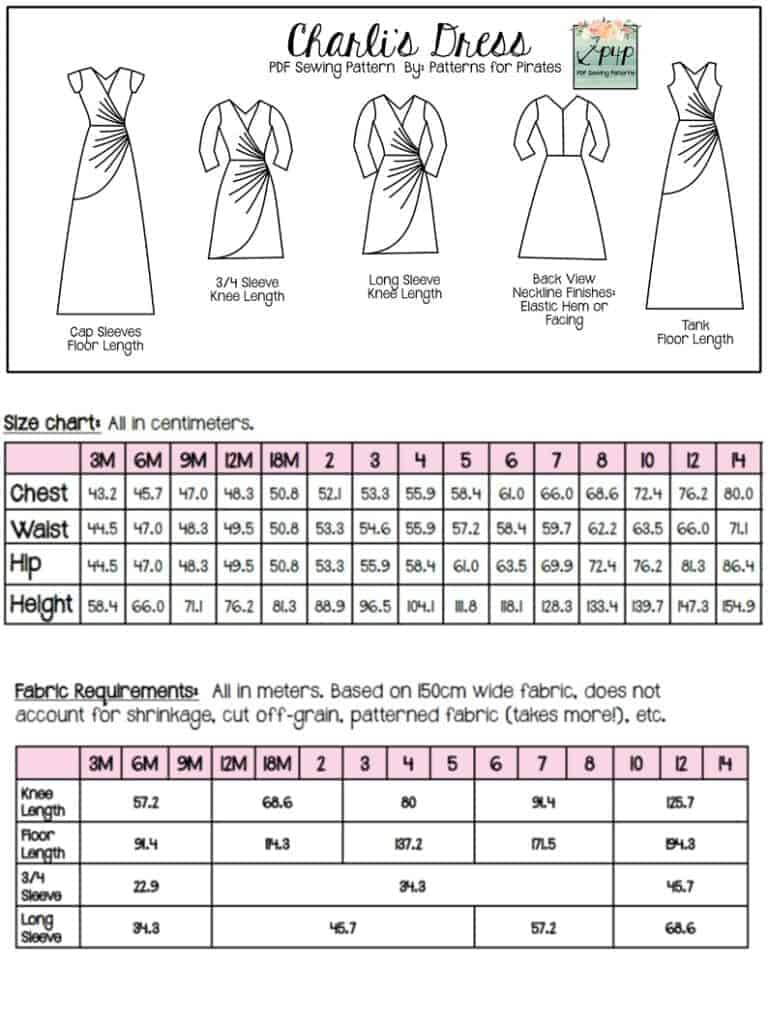
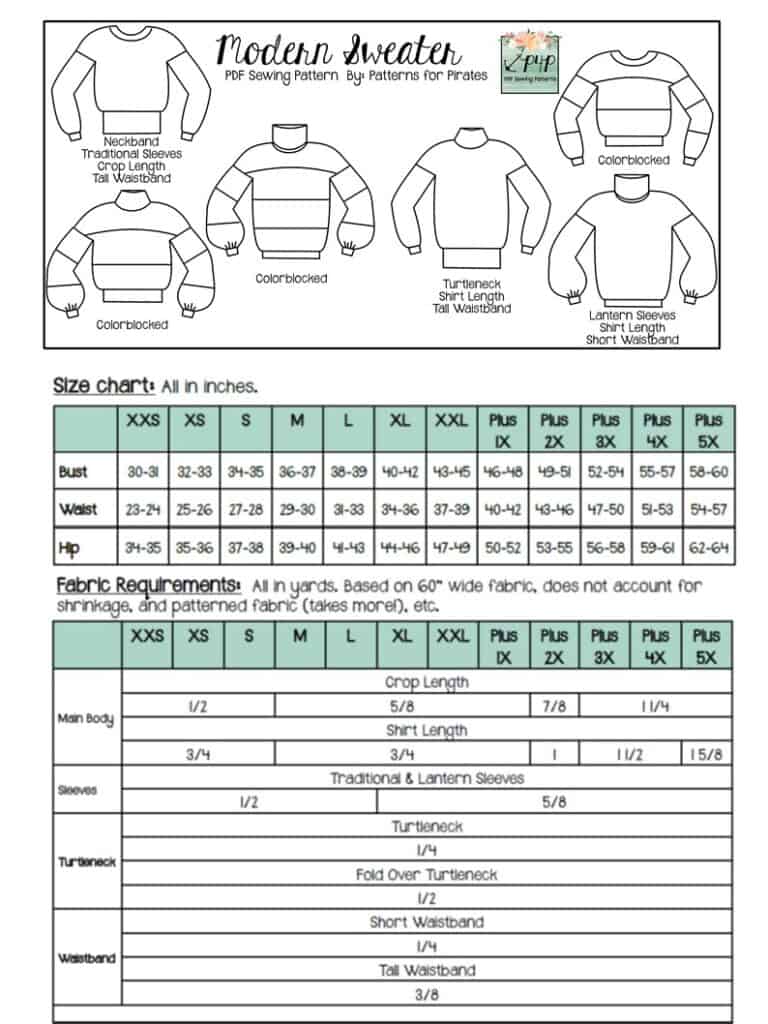
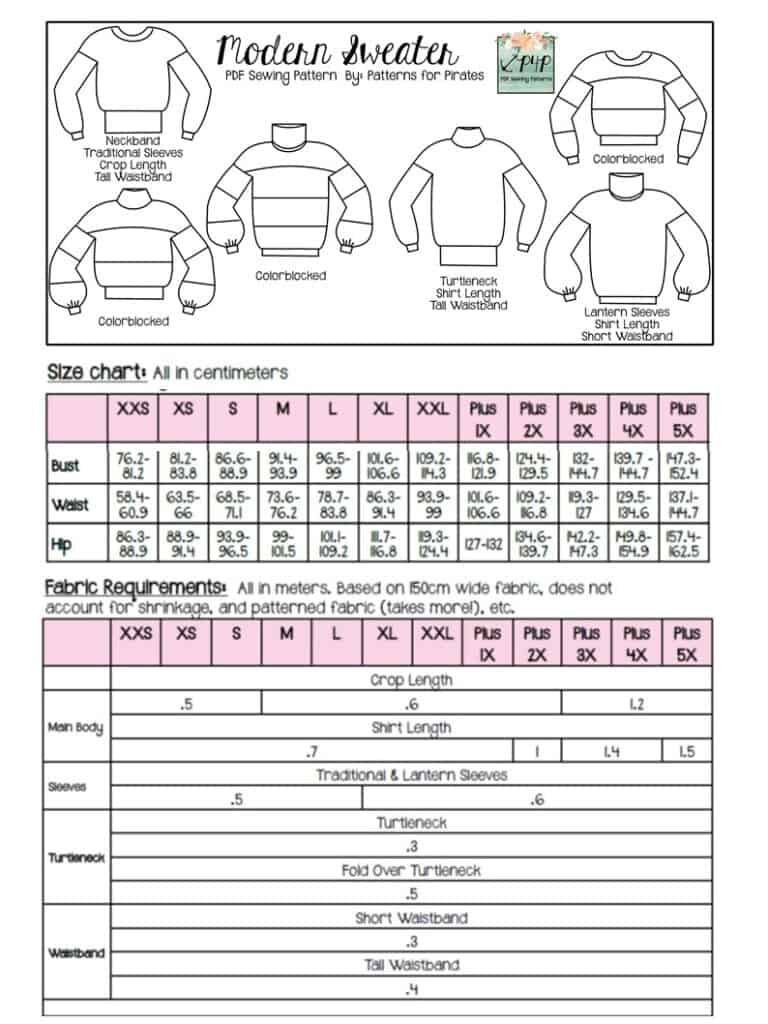
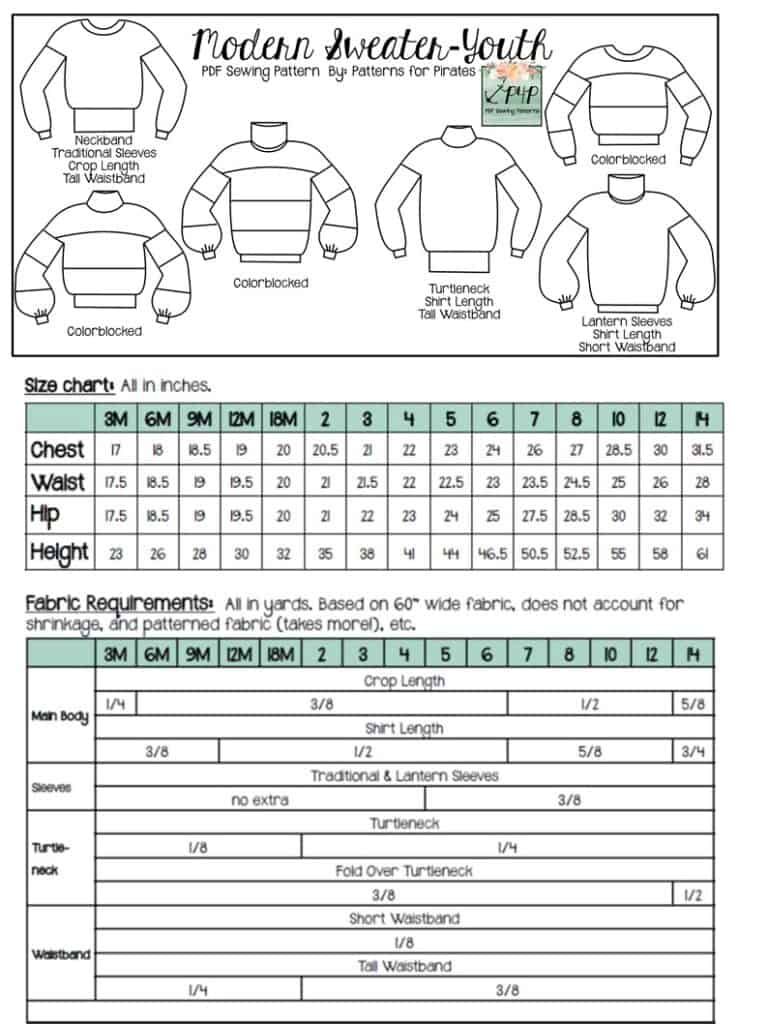
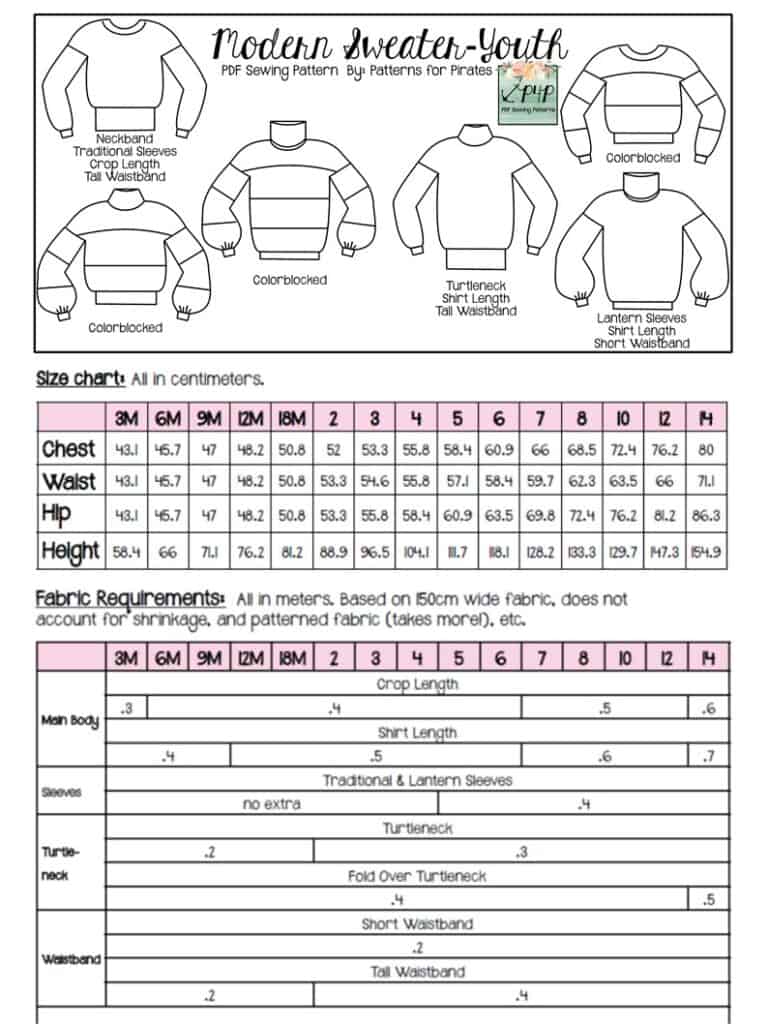
The youth sizes range from 3m – 14 and the adult sizes are for the full, newer size chart, extending from XXS – Plus 5X for the Adult Hourglass Figure. *Want to learn more about how to measure yourself for these pattern? We’ve got you covered with an in-depth blog HERE.
And in case you’re new to Patterns for Pirates and PDF patterns in general, we have a great blog full of new-user tips HERE to help you get started! As with all of our current releases and updates, the pdfs now include our layers feature and can be found in Letter, A4, A0 and projector sizes. And for even more helpful fun, we have a free* printable that you can use to help record your measurements as you take them.
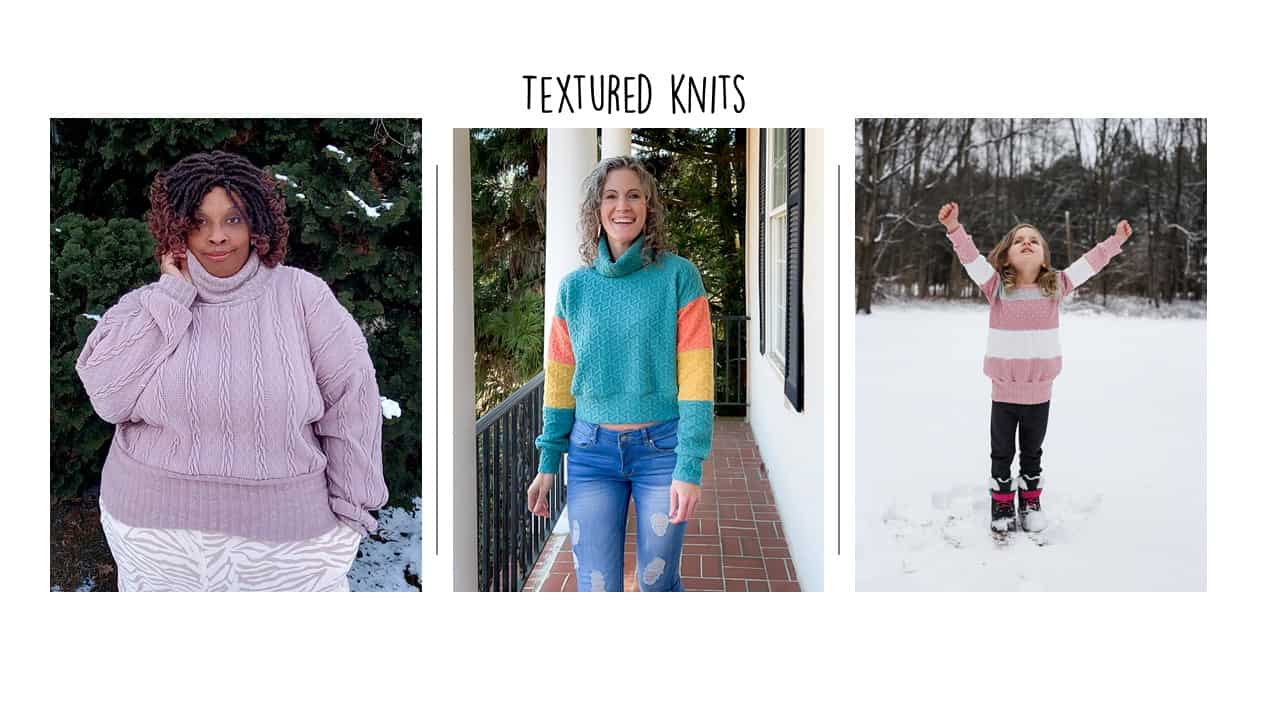
Let’s take a look at the different ways we can sew up these patterns!

I can’t wait to see everyone feeling fabulous in their new Grace Dresses! Head on over and grab yourself a copy of the new patterns! They are available on sale (no code needed) through 11:59pm CST, Saturday March 30, 2022.
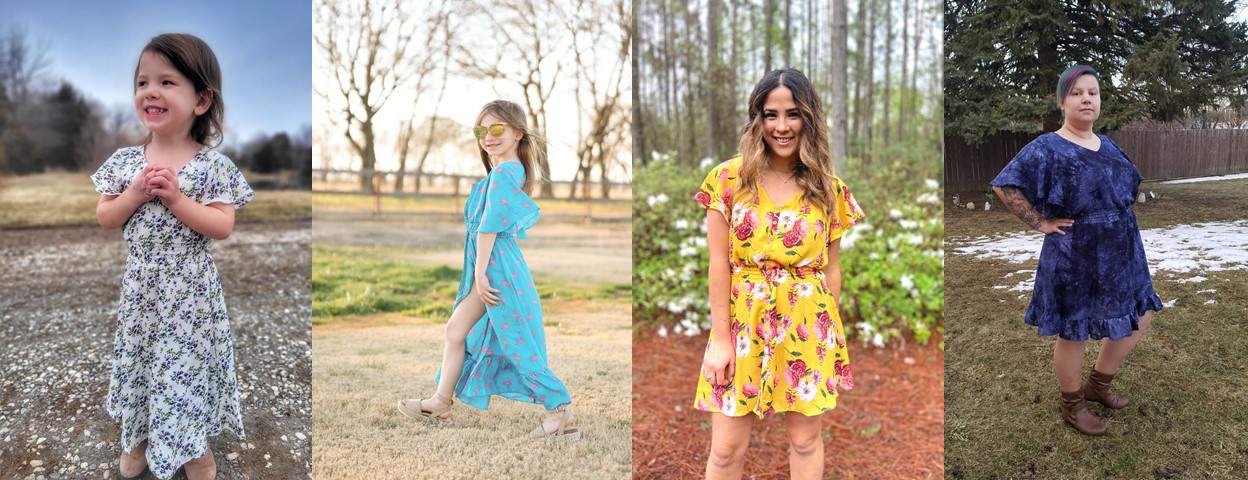
Head over to our Facebook group where you can see tester albums full of amazing images!
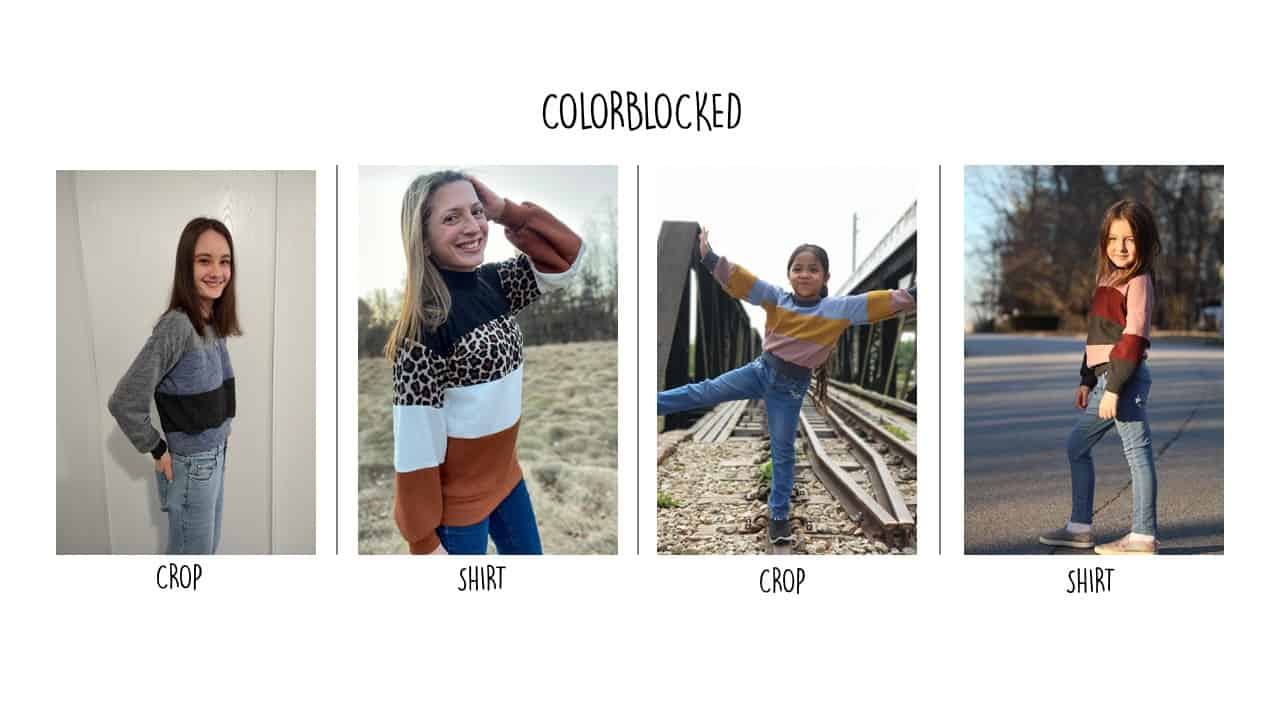
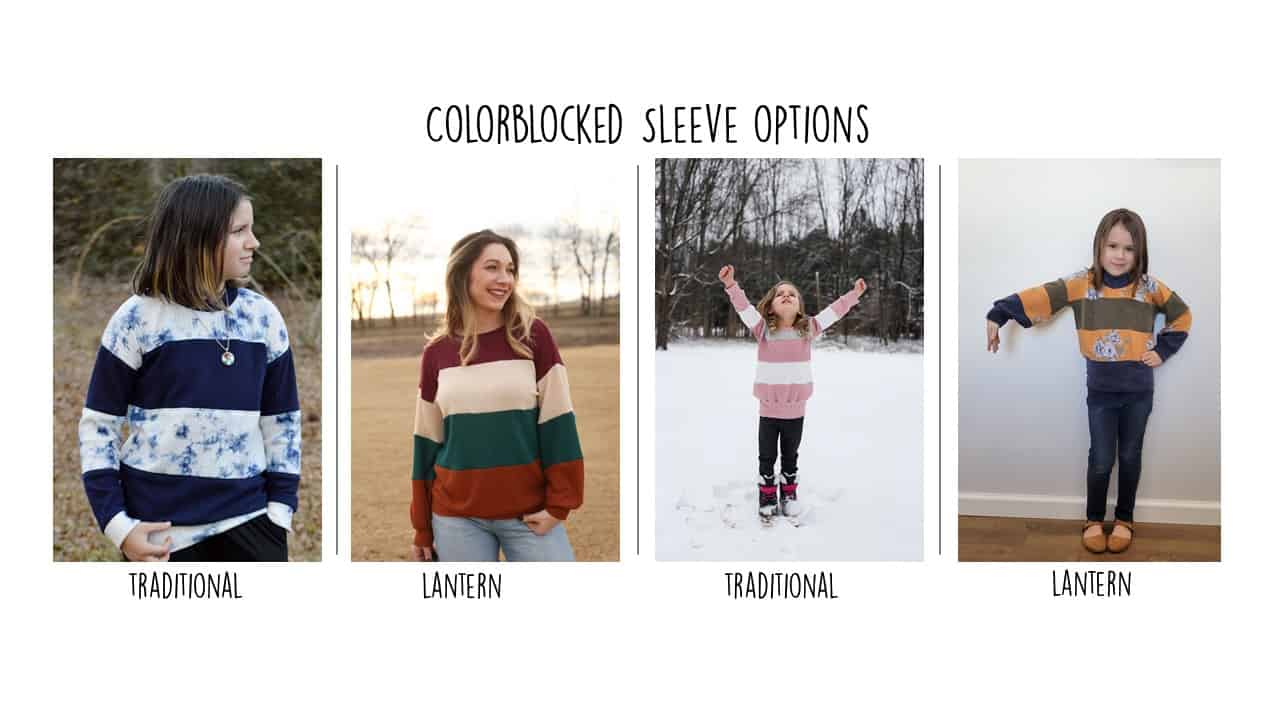
We also have a few hacks to show off as well here:


 v
v