Patterns for Pirates

P4P stylish, modern, wearable patterns

  • Home
  • Blog
    • Frequently Asked Questions
    • Pattern Releases
      • Free Patterns
    • P4P University
      • Fitting
      • Sewing with Stretch, Knit Fabrics
      • Sewing with Woven Fabrics
      • Sewing Machines
    • Sew-A-Longs
    • Fabric for Pirates
    • Pattern Hacks
    • Announcement
      • Blog Tours
      • Contest/Giveaway
  • Shop
  • Bundle Discounts
  • Flash Friday
  • Gift Cards
  • My Account
  • Cart

Lumberjack Hack- No Exposed Seams Lined with Knit Cuffs

November 4, 2021

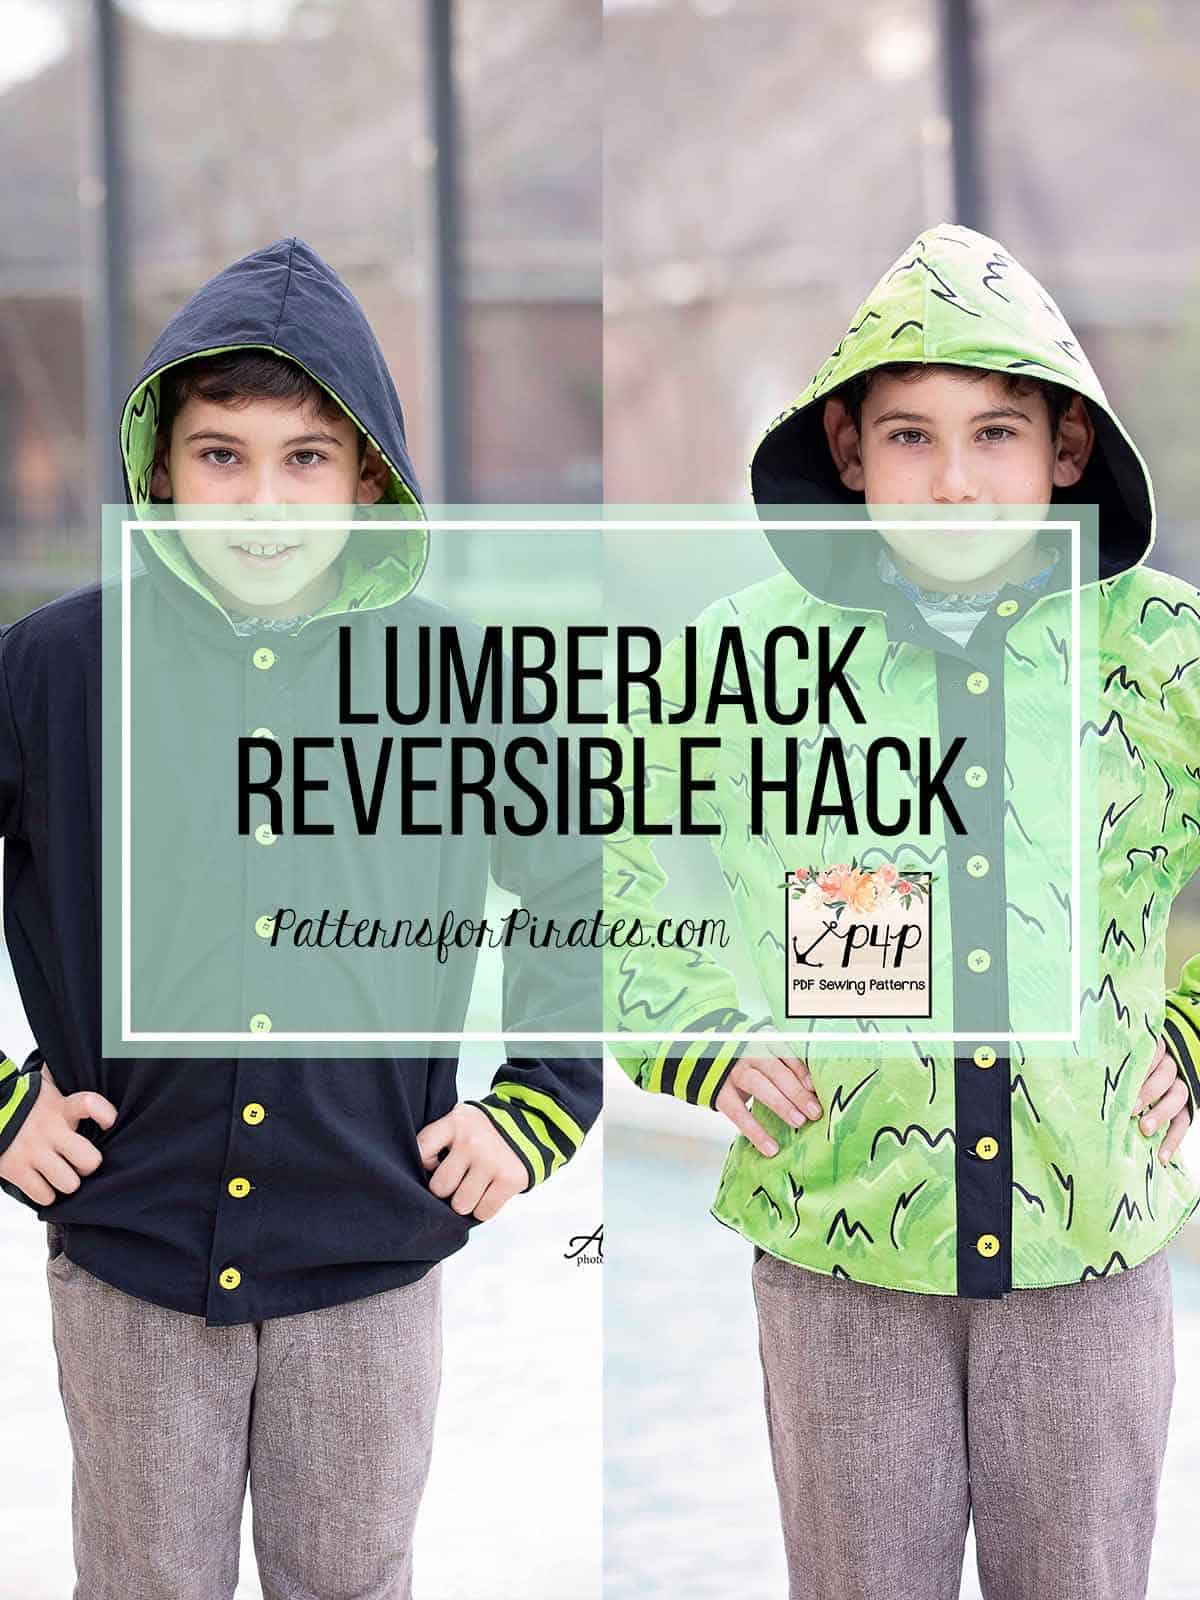
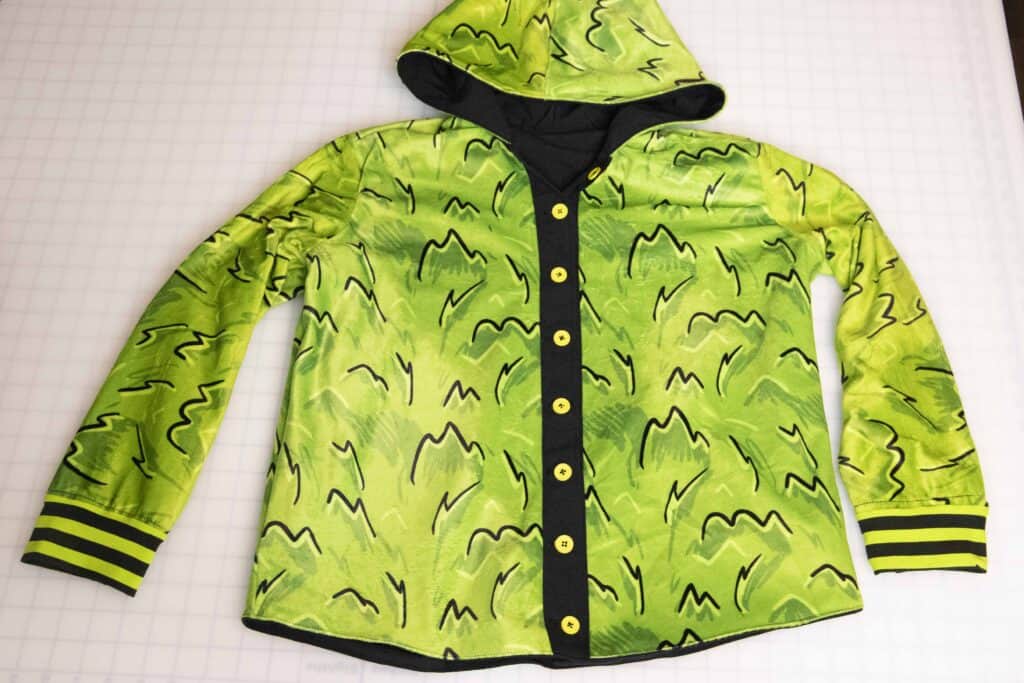
Hi- We have a beautiful inside finish to the Lumberjack and just to show you one more way to make the inside just as beautiful as the outside I’m going to show you how to hide the knit cuff seams if you’re lining your Lumberjack. It is simple, but you need to put together your Lumberjack in a bit different order than the tutorial- which is why we have it here on the blog (to keep the tutorial nice and streamline).

You will follow the tutorial for the lined Lumberjack until you get to the Side Seams.  Don’t sew those side seams yet!! 😉

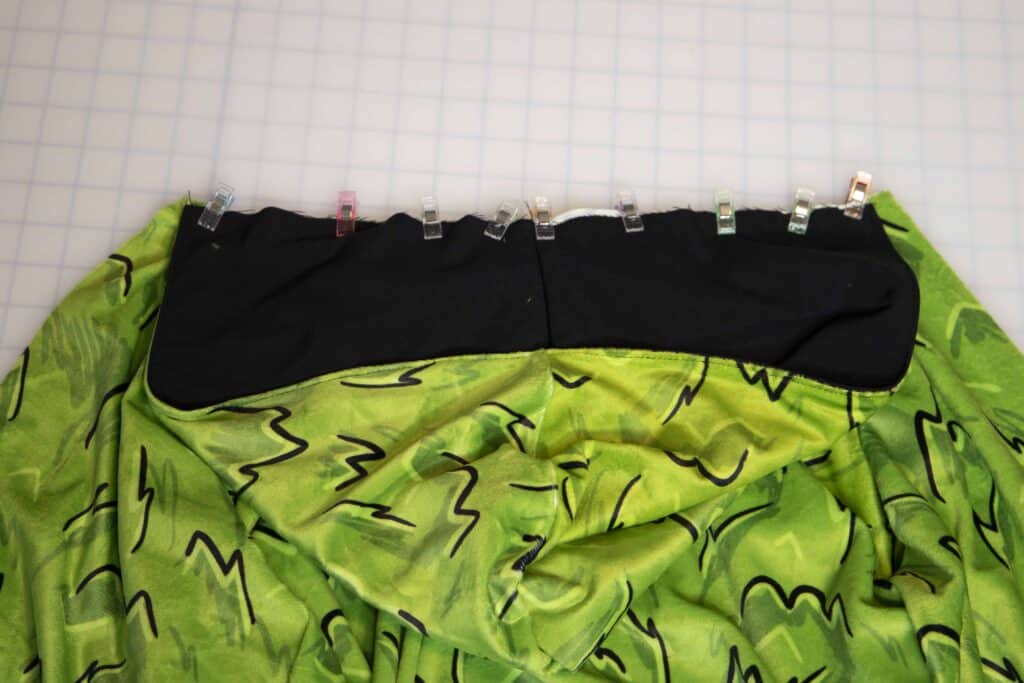
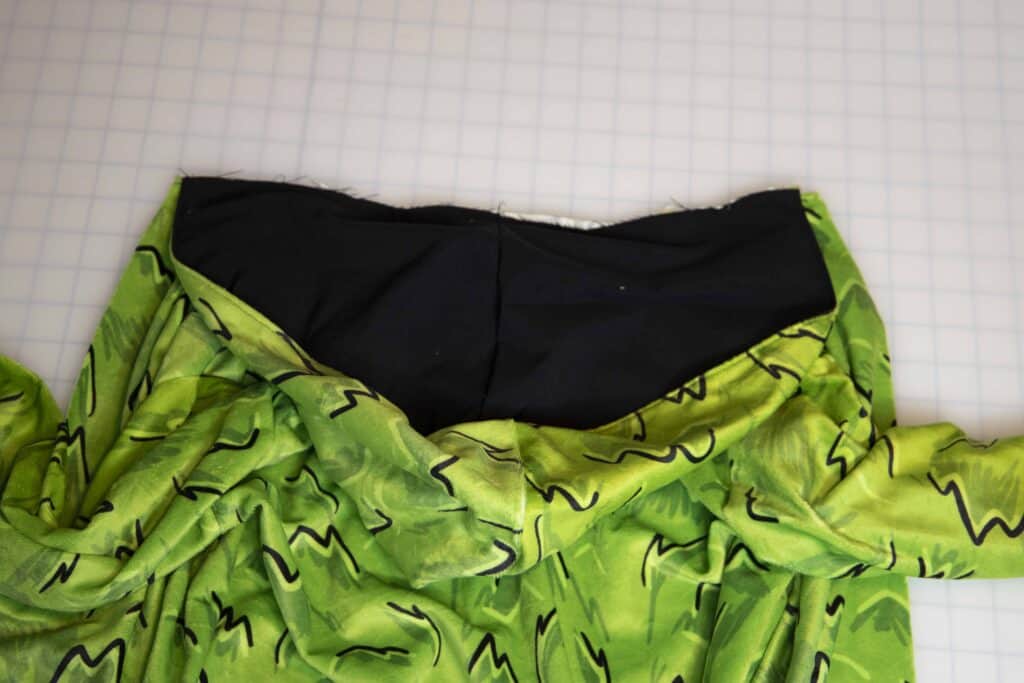
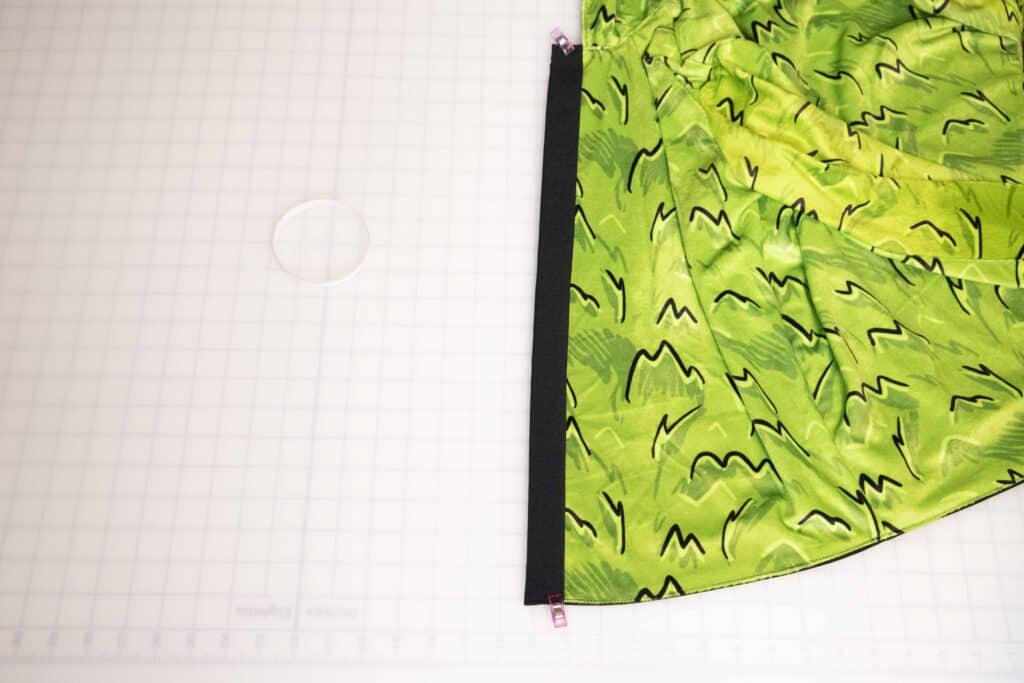
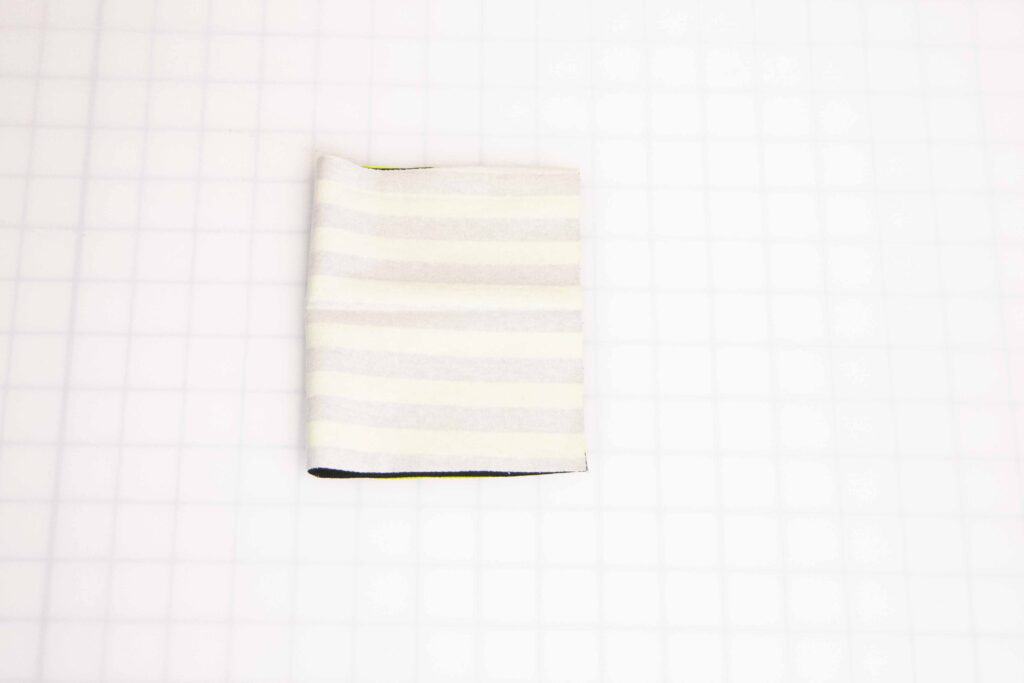
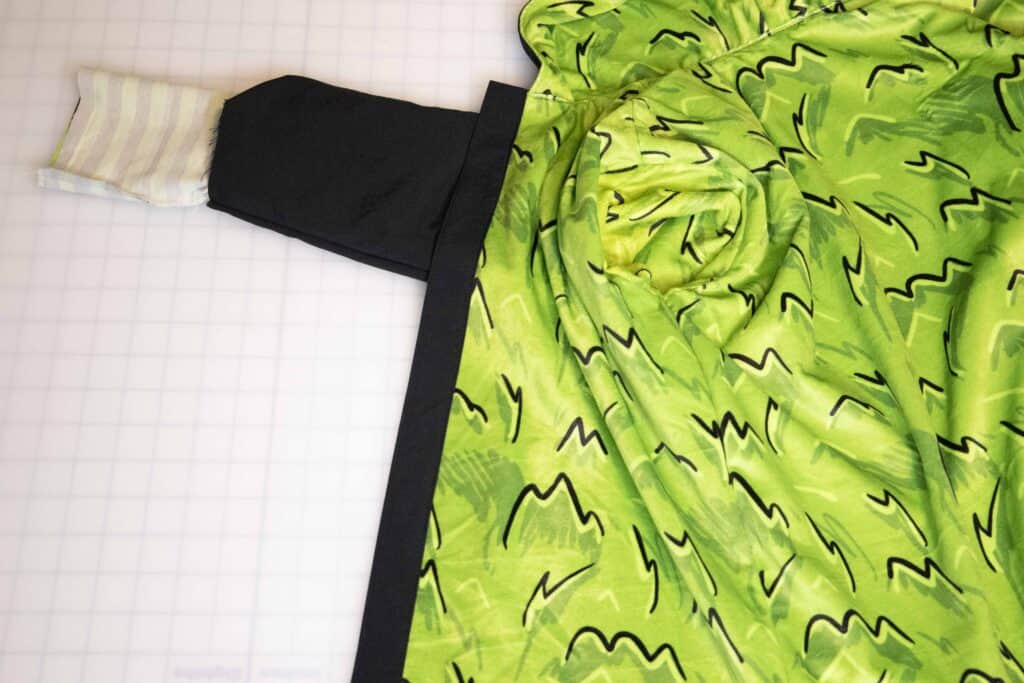
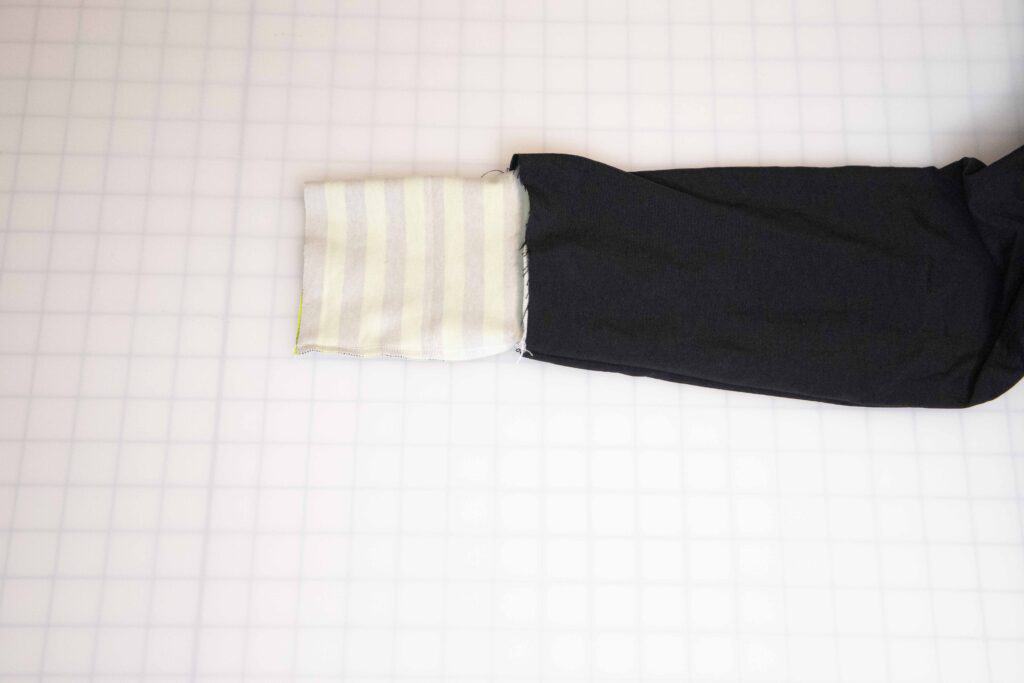
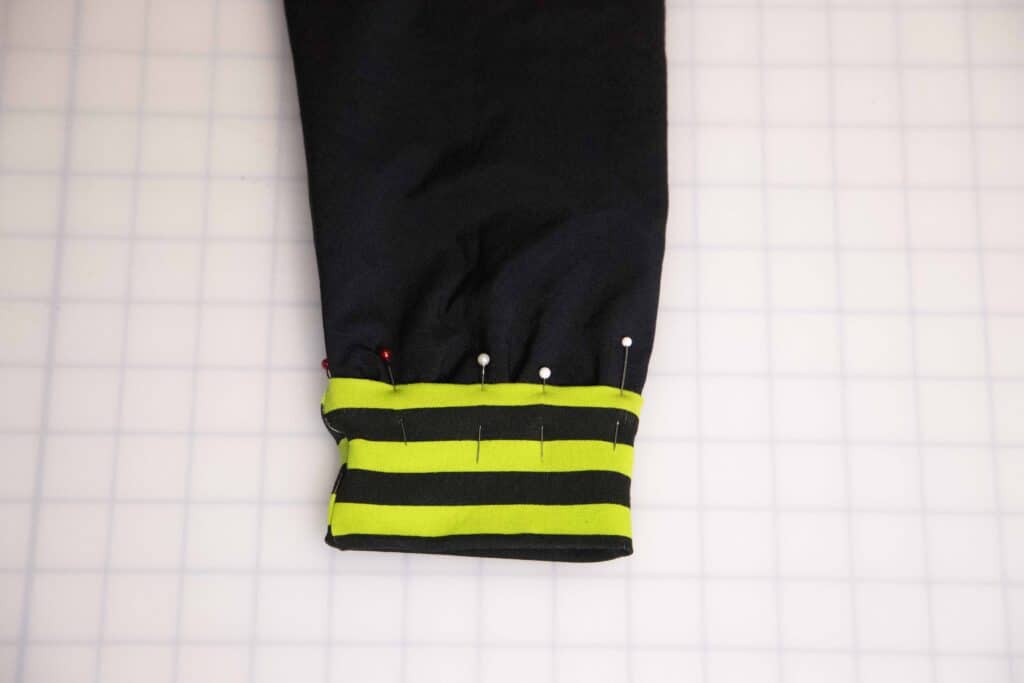
Instead, grab your knit cuff pieces. Sew your knit cuff onto your lining fabric wrist.  Right sides together, stretching the cuff to fit the wrist. Or gathering your wrist to fit the knit cuff if your cuff doesn’t have enough stretch.   Repeat with opposite wrist and knit cuff.   Now open up your Lumberjack right sides up all flat, making sure nothing is twisted.

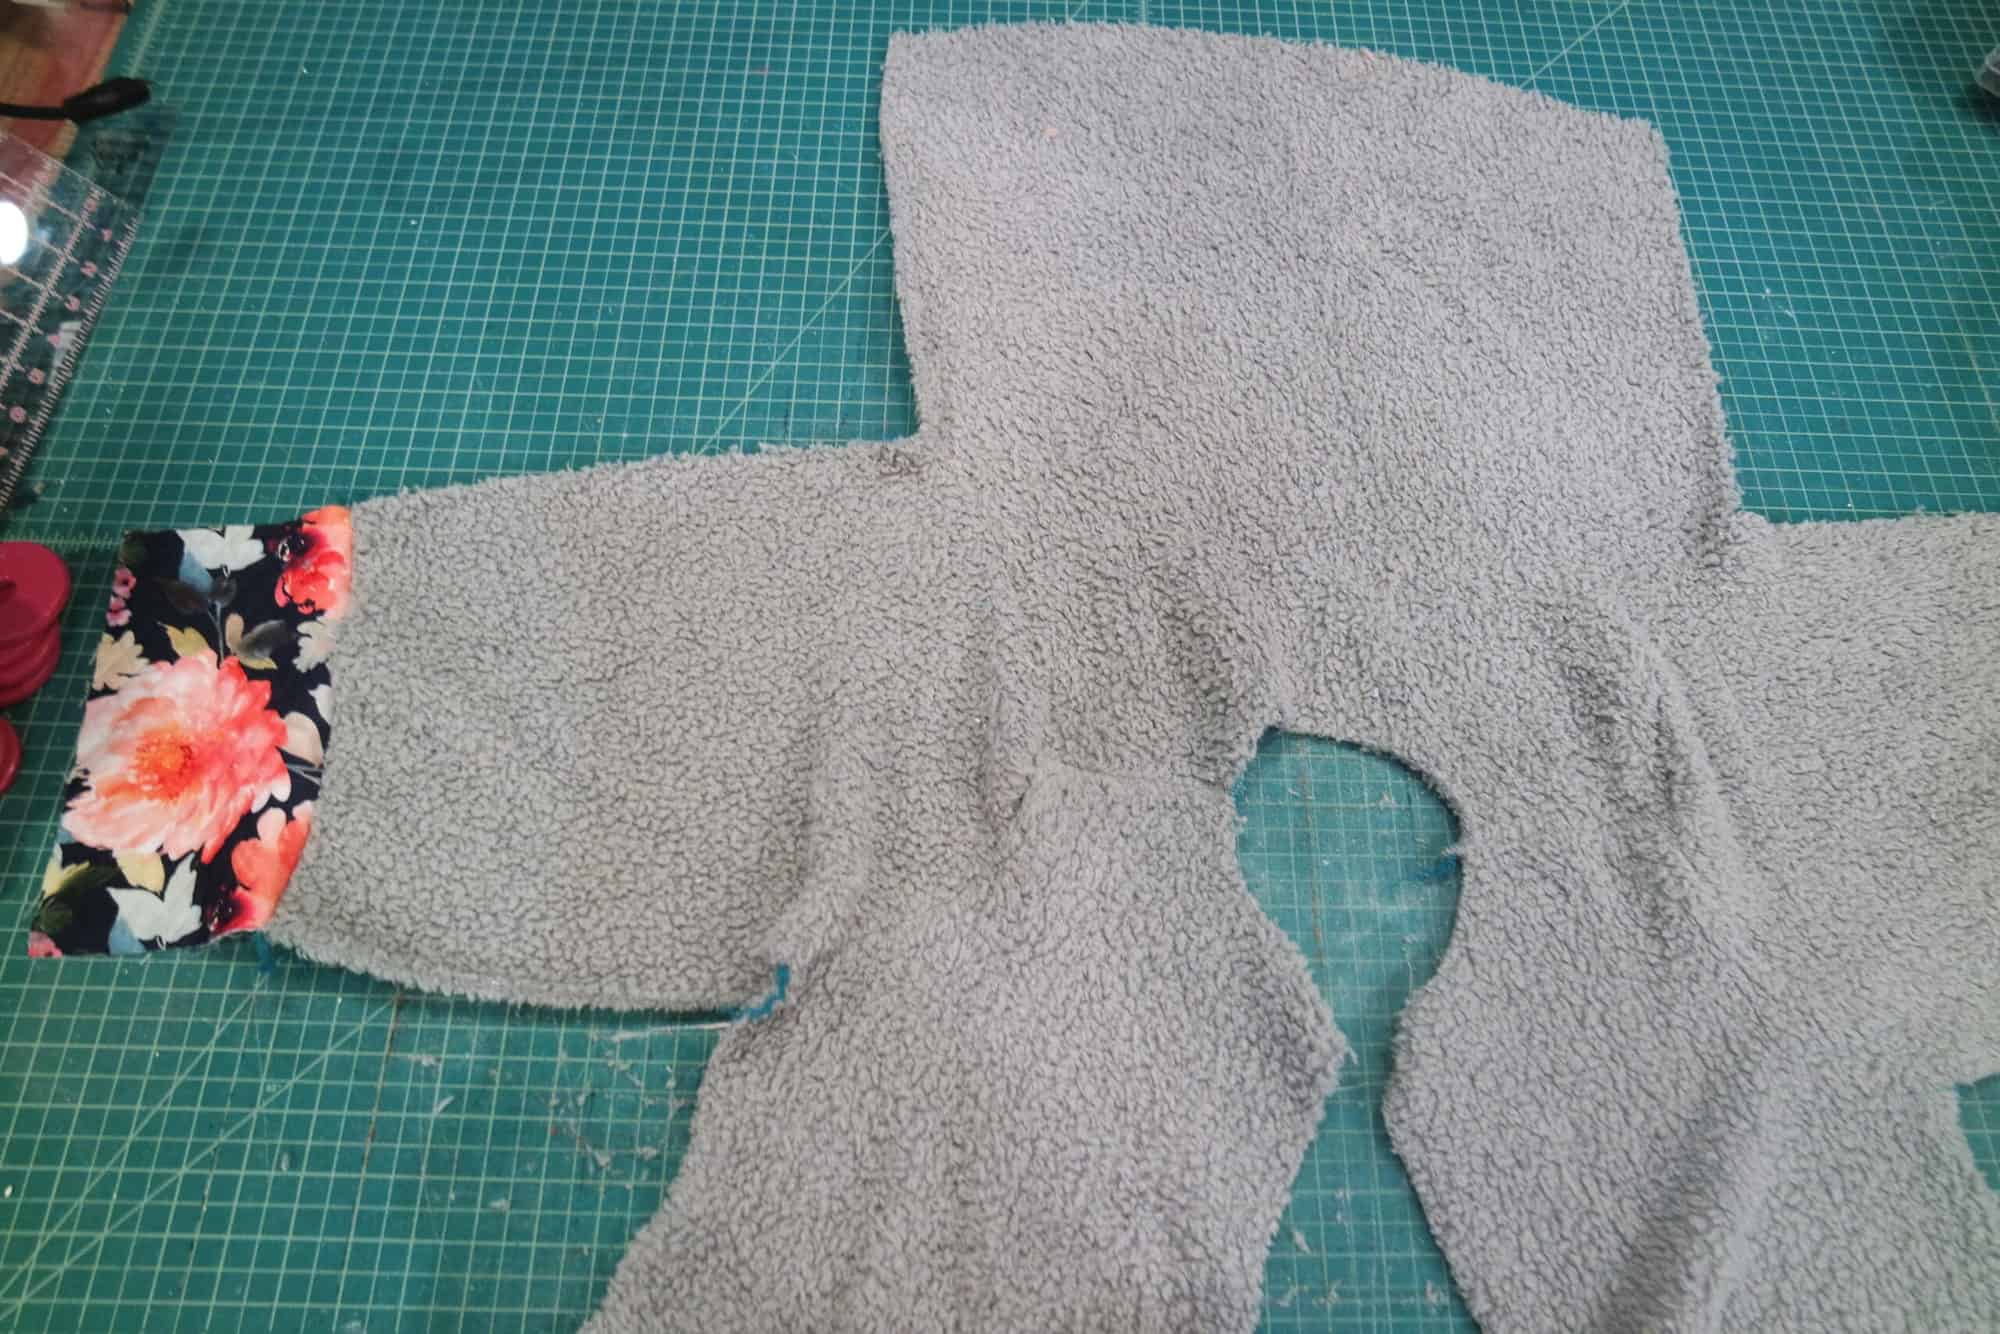
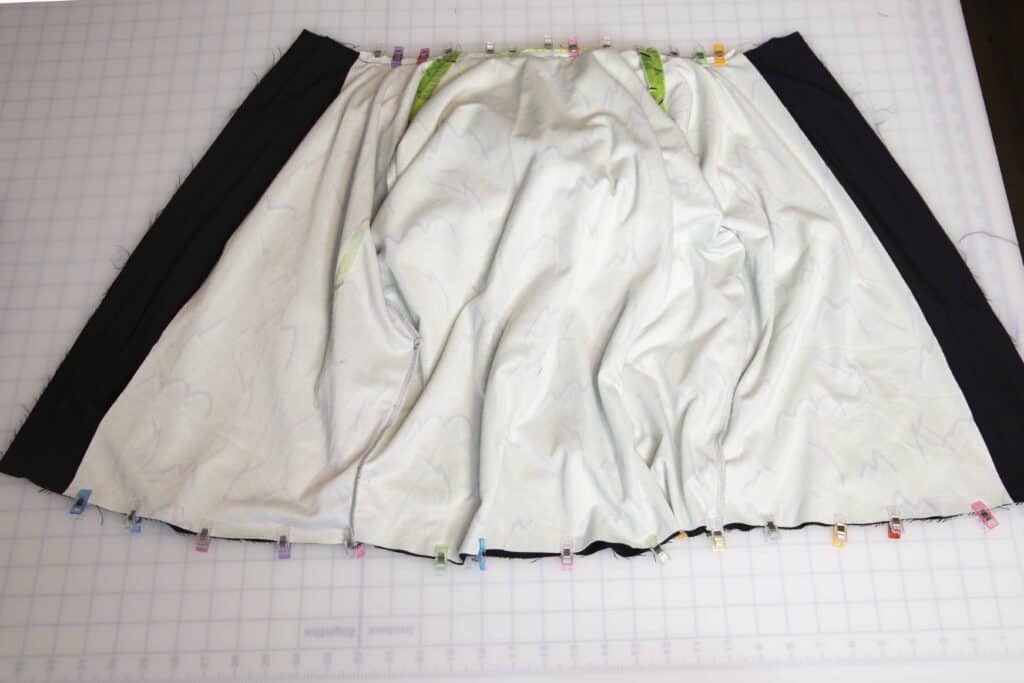
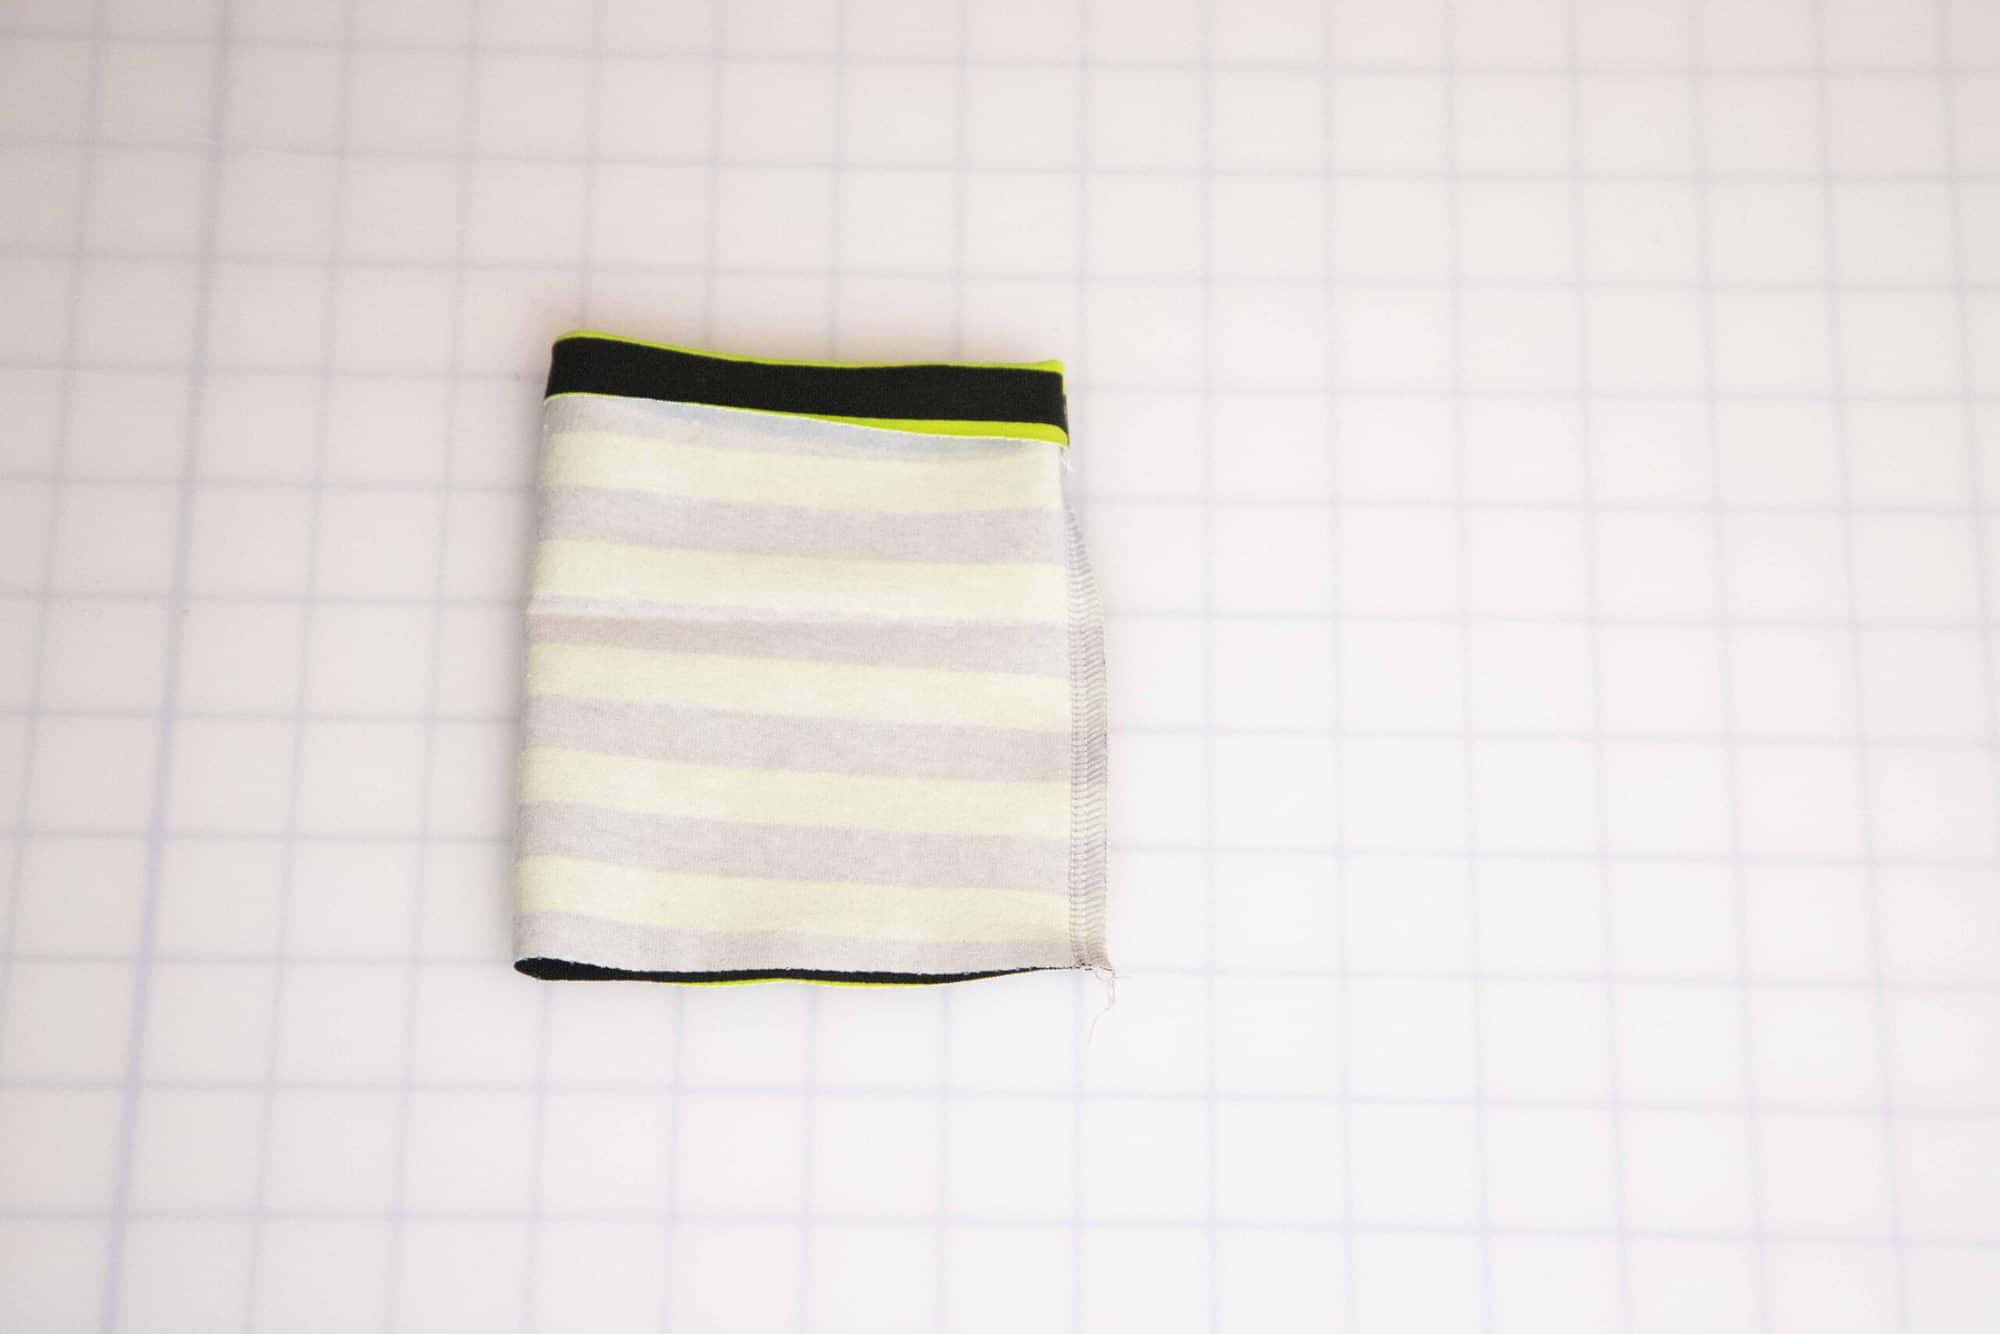
Lay your main piece right sides down on top your lining, matching areas (back to back, fronts to fronts, sleeves on top sleeves).  Now align and sew your knit cuffs to the main (they are right sides together), again stretching the knit cuff to fit to the wrist.  Make sure you don’t get anything twisted up here.

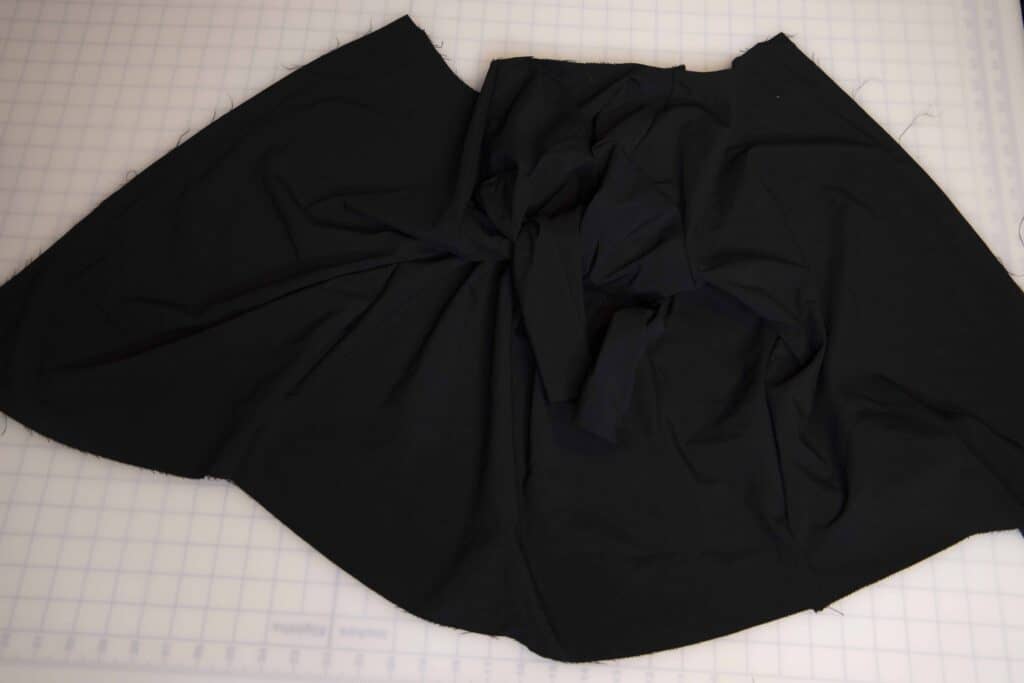
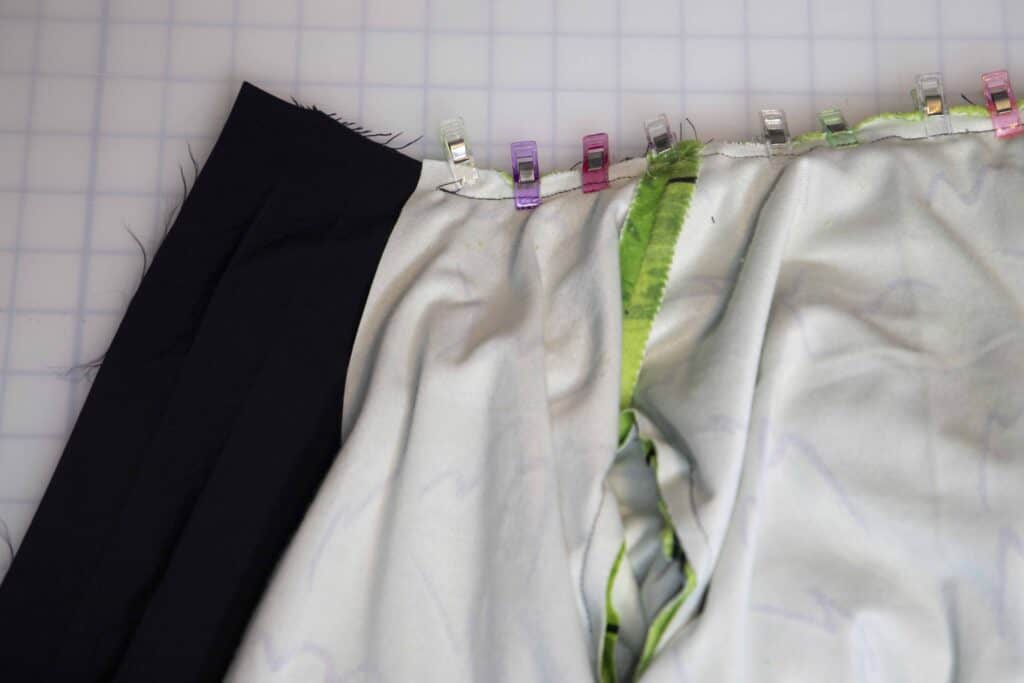
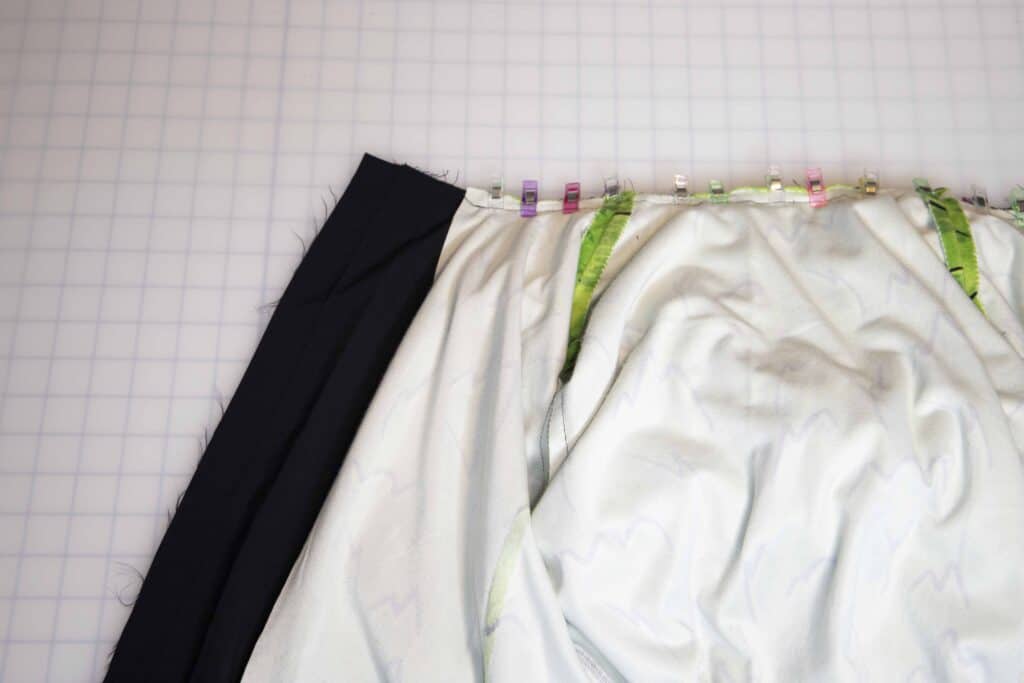
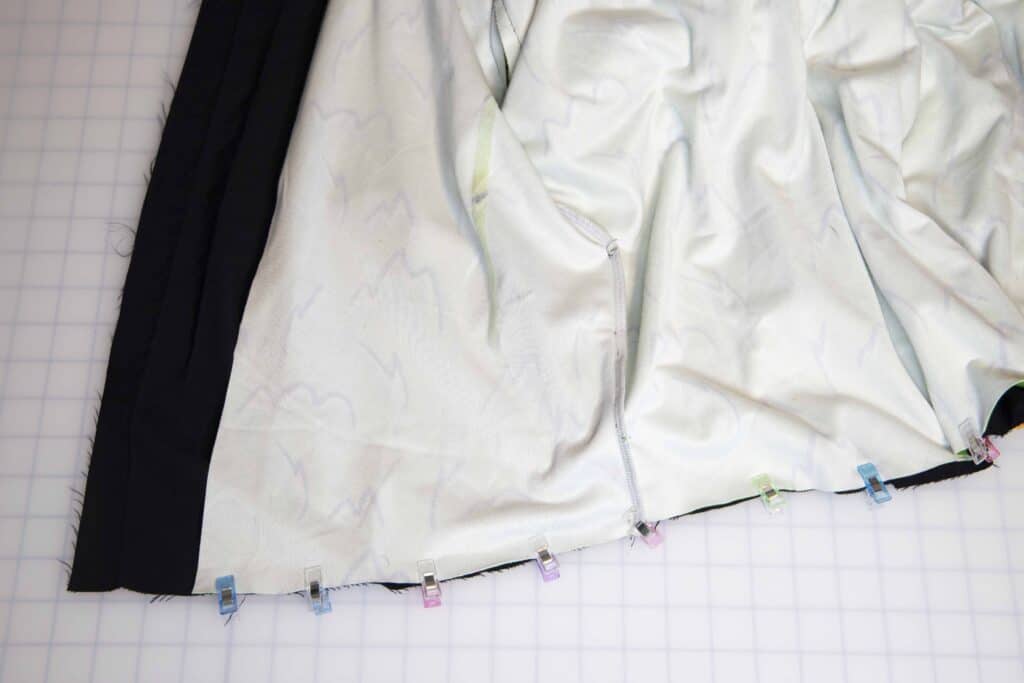
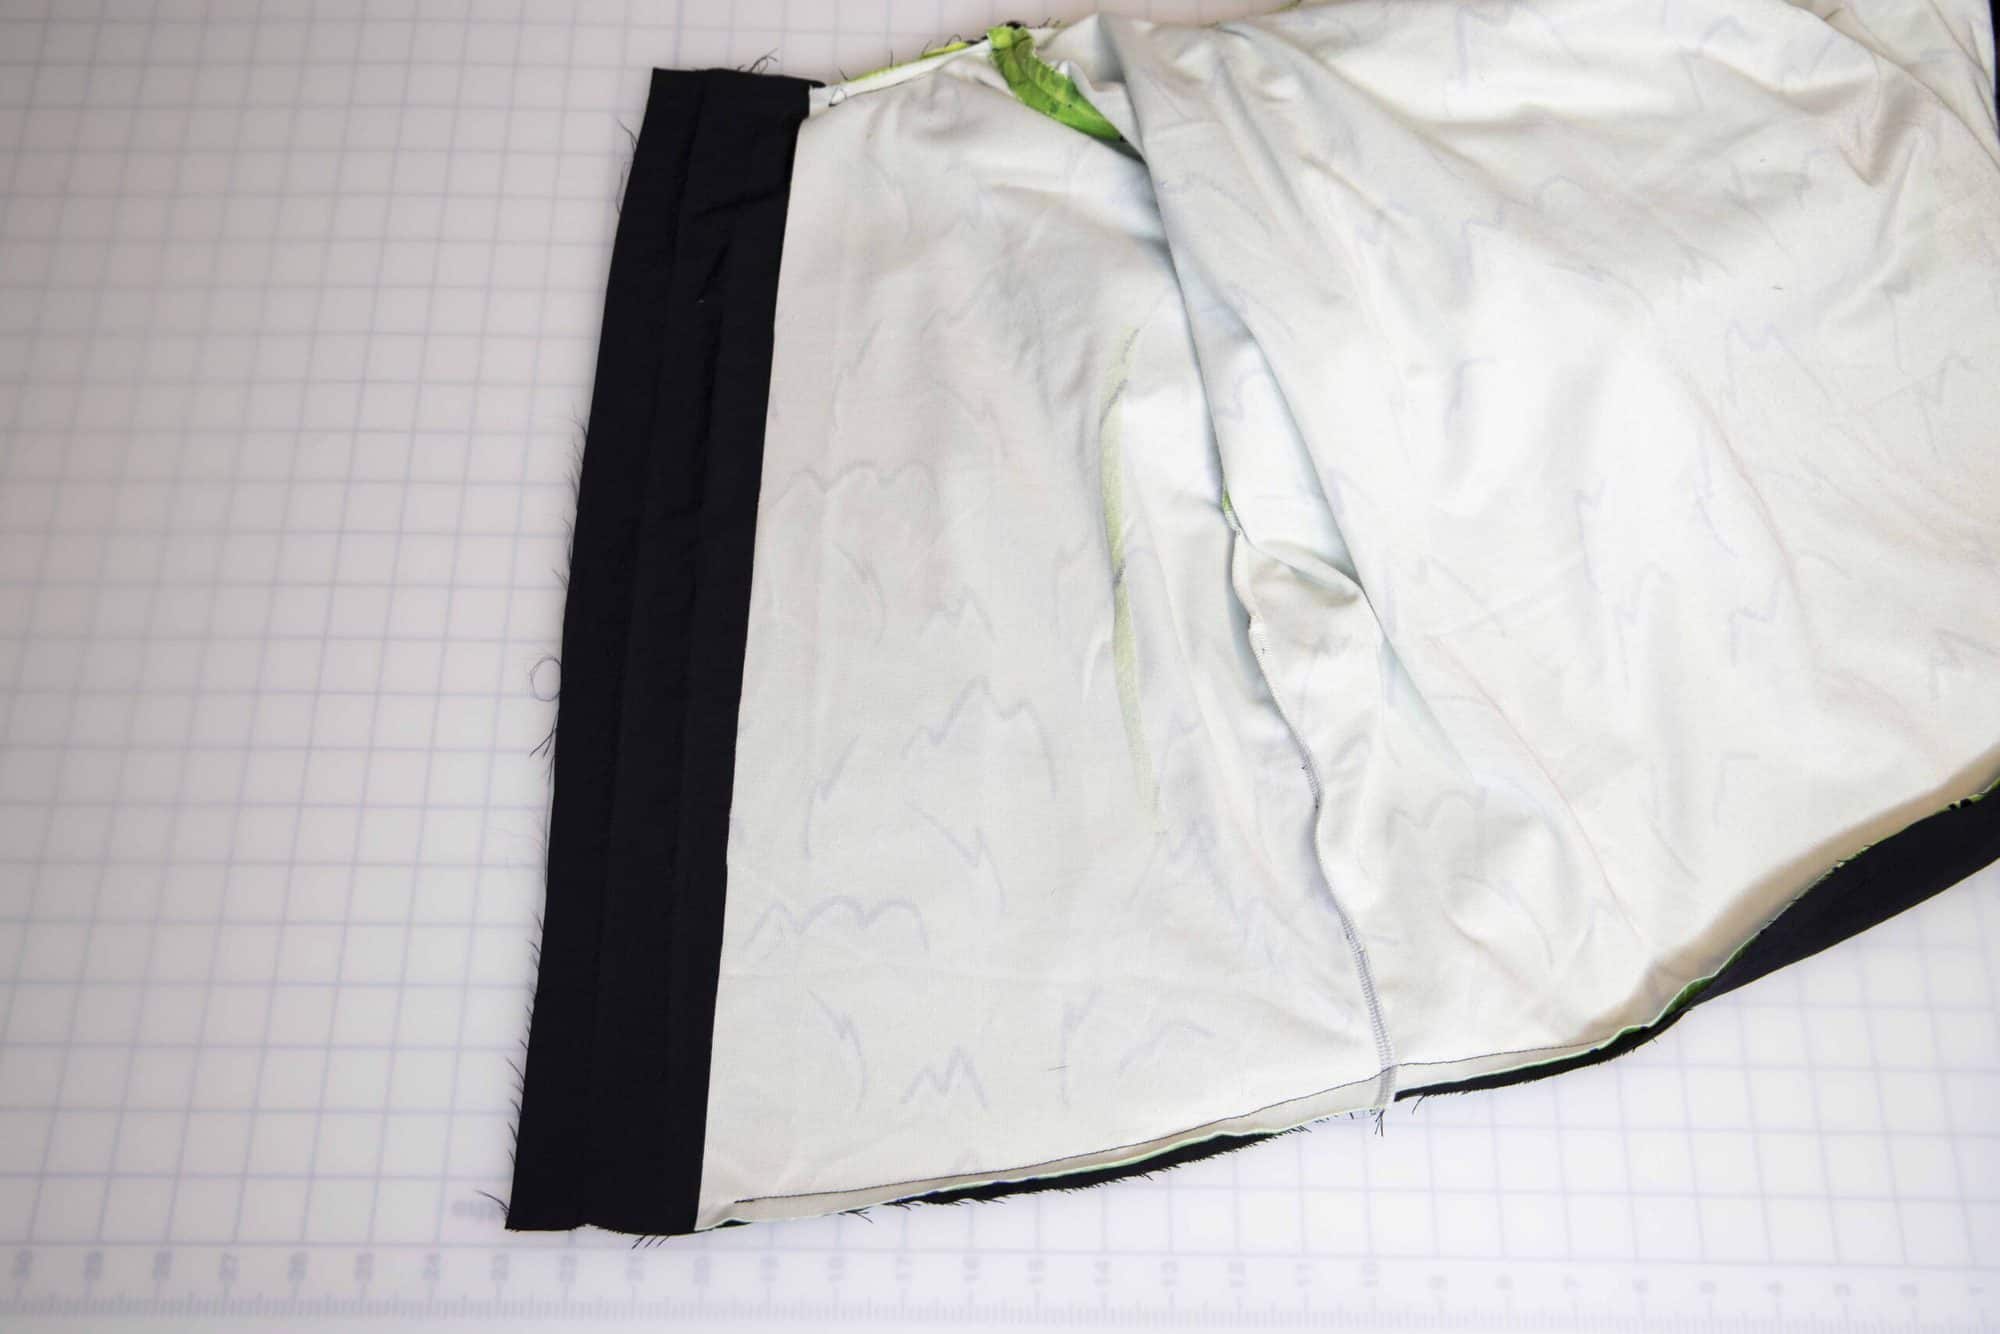
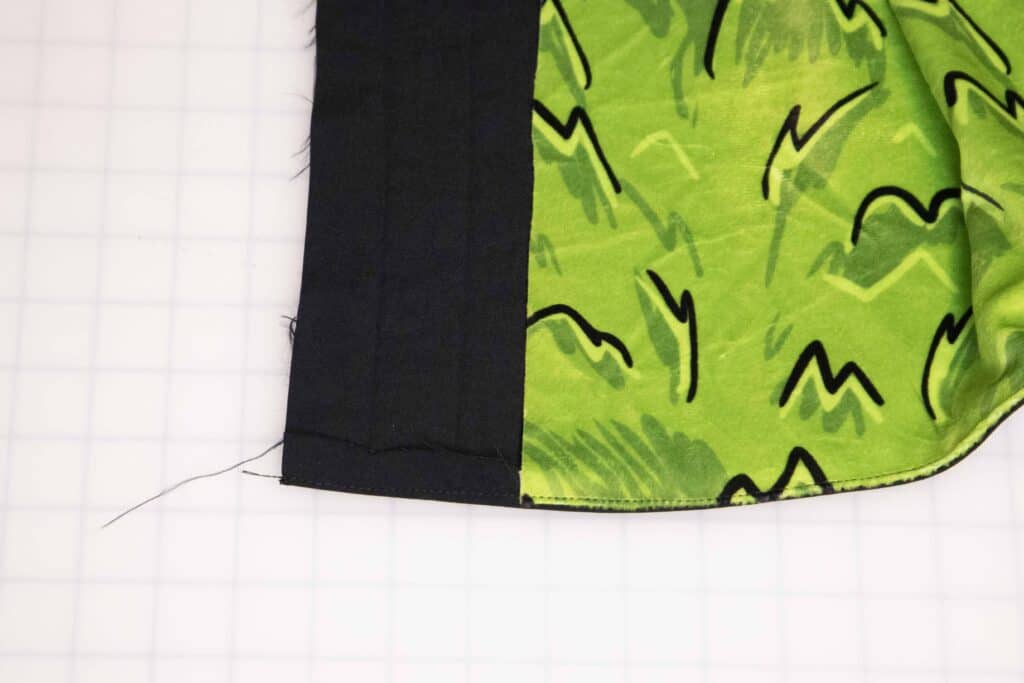
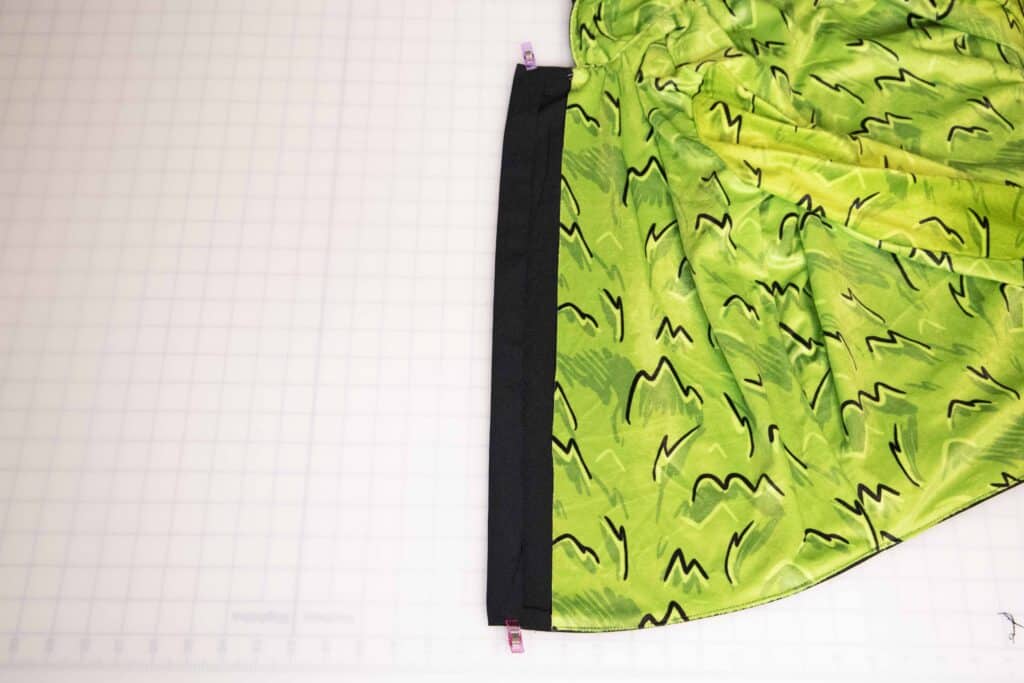
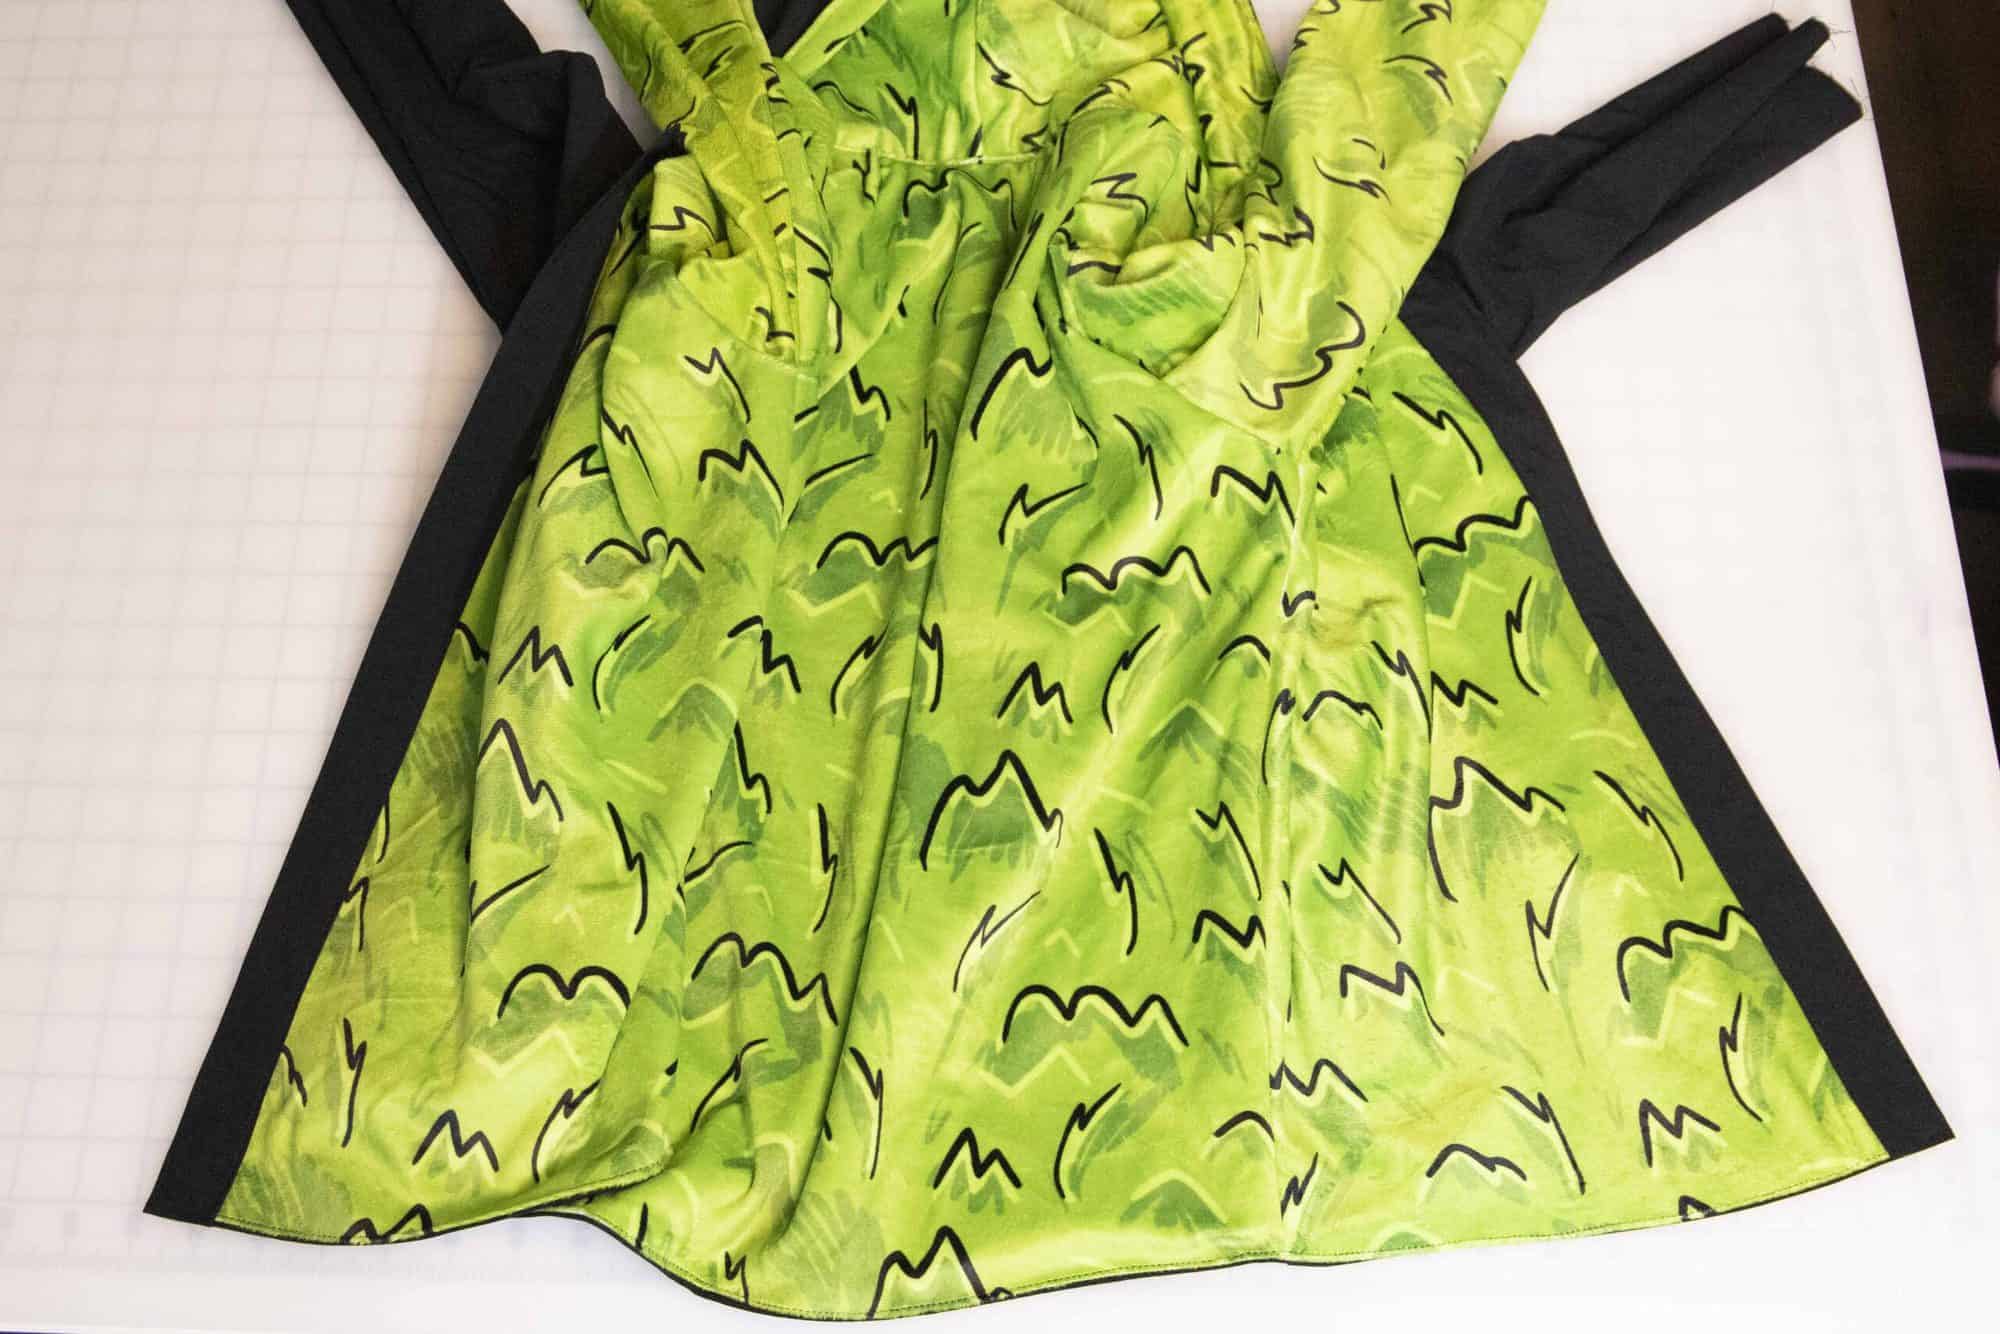
Now align your side seams down the main and lining of your Lumberjack with right sides together.  You’ll stitch from bottom hem of main fabric, up through main armpit, up main sleeve, through knit cuff, down the lining sleeve, down the side of the lining to the bottom of the lining side seam hem.  And repeat on the opposite side seam.   (This was very difficult to take a picture of LOL).

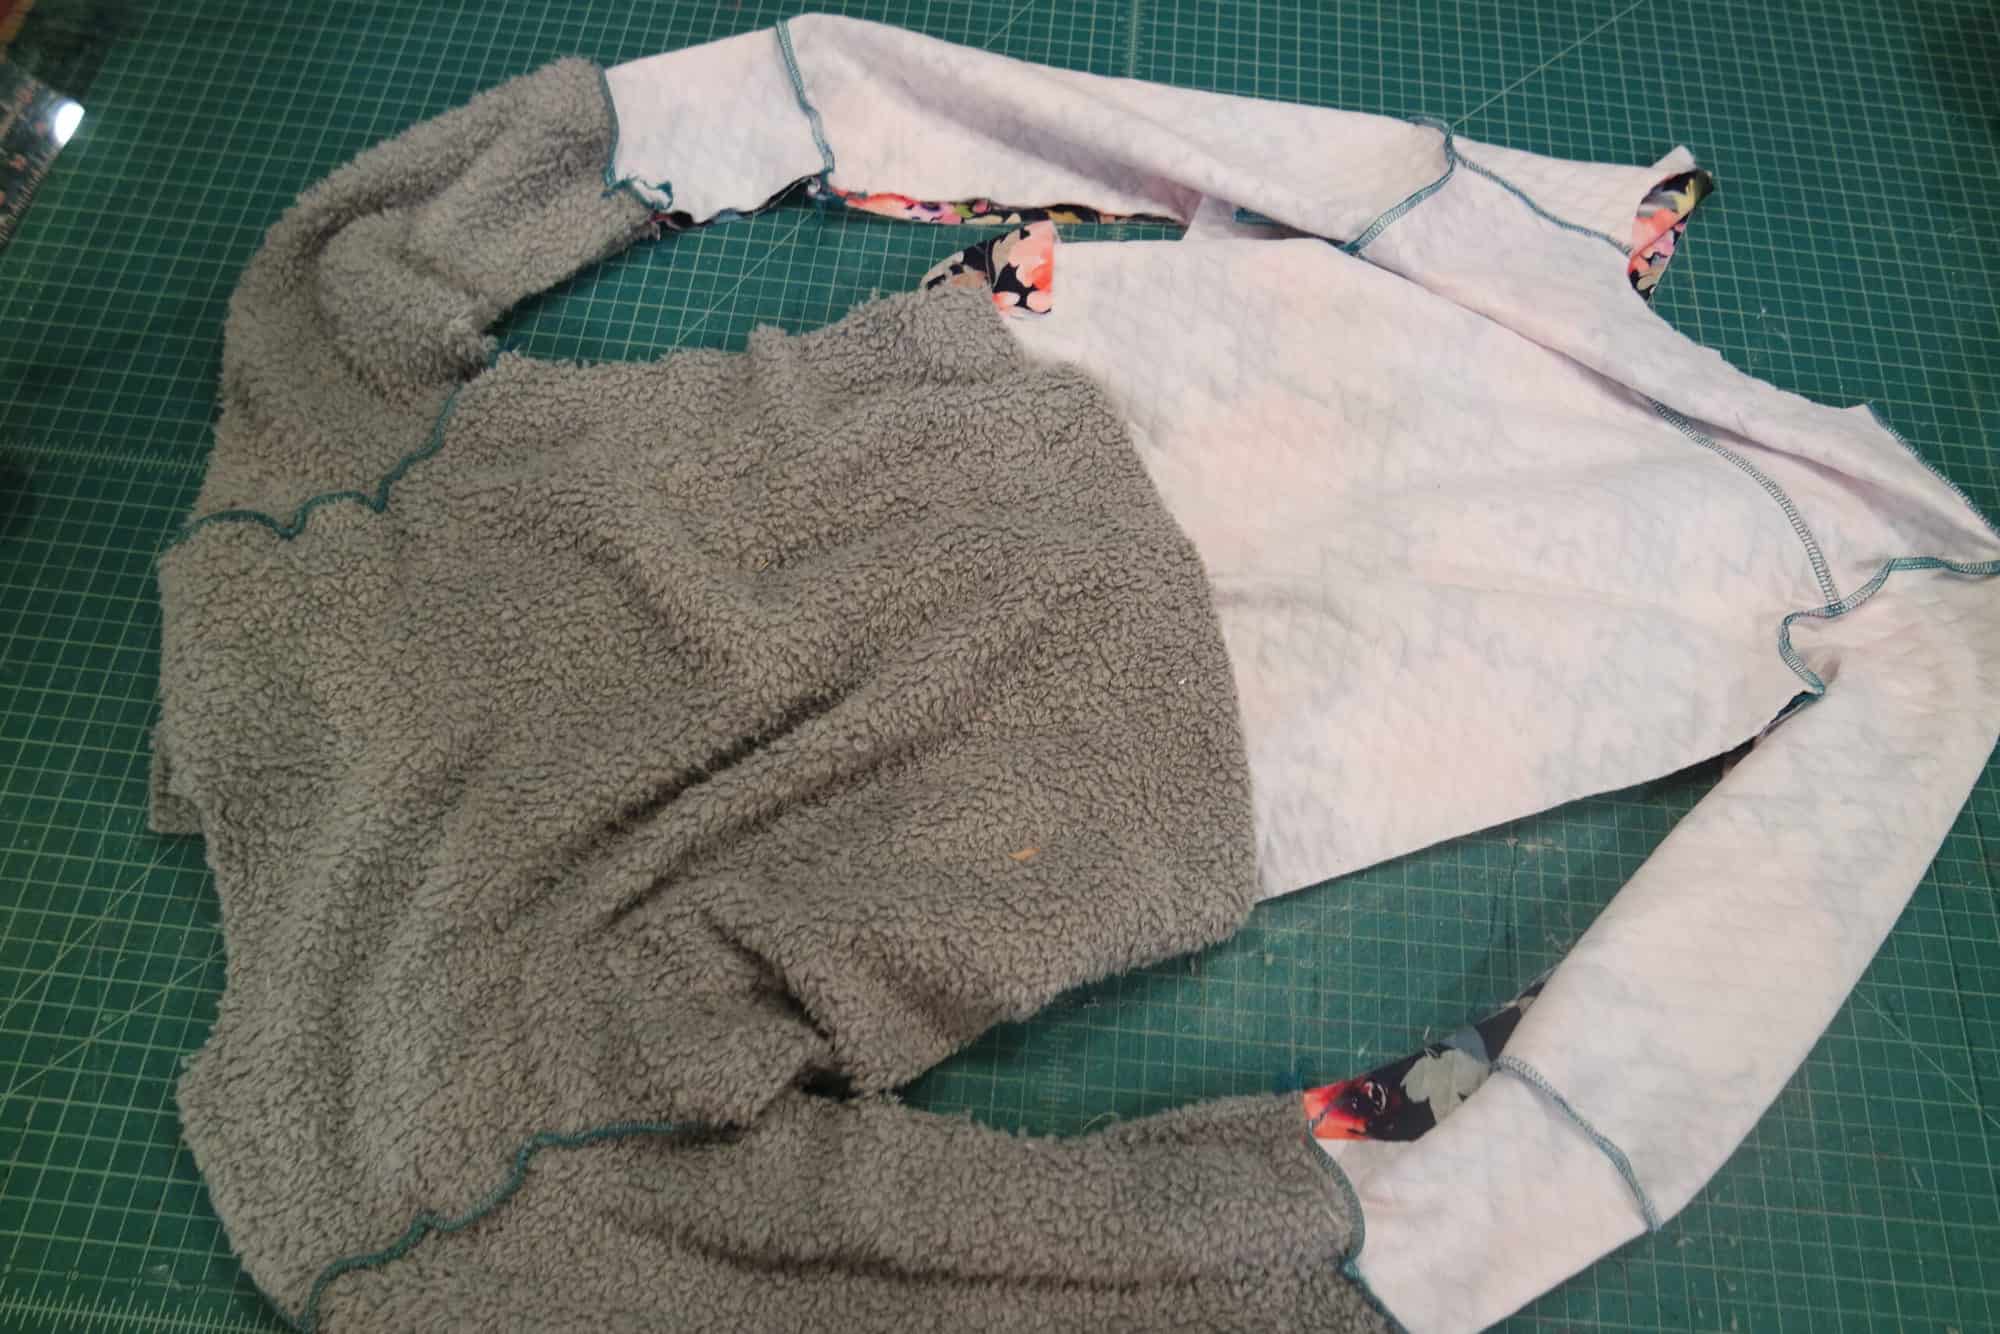
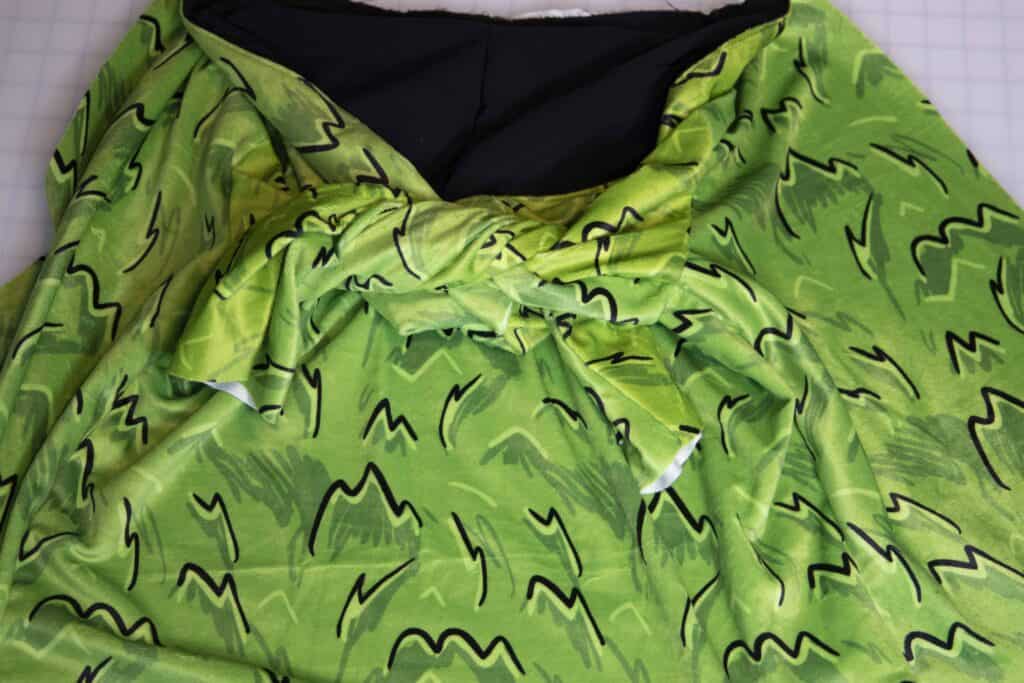
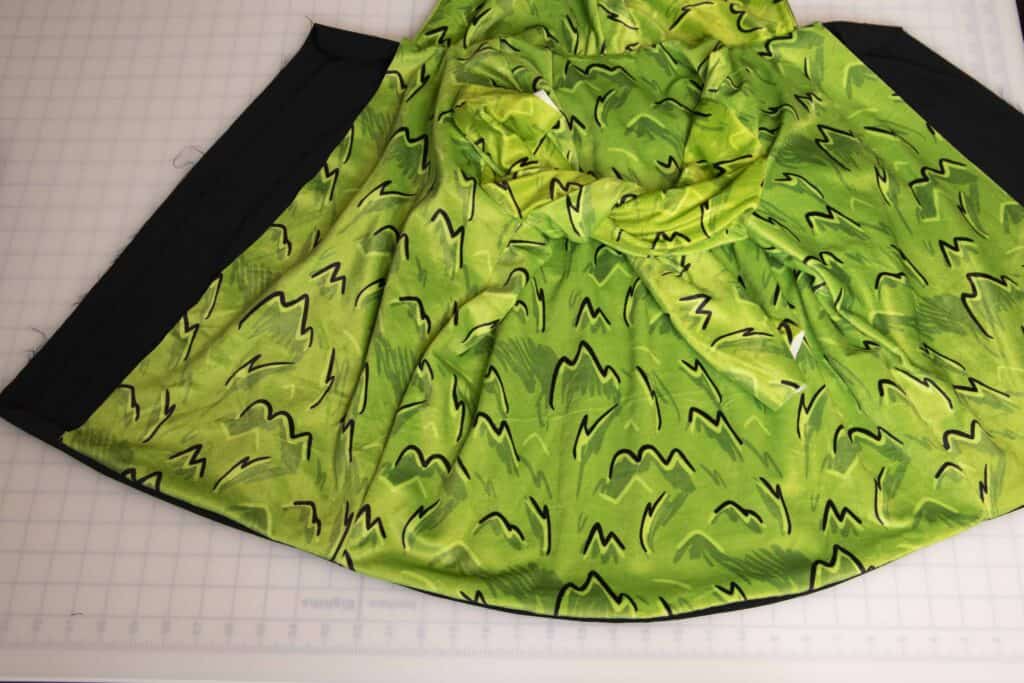
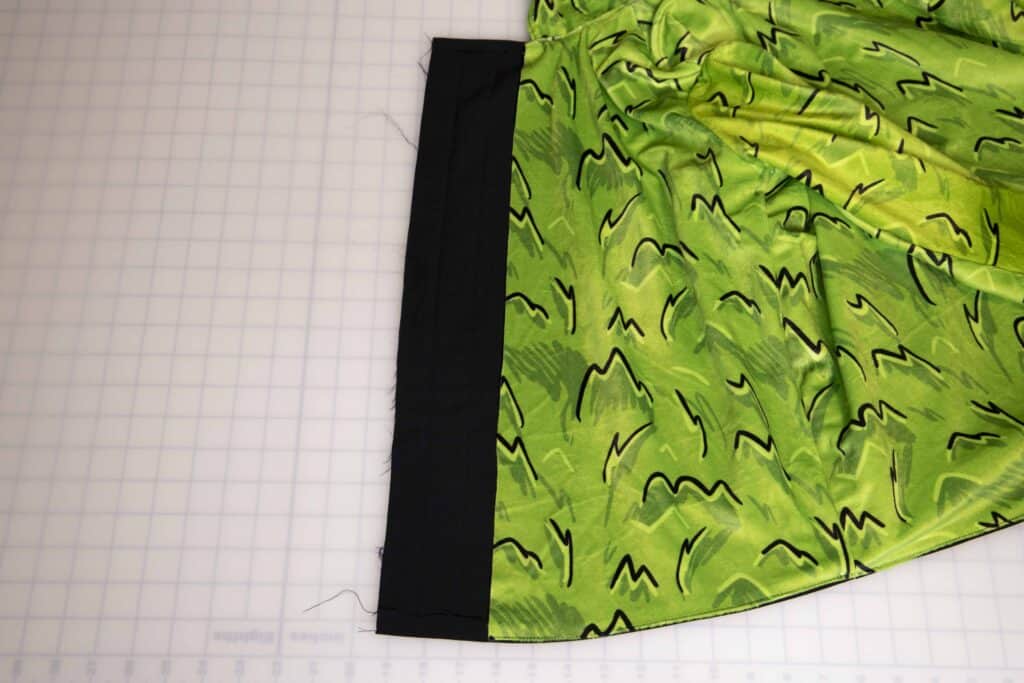
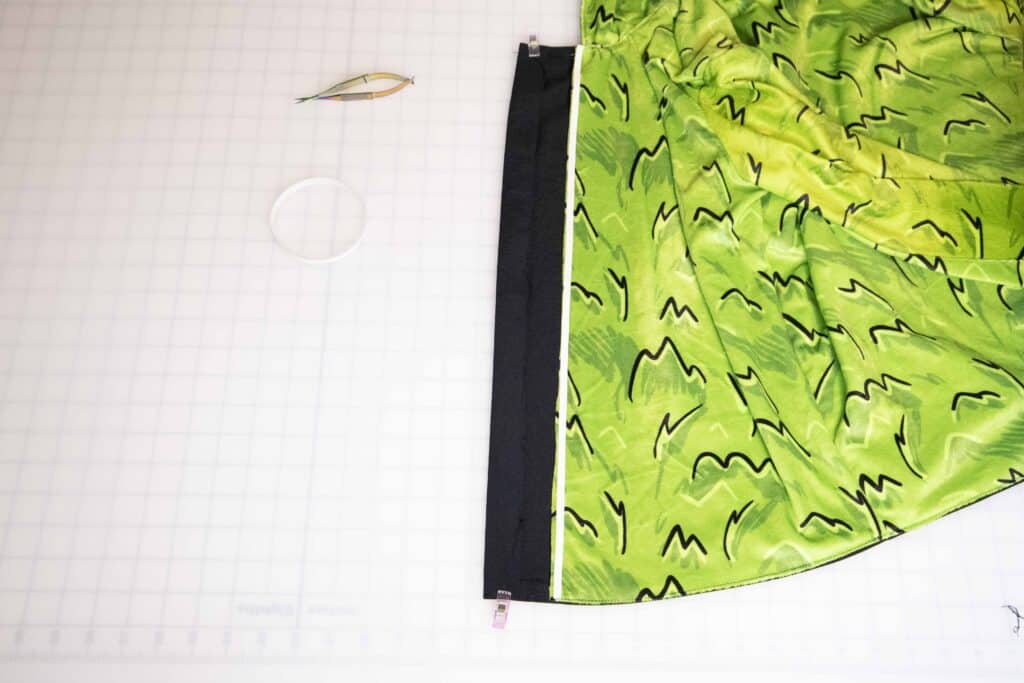
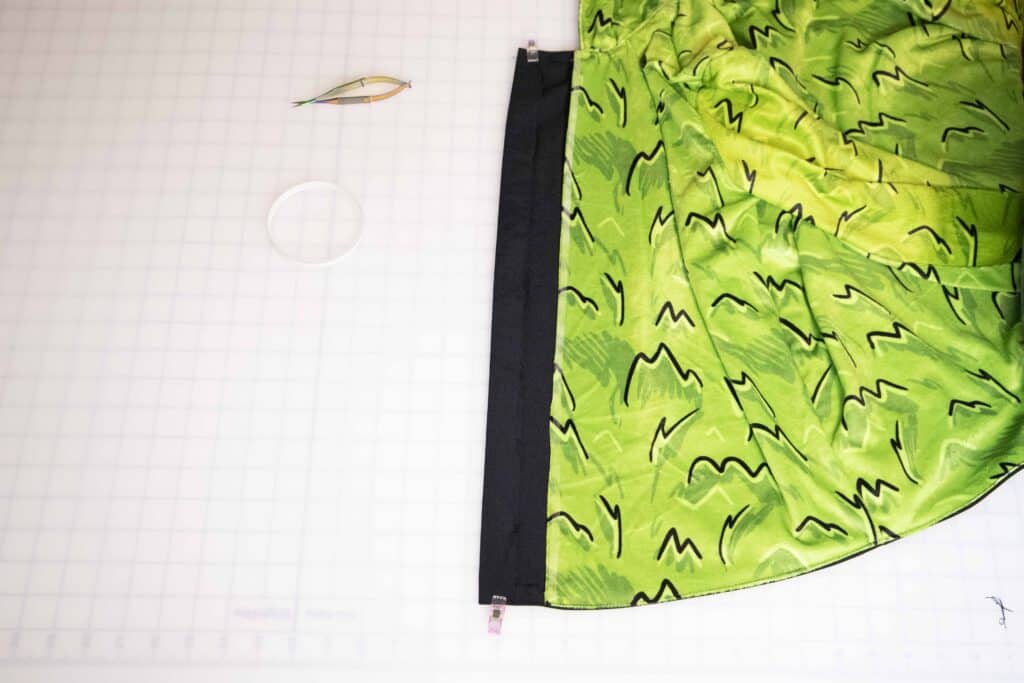
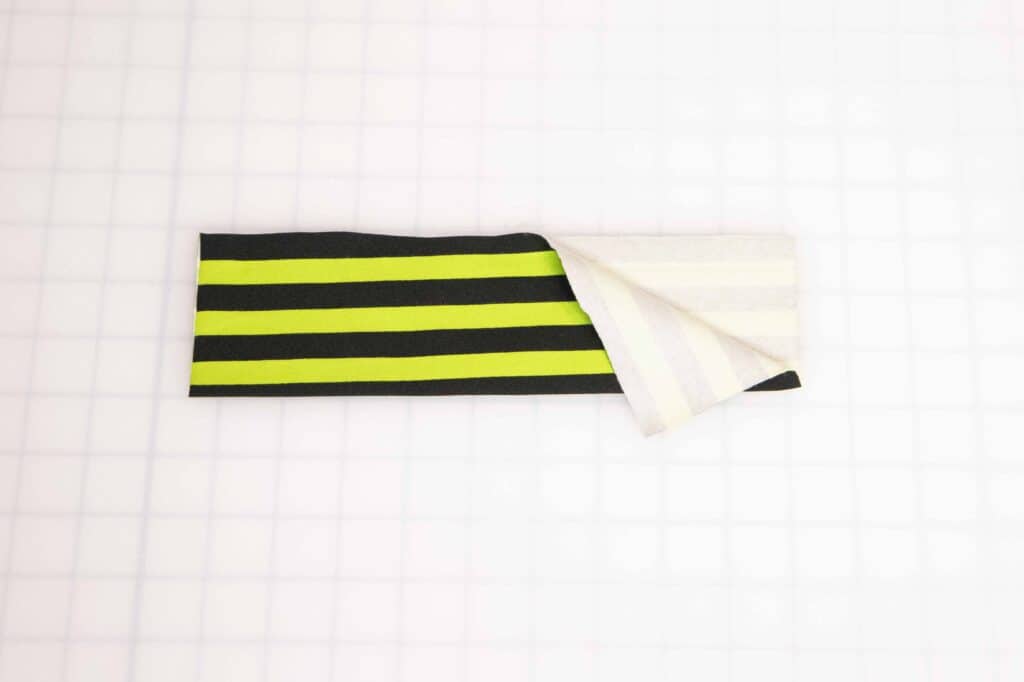
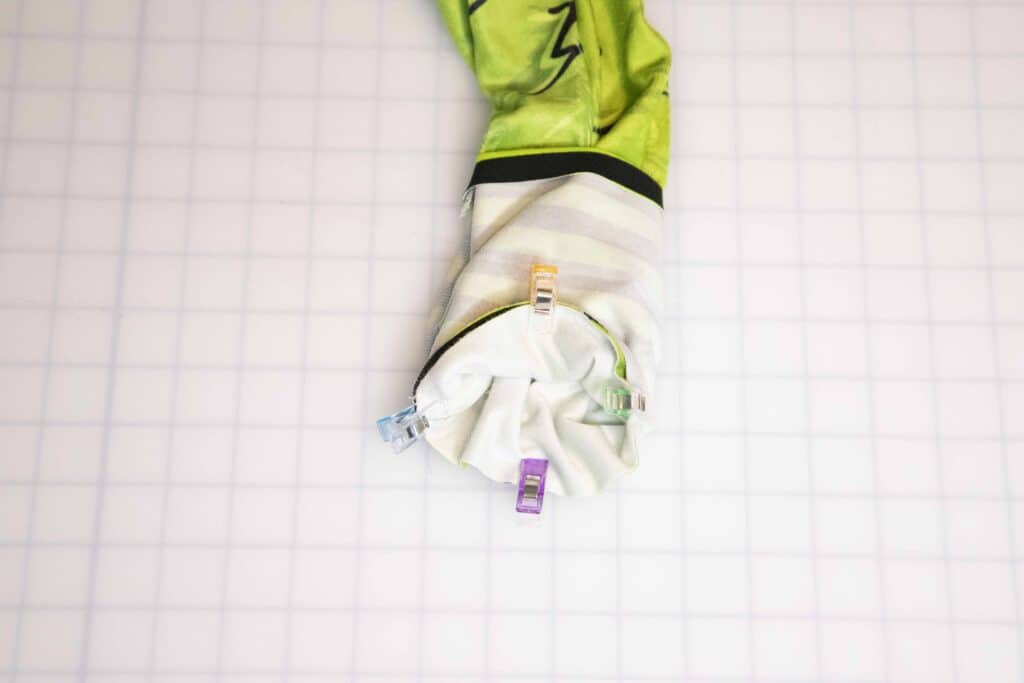
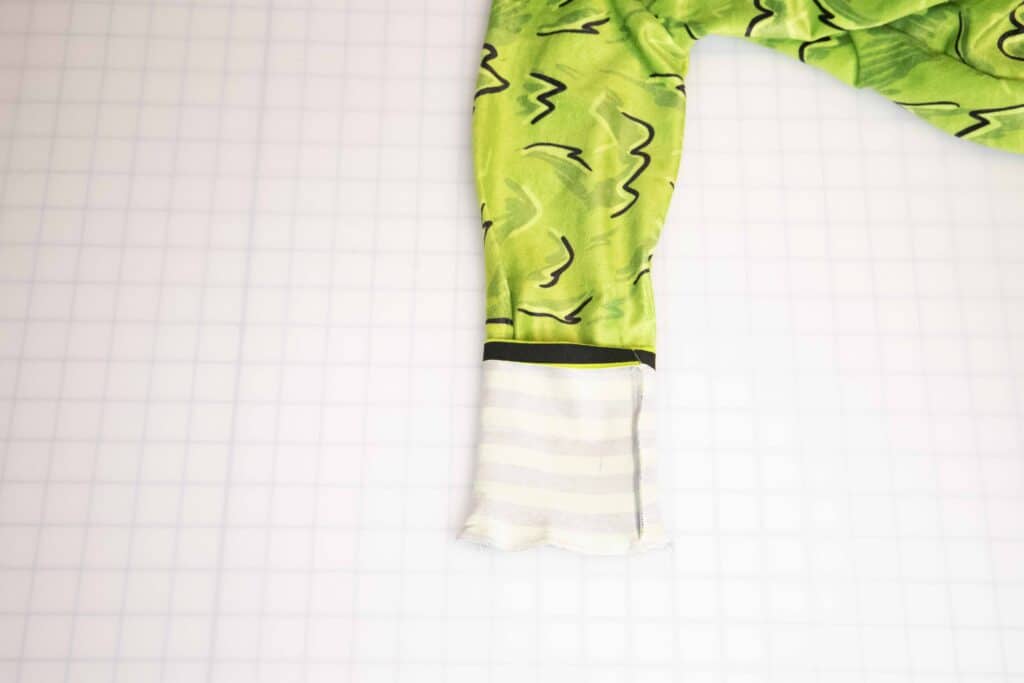
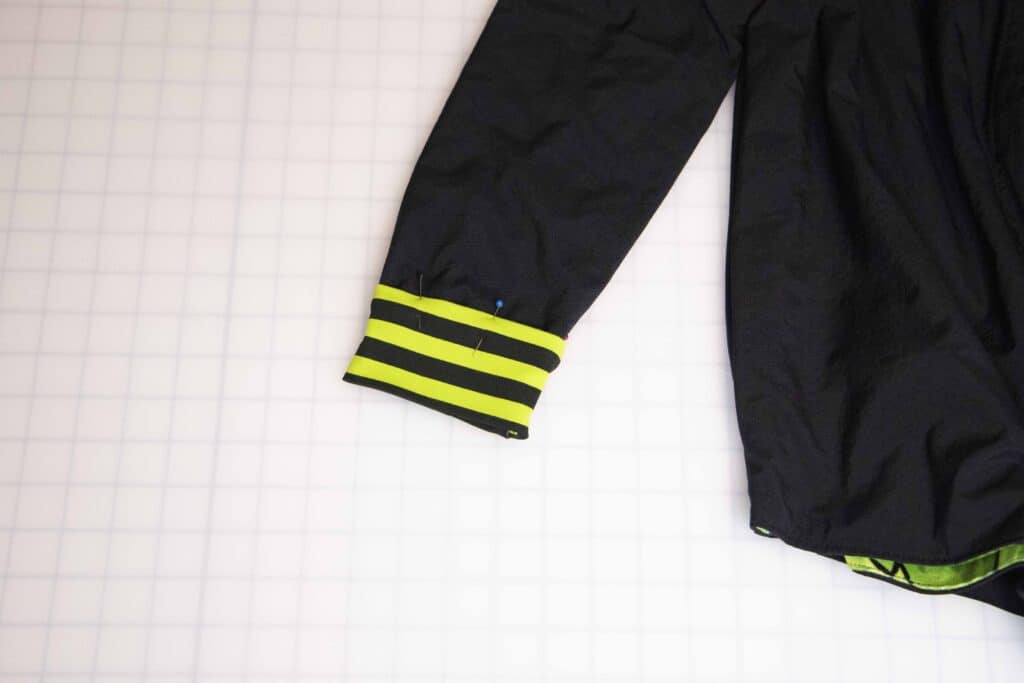
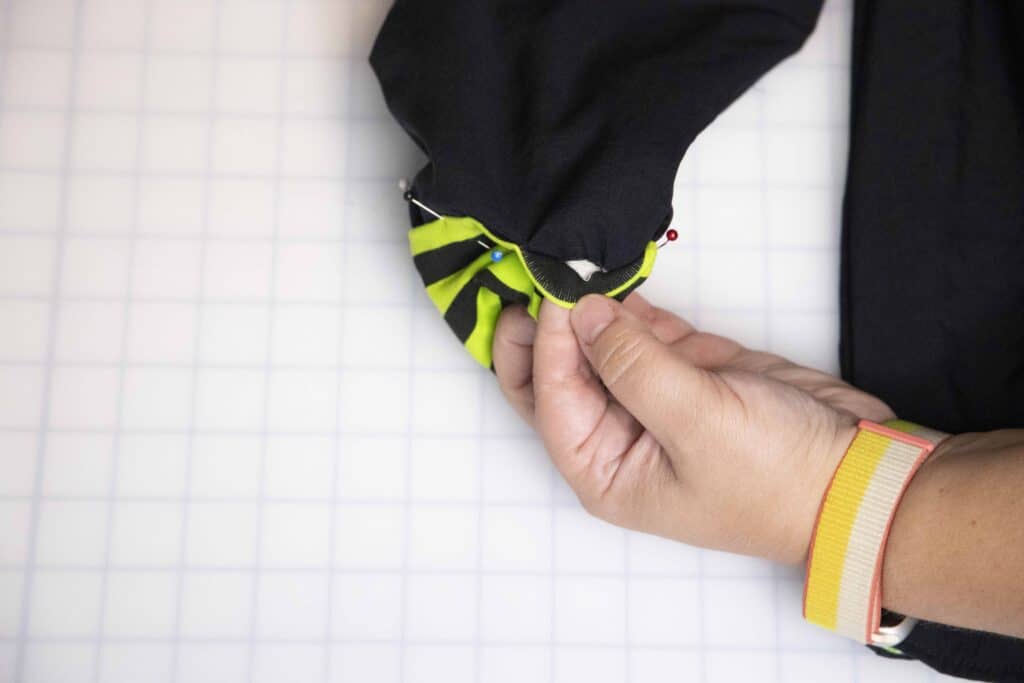
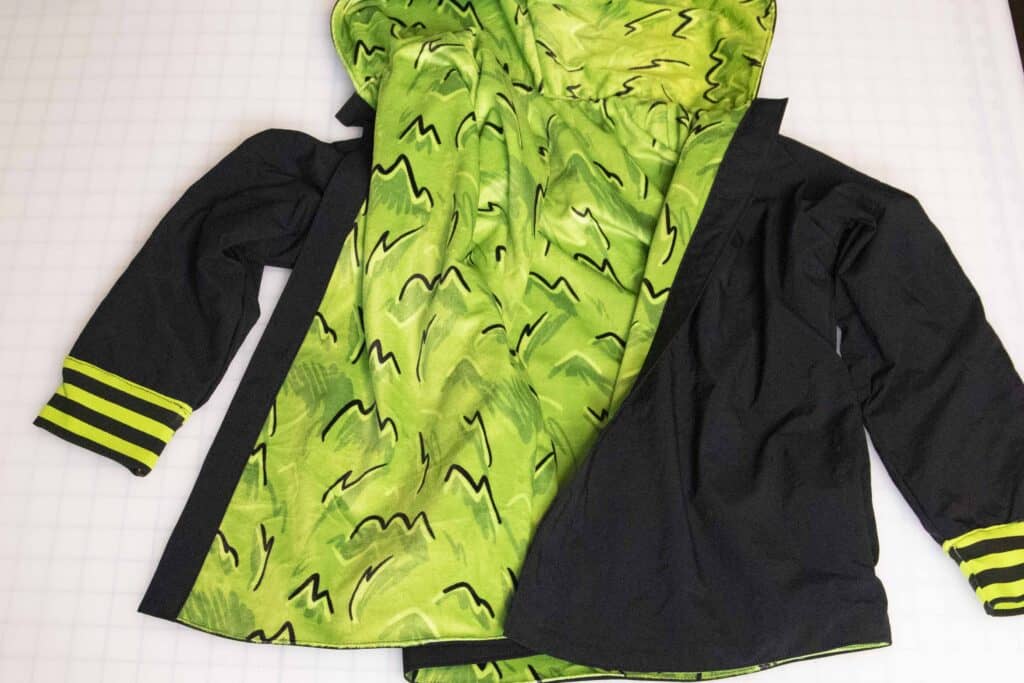
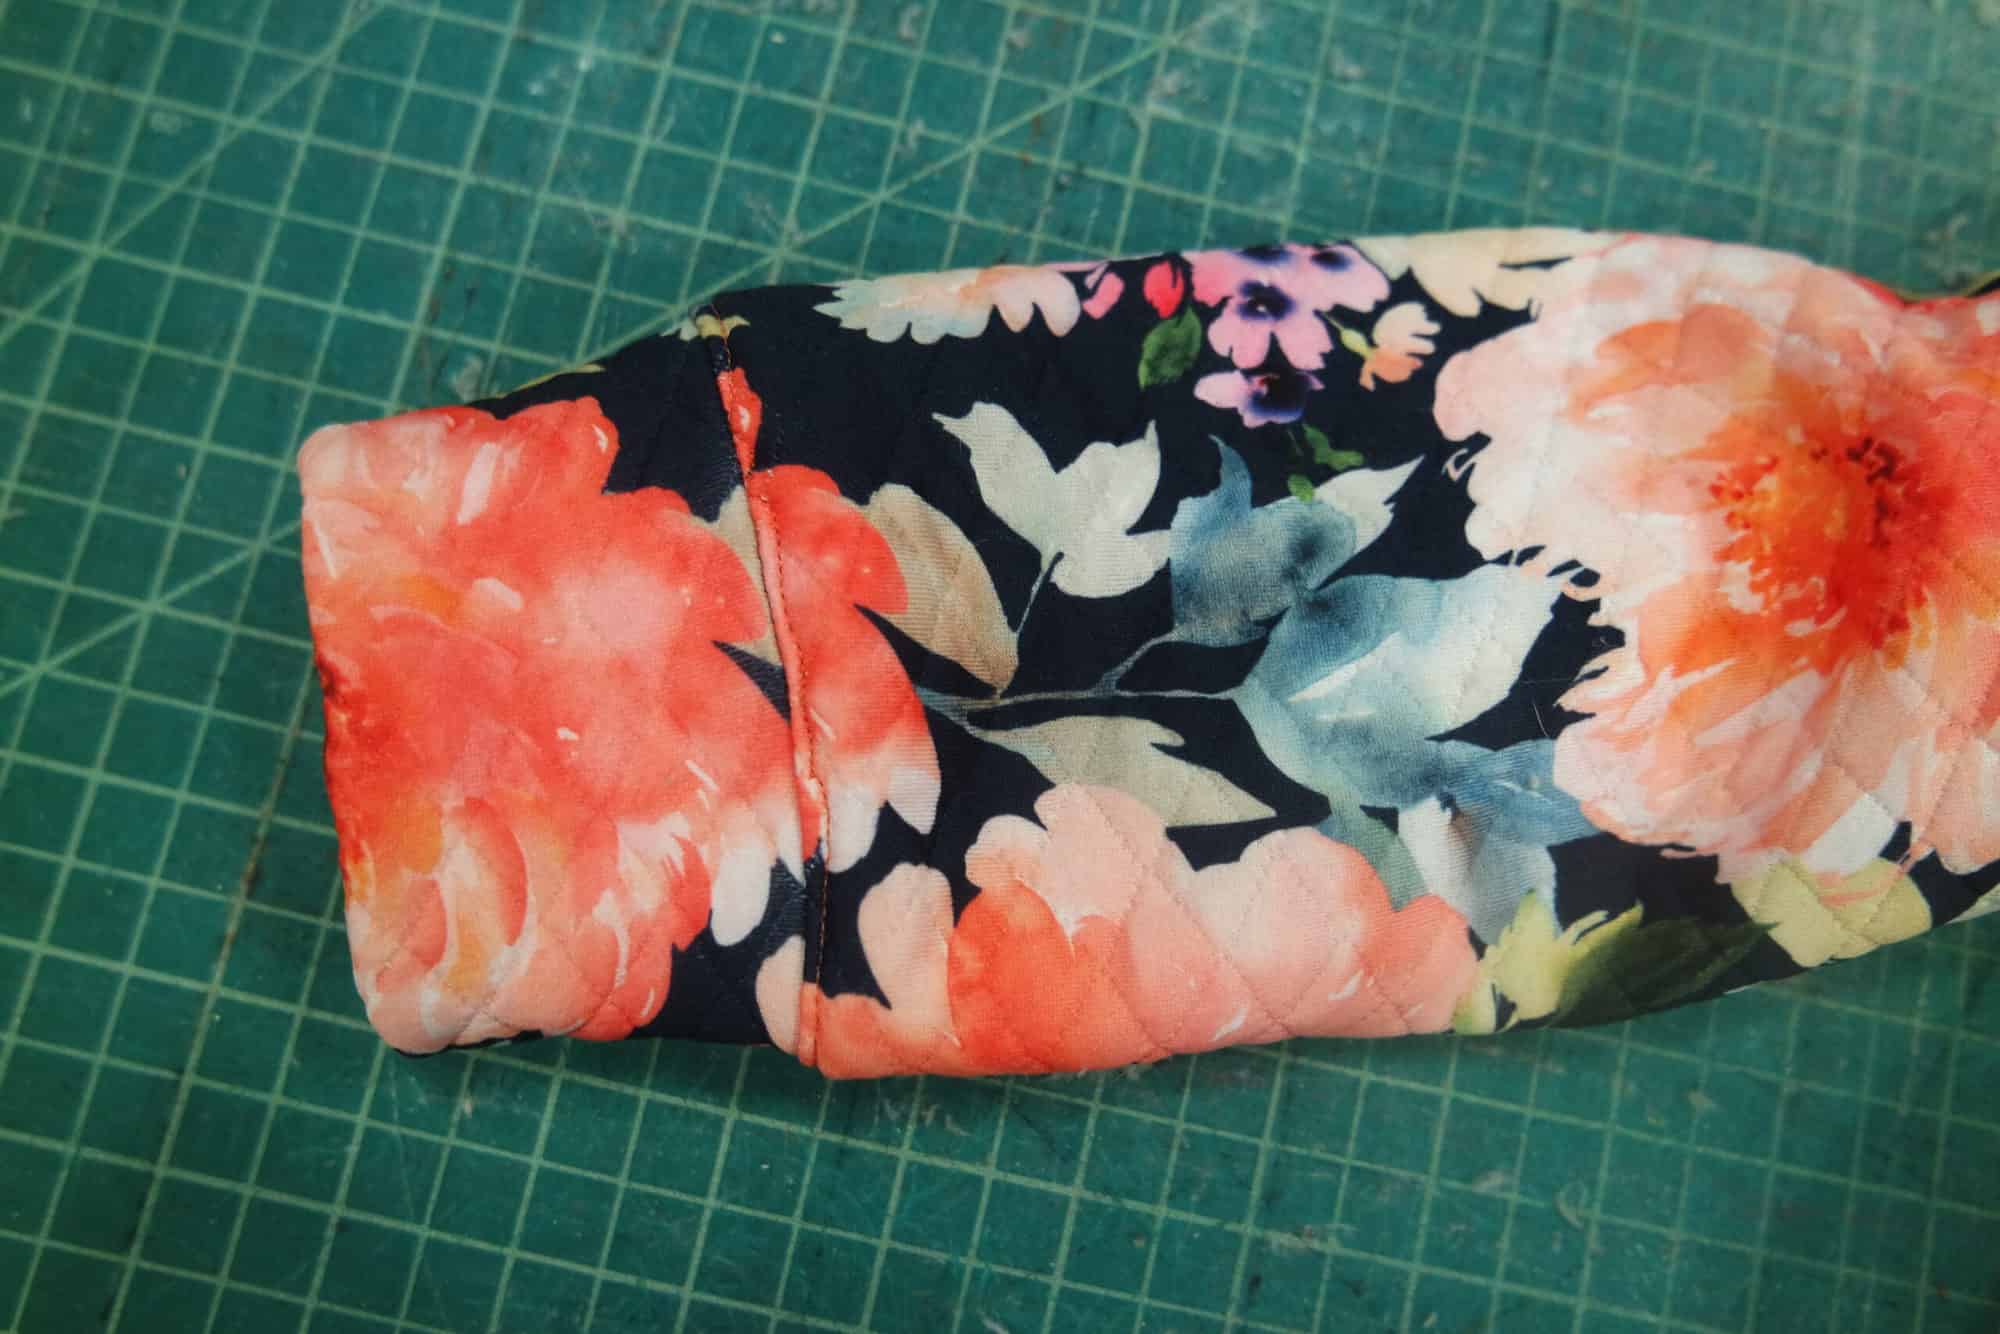
Here’s the magic part.  Put your arm through the main sleeve and grab the knit cuff.  Pull knit cuff through main fabric sleeve until the wrist seams of both main and lining are aligned with knit cuff folded in half. TA-DA… doesn’t that always feel so cool?  

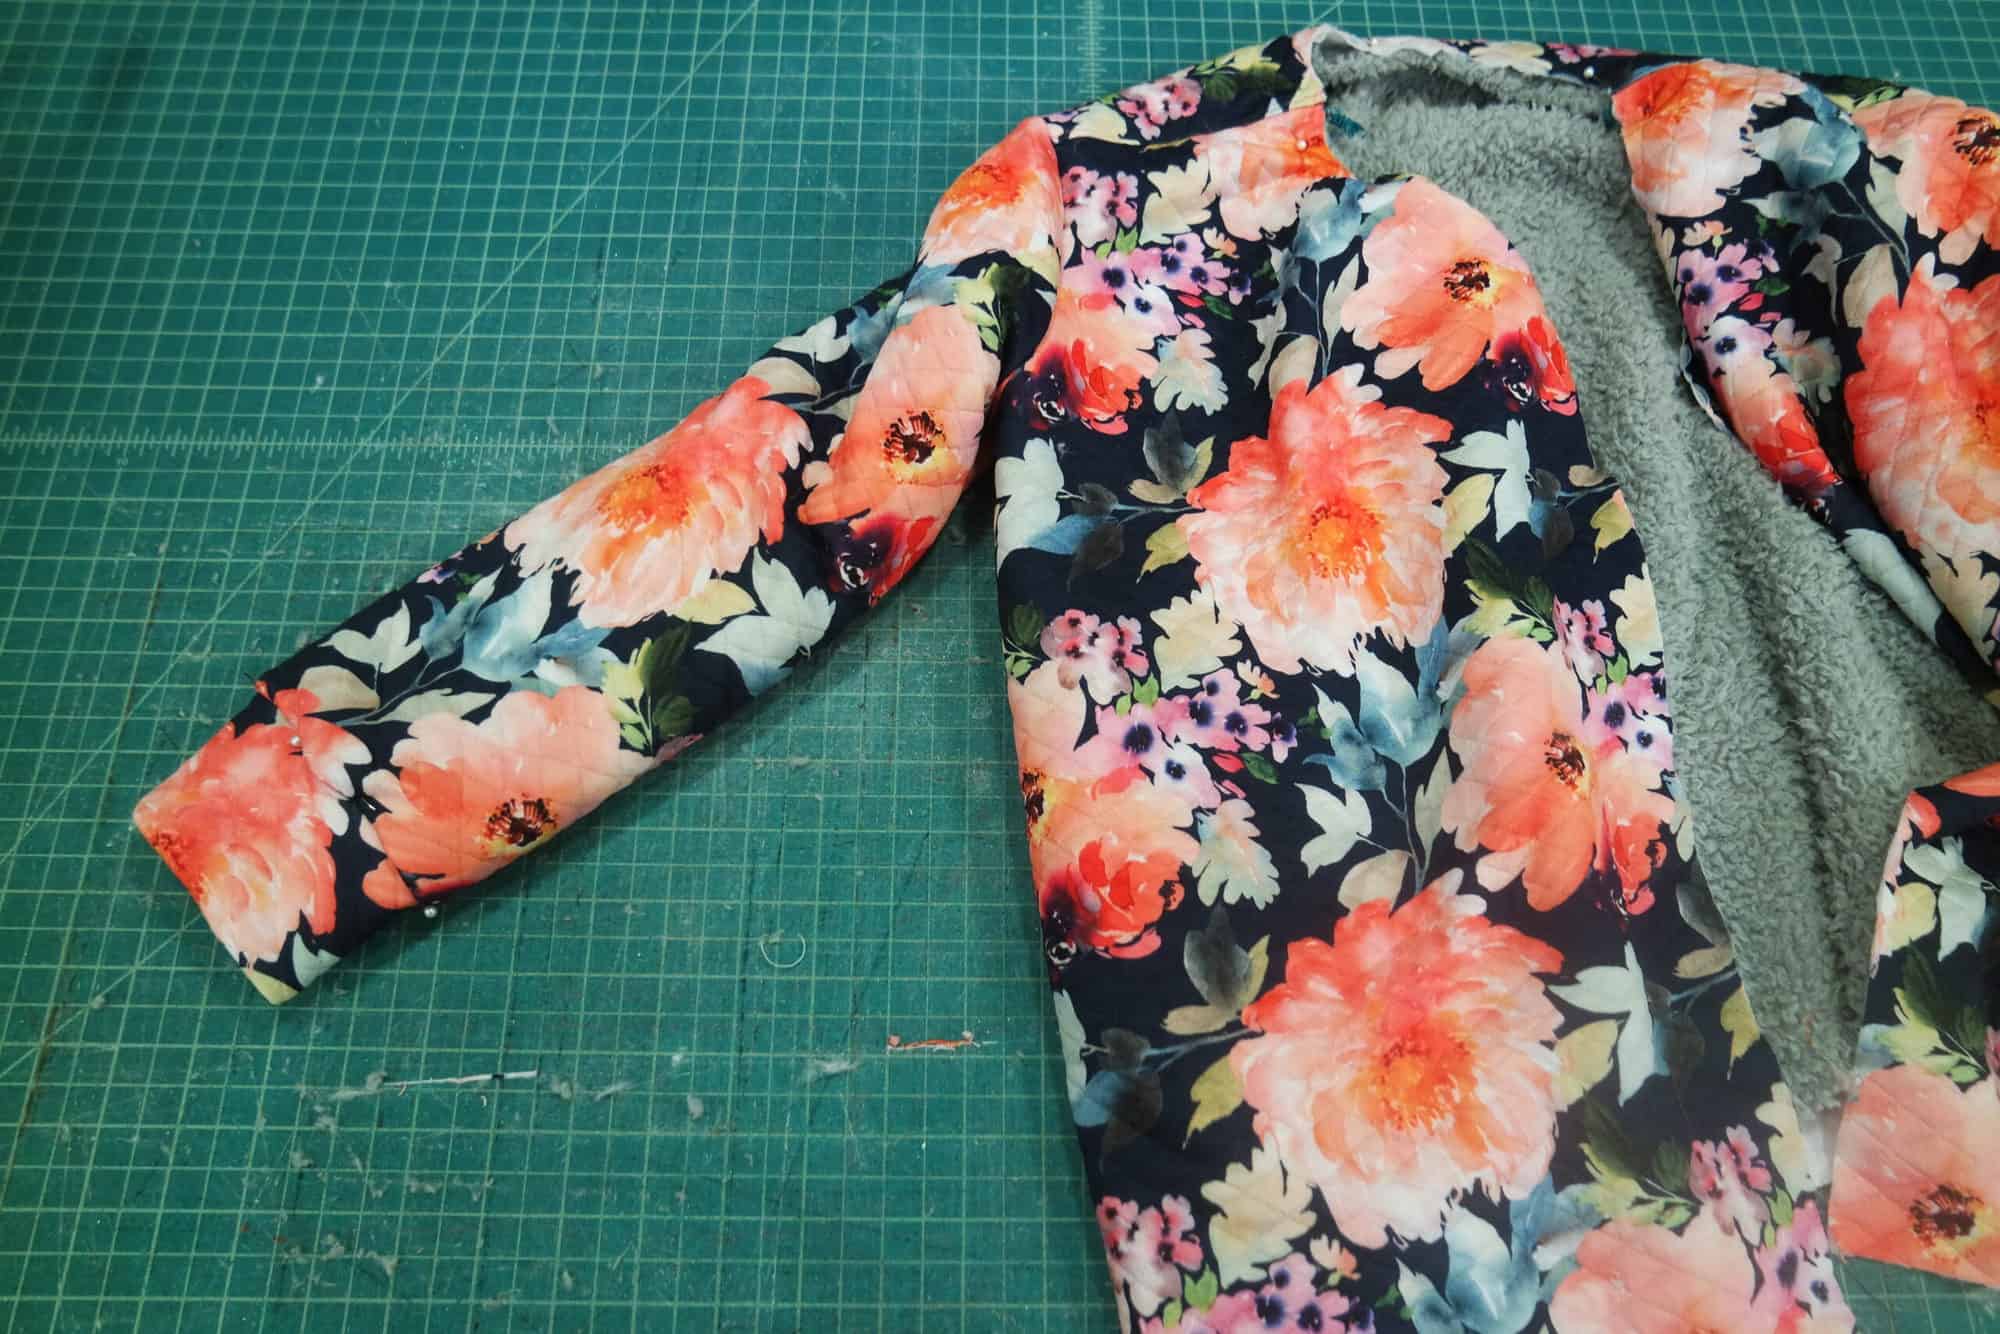
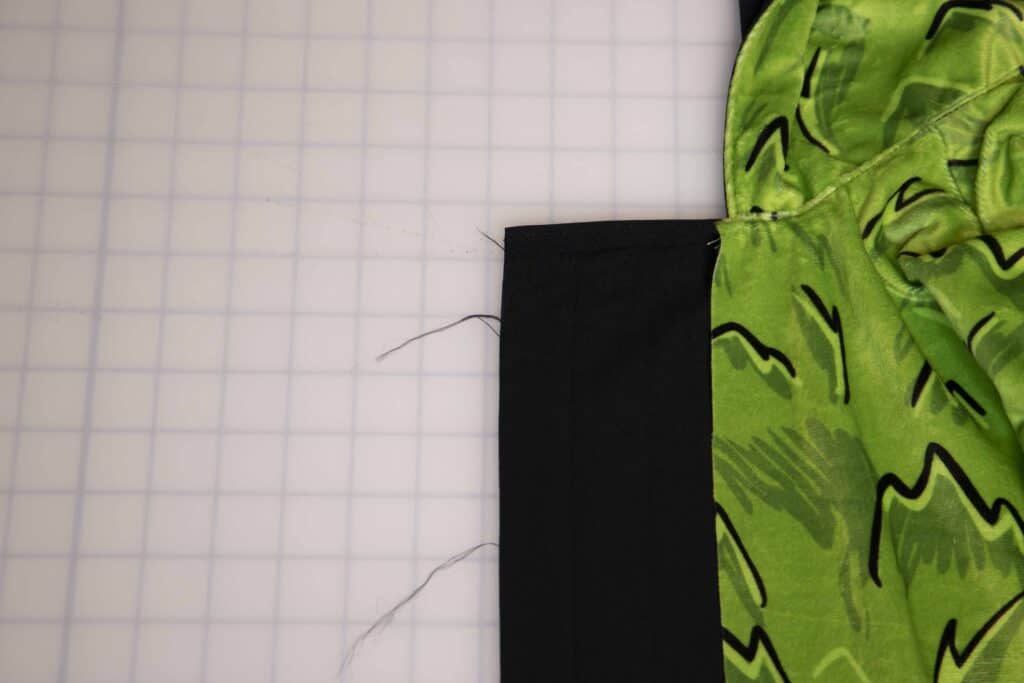
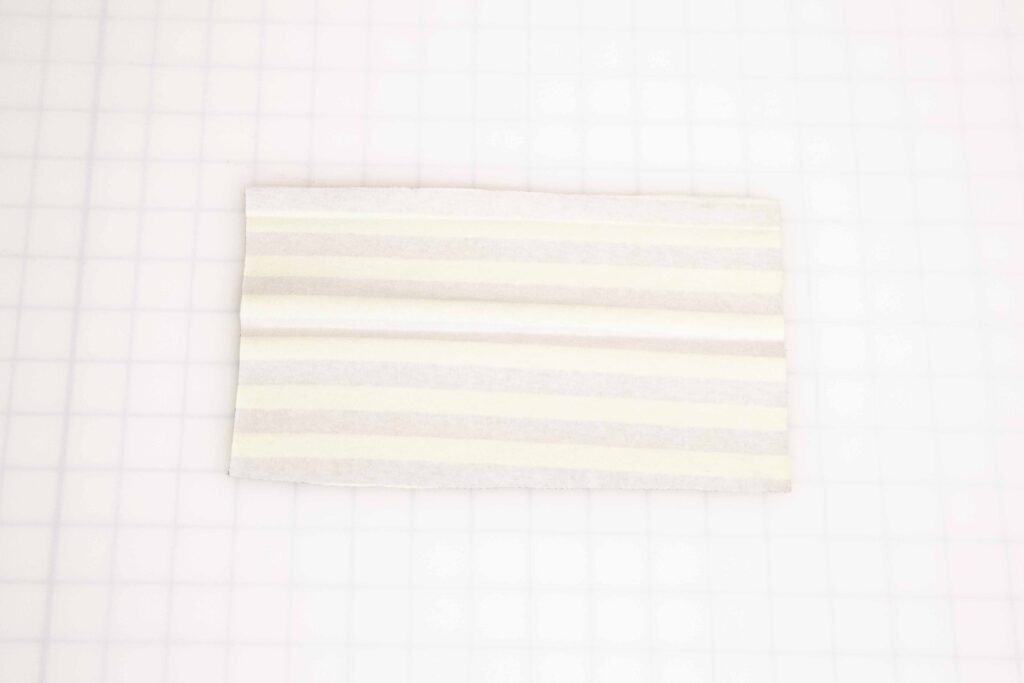
You can carefully pin seams and top-stitch the seams to keep the lining from shifting around.  I recommend taking the time to do this, otherwise you might go crazy trying to keep the knit cuff folded perfectly in half when you take on/off the Lumberjack.  

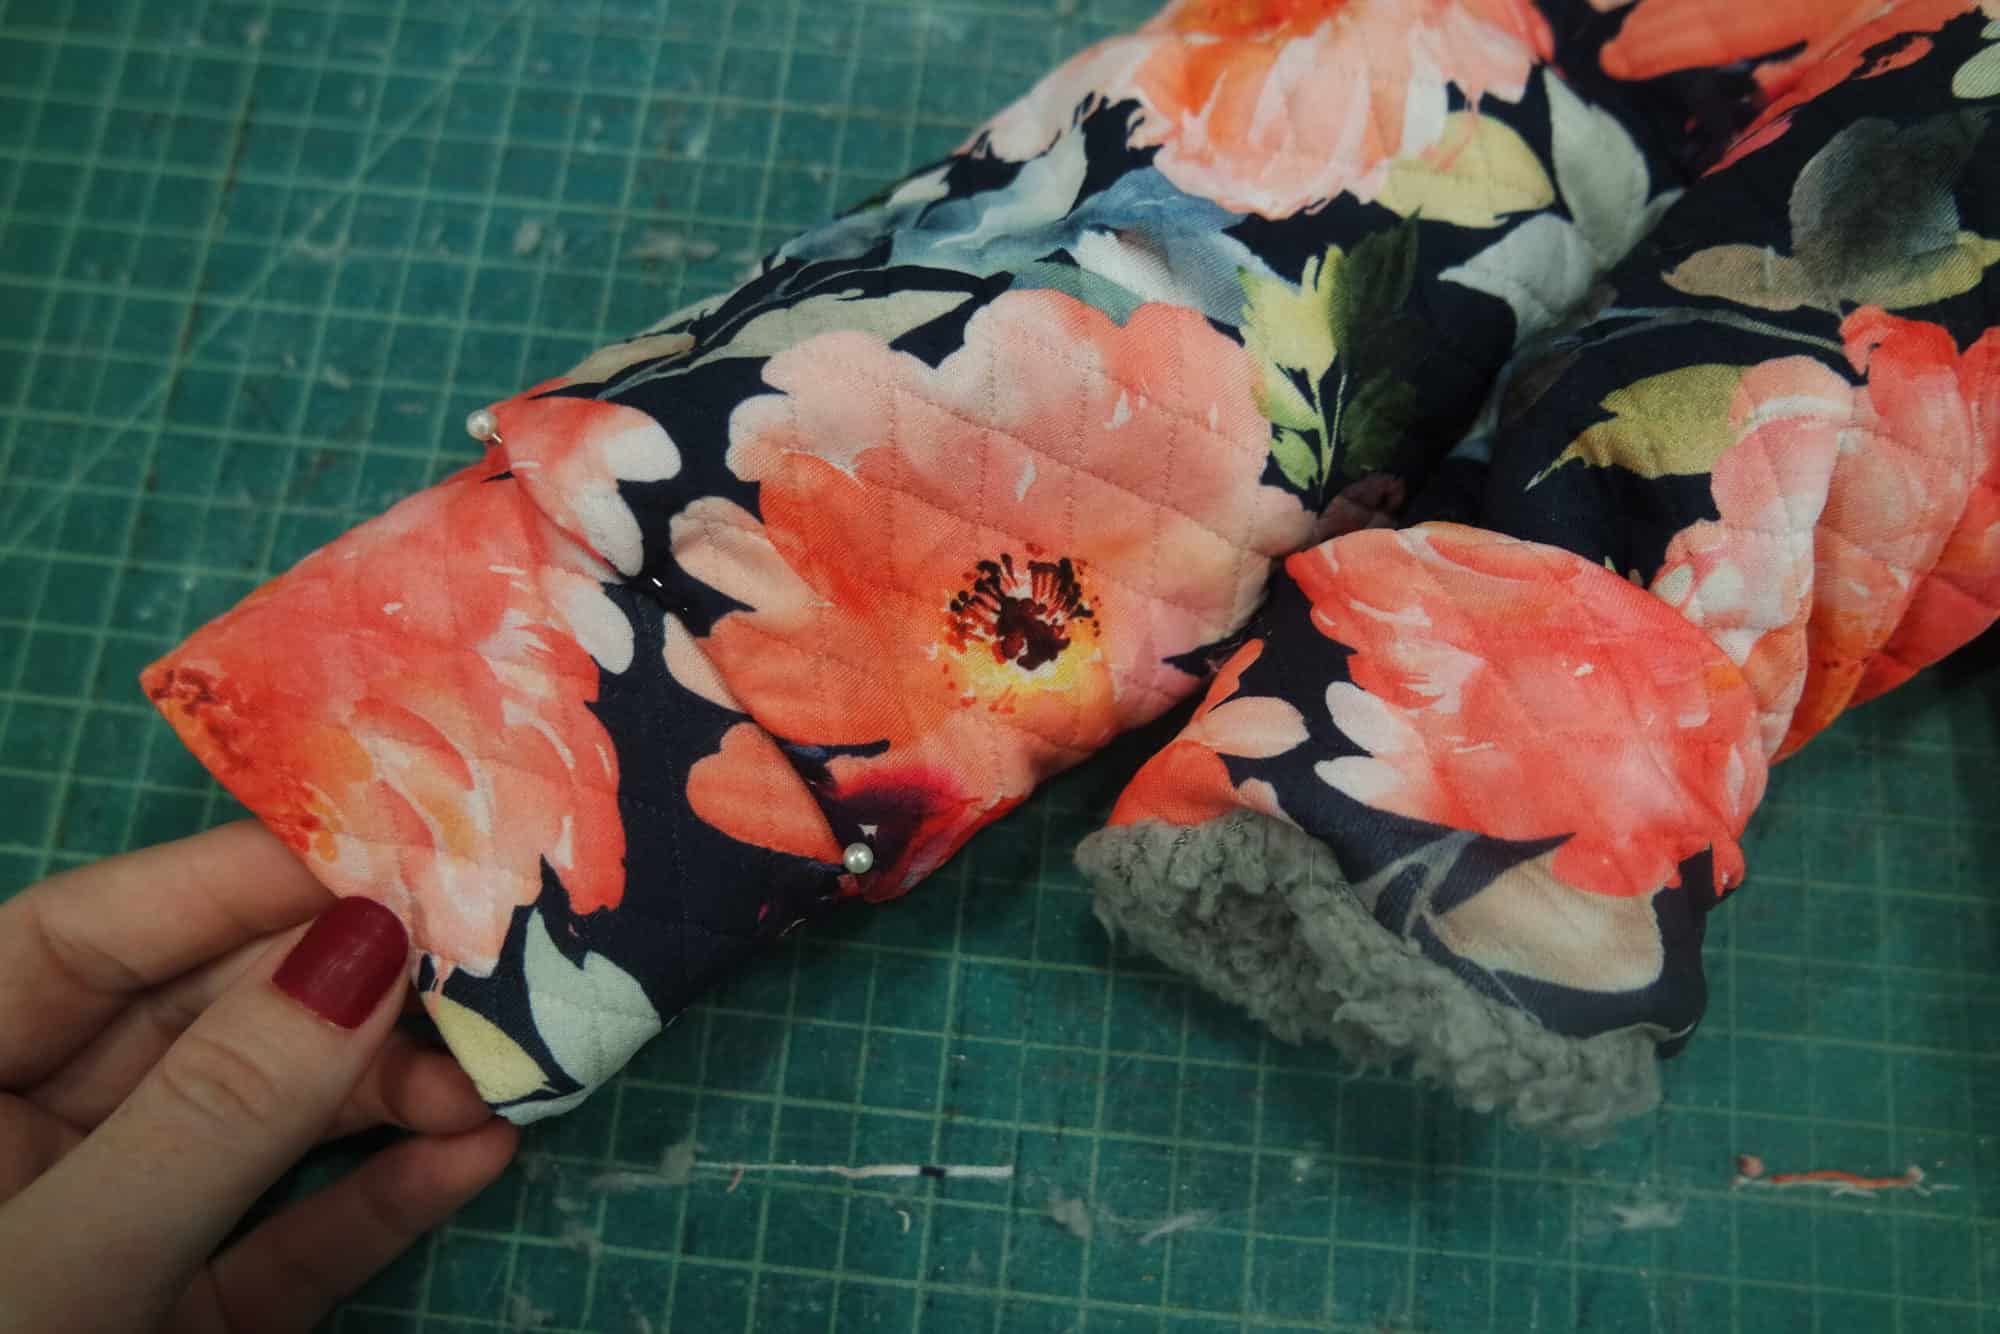
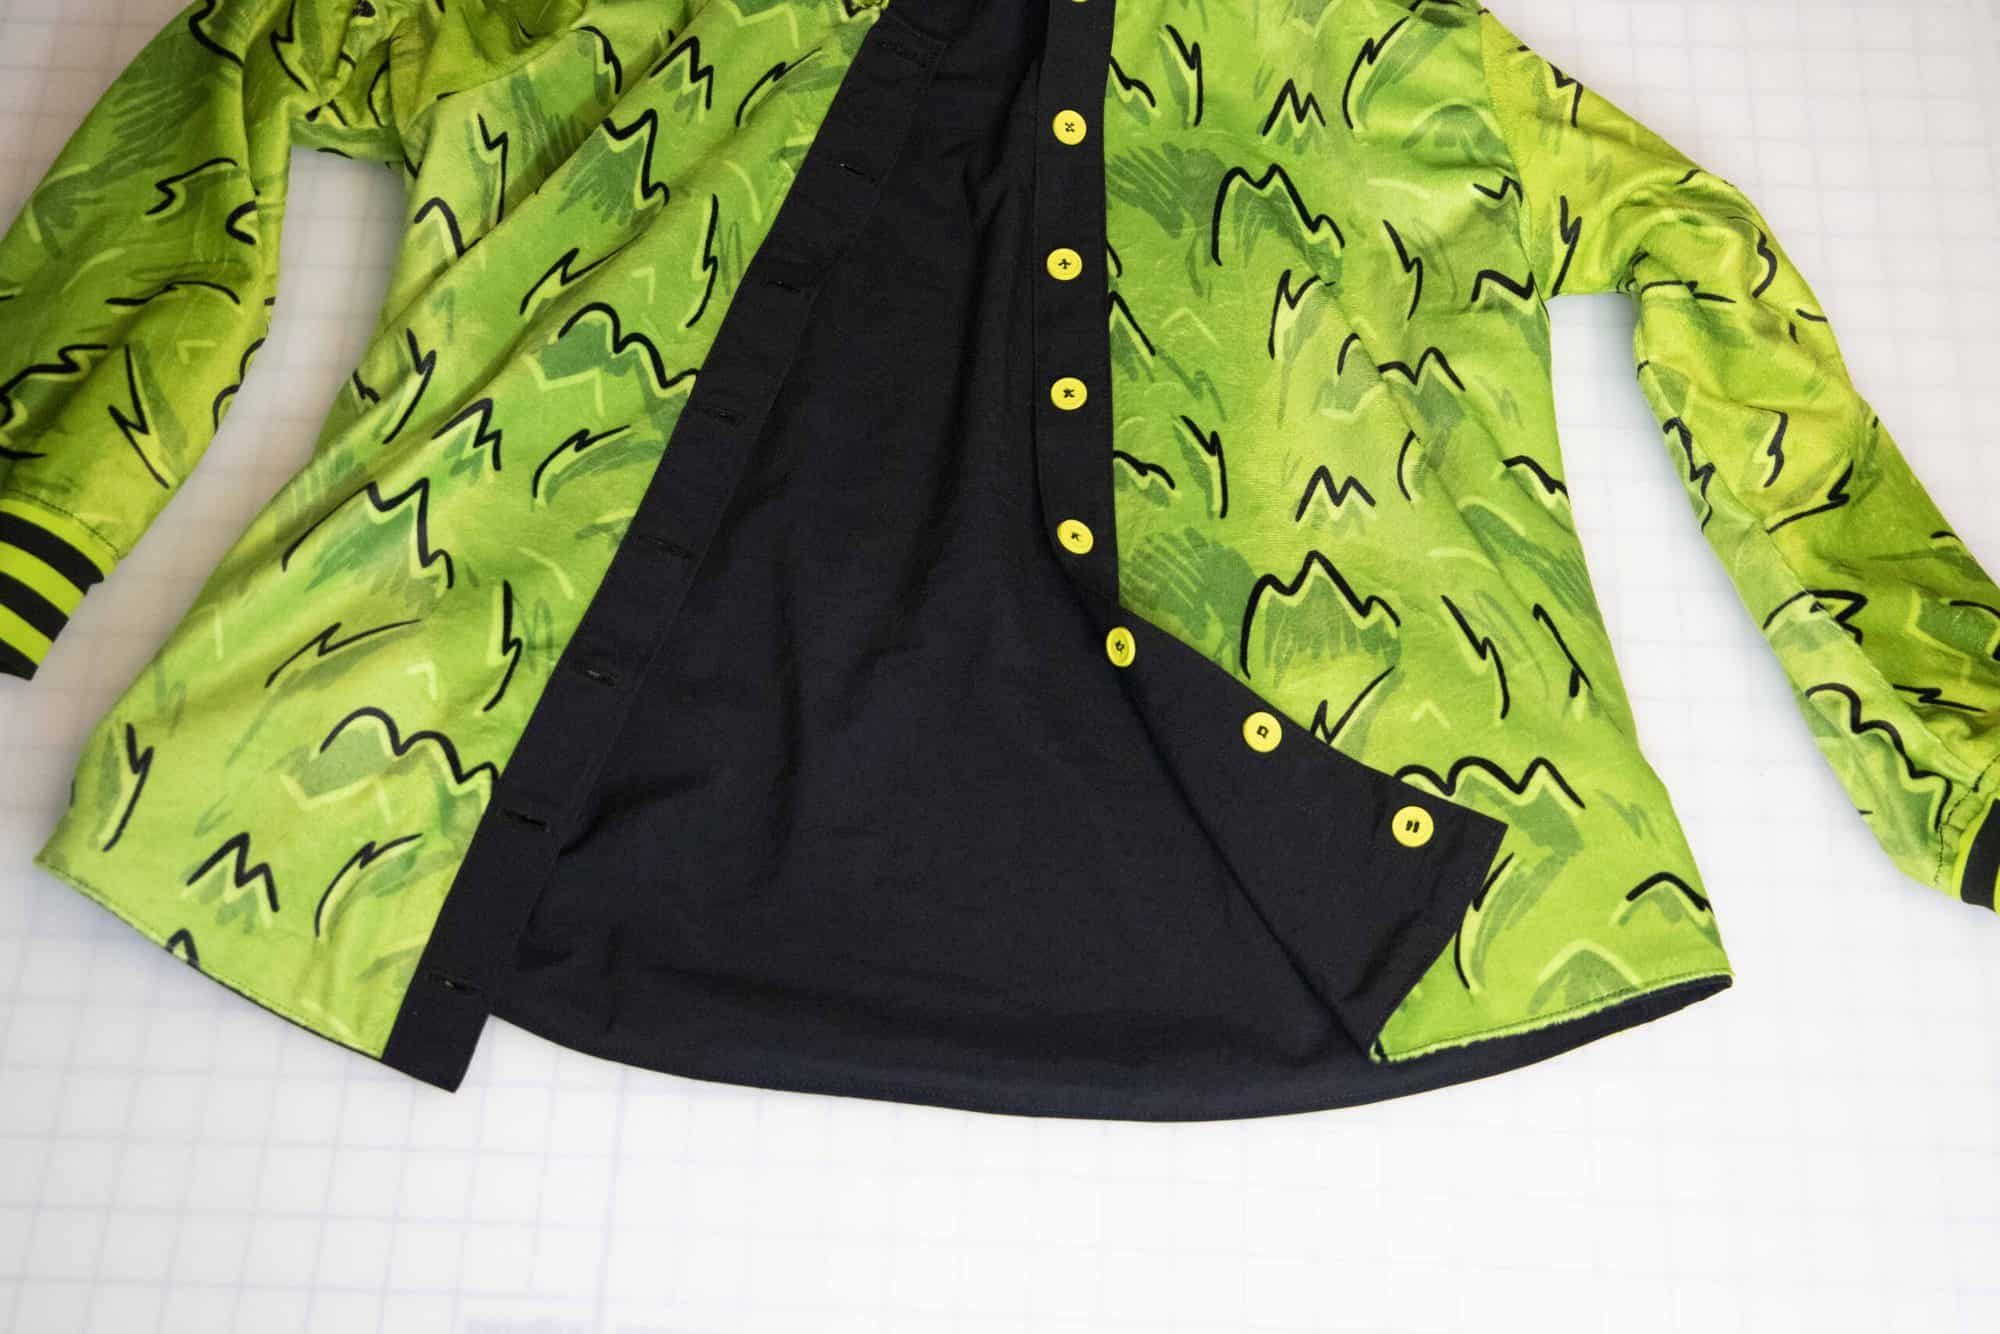
Continue on through the rest of the tutorial as normal.  I hope you like this little trick to give you no exposed seams there at the wrists!


Filed Under: Uncategorized 3 Comments

Go Team SAL – day 7

November 2, 2021


Good evening, friends! Thank you everyone who joined us last week for the Go Team sew along. I had so much fun making the two jerseys for my kids. I know you are here to find out the winners so without further ado, here they are!

Congratulations, Mel Goulet! She is our first winner. Mel won a $20 gift card from Patterns for Pirates and a $30 gift card from Purple Dragon Fabrics.


Congratulations go to Naomi McGrath as well! Naomi won a gift card from Made for Mermaids valued at $20 and a $30 gift certificate from Purple Dragon Fabrics.


A huge THANK YOU to our sew along sponsor. Make sure you check out Purple Dragon Fabrics on Facebook to keep up to date with their sales and preorders.


November’s sew along will be hosted by the mermaids so keep an eye on the Facebook group! See you back here in 2022! 

Go Team SAL – day 1 | cut fabric

Go Team SAL – day 2 | shoulder seams & neckline

Go Team SAL – day 3 | yokes

Go Team SAL – day 4 | sleeves

Go Team SAL – day 5 | side seams & hem bottom

Go Team SAL – day 6 | hem sleeves or add cuffs

Go Team SAL – day 7 | winners announcement

Filed Under: Pattern Release, Sew-A-Long, Uncategorized Leave a Comment

Lumberjack – Reversible Hack

November 1, 2021

It’s here! It’s here! And I don’t mean only the cooler weather! The updated Lumberjack Shacket is here and now it it’s available in V figure (based on men measurements) and Hourglass figure (women’s measurement). Everyone gets a Lumberjack shirt or shacket!

The pattern includes a lined and an unlined option so today on the b log I wanted to show you how to take the lined option and make it fully reversible! Yup, one shirt that can be worn both ways. 

Let’s get started! Print and cut the pattern and fabric as instructed in the tutorial. Make sure you use the lined option. For this tutorial I used a nylon, poly blend woven (the solid black) and a custom minky (the green one) for the lining.

NOTE: the hood I used for this hack is 1″ smaller on the front that the final pattern. If you want to achieve this exact look, remove 1″ from the hood pieces as show below. If you use the pattern hood as is, make sure to read below what small adjustments you need to make.


Once all pattern pieces are cut sew the main bodice and add sleeves and pockets as instructed in the tutorial. Repeat with the lining. Set the bodices aside for now. Sew the hood as per the lined tutorial. Place the hood (lining out) right sides together on the lining neckline. The hood will be about 1/2″ shorter than the lining neckline. 


Sew the hood in place with a 1/2″ seam allowance, making sure to stitch through all 3 layers. 

If you use the pattern hood, you will place the lined hood right sides together with the MAIN, not lining. The center back will match the neckline back and the front point will reach the fold line of the inner fold line. Sew it in place. Lay the lining over, right sides together and stitch along the neckline. The hood will be sandwiched between the right sides of the bodices. 

Tip: Tie the two sleeves in a knot for both main and lining so they are out of the way when you sew. 


Place your main and lining right sides together matching the raw edges of the neckline and bottom. Pin them in place.


The main will be longer, that’s the way it is supposed to be.


Sew along the neckline, the hood will be sandwiched in between the main and lining. Sew the bottom edge too. Seam allowance for these steps is 1/2 inch. 

Turn the jacket right side out. We will now top stitch the neckline and bottom hem.


When top stitching, fold the excess fabric down (or up) 1/2″ on the placket part. See picture below for how it will look both at the neckline and bottom hem. 


Following the first fold marking, press the front placket once on both sides. Pin in place. I like to add a strip of water soluble double sided tape to the raw edge of the lining. It will help tremendously when sewing.


Note: if you used the bigger hood, it will go all the way to the fold on both sides. 

Fold the placket one more time along the second fold line. This will no overlap over the raw edge of the lining, right where the double sided tape is. Press it down with your fingers. If you don’t have any DST handy for this step, you can always pin it in place. Sew the placket down.


I also like to top stitch all around the placket, on all 4 sides. Once you finish these steps (and your jacket looks like the pic below) set it aside. 

CUFFS

Let’s work on the cuffs. Press both cuffs, length wise. Open them up and press the top of each cuff 1/2″. Thus will create a memory hem. With the cuffs opened up, sew each at the short end to create a loop. 


Refold the top memory hem over the loop. 

Place the unfolded raw edge of the cuff on the lining sleeve opening. You will stretch the cuff to fit the opening. Match the sleeve seam with the cuff seam. Sew in place with a 1/2″ seam allowance. Repeat this step with the other cuff and lining sleeve.


Time to make it look like a shirt! Push the lining sleeve through the main sleeve so they are wrong sides together. 


Fold the cuff along the middle crease that we pressed earlier. The edge is still folded 1/2′. Once you bring the cuff over, the sleeve raw edge will be inclosed in the cuff. Pin the edge of the cuff on the sleeve all around. 


Stitch the cuff down. Look how beautiful is the cuff with no raw edges on the lining! Take a second to admire your work!


BUTTONS

Sew the button holes on one of the plackets. Let’s add the buttons now! To make this Lumberjack fully reversible I added buttons on both sides of the placket. I hate to say it but the easiest way to do this is to hand 🖐 stitch 🖐  the buttons on both sides simultaneously. Make sure that you don’t pull the thread extremely tight. You need wiggle room for the buttons to be able to be fastened. 

All done! This is how to take the newest Lumberjack pattern and turn it into a fully reversible shacket. 


I am very excited to see if you take on this project! Don’t forget to share it in our Facebook group and on Insta! 


Filed Under: Pattern Hacks, Pattern Release, Uncategorized Leave a Comment

Go Team SAL – day 6

October 30, 2021

Welcome to the last day of the Go Team sew along. All we have left to do today is add the cuffs or hem the sleeves. I did both options in today’s  video. The short and 3/4 length sleeve have only a hemmed option. 

  • When creating the cuffs it’s highly important to press the wrong sides together lengthwise. Stitch each cuff, right sides together to create a loop. Take a look over our P4P University Knit Cuffs blog to get some tips and tricks for beautiful cuffs. 
  • If you are doing the hem option, you can use your sewing machine’s twin needles option or your coverstitch as I have. Before you start, take a look over our Hemming blog because we have a few tips for easy and successful hemming. 

All done! Give your shirt or dress a good steam press and pair it with your favorite P4P bottoms for an extra cute look!


Needless to say, my little one loved both of his Mousefetti Go Team jerseys. 💜


Last Go Team sew along video is posted below. Once you complete your dress and/or jersey snap a photo of your finished project and add it to the day 6 photo comments in this SAL album. That is where the P4P team will select the winners. I do encourage you to share your pretty makes in the main P4P Facebook group so everyone can admire them. See you back here on Tuesday for the winners blog!

Go Team SAL – day 1 | cut fabric

Go Team SAL – day 2 | shoulder seams & neckline

Go Team SAL – day 3 | yokes

Go Team SAL – day 4 | sleeves

Go Team SAL – day 5 | side seams & hem bottom

Go Team SAL – day 6 | hem sleeves or add cuffs

Go Team SAL – day 7 | winners announcement

Filed Under: Pattern Release, Sew-A-Long, Uncategorized Leave a Comment

Go Team SAL – day 5

October 29, 2021

We are almost there! We made it to the 5th day and it’s an easy one. Today we sew the side seams and hem the bottom. 

   STOP! Before you pin the side seams, press your memory hem on the bottom of the shirt, both front and back. Trust me, you will thank me for not letting you skip this step. 

Now that you have that covered, pin the sides, right sides together and stitch with a 1/2″ seam allowance. If you opted for the sewing machine, make sure you use a stretch stitch. 

If you chose the dress, you will be hemming the curved edge. We have a P4P University blog with tips for hemming knits. You can read about it here. The most important thing about hemming knits with your coverstitch or sewing machine is to PRESS, press and press some more. If you are finishing the bottom hem using twin needles, a good refresher blog is the P4P University Twin Needles Tips. 

Day 5 video is below. Once you sew the side seams and hem the bottom, post a picture of your progress in the comments of day 5 photo of the Go Team sew along album. You can find the album in the M4M & P4P Sew Along group on Facebook. 

Go Team SAL – day 1 | cut fabric

Go Team SAL – day 2 | shoulder seams & neckline

Go Team SAL – day 3 | yokes

Go Team SAL – day 4 | sleeves

Go Team SAL – day 5 | side seams & hem bottom

Go Team SAL – day 6 | hem sleeves or add cuffs

Go Team SAL – day 7 | winners announcement

Filed Under: Pattern Release, Sew-A-Long, Uncategorized Leave a Comment

Go Team SAL – day 4

October 28, 2021

Welcome to day 4 of the Go Team sew along! Today is the day most of  you have been waiting for, we add the sleeves details. The pattern includes pieces for both strips but we also added measurements for the cut chart in the tutorial. 

Start by pressing the strips hems, two for each strip. If the type of fabric you’re using does not hold the pressed hem (like mine), use a some water soluble double sided tape to keep the hem folded. You can see how in today’s video below. Remember the markings we did on the sleeves on day one? Today we take peel off the paper backing and adhere the strips we made to them.

If you don’t have water soluble double sided tape, you can mark the strip placement on the sleeves with a fabric marker or chalk. Use a ruler and be sure to only mark the inner lines on the strips. Here is a short video with some tips for achieving the perfect strips. 

— If you are doing the HTV hack I mentioned during day 1, today you are fusing the strips to your sleeves. You can do that using a heat press or your iron. If you use your iron, add a hard surface under your sleeves, like a ceramic tile. HTV needs pressure to fuse, not just heat. 

Once the strips are added, pin them to the sleeve opening, matching the shoulder notch to the shoulder seam and the front notch to the front armscye. Sew it down with a 1/2″ seam allowance using a stretch stitch. 

You can see day 4 video below. Don’t forget to add your progress photo to the comments of day 4 photo in the sew along album. See you back here tomorrow when we’ll sew the side seams and hem the bottom. 


Go Team SAL – day 1 | cut fabric

Go Team SAL – day 2 | shoulder seams & neckline

Go Team SAL – day 3 | yokes

Go Team SAL – day 4 | sleeves

Go Team SAL – day 5 | side seams & hem bottom

Go Team SAL – day 6 | hem sleeves or add cuffs

Go Team SAL – day 7 | winners announcement

Filed Under: Pattern Release, Sew-A-Long, Uncategorized Leave a Comment

Go Team SAL – day 3

October 27, 2021


Ahoy, pirates! Welcome to day 3 of the Go Team Sew Along. Today we attach the yokes to the bodice. At the start of the day you should have one piece with the front and back sewn together (with a V neck, crew neckband or hood) and two pieces for the bodice, one front and one back.  

Mark the center of both the front and back bodices. Add a pin or a clip to the center back of the yoke. If sewing the crew or hood style, add one to the front yoke too. Matching the center fronts and center backs place the yoke and bodice right sides together. Sew with a stretch stitch or serger. Top stitch the seam allowance down. you can do this on your sewing machine with a zig zag stitch or a twin needle. Alternatively, you can use your serger. If you need a refresher or you are new to sewing with a twin needle, here is one of our P4P University post to help you with that. 

If you opted for the V neck style, overlap the two front pieces slightly and sew a basting stitch to keep them in place. Place the front of the bodice on the front V neck yoke, sew in place and top stitch. That’s it! You are done for today!

Here is the day 3 video where you can see both the hood and V neck options sewn. Once you finish today’s steps, post a photo of your progress in the day 3 comments of the Go Team sew along album. See you back here tomorrow! 

Go Team SAL – day 1 | cut fabric

Go Team SAL – day 2 | shoulder seams & neckline

Go Team SAL – day 3 | yokes

Go Team SAL – day 4 | sleeves

Go Team SAL – day 5 | side seams & hem bottom

Go Team SAL – day 6 | hem sleeves or add cuffs

Go Team SAL – day 7 | winners announcement

Filed Under: Pattern Release, Sew-A-Long, Uncategorized Leave a Comment

Go Team SAL – day 2

October 26, 2021


Good morning, friends! Today we start sewing our Go Team jerseys or dresses .  Let’s begin by stitching the shoulder seams, right sided together. The pattern follows a 1/2″ seam allowance so if you are using the serger for this step, don’t forget to cut off 1/4″. You can stitch the whole project using your sewing machine, just remember to sew with a stretch stitch.

All Go Team patterns feature 3 necklines: 

+ crew neck

+ V neck

+ hood

If you chose the crew neck, create the neckband first. Don’t forget to press it lengthwise prior to stitching it in a loop. It is very important to follow the pattern’s seam allowance when attaching the neckband to the neckline. If not, you may see that the opening is smaller than needed.

If you opted for the sporty V neck you will not be sewing the neckband in a loop. For this shirt the neckband will be stitch flat. Find the center of the back and the center of the neckband. Pin them in place, matching these center and the two fronts. You will have a small corner of the neckband sticking out on both sides. That’s the way it supposed to look. You can trim these corners today, or wait till we add the yokes tomorrow.

If you are adding the hood, start by stitching the curved part of the hood pieces right sides together. This pattern has an unlined hood. However, if you prefer the look of a lined one, simply cut one more pair of mirrored hood pieces. Instead of hemming the front opening 1/2″, you will place the two hoods right sides together, and stitch along the front opening. Turn your lined hood right sides out and top stitch the seam allowance. 

All you have left to do today is press! Don’t skip pressing your neckline, it will make a world of difference! 

You can see in the video below how I create the V neckline and the lined hood for my kid’s GT Jerseys. Once you finish today’s steps, post a photo of your progress in the comments of day 2 photo of this SAL album. You can find it in our Sew Along group. 

Go Team SAL – day 1 | cut fabric

Go Team SAL – day 2 | shoulder seams & neckline

Go Team SAL – day 3 | yokes

Go Team SAL – day 4 | sleeves

Go Team SAL – day 5 | side seams & hem bottom

Go Team SAL – day 6 | hem sleeves or add cuffs

Go Team SAL – day 7 | winners announcement

Filed Under: Pattern Release, Sew-A-Long, Uncategorized Leave a Comment

Go Team SAL – day 1

October 25, 2021


Welcome to the 🏈 Go Team 🏀 SEW ALONG! 

On day 1 we print the pattern and cut the fabric. But first, if you have not purchased the Go Team pattern(s) you can grab them here:

Go Team Jersey Youth

Go Team Jersey Adult

Go Team Dress Youth

Go Team Dress Adult

And of course, our bundle for the whole family

Before you select which style you are sewing along, browse over the Round Up Blog where we show you all options available.

Now that you have the patterns it’s time to select which file format you would like to use. Both the Youth and the Adult come in A4 and Letter format to print at home, A0 format to print with a plotter or at a copy shop AND a projector file. If you use the projector file you will not have to print anything!! That’s definitely my favorite way! You can see in today’s video how I use the file to cut the fabric. 

Let’s start by taking the measurements needed for the best fit. P4P has an amazing blog that gives you tips for accurately taking your measurements. You can read all about it here. If your measurements put you in a different size for chest/waist/hips be sure to check out our P4P University blog and grade to achieve the perfect fit. 


Let’s talk a little about the fabric! This is a great pattern for your coveted cotton spandex or any of your favorite t-shirt knits like tri-blend, interlock or poly blends. For my kiddo’s shirts I am using custom cotton spandex from Purple Dragon Fabrics. If you know me, you know we are big Disney fans around here so what better Go Team shirt than a parks one? 😉

 Purple Dragon Fabrics is also the sponsor for this sew along so our two lucky winners will receive gift cards to their shop. So fun! 


If you are unsure about which knit type will work best for your desired look, take a look over our P4P University Knit Types blog. Judy also included a cheat sheet that you can print. If you are like me and sometime are just keen on using a specific print for a specific pattern, read our Different fabric, different fit blog post before you cut your fabric.

Tip: if you have some stretch heat transfer vinyl (HTV) you can cut it using the pattern and use it for the sleeves accent instead of fabric. Just make sure you only cut the inner part of the strip, you won’t need the hem. 

Day 1 video is posted below. Check it out and once you are done cutting your fabric post a picture of it in the comments of the Day 1 photo of the Go Team SAL album  in the M4M & P4P Sew Along group. If you sew more than one,  post each one in a separate pic!

Go Team SAL – day 1 | cut fabric

Go Team SAL – day 2 | shoulder seams & neckline

Go Team SAL – day 3 | yokes

Go Team SAL – day 4 | sleeves

Go Team SAL – day 5 | side seams & hem bottom

Go Team SAL – day 6 | hem sleeves or add cuffs

Go Team SAL – day 7 | winners announcement

Filed Under: Pattern Release, Sew-A-Long, Uncategorized Leave a Comment

Go Team Patterns :: New Pattern Releases!!

October 15, 2021

IT. IS. GO. TEAM. TIME.  We have been working our bootys off on a set of four amazing patterns and today is the day, y’all!  We are ready to release them to our favorite pirate community!

Let’s talk allllll about the Go Team Jerseys and the Go Team Dresses!!

Whether you’re a fan of a sports team or just a fan of looking and feeling great, the Go Team Jersey is a great t-shirt for your wardrobe. The relaxed fit is super comfortable and the sporty details set it apart from your everyday tee. The front and back yoke give a great opportunity for mixing fabrics, decorative stitching or adding wording. The sleeve stripes are another great detail you can add for a sporty feel. You can pick from crew or V neckline, or even add a hood instead. This pattern works great year around with short, 3/4, long hemmed or long cuffed sleeve options. Shirt length options for average, short, and tall heights along with separate sleeves for each height.


The options for the Go Team Jersey includes:

  • Crew, V and Hooded Necklines.
  • Short, 3/4, Long Hemmed, and Long Cuffed Sleeve Lengths.
  • Adult sizes include Short, Average and Tall lengths for Sleeves and Bodice.
  • Stylish front + back yokes.
  • Optional Sleeve Stripes.

The youth sizes range from 3m – 14 and the adult sizes are for the full, newer size chart, extending from XXS – Plus 6X!  Please make sure to check the size charts, as there were slight adjustments made to accommodate the new size range for adults.


Goooo Team! Whether your “team” is for sports, foodie, fan fiction, or anything else, the Go Team Dress is the perfect way to show off your team spirit!  Or you can take this pattern and make a plain top for a great basic tee…while also allowing the perfect opportunity for fabric mixing with the front and back yoke. The stripes on the sleeves are another fun sporty detail you can add or leave off. You can choose from a crew, V or hood neckline. Don’t worry about what time of year it is because this pattern has you covered with short, 3/4, long hemmed or long with cuff sleeve options. Have a certain bottom you’re plaining on pairing your Go Team Dress with? No worries there… you can opt for crop, which goes great with high waisted bottoms, shirt, that hits mid booty, tunic, that hits under booty, curved hemline, also below booty, and dress, that hits at a flattering couple inches above knees. The semi-fitted, figure skimming silhouette is comfortable and flattering at the same time.


For this pattern, the youth sizes range from 3m – 14 and the adult sizes are for the size ranges from XXS – Plus 5X!  

The options for the Go Team Dress includes:

  • Crew, V and Hooded Necklines.
  • Short, 3/4, Long Hemmed, and Long Cuffed Sleeve Lengths.
  • Adult sizes hem lengths: Crop, Shirt, Tunic and Knee.
  • Youth sizes hem lengths: Shirt, Tunic, Curved Hem, and Dress Lengths.
  • Stylish front + back yokes.
  • Optional Sleeve Stripes.


*Want to learn more about how to measure yourself for these pattern?  We’ve got you covered with an in-depth blog HERE.  And in case you’re new to Patterns for Pirates and PDF patterns in general, we have a great blog full of new-user tips HERE to help you get started!  As with all of our current releases and updates, the pdfs now include our layers feature and can be found in Letter, A4, A0 and projector sizes.  And for even more helpful fun, we have a free* printable that you can use to help record your measurements as you take them.

Let’s take a look at the different ways we can sew up these patterns!

GO TEAM JERSEY + GO TEAM DRESS – NECKLINES
 
GO TEAM JERSEY + GO TEAM DRESS – SLEEVE LENGTHS
 
GO TEAM JERSEY + GO TEAM DRESS OPTIONAL SLEEVE STRIPES
 
GO TEAM DRESS – HEMLINES

What are you waiting for?  Head on over and grab yourself a copy of the Go Team patterns!  They are available on sale (no code needed) through 11:59pm CST, Friday October 22, 2021.

GO TEAM JERSEY | GO TEAM JERSEY – YOUTH

GO TEAM DRESS | GO TEAM DRESS – YOUTH

GO TEAM DRESS + JERSEY BUNDLE

Maybe hoping for a little more inspiration before you make the purchase?  Head over to our Facebook group where you can see tester albums full of amazing images!

Go Team Jersey Album | Go Team Jersey – Youth Album

Go Team Dress Album | Go Team Dress – Youth Album


Filed Under: Pattern Release 2 Comments

  • « Previous Page
  • 1
  • …
  • 14
  • 15
  • 16
  • 17
  • 18
  • …
  • 68
  • Next Page »

connect with me

  • Email
  • Facebook
  • Instagram
  • Pinterest
  • YouTube
Privacy & Cookies: This site uses cookies. By continuing to use this website, you agree to their use.

To find out more, including how to control cookies, see here: Cookie Policy
  • Privacy Policy
  • Refund Policy
  • Contact Us
  • About

Copyright © 2026 Patterns for Pirates

Copyright © 2026 · Genesis Framework · WordPress · Log in