Patterns for Pirates

P4P stylish, modern, wearable patterns

  • Home
  • Blog
    • Frequently Asked Questions
    • Pattern Releases
      • Free Patterns
    • P4P University
      • Fitting
      • Sewing with Stretch, Knit Fabrics
      • Sewing with Woven Fabrics
      • Sewing Machines
    • Sew-A-Longs
    • Fabric for Pirates
    • Pattern Hacks
    • Announcement
      • Blog Tours
      • Contest/Giveaway
  • Shop
  • Bundle Discounts
  • Flash Friday
  • Gift Cards
  • My Account
  • Cart

Favorite Tee | New Pattern Release!

April 11, 2017

After Judy teased you about a million times on Instagram with her pre-test versions of the Favorite Tee, we are finally going to give the people what they want.
No more teasers, it can be yours for keeps!  And guess what?  We made it in youth sizes too. Wahoo!

Here they are, your next most-sewn item: Favorite Tee (women’s) and Fav Tee (youth)

Both tees come packed full of options.  The women’s Favorite Tee is drafted for sizes XXS – Plus 3X.  There are a whopping FIVE hem options (shirt with side vent, tunic with side vent, banded knot tie hem, curved tunic length and curved dress length).  There are THREE sleeve lengths included (short, 3/4 and long) and even TWO options for neck finishes (scoop or vneck).

**Want to learn more about how to measure yourself for this pattern?  We’ve got you covered with an in-depth blog HERE.

The youth Fav Tee is drafted for sizes 3 months – 14 Youth.  It features nearly all of the same options as the women’s version with FOUR hem options (shirt with side vent, tunic with side vent, banded knot tie hem, and curved dress length), THREE sleeve lengths (short, 3/4 and long) and TWO neckline options (scoop and vneck).

Ready to see what those options look like?  Let’s do it!

THREE SLEEVE OPTIONS

SIDE VENT HEM

BANDED KNOT TIE HEM

CURVED TUNIC

CURVED DRESS

SCOOP NECK

VNECK

Ready to grab the patterns for yourself and start sewing?

Favorite Tee (women) | Fav Tee (youth) | Favorite Bundle (women + youth)

Need a little more inspiration?  Head over to our Facebook Group and check out the tester albums.  They are packed full of fabulous tester photos!
You can find the Favorite Tee album HERE, and the Fav Tee album HERE.

Happy Sewing!

Filed Under: Pattern Release 3 Comments

Spring Mini Capsule

April 10, 2017

We’re rounding out our Spring Mini Capsule Contest that we partnered with Made for Mermaids and I’m here to show you the two I got finished! (I wanted to make four…two got completed 😉 )

Katy , Alex, and Roberta  all shared theirs as well!

I finished up my Little Guy’s spring capsule quick! This totally gave me false hope of  finishing all of them lol! I did mostly tees and shorts since our spring gets pretty hot here in the south. Here was my plan for him.  I ended up leaving the yo-ho henley off for another raglan and the Lumberjack for a muscle tank.  I also didn’t quite make it to any undies…but he really needed the shorts and tees more anyways!  I switched out the joggers for the Cpt. Comfort jeans after finding some adorable striped denim that needed to be used.

I did 3 pairs of Pirate Playground Pants in the shorts length option.

These are a french terry with inseam pockets. I added some top-stitching to the pockets as well.

  Another french terry pair here with inseam pockets and I added a little stripe down the side in the wrong side of the french terry.

And yet another french terry 😉 Can you tell my favorite fabric for the Pirate Playground Pants yet? These are the patch pocket option I added a little band to the pocket with the wrong side of the french terry.

One pair of Cpt. Comfort Jeans that I modified to a shorts length in a striped denim.

And one pair of Swashbuckler Swim Trunks.  I still need to find the perfect drawstring for these!

Tops I did a three Jolly Roger Raglans in short sleeves. Two basic tees in cotton jerseys and one in swim fabric as a rash guard!

I added a Wingman Shirt in a cotton spandex.

And a Muscle Tank too.

We had fun with the silhouette machine and added a few of his favorite things to the plain ones.  The graphic ones took Mama a LOOOOONG time to get drawn out, but Little Guy is over the moon with them so I guess the time was worth it 😉

They can mix and match a bit and now he’s ready for that warm weather! <3 I loved this little challenge and contest so much I told Megan we’ll need to do another in the Fall!

My Little Guy isn’t one for modeling much- so here are a few shots of them on a super silly boy!
 

I also snuck in another mini capsule for a baby shower gift! Hers didn’t mix and match quite as well as a traditional capsule should…but I still thought it was a great little set 🙂
For bottoms I used the Baby Bear Joggers with yoga waistband and cuff options. As well as some quickly drafted size 3 month leggings (as I called Megan complaining her Bonny’s didn’t go down to a small enough baby size 😉 )

I did 3 tops for her.

A Heart Breaker Cami in the plain option.

A Sugar Pie in short sleeves and curved tunic hem option.  I added a cute little vinyl as well.

And a tiny Me Hearties in short sleeve and peplum options. I finished all the edges with a little scallop elastic.

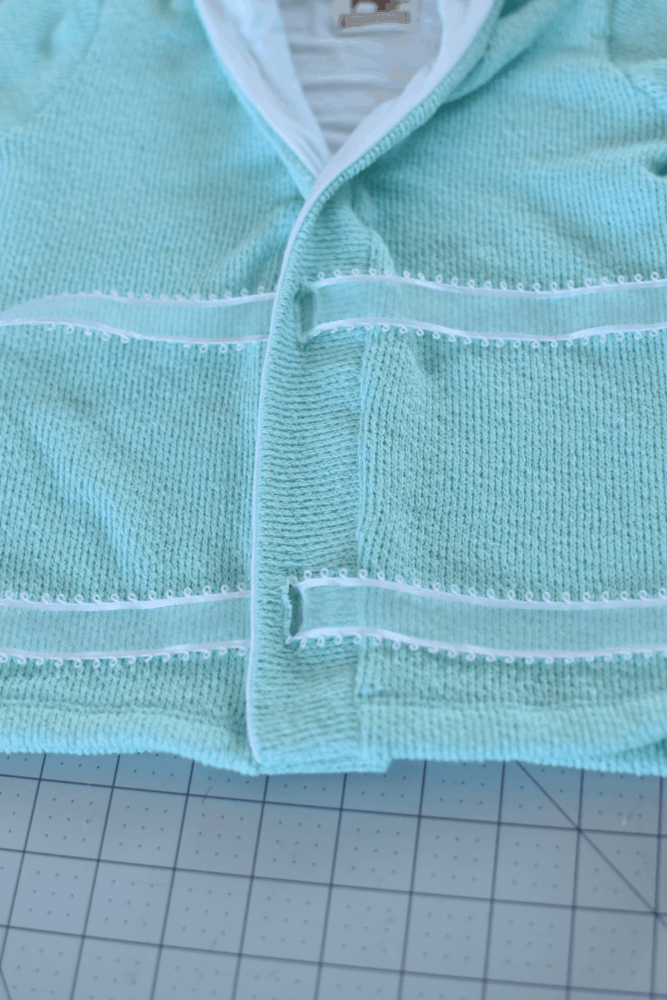
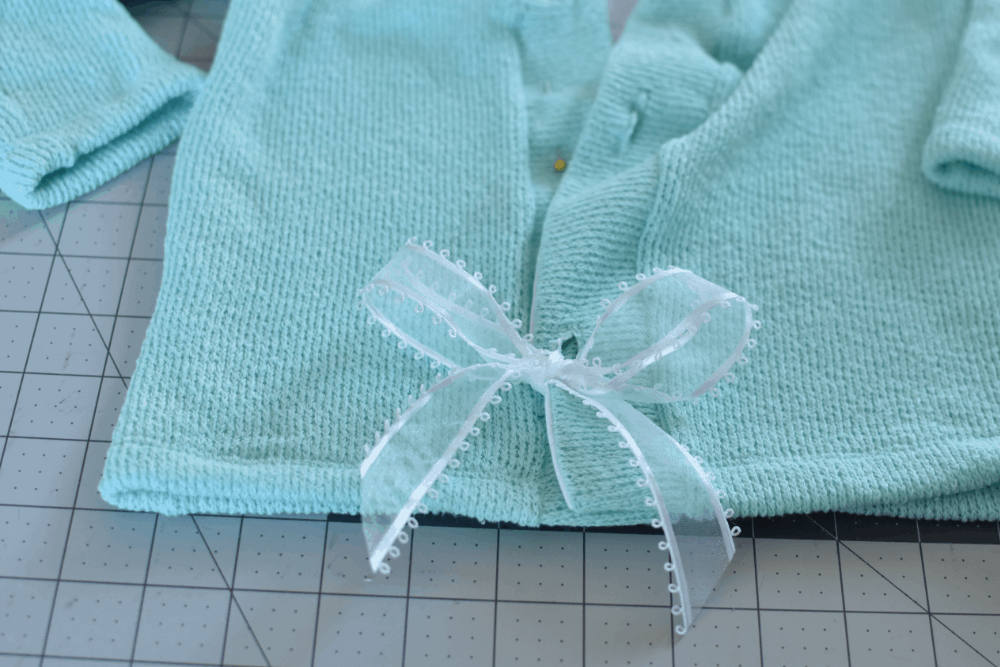
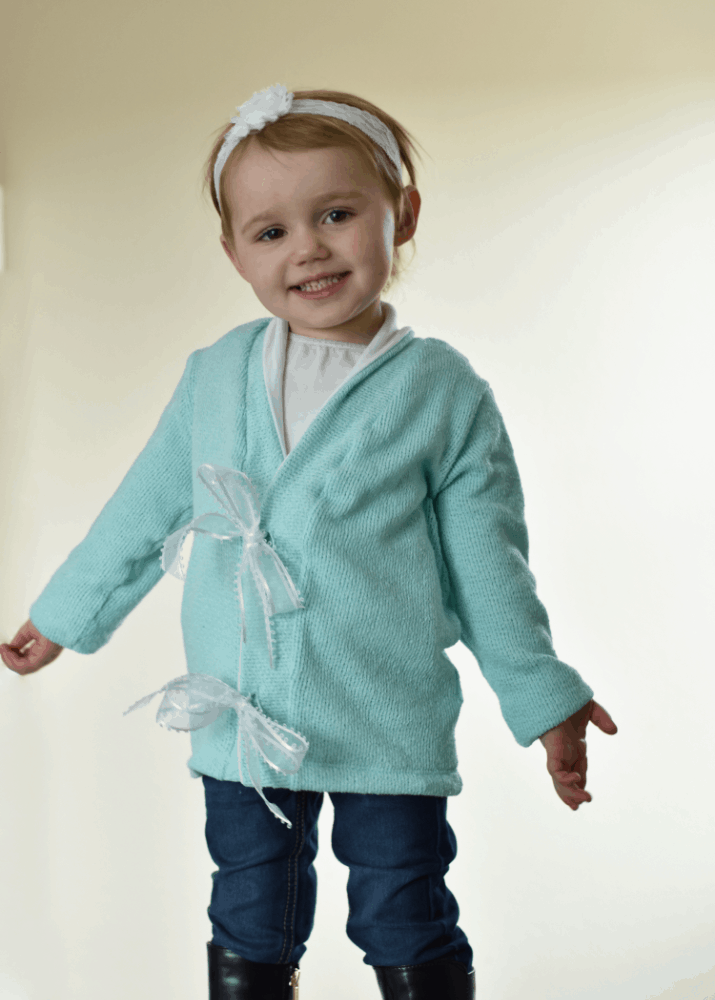
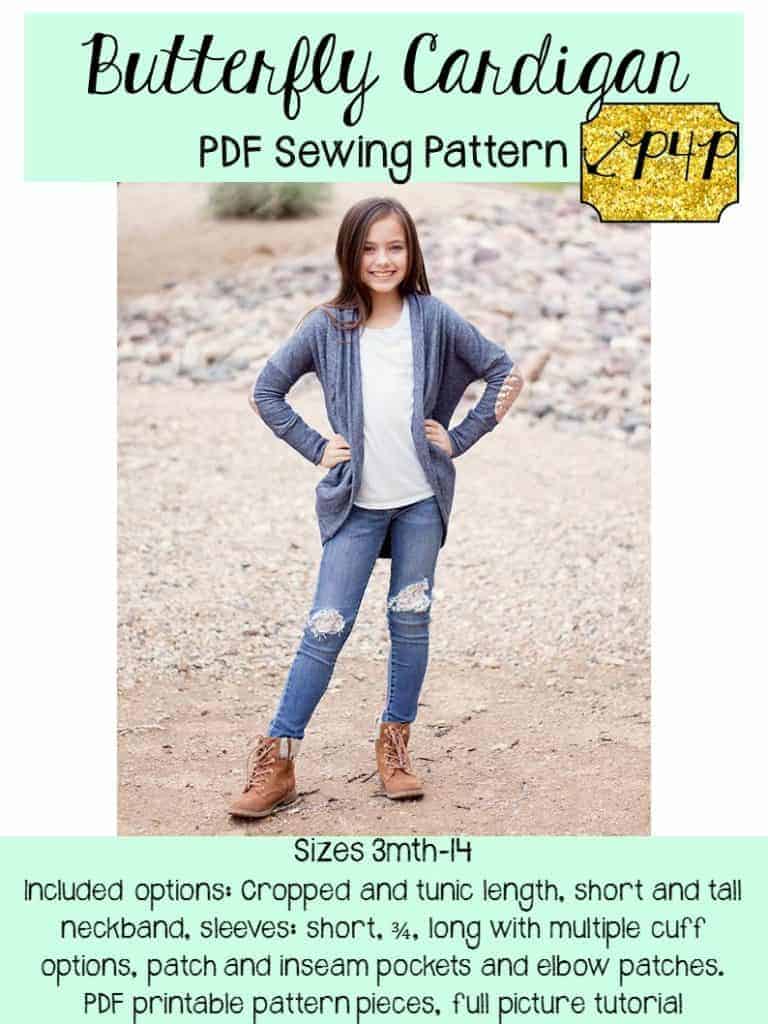
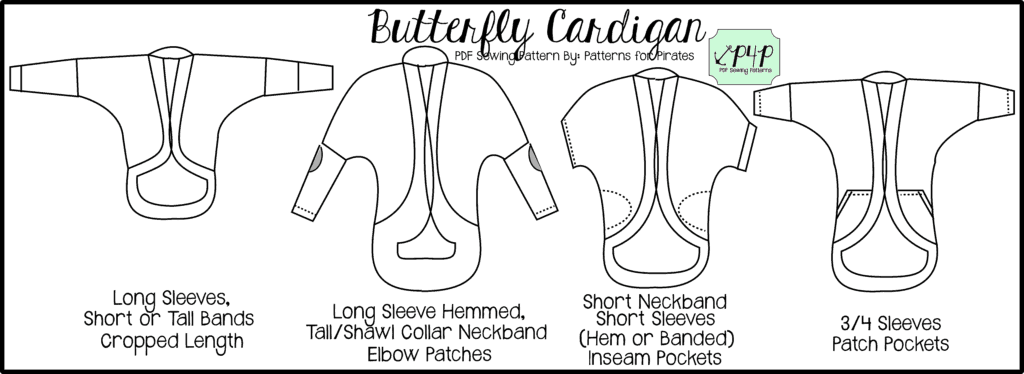
For her layering pieces I did two Butterfly Cardigans.

One in tunic length with tall bands in a ribbed knit.

And one is a very lightweight sweater knit in tunic length and short bands.

I added in two little headbands using M4M knit headband and a little tiny hat too 🙂

Although you can mix and match a bit I paired them together for a few photos of my favorite outfit pairings! <3

The teeny tiny capsule was oh so cute to make and I think mama to be enjoyed it too!

We have absolutely loved seeing everyone’s mini capsules for this contest.  I think it must go down as one of my very favorite contests we’ve done!  Don’t miss out on the rest of the capsules that were shared here: Katy  , Alex and Roberta.

We will be announcing the winner tomorrow!

Filed Under: Contest/Giveaway 1 Comment

Pumpkin Spice Dolman Cold Shoulder Hack

April 4, 2017

Cold shoulder tops are all the rage right now and it’s a quick and easy hack to add to your Pumpkin Spice Dolman.  The Pumpkin Spice Dolman is one of my very favorites and they are in constant rotation in my wardrobe, so as soon as I saw someone in the Patterns for Pirates Facebook Group ask about a hack, I knew I had to make one ASAP.  Let’s get started!

First you are going to cut out all your pieces, I choose to do the 3/4 sleeve with the long band for mine. Once your pieces are cut, we are going to line up our shoulders seams but instead of sewing the hole seam we are going to make a couple of marks.  I marked 1.5 inches down from the neck and placed a pin there and then 2.5 inches up from where the arm attaches. I am sewing a XXS and that is what worked for me but feel free to adjust those measurements to make it perfect for you.  Now we are going to sew from the edge to where we put our pin on the sewing machine.  It’s really important that you don’t use your serger for this step!

Now that our seams are sewn, we are going to press them open and continue pressing where we didn’t sew open as well. Measure to make sure that you are pressing exactly your 1/2 inch seam allowance.  Once you have it pressed open we are going to top stitch both sides of the seam allowance.  I’m using my coverstitch here, but you can use a twin needle or a single needle, whichever you prefer.  You just created your cold shoulder, easy right?!  You will now continue constructing your top just as the pattern says.

And don’t forget the Pumpkin Spice Dolman has a matching girls pattern the Spice Cake so you can also make the girls in your life a matching cold shoulder top- I know that my daughter is all about the cold shoulder and I plan on making her a couple too!

Don’t forget to show off your creations in the Facebook Group, we adore seeing all your creations – Angela

Filed Under: Pattern Hacks, Uncategorized 3 Comments

#allP4Ptoday winners

March 31, 2017

DECEMBER

And just like that, a new year is almost here. Hope you all had a fantastic holiday season! We couldn’t end the year without announcing our last 2017 #allP4Ptoday winner!

So without further ado…our December winner is:

Laura Van Niejenhuis

Laura has been rocking #allP4Ptoday every month since we started the contest. From casual to party attire, Laura has made them all and looks radiant in them.

Thank you all for a fantastic 2017!🎉 Keep posting your all P4P outfits next year too, we will be watching! 😉

NOVEMBER

Ahoy, pirates! We hope you had a wobbly gobbly Thanksgiving celebration! We saw some awesome P4P outfits being shown off this month. As always choosing only one winner was super hard.

Drumroll…. our latest #allP4Pwinner is Maggie Runyon!

Maggie’s post brought a smile to all the team’s face so we just had to pick her as our November winner. She looks adorable in her Wiggle dress … but little miss stole the show in her Fav tee dress. Congratulations, Maggie!!

We can’t wait to see your holiday all P4P outfits! Use the hashtag #allP4Ptoday so we can spot you!

OCTOBER

Boo! The trick or treating month has come and gone! We absolutely loved seeing you rock the Gone Batty shirt and incorporating P4P in your fall sewing.

Our October #allP4Ptoday winner is…. MAGDELYN GAMBLE !

Magdelyn rocked those Disneyland family outfits! She is definitely an inspiration, she chose the perfect P4P patterns ( Henley, Peg Legs and Sugar Pie) so that everyone was comfortable for the long walks while still being “park ready” and cool.

The Sweetheart  dress gets a lot of love from our October winner, she looks absolutley gorgeous in both the dress and the peplum top. Thank you, Magdelyn for sharing your creations with the P4P group.

I can’t wait to see your November entries and how you incorporate P4P in your Thanksgiving sewing. Don’t forget to add the #allP4Ptoday to your posts so we can see YOU when we search for our monthly winner.


SEPTEMBER

And just like that fall is here!!! I think most of you are just as excited as I am for some cooler weather and some pumpkin spice everything.

September P4P group wall was filled with amazing creations! We’ve seen lots of pegs, SOS and cocoons…clear sign of autumn’s arrival. So without further ado….our September #allP4Pwinner is…

JESSIE KILGER!

Jessie rocked her Pegs, SOS, Cocoon Cardigans and Favorite Tees like a boss! I loved how she shows the versatility of our patterns and look adorable doing it.

Keep posting those #allp4ptoday outfits in the P4P group! Maybe October’s winner will be YOU!


AUGUST

Ahoy, pirates! The month of August brought a lot of fantastic #allP4Ptoday outfits. We’ve seen kids going back to school and teachers ready for a brand new school year. One mom and teacher really stood out this month so let’s give a big “Congratulations!” to our August winner…

Britina Gilkey


Britina really brought her A game this past month…check out how many cool #allP4Poufits she posted!

From PSD to Peg legs, she’s done it all! We were just so happy to see all the great posts.

Happy sewing, pirates and remember to hash tag your #allP4Ptoday outfits.


JULY

Another summer month has come and gone. Have you guys started sewing for fall? Personally, I am not quite ready to give up on summer just yet…so when I was scrolling to all the amazing #allP4Ptoday photos one stood out for being what summer is all about.

Our July all P4P today winner is…..

Callie Zerby

Doesn’t Callie look stunning in her Hello Sailor and Siren Swim Top ? We hope you had an amazing birthday party, Callie!

If you’re wearing all P4P, snap a pic, post it in the group and tag it #allP4Ptoday…you may be our next lucky winner!


JUNE

Summer is officially on and so are the #allP4Ptoday outfits! We loved seeing all the light and breezy creations you posted this month and the occasional layered look from our friends down under. You guys were really rocking your P4P this month and we couldn’t be more proud.

Without further ado…the June winner is:…Beth Pannecoucke !

Beth has been showing off her baby bump comfy looks throughout the month so she caught the team’s eye. Just look how adorable she looks in her Favorite Tee and Palazzo short.

From the Cross my Heart Cami to FST and Cocoon Cardi, Beth has been rocking them all!

Don’t forget to hash tag your all P4P outfits post in August too. We look forward to seeing some of your Summer of Wovens creations too!


MAY

Can’t believe we are at the end of May already. Another month has passed and you have all outdone yourself. We’ve seen so many beautiful #allP4Ptoday outfits…you guys really like to make it hard on us to choose the monthly winner.

We’ve seen some spring outfits, some summer ones, even some special event ones. MeMadeMay was big in the Pirates land!

Drumroll….May’s winner is…. Susan Priddy – Fox! Susan has done a beautiful job making her and her daughter’s outfit for such a special event. Congratulations, Susan!

Don’t forget that the #allP4Ptoday contest is ongoing so keep those hashtags coming. You never know, next winner may be YOU!


APRIL

Once again you guys have not made our job easy, but that’s a good thing! We absolutely love seeing all of you rocking P4P outfits. April brought a lot of stunning Easter entries, I wish we could list them all.

Ok, Ok…I won’t make you wait any longer. Our April winner is Emily Merkel! Just look at this cool dude and tell me you can resist his smile. I couldn’t. He is just the cutest showing off his #allP4Ptoday outfit.

Keep those hash tags coming as there will be a winner every month. Happy sewing, pirates!

MARCH

Ohh wow! You guys have not made it easy for us to choose a March winner. We loved seeing you all rocking #allP4Ptoday and everyday.

Without further ado….our March winner is….. Lizzy Price! Lizzy just shines in all her pictures and since I couldn’t choose just one of them, here are a few that stood out. I think she might just be our SOS pants queen 😉

Thank you all who posted during March and don’t forget to keep showing off those P4P outfits. Use hashtag #allP4Ptoday so we can find them and who knows? Maybe YOU will be our April winner. You can read the contest details here.

Filed Under: Contest/Giveaway, Uncategorized 1 Comment

Spring Women Capsule

March 30, 2017

As I was going though my closet a couple of weeks ago I realized that I barely have any solid color pieces. I made it a point to make more solid clothes so as soon as I learned of the P4P/M4M capsule collaboration plans I knew I have to step up my game and have a plan. I started with building just a start off, mini spring capsule. I chose the pieces based on what I feel most comfortable wearing and what will suit the hot Florida spring.

I made myself sew mostly solids…you have no idea how hard that is when you’re used to making only outfits in bold prints 🙂 . The best thing to  consider when building a mini capsule is how the pieces will mix and match together. Try to use solids that will visually complement one another.

If you do want to add print to your capsule, use prints that will include some of your colors in your solid line up. For example, I chose this dandelion Art Gallery cotton spandex for my M4M Chloe skirt because there is white and aqua in the print and the background color complements my capsule tops beautifully.

I highly recommend including a white or black top in your capsule. For my white option I chose the M4M Mama Ava because it’s relaxed fit will work with all my bottom pieces.

Layering pieces are a must when you plan out your capsule. I went with the Free Spirit Tank and a short sleeve Cocoon because I can easily transition them in summer.

The Cross My Heart Cami was a must because…just look how perfect it layers with the Pumpkin Spice Dolman and the Mama Isabel Dress.

I hope my mini capsule inspired you to try one for yourself too. I know now I am even more motivated to make a capsule for my boys. Their closet lacks solid basics pieces even more than mine…but that will change! 🙂

So there you have it…9 pieces…a lot of possibilities.

Don’t forget to check out the P4P/M4M capsule contest for a chance to win some amazing prizes!

Spring Mini Capsule Sewing & Contest

Alex

Filed Under: Blog Tours, Contest/Giveaway, Uncategorized 4 Comments

Sleeves and Their Wrinkles

March 28, 2017

I’ve scrolled past the question or remark about wrinkling around armpits a ton in sewing groups.  I’m here to talk about the #1 cause of armpit wrinkle on the sleeves.

It’s easier to understand why we have wrinkles around the armpit when we know how the sleeve was drafted.  Different sleeve types are drafted differently.


Dolman sleeves are also drafted so that there are no wrinkles when we have our arms lifted horiztonally.

Raglan sleeves are drafted so that there are little to no wrinkles when your arms are lifted.

Set in sleeves on knit tees are drafted so that there are no wrinkles when our arms are at a diagonal.

Okay, so what does that mean? When your arms are in other positions than the ones the sleeves are drafted for there will always be wrinkles/extra fabric/pulling.  Lets see a few real life picture examples!

Dolman: Shown here: The Sweet Tee Others we have in the shop are: The Pumpkin Spice Dolman and CoCoon Cardigan

Arms up (almost horizontal– I don’t stand with my arms straight out too much for pictures ;)): very little wrinkling or extra fabric and if my arm was up slightly more horizontal it would go away completely.

Arms Down: All the extra fabric is now “bunched”up under my arm when I put them down.

Arms Up:

Arms Down: in this more stable cotton spandex you can really see the difference!


Raglan: Shown here in the pink and grey: Slim Fit Raglan , Shown here in the black and leopard: Relaxed Raglan , and Shown here in youth: Jolly Roger Raglan

Arm Up: (almost horizontal).

Arms Down:

Arms Up: (again it was near impossible to find one all the way up/out but this is close!)

Arms Down:

Arms Raised: higher than horizontal. You can see the wrinkling move from under the arm to on top, it is being pulled since it is higher than the raglan sleeve is drafted at.

And another raglan set courtesy of my Little Guy 🙂

Arms Up: although it’s a close up, you can see his hands are on his hips-so not fully horizontal, but close!

Arms Down: (that look guys!  He’s a sassy one for sure…that doesn’t enjoy modeling for mama 😉 )


Set in Sleeves: Shown here: Sweetheart Dress , Shown here in youth: Henley , Shown here: fit picture from testing the upcoming youth tee 🙂 , and also in the shop we have Grandpa Cardigan , Wingman Shirt , Boundless Knit Dress , Buried Treasure Tunic , High Low Tide Top

Arms Diagonal:

One Arm Down and One Arm Extended Up: see the wrinkles are in different spots. My arm that is down creates wrinkle under the armpit area.  My arm that is extended all the way up creates them on top of the shoulder. (Also super crazy face I’m making because it was super windy 😉 ).

Arms Diagonal: the only wrinkling going on here is because I’m pulling my arm to the back (pointing my elbow backwards) unnaturally to try to show off the top.

Arms Down:

Here is a few youth examples of set in sleeves as well!

Arms Diagonal:

Arms Down:

Arms Diagonal:

Arms Down:

Arms Diagonal: (no wrinkling)

Arms Down: (wrinkling at under arm)

Arms Extended Up: (wrinkling above arm/shoulder)

If you’re realizing you have wrinkles at the bust, not sleeve we’ve also blogged about those here!

I hope this helps all you wonderful seamstresses out there creating knit garments and trying to make sure you’re getting the fit right 🙂


Filed Under: Fitting, P4P University, Uncategorized Leave a Comment

Heart Breaker Cami- Swim Top Hack

March 27, 2017

During testing we had a lot of ladies used swim knit as a swim top for their littles! I think the design looked like a great swim top!

So, I thought I would share the very simple mods I did to use the Heart Breaker Cami as a swim top for my Baby Girl!  I recommend adding swim elastic around all the edges.  This helps the suit stay put when wet. I used 3/8″ swim elastic so I didn’t have to change any measurements to the binding 🙂

*I know a lot of ladies will be asking if they can skip the elastic.  Technically yes, you can sew it with just swim knit and it will stand up to the water.  BUT, the elastic will make it a “real swim suit”.  What does that mean exactly?  The swim elastic is made to hold up to the water and chlorine and doesn’t stretch out when wet.  The swim fabric does  stretch out and get heavier when wet.  For me personally, if I’m going to give the time to sew up a swim suit, I want it to be a nice, stay put, last all summer one! So, I absolutely take the time to put in the elastic 🙂 I don’t want it to grow and fall down on her while we’re swimming or constantly be slipping off her shoulders if I skip it.

Follow the tutorial for the first step of attaching binding.  Then serge or stitch your swim elastic along the opposite edge of binding that has not been attached yet.  You want the edge of the swim elastic to be even along the edge of the binding. For the front curved neckline you will want to put slight tension on the elastic as you’re attaching, you don’t need to stretch much- just a touch- so that it hugs to your little one’s body.

Finish the binding exactly per the tutorial.  Repeat these steps for the rest of the binding- putting a small amount of tension on the elastic only around the curved areas (under arms).  For the shoulder straps and X back binding pieces you do not need to stretch the elastic at all- use a 1:1 ratio.

I also added some swim elastic into the bottom hem to keep it from riding up.  For the cropped version I slipped elastic into the band there at the bottom.

And now she’s ready for the summer!  I can’t wait to see her in it (especially since I found these perfect accessories to go with it!)

Filed Under: Pattern Hacks 2 Comments

Spring Mini Capsule Sewing & Contest

March 27, 2017


Hey ya’ll- Judy’s sister, Megan here from Made for Mermaids! Judy and I have been talking about how badly we needed to start sewing warm weather clothes. Our kids have simply outgrown all their Spring (aka Summer in Dallas 😉 ) clothes. While we are constantly sewing for new pattern releases, most the time we’re using prints to show in tutorial and testing photos. Many times pieces end up not making any sense in our wardrobe and I find myself wearing the same staple, simple tops I have in my closet over and over. We decided a mini capsule was the perfect solution!

What is a capsule wardrobe? 

It’s a wardrobe made up of really versatile pieces that you completely LOVE to wear. Pieces that are simple; they can be mixed, mashed and worn several different ways. It’s about quickly and effortlessly being able to put an outfit together.  Now a full capsule wardrobe is made up of jewelry, shoes, accessories, everything you need to wear on a day to day basis. What we’re going to be doing is sewing 9 staple pieces for your closet. I’m trying to sew 3 mini capsules… I know I know, but we really need these so I’m hoping I can get them all done! One for myself, one for my daughter and one for  my son. 

How do you plan capsule sewing?

This will be different for everyone, depending on where you live, lifestyle and personal preferences. I can tell you how and what I have chose for our mini capsules. I love to have a board to help me plan. The visual really helps me be able to put it together exactly how I want. Don’t worry, I have FREE Photoshop templates if you’d like to make your own with photos or text. You can also use picmonkey or another editing/collage type site to help you. If you need directions on how to use the template, check the bottom of this post. Simply click each link below and they will download.

M4MWomensCapsuleTemplate

M4MGirlsCapsuleTemplate

M4MBoysCapsuleTemplate

First I decided what pieces I wanted to sew. I looked in my closet (and kid’s) and tried to see what was missing. Now I just typed these out, but you can do more of a suduko style where each row and column make an outfit, so you can REALLY make sure all your pieces can be worn together.

How do you choose patterns?

I choose patterns a few different ways.

1- What do I LOVE to wear and feel GOOD in? What do I find myself always pulling out of the dryer to wear again? Same for my kiddos. I find them asking to wear the same shirts and dresses all the time.

2- What is my wardrobe lacking? Do I need shorts, tanks, tees? We moved last Fall and my daughter’s new school dress code is much more strict than her last. She can’t wear any sleeveless tops or dresses, which throws out 90% of her Spring wardrobe from last year. I know I sound like a broken record…  but it’s HOT here in Dallas so I plan on making her a LIGHT cardi to be able to throw over tanks.

3- What will work with the warmer weather? Luckily for both M4M and P4P most our patterns have tons of options with different sleeve and hemlines that can be worn year-round 😉

How do you choose fabrics?

What makes capsules great is they are no fuss. So you don’t want to choose fabrics that clash, but rather coordinate and compliment each other. Think solid or solid-like fabric for most of your mini capsule. What am I talking about with “solid-like”?? A print that reads as a solid to blend the other fabrics together and something that coordinates with the focus fabrics. Think subtle: stripes, dots, heathered, burn-outs, etc. Also think about using different textures, so even if the fabric is solid or plain, it looks different against another piece. Choosing different types of fabrics will help your wardrobe not look or feel too bland. Remember to think about the weather and choose fabrics that won’t feel too warm. I know you know, by now that Dallas is HOT 😉 so I like to use ITY, rayon spandex, rayon challis, georgette, model, bamboo jersey, chiffon and light, open weave sweater knits when moving into warmer weather.

Here is Judy’s mini capsule fabric laid out for her Little Guy!  He’s old enough that he wanted to help pick! So, lots of superheros going on, which he considers a neutral 😉 She managed to keep in within a color scheme to help the tops and bottoms coordinate with each other.

How does the contest work?

We have several random participant prizes for you! To enter, all you need to do is sew a 9 piece mini capsule using all M4M and/or P4P patterns…now if you already have a favorite, staple piece you’ve sewn from one of our patterns and MUST have it in your capsule, that’s ok. They can be mash ups or a combo of our patterns. Then post your final capsule in our FB groups (P4P and/or M4M). The final post must be in a collage format. You can also share on Instagram, Pinterest, Twitter or other sewing/fabric FB groups. You MUST use the hashtag #sewminicapsule and we would love if you would tag M4M and P4P, and use #madeformermaids and/or #patternsforpirates . If you don’t use the hashtag we won’t be able to find your entry! You can sew multiple capsules for yourself and little one/s for more than one entry. Contest ends April 10th. We will have 12 random winners, open to international friends. Are you ready for prizes??

5 winners will get 1 pattern of choice from EACH P4P and M4M.

3 winners will get 3 patterns of choice from EACH P4P and M4M.

1 winner will get a $50 store credit to Sincerely Rylee Fabric Shop.

1 winner will get a $50 store credit to Pretty Posh Prints.

1 winner will get a $100 store credit to Knitpop.

Our grand prize winner will get their choice of a Brother Coverstitch 2340cv OR $100 gift card to Joann Fabric!

We can NOT wait to see what you make! If you have questions, need advice, inspiration, make sure to post in our FB groups, (P4P or M4M) we would LOVE to see what you’re sewing for your capsule!!
How to use the Photoshop templates-

Open file in Photoshop. Download all the photos you may want to put on your board. Click on the layer that says ‘Place Photo Here’. Click “File”, “Place” and then choose the photo you’d like. You can resize the photo by holding Shift and dragging the corners. Repeat with each box. Then save as a photo file so you can share with us!

If you want to just add JUST text to the board, click on the layer that says ‘Place Photo Here’ then add your text there for each box.

If you want to add text on top your photo, add a new layer above the layer that says ‘Place Photo Here’. Then add your text there for each box.

Want some inspiration?? Check out these boards from our team and/or blog contributors!


Filed Under: Contest/Giveaway 17 Comments

P4P University :: Twin Needle Tips

March 16, 2017

Hello Pirates!  Today I’ll be walking through some tips on using a twin needle for topstitching as an alternative to a coverstitch machine.  The end goal (of either twin needles or a coverstitch) is two lines of parallel stitching on the right side of the fabric, with the ability to stretch and not break threads when pulled.  This is usually used when hemming, but these tricks will especially come in handy when topstitching binding on our new cami pattern!


1. Stretch Needles

The most important point is to make sure you buy stretch needles.  Schmetz is the most common brand that people tend to use, they are available on Amazon.  I prefer the wider 4.0 width the best because it works better for me; it also comes in a 2.5 width.  These are both 75/11 needle size.


2. Threading

When threading, it helps to thread as shown in the below picture.  This helps stop the threads from twisting when sewing.  Also, make sure your threads are not caught on anything (or each other) at the top of your machine.


5. Stitch Type

Use a regular straight stitch for this; no need to use a triple stretch stitch (|||) or any other stretch stitch like that.


4. Tension

Tunneling is what happens when there is a large bump in between your two rows of stitching.  To avoid this, I’ve found it helps to increase your top thread tension.  Your machine may vary, but I usually set my tension to 3.  If possible, you should also decrease your bobbin tension as well.


5. Stitch Length

Increasing stitching length usually also helps with tunneling, especially on trickier, slipperier fabrics.  Your machine may also vary on this too, but I set mine between 3.0 – 4.0, depending on fabric.  The lower number will help things stretch more though, so you may need to find a happy medium.


6. Go Slowly!

This is a huge one.  It’s so tempting to go full steam ahead, especially if you using a twin needle to hem.  You’re almost done with your project, but don’t ruin it with a sloppy hemming job!  Going slowly can make all the difference between a wavy hem and a perfectly flat one.  If you encounter any thicker areas of fabric, it may also be a good idea to use the hand crank on your machine, turning it slowly to ensure no mistakes as you pass over the thicker area.


7. Don’t Stretch as You Sew

This applies to all knit fabric projects, but especially when using a twin needle.  Don’t pull or stretch the fabric as you feed it into the needle area.  I’ve found that even creating a little extra negative tension as you guide the fabric can help to avoid any pulling as you sew.


8. Top vs. Bottom

When everything is done correctly, you should have two parallel lines on the top of your fabric, and a perfect zigzag on the back.  The zigzag is what allows your fabric to stretch after it’s sewn, so if you have super tight or non-existent zigzags, then you likely need to adjust (likely increase – confusing, I know) your top thread tension.  Here’s how it should look, the underside of the fabric is at the top of the picture and the right side is on the bottom.  Note the zigzags!


I hope these tips help you as you prepare to topstitch lots of fun binding or finish up a fancy new garment with a twin needle hem!  Let us know in our Facebook group or here in the comments if you have any questions about twin needles!

Elisabeth

Filed Under: Frequently Asked Questions 15 Comments

Cross My Heart Cami Hacks

March 14, 2017

So you love the X option but you also love the T option of the Cross My Heart Cami and now you’re in a pickle…which one do I make? The answer is obvious, you make both! And if you’re anything like I am, you make both style in one cami! 🙂

IMG_6658

IMG_6671

The beauty of the CMHC pattern is that you don’t even need to make any modifications to achieve this look. Simply cut two pieces of the front pattern and follow the directions for adding the T and the X details to the pieces. Finish the cami as per the tutorial and voila! You made yourself a brand new cami that can be worn both way. You can wear the X in the front and the T in the back like I did or you can wear the T in the front.

cami 2fronts

I paired this cami with a Pirate Pencil Skirt and a Sweet Tee with curved hem and an off the shoulder mod. Which styles will you be making first?

Judy made this one with two backs! Such a simple mode that can add so many more options to this pattern!

The V front and low x makes a sizzler! I mean, who doesn’t love to have that piece of clothing that you can pull out, slip on feel a little sexy every once in a while?

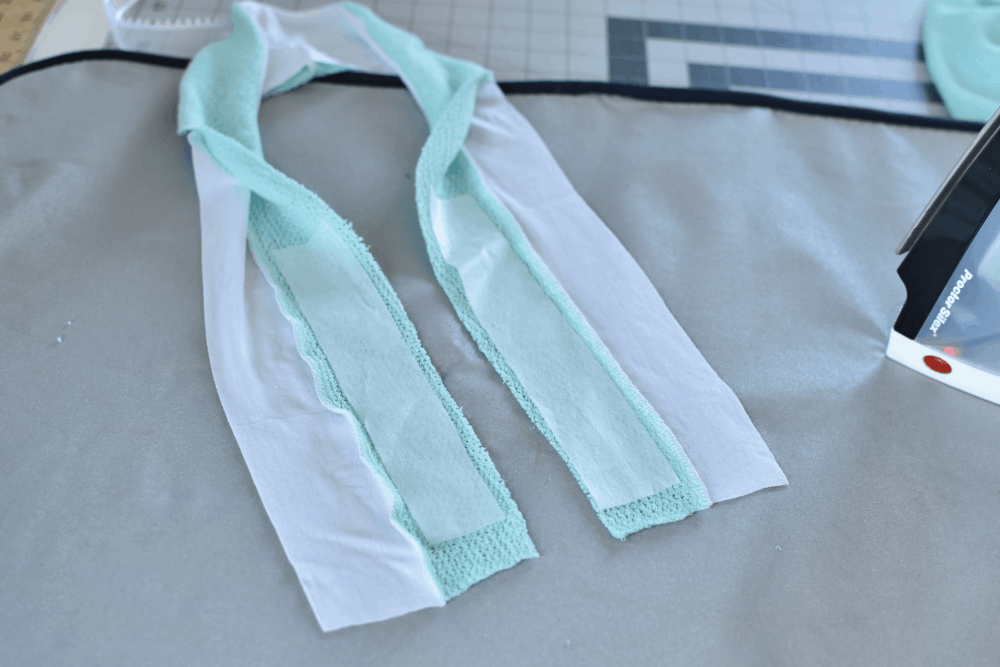
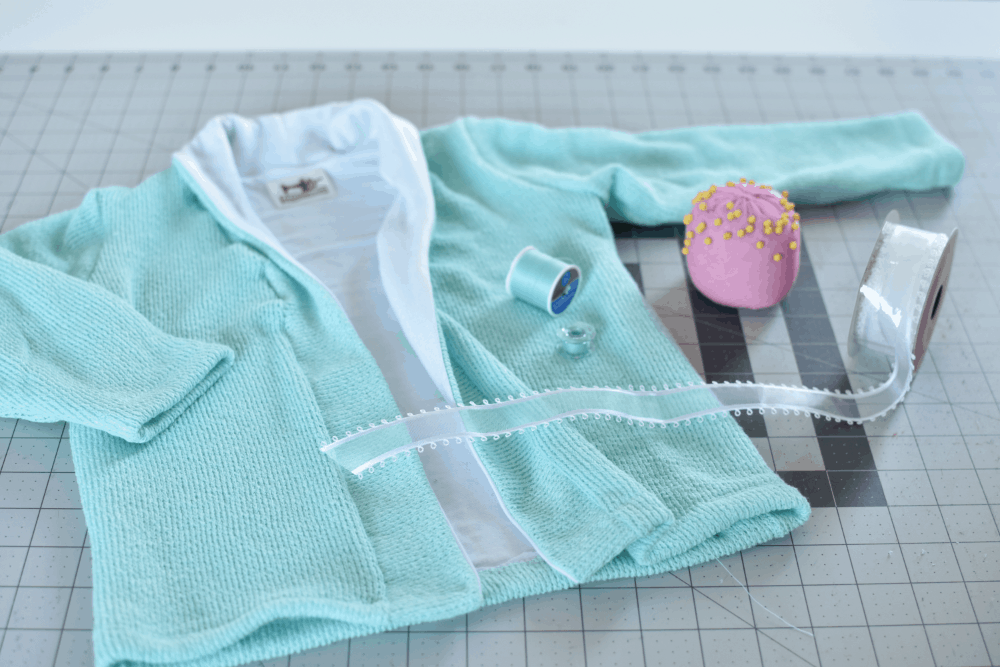
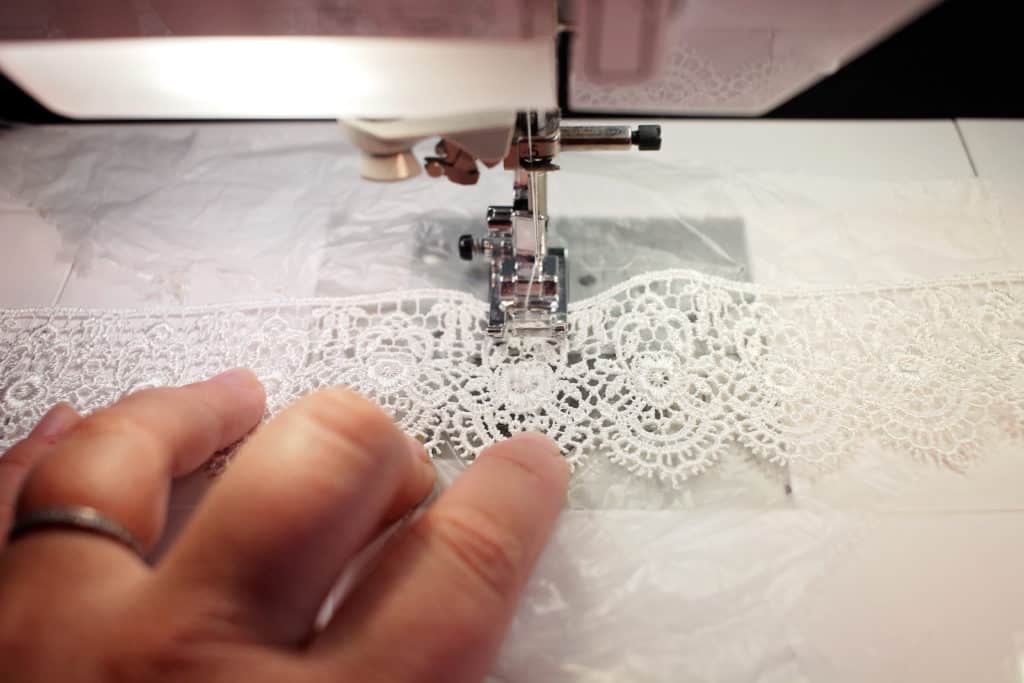
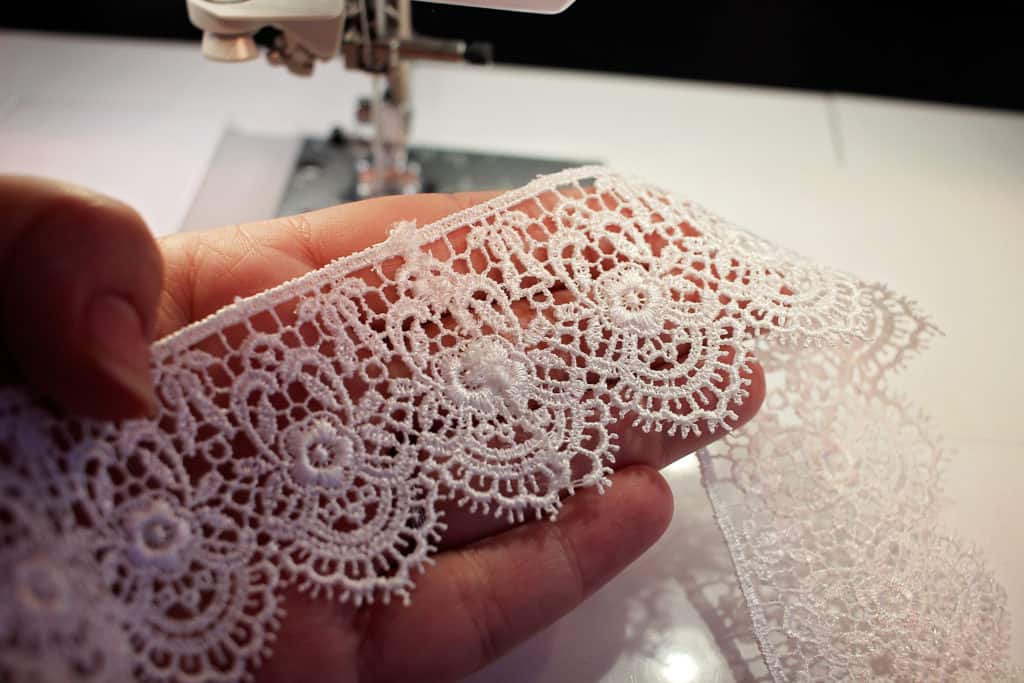
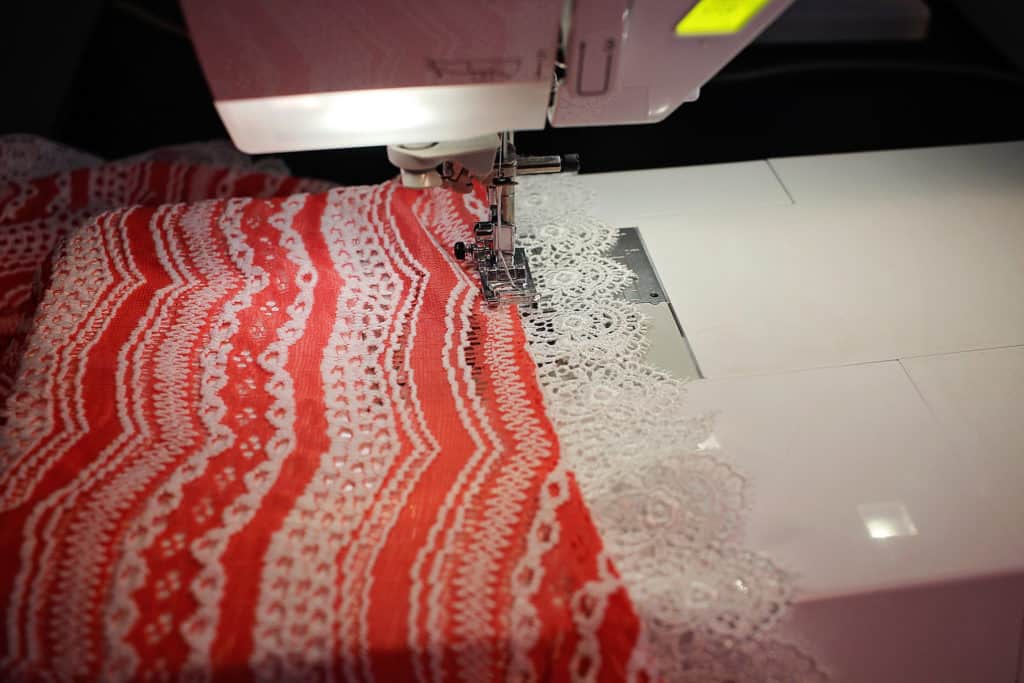
Are you looking for a more delicate, feminine feel?  Grab some stretch lace for an easy hack!

Here’s a simple how-to:

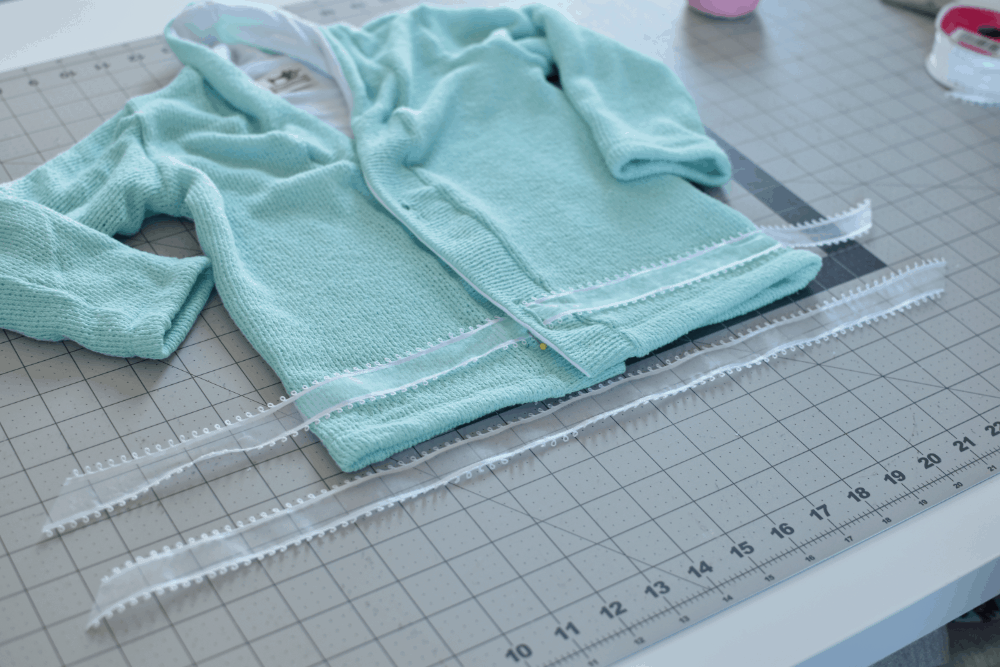
1. Cut the lace the same length as your binding pieces, for whichever neckline you are using.

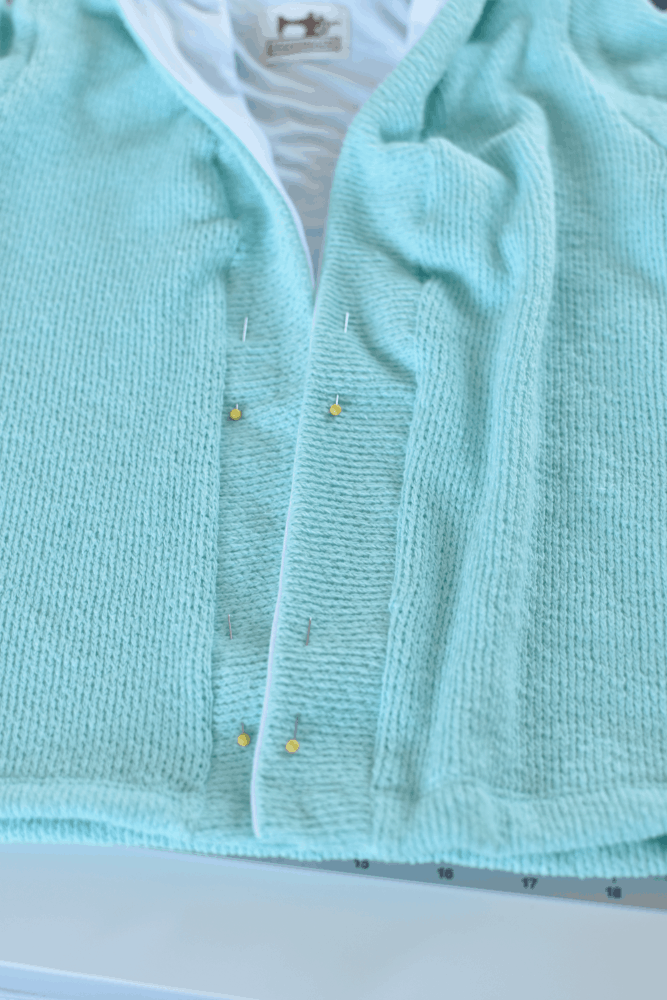
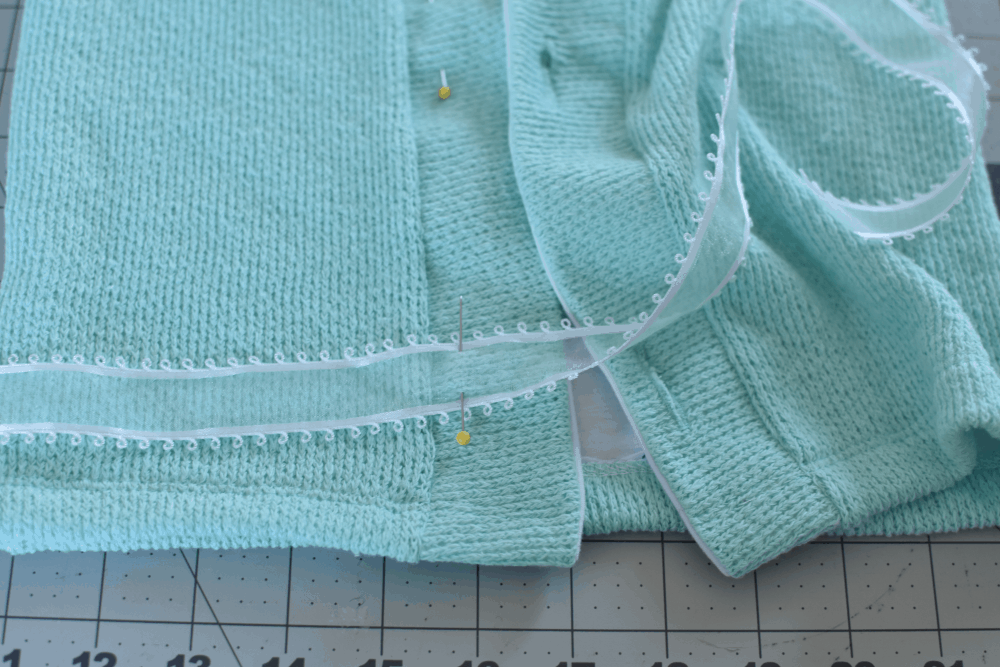
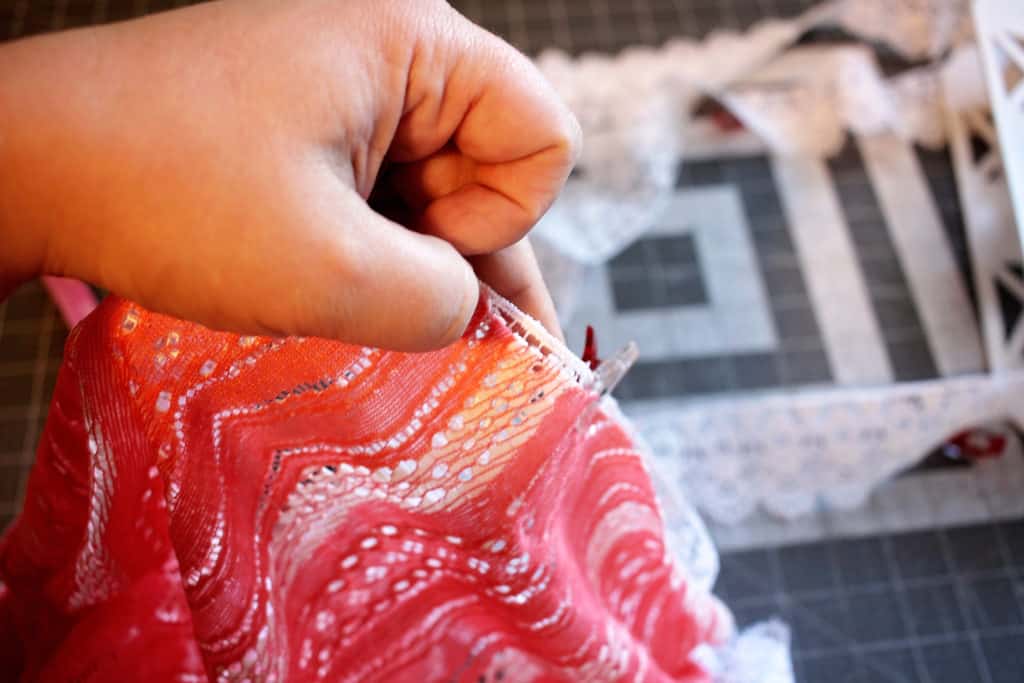
2. After you’ve attached and folded over the binding as directed in the tutorial, pin the right side of the lace to the wrong side of the neckline/binding. In the picture below, the fabric is right side up.


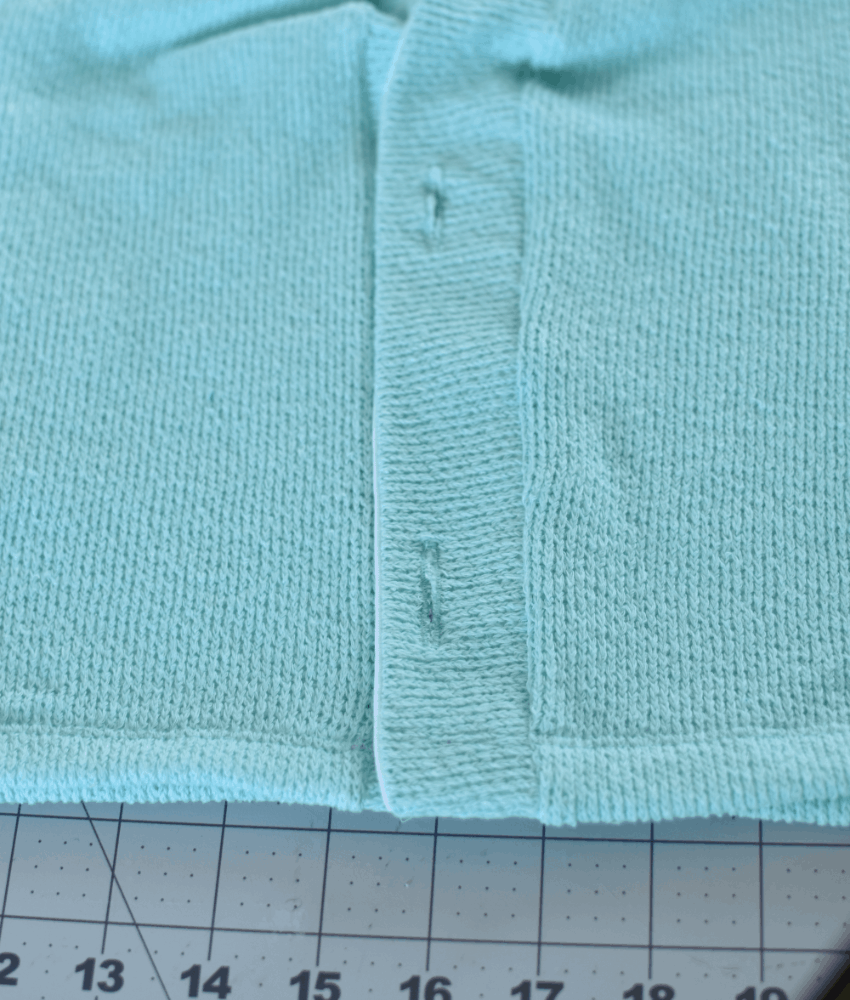
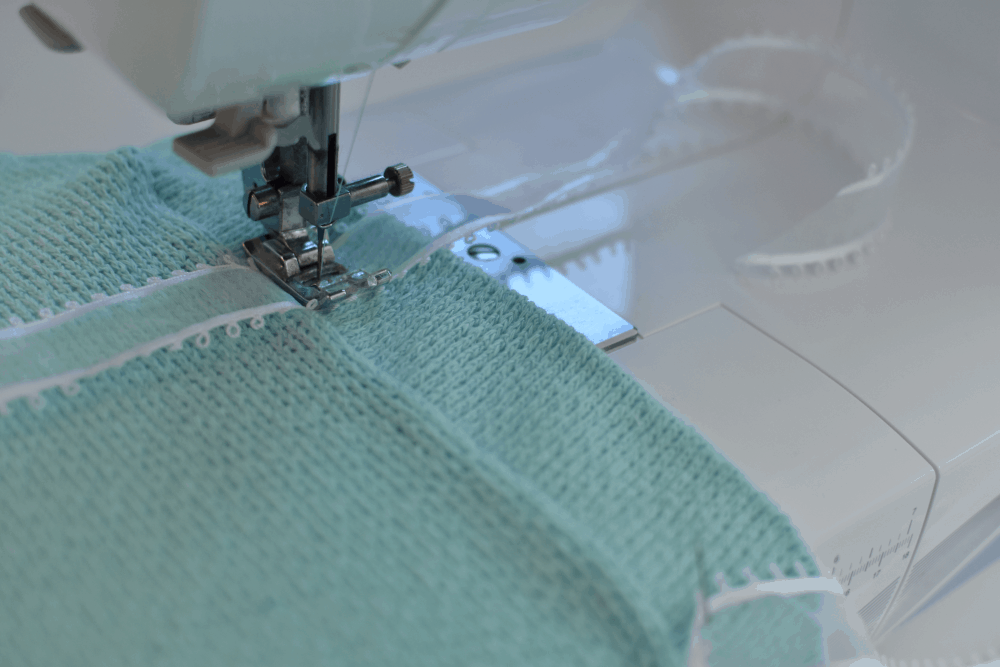
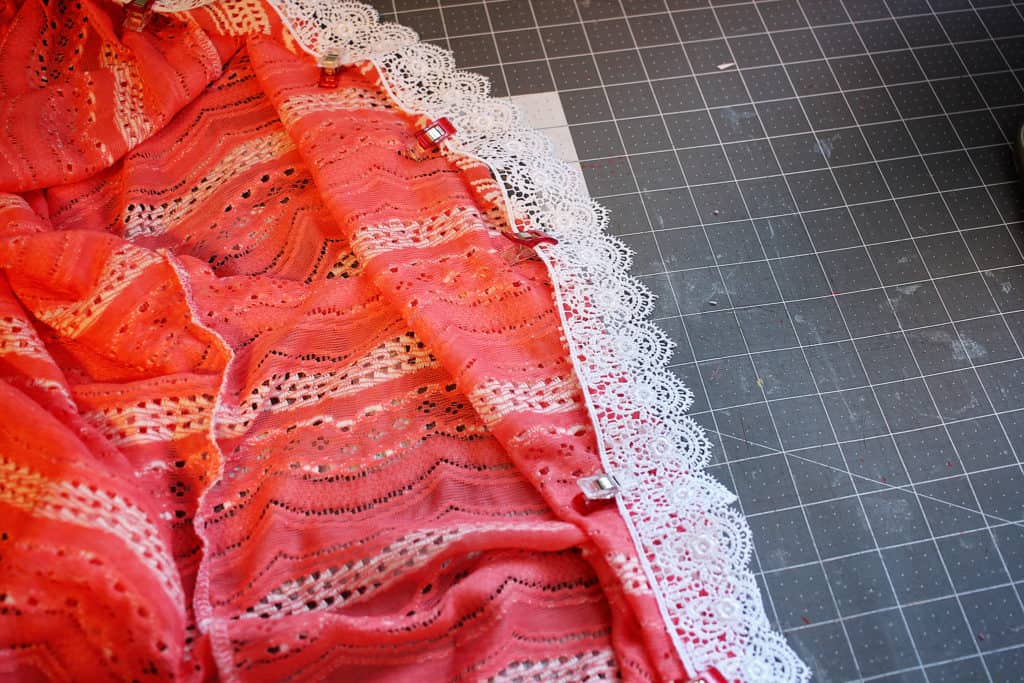
3. Repeat for the back as well, if you’d like.  Then, sew it on as you top-stitch the binding, per the pattern tutorial.  Here’s how it should look all said and done; wrong side up shown on the bottom of the picture, right side up shown at the top.


4. Be sure to catch the edge of the lace on the side of the shoulder binding as you attach it.


5. Finish the shirt as the pattern tutorial directs.  That’s it – easy peasy!

~ Elisabeth


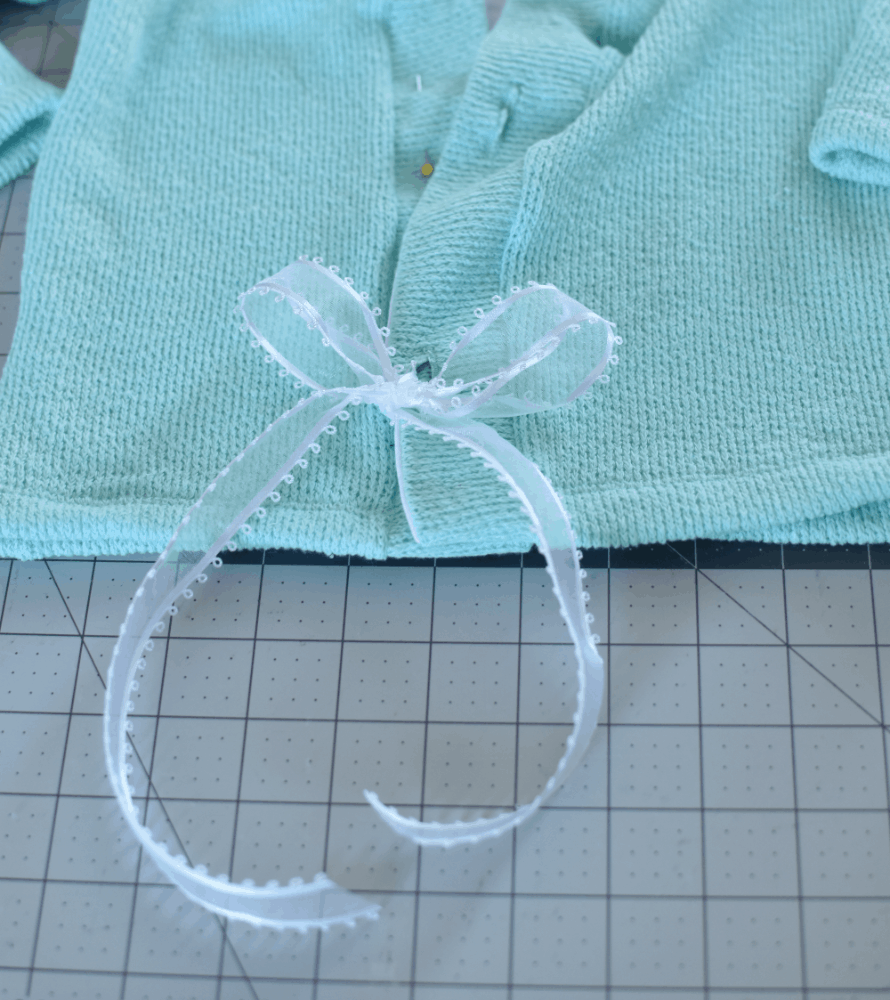
Not sure what to do with all those pretty lace appliques? Attach one to the front or back of the cami.  I happened to up-cycle one from an old shirt that didn’t fit anymore and have some knit on hand that matched perfectly!  I used to V back because of the shape of the applique.  I left the front neckline raw and stitched the lace just overlapping the top edge using a zigzag stitch.  (Knit does not unravel so no need to finish those edges).  Attach to the right side of the cami prior to doing the shoulder binding if your applique extends to the armholes.  For the main body of the applique, I chose to tack down in a few areas (center of the flowers) as the applique itself was pretty open throughout.  Easy Peasy!


Filed Under: Frequently Asked Questions, Pattern Release, Uncategorized 1 Comment

  • « Previous Page
  • 1
  • …
  • 53
  • 54
  • 55
  • 56
  • 57
  • …
  • 67
  • Next Page »

Featured Patterns

  • Loosey Goosey Loosey Goosey $12.00 Original price was: $12.00.$10.50Current price is: $10.50.
  • Loosey Goosey- Youth Loosey Goosey- Youth $10.00 Original price was: $10.00.$8.50Current price is: $8.50.
  • Loosey Goosey - Bundle Loosey Goosey - Bundle $20.00 Original price was: $20.00.$18.00Current price is: $18.00.
  • Everyday Shirt Everyday Shirt $12.00
  • Everyday Shirt- Youth Everyday Shirt- Youth $10.00
  • Privacy Policy
  • Refund Policy
  • Affliliate Program
  • Contact Us
  • About

Copyright © 2025 Patterns for Pirates

Copyright © 2025 · Genesis Framework · WordPress · Log in