Patterns for Pirates

P4P stylish, modern, wearable patterns

  • Home
  • Blog
    • Frequently Asked Questions
    • Pattern Releases
      • Free Patterns
    • P4P University
      • Fitting
      • Sewing with Stretch, Knit Fabrics
      • Sewing with Woven Fabrics
      • Sewing Machines
    • Sew-A-Longs
    • Fabric for Pirates
    • Pattern Hacks
    • Announcement
      • Blog Tours
      • Contest/Giveaway
  • Shop
  • Bundle Discounts
  • Flash Friday
  • Gift Cards
  • My Account
  • Cart

Pattern Testing: How to become part of the Crew

August 6, 2016

P4P-Pattern-Testing


So you want to be a Pirate?

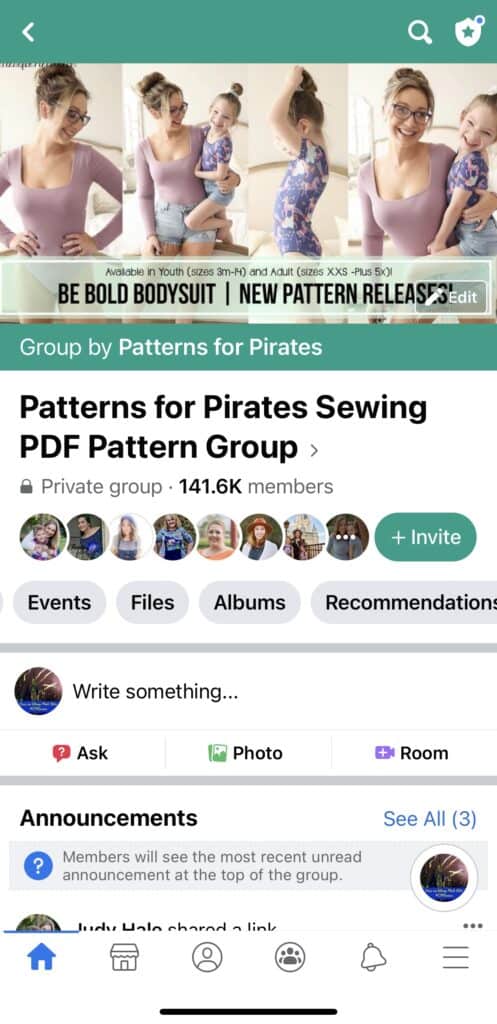
“Ooooo! I would love to test for you.” and “How do I become a tester?” are frequent posts in the P4P Facebook Group.  We are constantly on the look out to add talented ladies to our testing pool so we thought we’d give you the nitty gritty of what it takes to be a pattern tester and how to get picked.

Why do we need Pattern Testers?  All patterns are drafted based on average body measurements but we need people to sew them up and try them on to ensure the proper fit.  We also want to be sure that the instructions are not only grammatically correct but understandable by all levels of seamstresses.

The Pattern Testing Process:

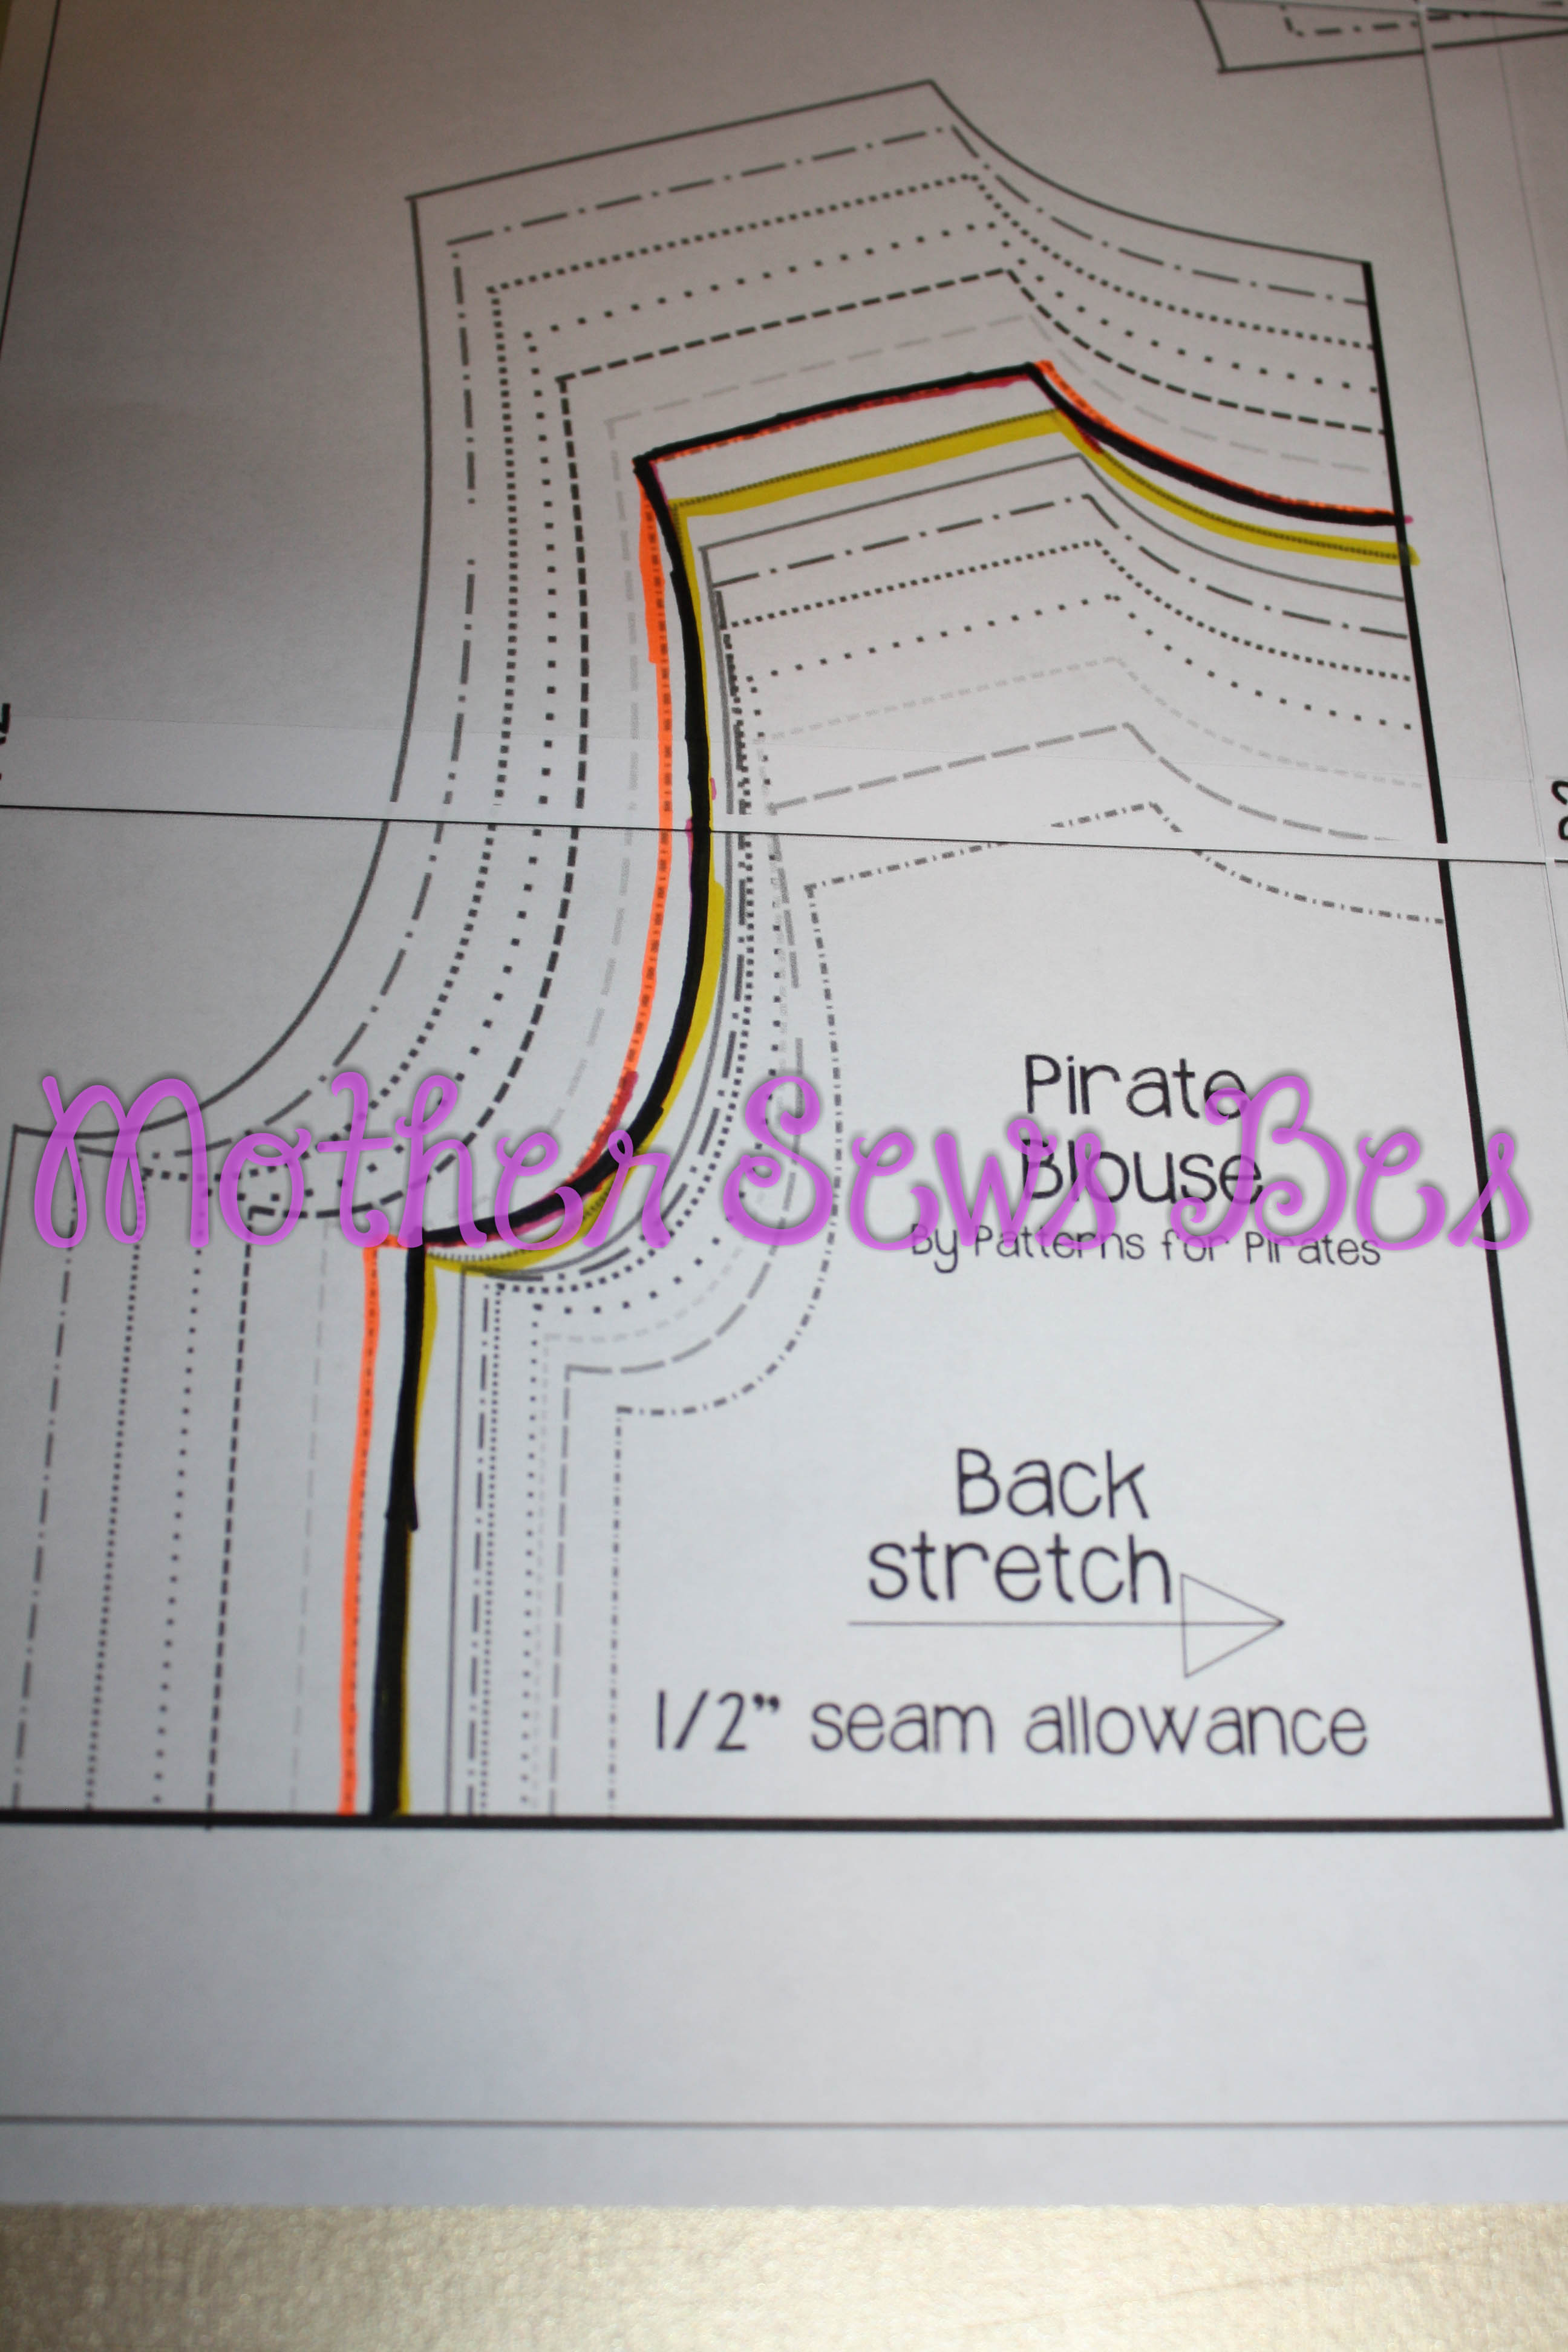
  • Pre-testing: Once a pattern has been drafted, it is pre-tested.  Before we even send out the pattern to our testers, we sew them up to determine if the fit and ease of the pattern is what we are looking for. We usually sew up one of each of the options to be sure to work out any issues before it goes in to live testing.  In some cases, we will modify a pattern numerous times before deciding on the final versions.  This is also where we really hash out what options, finishing methods, fabric suggestions we will include in the pattern.  Our phones are filled with tons of pre-test and fit pics so we thought we’d share a few!  😉
    pre-test
  • Tester Call: We are ready to do a full test on the pattern.  We post a call in our tester pool and our testers sign up for the size and options they’d prefer.  Our testing period usually runs about 1 week, unless we find there are issues and it needs to be extended.  It is crucial to be sure that the deadlines are able to be met as well as having updated and current measurements.  We rely on feedback from the testers regarding fit so is very important to be testing the item in the proper size. We usually have 20-40 testers per pattern depending on the options and size range.
  • Testing: Sizes and options are assigned to testers.  This is when all fit issues and edits to the tutorial are completed.  Testers are to provide feedback about the the overall tutorial as to if its understandable and concise as well as any fit issues. Some fit issues that we may run into are too low of an armscye, too much or not enough ease, gaping armholes and necklines, etc. so some patterns will require multiple revisions.   Although a tester is only required to complete one full item, many decide to sew up the revised and final versions during the testing week.  This means, the pattern pieces are printed multiple times and lots of fabric is used.  Any photos that will eventually be used for promotion (listing pictures, pattern covers, Facebook and blog posts, etc.) are typically only the final version, or one that reflects the final version of the pattern.  This was not quite the norm for us, but the slim fit raglan went through close to 5 versions in testing and 7 in pre-testing.  Not everyone sewed up all versions but we did have a few that ended up making more than 5 shirts that week.  During the testing week we have two deadlines; one for fit and one for feedback and final styled photos.   Fit pictures are basic photos of the garment being worn and point out any issues one may have. We ask for at least 5 final styled photos that showcase the front, back, side and any details of the pattern (like pockets).   These do not have to done by a professional photographer or taken with a high end camera but clear photos of the item and model are a must. We also like clean editing, so no over the top filters or photo-shopping.  An example of fit and styled photos are below.    P4P pattern testing photo example
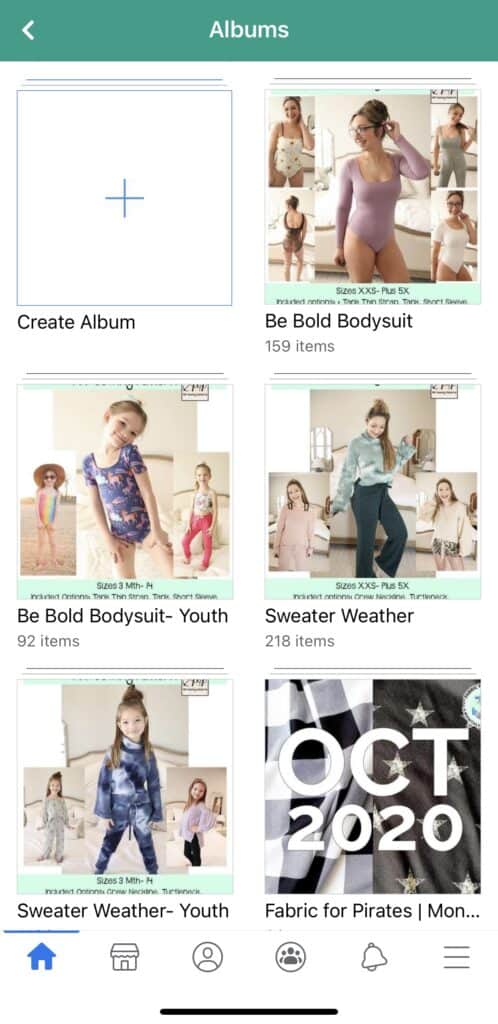
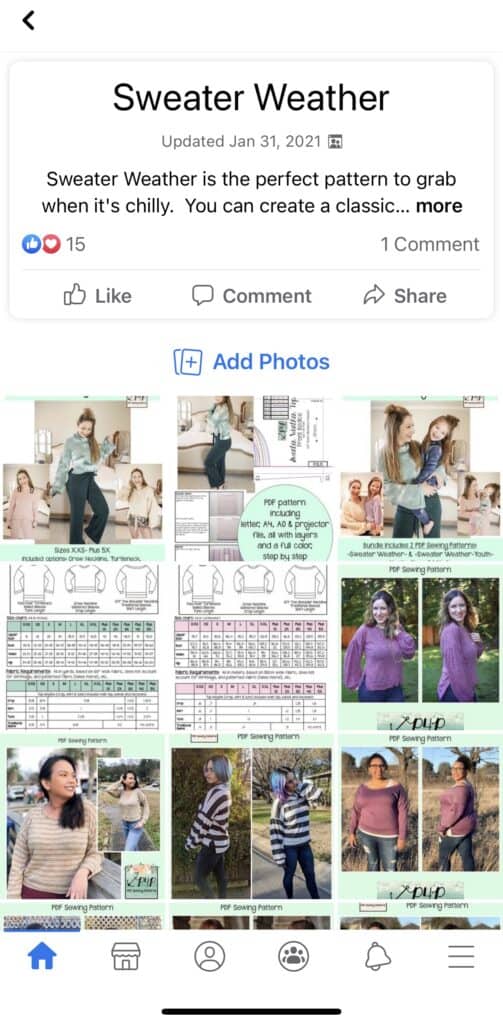
  • Pattern Release: All fit issues and tutorial edits have been addressed, testers final pictures have been submitted and we are ready to release to the public.  We work behind the scenes to get the pattern files ready, website listings and round up blog posts and then we release.  A new release is usually on sale for a week and we ask testers, if they love the pattern to share it.  Some have their own blogs and will provide their own “review” and write-ups and other simply post their pics in our Facebook Group as well as other sewing groups.  Final photos are also posted in an album in our Facebook Group for inspiration and promotional purposes that the members can access at any time. Check out some of our awesome testers from one of our last releases. Essential Tank Facebook Photo Album.
  • Celebrate:  We wouldn’t be able to get this point without all our awesome testers!  Testing is voluntary and not a paid position.  Upon completion of the test, the tester will receive the final pattern and a big thank you.


So now that you see what we do in testing, you ask, “How can I become part of the testing pool?”

  • When a new pattern is ready to go in to testing, we do a call in our testing pool first.  Sometimes we fall short on volunteers so will do a wide spread call in our Facebook Group to fill in where we need.  This is rare, but has happens a few times and if the test is successful, we add those ladies to the testing pool.
  • Facebook Members are given the first opportunity to test. We hand pick a few ladies from the group and ask if they would like to test the next pattern.   We “get to know you” by your posts in the group.  We are constantly looking for familiar faces that show off their P4P items in the group to add to the group! We look for the following:
    • Active group members who are familiar with our patterns and help out in the group by answering questions (Why? Testers are often asked a lot of questions about the new release and we love for the testers to be available and active in the group!)
    • Posting pics of their completed P4P projects
    • Ladies who are in the size range that we need to fill-in

Check out some of the gorgeous ladies we recently hand picked to test for us from our Facebook Group!!

13391387_10156987531095282_9212836292458574362_o 13717189_10207102251900050_8188682876773372792_o 13403763_10100540252776242_6199973707243297559_o 13723870_10103163709956739_3747945316400350143_o 13734906_10100188299473497_1585660700122181296_o  13698299_10157292206150599_225019478249495708_o


We currently have over 100 ladies in our testing pool so I asked them to share a few things about what they felt anyone that has never tested before should know. Here’s some of  what they had to say:

  • You’re going to use a lot of fabric, ink, tape, and paper. You’re going to take 10000000 pics that you hate and settle on 3.
  • It costs the tester quite a bit. It’s not just a time commitment, but a financial one as well. Also, MAKE THE PATTERN AS-IS. Its impossible for a designer to test their pattern correctly if the actual pattern is never actually tested. It doesn’t matter if you’re afraid that you or your child will grow out of it in a few months. You are testing and that’s a sacrifice you have to make.
  • People will expect you to know everything about the pattern. All the options, best fabric to use, where to get fabric, how it fits on various sizes etc. Sale info.
  • You can’t be shy! If you see a fit problem you have to say something. I know when I first started testing I felt bad saying something that might come across negative but had to get over that fast! 
  • Remeasure for EVERY test. 
  • Don’t wait until the last minute to make your garment. You never know which kid will start puking, which needle will break, or when the power decides to go out. Start ASAP and get it done on time. When in doubt of time, opt out of volunteering. There are many people that would love to take your place for that test. Making a commitment you can’t keep is way worse than politely declining and maybe trying again next time.
  • You need to sew step by step with the tutorial steps as written. It takes me 10x longer than if I were sewing on my own but you need to be as precise & exact to what’s instructed & as the pattern prints.
  • Get a remote clicker for your camera or find a buddy because most husbands don’t understand this process!
  • Most patterns are not perfect the first run, so patience with fitting and adjustments are a must. You are a tester… Testing by trial and error. Take it for all the pain and glory.

Pattern testing is a lot of WORK, but it is also fun and can be so rewarding! Our testers agree.

  • I enjoy testing because having a deadline really helps to motivate me to sew!
  • My absolute favorite is being a part of the team that helps these fabulous mamas succeed in their dreams!
  • Pros: making friends all over the world, being part of the design process, sharing and being proud of your work, learning new techniques and improving my sewing and photography skills
  • I think the biggest thing to realize is that it’s not about the “free pattern” or getting it first- testing for me is truly about being a part of the process! It is so much fun to see the behind the scenes, how much work it takes to get the pattern perfect (which often means a lot of fabric, printing, taping= $$ which counteracts the notion of a free pattern!), learning from all of the amazing women in the group, but most of all- getting to know all of the amazing women!

Phew! So there you have it!  Are you ready to join the crew?  Show us what you got and share you creations in the P4P Facebook Group. You might just be the next member to be given a chance. Happy Sewing!


Filed Under: Frequently Asked Questions, Uncategorized 6 Comments

P4P University :: Peg Leg 101

March 21, 2016

peg leg 101

Have you heard about P4P’s Peg Legs?  And no, we are not talking about those wooden pirate legs!  P4P released the Peg Legs some months back in celebration of reaching 5k members in the P4P Facebook Group. (crazy right!?!? since we just celebrated reaching 15k members last month!)  If you don’t have them, you can grab them HERE and don’t forget to join the Facebook Group for a special promo code (check the pinned post for details)! In the last few months, we’ve seen the good, the bad, the fails and the “HAAALLPP” questions posted frequently.  So, just like any introductory 101 college course, we are going to give you all the basics with this crash course to make a successful pair of Peg Legs!

First and foremost, if you are new to P4P, check out our First Time User Tips.  Pattern Assembly, a few fabric shops, general cutting instructions, and sewing machine stitches are all discussed there.  So now that you’re familiarized with P4P, here we go!

  • What are Peg Legs?  A classic mid-rise, tight fit leggings pattern for 4 way stretch knit fabrics.  Options include 4 lengths: shorties, bike, capri and ankle with a no elastic waistband.
  • Sizes Included: XXS – Plus 3x
  • Fabric Recommendations: 4 way stretch knit with at least 50% stretch (vertically and horizontally).  Typically 5% spandex or more will work.
    • Cotton Lycra/spandex (note- Lycra=spandex). Medium weight is usually 10oz or more
    • Rayon spandex.  This is typically thinner so may not be opaque.  One of our tunic tops to cover your booty are a MUST 😉
    • Nylon spandex / Supplex – great for performance wear. This usually has a higher content of spandex and will feel tighter, much like compression wear. Some prefer to size up 1 for a more comfortable fit.
    • Polyester spandex – brushed polyester spandex is what many of the boutique leggings are made from however, it is a slightly harder to find the fabric in retail stores. Be sure to check the vertical stretch percentage as some may be less than the 50% require stretch.
    • Stretch Fleece – Fabrics such as Polartec Powerstretch are a 4 way stretch fleece.  Regular fleece, like blizzard, anti-pill and cuddle fleece found in retail stores are NOT recommended.

Fabric is extremely important to get an accurate fit.   Here is an example of the same size medium, capri length made from a 2 way stretch ponte de roma and a 4 way stretch rayon spandex.  You can see the overall fit of the 2 way stretch is much shorter in length and has a lower rise.  I am able to put on the 2 way stretch pair but because there is no vertical stretch, they do not stretch and bend with movement and tend to slip down over time.  While they are a super cute fabric, sadly, they sit in my drawer as they are not comfortable to wear.

image1 image2

STRETCH PERCENTAGES

So, you ask, how do I know if my fabric is 4 way 50% stretch knit?  A 4″ piece will stretch to a minimum of 6″ both vertically and horizontally.  Below is a stretch percentage guide.  Cut a scrap piece of your fabric 4″ x 4″.  Fold in half so it is now 2″ x 4″ and place at the end of the stretch guide.  Hold fabric at one end (where indicated) and grab the opposite end and stretch.  If you can stretch the fabric to 5.2″, your fabric has 30% stretch, 5.7 is 40% and so on.  Unfold and refold the opposite direction and test again.  To determine horizontal stretch, your grainline will run vertically with the stretch perpendicular and horizontal.   The vertical stretch is with the grainline.  For a printable copy, head on over to our Facebook Group and download a copy from the files section.  🙂  Need more help? Megan from Made from Mermaids has a great blog post with video about stretching fabrics.  You can check it out HERE.

knit fabric stretch guide P4P

PICKING YOUR SIZE

Now that you have checked your fabric, how do you pick your size?  If you are unsure on how to measure your body, check out our “How to Measure Yourself” post.  The peg legs use the high hip (where your hip bones are) and the hip (across the fullest part of  your booty) measurements to determine size.  If you are in different sizes for your high hip and hip, you can grade between the two or use one size for the waistband and the other for your “legs”.  This works best for those that have a high hip 1 size smaller than their hip.  If your high hip is larger than your hip, it would be best to grade your sizes.


ADJUSTING THE RISE AND LENGTH

The Peg Legs are a mid rise legging, meant to hit under your belly button.  For those wanting a higher rise or more tummy coverage, you can either add a taller waistband than the pattern calls for or increase the rise of the legs and use the existing waistband measurements.

  • Taller waistband: increase height of waistband to 10″ instead of 7″
  • Fold Over Yoga Band: double the height of waistband to 14″

To increase the rise of the legs: 1) follow the curve of the rise to a larger size on the pattern and blend. OR 2) Slash and Spread – Cut the pattern horizontally through the rise, add the desired amount and smooth out the curves.

 P4P patterns peg leg rise adjustment

Our patterns are drafted for a curvy 5’5″ frame.  Using the same principle as found in our Petite & Tall Fitting Adjustment post, you will adjust your length of the legs by 1/2″ for every 1″ over or under 5’5″.  The Peg Legs’ have a 28″ inseam for ankle length.  If your inseam is shorter or longer, you will adjust to your desired length in the same manner.

  • Determine the amount you need to adjust your length by.  Using the principle above – A 5’10” woman would need an additional 2.5″ (5’10” – 5’5″ = 5″ ~ 5″ x .5″ = 2.5″ ).  A 5″1″ woman would need  2″ subtracted (5’1″ – 5’5″ = 4″ ~ 4″ x .5″ = 2″).  It is best to split the total length that needs to be added or subtracted throughout the entire leg.  Slash and spread the pattern in equal parts and blend the lines. The most common areas to adjust are the shorties, bike, and capri lengths as there are cut lines already indicated on the pattern.  You may also need to adjust the rise, higher or lower depending on your desired height.

 P4P patterns peg leg length adjustment

CUTTING YOUR FABRIC

You will need the following: 2 legs (mirror images) and 1 waistband.  Note: the greatest stretch should be horizontal and what goes around the body.  To create mirror images you can cut your fabric two ways:

  • Cut 1 pattern piece with pattern writing face up.  Flip your pattern piece over and cut again.

P4P patterns peg legs mirror images

  • Cut your pattern piece with fabric on the fold to create mirror images with 1 cut.

P4P patterns peg legs mirror images on fabric


Once you’ve assembled your pattern, pre-washed your fabric and cut your pattern pieces you are ready to sew up a pair!  Because this is a great beginning knit project, we have included a quick video tutorial! Enjoy!


Sewn up a pair of Peg Legs?  We would love to see what you are all creating. Join the Facebook Group and share away.


Filed Under: Frequently Asked Questions 47 Comments

How to use the new Layers feature

January 9, 2016

header

Patterns for Pirates has added a brand new feature to their newest upcoming patterns! The Layers Feature! This means you can choose to print one size, a couple, or all of them if you’d like.  They will still be the “No Trim” style.

Here is a few screenshots to help you use the new feature.

As always, you will need to open and print your PDF from Adobe PDF Reader (a free download if you don’t have it yet).

This is what your screen should look like viewing the PDF pattern pieces:

Patterns for Pirates how to print layered pdf sewing patterns using adobe (3)

Patterns for Pirates how to print layered pdf sewing patterns using adobe (1)

Patterns for Pirates how to print layered pdf sewing patterns using adobe (2)

Patterns for Pirates how to print layered pdf sewing patterns using adobe (4)

Now you can print just the sizes you need and save some ink and time tracing off your size! 🙂

As requested, here is our on-going list of patterns that have the layers feature (These are also the patterns that include the A0 Copy Shop File Size):

Freebies:

  • Pirate Pencil Skirt
  • Peg Legs
  • Peg Legs- Add Ons
  • Peg Legs- Maternity Add On
  • Tulip Tee
  • Tiny Tulip- Youth
  • Wee Lap Tee
  • Petite Pegs
  • Teeny Beanie
  • Walk the Plank- Adult
  • Walk the Plank- Youth

Youth:

  • Jolly Roger Raglan
  • Jolly Roger Add-On Pack
  • Sugar Pie Dolman
  • Spice Cake Dolman
  • Me Hearties Dress + Peplum
  • Yo Ho Henley
  • Tiny Timeless
  • Baby Bear Joggers
  • Fav Tee
  • Butterfly Cardigan
  • Heart Breaker Cami
  • Little Loungers
  • Sweet Bow Dress
  • SOS Knit Pants- Youth
  • So Classic Sundress- Youth
  • Go To Jacket- Youth
  • Cpt. Mack’s Cardigan

Womens

  • Slim Fit Raglan
  • Relaxed Raglan
  • Raglan Add-On Pack – for women
  • Sweet Tee Dolman
  • Pumpkin Spice Dolman
  • Sweetheart Dress + Peplum
  • Siren Swim Top
  • Hello Sailor Swim Bottoms
  • Layer Me Up Shirt
  • Women’s Henley
  • Essential Tank
  • Sunshine Dress
  • Free Spirit Tank
  • Women’s Henley
  • Timeless Tunic
  • Mama Bear Joggers
  • Carefree Cardigan
  • Granpda Cardigan
  • Summer Kimono
  • Cocoon Cardigan
  • Cross my Heart Cami
  • Favortie Tee
  • Linen Loungers
  • SOS Knit Pants
  • So Classic Sundress
  • Go To Jacket- Womens
  • Ragdoll Raglan

Mens:

  • Go To Jacket- Mens
  • Papa Bear Joggers
  • Men’s Henley

Filed Under: Frequently Asked Questions 70 Comments

First Time User Tips

October 23, 2015

Are you using a P4P pattern for the very first time? I’m so excited for you to try out one of my pdf sewing patterns! Here are a few tips if you are brand new to sewing a P4P pattern, or to sewing from a pattern in general.

*Buying from the site- you will receive an email with a download link after payment is processed (check JUNK mail) and you can also log back into the site to download any purchased patterns anytime! Our freebie patterns downloads expire in 30 days once purchased, but fear not! You can add them to cart and “buy”  them as many times as you want.

Our patterns include various formats so be sure to open the correct one.

Letter – used mainly in the USA, must be printed on letter size paper (8.5″ by 11″)

A4 – used outside of USA, must be printed on A4 size paper (8.25″ by 11.75″)

A0 – used to print on 36″ wide paper, usually at copy shops.

Projector – this new style of paperless/printless way of cutting the fabric pieces requires a special set up. I would not recommend this for beginners. Only the newest P4P patterns include projector files.

#1: Read the tutorial thoroughly before beginning.  Before you start envisioning fabric selection and thinking about what size, you need to sit and read!  There is A LOT of info in the first few pages of a P4P pattern. Here are some highlights in those first few pages:

*Printing instructions-  You MUST open and print from ADOBE PDF viewer, not the app, not another PDF program! This will ensure the correct scaling!  I advise only printing the pattern pieces (these are listed on the first page in the tutorial) to save paper and ink-you can read the tutorial instructions on a computer, laptop, tablet, smart phone-whatever you have available! You will want to print with scaling set to “none” or custom “100%”. Carefully measure the 1×1 inch square to ensure that the pattern is printed in the correct scale (I always advise to only print the first page with the measuring inch first to test, then when you are sure it’s correct print the other pages). Our newer patterns include a 2″x2″ and a 4cm x 4cm square instead of the 1″ one.

Here is a shot of what your adobe printing settings should look like before you print: Custom scale: 100% and about the preview it should say 100%

Screenshot 2015-12-10 17.15.33


Here is a shot of the printed page with a correct 1×1 inch square:

SAMSUNG CAMERA PICTURES

One of the most common printing mistakes is to have the “fit to page” option clicked. Here is a shot of “fit to page” INCORRECT printing.  This will result in a pattern that is much smaller then intended!

If you look, you will see an outline around the entire page about 1/8″ that should not be there. The 1×1 inch square will also measure slightly smaller.

Screenshot 2015-12-10 17.16.02

SAMSUNG CAMERA PICTURES

SAMSUNG CAMERA PICTURES

*Piecing the pattern pieces together- I have a quick video putting the “no trim pages” together here: (you must be a member of the P4P FB group to view) Video Link

*Choosing your size- I have a size chart both in the listing pictures and in the first few pages of the tutorial.  Carefully measure yourself and find the size that your measurements correlate to.  Chest-fullest part around your bust, Waist-where you naturally bend to the side, High Hip-around your hip bones, Hip-around the fullest part of bottom/booty.  I only add the measurements that are important for that particular pattern.

Here is a blog post about measuring yourself.

  • If your measurements put you in several sizes then you can mash/blend sizes between your measurements to create the perfect fit (this is why sewing is so great! Custom fit and size for your particular body type). Our P4P University blog series includes a very helpful post about grading. You can read the Grading blog here.
  • Using the “Finished Measurements”- You can flat measure other garments that are well fitting and compare, or compare to your measurements. You should be able to know exactly how much you need to add or take off for the perfect length before sewing up!
  • LAYERS – once you chose your size(s) you can print just the needed one(s) by selecting it/them on the left side of the pdf file. Simply use the cursor to click/unclick the little “eye” located on the left of each size.
  • I also include the height my patterns are drafted for above the size chart (5’5″). If you are shorter or taller you will need to adjust for your height.  I include a link right below the size chart to this post explaining how I prefer to add/take length for petite and tall adjustments: Petite and Tall Adjustment Blog Post
  • Do not choose your size based on what you buy in ready to wear/store bought clothing.  Store sizing varies extremely from store to store.  Just choose based on your current measurements!
  • Read the description of fit carefully (located under the line drawing in the tutorial).
  • Look through the pattern album in the group! Yes, I have an album for almost every single pattern filled with A TON of pictures of every size and option for everyone to look through to see the intended fit of the pattern.  You can see where it is fitted, loose, and how it looks on a variety of sizes and body types.  Most pictures are also labeled with their size and their fabric choose to help even more! You can view the albums both mobile and on a desktop! Just go to the P4P FB Group and click “view group info”.  From there you can click “pictures” and go to “albums”.  Scroll through for the particular patterns you’re looking for! 🙂
  • Mobile View:


  • Desktop View:


*Choosing fabric- One of the most IMPORTANT parts of following a pattern is to use fabric that is suggested by the designer.  If you don’t you will not have the intended look that is shown on the cover and listing pictures.  The wrong fabric can mean a loose fit turns snug, a flowy fit turns tent-like, and so on.

  • Knit fabrics– I often give the percent of stretch knit fabrics should have for fitted patterns. Here is a quick link to my sister’s blog with a video on how to find the percentage of stretch: Megan’s Blog Post
  • Different fabric = Different look and fit— if you do not follow the suggested types of fabric you have to be prepared for the garment to not look and fit how it is intended and showed in the pattern listing pictures. I make sure that all my testers follow those suggestions, so all the tester pictures are going to show the intended fit and look. If you are unsure, read our Different Fabric, Different Fit before you decide.
  • Buying online- I love to buy online.  In fact, I pretty much get fabric from an online source or scramble to “borrow” some from my Mama’s large stash ;).  I hardly ever make it to a brick and mortar store! BUT, there seems to be an endless amount of fabric types to learn as a beginner seamstress and online shopping can be very difficult to navigate.  I always suggest buying from a smaller shop that you can message questions to!  Being able to ask how thick/thin, percentage of stretch and even if it would be good for a certain type of garment is such a nice bonus to supporting a smaller shop!
    • There are a lot of shops offering non custom fabric online as well as an abundance of custom knit designers/hosts FB that are smaller businesses (but be weary-sadly there are many that have been scammed by these groups, so look for well established custom groups).  I love destash fb pages where you can buy from other sewists, but often you’re buying from someone who doesn’t know the full description of the fabric, so I don’t recommend this for beginners.
    • Stick to searching the exact recommended fabrics until you are confident with all the different kinds of fabrics out there.
    • We also offer a monthly subscription where you can receive a 2 yard piece of fabric, hand selected by our team. Get all the details about Fabric for Pirates here.
  • Fabric Requirements- I list fabric requirements on the last listing picture under the size chart as well as the first few pages of the tutorial.  I often break up the fabric requirements into different options and different parts of the garment. Example: Relaxed Raglan I list main body 7/8yd and long sleeves 7/8 yd, this means you will need 7/8 for the main body and an ADDITIONAL 7/8 for the sleeves.
    • As described in the tutorial, the fabric requirements do not include extra for fabric being cut off grain, shrinkage after prewashing (I ALWAYS recommend pre-washing fabric before cutting!), or to match any kind of patterned fabric/directional fabrics.
    • I recommend buying a little more to account for these things 🙂

Screenshot 2015-10-23 13.24.34

*Looking for more inspiration- If you have looked through the listing pictures, album pictures in the FB group and still want to see more you can use the search bar in the Facebook group. with our hashtags to help! Some pictures are tagged with hashtag/pattern name… here are a few for examples: #peglegs  #carefreecardigan #cptmackcardigan… using the hashtag will help pull up pictures and not posts about the pattern 🙂


Now we’re finally ready to begin!

*Cutting fabric- It is important to cut your pieces along the grainline of the fabric.  Grainline is easily found parallel along the selvage of the fabric (the sides that are not cut by the store).  You want to match your selvage/grainline to the grainline arrow on the pattern piece.  Making sure this is straight is important! If it is cut off grain/not straight it will hang not straight! Have you ever had a pant leg/sleeve/shirt always twisting while you wear it? That is because it was cut off grain! It’s really annoying! So take your time matching the grainline on both woven and knit fabrics.

cutting layout

*Cut chart- I include a cut chart for any rectangle pieces.  The measurements for the cut chart are located in the first few pages of the tutorial and on the pattern pieces.  This way you can cut your rectangle pieces without having to look up the tutorial :). Our newer patterns include rectangle pattern piece as well. Some sewists prefer to have everything printed so now you can chose.

  • I prefer to use my cutting mat, quilters ruler and rotary cutter for cutting rectangle pieces.  If it has a longer measurement I prefer to fold in half and cut on the fold for ease as well.  Again, make sure you are keeping your grainline straight.

*Direction of Stretch- I also include a direction of stretch arrow on all pattern pieces for knit garments.  It is always perpendicular to the grainline.  Even with 4 way stretch fabric the greatest amount of stretch will run horizontally on your fabric.  If it is on the fold, fold  your fabric selvage (the part not cut by the store) towards the opposite selvage as wide as your piece and place on fold.

B1

*Using a Stretch Stitch for Knit Garments- Since most of my patterns are for knit/stretch fabric I thought I would add available stretch stitches you can use.  I use a serger in the tutorial, this is a great machine stitch for stretch fabrics if you own one.  Basic sewing machine stitches that also work are

a) triple stitch

b) lightening stitch

c)honeycomb stitch

d) overlock stitch

e) stretch overlock stitch-this is my personal favorite usually-

f) double overlock stitch

If you read your manual they will list the stretch stitches your machine have.  If you don’t have or can’t find your manual you can always google for your manual!  It is very valuable to have! 🙂

stretch stitches


I hope these tips are helpful for first time users! You can always post other questions to the P4P FB group and don’t forget to share your final garment!


Filed Under: Frequently Asked Questions, P4P University 66 Comments

How to Sew “ready to wear” looking Jeans/Denim

June 13, 2015

Jeans can be an intimidating sewing task, but they really aren’t that difficult and it is so great to have well fitting jeans for you or your little ones! No more plumbers crack when bending down!!!!! 😉

IMG_9403

With my recent release of the Cpt. Comfort Jeans I wanted to post about how to distress your new denim to look more like ready to wear jeans! I personally LOVE the distressed look! Although a super clean dark denim can look nice as a “dressy” pair of jeans like here:

_DSC4859

But for everyday, I just love the little distressed look… something about looking like Daddy gets me every time with my little guy!

So, lets get started on those great store bought look jeans!

You really MUST use a top-stitching thread for all your top-stiching if you want store bought look… I scoffed at my Mom the first time she told me it was a must… BUT she was right, like always!!

IMG_7260

You will use this heavier/thicker weight top-stitching thread in the top only and for top-stitching only. You will use regular thread in the bobbin and for all seams sewing the jeans together– yep, you have to rethread a lot ;). But it is absolutely worth it if you want ready to wear looking jeans! I promise!

You will also NEED a bigger needle designed for heavy weight fabric like denim or you will be breaking needles on those thick belt loops!… here is a single and double needle:

IMG_7259

Now, I only have one machine, so there is A LOT of switching threads and needles if I use the double needle. So, I will often just sew two lines with my single needle instead of switching to my double needle 😉

Now for the distressing, you will need some sandpaper! To be honest, I’m not sure the BEST kind of sandpaper to use… I asked my husband if he had some and used whatever he handed me 😉 Here is a shot of the kind I happen to use!

IMG_9008

The trick to distressing your denim is to do at WHILE you’re sewing the jeans! If you try to do it before it’s hard to gauge where the distressing needs to be. If you do if after you’ve top-stitched them then you will be breaking your top-stitching threads (ask me how I know that one 😉 ) see left top pocket with it’s broken threads :/ oops!

IMG_9422

So, I suggest sewing the jeans together with your normal thread, then distressing with sandpaper before you top-stitch. Here is my patch pocket sewn, turned right sides out, and distressed along the edges (and any other places I fancied at the moment). Then I top-stitched.

IMG_9010

Some areas are harder to distress before topstitching like back pockets, belt loops, any piece that you are top-stitching closed or onto the jean.  But I still follow the same steps.  I just fold and press, distress, then top-stitch onto the back piece.

IMG_8998

So have fun with a little distressing or A LOT! lol! I like a lot 😉 I end up with a mound of blue fuzz all my sewing room by the time I’m done!

Last is the button! I love to use “real” jeans buttons- and honestly, I always have been lucky enough to take them from my loving mother’s stash! But they are very easy to put on, just line up the two parts and hammer away! Yep, you’ll have sandpaper and a hammer in your sewing room for jeans!!

I’ve always used snaps, which are very common on ready to wear for younger children 🙂

IMG_9000 IMG_9218 IMG_9245

Filed Under: Fitting, Frequently Asked Questions, Sewing Techniques, Uncategorized 3 Comments

How to Mash Sizes for a Custom Fit!

June 13, 2015

Do you have a tall skinny minny? Or a little one who needs a bigger width then their height? This is a simple easy route to mashing sizes for children to get a better fit! No more just adding to the hem!! If your child needs length they need it throughout the whole garment, not just the hem! And vice versa if your child is shorter they need it shortened throughout the whole garment.

So here is the quick guide. You will take their overall height and match that to the size chart of your pattern… for this example I’m going to be using my niece who is 44″ tall- which matches my size 5.  Her chest and waist match a size 4. So I will be using the width of a 4 and the length of the 5 on every pattern piece!

**I’m going to note in here too that going more then 2 sizes is very hard to keep the proportion and shape of the pattern.

Here is a picture where I highlighted the size 4 and 5 (Size 4 in yellow and size 5 in orange). I don’t typically do this, but I did to help illustrate 🙂

IMG_5433

And here I drew in black to show how I followed the size 4 width overall on the piece and the size 5 length.  See how I made the armhole the size 5 length, and neck hole… these are places where your little ones fit will drastically improve with this method!

IMG_5435

And again, here is the sleeve with a 4 width and 5 length. Make sure you keep EVERY piece the same length/width and your pattern will fit together beautifully 🙂

IMG_5436

Coming from a very tall girl- if your little one needs added length they will be so much more comfortable with that longer armhole/neckhole/bodice!! I can hardly wear shirts that I don’t add that 1/8-1/4″ at my armhole… even though it seems like such a small adjustment it makes such a BIG difference in my fit! 🙂

This method can also be used with a shorter length to width— I used to do this for my little one when he was younger– he is big for age so he was in toddler sizing with a baby figure! He needed a much bigger around then his height and it worked wonderful for him!

Now go create that perfect custom fit!! 🙂


Filed Under: Fitting, Frequently Asked Questions, P4P University 6 Comments

  • « Previous Page
  • 1
  • …
  • 15
  • 16
  • 17

Featured Patterns

  • Mae Top - Bundle Mae Top - Bundle $20.00 Original price was: $20.00.$18.00Current price is: $18.00.
  • Mae Bottom - Bundle Mae Bottom - Bundle $20.00 Original price was: $20.00.$18.00Current price is: $18.00.
  • Loosey Goosey - Bundle Loosey Goosey - Bundle $20.00
  • Bacall Bodysuit Bacall Bodysuit $12.00
  • Privacy Policy
  • Refund Policy
  • Affliliate Program
  • Contact Us
  • About

Copyright © 2025 Patterns for Pirates

Copyright © 2025 · Genesis Framework · WordPress · Log in