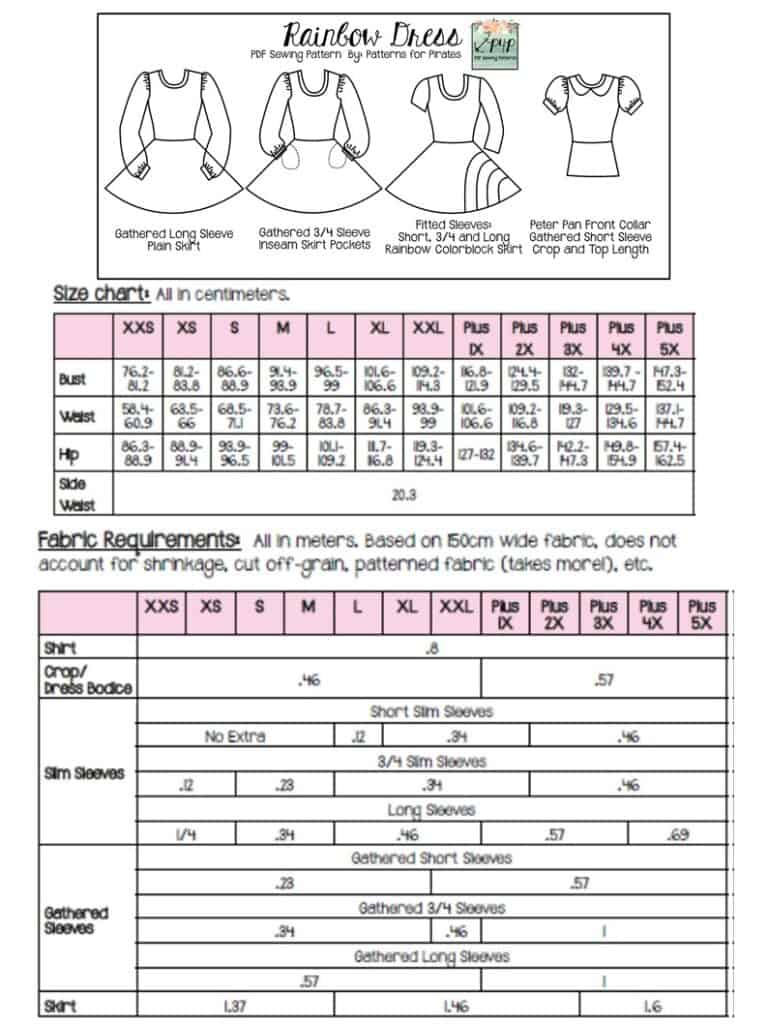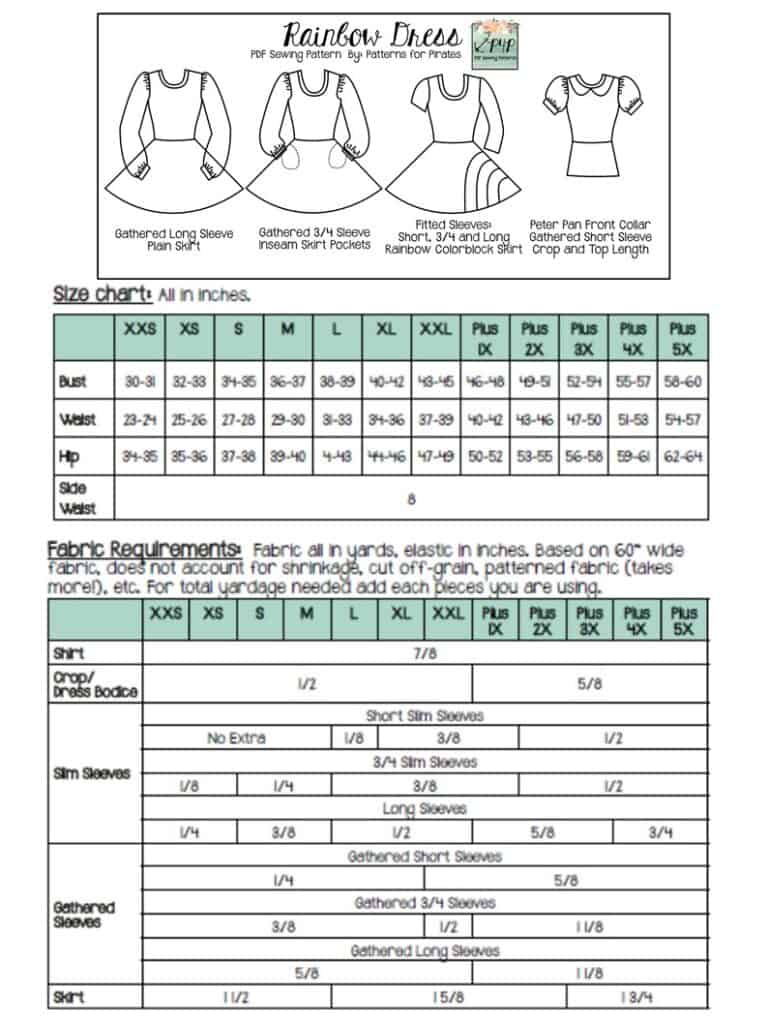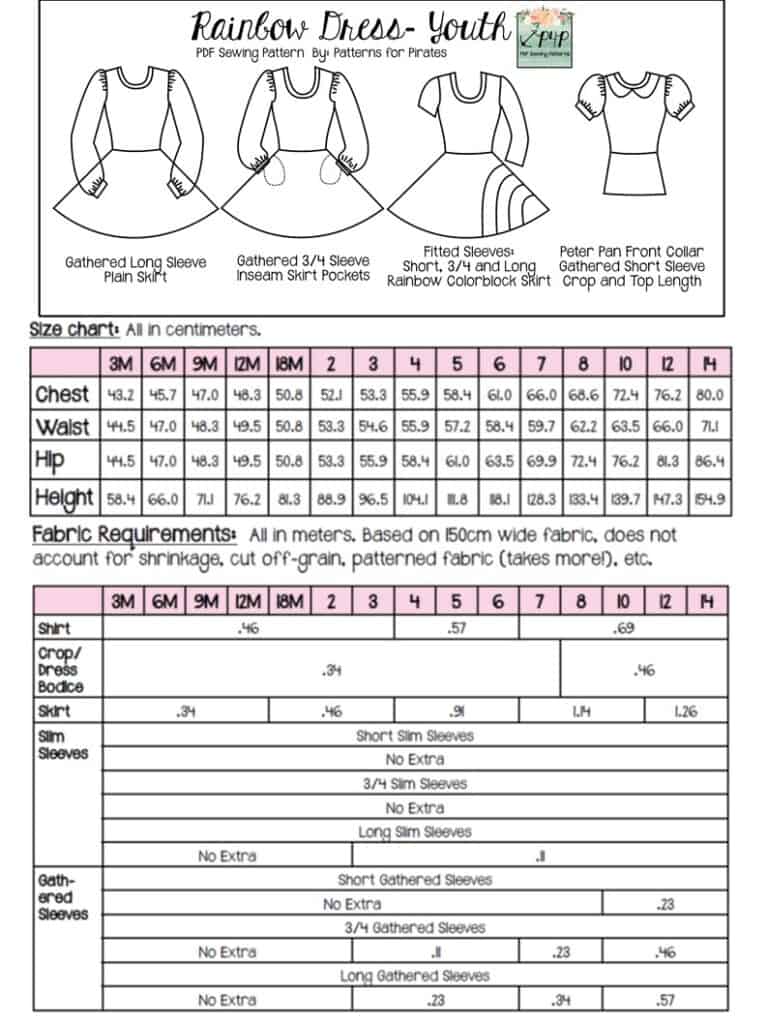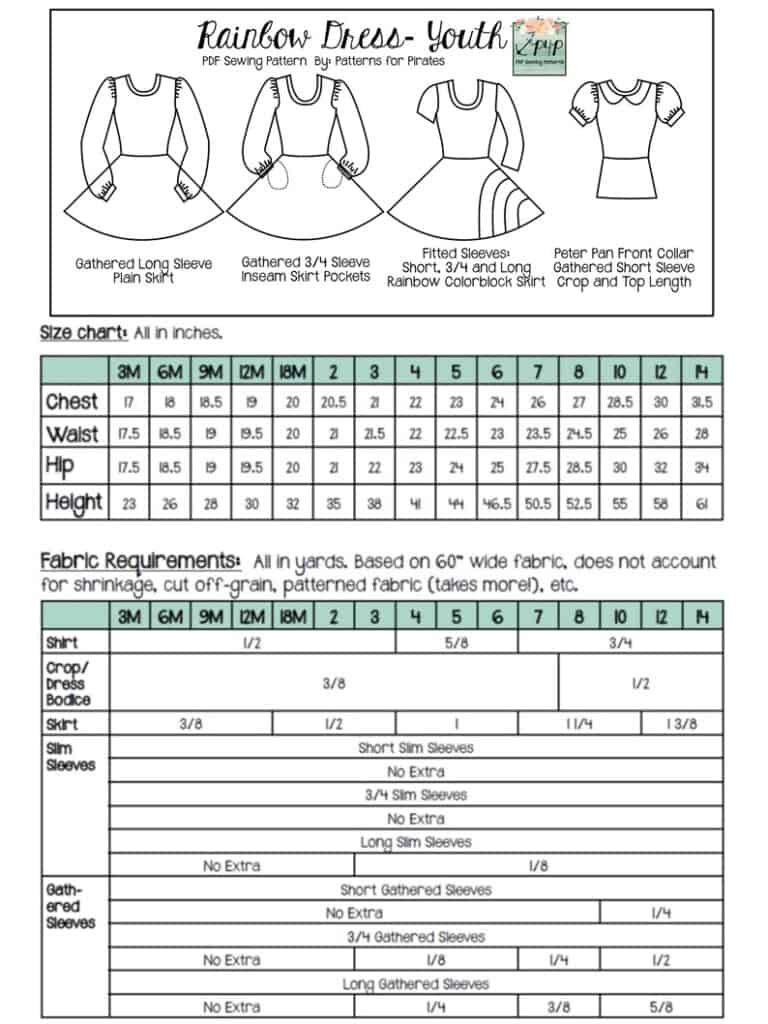
Welcome to the second day of our Rainbow dress Sew Along! Today we create the skirt by sewing the colorblock pieces and adding the the optional pockets. But let’s be honest here, who would skip the pockets? 😉
I love to lay the pieces in order (1 to 5) on the table, right side up to make sure I don’t mix them up. Place piece 5 over piece 4 and sew along the edge. I like to use my serger for this step (just remember the seam allowance is 1/2″!) however, you can sew the colorbloking part with a straight stitch. That part of the skirt will not be stretched when worn.
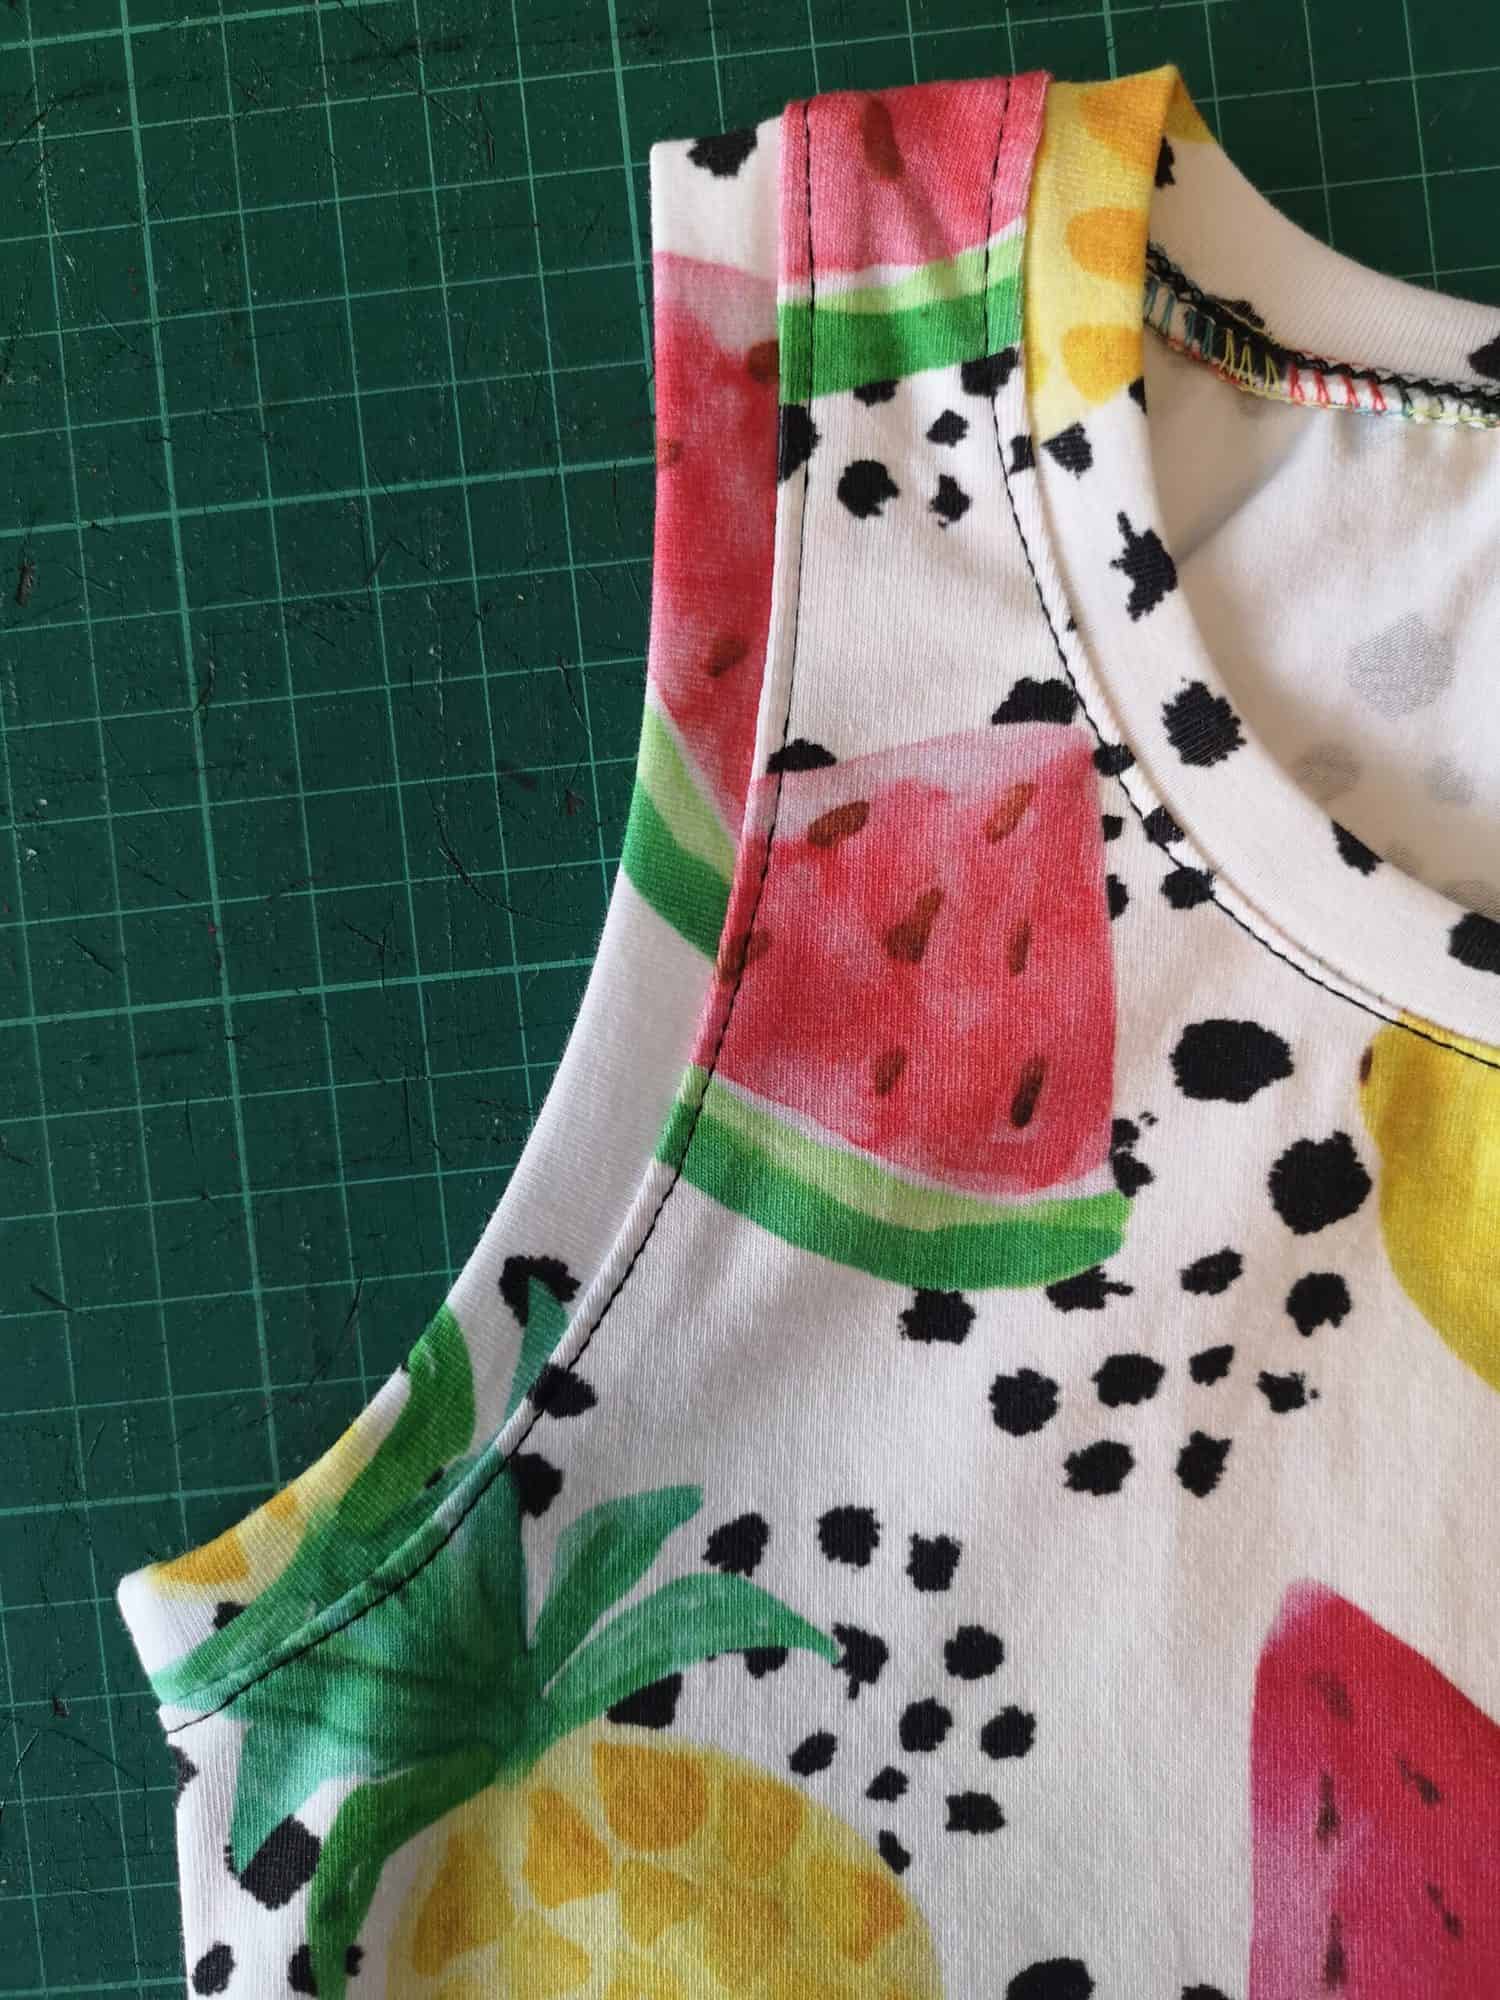
Top stitching the seams is optional, however, encouraged. I don’t like the feel of the seam allowance against my skin so I always top stitch it down. You can do this with your coverstitch, twin needles or just a simple straight stitch.
It’s pockets time! Using the marking on the pattern, place your pocket pieces on the skirt, right sides together. Sew this step with your sewing machine! I show you in today’s video how to alternate between the sewing machine and serger when you add pockets to the skirt.
You can see how I create my skirt in the video below. Once you complete today’s steps, post a picture of your progress in the comments of day 2 photo. You can find the Rainbow dress SAL album in the M4M/P4P sew along group on Facebook.
Rainbow Dress SAL – day 1 | Cut fabric
Rainbow Dress SAL – day 2 | Create rainbow skirt and add optional pockets
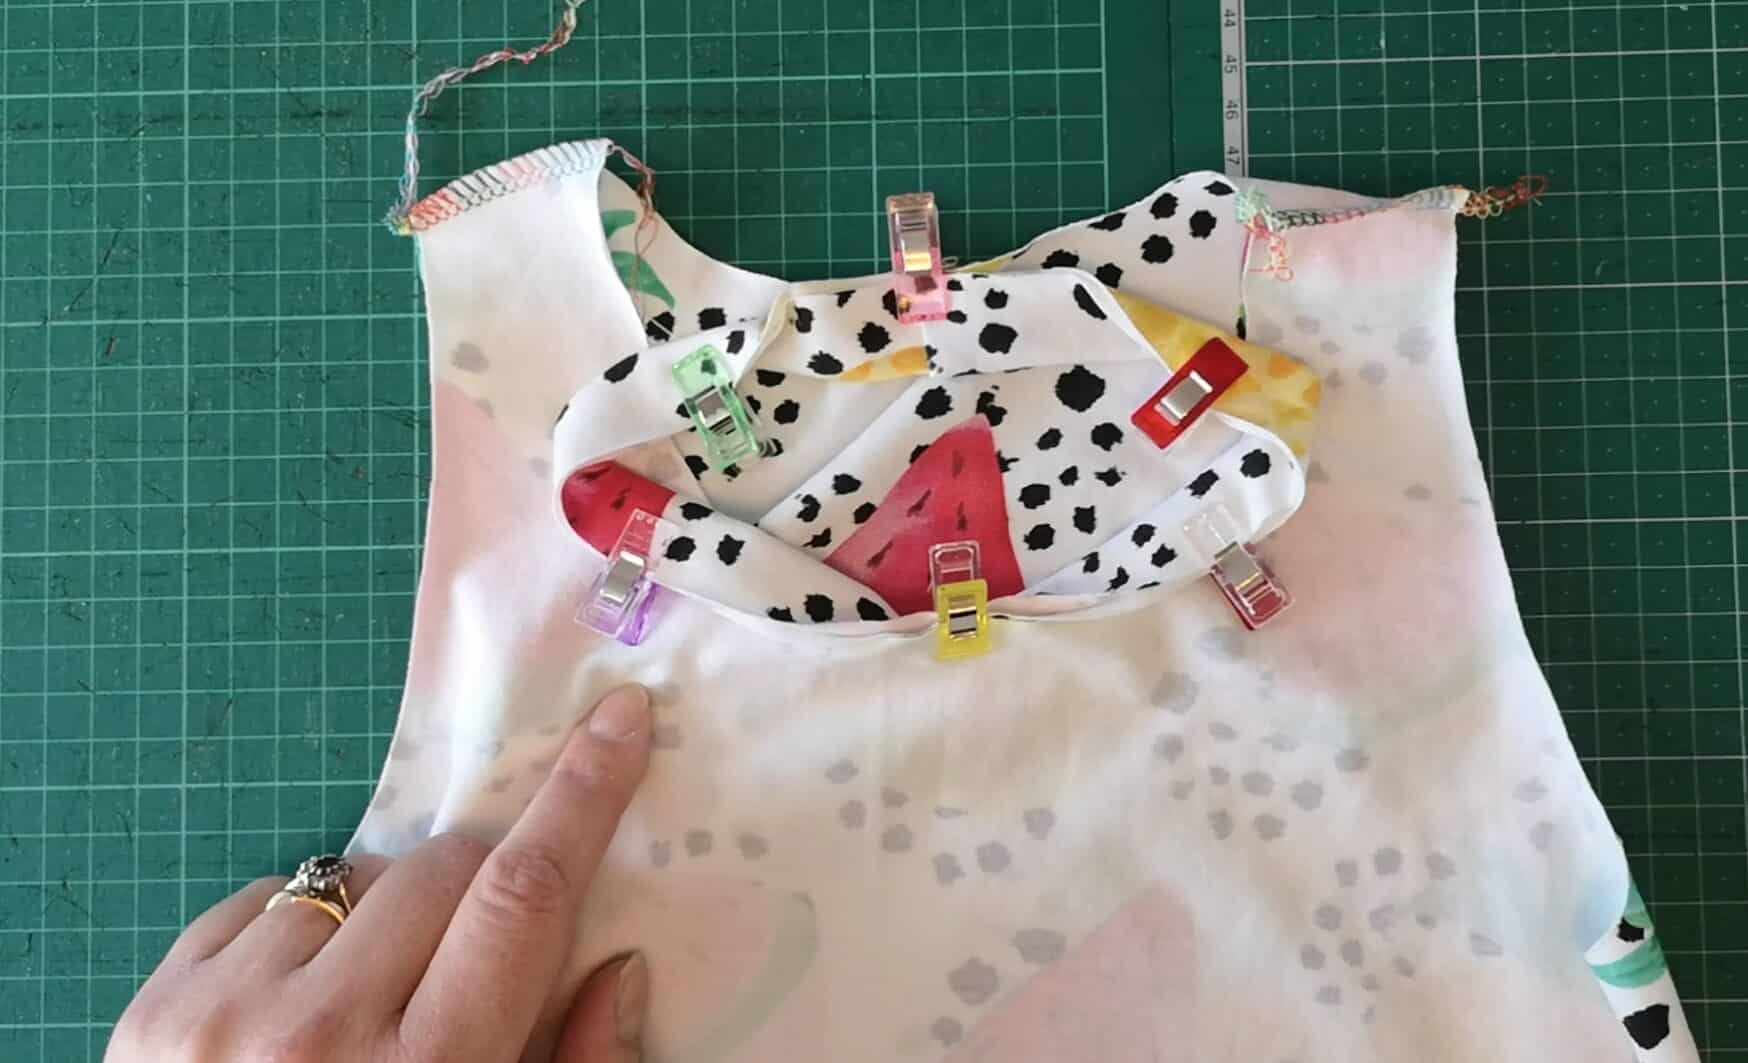
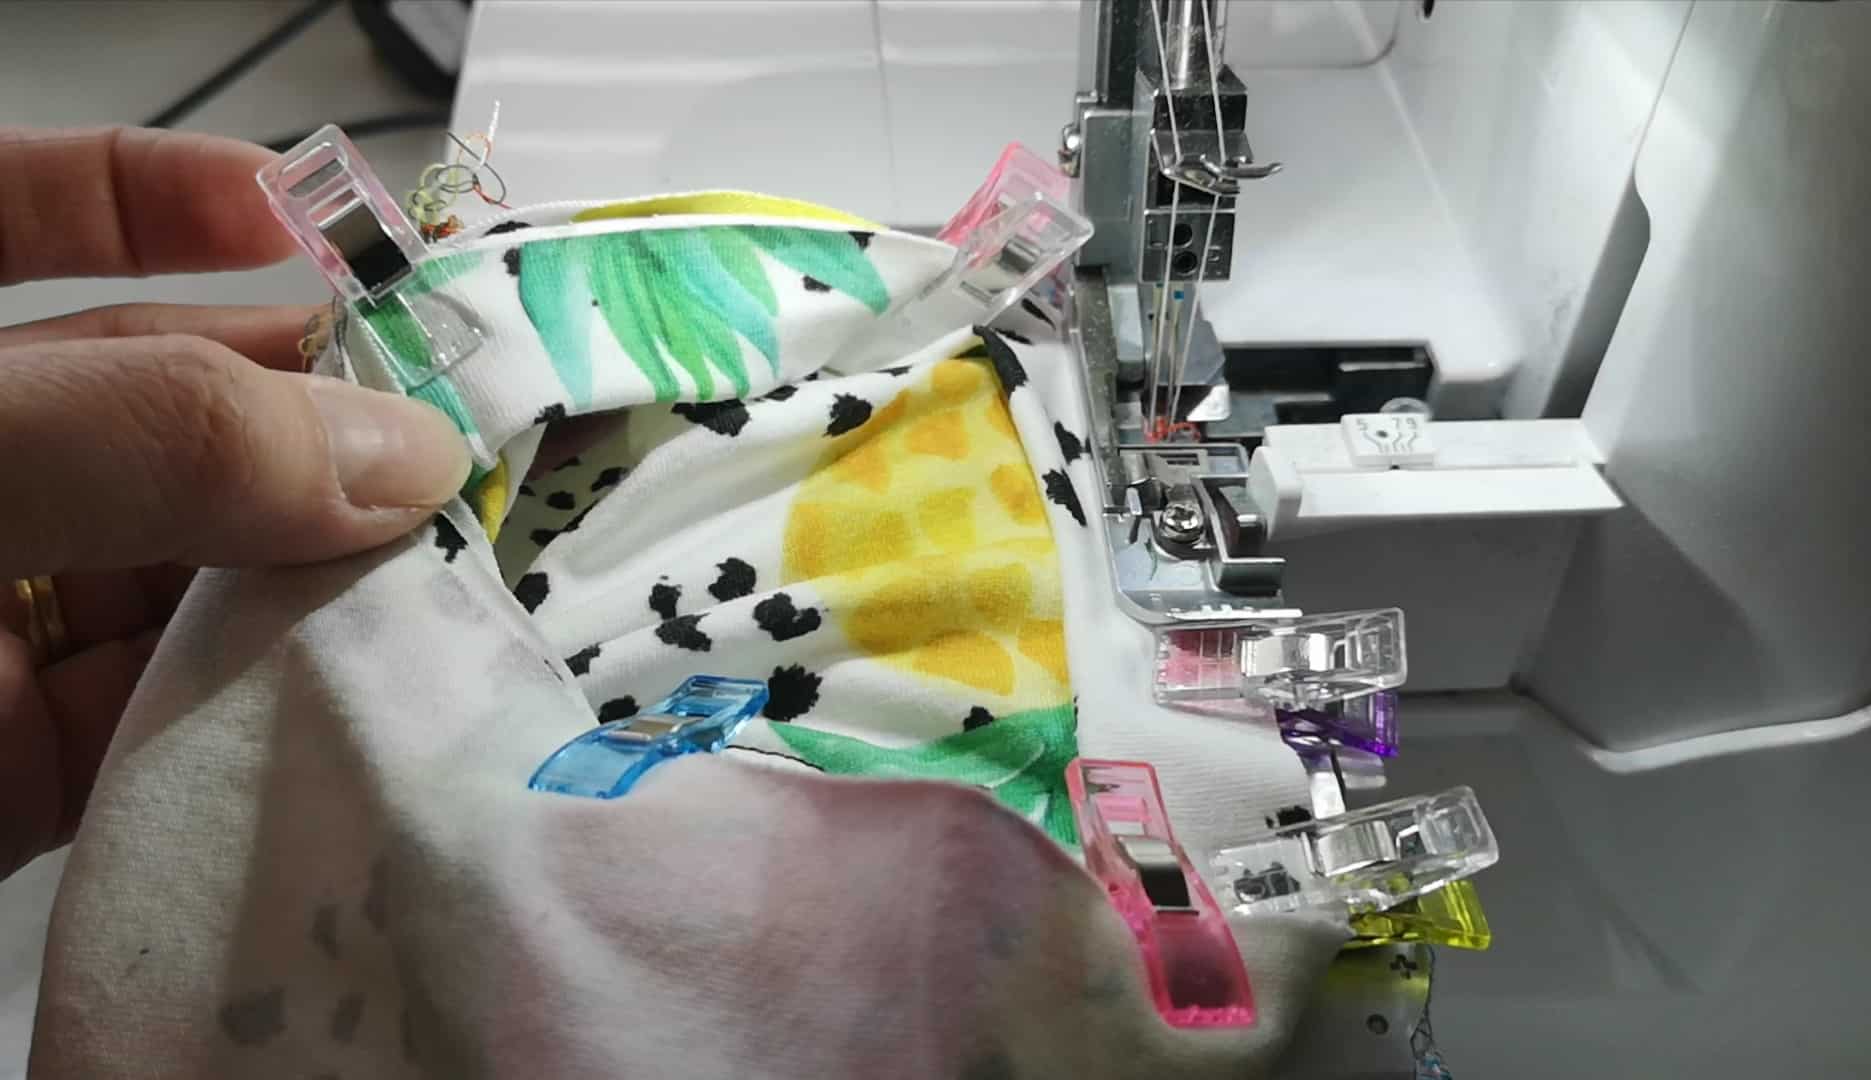
Rainbow Dress SAL – day 3 | Create collar
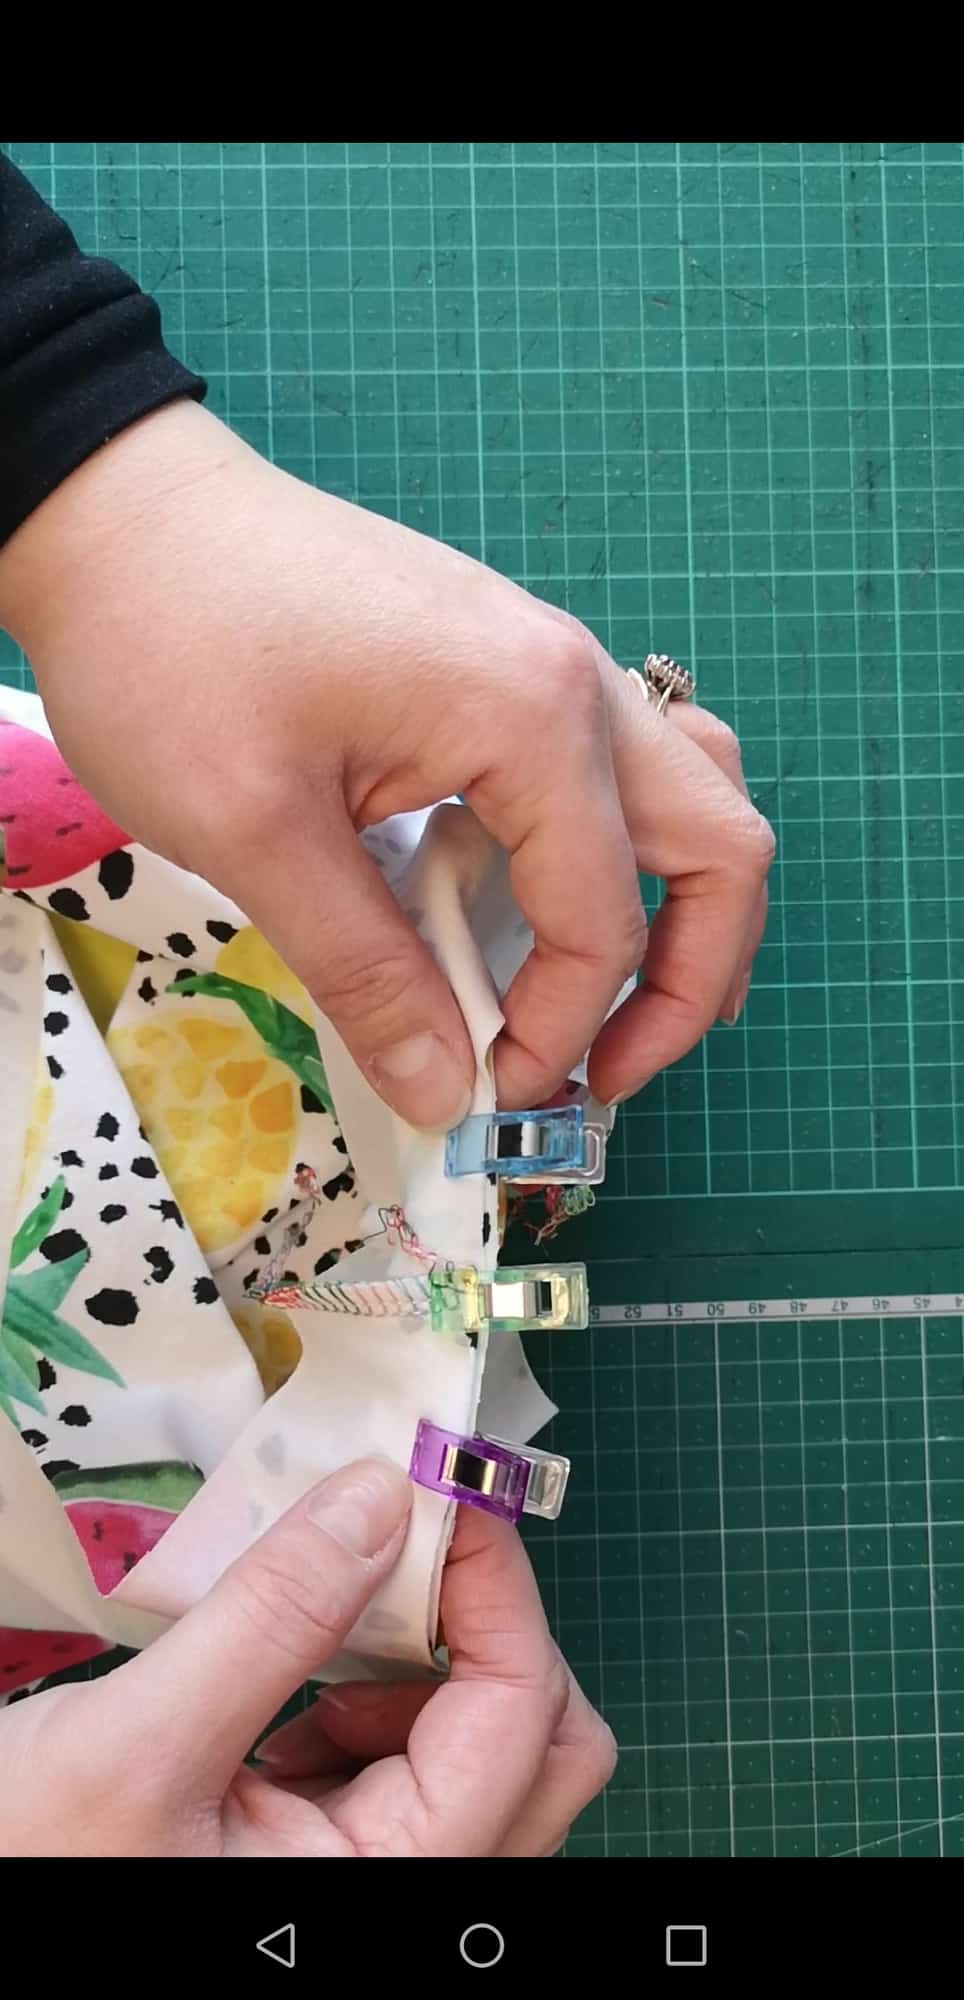
Rainbow Dress SAL – day 4 | Sew shoulder seams and add neckband
Rainbow Dress SAL – day 5 | Add sleeves and sew side seams
Rainbow Dress SAL – day 6 | Add skirt and hem
Rainbow Dress SAL – day 7 | Winners Announcement