Patterns for Pirates

P4P stylish, modern, wearable patterns

  • Home
  • Blog
    • Frequently Asked Questions
    • Pattern Releases
      • Free Patterns
    • P4P University
      • Fitting
      • Sewing with Stretch, Knit Fabrics
      • Sewing with Woven Fabrics
      • Sewing Machines
    • Sew-A-Longs
    • Fabric for Pirates
    • Pattern Hacks
    • Announcement
      • Blog Tours
      • Contest/Giveaway
  • Shop
  • Bundle Discounts
  • Gift Cards
  • My Account
  • Cart

P4P University- Waistbands

September 21, 2020

Ahoy Pirates! Today, we’re talking waistbands. We’ll cover some of the different types of waistbands that you’ll generally see in P4P patterns, the best fabrics and materials for constructing them, and some helpful tricks and tips to getting the very best results.

Types of Waistbands

There are many different types of waistbands out there in the wide world, but today I’ll cover some of the most common ones you’ll see in apparel sewing and in many P4P patterns.

First off, let’s talk about knit waistbands. These waistbands can be normal or high-rise, and are stretched to fit a garment’s waist.  Knit waistbands will need to be made with knits with excellent stretch and good recovery. You’ll want to look for fabrics like brushed polyester, cotton lycra, or cotton ribbing to make these. This type of waistband is easy to sew, with no casings, elastic or fancy stitching required. Hurray!

Generally with this type of waistband, you’ll line up the short ends of the waistband piece, right sides together, and stitch. Next, flip the waistband so the right side is up, then fold in half lengthwise, wrong sides together, and press. From there, you will quarter the band with pins and attach (more on quartering waistbands and other tips later)!


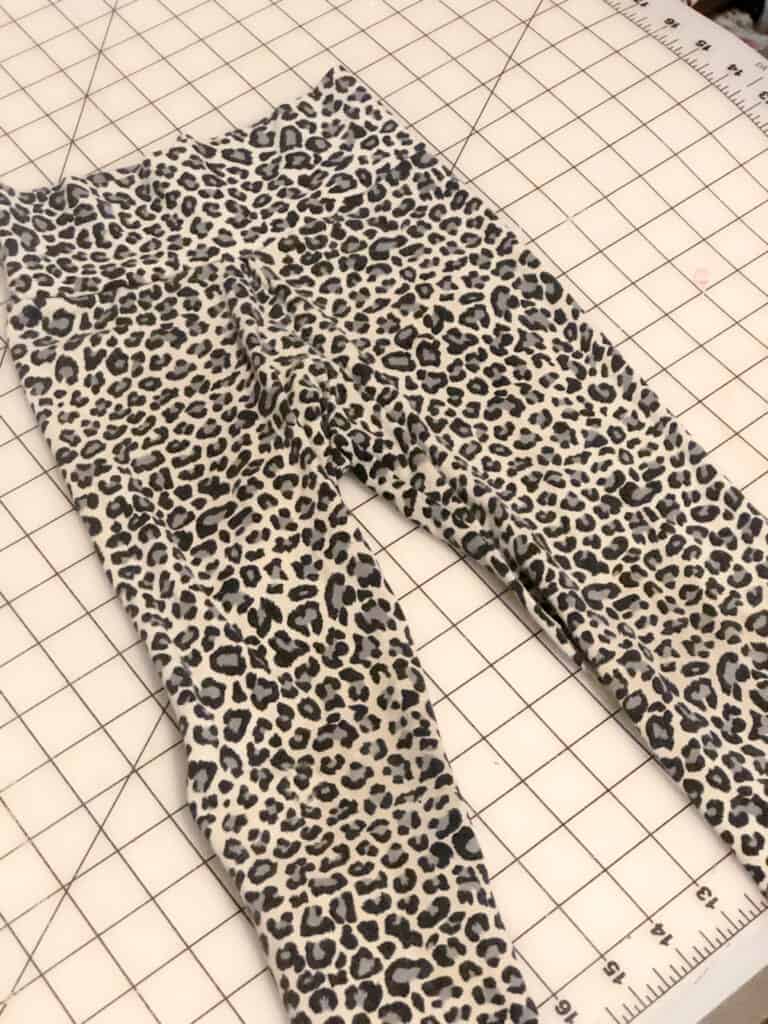
Here, I’ve used double brushed poly to sew a knit waistband onto a pair of Peg Legs. I’ve simply attached it by stretching it evenly, and sewing it to the garment with my serger, although a sewing machine will work just as well. Make sure to use a stretch stitch, like the lightening bolt, at the longest length setting!


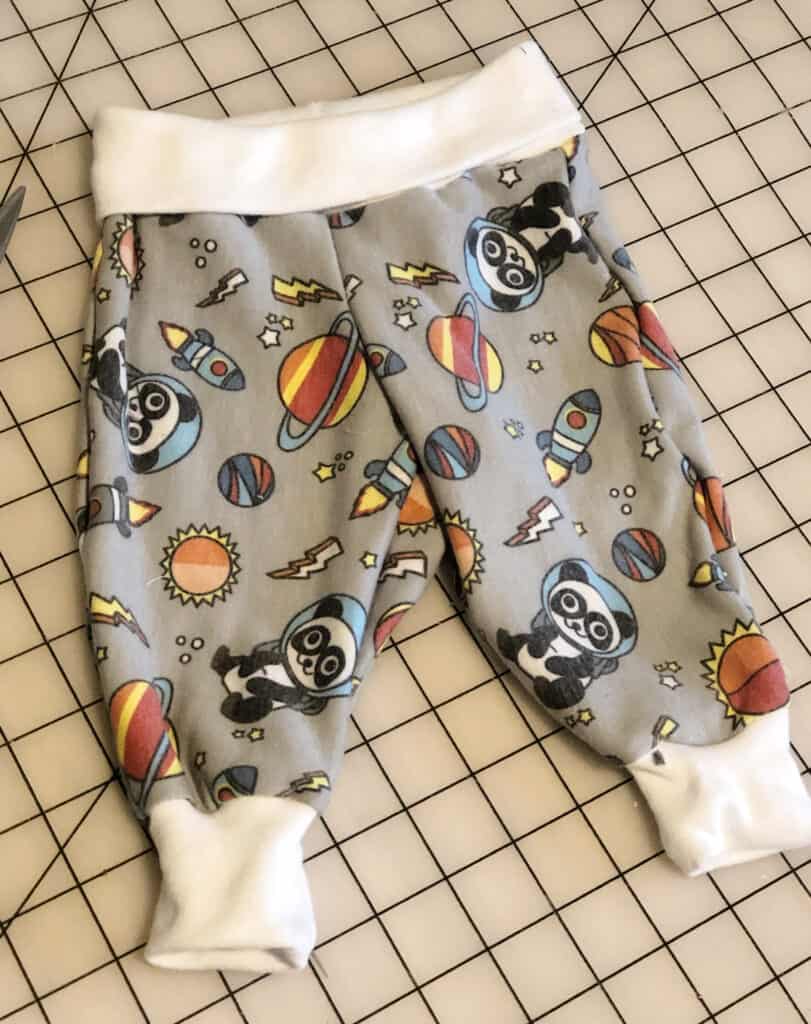
Next up, we have  tall/yoga waistbands. Yoga waistbands are made and constructed similarly to regular knit waistbands, but are simply “taller” and meant to be folded over for a even more comfortable fit. I especially like using yoga waistbands on clothing for children, as they are super comfy to wear! Brushed polyester and cotton lycra are excellent choices for these. I’ve used a yoga waistband here on a pair of Baby Bear Joggers, using brushed polyester.


Next,  we have enclosed elastic waistbands. Generally, this type of waistband is used for knit garments that have a little less vertical stretch or recovery and need a little “help” holding the garment up around the wearer’s waist.

To construct, you will sew together the short ends of the waistband casing, right sides together. Next fold lengthwise, wrong sides together, and press. Set aside. Take your elastic piece, and sew short ends together, using instructions for the specific pattern being used. Generally, you will be instructed to either overlap the two short ends and sew, or “butt up” the ends- pushing them together and sewing with a wide zig-zag stitch, but not overlapping. Next you will slip the elastic loop into your knit waistband casing, and sew together as one piece onto your garment. You may topstitch this seam afterwards, if desired.

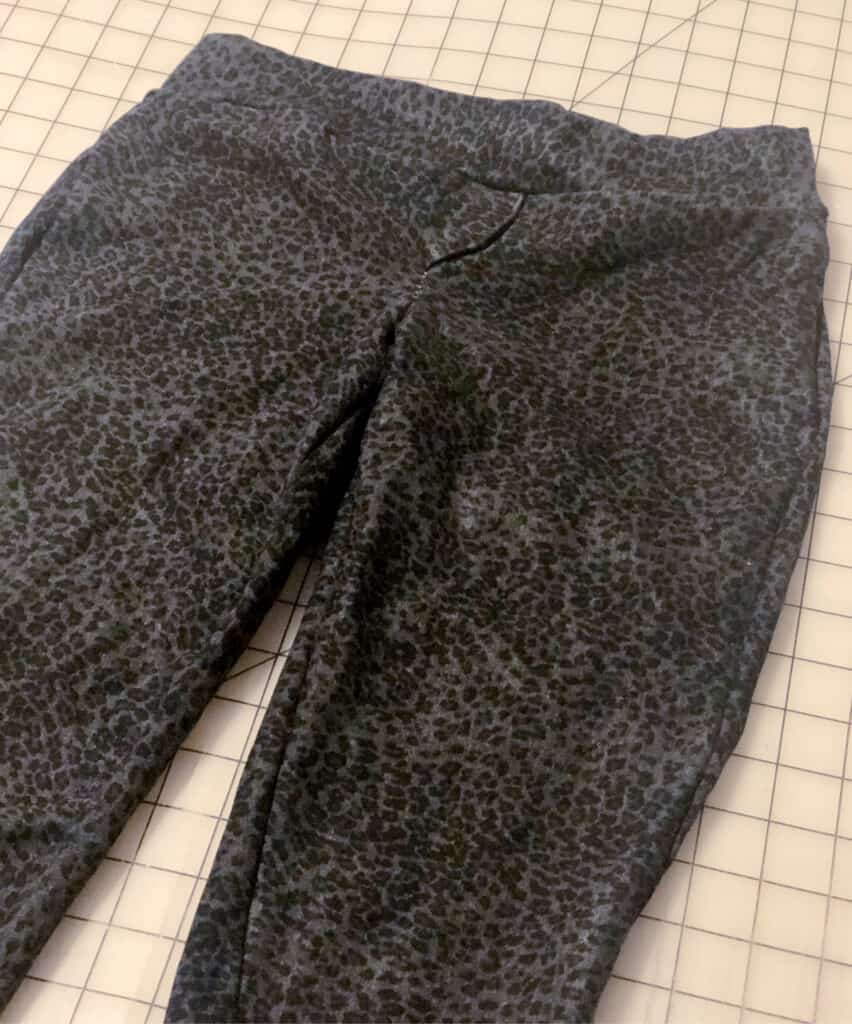
Here, I’ve made a pair of SOS Knit Pants with an enclosed elastic waistband. Although the fabric I used was a jegging material with little vertical stretch, the added elastic I used helps give the little bit of extra “oomph” needed to keep the pants up around my waist and snug-fitting.


Another style of waistband you’ll see often in apparel sewing is exposed elastic waistbands. These are waistbands that you’ll see in many applications, such as athletic shorts or undergarments. These will be generally created using plush back, underwear, or soft waistband elastics. It’s important to use these types of elastic, especially for undergarments, as they are much more comfortable and soft, and elastic will be up directly against the wearer’s skin.

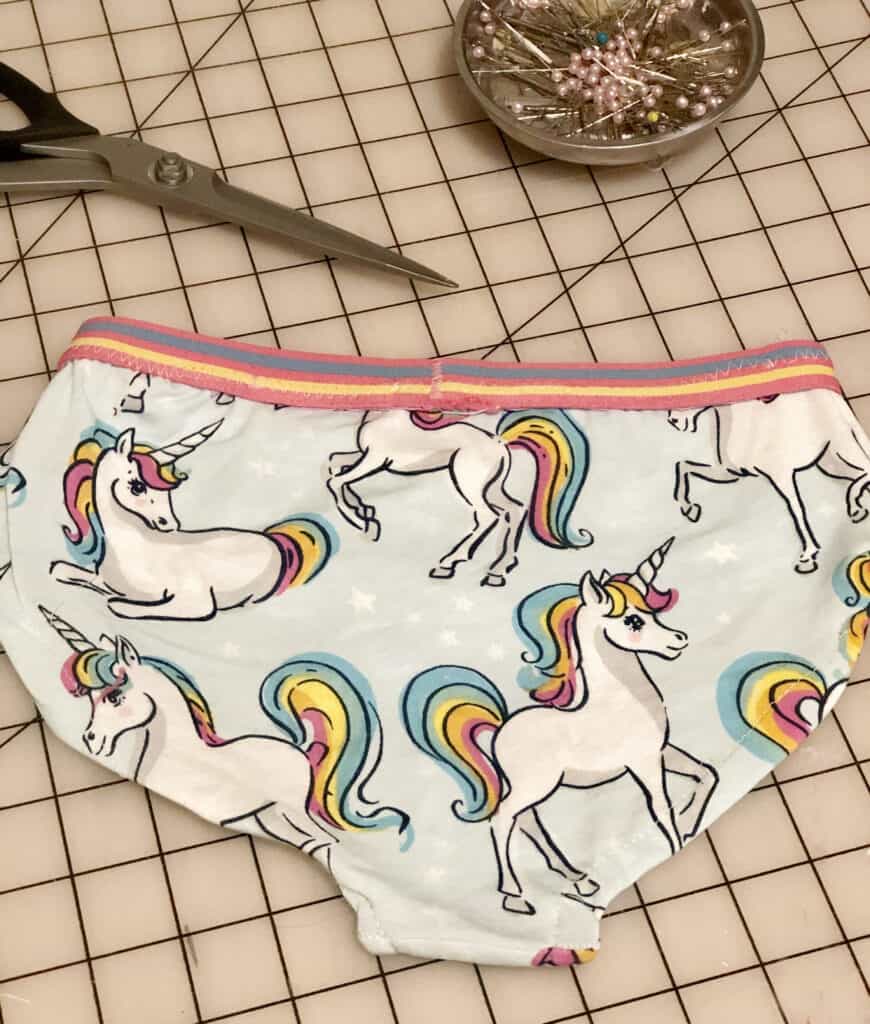
On patterns such as the Fierce Undies pictured here, the elastic used will be “butted” together before being sewn, not overlapped. This is because overlapping will make the exposed elastic waistband too bulky.


Tips and Tricks

Just as there are many different types of waistbands out there in the sewing world, there are just as many tips to make sewing them easier! Here are just a few to help you along the way:

1. With knit, yoga, and enclosed elastic waistbands, serge or baste the raw edges together once you’ve folded lengthwise, wrong sides together, and before attaching to the garment. This will essentially take those two layers of fabric of the folded waistband and turn them into one, making it easier to attach them to the garment in a clean and professional-looking way. Remember, if you serge the raw edges of your waistband before attaching it to your garment, DO NOT CUT ANY OFF!

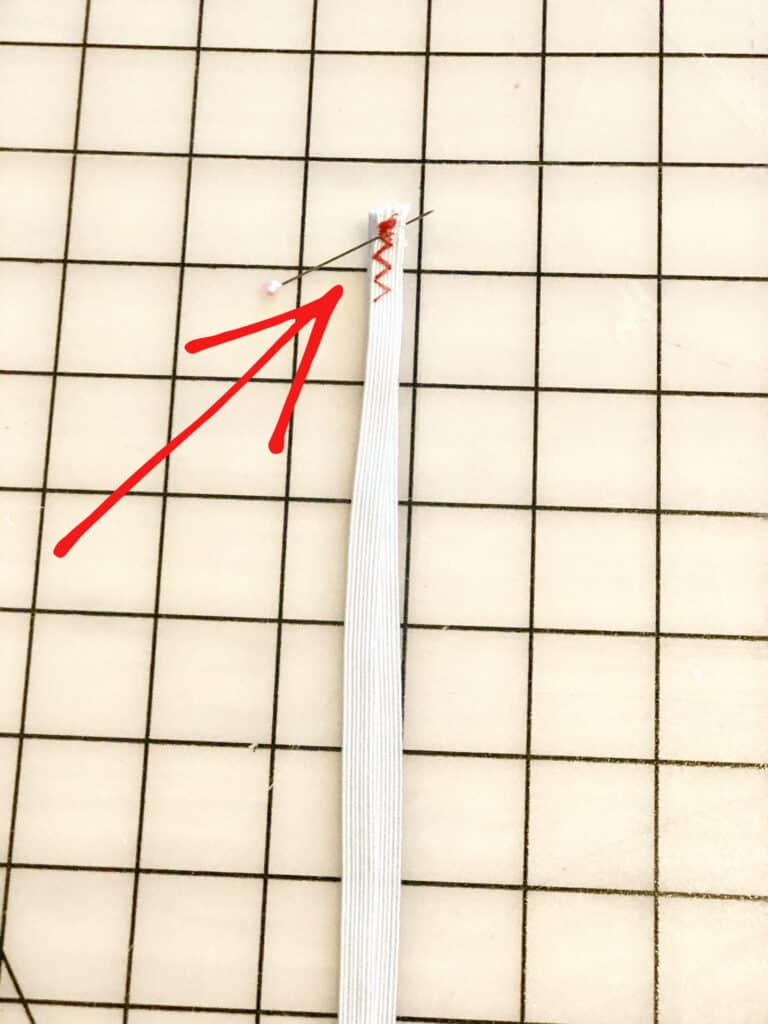
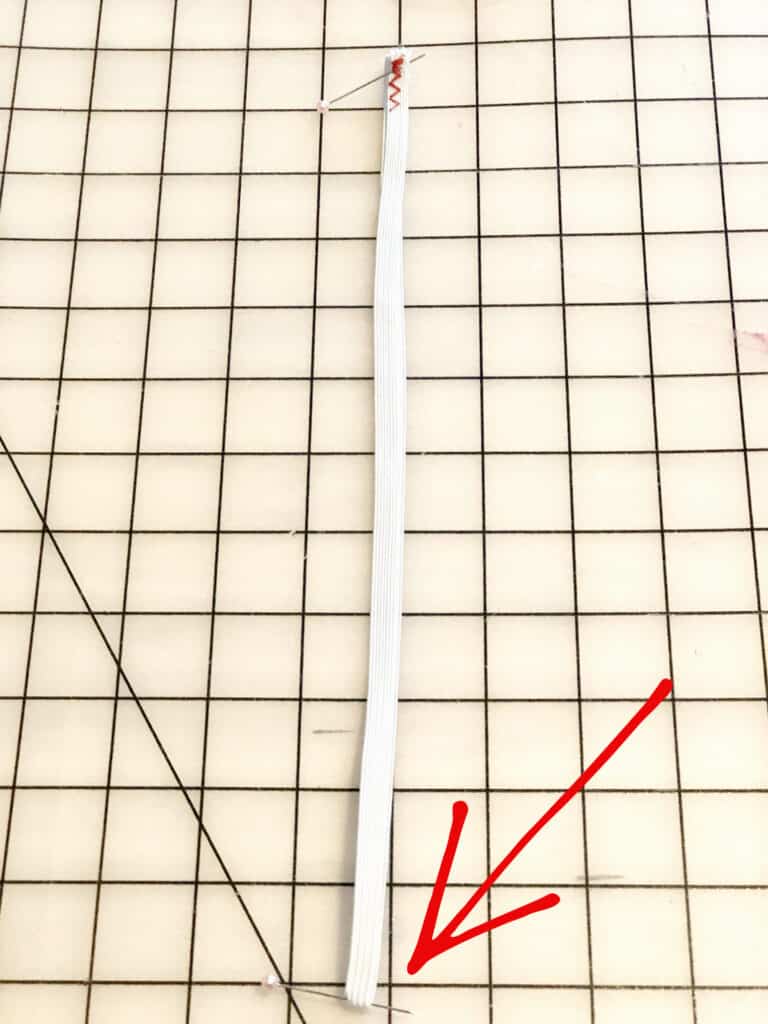
2. ALWAYS quarter your waistbands before attaching them to a garment! What is quartering? It’s equally dividing the waistband into fourths, so you can better ensure that the waistband will be evenly stretched across the garment’s waist.  It’s easy to do:

 First, sew the waistband or elastic together at the short ends, as directed by the pattern. Pin or mark the point of the seam.

Next,  fold in half to find the half point. Pin or mark the half point.

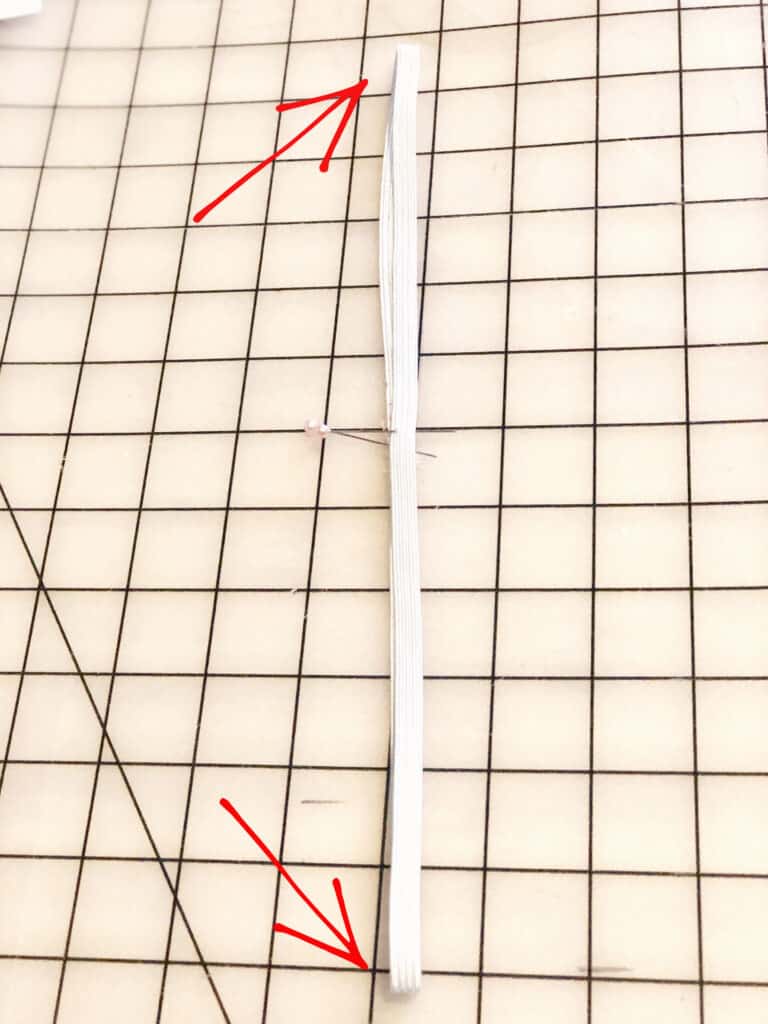
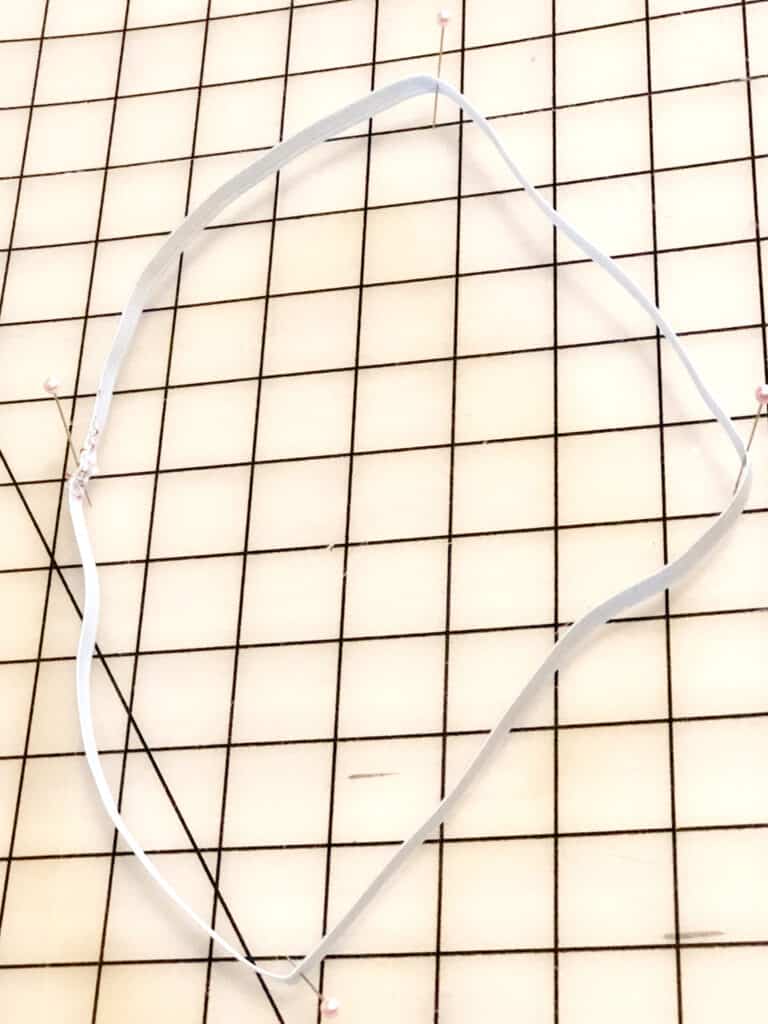
Now, take the two marked points (the seam and half point) and fold the waistband or elastic so that they meet in the center. Pin or mark the folded edges on either side to find the quarter points.

And there you have an evenly quartered waistband! This might sound like an extra step, but trust me, it’s one that will save you time by                          ensuring that you don’t have an unevenly stretched waistband (hello, seam ripper!) and will give you the most professional- looking finish.


3. SAVE your scraps! Especially with youth apparel, waistbands usually take very little fabric, and can be excellent scrap-busters. So next time you make something with a stretchy fabric with great recovery, make sure to stash those extras away for a rainy day!


That’s it for now! Just a few examples of some of the waistbands you’ll encounter while sewing some gorgeous, handmade apparel. No matter which waistband is required for your pattern, always make sure to quarter those bands, have fun, and share your beautiful makes with us over at Patterns for Pirates’ Facebook page!

Caitlin

Filed Under: Frequently Asked Questions, P4P University, Uncategorized Leave a Comment

P4P University – Easy gathering methods

April 3, 2018

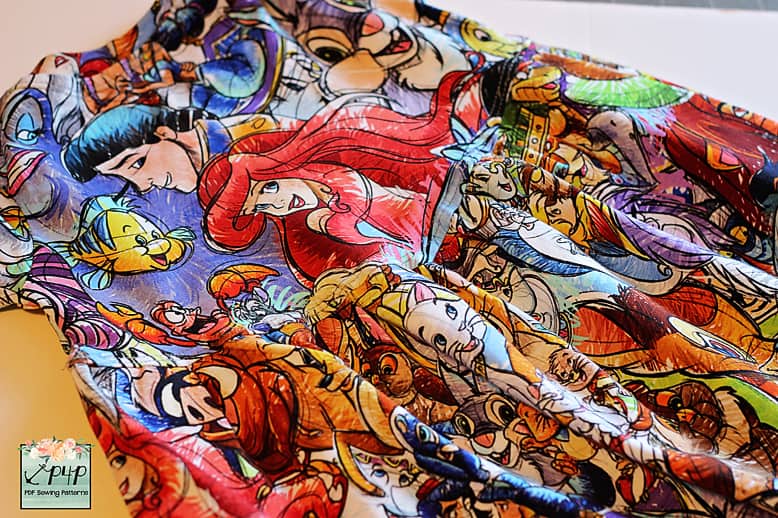
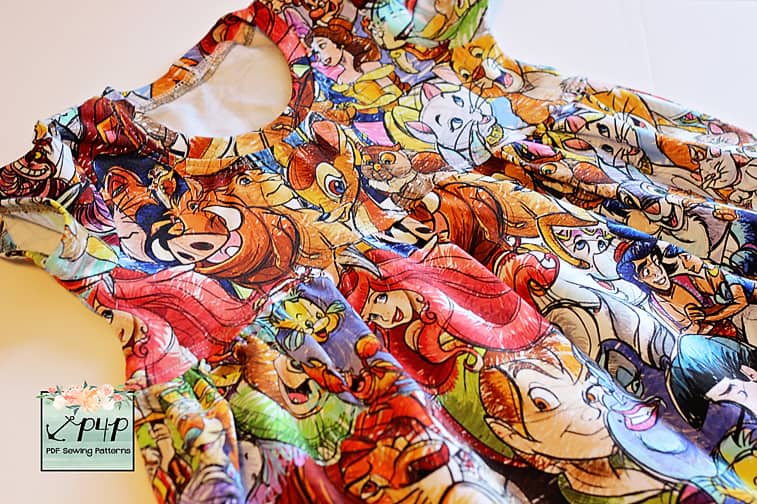
Hello, pirates! Today I wanted to talk to you about gathering and show you 4 of the easiest gathering methods that do not require investing in new gadgets or feet for your machines. All the methods I’m showing are applicable to both woven and knits.
Gathering with your serger

My favorite method of gathering is using my serger and its deferential feed. You will be switching your differential feed to the highest setting possible (in my case 2.0) and tightening the tension of your left needle. It is very important to test your new settings on a piece of fabric that is the same as the fabric you intend to gather. You will be able to see if you need to loosen the needle tension, tighten it or fidget with the right needle too.

For more tips and details watch the video below.


Gathering with two rows of basting stitches

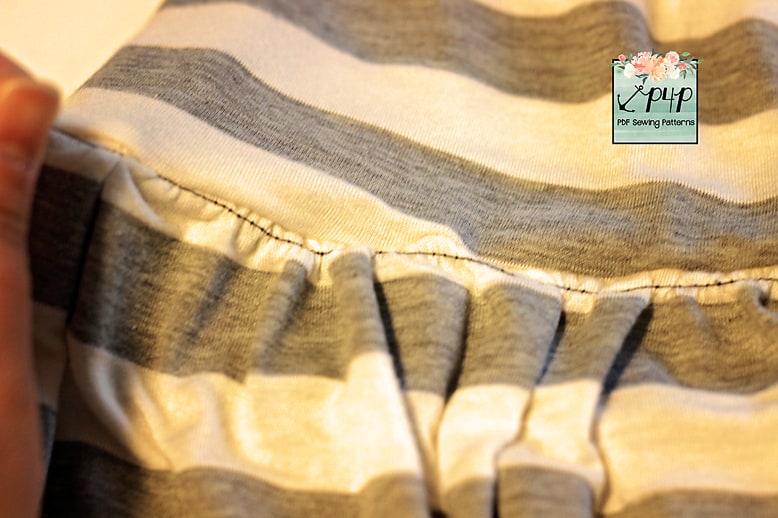
The most popular method of gathering, and the one most often used in our patterns (Judy’s favorite) is gathering with two parallel rows of stitching. This method uses your sewing machine.

Note: your first row of gathering stitches should be about 1/4″ away from the edge and your second one 5/8″ away.


Tip: For the basting stitches, use a different color thread than the fabric do you can remove it easily.

Gathering with elastic

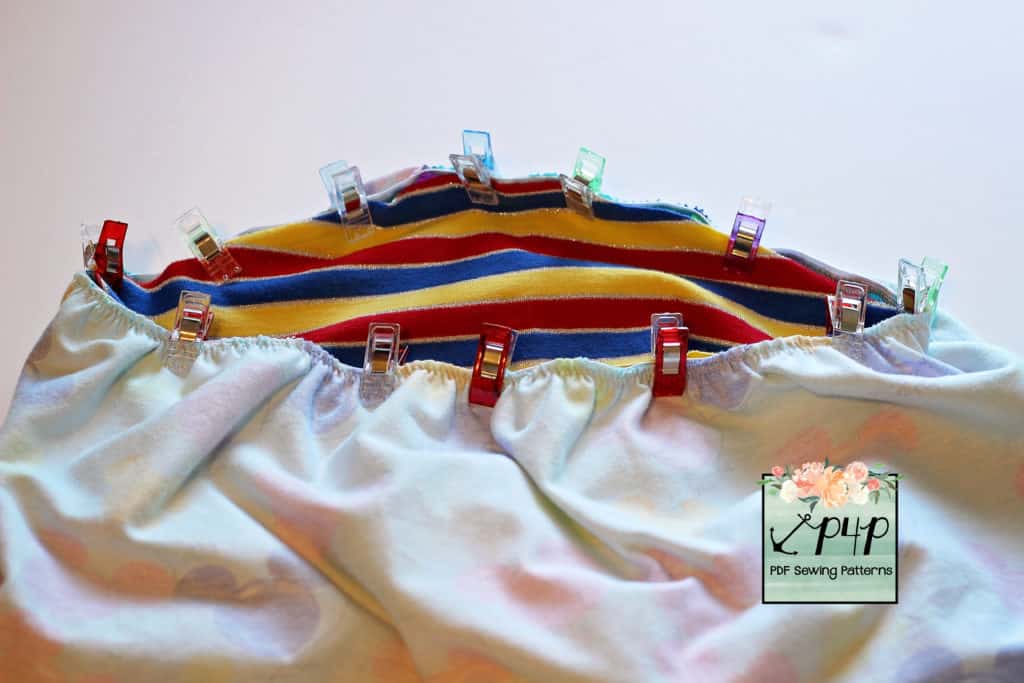
The next gathering method I wanted to show you is one that uses elastic, clear elastic or knit elastic. Avoid using no roll elastic!  Also, make sure to exercise (stretching it a few times) before cutting.

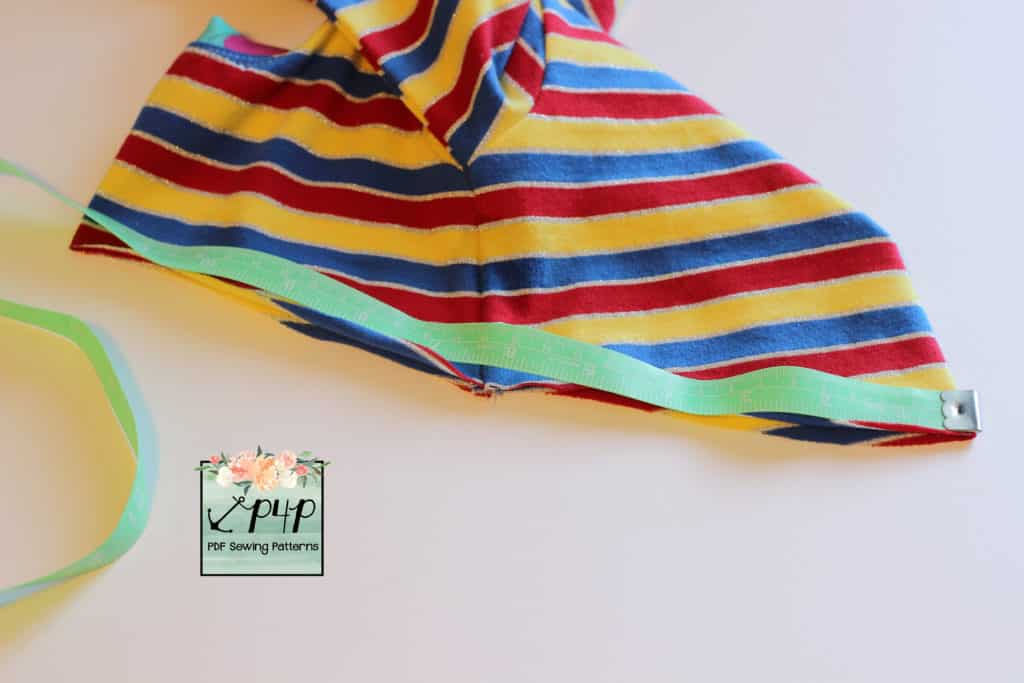
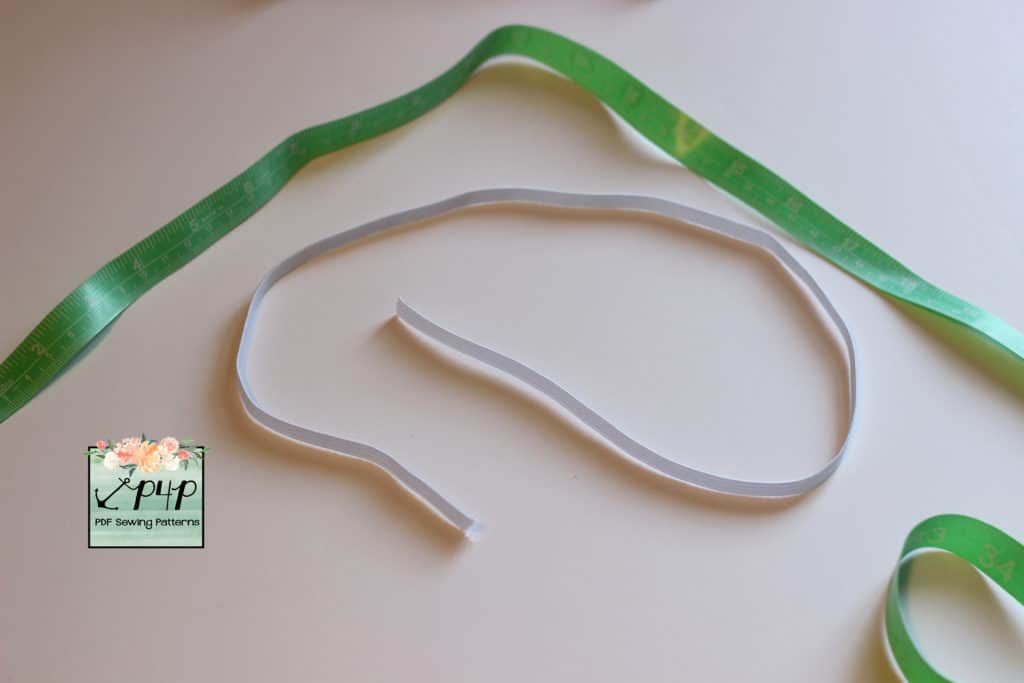
Start by measuring the opening of the bodice and cut a pieces of elastic that matches the opening. Don’t forget to add seam allowance.

Note: I used 1/4″ knit elastic. This method works beautifully with clear elastic.

Sew the elastic in a loop and mark its quarters. Follow the method as in the video below.


Gathering with yarn or floss

The last method I wanted to show you is commonly known as gathering with floss. You will simply sew a wide zig zag stitch over a floss or yarn and simply pull the ends to gather. Super easy!


Tip: if you’re using yarn, use thin yarn and preferably a color different than the fabric you’re gathering so you can easily pull it out.

There you have it, 4 easy gathering methods that will help you achieve beautiful, even gathers for your skirts and ruffles. No matter which method you use it’s important to hit the seam with a nice hot iron and steam (as much as your fabric type will handle), this will help if you accidentally stretched the bodice at all while attaching as well as set those gathers nicely.  Now go sew a Boundless or a Sunshine dress and show off your new gathering skills.

Filed Under: Frequently Asked Questions, Uncategorized 1 Comment

How to shorten zippers

February 23, 2018


Ahoy pirates! Today on the blog I wanted to show you how to shorten different style zippers. With the new Go-To Jacket patterns releasing, you will be playing around with various size zippers so I find that it’s easier to just stock up on longer zippers (30-36″) and then shorten them based on your needs.

*Plastic separating zippers

Let’s talk about plastic separating zippers first. They are my favorite zipper style for kids and women casual wear. And shortening them is a peace of cake. There’s no need for any fancy tool or muscles 😉

Simply grab a pair of scissors that you do NOT use to cut fabric, a measuring tape and a lighter. Measure the length of the zipper you need for your jacket, mark it on both sides of the separating zipper. Move the zipper pull down and cut the desired length. Follow the instructions I give you in the video below to create a “zipper stop”.

Note: since you’re working with an open flame (if you don’t have a hot knife) please be extra cautious and avoid having your little ones “help out” 🙂

TIP: Always measure 3 times before cutting the zipper, just to be sure. 

*Metal Separating Zippers

The other separating zipper you may use for hoodies or jackets is a metal zipper. Walmart always carries them so, on a pinch, it’s a good alternative for plastic zippers.

Shortening a metal zipper is more time consuming and it requires a little bit of elbow grease and more tools but it’s totally doable. Just grab those non fabric scissors, a measuring tape and some long nose pliers and watch the video below.

TIP: Mark on both sides of the zipper where the waistband meets the bodice, the pockets and the hood. This will make it a lot easier to make sure that everything matches when you zip up the jacket.

*All purpose zippers

If you are making a Wiggle dress  and you need to shorten the all purpose zipper you are using you will only need your scissors, a measuring tape and some thread. Simply mark on the BOTTOM of the zipper (not the top as you did for separating zippers) where you would like for the zipper pull to stop.

Sew by hand a zipper stop at the mark you just made. Simply sew back on forth over the zipper teeth a few times. You can certainly use your sewing machine for this step but I find it easier to just hand sew the thread zipper stop. Cut the zipper 1″ below  the thread zipper stop you just created and seal your zipper ribbon with a lighter. Optionally, remove the plastic teeth below the thread zipper stop. Tadah! You have shortened your AP zipper in minutes.


Now that you have shortening zippers all figured out, go and sew all the Go To Jackets and make sure to post them in the Patterns for Pirates group!

Filed Under: P4P University, Sewing Techniques 6 Comments

P4P University – knit cuffs

January 9, 2018

Ahoy Pirates! In our first P4P University blog of the year I wanted to give you a few tips and tricks to make adding knit cuffs to your projects easy peasy. Whether you’re sewing for yourself, your significant other or your little ones, adding cuffs to your sleeves or leg openings can be a tedious job. We can change that!

*Choose the right fabric for the cuff!

As I mentioned in the Neckbands 101 blog post, choosing the correct fabric for your cuffs will make a huge difference. The best one is rib knit or ribbing. If you do not have any ribbing handy or the colors you have do not work for your project the next best thing would be cotton spandex. I mainly use cotton spandex in for my kids’ shirts and joggers cuffs as I like to coordinate it with the main fabric. Whatever fabric you pick, make sure it has at least 50% stretch and excellent recovery.

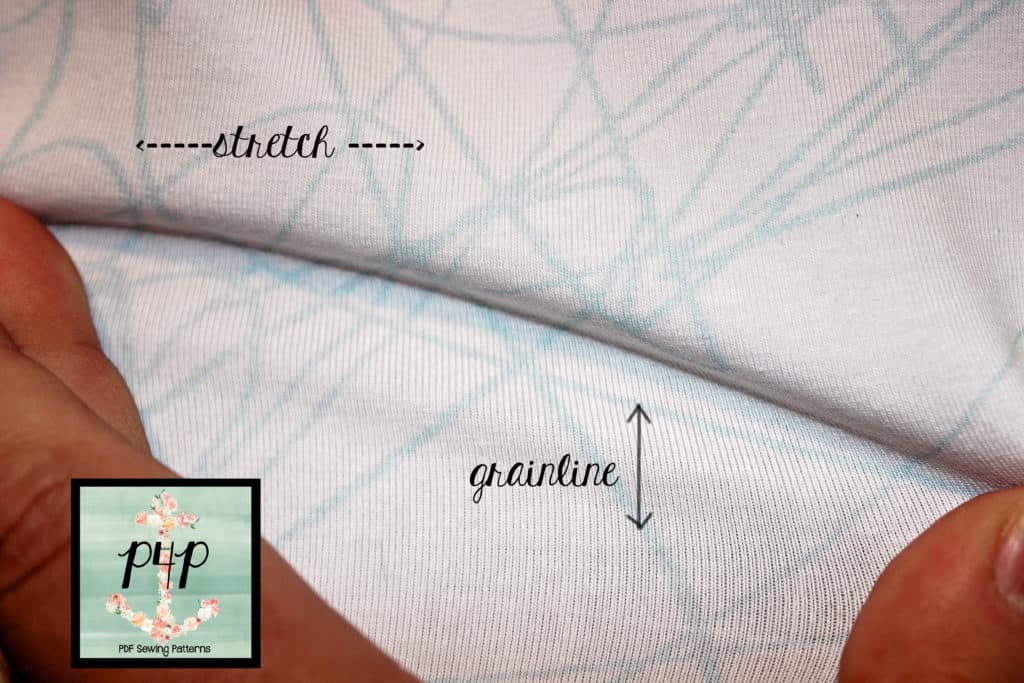
*Always cut the cuff with the greatest stretch horizontally.

Always cut your cuffs cross grain! Even if the fabric you use stretches over 50% in both directions, you should never cut against the grain. Read all about the importance of “the grain” in Roberta’s blog post, When It Goes Against the Grain. 

*Press your cuffs!

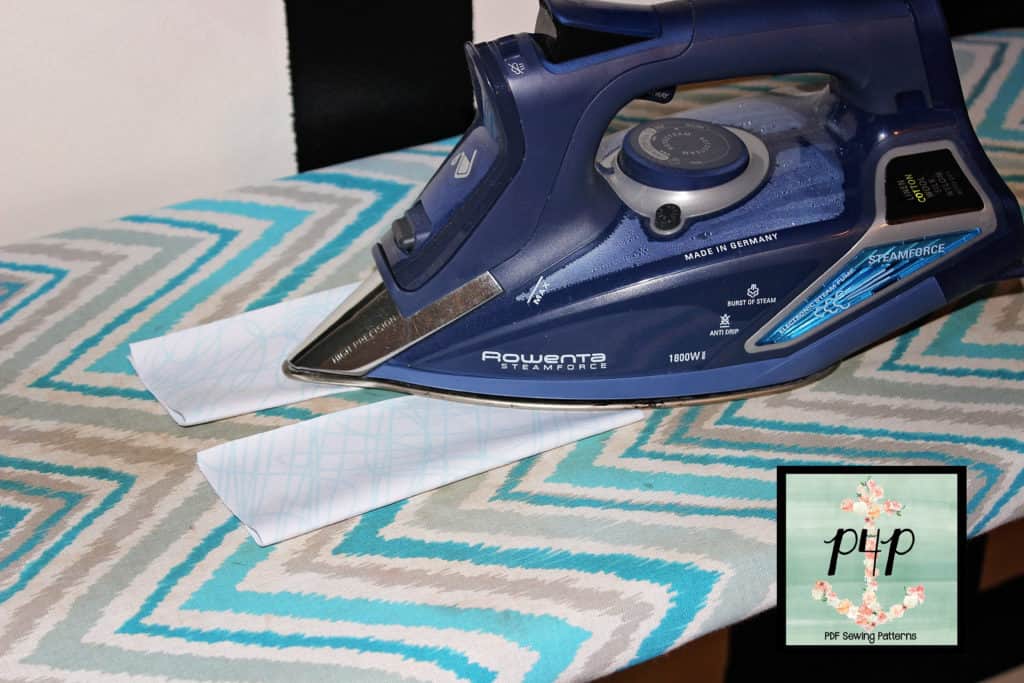
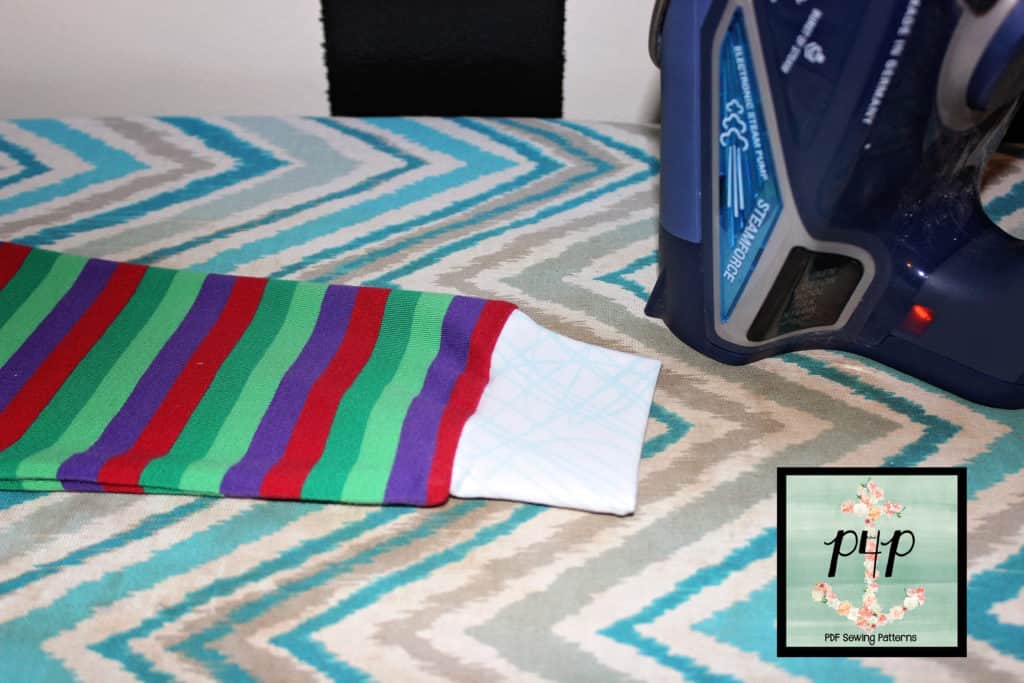
I know I talk about pressing a lot in my blogs, but you have to believe me, it makes your sewing life so much easier. I recommend grabbing those cuffs and giving them a good steam press as soon as you cut your fabric. This will create a memory hem that will make it so much easier to fold them once you sew the “loop” closed.

Press your cuffs after you sew them on too! 🙂

*Snip the seam allowance to create less bulk

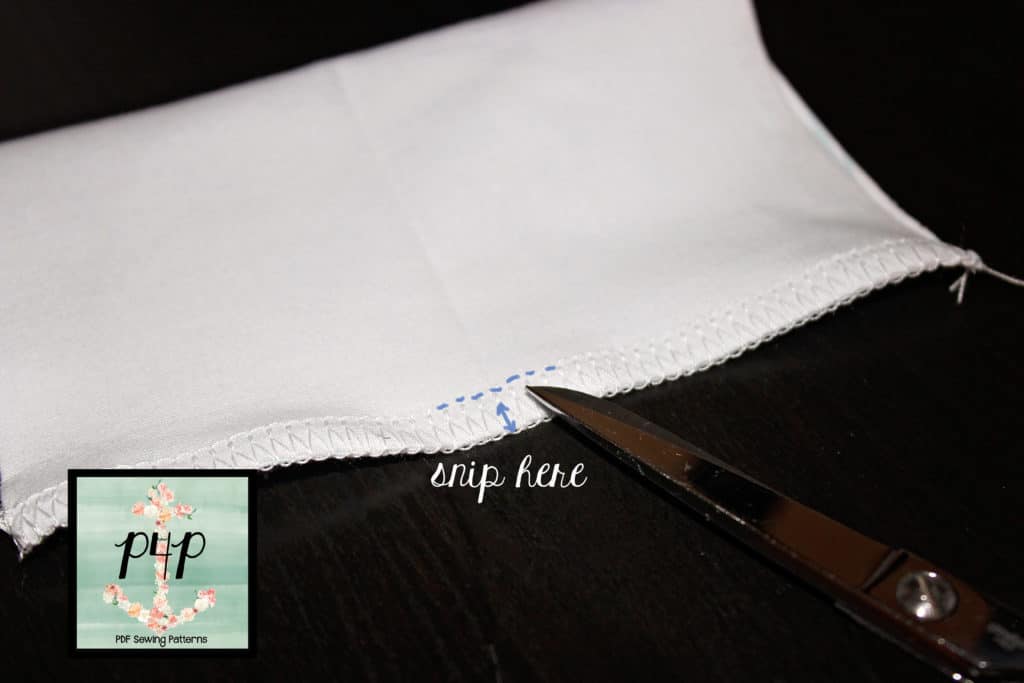
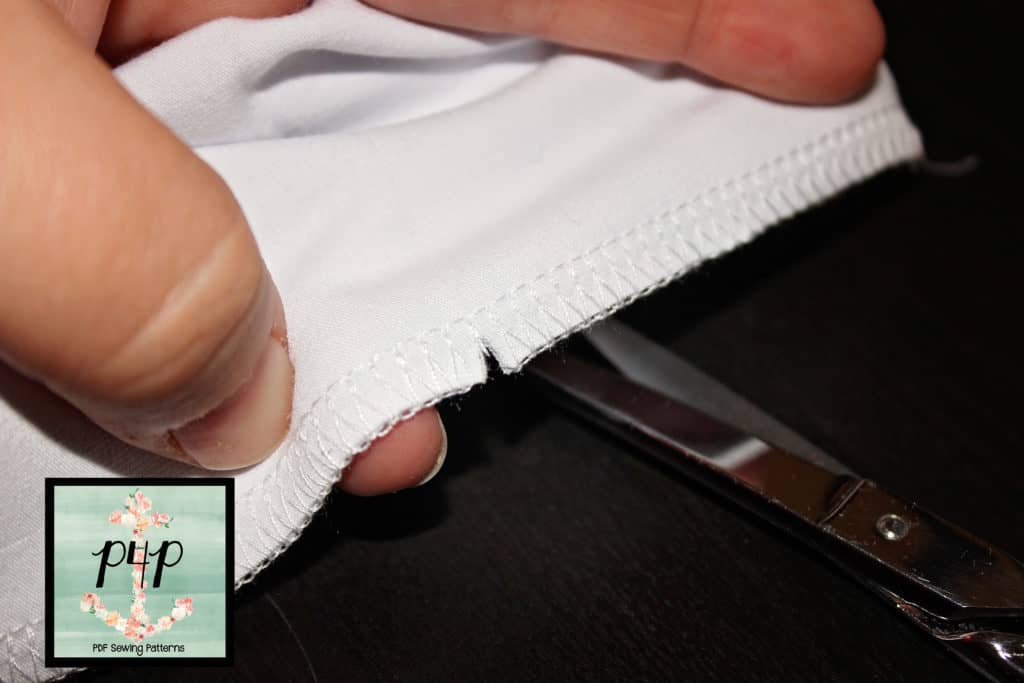
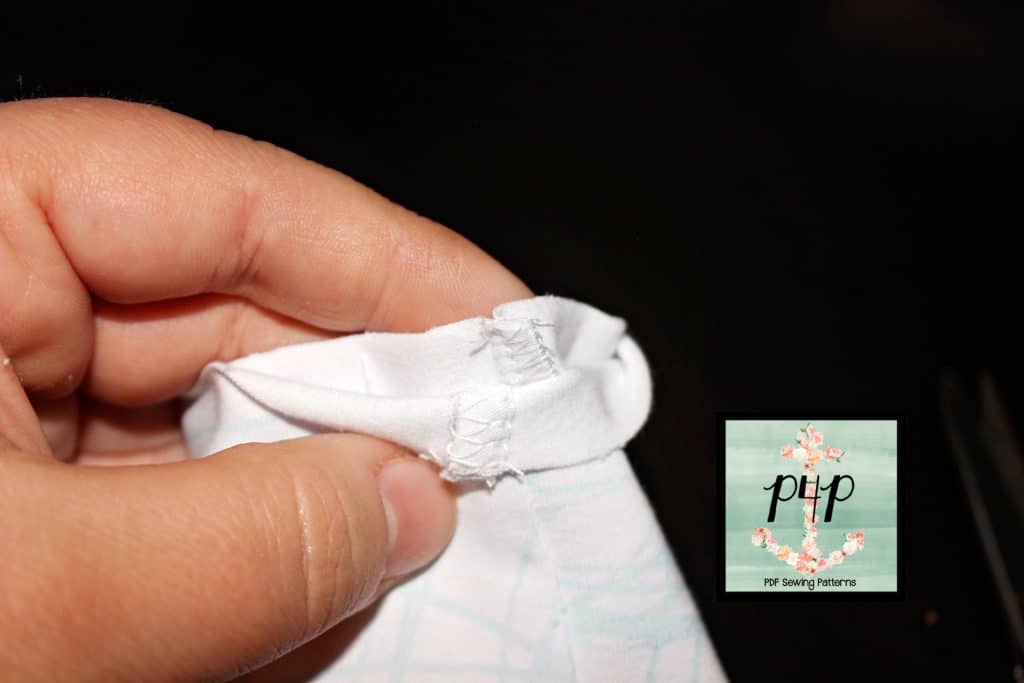
This is one of tricks for creating less bulk at he seam. Once you sew the cuff to create a loop, grab your sharpest scissors and make a cut as close to the stitch as possible without, of course, snipping the stitch.

That little snip will make it so easy to please the seam allowances on opposite sides when you sew fold the cuff. In doing so, you will have so much less bulk at the seam, your serger will thank you! 🙂

*Place your sleeve inside the cuffs

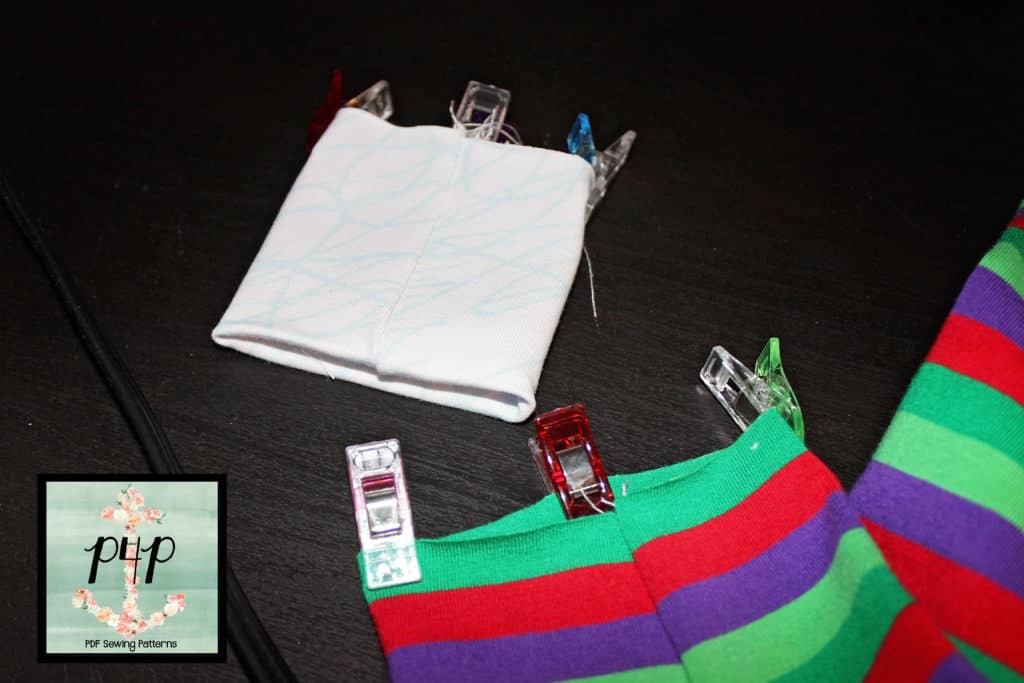
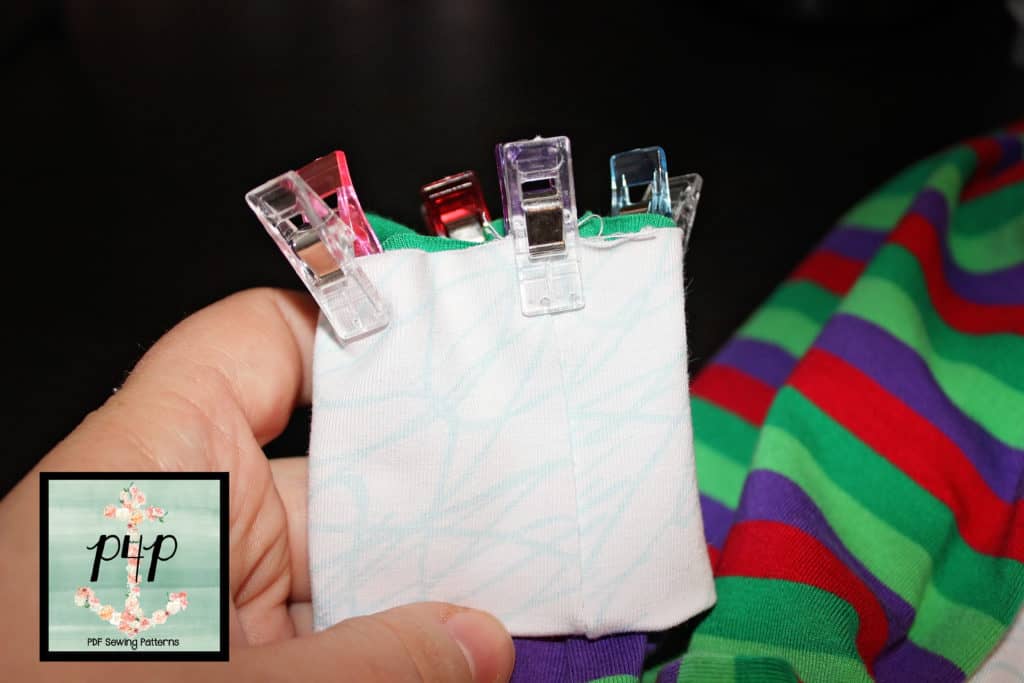
Mark the quarter points on the sleeve (or leg) opening as well as the cuffs. I find that for the smallest of sizes, marking just the half point is sufficient.

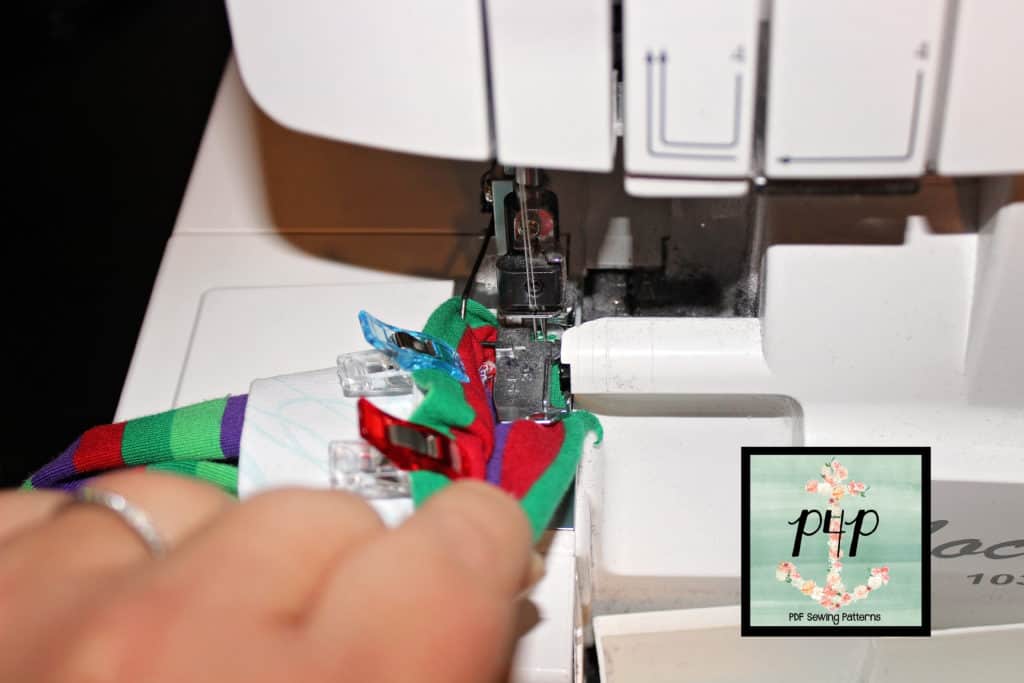
To make sure you will not have your seam allowance on the outside of your sleeve (or ankle) 😉 place the right side of your sleeve inside the cuff and match the quarter (or half way) points.

*Sew or serge with the presser foot inside the sleeve

Most of the time the sleeve opening is pretty small so I find that it is easier the place the presser foot of my serger (or sewing machine) inside the sleeve as opposed to stitching on the outside. This is especially important when you make Baby Bear Joggers or and kids shirts with cuffs, like the Jolly Roger Raglan or the Yo Ho Henley.

*Do not topstitch.

As opposed to necklines, I find that cuffs and waistbands look a lot better if you do not topstitch them down. I do encourage you to press your garments when you finish sewing it, including the cuffs.

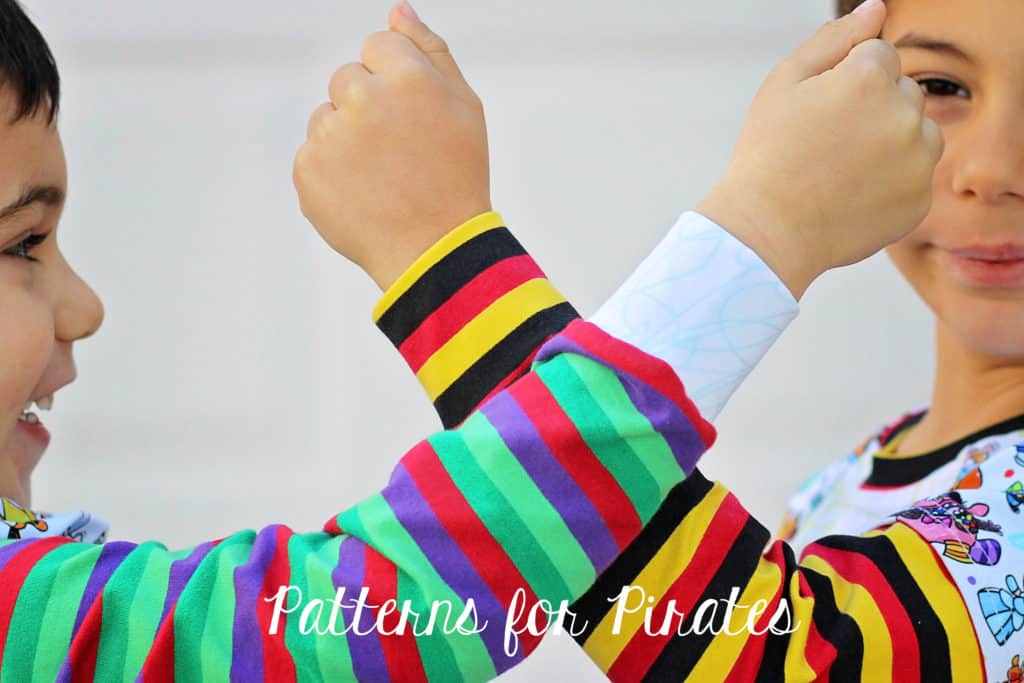
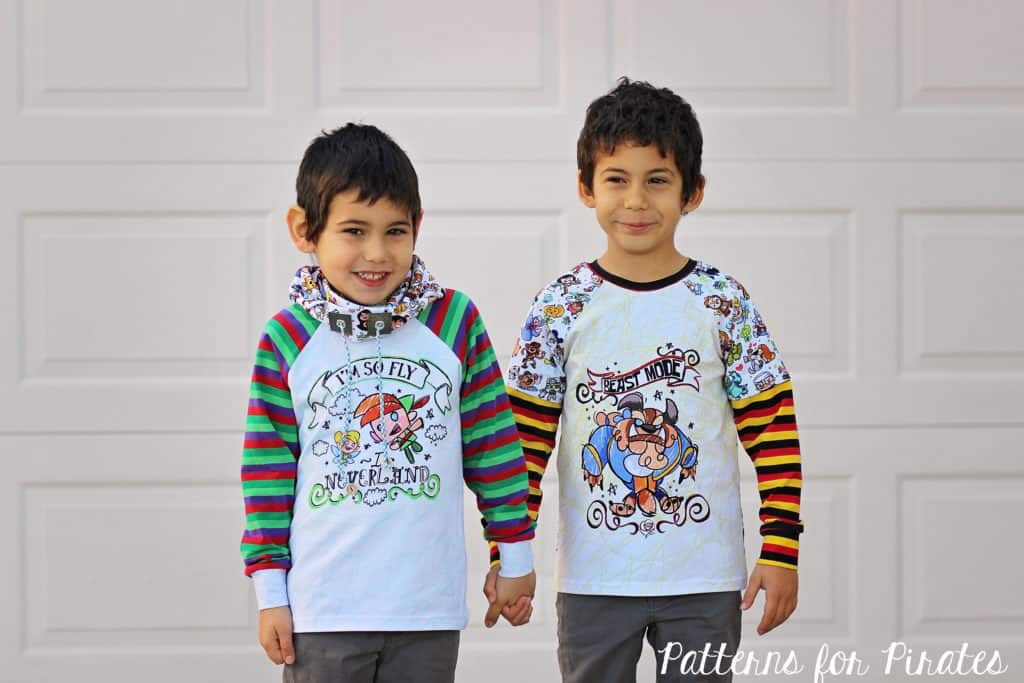
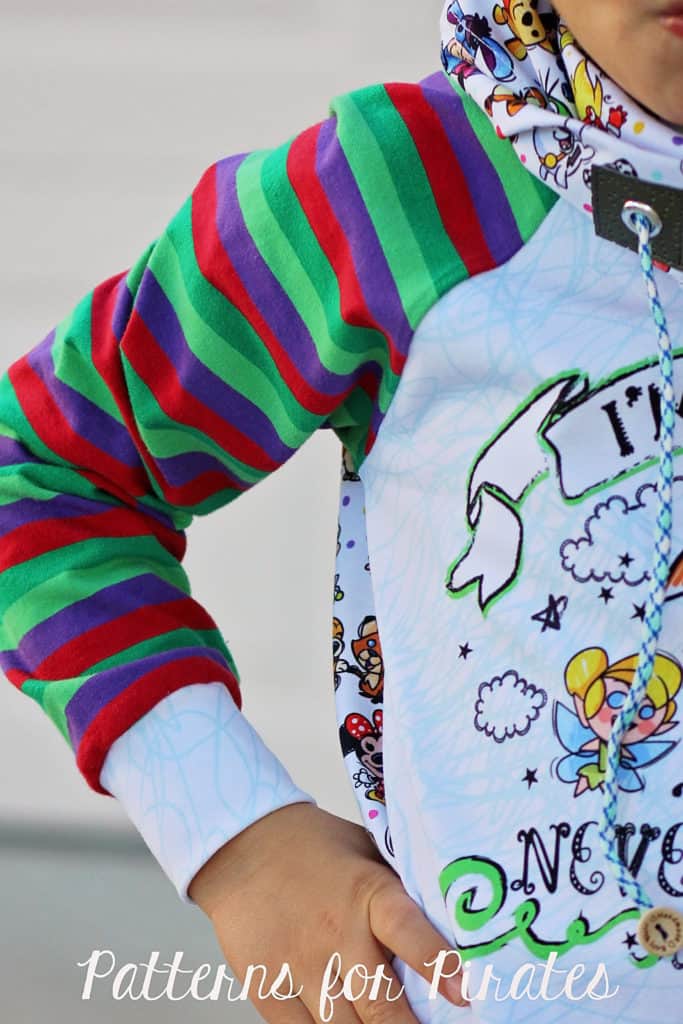
There you have it! 7 easy tips to follow when adding cuffs to your favorite P4P knit patterns. My boys are both rocking the JRR with add on cowl neck from the pack and faux layered sleeves from the blog.

Which one will you be making first? Make sure you post your creations in the P4P group and let me know if adding cuffs is now an easier “task”. 🙂


Filed Under: Frequently Asked Questions, P4P University, Sewing with Stretch, Knit Fabrics, Uncategorized 6 Comments

When It Goes Against the Grain

November 14, 2017

Woven Fabrics

We make woven fabrics on a loom. The weaver strings the lengthwise threads first, and we call them the “warp”. Then threads are woven through them creating the fabric. We call these horizontal threads  the “weft” or the “woof”. We’ve named the edges of the fabric the “selvages” or “selvedges”, and we weave them more tightly to prevent fraying.

The warp creates the “straight grain” of the fabric, and the weft creates the “cross grain”.

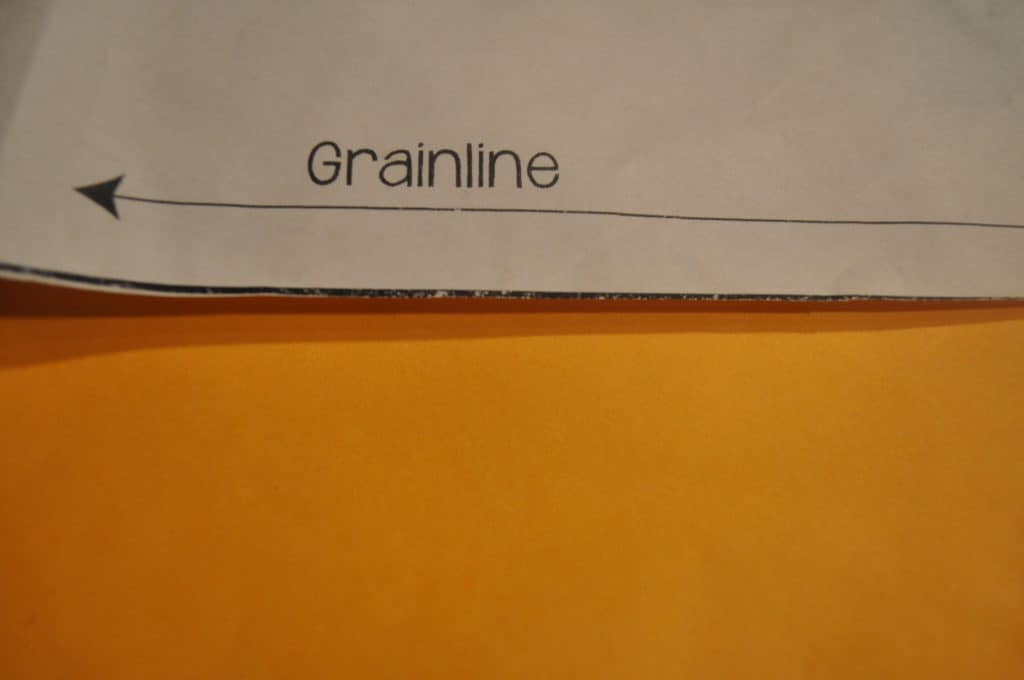
Pattern pieces have grainlines printed on them.  They are either arrows or fold lines.

Grainline


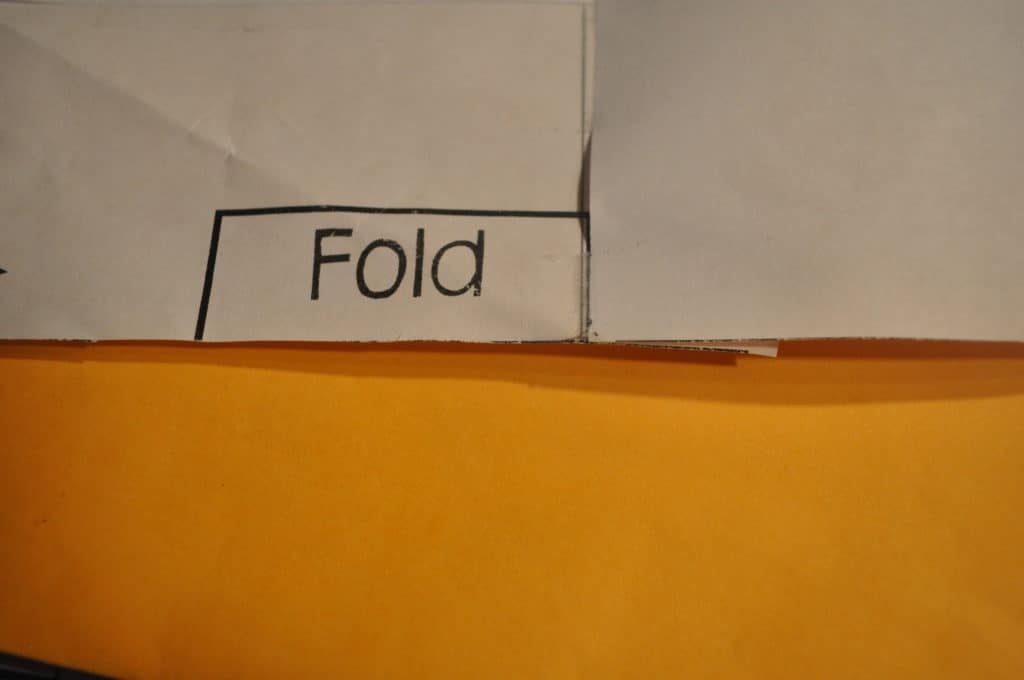
When we cut a pattern out, the best way is to fold the fabric carefully on the straight grain of the fabric, lining up the selvages .  If you need to straighten the ends of your fabric, take a snip through the selvage near one end. Then pull a horizontal thread. The missing thread will create a straight line for you to cut along.

Fold Placement

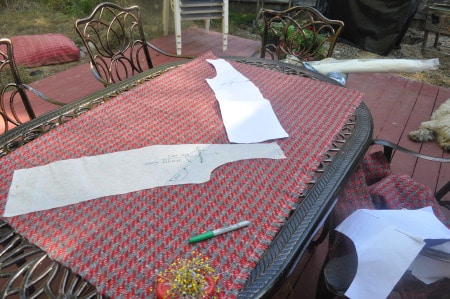
Then place the pattern pieces down carefully with the grain lines on the pattern piece lined up with the straight grain of the fabric.

Finding the Straight Grain

An easy way to check if your pattern piece is “on-grain” is to measure from the line on the pattern piece to the selvages in a couple of places. The distance should be the same.

It’s important for long pattern pieces, especially something like a pant leg, to be grain perfect. If it’s not, the garment will twist, and once you cut it, there’s nothing you can do to fix it. You’ll also never be able to match stripes or plaids if you cut off-grain.

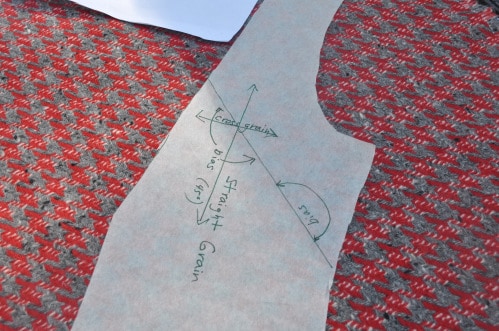
Smaller pieces like pockets, collars, cuffs, and yokes can be cut on the straight grain, the cross grain, or the bias no matter what the lines on the pattern say. The “bias” is the direction that’s 45 degrees from the straight grain. It has more drape than either the straight grain or the cross, and edges cut on the bias don’t fray.

When you cut major pieces on the bias, it’s important to cut them in opposite directions or your whole garment will twist. But it’s not important for small pieces like pockets.

How to Position Bias Cut Pieces


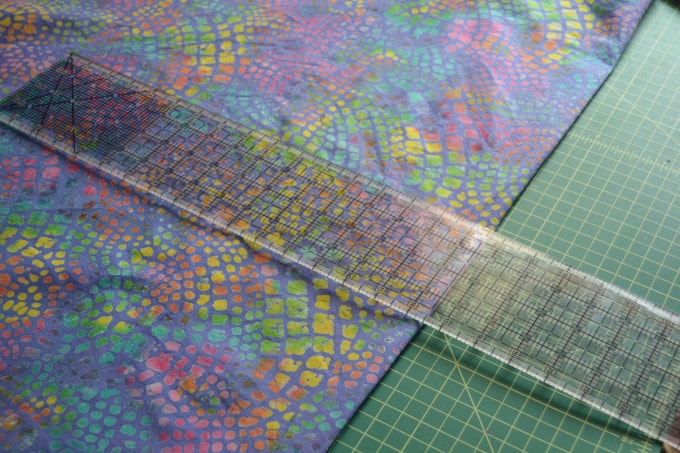
You can mark the bias on your pattern piece with a protractor or a quilting ruler.

Marking the Grainlines


Over time fabrics cut on the cross grain will droop more than then fabric cut on the straight. It’s not a problem for something like a skirt or pants made from a border print. The droop won’t be noticeable in the normal lifetime of the garment. You might see it in heavy curtains, though.

Knit Fabrics

Technically, knit fabrics don’t have a grain, but the direction you cut your pieces out matters just as much. Big machines make knit fabric, but they work the same way we knit with yarn and needles. Some machines knit back and forth and some  knit in the round. One results in a fabric with selvage-like edges and other in a tube of fabric.

Close up of a Knit Fabric


No matter what yarn is used to create the knit fabric, the single knit process will result in a horizontal stretch in the fabric we call the “mechanical stretch”.  Fabrics that only have horizontal stretch are usually called “two-way stretch”.  The addition of elastane (Spandex, Lycra, etc.) to the yarns can create a fabric with both horizontal and vertical stretch, and it is usually described as “four-way stretch”. Whether the fabric is two-way or four-way,  the horizontal stretch should be the circumference of your garment.

Horizontal Stretch Line

While the amount of elastane in the yarns might make the fabric stretchy enough for the garment to fit you cut with the vertical stretch used as the circumference, you shouldn’t cut it that way. If the mechanical stretch in the fabric hangs vertically, you’ll get elephant knees, saggy elbows, and baggy crotches. You can use the same method for making sure your pattern is lined up so the grainlines on your pattern are parallel to the edges of your fabric that we use for wovens. Knit patterns often have the horizontal stretch line marked, too.

There’s a saying in sewing- The fabric always wins. There is probably nowhere in sewing where fighting the fabric is more futile than not paying attention to the grain.

Roberta

Filed Under: Frequently Asked Questions, P4P University, Sewing Techniques, Uncategorized 14 Comments

5 tips for adding neckbands

June 6, 2017

So you spent an hour picking the perfect fabric, perfect coordinates and matching thread. You’ve sewn your favorite P4P shirt and you only have one step left…the dreaded neckband. That’s when you start panicking and getting nervous about attaching the neckband and finishing your outfit. Fear no more!

Today on the blog I will give you 5 tips that will help you achieve that perfect neckband you are striving for all the time.

1. Choose the right fabric for your neckband!

Neckbands will be stretched when you attach them, they will be stretched when you put on or take off the shirt, so it is very important that fabric you use for the neckband has great stretch and great recovery. My favorite type of materials for neckbands are cotton spandex, rayon spandex, ribbing and rib knit. You can get away with using some brushed poly as long as the recovery is good. Avoid, scuba, french terry and 2 way poly blends.


2. Always cut the neckband cross-grain!

Never cut your neckbands along the grain. Even if your fabric has 4 way stretch (which it should) the vertical stretch is not going to be as much as the horizontal one. If you don’t have enough of the main fabric to cut the neckband is best to use a coordinating fabric than cutting the neckband along the grain.


3. Mark the quarters of your neckband and neck opening!

It’s very important that you find and pin (or clip) the quarter points of the neckband and neck opening. After you have sewn the neckband RTS at the ends so you have a loop, fold it length wise and mark where the seam is. This will be the back of your neck band.  The center front of the neckband will be on the opposite side. Now fold it in half bringing the center front and back markings together. The fold will mark your two quarters.

To find the front and back  neck opening centers, bring the shoulder seams wrong side together. Where centers will be where the folds are. Mark them with a pin, a clip or a small snip. With the fabric still laying flat, bring the center front and back together. Your quarter marks will be at the folds. Mark them as well. You will see that the side neck opening quarter marks are NOT at the shoulder seam. The front opening is larger than the back opening.

For all you visual learners, here is a video of the process.


4. Use the right stitches!

Avoid using a straight stitch when attaching the neckband. As I mentioned earlier, the neckband will be stretched and pulled so you want to make sure the stitches are up to the job. If you are using only your sewing machine, attach the neckband with either a stretch stitch or a narrow zig zag stitch. I prefer to use my serger for this step but it is not mandatory. Once you attached the neckband, press the seam allowance towards the shirt. You will now be top stitching it down with your coverstitch machine or your sewing machine. You can top stitch with a wide zig zag stitch, a stretch stitch or twin needles. Be sure to check out our Twin Needles tips and tricks blog too.

You can see how I attached the neckbands here:


5. Press, press, and steam some more!

If you’ve followed the tips I gave you and notice a slight waviness, don’t panic. It’s normal when sewing knits especially if they are on the bias (as is part of the neck opening). Go back to your ironing board and give the neckline a good hefty steam press. Most of the times my neckbands are cotton spandex based and I crank up my ironing machine all the way to the “linen” setting. Make sure you test the heat of your iron on a scrap fabric first. If your shirt is poly based you will need a lower ironing temperature, you do not want to melt your fabric 🙂

There you have it! 5 easy to follow steps to achieve a perfect neckband all the time!

Happy sewing, pirates!

Filed Under: Frequently Asked Questions, P4P University, Sewing Techniques, Sewing with Stretch, Knit Fabrics 11 Comments

P4P University :: Twin Needle Tips

March 16, 2017

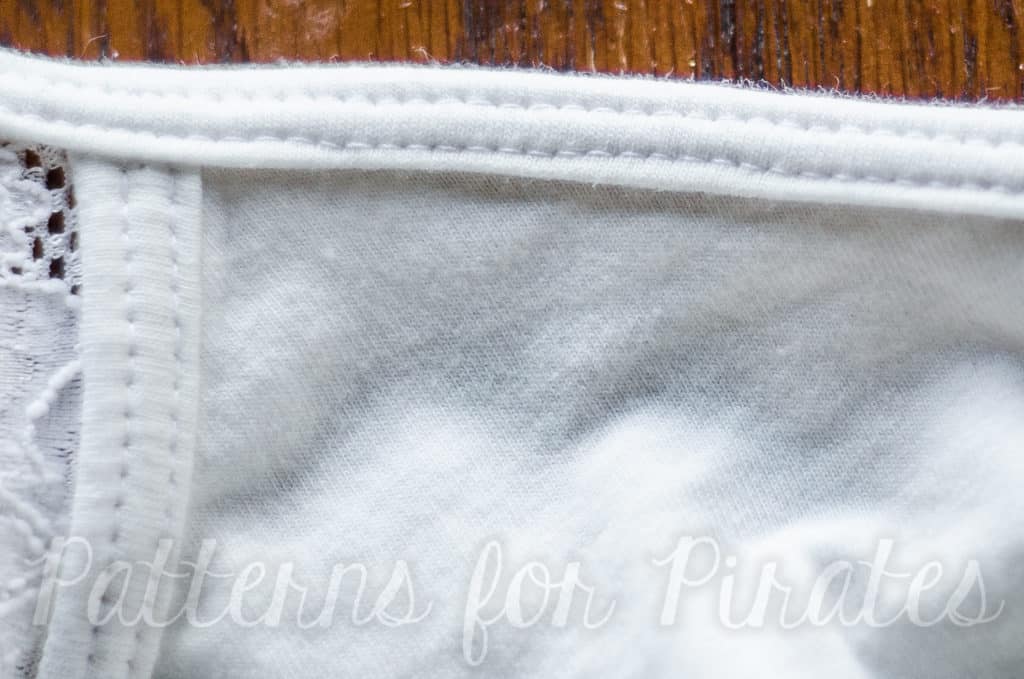
Hello Pirates!  Today I’ll be walking through some tips on using a twin needle for topstitching as an alternative to a coverstitch machine.  The end goal (of either twin needles or a coverstitch) is two lines of parallel stitching on the right side of the fabric, with the ability to stretch and not break threads when pulled.  This is usually used when hemming, but these tricks will especially come in handy when topstitching binding on our new cami pattern!


1. Stretch Needles

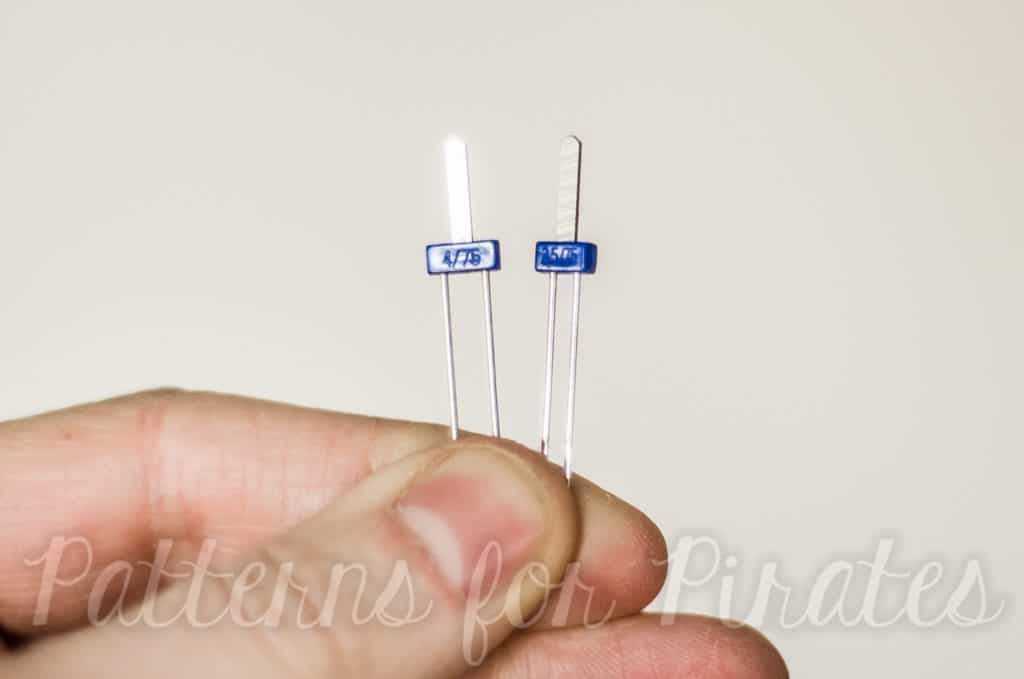
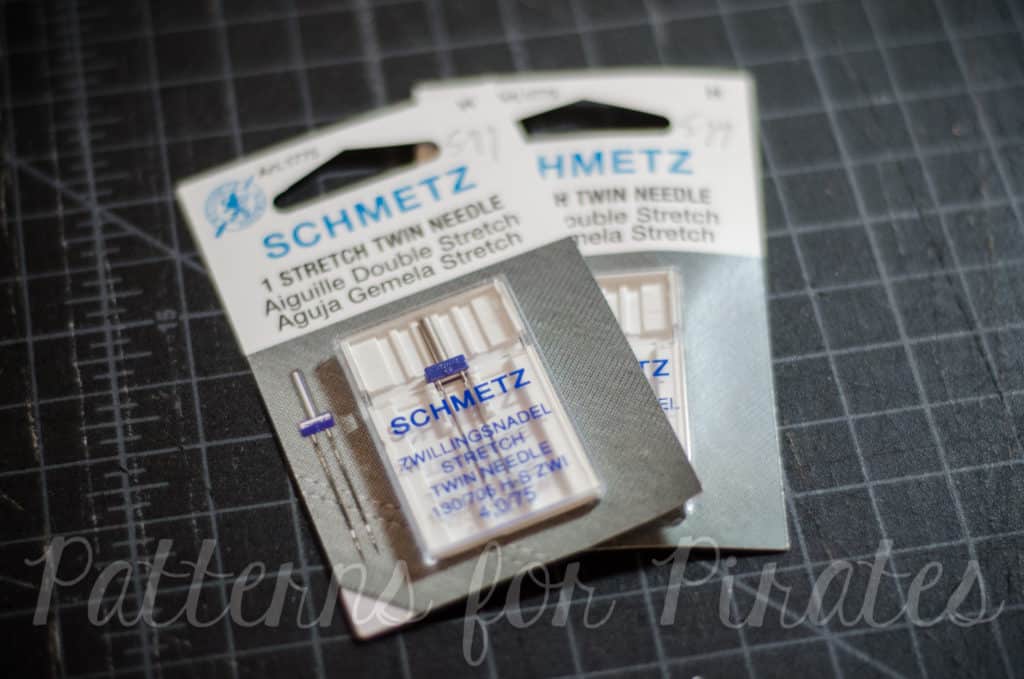
The most important point is to make sure you buy stretch needles.  Schmetz is the most common brand that people tend to use, they are available on Amazon.  I prefer the wider 4.0 width the best because it works better for me; it also comes in a 2.5 width.  These are both 75/11 needle size.


2. Threading

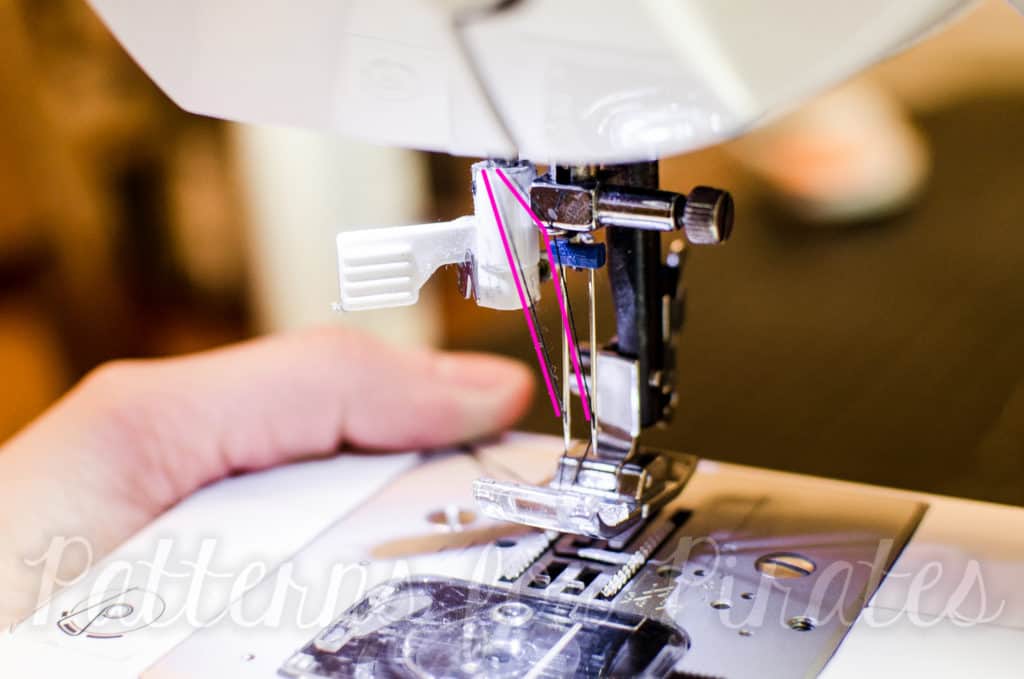
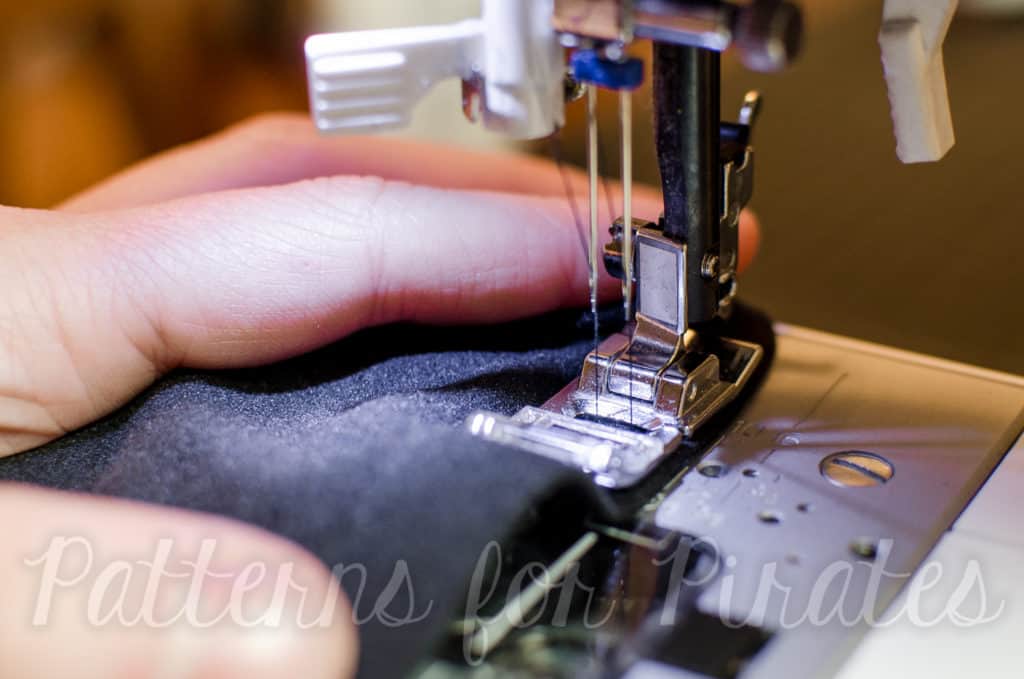
When threading, it helps to thread as shown in the below picture.  This helps stop the threads from twisting when sewing.  Also, make sure your threads are not caught on anything (or each other) at the top of your machine.


5. Stitch Type

Use a regular straight stitch for this; no need to use a triple stretch stitch (|||) or any other stretch stitch like that.


4. Tension

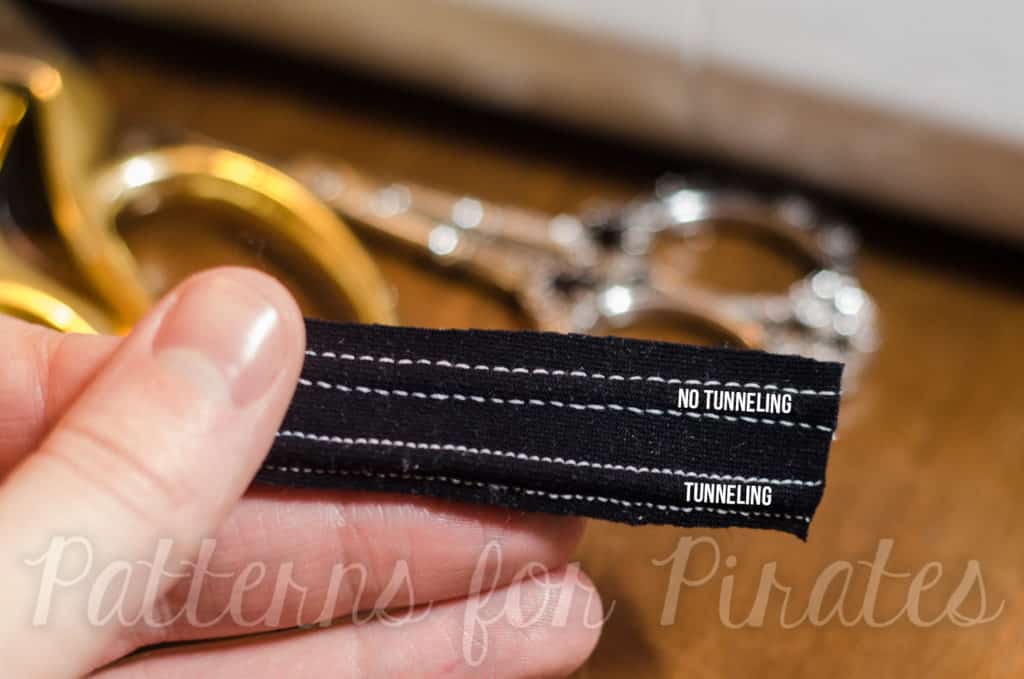
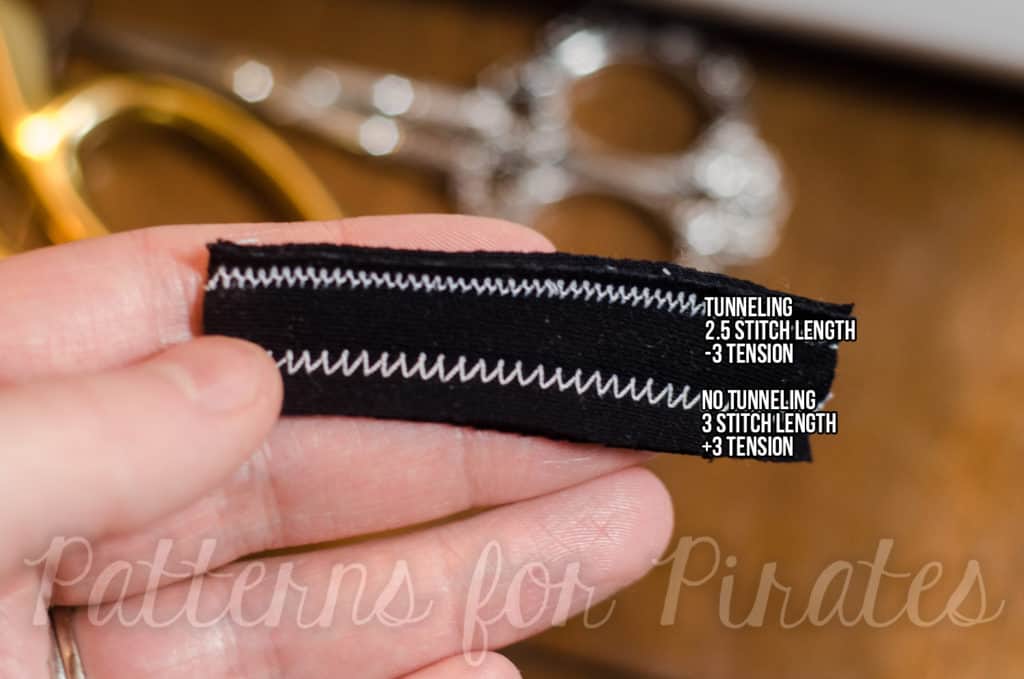
Tunneling is what happens when there is a large bump in between your two rows of stitching.  To avoid this, I’ve found it helps to increase your top thread tension.  Your machine may vary, but I usually set my tension to 3.  If possible, you should also decrease your bobbin tension as well.


5. Stitch Length

Increasing stitching length usually also helps with tunneling, especially on trickier, slipperier fabrics.  Your machine may also vary on this too, but I set mine between 3.0 – 4.0, depending on fabric.  The lower number will help things stretch more though, so you may need to find a happy medium.


6. Go Slowly!

This is a huge one.  It’s so tempting to go full steam ahead, especially if you using a twin needle to hem.  You’re almost done with your project, but don’t ruin it with a sloppy hemming job!  Going slowly can make all the difference between a wavy hem and a perfectly flat one.  If you encounter any thicker areas of fabric, it may also be a good idea to use the hand crank on your machine, turning it slowly to ensure no mistakes as you pass over the thicker area.


7. Don’t Stretch as You Sew

This applies to all knit fabric projects, but especially when using a twin needle.  Don’t pull or stretch the fabric as you feed it into the needle area.  I’ve found that even creating a little extra negative tension as you guide the fabric can help to avoid any pulling as you sew.


8. Top vs. Bottom

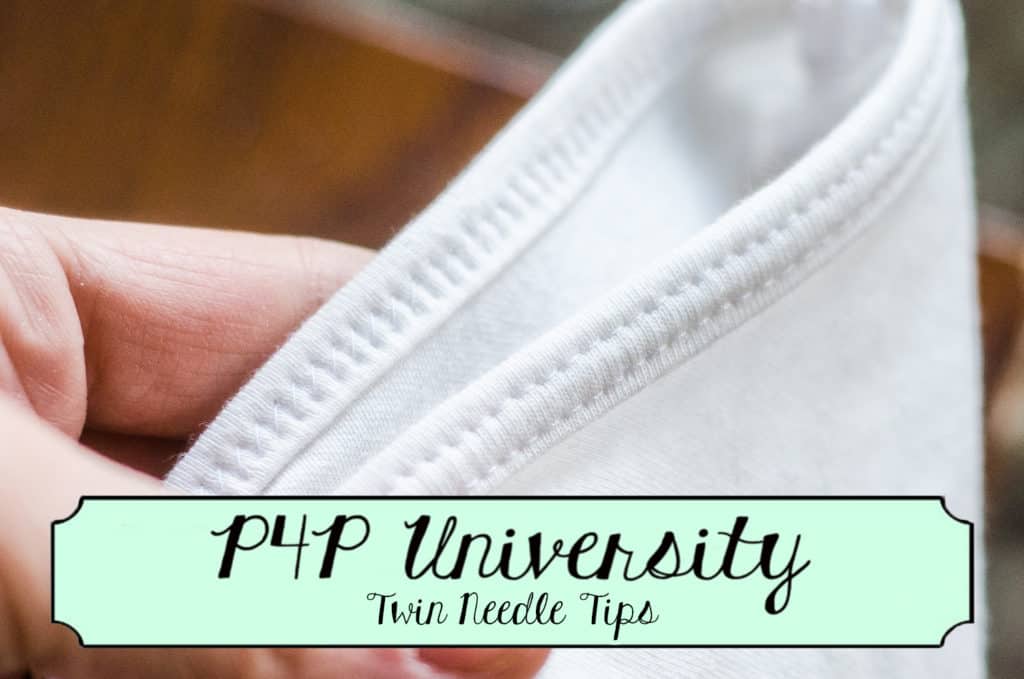
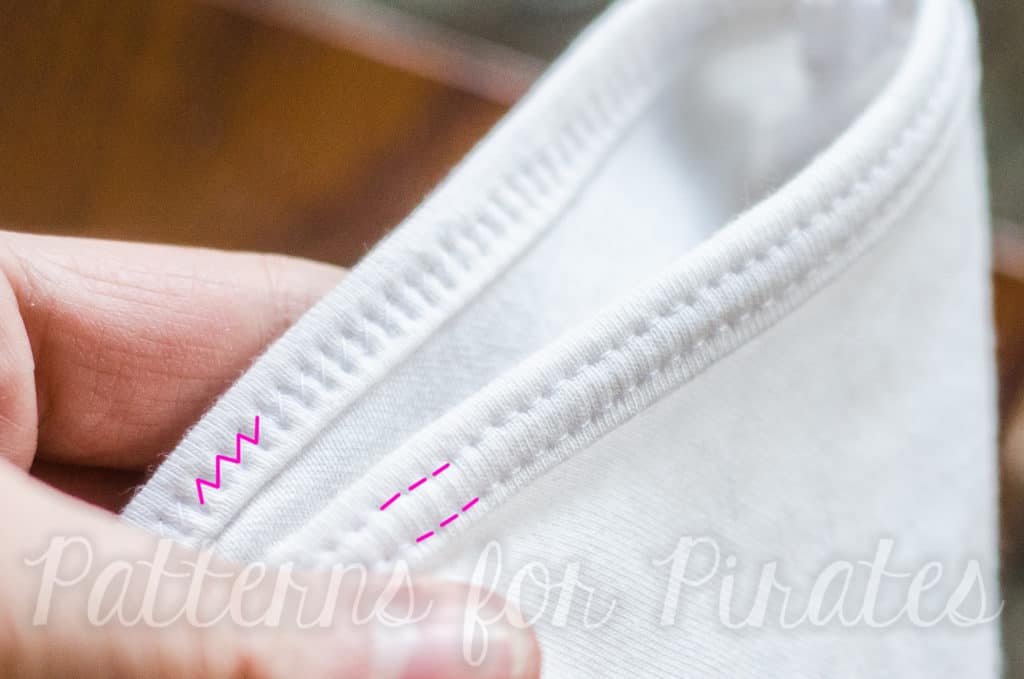
When everything is done correctly, you should have two parallel lines on the top of your fabric, and a perfect zigzag on the back.  The zigzag is what allows your fabric to stretch after it’s sewn, so if you have super tight or non-existent zigzags, then you likely need to adjust (likely increase – confusing, I know) your top thread tension.  Here’s how it should look, the underside of the fabric is at the top of the picture and the right side is on the bottom.  Note the zigzags!


I hope these tips help you as you prepare to topstitch lots of fun binding or finish up a fancy new garment with a twin needle hem!  Let us know in our Facebook group or here in the comments if you have any questions about twin needles!

Elisabeth

Filed Under: Frequently Asked Questions 15 Comments

Different Fabric, Different Fit!

May 22, 2016

Fabric choice can really make or break a garment.  Not just the color or pattern, but the kind of fabric you use.

I remember begging my mom to sew a pattern intended for knits with a woven, or a flowy top with ponte roma… of course she would try to explain that it wouldn’t work, but the begging continued!

It’s not until you use the WRONG fabric that you really understand using a fabric other than what is suggested in a pattern that you’re going to alter the final outcome.  It will fit and look different than intended.  I almost feel like it’s a right of passage to make a few mistakes with fabric choice to really understand how important it can be! But, I will try to help you out before you make those mistakes 😉

There are TONS of fabric types out there… I mean A LOT… too many for most seamstresses to remember.  But if you can familiarize yourself with what the fabric will look like made up (how it will drape and fit) then you can really help yourself when picking fabrics for a project.  Feeling fabric for the amount of stretch, thickness and drape will help you pair it with the right pattern.  Once you get to know the fabrics you like, you can more easily order them online for a bigger variety.

fabric choice

I have sewn up the exact same pattern in the same size, modeled on the same body to help show how different weights and fabric types can affect the fit and look of a garment.

I sewed up a ton of the new P4P release, the Sweet Tee, because it is such an easy, quick sew and has a semi-fitted silhouette so it can take a wide range of stretch and be wearable. So, here we go!

I will start with the fabrics with the most drape.  Drape is a term meaning how the fabric falls to the body when worn.  Fabrics with soft drape will be fluid and drape towards your body.  Think looser fits.  They will fall beautifully, and still show off your curves without needing to be tight at all. This is my FAVORITE kind of fabric for myself.  I love a little looser fit with a drapey fabric.  It means I can feel comfortable (not sucking in all day ;)) with a looser fit, but still not look sloppy or like I’m wearing baggy clothes- I still want to show my curves a little to be flattering. But, this is a very personal preference of course! My sister prefers more stable knits for her tees usually.  Think about what shirts/garments you like and how that fabric feels and drapes and it will help you understand what you prefer!

Slub Jersey.  One of my favorites to work with, it doesn’t have a ton of stretch (which makes cutting and assembling a bit easier), but has drape because it is thin and lightweight. It is light and airy to wear, but doesn’t cling and show off every lump and bump. Another fabric that fits in here would be a lightweight poly/cotton jersey blend :).

IMG_9451 IMG_9485 IMG_9507


Very thin sweater knit on beige and a lightweight rayon spandex on back.  You can see on both these that they drape under my bust towards my body/waist showing off curves. The loose-ness around the hips doesn’t look flared, but just relaxed.  Both are a little harder to work with during cutting and assembling.  The very thin sweater knit usually needs some extra support in the seams baring any weight (like shoulder seams).  You can use a clear elastic to reinforce them so they don’t stretch out with wear.  The rayon spandex blends are one of my all time favorites as well- I used to want my mom to make me every thing in it 😉 .  It has a slinkier feel because it has such a soft drape and can be difficult to fold on grain and cut without some movement. Rayon blends are also notorious for being “clingy”, because they drape so much they also tend to show lumps and bumps you might now want to show. So, I tend to pick rayon blends for a looser fit I know has plenty of room to not cling. Or a tight fit I know will be showing off everything anyways.

IMG_4091 IMG_4137


Tissue Jersey on front and rayon spandex blend on back. The tissue jersey is a bit of mix, it is not at stretchy and fluid as the others, but so lightweight that is still has some good drape. But the very thin fabric also showed my bra line a bit in front there as well, so you take the good with the bad sometimes with the thin stuff ;).  I like the light airy feel of tissue jersey living in a hot climate.

IMG_4015 IMG_4036IMG_4037

ITY Knit– Ity knit is a poly blend that is knitted to have a smooth face, soft drape and lots of stretch. It’s commonly used in RTW for maxi dress and skirts b/c its flows so nicely. It tends to not be as “clingy” as a rayon blend and usually a little thicker weights (although all fabrics can be found in different weights).  I like an Ity knit, especially for a nicer look.  When I taught kinder and wore more professional attire Ity was a great, comfortable fabric that looks a bit dressed up even with a simple tee silhouette.

IMG_4772 IMG_4774 IMG_4777


On to the sweater knits! I love a sweater knit for fall, winter and even early spring! Most sweater knits have good drape, especially light to medium weight sweater knits. They tend to be thicker than a rayon spandex and might do better if you’re worried about the thin fabric showing/clinging to any lumps/bumps/bra lines.

This is a very light weight sweater knit with almost an open weave.  Again, a tad see through, I will wear this one with a cami under after seeing the pictures ;).  But the looser weave also feels a little looser in fit, so putting on a cami under doesn’t make it feel too tight for me.

IMG_4185 IMG_4162 IMG_4180


Light weight hacci sweater knit. Again, you can see it drapes under the bust towards the waist for a flattering silheoutte.  This sweater knit is plenty thick for me to not worry about having to wear a layer under as well and a bit more comfortable that it doeesn’t show quite as much detail on lumps and bumps too.

IMG_3911 IMG_3896 IMG_3884


Medium weight sweater knit. This is a super soft ribbed sweater knit- It has tons of stretch and drape.  As you can see it looks a bit looser because it has so much stretch and drape.  I love this for a cozy sweater-I can’t wait to wear it in the fall (here in the hot south we’re already way past sweater weather!)  Even though it is a thicker weight it does show my bra lines b/c it’s so drapey.

IMG_4373 IMG_4387 IMG_4405


Medium weight sweater knit. This feels like an acrylic blend (it was bought from a LA detash page- so I’m guessing on content) so it has a little more body to it and doesn’t drape quite as well as the other sweater knits.  It also feels a little tighter, because it doesn’t have quite as much stretch as the others. You can see it still drapes on my deeper curves (like my sway back) but goes more straight down from my bust rather then draping under.

IMG_4482 IMG_4489 IMG_4491


Onto more stable knits 🙂

Cotton Spandex/Cotton Lycra.  Lycra is a name brand of spandex, so they are essentially the same fabric (much like tissue is to kleenex). This has good stretch and recovery with the spandex in it, but has much more body.  Meaning it will not drape towards your body, but stick out more stiff and hold it’s own shape.  I prefer to use cotton spandex on tighter fits, since there is no need for drape.  I find it not very flattering on a looser fit because it doesn’t drape under bust as well and will feel a bit tighter due to the thicker, more stable feel.  A lot of seamstress love this fabric because it is easy to find in great prints and a wide variety of colors, as well as a bit easier to work with because it is thicker.  And I love it for youth, but not for myself.  If we can all gang up on the knit companies to print their amazing customs on fabric with more drape I’ll sign the petitions 😉 I just can’t feel great in most cotton spandex shirts. I didn’t even hem this one because I knew it would quickly be cut up into something for baby girl! With that said, my sister likes a cotton spandex tee because she doesn’t like her fabric to drape to her waistline/under her bust. She prefers the more stable knit. Again, all personal prefence and learning to pair it with the right pattern for yourself!

IMG_4316 IMG_4323 IMG_4344


Stretch French Terry.  This is a medium weight french terry with good horizontal stretch.  French terry is a very popular fabric right now, and I share the love of it! But when using french terry you need to be aware that it doesn’t have great drape.  As you can see, it doesn’t fall under the bust to the body, but straight down. And my sway back pooling is much more obvious. It feels tighter on as well even though it has some stretch because it is thicker.  Now there are some with rayon in the blend which helps give it drape.  But most french terrys are much more stable on the knit spectrum and do better as something that needs a thicker, more stable fabric like pants, shorts, jackets, sweatshirts, etc… I added a cowl on this one for a fall/winter look since french terry is a thicker, warmer fabric.

IMG_4289 IMG_4298 IMG_4300


Liverpool.  This is also a very popular fabric right now. It is a poly spandex blend with high horizontal stretch and a texture on the right side. It has a feeling close to scuba/techno/neoprene. It is a more stable knit without much drape.  This is better suited for something that needs stretch and stability, like a tighter dress, pencil skirt, ect.  It does not have good drape, as you can see it goes straight down from my bust instead of falling toward my body under towards my waist.  It also makes the tiny “wings” on the dolman very bulky/poofy.  I was sad to cut into this gorgeous liverpool for this example, because I knew it wasn’t a great match for this pattern-but for the good blog post I did it!!! I hopefully still have enough for something that does work well with it! It is also all polyester, so it doesn’t breathe well. So, for me in TX I can only handle a thick poly knit during winter months.

IMG_4724 IMG_4730 IMG_4738

Ponte Roma would also belong in this high stretch, but more stable category.   It is a poly, rayon, spandex blend and is great for the same things: tighter dresses, pencil skirts, pants, etc.

Pictures coming soon!

Cotton Jersey.  This is a thinner cotton jersey.  It doesn’t have a lot of stretch or recovery since there is no spandex in it.  It doesn’t have great drape.  This is thinner cotton jersey so it has a touch of drape just because it is thin, but anything medium weight is considered more a “t-shirt jersey” without much drape or stretch at all (think traditional t-shirts).  I like this best for boys and men.  I don’t love drape on a man usually, they’re shirts are cut straight and they are meant to hang pretty straight as well (Unless they have some amzing abs to show off 😉 ).  For myself though I don’t love cotton jersey, but I do use it for a traditional t-shirt style from time to time.  Notice is looks and feels tighter because it has very little stretch.  it also sticks out from bust and booty instead of draping towards body.  I have a sway back, which I didn’t alter for here (you can see the pooling of fabric on my lower back) and it is much more obvious in a stable knit then a soft, drapey knit.  So if you’re still learning to perfectly alter for your body shape more stable knits are less forgiving to those alterations you may need, including full bust adjustments.  I do have some tees in a jersey I love though, I like to pair it with something only semi-fitted throughout the whole body so it doesn’t feel too tight on my chest and doesn’t miss the drape on a looser area.

IMG_4420 IMG_4461

From top- the more stretch and drape the looser and more flowy it will look – to the bottom–the more stable and less stretch will be more stiff and tighter feeling garment.  Keeping this general rule in your mind when pairing fabric to patterns will help you decide what will give you the best look and fit!

This isn’t even close to all the fabric choices that are out there, but I tried to include the most popular knits I see in the shops and being asked about in the P4P group on a daily basis!  I hope it helps you when picking fabric to pair with a pattern for the perfect look and outcome!

And remember that practice makes perfect- so if you make a few garments with the wrong fabric choice, use it as a great learning experience and know you’re a better/more knowledgeable seamstress after that mistake 😉


Filed Under: Fitting, P4P University, Uncategorized 27 Comments

  • « Previous Page
  • 1
  • 2

Newest Patterns

  • Ruched Top & Dress $12.00
  • Francis Flounce - Bundle $20.00
  • Francis Flounce - Youth $10.00
  • Francis Flounce
    Rated 5.00 out of 5
    $12.00
  • Breezy Overalls $12.00
  • Privacy Policy
  • Refund Policy
  • Affliliate Program
  • Contact Us
  • About

Copyright © 2023 Patterns for Pirates

Copyright © 2023 · Genesis Framework · WordPress · Log in